Soundmaster ICD1010AN Handleiding

Categorie
CD spelers
Type
Handleiding
DEUTSCH
ITALIANO
ENGLISH
ČEŠTINA
FRANÇAIS
SLOVENSKÝ
NEDERLANDS
ICD1010
Hersteller
Wörlein GmbH Tel.: +49 9103/71670
Gewerbestrasse 12 Fax.: +49 9103/716712
D 90556 Cadolzburg Email. info@soundmaster.de
GERMANY Web: www.soundmaster.de
Sicherheits- / Umwelt- / Aufstellhinweise
DE
HINWEIS ZUM UMWELTSCHUTZ
Dieses Produkt darf am Ende seiner Lebensdauer nicht über den
normalen Haushaltsabfall entsorgt werden, sondern muss an
einem Sammelpunkt für das Recycling von elektrischen und
elektronischen Geräten abgegeben werden. Das Symbol auf
dem Produkt in der Gebrauchsanleitung oder auf der
Verpackung weist darauf hin
Die Werkstoffe sind gemäß Ihrer Kennzeichnung wiederverwertbar. Mit
der Wiederverwendung der stofflichen Verwertung oder anderen Formen
der Verwertung von Altgeräten, leisten Sie einen wichtigen Beitrag zum
Schutze unserer Umwelt
Bitte fragen Sie Ihre Gemeindeverwaltung nach der zuständigen
Entsorgungsstelle.
WARNUNG
Gefahr elektrischer Schläge
Gerät nicht öffnen!
Zur Vermeidung von Stromschlägen darf dieses Gerät nicht geöffnet
werden. Es enthält keine Bauteile, die vom Benutzer gewartet oder
repariert werden können, Wartungs- und Reparaturarbeiten dürfen nur
von Fachpersonal ausgeführt werden.
Dieses Symbol zeigt an, dass im Inneren des
Gerätes gefährliche Spannungen vorhanden sind,
und einen Stromschlag verursachen können.
Dieses Symbol weist auf wichtige Bedienungs- und
Wartungsanweisungen bezüglich des Geräts hin.
Verbrauchte Batterien sind Sonderabfall und gehören
NICHT in den Hausmüll! Als Verbraucher sind Sie
gesetzlich verpflichtet alle Batterien und Akkus egal
ob Schadstoffe *) enthalten oder nicht zur
umweltschonenden Entsorgung zurückzugeben.
Sie können alle Batterien und Akkus bei den öffentlichen
Sammelstellen in Ihrer Gemeinde oder dort unentgeltlich ab-
geben wo Batterien und Akkus der betreffenden Art verkauf
werden.
Batterien und Akkus bitte nur in entladenem Zustand abgeben.
*) gekennzeichnet mit Cd = Cadmium, Hg =Quecksilber, Pb = Blei
Verwenden Sie nur Batterien, die frei von Quecksilber &
Cadmium sind.
Batterien dürfen nicht in die Hände von Kindern
gelangen. Kinder können Batterien verschlucken. Wurde
eine Batterie verschluckt, muss sofort medizinische Hilfe
in Anspruch genommen werden.
Überprüfen Sie regelmäßig die Batterien um ein
Auslaufen der Batterie zu vermeiden.
Batterien dürfen keiner Hitze (z. B. Sonnenbestrahlung),
Feuer ausgesetzt werden.
ACHTUNG: Explosionsgefahr bei falscher
Batteriehandhabung. Nur durch denselben oder
baugleichen Batterietyp ersetzen.
VORSICHT UNSICHTBARE LASERSTRAHLUNG
TRITT AUS, WENN DER DECKEL GEÖFFNET, UND
DIE SICHERHEITSVERRIEGELUNG
NIEDERGEDRÜCKT WIRD. SETZEN SIE SICH
NICHT DEM STRAHL AUS.
Das Gerät verfügt über einen „Klasse 1 Laser“. Setzen
Sie sich nicht dem Laserstrahl aus, dies kann zu
Augenverletzungen führen.
Das Gerät ausnahmslos nur in trockenen Innenräumen
betreiben.
Niemals mit Feuchtigkeit in Verbindung bringen.
Schützen Sie das Gerät vor tropfenden oder
spritzenden Flüssigkeiten, und stellen Sie keine mit
Flüssigkeit gefüllten Gefäße (z. B. Vasen) auf das
Gerät.
Betreiben Sie das Gerät nur in einem gemäßigten
Klima.
Schließen Sie das Gerät nur an eine vorschriftsmäßig
installierte und geerdete Netzsteckdose an. Die
Netzspannung muss mit den Angaben auf dem
Typenschild des Gerätes übereinstimmen.
Achten Sie darauf, dass im Betrieb das Netzkabel
niemals nass oder feucht wird. Das Netzkabel darf
nicht eingeklemmt oder anderweitig beschädigt
werden.
Der Netzstecker dient als Trennvorrichtung und muss
ohne Schwierigkeiten benutzbar sein.
Achten Sie beim Verlegen des Netzkabels darauf,
dass es beim Betrieb des Gerätes nicht zu einer
Stolperfalle werden kann.
Lassen Sie beschädigte Netzstecker oder Netzkabel
sofort von dem Kundenservice austauschen.
Prüfen Sie das Gerät, das Netzkabel sowie den
Netzstecker regelmäßig auf sichtbare
Beschädigungen. Verwenden Sie das Gerät auf
keinen Fall, wenn Sie Beschädigungen festgestellt
haben.
Benutzen Sie das Gerät nicht, wenn es
Beschädigungen aufweist, wenn es heruntergefallen
ist oder nicht einwandfrei funktioniert.
Sie dürfen das Gehäuse nicht öffnen oder reparieren.
In diesem Falle ist die Sicherheit nicht gegeben und
die Garantie erlischt. Reparaturen sind ausschließlich
durch einen Service-Center/Kundencenter
auszuführen.
Ziehen Sie bei Gewitter oder einer längerer
Abwesenheit (z.B. Urlaub) den Netzstecker und
entnehmen Sie ggf. die Batterien.
Kinder sollten das Gerät nur unter Aufsicht
Erwachsener betreiben.
Lassen Sie das Gerät während des Gebrauchs nicht
unbeaufsichtigt.
Das Gerät ausnahmslos nur mit einem trockenen
Abstaubtuch reinigen.
KEINE REINIGUNGSMITTEL oder TÜCHER mit
GROBEN Material verwenden!!!
Das Gerät keiner Sonnenbestrahlung oder anderen
Hitzequellen aussetzen.
Stellen Sie das Gerät so auf, dass kein Hitzestau
entstehen kann, also frei und gut belüftet.
Achten Sie darauf, dass an den Seiten ein
Mindestabstand von 10 cm besteht, um eine
ausreichende Luftzirkulation zu gewährleisten.
Decken Sie niemals die Belüftungsöffnungen zu!!!
Offene Brandquellen, wie z.B. brennende Kerzen,
dürfen nicht auf das Gerät gestellt werden.
Das Gerät an einem sicheren, erschütterungsfreien
Platz aufstellen.
Benutzen Sie das Gerät nicht, wenn es
Beschädigungen aufweist, wenn es heruntergefallen
ist oder nicht einwandfrei funktioniert.
Gerät möglichst weit entfernt von Computern und
Mikrowellengeräten platzieren, da es sonst evtl. zu
Empfangsstörungen im Radiobetrieb kommen kann.
Treten wegen einer elektrostatischen Entladung oder
kurzeitigen Netzüberspannung Fehlfunktionen auf,
setzen Sie das Gerät zurück. Ziehen Sie hierfür den
Netzstecker bzw. Netzadapter und schließen ihn
nach einigen Sekunden wieder an.
ICD1010 / Deutsche Bedienungsanleitung
1
INHALTSVERZEICHNIS
BEDIENELEMENTE ................................................................................................................. 2
FERNBEDIENUNG ................................................................................................................... 3
BATTERIEINSTALLATION ...................................................................................................... 3
LIEFERUMFANG ...................................................................................................................... 3
INBETRIEBNAHME .................................................................................................................. 3
WANDMONTAGE ..................................................................................................................... 4
NETZWERKVERBINDUNG VORBEREITEN ........................................................................... 5
INSTALLATION ........................................................................................................................ 5
HAUPTMENÜ ........................................................................................................................... 7
INTERNET RADIO .................................................................................................................... 7
PODCASTS .............................................................................................................................. 8
DAB+ (DIGITALRADIO) ........................................................................................................... 9
UKW (FM) ............................................................................................................................... 10
CD ........................................................................................................................................... 12
USB ........................................................................................................................................ 13
BLUETOOTH® ........................................................................................................................ 14
AUDIO IN (AUX) ..................................................................................................................... 14
EINSCHLAFTIMER - SLEEP ................................................................................................. 14
WECKER - ALARM ................................................................................................................ 14
UNDOK ................................................................................................................................... 15
SYSTEMEINSTELLUNGEN ................................................................................................... 15
STÖRUNGSBEHEBUNG ....................................................................................................... 18
ICD1010 / Deutsche Bedienungsanleitung
2
BEDIENELEMENTE
FRONTANSICHT
RÜCKANSICHT
1
Lautsprecher
9
EJECT Taste
2
CD Fach
10
BACK Taste
3
USB-Buchse (Oberseite)
11
Abnehmbarer Standfuß
4
STOP Taste
12
PLAY/PAUSE/SCAN Taste
5
POWER/SOURCE Taste
13
NAVIGATE/OK/LAUTSTÄRKE Knopf
6
MENU/INFO Taste
14
SKIP/TUNING Tasten
7
PRESET Taste
8
DISPLAY
15
16
Wurfantenne
AC Stromkabel
17
AUX-IN Buchse
ICD1010 / Deutsche Bedienungsanleitung
3
FERNBEDIENUNG
1
EIN/AUS
2
0-9 Numerische Tasten
3
Taste
4
LAUTSTÄRKE - Taste
5
SOURCE Taste
6
MENU Taste
7
EQ Taste
8
SCAN Taste
9
STOP Taste -
10
SKIP-/TUNE- Taste
11
EJECT Taste
12
PRESET Taste
13
OK Taste
14
LAUTSTÄRKE + Taste
15
Taste
16
ZURÜCK Taste
17
INFO Taste
18
SLEEP Taste
19
MUTE (STUMM) Taste
20
PLAY/PAUSE Taste
21
WIEDERHOLEN/SHUFFLE Taste
22
SKIP+/TUNE+ Taste
BATTERIEINSTALLATION
1. Drücken und schieben Sie die Batteriefachabdeckung zurück.
2. Legen Sie zwei AAA-Batterien polungsrichtig in das Batteriefach ein (siehe Abbildung im
Batteriefach).
3. Schließen Sie wieder die Batteriefachabdeckung.
LIEFERUMFANG
Hauptgerät
Fernbedienung
Bedienungsanleitung
Standfuß (Bereits montiert)
INBETRIEBNAHME
Schließen Sie dann den Netzstecker des Gerätes an eine Steckdose an. Das Gerät zeigt die
Startanzeige und ist anschließend betriebsbereit. Nach dem Einschalten spielt die zuletzt
benutzte Quelle. Wenn das Gerät das erste Mal eingeschalten wird, startet der
Einrichtungsassistent.
ICD1010 / Deutsche Bedienungsanleitung
4
WANDMONTAGE
HINWEIS:
Lassen Sie Vorsicht walten um das Gerät (2.1Kg) während der Montage vor dem
Herunterfallen zu schützen.
Prüfen Sie vor der Montage die Tragfähigkeit der Wand und stellen Sie sicher, dass
sich keine Wasser- oder Stromleitungen unter den Bohrlöchern befinden.
(Falls Sie unsicher sind, holen Sie sich Rat von einem Fachmann)
Schrauben und Dübel für die Montage sind nicht im Lieferumfang enthalten.
Prüfen Sie die in der Wand montierten Schrauben auf festen Sitz.
Montage Schritte
Verwenden Sie geeignete Schrauben
und Dübel für die Montage.
Die Maße der Schrauben können Sie
nebenstehender Grafik entnehmen.
Verwenden Sie ein Stück Papier als
Bohrschablone (nicht im Lieferumfang
enthalten) und zeichnen Sie die Löcher
in ca. 160mm Abstand an. Befestigen
Sie anschließend die Bohrschablone in
horizontaler Position an der Wand. (Wie
abgebildet) und Bohren Sie die beiden
Löcher.
Befestigen Sie, unter Verwendung von
geeigneten Dübeln, die Schrauben wie
in den Bildern gezeigt
Nehmen Sie den Stand Fuß des Gerätes
ab, indem Sie die Beiden Verriegelungen
an der Unterseite des Standfußes vom
Gerät wegziehen. Schieben Sie den
Stand Fuß nach hinten und ziehen ihn
ab. Nun können sie Ihr Gerät wie im Bild
gezeigt aufhängen
Wandoberfläche
Papier
Wandoberfläche
Wandoberfläche
ICD1010 / Deutsche Bedienungsanleitung
5
NETZWERKVERBINDUNG VORBEREITEN
Vergewissern Sie sich, dass Sie das WLAN Netzwerk eingerichtet haben und über die WEP-,
WPA- und WPA2-Passwörter zum Aktivieren der Verbindung verfügen.
Sie können die WPS-Funktion (Wi-Fi Protected Setup) auch für die Kopplung des
Netzwerkgeräts mit dem Internetradio verwenden. Überprüfen Sie, ob die Indikatoren am
Netzwerkgerät den entsprechenden Status anzeigen.
INSTALLATION
Hinweis: Wird der Einrichtungsassistent ohne Netzwerkeinrichtung vorzeitig abgebrochen, wird
vom Gerät ein eigener Wifi Zugang generiert, damit das Gerät über die UNDOK-APP
konfiguriert werden kann.
Netzwerkverbindungsindikator:
= Netzwerkverbindung hergestellt
= Netzwerkverbindung nicht hergestellt
Sprachen
Wählen Sie die Menüsprache aus.
Datenschutzgrundverordnung (DSGVO)
Bei der Erstinstallation oder nach dem Zurücksetzen in die Werkseinstellung erscheint im
Display die Datenschutzrichtlinie. Damit die Installation fortgesetzt werden kann bestätigen
Sie diese Bitte mit der „OK“ Taste.
Weitere Informationen finden Sie unter www.frontiersmart.com/privacy
Einrichtungsassistent
Wählen Sie “JA” um den Einrichtungsassistenten zu starten.
Uhrzeit / Datum / Anzeigeformat
Wählen Sie 12 oder 24 als Uhrzeitformat aus.
Automatische Aktualisierung
Datum und Uhrzeit können manuell oder automatisch via DAB, UKW oder
Netzwerkverbindung aktualisiert werden.
Die automatische Aktualisierung erfolgt mit Daten, die via DAB, UKW oder das Internet
übertragen werden. Die Uhrzeit wird nur in einem bestimmten Modus aktualisiert. Sie
sollten daher einen Modus auswählen, den Sie regelmäßig verwenden.
DAB und UKW verwenden Zeitsignal- und Funkübertragung. Das Netzwerk verwendet
ein Zeitsignal, das in einem beliebigen Netzwerkverbindungsmodus vom
Internetradioportal gesendet wird.
Zeitzone / Sommerzeit
Stellen Sie Ihre Zeitzone ein. Falls in Ihrem Land aktuell die Sommerzeit verwendet wird,
wählen Sie die Option der Sommerzeit.
ICD1010 / Deutsche Bedienungsanleitung
6
Manuelle Aktualisierung
Falls Sie die Option “Keine Aktualisierung auswählen, werden Sie aufgefordert, die
Uhrzeit und das Datum manuell einzustellen. Datum und Uhrzeit werden in den Formaten
tt-mm-jjjj und hh:mm angezeigt.
Der aktivierte Wert blinkt. Stellen Sie den Wert mit „ / ein. Drücken Sie nach der
Einstellung eines Wertes den „OK Knopf, um zum nächsten Wert zu gelangen.
Netzwerk
Netzwerkverbindung halten
Wählen Sie diese Option um das Gerät im Standby mit dem Netzwerk in Verbindung zu
halten, dadurch verbindet sich das Gerät schneller mit dem Internet, es kann mittels
UNDOK APP eingeschalten werden, allerdings ist die Standby -Leistungsaufnahme höher.
Suche nach dem Netzwerk
Das Gerät ist mit allen herkömmlichen Netzwerkprotokollen und Verschlüsselungs-
Methoden kompatibel. Er sucht nach verfügbaren Netzwerken und listet diese für die
Auswahl auf.
Im nächsten Schritt werden Sie aufgefordert, die Verschlüsselung
einzugeben. Um das Passwort des Netzwerks einzugeben,
verwenden Sie den Navigationsregler und bewegen Sie den
Cursor durch die Zeichen; drücken Sie OKzum Bestätigen.
Es gibt drei Möglichkeiten, den Cursor innerhalb des Passworts
rückwärts bis vor das erste Zeichen zu navigieren Rücktaste, OK
und Abbrechen.
WPS-verschlüsseltes Netzwerk
Falls Ihr Netzwerkgerät die WPS-Funktion unterstützt, erscheint vor der SSID (Name des
Netzwerkgeräts) [WPS].
Treffen Sie je nach Anforderung die entsprechende Auswahl.
Push button - WPS-Schnelltaste am Gerät
Sie werden aufgefordert, die Verbindungstaste am Router zu
drücken. Der Tuner sucht dann nach dem verbindungsbereiten
Netzwerk und stellt die Verbindung her.
Pin
Das Gerät erzeugt einen 8-stelligen Code, geben sie diesen Code
am Router ein.
ICD1010 / Deutsche Bedienungsanleitung
7
Skip WPS - WPS überspringen
Geben Sie das Passwort wie bei einem herkömmlich verschlüsselten Netzwerk ein.
Nähere Informationen zur Einrichtung eines WPS-verschlüsselten Netzwerks finden Sie in
der Gebrauchsanleitung des WPS-Routers.
Es wird versucht das ausgewählte Netzwerk zu
verbinden. Bei erfolgreichem Setup erscheint die
Verbindungsbestätigung. Bei erfolgloser Verbindung
kehrt das Gerät zur vorherigen Anzeige zurück
und versucht es erneut.
Drücken Sie OK”, um den Einrichtungsassistent
zu schließen.
HAUPTMENÜ
Drücken Sie die „SOURCE“ Taste um eine der folgenden Funktionen zu wählen: Internet Radio,
Podcasts, DAB, UKW (FM), CD, Musik abspielen (USB), Bluetooth®, Schlummer (Sleep) und
Wecker .
INTERNET RADIO
Das Gerät kann Tausende von Radiosendern und Podcasts aus der
ganzen Welt via Breitband-Internetverbindung wiedergeben.
Wenn Sie Internetradio auswählen, kontaktiert das Gerät direkt das
Frontier Silicon Internetradioportal (unterstützt von Airable), um die
Liste der Sender zu abzurufen.
Falls Sie bereits einen Internetradiosender wiedergeben, können Sie die „ “ Taste drücken,
um zur vorherigen Menüeinstellung zurückzukehren, anstatt die Taste MENÜ zu drücken und
das erste Menü im Internetradiomodus zu öffnen.
Deutschland
Sender aus Deutschland
Verlauf
Wenn Sie den Internetradiomodus einschalten, wird der zuletzt gehörte Sender
ausgewählt. Um einen anderen kürzlich gehörten Sender auszuwählen, klicken Sie hier,
um die ausgewählten Sender aufzulisten. Die zuletzt angehörten Sender erscheinen ganz
oben in der Liste.
ICD1010 / Deutsche Bedienungsanleitung
8
Suche
Hier kann nach gewünschten Radiosendern gesucht werden.
Länder
Hier können Radiosender nach Kontinent und Länder ausgewählt werden.
Populär
Hier sind beliebte Radiosender zu sehen.
Entdecken
Hier können Sie Radiosender nach Land, Genre oder Sprache auswählen.
Sender speichern Presets
Um einen Internetradiosender zu speichern, drücken und halten Sie die „PRE“ Taste bis im
Display die Anzeige für die Speicherung von Sendern erscheint und wählen Sie den
Speicherplatz aus und bestätigen Sie die Auswahl mit „OK“.
Um einen Festsender aufzurufen geben Sie mit den Tasten 0-9 auf der Fernbedienung den
Programmplatz ein oder Sie drücken die „PRESET“ Taste, wählen den gewünschten Sender
aus und drücken die „OK“ Taste zum Bestätigen.
Hinweis: Sie können bis zu 20 Festsender speichern!
Informationen zur aktuellen Wiedergabe
Während der Wiedergabe werden im Display der Name und die Bezeichnung der Übertragung
angezeigt. Um weitere Informationen anzuzeigen, drücken Sie die Taste INFO“ am Gerät oder
auf der Fernbedienung.
Mit jedem Drücken der Taste INFOwird nacheinander eine andere Gruppe von Informationen
angezeigt: Name/Titel, Genre/Standort, Zuverlässigkeit, Codec/Abtastrate, Wiedergabe-Puffer
und aktuelles Datum.
PODCASTS
Mit dieser Funktion können Podcasts ausgewählt, gesucht und angehört werden.
ICD1010 / Deutsche Bedienungsanleitung
9
DAB+ (DIGITALRADIO)
Im DAB-Modus werden digitale DAB/DAB+ Radiosender empfangen
und Informationen bzgl. Sender, Übertragung und
Titelwiedergabedauer angezeigt.
Radiosender suchen
Wenn Sie den DAB-Radiomodus das erste Mal einschalten oder die
Senderliste leer ist, führt das Gerät einen vollständigen Scan nach
verfügbaren Sendern durch. Sie können die Suche auch manuell
starten, um die Senderliste aus einem der nachfolgenden Gründe zu
aktualisieren:
Von Zeit zu Zeit sind andere Sender verfügbar.
Falls der Empfang des ursprünglichen Scans nicht gut war, kann
dies dazu führen, dass die Senderliste leer oder unvollständig ist.
Falls der Empfang einiger Sender schlecht ist (Aussetzer), haben
Sie die Möglichkeit, nur die Sender mit guter Signalstärke
aufzulisten.
Um die Suche zu starten, drücken Sie die „MENÜ“ Taste auf der Fernbedienung oder drücken
und halten Sie die „MENÜ/INFO“ Taste um in das DAB-Menü zu gelangen. Wählen Sie die
Option Vollständiger Suchlauf“ und bestätigen Sie mit „OK oder drücken Sie die „SCAN“ Taste
auf der Fernbedienung.
Nach Abschluss der Sendersuche zeigt das Radio eine Liste aller verfügbaren Sender an.
Sender speichern Presets
Um einen DAB-Radiosender zu speichern, drücken und halten Sie die „PRE“ Taste bis im
Display die Anzeige für die Speicherung von Sendern erscheint und wählen Sie den
Speicherplatz aus und bestätigen Sie die Auswahl mit „OK“.
Um einen Festsender aufzurufen geben Sie mit den Tasten 0-9 auf der Fernbedienung den
Programmplatz ein oder Sie drücken die „PRE“ Taste, wählen den gewünschten Sender aus
und drücken die „OK“ Taste zum Bestätigen.
Informationen zur aktuellen Wiedergabe
Während der Übertragung werden der Sendername und die vom Sender übertragenen DLS-
Informationen (Dynamic Label Segment) angezeigt; diese enthalten Echtzeitdaten wie z.B.
Sendungsname, Titel und Kontaktinformationen. Stereoübertragungen sind oben im Display mit
einem entsprechenden Icon gekennzeichnet. Um weitere Informationen anzuzeigen, drücken
Sie die Taste INFO am Gerät oder auf der Fernbedienung.
ICD1010 / Deutsche Bedienungsanleitung
10
DAB Menü
Senderliste
Die gefundenen Sender werden in der Senderliste angezeigt.
Vollständiger Suchlauf
Ein vollständiger Sendersuchlauf wird gestartet. Die Sender werden in der Senderliste
angezeigt.
Manuell einstellen
Hier haben Sie die Möglichkeit einen Kanal auszuwählen und nur den Suchlauf für diesen
Kanal zu starten.
Senderberreinigung
Radiosender, die nicht mehr zu hören oder empfangbar sind, können hier gelöscht werden.
Lautstärkeanpassung (DRC)
Falls Sie in einer lauten Umgebung Musik mit einem hohen Dynamikbereich anhören,
können Sie den Audio-Dynamikbereich komprimieren. Leise Töne werden dadurch lauter
und laute Töne leiser. Stellen Sie die Option DRC mit Aus, Niedrig oder Hoch ein.
Senderreihenfolge
Sie können die DAB-Radiosender alphanumerisch oder nach Ensemble Sender sortieren.
Ensemble listen Sender auf, die gemeinsam auf dem gleichen Ensemble übertragen
werden. Mit der Option Gültig werden zunächst gültige Sender alphanumerisch und
anschließend nicht übertragene Sender angezeigt.
UKW (FM)
Im UKW-Radiomodus werden analoge Radiosender über das UKW-
Band empfangen und RDS-Daten (Radio Data System)
Zusatzinformationen bzgl. des Sender angezeigt.
Für eine manuelle Abstimmung drücken und halten Sie die Taste / “, bis der Suchlauf
startet. Der Suchlauf stoppt beim nächsten gefundenen Sender.
Für die Feinabstimmung drücken Sie die Tasten / auf der Fernbedienung oder an
Ihrem Gerät. Das Gerät stimmt die Frequenz in einer Schrittweite von 0,05 MHz ab.
ICD1010 / Deutsche Bedienungsanleitung
11
Sender speichern Presets
Um einen UKW-Radiosender zu speichern, drücken und halten Sie die „PRE“ Taste bis im
Display die Anzeige für die Speicherung von Sendern erscheint und wählen Sie den
Speicherplatz aus und bestätigen Sie die Auswahl mit „OK“.
Um einen Festsender aufzurufen geben Sie mit den Tasten 0-9 auf der Fernbedienung den
Programmplatz ein oder Sie drücken die „PRE“ Taste, wählen den gewünschten Sender aus
und drücken die „OK“ Taste zum Bestätigen.
Informationen zur aktuellen Wiedergabe
Während der Übertragung werden im Display die Frequenz und sofern RDS-Informationen
verfügbar sind der Sendername und andere RDS-Daten wie Sendungsname, Titel und
Kontaktinformationen angezeigt. Falls keine Daten verfügbar sind, wird nur die Frequenz
angezeigt. Stereoübertragungen sind unten im Display mit einem entsprechenden Icon
gekennzeichnet.
Um weitere Informationen bzgl. der Sendung anzuzeigen, drücken Sie die Taste INFO“ am
Gerät.
Mit jedem Drücken der Taste „INFO auf dem Gerät wird nacheinander eine andere Gruppe von
Informationen angezeigt: RDS-Text, weitere RDS-Daten (Sender/Art der Sendung), Frequenz
und das aktuelle Datum.
EINSTELLUNEGN
Suchlaufeinstellungen
Per Standardeinstellung wird die UKW-Suche beendet, sobald ein verfügbarer Sender
gefunden wurde. Diese Funktion kann dazu führen, dass ein Sender mit schlechtem
Rauschabstand (Rauschen) wiedergegeben wird. Um die Scaneinstellungen dahingehend zu
ändern, dass nur Sender mit guter Signalstärke empfangen werden, wählen Sie zunächst die
Option nur starke Sender und anschließend die Option Ja.
Audioeinstellungen
Alle Stereosender werden in Stereo wiedergegeben. Bei Sendern mit schlechterem Empfang
kann dies zu einem schlechten Rauschabstand (Rauschen) führen. Um solche Sender in Mono
wiederzugeben, wählen Sie die Option Schlechter UKW-Empfang: Nur in Mono wiedergeben
und Ja.
ICD1010 / Deutsche Bedienungsanleitung
12
CD
Unsachgemäßer Betrieb kann zu Schäden führen! Legen Sie keine CDs, die von der Standard-
CD abweicht z. B. Mini-CDs in das Gerät ein. Diese können nicht korrekt wiedergegeben oder
ausgeworfen werden.
Öffnen Sie das CD-Fach mit der Taste „ “ und legen Sie eine CD mit der beschrifteten Seite
nach vorne zeigend ein. Schließen Sie wieder das CD-Fach mit der „ “ Taste. Im Display
erscheint „Ladevorgang“ und die CD wird eingelesen. In dieser Zeit ist eine Bedienung nicht
möglich. Nach dem Einlesen zeigt das Gerät folgende Informationen:
Ordner (F)
Titel (T)
Aktuelle Spielzeit
Wiedergabe Status (Wiedergabe/ Pause)
Die Wiedergabe startet automatisch nach dem Einlesen der CD. Wird eine CD nicht erkannt
oder ist keine CD eingelegt zeigt das Display “Keine CD”.
Um die Wiedergabe zu unterbrechen und fortzusetzen drücken Sie die “ ” Taste
Um den nächsten Titel zu wählen drücken die “ ” Taste.
Schnelles Vorspulen machen Sie drücken und halten der “ ” Taste.
Um den vorherigen Titel zu wählen drücken Sie zweimal die “ ” Taste.
Schnelles Zurückspulen machen Sie drücken und halten der “ ” Taste.
Um die Wiedergabe zu beenden drücken Sie die “ ” Taste.
Um die CD auszuwerfen drücken Sie im Stop-Modus die “ ” Taste.
Titelprogrammierung
1. Vergewissern Sie sich, dass sich das Gerät im Stop-Modus befindet.
2. Drücken Sie die “PRE” Taste auf der Fernbedienung. Das Display zeigt “P01 F01 T001
wobei die Anzeige “T001” blinkt.
3. Wählen Sie mit den “ ” oder “ ” Tasten den Titel den Sie programmieren möchten
und bestätigen Sie die Eingabe durch Drücken der “OK” Taste auf der Fernbedienung. Die
Anzeige wechselt anschließend auf “P02”.
4. Wenn Sie weitere Titel speichern möchten führen Sie Schritt 3 nochmals aus.
5. Wenn alle Titel gespeichert sind drücken Sie die “ ” Taste am Gerät oder auf der
Fernbedienung um die Wiedergabe zu starten.
ICD1010 / Deutsche Bedienungsanleitung
13
Wiedergabefunktionen
Durch wiederholtes Drücken der „ Taste auf der Fernbedienung können folgende
Wiedergabefunktionen ausgewählt werden:
Für Audio-CD:
1 x: Der aktuelle Titel wird wiederholt.
2 x: Die komplette CD wird wiederholt.
3 x: Die Titel der CD werden zufällig wiedergegeben.
4 x: Die Wiederholfunktion ist deaktiviert.
Für MP3-CD:
1 x: Der aktuelle Titel wird wiederholt.
2 x: Der komplette Ordner wird wiederholt.
3 x: Die komplette CD wird wiederholt.
4 x: Die Titel der CD werden zufällig wiedergegeben.
5 x: Die Wiederholfunktion ist deaktiviert.
Das jeweilige Wiedergabesymbol wird unten im Display angezeigt.
USB
Von nun an werden die Ordner - Menüs von dem USB-Gerät aus
erstellt.
Die Steuerfunktionen sind identisch wie im CD-Betrieb.
Mit den “ / ” Tasten auf der Fernbedienung oder mithilfe der
UNDOK - APP können die Ordner ausgewählt werden. Im Display
werden der Ordner und die Dateinamen (nicht unbedingt die Namen
des Titels) angezeigt.
Drücken Sie die „ -Taste oder benutzen Sie die „UNDOK APP“ um die Wiedergabe zu
starten.
Wiedergabeliste
Sie können Lieder der Wiedergabeliste hinzufügen, indem Sie während der Wiedergabe die
OK“ Taste Ihrer Fernbedienung drücken und halten.
Wiedergabeliste löschen
Wählen Sie „Wiedergabe Liste löschen und bestätigen Sie mit „OK“.
ICD1010 / Deutsche Bedienungsanleitung
14
BLUETOOTH®
Wenn Sie den Bluetooth®-Modus auswählen, aktiviert das Gerät die
Kopplung und unten im Display blinkt das BT-Icon. Schalten Sie Ihr
Smartphone, Tablet oder Bluetooth® -Gerät ein, um nach ICD1010 zu
suchen.
Nach der erfolgreichen Kopplung leuchtet die Bluetooth®-Anzeige
stetig und hört auf zu blinken.
Um die BT-Kopplung zu beenden, müssen Sie Ihr Smartphone, Tablet
oder andere Bluetooth®-Geräte ausschalten oder trennen.
Drücken Sie die „ “ Taste am Gerät oder auf der Fernbedienung um die Musikwiedergabe zu
starten oder zu unterbrechen. Sie können mit den Tasten „ “ oder „ “ zum vorherigen oder
nächsten Titel gelangen.
AUDIO IN (AUX)
Über diese Buchse können Sie auch den Ton anderer Wiedergabegeräte wie MP3-Player,
CD-Player usw. über die Lautsprecher hören.
1. Schließen Sie das externe Gerät mit einem 3.5mm Klinkenkabel an die AUX-IN-Buchse
auf der Rückseite des Geräts an.
2. Sie hören die Tonwiedergabe vom externen Gerät über die Lautsprecher des Gerätes.
Sie können die Lautstärke mit den Lautstärketasten einstellen. Die CD-Tasten sind nicht
funktionsfähig.
3. Informationen zur Bedienung finden Sie in der Bedienungsanleitung des externen
Gerätes.
Hinweis:
Stellen Sie die Lautstärke des externen Geräts auf einen angenehmen Wert ein.
EINSCHLAFTIMER - SLEEP
Stellen Sie den Einschlaftimer ein, indem Sie im Hauptmenü die Option „Schlummer“
auswählen. Wählen Sie Sleep: AUS, 15 MIN., 30 MIN., 45.MIN oder 60 MIN.
Die verbleibende Zeit bis zum Ausschalten ist unten im Display zu sehen.
WECKER - ALARM
Das Gerät bietet zwei unterschiedliche Weckrufoptionen mit
Schlummerfunktion, um das Gerät nach einer bestimmten Dauer
einzuschalten. Sie können für jeden Weckruf einen bestimmten
Weckmodus einstellen.
Wählen Sie die Option Wecker im Hauptmenü um einen Wecker einzustellen oder zu ändern.
Wählen Sie den gewünschten Wecker (1 oder 2) und konfigurieren Sie dann die folgenden
Einstellungen:
ICD1010 / Deutsche Bedienungsanleitung
15
Intervall: Aus, Täglich, Einmal, Wochenende oder Werktage
Zeit
Quelle: Internet Radio, DAB, UKW (FM), CD, USB, Summer
Programm: zuletzt gehört, P1 P20 (nur bei Auswahl DAB oder UKW möglich).
Lautstärke: 0 - 32
Um die neuen Einstellungen zu aktivieren, scrollen Sie nach unten und wählen Sie „Speichern.
Die aktivierten Wecker werden unten links im Display mit einem entsprechenden Icon
angezeigt.
UNDOK
Das Gerät unterstützt eine Fernbedienungsfunktion welche über die UNDOK APP
bereitgestellt wird. Die „UNDOK APP“ ist im „Apple App Store“ und bei „Google Android Play“
für den Download verfügbar.
Sie können mittels UNDOK das Gerät bedienen, Gerätegruppen erstellen und verwalten.
Folgende Funktionen sind mit der „UNDOK APP“ verfügbar:
Gruppe erzeugen
Gruppennamen vergeben
Gruppen verwalten, Geräte zu Gruppe hinzufügen oder entfernen.
Gruppe löschen
Gruppe steuern, den Betriebsmode wählen oder nach Inhalten suchen.
Die Funktionen der Gruppengeräte steuern.
Alle Betriebsfunktionen (Internetradio, Podcast, DAB, UKW, CD, USB, Bluetooth®) des
Gerätes steuern.
Die Equalizer-Einstellungen vornehmen.
Den Einschlaftimer (Sleep) einstellen und aktivieren.
Den Gerätenamen ändern.
SYSTEMEINSTELLUNGEN
1. EQUALIZER
Es sind mehrere voreingestellte EQ-Modi verfügbar: Mittig, Jazz, Rock, Soundtrack,
Klassik, Pop, Mein EQ und Meine EQ-Einstellungen.
Darüber hinaus ist auch eine benutzerdefinierte Einstellung verfügbar; erstellen Sie Ihren
eigenen EQ mit benutzerdefinierten Tiefton-, Hochton- und Lautstärkeeinstellungen.
Sie können diese Funktionen auch durch Drücken der „EQ“ Taste auf der Fernbedienung
auswählen.
2. AUDIOSTREAM QUÄLITÄT
Hier können Sie die Wiedergabequalität des Radiostreams einstellen.
ICD1010 / Deutsche Bedienungsanleitung
16
3. INTERNETEINSTELLUNGEN
Netzwerkassistent
Starten Sie die Suche nach der AP SSID und geben Sie dann den WEP-/WPA-Schlüssel
ein oder wählen Sie Drucktaste/PIN/WPS überspringen für die Verbindung des schnurlosen
Netzwerks aus.
Setup von PBC-WLAN
Konfiguration via Drucktaste für die Verbindung des AP, das WPA (Wi-Fi Protected Setup)
unterstützt.
Einstellungen anzeigen
Informationen des aktuell verbundenen Netzwerks anzeigen: Aktive Verbindung, MAC-
Adresse, WLAN Region, DHCP, SSID, IP-Adresse etc
Manuelle Einstellungen
Wählen Sie die schnurlose Netzwerkverbindung aus und aktivieren oder deaktivieren Sie
DHCP (Dynamic Host Configuration Protocol).
Sicherheits-PIN
Hier können Sie den Sicherheits-PIN einstellen.
Netzwerkprofil
Der ICD1010 speichert die letzten vier verbundenen schnurlosen Netzwerke und versucht
automatisch, die Verbindung mit dem jeweils verfügbaren Netzwerk herzustellen.
Hier sehen Sie die Liste der registrierten Netzwerke. Sie können unerwünschte Netzwerke
löschen, indem Sie NAVIGATEdrehen und drücken, um die Option JA auszuwählen und
den Löschvorgang zu bestätigen.
Netzwerkeinstellungen löschen
Die eingestellten Netzwerkeinstellungen werden gelöscht.
Netzwerkverbindung halten in Standby
Wählen Sie die Option „JA“, um die Netzwerkverbindung im
Standby, DAB, FM und Bluetooth® - Modus aufrecht zu erhalten.
Falls Sie die Option „NEIN“ auswählen, wird die WLAN -
Verbindung bei nichtgebrauch abgeschalten.
Es wird jedoch Empfohlen die Verbindung für den Gebrauch der
UNDOK APP aufrecht zu erhalten.
4. ZEIT UND DATUM
Hier können Sie die Zeiteinstellungen vornehmen wie Uhrzeit/Datumeinstellung,
Automatisches Update, Format einstellen, Zeitzone einstellen, Sommerzeit, Uhranzeige.
ICD1010 / Deutsche Bedienungsanleitung
17
5. SPRACHE
Ändern Sie die Sprache je nach Bedarf
6. WERKSEINSTELLUNG
Bei der Werkseinstellung werden alle benutzerdefinierten Einstellungen auf die
Werkseinstellungen zurückgesetzt, d.h. die Uhrzeit, das Datum, die
Netzwerkkonfigurationen und Speichereinstellungen gehen verloren. Die aktuelle Software-
Version des ICD1010 wird jedoch beibehalten. sowie die Registrierung mit dem
Internetradioportal. Die Internetradiofavoriten werden also solange beibehalten, bis Sie den
ICD1010 mit einem anderen Konto im Portal anmelden.
7. SOFTWAREUPDATE
Um Störungen zu beheben und/oder neue Funktionen hinzuzufügen können neue
Softwareversionen zu Verfügung gestellt werden. Sie können manuell nach
Aktualisierungen suchen oder den ICD1010 so einstellen, dass dieser regelmäßig und
automatisch nach Aktualisierungen sucht (letzteres ist Standardeinstellung). Falls eine
neuere Software erkannt wird, werden Sie gefragt, ob Sie diese installieren möchten. Falls
ja, wird die neue Software heruntergeladen und installiert. Nach der Aktualisierung der
Software werden alle benutzerdefinierten Einstellungen beibehalten.
HINWEIS: Vor der Aktualisierung der Software müssen Sie sich vergewissern, dass der
ICD1010 mit einer stabilen Stromversorgung verbunden ist. Falls die Stromversorgung
während der Aktualisierung getrennt wird, kann das Gerät dadurch permanent beschädigt
werden.
8. EINSRICHTUNGSASSISTENT
Hier haben Sie die Möglichkeit den Einrichtungsassistenten zu starten.
9. INFORMATION
Firmware-Version und Radio-ID anzeigen.
10. DATENSCHUTZ
Hier werden Informationen zur Datenschutzgrundverordnung angezeigt.
11. DISPLAYBELEUCHTUNG
Sie können die Displayhelligkeit in Standby und Betrieb separat sowie die Dauer einstellen.
ICD1010 / Deutsche Bedienungsanleitung
18
STÖRUNGSBEHEBUNG
Problem
Behebung
Das Gerät lässt sich
nicht einschalten.
Überprüfen Sie, ob der Netzadapter richtig angeschlossen ist.
Gerät schaltet sich
automatisch ab.
Aufgrund der ErP2-Anforderungen und des Umweltschutzes
wechselt das Gerät automatisch in den Standby-Modus, wenn mehr
als 15 Minuten lang keine Musik abgespielt wird.
Kein Ton.
1. Schalten Sie den Ton ein; möglicherweise ist er stumm gestellt.
2. Erhöhen Sie die Lautstärke.
3. Trennen Sie möglicherweise verbundene Kopfhörer oder
Lautsprecher von der Anschlussbuchse.
Die
Netzwerkverbindung
kann nicht hergestellt
werden.
1. Überprüfen Sie die WLAN-Funktion.
2. Versuchen Sie, am Gerät eine IP-Adresse einzurichten.
3. Aktivieren Sie am Router die DHCP-Funktion und stellen Sie
dann am Gerät wieder die Verbindung her.
4. Im Netzwerk ist eine Firewall aktiviert stellen Sie das
entsprechende Programm so ein, dass der Zugang
gewährleistet ist.
5. Router neu starten
Die Wi-Fi-Verbindung
lässt sich nicht
herstellen.
1. Überprüfen Sie am Router die Verfügbarkeit des WLAN-
Netzwerks.
2. Stellen Sie das Gerät näher an den Router heran.
3. Vergewissern Sie sich, dass das Passwort korrekt ist.
Kein Radiosender
gefunden.
1. Überprüfen Sie das Netzwerk sowie den Zugangspunkt und
Firewall.
2. Der Sender ist momentan möglicherweise nicht verfügbar.
Versuchen Sie es später erneut oder stellen Sie einen anderen
Sender ein.
3. Die Senderverknüpfung hat sich geändert oder der Sender
überträgt nicht mehr kontaktieren Sie den Anbieter.
4. Die Verknüpfung manuell hinzugefügter Sender ist nicht korrekt.
Vergewissern Sie sich, dass diese korrekt sind und geben Sie
die Daten dann erneut ein.
Rauschen im UKW-
Modus
1. Überprüfen/positionieren Sie die UKW-Antenne.
2. Stellen Sie das Radio um.
3. Schalten Sie gegebenenfalls das Gerät auf MONO
ICD1010 / Deutsche Bedienungsanleitung
19
Keine Sender
verfügbar/
Störungen/Unterbrechu
ngen im DAB-Modus.
1. Stellen Sie das Radio um.
2. Führen Sie den Scan nach lokalen Sendern durch (hohe
Signalstärke).
3. Überprüfen Sie die lokale DAB-Reichweite.
Weckruf funktioniert
nicht.
1. Schalten Sie den Weckruf ein.
2. Informieren Sie sich unter „Kein Ton“ näher über die
Lautstärkeeinstellung.
3. Es wurde ein Sender als Weckmodus eingestellt, aber das
Netzwerk ist nicht verbunden. Ändern Sie den Weckmodus oder
konfigurieren Sie die Verbindung.
USB-Treiber oder MP3-
Player werden nicht
erkannt.
1. Überprüfen Sie, ob der USB-Treiber oder der MP3-Player richtig
angeschlossen sind.
2. Einige USB-Festplatten benötigen eine externe
Stromversorgung; vergewissern Sie sich, dass diese mit der
Stromversorgung verbunden sind.
3. Das Gerät kann nicht alle MP3-Player direkt scannen
verwenden Sie stattdessen einen USB-Treiber.
UNDOK APP erscheint
nicht oder wird nicht mit
dem
ICD1010verbunden
1. Öffnen Sie die App erneut. (UNDOK)
2. Falls mehrere Inhalte von unterschiedlichen Geräten gleichzeitig
übertragen werden, kann es zu einem Betriebsausfall kommen.
Starten Sie den ICD1010 und/oder Ihr Gerät neu.
Andere unerklärte
Ursachen.
Der ICD1010 verarbeitet eine große Datenmenge; nach einer
bestimmten Betriebsdauer kann dies unabhängig in welchem
Modus dazu führen, dass das Gerät hängen bleibt oder
unsachgemäß funktioniert. Starten Sie den ICD1010 ggf. neu.
Die normale Funktionsweise des Geräts kann durch starke
elektromagnetische Störungen beeinträchtigt werden. Stellen Sie
den normalen Betrieb wieder her; beachten Sie die Angaben in der
Bedienungsanleitung. Falls Sie den normalen Betrieb nicht
wiederherstellen können, verwenden Sie das Gerät an einem
anderen Ort.
An Orten mit starken Funkstörungen können Fehlfunktionen
verursacht werden. Sobald solche Störungen behoben wurden,
funktioniert das Gerät wieder ordnungsgemäß.
Sollten in Ihrem Stromnetz Störungen vorliegen, kann das Gerät
Fehlfunktionen aufweisen. Das Gerät kehrt zur normalen Funktion
zurück, sobald die Netzstörungen vorüber sind.
Die aktuelle Version der Bedienungsanleitung kann unter www.soundmaster.de
Heruntergeladen werden.
Technische Änderungen und Druckfehler vorbehalten
Copyright von Woerlein GmbH, 90556 Cadolzburg, www.soundmaster.de
Vervielfältigung nur mit ausdrücklicher Genehmigung der Woerlein GmbH
Safety, Environmental and Setup Instructions
EN
ENVIRONMENTAL PROTECTION
Do not dispose of this product with the normal household
waste at the end of its life cycle. Return it to a collection
point for the recycling of electrical and electronic devices.
This is indicated by the symbol on the product, user
manual or packaging
The materials are reusable according to their markings. By
reusing, recycling or other forms of utilization of old devices you
make an important contribution to the protection of our
environment.
Please contact your local authorities for details about collection
points.
WARNING
Risk of electric shock
Do not open!
Caution: To reduce the risk of electric shock, do not remove the
cover (or back). There are no user serviceable parts inside.
Refer servicing to qualified service personnel.
This symbol indicates the presence of dangerous
voltage inside the enclosure, sufficient enough to
cause electric shock.
This symbol indicates the presence of important
operating and maintenance instructions for the device
Used batteries are hazardous waste and NOT to be
disposed of with the household waste! As a
consumer you are legally obligated to return all
batteries for environmentally responsible recycling
no matter whether or not the batteries contain harmful
substances*)
Return batteries free of charge to public collection points in your
community or shops selling batteries of the respective kind.
Only return fully discharged batteries
*) marked Cd = cadmium, Hg = mercury, Pb = lead
Only use mercury and cadmium-free batteries.
Used batteries are hazardous waste and NOT to be
disposed of with the household waste!!!
Keep batteries away from children. Children might
swallow batteries.
Contact a physician immediately if a battery was
swallowed.
Check your batteries regularly to avoid battery leakage.
Batteries shall not be exposed to excessive heat such
as sunshine, fire or the like.
CAUTION: Danger of explosion if battery is incorrectly
replaced
Replace only with the same or equivalent type
CAUTION - INVISIBLE LASER
RADIATION WHEN OPENING THE
COVER OR PRESSING THE SAFETY
INTERLOCK. AVOID EXPOSURE TO
THE LASER BEAM.
The device is equipped with a Class 1 Laser”. Avoid
exposure to the laser beam as this could cause eye
injuries.
Use the device in dry indoor environments only.
Protect the device from humidity.
This apparatus is for moderate climates areas
use, not suitable for use in tropical climates
countries.
No objects filled with liquids, such as vases, shall
be placed on the apparatus.
The mains plug or an appliance coupler is used
as the disconnect device, the disconnect devices
shallremain readily operable.
Connect this device to a properly installed and
earthed wall outlet only. Make sure the mains
voltage corresponds with the specifications on
the rating plate.
Make sure the mains cable stays dry during
operation. Do not pinch or damage the mains
cable in any way.
A damaged mains cable or plug must
immediately be replaced by an authorized service
center.
In case of lightning, immediately disconnect the
device from the mains supply.
Children should be supervised by parents when
using the device.
Clean the device with a dry cloth only.
Do NOT use CLEANING AGENTS or ABRASIVE
CLOTHS!
Do not expose the device to direct sunlight or
other heat sources.
Install the device at a location with sufficient
ventilation in order to prevent heat accumulation.
Do not cover the ventilation openings!
Install the device at a safe and vibration-free
location.
Install the device as far away as possible from
computers and microwave units; otherwise radio
reception may be disturbed.
Do not open or repair the enclosure. It is not safe
to do so and will void your warranty. Repairs only
by authorized service/ customer center.
No naked flame sources, such as lighted
candles, should be placed on the unit.
When you are necessary to ship the unit store it
in its original package. Save the package for this
purpose.
In case of malfunction due to electrostatic
discharge or fast transient (burst), remove and
reconnect the power supply.
If the unit is not using for a long period of time,
disconnect it from the power supply by
unplugging the power plug. This is to avoid the
risk of fire.
ICD1010 / English Instruction Manual
1
TABLE OF CONTENT
TABLE OF CONTENT ................................................................................................ 1
LOCATIONS OF CONTROLS .................................................................................... 2
REMOTE CONTROL .................................................................................................. 3
OPERATION YOUR REMOTE CONTROL ................................................................. 3
CONTENT OF DELIVERY .......................................................................................... 3
GETTING STARTED / SET UP ................................................................................... 3
WALL MOUNTING ...................................................................................................... 4
GET THE NETWORK ENVIRONMENT READY ......................................................... 5
SETUP WIZARD ......................................................................................................... 5
MAIN MENU ................................................................................................................ 7
INTERNET RADIO ...................................................................................................... 7
PODCASTS ................................................................................................................. 8
DAB ............................................................................................................................. 8
FM ............................................................................................................................. 10
CD ............................................................................................................................. 11
USB ........................................................................................................................... 12
BLUETOOTH® .......................................................................................................... 13
AUX-IN ...................................................................................................................... 13
SLEEP ....................................................................................................................... 13
ALARM...................................................................................................................... 14
UNDOK ..................................................................................................................... 14
SYSTEM SETTINGS ................................................................................................. 14
TROUBLESHOOTING .............................................................................................. 16
ICD1010 / English Instruction Manual
2
LOCATIONS OF CONTROLS
FRONT VIEW
BACK VIEW
1
Speaker
9
EJECT button
2
CD tray
10
BACK button
3
USB Port
11
Detachable Stand
4
STOP button
12
PLAY/PAUSE/SCAN button
5
POWER/SOURCE button
13
NAVIGATE/VOLUME/OK knob
6
MENU/INFO button
14
SKIP/TUNING buttons
7
PRESET button
8
Display
15
16
Pigtail antenna
AC IN
17
AUX IN
ICD1010 / English Instruction Manual
3
REMOTE CONTROL
1
STANDBY/OFF
2
0-9 numeric buttons
3
button
4
Volume - button
5
Source button
6
Menu button
7
Equalizer button
8
SCAN button
9
- button
10
SKIP-/TUNE- button
11
EJECT button
12
PRESET button
13
OK button
14
VOLUME+ button
15
button
16
BACK button
17
INFO button
18
SLEEP button
19
MUTE button
20
PLAY/PAUSE button
21
REPEAT/SHUFFLE button
22
SKIP+/TUNE+ button
OPERATION YOUR REMOTE CONTROL
1. Press and slide the back cover to open the battery compartment of the remote control.
2. Insert two AAA size batteries. Make sure the (+) and (-) ends of the batteries match
the (+) and (-) ends indicated in the battery compartment.
3. Close the battery compartment cover.
CONTENT OF DELIVERY
Main Unit
Remote Control
Instruction Manual
Stand (already attached)
GETTING STARTED / SET UP
Connect the unit to a suitable power source. After showing a starting screen, it will enter the last
used listening mode. When the unit is started for the first time, the setup wizard will be launched
automatically.
ICD1010 / English Instruction Manual
4
WALL MOUNTING
NOTE:
Be very careful to prevent the unit (2.1kg) from falling when mounting on the wall.
Before mounting, check the wall strength and also if there a any Power cables behind
your drill point. (If you are unsure, ask a qualified technician for help)
Content of delivery does not include Screws and Dowels.
After screwed in the screws, check if they are tight
How to mount
Use suitable screws and dowels for the
assembly. The dimensions of the screws
can be found in the graphic below.
Use a piece of paper as a drilling
template (not included) and mark the
holes approx. 160mm apart. Then attach
the drilling template to the wall in a
horizontal position. (As pictured)
Drill the two holes.
Attach the screws with proper dowels as
you can see in the pictures
Remove the base of the device by
pulling the two locks on the underside of
the base away from the device. Push the
stand foot back and pull it off. Now you
can hang up your device as shown in the
picture
ICD1010 / English Instruction Manual
5
GET THE NETWORK ENVIRONMENT READY
Make sure you have setup the wireless network and you have the WEP, WPA or WPA2 security
password to activate the connection.
You may also use the WPS (WiFi Protected Setup) function for easy pairing between the
network device and ICD1010. Check if the light indicators on the network device are in
appropriate status.
SETUP WIZARD
Note: If the setup wizard is terminated prematurely without a network setup, the device
generates its own WiFi access so that the device can be configured using the UNDOK APP.
Network connection indicator:
= Network connection established.
= Network connection not established.
1. Language
Select the menu language
2. Private Policy
At the beginning of the first installation or after making a factory reset, the product privacy
policy will first appear on the display. To continue the installation, please confirm with the
"OK” button.
Further information are available under www.frontiersmart.com/privacy
3. Setup Wizard
Select “YES” to start the Setup Wizard.
4. Time/Date Display format
Select 12 or 24 as the time format.
5. Auto update
The time and date can be updated manually or automatically from DAB, FM or network.
Auto update works with data sent over DAB, FM or the Internet. The clock is only updated
when it is in a corresponding mode, so it is suggested to select a mode you use regularly.
DAB and FM use time signals broadcast with radio transmissions. Network uses a time
signal sent from the Internet radio portal when in any network connected mode.
6. Time zone/daylight
Set your time zone. If your country uses daylight saving and it is in effect, turn on the
Daylight saving option (only available when Auto update from Internet is selected).
ICD1010 / English Instruction Manual
6
7. Manual update
If you set No update, the wizard prompts you to set the time and date manually. The date
and time are displayed as dd-mm-yyyy and hh:mm.
The active value appears as flashing. Adjust each value with the “ / knob. Once the
value is set, press the knob to continue setting with next value.
8. Network
Keep Network connected
Select this option when the unit should the network connection in standby keep, when the
function is confirmed, the unit wills faster connecting the internet and it is possible to switch
on the unit with the “UNDOK” app.
Note: The standby power consumption is slightly increased with this function.
Scanning for the network
ICD1010 is compatible with all common network protocols and encryption methods. It
searches for the available networks and list them out for you.
There will be hints for the type of network if your network devices support WPS function, it
will be [WPS] before the SSID (the name of the network device). Select the one you want to
connect.
For the wireless connection, you will be asked for input the
encryption in the next step. To enter the network’s key, use the
NAVIGATEknob to move the cursor through the characters and
press “OK” to confirm. As each character is selected, the key is built
up near the top of the display.
There are three options accessible by tuning the navigate reel back
before the first characters Backspace, OK and Cancel.
WPS encrypted network
WPS encrypted networks are identified by WPS at the start of the network name when the
ICD1010 searches the available AP. Use one of the following methods of connection: There
is the shortcut WPS key on the unit.
Push button
ICD1010 prompts you to press the connect button on the router. It
then scans for a ready Push Button Connect network and connects.
ICD1010 / English Instruction Manual
7
Pin
ICD1010 generates an 8-digit code number which you enter into the
wireless router, access point, or an external registrar.
Skip WPS
Enter key as for a standard encrypted network.
For more information on setting up a WPS encrypted network, see your WPS router’s
instructions.
Completion
ICD1010 attempts to connect to the selected network.
It will show connected if the setup is successful. If connecting fails,
ICD1010 returns to a previous screen to try again.
Press “OK” to quit the setup wizard.
MAIN MENU
Press the “MODE” button to select the following modes: Internet Radio, Podcasts, DAB, FM,
CD, USB, Bluetooth®, Sleep, Alarm and Timer.
INTERNET RADIO
ICD1010 can play thousands of radio stations and podcasts from
around the world though a broadband Internet connection.
When you select Internet radio, ICD1010 directly contacts the Frontier
Silicon Internet radio portal (which is supported by Airable) to get a list
of stations.
If you are already listening to an Internet radio station, you can press “ ” button to quickly
return to the last visited branch of the menu tree, rather than “MENU” to go to the first menu of
Internet radio mode.
Germany
German radio stations will be displayed.
ICD1010 / English Instruction Manual
8
History
When Internet radio mode restarts, the last-listened station is selected. To select another
recently used station, enter here to select the listed station. Most recent stations appear at
the top of the list.
Search
You can search to desired radio stations
Location
Here radio stations can be selected by continent and countries.
Popular
Here are popular radio stations to see.
Discover
Here you can select radio stations by country, genre or language.
Presets
To store an Internet radio preset, press and hold the PRESET” key until the display shows the
“Save preset” screen. Select one of the presets to save the current station and press “OK” to
confirm.
To select a preset station, press the PRESET on, then select one of the listed preset stations
and press “OK” to confirm. Or press 0 to 9 on the Remote Control to directly recall the presets.
Now playing information
While the stream is playing, the screen shows its name and description. To view further
information, press “INFO” button on the radio or Remote Control.
Each time you press “INFO” button, another set of information is displayed, cycle through
name/description, genre/location, reliability, codec/sampling rate, playback buffer and today’s
date.
PODCASTS
This feature allows podcasts to be selected, searched and listened to.
DAB
DAB mode receives DAB or DAB plus digital radio signal and
displays information about the station, streaming audio and the
program details.
ICD1010 / English Instruction Manual
9
Scanning for stations
To start the scan, press the "MENU" button on the remote control or press and hold the "MENU
/ INFO" button to access the DAB menu. Select the option “Full scan” and confirm with “OK” or
press the “SCAN” button on the remote control.
To remove stations that are listed but not unavailable, choose Prune invalid.
Presets
To store a DAB radio preset, press and hold the PRESET button until the display shows the
“Save preset” screen. Select one of the presets to save the current station and press “OK” to
confirm.
To select a preset, press the PRESET button, then select one of the listed preset stations and
press “OK” to confirm. Or press 0 to 9 on the Remote Control to directly recall the presets.
Now playing information
While the stream is playing, the screen shows its name and DLS (Dynamic Label Segment)
information broadcast by the station giving real-time information such as program name, track
title and contact details. Stereo broadcasts are indicated with an icon at the bottom of the
screen. To view further information, press “INFO” button.
Each time you press “INFO” button on the radio, another set of information is displayed, cycling
through DLS text, program type, ensemble name/frequency, signal strength/error rate, bite
rate/codec/channels and today’s date.
DAB menu
Station list
Show the found stations in the station list.
Scan
A full scan will be started. The found stations will be shown in the station list.
Manual tune
Select the desired channel and only the selected channel.
The first time you select DAB radio mode, or if the station list is
empty, ICD1010 automatically performs a full scan to see what
stations are available. You may also need to start a scan manually
to update the list of stations for one of the following reasons:
Available stations change from time to time.
If reception was not good for the original scan, this may result in
an empty or incomplete list of available stations.
If you have poor reception of some stations (burbling), you may
wish to list only stations with good signal strength.
ICD1010 / English Instruction Manual
10
Prune invalid
Delete all radio stations which are not receivable anymore.
Dynamic range compression (DRC)
If you are listening to music with a high dynamic range in a noisy environment, you may wish to
compress the audio dynamic range. This makes quiet sounds louder, and loud sounds quieter.
You can change DRC as off, low or high.
Station order
You can choose the order of the DAB station list to be either Alphanumeric, Ensemble or Valid.
Ensemble lists groups of stations that are broadcast together on the same ensemble. Valid lists
valid stations first, alphanumerically, then off-air stations.
FM
FM radio mode receives analogue radio from the FM band and
displays RDS (Radio Data System) information about the station
and where broadcast.
To manual scan, press and hold “ / button. The frequency
display starts to run and scans the FM band and stops at the next
station.
To fine tune press the “ / button on the Remote Control
or on the unit.The unit search in 0.05 MHz steps.
Preset
To store an FM radio preset, press and hold the “PRESET” button until the display shows the
“Save preset” screen. Select one of the presets to save the current station and press “OK” to
confirm.
To select a preset, press the PRESET” button, then select one of the listed preset stations and
press “OK” to confirm. Or press 0 to 9 on the Remote Control to directly recall the presets.
Now playing information
While the stream is playing, the screen shows its frequency, or if RDS signal is available, station
name and any further RDS information such as program name, title and other details. Stereo
broadcasts are indicated with an icon at the bottom of the screen. To view further information,
press the “INFO” button.
Each time you press “INFO” button on the radio, another set of information is displayed, cycling
through Radio text, program type, frequency and today’s date.
ICD1010 / English Instruction Manual
11
SETTINGS
Scan settings
Choose FM at first, it will go to a specific station playing. Then press “MENU” on the radio to get
above table.
By default, FM scans stop at any available station. This may result in a poor signal-to-noise ratio
(hiss) from weak stations. To change the scan settings to stop only at stations with good signal
strength, select “Yes” after choosing Strong station only.
Audio settings
All stereo stations are reproduced in stereo. For weak stations, this may result in a poor signal-
to-noise ratio (hiss). To play weak stations in mono, select FM weak reception: Listen in mono
only and then YES.
CD
Notice!
Improper operation can result in material damages!
Do not insert any recording media that deviate from the standard CD format (eg: mini-discs) into
the CD player. These may not be played and ejected correctly. Insert only one disc at a time
into the CD player.
Open the CD tray by pressing the “ “ button and put a disc (with printing side facing to you)
inside. Close the CD tray with the “ “ button. The display will say “Loading” and the disc
functions will not work while the disc is loading. After reading the display shows the following
information in CD mode:
Folder
Track
Current Play time
Playback status (playing/pause)
The Playback will begin automatically once the table of contents is read. The display will show
“No Disc” when the unit is set to CD mode and there is no CD inside.
To pause/resume playback of the CD, press the “ ” button
To switch to the next track, press the “ ” button once
To fast forward through a track, press and hold the “ button.
To switch to the previous track, press the “ ” button twice
To fast backward through a track, press and hold “ ” button.
To stop CD playback, press the “ ” button on the remote control.
To eject the disc press in stop mode the “ ” button on the unit.
ICD1010 / English Instruction Manual
12
CD Program
1. Set the unit in Stop mode
2. Press the “PRE” button on the remote control. The display will show “T01 P01” and “T001”
flash.
3. Choose with “ ” or “ or 0 to 9 on the Remote Control, the track which should be
programmed and confirm the track by pressing the “PRE” button on the remote control. The
display changes to “P02”.
4. To choose more tracks do step 3 again.
5. If all tracks are programmed press the “ ” button on the unit or remote control to start the
programmed playback.
Repeat function
Press repeatedly the “ button on the remote control to select one of the following functions:
For Audio-CD:
1 x: The played track will be repeated.
2 x: The complete CD will be repeated.
3 x: The songs are played randomly.
4 x: Repeat function is deactivated.
For MP3-CD:
1 x: The played track will be repeated.
2 x: The complete folder will be repeated.
3 x: The complete CD will be repeated.
4 x: The songs are played randomly.
5 x: Repeat function is deactivated.
The icon of the selected function will be shown at the bottom of the display.
USB
USB playback
From this point on, menus are generated from the folders on the USB
device.
The control functions are the same as in CD mode.
Select with the / buttons on the remote control or by using the
UNDOK app the desired folder. The display shows folder and file
names (not necessarily track names).
Once you have found a track you want to play, press the “ button or click on the song title in
UNDOK app.
My Playlist
You can add Tracks to your Playlist. While playback press and hold the OKbutton on the
remote control.
Clear my Playlist
Select “Clear my Playlist” and confirm by pressing the “OK” button.
ICD1010 / English Instruction Manual
13
BLUETOOTH®
When you select the Bluetooth® mode, the device is entering to
pairing and the BT icon at the bottom of the screen will flash.
Turn on your smartphone, tablet or other Bluetooth® devices to
search for the device.
The Bluetooth® pairing name is “ICD1010”.
When pairing is successful, the Bluetooth® indicator will light up and stop flashing.
To release BT pairing, turn off or unpair your smartphone, table or other Bluetooth® devices.
Press “ ” on the radio or Remote Control to start or pause the playback. You can press
or “ on the radio or Remote Control to play the previous or next track.
AUX-IN
You can also use this socket to listen to the sound of other playback devices such as MP3
players, CD players, etc. through the loudspeakers.
Connect the external unit with a 3.5mm Jack cable to the AUX-IN port at the backside of the
unit.
Now you can listen to some music through the speakers of the unit. You can use the Volume
control buttons of the unit, but the CD-buttons have no function while listen to AUX.
You can find more information’s about the handling in the instruction manual of your external
unit.
NOTE:
Set the Volume of the external unit not to maximum while starting playback.
SLEEP
Select the function “Sleep” in the main menu. Choose from Sleep OFF, 15 mins, 30 mins,
45 mins or 60 mins.
The remaining time to switch off is shown at the bottom of the display.
ICD1010 / English Instruction Manual
14
ALARM
There are two versatile wake-up alarms with snooze facility, and a
sleep function to turn the system off after a set period. Each alarm
can be set to start in a particular mode.
Select Alarm in the Main menu to set or change an alarm.
Select the alarm number (1 or 2) then configure the following parameters:
Enable: on/off, Frequency: Daily, Once, Weekends or Weekdays,
Time
Mode: Internet Radio, DAB, FM, CD, USB, Buzzer
Preset: Last listened, P1 P20 (only when DAB or FM is selected).
Volume: 0 - 32
To activate the new settings, scroll down and select Save.
The screen shows active alarms with an icon at the bottom left.
UNDOK
The ICD1010 supports remote control from Apple iPhone, iPad and Android using the UNDOK
app. The apps are available in Apple’s app store and Google’s android play.
The UNDOK app allows you to:
Create a group
Rename a group
Edit a group - add or remove one or more products
Delete a group
Control a group - choose operating mode and browse for content
Adjust volume for an entire group or for individual products within a group
Control products which have not been assigned to any group
Control all the modes of the ICD1010 (Internet Radio, Podcast, DAB, FM, CD, USB,
Bluetooth®) of the unit.
Adjust the volume level of current playback
Setting EQ for various audio presets
Setting Sleep timer
Editing the displayed name of the radio.
SYSTEM SETTINGS
1. EQUALIZER
Several preset EQ modes are available: Normal, Flat, Jazz, Rock, Movie, Classic, Pop,
News and My EQ.
In the My EQ settings, you can create your own EQ with custom bass and treble settings.
You can also select these functions by pressing the “EQ” button on the remote control.
ICD1010 / English Instruction Manual
15
2. STREAMING AUDIO QUALITY
You can set the quality of the radio stations.
3. NETWORK SETTINGS
Network wizard
Enter to search AP SSID, then input the WEP / WPA key or choose Push Button/Pin/Skip
WPS to connect to the wireless network.
PBC Wlan setup
Push Button Configuration, it is to connect the AP that supports WPS (Wi-Fi Protected
Setup).
View settings
View the information of current connected network: Active connection, MAC address, Wlan
region, DHCP, SSID, IP address, Subnet mask, Gateway address, Primary DNS and
Secondary DNS.
Manual settings
Choose wireless network connection and enable or disable DHCP (Dynamic Host
Configuration Protocol).
Network profile
ICD1010 remembers the last four wireless networks it has connected to, and automatically
tries to connect to whichever one of them it can find. From here you can see the list of
registered networks. You can delete unwanted networks by turning and pressing then
choosing YES to confirm delete.
Clear network settings
The adjusted network settings will be deleted.
Keep network connected in standby
If you choose to keep network in standby connected, the WiFi will
not disconnect even you are in standby, DAB, FM and Bluetooth®
mode. Otherwise, the connection will only available in internet radio
mode.
However, it is recommended to maintain the connection for the use
of the UNDOK APP.
4. TIME/DATE
Set the time manually or automatically update, time format, time zone and daylight.
5. INACTIVE STANDBY
Set the time after the unit switch off automatically in standby.
ICD1010 / English Instruction Manual
16
6. LANGUAGE
Change it as your preference.
7. FACTORY RESET
A factory reset resets all user settings to default values, so that time and date, network
configuration and presets are lost. However, the ICD1010 ‘s current software version is
maintained.
8. SOFTWARE UPDATE
From time to time, software upgrades may be created with bug fixes and/or additional
features. You can either check manually or set ICD1010 to check periodically automatically
(this is the default). If newer available software is detected, you will be asked if you want to
go ahead with an update. If you agree, the new software is then downloaded and installed.
After a software upgrade, all user settings are maintained.
NOTE: Before starting a software upgrade, ensure that ICD1010 is plugged into a stable
main power connection. Disconnecting power during an upgrade may permanently damage
the unit.
9. SOFTWARE UPGRADE
Install the software via PC
10. SETUP WIZARD
Starts the setup wizard
11. INFORMATION
View the firmware version and the radio ID.
12. PRIVACY POLICY
Shows information about the privacy policy
13. BACKLIGHT
Adjust the display brightness in standby and on mode.
TROUBLESHOOTING
Error
Remedy
The device does not
switch on.
Check it the power adaptor is connected properly.
Switch automatically off
Due to ErP2 requirements and environmental protection, the unit
automatically switches to standby mode when no music is played
for more than 15 minutes.
No sound.
1. Turn on the sound as it may be muted
2. Increase the volume.
ICD1010 / English Instruction Manual
17
3. Pull any connected headphone or speaker from the connector
jack.
No network connection
can be established.
1. Check the WLAN function.
2. Try to set an IP address at the device.
3. Activate the DHCP function on the router and make the
connection again at the device.
4. A firewall is activated on the network set the respective
program in such a way that access is possible.
5. Reboot the router
WiFi connection cannot
be established.
1. Check the availability of WLAN network on the router.
2. Place the device closer to the router.
3. Make sure the password is correct.
No station is found.
1. Check the network as well as the access point and firewall.
2. The station may not be available currently, try it again later or
select another station.
3. The link of the station is changed or the station no longer
transmits ask the provider for information.
4. The link of manual added station is not correct, make sure it is
correct and re-enter.
Hiss in FM mode
Check/move the FM antenna or move the radio
No stations available /
burbling / intermittent in
DAB mode.
1. Move the radio.
2. Rescan local stations only (high-strength).
3. Check the local DAB coverage.
Alarm does not work.
1. Switch on the alarm.
2. Due to the volume setting, refer to the solutions of “No sound”.
3. The source of alarm was set to be station but there is no network
connection. Change the source of alarm or reconfigure the
connection.
USB driver or MP3
player is not detected.
1. Check if the USB driver or MP3 player is plugged properly.
2. Some USB hard disks need external power supply, make sure it
is connected to the power.
3. Not all MP3 players can be read directly on the device use an
USB drive instead.
NetRemote does not
show or connect to
ICD1010
1. Reopen the App.
2. If you have several streaming from several devices at the same
time, it may cause crash, reboot ICD1010 and/or your device.
All other undetermined
cases.
ICD1010 may process large amount of data after a period of
operation, no matter in which mode, it will cause the system freeze
or malfunction. Reboot ICD1010 if necessary.
The normal function of the product may be disturbed by strong
Electro-Magnetic
ICD1010 / English Instruction Manual
18
Interference. If so, simply reset the product to resume normal
operation by following the instruction manual. In case the function
could not resume, please use the product in other location.
The device may malfunction when used in areas with strong radio
interference. The device will work properly again once there is no
more interference.
Under the environment with Conducted Immunity disturbance, the
sample may malfunction. It will automatically recover to normal
when the Conducted Immunity disturbance stopped.
The current Version of the instruction manual can be downloaded from www.soundmaster.de
Technical changes and misprints reserved
Copyright by Woerlein GmbH, 90556 Cadolzburg, www.soundmaster.de
Duplication only with the permission of Woerlein GmbH
Consignes de sécurité, d’environnement et d’installation
FR
PROTECTION DE L’ENVIRONNEMENT
Ne jetez pas ce produit avec les ordures ménagères
lorsqu’il est usagé. Retournez-le à un point de collecte
pour le recyclage des appareils électriques et
électroniques. Cette recommandation est indiquée par le
symbole sur le produit, le mode d’emploi ou l’emballage.
Les composants sont réutilisables en fonction de leur marquage.
En réutilisant, recyclant ou employant autrement les vieux
appareils, vous contribuerez de façon signifiante à la protection
de notre environnement.
Veuillez contacter vos collectivités locales pour vous
renseigner sur les points de collecte
ATTENTION
Risque d’électrocution
Ne pas ouvrir!
Attention!: Pour réduire le risque d’électrocution, ne retirez
pas le couvercle (ou l’arrière). L’usager ne peut entretenir
aucune pièce à l’intérieur. Confiez l’entretien à un
personnel qualifié.ntretenir aucune pièce à l’intérieur.
Confiez l’entretien à un personnel qualifié.
Ce symbole indique la présence d’une tension
dangereuse à l’intérieur de l'appareil, qui est
suffisante pour provoquer un choc électrique.
Ce symbole indique la présence de consignes
importantes de fonctionnement et d’entretien de pour
l’appareil
Les piles usages sont des déchets dangereux et
ne doivent PAS être jetées avec les ordures
ménagères ! La loi impose aux consommateurs de
disposer de toutes les piles pour un recyclage
écologique et ce que les piles soient de contenance
dangereuse ou pas*).
Disposer gratuitement des piles dans les points de collecte
de votre communauté ou auprès des magasins détaillant
les piles de même catégories.
Ne disposez que de piles entièrement vides.
*) marquée Cd = cadmium, Hg = mercure, Pb = plomb
CLASS 1 LASER PRODUCT
KLASSE 1 LASER PRODUKT
LUOKAN 1 LASER LAITE
KLASS 1 LASER APPARAT
PRODUCTO LASER CLASE 1
ATTENTION RADIATION
LASER INVISIBLE LORSQUE
VOUS OUVREZ LE COUVERCLE
OU APPUYEZ SUR
L’ENCLENCHEMENT DE
SECURITE. EVITEZ TOUTE
EXPOSITION AU RAYON LASER
L’appareil est équipé d’un « Laser Classe 1 ». Evitez
toute exposition au rayon laser car cela pourrait
blesser les yeux.
N'utilisez l'appareil qu’à l’intérieur dans un lieu sec
Protégez l’appareil contre l’humidité
N’ouvrez pas l’appareil RISQUE
D’ELECTROCUTION ! Faites effectuer l’ouverture
et l’entretien par un personnel qualifié
Ne connectez cet appareil qu'à une prise murale
correctement installée et reliée à la terre Assurez-
vous que la tension principale corresponde aux
recommandations de la plaque d’indice
Assurez-vous que le ble d’alimentation reste
au sec pendant le fonctionnement. Ne pincez
pas le câble et ne l’endommagez d’aucune
façon
Un câble de réseau ou une prise abimés doivent
être immédiatement remplacés par un centre
agréé.
En cas de tonnerre, débranchez immédiatement
l’appareil de l’alimentation.
Les enfants doivent être surveillés par leurs
parents lorsqu’ils utilisent l’appareil.
Ne nettoyez l’appareil qu’avec un tissu sec.
N’utilisez PAS de PRODUITS DETERGENTS
ou de CHIFFONS ABRASIFS !
N’exposez pas l’appareil à la lumière directe du
soleil ou toute autre source de chaleur
Installez l’appareil dans un emplacement
suffisamment ventilé pour éviter une
accumulation de chaleur.
Ne recouvrez pas les grilles d’aération !
Installez l’appareil dans un emplacement
sécurisé et sans vibrations.
Ne pas installer l’appareil à proximité
d’ordinateurs et fours à micro-ondes; sinon la
réception de radio pourrait être perturbée.
Ne pas ouvrir ou réparer l’appareil. Cela est
dangereux et annulerait la garantie. La
réparation doit être uniquement effectuée que
par un centre de réparations / service agréé.
N’utilisez que des piles au mercure et sans
cadmium.
Les piles usagées sont des déchets dangereux
et ne doivent PAS être jetées avec les ordures
ménagères !!! Ramenez les piles à votre point
de vente ou aux points de collecte de votre ville.
Eloignez les piles des enfants. Les enfants
pourraient avaler les piles. En cas d’ingestion
d’une pile, contactez immédiatement un
médecin.
Vérifiez régulièrement vos piles pour éviter les
fuites.
La prise de courant ou un coupleur d’appareil
est utilisé comme dispositif de déconnexion, les
dispositifs de déconnexion doivent rester
facilement utilisables.
Aucune source de flamme nue, telle que des
bougies allumées, ne doit être placée sur
l’appareil.
Aucun objet rempli de liquide, tel que des vases,
ne doit être placé sur l’appareil.
Cet appareil, conçu pour les climats modérés,
ne convient pas pour une utilisation dans les
pays au climat tropical.
ICD1010 / Français Manuel d’instructions
1
TABLE DES MATIERES
TABLE DES MATIERES ............................................................................................. 1
EMPLACEMENT DES COMMANDES ........................................................................ 2
TÉLÉCOMMANDE ...................................................................................................... 3
UTILISATION DE LA TÉLÉCOMMANDE ................................................................... 3
CONTENU DU PAQUET ............................................................................................. 3
MISE EN MARCHE/CONFIGURATION ...................................................................... 3
PRÉPARER L’ENVIRONNEMENT RÉSEAU ............................................................. 4
MONTAGE MURAL ..................................................................................................... 4
ASSISTANT DE CONFIGURATION ........................................................................... 5
MENU PRINCIPAL ...................................................................................................... 7
RADIO INTERNET ...................................................................................................... 7
PODCAST ................................................................................................................... 8
DAB ............................................................................................................................. 9
FM .............................................................................................................................. 10
CD .............................................................................................................................. 11
USB ........................................................................................................................... 13
BLUETOOTH® ........................................................................................................... 13
AUX-IN ...................................................................................................................... 13
SOMMEIL .................................................................................................................. 13
ALARME ................................................................................................................... 14
UNDOK ...................................................................................................................... 14
SYSTÈME RÉGLAGES ............................................................................................. 15
RÉSOLUTION DES PROBLÈMES ........................................................................... 17
ICD1010 / Français Manuel d’instructions
2
EMPLACEMENT DES COMMANDES
VUE DE FACE
VUE ARRIÈRE
1
Écran LCD
9
Touche EJECT
2
Compartiment à CD
10
Touche BACK
3
Prise USB (Haut)
11
Support (amovible)
4
Touche STOP
12
Prise PLAY/PAUSE/SCAN
5
Touche POWER/SOURCE
13
Touche NAVIGATE/OK/VOLUME
6
Touche MENU/INFO
14
Touche SKIP/TUNING
7
Touche PRESET
8
Écran LCD
15
16
Prise d'antenne
ENTRÉE CA
17
Prise d'alimentation
ICD1010 / Français Manuel d’instructions
3
TÉLÉCOMMANDE
1
ALLUMÉ/ÉTEINT
2
Touche 0-9 numériquement
3
Touche
4
Touche VOLUME-
5
Touche SOURCE
6
Touche MENU
7
Touche EQ
8
Touche SCAN
9
Touche STOP
10
Touche SKIP- / TUNE-
11
Touche EJECT
12
Touche PRESET
13
Touche OK
14
Touche VOLUME+
15
Touche
16
Touche BACK
17
Touche INFO
18
Touche SLEEP
19
Touche MUTE
20
Touche PLAY/PAUSE
21
Touches REPEAT/SHUFFLE
22
Touche SKIP+/TUNE+
UTILISATION DE LA TÉLÉCOMMANDE
1. Appuyez et faites glisser le couvercle arrière pour ouvrir le compartiment à piles de la
télécommande.
2. Insérez deux piles de type AAA. Assurez-vous que les polarités (+) et (-) des piles
correspondent aux signes (+) et (-) gravés dans le compartiment à piles.
3. Remettez en place le couvercle du compartiment à piles.
CONTENU DU PAQUET
Unité principale
Télécommande
Manuel d’instructions
Supporter (déjà assemblé)
MISE EN MARCHE/CONFIGURATION
Connectez l'appareil à une source d'alimentation appropriée. Après avoir affiché un écran de
démarrage, il accède au dernier mode d’écoute utilisé. Lorsque l’appareil est allumé pour la
première fois, l’assistant d’installation est lancé automatiquement.
ICD1010 / Français Manuel d’instructions
4
PRÉPARER L’ENVIRONNEMENT RÉSEAU
Assurez-vous que le réseau Wi-Fi est correctement installé et que vous disposez du mot de
passe WEP, WPA ou WPA2 pour activer la connexion.
Vous pouvez également utiliser la fonction WPS (WiFi Protected Setup) pour un couplage facile
entre le périphérique réseau et l’appareil. Vérifiez que les témoins lumineux sur le périphérique
réseau indiquent le statut approprié.
MONTAGE MURAL
REMARQUE :
Veillez à protéger l'appareil (2,1 kg) de la chute lors de l'installation
Avant l'installation, vérifiez la capacité de charge du mur et assurez-vous qu'il n'y a
pas de tuyaux d'eau ou d'électricité sous les trous de perçage. (En cas de doute,
demandez conseil à un professionnel)
Schrauben und Dübel für die Montage sind nicht im Lieferumfang enthalten
Vérifiez que les vis installées dans le mur sont bien serrées.
Étapes de montage
Utilisez des vis et des chevilles
appropriées pour l'assemblage.
Les dimensions des vis se trouvent dans
le graphique ci-contre.
Utilisez un morceau de papier comme
gabarit de perçage (non inclus) et
marquez les trous à environ 160 mm
d'intervalle. Fixez ensuite le gabarit de
perçage au mur en position horizontale.
(Comme illustré) et percez les deux
trous.
À l'aide de chevilles appropriées, fixez
les vis telles que in den Bildern gezeigt
Surface du mur
Papier
Surface du mur
Surface du mur
ICD1010 / Français Manuel d’instructions
5
Retirez la base de l'appareil en tirant les
deux verrous sur la face inférieure de la
base loin de l'appareil. Repoussez le
pied du support et retirez-le. Vous
pouvez maintenant raccrocher votre
appareil comme indiqué sur l'image
ASSISTANT DE CONFIGURATION
Remarque: si l'assistant de configuration se termine prématurément sans configuration
réseau, l'appareil génère son propre accès WiFi afin que l'appareil puisse être configuré à
l'aide de l'application UNDOK.
Indicateur de connexion réseau:
= Connexion réseau établie
= Connexion réseau non établie
1. Langue
Sélectionnez la langue du menu
2. Démarrage du système
Au début de la première installation ou après une réinitialisation d'usine, la politique de
confidentialité du produit apparaîtra en premier à l'écran. Pour continuer l’installation,
veuillez confirmer avec le bouton « OK ».
De plus amples informations sont disponibles sur www.frontiersmart.com/privacy
3. Assistant de configuration
Sélectionnez « Yes » pour lancer l'assistant d'installation.
4. Format d’affichage de l’heure/de la date
Sélectionnez le format horaire 12 ou 24 heures.
5. Actualisation automatique
La date et l’heure peuvent être mises à jour manuellement ou automatiquement depuis la
connexion DAB, FM ou le réseau.
La mise à jour automatique fonctionne avec les données envoyées via la réception DAB, FM
ou internet. L’horloge ne peut être mise à jour que dans le mode correspondant, il est donc
conseil de sélectionner un mode que vous utilisez gulrement.
DAB et FM utilisent les signaux horaires des transmissions radio. Le réseau utilise le signal
horaire envoyé par le portail de la radio internet lorsque l’appareil est réglé sur un mode
connecté au réseau
ICD1010 / Français Manuel d’instructions
6
6. Fuseau horaire/Heure d’été
Réglez votre fuseau horaire. Si votre pays utilise l’heure d’été au moment du réglage,
activez l’option heure d’été.
7. Mise à jour manuelle
Si vous ne choisissez pas l’option mise à jour automatique, l’assistant de configuration vous
demandera de régler la date et l’heure manuellement. La date et l’heure sont affichées
comme suit : jj-mm-aaaa and hh:mm.
La valeur activée clignote. Définissez la valeur avec « / ». Après avoir défini une
valeur, appuyez sur le bouton « OK » pour passer à la valeur suivante.
8. Réseau
Garder le réseau connecté
Sélectionnez cette option lorsque certaines fonctions de cet appareil requièrent la connexion
auseau ; lorsque cette option est sélectionnée, l’appareil se connecte rapidement à
l’Internet et il est possible d’allumer l’appareil via l’application « UNDOK ».
Remarque : La consommation d’énergie en mode veille est légèrement augmentée avec
cette fonction.
Recherche de réseau
L’appareil est compatible avec la plupart des protocoles réseau et des méthodes de
cryptage. Il recherche les réseaux disponibles et les liste pour que vous puissiez faire votre
sélection.
Pour une connexion sans fil, la prochaine étape consiste à saisir le
mot de passe de cryptage. Pour saisir la clé du réseau, utilisez le
bouton «NAVIGATE» pour déplacer le curseur entre les caractères
et confirmez en appuyant sur « OK ». Alors que chaque caractère
est sélectionné, la touche apparaît en haut de l’écran.
Avant les trois premiers caractères, trois options sont accessibles
via la molette de navigation - « Backspace », « OK » et « Cancel ».
Réseau à cryptage « WPS »
Des indications sur le type de réseau apparaissent si votre périphérique réseau prend en
charge la fonction WPS, [WPS] s’affiche avant le SSID (le nom du dispositif réseau).
Sélectionnez celui auquel vous souhaitez vous connecter. Utilisez l’une des méthodes de
connexion suivantes :
Il existe une touche de raccourci WPS sur le point d’accès.
Bouton poussoir
L’appareil vous demande d’appuyer sur la touche de connexion du
routeur. Il recherche ensuite un réseau disponible via le bouton
poussoir et s’y connecte.
ICD1010 / Français Manuel d’instructions
7
Code pin
L’appareil génère un code à huit chiffres à saisir dans votre routeur
sans fil, dans le point d’accès ou par enregistrement externe.
Sauter WPS
Touche entrée comme pour une connexion à un réseau avec un cryptage standard.
Pour plus d’informations sur les réglages d’un réseau à cryptage
WPS, veuillez consulter les instructions de votre routeur WPS.
L’appareil tente de se connecter au réseau choisi.
Si la connexion est réussie, l’ICD1010 s’affichera comme étant
connecté. Si la connexion échoue, l’appareil retourne à la page
précédente. Appuyez sur « OK » pour quitter l’assistant de
configuration.
MENU PRINCIPAL
Dans le menu principal, vous pouvez sélectionner les modes suivants : Radio Internet,
Podcasts, DAB, FM, AUX, CD, USB, Bluetooth®, Sommeil, alarme.
RADIO INTERNET
L’appareil peut accéder à des milliers de stations radio et podcasts à
travers le monde via une connexion internet à bande passante.
Lorsque vous sélectionnez la radio internet, l’appareil contacte
directement le portail de radio internet Frontier Silicon (pris en charge
par Airable) pour obtenir une liste de stations.
Si vous êtes déjà en train d’écouter une station radio via internet, vous pouvez appuyer sur la
touche « » pour revenir rapidement à la dernière branche visitée du menu arborescent,
plutôt que sur la touche « MENU » qui vous ferait revenir au menu principal.
ICD1010 / Français Manuel d’instructions
8
Histoire
Lorsque vous activez le mode Radio Internet, la dernière station écoutée est sélectionnée.
Pour sélectionner une autre station récemment écoutée, cliquez ici pour afficher la liste des
stations sélectionnées. Les stations les plus récentes apparaissent en haut de la liste.
Recherche
Ici, vous pouvez rechercher les stations de radio souhaitées.
Pays
Ici, les stations de radio peuvent être sélectionnées par continent et par pays.
Populaire
Ici vous pouvez trouver des chaînes populaires.
Discover
Ici, vous pouvez sélectionner des stations de radio par pays, genre ou langue.
Préréglages
Pour enregistrer un préréglage de radio Internet, maintenez enfoncée la touche «PRESET» de
la télécommande jusqu'à ce que l'écran «Save preset» apparaisse. Sélectionnez l'un des
emplacements pour enregistrer la station en cours et confirmez avec « OK ».
Pour sélectionner une station préréglée, appuyez sur la touche « PRESET» de la
télécommande, puis sélectionnez l'une des stations préréglées répertoriées et appuyez sur
« OK » pour confirmer. Ou appuyez sur les touches 0 à 9 de la télécommande pour rappeler
directement les préréglages.
Informations de lecture
Pendant la lecture du flux, l’écran affiche son nom et sa description. Pour plus d’informations,
appuyez sur la touche « INFO » de la radio ou de la télécommande. Chaque fois que vous
appuyez sur la touche « INFO », un autre ensemble d’informations s’affiche, parcourez nom /
description, genre / lieu, fiabilité, taux de codec / échantillonnage, tampon de lecture et date du
jour.
PODCAST
Cette fonctionnalité permet aux podcasts d'être sélectionnés, recherchés et écoutés.
ICD1010 / Français Manuel d’instructions
9
DAB
En mode DAB, l’appareil reçoit les signaux de la radio numérique
DAB/DAB+, et affiche des informations sur la station, le streaming
audio et le programme.
Recherche des stations
La première fois que vous sélectionnez le mode radio DAB, ou si la
liste des stations est vide, l’appareil effectue automatiquement une
recherche complète pour trouver des stations disponibles. Pour l’une
des raisons suivantes, il sera peut-être nécessaire d’effectuer une
recherche manuelle pour mettre la liste à jour :
Les stations disponibles changent de temps en temps.
Si la réception n’était pas idéale lors de la première recherche, la
liste des stations peut être incomplète ou vide.
Si la réception de certaines stations est mauvaise, vous pouvez
souhaiter ne lister que les stations avec une bonne réception.
Pour lancer la recherche, appuyez sur la touche "MENU" de la télécommande ou maintenez la
touche "MENU / INFO" enfoncée pour accéder au menu DAB. Sélectionnez l'option « Analyse
complète » et confirmez par « OK » ou appuyez sur la touche « SCAN » de la télécommande.
Lorsque la recherche de stations est terminée, la radio affiche une liste de toutes les stations
disponibles.
Préréglages
Pour enregistrer un préréglage de radio DAB, maintenez enfoncée la touche «PRESET» de la
télécommande jusqu'à ce que l'écran «Save preset» apparaisse. Sélectionnez l'un des
emplacements pour enregistrer la station en cours et confirmez avec « OK ».
Pour sélectionner une station préréglée, appuyez sur la touche « PRESET » de la
télécommande, puis sélectionnez l'une des stations préréglées répertoriées et appuyez sur
« OK » pour confirmer. Ou appuyez sur les touches 0 à 9 de la télécommande pour rappeler
directement les préréglages.
Informations sur la station écoutée
Pendant la lecture, l’écran affiche le nom de la station et ses informations DLS (Segment
d’étiquetage dynamique) données par la station en temps réel, comme le nom du programme, le
nom de la piste ou les données de contact. Les diffusions stéréo sont indiquées par une icône en
bas de l’écran. Pour afficher d’autres informations, appuyez sur la touche « INFO » de la radio.
ICD1010 / Français Manuel d’instructions
10
Menu DAB
Stations
Les stations trouvées sont affichées dans la liste des stations.
Recherche complète
Une recherche complète est lancée. Les stations sont affichées dans la liste des stations.
Recherche manuelle
Ici, vous avez la possibilité delectionner une chaîne et de ne lancer que la recherche de
cette chaîne.
Nettoyage de l'expéditeur
Les stations de radio qui ne sont plus audibles ou recevables peuvent être supprimées ici.
Compression de plage dynamique (DRC)
Si vous écoutez de la musique avec une plage dynamique élevée dans un environnement
bruyant, vous pouvez compresser la plage dynamique audio. Cela rend les sons faibles plus
forts et les sons forts plus silencieux. Il existe trois options de compression de plage
dynamique : désactivé, faible ou élevé.
Ordre des stations
Vous pouvez choisir l'ordre des stations DAB dans la liste, les stations peuvent êtres
classées par ordre alphanumérique, par ensemble ou par validité.
« Ensemble » liste les stations diffusées dans un même ensemble. « Validité » liste les
stations disponibles en premier, de manière alphanumérique, puis les stations ayant cessé
d'émettre.
FM
En mode radio FM, l’appareil reçoit la radio analogique depuis la
bande FM et affiche les informations RDS (Système de données
radio) à propos de la station et des diffusions.
Pour numériser manuellement, maintenez enfoncé le bouton « » ou « ». L’affichage de
la fréquence commence à courir, balaie la bande FM et s’arrête à la station suivante.
Pour affiner le réglage, appuyez sur les boutons « » ou « » de la télécommande. L'unité
recherche par pas de 0,05 MHz.
ICD1010 / Français Manuel d’instructions
11
Préréglage
Pour enregistrer un préréglage de radio FM, maintenez enfoncée la touche «PRESET» de la
télécommande jusqu'à ce que l'écran «Save preset» apparaisse. Sélectionnez l'un des
emplacements pour enregistrer la station en cours et confirmez avec « OK ».
Pour sélectionner une station préréglée, appuyez sur la touche « PRESET » de la
télécommande, puis sélectionnez l'une des stations préréglées répertoriées et appuyez sur
« OK » pour confirmer. Ou appuyez sur les touches 0 à 9 de la télécommande pour rappeler
directement les préréglages.
Informations de lecture
Pendant la lecture, l'écran affiche la fréquence de la radio ainsi que les informations RDS
lorsque celles-ci sont disponibles : nom du programme, titre de la piste, données de contact. Si
aucune information n'est disponible, seule la fréquence est affichée.
Les diffusions stéréo sont indiquées par une icône en haut de l'écran. Pour afficher plus
d'information sur la diffusion, appuyez sur la touche « INFO » de l'appareil.
Chaque fois que vous appuyez sur la touche « INFO » de l'appareil, une autre information est
affichée : texte DLS (type de programme/station), fréquence et date du jour.
Réglages
Réglages de la recherche
Par défaut, la recherche FM s'arrête sur toute station disponible. Cela peut produire un mauvais
ratio signal/bruit (grésillement) sur les stations au signal faible. Pour changer les réglages de la
recherche pour qu'elle ne s'arrête que sur les stations avec un signal fort, sélectionnez « Oui »
après avoir choisi « Signaux forts uniquement ».
Réglages audio
Toutes les stations stéréo sont jouées en stéréo. Cela peut produire un mauvais ratio
signal/bruit (grésillement) sur les stations au signal faible. Pour lire ces stations en mode mono,
sélectionnez « Faible réception FM » : « Mono » puis confirmer en appuyant sur « Oui ».
CD
Un fonctionnement incorrect peut entraîner des dommages matériels! N'insérez pas de supports
d'enregistrement qui diffèrent du format CD standard (par exemple: mini-disques) dans le
lecteur de CD. Ceux-ci peuvent ne pas être joués et éjectés correctement. Insérez un seul
disque à la fois dans le lecteur de CD
Insérez un disque dans le compartiment à CD, la face imprimée vers le haut. « Loading »
s’affiche à l’écran ; les fonctions du disque deviennent inopérantes durant le chargement du
disque. Pendant la lecture en mode CD, les informations ci-dessous s’affichent à l’écran :
Dossier (F)
Titre (T)
Temps de jeu actuel
Statut de lecture (lecture / pause)
ICD1010 / Français Manuel d’instructions
12
La lecture commencera automatiquement une fois la table des matières lue. L'écran affiche "No
Disc" lorsque l'appareil est en mode CD et qu'il n'y a pas de CD à l'intérieur.
Pour mettre en pause / reprendre la lecture du CD, appuyez sur le bouton " "
Pour passer à la piste suivante, appuyez une fois sur le bouton " "
Pour avancer rapidement dans une piste, maintenez enfoncé le bouton " ".
Pour passer à la piste précédente, appuyez deux fois sur le bouton " "
Pour revenir rapidement en arrière sur une piste, maintenez le bouton " " enfoncé
Pour arrêter la lecture du CD, appuyez sur le bouton " ".
Pour éjecter le disque, appuyez sur le bouton " " en mode d'arrêt.
Programme CD
1. Réglez l'appareil en mode Arrêt.
2. Appuyez sur le bouton « PRE » de la télécommande. L'affichage indique "P01 F01 T001" et
"T001" clignotent.
3. Appuyez sur « » ou « » ou sur les touches numériques 0 à 9 de la télécommande
pour sélectionner la piste à programmer, puis sur la touche « OK » de la télécommande
pour confirmer. « P02 » s’affiche à l’écran.
4. Pour choisir d'autres pistes, répétez l'étape 3.
5. Si toutes les pistes sont programmées, appuyez sur la touche « » de l'appareil ou de la
télécommande pour démarrer la lecture programmée.
Fonctions de lecture
En appuyant plusieurs fois sur la touche " " de la télécommande, les fonctions de lecture
suivantes peuvent être sélectionnées:
Pour les CD audio:
1 x: la piste en cours est répétée.
2 x: le CD complet est répété.
3x: les pistes du CD sont lues de manière aléatoire.
4 x: la fonction de répétition est désactivée.
Pour les CD MP3:
1 x: la piste en cours est répétée.
2 x: le dossier complet est répété.
3 x: le CD complet est répété.
4 x: les pistes du CD sont lues de manière aléatoire.
5 x: la fonction de répétition est désactivée.
Le symbole de lecture correspondant est affiché en bas de l'écran.
ICD1010 / Français Manuel d’instructions
13
USB
À partir de maintenant, les menus de dossiers sont créés à partir du
périphérique USB.
Les fonctions de contrôle sont identiques à celles du mode CD. Les
dossiers peuvent être sélectionnés à l’aide des touches « / » de
la télécommande ou de l’APP UNDOK. L'écran affiche le dossier et les
noms de fichier (pas nécessairement le nom du titre).
Appuyez sur le bouton « » ou utilisez "UNDOK APP" pour lancer la lecture.
BLUETOOTH®
Lorsque vous sélectionnez le mode Bluetooth®, l’appareil entre en
mode couplage et l’icône BT clignote en bas de l’écran. Allumez votre
Smartphone, tablette ou autres appareils Bluetooth® à coupler avec
l’appareil. Le nom Bluetooth® de l’appareil est « ICD1010 ».
Lorsque le couplage réussit, l’indicateur Bluetooth® s’allume et cesse
de clignoter.
Pour découpler les appareils, éteignez ou découplez votre
Smartphone, tablette ou autres appareils Bluetooth®.
Appuyez sur « »" sur la radio ou la télécommande pour démarrer
ou mettre en pause la lecture. Vous pouvez appuyer sur « » ou
« » sur la radio ou la télécommande pour lire la piste précédente
ou suivante.
AUX-IN
Vous pouvez également utiliser cette prise pour écouter le son d'autres appareils de lecture
tels que lecteurs MP3, lecteurs CD, etc. via les haut-parleurs.
1. Connectez l'appareil externe avec un câble jack 3,5 mm à la prise AUX-IN à l'arrière de
l'appareil
2. Sie hören die Tonwiedergabe vom externen Gerät über die Lautsprecher des Gerätes.
Sie können die Lautstärke mit den Lautstärketasten einstellen. Die CD-Tasten sind nicht
funktionsfähig
3. Vous trouverez des informations sur le fonctionnement dans le mode d'emploi de
l'appareil externe
Noter:
Réglez le volume de l'appareil externe à un niveau confortable.
SOMMEIL
Pour régler la minuterie de sommeil, appuyez sur "SLEEP" sur l'appareil ou sur la
télécommande. Choisissez parmi Sleep OFF, 15mins, 30mins, 45mins ou 60mins.
Le temps restant pour s’éteindre est indiqué en bas de l’écran.
ICD1010 / Français Manuel d’instructions
14
ALARME
Deux alarmes polyvalentes possèdent une fonction de répétition et de
sommeil pour arrêter le système après une période de temps définie.
Chaque alarme peut être réglée dans un mode différent.
Sélectionnez « Alarm » dans le menu principal pour régler ou modifier une alarme.
Sélectionner le numéro de l’alarme (1 ou 2) puis configurez les paramètres suivants:
Fréquence : Off, Quotidien, Une fois, Week-end ou Jours de semaine
Heure
Mode : Radio Internet, DAB, FM, CD, USB, Buzzer
Préréglage : Dernières écoutes P1 P20 (possible uniquement en sélectionnant DAB ou
FM).
Volume : 0 - 32
Pour activer le nouveau réglage, naviguez vers le bas et sélectionnez « Enregistrer ».
L’écran affiche les alarmes actives par une icône en bas de l’écran.
UNDOK
L’appareil peur être télécommandé par les appareils iPhone, iPad d’Apple et Android à l’aide de
l’application UNDOK. Les applications sont disponibles dans l’App Store d’Apple et le Google
Play pour Android.
Vous pouvez contrôler un seul appareil, un groupe d’appareils ou même plusieurs groupes à
l’aide de l’application UNDOK ou des commandes de votre radio.
L’application UNDOK vous permet de :
Créer un groupe
Renommer un groupe
Modifier un groupe - ajouter ou supprimer un ou plusieurs appareils
Supprimer un groupe
Contrôler un groupe - choisir le mode de fonctionnement et explorer le contenu
Ajuster le volume pour un groupe entier ou pour des appareils individuels dans un groupe
Contrôler les appareils qui n’ont pas été assignés à un groupe
Contrôler tous les modes de l’appareil, y compris les modes Radio Internet, Podcast,
DAB, FM, CD, USB, Bluetooth®.
Réglage de l’égaliseur pour différents préréglages audio
Réglage du minuteur Sommeil
Modification du nom affiché de la station.
ICD1010 / Français Manuel d’instructions
15
SYSTÈME RÉGLAGES
1. ÉGALISATEUR
Plusieurs modes d'égalisation prédéfinis sont disponibles: Normal, Mid, Jazz, Rock,
Bande sonore, Classique, Pop, Messages, Mon EQ et Mes réglages EQ.
Vous pouvez également créer vos propres réglages d'égalisateur en personnalisant les
réglages des basses, des aigus et de la puissance sonore.
2. QUALITE AUDIOSTREAM
Ici, vous pouvez définir la qualité de lecture du flux radio.
3. RÉSEAU
Assistant de seau
Entrez pour rechercher AP SSID, puis entrer la clé WEP/WPA ou choisissez Bouton
poussoir/Code pin/Sauter WPS spour vous connecter au réseau sans fil.
glages configuration du bouton poussoir Wlan
La configuration du bouton poussoir sert à la connexion de l'Apprenant en charge la
fonction WPS (Wi-Fi Protected Setup).
glages d'affichage
Afficher les informations du réseau actuellement utilisé : Connexion active, adresse MAC,
zone Wlan.
glages manuels
Choisissez une connexion réseau filaire ou sans fil puis activez ou désactivez le protocole
DHCP (Dynamic Host Configuration Protocol).
Profil seau
L'ICD1010 garde en mémoire les quatre derniers réseaux auquel il a été connecté et tente
automatiquement de se connecter au premier qu'il peut trouver.
Supprimer les paramètres réseau
Les paramètres réseau définis seront supprimés.
Garder le seau connec
Sélectionnez « YES » pour maintenir la connexion réseau en
veille, en mode DAB, FM et Bluetooth®. Si vous sélectionnez
l'option « NON », la connexion WLAN est désactivée lorsqu'elle
n'est pas utilisée. Cependant, il est recommandé de maintenir la
connexion pour l'utilisation de l'UNDOK APP.
4. RÉGLAGE DE I'HEURE
Vous pouvez y définir les paramètres de l'heure, tels que l'heure / la date, la mise à jour
automatique, le format, le fuseau horaire, l'heure d'été et l'affichage de l'horloge.
ICD1010 / Français Manuel d’instructions
16
5. VEILLE INACTIVE
Ici, vous définissez la durée après laquelle l'appareil passe automatiquement en mode
veille.
6. LANGUE
Changez la langue selon le besoin.
7. RÉINITIALSATION DES RÉGLADES D’USINE
Une réinitialisation d'usine réinitialise tous les paramètres utilisateur aux valeurs par défaut,
de sorte que l'heure et la date, la configuration réseau et les préréglages soient perdus.
Cependant, la version actuelle du logiciel de l’ICD1010 est conservée.
8. MISE À JOUR DU LOGICIEL
De temps en temps, des mises à jour du logiciel peuvent être créées avec des corrections
de bugs et/ou des fonctionnalités supplémentaires. Vous pouvez les vérifier manuellement
ou régler l'ICD1010 pour les vérifier régulièrement de manière automatique (par défaut). Si
une nouvelle version du logiciel est détectée, il vous sera demandé si vous souhaitez ou
non procéder à la mise à jour. Si vous acceptez, la nouvelle version sera téléchargée et
installée. Les réglages utilisateur sont maintenus après une mise à jour.
REMARQUE : Bavant de démarrer une mise à jour, assurez-vous que l'ICD1010 est
correctement branché à une source de courant stable. Une rupture de l'alimentation
pendant la mise à jour risquerait d'endommager l'appareil de manière permanente.
9. ASSISTANT DE CONFIGURATION
Ici, vous avez la possibilité de lancer l'assistant d'installation.
10. INFORMATIONS
Afficher la version du microprogramme et l'identifiant radio.
11. PLOITIQUE DE CONFIDENTIALITÉ
Vous trouverez ici des informations sur la réglementation de base en matière de protection
des données.
12. ÉCLAIRAGE DE L`ÉCRAN
Vous pouvez régler la luminosité de l'écran séparément en mode veille et en
fonctionnement, ainsi que la durée.
ICD1010 / Français Manuel d’instructions
17
RÉSOLUTION DES PROBLÈMES
Erreur
Solution
L'appareil ne s'allume
pas.
Vérifiez que l'appareil est correctement branché.
Éteindre
automatiquement
En raison des exigences ErP2 et de la protection de
l'environnement, l'appareil bascule automatiquement en mode
veille lorsqu'aucune musique n'est lue pendant plus de 15 minutes.
Aucun son.
1. Augmentez le volume pour vérifier que le son n'est pas coupé.
2. Augmentez le volume.
3. Retirez tout casque ou toute enceinte branchés.
Aucune connexion
réseau.
1. Vérifiez la fonction WLAN.
2. Essayez d'assigner une adresse IP à l'appareil.
3. Activez la fonction DHCP du routeur et connectez de nouveau à
l'appareil.
4. Un pare-feu est activé sur le réseau - réglez le programme
respectif d'une manière telle que l'accès est possible.
5. Redémarrez le routeur
Connexion Wi-Fi
impossible.
1. Vérifiez la disponibilité du réseau WLAN sur le routeur.
2. Placez l'appareil plus près du routeur.
3. Assurez-vous de saisir le bon mot de passe.
Aucune station trouvée.
1. Vérifiez le réseau ainsi que le point d'accès et le pare-feu.
2. La station peut ne pas être disponible pour le moment,
réessayez plus tard, ou sélectionnez une autre station.
3. Le lien de la station a changé ou la station à cesser d'émettre,
contactez le fournisseur pour plus d'informations.
4. Le lien de la station ajoutée manuellement est incorrect, vérifiez
le lien.
Grésillement en mode
FM
Vérifiez/faites bouger l'antenne FM. Déplacez la radio.
Aucune station
disponible/grésillements
/interférences en mode
DAB.
1. Déplacez la radio.
2. Effectuez une recherche locale uniquement (signaux forts).
3. Vérifiez la couverture DAB locale.
L'alarme ne fonctionne
pas.
1. Allumez l'alarme.
2. Voir la solution du problème « Aucun son ».
3. Aucune connexion réseau disponible. Changez la source de
l'alarme ou reconfigurez la connexion.
Clé USB ou lecteur MP3
non détectés.
1. Vérifiez que la clé USB ou le lecteur MP3 soit correctement
branchés.
ICD1010 / Français Manuel d’instructions
18
2. Certains disques durs USB nécessitent une alimentation
externe, vérifiez que votre appareil USB est connecté à une
source d'alimentation.
3. Tous les lecteurs MP3 ne peuvent pas être lus directement sur
l'appareil, utilisez une clé USB à la place.
NetRemote ne s'affiche
pas ou ne se connecte
pas à l'ICD1010
1. Ouvrez à nouveau l'application.
2. Si plusieurs streaming sont effectués en même temps depuis
plusieurs sources, cela peut entraîner un plantage de l'appareil,
rallumez l'ICD1010 et/ou votre appareil.
Autres problèmes.
L'ICD1010 traite une large quantité de données après une certaine
période d'utilisation, et ce quel que soit son mode d'utilisation, le
système peut geler ou mal fonctionner. Redémarrer l'ICD1010 si
nécessaire.
Le fonctionnement normal de l'appareil peut être gêner par des
interférences électromagnétiques fortes.
Interference. Si cela se produit, il vous suffit de réinitialiser le
produit pour reprendre un fonctionnement normal en suivant le
manuel d'instruction. Si le fonctionnement normal ne reprend pas,
utilisez l'appareil à un autre emplacement.
L'appareil peut ne pas fonctionner correctement lorsqu'il est utilisé
dans des zones à fortes interférences radio. L'appareil
fonctionnera de nouveau normalement lorsque les interférences
auront disparues.
Devrait être dans votre secteur interférences, l'appareil risque de
mal fonctionner. L'appareil revient à un fonctionnement normal dès
que les perturbations du réseau sont plus.
La version actuelle du mode d'emploi peut être téléchargée sur www.soundmaster.de
Modifications techniques et fautes d’impression réservées.
Copyright de Wörlein GmbH, 90556 Cadolzburg, www.soundmaster.de
Duplication uniquement avec l’autorisation de Woerlein GmbH
Veiligheids-, milieu- en instellingsaanwijzingen
NL
MILIEUBESCHERMING
Gooi dit product niet weg bij het huishoudafval aan
het einde van de levensduur ervan. Breng het product
terug naar een inzamelingspunt voor hergebruik van
electrische en electronische apparatuur. Dit wordt
aangegeven door dit symbool op het product, in de
gebruiksaanwijzing of op de verpakking.
De materialen zijn herbruikbaar volgens de markeringen.
Door materiaal te recyclen of oude apparaten op een andere
manier te hergebruiken draagt u bij aan het bescherming van
ons milieu. Neem a.u.b. contact op met uw gemeente voor
informatie over inzamelingspunten.
WAARSCHUWING
Risico voor een elektrische schok
Niet openen!
Waarschuwing: Verwijder de behuizing (of achterzijde) niet,
om het risico op elektrische schokken te verkleinen. Geen
voor de gebruiker te onderhouden onderdelen binnenin het
apparaat. Laat reparatie over aan gekwalificeerd
onderhoudspersoneel.
Dit symbool wijst op de aanwezigheid van een
gevaarlijke spanning binnenin de behuizing, die groot
genoeg is om electrische schokken te veroorz aken.
Dit symbool wijst de gebruiker op de aanwezigheid
van belangrijke gebruiks- en onderhoudsinstructies
voor het apparaat.
Gebruikte batterijen zijn gevaarlijk afval en mogen
NIET weggegooid worden bij het huishoudelijk afval!!!
Als consument bent u wettelijk verplicht alle batterijen
terug te brengen voor milieuvriendelijk hergebruik - of
de batterijen gevaarlijke stoffen*) bevatten of niet.
U kunt batterijen gratis terugbrengen naar openbare
inzamelingspunten in uw gemeente of bij winkels die de
betreffende soort batterijen verkopen.
Alleen volledig lege batterijen.
*) met de markering Cd = cadmium, Hg = kwik, Pb = lood
CLASS 1 LASER PRODUCT
KLASSE 1 LASER PRODUKT
LUOKAN 1 LASER LAITE
KLASS 1 LASER APPARAT
PRODUCTO LASER CLASE 1
WAARSCHUWING - ONZICHTBARE
LASERSTRALING WANNEER DE
BEHUIZING GEOPEND WORDT OF
DE INTERNE BEVEILIGING
UITGESCHAKELD. VERMIJD
BLOOTSTELLING AAN DE
LASERSTRAAL.
Dit apparaat is uitgerust met een “Klasse 1 Laser”.
Vermijd blootstelling aan de laserstraal; dit kan
verwondingen aan de ogen veroorzaken.
Gebruik het apparaat alleen binnenshuis in een
droge omgeving.
Bescherm het apparaat tegen vocht.
Open het apparaat niet. ELECTRISCHE
SCHOKGEVAAR! Laat opening en reparatie over
aan gekwalificeerd onderhoudspersoneel.
Sluit dit apparaat alleen aan op een goed
geïnstalleerd en geaard stopcontact. Zorg ervoor dat
de netspanning overeenkomt met het de
specificaties op het etiket.
Zorg ervoor dat het electriciteitssnoer droog blijft
tijdens gebruik. Zorg ervoor dat het
electriciteitssnoer niet afgeknepen of op een
andere manier beschadigd wordt.
Beschadigde snoeren of stekkers moeten
meteen vervangen worden door geautoriseerd
onderhoudspersoneel.
In geval van bliksem moet de stekker
onmiddellijk uit het stopcontact getrokken
worden.
Wanneer kinderen het apparaat gebruiken,
moeten de ouders toezicht houden.
Reinig het apparaat alleen met een droge doek.
Gebruik GEEN SCHOONMAAKMIDDELEN of
SCHUURSPONSJES!
Stel het apparaat niet bloot aan direct zonlicht of
andere hittebronnen.
Installeer het apparaat op een plaats met
voldoende ventilatie, om oververhitting te
voorkomen.
Dek de ventilatieopeningen niet af!
Installeer het apparaat op een veilige en
vibratie-vrije plaats.
Installeer het apparaat zo ver mogelijk uit de
buurt van computers en magnetrons; anders kan
de radio-ontvangst gestoord worden.
Open de behuizing niet en probeer het apparaat
niet te repareren. Dit is gevaarlijk en doet uw
garantie vervallen. Reparaties mogen alleen
uitgevoerd worden door geautoriseerd
onderhoudspersoneel.
Gebruik alleen kwik- en cadmium-vrije batterijen.
Gebruikte batterijen zijn gevaarlijk afval en
mogen NIET weggegooid worden bij het
huishoudelijk afval!!! Breng de batterijen terug
naar uw handelaar of naar inzamelingspunten in
uw gemeente.
Houd batterijen buiten bereik van kinderen.
Kinderen kunnen batterijen per ongeluk
inslikken. Raadpleeg onmiddellijk een dokter
wanneer een kind een batterij ingeslikt heeft.
Controleer uw batterijen regelmatig om
batterijlekkage te voorkomen.
De stekker of een koppelkabel wordt gebruikt als
onderbrekingsapparaat. De
onderbrekingsapparaten zullen gereed zijn voor
gebruik.
Zet geen open vuurbronnen, zoals brandende
kaarsen, op het apparaat.
Zet geen met vloeistof gevulde objecten, zoals
vazen, op het apparaat.
Dit apparaat is voor gebuik in omgevingen met
een gematigd klimaat; niet geschikt in landen
met een tropisch klimaat.
ICD1010 / Nederlands Gebruiksaanwijzing
1
INHOUDSOPGAVE
INHOUDSOPGAVE ..................................................................................................... 1
LOCATIE VAN BEDIENINGEN .................................................................................. 2
AFSTANDSBEDIENING ............................................................................................. 3
UW AFSTANDSBEDIENING GEBRUIKEN ................................................................ 3
LEVERINGSOMVANG ................................................................................................ 3
AAN DE SLAG/INSTELLEN ....................................................................................... 3
MUURMONTAGE ....................................................................................................... 4
DE NETWERKOMGEVING IN GEREEDHEID BRENGEN ......................................... 4
INSTALLATIE ............................................................................................................. 5
HOOFDMENU ............................................................................................................. 7
INTERNETRADIO ....................................................................................................... 7
PODCASTS ................................................................................................................. 8
DAB ............................................................................................................................. 8
FM ............................................................................................................................. 10
CD ............................................................................................................................. 11
USB ........................................................................................................................... 12
BLUETOOTH® .......................................................................................................... 12
AUDIO-IN (AUX) ....................................................................................................... 13
SLAAP ...................................................................................................................... 13
ALARM...................................................................................................................... 13
UNDOK ..................................................................................................................... 14
SYSTEEMINSTELLINGEN ....................................................................................... 14
PROBLEMEN OPLOSSEN ....................................................................................... 16
ICD1010 / Nederlands Gebruiksaanwijzing
2
LOCATIE VAN BEDIENINGEN
VOORAANZICHT
ACHTERAANZICHT
1
Spreker
9
Toets EJECT
2
CD Fach
10
Toets BACK
3
USB poort
11
Afneembare standaard
4
Toets STOP
12
Toets PLAY/PAUSE/SCAN
5
Toets POWER/SOURCE
13
Knob NAVIGATE/OK/VOLUME
6
Toets MENU/INFO
14
Toets SKIP/TUNE
7
Toets PRESET
8
LCD scherm
15
16
Antennedoos
AC Stroomaansluiting
17
AUX IN Aansluiting
ICD1010 / Nederlands Gebruiksaanwijzing
3
AFSTANDSBEDIENING
1
Toets STAND-BY/AAN
2
Toets 0-9 numeriek
3
Toets
4
Toets Volume-
5
Toets SOURCE
6
Toets MENU
7
Toets EQ
8
Toets SCAN
9
Toets STOP
10
Toets SKIP-/TUNE-
11
Toets EJECT
12
Toets PRESET
13
Toets OK
14
Toets VOLUME +
15
Toets
16
Toets BACK
17
Toets INFO
18
Toets SLEEP
19
Toets MUTE
20
Toets PLAY/PAUSE
21
Toets REPEAT/SCHUFFLE
22
Toets SKIP+/TUNE+
UW AFSTANDSBEDIENING GEBRUIKEN
1. Druk op het klepje op de achterzijde van de afstandsbediening en schuif deze open om het
batterijvak te openen.
2. Installeer twee type AAA batterijen. Controleer of de (+) en (-) uiteindes van de batterijen
overeenkomen met de (+) en (-) richtingen aangegeven in het batterijvak.
3. Sluit het klepje van het batterijvak.
LEVERINGSOMVANG
Hoofdeenheid
Afstandsbediening
Gebruiksaanwijzing
Stand (al in elkaar gezet)
AAN DE SLAG/INSTELLEN
Sluit het apparaat aan op een geschikte voedingsbron. Nadat een opstartscherm wordt
weergegeven, zal het apparaat in de laatst gebruikte luistermodus gaan. Wanneer het apparaat
voor het eerst wordt gestart, zal automatisch Installatiebeheer worden gestart.
ICD1010 / Nederlands Gebruiksaanwijzing
4
MUURMONTAGE
OPMERKING:
Zorg ervoor dat het apparaat (2,1 kg) niet valt tijdens de installatie
Controleer voor installatie het draagvermogen van de muur en zorg ervoor dat er
geen water- of elektriciteitsleidingen onder de boorgaten zitten. (Als u niet zeker bent,
vraag dan advies aan een professional)
Schroeven en pluggen voor montage zijn niet bij de levering inbegrepen
Controleer of de schroeven in de muur goed vast zitten
Montage stappen
Gebruik geschikte schroeven en pluggen
voor de montage.
De afmetingen van de schroeven vindt u
in de afbeelding hiernaast
Gebruik een stuk papier als
boorsjabloon (niet meegeleverd) en
markeer de gaten met een onderlinge
afstand van ongeveer 160 mm. Bevestig
vervolgens de boorsjabloon horizontaal
aan de muur. (zoals afgebeeld) en boor
de twee gaten.
Draai de schroeven vast met behulp van
geschikte pluggen zoals weergegeven in
de afbeeldingen
Verwijder de basis van het apparaat
door de twee vergrendelingen aan de
onderkant van de basis weg te trekken
van het apparaat. Duw de standaardvoet
naar achteren en trek hem eraf. Nu kunt
u uw apparaat ophangen zoals op de
afbeelding wordt getoond
DE NETWERKOMGEVING IN GEREEDHEID BRENGEN
Zorg ervoor dat u het draadloze netwerk heeft ingesteld en over het WEP-, WPA- of WPA2-
beveiligingswachtwoord beschikt om de verbinding te activeren.
Muur oppervlak
Papier
Muur oppervlak
Muur oppervlak
ICD1010 / Nederlands Gebruiksaanwijzing
5
U kunt tevens de WPS (WiFi Protected Setup)-functie gebruiken voor een eenvoudig koppelen
van het netwerkapparaat en het apparaat. Controleer of de lampjes op het netwerkapparaat in
juiste status verkeren.
INSTALLATIE
Opmerking: als de installatiewizard voortijdig wordt geannuleerd zonder een netwerkconfiguratie,
genereert het apparaat zijn eigen WiFi-toegang zodat het apparaat kan worden geconfigureerd
via de UNDOK-APP.
Netwerkverbindingsindicator:
= Netwerkverbinding tot stand gebracht
= Netwerkverbinding niet tot stand gebracht
1. Taal
Selecteer de menutaal
2. Productprivacybeleid
Aan het begin van de eerste installatie of nadat de fabrieksinstellingen zijn teruggezet,
verschijnt eerst het productprivacybeleid op het scherm. Bevestig met de knop "OK" om
door te gaan met de installatie.
Meer informatie is beschikbaar op www.frontiersmart.com/privacy
3. Setup Wizard
Selecteer "JA" om de installatiewizard te starten.
4. Tijd/datum-weergave
Selecteer 12 of 24 als tijdsindeling.
5. Autom. bijwerken
De tijd en datum kunnen handmatig of automatisch vanaf DAB, FM of het netwerk
geüpdatet worden.
Auto-update werkt met gegevens die via DAB, FM of internet verstuurd worden. De klok
wordt alleen bijgewerkt wanneer deze in een overeenkomstige modus staat. Het is daarom
aanbevolen om een modus te selecteren die u regelmatig gebruikt.
DAB en FM zenden tijds- en radiosignalen uit. Netwerk gebruikt een tijdsignaal verzonden
vanaf het internetradioportaal wanneer in een modus waarbij het netwerk is aangesloten.
6. Tijdzone/Zomertijd
Stel uw tijdzone in. Indien uw land gebruik maakt van zomertijd en van kracht is, zet dan de
Zomertijd-optie aan.
7. Handmatige update
Indien u Geen update heeft ingesteld, geeft de wizard de melding om de tijd en datum
handmatig in te stellen. De datum en tijd worden weergegeven als dd-mm-jjjj en uu:mm.
ICD1010 / Nederlands Gebruiksaanwijzing
6
De actieve waarde knippert. Pas elke waarde aan met de / -knop. Druk op de knop
zodra de waarde is ingesteld, om de volgende waarde in te stellen.
8. Netwerk
Verbinding met netwerk behouden
Selecteer deze optie als er functies van het apparaat zijn die een netwerkverbinding
behoeven. Wanneer deze optie geselecteerd is, zal het apparaat een snelle verbinding met
het internet hebben en kan het apparaat aangezet worden via de “UNDOK”-app.
Opmerking: Het energieverbruik in stand-by neemt met deze functie iets toe
Scannen naar het netwerk
Het apparaat is compatibel met alle gangbare netwerkprotocollen en encryptiemethoden.
Het zoekt naar de beschikbare netwerken en zet ze voor u in een lijst.
Voor de draadloze verbinding wordt u in de volgende stap gevraagd
een encryptie in te voeren. Om de netwerksleutel in te voeren,
gebruikt u de “NAVIGATE-knop om de cursor door de tekens te
bewegen en “OK” te selecteren om te bevestigen. Bij ieder teken
dat wordt geselecteerd, wordt de sleutel opgebouwd bovenin het
scherm.
Er zijn drie opties beschikbaar bij het terugafstemmen van de
draaiknop voor de eerste tekens - “Backspace”, “OK” en “Cancel”.
“WPS” beveiligd netwerk
Er zullen tips voor het type netwerk worden gegeven - als uw netwerkapparaat de WPS-
functie ondersteunt, zal er [WPS] voor de SSID (de naam van het netwerkapparaat) staan.
Selecteer degene die u wilt aansluiten. Gebruik een van de volgende verbindingsmethoden:
Er zit een WPS-sneltoets op het toegangspunt.
Druk op de knop
Het apparaat geeft een melding dat u de verbindingsknop op de
router moet indrukken. Hierna wordt gescand op een actief Push-
Button-Connect-netwerk en verbind hiermee.
Pin
Het apparaat genereert een 8-cijferige code die u in de draadloze
router, toegangspoort of een externe registrator moet invoeren.
WPS overslaan
Voer de sleutel Ein zoals bij een standaard beveiligd netwerk.
Voor meer informatie over het instellen van een WPS beveiligd netwerk, raadpleeg de
instructies van uw WPS-router.
ICD1010 / Nederlands Gebruiksaanwijzing
7
Het apparaat zal verbinding proberen te maken met het
geselecteerde netwerk.
Het zal 'verbonden' weergeven als het instellen geslaagd is.
Indien het verbinden mislukt, zal het apparaat teruggaan naar het
vorige scherm om het opnieuw te proberen.
Druk op “OKom Installatiebeheer af te sluiten.
HOOFDMENU
Onder het hoofdmenu kunt u de volgende modi selecteren: Internetradio, Podcast, DAB, FM,
AUX, CD, USB (Muziekspeler), Bluetooth®, Slaapstand, Wekker.
INTERNETRADIO
Het apparaat kan duizenden radiozenders en podcasts van over de
hele wereld afspelen met behulp van een breedband internetverbinding.
Wanneer u internetradio selecteert, maakt het apparaat direct contact
met het Frontier Silicon internetradioportaal (welke wordt ondersteund
door de Airable) om een lijst met zenders te verkrijgen.
Indien u reeds naar een internetradiozender luistert, kunt u op de -knop drukken om snel
terug te gaan naar het laatst bezochte submenu in plaats van MENU, wat u terugbrengt naar
het eerste menu van de internetradiomodus.
Cursus
Wanneer de internetradiomodus opnieuw wordt opgestart, is de laatstbeluisterde zender
geselecteerd. Voer hier een ander onlangs gebruikte zender uit de weergegeven zenders
in. De meest recente zenders staan bovenaan de lijst.
Zoeken
Radiozenders kunnen hier zuchten.
Landen
Hier kunnen radiostations worden geselecteerd op continent en landen.
Populair
Hier zijn populaire stations te vinden.
Discover
Hier kunt u radiostations selecteren op land, genre of taal.
ICD1010 / Nederlands Gebruiksaanwijzing
8
Voorinstellingen
Om een vooraf ingestelde internetradio op te slaan, houdt u de "PRESET" -toets op de
afstandsbediening ingedrukt totdat het scherm "Voorinstelling opslaan" wordt weergegeven.
Selecteer een van de presets om de huidige zender op te slaan en druk op "OK" om te
bevestigen.
Om een voorkeuzezender te selecteren, drukt u op "PRESET" op de afstandsbediening en
selecteert u vervolgens een van de genoemde voorkeurszenders en drukt u op "OK" om te
bevestigen. Of druk op 0 tot 9 op de afstandsbediening om de presets direct op te roepen.
Afspeel-informatie
Het scherm toont de naam en beschrijving van de stream die wordt afgespeeld. Druk voor meer
informatie op “INFO” op het apparaat.
Ledere keer dat u “INFO” op het apparaat indrukt, wordt er nieuwe informatie weergegeven:
naam/beschrijving, genre/locatie, betrouwbaarheid, codec/sampling rate, afspeelbuffer en de
datum.
PODCASTS
Met deze functie kunnen podcasts worden geselecteerd, doorzocht en beluisterd.
DAB
DAB-modus ontvangt DAB of DAB-plus digitale radio en toont
informatie over de zender, de stream en informatie over het
programma.
Scannen naar stations
De eerste keer dat u DAB-radiomodus selecteert of als de zenderlijst
leeg is, zal het apparaat automatisch een volledige scan uitvoeren
om te kijken welke zenders beschikbaar zijn. U dient om de
volgende redenen wellicht een handmatige scan uit te voeren om de
zenderlijst bij te werken:
De beschikbare zenders veranderen van tijd tot tijd.
Indien de ontvangst niet goed was van de originele scan, kan dit
leiden tot een lege of incomplete lijst van beschikbare zenders.
Indien zenders een slechte ontvangst hebben (kraken), kunt u
ervoor kiezen uitsluitend zenders met een goede signaalsterkte
in de lijst op te nemen.
Om het zoeken te starten, drukt u op de "MENU"-knop op de afstandsbediening of houdt u de
"MENU / INFO"-knop ingedrukt om het DAB-menu te openen. Selecteer de optie “Volledige
scan” en bevestig met “OK” of druk op de “SCAN” knop op de afstandsbediening.
ICD1010 / Nederlands Gebruiksaanwijzing
9
Kies Ongeldige verwijderen om beschikbare zenders in de lijst te verwijderen.
Draai aan de draaiknop om een zenderlijst te bekijken en druk erop om er een te selecteren. Na
selectie begint de zender af te spelen en toont het scherm informatie over de zender, het
nummer of show.
Voorinstellingen
Om een vooraf ingestelde DAB radio op te slaan, houdt u de "PRESET" -toets op de
afstandsbediening ingedrukt totdat het scherm "Voorinstelling opslaan" wordt weergegeven.
Selecteer een van de presets om de huidige zender op te slaan en druk op "OK" om te
bevestigen.
Om een voorkeuzezender te selecteren, drukt u op "PRESET" op de afstandsbediening en
selecteert u vervolgens een van de genoemde voorkeurszenders en drukt u op "OK" om te
bevestigen. Of druk op 0 tot 9 op de afstandsbediening om de presets direct op te roepen.
Huidige afspeelinformatie
Tijdens het afspelen van de stream, toont het scherm de naam en DLS (Dynamic Label
Segment)-informatie die wordt uitgezonden door de zender, waarmee real-time informatie, zoals
naam van het programma, titel van het nummer en contactinformatie worden weergegeven.
Uitzendingen in stereo worden aangeduid met een pictogram onder aan het scherm. Druk op de
Info-knop op de radio om meer informatie te bekijken.
DAB-Menu
Stations
De gevonden zenders worden weergegeven in de zenderlijst.
Volledige zoekopdracht
Er wordt een volledige zoekopdracht gestart.
Handmatig zoeken
Hier hebt u de mogelijkheid om het kanaal te selecteren en alleen de zoektocht naar dit
kanaal te starten.
Afzender opruimen
Radiozenders die niet langer hoorbaar of ontvangbaar zijn, kunnen hier worden verwijderd.
Compressie
Indien u in een lawaaierige omgeving naar muziek luistert met een hoog dynamisch bereik, kunt u
het audio-dynamische bereik comprimeren. Hierdoor klinken zachte geluiden harder en harde
geluiden zachter. U kunt de Compressie uit, laag of hoog instellen.
Stationsvolgorde
U kunt de DAB-zenderlijst Alfanumeriek, op Groepering of op Geldigheid ordenen.
In Groepering staan groepen zenders die samen op dezelfde groepering uitgezonden worden.
Geldigheid vermeld geldige zenders eerst, alfanumeriek, en daarna de zenders die uit de lucht
zijn.
ICD1010 / Nederlands Gebruiksaanwijzing
10
FM
De FM-radiomodus ontvangt analoge radio vanuit de FM-band en toont
RDS (Radio Data System)-informatie over de zender en waar er wordt
uigezonden.
Om handmatig te scannen, houdt u de " " of " " knop ingedrukt. De frequentieweergave
begint te lopen en scant de FM-band en stopt bij het volgende station.
Om af te stemmen, drukt u op de " " of " " toets op de afstandsbediening or of op het
apparaat. Het apparaat zoekt in stappen van 0,05 MHz.
Stationsgeheugen
Om een vooraf ingestelde FM radio op te slaan, houdt u de "PRESET" -toets op de
afstandsbediening ingedrukt totdat het scherm "Voorinstelling opslaan" wordt weergegeven.
Selecteer een van de presets om de huidige zender op te slaan en druk op "OK" om te
bevestigen.
Om een voorkeuzezender te selecteren, drukt u op "PRESET" op de afstandsbediening en
selecteert u vervolgens een van de genoemde voorkeurszenders en drukt u op "OK" om te
bevestigen. Of druk op 0 tot 9 op de afstandsbediening om de presets direct op te roepen.
Afspeel-informatie
Terwijl de stream wordt afgespeeld, toont het scherm de frequentie of, indien RDS-informatie
beschikbaar is, de naam van de zender en eventuele aanvullende RDS-informatie, zoals naam
van het programma, titel van het nummer en contactgegevens. Indien er geen informatie
beschikbaar is, wordt alleen de frequentie weergegeven. Uitzendingen in stereo worden
aangeduid met een pictogram boven aan het scherm. Druk voor meer informatie over de
uitzending op “INFO” op het apparaat.
Instellingen
Scaninstellingen
FM-scans stoppen standaard bij iedere beschikbare zender. Dit kan leiden tot een slechte
signaal-ruisverhouding (sissend geluid) van zwakke zenders. Om de scan-instellingen zodanig
te veranderen dat alleen wordt gestopt bij zenders met goede signaalsterkte, selecteer JA”
nadat u Alleen sterke zenders heeft geselecteerd.
Audio-instellingen
Alle stereo-zenders worden afgespeeld in stereo. Dit kan voor zwakke zenders leiden tot een
slechte signaal-ruisverhouding (sissend geluid). Om zwakke zenders in mono af te spelen,
selecteer Zwakke FM-ontvangst: Alleen in mono luisteren en JA.
ICD1010 / Nederlands Gebruiksaanwijzing
11
CD
Onjuiste bediening kan materiële schade tot gevolg hebben!
Plaats geen opnamemedium dat afwijkt van het standaard-CD-formaat (bijv. Mini-discs) in de
CD-speler. Deze worden mogelijk niet correct afgespeeld en uitgeworpen. Plaats slechts één
disc tegelijk in de CD-speler.
Plaats een disk in de houder (met de bedrukte zijde vooruit). De display zal “Loading”
weergeven; de diskfuncties zullen niet werken terwijl de disk wordt geladen. De display zal na
het inlezen de volgende informatie weergeven in CD-modus:
Map (F)
Titel (T)
huidige speelduur
Afspeelstatus (afspelen / pauze)
Het afspelen wil beginnen met het lezen van de inhoudsopgave. Het display toont "No Disc"
wanneer het apparaat op CD-modus is ingesteld.
Om het afspelen van de CD te pauzeren / hervatten, drukt u op " ".
Druk eenmaal op de knop " ” om naar het volgende nummer te gaan.
Houd de " " -knop ingedrukt om snel door een nummer te spoelen.
Druk tweemaal op de " " -toets om naar de vorige track te gaan.
Houd de " " -knop ingedrukt om achteruit door een nummer te gaan.
Om het afspelen van de CD te stoppen, drukt u op de knop " ".
Om de schijf uit te werpen, drukt u in de stopmodus op de knop " ".
CD-programma
1. Zet het apparaat in de stopmodus.
2. Druk op de toets "PRE" op de afstandsbediening. Op het display verschijnt "P01 F01 T001"
en "T001" knipperen.
3. Druk op " " of " " of 0 tot 9 op de afstandsbediening om de te programmeren titel te
selecteren en bevestig de titel door op de knop "OK" op de afstandsbediening te drukken.
Het display verandert in "P02".
4. Voer stap 3 opnieuw uit om meer tracks te kiezen.
5. Als alle tracks zijn geprogrammeerd, drukt u op de knop " " op het apparaat of op de
afstandsbediening om het geprogrammeerde afspelen te starten.
Weergavefuncties
Door herhaaldelijk op de knop " " op de afstandsbediening te drukken, kunnen de volgende
afspeelfuncties worden geselecteerd:
Voor audio-cd:
1 x: het huidige nummer wordt herhaald.
2 x: de volledige CD wordt herhaald.
3 x: de nummers van de CD worden willekeurig afgespeeld.
4 x: de herhaalfunctie is gedeactiveerd.
ICD1010 / Nederlands Gebruiksaanwijzing
12
Voor MP3-CD:
1 x: het huidige nummer wordt herhaald.
2 x: de volledige map wordt herhaald.
3 x: de volledige CD wordt herhaald.
4 x: de nummers van de CD worden willekeurig afgespeeld.
5 x: de herhaalfunctie is gedeactiveerd.
Het respectieve afspeelsymbool wordt onderaan het display weergegeven.
USB
Vanaf nu worden de mapmenu's gemaakt vanaf het USB-apparaat. De
bedieningsfuncties zijn identiek aan die in de CD-modus. De mappen
kunnen worden geselecteerd met de " / " -knoppen op de
afstandsbediening of de UNDOK-APP. Het display toont de map en de
bestandsnamen (niet noodzakelijk de naam van de titel).
Druk op de “ -knop op het apparaat of klik op het liedje in de “UNDOK”-app wanneer u een
nummer heeft gevonden dat u wilt afspelen.
My Playlist
U kunt nummers aan de afspeellijst toevoegen door tijdens het afspelen de "OK"-knop op uw
afstandsbediening ingedrukt te houden
Clear My Playlist
Kies "Afspeellijst wissen" en bevestig met "OK".
BLUETOOTH®
Wanneer u de Bluetooth®-modus selecteert, zal het apparaat
gekoppeld worden en knippert het Bluetooth®-pictogram onder aan het
scherm. Zet uw smartphone, tablet of ander Bluetooth®-apparaat aan
om naar het apparaat te zoeken. De koppelnaam voor Bluetooth® is
ICD1010”.
Wanneer het koppelen is gelukt, zal het Bluetooth®-pictogram gaan
branden en stoppen met knipperen.
Ontkoppel of zet uw smartphone, tablet of ander Bluetooth®-apparaat
uit om Bluetooth® te ontkoppelen.
Druk op " ” op de radio of afstandsbediening om het afspelen te
starten of te pauzeren. U kunt op " ” of " " op de radio of
afstandsbediening drukken om het vorige of volgende nummer af te
spelen.
ICD1010 / Nederlands Gebruiksaanwijzing
13
AUDIO-IN (AUX)
U kunt deze aansluiting ook gebruiken om via de luidsprekers naar het geluid van andere
afspeelapparaten zoals mp3-spelers, cd-spelers enz. te luisteren
1. Sluit het externe apparaat met een 3,5 mm jack-kabel aan op de AUX-IN-aansluiting aan de
achterkant van het apparaat
2. U kunt het geluid van het externe apparaat horen via de luidsprekers van het apparaat. Met
de volumeknoppen pas je het volume aan. De cd-knoppen werken niet
3. Informatie over de bediening vindt u in de gebruiksaanwijzing van het externe apparaat
OPMERKING:
Stel het volume van het externe apparaat in op een comfortabel niveau.
SLAAP
Om de slaaptimer in te stellen, drukt u op "SLEEP" op het apparaat of op de afstandsbediening.
Kies uit Sleep OFF, 15 minuten, 30 minuten, 45 minuten of 60 minuten.
De resterende uitschakeltijd wordt onderaan het display weergegeven.
ALARM
Er zijn twee veelzijdige wekalarmen met sluimerfunctie en een
slaapfunctie om het systeem na een ingestelde periode uit te zetten.
Ieder alarm kan worden ingesteld om te starten in een bepaalde
modus.
Selecteer een alarm in het hoofdmenu om een alarm in te stellen of te wijzigen.
Selecteer het nummer van het alarm (1 of 2) en configureer de volgende parameters:
Frequentie: Uit, Dagelijks, Eenmalig, Weekends of Werkdagen
Tijd
Modus: Internetradio,l DAB, FM, CD, USB, Zoemer
Preset: Laatst beluisterd P1 P20 (alleen mogelijk bij het selecteren van DAB of VHF).
Volume: 0 - 32
Scroll naar beneden en selecteer Opslaan om de nieuwe instellingen te activeren.
Het scherm toont actieve alarmen met een pictogram links onderin.
ICD1010 / Nederlands Gebruiksaanwijzing
14
UNDOK
Het apparaat ondersteunt bediening op afstand vanaf Apple iPhone, iPad en Android door middel
van de UNDOK-app. De app is beschikbaar in Apple’s App Store en Google’s Android Play.
U kunt een enkel apparaat, een groep van deze apparaten of zelfs meerdere groepen bedienen
met behulp van de UNDOK-app of de bedieningsorganen van uw radio.
Met de UNDOK-app kunt u:
Een groep aanmaken
Een groep hernoemen
Een groep bewerken - een of meer producten toevoegen of verwijderen
Een groep verwijderen
Een groep besturen - kies een bedrijfsmodus en zoek naar inhoud
Het volume voor een hele groep of voor individuele producten binnen een groep
aanpassen
Producten besturen die niet aan een groep zijn toegewezen
Alle modi van het apparaat bedienen, waaronder Internetradio, Podcast, DAB, FM, CD,
USB, Bluetooth®,
Equalizer instellen voor diverse audio-presets;
De Slaap-timer instellen;
De weergavenaam van de radio bewerken.
SYSTEEMINSTELLINGEN
1. EQUALIZER
Verschillende vooraf ingestelde EQ-modi zijn beschikbaar: Normaal, Mid, Jazz, Rock,
Soundtrack, Klassiek, Pop, Berichten, Mijn EQ en Mijn EQ-instellingen.
Bovendien is er ook een aangepaste instelling beschikbaar; maak je eigen EQ met
aangepaste bas-, treble- en volumeknoppen.
U kunt deze functies ook selecteren door op de knop "EQ" op de afstandsbediening te
drukken.
2. AUDIOSTREAM KWALITEIT
Hier kunt u de afspeelkwaliteit van de radiostream instellen.
3. NETWERKINSTELLINGEN
Netwerkbeheer
Zoek AP SSID en voer de WEP/WPA-sleutel in of selecteer WPS Push-
Button/Pin/Overslaan om verbinding te maken met het draadloze netwerk.
PBC WLAN instellen
Met Push-Button-Configuration wordt de AP die WPS (Wi-Fi Protected Setup) ondersteunt
verbonden.
ICD1010 / Nederlands Gebruiksaanwijzing
15
Instellingen bekijken
Bekijk de informatie van het huidige verbonden netwerk: Actieve verbinding, MAC-adres,
WLAN-regio, DHCP, SSID, IP-adres, Subnetmasker, Gateway-adres, Primaire DNS en
Secondaire DNS.
Handmatige instellingen
Kies of draadloze netwerkverbinding en schakel DHCP (Dynamic Host Configuration
Protocol) in of uit.
Netwerkprofiel
De ICD1010 onthoudt de laatste vier draadloze netwerken waarmee het verbonden was en
probeert automatisch verbinding te maken met degene die het kan vinden.
Hier kunt u de lijst van geregistreerde netwerken bekijken. U kunt ongewilde netwerken
verwijderen door NAVIGATE te draaien en in te drukken en vervolgens YES te kiezen
om de verwijdering te bevestigen.
Verwijder netwerkinstellingen
De ingestelde netwerkinstellingen worden verwijderd.
Houd de netwerkverbinding in stand-by
Selecteer "JA" om de netwerkverbinding in stand-by, DAB, FM en
Bluetooth®-modus te houden. Als u de optie "NO" selecteert, wordt
de WLAN-verbinding uitgeschakeld wanneer deze niet in gebruik is.
Het wordt echter aanbevolen om de verbinding te behouden voor
het gebruik van de UNDOK-APP.
4. Tijdsinstelling
Hier kunt u de tijdinstellingen instellen, zoals tijd / datuminstelling, automatische update,
formaatinstelling, tijdzone-instelling, zomertijd, klokweergave.
5. Inactieve stand-by
Stel de duur in waarna het apparaat automatisch naar stand-by schakelt.
6. Taal
Verander naar uw voorkeur.
7. Terugzetten in fabriekinstellingen
Een fabrieksreset reset alle gebruikersinstellingen naar standaardwaarden, zodat tijd en
datum, netwerkconfiguratie en presets verloren gaan. De huidige softwareversie van de
ICD1010 wordt echter gehandhaafd.
8. Software-update
Van tijd tot tijd kunnen software-upgrades met foutreparaties en/of nieuwe functies worden
gemaakt. U kunt hier handmatig naar zoeken of de ICD1010 instellen om hier automatisch
periodiek naar te zoeken (dit is de standaard). Als er nieuwere software wordt gevonden,
zal u worden gevraagd of u deze update in gang wilt zetten. Zo ja, dan wordt de nieuwe
software gedownload en geïnstalleerd. Alle gebruikersinstellingen worden behouden na een
software-upgrade.
ICD1010 / Nederlands Gebruiksaanwijzing
16
OPMERKING: Zorg er voor het starten van een software-upgrade voor dat de ICD1010 is
aangesloten op een stabiele stroomvoorziening. Het loskoppelen van de stroomvoorziening
tijdens een upgrade kan het apparaat blijvend beschadigen.
9. Setup Wizard
Hier hebt u de mogelijkheid om de installatiewizard te starten.
10. Information
Bekijk de firmwareversie en de ID van de radio.
11. Productprivacybeleid
Informatie over de basisregelgeving voor gegevensbescherming wordt hier weergegeven.
12. Vertoningsverlichting
U kunt de helderheid van het display afzonderlijk instellen in stand-by en bediening, evenals
de duur.
PROBLEMEN OPLOSSEN
Fout
Oplossing
Het apparaat gaat niet
aan.
Controleer of de voedingsadapter juist is aangesloten.
Schakel automatisch
offs.
Vanwege ErP2-vereisten en milieubescherming schakelt het toestel
automatisch naar de stand-bymodus wanneer er gedurende meer
dan 15 minuten geen muziek wordt afgespeeld.
Geen geluid.
1. Zet het geluid aan, omdat deze gedempt kan zijn.
2. Verhoog het volume.
3. Haal aangesloten hoofdtelefoon of luidspreker uit de audio-
uitvoer.
Er kan geen
netwerkverbinding
worden vastgesteld.
1. Controleer de WLAN-functie.
2. Probeer een IP-adres in te stellen op het apparaat.
3. Activeer de DHCP-functie op de router een probeer opnieuw
verbinding te maken op het apparaat.
4. Er is een firewall op het netwerk geactiveerd stel het
betreffende programma zodanig in dat toegang mogelijk is.
5. Herstart de router.
WiFi-verbinding kan
niet worden
vastgesteld.
1. Controleer de beschikbaarheid van het WLAN-netwerk op de
router.
2. Zet het apparaat dichterbij de router.
3. Controleer of het wachtwoord juist is.
Geen zender
gevonden.
1. Controleer het netwerk, het toegangspunt en de firewall.
2. De zender kan tijdens niet beschikbaar zijn. Probeer het later
nog eens of selecteer een andere zender.
3. De verbinding van de zender is veranderd of de zender zendt
ICD1010 / Nederlands Gebruiksaanwijzing
17
niet langer uit vraag de provider om informatie.
4. De verbinding van de handmatige toegevoegde zender is niet
juist corrigeer deze en voer opnieuw in.
Gesis FM-modus
Controleer/verplaats de FM-antenne. Verplaats de radio.
Geen zenders
beschikbaar/krakend/o
nderbrekend in DAB-
modus.
1. Verplaats de radio.
2. Scan opnieuw op uitsluitend lokale zenders (hoge sterkte).
3. Controleer het lokale DAB-bereik.
Alarm werkt niet.
1. Zet het alarm aan.
2. Zie de oplossingen onder “Geen geluid” met betrekking tot de
volume-instelling.
3. Het alarm is ingesteld op een zender, maar er is geen
netwerkverbinding. Wijzig de alarmbron of herconfigureer de
verbinding.
De actuele versie van de gebruiksaanwijzing kan worden gedownload van www.soundmaster.de
Technische veranderingen en drukfouten voorbehouden.
Auteursrecht van Woerlein GmbH, 90556 Cadolzburg, www.soundmaster.de
Duplicatie alleen met de toestemming van Woerlein GmbH
USB-apparaat of MP3-
speler wordt niet
gevonden.
1. Controleer of het USB-apparaat of de MP3-speler juist is
aangesloten.
2. Sommige USB-schijven hebben een externe voedingsbron
nodig zorg ervoor dat deze aangesloten is.
3. Niet alle MP3-speler kunnen direct door het apparaat gelezen
worden gebruik een USB-apparaat in de plaats.
NetRemote geeft
ICD1010 niet weer of
kan er geen verbinding
mee maken
1. Open de app opnieuw.
2. Als u meerdere streams van verschillende apparaten aan heeft
staan, kan dit een crash veroorzaken. Herstart de ICD1010
en/of uw apparaat.
In andere onbepaalde
gevallen.
De ICD1010 kan, in welke modus dan ook, na een bedrijfsperiode,
een grote hoeveelheid data te verwerken. Hierdoor kan het
systeem vastlopen of uitvallen. Herstart de ICD1010 indien nodig.
De normale werking van het product kan worden gestoord door
sterke elektromagnetische interferentie. In dergelijk geval, herstart
het product om de normale werking voort te zetten door de
gebruikershandleiding te volgen. Gebruik het product op een
andere plek in geval de werking niet kan worden hervat.
Het apparaat kan vastlopen bij gebruik in ruimtes met sterke
radiostoring. Zodra er geen storingen meer zijn, zal het apparaat
weer correct werken.
Moet in uw stopcontact interferentie, kan het apparaat defect raken.
Het toestel keert terug naar de normale werking zodra het netwerk
storingen zijn voorbij
Istruzioni di sicurezza, configurazione e ambienti di utilizzo
IT
PROTEZIONE AMBIENTALE
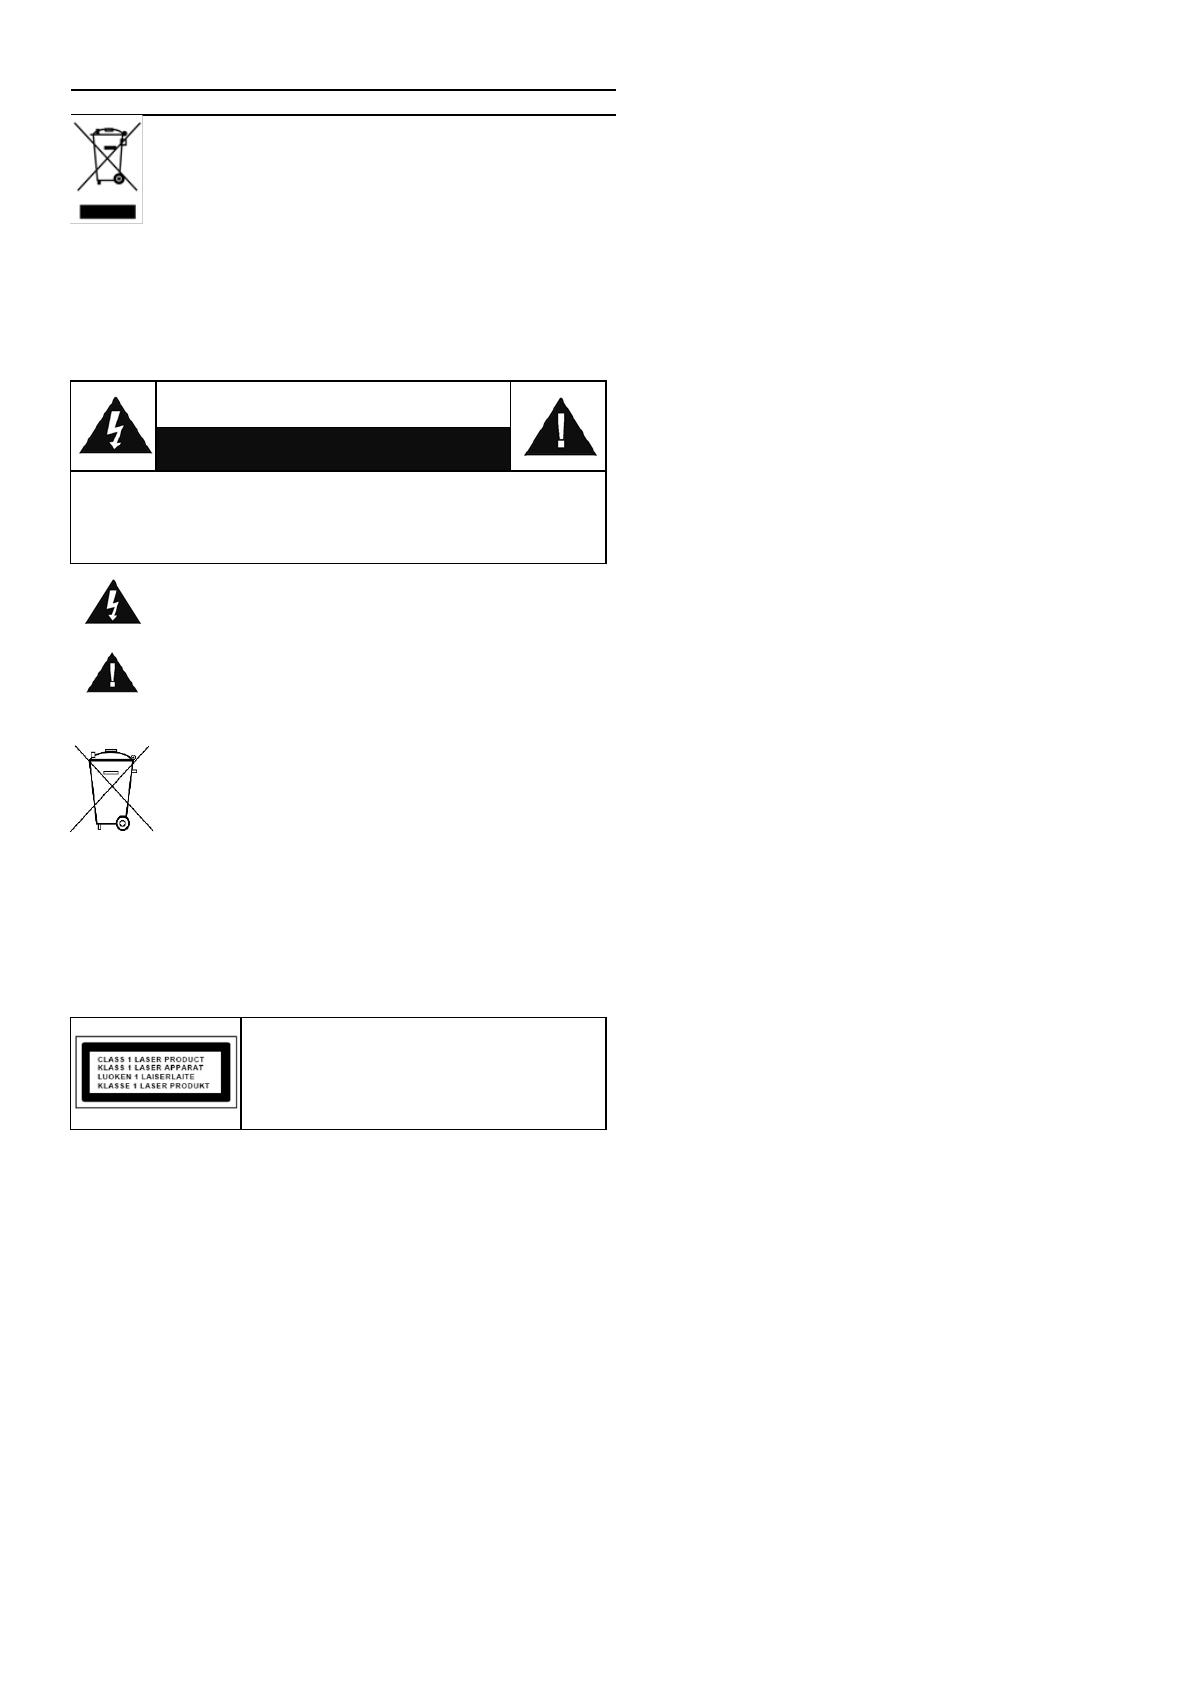
Non smaltire il presente prodotto tra I normali rifiuti
domestici al termine del suo ciclo di vita. Portarlo invece
ad un centro specializzato nel riciclo di materiale elettrico
e dispositivi elettronici. Quest’obbligo è indicato dal
simbolo di riciclo presente sul prodotto, sul manuale di
istruzioni o sulla confezione.
I materiali sono riutilizzabili in base alle indicazioni su di essi
riportate. Riutilizzando, riciclando o comunque trovando altri usi ai
dispositivi usati, si dà un grande contributo alla protezione
ambientale. Contattare i propri enti locali responsabili della
questione per ulteriori informazioni sui punti di raccolta.
ATTENZIONE
Rischio di scosse elettriche
Non aprire il dispositivo!
Cautela: Per ridurre il rischio di scosse elettriche, non rimuovere
la copertura (o il retro). Il prodotto non contiene componenti
riparabili. Affidare le riparazioni esclusivamente a personale
qualificato.
Tale simbolo indica la presenza all’interno
dell’apparecchio di componenti che generano
tensione elettrica a livelli pericolosi, capaci di
produrre scosse elettriche.
Tale simbolo indica la presenza di importanti
istruzioni di utilizzo e manutenzione del prodotto.
Le batterie usate sono rifiuti pericolosi e NON
devono essere smaltite assieme agli altri rifiuti
domestici! Infatti, ogni consumatore è obbligato a
norma di legge a restituire tutte le batterie ai centri
di riciclaggio ecosostenibile indipendentemente
dalla presenza nelle batterie di sostanze più o meno
dannose*).Le batterie usate possono essere consegnate in
maniera completamente gratuita ai centri di raccolta
pubblica o al proprio rivenditore.
Riportare le batterie solo quando esse sono completamente
scariche.
*) indicate dai simboli Cd = cadmio, Hg = mercurio, Pb = piombo
ATTENZIONE IL DISPOSITIVO PUÒ
EMETTERE RADIAZIONI LASER INVISIBILI,
IN CASO DI APERTURA DEL COPERCHIO O
RIMOZIONE DEL BLOCCO DI PROTEZIONE.
EVITARE L’ESPOSIZIONE ALLE EMISSIONI
LASER.
Il dispositivo è dotato di una fonte di emissioni laser di
Classe 1. Evitare di esporsi direttamente all’emissione
dei fasci laser, che potrebbero causare danni agli
occhi.
Usare il dispositivo esclusivamente al chiuso, in
ambienti asciutti. Proteggere il dispositivo dall’umidità.
Non aprire l’unità. RISCHIO DI SCOSSE
ELETTRICHE! Affidare l’apertura dell’apparecchio e le
riparazioni esclusivamente a personale qualificato.
Collegare il presente dispositivo esclusivamente ad
una presa a muro ben installata e dotata di messa a
terra. Accertarsi che la tensione di alimentazione
corrisponda a quella nominale riportata sulla targa del
prodotto.
Tenere il cavo di alimentazione lontano da fonti di
umidità durante il funzionamento. Non ostruire o
danneggiare il cavo di alimentazione in alcun modo.
Avvisi per la disconnessione del dispositivo: La
spina di alimentazione serve per la connessione
del dispositivo alla rete elettrica, quindi tenerla
sempre in posizione facilmente accessibile.
Se il cavo o la spina di alimentazione sono
danneggiati in qualunque modo, farli sostituire
immediatamente presso un centro di assistenza
autorizzato.
In caso di temporali, disconnettere
immediatamente il dispositivo dalla rete elettrica.
Il dispositivo può essere utilizzato dai bambini, solo
sotto il controllo dei genitori.
Per la pulizia dell’apparecchio, servirsi
esclusivamente di un panno asciutto.
NON USARE DETERGENTI o PANNI ABRASIVI!
Installare il dispositivo in un ambiente dotato di
sufficiente ventilazione, per evitare problemi di
surriscaldamento.
Non ostruire le aperture di ventilazione!
La libera circolazione dell’aria potrebbe essere
ostacolata, ostruendo le feritoie di ventilazione con
oggetti, quali giornali, tovaglie o tende ecc.
Tenere l’apparecchio lontano da schizzi o zampilli,
evitando di appoggiare sopra di esso oggetti
contenenti liquidi, ad esempio tazze.
L’unità non deve essere esposta direttamente alla
luce solare o altre fonti di calore, conservata in
ambienti eccessivamente freddi, umidi, polverosi o
soggetti ad urti e vibrazioni.
Non tentare di applicare cavi, spine o altri oggetti
all’unità, né tentare di aprirla.
Installare il dispositivo in una posizione sicura e
non soggetta a vibrazioni.
Non appoggiare sul dispositivo fonti di fiamme
libere, ad esempio candele accese.
Installare l’apparecchio lontano da computer o
unità a microonde, che potrebbero causare
interferenze alla ricezione radio.
Non tentare di aprire o riparare l’unità. Tale
operazione espone l’utente a rischio di lesioni e
rende nulla la garanzia del prodotto. Per le
riparazione affidarsi esclusivamente a personale /
centri di assistenza autorizzati.
Usare esclusivamente batterie prive di mercurio e
cadmio.
Le batterie non devono essere esposte
direttamente a fonti di calore, quali luce solare,
fiamme libere o simili.
Le batterie usate sono rifiuti pericolosi e NON
devono essere smaltite assieme agli altri rifiuti
domestici!!! Portare invece le batterie vecchie al
proprio rivenditore o in appositi centri di raccolta
locali.
Tenere le batterie fuori della portata dei bambini. I
bambini potrebbero infatti correre il rischio di
ingerirle. Consultare immediatamente un medico in
caso di ingestione di batterie.
Controllare regolarmente che le batterie del proprio
apparecchio non abbiano perdite.
L’apparato è concepito per l’uso in zone con climi
temperati; non è adatto all’uso in paesi con climi
tropicali.
ICD1010 / Italiano Manuale di istruzioni
1
INDICE
INDICE ........................................................................................................................ 1
POSIZIONE DEI CONTROLLI .................................................................................... 2
TELECOMANDO ........................................................................................................ 3
FUNZIONAMENTO DEL TELECOMANDO ................................................................ 3
CONTENUTO DELLA CONFEZIONE ........................................................................ 3
OPERAZIONI PRELIMINARI/CONFIGURAZIONE .................................................... 3
MONTAGGIO A PARETE ........................................................................................... 4
PREPARAZIONE DELL’AMBIENTE DI RETE ........................................................... 5
PROCEDURA DI CONFIGURAZIONE GUIDATA ...................................................... 5
MENU PRINCIPALE ................................................................................................... 7
RADIO INTERNET ...................................................................................................... 7
PODCASTS ................................................................................................................. 8
DAB ............................................................................................................................. 8
FM ............................................................................................................................. 10
CD ............................................................................................................................. 11
USB ........................................................................................................................... 12
BLUETOOTH® .......................................................................................................... 13
AUDIO-IN (AUX) ....................................................................................................... 13
SLEEP ....................................................................................................................... 13
SVEGLIA ................................................................................................................... 13
UNDOK ..................................................................................................................... 14
IMPOSTAZIONI DI SISTEMA ................................................................................... 14
RETROILLUMINAZIONE .......................................................................................... 16
RISOLUZIONE DEI PROBLEMI ............................................................................... 16
ICD1010 / Italiano Manuale di istruzioni
2
POSIZIONE DEI CONTROLLI
VISTA ANTERIORE
VISTA POSTERIORE
1
Schermo
9
Pulsante EJECT
2
Altoparlante
10
Pulsante BACK
3
Presa USB (Superiore)
11
Supporto staccabile
4
Pulsante STOP
12
Presa PALY/PAUSE/SCAN
5
Pulsante POWER/SOURCE
13
Pulsante NAVIGATE/OK/VOLUME
6
Pulsante MENU/INFO
14
Pulsante SKIP/TUNING
7
Pulsante PRESET
8
Schermo
15
16
Presa dell’antenna
Ingresso CA
17
AUX-IN
ICD1010 / Italiano Manuale di istruzioni
3
TELECOMANDO
1
Pulsante /ON
2
Pulsante 0-9
3
Pulsante
4
Pulsante VOLUME -
5
Pulsante SOURCE
6
Pulsante MENU
7
Pulsante EQ
8
Pulsante SCAN
9
Pulsante STOP
10
Pulsante SKIP-/TUNE-
11
Pulsante EJECT
12
Pulsante PRESET
13
Pulsante OK
14
Pulsante VOLUME+
15
Pulsante
16
Pulsante BACK
17
Pulsante INFO
18
Pulsante SLEEP
19
Pulsante MUTE
20
Pulsante PLAY/PAUSE
21
Pulsante SHUFFLE/REPEAT
22
Pulsante SKIP+/TUNE+
FUNZIONAMENTO DEL TELECOMANDO
1. Premere e far scorrere lo sportellino posteriore per aprire il vano portabatteria del telecomando.
2. Inserire due batterie di tipo AAA. Assicurarsi che le batterie siano inserite correttamente nel
rispetto della polarità indicata all’interno del vano.
3. Chiudere lo sportellino del vano portabatteria.
CONTENUTO DELLA CONFEZIONE
Unità principale
Telecomando
Manuale di istruzioni
Supporto (già montato)
OPERAZIONI PRELIMINARI/CONFIGURAZIONE
Collegare il dispositivo a una fonte di alimentazione adeguata. Dopo aver visualizzato una
schermata iniziale, verrà selezionata l’ultima modalità di ascolto utilizzata. Quando l’unità viene
avviata per la prima volta, verrà avviata automaticamente la procedura guidata.
ICD1010 / Italiano Manuale di istruzioni
4
MONTAGGIO A PARETE
NOTA:
Fare attenzione a proteggere il dispositivo (2,1Kg) dalla caduta durante l'installazione
Prima dell'installazione, verificare la capacità portante della parete e assicurarsi che
non vi siano tubi dell'acqua o dell'elettricità sotto i fori. (Se non sei sicuro, chiedi
consiglio a un professionista)
Viti e tasselli per il montaggio non sono inclusi nella fornitura
Verificare che le viti installate nel muro siano serrate
Fasi di montaggio
Utilizzare viti e tasselli idonei per il
montaggio.
Le dimensioni delle viti sono riportate nel
grafico a lato.
Usa un pezzo di carta come modello di
foratura (non incluso) e segna i fori a
circa 160 mm di distanza. Quindi fissare
la dima di foratura alla parete in
posizione orizzontale. (Come mostrato)
e praticare i due fori.
Fissare le viti utilizzando tasselli idonei
come mostrato nelle immagini
Rimuovere la base del dispositivo
tirando i due fermi sul lato inferiore della
base lontano dal dispositivo. Spingere
indietro il piede del supporto e
rimuoverlo. Ora puoi riagganciare il tuo
dispositivo come mostrato nell'immagine
Superficie della
parete
Carta
Superficie della
parete
Superficie della
parete
ICD1010 / Italiano Manuale di istruzioni
5
PREPARAZIONE DELL’AMBIENTE DI RETE
Assicurarsi di aver configurato correttamente la rete wireless e di disporre della password di
sicurezza WEP, WPA o WPA2 per attivare la connessione.
È possibile inoltre utilizzare la funzione WPS (WiFi Protected Setup) per facilitare l’abbinamento
tra il dispositivo di rete e l’unità. Verificare che gli indicatori luminosi sul dispositivo di rete
indichino che la connessione è funzionante.
PROCEDURA DI CONFIGURAZIONE GUIDATA
Nota: se la configurazione guidata viene annullata prematuramente senza una
configurazione di rete, il dispositivo genera il proprio accesso WiFi in modo che il dispositivo
possa essere configurato tramite l'APP UNDOK.
Indicatore di connessione di rete:
= Connessione di rete stabilita
= Connessione di rete non stabilita
1. Lingua
Seleziona la lingua del menu
2. Politica sulla riservatezza
Durante l'installazione iniziale o dopo il ripristino delle impostazioni di fabbrica, sul display
appare l'informativa sulla privacy. Per continuare l'installazione, confermare questa
richiesta con il pulsante "OK".
Per ulteriori informazioni, visitare www.frontiersmart.com/privacy
3. Setup Wizard
Selezionare "YES" per avviare la procedura guidata di configurazione.
4. Formato di visualizzazione data/ora
Scegliere l'orario in formato 12 o 24 ore.
5. Aggiornamento automatico
La data e l'ora possono essere aggiornate manualmente o automaticamente tramite DAB,
FM o connessione di rete. L'aggiornamento automatico viene eseguito con i dati trasmessi
tramite DAB, VHF o Internet. L'ora viene aggiornata solo in una modalità specifica. Dovresti
quindi scegliere una modalità che usi regolarmente.
DAB e FM utilizzano il segnale orario e la trasmissione radio. La rete utilizza un segnale
orario che viene inviato dal portale radio Internet in qualsiasi modalità di connessione di
rete.
6. Fuso orario / ora legale
Imposta il tuo fuso orario. Se l'ora legale è attualmente utilizzata nel proprio paese,
selezionare l'opzione Ora legale.
7. Aggiornamento manuale
Impostando l'opzione a "Nessun aggiornamento", la procedura guidata richiederà di inserire
ora e data manualmente. Data e ora sono visualizzate in formato gg-mm-aaaa e oo:mm.
ICD1010 / Italiano Manuale di istruzioni
6
Il valore attivo apparirà in formato lampeggiante. Regolare ciascun valore con il comando
/ ”. Una volta impostato il valore, premere il comando per continuare con
l’impostazione del valore successivo.
8. Rete
Tenere rete connessa
Selezionare questa opzione quando alcune funzioni dell’unità richiedono che la rete sia
connessa; quando questa opzione è selezionata, l’unità si connetterà rapidamente a
Internet e sarà possibile accendere l’unità tramite l’app “UNDOK”.
Nota: il consumo di energia in standby aumenta leggermente con questa funzione attivata.
Ricerca della rete
L’unità è compatibile con tutti i protocolli di rete e i metodi di crittografia più comuni. Effettua
la ricerca delle reti disponibili e le elenca automaticamente.
Per la connessione wireless, verrà richiesto di immettere la chiave
di crittografia nel passo successivo. Per immettere la chiave di rete,
utilizzare il comando “NAVIGATE” per spostare il cursore attraverso
i caratteri, quindi selezionare “OK” per confermare. Alla selezione
di ogni carattere, la chiave si compone sulla parte superiore dello
schermo.
Ci sono tre opzioni raggiungibili ruotando con la manopola di
navigazione prima del primo carattere “Backspace”, “OK” e
“Cancel”.
Rete criptata “WPS”
Verranno visualizzati dei suggerimenti relativi al tipo di rete: se i dispositivi di rete
supportano la funzione WPS, verrà aggiunta la sigla [WPS] davanti al codice SSID
(il nome del dispositivo di rete). Selezionare la rete a cui si desidera connettersi. Utilizzare
uno dei seguenti metodi di connessione:
è presente il tasto WPS di scelta rapida sull’access point.
Premere tasto
L’unità richiede di premere il tasto di connessione sul router.
Quindi ricerca una rete pronta alla connessione alla pressione del
tasto, e si connette ad essa.
Pin
L’unità genera un numero a 8 cifre da immettere nel router
wireless, nell’access point o in un’unità di registrazione esterna.
ICD1010 / Italiano Manuale di istruzioni
7
Salta WPS
Inserire la chiave di crittografia come nel caso di reti standard criptate.
Per ulteriori informazioni sulla configurazione di una rete criptata WPS, fare riferimento alle
istruzioni del proprio router WPS.
Completamento
L'unità ICD1010 tenta di connettersi alla rete selezionata.
Il sistema mostrerà l'indicazione connesso, se la configurazione ha
avuto successo. Se la connessione non riesce, l'unità ICD1010
ritorna alla schermata precedente per permettere di riprovare.
L’unità tenta di connettersi alla rete selezionata. Il sistema
mostrerà l'indicazione Connesso, se la configurazione ha avuto
esito positivo. Se la connessione ha esito negativo, l’unità torna
alla schermata precedente per riprovare.
Premere OK” per uscire dalla procedura di configurazione
guidata.
MENU PRINCIPALE
Dal menu principale è possibile selezionare le seguenti modalità di funzionamento: Radio
Internet, Podcast, DAB, FM, AUX, CD, USB, Bluetooth®, Sleep, Sveglia.
RADIO INTERNET
L’unità può riprodurre migliaia di stazioni radio e podcast di tutto il mondo
tramite una connessione Internet a banda larga.
Quando si seleziona Radio Internet, l’unità contatta direttamente il
portale radio Internet Frontier Silicon (che è supportato da Airable) per
ottenere un elenco di stazioni.
Se si sta già ascoltando una stazione radio Internet, è possibile premere il tasto Back per
tornare rapidamente all’ultimo ramo della struttura di menu, piuttosto che MENU per andare al
primo menu della modalità Radio Internet.
Storia
Quando si attiva la modalità Radio Internet, viene selezionata l'ultima stazione che si
ascolta. Per selezionare un'altra stazione ascoltata di recente, fare clic qui per elencare le
stazioni selezionate. Le stazioni più recenti vengono visualizzate in cima all'elenco.
Ricerca
Qui è possibile cercare le stazioni radio desiderate.
Paese
Qui le stazioni radio possono essere selezionate per continente e paesi.
ICD1010 / Italiano Manuale di istruzioni
8
Popolare
Qui ci sono famose stazioni radio da vedere.
Scopri
Qui è possibile selezionare le stazioni radio per paese, genere o lingua.
Preselezioni
Per memorizzare una preselezione di radio Internet, premere e tenere premuto il tasto
"PRESET" sul telecomando fino a quando il display mostra la schermata "Salva preset".
Selezionare uno dei preset per salvare la stazione corrente e premere "OK" per confermare.
Per selezionare una stazione preimpostata, premere "PRESET" sul telecomando, quindi
selezionare una delle stazioni preimpostate elencate e premere "OK" per confermare. Oppure
premere da 0 a 9 sul telecomando per richiamare direttamente i preset.
Informazioni riproduzione in corso
Quando nell'unità vi è una riproduzione in corso, lo schermo ne mostra nome e descrizione. Per
visualizzare ulteriori informazioni, premere INFO sul dispositivo.
Premendo INFO sul dispositivo, si accede ad un altro gruppo di informazioni, che saranno
visualizzate ciclicamente a ogni pressione: nome/descrizione, genere/località, affidabilità,
codec/velocità di campionamento, buffer di riproduzione e data odierna.
PODCASTS
Questa funzione consente di selezionare, cercare e ascoltare i podcast.
DAB
La modalità DAB consente di ricevere il segnale radio digitale DAB o
DAB plus e di visualizzare informazioni relative alla stazione, allo
streaming audio e ai dettagli dei programmi.
Ricerca delle stazioni
La prima volta che si seleziona la modalità radio DAB o se l’elenco
delle stazioni è vuoto, l’unità effettua automaticamente una ricerca
completa per verificare quali stazioni sono disponibili. Potrebbe anche
essere necessario procedere ad una scansione manuale di
aggiornamento dell'elenco stazioni, per uno dei seguenti motivi:
Le stazioni disponibili possono cambiare di tanto in tanto.
Se non vi sono buone condizioni di ricezione al momento della
prima scansione, l'elenco stazioni ottenuto potrebbe essere
incompleto o vuoto.
Se la ricezione di alcuni canali è scadente (ricezione intermittente),
ci può essere l'esigenza di tenere nell'elenco solo le stazioni che
hanno un segnale di buona qualità.
ICD1010 / Italiano Manuale di istruzioni
9
Per avviare la ricerca premere il tasto "MENU" del telecomando oppure premere e tenere
premuto il tasto "MENU/INFO" per accedere al menù DAB. Selezionare l'opzione “Scansione
completa” e confermare con “OK” oppure premere il tasto “SCAN” sul telecomando.
Al termine della ricerca delle stazioni, la radio visualizza un elenco di tutte le stazioni disponibili
Preselezioni
Per memorizzare una preselezione di radio DAB, premere e tenere premuto il tasto "PRESET"
sul telecomando fino a quando il display mostra la schermata "Salva preset".
Selezionare uno dei preset per salvare la stazione corrente e premere "OK" per confermare.
Per selezionare una stazione preimpostata, premere "PRESET" sul telecomando, quindi
selezionare una delle stazioni preimpostate elencate e premere "OK" per confermare. Oppure
premere da 0 a 9 sul telecomando per richiamare direttamente i preset.
Informazioni sulla funzione “Now playing”
Durante la riproduzione di uno streaming musicale, sullo schermo viene visualizzato il relativo
nome e la trasmissione delle informazioni DLS (Dynamic Label Segment) per singola stazione,
fornendo indicazioni in tempo reale, quali nome del programma, titolo del brano e dettagli di
contatto. Le trasmissioni stereo sono indicate con un’icona in fondo allo schermo. Per visualizzare
ulteriori informazioni, premere il tasto INFO.
Menu DAB
Lista di invio
Le stazioni trovate vengono visualizzate nell'elenco delle stazioni.
Scansione completa
Viene avviata una ricerca completa della stazione. Le stazioni vengono visualizzate
nell'elenco delle stazioni.
Ricerca manuale delle stazioni
Qui hai la possibilità di selezionare un canale e iniziare solo la ricerca di questo canale.
Pulizia Canale
Le stazioni radio che non sono più udibili o ricevibili possono essere eliminate qui.
Compressione gamma dinamica (Dynamic range compression - DRC)
Se si ascolta musica con un'elevata gamma dinamica in un ambiente rumoroso, può essere
utile comprimere la gamma dinamica dell'audio. Questo permette di ridurre l'intensità dei
suoni più rumorosi e viceversa elevare quella dei suoni psilenziosi. L'opzione DRC può
essere impostata al valore basso, alto o disattivata.
ICD1010 / Italiano Manuale di istruzioni
10
Ordine delle stazioni
È possibile scegliere l'ordine con cui visualizzare le stazioni DAB in elenco: Alfanumerico, di
Insieme o Validità.
Gli elenchi di insieme raggruppano le stazioni che sono trasmesse in uno stesso insieme. Gli
elenchi di validità mostrano prima le stazioni valide, in ordine alfanumerico, quindi quelle
indisponibili.
FM
La modalità radio FM riceve i canali radio analogici della banda FM e
mostra le informazioni RDS (Sistema dati radiofonici - Radio Data
System) sulla stazione e le relative trasmissioni.
Per una ricerca completa, premere il tasto sul telecomando “INTRO/AMS”. Verranno
visualizzate sul display le frequenze mentre sarà effettuata la scansione di tutta la banda FM.
Per la scansione manuale, premere e tenere premuto il tasto " " o " ". Il display della
frequenza inizia a funzionare e scansiona la banda FM e si ferma alla stazione successiva.
Per eseguire una regolazione fine, premere il tasto " " o " " sul telecomando. L'unità cerca in
passi da 0,05 MHz.
Preselezione
Per memorizzare una preselezione di radio FM, premere e tenere premuto il tasto "PRESET"
sul telecomando fino a quando il display mostra la schermata "Salva preset".
Selezionare uno dei preset per salvare la stazione corrente e premere "OK" per confermare.
Per selezionare una stazione preimpostata, premere "PRESET" sul telecomando, quindi
selezionare una delle stazioni preimpostate elencate e premere "OK" per confermare. Oppure
premere da 0 a 9 sul telecomando per richiamare direttamente i preset.
Informazioni riproduzione in corso
Quando un flusso è in riproduzione, lo schermo ne mostra la frequenza o le informazioni RDS,
se disponibili: esse contengono il nome della stazione e altre informazioni, quali nome
programma, titolo brani e dati di contatto. Se non ci sono informazioni disponibili, sullo schermo
appare solo la frequenza.
Le trasmissioni stereo sono evidenziate da un'icona che appare in cima allo schermo. Per
visualizzare altre informazioni sulla trasmissione, premere INFO sul dispositivo.
Premendo INFO sul dispositivo, si accede ad un altro gruppo di informazioni, che saranno
visualizzate ciclicamente a ogni pressione (testo RDS): altro testo RDS (stazione/tipo di
programma), frequenza e data odierna.
ICD1010 / Italiano Manuale di istruzioni
11
IMPOSTAZIONI
Impostazioni di scansione
Scegliendo FM la prima volta, il sistema si posizionerà sulla riproduzione di una certa stazione.
Quindi premendo il tasto “Menu”, si apre la tabella mostrata sopra.
Per impostazione predefinita, la scansione FM si ferma ad ogni nuova stazione disponibile.
Potrebbe accadere che le stazioni con segnale debole, presentino uno scadente rapporto
segnale rumore (ascolto disturbato da fruscio). Per modificare le impostazioni di scansione, in
modo che essa si fermi solo sulle stazioni con un buon livello di segnale, impostare il valore Sì,
dopo aver selezionato l'opzione "Scelta sole stazioni con segnale forte".
Impostazioni audio
Tutte le stazioni con trasmissione stereofonica, saranno riprodotte in stereo. Potrebbe accadere
che le stazioni con segnale debole, presentino uno scadente rapporto segnale rumore (ascolto
disturbato da fruscio). Per forzare la riproduzione mono delle stazioni con segnale debole,
selezionare la voce ricezione FM debole: Quindi impostare al valore SÌ l'opzione Ascolto in
modalità mono.
CD
Il funzionamento improprio può causare danni materiali! Non inserire supporti di registrazione
che si discostano dal formato CD standard (ad es mini-dischi) nel lettore CD. Questi potrebbero
non essere riprodotti ed espulsi correttamente. Inserire solo un disco alla volta nel lettore CD.
Aprire lo scomparto del CD con il tasto " " e inserire un CD con il lato dell'etichetta rivolto
verso l'alto. Chiudere di nuovo il vano CD con il tasto " ". Il display mostra "In carica" e il CD
è in fase di lettura. Un'operazione non è possibile durante questo periodo. Dopo aver letto, il
dispositivo visualizza le seguenti informazioni:
Cartella (F)
Titolo
Tempo di gioco attuale
Stato di riproduzione (riproduzione / pausa)
La riproduzione inizierà automaticamente una volta letto il sommario. Il display mostrerà "No
Disc" quando l'unità è impostata sulla modalità CD e non vi è alcun CD al suo interno.
Per mettere in pausa / riprendere la riproduzione del CD, premere il tasto " "
Per passare alla traccia successiva, premere una volta il tasto " "
Per avanzare rapidamente attraverso una traccia, tieni premuto il pulsante " ".
Per passare alla traccia precedente, premere due volte il pulsante " “.
Per riavvolgere velocemente una traccia, tenere premuto il pulsante " ".
Per interrompere la riproduzione del CD, premere il tasto " .
Per espellere il disco, premere in modalità stop il pulsante " ".
ICD1010 / Italiano Manuale di istruzioni
12
Programma CD
1. Impostare l'unità in modalità Stop.
2. Premere il tasto "PRE" sul telecomando. Il display mostrerà "P01 F01 T001" e "T001"
lampeggianti.
3. Scegliere con “ ” o “ ” o i tasti numerici 0-9 del telecomando la traccia da
programmare. Confermare la traccia premendo il tasto “PROG” sul telecomando. Sul
display sarà così visualizzato “P02”.
4. Per scegliere più brani, ripetere nuovamente il passaggio 3.
5. Se tutti i brani sono programmati, premere il tasto " " sull'unità o il telecomando per
avviare la riproduzione programmata.
Funzioni di riproduzione
Premendo ripetutamente il tasto " " sul telecomando, è possibile selezionare le seguenti
funzioni di riproduzione:
Per CD audio:
1 x: la traccia corrente viene ripetuta.
2 x: il CD completo viene ripetuto.
3 x: i brani del CD vengono riprodotti in modo casuale.
4 x: la funzione di ripetizione è disattivata.
Per CD MP3:
1 x: la traccia corrente viene ripetuta.
2 x: la cartella completa viene ripetuta.
3 x: il CD completo viene ripetuto.
4 x: i brani del CD vengono riprodotti in modo casuale.
5 x: la funzione di ripetizione è disattivata.
Il rispettivo simbolo di riproduzione è mostrato nella parte inferiore del display.
USB
Da ora in poi, i menu delle cartelle vengono creati dal dispositivo USB.
Le funzioni di controllo sono identiche a quelle della modalità CD. Le
cartelle possono essere selezionate usando i pulsanti " / " sul
telecomando o l'APP UNDOK. Il display mostra la cartella e i nomi dei
file (non necessariamente il nome del titolo).
Premere il tasto " " o utilizzare "UNDOK APP" per avviare la riproduzione
Elenco di riproduzione
Puoi aggiungere brani alla playlist tenendo premuto il pulsante "OK" sul telecomando durante la
riproduzione.
Elimina playlist
Selezionare "Cancella elenco di riproduzione" e confermare con "OK".
ICD1010 / Italiano Manuale di istruzioni
13
BLUETOOTH®
Selezionando la modalità Bluetooth®, il dispositivo è pronto per la
procedura di abbinamento, come indicato dall'icona BT che lampeggia
in fondo allo schermo. Accendere il proprio smartphone, Tablet o altro
dispositivo Bluetooth® per effettuare la ricerca dell'apparecchio. Il nome
di abbinamento Bluetooth® è “ICD1010”.
Quando l'abbinamento è stato correttamente completato, l'indicatore
Bluetooth® si illumina e smette di lampeggiare.
Per rimuovere l'abbinamento BT, spegnere o annullare l'associazione
del proprio smartphone, tablet o altro dispositivo Bluetooth®.
Premere " " sulla radio o sul telecomando per avviare o mettere in pausa la riproduzione. È
possibile premere " ” o " ” sulla radio o sul telecomando per riprodurre la traccia
precedente o successiva.
AUDIO-IN (AUX)
È inoltre possibile utilizzare questa presa per ascoltare l'audio di altri dispositivi di riproduzione
come lettori MP3, lettori CD, ecc. attraverso gli altoparlanti.
1. Collegare il dispositivo esterno con un cavo jack da 3,5 mm alla presa AUX-IN sul retro del
dispositivo.
2. È possibile ascoltare l'audio dal dispositivo esterno attraverso gli altoparlanti del dispositivo. È
possibile regolare il volume con i pulsanti del volume. I pulsanti del CD non funzionano.
3. Le informazioni sul funzionamento sono disponibili nelle istruzioni per l'uso del dispositivo
esterno.
Nota:
Imposta il volume del dispositivo esterno a un livello confortevole.
SLEEP
Impostare il timer di spegnimento selezionando "Ripeti" dal menu principale. Selezionare Sleep:
OFF, 15 MIN, 30 MIN, 45 MIN o 60 MIN.
Il tempo rimanente per lo spegnimento è mostrato nella parte inferiore del display.
SVEGLIA
Sono disponibili due versatili allarmi sveglia dotati di opzione di
snooze, nonché una funzione di sospensione che spegne il sistema
dopo un periodo di tempo definito. È possibile definire la modalità di
attivazione di ciascun allarme.
Selezionare Allarme nel menu principale per impostare o modificare un allarme.
Indicare il numero dell'allarme su cui agire (1 o 2), quindi configurarne i parametri seguenti:
ICD1010 / Italiano Manuale di istruzioni
14
Imp. freq. allar.: Off, Ogni giorno, Una volta, Fine settimana o Giorni della sett.
Ora
Modalità: Internet Radio, DAB, FM, CD, USB, Buzzer
Imp. allar. pred.: Ascoltato per ultimo: P1 P20 (possibile solo selezionando DAB o VHF).
Volume: 0 - 32
Per attivare le nuove impostazioni, scorrere il menu verso il basso e selezionare la voce Salva.
Lo schermo indica la presenza di sveglie attive con un'apposita icona che compare in basso a
sinistra.
UNDOK
L’unità supporta il controllo remoto da Apple iPhone, iPad e Android mediante l’app UNDOK. Le
app sono disponibili nell’App Store di Apple e in Google Play.
È possibile controllare una singola unità, un gruppo di dispositivi o anche più gruppi mediante
l’app UNDOK o i controlli della radio.
L’app UNDOK consente di effettuare quanto segue:
Creare un gruppo
Rinominare un gruppo
Modificare un gruppo, ovvero aggiungere o rimuovere uno o più prodotti
Eliminare un gruppo
Controllare un gruppo, ovvero scegliere la modalità di funzionamento e cercare contenuti
Regolare il volume di un intero gruppo o di singoli prodotti all’interno di un gruppo
Controllare i prodotti che non sono stati assegnati ad alcun gruppo
Controllare tutte le modalità dell’unità, tra cui Radio Internet, Podcast, DAB, FM, CD,
USB, Bluetooth®
Impostare l’equalizzatore per varie preselezioni audio
Impostare il timer Sleep
Modificare il nome visualizzato della radio
IMPOSTAZIONI DI SISTEMA
1. EQUALIZZAZIONE
Sono disponibili diverse modalità di equalizzazione predefinite: Normale, Media, Jazz,
Rock, Colonna sonora, Classica, Pop, Messaggi, My EQ e My EQ Settings.
Nelle impostazioni My EQ, puoi creare il tuo EQ personalizzato con le impostazioni
personalizzate dei bassi e degli alti.
È inoltre possibile selezionare queste funzioni premendo il tasto "EQ" sul telecomando.
2. QUALITÀ DEL FILO AUDIO
Qui è possibile impostare la qualità di riproduzione del flusso radio.
3. RETE
Procedura guidata di rete
ICD1010 / Italiano Manuale di istruzioni
15
Inserire l'SSID dell'AP da ricercare, quindi inserire la chiave WEP/WPA o scegliere come
proseguire la connessione alla rete wireless: premere il pulsante WPS, inserire il PIN o
ignorare la funzione WPS.
Configurazione Wlan tramite PBC
La Configurazione tramite pressione tasto (Push Button Configuration - PBC), serve per la
connessione dei punti di accesso (AP) che supportano la funzione WPS (Configurazione
Wi-Fi Protetta).
Impostazioni di visualizzazione
Permettono di visualizzare le informazioni della rete attualmente connessa: Connessione
attiva, indirizzo MAC, area Wlan, DHCP, SSID, indirizzo IP, Subnet mask, indirizzo
Gateway, DNS Primario e Secondario.
Impostazioni manuali
Permette di selezionare la connessione a una rete cablata o wireless e di abilitare o
disabilitare la funzione DHCP (Dynamic Host Configuration Protocol - Protocollo di
configurazione dinamica host).
PIN di sicurezza
Qui è possibile impostare il PIN di sicurezza.
Profilo di rete
L'unità ICD1010 è in grado di memorizzare le ultime quattro reti wireless cui è stata
connessa, per cui al successivo utilizzo cerca di connettersi automaticamente a quella tra
esse disponibile.
Da qui è possibile vedere l'elenco delle reti registrate. È possibile cancellare le reti non più
richieste, ruotando e premendo NAVIGATE, seguito da YES per confermare la
cancellazione.
Elimina le impostazioni di rete
Le impostazioni di rete impostate verranno eliminate.
Mantenere la connessione di rete in standby
Selezionare "SÌ" per mantenere la connessione di rete in modalità
standby, DAB, FM e Bluetooth®. Se si seleziona l'opzione "NO", la
connessione WLAN viene disattivata quando non viene utilizzata.
Tuttavia, si consiglia di mantenere la connessione per l'uso
dell'APP UNDOK.
4. ORA/DATA
Permette di scegliere tra la regolazione manuale di data e ora e l'aggiornamento automatico
di formato orario, fuso orario e ora legale.
5. STANDBY INATTIVO
Qui puoi impostare la durata dopo la quale il dispositivo passa automaticamente in standby.
6. LINGUA
La lingua predefinita è il tedesco. Può essere modificata in base alle proprie preferenze.
ICD1010 / Italiano Manuale di istruzioni
16
7. RIPRISTINO DELLE IMPOSTAZIONI DI FABBRICA
Un ripristino delle impostazioni di fabbrica ripristina tutte le impostazioni utente ai valori
predefiniti, in modo che data e ora, configurazione di rete e impostazioni predefinite
vengano perse. Tuttavia, viene mantenuta la versione corrente del software ICD1010.
8. AGGIORNAMENTI SOFTWARE
Nuove versioni del software possono essere rese disponibili per la risoluzione dei problemi
e / o l'aggiunta di nuove funzioni. È possibile verificare manualmente la presenza di
aggiornamenti o impostare ICD1010 su periodicamente e automaticamente per verificare la
presenza di aggiornamenti (quest'ultimo è l'impostazione predefinita). Se viene rilevato un
software più recente, ti verrà chiesto se desideri installarlo. In tal caso, il nuovo software
verrà scaricato e installato. Dopo aver aggiornato il software, tutte le impostazioni
personalizzate verranno mantenute.
NOTA: prima di aggiornare il software, assicurarsi che ICD1010 sia collegato a un
alimentatore stabile. Se l'alimentazione viene scollegata durante l'aggiornamento, il
dispositivo potrebbe essere danneggiato in modo permanente.
9. AGGIORNAMENTO SOFTWARE
Con questa funzione si installa il software tramite PC.
10. SETUP WIZARD
Qui hai la possibilità di avviare la procedura guidata di configurazione.
11. INFORMAZIONI
Visualizza la versione firmware e l'ID radio.
12. VITA PRIVATA
Le informazioni sulla normativa di base sulla protezione dei dati sono visualizzate qui.
13. ILLUMANZIONE DISPLAY
È possibile impostare la luminosità del display separatamente in modalità standby e
operativa, nonché la durata.
RETROILLUMINAZIONE
È possibile modificare il livello di retroilluminazione in ogni modalità d'uso dell'unità (attiva o
standby) tra Alto, Medio o Basso. Si può inoltre regolare la durata del timeout, alla cui scadenza
la radio attiva il livello di retroilluminazione impostato per la modalità standby, quando essa non
viene utilizzata.
RISOLUZIONE DEI PROBLEMI
Errore
Rimedio
Il dispositivo non si
accende.
Verificare che l'adattatore di alimentazione sia ben collegato.
ICD1010 / Italiano Manuale di istruzioni
17
Spegni
automaticamente
A causa dei requisiti ErP2 e della protezione ambientale, l'unità
passa automaticamente alla modalità standby quando non viene
riprodotta la musica per più di 15 minuti.
Non viene emesso
alcun suono.
1. Riattivare il suono se esso è stato spento
2. Aumentare il volume.
3. Estrarre eventuali cuffie o altoparlanti connessi alla presa audio.
Impossibile stabilire
connessioni di rete.
1. Controllare la funzione WLAN.
2. Provare ad associare un indirizzo IP al dispositivo.
3. Attivare la funzione DHCP sul router e riprovare la connessione
tramite il dispositivo.
4. C'è un firewall attivo sulla rete: impostare i programmi coinvolti,
in modo da consentire l'accesso.
5. Riavviare il router
Impossibile stabilire la
connessione WiFi.
1. Controllare la disponibilità di una rete WLAN sul router.
2. Avvicinare il dispositivo al router.
3. Assicurarsi di aver inserito una password corretta.
Impossibile trovare
stazioni radio.
1. Controllare dispositivi di rete, punti di accesso e firewall.
2. È possibile che la stazione radio sia al momento indisponibile,
riprovare a sintonizzarsi più tardi o selezionare un altro canale.
3. Il link della stazione è cambiato o il canale non trasmette più:
contattare in proposito il fornitore.
4. Il link della stazione aggiunta manualmente potrebbe essere
sbagliato: verificarlo ed eventualmente reinserirlo.
Ascolto in modalità FM
disturbato da fruscio
Controllare o spostare l'antenna FM. Spostare la radio.
Nessuna stazione
disponibile/ascolto
disturbato o
intermittente in
modalità DAB.
1. Spostare la radio.
2. Effettuare la scansione delle sole stazioni locali (con ricezione
ottima).
3. Controllare la copertura locale del segnale DAB.
Allarme non
funzionante.
1. Attivare l'allarme.
2. Problema dovuto al livello di volume, consultare la sezione delle
soluzioni per i problemi di assenza audio.
3. La sorgente dell'allarme impostata è la riproduzione radio, ma al
momento la connessione di rete non è disponibile. Modificare la
sorgente di allarme o riconfigurare la connessione.
ICD1010 / Italiano Manuale di istruzioni
18
Impossibile individuare
il driver USB o il lettore
MP3.
1. Controllare che il driver USB o il lettore MP3 siano collegati
correttamente.
2. Alcuni dischi rigidi USB richiedono un'alimentatore esterno:
assicurarsi che esso sia connesso.
3. Non tutti i lettori MP3 sono leggibili direttamente dal dispositivo:
usare un disco USB.
L'applicazione
NetRemote non
visualizza l'unità
ICD1010 o non si
connette ad essa.
1. Riavviare l'App.
2. Se ci sono diversi streaming in corso da più dispositivi, ciò
potrebbe causare un arresto anomalo del sistema: riavviare
l'unità ICD1010 e/o il dispositivo di streaming.
Tutti gli altri casi non
risolvibili.
L'unità ICD1010 si trova spesso ad elaborare grandi quantità di dati,
il che può, dopo un certo periodo di tempo, essere causa di blocchi
o malfunzionamenti del sistema, indipendentemente dalla modalità
di utilizzo. Riavviare l'unità ICD1010 se necessario.
Il normale funzionamento dell'unità può essere disturbato da forti
interferenze
Elettromagnetiche. In tal caso, basta riavviare il prodotto per
ripristinarne il normale funzionamento, seguendo le istruzioni del
presente manuale. Se anche in tal modo, non è possibile ripristinare
il corretto funzionamento, provare ad usare il prodotto in un altro
ambiente.
Infatti il dispositivo potrebbe presentare malfunzionamenti, se usato
in aree con forti interferenze radio. L'unità tornerà a funzionare
normalmente, non appena spostata in un ambiente senza
interferenze.
La versione attuale delle istruzioni per l'uso può essere scaricata da www.soundmaster.de
Ci riserviamo eventuali errori di stampa e modifiche tecniche.
Copyright di Woerlein GmbH, 90556 Cadolzburg, www.soundmaster.de
Riproduzione possibile solo con il permesso di Woerlein GmbH
Pokyny týkající se bezpečnosti, životního prostředí a nastavení
CZ
OCHRANA ŽIVOTNÍHO PROSTŘEDÍ
Nelikvidujte tento výrobek na konci jeho životního cyklu
spolu s běžným domovním odpadem. Odevzdejte jej ve
sběrném dvoře pro recyklaci elektrických a
elektronických zařízení. Tento význam má symbol na
výrobku, návodu k použití nebo na balení.
Materiály lze dle jejich označení opětovně použít. Opětovným
použitím, recyklací nebo jinými způsoby využití starých zařízení
významně přispíváte k ochraně našeho životního prostředí.
Více informací o sběrných dvorech vám poskytne příslušný
místní úřad.
VAROVÁNÍ
Nebezpečí úrazu elektrickým
Proudem Neotevírejte!
Upozornění: Nesnímejte kryt (ani zadní část), abyste snížili
nebezpečí úrazu elektrickým proudem. Uvnitř nejsou žádné díly,
které by mohl uživatel opravit sám. Opravy svěřte
kvalifikovaným servisním pracovníkům.
Tento symbol značí přítomnost nebezpečného napětí
uvnitř krytu, které je dostatečně vysoké, aby
představovalo nebezpečí úrazu elektrickým proudem.
Tento symbol značí, že k zařízení jsou k dispozici
pokyny k obsluze a údržbě.
Použité baterie představují nebezpečný odpad a
NESMÍ být likvidovány spolu s domovním
odpadem! Jako spotřebitelé jste z právního
hlediska povinni odevzdat všechny baterie
k zajištění ekologicky šetrné recyklace bez ohledu
na to, zda baterie obsahují škodlivé látky či nikoli*.
Odevzdejte baterie zdarma v místním veřejném sběrném dvoře
nebo v obchodech, které příslušný druh baterií prodávají.
Odevzdávejte pouze zcela vybité baterie.
* Označení Cd = kadmium, Hg = rtuť, Pb = olovo
UPOZORNĚNÍ – PŘI OTEVŘENÍ KRYTU
NEBO STISKNUTÍ BEZPEČNOSTNÍHO
ODPOJOVAČE DOCHÁ K NEVIDITELNÉMU
LASEROVÉMU ZÁŘENÍ. NEVYSTAVUJTE SE
LASEROVÉMU PAPRSKU.
Zařízení je vybaveno „laserovým zařízením třídy 1“.
Nevystavujte se laserovému paprsku, protože by
mohlo dojít ke zranění očí.
Používejte zařízení pouze v suchém vnitřním
prostředí.
Chraňte zařízení před vlhkostí.
Zařízení neotevírejte. NEBEZPEČÍ ÚRAZU
ELEKTRICKÝM PROUDEM! Otevření a opravy svěřte
kvalifikovaným servisním pracovníkům.
Zařízení připojujte pouze ke správně namontované a
uzemněné nástěnné zásuvce. Zkontrolujte, zda napětí
odpovídá technickým údajům uvedeným na typovém
štítku.
Zajistěte, aby síťový kabel zůstal během provozu
suchý. Síťový kabel nepřiskřípněte ani jiným
způsobem nepoškozujte.
Varování pro odpojování zařízení: Síťová
zástrčka se používá jako připojení, měla by
proto zůstat vždy přístupná.
Poškozený síťový kabel nebo zástrčku je nutné
nechat ihned vyměnit v autorizovaném
servisním středisku.
Dochází-li k bleskům, zařízení ihned odpojte od
síťového napájení.
Děti by měly zařízení používat pod dohledem
rodičů.
Zařízení čistěte pouze suchým hadříkem.
NEPOUŽÍVEJTE ČISTICÍ PROSTŘEDKY ani
ABRAZIVNÍ TKANINY!
Zařízení umístěte na místo s dostatečnou
ventilací, aby nedocházelo k přehřívání.
Nezakrývejte ventilační otvory!
Ventilační otvory by neměly být zablokovány
předměty, jako jsou noviny, ubrusy, záclony
apod.
Zařízení by nemělo být vystaveno kapající ani
stříkající vodě a neměly by se na něj pokládat
předměty s tekutinami, jako jsou vázy.
Zařízení by nemělo být vystaveno přímému
slunečnímu záření, příl vysokým ani příliš
nízkým teplotám, vlhkosti, vibracím ani by
nemělo být umístěno v prašném prostředí.
Do ventilačních otvorů ani jiných otvorů zařízení
se nikdy nepokoušejte vložit dráty, špendlíky ani
jiné předměty.
Umístěte zařízení na bezpečné místo bez
vibrací.
Na zařízení by se neměly pokládat zdroje
otevřeného ohně jako například hořící svíčky.
Umístěte zařízení co nejdále od počítačů a
mikrovlnných trub. V opačném případě by mohlo
docházet k rušení příjmu rádiového signálu.
Neotevírejte ani neopravujte kryt. Ne to
bezpečné a došlo by k porušení platnosti
záruky. Opravy smí provádět pouze
autorizované servisní/zákaznické středisko.
Používejte pouze baterie neobsahující rtuť ani
kadmium.
Baterii by neměly být vystaveny působení
nadměrného tepla, jako je sluneční záření, oheň
apod.
Použité baterie představují nebezpečný odpad a
NESMÍ být likvidovány spolu s domovním
odpadem!!! Vraťte baterie svému prodejci nebo
je odevzdejte v místním sběrném dvoře.
Udržujte baterie mimo dosah dětí. Děti by mohly
baterie spolknout. Pokud došlo ke spolknutí
baterie, okamžitě vyhledejte lékařskou pomoc.
Baterie pravidelně kontrolujte, zda nedochází k
úniku kapalin.
Toto zařízení je určeno k používání v mírném
klimatu. Nevhodpro používání v zemích s
tropickým klimatem.
ICD1010 / Čeština Návod k použi
1
OBSAH
OBSAH........................................................................................................................ 1
UMÍSTĚNÍ OVLÁDACÍCH PRVKŮ ............................................................................. 2
DÁLKOVÝ OVLADAČ ................................................................................................ 3
OPERATION YOUR REMOTE CONTROL ................................................................. 3
CONTENT OF DELIVERY .......................................................................................... 3
ZAČÍNÁME .................................................................................................................. 3
MONTÁŽ NA STĚNU .................................................................................................. 4
PŘIPRAVTE SI SÍŤOVÉ PROSTŘEDÍ ........................................................................ 5
PRŮVODCE NASTAVENÍM ........................................................................................ 5
HLAVNÍ NABÍDKA ...................................................................................................... 7
INTERNET RADIO ...................................................................................................... 7
PODCASTS ................................................................................................................. 8
DAB ............................................................................................................................. 8
FM ............................................................................................................................. 10
CD ............................................................................................................................. 11
USB ........................................................................................................................... 13
BLUETOOTH® .......................................................................................................... 13
AUX-IN ...................................................................................................................... 14
SPÁT ......................................................................................................................... 14
ALARM...................................................................................................................... 14
UNDOK ..................................................................................................................... 14
NASTAVENÍ SYSTÉMU............................................................................................ 15
TROUBLESHOOTING .............................................................................................. 17
ICD1010 / Čeština Návod k použi
2
UMÍSTĚNÍ OVLÁDACÍCH PRVKŮ
POHLED ZEPŘEDU
POHLED SHORA
1
Mluvčí
9
EJECT knoflík
2
Zásobník na CD
10
BACK knoflík
3
USB Port
11
Odnímatelný stojan
4
STOP knoflík
12
PLAY/PAUSE/SCAN knoflík
5
POWER/SOURCE knoflík
13
NAVIGATE/VOLUME/OK stud
6
MENU/INFO knoflík
14
SKIP/TUNING knoflík
7
PRESET knoflík
8
Zobrazit
15
16
Pigtail antenna
AC IN
17
AUX IN
ICD1010 / Čeština Návod k použi
3
DÁLKOVÝ OVLADAČ
1
STANDBY/OFF
2
0-9 numeric knoflík
3
knoflík
4
Volume - knoflík
5
Source knoflík
6
Menu knoflík
7
Equalizer knoflík
8
SCAN knoflík
9
- knoflík
10
SKIP-/TUNE- knoflík
11
EJECT knoflík
12
PRESET knoflík
13
OK knoflík
14
VOLUME+ knoflík
15
knoflík
16
BACK knoflík
17
INFO knoflík
18
SLEEP knoflík
19
MUTE knoflík
20
PLAY/PAUSE knoflík
21
REPEAT/SHUFFLE knoflík
22
SKIP+/TUNE+ knoflík
OPERATION YOUR REMOTE CONTROL
1. Stiskněte a vysuňte zadní kryt a otevřete prostor pro baterie dálkového ovladače.
2. Vložte dvě baterie velikosti AAA. Ujistěte se, že strany (+) a (−) baterií odpovídají stranám
(+) a (-) uvedeným v prostoru pro baterie.
3. Zavřete kryt prostoru pro baterie
CONTENT OF DELIVERY
Zařízení
Remote Zařízení
Návod k použití
Stand (Stojan (již připojen)
ZAČÍNÁME
Připojte jednotku k vhodnému zdroji energie. Po zobrazení úvodní obrazovky přejde do
naposledy použitého režimu poslechu. Při prvním spuštění jednotky se automaticky spustí
průvodce nastavením.
ICD1010 / Čeština Návod k použi
4
MONTÁŽ NA STĚNU
POZNÁMKA:
Při montáži na zeď buďte velmi opatrní, abyste zabránili pádu jednotky (2,1 kg).
Před montáží zkontrolujte pevnost stěny a také, zda jsou za bodem vrtání nějaké
napájecí kabely. (Pokud si nejste jisti, požádejte o pomoc kvalifikovaného technika)
Obsah dodávky nezahrnuje šrouby a hmoždinky.
Po zašroubování šroubů zkontrolujte, zda jsou utažené
Jak se připojit
K montáži použijte vhodné šrouby a
hmoždinky. Rozměry šroubů naleznete
na obrázku níže.
Jako vrtací šablonu použijte kousek
papíru (není součástí dodávky) a
označte otvory přibližně. 160 mm od
sebe. Poté připevněte vrtací šablonu ke
zdi ve vodorovné poloze.
Šrouby připevněte správnými
hmoždinkami, jak vidíte na obrázcích
Odstraňte základnu zařízení zatažením
za dva zámky na spodní straně základny
směrem od zařízení. Zatlačte nohu
stojanu dozadu a vytáhněte ji. Nyní
můžete zařízení zavěsit, jak je
znázorněno na obrázku
ICD1010 / Čeština Návod k použi
5
PŘIPRAVTE SI SÍŤOVÉ PROSTŘEDÍ
Pro aktivaci připojení se ujistěte, že jste nastavili bezdrátovou síť a máte bezpečnostní heslo
WEP, WPA nebo WPA2.
Můžete také použít funkci WPS (WiFi Protected Setup) pro snadné párování mezi síťovým
zařízením a ICD1010. Zkontrolujte, zda jsou světelné indikátory na síťovém zařízení v
odpovídajícím stavu.
PRŮVODCE NASTAVENÍM
Poznámka: Pokud je průvodce nastavením předčasně ukončen bez nastavení sítě, zařízení
vygeneruje vlastní WiFi přístup, aby bylo možné zařízení konfigurovat pomocí aplikace UNDOK.
Indikátor síťového připojení:
= Bylo navázáno síťové připojení.
= Síťové připojení nebylo navázáno.
1. Jazyk
Vyberte požadovaný jazyk nabídky.
2. Obecné nařízení o ochraně údajů
Aby instalace mohla pokračovat, potvrďte prosím zásady ochrany osobních údajů
tlačítkem „OK“.
Další informace najdete na www.frontiersmart.com/privacy
3. Průvodce nastavením
Chcete-li pokračovat v nastavení, vyberte možnost „ANO“. Vyberete-li možnost „NE“, na
dalším displeji se zobrazí dotaz, zda by se měl průvodce nastavením spustit při příštím
zapnutí zařízení.
4. Formát zobrazení času a data
Vyberte mezi 12- a 24hodinovým formátem času.
5. Automatické aktualizace
Čas a datum lze aktualizovat ručně nebo automaticky prostřednictvím vysílání DAB, FM
nebo sítě.
Funkce automatické aktualizace využívá dat vysílaných přes pásmo DAB, FM nebo
internetu. Hodiny se aktualizují pouze v odpovídajícím režimu, proto se doporučuje vybrat
režim, který používáte pravidelně.
V pásmech DAB a FM se časový signál vysílá prostřednictvím rádiového přenosu. V režimu
jakéhokoli síťového připojení se v síti využívá časový signál odesílaný z portálu
internetového rádia.
6. Časové pásmo / denní světlo
Nastavte své časové pásmo. Pokud je ve vaší zemi zaveden letní čas a právě se používá,
zapněte funkci letního času. (k dispozici pouze při výběru funkce Automatické aktualizace z
internetu)
ICD1010 / Čeština Návod k použi
6
Ruční aktualizace
7. Pokud zvolíte možnost Žádná aktualizace, zobrazí se výzva průvodce k ručnímu
nastavení času a data. Datum a čas se zobrazí ve formátu dd-mm-rrrr a hh:mm.
Upravte jednotlivé hodnoty knoflíkem „NAVIGATE“ . Jakmile hodnotu nastavíte,
stisknutím knoflíku budete pokračovat k nastavení další hodnoty
8. Síť
Udržovat síť připojenou
Tuto možnost vyberte, pokud má být zařízení v pohotovostním režimu připojeno k síti, když
je funkce potvrzena, jednotka se bude rychleji připojovat k internetu a na jednotce je možné
přepnout pomocí aplikace „UNDOK“. Je-li tato funkce aktivována, v pohotovostním režimu
se mírně zvýší spotřeba elektrické energie.
Vyhledávání sítě
ICD1010 je kompatibilní se všemi běžnými síťovými protokoly a metodami šifrování.
Zařízení vyhledává dostupné sítě a zobrazí jejich seznam.
Při bezdrátovém připojení budete požádáni o zadání hesla
v dalším kroku (Pouze s WLAN!). Chcete-li zadat klíč sítě,
použijte knoflík „NAVIGATE“ pro přesun kurzoru přes znaky a
stiskněte „OK“ pro potvrzení. Při výběru jednotlivých znaků se
klíč zobrazuje v horní části displeje.
K návratu před první znak lze pomocí navigačního knoflíku
využít tři možnosti – „Backspace“, „OK“ a „Cancel“..
Šifrovaná síť „WPS“
Šifrované sítě WPS jsou identifikovány pomocí WPS na začátku názvu sítě, když ICD1010
vyhledává dostupný přístupový bod. Použijte jeden z následujících způsobů připojení:
Klávesa WPS na přístroji je rychlou volbou.
Tlačítko
ICD1010 vás vyzve ke stisknutí tlačítka připojení na směrovači.
Zařízení poté vyhledá síť s funkcí Push Button Connect a připojí se
k ní.
Pin
ICD1010 vygeneruje 8místné kódové číslo, které zadáte do
bezdrátového směrovače, přístupového bodu nebo externího
registrátoru.
ICD1010 / Čeština Návod k použi
7
Přeskočit WPS
Zadejte klíč jako u standardní šifrované sítě.
Více informací o nastavení šifrované sítě WPS naleznete v návodu ke směrovači s funkcí
WPS.
Dokončení
ICD1010 se pokusí připojit k vybrané síti.
Jakmile úspěšně proběhne nastavení, zobrazí se připojení. Pokud
se připojení nezdaří, ICD2080 se vrátí na předchozí obrazovku a
zkusí to znovu.
Stisknutím tlačítka „OK“ ukončíte průvodce nastavením
HLAVNÍ NABÍDKA
V hlavní nabídce lze zvolit následující režimy:
Internet Radio, Podcast, Media player (USB), DAB, FM, Bluetooth®, CD, AUX-In, Sleep and
Alarm.
INTERNET RADIO
ICD1010 může prostřednictvím širokopásmového připojení k internetu
přehrávat tisíce rozhlasových stanic a podcastů z celého světa.
Když vyberete internetové rádio, ICD1010 se přímo spojí s
internetovým rádiovým portálem Frontier Silicon (který je podporován
společností Aitable), aby získal seznam stanic.
Pokud již posloucháte stanici internetového rádia, můžete se stisknutím tlačítka „ “ rychle
vrátit do poslední navštívené větve stromu nabídky, nikoli „MENU“ přejít do první nabídky
režimu internetového rádia.
Dějiny
Po restartu režimu internetového rádia je vybrána naposledy poslouchaná stanice.
Chcete-li vybrat jinou naposledy použitou stanici, zadejte sem a vyberte uvedenou stanici.
Nejnovější stanice se zobrazí v horní části seznamu.
Vyhledávání
Můžete vyhledávat požadované rozhlasové stanice
Umístění
ICD1010 / Čeština Návod k použi
8
Zde lze vybrat rozhlasové stanice podle kontinentu a zemí.
Populární
Zde jsou oblíbené rozhlasové stanice.
Objevit
Zde si můžete vybrat rozhlasové stanice podle země, žánru nebo jazyka.
Předvolby
Chcete-li uložit předvolbu internetového rádia, stiskněte a podržte klávesu „PRE“, dokud se na
displeji nezobrazí obrazovka „Save preset“. Vyberte jednu z předvoleb pro uložení aktuální
stanice a stiskněte „OK“ pro potvrzení.
Chcete-li vybrat předvolenou stanici, stiskněte „PRE“, poté vyberte jednu z uvedených
přednastavených stanic a potvrďte stisknutím „OK“. Nebo stiskněte 0 až 9 na dálkovém
ovladači pro přímé vyvolání předvoleb.
Právě se přehrávají informace
Během přehrávání streamu se na obrazovce zobrazuje jeho název a popis. Chcete-li zobrazit
další informace, stiskněte tlačítko „INFO“ na rádiu nebo na dálkovém ovladači.
Pokaždé, když stisknete tlačítko „INFO“, zobrazí se další sada informací, cyklicky procházejte
názvem / popisem, žánrem / umístěním, spolehlivostí, kodekem / vzorkovací frekvencí,
vyrovnávací pamětí přehrávání a dnešním datem.
PODCASTS
Tato funkce umožňuje výběr, prohledávání a poslech podcastů.
DAB
Režim DAB přijímá digitální rádiový signál DAB nebo DAB plus a
zobrazuje informace o stanici, streamovaný zvuk a podrobnosti
programu.
Hledání stanic
ICD1010 / Čeština Návod k použi
9
Pro spuštění skenování stiskněte tlačítko „MENU“ na dálkovém ovládání nebo stiskněte a
podržte tlačítko „MENU / INFO“ pro přístup do nabídky DAB. Vyberte možnost „Úplné
skenování“ a potvrďte pomocí „OK“ nebo stiskněte tlačítko „SKENOVAT“ na dálkovém
ovládání.
Chcete-li odebrat stanice, které jsou v seznamu, ale nejsou k dispozici, zvolte Oříznout
neplatné.
Přednastavení
Chcete-li uložit předvolbu rádia DAB, stiskněte a podržte tlačítko „PRE“, dokud se na displeji
nezobrazí obrazovka „Save preset“. Vyberte jednu z předvoleb pro uložení aktuální stanice a
stiskněte „OK“ pro potvrzení.
Chcete-li vybrat předvolbu, stiskněte tlačítko „PRESET“, poté vyberte jednu z uvedených
předvoleb stanic a potvrďte stisknutím „OK“. Nebo stiskněte 0 až 9 na dálkovém ovladači pro
přímé vyvolání předvoleb.
Právě se přehrávají informace
Během přehrávání streamu se na obrazovce zobrazuje jeho název a informace DLS (Dynamic
Label Segment) vysílaná stanicí, která poskytuje informace v reálném čase, jako je název
programu, název stopy a kontaktní údaje. Stereofonní vysílání je označeno ikonou ve spodní
části obrazovky. Chcete-li zobrazit další informace, stiskněte tlačítko „INFO.
Pokaždé, když stisknete tlačítko „INFO“ na rádiu, zobrazí se další sada informací, cyklicky
procházející textem DLS, typ programu, název / frekvence souboru, síla signálu / chybovost,
přenosová rychlost / kodek / kanály a dnešní datum.
DAB menu
Station list
Zobrazit nalezené stanice v seznamu stanic.
Scan
Spustí se úplné skenování. Nalezené stanice se zobrazí v seznamu stanic.
Když poprvé vyberete režim rádia DAB, nebo pokud je seznam
stanic prázdný, ICD1010 automaticky provede úplné prohledání,
aby zjistil, jaké stanice jsou k dispozici. Pro aktualizaci seznamu
stanic bude pravděpodobně nutné spustit vyhledávání ručně, a to z
jednoho z následujících důvodů :
Dostupné stanice se čas od času mění .
Pokud příjem nebyl pro původní skenování dobrý, může to mít
za následek prázdný nebo neúplný seznam dostupných stanic .
Pokud máte špatný příjem některých stanic (burbling), můžete
chtít vypsat pouze stanice s dobrou sílou signálu .
ICD1010 / Čeština Návod k použi
10
Manual tune
Vyberte požadovaný kanál a pouze vybraný kanál.
Prune invalid
Vymažte všechny rozhlasové stanice, které již nelze přijímat.
Dynamic range compression (DRC)
Pokud posloucháte hudbu s vysokým dynamickým rozsahem v hlučném prostředí, můžete
komprimovat dynamický rozsah zvuku. Díky tomu jsou tiché zvuky hlasitější a hlasité zvuky
tišší. Můžete změnit DRC jako vypnutou, nízkou nebo vysokou.
Station order
V seznamu stanic DAB můžete zvolit pořadí alfanumerické, souborové nebo platné.
Soubor uvádí skupiny stanic, které jsou vysílány společně ve stejném souboru. Platný seznam
platných stanic nejprve, alfanumericky, poté vysílací stanice.
FM
Režim rádia FM přijímá analogové rádio z pásma FM a zobrazuje
informace RDS (Radio Data System) o stanici a místě vysílání.
Chcete-li skenovat ručně, stiskněte a podržte tlačítko „ / “.
Zobrazení frekvence začne běžet a prohledává pásmo FM a
zastaví se na další stanici.
Chcete-li doladit, stiskněte tlačítko „ / “ na dálkovém
ovladači nebo na jednotce. Hledání jednotky v krocích po 0,05
MHz.
Přednastavení
Chcete-li uložit předvolbu rádia FM, stiskněte a podržte tlačítko „PRESET“, dokud se na displeji
nezobrazí obrazovka „Save preset“. Vyberte jednu z předvoleb pro uložení aktuální stanice a
stiskněte „OK“ pro potvrzení.
Chcete-li vybrat předvolbu, stiskněte tlačítko „PRESET“, poté vyberte jednu z uvedených
předvoleb stanic a potvrďte stisknutím „OK“. Nebo stiskněte 0 až 9 na dálkovém ovladači pro
přímé vyvolání předvoleb.
ICD1010 / Čeština Návod k použi
11
Právě se přehrávají informace
Během přehrávání streamu se na obrazovce zobrazuje jeho frekvence, nebo pokud je k
dispozici signál RDS, název stanice a další informace RDS, jako je název programu, název a
další podrobnosti. Stereofonní vysílání je označeno ikonou ve spodní části obrazovky. Chcete-li
zobrazit další informace, stiskněte tlačítko „INFO.
Pokaždé, když stisknete tlačítko „INFO“ na rádiu, zobrazí se další sada informací, která bude
procházet textem rádia, typem programu, frekvencí a dnešním datem.
Nastavení
Nastavení skenování
Nejprve vyberte FM, přejde na konkrétní přehrávanou stanici. Poté stiskněte „MENU“ na rádiu,
abyste se dostali nad tabulku.
Ve výchozím nastavení se vyhledávání FM zastaví na jakékoli dostupné stanici. To může mít za
následek špatný poměr signálu k šumu (syčení) od slabých stanic. Chcete-li změnit nastavení
skenování tak, aby se zastavilo pouze u stanic s dobrou silou signálu, vyberte po výběru Pouze
silná stanice možnost „Ano.
Nastavení zvuku
Všechny stereofonní stanice jsou reprodukovány stereofonně. U slabých stanic to může mít za
následek špatný poměr signálu k šumu (syčení). Chcete-li přehrávat slabé stanice v mono,
vyberte slabý příjem FM: Poslouchejte pouze mono a poté „ANO.
CD
Poznámka!
Nesprávný provoz může mít za následek materiální škody!
Do přehrávače CD nevkládejte žádná záznamová média, která se liší od standardního formátu
CD (např. Mini-disky). Je možné, že nebudou přehrány a vysunuty správně. Vložte do
přehrávače CD najednou pouze jeden disk.
Otevřete přihrádku na CD stisknutím tlačítka a vložte dovnitř disk (tiskovou stranou k
sobě). Zavřete přihrádku na CD pomocí knoflík. Na displeji se zobrazí „Loading“ a
funkce disku nebudou během načítání disku fungovat. Po přečtení se na displeji v režimu CD
zobrazí následující informace:
Složka (F)
Titul (T)
Aktuální hrací doba
Playback status (playing/pause)
ICD1010 / Čeština Návod k použi
12
Přehrávání začne automaticky po přečtení obsahu. Pokud je jednotka nastavena na režim CD a
uvnitř není CD, na displeji se zobrazí „No Disc“.
Chcete-li pozastavit / obnovit přehrávání CD, stiskněte knoflík
Chcete-li přepnout na další skladbu, stiskněte tlačítko “ tlačítko jednou
Chcete-li rychle posunout skladbu vpřed, stiskněte a podržte tlačítko knoflík.
Chcete-li přepnout na předchozí skladbu, stiskněte tlačítko “ tlačítko dvakrát
Chcete-li rychle posunout skladbu dozadu, stiskněte a podržte “ knoflík.
Přehrávání CD zastavíte stisknutím tlačítka tlačítko na dálkovém ovládání.
Chcete-li disk vysunout, stiskněte v režimu zastavení tlačítko na jednotce.
CD Program
1. Nastavte jednotku do režimu Stop
2. tiskněte tlačítko „PRE“ na dálkovém ovládání. Na displeji se zobrazí „T01 P01“ a „T001“.
3. Vyberte pomocí “ ” nebo “ ” nebo 0 až 9 na dálkovém ovládání stopu, která má být
naprogramována, a potvrďte stopu stisknutím tlačítka “PRE” na dálkovém ovládání. Displej
se změní na „P02“.
4. Chcete-li vybrat více stop, proveďte znovu krok 3.
5. Pokud jsou naprogramovány všechny stopy, spusťte programované přehrávání stisknutím
tlačítka „ “ na přístroji nebo na dálkovém ovladači.
Repeat function
Opakovaně stiskněte tlačítko tlačítka na dálkovém ovladači vyberte jednu z následujících
funkcí:
Pro audio-CD:
1 x: Přehrávaná skladba se bude opakovat.
2 x: Kompletní CD se bude opakovat.
3 x: Skladby se přehrávají náhodně.
4 x: Funkce opakování je deaktivována.
Pro MP3-CD:
1 x: Přehrávaná skladba se bude opakovat.
2 x: Celá složka se bude opakovat.
3 x: Kompletní CD se bude opakovat.
4 x: Skladby se přehrávají náhodně.
5 x: Funkce opakování je deaktivována.
Ve spodní části displeje se zobrazí ikona vybrané funkce.
ICD1010 / Čeština Návod k použi
13
USB
USB přehrávání
Od tohoto okamžiku se nabídky generují ze složek na zařízení USB.
Ovládací funkce jsou stejné jako v režimu CD.
Vyberte pomocí tlačítek „ /“ na dálkovém ovladači nebo pomocí
aplikace UNDOK požadovanou složku. Na displeji se zobrazují názvy
složek a souborů (nemusí to nutně být názvy skladeb).
Jakmile najdete skladbu, kterou chcete přehrát, stiskněte tlačítko „ “ nebo klikněte na název
skladby v aplikaci UNDOK.
My Playlist
Skladby můžete přidat do seznamu skladeb. Během přehrávání stiskněte a podržte tlačítko
OK“ na dálkovém ovládání.
Clear my Playlist
Vyberte „Vymazat můj seznam skladeb“ a potvrďte stisknutím tlačítka „OK.
BLUETOOTH®
Když vyberete režim Bluetooth®, zařízení vstupuje do párování a
ikona BT ve spodní části obrazovky bude blikat.
Vyhledejte zařízení zapnutím smartphonu, tabletu nebo jiného
zařízení Bluetooth®.
Název párování Bluetooth® je „ICD1010“.
Po úspěšném spárování se indikátor Bluetooth® rozsvítí a přestane blikat.
Chcete-li rování BT uvolnit, vypněte nebo zrušte spárování smartphonu, stolu nebo jiného
zařízení Bluetooth®.
Stisknutím tlačítka „ “ na rádiu nebo na dálkovém ovladači spusťte nebo pozastavte
přehrávání. Stisknutím tlačítka „ “ nebo „ “ na rádiu nebo na dálkovém ovladači můžete
přehrát předchozí nebo následující skladbu.
ICD1010 / Čeština Návod k použi
14
AUX-IN
Tuto zásuvku můžete také použít k poslechu zvuku jiných přehrávacích zařízení, jako jsou MP3
přehrávače, CD přehrávače atd., Přes reproduktory.
Připojte externí jednotku pomocí kabelu 3,5 mm Jack k portu AUX-IN na zadní straně
jednotky.
Nyní můžete poslouchat hudbu přes reproduktory jednotky. Můžete použít tlačítka ovládání
hlasitosti na jednotce, ale tlačítka CD nemají při poslechu AUX žádnou funkci.
Více informací o zacházení naleznete v návodu k použití vaší externí jednotky.
POZNÁMKA:
Během spouštění přehrávání nastavte maximální hlasitost externí jednotky.
SPÁT
V hlavní nabídce vyberte funkci „Spánek“. Vyberte si z režimu spánku VYPNUTO, 15 minut, 30
minut, 45 minut nebo 60 minut.
Zbývající čas do vypnutí se zobrazuje ve spodní části displeje.
ALARM
K dispozici jsou dva univerzální budíky s funkcí odložení a funkce
spánku, která systém po stanovené době vypne. Každý alarm lze
nastavit tak, aby se spouštěl v konkrétním režimu.
Chcete-li nastavit nebo změnit budík, vyberte v hlavní nabídce
možnost „Budík“.
Vyberte číslo alarmu (1 nebo 2) a nakonfigurujte následující parametry:
Povolit: zapnuto / vypnuto, frekvence: denně, jednou, víkendy nebo pracovní dny,
Čas
Režim: Internet Radio, DAB, FM, CD, USB, Buzzer
Přednastavení: Naposledy poslouchal, P1 P20 (pouze pokud je vybrán DAB nebo FM).
Objem: 0 - 32
Chcete-li aktivovat nové nastavení, přejděte dolů a vyberte „Uložit“.
Na obrazovce jsou aktivní alarmy s ikonou vlevo dole.
UNDOK
ICD1010 podporuje dálkové ovládání z Apple iPhone, iPad a Android pomocí aplikace UNDOK.
Aplikace jsou k dispozici v obchodě s aplikacemi Apple a Androidu od Googlu.
Aplikace UNDOK vám to umožňuje:
Vytvořte skupinu
Přejmenujte skupinu
Upravit skupinu - přidat nebo odebrat jeden nebo více produktů
Odstranit skupinu
ICD1010 / Čeština Návod k použi
15
Ovládejte skupinu - vyberte provozní režim a procházejte obsah
Upravte hlasitost pro celou skupinu nebo pro jednotlivé produkty ve skupině
Ovládejte produkty, které nebyly přiřazeny k žádné skupině
Ovládejte všechny režimy ICD1010 (internetové rádio, podcast, DAB, FM, CD, USB,
Bluetooth®) jednotky.
Upravte úroveň hlasitosti aktuálního přehrávání
Nastavení ekvalizéru pro různé zvukové předvolby
Nastavení časovače vypnutí
Úpravy zobrazeného názvu rádia.
NASTAVENÍ SYSTÉMU
1. EQUALIZER
K dispozici je několik přednastavených režimů EQ: Normal, Flat, Jazz, Rock, Movie,
Classic, Pop, News a My EQ.
2. V nastavení My EQ můžete vytvořit svůj vlastní EQ s vlastním nastavením basů a výšek.
Tyto funkce můžete také vybrat stisknutím tlačítka „EQ“ na dálkovém ovládání.
STREAMING KVALITA ZVUKU
Můžete nastavit kvalitu rozhlasových stanic..
NASTAVENÍ SÍTĚ
Průvodce sítí
Vstupte do vyhledávání AP SSID, poté zadejte klíč WEP / WPA nebo zvolte Push Button /
Pin / Skip WPS pro připojení k bezdrátové síti.
Nastavení PBC Wlan
Konfigurace tlačítkem, je pro připojení AP, který podporuje WPS (Wi-Fi Protected Setup).
Zobrazit nastavení
Zobrazit informace o aktuální připojené síti: Aktivní připojení, MAC adresa, Wlan
region, DHCP, SSID, IP adresa, maska podsítě, adresa brány, primární DNS a sekundár
DNS.
Ruční nastavení
Vyberte bezdrátové připojení k síti a povolte nebo zakažte DHCP (Dynamic Host
Konfigurační protokol).
Síťový profil
ICD1010 si pamatuje poslední čtyři bezdrátové sítě, ke kterým se připojil, a automaticky se
pokusí připojit k kterékoli z nich, které najde. Odtud můžete zobrazit seznam registrovaných
sítí. Nežádoucí sítě můžete odstranit otočením a stisknutím a následným výběrem možnosti
„ANO“ odstranění potvrďte.
ICD1010 / Čeština Návod k použi
16
Vymazat nastavení sítě
Upravené nastavení sítě bude odstraněno.
Udržujte síť připojenou v pohotovostním režimu
Pokud se rozhodnete ponechat síť v pohotovostním režimu
připojenou, WiFi se neodpojí, ani když jste v pohotovostním
režimu, DAB, FM a Bluetooth®. Jinak bude připojení k dispozici
pouze v režimu internetového rádia.
Pro používání aplikace UNDOK se však doporučuje udržovat
připojení.
3. ČAS / DATUM
Nastavte čas ručně nebo automaticky, formát času, časové pásmo a denní světlo.
5. NEAKTIVNÍ POHOTOVOSTNÍ REŽIM
Nastavte čas po automatickém vypnutí jednotky v pohotovostním režimu.
6. JAZYK
Změňte to podle svých preferencí.
7. TOVÁRNÍ RESET
Tovární nastavení resetuje všechna uživatelská nastavení na výchozí hodnoty, takže dojde
ke ztrátě času a data, konfigurace sítě a předvoleb. Aktuální verze softwaru ICD1010 je
však zachována.
8. AKTUALIZACE SOFTWARU
Čas od času mohou být aktualizace softwaru vytvořeny s opravami chyb a / nebo dalšími
funkcemi. Můžete buď zkontrolovat ručně, nebo nastavit ICD1010 na automatickou
pravidelnou kontrolu (toto je výchozí nastavení). Pokud je zjištěn novější dostupný software,
budete dotázáni, zda chcete pokračovat v aktualizaci. Pokud souhlasíte, nový software se
poté stáhne a nainstaluje. Po upgradu softwaru jsou zachována všechna uživatelská
nastavení.
POZNÁMKA: Před zahájením aktualizace softwaru se ujistěte, že je ICD1010 zapojen do
stabilního hlavního napájecího připojení. Odpojení napájení během aktualizace může
jednotku trvale poškodit.
9. PRŮVODCE NASTAVENÍM
Spustí průvodce nastavením
10. INFORMACE
Zobrazit verzi firmwaru a ID rádia.
ICD1010 / Čeština Návod k použi
17
11. ZÁSADY OCHRANY OSOBNÍCH ÚDA
Zobrazuje informace o zásadách ochrany osobních údajů
12. PODSVÍCENÍ
Upravte jas displeje v pohotovostním a zapnutém režimu.
TROUBLESHOOTING
CHYBA
NAPRAVIT
Zařízení se nezapne
Zkontrolujte, zda je napájecí adaptér správně připojen.
Automatické vypnutí
Vzhledem k požadavkům ErP2 a ochraně životního prostředí se
jednotka automaticky přepne do pohotovostního režimu, pokud se
po dobu 15 minut nepřehrává žádná hudba.
Žádný zvuk.
1. Zapněte zvuk, protože může být ztlumený
2. Zvyšte hlasitost.
3. Vytáhněte všechna připojená sluchátka nebo reproduktor z
konektorového konektoru.
Nelze navázat žádné
síťové připojení.
1. Zkontrolujte funkci WLAN.
2. Zkuste na zařízení nastavit IP adresu.
3. Aktivujte funkci DHCP na routeru a znovu proveďte připojení na
zařízení.
4. V síti je aktivován firewall - nastavte příslušný program tak, aby
byl možný přístup.
5. Restartujte router
Nelze navázat připojení
WiFi.
1. Zkontrolujte dostupnost sítě WLAN na routeru.
2. Umístěte zařízení blíže k routeru.
3. Zkontrolujte, zda je heslo správné
Nebyla nalezena žádná
stanice.
1. Zkontrolujte síť, přístupový bod a bránu firewall.
2. Stanice nemusí být aktuálně k dispozici, zkuste to znovu později
nebo vyberte jinou stanici.
3. Odkaz na stanici je změněn nebo stanice již nevysílá - požádejte
poskytovatele o informace.
4. Odkaz na ručně přidanou stanici není správný, zkontrolujte
správnost a zadejte znovu.
Syčení v režimu FM
Zkontrolujte / posuňte anténu FM nebo posuňte rádio
V režimu DAB nejsou k
dispozici žádné stanice
/ rušivé / přerušované.
1. Přesuňte rádio.
2. Znovu prohledejte pouze místní stanice (vysoce silné).
3. Zkontrolujte místní pokrytí DAB.
Alarm nefunguje.
1. Zapněte budík.
2. Vzhledem k nastavení hlasitosti si přečtěte řešení „Žádný zvuk“.
ICD1010 / Čeština Návod k použi
18
3. Zdroj alarmu byl nastaven na stanici, ale není k dispozici žádné
síťové připojení. Změňte zdroj alarmu nebo překonfigurujte
připojení.
Ovladač USB nebo
přehrávač MP3 nebyl
detekován.
1. Zkontrolujte, zda je správně připojen USB ovladač nebo MP3
přehrávač.
2. Některé pevné disky USB vyžadují externí napájení, ujistěte se,
že je připojeno k napájení.
3. Ne všechny přehrávače MP3 lze číst přímo na zařízení - použijte
místo toho USB disk.
NetRemote se
nezobrazuje nebo se k
ICD1010 nepřipojuje
1. Znovu otevřete aplikaci.
2. Pokud máte několik streamů z několika zařízení současně, může
to způsobit selhání, restartovat ICD1010 a / nebo vaše zařízení.
Všechny ostatní
neurčené případy.
ICD1010 může po určité době provozu zpracovávat velké množství
dat, bez ohledu na to, v jakém režimu, způsobí zablokování nebo
poruchu systému. V případě potřeby restartujte ICD1010.
Normální funkce produktu může být narušena silným
elektromagnetickým magnetem
Rušení. Pokud ano, jednoduše resetujte produkt a obnovte
normální provoz podle pokynů v návodu. Pokud se funkce
nepodařilo obnovit, použijte produkt na jiném místě.
Při použití v oblastech se silným rádiovým rušením může dojít k
poruše zařízení. Jakmile již nedojde k rušení, zařízení bude opět
správně fungovat.
V prostředí s narušenou imunitou může dojít k poruše vzorku.
Automaticky se obnoví do normálu, když se rušení rušení imunitou
zastaví.
Aktuální návod k obsluze lze stáhnout z webu www.soundmaster.de
Technické změny a chyby tisku jsou vyhrazeny
Autorská práva jsou ve vlastnictví společnosti
Woerlein GmbH, 90556 Cadolzburg, www.soundmaster.de
Kopírování pouze se souhlasem společnosti Woerlein GmbH.
Bezpečnostné, environmentálne a inštalačné pokyny
SK
OCHRANA ŽIVOTNÉHO PROSTREDIA
Na konci životnosti výrobok nelikvidujte s bežným
komunálnym odpadom. Odovzdajte ho na zberné miesto
na recyklovanie elektrických a elektronických zariadení.
Je to označené symbolom na výrobku, v používateľskej
príručke a na obale.
Materiály sú opakovane použiteľné podľa príslušných značiek.
Opakovaným používaním, recyklovaním alebo inou formou
využívania starých zariadení významne prispievate k ochrane
životného prostredia.
Podrobnosti o zberných miestach získate od miestnych orgánov.
UPOZORNENIE
Nebezpečenstvo zásahu elektrickým
prúdom Neotvárať!
Výstraha: Aby sa znížilo nebezpečenstvo zásahu elektrickým
prúdom, neodstraňujte kryt (ani zadnú časť). Vo vnútri sa
nenachádzajú žiadne diely, ktorých údržbu by mohol vykonávať
používateľ. Vykonávanie údržby prenechajte kvalifikovaným
servisným pracovníkom.
Tento symbol označuje prítomnosť nebezpečného
napätia pod krytom, ktoré je dostatočne vysoké na
spôsobenie zásahu elektrickým prúdom.
Tento symbol označuje prítomnosť dôležitých pokynov k
prevádzke a údržbe zariadenia.
Použité batérie predstavujú nebezpečný odpad a
NESMÚ sa likvidovať s komunálnym odpadom!
Ako zákazník máte zákonnú povinnosť odovzdať
všetky batérie na ekologické recyklovanie bez
ohľadu na to, či obsahujú alebo neobsahujú škodlivé látky*).
Batérie bezplatne odovzdajte na verejné zberné miesta vo
vašom okolí alebo v obchodoch, v ktorých sa predávajú
batérie príslušného druhu.
Odovzdávajte len úplne vybité batérie.
*) označenie Cd = kadmium, Hg = ortuť, Pb = olovo
LASEROVÝ VÝROBOK TRIEDY 1
LUOKEN 1 LAISERLAITE
KLASSE 1 LASER PRODUKT
VÝSTRAHA NEVIDITEĽNÉ LASEROVÉ
ŽIARENIE PRI OTVORENÍ KRYTU ALEBO
STLAČENÍ BEZPEČNOSTNEJ POISTKY.
NEVYSTAVUJTE SA PÔSOBENIU
LASEROVÉHO LÚČA.
Zariadenie je vybavené „laserom triedy 1“.
Nevystavujte sa laserovým lúčom, pretože môžu
spôsobiť poranenie očí.
Zariadenie používajte len v suchých vnútorných
priestoroch.
Chráňte zariadenie pred vlhkosťou.
Neotvárajte zariadenie. NEBEZPEČENSTVO
ZÁSAHU ELEKTRICKÝM PRÚDOM! Otváranie a
servis zariadenia prenechajte kvalifikovaným
pracovníkom.
Zariadenie zapájajte len do správne nainštalovanej a
uzemnenej zásuvky. Ubezpečte sa, že sieťo
napätie zodpovedá špecifikáciám uvedeným na
typovom štítku.
Zabezpečte, aby napájací kábel bol počas
prevádzky suchý. Zabráňte privretiu alebo
akémukoľvek poškodeniu napájacieho kábla.
Upozornenie pri odpájaní zariadenia: Napájacia
zástrčka slúži ako pripojenie, preto musí vždy
umožňovať manipuláciu.
Napájacia zástrčka slúži ako odpájacie
zariadenie, s ktorým sa musí vždy dať
manipulovať.
Poškodený napájací kábel alebo zástrčku musí
autorizované servisné centrum okamžite
vymeniť.
V prípade výskytu bleskov zariadenie okamžite
odpojte od zdroja sieťového napätia.
Deti musia byť pri používaní zariadenia pod
dohľadom rodičov.
Na čistenie zariadenia používajte len suchú
tkaninu.
Nepoužívajte ČISTIACE PROSTRIEDKY ani
DRSNÉ TKANINY!
Zariadenie inštalujte na miesto s dostatočným
vetraním, aby ste predchádzali nahromadeniu
tepla.
Nezakrývajte vetracie otvory!
Nebráňte vetraniu zakrytím vetracích otvorov
predmetmi, napríklad novinami, obrusom,
záclonou atď.
Nevystavujte zariadenie kvapkajúcim ani
striekajúcim kvapalinám a neklaďte na zariadenie
žiadne predmety naplnené kvapalinami,
napríklad vázy.
Nevystavujte jednotku priamemu slnečnému
žiareniu, veľmi vysokým alebo veľmi nízkym
teplotám, vlhkosti, vibráciám ani prašnému
prostrediu.
Nikdy sa nepokúšajte vkladať do ventilačných
otvorov alebo do otváracej časti jednotky drôty,
špendlíky ani iné podobné predmety.
Zariadenie nainštalujte na bezpečné miesto,
ktoré nie je vystavené vibráciám.
Na zariadenie neumiestňujte žiadne zdroje
otvoreného ohňa, napríklad horiace sviečky.
Zariadenie nainštalujte čo najďalej od počítačov a
mikrovlnných rúr, v opačnom prípade môže dôjsť
k rušeniu rozhlasového príjmu.
Kryt neotvárajte ani neopravujte. Nie je to
bezpečné a vaša záruka tým stratí platnosť.
Opravy smie vykonávať len autorizované
servisné/zákaznícke stredisko.
Používajte len batérie bez obsahu ortuti a
kadmia.
Batérie nevystavujte nadmernému teplu,
napríklad slnečnému žiareniu, ohňu a podobne.
Použité batérie predstavujú nebezpečný odpad a
NESMÚ sa likvidovať s komunálnym odpadom!
Batérie odovzdajte u predajcu alebo na zberných
miestach vo vašom okolí.
Udržujte batérie mimo dosahu detí. Deti by mohli
batérie prehltnúť. V prípade prehltnutia batérie sa
okamžite obráťte na lekára.
Pravidelne kontrolujte vaše batérie, aby nedošlo
k ich vytečeniu.
Toto zariadenie je určené na použitie v miernom
podnebí, nie je vhodné na použitie v tropických
krajinách.
ICD1010 / Slovensky Návod na používanie
1
OBSAH
OBSAH........................................................................................................................ 1
UMÍSTĚNÍ OVLÁDACÍCH PRVKŮ ............................................................................. 2
DIAĽKOVÉ OVLÁDANIE ............................................................................................ 3
PROVOZ DÁLKOVÉHO OVLADAČE ........................................................................ 3
OBSAH DODÁVKY ..................................................................................................... 3
GETTING STARTED / SET UP ................................................................................... 3
MONTÁŽ NA STENU .................................................................................................. 4
GET THE NETWORK ENVIRONMENT READY ......................................................... 5
ASISTENT NASTAVENIA ........................................................................................... 5
HLAVNÉ MENU .......................................................................................................... 7
INTERNET RADIO ...................................................................................................... 7
PODCASTS ................................................................................................................. 8
DAB ............................................................................................................................. 8
FM ............................................................................................................................. 10
CD ............................................................................................................................. 11
USB ........................................................................................................................... 13
BLUETOOTH® .......................................................................................................... 13
AUX-IN ...................................................................................................................... 14
SPÁNOK ................................................................................................................... 14
ALARM...................................................................................................................... 14
UNDOK ..................................................................................................................... 15
SYSTÉMOVÉ NASTAVENIA .................................................................................... 15
RIEŠENIE PROBLÉMOV .......................................................................................... 17
ICD1010 / Slovensky Návod na používanie
2
UMÍSTĚNÍ OVLÁDACÍCH PRVKŮ
POHĽAD SPREDU
POHĽAD ZOZADU
1
Rečník
9
EJECT čísel
2
Zásobník CD
10
BACK číselný
3
USB vstup
11
Odnímateľný stojan
4
STOP čísel
12
PLAY/PAUSE/SCAN číselný
5
POWER/SOURCE číselný
13
NAVIGATE/VOLUME/OK čísel
6
MENU/INFO číselný
14
SKIP/TUNING čísel
7
PRESET číselný
8
Displej
15
16
Drôtová antenna
AC IN
17
AUX IN
ICD1010 / Slovensky Návod na používanie
3
DIAĽKOVÉ OVLÁDANIE
1
STANDBY/OFF
2
0-9 číselný tlačidlo
3
tlačidlo
4
Volume - tlačidlo
5
Source tlačidlo
6
Menu tlačidlo
7
Equalizer tlačidlo
8
SCAN tlačidlo
9
- tlačidlo
10
SKIP-/TUNE- tlačidlo
11
EJECT tlačidlo
12
PRESET tlačidlo
13
OK tlačidlo
14
VOLUME+ tlačidlo
15
tlačidlo
16
BACK tlačidlo
17
INFO tlačidlo
18
SLEEP tlačidlo
19
MUTE tlačidlo
20
PLAY/PAUSE tlačidlo
21
REPEAT/SHUFFLE tlačidlo
22
SKIP+/TUNE+ tlačidlo
PROVOZ DÁLKOVÉHO OVLADAČE
1. Zatlačením a posunutím zadného krytu otvorte priestor pre batérie diaľkového ovládania.
2. Vložte dve batérie veľkosti AAA. Uistite sa, že póly (+) a (-) na batériách zodpovedajú pólom
(+) a (-) vyznačeným v priestore pre batérie.
3. Zatvorte kryt priestoru pre batérie.
OBSAH DODÁVKY
Hlavná jednotka
Diaľkové ovládanie
Návod na obsluhu
Stojan (už pripojený)
GETTING STARTED / SET UP
Prístroj zobrazí úvodný displej a je potom pripravený na prevádzku. Po zapnutí sa prehrá
naposledy použitý zdroj. Pri prvom zapnutí prístroja sa spustí sprievodca nastavením.
ICD1010 / Slovensky Návod na používanie
4
MONTÁŽ NA STENU
POZNÁMKA:
Pri montáži na stenu buďte veľmi opatrní, aby ste zabránili pádu jednotky (2,1 kg).
Pred namontovaním skontrolujte pevnosť steny a tiež to, či sú za bodom vŕtania
nejaké silové káble. (Ak si nie ste istí, požiadajte o pomoc kvalifikovaného technika)
Obsah dodávky nezahŕňa skrutky a hmoždinky.
Po zaskrutkovaní skrutiek skontrolujte, či sú dotiahnuté.
Ako namontovať
Na montáž použite vhodné skrutky a
hmoždinky. Rozmery skrutiek nájdete na
obrázku nižšie.
Ako vŕtaciu šablónu použite kúsok
papiera (nie je súčasťou dodávky) a
otvory označte cca. 160 mm od seba.
Potom pripevnite vŕtaciu šablónu k stene
v horizontálnej polohe. (Ako je
znázornené)
Vyvŕtajte dva otvory.
Skrutky pripevnite pomocou správnych
hmoždiniek, ako vidíte na obrázkoch
Odstráňte základňu prístroja potiahnutím
dvoch zámkov na spodnej strane
základne smerom od prístroja. Zatlačte
nohu stojana dozadu a stiahnite ju. Teraz
môžete zariadenie zavesiť, ako je to
znázornené na obrázku
ICD1010 / Slovensky Návod na používanie
5
GET THE NETWORK ENVIRONMENT READY
Presvedčte sa, že ste nastavili bezdrôtovú sieť a máte WEP, WPA alebo WPA2 bezpečnostné
heslo potrebné na aktiváciu pripojenia. Na jednoduché párovanie sieťového zariadenia a
zariadenia ICD1010 môžete použiť aj funkciu WPS (chránené nastavenie WiFi). Skontrolujte, či
svetelné indikátory na sieťovom zariadení sú v príslušnom stave.
ASISTENT NASTAVENIA
Poznámka: Ak je sprievodca nastavením predčasne zrušený bez nastavenia siete, zariadenie
vygeneruje svoj vlastný prístup WiFi, aby ho bolo možné nakonfigurovať pomocou aplikácie
UNDOK APP.
Indikátor sieťového pripojenia:
= Sieťové pripojenie je nadviazané.
= Sieťové pripojenie nebolo nadviazané.
1. Jazyk
Vyberte požadovaný jazyk ponuky.
2. Všeobecné nariadenie o ochrane údajov
Aby inštalácia mohla pokračovať, potvrďte politiku ochrany osobných údajov pomocou
tlačidla OK.
Ďalšie informácie nájdete na www.frontiersmart.com/privacy
3. Asistent nastavenia
Ak chcete pokračovať v nastavovaní, vyberte možnosť „ÁNO“. Ak vyberiete možnosť
„NIE“, na nasledujúcom displeji sa zobrazí otázka, či by sa mal sprievodca nastavením
spustiť pri ďalšom zapnutí zariadenia.
4. Formát zobrazenia času/dátumu
Zvoľte 12- alebo 24-hodinový časový formát.
5. Automatická aktualizácia
Čas a dátum môžu byť aktualizované manuálne alebo automaticky z DAB, FM alebo siete.
Automatická aktualizácia pracuje s údajmi zaslanými cez DAB, FM alebo internet. Hodiny
sú aktualizované len v príslušnom režime, preto odporúčame zvoliť režim, ktorý používate
pravidelne.
DAB a FM používajú časové signály šírené rádiovými vlnami. Sieť používa časový signál
zaslaný z portálu internetového rádia v režime pripojenia akejkoľvek siete
6. Časová zóna/letný čas
Nastavte svoju časovú zónu. Ak vaša krajina využíva letný čas, zapnite možnosť letného
času. (K dispozícii iba vtedy, keď je vybratá možnosť automatickej aktualizácie
prostredníctvom internetu.)
ICD1010 / Slovensky Návod na používanie
6
7. Ručná aktualizácia
Ak nastavíte možnosť Žiadna aktualizácia, sprievodca vás vyzve na manuálne nastavenie
času a dátumu. Dátum a čas sú zobrazené ako dd-mm-rrrr a hh: mm.
Aktívna hodnota sa zobrazí ako blikajúca. Každú hodnotu upravte pomocou /
gombík. Akonáhle je hodnota nastavená, stlačte gombík a pokračujte v nastavovaní s
ďalšou hodnotou.
8. Sieť
Udržujte sieť pripojenú
Túto možnosť vyberte, ak má zariadenie zostať v pohotovostnom režime. Po potvrdení
funkcie bude zariadenie rýchlejšie pracovať s internetom a je možné ho zapnúť pomocou
aplikácie „UNDOK“.
Poznámka: Spotreba energie v pohotovostnom režime sa pri tejto funkcii mierne zvyšuje.
Vyhľadáva sa sieť
ICD1010 je kompatibilný so všetkými bežnými sieťovými protokolmi a metódami šifrovania.
Vyhľadá dostupné siete a zobrazí ich pre vás.
Zobrazia sa tipy na typ siete - ak vaše sieťové zariadenia podporujú funkciu WPS, bude to
[WPS] pred SSID (názov sieťového zariadenia). Vyberte ten, ku ktorému sa chcete pripojiť.
V prípade bezdrôtového pripojenia budete v nasledujúcom kroku
požiadaní o zadanie šifrovania. Na vstup do sieťového kľúča použite
gombík „NAVIGATE“ na pohyb kurzora medzi znakmi a stlačte „OK
na potvrdenie. Po výbere každého znaku sa kláves nachádza v
hornej časti displeja.
K dispozícii sú tri možnosti dostupné vyladením navigačnej cievky
späť pred prvé znaky - Backspace, OK a Cancel.
WPS šifrovaná sieť
Siete šifrované WPS sú identifikované pomocou WPS na začiatku názvu siete, k
ICD1010 prehľadá dostupný AP. Použite jeden z nasledujúcich spôsobov pripojenia: Na
prístroji je klávesová skratka WPS.
Stlačte tlačidlo
ICD1010 vás vyzve na stlačenie tlačidla pripojenia na smerovači.
Potom vyhľadá pripravenú sieť Push Button Connect a pripojí sa.
ICD1010 / Slovensky Návod na používanie
7
Pin
ICD1010 generuje 8-ciferné číslo kódu, ktoré zadáte do
bezdrôtového smerovača, prístupového bodu alebo externého
registrátora.
Skip WPS
Zadajte kľúč ako pre štandardnú šifrovanú sieť.
Ďalšie informácie o nastavení šifrovanej siete WPS nájdete v pokynoch smerovača WPS.
Completion
ICD1010 sa pokúša pripojiť k vybranej sieti.
Ak je nastavenie úspešné, zobrazí sa pripojenie. Ak pripojenie
zlyhá,
ICD1010 sa vráti na predchádzajúcu obrazovku a skúsi to znova.
Sprievodcu nastavením ukončíte stlačením tlačidla „OK.
HLAVNÉ MENU
Stlačením tlačidla „MODE“ vyberte nasledujúce režimy: Internet Radio, Podcasts, DAB, FM,
CD, USB, Bluetooth®, Sleep, Alarm
INTERNET RADIO
ICD1010 dokáže cez širokopásmové pripojenie na internet prehrávať
tisíce rozhlasových staníc a podcastov z celého sveta.
Ak vyberiete internetové rádio, ICD1010 kontaktuje priamo interneto
rádiový portál Frontier Silicon (podporovaný programom Aitable), aby
získal zoznam staníc.
Ak už počúvate stanicu internetového rádia, môžete stlačiť tlačidlo pre rýchly návrat do
naposledy navštívenej vetvy stromu ponuky, namiesto položky „MENU“ prejdete do prvej
ponuky režimu internetového rádia.
ICD1010 / Slovensky Návod na používanie
8
História
Po reštarte režimu internetového rádia sa vyberie naposledy počúvaná stanica. Ak chcete
zvoliť inú naposledy použitú stanicu, zadajte tu a vyberte stanicu uvedenú v zozname.
Najnovšie stanice sa zobrazia v hornej časti zoznamu.
Vyhľadávanie
Môžete vyhľadávať požadované rozhlasové stanice
Poloha
Tu je možné zvoliť rozhlasové stanice podľa kontinentu a krajín.
Populárne
Tu sú populárne rozhlasové stanice, ktoré môžete vidieť.
Objavte
Tu si môžete zvoliť rozhlasové stanice podľa krajiny, žánru alebo jazyka.
Predvoľby
Ak chcete uložiť predvoľbu internetového rádia, stlačte a podržte tlačidlo „PRESET“, kým sa na
displeji nezobrazí obrazovka „Save preset“. Vyberte jednu z predvolieb na uloženie aktuálnej
stanice a stlačte tlačidlo „OK“ na potvrdenie.
Ak chcete zvoliť predvolenú stanicu, stlačte tlačidlo „PRESET“, potom vyberte jednu z
uvedených predvolených staníc a potvrďte tlačidlom „OK“. Alebo stlačte 0 až 9 na diaľkovom
ovládači, aby ste priamo vyvolali predvoľby.
Prehrávajú sa informácie
Počas prehrávania streamu sa na obrazovke zobrazuje jeho názov a popis. Ak chcete zobraziť
ďalšie informácie, stlačte tlačidlo „INFO“ na rádiu alebo na diaľkovom ovládači.
Zakaždým, keď stlačíte tlačidlo „INFO“, zobrazí sa iná sada informácií, prechádzajte menom /
popisom, žánrom / umiestnením, spoľahlivosťou, kodekom / vzorkovacou frekvenciou,
medzipamäťou na prehrávanie a dnešným dátumom.
PODCASTS
Táto funkcia umožňuje výber, vyhľadávanie a počúvanie podcastov.
DAB
Režim DAB prijíma digitálny rádiový signál DAB alebo DAB plus a
zobrazuje informácie o stanici, streamovanom zvuku a detailoch
programu.
ICD1010 / Slovensky Návod na používanie
9
Vyhľadávajú sa stanice
Na spustenie skenovania stlačte tlačidlo "MENU" na diaľkovom ovládači alebo stlačte a podržte
tlačidlo "MENU / INFO", aby ste vstúpili do ponuky DAB. Vyberte možnosť „Úplné skenovanie“ a
potvrďte tlačidlom „OK“ alebo stlačte tlačidlo „SKENOVAŤ“ na diaľkovom ovládači.
Ak chcete odstrániť stanice, ktoré sú v zozname, ale nie sú k dispozícii, vyberte možnosť
Orezať neplatné.
Predvoľby
Ak chcete uložiť predvoľbu rádia DAB, stlačte a podržte tlačidlo „PRESET“, kým sa na displeji
nezobrazí obrazovka „Save preset“. Vyberte jednu z predvolieb na uloženie aktuálnej stanice a
stlačte tlačidlo „OK“ na potvrdenie.
Ak chcete zvoliť predvoľbu, stlačte tlačidlo „PRESET“, potom vyberte jednu z uvedených
predvolených staníc a potvrďte tlačidlom „OK“. Alebo stlačte 0 až 9 na diaľkovom ovládači, aby
ste priamo vyvolali predvoľby.
Teraz sa prehrávajú informácie
Počas prehrávania streamu sa na obrazovke zobrazuje jeho názov a informácie DLS (Dynamic
Label Segment) vysielané stanicou, ktoré poskytujú informácie v reálnom čase, ako napríklad
názov programu, názov stopy a kontaktné údaje. Stereo vysielanie je označené ikonou v dolnej
časti obrazovky. Ak chcete zobraziť ďalšie informácie, stlačte tlačidlo „INFO.
Zakaždým, keď stlačíte tlačidlo „INFO“ na rádiu, zobrazí sa ďalšia sada informácií, ktorá bude
prechádzať textom DLS, typom programu, názvom / frekvenciou súboru, silou signálu /
chybovosťou, rýchlosťou bitov / kodekom / kanálmi a dnešným dátumom.
DAB menu
Zoznam staníc
Zobraziť nájdené stanice v zozname staníc.
Keď prvýkrát vyberiete režim rádia DAB, alebo ak je zoznam staníc
prázdny, ICD1010 automaticky vykoná úplné prehľadanie a zistí,
ktoré stanice sú k dispozícii. Možno budete musieť spustiť
skenovanie manuálne, aby ste aktualizovali zoznam staníc, a to z
jedného z nasledujúcich dôvodov:
Dostupné stanice sa z času na čas menia .
Ak príjem nebol pre pôvodné skenovanie dobrý, mohlo by to
mať za následok prázdny alebo neúplný zoznam dostupných
staníc .
Ak máte zlý príjem niektorých staníc (rušenie), môžete uviesť
iba tie, ktoré majú dobrú silu signálu .
ICD1010 / Slovensky Návod na používanie
10
Skenovať
Spustí sa úplné skenovanie. Nájdené stanice sa zobrazia v zozname staníc.
Ručné ladenie
Vyberte požadovaný kanál a iba vybratý kanál.
Prune invalid
Vymažte všetky rozhlasové stanice, ktoré už nie sú možné.
Dynamic range compression (DRC)
Ak počúvate hudbu s vysokým dynamickým rozsahom v hlučnom prostredí, možno budete
chcieť komprimovať dynamický rozsah zvuku. Vďaka tomu sú tiché zvuky hlasnejšie a hlasné
zvuky sú tichšie. Môžete zmeniť DRC na vypnuté, nízke alebo vysoké.
Poradie stanice
Môžete si zvoliť poradie v zozname staníc DAB, buď alfanumerické, súborové alebo platné.
Súbor obsahuje zoznam skupín staníc, ktoré sú vysielané spoločne v rovnakom súbore. Platné
najskôr zobrazuje platné stanice, alfanumericky, potom vysielacie.
FM
Režim rádia FM prijíma analógové rádio z pásma FM a zobrazuje
informácie RDS (Radio Data System) o stanici a mieste
vysielania.
Ak chcete manuálne skenovať, stlačte a podržte /
tlačidlo. Zobrazenie frekvencie začne bežať a prehľadá pásmo
FM a zastaví sa na nasledujúcej stanici.
Pre doladenie stlačte /“na diaľkovom ovládači alebo na
prístroji. Jednotka vyhľadáva v krokoch po 0,05 MHz.
Prednastavené
Ak chcete uložiť predvoľbu FM rádia, stlačte a podržte tlačidlo „PRESET“, kým sa na displeji
nezobrazí obrazovka „Save preset“. Vyberte jednu z predvolieb na uloženie aktuálnej stanice a
stlačte tlačidlo „OK“ na potvrdenie.
Ak chcete zvoliť predvoľbu, stlačte tlačidlo „PRESET“, potom vyberte jednu z uvedených
predvolených staníc a potvrďte tlačidlom „OK“. Alebo stlačte 0 až 9 na diaľkovom ovládači, aby
ste priamo vyvolali predvoľby.
Prehrávajú sa informácie
Počas prehrávania streamu sa na obrazovke zobrazuje jeho frekvencia, alebo ak je k dispozícii
signál RDS, názov stanice a ďalšie informácie RDS, ako napríklad názov programu, titul a
ďalšie podrobnosti. Stereo vysielanie je označené ikonou v dolnej časti obrazovky. Ak chcete
zobraziť ďalšie informácie, stlačte tlačidlo „INFO.
ICD1010 / Slovensky Návod na používanie
11
Zakaždým, keď stlačíte tlačidlo „INFO“ na rádiu, zobrazí sa ďalšia sada informácií, ktorá bude
prechádzať textom rádia, typom programu, frekvenciou a dnešným dátumom.
NASTAVENIE
Nastavenia skenovania
Najprv vyberte FM, prejde na konkrétnu hrajúcu stanicu. Potom stlačte „MENU“ na rádiu, aby
ste sa dostali nad stôl.
Štandardne sa skenovanie FM zastaví na akejkoľvek dostupnej stanici. To môže mať za
následok zlý pomer signálu k šumu (syčanie) od slabých staníc. Ak chcete zmeniť nastavenie
vyhľadávania tak, aby sa zastavilo iba na staniciach s dobrou silou signálu, po výbere možnosti
Iba stanica silné vyberte možnosť „Áno“.
Nastavenia zvuku
Všetky stereofónne stanice sú reprodukované stereofónne. U slabých staníc to môže mať za
následok zlý pomer signálu k šumu (syčanie). Ak chcete prehrávať slabé stanice v mono,
vyberte FM slabý príjem: Počúvajte iba mono a potom „ÁNO“
CD
Všimnite si!
Nesprávna obsluha môže mať za následok materiálne škody!
Do prehrávača CD nevkladajte záznamové médiá, ktoré sa líšia od štandardného formátu CD
(napr. Mini disky). Možno sa nebudú prehrávať a vysunú správne. Vložte do prehrávača CD
naraz iba jeden disk.
Otvorte nosič CD stlačením tlačidla “ a vložte disk (tlačenou stranou k sebe). Zatvorte
priečinok na disk CD pomocou tlačidlo. Na displeji sa zobrazí „Loading“ a funkcie disku
nebudú fungovať, keď sa disk zavádza. Po prečítaní sa na displeji v režime CD zobrazia
nasledujúce informácie:
Priečinok
Sledovať
Aktuálny čas prehrávania
Stav prehrávania (playing/pause)
Prehrávanie sa spustí automaticky po prečítaní obsahu. Ak je jednotka nastavená na režim CD
a vnútri nie je vložené CD, na displeji sa zobrazí „No Disc“.
ICD1010 / Slovensky Návod na používanie
12
Ak chcete pozastaviť / obnoviť prehrávanie CD, stlačte tlačidlo
Ak chcete prepnúť na ďalšiu stopu, stlačte tlačidlo raz
Ak sa chcete v skladbe rýchlo presunúť dopredu, stlačte a podržte tlačidlo tlačidlo.
Ak chcete prepnúť na predchádzajúcu skladbu, stlačte tlačidlo tlačidlo dvakrát
Ak sa chcete v skladbe rýchlo presunúť dozadu, stlačte a podržte tlačidlo.
Prehrávanie CD zastavíte stlačením tlačidla tlačidlo na diaľkovom ovládači.
Ak chcete disk vysunúť, stlačte v režime zastavenia ikonu tlačidlo na jednotku.
CD Program
1. Nastavte jednotku do režimu Stop
2. Stlačte tlačidlo „PRE“ na diaľkovom ovládači. Na displeji sa zobrazí blikanie „T01 P01“ a
„T001“.
3. Vyberte si pomocou alebo “ ” alebo 0 až 9 na diaľkovom ovládači, stopa, ktorá sa
má naprogramovať, a potvrďte ju stlačením tlačidla „PRE“ na diaľkovom ovládači. Displej sa
zmení na „P02“.
4. Ak chcete zvoliť viac skladieb, urobte krok 3 znova.
5. Ak sú naprogramované všetky stopy, stlačte tlačidlo na prístroji alebo na diaľkovom
ovládači na spustenie naprogramovaného prehrávania
Funkcia opakovania
Opakovane stlačte tlačidlo na diaľkovom ovládači vyberte jednu z nasledujúcich funkcií:
Pre zvukové CD:
1 x: Prehraná skladba sa bude opakovať.
2 x: Kompletné CD sa bude opakovať.
3 x: Skladby sa prehrávajú náhodne.
4 x: Funkcia opakovania je deaktivovaná.
Pre MP3-CD:
1 x: Prehraná skladba sa bude opakovať.
2 x: Celý priečinok sa bude opakovať.
3 x: Kompletné CD sa bude opakovať.
4 x: Skladby sa prehrávajú náhodne.
5 x: Funkcia opakovania je deaktivovaná.
V spodnej časti displeja sa zobrazí ikona zvolenej funkcie.
ICD1010 / Slovensky Návod na používanie
13
USB
USB Prehrávanie
Od tohto okamihu sa ponuky generujú zo priečinkov na zariadení
USB.
Ovládacie funkcie sú rovnaké ako v režime CD.
Vyberte pomocou / tlačidlá na diaľkovom ovládači alebo
pomocou aplikácie UNDOK požadovaný priečinok. Na displeji sa
zobrazujú názvy priečinkov a súborov (nie nevyhnutne názvy
skladieb).
Keď nájdete skladbu, ktorú chcete prehrať, stlačte tlačidlo „“ alebo kliknite na názov skladby v
aplikácii UNDOK.
Môj zoznam skladieb
Skladby môžete pridať do zoznamu skladieb. Počas prehrávania stlačte a podržte tlačidlo „OK
na diaľkovom ovládači.
Vymazať môj zoznam skladieb
Vyberte možnosť „Vymazať môj zoznam skladieb“ a potvrďte stlačením tlačidla „OK.
BLUETOOTH®
Keď vyberiete režim Bluetooth®, zariadenie prechádza do
párovania a ikona BT v dolnej časti obrazovky bude blikať.
Vyhľadajte zariadenie zapnutím svojho smartphonu, tabletu alebo
iného zariadenia Bluetooth®.
Názov párovania Bluetooth® je „ICD1010”.
Po úspešnom spárovaní sa indikátor Bluetooth® rozsvieti a prestane blikať.
Ak chcete uvoľniť párovanie BT, vypnite alebo zrušte párovanie svojho smartphonu, stola alebo
iného zariadenia Bluetooth®.
Stlačte na rádiu alebo na diaľkovom ovládaní spustite alebo pozastavte prehrávanie.
Môžete stlačiť alebo na rádiu alebo na diaľkovom ovládači na prehranie
predchádzajúcej alebo nasledujúcej stopy.
ICD1010 / Slovensky Návod na používanie
14
AUX-IN
Túto zásuvku môžete tiež použiť na počúvanie zvuku iných prehrávacích zariadení, ako sú MP3
prehrávače, CD prehrávače atď., Cez reproduktory.
Pripojte externú jednotku pomocou kábla 3,5 mm Jack k portu AUX-IN na zadnej strane
jednotky.
Teraz môžete počúvať hudbu cez reproduktory jednotky. Môžete použiť tlačidlá ovládania
hlasitosti na jednotke, ale tlačidlá CD nemajú počas počúvania AUX žiadnu funkciu.
Viac informácií o manipulácii nájdete v návode na použitie vašej externej jednotky.
POZNÁMKA:
Počas spustenia prehrávania nastavte maximálnu hlasitosť externej jednotky
. SPÁNOK
V hlavnej ponuke vyberte funkciu „Spánok“. Vyberte si z režimu spánku vypnuté, 15 minút, 30
minút, 45 minút alebo 60 minút.
Zostávajúci čas potrebný na vypnutie sa zobrazuje v spodnej časti displeja.
ALARM
K dispozícii sú dva univerzálne budíky s možnosťou opakovaného
budenia a funkciou spánku, ktorá po uplynutí nastavenej doby
systém vypne. Každý budík je možné nastaviť tak, aby sa spustil v
konkrétnom režime.
Ak chcete nastaviť alebo zmeniť budík, v hlavnej ponuke vyberte
možnosť „Budík“.
Vyberte číslo alarmu (1 alebo 2) a nakonfigurujte nasledujúce parametre:
Povoliť: zapnuté / vypnuté, Frekvencia: Denne, Raz, Víkendy alebo Pracovné dni,
Čas
Režim: Internet Radio, DAB, FM, CD, USB, Buzzer
Prednastavené: Last listened, P1 P20 (only when DAB or FM is selected).
Objem: 0 - 32
Nové nastavenia aktivujete posunutím nadol a výberom položky „Uložiť“.
Na obrazovke sa zobrazujú aktívne budíky s ikonou vľavo dole.
ICD1010 / Slovensky Návod na používanie
15
UNDOK
Nové nastavenia aktivujete posunutím nadol a výberom položky „Uložiť“.
Na obrazovke sa zobrazujú aktívne budíky s ikonou vľavo dole:
Vytvorte skupinu
Premenujte skupinu
Upravte skupinu - pridajte alebo odstráňte jeden alebo viac produktov
Odstrániť skupinu
Ovládanie skupiny - zvoľte prevádzkový režim a vyhľadajte obsah
Upravte hlasitosť pre celú skupinu alebo pre jednotlivé produkty v skupineControl products
which have not been assigned to any group
Ovládajte všetky režimy ICD1010 (internetové rádio, Podcast, DAB, FM, CD, USB,
Bluetooth®) jednotky.
Upravte úroveň hlasitosti aktuálneho prehrávania
Nastavenie EQ pre rôzne zvukové predvoľby
Nastavenie časovača spánku
Úpravy zobrazeného názvu rádia.
SYSTÉMOVÉ NASTAVENIA
1. EQUALIZER
K dispozícii je niekoľko prednastavených režimov EQ: Normálny, Plochý, Jazz, Rock, Film,
Klasický, Pop, Správy a Môj EQ.
V nastaveniach My EQ môžete vytvoriť svoj vlastný EQ s vlastnými nastaveniami basov a
výšok.
Tieto funkcie môžete zvoliť aj stlačením tlačidla „EQ“ na diaľkovom ovládači.
2. STREAMING KVALITA ZVUKU
Môžete nastaviť kvalitu rozhlasových staníc.
3. NASTAVENIA SIETE
Sprievodca sieťou
Zadajte hľadanie AP SSID, potom zadajte kľúč WEP / WPA alebo sa pomocou tlačidla Push
/ Pin / Skip WPS pripojte k bezdrôtovej sieti.
PBC Nastavenie WLAN
Konfigurácia pomocou tlačidla, slúži na pripojenie prístupového bodu, ktorý podporuje WPS
(Wi-Fi Protected Setup).
Zobraziť nastavenia
Zobraziť informácie o aktuálnej pripojenej sieti: Aktívne pripojenie, MAC adresa, Wlan
región, DHCP, SSID, IP adresa, maska podsiete, adresa brány, primárny DNS a
sekundárny DNS.
ICD1010 / Slovensky Návod na používanie
16
Ručné nastavenie
Vyberte bezdrôtové sieťové pripojenie a zapnite alebo vypnite DHCP (Dynamic Host
Konfiguračný protokol).
Sieťový profil
ICD1010 si pamätá posledné štyri bezdrôtové siete, ku ktorým sa pripojil, a automaticky sa
pokúša pripojiť k ktorejkoľvek z nich, ktorú dokáže nájsť. Odtiaľto uvidíte zoznam
registrovaných sietí. Nechcené siete môžete odstrániť otočením a stlačením a následným
výberom možnosti „ÁNO“ na potvrdenie odstránenia.
Vymažte nastavenia siete
Upravené nastavenia siete sa odstránia.
Udržujte sieť pripojenú v pohotovostnom režime
Ak sa rozhodnete ponechať sieť v pohotovostnom režime
pripojenú, WiFi sa neodpojí, ani keď ste v pohotovostnom režime,
DAB, FM a Bluetooth®. V opačnom prípade bude pripojenie k
dispozícii iba v režime internetového rádia.
Pre použitie aplikácie UNDOK sa však odporúča udržiavať
pripojenie.
4. ČAS / DÁTUM
Nastavte čas manuálne alebo automaticky, formát času, časové pásmo a denné svetlo.
5. NEAKTÍVNY POHOTOVOSTNÝ REŽIM
Nastavte čas po automatickom vypnutí jednotky v pohotovostnom režime.
6. JAZYK
Zmeňte to podľa svojich preferencií.
VÝROBNÝ RESET
Obnovením továrenských nastavení sa všetky používateľské nastavenia nastavia na
predvolené hodnoty, takže sa stratí čas a dátum, konfigurácia siete a predvoľby. Aktuálna
verzia softvéru ICD1010 je však zachovaná.
AKTUALIZÁCIA SOFTVÉRU
Z času na čas môžu byť aktualizácie softvéru vytvorené pomocou opráv chýb a / alebo
ďalších funkcií. Môžete to skontrolovať manuálne alebo nastaviť, aby ICD1010 kontroloval
pravidelne automaticky (toto je predvolené). Ak sa zistí novší dostupný softvér, zobrazí sa
otázka, či chcete pokračovať v aktualizácii. Ak súhlasíte, nový softvér sa potom stiahne a
nainštaluje. Po aktualizácii softvéru sa zachovajú všetky používateľské nastavenia.
ICD1010 / Slovensky Návod na používanie
17
POZNÁMKA: Pred spustením aktualizácie softvéru sa uistite, že je ICD1010 zapojený do
stabilného hlavného napájacieho zdroja. Odpojenie napájania počas aktualizácie môže
jednotku trvale poškodiť.
7. SPRIEVODCA NASTAVENÍM
Starts the setup wizard
8. INFORMATION
Zobraziť verziu firmvéru a ID rádia
9. ZÁSADY OCHRANY OSOBNÝCH ÚDAJOV
Zobrazuje informácie o pravidlách ochrany osobných údajov
10. PODSVIETENIE
Upravte jas displeja v pohotovostnom režime a v režime zapnutia.
RIEŠENIE PROBLÉMOV
CHYBA
NÁPRAVA
Prístroj sa nezapne.
Skontrolujte, či je napájací adaptér správne pripojený.
Automatické vypnutie
Z dôvodu požiadaviek ErP2 a ochrany životného prostredia sa
zariadenie automaticky prepne do pohotovostného režimu, keď sa
žiadna hudba neprehráva dlhšie ako 15 minút.
Žiadny zvuk.
1. Zapnite zvuk, pretože môže byť stlmený
2. Zvýšte hlasitosť.
3. Vytiahnite všetky pripojené slúchadlá alebo reproduktory z
konektora jack
Nie je možné nadviazať
žiadne sieťové
pripojenie.
1. Skontrolujte funkciu WLAN.
2. Skúste na prístroji nastaviť adresu IP.
3. Aktivujte funkciu DHCP na smerovači a znova vykonajte
pripojenie na zariadení.
4. V sieti je aktivovaný firewall - nastavte príslušný program tak, aby
bol možný prístup.
5. Reštartujte smerovač
Nie je možné nadviazať
pripojenie WiFi.
1. Skontrolujte dostupnosť siete WLAN na smerovači.
2. Umiestnite zariadenie bližšie k smerovaču.
3. Skontrolujte, či je heslo správne.
Nenašla sa žiadna
stanica.
1. Skontrolujte sieť, prístupový bod a bránu firewall.
2. Stanica nemusí byť momentálne k dispozícii, skúste to znova
neskôr alebo vyberte inú stanicu.
3. Odkaz na stanicu sa zmenil alebo stanica už neprenáša -
požiadajte poskytovateľa o informácie.
ICD1010 / Slovensky Návod na používanie
18
4. Odkaz na ručne pridanú stanicu nie je správny, uistite sa, že je
správny, a zadajte znova
Syčať v režime FM
Skontrolujte / pohnite FM anténou alebo pohnite rádiom
V režime DAB nie sú k
dispozícii / prerušované
/ prerušované stanice.
1. Presuňte rádio.
2. Znova vyhľadajte iba miestne stanice (vysokopevnostné).
3. Skontrolujte miestne pokrytie DAB.
Alarm nefunguje.
1. Zapnite budík.
2. Z dôvodu nastavenia hlasitosti si pozrite riešenie „Žiadny zvuk“.
3. Zdrojom alarmu bol stanica, ale nie je k dispozícii žiadne sieťové
pripojenie. Zmeňte zdroj alarmu alebo prekonfigurujte pripojenie.
Ovládač USB alebo
prehrávač MP3 nebol
zistený.
1. Skontrolujte, či je USB ovládač alebo MP3 prehrávač správne
zapojený.
2. Niektoré pevné disky USB vyžadujú externé napájanie. Uistite sa,
že je pripojený k napájaniu.
3. Nie všetky prehrávače MP3 je možné čítať priamo na zariadení -
použite namiesto nich jednotku USB.
NetRemote sa
nezobrazuje alebo sa k
ICD1010 nepripojuje
1. Znova otvorte aplikáciu.
2. Ak streamujete z viacerých zariadení súčasne, môže to spôsobiť
zlyhanie, reštartujte ICD1010 a / alebo vaše zariadenie..
Všetky ostatné
neurčené prípady.
ICD1010 môže po určitej dobe prevádzky spracovať veľké
množstvo údajov, bez ohľadu na to, v akom režime, spôsobí
zastavenie alebo poruchu systému. V prípade potreby reštartujte
ICD1010.
Normálna funkcia produktu môže byť silne elektromagneticky
narušená
Rušenie. Ak je to tak, jednoducho resetujte produkt a obnovte
normálnu prevádzku podľa pokynov v návode. Ak sa obnovenie
funkcie nepodarilo, použite produkt na inom mieste.
Môže dôjsť k poruche funkcie zariadenia, ak sa používa v
oblastiach so silným rádiovým rušením. Keď už nedôjde k ďalšiemu
rušeniu, zariadenie bude opäť správne fungovať.
V prostredí s narušenou vodivosťou môže dôjsť k nesprávnej funkcii
vzorky. Automaticky sa obnoví do normálu, keď sa porucha riadenej
imunity zastaví.
Aktuálny návod na používanie si môžete prevziať z webovej stránky www.soundmaster.de
Technické zmeny a chyby vyhradené
Copyright Woerlein GmbH, 90556 Cadolzburg, www.soundmaster.de
Kopírovanie je možné iba so súhlasom spoločnosti Woerlein GmbH
ICD1010 / Technical Specifications
TECHNICAL SPECIFICATIONS
Hersteller
Manufacturer
Fabricant
Fabrikant
Fabbricante
Fabricante
Fabricante
Producent
Tillverkare
Výrobce
Výrobca -
Wörlein GmbH,
Gewerbestrasse 12,
D-90556 Cadolzburg
www.soundmaster.de
HRB-Nr. 771 bei
Amtsgericht
Fürth/Bay.
Spannungseingang
Power input
Entrée d’alimentation
Voedingsingang
Ingresso di alimentazione
Entrada de alimentación
Entrada de energia
Strømindgang
Kraftuttag
Vstup napájení
Zdroj napájania
100-240V~ 50/60Hz
DAB Bereich
DAB range
Plage DAB
DAB-bereik
Portata DAB
Rango DAB+
Gama DAB
DAB-række
DAB-intervall
Rozsah DAB+
Rozsah DAB+
Band III 174.928
239.200Mz
UKW Bereich
FM range
Plage FM
FM-bereik
Portata FM
Rango de FM
Gama FM
FM rækkevidde
FM-intervall
Rozsah pásma FM
Rozsah frekvencií FM
87.5MHz 108.0MHz
Festsenderspeicher
Preset Stations
Stations présélectionnées
Voorkeuzestation
Stazione in preselezione
Presintonías
Estações predefinidas
Forudindstillet station
Förinställd station
Přednastavení stanic
Predvolené stanice
20 Internetradio,
20 DAB, 40 FM
WLAN-Verbindung
Connectivity
Connectivité
Draadloos netwerk
Connettività
Conectividad
Conectividade
Tilslutninger
Anslutning
Připojení
Pripojiteľnosť
WiFi 2.4GHz und
5GHz
Audioausgangsleistung
Audio power output
Sortie de puissance audio
Audio-uitgangsvermogen
Uscita di potenza audio
Potencia de salida de audio
Saída de potência de áudio
Lydeffektudgang
Ljudeffekt
Napájecí výstup zvuku
Výstupný zvukový výkon
2 x 5W RMS
Standby-Verbrauch bei Einstellung
Netzwerk in Standby halten“
Standby consumption with setting Keep
network in standby”
Consommation en veille avec le
réglage "Garder le réseau en veille"
Stand-byverbruik met de instelling "Houd
netwerk in stand-by"
Consumo in standby con
impostazione "Mantieni la rete in standby"
Consumo en espera con la
configuración "Mantener la red en espera"
Consumo em espera com a configuração
"Manter a rede em espera"
Standby forbrug med "Hold netværk i
standby" indstilling
Standby-konsumtion med inställningen
"Behåll nätverket i vänteläge"
Spotřeba v pohotovostním režimu s
nastavením „Udržovat síť v
pohotovostním režimu“
Spotreba v pohotovostnom režime s
nastavením „Udržiavať sieť v
pohotovostnom režime“
< 2W
HERSTELLER / IMPORTEUR
Wörlein GmbH
Gewerbestraße 12
D 90556 Cadolzburg, Germany
Tel: +49 9103 71 67 0
Fax: +49 9103 71 67 12
E-Mail: info@soundmaster.de
Internet: www.soundmaster.de
Hiermit bestätigt Wörlein GmbH, dass sich dieses Gerät in
Übereinstimmung mit den grundlegenden Anforderungen
und den übrigen einschlägigen Bestimmungen der Richtlinie
2014/53/EU befindet.
Eine Kopie der Konformitätserklärung kann unter
obenstehender Adresse bezogen werden.
Hereby, Wörlein GmbH declares that this device is in
compliance with the essential requirements and other
relevant provisions of Directive 2014/53/EU.
A copy of the declaration of conformity can be obtained from
the above address.
Par la présente, Wörlein GmbH déclare que cet appareil est
conforme aux exigences principales et autres clauses
applicables de la Directive 2014/53/EU.
Une copie de la déclaration de conformité peut être obtenue
à l'adresse ci-dessus.
Wörlein GmbH verklaart hierbij dat dit apparaat in
overeenkomst is met de essentiële vereisten en andere
relevante bepalingen van de Richtlijn 2014/53/EU.
Een kopie van de conformiteitsverklaring kunt u verkrijgen
op het hierboven vermelde adres.
Con la presente, Wörlein GmbH dichiara che questo
dispositivo è conforme ai requisiti essenziali e altre
disposizioni contenute nella Direttiva 2014/53/EU.
Una copia della dichiarazione di conformità può essere
richiesta all'indirizzo sopra indicato.
Härmed Wörlein GmbH deklarerar att denna enhet är i
överensstämmelse med de grundläggande kraven och andra
relevanta bestämmelser i direktiv 2014/53/EU.
En kopia av försäkran om överensstämmelse kan erhållas
från ovanstående adress.
Herved Wörlein GmbH erklærer, at denne enhed er i
overensstemmelse med de væsentlige krav og øvrige
relevante krav i direktiv 2014/53/EU.
En kopi af overensstemmelseserklæringen kan hentes fra
ovennævnte adresse.
Tímto Wörlein GmbH prohlašuje, že toto zařízení je ve shodě
se základními požadavky a dalšími příslušnými ustanoveními
směrnice 2014/53/EU.
Kopii prohlášení o shodě lze získat na výše uvedené adrese.
Por este meio, Wörlein GmbH declara que este dispositivo
está em conformidade com os requisitos essenciais e outras
disposições da Directiva 2014/53/EU.
Uma cópia da declaração de conformidade pode ser obtida
no endereço acima.
Wörlein GmbH confirma que este dispositivo cumple con los
requisitos esenciales y otras disposiciones relevantes de la
Directiva 2014/53/EU.
Se puede obtener una copia de la declaración de
conformidad en la dirección anterior.
Wörlein GmbH týmto potvrdzuje, že toto zariadenie je v
súlade so základnými požiadavkami a ďalšími príslušnými
ustanoveniami smernice 2014/53/EU.
Kópiu vyhlásenia o zhode je možné získať na uvedenej
adrese.
Wörlein GmbH potrjuje, da je ta naprava v skladu z
bistvenimi zahtevami in drugimi ustreznimi določbami
Direktive 2014/53/EU.
Kopijo izjave o skladnosti je mogoče dobiti na zgornjem
naslovu.
Wörlein GmbH confirmă prin prezenta că acest dispozitiv
respectă cerințele esențiale și alte prevederi relevante ale
Directivei 2014/53/EU.
O copie a declarației de conformitate poate fi obținută de la
adresa de mai sus.
Wörlein GmbH patvirtina, kad šis prietaisas atitinka esminius
reikalavimus ir kitas atitinkamas Direktyvos 2014/53/EU
nuostatas.
Atitikties deklaracijos kopiją galima gauti iš pirmiau nurodyto
adreso.
A Wörlein GmbH megerősíti, hogy ez az eszköz megfelel a
2014/53/EU irányelv alapvető követelményeinek és egyéb
vonatkozó rendelkezéseinek.
A megfelelőségi nyilatkozat egy példányát a fenti címről
szerezheti be.
Wörlein GmbH potvŭrzhdava, che tova ustrostvo e v
sŭotvet·stvie sŭs sŭshtestvenite iziskvaniya i drugi prilozhimi
razporedbi na Direktiva 2014/53 EUS. Kopie ot deklaratsiyata
za sŭotvet·stvie mozhe da bŭde polucheno ot
goreposocheniya adres.
Wörlein GmbH kinnitab käesolevaga, et see seade vastab
direktiivi 2014/53/EU olulisteleuetele ja muudele
asjakohastele sätetele.
Vastavusdeklaratsiooni koopiat saab eespool nimetatud
aadressilt.
Wörlein GmbH vahvistaa, että tämä laite on direktiivin
2014/53/EU olennaisten vaatimusten ja muiden asiaa
koskevien säännösten mukainen.
Kopio vaatimustenmukaisuusvakuutuksesta on saatavissa
edellä mainitusta osoitteesta.
Ar šo Wörlein GmbH apstiprina, ka šī ierīce atbilst Direktīvas
2014/53/EU būtiskajām prasībām un citiem attiecīgajiem
noteikumiem.
Atbilstības deklarācijas kopiju var iegūt, izmantojot iepriekš
minēto adresi.
Wörlein GmbH bekrefter herved at denne enheten er i
samsvar med de vesentlige kravene og andre relevante
bestemmelser i direktiv 2014/53/EU.
En kopi av samsvarserklæringen kan fås fra adressen ovenfor.
Wörlein GmbH niniejszym potwierdza, że to urządzenie jest
zgodne z zasadniczymi wymaganiami i innymi stosownymi
postanowieniami dyrektywy 2014/53/EU.
Kopię deklaracji zgodności można uzyskać pod powyższym
adresem.
  • Page 1 1
  • Page 2 2
  • Page 3 3
  • Page 4 4
  • Page 5 5
  • Page 6 6
  • Page 7 7
  • Page 8 8
  • Page 9 9
  • Page 10 10
  • Page 11 11
  • Page 12 12
  • Page 13 13
  • Page 14 14
  • Page 15 15
  • Page 16 16
  • Page 17 17
  • Page 18 18
  • Page 19 19
  • Page 20 20
  • Page 21 21
  • Page 22 22
  • Page 23 23
  • Page 24 24
  • Page 25 25
  • Page 26 26
  • Page 27 27
  • Page 28 28
  • Page 29 29
  • Page 30 30
  • Page 31 31
  • Page 32 32
  • Page 33 33
  • Page 34 34
  • Page 35 35
  • Page 36 36
  • Page 37 37
  • Page 38 38
  • Page 39 39
  • Page 40 40
  • Page 41 41
  • Page 42 42
  • Page 43 43
  • Page 44 44
  • Page 45 45
  • Page 46 46
  • Page 47 47
  • Page 48 48
  • Page 49 49
  • Page 50 50
  • Page 51 51
  • Page 52 52
  • Page 53 53
  • Page 54 54
  • Page 55 55
  • Page 56 56
  • Page 57 57
  • Page 58 58
  • Page 59 59
  • Page 60 60
  • Page 61 61
  • Page 62 62
  • Page 63 63
  • Page 64 64
  • Page 65 65
  • Page 66 66
  • Page 67 67
  • Page 68 68
  • Page 69 69
  • Page 70 70
  • Page 71 71
  • Page 72 72
  • Page 73 73
  • Page 74 74
  • Page 75 75
  • Page 76 76
  • Page 77 77
  • Page 78 78
  • Page 79 79
  • Page 80 80
  • Page 81 81
  • Page 82 82
  • Page 83 83
  • Page 84 84
  • Page 85 85
  • Page 86 86
  • Page 87 87
  • Page 88 88
  • Page 89 89
  • Page 90 90
  • Page 91 91
  • Page 92 92
  • Page 93 93
  • Page 94 94
  • Page 95 95
  • Page 96 96
  • Page 97 97
  • Page 98 98
  • Page 99 99
  • Page 100 100
  • Page 101 101
  • Page 102 102
  • Page 103 103
  • Page 104 104
  • Page 105 105
  • Page 106 106
  • Page 107 107
  • Page 108 108
  • Page 109 109
  • Page 110 110
  • Page 111 111
  • Page 112 112
  • Page 113 113
  • Page 114 114
  • Page 115 115
  • Page 116 116
  • Page 117 117
  • Page 118 118
  • Page 119 119
  • Page 120 120
  • Page 121 121
  • Page 122 122
  • Page 123 123
  • Page 124 124
  • Page 125 125
  • Page 126 126
  • Page 127 127
  • Page 128 128
  • Page 129 129
  • Page 130 130
  • Page 131 131
  • Page 132 132
  • Page 133 133
  • Page 134 134
  • Page 135 135
  • Page 136 136

Soundmaster ICD1010AN Handleiding

Categorie
CD spelers
Type
Handleiding