Benning ST 710 de handleiding

Categorie
Meten
Type
de handleiding

Deze handleiding is ook geschikt voor

Klasse I
Class I
RPE
RISO
IEA
RPE
RISO
Leitungstest
Wiring
RISO
IEA
Klasse II
Class II Leitung
Cord
ST 710
DIN VDE 0701/0702, BGV A3, ÖVE/ÖNORM E 8701, NEN 3140
Prüfling während der Prüfung einschalten
Switch on test object during test
ON/OFF
press 2 sec.
R
R
PE
ISO M
mA
D Bedienungsanleitung
Operating manual
F Notice d’emploi
Návod k obsluze
Gebruiksaanwijzing
Instrukcja obsługi
BENNING ST 710
01/ 2009
BENNING ST 710
D F
Bild 2: Geräteoberseite
Fig. 2: Top side of the device
Fig. 2: Face supérieure de l'appareil
Obr. 2: Horní strana přístroje
Fig. 2: Bovenaanzicht apparaat
Rys. 2: Górna strona urządzenia
Bild 1: Gerätefrontseite
Fig. 1: Appliance front face
Fig. 1: Partie avant de l’appareil
Obr. 1: Přední strana přístroje
Fig. 1: Voorzijde van het apparaat
Rys. 1: Panel przedni przyrządu
3
4
5
67
2
Klasse I
Class I
RPE
RISO
IEA
RPE
RISO
Leitungstest
Wiring
RISO
IEA
Klasse II
Class II Leitung
Cord
ST 710
DIN VDE 0701/0702, BGV A3, ÖVE/ÖNORM E 8701, NEN 3140
Prüfling während der Prüfung einschalten
Switch on test object during test
ON/OFF
press 2 sec.
R
R
PE
ISO M
mA
Klasse I
Class I
RPE
RISO
IEA
RPE
RISO
Leitungstest
Wiring
RISO
IEA
Klasse II
Class II Leitung
Cord
ST 710
DIN VDE 0701/0702, BGV A3, ÖVE/ÖNORM E 8701, NEN 3140
Prüfling während der Prüfung einschalten
Switch on test object during test
ON/OFF
press 2 sec.
R
R
PE
ISO M
mA
01/ 2009
BENNING ST 710
D F
Bild 3: Prüfung von Geräten der Schutzklasse I (Geräte mit
Schutzleiter und berührbaren leitfähigen Teilen die
am Schutzleiter angeschlossen sind)
Fig. 3: Testing of devices of protection class I (devices with
protective conductor and accessible conductive
parts which are connected to the protective
conductor)
Fig. 3: Contrôle des appareils de la classe de protection
I (les appareils avec conducteur de protection et
avec des pièces touchables conductrices qui sont
connectées au conducteur de protection)
Obr. 3: Zkoušení zařízení třídy ochrany I (zařízení s
ochranným vodičem a vodivými díly nechráněnými
proti doteku, připojenými k ochrannému vodiči)
Fig. 3: Testen van apparaten van beschermklasse I
(apparaten met aardegeleider en aanraakbare
geleidende onderdelen die op de aardegeleider zijn
aangesloten)
Rys. 3: Testy urządzeń klasy ochronnej I (urządzenia
z przewodami ochronnymi i dotykającymi się i
przewodzącymi częściami, które są podłączone do
kabla ochronnego)
Bild 4: Prüfung von Geräten der Schutzklasse II
(Schutzisolierte Geräte ohne Schutzleiter und mit
berührbaren leitfähigen Teilen) bzw. Prüfung von
Geräten der Schutzklasse III (Schutzkleinspannung)
Fig. 4: Testing of devices of protection class II (shock-proof
devices without protective conductor and with
accessible conductive parts) and testing of devices
of protection class III (safety extra-low voltage)
Fig. 4: Contrôle des appareils de la classe de protection
II (appareils à double isolation sans conducteur
de protection et avec des pièces touchables
conductrices) et contrôle des appareils de la classe
de protection III (basse tension de protection)
Obr. 4: Zkoušení zařízení třídy ochrany II (zařízení s
ochrannou izolací bez ochranného vodiče a s
vodivými díly nechráněnými proti doteku) nebo
zkoušení zařízení třídy ochrany III (malé bezpečné
napětí)
Fig. 4: Testen van apparaten van beschermklasse II
(apparaten met randaarding zonder aardegeleider
en met aanraakbare geleidende onderdelen) resp.
testen van apparaten van beschermklasse III
(veiligheidslaagspanning)
Rys. 4: Testowanie urządzeń II klasy ochronnej (urządzenia
z izolacją ochronną bez kabla ochronnego i z
dotykającymi się i przewodzącymi częściami) lub
testowanie urządzeń III klasy ochronnej (małe
napięcie ochronne)
Klasse I
Class I
RPE
RISO
IEA
RPE
RISO
Leitungstest
Wiring
RISO
IEA
Klasse II
Class II Leitung
Cord
ST 710
DIN VDE 0701/0702, BGV A3, ÖVE/ÖNORM E 8701, NEN 3140
Prüfling während der Prüfung einschalten
Switch on test object during test
ON/OFF
press 2 sec.
R
R
PE
ISO M
mA
Klasse I
Class I
RPE
RISO
IEA
RPE
RISO
Leitungstest
Wiring
RISO
IEA
Klasse II
Class II Leitung
Cord
ST 710
DIN VDE 0701/0702, BGV A3, ÖVE/ÖNORM E 8701, NEN 3140
Prüfling während der Prüfung einschalten
Switch on test object during test
ON/OFF
press 2 sec.
RISO M
mA
01/ 2009
BENNING ST 710
D F
Bild 5a: Prüfung von Geräteanschlussleitungen mit Kaltgerätestecker
Fig. 5a: Testing of device connecting cables with IEC connector
Fig. 5a: Contrôle des câbles de connexion d'appareil avec che mâle CEI
Obr. 5a: Zkouška připojovacích kabelů zařízení s připojovací zástrčkou
Fig. 5a: Testen van netvoedingskabels met apparaatstekker
Rys. 5a: Test kabli przyłączeniowych urządzeń z wtyczkami zimnych urządzeń.
Bild 5b: Prüfung von Leitungen, Mehrfachverteilern und Leitungsroller
Fig. 5b: Testing of lines, multiple distributors and cable reels
Fig. 5b: Contrôle de câbles, de câbles de distribution multiple et
d'enrouleurs de câble
Obr. 5b: Zkoušení kabelů, vícenásobných rozvaděčů a kabelových cívek
Fig. 5b: Testen van kabels, verdeeldozen en kabelhaspels
Rys. 5b: Testowanie kabli, rozdzielnic wielokrotnych i bębnów kablowych
Klasse I
Class I
RPE
RISO
IEA
RPE
RISO
Leitungstest
Wiring
RISO
IEA
Klasse II
Class II Leitung
Cord
ST 710
DIN VDE 0701/0702, BGV A3, ÖVE/ÖNORM E 8701, NEN 3140
Prüfling während der Prüfung einschalten
Switch on test object during test
ON/OFF
press 2 sec.
R
R
PE
ISO M
mA
R
R
PE
ISO M
Klasse I
Class I
RPE
RISO
IEA
RPE
RISO
Leitungstest
Wiring
RISO
IEA
Klasse II
Class II Leitung
Cord
ST 710
DIN VDE 0701/0702, BGV A3, ÖVE/ÖNORM E 8701, NEN 3140
Prüfling während der Prüfung einschalten
Switch on test object during test
ON/OFF
press 2 sec.
R
R
PE
ISO M
mA
R
R
PE
ISO M
01/ 2009
BENNING ST 710
D F
Bild 6: Spannungsmessung an externer Schutzkontaktsteckdose
Fig. 6: Voltage measurement on external shock-proof socket
Fig. 6: Mesure de tension sur une prise de courant de sécurité
externe
Obr. 6: Měření napětí na externí zásuvce s ochranným kontaktem
Fig. 6: Spanningsmeting aan externe veiligheidswandcontactdoos
Rys. 6: Pomiar napięcia na zewnętrznym gniazdku wtykowym z
zestykiem ochronnym
Bild 7: Batteriewechsel
Fig. 7: Battery replacement
Fig. 7: Remplacement des piles
Obr. 7: Výměna baterií
Fig. 7: Vervanging van de batterij.
Rys. 7: Wymiana baterii
Klasse I
Class I
RPE
RISO
IEA
RPE
RISO
Leitungstest
Wiring
RISO
IEA
Klasse II
Class II Leitung
Cord
ST 710
DIN VDE 0701/0702, BGV A3, ÖVE/ÖNORM E 8701, NEN 3140
Prüfling während der Prüfung einschalten
Switch on test object during test
ON/OFF
press 2 sec.
LN
LE
NE
V
V
01/ 2009
BENNING ST 710
D
1
Bedienungsanleitung
BENNING ST 710
Gerätetester zur sicherheitstechnischen Prüfung ortsveränderlicher elektrischer Geräte/ Be-
triebsmittel
- Prüfung gemäß DIN VDE 701/ 0702, ÖVE/ ÖNORM E 8701
- Prüfung von Leitungsrollern, Mehrfachverteilern und Kaltgeräteleitungen
- Spannungsmessung an externer Schutzkontaktsteckdose
Inhaltsverzeichnis
1. Benutzerhinweise
2. Sicherheitshinweise
3. Lieferumfang
4. Gerätebeschreibung
5. Allgemeine Angaben
6. Umgebungsbedingungen
7. Elektrische Angaben
8. Prüfen mit dem BENNING ST 710
9. Instandhaltung
10. Umweltschutz
1. Benutzerhinweise
Diese Bedienungsanleitung richtet sich an
- Elektrofachkräfte (EF), befähigte Personen und
- Elektrotechnisch unterwiesene Personen (EuP)
Das BENNING ST 710 ist zur Messung in trockener Umgebung vorgesehen. Es darf nicht in
Stromkreisen mit einer höheren Nennspannung als 300 V AC eingesetzt werden (näheres hierzu
im Abschnitt 6: Umgebungsbedingungen).
In der Bedienungsanleitung und auf dem BENNING ST 710 werden folgende Symbole ver-
wendet:
Anlegen um GEFÄHRLICH AKTIVE Leiter oder Abnehmen von diesen ist
zugelassen.
Warnung vor elektrischer Gefahr!
Steht vor Hinweisen, die beachtet werden müssen, um Gefahren für Menschen zu
vermeiden.
Achtung Dokumentation beachten!
Das Symbol gibt an, dass die Hinweise in der Bedienungsanleitung zu beachten
sind, um Gefahren zu vermeiden.
Dieses Symbol auf dem BENNING ST 710 bedeutet, dass das BENNING ST 710
schutzisoliert (Schutzklasse II) ausgeführt ist.
Dieses Symbol auf dem BENNING ST 710 bedeutet, dass das BENNING ST 710
konform zu den EU-Richtlinien ist.
Dieses Symbol erscheint in der Anzeige für eine entladene Batterie.
(AC) Wechsel- Spannung oder Strom.
Erde (Spannung gegen Erde).
01/ 2009
BENNING ST 710
D
2
2. Sicherheitshinweise
Das Gerät ist gemäß
DIN VDE 0404 Teil 1 und 2
DIN VDE 0411 Teil 1/ EN 61010 Teil 1
DIN VDE 0413 Teil 1/ EN 61557 Teil 1, 2, 4 und 10
gebaut und geprüft und hat das Werk in einem sicherheitstechnisch einwandfreien Zustand ver-
lassen. Um diesen Zustand zu erhalten und einen gefahrlosen Betrieb sicherzustellen, muss
der Anwender die Hinweise und Warnvermerke beachten, die in dieser Anleitung enthalten sind.
Fehlverhalten und Nichtbeachtung der Warnungen kann zu schwerwiegenden Verletzungen
oder zum Tode führen.
Extreme Vorsicht bei Arbeiten um blanke Leiter oder Hauptleitungsträger. Ein
Kontakt mit Leitern kann einen Elektroschock verursachen.
Das BENNING ST 710 darf nur in Stromkreisen der Überspannungskategorie II
mit max. 300 V Leiter gegen Erde benutzt werden.
Beachten Sie, dass Arbeiten an spannungsführenden Teilen und Anlagen
grundsätzlich gefährlich sind. Bereits Spannungen ab 30 V AC und 60 V DC
können für den Menschen lebensgefährlich sein.
Vor jeder Inbetriebnahme überprüfen Sie das Gerät und die Leitungen auf
Beschädigungen.
Ist anzunehmen, dass ein gefahrloser Betrieb nicht mehr möglich ist, ist das Gerät außer
Betrieb zu setzen und gegen unbeabsichtigten Betrieb zu sichern.
Es ist anzunehmen, dass ein gefahrloser Betrieb nicht mehr möglich ist,
- wenn das Gerät oder die Messleitungen sichtbare Beschädigungen aufweisen,
- wenn das Gerät nicht mehr arbeitet,
- nach längerer Lagerung unter ungünstigen Verhältnissen,
- nach schweren Transportbeanspruchungen,
- wenn das Gerät oder die Messleitungen feucht sind.
Um eine Gefährdung auszuschließen
- berühren Sie die Leitungen nicht an den blanken Messspitzen,
- stecken Sie die Leitungen in die entsprechend gekennzeichneten Buchsen
am Messinstrument
Wartung:
Das Gerät nicht öffnen, es enthält keine durch den Benutzer wartbaren
Komponenten. Reparatur und Service kann nur durch qualifiziertes Personal
erfolgen.
Reinigung:
Das Gehäuse regelmäßig mit einem Tuch und Reinigungsmittel trocken
abwischen. Kein Poliermittel oder Lösungsmittel verwenden.
3. Lieferumfang
Zum Lieferumfang des BENNING ST 710 gehören:
3.1 ein Stück BENNING ST 710,
 3.2einStückPrüeitungmitAbgreifklemme,
3.3 ein Stück Kaltgeräteleitung (IEC-Adapterleitung)
3.4 ein Stück Kompakt-Schutztasche,
3.5 sechs Stück 1,5 V Mignon-Batterien/ Typ AA, IEC LR6 zur Erstbestückung
3.6 eine Bedienungsanleitung.
Hinweis auf Verschleißteile:
- Das BENNING ST 710 benötigt sechs 1,5-V-Batterien/Typ AA, IEC LR6
Hinweis auf optionales Zubehör:
- Leckstromzange BENNING CM 9 zur Differenzstrommessung an ein- und dreiphasige
Verbraucher (044065)
- Prüfplaketten „Nächster Prüftermin“, 300 Stück (756213)
- Messadapter Schukostecker-Schukokupplung zur Messung von Differenz-, Schutzleiter-
und Laststrom an einphasigen Verbrauchern, Leiter einzeln herausgeführt (044131)
- Messadapter für dreiphasige Verbraucher
zur Messung von RPE und RISO:
- 16 A CEE-Kupplung - Schukostecker (044122)
- 32 A CEE-Kupplung - Schukostecker (044123)
zur Messung von Differenz-, Schutzleiter- und Laststrom:
01/ 2009
BENNING ST 710
D
3
- 16 A CEE-Kupplung – CEE-Stecker (044127)
- 32 A CEE-Kupplung – CEE-Stecker (044128)
- Prüfprotkoll-Formulare “Prüfung elektrischer Geräte” können Sie kostenlos downloaden
unter www.benning.de
4. Gerätebeschreibung
siehe Bild 1: Gerätefrontseite
siehe Bild 2: Geräteoberseite
Die in Bild 1 und 2 angegebenen Anzeige- und Bedienelemente werden wie folgt bezeichnet:
1 Prüfsteckdose, zum Anschluss des zu prüfenden Gerätes,
2 -Taste, Prüfung von Geräten der Schutzklasse I (Geräte mit Schutzleiter und berührbaren
leitfähigen Teilen, die am Schutzleiter angeschlossen sind),
3 -Symbol-Taste, Prüfung von Geräten der Schutzklasse II (Schutzisolierte Geräte
ohne Schutzleiter und mit berührbaren leitfähigen Teilen) bzw. Prüfung von Geräten der
Schutzklasse III (Schutzkleinspannung),
4 -Symbol-Taste, Prüfung von Leitungen, Mehrfachverteilern und Geräte an schluss lei-
tungen mit Kaltgerätestecker
5 LCD-Display, zeigt den Prüffortschritt und einzelne Messergebnisse,
6 4 mm Prüfbuchse, zum Anschluss der Prüfleitung mit Abgreifklemme
7 Kaltgerätestecker (IEC-Stecker), zum Anschluss der Kaltgeräteleitung
5. Allgemeine Angaben
Das BENNING ST 710 führt elektrische Sicherheitsüberprüfungen nach DIN VDE 0701/ 0702,
BGV A3, ÖVE/ ÖNORM E8701 und NEN 3140 aus.
Eigenständig überprüft das BENNING ST 710 die Art des angeschlossenen Prüfobjekts und
gibt den Benutzer einen Hinweis bei unkorrekter Auswahl der Prüfablaufs [2...4]: Voreinge-
stellte Grenzwerte und Messergebnisse mit gut/ schlecht Aussage erleichtern die Bewertung
der Prüfung.
6. Umgebungsbedingungen
- Das BENNING ST 710 ist für Messungen in trockener Umgebung vorgesehen.
- Barometrische Höhe bei Messungen: Maximal 2000 m
- Überspannungskategorie/Aufstellungskategorie:IEC61010-1→300VKategorieII,
- Verschmutzungsgrad: 2,
- Schutzart: IP 40 (DIN VDE 0470-1, IEC/ EN 60529)
4 - erste Kennziffer: Schutz gegen kornförmige Fremdkörper
0 - zweite Kennziffer: Kein Wasserschutz,
- EMC: EN-61326-1,
- Arbeitstemperatur und relative Luftfeuchte:
Bei Arbeitstemperatur von 0° C bis 30° C: relative Luftfeuchte kleiner 80 %,
Bei Arbeitstemperatur von 31° C bis 40° C: relative Luftfeuchte kleiner 75 %,
- Lagerungstemperatur: Das BENNING ST 710 kann bei Temperaturen von - 25° C bis
+ 65° C (Luftfeuchte 0 bis 80 %) gelagert werden. Dabei sind die Batterien aus dem Gerät
herauszunehmen.
7. Elektrische Angaben
Bemerkung: Die Messgenauigkeit wird angegeben als Summe aus
- einem relativen Anteil des Messwertes und
- einer Anzahl von Digit (d.h. Zahlenschritte der letzten Stelle).
Diese Messgenauigkeit gilt bei Temperaturen von 18 °C bis 28 °C und einer relativen Luftfeuch-
tigkeit kleiner 80 %.
7.1 Schutzleiterwiderstand
Messbereich Auflösung Messgenauigkeit
0,05Ω-20Ω 0,01 5 % ± 2 Digit
Prüfstrom: >200mA(2)
Leerlaufspannung: > 4 V nominal
7.2 Isolationswiderstand
Messbereich Auflösung Messgenauigkeit
0,5MΩ-20MΩ 0,01MΩ 5 % ± 2 Digit
0,1MΩ-0,49MΩ 0,01MΩ 10 % ± 2 Digit
Prüfspannung
:
500 VDC @ 1 mA nominal, + 20 %, - 0 %
Prüfstrom
:>1mAbei500kΩ,<2mAbei2
01/ 2009
BENNING ST 710
D
4
7.3 Schutzleiter- und Berührungsstrom über Ersatzableitstromverfahren
Messbereich Auflösung Messgenauigkeit
0,10 mA - 20 mA 0,01 mA 5 % ± 2 Digit
Prüfspannung
:40 VAC, 50 Hz
Prüfstrom
:<5mAbei2kΩ
7.4 Leitungstest
- Messung des Schutzleiterwiderstandes gemäß 7.1
- Messung des Isolationswiderstandes gemäß 7.2
- Leitungsbruchprüfung von Außenleiter (L) und Neutralleiter (N)
- Kurzschlussprüfung von Außenleiter (L) und Neutralleiter (N)
7.5 Spannungsmessung an externer Schutzkontaktsteckdose
Messbereich Auflösung Messgenauigkeit Überlastschutz
50 V - 270 VAC 1 V <5%vom
Messbereichsendwert
300 V
Anzeige:
- Spannung zwischen Außenleiter (L) und Neutralleiter (N)
- Spannung zwischen Außenleiter (L) und Erdleiter PE)
- Spannung zwischen Neutralleiter (N) und Erdleiter (PE)
7.6 Grenzwerte gemäß DIN VDE 0701/ 0702, bzw. ÖVE/ ÖNORM E 8701-1
Hinweis:
Voreingestellte Grenzwerte in Fettdruck sind im BENNING ST 710 hinterlegt.
Schutzklasse I Schutzklasse II, III Leitungsprüfung
Schutzleiter-
widerstand
RPE
Für Leitungen mit einem
Bemessungsstrom≤16A:
≤ 0,3
bis 5 m Länge,
jeweitere7,5m:zusätzlich0,1Ω,
max.1Ω,
Für Leitungen mit höheren
Bemessungsströmen gilt der berech-
nete ohmsche Widerstandswert
≤ 0,3 Ω
(siehe SK I)
Isolations-
widerstand
RISO
≥ 1
≥2MΩfürdenNachweis
der sicheren Trennung (Trafo)
≥0,3MΩbeiGerätenmit
Heizelementen
≥ 2 MΩ (SK II)
,
≥0,25MΩ(SKIII),
≥ 1
Schutzleiter-
strom
IEA
≤ 3,5 mA
an leitfähigen Teilen mit
PE-Verbindung
1 mA/ kW bei Geräten mit
Heizelementen P > 3,5 kW
Berührungs-
strom
IEA
≤0,5mA
an leitfähigen Teilen ohne
PE-Verbindung
≤ 0,5 mA
an leitfähigen
Teilen ohne
PE-Verbindung
8. Prüfen mit dem BENNING ST 710
8.1 Vorbereiten der Prüfung
Benutzen und lagern Sie das BENNING ST 710 nur bei den angegebenen Lager- und Arbeits-
temperaturbedingungen, vermeiden Sie dauernde Sonneneinstrahlung.
- Angaben von Nennspannung und Nennstrom auf den Sicherheitsmessleitungen
überprüfen.
- Starke Störquellen in der Nähe des BENNING ST 710 können zu instabiler Anzeige und zu
Messfehlern führen.
Vor jeder Inbetriebnahme überprüfen Sie das Gerät, die Leitungen und das
Prüfobjekt auf Beschädigungen.
01/ 2009
BENNING ST 710
D
5
Vor Prüfbeginn ist das Prüfobjekt einzuschalten. (Netzschalter ein)
Zur Beginn der Prüfung ist zu prüfen, ob der gewählte Prüfablauf zur
Schutzklasse des angeschlossenen Prüfobjektes stimmt.
8.1.1 Ein-, Ausschalten des BENNING ST 710
Durch ein gedrückt halten der Tasten 2 + 3 für ca. 3 Sekunden wird das BENNING ST 710 ein-
geschaltet, 2 Signaltöne bestätigen dies. Erneutes drücken der Tasten schaltet das Gerät aus.
Das BENNING ST 710 schaltet sich nach ca. 3 Minuten selbstständig ab. (APO, Auto-Power-
Off). Es schaltet sich wieder ein, wenn die Tasten 2 + 3 betätigt werden. Ein Signalton signa-
lisiert die selbsttätige Abschaltung des Gerätes. Die automatische Abschaltung ist während der
Spannungsmessung an einer externen Schutzkontaktsteckdose deaktiviert.
8.1.2 Prüfablauf
Das BENNING ST 710 führt elektrische Sicherheitsüberprüfungen nach DIN VDE 0701/ 0702
bzw. ÖVE/ ÖNORM E 8701 aus. Ausführliche Informationen zu den Prüfungen und Grenzwerten
sind den Normen in der aktuellen Fassung zu entnehmen.
Eigenständig überprüft das BENNING ST 710 die Art des angeschlossenen Prüfobjekts und gibt
den Benutzer einen Hinweis bei falsch vorgewähltem Prüfablauf [2...4]
8.2 Prüfung elektrischer Geräte/ Betriebsmittel nach DIN VDE 0701/ 0702, bzw. ÖVE/
ÖNORM E 8701
Vor Prüfbeginn ist das Prüfobjekt einer Sichtprüfung zu unterziehen, bei evtl.
Beschädigungen ist die Prüfung abzubrechen.
8.2.1 Prüfung von Geräten der Schutzklasse I
- Prüfung von Geräten mit Schutzleiter und berührbaren leitfähigen Teilen, die am Schutzleiter
angeschlossen sind.
-
Das Prüfobjekt muss an die Prüfsteckdose 1 des BENNING ST 710 angeschlossen werden.
- Stecken Sie den 4 mm Sicherheitsstecker der Prüfleitung mit Abgreifklemme in die 4 mm
Sicherheitsbuchse 6 und stellen Sie eine Verbindung mit einem Metallteil des Prüfobjekts her.
- Schalten Sie das Prüfobjekt ein.
- Durch drücken der Taste 2 startet der automatische Prüfablauf.
- Die Prüfung beginnt mit der Messung des Schutzleiterwiderstandes RPE. Falls RPE >~ 100
übersteigt, wird die Messung ohne Messergebnis abgebrochen und ein Kreuz erscheint
neben dem RPE-Symbol. Der Abbruch wird durch den Hinweis „FAIL“ im Display bestätigt.
- Falls RPE<20 aber größer als der maximal zulässige Grenzwert ist, wird der Messwert
von RPE im Display angezeigt. Ein neben dem RPE -Symbol bestätigt die Überschreitung
des Grenzwertes.
01/ 2009
BENNING ST 710
D
6
- Falls RPE kleiner als der zulässige Grenzwert ist, wird der Messwert von RPE angezeigt und
ein erscheint neben dem RPE-Symbol. Die Messung von RPE wird nun wiederholt mit
vertauschter Polarität durchgeführt. Nach bestandener Prüfung von RPE wird die Prüfung
des Isolationswiderstandes gestartet.
-
Sollte im Display „Lo LOAD“ erscheinen, überprüfen Sie, ob das Prüfobjekt eingeschaltet ist.
- Durch drücken der Taste 2 wird bei zu geringer Last (RL-N < 100 k) der Prüfablauf
fortgesetzt.
- Falls der Isolationswiderstand RISO größer als der zulässige Grenzwert ist, erscheint ein
neben dem RISO-Symbol.
- Ebenso erscheint ein neben dem IEA-Symbol, falls der Schutzleiterstrom IEA kleiner als
der zulässige Grenzwert ist.
- Die Prüfung gilt als bestanden, wenn das Symbol „PASS“ im Display erscheint.
siehe Bild 3: Prüfung von Geräten der Schutzklasse I (Geräte mit Schutzleiter und berühr-
baren leitfähigen Teilen die am Schutzleiter angeschlossen sind)
Hinweis zur Messung des Schutzleiterwiderstandes:
- Die Messung des Schutzleiterwiderstandes RPE kann alternativ auch als Dauermessung
(max. 3 Min.) durchgeführt werden. Drücken Sie hierzu die Taste 2 für ca. > 5 Sek.
bis das Symbol im Display erscheint. Bewegen Sie die Anschlussleitung des
Prüfobjektes über die komplette Länge um eine Schwachstelle oder einen Bruch in der
Schutzleiterbahn festzustellen. Das BENNING ST 710 erfasst fortlaufend den aktuellen
Messwert im Display und hinterlegt den Maximalwert im Speicher. Durch erneuten
Druck auf die Taste 2 wird die Messung mit vertauschter Polarität durchgeführt. Eine
erneute Betätigung der Taste 2 zeigt den Maximalwert von RPE im Display an und führt
den Prüfablauf wie unter Punkt 8.2.1 beschrieben weiter fort.
01/ 2009
BENNING ST 710
D
7
8.2.2 Prüfung von Geräten der Schutzklasse II (Schutzisoliert) und von Geräten der
Schutzklasse III (Schutzkleinspannung)
- Prüfung von Geräten ohne Schutzleiter und mit berührbaren leitfähigen Teilen.
-
Das Prüfobjekt muss an die Prüfsteckdose 1 des BENNING ST 710 angeschlossen werden.
- Stellen Sie eine Verbindung zwischen der 4 mm Prüfbuchse 6 und einem Metallteil des
Prüfobjekts mittels der Prüfleitung mit Abgreifklemme her.
- Schalten Sie das Prüfobjekt ein.
- Durch drücken der Taste 3 startet der automatische Prüfablauf.
-
Sollte im Display „Lo LOAD“ erscheinen, überprüfen Sie, ob das Prüfobjekt eingeschaltet ist.
-
Durch drücken der Taste 3 wird bei zu geringer Last (RL-N<100k) der Prüfablauf fortgesetzt.
- Falls der Isolationswiderstand RISO größer als der zulässige Grenzwert ist, erscheint ein
neben dem RISO-Symbol.
- Ebenso erscheint ein neben dem IEA-Symbol, falls der Berührungsstrom IEA kleiner als
der zulässige Grenzwert ist.
- Die Prüfung gilt als bestanden, wenn das Symbol „PASS“ im Display erscheint.
Hinweis zur Messung des Isolationswiderstandes bei Prüfobjekten des Schutzklasse III:
- Aufgrund des voreingestellten Grenzwertes von 2 M für Prüfobjekte der Schutzklasse II,
ist bei der Prüfung von Prüfobjekten der Schutzklasse III zu beachten, dass Messwerte
zwischen den Grenzwerten von 2 M (SK II) bis 0,25 M (SK III) mit einem neben dem
RISO-Symbol dargestellt werden.
siehe Bild 4: Prüfung von Geräten der Schutzklasse II (Schutzisolierte Geräte ohne Schutz-
leiter und mit berührbaren leitfähigen Teilen) bzw. Prüfung von Geräten der
Schutzklasse III (Schutzkleinspannung)
8.2.3 Leitungstest
Der Leitungstest kann zur Prüfung von Kaltgeräteleitungen (Geräteanschlussleitungen mit Kalt-
gerätekupplung) als auch zur Prüfung von Leitungsroller, Mehrfachverteilern und Verlängerungs-
leitungen genutzt werden.
8.2.3.1 Prüfung von Kaltgeräteleitungen (IEC-Adapterleitungen)
- Schließen Sie die zu prüfende Kaltgeräteleitung über den Kaltgerätestecker 7 und die
Prüfsteckdose 1 an das BENNING ST 710 an.
- Durch drücken der Taste 4 startet der automatische Prüfablauf.
- Die Prüfung beginnt mit der Messung des Schutzleiterwiderstandes RPE.
- Je nach Grenzwertüber- oder -unterschreitung wird ein oder ein neben dem RPE-
Symbol angezeigt.
Der Schutzleiterwiderstand ist abhängig von Länge und Querschnitt der zu
prüfenden Leitung. Es ist möglich, dass das Messergebnis akzeptabel ist,
obwohl das BENNING ST 710 ein neben RPE darstellt.
- Typische Widerstandswerte von Leitungen sind der Tabelle 1 zu entnehmen.
01/ 2009
BENNING ST 710
D
8
Querschnitt
Länge 1,0 mm² 1.5 mm² 2,5 mm²
5 m 0,1Ω 0,06Ω 0,04Ω
10 m 0,2Ω 0,12Ω 0,08Ω
25 m 0,5Ω 0,3Ω 0,2Ω
50 m 1,0Ω 0,6Ω 0,4Ω
Tabelle 1: Widerstandwerte des Schutzleiters in Abhängigkeit von Länge und Querschnitt
- Nach bestandener Prüfung von RPE wird automatisch die Isolationswiderstandsmessung
durchgeführt.
- Je nach Grenzwertüber- oder -unterschreitung wird ein oder ein neben dem RISO-
Symbol angezeigt.
- Nach bestandener Prüfung von RISO wird der Außenleiter (L) und der Neutralleiter (N)
auf Leitungsbruch und Kurzschluss überprüft. Eine bestandene Leitungsbruch- und
Kurzschlussprüfung wird über ein neben dem und dem Symbol „GOOd“
angezeigt.
- Das Symbol „PASS“ betätigt die erfolgreiche Prüfung des kompletten Prüfablaufs.
- Sollte die Leitungsbruch- oder die Kurzschlussprüfung nicht bestanden sein, wird an Stelle
des Symbol „GOOd“ eines der folgende Symbole angezeigt:
- Symbol „OPEN“:
Bestätigt den Leitungsbruch von Außenleiter (L) oder Neutralleiter (N)
- Symbol „Short“:
Bestätigt den Kurzschluss zwischen Außenleiter (L) und Neutralleiter (N)
siehe Bild 5a: Prüfung von Geräteanschlussleitungen mit Kaltgerätestecker
Hinweis zur Messung des Schutzleiterwiderstandes:
- Die Messung des Schutzleiterwiderstandes RPE kann alternativ auch als Dauermessung
(max. 3 Min.) durchgeführt werden. Drücken Sie hierzu die Taste 2 für ca. > 5 Sek.
bis das Symbol im Display erscheint. Bewegen Sie die Anschlussleitung des
Prüfobjektes über die komplette Länge um eine Schwachstelle oder einen Bruch in der
Schutzleiterbahn festzustellen. Das BENNING ST 710 erfasst fortlaufend den aktuellen
Messwert im Display und hinterlegt den Maximalwert im Speicher. Durch erneuten
Druck auf die Taste 4 wird die Messung mit vertauschter Polarität durchgeführt. Eine
erneute Betätigung der Taste 4 zeigt den Maximalwert von RPE im Display an und führt
den Prüfablauf wie unter Punkt 8.2.3.1 beschrieben weiter fort.
8.2.3.2 Prüfung von Leitungsroller, Mehrfachverteilern und Verlängerungsleitungen
- Schließen Sie die im Lieferumfang befindliche Kaltgeräteleitung (IEC-Adapterleitung) an
den Kaltgerätestecker 7 des BENNING ST 710 an.
- Die zu prüfende Leitung wird an die Prüfsteckdose 1 und den Schukostecker der
Kaltgeräteleitung angeschlossen.
- Durch drücken der Taste 4 startet der automatische Prüfablauf.
- Der weitere Prüfablauf entspricht dem Prüfablauf von Punkt 8.2.3.1.
siehe Bild 5b: Prüfung von Leitungen, Mehrfachverteilern und Leitungsroller
8.3 Spannungsmessung an externer Schutzkontaktsteckdose
- Schließen Sie die Kaltgeräteleitung (IEC-Adapterleitung) an den Kaltgerätestecker 7 des
BENNING ST 710 an.
- Schließen Sie den Schukostecker an die zu überprüfende Schutzkontaktsteckdose an. Bei
anliegender Netzspannung wird die Spannungsmessung automatisch gestartet.
- Abhängig der Außenleiterlage (rechts oder links) der Schutzkontaktsteckdose werden die
Spannungspotentiale zwischen den Anschlussklemmen L, N und PE angezeigt.
01/ 2009
BENNING ST 710
D
9
oder
Es werden nur die Spannungspotentiale zwischen den einzelnen Anschlüssen
L, N und PE gemessen. Die Messung gibt keine Aussage über die fachgerechte
Installation der Schutzkontaktsteckdose. Kein Warnhinweis bei gefährlicher
Berührungsspannung des PE-Leiters!
siehe Bild 6: Spannungsmessung an externer Schutzkontaktsteckdose
9. Instandhaltung
Vor dem Öffnen das BENNING ST 710 unbedingt spannungsfrei machen!
Elektrische Gefahr!
Die Arbeit am geöffneten BENNING ST 710 unter Spannung ist ausschließlich
Elektrofachkräften vorbehalten, die dabei besondere Maßnahmen zur Unfallverhütung
treffen müssen.
So machen Sie das BENNING ST 710 spannungsfrei, bevor Sie das Gerät öffnen:
- Schalten Sie das Prüfgerät aus
- Trennen Sie alle Anschlussleitungen vom Gerät
9.1 Sicherstellen des Gerätes
Unter bestimmten Voraussetzungen kann die Sicherheit im Umgang mit dem BENNING ST 710
nicht mehr gewährleistet sein; zum Beispiel bei:
- Sichtbaren Schäden am Gehäuse,
- Fehlern bei Messungen,
- Erkennbaren Folgen von längerer Lagerung unter unzulässigen Bedingungen und
- Erkennbaren Folgen von außerordentlicher Transportbeanspruchung.
In diesen Fällen ist das BENNING ST 710 sofort abzuschalten, von den Prüfstellen zu entfernen
und gegen erneute Nutzung zu sichern.
9.2 Reinigung
Reinigen Sie das Gehäuse äußerlich mit einem sauberen und trockenen Tuch (Ausnahme spe-
zielle Reinigungstücher). Verwenden Sie keine Lösungs- und/ oder Scheuermittel um das Gerät
zu reinigen. Achten Sie unbedingt darauf, dass das Batteriefach und die Batteriekontakte nicht
durch auslaufendes Batterie-Elektrolyt verunreinigt werden.
Falls Elektrolytverunreinigungen oder weiße Ablagerungen im Bereich der Batterie oder des Bat-
teriegehäuses vorhanden sind, reinigen Sie auch diese mit einem trockenen Tuch.
9.3 Batteriewechsel
Vor dem Öffnen das BENNING ST 710 unbedingt spannungsfrei machen!
Elektrische Gefahr!
Das BENNING ST 710 wird durch sechs 1,5V-Blockbatterien/Typ AA (IEC LR6) gespeist.
Ein Batteriewechsel ist erforderlich, wenn in der Anzeige 5 das Batteriesymbol erscheint.
So wechseln Sie die Batterie (siehe Bild 7):
- Schalten Sie das BENNING ST 710 aus.
- Legen Sie das BENNING ST 710 auf die Frontseite und lösen Sie die Schraube vom
Batteriedeckel.
- Heben Sie den Batteriedeckel (im Bereich der Gehäusevertiefungen) vom Unterteil ab.
- Heben Sie die entladenen Batterien aus dem Batteriefach.
- Legen Sie dann die Batterien in die dafür vorgesehenen Stellen im Batteriefach (achten Sie
bitte unbedingt auf die korrekte Polung der Batterien).
- Rasten Sie den Batteriedeckel an das Unterteil an, und ziehen Sie die Schraube an.
siehe Bild 7: Batteriewechsel
Leisten Sie Ihren Beitrag zum Umweltschutz! Batterien dürfen nicht in den
Hausmüll. Sie können bei einer Sammelstelle für Altbatterien bzw. Sondermüll
abgegeben werden. Informieren Sie sich bitte bei ihrer Kommune.
01/ 2009
BENNING ST 710
D
10
9.4 Kalibrierung
Um die angegebenen Genauigkeiten der Messergebnisse zu erhalten, muss das Gerät regel-
mäßig durch unseren Werksservice kalibriert werden. Wir empfehlen ein Kalibrierintervall von
einem Jahr. Senden Sie hierzu das Gerät an folgende Adresse:
Benning Elektrotechnik & Elektronik GmbH & Co. KG
Service Center
Robert-Bosch-Str. 20
D – 46397 Bocholt
10. Umweltschutz
Bitte führen Sie das Gerät am Ende seiner Lebensdauer den zur Verfügung ste hen-
den Rückgabe- und Sammelsystemen zu.
01/ 2009
BENNING ST 710
11
Operating instructions
BENNING ST 710
Appliance tester for safety-related testing of portable electrical devices and equipment
- testing according to DIN VDE 701/ 0702, ÖVE/ ÖNORM E 8701
- testing of cable reels, multiple distributors and IEC power cords
- voltage measurement on external shock-proof socket
Table of contents
1. User notes
2. Safety note
3. Scope of delivery
4. Unit description
5. General information
6. Environment conditions:
7. Electrical specifications
8. Making measurements with the BENNING ST 710
9. Maintenance
10. Environmental notice
1. User notes
These operating instructions are intended for
- qualiedelectricians,competentpersonsand
- electro technically trained persons
The BENNING ST 710 is intended for making measurements in dry environment. It must not be
used in power circuits with a nominal voltage higher than 300 V AC (More details in Section 6.
“Environmental conditions”).
The following symbols are used in these operating instructions and on the BENNING ST 710:
Application around and removal from HAZARDOUS LIVE conductors is permitted.
Warning of electrical danger!
Indicates instructions which must be followed to avoid danger to persons.
Important, comply with the documentation!
The symbol indicates that the information provided in the operating instructions must
be complied with in order to avoid risks.
This symbol on the BENNING ST 710 means that the BENNING ST 710 is totally
insulated (protection class II).
This symbol on the BENNING ST 710 means that the BENNING ST 710 complies
with the EU directives.
This symbol appears in the display to indicate a discharged battery.
(AC) Alternating voltage or current.
Ground (Voltage against ground).
01/ 2009
BENNING ST 710
12
2. Safety note
The instrument is built and tested in accordance with
DIN VDE 0404 part 1 and 2
DIN VDE 0411 part 1/ EN 61010 part 1
DIN VDE 0413 part 1/ EN 61557 part 1, 2, 4 and 10
and has left the factory in perfectly safe technical state.
To maintain this state and ensure safe operation of the appliance tester, the user must observe
the notes and warnings given in these instructions at all times. Improper handling and non-
observance of the warnings might involve severe injuries or danger to life.
WARNING! Be careful when working with bare conductors or main line carrier!
Contact with live conductors will cause an electric shock!
The BENNING ST 710 may be used only in power circuits within the overvoltage
category II with a conductor for 300 V AC max. to earth.
Remember that work on electrical components of all kinds is dangerous. Even
low voltages of 30 V AC and 60 V DC may be dangerous to human life.
Before starting the appliance tester up, always check it for signs of damage.
Should it appear that safe operation of the appliance tester is no longer possible, it should be
shut down immediately and secured to prevent it being switched on accidentally.
It may be assumed that safe operation is no longer possible:
- if the instrument show visible signs of damage
- if the appliance tester no longer functions
- after long periods of storage under unfavourable conditions
- after being subjected to rough transport
- the device is exposed to moisture.
In order to prevent danger
- do not touch the bare measuring probe tips of the measuring lines,
- plug the lines into the correspondingly marked jacks at the measuring
instrument
Maintenance:
Do not open the tester, because it contains no components which can be
repaired by the user. Repair and service must be carried out by qualified
personnel only!
Cleaning:
Regularly wipe the housing by means of a dry cloth and cleaning agent. Do not
use any polishing agents or solvents!
3. Scope of delivery
The scope of delivery for the BENNING ST 710 comprises:
3.1 One BENNING ST 710,
3.2 One test cable with alligator clip,
3.3 One IEC power cord (IEC adapter cable)
3.4 One compact protective pouch,
3.5 Six 1.5-V-batteries/ type AA (IEC LR6) fitted in the unit as original equipment,
3.4 One operating instructions manual
Parts subject to wear:
- The BENNING ST 710 is supplied by six 1.5 V batteries/ type AA (IEC LR6).
Note on optional accessories:
- Leakage current clamp BENNING CM 9 for differential current measurement of single-phase
and three-phase loads (044065)
- Test badges “next test date”, 300 pieces (756213)
- Measuring adapter shock-proof plug/ shock-proof coupling for measuring the differential
current, protective conductor current and load current of single-phase loads, conductors led
through individually (044131)
- Measuring adapter for three-phase loads
for measurement of RPE and RISO:
- 16 A CEE coupling - shock-proof plug (044122)
- 32 A CEE coupling - shock-proof plug (044123)
for measurement of differential current, protective conductor current and load current:
- 16 A CEE coupling - CEE plug (044127)
01/ 2009
BENNING ST 710
13
- 32 A CEE coupling - CEE plug (044128)
- Test certificate forms for "Testing of electrical devices" are available for download free of
charge at www.benning.de
4. Unit description
Seegure1: Appliancefrontface
Seegure2: Topsideofthedevice
ThedisplayandoperatorcontrolelementsspeciedinFig.1and2aredesignatedasfollows:
1 test socket, for connecting the device to be tested,
2 -key, testing of devices of protection class I (devices with protective conductor and
accessible conductive parts which are connected to the protective conductor),
3 -symbol key, testing of devices of protection class II (shock-proof devices without
protective conductor and with accessible conductive parts) and testing of devices of
protection class III (safety extra-low voltage),
4 -symbol key, testing of lines, multiple distributors and device connecting cables with IEC
connector
5 LC display, indicates the test progress and individual measuring results,
6 4 mm test socket, for connecting the test cable with alligator clip
7 IEC connector, for connecting the IEC power cord
5. General information
The BENNING ST 710 is intended for electrical safety tests according to DIN VDE 0701/ 0702,
BGV A3, ÖVE/ ÖNORM E8701 and NEN 3140.
Automatically,theBENNINGST710veriesthetypeoftheconnectedtestobjectandinforms
the user in case of incorrect selection of the testing procedure [2...4]: preset limiting values and
measuring results with "pass/ fail" information make it easier to evaluate the test.
6. Environment conditions:
- The BENNING ST 710 is intended for making measurements in dry environment.
- Maximum barometric elevation for making measurements: 2000 m,
- Overvoltagecategory/Sitingcategory:IEC61010-1→300VcategoryII,
- Contamination class: 2,
- Protection Class: IP 40 (DIN VDE 0470-1 IEC/ EN 60529)
IP 40 means: Protection against access to dangerous parts and protection against solid
impurities of a diameter > 1 mm, (4 - first index). No protection against water, (0 - second
index).
- EMC: EN 61326-1
- Operating temperature and relative humidity:
For operating temperature from 0 °C to 30 °C: relative humidity less than 80 %
For operating temperatures from 31 °C to 40 °C: relative humidity less than 75 %
- Storage temperature: The BENNING ST 710 can be stored at any temperature in the range
from - 25 °C to + 65 °C (relative humidity from 0 to 80 %). The battery should be taken out of
the instrument for storage.
7. Electrical specifications
Note:Themeasuringprecisionisspeciedasthesumof
- a relative fraction of the measured value and
- a number of digits (counting steps of the least significant digit).
Thisspeciedmeasuringprecisionisvalidfortemperaturesintherangefrom18°Cto28°Cand
relative humidity less than 80 %.
7.1 Protective conductor resistance:
Measuring range Resolution Measuring accuracy
0.05Ω-20Ω 0.01 5 % ± 2 Digit
Testing current:
>200mA(2)
open-circuit voltage:
> 4 V nominal
7.2 Insulating resistance
Measuring range Resolution Measuring accuracy
0.5MΩ-20MΩ 0.01MΩ 5 % ± 2 Digit
0.1MΩ-0.49MΩ 0.01MΩ 10 % ± 2 Digit
Testing voltage: 500 VDC @ 1 mA nominal, + 20 %, - 0 %
Testing current:
>1mAat500kΩ,<2mAat2
01/ 2009
BENNING ST 710
14
7.3 Protective conductor current and contact current by means of alternative leakage
current measurement method
Measuring range Resolution Measuring accuracy
0.10 mA - 20 mA 0.01 mA 5 % ± 2 Digit
Testing voltage:
40 VAC, 50 Hz
Testing current
:<5mAat2kΩ
7.4 Cord test
- measurement of the protective conductor resistance according to 7.1
- measurement of the insulating resistance according to 7.2
- line break testing of the external conductor (L) and the neutral conductor (N)
- short-circuit testing of the external conductor (L) and the neutral conductor (N)
7.5 Voltage measuring on external shock-proof socket
Measuring range Resolution Measuring accuracy Overload protection
50 V - 270 VAC 1 V <5%
of the upper mea-
suring range value
300 V
Display:
- voltage between the external conductor (L) and the neutral conductor (N)
- voltage between the external conductor (L) and the ground conductor (PE)
- voltage between the neutral conductor (N) and the ground conductor (PE)
7.6 Limiting values according to DIN VDE 0701/ 0702 and ÖVE/ ÖNORM E 8701-1
Note:
Protection class
I
Protection class
II, III
Line test
Protective
conductor
resistance
RPE
forcordswithratedcurrent≤16A:
≤ 0.3 Ω up to a length of 5 m,
per further 7.5 m:
additional0.1Ω,max.1Ω,
For cords with higher rated
currents the calculated ohmic
resistance value applies.
≤ 0.3 Ω
(
see protection
class I
)
Insulating
resistance
RISO
≥ 1
≥2MΩforprovingsafe
disconnection (transformer)
≥0.3MΩfordevices
with heating element
≥ 2
(protection class II)
,
≥0,25
(
protection class
III),
≥ 1
Protective
conductor
current
IEA
≤ 3.5 mA
on conductive parts with
PE connection
1 mA/ kW for devices with
heating elements P > 3.5 kW
Contact
current
IEA
≤0.5mA
on conductive parts
without PE connection
≤ 0.5 mA
on conductive parts
without PE connection
8. Making measurements with the BENNING ST 710
8.1 Preparations for making measurements
OperateandstoretheBENNINGST710onlyatthespeciedstorageandoperatingtempera-
tures conditions. Do not permanently expose the device to sunlight.
- Check rated voltage and rated current details specified on the safety measuring lines.
- Strong sources of interference in the vicinity of the BENNING ST 710 can lead to unstable
readings and measuring errors.
Before starting the BENNING ST 710, always check the device, the lines and the
test object for damages.
Before starting the test, switch the test object on (mains switch ON).
01/ 2009
BENNING ST 710
15
At the beginning of the test it has to be checked whether the selected testing
procedure complies with the protection class of the connected test object.
8.1.1 Switching the BENNING ST 710 ON/ OFF
Press and hold the keys 2 and 3 for approx. 3 seconds to switch the BENNING ST 710 on.
2acousticsignalsconrmthat thedeviceisswitched on. Pressthekeysagain toswitchthe
device off.
After approx. 3 minutes, the BENNING ST 710 switches off automatically (APO, Auto Power-
Off). It switches on again when the keys 2 and 3 are pressed. An acoustic signal indicates that
the device has switched off automatically. During voltage measurement on an external shock-
proof socket, the automatic switch-off is deactivated.
8.1.2 Testing procedure
The BENNING ST 710 is intended for electrical safety tests according to DIN VDE 0701/ 0702
and ÖVE/ ÖNORM E 8701. Please refer to the current version of the standards for detailed
information concerning the tests and limiting values.
Automatically,theBENNINGST710veriesthetypeoftheconnectedtestobjectandinforms
the user in case of incorrect preselection of the testing procedure [2...4]
8.2 Testing of electrical devices / equipment according to DIN VDE 0701/ 0702 and ÖVE/
ÖNORM E 8701
Prior to test, a visual inspection of the test object has to be carried out. In case
of possible damages, the test must be stopped.
8.2.1 Testing of devices of protection class I
- Testing of devices with protective conductor and accessible conductive parts which are
connected to the protective conductor
- Connect the test object to the test socket 1 of the BENNING ST 710.
- Plug the 4 mm safety plug of the test cable with alligator clip into the 4 mm safety socket 6
and establish a connection with a metal part of the test object.
- Switch the test object on.
- Press the key 2 to start the automatic testing procedure.
- The test starts with measuring the protective conductor resistance RPE. If RPE>~100Ω,the
measurement is stopped without a measuring result and a cross is shown next to the RPE
symbol. "FAIL" appears on the display to confirm that the measurement has been stopped.
- If RPE<20Ω(buthigherthanthemaximumadmissiblelimitingvalue),themeasuredvalue
of RPE is shown on the display. A next to the RPE symbol confirms that the limiting value
has been exceeded.
01/ 2009
BENNING ST 710
16
- If RPE is lower than the admissible limiting value, the measured value of RPE is shown and
a appears next to the RPE symbol. Now, the RPE measurement is carried out again with
reversed polarity. After the RPE test has been passed, the test of the insulating resistance is
started.
- If "Lo LOAD" is shown on the display, please check whether the test object is switched on.
-
Press the key 2 to continue the testing procedure in case of the load being too low (RL-N<100kΩ).
- If the insulating resistance RISO is higher than the admissible limiting value, a appears
next to the RISO symbol.
- Similarly, a is shown next to the IEA symbol, if the protective conductor current IEA is lower
than the admissible limiting value.
- The test is considered to be passed, if "PASS" is shown on the display.
Seegure3: TestingofdevicesofprotectionclassI(deviceswithprotectiveconductorand
accessible conductive parts which are connected to the protective conductor)
Note on measuring the protective conductor resistance:
- Alternatively, the measurement of the protective conductor resistance RPE can be carried
out as permanent measurement (max. 3 minutes). For this purpose press the key 2 for
approx. > 5 sec. until the symbol appears on the display. Check the connecting line
of the test object by bending it over the entire length in order to detect weak points or
a break of the protective conductor. The BENNING ST 710 continuously records the
current measured value on the display and stores the maximum value in the memory. By
pressing the key 2 again, the measurement is carried out with reversed polarity. Press
the key again to indicate the maximum value of RPE on the display and to continue the
testing procedure as described in section 8.2.1.
01/ 2009
BENNING ST 710
17
8.2.2 Testing of devices of protection class II (shock-proof) and of devices of
protection class III (safety extra-low voltage)
- Testing of devices without protective conductor and with accessible conductive parts
- Connect the test object to the test socket 1 of the BENNING ST 710.
- Establish a connection between the 4 mm test socket 6 and a metal part of the test object
by means of the test cable with alligator clip.
- Switch the test object on.
- Press the key 3 to start the automatic testing procedure.
- If "Lo LOAD" is shown on the display, please check whether the test object is switched on.
- Press the key 3 to continue the testing procedure in case of the load being too low (RL-N<
100kΩ).
- If the insulating resistance RISO is higher than the admissible limiting value, a appears
next to the RISO symbol.
- Similarly, a is shown next to the IEA symbol, if the contact current IEA is lower than the
admissible limiting value.
- The test is considered to be passed, if "PASS" is shown on the display.
Note on measuring the insulating resistance for test objects of protection class III:
- Duetothepresetlimitingvalueof2MΩfortestobjectsofprotectionclassII,forthetesting
of test objects of protection class III it has to be observed that measured values between
thelimitingvaluesof2MΩ(protectionclassII)andupto0.25MΩ(protectionclassIII)are
indicated with a next to the RISO symbol.
Seegure4: TestingofdevicesofprotectionclassII(shock-proofdeviceswithoutprotective
conductor and with accessible conductive parts) and testing of devices of pro-
tection class III (safety extra-low voltage)
8.2.3 Cord test
The cord test can be used both for the testing of IEC power cords (device connecting cables with
IEC coupler) and for the testing of cable reels, multiple distributors and extension cables.
8.2.3.1 Testing of IEC power cords (IEC adapter cables)
- Connect the IEC power cord to be tested to the BENNING ST 710 by means of the IEC
connector 7 and the test socket 1.
- Press the key 4 to start the automatic testing procedure.
- The test starts with measuring the protective conductor resistance RPE.
- Depending on whether the value is higher or lower than the limiting value, a or a is
indicated next to the RPE symbol.
The protective conductor resistance depends on the length and cross-section
of the line to be tested. It is possible that the measuring result is acceptable
although the BENNING ST 710 indicates a next to the RPE symbol.
- Please refer to Table 1 for typical resistance values of lines.
01/ 2009
BENNING ST 710
18
Cross-section
Length
1.0 mm² 1.5 mm² 2.5 mm²
5 m 0.1Ω 0.06Ω 0.04Ω
10 m 0.2Ω 0.12Ω 0.08Ω
25 m 0.5Ω 0.3Ω 0.2Ω
50 m 1.0Ω 0.6Ω 0.4Ω
Table 1:
Resistance values of the protective conductor depending on length and cross-section
- After the RPE test has been passed, the measurement of the insulating resistance is carried
out automatically.
- Depending on whether the value is higher or lower than the limiting value, a or a is
indicated next to the RISO symbol.
- After the RISO test has been passed, the external conductor (L) and the neutral conductor
(N) are checked for line breaks and short-circuits. A passed test regarding line breaks and
short-circuits is indicated by a next to the and the "GOOd“ symbol.
- The "PASS" symbol confirms successful testing of the entire testing procedure.
- If the test regarding line breaks and short-circuits has failed, one of the following symbols is
indicated instead of the "GOOd" symbol:
- "OPEN" symbol:
confirms a line break of the external conductor (L) or neutral conductor (N)
- "Short" symbol:
confirms a short-circuit between the external conductor (L) and the neutral conductor (N)
Seegure5a: TestingofdeviceconnectingcableswithIECconnector
Note on measuring the protective conductor resistance:
- Alternatively, the measurement of the protective conductor resistance RPE can be carried
out as permanent measurement (max. 3 minutes). For this purpose press the key 2 for
approx. > 5 sec. until the symbol appears on the display. Check the connecting line of the
test object by bending it over the entire length in order to detect weak points or a break of
the protective conductor. The BENNING ST 710 continuously records the current measured
value on the display and stores the maximum value in the memory. By pressing the key
4 again, the measurement is carried out with reversed polarity. Press the key 4 again to
indicate the maximum value of RPE on the display and to continue the testing procedure as
described in section 8.2.3.1.
8.2.3.2 Testing of cable reels, multiple distributors and extension cables
- Connect the IEC power cord (IEC adapter cable) included in the scope of delivery to the IEC
connector 7 of the BENNING ST 710.
- Connect the line to be tested to the test socket 1 and to the shock-proof socket of the IEC
power cord.
- Press the key 4 to start the automatic testing procedure.
- The further testing procedure corresponds to the testing procedure described in section
8.2.3.1.
Seegure5b: Testingoflines,multipledistributorsandcablereels
8.3 Voltage measurement on external shock-proof socket
- Connect the IEC power cord (IEC adapter cable) to the IEC connector 7 of the
BENNING ST 710.
- Connect the shock-proof plug to the shock-proof socket to be tested. With the mains voltage
being applied, the voltage measurement will start automatically.
- Depending on the external conductor position (right or left) of the shock-proof socket, the
voltage potentials between the connecting terminals L, N and PE are indicated.
01/ 2009
BENNING ST 710
19
or
Only the voltage potentials between the individual connections L, N and PE are
measured. The measurement does not provide any information on the proper
installation of the shock-proof socket. There will be no warning in case of a
dangerous contact voltage of the PE conductor!
Seegure6: Voltagemeasurementonexternalshock-proofsocket
9. Maintenance
Before opening the BENNING ST 710, make quite sure that it is voltage free!
Electrical danger!
Work on the opened BENNING ST 710 under voltage may be carried out only by skilled
electricians with special precautions for the prevention of accidents.
Make the BENNING ST 710 voltage free as follows before opening the instrument:
- Switch the tester off.
- Remove all connecting cables from the object.
9.1 Securing the instrument
Under certain circumstances safe operation of the BENNING ST 710 is no longer ensured, for
example in the case of:
- Visible damage of the casing.
- Incorrect measurement results.
- Recognisable consequences of prolonged storage under improper conditions.
- Recognisable consequences of extraordinary transportation stress.
In such cases the BENNING ST 710 must be switched off immediately, disconnected from the
measuring points and secured to prevent further utilisation.
9.2 Cleaning
Clean the casing externally with a clean dry cloth (exception: special cleaning wipers). Avoid
using solvents and/ or scouring agents for cleaning the instrument. It is important to make sure
that the battery compartment and battery contacts are not contaminated by leaking electrolyte.
If electrolyte contamination or white deposits are present in the region of the batteries or battery
casing, clean them too with a dry cloth.
9.3 Battery change
Before opening the BENNING ST 710, make quite sure that it is voltage free!
Electrical danger!
The BENNING ST 710 is supplied by six 1.5 V batteries/ type AA (IEC LR6).
A battery change (see Figure 7) is required, if the battery symbol appears in the display unit 5.
Proceed as follows to replace the batteries:
- Switch the BENNING ST 710 off.
- Put the BENNING ST 710 face down and unscrew the screw of the battery compartment
cover.
- Lift off the battery compartment cover (in the area of the housing slots) from the bottom part
of the battery compartment.
- Remove the discharged batteries from the battery compartment.
- Then, insert the batteries into the battery compartment at the provided places (please
observe correct polarity of the batteries).
- Lock the battery compartment cover into place on the bottom part and tighten the screw.
Seegure7: Batteryreplacement
Make your contribution to environmental protection! Do not dispose of
discharged batteries in the household garbage. Instead, take them to a
collecting point for discharged batteries and special waste material. Please
inform yourself in your community.
01/ 2009
BENNING ST 710
20
9.4 Calibration
Tomaintainthespeciedprecisionofthemeasurementresults,theinstrumentmustberecali-
brated at regular intervals by our factory service. We recommend a recalibration interval of one
year. Send the appliance to the following address:
BENNING Elektrotechnik & Elektronik GmbH & Co. KG
Service Centre
Robert-Bosch-Str. 20
D - 46397 Bocholt
10. Environmental notice
At the end of the product’s useful life, please dispose of it at appropriate collection
points provided in your country.
01/ 2009
BENNING ST 710
F
21
Notice d’emploi
BENNING ST 710
Contrôleur d'appareil pour les tests de sécurité d'appareils et d'équipements électriques por-
tables
- contrôle conformément à DIN VDE 701/ 0702, ÖVE/ ÖNORM E 8701
- contrôle des enrouleurs de câble, des câbles de distribution multiple et des câbles d'ali-
mentation CEI
- mesure de tension sur une prise de courant de sécurité externe
Sommaire
1. Remarques à l’attention de l’utilisateur
2. Consignes de sécurité
3. Fourniture
4. Description de l’appareil
5. Indications générales
6. Conditions d’environnement
7. Indication des valeurs électriques
8. Mesure avec le BENNING ST 710
9. Entretien
10. Information sur l’environnement
1. Remarques à l’attention de l’utilisateur
Cette notice d’emploi s’adresse aux
- électrotechniciens,personnesqualiéeset
- personnes instruites dans le domaine électrotechnique
Le BENNING ST 710 est conçu pour effectuer des mesures dans un environnement sec. Il ne
doit pas être utilisé dans des circuits dont la tension nominale est supérieure à 300 V CA (pour
de plus amples informations, consulter la section « Conditions d’environnement »).
Les symboles suivants sont utilisés dans cette notice d’emploi et sur le BENNING ST 710:
Permet le déplacement et l’application autours d’un conducteur actif non isolé.
Attention ! Danger électrique !
Setrouvedevantlesremarquesdevantêtrerespectéesand‘évitertoutrisquepour
les personnes.
Attention ! Se conformer à la documentation !
Ce symbole indique qu‘il faut tenir compte des remarques contenues dans cette
noticed‘emploipouréviterlesrisques.
CesymbolesurleBENNINGST710signiequeleBENNINGST710estdotéd‘une
isolation double (classe de protection II).
CesymbolesurlecontrôleurBENNINGST710signiequeleBENNINGST710est
conforme aux directives de l'UE.
Cesymboleapparaîtsurl‘afchageindiquantquelabatterieestdéchargée.
(CA) Tension alternative ou courant alternatif.
Terre (tension à la terre).
01/ 2009
BENNING ST 710
F
22
2. Consignes de sécurité
Cet appareil a été fabriqué et contrôlé conformément à
DIN VDE 0404 Partie 1 et 2
DIN VDE 0411 Partie 1/ EN 61010 Partie 1
DIN VDE 0413 Partie 1/ EN 61557 Partie 1, 2, 4 et 10
et a quitté les ateliers de production dans un état technique parfait. Pour conserver cet état et
garantir un service sans risques, l’utilisateur doit se conformer aux remarques et aux avertisse-
ments contenus dans cette notice d’utilisation. Un maniement incorrect de l'appareil et la non ob-
servation des avertissements pourraient provoquer des blessures graves ou danger de mort !
Attention ! Soyez prudents si vous travaillez avec les conducteurs denudés ou
avec des lignes principales. Il y a le risque d'un électrochoc très dangereux au
toucher de conducteurs !
Le BENNING ST 710 doit être utilisé uniquement dans des circuits électriques
de la catégorie de protection contre les surtensions II avec des conducteurs
de max. 300 V AC à la terre.
Veuillez noter que les travaux au niveau d‘éléments et d‘installations
conducteurs de tension sont toujours dangereux. Déjà les tensions de 30 V CA
et 60 V CC peuvent être mortelles.
Assurez-vous, avant chaque mise en marche, que l‘appareil ne sont pas
détériorés.
Si l’on considère que l’utilisation sans risques n’est plus possible, il faut mettre l’appareil hors
service et le protéger contre toute utilisation involontaire.
Une utilisation sans risques n’est plus possible
- quand l’appareil présentent des détériorations visibles,
- quand l’appareil ne fonctionne plus,
- après un stockage prolongé dans de mauvaises conditions,
- aprèsdesconditionsdifcilesdetransport.
- l’appareil sont mouillés.
Afin d’exclure tout risque
- ne touchez pas les parties dénudées des câbles au niveau des pointes de
mesure,
- raccordez les câbles aux douilles de l'instrument de mesure qui sont
pourvues de marquages correspondants
Entretien :
N'ouvrez pas l'appareil de mesure, parce qu'il ne contient pas des composants
qui peuvent être réparés par l'utilisateur. Toute réparation et tout service ne
peuvent être fait que par du personnel qualifié.
Nettoyage :
Nettoyer le contrôleur régulièrement avec un chiffon sec et un détergent.
N'utilisez jamais des produits de polissage ou des solvants.
3. Fourniture
Font partie de la fourniture du BENNING ST 710 :
3.1 un BENNING ST 710,
3.2 un câble d'essai avec pince crocodile,
3.3 un câble d'alimentation CEI (câble adaptateur CEI)
3.4 un étui compact de protection,
3.5 six piles rondes de 1,5 V mignon (IEC LR 6/ AA) montées initialement dans l’appareil,
3.6 une notice d’emploi.
Remarque concernant les pièces d’usure :
- Le BENNING ST 710 est alimenté par six piles rondes incorporées de 1,5 V mignon (IEC
LR6/ AA).
Remarque concernant les accessoires en option :
- pince de courant de fuite BENNING CM 9 pour la mesure du courant différentiel sur les
appareils monophasés et triphasés (044065)
- plaquettes d'essai « Next test date », 300 pièces (756213)
- adaptateur de mesure afin de raccorder une fiche mâle de sécurité à un coupleur de sécurité
pour la mesure du courant différentiel, du courant du conducteur de protection et du courant
de charge sur les appareils monophasés, les conducteurs sorties séparément (044131)
- adaptateur de mesure pour appareils triphasés
01/ 2009
BENNING ST 710
F
23
pour la mesure RPE et RISO :
- coupleur CEE 16 A - fiche mâle de sécurité (044122)
- coupleur CEE 32 A - fiche mâle de sécurité (044123)
pour la mesure du courant différentiel, du courant du conducteur de protection et du courant
de charge :
- coupleur CEE 16 A - fiche mâle CEE (044127)
- coupleur CEE 32 A - fiche mâle CEE (044128)
- Les formulaires de rapport d'essais « Contrôle d'appareils électriques » peuvent être télé-
chargés gratuitement sur www.benning.de
4. Description de l’appareil
voirg.1: partieavantdel’appareil
voirg.2: facesupérieuredel'appareil
Lesélémentsd’afchageetdecommandereprésentésàlag.1et2sontlessuivants:
1 prise de test, afin de raccorder l'appareil à tester,
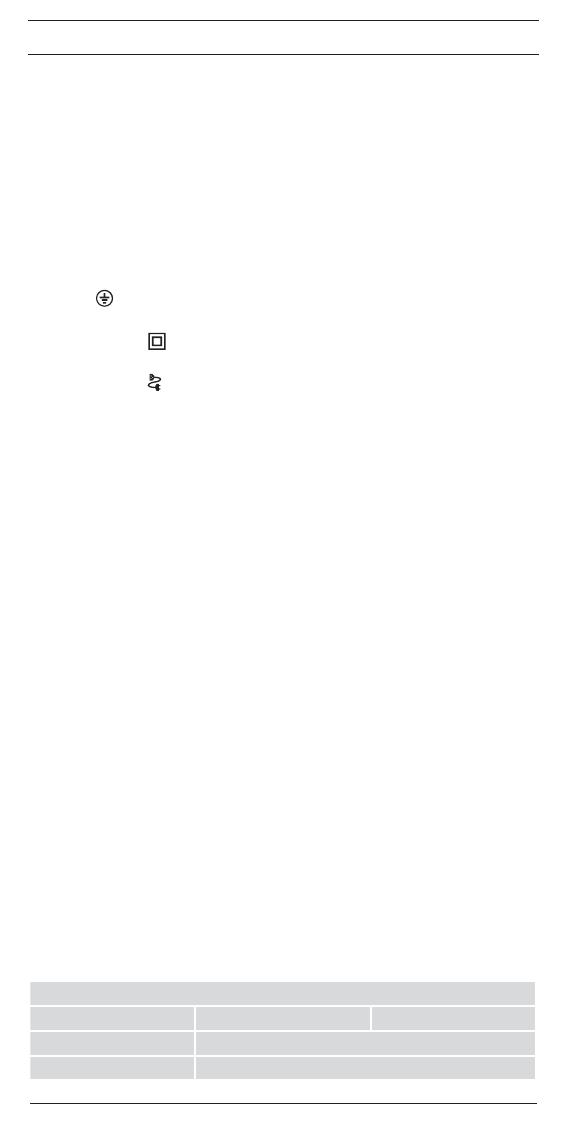
2 touche , contrôle des appareils de la classe de protection I (les appareils avec conduc-
teur de protection et avec des pièces touchables conductrices qui sont connectées au
conducteur de protection),
3 touche symbole , contrôle des appareils de la classe de protection II (appareils à dou-
ble isolation sans conducteur de protection et avec des pièces touchables conductrices) et
contrôle des appareils de la classe de protection III (basse tension de protection),
4 touche symbole , contrôle de câbles, des câbles de distribution multiple et des câble de
connexion d'appareil avec fiche mâle CEI
5 afficheur à cristaux liquides (LCD), affiche le progrès du contrôle et des résultats de me-
sure individuels,
6 douille de test 4 mm, afin de raccorder le câble d'essai avec pince crocodile
7 fiche mâle CEI (connecteur CEI), afin de raccorder le câble d'alimentation CEI
5. Indications générales
Le contrôleur BENNING ST 710 sert à effectuer des contrôles de sécurité conformément à DIN
VDE 0701/ 0702, BGV A3, ÖVE/ ÖNORM E8701 et NEN 3140.
L'appareil BENNING ST 710 contrôle automatiquement le type de l'objet de contrôle connecté
et indique à l'utilisateur la présélection incorrecte de la procédure de contrôle [2...4]: Les va-
leurs limites préréglées et les résultats de mesure avec information « bon/ mauvais » facilitent
l'évaluation du contrôle.
6. Conditions d’environnement
- Le BENNING ST 710 est conçu pour procéder à la mesure dans des environnements
secs,
- Hauteur barométrique pour les mesures : maximum 2000 m,
- Catégoriedesurtension/catégoried’implantation:IEC61010-1→300VcatégorieII,
- Degré d’encrassement: 2,
- Type de protection: IP 40 (DIN VDE 0470-1 IEC/ EN 60529),
IP 40 signifie: protection contre l’accès aux composants dangereux et protection contre les
impuretés solides > 1 mm de diamètre, (4 - premier indice).
Aucune protection contre l’eau, (0 - second indice).
- EMC: EN 61326-1
- Température de travail et humidité relative de l’air:
Avec une température de travail de 0 °C à 30 °C: humidité relative de l’air inférieure à
80 %,
Avec une température de travail de 31 °C à 40 °C: humidité relative de l’air inférieure à
75 %,
- Température de stockage: Le BENNING ST 710 peut être stocké à des températures de
- 25 °C à + 65 °C (humidité de l’air de 0 à 80 %). Pour cela, il faut retirer la pile hors de
l’appareil.
7. Indication des valeurs électriques
Remarque: La précision de mesure est la somme
- d’une part relative de la valeur mesurée et
- d’un nombre de chiffres (c.-à-d. les chiffres de la dernière position).
Cette précision de mesure est valable pour des températures comprises entre 18 °C et 28 °C et
pour une humidité relative de l’air inférieure à 80 %.
7.1 Resistance de conducteur de la terre de protection
Plage de mesure Résolution Précision de mesure
0,05Ω-20 0,01Ω 5 % ± 2 chiffres
courant de test: >200mA(2)
tension à circuit ouvert: > 4 V nominal
01/ 2009
BENNING ST 710
F
24
7.2 Résistance d’isolement
Plage de mesure Résolution Précision de mesure
0,5MΩ-20MΩ 0,01MΩ 5 % ± 2 chiffres
0,1MΩ-0,49MΩ 0,01MΩ 10 % ± 2 chiffres
tension de test:
500 VDC @ 1 mA nominal, + 20 %, - 0 %
courant de test: >1mAde500kΩ,<2mAde2
7.3 Courant de conducteur de la terre de protection, courant de contact en utilisant la
méthode courant de fuite équivalent
Plage de mesure Résolution Précision de mesure
0,10 mA - 20 mA 0,01 mA 5 % ± 2
chiffres
tension de test
:40 VAC, 50 Hz
courant de test
:<5mAde2kΩ
7.4 Test de ligne
- mesure de la résistance du conducteur de protection selon 7.1
- mesure de la résistance d'isolement selon 7.2
- test de rupture de ligne du conducteur extérieur (L) et du conducteur neutre (N)
- essai en court-circuit du conducteur extérieur (L) et du conducteur neutre (N)
7.5 Mesure de tension sur une prise de courant de sécurité externe
Plage de mesure Résolution Précision de mesure Protection contre
les surcharges
50 V - 270 VAC 1 V
<5%delavaleur
finale de la plage de
mesure
300 V
Afchage:
- tension entre le conducteur extérieur (L) et le conducteur neutre (N)
- tension entre le conducteur extérieur (L) et le conducteur de terre (PE)
- tension entre le conducteur neutre (N) et le conducteur de terre (PE)
7.6 Valeurs limites selon DIN VDE 0701/ 0702 et ÖVE/ ÖNORM E 8701-1
Remarque:
Les valeurs limites préréglées imprimées en gras sont mémorisées dans l'appareil BENNING ST 710.
Classe de protection
I
Classe de
protection
II, III
Test de
ligne
Résistance
du
conducteur
de
protection
RPE
pour les lignes avec un courant assigné
≤16A:
≤ 0,3 Ω jusqu'à une longueur de 5 m,
pour7,5msupplémentaires:plus0,1Ω,
max.1Ω,
pour les lignes avec des courants
assignés plus hauts, il s'applique la valeur
de résistance ohmique calculée
≤ 0,3 Ω
(voir classe de
protection I)
Résistance
d'isolement
RISO
≥ 1
≥2MΩpourlapreuved'une
séparation sûre (transformateur)
≥0,3MΩpourlesappareilsavecdes
éléments de chauffage
≥ 2 MΩ (classe de
protection II)
,
≥0,25MΩ(classe
de protection III),
≥ 1
Courant du
conducteur
de
protection
IEA
≤ 3,5 mA
aux pièces conductrices avec connexion
PE
1 mA/ kW pour les appareils avec des
éléments de chauffage
P > 3,5 kW
Courant de
contact
IEA
≤0,5mA
aux pièces conductrices sans connexion
PE
≤ 0,5 mA
aux pièces
conductrices sans
connexion PE
01/ 2009
BENNING ST 710
F
25
8. Mesure avec le BENNING ST 710
8.1 Préparation de la mesure
Utilisez et stockez le BENNING ST 710 uniquement conformément aux conditions de températu-
res de service et de stockage; évitez de l’exposer longtemps aux rayons du soleil.
- Contrôler les indications de tension nominale et de courant nominal sur les câbles de me-
sure de sécurité.
- Toutes fortes sources de parasites à proximité du BENNING ST 710 peuvent entraîner un
affichage instable et des erreurs de mesure.
Assurez-vous, avant chaque mise en marche, que l'appareil, les câbles et
l'objet de contrôle ne sont pas endommagés.
Avant de commencer le contrôle, allumez l'objet de contrôle ( interrupteur
d'alimentation sur « Marche »)
Avant de commencer le contrôle, assurez-vous que la procédure de contrôle
sélectionnée convient à la classe de protection de l'objet de contrôle
connecté.
8.1.1 Mise en marche/ en arrêt du contrôleur BENNING ST 710
L'appareil BENNING ST 710 est allumé en maintenant appuyées les touches 2 et 3 pour 3
secondesenviron.Lamiseenmarcheestconrméepar2signauxacoustiques.Appuyezsurles
touchesencoreunefoisand'éteindrel'appareil.
Après 3 minutes environ, l'appareil BENNING ST 710 s'éteint automatiquement (APO, Auto-
Power-Off). L'appareil s'allume de nouveau quand les touches 2 et 3 sont appuyées. Un signal
acoustique signale l'arrêt automatique de l'appareil. Pendant la mesure de tension sur une prise
de courant de sécurité externe, l'arrêt automatique est désactivé.
8.1.2 Procédure de contrôle
Le contrôleur BENNING ST 710 sert à effectuer des contrôles de sécurité conformément à DIN
VDE 0701/ 0702 et ÖVE/ ÖNORM E 8701. Pour plus d'informations concernant les contrôles et
les valeurs limites, référez-vous aux versions actuelles des normes correspondantes.
L'appareil BENNING ST 710 contrôle automatiquement le type de l'objet de contrôle connecté et
indique à l'utilisateur la présélection incorrecte de la procédure de contrôle [2...4].
8.2 Contrôle d'appareils et d'équipements électriques conformément à DIN VDE 0701/
0702 et ÖVE/ ÖNORM E 8701
Avant de commencer le contrôle, effectuez un contrôle visuel de l'objet de
contrôle. Au cas où l'objet de contrôle serait endommagé, interrompez le
contrôle.
8.2.1 Contrôle d'appareils de la classe de protection I
- Contrôle des appareils avec conducteur de protection et avec des pièces touchables
conductrices qui sont connectées au conducteur de protection
- Raccordez l'objet de contrôle à la prise de test 1 du contrôleur BENNING ST 710.
- Branchez le connecteur de sécurité 4 mm du câble d'essai à la douille de sécurité 6 et
établissez une connexion avec une pièce métallique de l'objet de contrôle.
- Allumez l'objet de contrôle.
- Appuyez sur la touche 2 afin de commencer le contrôle automatique.
- Le contrôle commence avec une mesure de la résistance du conducteur de protection RPE.
Si RPE>~100Ω,lamesureestinterrompuesansrésultatdemesureetunecroixestaffichée
à côté du symbole RPE. L'interruption du contrôle est confirmée par l'information « FAIL » sur
l'écran.
01/ 2009
BENNING ST 710
F
26
- Si RPE<20Ω,maissupérieuràlavaleurlimitemaximaleadmissible,lavaleurmesuréeRPE
est affichée sur l'écran. Le symbole à côté du symbole RPE confirme le dépassement de
la valeur limite.
-
Si RPE est inférieur à la valeur limite admissible, la valeur mesurée RPE est affichée et le symbole
est affiché à côté du symbole RPE. Maintenant, la mesure RPE est répétée avec polarité
inversée. Suite au contrôle RPE réussi, le contrôle de la résistance d'isolement est lancé.
- Au cas où « Lo LOAD » est affiché sur l'écran, vérifiez si l'objet de contrôle est allumé.
- Appuyez sur la touche 2 afin de continuer le contrôle en cas d'une charge trop faible (RL-N
<100kΩ).
- Si la résistance d'isolement RISO est supérieure à la valeur limite admissible, le symbole
est affiché à côté du symbole RISO.
- De même, le symbole est affiché à côté du symbole IEA, si le courant du conducteur de
protection IEA est inférieur à la valeur limite admissible.
- Le contrôle est considéré comme réussi, si le symbole « PASS » est affiché sur l'écran.
01/ 2009
BENNING ST 710
F
27
voirgure3: ContrôledesappareilsdelaclassedeprotectionI(lesappareilsavecconduc-
teur de protection et avec des pièces touchables conductrices qui sont connec-
tées au conducteur de protection)
Remarque concernant la mesure de la résistance du conducteur de protection :
- Alternativement, la mesure de la résistance du conducteur de protection RPE peut être
effectuée en tant que mesure permanente (max. 3 minutes). Pour cela, appuyez sur
la touche 2 pour > 5 secondes environ jusqu'à ce que le symbole soit affiché sur
l'écran. Agitez le câble de raccordement de l'objet de contrôle sur toute sa longueur
afin de détecter un point faible ou une rupture du conducteur de protection. L'appareil
BENNING ST 710 saisit de manière continue la valeur mesurée actuelle sur l'écran et
enregistre la valeur maximale dans la mémoire. Appuyez encore une fois sur la touche
2 afin d'effectuer la mesure avec polarité inversée. Appuyez encore une fois sur la
touche 2 afin d'afficher la valeur maximale RPE sur l'écran et de continuer le contrôle
comme décrit au chapitre 8.2.1.
8.2.2 Contrôle d'appareils de la classe de protection II (isolation double) et d'appa-
reils de la classe de protection III (basse tension de protection)
- Contrôle des appareils sans conducteur de protection et avec des pièces touchables
conductrices
- Raccordez l'objet de contrôle à la prise de test 1 du contrôleur BENNING ST 710.
- Établissez une connexion entre la douille de test 4 mm 6 et une pièce métallique de l'objet
de contrôle au moyen du câble d'essai avec pince crocodile.
- Allumez l'objet de contrôle.
- Appuyez sur la touche 3 afin de commencer le contrôle automatique.
- Au cas où « Lo LOAD » est affiché sur l'écran, vérifiez si l'objet de contrôle est allumé.
- Appuyez sur la touche 3 afin de continuer le contrôle en cas d'une charge trop faible (RL-N
<100kΩ).
- Si la résistance d'isolement RISO est supérieure à la valeur limite admissible, le symbole
est affiché à côté du symbole RISO.
- De même, le symbole est affiché à côté du symbole IEA, si le courant de contact IEA est
inférieur à la valeur limite admissible.
- Le contrôle est considéré comme réussi, si le symbole « PASS » est affiché sur l'écran.
Remarque concernant la mesure de la résistance d'isolement pour les objets de contrôle
de la classe protection III :
- Àcausedelavaleurlimiteprérégléede2MΩpourlesobjetsdecontrôledelaclasse
de protection II, assurez-vous lors du contrôle des objets de contrôle de la classe de
protectionIIIque lesvaleursmesurées entrelesvaleurs limitesde2 MΩ(classede
protectionII)jusqu'à0,25MΩ(classedeprotectionIII)sontaffichéesavecunsymbole
à côté du symbole RISO.
voirgure4: ContrôledesappareilsdelaclassedeprotectionII(appareilsàdoubleisolation
sans conducteur de protection et avec des pièces touchables conductrices) et
contrôle des appareils de la classe de protection III (basse tension de protec-
tion)
8.2.3 Test de ligne
Le test de ligne peut être utilisé non seulement pour le contrôle de câbles d'alimentation CEI
(câbles de connexion d'appareil avec coupleur CEI) mais aussi pour le contrôle des enrouleurs
de câble, de câbles de distribution multiple et de rallonges électriques.
01/ 2009
BENNING ST 710
F
28
8.2.3.1 Contrôle de câbles d'alimentation CEI ( câble d'adaptateur CEI )
- Connectez le câble d'alimentation CEI à contrôler à l'appareil BENNING ST 710 au moyen
de la fiche mâle CEI 7 et la prise de test 1.
- Appuyez sur la touche 4 afin de commencer le contrôle automatique.
- Le contrôle commence avec une mesure de la résistance du conducteur de protection RPE.
- En fonction du dépassement ou sous-dépassement de la valeur limite, un symbole ou
est affiché à côté du symbole RPE.
La résistance du conducteur de protection dépend de la longueur et de la
section transversale du câble à contrôler. Il est possible que le résultat de
mesure est acceptable bien qu'un symbole soit affiché à côté du symbole
RPE sur l'écran de l'appareil BENNING ST 710.
- Vous trouverez les résistances typiques des câbles dans le tableau 1.
Section du câble
Longueur 1,0 mm² 1.5 mm² 2,5 mm²
5 m 0,1Ω 0,06Ω 0,04Ω
10 m 0,2Ω 0,12Ω 0,08Ω
25 m 0,5Ω 0,3Ω 0,2Ω
50 m 1,0Ω 0,6Ω 0,4Ω
tableau 1: Résistances du conducteur de protection en fonction de la longueur et de la section
du câble
- Suite au contrôle RPE réussi, la mesure de la résistance d'isolement est effectuée automati-
quement.
- En fonction du dépassement ou sous-dépassement de la valeur limite, un symbole ou
est affiché à côté du symbole RISO.
- Suite au contrôle RISO réussi, le conducteur extérieur (L) et le conducteur neutre (N) sont
contrôler en vue d'une rupture de fil et d'un court-circuit. Un contrôle de rupture de fil et un
essai en court-circuit réussis sont affichés au moyen d'un symbole à côté des symboles
et « GOOd ».
- Le symbole « PASS » confirme que la procédure de contrôle entière est réussie.
- Si le contrôle de rupture de fil et l'essai en court-circuit ne sont pas réussis, un des symboles
suivants est affiché au lieu du symbole « GOOd » :
- le symbole « OPEN » :
confirme qu'il y a une rupture de fil du conducteur extérieur (L) ou du conducteur neutre
(N)
- le symbole « SHORT » :
Confirme qu'il y a un court-circuit entre le conducteur extérieur (L) et le conducteur
neutre (N)
voir figure 5a: Contrôle des câbles de connexion d'appareil avec fiche mâle CEI
Remarque concernant la mesure de la résistance du conducteur de protection :
- Alternativement, la mesure de la résistance du conducteur de protection RPE peut être
effectuée en tant que mesure permanente (max. 3 minutes). Pour cela, appuyez sur
la touche 2 pour > 5 secondes environ jusqu'à ce que le symbole soit affiché sur
l'écran. Agitez le câble de raccordement de l'objet de contrôle sur toute sa longueur
afin de détecter un point faible ou une rupture du conducteur de protection. L'appareil
BENNING ST 710 saisit de manière continue la valeur mesurée actuelle sur l'écran et
enregistre la valeur maximale dans la mémoire. Appuyez encore une fois sur la touche
4 afin d'effectuer la mesure avec polarité inversée. Appuyez encore une fois sur la
touche 4 afin d'afficher la valeur maximale RPE sur l'écran et de continuer le contrôle
comme décrit au chapitre 8.2.3.1.
01/ 2009
BENNING ST 710
F
29
8.2.3.2 Contrôle d'enrouleurs de câble, de câbles de distribution multiple et de rallonges
électriques
- Raccordez le câble d'alimentation CEI (câble adaptateur CEI) compris dans le contenu de
l'emballage à la fiche mâle CEI 7 de l'appareil BENNING ST 710.
- Connectez le câble à contrôler à la prise de test 1 et à la fiche mâle de sécurité du câble
d'alimentation CEI.
- Appuyez sur la touche 4 afin de commencer le contrôle automatique.
- La suite du contrôle correspond à la procédure de contrôle du chapitre 8.2.3.1.
voirgure5b: Contrôledecâbles,decâblesdedistributionmultipleetd'enrouleursdecâble
8.3 Mesure de tension sur une prise de courant de sécurité externe
- Raccordez le câble d'alimentation CEI (câble adaptateur CEI) à la fiche mâle CEI 7 de
l'appareil BENNING ST 710.
- Connectez la fiche mâle de sécurité à la prise de courant de sécurité à contrôler. Lorsque la
tension du secteur est appliquée, la mesure de tension est lancée automatiquement.
- En fonction de la position du conducteur extérieur droite ou à gauche) de la prise de
courant de sécurité, les potentiels de tension entre les bornes L, N et PE sont affichés.
ou
Seuls les potentiels de tension entre les raccordements individuels L, N et
PE sont mesurés. La mesure ne donne aucune information sur l'installation
appropriée de la prise de courant de sécurité. Pas d'avertissement en cas d'une
tension de contact dangereuse du conducteur PE !
voirgure6: Mesuredetensionsuruneprisedecourantdesécuritéexterne
9. Entretien
Il faut absolument mettre le BENNING ST 710 hors tension avant de l‘ouvrir !
Danger électrique !
Seuls des électrotechniciens devant prendre des mesures particulières pour éviter les ac-
cidents sont autorisés à procéder à des travaux sur le BENNING ST 710 ouvert sous tension.
ProcédureàsuivrepourmettreleBENNINGST710horstensionavantdel‘ouvrir:
- Éteignez l'appareil de contrôle.
- Déconnectez tous les câbles de connexion de l'appareil.
9.1 Rangement sûr de l’appareil
Dans certaines conditions, la sécurité de travail avec le BENNING ST 710 peut ne plus être
garantie ; par exemple dans les cas suivants :
- dommages visibles sur le boîtier,
- erreurs lors des mesures,
- conséquences visibles d’un stockage prolongé dans des conditions inadéquates et
- conséquences visibles de conditions difficiles de transport.
Dans ces cas, il faut mettre le BENNING ST 710 immédiatement hors circuit, le retirer du point
de mesure et le protéger de manière à ne plus être utilisé.
9.2 Nettoyage
Nettoyez l’extérieur du boîtier avec un chiffon propre et sec ( seule exception : les chiffons
de nettoyage spéciaux). N’utilisez ni solvants ni produit de récurage pour nettoyer l’appareil.
Veiller absolument à ce que le logement et les contacts des piles ne soient pas souillés par de
l’électrolyte de pile.
Dans ce cas ou en cas de dépôts blancs à proximité des piles ou dans le logement, nettoyez-les
également avec un chiffon sec.
9.3 Remplacement des piles
Il faut absolument mettre le BENNING ST 710 hors tension avant de l‘ouvrir !
Danger électrique !
Le BENNING ST 710 est alimenté par six piles incorporées de 1,5 V/ AA (IEC LR 06).
Ilestnécessairederemplacerlespiles(voirg.7)quandlesymboledepiles5 apparaît sur
l’afchage.
01/ 2009
BENNING ST 710
F
30
Remplacez les piles de la manière suivante:
- Éteignez l'appareil BENNING ST 710.
- Posez l'appareil BENNING ST 710 sur la face avant et dévissez la vis du couvercle du
compartiment à piles.
- Soulevez le couvercle du compartiment à piles (au niveau des cavités du boîtier) de la partie
inférieure de l'appareil.
- Enlevez les piles déchargées du compartiment à piles.
- Insérez les piles dans le compartiment à piles aux positions correspondantes (veillez à la
bonne polarité).
- Encliquetez le couvercle du compartiment à piles dans la partie inférieure du boîtier et vissez
la vis.
voirgure7: remplacementdespiles
Apportez votre contribution à la protection de l‘environnement! Ne jetez pas
les piles dans les ordures ménagères. Vous pouvez les remettre à un point de
récupération des piles usées ou des déchets spéciaux. Veuillez vous informer
auprès de votre commune.
9.4 Étalonnage
Pourconserverlaprécisionspéciéedesrésultatsdemesure,ilfautfaireétalonnerrégulière-
ment l’appareil par notre service clients. Nous conseillons de respecter un intervalle d’étalon-
nage d’un an. Envoyez, pour cela, l’appareil à l’adresse suivante:
Benning Elektrotechnik & Elektronik GmbH & Co. KG
Service Center
Robert-Bosch-Str. 20
D - 46397 Bocholt
10. Information sur l’environnement
Une fois le produit en n de vie, veuillez le déposer dans un point de recyclage
approprié.
01/ 2009
BENNING ST 710
31
Návod k obsluze
BENNING ST 710
Přístrojovýtesterprobezpečnostnětechnickézkoušenípřenosnýchelektrickýchzařízení/pro-
vozníchprostředků
- ZkouškypodleDINVDE701/0702
- Zkouškykabelovýchcívek,vícenásobnýchrozvaděčůapřipojovacíchkabelůpřístrojů
- Měřenínapětínaexternízásuvcesochrannýmkontaktem
Obsah
1. Pokyny pro uživatele
2. Bezpečnostní pokyny
3. Obsah dodávky
4. Popis přístroje
5. Všeobecné údaje
6. Podmínky prostředí
7. Elektrické údaje
8. Měření s BENNING ST 710
9. Údržba
10. Ochrana životního prostředí
1. Pokyny pro uživatele
Tentonávodjeurčenpro
- odborníelektrikáři(EF),oprávněnéosobya
- elektrotechnickypoučenéosoby(EuP)
BENNINGST710jeurčenproměřenívsuchémprostředí.Nesmíbýtpoužitvobvodechsjme-
novitýmnapětímvyššímnež300VAC(Blíževkapitole6.„Podmínkyprostředí“).
VnávodukobsluzeanapřístrojiBENNINGST710jsoupoužitynásledujícísymboly:
JedovolenopřiložitNEBEZPEČNĚAKTIVNÍvodičenebojeodstranit.
Tentosymbolupozorňujenanebezpečíúrazuelektrickýmproudem.
Tento symbol upozorňuje na nebezpečí při používání přístroje BENNING ST 710
(řiďtesetechnickoudokumentací!).
TentosymbolnaměřicímpřístrojiBENNINGST710znamená,žejepřístrojopatřen
ochrannouizolací(ochranatřídyII).
TentosymbolnaBENNINGST710znamená,žeBENNINGST710splňujesměrnice
EU.
Tentosymbolseobjevínadispleji,kdyžjevybitábaterie.
(AC)Střídavénapětíneboproud.
Uzemnění(napětívůčizemi).
01/ 2009
BENNING ST 710
32
2. Bezpečnostní pokyny
Tentopřístrojjedlenormy
DINVDE0404část1a2
DINVDE0411část1/EN61010část1
DINVDE0413část1/EN61557část1,2,4a10
sestrojenaprověřenaopustilvýrobnízávodbezzávad.Proudrženítohotostavuaprozajištění
bezpečnéhoprovozu musíuživatel dbátupozornění avarování vtomto návoděobsažených.
Nesprávnéchováníanedodržovánívýstražnýchupozorněnímůževéstktěžkýmúrazům i se
smrtelnýminásledky.
Pozor při pracích v blízkosti holých vodičů nebo nosičů hlavního vedení.
Kontakt s vodiči může způsobit úder elektrickým proudem.
BENNING ST 710 může být použit jen v obvodech kategorie II s max. 300 V
AC proti zemi.
Dbejte na to, že práce na vodivých dílech a zařízeních jsou nebezpečné. Napětí
nad 30 V AC a 60 V DC mohou být pro lidi životu nebezpečná.
Před každým použitím prověřte, zda přístroj nejsou poškozeny.
Pokudje bezpečný provoz přístrojedále nemožný, přístroj neužívejte a zabraňte, aby s ním
nemohlynakládatanidalšíosoby.
Předpokládejte,žedalšíbezpečnýprovoznenímožný,
- kdyžpřístrojvykazujíviditelnápoškození,
- kdyžpřístrojnepracuje,
- podlouhémskladovánívnevyhovujícíchpodmínkách,
- poobtížnépřepravě,
- kdyžpřístrojjsouvlhké.
Aby se vyloučilo ohrožení
- nedotýkejte se kabelů s holými měřícími hroty,
- kabely zasuňte do odpovídajícím způsobem označených zdířek na měřícím
přístroji
Údržba:
Zkušební zařízení neotevírejte, neobsahuje žádné konstrukční díly, které by
mohly být uživatelem opraveny. Oprava a servis mohou být prováděny pouze
kvalifikovaným personálem.
Čištění:
Pouzdro pravidelně otřete do sucha utěrkou a čistícím prostředkem.
Nepoužívejte žádné leštící prostředky nebo rozpouštědla.
3. Rozsah dodávky
SoučástídodávkypřístrojeBENNINGST710je:
 3.1jedenměřicípřístrojBENNINGST710,
 3.2jedenkuskontrolníhokabelusupínacísvorkou,
 3.3jedenkuspřipojovacíhokabelupřístroje(připojovacíkabelIEC)
 3.4jednapraktickáochrannábrašna,
 3.5šest1,5Vmignonbaterie/AA(IECLR6),
 3.6návodkobsluze.
Upozorněnínaopotřebovatelnésoučástky:
- BENNINGST710jenapájenšestmazabudovanými1,5Vmignonbateriemi(AA/IECLR6)
Poznámkykvolitelnémupříslušenství:
- Kleštěproměřenísvodovýchproudů BENNINGCM9proměření rozdílových proudůna
jednofázovýchatrojfázovýchspotřebičích(044065)
- zkušebníštítky"Termínnásledujícízkoušky"300kusů(756213)
- měřícíadaptér zásuvekSchuko - Schukospojka pro měřenírozdílových proudů, proudů
ochrannýchvodičůazátěžovýchproudůnajednofázovýchspotřebičích,vodičevyvedené
jednotlivě(044131)
- měřícíadaptérprotřífázovéspotřebičeproměřeníRPE a RISO:
- 16 A CEE-spojka Schuko testeru (044122)
- 32 A CEE-spojka Schuko testeru (044123)
 proměřenírozdílovýchproudů,proudůochrannýchvodičůazátěžovýchproudů:
- 16 A CEE-spojka – CEE-konektor (044127)
- 32 A CEE-spojka – CEE-konektor (044128)
01/ 2009
BENNING ST 710
33
- Zkušební protokol "Prüfung elektrischer Geräte" (Zkoušení elektrických zařízení) si
můžetebezplatněstáhnoutnawww.benning.de
4. Popis přístroje
vizobr.1:  Přednístranapřístroje
vizobr.2:  Hornístranapřístroje
Naobr.1a2zobrazenéukazateleaovládacíprvkyjsoupopsánydále:
1 Zkušební zásuvka,propřipojenízkoušenéhozařízení,
2 -Tlačítko,zkoušenízařízenístřídouochranyI(zařízenísochrannýmvodičemavodivými
dílynechráněnýmiprotidoteku,kteréjsoupřipojenénaochrannývodič)
3 -Tlačítko se symbolem,zkoušenízařízenítřídyochranyII(zařízenísochrannouizolací
bezochrannéhovodičeasvodivýmidílynechráněnýmiprotidoteku)nebozkoušenízařízení
třídyochranyIII(bezpečnémalénapětí),
4 -Tlačítko se symbolem, zkoušení kabelů, vícenásobných rozvaděčů a připojovacích
vedenízařízeníspřipojovacízásuvkou
5 LCD-displej,zobrazujeprůběhzkouškyavýsledkyjednotlivýchměření
6 4 mm zkušební zdířka,propřipojenízkušebníhokabeluspřipojovacísvorkou
7 Připojovací zásuvka zařízení (IEC-zásuvka),propřipojenípřipojovacíhokabeluzařízení
5. Všeobecné údaje
BENNINGST710provádíelektrickébezpečnostnízkouškypodleDINVDE0701/0702.
BENNINGST710samostatněkontrolujedruhpřipojenéhokontrolovanéhoobjektuaupozorňuje
uživatelenanesprávnouvolbuzkušebníhopostupu[2...4]:předemnastavenémezníhodnoty
avýsledkyměření"dobrý/špatný"usnadňujívyhodnocenízkoušky.
6. Podmínky prostředí
- BENNINGST710jeurčenproměřenívsuchémprostředí
- Maximálnínadmořskávýškapřiměření:2000m,
- Kategoriepřepětí/nastavení:IEC61010-1→300VkategorieII,
- Stupeňznečistitelnosti:2,
- Krytí:IP40DINVDE0470-1IEC/EN60529,
Význam IP 40: Ochrana proti malým cizím předmětům, proti dotyku nářadím, drátem a
podobněsprůměrem>1mm,(4-prvníčíslice).
 Žádnáochranapředvodou,(0-druháčíslice).
- EMC: EN 61326-1
- Pracovníteplotaarelativnívlhkost:
 Přiteplotěod0°Cdo30°C:relativnívlhkostmenší80%,
 Přiteplotěod31°Cdo40°C:relativnívlhkostmenší75%,
- Skladovací teploty: BENNING ST 710 může být skladován při teplotách od - 25 °C do
+65°C(vlhkost0až80%).Bateriemusíbýtvyňaty.
7. Elektrické údaje
Poznámka:Přesnostměřeníseudávájakosoučet
- relativníhopodíluměřenéhodnotya
- počtučíslic(t.j.zobrazeníčíslanaposledníchmístech).
Přesnostměřeníplatípřiteplotáchod18°Cdo28°Capřirelativnívlhkostimenšínež80%.
7.1 Odpor ochranného vodiče
Měřící rozsah Rozlišení Přesnost měření
0,05Ω-20Ω 0,01 5%±2číslic
Zkušebnímproudem: >200mA(2)
Napětínaprázdno: >4Vjmenovitě
7.2 Izolační odpor
Měřící rozsah Rozlišení Přesnost měření
0,5MΩ-20MΩ 0,01MΩ 5 % ± 2
číslic
0,1MΩ-0,49MΩ 0,01MΩ 10 % ± 2
číslic
Zkušebnímnapětí
:
500 VDC@1mAjmenovitě,+20%,-0%
Zkušebnímproudem
:>1mAo500kΩ,<2mAo2
01/ 2009
BENNING ST 710
34
7.3 Ochranného vodiče a dotykového proudu podle měření náhradního svodového
proudu
Měřící rozsah Rozlišení Přesnost měření
0,10 mA - 20 mA 0,01 mA 5 % ± 2
číslic
Zkušebnímnapětí
:40 VAC, 50 Hz
Zkušebnímproudem
:<5mAo2kΩ
7.4 Test vodiče
-Měřeníodporuochrannéhovodičepodle7.1
-Měřeníizolačníhoodporupodle7.2
-Kontrolapřerušenívnějšíchvodičů(L)aneutrálníchvodičů(N)
-Kontrolazkratuvnějšíchvodičů(L)aneutrálníchvodičů(N)
7.5 Měření napětí na externí zásuvce s ochranným kontaktem
Měřící rozsah Rozlišení Přesnost měření Ochrana před přetížením
50 V - 270 VAC 1 V <5%zkoncové
hodnotyměřícíhorozsahu 300 V
Zobrazení:
-Napětímezivnějšímvodičem(L)aneutrálnímvodičem(N)
-Napětímezivnějšímvodičem(L)auzemňovacímvodičem(PE)
-Napětímezineutrálnímvodičem(N)auzemňovacímvodičem(PE)
7.6 Mezní hodnoty podle DIN VDE 0701/ 0702.
Poznámka:
PředemnastavenémezníhodnotyjsouvBENNINGST710uvedenétučně.
Třída ochrany I Třída ochrany II, III Kontrola vedení
Odpor
ochranného
vodiče
RPE
Provedenísdimenzovacímproudem
≤16A:
≤ 0,3 Ω
do délky 5 m,
nakaždýchdalších7,5m:navíc
0,1Ω,max.1Ω,
Provedenísvyššímidimenzovacími
proudyplatívypočítanáhodnota
odporu
≤ 0,3 Ω
(viz SK I)
Izolační
odpor
RISO
≥ 1
≥2MΩprodůkazbezpečného
oddělení(Trafo)
≥0,3MΩuzařízenístopnýmiprvky
≥ 2 MΩ (SK II)
,
≥0,25MΩ(SKIII),
≥ 1
Proud
ochranného
vodiče
IEA
≤ 3,5 mA
navodivýchdílechsPEpřipojením
1mA/kWuzařízenístopnýmiprvky
P > 3,5 kW
Dotekový
proud
IEA
≤0,5mA
navodivýchdílechbezPE-připojení
≤ 0,5 mA
navodivýchdílech
bezPE-připojení
8. Měření s BENNING ST 710
8.1 Příprava měření
BENNINGST710používejteaskladujtevýhradněpřipředepsanýchprovozníchaskladovacích
teplotách;přístrojdlouhodoběnevystavujteslunečnímuzáření.
- Zkontrolujte bezpečnou hodnotu jmenovitého napětí a jmenovitého proudu na měřených
kabelech.
- Všechny zdroje rušení v blízkosti BENNING ST 710 vedou k nestabilním hodnotám a
chybámměření.
Před uvedením do provozu zkontrolujte nepoškozenost přístroje, vedení a
zkoušeného zařízení.
Před začátkem zkoušky je nutno zapnout zkoušené zařízení. (Zapnutím
síťového spínače.)
01/ 2009
BENNING ST 710
35
Na začátku zkoušky je nutno zkontrolovat, zda zvolený postup zkoušky
odpovídá třídě ochrany připojeného zkoušeného zařízení.
8.1.1 Zapnutí, vypnutí BENNING ST 710
BENNINGST710sezapnestiskemtlačítek2 + 3asina3sekundy,zapnutípotvrdídvazvu-
kovésignály.Opětovnýmstiskemtlačíteksepřístrojvypne.
BENNINGST710seautomatickyvypneasipo3minutách.(APO, Auto-Power-Off).Přistisku
tlačítek2 + 3seopětzapne.Samočinnévypnutípřístrojesignalizujezvukovýsignál.Přiměření
napětínaexternízásuvcesochrannýmkontaktemjeautomatickévypínánídeaktivované.
8.1.2 Postup zkoušky
BENNINGST710provádíelektrickébezpečnostnízkouškypodleDINVDE0701/0702.Podrob-
néinformaceozkouškáchamezníchhodnotáchjsouuvedenyvaktuálnímvydánínorem.
BENNING ST 710 samostatně zkontroluje druh připojeného zkušebního zařízení a upozorní
uživatelepřinesprávnémpostupuzkoušky[2...4].
8.2 Zkoušení elektrických zařízení / provozních prostředků podle DIN VDE 0701/ 0702
Před začátkem zkoušky je nutno provést vizuální kontrolu zkoušeného zařízení
a při případném poškození je nutno zkoušku přerušit.
8.2.1 Zkoušení zařízení třídy ochrany I
- Zkoušení zařízení s ochranným vodičem a vodivými díly nechráněnými proti doteku,
připojenýminaochrannémvodiči.
- Zkoušenézařízenímusíbýtpřipojenokezkušebnízásuvce1přístrojeBENNINGST710.
- 4mmbezpečnostníkonektorzkušebníhokabeluspřipojovacísvorkouzasuňtedo4 mm
bezpečnostnízdířky6avytvořtespojenískovovýmdílemzkoušenéhozařízení.
- Zapnětezkoušenézařízení.
- Stiskemtlačítka2sezapneautomatickýpostupzkoušky.
- ZkouškazačínáměřenímodporuochrannéhovodičeRPE. Pokud RPEpřekročí>~100Ω,
měřenísepřerušíbezzobrazenívýsledkuměřeníavedlesymboluRPEsezobrazíkřížek.
Přerušenísepotvrdízobrazenímnápisu"FAIL"nadispleji.
- Pokud je RPE<20Ω,alevětšínežmaximálnípřípustnámezníhodnota,zobrazísenadispleji
naměřenáhodnotaRPE. vedle symbolu RPEpotvrzujepřekročenímezníhodnoty.
01/ 2009
BENNING ST 710
36
- Pokud je RPE menší než přípustná hodnota, zobrazí se naměřená hodnota RPE a vedle
symbolu RPEsezobrazí .MěřeníRPEsenyníopakujesopačnoupolaritou.Poprovedení
měřeníRPEsezahájízkouškaizolačníhoodporu.
- Pokudsenadisplejizobrazí"LoLOAD",zkontrolujte,zdajezkoušenézařízenízapnuté.
- Stiskemtlačítka2sepřimalémzatížení(RL-N<100kΩ)pokračujevpostupuzkoušky.
- PokudjeizolačníodporRISOvětšínežpřípustnámezníhodnota,objevísevedlesymbolu
RISO .
- Stejnětakse objevívedlesymboluIEA,pokudproudochrannéhovodičeIEAjemenšínež
přípustnámezníhodnota.
- Zkouškasepovažujezaúspěšnou,pokudsenadisplejizobrazísymbol"PASS".
vizobr.3:  ZkoušenízařízenítřídyochranyI(zařízenísochrannýmvodičemavodivými
dílynechráněnýmiprotidoteku,připojenýmikochrannémuvodiči)
Poznámka k měření odporu ochranného vodiče:
- MěřeníodporuochrannéhovodičeRPEsealternativnědáprovésttakéjakotrvaléměření
(maximálně3 minuty).Tlačítko 2 stisknětena asi > 5sekund, dokud se na displeji
nezobrazí symbol . Připojovacím kabelem zkoušeného zařízení pohybujte po celé
délce,abystezjistilislabémístonebopřerušeníochrannéhovodiče.BENNINGST710
průběžnězobrazujeaktuálnínaměřenouhodnotunadisplejiamaximálníhodnotuuloží
do paměti. Opětovným stiskem tlačítka 2 se provede měření s opačnou polaritou.
Opětovnýmstiskemtlačítka2senadisplejizobrazímaximálníhodnotaRPEazkouška
pokračujepostupempopsanýmvbodě8.2.1.
8.2.2 Zkoušení zařízení třídy ochrany II (s ochrannou izolací) a zařízení třídy ochrany
III (bezpečné malé napětí)
- Zkoušenízařízeníbezochrannéhovodičeasvodivýmidílynechráněnýmiprotidoteku.
- Zkoušenézařízenímusíbýtpřipojenénazkušebnízásuvku1přístrojeBENNINGST710.
- Pomocí zkušebního kabelu s připojovací svorkou propojte 4 mm zkušební zdířku 6 a
kovovýdílzkoušenéhozařízení.
- Zapnětezkoušenézařízení.
- Stiskemtlačítka3sezapneautomatickýprůběhzkoušky.
- Pokudsenadisplejizobrazí"LoLOAD",zkontrolujte,zdajezkoušenézařízenízapnuté.
01/ 2009
BENNING ST 710
37
- Stiskemtlačítka3sepokračujevezkoušcepřipřílišmalémzatížení(RL-N<100kΩ).
- Pokud je izolační odpor RISO větší než přípustná mezní hodnota, zobrazí se vedle
symbolu RISO.
- serovněžobjevívedlesymboluIEA,pokuddotekovýproudIEAjemenšínežpřípustná
mezníhodnota.
- Zkouška se považuje za úspěšně provedenou, pokud se na displeji zobrazí symbol
"PASS".
Poznámka k měření izolačního odporu u zkoušených zařízení třídy ochrany III:
- Vzhledemkpočátečnímunastavenímezníhodnotyna2MΩprozkoušenázařízenítřídy
ochranyIIjenutnopřizkoušenízařízenítřídyochranyIIIpamatovatnato,abynaměřené
hodnotymezimeznímihodnotami2MΩ(třídaochranyII)až0,25MΩ(třídaochranyIII)byly
zobrazené s vedle symbolu RISO.
vizobr.4:  ZkoušenízařízenítřídyochranyII(zařízenísochrannouizolacíbezochranné-
hovodičeasvodivýmidílynechráněnýmiprotidoteku)nebozkoušenízařízení
třídyochranyIII(malébezpečnénapětí)
8.2.3 Test vedení
Test vedení se dá použít ke zkouškám připojovacích kabelů (připojovací kabely zařízení
s připojovací spojkou) a pro zkoušení kabelových cívek, vícenásobných rozvaděčů a
prodlužovacíchkabelů.
8.2.3.1 Zkoušky připojovacích kabelů (připojovací kabely IEC)
- Zkoušenýpřipojovacíkabelpřipojtepomocípřipojovacízástrčky7azkušebnízásuvky1 k
přístrojiBENNINGST710.
- Stiskemtlačítka4sespustíautomatickýprůběhzkoušky.
- ZkouškazačínáměřenímodporuochrannéhovodičeRPE.
-
PřipřekročenínebonedosaženímezníhodnotysevedlesymboluRPEzobrazí nebo .
Odpor ochranného vodiče je závislý na délce a průřezu zkoušeného kabelu. Je
možné, že výsledek měření je přijatelný, ačkoli na přístroji BENNING ST 710 je
vedle RPE zobrazeno .
- Typickéhodnotyodporuvedeníjsouuvedenyvtabulce1.
Průřez
Délka
1,0 mm² 1.5 mm² 2,5 mm²
5 m 0,1Ω 0,06Ω 0,04Ω
10 m 0,2Ω 0,12Ω 0,08Ω
25 m 0,5Ω 0,3Ω 0,2Ω
50 m 1,0Ω 0,6Ω 0,4Ω
Tabulka1:hodnotyodporuochrannéhovodičevzávislostinadélceaprůřezu
- PoúspěšněprovedenézkoušceRPEseautomatickyprovedeměřeníizolačníhoodporu.
-
PřipřekročenínebonedosaženímezníhodnotysevedlesymboluRISOzobrazí nebo .
- PoúspěšněprovedenézkoušceRISOseprovedezkouškavnějšíhovodiče(L)aneutrálního
vodiče(N)napřerušenívedeníazkrat.Přiúspěšněprovedenézkoušcepřerušenívedenía
zkratu se vedle symbolu asymbolu"GOOd"zobrazísymbol .
01/ 2009
BENNING ST 710
38
- Symbol"PASS"potvrzujeúspěšnéprovedeníceléhoprůběhuzkoušky.
- Pokud není zkouška přerušení vedení nebo zkratu úspěšná, zobrazí se místo symbolu
"GOOd"následujícísymboly:
- Symbol „OPEN“:
  Potvrzujepřerušenívnějšíhovodiče(L)neboneutrálníhovodiče(N)
- Symbol „Short“:
  Potvrzujezkratmezivnějšímvodičem(L)aneutrálnímvodičem(N)
vizobr.5a:  Zkouškapřipojovacíchkabelůzařízeníspřipojovacízástrčkou
Poznámka k měření odporu ochranného vodiče:
- MěřeníodporuochrannéhovodičeRPEsedáalternativněprovéstijakotrvaléměření
(maximálně3minuty).Tlačítko2nadélenež5sekund,dokudsenadisplejinezobrazí
symbol .Pohybujtepřipojovacímvedenímzkoušenéhozařízenípocelédélce,abyste
zjistili slabé místo nebo přerušení ochranného vodiče. BENNINGST710 zobrazuje
průběžněaktuálnínaměřenouhodnotunadisplejiamaximálníhodnotuuložídopaměti.
Opětovným stiskem tlačítka 4 se provede měření s opačnou polaritou. Opětovným
stiskemtlačítka4senadisplejizobrazímaximálníhodnotaRPEazkouškapokračuje
postupempopsanýmvbodě8.2.3.1.
8.2.3.2 Zkoušení kabelových cívek, vícenásobných rozvaděčů a prodlužovacích kabelů
- Připojovacíkabel(připojovacíkabelIEC),kterýjesoučástídodávky,připojtenapřipojovací
zástrčku7přístrojeBENNINGST710.
- Zkoušenýkabelsepřipojínazkušebnízásuvku1aschukozásuvkupřipojovacíhokabelu
přístroje.
- Stiskemtlačítka4sespustíautomatickýpostupzkoušky.
- Dalšíprůběhzkouškyodpovídáprůběhuodbodu8.2.3.1.
vizobr.5b:  Zkoušeníkabelů,vícenásobnýchrozvaděčůakabelovýchcívek
8.3 Měření napětí na externí zásuvce s ochranným kontaktem
- Připojte připojovací kabel (připojovací kabel IEC) na připojovací zástrčku 7 přístroje
BENNING ST 710.
- Zástrčkuschukopřipojtenazkoušenouzástrčku sochrannýmkontaktem.Připřipojeném
síťovémnapětíseměřenínapětíspustíautomaticky.
- Vzávislostinapolozevnějšíhovodičezásuvkysochrannýmkontaktem(vpravonebovlevo)
sezobrazínapěťovépotenciálymezipřipojovacímisvorkamiL,NaPE.
nebo
Měří se jen napěťové potenciály mezi jednotlivými přípojkami L, N a PE.
Měření neposkytuje žádnou přesnou informaci o odborné instalaci zásuvky
s ochranným kontaktem. Neexistuje žádné výstražné upozornění při
nebezpečném provozním napětí PE vodiče!
vizobr.6:  Měřenínapětínaexternízásuvcesochrannýmkontaktem
9. Údržba
Před otevřením BENNING ST 710 odpojte od napětí!
Nebezpečí úrazu elektrickým proudem!
Práce na otevřeném BENNING ST 710 pod napětím jsou vyhrazeny odborníkům, kteří
přitom musí dbát zvýšené opatrnosti.
01/ 2009
BENNING ST 710
39
OddělteBENNINGST710odnapětí,nežpřístrojotevřete:
- Vypnětezkušebnípřístroj
- Odpřístrojeodpojtevšechnypřipojovacíkabely
9.1 Zajištění přístroje
Za určitých podmínek nemůže být bezpečnost při používání BENNING ST 710 zajištěna,
napříkladpři:
- zřejmémpoškozeníkrytupřístroje,
- chybáchpřiměření,
- zřejmýchnásledcíchdelšíhochybnéhoskladovánía
- zřejmýchnásledcíchšpatnéhotransportu.
VtěchtopřípadechBENNINGST710ihnedvypněte,odpojteodměřenýchbodůazajistěte,aby
přístrojnemohlbýtznovupoužitjinouosobou.
9.2 Čištění
Krytpřístroječistěteopatrněčistýmasuchýmhadříkem(výjimkutvoříspeciálníčistícíubrousky).
Nepoužívejte žádná rozpouštědla ani čistící prostředky. Zejména dbejte toho, aby místo pro
baterieanibateriovékontaktynebylyznečištěnyvyteklýmelektrolytem.
Pokudkvytečeníelektrolytudojdenebojebateriovázásuvkaznečištěnabílouúsadou,vyčistěte
jetakéčistýmasuchýmhadříkem.
9.3 Výměna baterií
Před otevřením BENNING ST 710 odpojte od napětí!
Nebezpečí úrazu elektrickým proudem!
BENNINGST710jenapájenšestmazabudovanými1,5Vbateriemi(AA,IECLR6).
Baterievyměňte(viz.obr.7),pokudsenadisplejiobjevísymbolbaterie5.
Taktovyměnítebaterie:
- VypněteBenningST710.
- BENNINGST710postavtenapřednístranuapovoltešroubvíkabaterií.
- Víkobateriísejmětezespodníčásti(vmístězahloubenípouzdra).
- Zprostoruprobaterievyjmětevybitébaterie.
- Bateriepakvložtedoktomuurčenýchmístvprostoruprobaterie(bezpodmínečněprosím
dbejtenasprávnoupolaritubaterií).
- Víkoprostoruprobateriezaklapnětedospodníhodíluautáhnětešroub.
Obr.7:   Výměnabaterií
Šetřete životní prostředí! Baterie nesmí do běžného domovního odpadu!
Vyhazujte baterie jen na místech k tomu určených.
9.4 Kalibrace
Proudrženídeklarovanépřesnostiměřenímusíbýtpřístrojpravidelněkalibrován.Doporučujeme
jednouročně.Zašletepřístrojnaadresu:
Benning Elektrotechnik & Elektronik GmbH & Co. KG
Service Center
Robert-Bosch-Str. 20
D - 46397 Bocholt
10. Ochrana životního prostředí
Poukončeníživotnostipřístrojeprosímpředejtepřístrojpříslušnýmsběrnýmmístům
na likvidaci.
01/ 2009
BENNING ST 710
40
Gebruiksaanwijzing
BENNING ST 710
Apparaattester voor de veiligheidstechnische controle van mobiele elektrische apparaten/be-
drijfsmiddelen
- Controle volgens NEN 3140, DIN VDE 701/ 0702, ÖVE/ ÖNORM E 8701
- Testen van kabelhaspels, verdeeldozen en netvoedingskabels
- Spanningsmeting aan externe veiligheidswandcontactdozen
Inhoud
1. Opmerkingen voor de gebruiker
2. Veiligheidsvoorschriften
3. Leveringsomvang
4. Beschrijving van het apparaat
5. Algemene kenmerken
6. Gebruiksomstandigheden
7. Elektrische gegevens
8. Meten met de BENNING ST 710
9. Onderhoud
10. Milieu
1. Opmerkingen voor de gebruiker
Deze gebruiksaanwijzing is bedoeld voor
- elektriciens, bekwame personen en
- elektrotechnisch opgeleide personen
De BENNING ST 710 is bedoeld voor metingen in droge ruimtes en mag niet worden gebruikt
inelektrischecircuitsmeteennominalespanninghogerdan300VAC(zieookpt.6:‘Gebruiks-
omstandigheden’).
In de gebruiksaanwijzing en op de BENNING ST 710 worden de volgende symbolen gebruikt:
Aanleggen om GEVAARLIJKE ACTIEVE geleider of demonteren van deze is toe-
gestaan.
Waarschuwing voor gevaarlijke spanning!
Verwijst naar voorschriften die in acht genomen moeten worden om gevaar voor de
omgeving te vermijden.
Let op de gebruiksaanwijzing!
Dit symbool geeft aan dat de aanwijzingen in de handleiding in acht genomen moe-
ten worden om gevaar te voorkomen.
Dit symbool geeft aan dat de BENNING ST 710 dubbel geïsoleerd is (beschermings-
klasse II).
Dit symbool op de BENNING ST 710 betekent dat de BENNING ST 710 in ove-
reenstemming is met de EU-richtlijnen.
Dit symbool verschijnt in het scherm bij een te lage batterijspanning.
AC: wisselspanning/-stroom
Aarding (spanning t.o.v. aarde)
01/ 2009
BENNING ST 710
41
2. Veiligheidsvoorschriften
Dit apparaat is gebouwd en getest volgens de voorschriften:
DIN VDE 0404 deel 1 en 2
DIN VDE 0411 deel 1/ EN 61010 deel 1
DIN VDE 0413 deel 1/ EN 61557 deel 1, 2, 4 en 10
en heeft, vanuit een veiligheidstechnisch oogpunt, de fabriek verlaten in een perfecte staat. Om
deze staat te handhaven en om zeker te zijn van gebruik zonder gevaar, dient de gebruiker goed
te letten op de aanwijzingen en waarschuwingen zoals aangegeven in deze gebruiksaanwijzing.
Een verkeerd gebruik en niet-naleving van de waarschuwingen kan ernstig letsel of de dood
tot gevolg hebben.
Pas op bij het werken in de nabijheid van ongeïsoleerde aders of geleidingrails.
Contact met spanningsvoerende leidingen kan elektrocutie veroorzaken.
De BENNING ST 710 mag alleen worden gebruikt in elektrische circuits van
overspanningscategorie II met max. 300 V AC ten opzichte van aarde.
Bedenk dat werken aan installaties of onderdelen die onder spanning staan, in
principe altijd gevaar kan opleveren. Zelfs spanningen vanaf 30 V AC en 60 V
DC kunnen voor mensen al levensgevaarlijk zijn.
Elke keer, voordat het apparaat in gebruik wordt genomen, moet het worden
gecontroleerd op beschadigingen.
Bij vermoeden dat het apparaat niet meer geheel zonder gevaar kan worden gebruikt, mag het
dan ook niet meer worden ingezet, maar zodanig worden opgeborgen dat het, ook niet bij toeval,
niet kan worden gebruikt.
Ga ervan uit dat gebruik van het apparaat zonder gevaar niet meer mogelijk is:
- bij zichtbare schade aan de behuizing van het apparaat
- als het apparaat niet meer (goed) werkt
- na langdurige opslag onder ongunstige omstandigheden
- na zware belasting of mogelijke schade ten gevolge van transport of onoordeelkundig ge-
bruik.
- indien het apparaat vochtig zijn.
Om een risico uit te sluiten
- mag u de leidingen niet aan de blanke meetstaven aanraken,
- dient u de leidingen in de dienovereenkomstig gemarkeerde contacten van
het meetinstrument te steken.
Onderhoud:
Het apparaat niet openen, zij bevat geen onderdelen die door de gebruiker te
repareren zijn. Reparatie en service alleen door gekwalificeerd personeel.
Reiniging:
Reinig de buitenkant regelmatig met een doek en reinigingsmiddel en wrijf
deze aansluitend goed droog. Gebruik geen schuur- of oplosmiddelen.
3. Leveringsomvang
Bij de levering van de BENNING ST 710 behoren:
3.1 Eén BENNING ST 710
3.2 Eén stuk testleiding met krokodilklem,
3.3 Eén stuk netvoedingskabel (IEC-adapterkabel)
3.4 Eén compactbeschermingsetui
3.5 Zes batterijen van 1,5 V mignon (IEC LR6/ AA) (ingebouwd)
3.6 Eén gebruiksaanwijzing
Opmerking t.a.v. aan slijtage onderhevige onderdelen:
- De BENNING ST 710 wordt gevoed door zes batterijen van 1,5 V (IEC LR6/ AA, mignon)
Opmerking t.a.v. aan optionele toebehor:
- Lekstroomtang BENNING CM 9 voor verschilstroommeting van één- en driefase verbruikers
(044065)
- Testetiketten „Nächster Prüftermin“, 300 stuks (756213)
- Meetadapter randaardesteker-apparatensteker voor meting van de verschil-, lek- en last-
stroom bij éénfase verbruikers, aders separaat naar buiten gevoerd (044131)
- Meetadapter voor driefase verbruikers
voor meting van RPE und RISO:
- 16 A CEE-koppeling - randaardesteker (044122)
- 32 A CEE-koppeling - randaardesteker (044123)
01/ 2009
BENNING ST 710
42
voor meting van de verschil-, lek- en laststroom:
- 16 A CEE-koppeling - CEE-steker (044127)
- 32 A CEE-Koppeling - CEE-steker (044128)
- Testrapportformulieren‘Testenvanelektrischeapparaten’kuntugratisdownloadenonder
www.benning.de
4. Beschrijving van het apparaat
Zieg.1: Voorzijdevanhetapparaat
Zieg.2: Bovenaanzichtapparaat
Hierondervolgteenbeschrijvingvandeing.1en2aangegeveninformatie-enbedienings-
elementen.
1 Testcontact voor de aansluiting van het te testen apparaat
2 -Knop voor het testen van apparaten van beschermklasse I (apparaten met aardegelei-
der en aanraakbare geleidende onderdelen, die op de aardegeleider zijn aangesloten)
3 -Symboolknop voor het testen van apparaten van beschermklasse II (apparaten met
randaarding zonder aardegeleider en met aanraakbare geleidende onderdelen) of voor het
testen van apparaten van beschermklasse III (veiligheidslaagspanning)
4 -Symboolknop voor het testen van leidingen, verdeeldozen en aansluitkabels met ap-
paraatstekker
5 lcd-scherm geeft de voortgang van het testproces alsmede afzonderlijke meetresultaten
weer
6 4 mm-testcontact voor de aansluiting van de testleiding met krokodilklem
7 Apparaatstekker (IEC-stekker) voor de aansluiting van de netvoedingskabel
5. Algemene kenmerken
De BENNING ST 710 voert elektrische veiligheidscontroles volgens DIN VDE 0701/ 0702, BGV
A3, ÖVE/ ÖNORM E 8701 en NEN 3140 uit.
De BENNING ST 710 controleert automatisch het type van het aangesloten testobject en waar-
schuwt de gebruiker in het geval van een verkeerd geselecteerd testproces [2...4]. Voorin-
gestelde grenswaarden en meetresultaten met goed/ slecht-beoordeling vergemakkelijken de
beoordeling van de test.
6. Gebruiksomstandigheden
- De BENNING St 710 is bedoeld om gebruikt te worden voor metingen in droge ruimtes.
- Barometrische hoogte bij metingen: 2000 m. maximaal.
- Categorievanoverbelasting/installatie:IEC61010-1→300VcategorieII.
- Beschermingsgraad stofindringing: 2
- Beschermingsgraad: IP 40 (DIN VDE 0470-1 IEC/ EN 60529),
Betekenis IP 40: Het eerste cijfer (4); Bescherming tegen binnendringen van stof en vuil >
1 mm in doorsnede, (eerste cijfer is bescherming tegen stof/ vuil). Het tweede cijfer (0); Niet
beschermd tegen water, (tweede cijfer is waterdichtheid).
- EMV: EN 61326-1
- Werktemperatuur en relatieve vochtigheid:
 Bijeenwerktemperatuurvan0°Ctot30°C:relatievevochtigheidvandelucht<80%.
 Bijeenwerktemperatuurvan31°Ctot40°C:relatievevochtigheidvandelucht<75%.
- Opslagtemperatuur: de BENNING ST 710 kan worden opgeslagen bij temperaturen van
-25°Ctot+65°Cmeteenrelatievevochtigheidvandelucht<80%.Daarbijdienenwelde
batterijen te worden verwijderd.
7. Elektrische gegevens
Opmerking: de nauwkeurigheid van de meting wordt aangegeven als som van:
- een relatief deel van de meetwaarde
- een aantal digits.
Deze nauwkeurigheid geldt bij temperaturen van 18 °C tot 28 °C bij een relatieve vochtigheid
vandelucht<80%.
7.1 Aardgeleidingsweerstand:
Meetbereik Resolutie Nauwkeurigheid v/d meting
0,05Ω-20Ω 0,015 % ± 2 digits
Teststroom: >200mA(2)
Nullastspanning: > 4 V nominaal
01/ 2009
BENNING ST 710
43
7.2 Isolatieweerstand:
Meetbereik Resolutie Nauwkeurigheid v/d meting
0,5MΩ-20MΩ 0,01MΩ 5 % ± 2 digits
0,1MΩ-0,49MΩ 0,01MΩ 10 % ± 2 digits
Testspanning:
500 VDC @ 1 mA
nominaal
, + 20 %, - 0 %
Teststroom: >1mAbij500kΩ,<2mAbij2kΩ
7.3 Lekstroom en aanraakstroom via vervangende lekstroom
Meetbereik Resolutie Nauwkeurigheid v/d meting
0,10 mA - 20 mA 0,01 mA 5 % ± 2 digits
Testspanning: 40 VAC, 50 Hz
Teststroom: <5mAbij2kΩ
7.4 Leidingtest
- Meting van de aardegeleidersweerstand volgens 7.1
- Meting van de isolatieweerstand volgens 7.2
- Controle op leidingbreuk van buitengeleider (L) en nulgeleider (N)
- Controle op kortsluiting van buitengeleider (L) en nulgeleider (N)
7.5 Spanningsmeting aan externe veiligheidswandcontactdoos
Meetbereik Resolutie Nauwkeurigheid v/d
meting
Beveiliging tegen
overbelasting
50 V - 270 VAC 1 V <5%vandeeindwaarde
van het meetbereik
300 V
Weergave:
- spanning tussen buitengeleider (L) en nulgeleider (N)
- spanning tussen buitengeleider (L) en aardegeleider (PE)
- spanning tussen nulgeleider (N) en aardegeleider (PE)
7.6 Grenswaarden volgens NEN 3140, DIN VDE 0701/ 0702 resp. ÖVE/ ÖNORM E 8701-1
Opmerking
Vooringestelde grenswaarden (vetgedrukt) zijn in de BENNING ST 710 opgeslagen.
Beschermklasse
I
Beschermklasse
II, III
Leidingtest
Aarde-
geleiders-
weerstand
RPE
Voor leidingen met een
nominalestroom≤16A:
≤ 0,3 Ω tot 5 m lengte,
per extra 7,5 m: plus
0,1Ω,max.1Ω
Voor leidingen met een hogere
nominale stroom geldt de bere-
kende ohmse weerstandswaarde
≤ 0,3 Ω
(zie VK I)
Isolatie weer-
stand
RISO
≥ 1
≥2MΩvoorhetbewijsvande
veilige scheiding (transformator)
≥0,3MΩbijapparatenmet
verwarmingselementen
≥ 2 MΩ (VK II)
,
≥0,25MΩ(VKIII),
≥ 1
Aarde-
geleiders-
stroom
IEA
≤ 3,5 mA
aan geleidende onderdelen
met PE-verbinding
1 mA/kW bij apparaten met
verwarmingselementen P > 3,5 kW
Aanraak-
stroom
IEA
≤0,5mA
aan geleidende onderdelen zonder
PE-verbinding
≤ 0,5 mA
aan geleidende
onderdelen zonder
PE-verbinding
01/ 2009
BENNING ST 710
44
8. Testen met de BENNING ST 710
8.1 Voorbereiding van de metingen
Gebruik en bewaar de BENNING ST 710 uitsluitend bij de aangegeven werk- en opslagtempe-
raturen. Niet blootstellen aan direct zonlicht.
- Controleer de gegevens op de veiligheidsmeetsnoeren ten aanzien van nominale spanning
en stroom.
- Storingsbronnen in de omgeving van de BENNING ST 710 kunnen leiden tot instabiele
aanduiding en/of meetfouten.
Vóór elk gebruik dient u het apparaat, de leidingen en het testobject te
controleren op beschadigingen.
Vóór het begin van de test moet het testobject worden ingeschakeld
(netschakelaar aan).
Aan het begin van de test dient te worden gecontroleerd of het juiste testproces
werd geselecteerd voor de beschermklasse van het aangesloten testobject.
8.1.1 In- en uitschakelen van de BENNING ST 710
Door de knoppen 2 en 3 ca. 3 seconden ingedrukt te houden, wordt de BENNING ST 710
ingeschakeld. Dit wordt bevestigd door 2 geluidssignalen. Door deze knoppen nogmaals in te
drukken, wordt het apparaat uitgeschakeld.
De BENNING ST 710 wordt na ca. 3 minuten automatisch uitgeschakeld (APO, Auto-Power-
Off). Het apparaat wordt weer ingeschakeld, als de knoppen 2 en 3 worden ingedrukt. Een
geluidssignaal geeft de automatische uitschakeling van het apparaat aan. De automatische
uitschakeling is tijdens de spanningsmeting aan een externe veiligheidswandcontactdoos ge-
deactiveerd.
8.1.2 Testverloop
De BENNING ST 710 voert elektrische veiligheidscontroles volgens NEN 3140, DIN VDE 0701/
0702 resp. ÖVE/ ÖNORM E 8701 uit. Uitvoerige informatie over de tests en grenswaarden vindt
u in de actuele versie van de betreffende normen.
De BENNING ST 710 controleert automatisch het type van het aangesloten testobject en waar-
schuwt de gebruiker in het geval van een verkeerd geselecteerd testproces [2...4].
8.2 Controle van elektrische apparaten/bedrijfsmiddelen volgens NEN 3140, DIN VDE
0701/ 0702 resp. ÖVE/ ÖNORM E 8701
Vóór het begin van de test dient het testobject aan een visuele controle te
worden onderworpen. Bij eventuele beschadigingen moet de test worden
stopgezet.
8.2.1 Testen van apparaten van beschermklasse I
- Testen van apparaten met aardegeleider en aanraakbare geleidende onderdelen die op de
aardegeleider zijn aangesloten.
- Het testobject moet op het testcontact 1 van de BENNING ST 710 worden aangesloten.
- Steek de 4 mm-veiligheidsstekker van de testleiding met krokodilklem in het 4mm-veilig-
heidscontact 6 en breng een verbinding met een metalen onderdeel van het testobject tot
stand.
- Schakel het testobject in.
- Na een druk op de knop 2 start het automatische testproces.
- De test begint met de meting van de aardegeleidersweerstand RPE. Indien RPE>~100Ω
overstijgt, wordt de meting zonder meetresultaat afgebroken en verschijnt een kruis naast
het RPE-symbool.Devroegtijdigebeëindigingwordtbevestigdmetdemelding‘FAIL’ophet
display.
01/ 2009
BENNING ST 710
45
- Indien RPE<20Ωmaargroterdandemaximaaltoelaatbaregrenswaardeis,wordtdemeet-
waarde van RPE op het display weergegeven. Een naast het RPE-symbool bevestigt de
overschrijding van de grenswaarde.
- Indien RPE kleiner dan de toelaatbare grenswaarde is, wordt de meetwaarde van RPE weer-
gegeven en verschijnt naast het RPE-symbool een . De meting van RPE wordt nu nog-
maals uitgevoerd met omgekeerde polariteit. Als de test van RPE succesvol was, wordt de
test van de isolatieweerstand gestart.
- Indienophetdisplay‘LoLOAD’verschijnt,dientutecontrolerenofhettestobjectingescha-
keld is.
- Met een druk op de knop 2 wordt bij een te geringe belasting (RL-N<100kΩ)hettestproces
voortgezet.
- Indien de isolatieweerstand RISO groter is dan de toelaatbare grenswaarde, verschijnt een
naast het RISO-symbool.
- Er verschijnt eveneens een naast het IEA-symbool, indien de aardegeleidersstroom IEA
kleiner is dan de toelaatbare grenswaarde.
- Detestissuccesvolafgesloten,alsdemelding‘PASS’ophetdisplayverschijnt.
01/ 2009
BENNING ST 710
46
Zieg.3: TestenvanapparatenvanbeschermklasseI(apparatenmetaardegeleiderenaan-
raakbare geleidende onderdelen die op de aardegeleider zijn aangesloten)
Opmerking bij de meting van de aardegeleidersweerstand
- De meting van de aardegeleidersweerstand RPE kan ook als continue meting (max. 3
min) worden uitgevoerd. Houd hiervoor de knop 2 langer dan ca. 5 seconden inge-
drukt, tot het symbool op het display verschijnt. Beweeg nu de aansluitleiding van
het testobject over de gehele lengte, om een eventuele zwakke plek of breuk in de
aardegeleider vast te stellen. De BENNING ST 710 registreert doorlopend de actuele
meetwaarde op het display en bewaart de maximale waarde in zijn geheugen. Door
nogmaals op de knop 2 te drukken, wordt de meting met omgekeerde polariteit uitge-
voerd. Bij een nieuwe druk op knop 2 verschijnt de maximale waarde van RPE op het
display en wordt het testproces voortgezet zoals beschreven onder punt 8.2.1.
8.2.2 Testen van apparaten van beschermklasse II (randaarding) en van apparaten
van beschermklasse III (veiligheidslaagspanning)
- Testen van apparaten zonder aardegeleider en met aanraakbare geleidende onderdelen.
- Het testobject moet op het testcontact 1 van de BENNING ST 710 worden aangesloten.
- Breng door middel van de testleiding met krokodilklem een verbinding tussen het 4mm-
testcontact 6 en een metalen deel van het testobject tot stand.
- Schakel het testobject in.
- Met een druk op de knop 3 start het automatische testproces.
- Indienophetdisplay‘LoLOAD’verschijnt,dientutecontrolerenofhettestobjectingescha-
keld is.
- Met een druk op de knop 3 wordt bij een te geringe belasting (RL-N <100kΩ)hettestproces
voortgezet.
- Indien de isolatieweerstand RISO groter is dan de toelaatbare grenswaarde, verschijnt een
naast het RISO-symbool.
- Er verschijnt eveneens een naast het IEA-symbool, indien de aanraakstroom IEA kleiner
is dan de toelaatbare grenswaarde.
- Detestissuccesvolafgesloten,alsdemelding‘PASS’ophetdisplayverschijnt.
Opmerking bij de meting van de isolatieweerstand bij testobjecten van beschermklasse III
- Opbasisvandevooringesteldegrenswaardevan2MΩvoortestobjectenvanbescherm-
klasse II dient men er bij het testen van testobjecten van beschermklasse III rekening mee
tehoudendatmeetwaardentussendegrenswaarden2MΩ(VKII)en0,25MΩ(VKIII)met
een naast het RISO-symbool worden weergegeven.
Zieg.4: TestenvanapparatenvanbeschermklasseII(apparatenmetrandaardingzonder
aardegeleider en met aanraakbare geleidende onderdelen) resp. testen van ap-
01/ 2009
BENNING ST 710
47
paraten van beschermklasse III (veiligheidslaagspanning)
8.2.3 Leidingtest
De leidingtest kan worden gebruikt voor het testen van netvoedingskabels (aansluitsnoer met
koppeling voor apparaten) alsmede voor het testen van kabelhaspels, verdeeldozen en ver-
lengsnoeren.
8.2.3.1 Testen van netvoedingskabels (IEC-adapterkabels)
- Sluit de te testen netvoedingskabel via de apparaatstekker 7 en het testcontact 1 op de
BENNING ST 710 aan.
- Na een druk op de knop 4 start het automatische testproces.
- De test begint met de meting van de aardegeleidersweerstand RPE.
- Al naargelang de grenswaarde wordt over- of onderschreden, verschijnt een of een
naast het RPE-symbool.
De aardegeleidersweerstand is afhankelijk van de lengte en diameter van de te
testen kabel. Het is mogelijk dat het meetresultaat aanvaardbaar is, hoewel de
BENNING ST 710 een naast het RPE-symbool toont.
- Typische weerstandswaarden van kabels zijn in tabel 1 vermeld.
Diameter
Lengte
1,0 mm² 1.5 mm² 2,5 mm²
5 m 0,1Ω 0,06Ω 0,04Ω
10 m 0,2Ω 0,12Ω 0,08Ω
25 m 0,5Ω 0,3Ω 0,2Ω
50 m 1,0Ω 0,6Ω 0,4Ω
Tabel 1: weerstandswaarden van de aardegeleider in relatie tot de lengte en diameter
- Na een succesvolle test van RPE wordt automatisch een meting van de isolatieweerstand
uitgevoerd.
- Al naargelang de grenswaarde wordt over- of onderschreden, verschijnt een of een
naast het RISO-symbool.
- Na een succesvolle test van RISO wordt de buitengeleider (L) en de nulgeleider (N) op lei-
dingbreuk en kortsluiting gecontroleerd. Een succesvolle controle op leidingbreuk en kort-
sluiting wordt aangegeven met een naast de endemelding‘GOOd’.
- Demelding‘PASS’bevestigtdesuccesvollevoltooiingvanhetcompletetestproces.
- Indien de leidingbreuk- of kortsluitingstest niet succesvol was, verschijnt in plaats van
‘GOOd’eenvandevolgendemeldingen:
- ‘OPEN’:
Meldt een leidingbreuk in de buitengeleider (L) of nulgeleider (N).
- ‘Short’:
Meldt een kortsluiting tussen de buitengeleider (L) en nulgeleider (N).
Zieg.5a: Testenvannetvoedingskabelsmetapparaatstekker
Opmerking bij de meting van de aardegeleidersweerstand
- De meting van de aardegeleidersweerstand RPE kan ook als continue meting (max. 3
min) worden uitgevoerd. Houd hiervoor de knop 2 langer dan ca. 5 seconden inge-
drukt, tot het symbool op het display verschijnt. Beweeg nu de aansluitleiding van
het testobject over de gehele lengte, om een eventuele zwakke plek of breuk in de
aardegeleider vast te stellen. De BENNING ST 710 registreert doorlopend de actuele
meetwaarde op het display en bewaart de maximale waarde in zijn geheugen. Door
nogmaals op de knop 4 te drukken, wordt de meting met omgekeerde polariteit uitge-
voerd. Bij een nieuwe druk op knop 4 verschijnt de maximale waarde van RPE op het
display en wordt het testproces voortgezet zoals beschreven onder punt 8.2.3.1.
8.2.3.2 Testen van kabelhaspels, verdeeldozen en verlengsnoeren
- Sluit de bijgeleverde apparaatstekker (IEC-adapterkabel) aan op de apparaatstekker 7 van
01/ 2009
BENNING ST 710
48
de BENNING ST 710.
- De te testen kabel wordt op het testcontact 1 en de randaardestekker van de netvoedings-
kabel aangesloten.
- Na een druk op de knop 4 start het automatische testproces.
- Het verdere testproces is identiek met het testproces onder punt 8.2.3.1.
Zieg.5b: Testenvankabels,verdeeldozenenkabelhaspels
8.3 Spanningsmeting aan externe veiligheidswandcontactdozen
- Sluit de netvoedingskabel (IEC-adapterkabel) aan op de apparaatstekker 7 van de BEN-
NING ST 710.
- Sluit de randaardestekker aan op de te testen veiligheidswandcontactdoos. Als er netspan-
ning aanwezig is, wordt de spanningsmeting automatisch gestart.
- Afhankelijk van de positie van de buitengeleider (rechts of links) van de veiligheidswandcon-
tactdoos worden de spanningspotentialen tussen de aansluitklemmen L, N en PE vermeld.
of
Alleen de spanningspotentialen tussen de afzonderlijke aansluitingen L, N
en PE worden gemeten. De meting geeft geen uitsluitsel over de vakkundige
installatie van de veiligheidswandcontactdoos. Er volgt geen waarschuwing bij
een gevaarlijke aanraakspanning van de PE-geleider!
Zieg.6: Spanningsmetingaanexterneveiligheidswandcontactdoos
9. Onderhoud
De BENNING ST 710 mag nooit onder spanning staan als het apparaat geopend
wordt. Gevaarlijke spanning!
Werken aan een onder spanning staande BENNING ST 710 mag uitsluitend gebeuren door
elektrotechnische specialisten, die daarbij de nodige voorzorgsmaatregelen dienen te
treffen om ongevallen te voorkomen.
Maak de BENNING ST 710 dan ook spanningsvrij alvorens het apparaat te openen.
- Schakel het testapparaat uit.
- Koppel alle aansluitleidingen van het apparaat los.
9.1 Veiligheidsstelling van het apparaat
Onder bepaalde omstandigheden kan de veiligheid tijdens het werken met de BENNING ST 710
niet meer worden gegarandeerd, bijvoorbeeld in geval van:
- zichtbare schade aan de behuizing.
- meetfouten.
- waarneembare gevolgen van langdurige opslag onder verkeerde omstandigheden.
- transportschade.
In dergelijke gevallen dient de BENNING ST 710 direct te worden uitgeschakeld en niet opnieuw
elders worden gebruikt.
9.2 Reiniging
Reinig de behuizing aan de buitenzijde met een schone, droge doek (speciale reinigingsdoeken
uitgezonderd). Gebruik geen oplos- en/ of schuurmiddelen om de BENNING ST 710 schoon te
maken. Let er in het bijzonder op dat het batterijvak en de batterijcontacten niet vervuilen door
uitlopende batterijen.
Indien toch verontreiniging ontstaat door elektrolyt of zich zout afzet bij de batterijen en/of in het
huis, dit eveneens verwijderen met een droge, schone doek.
9.3 Het wisselen van de batterijen
Vóór het openen van de BENNING ST 710 moet het apparaat spanningsvrij zijn.
Gevaarlijke spanning!
De BENNING ST 710 wordt gevoed door zes batterijen van 1,5 V (IEC LR6/ AA/ mignon).
Als het batterijsymbool op het display 5 verschijnt, moeten de batterijen worden vervangen. Bij
het inschakelen van de BENNING ST 710 vindt een batterijtest plaats.
De batterijen worden als volgt verwisseld:
- Schakel de BENNING ST 710 uit.
01/ 2009
BENNING ST 710
49
- Leg de BENNING ST 710 op zijn voorzijde en draai de schroef uit het batterijdeksel.
- Open het batterijdeksel (hiervoor bevinden zich uitsparingen in het apparaat).
- Neem de lege batterijen uit het batterijvak.
- Leg vervolgens nieuwe batterijen in het batterijvak (let op de correcte polariteit!).
- Sluit het batterijdeksel weer en draai de schroef weer vast.
Zieg.7: Vervangingvandebatterij.
Gooi batterijen niet weg met het gewone huisvuil, maar lever ze in op de
bekende inzamelpunten. Zo levert u opnieuw een bijdrage aan een schoner
milieu.
9.4 Kalibrering
Op de nauwkeurigheid van de metingen te waarborgen, is het aan te bevelen het apparaat
jaarlijks door onze servicedienst te laten kalibreren:
Benning Elektrotechnik & Elektronik GmbH & Co. KG
Service Center
Robert-Bosch-Str. 20
D - 46397 Bocholt
10. Milieu
Wij raden u aan het apparaat aan het einde van zijn nuttige levensduur, niet bij het
gewone huisafval te deponeren, maar op de daarvoor bestemde adressen.
01/ 2009
BENNING ST 710
50
Instrukcja obsługi
BENNING ST 710
Urządzenietestującedokontrolibezpieczeństwatechnicznegoprzenośnychurządzeńelektry-
cznych/ pomocy warsztatowych.
- testowaniezgodniezDINVDE(ZwiązekElektrotechniki)701/0702
- testowaniebębnówkablowych,rozdzielnicwielokrotnychikabliurządzeńzimnych
- Pomiarnapięcianazewnętrznymgniazdkuwtykowymzzestykiemochronnym
Spis treści
1. Uwagi dla użytkownika
2. Uwagi odnośnie bezpieczeństwa
3. Zakres dostawy
4. Opis przyrządu
5. Informacje ogólne
6. Warunki środowiskowe:
7. Specyfikacje elektryczne
8. Wykonywanie pomiarów przy użyciu miernika BENNING ST 710
9. Konserwacja
10. Ochrona środowiska
1. Uwagi dla użytkownika
Niniejszainstrukcjaobsługiprzeznaczonajestdla
- specjaliściwzakresieelektryczności(EF),wykwalikowaneosoby
- osoby wyszkolone w zakresie elektrotechniki (EuP)
PrzyrządBENNING ST 710 przeznaczony jest do wykonywaniapomiarów w środowisku su-
chym.Przyrząduniewolnoużywaćdopomiarówwobwodachelektroenergetycznychonapięciu
znamionowympowyżej300VAC(Dalszeszczegóływpunkcie6.„Warunkiśrodowiskowe”).
WniniejszejinstrukcjiobsługioraznaprzyrządzieBENNINGST710zastosowanonastępujące
symbole:
PRACAZPRZEWODAMIPODWYSOKIMNAPIĘCIEMJESTDOZWOLONA.
Ostrzeżenieoniebezpieczeństwieporażeniaprądemelektrycznym!
Symbol ten wskazuje zalecenia, których należy przestrzegać w celu uniknięcia
zagrożeniadlaludzi
Należyprzestrzegaćzgodnościzdokumentacją!
Symbol ten wskazuje na zalecenia w niniejszej instrukcji obsługi, których należy
przestrzegaćwceluuniknięciazagrożeń.
Niniejszy symbol znajdujący się na przyrządzie BENNING ST 710 oznacza, że
przyrządposiadapełnąizolacjęochronną(klasaochronnościII).
Ten symbol na urządzeniu BENNING ST 710 oznacza, że jest ono zgodne z
dyrektywami UE.
Niniejszy symbol pojawia się na wyświetlaczu w celu wskazania rozładowania
baterii.
(AC)Napięcielubprądprzemienny.
Uziemienie(potencjałelektrycznyziemi).
01/ 2009
BENNING ST 710
51
2. Uwagi odnośnie bezpieczeństwa
Przyrządzostałzbudowanyiprzebadanynazgodnośćz
DINVDE0411część1/EN61010-1
DINVDE0404część1i2
DINVDE0411część1/EN61010część1
DINVDE0413część1/EN61557część1,2,4i10
oraz opuścił fabrykę w idealnym stanie technicznym pod względem bezpieczeństwa. Aby
utrzymaćtenstanizapewnićbezpiecznąobsługęprzyrządu,użytkownikmusiwkażdymprzy-
padkuprzestrzegaćzaleceńiuwagpodanychwniniejszejinstrukcji.Błędnezachowaniainie
przestrzeganieostrzeżeńmożebyćprzyczynązranienialubśmierci.
UWAGA! Zachować ostrożność przy pracy z odsłoniętymi przewodami
lub głównymi liniami przesyłowymi. Dotknięcie przewodu pod napięciem
spowoduje porażenie prądem!
Przyrząd BENNING ST 710 może być używany wyłącznie w obwodach
elektroenergetycznych kategorii przepięciowej II dla przewodów pod napięciem
300 V AC max względem ziemi.
Należy pamiętać, że praca przy użyciu wszelkiego rodzaju komponentów
elektrycznych jest niebezpieczna. Nawet niskie napięcia 30 V AC i 60 V DC
mogą okazać się bardzo niebezpieczne dla ludzi.
Przed każdym uruchomieniem przyrządu, należy sprawdzić czy przyrząd, nie
wykazują śladów uszkodzeń.
Jeżeliokaże się,że bezpiecznaobsługa przyrządu nie jest jużmożliwa, przyrządnależy na-
tychmiastwyłączyćizabezpieczyćprzedprzypadkowymwłączeniem.
Zakładasię,żebezpiecznaobsługaprzyrząduniejestjużmożliwa:
- jeżeliprzyrządwykazująwidoczneśladyuszkodzeń,lub
- jeżeliprzyrządprzestajepoprawniedziałać,lub
- podłuższymokresieprzechowywaniawnieodpowiednichwarunkach,lub
- ponarażeniachspowodowanychnieodpowiednimtransportem,
- urządzeniepoddanesądziałaniuwilgoci.
Aby wykluczyć niebezpieczeństwo należy:
- nie dotykać kabli w nieosłoniętych grotach pomiarowych,
- kable wtykać w odpowiednio oznakowane przyłącza na urządzeniu
pomiarowym
Ostrzeżenie:
Nie otwierać miernika, dlatego że nie zawiera on podzespołów, które mogą być
naprawiane przez użytkownika. Naprawy mogą być dokonywane tylko przez
wykwalifikowany personel.
Czyszczenie:
Obudowę należy czyścić regularnie na sucho za pomocą szmatki i środka
czyszczącego. Nie używać środków do polerowania lub rozpuszczalników.
3. Zakres dostawy
ZakresdostawyprzyrząduBENNINGST710obejmuje:
3.1 Jeden miernik BENNING ST 710
3.2 jedna sztuka kabla testowego z zaciskiem pomiarowym,
3.3 jednasztukakablaurządzeniazimnego(kabelłącznikowyIEC)
3.4 Jedenkompaktowyfuterałochronny
3.5 Sześć baterie 1,5 V typu mignon (IEC LR6/ AA) zamontowane w przyrządzie jako
oryginalnewyposażenie
3.6 Instrukcjaobsługi
Częścipodlegającezużyciu:
- MiernikBENNINGST710zasilanyjestzsześćbaterii1,5Vtypumignon(IECLR6/AA).
Wskazówkaodnośnieosprzętudowyboru:
- Kleszczeprądu upływowego BENNINGCM 9 do pomiaruprądu różnicowego dojedno i
trójfazowegourządzeniaodbiorczego(044065)
- Plakietkatestowania„Terminnastępnegotestu“,300sztuk(756213)
- Łącznik pomiarowy wtyczka z uziemieniem - łącznik wtykowy do pomiaru prądu
dyferencjacyjnego,prądukablaochronnegoiprąduobciążeniadojednofazowychurządzeń
odbiorczych, kabel jest wyprowadzony oddzielnie (044131)
01/ 2009
BENNING ST 710
52
- Łącznikpomiarowydotrójfazowegourządzeniaodbiorczego
Do pomiaru RPE i RISO:
- 16AłącznikwtykowyCEE-wtyczkazuziemieniem(044122)
- 32AłącznikwtykowyCEE-wtyczkazuziemieniem(044123)
 Dopomiaruprądudyferencjacyjnego,prądukablaochronnegoiprąduobciążenia:
- 16AłącznikwtykowyCEE-wtyczkaCEE(044127)
- 32AłącznikwtykowyCEE-wtyczkaCEE(044128)
- Formularzeprotokołutestu“testowanieurządzeńelektrycznych”możnapobraćbezpłatnie
pod adresem www.benning.de
4. Opis przyrządu
PatrzRysunek1:  Panelprzedniprzyrządu
PatrzRysunek2:  Górnastronaurządzenia
Zaznaczonenarys.1i2elementywyświetlaczaipanelusterującegomająnastępującefunk-
cje:
1 Gniazdo testowe,dopodłączeniatestowanegourządzenia,
2 -Przycisk, testowanie urządzeń I klasy ochronnej (urządzenia z kablami ochronnymi
i dotykającymi się przewodzącymi częściami, które zostały podłączone do kabla
ochronnego),
3 -Przycisk - symbol, testowanie urządzeń II klasy ochronnej (urządzenia z izolacją
ochronnąbezkabliochronnychizdotykającymisięprzewodzącymikablami)lubtestowanie
urządzeńIIIklasyochronnej(małenapięcieochronne),
4 -Symbol-przycisk, testowanie kabli, rozdzielnice wielokrotne i kable przyłączeniowe
urządzeńzwtykamiurządzeńzimnych
5 Wyświetlacz LCD,pokazujepostępsprawdzaniaiposzczególnewynikibadania,
6 4 mm wtyczka testowa,dopodłączaniatestowanychkablizkońcówkąpomiarową
7 Wtyczka urządzenia zimnego (wtyczka IEC),dopodłączeniakablaurządzeniazimnego
5. Informacje ogólne
BENNINGST710wykonujebadaniabezpieczeństwawedługDINVDE0701/0702.
BENNINGST710samodzielniesprawdzarodzajpodłączonegotestowanegoprzedmiotuidaje
użytkownikowiwskazówkęwwypadkuniewłaściwegowyboruprzebiegusprawdzania[2...4]:
Wstępnie nastawione wartości graniczne i wyniki badania z dobrą/złą wypowiedzią ułatwiają
ocenębadania.
6. Warunki środowiskowe:
- PrzyrządBENNING ST710 przeznaczony jest dowykonywania pomiaróww środowisku
suchym.
- Maksymalnawysokośćnadpoziomemmorzadlawykonywanychpomiarów:2000m,
- Kategoriaprzepięciowa/Kategorialokalizacji:IEC61010-1→300VkategoriaII
- Klasa zanieczyszczenia: 2,
- Stopieńochronyobudowy:IP40.
 StopieńochronyIP40:Ochronaprzeddostępemdoniebezpiecznychczęściorazochrona
przedzanieczyszczeniemciałamistałymiowymiarach>1mm(4-pierwszacyfra).Brak
ochronyprzedwodą(0-drugacyfra)
- EMC: EN 61326-1
- Temperaturapracyiwilgotnośćwzględna:
 Dlatemperaturypracyod0°Cdo30°C:wilgotnośćwzględnaponiżej80%
 Dlatemperaturypracyod31°Cdo40°C:wilgotnośćwzględnaponiżej75%
- Temperatura przechowywania: Miernik BENNING ST 710 może być przechowywany w
dowolnejtemperaturze wzakresie od- 25°C do+ 65°C (wilgotność względna od 0do
80%).Bateriapowinnabyćwyjętazmiernikanaczasprzechowywania.
7. Specyfikacje elektryczne
Uwaga:Precyzjępomiaruokreślasięjakosumę
- ułamkawzględnegowartościmierzoneji
- liczbycyfr(krokówzliczaniacyfrynajmniejznaczącej).
Określonawtensposób precyzjajestważnadla temperaturwzakresieod 18°Cdo 28°Ci
wilgotnościwzględnejponiżej80%.
7.1 Rezystancja przewodu ochronnego
Zakres pomiarowy Rozdzielczość Precyzja pomiaru
0,05Ω-20Ω 0,01 5 % ± 2 cyfr
Prądukontrolnego: >200mA(2)
Napięciejałowe: > 4 V nominalnie
01/ 2009
BENNING ST 710
53
7.2 Rezystancja izolacji
Zakres pomiarowy Rozdzielczość Precyzja pomiaru
0,5MΩ-20MΩ 0,01MΩ 5 % ± 2
cyfr
0,1MΩ-0,49MΩ 0,01MΩ 10 % ± 2
cyfr
Napięciakontrolnego
:
500 VDC @ 1 mA nominalnie, + 20 %, - 0 %
Prądukontrolnego
:>1mAo500kΩ,<2mAo2
7.3 Prądu przewodu ochronnego oraz prądu dotykowego zgodnie z metoda prądu
upływowego
Zakres pomiarowy Rozdzielczość Precyzja pomiaru
0,10 mA - 20 mA 0,01 mA 5 % ± 2
cyfr
Napięciakontrolnego
:40 VAC, 50 Hz
Prądukontrolnego
:<5mAo2kΩ
7.4 Test kabla
- pomiar oporu kabla ochronnego zgodnie z 7.1
- pomiar oporu izolacji zgodnie z 7.2
-testpęknięciakablakablizewnętrznych(L)ikabliobojętnych(N)
-zwarciakablizewnętrznych(L)ikabliobojętnych(N)
7.5 Pomiar napięcia na zewnętrznym gniazdku wtykowym z zestykiem ochronnym
Zakres pomiarowy Rozdzielczość Precyzja pomiaru Zabezpieczenie
przeciążeniowe
50 V - 270 VAC 1 V <5%odwartościkońcowej
zakresu pomiaru 300 V
Wskazanie:
-Napięciepomiędzykablemzewnętrznym(L)akablemobojętnym(N)
-Napięciepomiędzykablemzewnętrznym(L)akablemuziemiającymPE)
-Napięciepomiędzykablemobojętnym(N)akablemuziemiającym(PE)
7.6 Wartości graniczne DIN VDE 0701/ 0702
Wskazówka:
Wstępnie nastawione wartości graniczne pogrubionym pismem są zapisane w pamięci
BENNING ST 710.
Klasa ochrony
I
Klasa ochrony
II, III
test kabla
Opór kabla
ochronnego
RPE
dlakablizprądempo-
miarowym≤16A:
≤ 0,3Ωdo5mdługości,
nakażdenastępne7,5m:
dodatkowo0,1Ω,maks.1Ω,
Dlakabliowyższychprądach
pomiarowychobowiązujeobli-
czonawartośćoporuwOhmach
≤ 0,3 Ω
(
zobacz
klasa
ochrony
I)
Opór
izolacyjny
RISO
≥ 1
≥2MΩdlapotwierdzeniapew-
negoodłączenia(transformator)
≥0,3MΩwurządzeniachz
elementami grzewczymi
≥ 2
(SK- klasa ochrony II)
,
≥0,25MΩ
(
SK- klasa ochrony
III),
≥ 1
Prąd kabla
ochronnego
IEA
≤ 3,5 mA
naprzewodzącychczęściach
zpołączeniemPE
1mA/kWwurządzeniachzele-
mentami grzewczymi P > 3,5 kW
Prąd
dotykowy
IEA
≤0,5mA
naprzewodzącychczęściach
bezpołączeńPE
≤ 0,5 mA
naprzewodzących
częściachbezpołączeńPE
01/ 2009
BENNING ST 710
54
8. Pomiar za pomocą BENNING ST 710
8.1 Przygotowanie do wykonywania pomiaru
BENNING ST 710 należy używać i przechowywać wyłącznie w określonych temperaturach
eksploatacjiiprzechowywania;urządzenianiewolnowystawiaćdługotrwalenadziałaniepro-
mienisłonecznych.
- Sprawdzić bezpieczną wartość napięcia znamionowego i prądu znamionowego na
testowanych kablach
- Wszystkie źródła zakłóceń znajdujące się w pobliżu BENNING ST 710 są przyczyną
niestabilnychwartościibłędówprzypomiarach.
Przed każdym uruchomieniem należy sprawdzić, czy urządzenie, kable i
testowany przedmiot nie są uszkodzone.
Przed rozpoczęciem testu należy włączyć badany przedmiot. (Włącznik
sieciowy wł.)
Przed rozpoczęciem testu należy skontrolować, czy wybrany przebieg
sprawdzania zgadza się z klasą ochrony podłączonego sprawdzanego
przedmiotu.
8.1.1 Włączanie i wyłączanie BENNING ST 710
BENNINGST710 zostanie włączonypoprzez wciśnięciei przytrzymanie przycisków2 + 3
przezok.3sekund,potwierdzeniemtegosą2dźwiękisygnału.Ponownenaciśnięcieprzycisków
wyłączyurządzenie.
BENNINGST710wyłączasięsamoistniepookoło3minutach.(APO, Auto-Power-Off).Włączy
sięponownie,popotwierdzeniuprzycisków2 + 3.Jedendźwięksygnałusygnalizujesamoist-
newyłączenieurządzenia.Automatyczne wyłączeniejestdezaktywowane podczasmierzenia
napięciawzewnętrznymgniazdkuwtykowymzzestykiemochronnym.
8.1.2 Przebieg pomiaru
BENNINGST710wykonujeelektrycznetestybezpieczeństwazgodniezDINVDE0701/0702.
Dokładniejszychinformacjiodnośnietestówiwartościgranicznychnależyzaczerpnąćznormw
ich aktualnym brzmieniu.
SamodzielnieBENNINGST710sprawdzarodzajpodłączonegosprawdzanegoprzedmiotuidaje
użytkownikowiwskazówkęwraziebłędniewstępnienastawionegoprzebiegutestu[2...4]
8.2 Testowanie urządzeń elektrycznych/ pomocy warsztatowych według DIN VDE 0701/
0702
Przed rozpoczęciem testu należy mierzony przedmiot poddać kontroli
wzrokowej, w razie ewentualnych uszkodzeń należy przerwać test.
8.2.1 Testowanie urządzeń I klasy ochronnej
- Testowanieurządzeńzkablemochronnymidotykającymisięiprzewodzącymiczęściami,
któresąpodłączonedokablaochronnego.
- Sprawdzany przedmiot musi zostać podłączony do gniazdka testowego 1
BENNING ST 710.
- Wetknąć wtyczkę bezpieczeństwa 4 mm kabla testowego z zaciskiem pomiarowym do
4 mm gniazda bezpieczeństwa 6 i utworzyć złącze z metalową częścią testowanego
przedmiotu.
- Włączyćtestowanyprzedmiot.
- Poprzeznaciśnięcieprzycisku2rozpoczniesięautomatycznyprocestestowania.
- TestrozpoczynasięwrazzpomiaremoporukablaochronnegoRPE.JeśliRPE przekracza
>~100Ω,pomiarzostanieprzerwanybezwynikówpomiaruioboksymboluRPEpojawisię
krzyżyk.Przerwaniezostaniepotwierdzonenawyświetlaczuwskazówką„FAIL“.
01/ 2009
BENNING ST 710
55
- JeśliRPE<20Ωalewiększeaniżelimaksymalniedopuszczalnawartośćgraniczna,wartość
pomiaru RPEzostajepokazananawyświetlaczu.Symbol znajdującysięoboksymbolu
RPEpotwierdzaprzekroczeniewartościgranicznej.
- Jeśli RPE jest mniejszy aniżeli dopuszczalna wartość graniczna, wartość pomiaru
zostaje pokazana przez RPE iobok symbolu RPEpojawi się . Zostanie teraz ponownie
przeprowadzony pomiar RPEwrazzzamienionąbiegunowością.Powykonanymsprawdzeniu
RPErozpoczniesiętestowanieoporuizolacji.
- Jeślinawyświetlaczupojawiłobysię„LoLOAD“,należysprawdzić,czytestowanyprzedmiot
jestwłączony.
- Nciskając przycisk 2 zostanie kontynuowany przebieg testowania przy zbyt małym
obciążeniu(RL-N<100kΩ).
- JeśliopórizolacjiRISOjestwiększyoddopuszczalnejwartościgranicznej,oboksymboluRISO
pojawisię .
- Również obok symbolu IEA pojawi się , jeśli prąd kabla ochronnego IEA jest mniejszy
aniżelidopuszczalnawartośćgraniczna.
- Testzostaniezakończonywtedy,gdynawyświetlaczupojawisięsymbol„PASS“.
01/ 2009
BENNING ST 710
56
PatrzRysunek3: TestyurządzeńklasyochronnejI(urządzeniazprzewodamiochronnymii
dotykającymisięiprzewodzącymiczęściami,któresąpodłączonedokabla
ochronnego)
Wskazówka odnośnie pomiaru oporu kabla ochronnego:
- Pomiaru oporu kabla ochronnego RPE można wykonać alternatywnie również jako
pomiartrwały (maks.3 min.). Nacisnąćprzycisk 2 przez ok. > 5 sek., do momentu
pojawienia się na wyświetlaczu symbolu . Poruszyć kabel przyłączeniowy
testowanego przedmiotu wzdłuż całej długości w celu ustalenia słabego miejsca lub
pęknięciawtorzekablaochronnego. BENNINGST710zapisujestopniowoaktualną
wartośćpomiarunawyświetlaczuizapisujewpamięciwartośćmaksymalną.Ponowne
naciśnięcie przycisku 2 spowoduje wykonanie testu z zamienioną biegunowością.
Ponownenaciśnięcieprzycisku2pokażemaksymalnąwartośćRPEnawyświetlaczui
będziedalejkontynuowaćprzebiegsprawdzaniatakjakopisanowpunkcie8.2.1.
8.2.2 Testowanie urządzeń klasy ochronnej II (z izolacją ochronną) i urządzeń klasy
ochronnej III (małe napięcie ochronne)
- Testowanie urządzeń bez kabla ochronnego i z dotykającymi się i przewodzącymi
częściami.
- Sprawdzany przedmiot musi zostać podłączony do gniazdka testowego 1
BENNING ST 710.
- Utworzyć połączenie pomiędzy gniazdem testowym 4 mm 6 a częścią metalową
sprawdzanegoprzedmiotuzapomocąkablatestowegozzaciskiempomiarowym.
- Włączyćtestowanyprzedmiot.
- Poprzeznaciśnięcieprzycisku3rozpoczniesięautomatycznyprocestestowania.
- Jeślinawyświetlaczupojawiłobysię„LoLOAD“,należysprawdzić,czytestowanyprzedmiot
jestwłączony.
- Poprzez naciśnięcie przycisku 3 będzie przy zbyt małym obciążeniu (RL-N < 100 kΩ)
kontynuowany proces sprawdzania.
- JeśliopórizolacjiRISOjestwiększyoddopuszczalnejwartościgranicznej,oboksymboluRISO
pojawisięinnysymbol
- RównieżoboksymboluIEApojawisięinnysymbol ,jeśliprąddotykowyIEA jest mniejszy
aniżelidopuszczalnawartośćgraniczna.
- Testzostaniezakończonywtedy,gdynawyświetlaczupojawisięsymbol„PASS“.
Wskazówka odnośnie pomiaru oporu izolacyjnego przy testowanych przedmiotach klasy
ochronnej III.
- Zewzględunanastawionąwcześniejwartośćgranicznąwynoszącą2MΩdlasprawdzanych
01/ 2009
BENNING ST 710
57
przedmiotów klasy ochronnej II, należy pamiętać przy testowaniu przedmiotów III klasy
ochronnej,abywartopomiarupomiędzywartościamigranicznymiwynoszącymi2MΩ(SK
II)do0,25MΩ(SKIII)zostałyprzedstawionezapomocą obok symbolu RISO.
PatrzRysunek4: TestowanieurządzeńII klasyochronnej (urządzeniaz izolacjąochronną
bezkablaochronnegoizdotykającymisięiprzewodzącymiczęściami)lub
testowanieurządzeńIIIklasyochronnej(małenapięcieochronne)
8.2.3 Test kabla
Testkablamożnawykorzystaćdosprawdzeniakabliurządzeńzimnych(kabliprzyłączeniowych
urządzeń z łącznikiem wtykowym urządzeń zimnych) jak również do sprawdzenia bębnów
kablowychrozdzielnicwielokrotnychiprzedłużaczy.
8.2.3.1 Testowanie kabli zimnych (przewody łącznikowe IEC)
- Testowanykabelurządzeniazimnegonależypodłączyćprzezwtyczkęurządzeniazimnego
7 i gniazdo testowe 1 do BENNING ST 710.
- Poprzeznaciśnięcieprzycisku4rozpoczynasięautomatycznyprocestestowania.
- TestrozpoczynasięwrazzpomiaremoporukablaochronnegoRPE.
- WzależnościodprzekroczenialubnieosiągnięciawartościgranicznejoboksymboluRPE
zostaje pokazany lub .
Opór kabla ochronnego jest uzależniony od długości i przekroju sprawdzanego
kabla. Jest możliwe, że wynik programu może zostać zaakceptowany, mimo, iż
obok RPE urządzenie BENNING ST 710 pokazuje .
-Typowewartościoporukablinależyzaczerpnąćztabeli1.
Przekrój
Długość
1,0 mm² 1.5 mm² 2,5 mm²
5 m 0,1Ω 0,06Ω 0,04Ω
10 m 0,2Ω 0,12Ω 0,08Ω
25 m 0,5Ω 0,3Ω 0,2Ω
50 m 1,0Ω 0,6Ω 0,4Ω
Tabela1: Wartościoporukablaochronnegowzależnościoddługościiprzekroju
- PowykonanymteścieRPE zostaje automatycznie przeprowadzony pomiar oporu izolacji.
- WzależnościodprzekroczenialubnieosiągnięciawartościgranicznejoboksymboluRPE
zostaje pokazany lub .
- PowykonanymteścieRISOzostajeprzeprowadzonytestpęknięćizwarćkablazewnętrznego
(L)ikablaobojętnego(N).Powykonanymteściepęknięćispięćkablaoboksymbolu„GOOd“
zostaje pokazany obok .
- Symbol„PASS“potwierdzapowodzeniecałegoprzebiegutestu.
- Jeślitestpęknięcia przewodulub testzwarcianie zostałybywykonane, zamiastsymbolu
„GOOd”pokazałbysięjedenzponiższychsymboli:
- Symbol „OPEN“:
 Potwierdzapęknięciekablazewnętrznego(L)lubobojętnego(N)
- Symbol „Short“:
 Potwierdzazwarciepomiędzykablemzewnętrznym(L)akablemobojętnym(N)
PatrzRysunek5a: Testkabliprzyłączeniowychurządzeńzwtyczkamizimnychurządzeń.
Wskazówka odnośnie pomiaru oporu kabla ochronnego:
- Pomiaru oporu kabla ochronnego RPE można wykonać alternatywnie również jako
pomiartrwały (maks.3 min.). Nacisnąćprzycisk 2 przez ok. > 5 sek., do momentu
pojawienia się na wyświetlaczu symbolu . Poruszyć kabel przyłączeniowy
testowanego przedmiotu wzdłuż całej długości w celu ustalenia słabego miejsca lub
pęknięciawtorzekablaochronnego. BENNINGST710zapisujestopniowoaktualną
wartośćpomiarunawyświetlaczuizapisujewpamięciwartośćmaksymalną.Ponowne
naciśnięcie przycisku 4 spowoduje wykonanie testu z zamienioną biegunowością.
Ponownenaciśnięcieprzycisku4pokażemaksymalnąwartośćRPEnawyświetlaczui
01/ 2009
BENNING ST 710
58
będziedalejkontynuowaćprzebiegsprawdzaniatakjakopisanowpunkcie8.2.3.1.
8.2.3.2 Testowanie bębnów kablowych, rozdzielnic wielokrotnych i przedłużaczy
- Podłączyćznajdującysięwdostawiekabelurządzeniazimnego(kabelłącznikowyIEC)do
wtyczkiurządzeniazimnego7 BENNING ST 710.
- Testowany kabel zostaje podłączony do gniazdka testowego 1 i wtyczki z uziemieniem
kablaurządzeniazimnego.
- Poprzeznaciśnięcieprzycisku4rozpoczynasięautomatycznyprocestestowania.
- Następnyprocestestowaniaodpowiadaprocesowitestowaniazpunktu8.2.3.1.
PatrzRysunek5b: Testowaniekabli,rozdzielnicwielokrotnychibębnówkablowych
8.3 Pomiar napięcia na zewnętrznym gniazdku wtykowym z zestykiem ochronnym
- Podłączyćkabelurządzeniazimnego(kabelłącznikowyIEC)dowtyczkiurządzeniazimnego
7urządzeniaBENNINGST710.
- Podłączyć wtyczkę z uziemieniem do sprawdzanego gniazdka wtykowego z zestykiem
ochronnym. W razie istnienia napięcia zasilającego pomiar napięcia rozpocznie się
automatycznie.
- W zależności od położenia kabla zewnętrznego (z prawej lub z lewej strony) gniazdka
wtykowego z zestykiem ochronnym zostaną pokazane potencjały napięcia pomiędzy
zaciskamiprzyłączającymiL,NiPE.
lub
Zostają zmierzone tylko potencjały napięcia pomiędzy poszczególnymi
przyłączami L, N i PE. Pomiar mówi nic o fachowej instalacji gniazdka zestyku
ochronnego. Brak wskazówki ostrzegawczej przy niebezpiecznym napięciu
dotykowym kabla PE!
PatrzRysunek6: Pomiarnapięcianazewnętrznymgniazdkuwtykowymzzestykiemochron-
nym
9. Konserwacja
Przed otwarciem przyrządu BENNING ST 710, należy upewnić się, że nie znajduje
się on pod napięciem. Niebezpieczeństwo porażenia prądem elektrycznym!
Praca pod napięciem na otwartym przyrządzie BENNING ST 710 może być prowadzona
wyłącznie przez uprawnionego elektryka z zastosowaniem środków zapobiegającym
wypadkom.
Przed otwarciem przyrządu, należy uwolnić przyrząd BENNING ST 710 od napięcia w
następującysposób:
- Wyłączyćurządzenietestujące
- Odłączyćwszystkiekableprzyłączenioweodurządzenia
9.1 Zabezpieczenie przyrządu
W pewnych okolicznościach, nie jest możliwe zapewnienie bezpiecznej obsługi przyrządu
BENNING ST 710:
- Widoczne uszkodzenie obudowy.
- Nieprawidłowewynikipomiarów.
- Rozpoznawalneskutkidługiegoprzechowywaniawnieprawidłowychwarunkach.
- Rozpoznawalneskutkinadmiernegonarażeniapodczastransportu.
Wtakichprzypadkach,należynatychmiastwyłączyćprzyrządBENNINGST710,odłączyćod
punktówpomiarowychizabezpieczyćwceluuniemożliwieniadalszegokorzystania.
9.2 Czyszczenie
Obudowęnależy czyścićod zewnątrzprzy użyciuczystej, suchejtkaniny (wyjątek:specjalne
ściereczkidoczyszczenia).Podczasczyszczeniaprzyrządu,należyunikaćstosowaniarozpusz-
czalnikówi/lubśrodkówczyszczących.Należyupewnićsię,żekomoranabaterięistykibaterii
niesązanieczyszczonewyciekamielektrolitu.
Wprzypadkuzanieczyszczeniaelektrolitemlubobecnościbiałegoosaduwrejoniebateriilubna
obudowiebaterii,należywyczyścićprzyużyciusuchejtkaniny.
01/ 2009
BENNING ST 710
59
9.3 Wymiana baterii
Przed otwarciem przyrządu BENNING ST 710, należy upewnić się, że nie znajduje
się on pod napięciem. Niebezpieczeństwo porażenia prądem elektrycznym!
PrzyrządBENNINGST710zasilanyjestprzezsześćbaterieminiaturowe1,5VMignon(AA/
IEC LR6).
Jeżelinawyświetlaczupojawisię symbolbaterii5,wówczaskonieczna jestwymianabaterii
(patrz rysunek 7).
Wceluwymianybaterii,należy:
- WyłączyćBenningST710.
- PołożyćBENNINGST710nastronęczołowąiodkręcićśrubęzpokrywybaterii.
- Podnieśćpokrywębaterii(wobrębiewgłębieńwobudowie)zdolnejstrony.
- Wyjąćrozładowanebateriezkieszenibaterii.
- Następniewłożyćbateriewprzeznaczonedlanichmiejscewkieszenibaterii(należyprzy
tymkoniecznieuważaćnaukładbiegunówbaterii).
- Pokrywębateriiwcisnąćwdolnączęśćidokręcićśrubę.
Patrz Rysunek 7: Wymiana baterii
Należy pamiętać o ochronie środowiska! Nie wyrzucać rozładowanych baterii
do śmieci. Należy je przekazywać do punktu zbierania rozładowanych baterii
i odpadów specjalnych. Prosimy zasięgnąć odpowiednich informacji na
własnym terenie.
9.4 Kalibracja
Wcelu utrzymaniawyspecykowanej precyzjiwyników pomiarów,przyrządnależy regularnie
przekazywaćdokalibracjidonaszegoserwisufabrycznego.Zalecasięprzeprowadzaniekali-
bracjiwodstępiejednegoroku.Przyrządnależywysłaćnanastępującyadres:
Benning Elektrotechnik & Elektronik GmbH & CO. KG
Service Centre
Robert-Bosch-Str. 20
D - 46397 Bocholt
10. Ochrona środowiska
Pozakończeniużywotnościurządzenia,prosimyooddanie urządzeniedopunktu
utylizacji.
  • Page 1 1
  • Page 2 2
  • Page 3 3
  • Page 4 4
  • Page 5 5
  • Page 6 6
  • Page 7 7
  • Page 8 8
  • Page 9 9
  • Page 10 10
  • Page 11 11
  • Page 12 12
  • Page 13 13
  • Page 14 14
  • Page 15 15
  • Page 16 16
  • Page 17 17
  • Page 18 18
  • Page 19 19
  • Page 20 20
  • Page 21 21
  • Page 22 22
  • Page 23 23
  • Page 24 24
  • Page 25 25
  • Page 26 26
  • Page 27 27
  • Page 28 28
  • Page 29 29
  • Page 30 30
  • Page 31 31
  • Page 32 32
  • Page 33 33
  • Page 34 34
  • Page 35 35
  • Page 36 36
  • Page 37 37
  • Page 38 38
  • Page 39 39
  • Page 40 40
  • Page 41 41
  • Page 42 42
  • Page 43 43
  • Page 44 44
  • Page 45 45
  • Page 46 46
  • Page 47 47
  • Page 48 48
  • Page 49 49
  • Page 50 50
  • Page 51 51
  • Page 52 52
  • Page 53 53
  • Page 54 54
  • Page 55 55
  • Page 56 56
  • Page 57 57
  • Page 58 58
  • Page 59 59
  • Page 60 60
  • Page 61 61
  • Page 62 62
  • Page 63 63
  • Page 64 64
  • Page 65 65

Benning ST 710 de handleiding

Categorie
Meten
Type
de handleiding
Deze handleiding is ook geschikt voor