Silvercrest SKRI 2000 A1 Operation and Safety Notes
- Categorie
- Wekkers
- Type
- Operation and Safety Notes

2
IAN 63920
RADIO SOUS-MEUBLE SKRI 2000 A1
RADIO SOUS-MEUBLE
Instructions d‘utilisation et consignes de sécurité
UNTERBAU-RADIO
Bedienungs- und Sicherheitshinweise
ONDERBOUW-RADIO
Bedienings- en veiligheidsinstructies
UNDER-CABINET RADIO
Operation and Safety Notes

FR / BE Instructions d‘utilisation et consignes de sécurité Page 1
NL / BE Bedienings- en veiligheidsinstructies Pagina 37
DE / AT / CH Bedienungs- und Sicherheitshinweise Seite 73
GB Operation and Safety Notes Page 109
Avant de lire le mode d‘emploi, ouvrez la page contenant les illustrations et familiarisez-vous ensuite avec
toutes les fonctions de l‘appareil.
Vouw vóór het lezen de pagina met de afbeeldingen open en maak u vertrouwd met alle functies van het
apparaat.
Klappen Sie vor dem Lesen die Seite mit den Abbildungen aus und machen Sie sich anschließend mit allen
Funktionen des Gerätes vertraut.
Before reading, unfold the page containing the illustrations and familiarise yourself with all functions of
the device.

A
6
7
8 9
10 11 12
20
16
13
18
14
17
1
1
19
2
4
5
3
23
25 26
21
21
2324
22
27
15
40
41
42
43
43
4
44
45
30
33
32
36
37
38
39
29
31
2828
46
4
4
47
34
48
35
B

1
SKRI 2000 A1
FR
BE
Sommaire
Introduction . . . . . . . . . . . . . .2
Informations relatives à ce mode
d'emploi . . . . . . . . . . . . . . . . . . . . . . 2
Droits d'auteur . . . . . . . . . . . . . . . . . 2
Utilisation conforme . . . . . . . . . . . . . 2
Avertissements . . . . . . . . . . . . . . . . . 3
Sécurité . . . . . . . . . . . . . . . . . .4
Danger dû au courant électrique . . . 4
Concernant l'usage des piles . . . . . . 4
Consignes de sécurité fondamentales . 5
Eléments de commande . . . . .6
Installation et raccordement .8
Consignes de sécurité. . . . . . . . . . . . 8
Accessoires fournis et inspection de
transport . . . . . . . . . . . . . . . . . . . . . . 8
Déballage. . . . . . . . . . . . . . . . . . . . . 8
Recyclage de l'emballage . . . . . . . . 9
Exigences imposées au lieu
d'installation . . . . . . . . . . . . . . . . . . . 9
Raccordement électrique . . . . . . . . . 9
Pile . . . . . . . . . . . . . . . . . . . . . . . . .10
Pile de la télécommande . . . . . . . .10
Fixation sous un meuble suspendu .11
Démontage . . . . . . . . . . . . . . . . . . .12
Installation de l'appareil . . . . . . . . .12
Préparation de la station support
pour iPod ou iPhone . . . . . . . . . . .12
Raccordement à l'alimentation
électrique . . . . . . . . . . . . . . . . . . . . 12
Antenne baladeuse FM . . . . . . . . .12
Fonctionnement et opération 13
Allumer et éteindre . . . . . . . . . . . . .13
Réglages de base . . . . . . . . . . . . . .13
Activation du menu de réglage . . .14
Programmation de l'alarme / réveil .18
Minuterie de cuisine . . . . . . . . . . . .21
Programmation de la minuterie de
cuisine . . . . . . . . . . . . . . . . . . . . . . .22
Mode radio . . . . . . . . . . . . . . . . . .23
Lecture d'appareils audio externes .26
Raccordement d'un iPod / d'un iPhone 26
Autres fonctions . . . . . . . . . . . . . . .28
Nettoyage . . . . . . . . . . . . . . .31
Consignes de sécurité. . . . . . . . . . .31
Nettoyage du boîtier . . . . . . . . . . .31
Dépannage . . . . . . . . . . . . . .31
Consignes de sécurité. . . . . . . . . . .31
Causes des pannes et remèdes . . . 32
Entreposage / Mise au rebut 33
Entreposage . . . . . . . . . . . . . . . . . .33
Mise au rebut . . . . . . . . . . . . . . . . .33
Mise au rebut des piles . . . . . . . . .33
Annexe . . . . . . . . . . . . . . . . .33
Renvois à la déclaration de
conformité de l'UE . . . . . . . . . . . . .33
Caractéristiques techniques . . . . . .34
Garantie . . . . . . . . . . . . . . . . . . . . .35
Service après-vente. . . . . . . . . . . . .35
Importateur . . . . . . . . . . . . . . . . . . .35
IB_63920_SKRI2000A1_LB2.indb Abs2:1 17.01.2012 12:03:36 Uhr

2
Introduction
SKRI 2000 A1
FR
BE
Introduction
Informations relatives à ce mode d'emploi
Ce mode d'emploi fait partie intégrante de la radio sous-meuble SKRI 2000 A1
(désignée ci-après par appareil) et vous donne des indications importantes sur
l'usage conforme, la sécurité, le montage et le raccordement, ainsi que l'opération
de l'appareil.
Le mode d'emploi doit en tout temps être accessible à proximité de l'appareil. Il
doit être lu et appliqué par chaque personne qui est chargé d'utilisée l'appareil
et de réparer ses défaillances.
Conservez ce mode d'emploi et remettez-le au nouveau propriétaire de l'appareil.
Droits d'auteur
Cette documentation est protégée par les droits d'auteur. Toute reproduction
ou réimpression, y compris sous forme d'extraits, ainsi que la reproduction des
illustrations, y compris dans un état modifi é, n'est autorisée qu'avec l'autorisation
écrite du fabricant.
Utilisation conforme
Cet appareil est destiné à la réception dans des locaux fermés de programmes
radiophoniques en ondes UC (UKW), il est raccordable à des appareils audio
externes (tels qu'un lecteur MP3), à un iPod ou un iPhone, il peut aussi fonctionner
comme minuterie de cuisine et émetteur d'alarme. L'appareil peut être monté
dans une armoire ou autre : Des piéds supports et une plaque de montage livrée
avec l'appareil sont prévues pour son installation. Tout usage divergent ou toute
utilisation allant au-delà seront considérés comme non conformes. Cet appareil
n'est pas conçu pour être utilisé dans des contextes commerciaux ou industriels.
Toutes prétentions résultant de dommages découlant d'une utilisation non conforme
à l'usage prévu, de réparations inappropriées, de modifi cations apportées sans
autorisation ou de l'utilisation de pièces de rechange non agréées, ne seront pas
prises en compte. La personne opérant l'appareil est seule à assumer le risque.
Les expressions "Made for iPod“ et "Made for iPhone“ signalent la présence d'un
dispositif électronique dédié pour le raccordement d'un iPod ou d'un iPhone, dis-
positif dont les performances sont conformes aux spécifi cations d'Apple. Apple
n'est en rien responsable de l'utilisation de cet appareil par son propriétaire et
donc des conditions de sécurité dans son emploi. Noter que l'utilisation de ce
dispositif électronique avec un iPod ou un iPhone peut avoir une incidence sur les
fonctionnalités des liaisons sans fi l. iPad, iPhone, iPod, iPod classic, iPod nano,
iPod shuffl e et iPod touch sont des marques déposées de la société Apple Inc.
aux USA et dans d'autres pays. iPad est aussi une marque déposée de la société
Apple Inc.
IB_63920_SKRI2000A1_LB2.indb Abs1:2 17.01.2012 12:03:37 Uhr

3
Introduction
SKRI 2000 A1
FR
BE
Avertissements
Les avertissements suivants sont utilisés dans ce mode d'emploi :
DANGER
Un avertissement de ce niveau de danger signale une situation
éventuellement dangereuse.
Si la situation dangereuse n'est pas évitée, elle peut déboucher sur un décès
ou de graves blessures.
Il faut suivre les instructions de ces avertissements pour éviter tout risque de
►
décès ou de graves blessures de personnes.
AVERTISSEMENT
Un avertissement de ce niveau de danger signale une situation
potentiellement dangereuse.
Des accidents peuvent résulter de l'incapacité à éviter la situation dangereuse.
Voilà pourquoi il est important de suivre les instructions fi gurant dans cet
►
avertissement pour éviter que des personnes ne soient blessées.
ATTENTION
Un avertissement de ce niveau de danger signale un dommage
matériel potentiel.
Si vous ne pouvez éviter la situation dangereuse, cela peut entraîner des
dommages matériels.
Suivre les instructions dans cet avertissement pour éviter tous dommages
►
matériels.
REMARQUE
Une remarque signale des informations supplémentaires qui facilitent la ►
manipulation de l'appareil.
IB_63920_SKRI2000A1_LB2.indb Abs4:3 17.01.2012 12:03:37 Uhr

4
Sécurité
SKRI 2000 A1
FR
BE
Sécurité
Ce chapitre contient des consignes de sécurité importantes se rapportant à la
manipulation de l'appareil.
Cet appareil est conforme aux consignes de sécurité prescrites.
Une utilisation non conforme peut provoquer des blessures corporelles et des
dégâts matériels.
Danger dû au courant électrique
DANGER
Danger de mort causé par le courant électrique !
Danger de mort en cas de contact avec des lignes électriques
ou des composants sous tension !
Veuillez observer les consignes de sécurité suivantes afi n d'éviter un danger
dû au courant électrique :
Ne pas utiliser cet appareil si le bloc d'alimentation tension secteur, le
►
câble de raccordement ou le connecteur sont endommagés.
N'ouvrir en aucun cas le bloc d'alimentation secteur. En cas de contact avec ►
des raccordements sous tension et en cas de modifi cation de la structure
électrique et mécanique, il existe un danger d'électrocution.
Concernant l'usage des piles
AVERTISSEMENT
Danger par l'usage non conforme ! Risque d'explosion et
d'accident !
Veuillez respecter les consignes de sécurité suivantes pour assurer la manipu-
lation des piles en toute sécurité :
Ne jetez pas les piles dans le feu.
►
Ne court-circuitez pas les piles. ►
Ne tentez pas de recharger les piles. ►
Vérifi ez régulièrement les piles. Des fuites d'acide de pile peuvent sérieuse- ►
ment endommager l'appareil. Il convient d'être particulièrement prudent
lorsque vous manipulez des piles endommagées ou ayant coulé. Danger
de brûlure par l'acide ! Porter des gants de protection.
Conservez les piles hors de portée des enfants. Consulter immédiatement ►
un médecin en cas d'incident (ingestion).
Retirez les piles si vous n'utilisez pas l'appareil pendant une longue période. ►
IB_63920_SKRI2000A1_LB2.indb Abs3:4 17.01.2012 12:03:38 Uhr

5
Sécurité
SKRI 2000 A1
FR
BE
Consignes de sécurité fondamentales
Pour assurer la manipulation de l'appareil en toute sécurité, veuillez respecter les
consignes de sécurité suivantes :
Vérifi ez la présence de dommages visibles extérieurs avant l'usage de l'appareil.
■
Ne mettez pas en service un appareil endommagé ou ayant subi une chute.
En cas de dommages sur les câbles ou les raccordements, faites-les remplacer
■
par le personnel technique agréé ou par le service après-vente.
Cet appareil n'est pas prévu pour des personnes (y compris des enfants)
■
dont les capacités physiques, sensorielles ou mentales ou dont le manque
d'expérience ou de connaissances les empêchent d'assurer un usage sûr
des appareils, s'ils n'ont pas été surveillés ou initiés au préalable.
Les enfants doivent être surveillés afi n d'éviter qu'ils ne jouent avec l'appareil.
■
Confi ez les réparations sur l'appareil exclusivement à des entreprises agréées ■
ou au service après-vente. Suite à des réparations non conformes, des risques
importants peuvent être créés pour l'utilisateur. A cela s'ajoute l'expiration de
la garantie.
Toute réparation de l'appareil au cours de la période sous garantie devra
■
être exclusivement confi ée à un service après-vente agréé par le fabricant,
sinon tous dommages se produisant ultérieurement ne seront pas couverts
par la garantie.
Les pièces défectueuses devront impérativement être remplacées par des
■
pièces de rechange d'origine. Seules ces pièces garantissent en eff et la
satisfaction des critères de sécurité.
Protégez l'appareil de l'humidité et de la pénétration de liquides. Ne plongez
■
jamais l'appareil sous l'eau, n'installez pas l'appareil à proximité de l'eau et ne
posez pas d'objets remplis d'un liquide (par ex. vases) sur l'appareil.
Ne posez aucun objet sur l'appareil.
■
Ne faites pas fonctionner l'appareil à proximité de fl ammes nues (par ex. ■
des bougies).
Evitez l'exposition directe aux rayons du soleil.
■
Retirez le cordon de raccordement de la prise de courant toujours par la ■
fi che, et non par le câble de raccordement.
En cas de perturbations ou d'orages, sortez le bloc d'adaptation secteur
■
de la prise de courant.
IB_63920_SKRI2000A1_LB2.indb Abs3:5 17.01.2012 12:03:38 Uhr

6
Eléments de commande
SKRI 2000 A1
FR
BE
Eléments de commande
(illustrations, voir face rabattable fi gure A)
Ecran
2
User : sélectionner l'utilisateur
3
Vol+ : augmenter le volume
4
Mem : sélection emplacement mémoire
5
Vol– : Abaisser le volume
6
Power : Marche / arrêt
7
Function / ST : sélection de fonction / activation stéréo
8
Timer : réglage et démarrage de la minuterie
9
Alarm Mode : sélection du mode alarme
10
AOT / Dimmer : minuterie de mise à l'arrêt / mise en marche ou à l'arrêt variateur
de luminosité écran
11
Mode / Lock : appel de menu réglage / verrouillage des touches
12
i-Time Sync
i-Time Sync
Bass : synchronisation de l'affi chage heure et date avec un iPod ou
un iPhone / accentuation des basses
13
:
I Enter
I Enter
:
opérations avec un iPod ou un iPhone / saisie
14
i
i
/ Memory Scan : pause / lecture sur iPod ou iPhone / recherche automatique
d'émetteur / appel d'un émetteur radio enregistré
15
Bloc d'alimentation
16
i
i
/ Pr– / AL2 : fonction précédente avec iPod / iPhone / sélection emplacement
mémoire précédent / réglage alarme 2
17
/ Up : avance rapide avec iPod ou iPhone / monter en fréquence de réception
18
i
i
/ Pr+ / AL1 : fonction suivante avec iPod / iPhone / sélection emplacement
mémoire suivant/ réglage alarme 1
19
i
i
/ Down : retour rapide avec iPod ou iPhone / descendre en fréquence de
réception
20
Plaque de montage
21
Pieds supports (rabattables)
22
Etrier de fi xation pour iPod / iPhone
23
Enceintes
24
Compartiment à piles
25
Douille DC : raccordement électrique (7V) pour bloc d'alimentation tension secteur
26
Douille AUX IN : raccordement d'appareils audio avec connecteur à jack 3,5 mm
27
Antenne baladeuse pour réception UKW
IB_63920_SKRI2000A1_LB2.indb Abs3:6 17.01.2012 12:03:38 Uhr

7
Eléments de commande
SKRI 2000 A1
FR
BE
(illustrations, voir face rabattable avant fi gure B)
28
Support entretoise (pour accrochage sous un élément de meuble)
29
Station support pour iPod / iPhone
30
: mise en marche / mise à l'arrêt
31
User : sélectionner l'utilisateur
32
i / Down : retour rapide avec iPod ou iPhone / descendre en fréquence de
réception
33
i : pause / lecture avec iPod / iPhone
34
iMenu / Enter : opérations avec un iPod ou un iPhone / saisie
35
Mem : sélection emplacement mémoire
36
Memory-Scan : recherche automatique d'émetteur / appel d'un émetteur radio
enregistré
37
Minuterie : réglage et démarrage de la minuterie
38
Function / ST : sélection de fonction / activation stéréo Mode : menu réglage
39
Vol+ : augmenter le volume
40
i
/ Pr+ : fonction suivante avec iPod / iPhone / sélection emplacement mémoire
suivant
41
Vol– : abaisser le volume
42
i / Up : avance rapide avec iPod ou iPhone / monter en fréquence de réception
43
iTime Sync / Bass : synchronisation de l'affi chage heure et date avec un iPod ou un
iPhone / accentuation graves
44
i
i
/ Pr– : sélection emplacement mémoire précédent / fonction précédente avec
iPod / iPhone
45
Mode / Lock : appel de menu réglage / verrouillage des touches
46
AOT / Dimmer : minuterie de mise à l'arrêt / mise en marche ou à l'arrêt variateur
de luminosité écran
47
Alarm : sélection du mode alarme
48
Capteur pour la télécommande
IB_63920_SKRI2000A1_LB2.indb Abs3:7 17.01.2012 12:03:41 Uhr

8
Installation et raccordement
SKRI 2000 A1
FR
BE
Installation et raccordement
Consignes de sécurité
AVERTISSEMENT
Lors de la mise en service de l'appareil, des blessures corporelles
et des dégâts matériels peuvent être occasionnés !
Respecter les consignes de sécurité suivantes pour éviter une situation
dangereuse :
Les matériaux d'emballage ne sont pas un jouet et ne doivent donc pas
►
être considérés comme tels. Il y a un risque d'étouff ement.
Respectez les consignes sur les exigences imposées au lieu d'installation
►
et sur le raccordement électrique de l'appareil, afi n d'éviter les blessures
corporelles et les dégâts matériels.
Accessoires fournis et inspection de transport
L'appareil est équipé par défaut des composants suivants :
Radio pour montage sous un élément de meuble SKRI 2000 A1
▯
Bloc d'alimentation tension secteur JVSW0702000 ▯
Plaque de montage ▯
4 vis de fi xation (format court) ▯
2 x supports entretoises avec 4 vis de fi xation (format long) ▯
Etrier de fi xation pour iPod / iPhone ▯
1 x pile 3 V type CR2032 ▯
1 x pile 3 V type CR2025 ▯
Télécommande ▯
Câble jack 3,5 auf 3,5 mm (50 cm) ▯
Mode d'emploi ▯
REMARQUE
Vérifi ez que la livraison est bien complète et qu'elle ne présente pas de ►
dommages apparents.
En cas de livraison incomplète ou de dégâts résultant d'un emballage non
►
approprié ou du transport, veuillez prendre contact avec la hotline du SAV
(voir chapitre Service après-vente p. 35).
Déballage
Sortez du carton toutes les pièces de l'appareil et les instructions d'utilisation. ♦
Retirer tous les matériaux d'emballage. ♦
IB_63920_SKRI2000A1_LB2.indb Abs3:8 17.01.2012 12:03:44 Uhr

9
Installation et raccordement
SKRI 2000 A1
FR
BE
Recyclage de l'emballage
L'emballage protège l'appareil de tous dommages éventuels au cours du
transport. Les matériaux d'emballage ont été sélectionnés selon des critères de
respect de l'environnement et de recyclage, de sorte qu'ils peuvent être recyclés.
Le retour de l'emballage dans le cycle des matériaux permet d'économiser les
matières premières et réduit la formation de déchets. Recyclez les matériaux d'em-
ballage qui ne sont plus utilisés en conformité avec les règles locales en vigueur.
REMARQUE
Dans la mesure du possible, conservez l'emballage d'origine pendant la ►
période sous garantie, afi n de pouvoir emballer l'appareil en bonne et due
forme pour l'expédition si vous étiez amené à faire valoir la garantie.
Exigences imposées au lieu d'installation
Pour une utilisation sûre et sans erreurs de l'appareil, son lieu d'installation doit
répondre aux conditions suivantes :
Lors de l'installation de l'appareil, placez celui-ci sur un support plat et hori-
■
zontal. Utilisez les pieds rabattables.
Placez ou montez l'appareil de manière à ne pas recouvrir les ouvertures
■
d'aération et le haut-parleur.
Evitez d'installer l'appareil dans un environnement chaud, mouillé ou très
■
humide ou à proximité de matériaux infl ammables.
Ne jamais placer l'appareil au dessus d'une cuisinière ou similaire.
■
La prise doit être facile d'accès, afi n que l'adaptateur secteur puisse être ■
retiré en cas d'urgence.
Raccordement électrique
L'appareil fonctionne en 7 V continu donné par le bloc d'alimentation tension ■
secteur. Toujours raccorder l'appareil au bloc d'alimentation tension secteur
fourni, ce dernier est à brancher sur la tension secteur.
Avant le raccordement de l'appareil, comparez les données de raccorde-
■
ment (tension et fréquence) marquées sur la plaque signalétique avec celles
de votre réseau électrique. Ces données doivent concorder afi n que l'appa-
reil ne risque pas d'être endommagé.
Ne pas exposer le câble de raccordement aux eff ets thermiques ni aux
■
objets contondants.
Veillez à ce que le câble de raccordement ne soit pas tendu de manière
■
excessive ou ne soit pas plié.
Ne laissez pas le câble de raccordement pendre sur les angles (eff et du fi l ■
de fer tendu).
Débrancher le bloc d'alimentation secteur lorsque l'appareil va rester inutilisé
■
pour une longue période.
IB_63920_SKRI2000A1_LB2.indb Abs3:9 17.01.2012 12:03:44 Uhr

10
Installation et raccordement
SKRI 2000 A1
FR
BE
Pile
En insérant la pile, vous évitez la perte de l'heure programmée, la perte des
emplacements mémoire programmés et des heures d'alarme en cas de panne
d'électricité. La pile permet à l'horloge interne de continuer à fonctionner pendant
la panne de tension secteur. Lorsque le courant est rétabli, l'heure correcte appa-
raît automatiquement sur l'écran
.
REMARQUE
L'appareil est également utilisable sans pile. ►
Mise en place / remplacement de pile
Ouvrez le couvercle du compartiment à pile ♦
24
sur la face inférieure de
l'appareil en tournant le couvercle à gauche jusqu'à la butée à l'aide d'une
pièce et en le soulevant.
Insérez la pile de type CR2032 (incluse dans les accessoires fournis) dans
♦
le compartiment à pile. Le côté comportant la marque "+" est orienté vers le
haut.
Refermez le compartiment à pile en mettant en place le couvercle en tournant
♦
le couvercle à droite à l'aide d'une pièce.
Pile de la télécommande
Activation de la pile
La pile de la télécommande est insérée à la livraison.
Activez la pile en retirant la bande isolante. ♦
Remplacement de la pile
Poussez l'encoche (A) à droite avec l'ongle ♦
tout en sortant le compartiment à piles.
Insérez une pile de 3 V type CR 2025 dans
♦
ce compartiment. Le côté comportant la marque
"+" est orienté vers le haut.
Replacez à nouveau complètement le comparti-
♦
ment à piles dans la télécommande.
IB_63920_SKRI2000A1_LB2.indb Abs3:10 17.01.2012 12:03:44 Uhr

11
Installation et raccordement
SKRI 2000 A1
FR
BE
Fixation sous un meuble suspendu
Vous pouvez monter l'appareil avec la plaque de montage
20
fournie, par
exemple sous un meuble suspendu. Pour le montage de l'appareil, procéder
comme suit:
Poussez la plaque de montage
♦
20
en arrière et retirez-la
20
.
Choisissez un emplacement de montage approprié pour l'appareil (voir aussi
♦
le chapitre "Exigences imposées au lieu d'installation" p. 9).
Maintenez la plaque de montage ♦
20
sous le point de montage. Le bord
antérieur de la plaque de montage
20
doit se trouver à environ 6,8 cm
derrière la façade du meuble suspendue afi n d'aligner l'appareil après le
montage sur le meuble suspendu. Les bords de la plaque de montage
20
doivent être distants de 4,5 cm env. des parois du meuble environnant.
REMARQUE
Enlever l'étrier de sécurité de l'appareil si l'appareil est monté avec le côté ►
gauche accolé à une paroi de meuble
22
.
Marquez les 4 points de fi xation à l'aide d'un crayon.
♦
Créez un petit enfoncement au niveau des marquages à l'aide d'une pointe ♦
ou d'une aiguille.
Mettez en place les supports entretoises ♦
28
fournis avec tenons de retenue-
dans les renfoncements correspondants de la plaque de montage
20
.
Fixez la plaque de montage
♦
20
avec les vis fournies (voir la fi gure).
IB_63920_SKRI2000A1_LB2.indb Abs3:11 17.01.2012 12:03:46 Uhr

12
Installation et raccordement
SKRI 2000 A1
FR
BE
Placez l'appareil de biais avec les évidements antérieurs sur le côté supé- ♦
rieur de l'appareil dans la plaque de montage
20
. Pressez vers le haut la
partie arrière de l'appareil contre la plaque de montage
20
jusqu'à ce que
l'appareil s'enclique de manière audible.
Vérifi ez la stabilité de l'appareil.
♦
Démontage
Tirez l'appareil vers l'avant et le retirez par en bas. ♦
Dévissez les vis sur la plaque de montage ♦
20
et retirez la plaque de
montage
20
.
Installation de l'appareil
Vous avez également la possibilité de poser l'appareil. A la mise en place ne
pas recouvrir les fentes pour la ventilation
23
ni le haut-parleur en dessous de
l'appareil, sortir les deux pieds supports
21
de l'appareil :
Saisir les pieds dans leur logement et les sortir jusqu'à la butée.
♦
Choisir un emplacement d'installation approprié pour l'appareil (voir aussi ♦
le chapitre "Exigences imposées au lieu d'installation" p. 9).
Préparation de la station support pour iPod ou iPhone
Vous pouvez raccorder à l'appareil votre iPod ou votre iPhone. Rabattre vers le
bas la station
29
support et monter l'étrier de sécurité
22
:
Rabattre la station support
♦
29
complètement vers le bas.
Enlever l'étrier de sécurité
♦
22
(sur le côté de l'appareil).
Un évidement est aménagé sur les côtés de la station support
♦
29
. Pousser
l'étrier de sécurité
22
sur la station support
29
en vérifi ant que les ténons
s'encliquent bien dans les évidements.
Raccordement à l'alimentation électrique
Branchez le connecteur ♦
15
du bloc d'alimentation secteur sur la prise
DC
25
à l'arrière de l'appareil.
Branchez le bloc d'alimentation secteur
♦
15
dans la prise.
Antenne baladeuse FM
Déroulez entièrement l'antenne baladeuse ♦
27
pour la réception des
stations FM.
IB_63920_SKRI2000A1_LB2.indb Abs3:12 17.01.2012 12:03:50 Uhr

13
Fonctionnement et opération
SKRI 2000 A1
FR
BE
Fonctionnement et opération
Ce chapitre contient des remarques importantes sur le fonctionnement et l'opéra-
tion de l'appareil.
Allumer et éteindre
L'appareil se met automatiquement en route après son raccordement à l'alimenta-
tion électrique. L'écran
affi che "PLEASE WAIT FOR SETTING THANKS“
pendant 3 à 5 minutes. Le système s'actualise automatiquement si un signal est
reçu pendant ce laps de temps.
REMARQUE
Appuyer sur n'importe quelle touche pour interrompre cette séquence. ►
Réglages initiaux au démarrage :
date / heure :
■
radio éteinte ■
mode horloge / veille actif ■
variateur de luminosité écran actif ■
L'appareil se met en mode horloge / veille après raccordement à l'alimentation
électrique. Actionner la touche
Power
6
ou la touche
30
sur la télécom-
mande pour la mise en marche ou à l'arrêt de l'appareil.
En agissant sur la touche Fonction / ST
7
ou la touche Fonction / ST
38
sur la
télécommande, on passe d'un des modes radio, iPod ou AUX à l'autre.
REMARQUE
La touche ► Power
6
ou la touche
30
sur la télécommande n'isole pas
complètement l'appareil de la tension du réseau. L'appareil consomme éga-
lement du courant en mode veille. Pour couper complètement l'alimentation
électrique de l'appareil, retirez le bloc d'alimentation
15
de la prise secteur.
Réglages de base
Une fois l'appareil sous tension, l'écran indique l'heure et le jour de la
semaine. l'appareil est en mode Horloge / veille.
IB_63920_SKRI2000A1_LB2.indb Abs3:13 17.01.2012 12:03:52 Uhr

14
Fonctionnement et opération
SKRI 2000 A1
FR
BE
Activation du menu de réglage
Pour activer le menu réglage, actionner dans le mode horloge / veille la touche
Mode / Lock
11
ou la touche Mode Lock
45
sur la télécommande. L'heure
affi chée sur l'écran
commence à clignoter. A chaque action sur la touche
Mode / Lock
11
ou
45
on passe à la fonctionnalité suivante. Les éléments du
menu apparaissent dans l'ordre suivant :
Réglage de l'heure
▯
Réglage de la date ▯
Réglage de la fonction de rappel ▯
Réglage mode mise à jour ▯
Mise en marche / arrêt du variateur de luminosité écran ▯
Réglage temps démarrage du variateur de luminosité écran ▯
Réglage du format horaire ▯
REMARQUE
Le menu de paramétrage est quitté automatiquement lorsque vous n'ac- ►
tionnez pas de bouton pendant 15 secondes environ. Les réglages sont
enregistrés.
Régler l'heure
Condition : l'appareil est en mode horloge / veille.
Actionner une fois la touche Mode / Lock
♦
11
ou la touche Mode Lock
45
sur la télécommande. L'heure commence à clignoter sur l'écran.
Régler l'heure en agissant sur les touches
♦
/ Up
17
et
i
i
/ Down
19
ou
les touches i
/ Up
42
et i / Down
32
sur la télécommande. L'heure
change d'une minute à chaque pression sur le bouton. Maintenez la touche
enfoncée pendant plus de 2 secondes pour démarrer le réglage rapide.
Réctionner la touche Mode / Lock
♦
11
ou la touche Mode Lock
45
sur
la télécommande pour enregistrer le réglage fait et passer à la rubrique
suivante.
REMARQUE
L'heure est réinitialisée à ► h lorsque l'appareil n'est plus sous tension
et qu'aucune pile n'est insérée ou que la pile est trop faible.
IB_63920_SKRI2000A1_LB2.indb Abs3:14 17.01.2012 12:03:53 Uhr

15
Fonctionnement et opération
SKRI 2000 A1
FR
BE
Réglage de la date
Condition : l'appareil est en mode Horloge / veille.
Actionner deux fois la touche Mode / Lock
♦
11
ou la touche Mode Lock
45
sur la télécommande. La date commence à clignoter sur l'écran.
Régler la date en agissant sur les touches
♦
/ Up
17
et
i
i
/ Down
19
ou les touches i
/ Up
42
et i / Down
32
sur la télécommande. La
date change d'un jour à chaque pression sur le bouton. L'affi chage de la
semaine change automatiquement. Maintenez la touche enfoncée pendant
plus de 2 secondes pour démarrer le réglage rapide.
Réactionner la touche Mode / Lock
♦
11
ou la touche Mode Lock
45
sur la télé-
commande pour enregister le réglage fait et passer à la rubrique suivante.
REMARQUE
La date est réinitialisée au ► lorsque l'appareil n'est plus sous
tension et qu'aucune pile n'est insérée ou que la pile est trop faible.
Réglage de la fonction de rappel
Vous pouvez confi gurer jusqu'à 6 valeurs date, sur lesquelles un rappel automa-
tique est déclenché. La fonction SdA (SdA=Special Day Alert) est utile pour se
faire rappeler par exemple des anniversaires ou d'autres événement récurrents.
Le rappel intervient tous les ans à la même date. A cette date particulière retentit
un signal sonore pendant 10 minutes à chaque heure de 8h 00 à 23 h 00.
Condition : l'appareil est en mode horloge / veille.
Actionner tros fois la touche Mode / Lock
♦
11
ou la touche Mode Lock
45
sur la télécommande. Le réglage actuel de la date de rappel choisie appa-
raît sur l'écran en alternance avec l'affi chage . A côté de l'affi chage
fi gure le numéro de l'emplacement mémoire pour la date. Valeurs possibles :
à .
Sélectionner avec la touche
♦
i
i
/ Memory Scan
14
ou la touche Memory-
Scan
36
sur la télécommande l'emplacement mémoire de la date à fi xer.
Régler la date en agissant sur les touches
♦
/ Up
17
et
i
i
/ Down
19
ou les touches i
/ Up
42
et i / Down
32
sur la télécommande. La
date change d'un jour à chaque pression sur le bouton. Maintenez le bouton
enfoncé pendant plus de 2 secondes pour démarrer le réglage rapide.
IB_63920_SKRI2000A1_LB2.indb Abs3:15 17.01.2012 12:03:55 Uhr

16
Fonctionnement et opération
SKRI 2000 A1
FR
BE
REMARQUE
Actionner la touche Timer ►
8
ou la touche Timer
37
sur la télécommande
pour laisser l'année. A l'écran
ne s'affi chent que le jour et le mois. La
fonction rappel se déclenchera alors chaque année à cette date.
Réactionner la touche Mode / Lock ♦
11
ou la touche Mode Lock
45
sur
la télécommande pour enregistrer le réglage fait et passer à la rubrique
suivante.
Réglage mode mise à jour
Condition : l'appareil est en mode horloge / veille.
Actionner quatre fois la touche Mode / Lock
♦
11
ou la touche Mode Lock
45
sur la télécommande. A l'écran
s'affi che et Le symbole d'une
horloge clignotante .
Actionner la touche
♦
i
i
/ Down
19
ou la touche i / Down
32
sur la
télécommande pour arrêter automaquement la fonction RDS. Le symbole
clignotant de l'horloge disparaît de l'écran.
Actionner la touche
♦
/ Up
17
ou la touche i / Up
42
sur la télécom-
mande pour activer automaquement la fonction RDS. Le symbole clignotant
de l'horloge s'affi che .
Réactionner la touche Mode / Lock ♦
11
ou la touche Mode Lock
45
sur
la télécommande pour enregistrer le réglage fait et passer à la rubrique
suivante.
Mise en marche / mise à l'arrêt sur commande d'horloge
du variateur de luminosité écran
Condition : l'appareil est en mode horloge / veille.
Deux possibilités de réglage :
1. Variateur de luminosité écran commandé sur signal d'horloge
2. Réglage en manuel du variateur de luminosité écran (voir aussi le chapitre
"Mise en marche/à l'arrêt du variateur de luminosité écran" p. 30).
Actionner cinq fois la touche Mode / Lock
♦
11
ou la touche Mode Lock
45
sur la télécommande. Le réglage en cours du variateur de luminosité écran
est affi ché ( ou ).
Sélectionner avec la touche
♦
/ Up
17
ou la touche i / Up
42
sur
la télécommande „ “, l'éclairage d'écran s'éteint au bout de 15
secondes.
Sélectionner avec la touche ♦
i
i
/ Down
19
ou la touche i / Down
32
sur
la télécommande „
“, l'éclairage d'écran reste allumé.
IB_63920_SKRI2000A1_LB2.indb Abs3:16 17.01.2012 12:03:57 Uhr

17
Fonctionnement et opération
SKRI 2000 A1
FR
BE
Réactionner la touche Mode / Lock ♦
11
ou la touche Mode Lock
45
sur
la télécommande pour enregistrer le réglage fait et passer à la rubrique
suivante.
Mode affi chage
à l'écran
éclairage
d'écran
commande avec la touche AOT/
Dimmer
10
ou
46
variateur
lumino-
sité écran
ARRET
DT OFF
réglé par
la touche
AOT/Dim-
mer
DIM OFF: écran allumé en permanence
DIM ON: éclairage d'écran éteint; l'action sur une
touche quelconque déclenche l'éclairage d'écran
pendant 15 sec.
variateur
lumino-
sité écran
MARCHE
DT ON
en standard
à l'arrêt de
23:00 à
5:59
23:00 - 5:59
heures
l'action sur une touche quelconque
déclenche l'éclairage d'écran
pendant 60 sec.
6:00 - 22:59
heures
DIM OFF: écran allumé en per-
manence
DIM ON: éclairage d'écran
éteint; l'action sur une touche
quelconque déclenche l'éclairage
d'écran pendant 15 sec.
Réglage du temps démarrage du variateur de luminosité écran
Condition : l'appareil est en mode horloge / veille.
Actionner six fois la touche Mode / Lock
♦
11
ou la touche Mode Lock
45
sur
la télécommande. Le temps actuel de démarrage du variateur de luminosité
écran ( ) s'affi che en alternance avec .
Régler l'heure de démarrage souhaitée avec les touches
♦
/ Up
17
et
i
i
/ Down
19
ou les touches i / Up
42
et i / Down
32
sur la télé-
commande. L'heure change d'une minute à chaque pression sur le bouton.
Maintenez la touche enfoncée pendant plus de 2 secondes pour démarrer
le réglage rapide.
Réactionner la touche Mode / Lock ♦
11
ou la touche Mode Lock
45
sur la
télécommande pour enregistrer le réglage et passer à la rubrique suivante.
Réglage du format horaire
Condition : l'appareil est en mode Horloge / veille.
Actionner sept fois la touche Mode / Lock
♦
11
ou la touche Mode Lock
45
sur
la télécommande. Le réglage actuel du format horaire est affi ché (
=format horaire 24 heures ou = format horaire 12 heures).
Fixer avec la touche
♦
/ Up
17
ou la touche i / Up
42
sur la télé-
commande le format horaire sur si le format sur 12 heures est
souhaité.
IB_63920_SKRI2000A1_LB2.indb Abs3:17 17.01.2012 12:03:59 Uhr

18
Fonctionnement et opération
SKRI 2000 A1
FR
BE
Fixer avec la touche ♦
i
i
/ Down
19
ou la touche i / Down
32
sur la
télécommande le format horaire
sur si le format sur 24 heures est
souhaité.
Réactionner la touche Mode / Lock
♦
11
ou la touche Mode Lock
45
sur la
télécommande pour enregistrer le réglage et passer à la rubrique suivante.
Programmation de l'alarme / réveil
L'appareil dispose de deux compteurs pour les alarmes / réveil. Les réglages sur
les deux minuteries d'alarme / réveil peuvent être faits indépendamment l'une de
l'autre. Lors de la programmation des heures de d'alarme / de réveil, vous pou-
vez choisir si une sonnerie doit retentir ou si la radio, l'iPod ou encore l'iPhone
doit s'enclencher.
REMARQUE
Si l'on n'appuie sur aucun bouton pendant 15 secondes environ pendant ►
la programmation de l'heure de réveil / d'alarme, l'heure d'alarme / de
réveil est activée avec les réglages affi chés à ce moment là.
Réglage du temps d'alarme
Actionner la touche Mode alarme ♦
9
ou la touche alarme
47
sur la télé-
commande. Le temps réglé de l'alarme concernée s'affi che en clignotant sur
l'écran et s'affi che ou . L'indication du temps affi che les jours de la
semaine auxquels cette alarme est activée.
Régler l'heure d'alarme / de réveil souhaitée avec les touches
♦
/ Up
17
et
i
i
/ Down
19
ou les touches i / Up
42
et i / Down
32
sur la télé-
commande. L'heure change d'une minute à chaque pression sur le bouton.
Maintenez la touche enfoncée pendant plus de 2 secondes pour démarrer
le réglage rapide.
Réglage du jour de la semaine
Actionner en mode alarme la touche Fonction / ST ♦
7
ou la touche
Fonction / ST
38
sur la télécommande pour sélectionner l'une ou l'autre de
ces combinaisons hebdomadaires : lu-ve ou sa-di ou lu-di. La combinaison
choisie est indiquée au dessus du temps d'alarme.
Actionner et maintenir appuyée au moins 2 secondes la touche Fonction /
♦
ST
7
ou la touche Fonction / ST
38
sur la télécommande pour passer
sur les diff érentes combinaisons hebdomadaires et sélectionner des jours
particuliers.
REMARQUE
Pour la sélection d'un jour dans la semaine actionner la touche Func- ►
tion / ST
7
ou la touche Function / ST
38
sur la télécommande.
IB_63920_SKRI2000A1_LB2.indb Abs3:18 17.01.2012 12:04:01 Uhr

19
Fonctionnement et opération
SKRI 2000 A1
FR
BE
Réglage de l'alarme avec signal sonore
Pour sélectionner "signal sonore" pour une alarme, actionner en mode ♦
alarme la touche
i
i
/ Pr+ / AL1
18
ou la touche
i
i
/ Pr– / AL2
16
ou la
touche i
Pr+
40
ou la touche i Pr–
44
sur la télécommande jusqu'à
affi chage du symbole à l'écran
.
Réglage de l'alarme / du réveil avec la radio
Pour déclencher la radio à l'heure de l'alarme / du réveil, faire les réglages
suivants avant d'activer l'alarme:
Allumer la radio en actionnant la touche
♦ Power
6
ou la touche
30
sur la télécommande et sélectionner le mode radio avec la touche Fonc-
tion / ST
7
ou la touche Fonction / ST
38
sur la télécommande.
Sélectionner le poste émetteur avec lequel vous souhaitez être réveillé (voir
♦
le chapitre "Réglage manuel de la station" p. 24 ou "Recherche
de la station suivante" p. 24).
Régler le volume souhaité avec les touches Vol+
♦
3
et Vol–
5
ou la touche
Vol+
39
et la touche Vol–
41
sur la télécommande (voir le chapitre "Réglage
du volume" p. 24).
Eteindre la radio en actionnant la touche
♦ Power
6
ou la touche
30
sur la télécommande.
Pour sélectionner "Radio“ pour l'alarme / le réveil, actionner dans le mode
♦
alarme la touche
i
i
/ Pr+ / AL1
18
ou la touche
i
i
/ Pr– / AL2
16
ou la
touche i
Pr+
40
ou la touche i Pr–
44
sur la télécommande jusqu'à
affi chage à l'écran du symbole .
Réglage d'une alarme avec un iPod / un iPhone
Pour déclencher l'iPod ou l'iPhone à l'heure de l'alarme / du réveil, faire les régla-
ges suivants avant d'activer l'alarme:
Mettez en marche l'appareil en actionnant la touche
♦ Power
6
ou la
touche
30
sur la télécommande et sélectionner le mode avec la touche
Fonction / ST
7
ou la touche Fonction / ST
38
sur la télécommande.
Placez votre iPod ou votre iPhone dans la station support
♦
29
.
Sélectionnez sur votre iPod ou votre iPhone un titre (ou un album,une liste
♦
de morceaux, etc.).
Réglez le volume avec les touches Vol+
♦
3
et Vol–
5
ou les touches
Vol+
39
et Vol–
41
sur la télécommande (voir le chapitre "Réglage du
volume" p. 24).
Mettez votre iPod ou votre iPhone en mode pause, ou arrêtez l'appareil.
♦
IB_63920_SKRI2000A1_LB2.indb Abs3:19 17.01.2012 12:04:03 Uhr

20
Fonctionnement et opération
SKRI 2000 A1
FR
BE
Arrêtez le mode iPod en actionnant la touche ♦ Power
6
ou la touche
30
sur la télécommande.
Pour sélectionner l'alarme avec "iPod", actionner la touche
♦
i
i
/ Pr+ / AL1
18
ou la touche
i
i
/ Pr– / AL2
16
ou la touche i Pr+
40
ou la touche i Pr–
44
sur la télécommande jusqu'à ce que l'écran
affi che le symbole .
Mise à l'arrêt de l'alarme
Pour mettre à l'arrêt une alarme, actionner en mode alarme la touche ♦
i
i
/ Pr+ / AL1
18
ou la touche
i
i
/ Pr– / AL2
16
ou la touche i Pr+
40
ou
la touche i
Pr–
44
sur la télécommande jusqu'à ce que l'écran n'affi che
plus le symbole.
Lorsque l'heure de l'alarme / du réveil est atteinte
REMARQUE
Temps d'alarme atteint : arrêt immédiat de la minuterie de mise à l'arrêt ►
(si activée).
Avec le réglage „Alarme avec signal sonore“ un signal sonore retentit.
Le volume du signal sonore augmente de manière continue jusqu'à atteindre le
volume maximum. La durée du signal d'alarme est limitée à 10 minutes. La radio
passe alors sur "Mute“ (silence) .
Avec le réglage „Alarme avec radio“ la radio s'allume. L'émetteur radio
précédemment sélectionné est activé avec le volume réglé, pendant une durée
maximum de 60 minutes.
Avec le réglage „Alarme avec iPod / iPhone“ l'iPod ou l'iPhone se met
en marche. La lecture commence avec le dernier titre sélectionné et se poursuit
pendant 60 minutes maximum avec le volume sonore programmé.
Appuyez sur une touche quelconque pour mettre fi n à l'alarme en cours.
REMARQUE
L'alarme est réactivée en atteignant l'heure d'alarme / de réveil suivante ►
(par exemple le lendemain).
IB_63920_SKRI2000A1_LB2.indb Abs3:20 17.01.2012 12:04:07 Uhr

21
Fonctionnement et opération
SKRI 2000 A1
FR
BE
Minuterie de cuisine
L'appareil comporte une minuterie de cuisine pratique permettant par exemple de
surveiller les temps de cuisson. La plage de temps paramétrable de la minuterie est
compris entre 1 minute et 23 heures, 59 minutes.
Réglage de la minuterie de cuisine
Actionner la touche Timer ♦
8
ou la touche Timer
37
sur la télécommande.
L'affi cheur indique . A l'écran s'affi che le symbole d'une casserolle
pour la minuterie de cuisine .
Régler avec les touches
♦
/ Up
17
et
i
i
/ Down
19
ou la touche i
/ Up
42
et la touche i / Down
32
sur la télécommande la durée
souhaitée sur la minuterie. La durée change d'une minute à chaque pression
sur le bouton. Maintenir le bouton enfoncé pendant plus de 2 secondes
pour démarrer le réglage rapide.
REMARQUE
Si aucune modifi cation n'intervient au bout de 15 secondes, l'appareil ►
rétablit le mode précédent.
Démarrage de la minuterie de cuisine
Après réglage de la durée réactionner la touche Timer ♦
8
ou la touche
Timer
37
sur la télécommande. Le temps affi ché commence dans le sens
décroissant. A l'écran s'affi che une horloge décomptant le temps.
REMARQUE
Si vous sélectionnez une autre fonction pendant que la minuterie de cuisine ►
tourne, l'indication du temps restant est masquée. Le symbole de casserolle
et l'horloge de décomptage restent à l'écran . Réactionner la
touche Timer
8
ou la touche Timer
37
sur la télécommande pour affi cher
pendant 10 secondes le temps restant de la minuterie.
30 secondes avant la fi n de la minuterie de cuisine, l'appareil commence à
signaler acoustiquement à l'aide de signaux sonores discontinus que le temps
réglé est écoulé. Les signaux sonores se suivent de plus proches. Lorsque le
temps programmé est écoulé, le signal sonore de la minuterie retentit pandant
60 minutes maximum.
Actionner la touche Timer
♦
8
ou la touche Timer
37
sur la télécommande
pour mettre à l'arrêt le signal de la minuterie.
IB_63920_SKRI2000A1_LB2.indb Abs3:21 17.01.2012 12:04:08 Uhr

22
Fonctionnement et opération
SKRI 2000 A1
FR
BE
Interruption de la minuterie de cuisine
La minuterie de cuisine étant en marche actionner la touche Timer ♦
8
ou la
touche Timer
37
sur la télécommande. La minuterie de cuisine s'interrompt.
Le temps restant indiqué commence à clignoter.
REMARQUE
L'appareil rétablit le mode précédent au bout de 15 secondes environ. ►
Réactionner la touche Timer
8
ou la touche Timer
37
sur la télécommande
pour réaffi cher le temps restant de la minuterie.
Pour relancer la minuterie, réactionner la touche Timer
♦
8
ou la touche
Timer
37
sur la télécommande. La minuterie redémarre.
Pour arrêter la minuterie avant l'échéance programmée, actionner et mainte-
♦
nir appuyée la touche Timer
8
ou la touche Timer
37
sur la télécommande
jusqu'à ce que sur l'écran
le symbole de casserolle et l'horloge de
décomptage disparaissent.
REMARQUE
La minuterie de cuisine est immédiatement arrêtée au cas où une alarme es ►
active.
Programmation de la minuterie de cuisine
Vous pouvez préprogrammer les temps dont vous avez régulièrement besoin
pour la minuterie de cuisine afi n de ne pas être obligés de les entrer à nouveau.
Jusqu'à 6 temps peuvent être programmés. Par défaut, les 6 emplacements
mémoire sont tous préprogrammés sur 5/10/15/20/25/30 minutes.
Procédez comme indiqué ci-après pour la minuterie de cuisine :
Actionner la touche Timer
♦
8
ou la touche Timer
37
sur la télécommande
pour activer la minuterie de cuisine.
Régler avec les touches
♦
/ Up
17
et
i
i
/ Down
19
ou la touche i
/ Up
42
et la touche i / Down
32
sur la télécommande la durée
souhaitée sur la minuterie. La durée change d'une minute à chaque pression
sur le bouton. Maintenez le bouton enfoncé pendant plus de 2 secondes
pour démarrer le réglage rapide.
Actionner la touche Fonction / ST
♦
7
ou la touche Fonction / ST
38
sur la télé-
commande pour activer la sélection de minuterie. A côté de la durée s'affi che
un clignotant, à côté s'affi che le chiff re pour la première minuterie.
Sélectionner avec les touches
♦
i
i
/ Pr+ / AL1
18
et
i
i
/ Pr– / AL2
16
ou la
touche i
Pr+
40
ou la touche i Pr
44
sur la télécommande l'emplacement
mémoire de la minuterie à régler entre et .
IB_63920_SKRI2000A1_LB2.indb Abs3:22 17.01.2012 12:04:10 Uhr

23
Fonctionnement et opération
SKRI 2000 A1
FR
BE
Réactionner la touche Fonction / ST ♦
7
ou la touche Fonction / ST
38
sur
la télécommande pour programmer la durée sur l'emplacement mémoire
sélectionné. Le signe clignotant reste maintenant affi ché en permanence.
Répétez l'opération pour les autres emplacements mémoire.
♦
Sélection de la minuterie de cuisine
Procédez comme indiqué ci-après pour sélectionner un temps programmé pour
la minuterie de cuisine :
Actionner la touche Timer
♦
8
ou la touche Timer
37
sur la télécommande
pour activer la minuteruie de cuisine.
Sélectionner avec les touches
♦
i
i
/ Pr+ / AL1
18
et
i
i
/ Pr– / AL2
16
ou la
touche i
Pr+
40
ou la touche i Pr–
44
sur la télécommande la minuterie
souhaitée entre et .
Réactionner la touche Timer
♦
8
ou la touche Timer
37
sur la télécommande
pour démarrer la minuterie.
Mode radio
REMARQUE
L'antenne baladeuse ►
27
doit être complètement déployée pour une bonne
réception radio. Orientez l'antenne en mode radio sur la meilleure réception.
Les caractéristiques techniques de l'appareil autorisent une fréquence de
►
réception réglable hors de la gamme UKW (FM) autorisée de 87,5–
108 MHz. Dans diff érents pays, il est possible qu'il existe des régulations
nationales divergentes pour les plages de fréquence radio attribuées.
Attention à ne pas exploiter des informations diff usées hors de la plage de
fréquences radio attribuée, à ne pas les rediff user à des tiers ou à en faire
un usage non autorisé.
Mise en marche / arrêt de la radio
Actionner la touche ♦ Power
6
ou la touche
30
sur la télécommande.
L'écran affi che le mode en cours de l'appareil.
Actionner à plusieurs reprises la touche Fonction / ST
♦
7
ou la touche
Fonction / ST
38
sur la télécommande pour sélectionner la fonction radio.
La fréquence de réception de l'émetteur sélectionné s'affi che à l'écran.
La radio s'éteint en réactionnant la touche
♦ Power
6
ou la touche
30
sur la télécommande. L'appareil réactive le mode Heure / Veille. L'heure
actuelle est affi chée.
IB_63920_SKRI2000A1_LB2.indb Abs3:23 17.01.2012 12:04:13 Uhr

24
Fonctionnement et opération
SKRI 2000 A1
FR
BE
Réglage du volume
Régler le volume souhaité en agissant sur les touches Vol+ ♦
3
et Vol–
5
ou
la touche Vol+
39
et la touche Vol–
41
sur la télécommande. L'écran affi -
che le niveau sonore (volume). Possibilité de sélectionner un niveau sonore
entre et .
Réglage manuel de la station
Régler sur l'émetteur souhaité en actionnant (une seule pression) les touches ♦
/ Up
17
et
i
i
/ Down
19
ou la touche i / Up
42
et la touche i
/ Down
32
sur la télécommande. La fréquence de la station est indiquée
sur l'écran . Le haut-parleur est désactivé pendant le réglage.
Recherche de la station suivante
Vous pouvez laisser l'appareil rechercher automatiquement la prochaine station.
Actionner et maintenir appuyée pendant au moins deux secondes les
♦
touches
/ Up
17
et
i
i
/ Down
19
ou la touche i / Up
42
et la
touche i
/ Down
32
sur la télécommande. L'appareil recherche la station
la plus proche dont la qualité de réception est suffi sante.
Répétez l'opération jusqu'à ce que vous ayez trouvé la station souhaitée.
♦
Sélection utilisateur
Condition : l'appareil est en mode radio.
Actionner la touche User
♦
2
ou la touche User
31
sur la télécommande
pour sélectionner l'utilisateur souhaité. L'utilisateur actuel à est affi ché à
l'écran pendant 10 secondes.
Actionner les touches
♦
i
i
/ Pr+ / AL1
18
et
i
i
/ Pr– / AL2
16
ou la touche
i
Pr+
40
ou la touche i Pr–
44
sur la télécommande pour sélectionner un
emplacement mémoire entre et .
REMARQUE
Chaque utilisateur dispose de 15 emplacements mémoire. Le premier ►
emplacement mémoire pour l'utilisateur A est défi ni par le fabricant.
IB_63920_SKRI2000A1_LB2.indb Abs3:24 17.01.2012 12:04:15 Uhr

25
Fonctionnement et opération
SKRI 2000 A1
FR
BE
Mémorisation manuelle des stations
Condition : l'appareil est en mode radio.
L'appareil dispose de 60 emplacements mémoire (4 utilisateurs à 15 empla-
cements mémoire) pour les fréquences d'émetteur. Procédez comme indiqué
ci-après pour enregistrer une fréquence d'émission :
Régler sur la station émettrice choisie, comme indiqué précédemment.
♦
Actionner la touche Mem ♦
4
ou la touche Mem
35
sur la télécommande.
Le symbole MEM, l'utilisateur et l'emplacement mémoire s'affi chent à
l'écran .
Actionner la touche User ♦
2
ou la touche User
31
sur la télécommande
jusqu'à affi chage de l'utilisateur ( - ) souhaité.
Sélectionner avec les touches
♦
i
i
/ Pr+ / AL1
18
ou
i
i
/ Pr– / AL2
16
ou la
touche i
Pr+
40
ou la touche i Pr–
44
sur la télécommande l'emplacement
mémoire souhaité pour la station émettrice, entre et .
Actionner la touche Mem
♦
4
ou la touche Mem
35
sur la télécommande.
La fréquence de réception de la station paramétrée est enregistrée à l'em-
placement mémoire choisi.
Appel d'une station émettrice mémorisée
Condition : l'appareil est en mode radio.
Actionner la touche User
♦
2
ou la touche User
31
sur la télécommande
jusqu'à affi chage de l'utilisateur ( - ) souhaité.
Sélectionner avec les touches
♦
i
i
/ Pr+ / AL1
18
ou
i
i
/ Pr– / AL2
16
ou la
touche i
Pr+
40
ou la touche i Pr–
44
sur la télécommande l'emplace-
ment mémoire pour la station émettrice enregisrée entre et .
IB_63920_SKRI2000A1_LB2.indb Abs3:25 17.01.2012 12:04:17 Uhr

26
Fonctionnement et opération
SKRI 2000 A1
FR
BE
Recherche automatique de station émettrice (fonction AMS)
Condition : l'appareil est en mode radio.
Pour occuper les emplacements mémoire des fréquences d'émission avec les
stations émettrices à la réception la plus forte, vous pouvez lancer un cycle de
recherche.
REMARQUE
Lorsque vous exécutez la fonction décrite ci-après, toutes les stations émet- ►
trices précédemment enregistrées sont perdues.
Actionner et maintenir appuyée la touche
♦
i
i
/ Memory Scan
14
ou la
touche Memory-Scan
36
pendant au moins trois secondes. L'appareil
commence un cycle de recherche et occupe les emplacements mémoire
à avec les stations émettrices trouvées.
A la fi n du cycle de recherche il suffi t d'appuyer pendant 10 secondes sur
♦
la touche
i
i
/ Memory Scan
14
ou la touche Memory-Scan
36
pour
retrouver les stations émettrices enregistrées entre et .
REMARQUE
Dans le cas où le nombre de stations trouvées est supérieur à 60, seules les ►
60 premières fréquences de réception sont enregistrées.
Dans le cas où moins de 60 stations ont été trouvées, les derniers emplace-
►
ments mémoire restent inchangés.
Lecture d'appareils audio externes
Relier un appareil audio externe, comme par exemple un lecteur de MP3 , ♦
à l'adaptateur jack de 3,5 mm AUX IN
26
sur le côté arrière de l'appareil.
Actionner la touche
♦ Power
6
ou la touche
30
sur la télécommande.
L'écran affi che le mode en cours de l'appareil.
Actionner à plusieurs reprises la touche Fonction / ST
♦
7
ou la touche Fonc-
tion / ST
38
sur la télécommande pour sélectionner la fonction .
Commencer la lecture sur l'appareil audio externe et régler le volume.
♦
REMARQUE
Veuillez tenir compte du mode d'emploi de l'appareil audio externe. ►
Raccordement d'un iPod / d'un iPhone
La station
29
vous permet d'utiliser le haut-parleur pour votre iPod ou votre
iPhone. Si vous utilisez l'iPod ou l'iPhone dans la station support, il est chargé
automatiquement.
IB_63920_SKRI2000A1_LB2.indb Abs3:26 17.01.2012 12:04:19 Uhr

27
Fonctionnement et opération
SKRI 2000 A1
FR
BE
iMenu
Condition : l'appareil se trouve en mode iPod.
Actionner la touche
♦
I Enter
I Enter
13
, pour activer la commande de menu
pour l' iPod ou l'iPhone.
Fonctions exécutables :
Touche Fonction
i
i
/ Pr– / AL2
16
fonction suivante
i
i
/ Pr+ / AL1
18
fonction précédente
i-Time Sync
i-Time Sync
Bass
12
synchronisation de l'heure et de la date de
l'appareil avec l'heure et la date de l'iPod ou
de l'Phone
i
i
/ Memory Scan
14
démarrer/poursuivre la lecture
i
i
/ Down
19
retour rapide
/ Up
17
avance rapide
I Enter
I Enter
13
pression brève : retour au menu
pression longue : confi rmation de la sélection
Ecoute de musique
Préparer la station support
29
comme indiqué au chapitre "Préparation de
la station support pour iPod ou iPhone" p. 12.
Placez votre iPod ou votre iPhone dans la station support
♦
29
.
Actionner la touche
♦ Power
6
ou la touche
30
sur la télécommande.
L'écran affi che le mode en cours de l'appareil.
Actionner à plusieurs reprises la touche Fonction / ST
♦
7
ou la touche Fonc-
tion / ST
38
sur la télécommande pour sélectionner la fonction .
Sélectionner sur votre iPod ou iPhone un titre (ou un album, une liste de
♦
morceaux, etc.).
Actionner la touche
♦
i
i
/ Memory Scan
14
ou la touche i
33
sur la
télécommande pour démarrer ou suspendre la lecture.
IB_63920_SKRI2000A1_LB2.indb Abs3:27 17.01.2012 12:04:21 Uhr

28
Fonctionnement et opération
SKRI 2000 A1
FR
BE
Charger l'Pod / l'iPhone
Lorsque votre iPod ou iPhone est inséré dans la station
29
, il est automatiquement
rechargé jusqu'à ce que la batterie soit complètement chargée.
REMARQUE
L'iPod / iPhone n'est pas chargé à partir de la batterie de sauvegarde. ►
Réglage de l'horloge i-Time Sync
La fonction iTime-Sync permet de synchroniser la date et l'heure sur l'appareil
avec la date et l'heure de votre iPod ou de votre iPhone (iPod Touch, iPod nano
et iPod Classic; les anciens modèles d'iPod comme iPod mini ne supportent pas
cette fonction).
Placez votre iPod ou votre iPhone dans la station support
♦
29
.
Actionner la touche
♦
i-Time Sync
i-Time Sync
Bass
12
ou la touche iTime Sync Bass
43
sur la télécommande. L'heure et la date de l'iPod ou de l'iPhone sont transfé-
rées sur l'appareil. Un signal sonore retentit une fois la synchronisation faite.
REMARQUE
L'heure sur l'iPhone est réactualisée en permanence via l'antenne portable. ►
L'heure sur l'iPod ne correspond qu'à celle de votre ordinateur après la
dernière synchronisation. Une diff érence de 59 secondes entre l'appareil
et l'iPod / l'iPhone synchronisé est possible.
Autres fonctions
Fonction stéréo
L'appareil supporte la fonction stéréo. "Stéréo on" est le réglage standard.
Procédez comme indiqué ci-après pour modifi er cette fonction :
Actionner et maintenir appuyée la touche Function / ST ♦
7
ou la touche Func-
tion / ST
38
sur la télécommande jusqu'à affi chage sur l'écran du réglage
en cours de la fonction stéréo ( ou ).
Réactionner et maintenir appuyée la touche Fonction / ST
♦
7
ou la touche
Fonction / ST
38
sur la télécommande pour changer de réglage.
REMARQUE
En réception stéréo d'un émetteur radio, la fonction stéréo étant active, ►
s'affi che pendant 3 secondes à l'écran .
IB_63920_SKRI2000A1_LB2.indb Abs3:28 17.01.2012 12:04:23 Uhr

29
Fonctionnement et opération
SKRI 2000 A1
FR
BE
Verrouillage des touches
Vous pouvez verrouiller les touches de l'appareil pour ne pas modifi er des régla-
ges par inadvertance.
Actionner et maintenir appuyée au moins deux secondes la touche Mode /
♦
Lock
11
ou la touche Mode Lock
45
sur la télécommande pour verrouiller
ou déverrouiller les touches. Lorsque le verrouillage des touches est activé,
l'écran
affi che le symbole .
Pour déverrouiller, réactionner et maintenir appuyée au moins deux secondes
♦
la touche Mode / Lock
11
ou la touche Mode Lock
45
sur la télécommande.
Accentuation des graves
L'accentuation des graves vous permet de renforcer la restitution des fréquences
graves.
Actionner pendant env. 2 secondes la touche
♦
i-Time Sync
i-Time Sync
Bass
12
ou la
touche iTime Sync Bass
43
sur la télécommande pour activer ou désactiver
l'accentuation des graves. Lorsque l'accentuation des graves est activé,
l'écran affi che le symbole .
Affi chages alternés
Condition : l'appareil est en mode horloge / veille.
Actionner la touche
♦
i
i
/ Down
19
ou la touche i / Down
32
sur la
télécommande : la date et l'heure s'affi chent alternativement.
Réactionner la touche
♦
i
i
/ Down
19
ou la touche i / Down
32
sur la
télécommande : seule l'heure s'affi che.
Condition : l'appareil est en mode radio.
Actionner la touche Mode / Lock
♦
11
ou la touche Mode Lock
45
sur la
télécommande : la fréquence de réception ou le nom du poste émetteur
(en réception RDS) et l'heure s'affi chent alternativement.
Réactionner la touche Mode / Lock
♦
11
ou la touche Mode Lock
45
sur la
télécommande : c'est l'heure seule qui s'affi che.
Réctionner la touche Mode / Lock ♦
11
ou la touche Mode Lock
45
sur la
télécommande : c'est maintenant la fréquence de réception ou le nom du
poste émetteur (en réception RDS) qui s'affi che.
IB_63920_SKRI2000A1_LB2.indb Abs3:29 17.01.2012 12:04:24 Uhr

30
Fonctionnement et opération
SKRI 2000 A1
FR
BE
Arrêt automatique (fonction sommeil)
Avec la fonction sommeil, l'appareil s'arrête de lui-même au bout d'une période
allant de 5 à 90 minutes.
Actionner la touche AOT / Dimmer
♦
10
ou la touche AOT Dimmer
46
sur la
télécommande pour appeler cette fonction. Le temps restant jusqu'à l'arrêt
de la radio est affi ché.
Réactionner la touche AOT / Dimmer ♦
10
ou la touche AOT Dimmer
46
sur
la télécommande pour régler le temps souhaité. Après env. 12 secondes
l'appareil repasse au mode sélectionné.
REMARQUE
La période concernée se situe entre 90 et 5 minutes. Le réglage est réalisé ►
par pas de 5 minutes. L'écran indique ensuite .
Quand est affi ché, la fonction sommeil est à l'arrêt.
Si l'appareil se trouve dans le mode horloge / veille, vous mettez l'appareil ►
sur le dernier mode sélectionné (Radio / iPod / AUX) en actionnant la tou-
che AOT / Dimmer
10
ou la touche AOT Dimmer
46
sur la télécommande.
Mise en marche / à l'arrêt du variateur de luminosité écran
Actionner et maintenir appuyée la touche AOT / Dimmer ♦
10
ou la touche
AOT Dimmer
46
sur la télécommande jusqu'à affi chage sur l'écran du
réglage en cours du variateur de luminosité écran ( ou ).
Actionner et maintenir enfoncée la touche AOT / Dimmer
♦
10
ou la touche
AOT Dimmer
46
sur la télécommande pour changer de réglage (voir aussi le
chapitre "Mise en marche/mise à l'arrêt sur commande d'horloge
du variateur de luminosité écran" p. 16). Après env. 15 secondes
l'écran réaffi che l'indication précédente.
IB_63920_SKRI2000A1_LB2.indb Abs3:30 17.01.2012 12:04:26 Uhr

31
Nettoyage/Dépannage
SKRI 2000 A1
FR
BE
Nettoyage
Consignes de sécurité
DANGER
Danger de mort causé par le courant électrique !
Débrancher le bloc d'alimentation tension secteur de la prise avant de ►
commencer le nettoyage.
ATTENTION
Dégâts sur l'appareil !
Assurez-vous lors du nettoyage qu'aucune humidité ne pénètre dans ►
l'appareil pour éviter tous dommages irréparables sur l'appareil.
Nettoyage du boîtier
Nettoyez les surfaces de l'appareil avec un chiff on doux et sec. ■
Dépannage
Ce chapitre contient des remarques importantes relatives à la localisation des
pannes et au dépannage. Respectez les remarques pour éviter tous dangers et
dommages.
Consignes de sécurité
AVERTISSEMENT
Veuillez respecter les consignes de sécurité suivantes afi n d'éviter des dangers
et des dommages:
Les réparations sur les appareils électriques doivent exclusivement être
►
confi ées à des spécialistes qui ont été formés par le fabricant. Toutes
réparations non conformes peuvent entraîner des dangers signifi catifs pour
l'utilisateur et endommager l'appareil.
IB_63920_SKRI2000A1_LB2.indb Abs3:31 17.01.2012 12:04:28 Uhr

32
Dépannage
SKRI 2000 A1
FR
BE
Causes des pannes et remèdes
Le tableau ci-dessous est destiné à vous aider à localiser de petits dysfonctionne-
ments et à y remédier :
Panne Cause possible Solutions
L'écran n'indique
rien.
bloc d'alimentation
15
tension secteur non branché.
Branchez le bloc d'alimentation
secteur
15
dans la prise.
La prise secteur n'est pas
sous tension.
Vérifi ez les fusibles du secteur.
Pas de son
Le volume est réglé sur
l'intensité minimum.
Augmenter le volume avec la touche
Vol+
3
.
L'appareil est en mode
Horloge / veille.
Mettez l'appareil avec la touche
Power
6
sur le mode Radio /
iPod / Aux/.
La lecture de l'appareil
audio externe n'a pas
démarré.
Lancez la lecture sur l'appareil
audio externe.
La lecture de l'iPod ou de
l'iPhone n'a pas démarré.
Lancez la lecture sur le iPod / iPhone.
L'iPod ou l'iPhone n'est pas
bien calé sur la station
29
Réglez l'iPod ou l'iPhone
29
sur le
poste émetteur.
Bruits parasites
lors de la récep-
tion radio
La station radio n'est pas
correctement réglée.
Se régler correctement sur la station
radio avec les touches
/ Up
17
et
i
i
/ Down
19
.
La réception est trop faible.
Essayez d'améliorer la réception en
bougeant l'antenne
27
baladeuse.
iPod / iPhone non
chargé
L'iPod ou l'iPhone n'est pas
bien monté sur la station
29
support .
Réglez l'iPod ou l'iPhone
29
sur le
poste émetteur.
L'alarme avec
l'iPod / l'iPhone n'a
pas fonctionné
Liste vide sur votre iPod ou
votre iPhone.
Vérifi ez que la liste contient bien des
morceaux de musique.
REMARQUE
Si les opérations susmentionnées ne vous permettent pas de résoudre le ►
problème, veuillez vous adresser au service après-vente.
IB_63920_SKRI2000A1_LB2.indb Abs3:32 17.01.2012 12:04:28 Uhr

33
Entreposage/mise au rebut/Annexe
SKRI 2000 A1
FR
BE
Entreposage / Mise au rebut
Entreposage
Si vous n'utilisez pas l'appareil pendant un certain temps, mettez-le hors tension,
retirez la pile et rangez l'appareil dans un endroit propre et sec, à l'abri d'une
exposition directe aux rayons du soleil.
Mise au rebut
L'appareil ne doit jamais être jeté dans la poubelle domesti-
que normale. Ce produit est assujetti à la directive européenne
2002/96/EC-WEEE (Waste Electrical and Electronic Equipment).
Remettez l'appareil destiné au recyclage à une entreprise spécialisée ou au
centre de recyclage de votre commune. Respectez la réglementation en vigueur.
En cas de doutes, contactez votre organisme de recyclage.
Mise au rebut des piles
Il est interdit de jeter les piles aux ordures ménagères. Le consommateur est tenu
par la loi de remettre les piles au lieu de collecte des déchets de sa commune ou
de son quartier ou dans un magasin. Cette obligation a pour objectif d'assurer
l'élimination écologique des piles. Ne vous débarrassez des piles que lorsqu'elles
sont déchargées.
Annexe
Renvois à la déclaration de conformité de l'UE
Cet appareil correspond au niveau de l'harmonisation aux
exigences fondamentales et aux autres presciptions perti-
nentes de la directive européenne relative à la compatibilité
électromagnétique 2004/108/EC, de la directive relative à
la basse tension 2006/95/EC ainsi que de la directive sur
l'écoconception 2009/125/EC (Décret 1275/2008 Annexe
II, N° 1).
La déclaration de conformité originale est disponible chez
l'importateur.
IB_63920_SKRI2000A1_LB2.indb Abs3:33 17.01.2012 12:04:29 Uhr

34
Annexe
SKRI 2000 A1
FR
BE
Caractéristiques techniques
Bloc d'alimentation
Fabricant Fai Shing Industries Ltd.
Modèle JVSW0702000
Tension d'entrée, ampérage 100-240 V
~
50/60 Hz, 350 mA
Tension de sortie, ampérage 7 V
, 2 A
Classe de protection
II /
Appareil
Tension d'entrée, ampérage 7 V , 2 A
Pile de sauvegarde des données
1 x pile 3 V type CR2032
(non comprise dans la livraison)
Pile pour la télécommande
1 x 3 V type CR2025
(non comprise dans la livraison)
Puissance absorbée
Fonctionnement env. 5 W
Veille env. 1,8 W
Puissance de sortie du haut-
parleur
env. 2 x 1W
(avec un taux de distorsion de 10 %)
Gamme de fréquences radio
(OUC / UKW)
87,5 - 108 MHz
Température de service +5 - +40 °C
Humidité (pas de condensation) 5 - 90 %
Dimensions (l x H x P)
(sans pied)
env. 30 x 15,7 x 8,4 cm
Poids env. 1070 g
IB_63920_SKRI2000A1_LB2.indb Abs3:34 17.01.2012 12:04:30 Uhr

35
Annexe
SKRI 2000 A1
FR
BE
Garantie
Cet appareil bénéfi cie de 3 ans de garantie à compter de la date d'achat.
L'appareil a été fabriqué avec soin et consciencieusement contrôlé avant sa
distribution.
Veuillez conserver le ticket de caisse en guise de preuve d'achat. Dans le cas
où la garantie s'applique, veuillez appeler le service après-vente concerné.
Cette condition doit être respectée pour assurer l'expédition gratuite de votre
marchandise.
REMARQUE
La prestation de garantie est uniquement valable pour les défauts de ►
matériaux et de fabrication et ne s'applique pas aux dommages dus au
transport, aux dommages sur les pièces d'usure, ou aux détériorations de
parties cassables telles que les boutons ou accus.
Le produit est exclusivement destiné à un usage privé et non commercial. La ga-
rantie est annulée en cas de manipulation incorrecte et inappropriée, d'utilisation
brutale et en cas d'intervention qui n'aurait pas été réalisée par notre centre de
service après-vente agréé.
Cette garantie ne constitue pas une restriction de vos droits légaux. La période
de garantie n'est pas prolongée par la garantie du fabricant. Ceci s'applique
également aux pièces remplacées et réparées.
Les dommages et défauts qui sont éventuellement déjà présents à l'achat doivent
être notifi és dès le déballage, au plus tard deux jours après la date d'achat.
Après expiration du délai de garantie, les éventuelles réparations seront payantes.
Service après-vente
Service France
Tel.: 0800 919270
E-Mail: k[email protected]
IAN 63920
Service Belgique
Tel.: 070 270 171 (0,15 EUR/Min.)
E-Mail: k[email protected]
IAN 63920
Importateur
KOMPERNASS GMBH
BURGSTRASSE 21
44867 BOCHUM, GERMANY
www.kompernass.com
IB_63920_SKRI2000A1_LB2.indb Abs3:35 17.01.2012 12:04:30 Uhr

36
SKRI 2000 A1
IB_63920_SKRI2000A1_LB2.indb Abs3:36 17.01.2012 12:04:30 Uhr

37
SKRI 2000 A1
NL
BE
Inhoud
Inleiding . . . . . . . . . . . . . . . .38
Informatie bij deze
gebruiksaanwijzing . . . . . . . . . . . .38
Auteursrecht . . . . . . . . . . . . . . . . . .38
Gebruik in overeenstemming met
bestemming . . . . . . . . . . . . . . . . . .38
Waarschuwingen . . . . . . . . . . . . . .39
Veiligheid . . . . . . . . . . . . . . .40
Gevaar door elektrische stroom . . .40
Omgang met batterijen . . . . . . . . .40
Basisveiligheidsvoorschriften . . . . .41
Bedieningselementen . . . . . .42
Opstellen en aansluiten . . . .44
Veiligheidsvoorschriften . . . . . . . . .44
Inhoud van het pakket en inspectie
na transport . . . . . . . . . . . . . . . . . .44
Uitpakken . . . . . . . . . . . . . . . . . . . .44
De verpakking afvoeren . . . . . . . . .45
Eisen aan de plaatsingslocatie . . . .45
Elektrische aansluiting . . . . . . . . . . .45
Batterij van het apparaat . . . . . . . .46
Batterij van de afstandsbediening .46
Bevestiging onder een hangkastje .47
Demontage . . . . . . . . . . . . . . . . . . .48
Het apparaat neerzetten . . . . . . . .48
Station voorbereiden voor
iPod / iPhone . . . . . . . . . . . . . . . . .48
Netvoeding inschakelen . . . . . . . . .48
UKW-draadantenne . . . . . . . . . . . .48
Bediening en bedrijf . . . . . . .49
In- en uitschakelen . . . . . . . . . . . . .49
Basisinstellingen . . . . . . . . . . . . . . .49
Instelmenu activeren . . . . . . . . . . . .50
Alarm programmeren . . . . . . . . . . .54
Kookwekker . . . . . . . . . . . . . . . . . .57
Kookwekker programmeren . . . . . .58
Radiofunctie . . . . . . . . . . . . . . . . . .59
Weergave van externe
audio-apparaten . . . . . . . . . . . . . . .62
Aansluiting iPod / iPhone . . . . . . . .62
Overige functies . . . . . . . . . . . . . . .64
Reiniging . . . . . . . . . . . . . . . .67
Veiligheidsvoorschriften . . . . . . . . .67
Behuizing schoonmaken . . . . . . . . .67
Problemen oplossen . . . . . . .67
Veiligheidsvoorschriften . . . . . . . . .67
Oorzaken van storingen en
storingen verhelpen . . . . . . . . . . . .68
Opbergen / Afvoeren . . . . . .69
Opbergen . . . . . . . . . . . . . . . . . . . . 69
Apparaat afvoeren . . . . . . . . . . . . .69
Batterijen afvoeren . . . . . . . . . . . . .69
Appendix . . . . . . . . . . . . . . .69
Voorschriften voor de
conformiteitsverklaring . . . . . . . . . .69
Technische gegevens . . . . . . . . . . .70
Garantie . . . . . . . . . . . . . . . . . . . . .71
Service . . . . . . . . . . . . . . . . . . . . . .71
Importeur . . . . . . . . . . . . . . . . . . . .71
IB_63920_SKRI2000A1_LB2.indb Abs2:37 17.01.2012 12:04:30 Uhr

38
Inleiding
SKRI 2000 A1
NL
BE
Inleiding
Informatie bij deze gebruiksaanwijzing
Deze gebruiksaanwijzing maakt onderdeel uit van de onderbouwradio
SKRI 2000 A1 (hierna aangeduid als “apparaat”) en voorziet u van belangrijke
aanwijzingen voor het gebruik in overeenstemming met de bestemming, de veilig-
heid, het inbouwen en aansluiten, evenals voor de bediening van het apparaat.
De gebruiksaanwijzing moet voortdurend nabij het apparaat beschikbaar zijn.
Zij moet door iedere persoon gelezen en gebruikt worden, die opdracht heeft
voor de bediening en voor het verhelpen van storingen van het apparaat.
Bewaar de gebruiksaanwijzing en geef deze met het apparaat door aan de
volgende eigenaar.
Auteursrecht
Deze documentatie is auteursrechtelijk beschermd. Elke verveelvoudiging resp.
elke herdruk, ook gedeeltelijk, alsmede de weergave van de afbeeldingen, ook
in gewijzigde toestand, is uitsluitend toegestaan met schriftelijke toestemming van
de fabrikant.
Gebruik in overeenstemming met bestemming
Dit apparaat is alleen bestemd voor de ontvangst van UKW-radioprogramma's,
als kookwekker, voor het alarmeren door een alarmsignaal, radio of iPod / iPhone
en voor de aansluiting van externe audio-apparaten (bijv. MP3-speler) en iPod / iPhone
in gesloten ruimtes. Het apparaat is bestemd voor vrije opstelling of voor mon-
tage onder een hangkastje. Hiertoe moeten de geïntegreerde stelpootjes resp.
de meegeleverde montageplaat worden gebruikt. Een ander of verdergaand
gebruik geldt als niet in overeenstemming met de bestemming. Het apparaat is
niet bedoeld voor gebruik in bedrijfsmatige of industriële omgevingen.
Claims van welke aard ook wegens schade voortvloeiend uit gebruik in strijd met
de bestemming, onvakkundige reparaties, ongeoorloofd uitgevoerde veranderingen
of gebruik van ongeoorloofde reserveonderdelen, zijn uitgesloten. Het risico is
uitsluitend voor de gebruiker.
“Made for iPod” en “Made for iPhone” betekent dat een elektronisch accessoire-
onderdeel speciaal voor aansluiting op een iPod of een iPhone is bedoeld en dat
de ontwikkelaar garandeert dat het apparaat voldoet aan de kwaliteitsnormen van
Apple. Apple is niet verantwoordelijk voor het gebruik van dit apparaat of voor
het voldoen ervan aan veiligheids- en reguleringsnormen. Houd er rekening mee
dat het gebruik van dit accessoireonderdeel in combinatie met een iPod, iPhone de
prestaties van de draadloze communicatie kan beïnvloeden. iPad, iPhone, iPod, iPod
classic, iPod nano, iPod shuffl e en iPod touch zijn handelsmerken van Apple Inc.,
gedeponeerd in de VS en andere landen. iPad is een handelsmerk van Apple Inc.
IB_63920_SKRI2000A1_LB2.indb Abs1:38 17.01.2012 12:04:31 Uhr

39
Inleiding
SKRI 2000 A1
NL
BE
Waarschuwingen
In de onderhavige gebruiksaanwijzing worden de volgende waarschuwingen
gebruikt:
GEVAAR
Een waarschuwing op dit niveau van gevaar duidt op een
dreigende gevaarlijke situatie.
Indien de gevaarlijke situatie niet wordt vermeden, kan dit leiden tot de dood
of tot zwaar letsel.
De aanwijzingen in deze waarschuwing in acht nemen, om levensgevaar
►
of zwaar letsel van personen te vermijden.
WAARSCHUWING
Een waarschuwing op dit niveau van gevaar duidt op een
eventuele gevaarlijke situatie.
Als de gevaarlijke situatie niet wordt vermeden, kan dit letsel tot gevolg hebben.
De aanwijzingen in deze waarschuwing opvolgen om persoonlijk letsel te
►
vermijden.
LET OP
Een waarschuwing op dit niveau van gevaar duidt op een
eventuele materiële schade.
Als de gevaarlijke situatie niet wordt vermeden, kan dit materiële schade tot
gevolg hebben.
De aanwijzingen in deze waarschuwing opvolgen om materiële schade te
►
vermijden.
OPMERKING
Een opmerking wijst op extra informatie, die de omgang met het apparaat ►
vergemakkelijkt.
IB_63920_SKRI2000A1_LB2.indb Abs4:39 17.01.2012 12:04:31 Uhr

40
Veiligheid
SKRI 2000 A1
NL
BE
Veiligheid
In dit hoofdstuk krijgt u belangrijke veiligheidsinstructies voor de omgang met het
apparaat.
Dit apparaat voldoet aan de gestelde veiligheidsvoorschriften.
Een verkeerd gebruik kan leiden tot persoonlijk letsel en materiële schade.
Gevaar door elektrische stroom
GEVAAR
Levensgevaar door elektrische stroom!
Bij contact met onder spanning staande leidingen of onderdelen
bestaat er levensgevaar!
Let op de volgende veiligheidsinstructies om risico's door elektrische stroom te
vermijden:
Gebruik het apparaat niet wanneer de netvoedingsadapter, het aansluit-
►
snoer of de netstekker zijn beschadigd.
Open in geen geval de netvoedingsadapter. Als stroomgeleidende aanslui- ►
tingen worden aangeraakt en de elektrische en mechanische constructie
wordt veranderd, bestaat er gevaar voor stroomschokken.
Omgang met batterijen
WAARSCHUWING
Gevaar door gebruik dat niet in overeenstemming is met de
bestemming! Er bestaat gevaar voor explosies en lekken!
Voor een veilige omgang met batterijen neemt u de volgende veiligheidsin-
structies in acht:
Gooi batterijen niet in het vuur.
►
Batterijen niet kortsluiten. ►
Probeer batterijen niet weer op te laden. ►
Controleer de batterijen regelmatig. Vrijkomend batterijzuur kan tot onher- ►
stelbare beschadiging van het apparaat leiden. Zeer voorzichtig omgaan
met een beschadigde of lekkende batterij. Gevaar voor letsel door bijtende
chemicaliën! Veiligheidshandschoenen dragen.
Bewaar batterijen buiten bereik van kinderen. In geval van inslikken, ►
onmiddellijk medische hulp zoeken.
Neem de batterijen uit wanneer u het apparaat langere tijd niet gebruikt. ►
IB_63920_SKRI2000A1_LB2.indb Abs3:40 17.01.2012 12:04:32 Uhr

41
Veiligheid
SKRI 2000 A1
NL
BE
Basisveiligheidsvoorschriften
Neem de volgende veiligheidsvoorschriften in acht voor een veilige omgang met
het apparaat:
Controleer het apparaat vóór het gebruik op uitwendig zichtbare schade.
■
Neem een defect apparaat of een apparaat dat gevallen is niet in gebruik.
In geval het snoer of de aansluitingen beschadigd zijn, laat u deze door
■
geautoriseerd en vakkundig personeel, of door de klantenservice vervangen.
Dit apparaat is niet bedoeld voor gebruik door personen (met inbegrip van
■
kinderen) met beperkte fysieke, zintuiglijke of geestelijke vermogens of met
gebrek aan ervaring en / of gebrek aan kennis, tenzij ze onder toezicht
staan van een voor hun veiligheid verantwoordelijke persoon of van die
persoon aanwijzingen kregen voor het gebruik van het apparaat.
Bij kinderen is supervisie noodzakelijk om er voor te zorgen dat ze niet met
■
het apparaat spelen.
Laat reparaties aan het apparaat alleen uitvoeren door geautoriseerde spe-
■
ciaalzaken of door de klantenservice. Door ondeskundige reparaties kunnen
er gevaren voor de gebruiker ontstaan. Bovendien vervalt dan de garantie.
Een reparatie van het apparaat tijdens de garantieperiode mag alleen worden
■
uitgevoerd door een klantenservice die door de fabrikant geautoriseerd is,
anders wordt er geen garantie meer gegeven bij schade die nadien optreedt.
Defecte onderdelen mogen alleen worden vervangen door originele onder-
■
delen. Alleen bij deze onderdelen is gegarandeerd dat ze voldoen aan de
veiligheidseisen.
Bescherm het apparaat tegen vocht en het binnendringen van vloeistoff en.
■
Dompel het apparaat nooit onder water, plaats het apparaat niet in de buurt
van water en zet geen voorwerpen gevuld met water (bijv. vazen) op het
apparaat.
Plaats geen voorwerpen op het apparaat.
■
Gebruik het apparaat niet in de buurt van open vlammen (bijv. kaarsen). ■
Vermijd rechtstreeks zonlicht. ■
De toevoer altijd aan de stekker van de netvoedingsadapter uit het stopcon- ■
tact trekken, niet aan het aansluitsnoer.
Haal als er storingen optreden en bij onweer de netstekker uit het stopcontact.
■
IB_63920_SKRI2000A1_LB2.indb Abs3:41 17.01.2012 12:04:32 Uhr

42
Bedieningselementen
SKRI 2000 A1
NL
BE
Bedieningselementen
(afbeeldingen zie voorste uitvouwpagina afbeelding A)
Display
2
User: gebruiker kiezen
3
Vol+: volume verhogen
4
Mem: geheugenpositie kiezen
5
Vol-: volume verlagen
6
Power: in / uitschakelen
7
Function / ST: functie kiezen / stereo activeren
8
Timer: timer instellen en activeren
9
Alarm Mode: alarmstand kiezen
10
AOT / Dimmer: uitschakeltimer / displaydimmer in-/uitschakelen
11
Mode / Lock: instelmenu oproepen / toetsenblokkering
12
i-Time Sync
i-Time Sync
Bass: tijdindicatie en datum synchroniseren met iPod / iPhone /
basversterking
13
I Enter
I Enter
: bediening bij iPod / iPhone / invoer
14
i
i
/ Memory Scan: pauze / afspelen bij iPod / iPhone / automatisch zenders
zoeken / opgeslagen radiozenders oproepen
15
Netvoedingsadapter
16
i
i
/ Pr– / AL2: vorige functie bij iPod / iPhone / vorige geheugenpositie
selecteren / alarm 2 instellen
17
/ Up: sneller vooruit bij iPod / iPhone / ontvangstfrequentie verhogen
18
i
i
/ Pr+ / AL1: volgende functie bij iPod / iPhone / volgende geheugenpositie
selecteren / alarm 1 instellen
19
i
i
/ Down: sneller achteruit bij iPod / iPhone / ontvangstfrequentie verlagen
20
Montageplaat
21
Stelpootjes (uitklapbaar)
22
Borgbeugel voor iPod / iPhone
23
Luidsprekers
24
Batterijvak
25
DC-aansluiting: stroomaansluitconnector (7V) voor netvoedingsadapter
26
AUX IN-aansluiting: ingangs-aansluitconnector voor audioapparaten
met 3,5mm jackplugstekker
27
Draadantenne voor UKW-ontvangst
IB_63920_SKRI2000A1_LB2.indb Abs3:42 17.01.2012 12:04:32 Uhr

43
Bedieningselementen
SKRI 2000 A1
NL
BE
(afbeeldingen zie voorste uitvouwpagina afbeelding B)
28
Afstandhouder (voor onderbouwmontage)
29
Station voor iPod / iPhone
30
: in-/uitschakelen
31
User: gebruiker kiezen
32
i / Down: sneller achteruit bij iPod / iPhone / ontvangstfrequentie verlagen
33
i : pauze / afspelen bij iPod / iPhone
34
iMenu / Enter: bediening bij iPod / iPhone / invoer
35
Mem: geheugenpositie kiezen
36
Memory-Scan: automatisch zenders zoeken / opgeslagen radiozenders oproepen
37
Timer: timer instellen en activeren
38
Function / ST: functie kiezen / stereo activeren Stand: instelmenu
39
Vol+: volume verhogen
40
i
/ Pr+: volgende functie bij iPod / iPhone / volgende geheugenpositie selecteren
41
Vol–: volume verlagen
42
i / Up: sneller vooruit bij iPod/iPhone / ontvangstfrequentie verhogen
43
iTime Sync / Bass: tijdindicatie en datum synchroniseren met iPod / iPhone /
basversterking
44
i
i
/ Pr–: vorige geheugenpositie selecteren / vorige functie bij iPod / iPhone
45
Mode / Lock: instelmenu oproepen / toetsenblokkering
46
AOT / Dimmer: uitschakeltimer / displaydimmer in-/uitschakelen
47
Alarm: alarmstand kiezen
48
Sensor voor afstandsbediening
IB_63920_SKRI2000A1_LB2.indb Abs3:43 17.01.2012 12:04:35 Uhr

44
Opstellen en aansluiten
SKRI 2000 A1
NL
BE
Opstellen en aansluiten
Veiligheidsvoorschriften
WAARSCHUWING
Bij de ingebruikname van het apparaat kan er persoonlijke en
materiële schade optreden!
Neem de volgende veiligheidsinstructies in acht om de gevaren te vermijden:
Verpakkingsmateriaal mag niet als speelgoed worden gebruikt.
►
Er bestaat verstikkingsgevaar.
Neem de aanwijzingen voor de eisen aan de opstellingsplaats en voor
►
de elektrische aansluiting van het apparaat in acht om persoonlijke en
materiële schade te vermijden.
Inhoud van het pakket en inspectie na transport
Het apparaat wordt standaard met volgende componenten geleverd:
Onderbouwradio SKRI 2000 A1
▯
Netvoedingsadapter JVSW0702000 ▯
Montageplaat ▯
4 bevestigingsschroeven (kort) ▯
2 x afstandhouder incl. 4 bevestigingsschroeven (lang) ▯
Borgbeugel voor iPod / iPhone ▯
1 x batterij 3 V type CR2032 ▯
1 x batterij 3 V type CR2025 ▯
Afstandsbediening ▯
Cinchkabel 3,5 naar 3,5 mm (50 cm) ▯
Deze gebruiksaanwijzing ▯
OPMERKING
Controleer of de levering compleet is en of er sprake is van zichtbare ►
schade.
Bij een onvolledige levering of bij beschadigingen door een verkeerde
►
verpakking of door het transport neemt u contact op met de Service-Hotline
(zie hoofdstuk Service pag. 71).
Uitpakken
Haal alle delen van het apparaat en de gebruiksaanwijzing uit de doos. ♦
Verwijder al het verpakkingsmateriaal. ♦
IB_63920_SKRI2000A1_LB2.indb Abs3:44 17.01.2012 12:04:37 Uhr

45
Opstellen en aansluiten
SKRI 2000 A1
NL
BE
De verpakking afvoeren
De verpakking beschermt het apparaat tegen transportschade. De verpakkings-
materialen zijn niet schadelijk voor het milieu en gekozen om afvoertechnische
redenen en daarom recyclebaar.
Het terugvoeren van de verpakking in de materiaalkringloop is een besparing
op grondstoff en en reduceert het ontstaan van afval. Voer verpakkingsmaterialen
die niet meer worden gebruikt af conform de plaatselijk geldende voorschriften.
OPMERKING
Indien mogelijk de originele verpakking bewaren gedurende de garantie- ►
periode van het apparaat, om het apparaat in geval van een garantie-
kwestie volgens de voorschriften te kunnen verpakken.
Eisen aan de plaatsingslocatie
Voor een veilig en storingsvrij gebruik van het apparaat moet de plaats van
opstelling voldoen aan de volgende voorwaarden:
Bij de plaatsing van het apparaat het apparaat op een stevige, vlakke en
■
horizontale ondergrond zetten. Gebruik de uitklapbare stelpootjes.
Het apparaat zodanig neerzetten of monteren, dat de aanwezige ventilatie-
■
openingen en de luidsprekers niet afgedekt worden.
Zet het apparaat niet neer in een hete, natte of zeer vochtige omgeving of in
■
de buurt van brandbaar materiaal.
Bevestig het apparaat niet direct boven een kookplaat.
■
Het stopcontact moet goed toegankelijk zijn, zodat de netvoedingsadapter ■
in geval van nood gemakkelijk uit het stopcontact kan worden gehaald.
Elektrische aansluiting
Het apparaat wordt via de meegeleverde netvoedingsadapter gevoed met ■
een gelijkspanning van 7V. Sluit het apparaat uitsluitend via de meegeleverde
netvoedingsadapter aan op de stroomvoorziening.
Vergelijk voordat u het apparaat aansluit de aansluitgegevens van de net-
■
voedingsadapter (spanning en frequentie) op het kenplaatje met die van uw
lichtnet. Deze gegevens moeten overeenkomen, zodat er geen schade aan
het apparaat optreedt.
Bescherm het aansluitsnoer tegen hete oppervlakken en scherpe kanten.
■
Let erop dat het aansluitsnoer niet strak gespannen of geknikt wordt. ■
Laat het aansluitsnoer niet over hoeken hangen (struikelgevaar). ■
Wanneer u het apparaat langere tijd niet gebruikt, koppelt u de netvoedings- ■
adapter los van de stroomvoorziening.
IB_63920_SKRI2000A1_LB2.indb Abs3:45 17.01.2012 12:04:38 Uhr

46
Opstellen en aansluiten
SKRI 2000 A1
NL
BE
Batterij van het apparaat
Door het plaatsen van de batterij voorkomt u dat bij een mogelijke stroomuitval
de geprogrammeerde tijd, geprogrammeerde geheugenposities en alarmtijden
verloren gaan. De batterij zorgt ervoor dat de interne tijd en datum ook tijdens
een stroomuitval doorlopen. Bij opnieuw inschakelen van de netstroom verschijnt
op het display
automatisch de juiste tijd.
OPMERKING
Het apparaat kan ook worden gebruikt zonder batterij. ►
Batterij plaatsen / vervangen
Open de afdekking van het batterijvak ♦
24
aan de onderkant van het ap-
paraat, door de afdekking met een munt tot aan de aanslag naar links te
draaien en af te nemen.
Plaats de batterij van het type CR2032 (inbegrepen in de levering) in het
♦
batterijvak. De kant met de markering + wijst omhoog.
Sluit het batterijvak door de afdekking erop te plaatsen en de afdekking
♦
met een munt naar rechts te draaien.
Batterij van de afstandsbediening
Batterij activeren
De batterij voor de afstandsbediening is bij levering al geplaatst.
Activeer de batterij door het isolatiestrookje te verwijderen. ♦
Batterij vervangen
Druk met de vingernagel de inkeping (A) naar ♦
rechts en trek het batterijvak er gelijktijdig uit.
Plaats een 3 V-batterij van het type CR 2025
♦
in het batterijvak. De kant met de markering “+”
wijst omhoog.
Schuif het batterijvak weer helemaal in de
♦
afstandsbediening.
IB_63920_SKRI2000A1_LB2.indb Abs3:46 17.01.2012 12:04:38 Uhr

47
Opstellen en aansluiten
SKRI 2000 A1
NL
BE
Bevestiging onder een hangkastje
U kunt het apparaat met de meegeleverde montageplaat
20
bijv. onder een
hangkastje monteren. Voor de montage van het apparaat gaat u als volgt te
werk:
Schuif de montageplaat
♦
20
naar achteren en neem deze
20
af.
Zoek een geschikte bevestigingsplaats voor het apparaat (zie ook het
♦
hoofdstuk Eisen aan de plaatsingslocatie pag. 45).
Houd de montageplaat ♦
20
onder de bevestigingsplaats. Daarbij moet de
voorkant van de montageplaat
20
ca. 6,8 cm achter de voorzijde zitten,
zodat het apparaat na de montage evenwijdig aan het hangkastje afsluit.
De zijkanten van de montageplaat
20
moeten een afstand van ca. 4,5 cm
tot aangrenzende kasten of wanden hebben.
OPMERKING
Wanneer u het apparaat links van een aangrenzende kast resp. een wand ►
wilt monteren, verwijdert u vooraf de borgbeugel
22
van het apparaat.
Markeer de 4 bevestigingspunten met een pen.
♦
Maak met een drevel of spijker telkens een kleine verdieping in de marke- ♦
ringen.
Plaats desgewenst de meegeleverde afstandhouder ♦
28
met het nokje in de
hiervoor bestemde verdieping op de montageplaat
20
.
Schroef de montageplaat
♦
20
met de meegeleverde schroeven vast (zie
afbeelding).
IB_63920_SKRI2000A1_LB2.indb Abs3:47 17.01.2012 12:04:39 Uhr

48
Opstellen en aansluiten
SKRI 2000 A1
NL
BE
Zet het apparaat schuin met de voorste uitsparingen in de bovenkant van ♦
het apparaat in de montageplaat
20
. Druk het achterste deel van het appa-
raat naar boven tegen de montageplaat
20
, totdat het apparaat hoorbaar
vastklikt.
Controleer of het apparaat stevig zit.
♦
Demontage
Trek het apparaat naar voren en neem het apparaat naar beneden toe af. ♦
Draai de schroeven op de montageplaat ♦
20
los en neem de montageplaat
20
af.
Het apparaat neerzetten
Als alternatief kunt u het apparaat ook neerzetten. Om bij het plaatsen de venti-
latieopeningen en de luidsprekers
23
aan de onderkant van het apparaat niet af
te dekken, moeten de beide stelpootjes
21
van het apparaat worden uitgeklapt:
Grijp in de inkeping aan de zijkant van een stelpootje en klap het stelpootje
♦
tot aan de aanslag uit.
Zoek een geschikte opstellingsplaats voor het apparaat (zie ook het hoofd-
♦
stuk Eisen aan de plaatsingslocatie pag. 45).
Station voorbereiden voor iPod / iPhone
U kunt uw iPod / iPhone op het apparaat aansluiten. Daartoe moet u het station
29
omlaagklappen en de borgbeugel
22
monteren:
Klap het station
♦
29
helemaal omlaag.
Verwijder de borgbeugel
♦
22
van de zijkant van het apparaat.
Aan de zijkanten van het station
♦
29
bevinden zich twee uitsparingen. Schuif
de borgbeugel
22
van voren zodanig op het station
29
, dat de nokjes in de
uitsparingen vallen.
Netvoeding inschakelen
Sluit de netstekker van de netvoedingsadapter ♦
15
aan op de DC-aansluiting
25
op de achterkant van het apparaat.
Sluit de netvoedingsadapter
♦
15
aan op het stopcontact.
UKW-draadantenne
Rol de draadantenne ♦
27
voor de UKW-ontvangst helemaal uit.
IB_63920_SKRI2000A1_LB2.indb Abs3:48 17.01.2012 12:04:44 Uhr

49
Bediening en bedrijf
SKRI 2000 A1
NL
BE
Bediening en bedrijf
In dit hoofdstuk krijgt u belangrijke aanwijzingen over de bediening en het
bedrijf van het apparaat.
In- en uitschakelen
Na aansluiting van het apparaat op de stroomvoorziening start de automatische
systeeminstelling. Op het display
verschijnt ca. 3 tot 5 minuten de tekst
“PLEASE WAIT FOR SETTING THANKS”. Als in deze tijd een signaal wordt
ontvangen, wordt het systeem automatisch geactualiseerd.
OPMERKING
Om deze procedure af te breken, drukt u op een willekeurige toets. ►
Het systeem start dan met de volgende standaardinstellingen:
Datum / tijd:
■
Radio is uitgeschakeld ■
Bedrijfsstand Klok / stand-by is actief ■
Displaydimmer is actief ■
Na aansluiting op de stroomvoorziening schakelt het apparaat over op de stand
Klok / stand-by. Met de toets
Power
6
of de -toets
30
op de afstandsbe-
diening wordt het apparaat in- resp. uitgeschakeld.
Met de toets Function / ST
7
of de toets Function / ST
38
op de afstandsbedie-
ning schakelt u tussen de bedrijfsstanden Radio, iPod en AUX.
OPMERKING
De toets ► Power
6
of de -toets
30
op de afstandsbediening koppelt
het apparaat niet volledig los van de netstroom. Het apparaat verbruikt
ook stroom in de stand-bystand. Om het apparaat volledig los te koppelen
van de netstroom, moet de stekker van de netvoedingsadapter
15
uit het
stopcontact worden getrokken.
Basisinstellingen
Na het aansluiten van het apparaat op de stroomvoorziening toont het apparaat
op het display
de tijd en de dag van de week. Het apparaat staat in de
bedrijfsstand Klok / stand-by.
IB_63920_SKRI2000A1_LB2.indb Abs3:49 17.01.2012 12:04:46 Uhr

50
Bediening en bedrijf
SKRI 2000 A1
NL
BE
Instelmenu activeren
Om het instelmenu te activeren, drukt u in de bedrijfsstand Klok / stand-by op de
toets Mode / Lock
11
of op de Mode Lock-toets
45
op de afstandsbediening. De
op het display
aangegeven tijd begint te knipperen. Bij iedere verdere active-
ring van de toets Mode / Lock
11
of
45
wordt overgeschakeld op de volgende
instelmogelijkheid. De volgorde van de menupunten is:
Tijd instellen
▯
Datum instellen ▯
Herinneringsfunctie instellen ▯
Updatestand instellen ▯
Displaydimmer in-/uitschakelen ▯
Starttijd displaydimmer instellen ▯
Tijdnotatie instellen ▯
OPMERKING
Het instelmenu wordt automatisch beëindigd als u ca. 15 seconden lang ►
geen toets activeert. De uitgevoerde instellingen worden opgeslagen.
Tijd instellen
Voorwaarde: het apparaat staat in de stand Klok / stand-by.
Druk één keer op de toets Mode / Lock
♦
11
of de Mode Lock-toets
45
op de
afstandsbediening. De tijdindicatie begint te knipperen.
Stel met de toetsen
♦
/ Up
17
en
i
i
/ Down
19
of de i / Up-toets
42
en de i
/ Down-toets
32
op de afstandsbediening de actuele tijd in. Per
toetsdruk verandert de tijd met een minuut. De betreff ende knop meer dan 2
seconden ingedrukt houden start de snelinstelling.
Druk nogmaals op de toets Mode / Lock
♦
11
of de Mode Lock-toets
45
op de afstandsbediening om de actuele instelling op te slaan en naar het
volgende menupunt te gaan.
OPMERKING
De tijd wordt gereset naar ► uur, als het apparaat van de stroomvoor-
ziening wordt losgekoppeld en er geen batterij is geplaatst of de batterij te
zwak is.
IB_63920_SKRI2000A1_LB2.indb Abs3:50 17.01.2012 12:04:47 Uhr

51
Bediening en bedrijf
SKRI 2000 A1
NL
BE
Datum instellen
Voorwaarde: het apparaat staat in de stand Klok / stand-by.
Druk twee keer op de toets Mode / Lock
♦
11
of de Mode Lock-toets
45
op
de afstandsbediening. De datumindicatie begint te knipperen.
Stel met de toetsen ♦
/ Up
17
en
i
i
/ Down
19
of de i / Up-toets
42
en de i
/ Down-toets
32
op de afstandsbediening de actuele datum in.
Per druk op de knop wordt de datum om een dag veranderd. De weekdag-
indicatie verandert automatisch. De betreff ende knop meer dan 2 seconden
ingedrukt houden start de snelinstelling.
Druk nogmaals op de toets Mode / Lock
♦
11
of de Mode Lock-toets
45
op de afstandsbediening om de actuele instelling op te slaan en naar het
volgende menupunt te gaan.
OPMERKING
De datum wordt gereset naar ► als het apparaat van de
stroomvoorziening wordt losgekoppeld en er geen batterij is geplaatst of
de batterij te zwak is.
Herinneringsfunctie instellen
U kunt tot wel 6 data instellen, waarop een automatische herinnering geactiveerd
wordt. De functie SSA (Special Day Alert) is handig om bijv. aan verjaardagen
of andere terugkerende gebeurtenissen herinnerd te worden.
De herinnering vindt ieder jaar op dezelfde datum plaats. Op deze datum klinkt
op elk heel uur van 8:00 - 23:00 uur 10 minuten lang een alarmsignaal.
Voorwaarde: het apparaat staat in de bedrijfsstand Klok / stand-by.
Druk drie keer op de toets Mode / Lock
♦
11
of de Mode Lock-toets
45
op de
afstandsbediening. De actuele instelling van de gekozen herinneringsdatum
wordt afwisselend met de indicatie weergegeven. Naast de staat
het nummer van de geheugenpositie voor de datum. Mogelijke waarden
zijn - .
Selecteer met de toets
♦
i
i
/ Memory Scan
14
of de toets Memory-Scan
36
op de afstandsbediening de geheugenpositie van de in te stellen datum.
Stel met de toetsen
♦
/ Up
17
en
i
i
/ Down
19
of de i / Up-toets
42
en de i
/ Down-toets
32
op de afstandsbediening de datum voor deze
geheugenpositie in. Per toetsdruk verandert de datum met een dag. De betref-
fende knop meer dan 2 seconden ingedrukt houden start de snelinstelling.
IB_63920_SKRI2000A1_LB2.indb Abs3:51 17.01.2012 12:04:49 Uhr

52
Bediening en bedrijf
SKRI 2000 A1
NL
BE
OPMERKING
Druk op de toets Timer ►
8
of de Timer-toets
37
op de afstandsbedie-
ning om het jaar over te slaan. Op het display
worden nu de dag
en de maand weergegeven. De herinneringsfunctie wordt nu elk jaar
op deze datum geactiveerd.
Druk nogmaals op de toets Mode / Lock
♦
11
of de Mode Lock-toets
45
op de afstandsbediening om de actuele instelling op te slaan en naar het
volgende menupunt te gaan.
Updatestand instellen
Voorwaarde: het apparaat staat in de stand Klok / stand-by.
Druk vier keer op de toets Mode / Lock
♦
11
of de Mode Lock-toets
45
op de
afstandsbediening. Op het display verschijnt en een knipperend
kloksymbool .
Druk op de toets
♦
i
i
/ Down
19
of de toets i / Down
32
op de afstands-
bediening om de automatische RDS-functie uit te schakelen. Het knipperende
kloksymbool verdwijnt.
Druk op de toets
♦
/ Up
17
of de toets i / Up-toets
42
op de afstands-
bediening om de automatische RDS-functie te activeren. Het knipperende
kloksymbool verschijnt.
Druk nogmaals op de toets Mode / Lock ♦
11
of de Mode Lock-toets
45
op de afstandsbediening om de actuele instelling op te slaan en naar het
volgende menupunt te gaan.
Tijdgestuurd dimmen van het display in-/uitschakelen
Voorwaarde: het apparaat staat in de stand Klok / stand-by.
Het apparaat heeft twee mogelijkheden voor dimmen van het display.
1. Tijdgestuurd dimmen van het display
2. Dimmen van het display handmatig instellen (zie ook het hoofdstuk
Displaydimmer handmatig in-/uitschakelen pag. 66).
Druk vijf keer op de toets Mode / Lock
♦
11
of de Mode Lock-toets
45
op
de afstandsbediening. De actuele instelling van de displaydimmer wordt
weergegeven ( of ).
Selecteer met de toets
♦
/ Up
17
of de i / Up-toets
42
op de af-
standsbediening “ ”. De displayverlichting verdwijnt na 15 seconden.
Selecteer met de toets ♦
i
i
/ Down
19
of de i / Down-toets
32
op de
afstandsbediening “ ”. De displayverlichting brandt continu.
IB_63920_SKRI2000A1_LB2.indb Abs3:52 17.01.2012 12:04:51 Uhr

53
Bediening en bedrijf
SKRI 2000 A1
NL
BE
Druk nogmaals op de toets Mode / Lock ♦
11
of de Mode Lock-toets
45
op de afstandsbediening om de actuele instelling op te slaan en naar het
volgende menupunt te gaan.
Modus Display-
indicatie
Display-
verlichting
Besturing met de toets AOT / Dimmer
10
of
46
Tijdge-
stuurde
dimmer
UIT
DT OFF Wordt ingesteld
door de AOT/
Dimmer-toets
DIM OFF: display brandt continu
DIM ON: displayverlichting uit; bij een druk op
een willekeurige toets wordt de displayverlichting
15 sec. lang ingeschakeld.
Tijdge-
stuurde
dimmer
AAN
DT ON Standaard van
23:00 - 5:59
uitgeschakeld
23:00 - 5:59 uur Bij een druk op een willekeu-
rige toets wordt het display
60 sec. lang ingeschakeld.
6:00 - 22:59 uur DIM OFF: display brandt
continu DIM ON: displayver-
lichting uit; bij een druk op
een willekeurige toets wordt
de displayverlichting 15 sec.
lang ingeschakeld.
Starttijd displaydimmer instellen
Voorwaarde: het apparaat staat in de stand Klok / stand-by.
Druk zes keer op de toets Mode / Lock
♦
11
of de Mode Lock-toets
45
op de
afstandsbediening. De actuele starttijd van de displaydimmer ( ) wordt
afwisselend met de weergegeven.
Stel met de toetsen
♦
/ Up
17
en
i
i
/ Down
19
of de i / Up-toets
42
en de i
/ Down-toets
32
op de afstandsbediening de gewenste starttijd in.
Per toetsdruk verandert de tijd met een minuut. De betreff ende knop meer
dan 2 seconden ingedrukt houden start de snelinstelling.
Druk nogmaals op de toets Mode / Lock
♦
11
of de Mode Lock-toets
45
op de afstandsbediening om de actuele instelling op te slaan en naar het
volgende menupunt te gaan.
Tijdformaat instellen
Voorwaarde: het apparaat staat in de stand Klok / stand-by.
Druk zeven keer op de toets Mode / Lock
♦
11
of de Mode Lock-toets
45
op de afstandsbediening. De actuele instelling van de tijdnotatie wordt
weergegeven ( = 24-uurs notatie of = 12-uurs notatie).
Zet met de toets
♦
/ Up
17
of de i / Up-toets
42
op de afstandsbe-
diening de tijdnotatie op wanneer u de tijd in de 12-uurs notatie
wilt weergeven.
IB_63920_SKRI2000A1_LB2.indb Abs3:53 17.01.2012 12:04:53 Uhr

54
Bediening en bedrijf
SKRI 2000 A1
NL
BE
Zet met de toets ♦
i
i
/ Up
19
of de i / Up-toets
32
op de afstandsbe-
diening de tijdnotatie op
wanneer u de tijd in de 24-uurs notatie
wilt weergeven.
Druk nogmaals op de toets Mode / Lock
♦
11
of de Mode Lock-toets
45
op de afstandsbediening om de actuele instelling op te slaan en naar het
volgende menupunt te gaan.
Alarm programmeren
Het apparaat beschikt over twee alarmtimers. Alle instellingen kunnen voor beide
alarmtimers afzonderlijk worden gedaan. U kunt kiezen of er op de geprogram-
meerde tijd een alarmsignaal moet klinken of dat de radio of de iPod / iPhone
aan moet gaan.
OPMERKING
Wordt er tijdens de alarmprogrammering ca. 15 seconden lang geen toets ►
ingedrukt, dan wordt de alarmtijd met de actuele instellingen geactiveerd.
Alarmtijd instellen
Druk op de toets Alarm Mode ♦
9
of de toets Alarm
47
op de afstandsbe-
diening. De ingestelde alarmtijd van het betreff ende alarm wordt knippe-
rend op het display weergegeven en de resp. verschijnt. Via de
tijdsaanduiding worden de weekdagen aangegeven, waarop het alarm is
geactiveerd.
Stel met de toetsen
♦
/ Up
17
en
i
i
/ Down
19
of de i / Up-toets
42
en de i
/ Down-toets
32
op de afstandsbediening de gewenste alarmtijd
in. Per toetsdruk verandert de datum met een dag. De betreff ende knop
meer dan 2 seconden ingedrukt houden start de snelinstelling.
Weekdag instellen
Druk in de alarmstand op de toets Function / ST ♦
7
of de toets Function /
ST
38
op de afstandsbediening om te schakelen tussen de weekdagcombi-
naties Ma-Vr, Za-Zo of Ma-Zo. De gekozen combinatie wordt aangegeven
via de alarmtijd.
Houd de toets Function / ST ♦
7
of de toets Function / ST
38
op de afstands-
bediening minstens 2 seconden ingedrukt om te schakelen tussen de week-
dagcombinaties en de instelmogelijkheid voor een afzonderlijke weekdag.
OPMERKING
Bij de instelmogelijkheid voor een afzonderlijke weekdag schakelt ►
u met de toets Function / ST
7
of de toets Function / ST
38
op de
afstandsbediening tussen de weekdagen.
IB_63920_SKRI2000A1_LB2.indb Abs3:54 17.01.2012 12:04:55 Uhr

55
Bediening en bedrijf
SKRI 2000 A1
NL
BE
Alarm met alarmsignaal instellen
Om voor een alarm “Alarmsignaal” te selecteren, drukt u in de alarmstand ♦
op de toets
i
i
/ Pr+ / AL1
18
of de toets
i
i
/ Pr– / AL2
16
resp. de i Pr+
toets
40
of de i Pr– toets
44
op de afstandsbediening, tot op het display
het symbool
verschijnt.
Alarm met radio instellen
Wanneer de radio op het alarmtijdstip aan moet gaan, voert u voorafgaand aan
de activering van het alarm de volgende instellingen uit:
Schakel de radio in door op de toets
♦ Power
6
of de toets
30
op de
afstandsbediening te drukken en met de toets Function / ST
7
of de toets
Function / ST
38
op de afstandsbediening de bedrijfsstand Radio te kiezen.
Selecteer de zender waarmee u wilt worden gewekt (zie hoofdstuk
♦ Zender
handmatig instellen pag. 60 of Volgende zender zoeken pag. 60).
Stel met de toetsen Vol+
♦
3
en Vol–
5
of de Vol+ toets
39
en de Vol–
toets
41
op de afstandsbediening het gewenste volume in (zie hoofdstuk
Volume instellen S. 60).
Schakel de radio uit door op de toets
♦ Power
6
of de toets
30
op de
afstandsbediening te drukken.
Om voor een alarm “Radio” te selecteren, drukt u in de alarmstand op de
♦
toets
i
i
/ Pr+ / AL1
18
of de toets
i
i
/ Pr– / AL2
16
resp. de i Pr+ toets
40
of de i
Pr– toets
44
op de afstandsbediening, tot op het display het
symbool verschijnt.
Alarm met iPod / iPhone instellen
Wanneer de iPod / iPhone op het alarmtijdstip aan moet gaan, voert u vooraf-
gaand aan de activering van het alarm de volgende instellingen uit:
Schakel het apparaat in door op de toets
♦ Power
6
of de toets
30
op de afstandsbediening te drukken en met de toets Function / ST
7
of de
toets Function / ST
38
op de afstandsbediening de bedrijfsstand te
kiezen.
Plaats uw iPod, resp. uw iPhone in het station
♦
29
.
Selecteer op de iPod / iPhone een titel (of een album resp. een afspeellijst).
♦
Stel met de toetsen Vol+ ♦
3
en Vol–
5
of de Vol+ toets
39
en de Vol–
toets
41
op de afstandsbediening het gewenste volume in (zie hoofdstuk
Volume instellen S. 60).
Zet de iPod / iPhone in de pauzestand of schakel het apparaat uit.
♦
IB_63920_SKRI2000A1_LB2.indb Abs3:55 17.01.2012 12:04:57 Uhr

56
Bediening en bedrijf
SKRI 2000 A1
NL
BE
Schakel de bedrijfsstand iPod uit door op de toets ♦ Power
6
of de
toets
30
op de afstandsbediening te drukken.
Om voor een alarm “iPod” te selecteren, drukt u in de alarmstand op de
♦
toets
i
i
/ Pr+ / AL1
18
of de toets
i
i
/ Pr– / AL2
16
resp. de i Pr+ toets
40
of de i
Pr– toets
44
op de afstandsbediening, tot op het display het
symbool verschijnt.
Alarm uitschakelen
Om het geactiveerde alarm uit te schakelen, drukt u in de alarmstand op de ♦
toets
i
i
/ Pr+ / AL1
18
of de toets
i
i
/ Pr– / AL2
16
resp. de i Pr+ toets
40
of de i
Pr– toets
44
op de afstandsbediening, tot op het display geen
symbool weer wordt weergegeven.
Als de alarmtijd is bereikt
OPMERKING
Als het alarmtijdstip is bereikt, wordt de uitschakeltimer (indien geactiveerd) ►
meteen gestopt.
Bij de instelling “Alarm met alarmsignaal” klinkt er een geluidssignaal.
Het volume van het geluidssignaal wordt tot aan het maximale volume continu
hoger. De duur van het alarm is beperkt tot 10 minuten. De radio wordt daarbij
op “Mute” geschakeld.
Bij de instelling “Alarm met radio” wordt de radio aangezet. De eerder
gekozen zender wordt op het ingestelde volume maximaal 60 minuten lang
geactiveerd.
Bij de instelling “Alarm met iPod / iPhone” wordt de iPod / das iPhone
aangezet. De weergave start met de laatst geselecteerde titel en wordt op het
ingestelde volume maximaal 60 minuten lang weergegeven.
Druk op een willekeurige toets om het actuele alarm te stoppen.
OPMERKING
Het alarm wordt bij het bereiken van de volgende alarmtijd (bijv. de vol- ►
gende dag) weer actief.
IB_63920_SKRI2000A1_LB2.indb Abs3:56 17.01.2012 12:05:01 Uhr

57
Bediening en bedrijf
SKRI 2000 A1
NL
BE
Kookwekker
Het apparaat beschikt over een handige kookwekker, waarmee bijv. kook- en
baktijden bewaakt kunnen worden. Het instelbare tijdbereik van de kookwekker
ligt tussen 1 minuut en 23 uur, 59 minuten.
Kookwekker instellen
Druk op de toets Timer ♦
8
of de Timer-toets
37
op de afstandsbediening.
De indicatie verschijnt. Op het display wordt het kookpansymbool
voor de kookwekker weergegeven.
Stel met de toetsen
♦
/ Up
17
en
i
i
/ Down
19
of de i / Up-toets
42
en de i
/ Down-toets
32
op de afstandsbediening de gewenste tijd voor
de kookwekker in. Per toetsdruk verandert de tijd met een minuut. De toets
meer dan 2 seconden ingedrukt houden start de snelinstelling.
OPMERKING
Wordt tijdens de instelling ca. 15 seconden lang geen verandering ge- ►
daan, schakelt het apparaat weer over op de vorige stand.
Kookwekker starten
Druk na instelling van de tijd nogmaals op de toets Timer ♦
8
of de Timer-
toets
37
op de afstandsbediening. De aangegeven tijd begint met aftellen.
Op het display wordt een terugwaarts lopende klok weergegeven.
OPMERKING
Wordt tijdens het afl open van de kookwekker een andere functie gekozen, ►
dan verdwijnt de van de resterende tijd uit beeld. Het kookpansymbool
en de terugwaarts lopende klok
worden opnieuw op het display
weergegeven. Druk nogmaals op de toets Timer
8
of de Timer-toets
37
op de afstandsbediening om de resterende tijd van de kookwekker
ca. 10 seconden opnieuw weer te geven.
30 seconden voor het afl open van de kookwekker begint het apparaat met enkele
geluidssignalen akoestisch te wijzen op het bereiken van de ingestelde tijd.
De intervallen tussen de afzonderlijke tonen worden daarbij steeds korter.
Bij het bereiken van de ingesteld tijd klinkt het alarmsignaal van de kookwekker
als continu interval gedurende maximaal 60 minuten.
Druk op de toets Timer
♦
8
of de Timer-toets
37
op de afstandsbediening om
het alarmsignaal van de kookwekker uit te schakelen.
IB_63920_SKRI2000A1_LB2.indb Abs3:57 17.01.2012 12:05:02 Uhr

58
Bediening en bedrijf
SKRI 2000 A1
NL
BE
Kookwekker onderbreken
Druk als de kookwekker loopt op de toets Timer ♦
8
of de Timer-toets
37
op
de afstandsbediening. De kookwekker wordt onderbroken. De getoonde
resterende tijd begint te knipperen.
OPMERKING
Het apparaat schakelt na ca. 15 seconden weer over op de vorige stand. ►
Druk nogmaals op de toets Timer
8
of de Timer-toets
37
op de afstands-
bediening om de resterende tijd van de kookwekker opnieuw weer te
geven.
Om de kookwekker opnieuw te starten, drukt u nogmaals op de toets
♦
Timer
8
of de Timer-toets
37
op de afstandsbediening . De kookwekker
wordt weer gestart.
Om de kookwekker uit te schakelen voordat de tijd is verstreken, houdt u de
♦
toets Timer
8
of de Timer-toets
37
op de afstandsbediening ingedrukt, tot
op het display
het kookpansymbool en de terugwaarts lopende klok niet
meer worden weergegeven.
OPMERKING
De kookwekker wordt meteen uitgeschakeld op het moment dat een alarm ►
actief wordt.
Kookwekker programmeren
Tijden die u vaker nodig heeft, kunt u voorprogrammeren voor de kookwekker,
zodat u deze niet steeds weer moet invoeren. Er kunnen tot wel 6 tijden vooraf
geprogrammeerd worden. Standaard zijn de 6 geheugenposities voorgepro-
grammeerd met 5/10/15/20/25/30 minuten.
Voor het programmeren van de kookwekker gaat u als volgt te werk:
Druk op de toets Timer
♦
8
of de Timer-toets
37
op de afstandsbediening om
de kookwekker te activeren.
Stel met de toetsen
♦
/ Up
17
en
i
i
/ Down
19
of de i / Up-toets
42
en de i
/ Down-toets
32
op de afstandsbediening de gewenste tijd voor
de kookwekker in. Per toetsdruk verandert de tijd met een minuut. De toets
meer dan 2 seconden ingedrukt houden start de snelinstelling.
Druk op de toets Function / ST
♦
7
of de toets Function / ST
38
op de af-
standsbediening om de timerselectie te activeren. Naast de tijdsaanduiding
wordt een knipperend weergegeven, en daarnaast verschijnt het getal
voor de eerste timer.
Selecteer met de toetsen
♦
i
i
/ Pr+ / AL1
18
en
i
i
/ Pr– / AL2
16
resp. de i
Pr+ toets
40
of de i Pr– toets
44
op de afstandsbediening de geheugen-
positie van de in te stellen timer tussen en .
IB_63920_SKRI2000A1_LB2.indb Abs3:58 17.01.2012 12:05:04 Uhr

59
Bediening en bedrijf
SKRI 2000 A1
NL
BE
Druk nogmaals op de toets Function / ST ♦
7
of de toets Function / ST
38
op
de afstandsbediening om de ingestelde tijd op de geselecteerde geheugen-
positie te programmeren. Het knipperende wordt nu continu weergegeven.
Herhaal de procedure voor de andere geheugenposities.
♦
Kookwekker opvragen
Om een geprogrammeerde tijd voor de kookwekker op te vragen, gaat u als
volgt te werk:
Druk op de toets Timer
♦
8
of de Timer-toets
37
op de afstandsbediening,
om de kookwekker te activeren.
Selecteer met de toetsen
♦
i
i
/ Pr+ / AL1
18
en
i
i
/ Pr– / AL2
16
resp. de i
Pr+ toets
40
of de i Pr– toets
44
op de afstandsbediening de gewenste
timer tussen en .
Druk nogmaals op de toets Timer
♦
8
of de Timer-toets
37
op de afstandsbe-
diening om de kookwekker te starten.
Radiofunctie
OPMERKING
Voor een goede radio-ontvangst moet de draadantenne ►
27
helemaal afge-
rold worden. Richt de antenne in de radiostand naar de beste ontvangst.
De technische eigenschappen van het apparaat maken een instelbaar
►
ontvangstbereik mogelijk buiten het toegelaten UKW (FM)-bereik van
87,5–108 MHz. In verschillende landen kunnen afwijkende landelijke
bepalingen bestaan voor de toegewezen radiofrequentiebereiken. Houd er
rekening mee dat u buiten het toegewezen radiofrequentiebereik ontvan-
gen informatie niet mag verkopen, doorgeven aan derden of gebruiken
voor niet-geëigende doeleinden.
Radio aan-/uitzetten
Druk op de toets ♦ Power
6
of de -toets
30
op de afstandsbediening.
Het display geeft de stand aan waarin het apparaat zich bevindt.
Druk meermalen op de toets Function / ST ♦
7
of de toets Function / ST
38
op de afstandsbediening om de radiofunctie te selecteren. Op het display
verschijnt de ontvangstfrequentie van de ingestelde zender.
Schakel de radio uit door nogmaals op de toets
♦ Power
6
of de
-toets
30
op de afstandsbediening te drukken. Het apparaat schakelt over
op de bedrijfsstand Klok / stand-by. De actuele tijd wordt aangegeven
IB_63920_SKRI2000A1_LB2.indb Abs3:59 17.01.2012 12:05:06 Uhr

60
Bediening en bedrijf
SKRI 2000 A1
NL
BE
Volume instellen
Stel met de toetsen Vol+ ♦
3
en Vol–
5
of de Vol+ toets
39
en de Vol–
toets
41
op de afstandsbediening het gewenste volume in. Het volume-
niveau wordt weergegeven op het display . U kunt een volumeniveau
tussen
en kiezen.
Zenders handmatig instellen
Stel door steeds opnieuw te drukken op de toetsen ♦
/ Up
17
en
i
i
/ Down
19
resp. de i / Up-toets
42
en de i / Down-toets
32
op
de afstandsbediening de gewenste zender in. De frequentie van de zender
wordt aangegeven op het display . De luidspreker is uitgeschakeld
tijdens de instelling.
Volgende zender zoeken
U kunt het apparaat automatisch naar de volgende zender laten zoeken.
Houd de toets
♦
/ Up
17
en
i
i
/ Down
19
resp. de i / Up-toets
42
en de i
/ Down-toets
32
op de afstandsbediening minstens twee seconden
ingedrukt. Het apparaat zoekt automatisch naar de dichtstbijzijnde zender
met voldoende ontvangstkwaliteit.
Herhaal deze procedure totdat u de zender van uw keuze heeft gevonden.
♦
Gebruiker selecteren
Voorwaarde: het apparaat staat in de stand Radio.
Druk op de toets User
♦
2
of de User-toets
31
op de afstandsbediening om
de gewenste gebruiker te selecteren. De actuele gebruiker tot wordt op
het display 10 seconden lang weergegeven.
Druk op de toetsen
♦
i
i
/ Pr+ / AL1
18
en
i
i
/ Pr– / AL2
16
resp. de i Pr+
toets
40
of de i Pr– toets
44
op de afstandsbediening om een vooringe-
stelde geheugenpositie tussen en te selecteren.
OPMERKING
Elke gebruiker beschikt over 15 geheugenposities. De eerste geheugen- ►
positie voor gebruiker A is door de fabrikant vooringesteld.
IB_63920_SKRI2000A1_LB2.indb Abs3:60 17.01.2012 12:05:09 Uhr

61
Bediening en bedrijf
SKRI 2000 A1
NL
BE
Zender handmatig opslaan
Voorwaarde: het apparaat staat in de stand Radio.
Het apparaat beschikt over 60 geheugenposities (4 gebruikers met elk 15 geheu-
genposities) voor zendfrequenties. Om een zendfrequentie op te slaan gaat u als
volgt te werk:
Stel de gewenste zender in, zoals eerder beschreven.
♦
Druk op de toets Mem ♦
4
of de Mem-toets
35
op de afstandsbediening.
Het symbool MEM, de gebruiker en de geheugenpositie verschijnen
op het display .
Druk op de toets User ♦
2
of de User-toets
31
op de afstandsbediening, tot
de gewenste gebruiker ( - ) wordt weergegeven.
Selecteer met de toetsen
♦
i
i
/ Pr+ / AL1
18
of
i
i
/ Pr– / AL2
16
resp. de i
Pr+ toets
40
of de i Pr– toets
44
op de afstandsbediening de gewenste
geheugenpositie voor de ingestelde zender tussen en .
Druk op de toets Mem
♦
4
of de Mem-toets
35
op de afstandsbediening.
De ontvangstfrequentie van de ingestelde zender wordt opgeslagen op de
gekozen geheugenpositie.
Opgeslagen zenders opvragen
Voorwaarde: het apparaat staat in de stand Radio.
Druk op de toets User
♦
2
of de User-toets
31
op de afstandsbediening, tot
de gewenste gebruiker ( - ) wordt weergegeven.
Selecteer met de toetsen
♦
i
i
/ Pr+ / AL1
18
of
i
i
/ Pr– / AL2
16
resp. de i
Pr+ toets
40
of de i Pr– toets
44
op de afstandsbediening de geheugen-
positie voor de opgeslagen zender tussen en .
IB_63920_SKRI2000A1_LB2.indb Abs3:61 17.01.2012 12:05:11 Uhr

62
Bediening en bedrijf
SKRI 2000 A1
NL
BE
Automatische zenderzoekactie (AMS-functie)
Voorwaarde: het apparaat staat in de stand Radio.
Om de geheugenposities voor de zendfrequenties met de best ontvangen zenders
te bezetten, kan een automatische zenderzoekactie worden uitgevoerd.
OPMERKING
Bij de uitvoering van de navolgend beschreven functie gaan alle eerder ►
opgeslagen zenders verloren.
Houd de toets
♦
i
i
/ Memory Scan
14
of de Memory Scan-toets
36
minstens
drie seconden lang ingedrukt. Het apparaat begint met de zenderzoekactie
en bezet de geheugenposities - met de gevonden zenders.
Na afl oop van de zenderzoekactie kunt u door één keer drukken op de
♦
toets
i
i
/ Memory Scan
14
of de Memory Scan-toets
36
alle opgeslagen
zenders tussen en 10 seconden lang laten weergeven.
OPMERKING
Worden er meer dan 60 zenders gevonden, dan worden alleen de eerste ►
60 ontvangstfrequenties opgeslagen.
Worden er minder dan 60 zenders gevonden, dan blijven de laatste geheu- ►
genposities onveranderd.
Weergave van externe audio-apparaten
Sluit een extern audio-apparaat, zoals bijv. een MP3-speler, aan op de ♦
3,5 mm jackplug-aansluiting AUX IN
26
op de achterkant van het apparaat.
Druk op de toets ♦ Power
6
of de toets
30
op de afstandsbediening.
Het display geeft de stand aan waarin het apparaat zich bevindt.
Druk meermaals op de toets Function / ST
♦
7
of de toets Function / ST
38
op de afstandsbediening om de functie te selecteren.
Start de weergave op het externe audio-apparaat en stel het volume in.
♦
OPMERKING
Let op de gebruiksaanwijzing van het externe audio-apparaat. ►
Aansluiting iPod / iPhone
Met het station
29
kunt u het apparaat ook als luidspreker voor uw iPod/iPhone
gebruiken. Als u de iPod/ iPhone in het station plaatst, wordt deze bovendien
automatisch opgeladen.
IB_63920_SKRI2000A1_LB2.indb Abs3:62 17.01.2012 12:05:13 Uhr

63
Bediening en bedrijf
SKRI 2000 A1
NL
BE
iMenu
Voorwaarde: het apparaat staat in de stand iPod.
Druk op de toets
♦
I Enter
I Enter
13
om de menubesturing voor de iPod /
iPhone te activeren.
Hiermee kunnen de volgende functies worden uitgevoerd:
Toets Functie
i
i
/ Pr– / AL2
16
Volgende functie
i
i
/ Pr+ / AL1
18
Vorige functie
i-Time Sync
i-Time Sync
Bass
12
Tijdsaanduiding en datum van het apparaat
synchroniseren met de tijd van de iPod / iPhone
i
i
/ Memory Scan
14
Weergave onderbreken en vervolgen
i
i
/ Down
19
Snel terugspoelen
/ Up
17
Snel vooruitspoelen
I Enter
I Enter
13
Kort drukken: menu terug
Lang drukken: selectie bevestigen
Muziek weergeven
Bereid het aansluitstation
29
voor, zoals beschreven in het hoofdstuk Station
voorbereiden voor iPod / iPhone pag. 48.
Plaats uw iPod, resp. uw iPhone in het station
♦
29
.
Druk op de toets
♦ Power
6
of de -toets
30
op de afstandsbediening.
Het display geeft de stand aan waarin het apparaat zich bevindt.
Druk meermaals op de toets Function / ST ♦
7
of de toets Function / ST
38
op de afstandsbediening om de functie te selecteren.
Selecteer op de iPod / iPhone een titel (of een album resp. een afspeellijst).
♦
Druk op de toets ♦
i
i
/ Memory Scan
14
of de i -toets
33
op de af-
standsbediening om de weergave te starten of te pauzeren.
IB_63920_SKRI2000A1_LB2.indb Abs3:63 17.01.2012 12:05:14 Uhr

64
Bediening en bedrijf
SKRI 2000 A1
NL
BE
iPod / iPhone opladen
Als uw iPod / iPhone in het station
29
is geplaatst, wordt deze automatisch opge-
laden tot de batterij vol is.
OPMERKING
De iPod / iPhone wordt niet opgeladen via de batterij. ►
Tijd i-Time Sync instellen
Met de functie iTime-Sync kunt u de tijd en datum op het apparaat synchronise-
ren met de tijd en datum van uw iPod of iPhone (iPod Touch, iPod nano en iPod
Classic; oudere iPod-modellen zoals iPod mini ondersteunen deze functie niet).
Plaats uw iPod, resp. uw iPhone in het station
♦
29
.
Druk op de toets
♦
i-Time Sync
i-Time Sync
Bass
12
of de toets iTime Sync Bass
43
op
de afstandsbediening. De tijd en datum van de iPod of iPhone worden
overgedragen aan het apparaat. Na afloop van de synchronisatie klinkt er
een geluidssignaal.
OPMERKING
De tijd op de iPhone wordt continu via de gsm-zendmasten geactualiseerd. ►
De tijd op de iPod komt alleen overeen met de tijd op uw computer na de
laatste synchronisatie. Er kan een tijdsverschil van maximaal 59 seconden
tussen het apparaat en de gesynchroniseerde iPod / iPhone zijn.
Overige functies
Stereofunctie
Het apparaat ondersteunt de stereofunctie. De standaardinstelling is “Stereo on”.
Om de stereofunctie te wijzigen, gaat u als volgt te werk:
Houd de toets Function / ST
♦
7
of de toets Function / ST
38
op de afstands-
bediening ingedrukt, tot op het display
de actuele instelling van de
stereofunctie wordt weergegeven ( of ).
Houd de toets Function / ST ♦
7
of de toets Function / ST
38
op de afstands-
bediening opnieuw ingedrukt om de instelling te wijzigen.
OPMERKING
Bij stereo-ontvangst van een radiozender en geactiveerde stereofunctie ►
verschijnt 3 seconden lang op het display .
IB_63920_SKRI2000A1_LB2.indb Abs3:64 17.01.2012 12:05:17 Uhr

65
Bediening en bedrijf
SKRI 2000 A1
NL
BE
Toetsenblokkering
U kunt de toetsen van het apparaat vergrendelen, zodat instellingen niet per
ongeluk kunnen worden gewijzigd.
Houd de toets Mode / Lock
♦
11
of de Mode Lock-toets
45
op de afstandsbe-
diening minstens twee seconden ingedrukt om de toetsenblokkering in- of uit
te schakelen. Bij ingeschakelde toetsenblokkering verschijnt op het display
het symbool .
Om de toetsenblokkering te annuleren, houdt u de toets Mode / Lock
♦
11
of
de Mode Lock-toets
45
op de afstandsbediening minstens twee seconden
ingedrukt.
Basversterking
Met de basversterking kunt u een sterkere weergave van de lage frequenties
inschakelen.
Druk ca. 2 seconden lang op de toets
♦
i-Time Sync
i-Time Sync
Bass
12
of de toets iTime
Sync Bass
43
op de afstandsbediening om de basversterking in- of uit te
schakelen. Bij ingeschakelde basversterking verschijnt op het display het
symbool .
Wisselende weergave
Voorwaarde: het apparaat staat in de stand Klok / stand-by.
Druk op de toets
♦
i
i
/ Down
19
of de i / Down toets
32
op de af-
standsbediening. De datum en de tijd worden nu afwisselend weergegeven.
Druk nogmaals op de toets
♦
i
i
/ Down
19
of de i / Down toets
32
op
de afstandsbediening om alleen de tijd weer te geven.
Voorwaarde: het apparaat staat in de stand Radio.
Druk op de toets Mode / Lock
♦
11
of de Mode Lock-toets
45
op de afstands-
bediening. De ontvangstfrequentie resp. de zendernaam (bij RDS-ontvangst)
en de tijd worden afwisselend weergegeven.
Druk nogmaals op de toets Mode / Lock ♦
11
of de Mode Lock-toets
45
op
de afstandsbediening om alleen de tijd weer te geven.
Druk nogmaals op de toets Mode / Lock
♦
11
of de Mode Lock-toets
45
op
de afstandsbediening om alleen de ontvangstfrequentie resp. de zender-
naam (bij RDS-ontvangst) weer te geven.
IB_63920_SKRI2000A1_LB2.indb Abs3:65 17.01.2012 12:05:18 Uhr

66
Bediening en bedrijf
SKRI 2000 A1
NL
BE
Automatisch uitschakelen (inslaapfunctie)
Met de inslaapfunctie wordt het apparaat na een tijd tussen 5 en 90 minuten
vanzelf uitgeschakeld.
Druk op de toets AOT / Dimmer
♦
10
of de AOT Dimmer-toets
46
op de
afstandsbediening om de functie op te roepen. De actueel resterende tijd tot
aan het uitschakelen van de radio wordt getoond.
Druk nogmaals op de toets AOT / Dimmer ♦
10
of de AOT Dimmer-toets
46
op de afstandsbediening om de gewenste tijd in te stellen. Na ca. 15
seconden gaat het apparaat weer over op weergave van de gekozen
bedrijfsstand.
OPMERKING
De instelbare tijd loopt van 90 tot 5 minuten. De instelling vindt plaats in ►
stappen van 5 minuten. Daarna verschijnt de indicatie .
Bij de indicatie is de inslaapfunctie uitgeschakeld.
Als het apparaat zich in de bedrijfsstand Klok / stand-by bevindt, schakelt ►
u door een druk op de toets AOT / Dimmer
10
of de AOT Dimmer-toets
46
op de afstandsbediening de laatst gekozen stand van het apparaat
(Radio / iPod / AUX) weer in.
Displaydimmer handmatig in-/uitschakelen
Houd de toets AOT / Dimmer ♦
10
of de AOT Dimmer-toets
46
op de af-
standsbediening ingedrukt tot op het display
de actuele instelling van
de displaydimmer wordt weergegeven ( of ).
Houd de toets AOT / Dimmer
♦
10
of de AOT Dimmer-toets
46
op de
afstandsbediening nogmaals ingedrukt om de actuele instelling te wijzigen
(zie ook het hoofdstuk Tijdgestuurd dimmen van het display in-/
uitschakelen S. 52). Na ca. 15 seconden wordt de laatst gebruikte
displayweergave opnieuw weergegeven.
IB_63920_SKRI2000A1_LB2.indb Abs3:66 17.01.2012 12:05:20 Uhr

67
Reiniging/Problemen oplossen
SKRI 2000 A1
NL
BE
Reiniging
Veiligheidsvoorschriften
GEVAAR
Levensgevaar door elektrische stroom!
Haal de stekker van de netvoedingsadapter uit het stopcontact voordat u met ►
de reiniging begint.
LET OP
Beschadiging van het apparaat!
Let erop, dat er bij het schoonmaken geen vocht in het apparaat indringt, ►
om onherstelbare schade aan het apparaat te vermijden.
Behuizing schoonmaken
Reinig de oppervlakken van het apparaat met een zachte, droge doek. ■
Problemen oplossen
In dit hoofdstuk krijgt u belangrijke aanwijzingen over het lokaliseren van storin-
gen en verhelpen van storingen. Neem de aanwijzingen in acht om gevaren en
beschadigingen te voorkomen.
Veiligheidsvoorschriften
WAARSCHUWING
Neem de volgende veiligheidsinstructies in acht om gevaren en materiële
schade te voorkomen:
Reparaties aan elektrische apparatuur mogen alleen worden uitgevoerd
►
door vakmensen, die door de fabrikant zijn geschoold. Door onvakkundige
reparaties kunnen aanzienlijke gevaren optreden voor de gebruiker en kan
er schade ontstaan aan het apparaat.
IB_63920_SKRI2000A1_LB2.indb Abs3:67 17.01.2012 12:05:21 Uhr

68
Problemen oplossen
SKRI 2000 A1
NL
BE
Oorzaken van storingen en storingen verhelpen
De navolgende tabel helpt bij de lokalisering en het verhelpen van kleinere
storingen:
Probleem Mogelijke oorzaak Oplossing
Het display geeft
niets aan.
De netvoedingsadapter
15
is niet aangesloten.
Sluit de netvoedingsadapter
15
aan
op het stopcontact.
Stopcontact levert geen
stroom.
Controleer de huiszekeringen.
Geen geluid
Het volume staat op mini-
mum.
Verhoog het volume met de toets
Vol+
3
.
Het apparaat staat in de
bedrijfsstand Klok / stand-by.
Schakel het apparaat met de toets
Power
6
in op de bedrijfsstand
Radio / iPod / Aux/.
De weergave van het
externe audio-apparaat is
niet gestart.
Start de weergave op het externe
audio-apparaat.
De weergave van de iPod /
iPhone is niet gestart.
Start de weergave op de iPod /
iPhone.
De iPod / das iPhone is niet
correct in het station
29
geplaatst
Plaats de iPod / iPhone correct in het
station
29
.
Storende geluiden
bij de radio-
ontvangst
De zender is niet correct
ingesteld.
Stel de zender correct in met de toet-
sen
/ Up
17
en
i
i
/ Down
19
.
De ontvangst is te zwak.
Probeer door bewegen van de
draadantenne
27
de ontvangst te
verbeteren.
iPod / iPhone
wordt niet opge-
laden
De iPod / das iPhone is niet
correct in het station
29
geplaatst
Plaats de iPod / iPhone correct in het
station
29
.
Alarm met iPod /
iPhone heeft niet
gewerkt
De geselecteerde afspeellijst
op de iPod / iPhone is leeg.
Zorg ervoor dat de afspeellijst muziek
bevat.
OPMERKING
Als u met de eerdergenoemde stappen het probleem niet kunt verhelpen, ►
neem dan a.u.b. contact op met de klantenservice.
IB_63920_SKRI2000A1_LB2.indb Abs3:68 17.01.2012 12:05:22 Uhr

69
Opbergen/Afvoeren/Appendix
SKRI 2000 A1
NL
BE
Opbergen / Afvoeren
Opbergen
Mocht u het apparaat langere tijd niet gebruiken, ontkoppelt u het van de stroom-
voorziening, haalt u de batterijen eruit en bewaart u het op een schone, droge
plaats zonder directe instraling door de zon.
Apparaat afvoeren
Deponeer het apparaat in geen geval bij het normale huisvuil.
Dit product is onderworpen aan de Europese richtlijn 2002/96/EC-
WEEE (Waste Electrical and Electronic Equipment).
Voer het apparaat af via een erkend afvalverwerkingsbedrijf of via uw gemeente-
reiniging. Neem de momenteel geldende voorschriften in acht. Neem in geval
van twijfel contact op met uw gemeentereinigingsdienst.
Batterijen afvoeren
Batterijen mogen niet bij het normale huisvuil worden gedeponeerd. Iedere
consument is wettelijk verplicht, batterijen af te geven bij een inzamelpunt in zijn
gemeente / zijn stadsdeel of in de handel. Deze verplichting dient ertoe, dat bat-
terijen om een milieuvriendelijke wijze afgevoerd kunnen worden. Geef batterijen
alleen terug in lege toestand.
Appendix
Voorschriften voor de conformiteitsverklaring
Dit apparaat voldoet met betrekking tot overeenstemming
aan de fundamentele eisen en de andere relevante voorschrif-
ten van de richtlijn voor elektromagnetische compatibiliteit
2004/108/EC, de laagspanningsrichtlijn 2006/95/EC,
evenals de richtlijn eco-design 2009/125/EC (Verordening
1275/2008 Lid II, nr. 1).
De volledige originele conformiteitsverklaring is te verkrijgen
bij de importeur.
IB_63920_SKRI2000A1_LB2.indb Abs3:69 17.01.2012 12:05:23 Uhr

70
Appendix
SKRI 2000 A1
NL
BE
Technische gegevens
Netvoedingsadapter
Fabrikant Fai Shing Industries Ltd.
Model JVSW0702000
Ingangsspanning, -stroom 100-240 V
~
50/60 Hz, 350 mA
Uitgangsspanning, -stroom 7 V
, 2 A
Beschermingsklasse
II /
Apparaat
Ingangsspanning, -stroom 7 V , 2 A
Batterij voor gegevensopslag
1 x 3 V type CR2032
(inbegrepen in de levering)
Batterij voor afstandsbediening
1 x 3 V type CR2025
(inbegrepen in de levering)
Vermogen
Bedrijf ca. 5 W
Stand-by ca. 1,8 W
Uitgangsvermogen luidsprekers ca. 2 x 1W (bij 10% vervormingsfactor)
Frequentiebereik radio (UKW) 87,5 - 108 MHz
Bedrijfstemperatuur +5 - +40 °C
Vochtigheid (geen condensatie) 5 - 90 %
Afmetingen (b x h x d)
(zonder standvoet)
ca. 30 x 15,7 x 8,4 cm
Gewicht ca. 1070 g
IB_63920_SKRI2000A1_LB2.indb Abs3:70 17.01.2012 12:05:23 Uhr

71
Appendix
SKRI 2000 A1
NL
BE
Garantie
U heeft op dit apparaat 3 jaar garantie vanaf de aankoopdatum. Het apparaat
is met de grootst mogelijke zorg vervaardigd en voorafgaand aan de levering
nauwkeurig gecontroleerd.
Bewaar a.u.b. de kassabon als aankoopbewijs. Mocht u aanspraak willen
maken op de garantie, neem dan telefonisch contact op met uw serviceadres.
Alleen op die manier is een kosteloze verzending van uw product gegarandeerd.
OPMERKING
De garantie geldt alleen voor materiaal- of fabricagefouten, echter niet ►
voor transportschade, of voor onderdelen die aan slijtage onderhevig zijn,
of voor beschadigingen aan breekbare delen, bijv. schakelaars of accu's.
Het product is uitsluitend bestemd voor privé-gebruik en niet voor bedrijfsmatige
doeleinden. Bij verkeerd gebruik en ondeskundige behandeling, bij gebruik
van geweld en bij reparaties die niet door ons geautoriseerd servicefi liaal zijn
uitgevoerd, vervalt de garantie.
Uw wettelijke rechten worden door deze garantie niet beperkt. De garantiepe-
riode wordt niet verlengd door de aansprakelijkheid. Dit geldt eveneens voor
vervangen en gerepareerde onderdelen.
Schade en gebreken die mogelijk reeds bij de aankoop aanwezig zijn, moeten
direct na het uitpakken worden gemeld, uiterlijk echter twee dagen na de dag
van aankoop.
Na verstrijken van de garantieperiode moeten alle voorkomende reparaties
vergoed worden.
Service
Service Nederland
Tel.: 0900 0400223 (0,10 EUR/Min.)
E-Mail: k[email protected]
IAN 63920
Service België
Tel.: 070 270 171 (0,15 EUR/Min.)
E-Mail: k[email protected]
IAN 63920
Importeur
KOMPERNASS GMBH
BURGSTRASSE 21
44867 BOCHUM, GERMANY
www.kompernass.com
IB_63920_SKRI2000A1_LB2.indb Abs3:71 17.01.2012 12:05:24 Uhr

72
SKRI 2000 A1
IB_63920_SKRI2000A1_LB2.indb Abs3:72 17.01.2012 12:05:24 Uhr

73
SKRI 2000 A1
DE
AT
CH
Inhaltsverzeichnis
Einführung . . . . . . . . . . . . . . .74
Informationen zu dieser
Bedienungsanleitung . . . . . . . . . . .74
Urheberrecht. . . . . . . . . . . . . . . . . .74
Bestimmungsgemäße Verwendung 74
Warnhinweise . . . . . . . . . . . . . . . . .75
Sicherheit . . . . . . . . . . . . . . .76
Gefahr durch elektrischen Strom . .76
Umgang mit Batterien . . . . . . . . . . .76
Grundlegende Sicherheitshinweise 77
Bedienelemente . . . . . . . . . .78
Aufstellen und Anschließen .80
Sicherheitshinweise . . . . . . . . . . . . .80
Lieferumfang und Transportinspektion .80
Auspacken . . . . . . . . . . . . . . . . . . .80
Entsorgung der Verpackung . . . . . .81
Anforderungen an den Aufstellort .81
Elektrischer Anschluss . . . . . . . . . . .81
Gerätebatterie . . . . . . . . . . . . . . . .82
Fernbedienungsbatterie . . . . . . . . .82
Anbringung unter einem
Hängeschrank . . . . . . . . . . . . . . . .83
Demontage . . . . . . . . . . . . . . . . . . .84
Aufstellen des Gerätes . . . . . . . . . .84
Station für iPod/iPhone vorbereiten 84
Stromversorgung herstellen . . . . . . .84
UKW-Wurfantenne . . . . . . . . . . . . .84
Bedienung und Betrieb . . . .85
Ein- und Ausschalten . . . . . . . . . . . .85
Grundeinstellungen . . . . . . . . . . . .85
Einstellmenü aktivieren . . . . . . . . . .86
Alarm programmieren . . . . . . . . . .90
Küchentimer . . . . . . . . . . . . . . . . . .93
Küchentimer programmieren. . . . . .94
Radiobetrieb . . . . . . . . . . . . . . . . . .95
Wiedergabe von externen
Audiogeräten . . . . . . . . . . . . . . . . .98
Anschluss iPod/iPhone . . . . . . . . . .98
Weitere Funktionen . . . . . . . . . . . .100
Reinigung . . . . . . . . . . . . . 103
Sicherheitshinweise . . . . . . . . . . . .103
Gehäuse reinigen . . . . . . . . . . . . .103
Fehlerbehebung . . . . . . . . 103
Sicherheitshinweise . . . . . . . . . . . .103
Fehlerursachen und -behebung . .104
Lagerung/Entsorgung . . . 105
Lagerung . . . . . . . . . . . . . . . . . . .105
Gerät entsorgen . . . . . . . . . . . . . .105
Batterien entsorgen . . . . . . . . . . . .105
Anhang . . . . . . . . . . . . . . . 105
Hinweise zur
EG-Konformitätserklärung . . . . . . .105
Technische Daten . . . . . . . . . . . . .106
Garantie . . . . . . . . . . . . . . . . . . . .107
Service . . . . . . . . . . . . . . . . . . . . .107
Importeur . . . . . . . . . . . . . . . . . . .107
IB_63920_SKRI2000A1_LB2.indb 73 17.01.2012 12:05:24 Uhr

74
Einführung
SKRI 2000 A1
DE
AT
CH
Einführung
Informationen zu dieser Bedienungsanleitung
Diese Bedienungsanleitung ist Bestandteil des Unterbau-Radios SKRI 2000 A1
(nachfolgend als Gerät bezeichnet) und gibt Ihnen wichtige Hinweise für den
bestimmungsgemäßen Gebrauch, die Sicherheit, den Anschluss sowie die
Bedienung des Gerätes.
Die Bedienungsanleitung muss ständig in der Nähe des Gerätes verfügbar sein.
Sie ist von jeder Person zu lesen und anzuwenden, die mit der Bedienung und
Störungsbehebung des Gerätes beauftragt ist.
Bewahren Sie diese Bedienungsanleitung auf und geben Sie diese mit dem
Gerät an Nachbesitzer weiter.
Urheberrecht
Diese Dokumentation ist urheberrechtlich geschützt. Jede Vervielfältigung, bzw.
jeder Nachdruck, auch auszugsweise, sowie die Wiedergabe der Abbildungen,
auch im veränderten Zustand ist nur mit schriftlicher Zustimmung des Herstellers
gestattet.
Bestimmungsgemäße Verwendung
Dieses Gerät ist nur zum Empfang von UKW-Radioprogrammen, als Küchentimer,
zum Alarmgeben durch Alarmton, Radio oder iPod/iPhone und zum Anschluss
von externen Audiogeräten (z.B. MP3-Player) und iPod/iPhone in geschlossenen
Räumen bestimmt. Das Gerät ist zur freien Aufstellung oder zur Montage unter
einem Hängeschrank bestimmt. Hierzu müssen die integrierten Stellfüße bzw.
die mitgelieferte Montageplatte verwendet werden. Eine andere oder darüber
hinausgehende Benutzung gilt als nicht bestimmungsgemäß. Das Gerät ist nicht
zur Verwendung in gewerblichen oder industriellen Bereichen vorgesehen.
Ansprüche jeglicher Art wegen Schäden aus nicht bestimmungsgemäßer Verwen-
dung, unsachgemäßen Reparaturen, unerlaubt vorgenommener Veränderungen
oder Verwendung nicht zugelassener Ersatzteile sind ausgeschlossen. Das Risiko
trägt allein der Benutzer.
„Made for iPod“ und „Made for iPhone“ bedeutet, dass ein elektronisches Zube-
hörteil speziell für den Anschluss an einen iPod oder ein iPhone konzipiert wurde
und der Entwickler sich dafür verbürgt, dass das Gerät den Leistungsstandards von
Apple entspricht. Apple ist nicht verantwortlich für den Betrieb dieses Gerätes oder
dafür, dass es Sicherheits- und Regulierungsstandards einhält. Beachten Sie, dass
die Verwendung dieses Zubehörteils mit einem iPod, iPhone die drahtlose Leistung
beeinfl ussen kann. iPad, iPhone, iPod, iPod classic, iPod nano, iPod shuffl e und
iPod touch sind Warenzeichen der Apple Inc., eingetragen in den USA und anderen
Ländern. iPad ist ein Warenzeichen der Apple Inc.
IB_63920_SKRI2000A1_LB2.indb Abs1:74 17.01.2012 12:05:24 Uhr

75
Einführung
SKRI 2000 A1
DE
AT
CH
Warnhinweise
In der vorliegenden Bedienungsanleitung werden folgende Warnhinweise verwendet:
GEFAHR
Ein Warnhinweis dieser Gefahrenstufe kennzeichnet eine
drohende gefährliche Situation.
Falls die gefährliche Situation nicht vermieden wird, kann dies zum Tod oder
zu schweren Verletzungen führen.
Die Anweisungen in diesem Warnhinweis befolgen, um die Gefahr des
►
Todes oder schwerer Verletzungen von Personen zu vermeiden.
WARNUNG
Ein Warnhinweis dieser Gefahrenstufe kennzeichnet eine
mögliche gefährliche Situation.
Falls die gefährliche Situation nicht vermieden wird, kann dies zu Verletzungen
führen.
Die Anweisungen in diesem Warnhinweis befolgen, um Verletzungen von
►
Personen zu vermeiden.
ACHTUNG
Ein Warnhinweis dieser Gefahrenstufe kennzeichnet einen
möglichen Sachschaden.
Falls die Situation nicht vermieden wird, kann dies zu Sachschäden führen.
Die Anweisungen in diesem Warnhinweis befolgen, um Sachschäden zu
►
vermeiden.
HINWEIS
Ein Hinweis kennzeichnet zusätzliche Informationen, die den Umgang mit ►
dem Gerät erleichtern.
IB_63920_SKRI2000A1_LB2.indb Abs4:75 17.01.2012 12:05:25 Uhr

76
Sicherheit
SKRI 2000 A1
DE
AT
CH
Sicherheit
In diesem Kapitel erhalten Sie wichtige Sicherheitshinweise im Umgang mit
dem Gerät.
Dieses Gerät entspricht den vorgeschriebenen Sicherheitsbestimmungen.
Ein unsachgemäßer Gebrauch kann zu Personen- und Sachschäden führen.
Gefahr durch elektrischen Strom
GEFAHR
Lebensgefahr durch elektrischen Strom!
Beim Kontakt mit unter Spannung stehenden Leitungen oder
Bauteilen besteht Lebensgefahr!
Beachten Sie die folgenden Sicherheitshinweise um eine Gefährdung durch
elektrischen Strom zu vermeiden:
Benutzen Sie das Gerät nicht, wenn das Steckernetzteil, das Anschlusskabel
►
oder der Anschlussstecker beschädigt sind.
Öff nen Sie auf keinen Fall das Steckernetzteil. Werden spannungsführende ►
Anschlüsse berührt und der elektrische und mechanische Aufbau verändert,
besteht Stromschlaggefahr.
Umgang mit Batterien
WARNUNG
Gefahr durch nicht ordnungsgemäße Verwendung! Es besteht
Explosions- und Auslaufgefahr!
Für den sicheren Umgang mit Batterien beachten Sie folgende Sicherheitshinweise:
Werfen Sie Batterien nicht ins Feuer.
►
Schließen Sie Batterien nicht kurz. ►
Versuchen Sie nicht Batterien wieder aufzuladen. ►
Überprüfen Sie regelmäßig die Batterien. Ausgetretene Batteriesäure kann ►
dauerhafte Schäden am Gerät verursachen. Im Umgang mit beschädigten
oder ausgelaufen Batterien besondere Vorsicht walten lassen. Verätzungs-
gefahr! Schutzhandschuhe tragen.
Batterien für Kinder unzugänglich aufbewahren. Bei Verschlucken umgehend ►
einen Arzt aufsuchen.
Entnehmen Sie die Batterien, wenn Sie das Gerät längere Zeit nicht benutzen. ►
IB_63920_SKRI2000A1_LB2.indb Abs3:76 17.01.2012 12:05:25 Uhr

77
Sicherheit
SKRI 2000 A1
DE
AT
CH
Grundlegende Sicherheitshinweise
Beachten Sie für einen sicheren Umgang mit dem Gerät die folgenden
Sicherheitshinweise:
Kontrollieren Sie das Gerät vor der Verwendung auf äußere sichtbare Schäden.
■
Nehmen Sie ein beschädigtes oder heruntergefallenes Gerät nicht in Betrieb.
Bei Beschädigung der Kabel oder Anschlüsse lassen Sie diese von autorisiertem
■
Fachpersonal oder dem Kundenservice austauschen.
Dieses Gerät ist nicht dafür bestimmt, durch Personen (einschließlich Kinder)
■
mit eingeschränkten physischen, sensorischen oder geistigen Fähigkeiten
oder mangels Erfahrung und/oder mangels Wissen benutzt zu werden, es
sei denn, sie werden durch eine für ihre Sicherheit zuständige Person beauf-
sichtigt oder erhielten von ihr Anweisungen, wie das Gerät zu benutzen ist.
Kinder sollten beaufsichtigt werden, um sicherzustellen, dass sie nicht mit
■
dem Gerät spielen.
Lassen Sie Reparaturen am Gerät nur von autorisierten Fachbetrieben oder
■
dem Kundenservice durchführen. Durch unsachgemäße Reparaturen können
Gefahren für den Benutzer entstehen. Zudem erlischt der Garantieanspruch.
Eine Reparatur des Gerätes während der Garantiezeit darf nur von einem vom
■
Hersteller autorisierten Kundendienst vorgenommen werden, sonst besteht bei
nachfolgenden Schäden kein Garantieanspruch mehr.
Defekte Bauteile dürfen nur gegen Original-Ersatzteile ausgetauscht werden.
■
Nur bei diesen Teilen ist gewährleistet, dass sie die Sicherheitsanforderungen
erfüllen werden.
Schützen Sie das Gerät vor Feuchtigkeit und dem Eindringen von Flüssigkeiten.
■
Tauchen Sie das Gerät niemals unter Wasser, stellen Sie das Gerät nicht in der
Nähe von Wasser auf und stellen Sie keine mit Flüssigkeit gefüllten Gegen-
stände (z.B. Vasen) auf das Gerät.
Stellen Sie keine Gegenstände auf das Gerät.
■
Das Gerät nicht in der Nähe von off enen Flammen (z.B. Kerzen) betreiben. ■
Vermeiden Sie direkte Sonneneinstrahlung. ■
Die Zuleitung immer am Steckernetzteil aus der Steckdose ziehen, nicht am ■
Anschlusskabel.
Ziehen Sie bei auftretenden Störungen und bei Gewitter das Steckernetzteil
■
aus der Steckdose.
IB_63920_SKRI2000A1_LB2.indb Abs3:77 17.01.2012 12:05:25 Uhr

78
Bedienelemente
SKRI 2000 A1
DE
AT
CH
Bedienelemente
(Abbildungen siehe vordere Ausklappseite Bild A)
Display
2
User: Benutzer wählen
3
Vol+: Lautstärke erhöhen
4
Mem: Speicherplatzwahl
5
Vol–: Lautstärke senken
6
Power: Ein-/ausschalten
7
Function / ST: Funktionswahl / Stereoaktivierung
8
Timer: Timer einstellen und aktivieren
9
Alarm Mode: Alarmart auswählen
10
AOT / Dimmer: Ausschalttimer / Displaydimmer ein-/ausschalten
11
Mode / Lock: Einstellmenü aufrufen / Tastensperre
12
i-Time Sync
i-Time Sync
Bass: Zeitanzeige und Datum mit iPod/iPhone synchronisieren / Bass-
anhebung
13
I Enter
I Enter
: Bedienung beim iPod/iPhone / Eingabe
14
i
i
/ Memory Scan: Pause/Abspielen beim iPod/iPhone / automatischer Sender-
suchlauf / gespeicherte Radiosender abrufen
15
Steckernetzteil
16
i
i
/ Pr– / AL2: Vorherige Funktion beim iPod/iPhone / Vorherigen Speicherplatz
anwählen / Alarm 2 einstellen
17
/ Up: Schneller Vorlauf beim iPod/iPhone / Empfangsfrequenz erhöhen
18
i
i
/ Pr+ / AL1: Nächste Funktion beim iPod/iPhone / Nächsten Speicherplatz
anwählen / Alarm 1 einstellen
19
i
i
/ Down: Schneller Rücklauf beim iPod/iPhone / Empfangsfrequenz senken
20
Montageplatte
21
Stellfüße (ausklappbar)
22
Sicherungsbügel für iPod/iPhone
23
Lautsprecher
24
Batteriefach
25
DC-Buchse: Stromanschlussbuchse (7V) für Steckernetzteil
26
AUX IN-Buchse: Eingangs-Anschlussbuchse für Audiogeräte mit 3,5mm Klinkenstecker
27
Wurfantenne für UKW-Empfang
IB_63920_SKRI2000A1_LB2.indb Abs3:78 17.01.2012 12:05:26 Uhr

79
Bedienelemente
SKRI 2000 A1
DE
AT
CH
(Abbildungen siehe vordere Ausklappseite Bild B)
28
Abstandshalter (für Unterbaumontage)
29
Station für iPod/iPhone
30
: Ein-/ausschalten
31
User: Benutzer wählen
32
i / Down: Schneller Rücklauf beim iPod/iPhone / Empfangsfrequenz senken
33
i : Pause/Abspielen beim iPod/iPhone
34
iMenu / Enter: Bedienung beim iPod/iPhone / Eingabe
35
Mem: Speicherplatzwahl
36
Memory-Scan: automatischer Sendersuchlauf / gespeicherte Radiosender abrufen
37
Timer: Timer einstellen und aktivieren
38
Function / ST: Funktionswahl / Stereoaktivierung Mode: Einstellmenü
39
Vol +: Lautstärke erhöhen
40
i
/ Pr+: Nächste Funktion beim iPod/iPhone / Nächsten Speicherplatz anwählen
41
Vol -: Lautstärke senken
42
i / Up: Schneller Vorlauf beim iPod/iPhone / Empfangsfrequenz erhöhen
43
iTime Sync / Bass: Zeitanzeige und Datum mit iPod/iPhone synchronisieren / Bass-
anhebung
44
i
i
/ Pr–: Vorherigen Speicherplatz anwählen / Vorherige Funktion beim iPod/iPhone
45
Mode / Lock: Einstellmenü aufrufen / Tastensperre
46
AOT / Dimmer: Ausschalttimer / Displaydimmer ein-/ausschalten
47
Alarm: Alarmart auswählen
48
Sensor für Fernbedienung
IB_63920_SKRI2000A1_LB2.indb Abs3:79 17.01.2012 12:05:29 Uhr

80
Aufstellen und Anschließen
SKRI 2000 A1
DE
AT
CH
Aufstellen und Anschließen
Sicherheitshinweise
WARNUNG
Bei der Inbetriebnahme des Gerätes können Personen- und
Sachschäden auftreten!
Beachten Sie die folgenden Sicherheitshinweise, um die Gefahren zu vermeiden:
Verpackungsmaterialien dürfen nicht zum Spielen verwendet werden.
►
Es besteht Erstickungsgefahr.
Beachten Sie die Hinweise zu den Anforderungen an den Aufstellort sowie
►
zum elektrischen Anschluss des Gerätes, um Personen- und Sachschäden
zu vermeiden.
Lieferumfang und Transportinspektion
Das Gerät wird standardmäßig mit folgenden Komponenten geliefert:
Unterbau-Radio SKRI 2000 A1
▯
Steckernetzteil JVSW0702000 ▯
Montageplatte ▯
4 Befestigungsschrauben (kurz) ▯
2 x Abstandshalter inkl. 4 Befestigungsschrauben (lang) ▯
Sicherungsbügel für iPod/iPhone ▯
1 x Batterie 3 V Typ CR2032 ▯
1 x Batterie 3 V Typ CR2025 ▯
Fernbedienung ▯
Klinke-Kabel 3,5 auf 3,5 mm (50 cm) ▯
Diese Bedienungsanleitung ▯
HINWEIS
Prüfen Sie die Lieferung auf Vollständigkeit und auf sichtbare Schäden. ►
Bei einer unvollständigen Lieferung oder Schäden infolge mangelhafter ►
Verpackung oder durch Transport wenden Sie sich an die Service-Hotline
(siehe Kapitel Service S. 107).
Auspacken
Entnehmen Sie alle Teile des Gerätes und die Bedienungsanleitung aus dem ♦
Karton.
Entfernen Sie sämtliches Verpackungsmaterial.
♦
IB_63920_SKRI2000A1_LB2.indb Abs3:80 17.01.2012 12:05:31 Uhr

81
Aufstellen und Anschließen
SKRI 2000 A1
DE
AT
CH
Entsorgung der Verpackung
Die Verpackung schützt das Gerät vor Transportschäden. Die Verpackungsmate-
rialien sind nach umweltverträglichen und entsorgungstechnischen Gesichtspunkten
ausgewählt und deshalb recyclebar.
Die Rückführung der Verpackung in den Materialkreislauf spart Rohstoff e und
verringert das Abfallaufkommen. Entsorgen Sie nicht mehr benötigte Verpackungs-
materialien gemäß den örtlich geltenden Vorschriften.
HINWEIS
Heben Sie wenn möglich die Originalverpackung während der Garantiezeit ►
des Gerätes auf, um das Gerät im Garantiefall ordnungsgemäß verpacken
zu können.
Anforderungen an den Aufstellort
Für einen sicheren und fehlerfreien Betrieb des Gerätes muss der Aufstellort
folgende Voraussetzungen erfüllen:
Bei Aufstellung des Gerätes das Gerät auf eine feste, fl ache und waagerechte
■
Unterlage stellen. Verwenden Sie die ausklappbaren Stellfüße.
Das Gerät so aufstellen oder montieren, dass vorhandene Lüftungsöff nungen
■
und die Lautsprecher nicht verdeckt werden.
Betreiben Sie das Gerät nicht in einer heißen, nassen oder sehr feuchten
■
Umgebung oder in der Nähe von brennbarem Material.
Montieren Sie das Gerät nicht direkt über einer Kochstelle.
■
Die Steckdose muss leicht zugänglich sein, so dass das Steckernetzteil ■
notfalls leicht abgezogen werden kann.
Elektrischer Anschluss
Das Gerät wird über das mitgelieferte Steckernetzteil mit einer Gleichspannung ■
von 7V versorgt. Schließen Sie das Gerät ausschließlich über das mitgelieferte
Steckernetzteil an die Stromversorgung an.
Vergleichen Sie vor dem Anschließen des Gerätes die Anschlussdaten des
■
Steckernetzteils (Spannung und Frequenz) auf dem Typenschild mit denen Ihres
Elektronetzes. Diese Daten müssen übereinstimmen, damit keine Schäden am
Gerät auftreten.
Schützen Sie das Anschlusskabel vor heißen Oberfl ächen und scharfen Kanten.
■
Achten Sie darauf, dass das Anschlusskabel nicht straff gespannt oder ■
geknickt wird.
Lassen Sie das Anschlusskabel nicht über Ecken hängen (Stolperdrahteff ekt).
■
Wenn Sie das Gerät für längere Zeit nicht nutzen, trennen Sie das Stecker- ■
netzteil von der Stromversorgung.
IB_63920_SKRI2000A1_LB2.indb Abs3:81 17.01.2012 12:05:31 Uhr

82
Aufstellen und Anschließen
SKRI 2000 A1
DE
AT
CH
Gerätebatterie
Durch Einlegen der Batterie vermeiden Sie, dass bei einem möglichen Netzausfall
die programmierte Uhrzeit, programmierte Speicherplätze und Alarmzeiten
verloren gehen. Die Batterie bewirkt, dass die interne Uhr und das Datum auch
während des Netzausfalls weiterlaufen. Bei Wiedereinschalten des Netzstroms
erscheint auf dem Display
automatisch die korrekte Zeit.
HINWEIS
Das Gerät kann auch ohne Batterie betrieben werden. ►
Batterie einlegen/wechseln
Öff nen Sie die Abdeckung des Batteriefachs ♦
24
auf der Geräteunterseite,
indem Sie die Abdeckung mit einer Münze bis zum Anschlag nach links
drehen und abheben.
Legen Sie die Batterie vom Typ CR2032 (im Lieferumfang enthalten) in das
♦
Batteriefach ein. Die Seite mit der Markierung + zeigt nach oben.
Schließen Sie das Batteriefach, indem Sie die Abdeckung aufsetzen und die
♦
Abdeckung mit einer Münze nach rechts drehen.
Fernbedienungsbatterie
Batterie aktivieren
Die Batterie für die Fernbedienung ist bei Auslieferung bereits eingelegt.
Aktivieren Sie die Batterie, indem Sie den Isolationsstreifen entfernen. ♦
Batterie wechseln
Drücken Sie mit dem Fingernagel die Kerbe (A) ♦
nach rechts und ziehen Sie gleichzeitig das
Batteriefach heraus.
Legen Sie eine 3 V Batterie vom Typ CR 2025
♦
in das Batteriefach ein. Die Seite mit der Markie-
rung „+“ zeigt nach oben.
Schieben Sie das Batteriefach wieder ganz in
♦
die Fernbedienung ein.
IB_63920_SKRI2000A1_LB2.indb Abs3:82 17.01.2012 12:05:32 Uhr

83
Aufstellen und Anschließen
SKRI 2000 A1
DE
AT
CH
Anbringung unter einem Hängeschrank
Sie können das Gerät mit der mitgelieferten Montageplatte
20
z.B. unter einem
Hängeschrank montieren. Zur Montage des Gerätes gehen Sie wie folgt vor:
Schieben Sie die Montageplatte
♦
20
nach hinten und nehmen Sie die
Montageplatte
20
ab.
Suchen Sie eine geeignete Anbaustelle für das Gerät aus (siehe auch
♦
Kapitel Anforderungen an den Aufstellort S. 81).
Halten Sie die Montageplatte
♦
20
unter die Anbaustelle. Dabei sollte sich
die Vorderkante der Montageplatte
20
ca. 6,8 cm hinter der Front des
Hängeschrankes befi nden, damit das Gerät nach der Montage bündig mit
dem Hängeschrank abschließt. Die Seitenkanten der Montageplatte
20
müssen einen Abstand von ca. 4,5 cm zu angrenzenden Schränken oder
Wänden haben.
HINWEIS
Wenn Sie das Gerät linksbündig an einem angrenzenden Schrank bzw. einer ►
Wand montieren möchten, entfernen Sie vorher den Sicherungsbügel
22
vom Gerät.
Markieren Sie die 4 Befestigungspunkte mit einem Stift.
♦
Erzeugen Sie mit einem Dorn oder Nagel jeweils eine kleine Vertiefung an ♦
den Markierungen.
Setzen Sie wahlweise die mitgelieferten Abstandshalter
♦
28
mit der Haltenase
in die jeweilige Vertiefung auf der Montageplatte
20
.
Schrauben Sie die Montageplatte ♦
20
mit den mitgelieferten Schrauben fest
(siehe Abbildung).
IB_63920_SKRI2000A1_LB2.indb Abs3:83 17.01.2012 12:05:33 Uhr

84
Aufstellen und Anschließen
SKRI 2000 A1
DE
AT
CH
Setzen Sie das Gerät schräg mit den vorderen Aussparungen in der Ober- ♦
seite des Gerätes in die Montageplatte
20
ein. Drücken Sie den hinteren
Teil des Gerätes nach oben gegen die Montageplatte
20
, bis das Gerät
hörbar einrastet.
Prüfen Sie den sicheren Sitz des Gerätes.
♦
Demontage
Ziehen Sie das Gerät nach vorne und nehmen Sie das Gerät nach unten ab. ♦
Drehen Sie die Schrauben an der Montageplatte ♦
20
heraus und nehmen
Sie die Montageplatte
20
ab.
Aufstellen des Gerätes
Sie können das Gerät alternativ auch aufstellen. Um bei der Aufstellung die
Lüftungsschlitze und die Lautsprecher
23
an der Geräteunterseite nicht zu verde-
cken, müssen die beiden Stellfüße
21
des Gerätes ausgeklappt werden:
Greifen Sie in die Mulde an der Seite des jeweiligen Stellfußes und klappen
♦
Sie den Stellfuß bis zum Anschlag aus.
Suchen Sie einen geeigneten Aufstellort für das Gerät aus (siehe auch
♦
Kapitel Anforderungen an den Aufstellort S. 81).
Station für iPod/iPhone vorbereiten
Sie können Ihren iPod/Ihr iPhone an das Gerät anschließen. Dazu müssen Sie
die Station
29
herunterklappen und den Sicherungsbügel
22
montieren:
Klappen Sie die Station
♦
29
ganz nach unten.
Entfernen Sie den Sicherungsbügel
♦
22
von der Seite des Gerätes.
An den Seiten der Station
♦
29
befi ndet sich jeweils eine Aussparung. Schieben
Sie den Sicherungsbügel
22
von vorn so auf die Station
29
, dass die Halte-
nasen in den Aussparungen einrasten.
Stromversorgung herstellen
Schließen Sie den Anschlussstecker des Steckernetzteils ♦
15
an die DC-Buchse
25
auf der Rückseite des Gerätes an.
Stecken Sie das Steckernetzteil
♦
15
in die Steckdose.
UKW-Wurfantenne
Wickeln Sie die Wurfantenne ♦
27
für den UKW-Empfang ganz ab.
IB_63920_SKRI2000A1_LB2.indb Abs3:84 17.01.2012 12:05:38 Uhr

85
Bedienung und Betrieb
SKRI 2000 A1
DE
AT
CH
Bedienung und Betrieb
In diesem Kapitel erhalten Sie wichtige Hinweise zur Bedienung und Betrieb des
Gerätes.
Ein- und Ausschalten
Nach dem Anschließen des Gerätes an die Stromversorgung startet die automatische
Systemeinstellung. Auf dem Display
erscheint für ca. 3 bis 5 Minuten der Text
„PLEASE WAIT FOR SETTING THANKS“. Wird in dieser Zeit ein Signal empfangen,
wird das System automatisch aktualisiert.
HINWEIS
Um diesen Vorgang abzubrechen, drücken Sie eine beliebige Taste. ►
Das System startet dann mit folgenden Standardeinstellungen:
Datum/Zeit:
■
Radio ist ausgeschaltet ■
Betriebsart Uhr/Standby-Betrieb ist aktiv ■
Displaydimmer ist aktiv ■
Mit dem Anschluss an die Stromversorgung schaltet das Gerät in den Uhr/Standby-
Betrieb. Über die Taste
Power
6
oder die -Taste
30
auf der Fernbedienung
wird das Gerät ein- bzw. ausgeschaltet.
Über die Taste Function / ST
7
oder die Taste Function / ST
38
auf der Fernbedie-
nung schalten Sie zwischen den Betriebsarten Radio, iPod und AUX hin und her.
HINWEIS
Die Taste ► Power
6
oder die -Taste
30
auf der Fernbedienung tren-
nen das Gerät nicht vollständig vom Stromnetz. Das Gerät verbraucht auch
im Standby-Betrieb Strom. Um das Gerät vollständig vom Stromnetz zu
trennen, muss das Steckernetzteil
15
aus der Steckdose gezogen werden.
Grundeinstellungen
Nach dem Anschließen des Gerätes an die Stromversorgung zeigt das Gerät auf
dem Display
die Uhrzeit und den Wochentag an. Das Gerät befi ndet sich in
der Betriebsart Uhr/Standby-Betrieb.
IB_63920_SKRI2000A1_LB2.indb Abs3:85 17.01.2012 12:05:40 Uhr

86
Bedienung und Betrieb
SKRI 2000 A1
DE
AT
CH
Einstellmenü aktivieren
Um das Einstellmenü zu aktivieren, drücken Sie in der Betriebsart Uhr/Standby-
Betrieb die Taste Mode / Lock
11
oder die Mode Lock Taste
45
auf der Fernbe-
dienung. Die im Display
angezeigte Uhrzeit beginnt zu blinken. Jede weitere
Betätigung der Taste Mode / Lock
11
oder
45
schaltet auf die nächste Einstell-
möglichkeit um. Die Reihenfolge der Menüpunkte ist:
Uhrzeit einstellen
▯
Datum einstellen ▯
Erinnerungsfunktion einstellen ▯
Update-Modus einstellen ▯
Displaydimmer ein-/ausschalten ▯
Displaydimmer Startzeit einstellen ▯
Uhrzeitformat einstellen ▯
HINWEIS
Das Einstellmenü wird automatisch beendet, wenn Sie ca. 15 Sekunden ►
lang keine Taste betätigen. Die vorgenommenen Einstellungen werden
gespeichert.
Uhrzeit einstellen
Voraussetzung: Das Gerät befi ndet sich in der Betriebsart Uhr/Standby-Betrieb.
Drücken Sie einmal die Taste Mode / Lock
♦
11
oder die Mode Lock Taste
45
auf der Fernbedienung. Die Uhrzeitanzeige beginnt zu blinken.
Stellen Sie mit den Tasten
♦
/ Up
17
und
i
i
/ Down
19
oder der
i
/ Up-Taste
42
und der i / Down Taste
32
auf der Fernbedienung
die aktuelle Uhrzeit ein. Pro Tastendruck wird die Uhrzeit um eine Minute
verändert. Ein Festhalten der jeweiligen Taste für mehr als 2 Sekunden
startet die Schnelleinstellung.
Drücken Sie die Taste Mode / Lock
♦
11
oder die Mode Lock Taste
45
auf der
Fernbedienung erneut, um die aktuelle Einstellung zu speichern und zum
nächsten Menüpunkt zu wechseln.
HINWEIS
Die Uhrzeit wird auf ► Uhr zurückgesetzt, wenn das Gerät von der
Stromversorgung getrennt wird und keine Batterie eingelegt ist oder die
Batterie zu schwach ist.
IB_63920_SKRI2000A1_LB2.indb Abs3:86 17.01.2012 12:05:41 Uhr

87
Bedienung und Betrieb
SKRI 2000 A1
DE
AT
CH
Datum einstellen
Voraussetzung: Das Gerät befi ndet sich in der Betriebsart Uhr/Standby-Betrieb.
Drücken Sie zweimal die Taste Mode / Lock
♦
11
oder die Mode Lock Taste
45
auf der Fernbedienung. Die Datumsanzeige beginnt zu blinken.
Stellen Sie mit den Tasten
♦
/ Up
17
und
i
i
/ Down
19
oder der
i
/ Up-Taste
42
und der i / Down Taste
32
auf der Fernbedienung
das aktuelle Datum ein. Pro Tastendruck wird das Datum um einen Tag
verändert. Die Wochentagsanzeige ändert sich automatisch. Ein Festhalten der
jeweiligen Taste für mehr als 2 Sekunden startet die Schnelleinstellung.
Drücken Sie die Taste Mode / Lock
♦
11
oder die Mode Lock Taste
45
auf der
Fernbedienung erneut, um die aktuelle Einstellung zu speichern und zum
nächsten Menüpunkt zu wechseln.
HINWEIS
Das Datum wird auf ► zurückgesetzt, wenn das Gerät von der
Stromversorgung getrennt wird und keine Batterie eingelegt ist oder die
Batterie zu schwach ist.
Erinnerungsfunktion einstellen
Sie können bis zu 6 Datumswerte einstellen, an denen eine automatische Erinne-
rung ausgelöst wird. Die Funktion SDA (Special Day Alert) ist nützlich, um sich
z.B. an Geburtstage oder andere wiederkehrende Ereignisse erinnern zu lassen.
Die Erinnerung erfolgt jedes Jahr zum gleichen Datum. An diesem Datum ertönt
zu jeder vollen Stunde von 8:00 - 23:00 Uhr für 10 Minuten ein Alarmton.
Voraussetzung: Das Gerät befi ndet sich in der Betriebsart Uhr/Standby-Betrieb.
Drücken Sie dreimal die Taste Mode / Lock
♦
11
oder die Mode Lock Taste
45
auf der Fernbedienung. Die aktuelle Einstellung des gewählten Erinnerungsda-
tums wird im Wechsel mit der Anzeige angezeigt. Neben der Anzeige
steht die Nummer des Speicherplatzes für das Datum. Mögliche Werte
sind bis .
Wählen Sie mit der Taste
♦
i
i
/ Memory Scan
14
oder der Taste Memory-
Scan
36
auf der Fernbedienung den Speicherplatz des einzustellenden
Datums aus.
Stellen Sie mit den Tasten
♦
/ Up
17
und
i
i
/ Down
19
oder der
i
/ Up-Taste
42
und der i / Down Taste
32
auf der Fernbedienung
das Datum für diesen Speicherplatz ein. Pro Tastendruck wird das Datum
um einen Tag verändert. Ein Festhalten der jeweiligen Taste für mehr als 2
Sekunden startet die Schnell einstellung.
IB_63920_SKRI2000A1_LB2.indb Abs3:87 17.01.2012 12:05:43 Uhr

88
Bedienung und Betrieb
SKRI 2000 A1
DE
AT
CH
HINWEIS
Drücken Sie die Taste Timer ►
8
oder die Timer Taste
37
auf der Fern-
bedienung, um das Jahr zu ignorieren. Im Display
werden nur der
Tag und der Monat angezeigt. Die Erinnerungsfunktion wird nun jedes
Jahr an diesem Datum aktiviert.
Drücken Sie die Taste Mode / Lock
♦
11
oder die Mode Lock Taste
45
auf der
Fernbedienung erneut, um die aktuelle Einstellung zu speichern und zum
nächsten Menüpunkt zu wechseln.
Update-Modus einstellen
Voraussetzung: Das Gerät befi ndet sich in der Betriebsart Uhr/Standby-Betrieb.
Drücken Sie viermal die Taste Mode / Lock
♦
11
oder die Mode Lock Taste
45
auf der Fernbedienung. Im Display erscheint und ein blinken-
des Uhrensymbol .
Drücken Sie die Taste
♦
i
i
/ Down
19
oder die Taste i / Down
32
auf
der Fernbedienung, um die automatische RDS-Funktion auszuschalten. Das
blinkende Uhrensymbol erlischt.
Drücken Sie die Taste
♦
/ Up
17
oder die Taste i / Up-Taste
42
auf
der Fernbedienung, um die automatische RDS-Funktion zu aktivieren. Das
blinkende Uhrensymbol erscheint.
Drücken Sie die Taste Mode / Lock ♦
11
oder die Mode Lock Taste
45
auf der
Fernbedienung erneut, um die aktuelle Einstellung zu speichern und zum
nächsten Menüpunkt zu wechseln.
Zeitgesteuerte Displaydimmung ein-/ausschalten
Voraussetzung: Das Gerät befi ndet sich in der Betriebsart Uhr/Standby-Betrieb.
Das Gerät verfügt über zwei Möglichkeiten der Displaydimmung.
1. Zeitgesteuerte Displaydimmung
2. Displaydimmung manuell einstellen (siehe auch Kapitel Displaydimmer
manuell ein-/ausschalten S. 102).
Drücken Sie fünfmal die Taste Mode / Lock
♦
11
oder die Mode Lock Taste
45
auf der Fernbedienung. Die aktuelle Einstellung des Displaydimmers wird
angezeigt ( oder ).
Wählen Sie mit der Taste
♦
/ Up
17
oder der i / Up-Taste
42
auf der
Fernbedienung „ “, die Displaybeleuchtung erlischt nach 15 Sekunden.
Wählen Sie mit der Taste ♦
i
i
/ Down
19
oder der i / Down Taste
32
auf der Fernbedienung „ “, die Displaybeleuchtung leuchtet dauer-
haft.
IB_63920_SKRI2000A1_LB2.indb Abs3:88 17.01.2012 12:05:45 Uhr

89
Bedienung und Betrieb
SKRI 2000 A1
DE
AT
CH
Drücken Sie die Taste Mode / Lock ♦
11
oder die Mode Lock Taste
45
auf der
Fernbedienung erneut, um die aktuelle Einstellung zu speichern und zum
nächsten Menüpunkt zu wechseln.
Modus Display-
Anzeige
Displaybe-
leuchtung
Steuerung mit der Taste AOT/Dimmer
10
oder
46
Zeitst.
Dimmer
AUS
DT OFF Wird durch
die AOT/
Dimmer Taste
eingestellt
DIM OFF: Display leuchtet dauerhaft
DIM ON: Displaybeleuchtung aus; drücken einer
beliebigen Taste schaltet die Displaybeleuchtung für
15 s ein.
Zeitst.
Dimmer
EIN
DT ON Standard-
mäßig von
23:00 - 5:59
ausgeschaltet
23:00 - 5:59 Uhr Drücken einer beliebigen
Taste schaltet das Display für
60 s ein.
6:00 - 22:59 Uhr DIM OFF: Display leuchtet
dauerhaft DIM ON: Display-
beleuchtung aus; drücken einer
beliebigen Taste schaltet die
Displaybeleuchtung für 15 s ein.
Displaydimmer Startzeit einstellen
Voraussetzung: Das Gerät befi ndet sich in der Betriebsart Uhr/Standby-Betrieb.
Drücken Sie sechsmal die Taste Mode / Lock
♦
11
oder die Mode Lock Taste
45
auf der Fernbedienung. Die aktuelle Startzeit des Displaydimmers ( )
wird im Wechsel mit der Anzeige angezeigt.
Stellen Sie mit den Tasten
♦
/ Up
17
und
i
i
/ Down
19
oder der
i
/ Up-Taste
42
und der i / Down-Taste
32
auf der Fernbedienung die
gewünschte Startzeit ein. Pro Tastendruck wird die Startzeit um eine Minute
verändert. Ein Festhalten der jeweiligen Taste für mehr als 2 Sekunden startet
die Schnelleinstellung.
Drücken Sie die Taste Mode / Lock
♦
11
oder die Mode Lock Taste
45
auf der
Fernbedienung erneut, um die aktuelle Einstellung zu speichern und zum
nächsten Menüpunkt zu wechseln.
Uhrzeitformat einstellen
Voraussetzung: Das Gerät befi ndet sich in der Betriebsart Uhr/Standby-Betrieb.
Drücken Sie siebenmal die Taste Mode / Lock
♦
11
oder die Mode Lock Taste
45
auf der Fernbedienung. Die aktuelle Einstellung des Uhrzeitformates wird
angezeigt ( = 24-Stunden-Format oder = 12-Stunden-
Format).
Stellen Sie mit der Taste ♦
/ Up
17
oder die Taste i / Up-Taste
42
auf
der Fernbedienung das Uhrzeitformat auf
, wenn Sie eine Uhrzeit-
anzeige im 12-Stunden-Format wünschen.
IB_63920_SKRI2000A1_LB2.indb Abs3:89 17.01.2012 12:05:47 Uhr

90
Bedienung und Betrieb
SKRI 2000 A1
DE
AT
CH
Stellen Sie mit der Taste ♦
i
i
/ Down
19
oder der i / Down-Taste
32
auf
der Fernbedienung das Uhrzeitformat auf
, wenn Sie eine Uhrzeit-
anzeige im 24-Stunden-Format wünschen.
Drücken Sie die Taste Mode / Lock
♦
11
oder die Mode Lock Taste
45
auf
der Fernbedienung erneut, um die aktuelle Einstellung zu speichern und zur
Grundeinstellung zurück zu kehren.
Alarm programmieren
Das Gerät verfügt über zwei Alarmtimer. Alle Einstellungen können für beide
Alarmtimer unabhängig voneinander vorgenommen werden. Sie können wählen,
ob zur programmierten Zeit ein Alarmton erklingen, das Radio oder der iPod/
das iPhone angehen soll.
HINWEIS
Wird während der Alarmprogrammierung ca. 15 Sekunden lang keine ►
Taste gedrückt, wird die Alarmzeit mit den aktuellen Einstellungen aktiviert.
Alarmzeit einstellen
Drücken Sie die Taste Alarm Mode ♦
9
oder die Taste Alarm
47
auf der
Fernbedienung. Die eingestellte Alarmzeit des jeweiligen Alarms wird
blinkend im Display angezeigt und die Anzeige bzw. erscheint.
Über der Zeitanzeige werden die Wochentage angezeigt, an denen dieser
Alarm aktiviert ist.
Stellen Sie mit den Tasten
♦
/ Up
17
und
i
i
/ Down
19
oder der
i
/ Up-Taste
42
und der i / Down-Taste
32
auf der Fernbedienung die
gewünschte Alarmzeit ein. Pro Tastendruck wird die Alarmzeit um eine Minute
verändert. Ein Festhalten der jeweiligen Taste für mehr als 2 Sekunden startet
die Schnelleinstellung.
Wochentage einstellen
Drücken Sie im Alarm-Modus die Taste Function / ST ♦
7
oder die Taste
Function / ST
38
auf der Fernbedienung, um zwischen den Wochentagskom-
binationen Mo-Fr, Sa-So oder Mo-So umzuschalten. Die jeweils gewählte
Kombination wird über der Alarmzeit angezeigt.
Drücken und halten Sie die Taste Function / ST
♦
7
oder die Function / ST
38
auf der Fernbedienung für mindestens 2 Sekunden gedrückt, um zwischen
den Wochentagskombinationen und der Einstellmöglichkeit für einen einzelnen
Wochentag umzuschalten.
HINWEIS
Bei der Einstellmöglichkeit für einen einzelnen Wochentag wechseln ►
Sie mit der Taste Function / ST
7
oder der Taste Function / ST
38
auf
der Fernbedienung zwischen den Wochentagen.
IB_63920_SKRI2000A1_LB2.indb Abs3:90 17.01.2012 12:05:49 Uhr

91
Bedienung und Betrieb
SKRI 2000 A1
DE
AT
CH
Alarm mit Alarmton einstellen
Um für den jeweiligen Alarm „Alarmton“ auszuwählen drücken Sie im ♦
Alarm-Modus die Taste
i
i
/ Pr+ / AL1
18
oder die Taste
i
i
/ Pr– / AL2
16
bzw. die i
Pr+ Taste
40
oder die i Pr– Taste
44
auf der Fernbedienung,
bis im Display
das Symbol erscheint.
Alarm mit Radio einstellen
Wenn das Radio zum Alarmzeitpunkt angehen soll, nehmen Sie vor der Aktivierung
des Alarms folgende Einstellungen vor:
Schalten Sie das Radio ein, indem Sie die Taste
♦ Power
6
oder die
Taste
30
auf der Fernbedienung drücken und mit der Taste Function / ST
7
oder der Taste Function / ST
38
auf der Fernbedienung die Betriebsart
Radio wählen.
Wählen Sie den Sender aus, mit dem Sie geweckt werden möchten
♦
(siehe Kapitel Sender manuell einstellen S. 96 oder Nächsten
Sender suchen S. 96).
Stellen Sie mit den Tasten Vol+
♦
3
und Vol–
5
oder der Vol+ Taste
39
und
der Vol– Taste
41
auf der Fernbedienung die gewünschte Lautstärke ein
(siehe Kapitel Lautstärke einstellen S. 96).
Schalten Sie das Radio aus, indem Sie die Taste ♦ Power
6
oder die
Taste
30
auf der Fernbedienung drücken.
Um für den jeweiligen Alarm „Radio“ auszuwählen drücken Sie im Alarm-
♦
Modus die Taste
i
i
/ Pr+ / AL1
18
oder die Taste
i
i
/ Pr– / AL2
16
bzw.
die i
Pr+ Taste
40
oder die i Pr– Taste
44
auf der Fernbedienung, bis im
Display das Symbol erscheint.
Alarm mit iPod/iPhone einstellen
Wenn der iPod/das iPhone zum Alarmzeitpunkt angehen soll, nehmen Sie vor
der Aktivierung des Alarms folgende Einstellungen vor:
Schalten Sie das Gerät ein, indem Sie die Taste
♦ Power
6
oder die
Taste
30
auf der Fernbedienung drücken und mit der Taste Function / ST
7
oder der Taste Function / ST
38
auf der Fernbedienung die Betriebsart
wählen.
Setzen Sie Ihren iPod bzw. Ihr iPhone in die Station ♦
29
ein.
Wählen Sie auf Ihrem iPod/iPhone einen Titel (oder ein Album bzw. eine
♦
Wiedergabeliste) aus.
Stellen Sie mit den Tasten Vol+
♦
3
und Vol–
5
oder der Vol+ Taste
39
und
der Vol– Taste
41
auf der Fernbedienung die gewünschte Lautstärke ein
(siehe Kapitel Lautstärke einstellen S. 96).
Schalten Sie Ihren iPod/Ihr iPhone in den Pausemodus, oder schalten Sie
♦
das Gerät aus.
IB_63920_SKRI2000A1_LB2.indb Abs3:91 17.01.2012 12:05:51 Uhr

92
Bedienung und Betrieb
SKRI 2000 A1
DE
AT
CH
Schalten Sie die Betriebsart iPod aus, indem Sie die Taste ♦ Power
6
oder
die
Taste
30
auf der Fernbedienung drücken.
Um für den jeweiligen Alarm „iPod“ auszuwählen drücken Sie die Taste
♦
i
i
/ Pr+ / AL1
18
oder die Taste
i
i
/ Pr– / AL2
16
bzw. die i Pr+ Taste
40
oder die i Pr– Taste
44
auf der Fernbedienung, bis im Display das
Symbol erscheint.
Alarm ausschalten
Um den jeweiligen Alarm auszuschalten, drücken Sie im Alarm-Modus die ♦
Taste
i
i
/ Pr+ / AL1
18
oder die Taste
i
i
/ Pr– / AL2
16
bzw. die i Pr+
Taste
40
oder die i Pr– Taste
44
auf der Fernbedienung, bis im Display
kein Symbol mehr angezeigt wird.
Wenn die Alarmzeit erreicht ist
HINWEIS
Ist der Alarmzeitpunkt erreicht, wird der Ausschalttimer (falls aktiviert) ►
sofort beendet.
Bei der Einstellung „Alarm mit Alarmton“ ertönt ein Signalton. Die Laut-
stärke des Signaltons wird bis zur Maximallautstärke kontinuierlich angehoben.
Die Dauer des Alarms ist auf 10 Minuten begrenzt. Das Radio wird dabei auf
„Mute“ geschaltet.
Bei der Einstellung „Alarm mit Radio“ wird das Radio eingeschaltet. Der zuvor
gewählte Sender wird in der eingestellten Lautstärke für maximal 60 Minuten aktiviert.
Bei der Einstellung „Alarm mit iPod/iPhone“ wird der iPod/das iPhone ein-
geschaltet. Die Wiedergabe startet mit dem zuletzt ausgewählten Titel und wird
in der eingestellten Lautstärke für maximal 60 Minuten wiedergegeben.
Drücken Sie eine beliebige Taste, um den aktuellen Alarm zu beenden.
HINWEIS
Der Alarm wird bei Erreichen der nächsten Alarmzeit (z.B. am nächsten Tag) ►
wieder aktiv.
IB_63920_SKRI2000A1_LB2.indb Abs3:92 17.01.2012 12:05:55 Uhr

93
Bedienung und Betrieb
SKRI 2000 A1
DE
AT
CH
Küchentimer
Das Gerät verfügt über einen praktischen Küchentimer, mit dem z.B. Koch- und
Backzeiten überwacht werden können. Der einstellbare Zeitbereich des Küchen-
timers liegt zwischen 1 Minute und 23 Stunden, 59 Minuten.
Küchentimer einstellen
Drücken Sie die Taste Timer ♦
8
oder die Timer Taste
37
auf der Fernbedienung.
Die Anzeige zeigt . Im Display wird das Kochtopfsymbol für den
Küchentimer eingeblendet.
Stellen Sie mit den Tasten
♦
/ Up
17
und
i
i
/ Down
19
oder der
i
/ Up-Taste
42
und der i / Down-Taste
32
auf der Fernbedienung
die gewünschte Zeit für den Küchentimer ein. Pro Tastendruck wird die Zeit
um eine Minute verändert. Ein Festhalten der Taste für mehr als 2 Sekunden
startet die Schnelleinstellung.
HINWEIS
Wird während der Einstellung ca. 15 Sekunden lang keine Veränderung ►
vorgenommen, wechselt das Gerät wieder in die vorherige Betriebsart.
Küchentimer starten
Drücken Sie nach Einstellung der Zeit die Taste Timer ♦
8
oder die Timer
Taste
37
auf der Fernbedienung erneut. Die angezeigte Zeit beginnt
rückwärts zu laufen. Im Display wird eine rückwärts laufende Uhr
eingeblendet.
HINWEIS
Wird während des Ablaufens des Küchentimers eine andere Funktion gewählt, ►
wird die Anzeige der Restzeit ausgeblendet. Das Kochtopfsymbol und
die rückwärts laufende Uhr
werden weiter im Display angezeigt.
Drücken Sie die Taste Timer
8
oder die Timer Taste
37
auf der Fernbedie-
nung erneut, um die Restzeit des Küchentimers für ca. 10 Sekunden wieder
anzeigen zu lassen.
30 Sekunden vor Ablauf des Küchentimers beginnt das Gerät mit einzelnen Signal-
tönen auf das Erreichen der eingestellten Zeit akustisch hinzuweisen. Die Abstände
der Einzeltöne werden dabei immer kürzer. Bei Erreichen der eingestellten Zeit er-
tönt das Alarmsignal des Küchentimers als Dauerintervall für maximal 60 Minuten.
Drücken Sie die Taste Timer
♦
8
oder die Timer Taste
37
auf der Fernbedie-
nung, um das Alarmsignal des Küchentimers abzuschalten.
IB_63920_SKRI2000A1_LB2.indb Abs3:93 17.01.2012 12:05:56 Uhr

94
Bedienung und Betrieb
SKRI 2000 A1
DE
AT
CH
Küchentimer unterbrechen
Drücken Sie bei laufendem Küchentimer die Taste Timer ♦
8
oder die Timer
Taste
37
auf der Fernbedienung. Der Küchentimer wird angehalten. Die
angezeigte Restzeit beginnt zu blinken.
HINWEIS
Das Gerät wechselt nach ca. 15 Sekunden wieder in die vorherige Be- ►
triebsart. Drücken Sie die Taste Timer
8
oder die Timer Taste
37
auf der
Fernbedienung erneut, um die Restzeit des Küchentimers wieder anzeigen
zu lassen.
Um den Küchentimer wieder zu starten, drücken Sie die Taste Timer
♦
8
oder
die Timer Taste
37
auf der Fernbedienung erneut. Der Küchentimer wird
wieder gestartet.
Um den Küchentimer vor Ablauf der Zeit abzuschalten, drücken und halten
♦
Sie die Taste Timer
8
oder die Timer Taste
37
auf der Fernbedienung, bis
im Display
das Kochtopfsymbol und die rückwärts laufende Uhr nicht
mehr angezeigt werden.
HINWEIS
Der Küchentimer wird sofort ausgeschaltet für den Fall, dass ein Alarm ►
aktiv wird.
Küchentimer programmieren
Sie können häufi g benötigte Zeiten für den Küchentimer vorprogrammieren,
um diese nicht immer wieder eingeben zu müssen. Es können bis zu 6 Zeiten
vorprogrammiert werden. Standardmäßig sind die 6 Speicherplätze mit
5/10/15/20/25/30 Minuten vorprogrammiert.
Gehen Sie zur Programmierung der Küchentimer wie folgt vor:
Drücken Sie die Taste Timer
♦
8
oder die Timer Taste
37
auf der Fernbedienung,
um den Küchentimer zu aktivieren.
Stellen Sie mit den Tasten
♦
/ Up
17
und
i
i
/ Down
19
oder der
i
/ Up-Taste
42
und der i / Down-Taste
32
auf der Fernbedienung
die gewünschte Zeit für den Küchentimer ein. Pro Tastendruck wird die Zeit
um eine Minute verändert. Ein Festhalten der Taste für mehr als 2 Sekunden
startet die Schnelleinstellung.
Drücken Sie die Taste Function / ST
♦
7
oder die Taste Function / ST
38
auf der
Fernbedienung, um die Timerauswahl zu aktivieren. Neben der Zeitanzeige
wird ein blinkendes angezeigt, daneben erscheint die Zahl für den ersten
Timer.
Wählen Sie mit den Tasten
♦
i
i
/ Pr+ / AL1
18
und
i
i
/ Pr– / AL2
16
bzw.
der i
Pr+ Taste
40
oder der i Pr– Taste
44
auf der Fernbedienung den
Speicherplatz des einzustellenden Timers zwischen und aus.
IB_63920_SKRI2000A1_LB2.indb Abs3:94 17.01.2012 12:05:58 Uhr

95
Bedienung und Betrieb
SKRI 2000 A1
DE
AT
CH
Drücken Sie die Taste Function / ST ♦
7
oder die Taste Function / ST
38
auf
der Fernbedienung erneut, um die eingestellte Zeit auf dem gewählten Spei-
cherplatz zu programmieren. Das blinkende wird nun konstant angezeigt.
Wiederholen Sie den Vorgang für die anderen Speicherplätze.
♦
Küchentimer abrufen
Um eine programmierte Zeit für den Küchentimer abzurufen, gehen Sie wie folgt vor:
Drücken Sie die Taste Timer
♦
8
oder die Timer Taste
37
auf der Fernbedienung,
um den Küchentimer zu aktivieren.
Wählen Sie mit den Tasten
♦
i
i
/ Pr+ / AL1
18
und
i
i
/ Pr– / AL2
16
bzw.
der i
Pr+ Taste
40
oder der i Pr– Taste
44
auf der Fernbedienung den
gewünschten Timer zwischen und aus.
Drücken Sie die Taste Timer
♦
8
oder die Timer Taste
37
auf der Fernbedienung
erneut, um den Küchentimer zu starten.
Radiobetrieb
HINWEIS
Für einen guten Radioempfang muss die Wurfantenne ►
27
ganz abgewickelt
werden. Richten Sie die Antenne im Radiobetrieb auf den besten Empfang aus.
Die technischen Gegebenheiten des Gerätes ermöglicht eine einstellbare
►
Empfangsfrequenz außerhalb des zulässigen UKW (FM)-Bereiches von
87,5–108 MHz. In verschiedenen Ländern können abweichende nationale
Regelungen zu den zugewiesenen Rundfunkfrequenzbereichen bestehen.
Beachten Sie, dass Sie die außerhalb des zugewiesenen Rundfunkfre-
quenzbereiches empfangenen Informationen nicht verwerten, an Dritte
weiterleiten oder zweckentfremdet missbräuchlich verwenden dürfen.
Radio ein-/ausschalten
Drücken Sie die Taste ♦ Power
6
oder die -Taste
30
auf der Fernbedie-
nung. Das Display zeigt den aktuellen Modus an indem sich das Gerät
befi ndet.
Drücken Sie die Taste Function / ST ♦
7
oder die Taste Function / ST
38
auf
der Fernbedienung mehrfach, um die Radiofunktion auszuwählen. Im Display
erscheint die Empfangsfrequenz des eingestellten Senders.
Schalten Sie das Radio aus, indem Sie die Taste
♦ Power
6
oder die
-Taste
30
auf der Fernbedienung erneut drücken. Das Gerät wechselt
zurück in die Betriebsart Uhr/Standby-Betrieb. Die aktuelle Uhrzeit wird
angezeigt.
IB_63920_SKRI2000A1_LB2.indb Abs3:95 17.01.2012 12:06:00 Uhr

96
Bedienung und Betrieb
SKRI 2000 A1
DE
AT
CH
Lautstärke einstellen
Stellen Sie mit den Tasten Vol+ ♦
3
und Vol–
5
oder der Vol+ Taste
39
und der Vol– Taste
41
auf der Fernbedienung die gewünschte Lautstärke
ein. Der Lautstärkepegel wird im Display angezeigt. Sie können einen
Lautstärkepegel zwischen
und wählen.
Sender manuell einstellen
Stellen Sie durch Einzeldrücke auf die Tasten ♦
/ Up
17
und
i
i
/ Down
19
bzw. der i / Up-Taste
42
und der i / Down-Taste
32
auf der Fernbedienung den gewünschten Sender ein. Die Frequenz des
Senders wird auf dem Display angezeigt. Der Lautsprecher ist während
der Einstellung abgeschaltet.
Nächsten Sender suchen
Sie können das Gerät automatisch nach dem nächstliegenden Sender suchen
lassen.
Drücken und halten Sie die Taste ♦
/ Up
17
und
i
i
/ Down
19
bzw.
der i
/ Up-Taste
42
und der i / Down-Taste
32
auf der Fernbedie-
nung für mindestens zwei Sekunden gedrückt. Das Gerät sucht nach dem
nächstliegenden Sender mit ausreichender Empfangsqualität.
Wiederholen Sie den Vorgang, bis Sie den gesuchten Sender gefunden haben.
♦
Benutzer auswählen
Voraussetzung: Das Gerät befi ndet sich in der Betriebsart Radio.
Drücken Sie die Taste User
♦
2
oder die User Taste
31
auf der Fernbedienung,
um den gewünschten Benutzer auszuwählen. Der aktuelle Benutzer bis
wird auf dem Display für 10 Sekunden angezeigt.
Drücken Sie die Tasten
♦
i
i
/ Pr+ / AL1
18
und
i
i
/ Pr– / AL2
16
bzw. die
i
Pr+ Taste
40
oder die i Pr– Taste
44
auf der Fernbedienung , um einen
voreingestellten Speicherplatz zwischen und auszuwählen.
HINWEIS
Jeder Benutzer hat 15 Speicherplätze zur Verfügung. Der erste Speicher- ►
platz für Benutzer A ist vom Hersteller voreingestellt.
IB_63920_SKRI2000A1_LB2.indb Abs3:96 17.01.2012 12:06:03 Uhr

97
Bedienung und Betrieb
SKRI 2000 A1
DE
AT
CH
Sender manuell speichern
Voraussetzung: Das Gerät befi ndet sich in der Betriebsart Radio.
Das Gerät stellt 60 Speicherplätze (4 Benutzer a 15 Speicherplätze) für Sende-
frequenzen zur Verfügung. Um eine Sendefrequenz zu speichern, gehen Sie wie
folgt vor:
Stellen Sie wie vorab beschrieben den gewünschten Sender ein.
♦
Drücken Sie die Taste Mem ♦
4
oder die Mem Taste
35
auf der Fernbedie-
nung. Das Symbol MEM, der Benutzer und der Speicherplatz erscheinen
im Display .
Drücken Sie die Taste User ♦
2
oder die User Taste
31
auf der Fernbedienung,
bis der gewünschte Benutzer ( - ) angezeigt wird.
Wählen Sie mit den Tasten
♦
i
i
/ Pr+ / AL1
18
oder
i
i
/ Pr– / AL2
16
bzw.
der i
Pr+ Taste
40
oder der i Pr– Taste
44
auf der Fernbedienung den ge-
wünschten Speicherplatz für den eingestellten Sender zwischen und aus.
Drücken Sie die Taste Mem
♦
4
oder die Mem Taste
35
auf der Fernbe-
dienung. Die Empfangsfrequenz des eingestellten Senders wird auf dem
gewählten Speicherplatz gespeichert.
Gespeicherten Sender abrufen
Voraussetzung: Das Gerät befi ndet sich in der Betriebsart Radio.
Drücken Sie die Taste User
♦
2
oder die User Taste
31
auf der Fernbedienung,
bis der gewünschte Benutzer ( - ) angezeigt wird.
Wählen Sie mit den Tasten
♦
i
i
/ Pr+ / AL1
18
oder
i
i
/ Pr– / AL2
16
bzw.
der i
Pr+ Taste
40
oder der i Pr– Taste
44
auf der Fernbedienung den
Speicherplatz für den gespeicherten Sender zwischen und aus.
IB_63920_SKRI2000A1_LB2.indb Abs3:97 17.01.2012 12:06:05 Uhr

98
Bedienung und Betrieb
SKRI 2000 A1
DE
AT
CH
Automatischer Sendersuchlauf (AMS-Funktion)
Voraussetzung: Das Gerät befi ndet sich in der Betriebsart Radio.
Um die Speicherplätze für die Sendefrequenzen mit den stärksten empfangba-
ren Sendern zu belegen, kann ein automatischer Sendersuchlauf durchgeführt
werden.
HINWEIS
Bei Ausführung der nachfolgend beschriebenen Funktion gehen alle vorher ►
gespeicherten Sender verloren.
Drücken und halten Sie die Taste
♦
i
i
/ Memory Scan
14
oder die
Memory-Scan-Taste
36
für mindestens drei Sekunden gedrückt. Das Gerät
beginnt mit dem Sendersuchlauf und belegt die Speicherplätze bis
mit den gefundenen Sendern.
Nach Beendigung des Sendersuchlaufs können Sie durch einmaliges
♦
drücken der Taste
i
i
/ Memory Scan
14
oder der Memory-Scan-Taste
36
, alle gespeicherten Sender zwischen und für 10 Sekunden
wiedergeben.
HINWEIS
Werden mehr als 60 Sender gefunden, werden nur die ersten 60 Empfangs- ►
frequenzen gespeichert.
Werden weniger als 60 Sender gefunden, bleiben die letzten Speicherplätze ►
unverändert.
Wiedergabe von externen Audiogeräten
Schließen Sie ein externes Audiogerät, wie z.B. einen MP3-Player, an die ♦
3,5 mm Klinkenbuchse AUX IN
26
auf der Rückseite des Gerätes an.
Drücken Sie die Taste
♦ Power
6
oder die Taste
30
auf der Fernbedie-
nung. Das Display zeigt den aktuellen Modus an indem sich das Gerät
befi ndet.
Drücken Sie die Taste Function / ST ♦
7
oder die Taste Function / ST
38
auf
der Fernbedienung mehrfach, um die Funktion auszuwählen.
Starten Sie die Wiedergabe am externen Audiogerät und stellen Sie die
♦
Lautstärke ein.
HINWEIS
Beachten Sie die Bedienungsanleitung des externen Audiogerätes. ►
Anschluss iPod/iPhone
Mit der Station
29
können Sie das Gerät als Lautsprecher für Ihren iPod/Ihr iPhone
verwenden. Wenn Sie den iPod/das iPhone in die Station einsetzen, wird es außer-
dem automatisch aufgeladen.
IB_63920_SKRI2000A1_LB2.indb Abs3:98 17.01.2012 12:06:07 Uhr

99
Bedienung und Betrieb
SKRI 2000 A1
DE
AT
CH
iMenu
Voraussetzung: Das Gerät befi ndet sich in der Betriebsart iPod.
Drücken Sie die Taste
♦
I Enter
I Enter
13
, um die Menüsteuerung für den
iPod/das iPhone zu aktivieren.
Die folgenden Funktionen können damit ausgeführt werden:
Taste Funktion
i
i
/ Pr– / AL2
16
Nächste Funktion
i
i
/ Pr+ / AL1
18
Vorherige Funktion
i-Time Sync
i-Time Sync
Bass
12
Zeitanzeige und Datum des Gerätes mit der
Zeit des iPods/iPhones synchronisieren
i
i
/ Memory Scan
14
Wiedergabe anhalten und fortsetzen
i
i
/ Down
19
Schneller Rücklauf
/ Up
17
Schneller Vorlauf
I Enter
I Enter
13
kurz drücken: Menü zurück
lang drücken: Auswahl bestätigen
Musik wiedergeben
Bereiten Sie die Anschlussstation
29
vor, wie im Kapitel Station für iPod/
iPhone vorbereiten S. 84 beschrieben.
Setzen Sie Ihren iPod bzw. Ihr iPhone in die Station
♦
29
ein.
Drücken Sie die Taste
♦ Power
6
oder die -Taste
30
auf der Fernbedie-
nung. Das Display zeigt den aktuellen Modus an indem sich das Gerät
befi ndet
Drücken Sie die Taste Function / ST ♦
7
oder die Taste Function / ST
38
auf
der Fernbedienung mehrfach, um die Funktion auszuwählen.
Wählen Sie auf Ihrem iPod/iPhone einen Titel (oder ein Album bzw. eine
♦
Wiedergabeliste) aus.
Drücken Sie die Taste ♦
i
i
/ Memory Scan
14
oder die i -Taste
33
auf
der Fernbedienung, um die Wiedergabe zu starten oder anzuhalten.
IB_63920_SKRI2000A1_LB2.indb Abs3:99 17.01.2012 12:06:09 Uhr

100
Bedienung und Betrieb
SKRI 2000 A1
DE
AT
CH
iPod/iPhone aufl aden
Ist Ihr iPod/iPhone in die Station
29
eingesetzt, wird es automatisch aufgeladen,
bis die Batterie voll ist.
HINWEIS
Der iPod/das iPhone wird nicht über die Backup-Batterie aufgeladen. ►
Uhrzeit i-Time Sync einstellen
Die iTime-Sync-Funktion ermöglicht es Ihnen, die Uhrzeit und das Datum auf dem
Gerät mit der Uhrzeit und dem Datum Ihres iPods oder iPhones zu synchronisieren
(iPod Touch, iPod nano und iPod Classic; ältere iPod-Modelle wie iPod mini
unterstützen diese Funktion nicht).
Setzen Sie Ihren iPod bzw. Ihr iPhone in die Station
♦
29
ein.
Drücken Sie die Taste
♦
i-Time Sync
i-Time Sync
Bass
12
oder die Taste iTime Sync Bass
43
auf der Fernbedienung. Die Uhrzeit und das Datum des iPods oder iPhones
werden auf das Gerät übertragen. Nach Abschluss der Synchronisation,
ertönt ein Signalton.
HINWEIS
Die Uhrzeit auf dem iPhone wird kontinuierlich über die Mobilfunkmasten ►
aktualisiert. Die Uhrzeit auf dem iPod entspricht nur der Uhrzeit auf Ihrem
Computer nach der letzten Synchronisation. Es ist möglich, einen Zeitunter-
schied von 59 Sekunden zwischen dem Gerät und dem synchronisiertem
iPod/iPhone zu haben.
Weitere Funktionen
Stereofunktion
Das Gerät unterstützt die Stereofunktion. Die Standardeinstellung ist Stereo on.
Um die Stereofunktion zu ändern, gehen Sie wie folgt vor:
Drücken und halten Sie die Taste Function / ST
♦
7
oder die Taste Function / ST
38
auf der Fernbedienung gedrückt, bis im Display
die
aktuelle Einstellung der Stereofunktion angezeigt wird ( oder ).
Drücken und halten Sie die Taste Function / ST ♦
7
oder die Taste Function / ST
38
auf der Fernbedienung erneut, um die Einstellung zu wechseln.
HINWEIS
Bei Stereoempfang eines Radiosenders und aktivierter Stereofunktion, ►
erscheint für 3 Sekunden im Display .
IB_63920_SKRI2000A1_LB2.indb Abs3:100 17.01.2012 12:06:11 Uhr

101
Bedienung und Betrieb
SKRI 2000 A1
DE
AT
CH
Tastensperre
Sie können die Tasten des Gerätes sperren, damit keine Einstellungen versehent-
lich geändert werden können.
Drücken und halten Sie die Taste Mode / Lock
♦
11
oder die Mode Lock Taste
45
auf der Fernbedienung für mindestens zwei Sekunden gedrückt, um die
Tastensperre ein- oder auszuschalten. Bei eingeschalteter Tastensperre
erscheint im Display
das Symbol .
Zum Entsperren drücken und halten Sie wieder die Taste Mode / Lock
♦
11
oder die Mode Lock Taste
45
auf der Fernbedienung für mindestens zwei
Sekunden gedrückt.
Bassanhebung
Mit der Bassanhebung können Sie eine verstärkte Wiedergabe der tiefen Frequenzen
einschalten.
Drücken Sie für ca. 2 Sekunden die Taste
♦
i-Time Sync
i-Time Sync
Bass
12
oder die
Taste iTime Sync Bass
43
auf der Fernbedienung, um die Bassanhebung ein-
oder auszuschalten. Bei eingeschalteter Bassanhebung erscheint im Display
das Symbol .
Wechselnde Anzeige
Voraussetzung: Das Gerät befi ndet sich in der Betriebsart Uhr/Standby-Betrieb.
Drücken Sie die Taste
♦
i
i
/ Down
19
oder die i / Down Taste
32
auf der Fernbedienung, das Datum und die Uhrzeit werden abwechselnd
angezeigt.
Drücken Sie die Taste ♦
i
i
/ Down
19
oder die i / Down Taste
32
auf
der Fernbedienung noch einmal, wird nur die Uhrzeit angezeigt.
Voraussetzung: Das Gerät befi ndet sich in der Betriebsart Radio.
Drücken Sie die Taste Mode / Lock
♦
11
oder die Mode Lock Taste
45
auf
der Fernbedienung, die Empfangsfrequenz bzw. der Stationsname (bei RDS-
Empfang) und die Uhrzeit werden abwechselnd angezeigt.
Drücken Sie die Taste Mode / Lock
♦
11
oder die Mode Lock Taste
45
auf der
Fernbedienung noch einmal, wird nur die Uhrzeit angezeigt.
Drücken Sie die Taste Mode / Lock
♦
11
oder die Mode Lock Taste
45
auf
der Fernbedienung noch einmal, wird nur die Empfangsfrequenz bzw. der
Stationsname (bei RDS-Empfang) angezeigt.
IB_63920_SKRI2000A1_LB2.indb Abs3:101 17.01.2012 12:06:12 Uhr

102
Bedienung und Betrieb
SKRI 2000 A1
DE
AT
CH
Automatisches Abschalten (Einschlaff unktion)
Mit der Einschlaff unktion stellt sich das Gerät nach einer Zeit zwischen 5 und
90 Minuten selbst aus.
Drücken Sie die Taste AOT / Dimmer
♦
10
oder die AOT Dimmer Taste
46
auf
der Fernbedienung, um die Funktion aufzurufen. Die aktuell verbleibende
Zeit bis zum Abschalten des Radios wird angezeigt.
Drücken Sie die Taste AOT / Dimmer ♦
10
oder die AOT Dimmer Taste
46
auf der Fernbedienung wiederholt, um die gewünschte Zeit einzustellen.
Nach ca. 15 Sekunden kehrt das Gerät wieder zur Anzeige der gewählten
Betriebsart zurück.
HINWEIS
Die einstellbare Zeitspanne reicht von 90 bis 5 Minuten. Die Einstellung ►
erfolgt in Schritten zu 5 Minuten. Danach erscheint die Anzeige .
Bei der Anzeige ist die Einschlaff unktion abgeschaltet.
Befi ndet sich das Gerät in der Betriebsart Uhr/Standby-Betrieb, schalten ►
Sie mit dem Drücken der Taste AOT / Dimmer
10
oder der AOT Dimmer
Taste
46
auf der Fernbedienung das Gerät in dem zuletzt ausgewählten
Modus (Radio/iPod/AUX) ein.
Displaydimmer manuell ein-/ausschalten
Drücken und halten Sie die Taste AOT / Dimmer ♦
10
oder die AOT Dimmer
Taste
46
auf der Fernbedienung gedrückt, bis im Display die aktuelle
Einstellung des Displaydimmers angezeigt wird ( oder ).
Drücken und halten Sie die Taste AOT / Dimmer
♦
10
oder die AOT Dimmer
Taste
46
auf der Fernbedienung erneut, um die aktuelle Einstellung zu
wechseln (siehe auch Kapitel Zeitgesteuerte Displaydimmung ein-/
ausschalten S. 88). Nach ca. 15 Sekunden wird die zuletzt verwendete
Displaydarstellung wieder angezeigt.
IB_63920_SKRI2000A1_LB2.indb Abs3:102 17.01.2012 12:06:14 Uhr

103
Reinigung/Fehlerbehebung
SKRI 2000 A1
DE
AT
CH
Reinigung
Sicherheitshinweise
GEFAHR
Lebensgefahr durch elektrischen Strom!
Ziehen Sie das Steckernetzteil aus der Steckdose, bevor Sie mit der Reinigung ►
beginnen.
ACHTUNG
Beschädigung des Gerätes!
Stellen Sie sicher, dass bei der Reinigung keine Feuchtigkeit in das Gerät ►
eindringt, um eine irreparable Beschädigung des Gerätes zu vermeiden.
Gehäuse reinigen
Reinigen Sie die Oberfl ächen des Gerätes mit einem weichen, trockenen Tuch. ■
Fehlerbehebung
In diesem Kapitel erhalten Sie wichtige Hinweise zur Störungslokalisierung und
Störungsbehebung. Beachten Sie die Hinweise um Gefahren und Beschädigungen
zu vermeiden.
Sicherheitshinweise
WARNUNG
Beachten Sie die folgenden Sicherheitshinweise um Gefahren und Sachschäden
zu vermeiden:
Reparaturen an Elektrogeräten dürfen nur von Fachleuten durchgeführt werden,
►
die vom Hersteller geschult sind. Durch unsachgemäße Reparaturen können
erhebliche Gefahren für den Benutzer und Schäden am Gerät entstehen.
IB_63920_SKRI2000A1_LB2.indb Abs3:103 17.01.2012 12:06:15 Uhr

104
Fehlerbehebung
SKRI 2000 A1
DE
AT
CH
Fehlerursachen und -behebung
Die nachfolgende Tabelle hilft bei der Lokalisierung und Behebung kleinerer
Störungen:
Fehler Mögliche Ursache Behebung
Das Display zeigt
nichts an.
Das Steckernetzteil
15
ist
nicht eingesteckt.
Stecken Sie das Steckernetzteil
15
in
die Steckdose.
Steckdose liefert keine
Spannung.
Überprüfen Sie die Haussicherungen.
Kein Ton
Die Lautstärke steht auf
Minimum.
Erhöhen Sie die Lautstärke mit der
Taste Vol+
3
.
Das Gerät befi ndet sich in
der Betriebsart Uhr/Stand-
by-Betrieb.
Schalten Sie das Gerät mit der Taste
Power
6
auf die Betriebsart
Radio/iPod/Aux/ ein.
Die Wiedergabe des exter-
nen Audiogerätes ist nicht
gestartet.
Starten Sie die Wiedergabe an dem
externen Audiogerät.
Die Wiedergabe des iPod/
iPhones ist nicht gestartet.
Starten Sie die Wiedergabe am iPod/
iPhone.
Der iPod/das iPhone ist
nicht richtig in die Station
29
eingesetzt
Setzen Sie den iPod/das iPhone
richtig in die Station
29
ein.
Störgeräusche
beim
Radioempfang
Der Sender ist nicht richtig
eingestellt.
Stellen Sie den Sender mit dem Tasten
/ Up
17
und
i
i
/ Down
19
richtig ein.
Der Empfang ist zu
schwach.
Versuchen Sie durch Bewegen der
Wurfantenne
27
den Empfang zu
verbessern.
iPod/iPhone wird
nicht aufgeladen
Der iPod/das iPhone ist
nicht richtig in die Station
29
eingesetzt.
Setzen Sie den iPod/das iPhone
richtig in die Station
29
ein.
Alarm mit iPod/
iPhone hat nicht
funktioniert
Die ausgewählte Wieder-
gabeliste auf Ihrem iPod/
iPhone ist leer.
Stellen Sie sicher, dass die Wiederga-
beliste Musik enthält.
HINWEIS
Wenn Sie mit den vorstehend genannten Schritten das Problem nicht lösen ►
können, wenden Sie sich bitte an den Kundendienst.
IB_63920_SKRI2000A1_LB2.indb Abs3:104 17.01.2012 12:06:16 Uhr

105
Lagerung/Entsorgung/Anhang
SKRI 2000 A1
DE
AT
CH
Lagerung/Entsorgung
Lagerung
Sollten Sie das Gerät längere Zeit nicht benutzen, trennen Sie es von der Strom-
versorgung, entnehmen Sie die Batterie und lagern Sie es an einem sauberen,
trockenen Ort ohne direkte Sonneneinstrahlung.
Gerät entsorgen
Werfen Sie das Gerät keinesfalls in den normalen Hausmüll.
Dieses Produkt unterliegt der europäischen Richtlinie 2002/96/EC-
WEEE (Waste Electrical and Electronic Equipment).
Entsorgen Sie das Gerät über einen zugelassenen Entsorgungsbetrieb oder über
Ihre kommunale Entsorgungseinrichtung. Beachten Sie die aktuell geltenden
Vorschriften. Setzen Sie sich im Zweifelsfall mit Ihrer Entsorgungseinrichtung in
Verbindung.
Batterien entsorgen
Batterien dürfen nicht im Hausmüll entsorgt werden. Jeder Verbraucher ist gesetzlich
verpfl ichtet, Batterien bei einer Sammelstelle seiner Gemeinde/seines Stadtteils
oder im Handel abzugeben. Diese Verpfl ichtung dient dazu, dass Batterien einer
umweltschonenden Entsorgung zugeführt werden können. Geben Sie Batterien
nur im entladenen Zustand zurück.
Anhang
Hinweise zur EG-Konformitätserklärung
Dieses Gerät entspricht hinsichtlich Übereinstimmung mit den
grundlegenden Anforderungen und den anderen relevanten
Vorschriften der europäischen Richtlinie für elektromagnetische
Verträglichkeit 2004/108/EC, der Niederspannungsrichtlinie
2006/95/EC sowie der Ökodesign-Richtlinie 2009/125/EC
(Verordnung 1275/2008 Anhang II, Nr.1).
Die vollständige Original-Konformitätserklärung ist beim
Importeur erhältlich.
IB_63920_SKRI2000A1_LB2.indb Abs3:105 17.01.2012 12:06:17 Uhr

106
Anhang
SKRI 2000 A1
DE
AT
CH
Technische Daten
Steckernetzteil
Hersteller Fai Shing Industries Ltd.
Modell JVSW0702000
Eingangsspannung, -strom 100-240 V
~
50/60 Hz, 350 mA
Ausgangsspannung, -strom 7 V
, 2 A
Schutzklasse
II /
Gerät
Eingangsspannung, -strom 7 V , 2 A
Batterie für Datensicherung
1 x 3 V Typ CR2032
(im Lieferumfang enthalten)
Batterie für Fernbedienung
1 x 3 V Typ CR2025
(im Lieferumfang enthalten)
Leistungsaufnahme
Betrieb ca. 5 W
Standby ca. 1,8 W
Ausgangsleistung Lautsprecher ca. 2 x 1W (bei 10 % Klirrfaktor)
Frequenzbereich Radio (UKW) 87,5 - 108 MHz
Betriebstemperatur +5 - +40 °C
Feuchtigkeit (keine Kondensation) 5 - 90 %
Abmessungen (B x H x T)
(ohne Standfuß)
ca. 30 x 15,7 x 8,4 cm
Gewicht ca. 1070 g
IB_63920_SKRI2000A1_LB2.indb Abs3:106 17.01.2012 12:06:17 Uhr

107
Anhang
SKRI 2000 A1
DE
AT
CH
Garantie
Sie erhalten auf dieses Gerät 3 Jahre Garantie ab Kaufdatum. Das Gerät wurde
sorgfältig produziert und vor Anlieferung gewissenhaft geprüft.
Bitte bewahren Sie den Kassenbon als Nachweis für den Kauf auf. Bitte setzen
Sie sich im Garantiefall mit Ihrer Servicestelle telefonisch in Verbindung. Nur so
kann eine kostenlose Einsendung Ihrer Ware gewährleistet werden.
HINWEIS
Die Garantieleistung gilt nur für Material- oder Fabrikationsfehler, nicht ►
aber für Transportschäden, Verschleißteile oder für Beschädigungen an
zerbrechlichen Teilen, z.B. Schalter oder Akkus.
Das Produkt ist lediglich für den privaten und nicht für den gewerblichen Gebrauch
bestimmt. Bei missbräuchlicher und unsachgemäßer Behandlung, Gewaltanwen-
dung und bei Eingriff en, die nicht von unserer autorisierten Service-Niederlassung
vorgenommen wurden, erlischt die Garantie.
Ihre gesetzlichen Rechte werden durch diese Garantie nicht eingeschränkt. Die
Garantiezeit wird durch die Gewährleistung nicht verlängert. Dies gilt auch für
ersetzte und reparierte Teile.
Eventuell schon beim Kauf vorhandene Schäden und Mängel müssen sofort nach
dem Auspacken gemeldet werden, spätestens aber zwei Tage nach Kaufdatum.
Nach Ablauf der Garantiezeit anfallende Reparaturen sind kostenpfl ichtig.
Service
Service Deutschland
Tel.: 01805 772 033 (0,14 EUR/Min. aus dem dt. Festnetz,
Mobilfunk max. 0,42 EUR/Min.)
E-Mail: k[email protected]
IAN 63920
Service Österreich
Tel.: 0820 201 222 (0,15 EUR/Min.)
E-Mail: k[email protected]
IAN 63920
Service Schweiz
Tel.: 0842 665566 (0,08 CHF/Min., Mobilfunk max. 0,40 CHF/Min.)
E-Mail: k[email protected]
IAN 63920
Importeur
KOMPERNASS GMBH
BURGSTRASSE 21
D-44867 BOCHUM
www.kompernass.com
IB_63920_SKRI2000A1_LB2.indb Abs3:107 17.01.2012 12:06:18 Uhr

108
SKRI 2000 A1
IB_63920_SKRI2000A1_LB2.indb Abs3:108 17.01.2012 12:06:18 Uhr

109
SKRI 2000 A1
GB
Index
Introduction . . . . . . . . . . . 110
Information for these operating
instructions . . . . . . . . . . . . . . . . . .110
Copyright . . . . . . . . . . . . . . . . . . .110
Intended use . . . . . . . . . . . . . . . . .110
Warning notices . . . . . . . . . . . . . .111
Safety . . . . . . . . . . . . . . . . 112
Risks from electric shock . . . . . . . .112
Handling of batteries . . . . . . . . . .112
Basic Safety Instructions . . . . . . . .113
Operating components . . 114
Setting up and connecting 116
Safety instructions . . . . . . . . . . . . .116
Items supplied and transport
inspection . . . . . . . . . . . . . . . . . . .116
Unpacking . . . . . . . . . . . . . . . . . .116
Disposal of the packaging . . . . . .117
Set-up location requirements. . . . .117
Electrical connection . . . . . . . . . . .117
Appliance battery . . . . . . . . . . . . .118
Remote Control Battery . . . . . . . .118
Installation under a wall cupboard .119
Disinstallation . . . . . . . . . . . . . . . .120
Setting the appliance up. . . . . . . .120
Preparing the station for
iPod/iPhone . . . . . . . . . . . . . . . . .120
Providing mains power . . . . . . . . .120
VHF wire antenna . . . . . . . . . . . . .120
Handling and operation . 121
Switching On and Off . . . . . . . . .121
Basic settings . . . . . . . . . . . . . . . .121
Activating the settings menu . . . . .122
Programming the alarm . . . . . . . .126
Kitchen timer . . . . . . . . . . . . . . . . .129
Programming the kitchen timer . . .130
Radio operation . . . . . . . . . . . . . .131
Playback of external audio
appliances . . . . . . . . . . . . . . . . . .134
Connection of iPod/iPhone . . . . .134
Additional functions . . . . . . . . . . .136
Cleaning . . . . . . . . . . . . . . 139
Safety instructions . . . . . . . . . . . . .139
Cleaning the housing . . . . . . . . . .139
Troubleshooting . . . . . . . . 139
Safety instructions . . . . . . . . . . . . .139
Malfunction causes and remedies 140
Storage / Disposal . . . . . . 141
Storage . . . . . . . . . . . . . . . . . . . . .141
Disposal of the appliance . . . . . . .141
Disposing of the batteries . . . . . . .141
Appendix . . . . . . . . . . . . . 141
Information regarding the
EG Declaration of Conformity . . .141
Technical data . . . . . . . . . . . . . . .142
Warranty . . . . . . . . . . . . . . . . . . .143
Service . . . . . . . . . . . . . . . . . . . . .143
Importer . . . . . . . . . . . . . . . . . . . .143
IB_63920_SKRI2000A1_LB2.indb Abs2:109 17.01.2012 12:06:18 Uhr

110
Introduction
SKRI 2000 A1
GB
Introduction
Information for these operating instructions
These operating instructions are a component of the Under-Cabinet Radio
SKRI 2000 A1 (henceforth designated as the appliance) and they provide you
with important information about the intended use, safety, installation and con-
nection as well as operation of the appliance.
These operating instructions must be kept available in the vicinity of the appli-
ance at all times. They are to be read and used by everyone assigned to service
and repair faults in the appliance.
Retain these operating instructions and pass them on, with the appliance, to any
future owners.
Copyright
This documentation is copyright protected. Any copying or reproduction, including
as extracts, as well as the reproduction of images, also in an altered state, is not
permitted without the express written consent of the manufacturer.
Intended use
This appliance is intended only for use in the reception of FM radio stations, as
a kitchen timer, to give alarms through signal tones, radio or iPod / iPhone and
for the connection of external audio appliances (e.g. MP3 player) and iPod /
iPhone in indoor areas. The appliance is intended as a free standing unit or
for installation under a wall cupboard. For this, the built-in foot-pads resp. the
supplied mounting plate must be used. Any other use or uses beyond those men-
tioned here are considered to be unintended use. This appliance is not intended
for use in commercial or industrial environments.
No warranty claims of any kind will be accepted for damage caused by
improper use, incompetent repairs, unauthorised modifi cations or for the use of
unapproved replacement parts. The operator bears the risk alone.
"Made for iPod" and "Made for iPhone" means that an electronic accessory has
been specifi cally designed for connection to an iPod or iPhone and the developer
guarantees that the appliance complies with the performance standards of
Apple. Apple is not responsible for the operation of this appliance or that it com-
plies with safety and regulatory standards. Take note that using this accessory
with an iPod or iPhone can aff ect the wireless performance. iPad, iPhone, iPod,
iPod classic, iPod nano, iPod shuffl e and iPod touch are trademarks of Apple Inc.,
registered in the U.S. and other countries. iPad is a trademark of Apple Inc.
IB_63920_SKRI2000A1_LB2.indb Abs1:110 17.01.2012 12:06:19 Uhr

111
Introduction
SKRI 2000 A1
GB
Warning notices
In these extant operating instructions the following warning notices are used:
DANGER
A warning at this risk level indicates a threateningly dangerous
situation.
In the event that the dangerous situation is not avoided it could lead to death
or serious physical injury.
The directives in this warning are there to avoid the risks of death or serious
►
physical injury.
WARNING
A warning at this risk level indicates a possible dangerous
situation.
If the dangerous situation is not avoided it could lead to physical injuries.
The directives in this warning are there to avoid personal physical injuries.
►
IMPORTANT
A warning at this risk level indicates possible property damage.
If the situation is not avoided it could lead to property damage.
The directives in this warning are there to avoid property damage.
►
NOTICE
A notice indicates additional information that assists in the handling of the ►
appliance.
IB_63920_SKRI2000A1_LB2.indb Abs4:111 17.01.2012 12:06:19 Uhr

112
Safety
SKRI 2000 A1
GB
Safety
In this section you receive important safety information regarding the handling of
the appliance.
This appliance complies with the statutory safety regulations.
Incorrect usage can lead to injuries and property damage.
Risks from electric shock
DANGER
Potentially fatal risks from electric shock!
A potentially fatal risk can arise from contact with live wires or
components!
Observe the following safety instructions to avoid the risks of electric shock:
Do not use the appliance if the power adapter, the power cable or the
►
plug are damaged.
Do not, under any circumstances, open the power adapter. The risk of ►
receiving an electric shock is elevated if the power carrying connections
are touched or the electrical or mechanical construction is altered.
Handling of batteries
WARNING
Risks from improper use! The risk of explosions and injuries
exists!
For the safe handling of batteries observe the following safety instructions:
Do not throw batteries into a fi re.
►
Do not short circuit batteries. ►
Do not attempt to recharge batteries. ►
Regularly check the condition of the batteries. Leaking battery acid can ►
cause permanent damage to the appliance. Special caution should be
shown when handling damaged or leaking batteries. Risk of acid burns!
Wear protective gloves.
Store batteries in a place inaccessible to children. If swallowed seek ►
IMMEDIATE medical attention.
If you do not intend to use the appliance for an extended period of time,
►
remove the batteries.
IB_63920_SKRI2000A1_LB2.indb Abs3:112 17.01.2012 12:06:19 Uhr

113
Safety
SKRI 2000 A1
GB
Basic Safety Instructions
For safe handling of the appliance observe the following safety instructions:
Before using it, check the appliance for signs of visible external damage. Do ■
not put into operation an appliance that is damaged or has been dropped.
Damaged cables or connections should be replaced by authorised qualifi ed
■
persons or by the Customer Service Department.
This appliance is not intended for use by individuals (including children)
■
with restricted physical, physiological or intellectual abilities or defi ciences
in experience and / or knowledge unless they are supervised by a person
responsible for their safety or receive from this person instruction on how the
appliance is to be used.
Children should be supervised to ensure that they do not play with the appliance.
■
Repairs should only be carried out by authorised specialist companies or by ■
the Customer Service Department. Incompetent repairs can result in risks for
the user. In addition, warranty claims become void.
Repairs to the appliance during the warranty period may only be carried
■
out by a customer service fi rm authorised by the manufacturer, if they are
not, additional warranty claims can no longer be considered for subsequent
defects.
Defective components may only be replaced with original replacement parts.
■
Only by using original replacement parts can it be guaranteed that the
safety requirements are being complied with.
Protect the appliance from moisture and penetration by liquids. Never sub-
■
merge the appliance under water, do not place the appliance in the vicinity
of water and do not place any object fi lled with liquids (i.e. fl ower vases) on
the appliance.
Do not place any objects on the appliance.
■
Do not operate the appliance in the vicinity of open fl ames (i.e. candles). ■
Avoid direct sunlight. ■
Always pull on the plug when disconnecting from the mains power socket, ■
never pull on the power cable itself.
In the event of a malfunction occurring or a thunderstorm approaching,
■
remove the plug from the mains power socket.
IB_63920_SKRI2000A1_LB2.indb Abs3:113 17.01.2012 12:06:20 Uhr

114
Operating components
SKRI 2000 A1
GB
Operating components
(for illustrations see front fold out side fi gure A)
Display
2
User: Select user
3
Vol+: Volume increase
4
Mem: Memory storage space selection
5
Vol–: Volume decrease
6
Power: Switching On and Off
7
Function / ST: Function selection / Stereo activation
8
Timer: Set and activate the timer
9
Alarm Mode: Select alarm type
10
AOT / Dimmer: Switch-off timer / Switch display dimmer on / off
11
Mode / Lock: Call-up settings menu / Button lock
12
i-Time Sync
i-Time Sync
Bass: Synchronise time and date display with iPod / iPhone /
Bass boost
13
I Enter
I Enter
: Operation of the iPod / iPhone / Input
14
i
i
/ Memory Scan: Pause/Playback with iPod / iPhone / Automatic radio
station search / retrieve preset radio station
15
Connector power pack
16
i
i
/ Pr– / AL2: Previous function with iPod / iPhone / Call-up previous memory
storage space / Set Alarm 2
17
/ Up: Fast forward with iPod/iPhone / Raise reception frequency
18
i
i
/ Pr+ / AL1: Next function with iPod/iPhone / Call-up next memory storage
space / Set Alarm 1
19
i
i
/ Down: Fast rewind with iPod/iPhone / Lower reception frequency
20
Mounting plate
21
Foot-pads (hinged)
22
Securing bracket for iPod/iPhone
23
Speakers
24
Battery compartment
25
DC-Socket: Current connection socket (7V) for power adapter
26
AUX IN-Socket: Input connection socket for audio appliances with 3.5mm jackplug
27
Wire antenna for VHF reception
IB_63920_SKRI2000A1_LB2.indb Abs3:114 17.01.2012 12:06:20 Uhr

115
Operating components
SKRI 2000 A1
GB
(for illustrations see front fold out side fi gure B)
28
Spacer (for under-cabinet installation)
29
Station for iPod/iPhone
30
: Switching On and Off
31
User: Select user
32
i / Down: Fast rewind with iPod/iPhone / Lower reception frequency
33
i : Pause/Playback with iPod/iPhone
34
iMenu / Enter: Operation with iPod/iPhone / Input
35
Mem: Memory storage space selection
36
Memory-Scan: automatic radio station search/call-up preset radio station
37
Timer: Set and activate the timer
38
Function / ST: Function selection / Stereo activation Mode: Setting menu
39
Vol+: Volume increase
40
i
/ Pr+: Next function with iPod/iPhone / Call-up next memory storage space
41
VOL–: Volume decrease
42
i / Up: Fast forward with iPod/iPhone / Raise reception frequency
43
iTime Sync / Bass: Synchronise time and date display with iPod / iPhone / Bass boost
44
i
i
/ Pr–: Select previous memory storage space / Previous function with iPod/iPhone
45
Mode / Lock: Call-up settings menu / Button lock
46
AOT / Dimmer: Switch-off timer / Switch display dimmer on/off
47
Alarm: Select alarm type
48
Sensor for remote control
IB_63920_SKRI2000A1_LB2.indb Abs3:115 17.01.2012 12:06:23 Uhr

116
Setting up and connecting
SKRI 2000 A1
GB
Setting up and connecting
Safety instructions
WARNING
Damage may occur to property and injuries to people when
taking the appliance into service!
Pay heed to the following safety information to avoid these risks.
Packaging material should not be used as a play thing by children.
►
There is a risk of suff ocation!
To avoid risks to persons and property, observe the requirements for the
►
set-up location and the electrical connections.
Items supplied and transport inspection
The appliance is delivered with the following components as standard:
Under-Cabinet Radio SKRI 2000 A1
▯
Power adapter JVSW0702000 ▯
Mounting plate ▯
4 Securing screws (short) ▯
2 x Spacers including 4 securing screws (long) ▯
Securing bracket for iPod/iPhone ▯
1 x Battery 3 V Type CR2032 ▯
1 x Battery 3 V Type CR2025 ▯
Remote control ▯
Jackplug cable 3.5 to 3.5 mm (50 cm) ▯
This operating manual ▯
NOTICE
Check the contents to ensure everything is present and for signs of visible ►
damage.
If the items supplied are incomplete, or damaged due to defective packaging
►
or transportation, contact the Service Hotline (see chapter Service p. 143).
Unpacking
Remove all appliance parts and the operating instructions from the carton. ♦
Remove all packing material. ♦
IB_63920_SKRI2000A1_LB2.indb Abs3:116 17.01.2012 12:06:25 Uhr

117
Setting up and connecting
SKRI 2000 A1
GB
Disposal of the packaging
The packaging protects the appliance from transport damage. The packaging
materials are selected from the point of view of their environmental friendliness
and disposal technology and are therefore recyclable.
The recirculation of packaging into the material circuit saves on raw material and
reduces the amount of waste generated. Dispose of packaging material that is
no longer needed as per the regionally established regulations.
NOTICE
If possible preserve the original packaging during the warranty period so ►
that, in the event of a warranty claim, you can repackage the appliance
ideally for its return.
Set-up location requirements
For the safe and fault free operation of the appliance, the installation location
must fulfi ll the following conditions:
When setting the appliance up, place it on a fi rm, fl at and even surface.
■
Use the hinged foot-pads.
Set up or mount the appliance in such a way that the extant ventilation open-
■
ings and the speaker are not covered.
Do not operate the appliance in a hot, wet or very humid location or in the
■
vicinity of fl ammable materials.
Do not install the appliance directly over a hotplate.
■
The mains power socket must at all times be easily accessible, so that the ■
plug can be easily and quickly removed if necessary.
Electrical connection
The appliance is powered with a DC voltage of 7V via the supplied power ■
adapter. Connect the appliance to the mains power supply only via the
supplied power adapter.
Before connecting the appliance compare the connection data (Voltage
■
and frequency) on the rating plate with that of your mains electric source.
To avoid potential damage to the appliance this data must concur.
Protect the connection cable against hot surfaces and sharp edges.
■
Ensure that the connection cable is not tightly stretched or kinked. ■
Do not allow the connection cable to hang over edges (Tripwire eff ect). ■
If you do not intend to use the appliance for an extended period, disconnect ■
the plug from the mains power supply.
IB_63920_SKRI2000A1_LB2.indb Abs3:117 17.01.2012 12:06:26 Uhr

118
Setting up and connecting
SKRI 2000 A1
GB
Appliance battery
With the insertion of a battery you can avoid the loss of programmed times
and dates plus alarm times in the event of a possible power failure. The battery
ensures that the internal clock and date continue to run even during a power
failure. The display
will then automatically show the correct time on the resto-
ration of mains power.
NOTICE
The appliance can also be operated without a battery. ►
Inserting / replacing the battery
Open the cover of the battery compartment ♦
24
on the underside of the
appliance by turning the cover with a coin as far as it will go to the left
and then lifting it off .
Insert the battery type CR2032 (supplied) into the battery compartment.
♦
The side with the marking + points upwards.
Close the battery compartment by attaching the cover and then, using a
♦
coin, turn it all the way to the right.
Remote Control Battery
Activating the battery
The remote control battery is already inserted when delivered.
Activate the battery by removing the isolation strip. ♦
Changing the battery
Using a fingernail press the recess (A) to the right ♦
and, at the same time, pull the battery compart-
ment out.
Insert a 3 V battery of type CR 2025 in the
♦
battery compartment. The side with the marking
"+" must point upwards.
Slide the battery compartment completely back
♦
into the remote control.
IB_63920_SKRI2000A1_LB2.indb Abs3:118 17.01.2012 12:06:26 Uhr

119
Setting up and connecting
SKRI 2000 A1
GB
Installation under a wall cupboard
With the supplied mounting plate
20
you can install the appliance under, for ex-
ample, a wall cupboard. For the installation of the appliance proceed as follows:
Slide the mounting plate
♦
20
to the rear and remove the mounting plate
20
.
Select a suitable installation location for the appliance (see also the section
♦
Set-up location requirements p. 117).
Hold the mounting plate ♦
20
under the installation location. Thereby the front
edge of the mounting plate
20
should be approx. 6.8 cm behind the front
of the cupboard so that, after the installation, the appliance is fl ush with the
cupboard. The side edges of the mounting plate
20
must have a spacing of
about 4.5 cm to adjacent cabinets or walls.
NOTICE
If you wish to install the unit fl ush to the left on an adjacent cabinet or a ►
wall, remove the safety clip
22
from the appliance beforehand.
Mark the 4 securing points with a pencil.
♦
Using a spike or nail, make a small depression at the respective marking points. ♦
If wished, insert the supplied spacer ♦
28
with the retaining lug into the
respective depression on the mounting plate
20
.
Firmly screw the mounting plate
♦
20
on with the supplied screws (see illustration).
IB_63920_SKRI2000A1_LB2.indb Abs3:119 17.01.2012 12:06:27 Uhr

120
Setting up and connecting
SKRI 2000 A1
GB
Place the appliance aslant, with the front recesses in the top face of the ♦
appliance, in the mounting plate
20
. Press the rear part of the appliance
upwards against the mounting plate
20
until the appliance audibly locks
into place.
Check to ensure that the appliance is securely seated.
♦
Disinstallation
Pull the appliance forwards and remove the appliance downwards. ♦
Unscrew the screws on the mounting plate ♦
20
and remove the mounting
plate
20
.
Setting the appliance up
As an alternative you can stand the appliance on a level surface. In order to
avoid the ventilation slots and speaker
23
on the bottom of the appliance being
covered, the two foot-pads
21
on the appliance must be hinged outwards:
Reach into the recess on the side of the respective foot-pad and pull the
♦
hinged foot out as far as it will go.
Select a suitable installation location for the appliance (see also the section
♦
Set-up location requirements p. 117).
Preparing the station for iPod/iPhone
You can connect your iPod/iPhone to the appliance. For this you must fold the
station
29
down and install the locking clip
22
:
Fold the station
♦
29
all the way down.
Remove the locking clip
♦
22
from the side of the appliance.
On each side of the station ♦
29
there is a recess. Slide the locking clip
22
from the front onto the station
29
so that the retaining lugs engage in the
recesses.
Providing mains power
Connect the connector plug of the power adapter ♦
15
into the DC socket
25
on the rear panel of the appliance.
Insert the power adapter
♦
15
into a mains power socket.
VHF wire antenna
Unwind the wire antenna ♦
27
completely for VHF reception.
IB_63920_SKRI2000A1_LB2.indb Abs3:120 17.01.2012 12:06:32 Uhr

121
Handling and operation
SKRI 2000 A1
GB
Handling and operation
In this section you receive important information for the handling and operation
of the appliance.
Switching On and Off
After connecting the appliance to the mains power supply, it automatically starts
the setting system. In the display
the text „PLEASE WAIT FOR SETTING
THANKS“ appears for about 3 to 5 minutes. Should a signal be received during
this period, the system is updated automatically.
NOTICE
To cancel this process, press any button. ►
The system then starts with the following default settings:
Date/Time
■
Radio is switched off ■
Clock mode/Standby operation is active ■
Display dimmer is active ■
With connection to the mains power supply, the appliance switches to clock/
standby operation. The appliance can be switched on or off via the button
Power
6
or the -button
30
on the remote control.
Using the button Function / ST
7
or the button Function / ST
38
on the remote
control, you can switch back and forth between the modes radio, iPod and AUX.
NOTICE
The button ► Power
6
or the -button
30
on the remote control do not
completely disconnect the appliance from the mains power supply. The
appliance also consumes power when in standby-mode. To completely
disconnect the appliance from the mains power supply, the power adapter
15
must be removed from the mains power socket.
Basic settings
After the appliance has been connected to the mains power supply it shows the
time of day and the day of the week in the display
. The appliance is in the
operational mode clock/standby operation.
IB_63920_SKRI2000A1_LB2.indb Abs3:121 17.01.2012 12:06:34 Uhr

122
Handling and operation
SKRI 2000 A1
GB
Activating the settings menu
To activate the settings menu, in the mode clock/standby operation press the
button Mode / Lock
11
or the button Mode Lock
45
on the remote control. The
time of day, shown in the display
, begins to blink. Each further actuation of
the button Mode / Lock
11
or
45
switches to the next setting potential. The menu
item sequence is:
Setting the time of day
▯
Setting the date ▯
Setting the memory function ▯
Set the Update Mode ▯
Switch display dimmer on/off ▯
Set display dimmer start time ▯
Setting the time of day format ▯
NOTICE
The setting menu ends automatically if you do not actuate any buttons for ►
approx. 15 seconds. The executed setting(s) is/are saved.
Setting the time
Prerequisite: The appliance is in the operational mode clock/standby operation.
Press the button Mode / Lock
♦
11
or the Mode Lock button
45
on the remote
control once. The time of day indicator begins to blink.
Using the buttons
♦
/ Up
17
and
i
i
/ Down
19
or the / Up
42
and
/ Down buttons
32
on the remote control, set the current time. With each
press on the button the time of day changes by one minute. Holding the
respective button down for more than 2 seconds starts the speed setting.
Press the button Mode / Lock
♦
11
, or the Mode Lock
45
button on the remote
control, once again to save the current setting and move on to the next
menu item.
NOTICE
The time of day will revert back to ► if the appliance is disconnected
from the mains power supply and no battery is inserted or if the battery is
too weak.
IB_63920_SKRI2000A1_LB2.indb Abs3:122 17.01.2012 12:06:35 Uhr

123
Handling and operation
SKRI 2000 A1
GB
Setting the date
Prerequisite: The appliance is in the operational mode clock/standby operation.
Press the button Mode / Lock
♦
11
, or the Mode Lock
45
button on the remote
control, twice. The date indicator begins to blink.
Using the buttons ♦
/ Up
17
and
i
i
/ Down
19
or the / Up
42
and
/ Down buttons
32
on the remote control, set the current date. With
each press of the button the date is changed by one day. The weekday
indicator changes automatically. Holding the respective button down for
more than 2 seconds starts the speed setting.
Press the button Mode / Lock
♦
11
, or the Mode Lock
45
button on the remote
control, once again to save the current setting and move on to the next menu item.
NOTICE
The date will revert back to ► if the appliance is disconnected
from the mains power supply and no battery is inserted or if the battery is
too weak.
Setting the memory function
You can set up to 6 dates on which an automatic reminder will be triggered.
The function SDA (Special Day Alert) is useful as a reminder, for example, of
birthdays or other recurring events. The reminder occurs every year on the same
date. On these dates an alarm tone is sounded for 10 minutes, every hour on the
hour, from 08:00 to 23:00.
Prerequisite: The appliance is in the operational mode clock/standby operation.
Press the button Mode / Lock
♦
11
, or the Mode Lock
45
button on the remote
control, three times. The current setting of the selected reminder dates is
shown alternating with the indicator . Next to the indicator is the
number of the memory slot for that date. Possible classifi cations are to
.
Using the button
♦
i
i
/ Memory Scan
14
, or the Memory-Scan
36
button
on the remote control, select storage slot of the date to be set.
Using the buttons
♦
/ Up
17
and
i
i
/ Down
19
or the / Up
42
and
/ Down
32
buttons on the remote control, set the current date for
this memory slot. With each press of the button the date is changed by one
day. Holding the respective button down for more than 2 seconds starts the
speed setting.
IB_63920_SKRI2000A1_LB2.indb Abs3:123 17.01.2012 12:06:37 Uhr

124
Handling and operation
SKRI 2000 A1
GB
NOTICE
Press the button Timer ►
8
, or the Timer
37
button on the remote con-
trol, to ignore the year. In the display
only the day and the month
are indicated. The memory function will then be activated every year
on this date.
Press the button Mode / Lock
♦
11
, or the Mode Lock
45
button on the remote
control, once again to save the current setting and move on to the next
menu item.
Set the Update Mode
Prerequisite: The appliance is in the operational mode clock/standby operation.
Press the button Mode / Lock
♦
11
, or the Mode Lock
45
button on the remote
control, four times. In the display appears and a blinking clock
symbol .
Press the button
♦
i
i
/ Down
19
, or the button / Down
32
on the remote
control, to switch the automatic RDS function off . The blinking clock symbol
extinguishes.
Press the button
♦
/ Up
17
, or the button / Up
42
on the remote
control, to activate the automatic RDS function. The blinking clock symbol
appears.
Press the button Mode / Lock ♦
11
, or the Mode Lock
45
button on the remote
control, once again to save the current setting and move on to the next
menu item.
Switching time controlled display dimming on/off
Prerequisite: The appliance is in the operational mode clock/standby operation.
This appliance has two options for display dimming.
1. Time conrtrolled display dimming
2. Setting the display dimming manually (see also chapter Switching the
display dimmer on/off manually S. 138).
Press the button Mode / Lock
♦
11
, or the Mode Lock
45
button on the remote
control, fi ve times. The current setting of the display dimmer appears (
or ).
Using the button
♦
/ Up
17
, or the / Up
42
button on the remote
control, select " ", the display light extinguishes after 15 seconds.
Using the button ♦
i
i
/ Down
19
, or the / Down
32
button on the
remote control, select " ", the display light now glows continuously.
IB_63920_SKRI2000A1_LB2.indb Abs3:124 17.01.2012 12:06:38 Uhr

125
Handling and operation
SKRI 2000 A1
GB
Press the button Mode / Lock ♦
11
, or the Mode Lock
45
button on the remote
control, once again to save the current setting and move on to the next
menu item.
Mode Display
Indica-
tor
Display
lighting
Control with the button AOT/Dimmer
10
or
46
Time
control-
led
Dimmer
OFF
DT OFF Is set by the
AOT / Dim-
mer button
DIM OFF: Display lighting glows continuously
DIM ON: Display lighting off ; press any button and
the display lighting switches on for 15 seconds.
Time
control-
led
Dimmer
ON
DT ON Off by default,
from 23:00 to
05:59
23:00 pm -
05:59 am
Press any button and the display
lighting switches on for 60 seconds.
06:00 am -
22:59 pm
DIM OFF: Display lighting glows
continuously
DIM ON: Display lighting off ; press
any button and the display lighting
switches on for 15 seconds.
Setting the display dimmer start time
Prerequisite: The appliance is in the operational mode clock/standby operation.
Press the button Mode / Lock
♦
11
, or the Mode Lock
45
button on the remote
control, six times. The current start time of the display dimmer ( ) is
shown alternating with the indicator .
Using the buttons
♦
/ Up
17
and
i
i
/ Down
19
, or the / Up
42
and
/ Down
32
buttons on the remote control, set the desired start time.
With each press on the button the start time changes by one minute. Holding
the respective button down for more than 2 seconds starts the speed setting.
Press the button Mode / Lock ♦
11
, or the Mode Lock
45
button on the remote
control, once again to save the current setting and move on to the next
menu item.
Setting the time of day format
Prerequisite: The appliance is in the operational mode clock/standby operation.
Press the button Mode / Lock
♦
11
, or the Mode Lock
45
button on the remote
control, seven times. The current setting for the time of day format is shown
( = 24 hour format or = 12 hour format).
Using the button
♦
/ Up
17
, or the button / Up
42
on the remote
control, change the time format to if you want a clock display in
12-hour format.
IB_63920_SKRI2000A1_LB2.indb Abs3:125 17.01.2012 12:06:41 Uhr

126
Handling and operation
SKRI 2000 A1
GB
Using the button ♦
i
i
/ Down
19
, or the / Down
32
button on the
remote control, change the time format to
, if you want a clock
display in 24-hour format.
Press the button Mode / Lock
♦
11
, or the Mode Lock
45
button on the remote
control, once again to save the current setting and to return to the basic settings.
Programming the alarm
This appliance has two alarms available. All settings for both alarms can be
carried out independently of each other. When programming the alarm times
you can select whether at the programmed time an alarm tone should sound,
the radio should start playing or the iPod/iPhone should switch on.
NOTICE
If, during alarm programming, a further button is not pressed within ►
approx. 15 seconds, the alarm will activate with the current settings.
Setting alarm times
Press the button Alarm Mode ♦
9
, or the button Alarm
47
on the remote
control. The set alarm time of the respective alarm is shown blinking in the
display and the indicator resp. appears. The weekdays on which
this alarm is activated are shown above the time indicator.
Using the buttons
♦
/ Up
17
and
i
i
/ Down
19
, or the / Up
42
and
/ Down
32
buttons on the remote control, set the desired alarm
time. With each press on the button the alarm time changes by one minute.
Holding the respective button down for more than 2 seconds starts the
speed setting.
Setting the weekdays
In alarm-mode, press the button Function / ST ♦
7
, or the button Function /
ST
38
on the remote control, to toggle between the weekday combinations
Mon-Fri, Sat-Sun or Mon-Sun. The respective selected combination is indi-
cated above the alarm time.
Press and hold the button Function / ST ♦
7
, or the Function / ST
38
button
on the remote control, for at least 2 seconds, so as to switch between the
weekday combinations and adjustment options for an individual weekday.
NOTICE
With the adjustment options for an individual weekday, switch between ►
the weekdays with the button Function / ST
7
, or the button Func-
tion / ST
38
on the remote control.
IB_63920_SKRI2000A1_LB2.indb Abs3:126 17.01.2012 12:06:43 Uhr

127
Handling and operation
SKRI 2000 A1
GB
Setting the alarm with an alarm tone
To select an individual "alarm tone" option for the respective alarm, in ♦
alarm-mode press the button
i
i
/ Pr+ / AL1
18
or the button
i
i
/ Pr– / AL2
16
resp. the button Pr+
40
or the button Pr–
44
on the remote control,
until in the display
the symbol appears.
Setting the alarm with radio
If it is intended that the radio switches on at the alarm time, carry out the follow-
ing settings before activation of the alarm:
Switch the radio on by pressing the button
♦ Power
6
, or the button
30
on the remote control, and with the button Function / ST
7
, or the button
Function / ST
38
on the remote control, select the operating mode radio.
Select the radio station with which you wish to be woken (see chapter
♦
Manual station selection p. 132 or Search for the next station
p. 132).
With the buttons Vol+
♦
3
and Vol–
5
, or the buttons Vol+
39
and Vol–
41
on the remote control, set the desired sound volume level (see chapter
Adjusting the volume p. 132).
Switch the radio off by pressing the button
♦ Power
6
, or the button
30
on the remote control.
To select the "radio" option for the respective alarm, in alarm-mode press the
♦
button
i
i
/ Pr+ / AL1
18
or the button
i
i
/ Pr– / AL2
16
resp. the button
Pr+
40
or the button Pr–
44
on the remote control, until in the display
the symbol appears.
Setting the alarm with iPod/iPhone
If it is intended that the iPod/iPhone switches on at the alarm time, carry out the
following settings before activation of the alarm:
Switch the appliance on by pressing the button
♦ Power
6
, or the
button
30
on the remote control, and with the button Function / ST
7
, or
the button Function / ST
38
on the remote control, select the operating mode
.
Insert your iPod and/or iPhone into the station
♦
29
.
Select a title (or an album or playlist) on your iPod / iPhone.
♦
With the buttons Vol+ ♦
3
and Vol–
5
, or the Vol+ button
39
and the
Vol– button
41
on the remote control, set the desired sound volume level
(see chapter Adjusting the volume p. 132).
Switch your iPod / iPhone in the pause mode, or switch the power off .
♦
IB_63920_SKRI2000A1_LB2.indb Abs3:127 17.01.2012 12:06:45 Uhr

128
Handling and operation
SKRI 2000 A1
GB
Switch the mode iPod off by pressing the button ♦ Power
6
or the but-
ton
30
on the remote control.
To select the "iPod" option for the respective alarm, press the button
♦
i
i
/
Pr+ / AL1
18
, or the button
i
i
/ Pr– / AL2
16
resp. the Pr+ Taste
40
or the
Pr– button
44
on the remote control, until in the display the symbol
appears.
Switching the alarm off
To switch an individual alarm off , in alarm-mode press the button ♦
i
i
/
Pr+ / AL1
18
, or the button
i
i
/ Pr– / AL2
16
resp. the Pr+ button
40
or
the i
Pr– button
44
on the remote control, until in display a symbol no
longer appears.
When the alarm time has arrived
NOTICE
When the alarm time is reached, the switch off timer (if enabled) is immedi- ►
ately terminated.
With the setting "Alarm with an alarm tone", a signal tone sounds. The vol-
ume of the signal tone will continually increase until the maximum sound volume
level has been reached. The duration of the alarm signal is limited to 10 minutes.
The radio is thereby switched to "mute".
With the setting "Alarm with Radio" the radio will be switched on. The previ-
ously selected station will be activated for a maximum of 60 minutes at the set
volume.
With the setting "Alarm with iPod/iPhone" the iPod/iPhone will be
switched on. Playback starts with the last selected title and is played at the set
volume for a maximum of 60 minutes.
Press any button to end the currently sounding alarm.
NOTICE
The alarm becomes active again when the next alarm time has arrived (i.e. ►
on the next day).
IB_63920_SKRI2000A1_LB2.indb Abs3:128 17.01.2012 12:06:48 Uhr

129
Handling and operation
SKRI 2000 A1
GB
Kitchen timer
The appliance has a convenient kitchen timer with which, for example, cooking
and baking times can be monitored. The programmable time range of the kitchen
timer lies between 1 minute and 23 hours, 59 minutes.
Setting the kitchen timer
Press the button Timer ♦
8
, or the button Timer
37
on the remote control. The
indicator shows . In the display the cooking pot symbol for the
kitchen timer is faded in.
Using the buttons
♦
/ Up
17
and
i
i
/ Down
19
, or the / Up-
button
42
and the / Down-button
32
on the remote control, set the
desired running time for the kitchen timer. With each press on the button
the start time changes by one minute. Holding the button down for more
than 2 seconds starts the speed setting.
NOTICE
If, during the setting, approx. 15 seconds passes without any changes tak- ►
ing place, the appliance reverts back to the previous operational mode.
Starting the kitchen timer
After setting the time, press the button Timer ♦
8
, or the button Timer
37
on
the remote control, once again. The displayed time begins to run backwards.
In the display a backwards-running clock
is blended in.
NOTICE
If, during the operation of the kitchen timer, another function is selected, the ►
indicator of the remaining time is faded out. The cooking pot symbol and
the backwards-running clock
continue to be indicated in the display .
Press the button Timer
8
or the button Timer
37
on the remote control once
again to display the remaining time for the kitchen timer for about 10 seconds.
30 seconds before the kitchen timer run time has expired the appliance begins to
acoustically indicate, with individual signal tones, the arrival of the set time. The
intervals between the individual tones will be ever shorter. When the set time has
elapsed, the alarm signal of the kitchen timer sounds as a continuous tone for a
maximum of 60 minutes.
Press the button Timer
♦
8
, or the button Timer
37
on the remote control, to
switch the alarm signal of the kitchen timer off .
IB_63920_SKRI2000A1_LB2.indb Abs3:129 17.01.2012 12:06:50 Uhr

130
Handling and operation
SKRI 2000 A1
GB
Interrupting the kitchen timer.
When the kitchen timer is running, press the button Timer ♦
8
, or the button
Timer
37
on the remote control. The kitchen timer is interrupted. The indicated
remaining time begins to blink.
NOTICE
After approx. 15 seconds the appliance reverts back to the previous opera- ►
tional mode. Press the button Timer
8
, or the button Timer
37
on the remote
control, once again to display the remaining time to elapse on the kitchen timer.
To restart the kitchen timer, press the button Timer
♦
8
, or the button Timer
37
on the remote control, once again. The kitchen timer restarts.
To switch the kitchen timer off before the expiry of the set period, press and
♦
hold the the button Timer
8
, or the button Timer
37
on the remote control,
until in the display
the cooking pot symbol and the backwards running
clock are no longer indicated.
NOTICE
The kitchen timer is switched off immediately in the event of an alarm ►
becoming active.
Programming the kitchen timer
So that it is no longer necessary to continually re-enter them, you can prepro-
gramme the kitchen timer with the most frequently used time periods. Up to
6 time periods can be preprogrammed. By default, the six memory slots are
preprogrammed with 5/10/15/20/25/30 minutes.
For the programming of the kitchen timer proceed as follows:
Press the button Timer
♦
8
, or the button Timer
37
on the remote control, to
activate the kitchen timer.
Using the buttons
♦
/ Up
17
and
i
i
/ Down
19
, or the / Up- button
42
and the / Down-button
32
on the remote control , set the desired run-
ning time for the kitchen timer. With each press on the button the start time
changes by one minute. Holding the button down for more than 2 seconds
starts the speed setting.
Press the button Function / ST
♦
7
, or the button Function / ST
38
on the
remote control, to activate the kitchen timer. Next to the time display a blink-
ing is indicated, next to it appears a number for the fi rst timer.
Using the buttons
♦
i
i
/ Pr+ / AL1
18
and
i
i
/ Pr– / AL2
16
, resp. the Pr+
button
40
or the Pr– button
44
on the remote control, select the memory
slot for the interval to be saved, between and .
IB_63920_SKRI2000A1_LB2.indb Abs3:130 17.01.2012 12:06:52 Uhr

131
Handling and operation
SKRI 2000 A1
GB
Press the button Function / ST ♦
7
, or the button Function / ST
38
on the
remote control, once again to programme the set time onto the selected
memory slot. The blinking element is now indicated as a constant.
Repeat the process for the other memory slots.
♦
Accessing the kitchen timer
To access a programmed time for the kitchen timer proceed as follows:
Press the button Timer
♦
8
, or the button Timer
37
on the remote control, to
activate the kitchen timer.
Using the buttons
♦
i
i
/ Pr+ / AL1
18
and
i
i
/ Pr– / AL2
16
, resp. the Pr+
button
40
or the Pr– button
44
on the remote control, select the memory
slot between and for the required timer interval.
Press the button Timer
♦
8
, or the Timer button
37
on the remote control,
once again to start the kitchen timer.
Radio operation
NOTICE
For good radio reception the wire antenna ►
27
must be completely uncoiled.
Adjust the antenna, whilst in radio operation, for the best reception.
The technical realities of the appliance allow for tuning reception frequen-
►
cies outside of the permitted VHF (FM) range of 87.5 to 108 MHz.
Deviating national regulations may apply in various countries to the
allocated radio frequency ranges. Please note that information received
outside of the assigned radio frequency ranges may not be exploited,
passed on to third parties or otherwise misused.
Switching the radio on/off
Press the button ♦ Power
6
, or the -Taste
30
on the remote control.
The display indicates the mode in which the appliance is currently in.
Press the button Function / ST ♦
7
, or the button Function / ST
38
on the
remote control, several times to select the radio function. The display shows
the reception frequency of the selected radio station.
Switch the radio off by pressing the button
♦ Power
6
, or the -button
30
on the remote control, once again. The appliance switches back to the opera-
tional mode clock/standby operation. The current time of day is shown.
IB_63920_SKRI2000A1_LB2.indb Abs3:131 17.01.2012 12:06:54 Uhr

132
Handling and operation
SKRI 2000 A1
GB
Adjusting the volume.
Using the buttons Vol+ ♦
3
and Vol–
5
, or the Vol+ button
39
and Vol–
button
41
on the remote control, set the desired sound volume level. The
sound volume level will be indicated in the display . You can select a
sound volume level between
and .
Manual station selection
Using single presses on the buttons ♦
/ Up
17
and
i
i
/ Down
19
,
resp. the
/ Up-button
42
and the / Down-button
32
on the remote
control, select the desired radio station. The frequency of the station is
shown in the display . During the tuning the speaker is switched off .
Search for the next station
The appliance can automatically search for the nearest station.
Press and hold the buttons
♦
/ Up
17
and
i
i
/ Down
19
, resp. the
/ Up-button
42
and the / Down-Taste
32
on the remote control, for
at least two seconds. The appliance searches for the nearest station with
suffi cient reception quality.
Repeat this process until you have found the station you are looking for.
♦
Selecting the user
Prerequisite: The appliance is in the radio operational mode.
Press the button User
♦
2
, or the User button
31
on the remote control, to
select the desired user. The current user, to , is indicated in the display
for 10 seconds.
Press the buttons
♦
i
i
/ Pr+ / AL1
18
and
i
i
/ Pr– / AL2
16
resp. the Pr+
button
40
or the Pr– button
44
on the remote control, to choose a prese-
lected memory slot between and .
NOTICE
Every user has 15 memory slots available. The fi rst memory slot for user A ►
is preset by the manufacturer.
IB_63920_SKRI2000A1_LB2.indb Abs3:132 17.01.2012 12:06:56 Uhr

133
Handling and operation
SKRI 2000 A1
GB
Saving stations manually
Prerequisite: The appliance is in the radio operational mode.
The appliance provides 60 memory slots (4 users each with 15 memory locations)
for transmitter frequencies. To save a station frequency proceed as follows:
Tune, as described previously, the desired station.
♦
Press the button Mem ♦
4
, or the Mem button
35
on the remote control. The
symbol MEM, the user and the memory slot appear in the display .
Press the button User ♦
2
, or the User button
31
on the remote control, until
the desired user ( - ) is indicated.
Using the buttons
♦
i
i
/ Pr+ / AL1
18
or
i
i
/ Pr– / AL2
16
, resp. the Pr+
button
40
or the Pr– button
44
on the remote control, select the desired
memory slot for the set transmitter between and .
Press the button Mem
♦
4
, or the Mem button
35
on the remote control. The
reception frequency of the tuned station is saved on the selected memory slot.
Access saved stations
Prerequisite: The appliance is in the radio operational mode.
Press the button User
♦
2
, or the User button
31
on the remote control, until
the desired user ( - ) is indicated.
Using the buttons
♦
i
i
/ Pr+ / AL1
18
or
i
i
/ Pr– / AL2
16
resp. the Pr+
button
40
or the Pr– button
44
on the remote control, select the memory
slots for the saved radio transmitters between and .
IB_63920_SKRI2000A1_LB2.indb Abs3:133 17.01.2012 12:06:59 Uhr

134
Handling and operation
SKRI 2000 A1
GB
Automatic station search (AMS function)
Prerequisite: The appliance is in the radio operational mode.
To allocate the memory slots to the station frequencies with the strongest receivable
signals, an automatic station search can be carried out.
NOTICE
With the carrying out of the following described function all previously ►
saved stations will be lost.
Press and hold the button
♦
i
i
/ Memory Scan
14
, or the Memory-Scan
button
36
on the remote control, for at least three seconds. The appliance
begins the station search and allocates the stations found to the memory
slots to .
On completion of the station search, by a single press on the button
♦
i
i
/ Memory Scan
14
, or Memory Scan button
36
on the remote control,
you can playback all the saved radio stations between and for
10 seconds.
NOTICE
If more than 60 stations are found, only the fi rst 60 reception frequencies will ►
be saved.
If less than 60 radio stations are found, the last memory slots remain un-
►
changed.
Playback of external audio appliances
Connect an external audio appliance, for example, an MP3 player to the ♦
3.5 mm jackplug socket AUX IN
26
on the rear panel of the appliance.
Press the button
♦ Power
6
, or the button
30
on the remote control.
The display indicates the mode in which the appliance is currently in.
Press the button Function / ST
♦
7
, or the button Function / ST
38
on the
remote control, several times to select the function .
Start playback of the external audio appliance and set the volume as
♦
required.
NOTICE
Follow the operating instructions for the external audio appliance. ►
Connection of iPod/iPhone
With the station
29
you can use the appliance as a speaker for your iPod/
iPhone. When you insert the iPod/iPhone in the station it will, in addition, be
automatically charged.
IB_63920_SKRI2000A1_LB2.indb Abs3:134 17.01.2012 12:07:01 Uhr

135
Handling and operation
SKRI 2000 A1
GB
iMenu
Prerequisite: The appliance is in the operational mode iPod.
Press the button
♦
I Enter
I Enter
13
to activate menu management for the
iPod/iPhone.
With this, the following functions can be executed:
Button Function
i
i
/ Pr– / AL2
16
Next function
i
i
/ Pr+ / AL1
18
Previous function
i-Time Sync
i-Time Sync
Bass
12
Synchronise the date and time display of the
appliance with the time on the iPod/iPhone
i
i
/ Memory Scan
14
Stop/continue playback
i
i
/ Down
19
Fast rewind
/ Up
17
Fast forward
I Enter
I Enter
13
brief press: back to menu
long press: confi rm selection
Playback of music
Prepare the docking station
29
as described in the chapter Preparing the
station for iPod/iPhone on p. 120.
Insert your iPod and/or iPhone into the station
♦
29
.
Press the button
♦ Power
6
, or the -button
30
on the remote control.
The display indicates the mode in which the appliance is currently in.
Press the button Function / ST ♦
7
, or the button Function / ST
38
on the
remote control, several times to select the function .
Select a title (or an album or playlist) on your iPod / iPhone.
♦
Press the button ♦
i
i
/ Memory Scan
14
or the -button
33
on the remote
control to start or stop playback.
IB_63920_SKRI2000A1_LB2.indb Abs3:135 17.01.2012 12:07:02 Uhr

136
Handling and operation
SKRI 2000 A1
GB
Charging the iPod/iPhone
If your iPod/iPhone is inserted into the station
29
it will charge automatically until
the battery is full.
NOTICE
The iPod/iPhone will not charge via the back-up battery. ►
Setting the Time/i-Time Synchronisation
The iTime Sync function allows you to synchronize the time and date on the appli-
ance with the time and date on your iPod or iPhone (iPod Touch, iPod Nano and
iPod Classic); older iPod models such as iPod mini do not support this function).
Insert your iPod and/or iPhone into the station
♦
29
.
Press the button
♦
i-Time Sync
i-Time Sync
Bass
12
or the button iTime Sync Bass
43
on the
remote control. The time and date on the iPod or iPhone will be transferred to
the appliance. After the synchronisation is completed, a signal tone sounds.
NOTICE
The time on the iPhone will be updated continuously over the cell phone ►
towers. The time on the iPod corresponds only to the time on your computer
after the last synchronisation. It is possible to have a time diff erence of 59
seconds between the appliance and the synchronised iPod/iPhone.
Additional functions
Stereo function
The appliance supports stereo function. The standard setting is Stereo on. To
change the stereo function, proceed as follows:
Press and hold the button Function / ST
♦
7
, or the button Function / ST
38
on
the remote control , until the current setting of the stereo function is indicated
in the display
( or ).
Press and once again hold the button Function / ST
♦
7
, or the button Func-
tion / ST
38
on the remote control, to change the setting.
NOTICE
With the stereo reception of a radio transmitter and an activated stereo ►
feature, there appears in the display for 3 seconds the indicator icon.
IB_63920_SKRI2000A1_LB2.indb Abs3:136 17.01.2012 12:07:04 Uhr

137
Handling and operation
SKRI 2000 A1
GB
Button lock
You can lock the buttons of the appliance so that settings cannot be altered by
unauthorised people.
Press and hold the button Mode / Lock
♦
11
, or the Mode Lock button
45
on
the remote control, for at least two seconds to switch the button lock either
on or off . When the button lock is switched on, in the display
the symbol
appears.
To release the lock, press and hold the button Mode / Lock
♦
11
, or the Mode
Lock button
45
on the remote control, for at least two seconds.
Bass accentuation
With the bass accentuation you can switch on an enhanced playback of the low
frequencies.
For about 2 seconds press the button
♦
i-Time Sync
i-Time Sync
Bass
12
, or the button
iTime Sync Bass
43
on the remote control, to switch the bass accentuation
on or off . With bass accentuation switched on, the symbol appears
in the display.
Alternating display
Prerequisite: The appliance is in the operational mode clock/standby operation.
Press the button
♦
i
i
/ Down
19
, or the / Down button
32
on the remote
control, the date and time are indicated alternately.
Press the button
♦
i
i
/ Down
19
, or the / Down button
32
on the remote
control, once more and only the time is indicated.
Prerequisite: The appliance is in the radio operational mode.
By pressing the button Mode / Lock
♦
11
, or the Mode Lock button
45
on
the remote control, the reception frequency resp. the station name (for RDS
reception) and the time are displayed alternately.
Press the button Mode / Lock ♦
11
, or the Mode Lock button
45
on the remote
control, once more to only indicate the time.
Press the button Mode / Lock
♦
11
or the Mode Lock button
45
on the remote
control, once more to indicate only the reception frequency resp. the station
name (for RDS reception).
IB_63920_SKRI2000A1_LB2.indb Abs3:137 17.01.2012 12:07:05 Uhr

138
Handling and operation
SKRI 2000 A1
GB
Automatic switch off (Sleep function)
With the sleep function the appliance switches itself off after a time lapse of
between 5 and 90 minutes.
Press the button AOT / Dimmer
♦
10
, or the AOT Dimmer button
46
on the
remote control, to call the function up. The currently remaining time until the
radio switches itself off is shown.
Press the button AOT / Dimmer ♦
10
, or the AOT Dimmer button
46
on the
remote control, repeatedly to set the desired time period. After about
15 seconds the appliance returns to an indication of the selected mode.
NOTICE
The setable time period ranges from 90 to 5 minutes. The setting takes ►
place in stages of 5 minutes. Afterwards, the indicator appears.
With the indicator the sleep function is switched off .
Should the appliance be in the mode clock/standby operation, by pressing ►
the button AOT / Dimmer
10
or the AOT Dimmer button
46
on the remote
control, you switch the appliance into the last selected mode (radio / iPod
/ AUX).
Switching the display dimmer on/off manually
Press and hold the button AOT / Dimmer ♦
10
, or the AOT Dimmer button
46
on the remote control, until in the display
the current setting of the dis-
play dimmer is indicated ( or ).
Press and hold the button AOT / Dimmer
♦
10
, or the AOT Dimmer button
46
on
the remote control, once again to change the current setting (see also the
chapter Switching time controlled display dimming on/off p. 124).
After about 15 seconds, the last indicated screen display reappears.
IB_63920_SKRI2000A1_LB2.indb Abs3:138 17.01.2012 12:07:08 Uhr

139
Cleaning/Troubleshooting
SKRI 2000 A1
GB
Cleaning
Safety instructions
DANGER
Potentially fatal risk from electric shock!
Remove the plug from the mains power socket before you start cleaning the ►
appliance.
IMPORTANT
Damage to the appliance!
To avoid irreparable damage, ensure that no moisture can get inside the ►
appliance when you are cleaning it.
Cleaning the housing
Clean the surfaces of the appliance with a soft, dry cloth. ■
Troubleshooting
In this section you receive important information for the localisation and remedy-
ing of malfunctions. Observe these instructions to avoid risks and damage.
Safety instructions
WARNING
Pay heed to the following safety information to avoid risks and property damage:
Repairs to electronic appliances may only be carried out by specialists who
►
have been trained by the manufacturer. Considerable risk for the consumer and
damage to the appliance can occur as a result of incompetent repairs.
IB_63920_SKRI2000A1_LB2.indb Abs3:139 17.01.2012 12:07:09 Uhr

140
Troubleshooting
SKRI 2000 A1
GB
Malfunction causes and remedies
The following table will help with the localising and remedying of minor malfunc-
tions:
Defect Possible cause Solution
The display is
showing nothing.
The power adapter
15
has
not been connected.
Insert the power adapter
15
into a
mains power socket.
The mains power socket is
not supplying any power.
Check the circuit fuse.
No sound
The volume is set to minimum.
Increase the sound volume with the
button Vol+
3
.
The appliance is in the
operational mode clock/
standby operation.
With the button
Power
6
switch
the appliance into the operating mode
Radio/iPod/Aux.
Playback of the external
audio appliance has not
started.
Start playback of the external audio
appliance.
Playback of the iPod/iPhone
has not started.
Start playback of the iPod/iPhone.
The iPod/iPhone is not
properly inserted into the
station
29
Insert the iPod/iPhone correctly into
the station
29
.
Noisy radio
reception
The radio station is not
properly tuned in.
Using the buttons
/ Up
17
and
i
i
/ Down
19
, tune the radio station
in to the ideal reception.
Reception is too weak.
Try to improve reception by moving
the wire antenna
27
.
iPod/iPhone is not
being charged
The iPod/iPhone is not
properly inserted into the
station
29
.
Insert the iPod/iPhone correctly into
the station
29
.
The alarm with
iPod/iPhone has
not functioned
The selected playlist on your
iPod/iPhone is empty.
Ensure that the playlist contains music.
NOTICE
If you cannot solve the problem with the aforementioned methods, please ►
contact the Customer Service Department.
IB_63920_SKRI2000A1_LB2.indb Abs3:140 17.01.2012 12:07:09 Uhr

141
Storage/Disposal/Appendix
SKRI 2000 A1
GB
Storage / Disposal
Storage
If you do not intend to use the appliance for an extended period of time, discon-
nect it from the mains power supply, remove the battery and store it at a clean,
dry location that is not subjected to direct sunlight.
Disposal of the appliance
Do not dispose of the appliance in your normal domestic waste.
This product is subject to the provisions of European Directive
2002/96/EC-WEEE (Waste Electrical and Electronic Equipment).
Dispose of the appliance through an approved disposal centre or at your com-
munity waste facility. Observe the currently applicable regulations. In case of
doubt, please contact your waste disposal centre.
Disposing of the batteries
Batteries must not be disposed of in your household waste. Every consumer is
statutorily obliged to dispose of batteries at a collection centre in his/her commu-
nity/district or a at a dealer. This obligation is intended to ensure that batteries
are disposed of in an environmentally friendly manner. Dispose of batteries only
when they are fully discharged.
Appendix
Information regarding the EG Declaration of Conformity
This appliance complies with, in regard to conformance
to the basic requirements and other relevent regulations,
the European Directive for Electromagnetic Compatibility
2004/108/EC, the Low Voltage Directive 2006/95/EC as
well as the Eco-Design Directive 2009/125/EC (Supplement
1275/2008 Appendix II, Nr.1).
The complete original Declaration of Conformity can be
obtained from the importer.
IB_63920_SKRI2000A1_LB2.indb Abs3:141 17.01.2012 12:07:11 Uhr

142
Appendix
SKRI 2000 A1
GB
Technical data
Mains plug
Manufacturer Fai Shing Industries Ltd.
Model JVSW0702000
Input voltage, current 100-240 V
~
50/60 Hz, 350 mA
Output voltage, current 7 V
, 2 A
Protection class
II /
Appliance
Input voltage, current 7 V , 2 A
Battery for data retention
1 x 3 V Type CR2032
(supplied)
Battery for remote control
1 x 3 V Type CR2025
(supplied)
Power consumption
Operation approx. 5 W
Standby approx. 1.8 W
Speaker power output:
approx. 2 x 1 W
(with 10 % harmonic distortion)
Radio frequency range (VHF) 87.5 - 108 MHz
Operating temperature +5 - +40 °C
Humidity (no condensation) 5 - 90 %
Measurements (W x H x D)
(without stand)
approx.
30 x 15.7 x 8.4
cm
Weight approx. 1070 g
IB_63920_SKRI2000A1_LB2.indb Abs3:142 17.01.2012 12:07:11 Uhr

143
Appendix
SKRI 2000 A1
GB
Warranty
With this appliance you receive a 3 year warranty from the date of purchase.
The appliance has been manufactured with care and meticulously examined
before delivery.
Please retain your receipt as proof of purchase. In the case of a warranty claim,
please make contact with our service department by telephone. Only in this way
can a post-free dispatch for your goods be assured.
NOTICE
The warranty is valid only for material or manufacturing defects not, ►
however, for transport damage, wear and tear or for damage to breakable
parts, i.e. switches or batteries.
This appliance is intended solely for private, non-commercial use. If this product
has been subjected to improper or inappropriate handling, abuse, or modifi ca-
tions not carried out by one of our authorised sales and service outlets, the
warranty becomes void.
Your statutory rights are not restricted in any way by this warranty. The warranty
period will not be extended as a result of warranty adjustments. This applies also
to replacement and repaired parts.
Possible damage and/or faults present at the time of purchase must be reported
immediately after unpacking or, at the very latest, within two days after the
purchase date.
After expiry of the warranty period incidental repairs are subject to payment.
Service
Service Great Britain
Tel.: 0871 5000 720 (£ 0.10/Min.)
E-Mail: k[email protected]
IAN 63920
Importer
KOMPERNASS GMBH
BURGSTRASSE 21
44867 BOCHUM, GERMANY
www.kompernass.com
IB_63920_SKRI2000A1_LB2.indb Abs3:143 17.01.2012 12:07:11 Uhr

2
IAN 63920
KOMPERNASS GMBH
Burgstraße 21
D-44867 Bochum
www.kompernass.com
Version des informations · Stand van de informatie
Stand der Informationen · Last Information Update:
01 / 2012 · Ident.-No.: SKRI2000A1092011-3
Documenttranscriptie
RADIO SOUS-MEUBLE SKRI 2000 A1 RADIO SOUS-MEUBLE ONDERBOUW-RADIO Instructions d‘utilisation et consignes de sécurité Bedienings- en veiligheidsinstructies UNTERBAU-RADIO UNDER-CABINET RADIO Bedienungs- und Sicherheitshinweise Operation and Safety Notes IAN 63920 2 Avant de lire le mode d‘emploi, ouvrez la page contenant les illustrations et familiarisez-vous ensuite avec toutes les fonctions de l‘appareil. Vouw vóór het lezen de pagina met de afbeeldingen open en maak u vertrouwd met alle functies van het apparaat. Klappen Sie vor dem Lesen die Seite mit den Abbildungen aus und machen Sie sich anschließend mit allen Funktionen des Gerätes vertraut. Before reading, unfold the page containing the illustrations and familiarise yourself with all functions of the device. FR / BE NL / BE DE / AT / CH GB Instructions d‘utilisation et consignes de sécurité Bedienings- en veiligheidsinstructies Bedienungs- und Sicherheitshinweise Operation and Safety Notes Page 1 Pagina 37 Seite 73 Page 109 A 20 19 2 3 4 5 1 18 17 1 16 6 7 8 9 10 11 12 13 14 15 22 21 21 23 24 27 23 25 26 B 28 28 30 31 32 33 34 35 36 37 48 29 38 39 40 41 42 4 43 44 45 4 46 47 Sommaire Introduction . . . . . . . . . . . . . .2 Fonctionnement et opération 13 Informations relatives à ce mode d'emploi . . . . . . . . . . . . . . . . . . . . . . 2 Droits d'auteur . . . . . . . . . . . . . . . . . 2 Utilisation conforme . . . . . . . . . . . . . 2 Avertissements . . . . . . . . . . . . . . . . . 3 Eléments de commande . . . . .6 Allumer et éteindre . . . . . . . . . . . . . 13 Réglages de base . . . . . . . . . . . . . . 13 Activation du menu de réglage . . . 14 Programmation de l'alarme / réveil . 18 Minuterie de cuisine . . . . . . . . . . . . 21 Programmation de la minuterie de cuisine. . . . . . . . . . . . . . . . . . . . . . . 22 Mode radio . . . . . . . . . . . . . . . . . . 23 Lecture d'appareils audio externes . 26 Raccordement d'un iPod / d'un iPhone 26 Autres fonctions . . . . . . . . . . . . . . . 28 Installation et raccordement .8 Nettoyage . . . . . . . . . . . . . . .31 Consignes de sécurité. . . . . . . . . . . . 8 Accessoires fournis et inspection de transport . . . . . . . . . . . . . . . . . . . . . . 8 Déballage. . . . . . . . . . . . . . . . . . . . . 8 Recyclage de l'emballage . . . . . . . . 9 Exigences imposées au lieu d'installation . . . . . . . . . . . . . . . . . . . 9 Raccordement électrique . . . . . . . . . 9 Pile . . . . . . . . . . . . . . . . . . . . . . . . . 10 Pile de la télécommande . . . . . . . . 10 Fixation sous un meuble suspendu . 11 Démontage . . . . . . . . . . . . . . . . . . . 12 Installation de l'appareil . . . . . . . . . 12 Préparation de la station support pour iPod ou iPhone . . . . . . . . . . . 12 Raccordement à l'alimentation électrique . . . . . . . . . . . . . . . . . . . . 12 Antenne baladeuse FM . . . . . . . . . 12 Consignes de sécurité. . . . . . . . . . . 31 Nettoyage du boîtier . . . . . . . . . . . 31 Sécurité . . . . . . . . . . . . . . . . . .4 Danger dû au courant électrique . . . 4 Concernant l'usage des piles . . . . . . 4 Consignes de sécurité fondamentales. 5 SKRI 2000 A1 FR BE Dépannage . . . . . . . . . . . . . .31 Consignes de sécurité. . . . . . . . . . . 31 Causes des pannes et remèdes . . . 32 Entreposage / Mise au rebut 33 Entreposage . . . . . . . . . . . . . . . . . . 33 Mise au rebut . . . . . . . . . . . . . . . . . 33 Mise au rebut des piles . . . . . . . . . 33 Annexe . . . . . . . . . . . . . . . . .33 Renvois à la déclaration de conformité de l'UE . . . . . . . . . . . . . 33 Caractéristiques techniques . . . . . . 34 Garantie . . . . . . . . . . . . . . . . . . . . . 35 Service après-vente. . . . . . . . . . . . . 35 Importateur . . . . . . . . . . . . . . . . . . . 35 1 Introduction Introduction FR BE Informations relatives à ce mode d'emploi Ce mode d'emploi fait partie intégrante de la radio sous-meuble SKRI 2000 A1 (désignée ci-après par appareil) et vous donne des indications importantes sur l'usage conforme, la sécurité, le montage et le raccordement, ainsi que l'opération de l'appareil. Le mode d'emploi doit en tout temps être accessible à proximité de l'appareil. Il doit être lu et appliqué par chaque personne qui est chargé d'utilisée l'appareil et de réparer ses défaillances. Conservez ce mode d'emploi et remettez-le au nouveau propriétaire de l'appareil. Droits d'auteur Cette documentation est protégée par les droits d'auteur. Toute reproduction ou réimpression, y compris sous forme d'extraits, ainsi que la reproduction des illustrations, y compris dans un état modifié, n'est autorisée qu'avec l'autorisation écrite du fabricant. Utilisation conforme Cet appareil est destiné à la réception dans des locaux fermés de programmes radiophoniques en ondes UC (UKW), il est raccordable à des appareils audio externes (tels qu'un lecteur MP3), à un iPod ou un iPhone, il peut aussi fonctionner comme minuterie de cuisine et émetteur d'alarme. L'appareil peut être monté dans une armoire ou autre : Des piéds supports et une plaque de montage livrée avec l'appareil sont prévues pour son installation. Tout usage divergent ou toute utilisation allant au-delà seront considérés comme non conformes. Cet appareil n'est pas conçu pour être utilisé dans des contextes commerciaux ou industriels. Toutes prétentions résultant de dommages découlant d'une utilisation non conforme à l'usage prévu, de réparations inappropriées, de modifications apportées sans autorisation ou de l'utilisation de pièces de rechange non agréées, ne seront pas prises en compte. La personne opérant l'appareil est seule à assumer le risque. Les expressions "Made for iPod“ et "Made for iPhone“ signalent la présence d'un dispositif électronique dédié pour le raccordement d'un iPod ou d'un iPhone, dispositif dont les performances sont conformes aux spécifications d'Apple. Apple n'est en rien responsable de l'utilisation de cet appareil par son propriétaire et donc des conditions de sécurité dans son emploi. Noter que l'utilisation de ce dispositif électronique avec un iPod ou un iPhone peut avoir une incidence sur les fonctionnalités des liaisons sans fil. iPad, iPhone, iPod, iPod classic, iPod nano, iPod shuffle et iPod touch sont des marques déposées de la société Apple Inc. aux USA et dans d'autres pays. iPad est aussi une marque déposée de la société Apple Inc. 2 SKRI 2000 A1 Introduction Avertissements FR BE Les avertissements suivants sont utilisés dans ce mode d'emploi : DANGER Un avertissement de ce niveau de danger signale une situation éventuellement dangereuse. Si la situation dangereuse n'est pas évitée, elle peut déboucher sur un décès ou de graves blessures. ► Il faut suivre les instructions de ces avertissements pour éviter tout risque de décès ou de graves blessures de personnes. AVERTISSEMENT Un avertissement de ce niveau de danger signale une situation potentiellement dangereuse. Des accidents peuvent résulter de l'incapacité à éviter la situation dangereuse. ► Voilà pourquoi il est important de suivre les instructions figurant dans cet avertissement pour éviter que des personnes ne soient blessées. ATTENTION Un avertissement de ce niveau de danger signale un dommage matériel potentiel. Si vous ne pouvez éviter la situation dangereuse, cela peut entraîner des dommages matériels. ► Suivre les instructions dans cet avertissement pour éviter tous dommages matériels. REMARQUE ► Une remarque signale des informations supplémentaires qui facilitent la manipulation de l'appareil. SKRI 2000 A1 3 Sécurité Sécurité FR BE Ce chapitre contient des consignes de sécurité importantes se rapportant à la manipulation de l'appareil. Cet appareil est conforme aux consignes de sécurité prescrites. Une utilisation non conforme peut provoquer des blessures corporelles et des dégâts matériels. Danger dû au courant électrique DANGER Danger de mort causé par le courant électrique ! Danger de mort en cas de contact avec des lignes électriques ou des composants sous tension ! Veuillez observer les consignes de sécurité suivantes afin d'éviter un danger dû au courant électrique : ► Ne pas utiliser cet appareil si le bloc d'alimentation tension secteur, le câble de raccordement ou le connecteur sont endommagés. ► N'ouvrir en aucun cas le bloc d'alimentation secteur. En cas de contact avec des raccordements sous tension et en cas de modification de la structure électrique et mécanique, il existe un danger d'électrocution. Concernant l'usage des piles AVERTISSEMENT Danger par l'usage non conforme ! Risque d'explosion et d'accident ! Veuillez respecter les consignes de sécurité suivantes pour assurer la manipulation des piles en toute sécurité : ► Ne jetez pas les piles dans le feu. ► Ne court-circuitez pas les piles. ► Ne tentez pas de recharger les piles. ► Vérifiez régulièrement les piles. Des fuites d'acide de pile peuvent sérieusement endommager l'appareil. Il convient d'être particulièrement prudent lorsque vous manipulez des piles endommagées ou ayant coulé. Danger de brûlure par l'acide ! Porter des gants de protection. ► Conservez les piles hors de portée des enfants. Consulter immédiatement un médecin en cas d'incident (ingestion). ► Retirez les piles si vous n'utilisez pas l'appareil pendant une longue période. 4 SKRI 2000 A1 Sécurité Consignes de sécurité fondamentales FR BE Pour assurer la manipulation de l'appareil en toute sécurité, veuillez respecter les consignes de sécurité suivantes : ■ Vérifiez la présence de dommages visibles extérieurs avant l'usage de l'appareil. Ne mettez pas en service un appareil endommagé ou ayant subi une chute. ■ En cas de dommages sur les câbles ou les raccordements, faites-les remplacer par le personnel technique agréé ou par le service après-vente. ■ Cet appareil n'est pas prévu pour des personnes (y compris des enfants) dont les capacités physiques, sensorielles ou mentales ou dont le manque d'expérience ou de connaissances les empêchent d'assurer un usage sûr des appareils, s'ils n'ont pas été surveillés ou initiés au préalable. ■ Les enfants doivent être surveillés afin d'éviter qu'ils ne jouent avec l'appareil. ■ Confiez les réparations sur l'appareil exclusivement à des entreprises agréées ou au service après-vente. Suite à des réparations non conformes, des risques importants peuvent être créés pour l'utilisateur. A cela s'ajoute l'expiration de la garantie. ■ Toute réparation de l'appareil au cours de la période sous garantie devra être exclusivement confiée à un service après-vente agréé par le fabricant, sinon tous dommages se produisant ultérieurement ne seront pas couverts par la garantie. ■ Les pièces défectueuses devront impérativement être remplacées par des pièces de rechange d'origine. Seules ces pièces garantissent en effet la satisfaction des critères de sécurité. ■ Protégez l'appareil de l'humidité et de la pénétration de liquides. Ne plongez jamais l'appareil sous l'eau, n'installez pas l'appareil à proximité de l'eau et ne posez pas d'objets remplis d'un liquide (par ex. vases) sur l'appareil. ■ Ne posez aucun objet sur l'appareil. ■ Ne faites pas fonctionner l'appareil à proximité de flammes nues (par ex. des bougies). ■ Evitez l'exposition directe aux rayons du soleil. ■ Retirez le cordon de raccordement de la prise de courant toujours par la fiche, et non par le câble de raccordement. ■ En cas de perturbations ou d'orages, sortez le bloc d'adaptation secteur de la prise de courant. SKRI 2000 A1 5 Eléments de commande Eléments de commande FR BE (illustrations, voir face rabattable figure A) Ecran 2 User : sélectionner l'utilisateur 3 Vol+ : augmenter le volume 4 Mem : sélection emplacement mémoire 5 Vol– : Abaisser le volume 6 Power : Marche / arrêt 7 Function / ST : sélection de fonction / activation stéréo 8 Timer : réglage et démarrage de la minuterie 9 Alarm Mode : sélection du mode alarme 10 AOT / Dimmer : minuterie de mise à l'arrêt / mise en marche ou à l'arrêt variateur de luminosité écran 11 Mode / Lock : appel de menu réglage / verrouillage des touches 12 i-Time Sync Bass : synchronisation de l'affichage heure et date avec un iPod ou un iPhone / accentuation des basses I Enter : opérations avec un iPod ou un iPhone / saisie 13 : / Memory Scan : pause / lecture sur iPod ou iPhone / recherche automatique d'émetteur / appel d'un émetteur radio enregistré 14 i 15 Bloc d'alimentation 16 i / Pr– / AL2 : fonction précédente avec iPod / iPhone / sélection emplacement mémoire précédent / réglage alarme 2 / Up : avance rapide avec iPod ou iPhone / monter en fréquence de réception 17 18 i / Pr+ / AL1 : fonction suivante avec iPod / iPhone / sélection emplacement mémoire suivant/ réglage alarme 1 19 i 20 Plaque de montage / Down : retour rapide avec iPod ou iPhone / descendre en fréquence de réception 21 Pieds supports (rabattables) 6 22 Etrier de fixation pour iPod / iPhone 23 Enceintes 24 Compartiment à piles 25 Douille DC : raccordement électrique (7V) pour bloc d'alimentation tension secteur 26 27 Douille AUX IN : raccordement d'appareils audio avec connecteur à jack 3,5 mm Antenne baladeuse pour réception UKW SKRI 2000 A1 Eléments de commande FR BE (illustrations, voir face rabattable avant figure B) 28 Support entretoise (pour accrochage sous un élément de meuble) 29 Station support pour iPod / iPhone : mise en marche / mise à l'arrêt 30 31 User : sélectionner l'utilisateur 32 i / Down : retour rapide avec iPod ou iPhone / descendre en fréquence de réception 33 i : pause / lecture avec iPod / iPhone 34 iMenu / Enter : opérations avec un iPod ou un iPhone / saisie 35 Mem : sélection emplacement mémoire 36 Memory-Scan : recherche automatique d'émetteur / appel d'un émetteur radio enregistré 37 Minuterie : réglage et démarrage de la minuterie 38 Function / ST : sélection de fonction / activation stéréo Mode : menu réglage 39 Vol+ : augmenter le volume 40 i / Pr+ : fonction suivante avec iPod / iPhone / sélection emplacement mémoire suivant 41 Vol– : abaisser le volume 42 i 43 iTime Sync / Bass : synchronisation de l'affichage heure et date avec un iPod ou un iPhone / accentuation graves 44 i / Pr– : sélection emplacement mémoire précédent / fonction précédente avec iPod / iPhone 45 Mode / Lock : appel de menu réglage / verrouillage des touches 46 AOT / Dimmer : minuterie de mise à l'arrêt / mise en marche ou à l'arrêt variateur de luminosité écran 47 Alarm : sélection du mode alarme 48 Capteur pour la télécommande SKRI 2000 A1 / Up : avance rapide avec iPod ou iPhone / monter en fréquence de réception 7 Installation et raccordement Installation et raccordement FR BE Consignes de sécurité AVERTISSEMENT Lors de la mise en service de l'appareil, des blessures corporelles et des dégâts matériels peuvent être occasionnés ! Respecter les consignes de sécurité suivantes pour éviter une situation dangereuse : ► Les matériaux d'emballage ne sont pas un jouet et ne doivent donc pas être considérés comme tels. Il y a un risque d'étouffement. ► Respectez les consignes sur les exigences imposées au lieu d'installation et sur le raccordement électrique de l'appareil, afin d'éviter les blessures corporelles et les dégâts matériels. Accessoires fournis et inspection de transport L'appareil est équipé par défaut des composants suivants : ▯ Radio pour montage sous un élément de meuble SKRI 2000 A1 ▯ Bloc d'alimentation tension secteur JVSW0702000 ▯ Plaque de montage ▯ 4 vis de fixation (format court) ▯ 2 x supports entretoises avec 4 vis de fixation (format long) ▯ Etrier de fixation pour iPod / iPhone ▯ 1 x pile 3 V type CR2032 ▯ 1 x pile 3 V type CR2025 ▯ Télécommande ▯ Câble jack 3,5 auf 3,5 mm (50 cm) ▯ Mode d'emploi REMARQUE ► Vérifiez que la livraison est bien complète et qu'elle ne présente pas de dommages apparents. ► En cas de livraison incomplète ou de dégâts résultant d'un emballage non approprié ou du transport, veuillez prendre contact avec la hotline du SAV (voir chapitre Service après-vente p. 35). Déballage ♦ Sortez du carton toutes les pièces de l'appareil et les instructions d'utilisation. ♦ Retirer tous les matériaux d'emballage. 8 SKRI 2000 A1 Installation et raccordement Recyclage de l'emballage FR BE L'emballage protège l'appareil de tous dommages éventuels au cours du transport. Les matériaux d'emballage ont été sélectionnés selon des critères de respect de l'environnement et de recyclage, de sorte qu'ils peuvent être recyclés. Le retour de l'emballage dans le cycle des matériaux permet d'économiser les matières premières et réduit la formation de déchets. Recyclez les matériaux d'emballage qui ne sont plus utilisés en conformité avec les règles locales en vigueur. REMARQUE ► Dans la mesure du possible, conservez l'emballage d'origine pendant la période sous garantie, afin de pouvoir emballer l'appareil en bonne et due forme pour l'expédition si vous étiez amené à faire valoir la garantie. Exigences imposées au lieu d'installation Pour une utilisation sûre et sans erreurs de l'appareil, son lieu d'installation doit répondre aux conditions suivantes : ■ Lors de l'installation de l'appareil, placez celui-ci sur un support plat et horizontal. Utilisez les pieds rabattables. ■ Placez ou montez l'appareil de manière à ne pas recouvrir les ouvertures d'aération et le haut-parleur. ■ Evitez d'installer l'appareil dans un environnement chaud, mouillé ou très humide ou à proximité de matériaux inflammables. ■ Ne jamais placer l'appareil au dessus d'une cuisinière ou similaire. ■ La prise doit être facile d'accès, afin que l'adaptateur secteur puisse être retiré en cas d'urgence. Raccordement électrique ■ L'appareil fonctionne en 7 V continu donné par le bloc d'alimentation tension secteur. Toujours raccorder l'appareil au bloc d'alimentation tension secteur fourni, ce dernier est à brancher sur la tension secteur. ■ Avant le raccordement de l'appareil, comparez les données de raccordement (tension et fréquence) marquées sur la plaque signalétique avec celles de votre réseau électrique. Ces données doivent concorder afin que l'appareil ne risque pas d'être endommagé. ■ Ne pas exposer le câble de raccordement aux effets thermiques ni aux objets contondants. ■ Veillez à ce que le câble de raccordement ne soit pas tendu de manière excessive ou ne soit pas plié. ■ Ne laissez pas le câble de raccordement pendre sur les angles (effet du fil de fer tendu). ■ Débrancher le bloc d'alimentation secteur lorsque l'appareil va rester inutilisé pour une longue période. SKRI 2000 A1 9 Installation et raccordement Pile FR BE En insérant la pile, vous évitez la perte de l'heure programmée, la perte des emplacements mémoire programmés et des heures d'alarme en cas de panne d'électricité. La pile permet à l'horloge interne de continuer à fonctionner pendant la panne de tension secteur. Lorsque le courant est rétabli, l'heure correcte apparaît automatiquement sur l'écran . REMARQUE ► L'appareil est également utilisable sans pile. Mise en place / remplacement de pile ♦ Ouvrez le couvercle du compartiment à pile 24 sur la face inférieure de l'appareil en tournant le couvercle à gauche jusqu'à la butée à l'aide d'une pièce et en le soulevant. ♦ Insérez la pile de type CR2032 (incluse dans les accessoires fournis) dans le compartiment à pile. Le côté comportant la marque "+" est orienté vers le haut. ♦ Refermez le compartiment à pile en mettant en place le couvercle en tournant le couvercle à droite à l'aide d'une pièce. Pile de la télécommande Activation de la pile La pile de la télécommande est insérée à la livraison. ♦ Activez la pile en retirant la bande isolante. Remplacement de la pile ♦ Poussez l'encoche (A) à droite avec l'ongle tout en sortant le compartiment à piles. ♦ Insérez une pile de 3 V type CR 2025 dans ce compartiment. Le côté comportant la marque "+" est orienté vers le haut. ♦ Replacez à nouveau complètement le compartiment à piles dans la télécommande. 10 SKRI 2000 A1 Installation et raccordement Fixation sous un meuble suspendu FR BE Vous pouvez monter l'appareil avec la plaque de montage 20 fournie, par exemple sous un meuble suspendu. Pour le montage de l'appareil, procéder comme suit: ♦ Poussez la plaque de montage 20 en arrière et retirez-la 20 . ♦ Choisissez un emplacement de montage approprié pour l'appareil (voir aussi le chapitre "Exigences imposées au lieu d'installation" p. 9). ♦ Maintenez la plaque de montage 20 sous le point de montage. Le bord antérieur de la plaque de montage 20 doit se trouver à environ 6,8 cm derrière la façade du meuble suspendue afin d'aligner l'appareil après le montage sur le meuble suspendu. Les bords de la plaque de montage 20 doivent être distants de 4,5 cm env. des parois du meuble environnant. REMARQUE ► Enlever l'étrier de sécurité de l'appareil si l'appareil est monté avec le côté gauche accolé à une paroi de meuble 22 . ♦ Marquez les 4 points de fixation à l'aide d'un crayon. ♦ Créez un petit enfoncement au niveau des marquages à l'aide d'une pointe ou d'une aiguille. ♦ Mettez en place les supports entretoises 28 fournis avec tenons de retenuedans les renfoncements correspondants de la plaque de montage 20 . ♦ Fixez la plaque de montage 20 avec les vis fournies (voir la figure). SKRI 2000 A1 11 Installation et raccordement ♦ Placez l'appareil de biais avec les évidements antérieurs sur le côté supérieur de l'appareil dans la plaque de montage 20 . Pressez vers le haut la partie arrière de l'appareil contre la plaque de montage 20 jusqu'à ce que l'appareil s'enclique de manière audible. FR BE ♦ Vérifiez la stabilité de l'appareil. Démontage ♦ Tirez l'appareil vers l'avant et le retirez par en bas. ♦ Dévissez les vis sur la plaque de montage 20 et retirez la plaque de montage 20 . Installation de l'appareil Vous avez également la possibilité de poser l'appareil. A la mise en place ne pas recouvrir les fentes pour la ventilation 23 ni le haut-parleur en dessous de l'appareil, sortir les deux pieds supports 21 de l'appareil : ♦ Saisir les pieds dans leur logement et les sortir jusqu'à la butée. ♦ Choisir un emplacement d'installation approprié pour l'appareil (voir aussi le chapitre "Exigences imposées au lieu d'installation" p. 9). Préparation de la station support pour iPod ou iPhone Vous pouvez raccorder à l'appareil votre iPod ou votre iPhone. Rabattre vers le bas la station 29 support et monter l'étrier de sécurité 22 : ♦ Rabattre la station support 29 complètement vers le bas. ♦ Enlever l'étrier de sécurité 22 (sur le côté de l'appareil). ♦ Un évidement est aménagé sur les côtés de la station support 29 . Pousser l'étrier de sécurité 22 sur la station support 29 en vérifiant que les ténons s'encliquent bien dans les évidements. Raccordement à l'alimentation électrique ♦ Branchez le connecteur 15 du bloc d'alimentation secteur sur la prise DC 25 à l'arrière de l'appareil. ♦ Branchez le bloc d'alimentation secteur 15 dans la prise. Antenne baladeuse FM ♦ Déroulez entièrement l'antenne baladeuse 27 pour la réception des stations FM. 12 SKRI 2000 A1 Fonctionnement et opération Fonctionnement et opération FR BE Ce chapitre contient des remarques importantes sur le fonctionnement et l'opération de l'appareil. Allumer et éteindre L'appareil se met automatiquement en route après son raccordement à l'alimentaaffiche "PLEASE WAIT FOR SETTING THANKS“ tion électrique. L'écran pendant 3 à 5 minutes. Le système s'actualise automatiquement si un signal est reçu pendant ce laps de temps. REMARQUE ► Appuyer sur n'importe quelle touche pour interrompre cette séquence. Réglages initiaux au démarrage : ■ date / heure : ■ radio éteinte ■ mode horloge / veille actif ■ variateur de luminosité écran actif L'appareil se met en mode horloge / veille après raccordement à l'alimentation 30 sur la télécomélectrique. Actionner la touche Power 6 ou la touche mande pour la mise en marche ou à l'arrêt de l'appareil. En agissant sur la touche Fonction / ST 7 ou la touche Fonction / ST 38 sur la télécommande, on passe d'un des modes radio, iPod ou AUX à l'autre. REMARQUE 30 sur la télécommande n'isole pas ► La touche Power 6 ou la touche complètement l'appareil de la tension du réseau. L'appareil consomme également du courant en mode veille. Pour couper complètement l'alimentation électrique de l'appareil, retirez le bloc d'alimentation 15 de la prise secteur. Réglages de base Une fois l'appareil sous tension, l'écran indique l'heure et le jour de la semaine. l'appareil est en mode Horloge / veille. SKRI 2000 A1 13 Fonctionnement et opération Activation du menu de réglage FR BE Pour activer le menu réglage, actionner dans le mode horloge / veille la touche Mode / Lock 11 ou la touche Mode Lock 45 sur la télécommande. L'heure commence à clignoter. A chaque action sur la touche affichée sur l'écran Mode / Lock 11 ou 45 on passe à la fonctionnalité suivante. Les éléments du menu apparaissent dans l'ordre suivant : ▯ Réglage de l'heure ▯ Réglage de la date ▯ Réglage de la fonction de rappel ▯ Réglage mode mise à jour ▯ Mise en marche / arrêt du variateur de luminosité écran ▯ Réglage temps démarrage du variateur de luminosité écran ▯ Réglage du format horaire REMARQUE ► Le menu de paramétrage est quitté automatiquement lorsque vous n'actionnez pas de bouton pendant 15 secondes environ. Les réglages sont enregistrés. Régler l'heure Condition : l'appareil est en mode horloge / veille. ♦ Actionner une fois la touche Mode / Lock 11 ou la touche Mode Lock 45 sur la télécommande. L'heure commence à clignoter sur l'écran. ♦ Régler l'heure en agissant sur les touches / Up 17 et i / Down 19 ou 42 32 les touches i / Up et i / Down sur la télécommande. L'heure change d'une minute à chaque pression sur le bouton. Maintenez la touche enfoncée pendant plus de 2 secondes pour démarrer le réglage rapide. ♦ Réctionner la touche Mode / Lock 11 ou la touche Mode Lock 45 sur la télécommande pour enregistrer le réglage fait et passer à la rubrique suivante. REMARQUE ► L'heure est réinitialisée à h lorsque l'appareil n'est plus sous tension et qu'aucune pile n'est insérée ou que la pile est trop faible. 14 SKRI 2000 A1 Fonctionnement et opération Réglage de la date FR BE Condition : l'appareil est en mode Horloge / veille. ♦ Actionner deux fois la touche Mode / Lock 11 ou la touche Mode Lock 45 sur la télécommande. La date commence à clignoter sur l'écran. ♦ Régler la date en agissant sur les touches / Up 17 et i / Down 19 / Up 42 et i / Down 32 sur la télécommande. La ou les touches i date change d'un jour à chaque pression sur le bouton. L'affichage de la semaine change automatiquement. Maintenez la touche enfoncée pendant plus de 2 secondes pour démarrer le réglage rapide. ♦ Réactionner la touche Mode / Lock 11 ou la touche Mode Lock 45 sur la télécommande pour enregister le réglage fait et passer à la rubrique suivante. REMARQUE ► La date est réinitialisée au lorsque l'appareil n'est plus sous tension et qu'aucune pile n'est insérée ou que la pile est trop faible. Réglage de la fonction de rappel Vous pouvez configurer jusqu'à 6 valeurs date, sur lesquelles un rappel automatique est déclenché. La fonction SdA (SdA=Special Day Alert) est utile pour se faire rappeler par exemple des anniversaires ou d'autres événement récurrents. Le rappel intervient tous les ans à la même date. A cette date particulière retentit un signal sonore pendant 10 minutes à chaque heure de 8h 00 à 23 h 00. Condition : l'appareil est en mode horloge / veille. ♦ Actionner tros fois la touche Mode / Lock 11 ou la touche Mode Lock 45 sur la télécommande. Le réglage actuel de la date de rappel choisie apparaît sur l'écran en alternance avec l'affichage . A côté de l'affichage figure le numéro de l'emplacement mémoire pour la date. Valeurs possibles : à . ♦ Sélectionner avec la touche i / Memory Scan 14 ou la touche MemoryScan 36 sur la télécommande l'emplacement mémoire de la date à fixer. ♦ Régler la date en agissant sur les touches / Up 17 et i / Down 19 ou les touches i / Up 42 et i / Down 32 sur la télécommande. La date change d'un jour à chaque pression sur le bouton. Maintenez le bouton enfoncé pendant plus de 2 secondes pour démarrer le réglage rapide. SKRI 2000 A1 15 Fonctionnement et opération FR BE REMARQUE ► Actionner la touche Timer 8 ou la touche Timer 37 sur la télécommande ne s'affichent que le jour et le mois. La pour laisser l'année. A l'écran fonction rappel se déclenchera alors chaque année à cette date. ♦ Réactionner la touche Mode / Lock 11 ou la touche Mode Lock 45 sur la télécommande pour enregistrer le réglage fait et passer à la rubrique suivante. Réglage mode mise à jour Condition : l'appareil est en mode horloge / veille. ♦ Actionner quatre fois la touche Mode / Lock 11 ou la touche Mode Lock 45 s'affiche et Le symbole d'une sur la télécommande. A l'écran horloge clignotante . ♦ Actionner la touche i / Down 19 ou la touche i / Down 32 sur la télécommande pour arrêter automaquement la fonction RDS. Le symbole clignotant de l'horloge disparaît de l'écran. ♦ Actionner la touche / Up 17 ou la touche i / Up 42 sur la télécommande pour activer automaquement la fonction RDS. Le symbole clignotant . de l'horloge s'affiche ♦ Réactionner la touche Mode / Lock 11 ou la touche Mode Lock 45 sur la télécommande pour enregistrer le réglage fait et passer à la rubrique suivante. Mise en marche / mise à l'arrêt sur commande d'horloge du variateur de luminosité écran Condition : l'appareil est en mode horloge / veille. Deux possibilités de réglage : 1. Variateur de luminosité écran commandé sur signal d'horloge 2. Réglage en manuel du variateur de luminosité écran (voir aussi le chapitre "Mise en marche/à l'arrêt du variateur de luminosité écran" p. 30). ♦ Actionner cinq fois la touche Mode / Lock 11 ou la touche Mode Lock 45 sur la télécommande. Le réglage en cours du variateur de luminosité écran est affiché ( ou ). ♦ Sélectionner avec la touche / Up 17 ou la touche i / Up 42 sur la télécommande „ “, l'éclairage d'écran s'éteint au bout de 15 secondes. ♦ Sélectionner avec la touche i / Down 19 ou la touche i / Down 32 sur “, l'éclairage d'écran reste allumé. la télécommande „ 16 SKRI 2000 A1 Fonctionnement et opération ♦ Réactionner la touche Mode / Lock 11 ou la touche Mode Lock 45 sur la télécommande pour enregistrer le réglage fait et passer à la rubrique suivante. Mode affichage éclairage à l'écran d'écran variateur luminosité écran ARRET DT OFF réglé par la touche AOT/Dimmer variateur luminosité écran MARCHE DT ON en standard 23:00 - 5:59 à l'arrêt de heures 23:00 à 5:59 6:00 - 22:59 heures FR BE commande avec la touche AOT/ Dimmer 10 ou 46 DIM OFF: écran allumé en permanence DIM ON: éclairage d'écran éteint; l'action sur une touche quelconque déclenche l'éclairage d'écran pendant 15 sec. l'action sur une touche quelconque déclenche l'éclairage d'écran pendant 60 sec. DIM OFF: écran allumé en permanence DIM ON: éclairage d'écran éteint; l'action sur une touche quelconque déclenche l'éclairage d'écran pendant 15 sec. Réglage du temps démarrage du variateur de luminosité écran Condition : l'appareil est en mode horloge / veille. ♦ Actionner six fois la touche Mode / Lock 11 ou la touche Mode Lock 45 sur la télécommande. Le temps actuel de démarrage du variateur de luminosité écran ( ) s'affiche en alternance avec . ♦ Régler l'heure de démarrage souhaitée avec les touches / Up 17 et 42 32 / Down 19 ou les touches i / Up et i / Down sur la téléi commande. L'heure change d'une minute à chaque pression sur le bouton. Maintenez la touche enfoncée pendant plus de 2 secondes pour démarrer le réglage rapide. ♦ Réactionner la touche Mode / Lock 11 ou la touche Mode Lock 45 sur la télécommande pour enregistrer le réglage et passer à la rubrique suivante. Réglage du format horaire Condition : l'appareil est en mode Horloge / veille. ♦ Actionner sept fois la touche Mode / Lock 11 ou la touche Mode Lock 45 sur la télécommande. Le réglage actuel du format horaire est affiché ( =format horaire 24 heures ou = format horaire 12 heures). ♦ Fixer avec la touche / Up 17 ou la touche i / Up 42 sur la télécommande le format horaire sur si le format sur 12 heures est souhaité. SKRI 2000 A1 17 Fonctionnement et opération ♦ Fixer avec la touche i / Down 19 ou la touche i / Down 32 sur la sur si le format sur 24 heures est télécommande le format horaire souhaité. FR BE ♦ Réactionner la touche Mode / Lock 11 ou la touche Mode Lock 45 sur la télécommande pour enregistrer le réglage et passer à la rubrique suivante. Programmation de l'alarme / réveil L'appareil dispose de deux compteurs pour les alarmes / réveil. Les réglages sur les deux minuteries d'alarme / réveil peuvent être faits indépendamment l'une de l'autre. Lors de la programmation des heures de d'alarme / de réveil, vous pouvez choisir si une sonnerie doit retentir ou si la radio, l'iPod ou encore l'iPhone doit s'enclencher. REMARQUE ► Si l'on n'appuie sur aucun bouton pendant 15 secondes environ pendant la programmation de l'heure de réveil / d'alarme, l'heure d'alarme / de réveil est activée avec les réglages affichés à ce moment là. Réglage du temps d'alarme ♦ Actionner la touche Mode alarme 9 ou la touche alarme 47 sur la télécommande. Le temps réglé de l'alarme concernée s'affiche en clignotant sur et s'affiche ou . L'indication du temps affiche les jours de la l'écran semaine auxquels cette alarme est activée. ♦ Régler l'heure d'alarme / de réveil souhaitée avec les touches / Up 17 et i / Down 19 ou les touches i / Up 42 et i / Down 32 sur la télécommande. L'heure change d'une minute à chaque pression sur le bouton. Maintenez la touche enfoncée pendant plus de 2 secondes pour démarrer le réglage rapide. Réglage du jour de la semaine ♦ Actionner en mode alarme la touche Fonction / ST 7 ou la touche Fonction / ST 38 sur la télécommande pour sélectionner l'une ou l'autre de ces combinaisons hebdomadaires : lu-ve ou sa-di ou lu-di. La combinaison choisie est indiquée au dessus du temps d'alarme. ♦ Actionner et maintenir appuyée au moins 2 secondes la touche Fonction / ST 7 ou la touche Fonction / ST 38 sur la télécommande pour passer sur les différentes combinaisons hebdomadaires et sélectionner des jours particuliers. REMARQUE ► Pour la sélection d'un jour dans la semaine actionner la touche Function / ST 7 ou la touche Function / ST 38 sur la télécommande. 18 SKRI 2000 A1 Fonctionnement et opération Réglage de l'alarme avec signal sonore FR BE ♦ Pour sélectionner "signal sonore" pour une alarme, actionner en mode alarme la touche i / Pr+ / AL1 18 ou la touche i / Pr– / AL2 16 ou la jusqu'à touche i Pr+ 40 ou la touche i Pr– 44 sur la télécommande . affichage du symbole à l'écran Réglage de l'alarme / du réveil avec la radio Pour déclencher la radio à l'heure de l'alarme / du réveil, faire les réglages suivants avant d'activer l'alarme: 30 ♦ Allumer la radio en actionnant la touche Power 6 ou la touche sur la télécommande et sélectionner le mode radio avec la touche Fonction / ST 7 ou la touche Fonction / ST 38 sur la télécommande. ♦ Sélectionner le poste émetteur avec lequel vous souhaitez être réveillé (voir le chapitre "Réglage manuel de la station" p. 24 ou "Recherche de la station suivante" p. 24). ♦ Régler le volume souhaité avec les touches Vol+ 3 et Vol– 5 ou la touche Vol+ 39 et la touche Vol– 41 sur la télécommande (voir le chapitre "Réglage du volume" p. 24). ♦ Eteindre la radio en actionnant la touche sur la télécommande. Power 6 ou la touche 30 ♦ Pour sélectionner "Radio“ pour l'alarme / le réveil, actionner dans le mode alarme la touche i / Pr+ / AL1 18 ou la touche i / Pr– / AL2 16 ou la touche i Pr+ 40 ou la touche i Pr– 44 sur la télécommande jusqu'à affichage à l'écran du symbole . Réglage d'une alarme avec un iPod / un iPhone Pour déclencher l'iPod ou l'iPhone à l'heure de l'alarme / du réveil, faire les réglages suivants avant d'activer l'alarme: ♦ Mettez en marche l'appareil en actionnant la touche Power 6 ou la 30 sur la télécommande et sélectionner le mode avec la touche touche sur la télécommande. Fonction / ST 7 ou la touche Fonction / ST 38 ♦ Placez votre iPod ou votre iPhone dans la station support 29 . ♦ Sélectionnez sur votre iPod ou votre iPhone un titre (ou un album,une liste de morceaux, etc.). ♦ Réglez le volume avec les touches Vol+ 3 et Vol– 5 ou les touches Vol+ 39 et Vol– 41 sur la télécommande (voir le chapitre "Réglage du volume" p. 24). ♦ Mettez votre iPod ou votre iPhone en mode pause, ou arrêtez l'appareil. SKRI 2000 A1 19 Fonctionnement et opération ♦ Arrêtez le mode iPod en actionnant la touche 30 sur la télécommande. FR BE Power 6 ou la touche ♦ Pour sélectionner l'alarme avec "iPod", actionner la touche i / Pr+ / AL1 18 ou la touche i / Pr– / AL2 16 ou la touche i Pr+ 40 ou la touche i Pr– 44 affiche le symbole . sur la télécommande jusqu'à ce que l'écran Mise à l'arrêt de l'alarme ♦ Pour mettre à l'arrêt une alarme, actionner en mode alarme la touche i / Pr+ / AL1 18 ou la touche i / Pr– / AL2 16 ou la touche i Pr+ 40 ou la touche i Pr– 44 sur la télécommande jusqu'à ce que l'écran n'affiche plus le symbole. Lorsque l'heure de l'alarme / du réveil est atteinte REMARQUE ► Temps d'alarme atteint : arrêt immédiat de la minuterie de mise à l'arrêt (si activée). Avec le réglage „Alarme avec signal sonore“ un signal sonore retentit. Le volume du signal sonore augmente de manière continue jusqu'à atteindre le volume maximum. La durée du signal d'alarme est limitée à 10 minutes. La radio passe alors sur "Mute“ (silence) . Avec le réglage „Alarme avec radio“ la radio s'allume. L'émetteur radio précédemment sélectionné est activé avec le volume réglé, pendant une durée maximum de 60 minutes. Avec le réglage „Alarme avec iPod / iPhone“ l'iPod ou l'iPhone se met en marche. La lecture commence avec le dernier titre sélectionné et se poursuit pendant 60 minutes maximum avec le volume sonore programmé. Appuyez sur une touche quelconque pour mettre fin à l'alarme en cours. REMARQUE ► L'alarme est réactivée en atteignant l'heure d'alarme / de réveil suivante (par exemple le lendemain). 20 SKRI 2000 A1 Fonctionnement et opération Minuterie de cuisine FR BE L'appareil comporte une minuterie de cuisine pratique permettant par exemple de surveiller les temps de cuisson. La plage de temps paramétrable de la minuterie est compris entre 1 minute et 23 heures, 59 minutes. Réglage de la minuterie de cuisine ♦ Actionner la touche Timer 8 ou la touche Timer 37 sur la télécommande. L'afficheur indique . A l'écran s'affiche le symbole d'une casserolle pour la minuterie de cuisine . ♦ Régler avec les touches / Up 17 et i / Down 19 ou la touche i / Up 42 et la touche i / Down 32 sur la télécommande la durée souhaitée sur la minuterie. La durée change d'une minute à chaque pression sur le bouton. Maintenir le bouton enfoncé pendant plus de 2 secondes pour démarrer le réglage rapide. REMARQUE ► Si aucune modification n'intervient au bout de 15 secondes, l'appareil rétablit le mode précédent. Démarrage de la minuterie de cuisine ♦ Après réglage de la durée réactionner la touche Timer 8 ou la touche Timer 37 sur la télécommande. Le temps affiché commence dans le sens décomptant le temps. décroissant. A l'écran s'affiche une horloge REMARQUE ► Si vous sélectionnez une autre fonction pendant que la minuterie de cuisine tourne, l'indication du temps restant est masquée. Le symbole de casserolle et l'horloge de décomptage restent à l'écran . Réactionner la 8 37 touche Timer ou la touche Timer sur la télécommande pour afficher pendant 10 secondes le temps restant de la minuterie. 30 secondes avant la fin de la minuterie de cuisine, l'appareil commence à signaler acoustiquement à l'aide de signaux sonores discontinus que le temps réglé est écoulé. Les signaux sonores se suivent de plus proches. Lorsque le temps programmé est écoulé, le signal sonore de la minuterie retentit pandant 60 minutes maximum. ♦ Actionner la touche Timer 8 ou la touche Timer 37 sur la télécommande pour mettre à l'arrêt le signal de la minuterie. SKRI 2000 A1 21 Fonctionnement et opération Interruption de la minuterie de cuisine FR BE ♦ La minuterie de cuisine étant en marche actionner la touche Timer 8 ou la touche Timer 37 sur la télécommande. La minuterie de cuisine s'interrompt. Le temps restant indiqué commence à clignoter. REMARQUE ► L'appareil rétablit le mode précédent au bout de 15 secondes environ. Réactionner la touche Timer 8 ou la touche Timer 37 sur la télécommande pour réafficher le temps restant de la minuterie. ♦ Pour relancer la minuterie, réactionner la touche Timer 8 ou la touche Timer 37 sur la télécommande. La minuterie redémarre. ♦ Pour arrêter la minuterie avant l'échéance programmée, actionner et maintenir appuyée la touche Timer 8 ou la touche Timer 37 sur la télécommande jusqu'à ce que sur l'écran le symbole de casserolle et l'horloge de décomptage disparaissent. REMARQUE ► La minuterie de cuisine est immédiatement arrêtée au cas où une alarme es active. Programmation de la minuterie de cuisine Vous pouvez préprogrammer les temps dont vous avez régulièrement besoin pour la minuterie de cuisine afin de ne pas être obligés de les entrer à nouveau. Jusqu'à 6 temps peuvent être programmés. Par défaut, les 6 emplacements mémoire sont tous préprogrammés sur 5/10/15/20/25/30 minutes. Procédez comme indiqué ci-après pour la minuterie de cuisine : ♦ Actionner la touche Timer 8 ou la touche Timer 37 sur la télécommande pour activer la minuterie de cuisine. ♦ Régler avec les touches / Up 17 et i / Down 19 ou la touche i / Up 42 et la touche i / Down 32 sur la télécommande la durée souhaitée sur la minuterie. La durée change d'une minute à chaque pression sur le bouton. Maintenez le bouton enfoncé pendant plus de 2 secondes pour démarrer le réglage rapide. ♦ Actionner la touche Fonction / ST 7 ou la touche Fonction / ST 38 sur la télécommande pour activer la sélection de minuterie. A côté de la durée s'affiche un clignotant, à côté s'affiche le chiffre pour la première minuterie. ♦ Sélectionner avec les touches i / Pr+ / AL1 18 et i / Pr– / AL2 16 ou la touche i Pr+ 40 ou la touche i Pr 44 sur la télécommande l'emplacement mémoire de la minuterie à régler entre et . 22 SKRI 2000 A1 Fonctionnement et opération ♦ Réactionner la touche Fonction / ST 7 ou la touche Fonction / ST 38 sur la télécommande pour programmer la durée sur l'emplacement mémoire sélectionné. Le signe clignotant reste maintenant affiché en permanence. FR BE ♦ Répétez l'opération pour les autres emplacements mémoire. Sélection de la minuterie de cuisine Procédez comme indiqué ci-après pour sélectionner un temps programmé pour la minuterie de cuisine : ♦ Actionner la touche Timer 8 ou la touche Timer 37 sur la télécommande pour activer la minuteruie de cuisine. ♦ Sélectionner avec les touches i / Pr+ / AL1 18 et i / Pr– / AL2 16 ou la touche i Pr+ 40 ou la touche i Pr– 44 sur la télécommande la minuterie souhaitée entre et . ♦ Réactionner la touche Timer 8 ou la touche Timer 37 sur la télécommande pour démarrer la minuterie. Mode radio REMARQUE ► L'antenne baladeuse 27 doit être complètement déployée pour une bonne réception radio. Orientez l'antenne en mode radio sur la meilleure réception. ► Les caractéristiques techniques de l'appareil autorisent une fréquence de réception réglable hors de la gamme UKW (FM) autorisée de 87,5– 108 MHz. Dans différents pays, il est possible qu'il existe des régulations nationales divergentes pour les plages de fréquence radio attribuées. Attention à ne pas exploiter des informations diffusées hors de la plage de fréquences radio attribuée, à ne pas les rediffuser à des tiers ou à en faire un usage non autorisé. Mise en marche / arrêt de la radio ♦ Actionner la touche Power 6 ou la touche 30 sur la télécommande. L'écran affiche le mode en cours de l'appareil. ♦ Actionner à plusieurs reprises la touche Fonction / ST 7 ou la touche Fonction / ST 38 sur la télécommande pour sélectionner la fonction radio. La fréquence de réception de l'émetteur sélectionné s'affiche à l'écran. ♦ La radio s'éteint en réactionnant la touche Power 6 ou la touche 30 sur la télécommande. L'appareil réactive le mode Heure / Veille. L'heure actuelle est affichée. SKRI 2000 A1 23 Fonctionnement et opération Réglage du volume FR BE ♦ Régler le volume souhaité en agissant sur les touches Vol+ 3 et Vol– 5 ou affila touche Vol+ 39 et la touche Vol– 41 sur la télécommande. L'écran che le niveau sonore (volume). Possibilité de sélectionner un niveau sonore entre et . Réglage manuel de la station ♦ Régler sur l'émetteur souhaité en actionnant (une seule pression) les touches / Up 17 et i / Down 19 ou la touche i / Up 42 et la touche i / Down 32 sur la télécommande. La fréquence de la station est indiquée sur l'écran . Le haut-parleur est désactivé pendant le réglage. Recherche de la station suivante Vous pouvez laisser l'appareil rechercher automatiquement la prochaine station. ♦ Actionner et maintenir appuyée pendant au moins deux secondes les touches / Up 17 et i / Down 19 ou la touche i / Up 42 et la 32 touche i / Down sur la télécommande. L'appareil recherche la station la plus proche dont la qualité de réception est suffisante. ♦ Répétez l'opération jusqu'à ce que vous ayez trouvé la station souhaitée. Sélection utilisateur Condition : l'appareil est en mode radio. ♦ Actionner la touche User 2 ou la touche User 31 sur la télécommande pour sélectionner l'utilisateur souhaité. L'utilisateur actuel à est affiché à l'écran pendant 10 secondes. ♦ Actionner les touches i / Pr+ / AL1 18 et i / Pr– / AL2 16 ou la touche i Pr+ 40 ou la touche i Pr– 44 sur la télécommande pour sélectionner un emplacement mémoire entre et . REMARQUE ► Chaque utilisateur dispose de 15 emplacements mémoire. Le premier emplacement mémoire pour l'utilisateur A est défini par le fabricant. 24 SKRI 2000 A1 Fonctionnement et opération Mémorisation manuelle des stations FR BE Condition : l'appareil est en mode radio. L'appareil dispose de 60 emplacements mémoire (4 utilisateurs à 15 emplacements mémoire) pour les fréquences d'émetteur. Procédez comme indiqué ci-après pour enregistrer une fréquence d'émission : ♦ Régler sur la station émettrice choisie, comme indiqué précédemment. ♦ Actionner la touche Mem 4 ou la touche Mem 35 sur la télécommande. Le symbole MEM, l'utilisateur et l'emplacement mémoire s'affichent à l'écran . ♦ Actionner la touche User 2 ou la touche User 31 sur la télécommande jusqu'à affichage de l'utilisateur ( - ) souhaité. ♦ Sélectionner avec les touches i / Pr+ / AL1 18 ou i / Pr– / AL2 16 ou la touche i Pr+ 40 ou la touche i Pr– 44 sur la télécommande l'emplacement mémoire souhaité pour la station émettrice, entre et . ♦ Actionner la touche Mem 4 ou la touche Mem 35 sur la télécommande. La fréquence de réception de la station paramétrée est enregistrée à l'emplacement mémoire choisi. Appel d'une station émettrice mémorisée Condition : l'appareil est en mode radio. ♦ Actionner la touche User 2 ou la touche User 31 sur la télécommande jusqu'à affichage de l'utilisateur ( - ) souhaité. ♦ Sélectionner avec les touches i / Pr+ / AL1 18 ou i / Pr– / AL2 16 ou la touche i Pr+ 40 ou la touche i Pr– 44 sur la télécommande l'emplacement mémoire pour la station émettrice enregisrée entre et . SKRI 2000 A1 25 Fonctionnement et opération Recherche automatique de station émettrice (fonction AMS) FR BE Condition : l'appareil est en mode radio. Pour occuper les emplacements mémoire des fréquences d'émission avec les stations émettrices à la réception la plus forte, vous pouvez lancer un cycle de recherche. REMARQUE ► Lorsque vous exécutez la fonction décrite ci-après, toutes les stations émettrices précédemment enregistrées sont perdues. ♦ Actionner et maintenir appuyée la touche i / Memory Scan 14 ou la touche Memory-Scan 36 pendant au moins trois secondes. L'appareil commence un cycle de recherche et occupe les emplacements mémoire à avec les stations émettrices trouvées. ♦ A la fin du cycle de recherche il suffit d'appuyer pendant 10 secondes sur la touche i / Memory Scan 14 ou la touche Memory-Scan 36 pour retrouver les stations émettrices enregistrées entre et . REMARQUE ► Dans le cas où le nombre de stations trouvées est supérieur à 60, seules les 60 premières fréquences de réception sont enregistrées. ► Dans le cas où moins de 60 stations ont été trouvées, les derniers emplacements mémoire restent inchangés. Lecture d'appareils audio externes ♦ Relier un appareil audio externe, comme par exemple un lecteur de MP3 , à l'adaptateur jack de 3,5 mm AUX IN 26 sur le côté arrière de l'appareil. 30 sur la télécommande. ♦ Actionner la touche Power 6 ou la touche L'écran affiche le mode en cours de l'appareil. ♦ Actionner à plusieurs reprises la touche Fonction / ST 7 ou la touche Fonction / ST 38 sur la télécommande pour sélectionner la fonction . ♦ Commencer la lecture sur l'appareil audio externe et régler le volume. REMARQUE ► Veuillez tenir compte du mode d'emploi de l'appareil audio externe. Raccordement d'un iPod / d'un iPhone La station 29 vous permet d'utiliser le haut-parleur pour votre iPod ou votre iPhone. Si vous utilisez l'iPod ou l'iPhone dans la station support, il est chargé automatiquement. 26 SKRI 2000 A1 Fonctionnement et opération iMenu FR BE Condition : l'appareil se trouve en mode iPod. ♦ Actionner la touche pour l' iPod ou l'iPhone. I Enter 13 , pour activer la commande de menu Fonctions exécutables : Touche i / Pr– / AL2 16 i / Pr+ / AL1 18 i-Time Sync Bass 12 Fonction fonction suivante fonction précédente synchronisation de l'heure et de la date de l'appareil avec l'heure et la date de l'iPod ou de l'Phone démarrer/poursuivre la lecture i / Memory Scan 14 i / Down 19 retour rapide / Up 17 avance rapide pression brève : retour au menu pression longue : confirmation de la sélection I Enter 13 Ecoute de musique Préparer la station support 29 comme indiqué au chapitre "Préparation de la station support pour iPod ou iPhone" p. 12. ♦ Placez votre iPod ou votre iPhone dans la station support 29 . 30 sur la télécommande. ♦ Actionner la touche Power 6 ou la touche L'écran affiche le mode en cours de l'appareil. ♦ Actionner à plusieurs reprises la touche Fonction / ST 7 ou la touche Fonction / ST 38 sur la télécommande pour sélectionner la fonction . ♦ Sélectionner sur votre iPod ou iPhone un titre (ou un album, une liste de morceaux, etc.). ♦ Actionner la touche i / Memory Scan 14 ou la touche i télécommande pour démarrer ou suspendre la lecture. SKRI 2000 A1 33 sur la 27 Fonctionnement et opération Charger l'Pod / l'iPhone FR BE Lorsque votre iPod ou iPhone est inséré dans la station 29 , il est automatiquement rechargé jusqu'à ce que la batterie soit complètement chargée. REMARQUE ► L'iPod / iPhone n'est pas chargé à partir de la batterie de sauvegarde. Réglage de l'horloge i-Time Sync La fonction iTime-Sync permet de synchroniser la date et l'heure sur l'appareil avec la date et l'heure de votre iPod ou de votre iPhone (iPod Touch, iPod nano et iPod Classic; les anciens modèles d'iPod comme iPod mini ne supportent pas cette fonction). ♦ Placez votre iPod ou votre iPhone dans la station support 29 . ♦ Actionner la touche i-Time Sync Bass 12 ou la touche iTime Sync Bass 43 sur la télécommande. L'heure et la date de l'iPod ou de l'iPhone sont transférées sur l'appareil. Un signal sonore retentit une fois la synchronisation faite. REMARQUE ► L'heure sur l'iPhone est réactualisée en permanence via l'antenne portable. L'heure sur l'iPod ne correspond qu'à celle de votre ordinateur après la dernière synchronisation. Une différence de 59 secondes entre l'appareil et l'iPod / l'iPhone synchronisé est possible. Autres fonctions Fonction stéréo L'appareil supporte la fonction stéréo. "Stéréo on" est le réglage standard. Procédez comme indiqué ci-après pour modifier cette fonction : ♦ Actionner et maintenir appuyée la touche Function / ST 7 ou la touche Function / ST 38 sur la télécommande jusqu'à affichage sur l'écran du réglage ou ). en cours de la fonction stéréo ( ♦ Réactionner et maintenir appuyée la touche Fonction / ST 7 ou la touche Fonction / ST 38 sur la télécommande pour changer de réglage. REMARQUE ► En réception stéréo d'un émetteur radio, la fonction stéréo étant active, s'affiche pendant 3 secondes à l'écran . 28 SKRI 2000 A1 Fonctionnement et opération Verrouillage des touches FR BE Vous pouvez verrouiller les touches de l'appareil pour ne pas modifier des réglages par inadvertance. ♦ Actionner et maintenir appuyée au moins deux secondes la touche Mode / Lock 11 ou la touche Mode Lock 45 sur la télécommande pour verrouiller ou déverrouiller les touches. Lorsque le verrouillage des touches est activé, affiche le symbole . l'écran ♦ Pour déverrouiller, réactionner et maintenir appuyée au moins deux secondes la touche Mode / Lock 11 ou la touche Mode Lock 45 sur la télécommande. Accentuation des graves L'accentuation des graves vous permet de renforcer la restitution des fréquences graves. ♦ Actionner pendant env. 2 secondes la touche i-Time Sync Bass 12 ou la touche iTime Sync Bass 43 sur la télécommande pour activer ou désactiver l'accentuation des graves. Lorsque l'accentuation des graves est activé, . l'écran affiche le symbole Affichages alternés Condition : l'appareil est en mode horloge / veille. ♦ Actionner la touche i / Down 19 ou la touche i / Down 32 sur la télécommande : la date et l'heure s'affichent alternativement. ♦ Réactionner la touche i / Down 19 ou la touche i télécommande : seule l'heure s'affiche. / Down 32 sur la Condition : l'appareil est en mode radio. ♦ Actionner la touche Mode / Lock 11 ou la touche Mode Lock 45 sur la télécommande : la fréquence de réception ou le nom du poste émetteur (en réception RDS) et l'heure s'affichent alternativement. ♦ Réactionner la touche Mode / Lock 11 ou la touche Mode Lock 45 sur la télécommande : c'est l'heure seule qui s'affiche. ♦ Réctionner la touche Mode / Lock 11 ou la touche Mode Lock 45 sur la télécommande : c'est maintenant la fréquence de réception ou le nom du poste émetteur (en réception RDS) qui s'affiche. SKRI 2000 A1 29 Fonctionnement et opération Arrêt automatique (fonction sommeil) FR BE Avec la fonction sommeil, l'appareil s'arrête de lui-même au bout d'une période allant de 5 à 90 minutes. ♦ Actionner la touche AOT / Dimmer 10 ou la touche AOT Dimmer 46 sur la télécommande pour appeler cette fonction. Le temps restant jusqu'à l'arrêt de la radio est affiché. ♦ Réactionner la touche AOT / Dimmer 10 ou la touche AOT Dimmer 46 sur la télécommande pour régler le temps souhaité. Après env. 12 secondes l'appareil repasse au mode sélectionné. REMARQUE ► La période concernée se situe entre 90 et 5 minutes. Le réglage est réalisé par pas de 5 minutes. L'écran indique ensuite . Quand est affiché, la fonction sommeil est à l'arrêt. ► Si l'appareil se trouve dans le mode horloge / veille, vous mettez l'appareil sur le dernier mode sélectionné (Radio / iPod / AUX) en actionnant la touche AOT / Dimmer 10 ou la touche AOT Dimmer 46 sur la télécommande. Mise en marche / à l'arrêt du variateur de luminosité écran ♦ Actionner et maintenir appuyée la touche AOT / Dimmer 10 ou la touche AOT Dimmer 46 sur la télécommande jusqu'à affichage sur l'écran du réglage en cours du variateur de luminosité écran ( ou ). ♦ Actionner et maintenir enfoncée la touche AOT / Dimmer 10 ou la touche AOT Dimmer 46 sur la télécommande pour changer de réglage (voir aussi le chapitre "Mise en marche/mise à l'arrêt sur commande d'horloge du variateur de luminosité écran" p. 16). Après env. 15 secondes l'écran réaffiche l'indication précédente. 30 SKRI 2000 A1 Nettoyage/Dépannage Nettoyage FR BE Consignes de sécurité DANGER Danger de mort causé par le courant électrique ! ► Débrancher le bloc d'alimentation tension secteur de la prise avant de commencer le nettoyage. ATTENTION Dégâts sur l'appareil ! ► Assurez-vous lors du nettoyage qu'aucune humidité ne pénètre dans l'appareil pour éviter tous dommages irréparables sur l'appareil. Nettoyage du boîtier ■ Nettoyez les surfaces de l'appareil avec un chiffon doux et sec. Dépannage Ce chapitre contient des remarques importantes relatives à la localisation des pannes et au dépannage. Respectez les remarques pour éviter tous dangers et dommages. Consignes de sécurité AVERTISSEMENT Veuillez respecter les consignes de sécurité suivantes afin d'éviter des dangers et des dommages: ► Les réparations sur les appareils électriques doivent exclusivement être confiées à des spécialistes qui ont été formés par le fabricant. Toutes réparations non conformes peuvent entraîner des dangers significatifs pour l'utilisateur et endommager l'appareil. SKRI 2000 A1 31 Dépannage Causes des pannes et remèdes FR BE Le tableau ci-dessous est destiné à vous aider à localiser de petits dysfonctionnements et à y remédier : Panne Cause possible L'écran n'indique rien. Pas de son Bruits parasites lors de la réception radio iPod / iPhone non chargé Solutions Branchez le bloc d'alimentation bloc d'alimentation 15 tension secteur non branché. secteur 15 dans la prise. La prise secteur n'est pas sous tension. Vérifiez les fusibles du secteur. Le volume est réglé sur l'intensité minimum. Augmenter le volume avec la touche Vol+ 3 . L'appareil est en mode Horloge / veille. Mettez l'appareil avec la touche Power 6 sur le mode Radio / iPod / Aux/. La lecture de l'appareil audio externe n'a pas démarré. Lancez la lecture sur l'appareil audio externe. La lecture de l'iPod ou de l'iPhone n'a pas démarré. Lancez la lecture sur le iPod / iPhone. L'iPod ou l'iPhone n'est pas bien calé sur la station 29 Réglez l'iPod ou l'iPhone 29 sur le poste émetteur. La station radio n'est pas correctement réglée. Se régler correctement sur la station / Up 17 radio avec les touches et i / Down 19 . La réception est trop faible. Essayez d'améliorer la réception en bougeant l'antenne 27 baladeuse. L'iPod ou l'iPhone n'est pas bien monté sur la station 29 support . Réglez l'iPod ou l'iPhone 29 sur le poste émetteur. L'alarme avec Liste vide sur votre iPod ou l'iPod / l'iPhone n'a votre iPhone. pas fonctionné Vérifiez que la liste contient bien des morceaux de musique. REMARQUE ► Si les opérations susmentionnées ne vous permettent pas de résoudre le problème, veuillez vous adresser au service après-vente. 32 SKRI 2000 A1 Entreposage/mise au rebut/Annexe Entreposage / Mise au rebut FR BE Entreposage Si vous n'utilisez pas l'appareil pendant un certain temps, mettez-le hors tension, retirez la pile et rangez l'appareil dans un endroit propre et sec, à l'abri d'une exposition directe aux rayons du soleil. Mise au rebut L'appareil ne doit jamais être jeté dans la poubelle domestique normale. Ce produit est assujetti à la directive européenne 2002/96/EC-WEEE (Waste Electrical and Electronic Equipment). Remettez l'appareil destiné au recyclage à une entreprise spécialisée ou au centre de recyclage de votre commune. Respectez la réglementation en vigueur. En cas de doutes, contactez votre organisme de recyclage. Mise au rebut des piles Il est interdit de jeter les piles aux ordures ménagères. Le consommateur est tenu par la loi de remettre les piles au lieu de collecte des déchets de sa commune ou de son quartier ou dans un magasin. Cette obligation a pour objectif d'assurer l'élimination écologique des piles. Ne vous débarrassez des piles que lorsqu'elles sont déchargées. Annexe Renvois à la déclaration de conformité de l'UE Cet appareil correspond au niveau de l'harmonisation aux exigences fondamentales et aux autres presciptions pertinentes de la directive européenne relative à la compatibilité électromagnétique 2004/108/EC, de la directive relative à la basse tension 2006/95/EC ainsi que de la directive sur l'écoconception 2009/125/EC (Décret 1275/2008 Annexe II, N° 1). La déclaration de conformité originale est disponible chez l'importateur. SKRI 2000 A1 33 Annexe Caractéristiques techniques FR BE Bloc d'alimentation Fabricant Fai Shing Industries Ltd. Modèle JVSW0702000 Tension d'entrée, ampérage 100-240 V~ 50/60 Hz, 350 mA Tension de sortie, ampérage 7V Classe de protection ,2A II / Appareil Tension d'entrée, ampérage 7V ,2A Pile de sauvegarde des données 1 x pile 3 V type CR2032 (non comprise dans la livraison) Pile pour la télécommande 1 x 3 V type CR2025 (non comprise dans la livraison) Puissance absorbée Fonctionnement Veille W env. 1,8 W Puissance de sortie du hautparleur env. 2 x 1W (avec un taux de distorsion de 10 %) Gamme de fréquences radio (OUC / UKW) 87,5 - 108 MHz Température de service Humidité (pas de condensation) Dimensions (l x H x P) (sans pied) Poids 34 env. 5 +5 - +40 °C 5 - 90 % env. 30 x 15,7 x 8,4 cm env. 1070 g SKRI 2000 A1 Annexe Garantie FR BE Cet appareil bénéficie de 3 ans de garantie à compter de la date d'achat. L'appareil a été fabriqué avec soin et consciencieusement contrôlé avant sa distribution. Veuillez conserver le ticket de caisse en guise de preuve d'achat. Dans le cas où la garantie s'applique, veuillez appeler le service après-vente concerné. Cette condition doit être respectée pour assurer l'expédition gratuite de votre marchandise. REMARQUE ► La prestation de garantie est uniquement valable pour les défauts de matériaux et de fabrication et ne s'applique pas aux dommages dus au transport, aux dommages sur les pièces d'usure, ou aux détériorations de parties cassables telles que les boutons ou accus. Le produit est exclusivement destiné à un usage privé et non commercial. La garantie est annulée en cas de manipulation incorrecte et inappropriée, d'utilisation brutale et en cas d'intervention qui n'aurait pas été réalisée par notre centre de service après-vente agréé. Cette garantie ne constitue pas une restriction de vos droits légaux. La période de garantie n'est pas prolongée par la garantie du fabricant. Ceci s'applique également aux pièces remplacées et réparées. Les dommages et défauts qui sont éventuellement déjà présents à l'achat doivent être notifiés dès le déballage, au plus tard deux jours après la date d'achat. Après expiration du délai de garantie, les éventuelles réparations seront payantes. Service après-vente Service France Tel.: 0800 919270 E-Mail: [email protected] IAN 63920 Service Belgique Tel.: 070 270 171 (0,15 EUR/Min.) E-Mail: [email protected] IAN 63920 Importateur KOMPERNASS GMBH BURGSTRASSE 21 44867 BOCHUM, GERMANY www.kompernass.com SKRI 2000 A1 35 36 SKRI 2000 A1 Inhoud Inleiding . . . . . . . . . . . . . . . .38 Bediening en bedrijf . . . . . . .49 Informatie bij deze gebruiksaanwijzing . . . . . . . . . . . . 38 Auteursrecht . . . . . . . . . . . . . . . . . . 38 Gebruik in overeenstemming met bestemming . . . . . . . . . . . . . . . . . . 38 Waarschuwingen . . . . . . . . . . . . . . 39 In- en uitschakelen . . . . . . . . . . . . . 49 Basisinstellingen . . . . . . . . . . . . . . . 49 Instelmenu activeren . . . . . . . . . . . . 50 Alarm programmeren . . . . . . . . . . . 54 Kookwekker . . . . . . . . . . . . . . . . . . 57 Kookwekker programmeren . . . . . . 58 Radiofunctie . . . . . . . . . . . . . . . . . . 59 Weergave van externe audio-apparaten . . . . . . . . . . . . . . . 62 Aansluiting iPod / iPhone . . . . . . . . 62 Overige functies . . . . . . . . . . . . . . . 64 Veiligheid . . . . . . . . . . . . . . .40 Gevaar door elektrische stroom . . . 40 Omgang met batterijen . . . . . . . . . 40 Basisveiligheidsvoorschriften . . . . . 41 Bedieningselementen. . . . . .42 Opstellen en aansluiten . . . .44 Veiligheidsvoorschriften . . . . . . . . . 44 Inhoud van het pakket en inspectie na transport . . . . . . . . . . . . . . . . . . 44 Uitpakken . . . . . . . . . . . . . . . . . . . . 44 De verpakking afvoeren . . . . . . . . . 45 Eisen aan de plaatsingslocatie . . . . 45 Elektrische aansluiting. . . . . . . . . . . 45 Batterij van het apparaat . . . . . . . . 46 Batterij van de afstandsbediening . 46 Bevestiging onder een hangkastje . 47 Demontage . . . . . . . . . . . . . . . . . . . 48 Het apparaat neerzetten . . . . . . . . 48 Station voorbereiden voor iPod / iPhone . . . . . . . . . . . . . . . . . 48 Netvoeding inschakelen . . . . . . . . . 48 UKW-draadantenne . . . . . . . . . . . . 48 SKRI 2000 A1 NL BE Reiniging . . . . . . . . . . . . . . . .67 Veiligheidsvoorschriften . . . . . . . . . 67 Behuizing schoonmaken . . . . . . . . . 67 Problemen oplossen. . . . . . .67 Veiligheidsvoorschriften . . . . . . . . . 67 Oorzaken van storingen en storingen verhelpen . . . . . . . . . . . . 68 Opbergen / Afvoeren . . . . . .69 Opbergen. . . . . . . . . . . . . . . . . . . . 69 Apparaat afvoeren . . . . . . . . . . . . . 69 Batterijen afvoeren . . . . . . . . . . . . . 69 Appendix . . . . . . . . . . . . . . .69 Voorschriften voor de conformiteitsverklaring . . . . . . . . . . 69 Technische gegevens . . . . . . . . . . . 70 Garantie . . . . . . . . . . . . . . . . . . . . . 71 Service . . . . . . . . . . . . . . . . . . . . . . 71 Importeur . . . . . . . . . . . . . . . . . . . . 71 37 Inleiding Inleiding Informatie bij deze gebruiksaanwijzing NL BE Deze gebruiksaanwijzing maakt onderdeel uit van de onderbouwradio SKRI 2000 A1 (hierna aangeduid als “apparaat”) en voorziet u van belangrijke aanwijzingen voor het gebruik in overeenstemming met de bestemming, de veiligheid, het inbouwen en aansluiten, evenals voor de bediening van het apparaat. De gebruiksaanwijzing moet voortdurend nabij het apparaat beschikbaar zijn. Zij moet door iedere persoon gelezen en gebruikt worden, die opdracht heeft voor de bediening en voor het verhelpen van storingen van het apparaat. Bewaar de gebruiksaanwijzing en geef deze met het apparaat door aan de volgende eigenaar. Auteursrecht Deze documentatie is auteursrechtelijk beschermd. Elke verveelvoudiging resp. elke herdruk, ook gedeeltelijk, alsmede de weergave van de afbeeldingen, ook in gewijzigde toestand, is uitsluitend toegestaan met schriftelijke toestemming van de fabrikant. Gebruik in overeenstemming met bestemming Dit apparaat is alleen bestemd voor de ontvangst van UKW-radioprogramma's, als kookwekker, voor het alarmeren door een alarmsignaal, radio of iPod / iPhone en voor de aansluiting van externe audio-apparaten (bijv. MP3-speler) en iPod / iPhone in gesloten ruimtes. Het apparaat is bestemd voor vrije opstelling of voor montage onder een hangkastje. Hiertoe moeten de geïntegreerde stelpootjes resp. de meegeleverde montageplaat worden gebruikt. Een ander of verdergaand gebruik geldt als niet in overeenstemming met de bestemming. Het apparaat is niet bedoeld voor gebruik in bedrijfsmatige of industriële omgevingen. Claims van welke aard ook wegens schade voortvloeiend uit gebruik in strijd met de bestemming, onvakkundige reparaties, ongeoorloofd uitgevoerde veranderingen of gebruik van ongeoorloofde reserveonderdelen, zijn uitgesloten. Het risico is uitsluitend voor de gebruiker. “Made for iPod” en “Made for iPhone” betekent dat een elektronisch accessoireonderdeel speciaal voor aansluiting op een iPod of een iPhone is bedoeld en dat de ontwikkelaar garandeert dat het apparaat voldoet aan de kwaliteitsnormen van Apple. Apple is niet verantwoordelijk voor het gebruik van dit apparaat of voor het voldoen ervan aan veiligheids- en reguleringsnormen. Houd er rekening mee dat het gebruik van dit accessoireonderdeel in combinatie met een iPod, iPhone de prestaties van de draadloze communicatie kan beïnvloeden. iPad, iPhone, iPod, iPod classic, iPod nano, iPod shuffle en iPod touch zijn handelsmerken van Apple Inc., gedeponeerd in de VS en andere landen. iPad is een handelsmerk van Apple Inc. 38 SKRI 2000 A1 Inleiding Waarschuwingen In de onderhavige gebruiksaanwijzing worden de volgende waarschuwingen gebruikt: NL BE GEVAAR Een waarschuwing op dit niveau van gevaar duidt op een dreigende gevaarlijke situatie. Indien de gevaarlijke situatie niet wordt vermeden, kan dit leiden tot de dood of tot zwaar letsel. ► De aanwijzingen in deze waarschuwing in acht nemen, om levensgevaar of zwaar letsel van personen te vermijden. WAARSCHUWING Een waarschuwing op dit niveau van gevaar duidt op een eventuele gevaarlijke situatie. Als de gevaarlijke situatie niet wordt vermeden, kan dit letsel tot gevolg hebben. ► De aanwijzingen in deze waarschuwing opvolgen om persoonlijk letsel te vermijden. LET OP Een waarschuwing op dit niveau van gevaar duidt op een eventuele materiële schade. Als de gevaarlijke situatie niet wordt vermeden, kan dit materiële schade tot gevolg hebben. ► De aanwijzingen in deze waarschuwing opvolgen om materiële schade te vermijden. OPMERKING ► Een opmerking wijst op extra informatie, die de omgang met het apparaat vergemakkelijkt. SKRI 2000 A1 39 Veiligheid Veiligheid In dit hoofdstuk krijgt u belangrijke veiligheidsinstructies voor de omgang met het apparaat. NL BE Dit apparaat voldoet aan de gestelde veiligheidsvoorschriften. Een verkeerd gebruik kan leiden tot persoonlijk letsel en materiële schade. Gevaar door elektrische stroom GEVAAR Levensgevaar door elektrische stroom! Bij contact met onder spanning staande leidingen of onderdelen bestaat er levensgevaar! Let op de volgende veiligheidsinstructies om risico's door elektrische stroom te vermijden: ► Gebruik het apparaat niet wanneer de netvoedingsadapter, het aansluitsnoer of de netstekker zijn beschadigd. ► Open in geen geval de netvoedingsadapter. Als stroomgeleidende aansluitingen worden aangeraakt en de elektrische en mechanische constructie wordt veranderd, bestaat er gevaar voor stroomschokken. Omgang met batterijen WAARSCHUWING Gevaar door gebruik dat niet in overeenstemming is met de bestemming! Er bestaat gevaar voor explosies en lekken! Voor een veilige omgang met batterijen neemt u de volgende veiligheidsinstructies in acht: ► Gooi batterijen niet in het vuur. ► Batterijen niet kortsluiten. ► Probeer batterijen niet weer op te laden. ► Controleer de batterijen regelmatig. Vrijkomend batterijzuur kan tot onherstelbare beschadiging van het apparaat leiden. Zeer voorzichtig omgaan met een beschadigde of lekkende batterij. Gevaar voor letsel door bijtende chemicaliën! Veiligheidshandschoenen dragen. ► Bewaar batterijen buiten bereik van kinderen. In geval van inslikken, onmiddellijk medische hulp zoeken. ► Neem de batterijen uit wanneer u het apparaat langere tijd niet gebruikt. 40 SKRI 2000 A1 Veiligheid Basisveiligheidsvoorschriften Neem de volgende veiligheidsvoorschriften in acht voor een veilige omgang met het apparaat: NL BE ■ Controleer het apparaat vóór het gebruik op uitwendig zichtbare schade. Neem een defect apparaat of een apparaat dat gevallen is niet in gebruik. ■ In geval het snoer of de aansluitingen beschadigd zijn, laat u deze door geautoriseerd en vakkundig personeel, of door de klantenservice vervangen. ■ Dit apparaat is niet bedoeld voor gebruik door personen (met inbegrip van kinderen) met beperkte fysieke, zintuiglijke of geestelijke vermogens of met gebrek aan ervaring en / of gebrek aan kennis, tenzij ze onder toezicht staan van een voor hun veiligheid verantwoordelijke persoon of van die persoon aanwijzingen kregen voor het gebruik van het apparaat. ■ Bij kinderen is supervisie noodzakelijk om er voor te zorgen dat ze niet met het apparaat spelen. ■ Laat reparaties aan het apparaat alleen uitvoeren door geautoriseerde speciaalzaken of door de klantenservice. Door ondeskundige reparaties kunnen er gevaren voor de gebruiker ontstaan. Bovendien vervalt dan de garantie. ■ Een reparatie van het apparaat tijdens de garantieperiode mag alleen worden uitgevoerd door een klantenservice die door de fabrikant geautoriseerd is, anders wordt er geen garantie meer gegeven bij schade die nadien optreedt. ■ Defecte onderdelen mogen alleen worden vervangen door originele onderdelen. Alleen bij deze onderdelen is gegarandeerd dat ze voldoen aan de veiligheidseisen. ■ Bescherm het apparaat tegen vocht en het binnendringen van vloeistoffen. Dompel het apparaat nooit onder water, plaats het apparaat niet in de buurt van water en zet geen voorwerpen gevuld met water (bijv. vazen) op het apparaat. ■ Plaats geen voorwerpen op het apparaat. ■ Gebruik het apparaat niet in de buurt van open vlammen (bijv. kaarsen). ■ Vermijd rechtstreeks zonlicht. ■ De toevoer altijd aan de stekker van de netvoedingsadapter uit het stopcontact trekken, niet aan het aansluitsnoer. ■ Haal als er storingen optreden en bij onweer de netstekker uit het stopcontact. SKRI 2000 A1 41 Bedieningselementen Bedieningselementen (afbeeldingen zie voorste uitvouwpagina afbeelding A) NL BE Display 2 User: gebruiker kiezen 3 Vol+: volume verhogen 4 Mem: geheugenpositie kiezen 5 Vol-: volume verlagen Power: in / uitschakelen 6 7 Function / ST: functie kiezen / stereo activeren 8 Timer: timer instellen en activeren 9 Alarm Mode: alarmstand kiezen 10 AOT / Dimmer: uitschakeltimer / displaydimmer in-/uitschakelen 11 Mode / Lock: instelmenu oproepen / toetsenblokkering 12 i-Time Sync Bass: tijdindicatie en datum synchroniseren met iPod / iPhone / basversterking I Enter : bediening bij iPod / iPhone / invoer 13 / Memory Scan: pauze / afspelen bij iPod / iPhone / automatisch zenders zoeken / opgeslagen radiozenders oproepen 14 i 15 Netvoedingsadapter 16 i / Pr– / AL2: vorige functie bij iPod / iPhone / vorige geheugenpositie selecteren / alarm 2 instellen 17 / Up: sneller vooruit bij iPod / iPhone / ontvangstfrequentie verhogen 18 i / Pr+ / AL1: volgende functie bij iPod / iPhone / volgende geheugenpositie selecteren / alarm 1 instellen / Down: sneller achteruit bij iPod / iPhone / ontvangstfrequentie verlagen i 20 Montageplaat 19 21 Stelpootjes (uitklapbaar) 42 22 Borgbeugel voor iPod / iPhone 23 Luidsprekers 24 Batterijvak 25 DC-aansluiting: stroomaansluitconnector (7V) voor netvoedingsadapter 26 AUX IN-aansluiting: ingangs-aansluitconnector voor audioapparaten met 3,5mm jackplugstekker 27 Draadantenne voor UKW-ontvangst SKRI 2000 A1 Bedieningselementen (afbeeldingen zie voorste uitvouwpagina afbeelding B) 28 Afstandhouder (voor onderbouwmontage) 29 Station voor iPod / iPhone 30 : in-/uitschakelen 31 User: gebruiker kiezen 32 i / Down: sneller achteruit bij iPod / iPhone / ontvangstfrequentie verlagen 33 i : pauze / afspelen bij iPod / iPhone 34 iMenu / Enter: bediening bij iPod / iPhone / invoer 35 Mem: geheugenpositie kiezen 36 Memory-Scan: automatisch zenders zoeken / opgeslagen radiozenders oproepen 37 Timer: timer instellen en activeren 38 Function / ST: functie kiezen / stereo activeren Stand: instelmenu 39 Vol+: volume verhogen 40 i / Pr+: volgende functie bij iPod / iPhone / volgende geheugenpositie selecteren 41 Vol–: volume verlagen 42 i 43 iTime Sync / Bass: tijdindicatie en datum synchroniseren met iPod / iPhone / basversterking 44 i / Pr–: vorige geheugenpositie selecteren / vorige functie bij iPod / iPhone 45 Mode / Lock: instelmenu oproepen / toetsenblokkering 46 AOT / Dimmer: uitschakeltimer / displaydimmer in-/uitschakelen 47 Alarm: alarmstand kiezen 48 Sensor voor afstandsbediening SKRI 2000 A1 NL BE / Up: sneller vooruit bij iPod/iPhone / ontvangstfrequentie verhogen 43 Opstellen en aansluiten Opstellen en aansluiten Veiligheidsvoorschriften NL BE WAARSCHUWING Bij de ingebruikname van het apparaat kan er persoonlijke en materiële schade optreden! Neem de volgende veiligheidsinstructies in acht om de gevaren te vermijden: ► Verpakkingsmateriaal mag niet als speelgoed worden gebruikt. Er bestaat verstikkingsgevaar. ► Neem de aanwijzingen voor de eisen aan de opstellingsplaats en voor de elektrische aansluiting van het apparaat in acht om persoonlijke en materiële schade te vermijden. Inhoud van het pakket en inspectie na transport Het apparaat wordt standaard met volgende componenten geleverd: ▯ Onderbouwradio SKRI 2000 A1 ▯ Netvoedingsadapter JVSW0702000 ▯ Montageplaat ▯ 4 bevestigingsschroeven (kort) ▯ 2 x afstandhouder incl. 4 bevestigingsschroeven (lang) ▯ Borgbeugel voor iPod / iPhone ▯ 1 x batterij 3 V type CR2032 ▯ 1 x batterij 3 V type CR2025 ▯ Afstandsbediening ▯ Cinchkabel 3,5 naar 3,5 mm (50 cm) ▯ Deze gebruiksaanwijzing OPMERKING ► Controleer of de levering compleet is en of er sprake is van zichtbare schade. ► Bij een onvolledige levering of bij beschadigingen door een verkeerde verpakking of door het transport neemt u contact op met de Service-Hotline (zie hoofdstuk Service pag. 71). Uitpakken ♦ Haal alle delen van het apparaat en de gebruiksaanwijzing uit de doos. ♦ Verwijder al het verpakkingsmateriaal. 44 SKRI 2000 A1 Opstellen en aansluiten De verpakking afvoeren De verpakking beschermt het apparaat tegen transportschade. De verpakkingsmaterialen zijn niet schadelijk voor het milieu en gekozen om afvoertechnische redenen en daarom recyclebaar. NL BE Het terugvoeren van de verpakking in de materiaalkringloop is een besparing op grondstoffen en reduceert het ontstaan van afval. Voer verpakkingsmaterialen die niet meer worden gebruikt af conform de plaatselijk geldende voorschriften. OPMERKING ► Indien mogelijk de originele verpakking bewaren gedurende de garantieperiode van het apparaat, om het apparaat in geval van een garantiekwestie volgens de voorschriften te kunnen verpakken. Eisen aan de plaatsingslocatie Voor een veilig en storingsvrij gebruik van het apparaat moet de plaats van opstelling voldoen aan de volgende voorwaarden: ■ Bij de plaatsing van het apparaat het apparaat op een stevige, vlakke en horizontale ondergrond zetten. Gebruik de uitklapbare stelpootjes. ■ Het apparaat zodanig neerzetten of monteren, dat de aanwezige ventilatieopeningen en de luidsprekers niet afgedekt worden. ■ Zet het apparaat niet neer in een hete, natte of zeer vochtige omgeving of in de buurt van brandbaar materiaal. ■ Bevestig het apparaat niet direct boven een kookplaat. ■ Het stopcontact moet goed toegankelijk zijn, zodat de netvoedingsadapter in geval van nood gemakkelijk uit het stopcontact kan worden gehaald. Elektrische aansluiting ■ Het apparaat wordt via de meegeleverde netvoedingsadapter gevoed met een gelijkspanning van 7V. Sluit het apparaat uitsluitend via de meegeleverde netvoedingsadapter aan op de stroomvoorziening. ■ Vergelijk voordat u het apparaat aansluit de aansluitgegevens van de netvoedingsadapter (spanning en frequentie) op het kenplaatje met die van uw lichtnet. Deze gegevens moeten overeenkomen, zodat er geen schade aan het apparaat optreedt. ■ Bescherm het aansluitsnoer tegen hete oppervlakken en scherpe kanten. ■ Let erop dat het aansluitsnoer niet strak gespannen of geknikt wordt. ■ Laat het aansluitsnoer niet over hoeken hangen (struikelgevaar). ■ Wanneer u het apparaat langere tijd niet gebruikt, koppelt u de netvoedingsadapter los van de stroomvoorziening. SKRI 2000 A1 45 Opstellen en aansluiten Batterij van het apparaat Door het plaatsen van de batterij voorkomt u dat bij een mogelijke stroomuitval de geprogrammeerde tijd, geprogrammeerde geheugenposities en alarmtijden verloren gaan. De batterij zorgt ervoor dat de interne tijd en datum ook tijdens een stroomuitval doorlopen. Bij opnieuw inschakelen van de netstroom verschijnt op het display automatisch de juiste tijd. NL BE OPMERKING ► Het apparaat kan ook worden gebruikt zonder batterij. Batterij plaatsen / vervangen ♦ Open de afdekking van het batterijvak 24 aan de onderkant van het apparaat, door de afdekking met een munt tot aan de aanslag naar links te draaien en af te nemen. ♦ Plaats de batterij van het type CR2032 (inbegrepen in de levering) in het batterijvak. De kant met de markering + wijst omhoog. ♦ Sluit het batterijvak door de afdekking erop te plaatsen en de afdekking met een munt naar rechts te draaien. Batterij van de afstandsbediening Batterij activeren De batterij voor de afstandsbediening is bij levering al geplaatst. ♦ Activeer de batterij door het isolatiestrookje te verwijderen. Batterij vervangen ♦ Druk met de vingernagel de inkeping (A) naar rechts en trek het batterijvak er gelijktijdig uit. ♦ Plaats een 3 V-batterij van het type CR 2025 in het batterijvak. De kant met de markering “+” wijst omhoog. ♦ Schuif het batterijvak weer helemaal in de afstandsbediening. 46 SKRI 2000 A1 Opstellen en aansluiten Bevestiging onder een hangkastje NL BE U kunt het apparaat met de meegeleverde montageplaat 20 bijv. onder een hangkastje monteren. Voor de montage van het apparaat gaat u als volgt te werk: ♦ Schuif de montageplaat 20 naar achteren en neem deze 20 af. ♦ Zoek een geschikte bevestigingsplaats voor het apparaat (zie ook het hoofdstuk Eisen aan de plaatsingslocatie pag. 45). ♦ Houd de montageplaat 20 onder de bevestigingsplaats. Daarbij moet de voorkant van de montageplaat 20 ca. 6,8 cm achter de voorzijde zitten, zodat het apparaat na de montage evenwijdig aan het hangkastje afsluit. De zijkanten van de montageplaat 20 moeten een afstand van ca. 4,5 cm tot aangrenzende kasten of wanden hebben. OPMERKING ► Wanneer u het apparaat links van een aangrenzende kast resp. een wand wilt monteren, verwijdert u vooraf de borgbeugel 22 van het apparaat. ♦ Markeer de 4 bevestigingspunten met een pen. ♦ Maak met een drevel of spijker telkens een kleine verdieping in de markeringen. ♦ Plaats desgewenst de meegeleverde afstandhouder 28 met het nokje in de hiervoor bestemde verdieping op de montageplaat 20 . ♦ Schroef de montageplaat 20 met de meegeleverde schroeven vast (zie afbeelding). SKRI 2000 A1 47 Opstellen en aansluiten ♦ Zet het apparaat schuin met de voorste uitsparingen in de bovenkant van het apparaat in de montageplaat 20 . Druk het achterste deel van het apparaat naar boven tegen de montageplaat 20 , totdat het apparaat hoorbaar vastklikt. NL BE ♦ Controleer of het apparaat stevig zit. Demontage ♦ Trek het apparaat naar voren en neem het apparaat naar beneden toe af. ♦ Draai de schroeven op de montageplaat 20 los en neem de montageplaat 20 af. Het apparaat neerzetten Als alternatief kunt u het apparaat ook neerzetten. Om bij het plaatsen de ventilatieopeningen en de luidsprekers 23 aan de onderkant van het apparaat niet af te dekken, moeten de beide stelpootjes 21 van het apparaat worden uitgeklapt: ♦ Grijp in de inkeping aan de zijkant van een stelpootje en klap het stelpootje tot aan de aanslag uit. ♦ Zoek een geschikte opstellingsplaats voor het apparaat (zie ook het hoofdstuk Eisen aan de plaatsingslocatie pag. 45). Station voorbereiden voor iPod / iPhone U kunt uw iPod / iPhone op het apparaat aansluiten. Daartoe moet u het station 29 omlaagklappen en de borgbeugel 22 monteren: ♦ Klap het station 29 helemaal omlaag. ♦ Verwijder de borgbeugel 22 van de zijkant van het apparaat. ♦ Aan de zijkanten van het station 29 bevinden zich twee uitsparingen. Schuif de borgbeugel 22 van voren zodanig op het station 29 , dat de nokjes in de uitsparingen vallen. Netvoeding inschakelen ♦ Sluit de netstekker van de netvoedingsadapter 15 aan op de DC-aansluiting 25 op de achterkant van het apparaat. ♦ Sluit de netvoedingsadapter 15 aan op het stopcontact. UKW-draadantenne ♦ Rol de draadantenne 27 voor de UKW-ontvangst helemaal uit. 48 SKRI 2000 A1 Bediening en bedrijf Bediening en bedrijf In dit hoofdstuk krijgt u belangrijke aanwijzingen over de bediening en het bedrijf van het apparaat. NL BE In- en uitschakelen Na aansluiting van het apparaat op de stroomvoorziening start de automatische verschijnt ca. 3 tot 5 minuten de tekst systeeminstelling. Op het display “PLEASE WAIT FOR SETTING THANKS”. Als in deze tijd een signaal wordt ontvangen, wordt het systeem automatisch geactualiseerd. OPMERKING ► Om deze procedure af te breken, drukt u op een willekeurige toets. Het systeem start dan met de volgende standaardinstellingen: ■ Datum / tijd: ■ Radio is uitgeschakeld ■ Bedrijfsstand Klok / stand-by is actief ■ Displaydimmer is actief Na aansluiting op de stroomvoorziening schakelt het apparaat over op de stand Klok / stand-by. Met de toets Power 6 of de -toets 30 op de afstandsbediening wordt het apparaat in- resp. uitgeschakeld. Met de toets Function / ST 7 of de toets Function / ST 38 op de afstandsbediening schakelt u tussen de bedrijfsstanden Radio, iPod en AUX. OPMERKING ► De toets Power 6 of de -toets 30 op de afstandsbediening koppelt het apparaat niet volledig los van de netstroom. Het apparaat verbruikt ook stroom in de stand-bystand. Om het apparaat volledig los te koppelen van de netstroom, moet de stekker van de netvoedingsadapter 15 uit het stopcontact worden getrokken. Basisinstellingen Na het aansluiten van het apparaat op de stroomvoorziening toont het apparaat op het display de tijd en de dag van de week. Het apparaat staat in de bedrijfsstand Klok / stand-by. SKRI 2000 A1 49 Bediening en bedrijf Instelmenu activeren Om het instelmenu te activeren, drukt u in de bedrijfsstand Klok / stand-by op de toets Mode / Lock 11 of op de Mode Lock-toets 45 op de afstandsbediening. De aangegeven tijd begint te knipperen. Bij iedere verdere activeop het display ring van de toets Mode / Lock 11 of 45 wordt overgeschakeld op de volgende instelmogelijkheid. De volgorde van de menupunten is: NL BE ▯ Tijd instellen ▯ Datum instellen ▯ Herinneringsfunctie instellen ▯ Updatestand instellen ▯ Displaydimmer in-/uitschakelen ▯ Starttijd displaydimmer instellen ▯ Tijdnotatie instellen OPMERKING ► Het instelmenu wordt automatisch beëindigd als u ca. 15 seconden lang geen toets activeert. De uitgevoerde instellingen worden opgeslagen. Tijd instellen Voorwaarde: het apparaat staat in de stand Klok / stand-by. ♦ Druk één keer op de toets Mode / Lock 11 of de Mode Lock-toets 45 op de afstandsbediening. De tijdindicatie begint te knipperen. ♦ Stel met de toetsen / Up 17 en i / Down 19 of de i / Up-toets 42 / Down-toets 32 op de afstandsbediening de actuele tijd in. Per en de i toetsdruk verandert de tijd met een minuut. De betreffende knop meer dan 2 seconden ingedrukt houden start de snelinstelling. ♦ Druk nogmaals op de toets Mode / Lock 11 of de Mode Lock-toets 45 op de afstandsbediening om de actuele instelling op te slaan en naar het volgende menupunt te gaan. OPMERKING ► De tijd wordt gereset naar uur, als het apparaat van de stroomvoorziening wordt losgekoppeld en er geen batterij is geplaatst of de batterij te zwak is. 50 SKRI 2000 A1 Bediening en bedrijf Datum instellen Voorwaarde: het apparaat staat in de stand Klok / stand-by. ♦ Druk twee keer op de toets Mode / Lock 11 of de Mode Lock-toets 45 op de afstandsbediening. De datumindicatie begint te knipperen. NL BE ♦ Stel met de toetsen / Up 17 en i / Down 19 of de i / Up-toets 42 en de i / Down-toets 32 op de afstandsbediening de actuele datum in. Per druk op de knop wordt de datum om een dag veranderd. De weekdagindicatie verandert automatisch. De betreffende knop meer dan 2 seconden ingedrukt houden start de snelinstelling. ♦ Druk nogmaals op de toets Mode / Lock 11 of de Mode Lock-toets 45 op de afstandsbediening om de actuele instelling op te slaan en naar het volgende menupunt te gaan. OPMERKING ► De datum wordt gereset naar als het apparaat van de stroomvoorziening wordt losgekoppeld en er geen batterij is geplaatst of de batterij te zwak is. Herinneringsfunctie instellen U kunt tot wel 6 data instellen, waarop een automatische herinnering geactiveerd wordt. De functie SSA (Special Day Alert) is handig om bijv. aan verjaardagen of andere terugkerende gebeurtenissen herinnerd te worden. De herinnering vindt ieder jaar op dezelfde datum plaats. Op deze datum klinkt op elk heel uur van 8:00 - 23:00 uur 10 minuten lang een alarmsignaal. Voorwaarde: het apparaat staat in de bedrijfsstand Klok / stand-by. ♦ Druk drie keer op de toets Mode / Lock 11 of de Mode Lock-toets 45 op de afstandsbediening. De actuele instelling van de gekozen herinneringsdatum wordt afwisselend met de indicatie weergegeven. Naast de staat het nummer van de geheugenpositie voor de datum. Mogelijke waarden zijn . ♦ Selecteer met de toets i / Memory Scan 14 of de toets Memory-Scan 36 op de afstandsbediening de geheugenpositie van de in te stellen datum. ♦ Stel met de toetsen / Up 17 en i / Down 19 of de i / Up-toets 42 en de i / Down-toets 32 op de afstandsbediening de datum voor deze geheugenpositie in. Per toetsdruk verandert de datum met een dag. De betreffende knop meer dan 2 seconden ingedrukt houden start de snelinstelling. SKRI 2000 A1 51 Bediening en bedrijf OPMERKING ► Druk op de toets Timer 8 of de Timer-toets 37 op de afstandsbedieworden nu de dag ning om het jaar over te slaan. Op het display en de maand weergegeven. De herinneringsfunctie wordt nu elk jaar op deze datum geactiveerd. NL BE ♦ Druk nogmaals op de toets Mode / Lock 11 of de Mode Lock-toets 45 op de afstandsbediening om de actuele instelling op te slaan en naar het volgende menupunt te gaan. Updatestand instellen Voorwaarde: het apparaat staat in de stand Klok / stand-by. ♦ Druk vier keer op de toets Mode / Lock 11 of de Mode Lock-toets 45 op de afstandsbediening. Op het display verschijnt en een knipperend kloksymbool . ♦ Druk op de toets i / Down 19 of de toets i / Down 32 op de afstandsbediening om de automatische RDS-functie uit te schakelen. Het knipperende kloksymbool verdwijnt. ♦ Druk op de toets / Up 17 of de toets i / Up-toets 42 op de afstandsbediening om de automatische RDS-functie te activeren. Het knipperende kloksymbool verschijnt. ♦ Druk nogmaals op de toets Mode / Lock 11 of de Mode Lock-toets 45 op de afstandsbediening om de actuele instelling op te slaan en naar het volgende menupunt te gaan. Tijdgestuurd dimmen van het display in-/uitschakelen Voorwaarde: het apparaat staat in de stand Klok / stand-by. Het apparaat heeft twee mogelijkheden voor dimmen van het display. 1. Tijdgestuurd dimmen van het display 2. Dimmen van het display handmatig instellen (zie ook het hoofdstuk Displaydimmer handmatig in-/uitschakelen pag. 66). ♦ Druk vijf keer op de toets Mode / Lock 11 of de Mode Lock-toets 45 op de afstandsbediening. De actuele instelling van de displaydimmer wordt of ). weergegeven ( ♦ Selecteer met de toets / Up 17 of de i / Up-toets 42 op de afstandsbediening “ ”. De displayverlichting verdwijnt na 15 seconden. ♦ Selecteer met de toets i afstandsbediening “ 52 / Down 19 of de i / Down-toets 32 op de ”. De displayverlichting brandt continu. SKRI 2000 A1 Bediening en bedrijf ♦ Druk nogmaals op de toets Mode / Lock 11 of de Mode Lock-toets 45 op de afstandsbediening om de actuele instelling op te slaan en naar het volgende menupunt te gaan. Modus Display- Displayindicatie verlichting NL BE Besturing met de toets AOT / Dimmer 10 of 46 Tijdgestuurde dimmer UIT DT OFF Wordt ingesteld DIM OFF: display brandt continu door de AOT/ DIM ON: displayverlichting uit; bij een druk op Dimmer-toets een willekeurige toets wordt de displayverlichting 15 sec. lang ingeschakeld. Tijdgestuurde dimmer AAN DT ON Standaard van 23:00 - 5:59 uitgeschakeld 23:00 - 5:59 uur Bij een druk op een willekeurige toets wordt het display 60 sec. lang ingeschakeld. 6:00 - 22:59 uur DIM OFF: display brandt continu DIM ON: displayverlichting uit; bij een druk op een willekeurige toets wordt de displayverlichting 15 sec. lang ingeschakeld. Starttijd displaydimmer instellen Voorwaarde: het apparaat staat in de stand Klok / stand-by. ♦ Druk zes keer op de toets Mode / Lock 11 of de Mode Lock-toets 45 op de afstandsbediening. De actuele starttijd van de displaydimmer ( ) wordt afwisselend met de weergegeven. ♦ Stel met de toetsen / Up 17 en i / Down 19 of de i / Up-toets 42 en de i / Down-toets 32 op de afstandsbediening de gewenste starttijd in. Per toetsdruk verandert de tijd met een minuut. De betreffende knop meer dan 2 seconden ingedrukt houden start de snelinstelling. ♦ Druk nogmaals op de toets Mode / Lock 11 of de Mode Lock-toets 45 op de afstandsbediening om de actuele instelling op te slaan en naar het volgende menupunt te gaan. Tijdformaat instellen Voorwaarde: het apparaat staat in de stand Klok / stand-by. ♦ Druk zeven keer op de toets Mode / Lock 11 of de Mode Lock-toets 45 op de afstandsbediening. De actuele instelling van de tijdnotatie wordt weergegeven ( = 24-uurs notatie of = 12-uurs notatie). ♦ Zet met de toets / Up 17 of de i / Up-toets 42 op de afstandsbediening de tijdnotatie op wanneer u de tijd in de 12-uurs notatie wilt weergeven. SKRI 2000 A1 53 Bediening en bedrijf ♦ Zet met de toets i / Up 19 of de i / Up-toets 32 op de afstandsbewanneer u de tijd in de 24-uurs notatie diening de tijdnotatie op wilt weergeven. ♦ Druk nogmaals op de toets Mode / Lock 11 of de Mode Lock-toets 45 op de afstandsbediening om de actuele instelling op te slaan en naar het volgende menupunt te gaan. NL BE Alarm programmeren Het apparaat beschikt over twee alarmtimers. Alle instellingen kunnen voor beide alarmtimers afzonderlijk worden gedaan. U kunt kiezen of er op de geprogrammeerde tijd een alarmsignaal moet klinken of dat de radio of de iPod / iPhone aan moet gaan. OPMERKING ► Wordt er tijdens de alarmprogrammering ca. 15 seconden lang geen toets ingedrukt, dan wordt de alarmtijd met de actuele instellingen geactiveerd. Alarmtijd instellen ♦ Druk op de toets Alarm Mode 9 of de toets Alarm 47 op de afstandsbediening. De ingestelde alarmtijd van het betreffende alarm wordt knipperend op het display weergegeven en de resp. verschijnt. Via de tijdsaanduiding worden de weekdagen aangegeven, waarop het alarm is geactiveerd. ♦ Stel met de toetsen / Up 17 en i / Down 19 of de i / Up-toets 42 / Down-toets 32 op de afstandsbediening de gewenste alarmtijd en de i in. Per toetsdruk verandert de datum met een dag. De betreffende knop meer dan 2 seconden ingedrukt houden start de snelinstelling. Weekdag instellen ♦ Druk in de alarmstand op de toets Function / ST 7 of de toets Function / ST 38 op de afstandsbediening om te schakelen tussen de weekdagcombinaties Ma-Vr, Za-Zo of Ma-Zo. De gekozen combinatie wordt aangegeven via de alarmtijd. ♦ Houd de toets Function / ST 7 of de toets Function / ST 38 op de afstandsbediening minstens 2 seconden ingedrukt om te schakelen tussen de weekdagcombinaties en de instelmogelijkheid voor een afzonderlijke weekdag. OPMERKING ► Bij de instelmogelijkheid voor een afzonderlijke weekdag schakelt u met de toets Function / ST 7 of de toets Function / ST 38 op de afstandsbediening tussen de weekdagen. 54 SKRI 2000 A1 Bediening en bedrijf Alarm met alarmsignaal instellen ♦ Om voor een alarm “Alarmsignaal” te selecteren, drukt u in de alarmstand op de toets i / Pr+ / AL1 18 of de toets i / Pr– / AL2 16 resp. de i Pr+ toets 40 of de i Pr– toets 44 op de afstandsbediening, tot op het display verschijnt. het symbool NL BE Alarm met radio instellen Wanneer de radio op het alarmtijdstip aan moet gaan, voert u voorafgaand aan de activering van het alarm de volgende instellingen uit: ♦ Schakel de radio in door op de toets Power 6 of de toets 30 op de afstandsbediening te drukken en met de toets Function / ST 7 of de toets Function / ST 38 op de afstandsbediening de bedrijfsstand Radio te kiezen. ♦ Selecteer de zender waarmee u wilt worden gewekt (zie hoofdstuk Zender handmatig instellen pag. 60 of Volgende zender zoeken pag. 60). ♦ Stel met de toetsen Vol+ 3 en Vol– 5 of de Vol+ toets 39 en de Vol– toets 41 op de afstandsbediening het gewenste volume in (zie hoofdstuk Volume instellen S. 60). ♦ Schakel de radio uit door op de toets afstandsbediening te drukken. Power 6 of de toets 30 op de ♦ Om voor een alarm “Radio” te selecteren, drukt u in de alarmstand op de toets i / Pr+ / AL1 18 of de toets i / Pr– / AL2 16 resp. de i Pr+ toets 40 of de i Pr– toets 44 op de afstandsbediening, tot op het display het symbool verschijnt. Alarm met iPod / iPhone instellen Wanneer de iPod / iPhone op het alarmtijdstip aan moet gaan, voert u voorafgaand aan de activering van het alarm de volgende instellingen uit: ♦ Schakel het apparaat in door op de toets Power 6 of de toets 30 op de afstandsbediening te drukken en met de toets Function / ST 7 of de toets Function / ST 38 op de afstandsbediening de bedrijfsstand te kiezen. ♦ Plaats uw iPod, resp. uw iPhone in het station 29 . ♦ Selecteer op de iPod / iPhone een titel (of een album resp. een afspeellijst). ♦ Stel met de toetsen Vol+ 3 en Vol– 5 of de Vol+ toets 39 en de Vol– toets 41 op de afstandsbediening het gewenste volume in (zie hoofdstuk Volume instellen S. 60). ♦ Zet de iPod / iPhone in de pauzestand of schakel het apparaat uit. SKRI 2000 A1 55 Bediening en bedrijf ♦ Schakel de bedrijfsstand iPod uit door op de toets toets 30 op de afstandsbediening te drukken. Power 6 of de ♦ Om voor een alarm “iPod” te selecteren, drukt u in de alarmstand op de toets i / Pr+ / AL1 18 of de toets i / Pr– / AL2 16 resp. de i Pr+ toets 40 of de i Pr– toets 44 op de afstandsbediening, tot op het display het symbool verschijnt. NL BE Alarm uitschakelen ♦ Om het geactiveerde alarm uit te schakelen, drukt u in de alarmstand op de toets i / Pr+ / AL1 18 of de toets i / Pr– / AL2 16 resp. de i Pr+ toets 40 geen of de i Pr– toets 44 op de afstandsbediening, tot op het display symbool weer wordt weergegeven. Als de alarmtijd is bereikt OPMERKING ► Als het alarmtijdstip is bereikt, wordt de uitschakeltimer (indien geactiveerd) meteen gestopt. Bij de instelling “Alarm met alarmsignaal” klinkt er een geluidssignaal. Het volume van het geluidssignaal wordt tot aan het maximale volume continu hoger. De duur van het alarm is beperkt tot 10 minuten. De radio wordt daarbij op “Mute” geschakeld. Bij de instelling “Alarm met radio” wordt de radio aangezet. De eerder gekozen zender wordt op het ingestelde volume maximaal 60 minuten lang geactiveerd. Bij de instelling “Alarm met iPod / iPhone” wordt de iPod / das iPhone aangezet. De weergave start met de laatst geselecteerde titel en wordt op het ingestelde volume maximaal 60 minuten lang weergegeven. Druk op een willekeurige toets om het actuele alarm te stoppen. OPMERKING ► Het alarm wordt bij het bereiken van de volgende alarmtijd (bijv. de volgende dag) weer actief. 56 SKRI 2000 A1 Bediening en bedrijf Kookwekker Het apparaat beschikt over een handige kookwekker, waarmee bijv. kook- en baktijden bewaakt kunnen worden. Het instelbare tijdbereik van de kookwekker ligt tussen 1 minuut en 23 uur, 59 minuten. NL BE Kookwekker instellen ♦ Druk op de toets Timer 8 of de Timer-toets 37 op de afstandsbediening. De indicatie verschijnt. Op het display wordt het kookpansymbool voor de kookwekker weergegeven. ♦ Stel met de toetsen / Up 17 en i / Down 19 of de i / Up-toets 42 / Down-toets 32 op de afstandsbediening de gewenste tijd voor en de i de kookwekker in. Per toetsdruk verandert de tijd met een minuut. De toets meer dan 2 seconden ingedrukt houden start de snelinstelling. OPMERKING ► Wordt tijdens de instelling ca. 15 seconden lang geen verandering gedaan, schakelt het apparaat weer over op de vorige stand. Kookwekker starten ♦ Druk na instelling van de tijd nogmaals op de toets Timer 8 of de Timertoets 37 op de afstandsbediening. De aangegeven tijd begint met aftellen. weergegeven. Op het display wordt een terugwaarts lopende klok OPMERKING ► Wordt tijdens het aflopen van de kookwekker een andere functie gekozen, dan verdwijnt de van de resterende tijd uit beeld. Het kookpansymbool en de terugwaarts lopende klok worden opnieuw op het display weergegeven. Druk nogmaals op de toets Timer 8 of de Timer-toets 37 op de afstandsbediening om de resterende tijd van de kookwekker ca. 10 seconden opnieuw weer te geven. 30 seconden voor het aflopen van de kookwekker begint het apparaat met enkele geluidssignalen akoestisch te wijzen op het bereiken van de ingestelde tijd. De intervallen tussen de afzonderlijke tonen worden daarbij steeds korter. Bij het bereiken van de ingesteld tijd klinkt het alarmsignaal van de kookwekker als continu interval gedurende maximaal 60 minuten. ♦ Druk op de toets Timer 8 of de Timer-toets 37 op de afstandsbediening om het alarmsignaal van de kookwekker uit te schakelen. SKRI 2000 A1 57 Bediening en bedrijf Kookwekker onderbreken ♦ Druk als de kookwekker loopt op de toets Timer 8 of de Timer-toets 37 op de afstandsbediening. De kookwekker wordt onderbroken. De getoonde resterende tijd begint te knipperen. NL BE OPMERKING ► Het apparaat schakelt na ca. 15 seconden weer over op de vorige stand. Druk nogmaals op de toets Timer 8 of de Timer-toets 37 op de afstandsbediening om de resterende tijd van de kookwekker opnieuw weer te geven. ♦ Om de kookwekker opnieuw te starten, drukt u nogmaals op de toets Timer 8 of de Timer-toets 37 op de afstandsbediening . De kookwekker wordt weer gestart. ♦ Om de kookwekker uit te schakelen voordat de tijd is verstreken, houdt u de toets Timer 8 of de Timer-toets 37 op de afstandsbediening ingedrukt, tot op het display het kookpansymbool en de terugwaarts lopende klok niet meer worden weergegeven. OPMERKING ► De kookwekker wordt meteen uitgeschakeld op het moment dat een alarm actief wordt. Kookwekker programmeren Tijden die u vaker nodig heeft, kunt u voorprogrammeren voor de kookwekker, zodat u deze niet steeds weer moet invoeren. Er kunnen tot wel 6 tijden vooraf geprogrammeerd worden. Standaard zijn de 6 geheugenposities voorgeprogrammeerd met 5/10/15/20/25/30 minuten. Voor het programmeren van de kookwekker gaat u als volgt te werk: ♦ Druk op de toets Timer 8 of de Timer-toets 37 op de afstandsbediening om de kookwekker te activeren. ♦ Stel met de toetsen / Up 17 en i / Down 19 of de i / Up-toets 42 / Down-toets 32 op de afstandsbediening de gewenste tijd voor en de i de kookwekker in. Per toetsdruk verandert de tijd met een minuut. De toets meer dan 2 seconden ingedrukt houden start de snelinstelling. ♦ Druk op de toets Function / ST 7 of de toets Function / ST 38 op de afstandsbediening om de timerselectie te activeren. Naast de tijdsaanduiding wordt een knipperend weergegeven, en daarnaast verschijnt het getal voor de eerste timer. ♦ Selecteer met de toetsen i / Pr+ / AL1 18 en i / Pr– / AL2 16 resp. de i Pr+ toets 40 of de i Pr– toets 44 op de afstandsbediening de geheugenpositie van de in te stellen timer tussen en . 58 SKRI 2000 A1 Bediening en bedrijf ♦ Druk nogmaals op de toets Function / ST 7 of de toets Function / ST 38 op de afstandsbediening om de ingestelde tijd op de geselecteerde geheugenpositie te programmeren. Het knipperende wordt nu continu weergegeven. ♦ Herhaal de procedure voor de andere geheugenposities. NL BE Kookwekker opvragen Om een geprogrammeerde tijd voor de kookwekker op te vragen, gaat u als volgt te werk: ♦ Druk op de toets Timer 8 of de Timer-toets 37 op de afstandsbediening, om de kookwekker te activeren. ♦ Selecteer met de toetsen i / Pr+ / AL1 18 en i / Pr– / AL2 16 resp. de i Pr+ toets 40 of de i Pr– toets 44 op de afstandsbediening de gewenste timer tussen en . ♦ Druk nogmaals op de toets Timer 8 of de Timer-toets 37 op de afstandsbediening om de kookwekker te starten. Radiofunctie OPMERKING ► Voor een goede radio-ontvangst moet de draadantenne 27 helemaal afgerold worden. Richt de antenne in de radiostand naar de beste ontvangst. ► De technische eigenschappen van het apparaat maken een instelbaar ontvangstbereik mogelijk buiten het toegelaten UKW (FM)-bereik van 87,5–108 MHz. In verschillende landen kunnen afwijkende landelijke bepalingen bestaan voor de toegewezen radiofrequentiebereiken. Houd er rekening mee dat u buiten het toegewezen radiofrequentiebereik ontvangen informatie niet mag verkopen, doorgeven aan derden of gebruiken voor niet-geëigende doeleinden. Radio aan-/uitzetten ♦ Druk op de toets Power 6 of de -toets 30 op de afstandsbediening. Het display geeft de stand aan waarin het apparaat zich bevindt. ♦ Druk meermalen op de toets Function / ST 7 of de toets Function / ST 38 op de afstandsbediening om de radiofunctie te selecteren. Op het display verschijnt de ontvangstfrequentie van de ingestelde zender. ♦ Schakel de radio uit door nogmaals op de toets Power 6 of de -toets 30 op de afstandsbediening te drukken. Het apparaat schakelt over op de bedrijfsstand Klok / stand-by. De actuele tijd wordt aangegeven SKRI 2000 A1 59 Bediening en bedrijf Volume instellen ♦ Stel met de toetsen Vol+ 3 en Vol– 5 of de Vol+ toets 39 en de Vol– toets 41 op de afstandsbediening het gewenste volume in. Het volumeniveau wordt weergegeven op het display . U kunt een volumeniveau tussen en kiezen. NL BE Zenders handmatig instellen ♦ Stel door steeds opnieuw te drukken op de toetsen / Up 17 en / Down 19 resp. de i / Up-toets 42 en de i / Down-toets 32 op i de afstandsbediening de gewenste zender in. De frequentie van de zender wordt aangegeven op het display . De luidspreker is uitgeschakeld tijdens de instelling. Volgende zender zoeken U kunt het apparaat automatisch naar de volgende zender laten zoeken. ♦ Houd de toets / Up 17 en i / Down 19 resp. de i / Up-toets 42 32 en de i / Down-toets op de afstandsbediening minstens twee seconden ingedrukt. Het apparaat zoekt automatisch naar de dichtstbijzijnde zender met voldoende ontvangstkwaliteit. ♦ Herhaal deze procedure totdat u de zender van uw keuze heeft gevonden. Gebruiker selecteren Voorwaarde: het apparaat staat in de stand Radio. ♦ Druk op de toets User 2 of de User-toets 31 op de afstandsbediening om de gewenste gebruiker te selecteren. De actuele gebruiker tot wordt op het display 10 seconden lang weergegeven. ♦ Druk op de toetsen i / Pr+ / AL1 18 en i / Pr– / AL2 16 resp. de i Pr+ toets 40 of de i Pr– toets 44 op de afstandsbediening om een vooringestelde geheugenpositie tussen en te selecteren. OPMERKING ► Elke gebruiker beschikt over 15 geheugenposities. De eerste geheugenpositie voor gebruiker A is door de fabrikant vooringesteld. 60 SKRI 2000 A1 Bediening en bedrijf Zender handmatig opslaan Voorwaarde: het apparaat staat in de stand Radio. Het apparaat beschikt over 60 geheugenposities (4 gebruikers met elk 15 geheugenposities) voor zendfrequenties. Om een zendfrequentie op te slaan gaat u als volgt te werk: NL BE ♦ Stel de gewenste zender in, zoals eerder beschreven. ♦ Druk op de toets Mem 4 of de Mem-toets 35 op de afstandsbediening. Het symbool MEM, de gebruiker en de geheugenpositie verschijnen op het display . ♦ Druk op de toets User 2 of de User-toets 31 op de afstandsbediening, tot de gewenste gebruiker ( - ) wordt weergegeven. ♦ Selecteer met de toetsen i / Pr+ / AL1 18 of i / Pr– / AL2 16 resp. de i Pr+ toets 40 of de i Pr– toets 44 op de afstandsbediening de gewenste geheugenpositie voor de ingestelde zender tussen en . ♦ Druk op de toets Mem 4 of de Mem-toets 35 op de afstandsbediening. De ontvangstfrequentie van de ingestelde zender wordt opgeslagen op de gekozen geheugenpositie. Opgeslagen zenders opvragen Voorwaarde: het apparaat staat in de stand Radio. ♦ Druk op de toets User 2 of de User-toets 31 op de afstandsbediening, tot de gewenste gebruiker ( - ) wordt weergegeven. ♦ Selecteer met de toetsen i / Pr+ / AL1 18 of i / Pr– / AL2 16 resp. de i Pr+ toets 40 of de i Pr– toets 44 op de afstandsbediening de geheugenpositie voor de opgeslagen zender tussen en . SKRI 2000 A1 61 Bediening en bedrijf Automatische zenderzoekactie (AMS-functie) Voorwaarde: het apparaat staat in de stand Radio. Om de geheugenposities voor de zendfrequenties met de best ontvangen zenders te bezetten, kan een automatische zenderzoekactie worden uitgevoerd. NL BE OPMERKING ► Bij de uitvoering van de navolgend beschreven functie gaan alle eerder opgeslagen zenders verloren. ♦ Houd de toets i / Memory Scan 14 of de Memory Scan-toets 36 minstens drie seconden lang ingedrukt. Het apparaat begint met de zenderzoekactie en bezet de geheugenposities met de gevonden zenders. ♦ Na afloop van de zenderzoekactie kunt u door één keer drukken op de toets i / Memory Scan 14 of de Memory Scan-toets 36 alle opgeslagen zenders tussen en 10 seconden lang laten weergeven. OPMERKING ► Worden er meer dan 60 zenders gevonden, dan worden alleen de eerste 60 ontvangstfrequenties opgeslagen. ► Worden er minder dan 60 zenders gevonden, dan blijven de laatste geheugenposities onveranderd. Weergave van externe audio-apparaten ♦ Sluit een extern audio-apparaat, zoals bijv. een MP3-speler, aan op de 3,5 mm jackplug-aansluiting AUX IN 26 op de achterkant van het apparaat. ♦ Druk op de toets Power 6 of de toets 30 op de afstandsbediening. geeft de stand aan waarin het apparaat zich bevindt. Het display ♦ Druk meermaals op de toets Function / ST 7 of de toets Function / ST 38 op de afstandsbediening om de functie te selecteren. ♦ Start de weergave op het externe audio-apparaat en stel het volume in. OPMERKING ► Let op de gebruiksaanwijzing van het externe audio-apparaat. Aansluiting iPod / iPhone Met het station 29 kunt u het apparaat ook als luidspreker voor uw iPod/iPhone gebruiken. Als u de iPod/ iPhone in het station plaatst, wordt deze bovendien automatisch opgeladen. 62 SKRI 2000 A1 Bediening en bedrijf iMenu Voorwaarde: het apparaat staat in de stand iPod. ♦ Druk op de toets iPhone te activeren. I Enter 13 om de menubesturing voor de iPod / NL BE Hiermee kunnen de volgende functies worden uitgevoerd: Toets i / Pr– / AL2 16 Functie Volgende functie i / Pr+ / AL1 18 Vorige functie i-Time Sync Bass 12 Tijdsaanduiding en datum van het apparaat synchroniseren met de tijd van de iPod / iPhone i / Memory Scan 14 Weergave onderbreken en vervolgen i / Down 19 Snel terugspoelen / Up 17 Snel vooruitspoelen Kort drukken: menu terug Lang drukken: selectie bevestigen I Enter 13 Muziek weergeven Bereid het aansluitstation 29 voor, zoals beschreven in het hoofdstuk Station voorbereiden voor iPod / iPhone pag. 48. ♦ Plaats uw iPod, resp. uw iPhone in het station 29 . ♦ Druk op de toets Power 6 of de -toets 30 op de afstandsbediening. Het display geeft de stand aan waarin het apparaat zich bevindt. ♦ Druk meermaals op de toets Function / ST 7 of de toets Function / ST 38 te selecteren. op de afstandsbediening om de functie ♦ Selecteer op de iPod / iPhone een titel (of een album resp. een afspeellijst). ♦ Druk op de toets i / Memory Scan 14 of de i -toets 33 op de afstandsbediening om de weergave te starten of te pauzeren. SKRI 2000 A1 63 Bediening en bedrijf iPod / iPhone opladen Als uw iPod / iPhone in het station 29 is geplaatst, wordt deze automatisch opgeladen tot de batterij vol is. NL BE OPMERKING ► De iPod / iPhone wordt niet opgeladen via de batterij. Tijd i-Time Sync instellen Met de functie iTime-Sync kunt u de tijd en datum op het apparaat synchroniseren met de tijd en datum van uw iPod of iPhone (iPod Touch, iPod nano en iPod Classic; oudere iPod-modellen zoals iPod mini ondersteunen deze functie niet). ♦ Plaats uw iPod, resp. uw iPhone in het station 29 . ♦ Druk op de toets i-Time Sync Bass 12 of de toets iTime Sync Bass 43 op de afstandsbediening. De tijd en datum van de iPod of iPhone worden overgedragen aan het apparaat. Na afloop van de synchronisatie klinkt er een geluidssignaal. OPMERKING ► De tijd op de iPhone wordt continu via de gsm-zendmasten geactualiseerd. De tijd op de iPod komt alleen overeen met de tijd op uw computer na de laatste synchronisatie. Er kan een tijdsverschil van maximaal 59 seconden tussen het apparaat en de gesynchroniseerde iPod / iPhone zijn. Overige functies Stereofunctie Het apparaat ondersteunt de stereofunctie. De standaardinstelling is “Stereo on”. Om de stereofunctie te wijzigen, gaat u als volgt te werk: ♦ Houd de toets Function / ST 7 of de toets Function / ST 38 op de afstandsbediening ingedrukt, tot op het display de actuele instelling van de stereofunctie wordt weergegeven ( of ). ♦ Houd de toets Function / ST 7 of de toets Function / ST 38 op de afstandsbediening opnieuw ingedrukt om de instelling te wijzigen. OPMERKING ► Bij stereo-ontvangst van een radiozender en geactiveerde stereofunctie verschijnt 3 seconden lang op het display . 64 SKRI 2000 A1 Bediening en bedrijf Toetsenblokkering U kunt de toetsen van het apparaat vergrendelen, zodat instellingen niet per ongeluk kunnen worden gewijzigd. NL BE ♦ Houd de toets Mode / Lock 11 of de Mode Lock-toets 45 op de afstandsbediening minstens twee seconden ingedrukt om de toetsenblokkering in- of uit te schakelen. Bij ingeschakelde toetsenblokkering verschijnt op het display het symbool . ♦ Om de toetsenblokkering te annuleren, houdt u de toets Mode / Lock 11 of de Mode Lock-toets 45 op de afstandsbediening minstens twee seconden ingedrukt. Basversterking Met de basversterking kunt u een sterkere weergave van de lage frequenties inschakelen. ♦ Druk ca. 2 seconden lang op de toets i-Time Sync Bass 12 of de toets iTime Sync Bass 43 op de afstandsbediening om de basversterking in- of uit te schakelen. Bij ingeschakelde basversterking verschijnt op het display het . symbool Wisselende weergave Voorwaarde: het apparaat staat in de stand Klok / stand-by. ♦ Druk op de toets i / Down 19 of de i / Down toets 32 op de afstandsbediening. De datum en de tijd worden nu afwisselend weergegeven. ♦ Druk nogmaals op de toets i / Down 19 of de i / Down toets 32 op de afstandsbediening om alleen de tijd weer te geven. Voorwaarde: het apparaat staat in de stand Radio. ♦ Druk op de toets Mode / Lock 11 of de Mode Lock-toets 45 op de afstandsbediening. De ontvangstfrequentie resp. de zendernaam (bij RDS-ontvangst) en de tijd worden afwisselend weergegeven. ♦ Druk nogmaals op de toets Mode / Lock 11 of de Mode Lock-toets 45 op de afstandsbediening om alleen de tijd weer te geven. ♦ Druk nogmaals op de toets Mode / Lock 11 of de Mode Lock-toets 45 op de afstandsbediening om alleen de ontvangstfrequentie resp. de zendernaam (bij RDS-ontvangst) weer te geven. SKRI 2000 A1 65 Bediening en bedrijf Automatisch uitschakelen (inslaapfunctie) Met de inslaapfunctie wordt het apparaat na een tijd tussen 5 en 90 minuten vanzelf uitgeschakeld. NL BE ♦ Druk op de toets AOT / Dimmer 10 of de AOT Dimmer-toets 46 op de afstandsbediening om de functie op te roepen. De actueel resterende tijd tot aan het uitschakelen van de radio wordt getoond. ♦ Druk nogmaals op de toets AOT / Dimmer 10 of de AOT Dimmer-toets 46 op de afstandsbediening om de gewenste tijd in te stellen. Na ca. 15 seconden gaat het apparaat weer over op weergave van de gekozen bedrijfsstand. OPMERKING ► De instelbare tijd loopt van 90 tot 5 minuten. De instelling vindt plaats in stappen van 5 minuten. Daarna verschijnt de indicatie . Bij de indicatie is de inslaapfunctie uitgeschakeld. ► Als het apparaat zich in de bedrijfsstand Klok / stand-by bevindt, schakelt u door een druk op de toets AOT / Dimmer 10 of de AOT Dimmer-toets 46 op de afstandsbediening de laatst gekozen stand van het apparaat (Radio / iPod / AUX) weer in. Displaydimmer handmatig in-/uitschakelen ♦ Houd de toets AOT / Dimmer 10 of de AOT Dimmer-toets 46 op de afstandsbediening ingedrukt tot op het display de actuele instelling van de displaydimmer wordt weergegeven ( of ). ♦ Houd de toets AOT / Dimmer 10 of de AOT Dimmer-toets 46 op de afstandsbediening nogmaals ingedrukt om de actuele instelling te wijzigen (zie ook het hoofdstuk Tijdgestuurd dimmen van het display in-/ uitschakelen S. 52). Na ca. 15 seconden wordt de laatst gebruikte displayweergave opnieuw weergegeven. 66 SKRI 2000 A1 Reiniging/Problemen oplossen Reiniging Veiligheidsvoorschriften NL BE GEVAAR Levensgevaar door elektrische stroom! ► Haal de stekker van de netvoedingsadapter uit het stopcontact voordat u met de reiniging begint. LET OP Beschadiging van het apparaat! ► Let erop, dat er bij het schoonmaken geen vocht in het apparaat indringt, om onherstelbare schade aan het apparaat te vermijden. Behuizing schoonmaken ■ Reinig de oppervlakken van het apparaat met een zachte, droge doek. Problemen oplossen In dit hoofdstuk krijgt u belangrijke aanwijzingen over het lokaliseren van storingen en verhelpen van storingen. Neem de aanwijzingen in acht om gevaren en beschadigingen te voorkomen. Veiligheidsvoorschriften WAARSCHUWING Neem de volgende veiligheidsinstructies in acht om gevaren en materiële schade te voorkomen: ► Reparaties aan elektrische apparatuur mogen alleen worden uitgevoerd door vakmensen, die door de fabrikant zijn geschoold. Door onvakkundige reparaties kunnen aanzienlijke gevaren optreden voor de gebruiker en kan er schade ontstaan aan het apparaat. SKRI 2000 A1 67 Problemen oplossen Oorzaken van storingen en storingen verhelpen De navolgende tabel helpt bij de lokalisering en het verhelpen van kleinere storingen: NL BE Probleem Mogelijke oorzaak Oplossing De netvoedingsadapter 15 is niet aangesloten. Sluit de netvoedingsadapter 15 aan op het stopcontact. Stopcontact levert geen stroom. Controleer de huiszekeringen. Het volume staat op minimum. Verhoog het volume met de toets Vol+ 3 . Het apparaat staat in de bedrijfsstand Klok / stand-by. Schakel het apparaat met de toets Power 6 in op de bedrijfsstand Radio / iPod / Aux/. De weergave van het externe audio-apparaat is niet gestart. Start de weergave op het externe audio-apparaat. De weergave van de iPod / iPhone is niet gestart. Start de weergave op de iPod / iPhone. De iPod / das iPhone is niet correct in het station 29 geplaatst Plaats de iPod / iPhone correct in het station 29 . Storende geluiden bij de radioontvangst De zender is niet correct ingesteld. Stel de zender correct in met de toet/ Up 17 en i / Down 19 . sen De ontvangst is te zwak. Probeer door bewegen van de draadantenne 27 de ontvangst te verbeteren. iPod / iPhone wordt niet opgeladen De iPod / das iPhone is niet correct in het station 29 geplaatst Plaats de iPod / iPhone correct in het station 29 . Alarm met iPod / iPhone heeft niet gewerkt De geselecteerde afspeellijst Zorg ervoor dat de afspeellijst muziek op de iPod / iPhone is leeg. bevat. Het display geeft niets aan. Geen geluid OPMERKING ► Als u met de eerdergenoemde stappen het probleem niet kunt verhelpen, neem dan a.u.b. contact op met de klantenservice. 68 SKRI 2000 A1 Opbergen/Afvoeren/Appendix Opbergen / Afvoeren Opbergen NL BE Mocht u het apparaat langere tijd niet gebruiken, ontkoppelt u het van de stroomvoorziening, haalt u de batterijen eruit en bewaart u het op een schone, droge plaats zonder directe instraling door de zon. Apparaat afvoeren Deponeer het apparaat in geen geval bij het normale huisvuil. Dit product is onderworpen aan de Europese richtlijn 2002/96/ECWEEE (Waste Electrical and Electronic Equipment). Voer het apparaat af via een erkend afvalverwerkingsbedrijf of via uw gemeentereiniging. Neem de momenteel geldende voorschriften in acht. Neem in geval van twijfel contact op met uw gemeentereinigingsdienst. Batterijen afvoeren Batterijen mogen niet bij het normale huisvuil worden gedeponeerd. Iedere consument is wettelijk verplicht, batterijen af te geven bij een inzamelpunt in zijn gemeente / zijn stadsdeel of in de handel. Deze verplichting dient ertoe, dat batterijen om een milieuvriendelijke wijze afgevoerd kunnen worden. Geef batterijen alleen terug in lege toestand. Appendix Voorschriften voor de conformiteitsverklaring Dit apparaat voldoet met betrekking tot overeenstemming aan de fundamentele eisen en de andere relevante voorschriften van de richtlijn voor elektromagnetische compatibiliteit 2004/108/EC, de laagspanningsrichtlijn 2006/95/EC, evenals de richtlijn eco-design 2009/125/EC (Verordening 1275/2008 Lid II, nr. 1). De volledige originele conformiteitsverklaring is te verkrijgen bij de importeur. SKRI 2000 A1 69 Appendix Technische gegevens Netvoedingsadapter NL BE Fabrikant Model Ingangsspanning, -stroom Fai Shing Industries Ltd. JVSW0702000 100-240 V~ 50/60 Hz, 350 mA Uitgangsspanning, -stroom 7V Beschermingsklasse ,2A II / Apparaat Ingangsspanning, -stroom 7V ,2A Batterij voor gegevensopslag 1 x 3 V type CR2032 (inbegrepen in de levering) Batterij voor afstandsbediening 1 x 3 V type CR2025 (inbegrepen in de levering) Vermogen Bedrijf Stand-by W ca. 1,8 W Uitgangsvermogen luidsprekers ca. 2 x 1W (bij 10% vervormingsfactor) Frequentiebereik radio (UKW) 87,5 - 108 MHz Bedrijfstemperatuur Vochtigheid (geen condensatie) Afmetingen (b x h x d) (zonder standvoet) Gewicht 70 ca. 5 +5 - +40 °C 5 - 90 % ca. 30 x 15,7 x 8,4 cm ca. 1070 g SKRI 2000 A1 Appendix Garantie U heeft op dit apparaat 3 jaar garantie vanaf de aankoopdatum. Het apparaat is met de grootst mogelijke zorg vervaardigd en voorafgaand aan de levering nauwkeurig gecontroleerd. NL BE Bewaar a.u.b. de kassabon als aankoopbewijs. Mocht u aanspraak willen maken op de garantie, neem dan telefonisch contact op met uw serviceadres. Alleen op die manier is een kosteloze verzending van uw product gegarandeerd. OPMERKING ► De garantie geldt alleen voor materiaal- of fabricagefouten, echter niet voor transportschade, of voor onderdelen die aan slijtage onderhevig zijn, of voor beschadigingen aan breekbare delen, bijv. schakelaars of accu's. Het product is uitsluitend bestemd voor privé-gebruik en niet voor bedrijfsmatige doeleinden. Bij verkeerd gebruik en ondeskundige behandeling, bij gebruik van geweld en bij reparaties die niet door ons geautoriseerd servicefiliaal zijn uitgevoerd, vervalt de garantie. Uw wettelijke rechten worden door deze garantie niet beperkt. De garantieperiode wordt niet verlengd door de aansprakelijkheid. Dit geldt eveneens voor vervangen en gerepareerde onderdelen. Schade en gebreken die mogelijk reeds bij de aankoop aanwezig zijn, moeten direct na het uitpakken worden gemeld, uiterlijk echter twee dagen na de dag van aankoop. Na verstrijken van de garantieperiode moeten alle voorkomende reparaties vergoed worden. Service Service Nederland Tel.: 0900 0400223 (0,10 EUR/Min.) E-Mail: [email protected] IAN 63920 Service België Tel.: 070 270 171 (0,15 EUR/Min.) E-Mail: [email protected] IAN 63920 Importeur KOMPERNASS GMBH BURGSTRASSE 21 44867 BOCHUM, GERMANY www.kompernass.com SKRI 2000 A1 71 72 SKRI 2000 A1 Inhaltsverzeichnis Einführung . . . . . . . . . . . . . . .74 Bedienung und Betrieb . . . .85 Informationen zu dieser Bedienungsanleitung . . . . . . . . . . . 74 Urheberrecht. . . . . . . . . . . . . . . . . . 74 Bestimmungsgemäße Verwendung 74 Warnhinweise . . . . . . . . . . . . . . . . . 75 Bedienelemente . . . . . . . . . .78 Ein- und Ausschalten . . . . . . . . . . . . 85 Grundeinstellungen . . . . . . . . . . . . 85 Einstellmenü aktivieren . . . . . . . . . . 86 Alarm programmieren . . . . . . . . . . 90 Küchentimer . . . . . . . . . . . . . . . . . . 93 Küchentimer programmieren. . . . . . 94 Radiobetrieb . . . . . . . . . . . . . . . . . . 95 Wiedergabe von externen Audiogeräten . . . . . . . . . . . . . . . . . 98 Anschluss iPod/iPhone . . . . . . . . . . 98 Weitere Funktionen . . . . . . . . . . . .100 Aufstellen und Anschließen .80 Reinigung . . . . . . . . . . . . . 103 Sicherheitshinweise . . . . . . . . . . . . . 80 Lieferumfang und Transportinspektion .80 Auspacken . . . . . . . . . . . . . . . . . . . 80 Entsorgung der Verpackung . . . . . . 81 Anforderungen an den Aufstellort . 81 Elektrischer Anschluss . . . . . . . . . . . 81 Gerätebatterie . . . . . . . . . . . . . . . . 82 Fernbedienungsbatterie . . . . . . . . . 82 Anbringung unter einem Hängeschrank . . . . . . . . . . . . . . . . 83 Demontage . . . . . . . . . . . . . . . . . . . 84 Aufstellen des Gerätes . . . . . . . . . . 84 Station für iPod/iPhone vorbereiten 84 Stromversorgung herstellen. . . . . . . 84 UKW-Wurfantenne . . . . . . . . . . . . . 84 Sicherheitshinweise . . . . . . . . . . . .103 Gehäuse reinigen . . . . . . . . . . . . .103 Sicherheit . . . . . . . . . . . . . . .76 Gefahr durch elektrischen Strom . . 76 Umgang mit Batterien . . . . . . . . . . . 76 Grundlegende Sicherheitshinweise 77 SKRI 2000 A1 DE AT CH Fehlerbehebung . . . . . . . . 103 Sicherheitshinweise . . . . . . . . . . . .103 Fehlerursachen und -behebung . .104 Lagerung/Entsorgung . . . 105 Lagerung . . . . . . . . . . . . . . . . . . .105 Gerät entsorgen . . . . . . . . . . . . . .105 Batterien entsorgen. . . . . . . . . . . .105 Anhang . . . . . . . . . . . . . . . 105 Hinweise zur EG-Konformitätserklärung . . . . . . .105 Technische Daten . . . . . . . . . . . . .106 Garantie . . . . . . . . . . . . . . . . . . . .107 Service . . . . . . . . . . . . . . . . . . . . .107 Importeur . . . . . . . . . . . . . . . . . . .107 73 Einführung Einführung Informationen zu dieser Bedienungsanleitung Diese Bedienungsanleitung ist Bestandteil des Unterbau-Radios SKRI 2000 A1 (nachfolgend als Gerät bezeichnet) und gibt Ihnen wichtige Hinweise für den bestimmungsgemäßen Gebrauch, die Sicherheit, den Anschluss sowie die Bedienung des Gerätes. Die Bedienungsanleitung muss ständig in der Nähe des Gerätes verfügbar sein. Sie ist von jeder Person zu lesen und anzuwenden, die mit der Bedienung und Störungsbehebung des Gerätes beauftragt ist. DE AT CH Bewahren Sie diese Bedienungsanleitung auf und geben Sie diese mit dem Gerät an Nachbesitzer weiter. Urheberrecht Diese Dokumentation ist urheberrechtlich geschützt. Jede Vervielfältigung, bzw. jeder Nachdruck, auch auszugsweise, sowie die Wiedergabe der Abbildungen, auch im veränderten Zustand ist nur mit schriftlicher Zustimmung des Herstellers gestattet. Bestimmungsgemäße Verwendung Dieses Gerät ist nur zum Empfang von UKW-Radioprogrammen, als Küchentimer, zum Alarmgeben durch Alarmton, Radio oder iPod/iPhone und zum Anschluss von externen Audiogeräten (z.B. MP3-Player) und iPod/iPhone in geschlossenen Räumen bestimmt. Das Gerät ist zur freien Aufstellung oder zur Montage unter einem Hängeschrank bestimmt. Hierzu müssen die integrierten Stellfüße bzw. die mitgelieferte Montageplatte verwendet werden. Eine andere oder darüber hinausgehende Benutzung gilt als nicht bestimmungsgemäß. Das Gerät ist nicht zur Verwendung in gewerblichen oder industriellen Bereichen vorgesehen. Ansprüche jeglicher Art wegen Schäden aus nicht bestimmungsgemäßer Verwendung, unsachgemäßen Reparaturen, unerlaubt vorgenommener Veränderungen oder Verwendung nicht zugelassener Ersatzteile sind ausgeschlossen. Das Risiko trägt allein der Benutzer. „Made for iPod“ und „Made for iPhone“ bedeutet, dass ein elektronisches Zubehörteil speziell für den Anschluss an einen iPod oder ein iPhone konzipiert wurde und der Entwickler sich dafür verbürgt, dass das Gerät den Leistungsstandards von Apple entspricht. Apple ist nicht verantwortlich für den Betrieb dieses Gerätes oder dafür, dass es Sicherheits- und Regulierungsstandards einhält. Beachten Sie, dass die Verwendung dieses Zubehörteils mit einem iPod, iPhone die drahtlose Leistung beeinflussen kann. iPad, iPhone, iPod, iPod classic, iPod nano, iPod shuffle und iPod touch sind Warenzeichen der Apple Inc., eingetragen in den USA und anderen Ländern. iPad ist ein Warenzeichen der Apple Inc. 74 SKRI 2000 A1 Einführung Warnhinweise In der vorliegenden Bedienungsanleitung werden folgende Warnhinweise verwendet: GEFAHR Ein Warnhinweis dieser Gefahrenstufe kennzeichnet eine drohende gefährliche Situation. Falls die gefährliche Situation nicht vermieden wird, kann dies zum Tod oder zu schweren Verletzungen führen. ► Die Anweisungen in diesem Warnhinweis befolgen, um die Gefahr des Todes oder schwerer Verletzungen von Personen zu vermeiden. DE AT CH WARNUNG Ein Warnhinweis dieser Gefahrenstufe kennzeichnet eine mögliche gefährliche Situation. Falls die gefährliche Situation nicht vermieden wird, kann dies zu Verletzungen führen. ► Die Anweisungen in diesem Warnhinweis befolgen, um Verletzungen von Personen zu vermeiden. ACHTUNG Ein Warnhinweis dieser Gefahrenstufe kennzeichnet einen möglichen Sachschaden. Falls die Situation nicht vermieden wird, kann dies zu Sachschäden führen. ► Die Anweisungen in diesem Warnhinweis befolgen, um Sachschäden zu vermeiden. HINWEIS ► Ein Hinweis kennzeichnet zusätzliche Informationen, die den Umgang mit dem Gerät erleichtern. SKRI 2000 A1 75 Sicherheit Sicherheit In diesem Kapitel erhalten Sie wichtige Sicherheitshinweise im Umgang mit dem Gerät. Dieses Gerät entspricht den vorgeschriebenen Sicherheitsbestimmungen. Ein unsachgemäßer Gebrauch kann zu Personen- und Sachschäden führen. Gefahr durch elektrischen Strom DE AT CH GEFAHR Lebensgefahr durch elektrischen Strom! Beim Kontakt mit unter Spannung stehenden Leitungen oder Bauteilen besteht Lebensgefahr! Beachten Sie die folgenden Sicherheitshinweise um eine Gefährdung durch elektrischen Strom zu vermeiden: ► Benutzen Sie das Gerät nicht, wenn das Steckernetzteil, das Anschlusskabel oder der Anschlussstecker beschädigt sind. ► Öffnen Sie auf keinen Fall das Steckernetzteil. Werden spannungsführende Anschlüsse berührt und der elektrische und mechanische Aufbau verändert, besteht Stromschlaggefahr. Umgang mit Batterien WARNUNG Gefahr durch nicht ordnungsgemäße Verwendung! Es besteht Explosions- und Auslaufgefahr! Für den sicheren Umgang mit Batterien beachten Sie folgende Sicherheitshinweise: ► Werfen Sie Batterien nicht ins Feuer. ► Schließen Sie Batterien nicht kurz. ► Versuchen Sie nicht Batterien wieder aufzuladen. ► Überprüfen Sie regelmäßig die Batterien. Ausgetretene Batteriesäure kann dauerhafte Schäden am Gerät verursachen. Im Umgang mit beschädigten oder ausgelaufen Batterien besondere Vorsicht walten lassen. Verätzungsgefahr! Schutzhandschuhe tragen. ► Batterien für Kinder unzugänglich aufbewahren. Bei Verschlucken umgehend einen Arzt aufsuchen. ► Entnehmen Sie die Batterien, wenn Sie das Gerät längere Zeit nicht benutzen. 76 SKRI 2000 A1 Sicherheit Grundlegende Sicherheitshinweise Beachten Sie für einen sicheren Umgang mit dem Gerät die folgenden Sicherheitshinweise: ■ Kontrollieren Sie das Gerät vor der Verwendung auf äußere sichtbare Schäden. Nehmen Sie ein beschädigtes oder heruntergefallenes Gerät nicht in Betrieb. ■ Bei Beschädigung der Kabel oder Anschlüsse lassen Sie diese von autorisiertem Fachpersonal oder dem Kundenservice austauschen. ■ Dieses Gerät ist nicht dafür bestimmt, durch Personen (einschließlich Kinder) mit eingeschränkten physischen, sensorischen oder geistigen Fähigkeiten oder mangels Erfahrung und/oder mangels Wissen benutzt zu werden, es sei denn, sie werden durch eine für ihre Sicherheit zuständige Person beaufsichtigt oder erhielten von ihr Anweisungen, wie das Gerät zu benutzen ist. DE AT CH ■ Kinder sollten beaufsichtigt werden, um sicherzustellen, dass sie nicht mit dem Gerät spielen. ■ Lassen Sie Reparaturen am Gerät nur von autorisierten Fachbetrieben oder dem Kundenservice durchführen. Durch unsachgemäße Reparaturen können Gefahren für den Benutzer entstehen. Zudem erlischt der Garantieanspruch. ■ Eine Reparatur des Gerätes während der Garantiezeit darf nur von einem vom Hersteller autorisierten Kundendienst vorgenommen werden, sonst besteht bei nachfolgenden Schäden kein Garantieanspruch mehr. ■ Defekte Bauteile dürfen nur gegen Original-Ersatzteile ausgetauscht werden. Nur bei diesen Teilen ist gewährleistet, dass sie die Sicherheitsanforderungen erfüllen werden. ■ Schützen Sie das Gerät vor Feuchtigkeit und dem Eindringen von Flüssigkeiten. Tauchen Sie das Gerät niemals unter Wasser, stellen Sie das Gerät nicht in der Nähe von Wasser auf und stellen Sie keine mit Flüssigkeit gefüllten Gegenstände (z.B. Vasen) auf das Gerät. ■ Stellen Sie keine Gegenstände auf das Gerät. ■ Das Gerät nicht in der Nähe von offenen Flammen (z.B. Kerzen) betreiben. ■ Vermeiden Sie direkte Sonneneinstrahlung. ■ Die Zuleitung immer am Steckernetzteil aus der Steckdose ziehen, nicht am Anschlusskabel. ■ Ziehen Sie bei auftretenden Störungen und bei Gewitter das Steckernetzteil aus der Steckdose. SKRI 2000 A1 77 Bedienelemente Bedienelemente (Abbildungen siehe vordere Ausklappseite Bild A) Display DE AT CH 2 User: Benutzer wählen 3 Vol+: Lautstärke erhöhen 4 Mem: Speicherplatzwahl 5 Vol–: Lautstärke senken Power: Ein-/ausschalten 6 7 Function / ST: Funktionswahl / Stereoaktivierung 8 Timer: Timer einstellen und aktivieren 9 Alarm Mode: Alarmart auswählen 10 AOT / Dimmer: Ausschalttimer / Displaydimmer ein-/ausschalten 11 Mode / Lock: Einstellmenü aufrufen / Tastensperre 12 i-Time Sync Bass: Zeitanzeige und Datum mit iPod/iPhone synchronisieren / Bass- anhebung I Enter : Bedienung beim iPod/iPhone / Eingabe 13 / Memory Scan: Pause/Abspielen beim iPod/iPhone / automatischer Sendersuchlauf / gespeicherte Radiosender abrufen 14 i 15 Steckernetzteil 16 i / Pr– / AL2: Vorherige Funktion beim iPod/iPhone / Vorherigen Speicherplatz anwählen / Alarm 2 einstellen 17 18 / Up: Schneller Vorlauf beim iPod/iPhone / Empfangsfrequenz erhöhen i / Pr+ / AL1: Nächste Funktion beim iPod/iPhone / Nächsten Speicherplatz anwählen / Alarm 1 einstellen / Down: Schneller Rücklauf beim iPod/iPhone / Empfangsfrequenz senken i 20 Montageplatte 19 21 Stellfüße (ausklappbar) 78 22 Sicherungsbügel für iPod/iPhone 23 Lautsprecher 24 Batteriefach 25 DC-Buchse: Stromanschlussbuchse (7V) für Steckernetzteil 26 27 AUX IN-Buchse: Eingangs-Anschlussbuchse für Audiogeräte mit 3,5mm Klinkenstecker Wurfantenne für UKW-Empfang SKRI 2000 A1 Bedienelemente (Abbildungen siehe vordere Ausklappseite Bild B) 28 Abstandshalter (für Unterbaumontage) 29 Station für iPod/iPhone 30 : Ein-/ausschalten 31 User: Benutzer wählen 32 i / Down: Schneller Rücklauf beim iPod/iPhone / Empfangsfrequenz senken 33 i : Pause/Abspielen beim iPod/iPhone 34 iMenu / Enter: Bedienung beim iPod/iPhone / Eingabe 35 Mem: Speicherplatzwahl 36 Memory-Scan: automatischer Sendersuchlauf / gespeicherte Radiosender abrufen 37 Timer: Timer einstellen und aktivieren 38 Function / ST: Funktionswahl / Stereoaktivierung Mode: Einstellmenü 39 Vol +: Lautstärke erhöhen 40 i / Pr+: Nächste Funktion beim iPod/iPhone / Nächsten Speicherplatz anwählen 41 Vol -: Lautstärke senken 42 i 43 iTime Sync / Bass: Zeitanzeige und Datum mit iPod/iPhone synchronisieren / Bassanhebung 44 i / Pr–: Vorherigen Speicherplatz anwählen / Vorherige Funktion beim iPod/iPhone 45 Mode / Lock: Einstellmenü aufrufen / Tastensperre 46 AOT / Dimmer: Ausschalttimer / Displaydimmer ein-/ausschalten 47 Alarm: Alarmart auswählen 48 Sensor für Fernbedienung SKRI 2000 A1 DE AT CH / Up: Schneller Vorlauf beim iPod/iPhone / Empfangsfrequenz erhöhen 79 Aufstellen und Anschließen Aufstellen und Anschließen Sicherheitshinweise WARNUNG Bei der Inbetriebnahme des Gerätes können Personen- und Sachschäden auftreten! Beachten Sie die folgenden Sicherheitshinweise, um die Gefahren zu vermeiden: DE AT CH ► Verpackungsmaterialien dürfen nicht zum Spielen verwendet werden. Es besteht Erstickungsgefahr. ► Beachten Sie die Hinweise zu den Anforderungen an den Aufstellort sowie zum elektrischen Anschluss des Gerätes, um Personen- und Sachschäden zu vermeiden. Lieferumfang und Transportinspektion Das Gerät wird standardmäßig mit folgenden Komponenten geliefert: ▯ Unterbau-Radio SKRI 2000 A1 ▯ Steckernetzteil JVSW0702000 ▯ Montageplatte ▯ 4 Befestigungsschrauben (kurz) ▯ 2 x Abstandshalter inkl. 4 Befestigungsschrauben (lang) ▯ Sicherungsbügel für iPod/iPhone ▯ 1 x Batterie 3 V Typ CR2032 ▯ 1 x Batterie 3 V Typ CR2025 ▯ Fernbedienung ▯ Klinke-Kabel 3,5 auf 3,5 mm (50 cm) ▯ Diese Bedienungsanleitung HINWEIS ► Prüfen Sie die Lieferung auf Vollständigkeit und auf sichtbare Schäden. ► Bei einer unvollständigen Lieferung oder Schäden infolge mangelhafter Verpackung oder durch Transport wenden Sie sich an die Service-Hotline (siehe Kapitel Service S. 107). Auspacken ♦ Entnehmen Sie alle Teile des Gerätes und die Bedienungsanleitung aus dem Karton. ♦ Entfernen Sie sämtliches Verpackungsmaterial. 80 SKRI 2000 A1 Aufstellen und Anschließen Entsorgung der Verpackung Die Verpackung schützt das Gerät vor Transportschäden. Die Verpackungsmaterialien sind nach umweltverträglichen und entsorgungstechnischen Gesichtspunkten ausgewählt und deshalb recyclebar. Die Rückführung der Verpackung in den Materialkreislauf spart Rohstoffe und verringert das Abfallaufkommen. Entsorgen Sie nicht mehr benötigte Verpackungsmaterialien gemäß den örtlich geltenden Vorschriften. HINWEIS DE AT CH ► Heben Sie wenn möglich die Originalverpackung während der Garantiezeit des Gerätes auf, um das Gerät im Garantiefall ordnungsgemäß verpacken zu können. Anforderungen an den Aufstellort Für einen sicheren und fehlerfreien Betrieb des Gerätes muss der Aufstellort folgende Voraussetzungen erfüllen: ■ Bei Aufstellung des Gerätes das Gerät auf eine feste, flache und waagerechte Unterlage stellen. Verwenden Sie die ausklappbaren Stellfüße. ■ Das Gerät so aufstellen oder montieren, dass vorhandene Lüftungsöffnungen und die Lautsprecher nicht verdeckt werden. ■ Betreiben Sie das Gerät nicht in einer heißen, nassen oder sehr feuchten Umgebung oder in der Nähe von brennbarem Material. ■ Montieren Sie das Gerät nicht direkt über einer Kochstelle. ■ Die Steckdose muss leicht zugänglich sein, so dass das Steckernetzteil notfalls leicht abgezogen werden kann. Elektrischer Anschluss ■ Das Gerät wird über das mitgelieferte Steckernetzteil mit einer Gleichspannung von 7V versorgt. Schließen Sie das Gerät ausschließlich über das mitgelieferte Steckernetzteil an die Stromversorgung an. ■ Vergleichen Sie vor dem Anschließen des Gerätes die Anschlussdaten des Steckernetzteils (Spannung und Frequenz) auf dem Typenschild mit denen Ihres Elektronetzes. Diese Daten müssen übereinstimmen, damit keine Schäden am Gerät auftreten. ■ Schützen Sie das Anschlusskabel vor heißen Oberflächen und scharfen Kanten. ■ Achten Sie darauf, dass das Anschlusskabel nicht straff gespannt oder geknickt wird. ■ Lassen Sie das Anschlusskabel nicht über Ecken hängen (Stolperdrahteffekt). ■ Wenn Sie das Gerät für längere Zeit nicht nutzen, trennen Sie das Steckernetzteil von der Stromversorgung. SKRI 2000 A1 81 Aufstellen und Anschließen Gerätebatterie Durch Einlegen der Batterie vermeiden Sie, dass bei einem möglichen Netzausfall die programmierte Uhrzeit, programmierte Speicherplätze und Alarmzeiten verloren gehen. Die Batterie bewirkt, dass die interne Uhr und das Datum auch während des Netzausfalls weiterlaufen. Bei Wiedereinschalten des Netzstroms erscheint auf dem Display automatisch die korrekte Zeit. HINWEIS ► Das Gerät kann auch ohne Batterie betrieben werden. DE AT CH Batterie einlegen/wechseln ♦ Öffnen Sie die Abdeckung des Batteriefachs 24 auf der Geräteunterseite, indem Sie die Abdeckung mit einer Münze bis zum Anschlag nach links drehen und abheben. ♦ Legen Sie die Batterie vom Typ CR2032 (im Lieferumfang enthalten) in das Batteriefach ein. Die Seite mit der Markierung + zeigt nach oben. ♦ Schließen Sie das Batteriefach, indem Sie die Abdeckung aufsetzen und die Abdeckung mit einer Münze nach rechts drehen. Fernbedienungsbatterie Batterie aktivieren Die Batterie für die Fernbedienung ist bei Auslieferung bereits eingelegt. ♦ Aktivieren Sie die Batterie, indem Sie den Isolationsstreifen entfernen. Batterie wechseln ♦ Drücken Sie mit dem Fingernagel die Kerbe (A) nach rechts und ziehen Sie gleichzeitig das Batteriefach heraus. ♦ Legen Sie eine 3 V Batterie vom Typ CR 2025 in das Batteriefach ein. Die Seite mit der Markierung „+“ zeigt nach oben. ♦ Schieben Sie das Batteriefach wieder ganz in die Fernbedienung ein. 82 SKRI 2000 A1 Aufstellen und Anschließen Anbringung unter einem Hängeschrank DE AT CH Sie können das Gerät mit der mitgelieferten Montageplatte 20 z.B. unter einem Hängeschrank montieren. Zur Montage des Gerätes gehen Sie wie folgt vor: ♦ Schieben Sie die Montageplatte 20 nach hinten und nehmen Sie die Montageplatte 20 ab. ♦ Suchen Sie eine geeignete Anbaustelle für das Gerät aus (siehe auch Kapitel Anforderungen an den Aufstellort S. 81). ♦ Halten Sie die Montageplatte 20 unter die Anbaustelle. Dabei sollte sich die Vorderkante der Montageplatte 20 ca. 6,8 cm hinter der Front des Hängeschrankes befinden, damit das Gerät nach der Montage bündig mit dem Hängeschrank abschließt. Die Seitenkanten der Montageplatte 20 müssen einen Abstand von ca. 4,5 cm zu angrenzenden Schränken oder Wänden haben. HINWEIS ► Wenn Sie das Gerät linksbündig an einem angrenzenden Schrank bzw. einer Wand montieren möchten, entfernen Sie vorher den Sicherungsbügel 22 vom Gerät. ♦ Markieren Sie die 4 Befestigungspunkte mit einem Stift. ♦ Erzeugen Sie mit einem Dorn oder Nagel jeweils eine kleine Vertiefung an den Markierungen. ♦ Setzen Sie wahlweise die mitgelieferten Abstandshalter 28 mit der Haltenase in die jeweilige Vertiefung auf der Montageplatte 20 . ♦ Schrauben Sie die Montageplatte 20 mit den mitgelieferten Schrauben fest (siehe Abbildung). SKRI 2000 A1 83 Aufstellen und Anschließen ♦ Setzen Sie das Gerät schräg mit den vorderen Aussparungen in der Oberseite des Gerätes in die Montageplatte 20 ein. Drücken Sie den hinteren Teil des Gerätes nach oben gegen die Montageplatte 20 , bis das Gerät hörbar einrastet. ♦ Prüfen Sie den sicheren Sitz des Gerätes. Demontage ♦ Ziehen Sie das Gerät nach vorne und nehmen Sie das Gerät nach unten ab. ♦ Drehen Sie die Schrauben an der Montageplatte 20 heraus und nehmen Sie die Montageplatte 20 ab. DE AT CH Aufstellen des Gerätes Sie können das Gerät alternativ auch aufstellen. Um bei der Aufstellung die Lüftungsschlitze und die Lautsprecher 23 an der Geräteunterseite nicht zu verdecken, müssen die beiden Stellfüße 21 des Gerätes ausgeklappt werden: ♦ Greifen Sie in die Mulde an der Seite des jeweiligen Stellfußes und klappen Sie den Stellfuß bis zum Anschlag aus. ♦ Suchen Sie einen geeigneten Aufstellort für das Gerät aus (siehe auch Kapitel Anforderungen an den Aufstellort S. 81). Station für iPod/iPhone vorbereiten Sie können Ihren iPod/Ihr iPhone an das Gerät anschließen. Dazu müssen Sie die Station 29 herunterklappen und den Sicherungsbügel 22 montieren: ♦ Klappen Sie die Station 29 ganz nach unten. ♦ Entfernen Sie den Sicherungsbügel 22 von der Seite des Gerätes. ♦ An den Seiten der Station 29 befindet sich jeweils eine Aussparung. Schieben Sie den Sicherungsbügel 22 von vorn so auf die Station 29 , dass die Haltenasen in den Aussparungen einrasten. Stromversorgung herstellen ♦ Schließen Sie den Anschlussstecker des Steckernetzteils 15 an die DC-Buchse 25 auf der Rückseite des Gerätes an. ♦ Stecken Sie das Steckernetzteil 15 in die Steckdose. UKW-Wurfantenne ♦ Wickeln Sie die Wurfantenne 27 für den UKW-Empfang ganz ab. 84 SKRI 2000 A1 Bedienung und Betrieb Bedienung und Betrieb In diesem Kapitel erhalten Sie wichtige Hinweise zur Bedienung und Betrieb des Gerätes. Ein- und Ausschalten Nach dem Anschließen des Gerätes an die Stromversorgung startet die automatische erscheint für ca. 3 bis 5 Minuten der Text Systemeinstellung. Auf dem Display „PLEASE WAIT FOR SETTING THANKS“. Wird in dieser Zeit ein Signal empfangen, wird das System automatisch aktualisiert. DE AT CH HINWEIS ► Um diesen Vorgang abzubrechen, drücken Sie eine beliebige Taste. Das System startet dann mit folgenden Standardeinstellungen: ■ Datum/Zeit: ■ Radio ist ausgeschaltet ■ Betriebsart Uhr/Standby-Betrieb ist aktiv ■ Displaydimmer ist aktiv Mit dem Anschluss an die Stromversorgung schaltet das Gerät in den Uhr/StandbyBetrieb. Über die Taste Power 6 oder die -Taste 30 auf der Fernbedienung wird das Gerät ein- bzw. ausgeschaltet. Über die Taste Function / ST 7 oder die Taste Function / ST 38 auf der Fernbedienung schalten Sie zwischen den Betriebsarten Radio, iPod und AUX hin und her. HINWEIS ► Die Taste Power 6 oder die -Taste 30 auf der Fernbedienung trennen das Gerät nicht vollständig vom Stromnetz. Das Gerät verbraucht auch im Standby-Betrieb Strom. Um das Gerät vollständig vom Stromnetz zu trennen, muss das Steckernetzteil 15 aus der Steckdose gezogen werden. Grundeinstellungen Nach dem Anschließen des Gerätes an die Stromversorgung zeigt das Gerät auf die Uhrzeit und den Wochentag an. Das Gerät befindet sich in dem Display der Betriebsart Uhr/Standby-Betrieb. SKRI 2000 A1 85 Bedienung und Betrieb Einstellmenü aktivieren Um das Einstellmenü zu aktivieren, drücken Sie in der Betriebsart Uhr/StandbyBetrieb die Taste Mode / Lock 11 oder die Mode Lock Taste 45 auf der Fernbeangezeigte Uhrzeit beginnt zu blinken. Jede weitere dienung. Die im Display Betätigung der Taste Mode / Lock 11 oder 45 schaltet auf die nächste Einstellmöglichkeit um. Die Reihenfolge der Menüpunkte ist: ▯ Uhrzeit einstellen ▯ Datum einstellen ▯ Erinnerungsfunktion einstellen DE AT CH ▯ Update-Modus einstellen ▯ Displaydimmer ein-/ausschalten ▯ Displaydimmer Startzeit einstellen ▯ Uhrzeitformat einstellen HINWEIS ► Das Einstellmenü wird automatisch beendet, wenn Sie ca. 15 Sekunden lang keine Taste betätigen. Die vorgenommenen Einstellungen werden gespeichert. Uhrzeit einstellen Voraussetzung: Das Gerät befindet sich in der Betriebsart Uhr/Standby-Betrieb. ♦ Drücken Sie einmal die Taste Mode / Lock 11 oder die Mode Lock Taste 45 auf der Fernbedienung. Die Uhrzeitanzeige beginnt zu blinken. ♦ Stellen Sie mit den Tasten / Up 17 und i / Down 19 oder der 42 32 i / Up-Taste und der i / Down Taste auf der Fernbedienung die aktuelle Uhrzeit ein. Pro Tastendruck wird die Uhrzeit um eine Minute verändert. Ein Festhalten der jeweiligen Taste für mehr als 2 Sekunden startet die Schnelleinstellung. ♦ Drücken Sie die Taste Mode / Lock 11 oder die Mode Lock Taste 45 auf der Fernbedienung erneut, um die aktuelle Einstellung zu speichern und zum nächsten Menüpunkt zu wechseln. HINWEIS ► Die Uhrzeit wird auf Uhr zurückgesetzt, wenn das Gerät von der Stromversorgung getrennt wird und keine Batterie eingelegt ist oder die Batterie zu schwach ist. 86 SKRI 2000 A1 Bedienung und Betrieb Datum einstellen Voraussetzung: Das Gerät befindet sich in der Betriebsart Uhr/Standby-Betrieb. ♦ Drücken Sie zweimal die Taste Mode / Lock 11 oder die Mode Lock Taste 45 auf der Fernbedienung. Die Datumsanzeige beginnt zu blinken. ♦ Stellen Sie mit den Tasten / Up 17 und i / Down 19 oder der i / Up-Taste 42 und der i / Down Taste 32 auf der Fernbedienung das aktuelle Datum ein. Pro Tastendruck wird das Datum um einen Tag verändert. Die Wochentagsanzeige ändert sich automatisch. Ein Festhalten der jeweiligen Taste für mehr als 2 Sekunden startet die Schnelleinstellung. DE AT CH ♦ Drücken Sie die Taste Mode / Lock 11 oder die Mode Lock Taste 45 auf der Fernbedienung erneut, um die aktuelle Einstellung zu speichern und zum nächsten Menüpunkt zu wechseln. HINWEIS ► Das Datum wird auf zurückgesetzt, wenn das Gerät von der Stromversorgung getrennt wird und keine Batterie eingelegt ist oder die Batterie zu schwach ist. Erinnerungsfunktion einstellen Sie können bis zu 6 Datumswerte einstellen, an denen eine automatische Erinnerung ausgelöst wird. Die Funktion SDA (Special Day Alert) ist nützlich, um sich z.B. an Geburtstage oder andere wiederkehrende Ereignisse erinnern zu lassen. Die Erinnerung erfolgt jedes Jahr zum gleichen Datum. An diesem Datum ertönt zu jeder vollen Stunde von 8:00 - 23:00 Uhr für 10 Minuten ein Alarmton. Voraussetzung: Das Gerät befindet sich in der Betriebsart Uhr/Standby-Betrieb. ♦ Drücken Sie dreimal die Taste Mode / Lock 11 oder die Mode Lock Taste 45 auf der Fernbedienung. Die aktuelle Einstellung des gewählten Erinnerungsdatums wird im Wechsel mit der Anzeige angezeigt. Neben der Anzeige steht die Nummer des Speicherplatzes für das Datum. Mögliche Werte sind bis . ♦ Wählen Sie mit der Taste i / Memory Scan 14 oder der Taste MemoryScan 36 auf der Fernbedienung den Speicherplatz des einzustellenden Datums aus. ♦ Stellen Sie mit den Tasten / Up 17 und i / Down 19 oder der 42 32 i / Up-Taste und der i / Down Taste auf der Fernbedienung das Datum für diesen Speicherplatz ein. Pro Tastendruck wird das Datum um einen Tag verändert. Ein Festhalten der jeweiligen Taste für mehr als 2 Sekunden startet die Schnelleinstellung. SKRI 2000 A1 87 Bedienung und Betrieb HINWEIS ► Drücken Sie die Taste Timer 8 oder die Timer Taste 37 auf der Fernwerden nur der bedienung, um das Jahr zu ignorieren. Im Display Tag und der Monat angezeigt. Die Erinnerungsfunktion wird nun jedes Jahr an diesem Datum aktiviert. ♦ Drücken Sie die Taste Mode / Lock 11 oder die Mode Lock Taste 45 auf der Fernbedienung erneut, um die aktuelle Einstellung zu speichern und zum nächsten Menüpunkt zu wechseln. DE AT CH Update-Modus einstellen Voraussetzung: Das Gerät befindet sich in der Betriebsart Uhr/Standby-Betrieb. ♦ Drücken Sie viermal die Taste Mode / Lock 11 oder die Mode Lock Taste 45 auf der Fernbedienung. Im Display erscheint und ein blinkendes Uhrensymbol . ♦ Drücken Sie die Taste i / Down 19 oder die Taste i / Down 32 auf der Fernbedienung, um die automatische RDS-Funktion auszuschalten. Das blinkende Uhrensymbol erlischt. ♦ Drücken Sie die Taste / Up 17 oder die Taste i / Up-Taste 42 auf der Fernbedienung, um die automatische RDS-Funktion zu aktivieren. Das blinkende Uhrensymbol erscheint. ♦ Drücken Sie die Taste Mode / Lock 11 oder die Mode Lock Taste 45 auf der Fernbedienung erneut, um die aktuelle Einstellung zu speichern und zum nächsten Menüpunkt zu wechseln. Zeitgesteuerte Displaydimmung ein-/ausschalten Voraussetzung: Das Gerät befindet sich in der Betriebsart Uhr/Standby-Betrieb. Das Gerät verfügt über zwei Möglichkeiten der Displaydimmung. 1. Zeitgesteuerte Displaydimmung 2. Displaydimmung manuell einstellen (siehe auch Kapitel Displaydimmer manuell ein-/ausschalten S. 102). ♦ Drücken Sie fünfmal die Taste Mode / Lock 11 oder die Mode Lock Taste 45 auf der Fernbedienung. Die aktuelle Einstellung des Displaydimmers wird oder ). angezeigt ( ♦ Wählen Sie mit der Taste / Up 17 oder der i / Up-Taste 42 auf der Fernbedienung „ “, die Displaybeleuchtung erlischt nach 15 Sekunden. ♦ Wählen Sie mit der Taste i auf der Fernbedienung „ haft. 88 / Down 19 oder der i / Down Taste 32 “, die Displaybeleuchtung leuchtet dauer- SKRI 2000 A1 Bedienung und Betrieb ♦ Drücken Sie die Taste Mode / Lock 11 oder die Mode Lock Taste 45 auf der Fernbedienung erneut, um die aktuelle Einstellung zu speichern und zum nächsten Menüpunkt zu wechseln. Modus Display- DisplaybeAnzeige leuchtung Steuerung mit der Taste AOT/Dimmer 10 oder 46 Zeitst. Dimmer AUS DT OFF Wird durch die AOT/ Dimmer Taste eingestellt DIM OFF: Display leuchtet dauerhaft DIM ON: Displaybeleuchtung aus; drücken einer beliebigen Taste schaltet die Displaybeleuchtung für 15 s ein. Zeitst. Dimmer EIN DT ON Standard23:00 - 5:59 Uhr mäßig von 23:00 - 5:59 ausgeschaltet 6:00 - 22:59 Uhr DE AT CH Drücken einer beliebigen Taste schaltet das Display für 60 s ein. DIM OFF: Display leuchtet dauerhaft DIM ON: Displaybeleuchtung aus; drücken einer beliebigen Taste schaltet die Displaybeleuchtung für 15 s ein. Displaydimmer Startzeit einstellen Voraussetzung: Das Gerät befindet sich in der Betriebsart Uhr/Standby-Betrieb. ♦ Drücken Sie sechsmal die Taste Mode / Lock 11 oder die Mode Lock Taste 45 auf der Fernbedienung. Die aktuelle Startzeit des Displaydimmers ( ) wird im Wechsel mit der Anzeige angezeigt. ♦ Stellen Sie mit den Tasten / Up 17 und i / Down 19 oder der i / Up-Taste 42 und der i / Down-Taste 32 auf der Fernbedienung die gewünschte Startzeit ein. Pro Tastendruck wird die Startzeit um eine Minute verändert. Ein Festhalten der jeweiligen Taste für mehr als 2 Sekunden startet die Schnelleinstellung. ♦ Drücken Sie die Taste Mode / Lock 11 oder die Mode Lock Taste 45 auf der Fernbedienung erneut, um die aktuelle Einstellung zu speichern und zum nächsten Menüpunkt zu wechseln. Uhrzeitformat einstellen Voraussetzung: Das Gerät befindet sich in der Betriebsart Uhr/Standby-Betrieb. ♦ Drücken Sie siebenmal die Taste Mode / Lock 11 oder die Mode Lock Taste 45 auf der Fernbedienung. Die aktuelle Einstellung des Uhrzeitformates wird angezeigt ( = 24-Stunden-Format oder = 12-StundenFormat). ♦ Stellen Sie mit der Taste / Up 17 oder die Taste i / Up-Taste 42 auf , wenn Sie eine Uhrzeitder Fernbedienung das Uhrzeitformat auf anzeige im 12-Stunden-Format wünschen. SKRI 2000 A1 89 Bedienung und Betrieb ♦ Stellen Sie mit der Taste i / Down 19 oder der i / Down-Taste 32 auf , wenn Sie eine Uhrzeitder Fernbedienung das Uhrzeitformat auf anzeige im 24-Stunden-Format wünschen. ♦ Drücken Sie die Taste Mode / Lock 11 oder die Mode Lock Taste 45 auf der Fernbedienung erneut, um die aktuelle Einstellung zu speichern und zur Grundeinstellung zurück zu kehren. Alarm programmieren Das Gerät verfügt über zwei Alarmtimer. Alle Einstellungen können für beide Alarmtimer unabhängig voneinander vorgenommen werden. Sie können wählen, ob zur programmierten Zeit ein Alarmton erklingen, das Radio oder der iPod/ das iPhone angehen soll. DE AT CH HINWEIS ► Wird während der Alarmprogrammierung ca. 15 Sekunden lang keine Taste gedrückt, wird die Alarmzeit mit den aktuellen Einstellungen aktiviert. Alarmzeit einstellen ♦ Drücken Sie die Taste Alarm Mode 9 oder die Taste Alarm 47 auf der Fernbedienung. Die eingestellte Alarmzeit des jeweiligen Alarms wird blinkend im Display angezeigt und die Anzeige bzw. erscheint. Über der Zeitanzeige werden die Wochentage angezeigt, an denen dieser Alarm aktiviert ist. ♦ Stellen Sie mit den Tasten / Up 17 und i / Down 19 oder der i / Up-Taste 42 und der i / Down-Taste 32 auf der Fernbedienung die gewünschte Alarmzeit ein. Pro Tastendruck wird die Alarmzeit um eine Minute verändert. Ein Festhalten der jeweiligen Taste für mehr als 2 Sekunden startet die Schnelleinstellung. Wochentage einstellen ♦ Drücken Sie im Alarm-Modus die Taste Function / ST 7 oder die Taste Function / ST 38 auf der Fernbedienung, um zwischen den Wochentagskombinationen Mo-Fr, Sa-So oder Mo-So umzuschalten. Die jeweils gewählte Kombination wird über der Alarmzeit angezeigt. ♦ Drücken und halten Sie die Taste Function / ST 7 oder die Function / ST 38 auf der Fernbedienung für mindestens 2 Sekunden gedrückt, um zwischen den Wochentagskombinationen und der Einstellmöglichkeit für einen einzelnen Wochentag umzuschalten. HINWEIS ► Bei der Einstellmöglichkeit für einen einzelnen Wochentag wechseln Sie mit der Taste Function / ST 7 oder der Taste Function / ST 38 auf der Fernbedienung zwischen den Wochentagen. 90 SKRI 2000 A1 Bedienung und Betrieb Alarm mit Alarmton einstellen ♦ Um für den jeweiligen Alarm „Alarmton“ auszuwählen drücken Sie im Alarm-Modus die Taste i / Pr+ / AL1 18 oder die Taste i / Pr– / AL2 16 bzw. die i Pr+ Taste 40 oder die i Pr– Taste 44 auf der Fernbedienung, das Symbol erscheint. bis im Display Alarm mit Radio einstellen Wenn das Radio zum Alarmzeitpunkt angehen soll, nehmen Sie vor der Aktivierung des Alarms folgende Einstellungen vor: DE AT CH ♦ Schalten Sie das Radio ein, indem Sie die Taste Power 6 oder die Taste 30 auf der Fernbedienung drücken und mit der Taste Function / ST 7 oder der Taste Function / ST 38 auf der Fernbedienung die Betriebsart Radio wählen. ♦ Wählen Sie den Sender aus, mit dem Sie geweckt werden möchten (siehe Kapitel Sender manuell einstellen S. 96 oder Nächsten Sender suchen S. 96). ♦ Stellen Sie mit den Tasten Vol+ 3 und Vol– 5 oder der Vol+ Taste 39 und der Vol– Taste 41 auf der Fernbedienung die gewünschte Lautstärke ein (siehe Kapitel Lautstärke einstellen S. 96). ♦ Schalten Sie das Radio aus, indem Sie die Taste Taste 30 auf der Fernbedienung drücken. Power 6 oder die ♦ Um für den jeweiligen Alarm „Radio“ auszuwählen drücken Sie im AlarmModus die Taste i / Pr+ / AL1 18 oder die Taste i / Pr– / AL2 16 bzw. die i Pr+ Taste 40 oder die i Pr– Taste 44 auf der Fernbedienung, bis im Display das Symbol erscheint. Alarm mit iPod/iPhone einstellen Wenn der iPod/das iPhone zum Alarmzeitpunkt angehen soll, nehmen Sie vor der Aktivierung des Alarms folgende Einstellungen vor: ♦ Schalten Sie das Gerät ein, indem Sie die Taste Power 6 oder die Taste 30 auf der Fernbedienung drücken und mit der Taste Function / ST 7 oder der Taste Function / ST 38 auf der Fernbedienung die Betriebsart wählen. ♦ Setzen Sie Ihren iPod bzw. Ihr iPhone in die Station 29 ein. ♦ Wählen Sie auf Ihrem iPod/iPhone einen Titel (oder ein Album bzw. eine Wiedergabeliste) aus. ♦ Stellen Sie mit den Tasten Vol+ 3 und Vol– 5 oder der Vol+ Taste 39 und der Vol– Taste 41 auf der Fernbedienung die gewünschte Lautstärke ein (siehe Kapitel Lautstärke einstellen S. 96). ♦ Schalten Sie Ihren iPod/Ihr iPhone in den Pausemodus, oder schalten Sie das Gerät aus. SKRI 2000 A1 91 Bedienung und Betrieb ♦ Schalten Sie die Betriebsart iPod aus, indem Sie die Taste die Taste 30 auf der Fernbedienung drücken. Power 6 oder ♦ Um für den jeweiligen Alarm „iPod“ auszuwählen drücken Sie die Taste i / Pr+ / AL1 18 oder die Taste i / Pr– / AL2 16 bzw. die i Pr+ Taste 40 oder die i Pr– Taste 44 auf der Fernbedienung, bis im Display das Symbol erscheint. Alarm ausschalten ♦ Um den jeweiligen Alarm auszuschalten, drücken Sie im Alarm-Modus die Taste i / Pr+ / AL1 18 oder die Taste i / Pr– / AL2 16 bzw. die i Pr+ Taste 40 oder die i Pr– Taste 44 auf der Fernbedienung, bis im Display kein Symbol mehr angezeigt wird. DE AT CH Wenn die Alarmzeit erreicht ist HINWEIS ► Ist der Alarmzeitpunkt erreicht, wird der Ausschalttimer (falls aktiviert) sofort beendet. Bei der Einstellung „Alarm mit Alarmton“ ertönt ein Signalton. Die Lautstärke des Signaltons wird bis zur Maximallautstärke kontinuierlich angehoben. Die Dauer des Alarms ist auf 10 Minuten begrenzt. Das Radio wird dabei auf „Mute“ geschaltet. Bei der Einstellung „Alarm mit Radio“ wird das Radio eingeschaltet. Der zuvor gewählte Sender wird in der eingestellten Lautstärke für maximal 60 Minuten aktiviert. Bei der Einstellung „Alarm mit iPod/iPhone“ wird der iPod/das iPhone eingeschaltet. Die Wiedergabe startet mit dem zuletzt ausgewählten Titel und wird in der eingestellten Lautstärke für maximal 60 Minuten wiedergegeben. Drücken Sie eine beliebige Taste, um den aktuellen Alarm zu beenden. HINWEIS ► Der Alarm wird bei Erreichen der nächsten Alarmzeit (z.B. am nächsten Tag) wieder aktiv. 92 SKRI 2000 A1 Bedienung und Betrieb Küchentimer Das Gerät verfügt über einen praktischen Küchentimer, mit dem z.B. Koch- und Backzeiten überwacht werden können. Der einstellbare Zeitbereich des Küchentimers liegt zwischen 1 Minute und 23 Stunden, 59 Minuten. Küchentimer einstellen ♦ Drücken Sie die Taste Timer 8 oder die Timer Taste 37 auf der Fernbedienung. Die Anzeige zeigt . Im Display wird das Kochtopfsymbol für den Küchentimer eingeblendet. DE AT CH ♦ Stellen Sie mit den Tasten / Up 17 und i / Down 19 oder der i / Up-Taste 42 und der i / Down-Taste 32 auf der Fernbedienung die gewünschte Zeit für den Küchentimer ein. Pro Tastendruck wird die Zeit um eine Minute verändert. Ein Festhalten der Taste für mehr als 2 Sekunden startet die Schnelleinstellung. HINWEIS ► Wird während der Einstellung ca. 15 Sekunden lang keine Veränderung vorgenommen, wechselt das Gerät wieder in die vorherige Betriebsart. Küchentimer starten ♦ Drücken Sie nach Einstellung der Zeit die Taste Timer 8 oder die Timer Taste 37 auf der Fernbedienung erneut. Die angezeigte Zeit beginnt rückwärts zu laufen. Im Display wird eine rückwärts laufende Uhr eingeblendet. HINWEIS ► Wird während des Ablaufens des Küchentimers eine andere Funktion gewählt, wird die Anzeige der Restzeit ausgeblendet. Das Kochtopfsymbol und werden weiter im Display angezeigt. die rückwärts laufende Uhr Drücken Sie die Taste Timer 8 oder die Timer Taste 37 auf der Fernbedienung erneut, um die Restzeit des Küchentimers für ca. 10 Sekunden wieder anzeigen zu lassen. 30 Sekunden vor Ablauf des Küchentimers beginnt das Gerät mit einzelnen Signaltönen auf das Erreichen der eingestellten Zeit akustisch hinzuweisen. Die Abstände der Einzeltöne werden dabei immer kürzer. Bei Erreichen der eingestellten Zeit ertönt das Alarmsignal des Küchentimers als Dauerintervall für maximal 60 Minuten. ♦ Drücken Sie die Taste Timer 8 oder die Timer Taste 37 auf der Fernbedienung, um das Alarmsignal des Küchentimers abzuschalten. SKRI 2000 A1 93 Bedienung und Betrieb Küchentimer unterbrechen ♦ Drücken Sie bei laufendem Küchentimer die Taste Timer 8 oder die Timer Taste 37 auf der Fernbedienung. Der Küchentimer wird angehalten. Die angezeigte Restzeit beginnt zu blinken. HINWEIS ► Das Gerät wechselt nach ca. 15 Sekunden wieder in die vorherige Betriebsart. Drücken Sie die Taste Timer 8 oder die Timer Taste 37 auf der Fernbedienung erneut, um die Restzeit des Küchentimers wieder anzeigen zu lassen. DE AT CH ♦ Um den Küchentimer wieder zu starten, drücken Sie die Taste Timer 8 oder die Timer Taste 37 auf der Fernbedienung erneut. Der Küchentimer wird wieder gestartet. ♦ Um den Küchentimer vor Ablauf der Zeit abzuschalten, drücken und halten Sie die Taste Timer 8 oder die Timer Taste 37 auf der Fernbedienung, bis im Display das Kochtopfsymbol und die rückwärts laufende Uhr nicht mehr angezeigt werden. HINWEIS ► Der Küchentimer wird sofort ausgeschaltet für den Fall, dass ein Alarm aktiv wird. Küchentimer programmieren Sie können häufig benötigte Zeiten für den Küchentimer vorprogrammieren, um diese nicht immer wieder eingeben zu müssen. Es können bis zu 6 Zeiten vorprogrammiert werden. Standardmäßig sind die 6 Speicherplätze mit 5/10/15/20/25/30 Minuten vorprogrammiert. Gehen Sie zur Programmierung der Küchentimer wie folgt vor: ♦ Drücken Sie die Taste Timer 8 oder die Timer Taste 37 auf der Fernbedienung, um den Küchentimer zu aktivieren. ♦ Stellen Sie mit den Tasten / Up 17 und i / Down 19 oder der i / Up-Taste 42 und der i / Down-Taste 32 auf der Fernbedienung die gewünschte Zeit für den Küchentimer ein. Pro Tastendruck wird die Zeit um eine Minute verändert. Ein Festhalten der Taste für mehr als 2 Sekunden startet die Schnelleinstellung. ♦ Drücken Sie die Taste Function / ST 7 oder die Taste Function / ST 38 auf der Fernbedienung, um die Timerauswahl zu aktivieren. Neben der Zeitanzeige wird ein blinkendes angezeigt, daneben erscheint die Zahl für den ersten Timer. ♦ Wählen Sie mit den Tasten i / Pr+ / AL1 18 und i / Pr– / AL2 16 bzw. der i Pr+ Taste 40 oder der i Pr– Taste 44 auf der Fernbedienung den Speicherplatz des einzustellenden Timers zwischen und aus. 94 SKRI 2000 A1 Bedienung und Betrieb ♦ Drücken Sie die Taste Function / ST 7 oder die Taste Function / ST 38 auf der Fernbedienung erneut, um die eingestellte Zeit auf dem gewählten Speicherplatz zu programmieren. Das blinkende wird nun konstant angezeigt. ♦ Wiederholen Sie den Vorgang für die anderen Speicherplätze. Küchentimer abrufen Um eine programmierte Zeit für den Küchentimer abzurufen, gehen Sie wie folgt vor: ♦ Drücken Sie die Taste Timer 8 oder die Timer Taste 37 auf der Fernbedienung, um den Küchentimer zu aktivieren. DE AT CH ♦ Wählen Sie mit den Tasten i / Pr+ / AL1 18 und i / Pr– / AL2 16 bzw. der i Pr+ Taste 40 oder der i Pr– Taste 44 auf der Fernbedienung den gewünschten Timer zwischen und aus. ♦ Drücken Sie die Taste Timer 8 oder die Timer Taste 37 auf der Fernbedienung erneut, um den Küchentimer zu starten. Radiobetrieb HINWEIS ► Für einen guten Radioempfang muss die Wurfantenne 27 ganz abgewickelt werden. Richten Sie die Antenne im Radiobetrieb auf den besten Empfang aus. ► Die technischen Gegebenheiten des Gerätes ermöglicht eine einstellbare Empfangsfrequenz außerhalb des zulässigen UKW (FM)-Bereiches von 87,5–108 MHz. In verschiedenen Ländern können abweichende nationale Regelungen zu den zugewiesenen Rundfunkfrequenzbereichen bestehen. Beachten Sie, dass Sie die außerhalb des zugewiesenen Rundfunkfrequenzbereiches empfangenen Informationen nicht verwerten, an Dritte weiterleiten oder zweckentfremdet missbräuchlich verwenden dürfen. Radio ein-/ausschalten ♦ Drücken Sie die Taste Power 6 oder die -Taste 30 auf der Fernbedienung. Das Display zeigt den aktuellen Modus an indem sich das Gerät befindet. ♦ Drücken Sie die Taste Function / ST 7 oder die Taste Function / ST 38 auf der Fernbedienung mehrfach, um die Radiofunktion auszuwählen. Im Display erscheint die Empfangsfrequenz des eingestellten Senders. ♦ Schalten Sie das Radio aus, indem Sie die Taste Power 6 oder die -Taste 30 auf der Fernbedienung erneut drücken. Das Gerät wechselt zurück in die Betriebsart Uhr/Standby-Betrieb. Die aktuelle Uhrzeit wird angezeigt. SKRI 2000 A1 95 Bedienung und Betrieb Lautstärke einstellen ♦ Stellen Sie mit den Tasten Vol+ 3 und Vol– 5 oder der Vol+ Taste 39 und der Vol– Taste 41 auf der Fernbedienung die gewünschte Lautstärke angezeigt. Sie können einen ein. Der Lautstärkepegel wird im Display Lautstärkepegel zwischen und wählen. Sender manuell einstellen ♦ Stellen Sie durch Einzeldrücke auf die Tasten / Up 17 und / Down 19 bzw. der i / Up-Taste 42 und der i / Down-Taste i 32 auf der Fernbedienung den gewünschten Sender ein. Die Frequenz des Senders wird auf dem Display angezeigt. Der Lautsprecher ist während der Einstellung abgeschaltet. DE AT CH Nächsten Sender suchen Sie können das Gerät automatisch nach dem nächstliegenden Sender suchen lassen. ♦ Drücken und halten Sie die Taste / Up 17 und i / Down 19 bzw. der i / Up-Taste 42 und der i / Down-Taste 32 auf der Fernbedienung für mindestens zwei Sekunden gedrückt. Das Gerät sucht nach dem nächstliegenden Sender mit ausreichender Empfangsqualität. ♦ Wiederholen Sie den Vorgang, bis Sie den gesuchten Sender gefunden haben. Benutzer auswählen Voraussetzung: Das Gerät befindet sich in der Betriebsart Radio. ♦ Drücken Sie die Taste User 2 oder die User Taste 31 auf der Fernbedienung, um den gewünschten Benutzer auszuwählen. Der aktuelle Benutzer bis wird auf dem Display für 10 Sekunden angezeigt. ♦ Drücken Sie die Tasten i / Pr+ / AL1 18 und i / Pr– / AL2 16 bzw. die i Pr+ Taste 40 oder die i Pr– Taste 44 auf der Fernbedienung , um einen voreingestellten Speicherplatz zwischen und auszuwählen. HINWEIS ► Jeder Benutzer hat 15 Speicherplätze zur Verfügung. Der erste Speicherplatz für Benutzer A ist vom Hersteller voreingestellt. 96 SKRI 2000 A1 Bedienung und Betrieb Sender manuell speichern Voraussetzung: Das Gerät befindet sich in der Betriebsart Radio. Das Gerät stellt 60 Speicherplätze (4 Benutzer a 15 Speicherplätze) für Sendefrequenzen zur Verfügung. Um eine Sendefrequenz zu speichern, gehen Sie wie folgt vor: ♦ Stellen Sie wie vorab beschrieben den gewünschten Sender ein. ♦ Drücken Sie die Taste Mem 4 oder die Mem Taste 35 auf der Fernbedienung. Das Symbol MEM, der Benutzer und der Speicherplatz erscheinen im Display . DE AT CH ♦ Drücken Sie die Taste User 2 oder die User Taste 31 auf der Fernbedienung, bis der gewünschte Benutzer ( - ) angezeigt wird. ♦ Wählen Sie mit den Tasten i / Pr+ / AL1 18 oder i / Pr– / AL2 16 bzw. der i Pr+ Taste 40 oder der i Pr– Taste 44 auf der Fernbedienung den gewünschten Speicherplatz für den eingestellten Sender zwischen und aus. ♦ Drücken Sie die Taste Mem 4 oder die Mem Taste 35 auf der Fernbedienung. Die Empfangsfrequenz des eingestellten Senders wird auf dem gewählten Speicherplatz gespeichert. Gespeicherten Sender abrufen Voraussetzung: Das Gerät befindet sich in der Betriebsart Radio. ♦ Drücken Sie die Taste User 2 oder die User Taste 31 auf der Fernbedienung, bis der gewünschte Benutzer ( - ) angezeigt wird. ♦ Wählen Sie mit den Tasten i / Pr+ / AL1 18 oder i / Pr– / AL2 16 bzw. der i Pr+ Taste 40 oder der i Pr– Taste 44 auf der Fernbedienung den Speicherplatz für den gespeicherten Sender zwischen und aus. SKRI 2000 A1 97 Bedienung und Betrieb Automatischer Sendersuchlauf (AMS-Funktion) Voraussetzung: Das Gerät befindet sich in der Betriebsart Radio. Um die Speicherplätze für die Sendefrequenzen mit den stärksten empfangbaren Sendern zu belegen, kann ein automatischer Sendersuchlauf durchgeführt werden. HINWEIS ► Bei Ausführung der nachfolgend beschriebenen Funktion gehen alle vorher gespeicherten Sender verloren. DE AT CH ♦ Drücken und halten Sie die Taste i / Memory Scan 14 oder die Memory-Scan-Taste 36 für mindestens drei Sekunden gedrückt. Das Gerät bis beginnt mit dem Sendersuchlauf und belegt die Speicherplätze mit den gefundenen Sendern. ♦ Nach Beendigung des Sendersuchlaufs können Sie durch einmaliges drücken der Taste i / Memory Scan 14 oder der Memory-Scan-Taste 36 , alle gespeicherten Sender zwischen und für 10 Sekunden wiedergeben. HINWEIS ► Werden mehr als 60 Sender gefunden, werden nur die ersten 60 Empfangsfrequenzen gespeichert. ► Werden weniger als 60 Sender gefunden, bleiben die letzten Speicherplätze unverändert. Wiedergabe von externen Audiogeräten ♦ Schließen Sie ein externes Audiogerät, wie z.B. einen MP3-Player, an die 3,5 mm Klinkenbuchse AUX IN 26 auf der Rückseite des Gerätes an. ♦ Drücken Sie die Taste Power 6 oder die Taste 30 auf der Fernbedienung. Das Display zeigt den aktuellen Modus an indem sich das Gerät befindet. ♦ Drücken Sie die Taste Function / ST 7 oder die Taste Function / ST 38 auf der Fernbedienung mehrfach, um die Funktion auszuwählen. ♦ Starten Sie die Wiedergabe am externen Audiogerät und stellen Sie die Lautstärke ein. HINWEIS ► Beachten Sie die Bedienungsanleitung des externen Audiogerätes. Anschluss iPod/iPhone Mit der Station 29 können Sie das Gerät als Lautsprecher für Ihren iPod/Ihr iPhone verwenden. Wenn Sie den iPod/das iPhone in die Station einsetzen, wird es außerdem automatisch aufgeladen. 98 SKRI 2000 A1 Bedienung und Betrieb iMenu Voraussetzung: Das Gerät befindet sich in der Betriebsart iPod. I Enter 13 , um die Menüsteuerung für den ♦ Drücken Sie die Taste iPod/das iPhone zu aktivieren. Die folgenden Funktionen können damit ausgeführt werden: Taste i / Pr– / AL2 16 i / Pr+ / AL1 18 i-Time Sync Bass 12 Funktion Nächste Funktion Vorherige Funktion Zeitanzeige und Datum des Gerätes mit der Zeit des iPods/iPhones synchronisieren i / Memory Scan 14 Wiedergabe anhalten und fortsetzen i / Down 19 Schneller Rücklauf / Up 17 Schneller Vorlauf kurz drücken: Menü zurück lang drücken: Auswahl bestätigen I Enter 13 DE AT CH Musik wiedergeben Bereiten Sie die Anschlussstation 29 vor, wie im Kapitel Station für iPod/ iPhone vorbereiten S. 84 beschrieben. ♦ Setzen Sie Ihren iPod bzw. Ihr iPhone in die Station 29 ein. ♦ Drücken Sie die Taste Power 6 oder die -Taste 30 auf der Fernbedienung. Das Display zeigt den aktuellen Modus an indem sich das Gerät befindet ♦ Drücken Sie die Taste Function / ST 7 oder die Taste Function / ST 38 auf auszuwählen. der Fernbedienung mehrfach, um die Funktion ♦ Wählen Sie auf Ihrem iPod/iPhone einen Titel (oder ein Album bzw. eine Wiedergabeliste) aus. ♦ Drücken Sie die Taste i / Memory Scan 14 oder die i -Taste 33 auf der Fernbedienung, um die Wiedergabe zu starten oder anzuhalten. SKRI 2000 A1 99 Bedienung und Betrieb iPod/iPhone aufladen Ist Ihr iPod/iPhone in die Station 29 eingesetzt, wird es automatisch aufgeladen, bis die Batterie voll ist. HINWEIS ► Der iPod/das iPhone wird nicht über die Backup-Batterie aufgeladen. Uhrzeit i-Time Sync einstellen Die iTime-Sync-Funktion ermöglicht es Ihnen, die Uhrzeit und das Datum auf dem Gerät mit der Uhrzeit und dem Datum Ihres iPods oder iPhones zu synchronisieren (iPod Touch, iPod nano und iPod Classic; ältere iPod-Modelle wie iPod mini unterstützen diese Funktion nicht). DE AT CH ♦ Setzen Sie Ihren iPod bzw. Ihr iPhone in die Station 29 ein. ♦ Drücken Sie die Taste i-Time Sync Bass 12 oder die Taste iTime Sync Bass 43 auf der Fernbedienung. Die Uhrzeit und das Datum des iPods oder iPhones werden auf das Gerät übertragen. Nach Abschluss der Synchronisation, ertönt ein Signalton. HINWEIS ► Die Uhrzeit auf dem iPhone wird kontinuierlich über die Mobilfunkmasten aktualisiert. Die Uhrzeit auf dem iPod entspricht nur der Uhrzeit auf Ihrem Computer nach der letzten Synchronisation. Es ist möglich, einen Zeitunterschied von 59 Sekunden zwischen dem Gerät und dem synchronisiertem iPod/iPhone zu haben. Weitere Funktionen Stereofunktion Das Gerät unterstützt die Stereofunktion. Die Standardeinstellung ist Stereo on. Um die Stereofunktion zu ändern, gehen Sie wie folgt vor: ♦ Drücken und halten Sie die Taste Function / ST 7 oder die Taste Function / ST 38 auf der Fernbedienung gedrückt, bis im Display die aktuelle Einstellung der Stereofunktion angezeigt wird ( oder ). ♦ Drücken und halten Sie die Taste Function / ST 7 oder die Taste Function / ST 38 auf der Fernbedienung erneut, um die Einstellung zu wechseln. HINWEIS ► Bei Stereoempfang eines Radiosenders und aktivierter Stereofunktion, erscheint für 3 Sekunden im Display . 100 SKRI 2000 A1 Bedienung und Betrieb Tastensperre Sie können die Tasten des Gerätes sperren, damit keine Einstellungen versehentlich geändert werden können. ♦ Drücken und halten Sie die Taste Mode / Lock 11 oder die Mode Lock Taste 45 auf der Fernbedienung für mindestens zwei Sekunden gedrückt, um die Tastensperre ein- oder auszuschalten. Bei eingeschalteter Tastensperre erscheint im Display das Symbol . ♦ Zum Entsperren drücken und halten Sie wieder die Taste Mode / Lock 11 oder die Mode Lock Taste 45 auf der Fernbedienung für mindestens zwei Sekunden gedrückt. DE AT CH Bassanhebung Mit der Bassanhebung können Sie eine verstärkte Wiedergabe der tiefen Frequenzen einschalten. ♦ Drücken Sie für ca. 2 Sekunden die Taste i-Time Sync Bass 12 oder die Taste iTime Sync Bass 43 auf der Fernbedienung, um die Bassanhebung einoder auszuschalten. Bei eingeschalteter Bassanhebung erscheint im Display das Symbol . Wechselnde Anzeige Voraussetzung: Das Gerät befindet sich in der Betriebsart Uhr/Standby-Betrieb. ♦ Drücken Sie die Taste i / Down 19 oder die i / Down Taste 32 auf der Fernbedienung, das Datum und die Uhrzeit werden abwechselnd angezeigt. ♦ Drücken Sie die Taste i / Down 19 oder die i / Down Taste 32 auf der Fernbedienung noch einmal, wird nur die Uhrzeit angezeigt. Voraussetzung: Das Gerät befindet sich in der Betriebsart Radio. ♦ Drücken Sie die Taste Mode / Lock 11 oder die Mode Lock Taste 45 auf der Fernbedienung, die Empfangsfrequenz bzw. der Stationsname (bei RDSEmpfang) und die Uhrzeit werden abwechselnd angezeigt. ♦ Drücken Sie die Taste Mode / Lock 11 oder die Mode Lock Taste 45 auf der Fernbedienung noch einmal, wird nur die Uhrzeit angezeigt. ♦ Drücken Sie die Taste Mode / Lock 11 oder die Mode Lock Taste 45 auf der Fernbedienung noch einmal, wird nur die Empfangsfrequenz bzw. der Stationsname (bei RDS-Empfang) angezeigt. SKRI 2000 A1 101 Bedienung und Betrieb Automatisches Abschalten (Einschlaffunktion) Mit der Einschlaffunktion stellt sich das Gerät nach einer Zeit zwischen 5 und 90 Minuten selbst aus. ♦ Drücken Sie die Taste AOT / Dimmer 10 oder die AOT Dimmer Taste 46 auf der Fernbedienung, um die Funktion aufzurufen. Die aktuell verbleibende Zeit bis zum Abschalten des Radios wird angezeigt. ♦ Drücken Sie die Taste AOT / Dimmer 10 oder die AOT Dimmer Taste 46 auf der Fernbedienung wiederholt, um die gewünschte Zeit einzustellen. Nach ca. 15 Sekunden kehrt das Gerät wieder zur Anzeige der gewählten Betriebsart zurück. DE AT CH HINWEIS ► Die einstellbare Zeitspanne reicht von 90 bis 5 Minuten. Die Einstellung erfolgt in Schritten zu 5 Minuten. Danach erscheint die Anzeige . Bei der Anzeige ist die Einschlaffunktion abgeschaltet. ► Befindet sich das Gerät in der Betriebsart Uhr/Standby-Betrieb, schalten Sie mit dem Drücken der Taste AOT / Dimmer 10 oder der AOT Dimmer Taste 46 auf der Fernbedienung das Gerät in dem zuletzt ausgewählten Modus (Radio/iPod/AUX) ein. Displaydimmer manuell ein-/ausschalten ♦ Drücken und halten Sie die Taste AOT / Dimmer 10 oder die AOT Dimmer Taste 46 auf der Fernbedienung gedrückt, bis im Display die aktuelle Einstellung des Displaydimmers angezeigt wird ( oder ). ♦ Drücken und halten Sie die Taste AOT / Dimmer 10 oder die AOT Dimmer Taste 46 auf der Fernbedienung erneut, um die aktuelle Einstellung zu wechseln (siehe auch Kapitel Zeitgesteuerte Displaydimmung ein-/ ausschalten S. 88). Nach ca. 15 Sekunden wird die zuletzt verwendete Displaydarstellung wieder angezeigt. 102 SKRI 2000 A1 Reinigung/Fehlerbehebung Reinigung Sicherheitshinweise GEFAHR Lebensgefahr durch elektrischen Strom! ► Ziehen Sie das Steckernetzteil aus der Steckdose, bevor Sie mit der Reinigung beginnen. DE AT CH ACHTUNG Beschädigung des Gerätes! ► Stellen Sie sicher, dass bei der Reinigung keine Feuchtigkeit in das Gerät eindringt, um eine irreparable Beschädigung des Gerätes zu vermeiden. Gehäuse reinigen ■ Reinigen Sie die Oberflächen des Gerätes mit einem weichen, trockenen Tuch. Fehlerbehebung In diesem Kapitel erhalten Sie wichtige Hinweise zur Störungslokalisierung und Störungsbehebung. Beachten Sie die Hinweise um Gefahren und Beschädigungen zu vermeiden. Sicherheitshinweise WARNUNG Beachten Sie die folgenden Sicherheitshinweise um Gefahren und Sachschäden zu vermeiden: ► Reparaturen an Elektrogeräten dürfen nur von Fachleuten durchgeführt werden, die vom Hersteller geschult sind. Durch unsachgemäße Reparaturen können erhebliche Gefahren für den Benutzer und Schäden am Gerät entstehen. SKRI 2000 A1 103 Fehlerbehebung Fehlerursachen und -behebung Die nachfolgende Tabelle hilft bei der Lokalisierung und Behebung kleinerer Störungen: Fehler Das Display zeigt nichts an. DE AT CH Kein Ton Mögliche Ursache Behebung Das Steckernetzteil 15 ist nicht eingesteckt. Stecken Sie das Steckernetzteil 15 in die Steckdose. Steckdose liefert keine Spannung. Überprüfen Sie die Haussicherungen. Die Lautstärke steht auf Minimum. Erhöhen Sie die Lautstärke mit der Taste Vol+ 3 . Das Gerät befindet sich in der Betriebsart Uhr/Standby-Betrieb. Schalten Sie das Gerät mit der Taste Power 6 auf die Betriebsart Radio/iPod/Aux/ ein. Die Wiedergabe des externen Audiogerätes ist nicht gestartet. Starten Sie die Wiedergabe an dem externen Audiogerät. Die Wiedergabe des iPod/ iPhones ist nicht gestartet. Starten Sie die Wiedergabe am iPod/ iPhone. Der iPod/das iPhone ist Setzen Sie den iPod/das iPhone nicht richtig in die Station 29 richtig in die Station 29 ein. eingesetzt Störgeräusche beim Radioempfang Der Sender ist nicht richtig eingestellt. Stellen Sie den Sender mit dem Tasten / Up 17 und i / Down 19 richtig ein. Der Empfang ist zu schwach. Versuchen Sie durch Bewegen der Wurfantenne 27 den Empfang zu verbessern. iPod/iPhone wird nicht aufgeladen Der iPod/das iPhone ist Setzen Sie den iPod/das iPhone nicht richtig in die Station 29 richtig in die Station 29 ein. eingesetzt. Alarm mit iPod/ iPhone hat nicht funktioniert Die ausgewählte Wiedergabeliste auf Ihrem iPod/ iPhone ist leer. Stellen Sie sicher, dass die Wiedergabeliste Musik enthält. HINWEIS ► Wenn Sie mit den vorstehend genannten Schritten das Problem nicht lösen können, wenden Sie sich bitte an den Kundendienst. 104 SKRI 2000 A1 Lagerung/Entsorgung/Anhang Lagerung/Entsorgung Lagerung Sollten Sie das Gerät längere Zeit nicht benutzen, trennen Sie es von der Stromversorgung, entnehmen Sie die Batterie und lagern Sie es an einem sauberen, trockenen Ort ohne direkte Sonneneinstrahlung. Gerät entsorgen Werfen Sie das Gerät keinesfalls in den normalen Hausmüll. Dieses Produkt unterliegt der europäischen Richtlinie 2002/96/ECWEEE (Waste Electrical and Electronic Equipment). Entsorgen Sie das Gerät über einen zugelassenen Entsorgungsbetrieb oder über Ihre kommunale Entsorgungseinrichtung. Beachten Sie die aktuell geltenden Vorschriften. Setzen Sie sich im Zweifelsfall mit Ihrer Entsorgungseinrichtung in Verbindung. Batterien entsorgen Batterien dürfen nicht im Hausmüll entsorgt werden. Jeder Verbraucher ist gesetzlich verpflichtet, Batterien bei einer Sammelstelle seiner Gemeinde/seines Stadtteils oder im Handel abzugeben. Diese Verpflichtung dient dazu, dass Batterien einer umweltschonenden Entsorgung zugeführt werden können. Geben Sie Batterien nur im entladenen Zustand zurück. Anhang Hinweise zur EG-Konformitätserklärung Dieses Gerät entspricht hinsichtlich Übereinstimmung mit den grundlegenden Anforderungen und den anderen relevanten Vorschriften der europäischen Richtlinie für elektromagnetische Verträglichkeit 2004/108/EC, der Niederspannungsrichtlinie 2006/95/EC sowie der Ökodesign-Richtlinie 2009/125/EC (Verordnung 1275/2008 Anhang II, Nr.1). Die vollständige Original-Konformitätserklärung ist beim Importeur erhältlich. SKRI 2000 A1 105 DE AT CH Anhang Technische Daten Steckernetzteil Hersteller Modell Eingangsspannung, -strom Fai Shing Industries Ltd. JVSW0702000 100-240 V~ 50/60 Hz, 350 mA Ausgangsspannung, -strom DE AT CH 7V Schutzklasse ,2A II / Gerät Eingangsspannung, -strom 7V ,2A Batterie für Datensicherung 1 x 3 V Typ CR2032 (im Lieferumfang enthalten) Batterie für Fernbedienung 1 x 3 V Typ CR2025 (im Lieferumfang enthalten) Leistungsaufnahme Betrieb ca. 5 W Standby ca. 1,8 W Ausgangsleistung Lautsprecher ca. 2 x 1W (bei 10 % Klirrfaktor) Frequenzbereich Radio (UKW) 87,5 - 108 MHz Betriebstemperatur Feuchtigkeit (keine Kondensation) Abmessungen (B x H x T) (ohne Standfuß) Gewicht 106 +5 - +40 °C 5 - 90 % ca. 30 x 15,7 x 8,4 cm ca. 1070 g SKRI 2000 A1 Anhang Garantie Sie erhalten auf dieses Gerät 3 Jahre Garantie ab Kaufdatum. Das Gerät wurde sorgfältig produziert und vor Anlieferung gewissenhaft geprüft. Bitte bewahren Sie den Kassenbon als Nachweis für den Kauf auf. Bitte setzen Sie sich im Garantiefall mit Ihrer Servicestelle telefonisch in Verbindung. Nur so kann eine kostenlose Einsendung Ihrer Ware gewährleistet werden. HINWEIS ► Die Garantieleistung gilt nur für Material- oder Fabrikationsfehler, nicht aber für Transportschäden, Verschleißteile oder für Beschädigungen an zerbrechlichen Teilen, z.B. Schalter oder Akkus. Das Produkt ist lediglich für den privaten und nicht für den gewerblichen Gebrauch bestimmt. Bei missbräuchlicher und unsachgemäßer Behandlung, Gewaltanwendung und bei Eingriffen, die nicht von unserer autorisierten Service-Niederlassung vorgenommen wurden, erlischt die Garantie. Ihre gesetzlichen Rechte werden durch diese Garantie nicht eingeschränkt. Die Garantiezeit wird durch die Gewährleistung nicht verlängert. Dies gilt auch für ersetzte und reparierte Teile. Eventuell schon beim Kauf vorhandene Schäden und Mängel müssen sofort nach dem Auspacken gemeldet werden, spätestens aber zwei Tage nach Kaufdatum. Nach Ablauf der Garantiezeit anfallende Reparaturen sind kostenpflichtig. Service Service Deutschland Tel.: 01805 772 033 (0,14 EUR/Min. aus dem dt. Festnetz, Mobilfunk max. 0,42 EUR/Min.) E-Mail: [email protected] IAN 63920 Service Österreich Tel.: 0820 201 222 (0,15 EUR/Min.) E-Mail: [email protected] IAN 63920 Service Schweiz Tel.: 0842 665566 (0,08 CHF/Min., Mobilfunk max. 0,40 CHF/Min.) E-Mail: [email protected] IAN 63920 Importeur KOMPERNASS GMBH BURGSTRASSE 21 D-44867 BOCHUM www.kompernass.com SKRI 2000 A1 107 DE AT CH 108 SKRI 2000 A1 Index Introduction . . . . . . . . . . . 110 Handling and operation . 121 Information for these operating instructions . . . . . . . . . . . . . . . . . .110 Copyright . . . . . . . . . . . . . . . . . . .110 Intended use . . . . . . . . . . . . . . . . .110 Warning notices . . . . . . . . . . . . . .111 Operating components . . 114 Switching On and Off . . . . . . . . .121 Basic settings . . . . . . . . . . . . . . . .121 Activating the settings menu . . . . .122 Programming the alarm . . . . . . . .126 Kitchen timer . . . . . . . . . . . . . . . . .129 Programming the kitchen timer . . .130 Radio operation . . . . . . . . . . . . . .131 Playback of external audio appliances . . . . . . . . . . . . . . . . . .134 Connection of iPod/iPhone . . . . .134 Additional functions . . . . . . . . . . .136 Setting up and connecting 116 Cleaning . . . . . . . . . . . . . . 139 Safety instructions . . . . . . . . . . . . .116 Items supplied and transport inspection . . . . . . . . . . . . . . . . . . .116 Unpacking . . . . . . . . . . . . . . . . . .116 Disposal of the packaging . . . . . .117 Set-up location requirements. . . . .117 Electrical connection . . . . . . . . . . .117 Appliance battery. . . . . . . . . . . . .118 Remote Control Battery . . . . . . . .118 Installation under a wall cupboard .119 Disinstallation . . . . . . . . . . . . . . . .120 Setting the appliance up. . . . . . . .120 Preparing the station for iPod/iPhone . . . . . . . . . . . . . . . . .120 Providing mains power . . . . . . . . .120 VHF wire antenna . . . . . . . . . . . . .120 Safety instructions . . . . . . . . . . . . .139 Cleaning the housing . . . . . . . . . .139 Safety . . . . . . . . . . . . . . . . 112 Risks from electric shock . . . . . . . .112 Handling of batteries . . . . . . . . . .112 Basic Safety Instructions . . . . . . . .113 SKRI 2000 A1 Troubleshooting . . . . . . . . 139 Safety instructions . . . . . . . . . . . . .139 Malfunction causes and remedies 140 Storage / Disposal . . . . . . 141 Storage . . . . . . . . . . . . . . . . . . . . .141 Disposal of the appliance. . . . . . .141 Disposing of the batteries . . . . . . .141 Appendix . . . . . . . . . . . . . 141 Information regarding the EG Declaration of Conformity . . .141 Technical data . . . . . . . . . . . . . . .142 Warranty . . . . . . . . . . . . . . . . . . .143 Service . . . . . . . . . . . . . . . . . . . . .143 Importer . . . . . . . . . . . . . . . . . . . .143 109 GB Introduction Introduction Information for these operating instructions These operating instructions are a component of the Under-Cabinet Radio SKRI 2000 A1 (henceforth designated as the appliance) and they provide you with important information about the intended use, safety, installation and connection as well as operation of the appliance. These operating instructions must be kept available in the vicinity of the appliance at all times. They are to be read and used by everyone assigned to service and repair faults in the appliance. GB Retain these operating instructions and pass them on, with the appliance, to any future owners. Copyright This documentation is copyright protected. Any copying or reproduction, including as extracts, as well as the reproduction of images, also in an altered state, is not permitted without the express written consent of the manufacturer. Intended use This appliance is intended only for use in the reception of FM radio stations, as a kitchen timer, to give alarms through signal tones, radio or iPod / iPhone and for the connection of external audio appliances (e.g. MP3 player) and iPod / iPhone in indoor areas. The appliance is intended as a free standing unit or for installation under a wall cupboard. For this, the built-in foot-pads resp. the supplied mounting plate must be used. Any other use or uses beyond those mentioned here are considered to be unintended use. This appliance is not intended for use in commercial or industrial environments. No warranty claims of any kind will be accepted for damage caused by improper use, incompetent repairs, unauthorised modifications or for the use of unapproved replacement parts. The operator bears the risk alone. "Made for iPod" and "Made for iPhone" means that an electronic accessory has been specifically designed for connection to an iPod or iPhone and the developer guarantees that the appliance complies with the performance standards of Apple. Apple is not responsible for the operation of this appliance or that it complies with safety and regulatory standards. Take note that using this accessory with an iPod or iPhone can affect the wireless performance. iPad, iPhone, iPod, iPod classic, iPod nano, iPod shuffle and iPod touch are trademarks of Apple Inc., registered in the U.S. and other countries. iPad is a trademark of Apple Inc. 110 SKRI 2000 A1 Introduction Warning notices In these extant operating instructions the following warning notices are used: DANGER A warning at this risk level indicates a threateningly dangerous situation. In the event that the dangerous situation is not avoided it could lead to death or serious physical injury. ► The directives in this warning are there to avoid the risks of death or serious physical injury. GB WARNING A warning at this risk level indicates a possible dangerous situation. If the dangerous situation is not avoided it could lead to physical injuries. ► The directives in this warning are there to avoid personal physical injuries. IMPORTANT A warning at this risk level indicates possible property damage. If the situation is not avoided it could lead to property damage. ► The directives in this warning are there to avoid property damage. NOTICE ► A notice indicates additional information that assists in the handling of the appliance. SKRI 2000 A1 111 Safety Safety In this section you receive important safety information regarding the handling of the appliance. This appliance complies with the statutory safety regulations. Incorrect usage can lead to injuries and property damage. Risks from electric shock DANGER GB Potentially fatal risks from electric shock! A potentially fatal risk can arise from contact with live wires or components! Observe the following safety instructions to avoid the risks of electric shock: ► Do not use the appliance if the power adapter, the power cable or the plug are damaged. ► Do not, under any circumstances, open the power adapter. The risk of receiving an electric shock is elevated if the power carrying connections are touched or the electrical or mechanical construction is altered. Handling of batteries WARNING Risks from improper use! The risk of explosions and injuries exists! For the safe handling of batteries observe the following safety instructions: ► Do not throw batteries into a fire. ► Do not short circuit batteries. ► Do not attempt to recharge batteries. ► Regularly check the condition of the batteries. Leaking battery acid can cause permanent damage to the appliance. Special caution should be shown when handling damaged or leaking batteries. Risk of acid burns! Wear protective gloves. ► Store batteries in a place inaccessible to children. If swallowed seek IMMEDIATE medical attention. ► If you do not intend to use the appliance for an extended period of time, remove the batteries. 112 SKRI 2000 A1 Safety Basic Safety Instructions For safe handling of the appliance observe the following safety instructions: ■ Before using it, check the appliance for signs of visible external damage. Do not put into operation an appliance that is damaged or has been dropped. ■ Damaged cables or connections should be replaced by authorised qualified persons or by the Customer Service Department. ■ This appliance is not intended for use by individuals (including children) with restricted physical, physiological or intellectual abilities or deficiences in experience and / or knowledge unless they are supervised by a person responsible for their safety or receive from this person instruction on how the appliance is to be used. ■ Children should be supervised to ensure that they do not play with the appliance. ■ Repairs should only be carried out by authorised specialist companies or by the Customer Service Department. Incompetent repairs can result in risks for the user. In addition, warranty claims become void. ■ Repairs to the appliance during the warranty period may only be carried out by a customer service firm authorised by the manufacturer, if they are not, additional warranty claims can no longer be considered for subsequent defects. ■ Defective components may only be replaced with original replacement parts. Only by using original replacement parts can it be guaranteed that the safety requirements are being complied with. ■ Protect the appliance from moisture and penetration by liquids. Never submerge the appliance under water, do not place the appliance in the vicinity of water and do not place any object filled with liquids (i.e. flower vases) on the appliance. ■ Do not place any objects on the appliance. ■ Do not operate the appliance in the vicinity of open flames (i.e. candles). ■ Avoid direct sunlight. ■ Always pull on the plug when disconnecting from the mains power socket, never pull on the power cable itself. ■ In the event of a malfunction occurring or a thunderstorm approaching, remove the plug from the mains power socket. SKRI 2000 A1 113 GB Operating components Operating components (for illustrations see front fold out side figure A) Display GB 2 User: Select user 3 Vol+: Volume increase 4 Mem: Memory storage space selection 5 Vol–: Volume decrease Power: Switching On and Off 6 7 Function / ST: Function selection / Stereo activation 8 Timer: Set and activate the timer 9 Alarm Mode: Select alarm type 10 AOT / Dimmer: Switch-off timer / Switch display dimmer on / off 11 Mode / Lock: Call-up settings menu / Button lock 12 i-Time Sync Bass: Synchronise time and date display with iPod / iPhone / Bass boost I Enter : Operation of the iPod / iPhone / Input 13 / Memory Scan: Pause/Playback with iPod / iPhone / Automatic radio station search / retrieve preset radio station 14 i 15 Connector power pack 16 i / Pr– / AL2: Previous function with iPod / iPhone / Call-up previous memory storage space / Set Alarm 2 17 18 / Up: Fast forward with iPod/iPhone / Raise reception frequency i / Pr+ / AL1: Next function with iPod/iPhone / Call-up next memory storage space / Set Alarm 1 / Down: Fast rewind with iPod/iPhone / Lower reception frequency i 20 Mounting plate 19 21 Foot-pads (hinged) 114 22 Securing bracket for iPod/iPhone 23 Speakers 24 Battery compartment 25 DC-Socket: Current connection socket (7V) for power adapter 26 27 AUX IN-Socket: Input connection socket for audio appliances with 3.5mm jackplug Wire antenna for VHF reception SKRI 2000 A1 Operating components (for illustrations see front fold out side figure B) 28 Spacer (for under-cabinet installation) 29 Station for iPod/iPhone : Switching On and Off 30 31 User: Select user 32 i / Down: Fast rewind with iPod/iPhone / Lower reception frequency 33 i : Pause/Playback with iPod/iPhone 34 iMenu / Enter: Operation with iPod/iPhone / Input 35 Mem: Memory storage space selection 36 Memory-Scan: automatic radio station search/call-up preset radio station 37 Timer: Set and activate the timer 38 Function / ST: Function selection / Stereo activation Mode: Setting menu 39 Vol+: Volume increase 40 i / Pr+: Next function with iPod/iPhone / Call-up next memory storage space 41 VOL–: Volume decrease 42 i 43 iTime Sync / Bass: Synchronise time and date display with iPod / iPhone / Bass boost 44 i / Pr–: Select previous memory storage space / Previous function with iPod/iPhone 45 Mode / Lock: Call-up settings menu / Button lock 46 AOT / Dimmer: Switch-off timer / Switch display dimmer on/off 47 Alarm: Select alarm type 48 Sensor for remote control SKRI 2000 A1 GB / Up: Fast forward with iPod/iPhone / Raise reception frequency 115 Setting up and connecting Setting up and connecting Safety instructions WARNING Damage may occur to property and injuries to people when taking the appliance into service! Pay heed to the following safety information to avoid these risks. ► Packaging material should not be used as a play thing by children. There is a risk of suffocation! GB ► To avoid risks to persons and property, observe the requirements for the set-up location and the electrical connections. Items supplied and transport inspection The appliance is delivered with the following components as standard: ▯ Under-Cabinet Radio SKRI 2000 A1 ▯ Power adapter JVSW0702000 ▯ Mounting plate ▯ 4 Securing screws (short) ▯ 2 x Spacers including 4 securing screws (long) ▯ Securing bracket for iPod/iPhone ▯ 1 x Battery 3 V Type CR2032 ▯ 1 x Battery 3 V Type CR2025 ▯ Remote control ▯ Jackplug cable 3.5 to 3.5 mm (50 cm) ▯ This operating manual NOTICE ► Check the contents to ensure everything is present and for signs of visible damage. ► If the items supplied are incomplete, or damaged due to defective packaging or transportation, contact the Service Hotline (see chapter Service p. 143). Unpacking ♦ Remove all appliance parts and the operating instructions from the carton. ♦ Remove all packing material. 116 SKRI 2000 A1 Setting up and connecting Disposal of the packaging The packaging protects the appliance from transport damage. The packaging materials are selected from the point of view of their environmental friendliness and disposal technology and are therefore recyclable. The recirculation of packaging into the material circuit saves on raw material and reduces the amount of waste generated. Dispose of packaging material that is no longer needed as per the regionally established regulations. NOTICE ► If possible preserve the original packaging during the warranty period so that, in the event of a warranty claim, you can repackage the appliance ideally for its return. GB Set-up location requirements For the safe and fault free operation of the appliance, the installation location must fulfill the following conditions: ■ When setting the appliance up, place it on a firm, flat and even surface. Use the hinged foot-pads. ■ Set up or mount the appliance in such a way that the extant ventilation openings and the speaker are not covered. ■ Do not operate the appliance in a hot, wet or very humid location or in the vicinity of flammable materials. ■ Do not install the appliance directly over a hotplate. ■ The mains power socket must at all times be easily accessible, so that the plug can be easily and quickly removed if necessary. Electrical connection ■ The appliance is powered with a DC voltage of 7V via the supplied power adapter. Connect the appliance to the mains power supply only via the supplied power adapter. ■ Before connecting the appliance compare the connection data (Voltage and frequency) on the rating plate with that of your mains electric source. To avoid potential damage to the appliance this data must concur. ■ Protect the connection cable against hot surfaces and sharp edges. ■ Ensure that the connection cable is not tightly stretched or kinked. ■ Do not allow the connection cable to hang over edges (Tripwire effect). ■ If you do not intend to use the appliance for an extended period, disconnect the plug from the mains power supply. SKRI 2000 A1 117 Setting up and connecting Appliance battery With the insertion of a battery you can avoid the loss of programmed times and dates plus alarm times in the event of a possible power failure. The battery ensures that the internal clock and date continue to run even during a power failure. The display will then automatically show the correct time on the restoration of mains power. NOTICE ► The appliance can also be operated without a battery. Inserting / replacing the battery GB ♦ Open the cover of the battery compartment 24 on the underside of the appliance by turning the cover with a coin as far as it will go to the left and then lifting it off. ♦ Insert the battery type CR2032 (supplied) into the battery compartment. The side with the marking + points upwards. ♦ Close the battery compartment by attaching the cover and then, using a coin, turn it all the way to the right. Remote Control Battery Activating the battery The remote control battery is already inserted when delivered. ♦ Activate the battery by removing the isolation strip. Changing the battery ♦ Using a fingernail press the recess (A) to the right and, at the same time, pull the battery compartment out. ♦ Insert a 3 V battery of type CR 2025 in the battery compartment. The side with the marking "+" must point upwards. ♦ Slide the battery compartment completely back into the remote control. 118 SKRI 2000 A1 Setting up and connecting Installation under a wall cupboard GB With the supplied mounting plate 20 you can install the appliance under, for example, a wall cupboard. For the installation of the appliance proceed as follows: ♦ Slide the mounting plate 20 to the rear and remove the mounting plate 20 . ♦ Select a suitable installation location for the appliance (see also the section Set-up location requirements p. 117). ♦ Hold the mounting plate 20 under the installation location. Thereby the front edge of the mounting plate 20 should be approx. 6.8 cm behind the front of the cupboard so that, after the installation, the appliance is flush with the cupboard. The side edges of the mounting plate 20 must have a spacing of about 4.5 cm to adjacent cabinets or walls. NOTICE ► If you wish to install the unit flush to the left on an adjacent cabinet or a wall, remove the safety clip 22 from the appliance beforehand. ♦ Mark the 4 securing points with a pencil. ♦ Using a spike or nail, make a small depression at the respective marking points. ♦ If wished, insert the supplied spacer 28 with the retaining lug into the respective depression on the mounting plate 20 . ♦ Firmly screw the mounting plate 20 on with the supplied screws (see illustration). SKRI 2000 A1 119 Setting up and connecting ♦ Place the appliance aslant, with the front recesses in the top face of the appliance, in the mounting plate 20 . Press the rear part of the appliance upwards against the mounting plate 20 until the appliance audibly locks into place. ♦ Check to ensure that the appliance is securely seated. Disinstallation ♦ Pull the appliance forwards and remove the appliance downwards. ♦ Unscrew the screws on the mounting plate 20 and remove the mounting plate 20 . GB Setting the appliance up As an alternative you can stand the appliance on a level surface. In order to avoid the ventilation slots and speaker 23 on the bottom of the appliance being covered, the two foot-pads 21 on the appliance must be hinged outwards: ♦ Reach into the recess on the side of the respective foot-pad and pull the hinged foot out as far as it will go. ♦ Select a suitable installation location for the appliance (see also the section Set-up location requirements p. 117). Preparing the station for iPod/iPhone You can connect your iPod/iPhone to the appliance. For this you must fold the station 29 down and install the locking clip 22 : ♦ Fold the station 29 all the way down. ♦ Remove the locking clip 22 from the side of the appliance. ♦ On each side of the station 29 there is a recess. Slide the locking clip 22 from the front onto the station 29 so that the retaining lugs engage in the recesses. Providing mains power ♦ Connect the connector plug of the power adapter 15 into the DC socket 25 on the rear panel of the appliance. ♦ Insert the power adapter 15 into a mains power socket. VHF wire antenna ♦ Unwind the wire antenna 27 completely for VHF reception. 120 SKRI 2000 A1 Handling and operation Handling and operation In this section you receive important information for the handling and operation of the appliance. Switching On and Off After connecting the appliance to the mains power supply, it automatically starts the text „PLEASE WAIT FOR SETTING the setting system. In the display THANKS“ appears for about 3 to 5 minutes. Should a signal be received during this period, the system is updated automatically. GB NOTICE ► To cancel this process, press any button. The system then starts with the following default settings: ■ Date/Time ■ Radio is switched off ■ Clock mode/Standby operation is active ■ Display dimmer is active With connection to the mains power supply, the appliance switches to clock/ standby operation. The appliance can be switched on or off via the button Power 6 or the -button 30 on the remote control. Using the button Function / ST 7 or the button Function / ST 38 on the remote control, you can switch back and forth between the modes radio, iPod and AUX. NOTICE ► The button Power 6 or the -button 30 on the remote control do not completely disconnect the appliance from the mains power supply. The appliance also consumes power when in standby-mode. To completely disconnect the appliance from the mains power supply, the power adapter 15 must be removed from the mains power socket. Basic settings After the appliance has been connected to the mains power supply it shows the time of day and the day of the week in the display . The appliance is in the operational mode clock/standby operation. SKRI 2000 A1 121 Handling and operation Activating the settings menu To activate the settings menu, in the mode clock/standby operation press the button Mode / Lock 11 or the button Mode Lock 45 on the remote control. The time of day, shown in the display , begins to blink. Each further actuation of the button Mode / Lock 11 or 45 switches to the next setting potential. The menu item sequence is: ▯ Setting the time of day ▯ Setting the date ▯ Setting the memory function GB ▯ Set the Update Mode ▯ Switch display dimmer on/off ▯ Set display dimmer start time ▯ Setting the time of day format NOTICE ► The setting menu ends automatically if you do not actuate any buttons for approx. 15 seconds. The executed setting(s) is/are saved. Setting the time Prerequisite: The appliance is in the operational mode clock/standby operation. ♦ Press the button Mode / Lock 11 or the Mode Lock button 45 on the remote control once. The time of day indicator begins to blink. ♦ Using the buttons / Up 17 and i / Down 19 or the / Up 42 and / Down buttons 32 on the remote control, set the current time. With each press on the button the time of day changes by one minute. Holding the respective button down for more than 2 seconds starts the speed setting. ♦ Press the button Mode / Lock 11 , or the Mode Lock 45 button on the remote control, once again to save the current setting and move on to the next menu item. NOTICE ► The time of day will revert back to if the appliance is disconnected from the mains power supply and no battery is inserted or if the battery is too weak. 122 SKRI 2000 A1 Handling and operation Setting the date Prerequisite: The appliance is in the operational mode clock/standby operation. ♦ Press the button Mode / Lock 11 , or the Mode Lock 45 button on the remote control, twice. The date indicator begins to blink. ♦ Using the buttons / Up 17 and i / Down 19 or the / Up 42 and / Down buttons 32 on the remote control, set the current date. With each press of the button the date is changed by one day. The weekday indicator changes automatically. Holding the respective button down for more than 2 seconds starts the speed setting. ♦ Press the button Mode / Lock 11 , or the Mode Lock 45 button on the remote control, once again to save the current setting and move on to the next menu item. NOTICE ► The date will revert back to if the appliance is disconnected from the mains power supply and no battery is inserted or if the battery is too weak. Setting the memory function You can set up to 6 dates on which an automatic reminder will be triggered. The function SDA (Special Day Alert) is useful as a reminder, for example, of birthdays or other recurring events. The reminder occurs every year on the same date. On these dates an alarm tone is sounded for 10 minutes, every hour on the hour, from 08:00 to 23:00. Prerequisite: The appliance is in the operational mode clock/standby operation. ♦ Press the button Mode / Lock 11 , or the Mode Lock 45 button on the remote control, three times. The current setting of the selected reminder dates is shown alternating with the indicator . Next to the indicator is the number of the memory slot for that date. Possible classifications are to . ♦ Using the button i / Memory Scan 14 , or the Memory-Scan 36 button on the remote control, select storage slot of the date to be set. ♦ Using the buttons / Up 17 and i / Down 19 or the / Up 42 32 and / Down buttons on the remote control, set the current date for this memory slot. With each press of the button the date is changed by one day. Holding the respective button down for more than 2 seconds starts the speed setting. SKRI 2000 A1 123 GB Handling and operation NOTICE ► Press the button Timer 8 , or the Timer 37 button on the remote cononly the day and the month trol, to ignore the year. In the display are indicated. The memory function will then be activated every year on this date. ♦ Press the button Mode / Lock 11 , or the Mode Lock 45 button on the remote control, once again to save the current setting and move on to the next menu item. Set the Update Mode GB Prerequisite: The appliance is in the operational mode clock/standby operation. ♦ Press the button Mode / Lock 11 , or the Mode Lock 45 button on the remote control, four times. In the display appears and a blinking clock symbol . ♦ Press the button i / Down 19 , or the button / Down 32 on the remote control, to switch the automatic RDS function off. The blinking clock symbol extinguishes. ♦ Press the button / Up 17 , or the button / Up 42 on the remote control, to activate the automatic RDS function. The blinking clock symbol appears. ♦ Press the button Mode / Lock 11 , or the Mode Lock 45 button on the remote control, once again to save the current setting and move on to the next menu item. Switching time controlled display dimming on/off Prerequisite: The appliance is in the operational mode clock/standby operation. This appliance has two options for display dimming. 1. Time conrtrolled display dimming 2. Setting the display dimming manually (see also chapter Switching the display dimmer on/off manually S. 138). ♦ Press the button Mode / Lock 11 , or the Mode Lock 45 button on the remote control, five times. The current setting of the display dimmer appears ( ). or ♦ Using the button control, select " / Up 17 , or the / Up 42 button on the remote ", the display light extinguishes after 15 seconds. ♦ Using the button i / Down 19 , or the / Down 32 button on the remote control, select " ", the display light now glows continuously. 124 SKRI 2000 A1 Handling and operation ♦ Press the button Mode / Lock 11 , or the Mode Lock 45 button on the remote control, once again to save the current setting and move on to the next menu item. Mode Display Indicator Display lighting Control with the button AOT/Dimmer 10 or 46 Time controlled Dimmer OFF DT OFF Is set by the AOT / Dimmer button DIM OFF: Display lighting glows continuously DIM ON: Display lighting off; press any button and the display lighting switches on for 15 seconds. Time controlled Dimmer ON DT ON GB Off by default, 23:00 pm from 23:00 to 05:59 am 05:59 06:00 am 22:59 pm Press any button and the display lighting switches on for 60 seconds. DIM OFF: Display lighting glows continuously DIM ON: Display lighting off; press any button and the display lighting switches on for 15 seconds. Setting the display dimmer start time Prerequisite: The appliance is in the operational mode clock/standby operation. ♦ Press the button Mode / Lock 11 , or the Mode Lock 45 button on the remote control, six times. The current start time of the display dimmer ( ) is shown alternating with the indicator . ♦ Using the buttons / Up 17 and i / Down 19 , or the / Up 42 32 and / Down buttons on the remote control, set the desired start time. With each press on the button the start time changes by one minute. Holding the respective button down for more than 2 seconds starts the speed setting. ♦ Press the button Mode / Lock 11 , or the Mode Lock 45 button on the remote control, once again to save the current setting and move on to the next menu item. Setting the time of day format Prerequisite: The appliance is in the operational mode clock/standby operation. ♦ Press the button Mode / Lock 11 , or the Mode Lock 45 button on the remote control, seven times. The current setting for the time of day format is shown ( = 24 hour format or = 12 hour format). ♦ Using the button / Up 17 , or the button / Up 42 on the remote control, change the time format to if you want a clock display in 12-hour format. SKRI 2000 A1 125 Handling and operation ♦ Using the button i / Down 19 , or the remote control, change the time format to display in 24-hour format. / Down 32 button on the , if you want a clock ♦ Press the button Mode / Lock 11 , or the Mode Lock 45 button on the remote control, once again to save the current setting and to return to the basic settings. Programming the alarm This appliance has two alarms available. All settings for both alarms can be carried out independently of each other. When programming the alarm times you can select whether at the programmed time an alarm tone should sound, the radio should start playing or the iPod/iPhone should switch on. GB NOTICE ► If, during alarm programming, a further button is not pressed within approx. 15 seconds, the alarm will activate with the current settings. Setting alarm times ♦ Press the button Alarm Mode 9 , or the button Alarm 47 on the remote control. The set alarm time of the respective alarm is shown blinking in the display and the indicator resp. appears. The weekdays on which this alarm is activated are shown above the time indicator. ♦ Using the buttons / Up 17 and i / Down 19 , or the / Up 42 32 / Down buttons on the remote control, set the desired alarm and time. With each press on the button the alarm time changes by one minute. Holding the respective button down for more than 2 seconds starts the speed setting. Setting the weekdays ♦ In alarm-mode, press the button Function / ST 7 , or the button Function / ST 38 on the remote control, to toggle between the weekday combinations Mon-Fri, Sat-Sun or Mon-Sun. The respective selected combination is indicated above the alarm time. ♦ Press and hold the button Function / ST 7 , or the Function / ST 38 button on the remote control, for at least 2 seconds, so as to switch between the weekday combinations and adjustment options for an individual weekday. NOTICE ► With the adjustment options for an individual weekday, switch between the weekdays with the button Function / ST 7 , or the button Function / ST 38 on the remote control. 126 SKRI 2000 A1 Handling and operation Setting the alarm with an alarm tone ♦ To select an individual "alarm tone" option for the respective alarm, in alarm-mode press the button i / Pr+ / AL1 18 or the button i / Pr– / AL2 16 resp. the button Pr+ 40 or the button Pr– 44 on the remote control, the symbol appears. until in the display Setting the alarm with radio If it is intended that the radio switches on at the alarm time, carry out the following settings before activation of the alarm: ♦ Switch the radio on by pressing the button Power 6 , or the button 30 on the remote control, and with the button Function / ST 7 , or the button Function / ST 38 on the remote control, select the operating mode radio. ♦ Select the radio station with which you wish to be woken (see chapter Manual station selection p. 132 or Search for the next station p. 132). ♦ With the buttons Vol+ 3 and Vol– 5 , or the buttons Vol+ 39 and Vol– 41 on the remote control, set the desired sound volume level (see chapter Adjusting the volume p. 132). ♦ Switch the radio off by pressing the button on the remote control. Power 6 , or the button 30 ♦ To select the "radio" option for the respective alarm, in alarm-mode press the button i / Pr+ / AL1 18 or the button i / Pr– / AL2 16 resp. the button Pr+ 40 or the button Pr– 44 on the remote control, until in the display appears. the symbol Setting the alarm with iPod/iPhone If it is intended that the iPod/iPhone switches on at the alarm time, carry out the following settings before activation of the alarm: ♦ Switch the appliance on by pressing the button Power 6 , or the button 30 on the remote control, and with the button Function / ST 7 , or the button Function / ST 38 on the remote control, select the operating mode . ♦ Insert your iPod and/or iPhone into the station 29 . ♦ Select a title (or an album or playlist) on your iPod / iPhone. ♦ With the buttons Vol+ 3 and Vol– 5 , or the Vol+ button 39 and the Vol– button 41 on the remote control, set the desired sound volume level (see chapter Adjusting the volume p. 132). ♦ Switch your iPod / iPhone in the pause mode, or switch the power off. SKRI 2000 A1 127 GB Handling and operation ♦ Switch the mode iPod off by pressing the button ton 30 on the remote control. Power 6 or the but- ♦ To select the "iPod" option for the respective alarm, press the button i / Pr+ / AL1 18 , or the button i / Pr– / AL2 16 resp. the Pr+ Taste 40 or the Pr– button 44 on the remote control, until in the display the symbol appears. Switching the alarm off ♦ To switch an individual alarm off, in alarm-mode press the button i / Pr+ / AL1 18 , or the button i / Pr– / AL2 16 resp. the Pr+ button 40 or a symbol no the i Pr– button 44 on the remote control, until in display longer appears. GB When the alarm time has arrived NOTICE ► When the alarm time is reached, the switch off timer (if enabled) is immediately terminated. With the setting "Alarm with an alarm tone", a signal tone sounds. The volume of the signal tone will continually increase until the maximum sound volume level has been reached. The duration of the alarm signal is limited to 10 minutes. The radio is thereby switched to "mute". With the setting "Alarm with Radio" the radio will be switched on. The previously selected station will be activated for a maximum of 60 minutes at the set volume. With the setting "Alarm with iPod/iPhone" the iPod/iPhone will be switched on. Playback starts with the last selected title and is played at the set volume for a maximum of 60 minutes. Press any button to end the currently sounding alarm. NOTICE ► The alarm becomes active again when the next alarm time has arrived (i.e. on the next day). 128 SKRI 2000 A1 Handling and operation Kitchen timer The appliance has a convenient kitchen timer with which, for example, cooking and baking times can be monitored. The programmable time range of the kitchen timer lies between 1 minute and 23 hours, 59 minutes. Setting the kitchen timer ♦ Press the button Timer 8 , or the button Timer 37 on the remote control. The indicator shows . In the display the cooking pot symbol for the kitchen timer is faded in. ♦ Using the buttons / Up 17 and i / Down 19 , or the / Upbutton 42 and the / Down-button 32 on the remote control, set the desired running time for the kitchen timer. With each press on the button the start time changes by one minute. Holding the button down for more than 2 seconds starts the speed setting. GB NOTICE ► If, during the setting, approx. 15 seconds passes without any changes taking place, the appliance reverts back to the previous operational mode. Starting the kitchen timer ♦ After setting the time, press the button Timer 8 , or the button Timer 37 on the remote control, once again. The displayed time begins to run backwards. is blended in. In the display a backwards-running clock NOTICE ► If, during the operation of the kitchen timer, another function is selected, the indicator of the remaining time is faded out. The cooking pot symbol and the backwards-running clock continue to be indicated in the display . Press the button Timer 8 or the button Timer 37 on the remote control once again to display the remaining time for the kitchen timer for about 10 seconds. 30 seconds before the kitchen timer run time has expired the appliance begins to acoustically indicate, with individual signal tones, the arrival of the set time. The intervals between the individual tones will be ever shorter. When the set time has elapsed, the alarm signal of the kitchen timer sounds as a continuous tone for a maximum of 60 minutes. ♦ Press the button Timer 8 , or the button Timer 37 on the remote control, to switch the alarm signal of the kitchen timer off. SKRI 2000 A1 129 Handling and operation Interrupting the kitchen timer. ♦ When the kitchen timer is running, press the button Timer 8 , or the button Timer 37 on the remote control. The kitchen timer is interrupted. The indicated remaining time begins to blink. NOTICE ► After approx. 15 seconds the appliance reverts back to the previous operational mode. Press the button Timer 8 , or the button Timer 37 on the remote control, once again to display the remaining time to elapse on the kitchen timer. ♦ To restart the kitchen timer, press the button Timer 8 , or the button Timer 37 on the remote control, once again. The kitchen timer restarts. GB ♦ To switch the kitchen timer off before the expiry of the set period, press and hold the the button Timer 8 , or the button Timer 37 on the remote control, the cooking pot symbol and the backwards running until in the display clock are no longer indicated. NOTICE ► The kitchen timer is switched off immediately in the event of an alarm becoming active. Programming the kitchen timer So that it is no longer necessary to continually re-enter them, you can preprogramme the kitchen timer with the most frequently used time periods. Up to 6 time periods can be preprogrammed. By default, the six memory slots are preprogrammed with 5/10/15/20/25/30 minutes. For the programming of the kitchen timer proceed as follows: ♦ Press the button Timer 8 , or the button Timer 37 on the remote control, to activate the kitchen timer. ♦ Using the buttons / Up 17 and i / Down 19 , or the / Up- button 42 and the / Down-button 32 on the remote control , set the desired running time for the kitchen timer. With each press on the button the start time changes by one minute. Holding the button down for more than 2 seconds starts the speed setting. ♦ Press the button Function / ST 7 , or the button Function / ST 38 on the remote control, to activate the kitchen timer. Next to the time display a blinking is indicated, next to it appears a number for the first timer. ♦ Using the buttons i / Pr+ / AL1 18 and i / Pr– / AL2 16 , resp. the Pr+ button 40 or the Pr– button 44 on the remote control, select the memory slot for the interval to be saved, between and . 130 SKRI 2000 A1 Handling and operation ♦ Press the button Function / ST 7 , or the button Function / ST 38 on the remote control, once again to programme the set time onto the selected memory slot. The blinking element is now indicated as a constant. ♦ Repeat the process for the other memory slots. Accessing the kitchen timer To access a programmed time for the kitchen timer proceed as follows: ♦ Press the button Timer 8 , or the button Timer 37 on the remote control, to activate the kitchen timer. ♦ Using the buttons i / Pr+ / AL1 18 and i / Pr– / AL2 16 , resp. the Pr+ button 40 or the Pr– button 44 on the remote control, select the memory slot between and for the required timer interval. GB ♦ Press the button Timer 8 , or the Timer button 37 on the remote control, once again to start the kitchen timer. Radio operation NOTICE ► For good radio reception the wire antenna 27 must be completely uncoiled. Adjust the antenna, whilst in radio operation, for the best reception. ► The technical realities of the appliance allow for tuning reception frequencies outside of the permitted VHF (FM) range of 87.5 to 108 MHz. Deviating national regulations may apply in various countries to the allocated radio frequency ranges. Please note that information received outside of the assigned radio frequency ranges may not be exploited, passed on to third parties or otherwise misused. Switching the radio on/off ♦ Press the button Power 6 , or the -Taste 30 on the remote control. The display indicates the mode in which the appliance is currently in. ♦ Press the button Function / ST 7 , or the button Function / ST 38 on the remote control, several times to select the radio function. The display shows the reception frequency of the selected radio station. ♦ Switch the radio off by pressing the button Power 6 , or the -button 30 on the remote control, once again. The appliance switches back to the operational mode clock/standby operation. The current time of day is shown. SKRI 2000 A1 131 Handling and operation Adjusting the volume. ♦ Using the buttons Vol+ 3 and Vol– 5 , or the Vol+ button 39 and Vol– button 41 on the remote control, set the desired sound volume level. The sound volume level will be indicated in the display . You can select a sound volume level between and . Manual station selection ♦ Using single presses on the buttons / Up 17 and i / Down 19 , resp. the / Up-button 42 and the / Down-button 32 on the remote control, select the desired radio station. The frequency of the station is shown in the display . During the tuning the speaker is switched off. GB Search for the next station The appliance can automatically search for the nearest station. ♦ Press and hold the buttons / Up 17 and i / Down 19 , resp. the / Up-button 42 and the / Down-Taste 32 on the remote control, for at least two seconds. The appliance searches for the nearest station with sufficient reception quality. ♦ Repeat this process until you have found the station you are looking for. Selecting the user Prerequisite: The appliance is in the radio operational mode. ♦ Press the button User 2 , or the User button 31 on the remote control, to select the desired user. The current user, to , is indicated in the display for 10 seconds. ♦ Press the buttons i / Pr+ / AL1 18 and i / Pr– / AL2 16 resp. the Pr+ button 40 or the Pr– button 44 on the remote control, to choose a preselected memory slot between and . NOTICE ► Every user has 15 memory slots available. The first memory slot for user A is preset by the manufacturer. 132 SKRI 2000 A1 Handling and operation Saving stations manually Prerequisite: The appliance is in the radio operational mode. The appliance provides 60 memory slots (4 users each with 15 memory locations) for transmitter frequencies. To save a station frequency proceed as follows: ♦ Tune, as described previously, the desired station. ♦ Press the button Mem 4 , or the Mem button 35 on the remote control. The symbol MEM, the user and the memory slot appear in the display . ♦ Press the button User 2 , or the User button 31 on the remote control, until the desired user ( - ) is indicated. GB ♦ Using the buttons i / Pr+ / AL1 18 or i / Pr– / AL2 16 , resp. the Pr+ button 40 or the Pr– button 44 on the remote control, select the desired memory slot for the set transmitter between and . ♦ Press the button Mem 4 , or the Mem button 35 on the remote control. The reception frequency of the tuned station is saved on the selected memory slot. Access saved stations Prerequisite: The appliance is in the radio operational mode. ♦ Press the button User 2 , or the User button 31 on the remote control, until the desired user ( - ) is indicated. ♦ Using the buttons i / Pr+ / AL1 18 or i / Pr– / AL2 16 resp. the Pr+ button 40 or the Pr– button 44 on the remote control, select the memory slots for the saved radio transmitters between and . SKRI 2000 A1 133 Handling and operation Automatic station search (AMS function) Prerequisite: The appliance is in the radio operational mode. To allocate the memory slots to the station frequencies with the strongest receivable signals, an automatic station search can be carried out. NOTICE ► With the carrying out of the following described function all previously saved stations will be lost. ♦ Press and hold the button i / Memory Scan 14 , or the Memory-Scan button 36 on the remote control, for at least three seconds. The appliance begins the station search and allocates the stations found to the memory to . slots GB ♦ On completion of the station search, by a single press on the button i / Memory Scan 14 , or Memory Scan button 36 on the remote control, you can playback all the saved radio stations between and for 10 seconds. NOTICE ► If more than 60 stations are found, only the first 60 reception frequencies will be saved. ► If less than 60 radio stations are found, the last memory slots remain unchanged. Playback of external audio appliances ♦ Connect an external audio appliance, for example, an MP3 player to the 3.5 mm jackplug socket AUX IN 26 on the rear panel of the appliance. ♦ Press the button Power 6 , or the button 30 on the remote control. The display indicates the mode in which the appliance is currently in. ♦ Press the button Function / ST 7 , or the button Function / ST 38 on the . remote control, several times to select the function ♦ Start playback of the external audio appliance and set the volume as required. NOTICE ► Follow the operating instructions for the external audio appliance. Connection of iPod/iPhone With the station 29 you can use the appliance as a speaker for your iPod/ iPhone. When you insert the iPod/iPhone in the station it will, in addition, be automatically charged. 134 SKRI 2000 A1 Handling and operation iMenu Prerequisite: The appliance is in the operational mode iPod. ♦ Press the button iPod/iPhone. I Enter 13 to activate menu management for the With this, the following functions can be executed: Button i / Pr– / AL2 16 i / Pr+ / AL1 18 i-Time Sync Bass 12 Function Next function Previous function Synchronise the date and time display of the appliance with the time on the iPod/iPhone i / Memory Scan 14 Stop/continue playback i / Down 19 Fast rewind / Up 17 Fast forward brief press: back to menu long press: confirm selection I Enter 13 GB Playback of music Prepare the docking station 29 as described in the chapter Preparing the station for iPod/iPhone on p. 120. ♦ Insert your iPod and/or iPhone into the station 29 . ♦ Press the button Power 6 , or the -button 30 on the remote control. The display indicates the mode in which the appliance is currently in. ♦ Press the button Function / ST 7 , or the button Function / ST 38 on the remote control, several times to select the function . ♦ Select a title (or an album or playlist) on your iPod / iPhone. ♦ Press the button i / Memory Scan 14 or the control to start or stop playback. SKRI 2000 A1 -button 33 on the remote 135 Handling and operation Charging the iPod/iPhone If your iPod/iPhone is inserted into the station 29 it will charge automatically until the battery is full. NOTICE ► The iPod/iPhone will not charge via the back-up battery. Setting the Time/i-Time Synchronisation The iTime Sync function allows you to synchronize the time and date on the appliance with the time and date on your iPod or iPhone (iPod Touch, iPod Nano and iPod Classic); older iPod models such as iPod mini do not support this function). GB ♦ Insert your iPod and/or iPhone into the station 29 . ♦ Press the button i-Time Sync Bass 12 or the button iTime Sync Bass 43 on the remote control. The time and date on the iPod or iPhone will be transferred to the appliance. After the synchronisation is completed, a signal tone sounds. NOTICE ► The time on the iPhone will be updated continuously over the cell phone towers. The time on the iPod corresponds only to the time on your computer after the last synchronisation. It is possible to have a time difference of 59 seconds between the appliance and the synchronised iPod/iPhone. Additional functions Stereo function The appliance supports stereo function. The standard setting is Stereo on. To change the stereo function, proceed as follows: ♦ Press and hold the button Function / ST 7 , or the button Function / ST 38 on the remote control , until the current setting of the stereo function is indicated in the display ( or ). ♦ Press and once again hold the button Function / ST 7 , or the button Function / ST 38 on the remote control, to change the setting. NOTICE ► With the stereo reception of a radio transmitter and an activated stereo feature, there appears in the display for 3 seconds the indicator icon. 136 SKRI 2000 A1 Handling and operation Button lock You can lock the buttons of the appliance so that settings cannot be altered by unauthorised people. ♦ Press and hold the button Mode / Lock 11 , or the Mode Lock button 45 on the remote control, for at least two seconds to switch the button lock either the symbol on or off. When the button lock is switched on, in the display appears. ♦ To release the lock, press and hold the button Mode / Lock 11 , or the Mode Lock button 45 on the remote control, for at least two seconds. GB Bass accentuation With the bass accentuation you can switch on an enhanced playback of the low frequencies. ♦ For about 2 seconds press the button i-Time Sync Bass 12 , or the button iTime Sync Bass 43 on the remote control, to switch the bass accentuation on or off. With bass accentuation switched on, the symbol appears in the display. Alternating display Prerequisite: The appliance is in the operational mode clock/standby operation. ♦ Press the button i / Down 19 , or the / Down button 32 on the remote control, the date and time are indicated alternately. ♦ Press the button i / Down 19 , or the / Down button 32 on the remote control, once more and only the time is indicated. Prerequisite: The appliance is in the radio operational mode. ♦ By pressing the button Mode / Lock 11 , or the Mode Lock button 45 on the remote control, the reception frequency resp. the station name (for RDS reception) and the time are displayed alternately. ♦ Press the button Mode / Lock 11 , or the Mode Lock button 45 on the remote control, once more to only indicate the time. ♦ Press the button Mode / Lock 11 or the Mode Lock button 45 on the remote control, once more to indicate only the reception frequency resp. the station name (for RDS reception). SKRI 2000 A1 137 Handling and operation Automatic switch off (Sleep function) With the sleep function the appliance switches itself off after a time lapse of between 5 and 90 minutes. ♦ Press the button AOT / Dimmer 10 , or the AOT Dimmer button 46 on the remote control, to call the function up. The currently remaining time until the radio switches itself off is shown. ♦ Press the button AOT / Dimmer 10 , or the AOT Dimmer button 46 on the remote control, repeatedly to set the desired time period. After about 15 seconds the appliance returns to an indication of the selected mode. GB NOTICE ► The setable time period ranges from 90 to 5 minutes. The setting takes place in stages of 5 minutes. Afterwards, the indicator appears. With the indicator the sleep function is switched off. ► Should the appliance be in the mode clock/standby operation, by pressing the button AOT / Dimmer 10 or the AOT Dimmer button 46 on the remote control, you switch the appliance into the last selected mode (radio / iPod / AUX). Switching the display dimmer on/off manually ♦ Press and hold the button AOT / Dimmer 10 , or the AOT Dimmer button 46 on the remote control, until in the display the current setting of the display dimmer is indicated ( or ). ♦ Press and hold the button AOT / Dimmer 10 , or the AOT Dimmer button 46 on the remote control, once again to change the current setting (see also the chapter Switching time controlled display dimming on/off p. 124). After about 15 seconds, the last indicated screen display reappears. 138 SKRI 2000 A1 Cleaning/Troubleshooting Cleaning Safety instructions DANGER Potentially fatal risk from electric shock! ► Remove the plug from the mains power socket before you start cleaning the appliance. GB IMPORTANT Damage to the appliance! ► To avoid irreparable damage, ensure that no moisture can get inside the appliance when you are cleaning it. Cleaning the housing ■ Clean the surfaces of the appliance with a soft, dry cloth. Troubleshooting In this section you receive important information for the localisation and remedying of malfunctions. Observe these instructions to avoid risks and damage. Safety instructions WARNING Pay heed to the following safety information to avoid risks and property damage: ► Repairs to electronic appliances may only be carried out by specialists who have been trained by the manufacturer. Considerable risk for the consumer and damage to the appliance can occur as a result of incompetent repairs. SKRI 2000 A1 139 Troubleshooting Malfunction causes and remedies The following table will help with the localising and remedying of minor malfunctions: Defect The display is showing nothing. GB No sound Possible cause Solution The power adapter 15 has not been connected. Insert the power adapter 15 into a mains power socket. The mains power socket is not supplying any power. Check the circuit fuse. The volume is set to minimum. Increase the sound volume with the button Vol+ 3 . The appliance is in the operational mode clock/ standby operation. With the button Power 6 switch the appliance into the operating mode Radio/iPod/Aux. Playback of the external audio appliance has not started. Start playback of the external audio appliance. Playback of the iPod/iPhone Start playback of the iPod/iPhone. has not started. The iPod/iPhone is not properly inserted into the station 29 Insert the iPod/iPhone correctly into the station 29 . The radio station is not properly tuned in. Using the buttons / Up 17 and / Down 19 , tune the radio station i in to the ideal reception. Reception is too weak. Try to improve reception by moving the wire antenna 27 . iPod/iPhone is not being charged The iPod/iPhone is not properly inserted into the station 29 . Insert the iPod/iPhone correctly into the station 29 . The alarm with iPod/iPhone has not functioned The selected playlist on your iPod/iPhone is empty. Ensure that the playlist contains music. Noisy radio reception NOTICE ► If you cannot solve the problem with the aforementioned methods, please contact the Customer Service Department. 140 SKRI 2000 A1 Storage/Disposal/Appendix Storage / Disposal Storage If you do not intend to use the appliance for an extended period of time, disconnect it from the mains power supply, remove the battery and store it at a clean, dry location that is not subjected to direct sunlight. Disposal of the appliance Do not dispose of the appliance in your normal domestic waste. This product is subject to the provisions of European Directive 2002/96/EC-WEEE (Waste Electrical and Electronic Equipment). GB Dispose of the appliance through an approved disposal centre or at your community waste facility. Observe the currently applicable regulations. In case of doubt, please contact your waste disposal centre. Disposing of the batteries Batteries must not be disposed of in your household waste. Every consumer is statutorily obliged to dispose of batteries at a collection centre in his/her community/district or a at a dealer. This obligation is intended to ensure that batteries are disposed of in an environmentally friendly manner. Dispose of batteries only when they are fully discharged. Appendix Information regarding the EG Declaration of Conformity This appliance complies with, in regard to conformance to the basic requirements and other relevent regulations, the European Directive for Electromagnetic Compatibility 2004/108/EC, the Low Voltage Directive 2006/95/EC as well as the Eco-Design Directive 2009/125/EC (Supplement 1275/2008 Appendix II, Nr.1). The complete original Declaration of Conformity can be obtained from the importer. SKRI 2000 A1 141 Appendix Technical data Mains plug Manufacturer Model Input voltage, current Fai Shing Industries Ltd. JVSW0702000 100-240 V~ 50/60 Hz, 350 mA Output voltage, current GB 7V Protection class ,2A II / Appliance Input voltage, current 7V ,2A Battery for data retention 1 x 3 V Type CR2032 (supplied) Battery for remote control 1 x 3 V Type CR2025 (supplied) Power consumption Operation approx. 5 W Standby approx. 1.8 W Speaker power output: approx. 2 x 1 W (with 10 % harmonic distortion) Radio frequency range (VHF) Operating temperature 142 87.5 - 108 MHz +5 - +40 °C Humidity (no condensation) 5 - 90 % Measurements (W x H x D) (without stand) approx. 30 x 15.7 x 8.4 cm Weight approx. 1070 g SKRI 2000 A1 Appendix Warranty With this appliance you receive a 3 year warranty from the date of purchase. The appliance has been manufactured with care and meticulously examined before delivery. Please retain your receipt as proof of purchase. In the case of a warranty claim, please make contact with our service department by telephone. Only in this way can a post-free dispatch for your goods be assured. NOTICE ► The warranty is valid only for material or manufacturing defects not, however, for transport damage, wear and tear or for damage to breakable parts, i.e. switches or batteries. GB This appliance is intended solely for private, non-commercial use. If this product has been subjected to improper or inappropriate handling, abuse, or modifications not carried out by one of our authorised sales and service outlets, the warranty becomes void. Your statutory rights are not restricted in any way by this warranty. The warranty period will not be extended as a result of warranty adjustments. This applies also to replacement and repaired parts. Possible damage and/or faults present at the time of purchase must be reported immediately after unpacking or, at the very latest, within two days after the purchase date. After expiry of the warranty period incidental repairs are subject to payment. Service Service Great Britain Tel.: 0871 5000 720 (£ 0.10/Min.) E-Mail: [email protected] IAN 63920 Importer KOMPERNASS GMBH BURGSTRASSE 21 44867 BOCHUM, GERMANY www.kompernass.com SKRI 2000 A1 143 KOMPERNASS GMBH Burgstraße 21 D-44867 Bochum www.kompernass.com Version des informations · Stand van de informatie Stand der Informationen · Last Information Update: 01 / 2012 · Ident.-No.: SKRI2000A1092011-3 IAN 63920 2-
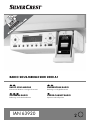 1
1
-
 2
2
-
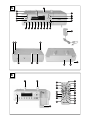 3
3
-
 4
4
-
 5
5
-
 6
6
-
 7
7
-
 8
8
-
 9
9
-
 10
10
-
 11
11
-
 12
12
-
 13
13
-
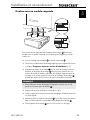 14
14
-
 15
15
-
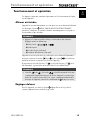 16
16
-
 17
17
-
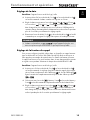 18
18
-
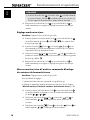 19
19
-
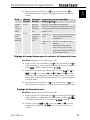 20
20
-
 21
21
-
 22
22
-
 23
23
-
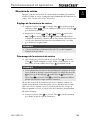 24
24
-
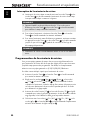 25
25
-
 26
26
-
 27
27
-
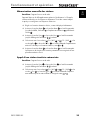 28
28
-
 29
29
-
 30
30
-
 31
31
-
 32
32
-
 33
33
-
 34
34
-
 35
35
-
 36
36
-
 37
37
-
 38
38
-
 39
39
-
 40
40
-
 41
41
-
 42
42
-
 43
43
-
 44
44
-
 45
45
-
 46
46
-
 47
47
-
 48
48
-
 49
49
-
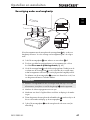 50
50
-
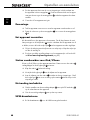 51
51
-
 52
52
-
 53
53
-
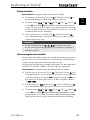 54
54
-
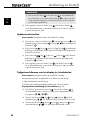 55
55
-
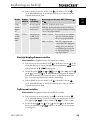 56
56
-
 57
57
-
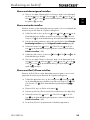 58
58
-
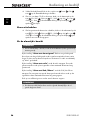 59
59
-
 60
60
-
 61
61
-
 62
62
-
 63
63
-
 64
64
-
 65
65
-
 66
66
-
 67
67
-
 68
68
-
 69
69
-
 70
70
-
 71
71
-
 72
72
-
 73
73
-
 74
74
-
 75
75
-
 76
76
-
 77
77
-
 78
78
-
 79
79
-
 80
80
-
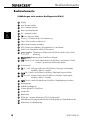 81
81
-
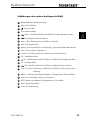 82
82
-
 83
83
-
 84
84
-
 85
85
-
 86
86
-
 87
87
-
 88
88
-
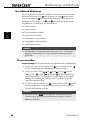 89
89
-
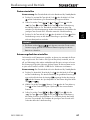 90
90
-
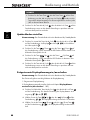 91
91
-
 92
92
-
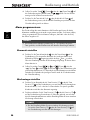 93
93
-
 94
94
-
 95
95
-
 96
96
-
 97
97
-
 98
98
-
 99
99
-
 100
100
-
 101
101
-
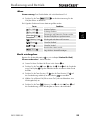 102
102
-
 103
103
-
 104
104
-
 105
105
-
 106
106
-
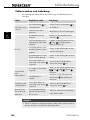 107
107
-
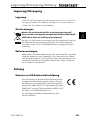 108
108
-
 109
109
-
 110
110
-
 111
111
-
 112
112
-
 113
113
-
 114
114
-
 115
115
-
 116
116
-
 117
117
-
 118
118
-
 119
119
-
 120
120
-
 121
121
-
 122
122
-
 123
123
-
 124
124
-
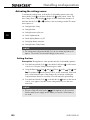 125
125
-
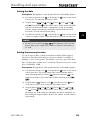 126
126
-
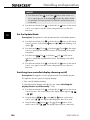 127
127
-
 128
128
-
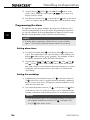 129
129
-
 130
130
-
 131
131
-
 132
132
-
 133
133
-
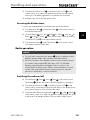 134
134
-
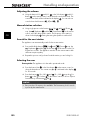 135
135
-
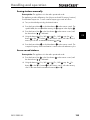 136
136
-
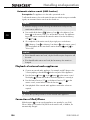 137
137
-
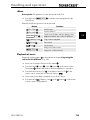 138
138
-
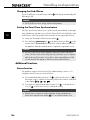 139
139
-
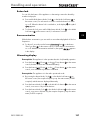 140
140
-
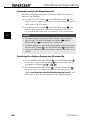 141
141
-
 142
142
-
 143
143
-
 144
144
-
 145
145
-
 146
146
-
 147
147


Silvercrest SKRI 2000 A1 Operation and Safety Notes
- Categorie
- Wekkers
- Type
- Operation and Safety Notes
in andere talen
- English: Silvercrest SKRI 2000 A1
- français: Silvercrest SKRI 2000 A1
- Deutsch: Silvercrest SKRI 2000 A1
Gerelateerde papieren
-
Silvercrest KH2398 de handleiding
-
-
-
Silvercrest KH 2281 de handleiding
-
-
Silvercrest SKRD 30 A1 de handleiding
-
-
Silvercrest SLS 1000 A1 de handleiding
Andere documenten
-
Balance HE-CLOCK-31W Handleiding
-
Memorex mi2290 Handleiding
-
EBENCH KH 2217 PROJECTION CLOCK WITH RADIO de handleiding
-
Thomson DS401 Operating Instructions Manual
-
Salora CR620RDS Handleiding
-
-
EBENCH EBENCH KH 2255 RADIO-REVEIL LECTEUR CD de handleiding
-
 abc home garden 22594 Handleiding
-
Lenco IPD-4800 de handleiding
-
