Pagina wordt geladen...

www.flowfitness.nl
Gebruiksaanwijzing / Manual

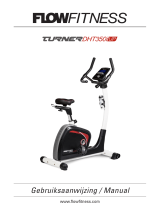
Turner DHT50 UP Hometrainer
Copyright © Flow Fitness.
Alle rechten voorbehouden. Niets uit deze gebruiksaanwijzing mag worden
gebruikt of gereproduceerd in welke vorm of op welke wijze dan ook
zondervoorgaande schriftelijke toestemming van Flow Fitness.
All rights reserved. Nothing in this instruction manual may be used or reproduced
in any form or way without the express written permission of Flow Fitness.
Handleiding (Nederlands)
Manual (English)
3 - 27
28 - 56

Gebruiksaanwijzing Turner DHT50 UP Hometrainer - 3
Inhoud
1. Belangrijke informatie 4
1.1 Gezondheid 4
1.2 Veiligheid 4
2. Introductie 6
2.1 Inhoud verpakking 6
2.2 Belangrijke onderdelen 9
2.3 Specificaties 9
3. Fitness 10
3.1 Trainen op hartslag 10
3.2 Warming up en cooling down 12
4. Gebruik 13
4.1 Montage 13
4.2 Gebruik computer 18
4.3 Onderhoud 21
5. Algemene informatie 22
5.1 Training schema’s 22
5.2 Exploded view 24
5.3 Probleemoplossen 26
6. Garantie 27
6.1 Garantie 27

4 - Gebruiksaanwijzing Turner DHT50 UP Hometrainer
1. Belangrijke informatie
Belangrijk:
lees eerst deze handleiding en volg de instructies nauwkeurig op voordat u het
product gaat gebruiken.
-Raadpleeg een deskundige om het trainingsniveau te bepalen dat voor het best
geschikt is.
-Indien u tijdens het trainen last krijgt van duizeligheid, misselijkheid of ander
lichamelijk ongemak, stop dan direct met trainen en raadpleeg een arts.
-Houd tijdens het trainen uw hartslag in de gaten en stop onmiddellijk bij
afwijkende waarden.
-Wij adviseren u warming up en cooling down oefeningen te doen gedurende
vijf tot tien minuten voor en na gebruik van het product. Zo kan uw hartslag
geleidelijk toe- en afnemen en voorkomt u spierpijn.
-Controleer voor gebruik of het product juist functioneert. In geval van storing of
defect stoppen met trainen en direct contact opnemen met uw dealer.
-Gebruik het product nooit als deze defect is.
-Dit product is alleen bedoeld voor thuisgebruik en dient op een vlakke
ondergrond te staan.
-Dit product mag door maximaal één persoon tegelijk worden gebruikt.
-Het product is geschikt voor personen met een lichaamsgewicht tot 120
kilogram.
-Zorg ervoor dat er altijd minimaal één meter vrije ruimte in alle richtingen
rondom het product is wanneer u aan het trainen bent.
-Steek geen voorwerpen in openingen van het product.
-Houd kinderen en huisdieren uit de buurt van het product.
-Personen met een handicap moeten medische goedkeuring hebben en
begeleiding krijgen bij gebruik van dit product. Plaats geen handen en voeten
onder het product.
-Houd nooit uw adem in tijdens het trainen. Uw ademhaling moet op een normaal
tempo zijn, afhankelijk van de intensiviteit van uw training.
-Begin uw trainingsprogramma langzaam en bouw dit geleidelijk op.
-Draag altijd geschikte kleding wanneer u aan het trainen bent. Draag geen te
wijde kleding, die tussen bewegende delen van het product kan komen.
1.1 Gezondheid
1.2 Veiligheid

Gebruiksaanwijzing Turner DHT50 UP Hometrainer - 5
1. Belangrijke informatie
-Gebruik voor het verplaatsen van het product altijd daarvoor geschikte
tiltechnieken om rugklachten te voorkomen.
-Controleer regelmatig of schroeven en bouten goed vastzitten en draai ze indien
nodig aan.
-De eigenaar van dit product is er verantwoordelijk voor dat alle gebruikers op
de hoogte zijn van de waarschuwingen en voorschriften zoals vermeld in deze
gebruiksanwijzing.
-Dit product is bedoeld voor gebruik in een schone, droge omgeving. Opslag in
koude en / of vochtige ruimtes zou tot problemen in het product kunnen leiden.
-Dit product is niet geschikt voor therapeutische ondersteuningen/ of het
professioneel gebruik ervan in de fysiotherapie.
WAARSCHUWING
Laat uw conditie controleren door een arts voordat u begint met trainen.
Dit is extra belangrijk voor personen ouder dan 35 jaar of personen met
gezondheidsproblemen. Lees alle instructies voor gebruik. Flow Fitness is
niet verantwoordelijkheid voor persoonlijk letsel of schade aan bezittingen
veroorzaakt door gebruik van dit product.
Dit product is niet geschikt voor verhuur of gebruik in een commerciële of
institutionele omgeving.

6 - Gebruiksaanwijzing Turner DHT50 UP Hometrainer
Dank u voor de aanschaf van de Flow Fitness Turner DHT50 UP hometrainer. Met
de Turner DHT50 UP hometrainer heeft u een hoogwaardig trainingsproduct in
huis gehaald.
Met de Turner DHT50 UP hometrainer heeft u de mogelijkheid verschillende
trainingswaarden in te stellen om zo uw doel te bereiken. De hartslag wordt door
de hand sensoren geregistreerd. Doordat de Turner DHT50 UP hometrainer 8
weerstandsniveaus bevat, is het mogelijk om zeer nauwkeurig en op eenvoudige
wijze de ideale weerstand in te stellen. Door het stille en soepele remsysteem is
de Turner DHT50 UP hometrainer een prima product voor thuisgebruik.
Het magnetische remprincipe van de Turner DHT50 UP hometrainer is manueel
instelbaar en geeft een soepele en gelijkmatige weerstand voor een prettige
training. Tevens heeft deze hometrainer een moderne vormgeving en een
eenvoudig te bedienen computer.
In deze handleiding staat alle informatie die nodig is voor het gebruiken en
bedienen van de hometrainer. Tevens bevat deze handleiding tips en adviezen
over hoe u het beste kunt trainen.
Wij adviseren u voor gebruik van de Turner DHT50 UP hometrainer eerst deze
handleiding aandachtig te lezen, zodat het product optimaal en veilig kan worden
gebruikt.
Flow Fitness wenst u veel succes en plezier met trainen.
2. Introductie
2.1 Inhoud verpakking
Nr. Onderdeel Aantal
1 Zadel 1
4 Zadelbuis 1
9 Voorpoot 1
12 Pedaal (L+R) 1+1
16 Stuurbuis 1
22 Stuur 1
28 Achterpoot 1
50 Hoofdframe 1

Gebruiksaanwijzing Turner DHT50 UP Hometrainer - 7
2. Introductie
X1
X1
X1
X1
X1X1
X1
X1
16
9
28
19
12L & 12R
1
22
4
Step-4
15 M8*1.25*20L 4pcs
8 D22*D8.5*1.5T 8pcs
29 D15.4*D8.2*2 T 4pcs
10 M8*1.25*75 4pcs
7 M8*1.25*15L 4pcs
56 M8*1.25*55 1pcs
59 D8.2*D12.7*23 1pcs
57 D16*D8.5*1.2 1pcs
60 80.6*56*52.5 1pcs
(mm)
29 D15.4*D8.2*2 T 4pcs
58 D15.4*D8.2*2 T 1pcs
Step-3
Step-1
8 D22*D8.5*1.5T 4pcs
X1
50

8 - Gebruiksaanwijzing Turner DHT50 UP Hometrainer
3. Fitness
Montage set
Alle onderdelen die nodig zijn om de Turner DHT50 UP hometrainer te
kunnen assembleren zijn in 1 verpakking samengevoegd. Hieronder staat per
montagestap weergegeven welke bevestigingsmiddelen u nodig heeft.
Stap 1
Stap 2
Stap 3
Inbus sleutelCombinatie
(x 4)
(x 4)
Stap 4
Stap 5
(x 4)
M5*10L

Gebruiksaanwijzing Turner DHT50 UP Hometrainer - 9
2. Introductie
2.2 Belangrijke onderdelen
2.3 Specificaties
Lengte:
Hoogte:
Breedte:
Gewicht:
97 cm
134 cm
51 cm
25,5 kg
Stuur
Computer
Weestand knop
Verstelbaar
zadel
Frame afdek-
kap
Pedaal L+R

10 - Gebruiksaanwijzing Turner DHT50 UP Hometrainer
3. Fitness
Wat is fitness? In het algemeen is een fitnessoefening te omschrijven als een
activiteit die er voor zorgt dat uw hart meer zuurstof via het bloed van uw longen
naar uw spieren pompt. Hoe zwaarder de training, hoe meer brandstof (zuurstof)
de spieren nodig hebben en hoe harder het hart moet werken om zuurstofrijk
bloed naar de spieren te pompen. Als u in een goede conditie bent, kan uw hart
met elke hartslag meer bloed pompen. Het hart hoeft dan niet zo vaak te pompen
om de noodzakelijke zuurstof naar uw spieren te transporteren. Uw rusthartslag
en hartslag bij inspanning gaan omlaag.
Bij het trainen is het dus belangrijk om uw hartslag in de gaten te houden. De
hoogte van uw hartslag is namelijk bepalend voor het resultaat van de training.
Wat voor u de beste hartslag is om op te trainen, hangt ten eerste af van uw
leeftijd en aan uw trainingsdoel. Als uw trainingsdoel is om gewicht te verliezen
dan kunt u het beste op 60% van uw maximale hartslag trainen. Wanneer uw
trainingsdoel is om de conditie te verbeteren dan is dat 85% van uw maximale
hartslag.
Het lichaam slaat energie op in twee vormen; koolhydraten en vetten. Bij een
inspanning gebruiken we een combinatie van deze twee energievoorraden.
Wanneer de in spanningsintensiteit hoog is, kiest het lichaam grotendeels voor
snel verbrandbare energie, te weten koolhydraten. Aangezien hiervan maar
een beperkte hoeveelheid is, zal dit slechts korte tijd worden volgehouden.
Bij trainingen op lage intensiteit zal het lichaam grotendeels kiezen voor een
langdurige en energievoorraad te weten vet. Aangezien dit in grote hoeveelheden
in het lichaam is opgeslagen, is dit langer vol te houden.
Hiernaast is een schema weergegeven waarin u kunt aflezen wat voor u de
beste hartslag is om mee te trainen. In dit schema is per leeftijdscategorie een
hartslaggebied aangegeven waarbinnen uw hartslag moet liggen tijdens de
training. in de middelste kolom staan de waarden vermeld die u moet aanhouden
als u gewicht wilt verliezen. Indien u uw conditie wilt verbeteren dient u de
waarden in de rechterkolom aan te houden.
De beste manier om te beginnen met trainen is per persoon verschillend. Als
u ongetraind bent of overgewicht heeft, moet u rustig aan beginnen en uw
trainingsarbeid geleidelijk opvoeren.
3.1 Trainen op hartslag

Gebruiksaanwijzing Turner DHT50 UP Hometrainer - 11
3. Fitness
In het laatste hoofdstuk van deze gebruiksaanwijzing (zie: 5.Algemene informatie)
staan verschillende trainingsschema’s weergeven. Deze schema’s kunt u
gebruiken bij het bereiken van uw trainingsdoel. Het programma is verdeeld in
twee fasen. De eerste fase bestaat uit zes weken en is een goede richtlijn voor
beginners of personen die sinds lange tijd weer gaan trainen. Gedurende deze
fase wordt de intensiteit van de training langzaam opgebouwd. Na zes weken
begint de tweede fase. U kunt dan kiezen voor een trainingsschema om gewicht
te verliezen of om uw conditie te verbeteren.
Op www.flowfitness.nl kunt uw vooruitgang berekenen.
Leeftijd
Gewicht verliezen
(slagen per minuut)
60%
Conditie verbeteren
(slagen per minuut)
85%
20 -24 120 - 118 170 -167
25 - 29 117 - 115 166 - 163
30 - 34 114 - 112 162 - 158
35 - 39 111 - 109 157 - 154
40 - 44 108 - 106 153 - 150
45 - 49 105 - 103 149 - 145
50 - 54 102 - 100 144 - 141
55 - 59 99 - 97 140 - 137
60 en ouder 96 - 94 136 - 133

12 - Gebruiksaanwijzing Turner DHT50 UP Hometrainer
3. Fitness
Een goed trainingsprogramma begint met een warming up en eindigt met een
cooling down. Hiermee kunnen spierpijn en blessures worden voorkomen.
Hieronder vindt u een aantal geschikte oefeningen.
Head Roll
Kantel uw hoofd naar rechts. Hou dit één tel vast, zodat u
de linkerkant van uw nek licht voelt trekken. Doe dezelfde
beweging naar links, naar voren en naar achteren. Herhaal
dit twee tot drie keer.
Toe Touch
Buig langzaam voorover met ontspannen armen en rug. Doe
dit zover u kunt en houd dit tien seconden vast. Herhaal dit
twee tot drie keer.
Side Stretch
Steek uw rechterarm in de lucht en rek met uw arm zo hoog
als u kunt. Buig naar links, zodat uw rechterzijde wordt
gestrekt. Houd dit gedurende één seconde vast. Ontspan
en doe vervolgens dezelfde beweging met uw linker arm.
Herhaal dit drie tot vier keer.
Knee bend
Plaats uw voeten op schouwder breedte en strek uw handen
voor uw uit. Buig nu langzaam door uw knieen, niet meer als
10 centimeter. Kom rustig omhoog en herhaal deze oefening
een aantal keren.
Lower back stretch
Begin met uw knieën en voeten op de vloer. Stek uw armen
voor u uit richting de grond. Plaats uw bekken boven uw
voeten en leun naar achteren en voel de spanning uw
onderrug.
Hamstring Stretch
Ga op de vloer zitten met uw rechterbeen gestrekt en plaats
uw linkervoet plat tegen de binnenkant van uw rechter
bovenbeen. Buig voorover richting uw rechtervoet en
houd dit gedurende tien seconden vast. Ontspan en doe dit
vervolgens met uw linkerbeen gestrekt. Herhaal dit twee tot
drie keer.
3.2 Warming up en cooling down

Gebruiksaanwijzing Turner DHT50 UP Hometrainer - 13
4. Gebruik
Stap 1
Monteer de voorpoot (9) en de achterpoot (28) aan het hoofdframe (50) met
behulp van de inbusbouten (10), de gebogen ringen (8), de veerringen (29) en de
bolkop moer (7).
Belangrijk voor een juiste montage is dat u eerst de gebogen ring plaatst en
vervolgens de veerring en de bolkop moer.
Let op: Door de verstelbare pootjes in de achterpoot afdekkappen kan de
hometrainer waterpas gezet worden.
4.1 Montage
M8*1.25*75L
D22*D8.5*1.5T
D15.4*D8.2*2T
M8*1.25*15L
D22*D8.5*1.5T
A(x4)
Step-1
29
8
7
1028 8
10
9
50

14 - Gebruiksaanwijzing Turner DHT50 UP Hometrainer
4. Gebruik
Stap 2
1. Controleer of de zadelplaat (55) goed aan het zadel (1) is bevestigd.
2. Plaats vervolgens het gemonteerde zadel (55) op het schuine deel van
de zadelbuis (4). Bevestig het zadel (55) met behulp van de ring (53) en de
verstelknop (54) aan de zadelbuis (4).
Schuif vervolgens de complete stuurbuis met het gemonteerde zadel (4) in de
buis van het hoofdframe die uit de afdekkappen steekt. Trek hierbij de pop-pin
(5) uit, zodat de buis in verticale richting vrij kan bewegen. Laat de pop-pin los
als het zadel op de juiste hoogte zit. Draai vervolgens de pop-pin (5) vast, zodat
de zadelbuis (4) is gefixeerd.
Step-2
50
5
4
53
54
55
DOWN
FRONTWARD
BACKWARD
c
UP
b
a
1
55

Gebruiksaanwijzing Turner DHT50 UP Hometrainer - 15
4. Gebruik
Stap 3
1. Verbind de bovenste afstelkabel (17) met de onderste afstelkabel (14) door het
uiteinde achter de houder te plaatsen, zoals in illustratie A-1 is aangegeven.
Trek vervolgens de rode kunststof draaibare bus van de bovenste afstelkabel
(17) naar achteren en vervolgens naar beneden. Hierdoor wordt het uiteinde
van de bus achter de houder geplaatst, zoals is geïllustreerd in afbeelding A-4.
Door aan de rode cilinder te draaien, kan de weerstand zwaarder of lichter
worden ingesteld. Draai rechtsom om de weerstand te verlagen en linksom om
deze te verzwaren.
2. Controleer of de kabels juist aan elkaar zijn verbonden door de weerstand
verstel knop naar links en naar rechts te bewegen. Het uiteinde van de
bovenste afstelkabel (17) moet nu de onderste afstelkabel (14) aantrekken
en laten vieren. Verbind nu de bovenste monitor kabel (24) met de onderste
monitorkabel (25) door de stekkers in elkaar te klikken.
3. Monteer de stuurbuis (16) aan het hoofdframe (50) met behulp van de gebogen
ringen (8), de veerringen (29) en de inbusbouten (15).
Belangrijk: voor een juiste montage is dat u eerst de veerring (29) om de
inbusbout (15) plaatst, daarna door de gebogen ring (8) en vervolgens de
stuurbuis 16) aan het hoofdframe (50) bevestigd.
C
Step-3
A-1
A-2
A-3
A-4
1
6
8
DECREASE INCREASE
B
M8*1.25*75L
D22*D8.5*1.5T
D15.4*D8.2*2T
B(x4)
17
14
24
25
16
17
14
15
29
8
50
C
Step-3
A-1
A-2
A-3
A-4
1
6
8
DECREASE INCREASE
B
M8*1.25*75L
D22*D8.5*1.5T
D15.4*D8.2*2T
B(x4)
17
14
24
25
16
17
14
15
29
8
50

16 - Gebruiksaanwijzing Turner DHT50 UP Hometrainer
4. Gebruik
Stap 4
Monteer het stuur (19) aan de stuurbuis (16). Klap hiervoor het stuurbevestiging
scharnier open en leg het stuur (19) met het geribbelde gedeelte in het scharnier.
Klap het scharnier weer dicht en breng de hand hartslag sensor kabels (18)
door het gat in de stuurbuis en vervolgens omhoog (illustratie a). De twee hand
hartslag sensor kabels steken nu aan de bovenkant uit de stuurbuis.
Plaats de stuurbevestiging afdekkap (60) over het bevestigingsscharnier en
vergrendel het scharnier met behulp van de bus (59), de ring (57), de veerring (58)
en de stuur verstelknop (56).
Zet het stuur (19) in de gewenste stand en draai de stuur verstelknop (56) vast.
Step-4
59
58
56
60
57
16
19
(a)
18
19

Gebruiksaanwijzing Turner DHT50 UP Hometrainer - 17
4. Gebruik
Stap 5
Voordat de computer (22) aan de stuurbuis (16) wordt bevestigd, dient men eerst
de twee hand hartslag sensor kabels (22) en (18) en de toerental sensor kabel
(24) aan de monitor te bevestigen. Daarna kan met behulp van de bouten (52) de
computer (22) aan de stuurbuis bevestigd worden.
Bevestig de voetbanden aan de pedalen(12 L+R). Als laatste worden de pedalen
(12 L+R) aan beide cranks (41) bevestigd. Draai deze stevig vast met behulp van
de combinatie sleutel.
R
L
R
L
Step-5
22
24
52
16
18
22
24
12R
12L
41
(x4) M5*10L
C
18

18 - Gebruiksaanwijzing Turner DHT50 UP Hometrainer
4. Gebruik
Uw trainingscomputer start automatisch wanneer u begint met trainen. Het is ook
mogelijk de computer te activeren door op een van de functieknoppen te drukken.
Om energie te besparen, schakelt de computer in stand-by mode wanneer deze 4
minuten niet wordt gebruikt.
Display Waarden
Speed Huidige snelheid in KM/U.
RPM Huidige Rotaties Per Minuut.
TIME De verstreken of resterende tijd afhankelijk van de instelling.
DISTANCE De verstreken of resterende afstand afhankelijk van de instelling.
CALORIES Aantal calorieën verbruikt.
PULSE Weergave van uw hartslag in BPM (Hartslagen Per Minuut). Deze
waarde is enkel zichtbaar wanneer uw de hand sensoren in het
stuur vastgrijpt.
SCAN Bij de scan functie komen alle bovenstaande waarden voor 6
seconden lang in beeld.
4.2 Gebruik computer

Gebruiksaanwijzing Turner DHT50 UP Hometrainer - 19
4. Gebruik
Functieknoppen
Enter 1. Het selecteren van de in te stellen doelwaarde. De
geselecteerde waarde zal gaan knipperen.
2. Druk de enter knop 2 seconden in en alle ingestelde
doelwaarden zullen hersteld worden
UP Verhogen van de doelwaarde. U kunt deze knop ingedrukt houden
om de waarde sneller te verhogen.
DOWN Verlagen van de doelwaarde. U kunt deze knop ingedrukt houden
om de waarde sneller te verlagen.
RESET De knop kan gebruikt worden om de huidige waarde te resetten.
Door de knop 2 seconden ingedrukt te houden zal de gehele
computer gereset worden.
RECOVERY Na een intensieve trainingssessie kunt u met de recovery knop de
conditie test starten.
BODY FAT Met de Body Fat knop kunt u de BMI en vet percentage test
starten.
Bediening computer
Voordat u begint met trainen kunt u de doelwaarde TIME (TIJD), DISTANCE
(afstand), CALORIES (calorieën) of PULSE (hartslag) instellen. Met de ENTER
knop kunt u de verschillende doelwaarde selecteren. Vervolgens kunt u met de
UP en DOWN knoppen de waarde instellen. De ingestelde doelwaardes zullen
tijdens een training aflopen in plaats van oplopen. Wanneer een doelwaarde de 0
heeft bereikt is de training succesvol afgerond.
Wanneer er een hartslag als doelwaarde ingesteld wordt zal de computer een
geluidssignaal geven wanneer uw hartslag te ver afwijkt van de ingestelde
waarde. Door het weerstandsniveau en / of uw trapsnelheid aan te passen
kunt u uw hartslag op de gewenste waarde houden. Wanneer u uw harstlag als
doelwaarde instelt dient uw de hartslag sensoren in het stuur geduurdende de
training vast te houden.
Conditie meting
Na een trainingssessie kunt u een conditiemeting starten door direct op de
Recovery knop te drukken. Grijp hierna direct de hand harstlagsensoren stevig
vast. De resterende tijd van de meting verschijnt nu op het display. De meting
duurt een minuut en zal aftellen van 00:60 tot 00:00 houd geduurdende deze tijd
de sensoren vast. Als de meting klaar is verschijnt er een code op de monitor.
De code ligt tussen de F1 –F6. Hieronder is aangegeven welke code bij welke
conditie niveau hoort:
F1: uitstekend
F2: goed
F3: voldoende
F4: matig
F5: slecht
F6: zeer slecht / geen correcte meting

20 - Gebruiksaanwijzing Turner DHT50 UP Hometrainer
4. Gebruik
Belangrijk:
1. De RECOVERY conditiemeting start alleen op als er een hartslag gedetecteerd
wordt. Voor een goede RECOVERY conditiemeting dient u de hartslag sensoren
goed en zonder te bewegen vast te houden.
2. Uw conditie is gebaseerd op het herstel van de hartslag na een intensieve
training. Daarom kan de RECOVERY conditiemeting alleen gemeten worden na
een training met een hartslag van minimaal 150 slagen per minuut.
Body Fat test
Druk op de Body Fat knop om de test te starten. Grijp daarna de handsensoren
stevig vast. De computer zal nu een meting van ongeveer 8 seconden doen.
Tijdens de meeting verschijnt ‘----’ op het display. Daarna zal de computer uw
BMI en Vetpercentage 30 seconden lang laten zien. Om terug te keren naar het
hoofdmenu kunt een de Body Fat knop nogmaals indrukken.
Belangrijk:
De body fat test werkt enkel in het hoofdmenu en niet tijdens een training sessie.

Gebruiksaanwijzing Turner DHT50 UP Hometrainer - 21
4. Gebruik
Flow Fitness adviseert om eens in de zes weken de bouten en moeren van de
scharnierpunten te controleren en indien nodig aan te draaien. Gebruik hiervoor
het bij het product aangeleverde gereedschap.
Veeg tevens na iedere training het eventuele zweet van alle onderdelen. Hiermee
voorkomt u dat het zweet kringen of zelfs corrosie veroorzaakt.
De metalen en kunststof onderdelen van de hometrainer zijn met standaard
schoonmaakmiddelen te reinigen. Zorg er echter wel voor dat alle onderdelen
goed droog zijn, voordat deze weer worden gebruikt.
Wanneer de aandrijfsnaar niet meer de juiste spanning heeft, is het nodig om
hem bij te stellen. Het bijstellen is mogelijk door de zijkappen te verwijderen.
Draai vervolgens de vliegwiel moeren aan beide zijden los en verstel de vliegwiel
positie met behulp van de twee 10mm Stelmoeren. Zorg ervoor dat het vliegwiel
blijft uitgelijnd en dat er een speling van ongeveer 10mm in de aandrijfsnaar zit.
4.3 Onderhoud

22 - Gebruiksaanwijzing Turner DHT50 UP Hometrainer
5. Algemene informatie
Introductie trainingsschema’s
Trainingsschema week 1 en 2
Train op 60% van uw maximale hartslag.
Maximaal 3 keer per week.
Warming up 5 - 10 minuten.
Train 4 minuten.
Rust 1 minuut.
Train 2 minuten.
1 minuut rustig bewegen.
Cooling down 5 minuten.
Trainingsschema week 3 en 4
Train op 60% van uw maximale hartslag.
Maximaal 4 keer per week.
Warming up 5 - 10 minuten.
Train 5 minuten.
Rust 1 minuut.
Train 3 minuten.
1 minuut rustig bewegen.
Cooling down 5 minuten.
Trainingsschema week 5 en 6
Train op 60% van uw maximale hartslag.
Maximaal 5 keer per week.
Warming up 5 - 10 minuten.
Train 6 minuten.
Rust 1 minuut.
Train 4 minuten.
3 minuut rustig bewegen.
Cooling down 5 minuten.
Na het volbrengen van het zes
weken durende introductie
trainingsschema, kunt u een keuze
maken uit vervolgtrainingen.
U kunt kiezen tussen een
trainingsschema om gewicht te
verliezen of een trainingsschema
om conditie te verbeteren.
Beide trainingsschema’s staan
weergeven op de volgende pagina.
5.1 Training schema’s

Gebruiksaanwijzing Turner DHT50 UP Hometrainer - 23
5. Algemene informatie
Trainingsschema om conditie te verbeteren
(vervolg op introductie trainingsschema)
Trainingsschema om gewicht te verliezen
(vervolg op introductie trainingsschema)
Ga naar flowfitness.nl en controleer uw vooruitgang
Trainingsschema week 7 en 8
Train op 85% van uw maximale hartslag.
Maximaal 6 keer per week.
Warming up 5 - 10 minuten.
Train 7 minuten.
Rust 1 minuut.
Train 5 minuten.
1 minuut rustig bewegen.
Cooling down 5 minuten.
Trainingsschema week 9 en verder
Train op 85% van uw maximale hartslag.
Maximaal 6 keer per week.
Warming up 5 - 10 minuten.
Train 10 minuten.
Rust 1 minuut.
Train 10 minuten.
Herhaal training 2 a 3 keer.
1 minuut rustig bewegen.
Cooling down 5 minuten.
Trainingsschema week 7 en 8
Train op 60% van uw maximale hartslag.
Maximaal 6 keer per week.
Warming up 5 - 10 minuten.
Train 7 minuten.
Rust 1 minuut.
Train 5 minuten.
1 minuut rustig bewegen.
Cooling down 5 minuten.
Trainingsschema week 9 en verder
Train op 60% van uw maximale hartslag.
Maximaal 6 keer per week.
Warming up 5 - 10 minuten.
Train 10 minuten.
Rust 1 minuut.
Train 10 minuten.
Heraal training 2 a 3 keer.
1 minuut rustig bewegen.
Cooling down 5 minuten.

24 - Gebruiksaanwijzing Turner DHT50 UP Hometrainer
5. Algemene informatie
5.2 Exploded view
55
1
51
53
54
5
26
4
59
58
56
60
57
19
17
16
52
22
21
18
20
15
29
8
50
24 14 2562
13L
9
10
13R
34 31 38 3837
30R
49
40
6R
6L
27 43 46 6347
41
35
44
48
30L
3337 6123
36 32
12R
1028 8
7
11
12L
42
64
39 65 67666870
71
72
73
76
75
74
69
77 78
45

Gebruiksaanwijzing Turner DHT50 UP Hometrainer - 25
5. Algemene informatie
1 Zadel 1
4 Zadelbuis 1
5 Zadelbuis pin 1
6L Frame afdekkap links 1
6R Frame afdekkap rechts 1
7 Bolkop moer M8 4
8 Gebogen ring D22 x D8.5 x 1.5 12
9 Voorpoot 1
10 Inbusbout M8 4
11 Achterpoot kap 2
12 Pedaal (L+R) 1+1
13L Voorpoot kap links 1
13R Voorpoot kap rechts 1
14 Afstel kabel beneden 1
15 Inbus bout M8 4
16 Stuurbuis 1
17 Afstel kabel boven 1
18 Hand hartslag sensoren + kabel 2
19 Stuur 1
20 Stuur afdekkap 2
21 Foamgrip 2
22 Computer 1
23 Magneet 1
24 Monitorkabel boven 1
25 Monitorkabel beneden 1
26 Zadelbuis beschermkap 1
27 Nylon moer M10 1
28 Achterpoot 1
29 Veerring D15.4 x D8.2 x 2 8
30L Crank afdekkap links 1
30R Crank afdekkap rechts 1
31 Borgring D35 x D22,6 x 2.5 1
32 Borgring D40.4 x D24 x 2.8 1
33 Fixatiering D45 x 12 1
34 As moer D7/8’’x D24 x 4 1
35 Fixatiering 1
36 Lager afdekring D55.6 x D40 x 16 2
37 Kogellager 2
38 Fixatiering Ø45 x 12 1
40 V-snaar 1
41 Crank 1
42 Afdekkap 1
43 Katrol D23.8 x D38 x 24 1
44 Veer 1
45 Bout ST4x1.41x10L 2
46 Kunststof ring D50 x D10 x 1.0 2
47 Ring D30 x D10 x 3.2 1
48 Moer D9.5 x 8 2
49 Beschermring 1
50 Hoofdframe 1
51 Zadelbuis afdekkap 2
52 Bolt M5 4
53 Ring D25 x D8.5 x 2 1
54 Zadel verstel knop 1
55 Zadel bevestigingsplaat 1
56 Stuur verstel knop 1
57 Ring D16 x D8.5 x 1.2 1
58 Veer ring D15.4 x D8.2 x 2 1
59 Bus D8*D12 x 23 1
60 Stuur bevestiging afdekkap 1
61 V-snaar wiel 1
62 Bout M5 1
63 Ring D50 x D10 x 2.0 1
64 Brogmoer 3/8”-26UNFx6.5 2
65 Vliegwiel 1
66 Fixatieplaat voor magneet 1
67 Moer M8 x 52 1
68 Moer D9.5x8T(3/8”-26UNFx8T) 1
69 Veer D1.0*42L 1
70 Bout M8*52L 1
71 Moer M8*1.25*8T 1
72 Bout M6*55L 1
73 Moet M6*1*6T 1
74 Nylon moet D6*D19*1.5T 1
75 Platte ring D13*D6.5*1.0T 1
76 Moer M6*1*6T 1
77 Bout ST4.2x1.4x25L 8
78 Bout ST4.0*1.4*15L 2
No. Description Qty No. Description Qty

26 - Gebruiksaanwijzing Turner DHT50 UP Hometrainer
5. Algemene informatie
Probleem
Het lukt niet om de weerstandskabel boven aan de weerstandskabel onder te
koppelen en montage stap 4 te voltooien.
Oplossing
Zet de weerstandsknop in de zwaarste stand. Hierdoor is de kabel het langst. Nu
kan het haakje in de metalen houder geplaatst worden. Zie pagina 15. Gebruik
hiervoor eventueel een tangetje.
Probleem
De beginweerstand is te zwaar of te licht.
Oplossing
Onderaan de stuurbuis zit de koppeling van de weerstandkabel boven en de
weerstandkabel onder. Om hierbij te kunnen moet de stuurbuis losgemaakt
worden en los worden getrokken van het hoofdframe. Zie pagina 15. De
koppeling bevat een rode draaicilinder deze kunt u verdraaien en daarmee de
beginweerstand zwaarder of lichter instellen.
Probleem
Het scherm heeft een zwakke of helemaal geen weergave.
Oplossing
Vervang de 2 AA batterijen achter in de computer.
Probleem
Tijdens het trainen piept of kraakt de hometrainer.
Oplossing
Piepen of kraken wordt in veel gevallen veroorzaakt door dat een kunststof kap
die tegen het metalen frame of stang schuurt. Om dit te verhelpen kunt u er WD40
olie op spuiten. Dit is te verkrijgen in de betere fietsenwinkel of doe-het-zelf zaak.
Indien uw probleem niet is opgelost of niet staat beschreven, raadpleeg dan de
fitnessdealer waar uw het product heeft gekocht.
5.3 Probleemoplossen

Gebruiksaanwijzing Turner DHT50 UP Hometrainer - 27
Flow Fitness verleent een garantie aan huis van 3 jaar op onderdelen,
voorrijkosten en uurloon, te rekenen vanaf de datum van aankoop. De garantie
heeft uitsluitend betrekking op materiaal- en/of productiefouten.
Indien u optimaal gebruik wilt maken van deze garantie, vul dan het online
garantie aanmeld formulier in en voeg daarbij een kopie van het aankoopsbewijs.
Dit formulier kunt u vinden op:
www.flowfitness.nl/nl/service/garantie.php
Indien het product defect is, neem dan contact op met de fitnessdealer bij wie
u het product heeft gekocht en meld het defect. Omdat Flow Fitness uitsluitend
met gespecialiseerde en ervaren dealers samenwerkt, kan deze in veel gevallen
het defect verhelpen. Indien nodig neemt de dealer contact op met Flow Fitness.
Vervolgens zal Flow Fitness in samenwerking met de dealer het defect naar
eigen inzicht verhelpen. Indien het defect binnen het garantietermijn valt, zal dit
kosteloos gebeuren.
De garantie vervalt wanneer:
-er gebreken zijn onstaan aan het product door een onjuiste montage van
het toestel dan wel wanneer er sprake is van het niet juist opvolgen van de
instructies zoals beschreven in deze handleiding,
-reparaties aan het product zijn verricht door anderen dan door Flow Fitness
aangewezen personen of zonder haar schriftelijke toestemming,
-het product naar het oordeel van Flow Fitness is verwaarloosd dan wel
onvoorzichtig en/of ondeskundig is gebruikt, behandeld en/of onderhouden, en/
of sprake is van normale slijtage,
-het product op andere wijze is gebruikt dan in deze gebruiksaanwijzing is
beschreven,
-het product onder andere omstandigheden is gebruikt dan in deze
gebruiksaanwijzing is beschreven,
-defecten zijn ontstaan door overige factoren van buitenaf.
Het garantietermijn wordt niet verlengd of vernieuwd door uitvoering van
garantiewerkzaamheden, met dien verstande dat de garantie op uitgevoerde
werkzaamheden drie maanden bedraagt.
6. Garantie
6.1 Garantie

Manual
www.flowfitness.nl/en

Manual Turner DHT50 UP Hometrainer - 29
1. Important information 30
1.1 Health 30
1.2 Safety 30
2. Introduction 32
2.1 Contents of package 32
2.2 Important parts 35
2.3 Specifications 35
3. Fitness 36
3.1 Training by heart rate 36
3.2 Warming up and cooling down 38
4. Use 39
4.1 Assembly 39
4.2 Use of the computer 44
4.3 Maintenance 47
5. General information 48
5.1 Training schedule 48
5.2 Exploded view 50
5.3 Troubleshooting 52
6. Warranty 53
6.1 Warranty 53
Content

30 - Manual Turner DHT50 UP Hometrainer
Important:
read this instruction manual first and follow the instructions
carefully before using the product.
-Consult an expert to determine the training level that is most suitable for you.
-If you experience any dizziness, nausea or any other physical discomfort while
training, cease the training immediately and consult a physician.
-Watch your heart beat during the training and immediately stop training when
values are inconsistent.
-We advise you to do warming up and cooling down exercises during five to
ten minutes before and after use of the product. This way your heart rate can
increase and decrease gradually and you can prevent painful muscles.
-Only use this product as described in this instruction manual.
-Before using this product check that the product functions as it should. In case
of malfunction or a defect stop training immediately and contact your vendor.
-Do not use the product when there is a malfunction.
-The product is only meant for use in the home and it has to be positioned on a
flat surface.
-The product can only be used by one person at the time.
-The product can be used by persons with a body weight of up to 120 kilos.
-Always make sure that there is at least one meter of free space in all directions
around the product when you are training.
-Don’t stick any objects in any opening of the equipment.
-Keep children and pets away from the product.
-Handicapped persons should get consent from a medical expert and follow their
directions for training with the product.
-Do not place hands or feets under the product.
-Never hold your breath during a training session. Your breathing should be at a
normal interval depending on the intensity of the training.
-Start your training schedule slowly and build it up gradually.
-Always wear appropriate clothing during training. Don’t wear anything that’s too
1. Important information
1.1 Health
1.2 Safety

Manual Turner DHT50 UP Hometrainer - 31
1. Important information
loose and can get caught between moving parts of the equipment.
-When moving the equipment always use the appropriate lifting techniques to
prevent back injury.
-Check screws and bolts regularly and fasten them if they are loose.
-The owner of the product is responsible for all users to be aware of the
warnings and instructions as mentioned in this instruction manual.
-This product is intended for use in a clean and dry environment. Storage in cold
and / or moist areas could lead to problems with the product.
-This product is not suitable for therapeutic supports / or professionally use in
physical therapy.
WARNING
Have your physical condition checked by a licensed physician before you start
training. This is particularly important for persons over 35 years old or persons
who have any problems with their health. Read all instructions before using the
equipment. Flow Fitness is not responsible for any personal injury or damage to
property caused by the use of this equipment.
This product is not suited for rental or use in a commercial or
professional environment.

32 - Manual Turner DHT50 UP Hometrainer
Thank you for purchasing the Turner DHT50 UP. This Flow Fitness product can be
purchased for several reasons. Whatever yours may be, improve stamina, lose
weight, rehabilitation or just because you like to exercise, we are convinced this
product will meet your requirements.
The Turner DHT50 UP is the ideal hometrainer for the starting home fitness user.
The low entry and easy to use monitor makes this product very accessible to use
at home. The resistance can be set manually by using the rotary knob. In this way,
you remain in charge of your own training program.
This manual contains all information necessary for the use and operation of the
hometrainer. This guide also contains tips and advice on how to train.
Flow Fitness wishes you successful and enjoyable training sessions.
2. Introduction
2.1 Contents of package
No. Part QTY
1 Seat 1
4 Seat post 1
9 Front stabilizer 1
12 Pedal (L+R) 1+1
16 Handlebar post 1
22 Handlebar 1
28 Rear stabilizer 1
50 Main frame 1

Manual Turner DHT50 UP Hometrainer - 33
2. Introduction
X1
X1
X1
X1
X1X1
X1
X1
16
9
28
19
12L & 12R
1
22
4
Step-4
15 M8*1.25*20L 4pcs
8 D22*D8.5*1.5T 8pcs
29 D15.4*D8.2*2 T 4pcs
10 M8*1.25*75 4pcs
7 M8*1.25*15L 4pcs
56 M8*1.25*55 1pcs
59 D8.2*D12.7*23 1pcs
57 D16*D8.5*1.2 1pcs
60 80.6*56*52.5 1pcs
(mm)
29 D15.4*D8.2*2 T 4pcs
58 D15.4*D8.2*2 T 1pcs
Step-3
Step-1
8 D22*D8.5*1.5T 4pcs
X1
50

34 - Manual Turner DHT50 UP Hometrainer
2. Introduction
Assembly set
All parts needed to assemble the Turner DHT50 UP Hometrainer are combined
into one set. Below you find a overview of fasteners needed in every step of
assembly.
Step 1
Step 2
Step 3
Allen toolCombination tool
(x 4)
(x 4)
Step 4
Step 5
(x 4)
M5*10L

Manual Turner DHT50 UP Hometrainer - 35
2. Introduction
2.2 Important parts
2.3 Specifications
Length:
Height:
Width:
Weight:
87 cm
134 cm
51 cm
25,5 kg
Handlebar
Computer
Resistance knob
Adjustable
Seat
Frame cover
Pedal L+R

36 - Manual Turner DHT50 UP Hometrainer
3. Fitness
What is fitness? In general a fitness exercise can be described as an activity
that makes your heart pump more oxygen from your lungs to your muscles by
means of circulating the blood. The more strenuous the training, the more fuel
(oxygen) the muscles need and the more work the heart has to do to pump
oxygen rich blood to the muscles. If you are in good physical shape your heart
can pump more blood to the muscle with each contraction. This means the heart
doesn’t have to contract as many times to transport the necessary oxygen to your
muscles. Your resting heart beat and heart beat when exercising will therefore
decrease.
While training it is important to monitor your heart rate. The heart rate is essential
for the result of your training. Your best training heart rate depends firstly on your
age. Your maximum heart beat can be determined by this. Secondly the most
effective heart rate depends on your training goals. If your training goal is to lose
weight, then the most effective training is at 60% of your maximum heart rate. If
your training goal is to improve your stamina, then you should train at 85% of your
maximum heart rate.
The body stores energy in two forms: carbohydrates and fat. When we exercise
we use a combination of these two energy supplies. If the training intensity is at a
high level the body will mostly choose the energy that burns fast: carbohydrates.
Since there is a limited supply of these carbohydrates you can’t continue this for
a long period of time. When training at a low intensity the body will mostly choose
to use a long lasting source of energy: fat. Since this is stored in large quantities
in the body, you can continue this kind of training for a longer time.
Below you will find a schedule allowing you to calculate the best heart rate for
your training. In this schedule each age category has a range that your heart rate
should be in during your training. The middle column has the values you should
3.1 Training by heart rate
Age
Weight lost
(beats per minute)
60%
Improve stamina
(beats per minute)
85%
20 -24 120 - 118 170 -167
25 - 29 117 - 115 166 - 163
30 - 34 114 - 112 162 - 158
35 - 39 111 - 109 157 - 154
40 - 44 108 - 106 153 - 150
45 - 49 105 - 103 149 - 145
50 - 54 102 - 100 144 - 141
55 - 59 99 - 97 140 - 137
60 and older 96 - 94 136 - 133

Manual Turner DHT50 UP Hometrainer - 37
3. Fitness
try to maintain if you want to lose weight. If you want to improve your stamina you
should try to maintain the rates in the right column.
For each individual the best way to start training is different. If you have not
exercised in some time or are overweight, you should start your training schedule
slowly and gradually increase the level of activity.
In the last chapter of this instruction manual you will find several different
training schedules (chapter 5. general information). You can use these schedules
to reach your training goals. The schedules are divided in two phases. The first
phase can be used for beginners or persons who start training after a long period
of inactivity. During this phase the level of intensity is built up gradually. After six
weeks the second phase begins. You can then choose a training schedule to lose
weight or improve your stamina.
At www.flowfitness.nl/en you can calculate your progress.

38 - Manual Turner DHT50 UP Hometrainer
3. Fitness
A good training schedule starts with a good warming up and ends with a cooling
down of the muscles. This will prevent painful muscles and injury. Below you will
find some suitable exercises.
Head Roll
Tilt your head to the right. Hold this for one second, so that you feel
a little pull in the muscles on the left side of your neck. Do the same
for the other side, front and back. Repeat two or three times.
Toe Touch
Slowly bend forward with your back and arms relaxed. Bend as far
as you can and hold the position for ten seconds. Repeat this two
or three times.
Side Stretch
Extend both your arms up in the air and reach as high as you can
with your right arm. Lean a bit to the left so that the muscles in the
right side of your torso are stretched. Hold this position for one
second. Relax and make the same motion on the other side of your
body. Repeat this three or four times.
Knee bend
Set your feet shoulder-width apart and your stretched your hands
out. Lower yourself no more than 10cm by bending your knees.
Come back up again and repeat several times.
Lower back stretch
Begin on all fours. Stretch your arms out in front of you, allowing
your face to lower to a position near the floor. Gently sit back. Rest
your glutes just above your heels. Ease back and feel the gentle
stretch in your lower back.
Hamstring Stretch
Sit down on the floor with your right leg extended in front of you
and place the sole of your left foot on the inside of your right upper
leg. Bend forward in the direction of your right foot and hold this
position for ten seconds. Relax and then do the same with your
other leg. Repeat two or three times.
3.2 Warming up and cooling down

Manual Turner DHT50 UP Hometrainer - 39
Step 1
Assemble the front (8) and rear (28) stabilizer to the main frame (50) by fastening
the Allen bolts (10), curved washers (8), spring washers (29) and nuts (7).
For a correct assembly it is important to first place the curved washer, then the
spring washer and the nut.
Note: The hometrainer can be levelled by turning the wheels in the end covers of
the rear stabilizer.
4. Use
4.1 Assembly
M8*1.25*75L
D22*D8.5*1.5T
D15.4*D8.2*2T
M8*1.25*15L
D22*D8.5*1.5T
A(x4)
Step-1
29
8
7
1028 8
10
9
50

40 - Manual Turner DHT50 UP Hometrainer
4. Use
Step 2
1. Check if the seat plate (55) is correctly connected to the seat (1).
2. Place the mounted seat (55) onto the diagonal tube of the seat post. Fasten the
seat with washer (53) and adjustable knob (54) to the seat post (4).
Slide the complete seat post with mounted seat (4) into the main frame. Pull the
locking knob (5) to allow the seat post to slide in vertical position. Release the
locking knob when the seat is at the preferable height. Rotate the locking knob
to secure the seat post into place.
Step-2
50
5
4
53
54
55
DOWN
FRONTWARD
BACKWARD
c
UP
b
a
1
55

Manual Turner DHT50 UP Hometrainer - 41
4. Use
Step 3
1. Connect the upper adjustment cable (17) with the lower adjustment cable (14)
as displayed in figure A-1. Pull the red plastic rotatable tube of the upper cable
back and downwards. The end of the red tube should be placed as displayed
within figure A-4.
By rotating the read tube the minimum resistance can increased or decreased.
Rotate clockwise to decrease the resistance and rotate counter clockwise to
increase the resistance.
2. Check if the cables are connected correctly by rotating the resistance knob.
The end of the upper cable (17) should increase or decrease tension in the
lower cable (14).
Connect the upper (24) and lower (25) computer cable.
3. Assemble the handlebar post (16) to the main frame (50) by fastening curved
washers (8), spring washers (29) and Allen bolts (15).
Important: for a correct assembly first place the spring washer (29) onto the
Allen bolt (15). Then place the curved washer (8) onto the Allen bolt. Screw the
Allen bolt with washers into the main frame.
C
Step-3
A-1
A-2
A-3
A-4
1
6
8
DECREASE INCREASE
B
M8*1.25*75L
D22*D8.5*1.5T
D15.4*D8.2*2T
B(x4)
17
14
24
25
16
17
14
15
29
8
50
C
Step-3
A-1
A-2
A-3
A-4
1
6
8
DECREASE INCREASE
B
M8*1.25*75L
D22*D8.5*1.5T
D15.4*D8.2*2T
B(x4)
17
14
24
25
16
17
14
15
29
8
50

42 - Manual Turner DHT50 UP Hometrainer
4. Use
Step 4
Assemble the handlebar (19) onto the handlebar post (16). Open the hinge on the
handlebar post (16) and place the handlebar (19) into the ribbed area of the hinge.
Close the hinge and guide the hand pulse sensor cables trough the hole within
the handlebar post as illustrated in figure a. The two hand pulse sensor cables
are now extended from the top of the handlebar post.
Place the protective cover (60) over the hinge and fasten with the busing (59),
flat washer (57), spring washer (58) and T knob (56). Rotate the handlebar to the
preferred position and fasten the T knob (56). Connect the adaptor to the back of
the hometrainer.
Step-4
59
58
56
60
57
16
19
(a)
18
19

Manual Turner DHT50 UP Hometrainer - 43
4. Use
Step 5
Before placing the computer (22) on the handlebar post (16) you need to connect
the hand pulse sensor cables (22) and (18) and the RPM sensor cable (24) to the
computer. After connect the cables the computer (22) can be secured onto the
handlebar post by fastening the bolts (52).
Connect the foot strips onto the pedals. The last step is connect both peldals (12
L+R) to both cranks (41). Fasten the pedals tightly with the supplied combination
tool.
R
L
R
L
Step-5
22
24
52
16
18
22
24
12R
12L
41
(x4) M5*10L
C
18

44 - Manual Turner DHT50 UP Hometrainer
4. Use
Your training computer will automatically turn on when you start tot exercise. It
is also possible to activate the computer by pressing one of the keys. To reduce
energy the computer will go into standby mode by 4 minutes of inactivity.
Display values
SPEED Your current speed in KPH.
RPM Your current Rotations Per Minute.
TIME Your elapsed or remaining time depending on the setting.
DISTANCE Your elapsed or remaining distance depending on the setting.
CALORIES An indication of you burned calories.
PULSE Display of your heart rate in BPM (Beats Per Minute). This value is
only visable when holding the hand pulse sensors.
SCAN With this function all values above will be displayed for 6 seconds
each.
4.2 Use of the computer

Manual Turner DHT50 UP Hometrainer - 45
4. Use
Function Keys
Enter 1. Selecting a target value. The select target value will blink.
2. Press the enter key for 2 seconds an all entered target value will
be reset
Up To increase the target values. Hold the key to increase the value
faster.
Down To decrease the target values. Hold the key to decrease the value
faster.
Reset Press this key to reset the current value. Press and hold for 2
seconds to reset all values.
Recovery Use this key after a training session to start the recovery test.
Body Fat Use this key to start the Body Fat test.
Use of the computer
Before starting a training exercise you can setup the target values; Time,
Distance, Calories and / or Pulse. Press ENTER to select between values. The
selected value will blink in the display. Use the UP and DOWN keys to set the
selected target value. During an exercise the target values will decrease instead
of increase. The training finishes when one of the target values reaches 0.
When having set Pulse as an target value the computer will play a sound signal
when your heart rate differs to much from the set value. Change the resistance
level and / or your pedaling speed (RPM) to maintain your preferred heart rate.
For a training with a heart rate target value you have to hold the hand pulse
sensors in the handlebar for the duration of the training.
Recovery Test
By pressing the RECOVERY key a fitness test will start directly. Firmly grab
both hand pulse sensors on the handlebar after pressing the recovery key. A
countdown will start form 00:60 to 00:00. During this time hold the hand pulse
sensors firmly. After the test is finished a code between F1 and F6 will appear on
the screen. The code responds to the following fitness level.
F1: Excellend
F2: Good
F3: Average
F4: Below average
F5: Bad
F6: Very bad / no correct measurement
Important:
1. The RECOVERY stamina test will only start when a heart rate is detected. For a
correct measurement you need to hold the hand sensors firmly without moving.

46 - Manual Turner DHT50 UP Hometrainer
4. Use
2. Your stamina is based upon the time in which your heart rate returns to rest
level. Therefor the RECOVERY program can only be done after a intense
workout of at least 150 BPM.
Body Fat Test
Press the Body Fat key to start a body fat test. After pressing the body fat
key directly grab bot hand pulse sensors firmly. The computer will start a
measurement for about 8 seconds and ‘----’ will be displayed on the screen. After
the measurement the computer will display your BMI and Body Fat percentage
for 30 seconds. Press the body fat key again to return to the main menu during the
body fat test.
Important:
The body fat test works only from the main menu and not during a training
session.

Manual Turner DHT50 UP Hometrainer - 47
4. Use
The metal and plastic parts of the hometrainer can be cleaned by using standard
cleaning products. However, make sure that all parts are completely dry before
they are used again.
Flow Fitness advises to fasten nuts and bolts, check and fasten pivot points once
every six weeks. For fastening use the tool supplied with the product.
To prevent unnecessary wear, the hometrainer can only be used indoors and in a
dry environment.
When the drive belt looses tension it needs to be adjusted. To adjust the tension
of the drive belt remove both covers. Loosen the nuts on both sides of the
flywheel and adjust the flywheel position with the two 10 mm adjustable nuts.
Make sure that there is 10 mm play within the drive belt and that the flywheel with
belt is correctly aligned.
4.3 Maintenance

48 - Manual Turner DHT50 UP Hometrainer
5. General information
Introduction schedule
5.1 Training schedule
Schedule week 1 and 2
Train at 60% of your maximum heart rate.
Max. 3 times a week.
Warming up 5 - 10 minutes.
Train 4 minutes.
Rest 1 minute.
Train 2 minutes.
Calmly train 1 minute.
Cooling down 5 minutes.
Schedule week 3 and 4
Train at 60% of your maximum heart rate.
Max. 4 times a week.
Warming up 5 - 10 minutes.
Train 5 minutes.
Rest 1 minute.
Train 3 minutes.
Calmly train 1 minute.
Cooling down 5 minutes.
Schedule week 5 and 6
Train at 60% of your maximum heart rate.
Max. 5 times a week.
Warming up 5 - 10 minutes.
Train 6 minutes.
Rest 1 minute.
Train 4 minutes.
Calmly train 3 minutes.
Cooling down 5 minutes.
After completing the introduction
training schedule for six weeks,
you can choose the follow-up
training schedule that is best
suited to your needs. You can
choose a schedule that will
maximize your weight loss, or one
that will improve your stamina.
Both training schedules are on the
next pages.

Manual Turner DHT50 UP Hometrainer - 49
5. General information
Training schedule to improve stamina
(follow-up to introduction training schedule)
Training schedule to lose weight
(follow-up to introduction training schedule)
Go to flowfitness.nl/en and check your progress.
Schedule week 7 and 8
Train at 85% of your maximum heart rate.
Max. 6 times a week.
Warming up 5 - 10 minutes.
Train 7 minutes.
Rest 1 minute.
Train 5 minutes.
Calmly train 1 minute.
Cooling down 5 minutes.
Schedule week 9 and beyond
Train at 85% of your maximum heart rate.
Max. 6 times a week.
Warming up 5 - 10 minutes.
Train 10 minutes.
Rest 1 minute.
Train 10 minutes.
Repeat training 2 or 3 times.
Calmly train 1 minute.
Cooling down 5 minutes.
Schedule week 7 and 8
Train at 60% of your maximum heart rate.
Max. 6 times a week.
Warming up 5 - 10 minutes.
Train 7 minutes.
Rest 1 minute.
Train 5 minutes.
Calmly train 1 minute.
Cooling down 5 minuten.
Schedule week 9 and beyond
Train at 60% of your maximum heart rate.
Max. 6 times a week.
Warming up 5 - 10 minutes.
Train 10 minutes.
Rest 1 minute.
Train 10 minutes.
Repeat training 2 or 3 times.
Calmly train 1 minute.
Cooling down 5 minutes.

50 - Manual Turner DHT50 UP Hometrainer
5. General information
5.2 Exploded view
55
1
51
53
54
5
26
4
59
58
56
60
57
19
17
16
52
22
21
18
20
15
29
8
50
24 14 2562
13L
9
10
13R
34 31 38 3837
30R
49
40
6R
6L
27 43 46 6347
41
35
44
48
30L
3337 6123
36 32
12R
1028 8
7
11
12L
42
64
39 65 67666870
71
72
73
76
75
74
69
77 78
45

Manual Turner DHT50 UP Hometrainer - 51
5. General information
No. Description Qty No. Description Qty
1 Seat LS-A16,without gel 1
4 Seat post 1
5 Knob D56xM16x24xD8 1
6L Left chain cover 1
6R Right chain cover 1
7 Domed nut M8x1.25x15L 4
8 Curved washer D22*D8.5*1.5T 12
9 Front stabilizer D60x440Lx1.5T 1
10 Allen bolt M8*1.25*75L, 4
11 Adjustable cap D60*79 L 2
12L\R Pedal JD-11A 1
13L Left moveable cap D60*83 L 1
13R Right moveable cap D60*83 L 1
14 Loower tension cable 1400L 1
15 Allen bolt M8x1.25x20L 4
16 Handlebar post 1
17 Upper tension cable 500L 1
18 Handle pulse sensor PE18 2
Handle pulse cable 600L 2
19 Fixed handlebar D22.2*1.5T*500 1
20 Half ball cap D7/8”*31L 2
21 Foam D20*5.5T*600L, 2
22 Computer ST-6599-71 1
23 Round magnet M02 1
24 Upper computer cable 900L 1
25 Lower computer cable 1200L 1
26 Inner tube D66xD52x170L 1
27 Nylon nut M10x1.5x10T 1
28 Rear stabilizer D60x440Lx1.5T 1
29 Spring washer D15.4 XD8.2x2T 8
30L Left decorative cover 1
30R Right decorative cover 1
31 Fixing plate D35xD22.6x2.5T 1
32 Fixing ring D40.4xD24x2.8 1
33 Fixing bolt R) D45x12T 1
34 Fixing bolt D7/8”x4T 2
35 Fixing plate for idle wheel 1
36 Bearing cover D55.6xD40x16 2
37 Ball bearing 5/16”x12 2
38 Fixing bolt L) D45x12T 1
39 Flywheel D260*35 1
40 Multi-groove belt 390 J5 1
41 Crank 6 1/2” 180MM 1
42 Screw cover D35*8 1
43 idle wheel D23.8*D38*24 1
44 spring D2.2*D14*65L 1
45 bolt ST4x1.41x10L 2
46 plastic flat washer D50*D10*1.0T 2
47 iron flat washer D30xD10x3.2T 1
48 nut 3/8”-26UNF*6.5T 2
49 round ring 84*82.5*9T 1
50 main frame 1
51 end cap 25*50*28L 2
52 bolt M5*0.8*10L 4
53 flat washer D25xD8.5x2T 1
54 club knob D60x32L(M8x1.25) 1
55 adjustable seat post 1
56 knob M8x1.25x55 1
57 flat washer D16xD8.5x1.2T 1
58 spring washer D15.4 XD8.2x2T 1
59 bushings D8xD12.7x23L 1
60 protective cover 80.6*56*52.5 1
61 belt wheel D240*21 1
62 bolt M5x0.8x12L 1
63 flat washer D50xD10x2.0T 1
64 hex nut D9.5x4T(3/8”-26UNFx4T) 1
65 fixing ring D13*D10*1.9T 1
66 flywheel axle D10x133L(3/8”-26UNF) 1
67 c-clip S-10(1T) 1
68 hex nut D9.5x8T(3/8”-26UNFx8T) 1
69 spring D1.0*42L 1
70 hex bolt M8*52L 1
71 nut M8*1.25*8T 1
72 hex bolt M6*55L 1
73 hex nut M6*1*6T 1
74 Nylon nut D6*D19*1.5T 1
75 flat washer D13*D6.5*1.0T 1
76 nut M6*1*6T 1
77 bolt ST4.2x1.4x25L 8
78 bolt ST4.0*1.4*15L 2

52 - Manual Turner DHT50 UP Hometrainer
5. General information
Problem:
It isn’t possible to connect the upper and lower resistance cables and complete
assembly step 4.
Solution:
Set the resistance knob on the highest level, this results into the longest setting
for the upper cable. Now it is easier to place the hook into the metal holder as
displayed on page 41. If necessary use a pair of tweezers.
Problem:
The starting resistance is to hard or easy.
Solution:
Behind the handlebar post there is a connection between the upper and lower
resistance cable. To access this connection the handlebar post needs to be
removed from the main frame. See page 41. The connection contains a red tube
that can be rotated to adjust the tension within the resistance cable. Rotate this
tube to increase or decrease the starting resistance.
Problem:
The computer display is weak or not working at all.
Solution:
Replace the two AA penlite battaries at the back of the computer.
Problem:
During a training the hometrainer makes squeaky noises
Solution:
Beeping or scratching noises are mostly caused by a plastic cover hitting the
metal frame or post. You can easily solve this problem to spay WD40 oil onto
these parts.
In case your problem is not resolved or not described, consult the fitness
reseller where you purchased this product.
5.3 Troubleshooting

Manual Turner DHT50 UP Hometrainer - 53
The warrenty is provided by the Flow Fitness distributor of your country and the
reseller where you have purchased your product. Please check
http://www.flowfitness.nl/en/dealers/locations.php
for contact information.
6. Warranty
6.1 Warranty

Notities / Notes
54 - Manual Turner DHT50 UP Hometrainer

Notities / Notes
Manual Turner DHT50 UP Hometrainer - 55

Turner DHT50 UP Hometrainer
www.flowfitness.nl
1/56