Silvercrest 277055 Operating Instructions Manual
- Categorie
- Vleesmolen
- Type
- Operating Instructions Manual
Deze handleiding is ook geschikt voor

IAN 277055
FLEISCHWOLF
MINCER
HACHOIR À VIANDE SFW 350 C2
PICADORA DE CARNE
Instrucciones de uso
PICADORA DE CARNE
Manual de instruções
MLÝNEK NA MASO
Návod k obsluze
HACHOIR À VIANDE
Mode d’emploi
FLEISCHWOLF
Bedienungsanleitung
MINCER
Operating instructions
VLEESMOLEN
Gebruiksaanwijzing

DE / AT / CH Bedienungsanleitung Seite 1
GB/IE Operating instructions Page 21
FR / BE Mode d’emploi Page 41
NL / BE Gebruiksaanwijzing Pagina 61
CZ Návod k obsluze Strana 81
ES Instrucciones de uso Página 101
PT Manual de instruções Página 121
Klappen Sie vor dem Lesen die Seite mit den Abbildungen aus und machen Sie sich anschließend mit allen
Funktionen des Gerätes vertraut.
Before reading, unfold the page containing the illustrations and familiarise yourself with all functions of
the device.
Avant de lire le mode d‘emploi, ouvrez la page contenant les illustrations et familiarisez-vous ensuite avec
toutes les fonctions de l‘appareil.
Vouw vóór het lezen de pagina met de afbeeldingen open en maak u vertrouwd met alle functies van het
apparaat.
Před čtením si otevřete stranu s obrázky a potom se seznamte se všemi funkcemi přístroje.
Antes de empezar a leer abra las dos páginas que contienen las imágenes y, en seguida, familiarícese
con todas las funciones del dispositivo.
Antes de começar a ler abra as duas páginas com as imagens e, de seguida, familiarize-se com todas as
funções do aparelho.

A
B
r
e
q
05
w
z
t
u
1
4
2
3
C
o
a
p
i
9
7
6
8

DE
│
AT
│
CH
│
1 ■
SFW 350 C2
Inhaltsverzeichnis
Einleitung . . . . . . . . . . . . . . . . . . . . . . . . . . . . . . . . . . . . . . . . . . . . . . . . . . . . . 2
Urheberrecht . . . . . . . . . . . . . . . . . . . . . . . . . . . . . . . . . . . . . . . . . . . . . . . . . . . . . . . . . . . . 2
Haftungsbeschränkung . . . . . . . . . . . . . . . . . . . . . . . . . . . . . . . . . . . . . . . . . . . . . . . . . . . . 2
Bestimmungsgemäße Verwendung . . . . . . . . . . . . . . . . . . . . . . . . . . . . . . . 2
Lieferumfang / Teilebeschreibung . . . . . . . . . . . . . . . . . . . . . . . . . . . . . . . . . 3
Technische Daten . . . . . . . . . . . . . . . . . . . . . . . . . . . . . . . . . . . . . . . . . . . . . . . 4
Sicherheitshinweise . . . . . . . . . . . . . . . . . . . . . . . . . . . . . . . . . . . . . . . . . . . . 4
Zusammenbauen / Zerlegen . . . . . . . . . . . . . . . . . . . . . . . . . . . . . . . . . . . . . 6
Fleischwolf zusammenbauen . . . . . . . . . . . . . . . . . . . . . . . . . . . . . . . . . . . . . . . . . . . . . . . . 6
Wurst-Stopf-Aufsatz montieren . . . . . . . . . . . . . . . . . . . . . . . . . . . . . . . . . . . . . . . . . . . . . . . 7
Kubbe-Aufsatz montieren . . . . . . . . . . . . . . . . . . . . . . . . . . . . . . . . . . . . . . . . . . . . . . . . . . . 8
Spritzgebäck-Aufsatz montieren . . . . . . . . . . . . . . . . . . . . . . . . . . . . . . . . . . . . . . . . . . . . . 8
Passier-Aufsatz montieren . . . . . . . . . . . . . . . . . . . . . . . . . . . . . . . . . . . . . . . . . . . . . . . . . . 9
Bedienen . . . . . . . . . . . . . . . . . . . . . . . . . . . . . . . . . . . . . . . . . . . . . . . . . . . . 10
Das Gerät bedienen . . . . . . . . . . . . . . . . . . . . . . . . . . . . . . . . . . . . . . . . . . . . . . . . . . . . . 10
Fleisch verarbeiten . . . . . . . . . . . . . . . . . . . . . . . . . . . . . . . . . . . . . . . . . . . . . . . . . . . . . . . 11
Wurst verarbeiten . . . . . . . . . . . . . . . . . . . . . . . . . . . . . . . . . . . . . . . . . . . . . . . . . . . . . . . 12
Arbeiten mit dem Kubbe-Aufsatz . . . . . . . . . . . . . . . . . . . . . . . . . . . . . . . . . . . . . . . . . . . . 12
Spritzgebäck herstellen . . . . . . . . . . . . . . . . . . . . . . . . . . . . . . . . . . . . . . . . . . . . . . . . . . . 13
Tomaten passieren . . . . . . . . . . . . . . . . . . . . . . . . . . . . . . . . . . . . . . . . . . . . . . . . . . . . . . . 13
Im Fehlerfall . . . . . . . . . . . . . . . . . . . . . . . . . . . . . . . . . . . . . . . . . . . . . . . . . 14
Reinigen . . . . . . . . . . . . . . . . . . . . . . . . . . . . . . . . . . . . . . . . . . . . . . . . . . . . . 14
Motorblock reinigen . . . . . . . . . . . . . . . . . . . . . . . . . . . . . . . . . . . . . . . . . . . . . . . . . . . . . 15
Zubehörteile reinigen . . . . . . . . . . . . . . . . . . . . . . . . . . . . . . . . . . . . . . . . . . . . . . . . . . . . . 15
Aufbewahren . . . . . . . . . . . . . . . . . . . . . . . . . . . . . . . . . . . . . . . . . . . . . . . . 15
Entsorgung. . . . . . . . . . . . . . . . . . . . . . . . . . . . . . . . . . . . . . . . . . . . . . . . . . . 16
Garantie und Service . . . . . . . . . . . . . . . . . . . . . . . . . . . . . . . . . . . . . . . . . . 16
Importeur . . . . . . . . . . . . . . . . . . . . . . . . . . . . . . . . . . . . . . . . . . . . . . . . . . . 17
Rezepte . . . . . . . . . . . . . . . . . . . . . . . . . . . . . . . . . . . . . . . . . . . . . . . . . . . . . 18
Kubbe . . . . . . . . . . . . . . . . . . . . . . . . . . . . . . . . . . . . . . . . . . . . . . . . . . . . . . . . . . . . . . . . 18
Frische Rostbratwurst . . . . . . . . . . . . . . . . . . . . . . . . . . . . . . . . . . . . . . . . . . . . . . . . . . . . . 19
Spritzgebäck . . . . . . . . . . . . . . . . . . . . . . . . . . . . . . . . . . . . . . . . . . . . . . . . . . . . . . . . . . . 19
IB_277055_SFW350C2_LB8.indb 1 24.02.16 08:13

■ 2
│
DE
│
AT
│
CH
SFW 350 C2
Einleitung
Herzlichen Glückwunsch zum Kauf Ihres neuen Gerätes.
Sie haben sich damit für ein hochwertiges Produkt entschieden. Die Bedie-
nungsanleitung ist Bestandteil dieses Produkts. Sie enthält wichtige Hinweise für
Sicherheit, Gebrauch und Entsorgung. Machen Sie sich vor der Benutzung des
Produkts mit allen Bedien- und Sicherheitshinweisen vertraut. Benutzen Sie das
Produkt nur wie beschrieben und für die angegebenen Einsatzbereiche. Händi-
gen Sie alle Unterlagen bei Weitergabe des Produkts an Dritte mit aus.
Urheberrecht
Diese Dokumentation ist urheberrechtlich geschützt.
Jede Vervielfältigung, bzw. jeder Nachdruck, auch auszugsweise, sowie die
Wiedergabe der Abbildungen, auch im veränderten Zustand, ist nur mit schriftlicher
Zustimmung des Herstellers gestattet.
Haftungsbeschränkung
Alle in dieser Bedienungsanleitung enthaltenen technischen Informationen, Daten
und Hinweise für den Anschluss und die Bedienung entsprechen dem letzten
Stand bei Drucklegung und erfolgen unter Berücksichtigung unserer bisherigen
Erfahrungen und Erkenntnisse nach bestem Wissen.
Aus den Angaben, Abbildungen und Beschreibungen in dieser Anleitung können
keine Ansprüche hergeleitet werden.
Der Hersteller übernimmt keine Haftung für Schäden aufgrund von Nichtbeach-
tung der Anleitung, nicht bestimmungsgemäßer Verwendung, unsachgemäßen
Reparaturen, unerlaubt vorgenommenen Veränderungen oder Verwendung nicht
zugelassener Ersatzteile.
Bestimmungsgemäße Verwendung
Dieses Gerät ist ausschließlich vorgesehen für das Verarbeiten von Lebensmitteln
in haushaltsüblichen Mengen im privaten Haushalt:
▯ Durchdrehen von frischem Fleisch,
▯ Herstellen von Wurst in Natur- oder Kunstdarm,
▯ Herstellung von Spritzgebäck,
▯ Passieren von Tomaten.
Das Ger
ät ist nicht vorgesehen für das Verarbeiten von gefrorenen oder ander-
weitig harten Lebensmitteln, z. B. Knochen oder Nüsse und nicht in gewerblichen
oder industriellen Bereichen.
IB_277055_SFW350C2_LB8.indb 2 24.02.16 08:13

DE
│
AT
│
CH
│
3 ■
SFW 350 C2
Lieferumfang / Teilebeschreibung
Abbildung A:
1 Spritzgebäck-Aufsatz mit Musterstreifen
2 Stopfer
3 Einfüllschale
4 Motorblock
5 Fleischwolfvorsatz aus Metall
6 Verschluss-Schelle
7 Tomatenauswurf
8 Plastikschnecke
9 Passier-Sieb
0 Transportschnecke
q Feder
w Kreuzmesser
e grobe und feine Lochscheibe
r Verschlussring
t Wurst-Stopf-Aufsatz
z Wurstscheibe
u Kubbe-Aufsatz
Abbildung B:
i Verriegelungsknopf
Abbildung C:
o Taste „I“
p Taste „0“
a Taste „<“
IB_277055_SFW350C2_LB8.indb 3 24.02.16 08:13

■ 4
│
DE
│
AT
│
CH
SFW 350 C2
Technische Daten
Spannung 220 - 240 V ∼, 50 Hz
Leistungsaufnahme 250 - 350 W
Schutzklasse
II /
Alle Teile dieses Gerätes, die mit
Lebensmitteln in Berührung kommen,
sind lebensmittelecht.
KB-Zeit 15 Minuten
KB-Zeit
Die KB-Zeit (Kurzzeitbetrieb) gibt an, wie lange man ein Gerät betreiben kann,
ohne dass der Motor überhitzt und Schaden nimmt. Nach der angegebenen
KB-Zeit muss das Gerät solange ausgeschaltet werden, bis sich der Motor ab-
gekühlt hat.
Sicherheitshinweise
STROMSCHLAGGEFAHR
► Achten Sie darauf, dass das Netzkabel nicht beschädigt
wird. Halten Sie es von heißen Bereichen fern und führen Sie
es so, dass es nicht eingeklemmt werden kann.
► Lassen Sie beschädigte Netzkabel oder Netzstecker sofort
von autorisiertem Fachpersonal ersetzen, um Gefährdungen
zu vermeiden.
► Verwenden Sie das Gerät nur in trockenen Räumen, nicht im
Freien.
Tauchen Sie den Motorblock niemals in Wasser oder
andere Flüssigkeiten! Andernfalls besteht Lebensgefahr
durch elektrischen Schlag.
WARNUNG!
► Verwenden Sie das Gerät niemals für andere Zwecke, als
hier beschrieben. Es besteht erhebliche Unfallgefahr, wenn
Sie durch Fehlverwendung die Schutzvorrichtungen am Gerät
außer Funktion setzen!
IB_277055_SFW350C2_LB8.indb 4 24.02.16 08:13

DE
│
AT
│
CH
│
5 ■
SFW 350 C2
WARNUNG! VERLETZUNGSGEFAHR!
► Fassen Sie niemals in Öff nungen am Gerät. Führen Sie niemals
irgendwelche Gegenstände dort hinein – mit Ausnahme der
jeweils zum Aufsatz gehörenden Stopfer und den zu verarbei-
tenden Lebensmitteln. Andernfalls kann erhebliche Unfallgefahr
bestehen!
► Ziehen Sie erst den Stecker aus der Steckdose, bevor Sie
Zubehörteile aufstecken oder abnehmen.
► Lassen Sie das Gerät niemals unbeaufsichtigt, wenn es
betriebsbereit ist. Ziehen Sie nach Gebrauch oder bei Arbeits-
unterbrechungen stets den Stecker aus der Steckdose, um
versehentliches Anlaufen zu vermeiden.
► Verwenden Sie nur die Original- Zubehörteile zu diesem
Gerät. Andere Teile sind dafür möglicherweise nicht ausrei-
chend sicher.
► Betreiben Sie das Gerät nie im Leerzustand. Das kann das
Gerät irreparabel beschädigen.
► Vor dem Auswechseln von Zubehör oder Zusatzteilen, die im
Betrieb bewegt werden, muss das Gerät ausgeschaltet und
vom Netz getrennt sein.
► Missbrauchen Sie das Gerät nicht für andere Zwecke, als in
dieser Anleitung beschrieben.
► Vorsicht: das Kreuzmesser ist sehr scharf! Gehen Sie beim
Umgang und Reinigen des Gerätes stets vorsichtig vor.
► Das Gerät ist bei nicht vorhandener Aufsicht und vor dem
Zusammenbau, dem Auseinandernehmen oder Reinigen
stets vom Netz zu trennen.
► Das Gerät darf nicht von Kindern benutzt werden.
► Das Gerät und seine Anschlussleitung sind von Kindern
fernzuhalten.
IB_277055_SFW350C2_LB8.indb 5 24.02.16 08:13

■ 6
│
DE
│
AT
│
CH
SFW 350 C2
WARNUNG! VERLETZUNGSGEFAHR!
► Dieses Gerät kann von Personen mit reduzierten physischen,
sensorischen oder mentalen Fähigkeiten oder Mangel an Er-
fahrung und/oder Wissen benutzt werden, wenn sie beauf-
sichtigt oder bezüglich des sicheren Gebrauchs des Gerätes
unterwiesen wurden und die daraus resultierenden Gefahren
verstanden haben.
► Kinder dürfen nicht mit dem Gerät spielen.
Zusammenbauen / Zerlegen
ACHTUNG - SACHSCHADEN!
► Sämtliche Zubehörteile sind mit einem dünnen Ölfi lm versehen, um diese
v
or Korrosion zu schützen. Reinigen Sie vor dem ersten Gebrauch daher
sämtliche Teile sorgfältig, wie im Kapitel „Reinigen“ ausführlich beschrie-
ben. Reiben Sie danach alle Metallteile mit etwas Speiseöl ein.
HINWEIS
► Entfernen Sie vor der ersten Benutzung die Schutzfolie vom Tastenfeld.
Fleischwolf zusammenbauen
Klappen Sie die Ausklappseite aus - Sie fi nden dort die Zusammenbau-Reihenfol-
ge bildlich dargestellt.
1) Setzen Sie die Transportschnecke 0 in den Fleischwolfvorsatz 5.
2) Stecken Sie die Feder q auf die Transportschnecke 0.
3) Setzen Sie dann das Kreuzmesser w so ein, dass die Seite mit den Messern
von der Feder q weg zeigt. Achten Sie darauf, dass die eckige Aussparung
des Kreuzmessers w korrekt auf der eckigen Achse liegt.
IB_277055_SFW350C2_LB8.indb 6 24.02.16 08:13

DE
│
AT
│
CH
│
7 ■
SFW 350 C2
WARNUNG! VERLETZUNGSGEFAHR!
► Das Kreuzmesser w ist sehr schar
f! Verletzungsgefahr!
ACHTUNG - SACHSCHADEN!
► Das Gerät wird beschädigt, wenn das Kreuzmesser w ander
s herum
eingesetzt wird!
4) Wählen Sie die gewünschte Lochscheibe e/Wurstscheibe z.
5) Legen Sie die ausgewählte Lochscheibe e so in den Fleischwolfvorsatz 5
ein, dass die Fixierungen an der Lochscheibe e in den Aussparungen am
Fleischwolfvorsatz 5 liegen.
6) Wenn alles richtig eingesetzt ist, schrauben Sie den Verschlussring r
handfest auf.
7) Der fertig montierte Fleischwolfvorsatz 5 wird über einen Bajonett-
Verschluss mit dem Motorblock 4 verbunden:
– Stecken Sie den Fleischwolfvorsatz 5 in den Motorblock 4, so dass
der Pfeil am Fleischw
olfvorsatz 5 am Symbol
am Motorblock 4
liegt. Der Verriegelungsknopf i drückt sich hinein (Abb. B).
– Drücken Sie den Fleischwolfvorsatz 5 leicht hinein und dr
ehen Sie da-
bei den Fleischwolfvorsatz 5 in die Mittelposition (Abb. B), so dass der
Pfeil am Einfüllschacht auf das Symbol
zeigt. Wenn der Fleischwolf-
vorsatz 5 einrastet, springt der Verriegelungsknopf i heraus.
– Setzen Sie zum Schluss die Einfüllschale 3 oben auf den Einfüllschacht.
– Zum Abnehmen drücken Sie den Verriegelungsknopf i und dr
ehen den
Einfüllschacht wieder nach rechts (Abb. B)
. Danach können Sie den
Fleischwolfvorsatz 5 heraus ziehen.
Wurst-Stopf-Aufsatz montieren
Klappen Sie die Ausklappseite aus - Sie fi nden dort die Zusammenbau-Reihenfol-
ge bildlich dargestellt.
1) Nehmen Sie den Fleischwolfvorsatz 5, wie unter „Fleischwolf zusammen-
bauen“ beschrieben, ab.
2) Nehmen Sie alle Teile, die am/im Fleischwolfvorsatz 5 montiert sind, auseinan-
der und reinigen Sie diese.
3) Reiben Sie alle Metallteile mit Speiseöl ab.
4) Setzen Sie die Transportschnecke 0, die Feder q und das Kreuzmesser w
wieder in den Fleischwolfvorsatz 5 ein.
5) Legen Sie die Wurstscheibe z so ein, dass die Fixierungen an der Wurst-
scheibe z in den Aussparungen am Fleischwolfvorsatz 5 liegen.
6) Setzen Sie dann den Wurst-Stopf-Aufsatz t vor die Wurstscheibe z.
IB_277055_SFW350C2_LB8.indb 7 24.02.16 08:13

■ 8
│
DE
│
AT
│
CH
SFW 350 C2
7) Schrauben Sie den Verschlussring r handfest auf.
8) Montieren Sie den Fleischwolfvorsatz 5 wie unter „Fleischwolf zusammen-
bauen“ beschrieben.
Kubbe-Aufsatz montieren
Klappen Sie die Ausklappseite aus - Sie fi nden dort die Zusammenbau-Reihenfolge
bildlich dargestellt.
1) Nehmen Sie den Fleischwolfvorsatz 5, wie unter „Fleischwolf zusammen-
bauen“ beschrieben, ab.
2) Nehmen Sie eventuelle Aufsätze ab und reinigen Sie den Fleischwolfvorsatz 5.
HINWEIS
► Für den Kubbe-Aufsatz u wir
d das Kreuzmesser w mit der Feder q nicht
benötigt! Nehmen Sie beides ggf. aus dem Fleischwolfvorsatz 5 heraus.
3) Reiben Sie alle Metallteile mit Speiseöl ab.
4) Legen Sie die beiden Kunststoff teile des Kubbe-Aufsatzes u so ein, dass die
Fixierungen am unteren Ring des Kubbe-Aufsatzes u in den Aussparungen
am Fleischwolfvorsatz 5 liegen.
5) Wenn alles richtig eingesetzt ist, schrauben Sie den Verschlussring r wieder
handfest auf.
6) Montieren Sie den Fleischwolfvorsatz 5 wie unter „Fleischwolf zusammen-
bauen“ beschrieben.
Spritzgebäck-Aufsatz montieren
Klappen Sie die Ausklappseite aus - Sie fi nden dort die Zusammenbau-Reihenfolge
bildlich dargestellt.
1) Nehmen Sie den Fleischwolfvorsatz 5, wie unter „Fleischwolf zusammen-
bauen“ beschrieben, ab.
2) Nehmen Sie eventuelle Aufsätze ab und reinigen Sie den Fleischwolfvorsatz 5.
HINWEIS
► Für den Spritzgebäck-Aufsatz 1 wir
d das Kreuzmesser w mit der Feder q
nicht benötigt! Nehmen Sie beides ggf. aus dem Fleischwolfvorsatz 5
heraus.
3) Reiben Sie alle Metallteile mit Speiseöl ab.
4) Ziehen Sie den Musterstreifen 1 vorne vom Spritzgebäck-Aufsatz 1 ab.
5) Setzen Sie zuerst die Plastikscheibe, dann die Metallscheibe des Spritzgebäck-
Aufsatzes 1 in den Fleischwolfvorsatz 5 (siehe Ausklappseite). Legen Sie
den Spritzgebäck-Aufsatz 1 so ein, dass die Fixierungen am Spritzgebäck-
Aufsatz 1 in den Aussparungen am Fleischwolfvorsatz 5 liegen.
IB_277055_SFW350C2_LB8.indb 8 24.02.16 08:13

DE
│
AT
│
CH
│
9 ■
SFW 350 C2
6) Wenn alles richtig eingesetzt ist, schrauben Sie den Verschlussring r hand-
fest auf.
7) Stecken Sie den Musterstreifen 1 wieder vorne in den Spritzgebäck-Aufsatz 1.
Achten Sie darauf, dass der Griff am Musterstreifen 1 vom Gerät weg zeigt.
Ansonsten können Sie das Muster, welches sich direkt am Griff befi ndet, nicht
einstellen.
8) Montieren Sie den Fleischwolfvorsatz 5 wie unter „Fleischwolf zusammen-
bauen“ beschrieben.
9) Zum Abnehmen müssen Sie erst wieder den Musterstreifen 1 abziehen,
bevor Sie den Verschlussring r abdrehen und den Spritzgebäck-Aufsatz 1
wieder herausnehmen können.
Passier-Aufsatz montieren
Klappen Sie die Ausklappseite aus - Sie fi nden dort die Zusammenbau-Reihenfol-
ge bildlich dargestellt.
1) Nehmen Sie den Fleischwolfvorsatz 5, wie unter „Fleischwolf zusammen-
bauen“ beschrieben, ab.
2) Nehmen Sie eventuelle Aufsätze ab und reinigen Sie den Fleischwolfvorsatz 5.
HINWEIS
► Für den Passier-Aufsatz wird die Transportschnecke 0 und das Kr
euzmes-
ser w mit der Feder q nicht benötigt! Nehmen Sie alles ggf. aus dem
Fleischwolfvorsatz 5 heraus.
3) Schieben Sie die Plastikschnecke 8 in den Fleischwolfvorsatz 5.
4) Schieben Sie das Passier-Sieb 9 so über die Plastikschnecke 8, dass die
Fixierungen am Passier-Sieb 9 in den Aussparungen am Fleischwolfvorsatz 5
liegen. Die Löcher des Passier-Siebes 9 weisen dabei nach unten.
5) Wenn alles richtig eingesetzt ist, stülpen Sie den Verschlussring r über das
Passier-Sieb 9 und schrauben Sie diesen handfest auf.
6) Montieren Sie den Fleischwolfvorsatz 5 wie unter „Fleischwolf zusammen-
bauen“ beschrieben.
7) Öff nen Sie die Verschluss-Schelle 6 am Tomatenauswurf 7.
8) Platzieren Sie den Tomatenauswurf 7 unter dem Passier-Aufsatz, indem Sie
die Spitze des Passier-Siebes 9 durch die kleine Öff nung am Tomatenaus-
wurf 7 stecken:
IB_277055_SFW350C2_LB8.indb 9 24.02.16 08:13

■ 10
│
DE
│
AT
│
CH
SFW 350 C2
9) Die Verschluss-Schelle 6 schließen Sie so, dass diese um den Fleischwolfvor-
satz 5 greift.
Bedienen
STROMSCHLAGGEFAHR
► Öff nen Sie niemals das Gehäuse des Motorblocks 4 – es befi
nden sich
keinerlei Bedienelemente darin. Wird das Gehäuse geöff net, so erlischt der
Garantieanspruch. Bei geöff netem Gehäuse besteht Lebensgefahr durch
elektrischen Schlag.
ACHTUNG - SACHSCHADEN!
► Verwenden Sie das Gerät nicht länger als 15 Minuten im Dauerbetrieb.
Lassen Sie das Ger
ät anschließend etwa 30 Minuten ausgeschaltet, um
ein Überhitzen zu vermeiden.
► Drücken Sie nie die Tasten „I“ o oder „<“ a bei Laufrichtungswechsel,
solange der Motor des Gerätes nicht vollständig still steht. Der Motor kann
beschädigt werden.
Das Gerät bedienen
Wenn Sie die gewünschten Aufsätze montiert haben:
1) Stellen Sie das Gerät so auf, dass es absolut stabil steht und auf keinen Fall
(z. B. durch Vibrationen oder Verfangen im Netzkabel) vom Tisch stürzen
oder in die Nähe von off enem Wasser gelangen kann. Erschütterungen sind
bei laufendem Betrieb unvermeidlich.
IB_277055_SFW350C2_LB8.indb 10 24.02.16 08:13

DE
│
AT
│
CH
│
11 ■
SFW 350 C2
STROMSCHLAGGEFAHR
► Greifen Sie nie nach einem angeschlossenen oder sogar laufenden Gerät,
w
enn es stürzen oder in Wasser geraten sollte – oder bei sonstigen Notfäl-
len! Ziehen Sie im Notfall sofort den Netzstecker! Andernfalls besteht akute
Verletzungs- und Lebensgefahr!
2) Legen Sie die zu verarbeitenden Lebensmittel in die Einfüllschale 3 und
stellen Sie ein Auff anggefäß vorne unter die Austrittsöff nung.
3) Drücken Sie erst die Taste „0“ p, um sicher zu gehen, dass das Gerät noch
ausgeschaltet ist. Ansonsten besteht die Gefahr, dass das Gerät unbeabsich-
tigt startet, wenn der Netzstecker in die Netzsteckdose gesteckt wird.
4) Stecken Sie dann den Netzstecker in die Steckdose.
5) Drücken Sie die Taste „I“ o, um das Gerät einzuschalten.
WARNUNG! VERLETZUNGSGEFAHR!
► Drücken Sie die Lebensmittel ausschließlich mit dem runden Stopfer 2 i
n den
Einfüllschacht – nie mit den Fingern, Gabeln, Löff elstielen oder ähnlichem.
Es besteht erhebliche Verletzungsgefahr und das Gerät könnte beschädigt
werden.
ACHTUNG - SACHSCHADEN!
► Drücken Sie nie so fest, dass der Motor hörbar langsamer wird. Andern-
falls k
ann das Gerät überlastet und beschädigt werden.
Fleisch verarbeiten
1) Verwenden Sie Fleischstücke, die problemlos in den Einfüllschacht passen.
Schneiden Sie das Fleisch gegebenenfalls vor. Achten Sie darauf, dass das
Fleisch keine Knochen oder Sehnen hat.
WARNUNG!
► Hackfl eisch ist sehr anfällig für Verkeimung. Achten Sie daher auf eine gute
Hy
giene, wenn Sie Fleisch verarbeiten. Ansonsten kann es zu gesundheitli-
chen Beeinträchtigungen kommen.
2) Wenn Sie alle Hinweise zum Thema „Fleisch“ gelesen haben, können Sie
das Gerät nun einsetzen wie im Kapitel „Das Gerät bedienen“ beschrieben.
IB_277055_SFW350C2_LB8.indb 11 24.02.16 08:13

■ 12
│
DE
│
AT
│
CH
SFW 350 C2
Wurst verarbeiten
1) Drehen Sie das Fleisch erst zweimal durch den Fleischwolf, bevor Sie dieses
zur Wurst verarbeiten.
2) Für die Wurstfüllung fügen Sie dem Hackfl eisch klein geschnittene Zwiebeln,
Gewürze und weitere Zutaten nach Ihrem Rezept hinzu und kneten die Mas-
se gut durch. Stellen Sie diese, vor der weiteren Verarbeitung, für 30 Min. in
den Kühlschrank.
3) Stülpen Sie den Wurstdarm (Natur- oder Kunstdarm) über den Wurst- Stopf-
Aufsatz t und knoten Sie das andere Ende zu. Für je 1 kg Füllmasse
können Sie etwa 1,60 m Wurstdarm kalkulieren.
TIPP
Legen Sie Naturdarm vorher etwa 3 Stunden in lauw
armes Wasser und wringen
Sie diesen vor dem Aufstülpen aus. Naturdarm wird so wieder elastisch.
Naturdärme bekommen Sie im Metzgerbedarfhandel in der Nähe von
Schlachthöfen oder von Ihrem Metzger.
4) Die Wurstfüllung wird durch den Wurst-Stopf-Aufsatz t in den Wurstdarm
gepresst. Wenn die gewünschte Länge erreicht ist, schalten Sie das Gerät
aus, drücken die Wurst am Ende zusammen und drehen sie ein paar Mal um
ihre Längsachse.
TIPP
Wurst dehnt sich beim Kochen und Einfrieren aus. Überfüllen Sie diese
daher nicht, die W
urst könnte sonst platzen.
5) Wenn Sie alle Hinweise zum Thema „Wurst“ gelesen haben, können Sie das
Gerät nun einsetzen wie im Kapitel „Das Gerät bedienen“ beschrieben.
Arbeiten mit dem Kubbe-Aufsatz
Mit dem Kubbe-Aufsatz u können Sie aus den eingelegten Lebensmitteln hohle
Röllchen aus Fleisch oder Gemüse formen lassen, die Sie nach Belieben füllen
können.
1) Drehen Sie das Fleisch erst zweimal durch den Fleischwolf, bevor Sie es
durch den Kubbe-Aufsatz u pressen.
2) Wenn Sie alle Hinweise zum Thema „Kubbe-Aufsatz“ gelesen haben,
können Sie das Gerät nun einsetzen wie im Kapitel „Das Gerät bedienen“
beschrieben.
IB_277055_SFW350C2_LB8.indb 12 24.02.16 08:13

DE
│
AT
│
CH
│
13 ■
SFW 350 C2
Spritzgebäck herstellen
Wenn Sie einen Spritzgebäck-Teig gemäß Ihrem Rezept vorbereitet und den
Spritzgebäck-Aufsatz 1 montiert haben:
1) Legen Sie ein kleines Backblech mit Backpapier aus und stellen Sie es unter
die Austrittsöff nung vorne am Gerät.
2) Drücken Sie gleichmäßig Teig in den Fleischwolfvorsatz 5 – die Transport-
schnecke 0 drückt diesen dann durch das gewählte Motiv am Motivstreifen
des Spritzgebäckaufsatzes 1.
3) Wenn das Gebäck die gewünschte Länge erreicht hat, stoppen Sie das
Gerät und brechen Sie den Teig an der Austrittsöff nung ab. Legen Sie das
Gebäck auf das Backblech.
4) Wenn Sie alle Hinweise zum Thema „Spritzgebäck“ gelesen haben, können
Sie das Gerät einsetzen wie im Kapitel „Das Gerät bedienen“ beschrieben.
Tomaten passieren
1) Stellen Sie ein Gefäß unter den Tomatenauswurf 7.
2) Stellen Sie ein Gefäß vorne unter das Passier-Sieb 9.
3) Vierteln Sie die Tomaten und drücken Sie diese langsam und gleichmäßig in
den Fleischwolfvorsatz 5.
Die Plastikschnecke 8 drückt die Tomaten durch den Passieraufsatz, die
passierten Tomaten fallen in den Tomatenauswurf 7. Die Tomatenschale
wird vorne aus dem Passier-Sieb 9 ausgegeben.
HINWEIS
Sollte Tomatensaft aus den Schraubverbindungen des Passieraufsatzes
tr
eten, kann dies folgende Ursachen haben:
– Sie arbeiten zu schnell.
– Sie pressen die Tomatenstücke mit zu hohem Druck in das Gerät.
– Die Tomatenstücke sind zu groß.
► Verlangsamen Sie in diesem Fall ihr Arbeitstempo, pressen Sie die Toma-
tenstück
e nur leicht in das Gerät und zerteilen Sie die Tomaten in kleinere
Stücke.
4) Wenn Sie alle Hinweise zum Thema „Tomaten passieren“ gelesen haben,
können Sie das Gerät einsetzen wie im Kapitel „Das Gerät bedienen“
beschrieben.
IB_277055_SFW350C2_LB8.indb 13 24.02.16 08:13

■ 14
│
DE
│
AT
│
CH
SFW 350 C2
Im Fehlerfall
Wenn der Antrieb durch anstauende Lebensmittel
blockiert ist:
■ Drücken Sie die Taste „0“ p, um den Fleischwolf zu stoppen.
■ Halten Sie die Taste „<“ a gedrückt. Der Antrieb läuf
t nun rückwärts. Damit
können Sie die Lebensmittel ein Stück rückwärts transportieren, um den
Antrieb wieder freizubekommen.
■ Ist der Antrieb frei, lassen Sie die Taste „<“ a los.
■ Drücken Sie die Taste „I“ o, um den Fleischw
olf zu starten.
■ Wenn Sie den Antrieb damit nicht frei bekommen, reinigen Sie das Gerät,
wie im K
apitel „Reinigen“ beschrieben.
Wenn der Motor plötzlich ausgeht, kann es sein, dass die
interne Überlastungssicherung ausgelöst hat. Diese soll
den Motor schützen.
■ Schalten Sie das Gerät aus und lassen Sie es ca. 30 Min. abkühlen, bevor
Sie das Gerät weiter verwenden.
■ Sollte dies ergebnislos sein, so warten Sie noch einmal weitere 15 Min..
■ Wenn auch diese Frist ergebnislos verstrichen ist, deutet dies auf einen
Defekt hin. W
enden Sie sich in diesem Fall an den Kundendienst.
Wenn das Netzkabel beschädigt ist oder Schäden an den
Geräteteilen erkennbar sind:
■ Schalten Sie das Gerät sofort aus, indem Sie die Taste „0“ p drücken!
■ Wenn dies nicht gefahrlos möglich ist, ziehen Sie den Netzstecker.
■ Lassen Sie diese Schäden erst vom Kundendienst instandsetzen, bevor Sie
das Ger
ät wieder verwenden.
Reinigen
STROMSCHLAGGEFAHR
► Ziehen Sie erst den Netzstecker aus der Steckdose, bevor Sie das Gerät
r
einigen. Damit verhindern Sie Unfallgefahren durch unerwarteten verse-
hentlichen Anlauf und elektrischen Schlag.
IB_277055_SFW350C2_LB8.indb 14 24.02.16 08:13

DE
│
AT
│
CH
│
15 ■
SFW 350 C2
Motorblock reinigen
■ Reinigen Sie alle Außenfl ächen und das Netzkabel mit einem leicht angefeuch-
teten Spültuch. Trocknen Sie das Gerät gut ab, bevor Sie es erneut verwenden.
STROMSCHLAGGEFAHR
► Tauchen Sie den Motorblock niemals in Wasser oder andere Flüssigkeiten!
Andernfalls besteht Lebensgefahr dur
ch elektrischen Schlag, wenn einge-
drungene Feuchtigkeit an elektrische Leiter gelangt.
ACHTUNG - SACHSCHADEN!
► Verwenden Sie keine Reinigungs-, Scheuer- oder Lösemittel. Diese können
das Ger
ät beschädigen und Rückstände an den Lebensmitteln hinterlassen.
Zubehörteile reinigen
HINWEIS
► Reinigen Sie die Zubehörteile nicht in der Spülmaschine! Das führt zu
Beschädigungen an den Zubehör
teilen!
■ Reinigen Sie die Zubehörteile, die in Kontakt mit Lebensmittel kommen können, ...
– nur von Hand, die Zubehörteile sind nicht spülmaschinenfest.
– mit heißem Spülwasser und einem für Lebensmittel geeigneten Haushalts-
Spülmittel.
WARNUNG! VERLETZUNGSGEFAHR!
► Das Kreuzmesser w ist sehr schar
f! Verletzungsgefahr!
■ Trocknen Sie alles gut ab, bevor Sie das Gerät weiter verwenden.
HINWEIS
► Reiben Sie nach jeder Reinigung die Metallteile wieder mit Speiseöl ein!
Ansonsten k
önnen sich die Metallteile verfärben!
Aufbewahren
■ Schieben Sie das Netzkabel (ohne Netzstecker) in den Kabelschacht unter
dem Geräteboden. So bleibt es geschützt vor Beschädigungen.
■ Lagern Sie das Gerät an einem trockenen Ort.
■ Reiben Sie die metallischen Aufsätze nach dem Abtrocknen dünn mit Speise-
öl ein – w
enn Sie das Gerät nicht sofort weiter benutzen. Damit erzielen Sie
einen guten Schutz vor Korrosion.
■ Bewahren Sie das Gerät so auf, dass es unerreichbar ist für Kinder und
aufsichtsbedür
ftige Personen. Diese können mögliche Gefahren im Umgang
mit elektrischen Geräten nicht immer richtig einschätzen.
IB_277055_SFW350C2_LB8.indb 15 24.02.16 08:13

■ 16
│
DE
│
AT
│
CH
SFW 350 C2
Entsorgung
Werfen Sie das Gerät keinesfalls in den normalen Hausmüll.
Dieses Produkt unterliegt der europäischen Richtlinie 2012/19/EU
(Waste Electrical and Electronic Equipment).
Entsorgen Sie das Gerät über einen zugelassenen Entsorgungsbetrieb oder über
Ihre kommunale Entsorgungseinrichtung. Beachten Sie die aktuell geltenden
Vorschriften. Setzen Sie sich im Zweifelsfall mit Ihrer Entsorgungseinrichtung in
Verbindung.
Führen Sie alle Verpackungsmaterialien einer umweltgerechten Entsorgung zu.
Garantie und Service
Sie erhalten auf dieses Gerät 3 Jahre Garantie ab Kaufdatum. Das Gerät wurde
sorgfältig produziert und vor Anlieferung gewissenhaft geprüft.
Bitte bewahren Sie den Kassenbon als Nachweis für den Kauf auf. Bitte setzen
Sie sich im Garantiefall mit Ihrer Servicestelle telefonisch in Verbindung. Nur so
kann eine kostenlose Einsendung Ihrer Ware gewährleistet werden.
HINWEIS
► Die Garantieleistung gilt nur für Material- oder Fabrikationsfehler, nicht
aber für T
ransportschäden, Verschleißteile oder für Beschädigungen an
zerbrechlichen Teilen, z. B. Schalter oder Akkus.
Das Produkt ist lediglich für den privaten und nicht für den gewerblichen
Gebrauch bestimmt. Bei missbräuchlicher und unsachgemäßer Behandlung,
Gewaltanwendung und bei Eingriff en, die nicht von unserer autorisierten Service-
Niederlassung vorgenommen wurden, erlischt die Garantie.
Ihre gesetzlichen Rechte werden durch diese Garantie nicht eingeschränkt. Die
Garantiezeit wird durch die Gewährleistung nicht verlängert. Dies gilt auch für
ersetzte und reparierte Teile.
Eventuell schon beim Kauf vorhandene Schäden und Mängel müssen sofort nach
dem Auspacken gemeldet werden, spätestens aber zwei Tage nach Kaufdatum.
Nach Ablauf der Garantiezeit anfallende Reparaturen sind kostenpfl ichtig.
Die Garantiezeit wird durch die Gewährleistung nicht verlängert. Dies gilt auch
für ersetzte und reparierte Teile.
Eventuell schon beim Kauf vorhandene Schäden und Mängel müssen sofort nach
dem Auspacken gemeldet werden, spätestens aber zwei Tage nach Kaufdatum.
Nach Ablauf der Garantiezeit anfallende Reparaturen sind kostenpfl ichtig.
IB_277055_SFW350C2_LB8.indb 16 24.02.16 08:13

DE
│
AT
│
CH
│
17 ■
SFW 350 C2
Service Deutschland
Tel.: 0800 5435 111 (Kostenfrei aus dem dt. Festnetz/Mobilfunknetz)
E-Mail: k[email protected]
IAN 277055
Service Österreich
Tel.: 0820 201 222 (0,15 EUR/Min.)
E-Mail: k[email protected]
IAN 277055
Service Schweiz
Tel.: 0842 665566 (0,08 CHF/Min., Mobilfunk max. 0,40 CHF/Min.)
E-Mail: k[email protected]
IAN 277055
Importeur
KOMPERNASS HANDELS GMBH
BURGSTRASSE 21
44867 BOCHUM
GERMANY
www.kompernass.com
IB_277055_SFW350C2_LB8.indb 17 24.02.16 08:13

■ 18
│
DE
│
AT
│
CH
SFW 350 C2
Rezepte
Kubbe
Zutaten für die Hülle
450 g mageres Hammel-, Kalb- oder Rindfl eisch
150 g Mehl
1 TL Piment (Nelkenpfeff er)
1 TL Muskatnuss
1 Prise Chilipulver
1 Prise Pfeff er
Zutaten für die Fleischfüllung
700 g Hammelfl eisch
1 1/2 EL Olivenöl
1 1/2 EL Zwiebeln feingehackt
1/2 TL Piment (Nelkenpfeff er)
1/2 TL Salz
1 1/2 EL Mehl
Das Fleisch für die Hülle zweimal hintereinander im Fleischwolf zerkleinern
(zuerst mit der groben und dann mit der feinen Lochscheibe e) und mit den
Zutaten vermengen. Diese Masse ebenfalls zweimal mit dem Fleischwolf zer-
kleinern. Lochscheibe e gegen den Kubbe-Aufsatz u wechseln (siehe Kapitel
„Kubbe-Aufsatz montieren“).
Kubbe-Hüllen mit dem Kubbe-Aufsatz u formen und anfrieren.
Füllung:
Fleisch zweimal mit dem Fleischwolf zerkleinern (zuerst mit der groben und
dann mit der feinen Lochscheibe e). Zwiebeln anbraten und mit dem
Fleisch und den restlichen Zutaten gut vermischen. Kubbe-Hüllen damit füllen
und ausbraten.
Alternative Füllungen:
250 g gedünsteten Brokkoli
oder 250 g gedünstete Zucchini
oder 250 g gekochten Reis
IB_277055_SFW350C2_LB8.indb 18 24.02.16 08:13

DE
│
AT
│
CH
│
19 ■
SFW 350 C2
Frische Rostbratwurst
Zutaten:
300 g mageres Rindfl eisch
500 g mageres Schweinefl eisch
200 g Schulterspeck
20 g Salz
1/2 Esslöff el weißer, gemahlener Pfeff er
1 Teelöff el Kümmel
1/2 Teelöff el Muskatnuss
Rindfl eisch, Schweinefl eisch und Speck zweimal durch den Fleischwolf drehen.
Gemischte Gewürze sowie Salz zugeben und 5 Minuten durchkneten.
Wurstfüllung für ca. 30 Minuten in den Kühlschrank stellen. Wurstfüllung nach
Anleitung abfüllen (siehe Kapitel „Wurst verarbeiten“) und Würstchen von 25 cm
Länge abdrehen.
Die fertige Rostbratwurst am gleichen Tag gut durchgebraten verzehren.
Spritzgebäck
Zutaten:
500 g Butter
500 g Zucker
2 - 3 Päckchen Vanillinzucker
1 Päckchen Vanillepudding
1/4 Teelöff el Salz
1 Ei
4 Eigelb
800 g Mehl (Type 405)
2 Teelöff el Backpulver
200 g gemahlene Mandeln (blanchiert)
abgeriebene Schale einer Zitrone
Die Butter schaumig schlagen. Die restlichen Zutaten nach und nach hinzugeben
und den Teig gut durchkneten. Den fertigen Teig ca. 12 Stunden (z. B. über
Nacht) im Kühlschrank abgedeckt ruhen lassen. Dann durch den Fleischwolf
mit Spritzgebäck-Aufsatz 1 drehen. Das Spritzgebäck auf ein mit Backpapier
ausgelegtes Backblech legen. Das Spritzgebäck im vorgeheizten Backofen bei
180°C ca.10-15 Minuten goldgelb backen.
IB_277055_SFW350C2_LB8.indb 19 24.02.16 08:13

■ 20
│
DE
│
AT
│
CH
SFW 350 C2
IB_277055_SFW350C2_LB8.indb 20 24.02.16 08:13

GB
│
IE
│
21 ■
SFW 350 C2
Index
Introduction . . . . . . . . . . . . . . . . . . . . . . . . . . . . . . . . . . . . . . . . . . . . . . . . . . 22
Copyright . . . . . . . . . . . . . . . . . . . . . . . . . . . . . . . . . . . . . . . . . . . . . . . . . . . . . . . . . . . . . 22
Limited liability . . . . . . . . . . . . . . . . . . . . . . . . . . . . . . . . . . . . . . . . . . . . . . . . . . . . . . . . . . 22
Intended use . . . . . . . . . . . . . . . . . . . . . . . . . . . . . . . . . . . . . . . . . . . . . . . . . 22
Items supplied / Component description . . . . . . . . . . . . . . . . . . . . . . . . . . . 23
Technical data . . . . . . . . . . . . . . . . . . . . . . . . . . . . . . . . . . . . . . . . . . . . . . . . 24
Safety instructions . . . . . . . . . . . . . . . . . . . . . . . . . . . . . . . . . . . . . . . . . . . . 24
Assembly / Disassembly . . . . . . . . . . . . . . . . . . . . . . . . . . . . . . . . . . . . . . . . 26
Assembling the meat grinder . . . . . . . . . . . . . . . . . . . . . . . . . . . . . . . . . . . . . . . . . . . . . . . 26
Assembling the sausage stuff er attachment . . . . . . . . . . . . . . . . . . . . . . . . . . . . . . . . . . . 27
Assembling the kubbe attachment . . . . . . . . . . . . . . . . . . . . . . . . . . . . . . . . . . . . . . . . . . . 28
Assembling the biscuit attachments . . . . . . . . . . . . . . . . . . . . . . . . . . . . . . . . . . . . . . . . . . 28
Fitting the strainer attachment . . . . . . . . . . . . . . . . . . . . . . . . . . . . . . . . . . . . . . . . . . . . . . 29
Operation . . . . . . . . . . . . . . . . . . . . . . . . . . . . . . . . . . . . . . . . . . . . . . . . . . . 30
Operating the appliance . . . . . . . . . . . . . . . . . . . . . . . . . . . . . . . . . . . . . . . . . . . . . . . . . . 30
Processing meat . . . . . . . . . . . . . . . . . . . . . . . . . . . . . . . . . . . . . . . . . . . . . . . . . . . . . . . . . 31
Processing sausage meat . . . . . . . . . . . . . . . . . . . . . . . . . . . . . . . . . . . . . . . . . . . . . . . . . . 32
Using the kubbe attachment . . . . . . . . . . . . . . . . . . . . . . . . . . . . . . . . . . . . . . . . . . . . . . . 32
Making biscuits . . . . . . . . . . . . . . . . . . . . . . . . . . . . . . . . . . . . . . . . . . . . . . . . . . . . . . . . . 33
Straining tomatoes . . . . . . . . . . . . . . . . . . . . . . . . . . . . . . . . . . . . . . . . . . . . . . . . . . . . . . . 33
Non-functionality . . . . . . . . . . . . . . . . . . . . . . . . . . . . . . . . . . . . . . . . . . . . . 34
Cleaning . . . . . . . . . . . . . . . . . . . . . . . . . . . . . . . . . . . . . . . . . . . . . . . . . . . . . 34
Cleaning the motor block . . . . . . . . . . . . . . . . . . . . . . . . . . . . . . . . . . . . . . . . . . . . . . . . . 35
Cleaning the accessories . . . . . . . . . . . . . . . . . . . . . . . . . . . . . . . . . . . . . . . . . . . . . . . . . . 35
Storage . . . . . . . . . . . . . . . . . . . . . . . . . . . . . . . . . . . . . . . . . . . . . . . . . . . . . 35
Disposal . . . . . . . . . . . . . . . . . . . . . . . . . . . . . . . . . . . . . . . . . . . . . . . . . . . . . 36
Warranty and Service . . . . . . . . . . . . . . . . . . . . . . . . . . . . . . . . . . . . . . . . . 36
Importer . . . . . . . . . . . . . . . . . . . . . . . . . . . . . . . . . . . . . . . . . . . . . . . . . . . . . 37
Recipes . . . . . . . . . . . . . . . . . . . . . . . . . . . . . . . . . . . . . . . . . . . . . . . . . . . . . . 38
Kubbe . . . . . . . . . . . . . . . . . . . . . . . . . . . . . . . . . . . . . . . . . . . . . . . . . . . . . . . . . . . . . . . . 38
Fresh Grill Sausages . . . . . . . . . . . . . . . . . . . . . . . . . . . . . . . . . . . . . . . . . . . . . . . . . . . . . 39
Biscuits . . . . . . . . . . . . . . . . . . . . . . . . . . . . . . . . . . . . . . . . . . . . . . . . . . . . . . . . . . . . . . . . 39
IB_277055_SFW350C2_LB8.indb 21 24.02.16 08:13

■ 22
│
GB
│
IE
SFW 350 C2
Introduction
Congratulations on the purchase of your new appliance.
You have clearly decided in favour of a quality product. These operating instructions
are a part of this product. They contain important information in regard to safety,
use and disposal. Before using the product, familiarise yourself with all of these
operating and safety instructions. Use the product only as described and only for
the specifi ed areas of application. Retain these instructions for future reference. In
addition, pass these documents on, together with the product, to any future owner.
Copyright
This documentation is copyright protected.
Any copying or reproduction of it, including as extracts, as well as the reproduction
of images, also in an altered state, is only permitted with the written authorisation
of the manufacturer.
Limited liability
All technical information, data and instructions for the installation, connection
and operation contained in these operating instructions correspond to the latest
available at the time of printing and, to the best of our knowledge, take into
account our previous experience and know-how.
No claims can be derived from the details, illustrations and descriptions in these
instructions.
The manufacturer assumes no responsibility for damage caused by failure to ob-
serve these instructions, improper use, incompetent repairs, making unauthorised
modifi cations or for using unapproved replacement parts.
Intended use
This appliance is intended only for the preparation of food in quantities expected
in domestic households:
▯ Mincing fresh meat,
▯ Making sausages with natural or artifi cial sausage skin,
▯ Making biscuits,
▯ Straining tomatoes.
This appliance is not intended for the pr
ocessing of frozen foods or other hard
foodstuff s, e.g. bones or nuts, or for use in commercial or industrial environments.
IB_277055_SFW350C2_LB8.indb 22 24.02.16 08:13

GB
│
IE
│
23 ■
SFW 350 C2
Items supplied / Component description
Figure A:
1 Biscuit attachment with pattern strips
2 Stodger
3 Feeding tray
4 Motor unit
5 Meat grinder casing made of metal
6 Locking clamp
7 Tomato outlet
8 Plastic screw
9 Strainer sieve
0 Transport screw
q Spring
w Cross blade
e Cutting discs for coarse and fi ne mincing
r Ring clamp
t Sausage stuff er attachment
z Sausage disc
u Kubbe attachment
Figure B:
i Locking button
Figure C:
o “I” button
p “0” button
a “<” button
IB_277055_SFW350C2_LB8.indb 23 24.02.16 08:13

■ 24
│
GB
│
IE
SFW 350 C2
Technical data
Voltage 220 - 240 V ∼, 50 Hz
Power consumption 250 - 350 W
Protection class
II /
All of the parts of this appliance
that come into contact with food are
food-safe.
C.O. Time 15 minutes
C.O. Time
The C.O. Time (Continuous Operation) details how long an appliance may be
used without the motor overheating and being damaged. After the appliance has
run for this period it must be switched off until the motor has cooled itself down.
Safety instructions
RISK OF ELECTRIC SHOCK
► Ensure that the power cable does not become damaged.
Protect the cable from heat and ensure that it cannot be
trapped or clamped.
► Arrange for damaged power cables and/or plugs to be
replaced as soon as possible by a qualifi ed specialist or by
Customer Services.
► Use the appliance only in dry indoor areas, not outdoors.
Never immerse the motor block in water or any other
liquid! If you do, then you could receive a potentially
fatal electric shock.
WARNING!
► Never use the appliance for purposes other than those listed
here. There will be a major risk of serious accidents should
you try to neutralise the safety fi tments on the appliance!
IB_277055_SFW350C2_LB8.indb 24 24.02.16 08:13

GB
│
IE
│
25 ■
SFW 350 C2
WARNING! RISK OF INJURY!
► Never put your hand into the openings of the appliance. Do
not insert any objects of any kind into the openings – except
for the appropriate stodger and the foodstuff to be pro-
cessed. If you do, there will be a serious risk of accidents!
► Unplug the appliance from the power source before attaching
or removing accessories.
► Do not leave the appliance unsupervised when it is ready
for use. To avoid it being switched on accidentally, always
unplug the appliance after use or during breaks.
► Only use the original accessory parts for this appliance.
Other accessories may not meet the safety requirements.
► Never operate the appliance in a no-load condition. This
could irreparably damage the appliance.
► Before changing accessories or additional parts that are in
motion during operation, the appliance must be switched off
and disconnected from mains power.
► Never use the appliance for purposes other than those
described in these instructions.
► Warning: the cross blade is very sharp! Always take care
when handling and cleaning the appliance.
► The appliance should always be disconnected from the
mains when unattended and before assembly, disassembly
or cleaning.
► This appliance may not be used by children.
► The appliance and its connecting cable must be kept away
from children.
IB_277055_SFW350C2_LB8.indb 25 24.02.16 08:13

■ 26
│
GB
│
IE
SFW 350 C2
WARNING! RISK OF INJURY!
► This appliance may be used by persons with limited physical,
sensory or mental capabilities or lack of experience and
knowledge, provided that they are under supervision or
have been told how to use the appliance safely and are
aware of the potential risks.
► The appliance must not be used as a plaything by children.
Assembly / Disassembly
CAUTION - PROPERTY DAMAGE!
► All accessories are coated with a thin fi lm of oil to protect them from corrosion.
Ther
efore, carefully clean all of the parts before using the appliance for the
fi rst time, as described in detail in the chapter “Cleaning”. After subsequent
usage, always apply a light coating of cooking oil to the metallic components.
NOTICE
► Before using for the fi rst time, remove the protective foil from the control
panel.
Assembling the meat grinder
Unfold the fold-out side. There you will fi nd the step-by-step illustrations for as-
sembling the appliance.
1) Place the transport screw 0 in the meat grinder casing 5.
2) Place the spring q onto the transport screw 0.
3) Then fi t the cross blade w on so that the sharp side points away from the
spring q. Ensure that the square opening in the cross blade w is placed
correctly on the square axle.
IB_277055_SFW350C2_LB8.indb 26 24.02.16 08:13

GB
│
IE
│
27 ■
SFW 350 C2
WARNING! RISK OF INJURY!
► The cross blade w is v
ery sharp! Risk of injury!
CAUTION - PROPERTY DAMAGE!
► The appliance will be damaged if the cross blade w is inser
ted the other
way around!
4) Select the appropriate cutting disc e/sausage disc z.
5) Place your selected cutting disc e into the meat grinder casing 5 so that
the fi xings on the cutting disc e are located in the openings in the meat
grinder casing 5.
6) After everything has been correctly assembled, screw the ring clamp r
back on hand-tight.
7) The ready-assembled meat grinder casing 5 is connected by a bayonet
connector to the motor unit 4:
– Insert the meat grinder casing 5 into the motor unit 4 such that the
arr
ow on the meat grinder casing 5 lies against the symbol
on the
motor unit 4. The locking button i presses itself in (Fig. B).
– Lightly press the meat grinder casing 5 in and at the same time turn
the feeding shaf
t on the meat grinder casing 5 into the middle position
(Fig. B) so that the arrow on the feeding shaft points to the symbol
.
When the meat grinder casing 5 engages, the locking button i
springs out.
– Finally, place the feeding tray 3 on top of the feeding funnel.
– To dismantle it, press the locking button i and turn the feeding funnel
to the right (F
ig. B)
. You can now pull the meat grinder casing 5 out.
Assembling the sausage stuff er attachment
Unfold the fold-out side - there you will fi nd the step-by-step illustrations for as-
sembling the appliance.
1) Remove the meat grinder casing 5 as described under “Assembling the
meat grinder”.
2) Dismantle all parts which are fi tted to/in the meat grinder casing 5 and
clean them.
3) Coat all metal parts with cooking oil.
4) Put the transport screw 0, the spring q and the cross blade w back into
the meat grinder casing 5.
5) Insert the sausage disc z so that the fi xings on the sausage disc z are
located in the openings in the meat grinder casing 5.
6) Then place the sausage stuff er attachment t before the sausage disc z.
IB_277055_SFW350C2_LB8.indb 27 24.02.16 08:13

■ 28
│
GB
│
IE
SFW 350 C2
7) Screw the ring clamp r on hand-tight.
8) Assemble the meat grinder casing 5 as described under “Assembling the
meat grinder”.
Assembling the kubbe attachment
Unfold the fold-out side. There you will fi nd the step-by-step illustrations for as-
sembling the appliance.
1) Remove the meat grinder casing 5 as described under “Assembling the
meat grinder”.
2) Disassemble any attachments that might be fi tted and clean the meat grinder
casing 5.
NOTICE
► For the kubbe attachment u, the cr
oss blade w with the spring q is not
required! If need be, remove them both from the meat grinder casing 5.
3) Coat all metal parts with cooking oil.
4) Insert the two plastic parts of the kubbe attachment u so that the fi xings on
the bottom kubbe attachment u ring are located in the openings in the meat
grinder casing 5.
5) When everything has been attached correctly, screw the ring clamp r back
on hand-tight.
6) Assemble the meat grinder casing 5 as described under “Assembling the
meat grinder”.
Assembling the biscuit attachments
Unfold the fold-out side. There you will fi nd the step-by-step illustrations for as-
sembling the appliance.
1) Remove the meat grinder casing 5 as described under “Assembling the
meat grinder”.
2) Disassemble any attachments that might be fi tted and clean the meat grinder
casing 5.
NOTICE
► For the biscuit attachment 1, the cr
oss blade w with the spring q is not
required! If need be, remove them both from the meat grinder casing 5.
3) Coat all metal parts with cooking oil.
4) Pull the pattern strips 1 away from the front of the biscuit attachment 1.
5) First place the plastic disc and then the metal disc of the biscuit attachment 1
into the meat grinder casing 5 (see fold-out side). Insert the biscuit attach-
ment 1. so that the fi xings on the biscuit attachment 1. are located in the
openings in the meat grinder casing 5.
IB_277055_SFW350C2_LB8.indb 28 24.02.16 08:13

GB
│
IE
│
29 ■
SFW 350 C2
6) After everything has been correctly assembled, screw the ring clamp r
back on hand-tight.
7) Replace the pattern strips 1 back in to the front of the biscuit attachment 1.
Ensure that the grip on the pattern strips 1 points away from the appliance.
If it does not, you will not be able to adjust the pattern, which is located
directly on the grip.
8) Assemble the meat grinder casing 5 as described under “Assembling the
meat grinder”.
9) To dismantle it, you must fi rst remove the pattern strips 1 before you can
screw the ring clamp r open and take the biscuit attachment 1 back out.
Fitting the strainer attachment
Unfold the fold-out page – it contains the step-by-step illustrations for assembling
the appliance.
1) Remove the meat grinder casing 5 as described in “Assembling the meat
grinder”.
2) Remove any attachments that might be fi tted and clean the meat grinder
casing 5.
NOTICE
► The transport screw 0 and the cr
oss blade w with the spring q are not
required for the strainer attachment! Remove these from the meat grinder
casing 5 if necessary.
3) Push the plastic screw 8 into the meat grinder casing 5.
4) Push the strainer sieve 9 over the plastic screw 8 so that the tabs on the
strainer sieve 9 fi t into the recesses in the meat grinder casing 5. The holes
of the strainer sieve 9 should be facing downwards.
5) Once everything has been correctly attached, roll the ring clamp r over the
strainer sieve 9 and screw it on hand-tight.
6) Fit the meat grinder casing 5 as described in “Assembling the meat grinder”.
7) Undo the locking clamp 6 on the tomato outlet 7.
8) Place the tomato outlet 7 under the strainer sieve by pushing the tip of the
strainer sieve 9 through the small hole in the tomato outlet 7:
IB_277055_SFW350C2_LB8.indb 29 24.02.16 08:13

■ 30
│
GB
│
IE
SFW 350 C2
9) Fasten the locking clamp 6 so that it grips the meat grinder casing 5.
Operation
RISK OF ELECTRIC SHOCK
► NEVER open the housing of the motor unit 4 – it does not contain an
y
user-serviceable elements. If the housing is opened, the warranty becomes
void. If the housing is opened, there is a risk of receiving a potentially fatal
electric shock.
CAUTION - PROPERTY DAMAGE!
► Do not use the appliance for longer than 15 minutes continuously. To avoid
an o
verheating of the appliance, after such a period switch it off and allow
it to cool down for ca. 30 minutes.
► NEVER activate the buttons “I” o or “<” a, during a change of rotation
direction, if the appliance motor has not come to a complete stop. This
could damage the motor.
Operating the appliance
Once the appropriate attachments have been fi xed:
1) Place the appliance where it will at all times be absolutely stable and under
no circumstances could it fall off of the work surface or in any way come into
contact with water (due to vibrations or becoming snagged in the power
cable). Vibration is unavoidable when it is working.
IB_277055_SFW350C2_LB8.indb 30 24.02.16 08:13

GB
│
IE
│
31 ■
SFW 350 C2
RISK OF ELECTRIC SHOCK
► Never touch an appliance, which is plugged in or is operational when it
happens, that falls or lands in w
ater – or in the case of other emergencies!
First disconnect the appliance from the mains power source in all emergency
situations! Otherwise you run the risk of serious injury or loss of life!
2) Put the food which is to be processed in the feeding tray 3 and place a
catchment container at the front under the exit opening.
3) First press the button “0” p to check that the appliance is still switched off .
Otherwise there is a risk that the appliance could unintentionally start
when the plug is inserted into the power socket.
4) Then insert the plug into a mains power socket.
5) Press the button “I” o to start the appliance.
WARNING! RISK OF INJURY!
► Push the foodstuff into the feeding shaft ONLY with the round stodger 2 –
NEVER with one’
s fi ngers, forks, spoons or similar objects. That could lead
to physical injury and also damage the appliance.
CAUTION - PROPERTY DAMAGE!
► Do not ever press so hard that the motor gets audibly slower. This could
o
verburden the machine and damage it.
Processing meat
1) Use pieces of meat that fi t easily into the feeding funnel. If necessary, cut the
meat to size beforehand. Check that the meat does not have any bones and
or tendons.
WARNING!
► Minced meat is very prone to bacterial contamination. Therefore take care
to maintain good h
ygiene when processing meat. If you do not, it may cause
serious health problems.
2) When you have read and understood all of the instructions on the topic
”Meat“, you can now use the appliance as described in the chapter
“Operating the appliance”.
IB_277055_SFW350C2_LB8.indb 31 24.02.16 08:13

■ 32
│
GB
│
IE
SFW 350 C2
Processing sausage meat
1) Pass meat through the meat grinder twice before using it as sausage stuffi ng.
2) To make sausage stuffi ng, add some chopped onions, spices and other
ingredients to the minced meat, as per your recipe, and knead the mixture
well. Refrigerate this for 30 minutes before processing it further.
3) Pull one end of the sausage skin (natural or artifi cial sausage skin) onto the
sausage stuff er attachment t and tie a knot in the other end. For 1 kg of the
fi lling, you will need approximately 1.60 m of sausage skin.
TIP!
Soak the natural sausage skin in lukewarm water for about 3 hours before
using it and wring it out befor
e attaching it. This will make the natural sau-
sage skin more elastic. Natural sausage skins are available from butcher
suppliers close to slaughter houses or from your family butcher.
4) The sausage mixture will be pressed into the sausage skin by the sausage
stuff er attachment t. When it is long enough switch the appliance off , press
the sausage together at the ends and rotate it a couple of times along its
longitudinal axis.
TIP!
Sausage meat tends to expand when cooked or frozen. Therefore, to prevent
it fr
om bursting it is best not to overstuff the sausage.
5) When you have read and understood all of the instructions on the topic
”Sausage”, you can now use the appliance as described in the chapter
“Operating the appliance”.
Using the kubbe attachment
With the kubbe attachment u foodstuff s can be processed to form hollow rolls
of meat or vegetables, which can then be stuff ed as desired.
1) First put the meat through the meat grinder twice before pressing it through
the kubbe attachment u.
2) When you have read and understood all of the instructions on the topic
“kubbe-Attachment”, you can now use the appliance as described in the
chapter “Operating the appliance”.
IB_277055_SFW350C2_LB8.indb 32 24.02.16 08:13

GB
│
IE
│
33 ■
SFW 350 C2
Making biscuits
After you have made the biscuit pastry according to your recipe, and after having
fi xed the biscuit attachment 1:
1) Line a small baking tray with greaseproof paper and place or hold it directly
under the exit opening at the front of the appliance.
2) Press pastry evenly into the meat grinder casing 5 – the transport screw 0
then pushes it through the selected design on the design motif strip of the
biscuit attachment 1.
3) When the biscuit is the required length, stop the appliance and break the
pastry off at the exit opening. Lay the biscuits on the baking tray.
4) When you have read and understood all of the instructions on the topic
“Biscuits”, you can now use the appliance as described in the chapter
“Operating the appliance”.
Straining tomatoes
1) Place a container under the tomato outlet 7.
2) Place a container at the front under the strainer sieve 9.
3) Quarter the tomatoes and push them slowly and evenly into the meat grinder
casing 5.
The plastic screw 8 pushes the tomatoes through the strainer attachment.
The strained tomatoes fall in the tomato outlet 7. The tomato skin is ejected
at the front from the strainer sieve 9.
NOTICE
If tomato juice starts leaking from the screw joints of the strainer attachment,
this can hav
e the following causes:
– You are working too fast.
– You are using too much pressure to press the tomato pieces into the
appliance.
– The tomato pieces are too large.
► Try working more slowly; press the tomato pieces gently into the appliance
and cut the tomatoes into smaller pieces.
4)
Once you have read and understood all of the instructions in the section
“Straining tomatoes”, you can use the appliance as described in the section
“Operating the appliance”.
IB_277055_SFW350C2_LB8.indb 33 24.02.16 08:13

■ 34
│
GB
│
IE
SFW 350 C2
Non-functionality
If the drive is blocked by accumulated food:
■ Press the button “0” p to stop the meat grinder.
■ Press and hold the button “<” a. The appliance will no
w run in the reverse
direction. This enables you to transport the food which has become stuck a
short way backwards, and the motor to run freely again.
■ When the drive runs smoothly again, release the “<” a button.
■ Press the button “I” o to r
e-start the meat grinder.
■ If you do not succeed in getting the drive free with this, clean the appliance
as described in the chapter “Cleaning”.
Should the motor suddenly stop, it could be due to automatic
activation of the internal overload fuse. This is intended to
protect the motor.
■ Switch the appliance off and allow it cool down for approximately 30 minutes
before continuing to use it.
■ Should this not work, wait for a further 15 minutes.
■ If it still does not function at the end of this period, this indicates a technical
pr
oblem. In this case, contact the Customer Service Centre.
If the power cable is damaged or the accessories are
visibly damaged:
■ Immediately switch the appliance off by pressing the “0” p button!
■ If this is not possible without risk to personal safety, disconnect the plug from
the mains po
wer socket.
■ Arrange for the defective parts to be repaired by Customer Services before
r
e-using the appliance.
Cleaning
RISK OF ELECTRIC SHOCK
► Disconnect the plug from the mains power socket before cleaning the appli-
ance. In this w
ay accidents caused by the inadvertent switching on of the
appliance and electric shocks can be avoided.
IB_277055_SFW350C2_LB8.indb 34 24.02.16 08:13

GB
│
IE
│
35 ■
SFW 350 C2
Cleaning the motor block
■ Clean the exterior surfaces and the power cable with a slightly damp cloth.
Dry the appliance well before re-using it.
RISK OF ELECTRIC SHOCK
► Never immerse the motor block in water or any other liquid! Should this
occur
, you are at risk of a potentially fatal electric shock if permeating
moisture makes contact with the electrical wiring.
CAUTION - PROPERTY DAMAGE!
► Never use detergents, abrasive cleaners or solvents. These could damage
the appliance and leav
e residues on the foodstuff s.
Cleaning the accessories
NOTICE
► Do not clean the accessories in a dishwasher! This could cause damage to
them!
■ Clean the accessories that could come in contact with foodstuff s, ...
– by hand only, the accessories are not dishwasher safe.
– with hot water and a household detergent suitable for use with foods.
WARNING! RISK OF INJURY!
► The cross blade w is v
ery sharp! Risk of injury!
■ Dry all parts thoroughly, before re-using the appliance.
NOTICE
► Apply a light coating of cooking oil to all metallic components after each
cleaning! Other
wise, metal parts can discolour!
Storage
■ Push the power cable (but not the plug) into the cable storage shaft under
the appliance base. There it is protected from damage.
■ Store the appliance at a dry location.
■ After drying the metal attachments coat them lightly with a little cooking oil –
if y
ou are not going to use the appliance immediately. This will protect them
from corrosion.
■ Store the appliance where it will be out of reach of children and people
r
equiring supervision. They are not always able to correctly assess the
potential risks involved with using electrical appliances.
IB_277055_SFW350C2_LB8.indb 35 24.02.16 08:13

■ 36
│
GB
│
IE
SFW 350 C2
Disposal
Do not dispose of the appliance in your normal domestic waste.
This product is subject to the provisions of European Directive
2012/19/EU (Waste Electrical and Electronic Equipment).
Dispose of the appliance through an approved disposal centre or at your com-
munity waste facility. Observe the currently applicable regulations. In case of
doubt, please contact your waste disposal centre.
Dispose of all packaging materials in an environmentally friendly manner.
Warranty and Service
The warranty for this appliance is for 3 years from the date of purchase. This appli-
ance has been manufactured with care and meticulously examined before delivery.
Please retain your receipt as proof of purchase. In the case of a warranty claim,
please make contact by telephone with our service department. Only in this way
can a post-free despatch for your goods be assured.
NOTICE
► The warranty covers only claims for material and manufacturing defects, not
for tr
ansport damages, worn parts or for damage to fragile components,
e.g. buttons or batteries.
The appliance is intended for domestic use only, NOT for commercial purposes.
If this product has been subjected to improper or inappropriate handling, abuse,
or modifi cations not carried out by one of our authorised sales and service
outlets, the warranty will be considered void.
Your statutory rights are not restricted in any way by this warranty. The warranty
period is not extended by repairs eff ected under warranty. This applies also to
replaced and repaired parts.
Damages or defects discovered after purchase are to be reported directly after
unpacking, at the latest two days after the purchase date.
Repairs carried out after lapse of the warranty period are subject to charge.
The warranty period is not extended by repairs eff ected under warranty.
This applies also to replaced and repaired parts.
Damages or defects discovered after purchase are to be reported directly after
unpacking, at the latest two days after the purchase date.
Repairs carried out after lapse of the warranty period are subject to charge.
IB_277055_SFW350C2_LB8.indb 36 24.02.16 08:13

GB
│
IE
│
37 ■
SFW 350 C2
Service Great Britain
Tel.: 0871 5000 720 (£ 0.10/Min.)
E-Mail: k[email protected]
IAN 277055
Service Ireland
Tel.: 1890 930 034
(0,08 EUR/Min., (peak))
(0,06 EUR/Min., (off peak))
E-Mail: k[email protected]
IAN 277055
Importer
KOMPERNASS HANDELS GMBH
BURGSTRASSE 21
44867 BOCHUM
GERMANY
www.kompernass.com
IB_277055_SFW350C2_LB8.indb 37 24.02.16 08:13

■ 38
│
GB
│
IE
SFW 350 C2
Recipes
Kubbe
Ingredients for the wrapping
450 g of lean Lamb, Veal or Beef
150 g Flour
1 Tsp Pimento (type of pepper)
1 Tsp Nutmeg
1 Pinch Chili powder
1 Pinch Pepper
Ingredients for the meat fi lling
700 g Mutton
1 1/2 Tbsp Olive oil
1 1/2 Tbsp Onions, fi nely chopped
1/2 Tsp Pimento (type of pepper)
1/2 Tsp Salt
1 1/2 Tbsp Flour
Pass the meat for the wrapping through the meat grinder twice (fi rst with the
coarse and then with the fi ne cutting discs e) and then combine it with the
ingredients. Then pass this mixture through the meat grinder twice. Exchange
the cutting disc e for the kubbe attachment u (see chapter “Using the kubbe
attachment”).
Shape the kubbe wrappers with the kubbe attachment u and then freeze them.
Filling:
Pass the meat through the meat grinder twice (fi rst with the coarse and then with
the fi ne cutting discs e). Saute the onions and then mix them well with the meat
and other ingredients. Fill the kubbe wrappers and fry until done.
Alternative Fillings:
250 g steamed Broccoli
or 250 g steamed Zucchini
or 250 g cooked Rice
IB_277055_SFW350C2_LB8.indb 38 24.02.16 08:13

GB
│
IE
│
39 ■
SFW 350 C2
Fresh Grill Sausages
Ingredients:
300 g lean Beef
500 g lean Pork
200 g Shoulder bacon
20 g Salt
1/2 Tsp ground white Pepper
1 Tsp Caraway
1/2 Tsp Nutmeg
Pass the beef, pork and bacon through the meat grinder twice.
Add the mixed spices and salt and thoroughly knead for 5 minutes.
Place the sausage fi lling in the refrigerator for ca. 30 minutes. Fill the skins with
sausage meat as detailed (see chapter “Processing sausage meat”) and make
sausages of ca. 25 cm in length.
Grill the sausages well and eat them on the same day.
Biscuits
Ingredients:
500 g butter
500 g sugar
2 - 3 packets of vanilla sugar
1 packet of vanilla custard
1/4 tsp salt
1 egg
4 egg yolks
800 g plain fl our
2 tbsp baking powder
200 g ground (blanched) almonds
Zest of a lemon
Beat the butter until fl uff y. Add the remaining ingredients one after another and
knead well into the dough. Cover the fi nished dough and allow to stand for around
12 hours in the fridge (e.g. overnight). Then pass it through the meat grinder with
the biscuit attachment 1. Place the biscuits on a baking tray lined with baking
paper. Bake the biscuits in a pre-heated oven at 180°C for approx. 10 - 15 minutes
until golden brown.
IB_277055_SFW350C2_LB8.indb 39 24.02.16 08:13

■ 40
│
GB
│
IE
SFW 350 C2
IB_277055_SFW350C2_LB8.indb 40 24.02.16 08:13

FR
│
BE
│
41 ■
SFW 350 C2
Sommaire
Introduction . . . . . . . . . . . . . . . . . . . . . . . . . . . . . . . . . . . . . . . . . . . . . . . . . . 42
Droits d’auteur . . . . . . . . . . . . . . . . . . . . . . . . . . . . . . . . . . . . . . . . . . . . . . . . . . . . . . . . . . 42
Limitation de responsabilité . . . . . . . . . . . . . . . . . . . . . . . . . . . . . . . . . . . . . . . . . . . . . . . . 42
Utilisation conforme . . . . . . . . . . . . . . . . . . . . . . . . . . . . . . . . . . . . . . . . . . . 42
Accessoires fournis / Description des pièces . . . . . . . . . . . . . . . . . . . . . . . . 43
Caractéristiques techniques . . . . . . . . . . . . . . . . . . . . . . . . . . . . . . . . . . . . . 44
Consignes de sécurité . . . . . . . . . . . . . . . . . . . . . . . . . . . . . . . . . . . . . . . . . . 44
Assemblage / désassemblage . . . . . . . . . . . . . . . . . . . . . . . . . . . . . . . . . . . 46
Assemblage du hachoir à viande . . . . . . . . . . . . . . . . . . . . . . . . . . . . . . . . . . . . . . . . . . . 46
Monter le poussoir à saucisse . . . . . . . . . . . . . . . . . . . . . . . . . . . . . . . . . . . . . . . . . . . . . . 47
Monter l’accessoire à boulettes . . . . . . . . . . . . . . . . . . . . . . . . . . . . . . . . . . . . . . . . . . . . . 48
Monter l’accessoire pour biscuits sablés . . . . . . . . . . . . . . . . . . . . . . . . . . . . . . . . . . . . . . 48
Monter l’embout presse-purée . . . . . . . . . . . . . . . . . . . . . . . . . . . . . . . . . . . . . . . . . . . . . . 49
Opération . . . . . . . . . . . . . . . . . . . . . . . . . . . . . . . . . . . . . . . . . . . . . . . . . . . 50
Fonctionnement de l’appareil . . . . . . . . . . . . . . . . . . . . . . . . . . . . . . . . . . . . . . . . . . . . . . 50
Travailler de la viande . . . . . . . . . . . . . . . . . . . . . . . . . . . . . . . . . . . . . . . . . . . . . . . . . . . . 51
Confectionner des saucisses . . . . . . . . . . . . . . . . . . . . . . . . . . . . . . . . . . . . . . . . . . . . . . . 52
Travailler avec l’accessoire à boulettes . . . . . . . . . . . . . . . . . . . . . . . . . . . . . . . . . . . . . . . 52
Confectionner des biscuits sablés . . . . . . . . . . . . . . . . . . . . . . . . . . . . . . . . . . . . . . . . . . . 53
Passer les tomates . . . . . . . . . . . . . . . . . . . . . . . . . . . . . . . . . . . . . . . . . . . . . . . . . . . . . . . 53
En cas de panne . . . . . . . . . . . . . . . . . . . . . . . . . . . . . . . . . . . . . . . . . . . . . . . 54
Nettoyage . . . . . . . . . . . . . . . . . . . . . . . . . . . . . . . . . . . . . . . . . . . . . . . . . . . 54
Nettoyage du bloc-moteur . . . . . . . . . . . . . . . . . . . . . . . . . . . . . . . . . . . . . . . . . . . . . . . . . 55
Nettoyage des accessoires . . . . . . . . . . . . . . . . . . . . . . . . . . . . . . . . . . . . . . . . . . . . . . . . 55
Rangement . . . . . . . . . . . . . . . . . . . . . . . . . . . . . . . . . . . . . . . . . . . . . . . . . . 55
Mise au rebut . . . . . . . . . . . . . . . . . . . . . . . . . . . . . . . . . . . . . . . . . . . . . . . . 56
Garantie et service après-vente . . . . . . . . . . . . . . . . . . . . . . . . . . . . . . . . . 56
Importateur . . . . . . . . . . . . . . . . . . . . . . . . . . . . . . . . . . . . . . . . . . . . . . . . . . 57
Recettes . . . . . . . . . . . . . . . . . . . . . . . . . . . . . . . . . . . . . . . . . . . . . . . . . . . . . 58
Boulettes . . . . . . . . . . . . . . . . . . . . . . . . . . . . . . . . . . . . . . . . . . . . . . . . . . . . . . . . . . . . . . 58
Saucisse à griller fraîche . . . . . . . . . . . . . . . . . . . . . . . . . . . . . . . . . . . . . . . . . . . . . . . . . . 59
Biscuits sablés . . . . . . . . . . . . . . . . . . . . . . . . . . . . . . . . . . . . . . . . . . . . . . . . . . . . . . . . . . 59
IB_277055_SFW350C2_LB8.indb 41 24.02.16 08:13

■ 42
│
FR
│
BE
SFW 350 C2
Introduction
Toutes nos félicitations pour l’achat de votre nouvel appareil.
Vous avez choisi un produit de grande qualité. Le mode d’emploi fait partie de ce
produit. Il contient des remarques importantes concernant la sécurité, l’utilisation et
la mise au rebut. Veuillez vous familiariser avec l’ensemble des consignes d’opération
et de sécurité avant l’usage du produit. N’utilisez le produit que conformément aux
consignes et pour les domaines d’utilisation prévus. Conservez soigneusement ces
instructions. En cas de transfert du produit à un tiers, remettez-lui également tous les
documents.
Droits d’auteur
Cette documentation est protégée par les droits d’auteur.
Toute reproduction ou réimpression, même partielle, y compris la reproduction des
illustrations, même modifi ées, n’est autorisée qu’avec l’accord écrit du fabricant.
Limitation de responsabilité
L’ensemble des informations, données et remarques techniques se rapportant
au raccordement et à l’opération contenues dans le présent mode d’emploi sont
conformes au dernier état lors du passage en presse en tenant compte de nos
expériences passées et de nos connaissances en toute bonne foi.
Aucune prétention ne peut être dérivée des indications, photos et descriptions
contenues dans le présent mode d’emploi.
Le fabricant n’assume aucune responsabilité pour les dommages résultant d’un
non-respect du mode d’emploi, d’un usage non conforme, de réparations non
conformes, de modifi cations eff ectuées sans autorisation ou de l’usage de pièces
de rechange non agréées.
Utilisation conforme
Cet appareil est prévu pour le travail exclusif avec des denrées alimentaires dans
des quantités usuelles ménagères dans le cadre privé :
▯ Hachage de viande fraîche,
▯ Confection de saucisses dans des boyaux naturels ou synthétiques,
▯ Confection de biscuits sablés,
▯ Passer des tomates au presse-purée.
L
’appareil n’est pas prévu pour le travail de denrées alimentaires congelées
ou dures, par exemple des os ou des noix, et son utilisation est exclue dans le
secteur commercial ou industriel.
IB_277055_SFW350C2_LB8.indb 42 24.02.16 08:13

FR
│
BE
│
43 ■
SFW 350 C2
Accessoires fournis / Description des pièces
Figure A :
1 Accessoire pour biscuits sablés avec plaquette des modèles
2 Bouchon
3 Plateau de remplissage
4 Bloc-moteur
5 Adaptateur du hachoir en métal
6 Collier de fermeture
7 Éjecteur de tomates
8 Vis plastique
9 Tamis
0 Vis transporteuse
q Ressort
w Lame cruciforme
e Grille fi ne et grossière
r Anneau de fermeture
t Embout à saucisses
z Grille à saucisses
u Accessoire à boulettes
Figure B :
i Bouton de verrouillage
Figure C :
o Touche «I»
p Touche «0»
a Touche «<»
IB_277055_SFW350C2_LB8.indb 43 24.02.16 08:13

■ 44
│
FR
│
BE
SFW 350 C2
Caractéristiques techniques
Tension 220 - 240 V ∼, 50 Hz
Puissance absorbée 250 - 350 W
Classe de protection
II /
Toutes les pièces de cet appareil, entrant
en contact avec les aliments, sont
appropriées à une utilisation alimentaire.
Temps d'opération par
intermittence
15 minutes
Temps d’opération par intermittence
Le temps d’opération par intermittence indique pendant combien de temps
l’appareil peut être opéré, sans que le moteur ne surchauff e ou subisse de
dommages. Après le temps d’opération par intermittence indiqué, l’appareil
doit être éteint jusqu’à ce que le moteur se soit refroidi.
Consignes de sécurité
RISQUE D'ÉLECTROCUTION
► Veillez à ce que le cordon d'alimentation ne soit pas
endommagé. Maintenez-le à distance de zones chaudes et
acheminez-le de telle manière qu'il ne puisse pas être coincé.
► Faites remplacer aussitôt un cordon d'alimentation ou une
fi che secteur endommagée par des techniciens spécialisés
agréés, afi n d'éviter tous dangers.
► Utiliser l'appareil exclusivement dans des locaux secs, surtout
pas en extérieur.
N'immergez jamais le bloc-moteur dans l'eau ou d'autres
liquides ! Sinon, il y a danger de mort par électrocution.
AVERTISSEMENT !
► N'utilisez jamais l'appareil à d'autres fi ns que celles décrites ici.
Risque important d'accident si vous mettez les dispositifs de
protection hors service en cas d'utilisation non appropriée
de l'appareil !
IB_277055_SFW350C2_LB8.indb 44 24.02.16 08:13

FR
│
BE
│
45 ■
SFW 350 C2
AVERTISSEMENT ! RISQUE D'ACCIDENT !
► Ne passez jamais vos mains dans les ouvertures de l'appareil.
N'introduisez jamais un quelconque objet dans les ouvertures –
exception faite du bouchon correspondant à la grille et des
denrées alimentaires que vous transformez. Risque très élevé
d'accident !
► Débranchez tout d'abord la fi che de la prise secteur, avant
d'installer ou de retirer les pièces accessoires.
► Ne laissez jamais l'appareil sans surveillance lorsqu'il est
prêt à l'emploi. Lorsque vous avez terminé ou en cas d'inter-
ruption du travail, débranchez toujours la fi che de la prise
secteur afi n d'éviter une mise en marche accidentelle.
► Utilisez exclusivement les accessoires d’origine constructeur
prévus pour cet appareil. L’utilisation de pièces diff érentes
peut ne pas être suffi samment sûr.
► N’opérez jamais l’appareil lorsqu’il est vide. Ceci peut en
eff et entraîner des dommages irréparables.
► Avant de changer les accessoires ou les pièces supplémen-
taires mobiles lors de l’utilisation, l’appareil doit être mis à
l’arrêt et débranché du secteur.
► N’utilisez pas l’appareil à d’autres fi ns que celles décrites
dans cette notice.
► Attention : la lame cruciforme est extrêmement tranchante !
Faites toujours très attention en manipulant et en nettoyant
l’appareil.
► En cas d’absence de surveillance et avant l’assemblage, le
désassemblage ou le nettoyage, l’appareil doit toujours être
débranché du secteur.
► L’appareil ne doit pas être utilisé par des enfants.
► Tenir l’appareil et son cordon de raccordement hors de
portée des enfants.
IB_277055_SFW350C2_LB8.indb 45 24.02.16 08:13

■ 46
│
FR
│
BE
SFW 350 C2
AVERTISSEMENT ! RISQUE D'ACCIDENT !
► Cet appareil peut être utilisé par des personnes ayant des
capacités physiques, sensorielles ou mentales réduites ou
un manque d’expérience et de connaissances à condition
qu’elles aient reçu une supervision ou des instructions
concernant l’utilisation de l’appareil en toute sécurité et
qu’elles comprennent les dangers encourus.
► Ne pas laisser les enfants jouer avec l’appareil.
Assemblage / désassemblage
ATTENTION - RISQUE DE DÉGÂTS MATÉRIELS !
► Toutes les pièces d'accessoires sont revêtues d'un fi n fi lm huileux afi n de les
pr
otéger de la corrosion. Avant la première utilisation, nettoyez pour cette
raison soigneusement toutes les pièces comme décrit en détails au chapitre
«Nettoyage». Badigeonnez ensuite toutes les pièces métalliques d'un peu
d'huile alimentaire.
REMARQUE
► Retirez le fi lm protecteur du bloc de touches avant la première utilisation.
Assemblage du hachoir à viande
Ouvrez la partie rabattable - vous y trouverez l’ordre d’assemblage sous forme
d’une représentation graphique.
1) Placez la vis transporteuse 0 dans l’adaptateur du hachoir à viande 5.
2) Insérez le ressort q sur la vis transporteuse 0.
3) Insérez la lame cruciforme w de telle manière que la face tranchante ne
soit pas orientée vers le ressort q. Veillez à ce que l’encoche angulaire de
la lame cruciforme w repose correctement dans l’axe angulaire.
IB_277055_SFW350C2_LB8.indb 46 24.02.16 08:13

FR
│
BE
│
47 ■
SFW 350 C2
AVERTISSEMENT ! RISQUE D'ACCIDENT !
► La lame cruciforme w est e
xtrêmement tranchante ! Risque de blessures !
ATTENTION - RISQUE DE DÉGÂTS MATÉRIELS !
► L'appareil sera endommagé si la lame cruciforme w est insér
ée dans le
sens contraire !
4) Sélectionnez la grille souhaitée e/grille à saucisses z.
5) Insérez la grille e sélectionnée de telle manière dans l’adaptateur du
hachoir 5, que les fi xations sur la grille e se trouvent dans les encoches de
l’adaptateur du hachoir à viande 5.
6) Lorsque tout est correctement inséré, vissez l’anneau de fermeture r fermement
à la main.
7) L’adaptateur du hachoir à viande 5 monté est relié au bloc-moteur 4 par
un joint à baïonnette :
– Insérez l’adaptateur du hachoir à viande 5 dans le bloc-moteur 4, afi
n
que la fl èche au niveau de la gaine de remplissage repose 5 sur le sym-
bole
du bloc-moteur 4. Le bouton de verrouillage i s’enfonce (Fig. B).
– Appuyez légèrement sur l’adaptateur du hachoir à viande 5 et ce faisant,
tournez la gaine de remplissage de l’adaptateur du hachoir à viande 5
dans la position du milieu (Fig. B), afi n que la fl èche au niveau de la gaine
de remplissage indique le symbole . Lorsque l’adaptateur du hachoir à
viande 5 s’enclenche, le bouton de verrouillage i ressort.
– Pour fi nir, placez le plateau de remplissage 3 en haut sur la gaine de
r
emplissage.
– Pour le retirer, appuyez sur le bouton de verrouillage i et tournez à
nouveau la gaine de remplissage vers la droite (Fig. B) . Ensuite, vous
pouvez retirer l’adaptateur du hachoir à viande 5.
Monter le poussoir à saucisse
Ouvrez la partie rabattable - vous y trouverez l’ordre d’assemblage sous forme
d’une représentation graphique.
1) Retirez l’adaptateur du hachoir à viande 5, conformément à la description
sous «Assemblage du hachoir à viande».
2) Démontez toutes les pièces qui sont montées dans/sur l’adaptateur du hachoir
en métal 5 et nettoyez-les.
3) Badigeonnez toutes les parties métalliques avec de l’huile alimentaire.
4) Insérez la vis transporteuse 0, le ressort q et la lame cruciforme w dans
l’adaptateur du hachoir en métal 5.
5) Insérez la grille à saucisses z de telle manière que les fi xations de la grille à sau-
cisses z se trouvent dans les encoches de l’adaptateur du hachoir à viande 5.
6) Placez ensuite le poussoir à saucisse t devant la grille à saucisse z.
IB_277055_SFW350C2_LB8.indb 47 24.02.16 08:13

■ 48
│
FR
│
BE
SFW 350 C2
7) Vissez l’anneau de fermeture r fermement à la main.
8) Montez l’adaptateur du hachoir à viande 5 conformément à la description
sous «Assemblage du hachoir à viande».
Monter l’accessoire à boulettes
Ouvrez la partie rabattable - vous y trouverez l’ordre d’assemblage sous forme
d’une représentation graphique.
1) Retirez l’adaptateur du hachoir à viande 5, conformément à la description
sous «Assemblage du hachoir à viande».
2) Retirez toutes les appliques éventuelles et nettoyez l’adaptateur du hachoir
à viande 5.
REMARQUE
► Pour l'accessoire à boulettes u, la lame cruciforme w av
ec le ressort q
n'est pas nécessaire ! Le cas échéant, ressortez les deux éléments de
l'adaptateur du hachoir à viande 5.
3) Badigeonnez toutes les parties métalliques avec de l’huile alimentaire.
4) Insérez les deux pièces en plastique de l’accessoire à boulettes u de telle
manière que les fi xations sur l’accessoire à boulettes u se trouvent dans les
encoches de l’adaptateur du hachoir à viande 5.
5) Si toutes les pièces sont correctement positionnées, vissez de nouveau ferme-
ment l’anneau de fermeture r à la main.
6) Montez l’adaptateur du hachoir à viande 5 conformément à la description
sous «Assemblage du hachoir à viande».
Monter l’accessoire pour biscuits sablés
Ouvrez la partie rabattable - vous y trouverez l’ordre d’assemblage sous forme
d’une représentation graphique.
1) Retirez l’adaptateur du hachoir à viande 5, conformément à la description
sous «Assemblage du hachoir à viande».
2) Retirez toutes les appliques éventuelles et nettoyez l’adaptateur du hachoir
à viande 5.
REMARQUE
► Pour l'accessoire pour biscuits sablés 1, la lame cruciforme w av
ec le res-
sort q n'est pas nécessaire ! Le cas échéant, ressortez les deux éléments
de l'adaptateur du hachoir à viande 5.
3) Badigeonnez toutes les parties métalliques avec de l’huile alimentaire.
4) Retirez la plaquette des modèles 1 à l’avant de l’accessoire pour biscuits
sablés 1.
5) Insérez tout d’abord le disque en plastique, puis le disque en métal de
l’accessoire pour biscuits sablés 1 dans l’adaptateur du hachoir à viande 5
(voir face dépliable). Insérez l’accessoire pour biscuits sablés 1 de telle
manière que les fi xations de l’accessoire pour biscuits sablés 1 se trouve
dans les encoches de l’adaptateur du hachoir à viande 5.
IB_277055_SFW350C2_LB8.indb 48 24.02.16 08:13

FR
│
BE
│
49 ■
SFW 350 C2
6) Lorsque tout est correctement inséré, vissez l’anneau de fermeture r à la
main.
7) Insérez la plaquette de modèles 1 à nouveau à l’avant dans l’accessoire pour
biscuits sablés 1. Veillez à ce que la poignée au niveau de la plaquette des
modèles 1 ne soit pas dirigée vers l’appareil. Sinon, vous ne pourrez pas
régler le modèle qui se trouve directement sur la poignée.
8) Montez l’adaptateur du hachoir à viande 5 conformément à la description
sous «Assemblage du hachoir à viande».
9) Pour le retirer, il faut à nouveau enlever la plaquette des modèles 1, avant
d’enlever l’anneau de fermeture r et de pouvoir à nouveau enlever l’acces-
soire pour biscuits sablés 1.
Monter l’embout presse-purée
Dépliez le volet, vous y trouverez l’illustration des diff érentes étapes de l’assemblage.
1) Retirez l’adaptateur du hachoir en métal 5, comme décrit sous «Assemblage
du hachoir à viande».
2) Retirez d’éventuels embouts et nettoyez l’adaptateur du hachoir en métal 5.
REMARQUE
► Pour l’embout presse-purée, la vis-transporteuse 0 et la lame cruciforme w
av
ec le ressort q ne sont pas nécessaires ! Si nécessaire, retirez le tout de
l’adaptateur du hachoir en métal 5.
3) Glissez la vis en plastique 8 dans l’adaptateur du hachoir en métal 5.
4) Glissez le tamis 9 au-dessus de la vis en plastique 8, de manière à ce que
les fi xations sur le tamis 9 entrent dans les évidements sur l’adaptateur du
hachoir en métal 5. Les trous du tamis 9 pointent vers le bas.
5) Lorsque tout est correctement positionné, enfi lez l’anneau de fermeture r
sur le tamis 9 et vissez-le bien à la main.
6) Montez l’adaptateur du hachoir en métal 5, comme décrit sous «Assemblage
du hachoir à viande».
7) Ouvrez le collier de fermeture 6 sur l’éjecteur de tomates 7.
8) Placez l’éjecteur de tomates 7 sous l’embout presse-purée, en passant
la pointe du tamis 9 au travers de la petite ouverture sur l’éjecteur de
tomates 7.
IB_277055_SFW350C2_LB8.indb 49 24.02.16 08:13

■ 50
│
FR
│
BE
SFW 350 C2
9) Fermez le collier de fermeture 6 de manière à ce qu’il s’enclenche dans
l’adaptateur du hachoir en métal 5.
Opération
RISQUE D'ÉLECTROCUTION
► N'ouvrez jamais le boîtier du bloc-moteur 4 – car il ne s'y tr
ouve aucun
élément d'opération. Toute ouverture du boîtier met fi n à la prétention à la
garantie. Si le boîtier est ouvert, danger de mort par électrocution.
ATTENTION - RISQUE DE DÉGÂTS MATÉRIELS !
► N'utilisez pas l'appareil plus de 15 minutes en opération permanente.
Laissez ensuite l'appar
eil éteint pendant environ 30 minutes pour éviter une
surchauff e.
► N'appuyez jamais sur les touches «I» o ou «<» a en cas de changement
de la dir
ection de marche, aussi longtemps que le moteur de l'appareil
n'est pas entièrement immobilisé. Le moteur peut être endommagé.
Fonctionnement de l’appareil
Si vous avez monté les grilles souhaitées :
1) Installez l’appareil afi n qu’il soit absolument stable et qu’il ne puisse pas tomber
de la table (par exemple suite à des vibrations ou à un accrochage dans le
cordon d’alimentation), ou être à proximité d’une source d’eau ouverte. Des
secousses sont inévitables en cours d’opération.
IB_277055_SFW350C2_LB8.indb 50 24.02.16 08:13

FR
│
BE
│
51 ■
SFW 350 C2
RISQUE D'ÉLECTROCUTION
► Ne saisissez jamais l'appareil s'il tombe sur le sol ou dans l'eau - ou en cas
de tout autr
e cas d'urgence - et qu'il est encore raccordé au secteur ou en
fonctionnement ! En cas d'urgence, débranchez immédiatement le cordon
d'alimentation ! Danger de mort et risque important de blessures !
2) Placez les denrées alimentaires à travailler dans le plateau de remplissage 3
et placez un récipient collecteur à l’avant sous l’ouverture de sortie.
3) Appuyez tout d’abord sur la touche «0» p, afi n de vous assurer que l’appa-
reil est encore éteint. Sinon, il y a le risque d’un démarrage accidentel de
l’appareil, lorsque la fi che secteur est branchée dans la prise secteur.
4) Insérez la fi che secteur dans la prise.
5) Appuyez sur la touche «I» o pour allumer l’appareil.
AVERTISSEMENT ! RISQUE D'ACCIDENT !
► Poussez les aliments dans la gaine de remplissage uniquement à l'aide du
bouchon r
ond 2 – ne prenez jamais vos doigts, des fourchettes ou des
manches de cuiller ou objets similaires. Risque important de blessure et
d'endommagement de l'appareil.
ATTENTION - RISQUE DE DÉGÂTS MATÉRIELS !
► N'appuyez jamais avec une force telle que l'on entende le moteur ralentir.
V
ous risquez sinon de surcharger et d'endommager l'appareil.
Travailler de la viande
1) Choisissez des morceaux de viande qui entrent sans problèmes dans la
gaine de remplissage. Le cas échéant, prédécoupez la viande. Veillez à ce
que la viande ne contienne pas d’os ou de tendons.
AVERTISSEMENT !
► La viande hachée s'avarie rapidement. Pour cette raison, veillez à une bonne
h
ygiène lorsque vous travaillez la viande. Sinon, vous risquez des problèmes
de santé.
2) Lorsque vous avez lu toutes les consignes se rapportant au sujet «Viande»,
vous pouvez maintenant utiliser l’appareil comme décrit au paragraphe
«Fonctionnement de l’appareil».
IB_277055_SFW350C2_LB8.indb 51 24.02.16 08:13

■ 52
│
FR
│
BE
SFW 350 C2
Confectionner des saucisses
1) Faites passer la viande deux fois par le hachoir à viande, avant de la trans-
former en saucisses.
2) Pour la farce des saucisses, ajoutez des oignons fi nement coupés, des
épices et autres ingrédients à la farce selon votre recette et pétrissez bien la
masse. Placez cette dernière pendant 30 minutes au réfrigérateur avant de
poursuivre la fabrication.
3) Enfi lez le boyau (naturel ou synthétique) sur l’embout à saucisses t et faites
un nœud à l’autre extrémité. Vous pouvez calculer environ 1,60 m de boyau
à saucisses pour environ 1 kg de farce.
CONSEIL
Laissez auparavant tremper le boyau naturel pendant environ 3 heures dans
l'eau tiède et essor
ez-le avant de l'enfi ler sur l'embout. Le boyau naturel
redevient ainsi plus élastique. Vous trouverez des boyaux naturels dans les
magasins spécialisés en accessoires pour bouchers à proximité d'abattoirs
ou auprès de votre boucher.
4) La farce à saucisses est ensuite pressée par l’embout à saucisses t dans le
boyau. Lorsque la longueur souhaitée est atteinte, éteignez l’appareil, pincez
la saucisse à son extrémité et tournez-la plusieurs fois sur son axe longitudinal.
CONSEIL
Lors de la cuisson et de la congélation, la saucisse se dilate. Ne la remplissez
donc pas tr
op, car sinon, elle pourrait éclater.
5) Lorsque vous avez lu toutes les consignes se rapportant au sujet «Saucisse»,
vous pouvez maintenant utiliser l’appareil comme décrit au chapitre «Fonc-
tionnement de l’appareil».
Travailler avec l’accessoire à boulettes
Avec l’accessoire à boulettes u, vous pouvez former des rouleaux creux à partir
de viande ou de légumes avec les denrées alimentaires introduites dans l’appa-
reil, que vous pouvez ensuite remplir comme souhaité.
1) Faites tout d’abord passer deux fois la viande dans le hachoir à viande
avant de la presser à travers l’accessoire à boulettes u.
2) Lorsque vous avez lu toutes les consignes se rapportant au sujet «Accessoire
à boulettes», vous pouvez maintenant utiliser l’appareil comme décrit au
chapitre «Fonctionnement de l’appareil».
IB_277055_SFW350C2_LB8.indb 52 24.02.16 08:13

FR
│
BE
│
53 ■
SFW 350 C2
Confectionner des biscuits sablés
Une fois que vous avez préparé une pâte pour fabriquer une pâtisserie selon
votre recette et que vous avez monté l’accessoire pour biscuits sablés 1 :
1) Étalez du papier sulfurisé dans un petit lèchefrite et placez-le à l’avant de
l’appareil sous l’ouverture de sortie.
2) Pressez de manière homogène la pâte dans l’adaptateur du hachoir à
viande 5 – la vis transporteuse 0 la presse alors à travers le motif sélec-
tionné au niveau de la plaquette de modèles de l’accessoire pour biscuits
sablés 1.
3) Lorsque les biscuits ont atteint la longueur souhaitée, arrêtez l’appareil et
sectionnez la pâte au niveau de l’ouverture de sortie. Posez les biscuits sur
sur le lèchefrite.
4) Lorsque vous avez lu toutes les consignes se rapportant au sujet «Biscuits
sablés», vous pouvez utiliser l’appareil, comme décrit au chapitre «Fonction-
nement de l’appareil».
Passer les tomates
1) Placez un récipient sous l’éjecteur de tomates 7.
2) Placez un récipient à l’avant sous le tamis 9.
3) Coupez les tomates en quatre et poussez-les lentement et régulièrement dans
l’adaptateur du hachoir en métal 5.
La vis plastique 8 pousse les tomates dans le presse-purée, les tomates
réduites en purée tombent dans l’éjecteur de tomates 7. Les peaux des
tomates sont éjectées à l’avant du tamis 9.
REMARQUE
Si du jus de tomates sort des raccords vissés de l’embout presse-purée, ceci
peut av
oir les causes suivantes :
– Vous travaillez trop vite.
– Vous poussez les morceaux de tomate avec trop de force dans
l’appar
eil.
– Les morceaux de tomate sont trop gros.
► Réduisez dans ce cas votre rythme de travail, appuyez légèrement seulement
sur les mor
ceaux de tomate dans l’appareil et coupez les tomates en plus
petits morceaux.
4) Si vous avez lu toutes les remarques relatives au thème «Passer les tomate»,
vous pouvez utiliser l’appareil comme décrit au chapitre «Fonctionnement de
l’appareil».
IB_277055_SFW350C2_LB8.indb 53 24.02.16 08:13

■ 54
│
FR
│
BE
SFW 350 C2
En cas de panne
Si l’entraînement est bloqué par des denrées alimentaires :
■ Appuyez sur la touche «0» p, pour arrêter le hachoir.
■ Maintenez la touche «<» a enfoncée. L
’entraînement tourne maintenant en
sens inverse. De cette manière, vous pouvez transporter les denrées alimen-
taires un peu en marche arrière afi n de débloquer l’entraînement.
■ Dès que l’entraînement est débloqué, relâchez la touche «<» a.
■ Appuyez sur la touche «I» o, pour fair
e démarrer le hachoir.
■ Si vous ne parvenez pas à débloquer l’entraînement de cette manière, net-
to
yez l’appareil, conformément à ce qui est décrit sous le point «Nettoyage».
Si le moteur s’éteint subitement, il est possible que le
fusible de surcharge interne ait été déclenché. Celui-ci est
destiné à protéger le moteur.
■ Éteignez le moteur et laissez-le refroidir pendant environ 30 min. avant de
réutiliser l’appareil.
■ Si cette solution n’apporte aucun résultat, attendez encore 15 minutes
supplémentair
es.
■ Si ce délai s’est écoulé également sans résultat, cela indique une défectuosité.
A
dressez-vous dans ce cas au service après-vente.
Si le cordon d’alimentation est endommagé ou si des
détériorations sont reconnaissables au niveau des pièces
de l’appareil :
■ Éteignez immédiatement l’appareil en appuyant sur la touche «0» p!
■ S’il n’est pas possible d’éteindre l’appareil sans prendre de risques supplé-
mentair
es, débranchez le cordon d’alimentation.
■ Laissez tout d’abord intervenir le service après-vente pour la réparation
av
ant de continuer à utiliser l’appareil.
Nettoyage
RISQUE D'ÉLECTROCUTION
► Débranchez tout d'abord la fi che de la prise secteur avant de nettoyer
l'appar
eil. Vous évitez ainsi les risques d'accident par un démarrage
accidentel de l'appareil et par électrocution.
IB_277055_SFW350C2_LB8.indb 54 24.02.16 08:13

FR
│
BE
│
55 ■
SFW 350 C2
Nettoyage du bloc-moteur
■ Nettoyez toutes les surfaces extérieures ainsi que le cordon d’alimentation
à l’aide d’un chiff on légèrement humide. Séchez soigneusement l’appareil
avant de le réutiliser.
RISQUE D'ÉLECTROCUTION
► N'immergez jamais le bloc-moteur dans l'eau ou d'autres liquides ! Danger
de mor
t par électrocution si de l'humidité ayant pénétré dans l'appareil
atteint les conducteurs électriques.
ATTENTION - RISQUE DE DÉGÂTS MATÉRIELS !
► N'utilisez pas de produit nettoyant, abrasif ou solvant. Ils peuvent endom-
mager l'appar
eil et laisser des résidus sur les aliments.
Nettoyage des accessoires
REMARQUE
► Ne nettoyez pas les accessoires dans le lave-vaisselle ! Ceci peut provoquer
des dommages sur ces pièces !
■ Nettoyez tous les accessoires qui entrent en contact avec les denrées ali-
mentair
es, ...
– uniquement à la main, les pièces accessoires ne sont pas adaptées pour
un lavage en lave-vaisselle.
– à l’eau chaude et avec un produit pour la vaisselle adéquat au lavage
des pr
oduits en contact avec des denrées alimentaires.
AVERTISSEMENT ! RISQUE D'ACCIDENT !
► La lame cruciforme w est e
xtrêmement tranchante ! Risque de blessures !
■ Séchez bien toutes les pièces avant de continuer à utiliser l’appareil.
REMARQUE
► Après chaque nettoyage, badigeonnez à nouveau les pièces métalliques
d’huile alimentair
e ! Sinon, les pièces métalliques risquent de décolorer !
Rangement
■ Glissez le cordon d’alimentation (sans fi che secteur) dans la gaine du câble
sous le dessous de l’appareil. Il est ainsi protégé des détériorations.
■ Rangez l’appareil dans un endroit sec.
■ Après le séchage, badigeonnez les pièces métalliques avec une fi ne couche
d’huile alimentair
e – si vous ne prévoyez pas d’utiliser immédiatement
l’appareil. Vous obtenez ainsi une bonne protection contre la corrosion.
■ Conservez l’appareil hors de portée des enfants et des personnes nécessitant
une surveillance. Ceux-ci peuvent ne pas toujours bien évaluer les risques
lors de la manipulation d’appareils électriques.
IB_277055_SFW350C2_LB8.indb 55 24.02.16 08:13

■ 56
│
FR
│
BE
SFW 350 C2
Mise au rebut
L’appareil ne doit jamais être jeté dans la poubelle domestique
normale. Ce produit est assujetti à la directive européenne
2012/19/EU (Waste Electrical and Electronic Equipment).
Remettez l’appareil destiné au recyclage à une entreprise spécialisée ou au
centre de recyclage de votre commune. Respectez la réglementation en vigueur.
En cas de doutes, contactez votre organisation de recyclage.
Éliminez l’ensemble des matériaux d’emballage d’une manière respectueuse de
l’environnement.
Garantie et service après-vente
Cet appareil bénéfi cie de 3 ans de garantie à compter de la date d’achat. L’appareil
a été fabriqué avec soin et consciencieusement contrôlé avant sa distribution.
Veuillez conserver le ticket de caisse en guise de preuve d’achat. Dans le cas
où la garantie s’applique, veuillez appeler le service après-vente concerné.
Cette condition doit être respectée pour assurer l’expédition gratuite de votre
marchandise.
REMARQUE
► La prestation de garantie s'applique uniquement aux vices de matériau ou
de fabrication, pas aux dégâts de tr
ansport, aux pièces d'usure ou aux
dégâts subis par des pièces fragiles, par ex. commutateurs ou batteries.
Le produit est exclusivement destiné à un usage privé et non commercial. La
garantie prend fi n en cas de manipulation abusive et non conforme, de recours
à la force et d’interventions qui n’ont pas été réalisées par notre succursale de
service après-vente agréée.
Cette garantie ne constitue pas une restriction de vos droits légaux. La durée de
la garantie n’est pas prolongée par l’exercice de la garantie. Ceci vaut également
pour les pièces remplacées et réparées.
Tous dommages et défauts présents dès l’achat doivent être notifi és dès que le
produit est déballé, et au plus tard deux jours après la date d’achat.
Toutes réparations survenant après la période sous garantie seront payantes.
La durée de la garantie n’est pas prolongée par l’exercice de la garantie. Ceci
vaut également pour les pièces remplacées et réparées.
Tous dommages et défauts présents dès l’achat doivent être notifi és dès que le
produit est déballé, et au plus tard deux jours après la date d’achat.
Toutes réparations survenant après la période sous garantie seront payantes.
IB_277055_SFW350C2_LB8.indb 56 24.02.16 08:13

FR
│
BE
│
57 ■
SFW 350 C2
Service France
Tel.: 0800 919270
E-Mail: k[email protected]
IAN 277055
Service Belgique
Tel.: 070 270 171 (0,15 EUR/Min.)
E-Mail: k[email protected]
IAN 277055
Importateur
KOMPERNASS HANDELS GMBH
BURGSTRASSE 21
44867 BOCHUM
GERMANY
www.kompernass.com
IB_277055_SFW350C2_LB8.indb 57 24.02.16 08:13

■ 58
│
FR
│
BE
SFW 350 C2
Recettes
Boulettes
Ingrédients du manteau
450 g de viande d’agneau, de veau ou de bœuf maigre
150 g de farine
1 cuillère à café de piment (quatre-épices)
1 cuillère à café de noix de muscade
1 pincée de piment fort
1 pincée de poivre
Ingrédients de la farce à la viande
700 g de viande d’agneau
1 1/2 cuillère à soupe d’huile d’olive
1 1/2 cuillère à soupe d’oignons fi nement hachés
1/2 cuillère à café de piment (quatre-épices)
1/2 cuillère à café de sel
1 1/2 cuillère à soupe de farine
Hacher la viande pour le manteau deux fois l’une après l’autre dans le hachoir
(tout d’abord avec la grille grossière, puis la grille fi ne e) et la mélanger
avec les ingrédients. Hacher également cette masse deux fois avec le hachoir.
Remplacer la grille e par l’accessoire à boulettes u voir le chapitre «Monter
l’accessoire à boulettes»).
Formez les manteaux des boulettes avec l’accessoire à boulettes u et les mettre
au congélateur.
Garniture :
Hacher la viande deux fois avec le hachoir (dans un premier temps avec la grille
grossière, puis avec la grille fi ne e). Faire suer les oignons et bien les mélanger
avec la viande et le reste des ingrédients. Remplir les manteaux des boulettes et
les faire rôtir.
Garnitures alternatives :
250 g de brocolis cuits à la vapeur
ou 250 g de courgettes cuites à la vapeur
ou 250 g de riz cuit
IB_277055_SFW350C2_LB8.indb 58 24.02.16 08:13

FR
│
BE
│
59 ■
SFW 350 C2
Saucisse à griller fraîche
Ingrédients :
300 g de viande de bœuf maigre
500 g de viande de porc maigre
200 g de lard d’épaule
20 g de sel
1/2 de cuillère à soupe de poivre blanc moulu
1 cuillère à café de cumin
1/2 cuillère à café de noix de muscade
Faire passer la viande de bœuf, la viande de porc et le lard deux fois par le
hachoir.
Ajouter le mélange d’épices ainsi que le sel et pétrir pendant 5 minutes.
Mettre la farce à saucisses au réfrigérateur pendant env. 30 minutes. Remplir la
farce à saucisses conformément aux instructions (voir le chapitre «Confectionner
des saucisses») et fabriquer des saucisses d’une longueur de 25 cm.
Consommer la saucisse à griller le même jour, bien cuite.
Biscuits sablés
Ingrédients :
500 g de beurre
500 g de sucre
2 - 3 paquets de sucre vanillé
1 paquet de fl an à la vanille
1/4 cuillère à café de sel
1 œuf
4 jaunes d’œuf
800 g de farine (type 405)
2 cuillères à café de levure chimique
200 g d’amandes en poudre (blanchies)
Zeste râpé d’un citron
Battre le beurre en mousse. Ajouter les autres ingrédients les uns après les autres
et bien malaxer la pâte. Laisser reposer la pâte en la couvrant environ 12 heures
(par ex. une nuit) au réfrigérateur. Puis la faire passer par le hachoir pourvu
de l’accessoire pour biscuits sablés 1. Poser les biscuits sablés sur une plaque
revêtue de papier sulfurisé. Faire cuire les biscuits sablés dans le four préchauff é
à 180°C pendant 10-15 minutes jusqu’à obtenir une belle couleur dorée.
IB_277055_SFW350C2_LB8.indb 59 24.02.16 08:13

■ 60
│
FR
│
BE
SFW 350 C2
IB_277055_SFW350C2_LB8.indb 60 24.02.16 08:13

NL
│
BE
│
61 ■
SFW 350 C2
Inhoud
Inleiding . . . . . . . . . . . . . . . . . . . . . . . . . . . . . . . . . . . . . . . . . . . . . . . . . . . . . 62
Auteursrecht . . . . . . . . . . . . . . . . . . . . . . . . . . . . . . . . . . . . . . . . . . . . . . . . . . . . . . . . . . . . 62
Beperking van aansprakelijkheid . . . . . . . . . . . . . . . . . . . . . . . . . . . . . . . . . . . . . . . . . . . . 62
Gebruik in overeenstemming met bestemming . . . . . . . . . . . . . . . . . . . . . 62
Inhoud van het pakket / Beschrijving van onderdelen . . . . . . . . . . . . . . . 63
Technische gegevens . . . . . . . . . . . . . . . . . . . . . . . . . . . . . . . . . . . . . . . . . . 64
Veiligheidsvoorschriften . . . . . . . . . . . . . . . . . . . . . . . . . . . . . . . . . . . . . . . . 64
Monteren/demonteren . . . . . . . . . . . . . . . . . . . . . . . . . . . . . . . . . . . . . . . . 66
Vleesmolen monteren . . . . . . . . . . . . . . . . . . . . . . . . . . . . . . . . . . . . . . . . . . . . . . . . . . . . . 66
Worst-stop-opzetstuk monteren . . . . . . . . . . . . . . . . . . . . . . . . . . . . . . . . . . . . . . . . . . . . . 67
Kubbe-opzetstuk monteren . . . . . . . . . . . . . . . . . . . . . . . . . . . . . . . . . . . . . . . . . . . . . . . . . 68
Sprits-opzetstuk monteren . . . . . . . . . . . . . . . . . . . . . . . . . . . . . . . . . . . . . . . . . . . . . . . . . 68
Passeer-opzetstuk bevestigen . . . . . . . . . . . . . . . . . . . . . . . . . . . . . . . . . . . . . . . . . . . . . . . 69
Bediening . . . . . . . . . . . . . . . . . . . . . . . . . . . . . . . . . . . . . . . . . . . . . . . . . . . . 70
Het apparaat gebruiken . . . . . . . . . . . . . . . . . . . . . . . . . . . . . . . . . . . . . . . . . . . . . . . . . . 70
Vlees verwerken . . . . . . . . . . . . . . . . . . . . . . . . . . . . . . . . . . . . . . . . . . . . . . . . . . . . . . . . . 71
Worst verwerken . . . . . . . . . . . . . . . . . . . . . . . . . . . . . . . . . . . . . . . . . . . . . . . . . . . . . . . . 72
Werken met het Kubbe-opzetstuk . . . . . . . . . . . . . . . . . . . . . . . . . . . . . . . . . . . . . . . . . . . 72
Spritsgebak maken . . . . . . . . . . . . . . . . . . . . . . . . . . . . . . . . . . . . . . . . . . . . . . . . . . . . . . 73
Tomaten passeren . . . . . . . . . . . . . . . . . . . . . . . . . . . . . . . . . . . . . . . . . . . . . . . . . . . . . . . 73
In geval van storingen . . . . . . . . . . . . . . . . . . . . . . . . . . . . . . . . . . . . . . . . . 74
Reinigen . . . . . . . . . . . . . . . . . . . . . . . . . . . . . . . . . . . . . . . . . . . . . . . . . . . . . 74
Motorblok reinigen . . . . . . . . . . . . . . . . . . . . . . . . . . . . . . . . . . . . . . . . . . . . . . . . . . . . . . 75
Accessoires reinigen . . . . . . . . . . . . . . . . . . . . . . . . . . . . . . . . . . . . . . . . . . . . . . . . . . . . . 75
Opbergen . . . . . . . . . . . . . . . . . . . . . . . . . . . . . . . . . . . . . . . . . . . . . . . . . . . 75
Milieurichtlijnen . . . . . . . . . . . . . . . . . . . . . . . . . . . . . . . . . . . . . . . . . . . . . . . 76
Garantie en service . . . . . . . . . . . . . . . . . . . . . . . . . . . . . . . . . . . . . . . . . . . . 76
Importeur . . . . . . . . . . . . . . . . . . . . . . . . . . . . . . . . . . . . . . . . . . . . . . . . . . . 77
Recepten . . . . . . . . . . . . . . . . . . . . . . . . . . . . . . . . . . . . . . . . . . . . . . . . . . . . 78
Kubbe . . . . . . . . . . . . . . . . . . . . . . . . . . . . . . . . . . . . . . . . . . . . . . . . . . . . . . . . . . . . . . . . 78
Verse gegrilde braadworst . . . . . . . . . . . . . . . . . . . . . . . . . . . . . . . . . . . . . . . . . . . . . . . . 79
Spritskoekjes . . . . . . . . . . . . . . . . . . . . . . . . . . . . . . . . . . . . . . . . . . . . . . . . . . . . . . . . . . . 79
IB_277055_SFW350C2_LB8.indb 61 24.02.16 08:13

■ 62
│
NL
│
BE
SFW 350 C2
Inleiding
Gefeliciteerd met de aankoop van uw nieuwe apparaat.
U hebt hiermee gekozen voor een hoogwaardig product. De bedieningshandlei-
ding maakt deel uit van dit product. Deze bevat belangrijke aanwijzingen voor
veiligheid, gebruik en afvoeren. Maak uzelf voorafgaand aan het gebruik van
het product vertrouwd met alle bedienings- en veiligheidsvoorschriften. Gebruik
het product uitsluitend op de voorgeschreven wijze en voor de aangegeven
doeleinden. Berg deze gebruiksaanwijzing zorgvuldig op. Geef alle documenten
mee als u het product doorgeeft aan een derde.
Auteursrecht
Deze documentatie is auteursrechtelijk beschermd.
Iedere reproductie, resp. herdruk, ook gedeeltelijk, evenals de weergave van de
afbeeldingen, ook in veranderde toestand is alleen toegestaan met schriftelijke
toestemming van de producent.
Beperking van aansprakelijkheid
Alle technische informatie, gegevens en aanwijzingen voor de inbouw en
aansluiting en de bediening in deze gebruiksaanwijzing voldoen aan de laatste
stand bij het in druk bezorgen en resulteren naar beste weten uit afweging van
onze ervaringen en inzichten tot dusverre.
Men kan op basis van de gegevens, afbeeldingen en beschrijvingen in deze
gebruiksaanwijzing geen aanspraken doen gelden.
De fabrikant is niet aansprakelijk voor schade als gevolg van het niet in acht
nemen van de gebruiksaanwijzing, gebruik dat niet volgens de bestemming is,
ondeskundige reparaties, ongeoorloofd uitgevoerde veranderingen of gebruik
van ongeoorloofde onderdelen.
Gebruik in overeenstemming met bestemming
Dit apparaat is uitsluitend bedoeld voor het thuis verwerken van levensmiddelen
waarvan de hoeveelheid past binnen het huishoudelijk gebruik:
▯ Doordraaien van vers vlees,
▯ Worst maken in een natuur- of kunstdarm,
▯ Spritsgebak maken,
▯ Passeren van tomaten.
Het appar
aat is niet bedoeld voor het verwerken van harde of bevroren levens-
middelen, bijv. botten of noten, en niet voor bedrijfsmatig of industrieel gebruik.
IB_277055_SFW350C2_LB8.indb 62 24.02.16 08:13

NL
│
BE
│
63 ■
SFW 350 C2
Inhoud van het pakket /
Beschrijving van onderdelen
Afbeelding A:
1 Opzetstuk voor spritskoekjes met streepmotief
2 Stopper
3 Vulschaal
4 Motor
5 Vleesmolen-voorzetstuk van metaal
6 Sluitklem
7 Tomatenuitworp
8 Plasticschroef
9 Passeerzeef
0 Transportschroef
q Veer
w Kruismes
e Grove en fi jne gatenschijf
r Afsluitring
t Worst-stop-opzetstuk
z Worstschijf
u Kubbe-opzetstuk
Afbeelding B:
i Vergrendelendeknop
Afbeelding C:
o Toets „I“
p Toets „0“
a Toets „<“
IB_277055_SFW350C2_LB8.indb 63 24.02.16 08:13

■ 64
│
NL
│
BE
SFW 350 C2
Technische gegevens
Spanning 220 - 240 V ∼, 50 Hz
Vermogen 250 - 350 W
Beschermingsklasse
II /
Alle delen van dit apparaat die in
aanraking komen met levensmiddelen,
zijn levensmiddelveilig
KB-tijd 15 minuten
KB-tijd
De KB-tijd (kort bedrijf) geeft aan hoe lang een apparaat kan worden bediend,
zonder dat de motor oververhit raakt en schade hieraan ontstaat. Na de aange-
geven KB-tijd moet het apparaat uitgeschakeld blijven tot de motor is afgekoeld.
Veiligheidsvoorschriften
GEVAAR VOOR ELEKTRISCHE SCHOK
► Let erop, dat het netsnoer niet wordt beschadigd. Zorg ervoor
dat het niet te warm wordt en geleid het zo, dat het niet kan
worden ingeklemd.
► Laat beschadigde netstekkers of netsnoeren onmiddellijk
door geautoriseerde vakmensen vervangen om gevaarlijke
situaties te vermijden.
► Gebruik het apparaat alleen in droge ruimtes en niet in de
openlucht.
Dompel het motorblok nooit in water of andere vloeistoff en!
Anders bestaat er levensgevaar voor elektrische schok.
WAARSCHUWING!
► Gebruik het apparaat nooit voor andere doeleinden dan hier
zijn beschreven. Er bestaat groot gevaar van ongelukken, als
u door onjuist gebruik de beschermende voorzieningen op
het apparaat buiten gebruik zet!
IB_277055_SFW350C2_LB8.indb 64 24.02.16 08:13

NL
│
BE
│
65 ■
SFW 350 C2
WAARSCHUWING! LETSELGEVAAR!
► Grijp nooit in de openingen van het apparaat. Druk er nooit
één of ander voorwerp in – met uitzondering van de telkens bij
het stuk behorende stopper en de te verwerken levensmiddelen.
Anders is het gevaar van ongelukken groot!
► Haal eerst de stekker uit het stopcontact, alvorens accessoires
op te zetten of af te nemen.
► Laat het apparaat nooit zonder toezicht, wanneer het klaar
voor gebruik is. Trek na het gebruik of bij werkonderbrekin-
gen steeds de stekker uit het stopcontact, om te vermijden
dat het per ongeluk gaat draaien.
► Gebruik uitsluitend de originele accessoires voor dit apparaat.
Andere onderdelen zijn daarvoor mogelijk niet veilig genoeg.
► Gebruik het apparaat nooit in lege toestand. Daardoor kan
het apparaat onherstelbaar beschadigd raken.
► U dient het apparaat uit te schakelen en de stekker uit het
stopcontact te trekken voordat u accessoires of hulpstukken
verwisselt, die bij gebruik in beweging zijn.
► Gebruik het apparaat nooit voor andere doeleinden dan in
deze gebruiksaanwijzing zijn beschreven.
► Voorzichtig: het kruismes is zeer scherp! Ga steeds voor-
zichtig te werk in de omgang met het apparaat en bij het
reinigen.
► Het apparaat moet altijd van de stroom worden losgekoppeld
indien er geen toezicht is, en voor montage, demontage of
reiniging.
► Het apparaat mag niet door kinderen worden gebruikt.
► Houd het apparaat en het bijbehorende snoer buiten bereik
van kinderen.
IB_277055_SFW350C2_LB8.indb 65 24.02.16 08:13

■ 66
│
NL
│
BE
SFW 350 C2
WAARSCHUWING! LETSELGEVAAR!
► Dit apparaat mag worden gebruikt door personen met
beperkte fysieke, zintuiglijke of geestelijke vermogens of
gebrek aan ervaring en/of kennis, mits ze onder toezicht
staan of over het veilige gebruik van het apparaat zijn
geïnstrueerd en de daaruit resulterende gevaren hebben
begrepen.
► Kinderen mogen niet met het apparaat spelen.
Monteren/demonteren
LET OP - MATERIËLE SCHADE!
► Alle accessoires zijn van een dunne oliefi lm voorzien, om deze tegen
corr
osie te beschermen. Reinig daarom alle onderdelen vóór het eerste
gebruik zorgvuldig, zoals uitgebreid beschreven onder „Reinigen“.
Wrijf alle metaaldelen in met een beetje plantaardige olie.
OPMERKING
► Verwijder voor het eerste gebruik de beschermfolie van het toetsenpaneel.
Vleesmolen monteren
Vouw de uitvouwbare pagina naar buiten - u vindt daar een afbeelding van de
volgorde van de montage.
1) Zet de transportschroef 0 in het vleesmolen-voorzetstuk 5.
2) Steek de veer q op de transportschroef 0.
3) Zet dan het kruismes w er zodanig in, dat de scherpe kant van de veer q
weg wijst. Let erop dat de hoekige inkeping van het kruismes w correct op
de hoekige as ligt.
IB_277055_SFW350C2_LB8.indb 66 24.02.16 08:13

NL
│
BE
│
67 ■
SFW 350 C2
WAARSCHUWING! LETSELGEVAAR!
► Het kruismes w is er
g scherp! Letselgevaar!
LET OP - MATERIËLE SCHADE!
► Het apparaat wordt beschadigd, als het kruismes w er ander
som wordt
ingezet!
4) Kies de gewenste gatenschijf e/worstschijf z.
5) Leg de gekozen gatenschijf e zodanig in het vleesmolen-voorzetstuk 5,
dat de fi xering op de gatenschijf e in de inkeping in het vleesmolen-voorzet-
stuk 5 ligt.
6) Als alles er goed is ingezet, draait u de sluitring r er stevig op.
7) Het gemonteerde vleesmolen-voorzetstuk 5 wordt d.m.v. een bajonetsluiting
met het motorblok 4 verbonden:
– Steek het vleesmolen-voorzetstuk 5 in het motorblok 4, z
odat de pijl
op het vleesmolen-voorzetstuk 5 tegen het symbool
op het motor-
blok 4 ligt. De vergrendelende knop i wordt erin gedrukt (Afb. B).
– Druk het vleesmolen-voorzetstuk 5 licht naar binnen en dr
aai daarbij
de vulschacht op het vleesmolen-voorzetstuk 5 in de middelste stand
(Afb. B), zodat de pijl op de vulschacht naar het symbool
wijst.
Als het voorzetstuk van de vleesmolen 5 vastklikt, springt de vergrende-
lende knop i eruit.
– Plaats tot slot de vulschaal 3 boven op de vulopening.
– Om eraf te nemen, drukt u op de vergrendelende knop i en dr
aait
u de vulschacht weer naar rechts (Afb. B)
. Daarna kunt u het
vleesmolen-voorzetstuk 5 eruit trekken.
Worst-stop-opzetstuk monteren
Vouw de uitvouwbare pagina naar buiten - u vindt daar een afbeelding van de
volgorde van de montage.
1) Haal het vleesmolen-voorzetstuk 5 eraf, zoals beschreven onder „Vleesmolen
monteren“.
2) Neem alle onderdelen die op/in het vleesmolen-voorzetstuk 5 zijn gemon-
teerd, uit elkaar en reinig ze.
3) Wrijf alle delen van metaal in met spijsolie.
4) Plaats de transportschroef 0, de veer q en het kruismes w terug in het
vleesmolen-voorzetstuk 5.
5) De worstschijf z zodanig inleggen, dat de fi xeringen op de worstschijf z in
de inkepingen in het vleesmolen-voorzetstuk 5 liggen.
6) Zet dan het worst-stop-opzetstuk t voor de worstschijf z.
IB_277055_SFW350C2_LB8.indb 67 24.02.16 08:13

■ 68
│
NL
│
BE
SFW 350 C2
7) Draai de afsluitring r er stevig op.
8) Monteer het vleesmolen-voorzetstuk 5 zoals beschreven onder „Vleesmolen
monteren“.
Kubbe-opzetstuk monteren
Vouw de uitvouwbare pagina naar buiten - u vindt daar een afbeelding van de
volgorde van de montage.
1) Haal het vleesmolen-voorzetstuk 5 eraf, zoals beschreven onder „Vleesmolen
monteren“.
2) Haal alle eventuele opzetstukken eraf en reinig het voorzetstuk voor de
vleesmolen 5.
OPMERKING
► Voor het kubbe-opzetstuk u w
ordt het kruismes w met de veer q niet ge-
bruikt! Neem beide in voorkomend geval uit het vleesmolen-opzetstuk 5.
3) Wrijf alle delen van metaal licht met spijsolie in.
4) Beide delen van het kubbe-opzetstuk u zodanig inleggen, dat de fi xerin-
gen op de onderste ring van het kubbe-opzetstuk u in de inkepingen in het
vleesmolen-voorzetstuk 5 liggen.
5) Als alles correct ingezet is, draait u de afsluitring r er weer stevig op.
6) Monteer het vleesmolen-voorzetstuk 5 zoals beschreven onder „Vleesmolen
monteren“.
Sprits-opzetstuk monteren
Vouw de uitvouwbare pagina naar buiten - u vindt daar een afbeelding van de
volgorde van de montage.
1) Haal het vleesmolen-voorzetstuk 5 eraf, zoals beschreven onder „Vleesmolen
monteren“.
2) Haal alle eventuele opzetstukken eraf en reinig het voorzetstuk voor de
vleesmolen 5.
OPMERKING
► Voor het sprits-opzetstuk 1 w
ordt het kruismes w met de veer q niet ge-
bruikt! Neem beide in voorkomend geval uit het vleesmolen-opzetstuk 5.
3) Wrijf alle delen van metaal licht met spijsolie in.
4) Trek de patroonstrook 1 van de voorkant van het sprits-opzetstuk 1 af.
5) Zet eerst de plastic schijf en dan de metalen schijf van het opzetstuk voor
spritsgebak 1 in het voorzetstuk voor de vleesmolen 5 (zi uitvouwpagina).
Het spritskoekjes-opzetstuk 1 zodanig inleggen, dat de fi xeringen op het
spritskoekjes-opzetstuk 1 in de inkepingen in het vleesmolen-voorzetstuk 5
liggen.
IB_277055_SFW350C2_LB8.indb 68 24.02.16 08:13

NL
│
BE
│
69 ■
SFW 350 C2
6) Als alles er goed is ingezet, draait u de sluitring r er stevig op.
7) Steek de patroonstrook 1 weer voor op het spritsgebak-opzetstuk 1. Let
erop, dat de handgreep op de patroonstrook 1 van het apparaat weg
wijst. Anders kunt u het motief, dat direct op de greep zit, niet instellen.
8) Monteer het vleesmolen-voorzetstuk 5 zoals beschreven onder „Vleesmolen
monteren“.
9) Alvorens eraf te halen moet u eerst de patroonstrook 1 eraf trekken, voordat
u de sluitring r eraf draait en het spritsgebak-opzetstuk 1 er weer uit kunt
halen.
Passeer-opzetstuk bevestigen
Klap de uitvouwpagina uit - hier vindt u afbeeldingen van de montagevolgorde.
1) Neem het vleesmolen-voorzetstuk 5 af, zoals beschreven onder “Vleesmo-
len monteren”.
2) Neem eventuele opzetstukken af en reinig het vleesmolen-voorzetstuk 5.
OPMERKING
► Voor het passeer-opzetstuk zijn de transportschroef 0 en het kruismes w
met de veer
q niet nodig! Haal alle eventueel aanwezige onderdelen uit
het vleesmolen-voorzetstuk 5.
3) Schuif de plasticschroef 8 in het vleesmolen-voorzetstuk 5.
4) Schuif de passeerzeef 9 zodanig over de plasticschroef 8, dat de fi xeringen
op de passeerzeef 9 in de uitsparingen van het vleesmolen-voorzetstuk 5
liggen. De gaten van de passeerzeef 9 wijzen daarbij omlaag.
5) Wanneer alles correct is bevestigd, schuift u de sluitring r over de passeer-
zeef 9 en schroeft u deze er handvast op.
6) Monteer het vleesmolen-voorzetstuk 5 zoals beschreven onder “Vleesmolen
monteren”.
7) Open de sluitklem 6 op de tomatenuitworp 7.
8) Plaats de tomatenuitworp 7 onder het passeer-opzetstuk door de punt
van de passeerzeef 9 door de kleine opening in de tomatenuitworp 7 te
steken:
IB_270744_SFW350C1_NL8.indd 69 25.02.16 09:55

■ 70
│
NL
│
BE
SFW 350 C2
9) Sluit de sluitklem 6 zodanig, dat deze het vleesmolen-voorzetstuk 5
rondom vastgrijpt.
Bediening
GEVAAR VOOR ELEKTRISCHE SCHOK
► Nooit de behuizing van het motorblok 4 openen – daarin zitten geen
bedieningselementen. Indien de behuizing geopend w
ordt, vervalt de
aanspraak op garantie. Bij geopende behuizing bestaat er levensgevaar
door een elektrische schok.
LET OP - MATERIËLE SCHADE!
► Gebruik het apparaat niet langer dan 15 minuten in continu bedrijf. Laat
het appar
aat vervolgens ongeveer 30 minuten lang uitgeschakeld om
oververhitting te voorkomen.
► Nooit op de toetsen „I“ o of „<“ a bij wisseling van de looprichting
drukken, zo lang de motor van het apparaat niet volledig stilstaat. De
motor kan beschadigd raken.
Het apparaat gebruiken
Als u de noodzakelijke stukken heeft gemonteerd:
1) Stel het apparaat zo op, dat het absoluut stabiel staat en het in geen geval
(bijv. door trillingen of het verstrikt raken in het netsnoer) van de tafel kan
vallen of in de buurt van open water kan komen. Trillingen zijn gedurende
het lopen onvermijdelijk.
IB_277055_SFW350C2_LB8.indb 70 24.02.16 08:13

NL
│
BE
│
71 ■
SFW 350 C2
GEVAAR VOOR ELEKTRISCHE SCHOK
► Grijp nooit naar een aangesloten of zelfs lopend apparaat, wanneer het gaat
v
allen of in het water komt - of bij andere noodsituaties! Trek gedurende
een noodsituatie direct de stekker uit het stopcontact! Anders bestaat er
acuut levens- en letselgevaar!.
2) Leg de te verwerken levensmiddelen in de vulschaal 3 en zet een opvang-
schaal voor onder de uitvoeropening.
3) Druk eerst op de toets „0“ p, om te controleren, of het apparaat nog uitge-
schakeld is. Anders bestaat het risico dat het apparaat onbedoeld start, als
de stekker in het stopcontact wordt gestoken.
4) Steek vervolgens de netstekker in het stopcontact.
5) Druk op de toets „I“ o, om het apparaat aan te zetten.
WAARSCHUWING! LETSELGEVAAR!
► Druk de levensmiddelen uitsluitend met de ronde stopper 2 in de vulope-
ning - nooit met de vinger
s, vorken, stelen van lepels o.i.d. Er bestaat groot
gevaar voor verwondingen en het apparaat zou beschadigd kunnen raken.
LET OP - MATERIËLE SCHADE!
► druk nooit zo vast, dat de motor hoorbaar langzamer loopt. Anders kan
het appar
aat overbelast raken en beschadigd worden.
Vlees verwerken
1) Gebruik stukken vlees die moeiteloos in de vulopening passen. Snij het vlees
desnoods eerst in stukken. Let erop, dat het vlees geen bot of pezen bevat.
WAARSCHUWING!
► Gehakt is erg gevoelig voor ziektekiemen. Let op een goede hygiëne, als u
vlees v
erwerkt. Anders kunnen er problemen optreden met de gezondheid.
2) Als u alle aanwijzingen heeft gelezen over het thema „vlees“ kunt u het
apparaat nu gebruiken zoals beschreven in het hoofdstuk „Het apparaat
gebruiken“.
IB_277055_SFW350C2_LB8.indb 71 24.02.16 08:13

■ 72
│
NL
│
BE
SFW 350 C2
Worst verwerken
1) Draai het vlees eerst twee keer door de vleeswolf, voor u dit tot worst
verwerkt.
2) Voor de worstvulling voegt u aan het gehakt kleine gesneden uitjes, kruiden en
andere ingrediënten volgens uw recept toe en daarna kneed u de massa goed
door. Zet die 30 min. lang in de koelkast voordat u die verder verwerkt.
3) Druk de worstdarm (natuur- of kunstdarm) over het worst-stop-stuk t en
knoop het andere einde dicht. Voor 1 kg vulmassa heeft u ongeveer 1,60 m
worstdarm nodig.
TIP
Leg de natuurdarm van te voren ongeveer 3 uur in lauwwarm water en
wring dez
e uit voor het erop trekken. Natuurdarm wordt zo weer elastisch.
Natuurdarmen kunt u bij de toeleverancier voor slagerijen nabij slachthuizen
krijgen of bij uw slager.
4) De worstvulling wordt door het worst-stop-stuk t in de worstdarm geperst.
Wanneer de gewenste lengte is bereikt, schakelt u het apparaat uit, drukt u de
worst aan het einde samen en draait u die een paar maal om de lengteas.
TIP
Worst gaat uitzetten bij het koken en bij het invriezen. Doe er daarom niet
te v
eel vulling in, anders kan de worst knappen.
5) Als u alle aanwijzingen heeft gelezen over het thema „worst“ kunt u het
apparaat nu gebruiken zoals beschreven in het hoofdstuk „Het apparaat
gebruiken“.
Werken met het Kubbe-opzetstuk
Met het kubbe-opzetstuk u kunt u van de erin gelegde levensmiddelen holle
rolletjes van vlees of groente vormen, die u naar wens kunt vullen.
1) Draai het vlees eerst twee maal door de vleeswolf, voor u het door het
kubbe-opzetstuk u perst.
2) Als u alle aanwijzingen heeft gelezen over het thema „Kubbe-opzetstuk“
kunt u het apparaat nu gebruiken zoals beschreven in het hoofdstuk „Het
apparaat gebruiken“.
IB_277055_SFW350C2_LB8.indb 72 24.02.16 08:13

NL
│
BE
│
73 ■
SFW 350 C2
Spritsgebak maken
Wanneer u deeg voor spritsgebak volgens uw recept maakt en het spritsgebak-
opzetstuk 1 heeft gemonteerd:
1) Leg bakpapier op een klein bakblik en houd dat dicht onder de uitvoeropening
aan de voorzijde van het apparaat.
2) Druk gelijkmatig deeg in het vleesmolen-voorzetstuk 5 – de transport-
schroef 0 drukt dit dan door het gekozen motief heen op het spritsgebak-
opzetstuk 1.
3) Als het gebak de gewenste lengte heeft bereikt, stopt u het apparaat en
breekt u het deeg af bij de uitvoeropening. Leg het gebak op het bakblik.
4) Als u alle aanwijzingen heeft gelezen over het thema „Spritsgebak“ kunt u
het apparaat nu gebruiken zoals beschreven in het hoofdstuk „Het apparaat
gebruiken”.
Tomaten passeren
1) Plaats een schaal onder de tomatenuitworp 7.
2) Plaats een schaal aan de voorkant onder de passeerzeef 9.
3) Snijd de tomaten in vieren en druk ze langzaam en gelijkmatig in het
vleesmolen-voorzetstuk 5.
De plasticschroef 8 drukt de tomaten door het passeer-opzetstuk en de
gepasseerde tomaten vallen in de tomatenuitworp 7. De tomatenschillen
komen aan de voorkant uit de passeerzeef 9.
OPMERKING
Als er tomatensap uit de schroefverbindingen van het passeer-opzetstuk
k
omt, kan dit de volgende oorzaken hebben:
– U werkt te snel.
– U drukt de stukken tomaat met te hoge druk in het apparaat.
– De stukken tomaat zijn te groot.
► Kies in dit geval een langzamer werktempo, druk de stukken tomaat slechts
met lichte druk in het appar
aat en snijd de tomaten in kleinere stukken.
4) Kies in dit geval een langzamer werktempo, druk de stukken tomaat slechts
met lichte druk in het apparaat en snijd de tomaten in kleinere stukken.
IB_277055_SFW350C2_LB8.indb 73 24.02.16 08:13

■ 74
│
NL
│
BE
SFW 350 C2
In geval van storingen
Als de aandrijving geblokkeerd is door het opeenhopen
van levensmiddelen:
■ Druk op de toets „0“ p, om de vleesmolen te stoppen.
■ Houd de toets „<“ a ingedrukt. De aandrijving loopt nu achter
waarts.
Zodoende kunt u de levensmiddelen een stuk terug transporteren om de
aandrijving weer vrij te krijgen.
■ Is de aandrijving vrij, laat u de toets „<“ a los.
■ Druk op de toets „I“ o, om de vleesmoelen te star
ten.
■ Indien u de aandrijving zodoende niet vrij heeft gekregen, reinig dan het
appar
aat zoals beschreven onder „Reinigen“.
Als de motor plotseling stil gaat staan, is het mogelijk, dat
de interne overbelastingszekering ingeschakeld is. Deze
moet de motor beveiligen.
■ Zet het apparaat uit en laat het ca. 30 min. lang afkoelen, alvorens het
apparaat weer te gebruiken.
■ Mocht dat niet helpen, dan wacht u nog eens 15 min.
■ Wanneer het ook gedurende deze periode niet gelukt is, dan moet er wel
een defect zijn. Neem in dit ge
val contact op met de klantenservice.
Als het netsnoer is beschadigd of schade aan de onderdelen
van de apparatuur evident is:
■ Zet het apparaat onmiddellijk uit, door op de toets „0“ p te drukken!
■ Wanneer dit niet zonder gevaar mogelijk is, trekt u de netstekker eruit.
■ Laat de schade eerst door de klantenservice herstellen, voordat u het
appar
aat opnieuw gebruikt.
Reinigen
GEVAAR VOOR ELEKTRISCHE SCHOK
► Haal de stekker uit het stopcontact voordat u het apparaat schoonmaakt.
Daarmee v
oorkomt u het gevaar van ongevallen door onverwacht en
onbedoeld starten en een elektrische schok.
IB_277055_SFW350C2_LB8.indb 74 24.02.16 08:13

NL
│
BE
│
75 ■
SFW 350 C2
Motorblok reinigen
■ Reinig alle vlakken aan de buitenkant en het netsnoer met een enigszins
vochtige doek. Droog het apparaat goed af voordat u het opnieuw gebruikt.
GEVAAR VOOR ELEKTRISCHE SCHOK
► Dompel het motorblok nooit in water of andere vloeistoff en! Anders kan
zich een le
vensgevaarlijke situatie voordoen door een elektrische schok,
als binnengedrongen vocht bij de elektrische leidingen komt.
LET OP - MATERIËLE SCHADE!
► Gebruik geen schoonmaak-, schuur- of oplosmiddelen. Deze kunnen het
appar
aat beschadigen en restanten achterlaten op de levensmiddelen.
Accessoires reinigen
OPMERKING
► Reinig de accessoires niet in de vaatwasmachine! Dat leidt tot beschadiging
aan de accessoir
es!
■ Reinig de accessoires die in contact kunnen komen met levensmiddelen, ...
– alleen met de hand, de accessoires zijn niet vaatwasmachinebestendig
– met heet afwaswater en een huishoudelijk afwasmiddel dat levensmiddel-
v
riendelijk is.
WAARSCHUWING! LETSELGEVAAR!
► Het kruismes w is er
g scherp! Letselgevaar!
■ Droog alles goed af, voordat u het apparaat verder gebruikt.
OPMERKING
► Wrijf na elke schoonmaakbeurt de metaaldelen weer met spijsolie in! Anders
k
unnen de metaaldelen verkleuren!
Opbergen
■ Schuif het netsnoer ( zonder netstekker ) in de kabelschacht onder op de
bodem van het apparaat. Zo beschadigt het niet.
■ Bewaar het apparaat op een droge plaats.
■ Vet de metalen opzetstukken na het afdrogen heel dun met wat spijsolie in -
w
anneer u het apparaat niet onmiddellijk weer gebruikt. Daarmee zorgt
u voor een goede bescherming tegen corrosie.
■ Berg het apparaat zo op, dat kinderen en minder valide personen er niet
bij k
unnen. Deze kunnen mogelijke gevaren in de omgang met elektrische
apparaten niet altijd juist inschatten.
IB_277055_SFW350C2_LB8.indb 75 24.02.16 08:13

■ 76
│
NL
│
BE
SFW 350 C2
Milieurichtlijnen
Deponeer het toestel in geen geval bij het normale huisvuil.
Dit product is onderworpen aan de Europese richtlijn 2012/19/EU
(Waste Electrical and Electronic Equipment).
Voer het toestel af via een erkend afvalverwerkingsbedrijf of via uw gemeente-
reiniging. Neem de bestaande voorschriften in acht. Neem in geval van twijfel
contact op met uw gemeentereinigingsdienst.
Voer alle verpakkingsmateriaal op een milieuvriendelijke manier af.
Garantie en service
U heeft op dit apparaat 3 jaar garantie vanaf de aankoopdatum. Het apparaat
is met de grootst mogelijke zorg vervaardigd en voorafgaand aan de levering
nauwkeurig gecontroleerd.
Bewaar a.u.b. de kassabon als aankoopbewijs. Mocht u aanspraak willen
maken op de garantie, neem dan telefonisch contact op met uw serviceadres.
Alleen dan kan het gratis inzenden van uw product worden gewaarborgd.
OPMERKING
► De garantie geldt uitsluitend voor materiaal- of fabricagefouten, echter niet
v
oor transportschade, aan slijtage onderhevige delen of voor beschadigin-
gen van breekbare delen, bijv. schakelaars of accu's.
Het product is uitsluitend bestemd voor privé-gebruik en niet voor bedrijfsmatige
doeleinden. Bij verkeerd gebruik en ondeskundige behandeling, bij gebruik
van geweld en bij reparaties die niet door ons geautoriseerd servicefi liaal zijn
uitgevoerd, vervalt de garantie.
Uw wettelijke rechten worden door deze garantie niet beperkt. De garantieperiode
wordt niet verlengd door de aansprakelijkheid. Dit geldt eveneens voor vervangen
en gerepareerde onderdelen.
Schade en gebreken die mogelijk reeds bij de aankoop aanwezig zijn, moeten
direct na het uitpakken worden gemeld, uiterlijk echter twee dagen na de dag
van aankoop.
Na verstrijken van de garantieperiode moeten alle voorkomende reparaties
vergoed worden.
De garantieperiode wordt niet verlengd door de aansprakelijkheid. Dit geldt
eveneens voor vervangen en gerepareerde onderdelen.
Schade en gebreken die mogelijk reeds bij de aankoop aanwezig zijn, moeten direct
na het uitpakken worden gemeld, uiterlijk echter twee dagen na de dag van aankoop.
Na verstrijken van de garantieperiode moeten alle voorkomende reparaties
vergoed worden.
IB_277055_SFW350C2_LB8.indb 76 24.02.16 08:13

NL
│
BE
│
77 ■
SFW 350 C2
Service Nederland
Tel.: 0900 0400223 (0,10 EUR/Min.)
E-Mail: k[email protected]
IAN 277055
Service België
Tel.: 070 270 171 (0,15 EUR/Min.)
E-Mail: k[email protected]
IAN 277055
Importeur
KOMPERNASS HANDELS GMBH
BURGSTRASSE 21
44867 BOCHUM
GERMANY
www.kompernass.com
IB_277055_SFW350C2_LB8.indb 77 24.02.16 08:13

■ 78
│
NL
│
BE
SFW 350 C2
Recepten
Kubbe
Ingrediënten voor het omhulsel
450 g mager schapen-, kalfs- of rundvlees
150 g meel
1 TL piment (jamaicapeper)
1 TL nootmuskaat
1 snufje chilipoeder
1 snufje peper
Ingrediënten voor de vleesvulling
700 g lamsvlees
1 1/2 EL olijfolie
1 1/2 EL fi jngehakte uien
1/2 TL piment (jamaicapeper)
1/2 TL zout
1 1/2 EL meel
Het vlees voor het omhulsel twee keer na elkaar in de vleesmolen fi jnmalen
(eerst met de grove en dan met de fi jne gatenschijf e) en vermengen met de
ingrediënten. Deze massa eveneens twee keer met de vleesmolen fi jnmalen.
Gatenschijf e vervangen voor kubbe-opzetstuk u (zie hoofdstuk „Kubbe-opzetstuk
monteren“).
Kubbe-omhulsels met het kubbe-opzetstuk u vormen en licht bevriezen.
Vulling:
vlees twee keer met de vleesmolen fi jnmalen (eerst met de grove en vervolgens
met de fi jne gatenschijf e). Uien fruiten en met het vlees en de overige ingredi-
enten goed vermengen. Kubbe-omhulsels ermee vullen en braden.
Alternatieve vullingen:
250 g gestoomde broccoli
of 250 g gestoomde courgette
of 250 g gekookt rijst
IB_277055_SFW350C2_LB8.indb 78 24.02.16 08:13

NL
│
BE
│
79 ■
SFW 350 C2
Verse gegrilde braadworst
Ingrediënten:
300 g mager rundvlees
500 g mager varkensvlees
200 g schouderspek
20 g zout
1/2 eetlepel gemalen witte peper
1 theelepel karwijzaad
1/2 theelepel nootmuskaat
Rundvlees, varkensvlees en spek twee keer door de vleesmolen draaien.
Vermengde kruiden en het zout toevoegen en 5 minuten door elkaar kneden.
Worstvulling ongeveer 30 minuten lang in de koelkast zetten. Worstvulling volgens
gebruiksaanwijzing vullen (zie hoofdstuk “Worst verwerken“) en worstjes van
25 cm lengte draaien.
De braadworst die gereed is dezelfde dag nog goed doorgebraden en nuttigen.
Spritskoekjes
Ingrediënten:
500 g boter
500 g suiker
2 - 3 pakjes vanillesuiker
1 pakje vanillepudding
1/4 theelepel zout
1 ei
4 dooiers
800 g meel (type 405)
2 theelepels bakpoeder
200 g gemalen amandelen (geblancheerd)
Geraspte schil van een citroen
De boter schuimig roeren. De overige ingrediënten beetje bij beetje toevoegen
en het deeg goed kneden. Het deeg als het klaar is ca. 12 uur (bijv. ‘s nachts)
in de koelkast afgedekt laten rusten. Dan door de vleesmolen draaien met het
spritskoekjes-opzetstuk 1. De spritskoekjes op een met bakpapier bekleed
bakblik leggen. De spritskoekjes in een voorverwarmde oven op 180°C in ca.
10-15 minuten goudgeel bakken.
IB_277055_SFW350C2_LB8.indb 79 24.02.16 08:13

■ 80
│
NL
│
BE
SFW 350 C2
IB_277055_SFW350C2_LB8.indb 80 24.02.16 08:13

CZ
│
81 ■
SFW 350 C2
Obsah
Úvod . . . . . . . . . . . . . . . . . . . . . . . . . . . . . . . . . . . . . . . . . . . . . . . . . . . . . . . . 82
Autorské právo . . . . . . . . . . . . . . . . . . . . . . . . . . . . . . . . . . . . . . . . . . . . . . . . . . . . . . . . . . 82
Omezení ručení . . . . . . . . . . . . . . . . . . . . . . . . . . . . . . . . . . . . . . . . . . . . . . . . . . . . . . . . . 82
Použití dle předpisů . . . . . . . . . . . . . . . . . . . . . . . . . . . . . . . . . . . . . . . . . . . 82
Rozsah dodávky / Popis dílů . . . . . . . . . . . . . . . . . . . . . . . . . . . . . . . . . . . . 83
Technická data . . . . . . . . . . . . . . . . . . . . . . . . . . . . . . . . . . . . . . . . . . . . . . . 84
Bezpečnostní pokyny . . . . . . . . . . . . . . . . . . . . . . . . . . . . . . . . . . . . . . . . . . 84
Složení / rozložení . . . . . . . . . . . . . . . . . . . . . . . . . . . . . . . . . . . . . . . . . . . . . 86
Složení mlýnku na maso . . . . . . . . . . . . . . . . . . . . . . . . . . . . . . . . . . . . . . . . . . . . . . . . . . 86
Montáž nástavce na plnění klobás . . . . . . . . . . . . . . . . . . . . . . . . . . . . . . . . . . . . . . . . . . 87
Montáž nástavce Kubbe . . . . . . . . . . . . . . . . . . . . . . . . . . . . . . . . . . . . . . . . . . . . . . . . . . 88
Montáž nástavce na stříkané pečivo . . . . . . . . . . . . . . . . . . . . . . . . . . . . . . . . . . . . . . . . . 88
Montáž naváděcího nástavce . . . . . . . . . . . . . . . . . . . . . . . . . . . . . . . . . . . . . . . . . . . . . . 89
Obsluha . . . . . . . . . . . . . . . . . . . . . . . . . . . . . . . . . . . . . . . . . . . . . . . . . . . . . 90
Obsluha přístroje . . . . . . . . . . . . . . . . . . . . . . . . . . . . . . . . . . . . . . . . . . . . . . . . . . . . . . . . 90
Zpracování masa . . . . . . . . . . . . . . . . . . . . . . . . . . . . . . . . . . . . . . . . . . . . . . . . . . . . . . . . 91
Zpracování klobás . . . . . . . . . . . . . . . . . . . . . . . . . . . . . . . . . . . . . . . . . . . . . . . . . . . . . . . 92
Práce s Kubbe nástavcem . . . . . . . . . . . . . . . . . . . . . . . . . . . . . . . . . . . . . . . . . . . . . . . . . 92
Výroba stříkaného pečiva . . . . . . . . . . . . . . . . . . . . . . . . . . . . . . . . . . . . . . . . . . . . . . . . . 93
Pasírování rajčat . . . . . . . . . . . . . . . . . . . . . . . . . . . . . . . . . . . . . . . . . . . . . . . . . . . . . . . . . 93
V případě poruchy . . . . . . . . . . . . . . . . . . . . . . . . . . . . . . . . . . . . . . . . . . . . 94
Čištění . . . . . . . . . . . . . . . . . . . . . . . . . . . . . . . . . . . . . . . . . . . . . . . . . . . . . . . 94
Čištění motorového tělesa . . . . . . . . . . . . . . . . . . . . . . . . . . . . . . . . . . . . . . . . . . . . . . . . . 95
Čištění příslušenství . . . . . . . . . . . . . . . . . . . . . . . . . . . . . . . . . . . . . . . . . . . . . . . . . . . . . . 95
Uložení . . . . . . . . . . . . . . . . . . . . . . . . . . . . . . . . . . . . . . . . . . . . . . . . . . . . . . 95
Likvidace . . . . . . . . . . . . . . . . . . . . . . . . . . . . . . . . . . . . . . . . . . . . . . . . . . . . 96
Záruka a servis . . . . . . . . . . . . . . . . . . . . . . . . . . . . . . . . . . . . . . . . . . . . . . . 96
Dovozce . . . . . . . . . . . . . . . . . . . . . . . . . . . . . . . . . . . . . . . . . . . . . . . . . . . . . 97
Recepty . . . . . . . . . . . . . . . . . . . . . . . . . . . . . . . . . . . . . . . . . . . . . . . . . . . . . 98
Kubbe . . . . . . . . . . . . . . . . . . . . . . . . . . . . . . . . . . . . . . . . . . . . . . . . . . . . . . . . . . . . . . . . 98
Cerstvá klobása . . . . . . . . . . . . . . . . . . . . . . . . . . . . . . . . . . . . . . . . . . . . . . . . . . . . . . . . . 99
Stříkané pečivo . . . . . . . . . . . . . . . . . . . . . . . . . . . . . . . . . . . . . . . . . . . . . . . . . . . . . . . . . 99
IB_277055_SFW350C2_LB8.indb 81 24.02.16 08:13

■ 82
│
CZ
SFW 350 C2
Úvod
Gratulujeme Vám k zakoupení nového přístroje.
Vaším nákupem jste si vybrali kvalitní výrobek. Návod k obsluze je součástí toho-
to výrobku. Obsahuje důležité pokyny a upozornění ohledně bezpečnosti, použití
a likvidace. Před použitím výrobku si dobře přečtěte provozní a bezpečnostní pokyny.
Výrobek používejte pouze předepsaným způsobem a v uvedených oblastech
použití. Při předávání výrobku třetím osobám předávejte i tyto podklady.
Autorské právo
Tato dokumentace je chráněná autorským právem.
Jakékoli rozmnožování, resp. dotisk, i jenom částečně, a reprodukce ilustrací
i ve změněném stavu, je dovolené pouze za výslovného písemného souhlasu
výrobce.
Omezení ručení
Všechny technické informace, obsažené v tomto návodu k obsluze, jakož i údaje
a pokyny pro instalaci a připojení a obsluhu, odpovídají poslednímu stavu techniky
v době tisku a byly provedené s přihlédnutím na naše dosavadní zkušenosti a
poznatky podle nejlepšího vědomí.
Z údajů, obrázků a popisů v tomto návodu nelze odvodit žádné nároky.
Výrobce nepřebírá ručení za škody, vzniklé na základě nedodržení návodu, na
základě použití ne dle předpisů, neodborných oprav, nedovoleně provedených
změn nebo na základě použití nedovolených náhradních dílů.
Použití dle předpisů
Tento přístroj je určen výhradně ke zpracování přiměřeného množství potravin v
domácnostech:
▯ mletí čerstvého masa,
▯ výroba klobás pomocí přírodního nebo umělého střeva,
▯ výroba stříkaného pečiva,
▯ pasírování rajčat.
Př
ístroj není určen ke zpracovávání zmrazených nebo jinak tvrdých potravin,
např. kostí nebo ořechů ani pro použití v živnostenských nebo průmyslových
provozech.
IB_277055_SFW350C2_LB8.indb 82 24.02.16 08:13

CZ
│
83 ■
SFW 350 C2
Rozsah dodávky / Popis dílů
Obrázek A:
1 nástavec na stříkané pečivo se vzorkovacím proužkem
2 nacpavač
3 plnicí miska
4 těleso motoru
5 kovový nástavec mlýnku na maso
6 uzavíraci spona
7 výhoz rajčat
8 plastový šnek
9 naváděcí sítko
0 podávací šnek
q pružina
w křížový nůž
e hrubý a jemný děrovaný kotouč
r uzavírací prstenec
t nástavec na plnění klobás
z kotouč na klobásy
u nástavec Kubbe
Obrázek B:
i zajišťovací tlačítko
Obrázek C:
o tlačítko „I“
p tlačítko „0“
a tlačítko „<“
IB_277055_SFW350C2_LB8.indb 83 24.02.16 08:13

■ 84
│
CZ
SFW 350 C2
Technická data
Napětí 220 - 240 V ∼, 50 Hz
Příkon 250 - 350 W
Třída ochrany
II/
Veškeré díly tohoto přístroje, přicházející
do styku s potravinami, jsou bezpečné
pro potraviny.
Krátká provozní doba 15 minut
Krátká provozní doba
Krátká provozní doba udává, jak dlouho je možné přístroj provozovat, aniž by
se přehřál, a tím poškodil motor. Po uplynutí udané KP-doby musí zůstat přístroj
vypnutý do té doby, než se motor ochladí.
Bezpečnostní pokyny
NEBEZPEČÍ ÚDERU ELEKTRICKÝM PROUDEM
► Dbejte na to, aby se síťový kabel nepoškodil. Udržujte jej
mimo horká místa a veďte jej tak, aby se nikde nemohl
zaklínit.
► Nechte poškozený síťový kabel nebo síťovou zástrčku oka-
mžitě vyměnit autorizovaným odborným personálem, abyste
zabránili ohrožení.
► Používejte přístroj pouze v suchých místnostech, ne ve ven-
kovních prostorách.
Nikdy nenamáčejte těleso motoru do vody ani jiných
kapalin! V opačném případě hrozí nebezpečí ohrožení
života elektrickým proudem.
VÝSTRAHA!
► Nepoužívejte přístroj nikdy pro jiné účely, než je zde popsáno.
Hrozí nebezpečí závažného zranění, jestliže nesprávným
použitím ochranné zařízení na přístroji vyřadíte z funkce!
IB_277055_SFW350C2_LB8.indb 84 24.02.16 08:13

CZ
│
85 ■
SFW 350 C2
VÝSTRAHA! NEBEZPEČÍ PORANĚNÍ!
► Nikdy nesahejte do otvorů na přístroji. Nikdy dovnitř nestr-
kejte jakékoli předměty – s výjimkou pěchovátek určených
vždy pro určitý nástavec a zpracovávaný druh potravin.
V opačném případě hrozí nebezpečí závažného zranění!
► Nejprve vytáhněte zástrčku ze zásuvky, než nasazujete
nebo odebíráte díly příslušenství.
► Nenechávejte přístroj nikdy bez dozoru, je-li připraven k
provozu. Vždy po použití nebo při přerušení práce vytáhněte
zástrčku ze zásuvky, abyste tak zabránili neúmyslnému
spuštění.
► Používejte jen originální příslušenství určené k tomuto přístroji.
Jiné díly nemusí být k tomu dostatečně bezpečné.
► Nikdy neprovozujte přístroj naprázdno. Mohlo by ho to
nenapravitelně poškodit.
► Před výměnou příslušenství nebo dodatečných dílů, které se
během provozu pohybují, musí být přístroj vypnutý a odpojený
od elektrické sítě.
► Nepoužívejte přístroj nikdy pro jiné účely, než je popsáno v
tomto návodu.
► Pozor: Křížový nůž je velmi ostrý! Při manipulaci s přístrojem
a při jeho čištění postupujte vždy opatrně.
► Přístroj se při chybějícím dohledu a před montáží, demontáží
nebo čištěním musí vždy odpojit od sítě.
► Přístroj nesmějí používat děti.
► Přístroj a jeho přívodní kabel se musí uchovávat mimo dosah
dětí.
IB_277055_SFW350C2_LB8.indb 85 24.02.16 08:13

■ 86
│
CZ
SFW 350 C2
VÝSTRAHA! NEBEZPEČÍ PORANĚNÍ!
► Osoby s omezenými fyzickými, smyslovými nebo mentálními
schopnostmi či nedostatkem zkušeností a/nebo znalostí
mohou používat tento přístroj pouze tehdy, pokud jsou pod
dohledem nebo pokud byly poučeny o bezpečném používání
přístroje a pokud porozuměly z toho vyplývajícímu nebezpečí.
► Děti si nesmí hrát s přístrojem.
Složení / rozložení
POZOR-VĚCNÉ ŠKODY!
► Veškeré díly příslušenství jsou opatřeny tenkým olejovým fi lmem, aby byly
chr
áněny před korozí. Proto před prvním použitím veškeré díly pečlivě
vyčistěte, jak je podrobně popsáno v kapitole „Čištění“. Po použití a vyčis-
tění naolejujte všechny kovové části jedlým olejem.
UPOZORNĚNÍ
► Před prvním použitím odstraňte z pole tlačítek ochrannou fólii.
Složení mlýnku na maso
Výklopnou stranu vyklopte - najdete tam schéma postupu montáže.
1) Vložte šnekový podavač 0 do nástavce mlýnku na maso 5.
2) Pružinu q nastrčte na šnekový podavač 0.
3) Křížový nůž w nasaďte tak, aby strana s noži směrovala od pružiny q.
Dbejte na to, aby hranatá drážka křížového nože w správně dosedala na
hranatý hřídel.
IB_277055_SFW350C2_LB8.indb 86 24.02.16 08:13

CZ
│
87 ■
SFW 350 C2
VÝSTRAHA! NEBEZPEČÍ PORANĚNÍ!
► Křížový nůž w je v
elmi ostrý! Nebezpečí poranění!
POZOR-VĚCNÉ ŠKODY!
► Přístroj se poškodí, jestliže křížový nůž w nasadíte obr
áceně!
4) Zvolte požadovaný děrovaný kotouč e/ kotouč na klobásy z.
5) Zvolený děrovaný kotouč e nasaďte do nástavce mlýnku na maso 5
tak, aby aretace na děrovaném kotouči e dosedaly do drážek v nástavci
mlýnku na maso 5.
6) Když je všechno správně nasazeno, přišroubujte napevno uzavírací kroužek r.
7) Smontovaný mlecí blok 5 se bajonetovým uzávěrem spojí s tělesem motoru 4:
– Mlecí blok 5 nastr
čte do motorového tělesa 4 tak, aby šipka mlecím
bloku 5 doléhala na symbol
na motorovém tělese 4. Aretační
tlačítko i se zatlačí dovnitř (Obr. B).
– Mlecí blok 5 lehce vtiskněte do
vnitř a při tom otočte plnicí otvor na
mlecím bloku 5 do středové polohy (Obr. B), tak, aby šipka na plnicím
otvoru ukazovala na symbol
. Jakmile se mlecí blok 5 zaaretuje,
zajišťovací tlačítko i vyskočí.
– Nakonec nasaďte plnicí misku 3 nahoru na plnicí oddíl.
– Pro odebrání zatlačte zajišťovací tlačítko i a otočte plnicí šachtu
opět dopr
ava (Obr. B)
. Poté můžete nástavec mlýnku na maso 5
vytáhnout.
Montáž nástavce na plnění klobás
Výklopnou stranu vyklopte - najdete tam schéma postupu montáže.
1) Odeberte nástavec mlýnku na maso 5, jak je popsano pod bodem
„Složení mlýnku na maso“.
2) Rozeberte a vyčistěte veškeré díly, které jsou namontované na/v nástavci
mlýnku na maso 5.
3) Otřete všechny kovové díly jedlým olejem.
4) Vložte podávací šnek 0, pružinu q a křížový nůž w opět vložte do nástavce
mlýnku na maso 5.
5) Kotouč na klobásy z nasaďte tak, aby fi xace na kotouči na klobásy z
dosedaly do drážek v nástavci mlýnku na maso 5.
6) Potom nasaďte nástavec pro pěchování klobás t před kotouč na klobásy z.
IB_277055_SFW350C2_LB8.indb 87 24.02.16 08:13

■ 88
│
CZ
SFW 350 C2
7) Přišroubujte napevno uzavírací kroužek r.
8) Namontujte mlecí blok 5 tak, jak je popsáno pod bodem „Složení mlýnku
na maso“.
Montáž nástavce Kubbe
Výklopnou stranu vyklopte - najdete tam schéma postupu montáže.
1) Odeberte nástavec mlýnku na maso 5, jak je popsáno pod bodem „Složení
mlýnku na maso“.
2) Odeberte případné nástavce a mlecí blok 5 vyčistěte.
UPOZORNĚNÍ
► U nástavce Kubbe u není potř
ebný křížový nůž w s pružinou q!
Oba díly příp. vyjměte z mlecího bloku 5.
3) Otřete všechny kovové díly jedlým olejem.
4) Obě plastové části nástavce Kubbe u nasaďte tak, aby fi xace na spodním
kroužku nástavce Kubbe u dosedaly do drážek v nástavci mlýnku na maso 5.
5) Jakmile je vše správně nasazeno, našroubujte opět pevně uzavírací prstenec r.
6) Namontujte nástavec mlýnku na maso 5 tak, jak je popsáno pod bodem
„Složení mlýnku na maso“.
Montáž nástavce na stříkané pečivo
Výklopnou stranu vyklopte - najdete tam schéma postupu montáže.
1) Odeberte nástavec mlýnku na maso 5, jak je popsano pod bodem
„Složení mlýnku na maso“.
2) Odeberte případné nástavce a mlecí blok 5 vyčistěte.
UPOZORNĚNÍ
► U nástavce pro stříkané pečivo 1 není potř
ebný křížový nůž w s pružinou q!
Oba díly příp. vyjměte z mlecího bloku 5.
3) Otřete všechny kovové díly jedlým olejem.
4) Odeberte tvarovací proužek 1 vepředu z nástavce na stříkané pečivo 1.
5) Nasaďte nejprve plastový kotouč, potom kovový kotouč nástavce na stříkané
pečivo 1 do mlecího bloku 5 (viz výklopnou stranu). Nástavec na stříkané
pečivo 1 nasaďte tak, aby fi xace na nástavci na stříkané pečivo 1 dose-
daly do drážek v nástavci mlýnku na maso 5.
IB_277055_SFW350C2_LB8.indb 88 24.02.16 08:13

CZ
│
89 ■
SFW 350 C2
6) Když je všechno správně nasazeno, přišroubujte napevno uzavírací kroužek r.
7) Tvarovací proužek 1 nastrčte opět vepředu do nástavce na stříkané pečivo 1.
Dbejte na to, aby rukojeť na tvarovacím proužku 1 směroval pryč od přístroje.
Jinak se nedá nastavit vzorek, který je přímo u rukojeti.
8) Namontujte nástavec mlýnku na maso 5 tak, jak je popsáno pod bodem
„Složení mlýnku na maso“.
9) Před odebráním musíte nejdřív sundat tvarovací proužek 1, než budete
moci odšroubovat uzavírací kroužek r a vyjmout opět nástavec na stříkané
pečivo 1.
Montáž naváděcího nástavce
Vyklopte vyklápěcí stránku - tam najdete pořadí smontování znázorněno v
obrázcích.
1) Odeberte předsádku mlýnku na maso 5 tak, jak je popsáno v „Složení
mlýnku na maso“.
2) Odeberte případné nástavce a vyčistěte předsádku mlýnku na maso 5.
UPOZORNĚNÍ
► Pro pasírovací nástavec není potřebný dopravní šnek 0 a kř
ížový nůž w s
pružinou q! Příp. vše vyjměte z předsádky mlýnku na maso 5.
3) Zasuňte plastový šnek 8 do předsádky mlýnku na maso 5.
4) Převlečte pasírovací sítko 9 přes plastový šnek 8 tak, aby upevnění na
pasírovacím sítku 9 zapadaly do vyhloubenin na předsádce mlýnku na maso 5.
Otvory pasírovacího sítka 9 přitom ukazují směrem dolů.
5) Když je vše správně vloženo, převlečte uzavírací kroužek r přes pasírovací
sítko 9 a zašroubujte ho pevně rukou.
6) Namontujte předsádku mlýnku na maso 5 tak, jak je popsáno v „Sestavení
mlýnku na maso“.
7) Otevřete uzavírací sponu 6 na výhoze rajčat 7.
8) Umístěte výhoz rajčat 7 pod pasírovací nástavec tak, že špičku pasírovací-
ho sítka 9 prostrčíte malým otvorem na výhozu rajčat 7:
IB_277055_SFW350C2_LB8.indb 89 24.02.16 08:13

■ 90
│
CZ
SFW 350 C2
9) Uzavírací sponu 6 uzavřete tak, aby tato uchytila předsádku mlýnku na
maso 5.
Obsluha
NEBEZPEČÍ ÚDERU ELEKTRICKÝM PROUDEM
► Nikdy neotvírejte kryt tělesa motoru 4 – uvnitř nejsou žádné o
vládací prvky.
Po otevření krytu zaniká nárok na záruku! Při otevřeném tělese hrozí nebez-
pečí ohrožení života ránou elektrickým proudem.
POZOR-VĚCNÉ ŠKODY!
► Nepoužívejte přístroj déle než 15 minut v trvalém provozu. Nechte pak
př
ístroj asi 30 minut vypnutý, abyste tak zabránili přehřátí.
► Nikdy netiskněte tlačítko „I“ o nebo „<“ a během změny směru chodu,
dokud motor přístroje není úplně v klidu. Motor se může poškodit.
Obsluha přístroje
Jakmile jste namontovali požadované nástavce:
1) Postavte přístroj tak, aby stál absolutně rovně a v žádném případě (např. vli-
vem vibrací nebo zachycením síťového kabelu) nemohl spadnout ze stolu nebo
se dostat do blízkosti otevřené vody. Vibrace jsou za provozu nevyhnutelné.
IB_277055_SFW350C2_LB8.indb 90 24.02.16 08:13

CZ
│
91 ■
SFW 350 C2
NEBEZPEČÍ ÚDERU ELEKTRICKÝM PROUDEM
► Nikdy nesahejte na připojený nebo dokonce běžící přístroj, pokud by měl
spadnout nebo se dostat do v
ody – ani v jiných nouzových případech!
V případě nouze ihned vytáhněte zástrčku ze sítě! Jinak hrozí akutní nebez-
pečí zranění či ohrožení života!
2) Vložte potraviny ke zpracování do plnicí misky 3 a pod výstupní otvor
vpředu postavte záchytnou nádobu.
3) Nejprve stiskněte tlačítko „0“ p, abyste se ujistili, že přístroj je ještě vypnutý.
Jinak hrozí nebezpečí, že přístroj se nečekaně spustí, jakmile bude zástrčka
zastrčena do zásuvky.
4) Potom zastrčte síťovou zástrčku do zásuvky.
5) Pro zapnutí přístroje stiskněte tlačítko „I“ o.
VÝSTRAHA! NEBEZPEČÍ PORANĚNÍ!
► Potraviny zatlačujte do plnicí šachty výhradně kulatým nacpavačem 2 –
nikdy pr
sty, vidličkami, rukojetí lžíce nebo pod. Hrozí nebezpečí závažného
zranění a přístroj by se mohl poškodit.
POZOR-VĚCNÉ ŠKODY!
► Nikdy netlačte potraviny tak silně, aby motor slyšitelně zpomalil. Jinak by
se př
ístroj mohl přetížit a poškodit.
Zpracování masa
1) Používejte pouze takové kusy masa, které se snadno vejdou do naplňovací
šachty. V případě potřeby maso dopředu nakrájejte na kousky. Dbejte na to,
aby maso nemělo kosti nebo šlachy.
VÝSTRAHA!
► Sekaná je velmi náchylná k napadení choroboplodnými zárodky. Dbejte
pr
oto na správnou hygienu, když zpracováváte maso. V opačném případě
může dojít ke zdravotním problémům.
2) Když jste si přečetli všechny instrukce na téma „maso“, můžete nyní použít
přístroj tak, jak je popsáno v kapitole „Obsluha přístroje“.
IB_277055_SFW350C2_LB8.indb 91 24.02.16 08:13

■ 92
│
CZ
SFW 350 C2
Zpracování klobás
1) Nejprve maso dvakrát pomelte v mlýnku na maso, než jej zpracujete do
klobásy.
2) Pro náplň do klobás přidejte do sekaného masa nadrobno nakrájenou cibuli,
koření a další suroviny podle Vašeho receptu a hmotu je třeba následně
dobře prohnísit. Pak ji před dalším zpracováním na 30 minut odstavte do
chladničky.
3) Nasaďte klobásové střevo (přírodní nebo umělé) na nástavec na plnění
klobás t a druhý konec zauzlujte. Na 1 kg náplně můžete počítat asi
s 1,60 m střeva.
TIP
Předtím namočte přírodní střevo asi na 3 hodiny do vlažné vody a před
nasaz
ením na nástavec je vyždímejte. Přírodní střevo tak získá opět svou
pružnost. Přírodní střeva dostanete v obchodě s řeznickými potřebami
v blízkosti jatek nebo u řezníka.
4) Náplň se pak natlačí plnicím nástavcem an klobásy t do střeva. Jakmile
je dosaženo požadované délky, přístroj vypněte, klobásu na konci stlačte a
několikrát jí otočte kolem její podélné osy.
TIP
Při vaření a zmrazování se klobása roztáhne. Proto ji nepřeplňujte, klobá-
sa b
y jinak mohla prasknout.
5) Když jste si přečetli všechny instrukce na téma „klobása“ můžete nyní použít
přístroj tak, jak je popsáno v kapitole „Obsluha přístroje“.
Práce s Kubbe nástavcem
Nástavcem Kubbe u můžete z vložených potravin nechat formovat duté závitky
z masa nebo zeleniny, které se pak mohou dle libosti plnit.
1) Nejprve maso dvakrát pomelte, než je protlačíte nástavcem Kubbe u.
2) Když jste si přečetli všechny instrukce na téma „nástavec Kubbe“, můžete
nyní použít přístroj tak, jak je popsáno v kapitole „Obsluha přístroje“.
IB_277055_SFW350C2_LB8.indb 92 24.02.16 08:13

CZ
│
93 ■
SFW 350 C2
Výroba stříkaného pečiva
Jakmile jste připravili těsto na stříkané pečivo podle svého receptu a namontovali
nástavec na stříkané pečivo 1:
1) Vyložte malý plech pečicím papírem a postavte jej těsně pod výstupní otvor
vpředu na přístroji.
2) Těsto natlačte rovnoměrně do mlecího bloku 5 – šnekovým podavačem 0
se toto protlačí poté přes zvolený motiv na tvarovaném proužku nástavce na
stříkané pečivo 1.
3) Jakmile pečivo dosáhne požadované délky, přístroj zastavte a těsto u výstup-
ního otvoru odřízněte. Pečivo položte na plech.
4) Když jste si přečetli všechny instrukce na téma „stříkané pečivo“, můžete nyní
použít přístroj tak, jak je popsáno v kapitole „Obsluha přístroje“.
Pasírování rajčat
1) Pod výhoz rajčat 7 postavte nádobu.
2) Pod pasírovací sítko 9 postavte dopředu nádobu.
3) Nakrájejte rajčata na čtvrťky a tlačte tyto pomalu a rovnoměrně do předsádky
mlýnku na maso 5.
Plastový šnek 8 protlačí rajčata pasírovacím nástavcem, propasírovaná
rajčata spadnou do výhozu rajčat 7. Miska na rajčata se vytáhne zepředu
z pasírovacího sítka 9.
UPOZORNĚNÍ
Pokud ze šroubového spoje pasírovacího nástavce vytéká rajčatová šťáva,
můž
e to mít následující příčiny:
– pracujete příliš rychle.
– kusy rajčat tlačíte do přístroje příliš vysokým tlakem.
– kusy rajčat jsou příliš velké.
► Zpomalte v tomto případě své pracovní tempo, tlačte kusy rajčat jen lehce
do př
ístroje a rozkrájejte rajčata na menší kousky.
4) Pokud jste si přečetli všechna upozornění na téma „Pasírování rajčat“, můžete
použít přístroj tak, jak je popsáno v kapitole „Obsluha přístroje“.
IB_277055_SFW350C2_LB8.indb 93 24.02.16 08:13

■ 94
│
CZ
SFW 350 C2
V případě poruchy
Je-li pohon blokován hromadícími se potravinami:
■ Pro zastavení mlýnku stiskněte tlačítko „0“ p.
■ Držte stisknuté tlačítko „<“ a. P
ohon nyní běží pozpátku. Tak můžete potraviny
dopravit o kousek zpátky, čímž se pohon může uvolnit.
■ Jakmile je pohon volný, tlačítko „<“ a pusť
te.
■ Pro spuštění mlýnku stiskněte tlačítko „I“ o.
■ Jestliže se tím pohon neuvolní, přístroj vyčistěte, jak je popsáno v kapitole
„Čištění“.
Jestliže motor náhle vypne, je možné, že sepla vnitřní
pojistka proti přetížení. Ta má motor chránit.
■ Přístroj vypněte a nechte jej asi 30 minut zchladnout, než přístroj znovu
použijete.
■ Pokud se výsledek nedostaví, vyčkejte dalších 15 minut.
■ Jestliže i tato lhůta uplyne bez výsledku, je příčinou závada. V tomto případě
se obr
aťte na servis pro zákazníky.
Jestliže je síťový kabel poškozený nebo jsou vidět škody
na dílech přístrojů:
■ Ihned přístroj vypněte stisknutím tlačítka „0“ p!
■ Není-li možné, toto provést bezpečně, vytáhněte zástrčku ze zásuvky.
■ Nechte nejprve tyto škody opravit v servisu, než přístroj budete opět používat.
Čištění
NEBEZPEČÍ ÚDERU ELEKTRICKÝM PROUDEM
► Nejprve vytáhněte zástrčku ze zásuvky, než se pustíte do čištění přístroje.
T
ím se vyhnete nebezpečí zranění způsobeného neočekávaným neúmyslným
spuštěním a ránou elektrickým proudem.
IB_277055_SFW350C2_LB8.indb 94 24.02.16 08:13

CZ
│
95 ■
SFW 350 C2
Čištění motorového tělesa
■ Očistěte mírně navlhčeným hadrem všechny vnější plochy a přívodní kabel.
Než přístroj začnete znovu používat, důkladně jej nechte vyschnout.
NEBEZPEČÍ ÚDERU ELEKTRICKÝM PROUDEM
► Nikdy nenamáčejte těleso motoru do vody ani jiných kapalin! Jinak hrozí
nebezpečí ohr
ožení života ránou elektrickým proudem, jestliže se kapalina
dostane k elektrickým vodičům.
POZOR-VĚCNÉ ŠKODY!
► Nepoužívejte žádné čisticí nebo abrazivní prostředky nebo rozpouštědla.
T
y mohou přístroj poškodit a zanechat v potravinách zbytky.
Čištění příslušenství
UPOZORNĚNÍ
► Nemyjte díly příslušenství v myčce! Tím se tyto díly poškodí!
■ Vyčistěte díly příslušenství, které mohou přijít do kontaktu s potravinami, ...
– jen ručně, díly příslušenství nejsou vhodné k mytí v myčkách.
– horkou vodou a oplachovacím prostředkem vhodným pro styk s potravinami.
VÝSTRAHA! NEBEZPEČÍ PORANĚNÍ!
► Křížový nůž w je v
elmi ostrý! Nebezpečí poranění!
■ Dobře všechno osušte, než přístroj znovu použijete.
UPOZORNĚNÍ
► Po každém čištění opět namažte kovové části jedlým olejem! Pokud tak
neučiníte, můž
e dojít k zabarvení kovových částí!
Uložení
■ Síťový kabel (bez zástrčky) zastrčte do šachty pro kabel pod dnem přístroje.
Tak bude chráněn před poškozením.
■ Přístroj skladujte na suchém místě.
■ Potřete kovové nástavce po osušení tenkou vrstvou jedlého oleje – pokud
nebudete př
ístroj ihned znovu používat. Tak budou dobře chráněny před
korozí.
■ Uchovávejte přístroj tak, aby byl nedostupný pro děti a osoby vyžadující
dohled. T
y nemusí vždy správně rozpoznat možná nebezpečí při manipulaci
s elektrickými přístroji.
IB_277055_SFW350C2_LB8.indb 95 24.02.16 08:13

■ 96
│
CZ
SFW 350 C2
Likvidace
V žádném případě nevyhazujte přístroj do normálního domovního
odpadu.
Tento výrobek podléhá evropské směrnici č. 2012/19/EU
(Waste Electrical and Electronic Equipment).
Přístroj předejte k likvidaci odborné fi rmě či jej odevzdejte v místním recyklačním
zařízení. Dodržujte aktuálně platné předpisy. V případě pochyb se poraďte
s recyklační fi rmou.
Také všechny obalové materiály zlikvidujte v souladu s ekologickými předpisy.
Záruka a servis
Na tento přístroj poskytujeme záruku 3 roky od data zakoupení. Přístroj byl
vyroben s nejvyšší pečlivostí a před odesláním prošel výstupní kontrolou.
Uschovejte si, prosím, pokladní lístek jako doklad o nákupu. V případě uplatňo-
vání záruky se prosím telefonicky spojte se servisem. Pouze tak vám můžeme
zajistit bezplatné zaslání vašeho zboží.
UPOZORNĚNÍ
► Záruční plnění se vztahuje pouze na chyby materiálu nebo výrobní chyby,
nik
oliv však na škody, způsobené při dopravě, na opotřebené součásti či
poškození rozbitných dílů, např. spínače anebo akumulátory.
Výrobek je určen výhradně pro soukromé použití, nikoliv pro podnikatelské
účely. Při nesprávném a neodborném využívání, při použití násilí a při zásazích,
které nebyly provedeny našimi autorizovanými servisními provozovnami, záruční
nároky zanikají.
Vaše práva vyplývající ze zákona touto zárukou nejsou omezena. Záručním
plněním se záruční doba neprodlouží. To platí i pro náhradní a opravené díly.
Případné škody a nedostatky, zijštěné už při nákupu výrobku, se musí po jeho
vybalení okamžitě hlásit, nejpozději ale do dvou dnů po datu nákupu.
Opravy, provedené po uplynutí záruční doby, se musí zaplatit.
Záručním plněním se záruční doba neprodlouží. To platí i pro náhradní a opra-
vené díly.
Případné škody a nedostatky, zijštěné už při nákupu výrobku, se musí po jeho
vybalení okamžitě hlásit, nejpozději ale do dvou dnů po datu nákupu.
Opravy, provedené po uplynutí záruční doby, se musí zaplatit.
Servis Česko
Tel.: 800143873
E-Mail: k[email protected]
IAN 277055
IB_277055_SFW350C2_LB8.indb 96 24.02.16 08:13

CZ
│
97 ■
SFW 350 C2
Dovozce
KOMPERNASS HANDELS GMBH
BURGSTRASSE 21
44867 BOCHUM
GERMANY
www.kompernass.com
IB_277055_SFW350C2_LB8.indb 97 24.02.16 08:13

■ 98
│
CZ
SFW 350 C2
Recepty
Kubbe
Suroviny pro obal
450 g libového jehněčího, telecího nebo hovězího masa
150 g mouky
1 lžička nového koření
1 lžička muškátového oříšku
špetka čili
špetka pepře
Suroviny pro masovou náplň
700 g skopového masa
1 1/2 lžíce olivového oleje
1 1/2 lžíce jemně nasekané cibule
1/2 lžičky nového koření
1/2 lžičky soli
1 1/2 lžíce mouky
Maso pro náplň dvakrát pomelte na mlýnku (nejprve s hrubě, pak s jemně
děrovaným kotoučem e) a smíchejte s ostatními surovinami.Tuto hmotu rovněž
dvakrát pomelte na mlýnku. Děrovaný kotouč e vyměňte za nástavec Kubbe u
(viz kapitolu „Montáž nástavce Kubbe“).
Kubbe obaly vyformujte nástavcem Kubbe u a nechte namrazit.
Náplň:
Maso dvakrát pomelte na mlýnku (nejprve s hrubě a pak jemně děrovaným
kotoučem e).
Osmahnete cibuli a dobře smícháme s masem a zbývajícími surovinami.
Směsí naplníme obaly Kubbe a upečeme.
Alternativní náplně:
250 g dušené brokolice
nebo 250 g dušené cukety
nebo 250 g vařené rýže
IB_277055_SFW350C2_LB8.indb 98 24.02.16 08:13

CZ
│
99 ■
SFW 350 C2
Cerstvá klobása
Suroviny:
300 g libového hovězího
500 g libového vepřového
200 g slaniny z plecka
20 g soli
1/2 lžíce bílého mletého pepře
1 lžička kmínu
1/2 lžičky muškátového oříšku
Hovězí, vepřové maso a slaninu dvakrát pomeleme v mlýnku.
Přidáme smíchané koření a sůl a 5 minut hněteme.
Náplň dejte na ca 30 minut do chladničky. Klobásy naplňte dle návodu
(viz kapitola „Zpracování uzenin“) a vytvořte klobásky o délce 25 cm.
Hotovou klobásku snězte dobře osmaženou ještě týž den.
Stříkané pečivo
Suroviny:
500 g másla
500 g cukru
2 - 3 balíčky vanilkového cukru
1 balíček vanilkového pudinku
1/4 čajové lžičky soli
1 vejce
4 žloutky
800 g mouky (typ 405)
2 čajové lžičky prášku do pečiva
200 g mletých mandlí (blanšírované)
nastrouhaná kůra z jednoho citronu
Máslo utřete do pěny. Poté postupně přidejte zbývající suroviny a těsto dobře
prohněťte. Hotové těsto nechte odpočívat zakryté cca 12 hodin (např. přes noc) v
ledničce. Pak těsto umelte v mlýnku s nástavcem na stříkané pečivo se vzorkovacím
proužkem 1. Stříkané pečivo položte na pečicí plech vyložený pečicím papírem.
Pečivo pečte v předehřáté troubě na 180 °C cca 10-15 minut do zlatožluta.
IB_277055_SFW350C2_LB8.indb 99 24.02.16 08:13

■ 100
│
CZ
SFW 350 C2
IB_277055_SFW350C2_LB8.indb 100 24.02.16 08:13

ES
│
101 ■
SFW 350 C2
Indice
Introducción . . . . . . . . . . . . . . . . . . . . . . . . . . . . . . . . . . . . . . . . . . . . . . . . . 102
Derechos de autor . . . . . . . . . . . . . . . . . . . . . . . . . . . . . . . . . . . . . . . . . . . . . . . . . . . . . . 102
Aviso legal . . . . . . . . . . . . . . . . . . . . . . . . . . . . . . . . . . . . . . . . . . . . . . . . . . . . . . . . . . . . 102
Finalidad de uso . . . . . . . . . . . . . . . . . . . . . . . . . . . . . . . . . . . . . . . . . . . . . 102
Volumen de suministro / Descripción de las piezas . . . . . . . . . . . . . . . . . 103
Características técnicas . . . . . . . . . . . . . . . . . . . . . . . . . . . . . . . . . . . . . . . . 104
Indicaciones de seguridad . . . . . . . . . . . . . . . . . . . . . . . . . . . . . . . . . . . . . 104
Ensamblaje / Despiece . . . . . . . . . . . . . . . . . . . . . . . . . . . . . . . . . . . . . . . .106
Ensamblaje máquina de picar . . . . . . . . . . . . . . . . . . . . . . . . . . . . . . . . . . . . . . . . . . . . . 106
Montaje del accesorio compactador para salchichas . . . . . . . . . . . . . . . . . . . . . . . . . . 107
Montar el accesorio para Kubbe . . . . . . . . . . . . . . . . . . . . . . . . . . . . . . . . . . . . . . . . . . 108
Montar el accesorio para la masa de galletas . . . . . . . . . . . . . . . . . . . . . . . . . . . . . . . . 108
Montaje del accesorio pasapurés . . . . . . . . . . . . . . . . . . . . . . . . . . . . . . . . . . . . . . . . . . 109
Manejo . . . . . . . . . . . . . . . . . . . . . . . . . . . . . . . . . . . . . . . . . . . . . . . . . . . . . 110
Manejo del aparato . . . . . . . . . . . . . . . . . . . . . . . . . . . . . . . . . . . . . . . . . . . . . . . . . . . . 110
Elaborar la carne . . . . . . . . . . . . . . . . . . . . . . . . . . . . . . . . . . . . . . . . . . . . . . . . . . . . . . . 111
Elaborar salchicha . . . . . . . . . . . . . . . . . . . . . . . . . . . . . . . . . . . . . . . . . . . . . . . . . . . . . . 112
Operar con el accesorio Kubbe . . . . . . . . . . . . . . . . . . . . . . . . . . . . . . . . . . . . . . . . . . . 112
Preparar masa para galletas . . . . . . . . . . . . . . . . . . . . . . . . . . . . . . . . . . . . . . . . . . . . . . 113
Triturado de tomates . . . . . . . . . . . . . . . . . . . . . . . . . . . . . . . . . . . . . . . . . . . . . . . . . . . . 113
En caso de avería . . . . . . . . . . . . . . . . . . . . . . . . . . . . . . . . . . . . . . . . . . . .114
Limpieza . . . . . . . . . . . . . . . . . . . . . . . . . . . . . . . . . . . . . . . . . . . . . . . . . . . 114
Limpiar bloque de motor . . . . . . . . . . . . . . . . . . . . . . . . . . . . . . . . . . . . . . . . . . . . . . . . . 115
Limpiar accesorios . . . . . . . . . . . . . . . . . . . . . . . . . . . . . . . . . . . . . . . . . . . . . . . . . . . . . . 115
Almacenaje . . . . . . . . . . . . . . . . . . . . . . . . . . . . . . . . . . . . . . . . . . . . . . . . .115
Evacuación . . . . . . . . . . . . . . . . . . . . . . . . . . . . . . . . . . . . . . . . . . . . . . . . . . 116
Garantía y asistencia técnica . . . . . . . . . . . . . . . . . . . . . . . . . . . . . . . . . . . 116
Importador . . . . . . . . . . . . . . . . . . . . . . . . . . . . . . . . . . . . . . . . . . . . . . . . .117
Recetas . . . . . . . . . . . . . . . . . . . . . . . . . . . . . . . . . . . . . . . . . . . . . . . . . . . . . 118
Kubbe . . . . . . . . . . . . . . . . . . . . . . . . . . . . . . . . . . . . . . . . . . . . . . . . . . . . . . . . . . . . . . . 118
Salchicha fresca para asar . . . . . . . . . . . . . . . . . . . . . . . . . . . . . . . . . . . . . . . . . . . . . . . 119
Galletas de mantequilla . . . . . . . . . . . . . . . . . . . . . . . . . . . . . . . . . . . . . . . . . . . . . . . . . 119
IB_277055_SFW350C2_LB8.indb 101 24.02.16 08:13

■ 102
│
ES
SFW 350 C2
Introducción
Felicidades por la compra de su aparato nuevo.
Ha optado por adquirir un producto de alta calidad. Las instrucciones de uso
forman parte del producto. Contiene indicaciones importantes acerca de la
seguridad, uso y evacuación. Antes de usar el producto familiaricese con todas
las indicaciones de manejo y de seguridad. Utilice el producto como se describe
y para los ámbitos de aplicación indicados. Entregue todos los documentos
cuando transfi era el producto a terceros.
Derechos de autor
Esta documentación está protegida por derechos de autor.
La reproducción, o cualquier tipo de reimpresión, total o parcial, así como la
reproducción de imágenes, incluso modifi cadas, únicamente estarán permitidas
con el consentimiento escrito del fabricante.
Aviso legal
Todas las informaciones técnicas, datos e indicaciones contenidos en estas
instrucciones de uso, para la conexión y manejo, refl ejan la situación más
avanzada en el momento de la impresión y se proporcionan teniendo en cuenta
nuestras experiencias y conocimientos hasta ese momento.
Los datos, ilustraciones y descripciones de estas instrucciones no pueden servir
como base para posibles reclamaciones.
El fabricante no asume ninguna responsabilidad por los daños debidos a la
inobservancia de las instrucciones, el uso contrario a lo previsto, las reparaciones
inadecuadas, las modifi caciones realizadas sin autorización o el empleo de
recambios no homologados.
Finalidad de uso
Este aparato ha sido concebido exclusivamente para el procesamiento de
alimentos en las cantidades habituales de uso doméstico en el hogar:
▯ Picado de carne fresca,
▯ Preparación de salchichas con tripa natural o artifi cial,
▯ Preparación de masa para galletas
▯ Triturado de tomates.
El apar
ato no ha sido concebido para la transformación de alimentos conge-
lados o duros, como por ejemplo huesos o nueces, y tampoco para su uso en
ámbitos profesionales o industriales.
IB_277055_SFW350C2_LB8.indb 102 24.02.16 08:13

ES
│
103 ■
SFW 350 C2
Volumen de suministro / Descripción de las piezas
Figura A:
1 Suplemento galletas de manguera con tiras de muestras
2 Mazo compactador
3 Bandeja de entrada
4 Bloque motor
5 Boquilla metálica de la picadora de carne
6 Abrazadera de cierre
7 Accesorio para tomates
8 Rosca de plástico
9 Punta del pasapurés
0 Rosca de transporte
q Muelle
w Cuchilla
e Disco perforado grueso y fi no
r Aro de cierre
t Accesorio compactador para salchichas
z Rodaja de charcutería
u Suplemento Kubbe
Figura B:
i Botón de bloqueo
Figura C:
o Tecla “I”
p Tecla “0“
a Tecla “<“
IB_277055_SFW350C2_LB8.indb 103 24.02.16 08:13

■ 104
│
ES
SFW 350 C2
Características técnicas
Tensión 220 - 240 V ∼, 50 Hz
Consumo de potencia 250 - 350 W
Clase de protección
II /
Todas las piezas de este aparato que
entran en contacto con alimentos son
aptas para su uso con alimentos.
Periodo KB 15 minutos
Periodo KB
Con el periodo KB (funcionamiento por un corto periodo de tiempo) se indica
durante cuánto tiempo puede funcionar un aparato sin que el motor se sobre-
caliente ni se dañe. Tras el periodo de corta duración (KB) indicado deberá
apagarse el aparato hasta que el motor se haya enfriado.
Indicaciones de seguridad
PELIGRO DE DESCARGA ELÉCTRICA
► Preste atención de que el cable de red no sufra desperfectos.
Manténgalo alejado de las zonas muy calientes y colóquelo
de modo que no pueda engancharse en ningún sitio.
► Deje que un especialista cambie inmediatamente el cable
de red dañado o la clavija de red, para evitar riesgos.
► Utilice el aparato sólo en habitaciones secas, no en el exterior.
¡No sumerja nunca el bloque motor en agua u otros
líquidos! De lo contrario, existe peligro de muerte por
descarga eléctrica.
¡ADVERTENCIA!
► No utilice nunca el aparato para otros fi nes distintos de los
aquí descritos. ¡Existe un riesgo considerable de accidentes
si debido a un error de manejo desactiva los dispositivos de
seguridad del aparato!
IB_277055_SFW350C2_LB8.indb 104 24.02.16 08:13

ES
│
105 ■
SFW 350 C2
¡ADVERTENCIA! ¡PELIGRO DE LESIONES!
► No introduzca nunca las manos en las aberturas del aparato.
No introduzca nunca ningún objeto dentro de él – excepto el
mazo compactador correspondiente al accesorio y los ali-
mentos. ¡De lo contrario, existe un alto riesgo de accidentes!
► Extraiga primero la clavija de la base de enchufe antes de
montar o bien de desmontar los accesorios.
► No deje nunca el aparato sin vigilancia cuando está listo
para su uso. Después de utilizarlo o durante las pausas de
trabajo, desenchufe siempre la clavija de la toma de corriente
para impedir el arranque involuntario del aparato.
► Utilice únicamente accesorios originales para este aparato.
Las piezas de otros fabricantes no son, probablemente,
sufi cientemente seguras.
► Nunca ponga el aparato en funcionamiento vacío. Esto
puede provocar daños irreparables en el aparato.
► Antes de cambiar los accesorios o las piezas móviles del
aparato, apáguelo y desconéctelo de la red.
► No utilice nunca el aparato para fi nes distintos de los aquí
descritos.
► Cuidado: ¡la cuchilla en cruz está muy afi lada! Proceda
siempre con cautela al manejar y limpiar el aparato.
► Desconecte el aparato de la red eléctrica siempre que no
esté bajo vigilancia y antes de su montaje, desmontaje y
limpieza.
► Los niños no deben utilizar el aparato.
► El aparato y su cable de conexión deben mantenerse fuera
del alcance de los niños.
IB_277055_SFW350C2_LB8.indb 105 24.02.16 08:13

■ 106
│
ES
SFW 350 C2
¡ADVERTENCIA! ¡PELIGRO DE LESIONES!
► Este aparato puede ser utilizado por personas cuyas facultades
físicas, sensoriales o mentales sean reducidas o carezcan de
los conocimientos y de la experiencia necesaria siempre que
sean vigiladas o hayan sido instruidas correctamente sobre el
uso seguro del aparato y hayan comprendido los peligros
que entraña.
► Los niños no deben jugar con el aparato.
Ensamblaje / Despiece
¡ATENCIÓN - DAÑOS MATERIALES!
► Todos los accesorios están recubiertos por una fi na capa de aceite para
pr
otegerlos de la corrosión. Por ello, debe limpiar con cuidado todas las
piezas antes de su primero uso, tal y como se describe en detalle en el
capítulo “Limpieza”. Después, frote todas las partes metálicas con un poco
de aceite de cocinar.
HINWEIS
► Antes de utilizar el aparato por primera vez, retire la lámina protectora del
teclado.
Ensamblaje máquina de picar
Abra el lado abatible; allí encontrará representado gráfi camente el orden de montaje.
1) Coloque el transportador helicoidal 0 en la boquilla de la picadora de carne 5.
2) Inserte el muelle q sobre la transportadora helicoidal 0.
3) Inserte la cuchilla en cruz w de modo que el lado con las cuchillas señale
en sentido contrario al del muelle q. Asegúrese de que el orifi cio cuadrado
de la cuchilla w esté correctamente encajado en el eje cuadrado.
IB_277055_SFW350C2_LB8.indb 106 24.02.16 08:13

ES
│
107 ■
SFW 350 C2
¡ADVERTENCIA! ¡PELIGRO DE LESIONES!
► ¡La cuchilla en cruz w está muy afi
lada! ¡Peligro de lesiones!
¡ATENCIÓN - DAÑOS MATERIALES!
► ¡El aparato se dañará si la cuchilla w en cruz se coloca al r
evés!
4) Seleccione el disco perforado e/rodaja de charcutería z elegido.
5) Inserte el disco perforado seleccionado e en la boquilla metálica de la
picadora de carne 5 de modo que las fi jaciones del disco perforado e
queden encajadas en los orifi cios de la boquilla metálica de la picadora
de carne 5.
6) Si todo está colocado correctamente, atornille con fuerza a mano el anillo
de cierre r.
7) El accesorio de la picadora completamente montado 5 se une con el
bloque de motor a través de un cierre de bayoneta 4:
– Inserte el accesorio de la picadora 5 en el bloque de motor 4, de
modo que la fl
echa en el accesorio de la picadora 5 quede junto al
símbolo
del bloque de motor 4. El botón de bloqueo i se introdu-
ce hacia dentro (Fig. B).
– Pulse el accesorio de la picadora para carne 5 liger
amente hacia dentro y
gire simultáneamente el tubo de alimentación en el accesorio de la picado-
ra 5 a la posición central (Fig. B), de modo que la fl echa señale en el tubo
de alimentación hacia el símbolo
. Cuando encastra el accesorio de la
picadora de carne 5, el botón de bloqueo i salta hacia fuera.
– Para terminar, coloque la bandeja de llenado 3 sobr
e el tubo de llenado.
– Para extraerlo pulse el botón de bloqueo i y gir
e el tubo de llenado
hacia la derecha (Fig. B)
. Después podrá retirar la boquilla de la
picadora de carne 5.
Montaje del accesorio compactador para salchichas
Abra el lado abatible; allí encontrará representado gráfi camente el orden de montaje.
1) Retire la boquilla de la picadora de carne 5, como se ha descrito en el
punto “Ensamblaje máquina de picar”.
2) Desmonte todas las piezas montadas en la boquilla de la picadora de
carne 5 y límpielas.
3) Impregne todas las piezas metálicas con aceite de cocina.
4) Vuelva a montar la rosca de transporte 0, el muelle q y la cuchilla w en
la boquilla de la picadora de carne 5.
5) Inserte la rodaja de charcutería z de modo que las fi jaciones de la rodaja
de charcutería z queden encajadas en los orifi cios de la boquilla metálica
de la picadora de carne 5.
6) Coloque el accesorio compactador para salchichas t delante del disco
para salchichas z.
IB_277055_SFW350C2_LB8.indb 107 24.02.16 08:13

■ 108
│
ES
SFW 350 C2
7) Atornille el anillo de cierre r fi rmemente a mano.
8) Monte la boquilla de la picadora de carne 5, como se ha descrito en el
punto “Ensamblaje máquina de picar”.
Montar el accesorio para Kubbe
Abra el lado abatible; allí encontrará representado gráfi camente el orden de
montaje.
1) Retire la boquilla de la picadora de carne 5, como se ha descrito en el
punto “Ensamblaje máquina de picar“.
2) Retire las posibles piezas suplementarias y limpie el accesorio de la picadora
de carne 5.
ADVERTENCIA
► ¡Para el accesorio Kubbe u no se pr
ecisa la cuchilla de cruz w con el
muelle q! Retire en su caso ambos del accesorio de la picadora de carne 5.
3) Impregne todas las piezas metálicas con aceite comestible.
4) Coloque ambas piezas de plástico del suplemento Kubbe u de modo que
las fi jaciones del anillo inferior del suplemento Kubbe u queden encajadas
en los orifi cios de la boquilla metálica de la picadora de carne 5.
5) Si todo está colocado correctamente, atornille de nuevo con fuerza a mano
el anillo de cierre r.
6) Monte la boquilla de la picadora de carne 5, como se ha descrito en el
punto “Ensamblaje máquina de picar”.
Montar el accesorio para la masa de galletas
Abra el lado abatible; allí encontrará representado gráfi camente el orden de montaje.
1) Retire la boquilla de la picadora de carne 5, como se ha descrito en el
punto “Ensamblaje máquina de picar“.
2) Retire las posibles piezas suplementarias y limpie el accesorio de la picadora
de carne 5.
ADVERTENCIA
► ¡Para el accesorio de galletas 1 no se pr
ecisa la cuchilla w de aspa con
el muelle q! Retire en su caso ambos del accesorio de la picadora de
carne 5.
3) Impregne todas las piezas metálicas con aceite comestible.
4) Extraiga las tiras de muestra 1 de la parte delantera del accesorio para
galletas de masa 1.
5) Inserte primero el disco de plástico a continuación el disco de metal del suple-
mento galletas de manguera 1 en el accesorio de la picadora de carne 5
(véase lado desplegable). Inserte el suplemento galletas de man-guera 1 de
modo que las fi jaciones del suplemento galletas de manguera 1 queden en-
cajadas en los orifi cios de la boquilla metálica de la picadora de carne 5.
IB_277055_SFW350C2_LB8.indb 108 24.02.16 08:13

ES
│
109 ■
SFW 350 C2
6) Si todo está colocado correctamente, atornille con fuerza a mano el anillo
de cierre r.
7) Inserte las tiras de muestra 1 de nuevo en el suplemento galletas de man-
guera 1. Preste atención que el asa en las tiras de muestra 1 señale hacia
el lado opuesto del aparato. De lo contrario no podría ajustar la muestra
situada directamente en el mango.
8) Monte la boquilla de la picadora de carne 5, como se ha descrito en el
punto “Ensamblaje máquina de picar“.
9) Para extraerlo, primero debe volver a retirar las tiras de prueba 1 antes de
cerrar el anillo de cierre r y poder extraer así el del suplemento galletas de
manguera 1.
Montaje del accesorio pasapurés
Abra el lado abatible; allí encontrará representado gráfi camente el orden de
montaje.
1) Retire la boquilla de la picadora de carne 5 de la manera descrita en la
sección “Ensamblaje máquina de picar”.
2) Retire cualquier accesorio y limpie la boquilla de la picadora de carne 5.
INDICACIÓN
► ¡Para el accesorio pasapurés no se precisa la rosca de transporte 0 ni la
cuchilla w con el muelle q! En caso necesario, r
etire todos estos accesorios
de la boquilla de la picadora de carne 5.
3) Inserte la rosca de plástico 8 en la boquilla de la picadora de carne 5.
4) Coloque el pasapurés 9 sobre la rosca de plástico 8 de forma que las
fi jaciones del pasapurés 9 encajen en los alojamientos de la boquilla de la
picadora de carne 5. Los orifi cios del pasapurés 9 deben apuntar hacia
abajo.
5) Tras montar todo correctamente, coloque el aro de cierre r sobre el pasa-
purés 9 y enrósquelo fi rmemente con la mano.
6) Monte la boquilla de la picadora de carne 5 de la manera descrita en la
sección “Ensamblaje máquina de picar”.
7) Abra la abrazadera de cierre 6 del accesorio para tomates 7.
8) Coloque el accesorio para tomates 7 bajo el accesorio pasapurés
mediante la inserción de la punta del pasapurés 9 a través de la pequeña
abertura del accesorio para tomates 7:
IB_277055_SFW350C2_LB8.indb 109 24.02.16 08:13

■ 110
│
ES
SFW 350 C2
9) Cierre la abrazadera de cierre 6 de forma que encaje alrededor de la
boquilla de la picadora de carne 5.
Manejo
PELIGRO DE DESCARGA ELÉCTRICA
► No abra nunca la carcasa del bloque de motor 4 – dentr
o de la misma
no encontrará ningún elemento de manejo. Si se abre la carcasa se pierde
el derecho a la garantía. Si se abre la carcasa, existe peligro de muerte
por descarga eléctrica.
¡ATENCIÓN - DAÑOS MATERIALES!
► No utilice el aparato durante más de 15 minutos en modo de funcionamiento
continuo. Deje a continuación el apar
ato apagado unos 30 minutos aprox.
para evitar un sobrecalentamiento.
► No accione nunca las teclas “I” o o “<“ a durante el cambio de sentido
de giro mientras que no esté detenido por completo el motor del aparato.
El motor podría dañarse.
Manejo del aparato
Si ya ha montado los accesorios que desea:
1) Coloque el aparato de modo que este completamente estable y no se pueda
caer de ningún modo de la mesa (p. ej. debido a las vibraciones o por que
se enganche el cable de red) ni entrar en contacto con agua corriente. Las
sacudidas son inevitables cuando el aparato está en funcionamiento.
IB_277055_SFW350C2_LB8.indb 110 24.02.16 08:13

ES
│
111 ■
SFW 350 C2
PELIGRO DE DESCARGA ELÉCTRICA
► ¡No intente agarrar el aparato cuando esté conectado o en funcionamiento
y éste se caiga o entr
e en contacto con el agua, ni en ninguna otra emergen-
cia! ¡En caso de emergencia, desenchufe inmediatamente la clavija de red!
¡De lo contrario, existe un elevado riesgo de accidente o muerte!
2) Coloque los alimentos que quiera elaborar en la bandeja de alimentación 3
y ponga un recipiente de recogida debajo del orifi cio de salida.
3) Pulse primero la tecla “0” p, para asegurarse de que el aparato sigue
desconectado. De lo contrario existe riesgo de que el aparato arranque
involuntariamente al insertar la clavija de red en una base de enchufe.
4) Inserte a continuación la clavija de red en el enchufe.
5) Pulse la tecla “I“ o, para conectar el aparato.
¡ADVERTENCIA! ¡PELIGRO DE LESIONES!
► Presione los alimentos exclusivamente con el compactador redondo 2
en el canal de llenado – nunca con los dedos, tenedor
es, mangos de la
cuchara o similar. Existe un riesgo considerable de accidente y podría
dañar el aparato.
¡ATENCIÓN - DAÑOS MATERIALES!
► No apriete nunca tanto que se escuche que el motor gira más lento.
De los contr
ario puede sobrecargar y dañar el aparato.
Elaborar la carne
1) Utilice trozos de carne que entren sin problemas en el tubo de alimentación.
En su caso desmenuce previamente la carne. Tenga cuidado de que la
carne no tenga huesos ni tendones.
¡ADVERTENCIA!
► La carne picada es muy sensible al desarrollo de microorganismos. Por ello,
mantenga una buen higiene cuando tr
abaje con carne. De lo contrario se
podrían correr elevados riesgos para la salud.
2) Una vez leídas todas las indicaciones acerca del tema “carne”, puede usar
el aparato conforme a lo descrito en el capítulo “Manejo del aparato".
IB_277055_SFW350C2_LB8.indb 111 24.02.16 08:13

■ 112
│
ES
SFW 350 C2
Elaborar salchicha
1) Pase primero la carne dos veces por la picadora de carne antes de hacer
salchichas con ella.
2) Para hacer el relleno de la salchicha, añada a la carne cebolla fi namente
picada, especias y otros ingredientes de su receta y amase bien la masa.
Déjela reposar durante 30 minutos en el frigorífi co antes de seguir el proceso.
3) Introduzca la tripa (natural o artifi cial) en el aplicador para salchicha t y
haga un nudo en el otro extremo. Calcule que necesitará aproximadamente
1,60 m de tripa por cada kilo de relleno.
¡CONSEJO!
Ponga a remojar la tripa natural unas 3 horas en agua templada y escúrrala
antes de r
ellenarla. De este modo, la tripa natural recuperará su elasticidad.
Las tripas naturales las puede adquirir en un comercio de productos para
carnicerías cerca de los mataderos o en su propio carnicero.
4) El relleno de la salchicha es empujado por el accesorio compactador para
salchichas t introducido en la tripa. Cuando haya alcanzado la longitud
que desee, desconecte el aparato, apriete el extremo de la salchicha y
gírela un par de veces alrededor de su eje longitudinal.
¡CONSEJO!
Las salchichas se expanden cuando se cuecen y se congelan. Por ello, no
las llene en e
xceso, ya que podrían romperse.
5) Una vez leídas todas las indicaciones acerca del tema “Salchichas”, puede
usar el aparato conforme a lo descrito en el capítulo “Manejo del aparato”.
Operar con el accesorio Kubbe
Con el accesorio Kubbe u puede formar rollitos huecos de carne o verduras a
partir de los alimentos introducidos, que puede rellenar después a su gusto.
1) Pase primero la carne dos veces por la picadora antes de pasarla a través
del accesorio Kubbe u.
2) Una vez leídas todas las indicaciones acerca del tema “Accesorio Kubbe”,
puede usar el aparato conforme a lo descrito en el capítulo “Manejo del
aparato”.
IB_277055_SFW350C2_LB8.indb 112 24.02.16 08:13

ES
│
113 ■
SFW 350 C2
Preparar masa para galletas
Una vez haya preparado una masa para galletas según su propia receta y
montado el accesorio para galletas 1:
1) Forre una pequeña chapa para hornos con papel para hornos y coloquelo
debajo del orifi cio de salida en la parte frontal del aparato.
2) Empuje la masa uniformemente dentro del accesorio para picadora 5 – el
transportador helicoidal 0 la hará pasar a continuación a través del molde
elegido en la tira de moldes del accesorio para galletas 1.
3) Una vez que las galletas han alcanzado la longitud deseada, pare el
aparato y parta la masa en el orifi cio de salida. Coloque las galletas en la
chapa para hornos.
4) Una vez leídas todas las indicaciones acerca del tema “Masa para galletas”,
puede usar el aparato conforme a lo descrito en el capítulo “Manejo del
aparato”.
Triturado de tomates
1) Coloque un recipiente bajo el accesorio para tomates 7.
2) Coloque otro recipiente en la parte delantera bajo el pasapurés 9.
3) Corte los tomates en cuartos e insértelos de forma lenta y uniforme en la
boquilla de la picadora de carne 5.
La rosca de plástico 8 presiona los tomates contra el accesorio pasapurés
y los tomates triturados caen hacia el accesorio para tomates 7. La piel del
tomate sale del pasapurés 9 por la parte delantera.
INDICACIÓN
Si sale zumo de tomate por los tornillos del accesorio pasapurés, puede
deber
se a las siguientes causas:
– Va demasiado rápido.
– Presiona demasiado al introducir los trozos de tomate en el aparato.
– Los trozos de tomate son demasiado grandes.
► En tal caso, reduzca el ritmo de trabajo, presione solo ligeramente al
intr
oducir los trozos de tomate en el aparato y corte los tomates en trozos
más pequeños.
4) Tras leer todas las indicaciones acerca del tema “Triturado de tomates”, podrá
usar el aparato según lo descrito en el capítulo “Manejo del aparato”.
IB_277055_SFW350C2_LB8.indb 113 24.02.16 08:13

■ 114
│
ES
SFW 350 C2
En caso de avería
Si el funcionamiento está bloqueado debido a alimento
acumulado:
■ Pulse la tecla “0” p para parar la picadora de carne.
■ Mantenga la tecla “<” a accionada. De este modo, el motor marcha hacia
atr
ás. Así puede transportar los alimentos algo hacia atrás, y liberar de
nuevo el accionamiento.
■ Si está el accionamiento libre, vuelva a soltar la tecla “<” a.
■ Pulse la tecla “I” o, par
a iniciar la picador
a de carne.
■ Si con ello no puede liberar el accionamiento, limpie el aparato tal como
viene descrito en el capítulo “Limpieza”.
Si el motor se para bruscamente, es posible que se haya
disparado el fusible interno contra sobrecargas. Está
previsto para proteger el motor.
■ Desconecte el aparato y deje que se enfríe unos 30 min., antes de volver
a utilizarlo.
■ Si esto no diera resultado, espere otros 15 min..
■ Si aún no hubiera ningún resultado pasado ese periodo, es probable que
e
xista una av
ería.. En ese caso, le recomendamos que se ponga en contacto
con nuestro servicio de atención al cliente.
Si el cable de red está dañado o si se perciben desperfectos
en las piezas del aparato:
■ ¡Desconecte el aparato de inmediato, pulsando al tecla “0” p!
■ Si no es posible hacerlo sin peligro, desenchufe la clavija de red.
■ Deje que el servicio técnico al cliente repare los desperfectos antes de
v
olv
er a utilizar el aparato.
Limpieza
PELIGRO DE DESCARGA ELÉCTRICA
► Desenchufe primero la clavija de la toma de corriente, antes de limpiar
el aparato. De este modo, evitará accidentes producidos por el arranque
involuntario del aparato y las descargas eléctricas.
IB_277055_SFW350C2_ES8.indd 114 25.02.16 09:55

ES
│
115 ■
SFW 350 C2
Limpiar bloque de motor
■ Limpie las superfi cies externas y el cable de red con un paño de cocina ligera-
mente húmedo. Antes de volver a utilizar el aparato, séquelo completamente.
PELIGRO DE DESCARGA ELÉCTRICA
► ¡No sumerja nunca el bloque motor en agua u otros líquidos! De lo contrario,
e
xiste peligro de muerte por descarga eléctrica, si la humedad que se ha
introducido llega a los cables eléctricos.
¡ATENCIÓN - DAÑOS MATERIALES!
► No utilice detergentes, ni sustancias abrasivas o disolventes. Estos podrían
dañar el apar
ato y dejar restos de alimentos.
Limpiar accesorios
ADVERTENCIA
► ¡No limpie los accesorios dentro de un lavavajillas! Ello conllevaría daños
en los accesorios!
■ Limpie los accesorios que puedan entrar en contacto con los alimentos, ...
– sólo a mano, ya que los accesorios no son aptos para lavavajillas.
– con agua caliente y un detergente de uso doméstico apto para alimentos.
¡ADVERTENCIA! ¡PELIGRO DE LESIONES!
► ¡La cuchilla en cruz w está muy afi
lada! ¡Peligro de lesiones!
■ Seque todo bien antes de volver a usar el aparato de nuevo.
ADVERTENCIA
► Después de cada limpieza, frote las piezas de metal con aceite de coci-
nar
. De lo contrario, las piezas metálicas podrían decolorarse.
Almacenaje
■ Deslice el cable de red (sin la clavija de red) dentro del compartimiento de
cable debajo del suelo del aparato. De este modo, estará protegido frente
a los desperfectos.
■ Guarde el aparato en un lugar seco.
■ Impregne los accesorios metálicos después de secarlos con una fi na capa
de aceite de cocina – si no v
a a volver a utilizar el aparato de inmediato.
De este modo, conseguirá una buena protección contra la corrosión.
■ Mantenga el aparato fuera del alcance de los niños y las personas con
necesidades especiales. Es posible que no siempr
e puedan evaluar correcta-
mente los posibles peligros en el manejo de aparatos eléctricos.
IB_277055_SFW350C2_LB8.indb 115 24.02.16 08:13

■ 116
│
ES
SFW 350 C2
Evacuación
En ningún caso deberá tirar el aparato a la basura doméstica.
Este producto está sujeto a la directiva europea 2012/19/EU-
WEEE (Waste Electrical and Electronic Equipment).
Evacue el aparato en un centro de evacuación autorizado a través de las insta-
laciones de evacuación comunitarias. Preste atención a las normas en vigor.
En caso de dudas póngase en contacto con su centro de evacuación.
El material de embalaje debe desecharse de forma respetuosa con el medio
ambiente.
Garantía y asistencia técnica
Este aparato tiene 3 años de garantía desde la fecha de compra. El aparato ha
sido fabricado cuidadosamente y ha sido probado antes de su entrega.
Guarde el comprobante de caja como justifi cante de compra. Si necesitara
hacer uso de la garantía, póngase en contacto por teléfono con su punto de
servicio habitual. Éste es el único modo de garantizar un envío gratuito.
ADVERTENCIA
► La garantía cubre los defectos de fabricación o del material, pero no los
daños de transpor
te, las piezas sujetas a desgaste ni los daños sufridos
por las piezas frágiles (p. ej. interruptores o pilas).
Este producto ha sido diseñado exclusivamente para el uso particular y no
para el uso industrial. En caso de manipulación indebida e incorrecta, uso de
la fuerza y en caso de abrir el aparato personas extrañas a nuestros centros de
asistencia técnica autorizados, la garantía pierde su validez.
Esta garantía no reduce en forma alguna sus derechos legales. El uso de la
garantía no implica la ampliación de su periodo de vigencia. Lo mismo se aplica
a las piezas sustituidas o reparadas.
Deberá informarse inmediatamente después del desempaquetado de los daños
y defectos que ya estuviesen presentes en el momento de la compra, como
máximo dos días después de la fecha de compra.
Una vez transcurrido el periodo de garantía, las reparaciones no serán gratuitas.
El uso de la garantía no implica la ampliación de su periodo de vigencia. Lo
mismo se aplica a las piezas sustituidas o reparadas.
Deberá informarse inmediatamente después del desempaquetado de los daños
y defectos que ya estuviesen presentes en el momento de la compra, como
máximo dos días después de la fecha de compra.
Una vez transcurrido el periodo de garantía, las reparaciones no serán gratuitas.
IB_277055_SFW350C2_ES8.indd 116 25.02.16 09:55

ES
│
117 ■
SFW 350 C2
Servicio España
Tel.: 902 59 99 22
(0,08 EUR/Min. + 0,11 EUR/llamada (tarifa normal))
(0,05 EUR/Min. + 0,11 EUR/llamada (tarifa reducida))
E-Mail: k[email protected]
IAN 277055
Importador
KOMPERNASS HANDELS GMBH
BURGSTRASSE 21
44867 BOCHUM
GERMANY
www.kompernass.com
IB_277055_SFW350C2_LB8.indb 117 24.02.16 08:13

■ 118
│
ES
SFW 350 C2
Recetas
Kubbe
Ingredientes para la capa externa
450 g de carne magra de carnero, ternera o vaca
150 g de harina
1 cucharadita de pimienta (pimienta de Jamaica)
1 cucharadita de nuez moscada
1 pellizco de chile en polvo
1 pellizco de pimienta
Ingredientes para el relleno de carne
700 g carne de carnero
1 1/2 cucharada de aceite de oliva
1 1/2 cucharada de cebolla picada fi na
1/2 cucharadita de pimienta (pimienta de Jamaica)
1/2 cucharadita de sal
1 1/2 cucharada de harina
Picar la carne para la capa externa dos veces con la picadora de carne, una
después de otra (primero con el disco perforado grueso y después con el fi no e)
y mezclar con los ingredientes. Picar la masa igualmente dos veces con la pica-
dora de carne. Sustituir el disco perforado e por un accesorio para Kubbe u
(véase capítulo “Montar el accesorio para Kubbe”).
Con el accesorio para Kubbe u formar la capa externa del Kubbe y precongelarla.
Relleno:
Picar la carne dos veces con la picadora de carne (primero con el disco perfora-
do grueso y después con el fi no e).
Dorar la cebolla y mezclarla bien con la carne y el resto de los ingredientes.
Rellenar con esta masa la capa externa y asar a punto.
Rellenos alternativos:
250 g de brécol rehogado
o 250 g de calabacines rehogados
o 250 g de arroz cocido
IB_277055_SFW350C2_LB8.indb 118 24.02.16 08:13

ES
│
119 ■
SFW 350 C2
Salchicha fresca para asar
Ingredientes:
300 g de carne magra de vaca
500 g de carne magra de cerdo
200 g de panceta
20 g de sal
1/2 cucharada de pimienta blanca molida
1 cucharadita de comino
1/2 cucharita nuez moscada
Pasar la carne de ternera, carne de cerdo y el tocino dos veces por la picadora.
Añadir las especies mezcladas y la sal y amasar bien durante 5 minutos.
Dejar reposar el relleno de la salchicha en el frigorífi co durante aprox. 30 minutos.
Introduzca el relleno de salchicha como se describe en las instrucciones (véase
capítulo “ Elaborar salchicha”) y hacer salchichas de 25 cm de longitud.
Consumir las salchichas bien asadas el mismo día.
Galletas de mantequilla
Ingredientes:
500 g de mantequilla
500 g de azúcar
2 - 3 sobres de azúcar de vainilla
1 sobre de crema de vainilla
1/4 de cucharadita de sal
1 huevo
4 yemas de huevo
800 g de harina (tipo 405)
2 cucharaditas de levadura
200 g de almendras molidas (blanqueadas)
Ralladura de la piel de un limón
Bata la mantequilla hasta que quede espumosa. Añada poco a poco el resto
de los ingredientes y amase bien la masa. Cubra la masa y déjela reposar en el
frigorífi co durante aprox. 12 horas (p. ej., durante la noche). A continuación, pase
la masa por la la boquilla metálica de la picadora de carne con el suplemento
galletas de manguera 1. Coloque las galletas de mantequilla sobre una bandeja
de horno cubierta con papel de horno. Hornee las galletas en el horno precalenta-
do a 180 °C durante aprox.10-15 minutos hasta que queden doradas.
IB_277055_SFW350C2_LB8.indb 119 24.02.16 08:13

■ 120
│
ES
SFW 350 C2
IB_277055_SFW350C2_LB8.indb 120 24.02.16 08:13

PT
│
121 ■
SFW 350 C2
Índice
Introdução . . . . . . . . . . . . . . . . . . . . . . . . . . . . . . . . . . . . . . . . . . . . . . . . . . 122
Direitos de autor . . . . . . . . . . . . . . . . . . . . . . . . . . . . . . . . . . . . . . . . . . . . . . . . . . . . . . . 122
Limitação da responsabilidade . . . . . . . . . . . . . . . . . . . . . . . . . . . . . . . . . . . . . . . . . . . . 122
Utilização correcta . . . . . . . . . . . . . . . . . . . . . . . . . . . . . . . . . . . . . . . . . . .122
Volume de fornecimento / Descrição dos componentes . . . . . . . . . . . . . 123
Dados técnicos . . . . . . . . . . . . . . . . . . . . . . . . . . . . . . . . . . . . . . . . . . . . . . . 124
Indicações de segurança . . . . . . . . . . . . . . . . . . . . . . . . . . . . . . . . . . . . . . 124
Montagem / Desmontagem . . . . . . . . . . . . . . . . . . . . . . . . . . . . . . . . . . . . 126
Montar a picadora de carne . . . . . . . . . . . . . . . . . . . . . . . . . . . . . . . . . . . . . . . . . . . . . . 126
Montar o acessório para enchimento de salsichas . . . . . . . . . . . . . . . . . . . . . . . . . . . . . 127
Montar o acessório em forma de cúpula . . . . . . . . . . . . . . . . . . . . . . . . . . . . . . . . . . . . 128
Montar o acessório para biscoitos . . . . . . . . . . . . . . . . . . . . . . . . . . . . . . . . . . . . . . . . . 128
Montar o adaptador do passe-vite . . . . . . . . . . . . . . . . . . . . . . . . . . . . . . . . . . . . . . . . . 129
Funcionamento . . . . . . . . . . . . . . . . . . . . . . . . . . . . . . . . . . . . . . . . . . . . . . 130
Operar o aparelho . . . . . . . . . . . . . . . . . . . . . . . . . . . . . . . . . . . . . . . . . . . . . . . . . . . . . 130
Preparar carne . . . . . . . . . . . . . . . . . . . . . . . . . . . . . . . . . . . . . . . . . . . . . . . . . . . . . . . . . 131
Preparar salsichas . . . . . . . . . . . . . . . . . . . . . . . . . . . . . . . . . . . . . . . . . . . . . . . . . . . . . . 132
Trabalhar com o acessório em forma de cúpula . . . . . . . . . . . . . . . . . . . . . . . . . . . . . . . 132
Fabricar biscoitos . . . . . . . . . . . . . . . . . . . . . . . . . . . . . . . . . . . . . . . . . . . . . . . . . . . . . . . 133
Passar tomate. . . . . . . . . . . . . . . . . . . . . . . . . . . . . . . . . . . . . . . . . . . . . . . . . . . . . . . . . . 133
Em caso de erro . . . . . . . . . . . . . . . . . . . . . . . . . . . . . . . . . . . . . . . . . . . . . .134
Limpeza . . . . . . . . . . . . . . . . . . . . . . . . . . . . . . . . . . . . . . . . . . . . . . . . . . . .134
Limpar o bloco do motor . . . . . . . . . . . . . . . . . . . . . . . . . . . . . . . . . . . . . . . . . . . . . . . . . 135
Limpar os acessórios . . . . . . . . . . . . . . . . . . . . . . . . . . . . . . . . . . . . . . . . . . . . . . . . . . . . 135
Guardar . . . . . . . . . . . . . . . . . . . . . . . . . . . . . . . . . . . . . . . . . . . . . . . . . . . .135
Eliminação . . . . . . . . . . . . . . . . . . . . . . . . . . . . . . . . . . . . . . . . . . . . . . . . . . 136
Garantia e assistência técnica . . . . . . . . . . . . . . . . . . . . . . . . . . . . . . . . . . 136
Importador . . . . . . . . . . . . . . . . . . . . . . . . . . . . . . . . . . . . . . . . . . . . . . . . .137
Receitas . . . . . . . . . . . . . . . . . . . . . . . . . . . . . . . . . . . . . . . . . . . . . . . . . . . .138
Kubbe (especialidade do Médio Oriente) . . . . . . . . . . . . . . . . . . . . . . . . . . . . . . . . . . . 138
Salsicha de churrasco fresca . . . . . . . . . . . . . . . . . . . . . . . . . . . . . . . . . . . . . . . . . . . . . . 139
Biscoitos . . . . . . . . . . . . . . . . . . . . . . . . . . . . . . . . . . . . . . . . . . . . . . . . . . . . . . . . . . . . . . 139
IB_277055_SFW350C2_LB8.indb 121 24.02.16 08:13

■ 122
│
PT
SFW 350 C2
Introdução
Parabéns pela compra do seu aparelho novo.
Decidiu-se, assim, por um produto de elevada qualidade. O manual de instruções
é constituinte deste produto. Este contém indicações importantes para a segurança,
utilização e eliminação. Antes da utilização do produto, famializa-se com todas as
indicações de utilização e de segurança. Utilize o produto apenas como descrito
e nas áreas de aplicação indicadas. Ao entregar o aparelho a terceiros entregue
todos os documentos.
Direitos de autor
Esta documentação está protegida por direitos de autor.
Qualquer distribuição ou cópia, mesmo de extractos, bem como a reprodução
de imagens, mesmo editadas, apenas podem ser realizadas mediante autoriza-
ção escrita do fabricante.
Limitação da responsabilidade
Todas as informações, dados e indicações presentes neste manual de instruções
relativas à montagem, ligação e operação correspondem à mais recente versão
de impressão e foram elaborados da melhor forma e de acordo com a nossa
experiência e conhecimentos actuais.
Excluem-se os direitos relativos a dados, imagens e descrições presentes neste
manual de instruções.
O fabricante não assume qualquer responsabilidade por danos resultantes da
inobservância das instruções, de uma utilização incorrecta, de reparações ina-
dequadas, alterações não autorizadas ou da utilização de peças de reposição
não aprovadas.
Utilização correcta
Este aparelho foi concebido unicamente para preparar exclusivamente alimentos
em quantidades habituais no uso doméstico:
▯ Picar carne fresca,
▯ Preparação de salsichas em tripa natural ou artifi cial,
▯ Preparação de biscoitos,
▯ Passar tomate.
O apar
elho não foi concebido para a preparação de alimentos congelados ou
duros, como por exemplo ossos ou nozes, bem como para o uso comercial ou
industrial.
IB_277055_SFW350C2_LB8.indb 122 24.02.16 08:13

PT
│
123 ■
SFW 350 C2
Volume de fornecimento /
Descrição dos componentes
Figura A:
1 Acessório para biscoitos com barra com formas
2 Empurrador
3 Recipiente para enchimento
4 Bloco do motor
5 Aplicação frontal da picadora de carne em metal
6 Braçadeira de fecho
7 Saída do tomate
8 Sem-fi m de plástico
9 Passe-vite
0 Transportador helicoidal
q Mola
w Lâmina em cruz
e Disco perfurado grosso e fi no
r Anel de fecho
t Acessório para enchimento de salsichas
z Disco para salsichas
u Acessório em forma de cúpula
Figura B:
i Botão de bloqueio
Figura C:
o Botão „I“
p Botão„0“
a Botão„<“
IB_277055_SFW350C2_LB8.indb 123 24.02.16 08:13

■ 124
│
PT
SFW 350 C2
Dados técnicos
Tensão 220 - 240 V ∼, 50 Hz
Consumo de energia 250 - 350 W
Classe de protecção
II /
Todas as peças deste aparelho que
entram em contacto com alimentos
são adequadas para uso alimentar.
Tempo de funcionamento descontínuo 15 minutos
Tempo de funcionamento descontínuo
O tempo de funcionamento descontínuo indica quanto tempo se pode trabalhar
com um aparelho sem que o motor sobreaqueça e fi que danifi cado. Após o
tempo de funcionamento descontínuo indicado, o aparelho deve ser desligado
até o motor ter arrefecido.
Indicações de segurança
PERIGO DE CHOQUE ELÉCTRICO
► Certifi que-se de que o cabo de rede não está danifi cado.
Mantenha-o afastado de superfícies quentes e coloque-o de
forma a que este não possa fi car entalado.
► Um cabo de rede ou fi cha de rede danifi cados devem ser
imediatamente substituídos por técnicos especializados
autorizados, de modo a evitar situações de perigo.
► Utilize o aparelho apenas em espaços secos, não ao ar livre.
Nunca mergulhe o bloco do motor em água ou outros
líquidos! Caso contrário, existe perigo de morte por
choque eléctrico.
AVISO!
► Nunca utilize o aparelho com outras fi nalidades que não as
aqui descritas. Existe um maior perigo de acidente, quando,
devido a uma utilização incorrecta, coloca os dispositivos
de segurança do aparelho fora de funcionamento!
IB_277055_SFW350C2_LB8.indb 124 24.02.16 08:13

PT
│
125 ■
SFW 350 C2
AVISO! PERIGO DE FERIMENTOS!
► Nunca introduza as mãos nas aberturas do aparelho. Nunca
insira quaisquer objectos – com excepção dos respectivos
empurradores dos acessórios e dos alimentos a serem prepa-
rados. Caso contrário, pode existir perigo de acidente!
► Retire a fi cha da tomada antes de encaixar ou retirar os
acessórios.
► Nunca deixe o aparelho sem vigilância quando este estiver
operacional. Retire imediatamente a fi cha da tomada após
a utilização ou em caso de interrupções, de modo a evitar
um arranque inadvertido.
► Utilize apenas acessórios originais para este aparelho.
As outras peças podem não ser sufi cientemente seguras.
► Nunca utilize o aparelho se este estiver vazio. Tal pode
danifi cá-lo de forma irreparável.
► Antes da substituição de acessórios ou peças adicionais, em
movimento durante o funcionamento, o aparelho deve ser
desligado e a fi cha retirada da tomada.
► Nunca utilize o aparelho para fi ns diferentes dos descritos
neste manual.
► Cuidado: a lâmina cruzada é muita afi ada! Manuseie e
limpe o aparelho com cuidado.
► Desligue sempre o aparelho da tomada em caso de inexis-
tência de vigilância e antes da montagem, desmontagem ou
limpeza.
► Este aparelho não pode ser utilizado por crianças.
► O aparelho e o respetivo cabo de ligação devem ser manti-
dos afastados de crianças.
IB_277055_SFW350C2_LB8.indb 125 24.02.16 08:13

■ 126
│
PT
SFW 350 C2
AVISO! PERIGO DE FERIMENTOS!
► Este aparelho pode ser utilizado por pessoas com capacidades
físicas, sensoriais ou mentais reduzidas, ou com falta de
experiência e/ou conhecimento, caso sejam vigiadas ou
instruídas sobre a utilização segura do aparelho e tenham
compreendido os perigos daí resultantes.
► As crianças não podem brincar com o aparelho.
Montagem / Desmontagem
ATENÇÃO - DANOS MATERIAIS!
► Todos os acessórios possuem uma fi na camada de óleo, com a fi nalidade
de os pr
oteger contra corrosão. Por isso, antes da primeira colocação em
funcionamento, limpe bem as peças todas como descrito detalhadamente
no capítulo "Limpeza". De seguida, aplique um pouco de óleo alimentar
em todas as peças de metal.
NOTA
► Antes da primeira utilização, retire a película de proteção do painel de
comandos.
Montar a picadora de carne
Desdobre a parte desdobrável - encontra lá a descrição da sequência de mon-
tagem apresentada através de imagens.
1) Coloque o transportador helicoidal 0 na aplicação frontal da picadora de
carne 5.
2) Encaixe a mola q no transportador helicoidal 0.
3) Coloque a lâmina cruzada w de forma que o lado com as lâminas fi que vi-
rado no sentido oposto à mola q. Certifi que-se de que o entalhe quadrado
da lâmina em cruz w se encontra exatamente no eixo quadrado.
IB_277055_SFW350C2_LB8.indb 126 24.02.16 08:13

PT
│
127 ■
SFW 350 C2
AVISO! PERIGO DE FERIMENTOS!
► A lâmina cruzada w é muito afi
ada! Perigo de ferimentos!
ATENÇÃO - DANOS MATERIAIS!
► O aparelho sofre danos se a lâmina cruzada w for posicionada de forma
difer
ente!
4) Seleccione o disco perfurado e/disco para salsichas z pretendido.
5) Coloque o disco perfurado selecionado e na aplicação frontal da picadora
de carne 5 de forma que as fi xações no disco perfurado e encaixem nos
entalhes da aplicação frontal da picadora de carne 5.
6) Quando tudo se encontrar correctamente colocado, aparafuse manualmente
o anel de fecho r.
7) A aplicação frontal da picadora de carne 5 é ligada ao bloco do motor 4
através de um fecho tipo baioneta:
– Encaixe a aplicação frontal da picadora de carne 5 no bloco do motor 4,
d
e forma que a seta na aplicação frontal da picadora de carne 5 assente
no símbolo
no bloco do motor 4. O botão de bloqueio i é pressio-
nado para dentro (Fig. B).
– Pressione a aplicação frontal da picadora de carne 5 ligeir
amente para
dentro e rode em simultâneo a abertura para enchimento na aplicação 5
até à posição central (Fig. B), de forma que a seta na abertura para
enchimento indique para o símbolo
. Quando a aplicação frontal da
picadora de carne 5 encaixar, o botão de bloqueio i salta.
– Por fi m, coloque o recipiente para enchimento 3 em cima, na abertura
para enchimento.
– Para retirar, pressione o botão de bloqueio i e v
olte a rodar a abertu-
ra para enchimento para a direita (Fig. B)
. De seguida pode retirar
a aplicação frontal da picadora de carne 5.
Montar o acessório para enchimento de salsichas
Desdobre a parte desdobrável - encontra lá a descrição da sequência de mon-
tagem apresentada através de imagens.
1) Retire a aplicação frontal da picadora de carne 5, como descrito em
“Montar a picadora de carne”.
2) Desmonte todas as peças que se encontram montadas sobre/dentro da
aplicação frontal da picadora de carne 5 e limpe-as.
3) Unte todas as peças metálicas com óleo alimentar.
4) Introduza o transportador helicoidal 0, a mola q e a lâmina em cruz w
novamente na aplicação frontal da picadora de carne 5.
5) Coloque o disco para salsichas z de forma que as fi xações no disco z
encaixem nos entalhes da aplicação frontal da picadora de carne 5.
6) De seguida, coloque o acessório para enchimento de salsichas t à frente
do disco de salsichas z.
IB_277055_SFW350C2_LB8.indb 127 24.02.16 08:13

■ 128
│
PT
SFW 350 C2
7) Aparafuse manualmente o anel de fecho r.
8) Monte a aplicação frontal da picadora de carne 5 como descrito em
“Montar a picadora de carne”.
Montar o acessório em forma de cúpula
Desdobre a parte desdobrável - encontra lá a descrição da sequência de mon-
tagem apresentada através de imagens.
1) Retire a aplicação frontal da picadora de carne 5, como descrito em
“Montar a picadora de carne”.
2) Retire eventuais acessórios e limpe a aplicação frontal da picadora de carne 5.
NOTA
► Para o acessório em forma de cúpula u não é necessária a lâmina cru-
zada w com a mola q! Se necessário, r
etire ambos da aplicação frontal
da picadora de carne 5.
3) Unte todas as peças metálicas com óleo alimentar.
4) Coloque ambas as peças plásticas do acessório em forma de cúpula u de
forma que as fi xações encaixem no anel inferior do acessório em forma de
cúpula u na aplicação frontal da picadora de carne 5.
5) Quando tudo se encontrar correctamente colocado, volte a apertar o anel
de fecho r manualmente.
6) Monte a aplicação frontal da picadora de carne 5 como descrito em
“Montar a picadora de carne”.
Montar o acessório para biscoitos
Desdobre a parte desdobrável - encontra lá a descrição da sequência de mon-
tagem apresentada através de imagens.
1) Retire a aplicação frontal da picadora de carne 5, como descrito em
“Montar a picadora de carne”.
2) Retire eventuais acessórios e limpe a aplicação frontal da picadora de carne 5.
NOTA
► Para o acessório para biscoitos 1 não é necessária a lâmina cruzada w
com a mola q! Se necessário, r
etire ambos da aplicação frontal da picado-
ra de carne 5.
3) Unte todas as peças metálicas com óleo alimentar.
4) Retire a barra com formas 1 à frente do acessório para biscoitos 1.
5) Primeiro coloque o disco plástico, depois o disco metálico do acessório
para biscoitos 1 na aplicação frontal da picadora de carne 5 (ver página
desdobrável). Coloque o acessório para biscoitos 1 de forma que as
fi xações no acessório para biscoitos 1 encaixem nos entalhes da aplicação
frontal da picadora de carne 5.
IB_277055_SFW350C2_LB8.indb 128 24.02.16 08:13

PT
│
129 ■
SFW 350 C2
6) Quando tudo se encontrar correctamente colocado, aparafuse manualmente
o anel de fecho r.
7) Volte a encaixar a barra com formas 1 à frente no acessório para biscoitos 1.
Certifi que-se de que a pega na barra com formas 1 fi ca virada para o lado
oposto ao do aparelho. Caso contrário não consegue ajustar o padrão que
se encontra directamente na pega.
8) Monte a aplicação frontal da picadora de carne 5 como descrito em
“Montar a picadora de carne”.
9) Para retirar deve primeiro remover a barra com formas 1 antes de rodar o
anel de fecho r e poder voltar a retirar o acessório para biscoitos 1.
Montar o adaptador do passe-vite
Abra a página desdobrável para consultar as imagens da sequência de
montagem.
1) Retire a aplicação frontal da picadora de carne 5, tal como descrito em
“Montar a picadora de carne”.
2) Retire eventuais adaptadores e limpe a aplicação frontal da picadora de
carne 5.
NOTA
► O sem-fi m de transporte 0 e a lâmina em cruz w com a mola q não
são necessários par
a o adaptador do passe-vite! Retire tudo, se necessá-
rio, da aplicação frontal da picadora de carne 5.
3) Insira o sem-fi m de plástico 8 na aplicação frontal da picadora de carne 5.
4) Desloque o passe-vite 9 sobre o sem-fi m de plástico 8, de forma que as
fi xações no passe-vite 9 encaixem nos entalhes da aplicação frontal da pi-
cadora de carne 5. Os furos do passe-vite 9 fi cam orientados para baixo.
5) Quando estiver tudo corretamente instalado, passe o anel de fecho r
sobre o passe-vite 9 e enrosque-o manualmente.
6) Monte a aplicação frontal da picadora de carne 5 tal como descrito em
“Montagem da picadora de carne”.
7) Abra a braçadeira de fecho 6 na saída do tomate 7.
8) Coloque a saída do tomate 7 por baixo do adaptador do passe-vite,
inserindo a ponta do passe-vite 9 pela pequena abertura da saída do
tomate 7:
IB_277055_SFW350C2_LB8.indb 129 24.02.16 08:13

■ 130
│
PT
SFW 350 C2
9) Feche a braçadeira de fecho 6 de forma a envolver a aplicação frontal da
picadora de carne 5.
Funcionamento
PERIGO DE CHOQUE ELÉCTRICO
► Nunca abra a caixa do bloco do motor 4 – não se encontr
am quaisquer
elementos de comando aí. Se a estrutura for aberta, o direito à garantia
extingue-se. Com a caixa aberta existe perigo de vida através de choque
eléctrico.
ATENÇÃO - DANOS MATERIAIS!
► Não utilize o aparelho por mais de 15 minutos no funcionamento
contínuo. Desligue o apar
elho durante cerca 30 minutos para evitar um
sobreaquecimento.
► Nunca prima os botões "I" o ou "<" a ao mudar o sentido de rotação,
se o motor do aparelho não estiver totalmente imobilizado. O motor pode
fi car danifi cado.
Operar o aparelho
Quando já tiver montado os acessórios pretendidos:
1) Coloque o aparelho de forma a que este fi que completamente estável e
não caia da mesa (em caso de, por exemplo, vibrações ou cabos de rede
presos) ou caia à água. A trepidação durante o funcionamento é inevitável.
IB_277055_SFW350C2_LB8.indb 130 24.02.16 08:13

PT
│
131 ■
SFW 350 C2
PERIGO DE CHOQUE ELÉCTRICO
► Nunca agarre no aparelho quando este se encontra ligado ou em funcio-
namento, tiv
er caído ou foi parar à água – ou em caso de outros acidentes!
Em caso de emergência retire imediatamente a fi cha da tomada!
Caso contrário, existe um enorme perigo de ferimentos e de morte!
2) Coloque os alimentos a processar no recipiente para enchimento 3 e
posicione um recipiente de recolha à frente, sob a abertura de saída.
3) Prima primeiro o botão “0” p para garantir que o aparelho ainda se
encontra desligado. Caso contrário existe o perigo do aparelho iniciar
inadvertidamente, se a fi cha for introduzida na tomada.
4) Depois introduza a fi cha na tomada.
5) Prima o botão “I” o para ligar o aparelho.
AVISO! PERIGO DE FERIMENTOS!
► Pressione os alimentos unicamente com o empurrador redondo 2 na
aber
tura para enchimento – nunca com os dedos, garfos, cabo da colher
ou semelhante. Existe um maior perigo de ferimentos e o aparelho poderia
ser danifi cado.
ATENÇÃO - DANOS MATERIAIS!
► Nunca exerça uma força tão forte que faça com que o motor se torne audi-
v
elmente mais lento. O aparelho pode fi car sobrecarregado e danifi cado.
Preparar carne
1) Utilize pedaços de carne que entrem sem problemas na abertura para
enchimento. Se necessário, corte a carne. Certifi que-se de que a carne não
tem quaisquer ossos ou tendões.
AVISO!
► A carne picada é muito sujeita a decomposição. Certifi que-se, por isso, de
que e
xiste uma boa higiene, quando pica a carne. Caso contrário podem
verifi car-se danos para a saúde.
2) Quando tiver lido todas as indicações relativamente ao tema “Carne”, pode
aplicar agora o aparelho como descrito no capítulo “Operar o aparelho”.
IB_277055_SFW350C2_LB8.indb 131 24.02.16 08:13

■ 132
│
PT
SFW 350 C2
Preparar salsichas
1) Passe a carne primeiro duas vezes pela picadora de carne, antes de preparar
a salsicha.
2) Para o recheio da salsicha adicione à carne picada cebola cortada, espe-
ciarias e outros ingredientes, de acordo com a sua receita, e amasse bem
a massa. Coloque esta no frigorífi co durante 30 min. antes de continuar a
preparar as salsichas.
3) Coloque a tripa (natural ou artifi cial) sobre o acessório para enchimento
de salsichas t e dê um nó na outra extremidade. Pode calcular cerca de
1,60 m de tripa para salsichas por cada kg de massa para enchimento.
SUGESTÃO
Coloque previamente a tripa natural cerca de 3 horas em água morna e
tor
ça-a bem antes de a colocar no acessório. Desta forma, a tripa natural
torna-se novamente elástica. Pode adquirir as tripas naturais no comércio
talhante próximo de matadouros ou directamente no talho onde faz
habitualmente as suas compras.
4) O recheio da salsicha é prensado para dentro da tripa pelo acessório para
enchimento de salsichas t. Quando o comprimento desejado é atingido,
desligue o aparelho, aperte a extremidade da salsicha e rode algumas
vezes em torno do seu eixo longitudinal.
SUGESTÃO
A salsicha estica ao cozer e congelar. Por isso, não as encha demais,
uma v
ez que podem rebentar.
5) Quando tiver lido todas as indicações relativamente ao tema “Salsichas”
pode aplicar o aparelho como descrito no capítulo “Operar o aparelho”.
Trabalhar com o acessório em forma de cúpula
Com o acessório em forma de cúpula u pode, com os alimentos introduzidos,
formar rolos de carne ou legumes vazios, os quais pode depois rechear a gosto.
1) Passe a carne duas vezes pela picadora de carne antes de a empurrar
através do acessório em forma de cúpula u.
2) Quando tiver lido todas as indicações relativamente ao tema “Acessório em
forma de cúpula” pode agora aplicar o aparelho como descrito no capítulo
“Operar o aparelho”.
IB_277055_SFW350C2_LB8.indb 132 24.02.16 08:13

PT
│
133 ■
SFW 350 C2
Fabricar biscoitos
Quando tiver preparado uma massa para biscoitos de acordo com a sua receita
e tiver montado o acessório para biscoitos 1:
1) Coloque um tabuleiro revestido com papel vegetal por baixo da abertura
de saída na frente do aparelho.
2) Pressione a massa uniformemente na aplicação frontal da picadora de
carne 5 – o transportador helicoidal 0 pressiona esta através do formato
seleccionado na barra com formas do acessório para biscoitos 1.
3) Quando o biscoito atingiu o comprimento desejado, pare o aparelho e
corte a massa na abertura de saída. Coloque o biscoito no tabuleiro.
4) Quando tiver lido todas as indicações relativamente ao tema “Biscoitos”,
pode agora aplicar o aparelho como descrito no capítulo “Operar o
aparelho”.
Passar tomate
1) Coloque um recipiente por baixo da saída do tomate 7.
2) Coloque um recipiente à frente, por baixo do passe-vite 9.
3) Corte os tomates em quartos e empurre-os lenta e uniformemente para
dentro da aplicação frontal da picadora de carne 5.
O sem-fi m de plástico 8 pressiona o tomate pelo adaptador do passe-vite e
o tomate passado cai na respetiva saída 7. A casca do tomate é expelida
à frente pelo passe-vite 9.
NOTA
Caso saia sumo do tomate pelas uniões roscadas do adaptador do
passe-vite, as causas podem ser as seguintes:
– A sua velocidade de trabalho é demasiado elevada.
– Está a pressionar os pedaços de tomate com muita pressão para
dentr
o do aparelho.
– Os pedaços de tomates são demasiado grandes.
► Neste caso, reduza a velocidade do seu trabalho, pressione apenas ligei-
r
amente os pedaços de tomate para dentro do aparelho e corte o tomate
em pedaços mais pequenos.
4) Depois de ter lido todas as indicações relativas ao tema “Passar tomate”,
pode utilizar o aparelho como descrito no capítulo “Operar o aparelho”.
IB_277055_SFW350C2_LB8.indb 133 24.02.16 08:13

■ 134
│
PT
SFW 350 C2
Em caso de erro
Se o accionamento estiver bloqueado por alimentos:
■ Prima o botão “0” p para parar a picadora de carne.
■ Mantenha o botão “<” a premido. O accionamento funciona agor
a para
trás. Dessa forma, os alimentos são transportados no sentido contrário para
voltar a libertar o accionamento.
■ Se o accionamento estiver livre, solte o botão “<” a.
■ Prima o botão “I” o par
a ligar a picador
a de carne.
■ Se não conseguir libertar o accionamento, limpe o aparelho como descrito
no capítulo “Limpeza”.
Se o motor se desligar repentinamente, é possível que a
protecção interna contra sobrecarga tenha sido activada.
Esta tem a função de protecção do motor.
■ Desligue o aparelho e deixe arrefecer por aprox. 30 minutos antes de
continuar a utilizar o aparelho.
■ Se, mesmo assim, não obtiver qualquer resultado, aguarde mais 15 min.
■ Se, mesmo assim, a espera não trouxer resultados, a máquina pode estar
av
ariada. Neste caso, entr
e em contacto com o serviço de apoio ao cliente.
Se o cabo de rede estiver danifi cado ou existirem danos
visíveis nas peças do aparelho:
■ Desligue imediatamente o aparelho, premindo o botão “0” p!
■ Se isto não for possível em segurança, retire a fi cha de rede.
■ Deixe que estes danos sejam reparados pelo serviço de apoio ao cliente,
antes de v
oltar a utilizar o apar
elho.
Limpeza
PERIGO DE CHOQUE ELÉCTRICO
► Retire a fi cha de rede da tomada antes de limpar o aparelho. Deste modo
evita perigos de acidente de
vido ao arranque inadvertido inesperado e
choque eléctrico.
IB_277055_SFW350C2_PT8.indd 134 24.02.16 16:03

PT
│
135 ■
SFW 350 C2
Limpar o bloco do motor
■ Limpe todas as superfícies exteriores e o cabo de rede com um pano levemente
humedecido. Seque bem o aparelho, antes de o voltar a utilizar.
PERIGO DE CHOQUE ELÉCTRICO
► Nunca mergulhe o bloco do motor em água ou outros líquidos! Caso
contr
ário existe perigo de morte através de choque eléctrico, se os cabos
eléctricos fi carem húmidos.
ATENÇÃO - DANOS MATERIAIS!
► Não utilize detergentes, abrasivos ou diluentes. Estes podem danifi car o
apar
elho e deixar resíduos nos alimentos.
Limpar os acessórios
NOTA
► Não lave os acessórios na máquina de lavar loiça! Estes são danifi cados!
■ Limpe os acessórios que entram em contacto com alimentos, ...
– apenas manualmente, os acessórios não são resistentes à máquina de
lav
ar loiça.
– com água quente e detergente apropriado aos alimentos.
AVISO! PERIGO DE FERIMENTOS!
► A lâmina cruzada w é muito afi
ada! Perigo de ferimentos!
■ Seque tudo muito bem antes de voltar a utilizar o aparelho.
NOTA
► Após cada limpeza, volte a untar as peças de metal com um pouco de óleo
alimentar
. Caso contrário, as peças de metal podem fi car manchadas!
Guardar
■ Coloque o cabo de alimentação (sem fi cha de rede) no compartimento
para o cabo, sob a base do aparelho. Dessa forma este fi ca protegido
contra danos.
■ Guarde o aparelho num local seco.
■ Depois do aparelho secar, unte os acessórios com um pouco de óleo ali-
mentar se não pr
etender continuar a utilizar o aparelho de imediato.
Desse modo obtém uma protecção efi caz contra corrosão.
■ Guarde o aparelho num local afastado do alcance das crianças e pessoas
que necessitem de vigilância. Estes nem sempr
e conseguem avaliar correcta-
mente os potenciais perigos que existem ao manusear aparelhos eléctricos.
IB_277055_SFW350C2_LB8.indb 135 24.02.16 08:13

■ 136
│
PT
SFW 350 C2
Eliminação
Nunca coloque o aparelho no lixo doméstico normal.
Este produto é abrangido pela Directiva Europeia 2012/19/EU
(Waste Electrical and Electronic Equipment).
Elimine o aparelho através de um serviço de eliminação autorizado ou das
entidades de eliminação locais. Tenha atenção aos regulamentos actualmente
em vigor. Em caso de dúvida, entre em contacto com a entidade de eliminação
de resíduos.
Elimine todos os materiais da embalagem de forma ecológica.
Garantia e assistência técnica
Este aparelho tem 3 anos de garantia a partir da data de compra. Este apare-
lho foi fabricado com o maior cuidado e testado escrupulosamente antes da sua
distribuição.
Guarde o talão de caixa como comprovativo da compra. No caso de reivindicação
da garantia, entre em contacto com o seu ponto de assistência técnica, via
telefone. Só assim pode ser garantido um envio gratuito do seu produto.
NOTA
► A garantia abrange apenas defeitos de material e de fabrico, mas não da-
nos de
vido ao transporte, peças de desgaste ou danos em peças frágeis,
por ex. interruptores ou baterias.
O produto foi concebido apenas para uso privado e não para uso comercial.
A garantia extingue-se no caso de utilização incorrecta e de intervenções que não
foram efectuadas pelo nosso representante autorizado de assistência técnica.
Os seus direitos legais não são limitados por esta garantia. O período de ga-
rantia não é prolongado pela utilização da mesma. O mesmo se aplica a peças
substituídas e reparadas.
Eventuais danos ou defeitos visíveis no momento da compra devem ser notifi cados
imediatamente após desembalar o aparelho, o mais tardar dois dias após a
data de compra.
Após expirar o período de garantia, as eventuais reparações estão sujeitas a
pagamento.
O período de garantia não é prolongado pela utilização da mesma. O mesmo
aplica-se a peças substituídas e reparadas.
Eventuais danos ou defeitos visíveis no momento da compra devem ser notifi cados
imediatamente após desembalar o aparelho, o mais tardar dois dias após a
data de compra.
Após expirar o período de garantia, as eventuais reparações estão sujeitas a
pagamento.
Assistência Portugal
Tel.: 70778 0005 (0,12 EUR/Min.)
E-Mail: k[email protected]
IAN 277055
IB_277055_SFW350C2_LB8.indb 136 24.02.16 08:13

PT
│
137 ■
SFW 350 C2
Importador
KOMPERNASS HANDELS GMBH
BURGSTRASSE 21
44867 BOCHUM
GERMANY
www.kompernass.com
IB_277055_SFW350C2_LB8.indb 137 24.02.16 08:13

■ 138
│
PT
SFW 350 C2
Receitas
Kubbe (especialidade do Médio Oriente)
Ingredientes para a cobertura
450 g carne magra de carneiro, vitela ou de vaca
150 g de farinha
1 colher de chá de pimenta (cravinho)
1 colher de chá de noz moscada
1 pitada de chili em pó
1 pitada de pimenta
Ingredientes para o recheio de carne
700 g de carne de borrego
1 1/2 colher de sopa de azeite
1 1/2 colher de sopa de cebola picada
1/2 colher de chá de pimenta (cravinho)
1/2 colher de chá de sal
1 1/2 colher de sopa de farinha
Para a cobertura passe a carne duas vezes pela picadora de carne (primeiro com
o disco perfurado grosso e depois com o fi no e) e junte com os ingredientes. Esta
massa também deve ser picada duas vezes com a picadora de carne. Substituir o
disco perfurado e pelo acessório em forma de cúpula u (ver capítulo “Montar o
acessório em forma de cúpula”).
Formar as coberturas Kubbe com o acessório em forma de cúpula u e levar ao
frigforífi co.
Recheio:
Passar a carne duas vezes com a máquina de passa carne (primeiro com disco
perfurado grosso e depois com o fi no e).
Salteie as cebolas e misture bem com a carne e os restantes ingredientes.
Encha as pequenas coberturas em forma de cúpula com este recheio e frite.
Recheios alternativo:
250 g de brócolos cozidos a vapor
ou 250 g de courgetes cozidas a vapor
ou 250 g de arroz cozido
IB_277055_SFW350C2_LB8.indb 138 24.02.16 08:13

PT
│
139 ■
SFW 350 C2
Salsicha de churrasco fresca
Ingredientes:
300 g de carne magra de vaca
500 g de carne magra de porco
200 g de toucinho
20 g de sal
1/2 colher de sopa de pimenta branca, moída
1 colher de chá de cominhos
1/2 colher de chá de noz moscada
A carne de vaca, de porco e toucinho devem ser picadas duas vezes na picadora
de carne.
Adicione as especiarias misturadas, bem como o sal e mexa durante 5 minutos.
Leve o recheio ao frigorifi co durante aprox. 30 minutos. Rechear as salsichas de
acordo com as instruções (ver capítulo “Preparar salsichas”) e fechar pequenas
salsichas de 25 cm de comprimento.
Consumir a salsicha para churrasco no próprio dia, bem frita.
Biscoitos
Ingredientes:
500 g de manteiga
500 g de açúcar
2 - 3 pacotinhos de açúcar baunilhado
1 pacotinho de pudim de baunilha
1/4 colher de chá de sal
1 ovo
4 gemas de ovo
800 g de farinha (tipo 405)
2 colheres de chá de fermento em pó
200 g de amêndoas moídas (branqueadas)
raspa de um limão
Bata a manteiga até fi car em creme. Adicionar os restantes ingredientes gradual-
mente e amassar bem a massa. Deixar levedar a massa coberta durante, aprox.
12 horas, (p.ex. durante a noite) no frigorifi co. Depois, passá-la pela picadora
de carne com o acessório para biscoitos 1. Coloque os biscoitos num tabuleiro
forrado com papel vegetal. Coza os biscoitos, no forno pré-aquecido, a 180°C
durante aprox.10-15 minutos, até fi carem dourados.
IB_277055_SFW350C2_LB8.indb 139 24.02.16 08:13

8
IAN 277055
KOMPERNASS HANDELS GMBH
BURGSTRASSE 21
44867 BOCHUM
DEUTSCHLAND / GERMANY
www.kompernass.com
Stand der Informationen · Last Information Update · Version des informations
Stand van de informatie · Stav informací · Estado de las informaciones · Estado das informações:
02 / 2016 · Ident.-No.: SFW350C2-012016-1
Documenttranscriptie
FLEISCHWOLF MINCER HACHOIR À VIANDE SFW 350 C2 FLEISCHWOLF MINCER Bedienungsanleitung Operating instructions HACHOIR À VIANDE VLEESMOLEN Mode d’emploi Gebruiksaanwijzing MLÝNEK NA MASO PICADORA DE CARNE Návod k obsluze Instrucciones de uso PICADORA DE CARNE Manual de instruções IAN 277055 Klappen Sie vor dem Lesen die Seite mit den Abbildungen aus und machen Sie sich anschließend mit allen Funktionen des Gerätes vertraut. Before reading, unfold the page containing the illustrations and familiarise yourself with all functions of the device. Avant de lire le mode d‘emploi, ouvrez la page contenant les illustrations et familiarisez-vous ensuite avec toutes les fonctions de l‘appareil. Vouw vóór het lezen de pagina met de afbeeldingen open en maak u vertrouwd met alle functies van het apparaat. Před čtením si otevřete stranu s obrázky a potom se seznamte se všemi funkcemi přístroje. Antes de empezar a leer abra las dos páginas que contienen las imágenes y, en seguida, familiarícese con todas las funciones del dispositivo. Antes de começar a ler abra as duas páginas com as imagens e, de seguida, familiarize-se com todas as funções do aparelho. DE / AT / CH GB/IE FR / BE NL / BE CZ ES PT Bedienungsanleitung Operating instructions Mode d’emploi Gebruiksaanwijzing Návod k obsluze Instrucciones de uso Manual de instruções Seite 1 Page 21 Page 41 Pagina 61 Strana 81 Página 101 Página 121 A 1 2 u 3 z t e r w q 0 5 4 9 B i 6 7 8 C o p a Inhaltsverzeichnis Einleitung . . . . . . . . . . . . . . . . . . . . . . . . . . . . . . . . . . . . . . . . . . . . . . . . . . . . . 2 Urheberrecht . . . . . . . . . . . . . . . . . . . . . . . . . . . . . . . . . . . . . . . . . . . . . . . . . . . . . . . . . . . . 2 Haftungsbeschränkung . . . . . . . . . . . . . . . . . . . . . . . . . . . . . . . . . . . . . . . . . . . . . . . . . . . . 2 Bestimmungsgemäße Verwendung . . . . . . . . . . . . . . . . . . . . . . . . . . . . . . . 2 Lieferumfang / Teilebeschreibung . . . . . . . . . . . . . . . . . . . . . . . . . . . . . . . . . 3 Technische Daten . . . . . . . . . . . . . . . . . . . . . . . . . . . . . . . . . . . . . . . . . . . . . . . 4 Sicherheitshinweise . . . . . . . . . . . . . . . . . . . . . . . . . . . . . . . . . . . . . . . . . . . . 4 Zusammenbauen / Zerlegen . . . . . . . . . . . . . . . . . . . . . . . . . . . . . . . . . . . . . 6 Fleischwolf zusammenbauen . . . . . . . . . . . . . . . . . . . . . . . . . . . . . . . . . . . . . . . . . . . . . . . . 6 Wurst-Stopf-Aufsatz montieren . . . . . . . . . . . . . . . . . . . . . . . . . . . . . . . . . . . . . . . . . . . . . . . 7 Kubbe-Aufsatz montieren . . . . . . . . . . . . . . . . . . . . . . . . . . . . . . . . . . . . . . . . . . . . . . . . . . . 8 Spritzgebäck-Aufsatz montieren . . . . . . . . . . . . . . . . . . . . . . . . . . . . . . . . . . . . . . . . . . . . . 8 Passier-Aufsatz montieren . . . . . . . . . . . . . . . . . . . . . . . . . . . . . . . . . . . . . . . . . . . . . . . . . . 9 Bedienen . . . . . . . . . . . . . . . . . . . . . . . . . . . . . . . . . . . . . . . . . . . . . . . . . . . . 10 Das Gerät bedienen . . . . . . . . . . . . . . . . . . . . . . . . . . . . . . . . . . . . . . . . . . . . . . . . . . . . . 10 Fleisch verarbeiten . . . . . . . . . . . . . . . . . . . . . . . . . . . . . . . . . . . . . . . . . . . . . . . . . . . . . . . 11 Wurst verarbeiten . . . . . . . . . . . . . . . . . . . . . . . . . . . . . . . . . . . . . . . . . . . . . . . . . . . . . . . 12 Arbeiten mit dem Kubbe-Aufsatz . . . . . . . . . . . . . . . . . . . . . . . . . . . . . . . . . . . . . . . . . . . . 12 Spritzgebäck herstellen . . . . . . . . . . . . . . . . . . . . . . . . . . . . . . . . . . . . . . . . . . . . . . . . . . . 13 Tomaten passieren . . . . . . . . . . . . . . . . . . . . . . . . . . . . . . . . . . . . . . . . . . . . . . . . . . . . . . . 13 Im Fehlerfall . . . . . . . . . . . . . . . . . . . . . . . . . . . . . . . . . . . . . . . . . . . . . . . . . 14 Reinigen . . . . . . . . . . . . . . . . . . . . . . . . . . . . . . . . . . . . . . . . . . . . . . . . . . . . . 14 Motorblock reinigen . . . . . . . . . . . . . . . . . . . . . . . . . . . . . . . . . . . . . . . . . . . . . . . . . . . . . 15 Zubehörteile reinigen . . . . . . . . . . . . . . . . . . . . . . . . . . . . . . . . . . . . . . . . . . . . . . . . . . . . . 15 Aufbewahren . . . . . . . . . . . . . . . . . . . . . . . . . . . . . . . . . . . . . . . . . . . . . . . . 15 Entsorgung. . . . . . . . . . . . . . . . . . . . . . . . . . . . . . . . . . . . . . . . . . . . . . . . . . . 16 Garantie und Service . . . . . . . . . . . . . . . . . . . . . . . . . . . . . . . . . . . . . . . . . . 16 Importeur . . . . . . . . . . . . . . . . . . . . . . . . . . . . . . . . . . . . . . . . . . . . . . . . . . . 17 Rezepte . . . . . . . . . . . . . . . . . . . . . . . . . . . . . . . . . . . . . . . . . . . . . . . . . . . . . 18 Kubbe . . . . . . . . . . . . . . . . . . . . . . . . . . . . . . . . . . . . . . . . . . . . . . . . . . . . . . . . . . . . . . . . 18 Frische Rostbratwurst . . . . . . . . . . . . . . . . . . . . . . . . . . . . . . . . . . . . . . . . . . . . . . . . . . . . . 19 Spritzgebäck . . . . . . . . . . . . . . . . . . . . . . . . . . . . . . . . . . . . . . . . . . . . . . . . . . . . . . . . . . . 19 SFW 350 C2 DE│AT│CH │ 1 ■ Einleitung Herzlichen Glückwunsch zum Kauf Ihres neuen Gerätes. Sie haben sich damit für ein hochwertiges Produkt entschieden. Die Bedienungsanleitung ist Bestandteil dieses Produkts. Sie enthält wichtige Hinweise für Sicherheit, Gebrauch und Entsorgung. Machen Sie sich vor der Benutzung des Produkts mit allen Bedien- und Sicherheitshinweisen vertraut. Benutzen Sie das Produkt nur wie beschrieben und für die angegebenen Einsatzbereiche. Händigen Sie alle Unterlagen bei Weitergabe des Produkts an Dritte mit aus. Urheberrecht Diese Dokumentation ist urheberrechtlich geschützt. Jede Vervielfältigung, bzw. jeder Nachdruck, auch auszugsweise, sowie die Wiedergabe der Abbildungen, auch im veränderten Zustand, ist nur mit schriftlicher Zustimmung des Herstellers gestattet. Haftungsbeschränkung Alle in dieser Bedienungsanleitung enthaltenen technischen Informationen, Daten und Hinweise für den Anschluss und die Bedienung entsprechen dem letzten Stand bei Drucklegung und erfolgen unter Berücksichtigung unserer bisherigen Erfahrungen und Erkenntnisse nach bestem Wissen. Aus den Angaben, Abbildungen und Beschreibungen in dieser Anleitung können keine Ansprüche hergeleitet werden. Der Hersteller übernimmt keine Haftung für Schäden aufgrund von Nichtbeachtung der Anleitung, nicht bestimmungsgemäßer Verwendung, unsachgemäßen Reparaturen, unerlaubt vorgenommenen Veränderungen oder Verwendung nicht zugelassener Ersatzteile. Bestimmungsgemäße Verwendung Dieses Gerät ist ausschließlich vorgesehen für das Verarbeiten von Lebensmitteln in haushaltsüblichen Mengen im privaten Haushalt: ▯ Durchdrehen von frischem Fleisch, ▯ Herstellen von Wurst in Natur- oder Kunstdarm, ▯ Herstellung von Spritzgebäck, ▯ Passieren von Tomaten. Das Gerät ist nicht vorgesehen für das Verarbeiten von gefrorenen oder anderweitig harten Lebensmitteln, z. B. Knochen oder Nüsse und nicht in gewerblichen oder industriellen Bereichen. ■ 2 │ DE│AT│CH SFW 350 C2 Lieferumfang / Teilebeschreibung Abbildung A: 1 Spritzgebäck-Aufsatz mit Musterstreifen 2 Stopfer 3 Einfüllschale 4 Motorblock 5 Fleischwolfvorsatz aus Metall 6 Verschluss-Schelle 7 Tomatenauswurf 8 Plastikschnecke 9 Passier-Sieb 0 Transportschnecke q Feder w Kreuzmesser e grobe und feine Lochscheibe r Verschlussring t Wurst-Stopf-Aufsatz z Wurstscheibe u Kubbe-Aufsatz Abbildung B: i Verriegelungsknopf Abbildung C: o Taste „I“ p Taste „0“ a Taste „<“ SFW 350 C2 DE│AT│CH │ 3 ■ Technische Daten Spannung 220 - 240 V ∼, 50 Hz Leistungsaufnahme 250 - 350 W Schutzklasse II / Alle Teile dieses Gerätes, die mit Lebensmitteln in Berührung kommen, sind lebensmittelecht. KB-Zeit 15 Minuten KB-Zeit Die KB-Zeit (Kurzzeitbetrieb) gibt an, wie lange man ein Gerät betreiben kann, ohne dass der Motor überhitzt und Schaden nimmt. Nach der angegebenen KB-Zeit muss das Gerät solange ausgeschaltet werden, bis sich der Motor abgekühlt hat. Sicherheitshinweise ► ► ► ► STROMSCHLAGGEFAHR Achten Sie darauf, dass das Netzkabel nicht beschädigt wird. Halten Sie es von heißen Bereichen fern und führen Sie es so, dass es nicht eingeklemmt werden kann. Lassen Sie beschädigte Netzkabel oder Netzstecker sofort von autorisiertem Fachpersonal ersetzen, um Gefährdungen zu vermeiden. Verwenden Sie das Gerät nur in trockenen Räumen, nicht im Freien. Tauchen Sie den Motorblock niemals in Wasser oder andere Flüssigkeiten! Andernfalls besteht Lebensgefahr durch elektrischen Schlag. WARNUNG! Verwenden Sie das Gerät niemals für andere Zwecke, als hier beschrieben. Es besteht erhebliche Unfallgefahr, wenn Sie durch Fehlverwendung die Schutzvorrichtungen am Gerät außer Funktion setzen! ■ 4 │ DE│AT│CH SFW 350 C2 ► ► ► ► ► ► ► ► ► ► ► WARNUNG! VERLETZUNGSGEFAHR! Fassen Sie niemals in Öffnungen am Gerät. Führen Sie niemals irgendwelche Gegenstände dort hinein – mit Ausnahme der jeweils zum Aufsatz gehörenden Stopfer und den zu verarbeitenden Lebensmitteln. Andernfalls kann erhebliche Unfallgefahr bestehen! Ziehen Sie erst den Stecker aus der Steckdose, bevor Sie Zubehörteile aufstecken oder abnehmen. Lassen Sie das Gerät niemals unbeaufsichtigt, wenn es betriebsbereit ist. Ziehen Sie nach Gebrauch oder bei Arbeitsunterbrechungen stets den Stecker aus der Steckdose, um versehentliches Anlaufen zu vermeiden. Verwenden Sie nur die Original- Zubehörteile zu diesem Gerät. Andere Teile sind dafür möglicherweise nicht ausreichend sicher. Betreiben Sie das Gerät nie im Leerzustand. Das kann das Gerät irreparabel beschädigen. Vor dem Auswechseln von Zubehör oder Zusatzteilen, die im Betrieb bewegt werden, muss das Gerät ausgeschaltet und vom Netz getrennt sein. Missbrauchen Sie das Gerät nicht für andere Zwecke, als in dieser Anleitung beschrieben. Vorsicht: das Kreuzmesser ist sehr scharf! Gehen Sie beim Umgang und Reinigen des Gerätes stets vorsichtig vor. Das Gerät ist bei nicht vorhandener Aufsicht und vor dem Zusammenbau, dem Auseinandernehmen oder Reinigen stets vom Netz zu trennen. Das Gerät darf nicht von Kindern benutzt werden. Das Gerät und seine Anschlussleitung sind von Kindern fernzuhalten. SFW 350 C2 DE│AT│CH │ 5 ■ ► ► WARNUNG! VERLETZUNGSGEFAHR! Dieses Gerät kann von Personen mit reduzierten physischen, sensorischen oder mentalen Fähigkeiten oder Mangel an Erfahrung und/oder Wissen benutzt werden, wenn sie beaufsichtigt oder bezüglich des sicheren Gebrauchs des Gerätes unterwiesen wurden und die daraus resultierenden Gefahren verstanden haben. Kinder dürfen nicht mit dem Gerät spielen. Zusammenbauen / Zerlegen ACHTUNG - SACHSCHADEN! ► Sämtliche Zubehörteile sind mit einem dünnen Ölfilm versehen, um diese vor Korrosion zu schützen. Reinigen Sie vor dem ersten Gebrauch daher sämtliche Teile sorgfältig, wie im Kapitel „Reinigen“ ausführlich beschrieben. Reiben Sie danach alle Metallteile mit etwas Speiseöl ein. HINWEIS ► Entfernen Sie vor der ersten Benutzung die Schutzfolie vom Tastenfeld. Fleischwolf zusammenbauen Klappen Sie die Ausklappseite aus - Sie finden dort die Zusammenbau-Reihenfolge bildlich dargestellt. 1) Setzen Sie die Transportschnecke 0 in den Fleischwolfvorsatz 5. 2) Stecken Sie die Feder q auf die Transportschnecke 0. 3) Setzen Sie dann das Kreuzmesser w so ein, dass die Seite mit den Messern von der Feder q weg zeigt. Achten Sie darauf, dass die eckige Aussparung des Kreuzmessers w korrekt auf der eckigen Achse liegt. ■ 6 │ DE│AT│CH SFW 350 C2 WARNUNG! VERLETZUNGSGEFAHR! ► Das Kreuzmesser w ist sehr scharf! Verletzungsgefahr! ACHTUNG - SACHSCHADEN! ► Das Gerät wird beschädigt, wenn das Kreuzmesser w anders herum eingesetzt wird! 4) Wählen Sie die gewünschte Lochscheibe e/Wurstscheibe z. 5) Legen Sie die ausgewählte Lochscheibe e so in den Fleischwolfvorsatz 5 ein, dass die Fixierungen an der Lochscheibe e in den Aussparungen am Fleischwolfvorsatz 5 liegen. 6) Wenn alles richtig eingesetzt ist, schrauben Sie den Verschlussring r handfest auf. 7) Der fertig montierte Fleischwolfvorsatz 5 wird über einen BajonettVerschluss mit dem Motorblock 4 verbunden: – Stecken Sie den Fleischwolfvorsatz 5 in den Motorblock 4, so dass der Pfeil am Fleischwolfvorsatz 5 am Symbol am Motorblock 4 liegt. Der Verriegelungsknopf i drückt sich hinein (Abb. B). – Drücken Sie den Fleischwolfvorsatz 5 leicht hinein und drehen Sie dabei den Fleischwolfvorsatz 5 in die Mittelposition (Abb. B), so dass der Pfeil am Einfüllschacht auf das Symbol zeigt. Wenn der Fleischwolfvorsatz 5 einrastet, springt der Verriegelungsknopf i heraus. – Setzen Sie zum Schluss die Einfüllschale 3 oben auf den Einfüllschacht. – Zum Abnehmen drücken Sie den Verriegelungsknopf i und drehen den Einfüllschacht wieder nach rechts (Abb. B) . Danach können Sie den Fleischwolfvorsatz 5 heraus ziehen. Wurst-Stopf-Aufsatz montieren Klappen Sie die Ausklappseite aus - Sie finden dort die Zusammenbau-Reihenfolge bildlich dargestellt. 1) Nehmen Sie den Fleischwolfvorsatz 5, wie unter „Fleischwolf zusammenbauen“ beschrieben, ab. 2) Nehmen Sie alle Teile, die am/im Fleischwolfvorsatz 5 montiert sind, auseinander und reinigen Sie diese. 3) Reiben Sie alle Metallteile mit Speiseöl ab. 4) Setzen Sie die Transportschnecke 0, die Feder q und das Kreuzmesser w wieder in den Fleischwolfvorsatz 5 ein. 5) Legen Sie die Wurstscheibe z so ein, dass die Fixierungen an der Wurstscheibe z in den Aussparungen am Fleischwolfvorsatz 5 liegen. 6) Setzen Sie dann den Wurst-Stopf-Aufsatz t vor die Wurstscheibe z. SFW 350 C2 DE│AT│CH │ 7 ■ 7) Schrauben Sie den Verschlussring r handfest auf. 8) Montieren Sie den Fleischwolfvorsatz 5 wie unter „Fleischwolf zusammenbauen“ beschrieben. Kubbe-Aufsatz montieren Klappen Sie die Ausklappseite aus - Sie finden dort die Zusammenbau-Reihenfolge bildlich dargestellt. 1) Nehmen Sie den Fleischwolfvorsatz 5, wie unter „Fleischwolf zusammenbauen“ beschrieben, ab. 2) Nehmen Sie eventuelle Aufsätze ab und reinigen Sie den Fleischwolfvorsatz 5. HINWEIS ► Für den Kubbe-Aufsatz u wird das Kreuzmesser w mit der Feder q nicht benötigt! Nehmen Sie beides ggf. aus dem Fleischwolfvorsatz 5 heraus. 3) Reiben Sie alle Metallteile mit Speiseöl ab. 4) Legen Sie die beiden Kunststoffteile des Kubbe-Aufsatzes u so ein, dass die Fixierungen am unteren Ring des Kubbe-Aufsatzes u in den Aussparungen am Fleischwolfvorsatz 5 liegen. 5) Wenn alles richtig eingesetzt ist, schrauben Sie den Verschlussring r wieder handfest auf. 6) Montieren Sie den Fleischwolfvorsatz 5 wie unter „Fleischwolf zusammenbauen“ beschrieben. Spritzgebäck-Aufsatz montieren Klappen Sie die Ausklappseite aus - Sie finden dort die Zusammenbau-Reihenfolge bildlich dargestellt. 1) Nehmen Sie den Fleischwolfvorsatz 5, wie unter „Fleischwolf zusammenbauen“ beschrieben, ab. 2) Nehmen Sie eventuelle Aufsätze ab und reinigen Sie den Fleischwolfvorsatz 5. HINWEIS ► Für den Spritzgebäck-Aufsatz 1 wird das Kreuzmesser w mit der Feder q nicht benötigt! Nehmen Sie beides ggf. aus dem Fleischwolfvorsatz 5 heraus. 3) Reiben Sie alle Metallteile mit Speiseöl ab. 4) Ziehen Sie den Musterstreifen 1 vorne vom Spritzgebäck-Aufsatz 1 ab. 5) Setzen Sie zuerst die Plastikscheibe, dann die Metallscheibe des SpritzgebäckAufsatzes 1 in den Fleischwolfvorsatz 5 (siehe Ausklappseite). Legen Sie den Spritzgebäck-Aufsatz 1 so ein, dass die Fixierungen am SpritzgebäckAufsatz 1 in den Aussparungen am Fleischwolfvorsatz 5 liegen. ■ 8 │ DE│AT│CH SFW 350 C2 6) Wenn alles richtig eingesetzt ist, schrauben Sie den Verschlussring r handfest auf. 7) Stecken Sie den Musterstreifen 1 wieder vorne in den Spritzgebäck-Aufsatz 1. Achten Sie darauf, dass der Griff am Musterstreifen 1 vom Gerät weg zeigt. Ansonsten können Sie das Muster, welches sich direkt am Griff befindet, nicht einstellen. 8) Montieren Sie den Fleischwolfvorsatz 5 wie unter „Fleischwolf zusammenbauen“ beschrieben. 9) Zum Abnehmen müssen Sie erst wieder den Musterstreifen 1 abziehen, bevor Sie den Verschlussring r abdrehen und den Spritzgebäck-Aufsatz 1 wieder herausnehmen können. Passier-Aufsatz montieren Klappen Sie die Ausklappseite aus - Sie finden dort die Zusammenbau-Reihenfolge bildlich dargestellt. 1) Nehmen Sie den Fleischwolfvorsatz 5, wie unter „Fleischwolf zusammenbauen“ beschrieben, ab. 2) Nehmen Sie eventuelle Aufsätze ab und reinigen Sie den Fleischwolfvorsatz 5. HINWEIS ► Für den Passier-Aufsatz wird die Transportschnecke 0 und das Kreuzmesser w mit der Feder q nicht benötigt! Nehmen Sie alles ggf. aus dem Fleischwolfvorsatz 5 heraus. 3) Schieben Sie die Plastikschnecke 8 in den Fleischwolfvorsatz 5. 4) Schieben Sie das Passier-Sieb 9 so über die Plastikschnecke 8, dass die Fixierungen am Passier-Sieb 9 in den Aussparungen am Fleischwolfvorsatz 5 liegen. Die Löcher des Passier-Siebes 9 weisen dabei nach unten. 5) Wenn alles richtig eingesetzt ist, stülpen Sie den Verschlussring r über das Passier-Sieb 9 und schrauben Sie diesen handfest auf. 6) Montieren Sie den Fleischwolfvorsatz 5 wie unter „Fleischwolf zusammenbauen“ beschrieben. 7) Öffnen Sie die Verschluss-Schelle 6 am Tomatenauswurf 7. 8) Platzieren Sie den Tomatenauswurf 7 unter dem Passier-Aufsatz, indem Sie die Spitze des Passier-Siebes 9 durch die kleine Öffnung am Tomatenauswurf 7 stecken: SFW 350 C2 DE│AT│CH │ 9 ■ 9) Die Verschluss-Schelle 6 schließen Sie so, dass diese um den Fleischwolfvorsatz 5 greift. Bedienen STROMSCHLAGGEFAHR ► Öffnen Sie niemals das Gehäuse des Motorblocks 4 – es befinden sich keinerlei Bedienelemente darin. Wird das Gehäuse geöffnet, so erlischt der Garantieanspruch. Bei geöffnetem Gehäuse besteht Lebensgefahr durch elektrischen Schlag. ACHTUNG - SACHSCHADEN! ► Verwenden Sie das Gerät nicht länger als 15 Minuten im Dauerbetrieb. Lassen Sie das Gerät anschließend etwa 30 Minuten ausgeschaltet, um ein Überhitzen zu vermeiden. ► Drücken Sie nie die Tasten „I“ o oder „<“ a bei Laufrichtungswechsel, solange der Motor des Gerätes nicht vollständig still steht. Der Motor kann beschädigt werden. Das Gerät bedienen Wenn Sie die gewünschten Aufsätze montiert haben: 1) Stellen Sie das Gerät so auf, dass es absolut stabil steht und auf keinen Fall (z. B. durch Vibrationen oder Verfangen im Netzkabel) vom Tisch stürzen oder in die Nähe von offenem Wasser gelangen kann. Erschütterungen sind bei laufendem Betrieb unvermeidlich. ■ 10 │ DE│AT│CH SFW 350 C2 STROMSCHLAGGEFAHR ► Greifen Sie nie nach einem angeschlossenen oder sogar laufenden Gerät, wenn es stürzen oder in Wasser geraten sollte – oder bei sonstigen Notfällen! Ziehen Sie im Notfall sofort den Netzstecker! Andernfalls besteht akute Verletzungs- und Lebensgefahr! 2) Legen Sie die zu verarbeitenden Lebensmittel in die Einfüllschale 3 und stellen Sie ein Auffanggefäß vorne unter die Austrittsöffnung. 3) Drücken Sie erst die Taste „0“ p, um sicher zu gehen, dass das Gerät noch ausgeschaltet ist. Ansonsten besteht die Gefahr, dass das Gerät unbeabsichtigt startet, wenn der Netzstecker in die Netzsteckdose gesteckt wird. 4) Stecken Sie dann den Netzstecker in die Steckdose. 5) Drücken Sie die Taste „I“ o, um das Gerät einzuschalten. WARNUNG! VERLETZUNGSGEFAHR! ► Drücken Sie die Lebensmittel ausschließlich mit dem runden Stopfer 2 in den Einfüllschacht – nie mit den Fingern, Gabeln, Löffelstielen oder ähnlichem. Es besteht erhebliche Verletzungsgefahr und das Gerät könnte beschädigt werden. ACHTUNG - SACHSCHADEN! ► Drücken Sie nie so fest, dass der Motor hörbar langsamer wird. Andernfalls kann das Gerät überlastet und beschädigt werden. Fleisch verarbeiten 1) Verwenden Sie Fleischstücke, die problemlos in den Einfüllschacht passen. Schneiden Sie das Fleisch gegebenenfalls vor. Achten Sie darauf, dass das Fleisch keine Knochen oder Sehnen hat. WARNUNG! ► Hackfleisch ist sehr anfällig für Verkeimung. Achten Sie daher auf eine gute Hygiene, wenn Sie Fleisch verarbeiten. Ansonsten kann es zu gesundheitlichen Beeinträchtigungen kommen. 2) Wenn Sie alle Hinweise zum Thema „Fleisch“ gelesen haben, können Sie das Gerät nun einsetzen wie im Kapitel „Das Gerät bedienen“ beschrieben. SFW 350 C2 DE│AT│CH │ 11 ■ Wurst verarbeiten 1) Drehen Sie das Fleisch erst zweimal durch den Fleischwolf, bevor Sie dieses zur Wurst verarbeiten. 2) Für die Wurstfüllung fügen Sie dem Hackfleisch klein geschnittene Zwiebeln, Gewürze und weitere Zutaten nach Ihrem Rezept hinzu und kneten die Masse gut durch. Stellen Sie diese, vor der weiteren Verarbeitung, für 30 Min. in den Kühlschrank. 3) Stülpen Sie den Wurstdarm (Natur- oder Kunstdarm) über den Wurst- StopfAufsatz t und knoten Sie das andere Ende zu. Für je 1 kg Füllmasse können Sie etwa 1,60 m Wurstdarm kalkulieren. TIPP Legen Sie Naturdarm vorher etwa 3 Stunden in lauwarmes Wasser und wringen Sie diesen vor dem Aufstülpen aus. Naturdarm wird so wieder elastisch. Naturdärme bekommen Sie im Metzgerbedarfhandel in der Nähe von Schlachthöfen oder von Ihrem Metzger. 4) Die Wurstfüllung wird durch den Wurst-Stopf-Aufsatz t in den Wurstdarm gepresst. Wenn die gewünschte Länge erreicht ist, schalten Sie das Gerät aus, drücken die Wurst am Ende zusammen und drehen sie ein paar Mal um ihre Längsachse. TIPP Wurst dehnt sich beim Kochen und Einfrieren aus. Überfüllen Sie diese daher nicht, die Wurst könnte sonst platzen. 5) Wenn Sie alle Hinweise zum Thema „Wurst“ gelesen haben, können Sie das Gerät nun einsetzen wie im Kapitel „Das Gerät bedienen“ beschrieben. Arbeiten mit dem Kubbe-Aufsatz Mit dem Kubbe-Aufsatz u können Sie aus den eingelegten Lebensmitteln hohle Röllchen aus Fleisch oder Gemüse formen lassen, die Sie nach Belieben füllen können. 1) Drehen Sie das Fleisch erst zweimal durch den Fleischwolf, bevor Sie es durch den Kubbe-Aufsatz u pressen. 2) Wenn Sie alle Hinweise zum Thema „Kubbe-Aufsatz“ gelesen haben, können Sie das Gerät nun einsetzen wie im Kapitel „Das Gerät bedienen“ beschrieben. ■ 12 │ DE│AT│CH SFW 350 C2 Spritzgebäck herstellen Wenn Sie einen Spritzgebäck-Teig gemäß Ihrem Rezept vorbereitet und den Spritzgebäck-Aufsatz 1 montiert haben: 1) Legen Sie ein kleines Backblech mit Backpapier aus und stellen Sie es unter die Austrittsöffnung vorne am Gerät. 2) Drücken Sie gleichmäßig Teig in den Fleischwolfvorsatz 5 – die Transportschnecke 0 drückt diesen dann durch das gewählte Motiv am Motivstreifen des Spritzgebäckaufsatzes 1. 3) Wenn das Gebäck die gewünschte Länge erreicht hat, stoppen Sie das Gerät und brechen Sie den Teig an der Austrittsöffnung ab. Legen Sie das Gebäck auf das Backblech. 4) Wenn Sie alle Hinweise zum Thema „Spritzgebäck“ gelesen haben, können Sie das Gerät einsetzen wie im Kapitel „Das Gerät bedienen“ beschrieben. Tomaten passieren 1) Stellen Sie ein Gefäß unter den Tomatenauswurf 7. 2) Stellen Sie ein Gefäß vorne unter das Passier-Sieb 9. 3) Vierteln Sie die Tomaten und drücken Sie diese langsam und gleichmäßig in den Fleischwolfvorsatz 5. Die Plastikschnecke 8 drückt die Tomaten durch den Passieraufsatz, die passierten Tomaten fallen in den Tomatenauswurf 7. Die Tomatenschale wird vorne aus dem Passier-Sieb 9 ausgegeben. HINWEIS Sollte Tomatensaft aus den Schraubverbindungen des Passieraufsatzes treten, kann dies folgende Ursachen haben: – Sie arbeiten zu schnell. – Sie pressen die Tomatenstücke mit zu hohem Druck in das Gerät. – Die Tomatenstücke sind zu groß. ► Verlangsamen Sie in diesem Fall ihr Arbeitstempo, pressen Sie die Tomatenstücke nur leicht in das Gerät und zerteilen Sie die Tomaten in kleinere Stücke. 4) Wenn Sie alle Hinweise zum Thema „Tomaten passieren“ gelesen haben, können Sie das Gerät einsetzen wie im Kapitel „Das Gerät bedienen“ beschrieben. SFW 350 C2 DE│AT│CH │ 13 ■ Im Fehlerfall Wenn der Antrieb durch anstauende Lebensmittel blockiert ist: ■ Drücken Sie die Taste „0“ p, um den Fleischwolf zu stoppen. ■ Halten Sie die Taste „<“ a gedrückt. Der Antrieb läuft nun rückwärts. Damit können Sie die Lebensmittel ein Stück rückwärts transportieren, um den Antrieb wieder freizubekommen. ■ Ist der Antrieb frei, lassen Sie die Taste „<“ a los. ■ Drücken Sie die Taste „I“ o, um den Fleischwolf zu starten. ■ Wenn Sie den Antrieb damit nicht frei bekommen, reinigen Sie das Gerät, wie im Kapitel „Reinigen“ beschrieben. Wenn der Motor plötzlich ausgeht, kann es sein, dass die interne Überlastungssicherung ausgelöst hat. Diese soll den Motor schützen. ■ Schalten Sie das Gerät aus und lassen Sie es ca. 30 Min. abkühlen, bevor Sie das Gerät weiter verwenden. ■ Sollte dies ergebnislos sein, so warten Sie noch einmal weitere 15 Min.. ■ Wenn auch diese Frist ergebnislos verstrichen ist, deutet dies auf einen Defekt hin. Wenden Sie sich in diesem Fall an den Kundendienst. Wenn das Netzkabel beschädigt ist oder Schäden an den Geräteteilen erkennbar sind: ■ Schalten Sie das Gerät sofort aus, indem Sie die Taste „0“ p drücken! ■ Wenn dies nicht gefahrlos möglich ist, ziehen Sie den Netzstecker. ■ Lassen Sie diese Schäden erst vom Kundendienst instandsetzen, bevor Sie das Gerät wieder verwenden. Reinigen STROMSCHLAGGEFAHR ► Ziehen Sie erst den Netzstecker aus der Steckdose, bevor Sie das Gerät reinigen. Damit verhindern Sie Unfallgefahren durch unerwarteten versehentlichen Anlauf und elektrischen Schlag. ■ 14 │ DE│AT│CH SFW 350 C2 Motorblock reinigen ■ Reinigen Sie alle Außenflächen und das Netzkabel mit einem leicht angefeuchteten Spültuch. Trocknen Sie das Gerät gut ab, bevor Sie es erneut verwenden. STROMSCHLAGGEFAHR ► Tauchen Sie den Motorblock niemals in Wasser oder andere Flüssigkeiten! Andernfalls besteht Lebensgefahr durch elektrischen Schlag, wenn eingedrungene Feuchtigkeit an elektrische Leiter gelangt. ACHTUNG - SACHSCHADEN! ► Verwenden Sie keine Reinigungs-, Scheuer- oder Lösemittel. Diese können das Gerät beschädigen und Rückstände an den Lebensmitteln hinterlassen. Zubehörteile reinigen HINWEIS ► Reinigen Sie die Zubehörteile nicht in der Spülmaschine! Das führt zu Beschädigungen an den Zubehörteilen! ■ Reinigen Sie die Zubehörteile, die in Kontakt mit Lebensmittel kommen können, ... – nur von Hand, die Zubehörteile sind nicht spülmaschinenfest. – mit heißem Spülwasser und einem für Lebensmittel geeigneten HaushaltsSpülmittel. WARNUNG! VERLETZUNGSGEFAHR! ► Das Kreuzmesser w ist sehr scharf! Verletzungsgefahr! ■ Trocknen Sie alles gut ab, bevor Sie das Gerät weiter verwenden. HINWEIS ► Reiben Sie nach jeder Reinigung die Metallteile wieder mit Speiseöl ein! Ansonsten können sich die Metallteile verfärben! Aufbewahren ■ Schieben Sie das Netzkabel (ohne Netzstecker) in den Kabelschacht unter dem Geräteboden. So bleibt es geschützt vor Beschädigungen. ■ Lagern Sie das Gerät an einem trockenen Ort. ■ Reiben Sie die metallischen Aufsätze nach dem Abtrocknen dünn mit Speiseöl ein – wenn Sie das Gerät nicht sofort weiter benutzen. Damit erzielen Sie einen guten Schutz vor Korrosion. ■ Bewahren Sie das Gerät so auf, dass es unerreichbar ist für Kinder und aufsichtsbedürftige Personen. Diese können mögliche Gefahren im Umgang mit elektrischen Geräten nicht immer richtig einschätzen. SFW 350 C2 DE│AT│CH │ 15 ■ Entsorgung Werfen Sie das Gerät keinesfalls in den normalen Hausmüll. Dieses Produkt unterliegt der europäischen Richtlinie 2012/19/EU (Waste Electrical and Electronic Equipment). Entsorgen Sie das Gerät über einen zugelassenen Entsorgungsbetrieb oder über Ihre kommunale Entsorgungseinrichtung. Beachten Sie die aktuell geltenden Vorschriften. Setzen Sie sich im Zweifelsfall mit Ihrer Entsorgungseinrichtung in Verbindung. Führen Sie alle Verpackungsmaterialien einer umweltgerechten Entsorgung zu. Garantie und Service Sie erhalten auf dieses Gerät 3 Jahre Garantie ab Kaufdatum. Das Gerät wurde sorgfältig produziert und vor Anlieferung gewissenhaft geprüft. Bitte bewahren Sie den Kassenbon als Nachweis für den Kauf auf. Bitte setzen Sie sich im Garantiefall mit Ihrer Servicestelle telefonisch in Verbindung. Nur so kann eine kostenlose Einsendung Ihrer Ware gewährleistet werden. HINWEIS ► Die Garantieleistung gilt nur für Material- oder Fabrikationsfehler, nicht aber für Transportschäden, Verschleißteile oder für Beschädigungen an zerbrechlichen Teilen, z. B. Schalter oder Akkus. Das Produkt ist lediglich für den privaten und nicht für den gewerblichen Gebrauch bestimmt. Bei missbräuchlicher und unsachgemäßer Behandlung, Gewaltanwendung und bei Eingriffen, die nicht von unserer autorisierten ServiceNiederlassung vorgenommen wurden, erlischt die Garantie. Ihre gesetzlichen Rechte werden durch diese Garantie nicht eingeschränkt. Die Garantiezeit wird durch die Gewährleistung nicht verlängert. Dies gilt auch für ersetzte und reparierte Teile. Eventuell schon beim Kauf vorhandene Schäden und Mängel müssen sofort nach dem Auspacken gemeldet werden, spätestens aber zwei Tage nach Kaufdatum. Nach Ablauf der Garantiezeit anfallende Reparaturen sind kostenpflichtig. Die Garantiezeit wird durch die Gewährleistung nicht verlängert. Dies gilt auch für ersetzte und reparierte Teile. Eventuell schon beim Kauf vorhandene Schäden und Mängel müssen sofort nach dem Auspacken gemeldet werden, spätestens aber zwei Tage nach Kaufdatum. Nach Ablauf der Garantiezeit anfallende Reparaturen sind kostenpflichtig. ■ 16 │ DE│AT│CH SFW 350 C2 Service Deutschland Tel.: 0800 5435 111 (Kostenfrei aus dem dt. Festnetz/Mobilfunknetz) E-Mail: [email protected] IAN 277055 Service Österreich Tel.: 0820 201 222 (0,15 EUR/Min.) E-Mail: [email protected] IAN 277055 Service Schweiz Tel.: 0842 665566 (0,08 CHF/Min., Mobilfunk max. 0,40 CHF/Min.) E-Mail: [email protected] IAN 277055 Importeur KOMPERNASS HANDELS GMBH BURGSTRASSE 21 44867 BOCHUM GERMANY www.kompernass.com SFW 350 C2 DE│AT│CH │ 17 ■ Rezepte Kubbe Zutaten für die Hülle 450 g mageres Hammel-, Kalb- oder Rindfleisch 150 g Mehl 1 TL Piment (Nelkenpfeffer) 1 TL Muskatnuss 1 Prise Chilipulver 1 Prise Pfeffer Zutaten für die Fleischfüllung 700 g Hammelfleisch 1 1/2 EL Olivenöl 1 1/2 EL Zwiebeln feingehackt 1/2 TL Piment (Nelkenpfeffer) 1/2 TL Salz 1 1/2 EL Mehl Das Fleisch für die Hülle zweimal hintereinander im Fleischwolf zerkleinern (zuerst mit der groben und dann mit der feinen Lochscheibe e) und mit den Zutaten vermengen. Diese Masse ebenfalls zweimal mit dem Fleischwolf zerkleinern. Lochscheibe e gegen den Kubbe-Aufsatz u wechseln (siehe Kapitel „Kubbe-Aufsatz montieren“). Kubbe-Hüllen mit dem Kubbe-Aufsatz u formen und anfrieren. Füllung: Fleisch zweimal mit dem Fleischwolf zerkleinern (zuerst mit der groben und dann mit der feinen Lochscheibe e). Zwiebeln anbraten und mit dem Fleisch und den restlichen Zutaten gut vermischen. Kubbe-Hüllen damit füllen und ausbraten. Alternative Füllungen: 250 g gedünsteten Brokkoli oder 250 g gedünstete Zucchini oder 250 g gekochten Reis ■ 18 │ DE│AT│CH SFW 350 C2 Frische Rostbratwurst Zutaten: 300 g mageres Rindfleisch 500 g mageres Schweinefleisch 200 g Schulterspeck 20 g Salz 1/2 Esslöffel weißer, gemahlener Pfeffer 1 Teelöffel Kümmel 1/2 Teelöffel Muskatnuss Rindfleisch, Schweinefleisch und Speck zweimal durch den Fleischwolf drehen. Gemischte Gewürze sowie Salz zugeben und 5 Minuten durchkneten. Wurstfüllung für ca. 30 Minuten in den Kühlschrank stellen. Wurstfüllung nach Anleitung abfüllen (siehe Kapitel „Wurst verarbeiten“) und Würstchen von 25 cm Länge abdrehen. Die fertige Rostbratwurst am gleichen Tag gut durchgebraten verzehren. Spritzgebäck Zutaten: 500 g Butter 500 g Zucker 2 - 3 Päckchen Vanillinzucker 1 Päckchen Vanillepudding 1/4 Teelöffel Salz 1 Ei 4 Eigelb 800 g Mehl (Type 405) 2 Teelöffel Backpulver 200 g gemahlene Mandeln (blanchiert) abgeriebene Schale einer Zitrone Die Butter schaumig schlagen. Die restlichen Zutaten nach und nach hinzugeben und den Teig gut durchkneten. Den fertigen Teig ca. 12 Stunden (z. B. über Nacht) im Kühlschrank abgedeckt ruhen lassen. Dann durch den Fleischwolf mit Spritzgebäck-Aufsatz 1 drehen. Das Spritzgebäck auf ein mit Backpapier ausgelegtes Backblech legen. Das Spritzgebäck im vorgeheizten Backofen bei 180°C ca.10-15 Minuten goldgelb backen. SFW 350 C2 DE│AT│CH │ 19 ■ ■ 20 │ DE│AT│CH SFW 350 C2 Index Introduction . . . . . . . . . . . . . . . . . . . . . . . . . . . . . . . . . . . . . . . . . . . . . . . . . . 22 Copyright . . . . . . . . . . . . . . . . . . . . . . . . . . . . . . . . . . . . . . . . . . . . . . . . . . . . . . . . . . . . . 22 Limited liability . . . . . . . . . . . . . . . . . . . . . . . . . . . . . . . . . . . . . . . . . . . . . . . . . . . . . . . . . . 22 Intended use . . . . . . . . . . . . . . . . . . . . . . . . . . . . . . . . . . . . . . . . . . . . . . . . . 22 Items supplied / Component description . . . . . . . . . . . . . . . . . . . . . . . . . . . 23 Technical data . . . . . . . . . . . . . . . . . . . . . . . . . . . . . . . . . . . . . . . . . . . . . . . . 24 Safety instructions . . . . . . . . . . . . . . . . . . . . . . . . . . . . . . . . . . . . . . . . . . . . 24 Assembly / Disassembly . . . . . . . . . . . . . . . . . . . . . . . . . . . . . . . . . . . . . . . . 26 Assembling the meat grinder . . . . . . . . . . . . . . . . . . . . . . . . . . . . . . . . . . . . . . . . . . . . . . . 26 Assembling the sausage stuffer attachment . . . . . . . . . . . . . . . . . . . . . . . . . . . . . . . . . . . 27 Assembling the kubbe attachment . . . . . . . . . . . . . . . . . . . . . . . . . . . . . . . . . . . . . . . . . . . 28 Assembling the biscuit attachments . . . . . . . . . . . . . . . . . . . . . . . . . . . . . . . . . . . . . . . . . . 28 Fitting the strainer attachment . . . . . . . . . . . . . . . . . . . . . . . . . . . . . . . . . . . . . . . . . . . . . . 29 Operation . . . . . . . . . . . . . . . . . . . . . . . . . . . . . . . . . . . . . . . . . . . . . . . . . . . 30 Operating the appliance . . . . . . . . . . . . . . . . . . . . . . . . . . . . . . . . . . . . . . . . . . . . . . . . . . 30 Processing meat . . . . . . . . . . . . . . . . . . . . . . . . . . . . . . . . . . . . . . . . . . . . . . . . . . . . . . . . . 31 Processing sausage meat . . . . . . . . . . . . . . . . . . . . . . . . . . . . . . . . . . . . . . . . . . . . . . . . . . 32 Using the kubbe attachment . . . . . . . . . . . . . . . . . . . . . . . . . . . . . . . . . . . . . . . . . . . . . . . 32 Making biscuits . . . . . . . . . . . . . . . . . . . . . . . . . . . . . . . . . . . . . . . . . . . . . . . . . . . . . . . . . 33 Straining tomatoes . . . . . . . . . . . . . . . . . . . . . . . . . . . . . . . . . . . . . . . . . . . . . . . . . . . . . . . 33 Non-functionality . . . . . . . . . . . . . . . . . . . . . . . . . . . . . . . . . . . . . . . . . . . . . 34 Cleaning . . . . . . . . . . . . . . . . . . . . . . . . . . . . . . . . . . . . . . . . . . . . . . . . . . . . . 34 Cleaning the motor block . . . . . . . . . . . . . . . . . . . . . . . . . . . . . . . . . . . . . . . . . . . . . . . . . 35 Cleaning the accessories . . . . . . . . . . . . . . . . . . . . . . . . . . . . . . . . . . . . . . . . . . . . . . . . . . 35 Storage . . . . . . . . . . . . . . . . . . . . . . . . . . . . . . . . . . . . . . . . . . . . . . . . . . . . . 35 Disposal . . . . . . . . . . . . . . . . . . . . . . . . . . . . . . . . . . . . . . . . . . . . . . . . . . . . . 36 Warranty and Service . . . . . . . . . . . . . . . . . . . . . . . . . . . . . . . . . . . . . . . . . 36 Importer. . . . . . . . . . . . . . . . . . . . . . . . . . . . . . . . . . . . . . . . . . . . . . . . . . . . . 37 Recipes . . . . . . . . . . . . . . . . . . . . . . . . . . . . . . . . . . . . . . . . . . . . . . . . . . . . . . 38 Kubbe . . . . . . . . . . . . . . . . . . . . . . . . . . . . . . . . . . . . . . . . . . . . . . . . . . . . . . . . . . . . . . . . 38 Fresh Grill Sausages . . . . . . . . . . . . . . . . . . . . . . . . . . . . . . . . . . . . . . . . . . . . . . . . . . . . . 39 Biscuits . . . . . . . . . . . . . . . . . . . . . . . . . . . . . . . . . . . . . . . . . . . . . . . . . . . . . . . . . . . . . . . . 39 SFW 350 C2 GB│IE │ 21 ■ Introduction Congratulations on the purchase of your new appliance. You have clearly decided in favour of a quality product. These operating instructions are a part of this product. They contain important information in regard to safety, use and disposal. Before using the product, familiarise yourself with all of these operating and safety instructions. Use the product only as described and only for the specified areas of application. Retain these instructions for future reference. In addition, pass these documents on, together with the product, to any future owner. Copyright This documentation is copyright protected. Any copying or reproduction of it, including as extracts, as well as the reproduction of images, also in an altered state, is only permitted with the written authorisation of the manufacturer. Limited liability All technical information, data and instructions for the installation, connection and operation contained in these operating instructions correspond to the latest available at the time of printing and, to the best of our knowledge, take into account our previous experience and know-how. No claims can be derived from the details, illustrations and descriptions in these instructions. The manufacturer assumes no responsibility for damage caused by failure to observe these instructions, improper use, incompetent repairs, making unauthorised modifications or for using unapproved replacement parts. Intended use This appliance is intended only for the preparation of food in quantities expected in domestic households: ▯ Mincing fresh meat, ▯ Making sausages with natural or artificial sausage skin, ▯ Making biscuits, ▯ Straining tomatoes. This appliance is not intended for the processing of frozen foods or other hard foodstuffs, e.g. bones or nuts, or for use in commercial or industrial environments. ■ 22 │ GB│IE SFW 350 C2 Items supplied / Component description Figure A: 1 Biscuit attachment with pattern strips 2 Stodger 3 Feeding tray 4 Motor unit 5 Meat grinder casing made of metal 6 Locking clamp 7 Tomato outlet 8 Plastic screw 9 Strainer sieve 0 Transport screw q Spring w Cross blade e Cutting discs for coarse and fine mincing r Ring clamp t Sausage stuffer attachment z Sausage disc u Kubbe attachment Figure B: i Locking button Figure C: o “I” button p “0” button a “<” button SFW 350 C2 GB│IE │ 23 ■ Technical data Voltage 220 - 240 V ∼, 50 Hz Power consumption 250 - 350 W Protection class II / All of the parts of this appliance that come into contact with food are food-safe. C.O. Time 15 minutes C.O. Time The C.O. Time (Continuous Operation) details how long an appliance may be used without the motor overheating and being damaged. After the appliance has run for this period it must be switched off until the motor has cooled itself down. Safety instructions ► ► ► ► RISK OF ELECTRIC SHOCK Ensure that the power cable does not become damaged. Protect the cable from heat and ensure that it cannot be trapped or clamped. Arrange for damaged power cables and/or plugs to be replaced as soon as possible by a qualified specialist or by Customer Services. Use the appliance only in dry indoor areas, not outdoors. Never immerse the motor block in water or any other liquid! If you do, then you could receive a potentially fatal electric shock. WARNING! Never use the appliance for purposes other than those listed here. There will be a major risk of serious accidents should you try to neutralise the safety fitments on the appliance! ■ 24 │ GB│IE SFW 350 C2 ► ► ► ► ► ► ► ► ► ► ► WARNING! RISK OF INJURY! Never put your hand into the openings of the appliance. Do not insert any objects of any kind into the openings – except for the appropriate stodger and the foodstuff to be processed. If you do, there will be a serious risk of accidents! Unplug the appliance from the power source before attaching or removing accessories. Do not leave the appliance unsupervised when it is ready for use. To avoid it being switched on accidentally, always unplug the appliance after use or during breaks. Only use the original accessory parts for this appliance. Other accessories may not meet the safety requirements. Never operate the appliance in a no-load condition. This could irreparably damage the appliance. Before changing accessories or additional parts that are in motion during operation, the appliance must be switched off and disconnected from mains power. Never use the appliance for purposes other than those described in these instructions. Warning: the cross blade is very sharp! Always take care when handling and cleaning the appliance. The appliance should always be disconnected from the mains when unattended and before assembly, disassembly or cleaning. This appliance may not be used by children. The appliance and its connecting cable must be kept away from children. SFW 350 C2 GB│IE │ 25 ■ ► ► WARNING! RISK OF INJURY! This appliance may be used by persons with limited physical, sensory or mental capabilities or lack of experience and knowledge, provided that they are under supervision or have been told how to use the appliance safely and are aware of the potential risks. The appliance must not be used as a plaything by children. Assembly / Disassembly CAUTION - PROPERTY DAMAGE! ► All accessories are coated with a thin film of oil to protect them from corrosion. Therefore, carefully clean all of the parts before using the appliance for the first time, as described in detail in the chapter “Cleaning”. After subsequent usage, always apply a light coating of cooking oil to the metallic components. NOTICE ► Before using for the first time, remove the protective foil from the control panel. Assembling the meat grinder Unfold the fold-out side. There you will find the step-by-step illustrations for assembling the appliance. 1) Place the transport screw 0 in the meat grinder casing 5. 2) Place the spring q onto the transport screw 0. 3) Then fit the cross blade w on so that the sharp side points away from the spring q. Ensure that the square opening in the cross blade w is placed correctly on the square axle. ■ 26 │ GB│IE SFW 350 C2 WARNING! RISK OF INJURY! ► The cross blade w is very sharp! Risk of injury! CAUTION - PROPERTY DAMAGE! ► The appliance will be damaged if the cross blade w is inserted the other way around! 4) Select the appropriate cutting disc e/sausage disc z. 5) Place your selected cutting disc e into the meat grinder casing 5 so that the fixings on the cutting disc e are located in the openings in the meat grinder casing 5. 6) After everything has been correctly assembled, screw the ring clamp r back on hand-tight. 7) The ready-assembled meat grinder casing 5 is connected by a bayonet connector to the motor unit 4: – Insert the meat grinder casing 5 into the motor unit 4 such that the arrow on the meat grinder casing 5 lies against the symbol on the motor unit 4. The locking button i presses itself in (Fig. B). – Lightly press the meat grinder casing 5 in and at the same time turn the feeding shaft on the meat grinder casing 5 into the middle position (Fig. B) so that the arrow on the feeding shaft points to the symbol . When the meat grinder casing 5 engages, the locking button i springs out. – Finally, place the feeding tray 3 on top of the feeding funnel. – To dismantle it, press the locking button i and turn the feeding funnel to the right (Fig. B) . You can now pull the meat grinder casing 5 out. Assembling the sausage stuffer attachment Unfold the fold-out side - there you will find the step-by-step illustrations for assembling the appliance. 1) Remove the meat grinder casing 5 as described under “Assembling the meat grinder”. 2) Dismantle all parts which are fitted to/in the meat grinder casing 5 and clean them. 3) Coat all metal parts with cooking oil. 4) Put the transport screw 0, the spring q and the cross blade w back into the meat grinder casing 5. 5) Insert the sausage disc z so that the fixings on the sausage disc z are located in the openings in the meat grinder casing 5. 6) Then place the sausage stuffer attachment t before the sausage disc z. SFW 350 C2 GB│IE │ 27 ■ 7) Screw the ring clamp r on hand-tight. 8) Assemble the meat grinder casing 5 as described under “Assembling the meat grinder”. Assembling the kubbe attachment Unfold the fold-out side. There you will find the step-by-step illustrations for assembling the appliance. 1) Remove the meat grinder casing 5 as described under “Assembling the meat grinder”. 2) Disassemble any attachments that might be fitted and clean the meat grinder casing 5. NOTICE ► For the kubbe attachment u, the cross blade w with the spring q is not required! If need be, remove them both from the meat grinder casing 5. 3) Coat all metal parts with cooking oil. 4) Insert the two plastic parts of the kubbe attachment u so that the fixings on the bottom kubbe attachment u ring are located in the openings in the meat grinder casing 5. 5) When everything has been attached correctly, screw the ring clamp r back on hand-tight. 6) Assemble the meat grinder casing 5 as described under “Assembling the meat grinder”. Assembling the biscuit attachments Unfold the fold-out side. There you will find the step-by-step illustrations for assembling the appliance. 1) Remove the meat grinder casing 5 as described under “Assembling the meat grinder”. 2) Disassemble any attachments that might be fitted and clean the meat grinder casing 5. NOTICE ► For the biscuit attachment 1, the cross blade w with the spring q is not required! If need be, remove them both from the meat grinder casing 5. 3) Coat all metal parts with cooking oil. 4) Pull the pattern strips 1 away from the front of the biscuit attachment 1. 5) First place the plastic disc and then the metal disc of the biscuit attachment 1 into the meat grinder casing 5 (see fold-out side). Insert the biscuit attachment 1. so that the fixings on the biscuit attachment 1. are located in the openings in the meat grinder casing 5. ■ 28 │ GB│IE SFW 350 C2 6) After everything has been correctly assembled, screw the ring clamp r back on hand-tight. 7) Replace the pattern strips 1 back in to the front of the biscuit attachment 1. Ensure that the grip on the pattern strips 1 points away from the appliance. If it does not, you will not be able to adjust the pattern, which is located directly on the grip. 8) Assemble the meat grinder casing 5 as described under “Assembling the meat grinder”. 9) To dismantle it, you must first remove the pattern strips 1 before you can screw the ring clamp r open and take the biscuit attachment 1 back out. Fitting the strainer attachment Unfold the fold-out page – it contains the step-by-step illustrations for assembling the appliance. 1) Remove the meat grinder casing 5 as described in “Assembling the meat grinder”. 2) Remove any attachments that might be fitted and clean the meat grinder casing 5. NOTICE ► The transport screw 0 and the cross blade w with the spring q are not required for the strainer attachment! Remove these from the meat grinder casing 5 if necessary. 3) Push the plastic screw 8 into the meat grinder casing 5. 4) Push the strainer sieve 9 over the plastic screw 8 so that the tabs on the strainer sieve 9 fit into the recesses in the meat grinder casing 5. The holes of the strainer sieve 9 should be facing downwards. 5) Once everything has been correctly attached, roll the ring clamp r over the strainer sieve 9 and screw it on hand-tight. 6) Fit the meat grinder casing 5 as described in “Assembling the meat grinder”. 7) Undo the locking clamp 6 on the tomato outlet 7. 8) Place the tomato outlet 7 under the strainer sieve by pushing the tip of the strainer sieve 9 through the small hole in the tomato outlet 7: SFW 350 C2 GB│IE │ 29 ■ 9) Fasten the locking clamp 6 so that it grips the meat grinder casing 5. Operation RISK OF ELECTRIC SHOCK ► NEVER open the housing of the motor unit 4 – it does not contain any user-serviceable elements. If the housing is opened, the warranty becomes void. If the housing is opened, there is a risk of receiving a potentially fatal electric shock. CAUTION - PROPERTY DAMAGE! ► Do not use the appliance for longer than 15 minutes continuously. To avoid an overheating of the appliance, after such a period switch it off and allow it to cool down for ca. 30 minutes. ► NEVER activate the buttons “I” o or “<” a, during a change of rotation direction, if the appliance motor has not come to a complete stop. This could damage the motor. Operating the appliance Once the appropriate attachments have been fixed: 1) Place the appliance where it will at all times be absolutely stable and under no circumstances could it fall off of the work surface or in any way come into contact with water (due to vibrations or becoming snagged in the power cable). Vibration is unavoidable when it is working. ■ 30 │ GB│IE SFW 350 C2 RISK OF ELECTRIC SHOCK ► Never touch an appliance, which is plugged in or is operational when it happens, that falls or lands in water – or in the case of other emergencies! First disconnect the appliance from the mains power source in all emergency situations! Otherwise you run the risk of serious injury or loss of life! 2) Put the food which is to be processed in the feeding tray 3 and place a catchment container at the front under the exit opening. 3) First press the button “0” p to check that the appliance is still switched off. Otherwise there is a risk that the appliance could unintentionally start when the plug is inserted into the power socket. 4) Then insert the plug into a mains power socket. 5) Press the button “I” o to start the appliance. WARNING! RISK OF INJURY! ► Push the foodstuff into the feeding shaft ONLY with the round stodger 2 – NEVER with one’s fingers, forks, spoons or similar objects. That could lead to physical injury and also damage the appliance. CAUTION - PROPERTY DAMAGE! ► Do not ever press so hard that the motor gets audibly slower. This could overburden the machine and damage it. Processing meat 1) Use pieces of meat that fit easily into the feeding funnel. If necessary, cut the meat to size beforehand. Check that the meat does not have any bones and or tendons. WARNING! ► Minced meat is very prone to bacterial contamination. Therefore take care to maintain good hygiene when processing meat. If you do not, it may cause serious health problems. 2) When you have read and understood all of the instructions on the topic ”Meat“, you can now use the appliance as described in the chapter “Operating the appliance”. SFW 350 C2 GB│IE │ 31 ■ Processing sausage meat 1) Pass meat through the meat grinder twice before using it as sausage stuffing. 2) To make sausage stuffing, add some chopped onions, spices and other ingredients to the minced meat, as per your recipe, and knead the mixture well. Refrigerate this for 30 minutes before processing it further. 3) Pull one end of the sausage skin (natural or artificial sausage skin) onto the sausage stuffer attachment t and tie a knot in the other end. For 1 kg of the filling, you will need approximately 1.60 m of sausage skin. TIP! Soak the natural sausage skin in lukewarm water for about 3 hours before using it and wring it out before attaching it. This will make the natural sausage skin more elastic. Natural sausage skins are available from butcher suppliers close to slaughter houses or from your family butcher. 4) The sausage mixture will be pressed into the sausage skin by the sausage stuffer attachment t. When it is long enough switch the appliance off, press the sausage together at the ends and rotate it a couple of times along its longitudinal axis. TIP! Sausage meat tends to expand when cooked or frozen. Therefore, to prevent it from bursting it is best not to overstuff the sausage. 5) When you have read and understood all of the instructions on the topic ”Sausage”, you can now use the appliance as described in the chapter “Operating the appliance”. Using the kubbe attachment With the kubbe attachment u foodstuffs can be processed to form hollow rolls of meat or vegetables, which can then be stuffed as desired. 1) First put the meat through the meat grinder twice before pressing it through the kubbe attachment u. 2) When you have read and understood all of the instructions on the topic “kubbe-Attachment”, you can now use the appliance as described in the chapter “Operating the appliance”. ■ 32 │ GB│IE SFW 350 C2 Making biscuits After you have made the biscuit pastry according to your recipe, and after having fixed the biscuit attachment 1: 1) Line a small baking tray with greaseproof paper and place or hold it directly under the exit opening at the front of the appliance. 2) Press pastry evenly into the meat grinder casing 5 – the transport screw 0 then pushes it through the selected design on the design motif strip of the biscuit attachment 1. 3) When the biscuit is the required length, stop the appliance and break the pastry off at the exit opening. Lay the biscuits on the baking tray. 4) When you have read and understood all of the instructions on the topic “Biscuits”, you can now use the appliance as described in the chapter “Operating the appliance”. Straining tomatoes 1) Place a container under the tomato outlet 7. 2) Place a container at the front under the strainer sieve 9. 3) Quarter the tomatoes and push them slowly and evenly into the meat grinder casing 5. The plastic screw 8 pushes the tomatoes through the strainer attachment. The strained tomatoes fall in the tomato outlet 7. The tomato skin is ejected at the front from the strainer sieve 9. NOTICE If tomato juice starts leaking from the screw joints of the strainer attachment, this can have the following causes: – You are working too fast. – You are using too much pressure to press the tomato pieces into the appliance. – The tomato pieces are too large. ► Try working more slowly; press the tomato pieces gently into the appliance and cut the tomatoes into smaller pieces. 4) Once you have read and understood all of the instructions in the section “Straining tomatoes”, you can use the appliance as described in the section “Operating the appliance”. SFW 350 C2 GB│IE │ 33 ■ Non-functionality If the drive is blocked by accumulated food: ■ Press the button “0” p to stop the meat grinder. ■ Press and hold the button “<” a. The appliance will now run in the reverse direction. This enables you to transport the food which has become stuck a short way backwards, and the motor to run freely again. ■ When the drive runs smoothly again, release the “<” a button. ■ Press the button “I” o to re-start the meat grinder. ■ If you do not succeed in getting the drive free with this, clean the appliance as described in the chapter “Cleaning”. Should the motor suddenly stop, it could be due to automatic activation of the internal overload fuse. This is intended to protect the motor. ■ Switch the appliance off and allow it cool down for approximately 30 minutes before continuing to use it. ■ Should this not work, wait for a further 15 minutes. ■ If it still does not function at the end of this period, this indicates a technical problem. In this case, contact the Customer Service Centre. If the power cable is damaged or the accessories are visibly damaged: ■ Immediately switch the appliance off by pressing the “0” p button! ■ If this is not possible without risk to personal safety, disconnect the plug from the mains power socket. ■ Arrange for the defective parts to be repaired by Customer Services before re-using the appliance. Cleaning RISK OF ELECTRIC SHOCK ► Disconnect the plug from the mains power socket before cleaning the appliance. In this way accidents caused by the inadvertent switching on of the appliance and electric shocks can be avoided. ■ 34 │ GB│IE SFW 350 C2 Cleaning the motor block ■ Clean the exterior surfaces and the power cable with a slightly damp cloth. Dry the appliance well before re-using it. RISK OF ELECTRIC SHOCK ► Never immerse the motor block in water or any other liquid! Should this occur, you are at risk of a potentially fatal electric shock if permeating moisture makes contact with the electrical wiring. CAUTION - PROPERTY DAMAGE! ► Never use detergents, abrasive cleaners or solvents. These could damage the appliance and leave residues on the foodstuffs. Cleaning the accessories NOTICE ► Do not clean the accessories in a dishwasher! This could cause damage to them! ■ Clean the accessories that could come in contact with foodstuffs, ... – by hand only, the accessories are not dishwasher safe. – with hot water and a household detergent suitable for use with foods. WARNING! RISK OF INJURY! ► The cross blade w is very sharp! Risk of injury! ■ Dry all parts thoroughly, before re-using the appliance. NOTICE ► Apply a light coating of cooking oil to all metallic components after each cleaning! Otherwise, metal parts can discolour! Storage ■ Push the power cable (but not the plug) into the cable storage shaft under the appliance base. There it is protected from damage. ■ Store the appliance at a dry location. ■ After drying the metal attachments coat them lightly with a little cooking oil – if you are not going to use the appliance immediately. This will protect them from corrosion. ■ Store the appliance where it will be out of reach of children and people requiring supervision. They are not always able to correctly assess the potential risks involved with using electrical appliances. SFW 350 C2 GB│IE │ 35 ■ Disposal Do not dispose of the appliance in your normal domestic waste. This product is subject to the provisions of European Directive 2012/19/EU (Waste Electrical and Electronic Equipment). Dispose of the appliance through an approved disposal centre or at your community waste facility. Observe the currently applicable regulations. In case of doubt, please contact your waste disposal centre. Dispose of all packaging materials in an environmentally friendly manner. Warranty and Service The warranty for this appliance is for 3 years from the date of purchase. This appliance has been manufactured with care and meticulously examined before delivery. Please retain your receipt as proof of purchase. In the case of a warranty claim, please make contact by telephone with our service department. Only in this way can a post-free despatch for your goods be assured. NOTICE ► The warranty covers only claims for material and manufacturing defects, not for transport damages, worn parts or for damage to fragile components, e.g. buttons or batteries. The appliance is intended for domestic use only, NOT for commercial purposes. If this product has been subjected to improper or inappropriate handling, abuse, or modifications not carried out by one of our authorised sales and service outlets, the warranty will be considered void. Your statutory rights are not restricted in any way by this warranty. The warranty period is not extended by repairs effected under warranty. This applies also to replaced and repaired parts. Damages or defects discovered after purchase are to be reported directly after unpacking, at the latest two days after the purchase date. Repairs carried out after lapse of the warranty period are subject to charge. The warranty period is not extended by repairs effected under warranty. This applies also to replaced and repaired parts. Damages or defects discovered after purchase are to be reported directly after unpacking, at the latest two days after the purchase date. Repairs carried out after lapse of the warranty period are subject to charge. ■ 36 │ GB│IE SFW 350 C2 Service Great Britain Tel.: 0871 5000 720 (£ 0.10/Min.) E-Mail: [email protected] IAN 277055 Service Ireland Tel.: 1890 930 034 (0,08 EUR/Min., (peak)) (0,06 EUR/Min., (off peak)) E-Mail: [email protected] IAN 277055 Importer KOMPERNASS HANDELS GMBH BURGSTRASSE 21 44867 BOCHUM GERMANY www.kompernass.com SFW 350 C2 GB│IE │ 37 ■ Recipes Kubbe Ingredients for the wrapping 450 g of lean Lamb, Veal or Beef 150 g Flour 1 Tsp Pimento (type of pepper) 1 Tsp Nutmeg 1 Pinch Chili powder 1 Pinch Pepper Ingredients for the meat filling 700 g Mutton 1 1/2 Tbsp Olive oil 1 1/2 Tbsp Onions, finely chopped 1/2 Tsp Pimento (type of pepper) 1/2 Tsp Salt 1 1/2 Tbsp Flour Pass the meat for the wrapping through the meat grinder twice (first with the coarse and then with the fine cutting discs e) and then combine it with the ingredients. Then pass this mixture through the meat grinder twice. Exchange the cutting disc e for the kubbe attachment u (see chapter “Using the kubbe attachment”). Shape the kubbe wrappers with the kubbe attachment u and then freeze them. Filling: Pass the meat through the meat grinder twice (first with the coarse and then with the fine cutting discs e). Saute the onions and then mix them well with the meat and other ingredients. Fill the kubbe wrappers and fry until done. Alternative Fillings: 250 g steamed Broccoli or 250 g steamed Zucchini or 250 g cooked Rice ■ 38 │ GB│IE SFW 350 C2 Fresh Grill Sausages Ingredients: 300 g lean Beef 500 g lean Pork 200 g Shoulder bacon 20 g Salt 1/2 Tsp ground white Pepper 1 Tsp Caraway 1/2 Tsp Nutmeg Pass the beef, pork and bacon through the meat grinder twice. Add the mixed spices and salt and thoroughly knead for 5 minutes. Place the sausage filling in the refrigerator for ca. 30 minutes. Fill the skins with sausage meat as detailed (see chapter “Processing sausage meat”) and make sausages of ca. 25 cm in length. Grill the sausages well and eat them on the same day. Biscuits Ingredients: 500 g butter 500 g sugar 2 - 3 packets of vanilla sugar 1 packet of vanilla custard 1/4 tsp salt 1 egg 4 egg yolks 800 g plain flour 2 tbsp baking powder 200 g ground (blanched) almonds Zest of a lemon Beat the butter until fluffy. Add the remaining ingredients one after another and knead well into the dough. Cover the finished dough and allow to stand for around 12 hours in the fridge (e.g. overnight). Then pass it through the meat grinder with the biscuit attachment 1. Place the biscuits on a baking tray lined with baking paper. Bake the biscuits in a pre-heated oven at 180°C for approx. 10 - 15 minutes until golden brown. SFW 350 C2 GB│IE │ 39 ■ ■ 40 │ GB│IE SFW 350 C2 Sommaire Introduction . . . . . . . . . . . . . . . . . . . . . . . . . . . . . . . . . . . . . . . . . . . . . . . . . . 42 Droits d’auteur . . . . . . . . . . . . . . . . . . . . . . . . . . . . . . . . . . . . . . . . . . . . . . . . . . . . . . . . . . 42 Limitation de responsabilité . . . . . . . . . . . . . . . . . . . . . . . . . . . . . . . . . . . . . . . . . . . . . . . . 42 Utilisation conforme . . . . . . . . . . . . . . . . . . . . . . . . . . . . . . . . . . . . . . . . . . . 42 Accessoires fournis / Description des pièces . . . . . . . . . . . . . . . . . . . . . . . . 43 Caractéristiques techniques . . . . . . . . . . . . . . . . . . . . . . . . . . . . . . . . . . . . . 44 Consignes de sécurité . . . . . . . . . . . . . . . . . . . . . . . . . . . . . . . . . . . . . . . . . . 44 Assemblage / désassemblage . . . . . . . . . . . . . . . . . . . . . . . . . . . . . . . . . . . 46 Assemblage du hachoir à viande . . . . . . . . . . . . . . . . . . . . . . . . . . . . . . . . . . . . . . . . . . . 46 Monter le poussoir à saucisse . . . . . . . . . . . . . . . . . . . . . . . . . . . . . . . . . . . . . . . . . . . . . . 47 Monter l’accessoire à boulettes . . . . . . . . . . . . . . . . . . . . . . . . . . . . . . . . . . . . . . . . . . . . . 48 Monter l’accessoire pour biscuits sablés . . . . . . . . . . . . . . . . . . . . . . . . . . . . . . . . . . . . . . 48 Monter l’embout presse-purée . . . . . . . . . . . . . . . . . . . . . . . . . . . . . . . . . . . . . . . . . . . . . . 49 Opération . . . . . . . . . . . . . . . . . . . . . . . . . . . . . . . . . . . . . . . . . . . . . . . . . . . 50 Fonctionnement de l’appareil . . . . . . . . . . . . . . . . . . . . . . . . . . . . . . . . . . . . . . . . . . . . . . 50 Travailler de la viande . . . . . . . . . . . . . . . . . . . . . . . . . . . . . . . . . . . . . . . . . . . . . . . . . . . . 51 Confectionner des saucisses . . . . . . . . . . . . . . . . . . . . . . . . . . . . . . . . . . . . . . . . . . . . . . . 52 Travailler avec l’accessoire à boulettes . . . . . . . . . . . . . . . . . . . . . . . . . . . . . . . . . . . . . . . 52 Confectionner des biscuits sablés . . . . . . . . . . . . . . . . . . . . . . . . . . . . . . . . . . . . . . . . . . . 53 Passer les tomates . . . . . . . . . . . . . . . . . . . . . . . . . . . . . . . . . . . . . . . . . . . . . . . . . . . . . . . 53 En cas de panne. . . . . . . . . . . . . . . . . . . . . . . . . . . . . . . . . . . . . . . . . . . . . . . 54 Nettoyage . . . . . . . . . . . . . . . . . . . . . . . . . . . . . . . . . . . . . . . . . . . . . . . . . . . 54 Nettoyage du bloc-moteur . . . . . . . . . . . . . . . . . . . . . . . . . . . . . . . . . . . . . . . . . . . . . . . . . 55 Nettoyage des accessoires . . . . . . . . . . . . . . . . . . . . . . . . . . . . . . . . . . . . . . . . . . . . . . . . 55 Rangement . . . . . . . . . . . . . . . . . . . . . . . . . . . . . . . . . . . . . . . . . . . . . . . . . . 55 Mise au rebut . . . . . . . . . . . . . . . . . . . . . . . . . . . . . . . . . . . . . . . . . . . . . . . . 56 Garantie et service après-vente . . . . . . . . . . . . . . . . . . . . . . . . . . . . . . . . . 56 Importateur . . . . . . . . . . . . . . . . . . . . . . . . . . . . . . . . . . . . . . . . . . . . . . . . . . 57 Recettes . . . . . . . . . . . . . . . . . . . . . . . . . . . . . . . . . . . . . . . . . . . . . . . . . . . . . 58 Boulettes . . . . . . . . . . . . . . . . . . . . . . . . . . . . . . . . . . . . . . . . . . . . . . . . . . . . . . . . . . . . . . 58 Saucisse à griller fraîche . . . . . . . . . . . . . . . . . . . . . . . . . . . . . . . . . . . . . . . . . . . . . . . . . . 59 Biscuits sablés . . . . . . . . . . . . . . . . . . . . . . . . . . . . . . . . . . . . . . . . . . . . . . . . . . . . . . . . . . 59 SFW 350 C2 FR│BE │ 41 ■ Introduction Toutes nos félicitations pour l’achat de votre nouvel appareil. Vous avez choisi un produit de grande qualité. Le mode d’emploi fait partie de ce produit. Il contient des remarques importantes concernant la sécurité, l’utilisation et la mise au rebut. Veuillez vous familiariser avec l’ensemble des consignes d’opération et de sécurité avant l’usage du produit. N’utilisez le produit que conformément aux consignes et pour les domaines d’utilisation prévus. Conservez soigneusement ces instructions. En cas de transfert du produit à un tiers, remettez-lui également tous les documents. Droits d’auteur Cette documentation est protégée par les droits d’auteur. Toute reproduction ou réimpression, même partielle, y compris la reproduction des illustrations, même modifiées, n’est autorisée qu’avec l’accord écrit du fabricant. Limitation de responsabilité L’ensemble des informations, données et remarques techniques se rapportant au raccordement et à l’opération contenues dans le présent mode d’emploi sont conformes au dernier état lors du passage en presse en tenant compte de nos expériences passées et de nos connaissances en toute bonne foi. Aucune prétention ne peut être dérivée des indications, photos et descriptions contenues dans le présent mode d’emploi. Le fabricant n’assume aucune responsabilité pour les dommages résultant d’un non-respect du mode d’emploi, d’un usage non conforme, de réparations non conformes, de modifications effectuées sans autorisation ou de l’usage de pièces de rechange non agréées. Utilisation conforme Cet appareil est prévu pour le travail exclusif avec des denrées alimentaires dans des quantités usuelles ménagères dans le cadre privé : ▯ Hachage de viande fraîche, ▯ Confection de saucisses dans des boyaux naturels ou synthétiques, ▯ Confection de biscuits sablés, ▯ Passer des tomates au presse-purée. L’appareil n’est pas prévu pour le travail de denrées alimentaires congelées ou dures, par exemple des os ou des noix, et son utilisation est exclue dans le secteur commercial ou industriel. ■ 42 │ FR│BE SFW 350 C2 Accessoires fournis / Description des pièces Figure A : 1 Accessoire pour biscuits sablés avec plaquette des modèles 2 Bouchon 3 Plateau de remplissage 4 Bloc-moteur 5 Adaptateur du hachoir en métal 6 Collier de fermeture 7 Éjecteur de tomates 8 Vis plastique 9 Tamis 0 Vis transporteuse q Ressort w Lame cruciforme e Grille fine et grossière r Anneau de fermeture t Embout à saucisses z Grille à saucisses u Accessoire à boulettes Figure B : i Bouton de verrouillage Figure C : o Touche «I» p Touche «0» a Touche «<» SFW 350 C2 FR│BE │ 43 ■ Caractéristiques techniques Tension 220 - 240 V ∼, 50 Hz Puissance absorbée 250 - 350 W Classe de protection II / Toutes les pièces de cet appareil, entrant en contact avec les aliments, sont appropriées à une utilisation alimentaire. Temps d'opération par intermittence 15 minutes Temps d’opération par intermittence Le temps d’opération par intermittence indique pendant combien de temps l’appareil peut être opéré, sans que le moteur ne surchauffe ou subisse de dommages. Après le temps d’opération par intermittence indiqué, l’appareil doit être éteint jusqu’à ce que le moteur se soit refroidi. Consignes de sécurité ► ► ► ► RISQUE D'ÉLECTROCUTION Veillez à ce que le cordon d'alimentation ne soit pas endommagé. Maintenez-le à distance de zones chaudes et acheminez-le de telle manière qu'il ne puisse pas être coincé. Faites remplacer aussitôt un cordon d'alimentation ou une fiche secteur endommagée par des techniciens spécialisés agréés, afin d'éviter tous dangers. Utiliser l'appareil exclusivement dans des locaux secs, surtout pas en extérieur. N'immergez jamais le bloc-moteur dans l'eau ou d'autres liquides ! Sinon, il y a danger de mort par électrocution. AVERTISSEMENT ! N'utilisez jamais l'appareil à d'autres fins que celles décrites ici. Risque important d'accident si vous mettez les dispositifs de protection hors service en cas d'utilisation non appropriée de l'appareil ! ■ 44 │ FR│BE SFW 350 C2 ► ► ► ► ► ► ► ► ► ► ► AVERTISSEMENT ! RISQUE D'ACCIDENT ! Ne passez jamais vos mains dans les ouvertures de l'appareil. N'introduisez jamais un quelconque objet dans les ouvertures – exception faite du bouchon correspondant à la grille et des denrées alimentaires que vous transformez. Risque très élevé d'accident ! Débranchez tout d'abord la fiche de la prise secteur, avant d'installer ou de retirer les pièces accessoires. Ne laissez jamais l'appareil sans surveillance lorsqu'il est prêt à l'emploi. Lorsque vous avez terminé ou en cas d'interruption du travail, débranchez toujours la fiche de la prise secteur afin d'éviter une mise en marche accidentelle. Utilisez exclusivement les accessoires d’origine constructeur prévus pour cet appareil. L’utilisation de pièces différentes peut ne pas être suffisamment sûr. N’opérez jamais l’appareil lorsqu’il est vide. Ceci peut en effet entraîner des dommages irréparables. Avant de changer les accessoires ou les pièces supplémentaires mobiles lors de l’utilisation, l’appareil doit être mis à l’arrêt et débranché du secteur. N’utilisez pas l’appareil à d’autres fins que celles décrites dans cette notice. Attention : la lame cruciforme est extrêmement tranchante ! Faites toujours très attention en manipulant et en nettoyant l’appareil. En cas d’absence de surveillance et avant l’assemblage, le désassemblage ou le nettoyage, l’appareil doit toujours être débranché du secteur. L’appareil ne doit pas être utilisé par des enfants. Tenir l’appareil et son cordon de raccordement hors de portée des enfants. SFW 350 C2 FR│BE │ 45 ■ ► ► AVERTISSEMENT ! RISQUE D'ACCIDENT ! Cet appareil peut être utilisé par des personnes ayant des capacités physiques, sensorielles ou mentales réduites ou un manque d’expérience et de connaissances à condition qu’elles aient reçu une supervision ou des instructions concernant l’utilisation de l’appareil en toute sécurité et qu’elles comprennent les dangers encourus. Ne pas laisser les enfants jouer avec l’appareil. Assemblage / désassemblage ATTENTION - RISQUE DE DÉGÂTS MATÉRIELS ! ► Toutes les pièces d'accessoires sont revêtues d'un fin film huileux afin de les protéger de la corrosion. Avant la première utilisation, nettoyez pour cette raison soigneusement toutes les pièces comme décrit en détails au chapitre «Nettoyage». Badigeonnez ensuite toutes les pièces métalliques d'un peu d'huile alimentaire. REMARQUE ► Retirez le film protecteur du bloc de touches avant la première utilisation. Assemblage du hachoir à viande Ouvrez la partie rabattable - vous y trouverez l’ordre d’assemblage sous forme d’une représentation graphique. 1) Placez la vis transporteuse 0 dans l’adaptateur du hachoir à viande 5. 2) Insérez le ressort q sur la vis transporteuse 0. 3) Insérez la lame cruciforme w de telle manière que la face tranchante ne soit pas orientée vers le ressort q. Veillez à ce que l’encoche angulaire de la lame cruciforme w repose correctement dans l’axe angulaire. ■ 46 │ FR│BE SFW 350 C2 AVERTISSEMENT ! RISQUE D'ACCIDENT ! ► La lame cruciforme w est extrêmement tranchante ! Risque de blessures ! ATTENTION - RISQUE DE DÉGÂTS MATÉRIELS ! ► L'appareil sera endommagé si la lame cruciforme w est insérée dans le sens contraire ! 4) Sélectionnez la grille souhaitée e/grille à saucisses z. 5) Insérez la grille e sélectionnée de telle manière dans l’adaptateur du hachoir 5, que les fixations sur la grille e se trouvent dans les encoches de l’adaptateur du hachoir à viande 5. 6) Lorsque tout est correctement inséré, vissez l’anneau de fermeture r fermement à la main. 7) L’adaptateur du hachoir à viande 5 monté est relié au bloc-moteur 4 par un joint à baïonnette : – Insérez l’adaptateur du hachoir à viande 5 dans le bloc-moteur 4, afin que la flèche au niveau de la gaine de remplissage repose 5 sur le symbole du bloc-moteur 4. Le bouton de verrouillage i s’enfonce (Fig. B). – Appuyez légèrement sur l’adaptateur du hachoir à viande 5 et ce faisant, tournez la gaine de remplissage de l’adaptateur du hachoir à viande 5 dans la position du milieu (Fig. B), afin que la flèche au niveau de la gaine de remplissage indique le symbole . Lorsque l’adaptateur du hachoir à viande 5 s’enclenche, le bouton de verrouillage i ressort. – Pour finir, placez le plateau de remplissage 3 en haut sur la gaine de remplissage. – Pour le retirer, appuyez sur le bouton de verrouillage i et tournez à nouveau la gaine de remplissage vers la droite (Fig. B) . Ensuite, vous pouvez retirer l’adaptateur du hachoir à viande 5. Monter le poussoir à saucisse Ouvrez la partie rabattable - vous y trouverez l’ordre d’assemblage sous forme d’une représentation graphique. 1) Retirez l’adaptateur du hachoir à viande 5, conformément à la description sous «Assemblage du hachoir à viande». 2) Démontez toutes les pièces qui sont montées dans/sur l’adaptateur du hachoir en métal 5 et nettoyez-les. 3) Badigeonnez toutes les parties métalliques avec de l’huile alimentaire. 4) Insérez la vis transporteuse 0, le ressort q et la lame cruciforme w dans l’adaptateur du hachoir en métal 5. 5) Insérez la grille à saucisses z de telle manière que les fixations de la grille à saucisses z se trouvent dans les encoches de l’adaptateur du hachoir à viande 5. 6) Placez ensuite le poussoir à saucisse t devant la grille à saucisse z. SFW 350 C2 FR│BE │ 47 ■ 7) Vissez l’anneau de fermeture r fermement à la main. 8) Montez l’adaptateur du hachoir à viande 5 conformément à la description sous «Assemblage du hachoir à viande». Monter l’accessoire à boulettes Ouvrez la partie rabattable - vous y trouverez l’ordre d’assemblage sous forme d’une représentation graphique. 1) Retirez l’adaptateur du hachoir à viande 5, conformément à la description sous «Assemblage du hachoir à viande». 2) Retirez toutes les appliques éventuelles et nettoyez l’adaptateur du hachoir à viande 5. REMARQUE ► Pour l'accessoire à boulettes u, la lame cruciforme w avec le ressort q n'est pas nécessaire ! Le cas échéant, ressortez les deux éléments de l'adaptateur du hachoir à viande 5. 3) Badigeonnez toutes les parties métalliques avec de l’huile alimentaire. 4) Insérez les deux pièces en plastique de l’accessoire à boulettes u de telle manière que les fixations sur l’accessoire à boulettes u se trouvent dans les encoches de l’adaptateur du hachoir à viande 5. 5) Si toutes les pièces sont correctement positionnées, vissez de nouveau fermement l’anneau de fermeture r à la main. 6) Montez l’adaptateur du hachoir à viande 5 conformément à la description sous «Assemblage du hachoir à viande». Monter l’accessoire pour biscuits sablés Ouvrez la partie rabattable - vous y trouverez l’ordre d’assemblage sous forme d’une représentation graphique. 1) Retirez l’adaptateur du hachoir à viande 5, conformément à la description sous «Assemblage du hachoir à viande». 2) Retirez toutes les appliques éventuelles et nettoyez l’adaptateur du hachoir à viande 5. REMARQUE ► Pour l'accessoire pour biscuits sablés 1, la lame cruciforme w avec le ressort q n'est pas nécessaire ! Le cas échéant, ressortez les deux éléments de l'adaptateur du hachoir à viande 5. 3) Badigeonnez toutes les parties métalliques avec de l’huile alimentaire. 4) Retirez la plaquette des modèles 1 à l’avant de l’accessoire pour biscuits sablés 1. 5) Insérez tout d’abord le disque en plastique, puis le disque en métal de l’accessoire pour biscuits sablés 1 dans l’adaptateur du hachoir à viande 5 (voir face dépliable). Insérez l’accessoire pour biscuits sablés 1 de telle manière que les fixations de l’accessoire pour biscuits sablés 1 se trouve dans les encoches de l’adaptateur du hachoir à viande 5. ■ 48 │ FR│BE SFW 350 C2 6) Lorsque tout est correctement inséré, vissez l’anneau de fermeture r à la main. 7) Insérez la plaquette de modèles 1 à nouveau à l’avant dans l’accessoire pour biscuits sablés 1. Veillez à ce que la poignée au niveau de la plaquette des modèles 1 ne soit pas dirigée vers l’appareil. Sinon, vous ne pourrez pas régler le modèle qui se trouve directement sur la poignée. 8) Montez l’adaptateur du hachoir à viande 5 conformément à la description sous «Assemblage du hachoir à viande». 9) Pour le retirer, il faut à nouveau enlever la plaquette des modèles 1, avant d’enlever l’anneau de fermeture r et de pouvoir à nouveau enlever l’accessoire pour biscuits sablés 1. Monter l’embout presse-purée Dépliez le volet, vous y trouverez l’illustration des différentes étapes de l’assemblage. 1) Retirez l’adaptateur du hachoir en métal 5, comme décrit sous «Assemblage du hachoir à viande». 2) Retirez d’éventuels embouts et nettoyez l’adaptateur du hachoir en métal 5. REMARQUE ► Pour l’embout presse-purée, la vis-transporteuse 0 et la lame cruciforme w avec le ressort q ne sont pas nécessaires ! Si nécessaire, retirez le tout de l’adaptateur du hachoir en métal 5. 3) Glissez la vis en plastique 8 dans l’adaptateur du hachoir en métal 5. 4) Glissez le tamis 9 au-dessus de la vis en plastique 8, de manière à ce que les fixations sur le tamis 9 entrent dans les évidements sur l’adaptateur du hachoir en métal 5. Les trous du tamis 9 pointent vers le bas. 5) Lorsque tout est correctement positionné, enfilez l’anneau de fermeture r sur le tamis 9 et vissez-le bien à la main. 6) Montez l’adaptateur du hachoir en métal 5, comme décrit sous «Assemblage du hachoir à viande». 7) Ouvrez le collier de fermeture 6 sur l’éjecteur de tomates 7. 8) Placez l’éjecteur de tomates 7 sous l’embout presse-purée, en passant la pointe du tamis 9 au travers de la petite ouverture sur l’éjecteur de tomates 7. SFW 350 C2 FR│BE │ 49 ■ 9) Fermez le collier de fermeture 6 de manière à ce qu’il s’enclenche dans l’adaptateur du hachoir en métal 5. Opération RISQUE D'ÉLECTROCUTION ► N'ouvrez jamais le boîtier du bloc-moteur 4 – car il ne s'y trouve aucun élément d'opération. Toute ouverture du boîtier met fin à la prétention à la garantie. Si le boîtier est ouvert, danger de mort par électrocution. ATTENTION - RISQUE DE DÉGÂTS MATÉRIELS ! ► N'utilisez pas l'appareil plus de 15 minutes en opération permanente. Laissez ensuite l'appareil éteint pendant environ 30 minutes pour éviter une surchauffe. ► N'appuyez jamais sur les touches «I» o ou «<» a en cas de changement de la direction de marche, aussi longtemps que le moteur de l'appareil n'est pas entièrement immobilisé. Le moteur peut être endommagé. Fonctionnement de l’appareil Si vous avez monté les grilles souhaitées : 1) Installez l’appareil afin qu’il soit absolument stable et qu’il ne puisse pas tomber de la table (par exemple suite à des vibrations ou à un accrochage dans le cordon d’alimentation), ou être à proximité d’une source d’eau ouverte. Des secousses sont inévitables en cours d’opération. ■ 50 │ FR│BE SFW 350 C2 RISQUE D'ÉLECTROCUTION ► Ne saisissez jamais l'appareil s'il tombe sur le sol ou dans l'eau - ou en cas de tout autre cas d'urgence - et qu'il est encore raccordé au secteur ou en fonctionnement ! En cas d'urgence, débranchez immédiatement le cordon d'alimentation ! Danger de mort et risque important de blessures ! 2) Placez les denrées alimentaires à travailler dans le plateau de remplissage 3 et placez un récipient collecteur à l’avant sous l’ouverture de sortie. 3) Appuyez tout d’abord sur la touche «0» p, afin de vous assurer que l’appareil est encore éteint. Sinon, il y a le risque d’un démarrage accidentel de l’appareil, lorsque la fiche secteur est branchée dans la prise secteur. 4) Insérez la fiche secteur dans la prise. 5) Appuyez sur la touche «I» o pour allumer l’appareil. AVERTISSEMENT ! RISQUE D'ACCIDENT ! ► Poussez les aliments dans la gaine de remplissage uniquement à l'aide du bouchon rond 2 – ne prenez jamais vos doigts, des fourchettes ou des manches de cuiller ou objets similaires. Risque important de blessure et d'endommagement de l'appareil. ATTENTION - RISQUE DE DÉGÂTS MATÉRIELS ! ► N'appuyez jamais avec une force telle que l'on entende le moteur ralentir. Vous risquez sinon de surcharger et d'endommager l'appareil. Travailler de la viande 1) Choisissez des morceaux de viande qui entrent sans problèmes dans la gaine de remplissage. Le cas échéant, prédécoupez la viande. Veillez à ce que la viande ne contienne pas d’os ou de tendons. AVERTISSEMENT ! ► La viande hachée s'avarie rapidement. Pour cette raison, veillez à une bonne hygiène lorsque vous travaillez la viande. Sinon, vous risquez des problèmes de santé. 2) Lorsque vous avez lu toutes les consignes se rapportant au sujet «Viande», vous pouvez maintenant utiliser l’appareil comme décrit au paragraphe «Fonctionnement de l’appareil». SFW 350 C2 FR│BE │ 51 ■ Confectionner des saucisses 1) Faites passer la viande deux fois par le hachoir à viande, avant de la transformer en saucisses. 2) Pour la farce des saucisses, ajoutez des oignons finement coupés, des épices et autres ingrédients à la farce selon votre recette et pétrissez bien la masse. Placez cette dernière pendant 30 minutes au réfrigérateur avant de poursuivre la fabrication. 3) Enfilez le boyau (naturel ou synthétique) sur l’embout à saucisses t et faites un nœud à l’autre extrémité. Vous pouvez calculer environ 1,60 m de boyau à saucisses pour environ 1 kg de farce. CONSEIL Laissez auparavant tremper le boyau naturel pendant environ 3 heures dans l'eau tiède et essorez-le avant de l'enfiler sur l'embout. Le boyau naturel redevient ainsi plus élastique. Vous trouverez des boyaux naturels dans les magasins spécialisés en accessoires pour bouchers à proximité d'abattoirs ou auprès de votre boucher. 4) La farce à saucisses est ensuite pressée par l’embout à saucisses t dans le boyau. Lorsque la longueur souhaitée est atteinte, éteignez l’appareil, pincez la saucisse à son extrémité et tournez-la plusieurs fois sur son axe longitudinal. CONSEIL Lors de la cuisson et de la congélation, la saucisse se dilate. Ne la remplissez donc pas trop, car sinon, elle pourrait éclater. 5) Lorsque vous avez lu toutes les consignes se rapportant au sujet «Saucisse», vous pouvez maintenant utiliser l’appareil comme décrit au chapitre «Fonctionnement de l’appareil». Travailler avec l’accessoire à boulettes Avec l’accessoire à boulettes u, vous pouvez former des rouleaux creux à partir de viande ou de légumes avec les denrées alimentaires introduites dans l’appareil, que vous pouvez ensuite remplir comme souhaité. 1) Faites tout d’abord passer deux fois la viande dans le hachoir à viande avant de la presser à travers l’accessoire à boulettes u. 2) Lorsque vous avez lu toutes les consignes se rapportant au sujet «Accessoire à boulettes», vous pouvez maintenant utiliser l’appareil comme décrit au chapitre «Fonctionnement de l’appareil». ■ 52 │ FR│BE SFW 350 C2 Confectionner des biscuits sablés Une fois que vous avez préparé une pâte pour fabriquer une pâtisserie selon votre recette et que vous avez monté l’accessoire pour biscuits sablés 1 : 1) Étalez du papier sulfurisé dans un petit lèchefrite et placez-le à l’avant de l’appareil sous l’ouverture de sortie. 2) Pressez de manière homogène la pâte dans l’adaptateur du hachoir à viande 5 – la vis transporteuse 0 la presse alors à travers le motif sélectionné au niveau de la plaquette de modèles de l’accessoire pour biscuits sablés 1. 3) Lorsque les biscuits ont atteint la longueur souhaitée, arrêtez l’appareil et sectionnez la pâte au niveau de l’ouverture de sortie. Posez les biscuits sur sur le lèchefrite. 4) Lorsque vous avez lu toutes les consignes se rapportant au sujet «Biscuits sablés», vous pouvez utiliser l’appareil, comme décrit au chapitre «Fonctionnement de l’appareil». Passer les tomates 1) Placez un récipient sous l’éjecteur de tomates 7. 2) Placez un récipient à l’avant sous le tamis 9. 3) Coupez les tomates en quatre et poussez-les lentement et régulièrement dans l’adaptateur du hachoir en métal 5. La vis plastique 8 pousse les tomates dans le presse-purée, les tomates réduites en purée tombent dans l’éjecteur de tomates 7. Les peaux des tomates sont éjectées à l’avant du tamis 9. REMARQUE Si du jus de tomates sort des raccords vissés de l’embout presse-purée, ceci peut avoir les causes suivantes : – Vous travaillez trop vite. – Vous poussez les morceaux de tomate avec trop de force dans l’appareil. – Les morceaux de tomate sont trop gros. ► Réduisez dans ce cas votre rythme de travail, appuyez légèrement seulement sur les morceaux de tomate dans l’appareil et coupez les tomates en plus petits morceaux. 4) Si vous avez lu toutes les remarques relatives au thème «Passer les tomate», vous pouvez utiliser l’appareil comme décrit au chapitre «Fonctionnement de l’appareil». SFW 350 C2 FR│BE │ 53 ■ En cas de panne Si l’entraînement est bloqué par des denrées alimentaires : ■ Appuyez sur la touche «0» p, pour arrêter le hachoir. ■ Maintenez la touche «<» a enfoncée. L’entraînement tourne maintenant en sens inverse. De cette manière, vous pouvez transporter les denrées alimentaires un peu en marche arrière afin de débloquer l’entraînement. ■ Dès que l’entraînement est débloqué, relâchez la touche «<» a. ■ Appuyez sur la touche «I» o, pour faire démarrer le hachoir. ■ Si vous ne parvenez pas à débloquer l’entraînement de cette manière, nettoyez l’appareil, conformément à ce qui est décrit sous le point «Nettoyage». Si le moteur s’éteint subitement, il est possible que le fusible de surcharge interne ait été déclenché. Celui-ci est destiné à protéger le moteur. ■ Éteignez le moteur et laissez-le refroidir pendant environ 30 min. avant de réutiliser l’appareil. ■ Si cette solution n’apporte aucun résultat, attendez encore 15 minutes supplémentaires. ■ Si ce délai s’est écoulé également sans résultat, cela indique une défectuosité. Adressez-vous dans ce cas au service après-vente. Si le cordon d’alimentation est endommagé ou si des détériorations sont reconnaissables au niveau des pièces de l’appareil : ■ Éteignez immédiatement l’appareil en appuyant sur la touche «0» p! ■ S’il n’est pas possible d’éteindre l’appareil sans prendre de risques supplémentaires, débranchez le cordon d’alimentation. ■ Laissez tout d’abord intervenir le service après-vente pour la réparation avant de continuer à utiliser l’appareil. Nettoyage RISQUE D'ÉLECTROCUTION ► Débranchez tout d'abord la fiche de la prise secteur avant de nettoyer l'appareil. Vous évitez ainsi les risques d'accident par un démarrage accidentel de l'appareil et par électrocution. ■ 54 │ FR│BE SFW 350 C2 Nettoyage du bloc-moteur ■ Nettoyez toutes les surfaces extérieures ainsi que le cordon d’alimentation à l’aide d’un chiffon légèrement humide. Séchez soigneusement l’appareil avant de le réutiliser. RISQUE D'ÉLECTROCUTION ► N'immergez jamais le bloc-moteur dans l'eau ou d'autres liquides ! Danger de mort par électrocution si de l'humidité ayant pénétré dans l'appareil atteint les conducteurs électriques. ATTENTION - RISQUE DE DÉGÂTS MATÉRIELS ! ► N'utilisez pas de produit nettoyant, abrasif ou solvant. Ils peuvent endommager l'appareil et laisser des résidus sur les aliments. Nettoyage des accessoires REMARQUE ► Ne nettoyez pas les accessoires dans le lave-vaisselle ! Ceci peut provoquer des dommages sur ces pièces ! ■ Nettoyez tous les accessoires qui entrent en contact avec les denrées alimentaires, ... – uniquement à la main, les pièces accessoires ne sont pas adaptées pour un lavage en lave-vaisselle. – à l’eau chaude et avec un produit pour la vaisselle adéquat au lavage des produits en contact avec des denrées alimentaires. AVERTISSEMENT ! RISQUE D'ACCIDENT ! ► La lame cruciforme w est extrêmement tranchante ! Risque de blessures ! ■ Séchez bien toutes les pièces avant de continuer à utiliser l’appareil. REMARQUE ► Après chaque nettoyage, badigeonnez à nouveau les pièces métalliques d’huile alimentaire ! Sinon, les pièces métalliques risquent de décolorer ! Rangement ■ Glissez le cordon d’alimentation (sans fiche secteur) dans la gaine du câble sous le dessous de l’appareil. Il est ainsi protégé des détériorations. ■ Rangez l’appareil dans un endroit sec. ■ Après le séchage, badigeonnez les pièces métalliques avec une fine couche d’huile alimentaire – si vous ne prévoyez pas d’utiliser immédiatement l’appareil. Vous obtenez ainsi une bonne protection contre la corrosion. ■ Conservez l’appareil hors de portée des enfants et des personnes nécessitant une surveillance. Ceux-ci peuvent ne pas toujours bien évaluer les risques lors de la manipulation d’appareils électriques. SFW 350 C2 FR│BE │ 55 ■ Mise au rebut L’appareil ne doit jamais être jeté dans la poubelle domestique normale. Ce produit est assujetti à la directive européenne 2012/19/EU (Waste Electrical and Electronic Equipment). Remettez l’appareil destiné au recyclage à une entreprise spécialisée ou au centre de recyclage de votre commune. Respectez la réglementation en vigueur. En cas de doutes, contactez votre organisation de recyclage. Éliminez l’ensemble des matériaux d’emballage d’une manière respectueuse de l’environnement. Garantie et service après-vente Cet appareil bénéficie de 3 ans de garantie à compter de la date d’achat. L’appareil a été fabriqué avec soin et consciencieusement contrôlé avant sa distribution. Veuillez conserver le ticket de caisse en guise de preuve d’achat. Dans le cas où la garantie s’applique, veuillez appeler le service après-vente concerné. Cette condition doit être respectée pour assurer l’expédition gratuite de votre marchandise. REMARQUE ► La prestation de garantie s'applique uniquement aux vices de matériau ou de fabrication, pas aux dégâts de transport, aux pièces d'usure ou aux dégâts subis par des pièces fragiles, par ex. commutateurs ou batteries. Le produit est exclusivement destiné à un usage privé et non commercial. La garantie prend fin en cas de manipulation abusive et non conforme, de recours à la force et d’interventions qui n’ont pas été réalisées par notre succursale de service après-vente agréée. Cette garantie ne constitue pas une restriction de vos droits légaux. La durée de la garantie n’est pas prolongée par l’exercice de la garantie. Ceci vaut également pour les pièces remplacées et réparées. Tous dommages et défauts présents dès l’achat doivent être notifiés dès que le produit est déballé, et au plus tard deux jours après la date d’achat. Toutes réparations survenant après la période sous garantie seront payantes. La durée de la garantie n’est pas prolongée par l’exercice de la garantie. Ceci vaut également pour les pièces remplacées et réparées. Tous dommages et défauts présents dès l’achat doivent être notifiés dès que le produit est déballé, et au plus tard deux jours après la date d’achat. Toutes réparations survenant après la période sous garantie seront payantes. ■ 56 │ FR│BE SFW 350 C2 Service France Tel.: 0800 919270 E-Mail: [email protected] IAN 277055 Service Belgique Tel.: 070 270 171 (0,15 EUR/Min.) E-Mail: [email protected] IAN 277055 Importateur KOMPERNASS HANDELS GMBH BURGSTRASSE 21 44867 BOCHUM GERMANY www.kompernass.com SFW 350 C2 FR│BE │ 57 ■ Recettes Boulettes Ingrédients du manteau 450 g de viande d’agneau, de veau ou de bœuf maigre 150 g de farine 1 cuillère à café de piment (quatre-épices) 1 cuillère à café de noix de muscade 1 pincée de piment fort 1 pincée de poivre Ingrédients de la farce à la viande 700 g de viande d’agneau 1 1/2 cuillère à soupe d’huile d’olive 1 1/2 cuillère à soupe d’oignons finement hachés 1/2 cuillère à café de piment (quatre-épices) 1/2 cuillère à café de sel 1 1/2 cuillère à soupe de farine Hacher la viande pour le manteau deux fois l’une après l’autre dans le hachoir (tout d’abord avec la grille grossière, puis la grille fine e) et la mélanger avec les ingrédients. Hacher également cette masse deux fois avec le hachoir. Remplacer la grille e par l’accessoire à boulettes u voir le chapitre «Monter l’accessoire à boulettes»). Formez les manteaux des boulettes avec l’accessoire à boulettes u et les mettre au congélateur. Garniture : Hacher la viande deux fois avec le hachoir (dans un premier temps avec la grille grossière, puis avec la grille fine e). Faire suer les oignons et bien les mélanger avec la viande et le reste des ingrédients. Remplir les manteaux des boulettes et les faire rôtir. Garnitures alternatives : 250 g de brocolis cuits à la vapeur ou 250 g de courgettes cuites à la vapeur ou 250 g de riz cuit ■ 58 │ FR│BE SFW 350 C2 Saucisse à griller fraîche Ingrédients : 300 g de viande de bœuf maigre 500 g de viande de porc maigre 200 g de lard d’épaule 20 g de sel 1/2 de cuillère à soupe de poivre blanc moulu 1 cuillère à café de cumin 1/2 cuillère à café de noix de muscade Faire passer la viande de bœuf, la viande de porc et le lard deux fois par le hachoir. Ajouter le mélange d’épices ainsi que le sel et pétrir pendant 5 minutes. Mettre la farce à saucisses au réfrigérateur pendant env. 30 minutes. Remplir la farce à saucisses conformément aux instructions (voir le chapitre «Confectionner des saucisses») et fabriquer des saucisses d’une longueur de 25 cm. Consommer la saucisse à griller le même jour, bien cuite. Biscuits sablés Ingrédients : 500 g de beurre 500 g de sucre 2 - 3 paquets de sucre vanillé 1 paquet de flan à la vanille 1/4 cuillère à café de sel 1 œuf 4 jaunes d’œuf 800 g de farine (type 405) 2 cuillères à café de levure chimique 200 g d’amandes en poudre (blanchies) Zeste râpé d’un citron Battre le beurre en mousse. Ajouter les autres ingrédients les uns après les autres et bien malaxer la pâte. Laisser reposer la pâte en la couvrant environ 12 heures (par ex. une nuit) au réfrigérateur. Puis la faire passer par le hachoir pourvu de l’accessoire pour biscuits sablés 1. Poser les biscuits sablés sur une plaque revêtue de papier sulfurisé. Faire cuire les biscuits sablés dans le four préchauffé à 180°C pendant 10-15 minutes jusqu’à obtenir une belle couleur dorée. SFW 350 C2 FR│BE │ 59 ■ ■ 60 │ FR│BE SFW 350 C2 Inhoud Inleiding . . . . . . . . . . . . . . . . . . . . . . . . . . . . . . . . . . . . . . . . . . . . . . . . . . . . . 62 Auteursrecht . . . . . . . . . . . . . . . . . . . . . . . . . . . . . . . . . . . . . . . . . . . . . . . . . . . . . . . . . . . . 62 Beperking van aansprakelijkheid . . . . . . . . . . . . . . . . . . . . . . . . . . . . . . . . . . . . . . . . . . . . 62 Gebruik in overeenstemming met bestemming . . . . . . . . . . . . . . . . . . . . . 62 Inhoud van het pakket / Beschrijving van onderdelen . . . . . . . . . . . . . . . 63 Technische gegevens . . . . . . . . . . . . . . . . . . . . . . . . . . . . . . . . . . . . . . . . . . 64 Veiligheidsvoorschriften. . . . . . . . . . . . . . . . . . . . . . . . . . . . . . . . . . . . . . . . 64 Monteren/demonteren . . . . . . . . . . . . . . . . . . . . . . . . . . . . . . . . . . . . . . . . 66 Vleesmolen monteren. . . . . . . . . . . . . . . . . . . . . . . . . . . . . . . . . . . . . . . . . . . . . . . . . . . . . 66 Worst-stop-opzetstuk monteren . . . . . . . . . . . . . . . . . . . . . . . . . . . . . . . . . . . . . . . . . . . . . 67 Kubbe-opzetstuk monteren. . . . . . . . . . . . . . . . . . . . . . . . . . . . . . . . . . . . . . . . . . . . . . . . . 68 Sprits-opzetstuk monteren . . . . . . . . . . . . . . . . . . . . . . . . . . . . . . . . . . . . . . . . . . . . . . . . . 68 Passeer-opzetstuk bevestigen . . . . . . . . . . . . . . . . . . . . . . . . . . . . . . . . . . . . . . . . . . . . . . . 69 Bediening . . . . . . . . . . . . . . . . . . . . . . . . . . . . . . . . . . . . . . . . . . . . . . . . . . . . 70 Het apparaat gebruiken . . . . . . . . . . . . . . . . . . . . . . . . . . . . . . . . . . . . . . . . . . . . . . . . . . 70 Vlees verwerken . . . . . . . . . . . . . . . . . . . . . . . . . . . . . . . . . . . . . . . . . . . . . . . . . . . . . . . . . 71 Worst verwerken . . . . . . . . . . . . . . . . . . . . . . . . . . . . . . . . . . . . . . . . . . . . . . . . . . . . . . . . 72 Werken met het Kubbe-opzetstuk . . . . . . . . . . . . . . . . . . . . . . . . . . . . . . . . . . . . . . . . . . . 72 Spritsgebak maken . . . . . . . . . . . . . . . . . . . . . . . . . . . . . . . . . . . . . . . . . . . . . . . . . . . . . . 73 Tomaten passeren . . . . . . . . . . . . . . . . . . . . . . . . . . . . . . . . . . . . . . . . . . . . . . . . . . . . . . . 73 In geval van storingen . . . . . . . . . . . . . . . . . . . . . . . . . . . . . . . . . . . . . . . . . 74 Reinigen . . . . . . . . . . . . . . . . . . . . . . . . . . . . . . . . . . . . . . . . . . . . . . . . . . . . . 74 Motorblok reinigen . . . . . . . . . . . . . . . . . . . . . . . . . . . . . . . . . . . . . . . . . . . . . . . . . . . . . . 75 Accessoires reinigen . . . . . . . . . . . . . . . . . . . . . . . . . . . . . . . . . . . . . . . . . . . . . . . . . . . . . 75 Opbergen . . . . . . . . . . . . . . . . . . . . . . . . . . . . . . . . . . . . . . . . . . . . . . . . . . . 75 Milieurichtlijnen. . . . . . . . . . . . . . . . . . . . . . . . . . . . . . . . . . . . . . . . . . . . . . . 76 Garantie en service. . . . . . . . . . . . . . . . . . . . . . . . . . . . . . . . . . . . . . . . . . . . 76 Importeur . . . . . . . . . . . . . . . . . . . . . . . . . . . . . . . . . . . . . . . . . . . . . . . . . . . 77 Recepten . . . . . . . . . . . . . . . . . . . . . . . . . . . . . . . . . . . . . . . . . . . . . . . . . . . . 78 Kubbe . . . . . . . . . . . . . . . . . . . . . . . . . . . . . . . . . . . . . . . . . . . . . . . . . . . . . . . . . . . . . . . . 78 Verse gegrilde braadworst . . . . . . . . . . . . . . . . . . . . . . . . . . . . . . . . . . . . . . . . . . . . . . . . 79 Spritskoekjes . . . . . . . . . . . . . . . . . . . . . . . . . . . . . . . . . . . . . . . . . . . . . . . . . . . . . . . . . . . 79 SFW 350 C2 NL│BE │ 61 ■ Inleiding Gefeliciteerd met de aankoop van uw nieuwe apparaat. U hebt hiermee gekozen voor een hoogwaardig product. De bedieningshandleiding maakt deel uit van dit product. Deze bevat belangrijke aanwijzingen voor veiligheid, gebruik en afvoeren. Maak uzelf voorafgaand aan het gebruik van het product vertrouwd met alle bedienings- en veiligheidsvoorschriften. Gebruik het product uitsluitend op de voorgeschreven wijze en voor de aangegeven doeleinden. Berg deze gebruiksaanwijzing zorgvuldig op. Geef alle documenten mee als u het product doorgeeft aan een derde. Auteursrecht Deze documentatie is auteursrechtelijk beschermd. Iedere reproductie, resp. herdruk, ook gedeeltelijk, evenals de weergave van de afbeeldingen, ook in veranderde toestand is alleen toegestaan met schriftelijke toestemming van de producent. Beperking van aansprakelijkheid Alle technische informatie, gegevens en aanwijzingen voor de inbouw en aansluiting en de bediening in deze gebruiksaanwijzing voldoen aan de laatste stand bij het in druk bezorgen en resulteren naar beste weten uit afweging van onze ervaringen en inzichten tot dusverre. Men kan op basis van de gegevens, afbeeldingen en beschrijvingen in deze gebruiksaanwijzing geen aanspraken doen gelden. De fabrikant is niet aansprakelijk voor schade als gevolg van het niet in acht nemen van de gebruiksaanwijzing, gebruik dat niet volgens de bestemming is, ondeskundige reparaties, ongeoorloofd uitgevoerde veranderingen of gebruik van ongeoorloofde onderdelen. Gebruik in overeenstemming met bestemming Dit apparaat is uitsluitend bedoeld voor het thuis verwerken van levensmiddelen waarvan de hoeveelheid past binnen het huishoudelijk gebruik: ▯ Doordraaien van vers vlees, ▯ Worst maken in een natuur- of kunstdarm, ▯ Spritsgebak maken, ▯ Passeren van tomaten. Het apparaat is niet bedoeld voor het verwerken van harde of bevroren levensmiddelen, bijv. botten of noten, en niet voor bedrijfsmatig of industrieel gebruik. ■ 62 │ NL│BE SFW 350 C2 Inhoud van het pakket / Beschrijving van onderdelen Afbeelding A: 1 Opzetstuk voor spritskoekjes met streepmotief 2 Stopper 3 Vulschaal 4 Motor 5 Vleesmolen-voorzetstuk van metaal 6 Sluitklem 7 Tomatenuitworp 8 Plasticschroef 9 Passeerzeef 0 Transportschroef q Veer w Kruismes e Grove en fijne gatenschijf r Afsluitring t Worst-stop-opzetstuk z Worstschijf u Kubbe-opzetstuk Afbeelding B: i Vergrendelendeknop Afbeelding C: o Toets „I“ p Toets „0“ a Toets „<“ SFW 350 C2 NL│BE │ 63 ■ Technische gegevens Spanning 220 - 240 V ∼, 50 Hz Vermogen 250 - 350 W Beschermingsklasse II / Alle delen van dit apparaat die in aanraking komen met levensmiddelen, zijn levensmiddelveilig KB-tijd 15 minuten KB-tijd De KB-tijd (kort bedrijf) geeft aan hoe lang een apparaat kan worden bediend, zonder dat de motor oververhit raakt en schade hieraan ontstaat. Na de aangegeven KB-tijd moet het apparaat uitgeschakeld blijven tot de motor is afgekoeld. Veiligheidsvoorschriften ► ► ► ► GEVAAR VOOR ELEKTRISCHE SCHOK Let erop, dat het netsnoer niet wordt beschadigd. Zorg ervoor dat het niet te warm wordt en geleid het zo, dat het niet kan worden ingeklemd. Laat beschadigde netstekkers of netsnoeren onmiddellijk door geautoriseerde vakmensen vervangen om gevaarlijke situaties te vermijden. Gebruik het apparaat alleen in droge ruimtes en niet in de openlucht. Dompel het motorblok nooit in water of andere vloeistoffen! Anders bestaat er levensgevaar voor elektrische schok. WAARSCHUWING! Gebruik het apparaat nooit voor andere doeleinden dan hier zijn beschreven. Er bestaat groot gevaar van ongelukken, als u door onjuist gebruik de beschermende voorzieningen op het apparaat buiten gebruik zet! ■ 64 │ NL│BE SFW 350 C2 ► ► ► ► ► ► ► ► ► ► ► WAARSCHUWING! LETSELGEVAAR! Grijp nooit in de openingen van het apparaat. Druk er nooit één of ander voorwerp in – met uitzondering van de telkens bij het stuk behorende stopper en de te verwerken levensmiddelen. Anders is het gevaar van ongelukken groot! Haal eerst de stekker uit het stopcontact, alvorens accessoires op te zetten of af te nemen. Laat het apparaat nooit zonder toezicht, wanneer het klaar voor gebruik is. Trek na het gebruik of bij werkonderbrekingen steeds de stekker uit het stopcontact, om te vermijden dat het per ongeluk gaat draaien. Gebruik uitsluitend de originele accessoires voor dit apparaat. Andere onderdelen zijn daarvoor mogelijk niet veilig genoeg. Gebruik het apparaat nooit in lege toestand. Daardoor kan het apparaat onherstelbaar beschadigd raken. U dient het apparaat uit te schakelen en de stekker uit het stopcontact te trekken voordat u accessoires of hulpstukken verwisselt, die bij gebruik in beweging zijn. Gebruik het apparaat nooit voor andere doeleinden dan in deze gebruiksaanwijzing zijn beschreven. Voorzichtig: het kruismes is zeer scherp! Ga steeds voorzichtig te werk in de omgang met het apparaat en bij het reinigen. Het apparaat moet altijd van de stroom worden losgekoppeld indien er geen toezicht is, en voor montage, demontage of reiniging. Het apparaat mag niet door kinderen worden gebruikt. Houd het apparaat en het bijbehorende snoer buiten bereik van kinderen. SFW 350 C2 NL│BE │ 65 ■ ► ► WAARSCHUWING! LETSELGEVAAR! Dit apparaat mag worden gebruikt door personen met beperkte fysieke, zintuiglijke of geestelijke vermogens of gebrek aan ervaring en/of kennis, mits ze onder toezicht staan of over het veilige gebruik van het apparaat zijn geïnstrueerd en de daaruit resulterende gevaren hebben begrepen. Kinderen mogen niet met het apparaat spelen. Monteren/demonteren LET OP - MATERIËLE SCHADE! ► Alle accessoires zijn van een dunne oliefilm voorzien, om deze tegen corrosie te beschermen. Reinig daarom alle onderdelen vóór het eerste gebruik zorgvuldig, zoals uitgebreid beschreven onder „Reinigen“. Wrijf alle metaaldelen in met een beetje plantaardige olie. OPMERKING ► Verwijder voor het eerste gebruik de beschermfolie van het toetsenpaneel. Vleesmolen monteren Vouw de uitvouwbare pagina naar buiten - u vindt daar een afbeelding van de volgorde van de montage. 1) Zet de transportschroef 0 in het vleesmolen-voorzetstuk 5. 2) Steek de veer q op de transportschroef 0. 3) Zet dan het kruismes w er zodanig in, dat de scherpe kant van de veer q weg wijst. Let erop dat de hoekige inkeping van het kruismes w correct op de hoekige as ligt. ■ 66 │ NL│BE SFW 350 C2 WAARSCHUWING! LETSELGEVAAR! ► Het kruismes w is erg scherp! Letselgevaar! LET OP - MATERIËLE SCHADE! ► Het apparaat wordt beschadigd, als het kruismes w er andersom wordt ingezet! 4) Kies de gewenste gatenschijf e/worstschijf z. 5) Leg de gekozen gatenschijf e zodanig in het vleesmolen-voorzetstuk 5, dat de fixering op de gatenschijf e in de inkeping in het vleesmolen-voorzetstuk 5 ligt. 6) Als alles er goed is ingezet, draait u de sluitring r er stevig op. 7) Het gemonteerde vleesmolen-voorzetstuk 5 wordt d.m.v. een bajonetsluiting met het motorblok 4 verbonden: – Steek het vleesmolen-voorzetstuk 5 in het motorblok 4, zodat de pijl op het motorop het vleesmolen-voorzetstuk 5 tegen het symbool blok 4 ligt. De vergrendelende knop i wordt erin gedrukt (Afb. B). – Druk het vleesmolen-voorzetstuk 5 licht naar binnen en draai daarbij de vulschacht op het vleesmolen-voorzetstuk 5 in de middelste stand (Afb. B), zodat de pijl op de vulschacht naar het symbool wijst. Als het voorzetstuk van de vleesmolen 5 vastklikt, springt de vergrendelende knop i eruit. – Plaats tot slot de vulschaal 3 boven op de vulopening. – Om eraf te nemen, drukt u op de vergrendelende knop i en draait u de vulschacht weer naar rechts (Afb. B) . Daarna kunt u het vleesmolen-voorzetstuk 5 eruit trekken. Worst-stop-opzetstuk monteren Vouw de uitvouwbare pagina naar buiten - u vindt daar een afbeelding van de volgorde van de montage. 1) Haal het vleesmolen-voorzetstuk 5 eraf, zoals beschreven onder „Vleesmolen monteren“. 2) Neem alle onderdelen die op/in het vleesmolen-voorzetstuk 5 zijn gemonteerd, uit elkaar en reinig ze. 3) Wrijf alle delen van metaal in met spijsolie. 4) Plaats de transportschroef 0, de veer q en het kruismes w terug in het vleesmolen-voorzetstuk 5. 5) De worstschijf z zodanig inleggen, dat de fixeringen op de worstschijf z in de inkepingen in het vleesmolen-voorzetstuk 5 liggen. 6) Zet dan het worst-stop-opzetstuk t voor de worstschijf z. SFW 350 C2 NL│BE │ 67 ■ 7) Draai de afsluitring r er stevig op. 8) Monteer het vleesmolen-voorzetstuk 5 zoals beschreven onder „Vleesmolen monteren“. Kubbe-opzetstuk monteren Vouw de uitvouwbare pagina naar buiten - u vindt daar een afbeelding van de volgorde van de montage. 1) Haal het vleesmolen-voorzetstuk 5 eraf, zoals beschreven onder „Vleesmolen monteren“. 2) Haal alle eventuele opzetstukken eraf en reinig het voorzetstuk voor de vleesmolen 5. OPMERKING ► Voor het kubbe-opzetstuk u wordt het kruismes w met de veer q niet gebruikt! Neem beide in voorkomend geval uit het vleesmolen-opzetstuk 5. 3) Wrijf alle delen van metaal licht met spijsolie in. 4) Beide delen van het kubbe-opzetstuk u zodanig inleggen, dat de fixeringen op de onderste ring van het kubbe-opzetstuk u in de inkepingen in het vleesmolen-voorzetstuk 5 liggen. 5) Als alles correct ingezet is, draait u de afsluitring r er weer stevig op. 6) Monteer het vleesmolen-voorzetstuk 5 zoals beschreven onder „Vleesmolen monteren“. Sprits-opzetstuk monteren Vouw de uitvouwbare pagina naar buiten - u vindt daar een afbeelding van de volgorde van de montage. 1) Haal het vleesmolen-voorzetstuk 5 eraf, zoals beschreven onder „Vleesmolen monteren“. 2) Haal alle eventuele opzetstukken eraf en reinig het voorzetstuk voor de vleesmolen 5. OPMERKING ► Voor het sprits-opzetstuk 1 wordt het kruismes w met de veer q niet gebruikt! Neem beide in voorkomend geval uit het vleesmolen-opzetstuk 5. 3) Wrijf alle delen van metaal licht met spijsolie in. 4) Trek de patroonstrook 1 van de voorkant van het sprits-opzetstuk 1 af. 5) Zet eerst de plastic schijf en dan de metalen schijf van het opzetstuk voor spritsgebak 1 in het voorzetstuk voor de vleesmolen 5 (zi uitvouwpagina). Het spritskoekjes-opzetstuk 1 zodanig inleggen, dat de fixeringen op het spritskoekjes-opzetstuk 1 in de inkepingen in het vleesmolen-voorzetstuk 5 liggen. ■ 68 │ NL│BE SFW 350 C2 6) Als alles er goed is ingezet, draait u de sluitring r er stevig op. 7) Steek de patroonstrook 1 weer voor op het spritsgebak-opzetstuk 1. Let erop, dat de handgreep op de patroonstrook 1 van het apparaat weg wijst. Anders kunt u het motief, dat direct op de greep zit, niet instellen. 8) Monteer het vleesmolen-voorzetstuk 5 zoals beschreven onder „Vleesmolen monteren“. 9) Alvorens eraf te halen moet u eerst de patroonstrook 1 eraf trekken, voordat u de sluitring r eraf draait en het spritsgebak-opzetstuk 1 er weer uit kunt halen. Passeer-opzetstuk bevestigen Klap de uitvouwpagina uit - hier vindt u afbeeldingen van de montagevolgorde. 1) Neem het vleesmolen-voorzetstuk 5 af, zoals beschreven onder “Vleesmolen monteren”. 2) Neem eventuele opzetstukken af en reinig het vleesmolen-voorzetstuk 5. OPMERKING ► Voor het passeer-opzetstuk zijn de transportschroef 0 en het kruismes w met de veer q niet nodig! Haal alle eventueel aanwezige onderdelen uit het vleesmolen-voorzetstuk 5. 3) Schuif de plasticschroef 8 in het vleesmolen-voorzetstuk 5. 4) Schuif de passeerzeef 9 zodanig over de plasticschroef 8, dat de fixeringen op de passeerzeef 9 in de uitsparingen van het vleesmolen-voorzetstuk 5 liggen. De gaten van de passeerzeef 9 wijzen daarbij omlaag. 5) Wanneer alles correct is bevestigd, schuift u de sluitring r over de passeerzeef 9 en schroeft u deze er handvast op. 6) Monteer het vleesmolen-voorzetstuk 5 zoals beschreven onder “Vleesmolen monteren”. 7) Open de sluitklem 6 op de tomatenuitworp 7. 8) Plaats de tomatenuitworp 7 onder het passeer-opzetstuk door de punt van de passeerzeef 9 door de kleine opening in de tomatenuitworp 7 te steken: SFW 350 C2 NL│BE │ 69 ■ 9) Sluit de sluitklem 6 zodanig, dat deze het vleesmolen-voorzetstuk 5 rondom vastgrijpt. Bediening GEVAAR VOOR ELEKTRISCHE SCHOK ► Nooit de behuizing van het motorblok 4 openen – daarin zitten geen bedieningselementen. Indien de behuizing geopend wordt, vervalt de aanspraak op garantie. Bij geopende behuizing bestaat er levensgevaar door een elektrische schok. LET OP - MATERIËLE SCHADE! ► Gebruik het apparaat niet langer dan 15 minuten in continu bedrijf. Laat het apparaat vervolgens ongeveer 30 minuten lang uitgeschakeld om oververhitting te voorkomen. ► Nooit op de toetsen „I“ o of „<“ a bij wisseling van de looprichting drukken, zo lang de motor van het apparaat niet volledig stilstaat. De motor kan beschadigd raken. Het apparaat gebruiken Als u de noodzakelijke stukken heeft gemonteerd: 1) Stel het apparaat zo op, dat het absoluut stabiel staat en het in geen geval (bijv. door trillingen of het verstrikt raken in het netsnoer) van de tafel kan vallen of in de buurt van open water kan komen. Trillingen zijn gedurende het lopen onvermijdelijk. ■ 70 │ NL│BE SFW 350 C2 GEVAAR VOOR ELEKTRISCHE SCHOK ► Grijp nooit naar een aangesloten of zelfs lopend apparaat, wanneer het gaat vallen of in het water komt - of bij andere noodsituaties! Trek gedurende een noodsituatie direct de stekker uit het stopcontact! Anders bestaat er acuut levens- en letselgevaar!. 2) Leg de te verwerken levensmiddelen in de vulschaal 3 en zet een opvangschaal voor onder de uitvoeropening. 3) Druk eerst op de toets „0“ p, om te controleren, of het apparaat nog uitgeschakeld is. Anders bestaat het risico dat het apparaat onbedoeld start, als de stekker in het stopcontact wordt gestoken. 4) Steek vervolgens de netstekker in het stopcontact. 5) Druk op de toets „I“ o, om het apparaat aan te zetten. WAARSCHUWING! LETSELGEVAAR! ► Druk de levensmiddelen uitsluitend met de ronde stopper 2 in de vulopening - nooit met de vingers, vorken, stelen van lepels o.i.d. Er bestaat groot gevaar voor verwondingen en het apparaat zou beschadigd kunnen raken. LET OP - MATERIËLE SCHADE! ► druk nooit zo vast, dat de motor hoorbaar langzamer loopt. Anders kan het apparaat overbelast raken en beschadigd worden. Vlees verwerken 1) Gebruik stukken vlees die moeiteloos in de vulopening passen. Snij het vlees desnoods eerst in stukken. Let erop, dat het vlees geen bot of pezen bevat. WAARSCHUWING! ► Gehakt is erg gevoelig voor ziektekiemen. Let op een goede hygiëne, als u vlees verwerkt. Anders kunnen er problemen optreden met de gezondheid. 2) Als u alle aanwijzingen heeft gelezen over het thema „vlees“ kunt u het apparaat nu gebruiken zoals beschreven in het hoofdstuk „Het apparaat gebruiken“. SFW 350 C2 NL│BE │ 71 ■ Worst verwerken 1) Draai het vlees eerst twee keer door de vleeswolf, voor u dit tot worst verwerkt. 2) Voor de worstvulling voegt u aan het gehakt kleine gesneden uitjes, kruiden en andere ingrediënten volgens uw recept toe en daarna kneed u de massa goed door. Zet die 30 min. lang in de koelkast voordat u die verder verwerkt. 3) Druk de worstdarm (natuur- of kunstdarm) over het worst-stop-stuk t en knoop het andere einde dicht. Voor 1 kg vulmassa heeft u ongeveer 1,60 m worstdarm nodig. TIP Leg de natuurdarm van te voren ongeveer 3 uur in lauwwarm water en wring deze uit voor het erop trekken. Natuurdarm wordt zo weer elastisch. Natuurdarmen kunt u bij de toeleverancier voor slagerijen nabij slachthuizen krijgen of bij uw slager. 4) De worstvulling wordt door het worst-stop-stuk t in de worstdarm geperst. Wanneer de gewenste lengte is bereikt, schakelt u het apparaat uit, drukt u de worst aan het einde samen en draait u die een paar maal om de lengteas. TIP Worst gaat uitzetten bij het koken en bij het invriezen. Doe er daarom niet te veel vulling in, anders kan de worst knappen. 5) Als u alle aanwijzingen heeft gelezen over het thema „worst“ kunt u het apparaat nu gebruiken zoals beschreven in het hoofdstuk „Het apparaat gebruiken“. Werken met het Kubbe-opzetstuk Met het kubbe-opzetstuk u kunt u van de erin gelegde levensmiddelen holle rolletjes van vlees of groente vormen, die u naar wens kunt vullen. 1) Draai het vlees eerst twee maal door de vleeswolf, voor u het door het kubbe-opzetstuk u perst. 2) Als u alle aanwijzingen heeft gelezen over het thema „Kubbe-opzetstuk“ kunt u het apparaat nu gebruiken zoals beschreven in het hoofdstuk „Het apparaat gebruiken“. ■ 72 │ NL│BE SFW 350 C2 Spritsgebak maken Wanneer u deeg voor spritsgebak volgens uw recept maakt en het spritsgebakopzetstuk 1 heeft gemonteerd: 1) Leg bakpapier op een klein bakblik en houd dat dicht onder de uitvoeropening aan de voorzijde van het apparaat. 2) Druk gelijkmatig deeg in het vleesmolen-voorzetstuk 5 – de transportschroef 0 drukt dit dan door het gekozen motief heen op het spritsgebakopzetstuk 1. 3) Als het gebak de gewenste lengte heeft bereikt, stopt u het apparaat en breekt u het deeg af bij de uitvoeropening. Leg het gebak op het bakblik. 4) Als u alle aanwijzingen heeft gelezen over het thema „Spritsgebak“ kunt u het apparaat nu gebruiken zoals beschreven in het hoofdstuk „Het apparaat gebruiken”. Tomaten passeren 1) Plaats een schaal onder de tomatenuitworp 7. 2) Plaats een schaal aan de voorkant onder de passeerzeef 9. 3) Snijd de tomaten in vieren en druk ze langzaam en gelijkmatig in het vleesmolen-voorzetstuk 5. De plasticschroef 8 drukt de tomaten door het passeer-opzetstuk en de gepasseerde tomaten vallen in de tomatenuitworp 7. De tomatenschillen komen aan de voorkant uit de passeerzeef 9. OPMERKING Als er tomatensap uit de schroefverbindingen van het passeer-opzetstuk komt, kan dit de volgende oorzaken hebben: – U werkt te snel. – U drukt de stukken tomaat met te hoge druk in het apparaat. – De stukken tomaat zijn te groot. ► Kies in dit geval een langzamer werktempo, druk de stukken tomaat slechts met lichte druk in het apparaat en snijd de tomaten in kleinere stukken. 4) Kies in dit geval een langzamer werktempo, druk de stukken tomaat slechts met lichte druk in het apparaat en snijd de tomaten in kleinere stukken. SFW 350 C2 NL│BE │ 73 ■ In geval van storingen Als de aandrijving geblokkeerd is door het opeenhopen van levensmiddelen: ■ Druk op de toets „0“ p, om de vleesmolen te stoppen. ■ Houd de toets „<“ a ingedrukt. De aandrijving loopt nu achterwaarts. Zodoende kunt u de levensmiddelen een stuk terug transporteren om de aandrijving weer vrij te krijgen. ■ Is de aandrijving vrij, laat u de toets „<“ a los. ■ Druk op de toets „I“ o, om de vleesmoelen te starten. ■ Indien u de aandrijving zodoende niet vrij heeft gekregen, reinig dan het apparaat zoals beschreven onder „Reinigen“. Als de motor plotseling stil gaat staan, is het mogelijk, dat de interne overbelastingszekering ingeschakeld is. Deze moet de motor beveiligen. ■ Zet het apparaat uit en laat het ca. 30 min. lang afkoelen, alvorens het apparaat weer te gebruiken. ■ Mocht dat niet helpen, dan wacht u nog eens 15 min. ■ Wanneer het ook gedurende deze periode niet gelukt is, dan moet er wel een defect zijn. Neem in dit geval contact op met de klantenservice. Als het netsnoer is beschadigd of schade aan de onderdelen van de apparatuur evident is: ■ Zet het apparaat onmiddellijk uit, door op de toets „0“ p te drukken! ■ Wanneer dit niet zonder gevaar mogelijk is, trekt u de netstekker eruit. ■ Laat de schade eerst door de klantenservice herstellen, voordat u het apparaat opnieuw gebruikt. Reinigen GEVAAR VOOR ELEKTRISCHE SCHOK ► Haal de stekker uit het stopcontact voordat u het apparaat schoonmaakt. Daarmee voorkomt u het gevaar van ongevallen door onverwacht en onbedoeld starten en een elektrische schok. ■ 74 │ NL│BE SFW 350 C2 Motorblok reinigen ■ Reinig alle vlakken aan de buitenkant en het netsnoer met een enigszins vochtige doek. Droog het apparaat goed af voordat u het opnieuw gebruikt. GEVAAR VOOR ELEKTRISCHE SCHOK ► Dompel het motorblok nooit in water of andere vloeistoffen! Anders kan zich een levensgevaarlijke situatie voordoen door een elektrische schok, als binnengedrongen vocht bij de elektrische leidingen komt. LET OP - MATERIËLE SCHADE! ► Gebruik geen schoonmaak-, schuur- of oplosmiddelen. Deze kunnen het apparaat beschadigen en restanten achterlaten op de levensmiddelen. Accessoires reinigen OPMERKING ► Reinig de accessoires niet in de vaatwasmachine! Dat leidt tot beschadiging aan de accessoires! ■ Reinig de accessoires die in contact kunnen komen met levensmiddelen, ... – alleen met de hand, de accessoires zijn niet vaatwasmachinebestendig – met heet afwaswater en een huishoudelijk afwasmiddel dat levensmiddelvriendelijk is. WAARSCHUWING! LETSELGEVAAR! ► Het kruismes w is erg scherp! Letselgevaar! ■ Droog alles goed af, voordat u het apparaat verder gebruikt. OPMERKING ► Wrijf na elke schoonmaakbeurt de metaaldelen weer met spijsolie in! Anders kunnen de metaaldelen verkleuren! Opbergen ■ Schuif het netsnoer ( zonder netstekker ) in de kabelschacht onder op de bodem van het apparaat. Zo beschadigt het niet. ■ Bewaar het apparaat op een droge plaats. ■ Vet de metalen opzetstukken na het afdrogen heel dun met wat spijsolie in wanneer u het apparaat niet onmiddellijk weer gebruikt. Daarmee zorgt u voor een goede bescherming tegen corrosie. ■ Berg het apparaat zo op, dat kinderen en minder valide personen er niet bij kunnen. Deze kunnen mogelijke gevaren in de omgang met elektrische apparaten niet altijd juist inschatten. SFW 350 C2 NL│BE │ 75 ■ Milieurichtlijnen Deponeer het toestel in geen geval bij het normale huisvuil. Dit product is onderworpen aan de Europese richtlijn 2012/19/EU (Waste Electrical and Electronic Equipment). Voer het toestel af via een erkend afvalverwerkingsbedrijf of via uw gemeentereiniging. Neem de bestaande voorschriften in acht. Neem in geval van twijfel contact op met uw gemeentereinigingsdienst. Voer alle verpakkingsmateriaal op een milieuvriendelijke manier af. Garantie en service U heeft op dit apparaat 3 jaar garantie vanaf de aankoopdatum. Het apparaat is met de grootst mogelijke zorg vervaardigd en voorafgaand aan de levering nauwkeurig gecontroleerd. Bewaar a.u.b. de kassabon als aankoopbewijs. Mocht u aanspraak willen maken op de garantie, neem dan telefonisch contact op met uw serviceadres. Alleen dan kan het gratis inzenden van uw product worden gewaarborgd. OPMERKING ► De garantie geldt uitsluitend voor materiaal- of fabricagefouten, echter niet voor transportschade, aan slijtage onderhevige delen of voor beschadigingen van breekbare delen, bijv. schakelaars of accu's. Het product is uitsluitend bestemd voor privé-gebruik en niet voor bedrijfsmatige doeleinden. Bij verkeerd gebruik en ondeskundige behandeling, bij gebruik van geweld en bij reparaties die niet door ons geautoriseerd servicefiliaal zijn uitgevoerd, vervalt de garantie. Uw wettelijke rechten worden door deze garantie niet beperkt. De garantieperiode wordt niet verlengd door de aansprakelijkheid. Dit geldt eveneens voor vervangen en gerepareerde onderdelen. Schade en gebreken die mogelijk reeds bij de aankoop aanwezig zijn, moeten direct na het uitpakken worden gemeld, uiterlijk echter twee dagen na de dag van aankoop. Na verstrijken van de garantieperiode moeten alle voorkomende reparaties vergoed worden. De garantieperiode wordt niet verlengd door de aansprakelijkheid. Dit geldt eveneens voor vervangen en gerepareerde onderdelen. Schade en gebreken die mogelijk reeds bij de aankoop aanwezig zijn, moeten direct na het uitpakken worden gemeld, uiterlijk echter twee dagen na de dag van aankoop. Na verstrijken van de garantieperiode moeten alle voorkomende reparaties vergoed worden. ■ 76 │ NL│BE SFW 350 C2 Service Nederland Tel.: 0900 0400223 (0,10 EUR/Min.) E-Mail: [email protected] IAN 277055 Service België Tel.: 070 270 171 (0,15 EUR/Min.) E-Mail: [email protected] IAN 277055 Importeur KOMPERNASS HANDELS GMBH BURGSTRASSE 21 44867 BOCHUM GERMANY www.kompernass.com SFW 350 C2 NL│BE │ 77 ■ Recepten Kubbe Ingrediënten voor het omhulsel 450 g mager schapen-, kalfs- of rundvlees 150 g meel 1 TL piment (jamaicapeper) 1 TL nootmuskaat 1 snufje chilipoeder 1 snufje peper Ingrediënten voor de vleesvulling 700 g lamsvlees 1 1/2 EL olijfolie 1 1/2 EL fijngehakte uien 1/2 TL piment (jamaicapeper) 1/2 TL zout 1 1/2 EL meel Het vlees voor het omhulsel twee keer na elkaar in de vleesmolen fijnmalen (eerst met de grove en dan met de fijne gatenschijf e) en vermengen met de ingrediënten. Deze massa eveneens twee keer met de vleesmolen fijnmalen. Gatenschijf e vervangen voor kubbe-opzetstuk u (zie hoofdstuk „Kubbe-opzetstuk monteren“). Kubbe-omhulsels met het kubbe-opzetstuk u vormen en licht bevriezen. Vulling: vlees twee keer met de vleesmolen fijnmalen (eerst met de grove en vervolgens met de fijne gatenschijf e). Uien fruiten en met het vlees en de overige ingredienten goed vermengen. Kubbe-omhulsels ermee vullen en braden. Alternatieve vullingen: 250 g gestoomde broccoli of 250 g gestoomde courgette of 250 g gekookt rijst ■ 78 │ NL│BE SFW 350 C2 Verse gegrilde braadworst Ingrediënten: 300 g mager rundvlees 500 g mager varkensvlees 200 g schouderspek 20 g zout 1/2 eetlepel gemalen witte peper 1 theelepel karwijzaad 1/2 theelepel nootmuskaat Rundvlees, varkensvlees en spek twee keer door de vleesmolen draaien. Vermengde kruiden en het zout toevoegen en 5 minuten door elkaar kneden. Worstvulling ongeveer 30 minuten lang in de koelkast zetten. Worstvulling volgens gebruiksaanwijzing vullen (zie hoofdstuk “Worst verwerken“) en worstjes van 25 cm lengte draaien. De braadworst die gereed is dezelfde dag nog goed doorgebraden en nuttigen. Spritskoekjes Ingrediënten: 500 g boter 500 g suiker 2 - 3 pakjes vanillesuiker 1 pakje vanillepudding 1/4 theelepel zout 1 ei 4 dooiers 800 g meel (type 405) 2 theelepels bakpoeder 200 g gemalen amandelen (geblancheerd) Geraspte schil van een citroen De boter schuimig roeren. De overige ingrediënten beetje bij beetje toevoegen en het deeg goed kneden. Het deeg als het klaar is ca. 12 uur (bijv. ‘s nachts) in de koelkast afgedekt laten rusten. Dan door de vleesmolen draaien met het spritskoekjes-opzetstuk 1. De spritskoekjes op een met bakpapier bekleed bakblik leggen. De spritskoekjes in een voorverwarmde oven op 180°C in ca. 10-15 minuten goudgeel bakken. SFW 350 C2 NL│BE │ 79 ■ ■ 80 │ NL│BE SFW 350 C2 Obsah Úvod. . . . . . . . . . . . . . . . . . . . . . . . . . . . . . . . . . . . . . . . . . . . . . . . . . . . . . . . 82 Autorské právo. . . . . . . . . . . . . . . . . . . . . . . . . . . . . . . . . . . . . . . . . . . . . . . . . . . . . . . . . . 82 Omezení ručení . . . . . . . . . . . . . . . . . . . . . . . . . . . . . . . . . . . . . . . . . . . . . . . . . . . . . . . . . 82 Použití dle předpisů . . . . . . . . . . . . . . . . . . . . . . . . . . . . . . . . . . . . . . . . . . . 82 Rozsah dodávky / Popis dílů . . . . . . . . . . . . . . . . . . . . . . . . . . . . . . . . . . . . 83 Technická data . . . . . . . . . . . . . . . . . . . . . . . . . . . . . . . . . . . . . . . . . . . . . . . 84 Bezpečnostní pokyny . . . . . . . . . . . . . . . . . . . . . . . . . . . . . . . . . . . . . . . . . . 84 Složení / rozložení . . . . . . . . . . . . . . . . . . . . . . . . . . . . . . . . . . . . . . . . . . . . . 86 Složení mlýnku na maso . . . . . . . . . . . . . . . . . . . . . . . . . . . . . . . . . . . . . . . . . . . . . . . . . . 86 Montáž nástavce na plnění klobás . . . . . . . . . . . . . . . . . . . . . . . . . . . . . . . . . . . . . . . . . . 87 Montáž nástavce Kubbe . . . . . . . . . . . . . . . . . . . . . . . . . . . . . . . . . . . . . . . . . . . . . . . . . . 88 Montáž nástavce na stříkané pečivo . . . . . . . . . . . . . . . . . . . . . . . . . . . . . . . . . . . . . . . . . 88 Montáž naváděcího nástavce . . . . . . . . . . . . . . . . . . . . . . . . . . . . . . . . . . . . . . . . . . . . . . 89 Obsluha . . . . . . . . . . . . . . . . . . . . . . . . . . . . . . . . . . . . . . . . . . . . . . . . . . . . . 90 Obsluha přístroje . . . . . . . . . . . . . . . . . . . . . . . . . . . . . . . . . . . . . . . . . . . . . . . . . . . . . . . . 90 Zpracování masa . . . . . . . . . . . . . . . . . . . . . . . . . . . . . . . . . . . . . . . . . . . . . . . . . . . . . . . . 91 Zpracování klobás . . . . . . . . . . . . . . . . . . . . . . . . . . . . . . . . . . . . . . . . . . . . . . . . . . . . . . . 92 Práce s Kubbe nástavcem . . . . . . . . . . . . . . . . . . . . . . . . . . . . . . . . . . . . . . . . . . . . . . . . . 92 Výroba stříkaného pečiva . . . . . . . . . . . . . . . . . . . . . . . . . . . . . . . . . . . . . . . . . . . . . . . . . 93 Pasírování rajčat. . . . . . . . . . . . . . . . . . . . . . . . . . . . . . . . . . . . . . . . . . . . . . . . . . . . . . . . . 93 V případě poruchy . . . . . . . . . . . . . . . . . . . . . . . . . . . . . . . . . . . . . . . . . . . . 94 Čištění. . . . . . . . . . . . . . . . . . . . . . . . . . . . . . . . . . . . . . . . . . . . . . . . . . . . . . . 94 Čištění motorového tělesa . . . . . . . . . . . . . . . . . . . . . . . . . . . . . . . . . . . . . . . . . . . . . . . . . 95 Čištění příslušenství . . . . . . . . . . . . . . . . . . . . . . . . . . . . . . . . . . . . . . . . . . . . . . . . . . . . . . 95 Uložení . . . . . . . . . . . . . . . . . . . . . . . . . . . . . . . . . . . . . . . . . . . . . . . . . . . . . . 95 Likvidace . . . . . . . . . . . . . . . . . . . . . . . . . . . . . . . . . . . . . . . . . . . . . . . . . . . . 96 Záruka a servis . . . . . . . . . . . . . . . . . . . . . . . . . . . . . . . . . . . . . . . . . . . . . . . 96 Dovozce . . . . . . . . . . . . . . . . . . . . . . . . . . . . . . . . . . . . . . . . . . . . . . . . . . . . . 97 Recepty . . . . . . . . . . . . . . . . . . . . . . . . . . . . . . . . . . . . . . . . . . . . . . . . . . . . . 98 Kubbe . . . . . . . . . . . . . . . . . . . . . . . . . . . . . . . . . . . . . . . . . . . . . . . . . . . . . . . . . . . . . . . . 98 Cerstvá klobása . . . . . . . . . . . . . . . . . . . . . . . . . . . . . . . . . . . . . . . . . . . . . . . . . . . . . . . . . 99 Stříkané pečivo . . . . . . . . . . . . . . . . . . . . . . . . . . . . . . . . . . . . . . . . . . . . . . . . . . . . . . . . . 99 SFW 350 C2 CZ │ 81 ■ Úvod Gratulujeme Vám k zakoupení nového přístroje. Vaším nákupem jste si vybrali kvalitní výrobek. Návod k obsluze je součástí tohoto výrobku. Obsahuje důležité pokyny a upozornění ohledně bezpečnosti, použití a likvidace. Před použitím výrobku si dobře přečtěte provozní a bezpečnostní pokyny. Výrobek používejte pouze předepsaným způsobem a v uvedených oblastech použití. Při předávání výrobku třetím osobám předávejte i tyto podklady. Autorské právo Tato dokumentace je chráněná autorským právem. Jakékoli rozmnožování, resp. dotisk, i jenom částečně, a reprodukce ilustrací i ve změněném stavu, je dovolené pouze za výslovného písemného souhlasu výrobce. Omezení ručení Všechny technické informace, obsažené v tomto návodu k obsluze, jakož i údaje a pokyny pro instalaci a připojení a obsluhu, odpovídají poslednímu stavu techniky v době tisku a byly provedené s přihlédnutím na naše dosavadní zkušenosti a poznatky podle nejlepšího vědomí. Z údajů, obrázků a popisů v tomto návodu nelze odvodit žádné nároky. Výrobce nepřebírá ručení za škody, vzniklé na základě nedodržení návodu, na základě použití ne dle předpisů, neodborných oprav, nedovoleně provedených změn nebo na základě použití nedovolených náhradních dílů. Použití dle předpisů Tento přístroj je určen výhradně ke zpracování přiměřeného množství potravin v domácnostech: ▯ mletí čerstvého masa, ▯ výroba klobás pomocí přírodního nebo umělého střeva, ▯ výroba stříkaného pečiva, ▯ pasírování rajčat. Přístroj není určen ke zpracovávání zmrazených nebo jinak tvrdých potravin, např. kostí nebo ořechů ani pro použití v živnostenských nebo průmyslových provozech. ■ 82 │ CZ SFW 350 C2 Rozsah dodávky / Popis dílů Obrázek A: 1 nástavec na stříkané pečivo se vzorkovacím proužkem 2 nacpavač 3 plnicí miska 4 těleso motoru 5 kovový nástavec mlýnku na maso 6 uzavíraci spona 7 výhoz rajčat 8 plastový šnek 9 naváděcí sítko 0 podávací šnek q pružina w křížový nůž e hrubý a jemný děrovaný kotouč r uzavírací prstenec t nástavec na plnění klobás z kotouč na klobásy u nástavec Kubbe Obrázek B: i zajišťovací tlačítko Obrázek C: o tlačítko „I“ p tlačítko „0“ a tlačítko „<“ SFW 350 C2 CZ │ 83 ■ Technická data Napětí 220 - 240 V ∼, 50 Hz Příkon 250 - 350 W Třída ochrany II/ Veškeré díly tohoto přístroje, přicházející do styku s potravinami, jsou bezpečné pro potraviny. Krátká provozní doba 15 minut Krátká provozní doba Krátká provozní doba udává, jak dlouho je možné přístroj provozovat, aniž by se přehřál, a tím poškodil motor. Po uplynutí udané KP-doby musí zůstat přístroj vypnutý do té doby, než se motor ochladí. Bezpečnostní pokyny ► ► ► ► NEBEZPEČÍ ÚDERU ELEKTRICKÝM PROUDEM Dbejte na to, aby se síťový kabel nepoškodil. Udržujte jej mimo horká místa a veďte jej tak, aby se nikde nemohl zaklínit. Nechte poškozený síťový kabel nebo síťovou zástrčku okamžitě vyměnit autorizovaným odborným personálem, abyste zabránili ohrožení. Používejte přístroj pouze v suchých místnostech, ne ve venkovních prostorách. Nikdy nenamáčejte těleso motoru do vody ani jiných kapalin! V opačném případě hrozí nebezpečí ohrožení života elektrickým proudem. VÝSTRAHA! Nepoužívejte přístroj nikdy pro jiné účely, než je zde popsáno. Hrozí nebezpečí závažného zranění, jestliže nesprávným použitím ochranné zařízení na přístroji vyřadíte z funkce! ■ 84 │ CZ SFW 350 C2 ► ► ► ► ► ► ► ► ► ► ► VÝSTRAHA! NEBEZPEČÍ PORANĚNÍ! Nikdy nesahejte do otvorů na přístroji. Nikdy dovnitř nestrkejte jakékoli předměty – s výjimkou pěchovátek určených vždy pro určitý nástavec a zpracovávaný druh potravin. V opačném případě hrozí nebezpečí závažného zranění! Nejprve vytáhněte zástrčku ze zásuvky, než nasazujete nebo odebíráte díly příslušenství. Nenechávejte přístroj nikdy bez dozoru, je-li připraven k provozu. Vždy po použití nebo při přerušení práce vytáhněte zástrčku ze zásuvky, abyste tak zabránili neúmyslnému spuštění. Používejte jen originální příslušenství určené k tomuto přístroji. Jiné díly nemusí být k tomu dostatečně bezpečné. Nikdy neprovozujte přístroj naprázdno. Mohlo by ho to nenapravitelně poškodit. Před výměnou příslušenství nebo dodatečných dílů, které se během provozu pohybují, musí být přístroj vypnutý a odpojený od elektrické sítě. Nepoužívejte přístroj nikdy pro jiné účely, než je popsáno v tomto návodu. Pozor: Křížový nůž je velmi ostrý! Při manipulaci s přístrojem a při jeho čištění postupujte vždy opatrně. Přístroj se při chybějícím dohledu a před montáží, demontáží nebo čištěním musí vždy odpojit od sítě. Přístroj nesmějí používat děti. Přístroj a jeho přívodní kabel se musí uchovávat mimo dosah dětí. SFW 350 C2 CZ │ 85 ■ ► ► VÝSTRAHA! NEBEZPEČÍ PORANĚNÍ! Osoby s omezenými fyzickými, smyslovými nebo mentálními schopnostmi či nedostatkem zkušeností a/nebo znalostí mohou používat tento přístroj pouze tehdy, pokud jsou pod dohledem nebo pokud byly poučeny o bezpečném používání přístroje a pokud porozuměly z toho vyplývajícímu nebezpečí. Děti si nesmí hrát s přístrojem. Složení / rozložení POZOR-VĚCNÉ ŠKODY! ► Veškeré díly příslušenství jsou opatřeny tenkým olejovým filmem, aby byly chráněny před korozí. Proto před prvním použitím veškeré díly pečlivě vyčistěte, jak je podrobně popsáno v kapitole „Čištění“. Po použití a vyčistění naolejujte všechny kovové části jedlým olejem. UPOZORNĚNÍ ► Před prvním použitím odstraňte z pole tlačítek ochrannou fólii. Složení mlýnku na maso Výklopnou stranu vyklopte - najdete tam schéma postupu montáže. 1) Vložte šnekový podavač 0 do nástavce mlýnku na maso 5. 2) Pružinu q nastrčte na šnekový podavač 0. 3) Křížový nůž w nasaďte tak, aby strana s noži směrovala od pružiny q. Dbejte na to, aby hranatá drážka křížového nože w správně dosedala na hranatý hřídel. ■ 86 │ CZ SFW 350 C2 VÝSTRAHA! NEBEZPEČÍ PORANĚNÍ! ► Křížový nůž w je velmi ostrý! Nebezpečí poranění! POZOR-VĚCNÉ ŠKODY! ► Přístroj se poškodí, jestliže křížový nůž w nasadíte obráceně! 4) Zvolte požadovaný děrovaný kotouč e/ kotouč na klobásy z. 5) Zvolený děrovaný kotouč e nasaďte do nástavce mlýnku na maso 5 tak, aby aretace na děrovaném kotouči e dosedaly do drážek v nástavci mlýnku na maso 5. 6) Když je všechno správně nasazeno, přišroubujte napevno uzavírací kroužek r. 7) Smontovaný mlecí blok 5 se bajonetovým uzávěrem spojí s tělesem motoru 4: – Mlecí blok 5 nastrčte do motorového tělesa 4 tak, aby šipka mlecím na motorovém tělese 4. Aretační bloku 5 doléhala na symbol tlačítko i se zatlačí dovnitř (Obr. B). – Mlecí blok 5 lehce vtiskněte dovnitř a při tom otočte plnicí otvor na mlecím bloku 5 do středové polohy (Obr. B), tak, aby šipka na plnicím otvoru ukazovala na symbol . Jakmile se mlecí blok 5 zaaretuje, zajišťovací tlačítko i vyskočí. – Nakonec nasaďte plnicí misku 3 nahoru na plnicí oddíl. – Pro odebrání zatlačte zajišťovací tlačítko i a otočte plnicí šachtu opět doprava (Obr. B) . Poté můžete nástavec mlýnku na maso 5 vytáhnout. Montáž nástavce na plnění klobás Výklopnou stranu vyklopte - najdete tam schéma postupu montáže. 1) Odeberte nástavec mlýnku na maso 5, jak je popsano pod bodem „Složení mlýnku na maso“. 2) Rozeberte a vyčistěte veškeré díly, které jsou namontované na/v nástavci mlýnku na maso 5. 3) Otřete všechny kovové díly jedlým olejem. 4) Vložte podávací šnek 0, pružinu q a křížový nůž w opět vložte do nástavce mlýnku na maso 5. 5) Kotouč na klobásy z nasaďte tak, aby fixace na kotouči na klobásy z dosedaly do drážek v nástavci mlýnku na maso 5. 6) Potom nasaďte nástavec pro pěchování klobás t před kotouč na klobásy z. SFW 350 C2 CZ │ 87 ■ 7) Přišroubujte napevno uzavírací kroužek r. 8) Namontujte mlecí blok 5 tak, jak je popsáno pod bodem „Složení mlýnku na maso“. Montáž nástavce Kubbe Výklopnou stranu vyklopte - najdete tam schéma postupu montáže. 1) Odeberte nástavec mlýnku na maso 5, jak je popsáno pod bodem „Složení mlýnku na maso“. 2) Odeberte případné nástavce a mlecí blok 5 vyčistěte. UPOZORNĚNÍ ► U nástavce Kubbe u není potřebný křížový nůž w s pružinou q! Oba díly příp. vyjměte z mlecího bloku 5. 3) Otřete všechny kovové díly jedlým olejem. 4) Obě plastové části nástavce Kubbe u nasaďte tak, aby fixace na spodním kroužku nástavce Kubbe u dosedaly do drážek v nástavci mlýnku na maso 5. 5) Jakmile je vše správně nasazeno, našroubujte opět pevně uzavírací prstenec r. 6) Namontujte nástavec mlýnku na maso 5 tak, jak je popsáno pod bodem „Složení mlýnku na maso“. Montáž nástavce na stříkané pečivo Výklopnou stranu vyklopte - najdete tam schéma postupu montáže. 1) Odeberte nástavec mlýnku na maso 5, jak je popsano pod bodem „Složení mlýnku na maso“. 2) Odeberte případné nástavce a mlecí blok 5 vyčistěte. UPOZORNĚNÍ ► U nástavce pro stříkané pečivo 1 není potřebný křížový nůž w s pružinou q! Oba díly příp. vyjměte z mlecího bloku 5. 3) Otřete všechny kovové díly jedlým olejem. 4) Odeberte tvarovací proužek 1 vepředu z nástavce na stříkané pečivo 1. 5) Nasaďte nejprve plastový kotouč, potom kovový kotouč nástavce na stříkané pečivo 1 do mlecího bloku 5 (viz výklopnou stranu). Nástavec na stříkané pečivo 1 nasaďte tak, aby fixace na nástavci na stříkané pečivo 1 dosedaly do drážek v nástavci mlýnku na maso 5. ■ 88 │ CZ SFW 350 C2 6) Když je všechno správně nasazeno, přišroubujte napevno uzavírací kroužek r. 7) Tvarovací proužek 1 nastrčte opět vepředu do nástavce na stříkané pečivo 1. Dbejte na to, aby rukojeť na tvarovacím proužku 1 směroval pryč od přístroje. Jinak se nedá nastavit vzorek, který je přímo u rukojeti. 8) Namontujte nástavec mlýnku na maso 5 tak, jak je popsáno pod bodem „Složení mlýnku na maso“. 9) Před odebráním musíte nejdřív sundat tvarovací proužek 1, než budete moci odšroubovat uzavírací kroužek r a vyjmout opět nástavec na stříkané pečivo 1. Montáž naváděcího nástavce Vyklopte vyklápěcí stránku - tam najdete pořadí smontování znázorněno v obrázcích. 1) Odeberte předsádku mlýnku na maso 5 tak, jak je popsáno v „Složení mlýnku na maso“. 2) Odeberte případné nástavce a vyčistěte předsádku mlýnku na maso 5. UPOZORNĚNÍ ► Pro pasírovací nástavec není potřebný dopravní šnek 0 a křížový nůž w s pružinou q! Příp. vše vyjměte z předsádky mlýnku na maso 5. 3) Zasuňte plastový šnek 8 do předsádky mlýnku na maso 5. 4) Převlečte pasírovací sítko 9 přes plastový šnek 8 tak, aby upevnění na pasírovacím sítku 9 zapadaly do vyhloubenin na předsádce mlýnku na maso 5. Otvory pasírovacího sítka 9 přitom ukazují směrem dolů. 5) Když je vše správně vloženo, převlečte uzavírací kroužek r přes pasírovací sítko 9 a zašroubujte ho pevně rukou. 6) Namontujte předsádku mlýnku na maso 5 tak, jak je popsáno v „Sestavení mlýnku na maso“. 7) Otevřete uzavírací sponu 6 na výhoze rajčat 7. 8) Umístěte výhoz rajčat 7 pod pasírovací nástavec tak, že špičku pasírovacího sítka 9 prostrčíte malým otvorem na výhozu rajčat 7: SFW 350 C2 CZ │ 89 ■ 9) Uzavírací sponu 6 uzavřete tak, aby tato uchytila předsádku mlýnku na maso 5. Obsluha NEBEZPEČÍ ÚDERU ELEKTRICKÝM PROUDEM ► Nikdy neotvírejte kryt tělesa motoru 4 – uvnitř nejsou žádné ovládací prvky. Po otevření krytu zaniká nárok na záruku! Při otevřeném tělese hrozí nebezpečí ohrožení života ránou elektrickým proudem. POZOR-VĚCNÉ ŠKODY! ► Nepoužívejte přístroj déle než 15 minut v trvalém provozu. Nechte pak přístroj asi 30 minut vypnutý, abyste tak zabránili přehřátí. ► Nikdy netiskněte tlačítko „I“ o nebo „<“ a během změny směru chodu, dokud motor přístroje není úplně v klidu. Motor se může poškodit. Obsluha přístroje Jakmile jste namontovali požadované nástavce: 1) Postavte přístroj tak, aby stál absolutně rovně a v žádném případě (např. vlivem vibrací nebo zachycením síťového kabelu) nemohl spadnout ze stolu nebo se dostat do blízkosti otevřené vody. Vibrace jsou za provozu nevyhnutelné. ■ 90 │ CZ SFW 350 C2 NEBEZPEČÍ ÚDERU ELEKTRICKÝM PROUDEM ► Nikdy nesahejte na připojený nebo dokonce běžící přístroj, pokud by měl spadnout nebo se dostat do vody – ani v jiných nouzových případech! V případě nouze ihned vytáhněte zástrčku ze sítě! Jinak hrozí akutní nebezpečí zranění či ohrožení života! 2) Vložte potraviny ke zpracování do plnicí misky 3 a pod výstupní otvor vpředu postavte záchytnou nádobu. 3) Nejprve stiskněte tlačítko „0“ p, abyste se ujistili, že přístroj je ještě vypnutý. Jinak hrozí nebezpečí, že přístroj se nečekaně spustí, jakmile bude zástrčka zastrčena do zásuvky. 4) Potom zastrčte síťovou zástrčku do zásuvky. 5) Pro zapnutí přístroje stiskněte tlačítko „I“ o. VÝSTRAHA! NEBEZPEČÍ PORANĚNÍ! ► Potraviny zatlačujte do plnicí šachty výhradně kulatým nacpavačem 2 – nikdy prsty, vidličkami, rukojetí lžíce nebo pod. Hrozí nebezpečí závažného zranění a přístroj by se mohl poškodit. POZOR-VĚCNÉ ŠKODY! ► Nikdy netlačte potraviny tak silně, aby motor slyšitelně zpomalil. Jinak by se přístroj mohl přetížit a poškodit. Zpracování masa 1) Používejte pouze takové kusy masa, které se snadno vejdou do naplňovací šachty. V případě potřeby maso dopředu nakrájejte na kousky. Dbejte na to, aby maso nemělo kosti nebo šlachy. VÝSTRAHA! ► Sekaná je velmi náchylná k napadení choroboplodnými zárodky. Dbejte proto na správnou hygienu, když zpracováváte maso. V opačném případě může dojít ke zdravotním problémům. 2) Když jste si přečetli všechny instrukce na téma „maso“, můžete nyní použít přístroj tak, jak je popsáno v kapitole „Obsluha přístroje“. SFW 350 C2 CZ │ 91 ■ Zpracování klobás 1) Nejprve maso dvakrát pomelte v mlýnku na maso, než jej zpracujete do klobásy. 2) Pro náplň do klobás přidejte do sekaného masa nadrobno nakrájenou cibuli, koření a další suroviny podle Vašeho receptu a hmotu je třeba následně dobře prohnísit. Pak ji před dalším zpracováním na 30 minut odstavte do chladničky. 3) Nasaďte klobásové střevo (přírodní nebo umělé) na nástavec na plnění klobás t a druhý konec zauzlujte. Na 1 kg náplně můžete počítat asi s 1,60 m střeva. TIP Předtím namočte přírodní střevo asi na 3 hodiny do vlažné vody a před nasazením na nástavec je vyždímejte. Přírodní střevo tak získá opět svou pružnost. Přírodní střeva dostanete v obchodě s řeznickými potřebami v blízkosti jatek nebo u řezníka. 4) Náplň se pak natlačí plnicím nástavcem an klobásy t do střeva. Jakmile je dosaženo požadované délky, přístroj vypněte, klobásu na konci stlačte a několikrát jí otočte kolem její podélné osy. TIP Při vaření a zmrazování se klobása roztáhne. Proto ji nepřeplňujte, klobása by jinak mohla prasknout. 5) Když jste si přečetli všechny instrukce na téma „klobása“ můžete nyní použít přístroj tak, jak je popsáno v kapitole „Obsluha přístroje“. Práce s Kubbe nástavcem Nástavcem Kubbe u můžete z vložených potravin nechat formovat duté závitky z masa nebo zeleniny, které se pak mohou dle libosti plnit. 1) Nejprve maso dvakrát pomelte, než je protlačíte nástavcem Kubbe u. 2) Když jste si přečetli všechny instrukce na téma „nástavec Kubbe“, můžete nyní použít přístroj tak, jak je popsáno v kapitole „Obsluha přístroje“. ■ 92 │ CZ SFW 350 C2 Výroba stříkaného pečiva Jakmile jste připravili těsto na stříkané pečivo podle svého receptu a namontovali nástavec na stříkané pečivo 1: 1) Vyložte malý plech pečicím papírem a postavte jej těsně pod výstupní otvor vpředu na přístroji. 2) Těsto natlačte rovnoměrně do mlecího bloku 5 – šnekovým podavačem 0 se toto protlačí poté přes zvolený motiv na tvarovaném proužku nástavce na stříkané pečivo 1. 3) Jakmile pečivo dosáhne požadované délky, přístroj zastavte a těsto u výstupního otvoru odřízněte. Pečivo položte na plech. 4) Když jste si přečetli všechny instrukce na téma „stříkané pečivo“, můžete nyní použít přístroj tak, jak je popsáno v kapitole „Obsluha přístroje“. Pasírování rajčat 1) Pod výhoz rajčat 7 postavte nádobu. 2) Pod pasírovací sítko 9 postavte dopředu nádobu. 3) Nakrájejte rajčata na čtvrťky a tlačte tyto pomalu a rovnoměrně do předsádky mlýnku na maso 5. Plastový šnek 8 protlačí rajčata pasírovacím nástavcem, propasírovaná rajčata spadnou do výhozu rajčat 7. Miska na rajčata se vytáhne zepředu z pasírovacího sítka 9. UPOZORNĚNÍ Pokud ze šroubového spoje pasírovacího nástavce vytéká rajčatová šťáva, může to mít následující příčiny: – pracujete příliš rychle. – kusy rajčat tlačíte do přístroje příliš vysokým tlakem. – kusy rajčat jsou příliš velké. ► Zpomalte v tomto případě své pracovní tempo, tlačte kusy rajčat jen lehce do přístroje a rozkrájejte rajčata na menší kousky. 4) Pokud jste si přečetli všechna upozornění na téma „Pasírování rajčat“, můžete použít přístroj tak, jak je popsáno v kapitole „Obsluha přístroje“. SFW 350 C2 CZ │ 93 ■ V případě poruchy Je-li pohon blokován hromadícími se potravinami: ■ Pro zastavení mlýnku stiskněte tlačítko „0“ p. ■ Držte stisknuté tlačítko „<“ a. Pohon nyní běží pozpátku. Tak můžete potraviny dopravit o kousek zpátky, čímž se pohon může uvolnit. ■ Jakmile je pohon volný, tlačítko „<“ a pusťte. ■ Pro spuštění mlýnku stiskněte tlačítko „I“ o. ■ Jestliže se tím pohon neuvolní, přístroj vyčistěte, jak je popsáno v kapitole „Čištění“. Jestliže motor náhle vypne, je možné, že sepla vnitřní pojistka proti přetížení. Ta má motor chránit. ■ Přístroj vypněte a nechte jej asi 30 minut zchladnout, než přístroj znovu použijete. ■ Pokud se výsledek nedostaví, vyčkejte dalších 15 minut. ■ Jestliže i tato lhůta uplyne bez výsledku, je příčinou závada. V tomto případě se obraťte na servis pro zákazníky. Jestliže je síťový kabel poškozený nebo jsou vidět škody na dílech přístrojů: ■ Ihned přístroj vypněte stisknutím tlačítka „0“ p! ■ Není-li možné, toto provést bezpečně, vytáhněte zástrčku ze zásuvky. ■ Nechte nejprve tyto škody opravit v servisu, než přístroj budete opět používat. Čištění NEBEZPEČÍ ÚDERU ELEKTRICKÝM PROUDEM ► Nejprve vytáhněte zástrčku ze zásuvky, než se pustíte do čištění přístroje. Tím se vyhnete nebezpečí zranění způsobeného neočekávaným neúmyslným spuštěním a ránou elektrickým proudem. ■ 94 │ CZ SFW 350 C2 Čištění motorového tělesa ■ Očistěte mírně navlhčeným hadrem všechny vnější plochy a přívodní kabel. Než přístroj začnete znovu používat, důkladně jej nechte vyschnout. NEBEZPEČÍ ÚDERU ELEKTRICKÝM PROUDEM ► Nikdy nenamáčejte těleso motoru do vody ani jiných kapalin! Jinak hrozí nebezpečí ohrožení života ránou elektrickým proudem, jestliže se kapalina dostane k elektrickým vodičům. POZOR-VĚCNÉ ŠKODY! ► Nepoužívejte žádné čisticí nebo abrazivní prostředky nebo rozpouštědla. Ty mohou přístroj poškodit a zanechat v potravinách zbytky. Čištění příslušenství UPOZORNĚNÍ ► Nemyjte díly příslušenství v myčce! Tím se tyto díly poškodí! ■ Vyčistěte díly příslušenství, které mohou přijít do kontaktu s potravinami, ... – jen ručně, díly příslušenství nejsou vhodné k mytí v myčkách. – horkou vodou a oplachovacím prostředkem vhodným pro styk s potravinami. VÝSTRAHA! NEBEZPEČÍ PORANĚNÍ! ► Křížový nůž w je velmi ostrý! Nebezpečí poranění! ■ Dobře všechno osušte, než přístroj znovu použijete. UPOZORNĚNÍ ► Po každém čištění opět namažte kovové části jedlým olejem! Pokud tak neučiníte, může dojít k zabarvení kovových částí! Uložení ■ Síťový kabel (bez zástrčky) zastrčte do šachty pro kabel pod dnem přístroje. Tak bude chráněn před poškozením. ■ Přístroj skladujte na suchém místě. ■ Potřete kovové nástavce po osušení tenkou vrstvou jedlého oleje – pokud nebudete přístroj ihned znovu používat. Tak budou dobře chráněny před korozí. ■ Uchovávejte přístroj tak, aby byl nedostupný pro děti a osoby vyžadující dohled. Ty nemusí vždy správně rozpoznat možná nebezpečí při manipulaci s elektrickými přístroji. SFW 350 C2 CZ │ 95 ■ Likvidace V žádném případě nevyhazujte přístroj do normálního domovního odpadu. Tento výrobek podléhá evropské směrnici č. 2012/19/EU (Waste Electrical and Electronic Equipment). Přístroj předejte k likvidaci odborné firmě či jej odevzdejte v místním recyklačním zařízení. Dodržujte aktuálně platné předpisy. V případě pochyb se poraďte s recyklační firmou. Také všechny obalové materiály zlikvidujte v souladu s ekologickými předpisy. Záruka a servis Na tento přístroj poskytujeme záruku 3 roky od data zakoupení. Přístroj byl vyroben s nejvyšší pečlivostí a před odesláním prošel výstupní kontrolou. Uschovejte si, prosím, pokladní lístek jako doklad o nákupu. V případě uplatňování záruky se prosím telefonicky spojte se servisem. Pouze tak vám můžeme zajistit bezplatné zaslání vašeho zboží. UPOZORNĚNÍ ► Záruční plnění se vztahuje pouze na chyby materiálu nebo výrobní chyby, nikoliv však na škody, způsobené při dopravě, na opotřebené součásti či poškození rozbitných dílů, např. spínače anebo akumulátory. Výrobek je určen výhradně pro soukromé použití, nikoliv pro podnikatelské účely. Při nesprávném a neodborném využívání, při použití násilí a při zásazích, které nebyly provedeny našimi autorizovanými servisními provozovnami, záruční nároky zanikají. Vaše práva vyplývající ze zákona touto zárukou nejsou omezena. Záručním plněním se záruční doba neprodlouží. To platí i pro náhradní a opravené díly. Případné škody a nedostatky, zijštěné už při nákupu výrobku, se musí po jeho vybalení okamžitě hlásit, nejpozději ale do dvou dnů po datu nákupu. Opravy, provedené po uplynutí záruční doby, se musí zaplatit. Záručním plněním se záruční doba neprodlouží. To platí i pro náhradní a opravené díly. Případné škody a nedostatky, zijštěné už při nákupu výrobku, se musí po jeho vybalení okamžitě hlásit, nejpozději ale do dvou dnů po datu nákupu. Opravy, provedené po uplynutí záruční doby, se musí zaplatit. Servis Česko Tel.: 800143873 E-Mail: [email protected] IAN 277055 ■ 96 │ CZ SFW 350 C2 Dovozce KOMPERNASS HANDELS GMBH BURGSTRASSE 21 44867 BOCHUM GERMANY www.kompernass.com SFW 350 C2 CZ │ 97 ■ Recepty Kubbe Suroviny pro obal 450 g libového jehněčího, telecího nebo hovězího masa 150 g mouky 1 lžička nového koření 1 lžička muškátového oříšku špetka čili špetka pepře Suroviny pro masovou náplň 700 g skopového masa 1 1/2 lžíce olivového oleje 1 1/2 lžíce jemně nasekané cibule 1/2 lžičky nového koření 1/2 lžičky soli 1 1/2 lžíce mouky Maso pro náplň dvakrát pomelte na mlýnku (nejprve s hrubě, pak s jemně děrovaným kotoučem e) a smíchejte s ostatními surovinami.Tuto hmotu rovněž dvakrát pomelte na mlýnku. Děrovaný kotouč e vyměňte za nástavec Kubbe u (viz kapitolu „Montáž nástavce Kubbe“). Kubbe obaly vyformujte nástavcem Kubbe u a nechte namrazit. Náplň: Maso dvakrát pomelte na mlýnku (nejprve s hrubě a pak jemně děrovaným kotoučem e). Osmahnete cibuli a dobře smícháme s masem a zbývajícími surovinami. Směsí naplníme obaly Kubbe a upečeme. Alternativní náplně: 250 g dušené brokolice nebo 250 g dušené cukety nebo 250 g vařené rýže ■ 98 │ CZ SFW 350 C2 Cerstvá klobása Suroviny: 300 g libového hovězího 500 g libového vepřového 200 g slaniny z plecka 20 g soli 1/2 lžíce bílého mletého pepře 1 lžička kmínu 1/2 lžičky muškátového oříšku Hovězí, vepřové maso a slaninu dvakrát pomeleme v mlýnku. Přidáme smíchané koření a sůl a 5 minut hněteme. Náplň dejte na ca 30 minut do chladničky. Klobásy naplňte dle návodu (viz kapitola „Zpracování uzenin“) a vytvořte klobásky o délce 25 cm. Hotovou klobásku snězte dobře osmaženou ještě týž den. Stříkané pečivo Suroviny: 500 g másla 500 g cukru 2 - 3 balíčky vanilkového cukru 1 balíček vanilkového pudinku 1/4 čajové lžičky soli 1 vejce 4 žloutky 800 g mouky (typ 405) 2 čajové lžičky prášku do pečiva 200 g mletých mandlí (blanšírované) nastrouhaná kůra z jednoho citronu Máslo utřete do pěny. Poté postupně přidejte zbývající suroviny a těsto dobře prohněťte. Hotové těsto nechte odpočívat zakryté cca 12 hodin (např. přes noc) v ledničce. Pak těsto umelte v mlýnku s nástavcem na stříkané pečivo se vzorkovacím proužkem 1. Stříkané pečivo položte na pečicí plech vyložený pečicím papírem. Pečivo pečte v předehřáté troubě na 180 °C cca 10-15 minut do zlatožluta. SFW 350 C2 CZ │ 99 ■ ■ 100 │ CZ SFW 350 C2 Indice Introducción . . . . . . . . . . . . . . . . . . . . . . . . . . . . . . . . . . . . . . . . . . . . . . . . . 102 Derechos de autor . . . . . . . . . . . . . . . . . . . . . . . . . . . . . . . . . . . . . . . . . . . . . . . . . . . . . . 102 Aviso legal . . . . . . . . . . . . . . . . . . . . . . . . . . . . . . . . . . . . . . . . . . . . . . . . . . . . . . . . . . . . 102 Finalidad de uso . . . . . . . . . . . . . . . . . . . . . . . . . . . . . . . . . . . . . . . . . . . . . 102 Volumen de suministro / Descripción de las piezas . . . . . . . . . . . . . . . . . 103 Características técnicas . . . . . . . . . . . . . . . . . . . . . . . . . . . . . . . . . . . . . . . . 104 Indicaciones de seguridad . . . . . . . . . . . . . . . . . . . . . . . . . . . . . . . . . . . . . 104 Ensamblaje / Despiece . . . . . . . . . . . . . . . . . . . . . . . . . . . . . . . . . . . . . . . . 106 Ensamblaje máquina de picar . . . . . . . . . . . . . . . . . . . . . . . . . . . . . . . . . . . . . . . . . . . . . 106 Montaje del accesorio compactador para salchichas . . . . . . . . . . . . . . . . . . . . . . . . . . 107 Montar el accesorio para Kubbe . . . . . . . . . . . . . . . . . . . . . . . . . . . . . . . . . . . . . . . . . . 108 Montar el accesorio para la masa de galletas . . . . . . . . . . . . . . . . . . . . . . . . . . . . . . . . 108 Montaje del accesorio pasapurés . . . . . . . . . . . . . . . . . . . . . . . . . . . . . . . . . . . . . . . . . . 109 Manejo . . . . . . . . . . . . . . . . . . . . . . . . . . . . . . . . . . . . . . . . . . . . . . . . . . . . . 110 Manejo del aparato . . . . . . . . . . . . . . . . . . . . . . . . . . . . . . . . . . . . . . . . . . . . . . . . . . . . 110 Elaborar la carne . . . . . . . . . . . . . . . . . . . . . . . . . . . . . . . . . . . . . . . . . . . . . . . . . . . . . . . 111 Elaborar salchicha . . . . . . . . . . . . . . . . . . . . . . . . . . . . . . . . . . . . . . . . . . . . . . . . . . . . . . 112 Operar con el accesorio Kubbe . . . . . . . . . . . . . . . . . . . . . . . . . . . . . . . . . . . . . . . . . . . 112 Preparar masa para galletas . . . . . . . . . . . . . . . . . . . . . . . . . . . . . . . . . . . . . . . . . . . . . . 113 Triturado de tomates . . . . . . . . . . . . . . . . . . . . . . . . . . . . . . . . . . . . . . . . . . . . . . . . . . . . 113 En caso de avería . . . . . . . . . . . . . . . . . . . . . . . . . . . . . . . . . . . . . . . . . . . . 114 Limpieza . . . . . . . . . . . . . . . . . . . . . . . . . . . . . . . . . . . . . . . . . . . . . . . . . . . 114 Limpiar bloque de motor . . . . . . . . . . . . . . . . . . . . . . . . . . . . . . . . . . . . . . . . . . . . . . . . . 115 Limpiar accesorios . . . . . . . . . . . . . . . . . . . . . . . . . . . . . . . . . . . . . . . . . . . . . . . . . . . . . . 115 Almacenaje . . . . . . . . . . . . . . . . . . . . . . . . . . . . . . . . . . . . . . . . . . . . . . . . . 115 Evacuación . . . . . . . . . . . . . . . . . . . . . . . . . . . . . . . . . . . . . . . . . . . . . . . . . . 116 Garantía y asistencia técnica . . . . . . . . . . . . . . . . . . . . . . . . . . . . . . . . . . . 116 Importador . . . . . . . . . . . . . . . . . . . . . . . . . . . . . . . . . . . . . . . . . . . . . . . . . 117 Recetas . . . . . . . . . . . . . . . . . . . . . . . . . . . . . . . . . . . . . . . . . . . . . . . . . . . . . 118 Kubbe . . . . . . . . . . . . . . . . . . . . . . . . . . . . . . . . . . . . . . . . . . . . . . . . . . . . . . . . . . . . . . . 118 Salchicha fresca para asar . . . . . . . . . . . . . . . . . . . . . . . . . . . . . . . . . . . . . . . . . . . . . . . 119 Galletas de mantequilla . . . . . . . . . . . . . . . . . . . . . . . . . . . . . . . . . . . . . . . . . . . . . . . . . 119 SFW 350 C2 ES │ 101 ■ Introducción Felicidades por la compra de su aparato nuevo. Ha optado por adquirir un producto de alta calidad. Las instrucciones de uso forman parte del producto. Contiene indicaciones importantes acerca de la seguridad, uso y evacuación. Antes de usar el producto familiaricese con todas las indicaciones de manejo y de seguridad. Utilice el producto como se describe y para los ámbitos de aplicación indicados. Entregue todos los documentos cuando transfiera el producto a terceros. Derechos de autor Esta documentación está protegida por derechos de autor. La reproducción, o cualquier tipo de reimpresión, total o parcial, así como la reproducción de imágenes, incluso modificadas, únicamente estarán permitidas con el consentimiento escrito del fabricante. Aviso legal Todas las informaciones técnicas, datos e indicaciones contenidos en estas instrucciones de uso, para la conexión y manejo, reflejan la situación más avanzada en el momento de la impresión y se proporcionan teniendo en cuenta nuestras experiencias y conocimientos hasta ese momento. Los datos, ilustraciones y descripciones de estas instrucciones no pueden servir como base para posibles reclamaciones. El fabricante no asume ninguna responsabilidad por los daños debidos a la inobservancia de las instrucciones, el uso contrario a lo previsto, las reparaciones inadecuadas, las modificaciones realizadas sin autorización o el empleo de recambios no homologados. Finalidad de uso Este aparato ha sido concebido exclusivamente para el procesamiento de alimentos en las cantidades habituales de uso doméstico en el hogar: ▯ Picado de carne fresca, ▯ Preparación de salchichas con tripa natural o artificial, ▯ Preparación de masa para galletas ▯ Triturado de tomates. El aparato no ha sido concebido para la transformación de alimentos congelados o duros, como por ejemplo huesos o nueces, y tampoco para su uso en ámbitos profesionales o industriales. ■ 102 │ ES SFW 350 C2 Volumen de suministro / Descripción de las piezas Figura A: 1 Suplemento galletas de manguera con tiras de muestras 2 Mazo compactador 3 Bandeja de entrada 4 Bloque motor 5 Boquilla metálica de la picadora de carne 6 Abrazadera de cierre 7 Accesorio para tomates 8 Rosca de plástico 9 Punta del pasapurés 0 Rosca de transporte q Muelle w Cuchilla e Disco perforado grueso y fino r Aro de cierre t Accesorio compactador para salchichas z Rodaja de charcutería u Suplemento Kubbe Figura B: i Botón de bloqueo Figura C: o Tecla “I” p Tecla “0“ a Tecla “<“ SFW 350 C2 ES │ 103 ■ Características técnicas Tensión 220 - 240 V ∼, 50 Hz Consumo de potencia 250 - 350 W Clase de protección II / Todas las piezas de este aparato que entran en contacto con alimentos son aptas para su uso con alimentos. Periodo KB 15 minutos Periodo KB Con el periodo KB (funcionamiento por un corto periodo de tiempo) se indica durante cuánto tiempo puede funcionar un aparato sin que el motor se sobrecaliente ni se dañe. Tras el periodo de corta duración (KB) indicado deberá apagarse el aparato hasta que el motor se haya enfriado. Indicaciones de seguridad ► ► ► ► PELIGRO DE DESCARGA ELÉCTRICA Preste atención de que el cable de red no sufra desperfectos. Manténgalo alejado de las zonas muy calientes y colóquelo de modo que no pueda engancharse en ningún sitio. Deje que un especialista cambie inmediatamente el cable de red dañado o la clavija de red, para evitar riesgos. Utilice el aparato sólo en habitaciones secas, no en el exterior. ¡No sumerja nunca el bloque motor en agua u otros líquidos! De lo contrario, existe peligro de muerte por descarga eléctrica. ¡ADVERTENCIA! No utilice nunca el aparato para otros fines distintos de los aquí descritos. ¡Existe un riesgo considerable de accidentes si debido a un error de manejo desactiva los dispositivos de seguridad del aparato! ■ 104 │ ES SFW 350 C2 ► ► ► ► ► ► ► ► ► ► ► ¡ADVERTENCIA! ¡PELIGRO DE LESIONES! No introduzca nunca las manos en las aberturas del aparato. No introduzca nunca ningún objeto dentro de él – excepto el mazo compactador correspondiente al accesorio y los alimentos. ¡De lo contrario, existe un alto riesgo de accidentes! Extraiga primero la clavija de la base de enchufe antes de montar o bien de desmontar los accesorios. No deje nunca el aparato sin vigilancia cuando está listo para su uso. Después de utilizarlo o durante las pausas de trabajo, desenchufe siempre la clavija de la toma de corriente para impedir el arranque involuntario del aparato. Utilice únicamente accesorios originales para este aparato. Las piezas de otros fabricantes no son, probablemente, suficientemente seguras. Nunca ponga el aparato en funcionamiento vacío. Esto puede provocar daños irreparables en el aparato. Antes de cambiar los accesorios o las piezas móviles del aparato, apáguelo y desconéctelo de la red. No utilice nunca el aparato para fines distintos de los aquí descritos. Cuidado: ¡la cuchilla en cruz está muy afilada! Proceda siempre con cautela al manejar y limpiar el aparato. Desconecte el aparato de la red eléctrica siempre que no esté bajo vigilancia y antes de su montaje, desmontaje y limpieza. Los niños no deben utilizar el aparato. El aparato y su cable de conexión deben mantenerse fuera del alcance de los niños. SFW 350 C2 ES │ 105 ■ ► ► ¡ADVERTENCIA! ¡PELIGRO DE LESIONES! Este aparato puede ser utilizado por personas cuyas facultades físicas, sensoriales o mentales sean reducidas o carezcan de los conocimientos y de la experiencia necesaria siempre que sean vigiladas o hayan sido instruidas correctamente sobre el uso seguro del aparato y hayan comprendido los peligros que entraña. Los niños no deben jugar con el aparato. Ensamblaje / Despiece ¡ATENCIÓN - DAÑOS MATERIALES! ► Todos los accesorios están recubiertos por una fina capa de aceite para protegerlos de la corrosión. Por ello, debe limpiar con cuidado todas las piezas antes de su primero uso, tal y como se describe en detalle en el capítulo “Limpieza”. Después, frote todas las partes metálicas con un poco de aceite de cocinar. HINWEIS ► Antes de utilizar el aparato por primera vez, retire la lámina protectora del teclado. Ensamblaje máquina de picar Abra el lado abatible; allí encontrará representado gráficamente el orden de montaje. 1) Coloque el transportador helicoidal 0 en la boquilla de la picadora de carne 5. 2) Inserte el muelle q sobre la transportadora helicoidal 0. 3) Inserte la cuchilla en cruz w de modo que el lado con las cuchillas señale en sentido contrario al del muelle q. Asegúrese de que el orificio cuadrado de la cuchilla w esté correctamente encajado en el eje cuadrado. ■ 106 │ ES SFW 350 C2 ¡ADVERTENCIA! ¡PELIGRO DE LESIONES! ► ¡La cuchilla en cruz w está muy afilada! ¡Peligro de lesiones! ¡ATENCIÓN - DAÑOS MATERIALES! ► ¡El aparato se dañará si la cuchilla w en cruz se coloca al revés! 4) Seleccione el disco perforado e/rodaja de charcutería z elegido. 5) Inserte el disco perforado seleccionado e en la boquilla metálica de la picadora de carne 5 de modo que las fijaciones del disco perforado e queden encajadas en los orificios de la boquilla metálica de la picadora de carne 5. 6) Si todo está colocado correctamente, atornille con fuerza a mano el anillo de cierre r. 7) El accesorio de la picadora completamente montado 5 se une con el bloque de motor a través de un cierre de bayoneta 4: – Inserte el accesorio de la picadora 5 en el bloque de motor 4, de modo que la flecha en el accesorio de la picadora 5 quede junto al símbolo del bloque de motor 4. El botón de bloqueo i se introduce hacia dentro (Fig. B). – Pulse el accesorio de la picadora para carne 5 ligeramente hacia dentro y gire simultáneamente el tubo de alimentación en el accesorio de la picadora 5 a la posición central (Fig. B), de modo que la flecha señale en el tubo de alimentación hacia el símbolo . Cuando encastra el accesorio de la picadora de carne 5, el botón de bloqueo i salta hacia fuera. – Para terminar, coloque la bandeja de llenado 3 sobre el tubo de llenado. – Para extraerlo pulse el botón de bloqueo i y gire el tubo de llenado hacia la derecha (Fig. B) . Después podrá retirar la boquilla de la picadora de carne 5. Montaje del accesorio compactador para salchichas Abra el lado abatible; allí encontrará representado gráficamente el orden de montaje. 1) Retire la boquilla de la picadora de carne 5, como se ha descrito en el punto “Ensamblaje máquina de picar”. 2) Desmonte todas las piezas montadas en la boquilla de la picadora de carne 5 y límpielas. 3) Impregne todas las piezas metálicas con aceite de cocina. 4) Vuelva a montar la rosca de transporte 0, el muelle q y la cuchilla w en la boquilla de la picadora de carne 5. 5) Inserte la rodaja de charcutería z de modo que las fijaciones de la rodaja de charcutería z queden encajadas en los orificios de la boquilla metálica de la picadora de carne 5. 6) Coloque el accesorio compactador para salchichas t delante del disco para salchichas z. SFW 350 C2 ES │ 107 ■ 7) Atornille el anillo de cierre r firmemente a mano. 8) Monte la boquilla de la picadora de carne 5, como se ha descrito en el punto “Ensamblaje máquina de picar”. Montar el accesorio para Kubbe Abra el lado abatible; allí encontrará representado gráficamente el orden de montaje. 1) Retire la boquilla de la picadora de carne 5, como se ha descrito en el punto “Ensamblaje máquina de picar“. 2) Retire las posibles piezas suplementarias y limpie el accesorio de la picadora de carne 5. ADVERTENCIA ► ¡Para el accesorio Kubbe u no se precisa la cuchilla de cruz w con el muelle q! Retire en su caso ambos del accesorio de la picadora de carne 5. 3) Impregne todas las piezas metálicas con aceite comestible. 4) Coloque ambas piezas de plástico del suplemento Kubbe u de modo que las fijaciones del anillo inferior del suplemento Kubbe u queden encajadas en los orificios de la boquilla metálica de la picadora de carne 5. 5) Si todo está colocado correctamente, atornille de nuevo con fuerza a mano el anillo de cierre r. 6) Monte la boquilla de la picadora de carne 5, como se ha descrito en el punto “Ensamblaje máquina de picar”. Montar el accesorio para la masa de galletas Abra el lado abatible; allí encontrará representado gráficamente el orden de montaje. 1) Retire la boquilla de la picadora de carne 5, como se ha descrito en el punto “Ensamblaje máquina de picar“. 2) Retire las posibles piezas suplementarias y limpie el accesorio de la picadora de carne 5. ADVERTENCIA ► ¡Para el accesorio de galletas 1 no se precisa la cuchilla w de aspa con el muelle q! Retire en su caso ambos del accesorio de la picadora de carne 5. 3) Impregne todas las piezas metálicas con aceite comestible. 4) Extraiga las tiras de muestra 1 de la parte delantera del accesorio para galletas de masa 1. 5) Inserte primero el disco de plástico a continuación el disco de metal del suplemento galletas de manguera 1 en el accesorio de la picadora de carne 5 (véase lado desplegable). Inserte el suplemento galletas de man-guera 1 de modo que las fijaciones del suplemento galletas de manguera 1 queden encajadas en los orificios de la boquilla metálica de la picadora de carne 5. ■ 108 │ ES SFW 350 C2 6) Si todo está colocado correctamente, atornille con fuerza a mano el anillo de cierre r. 7) Inserte las tiras de muestra 1 de nuevo en el suplemento galletas de manguera 1. Preste atención que el asa en las tiras de muestra 1 señale hacia el lado opuesto del aparato. De lo contrario no podría ajustar la muestra situada directamente en el mango. 8) Monte la boquilla de la picadora de carne 5, como se ha descrito en el punto “Ensamblaje máquina de picar“. 9) Para extraerlo, primero debe volver a retirar las tiras de prueba 1 antes de cerrar el anillo de cierre r y poder extraer así el del suplemento galletas de manguera 1. Montaje del accesorio pasapurés Abra el lado abatible; allí encontrará representado gráficamente el orden de montaje. 1) Retire la boquilla de la picadora de carne 5 de la manera descrita en la sección “Ensamblaje máquina de picar”. 2) Retire cualquier accesorio y limpie la boquilla de la picadora de carne 5. INDICACIÓN ► ¡Para el accesorio pasapurés no se precisa la rosca de transporte 0 ni la cuchilla w con el muelle q! En caso necesario, retire todos estos accesorios de la boquilla de la picadora de carne 5. 3) Inserte la rosca de plástico 8 en la boquilla de la picadora de carne 5. 4) Coloque el pasapurés 9 sobre la rosca de plástico 8 de forma que las fijaciones del pasapurés 9 encajen en los alojamientos de la boquilla de la picadora de carne 5. Los orificios del pasapurés 9 deben apuntar hacia abajo. 5) Tras montar todo correctamente, coloque el aro de cierre r sobre el pasapurés 9 y enrósquelo firmemente con la mano. 6) Monte la boquilla de la picadora de carne 5 de la manera descrita en la sección “Ensamblaje máquina de picar”. 7) Abra la abrazadera de cierre 6 del accesorio para tomates 7. 8) Coloque el accesorio para tomates 7 bajo el accesorio pasapurés mediante la inserción de la punta del pasapurés 9 a través de la pequeña abertura del accesorio para tomates 7: SFW 350 C2 ES │ 109 ■ 9) Cierre la abrazadera de cierre 6 de forma que encaje alrededor de la boquilla de la picadora de carne 5. Manejo PELIGRO DE DESCARGA ELÉCTRICA ► No abra nunca la carcasa del bloque de motor 4 – dentro de la misma no encontrará ningún elemento de manejo. Si se abre la carcasa se pierde el derecho a la garantía. Si se abre la carcasa, existe peligro de muerte por descarga eléctrica. ¡ATENCIÓN - DAÑOS MATERIALES! ► No utilice el aparato durante más de 15 minutos en modo de funcionamiento continuo. Deje a continuación el aparato apagado unos 30 minutos aprox. para evitar un sobrecalentamiento. ► No accione nunca las teclas “I” o o “<“ a durante el cambio de sentido de giro mientras que no esté detenido por completo el motor del aparato. El motor podría dañarse. Manejo del aparato Si ya ha montado los accesorios que desea: 1) Coloque el aparato de modo que este completamente estable y no se pueda caer de ningún modo de la mesa (p. ej. debido a las vibraciones o por que se enganche el cable de red) ni entrar en contacto con agua corriente. Las sacudidas son inevitables cuando el aparato está en funcionamiento. ■ 110 │ ES SFW 350 C2 PELIGRO DE DESCARGA ELÉCTRICA ► ¡No intente agarrar el aparato cuando esté conectado o en funcionamiento y éste se caiga o entre en contacto con el agua, ni en ninguna otra emergencia! ¡En caso de emergencia, desenchufe inmediatamente la clavija de red! ¡De lo contrario, existe un elevado riesgo de accidente o muerte! 2) Coloque los alimentos que quiera elaborar en la bandeja de alimentación 3 y ponga un recipiente de recogida debajo del orificio de salida. 3) Pulse primero la tecla “0” p, para asegurarse de que el aparato sigue desconectado. De lo contrario existe riesgo de que el aparato arranque involuntariamente al insertar la clavija de red en una base de enchufe. 4) Inserte a continuación la clavija de red en el enchufe. 5) Pulse la tecla “I“ o, para conectar el aparato. ¡ADVERTENCIA! ¡PELIGRO DE LESIONES! ► Presione los alimentos exclusivamente con el compactador redondo 2 en el canal de llenado – nunca con los dedos, tenedores, mangos de la cuchara o similar. Existe un riesgo considerable de accidente y podría dañar el aparato. ¡ATENCIÓN - DAÑOS MATERIALES! ► No apriete nunca tanto que se escuche que el motor gira más lento. De los contrario puede sobrecargar y dañar el aparato. Elaborar la carne 1) Utilice trozos de carne que entren sin problemas en el tubo de alimentación. En su caso desmenuce previamente la carne. Tenga cuidado de que la carne no tenga huesos ni tendones. ¡ADVERTENCIA! ► La carne picada es muy sensible al desarrollo de microorganismos. Por ello, mantenga una buen higiene cuando trabaje con carne. De lo contrario se podrían correr elevados riesgos para la salud. 2) Una vez leídas todas las indicaciones acerca del tema “carne”, puede usar el aparato conforme a lo descrito en el capítulo “Manejo del aparato". SFW 350 C2 ES │ 111 ■ Elaborar salchicha 1) Pase primero la carne dos veces por la picadora de carne antes de hacer salchichas con ella. 2) Para hacer el relleno de la salchicha, añada a la carne cebolla finamente picada, especias y otros ingredientes de su receta y amase bien la masa. Déjela reposar durante 30 minutos en el frigorífico antes de seguir el proceso. 3) Introduzca la tripa (natural o artificial) en el aplicador para salchicha t y haga un nudo en el otro extremo. Calcule que necesitará aproximadamente 1,60 m de tripa por cada kilo de relleno. ¡CONSEJO! Ponga a remojar la tripa natural unas 3 horas en agua templada y escúrrala antes de rellenarla. De este modo, la tripa natural recuperará su elasticidad. Las tripas naturales las puede adquirir en un comercio de productos para carnicerías cerca de los mataderos o en su propio carnicero. 4) El relleno de la salchicha es empujado por el accesorio compactador para salchichas t introducido en la tripa. Cuando haya alcanzado la longitud que desee, desconecte el aparato, apriete el extremo de la salchicha y gírela un par de veces alrededor de su eje longitudinal. ¡CONSEJO! Las salchichas se expanden cuando se cuecen y se congelan. Por ello, no las llene en exceso, ya que podrían romperse. 5) Una vez leídas todas las indicaciones acerca del tema “Salchichas”, puede usar el aparato conforme a lo descrito en el capítulo “Manejo del aparato”. Operar con el accesorio Kubbe Con el accesorio Kubbe u puede formar rollitos huecos de carne o verduras a partir de los alimentos introducidos, que puede rellenar después a su gusto. 1) Pase primero la carne dos veces por la picadora antes de pasarla a través del accesorio Kubbe u. 2) Una vez leídas todas las indicaciones acerca del tema “Accesorio Kubbe”, puede usar el aparato conforme a lo descrito en el capítulo “Manejo del aparato”. ■ 112 │ ES SFW 350 C2 Preparar masa para galletas Una vez haya preparado una masa para galletas según su propia receta y montado el accesorio para galletas 1: 1) Forre una pequeña chapa para hornos con papel para hornos y coloquelo debajo del orificio de salida en la parte frontal del aparato. 2) Empuje la masa uniformemente dentro del accesorio para picadora 5 – el transportador helicoidal 0 la hará pasar a continuación a través del molde elegido en la tira de moldes del accesorio para galletas 1. 3) Una vez que las galletas han alcanzado la longitud deseada, pare el aparato y parta la masa en el orificio de salida. Coloque las galletas en la chapa para hornos. 4) Una vez leídas todas las indicaciones acerca del tema “Masa para galletas”, puede usar el aparato conforme a lo descrito en el capítulo “Manejo del aparato”. Triturado de tomates 1) Coloque un recipiente bajo el accesorio para tomates 7. 2) Coloque otro recipiente en la parte delantera bajo el pasapurés 9. 3) Corte los tomates en cuartos e insértelos de forma lenta y uniforme en la boquilla de la picadora de carne 5. La rosca de plástico 8 presiona los tomates contra el accesorio pasapurés y los tomates triturados caen hacia el accesorio para tomates 7. La piel del tomate sale del pasapurés 9 por la parte delantera. INDICACIÓN Si sale zumo de tomate por los tornillos del accesorio pasapurés, puede deberse a las siguientes causas: – Va demasiado rápido. – Presiona demasiado al introducir los trozos de tomate en el aparato. – Los trozos de tomate son demasiado grandes. ► En tal caso, reduzca el ritmo de trabajo, presione solo ligeramente al introducir los trozos de tomate en el aparato y corte los tomates en trozos más pequeños. 4) Tras leer todas las indicaciones acerca del tema “Triturado de tomates”, podrá usar el aparato según lo descrito en el capítulo “Manejo del aparato”. SFW 350 C2 ES │ 113 ■ En caso de avería Si el funcionamiento está bloqueado debido a alimento acumulado: ■ Pulse la tecla “0” p para parar la picadora de carne. ■ Mantenga la tecla “<” a accionada. De este modo, el motor marcha hacia atrás. Así puede transportar los alimentos algo hacia atrás, y liberar de nuevo el accionamiento. ■ Si está el accionamiento libre, vuelva a soltar la tecla “<” a. ■ Pulse la tecla “I” o, para iniciar la picadora de carne. ■ Si con ello no puede liberar el accionamiento, limpie el aparato tal como viene descrito en el capítulo “Limpieza”. Si el motor se para bruscamente, es posible que se haya disparado el fusible interno contra sobrecargas. Está previsto para proteger el motor. ■ Desconecte el aparato y deje que se enfríe unos 30 min., antes de volver a utilizarlo. ■ Si esto no diera resultado, espere otros 15 min.. ■ Si aún no hubiera ningún resultado pasado ese periodo, es probable que exista una avería.. En ese caso, le recomendamos que se ponga en contacto con nuestro servicio de atención al cliente. Si el cable de red está dañado o si se perciben desperfectos en las piezas del aparato: ■ ¡Desconecte el aparato de inmediato, pulsando al tecla “0” p! ■ Si no es posible hacerlo sin peligro, desenchufe la clavija de red. ■ Deje que el servicio técnico al cliente repare los desperfectos antes de volver a utilizar el aparato. Limpieza PELIGRO DE DESCARGA ELÉCTRICA ► Desenchufe primero la clavija de la toma de corriente, antes de limpiar el aparato. De este modo, evitará accidentes producidos por el arranque involuntario del aparato y las descargas eléctricas. ■ 114 │ ES SFW 350 C2 Limpiar bloque de motor ■ Limpie las superficies externas y el cable de red con un paño de cocina ligeramente húmedo. Antes de volver a utilizar el aparato, séquelo completamente. PELIGRO DE DESCARGA ELÉCTRICA ► ¡No sumerja nunca el bloque motor en agua u otros líquidos! De lo contrario, existe peligro de muerte por descarga eléctrica, si la humedad que se ha introducido llega a los cables eléctricos. ¡ATENCIÓN - DAÑOS MATERIALES! ► No utilice detergentes, ni sustancias abrasivas o disolventes. Estos podrían dañar el aparato y dejar restos de alimentos. Limpiar accesorios ADVERTENCIA ► ¡No limpie los accesorios dentro de un lavavajillas! Ello conllevaría daños en los accesorios! ■ Limpie los accesorios que puedan entrar en contacto con los alimentos, ... – sólo a mano, ya que los accesorios no son aptos para lavavajillas. – con agua caliente y un detergente de uso doméstico apto para alimentos. ¡ADVERTENCIA! ¡PELIGRO DE LESIONES! ► ¡La cuchilla en cruz w está muy afilada! ¡Peligro de lesiones! ■ Seque todo bien antes de volver a usar el aparato de nuevo. ADVERTENCIA ► Después de cada limpieza, frote las piezas de metal con aceite de cocinar. De lo contrario, las piezas metálicas podrían decolorarse. Almacenaje ■ Deslice el cable de red (sin la clavija de red) dentro del compartimiento de cable debajo del suelo del aparato. De este modo, estará protegido frente a los desperfectos. ■ Guarde el aparato en un lugar seco. ■ Impregne los accesorios metálicos después de secarlos con una fina capa de aceite de cocina – si no va a volver a utilizar el aparato de inmediato. De este modo, conseguirá una buena protección contra la corrosión. ■ Mantenga el aparato fuera del alcance de los niños y las personas con necesidades especiales. Es posible que no siempre puedan evaluar correctamente los posibles peligros en el manejo de aparatos eléctricos. SFW 350 C2 ES │ 115 ■ Evacuación En ningún caso deberá tirar el aparato a la basura doméstica. Este producto está sujeto a la directiva europea 2012/19/EUWEEE (Waste Electrical and Electronic Equipment). Evacue el aparato en un centro de evacuación autorizado a través de las instalaciones de evacuación comunitarias. Preste atención a las normas en vigor. En caso de dudas póngase en contacto con su centro de evacuación. El material de embalaje debe desecharse de forma respetuosa con el medio ambiente. Garantía y asistencia técnica Este aparato tiene 3 años de garantía desde la fecha de compra. El aparato ha sido fabricado cuidadosamente y ha sido probado antes de su entrega. Guarde el comprobante de caja como justificante de compra. Si necesitara hacer uso de la garantía, póngase en contacto por teléfono con su punto de servicio habitual. Éste es el único modo de garantizar un envío gratuito. ADVERTENCIA ► La garantía cubre los defectos de fabricación o del material, pero no los daños de transporte, las piezas sujetas a desgaste ni los daños sufridos por las piezas frágiles (p. ej. interruptores o pilas). Este producto ha sido diseñado exclusivamente para el uso particular y no para el uso industrial. En caso de manipulación indebida e incorrecta, uso de la fuerza y en caso de abrir el aparato personas extrañas a nuestros centros de asistencia técnica autorizados, la garantía pierde su validez. Esta garantía no reduce en forma alguna sus derechos legales. El uso de la garantía no implica la ampliación de su periodo de vigencia. Lo mismo se aplica a las piezas sustituidas o reparadas. Deberá informarse inmediatamente después del desempaquetado de los daños y defectos que ya estuviesen presentes en el momento de la compra, como máximo dos días después de la fecha de compra. Una vez transcurrido el periodo de garantía, las reparaciones no serán gratuitas. El uso de la garantía no implica la ampliación de su periodo de vigencia. Lo mismo se aplica a las piezas sustituidas o reparadas. Deberá informarse inmediatamente después del desempaquetado de los daños y defectos que ya estuviesen presentes en el momento de la compra, como máximo dos días después de la fecha de compra. Una vez transcurrido el periodo de garantía, las reparaciones no serán gratuitas. ■ 116 │ ES SFW 350 C2 Servicio España Tel.: 902 59 99 22 (0,08 EUR/Min. + 0,11 EUR/llamada (tarifa normal)) (0,05 EUR/Min. + 0,11 EUR/llamada (tarifa reducida)) E-Mail: [email protected] IAN 277055 Importador KOMPERNASS HANDELS GMBH BURGSTRASSE 21 44867 BOCHUM GERMANY www.kompernass.com SFW 350 C2 ES │ 117 ■ Recetas Kubbe Ingredientes para la capa externa 450 g de carne magra de carnero, ternera o vaca 150 g de harina 1 cucharadita de pimienta (pimienta de Jamaica) 1 cucharadita de nuez moscada 1 pellizco de chile en polvo 1 pellizco de pimienta Ingredientes para el relleno de carne 700 g carne de carnero 1 1/2 cucharada de aceite de oliva 1 1/2 cucharada de cebolla picada fina 1/2 cucharadita de pimienta (pimienta de Jamaica) 1/2 cucharadita de sal 1 1/2 cucharada de harina Picar la carne para la capa externa dos veces con la picadora de carne, una después de otra (primero con el disco perforado grueso y después con el fino e) y mezclar con los ingredientes. Picar la masa igualmente dos veces con la picadora de carne. Sustituir el disco perforado e por un accesorio para Kubbe u (véase capítulo “Montar el accesorio para Kubbe”). Con el accesorio para Kubbe u formar la capa externa del Kubbe y precongelarla. Relleno: Picar la carne dos veces con la picadora de carne (primero con el disco perforado grueso y después con el fino e). Dorar la cebolla y mezclarla bien con la carne y el resto de los ingredientes. Rellenar con esta masa la capa externa y asar a punto. Rellenos alternativos: 250 g de brécol rehogado o 250 g de calabacines rehogados o 250 g de arroz cocido ■ 118 │ ES SFW 350 C2 Salchicha fresca para asar Ingredientes: 300 g de carne magra de vaca 500 g de carne magra de cerdo 200 g de panceta 20 g de sal 1/2 cucharada de pimienta blanca molida 1 cucharadita de comino 1/2 cucharita nuez moscada Pasar la carne de ternera, carne de cerdo y el tocino dos veces por la picadora. Añadir las especies mezcladas y la sal y amasar bien durante 5 minutos. Dejar reposar el relleno de la salchicha en el frigorífico durante aprox. 30 minutos. Introduzca el relleno de salchicha como se describe en las instrucciones (véase capítulo “Elaborar salchicha”) y hacer salchichas de 25 cm de longitud. Consumir las salchichas bien asadas el mismo día. Galletas de mantequilla Ingredientes: 500 g de mantequilla 500 g de azúcar 2 - 3 sobres de azúcar de vainilla 1 sobre de crema de vainilla 1/4 de cucharadita de sal 1 huevo 4 yemas de huevo 800 g de harina (tipo 405) 2 cucharaditas de levadura 200 g de almendras molidas (blanqueadas) Ralladura de la piel de un limón Bata la mantequilla hasta que quede espumosa. Añada poco a poco el resto de los ingredientes y amase bien la masa. Cubra la masa y déjela reposar en el frigorífico durante aprox. 12 horas (p. ej., durante la noche). A continuación, pase la masa por la la boquilla metálica de la picadora de carne con el suplemento galletas de manguera 1. Coloque las galletas de mantequilla sobre una bandeja de horno cubierta con papel de horno. Hornee las galletas en el horno precalentado a 180 °C durante aprox.10-15 minutos hasta que queden doradas. SFW 350 C2 ES │ 119 ■ ■ 120 │ ES SFW 350 C2 Índice Introdução . . . . . . . . . . . . . . . . . . . . . . . . . . . . . . . . . . . . . . . . . . . . . . . . . . 122 Direitos de autor . . . . . . . . . . . . . . . . . . . . . . . . . . . . . . . . . . . . . . . . . . . . . . . . . . . . . . . 122 Limitação da responsabilidade . . . . . . . . . . . . . . . . . . . . . . . . . . . . . . . . . . . . . . . . . . . . 122 Utilização correcta . . . . . . . . . . . . . . . . . . . . . . . . . . . . . . . . . . . . . . . . . . . 122 Volume de fornecimento / Descrição dos componentes . . . . . . . . . . . . . 123 Dados técnicos. . . . . . . . . . . . . . . . . . . . . . . . . . . . . . . . . . . . . . . . . . . . . . . 124 Indicações de segurança . . . . . . . . . . . . . . . . . . . . . . . . . . . . . . . . . . . . . . 124 Montagem / Desmontagem . . . . . . . . . . . . . . . . . . . . . . . . . . . . . . . . . . . . 126 Montar a picadora de carne . . . . . . . . . . . . . . . . . . . . . . . . . . . . . . . . . . . . . . . . . . . . . . 126 Montar o acessório para enchimento de salsichas . . . . . . . . . . . . . . . . . . . . . . . . . . . . . 127 Montar o acessório em forma de cúpula . . . . . . . . . . . . . . . . . . . . . . . . . . . . . . . . . . . . 128 Montar o acessório para biscoitos . . . . . . . . . . . . . . . . . . . . . . . . . . . . . . . . . . . . . . . . . 128 Montar o adaptador do passe-vite . . . . . . . . . . . . . . . . . . . . . . . . . . . . . . . . . . . . . . . . . 129 Funcionamento . . . . . . . . . . . . . . . . . . . . . . . . . . . . . . . . . . . . . . . . . . . . . . 130 Operar o aparelho . . . . . . . . . . . . . . . . . . . . . . . . . . . . . . . . . . . . . . . . . . . . . . . . . . . . . 130 Preparar carne . . . . . . . . . . . . . . . . . . . . . . . . . . . . . . . . . . . . . . . . . . . . . . . . . . . . . . . . . 131 Preparar salsichas . . . . . . . . . . . . . . . . . . . . . . . . . . . . . . . . . . . . . . . . . . . . . . . . . . . . . . 132 Trabalhar com o acessório em forma de cúpula . . . . . . . . . . . . . . . . . . . . . . . . . . . . . . . 132 Fabricar biscoitos . . . . . . . . . . . . . . . . . . . . . . . . . . . . . . . . . . . . . . . . . . . . . . . . . . . . . . . 133 Passar tomate. . . . . . . . . . . . . . . . . . . . . . . . . . . . . . . . . . . . . . . . . . . . . . . . . . . . . . . . . . 133 Em caso de erro . . . . . . . . . . . . . . . . . . . . . . . . . . . . . . . . . . . . . . . . . . . . . . 134 Limpeza . . . . . . . . . . . . . . . . . . . . . . . . . . . . . . . . . . . . . . . . . . . . . . . . . . . . 134 Limpar o bloco do motor . . . . . . . . . . . . . . . . . . . . . . . . . . . . . . . . . . . . . . . . . . . . . . . . . 135 Limpar os acessórios . . . . . . . . . . . . . . . . . . . . . . . . . . . . . . . . . . . . . . . . . . . . . . . . . . . . 135 Guardar . . . . . . . . . . . . . . . . . . . . . . . . . . . . . . . . . . . . . . . . . . . . . . . . . . . . 135 Eliminação . . . . . . . . . . . . . . . . . . . . . . . . . . . . . . . . . . . . . . . . . . . . . . . . . . 136 Garantia e assistência técnica . . . . . . . . . . . . . . . . . . . . . . . . . . . . . . . . . . 136 Importador . . . . . . . . . . . . . . . . . . . . . . . . . . . . . . . . . . . . . . . . . . . . . . . . . 137 Receitas . . . . . . . . . . . . . . . . . . . . . . . . . . . . . . . . . . . . . . . . . . . . . . . . . . . . 138 Kubbe (especialidade do Médio Oriente) . . . . . . . . . . . . . . . . . . . . . . . . . . . . . . . . . . . 138 Salsicha de churrasco fresca . . . . . . . . . . . . . . . . . . . . . . . . . . . . . . . . . . . . . . . . . . . . . . 139 Biscoitos . . . . . . . . . . . . . . . . . . . . . . . . . . . . . . . . . . . . . . . . . . . . . . . . . . . . . . . . . . . . . . 139 SFW 350 C2 PT │ 121 ■ Introdução Parabéns pela compra do seu aparelho novo. Decidiu-se, assim, por um produto de elevada qualidade. O manual de instruções é constituinte deste produto. Este contém indicações importantes para a segurança, utilização e eliminação. Antes da utilização do produto, famializa-se com todas as indicações de utilização e de segurança. Utilize o produto apenas como descrito e nas áreas de aplicação indicadas. Ao entregar o aparelho a terceiros entregue todos os documentos. Direitos de autor Esta documentação está protegida por direitos de autor. Qualquer distribuição ou cópia, mesmo de extractos, bem como a reprodução de imagens, mesmo editadas, apenas podem ser realizadas mediante autorização escrita do fabricante. Limitação da responsabilidade Todas as informações, dados e indicações presentes neste manual de instruções relativas à montagem, ligação e operação correspondem à mais recente versão de impressão e foram elaborados da melhor forma e de acordo com a nossa experiência e conhecimentos actuais. Excluem-se os direitos relativos a dados, imagens e descrições presentes neste manual de instruções. O fabricante não assume qualquer responsabilidade por danos resultantes da inobservância das instruções, de uma utilização incorrecta, de reparações inadequadas, alterações não autorizadas ou da utilização de peças de reposição não aprovadas. Utilização correcta Este aparelho foi concebido unicamente para preparar exclusivamente alimentos em quantidades habituais no uso doméstico: ▯ Picar carne fresca, ▯ Preparação de salsichas em tripa natural ou artificial, ▯ Preparação de biscoitos, ▯ Passar tomate. O aparelho não foi concebido para a preparação de alimentos congelados ou duros, como por exemplo ossos ou nozes, bem como para o uso comercial ou industrial. ■ 122 │ PT SFW 350 C2 Volume de fornecimento / Descrição dos componentes Figura A: 1 Acessório para biscoitos com barra com formas 2 Empurrador 3 Recipiente para enchimento 4 Bloco do motor 5 Aplicação frontal da picadora de carne em metal 6 Braçadeira de fecho 7 Saída do tomate 8 Sem-fim de plástico 9 0 q w e r t z u Passe-vite Transportador helicoidal Mola Lâmina em cruz Disco perfurado grosso e fino Anel de fecho Acessório para enchimento de salsichas Disco para salsichas Acessório em forma de cúpula Figura B: i Botão de bloqueio Figura C: o Botão „I“ p Botão„0“ a Botão„<“ SFW 350 C2 PT │ 123 ■ Dados técnicos Tensão 220 - 240 V ∼, 50 Hz Consumo de energia 250 - 350 W Classe de protecção II / Todas as peças deste aparelho que entram em contacto com alimentos são adequadas para uso alimentar. Tempo de funcionamento descontínuo 15 minutos Tempo de funcionamento descontínuo O tempo de funcionamento descontínuo indica quanto tempo se pode trabalhar com um aparelho sem que o motor sobreaqueça e fique danificado. Após o tempo de funcionamento descontínuo indicado, o aparelho deve ser desligado até o motor ter arrefecido. Indicações de segurança ► ► ► ► PERIGO DE CHOQUE ELÉCTRICO Certifique-se de que o cabo de rede não está danificado. Mantenha-o afastado de superfícies quentes e coloque-o de forma a que este não possa ficar entalado. Um cabo de rede ou ficha de rede danificados devem ser imediatamente substituídos por técnicos especializados autorizados, de modo a evitar situações de perigo. Utilize o aparelho apenas em espaços secos, não ao ar livre. Nunca mergulhe o bloco do motor em água ou outros líquidos! Caso contrário, existe perigo de morte por choque eléctrico. AVISO! Nunca utilize o aparelho com outras finalidades que não as aqui descritas. Existe um maior perigo de acidente, quando, devido a uma utilização incorrecta, coloca os dispositivos de segurança do aparelho fora de funcionamento! ■ 124 │ PT SFW 350 C2 ► ► ► ► ► ► ► ► ► ► ► AVISO! PERIGO DE FERIMENTOS! Nunca introduza as mãos nas aberturas do aparelho. Nunca insira quaisquer objectos – com excepção dos respectivos empurradores dos acessórios e dos alimentos a serem preparados. Caso contrário, pode existir perigo de acidente! Retire a ficha da tomada antes de encaixar ou retirar os acessórios. Nunca deixe o aparelho sem vigilância quando este estiver operacional. Retire imediatamente a ficha da tomada após a utilização ou em caso de interrupções, de modo a evitar um arranque inadvertido. Utilize apenas acessórios originais para este aparelho. As outras peças podem não ser suficientemente seguras. Nunca utilize o aparelho se este estiver vazio. Tal pode danificá-lo de forma irreparável. Antes da substituição de acessórios ou peças adicionais, em movimento durante o funcionamento, o aparelho deve ser desligado e a ficha retirada da tomada. Nunca utilize o aparelho para fins diferentes dos descritos neste manual. Cuidado: a lâmina cruzada é muita afiada! Manuseie e limpe o aparelho com cuidado. Desligue sempre o aparelho da tomada em caso de inexistência de vigilância e antes da montagem, desmontagem ou limpeza. Este aparelho não pode ser utilizado por crianças. O aparelho e o respetivo cabo de ligação devem ser mantidos afastados de crianças. SFW 350 C2 PT │ 125 ■ ► ► AVISO! PERIGO DE FERIMENTOS! Este aparelho pode ser utilizado por pessoas com capacidades físicas, sensoriais ou mentais reduzidas, ou com falta de experiência e/ou conhecimento, caso sejam vigiadas ou instruídas sobre a utilização segura do aparelho e tenham compreendido os perigos daí resultantes. As crianças não podem brincar com o aparelho. Montagem / Desmontagem ATENÇÃO - DANOS MATERIAIS! ► Todos os acessórios possuem uma fina camada de óleo, com a finalidade de os proteger contra corrosão. Por isso, antes da primeira colocação em funcionamento, limpe bem as peças todas como descrito detalhadamente no capítulo "Limpeza". De seguida, aplique um pouco de óleo alimentar em todas as peças de metal. NOTA ► Antes da primeira utilização, retire a película de proteção do painel de comandos. Montar a picadora de carne Desdobre a parte desdobrável - encontra lá a descrição da sequência de montagem apresentada através de imagens. 1) Coloque o transportador helicoidal 0 na aplicação frontal da picadora de carne 5. 2) Encaixe a mola q no transportador helicoidal 0. 3) Coloque a lâmina cruzada w de forma que o lado com as lâminas fique virado no sentido oposto à mola q. Certifique-se de que o entalhe quadrado da lâmina em cruz w se encontra exatamente no eixo quadrado. ■ 126 │ PT SFW 350 C2 AVISO! PERIGO DE FERIMENTOS! ► A lâmina cruzada w é muito afiada! Perigo de ferimentos! ATENÇÃO - DANOS MATERIAIS! ► O aparelho sofre danos se a lâmina cruzada w for posicionada de forma diferente! 4) Seleccione o disco perfurado e/disco para salsichas z pretendido. 5) Coloque o disco perfurado selecionado e na aplicação frontal da picadora de carne 5 de forma que as fixações no disco perfurado e encaixem nos entalhes da aplicação frontal da picadora de carne 5. 6) Quando tudo se encontrar correctamente colocado, aparafuse manualmente o anel de fecho r. 7) A aplicação frontal da picadora de carne 5 é ligada ao bloco do motor 4 através de um fecho tipo baioneta: – Encaixe a aplicação frontal da picadora de carne 5 no bloco do motor 4, de forma que a seta na aplicação frontal da picadora de carne 5 assente no símbolo no bloco do motor 4. O botão de bloqueio i é pressionado para dentro (Fig. B). – Pressione a aplicação frontal da picadora de carne 5 ligeiramente para dentro e rode em simultâneo a abertura para enchimento na aplicação 5 até à posição central (Fig. B), de forma que a seta na abertura para enchimento indique para o símbolo . Quando a aplicação frontal da picadora de carne 5 encaixar, o botão de bloqueio i salta. – Por fim, coloque o recipiente para enchimento 3 em cima, na abertura para enchimento. – Para retirar, pressione o botão de bloqueio i e volte a rodar a abertura para enchimento para a direita (Fig. B) . De seguida pode retirar a aplicação frontal da picadora de carne 5. Montar o acessório para enchimento de salsichas Desdobre a parte desdobrável - encontra lá a descrição da sequência de montagem apresentada através de imagens. 1) Retire a aplicação frontal da picadora de carne 5, como descrito em “Montar a picadora de carne”. 2) Desmonte todas as peças que se encontram montadas sobre/dentro da aplicação frontal da picadora de carne 5 e limpe-as. 3) Unte todas as peças metálicas com óleo alimentar. 4) Introduza o transportador helicoidal 0, a mola q e a lâmina em cruz w novamente na aplicação frontal da picadora de carne 5. 5) Coloque o disco para salsichas z de forma que as fixações no disco z encaixem nos entalhes da aplicação frontal da picadora de carne 5. 6) De seguida, coloque o acessório para enchimento de salsichas t à frente do disco de salsichas z. SFW 350 C2 PT │ 127 ■ 7) Aparafuse manualmente o anel de fecho r. 8) Monte a aplicação frontal da picadora de carne 5 como descrito em “Montar a picadora de carne”. Montar o acessório em forma de cúpula Desdobre a parte desdobrável - encontra lá a descrição da sequência de montagem apresentada através de imagens. 1) Retire a aplicação frontal da picadora de carne 5, como descrito em “Montar a picadora de carne”. 2) Retire eventuais acessórios e limpe a aplicação frontal da picadora de carne 5. NOTA ► Para o acessório em forma de cúpula u não é necessária a lâmina cruzada w com a mola q! Se necessário, retire ambos da aplicação frontal da picadora de carne 5. 3) Unte todas as peças metálicas com óleo alimentar. 4) Coloque ambas as peças plásticas do acessório em forma de cúpula u de forma que as fixações encaixem no anel inferior do acessório em forma de cúpula u na aplicação frontal da picadora de carne 5. 5) Quando tudo se encontrar correctamente colocado, volte a apertar o anel de fecho r manualmente. 6) Monte a aplicação frontal da picadora de carne 5 como descrito em “Montar a picadora de carne”. Montar o acessório para biscoitos Desdobre a parte desdobrável - encontra lá a descrição da sequência de montagem apresentada através de imagens. 1) Retire a aplicação frontal da picadora de carne 5, como descrito em “Montar a picadora de carne”. 2) Retire eventuais acessórios e limpe a aplicação frontal da picadora de carne 5. NOTA ► Para o acessório para biscoitos 1 não é necessária a lâmina cruzada w com a mola q! Se necessário, retire ambos da aplicação frontal da picadora de carne 5. 3) Unte todas as peças metálicas com óleo alimentar. 4) Retire a barra com formas 1 à frente do acessório para biscoitos 1. 5) Primeiro coloque o disco plástico, depois o disco metálico do acessório para biscoitos 1 na aplicação frontal da picadora de carne 5 (ver página desdobrável). Coloque o acessório para biscoitos 1 de forma que as fixações no acessório para biscoitos 1 encaixem nos entalhes da aplicação frontal da picadora de carne 5. ■ 128 │ PT SFW 350 C2 6) Quando tudo se encontrar correctamente colocado, aparafuse manualmente o anel de fecho r. 7) Volte a encaixar a barra com formas 1 à frente no acessório para biscoitos 1. Certifique-se de que a pega na barra com formas 1 fica virada para o lado oposto ao do aparelho. Caso contrário não consegue ajustar o padrão que se encontra directamente na pega. 8) Monte a aplicação frontal da picadora de carne 5 como descrito em “Montar a picadora de carne”. 9) Para retirar deve primeiro remover a barra com formas 1 antes de rodar o anel de fecho r e poder voltar a retirar o acessório para biscoitos 1. Montar o adaptador do passe-vite Abra a página desdobrável para consultar as imagens da sequência de montagem. 1) Retire a aplicação frontal da picadora de carne 5, tal como descrito em “Montar a picadora de carne”. 2) Retire eventuais adaptadores e limpe a aplicação frontal da picadora de carne 5. NOTA ► O sem-fim de transporte 0 e a lâmina em cruz w com a mola q não são necessários para o adaptador do passe-vite! Retire tudo, se necessário, da aplicação frontal da picadora de carne 5. 3) Insira o sem-fim de plástico 8 na aplicação frontal da picadora de carne 5. 4) Desloque o passe-vite 9 sobre o sem-fim de plástico 8, de forma que as fixações no passe-vite 9 encaixem nos entalhes da aplicação frontal da picadora de carne 5. Os furos do passe-vite 9 ficam orientados para baixo. 5) Quando estiver tudo corretamente instalado, passe o anel de fecho r sobre o passe-vite 9 e enrosque-o manualmente. 6) Monte a aplicação frontal da picadora de carne 5 tal como descrito em “Montagem da picadora de carne”. 7) Abra a braçadeira de fecho 6 na saída do tomate 7. 8) Coloque a saída do tomate 7 por baixo do adaptador do passe-vite, inserindo a ponta do passe-vite 9 pela pequena abertura da saída do tomate 7: SFW 350 C2 PT │ 129 ■ 9) Feche a braçadeira de fecho 6 de forma a envolver a aplicação frontal da picadora de carne 5. Funcionamento PERIGO DE CHOQUE ELÉCTRICO ► Nunca abra a caixa do bloco do motor 4 – não se encontram quaisquer elementos de comando aí. Se a estrutura for aberta, o direito à garantia extingue-se. Com a caixa aberta existe perigo de vida através de choque eléctrico. ATENÇÃO - DANOS MATERIAIS! ► Não utilize o aparelho por mais de 15 minutos no funcionamento contínuo. Desligue o aparelho durante cerca 30 minutos para evitar um sobreaquecimento. ► Nunca prima os botões "I" o ou "<" a ao mudar o sentido de rotação, se o motor do aparelho não estiver totalmente imobilizado. O motor pode ficar danificado. Operar o aparelho Quando já tiver montado os acessórios pretendidos: 1) Coloque o aparelho de forma a que este fique completamente estável e não caia da mesa (em caso de, por exemplo, vibrações ou cabos de rede presos) ou caia à água. A trepidação durante o funcionamento é inevitável. ■ 130 │ PT SFW 350 C2 PERIGO DE CHOQUE ELÉCTRICO ► Nunca agarre no aparelho quando este se encontra ligado ou em funcionamento, tiver caído ou foi parar à água – ou em caso de outros acidentes! Em caso de emergência retire imediatamente a ficha da tomada! Caso contrário, existe um enorme perigo de ferimentos e de morte! 2) Coloque os alimentos a processar no recipiente para enchimento 3 e posicione um recipiente de recolha à frente, sob a abertura de saída. 3) Prima primeiro o botão “0” p para garantir que o aparelho ainda se encontra desligado. Caso contrário existe o perigo do aparelho iniciar inadvertidamente, se a ficha for introduzida na tomada. 4) Depois introduza a ficha na tomada. 5) Prima o botão “I” o para ligar o aparelho. AVISO! PERIGO DE FERIMENTOS! ► Pressione os alimentos unicamente com o empurrador redondo 2 na abertura para enchimento – nunca com os dedos, garfos, cabo da colher ou semelhante. Existe um maior perigo de ferimentos e o aparelho poderia ser danificado. ATENÇÃO - DANOS MATERIAIS! ► Nunca exerça uma força tão forte que faça com que o motor se torne audivelmente mais lento. O aparelho pode ficar sobrecarregado e danificado. Preparar carne 1) Utilize pedaços de carne que entrem sem problemas na abertura para enchimento. Se necessário, corte a carne. Certifique-se de que a carne não tem quaisquer ossos ou tendões. AVISO! ► A carne picada é muito sujeita a decomposição. Certifique-se, por isso, de que existe uma boa higiene, quando pica a carne. Caso contrário podem verificar-se danos para a saúde. 2) Quando tiver lido todas as indicações relativamente ao tema “Carne”, pode aplicar agora o aparelho como descrito no capítulo “Operar o aparelho”. SFW 350 C2 PT │ 131 ■ Preparar salsichas 1) Passe a carne primeiro duas vezes pela picadora de carne, antes de preparar a salsicha. 2) Para o recheio da salsicha adicione à carne picada cebola cortada, especiarias e outros ingredientes, de acordo com a sua receita, e amasse bem a massa. Coloque esta no frigorífico durante 30 min. antes de continuar a preparar as salsichas. 3) Coloque a tripa (natural ou artificial) sobre o acessório para enchimento de salsichas t e dê um nó na outra extremidade. Pode calcular cerca de 1,60 m de tripa para salsichas por cada kg de massa para enchimento. SUGESTÃO Coloque previamente a tripa natural cerca de 3 horas em água morna e torça-a bem antes de a colocar no acessório. Desta forma, a tripa natural torna-se novamente elástica. Pode adquirir as tripas naturais no comércio talhante próximo de matadouros ou directamente no talho onde faz habitualmente as suas compras. 4) O recheio da salsicha é prensado para dentro da tripa pelo acessório para enchimento de salsichas t. Quando o comprimento desejado é atingido, desligue o aparelho, aperte a extremidade da salsicha e rode algumas vezes em torno do seu eixo longitudinal. SUGESTÃO A salsicha estica ao cozer e congelar. Por isso, não as encha demais, uma vez que podem rebentar. 5) Quando tiver lido todas as indicações relativamente ao tema “Salsichas” pode aplicar o aparelho como descrito no capítulo “Operar o aparelho”. Trabalhar com o acessório em forma de cúpula Com o acessório em forma de cúpula u pode, com os alimentos introduzidos, formar rolos de carne ou legumes vazios, os quais pode depois rechear a gosto. 1) Passe a carne duas vezes pela picadora de carne antes de a empurrar através do acessório em forma de cúpula u. 2) Quando tiver lido todas as indicações relativamente ao tema “Acessório em forma de cúpula” pode agora aplicar o aparelho como descrito no capítulo “Operar o aparelho”. ■ 132 │ PT SFW 350 C2 Fabricar biscoitos Quando tiver preparado uma massa para biscoitos de acordo com a sua receita e tiver montado o acessório para biscoitos 1: 1) Coloque um tabuleiro revestido com papel vegetal por baixo da abertura de saída na frente do aparelho. 2) Pressione a massa uniformemente na aplicação frontal da picadora de carne 5 – o transportador helicoidal 0 pressiona esta através do formato seleccionado na barra com formas do acessório para biscoitos 1. 3) Quando o biscoito atingiu o comprimento desejado, pare o aparelho e corte a massa na abertura de saída. Coloque o biscoito no tabuleiro. 4) Quando tiver lido todas as indicações relativamente ao tema “Biscoitos”, pode agora aplicar o aparelho como descrito no capítulo “Operar o aparelho”. Passar tomate 1) Coloque um recipiente por baixo da saída do tomate 7. 2) Coloque um recipiente à frente, por baixo do passe-vite 9. 3) Corte os tomates em quartos e empurre-os lenta e uniformemente para dentro da aplicação frontal da picadora de carne 5. O sem-fim de plástico 8 pressiona o tomate pelo adaptador do passe-vite e o tomate passado cai na respetiva saída 7. A casca do tomate é expelida à frente pelo passe-vite 9. NOTA Caso saia sumo do tomate pelas uniões roscadas do adaptador do passe-vite, as causas podem ser as seguintes: – A sua velocidade de trabalho é demasiado elevada. – Está a pressionar os pedaços de tomate com muita pressão para dentro do aparelho. – Os pedaços de tomates são demasiado grandes. ► Neste caso, reduza a velocidade do seu trabalho, pressione apenas ligeiramente os pedaços de tomate para dentro do aparelho e corte o tomate em pedaços mais pequenos. 4) Depois de ter lido todas as indicações relativas ao tema “Passar tomate”, pode utilizar o aparelho como descrito no capítulo “Operar o aparelho”. SFW 350 C2 PT │ 133 ■ Em caso de erro Se o accionamento estiver bloqueado por alimentos: ■ Prima o botão “0” p para parar a picadora de carne. ■ Mantenha o botão “<” a premido. O accionamento funciona agora para trás. Dessa forma, os alimentos são transportados no sentido contrário para voltar a libertar o accionamento. ■ Se o accionamento estiver livre, solte o botão “<” a. ■ Prima o botão “I” o para ligar a picadora de carne. ■ Se não conseguir libertar o accionamento, limpe o aparelho como descrito no capítulo “Limpeza”. Se o motor se desligar repentinamente, é possível que a protecção interna contra sobrecarga tenha sido activada. Esta tem a função de protecção do motor. ■ Desligue o aparelho e deixe arrefecer por aprox. 30 minutos antes de continuar a utilizar o aparelho. ■ Se, mesmo assim, não obtiver qualquer resultado, aguarde mais 15 min. ■ Se, mesmo assim, a espera não trouxer resultados, a máquina pode estar avariada. Neste caso, entre em contacto com o serviço de apoio ao cliente. Se o cabo de rede estiver danificado ou existirem danos visíveis nas peças do aparelho: ■ Desligue imediatamente o aparelho, premindo o botão “0” p! ■ Se isto não for possível em segurança, retire a ficha de rede. ■ Deixe que estes danos sejam reparados pelo serviço de apoio ao cliente, antes de voltar a utilizar o aparelho. Limpeza PERIGO DE CHOQUE ELÉCTRICO ► Retire a ficha de rede da tomada antes de limpar o aparelho. Deste modo evita perigos de acidente devido ao arranque inadvertido inesperado e choque eléctrico. ■ 134 │ PT SFW 350 C2 Limpar o bloco do motor ■ Limpe todas as superfícies exteriores e o cabo de rede com um pano levemente humedecido. Seque bem o aparelho, antes de o voltar a utilizar. PERIGO DE CHOQUE ELÉCTRICO ► Nunca mergulhe o bloco do motor em água ou outros líquidos! Caso contrário existe perigo de morte através de choque eléctrico, se os cabos eléctricos ficarem húmidos. ATENÇÃO - DANOS MATERIAIS! ► Não utilize detergentes, abrasivos ou diluentes. Estes podem danificar o aparelho e deixar resíduos nos alimentos. Limpar os acessórios NOTA ► Não lave os acessórios na máquina de lavar loiça! Estes são danificados! ■ Limpe os acessórios que entram em contacto com alimentos, ... – apenas manualmente, os acessórios não são resistentes à máquina de lavar loiça. – com água quente e detergente apropriado aos alimentos. AVISO! PERIGO DE FERIMENTOS! ► A lâmina cruzada w é muito afiada! Perigo de ferimentos! ■ Seque tudo muito bem antes de voltar a utilizar o aparelho. NOTA ► Após cada limpeza, volte a untar as peças de metal com um pouco de óleo alimentar. Caso contrário, as peças de metal podem ficar manchadas! Guardar ■ Coloque o cabo de alimentação (sem ficha de rede) no compartimento para o cabo, sob a base do aparelho. Dessa forma este fica protegido contra danos. ■ Guarde o aparelho num local seco. ■ Depois do aparelho secar, unte os acessórios com um pouco de óleo alimentar se não pretender continuar a utilizar o aparelho de imediato. Desse modo obtém uma protecção eficaz contra corrosão. ■ Guarde o aparelho num local afastado do alcance das crianças e pessoas que necessitem de vigilância. Estes nem sempre conseguem avaliar correctamente os potenciais perigos que existem ao manusear aparelhos eléctricos. SFW 350 C2 PT │ 135 ■ Eliminação Nunca coloque o aparelho no lixo doméstico normal. Este produto é abrangido pela Directiva Europeia 2012/19/EU (Waste Electrical and Electronic Equipment). Elimine o aparelho através de um serviço de eliminação autorizado ou das entidades de eliminação locais. Tenha atenção aos regulamentos actualmente em vigor. Em caso de dúvida, entre em contacto com a entidade de eliminação de resíduos. Elimine todos os materiais da embalagem de forma ecológica. Garantia e assistência técnica Este aparelho tem 3 anos de garantia a partir da data de compra. Este aparelho foi fabricado com o maior cuidado e testado escrupulosamente antes da sua distribuição. Guarde o talão de caixa como comprovativo da compra. No caso de reivindicação da garantia, entre em contacto com o seu ponto de assistência técnica, via telefone. Só assim pode ser garantido um envio gratuito do seu produto. NOTA ► A garantia abrange apenas defeitos de material e de fabrico, mas não danos devido ao transporte, peças de desgaste ou danos em peças frágeis, por ex. interruptores ou baterias. O produto foi concebido apenas para uso privado e não para uso comercial. A garantia extingue-se no caso de utilização incorrecta e de intervenções que não foram efectuadas pelo nosso representante autorizado de assistência técnica. Os seus direitos legais não são limitados por esta garantia. O período de garantia não é prolongado pela utilização da mesma. O mesmo se aplica a peças substituídas e reparadas. Eventuais danos ou defeitos visíveis no momento da compra devem ser notificados imediatamente após desembalar o aparelho, o mais tardar dois dias após a data de compra. Após expirar o período de garantia, as eventuais reparações estão sujeitas a pagamento. O período de garantia não é prolongado pela utilização da mesma. O mesmo aplica-se a peças substituídas e reparadas. Eventuais danos ou defeitos visíveis no momento da compra devem ser notificados imediatamente após desembalar o aparelho, o mais tardar dois dias após a data de compra. Após expirar o período de garantia, as eventuais reparações estão sujeitas a pagamento. Assistência Portugal Tel.: 70778 0005 (0,12 EUR/Min.) E-Mail: [email protected] IAN 277055 ■ 136 │ PT SFW 350 C2 Importador KOMPERNASS HANDELS GMBH BURGSTRASSE 21 44867 BOCHUM GERMANY www.kompernass.com SFW 350 C2 PT │ 137 ■ Receitas Kubbe (especialidade do Médio Oriente) Ingredientes para a cobertura 450 g carne magra de carneiro, vitela ou de vaca 150 g de farinha 1 colher de chá de pimenta (cravinho) 1 colher de chá de noz moscada 1 pitada de chili em pó 1 pitada de pimenta Ingredientes para o recheio de carne 700 g de carne de borrego 1 1/2 colher de sopa de azeite 1 1/2 colher de sopa de cebola picada 1/2 colher de chá de pimenta (cravinho) 1/2 colher de chá de sal 1 1/2 colher de sopa de farinha Para a cobertura passe a carne duas vezes pela picadora de carne (primeiro com o disco perfurado grosso e depois com o fino e) e junte com os ingredientes. Esta massa também deve ser picada duas vezes com a picadora de carne. Substituir o disco perfurado e pelo acessório em forma de cúpula u (ver capítulo “Montar o acessório em forma de cúpula”). Formar as coberturas Kubbe com o acessório em forma de cúpula u e levar ao frigforífico. Recheio: Passar a carne duas vezes com a máquina de passa carne (primeiro com disco perfurado grosso e depois com o fino e). Salteie as cebolas e misture bem com a carne e os restantes ingredientes. Encha as pequenas coberturas em forma de cúpula com este recheio e frite. Recheios alternativo: 250 g de brócolos cozidos a vapor ou 250 g de courgetes cozidas a vapor ou 250 g de arroz cozido ■ 138 │ PT SFW 350 C2 Salsicha de churrasco fresca Ingredientes: 300 g de carne magra de vaca 500 g de carne magra de porco 200 g de toucinho 20 g de sal 1/2 colher de sopa de pimenta branca, moída 1 colher de chá de cominhos 1/2 colher de chá de noz moscada A carne de vaca, de porco e toucinho devem ser picadas duas vezes na picadora de carne. Adicione as especiarias misturadas, bem como o sal e mexa durante 5 minutos. Leve o recheio ao frigorifico durante aprox. 30 minutos. Rechear as salsichas de acordo com as instruções (ver capítulo “Preparar salsichas”) e fechar pequenas salsichas de 25 cm de comprimento. Consumir a salsicha para churrasco no próprio dia, bem frita. Biscoitos Ingredientes: 500 g de manteiga 500 g de açúcar 2 - 3 pacotinhos de açúcar baunilhado 1 pacotinho de pudim de baunilha 1/4 colher de chá de sal 1 ovo 4 gemas de ovo 800 g de farinha (tipo 405) 2 colheres de chá de fermento em pó 200 g de amêndoas moídas (branqueadas) raspa de um limão Bata a manteiga até ficar em creme. Adicionar os restantes ingredientes gradualmente e amassar bem a massa. Deixar levedar a massa coberta durante, aprox. 12 horas, (p.ex. durante a noite) no frigorifico. Depois, passá-la pela picadora de carne com o acessório para biscoitos 1. Coloque os biscoitos num tabuleiro forrado com papel vegetal. Coza os biscoitos, no forno pré-aquecido, a 180°C durante aprox.10-15 minutos, até ficarem dourados. SFW 350 C2 PT │ 139 ■ KOMPERNASS HANDELS GMBH BURGSTRASSE 21 44867 BOCHUM DEUTSCHLAND / GERMANY www.kompernass.com Stand der Informationen · Last Information Update · Version des informations Stand van de informatie · Stav informací · Estado de las informaciones · Estado das informações: 02 / 2016 · Ident.-No.: SFW350C2-012016-1 IAN 277055 8-
 1
1
-
 2
2
-
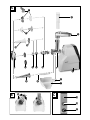 3
3
-
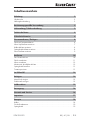 4
4
-
 5
5
-
 6
6
-
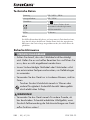 7
7
-
 8
8
-
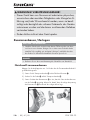 9
9
-
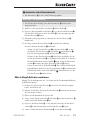 10
10
-
 11
11
-
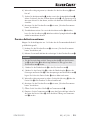 12
12
-
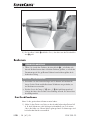 13
13
-
 14
14
-
 15
15
-
 16
16
-
 17
17
-
 18
18
-
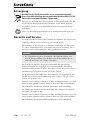 19
19
-
 20
20
-
 21
21
-
 22
22
-
 23
23
-
 24
24
-
 25
25
-
 26
26
-
 27
27
-
 28
28
-
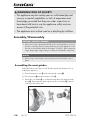 29
29
-
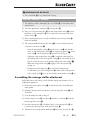 30
30
-
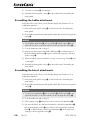 31
31
-
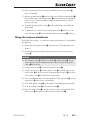 32
32
-
 33
33
-
 34
34
-
 35
35
-
 36
36
-
 37
37
-
 38
38
-
 39
39
-
 40
40
-
 41
41
-
 42
42
-
 43
43
-
 44
44
-
 45
45
-
 46
46
-
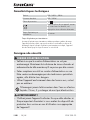 47
47
-
 48
48
-
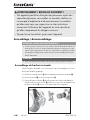 49
49
-
 50
50
-
 51
51
-
 52
52
-
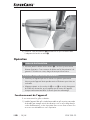 53
53
-
 54
54
-
 55
55
-
 56
56
-
 57
57
-
 58
58
-
 59
59
-
 60
60
-
 61
61
-
 62
62
-
 63
63
-
 64
64
-
 65
65
-
 66
66
-
 67
67
-
 68
68
-
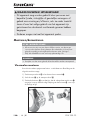 69
69
-
 70
70
-
 71
71
-
 72
72
-
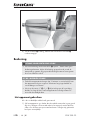 73
73
-
 74
74
-
 75
75
-
 76
76
-
 77
77
-
 78
78
-
 79
79
-
 80
80
-
 81
81
-
 82
82
-
 83
83
-
 84
84
-
 85
85
-
 86
86
-
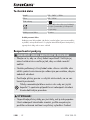 87
87
-
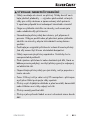 88
88
-
 89
89
-
 90
90
-
 91
91
-
 92
92
-
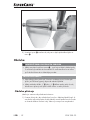 93
93
-
 94
94
-
 95
95
-
 96
96
-
 97
97
-
 98
98
-
 99
99
-
 100
100
-
 101
101
-
 102
102
-
 103
103
-
 104
104
-
 105
105
-
 106
106
-
 107
107
-
 108
108
-
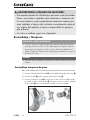 109
109
-
 110
110
-
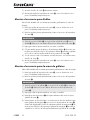 111
111
-
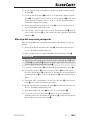 112
112
-
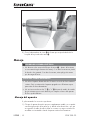 113
113
-
 114
114
-
 115
115
-
 116
116
-
 117
117
-
 118
118
-
 119
119
-
 120
120
-
 121
121
-
 122
122
-
 123
123
-
 124
124
-
 125
125
-
 126
126
-
 127
127
-
 128
128
-
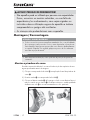 129
129
-
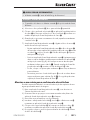 130
130
-
 131
131
-
 132
132
-
 133
133
-
 134
134
-
 135
135
-
 136
136
-
 137
137
-
 138
138
-
 139
139
-
 140
140
-
 141
141
-
 142
142
-
 143
143


Silvercrest 277055 Operating Instructions Manual
- Categorie
- Vleesmolen
- Type
- Operating Instructions Manual
- Deze handleiding is ook geschikt voor
in andere talen
- English: Silvercrest 277055
- français: Silvercrest 277055
- español: Silvercrest 277055
- Deutsch: Silvercrest 277055
- português: Silvercrest 277055
- čeština: Silvercrest 277055
Gerelateerde artikelen
Andere documenten
-
MIA MG 2507 de handleiding
-
COSYLIFE CL-HV01 à viande 550W de handleiding
-
Braun Multiquick 5 G 1500 Handleiding
-
Bifinett KH 3460 PROFI MEAT GRINDER de handleiding
-
Bifinett BIFINETT KH 3461 HACHOIR A VIANDE PROFESSIONNEL de handleiding
-
-
-
-
Unold 78131 de handleiding
-
Beem LW-6108 Handleiding