
IAN 304540
LED-SOLARSTRAHLER
Montage‑, Bedienungs‑ und
Sicherheitshinweise
LED SOLAR SPOTLIGHT
Assembly, operating and safety
instructions
PROJECTEUR SOLAIRE LED
Instructions de montage, d‘utilisation et
consignes de sécurité
LED-
SOLARSCHIJNWERPER
Montage‑, bedienings‑ en
veiligheidsinstructies
REFLEKTOR SOLARNY LED
Wskazówki montażu, obsługi i
bezpieczeństwa
LED SOLÁRNÍ REFLEKTOR
Pokyny k montáži, obsluze a
bezpečnostní pokyny
LED SOLÁRNY REFLEKTOR
Pokyny pre montáž, obsluhu a
bezpečnostné pokyny
LED-SOLARSTRAHLER/
LED SOLAR SPOTLIGHT/
PROJECTEUR SOLAIRE LED

DE/AT/CH Montage‑, Bedienungs‑ und Sicherheitshinweise Seite 5
GB/IE Assembly, operating and safety instructions Page 23
FR/BE Instructions de montage, d‘utilisation et consignes de sécurité Page 41
NL/BE Montage‑, bedienings‑ en veiligheidsinstructies Pagina 59
PL Wskazówki montażu, obsługi i bezpieczeństwa Strona 77
CZ Pokyny k montáži, obsluze a bezpečnostní pokyny Strana 95
SK Pokyny pre montáž, obsluhu a bezpečnostné pokyny Strana 113

1.8-2.5m
5.0m 8.0m
90°
DC
B
A1
2
3
4
5
10
11
12
13
6
7
8
9
HG04465A

1.8-2.5m
5.0m 8.0m
90°
A
B C
D
E F
HG04465B
12
4
5
11
12
13
10
8
6
9
17
19 18
15
14
16
7
3

5 DE/AT/CH
Liste der verwendeten Piktogramme ... Seite 6
Einleitung .................................... Seite 7
Bestimmungsgemäßer Gebrauch .................. Seite 7
Teilebeschreibung .............................. Seite 7
Technische Daten .............................. Seite 8
Lieferumfang .................................. Seite 9
Allgemeine Sicherheitshinweise. . . . . . . . . . Seite 9
Sicherheitshinweise für Batterien/ Akkus ............ Seite 10
Vor der Verwendung ...................... Seite 12
Laden der wiederaufladbaren Batterien ............. Seite 12
Batterien einsetzen/ersetzen ............. Seite 13
Montage ..................................... Seite 14
Inbetriebnahme ............................ Seite 18
Wartung und Reinigung ................... Seite 19
Entsorgung .................................. Seite 20
Garantie ..................................... Seite 21

6 DE/AT/CH
Liste der verwendeten Piktogramme
LED-Lebensdauer
Gleichstrom
Dieses Produkt ist für Extremtemperaturen bis -21°C
geeignet.
Reichweite des Bewegungssensors ca. 5 – 8m
Erkennungswinkel des Bewegungssensors: ca. 90º
Schutzart: IP44 (spritzwasserfest)
Batterien mitgeliefert
Beleuchtungsdauer (nach Aktivierung): ca. 30 Sekunden

7 DE/AT/CH
LED-SOLARSTRAHLER
Einleitung
Wir beglückwünschen Sie zum Kauf Ihres neuen Produkts. Sie
haben sich damit für ein hochwertiges Produkt entschieden. Die
Bedienungsanleitung ist Teil dieses Produkts. Sie enthält wichtige
Hinweise für Sicherheit, Gebrauch und Entsorgung. Machen
Sie sich vor der Benutzung des Produkts mit allen Bedien- und
Sicherheitshinweisen vertraut. Benutzen Sie das Produkt nur wie
beschrieben und für die angegebenen Einsatzbereiche. Händigen Sie
alle Unterlagen bei Weitergabe des Produkts an Dritte mit aus.
Bestimmungsgemäßer Gebrauch
Das Produkt ist zur Beleuchtung von Außenbereichen ohne
Stromanschluss vorgesehen. Das Produkt ist zur Nutzung in
Privathaushalten vorgesehen und nicht für gewerbliche Zwecke oder
andere Anwendungen geeignet.
Nicht zur normalen Raumbeleuchtung im Haushalt
geeignet.
Dieses Produkt ist für Extremtemperaturen bis -21°C geeignet.
Teilebeschreibung
1 Solar-Paneel
2 ON-/OFF-Schalter (ein/aus)
3 Strahler
4 Sensor
5 Dübel (Montageplatte)

8 DE/AT/CH
6 Montageplatte
7 Kugelgelenk-Abdeckung
8 Schraube (Montageplatte)
9 Öffnung
10
Vordere Abdeckung
11
Wiederaufladbare Batterien
12
Batteriefach
13
Befestigungsschraube (vordere Abdeckung)
14
Montagehalterung (nur HG04465B)
15
Dübel (für die Montagehalterung) (nur HG04465B)
16
Schraube (für die Montagehalterung) (nur HG04465B)
17
Verbindungskabel (nur HG04465B)
18
Stecker (nur HG04465B)
19
Buchse (nur HG04465B)
Technische Daten
Modell-Nr.: HG04465A oder HG04465B
LEDs: 6 x 0,5W (LEDs sind nicht
austauschbar)
Betriebsspannung: 3,6V
Wiederaufladbare
Batterien: 3 x Ni-MH AAA 600mAh 1,2V
Schutzart: IP44 (spritzwasserfest)
Bewegungssensor: Reichweite: ca. 5 – 8m
Erkennungswinkel: ca. 90º

9 DE/AT/CH
Lieferumfang
Überprüfen Sie sofort nach dem Auspacken, ob alle Teile vollständig
sind und das Produkt in ordnungsgemäßem Zustand ist.
1 solarbetriebener LED-Strahler, Modell HG04465A oder
HG04465B
1 Montagehalterung (für Solar-Paneel) (nur HG04465B)
1 Solar-Paneel (nur HG04465B)
2 Dübel (Montageplatte)
2 Schrauben (Montageplatte)
2 Dübel (Montagehalterung) (nur HG04465B)
2 Schrauben (Montagehalterung) (nur HG04465B)
1 Montage-, Bedien- und Sicherheitshinweise
Allgemeine Sicherheitshinweise
MACHEN SIE SICH VOR DER BENUTZUNG DES PRODUKTES
MIT ALLEN BEDIEN- UND SICHERHEITSHINWEISEN VERTRAUT!
WENN SIE DIESES PRODUKT AN ANDERE WEITERGEBEN, GEBEN
SIE AUCH ALLE DOKUMENTE WEITER!
Dieses Produkt kann von Kindern ab 8 Jahren und von Personen
mit eingeschränkten körperlichen, sensorischen oder geistigen
Fähigkeiten oder mit Mangel an Erfahrung und Kenntnissen
verwendet werden, wenn sie von einer Person beaufsichtigt
werden oder Anweisungen zur sicheren Verwendung des
Produktes erhalten haben und die damit verbundenen Gefahren
verstehen. Kinder dürfen nicht mit dem Produkt spielen.
Reinigung und Wartung dürfen nicht von Kindern ohne Aufsicht
durchgeführt werden.

10 DE/AT/CH
Lassen Sie Kinder niemals mit dem Verpackungsmaterial
unbeaufsichtigt. Das Verpackungsmaterial stellt eine
Erstickungsgefahr dar. Kinder unterschätzen die damit
verbundenen Gefahren häufig.
Halten Sie Kinder aus dem Arbeitsbereich fern. Es sind viele
Schrauben und andere Kleinteile im Lieferumfang enthalten.
Diese können verschluckt oder eingeatmet und so zu einer
Lebensgefahr werden.
Verwenden Sie das Produkt nicht, wenn Sie Beschädigungen
feststellen!
Die LEDs sind nicht austauschbar.
Wenn die LEDs am Ende ihrer Nutzungsdauer nicht mehr
funktionieren, muss das gesamte Produkt ausgetauscht werden.
Schauen Sie nicht direkt in die Lichtquelle (Glühlampe, LED usw.).
Betrachten Sie die LED nicht mit einem optischen Instrument (z. B.
durch eine Lupe).
Die flexible Anschlussleitung dieser Leuchte kann nicht ersetzt
werden. Falls die Leitung beschädigt ist, muss diese Leuchte
verschrottet werden (nurHG04465B).
Sicherheitshinweise für Batterien/
Akkus
m LEBENSGEFAHR! Halten Sie Batterien / Akkus außer
Reichweite von Kindern. Suchen Sie im Falle eines Verschluckens
sofort einen Arzt auf!

11 DE/AT/CH
EXPLOSIONSGEFAHR! Laden Sie nicht aufladbare
Batterien niemals wieder auf. Schließen Sie Batterien/
Akkus nicht kurz und/ oder öffnen Sie diese nicht.
Überhitzung, Brandgefahr oder Platzen können die Folge
sein.
Werfen Sie Batterien/ Akkus niemals in Feuer oder Wasser.
Setzen Sie Batterien/ Akkus keiner mechanischen Belastung aus.
Risiko des Auslaufens von Batterien/ Akkus
Vermeiden Sie extreme Bedingungen und Temperaturen, die
auf Batterien/ Akkus einwirken können z.B. auf Heizkörpern/
direkte Sonneneinstrahlung.
Wenn Batterien/ Akkus ausgelaufen sind, vermeiden Sie den
Kontakt mit Haut, Augen und Schleimhäuten mit den Chemikalien!
Spülen Sie die betroffenen Stellen sofort mit klarem Wasser und
suchen Sie einen Arzt auf!
SCHUTZHANDSCHUHE TRAGEN! Ausgelaufene
oder beschädigte Batterien/ Akkus können bei Berührung
mit der Haut Verätzungen verursachen. Tragen Sie deshalb
in diesem Fall geeignete Schutzhandschuhe.
Im Falle eines Auslaufens der Batterien/ Akkus entfernen Sie
diese sofort aus dem Produkt, um Beschädigungen zu vermeiden.
Verwenden Sie nur Batterien/ Akkus des gleichen Typs. Mischen
Sie nicht alte Batterien/ Akkus mit neuen!
Entfernen Sie Batterien/ Akkus, wenn das Produkt längere Zeit
nicht verwendet wird.

12 DE/AT/CH
Risiko der Beschädigung des Produkts
Verwenden Sie ausschließlich den angegebenen Batterietyp/
Akkutyp!
Setzen Sie Batterien/ Akkus gemäß der Polaritätskennzeichnung
(+) und (–) an Batterie/ Akku und des Produkts ein.
Reinigen Sie Kontakte an Batterie/ Akku und im Batteriefach vor
dem Einlegen!
Entfernen Sie erschöpfte Batterien/ Akkus umgehend aus dem
Produkt.
Vor der Verwendung
Hinweis: Entfernen Sie das gesamte Verpackungsmaterial vom
Produkt.
Laden der wiederaufladbaren Batterien
Hinweis: Die wiederaufladbaren Batterien
11
im Inneren des
Produktes sind bei der Lieferung vollständig geladen. Allerdings
können sie während des Transports vom Hersteller zum Händler an
Akkukapazität verloren haben. Laden Sie die wiederaufladbaren
Batterien
11
daher vor der Verwendung auf. Im Sommer ist für die
erstmalige Ladung zumindest 1Tag bei konstantem Sonnenlicht
erforderlich.
Stellen Sie den ON-/OFF-Schalter 2 auf die Position „ON“.
Hinweis: Bei konstantem Sonnenlicht (abhängig von der Jahreszeit)
sollte der Ladevorgang der leeren, wiederaufladbaren Batterien
11
2bis 10Tage dauern.

13 DE/AT/CH
Hinweis: Der integrierte Laderegler des Produktes verhindert eine
Überladung der wiederaufladbaren Batterien
11
.
Ersetzen Sie die wiederaufladbaren Batterien
11
, wenn sich die
Lichtabgabe nach dem Ladevorgang nicht verbessert (Abb.C:
HG04465A oder Abb.E: HG04465B).
Batterien einsetzen/ersetzen
Hinweis: Die wiederaufladbaren Batterien
11
sind bereits
eingesetzt. Verwenden Sie ausschließlich Batterien, die dem Kapitel
„Technische Daten“ entsprechen. Um die wiederaufladbaren
Batterien
11
zu entfernen, schalten Sie den Strahler 3 mit dem
ON-/OFF-Schalter 2 aus.
Öffnen Sie das Batteriefach
12
an der Rückseite des Strahlers
3, indem Sie die Befestigungsschrauben
13
gegen den
Uhrzeigersinn drehen, um die vordere Abdeckung
10
zu
entfernen (Abb.C: HG04465A oder Abb.E: HG04465B).
Nehmen Sie die alten, wiederaufladbaren Batterien
11
heraus.
Legen Sie die neuen, wiederaufladbaren Batterien
11
ein.
Verwenden Sie ausschließlich Batterien vom angegebenen Typ
(siehe „Technische Daten“).
Hinweis: Achten Sie beim Einlegen der Batterien auf die
korrekte Polarität! Diese wird im Batteriefach
12
angezeigt.
Schließen Sie das Batteriefach
12
wieder mit der vorderen
Abdeckung
10
. Befestigen Sie die vordere Abdeckung
10
, indem
Sie die Befestigungsschrauben
13
im Uhrzeigersinn drehen.

14 DE/AT/CH
Montage
Hinweis: Die im Lieferumfang enthaltenen Montagematerialien
sind für normale Wände aus Beton oder Mauerwerk geeignet. Für
andere Wandbaustoffe sind eventuell andere Befestigungsmaterialien
erforderlich. Holen Sie bei Bedarf den Rat eines Spezialisten ein.
Hinweis: Sie benötigen eine elektrische Bohrmaschine.
m ACHTUNG! VERLETZUNGSGEFAHR! Lesen Sie diese
Bedienungsanleitung Ihrer Bohrmaschine.
m ACHTUNG! Achten Sie darauf, dass Sie keine elektrischen
Kabel in der Wand oder Decke beschädigen.
Achten Sie bei der Wahl der Montageposition auf Folgendes:
Achten Sie darauf, dass der Strahler 3 den gewünschten
Bereich ausleuchtet. Sie können den Strahler 3 in die
gewünschte Position schwenken.
Achten Sie darauf, dass der Sensor 4 den gewünschten
Bereich abdeckt. Der Sensor 4 hat eine maximale Abdeckungs-
Reichweite von ca. 5 bis 8m, mit einem Abdeckungs-Winkel
von etwa 90° (abhängig von der Montagehöhe – eine
Höhe von 1,8 bis 2,5m ist ideal) (Abb.D: HG04465A oder
Abb.F:HG04465B).
Achten Sie darauf, dass der Sensor 4 bei Nacht nicht von
Straßenbeleuchtungen erhellt wird. Dies kann seine Funktion
beeinträchtigen.
Achten Sie darauf, dass das Solar-Paneel 1 an einer Position mit
direktem Sonnenlicht montiert ist.

15 DE/AT/CH
Installieren Sie das Solar-Paneel 1 nicht an Orten, an denen
starke Temperaturschwankungen auftreten, z.B. aufgrund von
Heizgeräten.
Installieren Sie das Solar-Paneel 1 fernab von unnatürlichen
Lichtquellen und nach Süden ausgerichtet.
Achten Sie darauf, dass das Verbindungskabel
17
des Solar-
Paneels 1 den Strahler 3 erreichen kann. Der maximale
Abstand zwischen Solar-Paneel 1 und Strahler 3 beträgt ca.
2,5m (nur HG04465B).
Für HG04465A:
Klappen Sie das Solar-Paneel 1 vorsichtig nach oben.
Entfernen Sie die Montageplatte 6 vom Strahler 3, indem Sie
die Schrauben der Kugelgelenk-Abdeckung 7 lösen (Abb.B).
Verwenden Sie die Schlitze in der Montageplatte 6, die für die
Schrauben 8 vorgesehen sind, um die Bohrlöcher zu markieren.
Bohren Sie nun die Befestigungslöcher (Ø 8mm, ca. 40mm
tief). Achten Sie vor dem Bohren der Befestigungslöcher darauf,
dass sich in dem Bereich, in dem Sie bohren werden, keine Gas-,
Wasser- oder Elektroleitungen befinden, die angebohrt oder
beschädigt werden könnten.
Setzen Sie die Dübel 5 in die Bohrlöcher ein (Abb.B).
Befestigen Sie die Montageplatte 6 mit den im Lieferumfang
enthaltenen Schrauben 8 (Abb.B).
Richten Sie das Solar-Paneel 1 zum Sonnenlicht aus.

16 DE/AT/CH
Positionieren Sie nun den Strahler 3 in Richtung der
Montageplatte 6. Setzen Sie das Kugelgelenk der
Montageplatte 6 korrekt in der Öffnung 9 des Strahlers 3
ein. Schließen Sie anschließend die Kugelgelenk-Abdeckung 7,
indem Sie die Schrauben im Uhrzeigersinn drehen (Abb.B).
Stellen Sie den ON-/OFF-Schalter 2 am Strahler 3 in die
Position „ON“ (Abb.A).
Die wiederaufladbaren Batterien
11
werden nun geladen, wenn
es ausreichend Sonneneinstrahlung gibt.
Für HG04465B:
Entfernen Sie die Montageplatte 6 vom Strahler 3, indem Sie
die Schrauben der Kugelgelenk-Abdeckung 7 lösen (Abb.B).
Verwenden Sie die Schlitze in der Montageplatte 6, die für die
Schrauben 8 vorgesehen sind, um die Bohrlöcher zu markieren.
Bohren Sie nun die Befestigungslöcher (Ø 8mm, ca. 40mm tief).
Achten Sie vor dem Bohren der Befestigungslöcher darauf, dass
sich in dem Bereich, in dem Sie bohren werden, keine Gas-,
Wasser- oder Elektroleitungen befinden, die angebohrt oder
beschädigt werden könnten.
Setzen Sie die Dübel 5 in die Bohrlöcher ein (Abb.B).
Befestigen Sie die Montageplatte 6 mit den im Lieferumfang
enthaltenen Schrauben 8 (Abb.B).
Positionieren Sie nun den Strahler 3 in Richtung der
Montageplatte 6. Setzen Sie das Kugelgelenk der
Montageplatte 6 korrekt in der Öffnung 9 des Strahlers 3
ein. Schließen Sie anschließend die Kugelgelenk-Abdeckung 7,
indem Sie die Schrauben im Uhrzeigersinn drehen (Abb.B).

17 DE/AT/CH
Verwenden Sie nun die Schlitze in der Montagehalterung
14
,
die für die Schrauben
16
vorgesehen sind, um die Bohrlöcher zu
markieren (Ø 8mm, ca. 40mm tief).
Achten Sie darauf, dass Sie den Strahler 3 über das
Verbindungskabel
17
mit dem Solar-Paneel 1 verbinden
können.
Bohren Sie nun die Befestigungslöcher. Achten Sie vor dem
Bohren der Befestigungslöcher darauf, dass sich in dem
Bereich, in dem Sie bohren werden, keine Gas-, Wasser- oder
Elektroleitungen befinden, die angebohrt oder beschädigt
werden könnten.
Setzen Sie die Dübel
15
in die Bohrlöcher ein (Abb.C).
Befestigen Sie die Montagehalterung
14
mit den Schrauben
16
.
Positionieren Sie das Solar-Paneel 1 in der Montagehalterung
14
(Abb.C).
Richten Sie das Solar-Paneel 1 zum Sonnenlicht aus.
Stecken Sie den Stecker
18
in die Buchse
19
(Abb.D).
Stellen Sie den ON-/OFF-Schalter 2 des Strahlers 3 auf die
Position „ON“ (Abb.A).
Die wiederaufladbaren Batterien
11
werden nun geladen, wenn
es ausreichend Sonneneinstrahlung gibt.
Achten Sie bei der Wahl der Montageposition für das
Solar-Paneel 1 auf Folgendes:
Das Solar-Paneel 1 muss dem Sonnenlicht so direkt wie möglich
ausgesetzt sein. Selbst ein Teilschatten auf dem Solar-Paneel 1
während des Tages kann sich erheblich auf den Ladevorgang
auswirken.

18 DE/AT/CH
Vorwiegende Richtung:
Optimal ist eine Ausrichtung nach Süden. Eine Ausrichtung mit
leichten Abweichungen nach Westen ist gegenüber einer Ausrichtung
mit leichter Abweichung nach Osten vorzuziehen.
Horizontale Ausrichtung:
Die horizontale Ausrichtung des Solar-Paneels 1 hängt von der
geografischen Breite des Montagestandortes ab. In Mitteleuropa ist
ein Winkel von 30° bis 40° ideal.
Ihr Produkt ist nun einsatzbereit.
Inbetriebnahme
Der Sensor 4 wird bei einer Beleuchtung von ca. <100Lux
aktiviert.
Der Strahler 3 schaltet sich bei Dunkelheit automatisch ein,
sobald der Sensor 4 eine Bewegung erkennt.
Das Licht schaltet sich nach 30Sekunden automatisch wieder
aus, wenn keine Bewegung mehr erkannt wird.
Wenn nach dem Ausschalten eine Bewegung erkannt wird,
schaltet sich das Licht erneut automatisch für ca. 30Sekunden
ein.
Um den Strahler 3 auszuschalten, muss der ON-/OFF-
Schalter 2 in die Position „OFF“ eingestellt werden. Die
wiederaufladbaren Batterien
11
werden nicht mehr geladen.

19 DE/AT/CH
Wartung und Reinigung
WARNUNG! LEBENSGEFAHR DURCH
STROMSCHLAG!
Verwenden Sie keine Lösungsmittel, Benzin usw. Anderenfalls
wird das Leuchtmittel beschädigt.
Stellen Sie den ON-/OFF-Schalter 2 des Strahlers 3 in die
Position „OFF“.
Entfernen Sie die wiederaufladbaren Batterien
11
.
Lösen Sie die Verbindung zwischen dem Stecker
18
und der
Buchse
19
(nur HG04465B).
Reinigen Sie die Leuchte mit einem trockenen, fusselfreien Tuch.
Legen Sie die wiederaufladbaren Batterien
11
wieder ein.
Verbinden Sie den Stecker
18
wieder mit der Buchse
19
(nur
HG04465B).
Stellen Sie den ON-/OFF-Schalter 2 des Strahlers 3 in die
Position „ON“.
Überprüfen Sie den Sensor 4 und das Solar-Paneel 1
regelmäßig auf Verunreinigungen. Entfernen Sie vorhandene
Verunreinigungen, um eine einwandfreie Funktion des Produktes
zu gewährleisten.
Halten Sie das Produkt insbesondere während des Winters frei
von Schnee und Eis.

20 DE/AT/CH
Entsorgung
Die Verpackung besteht aus umweltfreundlichen Materialien, die Sie
über die örtlichen Recyclingstellen entsorgen können.
Beachten Sie die Kennzeichnung der
Verpackungsmaterialien bei der Abfalltrennung, diese
sind gekennzeichnet mit Abkürzungen (a) und Nummern
(b) mit folgender Bedeutung: 1–7: Kunststoffe/ 20–22:
Papier und Pappe/ 80–98: Verbundstoffe.
Das Produkt und die Verpackungsmaterialien sind
recycelbar, entsorgen Sie diese getrennt für eine bessere
Abfallbehandlung.
Das Triman-Logo gilt nur für Frankreich.
Möglichkeiten zur Entsorgung des ausgedienten Produkts
erfahren Sie bei Ihrer Gemeinde- oder Stadtverwaltung.
Werfen Sie Ihr Produkt, wenn es ausgedient hat, im
Interesse des Umweltschutzes nicht in den Hausmüll,
sondern führen Sie es einer fachgerechten Entsorgung zu.
Über Sammelstellen und deren Öffnungszeiten können Sie
sich bei Ihrer zuständigen Verwaltung informieren.
Defekte oder verbrauchte Batterien/ Akkus müssen gemäß Richtlinie
2006/66/EG und deren Änderungen recycelt werden. Geben Sie
Batterien/ Akkus und/ oder das Produkt über die angebotenen
Sammeleinrichtungen zurück.

21 DE/AT/CH
Umweltschäden durch falsche Entsorgung der
Batterien/ Akkus!
Batterien/ Akkus dürfen nicht über den Hausmüll entsorgt werden.
Sie können giftige Schwermetalle enthalten und unterliegen der
Sondermüllbehandlung. Die chemischen Symbole der Schwermetalle
sind wie folgt: Cd=Cadmium, Hg=Quecksilber, Pb=Blei. Geben
Sie deshalb verbrauchte Batterien/ Akkus bei einer kommunalen
Sammelstelle ab.
Garantie
Das Produkt wurde nach strengen Qualitätsrichtlinien sorgfältig
produziert und vor Anlieferung gewissenhaft geprüft. Im Falle von
Mängeln dieses Produkts stehen Ihnen gegen den Verkäufer des
Produkts gesetzliche Rechte zu. Diese gesetzlichen Rechte werden
durch unsere im Folgenden dargestellte Garantie nicht eingeschränkt.
Sie erhalten auf dieses Produkt 3Jahre Garantie ab Kaufdatum. Die
Garantiefrist beginnt mit dem Kaufdatum. Bitte bewahren Sie den
Original-Kassenbon gut auf. Diese Unterlage wird als Nachweis für
den Kauf benötigt.
Tritt innerhalb von 3Jahren ab dem Kaufdatum dieses Produkts
ein Material- oder Fabrikationsfehler auf, wird das Produkt von uns
–nach unserer Wahl– für Sie kostenlos repariert oder ersetzt. Diese
Garantie verfällt, wenn das Produkt beschädigt, nicht sachgemäß
benutzt oder gewartet wurde.

22 DE/AT/CH
Die Garantieleistung gilt für Material- oder Fabrikationsfehler. Diese
Garantie erstreckt sich nicht auf Produktteile, die normaler Abnutzung
ausgesetzt sind (z.B. Batterien) und daher als Verschleißteile
angesehen werden können oder Beschädigungen an zerbrechlichen
Teilen, z.B. Schalter, Akkus oder die aus Glas gefertigt sind.

23GB/IE
List of pictograms used .................... Page 24
Introduction ................................. Page 25
Intended use .................................. Page 25
Description of parts ............................. Page 25
Technical data ................................. Page 26
Scope of delivery .............................. Page 27
General safety instructions ............... Page 27
Safety instructions for batteries/
rechargeable batteries .......................... Page 28
Before use ................................... Page 30
Charging the rechargeable batteries ............... Page 30
Inserting / replacing batteries ............ Page 31
Installation .................................. Page 32
Start-up ...................................... Page 36
Maintenance and cleaning ................ Page 37
Disposal ..................................... Page 38
Warranty .................................... Page 39

24 GB/IE
List of pictograms used
LED lifespan
Direct current
This product is suitable for extreme temperature up to
-21°C.
Motion detector range approx. 5 - 8 m
Detection angle of motion sensor: approx. 90º
Protection type: IP44 (splash-proof)
Batteries included
Illumination time (after activation): approx. 30seconds

25GB/IE
LED SOLAR SPOTLIGHT
Introduction
We congratulate you on the purchase of your new product. You have
chosen a high quality product. The instructions for use are part of the
product. They contain important information concerning safety, use
and disposal. Before using the product, please familiarise yourself
with all of the safety information and instructions for use. Only use the
product as described and for the specified applications. If you pass
the product on to anyone else, please ensure that you also pass on
all the documentation with it.
Intended use
The product is intended to illuminate outdoor areas without electrical
connection. The product is suitable for use in private household and is
not intended for commercial use or for use in other applications.
Not suitable for ordinary lighting in household room
illumination.
This product is suitable for extreme temperature up to -21°C.
Description of parts
1 Solar panel
2 ON/OFF switch
3 Spotlight
4 Sensor
5 Dowel (mounting plate)

26 GB/IE
6 Mounting plate
7 Ball joint cover
8 Screw (mounting plate)
9 Slot
10
Front cover
11
Rechargeable battery
12
Battery compartment
13
Fixing screw (front cover)
14
Mounting bracket (HG04465B only)
15
Dowel (for mounting bracket) (HG04465B only)
16
Screw (for mounting bracket) (HG04465B only)
17
Connection cable (HG04465B only)
18
Plug (HG04465B only)
19
Socket (HG04465B only)
Technical data
Model no.: HG04465A or HG04465B
LEDs: 6 x 0.5 W (LEDs not replaceable)
Operating voltage: 3.6 V
Rechargeable batteries: 3 x Ni-MH AAA, 600 mAh,1.2 V
Degree of ingress protection: IP44 (splash-proof)
Motion sensor: Range: approx. 5 to 8 m
Detection angle: approx. 90º

27GB/IE
Scope of delivery
Check immediately after unpacking that the parts are complete and
that the product is in proper condition.
1 LED solar powered spotlight, model HG04465A or HG04465B
1 Mounting bracket (for solar panel) (HG04465B only)
1 Solar panel (HG04465B only)
2 Dowels (mounting plate)
2 Screws (mounting plate)
2 Dowels (mounting bracket) (HG04465B only)
2 Screws (mounting bracket) (HG04465B only)
1 Assembly, operating and safety instructions
General safety instructions
BEFORE USING THE PRODUCT, PLEASE FAMILIARISE YOURSELF
WITH ALL OF THE SAFETY INFORMATION AND INSTRUCTIONS
FOR USE! WHEN PASSING THIS PRODUCT ON TO OTHERS,
PLEASE ALSO INCLUDE ALL THE DOCUMENTS!
This product can be used by children aged from 8 years and
above and persons with reduced physical, sensory or mental
capabilities or lack of experience and knowledge if they have
been given supervision or instruction concerning use of the
product in a safe way and understand the hazards involved.
Children shall not play with the product. Cleaning and user
maintenance shall not be made by children without supervision.

28 GB/IE
Never leave children unsupervised with the packaging material.
The packaging material represents a danger of suffocation.
Children frequently underestimate the dangers.
Keep children out of the area you are working in. A large number
of screws and other small parts are included with the delivery.
These may prove life-threatening if swallowed or inhaled.
Do not use this product if you notice any damage!
The LEDs are not replaceable.
If the LEDs fail at the end of their life, the entire product must be
replaced.
Do not look directly into the light source (light bulb, LED etc.).
Do not look at the LED with an optical instrument (e.g. magnifier).
The external flexible cable of this luminaire cannot be replaced;
if the cord is damaged, the luminaire shall be destroyed
(HG04465B only).
Safety instructions for batteries/
rechargeable batteries
m DANGER TO LIFE! Keep batteries/ rechargeable batteries out
of reach of children. If accidentally swallowed seek immediate
medical attention.

29GB/IE
DANGER OF EXPLOSION! Never recharge non-
rechargeable batteries. Do not short-circuit batteries/
rechargeable batteries and/ or open them. Overheating,
fire or bursting can be the result.
Never throw batteries/ rechargeable batteries into fire or water.
Do not exert mechanical loads to batteries/ rechargeable
batteries.
Risk of leakage of batteries/ rechargeable batteries
Avoid extreme environmental conditions and temperatures, which
could affect batteries/ rechargeable batteries, e.g. radiators/
direct sunlight.
If batteries/ rechargeable batteries have leaked, avoid contact
with skin, eyes and mucous membranes with the chemicals! Flush
immediately the affected areas with fresh water and seek medical
attention!
WEAR PROTECTIVE GLOVES! Leaked or damaged
batteries/ rechargeable batteries can cause burns on
contact with the skin. Wear suitable protective gloves at all
times if such an event occurs.
In the event of a leakage of batteries/ rechargeable batteries,
immediately remove them from the product to prevent damage.
Only use the same type of batteries/ rechargeable batteries. Do
not mix used and new batteries/ rechargeable batteries.
Remove batteries/ rechargeable batteries if the product will not
be used for a longer period.

30 GB/IE
Risk of damage of the product
Only use the specified type of battery/ rechargeable battery!
Insert batteries/ rechargeable batteries according to polarity
marks (+) and (–) on the battery/ rechargeable battery and the
product.
Clean the contacts on the battery/ rechargeable battery and in
the battery compartment before inserting!
Remove exhausted batteries/ rechargeable batteries from the
product immediately.
Before use
Note: Remove all packaging materials from the product.
Charging the rechargeable batteries
Note: The rechargeable batteries
11
inside the product are fully
charged at delivery. However, they may have lost charge during
transport from the manufacturer to the retail location. Therefore
charge the rechargeable batteries
11
prior to use. During summer,
initial charging will take at least 1 day in constant sunlight.
Set the ON/OFF switch 2 to the “ON“ position.
Note: In constant sunlight (depending on the season) drained
rechargeable batteries
11
should take 2 to 10 days to charge.

31GB/IE
Note: The built-in charging controller of the product prevents the
rechargeable batteries
11
from overcharging.
Replace the rechargeable batteries
11
if light output does not
improve after charging (Fig.C: HG04465A or Fig.E: HG04465B).
Inserting / replacing batteries
Note: The rechargeable batteries
11
are pre-installed. Only use
batteries as stated in the “Technical data” chapter. To remove the
rechargeable batteries
11
, switch the spotlight 3 off using the ON/
OFF switch 2 .
Open the battery compartment
12
on the back side of the
spotlight 3 by loosening the fixing screws
13
counterclockwise
to remove the front cover
10
(Fig.C: HG04465A or
Fig.E:HG04465B).
Remove the old rechargeable batteries
11
.
Insert the new rechargeable batteries
11
. Use only batteries of
the specified type (see “Technical data”).
Note: When inserting the battery, ensure the correct polarity!
This is indicated in the battery compartment
12
.
Close the battery compartment
12
again with the front cover
10
and fix the front cover
10
by turning the fixing screws
13
clockwise.

32 GB/IE
Installation
Note: The included mounting material is suitable for ordinary solid
concrete or masonry construction. Other wall substrates may require
other fastening materials. Seek specialist advice if necessary.
Note: You will need an electric drill.
m CAUTION! RISK OF INJURY! Read the operating instructions
for your drill.
m CAUTION! Ensure that you do not damage any electricity
cables in the wall or ceiling.
When selecting the mounting location, pay attention to the following:
Ensure that the spotlight 3 illuminates the desired area. You can
swivel the spotlight 3 into the desired position.
Ensure the sensor 4 covers the desired area. The sensor 4
has a maximum coverage range of approx. 5 to 8 m, with a
coverage angle of about 90° (depending on the mounting
height – a height from 1.8 to 2.5 m is ideal) (Fig. D: HG04465A
or Fig. F: HG04465B).
Ensure the sensor 4 is not illuminated at night by street lighting.
This can influence its functioning.
Ensure that the solar panel 1 is mounted in a place with direct
sunlight.

33GB/IE
Ensure that the solar panel 1 is not installed where there are
strong temperature fluctuations, e.g. due to heating devices.
Ensure that the solar panel 1 is installed far away from
unnatural light sources and in southern direction.
Ensure that the connection cable
17
of the solar panel 1 can
reach the spotlight 3. Max. distance between the solar panel
1 and the spotlight 3 is approx. 2.5 m (HG04465B only).
For HG04465A:
Carefully fold the solar panel 1 upwards.
Remove the mounting plate 6 from the spotlight 3 by loosening
the screws of the ball joint cover 7 (Fig. B).
Use the slotted holes of the mounting plate 6 intended for the
screws 8 to mark the drill holes.
Now drill the fixing holes (Ø 8 mm, depth approx. 40 mm).
Before drilling the fixing holes, ensure there are no gas, water or
electrical lines that could be drilled into or damaged in the area
where you will be drilling.
Insert the dowels 5 into the drill holes (Fig. B).
Attach the mounting plate 6 using the screws 8 provided
(Fig. B).
Ensure that the solar panel 1 is orientated towards the sun.

34 GB/IE
Now place the spotlight 3 towards the mounting plate 6.
Ensure that the ball joint of the mounting plate 6 is correctly
inserted into the slot 9 of the spotlight 3. Then, close the ball
joint cover 7 by tightening the screws clockwise (Fig. B).
Set the ON/OFF switch 2 on the spotlight 3 to the “ON“
position (Fig. A).
The rechargeable batteries
11
will now charge when there is
sufficient solar radiation.
For HG04465B:
Remove the mounting plate 6 from the spotlight 3 by loosening
the screws of the ball joint cover 7 (Fig. B).
Use the slotted holes of the mounting plate 6 intended for the
screws 8 to mark the drill holes.
Now drill the fixing holes (Ø 8 mm, depth approx. 40 mm).
Before drilling the fixing holes, ensure there are no gas, water or
electrical lines that could be drilled into or damaged in the area
where you will be drilling.
Insert the dowels 5 into the drill holes (Fig. B).
Attach the mounting plate 6 using the screws 8 provided
(Fig. B).
Now place the spotlight 3 towards the mounting plate 6 .
Ensure that the ball joint of the mounting plate 6 is correctly
inserted into the slot 9 of the spotlight 3. Then, close the ball
joint cover 7 by tighten the screws clockwise (Fig. B).

35GB/IE
Now use the slots in the mounting bracket
14
intended for
the screws
16
to mark the drill holes (Ø 8 mm, depth approx.
40 mm).
Ensure that you can connect the spotlight 3 using the connection
cable
17
to the solar panel 1 .
Now drill the fixing holes. Before drilling the fixing holes, ensure
there are no gas, water or electrical lines that could be drilled
into or damaged in the area where you will be drilling.
Insert the dowels
15
into the drill holes (Fig. C).
Attach the mounting bracket
14
using the screws
16
.
Place the solar panel 1 into the mounting bracket
14
(Fig. C).
Ensure that the solar panel 1 is orientated towards the sun.
Insert the plug
18
into the socket
19
(Fig. D).
Set the ON/OFF switch 2 on the spotlight 3 to the “ON“
position (Fig. A).
The rechargeable batteries
11
will now charge when there is
sufficient solar radiation.
When selecting the mounting location for the solar panel 1, pay
attention to the following:
The solar panel 1 needs to be as directly exposed to sunlight as
possible. Even partial shading of the solar panel 1 during the day
can have a significant influence on charging.

36 GB/IE
Cardinal direction:
Orientation towards the south is optimum. Orienta tions with slight
deviations towards the west are preferable to those with slight
deviations towards the east.
Horizontal orientation:
The horizontal orientation of the solar panel 1 depends on the
geographic latitude of the mounting loca tion. In central Europe, an
angle of 30°to 40° is ideal.
Your product is now ready to use.
Start-up
The sensor 4 is activated at an illumination level of approx.
<100 Lux.
The spotlight 3 will automatically switch on in darkness as soon
as the sensor 4 detects motion.
The light will automatically switch off after approx. 30 seconds if
motion is no longer detected.
If any motion is detected after it has been switched off, the light
will automatically switch on again for approx. 30 seconds.
To switch off the spotlight 3, the ON/OFF switch 2 must be
set to the “OFF“ position. The rechargeable batteries
11
will no
longer be charged.

37GB/IE
Maintenance and cleaning
WARNING! DANGER TO LIFE BY ELECTRIC SHOCK!
Do not use solvents, petrol, etc. Otherwise the light will be
damaged.
Set the ON/OFF switch 2 on the spotlight 3 to the “OFF“
position.
Remove the rechargeable batteries
11
.
Loosen the connection between the plug
18
and the socket
19
(HG04465B only).
Clean the light with a dry, lint-free cloth. Reinsert the
rechargeable batteries
11
.
Insert the plug
18
into the socket
19
again (HG04465B only).
Set the ON/OFF switch 2 on the spotlight 3 to the “ON“
position.
Check the sensor 4 and the solar panel 1 for dirt regularly. If
dirt or is present, remove it to guarantee flawless function of the
product.
Especially during the winter, keep the product free from snow and
ice.

38 GB/IE
Disposal
The packaging is made entirely of recyclable materials, which you
may dispose of at local recycling facilities.
Observe the marking of the packaging materials for waste
separation, which are marked with abbreviations (a)
and numbers (b) with following meaning: 1–7: plastics /
20–22: paper and fibreboard / 80–98: composite
materials.
The product and packaging materials are recyclable,
dispose of it separately for better waste treatment.
The Triman logo is valid in France only.
Contact your local refuse disposal authority for more
details of how to dispose of your worn-out product.
To help protect the environment, please dispose of the
product properly when it has reached the end of its
useful life and not in the household waste. Information on
collection points and their opening hours can be obtained
from your local authority.
Faulty or used batteries / rechargeable batteries must be recycled in
accordance with Directive 2006/66/EC and its amendments. Please
return the batteries / rechargeable batteries and / or the product to
the available collection points.

39GB/IE
Environmental damage through incorrect
disposal of the batteries / rechargeable
batteries!
Batteries / rechargeable batteries may not be disposed of with the
usual domestic waste. They may contain toxic heavy metals and
are subject to hazardous waste treatment rules and regulations. The
chemical symbols for heavy metals are as follows: Cd = cadmium,
Hg = mercury, Pb = lead. That is why you should dispose of used
batteries / rechargeable batteries at a local collection point.
Warranty
The product has been manufactured to strict quality guidelines and
meticulously examined before delivery. In the event of product defects
you have legal rights against the retailer of this product. Your legal
rights are not limited in any way by our warranty detailed below.
The warranty for this product is 3 years from the date of purchase.
Should this product show any fault in materials or manufacture within
3 years from the date of purchase, we will repair or replace it – at
our choice – free of charge to you.
The warranty period begins on the date of purchase. Please keep the
original sales receipt in a safe location. This document is required as
your proof of purchase. This warranty becomes void if the product
has been damaged, or used or maintained improperly.

40 GB/IE
The warranty applies to defects in material or manufacture. This
warranty does not cover product parts subject to normal wear, thus
possibly considered consumables (e. g. batteries) or for damage to
fragile parts, e. g. switches, rechargeable batteries or glass parts.

41 FR/BE
Liste des pictogrammes utilisés .......... Page 42
Introduction ................................. Page 43
Utilisation conforme aux prescriptions .............. Page 43
Description des pièces .......................... Page 43
Caractéristiques techniques ....................... Page 44
Contenu de la livraison .......................... Page 45
Consignes de sécurité générales ......... Page 45
Consignes de sécurité relatives aux piles/ aux piles
rechargeables ................................. Page 46
Avant la mise en service. . . . . . . . . . . . . . . . . . . Page 48
Charge des piles rechargeables ................... Page 48
Insertion/remplacement des piles ....... Page 49
Montage ..................................... Page 50
Mise en service ............................. Page 54
Maintenance et nettoyage ................ Page 55
Mise au rebut ............................... Page 56
Garantie ..................................... Page 57

42 FR/BE
Liste des pictogrammes utilisés
Durée de vie des LED
Courant continu
Ce produit est conçu pour des températures extrêmes
allant jusqu’à -21°C.
Portée du capteur de mouvement: env. 5 à 8m
Angle de détection du capteur de mouvement: env. 90º
Indice de protection: IP44 (étanche aux projections
d'eau)
Piles fournies
Durée d’éclairage (après l’activation): env. 30 secondes

43 FR/BE
PROJECTEUR SOLAIRE LED
Introduction
Nous vous félicitons pour l’achat de votre nouveau produit. Vous
avez opté pour un produit de grande qualité. Le mode d‘emploi fait
partie intégrante de ce produit. Il contient des indications importantes
pour la sécurité, l’utilisation et la mise au rebut. Veuillez lire
consciencieusement toutes les indications d‘utilisation et de sécurité
du produit. Ce produit doit uniquement être utilisé conformément aux
instructions et dans les domaines d‘application spécifiés. Lors d‘une
cession à tiers, veuillez également remettre tous les documents.
Utilisation conforme aux prescriptions
Le produit est prévu pour l’éclairage de zones extérieures sans
raccordement à l’électricité. Le produit est prévu pour une utilisation
domestique dans des habitations privées et n’est pas conçu pour un
usage commercial ou toute autre application.
Inapproprié pour un éclairage normal dans une pièce.
Ce produit est conçu pour des températures extrêmes allant
jusqu’à -21°C.
Description des pièces
1 Panneau solaire
2 Interrupteur ON/OFF (marche/arrêt)
3 Projecteur
4 Capteur
5 Cheville (plaque de montage)

44 FR/BE
6 Plaque de montage
7 Couvre-articulation
8 Vis (plaque de montage)
9 Ouverture
10
Couvercle frontal
11
Piles rechargeables
12
Compartiment des piles
13
Vis de fixation (couverture frontal)
14
Support de montage (seulement pour HG04465B)
15
Vis (pour le support de montage) (seulement pour HG04465B)
16
Vis (pour le support de montage) (seulement pour HG04465B)
17
Câble de raccordement (seulement pour HG04465B)
18
Fiche (seulement pour HG04465B)
19
Prise (seulement pour HG04465B)
Caractéristiques techniques
Modèle n°: HG04465A ou HG04465B
LED: 6 diodes de 0,5W (LED non
remplaçables)
Tension de fonctionnement: 3,6V
Piles rechargeables: 3 p. Ni-MH AAA 600mAh 1,2V
Indice de protection: IP44 (étanche aux projections d’eau)
Capteur de mouvement: Portée: env. 5 – 8m
Angle de détection: env. 90º

45 FR/BE
Contenu de la livraison
Après le déballage, contrôlez l’exhaustivité des pièces livrées et
vérifiez l’état parfait du produit.
1 projecteur alimenté par un panneau solaire, modèle HG04465A
ou HG04465B
1 support de montage (pour panneau solaire) (seulement pour
HG04465B)
1 panneau solaire (seulement pour HG04465B)
2 chevilles (plaque de montage)
2 vis (plaque de montage)
2 chevilles (support de montage) (seulement pour HG04465B)
2 vis (support de montage) (seulement pour HG04465B)
1 mode d’emploi avec notice de montage et consignes de sécurité
Consignes de sécurité générales
AVANT D’UTILISER LE PRODUIT, FAMILIARISEZ-VOUS AVEC TOUTES
LES CONSIGNES DE FONCTIONNEMENT ET DE SÉCURITÉ.
TRANSMETTEZ TOUS LES DOCUMENTS CONCERNANT LE
PRODUIT LORSQUE VOUS LE DONNEZ À UN TIERS!
Cet appareil peut être utilisé par des enfants de 8 ans et plus,
ainsi que par des personnes ayant des capacités physiques,
sensorielles ou mentales réduites ou manquant d’expérience
et/ou de connaissances, à condition qu’ils soient surveillés ou
aient reçu des instructions relatives à l’utilisation du produit en
toute sécurité et qu’ils soient ainsi conscients des dangers liés
à l’utilisation. Les enfants ne doivent pas jouer avec le produit.
Le nettoyage et l’entretien ne doivent pas être effectués par des
enfants sans surveillance.

46 FR/BE
Ne laissez jamais des enfants sans surveillance avec des
matériaux d’emballage. Les matériaux d’emballage représentent
un risque d’asphyxie. Les enfants sous-estiment fréquemment les
dangers en résultant.
Maintenez les enfants hors de portée de la zone de travail.
Beaucoup de vis et d’autres petites pièces sont comprises dans
le contenu de l’emballage. Celles-ci peuvent être avalées ou
inhalées et devenir dangereuses et causer un risque mortel.
Si vous relevez le moindre dommage, n’utilisez pas le produit.
Les diodes LED ne sont pas remplaçables.
Si les diodes LED ne fonctionnent plus à la fin de leur durée
d’utilisation, le produit doit être remplacé dans son ensemble.
Ne regardez pas directement des sources lumineuses (ampoules,
diodes LED, etc.).
Ne regardez pas de diodes LED avec un instrument optique
(p.ex. une loupe).
Le cordon d’alimentation flexible de cet éclairage ne peut pas
être remplacé. Si le fil est endommagé, cet éclairage doit être mis
au rebut (seulement pourHG04465B).
Consignes de sécurité relatives aux
piles/ aux piles rechargeables
m DANGER DE MORT! Rangez les piles/ piles rechargeables
hors de la portée des enfants. En cas d’ingestion, consultez
immédiatement un médecin!

47 FR/BE
RISQUE D‘EXPLOSION! Ne rechargez jamais des
piles non rechargeables. Ne courtcircuitez pas les piles/
piles rechargeables et/ ou ne les ouvrez pas! Autrement,
vous risquez de provoquer une surchauffe, un incendie ou
une explosion.
Ne jetez jamais des piles/ piles rechargeables au feu ou dans
l’eau.
Ne pas soumettre les piles/ piles rechargeables à une charge
mécanique.
Risque de fuite des piles/ piles rechargeables
Évitez d’exposer les piles/ piles rechargeables à des conditions
et températures extrêmes susceptibles de les endommager, par
ex. sur des radiateurs / exposition directe aux rayons du soleil.
Lorsque les piles/ piles rechargeables fuient, évitez tout
contact du produit chimique avec la peau, les yeux ou les
muqueuses ! Rincez les zones touchées à l‘eau claire et consultez
immédiatement un médecin !
PORTER DES GANTS DE PROTECTION! Les piles/
piles rechargeables endommagées ou sujettes à des fuites
peuvent provoquer des brûlures au contact de la peau.
Vous devez donc porter des gants adéquats pour les
manipuler.
En cas de fuite des piles/ piles rechargeables, retirez-les aussitôt
du produit pour éviter tout endommagement.
Utilisez uniquement des piles/ piles rechargeables du même
type. Ne mélangez pas des piles / piles rechargeables usées et
neuves !
Retirez les piles/ piles rechargeables, si vous ne comptez pas
utiliser le produit pendant une période prolongée.

48 FR/BE
Risque d‘endommagement du produit
Exclusivement utiliser le type de pile/ pile rechargeable spécifié.
Insérez les piles/ piles rechargeables conformément à
l‘indication de polarité (+) et (–) indiquée sur la pile/ pile
rechargeable et sur le produit.
Nettoyez les contacts de la pile/ pile rechargeable et du
compartiment à pile avant d‘insérer la pile !
Retirez immédiatement les piles/ piles rechargeables usées du
produit.
Avant la mise en service
Remarque: retirez tous les matériaux d’emballage du produit.
Charge des piles rechargeables
Remarque: Les piles rechargeables
11
à l’intérieur du produit sont
complètement chargées à la livraison. Cependant, elles peuvent avoir
perdu de leur capacité lors du transport du fabricant au revendeur.
Par conséquent, rechargez les piles rechargeables
11
avant
l’utilisation. En été, la première recharge nécessite au moins 1journée
d’ensoleillement constant.
Placez l’interrupteur ON/OFF 2 sur la position ON.
Remarque: en plein soleil (selon la saison), le chargement des
piles rechargeables vides
11
devrait prendre 2à 10jours.

49 FR/BE
Remarque: le contrôleur de charge intégré dans le produit
empêche la surcharge des piles rechargeables
11
.
Remplacez les piles rechargeables
11
lorsque la puissance lumineuse
ne s’améliore pas après la recharge (ill.C: HG04465A ou
ill.E:HG04465B).
Insertion/remplacement des piles
Remarque: les piles rechargeables
11
sont déjà insérées.
N’utilisez que des piles dont le type est indiqué au chapitre
«Données techniques». Pour retirer les piles rechargeables
11
,
éteignez le projecteur 3 à l’aide de l’interrupteur ON/OFF 2.
Ouvrez le compartiment des piles
12
au dos du projecteur
3 en tournant les vis de fixation
13
dans le sens inverse des
aiguilles d’une montre pour retirer le couvercle frontal
10
(ill.C:HG04465A ou ill.E: HG04465B).
Enlevez les piles rechargeables
11
usagées.
Insérez les nouvelles piles rechargeables
11
. Utilisez
exclusivement des piles du type indiqué (voir «Données
techniques»)!
Remarque: veillez à bien respecter la polarité lorsque vous
insérez les piles. Celle-ci est indiquée dans le compartiment des
piles
12
.
Fermez le compartiment des piles
12
avec le couvercle frontal
10
. Fixez le couvercle frontal
10
en tournant les vis de fixation
13
dans le sens des aiguilles d’une montre.

50 FR/BE
Montage
Remarque: les matériaux de montage compris dans le contenu
d’emballage conviennent aux murs en béton ou en maçonnerie
normaux. D’autres constructions murales peuvent nécessiter d’autres
matériaux de fixation. Demandez en cas de besoin conseil à un
spécialiste.
Remarque: vous avez besoin d’une perceuse électrique.
m ATTENTION! RISQUE DE BLESSURES! Lisez le mode
d’emploi de la perceuse électrique!
m ATTENTION! Veillez à ne pas endommager de câbles
électriques dans le mur ou le plafond.
Tenez compte lors du choix de la position de montage de ce qui suit:
Veillez à ce que le projecteur 3 éclaire le secteur souhaité. Vous
pouvez incliner le projecteur 3 dans la position souhaitée.
Veillez à ce que le capteur 4 couvre le secteur souhaité. Le
capteur 4 a une portée maximale de détection d’environ 5 à
8m, avec un angle de couverture d’environ 90° (en fonction de
la hauteur de montage – une hauteur de 1,8 à 2,5m est idéale)
(ill.D: HG04465A ou ill.F: HG04465B).
Assurez-vous que le capteur 4 ne soit pas éclairé par l’éclairage
public durant la nuit. Cela peut affecter son fonctionnement.
Assurez-vous que le panneau solaire 1 soit installé dans une
position qui permet l’exposition à un ensoleillement direct.

51 FR/BE
N’installez pas le panneau solaire 1 dans des endroits soumis
à de fortes variations de température provenant p.ex. de
chauffages.
Installez le panneau solaire 1 orienté vers le sud et hors de la
portée de sources lumineuses artificielles.
Assurez-vous que le câble de raccordement
17
du panneau
solaire 1 puisse atteindre le projecteur 3. La distance
maximale entre le panneau solaire 1 et le projecteur 3 s’élève
à env. 2,5m (seulement pour HG04465B).
Pour HG04465A:
dépliez soigneusement le panneau solaire 1 vers le haut.
Retirez la plaque de montage 6 du projecteur 3 en desserrant
les vis du couvre-articulation 7 (ill.B).
Utilisez les fentes de la plaque de montage 6 prévues pour les
vis 8 pour marquer les trous à percer.
Percez maintenant les trous de fixation (Ø 8mm, env. 40mm de
profondeur). Avant de percer les trous de fixation, assurez-vous
qu’il n’y a pas de conduites de gaz, de canalisations d’eau ou de
fils électriques dans la zone où vous allez percer qui pourraient
être percés ou endommagés lors des travaux.
Insérez les chevilles 5 dans les trous (ill.B).
Fixez la plaque de montage 6 avec les vis fournies dans le
contenu d’emballage 8 (ill.B).
Orientez le panneau solaire 1 vers la lumière du soleil.

52 FR/BE
Positionnez maintenant le projecteur 3 en direction de la plaque
de montage 6. Placez l’articulation de la plaque de montage
6 correctement dans l’ouverture 9 du projecteur 3. Refermez
ensuite le couvre-articulation 7 en tournant les vis dans le sens
des aiguilles d’une montre (ill.B).
Placez l’interrupteur ON/OFF 2 qui se trouve sur le projecteur
3 sur la position ON (ill.A).
Les piles rechargeables
11
sont maintenant rechargées lorsque le
rayonnement solaire est suffisant.
Pour HG04465B:
Retirez la plaque de montage 6 du projecteur 3 en desserrant
les vis du couvre-articulation 7 (ill.B).
Utilisez les fentes de la plaque de montage 6 prévues pour les
vis 8 pour marquer les trous à percer.
Percez maintenant les trous de fixation (Ø 8mm, env. 40mm de
profondeur).
Avant de percer les trous de fixation, assurez-vous qu’il n’y a pas
de conduites de gaz, de canalisations d’eau ou de fils électriques
dans la zone où vous allez percer qui pourraient être percés ou
endommagés lors des travaux.
Insérez les chevilles 5 dans les trous (ill.B).
Fixez la plaque de montage 6 avec les vis fournies dans le
contenu d’emballage 8 (ill.B).
Positionnez maintenant le projecteur 3 en direction de la plaque
de montage 6. Placez l’articulation de la plaque de montage
6 correctement dans l’ouverture 9 du projecteur 3. Refermez
ensuite le couvre-articulation 7 en tournant les vis dans le sens
des aiguilles d’une montre (ill.B).

53 FR/BE
Utilisez les fentes du support de montage
14
prévues pour les
vis
16
pour marquer les trous à percer (Ø 8mm, env. 40mm de
profondeur).
Assurez-vous que vous pouvez raccorder le projecteur 3 au
panneau solaire 1 via le câble de raccordement
17
.
Percez maintenant les trous de fixation. Avant de percer les trous
de fixation, assurez-vous qu’il n’y a pas de conduites de gaz, de
canalisations d’eau ou de fils électriques dans la zone où vous
allez percer qui pourraient être percés ou endommagés lors des
travaux.
Insérez les chevilles
15
dans les trous (ill.C).
Fixez le support de montage
14
avec les vis
16
.
Placez le panneau solaire 1 dans le support de montage
14
(ill.C).
Orientez le panneau solaire 1 vers la lumière du soleil.
Branchez la fiche
18
dans la prise
19
(ill.D).
Placez l’interrupteur ON/OFF 2 du projecteur 3 sur la position
ON (ill.A).
Les piles rechargeables
11
sont maintenant rechargées lorsque le
rayonnement solaire est suffisant.
Lors du choix de l’emplacement de montage du panneau solaire 1,
notez les points suivants:
Le panneau solaire 1 doit être exposé aussi directement que
possible au rayonnement solaire. Même une ombre partielle sur le
panneau solaire 1 durant la journée peut affecter considérablement
le processus de charge.

54 FR/BE
Direction préférable:
Une orientation vers le sud est optimale. Une orientation avec de
légères déviations vers l’ouest est préférable à une orientation avec
une légère déviation vers l’est.
Alignement horizontal:
L’alignement horizontal du panneau solaire 1 dépend de la largeur
géographique de l’emplacement du montage. En Europe centrale, un
angle de 30° à 40° est idéal.
Votre produit est maintenant prêt à l’emploi.
Mise en service
Le capteur 4 est activé par un éclairage d’environ <100lux.
Le projecteur 3 s’allume automatiquement dans l’obscurité dès
que le capteur 4 détecte un mouvement.
La lumière s’éteint automatiquement après 30secondes si aucun
mouvement n’est à nouveau détecté.
Si un mouvement est détecté après la coupure, l’appareil se
rallume automatiquement pendant env. 30secondes.
Pour éteindre le projecteur 3, réglez l’interrupteur ON/OFF 2
sur la position OFF. Les piles rechargeables
11
ne sont plus
rechargées.

55 FR/BE
Maintenance et nettoyage
AVERTISSEMENT! DANGER MORTEL DÛ À UNE
DÉCHARGE ÉLECTRIQUE!
N’utilisez pas de solvants, d’essence etc. sinon l’éclairage sera
endommagé.
Placez l’interrupteur ON/OFF 2 du projecteur 3 sur la position
OFF.
Enlevez les piles rechargeables
11
.
Desserrez le raccordement entre la fiche
18
et la prise
19
(seulement pour HG04465B).
Nettoyez l’éclairage avec un chiffon sec et non pelucheux.
Replacez les piles rechargeables
11
.
Raccordez à nouveau la fiche
18
à la prise
19
(seulement pour
HG04465B).
Placez l’interrupteur ON/OFF 2 du projecteur 3 sur la position
ON.
Vérifiez régulièrement que le capteur 4 et le panneau solaire 1
ne sont pas sales. Enlevez toutes les saletés pour assurer le bon
fonctionnement du produit.
Conservez le produit surtout en hiver sans neige et glace.

56 FR/BE
Mise au rebut
L’emballage se compose de matières recyclables pouvant être mises
au rebut dans les déchetteries locales.
Veuillez respecter l‘identification des matériaux
d‘emballage pour le tri sélectif, ils sont identifiés avec des
abbréviations (a) et des chiffres (b) ayant la signification
suivante : 1–7 : plastiques / 20–22 : papiers et cartons /
80–98 : matériaux composite.
Le produit et les matériaux d’emballage sont recyclables,
mettez-les au rebut séparément pour un meilleur traitement
des déchets.
Le logo Triman n’est valable qu’en France.
Votre mairie ou votre municipalité vous renseigneront sur
les possibilités de mise au rebut des produits usagés.
Afin de contribuer à la protection de l’environnement,
veuillez ne pas jeter votre produit usagé dans les ordures
ménagères, mais éliminez-le de manière appropriée.
Pour obtenir des renseignements concernant les points
de collecte et leurs horaires d’ouverture, vous pouvez
contacter votre municipalité.
Les piles / piles rechargeables défectueuses ou usagées doivent
être recyclées conformément à la directive 2006/66/CE et ses
modifications. Les piles et / ou piles rechargeables et / ou le produit
doivent être retournés dans les centres de collecte proposés.

57 FR/BE
Pollution de l’environnement par la
mise au rebut incorrecte des piles / piles
rechargeables !
Les piles / piles rechargeables ne doivent pas être mises au rebut
avec les ordures ménagères. Elles peuvent contenir des métaux lourds
toxiques et doivent être considérées comme des déchets spéciaux.
Les symboles chimiques des métaux lourds sont les suivants :
Cd = cadmium, Hg = mercure, Pb = plomb. Pour cette raison, veuillez
toujours déposer les piles / piles rechargeables usagées dans les
conteneurs de recyclage communaux.
Garantie
Le produit a été fabriqué selon des critères de qualité stricts
et contrôlé consciencieusement avant sa livraison. En cas de
défaillance, vous êtes en droit de retourner ce produit au vendeur.
La présente garantie ne constitue pas une restriction de vos droits
légaux.
Ce produit bénéficie d‘une garantie de 3 ans à compter de sa date
d’achat. La durée de garantie débute à la date d’achat. Veuillez
conserver le ticket de caisse original. Il fera office de preuve d’achat.
Si un problème matériel ou de fabrication devait survenir dans
3 ans suivant la date d‘achat de ce produit, nous assurons à notre
discrétion la réparation ou le remplacement du produit sans frais
supplémentaires. La garantie prend fin si le produit est endommagé
suite à une utilisation inappropriée ou à un entretien défaillant.

58 FR/BE
La garantie couvre les vices matériels et de fabrication. Cette garantie
ne s’étend ni aux pièces du produit soumises à une usure normale
(p. ex. des piles) et qui, par conséquent, peuvent être considérées
comme des pièces d’usure, ni aux dommages sur des composants
fragiles, comme des interrupteurs, des batteries ou des éléments
fabriqués en verre.

59 NL/BE
Overzicht gebruikte pictogrammen ... Pagina 60
Inleiding ................................... Pagina 61
Beoogd gebruik ............................. Pagina 61
Onderdelenbeschrijving ....................... Pagina 61
Technische gegevens .......................... Pagina 62
Leveringsomvang ............................. Pagina 63
Algemene veiligheidsinstructies ....... Pagina 63
Veiligheidsinstructies voor batterijen/ accu‘s ....... Pagina 64
Voor gebruik ............................. Pagina 66
Laad de herlaadbare batterijen op ............... Pagina 66
Batterijen plaatsen/vervangen ........ Pagina 67
Installatie .................................. Pagina 68
Ingebruikname ........................... Pagina 72
Onderhoud en schoonmaken ........... Pagina 73
Afvoer ..................................... Pagina 74
Garantie ................................... Pagina 75

60 NL/BE
Overzicht gebruikte pictogrammen
LED-levensduur
Gelijkstroom
Dit product is geschikt voor gebruik bij extreme
temperaturen tot -21°C.
Bereik bewegingssensor ca. 5 – 8m
Detectiehoek van de bewegingssensor: ca. 90º
Beschermingswijze: IP44 (bestand tegen spatwater)
Batterijen meegeleverd
Verlichtingsduur (na activering): ca 30 seconden

61 NL/BE
LED-SOLARSCHIJNWERPER
Inleiding
Hartelijk gefeliciteerd met de aankoop van uw nieuwe
product. U heeft voor een hoogwaardig product gekozen. De
gebruiksaanwijzing is een deel van het product. Deze bevat
belangrijke aanwijzingen voor veiligheid, gebruik en verwijdering.
Maakt U zich voor de ingebruikname van het product met alle
bedienings- en veiligheidsvoorschriften vertrouwd. Gebruik
het product alleen zoals beschreven en voor de aangegeven
toepassingsgebieden. Overhandig alle documenten bij doorgifte van
het product aan derden.
Beoogd gebruik
Het product is bestemd voor verlichting buitenshuis op plaatsen waar
geen stroomaansluiting is. Het product is bestemd voor privégebruik
en niet voor commerciële doeleinden of andere toepassingen.
Niet geschikt voor normale ruimteverliching
binnenshuis.
Dit product is geschikt voor gebruik bij extreme temperaturen tot
-21°C.
Onderdelenbeschrijving
1 Zonnepaneel
2 ON (aan) / OFF (uit)-schakelaar
3 Straler
4 Sensor
5 Pluggen (bevestigingsplaat)

62 NL/BE
6 Montageplaat
7 Afdekking kogelgewricht
8 Schroeven (montageplaat)
9 Opening
10
Afdekking voorkant
11
Herlaadbare batterijen
12
Batterijvak
13
Bevestigingsschroef (voorste afdekking)
14
Montagehouder (alleen voor HG04465B)
15
Pluggen (voor de montagehouder) (alleen voor HG04465B)
16
Schroeven (voor de montagehouder) (alleen voor HG04465B)
17
Verbindingskabel (alleen voor HG04465B)
18
Stekker (alleen voor HG04465B)
19
Contrastekker (alleen voor HG04465B)
Technische gegevens
Modelnr.: HG04465A of HG04465B
LED’s: 6 x 0,5W (LED's kunnen niet vervangen
worden)
Bedrijfsspanning: 3,6V
Herlaadbare
batterijen: 3 x Ni-MH AAA 600mAh 1,2V
Beschermingswijze: IP44 (bestand tegen spatwater)
Bewegingssensor: Bereik: ca. 5 – 8m
Detectiehoek: ca. 90º

63 NL/BE
Leveringsomvang
Controleer na het uitpakken direct of alle onderdelen volledig zijn en
dat het product afgeleverd is zoals behoort.
1 Op zonne-energie werkende LED-straler, model HG04465A of
HG04465B
1 Montagehouder (voor zonnepaneel) (alleen bij de HG04465B)
1 Zonnepaneel (alleen bij de HG04465B)
2 Pluggen (bevestigingsplaat)
2 Schroeven (montageplaat)
2 Pluggen (montagehouder) (alleen voor de HG04465B)
2 Schroeven (montagehouder) (alleen voor de HG04465B)
1 Installatie-, bedienings- en veiligheidsaanwijzingen
Algemene veiligheidsinstructies
MAAK U MET ALLE BEDIENINGS- EN VEILIGHEIDSINSTRUCTIES
VERTROUWD VOORDAT U HET PRODUCT GEBRUIKT. ALS U DIT
PRODUCT AAN IEMAND DOORGEEFT, GEEF DAN OOK ALLE
DOCUMENTEN MEE.
Dit product mag door kinderen vanaf 8 jaar en door personen
met beperkte lichamelijke, sensorische of mentale vermogens
of gebrek aan ervaring en kennis alleen gebruikt worden als
ze onder persoonlijk toezicht staan of aanwijzingen hebben
gekregen over hoe ze veilig met het product om moeten gaan
en inzicht hebben in de aan het gebruik verbonden gevaren.
Kinderen mogen niet met het product spelen. Schoonmaken en
onderhoud mogen niet zonder toezicht door kinderen worden
uitgevoerd.

64 NL/BE
Laat kinderen nooit zonder toezicht achter met het
verpakkingsmateriaal. Het verpakkingsmateriaal vormt een
risico voor verstikkingsgevaar. Kinderen onderschatten vaak de
daarmee verbonden gevaren.
Houd kinderen uit de buurt waar u de lamp installeert. De
levering bevat veel schroeven en andere kleine onderdelen. Deze
kunnen per ongeluk worden ingeslikt of ingeademd en zo tot een
levensgevaarlijke situatie leiden.
Gebruik het product niet meer als u heeft vastgesteld dat het
beschadigd is.
De LED's zijn niet vervangbaar.
Als de LED's aan het einde van hun gebruiksduur niet meer
werken, gooi het gehele product dan weg.
Kijk niet direct in de lichtbron (gloeilamp, LED, etc.).
Bekijk de LED niet met een optisch instrument (bijv. door een
loep).
De flexibele aansluitleiding van deze lamp kan niet worden
vervangen. Mocht de leiding beschadigd zijn, moet deze lamp
weggegooid worden (alleen voor deHG04465B).
Veiligheidsinstructies voor batterijen/
accu‘s
m LEVENSGEVAAR! Houd batterijen/ accu‘s buiten het bereik
van kinderen. Raadpleeg bij inslikken onmiddellijk een arts!

65 NL/BE
EXPLOSIEGEVAAR! Laad niet oplaadbare batterijen
nooit op. Sluit de batterijen/ accu‘s niet kort en/ of open
deze niet. Daardoor kan de batterij oververhit raken, in
brand vliegen of exploderen.
Gooi batterijen/ accu‘s nooit in het vuur of water.
Stel batterijen/ accu‘s nooit bloot aan mechanische belastingen.
Risico dat de batterijen/ accu’s lekken
Vermijd extreme omstandigheden en temperaturen die invloed op
de batterijen/ accu‘s zouden kunnen hebben bijv. radiatoren/
direct zonlicht.
Bij lekkende batterijen/ accu‘s het contact van de chemicaliën
met de huid, ogen en slijmvliezen vermijden! Spoel de
desbetreffende plekken direct af met schoon water en raadpleeg
onmiddellijk een arts!
DRAAG VEILIGHEIDSHANDSCHOENEN! Lekkende
of beschadigde batterijen/ accu‘s kunnen in geval van
huidcontact chemische brandwonden veroorzaken. Draag
daarom in dit geval geschikte veiligheidshandschoenen.
Als de batterijen/ accu‘s lekken, dient u deze direct uit het
product te halen om beschadigingen te vermijden.
Gebruik alleen batterijen/ accu‘s van hetzelfde type. Gebruik
nooit nieuwe en oude batterijen / accu‘s door elkaar!
Verwijder de batterijen/ accu‘s, als u het product gedurende een
langere periode niet gebruikt.

66 NL/BE
Risico op beschadiging van het product
Gebruik uitsluitend het aangegeven type batterij/ accu!
Plaats de batterijen/ accu‘s volgens de weergegeven polariteit
(+) en (–) op batterij/ accu en op product. type batterij/ accu!
Reinig de contacten van de batterij/ accu en die in het
batterijvak, voordat u deze plaatst!
Verwijder verbruikte batterijen/ accu‘s direct uit het product.
Voor gebruik
Tip: Pak het product helemaal uit.
Laad de herlaadbare batterijen op
Tip: De herlaadbare batterijen
11
die in het product zitten, zijn bij
aflevering volledig opgeladen. Desondanks kunnen ze tijdens het
transport van de fabrikant naar de verkoper wat van hun lading
verloren hebben. Laad de herlaadbare batterijen
11
in het product
daarom voor gebruik weer op. In de zomer is voor het voor het eerst
opladen minstens 1dag continu zonlicht vereist.
Zet de ON-/OFF-schakelaar 2 op stand „ON“.
Tip: Bij continu zonlicht (afhankelijk van het jaargetijde) zal het
opladen van lege herlaadbare batterijen
11
tussen 2en 10dagen
duren.

67 NL/BE
Tip: De in het product ingebouwde spanningsregelaar verhindert dat
de herlaadbare batterijen
11
overladen worden.
Vervang de herlaadbare batterijen
11
als de lichtsterkte na het
opladen niet toeneemt (Afb.C: HG04465A of Afb.E: HG04465B).
Batterijen plaatsen/vervangen
Tip: In het product zijn al herlaadbare batterijen
11
geplaatst.
Gebruik uitsluitend batterijen conform wat is aangegeven onder
"Technische Gegevens". Om de herlaadbare batterijen
11
te
verwijderen moet u de straler 3 met de ON-/OFF-schakelaar 2
uitzetten.
Open het batterijvak
12
aan de achterkant van de straler 3
door de bevestigingsschroeven
13
tegen de wijzers van de klok
in te draaien om de voorste afdekking
10
te verwijderen (Afb.C:
HG04465A of Afb.E: HG04465B).
Verwijder de oude herlaadbare batterijen
11
.
Plaats nieuwe herlaadbare batterijen
11
in het batterijvak.
Gebruik alleen batterijen van het aangegeven type (zie
„Technische Gegevens“).
Tip: Zorg ervoor dat de batterijen met de juiste polariteit
in het product worden gelegd. Deze is in het batterijvak
12
aangegeven.
Sluit het batterijvak
12
weer met de voorste afdekking
10
. Maak
de voorste afdekking
10
vast door de bevestigingsschroeven
13
met de wijzers van de klok mee te draaien.

68 NL/BE
Installatie
Tip: Het meegeleverde montagemateriaal is geschikt voor normale
betonnen of bakstenen muren. Voor muren van ander materiaal is
mogelijk ander bevestigingsmateriaal nodig. Win indien nodig advies
in van een specialist.
Tip: U heeft een elektrische boormachine nodig.
m OPGELET! VERWONDINGSGEVAAR! Lees de
gebruiksaanwijzing van uw boormachine goed door.
m OPGELET! Let erop geen elektrische kabels in de muur of het
plafond te beschadigen.
Let bij het kiezen van de montageplaats op het volgende:
Zorg ervoor dat de straler 3 het gewenste gebied verlicht. U
kunt de lamp 3 naar de gewenste stand draaien.
Let erop dat de sensor 4 het gewenste gebied bestrijkt. De
sensor 4 detecteert beweging op een maximale afstand van
5 tot 8m waarbij de detectiehoek ongeveer 90° bedraagt
(afhankelijk van de hoogte waarop het product is aangebracht -
een hoogte van 1,8 tot 2,5m is ideaal) (Afb.D: HG04465A of
Afb.F: HG04465B).
Let erop dat de sensor 4 's nachts niet door straatverlichting
wordt beschenen. Dit kan invloed hebben op de werking van de
lamp.
Zorg ervoor dat het zonnepaneel 1 zo is geinstalleerd dat er
direct zonlicht op valt.

69 NL/BE
Installeer het zonnepaneel 1 niet daar waar de temperatuur
sterk fluctueert, bijv. op verwarmingsapparatuur.
Installeer het zonnepaneel 1 uit de buurt van kunstlichtbronnen
en richt het op het zuiden.
Let erop dat de aansluitkabel
17
van het zonnepaneel 1
lang genoeg is voor aansluiting op de straler 3. De maximale
afstand tussen zonnepaneel 1 en straler 3 bedraagt ca. 2,5m
(alleen bij de HG04465B).
Voor de HG04465A:
Klap het zonnepaneel 1 voorzichtig naar boven.
Verwijder de montageplaat 6 van de straler 3 door de
schroeven van de afdekking van het kogelgewricht 7 los te
draaien (Afb.B).
Gebruik de openingen in de montageplaat 6 die voor de
schroeven 8 bestemd zijn, om aan te geven waar de boorgaten
moeten komen.
Boor de bevestigingsgaten (Ø 8mm, ca. 40mm diep). Let er bij
het boren van de bevestigingsgaten op dat er zich daar waar u
boren gaat geen gas-, water- of elektriciteitsleidingen bevinden
die door het boren beschadigd kunnen worden.
Steek de pluggen 5 in de boorgaten (Afb.B).
Maak de montageplaat 6 nu vast met de meegeleverde
schroeven 8 (Afb.B).
Plaats het zonnepaneel 1 zo dat het op de zon gericht is.

70 NL/BE
Plaats nu de straler 3 op de montageplaat 6. Plaats het
kogelgewricht van de montageplaat 6 op correcte wijze in de
opening 9 van de straler 3. Sluit dan de afdekking van het
kogelgewricht 7 door de schroeven met wijzers van de klok
mee vast te draaien (Afb.B).
Zet de ON-/OFF-schakelaar 2 van de straler 3 op stand
„ON“ (Afb.A).
De herlaadbare batterijen
11
worden nu opgeladen als er
voldoende zonlicht is.
Voor de HG04465B:
Verwijder de montageplaat 6 van de straler 3 door de
schroeven van de afdekking van het kogelgewricht 7 los te
draaien (Afb.B).
Gebruik de openingen in de montageplaat 6 die voor de
schroeven 8 bestemd zijn, om aan te geven waar de boorgaten
moeten komen.
Boor de bevestigingsgaten (Ø 8mm, ca. 40mm diep).
Let er bij het boren van de bevestigingsgaten op dat er zich daar
waar u boren gaat geen gas-, water- of elektriciteitsleidingen
bevinden die door het boren beschadigd kunnen worden.
Steek de pluggen 5 in de boorgaten (Afb.B).
Maak de montageplaat 6 nu vast met de meegeleverde
schroeven 8 (Afb.B).
Plaats nu de straler 3 op de montageplaat 6. Plaats het
kogelgewricht van de montageplaat 6 op correcte wijze in de
opening 9 van de straler 3. Sluit dan de afdekking van het
kogelgewricht 7 door de schroeven met wijzers van de klok
mee vast te draaien (Afb.B).

71 NL/BE
Gebruik de openingen in de montagehouder
14
die voor de
schroeven
16
bestemd zijn, om aan te geven waar de boorgaten
moeten komen (Ø 8mm, ca. 40mm diep).
Zorg ervoor dat u de straler 3 met behulp van de
verbindingskabel
17
met het zonnepaneel 1 kunt verbinden.
Boor nu de bevestigingsgaten. Let er bij het boren van de
bevestigingsgaten op dat er zich daar waar u boren gaat geen
gas-, water- of elektriciteitsleidingen bevinden die door het boren
beschadigd kunnen worden.
Steek de pluggen
15
in de boorgaten (Afb.C).
Bevestig de montagehouder
14
met de schroeven
16
.
Plaats het zonnepaneel 1 in de montagehouder
14
(Afb.C).
Plaats het zonnepaneel 1 zo dat het op de zon gericht is.
Steek de stekker
18
in de contrastekker
19
(Afb.D).
Zet de ON-/OFF-schakelaar 2 van de straler 3 in stand „ON“
(Afb.A).
De herlaadbare batterijen
11
worden nu opgeladen als er
voldoende zonlicht is.
Let bij het kiezen van de montageplaats voor het zonnepaneel 1 op
het volgende:
zonlicht moet zo direct mogelijk op het zonnepaneel 1 vallen. Zelfs
een gedeeltelijke beschaduwing van het zonnepaneel 1 overdag
kan een aanmerkelijk invloed hebben op het opladingsproces.

72 NL/BE
Oriëntatie:
het zonnepaneel kan het best op het zuiden gericht worden.
Oriëntatie op het zuiden met een lichte afwijking naar het westen is
te verkiezen boven een lichte afwijking naar het oosten.
Horizontaal richten:
De horizontale oriëntatie van het zonnepaneel 1 hangt af van de
geografische breedte van de plek waar het paneel is geinstalleerd. In
Midden-Europa is een hoek van 30° tot 40° ideaal.
Het product is nu klaar voor gebruik.
Ingebruikname
De sensor 4 wordt geactiveerd bij een lichtsterkte van ca.
<100Lux.
De straler 3 gaat als het donker wordt vanzelf aan zodra de
sensor 4 een beweging detecteert.
De lamp gaat na 30seconden automatisch weer uit als geen
beweging meer wordt gedetecteerd.
Als, nadat de straler is gedoofd, een beweging wordt
gedetecteerd, gaat het licht weer voor ca. 30seconden aan.
Om de straler 3 uit te zetten, moet de ON-/OFF-schakelaar
2 in stand "OFF" worden gezet. De herlaadbare batterijen
11
worden niet langer opgeladen.

73 NL/BE
Onderhoud en schoonmaken
WAARSCHUWING! LEVENSGEVAAR DOOR
ELEKTRISCHE SCHOKKEN!
Gebruik geen oplosmiddelen, benzine, etc. om te voorkomen dat
de lamp wordt beschadigd.
Zet de ON-/OFF-schakelaar 2 van de straler 3 in stand
„OFF“.
Verwijder de herlaadbare batterijen
11
.
Trek de stekker
18
uit de contrastekker
19
(alleen bij de
HG04465B).
Maak de lamp schoon met een droge, pluisvrije doek. Plaats de
herlaadbare batterijen
11
weer terug.
Steek de stekker
18
in de contrastekker
19
(alleen bij de
HG04465B).
Zet de ON-/OFF-schakelaar 2 van de straler 3 in stand „ON“.
Zorg ervoor dat de sensor 4 en het zonnepaneel 1 schoon
blijven. Verwijder verontreinigingen om ervoor te zorgen dat het
product probleemloos werkt.
Hou het product, in het bijzonder in de winter, sneeuw- en ijsvrij.

74 NL/BE
Afvoer
De verpakking bestaat uit milieuvriendelijke grondstoffen die u via de
plaatselijke recyclingcontainers kunt afvoeren.
Neem de aanduiding van de verpakkingsmaterialen voor
de afvalscheiding in acht. Deze zijn gemarkeerd met
de afkortingen (a) en een cijfers (b) met de volgende
betekenis: 1–7: kunststoffen / 20–22: papier en
vezelplaten / 80–98: composietmaterialen.
Het product en de verpakkingsmaterialen zijn
recyclebaar; verwijder deze afzonderlijk voor een betere
afvalbehandeling.
Het Triman-logo geldt alleen voor Frankrijk.
Informatie over de mogelijkheden om het uitgediende
product na gebruik te verwijderen, verstrekt uw
gemeentelijke overheid.
Gooi het afgedankte product omwille van het milieu niet
weg via het huisvuil, maar geef het af bij het daarvoor
bestemde depot of het gemeentelijke milieupark. Over
afgifteplaatsen en hun openingstijden kunt u zich bij uw
aangewezen instantie informeren.
Defecte of verbruikte batterijen / accu‘s moeten volgens de richtlijn
2006/66/EG en veranderingen daarop worden gerecycled. Geef
batterijen / accu‘s en / of het product af bij de daarvoor bestemde
verzamelstations.

75 NL/BE
Milieuschade door foutieve verwijdering van
de batterijen / accu‘s!
Batterijen / accu‘s mogen niet via het huisvuil worden weggegooid.
Ze kunnen giftige zware metalen bevatten en vallen onder het
chemisch afval. De chemische symbolen van de zware metalen zijn:
Cd = cadmium, Hg = kwik, Pb = lood. Geef verbruikte batterijen /
accu‘s daarom af bij een gemeentelijk inzamelpunt.
Garantie
Het product wordt volgens strenge kwaliteitsrichtlijnen zorgvuldig
geproduceerd en voor levering grondig getest. In geval van schade
aan het product kunt u rechtmatig beroep doen op de verkoper
van het product. Deze wettelijke rechten worden door onze hierna
vermelde garantie niet beperkt.
Op dit product verlenen wij 3 jaar garantie vanaf aankoopdatum. De
garantieperiode start op de dag van aankoop. Bewaar de originele
kassabon alstublieft. Dit document is nodig als bewijs voor aankoop.
Wanneer binnen 3 jaar na de aankoopdatum van dit product een
materiaal- of productiefout optreedt, dan wordt het product door ons
– naar onze keuze – gratis voor u gerepareerd of vervangen. Deze
garantie komt te vervallen als het product beschadigd wordt, niet
correct gebruikt of onderhouden wordt.

76 NL/BE
De garantie geldt voor materiaal- en productiefouten. Deze garantie
is niet van toepassing op productonderdelen, die onderhevig zijn aan
normale slijtage en hierdoor als aan slijtage onderhevige onderdelen
gelden (bijv. batterijen) of voor beschadigingen aan breekbare
onderdelen, zoals bijv. schakelaars, accu’s of dergelijke onderdelen,
die gemaakt zijn van glas.

77 PL
Lista używanych piktogramów ......... Strona 78
Wstęp ....................................... Strona 79
Przeznaczenie ................................ Strona 79
Opis części .................................. Strona 79
Dane techniczne .............................. Strona 80
Elementy wyposażenia ......................... Strona 81
Ogólne informacje o bezpieczeństwie . Strona 81
Wskazówki bezpieczeństwa dla baterii/
akumulatorów ................................ Strona 82
Przygotowanie produktu do użycia .... Strona 84
Ładowanie akumulatorków ...................... Strona 84
Wkładanie lub wymiana baterii ........ Strona 85
Montaż ..................................... Strona 86
Uruchomienie .............................. Strona 90
Konserwacja i czyszczenie ............... Strona 91
Utylizacja .................................. Strona 92
Gwarancja ................................. Strona 93

78 PL
Lista używanych piktogramów
Żywotność diod LED
Prąd stały
Ten produkt nadaje się do stosowania w ekstremalnych
temperaturach do -21°C.
Zasięg czujnika ruchu ok. 5 – 8m
Kąt detekcji czujnika ruchu: ok. 90º
Typ ochrony: IP44 (ochrona przed strugami wody)
Dołączona bateria
Czas świecenia (po aktywacji): ok. 30 sekund

79 PL
REFLEKTOR SOLARNY LED
Wstęp
Gratulujemy Państwu zakupu nowego produktu. Tym samym
zdecydowali się Państwo na zakup produktu wysokiej jakości.
Instrukcja obsługi jest częścią tego produktu. Zawiera ona ważne
wskazówki dotyczące bezpieczeństwa, użytkowania i utylizacji.
Przed pierwszym użyciem produktu należy zapoznać się ze
wszystkimi wskazówkami dotyczącymi obsługi i bezpieczeństwa.
Używać produktu wyłącznie zgodnie z jego poniżej opisanym
przeznaczeniem. W przypadku przekazania produktu innej osobie
należy dołączyć do niego całą jego dokumentację.
Przeznaczenie
Produkt jest przeznaczony do oświetlania obszarów zewnętrznych
pozbawionych złączy elektrycznych. Produkt jest przeznaczony
do użytku w prywatnych domach i nie nadaje się do zastosowań
komercyjnych ani innych.
Nie nadaje się do oświetlania pomieszczeń.
Ten produkt nadaje się do stosowania w ekstremalnych
temperaturach do -21°C.
Opis części
1 Panel solarny
2 Przełącznik zasilania (ON/OFF)
3 Reflektor
4 Czujnik
5 Dybel (płyty montażowej)

80 PL
6 Płyta montażowa
7 Osłona przegubu kulowego
8 Śruba (płyty montażowej)
9 Otwór
10
Osłona przednia
11
Akumulatorki
12
Komora na baterie
13
Śruba mocująca (osłony przedniej)
14
Uchwyt montażowy (do modelu HG04465B)
15
Dybel (uchwytu montażowego) (do modelu HG04465B)
16
Wkręt (uchwytu montażowego) (do modelu HG04465B)
17
Przewód połączeniowy (do modelu HG04465B)
18
Wtyczka (do modelu HG04465B)
19
Gniazdo (do modelu HG04465B)
Dane techniczne
Nr modelu: HG04465A lub HG04465B
Diody LED: 6 x 0,5W (diody LED są niewymienne)
Napięcie: 3,6V
Akumulatorki: 3 x Ni-MH AAA; 600mAh; 1,2V
Typ ochrony: IP44 (ochrona przed strugami wody)
Czujnik ruchu: Zasięg: ok. 5 – 8m
Kąt detekcji: ok. 90º

81 PL
Elementy wyposażenia
Zaraz po rozpakowaniu należy sprawdzić, czy są wszystkie części i
czy produkt jest w dobrym stanie.
1 Reflektor solarny LED, model HG04465A lub HG04465B
1 Uchwyt montażowy (panelu solarnego) (model HG04465B)
1 Panel solarny (model HG04465B)
2 Dybel (płyty montażowej)
2 Wkręt (płyty montażowej)
2 Dybel (płyty montażowej) (model HG04465B)
2 Wkręt (płyty montażowej) (model HG04465B)
1 Instrukcje montażu, obsługi i bezpieczeństwa
Ogólne informacje o
bezpieczeństwie
PRZED ROZPOCZĘCIEM UŻYWANIA PRODUKTU NALEŻY
ZAPOZNAĆ SIĘ ZE WSZYSTKIMI INSTRUKCJAMI OBSŁUGI I
BEZPIECZEŃSTWA! PRZEKAZUJĄC PRODUKT INNYM OSOBOM
NALEŻY DOŁĄCZYĆ WSZYSTKIE DOKUMENTY!
Produkt ten może być używany przez dzieci w wieku
powyżej 8 lat i starsze oraz osoby o ograniczonych
zdolnościach fizycznych, zmysłowych lub umysłowych lub
braku doświadczenia i wiedzy, gdy są nadzorowane lub
pouczone o bezpiecznym użyciu produktu i wynikających z
tego zagrożeniach. Dzieci nie mogą bawić się urządzeniem.
Czyszczenie i konserwacja nie mogą być przeprowadzane
przez dzieci pozostawione bez nadzoru.

82 PL
Nie zostawiać dzieci bez nadzoru w pobliżu materiałów
pakunkowych. Materiały pakunkowe grożą zadławieniem.
Dzieci często nie są w stanie ocenić związanych z tym
niebezpieczeństw.
Dzieci należy trzymać z dala od miejsca pracy. W zestawie
znajduje się wiele śrub i innych małych części. Mogą zostać
połknięte lub dostać się do dróg oddechowych, przez co staną
się śmiertelnym niebezpieczeństwem.
Nie używać urządzenia w przypadku zauważenia uszkodzenia.
Diody LED są niewymienne.
Jeśli po upływie okresu użytkowania diody LED przestają działać,
to należy wymienić cały produkt.
Nie należy patrzeć bezpośrednio w źródło światła (żarówkę,
diody LED itp.).
Nie patrzeć w diody LED za pomocą przyrządu optycznego
(takiego jak szkło powiększające).
Elastyczny kabel zewnętrzny jest niewymienny. W przypadku
uszkodzenia przewodu należy zutylizować całą lampę (tylko
modelHG04465B).
Wskazówki bezpieczeństwa dla
baterii/ akumulatorów
m ZAGROŻENIE ŻYCIA! Baterie/ akumulatory należy trzymać
poza zasięgiem dzieci. W przypadku połknięcia należy
natychmiast udać się do lekarza!

83 PL
NIEBEZPIECZEŃSTWO WYBUCHU! Baterii
jednorazowego użytku nie wolno ładować ponownie.
Baterii/ akumulatorów nie należy zwierać i/ lub
otwierać. Może to doprowadzić do przegrzania, pożaru
lub wybuchu.
Nigdy nie należy wrzucać baterii/ akumulatorów do ognia lub
wody.
Nigdy nie należy narażać baterii/ akumulatorów na obciążenia
mechaniczne.
Ryzyko wycieku kwasu z baterii/ akumulatorów
Należy unikać ekstremalnych warunków i temperatur, które
mogą oddziaływać na baterie/ akumulatory, np. kaloryferów/
bezpośredniego działania promieniowania słonecznego.
Jeśli wyciekną baterie/ akumulatory, należy unikać kontaktu
skóry, oczu i błon śluzowych z chemikaliami! Dotknięte miejsca
natychmiast przepłukać czystą wodą i udać się do lekarza!
ZAKŁADAĆ RĘKAWICE OCHRONNE! Wylane lub
uszkodzone baterie/ akumulatory po dotknięciu skóry
mogą spowodować poparzenia chemiczne. Dlatego
należy w takim przypadku nakładać odpowiednie
rękawice ochronne.
W przypadku wycieku baterii/ akumulatorów natychmiast
usunąć je z produktu, aby uniknąć uszkodzeń.
Używać wyłącznie baterii/ akumulatorów tego samego
typu. Nie zakładać razem nowych oraz zużytych baterii/
akumulatorów!
Jeżeli produkt nie jest przez dłuższy czas używany, baterie/
akumulatorynależy wyjąć.

84 PL
Ryzyko uszkodzenia produktu
Używać wyłącznie zalecanego rodzaju baterii/ akumulatora!
Włożyć baterie/ akumulatory zgodnie z oznaczeniem
biegunów (+) i (–) na baterii/ akumulatorze I produkcie.
Jeśli to konieczne, oczyścić styki baterii/ akumulatora i w
komorze baterii przed włożeniem baterii!
Zużyte baterie/ akumulatory wyjąć jak najszybciej z produktu.
Przygotowanie produktu do użycia
Uwaga: Usunąć z produktu wszelkie materiały pakunkowe.
Ładowanie akumulatorków
Uwaga: W chwili zakupu akumulatorki
11
są całkowicie
naładowane. Jednak mogą one utracić pojemność podczas
transportu od producenta do miejsca sprzedaży. Dlatego przed
użyciem akumulatorki
11
należy doładować. W okresie letnim
wstępne ładowanie przy stałym nasłonecznieniu będzie trwać co
najmniej 1dzień.
Przełącznik ON/OFF 2 ustawić w pozycji „ON”.
Uwaga: Przy stałym nasłonecznieniu (w zależności od pory roku)
ładowanie pustych akumulatorów
11
powinno trwać od 2do 10dni.

85 PL
Uwaga: Wbudowany sterownik ładowania produktu chroni
akumulatorki
11
przed przeładowaniem.
Akumulatorki
11
należy wymienić, jeśli po naładowaniu jasność
świecenia nie polepszy się (rys.C: HG04465A lub rys.E:
HG04465B).
Wkładanie lub wymiana baterii
Uwaga: Akumulatorki
11
są już włożone do urządzenia. Używać
wyłącznie akumulatorków wymienionych w rozdziale „Dane
techniczne”. W celu wyjęcia baterii
11
należy wyłączyć reflektor 3
za pomocą przełącznika ON/OFF 2.
Otworzyć komorę baterii
12
w reflektorze 3, wykręcając śruby
mocujące
13
w kierunku przeciwnym do ruchu wskazówek
zegara, aby zdjąć osłonę przednią
10
(rys.C: HG04465A lub
rys.E: HG04465B).
Wyjąć stare akumulatorki
11
.
Włożyć nowe akumulatorki
11
. Używać wyłącznie
akumulatorków zalecanego typu (patrz rozdział „Dane
techniczne”).
Uwaga: Podczas wkładania baterii należy zwrócić uwagę na
właściwą polaryzację. Jest to pokazane w komorze baterii
12
.
Zamknąć komorę baterii
12
zakładając osłonę przednią
10
.
Zamocować osłonę przednią
10
wkręcając śruby
13
zgodnie z
ruchem wskazówek zegara.

86 PL
Montaż
Uwaga: Dołączone materiały montażowe są przeznaczone do
normalnych ścian betonowych lub murowanych. Ściany z innego
materiału mogą wymagać innych elementów mocujących. W razie
potrzeby należy zasięgnąć porady specjalisty.
Uwaga: Potrzebna będzie wiertarka elektryczna.
m UWAGA! NIEBEZPIECZEŃSTWO USZKODZENIA
CIAŁA! Przeczytać instrukcję obsługi swojej wiertarki.
m UWAGA! Uważać, aby nie uszkodzić kabli elektrycznych w
ścianie lub suficie.
Wybierając miejsce montażu należy zwrócić uwagę na następujące
kwestie:
Upewnić się, że reflektor 3 oświetla żądany obszar. Reflektor
3 można nachylić do żądanej pozycji.
Upewnić się, że czujnik 4 pokrywa żądany obszar. Czujnik
4 ma maksymalny zasięg w zakresie ok. 5 do 8m przy kącie
pokrycia 90° (w zależności od wysokości montażu – idealna
wysokość wynosi od 1,8 do 2,5m) (rys.D: HG04465A lub
rys.F: HG04465B).
Upewnić się, że czujnik 4 nie jest w nocy oświetlany przez
oświetlenie uliczne. Może to wpływać na jego działanie.
Upewnić się, że panel solarny 1 jest zamontowany tak, aby był
oświetlany bezpośrednio światłem słonecznym.

87 PL
Nie montować panelu solarnego 1 w miejscach narażonych na
silne zmiany temperatury, np. z powodu urządzeń grzewczych.
Panel słoneczny 1 należy montować z dala od nienaturalnych
źródeł światła i tak, aby był skierowany na południe.
Upewnić się, że kabel połączeniowy
17
będzie w stanie
połączyć panel solarny 1 z reflektorem 3. Maksymalna
odległość między panelem solarnym 1 i reflektorem 3 wynosi
ok. 2,5m (dotyczy modelu HG04465B).
Model HG04465A:
Panel solarny 1 odchylić ostrożnie w górę.
Płytę montażową 6 odkręcić od reflektora 3 luzując śruby
osłony przegubu kulowego 7 (rys.B).
Otworów w płycie montażowej 6 przewidzianych pod wkręty
8 użyć do zaznaczenia miejsc wiercenia.
Teraz należy wywiercić otwory (Ø 8mm, głębokość ok. 40mm).
Przed rozpoczęciem wiercenia otworów montażowych upewnić
się, że w miejscu wiercenia nie ma żadnych przewodów
gazowych, wodnych ani elektrycznych.
Do wywierconych otworów włożyć dyble 5 (rys.B).
Płytę montażową 6 zamocować za pomocą dostarczonych
wkrętów 8 (rys.B).
Upewnić się, że panel solarny 1 jest skierowany na słońce.

88 PL
Teraz reflektor 3 nałożyć na przegub kulowy płyty montażowej
6. Upewnić się, że przegub kulowy płyty montażowej 6 jest
dokładnie wsunięty w gniazdo 9 reflektora 3. Następnie
zamontować pokrywę przegubu kulowego 7 dokręcając śruby
w kierunku zgodnym z ruchem wskazówek zegara (rys.B).
Przełącznik ON/OFF 2 reflektora 3 ustawić w pozycji „ON”
(rys.A).
Akumulatorki
11
będą teraz ładowane, gdy będzie
wystarczająca ilość promieniowania słonecznego.
Model HG04465B:
Płytę montażową 6 odkręcić od reflektora 3 luzując śruby
osłony przegubu kulowego 7 (rys.B).
Otworów w płycie montażowej 6 przewidzianych pod wkręty
8 użyć do zaznaczenia miejsc wiercenia.
Teraz należy wywiercić otwory (Ø 8mm, głębokość ok. 40mm).
Przed rozpoczęciem wiercenia otworów montażowych upewnić
się, że w miejscu wiercenia nie ma żadnych przewodów
gazowych, wodnych ani elektrycznych.
Do wywierconych otworów włożyć dyble 5 (rys.B).
Płytę montażową 6 zamocować za pomocą dostarczonych
wkrętów 8 (rys.B).
Teraz reflektor 3 nałożyć na przegub kulowy płyty montażowej
6. Upewnić się, że przegub kulowy płyty montażowej 6 jest
dokładnie wsunięty w gniazdo 9 reflektora 3. Następnie
zamontować pokrywę przegubu kulowego 7 dokręcając śruby
w kierunku zgodnym z ruchem wskazówek zegara (rys.B).

89 PL
Otworów w płycie montażowej
14
przewidzianych pod wkręty
16
użyć do zaznaczenia miejsc wiercenia (Ø 8mm, głębokość
ok. 40mm).
Upewnić się, że reflektor 3 będzie można połączyć kablem
połączeniowym
17
z panelem solarnym 1.
Teraz należy wywiercić otwory montażowe. Przed rozpoczęciem
wiercenia otworów montażowych upewnić się, że w miejscu
wiercenia nie ma żadnych przewodów gazowych, wodnych ani
elektrycznych.
Do wywierconych otworów włożyć dyble
15
(rys.C).
Wspornik montażowy
14
przykręcić za pomocą wkrętów
16
.
Panel solarny 1 umieścić we wsporniku montażowym
14
(rys.C).
Upewnić się, że panel solarny 1 jest skierowany na słońce.
Wtyczkę
18
włożyć do gniazda
19
(rys.D).
Przełącznik ON/OFF 2 reflektora 3 ustawić w pozycji „ON”
(rys.A).
Akumulatorki
11
będą teraz ładowane, gdy będzie
wystarczająca ilość promieniowania słonecznego.
Wybierając miejsce montażu panelu solarnego 1 należy zwrócić
uwagę na następujące kwestie:
Panel solarny 1 musi być wystawiony na światło słoneczne tak
bezpośrednio, jak to możliwe. Nawet częściowy cień na panelu
solarnym 1 w ciągu dnia może znacząco wpłynąć na proces
ładowania.

90 PL
Kierunek przeważający:
Skierowanie na południe jest wariantem optymalnym. Skierowanie
z niewielkim odchyleniem na zachód jest lepsze w porównanie z
odchyleniem na wschód.
Położenie w poziomie:
Pozioma orientacja panelu solarnego 1 zależy od szerokości
geograficznej miejsca montażu. W Europie Środkowej idealny kąt
mieści się w granicach od 30° do 40°.
Produkt jest teraz gotowy do użycia.
Uruchomienie
Czujnik 4 zaczyna działać przy poziomie oświetlenia poniżej
100luksów.
Reflektor 3 włącza się automatycznie w ciemności, gdy czujnik
4 wykryje ruch.
Jeśli ruch nie będzie wykrywany, to światło zgaśnie
automatycznie po upływie ok. 30sekund.
Jeśli po zgaśnięciu światła jakikolwiek ruch zostanie wykryty
ponownie, reflektor zaświeci się znowu na kolejne ok. 30sekund.
Aby wyłączyć reflektor 3, przełącznik ON/OFF 2 należy
ustawić w pozycji „OFF”. Akumulatorki
11
nie będą ładowane.

91 PL
Konserwacja i czyszczenie
OSTRZEŻENIE! NIEBEZPIECZEŃSTWO PORAŻENIA
PRĄDEM ELEKTRYCZNYM!
Nie używać rozpuszczalników, benzyny itp. W przeciwnym razie
lampa zostanie uszkodzona.
Przełącznik ON/OFF 2 reflektora 3 ustawić w pozycji „OFF”.
Wyjąć akumulatorki
11
.
Wtyczkę
18
odłączyć od gniazda
19
(tylko model
HG04465B).
Czyścić produkt za pomocą suchej, nie strzępiącej się ściereczki.
Włożyć ponownie akumulatorki
11
.
Wtyczkę
18
włożyć ponownie do gniazda
19
(tylko model
HG04465B).
Przełącznik ON/OFF 2 reflektora 3 ustawić w pozycji „ON”.
Czujnik 4 i panel solarny 1 sprawdzać regularnie pod kątem
zabrudzeń. Usuwać wszelkie zanieczyszczenia, aby zapewnić
prawidłowe działanie produktu.
W okresie zimowym usuwać z produktu śnieg i lód.

92 PL
Utylizacja
Opakowanie wykonane jest z materiałów przyjaznych dla
środowiska, które można przekazać do utylizacji w lokalnym
punkcie przetwarzania surowców wtórnych.
Przy segregowaniu odpadów prosimy zwrócić uwagę na
oznakowanie materiałów opakowaniowych, oznaczone
są one skrótami (a) i numerami (b) o następującym
znaczeniu: 1–7: Tworzywa sztuczne / 20–22: Papier i
tektura / 80–98: Materiały kompozytowe.
Produkt i materiał opakowania nadają się do ponownego
przetworzenia, należy je zutylizować osobno w celu
lepszego przetworzenia odpadów.
Logo Triman jest ważne tylko dla Francji.
Informacji na temat możliwości utylizacji
wyeksploatowanego produktu udziela urząd gminy lub
miasta.
Z uwagi na ochronę środowiska nie wyrzucać urządzenia
po zakończeniu eksploatacji do odpadów domowych,
lecz prawidłowo zutylizować. Informacji o punktach
zbiorczych i ich godzinach otwarcia udziela odpowiedni
urząd.
Uszkodzone lub zużyte baterie / akumulatory muszą być poddane
recyklingowi zgodnie z dyrektywą 2006/66/WE i jej zmianami.
Oddać baterie / akumulatory i / lub produkt w dostępnych punktach
zbiórki.

93 PL
Niewłaściwa utylizacja baterii /
akumulatorów stwarza zagrożenie dla
środowiska naturalnego!
Baterii / akumulatorów nie należy wyrzucać razem z odpadami
domowymi. Mogą one zawierać szkodliwe metale ciężkie i należy je
traktować jak odpady specjalne. Symbole chemiczne metali ciężkich
są następujące: Cd = kadm, Hg = rtęć, Pb = ołów. Dlatego też
zużyte baterie / akumulatory należy przekazywać do komunalnych
punktów gromadzenia odpadów niebezpiecznych.
Gwarancja
Produkt wyprodukowano według wysokich standardów jakości i
poddano skrupulatnej kontroli przed wysyłką. W przypadku wad
produktu nabywcy przysługują ustawowe prawa. Gwarancja nie
ogranicza ustawowych praw nabywcy produktu.
Produkt objęte jest 3 gwarancją, licząc od daty zakupu. Gwarancja
wygasa w razie zawinionego przez użytkownika uszkodzenia
produktu, niewłaściwego użycia lub konserwacji.
W przypadku wystąpienia w ciągu 3 lat od daty zakupu wad
materiałowych lub fabrycznych, dokonujemy – według własnej
oceny – bezpłatnej naprawy lub wymiany produktu.

94 PL
Świadczenie gwarancyjne obejmuje wady materiałowe i fabryczne.
Gwarancja nie obejmuje części produktu ulegających normalnemu
zużyciu, uznawanych za części zużywalne (np. baterie) oraz
uszkodzeń części łamliwych, np. przełączników, akumulatorów lub
wykonanych ze szkła.

95 CZ
Seznam použitých piktogramů ........ Strana 96
Úvod ....................................... Strana 97
Použití v souladu s určením ..................... Strana 97
Popis dílů ................................... Strana 97
Technická data .............................. Strana 98
Rozsah dodávky ............................. Strana 99
Všeobecné bezpečnostní pokyny ...... Strana 99
Bezpečnostní pokyny pro baterie a akumulátory .... Strana 100
Před použitím ............................. Strana 102
Nabíjení dobíjecích baterií ..................... Strana 102
Vložte/vyměňte baterie ................ Strana 103
Montáž .................................... Strana 104
Uvedení do provozu ..................... Strana 108
Údržba a čištění .......................... Strana 109
Zlikvidování .............................. Strana 110
Záruka ..................................... Strana 111

96 CZ
Seznam použitých piktogramů
Životnost LED
Stejnosměrný proud
Tento výrobek je vhodný pro extrémní teploty až -21°C.
Dosah snímače pohybu cca 5 – 8m
Detekční úhel snímače pohybu: cca 90º
Systém ochrany: IP44 (odolný proti stříkající vodě)
Baterie jsou součástí dodávky
Trvání osvětlení (po aktivaci): cca 30 sekund

97 CZ
LED SOLÁRNÍ REFLEKTOR
Úvod
Blahopřejeme Vám ke koupi nového výrobku. Rozhodli jste se
pro kvalitní produkt. Návod k obsluze je součástí tohoto výrobku.
Obsahuje důležité pokyny pro bezpečnost, použití a likvidaci.
Před použitím výrobku se seznamte se všemi pokyny k obsluze
a bezpečnostními pokyny. Používejte výrobek jen popsa¬ným
způsobem a na uvedených místech. Při předání výrobku třetí osobě
předejte i všechny podklady.
Použití v souladu s určením
Výrobek je určen k osvětlování venkovních prostor bez přípojky
elektřiny. Výrobek je určen pro použití v domácnostech a není vhodný
pro komerční účely nebo jiné aplikace.
Není vhodný pro běžné pokojové osvětlení v
domácnosti.
Tento výrobek je vhodný pro extrémní teploty až -21°C.
Popis dílů
1 Solární Panel
2 Vypínač ON/OFF (ZAP/VYP)
3 Reflektor
4 Senzor
5 Hmoždinka (Montážní deska)

98 CZ
6 Montážní deska
7 Kryt kulového kloubu
8 Šroub (Montážní deska)
9 Otvor
10
Přední kryt
11
Dobíjecí baterie
12
Přihrádka na baterie
13
Upevňovací šroub (přední kryt)
14
Montážní držák (jen HG04465B)
15
Hmoždinka (pro montážní držák) (jen HG04465B)
16
Šroub (pro montážní držák) (jen HG04465B)
17
Spojovací kabel (jen HG04465B)
18
Konektor (jen HG04465B)
19
Zdířka (jen HG04465B)
Technická data
Model č.: HG04465A nebo HG04465B
LED: 6 × 0,5W (LED diody nejsou
vyměnitelné)
Provozní napětí: 3,6V
Dobíjecí
baterie: 3 × Ni-MH AAA 600mAh 1,2V
Systém ochrany: IP44 (odolný proti stříkající vodě)
Snímač pohybu: Dosah: cca 5 – 8m
Detekční úhel: cca 90º

99 CZ
Rozsah dodávky
Ihned po vybalení, zkontrolujte, zda jsou všechny díly kompletní a
výrobek je v řádném stavu.
1 solární LED reflektor, model HG04465A nebo HG04465B
1 montážní držák (pro solární panel) (pouze HG04465B)
1 solární panel (pouze HG04465B)
2 hmoždinky (montážní deska)
2 šrouby (montážní deska)
2 hmoždinky (montážní držák) (pouze HG04465B)
2 šrouby (montážní držák) (pouze HG04465B)
1 pokyny pro montáž, obsluhu a bezpečnost
Všeobecné bezpečnostní pokyny
SEZNAMTE SE PŘED POUŽITÍM VÝROBKU SE VŠEMI POKYNY
PRO OBSLUHU A BEZPEČNOSTNÍMI POKYNY! KDYŽ PŘEDÁVÁTE
TENTO VÝROBEK JINÝM LIDEM, DEJTE JIM I VŠECHNY
DOKUMENTY!
Tento výrobek mohou používat děti starší 8 let i osoby s
omezenými tělesnými, smyslovými či duševními schopnostmi nebo
s nedostatkem zkušeností a znalostí, pokud jsou pod dohledem
nějaké osoby nebo byly poučeny ohledně bezpečného
používání výrobku a chápou z toho vyplývající rizika. Děti si
nesmí s výrobkem hrát. Čištění a údržbu nesmí provádět děti bez
dohledu.

100 CZ
Nenechte děti nikdy hrát si bez dozoru s balicími materiály.
Obalový materiál představuje nebezpečí udušení. Děti často
podceňují s tím spojená nebezpečí.
Držte děti daleko od pracovního prostoru. V objemu dodávky je
mnoho šroubů a jiných malých dílů. Ty mohou být spolknuty nebo
vdechnuty a tím se stát nebezpečím ohrožení života.
Výrobek nepoužívejte, pokud zjistíte poškození!
LED nejsou vyměnitelné.
Když LED na konci své životnosti už nefungují, musí být vyměněn
celý výrobek.
Nedívejte se přímo do zdroje světla (žárovky, LED atd.).
Nepozorujte LED optickým přístrojem (např. lupou).
Pružné přívodní vedení této lampy nemůže být nahrazeno.
Pokud je vedení poškozeno, musí být tato lampa vyřazena
(jenHG04465B).
Bezpečnostní pokyny pro baterie a
akumulátory
m NEBEZPEČÍ OHROŽENÍ ŽIVOTA! Uchovávejte baterie a
akumulátory mimo dosah dětí. V případě spolknutí okamžitě
vyhledejte lékařskou pomoc!

101 CZ
NEBEZPEČÍ VÝBUCHU! Nenabíjecí baterie nikdy
znovu nenabíjejte. Baterie nebo akumulátory nezkratujte
ani je neotevírejte. Hrozí přehřátí, nebezpečí požáru nebo
jejich prasknutí.
Nikdy neházejte baterie nebo akumulátory do ohně ani do vody.
Nevystavujte baterie nebo akumulátory mechanickému zatížení.
Nebezpečí vytečení baterií/ akumulátorů
Zabraňte extrémním podmínkám a teplotám, např. na topení
anebo na slunci, které mohou negativně ovlivnit funkci baterií
nebo akumulátorů.
V případě vytečení baterií/ akumulátorů zabraňte kontaktu
chemikálií s pokožkou, očima a sliznicemi! Omyjte ihned
postižená místa dostatečným množstvím čisté vody a vyhledejte
lékařskou pomoc!
NOSTE OCHRANNÉ RUKAVICE! Vyteklé I poškozené
baterie nebo akumulátory mohou při kontaktu s pokožkou
způsobit její poleptání. Noste proto vhodné rukavice.
V případě vytečení ihned odstraňte baterie nebo akumulátory z
výrobku, abyste zabránili jeho poškození!
Používejte jen baterie nebo akumulátory stejného typu.
Nekombinujte staré baterie nebo akumulátory s novými!
Odstraňte baterie nebo akumulátory při delším nepoužívání z
výrobku.

102 CZ
Nebezpečí poškození výrobku
Používejte jen udaný typ baterie nebo akumulátoru!
Nasazujte baterie nebo akumulátory podle označení polarity
(+)a(–) na bateriích nebo akumulátorech a na výrobku.
Vyčistěte před vložením kontakty baterie nebo akumulátoru a
kontakty v přihrádce na baterie!
Vybité baterie nebo akumulátory ihned vyjměte z výrobku.
Před použitím
Pokyn: Odstraňte veškerý obalový materiál z výrobku.
Nabíjení dobíjecích baterií
Pokyn: Dobíjecí baterie
11
uvnitř výrobku jsou při dodání plně
nabity. Mohou však při přepravě od výrobce k prodejci ztratit
na kapacitě akumulátoru. Proto si před použitím dobíjecí baterie
11
nabijte. V létě je pro počáteční nabití nutný alespoň 1 den při
konstantním slunečním záření.
Dejte vypínač ON/OFF 2 do polohy „ON“.
Pokyn: Při konstantním slunečním zářením (v závislosti na ročním
období) by mělo nabíjení prázdných baterií
11
trvat 2až 10dní.

103 CZ
Pokyn: Integrovaný regulátor nabíjení výrobku zabraňuje přebíjení
dobíjecích baterií
11
.
Vyměňte dobíjecí baterie
11
, když se světelný výkon po nabíjení
nezlepšil (Obr.C: HG04465A nebo Obr.E: HG04465B).
Vložte/vyměňte baterie
Pokyn: Dobíjecí baterie
11
jsou již vloženy. Používejte pouze
baterie, které odpovídají v kapitole „Technické údaje“. Pro odstranění
dobíjecích baterií
11
vypněte reflektor 3 s vypínačem ON/OFF 2.
Otevřete přihrádku na baterie
12
na zadní straně reflektoru 3
tak, že otáčíte upevňovací šrouby
13
proti směru hodinových
ručiček, abyste odstranili přední kryt
10
(Obr.C: HG04465A
nebo Obr.E: HG04465B).
Vyjměte staré dobíjecí baterie
11
ven.
Zasuňte nové dobíjecí baterie
11
. Používejte pouze baterie
uvedeného typu (viz „Technické údaje“).
Pokyn: Při vkládání baterií dbejte na správnou polaritu! Ta je
zobrazena v přihrádce na baterie
12
.
Uzavřete přihrádku na baterii
12
opět předním krytem
10
.
Upevněte přední kryt
10
tak, že otáčíte šrouby
13
ve směru
hodinových ručiček.

104 CZ
Montáž
Pokyn: Dodané montážní materiály jsou vhodné pro normální
stěny z betonu nebo zdiva. Pro jiné materiály stěn jsou případně
potřebné jiné upevňovací materiály. Je-li to potřeba, požádejte o radu
odborníka.
Pokyn: Potřebujete elektrickou vrtačku.
m VÝSTRAHA! NEBEZPEČÍ PORANĚNÍ! Přečtěte si tento
návod na obsluhu vrtačky.
m VÝSTRAHA! Dbejte na to, abyste nepoškodili žádné elektrické
kabely ve zdi nebo stropu.
Při výběru umístění instalace dbejte na následující:
Dbejte na to, aby reflektor 3 osvětloval požadovanou oblast.
Můžete reflektor 3 otočit do požadované polohy.
Dbejte na to, aby senzor 4 pokrýval požadovanou oblast.
Senzor 4 má maximální dosah pokrytí cca 5 až 8m, úhlem
pokrytí asi 90° (závislé na výšce montáže – výška 1,8 až 2,5m
je ideální) (Obr.D: HG04465A nebo Obr.F: HG04465B).
Dbejte na to, aby senzor 4 nebyl v noci osvětlen pouličním
osvětlení. To může ovlivnit jeho funkci.
Dbejte na to, aby byl solární panel 1 nainstalován v poloze s
přímým slunečním zářením.

105 CZ
Neinstalujte solární panel 1 v místech, ve kterých dochází k
velkým teplotním výkyvům, např. na základě ohřívačů.
Nainstalujte solární panel 1 daleko nepřírodních světelných
zdroje a směrem na jih.
Dbejte na to, aby připojovací kabel
17
solárního panelu 1
dosáhl na reflektor 3. Maximální vzdálenost mezi solárním
panelem 1 a reflektorem 3 je přibližně 2,5m (jen
HG04465B).
Pro HG04465A:
Vyklopte solární panel 1 opatrně nahoru.
Odstraňte montážní desku 6 z reflektoru 3 tak, že uvolníte
šrouby krytu kulového kloubu 7 (Obr.B).
Použijte drážky na montážní desce 6, které jsou určeny pro
šrouby 8 k označení otvorů.
Nyní vyvrtejte montážní otvory (Ø 8mm, cca 40mm hluboké).
Před vrtáním otvorů se ujistěte, že v oblasti, kde se bude vrtat,
nejsou vedení plynu, vody ani elektrické kabely, která by mohly
být navrtány nebo poškozeny.
Vložte hmoždinky 5 do vyvrtaných otvorů (Obr.B).
Upevněte montážní desku 6 šrouby obsaženými v dodávce 8
(Obr.B).
Nasměrujte solární panel 1 na sluneční světlo.

106 CZ
Nyní umístěte reflektor 3 směrem k montážní desce 6. Vložte
kulový kloub montážní desky 6 správně do otvoru 9 reflektoru
3. Potom zavřete kryt kulového kloubu 7 tak, že otáčíte šrouby
ve směru hodinových ručiček (Obr.B).
Dejte vypínač ON/OFF 2 na reflektoru 3 do polohy „ON“
(Obr.A).
Dobíjecí baterie
11
se nabíjejí pouze, pokud existuje dostatek
slunce.
Pro HG04465B:
Odstraňte montážní desku 6 z reflektoru 3 tak, že uvolníte
šrouby krytu kulového kloubu 7 (Obr.B).
Použijte drážky na montážní desce 6, které jsou určeny pro
šrouby 8 k označení otvorů.
Nyní vyvrtejte montážní otvory (Ø 8mm, cca 40mm hluboké).
Před vrtáním otvorů se ujistěte, že v oblasti, kde se bude vrtat,
nejsou vedení plynu, vody ani elektrické kabely, která by mohly
být navrtány nebo poškozeny.
Vložte hmoždinky 5 do vyvrtaných otvorů (Obr.B).
Upevněte montážní desku 6 šrouby obsaženými v dodávce 8
(Obr.B).
Nyní umístěte reflektor 3 směrem k montážní desce 6. Vložte
kulový kloub montážní desky 6 správně do otvoru 9 reflektoru
3. Potom zavřete kryt kulového kloubu 7 tak, že otáčíte šrouby
ve směru hodinových ručiček (Obr.B).

107 CZ
Nyní použijte otvory v montážní konzole
14
, které jsou určeny
pro šrouby
16
, aby označily otvory (Ø 8mm, cca 40mm
hluboké).
Dbejte na to, abyste reflektor 3 dokázali připojit pomocí
propojovacího kabelu
17
se solárním panelem 1.
Nyní vyvrtejte upevňovací otvory. Před vrtáním otvorů se ujistěte,
že v oblasti, kde se bude vrtat, nejsou vedení plynu, vody ani
elektrické kabely, která by mohly být navrtány nebo poškozeny.
Vložte hmoždinky
15
do vyvrtaných otvorů (Obr.C).
Upevněte montážní držák
14
s pomocí šroubů
16
.
Umístěte solární panel 1 do montážního držáku
14
(Obr.C).
Nasměrujte solární panel 1 na sluneční světlo.
Vložte konektor
18
do zdířky
19
(Obr.D).
Nastavte vypínač ON/OFF 2 reflektoru 3 do polohy „ON“
(Obr.A).
Dobíjecí baterie
11
se nabíjejí pouze, pokud existuje dostatek
slunce.
Při výběru místa pro namontování solárního panelu 1 dbejte na
následující:
Solární panel 1 musí být vystaven slunečnímu záření co možná
nejpříměji. I částečný stín na solárním panelu 1 během dne se může
značně projevit na nabíjení.

108 CZ
Převažující směr:
Optimální je nasměrování na jih. Nasměrováním s mírnými
odchylkami na západ je třeba dát přednost před nasměrováním s
mírnou odchylkou na východ.
Vodorovné nasměrování:
Vodorovné nasměrování solárního panelu 1 závisí na zeměpisné
šířce místa montáže. Ve střední Evropě je ideální úhel 30° až 40°.
Výrobek je nyní připraven k použití.
Uvedení do provozu
Senzor 4 se aktivuje při osvětlení cca <100Luxů.
Reflektor 3 se automaticky zapne v noci, když senzor 4
detekuje pohyb.
Světlo se znovu automaticky vypne po 30sekundách, pokud už
není zaznamenán pohyb.
Když je po vypnutí detekován pohyb, světlo se znovu
automaticky zapne asi na 30sekund.
Pro vypnutí reflektoru 3 musí být vypínač ON/OFF 2 nastaven
do polohy „OFF“. Dobíjecí baterie
11
již nejsou nabíjeny.

109 CZ
Údržba a čištění
VAROVÁNÍ! OHROŽENÍ ŽIVOTA ELEKTRICKÝM
PROUDEM!
Nepoužívejte žádná rozpouštědla, benzín atd. Jinak se svítidlo
poškodí.
Dejte vypínač ON/OFF 2 reflektoru 3 do polohy „OFF“.
Vyjměte dobíjecí baterie
11
.
Povolte spojení mezi konektorem
18
a zdířkou
19
(jen
HG04465B).
Čistěte světlo suchou nežmolkující utěrkou. Opět vložte dobíjecí
baterie
11
.
Konektor spojte
18
opět se zdířkou
19
(jen HG04465B).
Dejte vypínač ON/OFF 2 reflektoru 3 do polohy „ON“.
Kontrolujte senzor 4 a solární panel 1 pravidelně na
znečištění. Odstraňte stávající znečištění, aby bylo zajištěno
řádné fungování výrobku.
Zejména v zimě udržujte výrobek bez sněhu a ledu.

110 CZ
Zlikvidování
Obal se skládá z ekologických materiálů, které můžete zlikvidovat
prostřednictvím místních sběren recyklovatelných materiálů.
Při třídění odpadu se řiďte podle označení obalových
materiálů zkratkami (a) a čísly (b), s následujícím
významem: 1–7: umělé hmoty / 20–22: papír a
lepenka / 80–98: složené látky.
Výrobek a obalové materiály jsou recyklovatelné,
zlikvidujte je odděleně pro lepší odstranění odpadu.
Logo Triman platí jen pro Francii.
O možnostech likvidace vysloužilých zařízení se informujte
u správy vaší obce nebo města.
V zájmu ochrany životního prostředí vysloužilý výrobek
nevyhazujte do domovního odpadu, ale předejte k
odborné likvidaci. O sběrnách a jejich otevíracích
hodinách se můžete informovat u příslušné správy města
nebo obce.
Vadné nebo vybité baterie resp. akumulátory se musí, podle
směrnice 2006/66/ES a jejích příslušných změn, recyklovat. Baterie,
akumulátory i výrobek odevzdejte zpět do nabízených sběren.

111 CZ
Ekologické škody v důsledku chybné likvidace
baterií / akumulátorů!
Baterie / akumulátory se nesmí zlikvidovat v domácím odpadu.
Mohou obsahovat jedovaté těžké kovy a musí se zpracovávat jako
zvláštní odpad. Chemické symboly těžkých kovů: Cd = kadmium,
Hg = rtuť, Pb = olovo. Proto odevzdejte opotřebované baterie /
akumulátory u komunální sběrny.
Záruka
Výrobek byl vyroben s nejvyšší pečlivostí podle přísných kvalitativních
směrnic a před odesláním prošel výstupní kontrolou. V případě závad
máte možnost uplatnění zákonných práv vůči prodejci. Vaše práva ze
zákona nejsou omezena naší níže uvedenou zárukou.
Na tento artikl platí 3 záruka od data zakoupení. Záruční lhůta
začíná od data zakoupení. Uschovejte si dobře originál pokladní
stvrzenky. Tuto stvrzenku budete potřebovat jako doklad o zakoupení.
Pokud se do 3 let od data zakoupení tohoto výrobku vyskytne
vada materiálu nebo výrobní vada, výrobek Vám – dle našeho
rozhodnutí – bezplatně opravíme nebo vyměníme. Tato záruka
zaniká, jestliže se výrobek poškodí, neodborně použil nebo
neobdržel pravidelnou údržbu.

112 CZ
Záruka platí na vady materiálu a výrobní vady. Tato záruka se
nevztahuje na díly výrobku podléhající opotřebení (např. na baterie),
dále na poškození křehkých, choulostivých dílů, např. vypínačů,
akumulátorů nebo dílů zhotovených ze skla.

113 SK
Zoznam použitých piktogramov ....... Strana 114
Úvod ....................................... Strana 115
Použitie v súlade so zadaným účelom ............ Strana 115
Popis častí .................................. Strana 115
Technické údaje. . . . . . . . . . . . . . . . . . . . . . . . . . . . . . Strana 116
Rozsah dodávky ............................. Strana 117
Všeobecné bezpečnostné pokyny ..... Strana 117
Bezpečnostné upozornenia týkajúce sa batérií/
akumulátorových batérií ....................... Strana 118
Príprava výrobku na použitie .......... Strana 120
Nabíjanie nabíjateľných batérií ................. Strana 120
Vloženie/výmena batérií ............... Strana 121
Montáž .................................... Strana 122
Uvedenie do prevádzky ................ Strana 126
Údržba a čistenie ......................... Strana 127
Likvidácia ................................. Strana 128
Záruka ..................................... Strana 129

114 SK
Zoznam použitých piktogramov
Životnosť LED
Jednosmerný prúd
Tento produkt je vhodný pre extrémne teploty do -21°C.
Dosah pohybového snímača pribl. 5 – 8m
Uhol snímania pohybového snímača: pribl. 90º
Systémová ochrana: IP44 (chránené proti striekajúcej
vode)
Batérie sú súčasťou dodávky
Trvanie osvetlenia (po aktivácii): pribl. 30 sekúnd

115 SK
LED SOLÁRNY REFLEKTOR
Úvod
Blahoželáme Vám ku kúpe Vášho nového výrobku. Rozhodli ste sa
pre veľmi kvalitný výrobok. Návod na obsluhu je súčasťou tohto
výrobku. Obsahuje dôležité upozornenia týkajúce sa bezpečnosti,
používania a likvidácie. Skôr ako začnete výrobok používať,
oboznámte sa so všetkými pokynmi k obsluhe a bezpečnosti.
Výrobok používajte iba v súlade s popisom a v uvedených oblastiach
používania. V prípade postúpenia výrobku ďalším osobám
odovzdajte aj všetky dokumenty patriace k výrobku.
Použitie v súlade so zadaným účelom
Produkt je určený na osvetlenie vonkajších plôch bez prívodu
elektrickej energie. Produkt je určený na použitie v súkromných
domácnostiach a nie je vhodný na komerčné alebo iné účely.
Nevhodné na normálne osvetlenie miestnosti v
domácnosti.
Tento produkt je vhodný pre extrémne teploty do -21°C.
Popis častí
1 Solárny panel
2 Vypínač ON/OFF (zap./vyp.)
3 Žiarič
4 Snímač
5 Hmoždinka (montážna doska)

116 SK
6 Montážna doska
7 Kryt guľového kĺbu
8 Skrutka (montážna doska)
9 Otvor
10
Predný kryt
11
Nabíjateľné batérie
12
Priehradka na batérie
13
Upevňovacia skrutka (predný kryt)
14
Montážny držiak (len HG04465B)
15
Hmoždinka (pre montážny držiak) (len HG04465B)
16
Skrutka (pre montážny držiak) (len HG04465B)
17
Spojovací kábel (len HG04465B)
18
Konektor (len HG04465B)
19
Zdierka (len HG04465B)
Technické údaje
Č. modelu: HG04465A alebo HG04465B
LED: 6 x 0,5W (LED sa nedajú meniť)
Prevádzkové napätie: 3,6V
Nabíjateľné
batérie: 3 x Ni-MH AAA 600mAh 1,2V
Systémová ochrana: IP44 (chránené proti striekajúcej vode)
Pohybový snímač: Dosah: pribl. 5 – 8m
Uhol snímania: pribl. 90º

117 SK
Rozsah dodávky
Ihneď po rozbalení skontrolujte, či sú všetky diely úplné a či je
výrobok v bezchybnom stave.
1 Solárny LED žiarič, model HG04465A alebo HG04465B
1 Montážny držiak (pre solárny panel) (len HG04465B)
1 Solárny panel (len HG04465B)
2 Hmoždinka (montážna doska)
2 Skrutky (montážna doska)
2 Hmoždinka (montážny držiak) (len HG04465B)
2 Skrutky (montážny držiak) (len HG04465B)
1 Návod na montáž a obsluhu a bezpečnostné pokyny
Všeobecné bezpečnostné pokyny
PRED POUŽÍVANÍM VÝROBKU SA OBOZNÁMTE SO VŠETKÝMI
POKYNMI NA JEHO OBSLUHU A S BEZPEČNOSTNÝMI
UPOZORNENIAMI! KEĎ TENTO VÝROBOK BUDETE
ODOVZDÁVAŤ ĎALEJ, ODOVZDAJTE AJ KOMPLETNÚ
DOKUMENTÁCIU K VÝROBKU!
Tento produkt môžu používať deti od 8 rokov a osoby so
zníženými fyzickými, zmyslovými alebo duševnými schopnosťami,
alebo s nedostatkom skúseností a vedomostí, ak sú pod dozorom
inej osoby alebo boli poučené ohľadom bezpečného používania
výrobku a z toho vyplývajúcich nebezpečenstiev. Deti sa nesmú
hrať so zariadením. Čistenie a údržbu nesmú vykonávať deti bez
dozoru.

118 SK
Deti nikdy nenechávajte bez dozoru v blízkosti obalových
materiálov. Obalový materiál predstavuje nebezpečenstvo
udusenia. Deti často podceňujú riziká spojené s obalovými
materiálmi.
Nedovoľte deťom približovať sa k pracovnej oblasti. V rozsahu
dodávky je mnoho skrutiek a ďalších malých častí. Môže dôjsť
k ich prehltnutiu alebo vdýchnutiu a stanú sa tak smrteľným
nebezpečenstvom.
Nepoužívajte výrobok, ak si zistíte jeho poškodenie!
LED diódy sa nedajú meniť.
Ak LED diódy na konci ich životnosti už nesvietia, musí sa vymeniť
celý produkt.
Nepozerajte sa priamo do zdroja svetla (žiarovka, LED atď.).
Nepozerajte sa na LED diódu pomocou optického prístroja (napr.
lupa).
Flexibilný pripájací kábel tohto svietidla sa nedá vymeniť.
Ak je vedenie poškodené, musí sa svietidlo zlikvidovať
(lenHG04465B).
Bezpečnostné upozornenia týkajúce
sa batérií/ akumulátorových batérií
m NEBEZPEČENSTVO OHROZENIA ŽIVOTA! Batérie/
akumulátorové batérie držte mimo dosahu detí. V prípade
prehltnutia okamžite vyhľadajte lekára!

119 SK
NEBEZPEČENSTVO EXPLÓZIE! Nenabíjateľné
batérie nikdy znova nenabíjajte. Batérie/ akumulátorové
batérie neskratujte a/ alebo neotvárajte. Následkom
môže byť prehriatie, požiar alebo explózia.
Batérie/ akumulátorové batérie nikdy nehádžte do ohňa alebo
vody.
Nevystavujte batérie/ akumulátorové batérie mechanickej
záťaži.
Riziko vytečenia batérií/ akumulátorových batérií
Batérie/ akumulátorové batérie nikdy nevystavujte extrémnym
podmienkam a teplotám, ktoré by na ne mohli pôsobiť, napr. na
vykurovacích telesách / priamom slnečnom žiarení.
Ak batérie/ akumulátorové batérie vytiekli, zabráňte kontaktu
pokožky, očí a slizníc s chemikáliami! Ihneď vypláchnite
postihnuté miesta väčším množstvom čistej vody a okamžite
vyhľadajte lekára!
NOSTE OCHRANNÉ RUKAVICE! Vytečené alebo
poškodené batérie/ akumulátorové batérie môžu pri
kontakte s pokožkou spôsobiť poleptanie. V takom prípade
preto noste vhodné ochranné rukavice.
V prípade vytečenia batérií/ akumulátorových batérií ich ihneď
vyberte z výrobku, aby ste predišli vzniku škôd.
Používajte iba batérie/ akumulátorové batérie rovnakého typu.
Nekombinujte staré batérie/ akumulátorové batérie s novými!
Ak produkt dlhší čas nepoužívate, vyberte z neho batérie/
akumulátorové batérie.

120 SK
Riziko poškodenia produktu
Používajte výhradne uvedený typ batérií/ akumulátorových
batérií!
Vložte batérie/ akumulátorové batérie podľa označenia polarity
(+) a (–) na batérii/ akumulátorovej batérii a výrobku.
Pred vložením vyčistite kontakty na batérii/ akumulátorovej
batérii a v priečinku pre batérie!
Vybité batérie/ akumulátorové batérie ihneď vyberte z produktu.
Príprava výrobku na použitie
Upozornenie: Odstráňte celý obalový materiál z výrobku.
Nabíjanie nabíjateľných batérií
Poznámka: Nabíjateľné batérie
11
vo vnútri produktu sú pri
dodaní úplne nabité. Mohli však stratiť kapacitu počas prepravy
od výrobcu k predajcovi. Preto nabíjateľné batérie
11
pred
použitím nabite. V lete si prvé nabíjanie vyžaduje najmenej 1deň
konštantného slnečného žiarenia.
Vypínač ON/OFF 2 uveďte do polohy „ON“.
Upozornenie: Pri konštantnom slnečnom svetle (v závislosti od
ročného obdobia) by nabíjanie vybitých nabíjateľných batérií
11
malo trvať 2až 10dní.

121 SK
Upozornenie: Integrovaný regulátor nabíjania produktu zabraňuje
prebíjaniu nabíjateľných batérií
11
.
Vymeňte nabíjateľné batérie
11
, ak sa svetelný výkon po nabíjaní
nezlepší (obr.C: HG04465A alebo obr.E: HG04465B).
Vloženie/výmena batérií
Upozornenie: Nabíjateľné batérie
11
sú už vložené. Používajte
iba batérie, ktoré zodpovedajú údajom v kapitole „Technické údaje“.
Ak chcete vybrať nabíjateľné batérie
11
, vypnite žiarič 3 pomocou
vypínača ON/OFF 2.
Otvorte priečinok na batérie
12
na zadnej strane žiariča 3 tak,
že upevňovacie skrutky
13
otočíte proti smeru chodu hodinových
ručičiek, aby ste odstránili predný kryt
10
(obrázokC:
HG04465A alebo obr.E: HG04465B).
Staré, nabíjateľné batérie
11
vyberte von.
Vložte nové, nabíjateľné batérie
11
. Používajte výlučne batérie
uvedeného typu (pozri „Technické údaje“).
Upozornenie: Pri vkladaní batérií dbajte na správnu polaritu!
Táto je zobrazená v priečinku na batérie
12
.
Priečinok na batérie
12
opäť uzatvorte pomocou predného krytu
10
. Upevnite predný kryt
10
tak, že otočíte upevňovacie skrutky
13
v smere chodu hodinových ručičiek.

122 SK
Montáž
Upozornenie: V rozsahu dodávky obsiahnuté montážne materiály
sú vhodné pre bežné betónové alebo murované steny. Iné stenové
materiály môžu vyžadovať iné upevňovacie materiály. V prípade
potreby sa obráťte na špecialistu.
Upozornenie: Budete potrebovať elektrickú vŕtačku.
m POZOR! NEBEZPEČENSTVO PORANENIA! Prečítajte si
návod na obsluhu vašej vŕtačky.
m POZOR! Dávajte pozor, aby ste nepoškodili žiadne elektrické
káble v stene alebo v strope.
Pri výbere montážnej pozície dbajte na nasledovné:
Uistite sa, že žiarič 3 osvetľuje požadovanú oblasť. Žiarič 3
môžete nakloniť do požadovanej polohy.
Dbajte na to, aby snímač 4 snímal požadovanú oblasť. Snímač
4 má maximálny dosah pribl. 5 až 8m, s uhlom snímania pribl.
90° (v závislosti od výšky montáže – ideálna je výška od 1,8 do
2,5m) (obr.D: HG04465A alebo obr.F: HG04465B).
Uistite sa, že snímač 4 nie je v noci osvetlený pouličným
osvetlením. To môže ovplyvniť jeho funkciu.
Dbajte na to, aby bol solárny panel 1 namontovaný na
priamom slnečnom svetle.

123 SK
Neinštalujte solárny panel 1 na miesta vystavené silným
teplotným zmenám, napr. kvôli ohrievačom.
Solárny panel 1 montujte mimo umelých svetelných zdrojov a
nasmerujte ho na juh.
Dbajte na to, aby spojovací kábel
17
solárneho panelu 1
dosiahol žiarič 3. Maximálna vzdialenosť medzi solárnym
panelom 1 a žiaričom 3 činí pribl. 2,5m (len HG04465B).
Pre HG04465A:
Opatrne sklopte solárny panel 1 smerom nahor.
Odstráňte montážnu dosku 6 od žiariča 3 uvoľnením skrutiek
krytu guľového kĺbu 7 (obr.B).
Na označenie vŕtaných otvorov použite štrbiny v montážnej
doske 6, ktoré sú určené pre skrutky 8.
Teraz vyvŕtajte montážne otvory (Ø 8mm, pribl. 40mm hĺbka).
Pred vŕtaním montážnych otvorov sa ubezpečte, že sa v oblasti,
kde chcete vŕtať, nenachádzajú žiadne plynové, vodovodné
alebo elektrické vedenia, ktoré by ste mohli pri vŕtaní zasiahnuť
alebo poškodiť.
Vložte hmoždinky 5 do navŕtaných otvorov (obr.B).
Upevnite montážnu dosku 6 pomocou skrutiek 8, ktoré sú
súčasťou dodávky (obr.B).
Solárny panel 1 nasmerujte na slnečné svetlo.

124 SK
Teraz žiarič 3 umiestnite v smere montážnej dosky 6. Zasuňte
guľový kĺb montážnej dosky 6 správne do otvoru 9 žiariča 3.
Potom zatvorte kryt guľového kĺbu 7 tak, že otočíte skrutky v
smere chodu hodinových ručičiek (obr.B).
Vypínač ON/OFF 2 na žiariči 3 uveďte do polohy „ON“
(obr.A).
Nabíjateľné batérie
11
sa nabijú len vtedy, keď je dostatok
slnečného žiarenia.
Pre HG04465B:
Odstráňte montážnu dosku 6 od žiariča 3 uvoľnením skrutiek
krytu guľového kĺbu 7 (obr.B).
Na označenie vŕtaných otvorov použite štrbiny v montážnej
doske 6, ktoré sú určené pre skrutky 8.
Teraz vyvŕtajte montážne otvory (Ø 8mm, pribl. 40mm hĺbka).
Pred vŕtaním montážnych otvorov sa ubezpečte, že sa v oblasti,
kde chcete vŕtať, nenachádzajú žiadne plynové, vodovodné
alebo elektrické vedenia, ktoré by ste mohli pri vŕtaní zasiahnuť
alebo poškodiť.
Vložte hmoždinky 5 do navŕtaných otvorov (obr.B).
Upevnite montážnu dosku 6 pomocou skrutiek 8, ktoré sú
súčasťou dodávky (obr.B).
Teraz žiarič 3 umiestnite v smere montážnej dosky 6. Zasuňte
guľový kĺb montážnej dosky 6 správne do otvoru 9 žiariča 3.
Potom zatvorte kryt guľového kĺbu 7 tak, že otočíte skrutky v
smere chodu hodinových ručičiek (obr.B).

125 SK
Na označenie vŕtaných otvorov (Ø 8mm, pribl. 40mm hĺbka)
použite štrbiny v montážnej doske
14
, ktoré sú určené pre skrutky
16
.
Dbajte na to, aby sa dal žiarič 3 pomocou spojovacieho kábla
17
spojiť so solárnym panelom 1.
Teraz navŕtajte upevňovacie otvory. Pred vŕtaním montážnych
otvorov sa ubezpečte, že sa v oblasti, kde chcete vŕtať,
nenachádzajú žiadne plynové, vodovodné alebo elektrické
vedenia, ktoré by ste mohli pri vŕtaní zasiahnuť alebo poškodiť.
Vložte hmoždinky
15
do navŕtaných otvorov (obr.C).
Upevnite montážny držiak
14
pomocou skrutiek
16
.
Umiestnite solárny panel 1 do montážneho držiaka
14
(obr.C).
Solárny panel 1 nasmerujte na slnečné svetlo.
Zasuňte konektor
18
do zdierky
19
(obr.D).
Vypínač ON/OFF 2 na žiariči 3 uveďte do polohy „ON“
(obr.A).
Nabíjateľné batérie
11
sa nabijú len vtedy, keď je dostatok
slnečného žiarenia.
Pri výbere montážnej pozície pre solárny panel 1 dbajte na
nasledovné:
Solárny panel 1 musí byť nasmerovaný na slnečné svetlo čo možno
najpriamejšie. Aj čiastočný tieň na solárnom paneli 1 počas dňa
môže mať výrazný vplyv na proces nabíjania.

126 SK
Prevládajúci smer:
Optimálna je orientácia na juh. Orientácia s miernymi odchýlkami na
západ je vhodnejšia ako orientácia s miernou odchýlkou na východ.
Horizontálny smer:
Horizontálny smer solárneho panelu 1 závisí od zemepisnej šírky
miesta montáže. V strednej Európe je ideálny uhol od 30° do 40°.
Váš produkt je teraz pripravený na použitie.
Uvedenie do prevádzky
Snímač 4 sa aktivuje pri osvetlení približne <100Luxov.
Žiarič 3 sa automaticky zapne v tme, keď snímač 4 rozpozná
pohyb.
Po 30sekundách sa svetlo automaticky vypne, keď sa nezistí
žiadny pohyb.
Ak sa rozpozná pohyb po vypnutí, svetlo sa automaticky opäť
zapne na pribl. 30sekúnd.
Aby ste žiarič 3 vypli, musíte vypínač ON/OFF 2 uviesť do
polohy „OFF“. Nabíjateľné batérie
11
sa už nebudú nabíjať.

127 SK
Údržba a čistenie
VÝSTRAHA! NEBEZPEČENSTVO ZÁSAHU
ELEKTRICKÝM PRÚDOM!
Nepoužívajte rozpúšťadlá, benzín atď., pretože v opačnom
prípade sa poškodí žiarovka.
Vypínač ON/OFF 2 na žiariči 3 uveďte do polohy „OFF“.
Vyberte nabíjateľné batérie
11
.
Uvoľnite spojenie medzi konektorom
18
a zdierkou
19
(len
HG04465B).
Vyčistite svetlo suchou handrou, ktorá nezanecháva žmolky.
Znova vložte nabíjateľné batérie
11
.
Konektor
18
opäť pripojte do zdierky
19
(len HG04465B).
Vypínač ON/OFF 2 na žiariči 3 uveďte do polohy „ON“.
Skontrolujte snímač 4 a solárny panel 1 pravidelne na
znečistenia. Odstráňte všetky nečistoty, aby sa zabezpečila
bezchybná funkčnosť výrobku.
Produkt počas zimy udržiavajte najmä bez snehu a ľadu.

128 SK
Likvidácia
Obal pozostáva z ekologických materiálov, ktoré môžete odovzdať
na miestnych recyklačných zberných miestach.
Všímajte si prosím označenie obalových materiálov pre
triedenie odpadu, sú označené skratkami (a) a číslami (b)
s nasledujúcim významom: 1–7: Plasty / 20–22: Papier a
kartón / 80–98: Spojené látky.
Výrobok a obalové materiály sú recyklovateľné, zlikvidujte
ich oddelene pre lepšie spracovanie odpadu.
Triman-Logo platí iba pre Francúzsko.
O možnostiach likvidácie opotrebovaného výrobku sa
môžete informovať na Vašej obecnej alebo mestskej
správe.
Ak výrobok doslúžil, v záujme ochrany životného
prostredia ho neodhoďte do domového odpadu, ale
odovzdajte na odbornú likvidáciu. Informácie o zberných
miestach a ich otváracích hodinách získate na Vašej
príslušnej správe.
Defektné alebo použité batérie / akumulátorové batérie musia byť
odovzdané na recykláciu podľa smernice 2006/66/ES a jej zmien.
Batérie / akumulátorové batérie a / alebo výrobok odovzdajte
prostredníctvom dostupných zberných stredísk.

129 SK
Nesprávna likvidácia batérií /
akumulátorových batérií ničí životné
prostredie!
Batérie / akumulátorové batérie sa nesmú likvidovať spolu s
domovým odpadom. Môžu obsahovať jedovaté ťažké kovy a
je potrebné zaobchádzať s nimi ako s nebezpečným odpadom.
Chemické značky ťažkých kovov sú nasledovné: Cd = kadmium,
Hg = ortuť, Pb = olovo. Opotrebované batérie / akumulátorové
batérie preto odovzdajte v komunálnej zberni.
Záruka
Tento výrobok bol dôkladne vyrobený podľa prísnych akostných
smerníc a pred dodaním svedomito testovaný. V prípade nedostatkov
tohto výrobku Vám prináležia zákonné práva voči predajcovi
produktu. Tieto zákonné práva nie sú našou nižšie uvedenou zárukou
obmedzené.
Na tento produkt poskytujeme 3-ročnú záruku od dátumu nákupu.
Záručná doba začína plynúť dátumom kúpy. Starostlivo si prosím
uschovajte originálny pokladničný lístok. Tento doklad je potrebný
ako dôkaz o kúpe.
Ak sa v rámci 3 rokov od dátumu nákupu tohto výrobku vyskytne
chyba materiálu alebo výrobná chyba, výrobok Vám bezplatne
opravíme alebo vymeníme – podľa nášho výberu. Táto záruka
zaniká, ak bol produkt poškodený, neodborne používaný alebo
neodborne udržiavaný.

130 SK
Poskytnutie záruky sa vzťahuje na chyby materiálu a výrobné chyby.
Táto záruka sa nevzťahuje na časti produktu, ktoré sú vystavené
normálnemu opotrebovaniu, a preto ich je možné považovať za
opotrebovateľné diely (napr. batérie) alebo na poškodenia na
rozbitných dieloch, napr. na spínači, akumulátorových batériach
alebo častiach, ktoré sú zhotovené zo skla.

IAN 304540
OWIM GmbH & Co. KG
Stiftsbergstraße 1
DE‑74167 Neckarsulm
GERMANY
Model No.: HG04465A / HG04465B
Version: 09/2018
-
 1
1
-
 2
2
-
 3
3
-
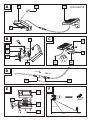 4
4
-
 5
5
-
 6
6
-
 7
7
-
 8
8
-
 9
9
-
 10
10
-
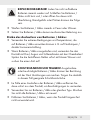 11
11
-
 12
12
-
 13
13
-
 14
14
-
 15
15
-
 16
16
-
 17
17
-
 18
18
-
 19
19
-
 20
20
-
 21
21
-
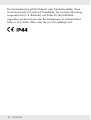 22
22
-
 23
23
-
 24
24
-
 25
25
-
 26
26
-
 27
27
-
 28
28
-
 29
29
-
 30
30
-
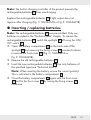 31
31
-
 32
32
-
 33
33
-
 34
34
-
 35
35
-
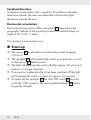 36
36
-
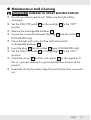 37
37
-
 38
38
-
 39
39
-
 40
40
-
 41
41
-
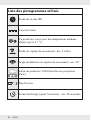 42
42
-
 43
43
-
 44
44
-
 45
45
-
 46
46
-
 47
47
-
 48
48
-
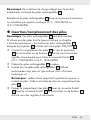 49
49
-
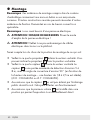 50
50
-
 51
51
-
 52
52
-
 53
53
-
 54
54
-
 55
55
-
 56
56
-
 57
57
-
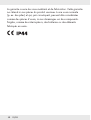 58
58
-
 59
59
-
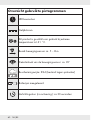 60
60
-
 61
61
-
 62
62
-
 63
63
-
 64
64
-
 65
65
-
 66
66
-
 67
67
-
 68
68
-
 69
69
-
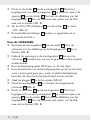 70
70
-
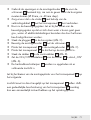 71
71
-
 72
72
-
 73
73
-
 74
74
-
 75
75
-
 76
76
-
 77
77
-
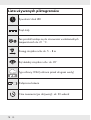 78
78
-
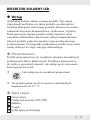 79
79
-
 80
80
-
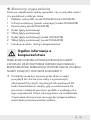 81
81
-
 82
82
-
 83
83
-
 84
84
-
 85
85
-
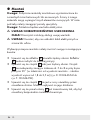 86
86
-
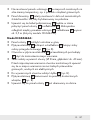 87
87
-
 88
88
-
 89
89
-
 90
90
-
 91
91
-
 92
92
-
 93
93
-
 94
94
-
 95
95
-
 96
96
-
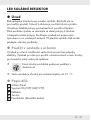 97
97
-
 98
98
-
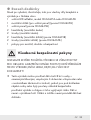 99
99
-
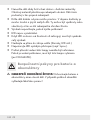 100
100
-
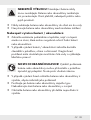 101
101
-
 102
102
-
 103
103
-
 104
104
-
 105
105
-
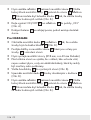 106
106
-
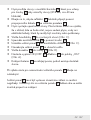 107
107
-
 108
108
-
 109
109
-
 110
110
-
 111
111
-
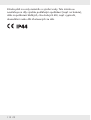 112
112
-
 113
113
-
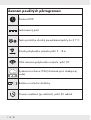 114
114
-
 115
115
-
 116
116
-
 117
117
-
 118
118
-
 119
119
-
 120
120
-
 121
121
-
 122
122
-
 123
123
-
 124
124
-
 125
125
-
 126
126
-
 127
127
-
 128
128
-
 129
129
-
 130
130
-
 131
131


in andere talen
- français: LIVARNO 304540 Le manuel du propriétaire
- Deutsch: LIVARNO 304540 Bedienungsanleitung
- slovenčina: LIVARNO 304540 Návod na obsluhu
- polski: LIVARNO 304540 Instrukcja obsługi