Medion md 80403 de handleiding
- Categorie
- CD spelers
- Type
- de handleiding
Deze handleiding is ook geschikt voor

MD 80403 Autoradio BDA_D.FH11 Fri Jan 28 12:11:12 2005 Seite 3
C M Y CM MY CY CMY K
D

MD 80403 Autoradio BDA_D.FH11 Fri Jan 28 12:11:12 2005 Seite 4
C M Y CM MY CY CMY K
D 2
FUNKTIONEN
1. OPEN Öffnen des Bedienteils
2. SEL: Aufrufen der einzelnen Funktionen
3. MULTIJOG Einstellung für Lautstärke, Bass, Höhen, Balance und Fader
4. DISPLAY
5. DSP/0: Abfrage für Programm-, Uhrzeit-, Frequenz- und
PTY-Einstellungen/Nummerntaste 0.
6. BND/LOU/ENT: Bandbereichs Auswahl/Loudness/Bestätigen
7. EQ: Equalizer
8. POWER/DIM: Ein-/Ausschalter, Diplaybeleuchtung dimmen
9. USB USB Anschluss für externe Datenträger
10. RESET auf Werkseinstellung zurücksetzen
11. AF: Einschalten des RDS-Modus
12. TA/REC: Traffic Announcement Identification / Verkehrsdurchsagen erkennen/
Aufnahme starten
13. PTY: Program Type Code
14. 19.: Stationswahltasten
14. PAU: Pause im CD/MP3-Betrieb / Nummertaste 1
15. SCN: Scan, Titel 10 Sek. Anspielen im CD/MP3-Betrieb / Nummerntaste 2
16. RPT: Repeat, Wiederholung im CD/MP3-Betrieb / Nummerntaste 3
17. SHF: Shuffle, Zufallswiedergabe im CD/MP3-Betrieb / Nummerntaste 4
18. Nummerntaste 5
19. Nummerntaste 6
20. MODE: Umschaltung Radio/CD/MP3/Nummerntaste 7
21. AMS/D-AUD Automatische Senderspeicherung / MP3-Suche
22. -<< : Tune/Sendersuchlauf/rückwärts/Nummerntaste 8
23. +>>: Tune/Sendersuchlauf vorwärts/Nummerntaste 9
24. Rote Leuchtdiode (Diebstahlschutz LED)
25. CD-Fach: Zum Einschieben der CD
26. EJECT CD auswerfen

MD 80403 Autoradio BDA_D.FH11 Fri Jan 28 12:11:12 2005 Seite 5
C M Y CM MY CY CMY K
SICHERHEITSHINWEIS
Setzen Sie das Gerät in den dafür vorgesehenen Schacht ein, oder wählen Sie einen Platz für die
Montage des Gerätes, an dem es die normalen Fahraufgaben des Fahrers nicht behindert.
Schließen Sie kurz die Kabel an, bevor Sie das Gerät endgültig einbauen. Stellen Sie sicher, dass
diese richtig eingebaut sind und dass das System richtig funktioniert.
Falls Änderungen am Fahrzeug erforderlich sind, wenden Sie sich an Ihren Fahrzeughändler/
-fachwerkstatt.
Bauen Sie das Gerät so ein, dass keine Verletzungen bei starkem Bremsen entstehen können.
Wenn das Gerät mehr als 30° aus der Waagerechten eingebaut wird, kann es seine optimale
Leistung verlieren.
Vermeiden Sie den Einbau des Gerätes in der Nähe hoher Temperaturen (z.B. direkte
Sonneneinstrahlung oder Heizungsluft), Staub, Schmutz oder übermäßige Erschütterungen.
30°
D 3
D

MD 80403 Autoradio BDA_D.FH11 Fri Jan 28 12:11:12 2005 Seite 6
C M Y CM MY CY CMY K
INHALTSANGABE
VOR INBETRIEBNAHME .....................................................................................................................5
MONTAGE.............................................................................................................................................5
EINBAU DES RADIOS IN DEN ISO SCHACHT IHRES FAHRZEUGES.............................................5
Abnehmen und Einsetzen des Bedienteils.........................................................................................6
ISO ADAPTERSTECKER .....................................................................................................................6
Antennen-Relais Kabel.......................................................................................................................6
Stereo-Cinch- Ausgang.......................................................................................................................6
KABELVERBINDUNGEN .....................................................................................................................7
GRUNDBEDIENUNG ............................................................................................................................8
Ein-/Ausschalten.................................................................................................................................8
Lautstärke...........................................................................................................................................8
Bass....................................................................................................................................................8
Höhen .................................................................................................................................................8
Balance...............................................................................................................................................8
Fader ..................................................................................................................................................8
Loudness ............................................................................................................................................8
Display................................................................................................................................................8
Mode...................................................................................................................................................8
Equalizer.............................................................................................................................................8
Reset ..................................................................................................................................................8
RADIO ...................................................................................................................................................9
Bandbereich wählen ...........................................................................................................................9
Sender auswählen..............................................................................................................................9
Vorprogrammierte Sender ..................................................................................................................9
Sender speichern ...............................................................................................................................9
Sender wiederfinden...........................................................................................................................9
Automatisches Speichern (AMS)........................................................................................................9
Vorprogrammierung durchlaufen ........................................................................................................9
Regional Programm Modus..............................................................................................................10
PTY (Programme-Type/Art)..............................................................................................................10
TA Verkehrsfunk ...............................................................................................................................10
EON TA ortlicher Modus ...................................................................................................................10
EON DX Modus ................................................................................................................................10
RDS (Radio Data System)................................................................................................................11
CD-PLAYER ........................................................................................................................................12
Einlegen und Herausnehmen von CDs ...........................................................................................12
Titel überspringen .............................................................................................................................12
CD unterbrechen ..............................................................................................................................12
Vorlauf und Rücklauf ........................................................................................................................12
Abspielen aller Titel ..........................................................................................................................12
Wiederholen eines Titels ..................................................................................................................12
Zufallswiedergabe ............................................................................................................................12
MP3 WIEDERGABE............................................................................................................................13
Suche nach Titeln (Nummern)..........................................................................................................13
Suche nach Interpreten ....................................................................................................................13
WMA-Dateien abspielen...................................................................................................................13
Tasten Belegtabelle ..........................................................................................................................14
ID3-TAG FUNKTION ...........................................................................................................................14
DATEN VON USB ABSPIELEN..........................................................................................................15
Aufnahmefunktion.............................................................................................................................15
FEHLERSUCHE..................................................................................................................................16
TECHNISCHE DATEN ........................................................................................................................17
D 4

MD 80403 Autoradio BDA_D.FH11 Fri Jan 28 12:11:12 2005 Seite 7
C M Y CM MY CY CMY K
ACHTUNG!
Bitte benutzen Sie beim Einbau zum Anschließen des Autoradios die ISO Buchsen des
Autoradios. Die passenden ISO Adapterstecker (Autogegenstücke) können Sie je nach
Fahrzeugtyp im Handel erwerben.
Sollten Sie die Adapterbuchse von dem Kabel trennen oder die Kabel abschneiden, so
erlischt Ihr Garantieanspruch!
MONTAGE
Dieses Autoradio kann ganz einfach in jeden Standard ISO Radioausschnitt eingebaut werden.
Sollte Ihr Fahrzeug keinen Standard ISO Radioausschnitt haben, wenden Sie sich an Ihren
Fahrzeughändler.
Einbau des Radios in den ISO Schacht Ihres Fahrzeuges.
Ziehen Sie den Einbaurahmen vom Radio ab.
Stecken Sie den Einbaurahmen in den Radioausschnitt des Armaturenbretts Ihres Fahrzeugs.
Biegen Sie die Laschen im Einbaurahmen mit einem Schraubendreher um, so dass dieser in
dem Fahrzeug fest fixiert ist.
Überprüfen Sie den Rahmen auf festen Halt.
Verbinden Sie den ISO Buchsenblock mit den
ISO Steckern Ihres Fahrzeugs.
Verbinden Sie das Antennenkabel des Fahrzeugs
mit dem Antennenstecker des Autoradios.
Schieben Sie mit Vorsicht das Radio in den
Einbaurahmen. Beachten Sie, dass Sie die Kabel nicht
einklemmen! Betätigen Sie die RESET-Taste (10) mit einem
Kugelschreiber oder einem ähnlichen, spitzen Gegenstand.
Setzen Sie das Bedienteil ein.
VOR INBETRIEBNAHME
Entfernen Sie unbedingt vor der Montage die beiden
Transportsicherungsschrauben im oberen Radiogehäuse
(durch rote Fahnen erkennbar)!
Transportsicherung
D 5
D

MD 80403 Autoradio BDA_D.FH11 Fri Jan 28 12:11:12 2005 Seite 8
C M Y CM MY CY CMY K
ABNEHMEN UND EINSETZEN DES BEDIENTEILS
Drücken Sie die OPEN-Taste (1) und entfernen Sie das Bedienteil. Bewahren Sie das
Bedienteil stets in der dafür vorgesehenen Transporttasche auf.
Bei entnommenen Bedienteil blinkt eine rote Leuchtdiode (24).
Setzen Sie das Bedienteil zum Einbauen zuerst mit der rechten Seite in den Rahmen. Drücken
Sie dann die linke Seite fest, bis es einrastet. Überprüfen Sie, dass das Bedienteil richtig und
fest auf seinem Platz sitzt. Ist das Bedienteil nicht richtig eingebaut, erscheinen im Display,
Fehlinformationen und/oder einige Tasten haben Fehlfunktionen.
Frontblende
ISO Adapterstecker
Achtung!
Nutzen Sie den ISO Adapterstecker des Autoradios, um eine sichere elektrische Verbindung herzustellen.
Wichtig!
Achten Sie darauf, dass das rosafarbene Backupkabel an Dauerplus anliegen muss (für Senderspeicher).
Nachdem alle Verbindungen hergestellt sind, drücken Sie die RESET-Taste (10).
Antennen-Relais Kabel
Das gelbe Kabel ist für eine Relais-gesteuerte Antenne zur Verfügung gestellt worden.
Das Relais wird die Antenne automatisch ausfahren, wenn das Gerät angeschaltet wird und beim
Abschalten fährt die Antenne wieder ein.
Vorsicht:
Das gelbe Kabel nicht mit dem Motorkabel verbinden, sonst können Schäden am Gerät
verursacht werden.
Stereo-Cinch- Ausgang
An diesen Anschlüssen (roter und weisser Cinchanschluss) können Sie externe Geräte (z.B. Verstärker)
anschließen.
D 6

MD 80403 Autoradio BDA_D.FH11 Fri Jan 28 12:11:12 2005 Seite 9
C M Y CM MY CY CMY K
für Zwei-Lautsprecher (Dual) System
KABELVERBINDUNGEN
für Vier-Lautsprecher (Quadro) System
Antennen Verbindung
Zündschloss-
schalter (B+)
rot
rosa
schwarz
gelb
blau/schwarz
blau
grün/schwarz
grün
Speicher
Back-up
Erdanschluss
(B-)(Masse)
Strom-
antenne
vorne links
Lautsprecher
hinten links
Lautsprecher
weiss/schwarz
weiss
grau/schwarz
grau
hinten rechts
Lautsprecher
links weiss
rechts rot
AUTORADIO RÜCKSEITE
RCA Kabel
Wichtig!
Speicher Back-up
muss an Dauerplus
angeschlossen sein,
für Senderspeicher.
vorne rechts
Lautsprecher
Antennen Verbindung
Zündschloss-
schalter (B+)
rot
rosa
schwarz
gelb
blau/schwarz
grün
Speicher
Back-up
Erdanschluss
(B-)(Masse)
Strom-
antenne
linker
Lautsprecher
weiss/schwarz
grau
rechter
Lautsprecher
links weiss
rechts rot
AUTORADIO RÜCKSEITE
WICHTIG!
Speicher Back-up
muss an Dauerplus
angeschlossen sein,
für Senderspeicher.
RCA Kabel
D 7
D

MD 80403 Autoradio BDA_D.FH11 Fri Jan 28 12:11:12 2005 Seite 10
C M Y CM MY CY CMY K
GRUNDBEDIENUNG
Ein- /Ausschalten
Drücken Sie die POWER/DIM-Taste (8), zum Ein-/Ausschalten des Gerätes.
Lautstärke
Wählen Sie durch Drücken der Taste SEL (2) die Funktion VOLUME aus und drehen Sie den Multijog
Regler (3) um die Lautstärke entsprechend einzustellen.
Stellen Sie die Lautstärke nur so ein, dass Sie die akustischen Signale evtl. herannahender
Rettungs-/Feuerwehr-/Polizeiwagen noch hören können!
Bass
Drücken Sie die SEL-Taste (2) einmal, um den Bass einzustellen. Durch Drehen des Multijog Reglers (3)
erhöhen oder senken Sie den Bass.
Höhen
Drücken Sie die SEL-Taste (2) zweimal, um die Höhen einzustellen. Durch Drehen des Multijog Reglers
(3) erhöhen oder senken Sie die Höhen.
Balance
Drücken Sie die SEL-Taste (2) dreimal, um die Balance einzustellen. Durch Drehen des Multijog Reglers
(3) können Sie die Balance zwischen dem rechten und linken Lautsprecher einstellen.
Fader
Drücken Sie die SEL-Taste (2) viermal, um den Fader einzustellen. Durch Drehen des Multijog Reglers
(3) können Sie den Fader der vorderen und hinteren Lautsprecher einstellen.
Loudness
Halten Sie die BND/LOU/ENT-Taste (6) gedrückt, bis ein Signalton ertönt. Im Display erscheint LOUD ON
bzw.LOUD OFF. So erreichen Sie die Anhebung der tiefen Frequenzen bei geringer Lautstärke.
Display
Durch Drücken der DSP/0-Taste (5) können Sie folgende Informationen abfragen:
Programmname
Frequenz
Uhrzeit (wird bei RDS Empfang automatisch eingestellt)
PTY Einstellungen
(Diese RDS Funktionen werden von den Sendeanstalten in unterschiedlicher Qualität und Umfang
gesendet. Nähere Informationen finden Sie im Kapitel RADIO unter RDS).
Mode
Mit der MODE-Taste (20) können Sie zwischen Radio und CD bzw. USB Anschluss wechseln.
Equalizer
Drücken Sie die Taste EQ (7) um die folgenden Klangeinstellungen nacheinander aufzurufen:
FLAT CLASSICS POP M ROCK M DSP OFF
Reset
Um Ihr Autoradio in den Auslieferungszustand zurück zu stellen, betätigen Sie die RESET-Taste (10)
mit einem Kugelschreiber. Diese Taste finden Sie hinter dem Bedienteil!
Bitte betätigen Sie die RESET-Taste bei
der ersten Inbetriebnahme, nach Abschluss der Kabelverbindungen,
wenn nicht alle Funktionstasten funktionieren,
bei Erscheinen einer Fehlermeldung im Display.
D 8

MD 80403 Autoradio BDA_D.FH11 Fri Jan 28 12:11:12 2005 Seite 11
C M Y CM MY CY CMY K
RADIO
Bandbereich wählen
Drücken Sie die BND/LOU/ENT-Taste (6), um zwischen UKW (F1, F2, F3), Mittelwelle
(MW) und Langwelle(LW) zu wechseln. In jedem Bereich können Sie sechs Sender speichern.
Sender auswählen
Drücken Sie die Sendersuchlauftasten (Tune-Tasten) I<< (22) oder Taste >>I (23) für kurze Zeit, das
Gerät sucht automatisch den nächsten Sender. Wenn Sie die eine der TUNE-Tasten für zwei
Sekunden gedrückt halten, schalten Sie auf manuelle Sendersuche um. Es erscheint MANUAL im
Display.
Jetzt können Sie mit der Tune-Taste den Sender auswählen und abspeichern. Das Gerät schaltet
nach kurzer Wartezeit wieder in die automatische Sendersuchfunktion um.
Vorprogrammierte Sender
In jedem Sendebereich können Sie sechs Sender fest speichern und über die Stationstasten
1-6 (14-19) wieder aufrufen.
Sender speichern
1. Wählen Sie den Bandbereich mit der BND/LOU/ENT-Taste (6) aus.
2. Wählen Sie mit der TUNE-Taste I<< (22) oder Taste I>> (23) einen Sender aus.
3. Drücken Sie eine der Stationstasten 1-6 (14-19) für ca. 3 Sekunden. Ein Signalton bestätigt die
Senderspeicherung.
Sender wiederfinden
1. Wählen Sie den Bandbereich mit der BND/LOU/ENT-Taste (6) aus.
2. Drücken Sie die Stationstaste (14-19), um den vorprogrammierte Sender aufrufen.
Automatisches Speichern (AMS)
Halten Sie die AMS/D-AUD-Taste (21) gedrückt, bis ein Signalton erklingt. Im Display erscheint
SEARCH. Der Suchlauf hält bei jedem gefundenen Sender ca. 5 sek. an. Die im Display blinkende
Zahl zeigt die Nummer der Stationstasten an, auf welche der jeweilige Sender abgespeichert wird.
Bei schwachen Sendern läuft der Suchlauf automatisch weiter.
Vorprogrammierung durchlaufen
Automatisches durchsuchen Ihrer im Sendebereich gespeicherten Sender.
1. Wählen Sie den Bandbereich mit der BND/LOU/ENT-Taste (6) aus.
2. Drücken Sie kurz die AMS/D-AUD-Taste (21). Alle Sender werden jetzt kurz angewählt.
Bei erreichen des gesuchten Senders, drücken Sie kurz die AMS/D-AUD-Taste (21).
D 9
D

MD 80403 Autoradio BDA_D.FH11 Fri Jan 28 12:11:12 2005 Seite 12
C M Y CM MY CY CMY K
D 10
(Die Informationen sind abhängig von der Sendeanstalt)
TA Verkehrsfunk
Halten Sie die TA/REC-Taste (12) für kurze Zeit gedrückt, um den TA-Modus ein- oder auszuschalten.
Wenn der TA-Modus eingeschaltet ist und der Verkehrsfunk übertragen wird während Sie die CD
oder USB-Anschluss eingestellt haben, wird automatisch auf Radio umgeschaltet. Zeitweise findet
eine Umschaltung auf die EON Verbindungsstation statt, wenn EON einen Verkehrsfunk auf einem
anderen Programm findet. Wenn sich der Lautstärkepegel unter der Schwelle befindet, wird er sich
erheben. Die TA-Funktion des laufenden Verkehrsfunks wird durch Drücken der TA/REC-Taste (12)
unterbrochen. Der TA-Modus wird dadurch nicht ausgeschaltet. Wird die TA/REC-Taste (12) längere
Zeit gedrückt gehalten, wird der EON TA LOCAL/EON TA DISTANCE Modus gewählt.
Mit diesem Modus können EON TA Informationen zugeordnet werden, z. B. Sie hören eine
Nicht-Verkehrsfunksender, aber auf einer anderen Senderfrequenz gibt es eine Verkehrsmeldung,
so schaltet das Gerät automatisch für diese Zeit um. Sobald diese Meldung beendet ist, wird wieder
auf den vorherigen Senderplatz umgeschaltet.
EON TA örtlicher Modus
Wenn der EON TA LOCAL Modus Gewählt wurde, blinkt EON TA LO einige Sekunden auf dem
Display. Der Modus für das lokale Gebiet wurde gewählt.
EON DX Modus
Wenn der EON DX Modus gewählt wurde, blinkt EON TA DX einige Sekunden auf dem Display.
Der Modus für das weiter entfernte Gebiet wurde gewählt.
MUSIK SPRACHE
1 POP M, ROCK M NEWS (Nachrichten), AFFAIRS
(Angelegenheiten), INFO (Infos)
2 EASY M, LIGHT M SPORT, EDUCATE (Bildung), DRAMA
3 CLASSICS (Klassik), CULTURE (Kultur), SCIENCE (Wissenschaft),
OTHER M (Andere M) VARIED (Verschiedenes)
4 JAZZ, COUNTRY WEATHER (Wetter), FINANCE (Finanzen),
CHILDREN (Kinder)
5 NATION M, OLDIES SOCIAL (Soziales), RELIGION, PHONE IN
(Telefoneingang)
6 FOLK M Travel (Reisen), Leisure (Freizeit), Document
(Dokumente)
Regional Programm Modus
Einige Programme strahlen verschiedene Regionalprogramme aus. Damit nur die Alternativ-
frequrenzen des gewünschten Regionalprogramms gewählt werden;
halten Sie die AF-Taste (11) etwas länger gedrückt bis ein Signalton ertönt, um den Modus ein-
oder auszuschalten. Im Display steht REG ON/REG OFF.
PTY (Programme-Type/Art)
Um das Menü zu aktivieren, drücken Sie die PTY-Taste (13).
Sie können jetzt nach folgenden Kategorien Ihre Sender auswählen:

MD 80403 Autoradio BDA_D.FH11 Fri Jan 28 12:11:12 2005 Seite 13
C M Y CM MY CY CMY K
RDS (Radio Data System)
RDS ist ein Service der Rundfunkanstalten. Neben den herkömmlichen Musik- und Sprachbeiträgen
werden Zusatzinformationen in Form verschlüsselter Digitalsignale ausgesendet, welche vom
Autoradio ausgewertet werden können.
Drücken Sie kurz die AF-Taste (11), um den RDS-Modus ein- oder auszuschalten. Bei Aktivierung
des RDS-Modus erscheint im Display das Symbol AF. Jetzt wird bei Empfang eines Senders der
Programmname und andere Informationen im Display (4) angezeigt.
Diese Informationen sind abhängig von der Sendeanstalt.
Es werden unterschiedliche RDS-Dienste angeboten:
PI: Program Identification Code
Mit Hilfe des PI-Codes kann das Radio den empfangenden Sender identifizieren.
PS: Program Service Name
Die Funktion Program Service ermöglicht die Anzeige des Sendernamens.
AF: Alternative Frequencies
Das Radio wählt automatisch die am besten zu empfangende Alternativ-Frequenz des gleichen
Programms.
TP/TA: Traffic-Program/Traffic-Annoucement
EON: Enhanced Other Networks Information
Im Falle einer Verkehrsdurchsage wird auch beim Hören eines Nicht-Verkehrsfunksenders
innerhalb einer Senderkette auf einem Verkehrsfunksender umgeschaltet.
PTY: Program Type Code
Mit Program Type kann das Radio nach Sendern mit vorwählbaren Programminhalten
suchen. Z. B. Sport, Nachrichten, Rock, Pop,.....
D 11
D

MD 80403 Autoradio BDA_D.FH11 Fri Jan 28 12:11:12 2005 Seite 14
C M Y CM MY CY CMY K
CD-PLAYER
Einlegen und Herausnehmen von CDs
Zum Einlegen die CD in das CD-Fach (25) schieben. Die Wiedergabe der CD beginnt.
Im Display erscheint S--CDP (d.h. suche Titel). Zum Herausnehmen der CD drücken Sie die EJECT-
Taste (26).
Die Wiedergabe bricht ab und die CD wird herausgefahren. Das Gerät schaltet auf den Radio Modus
um.
Titel überspringen
TUNE-Taste |<< (22) oder Taste >>| (23) drücken, um zum nächsten Titel zu springen.
Die Titelnummer wird im Display (4) angezeigt.
CD unterbrechen
Während der Wiedergabe die PAU-Taste (14) drücken, die CD-Wiedergabe wird unterbrochen.
Nochmaliges Drücken der PAU-Taste (14) und die CD spielt weiter.
Vorlauf und Rücklauf mit hoher Geschwindigkeit
TUNE-Taste |<< (22) oder Taste >>| (23) bei der Wiedergabe länger drücken um den schnellen
Vorlauf/Rücklauf zu starten.
Abspielen aller Titel
Die SCN-Taste (15) drücken und die ersten 10 Sekunden jedes Titels werden angespielt.
Erneutes Drücken der SCN-Taste (15) und die normale Wiedergabe wird gestartet.
Wiederholen eines Titels
Drücken Sie die RPT-Taste (16) um den gleichen Titel ständig zu hören. Erneutes Drücken der RPT-
Taste (16) deaktiviert die Funktion.
Zufallswiedergabe
SHF-Taste (17) drücken, um alle Titel der CD in Zufallsreihenfolge abzuspielen.
Hinweis:
Das Fahren auf unebenen Straßen könnte ein Überspringen auf der CD verursachen. Eine kurze
Einspielzeit wird die Leistung verbessern.
Überspringen schadet der CD keineswegs.
Feuchtigkeit und hohe Luftfeuchtigkeit können Fehlfunktionen des CD-Spieler verursachen.
Fahrzeug-Heizung anschalten und Feuchtigkeit vor Gebrauch verdunsten lassen.
Setzen Sie den CD-Spieler keinen extrem hohen oder niedrigen Temperaturen aus.
Fahren Sie nicht mit einer herausgefahrenen CD in dem Schlitz.
D 12

MD 80403 Autoradio BDA_D.FH11 Fri Jan 28 12:11:12 2005 Seite 15
C M Y CM MY CY CMY K
Hinweis:
Die Suchfunktion ist abhängig von der erstellten MP3-CD.
MP3-WIEDERGABE
Die Wiedergabe startet automatisch bei Einlegen einer MP3-CD-ROM. Die Tastenfunktionen entnehmen
Sie bitte dem Kapitel CD-Player.
Sie können die Titel oder die Interpreten direkt anwählen. Beachten Sie, dass die MP3-Funktionen
größtenteils von der Erstellung der MP3-CD abhängig sind.
Suche nach Titeln (Nummern)
Drücken Sie AMS/D-AUD-Taste (21) einmal. Im Display erscheint MP3T ..... .
Geben Sie mit den in der Tabelle angegebenen Tasten die Nummern des gewünschten Titels ein.
Bestätigen Sie die Eingabe mit der BND/LOU/ENT-Taste (6) oder warten Sie ca. 5 sek. bis das Gerät
automatisch auf den gewählten Titel springt.
Suche nach Interpreten
Drücken Sie AMS/D-AUD-Taste (21) zweimal. Im Display erscheint ein blinkender ....... .
Geben Sie den in der Tabelle angegebenen Tasten den Namen des gewünschten Interpreten ein.
Beachten Sie, dass nach jedem Buchstaben die SEL-Taste (2) gedrückt werden muss, damit der
nächste Buchstabe eingegeben werden kann (Zeichenverschiebung).
Bestätigen Sie die Eingabe mit der BND/LOU/ENT-Taste (6).
Das Gerät sucht nun den entsprechenden Titel.
Drücken Sie noch einmal die BND/LOU/ENT-Taste (6), wenn das Gerät den gewünschten Interpreten
gefunden hat. Der Titel wird jetzt abgespielt.
WMA-Dateien
Sie können in Ihrem Autoradio auch WMA-Dateien abspielen. Die Bedienung funktioniert hier genau
wie bei MP3 Dateien.
D 13
D

MD 80403 Autoradio BDA_D.FH11 Fri Jan 28 12:11:12 2005 Seite 16
C M Y CM MY CY CMY K
D 14
ID 3-TAG FUNKTION
Beim Erstellen einer MP3-CD können Sie zusätzliche Informationen abspeichern. Dies können
Informationen über den Interpret, Titel, Albumname und Erscheinungsjahr des Musikstücks, sowie ein
kurzer Kommentar sein. Zur Eingabe empfehlen wir einen ID3-Tag Editor.
Diese Informationen werden nach Abfrage während der Wiedergabe über das Display angezeigt.
Beim Abspielen von MP3-CD's können so, ausser Titelnummer, auch der Titelname oder der Interpret
angezeigt werden (abhängig von den gespeicherten Informationen auf der MP3-CD).
Zur Abfrage betätigen Sie die DSP/0-Taste (5). Nach jedem Tastendruck erscheint ein ID3-Tag Eintrag
der aktuellen Wiedergabe:
TITEL - INTERPRET - ALBUMNAME - ERSCHEINUNGSJAHR - KOMMENTAR
AMS/D-AUD (21) Einstellung wählen
BND/LOU/ENT (6) Bestätigen
1 (14) A, B, C, 1
2 (15) D, E, F, 2
3 (16) G, H, I, 3
4 (17) J, K, L, 4
5 (18) M, N, O, 5 / 10 Track runter
6 (19) P, Q, R, 6 / 10 Track rauf
MODE (20) S, T, U, 7
|<< (22) V, W, X, 8
>>| (23) Y, Z, Leerstelle, 9
SEL (2) Zeichenverschieben nach rechts
DSP/0 (5) 0,_, -, +,
(5) (6) Scrollfunktion A-Z / 0-9
Tasten Belegtabelle
Hinweis:
Bei der Erstellung einer MP3-CD-ROM beachten Sie bitte, dass sich die Titel einzeln oder in
Verzeichnissen befinden. Mixen Sie niemals Titel und Verzeichnisse, es könnte zu Problemen
beim Abspielen führen. Alle gängigen Codierungen können abgespielt werden.

MD 80403 Autoradio BDA_D.FH11 Fri Jan 28 12:11:12 2005 Seite 17
C M Y CM MY CY CMY K
D 15
DATEN VON USB ABSPIELEN
Sie können an den USB-Anschluss an der Gerätefront einen MP3 Player oder einen anderen USB-
Datenträger anschließen.
Ihr Autoradio kann USB-Datenträger bis zu 1GB verarbeiten.
Dabei darf die Verzeichnisstruktur maximal 1024 Ordner, 4096 Dateien und eine Verzeichnistiefe von
8 Ebenen enthalten.
Sobald das externe Gerät angeschlossen ist, sucht das Autoradio nach MP3- oder WMA Dateien auf
dem Datenträger und im Display (4) erscheint die Meldung USB. Die Bedienung zum Abspielen von
Dateien auf dem externen Datenträger, sowie die Suchfunktion funktionieren genau wie bei MP3 CDs.
Aufnahmefunktion
Sie können mit Ihrem Autoradio auch Daten von Radio und CD-Player auf den externen USB-Datenträger
aufnehmen.
Um mit der Aufnahme zu beginnen, drücken Sie im entsprechenden Modus die Taste TA/REC (12).
Die Audiodaten werden nun im WMA-Format auf den USB Datenträger gespeichert. Während der
Aufnahme erscheint im Display die Meldung FILE NAME.
Um die Aufnahme zu beeenden, drücken Sie nochmals kurz die Taste TA/REC (12).
Sie können die Daten wieder abspielen, indem Sie mit der Taste MOD E (20) in den USB-Modus
schalten und die einzelnen Titel vom USB-Datenträger aufrufen.
D

MD 80403 Autoradio BDA_D.FH11 Fri Jan 28 12:11:12 2005 Seite 18
C M Y CM MY CY CMY K
FEHLERSUCHE
Das Gerät lässt sich nicht
einschalten.
Die CD kann nicht geladen
oder ausgeschoben
werden.
Kein Ton
Funktionstasten
funktionieren nicht.
CD springt.
Radio funktioniert nicht.
Automatische Sender-
Auswahl funktioniert nicht.
Senderspeicher funktioniert
nicht.
Die Zündung ist nicht
eingeschaltet.
Die Sicherung ist defekt.
Es befindet sich bereits eine
CD im Gerät.
CD ist verkehrt herum
eingelegt worden.
CD ist sehr schmutzig oder
defekt.
Temperaturen im Auto sind
zu hoch.
Kondesation.
Lautstärke auf Minimum.
Kabel sind nicht richtig
angeschlossen.
Der eingebaute
Microcomputer kann wegen
Rauschen nicht funktionieren.
Bedienteil sitzt nicht korrekt.
Der Einbauwinkel übersteigt
30°.
CD ist sehr schmutzig oder
defekt.
Fehler bei selbstgebrannten CDs
Antennenkabel ist nicht
angeschlossen.
Die Sendesignale sind zu
schwach.
Rosa Kabel ist nicht am
Dauerplus angeschlossen.
Zündung durch drehen
des Schlüssel einschalten.
Sicherung erneuern.
CD aus dem Spieler entfernen,
dann neue CD einlegen.
CD immer mit der Beschriftung
nach oben legen.
CD säubern oder versuchen
eine andere abzuspielen.
Abkühlen, bis die
Umgebungstemperatur
wieder auf
Normalzustand ist.
Das Gerät ein paar
Stunden ausgeschaltet
lassen und dann erneut
versuchen.
Lautstärke zur gewünschten
Stärke einstellen.
Kabelverbindungen
überprüfen.
RESET-Taste drücken.
Überprüfen, dass das
Bedienteil richtig und
fest auf seinem Platz sitzt.
Einbauwinkel auf weniger
als 30° verstellen.
CD säubern oder versuchen
eine andere abzuspielen.
CD in einem anderen Gerät
überprüfen
Antennekabel fest einstecken.
Sender manuell
anwählen.
Kabelverbindungen
überprüfen.
Problem Ursache Abhilfe
D 16

MD 80403 Autoradio BDA_D.FH11 Fri Jan 28 12:11:12 2005 Seite 19
C M Y CM MY CY CMY K
CD-Player
Verwenden Sie ausschließlich CDs, die wie folgt gekennzeichnet sind:
Laserklasse 1
Technische Änderungen vorbehalten.
COMPACT
DIGITAL AUDIO
TECHNISCHE DATEN
Allgemein
Betriebsspannung: DC 12 V, negative Masseverbindung
Gestell-Abmessungen: 178 x 155 x 50 mm (BxTxH)
Leistung: Musikspitzenausgangsleistung 4 x 20W R.M.S.
Sicherung: 0,5 Ampere (rot), 15 Ampere (rosa)
MP3/CD-Player
MPEG Rate 64-320 K
Frequenzbereich 20 Hz ~ 20 kHz
MP3 Playback ISO 9660 & Joliet format of MP3
Radio
Für 3 Frequenzbänder
FM
Frequenzumfang 87.5 bis 108 MHz
IF 10.7 MHz
Empfindlichkeit 3 µV
(Rauschabstand = 30 dB)
Stereo Trennung > 30 dBu
MW
Frequenzumfang 522 bis 1620 kHz
IF 45 kHz
(Rauschabstand = 30 dB)
Stereo Trennung 32 dBu
LW
Frequenzumfang 144 bis 288 kHz
IF 450 kHz
Empfindlichkeit
(Rauschabstand = 30 dB) 35 dBu
D 17
D

MD 80403 Autoradio BDA_ENG.FH11 Fri Jan 28 12:14:09 2005 Seite 2
C M Y CM MY CY CMY K
GB 2
FUNCTIONS
1. OPEN Opens the control panel
2. SEL: Activates individual functions
3. MULTIJOG sets volume, bass, treble, balance and fader
4. DISPLAY
5. DSP/0: Queries program, time, frequency and
PTY settings/number key 0.
6. BND/LOU/ENT: Volume range selection/volume/confirm
7. EQ: Equalizer
8. POWER/DIM: On/off switch, dims the display panel
9. USB USB connection for external data storage media
10. RESET Return to factory settings
11. AF: Switches on RDS mode
12. TA/REC: Traffic Announcement Identification / detect traffic updates
Start recording
13. PTY: Program Type Code
14. 19.: Station selection keys
14. PAU: Pause in CD/MP3 mode / number key 1
15. SCN: Title scan with 10 sec. sample play (in CD/MP3 mode) / number key 2
16. RPT: Repeat (in CD/MP3 mode) / number key 3
17. SHF: Shuffle (in CD/MP3 mode) / number key 4
18. Number key 5
19. Number key 6
20. MODE: Mode switch: radio / CD / MP3 / number key 7
21. AMS/D-AUD automatic station storage / MP3 search
22. -<< : Tuning search/downwards / number key 8
23. +>>: Tuning search upwards/Number key 9
24. Red LED (anti-theft protection LED)
25. CD compartment: To insert the CD
26. EJECT eject CD

MD 80403 Autoradio BDA_ENG.FH11 Fri Jan 28 12:14:09 2005 Seite 3
C M Y CM MY CY CMY K
SAFETY INSTRUCTIONS
Insert the unit into the proper shaft or select a location to install the unit that will not affect the driver's
ability to drive.
Connect the cable briefly before finally installing the unit. Verify that these are installed properly and
that the system functions properly.
If changes have to be made to the vehicle, consult your vehicle dealer/repair shop.
Install the unit in such a manner that no injury can be caused during heavy braking.
If the unit is installed out of balance by over 30° from horizontal it may affect the output.
Avoid installing the unit near high temperatures (e.g. direct sunlight or hot air), dust, pollution or
excessive vibrations.
30°
GB 3
GB

MD 80403 Autoradio BDA_ENG.FH11 Fri Jan 28 12:14:09 2005 Seite 4
C M Y CM MY CY CMY K
INDEX
PRIOR TO OPERATING .......................................................................................................................5
INSTALLATION.....................................................................................................................................5
INSTALLING THE RADIO INTO THE ISO SLOT OF YOUR VEHICLE...............................................5
Removing and inserting the control unit ..............................................................................................6
ISO ADAPTER PLUGS.........................................................................................................................6
Antenna relay cable .............................................................................................................................6
Stereo-cinch output .............................................................................................................................6
CABLE CONNECTIONS.......................................................................................................................7
BASIC OPERATION .............................................................................................................................8
Switching on/off ...................................................................................................................................8
Volume.................................................................................................................................................8
Bass....................................................................................................................................................8
Treble...................................................................................................................................................8
Balance................................................................................................................................................8
Fader ..................................................................................................................................................8
Loudness ............................................................................................................................................8
Display................................................................................................................................................8
Mode...................................................................................................................................................8
Equalizer.............................................................................................................................................8
Reset ..................................................................................................................................................8
RADIO ...................................................................................................................................................9
Select band..........................................................................................................................................9
Select station .......................................................................................................................................9
Pre-set stations....................................................................................................................................9
Store station.........................................................................................................................................9
Recall station .......................................................................................................................................9
Store to memory (AMS) .......................................................................................................................9
Move through pre-set programs ..........................................................................................................9
Regional program mode....................................................................................................................10
PTY (Program type)...........................................................................................................................10
TA traffic announcement....................................................................................................................10
EON TA regional mode......................................................................................................................10
EON DX mode..................................................................................................................................10
RDS (Radio Data System)................................................................................................................11
CD PLAYER ........................................................................................................................................12
Inserting and removing CDS .............................................................................................................12
Skip titles ...........................................................................................................................................12
Pause CD PLAYER ...........................................................................................................................12
Forward and reverse .........................................................................................................................12
Play all titles.......................................................................................................................................12
Repeat a title .....................................................................................................................................12
Random playback..............................................................................................................................12
MP3 PLAYBACK.................................................................................................................................13
Search for titles (numbers) ................................................................................................................13
Search for artists ...............................................................................................................................13
Play WMA files...................................................................................................................................13
Recording chart keys.........................................................................................................................14
ID3 TAG FUNCTION ...........................................................................................................................14
PLAY DATA FROM USB.....................................................................................................................15
Recording function ............................................................................................................................15
TROUBLESHOOTING ........................................................................................................................16
SPECIFICATIONS...............................................................................................................................17
GB 4

MD 80403 Autoradio BDA_ENG.FH11 Fri Jan 28 12:14:09 2005 Seite 5
C M Y CM MY CY CMY K
WARNING!
During installation please use the car radio's ISO sockets to connect the
car radio. The corresponding ISO adapter plugs (car counterparts) can be
bought from a dealer depending on the vehicle model.
Your guarantee lapses if you disconnect the adapter socket from the cable or
cut the cable!
ASSEMBLY
This car radio can easily be installed in any standard ISO radio slot.
If your vehicle does not have a standard ISO radio slot, please contact your vehicle dealer.
Insert the radio into your vehicle's ISO slot.
Remove the mounting frame from the radio.
Insert the mounting frame into the radio slot on your vehicle's dashboard.
Bend the flaps in the mounting frame with a screwdriver so that it is fixed firmly in place in the
vehicle.
Check the frame is held securely.
Connect the ISO socket block to
the vehicle's ISO plugs.
Connect the vehicle's antenna cable
to the antenna plug of the car radio.
Carefully insert the radio into the
mounting frame. Verify that the cables are not
jammed! Press the RESET BUTTON (10) using a
ballpoint pen or a similar pointed object.
Insert the control unit.
PRIOR TO OPERATING
Before installation always remove the two transportation safety
screws in the top radio casing
(recognizable by their red flags)!
Transport locking
GB 5
GB

MD 80403 Autoradio BDA_ENG.FH11 Fri Jan 28 12:14:09 2005 Seite 6
C M Y CM MY CY CMY K
REMOVING AND INSERTING THE CONTROL UNIT
Press the OPEN button (1) and remove the control unit. Store the control unit in the transportation
bag provided.
A red LED light flashes when the control
unit has been removed (24).
First place the right side of the control unit into the frame for installation. Then press the left side
until it locks in. Verify that the control unit is properly located. If the control unit is not installed
properly, error messages appear in the display and/or several keys will not function properly.
front slot cover
ISO adapter plugs
Note!
Use the car radio's ISO adapter plug to produce a secure electrical connection.
Important!
Ensure that the pink backup cable is pointed towards the steady plus (for station memory).
After making all the connections, press the RESET button (10).
Antenna relay cable
The yellow cable is available for a relay-controlled antenna.
The relay will extend the antenna automatically when the unit is switched on and retract it again
when the unit is switched off.
Caution:
Do not connect the yellow cable to the engine cable because this may damage the unit.
Stereo-cinch output
You can connect external units (e.g. amplifiers) to these connections (red and white cinch
connections).
GB 6

MD 80403 Autoradio BDA_ENG.FH11 Fri Jan 28 12:14:09 2005 Seite 7
C M Y CM MY CY CMY K
for two loudspeaker (dual) system
CABLE CONNECTIONS
For four loudspeaker (Quad) system
Antenna connection
Ignition lock
switch (B+)
red
pink
black
yellow
blue/black
blue
green/black
green
Memory
Back-up
Earth connection
(B-) (ground/earth)
Power
Antenna
Front left
Loudspeaker
rear left
Loudspeaker
White/black
white
grey/black
grey
rear right
Loudspeaker
left white
right red
CAR RADIO REAR VIEW
RCA cable
Important!
Memory back-up
Must be connected to
permanent plus
for the station memory.
Front right
Loudspeaker
Antenna connection
Ignition lock
switch (B+)
red
pink
black
yellow
blue/black
green
Memory
Back-up
Earth connection
(B-) (ground/earth)
Power
Antenna
Left
Loudspeaker
white/black
grey
right
Loudspeaker
left white
right red
CAR RADIO REAR VIEW
RCA cable
GB 7
Important!
Memory back-up
Must be connected to
permanent plus
for the station memory.
GB

MD 80403 Autoradio BDA_ENG.FH11 Fri Jan 28 12:14:09 2005 Seite 8
C M Y CM MY CY CMY K
BASIC OPERATION
Switching on/off
Press the POWER/DIM button (8) to switch the unit on or off.
Volume
Select the VOLUME function by pressing the SEL (2) button and turn the multijog control (3), in
order to set the desired volume.
Only set the volume so that you are still able to hear the sirens of any approaching
rescue/fire/police vehicles!
Bass
Press the SEL button (2) once to adjust the bass. Increase or lower the bass by turning the
multijog control (3).
Treble
Press the SEL button (2) twice to adjust the treble. Increase or lower the treble by turning the
multijog control (3).
Balance
Press the SEL button (2) three times to adjust the balance. You can adjust the balance
between the right and the left loudspeaker by turning the multijog control (3).
Fader
Press the SEL button (2) four times to adjust the fader. You can adjust the fader between the front
and the rear loudspeakers by turning the multijog control (3).
Loudness
Press the BND/LOU/ENT button (6) until you hear a signal tone. LOUD ON or LOUD OFF
will appear in the display. This is how you increase the deeper frequencies at a low volume.
Display
You can request the following information by pressing the DSP/0 button (5):
Name of program
Frequency
Time (will be set automatically when receiving RDS)
PTY settings
(These RDS functions are transmitted by the stations in various qualities and ranges.
You will find more detailed information under RDS in the RADIO chapter).
Mode
You can switch between the radio and the CD and/or the USB connection by using
the mode button (20).
Equalizer
Press the EQ (7) button to sequentially open the following sound settings:
FLAT CLASSICS POP M ROCK M DSP OFF
Reset
In order to reset you car radio to its original setting, press the RESET button (10) using a
ball-point pen. This button can be found behind the control unit!
Please press the RESET button
- for first operation, after connecting the cables.
- if not all function keys are working,
- when an error message appears in the display.
GB 8

MD 80403 Autoradio BDA_ENG.FH11 Fri Jan 28 12:14:09 2005 Seite 9
C M Y CM MY CY CMY K
RADIO
Select band
Press the BND/LOU/ENT button (6) to switch between VHF (F1, F2, F3), medium wave (MW) and
long wave (LW). You can store up to 6 stations in each band.
Select station
Press the station search (tuning buttons) I<< (22) or >>I buttons (23) briefly; the unit will automatically
search for the next station. Switch to manual station search by pressing the TUNE button for two
seconds. MANUAL will appear in the display.
You can now select and store the station with the TUNE button. The unit switches to the automatic
station search function after a brief delay.
Pre-programmed stations
You can store six stations in each transmission range and recall them by using the
station buttons 1-6 (14-19).
Store station
1. Select the band with the BND/LOU/ENT button (6).
2. Select a station with the TUNE button I<< (22) or I>> button (23).
3. Press one of the station buttons 1-6 (14-19) for approximately 3 seconds.
A signal tone confirms the station storage.
Recall station
1. Select the band with the BND/LOU/ENT button (6).
2. Press the station button (14-19) to recall the pre-programmed station.
Store to memory (AMS)
Press the AMS/D-AUD button (21) until you hear a signal tone. SEARCH appears in the display.
The search continues for approximately 5 seconds after locating each station.
The number flashing in the display shows the number of the station button to which
the appropriate station will be stored.
The search continues automatically on weak stations.
Move through pre-set programs
Automatic search of your stations stored in the transmission range.
1. Select the band with the BND/LOU/ENT button (6).
2. Briefly press the AMS/D-AUD button (21). All stations are now briefly selected.
Briefly press the AMS/D-AUD button (21) when arriving at the desired station.
GB 9
GB

MD 80403 Autoradio BDA_ENG.FH11 Fri Jan 28 12:14:09 2005 Seite 10
C M Y CM MY CY CMY K
GB 10
(This information varies with the station.)
TA radio traffic service
Hold down the TA/REC button (12) briefly to switch the TA mode on or off.
When the TA mode is switched on and the radio traffic service is being transmitted while the
CD or USB is connected, it will switch automatically to radio. If EON cannot find any radio traffic
service in another program, it occasionally switches to the EON relay station. If the volume level is
below the threshold, it will be increased. The TA function for ongoing radio traffic service is interrupted
by pressing the TA/REC button (12). This will not switch off the TA mode. If the TA/REC
button (12) is pressed for a longer period, the EON TA LOCAL/EON TA DISTANCE mode will
be selected.
EON TA information may be assigned with this mode, for example, you are listening to a station
that does not provide traffic reports but a traffic report is broadcast on another station frequency, so
the unit will automatically switch over for the duration. The unit will switch back to the previous station
as soon as this report is completed.
EON TA local mode
EON TA LO flashes for several seconds on the display when the EON TA LOCAL mode has
been selected. The mode for the local area has been selected.
EON DX Mode
EON TA DX flashes for several seconds on the display when the EON DX mode has been selected.
The mode for a more distant area has been selected.
MUSIC LANGUAGE
1 POP M, ROCK M NEWS, AFFAIRS
(current affairs), INFO (information)
2 EASY M, LIGHT M SPORT, EDUCATE (education), DRAMA
3 CLASSICS, CULTURE, SCIENCE,
OTHER M VARIED (miscellaneous)
4 JAZZ, COUNTRY WEATHER, FINANCE,
CHILDREN
5 NATION M, OLDIES SOCIAL, RELIGION, PHONE IN
(telephone reception)
6 FOLK M Travel, Leisure, Document
Regional Program Mode
Some stations broadcast different regional programs. In order to select only the alternative
frequencies of the desired regional program; press the AF button (11) a little longer until a signal
sounds, in order to switch the mode on or off. REG ON/REG OFF will appear in the display.
PTY (Program type)
To activate the menu, press the PTY button (13).
You can now search your stations according to the following categories:

MD 80403 Autoradio BDA_ENG.FH11 Fri Jan 28 12:14:09 2005 Seite 11
C M Y CM MY CY CMY K
RDS (Radio Data System)
RDS is a service provided by radio stations. In addition to the familiar music and voice services they
also send additional information in the form of encrypted digital signals and these are analysed
by the car radio.
Briefly press the AF button (11) to switch the RDS mode on or off. When activating RDS mode
the AF symbol appears on the screen. When a station is received now, the station's name and other
information is displayed on the screen (14).
This information varies with the station.
Various kinds of RDS services are on offer:
PI: Program Identification Code
The PI code is used by the radio to identify the station that is being received.
PS: Program Service Name
The program service function allows the station's name to be displayed.
AF: Alternative Frequencies
The radio automatically selects the best alternative
frequency for the station of the same program.
TP/TA: Traffic Programme/Traffic Announcement
EON: Enhanced Other Network Information
If you are listening to a station that does not provide traffic reports and there is a traffic
report it is played by switching to another station.
PTY: Program Type Code
The radio can search for stations with pre-set program content, e.g. sports, news, rock, pop
etc., by using the program type.
GB 11
GB

MD 80403 Autoradio BDA_ENG.FH11 Fri Jan 28 12:14:09 2005 Seite 12
C M Y CM MY CY CMY K
CD PLAYER
Inserting and removing CDs
Push the CD into the CD slot (25). The CD will now be played.
SCDP (meaning, search titles) appears now in the display. Press the EJECT button (26) to
remove the CD.
Playback is interrupted and the CD is ejected. The unit will switch back to radio mode.
Skip titles
Press TUNE |<< (22) or >>| button (23) to skip to the next title.
The track number is shown on the display (4).
Pause CD
Push the PAU button (14) during playback to pause CD playback.
Press the PAU button (14) again to restart CD.
Forward and reverse at high speed
Press the TUNE |<< (22) or >>| button (23) longer during playback to start fast forward/reverse.
Play all titles
Press the SCN button (15) and the first 10 seconds of each title are played.
Press the SCN button (15) again and normal playback is started.
Repeat a title
Press the RPT button (16) in order to hear the same title continuously.
Press the RPT button (16) again and this function will be deactivated.
Random playback
Press the SHF button (17) to play all titles on the CD in random sequence.
Note:
Driving on uneven streets may cause CD to skip. A brief response time will improve performance.
Skipping will not damage the CD.
Moisture and high humidity may cause the CD player to malfunction.
Switch the vehicle heater on and let the moisture evaporate prior to use.
Never expose the CD player to extremely high or low temperatures.
Do not drive with a CD protruding from the slot.
GB 12

MD 80403 Autoradio BDA_ENG.FH11 Fri Jan 28 12:14:09 2005 Seite 13
C M Y CM MY CY CMY K
Note:
The search function depends on the manufacture of the MP3 CD.
MP3 PLAYBACK
An MP3 CD ROM will start to play automatically as soon as it is inserted in the player. Please refer to
the "CD PLAYER" chapter for the button functions.
You can select the titles or artists directly. Please note that the MP3 functions are generally dependent
on how the MP3 CD was produced.
Search for titles (numbers)
Press the AMS/D-AUD button (21) once. MP3T will appear in the display. .
Enter the numbers of the desired title with the buttons listed in the chart.
Confirm the input by using the BND/LOU/ENT button (6) or wait approximately 5 seconds until
the unit skips automatically to the selected title.
Search for artists
Press the AMS/D-AUD button (21) twice. A flashing...... appears in the display .
Enter the numbers of the desired artists with the buttons listed in the chart.
Please note that the SEL button (2) must be pressed after every letter, so that the next letter
may be entered (moving between characters).
Confirm the input by pressing the BND/LOU/ENT button (6).
The unit will now search for the appropriate title.
Press the BND/LOU/ENT button (6) again, when the unit has located the desired artist.
The title will now be played.
WMA files
You can also play WMA files on your car radio. The operation functions in the same way as for MP3
files.
GB 13
GB

MD 80403 Autoradio BDA_ENG.FH11 Fri Jan 28 12:14:09 2005 Seite 14
C M Y CM MY CY CMY K
GB 14
ID 3-TAG FUNCTION
You can store additional information when producing an MP3 CD. This may include information
concerning the artist, title, name of the album and year that the music was produced, as well as a brief
comment. We recommend an ID3 Tag Editor for input.
This information is displayed on the screen upon request during playback.
The name of the title or the artist may also be displayed in addition to the title number (depending on
the information stored on the MP3 CD) when playing the MP3 CDs.
Press the DSP/0 button (5) for listings. An ID3 tag entry for the current playback appears whenever a
button is pressed.
TITLE - ARTIST - NAME OF ALBUM - YEAR OF RELEASE - NOTES
AMS/D-AUD (21) select setting
BND/LOU/ENT (6) confirm
1 (14) A, B, C, 1
2 (15) D, E, F, 2
3 (16) G, H, I, 3
4 (17) J, K, L, 4
5 (18) M, N, O, 5 / 10 Next track down
6 (19) P, Q, R, 6 / 10 Next track up
MODE (20) S, T, U, 7
|<< (22) V, W, X, 8
>>| (23) Y, Z, blank, 9
SEL (2) move character to the right
DSP/0 (5) 0,_, -, +,
(5) (6) scrolling function A-Z / 0-9
Recording chart keys
Note:
When producing your MP3 CD ROM please ensure that the tracks are listed either individually
or in folders. Never mix titles and folders as this may lead to problems during playback.
All standard MP3 codings can be played by the unit.

MD 80403 Autoradio BDA_ENG.FH11 Fri Jan 28 12:14:09 2005 Seite 15
C M Y CM MY CY CMY K
GB 15
PLAY DATA FROM USB
You can connect an MP3 player or another data medium to the USB connection on the front of the unit.
Your car radio can process USB data media up to 1GB.
The directory structure may contain up to 1024 folders, 4096 files and a directory depth of 8 levels.
As soon as the external unit is connected, the car radio will search for MP3 or WMA files on the data
medium and the message USB will appear on the screen (4). Files on the external data medium and
search functions work in the same way as for MP3 CDs.
Recording function
You can also record data from the radio and the CD player to the external USB data medium with your
car radio.
In order to begin recording, press the TA/REC button (12) in the appropriate mode. Audio data is now
stored on the USB drive in the WMA format. The FILE NAME message will appear during recording.
In order to stop recording, briefly press the TA/REC button (12) again.
You can play the data again by switching to the USB mode with the MOD E button (20) and request
individual titles from the USB drive.
GB

MD 80403 Autoradio BDA_ENG.FH11 Fri Jan 28 12:14:09 2005 Seite 16
C M Y CM MY CY CMY K
TROUBLESHOOTING
The unit cannot be
switched on.
The CD cannot
be loaded or
ejected
No sound
Function buttons
do not work.
The CD skips.
The radio does not work.
The automatic station
selection does not work.
Station memory does
not work
The ignition is not
switched on.
The fuse is defective.
There is already a
CD in the unit.
The CD has been put in
upside down.
The CD is very dirty or
damaged.
The temperature in the car is
too high.
Condensation.
Volume is set to minimum.
Cables are not
properly connected.
The installed
microcomputer cannot function
due to interference.
The control unit is not
properly located.
The installation angle
exceeds 30°.
The CD is very dirty or
damaged.
Errors in self-made CDs
The antenna cable is not
connected.
The station signals are too
weak.
The pink cable is not connected
to the permanent plus.
Switch on the ignition by turning
the key.
Replace the fuse.
Remove the CD from the CD player.
Then insert another CD.
Insert the CD with the
label facing up.
Clean the CD or try
to play another one.
Let it cool off, until
the ambient
temperature
returns to normal.
Switch the
player off
for a few hours
and then retry
Set the volume at the desired
level.
Check cable
connections
Press the RESET button.
Verify that the
control unit is located
properly.
Set the installation angle to
less than 30°.
Clean the CD or try
to play another one.
Check the CD in another
unit.
Plug in the antenna cable.
Select the station
manually.
Check the
cable connections
Problem Cause Remedy
GB 16

MD 80403 Autoradio BDA_ENG.FH11 Fri Jan 28 12:14:09 2005 Seite 17
C M Y CM MY CY CMY K
CD Player
Please only use CDs that are marked as follows:
Laser class 1
Subject to technical changes.
COMPACT
DIGITAL AUDIO
TECHNICAL DATA
General instructions
Operating voltage: DC 12V, negative earth connection
Frame dimensions: 178 x 155 x 50mm (WxDxH)
Power consumption: Peak music output 4 x 20 W R.M.S.
Fuse: 0.5 amp (red); 15 amp (pink)
MP3/CD Player
MPEG rate 64-320 K
Frequency range 20Hz~20kHz
MP3 Playback ISO 9660 & Joliet format of MP3
Radio
For 3 Frequency bands
FM
Frequency range of 87.5 to 108MHz
IF 10.7MHz
Sensitivity of 3µV
(Signal-to-noise ratio = 30 dB)
Stereo separation of > 30dBu
MW
Frequency range of 522 to 1620kHz
IF 45kHz
(Signal-to-noise ratio = 30 dB)
Stereo separation of 32 dBu
LW
Frequency range of 144 to 288kHz
IF 450kHz
Sensitivity
(Signal-to-noise ratio = 30 dB) 35dBu
GB 17
GB

MD 80403 Autoradio BDA_F.FH11 Fri Jan 28 12:13:46 2005 Seite 2
C M Y CM MY CY CMY K
F 2
FONCTIONS
1. OPEN : Ouverture du panneau de commande
2. SEL : Invocation d'une fonction
3. MULTIJOG : Réglage du volume, des basses, des aigus, de la balance et du fader
4. AFFICHAGE
5. DSP/0 : Rappel du programme, de l'heure, de la fréquence et des réglages
PTY/Touche numérique 0.
6. BND/LOU/ENT : Sélection de la fréquence/Intensité sonore/Confirmer
7. EQ : Égaliseur de son
8. POWER/DIM : Marche/Arrêt, Variation de l'éclairage de l'affichage
9. USB : Connecteur USB pour supports de données externes
10. RESET : Restauration des réglages d'usine
11. AF : Enclenchement du mode RDS
12. TA/REC : Traffic Announcement Identification / Code d'identification permettant
la priorité d'accès des informations routières/Démarrage de
l'enregistrement
13. PTY : Program Type Code (code du type de programme)
14. - 19.: Touches de sélection des stations
14. PAU : Pause en mode CD/MP3 / Touche numérique 1
15. SCN : Scan, exécution du titre pendant 10 sec. dans le mode CD/MP3 / Touche
numérique 2
16. RPT : Repeat, répétition en mode CD/MP3 / Touche numérique 3
17. SHF : Shuffle, lecture aléatoire en mode CD/MP3 / Touche numérique 4
18. Touche numérique 5
19. Touche numérique 6
20. MODE : Permutation - Radio / CD / MP3 / Touche numérique 7
21. AMS/D-AUD : Enregistrement automatique des stations / Recherche MP3
22. -<< : Tune/Recherche de stations vers l'arrière/Touche numérique 8
23. +>>: Tune/Recherche de stations vers l'avant/Touche numérique 9
24. Témoin lumineux rouge (voyant antivol)
25. Compartiment CD : Pour insérer le CD
26. EJECT : Éjection du CD

MD 80403 Autoradio BDA_F.FH11 Fri Jan 28 12:13:46 2005 Seite 3
C M Y CM MY CY CMY K
CONSIGNES DE SÉCURITÉ
Insérez l'appareil dans l'emplacement prévu à cet effet ou choisissez un emplacement ne gênant
pas la conduite.
Raccordez les câbles avant de monter définitivement l'appareil. Vérifiez que les câbles aient été bien
raccordés et que le système fonctionne correctement.
Si le véhicule doit subir des modifications, adressez-vous à votre garagiste ou à votre atelier spécialisé.
Montez l'appareil de manière à ce qu'il ne provoque pas de blessures en cas de freinage brusque.
Si l'appareil est monté à plus de 30° par rapport à l'horizontale, ses performances peuvent s'en
trouver affectées.
Évitez de monter l'appareil à des endroits exposés à de fortes températures (par exemple le
rayonnement solaire direct ou près d'une bouche de chauffage), à la poussière, à la saleté ou à des
vibrations très importantes.
30°
F 3
F

MD 80403 Autoradio BDA_F.FH11 Fri Jan 28 12:13:46 2005 Seite 4
C M Y CM MY CY CMY K
F 4
SOMMAIRE
AVANT LA MISE EN MARCHE ......... ....................................................................................................5
MONTAGE ......... ...................................................................................................................................5
MONTAGE DE L'AUTORADIO DANS LE COMPARTIMENT ISO DE VOTRE VÉHICULE ..................5
Retrait et insertion du panneau de commande ..................................................................................6
PRISE D'ADAPTATION ISO ......... ........................................................................................................6
RACCORDEMENT DES CÂBLES ........................................................................................................7
FONCTIONS DE BASE ......... ...............................................................................................................8
Allumer/Éteindre ......... .......................................................................................................................8
Volume ...............................................................................................................................................8
Basses ......... ......................................................................................................................................8
Aigus ..................................................................................................................................................8
Balance ..............................................................................................................................................8
Fader ..................................................................................................................................................8
Intensité sonore ......... ........................................................................................................................8
Affichage ............................................................................................................................................8
Mode ..................................................................................................................................................8
Égaliseur de son ......... .......................................................................................................................8
Réinitialiser ......... ...............................................................................................................................8
RADIO ...................................................................................................................................................9
Sélectionner la fréquence ......... .........................................................................................................9
Sélectionner une station ......... ...........................................................................................................9
Station enregistrée .............................................................................................................................9
Enregistrer des stations ......... ............................................................................................................9
Rappel des stations ......... ..................................................................................................................9
Enregistrement automatique (AMS) ......... .........................................................................................9
Défilement des stations enregistrées .................................................................................................9
Mode programme régional .................................................................................................................10
PTY (type/genre de programme) ....... ................................................................................................10
TA Informations relatives à la circulation........ ....................................................................................10
Mode EON TA local.............................................................................................................................10
Mode EON DX ....... ............................................................................................................................10
RDS (Radio Data System) .................................................................................................................11
LECTEUR CD ....... ................................................................................................................................12
Insérer et retirer des CD ....... .............................................................................................................12
Sauter des titres .................................................................................................................................12
Interrompre la lecture du CD ....... ......................................................................................................12
Avance et retour .................................................................................................................................12
Lire tous les titres ...............................................................................................................................12
Répéter un titre ....... ...........................................................................................................................12
Lecture aléatoire ....... .........................................................................................................................12
LECTURE DE MP3 ...............................................................................................................................13
Rechercher par titres (numéros).........................................................................................................13
Rechercher par interprètes ....... .........................................................................................................13
Lire des fichiers WMA ....... .................................................................................................................13
Tableau explicatif des touches ...........................................................................................................14
FONCTION ID3 TAG .............................................................................................................................14
LIRE LES DONNÉES DE L'USB ....... ...................................................................................................15
Fonction d'enregistrement ....... ..........................................................................................................15
RÉSOLUTION DE PROBLÈMES ....... ..................................................................................................16
DONNÉES TECHNIQUES ....................................................................................................................17

MD 80403 Autoradio BDA_F.FH11 Fri Jan 28 12:13:46 2005 Seite 5
C M Y CM MY CY CMY K
ATTENTION !
Lors du montage, utilisez les prises ISO de l'autoradio pour procéder au branchement.
Vous trouverez dans le commerce les fiches adaptateur ISO (pièces pour voiture) adaptées
à votre véhicule.
Si vous retirez la prise adaptateur du câble ou si vous coupez les câbles, la garantie ne
s'applique plus !
MONTAGE
Cet autoradio peut être monté très facilement dans n'importe quel compartiment standard
répondant à la norme ISO pour autoradio.
Si votre véhicule ne dispose pas de compartiment standard répondant à la norme ISO pour
autoradio, adressez-vous à votre garagiste.
Cet autoradio peut être monté très facilement dans n'importe quel compartiment standard
répondant à la norme ISO pour autoradio.
Si votre véhicule ne dispose pas de compartiment standard répondant à la norme ISO pour
autoradio, adressez-vous à votre garagiste.
Montage de l'autoradio dans le compartiment ISO de
votre véhicule.
Retirez le support de montage de l'autoradio.
Insérez le support de montage dans le compartiment
pour autoradio qui se trouve sur la planche de bord
de votre véhicule.
À l'aide d'un tournevis, repliez les brides de fixation
du support de montage de manière à le fixer solidement
dans le véhicule.
Assurez-vous que le support est fermement fixé.
Reliez le bloc de prises ISO aux fiches ISO de votre véhicule.
Reliez le câble de l'antenne du véhicule à la fiche antenne de l'autoradio.
Poussez délicatement l'autoradio dans le support de montage. Prenez garde à ne pas coincer
les câbles ! Appuyez sur la touche RESET (10) à l'aide d'un stylo à bille ou d'un autre objet pointu
de ce type.
Placez le panneau de commande.
AVANT LA MISE EN MARCHE
Avant de procéder au montage, retirez impérativement les deux vis situées
sur la partie supérieure du boîtier de l'autoradio et servant à sécuriser le
transport (elles sont reconnaissables aux fanions rouges) !
Sécurité pour le transport
F 5
F

MD 80403 Autoradio BDA_F.FH11 Fri Jan 28 12:13:46 2005 Seite 6
C M Y CM MY CY CMY K
RETRAIT ET INSERTION DU PANNEAU DE COMMANDE
Appuyez sur la touche OPEN (1) et retirez le panneau de commande. Conservez toujours le
panneau de commande dans l'étui de transport prévu à cet effet.
Lorsque le panneau de commande a été retiré, un témoin lumineux rouge (24) clignote.
Pour insérer le panneau de commande, placez d'abord le côté droit dans le support. Appuyez
ensuite fermement sur le côté gauche, jusqu'à ce qu'il s'enclenche. Vérifiez que le panneau de
commande soit bien en place et ne puisse plus bouger. Si le panneau de commande n'est pas
correctement installé, des informations erronées apparaissent sur l'affichage et/ou certaines
touches ne fonctionnent pas correctement.
Panneau avant
Prise d'adaptation ISO
Attention !!
Utilisez la prise d'adaptation ISO de l'autoradio pour établir un raccordement électrique sûr.
Important !!
Notez que le câble de réserve rose doit être relié au plus constant (pour la mémorisation des stations).
Une fois tous les raccordements effectués, appuyez sur la touche RESET (10).
Câble de relais de l'antenne
Le câble jaune fourni est destiné aux antennes commandées par relais.
Le relais sortira automatiquement l'antenne lorsque l'appareil sera mis sous tension, et la rentrera
lorsque l'appareil sera mis hors tension.
Attention!
Ne pas relier le câble jaune au câble moteur, vous risqueriez d'endommager l'appareil.
Sortie Cinch stéréo
Ces raccordements (raccordements Cinch rouge et blanc) vous permettent de raccorder des appareils
externes (un amplificateur par ex.).
F 6

MD 80403 Autoradio BDA_F.FH11 Fri Jan 28 12:13:46 2005 Seite 7
C M Y CM MY CY CMY K
pour un système de deux haut-parleurs (Dual)
RACCORDEMENT DES CÂBLES
pour un système de quatre haut-parleurs (Quadro)
Branchement antenne
Interrupteur clé
de contact (B+)
rouge
rose
noir
jaune
bleu/noir
bleu
vert/noir
vert
Mémoire de
réserve
Raccordement
à la terre
(B-)(masse)
Courant
d'antenne
Haut-parleur
avant gauche
Haut-parleur
arrière gauche
blanc/noir
blanc
gris/noir
gris
Haut-parleur
arrière droit
Gauche blanc
Droite rouge
FACE ARRIÈRE DE L'AUTORADIO
Câble RCA
Important !
Pour la mémorisation des
stations, la mémoire de
réserve doit être raccordée
au plus constant.
Haut-parleur
avant droit
Branchement antenne
Interrupteur clé
de contact (B+)
rouge
rose
noir
jaune
bleu/noir
vert
Mémoire de
réserve
Prise de terre
(B-)(masse)
Courant
d'antenne
Haut-parleur
gauche
blanc/noir
gris
Haut-parleur
droit
Gauche blanc
Droite rouge
FACE ARRIÈRE DE L'AUTORADIO
IMPORTANT !
Pour la mémorisation des
stations, la mémoire de
réserve doit être raccordée
au plus constant.
Câble RCA
F 7
F

MD 80403 Autoradio BDA_F.FH11 Fri Jan 28 12:13:46 2005 Seite 8
C M Y CM MY CY CMY K
UTILISATION DE BASE
Allumer/Éteindre
Appuyez sur la touche POWER/DIM (8) pour allumer ou éteindre l'appareil.
Volume
Sélectionnez la fonction VOLUME en appuyant sur la touche SEL (2) et faites tourner le bouton de
réglage Multijog (3) afin d'obtenir le volume désiré.
Réglez le volume de manière à pouvoir encore entendre la sirène des ambulances, camions de
pompiers ou voitures de police éventuelles !
Basses
Appuyez une fois sur la touche SEL (2) pour régler les basses. En tournant le bouton de réglage
Multijog (3), vous augmentez ou réduisez les basses.
Aigus
Appuyez deux fois sur la touche SEL (2) pour régler les aigus. En tournant le bouton de réglage
Multijog (3), vous augmentez ou réduisez les aigus.
Balance
Appuyez trois fois sur la touche SEL (2) pour régler la balance. En tournant le bouton de réglage
Multijog (3), vous pouvez régler la balance entre le haut-parleur droit et gauche.
Fader
Appuyez quatre fois sur la touche SEL (2) pour régler le fader. En tournant le bouton de réglage
Multijog (3), vous pouvez régler le fader des haut-parleurs avant et arrière.
Intensité sonore
Maintenez appuyée la touche BND/LOU/ENT (6) jusqu'à ce qu'un signal sonore retentisse. La mention
LOUD ON ou LOUD OFF apparaît sur l'affichage. Cela vous permet de supprimer les basses
fréquences lorsque le volume est faible.
Affichage
En appuyant sur la touche DSP/0 (5), vous pouvez obtenir les informations suivantes :
Nom du programme
Fréquence
Heure (réglée automatiquement par RDS)
Réglages PTY
(Ces fonctions RDS sont émises par les différentes stations de radio, leur qualité et volume sont
variables. Vous trouverez de plus amples informations dans le chapitre RADIO, sous RDS).
Mode
La touche MODE (20) vous permet de passer du mode radio au mode CD ou connexion USB.
Égaliseur
Appuyez sur la touche EQ (7) pour invoquer successivement les réglages sonores suivants :
FLAT CLASSICS POP M ROCK M DSP OFF
Réinitialiser
Pour restaurer les réglages d'usine de votre autoradio, appuyez sur la touche RESET (10) à l'aide d'un
stylo à bille. Vous trouverez cette touche derrière le panneau de commande !
Appuyez sur la touche RESET dans les cas suivants :
- lors de la première mise en service, après avoir terminé le branchement des câbles
- si les touches de fonction ne sont pas toutes fonctionnelles,
- si un message d'erreur apparaît sur l'affichage.
F 8

MD 80403 Autoradio BDA_F.FH11 Fri Jan 28 12:13:46 2005 Seite 9
C M Y CM MY CY CMY K
RADIO
Sélectionner la fréquence
Appuyez sur la touche BND/LOU/ENT (6) pour sélectionner la fréquence : petites ondes (F1, F2, F3),
ondes moyennes (MW) ou grandes ondes (LW). Vous pouvez enregistrer six stations dans chaque
catégorie.
Sélectionner une station
Si vous appuyez brièvement sur les touches de recherche de station (touches Tune) I<< (22) ou >>I (23),
l'appareil recherche automatiquement la station suivante. Si vous maintenez appuyée l'une des touches
TUNE durant deux secondes, vous passez en mode de recherche manuelle des stations. La mention
MANUAL apparaît sur l'affichage.
Vous pouvez à présent sélectionner et mémoriser la station à l'aide de la touche Tune. Après un bref délai
d'attente, l'appareil retourne en mode de recherche automatique des stations.
Station enregistrée
Dans chaque fréquence, vous pouvez enregistrer six émetteurs, et les rappeler au moyen des touches
1-6 (14-19).
Enregistrer des stations
1. Sélectionnez la fréquence à l'aide de la touche BND/LOU/ENT (6).
2. Sélectionnez une station à l'aide de la touche TUNE I<< (22) ou I>> (23).
3. Appuyez sur l'une des touches de rappel des stations 1-6 (14-19) durant env. 3 secondes. Un signal
sonore confirme l'enregistrement de la station.
Rappel des stations
1. Sélectionnez la fréquence à l'aide de la touche BND/LOU/ENT (6).
2. Appuyez sur la touche de rappel des stations (14-19) pour rappeler la station enregistrée.
Enregistrement automatique (AMS)
Maintenez appuyée la touche AMS/D-AUD (21) jusqu'à ce qu'un signal sonore retentisse. La mention
SEARCH apparaît sur l'affichage. À chaque fois qu'une station est trouvée, la recherche s'arrête durant
env. 5 secondes. Le nombre clignotant sur l'affichage indique le numéro de la touche de rappel des stations
où la station correspondante est enregistrée.
Si l'émetteur est faible, la recherche se poursuit automatiquement.
Défilement des stations enregistrées
Défilement automatique des stations enregistrées pour une fréquence.
1. Sélectionnez la fréquence à l'aide de la touche BND/LOU/ENT (6).
2. Appuyez brièvement sur la touche AMS/D-AUD (21). Toutes les stations sont sélectionnées l'une après
l'autre pendant quelques secondes.
La station recherchée une fois atteinte, appuyez brièvement sur la touche AMS/D-AUD (21).
F 9
F

MD 80403 Autoradio BDA_F.FH11 Fri Jan 28 12:13:46 2005 Seite 10
C M Y CM MY CY CMY K
F 10
(Les informations dépendent de la station)
TA informations relatives à la circulation
Maintenez brièvement appuyée la touche TA/REC (12) pour activer ou désactiver le mode TA.
Si le mode TA est enclenché, l'autoradio passe automatiquement du mode CD ou connexion USB
au mode radio dès que la station émet un flash d'informations relatives à la circulation. Il se peut
que l'autoradio passe à la station relais EON lorsque EON capte des informations relatives à la
circulation dans un autre programme. Si le niveau sonore se situe sous le seuil, il augmente. La
fonction TA de la station émettrice des informations relatives à la circulation actuelle est interrompue
en appuyant sur la touche TA/REC (12). Cela ne désactive pas le mode TA. Si la touche TA/REC
(12) est maintenue appuyée durant quelques secondes, le mode EON TA LOCAL/EON TA DISTANCE
est sélectionné.
Ce mode permet de classer des informations EON TA ; par ex, vous êtes en train d'écouter une
station radio classique, mais un message d'information routière est diffusé sur une autre fréquence
d'émission ; à ce moment-là, l'appareil passe alors automatiquement sur cette fréquence. Dès que
le message est terminé, vous retournez à la station écoutée auparavant.
Mode EON TA local
Si le mode EON TA LOCAL a été sélectionné, la mention EON TA LO clignote sur l'affichage durant
quelques secondes. Le mode de la zone locale est alors enclenché.
Mode EON DX
Si le mode EON DX a été sélectionné, la mention EON TA DX clignote sur l'affichage durant quelques
secondes.
Le mode pour la région la plus éloignée est alors enclenché.
MUSiQUE LANGUE
1 POP M, ROCK M NEWS (nouvelles), AFFAIRS
(affairs), INFO (infos)
2 EASY M, LIGHT M SPORT, EDUCATE (éducation), DRAMA
3 CLASSICS (classique), CULTURE, SCIENCE,
OTHER M (autres) VARIED (divers)
4 JAZZ, COUNTRY WEATHER (météo), FINANCE (finances),
CHILDREN (enfants)
5 NATION M, OLDIES SOCIAL, RELIGION, PHONE IN
(appel téléphonique)
6 FOLK M Travel (voyages), Leisure (loisirs), Document
Mode programme régional
Certaines stations diffusent différents programmes régionaux. Pour que seules les fréquences
alternatives du programme régional souhaité soient sélectionnées,
maintenez la touche AF (11) appuyée durant quelques secondes, jusqu'à ce qu'un signal sonore
retentisse. Cette touche permet d'activer ou de désactiver le mode de programme régional. La mention
REG ON/REG OFF s'affiche.
PTY (type/genre de programme)
Pour activer le menu, appuyez sur la touche PTY (13).
Vous pouvez maintenant sélectionner vos stations selon les critères suivants :

MD 80403 Autoradio BDA_F.FH11 Fri Jan 28 12:13:46 2005 Seite 11
C M Y CM MY CY CMY K
RDS (Radio Data System)
Le service RDS est un service proposé par les stations de radio. Outre la diffusion classique des
programmes musicaux et vocaux, des informations supplémentaires sont émises sous forme de
signaux numériques codés exploitables par l'autoradio.
Appuyez brièvement sur la touche AF (11) pour activer ou désactiver le mode RDS. Lorsque le mode
RDS est activé, le symbole AF apparaît sur l'affichage. Dans ce cas, le nom du programme et d'autres
informations apparaissent sur l'affichage (4) lorsque l'appareil capte une station.
Les informations affichées varient selon la station.
Il existe différents services RDS :
PI : Program Identification Code
Le code PI permet à l'autoradio d'identifier la station réceptionnée.
PS : Program Service Name
Cette fonction permet l'affichage du nom de la station.
AF : Alternative Frequencies
La radio sélectionne automatiquement la fréquence alternative captée de façon optimale au
sein d'un programme.
TP/TA : Traffic-Program/Traffic-Annoucement
EON : Enhanced Other Networks Information
L'appareil passe automatiquement sur une des stations enregistrées émettrice d'informations
relatives à la circulation lorsque celle-ci diffuse un flash d'informations, même lorsque vous
écoutez une station n'émettant pas d'informations routières.
PTY : Program Type Code
Avec ce code, l'autoradio peut rechercher des stations selon certains critères relatifs à leur
contenu, par ex. sport, informations, rock, pop, ...
F 11
F

MD 80403 Autoradio BDA_F.FH11 Fri Jan 28 12:13:46 2005 Seite 12
C M Y CM MY CY CMY K
LECTEUR CD
Insérer et retirer des CD
Pour insérer un CD, le placer dans le compartiment CD (25). La lecture du CD démarre.
La mention S--CDP (c.-à-d. "recherche d'un titre") apparaît sur l'affichage. Pour sortir le CD, appuyez
sur la touche EJECT (26).
La lecture s'interrompt et le CD est éjecté. L'appareil passe en mode Radio.
Sauter un titre
Appuyer sur la touche TUNE |<< (22) ou >>| (23) pour passer au titre suivant.
Le numéro du titre apparaît sur l'affichage (4).
Interrompre la lecture d'un CD
En appuyant sur la touche PAU (14) en cours de lecture, la lecture du CD est interrompue. En
appuyant une nouvelle fois sur la touche PAU (14), la lecture du CD se poursuit.
Avance et retour rapide
Appuyer quelques secondes sur la touche TUNE |<< (22) ou >>| (23) en cours de lecture pour
démarrer l'avance/retour rapide.
Lire tous les titres
Appuyer sur la touche SCN (15) pour écouter les 10 premières secondes de chaque titre. Appuyer
une nouvelle fois sur la toucbe SCN (15) et la lecture normale est démarrée.
Répéter un titre
Appuyer sur la touche RPT (16) pour écouter continuellement le même titre. En appuyant une nouvelle
fois sur la touche RPT (16), la fonction est désactivée.
Lecture aléatoire
Appuyer sur la touche SHF (17) pour lire tous les titres du CD dans un ordre aléatoire.
Remarque :
Les CD peuvent sauter lorsque vous roulez sur une route accidentée. Après un certain temps de
lecture, les performances s'améliorent.
Sauter un titre n'endommage en aucun cas le CD.
L'humidité et une humidité de l'air élevée peuvent engendrer des dysfonctionnements du lecteur
CD.
Allumer le chauffage du véhicule et laisser l'humidité s'évaporer avant l'utilisation.
Ne soumettez pas le lecteur CD à des températures extrêmement élevées ou basses.
Ne roulez pas avec un CD sorti dans la fente.
F 12

MD 80403 Autoradio BDA_F.FH11 Fri Jan 28 12:13:46 2005 Seite 13
C M Y CM MY CY CMY K
LECTURE MP3
La lecture démarre automatiquement lors de l'insertion d'un CD-ROM MP3. Pour connaître la fonction
des différentes touches, rapportez-vous au chapitre Lecteur CD.
Vous pouvez sélectionner directement les titres ou les interprètes. Remarque : les fonctions MP3
dépendent en grande partie de la production du CD MP3.
Rechercher par titres (numéros)
Appuyez une fois sur la touche AMS/D-AUD (21). La mention MP3T ..... apparaît sur l'affichage. .
Entrez le numéro du titre souhaité à l'aide des touches indiquées dans le tableau.
Confirmez la saisie avec la touche BND/LOU/ENT (6) ou bien attendez env. 5 sec. jusqu'à ce que
l'appareil passe automatiquement au titre choisi.
Rechercher par interprètes
Appuyez deux fois sur la touche AMS/D-AUD (21). Un ...... clignotant apparaît sur l'affichage. .
Entrez le nom de l'interprète souhaité à l'aide des touches indiquées dans le tableau. Remarque :
la touche SEL (2) doit être appuyée après chaque lettre pour permettre la saisie de la lettre suivante
(déplacement de caractères).
Confirmez la saisie à l'aide de la touche BND/LOU/ENT (6).
L'appareil recherche à présent le titre correspondant.
Une fois que l'appareil a trouvé l'interprète désiré, appuyez à nouveau sur la touche BND/LOU/ENT
(6). La lecture du titre commence.
Fichiers WMA
Votre autoradio vous permet également de lire des fichiers WMA. Le maniement est identique à celui
des fichiers MP3.
Remarque :
La fonction de recherche dépend des CD MP3 produits.
F 13
F

MD 80403 Autoradio BDA_F.FH11 Fri Jan 28 12:13:46 2005 Seite 14
C M Y CM MY CY CMY K
F 14
FONCTION ID 3-TAG
Lors de la création d'un CD MP3, vous pouvez enregistrer des informations supplémentaires. Il peut
s'agir d'informations concernant l'interprète, le titre, le nom de l'album et l'année de sortie du morceau,
ou encore d'un bref commentaire. Nous conseillons l'éditeur ID3 Tag pour la saisie de ces informations.
Ces informations sont affichées sur demande au niveau de l'affichage en cours de lecture.
Outre le numéro du titre, le nom du titre ou de l'interprète peut être affiché lors de la lecture d'un CD
MP3 (en fonction des informations enregistrées sur le CD MP3).
Pour afficher ces informations, appuyez sur la touche DSP/0 (5). À chaque fois que la touche est
actionnée, un enregistrement ID3-Tag relatif à la lecture en cours est affiché :
TITRE - INTERPRÈTE - NOM DE L'ALBUM - ANNÉE DE SORTIE - COMMENTAIRE
AMS/D-AUD (21) Sélectionner le réglage
BND/LOU/ENT (6) Confirmer
1 (14) A, B, C, 1
2 (15) D, E, F, 2
3 (16) G, H, I, 3
4 (17) J, K, L, 4
5 (18) M, N, O, 5 / 10 Station vers l'arrière
6 (19) P, Q, R, 6 / 10 Station vers l'avant
MODE (20) S, T, U, 7
|<< (22) V, W, X, 8
>>| (23) Y, Z, Espace, 9
SEL (2) Décalage de signe vers la droite
DSP/0 (5) 0,_, -, +,
(5) (6) Fonction défilement A-Z / 0-9
Tableau explicatif des touches
Remarque :
Lors de la création d'un CD-ROM MP3, veillez à ce que les titres soient enregistrés séparément
ou regroupés dans des répertoires. Ne mélangez jamais les titres et les répertoires, cela pourrait
entraîner des perturbations lors de la lecture. Tous les codages habituels peuvent être lus.

MD 80403 Autoradio BDA_F.FH11 Fri Jan 28 12:13:46 2005 Seite 15
C M Y CM MY CY CMY K
F 15
LIRE LES DONNÉES DE L'USB
Vous pouvez brancher un lecteur MP3 ou un autre support de données USB au niveau du raccordement
USB situé sur la façade de l'appareil.
Votre autoradio peut utiliser des supports de données USB jusqu'à 1 Go.
La structure de répertoires peut contenir un maximum de 1024 dossiers, 4096 fichiers et une profondeur
de répertoires de 8 niveaux.
Dès que l'appareil externe est branché, l'autoradio recherche des fichiers MP3 ou WMA sur le support
de données, et la mention USB apparaît sur l'affichage (4). La lecture de fichiers sur le support de
données externe et la fonction de recherche s'effectuent de la même manière qu'avec les CD MP3.
Fonction d'enregistrement
Votre autoradio permet également d'enregistrer sur des supports de données USB externes des
données provenant de la radio et du lecteur CD.
Pour commencer l'enregistrement, appuyez sur la touche TA/REC (12) dans le mode approprié. Les
données audio sont maintenant enregistrées sur le support de donnés USB dans le format WMA. Au
cours de l'enregistrement, le message FILE NAME apparaît sur l'affichage.
Pour arrêter l'enregistrement, appuyez une nouvelle fois et brièvement sur la touche TA/REC (12).
Vous pouvez relire les données en passant dans le mode USB via la touche MODE (20) et en rappelant
les différents titres du support de données USB.
F

MD 80403 Autoradio BDA_F.FH11 Fri Jan 28 12:13:46 2005 Seite 16
C M Y CM MY CY CMY K
RÉSOLUTION DE PROBLÈMES
L'appareil ne s'allume pas.
Le CD n'est pas chargé
ou éjecté.
Pas de son
Les touches de fonction ne
fonctionnent pas.
Le CD saute.
La radio ne fonctionne pas.
La sélection automatique des
stations ne fonctionne pas.
La mémorisation des stations
ne fonctionne pas.
L'allumage n'est pas enclenché.
Le fusible est défectueux.
L'appareil contient déjà un CD.
Le CD a été inséré à l'envers.
Le CD est très sale ou
défectueux.
La température dans l'habitacle
de la voiture est trop élevée.
Condensation.
Volume réglé sur le minimum.
Les câbles ne sont pas
correctement raccordés.
Le micro-ordinateur intégré ne
peut pas fonctionner à cause du
brouillage.
Le panneau de commande n'est
pas correctement positionné.
L'angle d'installation est supérieur
à 30°.
Le CD est très sale ou
défectueux.
Erreur lors du gravage d'un CD
personnel.
Le câble antenne n'est pas
branché.
Les signaux d'émission sont trop
faibles.
Le câble rose n'est pas branché
au plus constant.
Enclencher l'allumage en
tournant la clé.
Remplacer le fusible.
Retirer le CD du lecteur et
insérer un autre CD.
Toujours insérer les CD
face imprimée vers le haut.
Nettoyer le CD ou
essayer d'en lire un autre.
Faire baisser la température
ambiante jusqu'à ce qu'elle
redevienne normale.
Éteindre l'appareil durant
quelques heures et réessayer.
Régler le volume au niveau
souhaité.
Vérifier le raccordement
des câbles.
Appuyer sur la touche RESET.
Vérifier le bon emplacement du
panneau de commande.
Réduire l'angle d'installation à
moins de 30°.
Nettoyer le CD ou essayer
d'en lire un autre.
Tester le CD dans un
autre appareil.
Brancher fermement le câble.
Sélectionner manuellement
la station.
Vérifier le raccordement des
câbles.
Problème Origine Solution
F 16

MD 80403 Autoradio BDA_F.FH11 Fri Jan 28 12:13:46 2005 Seite 17
C M Y CM MY CY CMY K
Lecteur CD
Utilisez exclusivement des CD portant le label :
Appareil laser de catégorie 1
Sous réserve de modifications techniques.
COMPACT
DIGITAL AUDIO
DONNÉES TECHNIQUES
Caractéristiques générales
Tension de service : DC 12V, borne de mise à la masse négative
Dimensions du boîtier : 178 x 155 x 50 mm (LxPxH)
Puissance : Puissance de sortie musicale de pointe
4 x 20 W R.M.S
Fusible : 0,5 ampère (rouge), 15 ampères (rose)
Lecteur CD/MP3
Débit MPEG 64 -320 k
Plage de fréquences 20 Hz ~ 20 kHz
Lecture des MP3 Format MP3 ISO 9660 & Joliet
Radio
Pour 3 bandes de fréquence
FM
Plage de fréquences 87.5 - 108 MHz
IF 10.7 MHz
Sensibilité 3 µV
(Rapport signal/bruit = 30 dB)
Stereo Trennung > 30dBu
MW
Plage de fréquences 522 - 1620 kHz
IF 45 kHz
(Rauschabstand = 30 dB)
Séparation stéréo 32 dBu
LW
Plage de fréquences 144 - 288 kHz
IF 450 kHz
Sensibilité
(Rapport signal/bruit = 30 dB) 35dBu
F 17
F

MD 80403 Autoradio BDA_SPA.FH11 Fri Jan 28 12:13:16 2005 Seite 2
C M Y CM MY CY CMY K
E 2
FUNCIONES
1. OPEN Abrir el panel de control
2. SEL: Acceso a cada una de las funciones
3. MULTIJOG Ajuste del volumen, graves, agudos, balance y fader
4. PANTALLA
5. DSP/0: Consulta de los ajustes de programa, hora, frecuencia y
ajustes PTY
6. BND/LOU/ENT: Selección del ancho de banda/intensidad/confirmar
7. EQ: Ecualizador
8. POWER/DIM: Encender/Apagar, regular la iluminación de la pantalla
9. USB Conexión USB para soportes externos de datos
10. RESET Restablecer los ajustes de fábrica
11. AF: Activar el modo RDS
12. TA/REC: Traffic Announcement Identification / Reconocer informaciones
relativas al tráfico/Iniciar la grabación
13. PTY: Program Type Code
14. 19.: Botones de selección de emisora
14. PAU: Pausa en modo CD/MP3 / tecla numérica 1
15. SCN: Scan, reproducir los primeros 10 seg. en el modo CD/MP3 / tecla
numérica 2
16. RPT: Repeat, repetición en modo CD/MP3 / tecla numérica 3
17. SHF: Shuffle, repetición aleatoria en modo CD/MP3 / tecla numérica 4
18. Tecla numérica 5
19. Tecla numérica 6
20. MODE: Cambio radio / CD / MP3 / tecla numérica 7
21. AMS/D-AUD Memorización automática de emisoras / búsqueda MP3
22. -<< : Tune/Búsqueda de emisoras/retroceder/tecla numérica 8
23. +>>: Tune/Búsqueda de emisoras/avanzar/tecla numérica 9
24. Diodo luminoso rojo (LED de protección antirrobo)
25. Compartimento del CD: Para insertar el CD
26. EJECT Expulsar el CD

MD 80403 Autoradio BDA_SPA.FH11 Fri Jan 28 12:13:16 2005 Seite 3
C M Y CM MY CY CMY K
ADVERTENCIAS DE SEGURIDAD
Introduzca el aparato en el hueco correspondiente o elija un lugar para el montaje del aparato que
no impida las operaciones normales de conducción del conductor.
Conecte los cables antes de instalar el aparato definitivamente. Asegúrese de que
están bien conectados y de que el sistema funciona correctamente.
En caso de que sean necesarias modificaciones en el vehículo, diríjase a su concesionario/
o taller de automóviles.
Instale el aparato de tal forma que no puedan producirse lesiones en caso de frenar en seco.
Si se instala el aparato en una posición con una inclinación mayor de 30º respecto a la horizontal,
esto puede impedir el rendimiento óptimo del aparato.
Evite instalar el aparato cerca de altas temperaturas (p.ej., radiación solar directa o aire de la
calefacción), polvo, suciedad o vibraciones excesivas.
30°
E 3
E

MD 80403 Autoradio BDA_SPA.FH11 Fri Jan 28 12:13:16 2005 Seite 4
C M Y CM MY CY CMY K
SUMARIO
ANTES DE LA PUESTA EN FUNCIONAMIENTO................................................................................5
MONTAJE .............................................................................................................................................5
EMPLAZAMIENTO DE LA RADIO EN EL HUECO ISO DE SU AUTOMÓVIL....................................5
Quitar y colocar el panel de control.....................................................................................................6
CLAVIJAS ADAPTADORAS ISO .........................................................................................................6
Cable para antena automática ............................................................................................................6
Salida cinch estéreo ............................................................................................................................6
CONEXIONES POR CABLE.................................................................................................................7
FUNCIONES BÁSICAS ........................................................................................................................8
Encender/Apagar.................................................................................................................................8
Volumen...............................................................................................................................................8
Graves ................................................................................................................................................8
Agudos................................................................................................................................................8
Balance...............................................................................................................................................8
Fader ..................................................................................................................................................8
Intensidad ...........................................................................................................................................8
Pantalla...............................................................................................................................................8
Mode...................................................................................................................................................8
Ecualizador.........................................................................................................................................8
Reset ..................................................................................................................................................8
RADIO ...................................................................................................................................................9
Seleccionar el ancho de banda ...........................................................................................................9
Seleccionar emisora.........9
Emisoras preprogramadas .................................................................................................................9
Memorizar emisoras ...........................................................................................................................9
Volver a encontrar emisoras...............................................................................................................9
Memorización automática (AMS) .......................................................................................................9
Recorrer la preprogramación..............................................................................................................9
Modo Programa Regional.................................................................................................................10
PTY (tipo de programa) ....................................................................................................................10
TA Información de tráfico..................................................................................................................10
Modo local EON TA ..........................................................................................................................10
Modo EON DX..................................................................................................................................10
RDS (Radio Data System)................................................................................................................11
REPRODUCTOR CD ..........................................................................................................................12
Insertar y expulsar CDs ...................................................................................................................12
Saltar al siguiente título ....................................................................................................................12
Interrumpir la reproducción del CD...................................................................................................12
Avance y retroceso.......12
Reproducir el inicio de todos los títulos............................................................................................12
Repetir un título ................................................................................................................................12
Reproducción aleatoria.....................................................................................................................12
REPRODUCCIÓN MP3.......................................................................................................................13
Búsqueda por títulos (números) .......................................................................................................13
Búsqueda por intérpretes .................................................................................................................13
Reproducir archivos WMA................................................................................................................13
Tabla de asignación de botones.......................................................................................................14
FUNCIÓN ID3-TAG .............................................................................................................................14
REPRODUCIR DATOS DESDE USB .................................................................................................15
Función grabación ............................................................................................................................15
BÚSQUEDA DE FALLOS ...................................................................................................................16
DATOS TÉCNICOS.............................................................................................................................17
E 4

MD 80403 Autoradio BDA_SPA.FH11 Fri Jan 28 12:13:16 2005 Seite 5
C M Y CM MY CY CMY K
¡ATENCIÓN!
Rogamos que en la instalación se utilicen las tomas ISO de la autorradio para la
conexión de la misma. Se pueden adquirir las clavijas adaptadoras ISO adecuadas
(contrapiezas) para cada tipo de vehículo en los correspondientes establacimientos.
¡Si separa la toma adaptadora del cable o si corta los cables, quedará anulada
la garantía!
MONTAJE
Esta autorradio puede ser instalada fácilmente en cualquier hueco de radio estándar ISO.
Si su automóvil no dispusiera de ningún hueco ISO estándar, diríjase a su concesionario.
Instalación de la radio en el hueco ISO de su vehículo.
Retire el marco de instalación de la radio.
Introduzca el marco de instalación en el hueco para la radio del salpicadero de su vehículo.
Doble las pestañas de fijación del marco de instalación mediante un destornillador para que el
marco esté bien fijado en el vehículo.
Asegúrese de que el marco esté bien fijado.
Conecte el bloque de tomas ISO con las
clavijas ISO de su vehículo.
Conecte el cable de antena de su vehículo con la
clavija de antena de la autorradio.
Introduzca la radio cuidadosamente en el marco
de instalación. ¡Tenga cuidado de no aprisionar
los cables! Pulse el botón RESET (10) con un bolígrafo
u otro objeto punzante.
Coloque el panel de control.
ANTES DE LA PUESTA EN FUNCIONAMIENTO
Antes del montaje no se olvide de retirar los dos tornillos de
seguridad para el transporte que hay en la parte superior de la
carcasa de la radio.
(¡marcados con banderas rojas!)
Bloqueadores para el
transporte
E 5
E

MD 80403 Autoradio BDA_SPA.FH11 Fri Jan 28 12:13:16 2005 Seite 6
C M Y CM MY CY CMY K
QUITAR Y COLOCAR EL PANEL DE CONTROL
Pulse el botón OPEN (1) y retire el panel de control. Conserve siempre el panel de control en
la correspondiente bolsa de transporte.
Cuando haya extraído el panel de control, parpadeará un diodo
rojo (24).
Para montar el panel de control coloque primero el lado derecho en el marco. A continuación
presione el lado izquierdo hasta que encaje. Cerciórese de que el panel de control está bien
encajado en su sitio. Si el panel de control no está bien colocado, en la pantalla aparecen
informaciones erróneas o algunos de los botones funcionan incorrectamente.
Conector ISO
¡Atención!
Utilice el conector ISO de la radio para garantizar una conexión eléctrica segura.
¡Importante!
Tenga en cuenta que el cable de color rosa debe estar conectado a un positivo constante
(para la memoria de emisoras).
Después de haber realizado todas las conexiones, pulse el botón tecla RESET (10).
Cable para antena automática
Se ha dispuesto el cable amarillo para una antena automática controlada por relé.
El relé saca la antena automáticamente cuando se conecta el aparato y la recoge al desconectar.
Cuidado:
No conecte el cable amarillo con el cable del motor; pueden producirse
daños en el aparato
Salida cinch estéreo
En estas conexiones (cinch de color rojo y blanco) se pueden conectar aparatos externos (p.ej.,
amplificadores).
E 6
Frontal

MD 80403 Autoradio BDA_SPA.FH11 Fri Jan 28 12:13:16 2005 Seite 7
C M Y CM MY CY CMY K
para el Sistema (Dual) de dos altavoces
CONEXIONES POR CABLE
para el Sistema (Quadro) de cuatro altavoces
conexión de la antena
llave de
contacto (B+)
rojo
rosa
negro
amarillo
azul/negro
azul
verde/negro
verde
memoria
back-up
toma de tierra
(B-)(masa)
antena
eléctrica
altavoz frontal
izquierdo
altavoz trasero
izquierda
blanco/negro
blanco
gris/negro
gris
altavoz
trasero derecha
izquierda
blanco
derecha rojo
AUTORRADIO PARTE POSTERIOR
cable RCA
¡Importante!
La memoria back-up
debe estar conectada
a un positivo constante
para la memorización de
emisoras.
altavoz
frontal derecho
conexión de la antena
llave de
contacto (B+)
rojo
rosa
negro
amarillo
azul/negro
verde
memoria
back-up
toma de tierra
(B-)(masa)
antena
eléctrica
altavoz
izquierda
blanco/negro
gris
altavoz
derecho
izquierda
derecha rojo
AUTORRADIO PARTE POSTERIOR
cable RCA
E 7
¡Importante!
La memoria back-up
debe estar conectada
a un positivo constante
para la memorización de
emisoras.
E

MD 80403 Autoradio BDA_SPA.FH11 Fri Jan 28 12:13:16 2005 Seite 8
C M Y CM MY CY CMY K
FUNCIONES BÁSICAS
Encender/Apagar
Pulse el botón POWER/DIM (8) para encender o apagar la radio.
Volumen
Seleccione la función VOLUME pulsando el botón SEL (2) y gire el regulador Multijog (3) para
ajustar el volumen deseado.
¡Ajuste el volumen de tal modo que pueda oír las ambulancias/coches de policía/bomberos que
eventualmente se acerquen a su vehículo!
Graves
Pulse el botón SEL (2) una vez, para ajustar los graves. Girando el regulador Multijog (3)
sube o baja los graves.
Agudos
Pulse el botón SEL (2) dos veces, para ajustar los agudos. Girando el regulador Multijog (3)
sube o baja los agudos.
Balance
Pulse el botón SEL (2) tres veces, para ajustar el balance. Girando el regulador Multijog (3)
puede ajustar el balance entre el altavoz derecho y el izquierdo.
Fader
Pulse el botón SEL (2) una vez, para ajustar el fader. Girando el regulador Multijog (3) puede
ajustar el fader entre los altavoces delanteros y traseros.
Intensidad
Mantenga pulsado el botón BND/LOU/ENT (6) hasta oír una señal acústica. En pantalla
aparece LOUD ON o LOUD OFF. De ese modo logrará el incremento de la frecuencias
bajas aunque el volumen esté bajo.
Pantalla
Si pulsa el botón DSP/0 (5) podrá acceder a la siguiente información:
programas
frecuencia
hora (se ajusta automáticamente si existe una sintonización RDS)
ajustes PTY
(Estas funciones RDS son emitidas con distinta amplitud y calidad por las diversas emisoras
de radio. Encontrará más información en el capítulo RADIO bajo RDS).
Modo
Mediante el botón MODE (20) puede cambiar entre la radio y el CD o la conexión USB.
Ecualizador
Pulse el botón EQ (7) para acceder sucesivamente a los siguientes ajustes de sonido:
FLAT CLASSICS POP M ROCK M DSP OFF
Reset
Para volver a poner la radio con los ajustes de fábrica, pulse el botón RESET (10) con la punta
de un bolígrafo. ¡Este botón se encuentra en la parte posterior del panel de control!
Por favor, pulse el botón RESET en los siguientes casos:
- durante la primera puesta en funcionamiento, tras haber efectuado las conexiones de cables,
- si no funcionan todos los botones de función,
- si aparece una indicación de error en la pantalla.
E 8

MD 80403 Autoradio BDA_SPA.FH11 Fri Jan 28 12:13:16 2005 Seite 9
C M Y CM MY CY CMY K
RADIO
Seleccionar la banda
Pulsando el botón BND/LOU/ENT (6) puede cambiar entre FM (F1, F2, F3), onda media (AM)
y onda larga (LW). En cada zona de banda puede memorizar seis emisoras.
Sintonización de emisoras
Pulse brevemente los botones de sintonización (botones Tune) I<< (22) o >>I (23) y el aparato
buscará automáticamente la siguiente emisora. Si mantiene pulsado el botón TUNE durante
dos segundos, cambiará a la búsqueda manual de emisoras. En pantalla aparecerá la
indicación MANUAL.
Ahora, mediante el botón Tune puede seleccionar y memorizar la emisora. El aparato, tras un
breve periodo de espera, pasa a la función de búsqueda automática de emisoras.
Emisoras preprogramadas
En cada área de emisión puede memorizar seis emisoras y acceder a ellas a través de los botones
de sintonía 1-6 (14-19).
Memorización de emisoras
1. Seleccione la zona de banda pulsando el botón BND/LOU/ENT (6).
2. Seleccione una emisora mediante los botones TUNE I<< (22) o I>> (23).
3. Pulse uno de los botones de sintonía 1-6 (14-19) durante aproximadamente 3 segundos.
Oirá una señal acústica que le indicará la memorización de la emisora.
Encontrar una emisora memorizada
1. Seleccione la zona de banda pulsando el botón BND/LOU/ENT (6).
2. Pulse los botones de sintonía (14-19), para acceder a las emisoras preprogramadas.
Memorización automática (AMS)
Mantenga pulsado el botón AMS/D-AUD (21) hasta oír una señal acústica. En pantalla
aparecerá SEARCH. La búsqueda automática se detiene durante aprox. 5 segundos en cada
emisora localizada. En pantalla parpadea una cifra que indica el número de sintonía en la que
ha sido memorizada cada emisora.
Si las emisoras emiten una señal débil, la búsqueda prosigue automáticamente.
Recorrer la preprogramación
Búsqueda automática de las emisoras memorizadas en cada área de emisoras.
1. Seleccione la zona de banda pulsando el botón BND/LOU/ENT (6).
2. Pulse brevemente el botón AMS/D-AUD (21). Se selecciona ahora brevemente cada una de
las emisoras memorizadas.
Cuando llegue a la emisora deseada, pulse brevemente el botón AMS/D-AUD (21).
E 9
E

MD 80403 Autoradio BDA_SPA.FH11 Fri Jan 28 12:13:16 2005 Seite 10
C M Y CM MY CY CMY K
E 10
MÚSICA CONTENIDOS
1 POP M, ROCK M NEWS (noticias), AFFAIRS
(asuntos), INFO (información)
2 EASY M, LIGHT M SPORT, EDUCATE (educación), DRAMA
3 CLASSICS (clásica), CULTURE (cultura), SCIENCE (ciencia),
OTHER M (otros) VARIED (diversos)
4 JAZZ, COUNTRY WEATHER (tiempo), FINANCE (finanzas),
CHILDREN (infantil)
5 NATION M, OLDIES SOCIAL (asuntos sociales), RELIGION, PHONE IN
(entradas telefónicas)
6 FOLK M Travel (viajes), Leisure (tiempo libre), Document
(Estas informaciones dependen de la emisora)
TA, información de tráfico
Mantenga pulsada brevemente el botón TA/REC (12) para activar o desactivar el modo TA.
Si el modo TA está activado y se emite una información relativa al tráfico mientras usted está oyendo
un CD o ha ajustado la conexión USB, el aparato cambiará automáticamente a la emisión radiofónica.
De vez en cuando se producirá un cambio de canal con la estación de conexión EON, si EON
encuentra una información relativa al tráfico en otro programa. Si el nivel de volumen se encuentra
por debajo del umbral, subirá. La función TA de la información de tráfico se interrumpe si pulsa el
botón TA/REC (12). Sin embargo, con ello no quedará desactivado el modo TA. Si mantiene pulsado
el botón TA/REC (12) durante más tiempo, se selecciona el modo EON TA LOCAL/EON TA DISTANCE.
Con este modo se administran las informaciones EON TA: si usted está oyendo por ejemplo una
emisora sin información de tráfico pero en otra emisora surge una, el aparato cambiará automáticamente
de emisora durante la transmisión de esa información. Tan pronto como la información haya finalizado,
volverá a la emisora que usted estaba oyendo antes.
Modo local EON TA
Si ha seleccionado el modo EON TA LOCAL, en pantalla parpadeará durante unos segundos la
indicación EON TA LO. Ha seleccionado el modo para el área local.
Modo EON DX
Si ha seleccionado el modo EON DX, en pantalla parpadeará durante unos segundos la indicación
EON TA DX.
Ha seleccionado el modo para el área más alejada.
Modo de programa regional
Algunas emisoras emiten diferentes programas regionales. Para seleccionar únicamente las
frecuencias alternativas del programa regional deseado, mantenga pulsado el
botón AF (11) hasta oír una señal acústica que le indicará que el modo ha sido conectado o
desconectado. En la pantalla aparecerá la indicación REG ON/REG OFF.
PTY (tipo de programa)
Para activar el menú pulse el botón PTY (13).
A continuación, podrá seleccionar sus emisoras según las siguientes categorías:

MD 80403 Autoradio BDA_SPA.FH11 Fri Jan 28 12:13:16 2005 Seite 11
C M Y CM MY CY CMY K
RDS (Sistema de radiodifusión de datos)
El RDS es un servicio de las emisoras de radio. Además de los programas de música y de charla
convencionales se emiten informaciones adicionales en forma de señales digitales codificadas que
pueden ser evaluadas por la radio.
Pulse brevemente el botón AF (11), para conectar o desconectar el modo RDS. Si el modo RDS
está activado, en la pantalla aparece el símbolo AF. Ahora durante la recepción de una emisora
en la pantalla (4) aparece el nombre del programa y otras informaciones.
Estas informaciones dependen de la emisora.
Se ofrecen diferentes servicios RDS:
PI: Program Identification Code
Mediante el código PI, la radio puede identificar la emisora sintonizada.
PS: Program Service Name
La función Programa permite indicar el nombre de la emisora.
AF: Alternative Frequencies
La radio elige automáticamente la frecuencia alternativa que mejor se recibe del
mismo programa.
TP/TA: Traffic-Program/Traffic-Annoucement
EON: Enhanced Other Networks Information
En caso de que esté escuchando una emisora sin informaciones de tráfico y haya una
información de tráfico actual, se cambiará automáticamente a una emisora asociada
con informaciones de tráfico.
PTY: Program Type Code
Con Program Type la radio puede buscar emisoras con contenidos de programas
preseleccionables. Por ejemplo, deportes, noticias, rock, pop, ...
E 11
E

MD 80403 Autoradio BDA_SPA.FH11 Fri Jan 28 12:13:16 2005 Seite 12
C M Y CM MY CY CMY K
REPRODUCTOR CD
Introducir y retirar CDs
Introduzca el CD en el compartimento de CDs (25). Se iniciará la reproducción del CD.
En pantalla aparecerá la indicación S--CDP (es decir, "búsqueda título"). Para extraer
el CD pulse el botón EJECT (26).
La reproducción queda interrumpida y sale el CD. El aparato cambia al modo radio.
Saltar título
Pulsar el botón TUNE |<< (22) o >>| (23) para saltar al siguiente título.
El número del título aparecerá en pantalla (4).
Interrumpir CD
Si pulsa el botón PAU (14) durante la reproducción, ésta quedará interrumpida.
Si vuelve a pulsar el botón PAU (14) se reanudará la reproducción.
Avance y retroceso rápidos
Pulsar durante la reproducción el botón TUNE |<< (22) o >>| (23) para iniciar el avance
o retroceso rápidos.
Reproducir el inicio de todos los títulos
Pulse el botón SCN (15) y se reproducirá los primeros 10 segundos de cada título.
Vuelva a pulsar el botón SCN (15) y se iniciará la reproducción normal.
Repetir un título
Pulse el botón RPT (16) para oír repetidas veces el mismo título. Si vuelve a pulsar RPT (16)
la función queda desactivada.
Reproducción aleatoria
Pulsar el botón SHF (17), para reproducir todos los títulos del CD en orden aleatorio.
Advertencia:
Conducir por carreteras con el pavimento accidentado puede provocar que el CD salte.
Un breve tiempo de reproducción puede mejorar el rendimiento.
Que se salten algunos títulos no daña en ningún caso al CD.
La humedad o una humedad del aire elevadas puede provocar errores de funcionamiento en el
reproductor de CD.
Conecte la calefacción del automóvil y deje que se evapore la humedad antes de hacer
funcionar el aparato.
No exponga el reproductor de CD a temperaturas extremadamente altas o bajas.
No conduzca con un CD expulsado y en la ranura de CDs.
E 12

MD 80403 Autoradio BDA_SPA.FH11 Fri Jan 28 12:13:16 2005 Seite 13
C M Y CM MY CY CMY K
Advertencia:
La función de búsqueda depende de cómo haya sido creado el CD-MP3.
REPRODUCCIÓN MP3
La reproducción se inicia automáticamente al introducir un CD-MP3. Para las funciones de los botones,
consulte el capítulo Reproductor CD.
Puede seleccionar los títulos o los intérpretes directamente. Tenga en cuenta que las funciones MP3
dependen en gran medida de cómo es la compilación del CD-MP3.
Búsqueda de títulos (números)
Pulse una vez el botón AMS/D-AUD (21). En pantalla aparecerá MP3T ..... .
Introduzca mediante los botones indicados en la tabla el número del título deseado.
Confirme la indicación con el botón BND/LOU/ENT (6) o espere 5 segundos hasta que el aparato
vaya automáticamente el título deseado.
Búsqueda por intérpretes
Pulse dos veces el botón AMS/D-AUD (21). En pantalla parpadeará la indicación ....... .
Introduzca mediante los botones indicados en la tabla el nombre del intérprete deseado.
Tenga en cuenta que después de cada letra deberá pulsar el botón SEL (2) , para poder introducir
la siguiente letra (desplazamiento de signos).
Confirme la indicación pulsando el botón BND/LOU/ENT (6).
El aparato busca ahora el título correspondiente.
Pulse de nuevo BND/LOU/ENT (6), cuando el aparato haya encontrado el intérprete deseado.
Se reproduce ahora el título buscado.
Archivos WMA
Su autorradio también puede reproducir archivos WMA. En tal caso el funcionamiento es idéntico al
de los archivos MP3.
E 13
E

MD 80403 Autoradio BDA_SPA.FH11 Fri Jan 28 12:13:16 2005 Seite 14
C M Y CM MY CY CMY K
E 14
FUNCIÓN ID 3-TAG
Al crear un CD-MP3 puede almacenar información complementaria. Dicho tipo de información puede
contener el nombre del intérprete, título, nombre del álbum y el año de publicación de la pieza musical,
así como un breve comentario. Para la introducción de esos datos recomendamos emplear un editor
ID3-Tag.
Si las solicita, dichas informaciones aparecen entonces en pantalla durante la reproducción.
Así, al reproducir un CD MP3, además del número de título, puede indicarse también el nombre del
título o el intérprete (en función de la información que haya sido almacenada en el CD MP3).
Para acceder a dicha información pulse el botón DSP/0 (5). Cada vez que pulse el botón aparecerá
una entrada ID3-Tag de la reproducción actual.
TÍTULO - INTÉRPRETE - NOMBRE DEL ALBUM - AÑO DE PUBLICACIÓN - COMENTARIO
AMS/D-AUD (21) Seleccionar ajuste
BND/LOU/ENT (6) Confirmar
1 (14) A, B, C, 1
2 (15) D, E, F, 2
3 (16) G, H, I, 3
4 (17) J, K, L, 4
5 (18) M, N, O, 5 / 10 track inferior
6 (19) P, Q, R, 6 / 10 track superior
MODE (20) S, T, U, 7
|<< (22) V, W, X, 8
>>| (23) Y, Z, espacio en blanco, 9
SEL (2) Desplazar signos hacia la derecha
DSP/0 (5) 0,_, -, +,
(5) (6) función desplazamiento A-Z / 0-9
Tabla de asignación de botones
Advertencia:
Al grabar un CD-MP3 tenga en cuenta que todos los títulos tienen que estar almacenados
sueltos o en carpetas. No mezcle nunca títulos y carpetas dado que esto podría ocasionar
problemas en la reproducción. Se pueden reproducir todas las codificaciones usuales.

MD 80403 Autoradio BDA_SPA.FH11 Fri Jan 28 12:13:16 2005 Seite 15
C M Y CM MY CY CMY K
E 15
REPRODUCIR DATOS DESDE USB
En la conexión USB que se encuentra en el frontal del aparato puede conectar un reproductor MP3
o un soporte de datos USB.
Su autorradio puede procesar formatos de datos USB de hasta 1GB.
Con ello, la estructura de índices solamente debe contener 1.024 carpetas, 4.096 archivos y hasta 8
niveles de subcarpetas.
Tan pronto como haya conectado un aparato externo, la autorradio buscará archivos MP3 o WMA en
el soporte de datos y en pantalla (4) aparecerá la indicación USB. El funcionamiento para la reproducción
de archivos en un soporte de datos externo funciona de la misma manera que con los CD MP3.
Función grabación
Con su autorradio también puede grabar datos de la radio o de un reproductor CD en un soporte de
datos USB.
Para iniciar la grabación, pulse en el modo correspondiente el botón TA/REC (12). Los datos de audio
son grabados ahora en formato WMA en el soporte de datos USB. Durante la grabación en pantalla
aparece la indicación FILE NAME.
Para finalizar la grabación, pulse de nuevo brevemente el botón TA/REC (12).
Podrá reproducir de nuevo los datos grabados pulsando el botón MODE (20) para pasar al modo USB
y acceder a cada uno de los títulos del soporte de datos USB.
E

MD 80403 Autoradio BDA_SPA.FH11 Fri Jan 28 12:13:16 2005 Seite 16
C M Y CM MY CY CMY K
BÚSQUEDA DE FALLOS
El aparato no
se enciende.
No se puede
introducir o expulsar
el CD.
No hay sonido
Las teclas de
función no funcionan.
El CD salta
La radio no funciona.
La búsqueda automática de
emisoras no funciona.
La memoria de emisoras
no funciona.
No está encendido
el motor.
El fusible está defectuoso.
Ya hay un CD en
el compartimento.
El CD se ha colocado
al revés.
El CD está muy
sucio o dañado.
La temperatura en el interior
del coche es demasiado alta.
Condensación.
El volumen está al mínimo.
Las conexiones de los cables
no son correctas.
El microordenador
integrado no funciona
debido a interferencias.
La posición del panel de
control no es correcta.
El ángulo de colocación supera
los 30°.
El CD está muy sucio
o dañado.
Error en un CD de creación
casera
El cable de la antena
no está conectado.
Las señales recibidas
son muy débiles.
El cable rosa no está conectado
a un positivo constante.
Encender el motor girando
la llave de contacto.
Cambiar el fusible.
Extraer el CD del reproductor y
sólo después colocar uno nuevo.
Introducir el CD con la
cara impresa hacia arriba.
Limpiar el CD o intentar
reproducir otro.
Refrigerar, hasta
que la temperatura
ambiental retorne
al estado normal.
Dejar el aparato
desconectado durante un
par de horas y volver
a intentarlo más tarde.
Ajustar el volumen
en el nivel deseado.
Controlar las conexiones
de los cables.
Pulsar el botón RESET.
Cerciórese de que el
panel de control está
bien encajado en su sitio.
Modificar el ángulo de colocación
para que sea inferior a 30º.
Limpiar el CD o intentar
reproducir otro.
Comprobar en otro aparato si el
CD funciona correctamente.
Enchufar bien el cable de la antena.
Seleccionar las
emisoras manualmente.
Controlar las conexiones
de los cables.
Problema Causa Solución
E 16

MD 80403 Autoradio BDA_SPA.FH11 Fri Jan 28 12:13:16 2005 Seite 17
C M Y CM MY CY CMY K
Reproductor CD
Utilice únicamente CDs que dispongan de la siguiente indicación:
Clase láser 1
Las especificaciones técnicas están sujetas a cambios sin previo aviso.
COMPACT
DIGITAL AUDIO
ESPECIFICACIONES TÉCNICAS
Características generales
Tensión de servicio: DC 12V, conexión para masa negativa
Dimensiones de la carcasa: 178 x 155 x 50mm (ancho x profundidad x altura)
Potencia: potencia máxima de salida de música 4 x 20 W R.M.S.
Fusible: 0,5 amperios (rojo); 15 amperios (rosa)
Reproductor CD/MP3
Tasa de transferencia MPEG 64 -320 k
Gama de frecuencia 20Hz~20kHz
Playback MP3 formato de archivo para MP3 ISO9660 & Joliet
Radio
Para 3 bandas de frecuencia
FM
Margen de frecuencia 87.5 hasta 108MHz
IF 10.7MHz
Sensibilidad 3µV
(Relación señal/ruido = 30 dB)
Separación entre canales > 30dBu
AM
Margen de frecuencia 522 hasta 1.620kHz
IF 45kHz
(Relación señal/ruido = 30 dB)
Separación entre canales 32 dBu
OL
Margen de frecuencia 144 hasta 288kHz
IF 450kHz
Sensibilidad
(Relación señal/ruido = 30 dB) 35dBu
E 17
E

MD 80403 Autoradio BDA_ITA.FH11 Fri Jan 28 12:12:53 2005 Seite 2
C M Y CM MY CY CMY K
I 2
FUNZIONI
1. OPEN Apertura del frontalino di comando
2. SEL: Richiamo delle singole funzioni
3. MULTIJOG Impostazione volume, bassi, alti, bilanciamento e dissolvenza
4. DISPLAY
5. DSP/0: Richiesta di impostazione programmi, orario, frequenza e
PTY/tasto numerico 0.
6. BND/LOU/ENT: Selezione di banda/volume/Conferma
7. EQ: Equalizzatore
8. POWER/DIM: Accensione/Spegnimento, riduzione illuminazione display
9. USB Collegamento USB per supporti dati esterni
10. RESET ripristino delle impostazioni predefinite
11. AF: Accensione della modalità RDS
12. TA/REC: Identificazione annunci sul traffico
Inizio registrazione
13. PTY: Program Type Code
14. 19.: Tasti di selezione delle stazioni
14. PAU: Pausa nel funzionamento del CD/MP3/tasto numerico 1
15. SCN: Scansione, riproduzione dei titoli per 10 secondi nella funzione
CD/MP3 / tasto numerico 2
16. RPT: Repeat, ripetizione nella funzione CD/MP3/tasto numerico 3
17. SHF: Shuffle, riproduzione casuale nella funzione CD/MP3/tasto numerico 4
18. Tasto numerico 5
19. Tasto numerico 6
20. MODE: Commutazione da Radio/CD/MP3/Tasto numerico 7
21. AMS/D-AUD memorizzazione automatica delle stazioni / Ricerca MP3
22. -<< : Tune/Ricerca delle stazioni/Indietro/Tasto numerico 8
23. +>>: Tune/Ricerca delle stazioni avanti/Tasto numerico 9
24. Led rosso (LED per protezione antifurto)
25. Vano CD: Per l'inserimento del CD
26. EJECT Rimozione CD

MD 80403 Autoradio BDA_ITA.FH11 Fri Jan 28 12:12:53 2005 Seite 3
C M Y CM MY CY CMY K
ISTRUZIONI DI SICUREZZA
Inserire l'apparecchio nel vano apposito oppure scegliere un posto per il montaggio dell'apparecchio
che non impedisca le normali operazioni di guida.
Collegare i cavi poco prima di installare definitivamente l'apparecchio. Assicurarsi che sia installato
correttamente e che il sistema funzioni altrettanto correttamente.
Nel caso in cui sia necessario apportare modifiche al veicolo, rivolgersi al rivenditore del veicolo
o a un'officina specializzata.
Installare l'apparecchio in modo da evitare qualsiasi ferita in caso di brusche frenate.
Se l'apparecchio viene installato con un'inclinazione di oltre 30°, può perdere le proprie
prestazioni ottimali.
Evitare di installare l'apparecchio in prossimità di elevate temperature (ad esempio a diretto contatto
con i raggi solari o del riscaldamento), polvere, sporco o scosse eccessive.
30°
I 3
I

MD 80403 Autoradio BDA_ITA.FH11 Fri Jan 28 12:12:53 2005 Seite 4
C M Y CM MY CY CMY K
INDICE
PRIMA DELLA MESSA IN FUNZIONE.................................................................................................5
MONTAGGIO ........................................................................................................................................5
INSTALLAZIONE DELLA RADIO NEL VANO ISO DEL VEICOLO.....................................................5
Inserimento ed estrazione del frontalino di comando..........................................................................6
ADATTATORE ISO................................................................................................................................6
Cavo per antenne a relè......................................................................................................................6
Uscita spinotto stereo..........................................................................................................................6
COLLEGAMENTI DEI CAVI..................................................................................................................7
COMANDI PRINCIPALI ........................................................................................................................8
Accensione/spegnimento ....................................................................................................................8
Volume.................................................................................................................................................8
Bassi...................................................................................................................................................8
Alti .........8
Bilanciamento .....................................................................................................................................8
Dissolvenza ........................................................................................................................................8
Volume................................................................................................................................................8
Display................................................................................................................................................8
Mode...................................................................................................................................................8
Equalizzatore......................................................................................................................................8
Ripristina.............................................................................................................................................8
RADIO ...................................................................................................................................................9
Selezione banda.................................................................................................................................9
Selezione stazioni...............................................................................................................................9
Stazioni preprogrammate ...................................................................................................................9
Memorizzazione delle stazioni............................................................................................................9
Ricerca delle stazioni..........................................................................................................................9
Memorizzazione automatica (AMS)....................................................................................................9
Scorrimento automatico......................................................................................................................9
Modalità programmi locali.................................................................................................................10
PTY (Programme-Type/Art)..............................................................................................................10
TA Notizie sul traffico ........................................................................................................................10
Modalità locale EON TA....................................................................................................................10
Modalità EON DX .............................................................................................................................10
RDS (Radio Data System)................................................................................................................11
LETTORE CD......................................................................................................................................12
Inserimento ed espulsione di CD......................................................................................................12
Ignora brani ......................................................................................................................................12
Interruzione CD ................................................................................................................................12
Avanzamento e riavvolgimento rapido .............................................................................................12
Riproduzione di tutti i brani...............................................................................................................12
Ripetizione di un titolo ......................................................................................................................12
Riproduzione casuale .......................................................................................................................12
RIPRODUZIONE MP3.........................................................................................................................13
Ricerca dei brani (numeri) ................................................................................................................13
Ricerca degli interpreti......................................................................................................................13
Riproduzione file WMA .....................................................................................................................13
Tabella dei tasti.................................................................................................................................14
FUNZIONE ID3-TAG ...........................................................................................................................14
RIPRODUZIONE DATI USB ...............................................................................................................15
Funzione registrazione ........................................................................................................................15
RICERCA ERRORI .............................................................................................................................16
SPECIFICHE TECNICHE....................................................................................................................17
I 4

MD 80403 Autoradio BDA_ITA.FH11 Fri Jan 28 12:12:53 2005 Seite 5
C M Y CM MY CY CMY K
ATTENZIONE!
Durante l'installazione utilizzare per il collegamento dell'autoradio le prese ISO
dell'autoradio. Tuttavia è possibile procurarsi sul mercato gli adattatori ISO (ricambi auto)
idonei.
Nel caso in cui questo adattatore venga rimosso dal cavo o se il cavo viene tagliato,
decade il diritto di garanzia!
MONTAGGIO
Questa autoradio può essere installata facilmente in qualsiasi vano radio ISO standard.
Se il veicolo non è dotato di un vano radio ISO standard, rivolgersi al proprio rivenditore.
Installazione della radio nel vano ISO del veicolo.
Rimuovere il telaio di installazione dalla radio.
Inserire il telaio di installazione nel vano radio del pannello strumenti del veicolo.
Ruotare le linguette del telaio di installazione con un cacciavite, in modo da fissarlo nel veicolo.
Verificare di aver fissato saldamente il telaio.
Collegare la presa ISO con
la spina ISO del veicolo.
Collegare il cavo dell'antenna del veicolo con
la spina dell'antenna dell'autoradio.
Far scorrere attentamente la radio nel
telaio. Verificare che il cavo non
resti incastrato! Attivare il tasto RESET (10) con una
penna o un oggetto appuntito simile.
Inserire il frontalino di comando.
PRIMA DELLA MESSA IN FUNZIONE
Prima del montaggio rimuovere assolutamente le due viti di
sicurezza per il trasporto nella parte superiore dell'alloggiamento
della radio
(riconoscibile grazie alla bandierina rossa!)
Sicurezza durante il
I 5
I

MD 80403 Autoradio BDA_ITA.FH11 Fri Jan 28 12:12:53 2005 Seite 6
C M Y CM MY CY CMY K
INSERIMENTO ED ESTRAZIONE DEL FRONTALINO DI COMANDO
Premere il tasto OPEN (1) ed estrarre il frontalino di comando. Conservare il frontalino di comando
sempre nellapposita custodia per il trasporto.
Nel caso in cui il frontalino di comando venga rimosso lampeggia
un LED rosso (24).
Per l'installazione posizionare il frontalino di comando prima dal lato destro sul telaio. Premere
quindi con forza il lato sinistro, fino a quando non scatta in posizione. Verificare che il frontalino
sia posizionato correttamente e saldamente. Se non è installato correttamente sul display vengono
visualizzate sul display informazioni errate e/o alcuni tasti non funzionano correttamente.
mascherina anteriore
Adattatore ISO
Attenzione!
Per ottenere un collegamento elettrico sicuro, utilizzare l'adattatore ISO dell'autoradio.
Importante!
Verificare che il cavo di backup di colore rosa sia posizionato su Dauerplus - più permanente
(per la memorizzazione delle stazioni).
Dopo aver eseguito tutti i collegamenti, premere il tasto RESET (10).
Cavo per antenne a relè
Il cavo giallo è disponibile per le antenne guidate da un relè.
Il relè fa uscire automaticamente l'antenna quando l'apparecchio viene acceso e, in caso di spegnimento,
fa rientrare l'antenna.
Attenzione:
Per evitare di danneggiare l'apparecchio, non collegare il cavo giallo al
cavo del motore.
Uscita spinotto stereo
A questi collegamenti (spinotto rosso e bianco) è possibile collegare apparecchi esterni (ad esempio gli
amplificatori).
I 6

MD 80403 Autoradio BDA_ITA.FH11 Fri Jan 28 12:12:53 2005 Seite 7
C M Y CM MY CY CMY K
Per sistemi a due amplificatori (duali)
COLLEGAMENTO DEI CAVI
Per sistemi a quattro amplificatori (quadro)
Collegamento antenna
Interruttore
di accensione
(B+)
rosso
rosa
nero
Giallo
blu/nero
Blu
verde/nero
Verde
Memoria
Back-up
Collegamento a
terra
(B-)(Massa)
Antenna
elettrica
Altoparlante
anteriore
sinistro
Altoparlante
posteriore
sinistro
bianco/nero
Bianco
grigio/nero
grigio
Altoparlante
posteriore
destro
a sinistra
bianco
a destra rosso
RETRO DELL'AUTORADIO
Cavo RCA
Importante!
Back-up memoria
deve essere collegata a
più permanente per la
memorizzazione delle
stazioni.
Altoparlante
anteriore destro
Collegamento antenna
Interruttore
di accensione
(B+)
rosso
Rosa
nero
Giallo
blu/nero
Verde
Memoria
Back-up
Collegamento a
terra
(B-)(Massa)
Antenna
elettrica
Altoparlante
sinistro
bianco/nero
grigio
Altoparlante
destro
a sinistra
a destra rosso
RETRO DELL'AUTORADIO
Cavo RCA
I 7
Importante!
Back-up memoria
deve essere collegata a
più permanente per la
memorizzazione delle
stazioni.
I

MD 80403 Autoradio BDA_ITA.FH11 Fri Jan 28 12:12:53 2005 Seite 8
C M Y CM MY CY CMY K
COMANDI PRINCIPALI
Accensione/spegnimento
Premere il tasto POWER/DIM (8) per accendere/spegnere l'apparecchio.
Volume
Selezionare la funzione VOLUME tenendo premuto il tasto Taste SEL (2) e ruotare il Multijog
(3) per impostare il volume.
Impostare il volume in modo tale da poter sentire i segnali acustici di eventuali
ambulanze/veicoli di pompieri/polizia in arrivo!
Bassi
Premere il tasto SEL (2) una volta per impostare i bassi. Ruotando il Multijog
(3) alzare o abbassare i bassi.
Alti
Premere il tasto SEL (2) due volte per impostare gli alti. Ruotando il Multijog
(3) alzare o abbassare gli alti.
Bilanciamento
Premere il tasto SEL (2) tre volte per impostare il bilanciamento. Ruotando il Multijog
(3) è possibile impostare il bilanciamento tra laltoparlante destro e quello sinistro.
Dissolvenza
Premere il tasto SEL (2) quattro volte per impostare la dissolvenza. Ruotando il Multijog
(3) è possibile impostare la dissolvenza tra laltoparlante anteriore e quello posteriore.
Volume
Tenere premuto il tasto BND/LOU/ENT (6) fino a quando non si sente un suono.
Sul display viene visualizzata la scritta LOUD ON oppure LOUD OFF. In tal modo si ottiene un
incremento acustico delle basse frequenze di basso volume.
Display
Premendo il tasto DSP/0 (5) si possono richiedere le seguenti informazioni:
Nome del programma
Frequenza
Orario (viene impostato automaticamente nella ricezione RDS)
Impostazioni PTY
(Queste funzioni RDS vengono inviate dalle emittenti radio con qualità e caratteristiche diverse.
Per ulteriori informazioni, vedere il capitolo RADIO in RDS).
Mode
Con il tasto MODE (20) è possibile scegliere tra Radio e CD o USB.
Equalizzatore
Premere il tasto EQ (7) per richiamare le seguenti impostazioni audio:
FLAT CLASSICS POP M ROCK M DSP OFF
Reset
Per riportare l'autoradio alle impostazioni standard, selezionare il tasto RESET (10) con una penna.
Questo tasto si trova dietro al frontalino di comando!
Selezionare il tasto RESET durante
la prima messa in funzione, dopo il collegamento dei cavi,
quando non tutti i tasti funzionano,
in caso di visualizzazione di un errore sul display.
I 8

MD 80403 Autoradio BDA_ITA.FH11 Fri Jan 28 12:12:53 2005 Seite 9
C M Y CM MY CY CMY K
RADIO
Selezione della banda
Premere il tasto BND/LOU/ENT (6), per scegliere tra onde corte (F1, F2, F3), onde medie
(OM) e onde lunghe (OL). Per ogni banda è possibile memorizzare sei stazioni.
Selezione delle stazioni
Premere i tasti di ricerca stazione (tasto Tune) I<< (22) o tasto >>I (23) brevemente, lapparecchio
cerca automaticamente la stazione successiva. Se si tiene premuto uno dei tasti TUNE per due
secondi, si passa alla ricerca manuale delle stazioni. Sul display compare la scritta MANUAL.
Adesso è possibile scegliere e memorizzare la stazione con il tasto Tune. L'apparecchio torna
dopo un breve periodo di attesa alla funzione di ricerca automatica delle stazioni.
Stazioni preprogrammate
In ogni banda è possibile memorizzare fino a sei stazioni e richiamarle tramite i tasti delle stazioni
1-6 (14-19).
Memorizzazione delle stazioni
1. Scegliere la banda con il tasto BND/LOU/ENT (6).
2. Scegliere una stazione con il tasto TUNE I<< (22) o tasto I>> (23).
3. Premere uno dei tasti stazione da 1 a 6 (14-19) per circa 3 secondi.
Un segnale conferma la memorizzazione delle stazioni.
Ricerca delle stazioni
1. Scegliere la banda con il tasto BND/LOU/ENT (6).
2. Premere il tasto stazione (14-19) per richiamare la stazione preprogrammata.
Memorizzazione automatica (AMS)
Tenere premuto il tasto AMS/D-AUD (21) fino a quando non si sente un suono. Sul display viene
visualizzato SEARCH. La ricerca si sofferma circa 5 sec. su ogni stazione trovata. Il numero che
lampeggia sul display indica il numero del tasto stazione dove è stata memorizzata la singola stazione.
Nel caso di ricezioni deboli la ricerca prosegue automaticamente.
Scorrimento automatico
Ricerca automatica delle stazioni memorizzate nel campo di trasmissione.
1. Scegliere la banda con il tasto BND/LOU/ENT (6).
2. Premere brevemente il tasto AMS/D-AUD (21). Tutte le stazioni vengono selezionate rapidamente.
Per raggiungere le stazioni cercate, premere brevemente il tasto AMS/D-AUD (21).
I 9
I

MD 80403 Autoradio BDA_ITA.FH11 Fri Jan 28 12:12:53 2005 Seite 10
C M Y CM MY CY CMY K
I 10
(Le informazioni dipendono dallemittente radio)
TA Informazioni sul traffico
Tenere premuto brevemente il tasto TA/REC (12) per attivare o disattivare la modalità TA.
Se è attivata la modalità TA e vengono trasmesse notizie sul traffico mentre è selezionata l'impostazione
CD o è impostato il collegamento USB, si passa automaticamente alla radio. Talvolta si verifica con
EON un cambio di stazione, nel caso in cui EON trovi delle informazioni sul traffico in un altro
programma. Quando il livello di intensità degli altoparlanti è al di sotto della soglia, si alza. La funzione
TA delle trasmissioni sul traffico si interrompe tramite il tasto TA/REC (12) La modalità TA non viene
tuttavia disattivata. Se si tiene premuto più a lungo il tasto TA/REC (12), si seleziona la modalità
EON TA LOCAL/EON TA DISTANCE.
Con questa modalità è possibile ordinare le informazioni EON TA, ad esempio se si ascolta una
trasmissione che non è relativa a informazioni sul traffico, ma su un'altra frequenza c'è una
comunicazione sul traffico gibt es eine Verkehrsmeldung, l'apparecchio cambia automaticamente la
frequenza. Al termine della comunicazione, ritorna alla stazione precedente.
Modalità locale EON TA
Se è stata selezionata la modalità EON TA LOCAL, sul display lampeggia per alcuni secondi
EON TA LO. È stata selezionata la modalità per il territorio locale.
Modalità EON DX
Se è stata selezionata la modalità EON DX, sul display lampeggia EON TA DX per alcuni secondi.
È stata selezionata la modalità per il territorio più distante.
MUSICA LINGUA
1 POP M, ROCK M NEWS (Notizie), AFFAIRS
(Affari), INFO (Informazioni)
2 EASY M, LIGHT M SPORT, EDUCATE (Istruzione), DRAMA
3 CLASSICS (classica), CULTURE (cultura), SCIENCE (scienza),
OTHER M (Altro M) VARIED (Varie)
4 JAZZ, COUNTRY WEATHER (Meteo), FINANCE (Finanza),
CHILDREN (Bambini)
5 NATION M, OLDIES SOCIAL (Sociale), RELIGION, PHONE IN
(Telefonate in arrivo)
6 FOLK M Travel (Viaggi), Leisure (Tempo libero), Document
Modalità programmi locali
Alcuni programmi trasmettono vari programmi locali. Per scegliere frequenze alternative
del programma locale desiderato, tenere premuto il tasto AF (11) fino a quando non si sente
un suono, per attivare o disattivare la modalità. Sul display viene visualizzato REG ON/REG OFF.
PTY (Programme-Type/Art)
Dopo aver attivato il menu, premere il tasto PTY (13).
È possibile scegliere le stazioni in base alle seguenti categorie:

MD 80403 Autoradio BDA_ITA.FH11 Fri Jan 28 12:12:53 2005 Seite 11
C M Y CM MY CY CMY K
RDS (Radio Data System)
RDS è un servizio per gli apparecchi radio. Oltre alle trasmissioni musicali e parlate tradizionali,
vengono trasmesse anche informazioni aggiuntive sotto forma di segnali digitali cifrati che
possono essere utilizzati dall'autoradio.
Premere brevemente il tasto AF (11) per attivare o disattivare la modalità RDS. Con lattivazione
della modalità RDS, sul display viene visualizzato il simbolo AF. Adesso alla ricezione di una stazione,
sul display (4) viene visualizzato il nome del programma e altre informazioni.
Queste informazioni dipendono dallemittente radio.
Sono disponibili diversi servizi RDS:
PI: Program Identification Code
Tramite il codice PI la radio può identificare la stazione ricevente.
PS: Program Service Name
La funzione Program Service consente di visualizzare il nome della stazione.
AF: Alternative Frequencies
La radio sceglie automaticamente le migliori frequenze di ricezione alternative
per lo stesso programma.
TP/TA: Traffic-Program/Traffic-Annoucement
EON: Enhanced Other Networks Information
Nel caso di una comunicazione sul traffico, anche nel caso in cui si stia ascoltando
una stazione non relativa al traffico, l'apparecchio passa tramite una catena di
stazioni alla stazione sul traffico.
PTY: Program Type Code
Con Program Type la radio può ricercare le stazioni con programmi su argomenti preselezionabili.
Ad esempio: sport, notizie, rock, pop,...
I 11
I

MD 80403 Autoradio BDA_ITA.FH11 Fri Jan 28 12:12:53 2005 Seite 12
C M Y CM MY CY CMY K
LETTORE CD
Inserimento ed espulsione di CD
Inserire i CD nellapposito vano (25). Inizia la riproduzione del CD.
Sul display viene visualizzato S--CDP (ovvero "ricerca titolo"). Per estrarre il CD premere il tasto
EJECT (26).
La riproduzione si interrompe e il CD viene espulso. L'apparecchio passa alla modalità Radio.
Ignora titoli
Premere il tasto TUNE |<< (22) o il tasto >>| (23) per saltare al titolo successivo.
Il numero del titolo viene visualizzato sul display (4).
Interruzione CD
Durante la riproduzione premere il tasto PAU (14), la riproduzione del CD viene interrotta.
Se si preme di nuovo il tasto PAU (14), riprende la riproduzione del CD.
Avanzamento e riavvolgimento rapido
Durante la riproduzione premere a lungo il tasto TUNE |<< (22) o il tasto >>| (23) per iniziare
l'avanzamento/riavvolgimento rapido.
Riproduzione di tutti i brani
Premere il tasto SCN (15) per ottenere la riproduzione dei primi 10 secondi di ogni titolo.
Se si preme di nuovo il tasto SCN (15), parte la normale riproduzione.
Ripetizione di un titolo
Premere il tasto RPT (16) per riascoltare costantemente lo stesso titolo.
Se si preme di nuovo il tasto RPT (16) si disattiva la funzione.
Riproduzione casuale
Premere il tasto SHF (17) per riprodurre tutti i titoli del CD in ordine casuale.
Nota:
La guida su strade sconnesse potrebbe provocare salti nella riproduzione del CD.
Una breve prova può migliorare le prestazioni.
I salti non danneggiano comunque il CD.
L'elevata umidità dell'aria possono causare malfunzionamenti del lettore CD.
Accendere il riscaldamento del veicolo e fare evaporare l'umidità prima dell'uso.
Non esporre il lettore CD né a temperature estremamente alte né basse.
Non viaggiare con un CD estratto dal vano.
I 12

MD 80403 Autoradio BDA_ITA.FH11 Fri Jan 28 12:12:53 2005 Seite 13
C M Y CM MY CY CMY K
Nota:
La funzione di ricerca varia in base ai CD MP3.
RIPRODUZIONE MP3
La riproduzione inizia automaticamente con l'immissione di un CD-ROM/MP3. Per le funzioni dei tasti,
vedere il capitolo sul lettore CD.
E possibile scegliere direttamente i titoli o gli interpreti. Verificare che le funzioni MP3 dipendano in
gran parte dalla creazione di CD MP3.
Ricerca dei titoli (numeri)
Premere una volta il tasto AMS/D-AUD (21). Sul display viene visualizzato MP3T ..... .
Immettere i numeri dei titoli desiderati con i tasti indicati nella tabella.
Confermare con il tasto BND/LOU/ENT (6) o attendere circa 5 secondi fino a quando
sull'apparecchio passa al titolo selezionato.
Ricerca degli interpreti
Premere due volte il tasto AMS/D-AUD (21). Sul display viene visualizzato un testo
lampeggiante..... .
Immettere il nome dell'interprete desiderato con i tasti indicati nella tabella. Dopo ogni
lettera è necessario premere il tasto SEL (2) per poter immettere la lettera successiva
(distinzione caratteri)
Confermare con il tasto BND/LOU/ENT (6).
L'apparecchio cerca quindi il titolo corrispondente.
Premere ancora una volta il tasto BND/LOU/ENT (6) quando l'apparecchio ha trovato
l'interprete desiderato. Viene quindi riprodotto il titolo.
File WMA
Nellautoradio è possibile riprodurre anche file WMA. Il funzionamento è lo stesso dei file MP3.
I 13
I

MD 80403 Autoradio BDA_ITA.FH11 Fri Jan 28 12:12:53 2005 Seite 14
C M Y CM MY CY CMY K
I 14
FUNZIONE ID3-TAG
Durante la creazione di un CD MP3 è possibile memorizzare anche informazioni aggiuntive. Possono
essere informazioni sull'interprete, il titolo, il nome dell'album, l'anno di pubblicazione del pezzo musicale,
nonché un breve commento. Per l'inserimento consigliamo Tag Editor ID3.
A richiesta, queste informazioni possono essere visualizzate sul display durante la riproduzione.
Durante la riproduzione di un CD MP3 è quindi possibile visualizzare oltre al numero del titolo, anche
il nome del titolo e dell'interprete (a seconda delle informazioni memorizzate sul CD MP3).
Per questa richiesta selezionare il tasto DSP/0 (5). Ogni volta che si preme il tasto ID3-Tag viene
visualizzata una sequenza della riproduzione attuale:
TITOLO - INTERPRETE - NOME ALBUM - ANNO DI PUBBLICAZIONE - COMMENTO
AMS/D-AUD (21) scelta impostazione
BND/LOU/ENT (6) Conferma
1 (14) A, B, C, 1
2 (15) D, E, F, 2
3 (16) G, H, I, 3
4 (17) J, K, L, 4
5 (18) M, N, O, 5 / 10 Brano precedente
6 (19) P, Q, R, 6 / 10 Brano successivo
MODE (20) S, T, U, 7
|<< (22) V, W, X, 8
>>| (23) Y, Z, spazio vuoto, 9
SEL (2) Distinzione caratteri verso destra
DSP/0 (5) 0,_, -, +,
(5) (6) Funzione di scorrimento A-Z / 0-9
Tabella dei tasti
Nota:
Durante la creazione di CD-ROM/MP3 verificare se i titoli sono singoli o se fanno parte di
un indice. Non mescolare mai i titoli e gli indici, si potrebbero verificare problemi di riproduzione.
È possibile riprodurre tutte le codificazioni attuali.

MD 80403 Autoradio BDA_ITA.FH11 Fri Jan 28 12:12:53 2005 Seite 15
C M Y CM MY CY CMY K
I 15
RIPRODUZIONE DATI USB
È possibile collegare il collegamento USB sul lato anteriore dellapparecchio a un lettore MP3 o a un
altro driver per dati USB.
La vostra autoradio supporta unità di trasmissione dati USB fino a 1 Gb.
La struttura delle directory è in grado di contenere fino a 1024 cartelle, 4096 file e 8 livelli di profondità.
Dopo il collegamento con lapparecchio esterno, lautoradio cerca file MP3 o WMA e sul display (4) è
visualizzato il messaggio USB. Lutilizzo per la riproduzione di file su un driver esterno, ma anceh la
funzione di ricerca è esattamente lo stesso dei CD MP3.
Funzione registrazione
Con lautoradio è possibile registrare anche dati dalla radio e da lettori CD su driver USB esterni.
Per iniziare la registrazione premere nella modalità corrispondente il tasto TA/REC (12). I dati audio
vengono memorizzati in formato WMA sul driver USB. Durante la registrazione sul display viene
visualizzata la scritta FILE NAME.
Per terminare la registrazione premere nuovamente il tasto Taste TA/REC (12).
È possibile riprodurre nuovamente i dati attivando con il tasto MOD E (20) la modalità USB e richiamare
i singoli titoli dal driver USB.
I

MD 80403 Autoradio BDA_ITA.FH11 Fri Jan 28 12:12:53 2005 Seite 16
C M Y CM MY CY CMY K
RICERCA ERRORI
L'apparecchio non si
accende.
Non è possibile caricare o
espellere il
CD.
Nessun audio
a toni
funziona.
Il CD salta.
La radio non funziona.
La selezione automatica
delle stazioni non funziona.
La memorizzazione delle
stazioni non funziona.
Il dispositivo di accensione
non si accende.
Il dispositivo di protezione è difettoso.
C'è già un CD
nell'apparecchio.
Il CD è stato inserito
al contrario.
Il CD è molto sporco o
difettoso.
La temperatura in auto è
troppo elevata.
Condensa.
Volume al minimo.
I cavi non sono collegati
correttamente.
Il microcomputer incorporato
non può funzionare a
causa del fruscio.
Il frontalino di comando
non è posizionato correttamente.
L'inclinazione di installazione
supera i 30°.
Il CD è molto sporco o
difettoso.
Errore durante la registrazione
del CD
Il cavo dell'antenna non è collegato.
I segnali di trasmissione sono troppo
deboli.
Il cavo rosa non è collegato
al più permanente.
Girare la chiave per
attivare l'accensione.
Cambiare le protezioni.
Rimuovere il CD dal lettore
immettere un nuovo CD.
Immettere sempre i CD con la
scritta verso l'alto.
Pulire il CD e provare a
riprodurne un altro.
Ridurre la temperatura, fino a
quando la temperatura
dell'ambiente è di nuovo
normale.
Tenere spento l'apparecchio
per alcune ore
e riprovare
di nuovo.
Impostare il volume
al livello desiderato.
Collegamenti cavo
collegamento dei cavi.
Premere il tasto RESET.
Verificare che il frontalino
di comando sia posizionato
correttamente e saldamente.
Riportare l'inclinazione di
installazione al di sotto di 30°.
Pulire il CD e provare a
riprodurne un altro.
Provare il CD in un altro
apparecchio.
Collegare saldamente il
cavo dell'antenna.
Scegliere manualmente
la stazione.
Collegamenti cavo
collegamento dei cavi.
Problema Causa Aiuto
I 16

MD 80403 Autoradio BDA_ITA.FH11 Fri Jan 28 12:12:53 2005 Seite 17
C M Y CM MY CY CMY K
Lettore CD
Utilizzare esclusivamente CD che presentano la seguente dicitura:
Classe laser 1
Soggetto a modifiche tecniche senza preavviso!
COMPACT
DIGITAL AUDIO
SPECIFICHE TECNICHE
In generale
Tensione di funzionamento: 12 V CC, collegamento massa negativo
Misure telaio: 178 x 155 x 50 mm (LxPxA)
Prestazioni: Uscita audio massima 4 x 20 W R.M.S.
Fusibile: 0,5 Ampere (rosso), 15 Ampere (rosa)
Lettore CD/MP3
MPEG Rate 64-320 K
Frequenzbereich 20Hz~20kHz
MP3 Playback ISO 9660 & Joliet format of MP3
Radio
Per 3 bande di frequenza
FM
Frequenza da 87.5 a 108 MHz
IF 10.7MHz
Sensibilità 3µV
(Intervallo di rumore = 30 dB)
Separazione stereo > 30dBu
OM
Frequenza da 522 a 1620 MHz
IF 45kHz
(Intervallo di rumore = 30 dB)
Separazione stereo 32 dBu
OL
Frequenza da 144 a 288 MHz
IF 450kHz
Sensibilità
(Intervallo di rumore = 30 dB) 35dBu
I 17
I

MD 80403 Autoradio BDA_nld.FH11 Fri Jan 28 12:12:25 2005 Seite 2
C M Y CM MY CY CMY K
NL 2
FUNKTIONEN
1. OPEN: Openen van het bedieningspaneel
2. SEL: De afzonderlijke functies oproepen
3. MULTI-JOG: Instelling voor geluidsvolume, bas, hoge tonen, balans en fader
4. DISPLAY:
5. DSP/0: Aanvragen voor programma-, tijd-, frequentie- en
PTY-instelling/nummertoets 0.
6. BND/LOU/ENT: Keuze frequentie/Loudness/Bevestigen
7. EQ: Equalizer
8. POWER/DIM: Aan/uit-schakelaar, displayverlichting dimmen
9. USB: USB-aansluiting voor externe gegevensdrager
10. RESET: Fabrieksinstellingen herstellen
11. AF: Inschakelen van de modus RDS
12. TA/REC: Traffic Announcement Identification /
verkeersinformatie herkennen / opname starten
13. PTY: Program Type Code
14. 19.: Stationskeuzetoetsen
14. PAU: Pauze in de CD/MP3-werking / nummertoets 1
15. SCN: Scannen, titels 10 sec. afspelen bij CD/MP3-functie / nummertoets 2
16. RPT: Repeat, herhalen bij CD/MP3-functie / nummertoets 3
17. SHF: S
huffle, willekeurige afspeelvolgorde bij CD/MP3-functie/nummertoets 4
18. Nummertoets 5
19. Nummertoets 6
20. MODE: Overschakelen radio/CD/MP3/nummertoets 7
21. AMS/D-AUD Automatisch zendergeheugen / MP3's zoeken
22. -<< : Tune/Zoeken van zenders terug/nummertoets 8
23. +>>: Tune/Zoeken van zenders vooruit/nummertoets 9
24. Rode verlichtingsdiode (LED voor diefstalbeveiliging)
25. CD-vak Voor het inschuiven van de CD
26. EJECT: CD uitwerpen

MD 80403 Autoradio BDA_nld.FH11 Fri Jan 28 12:12:25 2005 Seite 3
C M Y CM MY CY CMY K
SICHERHEITSHINWEIS
Plaats het apparaat in de daarvoor geschikte slede of kies een plaats voor het monteren van het
apparaat die de bestuurder bij het rijden niet hindert.
Sluit de kabels even tijdelijk aan voordat u het apparaat definitief inbouwt. Controleer of deze goed
zijn ingebouwd en of het systeem goed werkt.
Neem contact op met een garage of inbouwbedrijf als er wijzigingen aan de wagen noodzakelijk zijn.
Bouw het apparaat zo in dat<Char CRLF>er bij hard remmen geen letsel kan optreden.
Als het apparaat onder een hoek van meer dan 30° ten opzichte van horizontaal wordt ingebouwd
kan dit de optimale werking beïnvloeden.
Bouw het apparaat niet in op een plaats waar hoge temperaturen (bv. direct zonlicht of verwarmingslucht),
stof, vuil of teveel schokken optreden.
30°
NL 3
NL

MD 80403 Autoradio BDA_nld.FH11 Fri Jan 28 12:12:25 2005 Seite 4
C M Y CM MY CY CMY K
INHOUDSOPGAVE
VOOR INGEBRUIKNEMING.................................................................................................................5
MONTAGE.............................................................................................................................................5
INBOUW VAN DE RADIO IN DE ISO-SLEDE VAN UW WAGEN........................................................5
Afnemen en aanbrengen van het bedieningspaneel ..........................................................................6
ISO-ADAPTERSTEKKER.....................................................................................................................6
Antennerelaiskabel .............................................................................................................................6
Stereo tulpuitgang...............................................................................................................................6
KABELVERBINDINGEN .......................................................................................................................7
BASISBEDIENING................................................................................................................................8
In-/uitschakelen...................................................................................................................................8
Volume................................................................................................................................................8
Bas.........8
Hoge tonen .........................................................................................................................................8
Balans.................................................................................................................................................8
Fader ..................................................................................................................................................8
Loudness ............................................................................................................................................8
Display................................................................................................................................................8
Modus.................................................................................................................................................8
Equalizer.............................................................................................................................................8
Reset ...................................................................................................................................................8
RADIO ...................................................................................................................................................9
Golflengte instellen .............................................................................................................................9
Zenders kiezen ...................................................................................................................................9
Voorgeprogrammeerde zenders.........................................................................................................9
Zenders opslaan .................................................................................................................................9
Zenders terugvinden...........................................................................................................................9
Automatisch opslaan (AMS) ...............................................................................................................9
Voorprogrammering doorlopen...........................................................................................................9
Modus voor regionaal programma....................................................................................................10
PTY (Programmatype/-soort) ...........................................................................................................10
TA Verkeersinformatie ......................................................................................................................10
EON TA lokale modus.......................................................................................................................10
EON DX-modus................................................................................................................................10
RDS (Radio Data System)................................................................................................................11
CD-SPELER ........................................................................................................................................12
CD's plaatsen en verwijderen ...........................................................................................................12
Titels overslaan.................................................................................................................................12
CD onderbreken ...............................................................................................................................12
Vooruit/achteruit afspelen .................................................................................................................12
Alle titels afspelen.............................................................................................................................12
Een titel herhalen..............................................................................................................................12
Willekeurige weergave .....................................................................................................................12
MP3-WEERGAVE ...............................................................................................................................13
Zoeken op titels (nummers)..............................................................................................................13
Zoeken op artiesten..........................................................................................................................13
WMA-bestanden afspelen ...............................................................................................................13
Toetsen afspeellijst ...........................................................................................................................14
ID3-TAG-FUNCTIE..............................................................................................................................14
GEGEVENS VIA USB AFSPELEN .....................................................................................................15
Opnamefunctie .................................................................................................................................15
PROBLEMEN OPLOSSEN.................................................................................................................16
TECHNISCHE GEGEVENS ................................................................................................................17
NL 4

MD 80403 Autoradio BDA_nld.FH11 Fri Jan 28 12:12:25 2005 Seite 5
C M Y CM MY CY CMY K
LET OP!
Gebruik bij het inbouwen de ISO-aansluitingen van de autoradio om de autoradio aan te
sluiten. Een passende ISO-adapterstekker (auto-contrastekker) is, afhankelijk
van het type wagen, verkrijgbaar bij de vakhandel.
Als u de adapterbus van het snoer knipt of de kabel doorsnijdt vervalt uw garantie!
MONTAGE
Deze autoradio kan heel eenvoudig in elke standaard ISO-radioslede worden ingebouwd.
Neem contact op met uw vakgarage als de wagen niet over een standaard ISO-radioslede
beschikt.
Inbouw van de radio in de ISO-slede van uw wagen.
Trek het inbouwframe van het radio.
Plaats het inbouwframe in de radioslede van het instrumentenpaneel van uw wagen.
Buig de lippen in het inbouwframe met een schroevendraaier om zodat het stevig in de wagen
vastzit.
Controleren of het frame goed vastzit.
Verbind het ISO-aansluitingenblok met de
ISO-stekker van uw wagen. Sluit de antennekabel
van de wagen aan op de antennestekker van de
autoradio. Schuif de radio voorzichtig in het
inbouwframe. Let op dat er daarbij geen kabels
klem komen te zitten. Druk op de RESET-toets (10)
met een balpen of een vergelijkbaar puntig voorwerp.
Plaats het bedieningspaneel.
VOOR INGEBRUIKNEMING
Verwijder voor het monteren de beide transportbeveiligingsschroeven
in het bovendeel van het huis van de radio (aangegeven met rode
markering)!
Transportbeveiliging
NL 5
NL

MD 80403 Autoradio BDA_nld.FH11 Fri Jan 28 12:12:25 2005 Seite 6
C M Y CM MY CY CMY K
AFNEMEN EN AANBRENGEN VAN HET BEDIENINGSPANEEL
Druk op de toets OPEN (1) en verwijder het bedieningspaneel. Bewaar het bedieningspaneel
ter bescherming altijd in het daarvoor bestemde transportetui.
Als het bedieningspaneel is verwijderd, knippert er een rode
lichtdiode (24).
Zet het bedieningspaneel voor het inbouwen eerst met de rechterkant in het frame. Druk dan
linker kant aan tot hij inklikt. Controleer of het bedieningspaneel goed en vast op zijn plaats zit.
Als het bedieningspaneel niet correct is ingebouwd, wordt op het display onjuiste informatie
weergegeven en/ow werken enkele toetsen niet naar behoren.
ISO-adapterstekker
Voorzichtig!
Gebruik de ISO adapterstekker van de autoradio om een betrouwbare elektrische verbinding te
maken.
Belangrijk!
Let op dat de roze backup-kabel moet zijn verbonden met een constante plus-aansluiting (voor de
voorkeurszenders). Druk, nadat alle verbindingen aangesloten zijn, op de RESET-toets (10).
Antennerelaiskabel
De gele kabel is bedoeld voor een relaisgestuurde antenne.
Het relais zal de antenne automatisch uitschuiven als het apparaat wordt ingeschakeld en bij het
uitschakelen schuift de antenne weer in.
Let op:
Verbind de gele kabel niet met de motorkabel omdat daardoor schade aan het apparaat kan worden
veroorzaakt .
Stereo tulpuitgang
Op deze aansluitingen (rode en witte tulp) kan externe apparatuur (biijvoorbeeld een versterker) worden
aangesloten.
NL 6
Frontje

MD 80403 Autoradio BDA_nld.FH11 Fri Jan 28 12:12:25 2005 Seite 7
C M Y CM MY CY CMY K
voor systeem met twee luidsprekers (Dual)
KABELVERBINDINGEN
voor systeem met vier luidsprekers (Quadro)
Antenneaansluiting
Contactslot-
schakelaar (B+)
rood
Rose
zwart
Geel
blauw/zwart
Blauw
groen/zwart
Groen
Geheugen
Back-up
Aarde
(B-)(massa)
Stroom-
antenne
Luidspreker
linksvoor
Luidspreker
linksachter
wit/zwart
Wit
grijs/zwart
grijs
Luidspreker
rechtsachter
links wit
rechts rood
ACHTERZIJDE AUTORADIO
RCA kabel
Belangrijk!
Back-upgeheugen
moet zijn aangesloten
op constante plus
voor zendergeheugen.
Luidspreker
rechtsvoor
Antenneaansluiting
Contactslot-
schakelaar (B+)
rood
Rose
zwart
Geel
blauw/zwart
Groen
Geheugen
Back-up
Aarde
(B-)(massa)
Stroom-
antenne
Linker-
luidspreker
wit/zwart
grijs
Rechter-
luidspreker
links wit
rechts rood
ACHTERZIJDE AUTORADIO
BELANGRIJK!
Back-up voor opslag
moet zijn aangesloten
op constante plus
voor zendergeheugen.
RCA kabel
NL 7
NL

MD 80403 Autoradio BDA_nld.FH11 Fri Jan 28 12:12:25 2005 Seite 8
C M Y CM MY CY CMY K
GRUNDBEDIENUNG
In-/uitschakelen
Druk op de POWER/DIM-toets (8) voor het in- en uitschakelen van het toestel.
Geluidsniveau
Selecteer de functie VOLUME door op de toets SEL (2) te drukken en draai aan de multi-jog-regelaar
(3) om het volume in te stellen op de gewenste waarde. Stel het volume zodanig in dat u de
geluidssignalen van voorbijkomende reddings-, brandweer- of politieauto's nog kunt horen!
Bas
Druk eenmaal op de toets SEL (2) om de bas in te stellen. U kunt de bas verhogen of verlagen door
aan de multi-jog-regelaar (3) te draaien.
Hoge tonen
Druk tweemaal op de toets SEL (2) om de hoge tonen in te stellen. U kunt de hoge tonen verhogen
of verlagen door aan de multi-jog-regelaar (3) te draaien.
Balans
Druk driemaal op de toets SEL (2) om de balans in te stellen. U kunt de balans tussen de rechter-
en linkerluidspreker instellen door aan de multi-jog-regelaar (3) te draaien.
Fader
Druk vuermaal op de toets SEL (2) om de fader in te stellen. U kunt de fader van de voorste en
achterste luidspreker instellen door aan de multi-jog-regelaar (3) te draaien.
Loudness
Houd de toets BND/LOU/ENT (6) ingedrukt totdat een waarschuwingstoon klinkt. Op het display
wordt LOUD ON resp. LOUD OFF weergegeven. Hiermee kunt u de lage frequenties versterken bij
een laag volume.
Display
Met behulp van de toets DSP/0 (5) kunt u de volgende informatie opvragen:
Zendernaam
Frequentie
Tijd (wordt bij RDS-ontvangst automatisch ingesteld)
PTY-instellingen
(De kwaliteit en omvang van deze RDS-functies varieert per zendstation. Nadere informatie kunt u
vinden in het hoofdstuk RADIO onder RDS).
Modus
Met de toets MODE (20) kunt u omschakelen tussen radio-ontvangst en CD-weergave, resp.
USB-aansluiting.
Equalizer
Druk op de toets EQ (7) om achtereenvolgens de onderstaande geluidsinstellingen te kiezen:
FLAT CLASSICS POP M ROCK M DSP OFF
Reset
Druk met behulp van een balpen op de toets RESET (10) om de fabrieksinstellingen te herstellen
op uw toestel. Deze toets bevindt zich achter het bedieningspaneel!
Gebruik de toets RESET in de volgende gevallen:
bij de eerste ingebruikneming, nadat u de kabels hebt aangesloten
als niet alle functietoetsen werken
als een foutbericht wordt weergegeven op het display.
NL 8

MD 80403 Autoradio BDA_nld.FH11 Fri Jan 28 12:12:25 2005 Seite 9
C M Y CM MY CY CMY K
RADIO
Golflengte instellen
Druk op de toets BND/LOU/ENT (6) om te schakelen tussen FM (F1, F2, F3), middengolf (MW) en
lange golf (LW). Op elke golflengte kunnen zes zenders worden opgeslagen.
Zenders kiezen
Druk druk op de toetsen voor het zoeken van zenders (toetsen TUNE) I<< (22) of de toets >>I (23).
Het apparaat zoekt nu automatisch naar de volgende zender. Als u een van de toetsen TUNE twee
seconden lang ingedrukt houdt, schakelt u over op handmatig zoeken naar zenders. Op het display
wordt nu MANUAL weergegeven. U kunt nu met de toets TUNE de zender selecteren en opslaan.
Het apparaat schakelt na een korte wachttijd weer over naar de functie voor het automatisch zoeken
van zenders.
Voorgeprogrammeerde zenders
In elk frequentiegebied kunt u zes zenders vastleggen en weer oproepen via de zendertoetsen 1-6
(14-19).
Zenders opslaan
1. Selecteer het frequentiegebied met de toets BND/LOU/ENT (6).
2. Selecteer een zender met de toets TUNE I<< (22) of met de toets I>> (23).
3. Houd een van de zendertoetsen 1-6 (14-19) ongeveer 3 seconden lang ingedrukt. Een
waarschuwingstoon geeft aan dat de zender is opgeslagen.
Zenders terugvinden
1. Selecteer het frequentiegebied met de toets BND/LOU/ENT (6).
2. Druk op de zendertoets (14-19) om de voorgeprogrammeerde zender op te roepen.
Automatisch opslaan (AMS)
Houd de toets AMS/D-AUD (21) ingedrukt totdat een waarschuwingstoon klinkt. Op het display wordt
nu SEARCH weergegeven.
Het zoeken stopt nu ongeveer 5 seconden bij elke gevonden zender. Het op het display knipperende
getal geeft het nummer van de zendertoetsen aan waaronder de desbetreffende zender wordt
opgeslagen.
Bij zwakke zenders wordt automatisch verder gezocht.
Voorprogrammering doorlopen
Hiermee kunt u de binnen het frequentiegebied opgeslagen zenders automatisch afzoeken.
1. Selecteer het frequentiegebied met de toets BND/LOU/ENT (6).
2. Druk kort op de toets AMS/D-AUD (21). Alle zenders worden nu kort geselecteerd.
Druk, zodra u de gezochte zender bereikt, kort op de toets AMS/D-AUD (21).
NL 9
NL

MD 80403 Autoradio BDA_nld.FH11 Fri Jan 28 12:12:25 2005 Seite 10
C M Y CM MY CY CMY K
NL 10
(Deze informatie is afhankelijk van het zendstation.)
TA Verkeersinformatie
Houd de toets TA/RECT (12) kort ingedrukt om de TA-modus in of uit te schakelen.
Als de TA-modus is ingeschakeld en er wordt verkeersinformatie uitgezonden terwijl de CD- of
USB-modus is ingesteld, wordt automatisch overgeschakeld naar de radio. Af en toe wordt
overgeschakeld naar het EON-verbindingsstation as EON verkeersinformatie vindt op een andere
zender. Als het geluidsniveau te laag is, wordt dit verhoogd. De TA-functie van de actuele
verkeerinformatie kan worden onderbroken door op de toets TA/REC (12) te drukken. De TA-modus
wordt hierdoor niet uitgeschakeld. Als gedurende langere tijd op de toets TA/REC (12) wordt gedrukt,
wordt de modus EON TA LOCAL/EON TA DISTANCE geselecteerd. Met deze modus kan EON TA-
informatie worden weergegeven. Als u bijvoorbeeld naar een muziekzender luistert, terwijl op een
andere frequentie verkeersinformatie wordt uitgezonden, schakelt het apparaat automatisch over
naar deze verkeersinformatie. Zodra de melding is afgelopen, schakelt het apparaat terug naar de
oorspronkelijke zender.
EON TA lokale modus
Als de modus EON TA LOCAL is geselecteerd, knippert enkele seconden lang de aanduiding EON
TA LO op het display. De modus voor het lokale gebied is geselecteerd.
EON DX modus
Als de modus EON DX is geselecteerd, knippert enkele seconden lang de aanduiding EON TA DX
op het display. De modus voor het verder verwijderde gebied is geselecteerd.
MUZIEK TAAL
1 POP M, ROCK M NEWS (Nieuws), AFFAIRS
(Actualiteiten), INFO (Infos)
2 EASY M, LIGHT M SPORT, EDUCATE (Educatie), DRAMA
3 CLASSICS (Klassiek), CULTURE (Cultuur), SCIENCE (Wetenschap),
OTHER M (Andere M) VARIED (Gevarieerd)
4 JAZZ, COUNTRY WEATHER (Weer), FINANCE (Financiën),
CHILDREN (Kinderen)
5 NATION M, OLDIES SOCIAL (Sociaal), RELIGION, PHONE IN
(Telefooningang)
6 FOLK M Travel (Reizen), Leisure (Vrije tijd), Document
(Documenten)
Modus voor regionaal programma
Sommige zenders zenden verschillende regionale programma's uit. Houd, als u alleen deze alternatieve
frequenties van het gewenste regionale programma wilt kiezen, de AF-toets (11) iets langer
ingedrukt tot een waarschuwingstoon klinkt. Hiermee wordt de modus in- of uitgeschakeld.
Op het display wordt REG ON/REG OFF weergegeven.
PTY (Programmatype/-soort)
Om het PTY-menu te activeren, drukt u op de toets PTY (13).
U kunt nu volgens de onderstaande categorieën uw zenders kiezen:

MD 80403 Autoradio BDA_nld.FH11 Fri Jan 28 12:12:25 2005 Seite 11
C M Y CM MY CY CMY K
RDS (Radio Data System)
RDS is een service van de radio-omroepen. Naast de gebruikelijke muzikale en gesproken bijdragen
wordt extra informatie uitgezonden in de vorm van gecodeerde digitale signalen die door de autoradio
kunnen worden gedecodeerd.
Druk kort op de toets AF (11) om de RDS-modus in of uit te schakelen. Bij het inschakelen van de
RDS-modus wordt op het beeldscherm het symbool AF weergegeven. Nu worden bij de ontvangst
van een zender de programmanaam en andere informatie op het display (4) weergegeven.
Deze informatie is afhankelijk van het zendstation.
Er worden verschillende RDS-services aangeboden:
PI: Program Identification Code
Met behulp van de PI-code kan de radio de ontvangen zender identificeren.
PS: Program Service Name
Met de functie Program Service kan de naam van de zender worden weergegeven.
AF: Alternatieve frequenties
De radio kiest automatisch de beste te ontvangen alternatieve frequentie van hetzelfde
programma.
TP/TA: Traffic-Program/Traffic-Annoucement
EON: Enhanced Other Networks Information
Bij uitgezonden verkeersinformatie wordt ook bij het luisteren naar een andere zender binnen
een keten van zenders overgeschakeld naar de zender met verkeersinformatie.
PTY: Program Type Code
Met Program Type kan de radio zoeken naar zenders met een vooraf instelbare inhoud,
bijvoorbeeld sport, nieuws, rock, pop, enzovoort.
NL 11
NL

MD 80403 Autoradio BDA_nld.FH11 Fri Jan 28 12:12:25 2005 Seite 12
C M Y CM MY CY CMY K
CD-PLAYER
CD's plaatsen en verwijderen
Plaats de CD door deze in de sleuf (25) te schuiven. Het afspelen van de CD begint.
Op het display wordt S--CDP ("Titel zoeken") weergegeven. U kunt de CD verwijderen door op de toets
EJECT (26) te drukken.
De weergave wordt afgebroken en de CD wordt uitgeworpen. De autoradio schakelt over op de radiomodus.
Titels overslaan
Druk op toets TUNE |<< (22) of toets >>| (23) om naar de volgende titel te springen.
Het titelnummer wordt op het display (4) weergegeven.
CD onderbreken
Druk tijdens het afspelen op de toets PAU (14) om de CD-weergave te onderbreken. Druk nogmaals op
de toets PAU (14) om het afspelen van de CD te hervatten.
Snel vooruit en achteruit afspelen
Houd de toets TUNE |<< (22) of de toets >>| (23) langere tijd ingedrukt om het snel vooruit en achteruit
afspelen te starten.
Alle titels afspelen
Druk op de toets SCN (15) om de eerste 10 seconden van elke titel af te spelen. Druk nogmaals op de
toets SCN (15) om normaal afspelen te hervatten.
Een titel herhalen
Druk op de toets RPT (16) om steeds dezelfde titel af te spelen. Druk nogmaals op de toets RPT (16) om
deze functie uit te schakelen.
Willekeurig afspelen
Druk op de toets SHF (17) om alle titels op de CD in willekeurige volgorde af te spelen.
Aanwijzing:
Als u over hobbelige wegen rijdt, kan dit ertoe leiden dat de CD overslaat. Een korte inspeeltijd zal
tot betere prestaties leiden. Het overslaan heeft geen negatieve gevolgen voor de CD.
Vocht en een hoge luchtvochtigheid kunnen tot storingen in de CD-speler leiden.
Schakel de verwarming van de wagen in en laat het vocht vóór gebruik van het apparaat verdampen.
Stel de CD-speler niet bloot aan extreem hoge of lage temperaturen.
Laat tijdens het rijden geen CD uitsteken uit de sleuf..
NL 12

MD 80403 Autoradio BDA_nld.FH11 Fri Jan 28 12:12:25 2005 Seite 13
C M Y CM MY CY CMY K
Aanwijzing:
De zoekfunctie is afhankelijk van de geproduceerde MP3-CD
MP3-WEERGAVE
Het afspelen start automatisch bij het inleggen van een MP3-CD-ROM. De toetsfuncties staan vermeld
in het hoofdstuk CD-speler.U kunt de titel en de artiest rechtstreeks kiezen. De MP3-specifieke functies
zijn grotendeels afhankelijk van de productiewijze van de MP3-CD.
Zoeken op titels (nummers)
Druk eenmaal op de toets AMS/D-AUD (21). Op het display wordt nu MP3T weergegeven. Voer met
de in de tabel aangegeven toetsen de nummers van de gewenste titels in.
Bevestig de invoer met de toets BND/LOU/ENT (6) of wacht ongeveer vijf seconden tot het apparaat
automatisch naar de geselecteerde titel springt.
Zoeken op artiesten
Druk tweemaal op de toets AMS/D-AUD (21). Op het display verschijnt nu een knipperende ....... .
Voer met de in de tabel aangegeven toetsen de namen van de gewenste artiest in. Na elke letter
moet op de toets SEL (2) worden gedrukt zodat de volgende letter kan worden ingevoerd (opschuiven
van tekens).
Bevestig de invoer met de toets BND/LOU/ENT (6).
Het apparaat zoek nu de bijbehorende titel.
Druk nogmaals op de toets BND/LOU/ENT (6) als het apparaat de gewenste artiest heeft gevonden.
De titel wordt nu afgespeeld.
WMA-bestanden
U kunt op uw autoradio ook WMA-bestanden afspelen. De bediening werkt op exact dezelfde wijze
als bij MP3-bestanden.
.
NL 13
NL

MD 80403 Autoradio BDA_nld.FH11 Fri Jan 28 12:12:25 2005 Seite 14
C M Y CM MY CY CMY K
NL 14
ID3-TAG-FUNCTIE
Bij het maken van een MP3-CD kunt u extra informatie opslaan. Dit kunnen gegevens over de artiest,
de titel, de naam van het album en het jaar van uitbrengen van het muziekstuk zijn. Ook kunt u een
korte opmerking toevoegen. Voor de invoer kan het beste een ID3-tag-editor worden gebruikt.
Deze informatie wordt na het opvragen tijdens het afspelen weergegeven op he display. Bij het afspelen
van MP3-CD's kunnen zo, behalve het titelnummer ook de titelnaam of de artiest worden weergegeven
(afhankelijk van de informatie die is opgeslagen op de MP3-CD).
U kunt de informatie opvragen door op de toets DSP/0 (5) te drukken. Telkens wanneer u op deze toets
drukt, wordt een andere ID3-tag weergegeven:
TITEL - ARTIEST - ALBUMNAAM - JAAR VAN UITBRENGEN - COMMENTAAR
AMS/D-AUD (21) Instelling selecteren
BND/LOU/ENT (6) Bevestigen
1 (14) A, B, C, 1
2 (15) D, E, F, 2
3 (16) G, H, I, 3
4 (17) J, K, L, 4
5 (18) M, N, O, 5 / 10 Volgende track
6 (19) P, Q, R, 6 / 10 Vorige track
MODE (20) S, T, U, 7
|<< (22) V, W, X, 8
>>| (23) Y, Z, Lege positie, 9
SEL (2) Tekens naar rechts verschuiven
DSP/0 (5) 0,_, -, +,
(5) (6) Bladerfunctie A-Z / 0-9
Toetsen tabel
Aanwijzing:
Let er bij het maken van een MP3-CD-ROM op dat de titels apart staan of in lijsten staan. Meng nooit titel en lijsten,
dat veroorzaakt mogelijk problemen bij het afspelen. Alle gangbare coderingen kunnen worden afgespeeld.

MD 80403 Autoradio BDA_nld.FH11 Fri Jan 28 12:12:25 2005 Seite 15
C M Y CM MY CY CMY K
NL 15
GEGEVENS VIA USB AFSPELEN
U kunt op de USB-aansluiting aan de voorzijde van het apparaat een MP3-speler of een andere USB-
gegevensdrager aansluiten.
Uw autoradio kan USB-gegevensdrages tot 1GB verwerken.
Daarbij mag de mappenstructuur maximaal acht niveaus diep zijn en 1024 mappen en 4096 bestanden
omvatten.
Zodra het externe apparaat is aangesloten, zoekt de autoradio naar MP3- of WMA-bestanden op de
gegevensdrager en wordt op het display (4) de aanduiding USB weergegeven. De bediening bij het
afspelen van bestanden op de externe gegevensdrager alsmede de zoekfunctie werken op exact
dezelfde wijze als bij MP3-CD's.
Opnamefunctie
U kunt met uw autoradio ook gegevens van radio en CD-speler opnemen op de externe USB-
gegevensdrager.
U kunt het opnemen starten door in de desbetreffende modus op de toets TA/REC (12) te drukken.
De audiogegevens worden nu in WMA-indeling op de USB-gegevensdrager opgeslagen. Tijdens de
opname wordt op het display de aanduiding FILE NAME weergegeven.
U kunt het opnemen beëindigen door nogmaals kort op toets TA/REC (12) te drukken.
U kunt de gegevens weer afspelen door met de toets MOD E (20) naar de USB-modus over te schakelen
om de afzonderlijke titels op de USB-gegevensdrager op te vragen.
NL

MD 80403 Autoradio BDA_nld.FH11 Fri Jan 28 12:12:25 2005 Seite 16
C M Y CM MY CY CMY K
FOUTOPSPORING
Het apparaat kan niet worden
ingeschakeld.
De CD kan niet geladen of
uitgeworpen worden.
Geen geluid
Functietoetsen functioneren niet.
CD springt over.
Radio werkt niet.
Automatische zenderkeuze
werkt niet.
Zendergeheugen werkt niet.
Het contact staat niet aan.
De zekering is defect
Er zit al een CD in het apparaat.
De CD is verkeerd om geplaatst
De CD is erg vuil of defect
De temperatuur in de auto is te
hoog.
Condensvorming.
Geluidsvolume staat op zacht.
Kabels zijn niet goed aangesloten
De ingebouwde microcomputer
werkt niet vanwege ruis.
Het bedieningspaneel zit niet
goed.
De inbouwhoek is groter dan
30°.
De CD is erg vuil of defect
Fouten bij zelfgebrande CD's
De antennekabel is niet
aangesloten
De zendersignalen zijn te zwak.
De rose kabel is niet
goed aangesloten op de
constante plus.
Contact aanzetten door
contactsleutel om te draaien.
Zekering vervangen.
CD uit de speler verwijderen en
vervolgens een nieuwe CD plaatsen.
CD altijd met de tekst naar boven
plaatsen.
CD schoonmaken of een andere
CD proberen af te spelen.
Afkoelen
totdat de
omgevingstemperatuur
weer normaal is.
Het apparaat een paar uur
uitgeschakeld laten en het
daarna opnieuw proberen.
Volume instellen op de gewenste
waarde.
Kabelverbindingen controleren.
Op de toets RESET drukken.
Controleren of het
bedieningspaneel goed en vast
op zijn plaats zit
Inbouwhoek instellen op minder
dan 30°
CD schoonmaken of een
andere CD proberen af te spelen
CD controleren in een andere
speler.
Antennekabel goed vastmaken
Zender handmatig instellen.
Kabelverbindingen controleren.
Probleem Oorzaak Verhelpen van storingen
NL 16

MD 80403 Autoradio BDA_nld.FH11 Fri Jan 28 12:12:25 2005 Seite 17
C M Y CM MY CY CMY K
CD-speler
Gebruik uitsluitend CD's die aan de volgende specificaties voldoen:
Laserklasse 1
Technische wijzigingen voorbehouden.
COMPACT
DIGITAL AUDIO
TECHNISCHE GEGEVENS
Algemeen
Voeding: DC 12 V, negatieve massaverbinding
Afmetingen: 178 x 155 x 50 mm (BxTxH)
Vermogen: Maximaal piekvermogen muziek 4 x 20 W R.M.S.
Zekering: Ampère (rood), 15 Ampère (rose)
MP3/CD-speler
MPEGsnelheid 64-320 K
Frequentiebereik 20 Hz ~ 20 kHz
MP3-weergave ISO 9660- en Joliet-indeling van MP3
Radio
Voor 3 frequentiebanden
FM
Frequentiebereik 87.5 tot 108 MHz
IF 10.7 MHz
Gevoeligheid 3 µV
(Ruisafstand = 30 dB)
Stereoscheiding > 30 dBu
MW
Frequentiebereik 522 tot 1620 kHz
IF 45 kHz
(Ruisafstand = 30 dB)
Stereoscheiding 32 dBu
LW
Frequentiebereik 144 bis 288 kHz
IF 450 kHz
Gevoeligheid
(Ruisafstand = 30 dB) 35 dBu
NL 17
NL
Documenttranscriptie
Seite 3 C M Y CM MY CY CMY K D MD 80403 Autoradio BDA_D.FH11 Fri Jan 28 12:11:12 2005 MD 80403 Autoradio BDA_D.FH11 Fri Jan 28 12:11:12 2005 Seite 4 C M Y CM MY CY CMY K FUNKTIONEN 1. OPEN Öffnen des Bedienteils 2. SEL: Aufrufen der einzelnen Funktionen 3. MULTIJOG Einstellung für Lautstärke, Bass, Höhen, Balance und Fader 4. DISPLAY 5. DSP/0: Abfrage für Programm-, Uhrzeit-, Frequenz- und PTY-Einstellungen/Nummerntaste 0. 6. BND/LOU/ENT: Bandbereichs Auswahl/Loudness/Bestätigen 7. EQ: Equalizer 8. POWER/DIM: Ein-/Ausschalter, Diplaybeleuchtung dimmen 9. USB USB Anschluss für externe Datenträger 10. RESET auf Werkseinstellung zurücksetzen 11. AF: Einschalten des RDS-Modus 12. TA/REC: Traffic Announcement Identification / Verkehrsdurchsagen erkennen/ Aufnahme starten 13. PTY: Program Type Code 14. 19.: Stationswahltasten 14. PAU: Pause im CD/MP3-Betrieb / Nummertaste 1 15. SCN: Scan, Titel 10 Sek. Anspielen im CD/MP3-Betrieb / Nummerntaste 2 16. RPT: Repeat, Wiederholung im CD/MP3-Betrieb / Nummerntaste 3 17. SHF: Shuffle, Zufallswiedergabe im CD/MP3-Betrieb / Nummerntaste 4 18. Nummerntaste 5 19. Nummerntaste 6 20. MODE: Umschaltung Radio/CD/MP3/Nummerntaste 7 21. AMS/D-AUD Automatische Senderspeicherung / MP3-Suche 22. -<< : Tune/Sendersuchlauf/rückwärts/Nummerntaste 8 23. +>>: Tune/Sendersuchlauf vorwärts/Nummerntaste 9 24. Rote Leuchtdiode (Diebstahlschutz LED) 25. CD-Fach: Zum Einschieben der CD 26. EJECT CD auswerfen D 2 MD 80403 Autoradio BDA_D.FH11 Fri Jan 28 12:11:12 2005 Seite 5 C M Y CM MY CY CMY K SICHERHEITSHINWEIS Setzen Sie das Gerät in den dafür vorgesehenen Schacht ein, oder wählen Sie einen Platz für die Montage des Gerätes, an dem es die normalen Fahraufgaben des Fahrers nicht behindert. Schließen Sie kurz die Kabel an, bevor Sie das Gerät endgültig einbauen. Stellen Sie sicher, dass diese richtig eingebaut sind und dass das System richtig funktioniert. Falls Änderungen am Fahrzeug erforderlich sind, wenden Sie sich an Ihren Fahrzeughändler/ -fachwerkstatt. Wenn das Gerät mehr als 30° aus der Waagerechten eingebaut wird, kann es seine optimale Leistung verlieren. D Bauen Sie das Gerät so ein, dass keine Verletzungen bei starkem Bremsen entstehen können. 30° Vermeiden Sie den Einbau des Gerätes in der Nähe hoher Temperaturen (z.B. direkte Sonneneinstrahlung oder Heizungsluft), Staub, Schmutz oder übermäßige Erschütterungen. D 3 MD 80403 Autoradio BDA_D.FH11 Fri Jan 28 12:11:12 2005 Seite 6 C M Y CM MY CY CMY K INHALTSANGABE VOR INBETRIEBNAHME .....................................................................................................................5 MONTAGE.............................................................................................................................................5 EINBAU DES RADIOS IN DEN ISO SCHACHT IHRES FAHRZEUGES.............................................5 Abnehmen und Einsetzen des Bedienteils .........................................................................................6 ISO ADAPTERSTECKER .....................................................................................................................6 Antennen-Relais Kabel .......................................................................................................................6 Stereo-Cinch- Ausgang.......................................................................................................................6 KABELVERBINDUNGEN .....................................................................................................................7 GRUNDBEDIENUNG ............................................................................................................................8 Ein-/Ausschalten.................................................................................................................................8 Lautstärke ...........................................................................................................................................8 Bass....................................................................................................................................................8 Höhen .................................................................................................................................................8 Balance...............................................................................................................................................8 Fader ..................................................................................................................................................8 Loudness ............................................................................................................................................8 Display ................................................................................................................................................8 Mode...................................................................................................................................................8 Equalizer.............................................................................................................................................8 Reset ..................................................................................................................................................8 RADIO ...................................................................................................................................................9 Bandbereich wählen ...........................................................................................................................9 Sender auswählen ..............................................................................................................................9 Vorprogrammierte Sender ..................................................................................................................9 Sender speichern ...............................................................................................................................9 Sender wiederfinden...........................................................................................................................9 Automatisches Speichern (AMS)........................................................................................................9 Vorprogrammierung durchlaufen ........................................................................................................9 Regional Programm Modus..............................................................................................................10 PTY (Programme-Type/Art) ..............................................................................................................10 TA Verkehrsfunk ...............................................................................................................................10 EON TA ortlicher Modus ...................................................................................................................10 EON DX Modus ................................................................................................................................10 RDS (Radio Data System)................................................................................................................11 CD-PLAYER ........................................................................................................................................12 Einlegen und Herausnehmen von CDs ...........................................................................................12 Titel überspringen .............................................................................................................................12 CD unterbrechen ..............................................................................................................................12 Vorlauf und Rücklauf ........................................................................................................................12 Abspielen aller Titel ..........................................................................................................................12 Wiederholen eines Titels ..................................................................................................................12 Zufallswiedergabe ............................................................................................................................12 MP3 WIEDERGABE............................................................................................................................13 Suche nach Titeln (Nummern)..........................................................................................................13 Suche nach Interpreten ....................................................................................................................13 WMA-Dateien abspielen ...................................................................................................................13 Tasten Belegtabelle ..........................................................................................................................14 ID3-TAG FUNKTION ...........................................................................................................................14 DATEN VON USB ABSPIELEN..........................................................................................................15 Aufnahmefunktion.............................................................................................................................15 FEHLERSUCHE..................................................................................................................................16 TECHNISCHE DATEN ........................................................................................................................17 D 4 MD 80403 Autoradio BDA_D.FH11 Fri Jan 28 12:11:12 2005 Seite 7 C M Y CM MY CY CMY K VOR INBETRIEBNAHME Entfernen Sie unbedingt vor der Montage die beiden Transportsicherungsschrauben im oberen Radiogehäuse (durch rote Fahnen erkennbar)! D Transportsicherung MONTAGE Dieses Autoradio kann ganz einfach in jeden Standard ISO Radioausschnitt eingebaut werden. Sollte Ihr Fahrzeug keinen Standard ISO Radioausschnitt haben, wenden Sie sich an Ihren Fahrzeughändler. Einbau des Radios in den ISO Schacht Ihres Fahrzeuges. Ziehen Sie den Einbaurahmen vom Radio ab. Stecken Sie den Einbaurahmen in den Radioausschnitt des Armaturenbretts Ihres Fahrzeugs. Biegen Sie die Laschen im Einbaurahmen mit einem Schraubendreher um, so dass dieser in dem Fahrzeug fest fixiert ist. Überprüfen Sie den Rahmen auf festen Halt. Verbinden Sie den ISO Buchsenblock mit den ISO Steckern Ihres Fahrzeugs. Verbinden Sie das Antennenkabel des Fahrzeugs mit dem Antennenstecker des Autoradios. Schieben Sie mit Vorsicht das Radio in den Einbaurahmen. Beachten Sie, dass Sie die Kabel nicht einklemmen! Betätigen Sie die RESET-Taste (10) mit einem Kugelschreiber oder einem ähnlichen, spitzen Gegenstand. Setzen Sie das Bedienteil ein. ACHTUNG! Bitte benutzen Sie beim Einbau zum Anschließen des Autoradios die ISO Buchsen des Autoradios. Die passenden ISO Adapterstecker (Autogegenstücke) können Sie je nach Fahrzeugtyp im Handel erwerben. Sollten Sie die Adapterbuchse von dem Kabel trennen oder die Kabel abschneiden, so erlischt Ihr Garantieanspruch! D 5 MD 80403 Autoradio BDA_D.FH11 Fri Jan 28 12:11:12 2005 Seite 8 C M Y CM MY CY CMY K ABNEHMEN UND EINSETZEN DES BEDIENTEILS Drücken Sie die OPEN-Taste (1) und entfernen Sie das Bedienteil. Bewahren Sie das Bedienteil stets in der dafür vorgesehenen Transporttasche auf. Bei entnommenen Bedienteil blinkt eine rote Leuchtdiode (24). Setzen Sie das Bedienteil zum Einbauen zuerst mit der rechten Seite in den Rahmen. Drücken Sie dann die linke Seite fest, bis es einrastet. Überprüfen Sie, dass das Bedienteil richtig und fest auf seinem Platz sitzt. Ist das Bedienteil nicht richtig eingebaut, erscheinen im Display, Fehlinformationen und/oder einige Tasten haben Fehlfunktionen. Frontblende ISO Adapterstecker Achtung! Nutzen Sie den ISO Adapterstecker des Autoradios, um eine sichere elektrische Verbindung herzustellen. Wichtig! Achten Sie darauf, dass das rosafarbene Backupkabel an Dauerplus anliegen muss (für Senderspeicher). Nachdem alle Verbindungen hergestellt sind, drücken Sie die RESET-Taste (10). Antennen-Relais Kabel Das gelbe Kabel ist für eine Relais-gesteuerte Antenne zur Verfügung gestellt worden. Das Relais wird die Antenne automatisch ausfahren, wenn das Gerät angeschaltet wird und beim Abschalten fährt die Antenne wieder ein. Vorsicht: Das gelbe Kabel nicht mit dem Motorkabel verbinden, sonst können Schäden am Gerät verursacht werden. Stereo-Cinch- Ausgang An diesen Anschlüssen (roter und weisser Cinchanschluss) können Sie externe Geräte (z.B. Verstärker) anschließen. D 6 MD 80403 Autoradio BDA_D.FH11 Fri Jan 28 12:11:12 2005 Seite 9 C M Y CM MY CY CMY K KABELVERBINDUNGEN für Vier-Lautsprecher (Quadro) System AUTORADIO RÜCKSEITE Antennen Verbindung Zündschlossschalter (B+) rot Speicher Back-up rosa Erdanschluss (B-)(Masse) schwarz D Wichtig! Speicher Back-up muss an Dauerplus angeschlossen sein, für Senderspeicher. RCA Kabel rechts rot links weiss gelb Stromantenne vorne links Lautsprecher hinten links Lautsprecher grün grau grün/schwarz grau/schwarz blau weiss blau/schwarz weiss/schwarz vorne rechts Lautsprecher hinten rechts Lautsprecher für Zwei-Lautsprecher (Dual) System AUTORADIO RÜCKSEITE Antennen Verbindung WICHTIG! Speicher Back-up muss an Dauerplus angeschlossen sein, für Senderspeicher. Zündschlossschalter (B+) rot Speicher Back-up rosa Erdanschluss (B-)(Masse) schwarz Stromantenne linker Lautsprecher RCA Kabel rechts rot links weiss gelb grün grau blau/schwarz weiss/schwarz rechter Lautsprecher D 7 MD 80403 Autoradio BDA_D.FH11 Fri Jan 28 12:11:12 2005 Seite 10 C M Y CM MY CY CMY K GRUNDBEDIENUNG Ein- /Ausschalten Drücken Sie die POWER/DIM-Taste (8), zum Ein-/Ausschalten des Gerätes. Lautstärke Wählen Sie durch Drücken der Taste SEL (2) die Funktion VOLUME aus und drehen Sie den Multijog Regler (3) um die Lautstärke entsprechend einzustellen. Stellen Sie die Lautstärke nur so ein, dass Sie die akustischen Signale evtl. herannahender Rettungs-/Feuerwehr-/Polizeiwagen noch hören können! Bass Drücken Sie die SEL-Taste (2) einmal, um den Bass einzustellen. Durch Drehen des Multijog Reglers (3) erhöhen oder senken Sie den Bass. Höhen Drücken Sie die SEL-Taste (2) zweimal, um die Höhen einzustellen. Durch Drehen des Multijog Reglers (3) erhöhen oder senken Sie die Höhen. Balance Drücken Sie die SEL-Taste (2) dreimal, um die Balance einzustellen. Durch Drehen des Multijog Reglers (3) können Sie die Balance zwischen dem rechten und linken Lautsprecher einstellen. Fader Drücken Sie die SEL-Taste (2) viermal, um den Fader einzustellen. Durch Drehen des Multijog Reglers (3) können Sie den Fader der vorderen und hinteren Lautsprecher einstellen. Loudness Halten Sie die BND/LOU/ENT-Taste (6) gedrückt, bis ein Signalton ertönt. Im Display erscheint LOUD ON bzw.LOUD OFF. So erreichen Sie die Anhebung der tiefen Frequenzen bei geringer Lautstärke. Display Durch Drücken der DSP/0-Taste (5) können Sie folgende Informationen abfragen: Programmname Frequenz Uhrzeit (wird bei RDS Empfang automatisch eingestellt) PTY Einstellungen (Diese RDS Funktionen werden von den Sendeanstalten in unterschiedlicher Qualität und Umfang gesendet. Nähere Informationen finden Sie im Kapitel RADIO unter RDS). Mode Mit der MODE-Taste (20) können Sie zwischen Radio und CD bzw. USB Anschluss wechseln. Equalizer Drücken Sie die Taste EQ (7) um die folgenden Klangeinstellungen nacheinander aufzurufen: FLAT CLASSICS POP M ROCK M DSP OFF Reset Um Ihr Autoradio in den Auslieferungszustand zurück zu stellen, betätigen Sie die RESET-Taste (10) mit einem Kugelschreiber. Diese Taste finden Sie hinter dem Bedienteil! Bitte betätigen Sie die RESET-Taste bei der ersten Inbetriebnahme, nach Abschluss der Kabelverbindungen, wenn nicht alle Funktionstasten funktionieren, bei Erscheinen einer Fehlermeldung im Display. D 8 MD 80403 Autoradio BDA_D.FH11 Fri Jan 28 12:11:12 2005 Seite 11 C M Y CM MY CY CMY K RADIO Sender auswählen Drücken Sie die Sendersuchlauftasten (Tune-Tasten) I<< (22) oder Taste >>I (23) für kurze Zeit, das Gerät sucht automatisch den nächsten Sender. Wenn Sie die eine der TUNE-Tasten für zwei Sekunden gedrückt halten, schalten Sie auf manuelle Sendersuche um. Es erscheint MANUAL im Display. Jetzt können Sie mit der Tune-Taste den Sender auswählen und abspeichern. Das Gerät schaltet nach kurzer Wartezeit wieder in die automatische Sendersuchfunktion um. D Bandbereich wählen Drücken Sie die BND/LOU/ENT-Taste (6), um zwischen UKW (F1, F2, F3), Mittelwelle (MW) und Langwelle(LW) zu wechseln. In jedem Bereich können Sie sechs Sender speichern. Vorprogrammierte Sender In jedem Sendebereich können Sie sechs Sender fest speichern und über die Stationstasten 1-6 (14-19) wieder aufrufen. Sender speichern 1. Wählen Sie den Bandbereich mit der BND/LOU/ENT-Taste (6) aus. 2. Wählen Sie mit der TUNE-Taste I<< (22) oder Taste I>> (23) einen Sender aus. 3. Drücken Sie eine der Stationstasten 1-6 (14-19) für ca. 3 Sekunden. Ein Signalton bestätigt die Senderspeicherung. Sender wiederfinden 1. Wählen Sie den Bandbereich mit der BND/LOU/ENT-Taste (6) aus. 2. Drücken Sie die Stationstaste (14-19), um den vorprogrammierte Sender aufrufen. Automatisches Speichern (AMS) Halten Sie die AMS/D-AUD-Taste (21) gedrückt, bis ein Signalton erklingt. Im Display erscheint SEARCH. Der Suchlauf hält bei jedem gefundenen Sender ca. 5 sek. an. Die im Display blinkende Zahl zeigt die Nummer der Stationstasten an, auf welche der jeweilige Sender abgespeichert wird. Bei schwachen Sendern läuft der Suchlauf automatisch weiter. Vorprogrammierung durchlaufen Automatisches durchsuchen Ihrer im Sendebereich gespeicherten Sender. 1. Wählen Sie den Bandbereich mit der BND/LOU/ENT-Taste (6) aus. 2. Drücken Sie kurz die AMS/D-AUD-Taste (21). Alle Sender werden jetzt kurz angewählt. Bei erreichen des gesuchten Senders, drücken Sie kurz die AMS/D-AUD-Taste (21). D 9 MD 80403 Autoradio BDA_D.FH11 Fri Jan 28 12:11:12 2005 Seite 12 C M Y CM MY CY CMY K Regional Programm Modus Einige Programme strahlen verschiedene Regionalprogramme aus. Damit nur die Alternativfrequrenzen des gewünschten Regionalprogramms gewählt werden; halten Sie die AF-Taste (11) etwas länger gedrückt bis ein Signalton ertönt, um den Modus einoder auszuschalten. Im Display steht REG ON/REG OFF. PTY (Programme-Type/Art) Um das Menü zu aktivieren, drücken Sie die PTY-Taste (13). Sie können jetzt nach folgenden Kategorien Ihre Sender auswählen: MUSIK 1 POP M, ROCK M 2 EASY M, LIGHT M 3 CLASSICS (Klassik), OTHER M (Andere M) 4 JAZZ, COUNTRY 5 NATION M, OLDIES 6 FOLK M SPRACHE NEWS (Nachrichten), AFFAIRS (Angelegenheiten), INFO (Infos) SPORT, EDUCATE (Bildung), DRAMA CULTURE (Kultur), SCIENCE (Wissenschaft), VARIED (Verschiedenes) WEATHER (Wetter), FINANCE (Finanzen), CHILDREN (Kinder) SOCIAL (Soziales), RELIGION, PHONE IN (Telefoneingang) Travel (Reisen), Leisure (Freizeit), Document (Dokumente) (Die Informationen sind abhängig von der Sendeanstalt) TA Verkehrsfunk Halten Sie die TA/REC-Taste (12) für kurze Zeit gedrückt, um den TA-Modus ein- oder auszuschalten. Wenn der TA-Modus eingeschaltet ist und der Verkehrsfunk übertragen wird während Sie die CD oder USB-Anschluss eingestellt haben, wird automatisch auf Radio umgeschaltet. Zeitweise findet eine Umschaltung auf die EON Verbindungsstation statt, wenn EON einen Verkehrsfunk auf einem anderen Programm findet. Wenn sich der Lautstärkepegel unter der Schwelle befindet, wird er sich erheben. Die TA-Funktion des laufenden Verkehrsfunks wird durch Drücken der TA/REC-Taste (12) unterbrochen. Der TA-Modus wird dadurch nicht ausgeschaltet. Wird die TA/REC-Taste (12) längere Zeit gedrückt gehalten, wird der EON TA LOCAL/EON TA DISTANCE Modus gewählt. Mit diesem Modus können EON TA Informationen zugeordnet werden, z. B. Sie hören eine Nicht-Verkehrsfunksender, aber auf einer anderen Senderfrequenz gibt es eine Verkehrsmeldung, so schaltet das Gerät automatisch für diese Zeit um. Sobald diese Meldung beendet ist, wird wieder auf den vorherigen Senderplatz umgeschaltet. EON TA örtlicher Modus Wenn der EON TA LOCAL Modus Gewählt wurde, blinkt EON TA LO einige Sekunden auf dem Display. Der Modus für das lokale Gebiet wurde gewählt. EON DX Modus Wenn der EON DX Modus gewählt wurde, blinkt EON TA DX einige Sekunden auf dem Display. Der Modus für das weiter entfernte Gebiet wurde gewählt. D 10 MD 80403 Autoradio BDA_D.FH11 Fri Jan 28 12:11:12 2005 Seite 13 C M Y CM MY CY CMY K RDS (Radio Data System) RDS ist ein Service der Rundfunkanstalten. Neben den herkömmlichen Musik- und Sprachbeiträgen werden Zusatzinformationen in Form verschlüsselter Digitalsignale ausgesendet, welche vom Autoradio ausgewertet werden können. D Drücken Sie kurz die AF-Taste (11), um den RDS-Modus ein- oder auszuschalten. Bei Aktivierung des RDS-Modus erscheint im Display das Symbol AF. Jetzt wird bei Empfang eines Senders der Programmname und andere Informationen im Display (4) angezeigt. Diese Informationen sind abhängig von der Sendeanstalt. Es werden unterschiedliche RDS-Dienste angeboten: PI: Program Identification Code Mit Hilfe des PI-Codes kann das Radio den empfangenden Sender identifizieren. PS: Program Service Name Die Funktion Program Service ermöglicht die Anzeige des Sendernamens. AF: Alternative Frequencies Das Radio wählt automatisch die am besten zu empfangende Alternativ-Frequenz des gleichen Programms. TP/TA: Traffic-Program/Traffic-Annoucement EON: Enhanced Other Networks Information Im Falle einer Verkehrsdurchsage wird auch beim Hören eines Nicht-Verkehrsfunksenders innerhalb einer Senderkette auf einem Verkehrsfunksender umgeschaltet. PTY: Program Type Code Mit Program Type kann das Radio nach Sendern mit vorwählbaren Programminhalten suchen. Z. B. Sport, Nachrichten, Rock, Pop,..... D 11 MD 80403 Autoradio BDA_D.FH11 Fri Jan 28 12:11:12 2005 Seite 14 C M Y CM MY CY CMY K CD-PLAYER Einlegen und Herausnehmen von CDs Zum Einlegen die CD in das CD-Fach (25) schieben. Die Wiedergabe der CD beginnt. Im Display erscheint S--CDP (d.h. suche Titel). Zum Herausnehmen der CD drücken Sie die EJECTTaste (26). Die Wiedergabe bricht ab und die CD wird herausgefahren. Das Gerät schaltet auf den Radio Modus um. Titel überspringen TUNE-Taste |<< (22) oder Taste >>| (23) drücken, um zum nächsten Titel zu springen. Die Titelnummer wird im Display (4) angezeigt. CD unterbrechen Während der Wiedergabe die PAU-Taste (14) drücken, die CD-Wiedergabe wird unterbrochen. Nochmaliges Drücken der PAU-Taste (14) und die CD spielt weiter. Vorlauf und Rücklauf mit hoher Geschwindigkeit TUNE-Taste |<< (22) oder Taste >>| (23) bei der Wiedergabe länger drücken um den schnellen Vorlauf/Rücklauf zu starten. Abspielen aller Titel Die SCN-Taste (15) drücken und die ersten 10 Sekunden jedes Titels werden angespielt. Erneutes Drücken der SCN-Taste (15) und die normale Wiedergabe wird gestartet. Wiederholen eines Titels Drücken Sie die RPT-Taste (16) um den gleichen Titel ständig zu hören. Erneutes Drücken der RPTTaste (16) deaktiviert die Funktion. Zufallswiedergabe SHF-Taste (17) drücken, um alle Titel der CD in Zufallsreihenfolge abzuspielen. Hinweis: Das Fahren auf unebenen Straßen könnte ein Überspringen auf der CD verursachen. Eine kurze Einspielzeit wird die Leistung verbessern. Überspringen schadet der CD keineswegs. Feuchtigkeit und hohe Luftfeuchtigkeit können Fehlfunktionen des CD-Spieler verursachen. Fahrzeug-Heizung anschalten und Feuchtigkeit vor Gebrauch verdunsten lassen. Setzen Sie den CD-Spieler keinen extrem hohen oder niedrigen Temperaturen aus. Fahren Sie nicht mit einer herausgefahrenen CD in dem Schlitz. D 12 MD 80403 Autoradio BDA_D.FH11 Fri Jan 28 12:11:12 2005 Seite 15 C M Y CM MY CY CMY K MP3-WIEDERGABE Die Wiedergabe startet automatisch bei Einlegen einer MP3-CD-ROM. Die Tastenfunktionen entnehmen Sie bitte dem Kapitel CD-Player. Sie können die Titel oder die Interpreten direkt anwählen. Beachten Sie, dass die MP3-Funktionen größtenteils von der Erstellung der MP3-CD abhängig sind. Suche nach Interpreten Drücken Sie AMS/D-AUD-Taste (21) zweimal. Im Display erscheint ein blinkender ....... . Geben Sie den in der Tabelle angegebenen Tasten den Namen des gewünschten Interpreten ein. Beachten Sie, dass nach jedem Buchstaben die SEL-Taste (2) gedrückt werden muss, damit der nächste Buchstabe eingegeben werden kann (Zeichenverschiebung). Bestätigen Sie die Eingabe mit der BND/LOU/ENT-Taste (6). Das Gerät sucht nun den entsprechenden Titel. Drücken Sie noch einmal die BND/LOU/ENT-Taste (6), wenn das Gerät den gewünschten Interpreten gefunden hat. Der Titel wird jetzt abgespielt. D Suche nach Titeln (Nummern) Drücken Sie AMS/D-AUD-Taste (21) einmal. Im Display erscheint MP3T ..... . Geben Sie mit den in der Tabelle angegebenen Tasten die Nummern des gewünschten Titels ein. Bestätigen Sie die Eingabe mit der BND/LOU/ENT-Taste (6) oder warten Sie ca. 5 sek. bis das Gerät automatisch auf den gewählten Titel springt. WMA-Dateien Sie können in Ihrem Autoradio auch WMA-Dateien abspielen. Die Bedienung funktioniert hier genau wie bei MP3 Dateien. Hinweis: Die Suchfunktion ist abhängig von der erstellten MP3-CD. D 13 MD 80403 Autoradio BDA_D.FH11 Fri Jan 28 12:11:12 2005 Seite 16 C M Y CM MY CY CMY K Tasten Belegtabelle AMS/D-AUD (21) BND/LOU/ENT (6) 1 (14) 2 (15) 3 (16) Einstellung wählen Bestätigen A, B, C, 1 D, E, F, 2 G, H, I, 3 4 (17) 5 (18) 6 (19) MODE (20) J, K, L, 4 M, N, O, 5 / 10 Track runter P, Q, R, 6 / 10 Track rauf S, T, U, 7 |<< (22) >>| (23) SEL (2) DSP/0 (5) (5) (6) V, W, X, 8 Y, Z, Leerstelle, 9 Zeichenverschieben nach rechts 0,_, -, +, Scrollfunktion A-Z / 0-9 Hinweis: Bei der Erstellung einer MP3-CD-ROM beachten Sie bitte, dass sich die Titel einzeln oder in Verzeichnissen befinden. Mixen Sie niemals Titel und Verzeichnisse, es könnte zu Problemen beim Abspielen führen. Alle gängigen Codierungen können abgespielt werden. ID 3-TAG FUNKTION Beim Erstellen einer MP3-CD können Sie zusätzliche Informationen abspeichern. Dies können Informationen über den Interpret, Titel, Albumname und Erscheinungsjahr des Musikstücks, sowie ein kurzer Kommentar sein. Zur Eingabe empfehlen wir einen ID3-Tag Editor. Diese Informationen werden nach Abfrage während der Wiedergabe über das Display angezeigt. Beim Abspielen von MP3-CD's können so, ausser Titelnummer, auch der Titelname oder der Interpret angezeigt werden (abhängig von den gespeicherten Informationen auf der MP3-CD). Zur Abfrage betätigen Sie die DSP/0-Taste (5). Nach jedem Tastendruck erscheint ein ID3-Tag Eintrag der aktuellen Wiedergabe: TITEL - D 14 INTERPRET - ALBUMNAME - ERSCHEINUNGSJAHR - KOMMENTAR MD 80403 Autoradio BDA_D.FH11 Fri Jan 28 12:11:12 2005 Seite 17 C M Y CM MY CY CMY K DATEN VON USB ABSPIELEN Sie können an den USB-Anschluss an der Gerätefront einen MP3 Player oder einen anderen USBDatenträger anschließen. Ihr Autoradio kann USB-Datenträger bis zu 1GB verarbeiten. Dabei darf die Verzeichnisstruktur maximal 1024 Ordner, 4096 Dateien und eine Verzeichnistiefe von 8 Ebenen enthalten. Aufnahmefunktion Sie können mit Ihrem Autoradio auch Daten von Radio und CD-Player auf den externen USB-Datenträger aufnehmen. Um mit der Aufnahme zu beginnen, drücken Sie im entsprechenden Modus die Taste TA/REC (12). Die Audiodaten werden nun im WMA-Format auf den USB Datenträger gespeichert. Während der Aufnahme erscheint im Display die Meldung FILE NAME. Um die Aufnahme zu beeenden, drücken Sie nochmals kurz die Taste TA/REC (12). Sie können die Daten wieder abspielen, indem Sie mit der Taste MOD E (20) in den USB-Modus schalten und die einzelnen Titel vom USB-Datenträger aufrufen. D 15 D Sobald das externe Gerät angeschlossen ist, sucht das Autoradio nach MP3- oder WMA Dateien auf dem Datenträger und im Display (4) erscheint die Meldung USB. Die Bedienung zum Abspielen von Dateien auf dem externen Datenträger, sowie die Suchfunktion funktionieren genau wie bei MP3 CDs. MD 80403 Autoradio BDA_D.FH11 Fri Jan 28 12:11:12 2005 Seite 18 C M Y CM MY CY CMY K FEHLERSUCHE Problem Ursache Abhilfe Das Gerät lässt sich nicht einschalten. Die Zündung ist nicht eingeschaltet. Zündung durch drehen des Schlüssel einschalten. Die Sicherung ist defekt. Sicherung erneuern. Es befindet sich bereits eine CD im Gerät. CD aus dem Spieler entfernen, dann neue CD einlegen. CD immer mit der Beschriftung nach oben legen. Die CD kann nicht geladen oder ausgeschoben werden. CD ist verkehrt herum eingelegt worden. CD ist sehr schmutzig oder defekt. Temperaturen im Auto sind zu hoch. Kondesation. Kein Ton Lautstärke auf Minimum. Kabel sind nicht richtig angeschlossen. Funktionstasten funktionieren nicht. CD springt. CD säubern oder versuchen eine andere abzuspielen. Abkühlen, bis die Umgebungstemperatur wieder auf Normalzustand ist. Das Gerät ein paar Stunden ausgeschaltet lassen und dann erneut versuchen. Lautstärke zur gewünschten Stärke einstellen. Kabelverbindungen überprüfen. Der eingebaute Microcomputer kann wegen Rauschen nicht funktionieren. Bedienteil sitzt nicht korrekt. RESET-Taste drücken. Der Einbauwinkel übersteigt 30°. Einbauwinkel auf weniger als 30° verstellen. CD ist sehr schmutzig oder defekt. CD säubern oder versuchen eine andere abzuspielen. Überprüfen, dass das Bedienteil richtig und fest auf seinem Platz sitzt. Radio funktioniert nicht. Automatische SenderAuswahl funktioniert nicht. Fehler bei selbstgebrannten CDs CD in einem anderen Gerät überprüfen Antennenkabel ist nicht angeschlossen. Antennekabel fest einstecken. Die Sendesignale sind zu Sender manuell schwach. anwählen. Senderspeicher funktioniert nicht. Rosa Kabel ist nicht am Dauerplus angeschlossen. D 16 Kabelverbindungen überprüfen. MD 80403 Autoradio BDA_D.FH11 Fri Jan 28 12:11:12 2005 Seite 19 C M Y CM MY CY CMY K TECHNISCHE DATEN Allgemein DC 12 V, negative Masseverbindung 178 x 155 x 50 mm (BxTxH) Musikspitzenausgangsleistung 4 x 20W R.M.S. 0,5 Ampere (rot), 15 Ampere (rosa) MP3/CD-Player MPEG Rate Frequenzbereich MP3 Playback 64-320 K 20 Hz ~ 20 kHz ISO 9660 & Joliet format of MP3 D Betriebsspannung: Gestell-Abmessungen: Leistung: Sicherung: Radio Für 3 Frequenzbänder Frequenzumfang IF Empfindlichkeit (Rauschabstand = 30 dB) Stereo Trennung Frequenzumfang IF (Rauschabstand = 30 dB) Stereo Trennung Frequenzumfang IF Empfindlichkeit (Rauschabstand = 30 dB) FM 87.5 bis 108 MHz 10.7 MHz 3 µV > 30 dBu MW 522 bis 1620 kHz 45 kHz 32 dBu LW 144 bis 288 kHz 450 kHz 35 dBu CD-Player Verwenden Sie ausschließlich CDs, die wie folgt gekennzeichnet sind: COMPACT DIGITAL AUDIO Laserklasse 1 Technische Änderungen vorbehalten. D 17 MD 80403 Autoradio BDA_ENG.FH11 Fri Jan 28 12:14:09 2005 Seite 2 C M Y CM MY CY CMY K FUNCTIONS 1. OPEN Opens the control panel 2. SEL: Activates individual functions 3. MULTIJOG sets volume, bass, treble, balance and fader 4. DISPLAY 5. DSP/0: Queries program, time, frequency and PTY settings/number key 0. 6. BND/LOU/ENT: Volume range selection/volume/confirm 7. EQ: Equalizer 8. POWER/DIM: On/off switch, dims the display panel 9. USB USB connection for external data storage media 10. RESET Return to factory settings 11. AF: Switches on RDS mode 12. TA/REC: Traffic Announcement Identification / detect traffic updates Start recording 13. PTY: Program Type Code 14. 19.: Station selection keys 14. PAU: Pause in CD/MP3 mode / number key 1 15. SCN: Title scan with 10 sec. sample play (in CD/MP3 mode) / number key 2 16. RPT: Repeat (in CD/MP3 mode) / number key 3 17. SHF: Shuffle (in CD/MP3 mode) / number key 4 18. Number key 5 19. Number key 6 20. MODE: Mode switch: radio / CD / MP3 / number key 7 21. AMS/D-AUD automatic station storage / MP3 search 22. -<< : Tuning search/downwards / number key 8 23. +>>: Tuning search upwards/Number key 9 24. Red LED (anti-theft protection LED) 25. CD compartment: To insert the CD 26. EJECT GB 2 eject CD MD 80403 Autoradio BDA_ENG.FH11 Fri Jan 28 12:14:09 2005 Seite 3 C M Y CM MY CY CMY K SAFETY INSTRUCTIONS Insert the unit into the proper shaft or select a location to install the unit that will not affect the driver's ability to drive. Connect the cable briefly before finally installing the unit. Verify that these are installed properly and that the system functions properly. If changes have to be made to the vehicle, consult your vehicle dealer/repair shop. Install the unit in such a manner that no injury can be caused during heavy braking. 30° GB If the unit is installed out of balance by over 30° from horizontal it may affect the output. Avoid installing the unit near high temperatures (e.g. direct sunlight or hot air), dust, pollution or excessive vibrations. GB 3 MD 80403 Autoradio BDA_ENG.FH11 Fri Jan 28 12:14:09 2005 Seite 4 C M Y CM MY CY CMY K INDEX PRIOR TO OPERATING .......................................................................................................................5 INSTALLATION .....................................................................................................................................5 INSTALLING THE RADIO INTO THE ISO SLOT OF YOUR VEHICLE ...............................................5 Removing and inserting the control unit ..............................................................................................6 ISO ADAPTER PLUGS .........................................................................................................................6 Antenna relay cable .............................................................................................................................6 Stereo-cinch output .............................................................................................................................6 CABLE CONNECTIONS.......................................................................................................................7 BASIC OPERATION .............................................................................................................................8 Switching on/off ...................................................................................................................................8 Volume.................................................................................................................................................8 Bass....................................................................................................................................................8 Treble...................................................................................................................................................8 Balance................................................................................................................................................8 Fader ..................................................................................................................................................8 Loudness ............................................................................................................................................8 Display ................................................................................................................................................8 Mode...................................................................................................................................................8 Equalizer.............................................................................................................................................8 Reset ..................................................................................................................................................8 RADIO ...................................................................................................................................................9 Select band..........................................................................................................................................9 Select station .......................................................................................................................................9 Pre-set stations....................................................................................................................................9 Store station.........................................................................................................................................9 Recall station .......................................................................................................................................9 Store to memory (AMS).......................................................................................................................9 Move through pre-set programs ..........................................................................................................9 Regional program mode ....................................................................................................................10 PTY (Program type)...........................................................................................................................10 TA traffic announcement....................................................................................................................10 EON TA regional mode......................................................................................................................10 EON DX mode ..................................................................................................................................10 RDS (Radio Data System)................................................................................................................11 CD PLAYER ........................................................................................................................................12 Inserting and removing CDS .............................................................................................................12 Skip titles ...........................................................................................................................................12 Pause CD PLAYER ...........................................................................................................................12 Forward and reverse .........................................................................................................................12 Play all titles.......................................................................................................................................12 Repeat a title .....................................................................................................................................12 Random playback..............................................................................................................................12 MP3 PLAYBACK.................................................................................................................................13 Search for titles (numbers) ................................................................................................................13 Search for artists ...............................................................................................................................13 Play WMA files...................................................................................................................................13 Recording chart keys.........................................................................................................................14 ID3 TAG FUNCTION ...........................................................................................................................14 PLAY DATA FROM USB .....................................................................................................................15 Recording function ............................................................................................................................15 TROUBLESHOOTING ........................................................................................................................16 SPECIFICATIONS...............................................................................................................................17 GB 4 MD 80403 Autoradio BDA_ENG.FH11 Fri Jan 28 12:14:09 2005 Seite 5 C M Y CM MY CY CMY K PRIOR TO OPERATING Before installation always remove the two transportation safety screws in the top radio casing (recognizable by their red flags)! Transport locking This car radio can easily be installed in any standard ISO radio slot. If your vehicle does not have a standard ISO radio slot, please contact your vehicle dealer. GB ASSEMBLY Insert the radio into your vehicle's ISO slot. Remove the mounting frame from the radio. Insert the mounting frame into the radio slot on your vehicle's dashboard. Bend the flaps in the mounting frame with a screwdriver so that it is fixed firmly in place in the vehicle. Check the frame is held securely. Connect the ISO socket block to the vehicle's ISO plugs. Connect the vehicle's antenna cable to the antenna plug of the car radio. Carefully insert the radio into the mounting frame. Verify that the cables are not jammed! Press the RESET BUTTON (10) using a ballpoint pen or a similar pointed object. Insert the control unit. WARNING! During installation please use the car radio's ISO sockets to connect the car radio. The corresponding ISO adapter plugs (car counterparts) can be bought from a dealer depending on the vehicle model. Your guarantee lapses if you disconnect the adapter socket from the cable or cut the cable! GB 5 MD 80403 Autoradio BDA_ENG.FH11 Fri Jan 28 12:14:09 2005 Seite 6 C M Y CM MY CY CMY K REMOVING AND INSERTING THE CONTROL UNIT Press the OPEN button (1) and remove the control unit. Store the control unit in the transportation bag provided. A red LED light flashes when the control unit has been removed (24). First place the right side of the control unit into the frame for installation. Then press the left side until it locks in. Verify that the control unit is properly located. If the control unit is not installed properly, error messages appear in the display and/or several keys will not function properly. front slot cover ISO adapter plugs Note! Use the car radio's ISO adapter plug to produce a secure electrical connection. Important! Ensure that the pink backup cable is pointed towards the steady plus (for station memory). After making all the connections, press the RESET button (10). Antenna relay cable The yellow cable is available for a relay-controlled antenna. The relay will extend the antenna automatically when the unit is switched on and retract it again when the unit is switched off. Caution: Do not connect the yellow cable to the engine cable because this may damage the unit. Stereo-cinch output You can connect external units (e.g. amplifiers) to these connections (red and white cinch connections). GB 6 MD 80403 Autoradio BDA_ENG.FH11 Fri Jan 28 12:14:09 2005 Seite 7 C M Y CM MY CY CMY K CABLE CONNECTIONS For four loudspeaker (Quad) system CAR RADIO REAR VIEW Antenna connection Ignition lock switch (B+) red Memory pink Back-up Earth connection (B-) (ground/earth) black RCA cable right red left white yellow Power Antenna Front left Loudspeaker rear left Loudspeaker green grey green/black grey/black blue white blue/black White/black Front right Loudspeaker GB Important! Memory back-up Must be connected to permanent plus for the station memory. rear right Loudspeaker for two loudspeaker (dual) system CAR RADIO REAR VIEW Antenna connection Important! Memory back-up Must be connected to permanent plus for the station memory. Ignition lock switch (B+) red Memory pink Back-up Earth connection (B-) (ground/earth) black Power Antenna Left Loudspeaker RCA cable right red left white yellow green grey blue/black white/black right Loudspeaker GB 7 MD 80403 Autoradio BDA_ENG.FH11 Fri Jan 28 12:14:09 2005 Seite 8 C M Y CM MY CY CMY K BASIC OPERATION Switching on/off Press the POWER/DIM button (8) to switch the unit on or off. Volume Select the VOLUME function by pressing the SEL (2) button and turn the multijog control (3), in order to set the desired volume. Only set the volume so that you are still able to hear the sirens of any approaching rescue/fire/police vehicles! Bass Press the SEL button (2) once to adjust the bass. Increase or lower the bass by turning the multijog control (3). Treble Press the SEL button (2) twice to adjust the treble. Increase or lower the treble by turning the multijog control (3). Balance Press the SEL button (2) three times to adjust the balance. You can adjust the balance between the right and the left loudspeaker by turning the multijog control (3). Fader Press the SEL button (2) four times to adjust the fader. You can adjust the fader between the front and the rear loudspeakers by turning the multijog control (3). Loudness Press the BND/LOU/ENT button (6) until you hear a signal tone. LOUD ON or LOUD OFF will appear in the display. This is how you increase the deeper frequencies at a low volume. Display You can request the following information by pressing the DSP/0 button (5): Name of program Frequency Time (will be set automatically when receiving RDS) PTY settings (These RDS functions are transmitted by the stations in various qualities and ranges. You will find more detailed information under RDS in the RADIO chapter). Mode You can switch between the radio and the CD and/or the USB connection by using the mode button (20). Equalizer Press the EQ (7) button to sequentially open the following sound settings: FLAT CLASSICS POP M ROCK M DSP OFF Reset In order to reset you car radio to its original setting, press the RESET button (10) using a ball-point pen. This button can be found behind the control unit! Please press the RESET button - for first operation, after connecting the cables. - if not all function keys are working, - when an error message appears in the display. GB 8 MD 80403 Autoradio BDA_ENG.FH11 Fri Jan 28 12:14:09 2005 Seite 9 C M Y CM MY CY CMY K RADIO Select band Press the BND/LOU/ENT button (6) to switch between VHF (F1, F2, F3), medium wave (MW) and long wave (LW). You can store up to 6 stations in each band. Select station Press the station search (tuning buttons) I<< (22) or >>I buttons (23) briefly; the unit will automatically search for the next station. Switch to manual station search by pressing the TUNE button for two seconds. MANUAL will appear in the display. You can now select and store the station with the TUNE button. The unit switches to the automatic station search function after a brief delay. GB Pre-programmed stations You can store six stations in each transmission range and recall them by using the station buttons 1-6 (14-19). Store station 1. Select the band with the BND/LOU/ENT button (6). 2. Select a station with the TUNE button I<< (22) or I>> button (23). 3. Press one of the station buttons 1-6 (14-19) for approximately 3 seconds. A signal tone confirms the station storage. Recall station 1. Select the band with the BND/LOU/ENT button (6). 2. Press the station button (14-19) to recall the pre-programmed station. Store to memory (AMS) Press the AMS/D-AUD button (21) until you hear a signal tone. SEARCH appears in the display. The search continues for approximately 5 seconds after locating each station. The number flashing in the display shows the number of the station button to which the appropriate station will be stored. The search continues automatically on weak stations. Move through pre-set programs Automatic search of your stations stored in the transmission range. 1. Select the band with the BND/LOU/ENT button (6). 2. Briefly press the AMS/D-AUD button (21). All stations are now briefly selected. Briefly press the AMS/D-AUD button (21) when arriving at the desired station. GB 9 MD 80403 Autoradio BDA_ENG.FH11 Fri Jan 28 12:14:09 2005 Seite 10 C M Y CM MY CY CMY K Regional Program Mode Some stations broadcast different regional programs. In order to select only the alternative frequencies of the desired regional program; press the AF button (11) a little longer until a signal sounds, in order to switch the mode on or off. REG ON/REG OFF will appear in the display. PTY (Program type) To activate the menu, press the PTY button (13). You can now search your stations according to the following categories: MUSIC 1 POP M, ROCK M 2 EASY M, LIGHT M 3 CLASSICS, OTHER M 4 JAZZ, COUNTRY 5 NATION M, OLDIES 6 FOLK M LANGUAGE NEWS, AFFAIRS (current affairs), INFO (information) SPORT, EDUCATE (education), DRAMA CULTURE, SCIENCE, VARIED (miscellaneous) WEATHER, FINANCE, CHILDREN SOCIAL, RELIGION, PHONE IN (telephone reception) Travel, Leisure, Document (This information varies with the station.) TA radio traffic service Hold down the TA/REC button (12) briefly to switch the TA mode on or off. When the TA mode is switched on and the radio traffic service is being transmitted while the CD or USB is connected, it will switch automatically to radio. If EON cannot find any radio traffic service in another program, it occasionally switches to the EON relay station. If the volume level is below the threshold, it will be increased. The TA function for ongoing radio traffic service is interrupted by pressing the TA/REC button (12). This will not switch off the TA mode. If the TA/REC button (12) is pressed for a longer period, the EON TA LOCAL/EON TA DISTANCE mode will be selected. EON TA information may be assigned with this mode, for example, you are listening to a station that does not provide traffic reports but a traffic report is broadcast on another station frequency, so the unit will automatically switch over for the duration. The unit will switch back to the previous station as soon as this report is completed. EON TA local mode EON TA LO flashes for several seconds on the display when the EON TA LOCAL mode has been selected. The mode for the local area has been selected. EON DX Mode EON TA DX flashes for several seconds on the display when the EON DX mode has been selected. The mode for a more distant area has been selected. GB 10 MD 80403 Autoradio BDA_ENG.FH11 Fri Jan 28 12:14:09 2005 Seite 11 C M Y CM MY CY CMY K RDS (Radio Data System) RDS is a service provided by radio stations. In addition to the familiar music and voice services they also send additional information in the form of encrypted digital signals and these are analysed by the car radio. Briefly press the AF button (11) to switch the RDS mode on or off. When activating RDS mode the AF symbol appears on the screen. When a station is received now, the station's name and other information is displayed on the screen (14). This information varies with the station. GB Various kinds of RDS services are on offer: PI: Program Identification Code The PI code is used by the radio to identify the station that is being received. PS: Program Service Name The program service function allows the station's name to be displayed. AF: Alternative Frequencies The radio automatically selects the best alternative frequency for the station of the same program. TP/TA: Traffic Programme/Traffic Announcement EON: Enhanced Other Network Information If you are listening to a station that does not provide traffic reports and there is a traffic report it is played by switching to another station. PTY: Program Type Code The radio can search for stations with pre-set program content, e.g. sports, news, rock, pop etc., by using the program type. GB 11 MD 80403 Autoradio BDA_ENG.FH11 Fri Jan 28 12:14:09 2005 Seite 12 C M Y CM MY CY CMY K CD PLAYER Inserting and removing CDs Push the CD into the CD slot (25). The CD will now be played. SCDP (meaning, search titles) appears now in the display. Press the EJECT button (26) to remove the CD. Playback is interrupted and the CD is ejected. The unit will switch back to radio mode. Skip titles Press TUNE |<< (22) or >>| button (23) to skip to the next title. The track number is shown on the display (4). Pause CD Push the PAU button (14) during playback to pause CD playback. Press the PAU button (14) again to restart CD. Forward and reverse at high speed Press the TUNE |<< (22) or >>| button (23) longer during playback to start fast forward/reverse. Play all titles Press the SCN button (15) and the first 10 seconds of each title are played. Press the SCN button (15) again and normal playback is started. Repeat a title Press the RPT button (16) in order to hear the same title continuously. Press the RPT button (16) again and this function will be deactivated. Random playback Press the SHF button (17) to play all titles on the CD in random sequence. Note: Driving on uneven streets may cause CD to skip. A brief response time will improve performance. Skipping will not damage the CD. Moisture and high humidity may cause the CD player to malfunction. Switch the vehicle heater on and let the moisture evaporate prior to use. Never expose the CD player to extremely high or low temperatures. Do not drive with a CD protruding from the slot. GB 12 MD 80403 Autoradio BDA_ENG.FH11 Fri Jan 28 12:14:09 2005 Seite 13 C M Y CM MY CY CMY K MP3 PLAYBACK An MP3 CD ROM will start to play automatically as soon as it is inserted in the player. Please refer to the "CD PLAYER" chapter for the button functions. You can select the titles or artists directly. Please note that the MP3 functions are generally dependent on how the MP3 CD was produced. Search for titles (numbers) Press the AMS/D-AUD button (21) once. MP3T will appear in the display. . Enter the numbers of the desired title with the buttons listed in the chart. Confirm the input by using the BND/LOU/ENT button (6) or wait approximately 5 seconds until the unit skips automatically to the selected title. GB Search for artists Press the AMS/D-AUD button (21) twice. A flashing...... appears in the display . Enter the numbers of the desired artists with the buttons listed in the chart. Please note that the SEL button (2) must be pressed after every letter, so that the next letter may be entered (moving between characters). Confirm the input by pressing the BND/LOU/ENT button (6). The unit will now search for the appropriate title. Press the BND/LOU/ENT button (6) again, when the unit has located the desired artist. The title will now be played. WMA files You can also play WMA files on your car radio. The operation functions in the same way as for MP3 files. Note: The search function depends on the manufacture of the MP3 CD. GB 13 MD 80403 Autoradio BDA_ENG.FH11 Fri Jan 28 12:14:09 2005 Seite 14 C M Y CM MY CY CMY K Recording chart keys AMS/D-AUD (21) BND/LOU/ENT (6) 1 (14) 2 (15) 3 (16) select setting confirm A, B, C, 1 D, E, F, 2 G, H, I, 3 4 (17) 5 (18) 6 (19) MODE (20) J, K, L, 4 M, N, O, 5 / 10 Next track down P, Q, R, 6 / 10 Next track up S, T, U, 7 |<< (22) >>| (23) SEL (2) DSP/0 (5) (5) (6) V, W, X, 8 Y, Z, blank, 9 move character to the right 0,_, -, +, scrolling function A-Z / 0-9 Note: When producing your MP3 CD ROM please ensure that the tracks are listed either individually or in folders. Never mix titles and folders as this may lead to problems during playback. All standard MP3 codings can be played by the unit. ID 3-TAG FUNCTION You can store additional information when producing an MP3 CD. This may include information concerning the artist, title, name of the album and year that the music was produced, as well as a brief comment. We recommend an ID3 Tag Editor for input. This information is displayed on the screen upon request during playback. The name of the title or the artist may also be displayed in addition to the title number (depending on the information stored on the MP3 CD) when playing the MP3 CDs. Press the DSP/0 button (5) for listings. An ID3 tag entry for the current playback appears whenever a button is pressed. TITLE - GB 14 ARTIST - NAME OF ALBUM - YEAR OF RELEASE - NOTES MD 80403 Autoradio BDA_ENG.FH11 Fri Jan 28 12:14:09 2005 Seite 15 C M Y CM MY CY CMY K PLAY DATA FROM USB You can connect an MP3 player or another data medium to the USB connection on the front of the unit. Your car radio can process USB data media up to 1GB. The directory structure may contain up to 1024 folders, 4096 files and a directory depth of 8 levels. Recording function You can also record data from the radio and the CD player to the external USB data medium with your car radio. In order to begin recording, press the TA/REC button (12) in the appropriate mode. Audio data is now stored on the USB drive in the WMA format. The FILE NAME message will appear during recording. In order to stop recording, briefly press the TA/REC button (12) again. You can play the data again by switching to the USB mode with the MOD E button (20) and request individual titles from the USB drive. GB As soon as the external unit is connected, the car radio will search for MP3 or WMA files on the data medium and the message USB will appear on the screen (4). Files on the external data medium and search functions work in the same way as for MP3 CDs. GB 15 MD 80403 Autoradio BDA_ENG.FH11 Fri Jan 28 12:14:09 2005 Seite 16 C M Y CM MY CY CMY K TROUBLESHOOTING Problem Cause Remedy The unit cannot be switched on. The ignition is not switched on. Switch on the ignition by turning the key. The fuse is defective. Replace the fuse. There is already a CD in the unit. Remove the CD from the CD player. Then insert another CD. Insert the CD with the label facing up. The CD cannot be loaded or ejected The CD has been put in upside down. The CD is very dirty or damaged. The temperature in the car is too high. Condensation. No sound Volume is set to minimum. Cables are not properly connected. Clean the CD or try to play another one. Let it cool off, until the ambient temperature returns to normal. Switch the player off for a few hours and then retry Set the volume at the desired level. Check cable connections Function buttons do not work. The installed Press the RESET button. microcomputer cannot function due to interference. The control unit is not Verify that the properly located. control unit is located properly. The CD skips. The installation angle exceeds 30°. Set the installation angle to less than 30°. The CD is very dirty or damaged. Clean the CD or try to play another one. Errors in self-made CDs Check the CD in another unit. The radio does not work. The automatic station selection does not work. The antenna cable is not connected. Station memory does not work The pink cable is not connected Check the to the permanent plus. cable connections GB 16 The station signals are too weak. Plug in the antenna cable. Select the station manually. MD 80403 Autoradio BDA_ENG.FH11 Fri Jan 28 12:14:09 2005 Seite 17 C M Y CM MY CY CMY K TECHNICAL DATA General instructions DC 12V, negative earth connection 178 x 155 x 50mm (WxDxH) Peak music output 4 x 20 W R.M.S. 0.5 amp (red); 15 amp (pink) MP3/CD Player MPEG rate Frequency range MP3 Playback 64-320 K 20Hz~20kHz ISO 9660 & Joliet format of MP3 GB Operating voltage: Frame dimensions: Power consumption: Fuse: Radio For 3 Frequency bands Frequency range of IF Sensitivity of (Signal-to-noise ratio = 30 dB) Stereo separation of > 30dBu Frequency range of IF (Signal-to-noise ratio = 30 dB) Stereo separation of Frequency range of IF Sensitivity (Signal-to-noise ratio = 30 dB) CD Player Please only use CDs that are marked as follows: FM 87.5 to 108MHz 10.7MHz 3µV MW 522 to 1620kHz 45kHz 32 dBu LW 144 to 288kHz 450kHz 35dBu COMPACT DIGITAL AUDIO Laser class 1 Subject to technical changes. GB 17 MD 80403 Autoradio BDA_F.FH11 Fri Jan 28 12:13:46 2005 Seite 2 C M Y CM MY CY CMY K FONCTIONS 1. OPEN : Ouverture du panneau de commande 2. SEL : Invocation d'une fonction 3. MULTIJOG : Réglage du volume, des basses, des aigus, de la balance et du fader 4. AFFICHAGE 5. DSP/0 : Rappel du programme, de l'heure, de la fréquence et des réglages PTY/Touche numérique 0. 6. BND/LOU/ENT : Sélection de la fréquence/Intensité sonore/Confirmer 7. EQ : Égaliseur de son 8. POWER/DIM : Marche/Arrêt, Variation de l'éclairage de l'affichage 9. USB : Connecteur USB pour supports de données externes 10. RESET : Restauration des réglages d'usine 11. AF : Enclenchement du mode RDS 12. TA/REC : Traffic Announcement Identification / Code d'identification permettant la priorité d'accès des informations routières/Démarrage de l'enregistrement 13. PTY : Program Type Code (code du type de programme) 14. - 19.: Touches de sélection des stations 14. PAU : Pause en mode CD/MP3 / Touche numérique 1 15. SCN : Scan, exécution du titre pendant 10 sec. dans le mode CD/MP3 / Touche numérique 2 16. RPT : Repeat, répétition en mode CD/MP3 / Touche numérique 3 17. SHF : Shuffle, lecture aléatoire en mode CD/MP3 / Touche numérique 4 18. Touche numérique 5 19. Touche numérique 6 20. MODE : Permutation - Radio / CD / MP3 / Touche numérique 7 21. AMS/D-AUD : Enregistrement automatique des stations / Recherche MP3 22. -<< : Tune/Recherche de stations vers l'arrière/Touche numérique 8 23. +>>: Tune/Recherche de stations vers l'avant/Touche numérique 9 24. Témoin lumineux rouge (voyant antivol) 25. Compartiment CD : Pour insérer le CD 26. EJECT : F 2 Éjection du CD MD 80403 Autoradio BDA_F.FH11 Fri Jan 28 12:13:46 2005 Seite 3 C M Y CM MY CY CMY K CONSIGNES DE SÉCURITÉ Insérez l'appareil dans l'emplacement prévu à cet effet ou choisissez un emplacement ne gênant pas la conduite. Raccordez les câbles avant de monter définitivement l'appareil. Vérifiez que les câbles aient été bien raccordés et que le système fonctionne correctement. Si le véhicule doit subir des modifications, adressez-vous à votre garagiste ou à votre atelier spécialisé. Montez l'appareil de manière à ce qu'il ne provoque pas de blessures en cas de freinage brusque. Si l'appareil est monté à plus de 30° par rapport à l'horizontale, ses performances peuvent s'en trouver affectées. Évitez de monter l'appareil à des endroits exposés à de fortes températures (par exemple le rayonnement solaire direct ou près d'une bouche de chauffage), à la poussière, à la saleté ou à des vibrations très importantes. F 30° F 3 MD 80403 Autoradio BDA_F.FH11 Fri Jan 28 12:13:46 2005 Seite 4 C M Y CM MY CY CMY K SOMMAIRE AVANT LA MISE EN MARCHE ......... ....................................................................................................5 MONTAGE ......... ...................................................................................................................................5 MONTAGE DE L'AUTORADIO DANS LE COMPARTIMENT ISO DE VOTRE VÉHICULE ..................5 Retrait et insertion du panneau de commande ..................................................................................6 PRISE D'ADAPTATION ISO ......... ........................................................................................................6 RACCORDEMENT DES CÂBLES ........................................................................................................7 FONCTIONS DE BASE ......... ...............................................................................................................8 Allumer/Éteindre ......... .......................................................................................................................8 Volume ......... ......................................................................................................................................8 Basses ......... ......................................................................................................................................8 Aigus ......... .........................................................................................................................................8 Balance ......... .....................................................................................................................................8 Fader ..................................................................................................................................................8 Intensité sonore ......... ........................................................................................................................8 Affichage ......... ...................................................................................................................................8 Mode ......... .........................................................................................................................................8 Égaliseur de son ......... .......................................................................................................................8 Réinitialiser ......... ...............................................................................................................................8 RADIO ...................................................................................................................................................9 Sélectionner la fréquence ......... .........................................................................................................9 Sélectionner une station ......... ...........................................................................................................9 Station enregistrée .............................................................................................................................9 Enregistrer des stations ......... ............................................................................................................9 Rappel des stations ......... ..................................................................................................................9 Enregistrement automatique (AMS) ......... .........................................................................................9 Défilement des stations enregistrées .................................................................................................9 Mode programme régional .................................................................................................................10 PTY (type/genre de programme) ....... ................................................................................................10 TA Informations relatives à la circulation........ ....................................................................................10 Mode EON TA local.............................................................................................................................10 Mode EON DX ....... ............................................................................................................................10 RDS (Radio Data System) ....... ..........................................................................................................11 LECTEUR CD ....... ................................................................................................................................12 Insérer et retirer des CD ....... .............................................................................................................12 Sauter des titres .................................................................................................................................12 Interrompre la lecture du CD ....... ......................................................................................................12 Avance et retour .................................................................................................................................12 Lire tous les titres ...............................................................................................................................12 Répéter un titre ....... ...........................................................................................................................12 Lecture aléatoire ....... .........................................................................................................................12 LECTURE DE MP3 ....... ........................................................................................................................13 Rechercher par titres (numéros).........................................................................................................13 Rechercher par interprètes ....... .........................................................................................................13 Lire des fichiers WMA ....... .................................................................................................................13 Tableau explicatif des touches ...........................................................................................................14 FONCTION ID3 TAG .............................................................................................................................14 LIRE LES DONNÉES DE L'USB ....... ...................................................................................................15 Fonction d'enregistrement ....... ..........................................................................................................15 RÉSOLUTION DE PROBLÈMES ....... ..................................................................................................16 DONNÉES TECHNIQUES ....................................................................................................................17 F 4 MD 80403 Autoradio BDA_F.FH11 Fri Jan 28 12:13:46 2005 Seite 5 C M Y CM MY CY CMY K AVANT LA MISE EN MARCHE Avant de procéder au montage, retirez impérativement les deux vis situées sur la partie supérieure du boîtier de l'autoradio et servant à sécuriser le transport (elles sont reconnaissables aux fanions rouges) ! Sécurité pour le transport MONTAGE Cet autoradio peut être monté très facilement dans n'importe quel compartiment standard répondant à la norme ISO pour autoradio. Si votre véhicule ne dispose pas de compartiment standard répondant à la norme ISO pour autoradio, adressez-vous à votre garagiste. F Cet autoradio peut être monté très facilement dans n'importe quel compartiment standard répondant à la norme ISO pour autoradio. Si votre véhicule ne dispose pas de compartiment standard répondant à la norme ISO pour autoradio, adressez-vous à votre garagiste. Montage de l'autoradio dans le compartiment ISO de votre véhicule. Retirez le support de montage de l'autoradio. Insérez le support de montage dans le compartiment pour autoradio qui se trouve sur la planche de bord de votre véhicule. À l'aide d'un tournevis, repliez les brides de fixation du support de montage de manière à le fixer solidement dans le véhicule. Assurez-vous que le support est fermement fixé. Reliez le bloc de prises ISO aux fiches ISO de votre véhicule. Reliez le câble de l'antenne du véhicule à la fiche antenne de l'autoradio. Poussez délicatement l'autoradio dans le support de montage. Prenez garde à ne pas coincer les câbles ! Appuyez sur la touche RESET (10) à l'aide d'un stylo à bille ou d'un autre objet pointu de ce type. Placez le panneau de commande. ATTENTION ! Lors du montage, utilisez les prises ISO de l'autoradio pour procéder au branchement. Vous trouverez dans le commerce les fiches adaptateur ISO (pièces pour voiture) adaptées à votre véhicule. Si vous retirez la prise adaptateur du câble ou si vous coupez les câbles, la garantie ne s'applique plus ! F 5 MD 80403 Autoradio BDA_F.FH11 Fri Jan 28 12:13:46 2005 Seite 6 C M Y CM MY CY CMY K RETRAIT ET INSERTION DU PANNEAU DE COMMANDE Appuyez sur la touche OPEN (1) et retirez le panneau de commande. Conservez toujours le panneau de commande dans l'étui de transport prévu à cet effet. Lorsque le panneau de commande a été retiré, un témoin lumineux rouge (24) clignote. Pour insérer le panneau de commande, placez d'abord le côté droit dans le support. Appuyez ensuite fermement sur le côté gauche, jusqu'à ce qu'il s'enclenche. Vérifiez que le panneau de commande soit bien en place et ne puisse plus bouger. Si le panneau de commande n'est pas correctement installé, des informations erronées apparaissent sur l'affichage et/ou certaines touches ne fonctionnent pas correctement. Panneau avant Prise d'adaptation ISO Attention !! Utilisez la prise d'adaptation ISO de l'autoradio pour établir un raccordement électrique sûr. Important !! Notez que le câble de réserve rose doit être relié au plus constant (pour la mémorisation des stations). Une fois tous les raccordements effectués, appuyez sur la touche RESET (10). Câble de relais de l'antenne Le câble jaune fourni est destiné aux antennes commandées par relais. Le relais sortira automatiquement l'antenne lorsque l'appareil sera mis sous tension, et la rentrera lorsque l'appareil sera mis hors tension. Attention! Ne pas relier le câble jaune au câble moteur, vous risqueriez d'endommager l'appareil. Sortie Cinch stéréo Ces raccordements (raccordements Cinch rouge et blanc) vous permettent de raccorder des appareils externes (un amplificateur par ex.). F 6 MD 80403 Autoradio BDA_F.FH11 Fri Jan 28 12:13:46 2005 Seite 7 C M Y CM MY CY CMY K RACCORDEMENT DES CÂBLES pour un système de quatre haut-parleurs (Quadro) FACE ARRIÈRE DE L'AUTORADIO Branchement antenne Important ! Pour la mémorisation des stations, la mémoire de réserve doit être raccordée au plus constant. Interrupteur clé rouge de contact (B+) Mémoire de rose réserve Raccordement noir à la terre (B-)(masse) Courant d'antenne Haut-parleur avant gauche Droite rouge Gauche blanc jaune vert gris vert/noir gris/noir bleu blanc bleu/noir blanc/noir Haut-parleur avant droit Haut-parleur arrière droit F Haut-parleur arrière gauche Câble RCA pour un système de deux haut-parleurs (Dual) FACE ARRIÈRE DE L'AUTORADIO Branchement antenne IMPORTANT ! Pour la mémorisation des stations, la mémoire de réserve doit être raccordée au plus constant. Interrupteur clé rouge de contact (B+) Mémoire de réserve rose Prise de terre (B-)(masse) noir Courant d'antenne Haut-parleur gauche Câble RCA Droite rouge Gauche blanc jaune vert gris bleu/noir blanc/noir Haut-parleur droit F 7 MD 80403 Autoradio BDA_F.FH11 Fri Jan 28 12:13:46 2005 Seite 8 C M Y CM MY CY CMY K UTILISATION DE BASE Allumer/Éteindre Appuyez sur la touche POWER/DIM (8) pour allumer ou éteindre l'appareil. Volume Sélectionnez la fonction VOLUME en appuyant sur la touche SEL (2) et faites tourner le bouton de réglage Multijog (3) afin d'obtenir le volume désiré. Réglez le volume de manière à pouvoir encore entendre la sirène des ambulances, camions de pompiers ou voitures de police éventuelles ! Basses Appuyez une fois sur la touche SEL (2) pour régler les basses. En tournant le bouton de réglage Multijog (3), vous augmentez ou réduisez les basses. Aigus Appuyez deux fois sur la touche SEL (2) pour régler les aigus. En tournant le bouton de réglage Multijog (3), vous augmentez ou réduisez les aigus. Balance Appuyez trois fois sur la touche SEL (2) pour régler la balance. En tournant le bouton de réglage Multijog (3), vous pouvez régler la balance entre le haut-parleur droit et gauche. Fader Appuyez quatre fois sur la touche SEL (2) pour régler le fader. En tournant le bouton de réglage Multijog (3), vous pouvez régler le fader des haut-parleurs avant et arrière. Intensité sonore Maintenez appuyée la touche BND/LOU/ENT (6) jusqu'à ce qu'un signal sonore retentisse. La mention LOUD ON ou LOUD OFF apparaît sur l'affichage. Cela vous permet de supprimer les basses fréquences lorsque le volume est faible. Affichage En appuyant sur la touche DSP/0 (5), vous pouvez obtenir les informations suivantes : Nom du programme Fréquence Heure (réglée automatiquement par RDS) Réglages PTY (Ces fonctions RDS sont émises par les différentes stations de radio, leur qualité et volume sont variables. Vous trouverez de plus amples informations dans le chapitre RADIO, sous RDS). Mode La touche MODE (20) vous permet de passer du mode radio au mode CD ou connexion USB. Égaliseur Appuyez sur la touche EQ (7) pour invoquer successivement les réglages sonores suivants : FLAT CLASSICS POP M ROCK M DSP OFF Réinitialiser Pour restaurer les réglages d'usine de votre autoradio, appuyez sur la touche RESET (10) à l'aide d'un stylo à bille. Vous trouverez cette touche derrière le panneau de commande ! Appuyez sur la touche RESET dans les cas suivants : - lors de la première mise en service, après avoir terminé le branchement des câbles - si les touches de fonction ne sont pas toutes fonctionnelles, - si un message d'erreur apparaît sur l'affichage. F 8 MD 80403 Autoradio BDA_F.FH11 Fri Jan 28 12:13:46 2005 Seite 9 C M Y CM MY CY CMY K RADIO Sélectionner la fréquence Appuyez sur la touche BND/LOU/ENT (6) pour sélectionner la fréquence : petites ondes (F1, F2, F3), ondes moyennes (MW) ou grandes ondes (LW). Vous pouvez enregistrer six stations dans chaque catégorie. Sélectionner une station Si vous appuyez brièvement sur les touches de recherche de station (touches Tune) I<< (22) ou >>I (23), l'appareil recherche automatiquement la station suivante. Si vous maintenez appuyée l'une des touches TUNE durant deux secondes, vous passez en mode de recherche manuelle des stations. La mention MANUAL apparaît sur l'affichage. Vous pouvez à présent sélectionner et mémoriser la station à l'aide de la touche Tune. Après un bref délai d'attente, l'appareil retourne en mode de recherche automatique des stations. Enregistrer des stations 1. Sélectionnez la fréquence à l'aide de la touche BND/LOU/ENT (6). 2. Sélectionnez une station à l'aide de la touche TUNE I<< (22) ou I>> (23). 3. Appuyez sur l'une des touches de rappel des stations 1-6 (14-19) durant env. 3 secondes. Un signal sonore confirme l'enregistrement de la station. F Station enregistrée Dans chaque fréquence, vous pouvez enregistrer six émetteurs, et les rappeler au moyen des touches 1-6 (14-19). Rappel des stations 1. Sélectionnez la fréquence à l'aide de la touche BND/LOU/ENT (6). 2. Appuyez sur la touche de rappel des stations (14-19) pour rappeler la station enregistrée. Enregistrement automatique (AMS) Maintenez appuyée la touche AMS/D-AUD (21) jusqu'à ce qu'un signal sonore retentisse. La mention SEARCH apparaît sur l'affichage. À chaque fois qu'une station est trouvée, la recherche s'arrête durant env. 5 secondes. Le nombre clignotant sur l'affichage indique le numéro de la touche de rappel des stations où la station correspondante est enregistrée. Si l'émetteur est faible, la recherche se poursuit automatiquement. Défilement des stations enregistrées Défilement automatique des stations enregistrées pour une fréquence. 1. Sélectionnez la fréquence à l'aide de la touche BND/LOU/ENT (6). 2. Appuyez brièvement sur la touche AMS/D-AUD (21). Toutes les stations sont sélectionnées l'une après l'autre pendant quelques secondes. La station recherchée une fois atteinte, appuyez brièvement sur la touche AMS/D-AUD (21). F 9 MD 80403 Autoradio BDA_F.FH11 Fri Jan 28 12:13:46 2005 Seite 10 C M Y CM MY CY CMY K Mode programme régional Certaines stations diffusent différents programmes régionaux. Pour que seules les fréquences alternatives du programme régional souhaité soient sélectionnées, maintenez la touche AF (11) appuyée durant quelques secondes, jusqu'à ce qu'un signal sonore retentisse. Cette touche permet d'activer ou de désactiver le mode de programme régional. La mention REG ON/REG OFF s'affiche. PTY (type/genre de programme) Pour activer le menu, appuyez sur la touche PTY (13). Vous pouvez maintenant sélectionner vos stations selon les critères suivants : MUSiQUE 1 POP M, ROCK M 2 EASY M, LIGHT M 3 CLASSICS (classique), OTHER M (autres) 4 JAZZ, COUNTRY 5 NATION M, OLDIES 6 FOLK M LANGUE NEWS (nouvelles), AFFAIRS (affairs), INFO (infos) SPORT, EDUCATE (éducation), DRAMA CULTURE, SCIENCE, VARIED (divers) WEATHER (météo), FINANCE (finances), CHILDREN (enfants) SOCIAL, RELIGION, PHONE IN (appel téléphonique) Travel (voyages), Leisure (loisirs), Document (Les informations dépendent de la station) TA informations relatives à la circulation Maintenez brièvement appuyée la touche TA/REC (12) pour activer ou désactiver le mode TA. Si le mode TA est enclenché, l'autoradio passe automatiquement du mode CD ou connexion USB au mode radio dès que la station émet un flash d'informations relatives à la circulation. Il se peut que l'autoradio passe à la station relais EON lorsque EON capte des informations relatives à la circulation dans un autre programme. Si le niveau sonore se situe sous le seuil, il augmente. La fonction TA de la station émettrice des informations relatives à la circulation actuelle est interrompue en appuyant sur la touche TA/REC (12). Cela ne désactive pas le mode TA. Si la touche TA/REC (12) est maintenue appuyée durant quelques secondes, le mode EON TA LOCAL/EON TA DISTANCE est sélectionné. Ce mode permet de classer des informations EON TA ; par ex, vous êtes en train d'écouter une station radio classique, mais un message d'information routière est diffusé sur une autre fréquence d'émission ; à ce moment-là, l'appareil passe alors automatiquement sur cette fréquence. Dès que le message est terminé, vous retournez à la station écoutée auparavant. Mode EON TA local Si le mode EON TA LOCAL a été sélectionné, la mention EON TA LO clignote sur l'affichage durant quelques secondes. Le mode de la zone locale est alors enclenché. Mode EON DX Si le mode EON DX a été sélectionné, la mention EON TA DX clignote sur l'affichage durant quelques secondes. Le mode pour la région la plus éloignée est alors enclenché. F 10 MD 80403 Autoradio BDA_F.FH11 Fri Jan 28 12:13:46 2005 Seite 11 C M Y CM MY CY CMY K RDS (Radio Data System) Le service RDS est un service proposé par les stations de radio. Outre la diffusion classique des programmes musicaux et vocaux, des informations supplémentaires sont émises sous forme de signaux numériques codés exploitables par l'autoradio. Appuyez brièvement sur la touche AF (11) pour activer ou désactiver le mode RDS. Lorsque le mode RDS est activé, le symbole AF apparaît sur l'affichage. Dans ce cas, le nom du programme et d'autres informations apparaissent sur l'affichage (4) lorsque l'appareil capte une station. Les informations affichées varient selon la station. Il existe différents services RDS : Program Identification Code Le code PI permet à l'autoradio d'identifier la station réceptionnée. PS : Program Service Name Cette fonction permet l'affichage du nom de la station. AF : Alternative Frequencies La radio sélectionne automatiquement la fréquence alternative captée de façon optimale au sein d'un programme. F PI : TP/TA : Traffic-Program/Traffic-Annoucement EON : Enhanced Other Networks Information L'appareil passe automatiquement sur une des stations enregistrées émettrice d'informations relatives à la circulation lorsque celle-ci diffuse un flash d'informations, même lorsque vous écoutez une station n'émettant pas d'informations routières. PTY : Program Type Code Avec ce code, l'autoradio peut rechercher des stations selon certains critères relatifs à leur contenu, par ex. sport, informations, rock, pop, ... F 11 MD 80403 Autoradio BDA_F.FH11 Fri Jan 28 12:13:46 2005 Seite 12 C M Y CM MY CY CMY K LECTEUR CD Insérer et retirer des CD Pour insérer un CD, le placer dans le compartiment CD (25). La lecture du CD démarre. La mention S--CDP (c.-à-d. "recherche d'un titre") apparaît sur l'affichage. Pour sortir le CD, appuyez sur la touche EJECT (26). La lecture s'interrompt et le CD est éjecté. L'appareil passe en mode Radio. Sauter un titre Appuyer sur la touche TUNE |<< (22) ou >>| (23) pour passer au titre suivant. Le numéro du titre apparaît sur l'affichage (4). Interrompre la lecture d'un CD En appuyant sur la touche PAU (14) en cours de lecture, la lecture du CD est interrompue. En appuyant une nouvelle fois sur la touche PAU (14), la lecture du CD se poursuit. Avance et retour rapide Appuyer quelques secondes sur la touche TUNE |<< (22) ou >>| (23) en cours de lecture pour démarrer l'avance/retour rapide. Lire tous les titres Appuyer sur la touche SCN (15) pour écouter les 10 premières secondes de chaque titre. une nouvelle fois sur la toucbe SCN (15) et la lecture normale est démarrée. Appuyer Répéter un titre Appuyer sur la touche RPT (16) pour écouter continuellement le même titre. En appuyant une nouvelle fois sur la touche RPT (16), la fonction est désactivée. Lecture aléatoire Appuyer sur la touche SHF (17) pour lire tous les titres du CD dans un ordre aléatoire. Remarque : Les CD peuvent sauter lorsque vous roulez sur une route accidentée. Après un certain temps de lecture, les performances s'améliorent. Sauter un titre n'endommage en aucun cas le CD. L'humidité et une humidité de l'air élevée peuvent engendrer des dysfonctionnements du lecteur CD. Allumer le chauffage du véhicule et laisser l'humidité s'évaporer avant l'utilisation. Ne soumettez pas le lecteur CD à des températures extrêmement élevées ou basses. Ne roulez pas avec un CD sorti dans la fente. F 12 MD 80403 Autoradio BDA_F.FH11 Fri Jan 28 12:13:46 2005 Seite 13 C M Y CM MY CY CMY K LECTURE MP3 La lecture démarre automatiquement lors de l'insertion d'un CD-ROM MP3. Pour connaître la fonction des différentes touches, rapportez-vous au chapitre Lecteur CD. Vous pouvez sélectionner directement les titres ou les interprètes. Remarque : les fonctions MP3 dépendent en grande partie de la production du CD MP3. Rechercher par interprètes Appuyez deux fois sur la touche AMS/D-AUD (21). Un ...... clignotant apparaît sur l'affichage. . Entrez le nom de l'interprète souhaité à l'aide des touches indiquées dans le tableau. Remarque : la touche SEL (2) doit être appuyée après chaque lettre pour permettre la saisie de la lettre suivante (déplacement de caractères). Confirmez la saisie à l'aide de la touche BND/LOU/ENT (6). L'appareil recherche à présent le titre correspondant. Une fois que l'appareil a trouvé l'interprète désiré, appuyez à nouveau sur la touche BND/LOU/ENT (6). La lecture du titre commence. F Rechercher par titres (numéros) Appuyez une fois sur la touche AMS/D-AUD (21). La mention MP3T ..... apparaît sur l'affichage. . Entrez le numéro du titre souhaité à l'aide des touches indiquées dans le tableau. Confirmez la saisie avec la touche BND/LOU/ENT (6) ou bien attendez env. 5 sec. jusqu'à ce que l'appareil passe automatiquement au titre choisi. Fichiers WMA Votre autoradio vous permet également de lire des fichiers WMA. Le maniement est identique à celui des fichiers MP3. Remarque : La fonction de recherche dépend des CD MP3 produits. F 13 MD 80403 Autoradio BDA_F.FH11 Fri Jan 28 12:13:46 2005 Seite 14 C M Y CM MY CY CMY K Tableau explicatif des touches AMS/D-AUD (21) BND/LOU/ENT (6) 1 (14) 2 (15) 3 (16) Sélectionner le réglage Confirmer A, B, C, 1 D, E, F, 2 G, H, I, 3 4 (17) 5 (18) 6 (19) MODE (20) J, K, L, 4 M, N, O, 5 / 10 Station vers l'arrière P, Q, R, 6 / 10 Station vers l'avant S, T, U, 7 |<< (22) >>| (23) SEL (2) DSP/0 (5) (5) (6) V, W, X, 8 Y, Z, Espace, 9 Décalage de signe vers la droite 0,_, -, +, Fonction défilement A-Z / 0-9 Remarque : Lors de la création d'un CD-ROM MP3, veillez à ce que les titres soient enregistrés séparément ou regroupés dans des répertoires. Ne mélangez jamais les titres et les répertoires, cela pourrait entraîner des perturbations lors de la lecture. Tous les codages habituels peuvent être lus. FONCTION ID 3-TAG Lors de la création d'un CD MP3, vous pouvez enregistrer des informations supplémentaires. Il peut s'agir d'informations concernant l'interprète, le titre, le nom de l'album et l'année de sortie du morceau, ou encore d'un bref commentaire. Nous conseillons l'éditeur ID3 Tag pour la saisie de ces informations. Ces informations sont affichées sur demande au niveau de l'affichage en cours de lecture. Outre le numéro du titre, le nom du titre ou de l'interprète peut être affiché lors de la lecture d'un CD MP3 (en fonction des informations enregistrées sur le CD MP3). Pour afficher ces informations, appuyez sur la touche DSP/0 (5). À chaque fois que la touche est actionnée, un enregistrement ID3-Tag relatif à la lecture en cours est affiché : TITRE - INTERPRÈTE - NOM DE L'ALBUM - ANNÉE DE SORTIE - COMMENTAIRE F 14 MD 80403 Autoradio BDA_F.FH11 Fri Jan 28 12:13:46 2005 Seite 15 C M Y CM MY CY CMY K LIRE LES DONNÉES DE L'USB Vous pouvez brancher un lecteur MP3 ou un autre support de données USB au niveau du raccordement USB situé sur la façade de l'appareil. Votre autoradio peut utiliser des supports de données USB jusqu'à 1 Go. La structure de répertoires peut contenir un maximum de 1024 dossiers, 4096 fichiers et une profondeur de répertoires de 8 niveaux. Fonction d'enregistrement Votre autoradio permet également d'enregistrer sur des supports de données USB externes des données provenant de la radio et du lecteur CD. Pour commencer l'enregistrement, appuyez sur la touche TA/REC (12) dans le mode approprié. Les données audio sont maintenant enregistrées sur le support de donnés USB dans le format WMA. Au cours de l'enregistrement, le message FILE NAME apparaît sur l'affichage. Pour arrêter l'enregistrement, appuyez une nouvelle fois et brièvement sur la touche TA/REC (12). Vous pouvez relire les données en passant dans le mode USB via la touche MODE (20) et en rappelant les différents titres du support de données USB. F Dès que l'appareil externe est branché, l'autoradio recherche des fichiers MP3 ou WMA sur le support de données, et la mention USB apparaît sur l'affichage (4). La lecture de fichiers sur le support de données externe et la fonction de recherche s'effectuent de la même manière qu'avec les CD MP3. F 15 MD 80403 Autoradio BDA_F.FH11 Fri Jan 28 12:13:46 2005 Seite 16 C M Y CM MY CY CMY K RÉSOLUTION DE PROBLÈMES Problème Origine Solution L'appareil ne s'allume pas. L'allumage n'est pas enclenché. Enclencher l'allumage en tournant la clé. Le fusible est défectueux. Remplacer le fusible. Le CD n'est pas chargé ou éjecté. L'appareil contient déjà un CD. Retirer le CD du lecteur et insérer un autre CD. Le CD a été inséré à l'envers. Toujours insérer les CD face imprimée vers le haut. Nettoyer le CD ou Le CD est très sale ou essayer d'en lire un autre. défectueux. La température dans l'habitacle Faire baisser la température ambiante jusqu'à ce qu'elle de la voiture est trop élevée. redevienne normale. Pas de son Condensation. Éteindre l'appareil durant quelques heures et réessayer. Volume réglé sur le minimum. Régler le volume au niveau souhaité. Vérifier le raccordement des câbles. Les câbles ne sont pas correctement raccordés. Les touches de fonction ne fonctionnent pas. Le micro-ordinateur intégré ne Appuyer sur la touche RESET. peut pas fonctionner à cause du brouillage. Le panneau de commande n'est Vérifier le bon emplacement du pas correctement positionné. panneau de commande. Le CD saute. L'angle d'installation est supérieur à 30°. Le CD est très sale ou défectueux. Erreur lors du gravage d'un CD La radio ne fonctionne pas. La sélection automatique des stations ne fonctionne pas. La mémorisation des stations ne fonctionne pas. F 16 personnel. Le câble antenne n'est pas branché. Les signaux d'émission sont trop faibles. Le câble rose n'est pas branché au plus constant. Réduire l'angle d'installation à moins de 30°. Nettoyer le CD ou essayer d'en lire un autre. Tester le CD dans un autre appareil. Brancher fermement le câble. Sélectionner manuellement la station. Vérifier le raccordement des câbles. MD 80403 Autoradio BDA_F.FH11 Fri Jan 28 12:13:46 2005 Seite 17 C M Y CM MY CY CMY K DONNÉES TECHNIQUES Caractéristiques générales Tension de service : Dimensions du boîtier : Puissance : Fusible : DC 12V, borne de mise à la masse négative 178 x 155 x 50 mm (LxPxH) Puissance de sortie musicale de pointe 4 x 20 W R.M.S 0,5 ampère (rouge), 15 ampères (rose) Lecteur CD/MP3 Débit MPEG Plage de fréquences Lecture des MP3 64 -320 k 20 Hz ~ 20 kHz Format MP3 ISO 9660 & Joliet Radio Plage de fréquences IF Sensibilité (Rapport signal/bruit = 30 dB) Stereo Trennung Plage de fréquences IF (Rauschabstand = 30 dB) Séparation stéréo Plage de fréquences IF Sensibilité (Rapport signal/bruit = 30 dB) Lecteur CD Utilisez exclusivement des CD portant le label : F Pour 3 bandes de fréquence FM 87.5 - 108 MHz 10.7 MHz 3 µV > 30 dBu MW 522 - 1620 kHz 45 kHz 32 dBu LW 144 - 288 kHz 450 kHz 35 dBu COMPACT DIGITAL AUDIO Appareil laser de catégorie 1 Sous réserve de modifications techniques. F 17 MD 80403 Autoradio BDA_SPA.FH11 Fri Jan 28 12:13:16 2005 Seite 2 C M Y CM MY CY CMY K FUNCIONES 1. OPEN Abrir el panel de control 2. SEL: Acceso a cada una de las funciones 3. MULTIJOG Ajuste del volumen, graves, agudos, balance y fader 4. PANTALLA 5. DSP/0: Consulta de los ajustes de programa, hora, frecuencia y 6. BND/LOU/ENT: Selección del ancho de banda/intensidad/confirmar 7. EQ: Ecualizador 8. POWER/DIM: Encender/Apagar, regular la iluminación de la pantalla ajustes PTY 9. USB Conexión USB para soportes externos de datos 10. RESET Restablecer los ajustes de fábrica 11. AF: Activar el modo RDS 12. TA/REC: Traffic Announcement Identification / Reconocer informaciones relativas al tráfico/Iniciar la grabación 13. PTY: Program Type Code 14. 19.: Botones de selección de emisora 14. PAU: Pausa en modo CD/MP3 / tecla numérica 1 15. SCN: Scan, reproducir los primeros 10 seg. en el modo CD/MP3 / tecla numérica 2 16. RPT: Repeat, repetición en modo CD/MP3 / tecla numérica 3 17. SHF: Shuffle, repetición aleatoria en modo CD/MP3 / tecla numérica 4 18. Tecla numérica 5 19. Tecla numérica 6 20. MODE: Cambio radio / CD / MP3 / tecla numérica 7 21. AMS/D-AUD Memorización automática de emisoras / búsqueda MP3 22. -<< : Tune/Búsqueda de emisoras/retroceder/tecla numérica 8 23. +>>: Tune/Búsqueda de emisoras/avanzar/tecla numérica 9 24. Diodo luminoso rojo (LED de protección antirrobo) 25. Compartimento del CD: Para insertar el CD 26. EJECT E 2 Expulsar el CD MD 80403 Autoradio BDA_SPA.FH11 Fri Jan 28 12:13:16 2005 Seite 3 C M Y CM MY CY CMY K ADVERTENCIAS DE SEGURIDAD Introduzca el aparato en el hueco correspondiente o elija un lugar para el montaje del aparato que no impida las operaciones normales de conducción del conductor. Conecte los cables antes de instalar el aparato definitivamente. Asegúrese de que están bien conectados y de que el sistema funciona correctamente. En caso de que sean necesarias modificaciones en el vehículo, diríjase a su concesionario/ o taller de automóviles. Instale el aparato de tal forma que no puedan producirse lesiones en caso de frenar en seco. Si se instala el aparato en una posición con una inclinación mayor de 30º respecto a la horizontal, esto puede impedir el rendimiento óptimo del aparato. 30° E Evite instalar el aparato cerca de altas temperaturas (p.ej., radiación solar directa o aire de la calefacción), polvo, suciedad o vibraciones excesivas. E 3 MD 80403 Autoradio BDA_SPA.FH11 Fri Jan 28 12:13:16 2005 Seite 4 C M Y CM MY CY CMY K SUMARIO ANTES DE LA PUESTA EN FUNCIONAMIENTO................................................................................5 MONTAJE .............................................................................................................................................5 EMPLAZAMIENTO DE LA RADIO EN EL HUECO ISO DE SU AUTOMÓVIL....................................5 Quitar y colocar el panel de control .....................................................................................................6 CLAVIJAS ADAPTADORAS ISO .........................................................................................................6 Cable para antena automática ............................................................................................................6 Salida cinch estéreo ............................................................................................................................6 CONEXIONES POR CABLE.................................................................................................................7 FUNCIONES BÁSICAS ........................................................................................................................8 Encender/Apagar.................................................................................................................................8 Volumen...............................................................................................................................................8 Graves ................................................................................................................................................8 Agudos................................................................................................................................................8 Balance...............................................................................................................................................8 Fader ..................................................................................................................................................8 Intensidad ...........................................................................................................................................8 Pantalla...............................................................................................................................................8 Mode...................................................................................................................................................8 Ecualizador .........................................................................................................................................8 Reset ..................................................................................................................................................8 RADIO ...................................................................................................................................................9 Seleccionar el ancho de banda ...........................................................................................................9 Seleccionar emisora.........9 Emisoras preprogramadas .................................................................................................................9 Memorizar emisoras ...........................................................................................................................9 Volver a encontrar emisoras...............................................................................................................9 Memorización automática (AMS) .......................................................................................................9 Recorrer la preprogramación..............................................................................................................9 Modo Programa Regional.................................................................................................................10 PTY (tipo de programa) ....................................................................................................................10 TA Información de tráfico ..................................................................................................................10 Modo local EON TA ..........................................................................................................................10 Modo EON DX ..................................................................................................................................10 RDS (Radio Data System)................................................................................................................11 REPRODUCTOR CD ..........................................................................................................................12 Insertar y expulsar CDs ...................................................................................................................12 Saltar al siguiente título ....................................................................................................................12 Interrumpir la reproducción del CD...................................................................................................12 Avance y retroceso.......12 Reproducir el inicio de todos los títulos ............................................................................................12 Repetir un título ................................................................................................................................12 Reproducción aleatoria.....................................................................................................................12 REPRODUCCIÓN MP3.......................................................................................................................13 Búsqueda por títulos (números) .......................................................................................................13 Búsqueda por intérpretes .................................................................................................................13 Reproducir archivos WMA ................................................................................................................13 Tabla de asignación de botones .......................................................................................................14 FUNCIÓN ID3-TAG .............................................................................................................................14 REPRODUCIR DATOS DESDE USB .................................................................................................15 Función grabación ............................................................................................................................15 BÚSQUEDA DE FALLOS ...................................................................................................................16 DATOS TÉCNICOS .............................................................................................................................17 E 4 MD 80403 Autoradio BDA_SPA.FH11 Fri Jan 28 12:13:16 2005 Seite 5 C M Y CM MY CY CMY K ANTES DE LA PUESTA EN FUNCIONAMIENTO Antes del montaje no se olvide de retirar los dos tornillos de seguridad para el transporte que hay en la parte superior de la carcasa de la radio. (¡marcados con banderas rojas!) Bloqueadores para el transporte MONTAJE Instalación de la radio en el hueco ISO de su vehículo. Retire el marco de instalación de la radio. Introduzca el marco de instalación en el hueco para la radio del salpicadero de su vehículo. Doble las pestañas de fijación del marco de instalación mediante un destornillador para que el marco esté bien fijado en el vehículo. Asegúrese de que el marco esté bien fijado. Conecte el bloque de tomas ISO con las clavijas ISO de su vehículo. Conecte el cable de antena de su vehículo con la clavija de antena de la autorradio. Introduzca la radio cuidadosamente en el marco de instalación. ¡Tenga cuidado de no aprisionar los cables! Pulse el botón RESET (10) con un bolígrafo u otro objeto punzante. Coloque el panel de control. E Esta autorradio puede ser instalada fácilmente en cualquier hueco de radio estándar ISO. Si su automóvil no dispusiera de ningún hueco ISO estándar, diríjase a su concesionario. ¡ATENCIÓN! Rogamos que en la instalación se utilicen las tomas ISO de la autorradio para la conexión de la misma. Se pueden adquirir las clavijas adaptadoras ISO adecuadas (contrapiezas) para cada tipo de vehículo en los correspondientes establacimientos. ¡Si separa la toma adaptadora del cable o si corta los cables, quedará anulada la garantía! E 5 MD 80403 Autoradio BDA_SPA.FH11 Fri Jan 28 12:13:16 2005 Seite 6 C M Y CM MY CY CMY K QUITAR Y COLOCAR EL PANEL DE CONTROL Pulse el botón OPEN (1) y retire el panel de control. Conserve siempre el panel de control en la correspondiente bolsa de transporte. Cuando haya extraído el panel de control, parpadeará un diodo rojo (24). Para montar el panel de control coloque primero el lado derecho en el marco. A continuación presione el lado izquierdo hasta que encaje. Cerciórese de que el panel de control está bien encajado en su sitio. Si el panel de control no está bien colocado, en la pantalla aparecen informaciones erróneas o algunos de los botones funcionan incorrectamente. Frontal Conector ISO ¡Atención! Utilice el conector ISO de la radio para garantizar una conexión eléctrica segura. ¡Importante! Tenga en cuenta que el cable de color rosa debe estar conectado a un positivo constante (para la memoria de emisoras). Después de haber realizado todas las conexiones, pulse el botón tecla RESET (10). Cable para antena automática Se ha dispuesto el cable amarillo para una antena automática controlada por relé. El relé saca la antena automáticamente cuando se conecta el aparato y la recoge al desconectar. Cuidado: No conecte el cable amarillo con el cable del motor; pueden producirse daños en el aparato Salida cinch estéreo En estas conexiones (cinch de color rojo y blanco) se pueden conectar aparatos externos (p.ej., amplificadores). E 6 MD 80403 Autoradio BDA_SPA.FH11 Fri Jan 28 12:13:16 2005 Seite 7 C M Y CM MY CY CMY K CONEXIONES POR CABLE para el Sistema (Quadro) de cuatro altavoces AUTORRADIO PARTE POSTERIOR conexión de la antena ¡Importante! La memoria back-up debe estar conectada a un positivo constante para la memorización de emisoras. llave de contacto (B+) rojo memoria back-up rosa toma de tierra (B-)(masa) negro cable RCA derecha rojo izquierda blanco amarillo antena eléctrica altavoz frontal izquierdo gris gris/negro azul blanco azul/negro blanco/negro altavoz frontal derecho altavoz trasero derecha E altavoz trasero izquierda verde verde/negro para el Sistema (Dual) de dos altavoces AUTORRADIO PARTE POSTERIOR conexión de la antena ¡Importante! La memoria back-up debe estar conectada a un positivo constante para la memorización de emisoras. llave de contacto (B+) rojo memoria back-up rosa toma de tierra (B-)(masa) negro antena eléctrica altavoz izquierda cable RCA derecha rojo izquierda amarillo verde gris azul/negro blanco/negro altavoz derecho E 7 MD 80403 Autoradio BDA_SPA.FH11 Fri Jan 28 12:13:16 2005 Seite 8 C M Y CM MY CY CMY K FUNCIONES BÁSICAS Encender/Apagar Pulse el botón POWER/DIM (8) para encender o apagar la radio. Volumen Seleccione la función VOLUME pulsando el botón SEL (2) y gire el regulador Multijog (3) para ajustar el volumen deseado. ¡Ajuste el volumen de tal modo que pueda oír las ambulancias/coches de policía/bomberos que eventualmente se acerquen a su vehículo! Graves Pulse el botón SEL (2) una vez, para ajustar los graves. Girando el regulador Multijog (3) sube o baja los graves. Agudos Pulse el botón SEL (2) dos veces, para ajustar los agudos. Girando el regulador Multijog (3) sube o baja los agudos. Balance Pulse el botón SEL (2) tres veces, para ajustar el balance. Girando el regulador Multijog (3) puede ajustar el balance entre el altavoz derecho y el izquierdo. Fader Pulse el botón SEL (2) una vez, para ajustar el fader. Girando el regulador Multijog (3) puede ajustar el fader entre los altavoces delanteros y traseros. Intensidad Mantenga pulsado el botón BND/LOU/ENT (6) hasta oír una señal acústica. En pantalla aparece LOUD ON o LOUD OFF. De ese modo logrará el incremento de la frecuencias bajas aunque el volumen esté bajo. Pantalla Si pulsa el botón DSP/0 (5) podrá acceder a la siguiente información: programas frecuencia hora (se ajusta automáticamente si existe una sintonización RDS) ajustes PTY (Estas funciones RDS son emitidas con distinta amplitud y calidad por las diversas emisoras de radio. Encontrará más información en el capítulo RADIO bajo RDS). Modo Mediante el botón MODE (20) puede cambiar entre la radio y el CD o la conexión USB. Ecualizador Pulse el botón EQ (7) para acceder sucesivamente a los siguientes ajustes de sonido: FLAT CLASSICS POP M ROCK M DSP OFF Reset Para volver a poner la radio con los ajustes de fábrica, pulse el botón RESET (10) con la punta de un bolígrafo. ¡Este botón se encuentra en la parte posterior del panel de control! Por favor, pulse el botón RESET en los siguientes casos: - durante la primera puesta en funcionamiento, tras haber efectuado las conexiones de cables, - si no funcionan todos los botones de función, - si aparece una indicación de error en la pantalla. E 8 MD 80403 Autoradio BDA_SPA.FH11 Fri Jan 28 12:13:16 2005 Seite 9 C M Y CM MY CY CMY K RADIO Seleccionar la banda Pulsando el botón BND/LOU/ENT (6) puede cambiar entre FM (F1, F2, F3), onda media (AM) y onda larga (LW). En cada zona de banda puede memorizar seis emisoras. Sintonización de emisoras Pulse brevemente los botones de sintonización (botones Tune) I<< (22) o >>I (23) y el aparato buscará automáticamente la siguiente emisora. Si mantiene pulsado el botón TUNE durante dos segundos, cambiará a la búsqueda manual de emisoras. En pantalla aparecerá la indicación MANUAL. Ahora, mediante el botón Tune puede seleccionar y memorizar la emisora. El aparato, tras un breve periodo de espera, pasa a la función de búsqueda automática de emisoras. Emisoras preprogramadas En cada área de emisión puede memorizar seis emisoras y acceder a ellas a través de los botones de sintonía 1-6 (14-19). Encontrar una emisora memorizada 1. Seleccione la zona de banda pulsando el botón BND/LOU/ENT (6). 2. Pulse los botones de sintonía (14-19), para acceder a las emisoras preprogramadas. E Memorización de emisoras 1. Seleccione la zona de banda pulsando el botón BND/LOU/ENT (6). 2. Seleccione una emisora mediante los botones TUNE I<< (22) o I>> (23). 3. Pulse uno de los botones de sintonía 1-6 (14-19) durante aproximadamente 3 segundos. Oirá una señal acústica que le indicará la memorización de la emisora. Memorización automática (AMS) Mantenga pulsado el botón AMS/D-AUD (21) hasta oír una señal acústica. En pantalla aparecerá SEARCH. La búsqueda automática se detiene durante aprox. 5 segundos en cada emisora localizada. En pantalla parpadea una cifra que indica el número de sintonía en la que ha sido memorizada cada emisora. Si las emisoras emiten una señal débil, la búsqueda prosigue automáticamente. Recorrer la preprogramación Búsqueda automática de las emisoras memorizadas en cada área de emisoras. 1. Seleccione la zona de banda pulsando el botón BND/LOU/ENT (6). 2. Pulse brevemente el botón AMS/D-AUD (21). Se selecciona ahora brevemente cada una de las emisoras memorizadas. Cuando llegue a la emisora deseada, pulse brevemente el botón AMS/D-AUD (21). E 9 MD 80403 Autoradio BDA_SPA.FH11 Fri Jan 28 12:13:16 2005 Seite 10 C M Y CM MY CY CMY K Modo de programa regional Algunas emisoras emiten diferentes programas regionales. Para seleccionar únicamente las frecuencias alternativas del programa regional deseado, mantenga pulsado el botón AF (11) hasta oír una señal acústica que le indicará que el modo ha sido conectado o desconectado. En la pantalla aparecerá la indicación REG ON/REG OFF. PTY (tipo de programa) Para activar el menú pulse el botón PTY (13). A continuación, podrá seleccionar sus emisoras según las siguientes categorías: MÚSICA 1 POP M, ROCK M 2 EASY M, LIGHT M 3 CLASSICS (clásica), OTHER M (otros) 4 JAZZ, COUNTRY 5 NATION M, OLDIES 6 FOLK M CONTENIDOS NEWS (noticias), AFFAIRS (asuntos), INFO (información) SPORT, EDUCATE (educación), DRAMA CULTURE (cultura), SCIENCE (ciencia), VARIED (diversos) WEATHER (tiempo), FINANCE (finanzas), CHILDREN (infantil) SOCIAL (asuntos sociales), RELIGION, PHONE IN (entradas telefónicas) Travel (viajes), Leisure (tiempo libre), Document (Estas informaciones dependen de la emisora) TA, información de tráfico Mantenga pulsada brevemente el botón TA/REC (12) para activar o desactivar el modo TA. Si el modo TA está activado y se emite una información relativa al tráfico mientras usted está oyendo un CD o ha ajustado la conexión USB, el aparato cambiará automáticamente a la emisión radiofónica. De vez en cuando se producirá un cambio de canal con la estación de conexión EON, si EON encuentra una información relativa al tráfico en otro programa. Si el nivel de volumen se encuentra por debajo del umbral, subirá. La función TA de la información de tráfico se interrumpe si pulsa el botón TA/REC (12). Sin embargo, con ello no quedará desactivado el modo TA. Si mantiene pulsado el botón TA/REC (12) durante más tiempo, se selecciona el modo EON TA LOCAL/EON TA DISTANCE. Con este modo se administran las informaciones EON TA: si usted está oyendo por ejemplo una emisora sin información de tráfico pero en otra emisora surge una, el aparato cambiará automáticamente de emisora durante la transmisión de esa información. Tan pronto como la información haya finalizado, volverá a la emisora que usted estaba oyendo antes. Modo local EON TA Si ha seleccionado el modo EON TA LOCAL, en pantalla parpadeará durante unos segundos la indicación EON TA LO. Ha seleccionado el modo para el área local. Modo EON DX Si ha seleccionado el modo EON DX, en pantalla parpadeará durante unos segundos la indicación EON TA DX. Ha seleccionado el modo para el área más alejada. E 10 MD 80403 Autoradio BDA_SPA.FH11 Fri Jan 28 12:13:16 2005 Seite 11 C M Y CM MY CY CMY K RDS (Sistema de radiodifusión de datos) El RDS es un servicio de las emisoras de radio. Además de los programas de música y de charla convencionales se emiten informaciones adicionales en forma de señales digitales codificadas que pueden ser evaluadas por la radio. Pulse brevemente el botón AF (11), para conectar o desconectar el modo RDS. Si el modo RDS está activado, en la pantalla aparece el símbolo AF. Ahora durante la recepción de una emisora en la pantalla (4) aparece el nombre del programa y otras informaciones. Estas informaciones dependen de la emisora. PI: Program Identification Code Mediante el código PI, la radio puede identificar la emisora sintonizada. PS: Program Service Name La función Programa permite indicar el nombre de la emisora. AF: Alternative Frequencies La radio elige automáticamente la frecuencia alternativa que mejor se recibe del mismo programa. E Se ofrecen diferentes servicios RDS: TP/TA: Traffic-Program/Traffic-Annoucement EON: Enhanced Other Networks Information En caso de que esté escuchando una emisora sin informaciones de tráfico y haya una información de tráfico actual, se cambiará automáticamente a una emisora asociada con informaciones de tráfico. PTY: Program Type Code Con Program Type la radio puede buscar emisoras con contenidos de programas preseleccionables. Por ejemplo, deportes, noticias, rock, pop, ... E 11 MD 80403 Autoradio BDA_SPA.FH11 Fri Jan 28 12:13:16 2005 Seite 12 C M Y CM MY CY CMY K REPRODUCTOR CD Introducir y retirar CDs Introduzca el CD en el compartimento de CDs (25). Se iniciará la reproducción del CD. En pantalla aparecerá la indicación S--CDP (es decir, "búsqueda título"). Para extraer el CD pulse el botón EJECT (26). La reproducción queda interrumpida y sale el CD. El aparato cambia al modo radio. Saltar título Pulsar el botón TUNE |<< (22) o >>| (23) para saltar al siguiente título. El número del título aparecerá en pantalla (4). Interrumpir CD Si pulsa el botón PAU (14) durante la reproducción, ésta quedará interrumpida. Si vuelve a pulsar el botón PAU (14) se reanudará la reproducción. Avance y retroceso rápidos Pulsar durante la reproducción el botón TUNE |<< (22) o >>| (23) para iniciar el avance o retroceso rápidos. Reproducir el inicio de todos los títulos Pulse el botón SCN (15) y se reproducirá los primeros 10 segundos de cada título. Vuelva a pulsar el botón SCN (15) y se iniciará la reproducción normal. Repetir un título Pulse el botón RPT (16) para oír repetidas veces el mismo título. Si vuelve a pulsar RPT (16) la función queda desactivada. Reproducción aleatoria Pulsar el botón SHF (17), para reproducir todos los títulos del CD en orden aleatorio. Advertencia: Conducir por carreteras con el pavimento accidentado puede provocar que el CD salte. Un breve tiempo de reproducción puede mejorar el rendimiento. Que se salten algunos títulos no daña en ningún caso al CD. La humedad o una humedad del aire elevadas puede provocar errores de funcionamiento en el reproductor de CD. Conecte la calefacción del automóvil y deje que se evapore la humedad antes de hacer funcionar el aparato. No exponga el reproductor de CD a temperaturas extremadamente altas o bajas. No conduzca con un CD expulsado y en la ranura de CDs. E 12 MD 80403 Autoradio BDA_SPA.FH11 Fri Jan 28 12:13:16 2005 Seite 13 C M Y CM MY CY CMY K REPRODUCCIÓN MP3 La reproducción se inicia automáticamente al introducir un CD-MP3. Para las funciones de los botones, consulte el capítulo Reproductor CD. Puede seleccionar los títulos o los intérpretes directamente. Tenga en cuenta que las funciones MP3 dependen en gran medida de cómo es la compilación del CD-MP3. Búsqueda de títulos (números) Pulse una vez el botón AMS/D-AUD (21). En pantalla aparecerá MP3T ..... . Introduzca mediante los botones indicados en la tabla el número del título deseado. Confirme la indicación con el botón BND/LOU/ENT (6) o espere 5 segundos hasta que el aparato vaya automáticamente el título deseado. Archivos WMA Su autorradio también puede reproducir archivos WMA. En tal caso el funcionamiento es idéntico al de los archivos MP3. E Búsqueda por intérpretes Pulse dos veces el botón AMS/D-AUD (21). En pantalla parpadeará la indicación ....... . Introduzca mediante los botones indicados en la tabla el nombre del intérprete deseado. Tenga en cuenta que después de cada letra deberá pulsar el botón SEL (2) , para poder introducir la siguiente letra (desplazamiento de signos). Confirme la indicación pulsando el botón BND/LOU/ENT (6). El aparato busca ahora el título correspondiente. Pulse de nuevo BND/LOU/ENT (6), cuando el aparato haya encontrado el intérprete deseado. Se reproduce ahora el título buscado. Advertencia: La función de búsqueda depende de cómo haya sido creado el CD-MP3. E 13 MD 80403 Autoradio BDA_SPA.FH11 Fri Jan 28 12:13:16 2005 Seite 14 C M Y CM MY CY CMY K Tabla de asignación de botones AMS/D-AUD (21) BND/LOU/ENT (6) 1 (14) 2 (15) 3 (16) Seleccionar ajuste Confirmar A, B, C, 1 D, E, F, 2 G, H, I, 3 4 (17) 5 (18) 6 (19) MODE (20) J, K, L, 4 M, N, O, 5 / 10 track inferior P, Q, R, 6 / 10 track superior S, T, U, 7 |<< (22) >>| (23) SEL (2) DSP/0 (5) (5) (6) V, W, X, 8 Y, Z, espacio en blanco, 9 Desplazar signos hacia la derecha 0,_, -, +, función desplazamiento A-Z / 0-9 Advertencia: Al grabar un CD-MP3 tenga en cuenta que todos los títulos tienen que estar almacenados sueltos o en carpetas. No mezcle nunca títulos y carpetas dado que esto podría ocasionar problemas en la reproducción. Se pueden reproducir todas las codificaciones usuales. FUNCIÓN ID 3-TAG Al crear un CD-MP3 puede almacenar información complementaria. Dicho tipo de información puede contener el nombre del intérprete, título, nombre del álbum y el año de publicación de la pieza musical, así como un breve comentario. Para la introducción de esos datos recomendamos emplear un editor ID3-Tag. Si las solicita, dichas informaciones aparecen entonces en pantalla durante la reproducción. Así, al reproducir un CD MP3, además del número de título, puede indicarse también el nombre del título o el intérprete (en función de la información que haya sido almacenada en el CD MP3). Para acceder a dicha información pulse el botón DSP/0 (5). Cada vez que pulse el botón aparecerá una entrada ID3-Tag de la reproducción actual. TÍTULO - INTÉRPRETE - NOMBRE DEL ALBUM - AÑO DE PUBLICACIÓN - COMENTARIO E 14 MD 80403 Autoradio BDA_SPA.FH11 Fri Jan 28 12:13:16 2005 Seite 15 C M Y CM MY CY CMY K REPRODUCIR DATOS DESDE USB En la conexión USB que se encuentra en el frontal del aparato puede conectar un reproductor MP3 o un soporte de datos USB. Su autorradio puede procesar formatos de datos USB de hasta 1GB. Con ello, la estructura de índices solamente debe contener 1.024 carpetas, 4.096 archivos y hasta 8 niveles de subcarpetas. Tan pronto como haya conectado un aparato externo, la autorradio buscará archivos MP3 o WMA en el soporte de datos y en pantalla (4) aparecerá la indicación USB. El funcionamiento para la reproducción de archivos en un soporte de datos externo funciona de la misma manera que con los CD MP3. E Función grabación Con su autorradio también puede grabar datos de la radio o de un reproductor CD en un soporte de datos USB. Para iniciar la grabación, pulse en el modo correspondiente el botón TA/REC (12). Los datos de audio son grabados ahora en formato WMA en el soporte de datos USB. Durante la grabación en pantalla aparece la indicación FILE NAME. Para finalizar la grabación, pulse de nuevo brevemente el botón TA/REC (12). Podrá reproducir de nuevo los datos grabados pulsando el botón MODE (20) para pasar al modo USB y acceder a cada uno de los títulos del soporte de datos USB. E 15 MD 80403 Autoradio BDA_SPA.FH11 Fri Jan 28 12:13:16 2005 Seite 16 C M Y CM MY CY CMY K BÚSQUEDA DE FALLOS Problema Causa Solución El aparato no se enciende. No está encendido el motor. Encender el motor girando la llave de contacto. El fusible está defectuoso. Cambiar el fusible. Ya hay un CD en el compartimento. Extraer el CD del reproductor y sólo después colocar uno nuevo. El CD se ha colocado al revés. Introducir el CD con la cara impresa hacia arriba. No se puede introducir o expulsar el CD. El CD está muy sucio o dañado. La temperatura en el interior del coche es demasiado alta. Condensación. No hay sonido Las teclas de función no funcionan. El CD salta La radio no funciona. La búsqueda automática de emisoras no funciona. La memoria de emisoras no funciona. E 16 Limpiar el CD o intentar reproducir otro. Refrigerar, hasta que la temperatura ambiental retorne al estado normal. Dejar el aparato desconectado durante un par de horas y volver a intentarlo más tarde. El volumen está al mínimo. Ajustar el volumen en el nivel deseado. Las conexiones de los cables no son correctas. Controlar las conexiones de los cables. El microordenador integrado no funciona debido a interferencias. La posición del panel de control no es correcta. Pulsar el botón RESET. Cerciórese de que el panel de control está bien encajado en su sitio. El ángulo de colocación supera Modificar el ángulo de colocación para que sea inferior a 30º. los 30°. Limpiar el CD o intentar El CD está muy sucio reproducir otro. o dañado. Error en un CD de creación Comprobar en otro aparato si el casera CD funciona correctamente. El cable de la antena Enchufar bien el cable de la antena. no está conectado. Las señales recibidas son muy débiles. Seleccionar las emisoras manualmente. El cable rosa no está conectado Controlar las conexiones de los cables. a un positivo constante. MD 80403 Autoradio BDA_SPA.FH11 Fri Jan 28 12:13:16 2005 Seite 17 C M Y CM MY CY CMY K ESPECIFICACIONES TÉCNICAS Características generales Tensión de servicio: Dimensiones de la carcasa: Potencia: Fusible: DC 12V, conexión para masa negativa 178 x 155 x 50mm (ancho x profundidad x altura) potencia máxima de salida de música 4 x 20 W R.M.S. 0,5 amperios (rojo); 15 amperios (rosa) Reproductor CD/MP3 Tasa de transferencia MPEG 64 -320 k Gama de frecuencia 20Hz~20kHz Playback MP3 formato de archivo para MP3 ISO9660 & Joliet Radio Para 3 bandas de frecuencia Margen de frecuencia IF (Relación señal/ruido = 30 dB) Separación entre canales Margen de frecuencia IF Sensibilidad (Relación señal/ruido = 30 dB) FM 87.5 hasta 108MHz 10.7MHz 3µV E Margen de frecuencia IF Sensibilidad (Relación señal/ruido = 30 dB) Separación entre canales > 30dBu AM 522 hasta 1.620kHz 45kHz 32 dBu OL 144 hasta 288kHz 450kHz 35dBu Reproductor CD Utilice únicamente CDs que dispongan de la siguiente indicación: COMPACT DIGITAL AUDIO Clase láser 1 Las especificaciones técnicas están sujetas a cambios sin previo aviso. E 17 MD 80403 Autoradio BDA_ITA.FH11 Fri Jan 28 12:12:53 2005 Seite 2 C M Y CM MY CY CMY K FUNZIONI 1. OPEN Apertura del frontalino di comando 2. SEL: Richiamo delle singole funzioni 3. MULTIJOG Impostazione volume, bassi, alti, bilanciamento e dissolvenza 4. DISPLAY 5. DSP/0: Richiesta di impostazione programmi, orario, frequenza e PTY/tasto numerico 0. 6. BND/LOU/ENT: Selezione di banda/volume/Conferma 7. EQ: Equalizzatore 8. POWER/DIM: Accensione/Spegnimento, riduzione illuminazione display 9. USB Collegamento USB per supporti dati esterni 10. RESET ripristino delle impostazioni predefinite 11. AF: Accensione della modalità RDS 12. TA/REC: Identificazione annunci sul traffico Inizio registrazione 13. PTY: Program Type Code 14. 19.: Tasti di selezione delle stazioni 14. PAU: Pausa nel funzionamento del CD/MP3/tasto numerico 1 15. SCN: Scansione, riproduzione dei titoli per 10 secondi nella funzione CD/MP3 / tasto numerico 2 16. RPT: Repeat, ripetizione nella funzione CD/MP3/tasto numerico 3 17. SHF: Shuffle, riproduzione casuale nella funzione CD/MP3/tasto numerico 4 18. Tasto numerico 5 19. Tasto numerico 6 20. MODE: Commutazione da Radio/CD/MP3/Tasto numerico 7 21. AMS/D-AUD memorizzazione automatica delle stazioni / Ricerca MP3 22. -<< : Tune/Ricerca delle stazioni/Indietro/Tasto numerico 8 23. +>>: Tune/Ricerca delle stazioni avanti/Tasto numerico 9 24. Led rosso (LED per protezione antifurto) 25. Vano CD: Per l'inserimento del CD 26. EJECT Rimozione CD I 2 MD 80403 Autoradio BDA_ITA.FH11 Fri Jan 28 12:12:53 2005 Seite 3 C M Y CM MY CY CMY K ISTRUZIONI DI SICUREZZA Inserire l'apparecchio nel vano apposito oppure scegliere un posto per il montaggio dell'apparecchio che non impedisca le normali operazioni di guida. Collegare i cavi poco prima di installare definitivamente l'apparecchio. Assicurarsi che sia installato correttamente e che il sistema funzioni altrettanto correttamente. Nel caso in cui sia necessario apportare modifiche al veicolo, rivolgersi al rivenditore del veicolo o a un'officina specializzata. Installare l'apparecchio in modo da evitare qualsiasi ferita in caso di brusche frenate. Se l'apparecchio viene installato con un'inclinazione di oltre 30°, può perdere le proprie prestazioni ottimali. 30° I Evitare di installare l'apparecchio in prossimità di elevate temperature (ad esempio a diretto contatto con i raggi solari o del riscaldamento), polvere, sporco o scosse eccessive. I 3 MD 80403 Autoradio BDA_ITA.FH11 Fri Jan 28 12:12:53 2005 Seite 4 C M Y CM MY CY CMY K INDICE PRIMA DELLA MESSA IN FUNZIONE.................................................................................................5 MONTAGGIO ........................................................................................................................................5 INSTALLAZIONE DELLA RADIO NEL VANO ISO DEL VEICOLO.....................................................5 Inserimento ed estrazione del frontalino di comando..........................................................................6 ADATTATORE ISO................................................................................................................................6 Cavo per antenne a relè ......................................................................................................................6 Uscita spinotto stereo ..........................................................................................................................6 COLLEGAMENTI DEI CAVI..................................................................................................................7 COMANDI PRINCIPALI ........................................................................................................................8 Accensione/spegnimento ....................................................................................................................8 Volume.................................................................................................................................................8 Bassi ...................................................................................................................................................8 Alti .........8 Bilanciamento .....................................................................................................................................8 Dissolvenza ........................................................................................................................................8 Volume................................................................................................................................................8 Display ................................................................................................................................................8 Mode...................................................................................................................................................8 Equalizzatore ......................................................................................................................................8 Ripristina.............................................................................................................................................8 RADIO ...................................................................................................................................................9 Selezione banda .................................................................................................................................9 Selezione stazioni...............................................................................................................................9 Stazioni preprogrammate ...................................................................................................................9 Memorizzazione delle stazioni............................................................................................................9 Ricerca delle stazioni..........................................................................................................................9 Memorizzazione automatica (AMS)....................................................................................................9 Scorrimento automatico......................................................................................................................9 Modalità programmi locali.................................................................................................................10 PTY (Programme-Type/Art) ..............................................................................................................10 TA Notizie sul traffico ........................................................................................................................10 Modalità locale EON TA....................................................................................................................10 Modalità EON DX .............................................................................................................................10 RDS (Radio Data System)................................................................................................................11 LETTORE CD......................................................................................................................................12 Inserimento ed espulsione di CD......................................................................................................12 Ignora brani ......................................................................................................................................12 Interruzione CD ................................................................................................................................12 Avanzamento e riavvolgimento rapido .............................................................................................12 Riproduzione di tutti i brani ...............................................................................................................12 Ripetizione di un titolo ......................................................................................................................12 Riproduzione casuale .......................................................................................................................12 RIPRODUZIONE MP3.........................................................................................................................13 Ricerca dei brani (numeri) ................................................................................................................13 Ricerca degli interpreti ......................................................................................................................13 Riproduzione file WMA .....................................................................................................................13 Tabella dei tasti .................................................................................................................................14 FUNZIONE ID3-TAG ...........................................................................................................................14 RIPRODUZIONE DATI USB ...............................................................................................................15 Funzione registrazione ........................................................................................................................15 RICERCA ERRORI .............................................................................................................................16 SPECIFICHE TECNICHE....................................................................................................................17 I 4 MD 80403 Autoradio BDA_ITA.FH11 Fri Jan 28 12:12:53 2005 Seite 5 C M Y CM MY CY CMY K PRIMA DELLA MESSA IN FUNZIONE Prima del montaggio rimuovere assolutamente le due viti di sicurezza per il trasporto nella parte superiore dell'alloggiamento della radio (riconoscibile grazie alla bandierina rossa!) Sicurezza durante il MONTAGGIO Questa autoradio può essere installata facilmente in qualsiasi vano radio ISO standard. Se il veicolo non è dotato di un vano radio ISO standard, rivolgersi al proprio rivenditore. I Installazione della radio nel vano ISO del veicolo. Rimuovere il telaio di installazione dalla radio. Inserire il telaio di installazione nel vano radio del pannello strumenti del veicolo. Ruotare le linguette del telaio di installazione con un cacciavite, in modo da fissarlo nel veicolo. Verificare di aver fissato saldamente il telaio. Collegare la presa ISO con la spina ISO del veicolo. Collegare il cavo dell'antenna del veicolo con la spina dell'antenna dell'autoradio. Far scorrere attentamente la radio nel telaio. Verificare che il cavo non resti incastrato! Attivare il tasto RESET (10) con una penna o un oggetto appuntito simile. Inserire il frontalino di comando. ATTENZIONE! Durante l'installazione utilizzare per il collegamento dell'autoradio le prese ISO dell'autoradio. Tuttavia è possibile procurarsi sul mercato gli adattatori ISO (ricambi auto) idonei. Nel caso in cui questo adattatore venga rimosso dal cavo o se il cavo viene tagliato, decade il diritto di garanzia! I 5 MD 80403 Autoradio BDA_ITA.FH11 Fri Jan 28 12:12:53 2005 Seite 6 C M Y CM MY CY CMY K INSERIMENTO ED ESTRAZIONE DEL FRONTALINO DI COMANDO Premere il tasto OPEN (1) ed estrarre il frontalino di comando. Conservare il frontalino di comando sempre nellapposita custodia per il trasporto. Nel caso in cui il frontalino di comando venga rimosso lampeggia un LED rosso (24). Per l'installazione posizionare il frontalino di comando prima dal lato destro sul telaio. Premere quindi con forza il lato sinistro, fino a quando non scatta in posizione. Verificare che il frontalino sia posizionato correttamente e saldamente. Se non è installato correttamente sul display vengono visualizzate sul display informazioni errate e/o alcuni tasti non funzionano correttamente. mascherina anteriore Adattatore ISO Attenzione! Per ottenere un collegamento elettrico sicuro, utilizzare l'adattatore ISO dell'autoradio. Importante! Verificare che il cavo di backup di colore rosa sia posizionato su Dauerplus - più permanente (per la memorizzazione delle stazioni). Dopo aver eseguito tutti i collegamenti, premere il tasto RESET (10). Cavo per antenne a relè Il cavo giallo è disponibile per le antenne guidate da un relè. Il relè fa uscire automaticamente l'antenna quando l'apparecchio viene acceso e, in caso di spegnimento, fa rientrare l'antenna. Attenzione: Per evitare di danneggiare l'apparecchio, non collegare il cavo giallo al cavo del motore. Uscita spinotto stereo A questi collegamenti (spinotto rosso e bianco) è possibile collegare apparecchi esterni (ad esempio gli amplificatori). I 6 MD 80403 Autoradio BDA_ITA.FH11 Fri Jan 28 12:12:53 2005 Seite 7 C M Y CM MY CY CMY K COLLEGAMENTO DEI CAVI Per sistemi a quattro amplificatori (quadro) RETRO DELL'AUTORADIO Collegamento antenna Importante! Back-up memoria deve essere collegata a più permanente per la memorizzazione delle stazioni. Interruttore di accensione (B+) Memoria Back-up rosso Cavo RCA rosa Collegamento a nero terra (B-)(Massa) Antenna elettrica a destra rosso a sinistra bianco Giallo Altoparlante anteriore sinistro Verde grigio verde/nero grigio/nero Altoparlante posteriore sinistro Blu Bianco blu/nero bianco/nero Altoparlante anteriore destro Altoparlante posteriore destro I Per sistemi a due amplificatori (duali) RETRO DELL'AUTORADIO Collegamento antenna Importante! Back-up memoria deve essere collegata a più permanente per la memorizzazione delle stazioni. Interruttore di accensione (B+) Memoria Back-up rosso Altoparlante sinistro Cavo RCA Rosa Collegamento a nero terra (B-)(Massa) Antenna elettrica a destra rosso a sinistra Giallo Verde grigio blu/nero bianco/nero Altoparlante destro I 7 MD 80403 Autoradio BDA_ITA.FH11 Fri Jan 28 12:12:53 2005 Seite 8 C M Y CM MY CY CMY K COMANDI PRINCIPALI Accensione/spegnimento Premere il tasto POWER/DIM (8) per accendere/spegnere l'apparecchio. Volume Selezionare la funzione VOLUME tenendo premuto il tasto Taste SEL (2) e ruotare il Multijog (3) per impostare il volume. Impostare il volume in modo tale da poter sentire i segnali acustici di eventuali ambulanze/veicoli di pompieri/polizia in arrivo! Bassi Premere il tasto SEL (2) una volta per impostare i bassi. Ruotando il Multijog (3) alzare o abbassare i bassi. Alti Premere il tasto SEL (2) due volte per impostare gli alti. Ruotando il Multijog (3) alzare o abbassare gli alti. Bilanciamento Premere il tasto SEL (2) tre volte per impostare il bilanciamento. Ruotando il Multijog (3) è possibile impostare il bilanciamento tra laltoparlante destro e quello sinistro. Dissolvenza Premere il tasto SEL (2) quattro volte per impostare la dissolvenza. Ruotando il Multijog (3) è possibile impostare la dissolvenza tra laltoparlante anteriore e quello posteriore. Volume Tenere premuto il tasto BND/LOU/ENT (6) fino a quando non si sente un suono. Sul display viene visualizzata la scritta LOUD ON oppure LOUD OFF. In tal modo si ottiene un incremento acustico delle basse frequenze di basso volume. Display Premendo il tasto DSP/0 (5) si possono richiedere le seguenti informazioni: Nome del programma Frequenza Orario (viene impostato automaticamente nella ricezione RDS) Impostazioni PTY (Queste funzioni RDS vengono inviate dalle emittenti radio con qualità e caratteristiche diverse. Per ulteriori informazioni, vedere il capitolo RADIO in RDS). Mode Con il tasto MODE (20) è possibile scegliere tra Radio e CD o USB. Equalizzatore Premere il tasto EQ (7) per richiamare le seguenti impostazioni audio: FLAT CLASSICS POP M ROCK M DSP OFF Reset Per riportare l'autoradio alle impostazioni standard, selezionare il tasto RESET (10) con una penna. Questo tasto si trova dietro al frontalino di comando! Selezionare il tasto RESET durante la prima messa in funzione, dopo il collegamento dei cavi, quando non tutti i tasti funzionano, in caso di visualizzazione di un errore sul display. I 8 MD 80403 Autoradio BDA_ITA.FH11 Fri Jan 28 12:12:53 2005 Seite 9 C M Y CM MY CY CMY K RADIO Selezione della banda Premere il tasto BND/LOU/ENT (6), per scegliere tra onde corte (F1, F2, F3), onde medie (OM) e onde lunghe (OL). Per ogni banda è possibile memorizzare sei stazioni. Selezione delle stazioni Premere i tasti di ricerca stazione (tasto Tune) I<< (22) o tasto >>I (23) brevemente, lapparecchio cerca automaticamente la stazione successiva. Se si tiene premuto uno dei tasti TUNE per due secondi, si passa alla ricerca manuale delle stazioni. Sul display compare la scritta MANUAL. Adesso è possibile scegliere e memorizzare la stazione con il tasto Tune. L'apparecchio torna dopo un breve periodo di attesa alla funzione di ricerca automatica delle stazioni. Stazioni preprogrammate In ogni banda è possibile memorizzare fino a sei stazioni e richiamarle tramite i tasti delle stazioni 1-6 (14-19). Memorizzazione delle stazioni 1. Scegliere la banda con il tasto BND/LOU/ENT (6). 2. Scegliere una stazione con il tasto TUNE I<< (22) o tasto I>> (23). 3. Premere uno dei tasti stazione da 1 a 6 (14-19) per circa 3 secondi. Un segnale conferma la memorizzazione delle stazioni. Memorizzazione automatica (AMS) Tenere premuto il tasto AMS/D-AUD (21) fino a quando non si sente un suono. Sul display viene visualizzato SEARCH. La ricerca si sofferma circa 5 sec. su ogni stazione trovata. Il numero che lampeggia sul display indica il numero del tasto stazione dove è stata memorizzata la singola stazione. Nel caso di ricezioni deboli la ricerca prosegue automaticamente. Scorrimento automatico Ricerca automatica delle stazioni memorizzate nel campo di trasmissione. 1. Scegliere la banda con il tasto BND/LOU/ENT (6). 2. Premere brevemente il tasto AMS/D-AUD (21). Tutte le stazioni vengono selezionate rapidamente. Per raggiungere le stazioni cercate, premere brevemente il tasto AMS/D-AUD (21). I 9 I Ricerca delle stazioni 1. Scegliere la banda con il tasto BND/LOU/ENT (6). 2. Premere il tasto stazione (14-19) per richiamare la stazione preprogrammata. MD 80403 Autoradio BDA_ITA.FH11 Fri Jan 28 12:12:53 2005 Seite 10 C M Y CM MY CY CMY K Modalità programmi locali Alcuni programmi trasmettono vari programmi locali. Per scegliere frequenze alternative del programma locale desiderato, tenere premuto il tasto AF (11) fino a quando non si sente un suono, per attivare o disattivare la modalità. Sul display viene visualizzato REG ON/REG OFF. PTY (Programme-Type/Art) Dopo aver attivato il menu, premere il tasto PTY (13). È possibile scegliere le stazioni in base alle seguenti categorie: MUSICA 1 POP M, ROCK M 2 EASY M, LIGHT M 3 CLASSICS (classica), OTHER M (Altro M) 4 JAZZ, COUNTRY 5 NATION M, OLDIES 6 FOLK M LINGUA NEWS (Notizie), AFFAIRS (Affari), INFO (Informazioni) SPORT, EDUCATE (Istruzione), DRAMA CULTURE (cultura), SCIENCE (scienza), VARIED (Varie) WEATHER (Meteo), FINANCE (Finanza), CHILDREN (Bambini) SOCIAL (Sociale), RELIGION, PHONE IN (Telefonate in arrivo) Travel (Viaggi), Leisure (Tempo libero), Document (Le informazioni dipendono dallemittente radio) TA Informazioni sul traffico Tenere premuto brevemente il tasto TA/REC (12) per attivare o disattivare la modalità TA. Se è attivata la modalità TA e vengono trasmesse notizie sul traffico mentre è selezionata l'impostazione CD o è impostato il collegamento USB, si passa automaticamente alla radio. Talvolta si verifica con EON un cambio di stazione, nel caso in cui EON trovi delle informazioni sul traffico in un altro programma. Quando il livello di intensità degli altoparlanti è al di sotto della soglia, si alza. La funzione TA delle trasmissioni sul traffico si interrompe tramite il tasto TA/REC (12) La modalità TA non viene tuttavia disattivata. Se si tiene premuto più a lungo il tasto TA/REC (12), si seleziona la modalità EON TA LOCAL/EON TA DISTANCE. Con questa modalità è possibile ordinare le informazioni EON TA, ad esempio se si ascolta una trasmissione che non è relativa a informazioni sul traffico, ma su un'altra frequenza c'è una comunicazione sul traffico gibt es eine Verkehrsmeldung, l'apparecchio cambia automaticamente la frequenza. Al termine della comunicazione, ritorna alla stazione precedente. Modalità locale EON TA Se è stata selezionata la modalità EON TA LOCAL, sul display lampeggia per alcuni secondi EON TA LO. È stata selezionata la modalità per il territorio locale. Modalità EON DX Se è stata selezionata la modalità EON DX, sul display lampeggia EON TA DX per alcuni secondi. È stata selezionata la modalità per il territorio più distante. I 10 MD 80403 Autoradio BDA_ITA.FH11 Fri Jan 28 12:12:53 2005 Seite 11 C M Y CM MY CY CMY K RDS (Radio Data System) RDS è un servizio per gli apparecchi radio. Oltre alle trasmissioni musicali e parlate tradizionali, vengono trasmesse anche informazioni aggiuntive sotto forma di segnali digitali cifrati che possono essere utilizzati dall'autoradio. Premere brevemente il tasto AF (11) per attivare o disattivare la modalità RDS. Con lattivazione della modalità RDS, sul display viene visualizzato il simbolo AF. Adesso alla ricezione di una stazione, sul display (4) viene visualizzato il nome del programma e altre informazioni. Queste informazioni dipendono dallemittente radio. Sono disponibili diversi servizi RDS: PI: Program Identification Code Tramite il codice PI la radio può identificare la stazione ricevente. PS: Program Service Name La funzione Program Service consente di visualizzare il nome della stazione. AF: Alternative Frequencies La radio sceglie automaticamente le migliori frequenze di ricezione alternative per lo stesso programma. TP/TA: Traffic-Program/Traffic-Annoucement Enhanced Other Networks Information Nel caso di una comunicazione sul traffico, anche nel caso in cui si stia ascoltando una stazione non relativa al traffico, l'apparecchio passa tramite una catena di stazioni alla stazione sul traffico. PTY: Program Type Code Con Program Type la radio può ricercare le stazioni con programmi su argomenti preselezionabili. Ad esempio: sport, notizie, rock, pop,... I EON: I 11 MD 80403 Autoradio BDA_ITA.FH11 Fri Jan 28 12:12:53 2005 Seite 12 C M Y CM MY CY CMY K LETTORE CD Inserimento ed espulsione di CD Inserire i CD nellapposito vano (25). Inizia la riproduzione del CD. Sul display viene visualizzato S--CDP (ovvero "ricerca titolo"). Per estrarre il CD premere il tasto EJECT (26). La riproduzione si interrompe e il CD viene espulso. L'apparecchio passa alla modalità Radio. Ignora titoli Premere il tasto TUNE |<< (22) o il tasto >>| (23) per saltare al titolo successivo. Il numero del titolo viene visualizzato sul display (4). Interruzione CD Durante la riproduzione premere il tasto PAU (14), la riproduzione del CD viene interrotta. Se si preme di nuovo il tasto PAU (14), riprende la riproduzione del CD. Avanzamento e riavvolgimento rapido Durante la riproduzione premere a lungo il tasto TUNE |<< (22) o il tasto >>| (23) per iniziare l'avanzamento/riavvolgimento rapido. Riproduzione di tutti i brani Premere il tasto SCN (15) per ottenere la riproduzione dei primi 10 secondi di ogni titolo. Se si preme di nuovo il tasto SCN (15), parte la normale riproduzione. Ripetizione di un titolo Premere il tasto RPT (16) per riascoltare costantemente lo stesso titolo. Se si preme di nuovo il tasto RPT (16) si disattiva la funzione. Riproduzione casuale Premere il tasto SHF (17) per riprodurre tutti i titoli del CD in ordine casuale. Nota: La guida su strade sconnesse potrebbe provocare salti nella riproduzione del CD. Una breve prova può migliorare le prestazioni. I salti non danneggiano comunque il CD. L'elevata umidità dell'aria possono causare malfunzionamenti del lettore CD. Accendere il riscaldamento del veicolo e fare evaporare l'umidità prima dell'uso. Non esporre il lettore CD né a temperature estremamente alte né basse. Non viaggiare con un CD estratto dal vano. I 12 MD 80403 Autoradio BDA_ITA.FH11 Fri Jan 28 12:12:53 2005 Seite 13 C M Y CM MY CY CMY K RIPRODUZIONE MP3 La riproduzione inizia automaticamente con l'immissione di un CD-ROM/MP3. Per le funzioni dei tasti, vedere il capitolo sul lettore CD. E possibile scegliere direttamente i titoli o gli interpreti. Verificare che le funzioni MP3 dipendano in gran parte dalla creazione di CD MP3. Ricerca dei titoli (numeri) Premere una volta il tasto AMS/D-AUD (21). Sul display viene visualizzato MP3T ..... . Immettere i numeri dei titoli desiderati con i tasti indicati nella tabella. Confermare con il tasto BND/LOU/ENT (6) o attendere circa 5 secondi fino a quando sull'apparecchio passa al titolo selezionato. Ricerca degli interpreti Premere due volte il tasto AMS/D-AUD (21). Sul display viene visualizzato un testo lampeggiante..... . Immettere il nome dell'interprete desiderato con i tasti indicati nella tabella. Dopo ogni lettera è necessario premere il tasto SEL (2) per poter immettere la lettera successiva (distinzione caratteri) Confermare con il tasto BND/LOU/ENT (6). L'apparecchio cerca quindi il titolo corrispondente. Premere ancora una volta il tasto BND/LOU/ENT (6) quando l'apparecchio ha trovato l'interprete desiderato. Viene quindi riprodotto il titolo. I File WMA Nellautoradio è possibile riprodurre anche file WMA. Il funzionamento è lo stesso dei file MP3. Nota: La funzione di ricerca varia in base ai CD MP3. I 13 MD 80403 Autoradio BDA_ITA.FH11 Fri Jan 28 12:12:53 2005 Seite 14 C M Y CM MY CY CMY K Tabella dei tasti AMS/D-AUD (21) BND/LOU/ENT (6) 1 (14) 2 (15) 3 (16) scelta impostazione Conferma A, B, C, 1 D, E, F, 2 G, H, I, 3 4 (17) 5 (18) 6 (19) MODE (20) J, K, L, 4 M, N, O, 5 / 10 Brano precedente P, Q, R, 6 / 10 Brano successivo S, T, U, 7 |<< (22) >>| (23) SEL (2) DSP/0 (5) (5) (6) V, W, X, 8 Y, Z, spazio vuoto, 9 Distinzione caratteri verso destra 0,_, -, +, Funzione di scorrimento A-Z / 0-9 Nota: Durante la creazione di CD-ROM/MP3 verificare se i titoli sono singoli o se fanno parte di un indice. Non mescolare mai i titoli e gli indici, si potrebbero verificare problemi di riproduzione. È possibile riprodurre tutte le codificazioni attuali. FUNZIONE ID3-TAG Durante la creazione di un CD MP3 è possibile memorizzare anche informazioni aggiuntive. Possono essere informazioni sull'interprete, il titolo, il nome dell'album, l'anno di pubblicazione del pezzo musicale, nonché un breve commento. Per l'inserimento consigliamo Tag Editor ID3. A richiesta, queste informazioni possono essere visualizzate sul display durante la riproduzione. Durante la riproduzione di un CD MP3 è quindi possibile visualizzare oltre al numero del titolo, anche il nome del titolo e dell'interprete (a seconda delle informazioni memorizzate sul CD MP3). Per questa richiesta selezionare il tasto DSP/0 (5). Ogni volta che si preme il tasto ID3-Tag viene visualizzata una sequenza della riproduzione attuale: TITOLO - INTERPRETE - NOME ALBUM - ANNO DI PUBBLICAZIONE - COMMENTO I 14 MD 80403 Autoradio BDA_ITA.FH11 Fri Jan 28 12:12:53 2005 Seite 15 C M Y CM MY CY CMY K RIPRODUZIONE DATI USB È possibile collegare il collegamento USB sul lato anteriore dellapparecchio a un lettore MP3 o a un altro driver per dati USB. La vostra autoradio supporta unità di trasmissione dati USB fino a 1 Gb. La struttura delle directory è in grado di contenere fino a 1024 cartelle, 4096 file e 8 livelli di profondità. Dopo il collegamento con lapparecchio esterno, lautoradio cerca file MP3 o WMA e sul display (4) è visualizzato il messaggio USB. Lutilizzo per la riproduzione di file su un driver esterno, ma anceh la funzione di ricerca è esattamente lo stesso dei CD MP3. I Funzione registrazione Con lautoradio è possibile registrare anche dati dalla radio e da lettori CD su driver USB esterni. Per iniziare la registrazione premere nella modalità corrispondente il tasto TA/REC (12). I dati audio vengono memorizzati in formato WMA sul driver USB. Durante la registrazione sul display viene visualizzata la scritta FILE NAME. Per terminare la registrazione premere nuovamente il tasto Taste TA/REC (12). È possibile riprodurre nuovamente i dati attivando con il tasto MOD E (20) la modalità USB e richiamare i singoli titoli dal driver USB. I 15 MD 80403 Autoradio BDA_ITA.FH11 Fri Jan 28 12:12:53 2005 Seite 16 C M Y CM MY CY CMY K RICERCA ERRORI Problema L'apparecchio non si accende. Causa Il dispositivo di accensione non si accende. Aiuto Girare la chiave per attivare l'accensione. Il dispositivo di protezione è difettoso. Cambiare le protezioni. Non è possibile caricare o espellere il CD. C'è già un CD nell'apparecchio. Il CD è stato inserito al contrario. Il CD è molto sporco o difettoso. La temperatura in auto è troppo elevata. Condensa. Nessun audio Volume al minimo. I cavi non sono collegati correttamente. a toni funziona. Il CD salta. Rimuovere il CD dal lettore immettere un nuovo CD. Immettere sempre i CD con la scritta verso l'alto. Pulire il CD e provare a riprodurne un altro. Ridurre la temperatura, fino a quando la temperatura dell'ambiente è di nuovo normale. Tenere spento l'apparecchio per alcune ore e riprovare di nuovo. Impostare il volume al livello desiderato. Collegamenti cavo collegamento dei cavi. Il microcomputer incorporato non può funzionare a causa del fruscio. Premere il tasto RESET. Il frontalino di comando non è posizionato correttamente. Verificare che il frontalino di comando sia posizionato correttamente e saldamente. L'inclinazione di installazione supera i 30°. Riportare l'inclinazione di installazione al di sotto di 30°. Il CD è molto sporco o difettoso. Errore durante la registrazione del CD Pulire il CD e provare a riprodurne un altro. Provare il CD in un altro apparecchio. Il cavo dell'antenna non è collegato. La radio non funziona. Collegare saldamente il La selezione automatica I segnali di trasmissione sono troppo cavo dell'antenna. delle stazioni non funziona. deboli. Scegliere manualmente la stazione. Il cavo rosa non è collegato La memorizzazione delle Collegamenti cavo al più permanente. stazioni non funziona. collegamento dei cavi. I 16 MD 80403 Autoradio BDA_ITA.FH11 Fri Jan 28 12:12:53 2005 Seite 17 C M Y CM MY CY CMY K SPECIFICHE TECNICHE In generale Tensione di funzionamento: Misure telaio: Prestazioni: Fusibile: 12 V CC, collegamento massa negativo 178 x 155 x 50 mm (LxPxA) Uscita audio massima 4 x 20 W R.M.S. 0,5 Ampere (rosso), 15 Ampere (rosa) Lettore CD/MP3 MPEG Rate Frequenzbereich MP3 Playback 64-320 K 20Hz~20kHz ISO 9660 & Joliet format of MP3 Radio Per 3 bande di frequenza Frequenza IF (Intervallo di rumore = 30 dB) Separazione stereo Frequenza da 144 a 288 MHz IF Sensibilità (Intervallo di rumore = 30 dB) FM da 87.5 a 108 MHz 10.7MHz 3µV > 30dBu OM da 522 a 1620 MHz 45kHz I Frequenza IF Sensibilità (Intervallo di rumore = 30 dB) Separazione stereo 32 dBu OL 450kHz 35dBu Lettore CD Utilizzare esclusivamente CD che presentano la seguente dicitura: COMPACT DIGITAL AUDIO Classe laser 1 Soggetto a modifiche tecniche senza preavviso! I 17 MD 80403 Autoradio BDA_nld.FH11 Fri Jan 28 12:12:25 2005 Seite 2 C M Y CM MY CY CMY K FUNKTIONEN 1. OPEN: Openen van het bedieningspaneel 2. SEL: De afzonderlijke functies oproepen 3. MULTI-JOG: Instelling voor geluidsvolume, bas, hoge tonen, balans en fader 4. DISPLAY: 5. DSP/0: Aanvragen voor programma-, tijd-, frequentie- en PTY-instelling/nummertoets 0. 6. BND/LOU/ENT: Keuze frequentie/Loudness/Bevestigen 7. EQ: Equalizer 8. POWER/DIM: Aan/uit-schakelaar, displayverlichting dimmen 9. USB: USB-aansluiting voor externe gegevensdrager 10. RESET: Fabrieksinstellingen herstellen 11. AF: Inschakelen van de modus RDS 12. TA/REC: Traffic Announcement Identification / verkeersinformatie herkennen / opname starten 13. PTY: Program Type Code 14. 19.: Stationskeuzetoetsen 14. PAU: Pauze in de CD/MP3-werking / nummertoets 1 15. SCN: Scannen, titels 10 sec. afspelen bij CD/MP3-functie / nummertoets 2 16. RPT: Repeat, herhalen bij CD/MP3-functie / nummertoets 3 17. SHF: Shuffle, willekeurige afspeelvolgorde bij CD/MP3-functie/nummertoets 4 18. Nummertoets 5 19. Nummertoets 6 20. MODE: Overschakelen radio/CD/MP3/nummertoets 7 21. AMS/D-AUD Automatisch zendergeheugen / MP3's zoeken 22. -<< : Tune/Zoeken van zenders terug/nummertoets 8 23. +>>: Tune/Zoeken van zenders vooruit/nummertoets 9 24. Rode verlichtingsdiode (LED voor diefstalbeveiliging) 25. CD-vak Voor het inschuiven van de CD 26. EJECT: CD uitwerpen NL 2 MD 80403 Autoradio BDA_nld.FH11 Fri Jan 28 12:12:25 2005 Seite 3 C M Y CM MY CY CMY K SICHERHEITSHINWEIS Plaats het apparaat in de daarvoor geschikte slede of kies een plaats voor het monteren van het apparaat die de bestuurder bij het rijden niet hindert. Sluit de kabels even tijdelijk aan voordat u het apparaat definitief inbouwt. Controleer of deze goed zijn ingebouwd en of het systeem goed werkt. Neem contact op met een garage of inbouwbedrijf als er wijzigingen aan de wagen noodzakelijk zijn. Bouw het apparaat zo in dat<Char CRLF>er bij hard remmen geen letsel kan optreden. Als het apparaat onder een hoek van meer dan 30° ten opzichte van horizontaal wordt ingebouwd kan dit de optimale werking beïnvloeden. 30° NL Bouw het apparaat niet in op een plaats waar hoge temperaturen (bv. direct zonlicht of verwarmingslucht), stof, vuil of teveel schokken optreden. NL 3 MD 80403 Autoradio BDA_nld.FH11 Fri Jan 28 12:12:25 2005 Seite 4 C M Y CM MY CY CMY K INHOUDSOPGAVE VOOR INGEBRUIKNEMING.................................................................................................................5 MONTAGE.............................................................................................................................................5 INBOUW VAN DE RADIO IN DE ISO-SLEDE VAN UW WAGEN........................................................5 Afnemen en aanbrengen van het bedieningspaneel ..........................................................................6 ISO-ADAPTERSTEKKER.....................................................................................................................6 Antennerelaiskabel .............................................................................................................................6 Stereo tulpuitgang...............................................................................................................................6 KABELVERBINDINGEN .......................................................................................................................7 BASISBEDIENING................................................................................................................................8 In-/uitschakelen...................................................................................................................................8 Volume................................................................................................................................................8 Bas.........8 Hoge tonen .........................................................................................................................................8 Balans.................................................................................................................................................8 Fader ..................................................................................................................................................8 Loudness ............................................................................................................................................8 Display ................................................................................................................................................8 Modus .................................................................................................................................................8 Equalizer.............................................................................................................................................8 Reset ...................................................................................................................................................8 RADIO ...................................................................................................................................................9 Golflengte instellen .............................................................................................................................9 Zenders kiezen ...................................................................................................................................9 Voorgeprogrammeerde zenders.........................................................................................................9 Zenders opslaan .................................................................................................................................9 Zenders terugvinden...........................................................................................................................9 Automatisch opslaan (AMS) ...............................................................................................................9 Voorprogrammering doorlopen...........................................................................................................9 Modus voor regionaal programma....................................................................................................10 PTY (Programmatype/-soort) ...........................................................................................................10 TA Verkeersinformatie ......................................................................................................................10 EON TA lokale modus.......................................................................................................................10 EON DX-modus ................................................................................................................................10 RDS (Radio Data System)................................................................................................................11 CD-SPELER ........................................................................................................................................12 CD's plaatsen en verwijderen ...........................................................................................................12 Titels overslaan.................................................................................................................................12 CD onderbreken ...............................................................................................................................12 Vooruit/achteruit afspelen .................................................................................................................12 Alle titels afspelen.............................................................................................................................12 Een titel herhalen..............................................................................................................................12 Willekeurige weergave .....................................................................................................................12 MP3-WEERGAVE ...............................................................................................................................13 Zoeken op titels (nummers)..............................................................................................................13 Zoeken op artiesten ..........................................................................................................................13 WMA-bestanden afspelen ...............................................................................................................13 Toetsen afspeellijst ...........................................................................................................................14 ID3-TAG-FUNCTIE..............................................................................................................................14 GEGEVENS VIA USB AFSPELEN .....................................................................................................15 Opnamefunctie .................................................................................................................................15 PROBLEMEN OPLOSSEN.................................................................................................................16 TECHNISCHE GEGEVENS ................................................................................................................17 NL 4 MD 80403 Autoradio BDA_nld.FH11 Fri Jan 28 12:12:25 2005 Seite 5 C M Y CM MY CY CMY K VOOR INGEBRUIKNEMING Verwijder voor het monteren de beide transportbeveiligingsschroeven in het bovendeel van het huis van de radio (aangegeven met rode markering)! Transportbeveiliging MONTAGE Inbouw van de radio in de ISO-slede van uw wagen. Trek het inbouwframe van het radio. Plaats het inbouwframe in de radioslede van het instrumentenpaneel van uw wagen. Buig de lippen in het inbouwframe met een schroevendraaier om zodat het stevig in de wagen vastzit. Controleren of het frame goed vastzit. Verbind het ISO-aansluitingenblok met de ISO-stekker van uw wagen. Sluit de antennekabel van de wagen aan op de antennestekker van de autoradio. Schuif de radio voorzichtig in het inbouwframe. Let op dat er daarbij geen kabels klem komen te zitten. Druk op de RESET-toets (10) met een balpen of een vergelijkbaar puntig voorwerp. Plaats het bedieningspaneel. NL Deze autoradio kan heel eenvoudig in elke standaard ISO-radioslede worden ingebouwd. Neem contact op met uw vakgarage als de wagen niet over een standaard ISO-radioslede beschikt. LET OP! Gebruik bij het inbouwen de ISO-aansluitingen van de autoradio om de autoradio aan te sluiten. Een passende ISO-adapterstekker (auto-contrastekker) is, afhankelijk van het type wagen, verkrijgbaar bij de vakhandel. Als u de adapterbus van het snoer knipt of de kabel doorsnijdt vervalt uw garantie! NL 5 MD 80403 Autoradio BDA_nld.FH11 Fri Jan 28 12:12:25 2005 Seite 6 C M Y CM MY CY CMY K AFNEMEN EN AANBRENGEN VAN HET BEDIENINGSPANEEL Druk op de toets OPEN (1) en verwijder het bedieningspaneel. Bewaar het bedieningspaneel ter bescherming altijd in het daarvoor bestemde transportetui. Als het bedieningspaneel is verwijderd, knippert er een rode lichtdiode (24). Zet het bedieningspaneel voor het inbouwen eerst met de rechterkant in het frame. Druk dan linker kant aan tot hij inklikt. Controleer of het bedieningspaneel goed en vast op zijn plaats zit. Als het bedieningspaneel niet correct is ingebouwd, wordt op het display onjuiste informatie weergegeven en/ow werken enkele toetsen niet naar behoren. Frontje ISO-adapterstekker Voorzichtig! Gebruik de ISO adapterstekker van de autoradio om een betrouwbare elektrische verbinding te maken. Belangrijk! Let op dat de roze backup-kabel moet zijn verbonden met een constante plus-aansluiting (voor de voorkeurszenders). Druk, nadat alle verbindingen aangesloten zijn, op de RESET-toets (10). Antennerelaiskabel De gele kabel is bedoeld voor een relaisgestuurde antenne. Het relais zal de antenne automatisch uitschuiven als het apparaat wordt ingeschakeld en bij het uitschakelen schuift de antenne weer in. Let op: Verbind de gele kabel niet met de motorkabel omdat daardoor schade aan het apparaat kan worden veroorzaakt . Stereo tulpuitgang Op deze aansluitingen (rode en witte tulp) kan externe apparatuur (biijvoorbeeld een versterker) worden aangesloten. NL 6 MD 80403 Autoradio BDA_nld.FH11 Fri Jan 28 12:12:25 2005 Seite 7 C M Y CM MY CY CMY K KABELVERBINDINGEN voor systeem met vier luidsprekers (Quadro) ACHTERZIJDE AUTORADIO Antenneaansluiting Belangrijk! Back-upgeheugen moet zijn aangesloten op constante plus voor zendergeheugen. Contactslotrood schakelaar (B+) Geheugen Back-up Rose Aarde (B-)(massa) zwart RCA kabel rechts rood links wit Geel Stroomantenne Luidspreker linksvoor Luidspreker linksachter Groen grijs groen/zwart grijs/zwart Blauw Wit blauw/zwart wit/zwart Luidspreker rechtsvoor Luidspreker rechtsachter voor systeem met twee luidsprekers (Dual) NL ACHTERZIJDE AUTORADIO Antenneaansluiting BELANGRIJK! Back-up voor opslag moet zijn aangesloten op constante plus voor zendergeheugen. Contactslotrood schakelaar (B+) Geheugen Back-up Rose Aarde (B-)(massa) zwart Stroomantenne Linkerluidspreker RCA kabel rechts rood links wit Geel Groen grijs blauw/zwart wit/zwart Rechterluidspreker NL 7 MD 80403 Autoradio BDA_nld.FH11 Fri Jan 28 12:12:25 2005 Seite 8 C M Y CM MY CY CMY K GRUNDBEDIENUNG In-/uitschakelen Druk op de POWER/DIM-toets (8) voor het in- en uitschakelen van het toestel. Geluidsniveau Selecteer de functie VOLUME door op de toets SEL (2) te drukken en draai aan de multi-jog-regelaar (3) om het volume in te stellen op de gewenste waarde. Stel het volume zodanig in dat u de geluidssignalen van voorbijkomende reddings-, brandweer- of politieauto's nog kunt horen! Bas Druk eenmaal op de toets SEL (2) om de bas in te stellen. U kunt de bas verhogen of verlagen door aan de multi-jog-regelaar (3) te draaien. Hoge tonen Druk tweemaal op de toets SEL (2) om de hoge tonen in te stellen. U kunt de hoge tonen verhogen of verlagen door aan de multi-jog-regelaar (3) te draaien. Balans Druk driemaal op de toets SEL (2) om de balans in te stellen. U kunt de balans tussen de rechteren linkerluidspreker instellen door aan de multi-jog-regelaar (3) te draaien. Fader Druk vuermaal op de toets SEL (2) om de fader in te stellen. U kunt de fader van de voorste en achterste luidspreker instellen door aan de multi-jog-regelaar (3) te draaien. Loudness Houd de toets BND/LOU/ENT (6) ingedrukt totdat een waarschuwingstoon klinkt. Op het display wordt LOUD ON resp. LOUD OFF weergegeven. Hiermee kunt u de lage frequenties versterken bij een laag volume. Display Met behulp van de toets DSP/0 (5) kunt u de volgende informatie opvragen: Zendernaam Frequentie Tijd (wordt bij RDS-ontvangst automatisch ingesteld) PTY-instellingen (De kwaliteit en omvang van deze RDS-functies varieert per zendstation. Nadere informatie kunt u vinden in het hoofdstuk RADIO onder RDS). Modus Met de toets MODE (20) kunt u omschakelen tussen radio-ontvangst en CD-weergave, resp. USB-aansluiting. Equalizer Druk op de toets EQ (7) om achtereenvolgens de onderstaande geluidsinstellingen te kiezen: FLAT CLASSICS POP M ROCK M DSP OFF Reset Druk met behulp van een balpen op de toets RESET (10) om de fabrieksinstellingen te herstellen op uw toestel. Deze toets bevindt zich achter het bedieningspaneel! Gebruik de toets RESET in de volgende gevallen: bij de eerste ingebruikneming, nadat u de kabels hebt aangesloten als niet alle functietoetsen werken als een foutbericht wordt weergegeven op het display. NL 8 MD 80403 Autoradio BDA_nld.FH11 Fri Jan 28 12:12:25 2005 Seite 9 C M Y CM MY CY CMY K RADIO Golflengte instellen Druk op de toets BND/LOU/ENT (6) om te schakelen tussen FM (F1, F2, F3), middengolf (MW) en lange golf (LW). Op elke golflengte kunnen zes zenders worden opgeslagen. Zenders kiezen Druk druk op de toetsen voor het zoeken van zenders (toetsen TUNE) I<< (22) of de toets >>I (23). Het apparaat zoekt nu automatisch naar de volgende zender. Als u een van de toetsen TUNE twee seconden lang ingedrukt houdt, schakelt u over op handmatig zoeken naar zenders. Op het display wordt nu MANUAL weergegeven. U kunt nu met de toets TUNE de zender selecteren en opslaan. Het apparaat schakelt na een korte wachttijd weer over naar de functie voor het automatisch zoeken van zenders. Voorgeprogrammeerde zenders In elk frequentiegebied kunt u zes zenders vastleggen en weer oproepen via de zendertoetsen 1-6 (14-19). Zenders opslaan 1. Selecteer het frequentiegebied met de toets BND/LOU/ENT (6). 2. Selecteer een zender met de toets TUNE I<< (22) of met de toets I>> (23). 3. Houd een van de zendertoetsen 1-6 (14-19) ongeveer 3 seconden lang ingedrukt. Een waarschuwingstoon geeft aan dat de zender is opgeslagen. Automatisch opslaan (AMS) Houd de toets AMS/D-AUD (21) ingedrukt totdat een waarschuwingstoon klinkt. Op het display wordt nu SEARCH weergegeven. Het zoeken stopt nu ongeveer 5 seconden bij elke gevonden zender. Het op het display knipperende getal geeft het nummer van de zendertoetsen aan waaronder de desbetreffende zender wordt opgeslagen. Bij zwakke zenders wordt automatisch verder gezocht. NL Zenders terugvinden 1. Selecteer het frequentiegebied met de toets BND/LOU/ENT (6). 2. Druk op de zendertoets (14-19) om de voorgeprogrammeerde zender op te roepen. Voorprogrammering doorlopen Hiermee kunt u de binnen het frequentiegebied opgeslagen zenders automatisch afzoeken. 1. Selecteer het frequentiegebied met de toets BND/LOU/ENT (6). 2. Druk kort op de toets AMS/D-AUD (21). Alle zenders worden nu kort geselecteerd. Druk, zodra u de gezochte zender bereikt, kort op de toets AMS/D-AUD (21). NL 9 MD 80403 Autoradio BDA_nld.FH11 Fri Jan 28 12:12:25 2005 Seite 10 C M Y CM MY CY CMY K Modus voor regionaal programma Sommige zenders zenden verschillende regionale programma's uit. Houd, als u alleen deze alternatieve frequenties van het gewenste regionale programma wilt kiezen, de AF-toets (11) iets langer ingedrukt tot een waarschuwingstoon klinkt. Hiermee wordt de modus in- of uitgeschakeld. Op het display wordt REG ON/REG OFF weergegeven. PTY (Programmatype/-soort) Om het PTY-menu te activeren, drukt u op de toets PTY (13). U kunt nu volgens de onderstaande categorieën uw zenders kiezen: MUZIEK 1 POP M, ROCK M 2 EASY M, LIGHT M 3 CLASSICS (Klassiek), OTHER M (Andere M) 4 JAZZ, COUNTRY 5 NATION M, OLDIES 6 FOLK M TAAL NEWS (Nieuws), AFFAIRS (Actualiteiten), INFO (Infos) SPORT, EDUCATE (Educatie), DRAMA CULTURE (Cultuur), SCIENCE (Wetenschap), VARIED (Gevarieerd) WEATHER (Weer), FINANCE (Financiën), CHILDREN (Kinderen) SOCIAL (Sociaal), RELIGION, PHONE IN (Telefooningang) Travel (Reizen), Leisure (Vrije tijd), Document (Documenten) (Deze informatie is afhankelijk van het zendstation.) TA Verkeersinformatie Houd de toets TA/RECT (12) kort ingedrukt om de TA-modus in of uit te schakelen. Als de TA-modus is ingeschakeld en er wordt verkeersinformatie uitgezonden terwijl de CD- of USB-modus is ingesteld, wordt automatisch overgeschakeld naar de radio. Af en toe wordt overgeschakeld naar het EON-verbindingsstation as EON verkeersinformatie vindt op een andere zender. Als het geluidsniveau te laag is, wordt dit verhoogd. De TA-functie van de actuele verkeerinformatie kan worden onderbroken door op de toets TA/REC (12) te drukken. De TA-modus wordt hierdoor niet uitgeschakeld. Als gedurende langere tijd op de toets TA/REC (12) wordt gedrukt, wordt de modus EON TA LOCAL/EON TA DISTANCE geselecteerd. Met deze modus kan EON TAinformatie worden weergegeven. Als u bijvoorbeeld naar een muziekzender luistert, terwijl op een andere frequentie verkeersinformatie wordt uitgezonden, schakelt het apparaat automatisch over naar deze verkeersinformatie. Zodra de melding is afgelopen, schakelt het apparaat terug naar de oorspronkelijke zender. EON TA lokale modus Als de modus EON TA LOCAL is geselecteerd, knippert enkele seconden lang de aanduiding EON TA LO op het display. De modus voor het lokale gebied is geselecteerd. EON DX modus Als de modus EON DX is geselecteerd, knippert enkele seconden lang de aanduiding EON TA DX op het display. De modus voor het verder verwijderde gebied is geselecteerd. NL 10 MD 80403 Autoradio BDA_nld.FH11 Fri Jan 28 12:12:25 2005 Seite 11 C M Y CM MY CY CMY K RDS (Radio Data System) RDS is een service van de radio-omroepen. Naast de gebruikelijke muzikale en gesproken bijdragen wordt extra informatie uitgezonden in de vorm van gecodeerde digitale signalen die door de autoradio kunnen worden gedecodeerd. Druk kort op de toets AF (11) om de RDS-modus in of uit te schakelen. Bij het inschakelen van de RDS-modus wordt op het beeldscherm het symbool AF weergegeven. Nu worden bij de ontvangst van een zender de programmanaam en andere informatie op het display (4) weergegeven. Deze informatie is afhankelijk van het zendstation. Er worden verschillende RDS-services aangeboden: PI: Program Identification Code Met behulp van de PI-code kan de radio de ontvangen zender identificeren. PS: Program Service Name Met de functie Program Service kan de naam van de zender worden weergegeven. AF: Alternatieve frequenties De radio kiest automatisch de beste te ontvangen alternatieve frequentie van hetzelfde programma. TP/TA: Traffic-Program/Traffic-Annoucement Enhanced Other Networks Information Bij uitgezonden verkeersinformatie wordt ook bij het luisteren naar een andere zender binnen een keten van zenders overgeschakeld naar de zender met verkeersinformatie. PTY: Program Type Code Met Program Type kan de radio zoeken naar zenders met een vooraf instelbare inhoud, bijvoorbeeld sport, nieuws, rock, pop, enzovoort. NL EON: NL 11 MD 80403 Autoradio BDA_nld.FH11 Fri Jan 28 12:12:25 2005 Seite 12 C M Y CM MY CY CMY K CD-PLAYER CD's plaatsen en verwijderen Plaats de CD door deze in de sleuf (25) te schuiven. Het afspelen van de CD begint. Op het display wordt S--CDP ("Titel zoeken") weergegeven. U kunt de CD verwijderen door op de toets EJECT (26) te drukken. De weergave wordt afgebroken en de CD wordt uitgeworpen. De autoradio schakelt over op de radiomodus. Titels overslaan Druk op toets TUNE |<< (22) of toets >>| (23) om naar de volgende titel te springen. Het titelnummer wordt op het display (4) weergegeven. CD onderbreken Druk tijdens het afspelen op de toets PAU (14) om de CD-weergave te onderbreken. Druk nogmaals op de toets PAU (14) om het afspelen van de CD te hervatten. Snel vooruit en achteruit afspelen Houd de toets TUNE |<< (22) of de toets >>| (23) langere tijd ingedrukt om het snel vooruit en achteruit afspelen te starten. Alle titels afspelen Druk op de toets SCN (15) om de eerste 10 seconden van elke titel af te spelen. Druk nogmaals op de toets SCN (15) om normaal afspelen te hervatten. Een titel herhalen Druk op de toets RPT (16) om steeds dezelfde titel af te spelen. Druk nogmaals op de toets RPT (16) om deze functie uit te schakelen. Willekeurig afspelen Druk op de toets SHF (17) om alle titels op de CD in willekeurige volgorde af te spelen. Aanwijzing: Als u over hobbelige wegen rijdt, kan dit ertoe leiden dat de CD overslaat. Een korte inspeeltijd zal tot betere prestaties leiden. Het overslaan heeft geen negatieve gevolgen voor de CD. Vocht en een hoge luchtvochtigheid kunnen tot storingen in de CD-speler leiden. Schakel de verwarming van de wagen in en laat het vocht vóór gebruik van het apparaat verdampen. Stel de CD-speler niet bloot aan extreem hoge of lage temperaturen. Laat tijdens het rijden geen CD uitsteken uit de sleuf.. NL 12 MD 80403 Autoradio BDA_nld.FH11 Fri Jan 28 12:12:25 2005 Seite 13 C M Y CM MY CY CMY K MP3-WEERGAVE Het afspelen start automatisch bij het inleggen van een MP3-CD-ROM. De toetsfuncties staan vermeld in het hoofdstuk CD-speler.U kunt de titel en de artiest rechtstreeks kiezen. De MP3-specifieke functies zijn grotendeels afhankelijk van de productiewijze van de MP3-CD. Zoeken op titels (nummers) Druk eenmaal op de toets AMS/D-AUD (21). Op het display wordt nu MP3T weergegeven. Voer met de in de tabel aangegeven toetsen de nummers van de gewenste titels in. Bevestig de invoer met de toets BND/LOU/ENT (6) of wacht ongeveer vijf seconden tot het apparaat automatisch naar de geselecteerde titel springt. Zoeken op artiesten Druk tweemaal op de toets AMS/D-AUD (21). Op het display verschijnt nu een knipperende ....... . Voer met de in de tabel aangegeven toetsen de namen van de gewenste artiest in. Na elke letter moet op de toets SEL (2) worden gedrukt zodat de volgende letter kan worden ingevoerd (opschuiven van tekens). Bevestig de invoer met de toets BND/LOU/ENT (6). Het apparaat zoek nu de bijbehorende titel. Druk nogmaals op de toets BND/LOU/ENT (6) als het apparaat de gewenste artiest heeft gevonden. De titel wordt nu afgespeeld. WMA-bestanden U kunt op uw autoradio ook WMA-bestanden afspelen. De bediening werkt op exact dezelfde wijze als bij MP3-bestanden. Aanwijzing: De zoekfunctie is afhankelijk van de geproduceerde MP3-CD NL . NL 13 MD 80403 Autoradio BDA_nld.FH11 Fri Jan 28 12:12:25 2005 Seite 14 C M Y CM MY CY CMY K Toetsen tabel AMS/D-AUD (21) BND/LOU/ENT (6) 1 (14) 2 (15) 3 (16) Instelling selecteren Bevestigen A, B, C, 1 D, E, F, 2 G, H, I, 3 4 (17) 5 (18) 6 (19) MODE (20) J, K, L, 4 M, N, O, 5 / 10 Volgende track P, Q, R, 6 / 10 Vorige track S, T, U, 7 |<< (22) >>| (23) SEL (2) DSP/0 (5) (5) (6) V, W, X, 8 Y, Z, Lege positie, 9 Tekens naar rechts verschuiven 0,_, -, +, Bladerfunctie A-Z / 0-9 Aanwijzing: Let er bij het maken van een MP3-CD-ROM op dat de titels apart staan of in lijsten staan. Meng nooit titel en lijsten, dat veroorzaakt mogelijk problemen bij het afspelen. Alle gangbare coderingen kunnen worden afgespeeld. ID3-TAG-FUNCTIE Bij het maken van een MP3-CD kunt u extra informatie opslaan. Dit kunnen gegevens over de artiest, de titel, de naam van het album en het jaar van uitbrengen van het muziekstuk zijn. Ook kunt u een korte opmerking toevoegen. Voor de invoer kan het beste een ID3-tag-editor worden gebruikt. Deze informatie wordt na het opvragen tijdens het afspelen weergegeven op he display. Bij het afspelen van MP3-CD's kunnen zo, behalve het titelnummer ook de titelnaam of de artiest worden weergegeven (afhankelijk van de informatie die is opgeslagen op de MP3-CD). U kunt de informatie opvragen door op de toets DSP/0 (5) te drukken. Telkens wanneer u op deze toets drukt, wordt een andere ID3-tag weergegeven: TITEL - ARTIEST - ALBUMNAAM - JAAR VAN UITBRENGEN - COMMENTAAR NL 14 MD 80403 Autoradio BDA_nld.FH11 Fri Jan 28 12:12:25 2005 Seite 15 C M Y CM MY CY CMY K GEGEVENS VIA USB AFSPELEN U kunt op de USB-aansluiting aan de voorzijde van het apparaat een MP3-speler of een andere USBgegevensdrager aansluiten. Uw autoradio kan USB-gegevensdrages tot 1GB verwerken. Daarbij mag de mappenstructuur maximaal acht niveaus diep zijn en 1024 mappen en 4096 bestanden omvatten. Zodra het externe apparaat is aangesloten, zoekt de autoradio naar MP3- of WMA-bestanden op de gegevensdrager en wordt op het display (4) de aanduiding USB weergegeven. De bediening bij het afspelen van bestanden op de externe gegevensdrager alsmede de zoekfunctie werken op exact dezelfde wijze als bij MP3-CD's. NL Opnamefunctie U kunt met uw autoradio ook gegevens van radio en CD-speler opnemen op de externe USBgegevensdrager. U kunt het opnemen starten door in de desbetreffende modus op de toets TA/REC (12) te drukken. De audiogegevens worden nu in WMA-indeling op de USB-gegevensdrager opgeslagen. Tijdens de opname wordt op het display de aanduiding FILE NAME weergegeven. U kunt het opnemen beëindigen door nogmaals kort op toets TA/REC (12) te drukken. U kunt de gegevens weer afspelen door met de toets MOD E (20) naar de USB-modus over te schakelen om de afzonderlijke titels op de USB-gegevensdrager op te vragen. NL 15 MD 80403 Autoradio BDA_nld.FH11 Fri Jan 28 12:12:25 2005 Seite 16 C M Y CM MY CY CMY K FOUTOPSPORING Probleem Oorzaak Verhelpen van storingen Het apparaat kan niet worden ingeschakeld. Het contact staat niet aan. Contact aanzetten door contactsleutel om te draaien. De zekering is defect Zekering vervangen. De CD kan niet geladen of uitgeworpen worden. Er zit al een CD in het apparaat. CD uit de speler verwijderen en vervolgens een nieuwe CD plaatsen. De CD is verkeerd om geplaatst CD altijd met de tekst naar boven plaatsen. De CD is erg vuil of defect CD schoonmaken of een andere CD proberen af te spelen. De temperatuur in de auto is te Afkoelen hoog. totdat de omgevingstemperatuur weer normaal is. Condensvorming. Het apparaat een paar uur uitgeschakeld laten en het daarna opnieuw proberen. Geen geluid Geluidsvolume staat op zacht. Volume instellen op de gewenste waarde. Kabels zijn niet goed aangesloten Kabelverbindingen controleren. Functietoetsen functioneren niet. De ingebouwde microcomputer Op de toets RESET drukken. werkt niet vanwege ruis. CD springt over. Radio werkt niet. Automatische zenderkeuze werkt niet. Zendergeheugen werkt niet. NL 16 Het bedieningspaneel zit niet goed. Controleren of het bedieningspaneel goed en vast op zijn plaats zit De inbouwhoek is groter dan 30°. Inbouwhoek instellen op minder dan 30° De CD is erg vuil of defect CD schoonmaken of een andere CD proberen af te spelen Fouten bij zelfgebrande CD's De antennekabel is niet aangesloten CD controleren in een andere speler. Antennekabel goed vastmaken De zendersignalen zijn te zwak. Zender handmatig instellen. De rose kabel is niet goed aangesloten op de constante plus. Kabelverbindingen controleren. MD 80403 Autoradio BDA_nld.FH11 Fri Jan 28 12:12:25 2005 Seite 17 C M Y CM MY CY CMY K TECHNISCHE GEGEVENS Algemeen Voeding: Afmetingen: Vermogen: Zekering: DC 12 V, negatieve massaverbinding 178 x 155 x 50 mm (BxTxH) Maximaal piekvermogen muziek 4 x 20 W R.M.S. Ampère (rood), 15 Ampère (rose) MP3/CD-speler MPEGsnelheid Frequentiebereik MP3-weergave 64-320 K 20 Hz ~ 20 kHz ISO 9660- en Joliet-indeling van MP3 Radio Voor 3 frequentiebanden Frequentiebereik IF (Ruisafstand = 30 dB) Stereoscheiding Frequentiebereik IF Gevoeligheid (Ruisafstand = 30 dB) FM 87.5 tot 108 MHz 10.7 MHz 3 µV > 30 dBu MW 522 tot 1620 kHz 45 kHz 32 dBu NL Frequentiebereik IF Gevoeligheid (Ruisafstand = 30 dB) Stereoscheiding LW 144 bis 288 kHz 450 kHz 35 dBu CD-speler Gebruik uitsluitend CD's die aan de volgende specificaties voldoen: COMPACT DIGITAL AUDIO Laserklasse 1 Technische wijzigingen voorbehouden. NL 17-
 1
1
-
 2
2
-
 3
3
-
 4
4
-
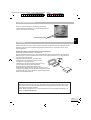 5
5
-
 6
6
-
 7
7
-
 8
8
-
 9
9
-
 10
10
-
 11
11
-
 12
12
-
 13
13
-
 14
14
-
 15
15
-
 16
16
-
 17
17
-
 18
18
-
 19
19
-
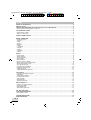 20
20
-
 21
21
-
 22
22
-
 23
23
-
 24
24
-
 25
25
-
 26
26
-
 27
27
-
 28
28
-
 29
29
-
 30
30
-
 31
31
-
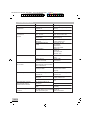 32
32
-
 33
33
-
 34
34
-
 35
35
-
 36
36
-
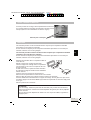 37
37
-
 38
38
-
 39
39
-
 40
40
-
 41
41
-
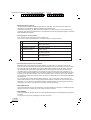 42
42
-
 43
43
-
 44
44
-
 45
45
-
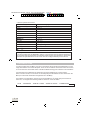 46
46
-
 47
47
-
 48
48
-
 49
49
-
 50
50
-
 51
51
-
 52
52
-
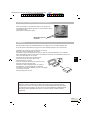 53
53
-
 54
54
-
 55
55
-
 56
56
-
 57
57
-
 58
58
-
 59
59
-
 60
60
-
 61
61
-
 62
62
-
 63
63
-
 64
64
-
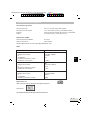 65
65
-
 66
66
-
 67
67
-
 68
68
-
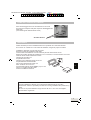 69
69
-
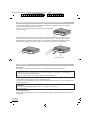 70
70
-
 71
71
-
 72
72
-
 73
73
-
 74
74
-
 75
75
-
 76
76
-
 77
77
-
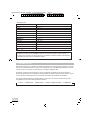 78
78
-
 79
79
-
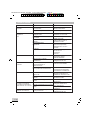 80
80
-
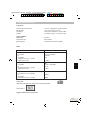 81
81
-
 82
82
-
 83
83
-
 84
84
-
 85
85
-
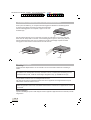 86
86
-
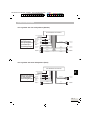 87
87
-
 88
88
-
 89
89
-
 90
90
-
 91
91
-
 92
92
-
 93
93
-
 94
94
-
 95
95
-
 96
96
-
 97
97


Medion md 80403 de handleiding
- Categorie
- CD spelers
- Type
- de handleiding
- Deze handleiding is ook geschikt voor
in andere talen
- English: Medion md 80403 Owner's manual
- italiano: Medion md 80403 Manuale del proprietario
- français: Medion md 80403 Le manuel du propriétaire
- español: Medion md 80403 El manual del propietario
- Deutsch: Medion md 80403 Bedienungsanleitung
Gerelateerde artikelen
Andere documenten
-
Tokai LAR-211 de handleiding
-
-
Lenco CS-322 de handleiding
-
Lenco CS 341 de handleiding
-
Silvercrest KH 2375 de handleiding
-
-
-
Silvercrest SAB 160 A1 Operating Instructions Manual
-
-
CTC Union AR 687 CD/MP3 de handleiding