
LED-UNTERBAULEUCHTE MIT FARBTONWAHL
/ LED UNDER-
CABINET LIGHT WITH ADJUSTABLE LIGHT COLOUR /
RÉGLETTE SOUS MEUBLE LED À BLANC VARIABLE
LED-UNTERBAULEUCHTE MIT
FARBTONWAHL
Bedienungs- und Sicherheitshinweise
LED UNDER-CABINET LIGHT WITH
ADJUSTABLE LIGHT COLOUR
Operation and safety notes
RÉGLETTE SOUS MEUBLE LED À
BLANC VARIABLE
Instructions d‘utilisation et consignes de sécurité
LED-ONDERBOUWLAMP MET
KLEURENKEUZE
Bedienings- en veiligheidsinstructies
LED SVÍTIDLO POD SKŘÍNKU
S NASTAVITELNÝMI TÓNY BÍLÉ
Pokyny pro obsluhu a bezpečnostní pokyny
IAN 336846_2001
SVIETIDLO POD SKRINKU S FAREBNÝM LED
Pokyny pre obsluhu a bezpečnostné pokyny
LAMPA LED DO ZABUDOWY Z
MOŻLIWOŚCIĄ WYBORU KOLORU
Wskazówki dotyczące obsługi i bezpieczeństwa

DE / AT / CH Bedienungs- und Sicherheitshinweise Seite 5
GB / IE Operation and safety notes Page 13
FR / BE Instructions d‘utilisation et consignes de sécurité Page 19
NL / BE Bedienings- en veiligheidsinstructies Pagina 27
PL Wskazówki dotyczące obsługi i bezpieczeństwa Strona 33
CZ Pokyny pro obsluhu a bezpečnostní pokyny Strana 41
SK Pokyny pre obsluhu a bezpečnostné pokyny Strana 47
Klappen Sie vor dem Lesen die Seite mit den Abbildungen aus und machen Sie sich anschließend mit allen
Funktionen des Gerätes vertraut.
Before reading, unfold the page containing the illustrations and familiarise yourself with all functions of the
device.
Avant de lire le mode d‘emploi, ouvrez la page contenant les illustrations et familiarisez-vous ensuite avec
toutes les fonctions de l‘appareil.
Vouw vóór het lezen de pagina met de afbeeldingen open en maak u vertrouwd met alle functies van het
apparaat.
Przed przeczytaniem proszę rozłożyć stronę z ilustracjami, a następnie proszę zapoznać się z wszystkimi
funkcjami urządzenia.
Před čtením si otevřete stranu s obrázky a potom se seznamte se všemi funkcemi přístroje.
Pred čítaním si odklopte stranu s obrázkami a potom sa oboznámte so všetkými funkciami prístroja.

B
14139304L / 14139306L
7
6
52
1
5
8
9
234
10
11
12
A
3 mm
14139304L /
14139306L


5 DE/AT/CH
Inhaltsverzeichnis
Legende der verwendeten Piktogramme ........................................................... Seite 6
Einleitung ......................................................................................................................................... Seite 6
Bestimmungsgemäße Verwendung ....................................................................................................Seite 6
Lieferumfang ........................................................................................................................................ Seite 7
Teilebeschreibung ...............................................................................................................................Seite 7
Technische Daten ................................................................................................................................Seite 7
Sicherheit ......................................................................................................................................... Seite 7
Sicherheitshinweise .............................................................................................................................Seite 7
Vorbereitung ................................................................................................................................Seite 8
Benötigtes Werkzeug und Material ...................................................................................................Seite 8
Inbetriebnahme ......................................................................................................................... Seite 9
Leuchte montieren ...............................................................................................................................Seite 9
Mehrere Leuchten miteinander verbinden ......................................................................................... Seite 9
Lichtfarbe wechseln .............................................................................................................................Seite 9
Ein- / Ausschalten.................................................................................................................................Seite 9
Leuchte ausrichten ............................................................................................................................... Seite 10
Wartung und Reinigung .....................................................................................................Seite 10
Entsorgung .....................................................................................................................................Seite 10
Garantie und Service ............................................................................................................Seite 10
Garantie ..............................................................................................................................................Seite 10
Konformitätserklärung .........................................................................................................................Seite 10
Hersteller / Service ..............................................................................................................................Seite 11

6 DE/AT/CH
Legende der verwendeten Piktogramme
Anweisungen lesen! Warnung vor elektrischem Schlag!
Lebensgefahr!
Diese Leuchte ist ausschließlich für den
Betrieb im Innenbereich, in trockenen
und geschlossenen Räumen geeignet.
So verhalten Sie sich richtig
Wechselstrom / -spannung Vorsicht! Verbrennungsgefahr durch
heiße Oberflächen!
Hertz (Frequenz)
b
a
Entsorgen Sie Verpackung
und Gerät umweltgerecht!
Watt (Wirkleistung) Lebens- und Unfallgefahr für
Kleinkinder und Kinder!
Schutzklasse II ON OFF Schaltzyklen
Lebensdauer Warn- und Sicherheitshinweise
beachten!
Verwenden Sie diese Leuchte nicht für
Dimmer und elektronische Schalter.
Sie ist dafür nicht geeignet.
Die Verpackung besteht aus
100 % recyceltem Papier.
Volt
LED-Unterbauleuchte mit
Farbtonwahl
Einleitung
Wir beglückwünschen Sie zum Kauf Ihres
neuen Gerätes. Sie haben sich damit für
ein hochwertiges Produkt entschieden.
Bitte lesen Sie diese Bedienungsanleitung vollständig
und sorgfältig durch. Klappen Sie die Seite mit den
Abbildungen aus. Diese Anleitung gehört zu diesem
Produkt und enthält wichtige Hinweise zur Inbetrieb-
nahme und Handhabung. Beachten Sie immer alle
Sicherheitshinweise. Prüfen Sie vor der Inbetrieb-
nahme, ob die korrekte Spannung vorhanden ist und
ob alle Teile richtig montiert sind. Sollten Sie Fragen
haben oder unsicher in Bezug auf die Handhabung
des Gerätes sein, setzen Sie sich bitte mit Ihrem
Händler oder der Servicestelle in Verbindung. Be-
wahren Sie diese Anleitung bitte sorgfältig auf und
geben Sie sie ggf. an Dritte weiter.
Bestimmungsgemäße
Verwendung
Diese Leuchte ist ausschließlich für den
Betrieb im Innenbereich, in trockenen
und geschlossenen Räumen geeignet.
Wegen der Schalterbedienung sollte die Leuchte im
Handbereich angebracht werden. Die Leuchte kann
auf allen normal entflammbaren Oberflächen befestigt
werden. Eine andere Verwendung als zuvor be-
schrieben oder eine Veränderung des Gerätes ist
nicht zulässig und führt zur Beschädigung. Darüber
Einleitung Einleitung / Sicherheit

7 DE/AT/CH
hinaus können weitere lebensgefährliche Gefahren
und Verletzungen sowie technische Fehlfunktionen
(z. B. Kurzschluss, Brand, elektrischer Schlag) die
Folge sein. Dieses Gerät ist nur für den Einsatz in
privaten Haushalten vorgesehen.
Dieses Produkt ist vorgesehen für den normalen Betrieb.
Lieferumfang
Kontrollieren Sie unmittelbar nach dem Auspacken
immer den Lieferumfang auf Vollständigkeit sowie
den einwandfreien Zustand des Gerätes.
1 LED-Unterbauleuchte mit Farbtonwahl,
Modell 14139304L / 14139306L
1 Netzkabel
1 Verbindungskabel
2 Dübel
2 Schrauben
1 Bedienungsanleitung
Teilebeschreibung
1 Montagelöcher zur Wandbefestigung
2 Leuchtensteckdose
3 Netzkabel
4 Netzstecker
5 EIN- / AUS-Schalter
6 Verbindungssteckdose
7 Schutzkappe
8 Verbindungskabel
9 Leuchtengehäuse
10 Dübel
11 Montagelöcher zur Unterbaubefestigung
12 Schwenkbare Lichtleiste
Technische Daten
Leuchte:
Artikel-Nummer: 14139304L / 14139306L
Betriebsspannung: 230‒240 V~, 50 Hz
Nennleistung: LED, 6,8 W
Schutzklasse: II /
Schutzart: IP20
LED:
Leuchtmittel: LED-Modul
Nennleistung: 6 W
Sicherheit
Sicherheitshinweise
Bei Schäden, die durch Nichtbeachtung dieser
Bedienungsanleitung verursacht werden, erlischt
der Garantieanspruch! Für Folgeschäden wird
keine Haftung übernommen!
Bei Sach- oder Personenschäden, die durch un-
sachgemäße Handhabung oder Nichtbeachtung
der Sicherheitshinweise verursacht werden, wird
keine Haftung übernommen!
LEBENS- UND UNFALL-
GEFAHR FÜR KLEINKINDER
UND KINDER!
Lassen Sie Kinder niemals unbeaufsichtigt mit
dem Verpackungsmaterial. Es besteht Erstickungs-
gefahr durch Verpackungsmaterial. Kinder un-
terschätzen häufig die Gefahren. Halten Sie
Kinder stets vom Produkt fern.
Dieses Gerät kann von Kindern ab 8 Jahren
und darüber, sowie von Personen mit verringer-
ten physischen, sensorischen oder mentalen
Fähigkeiten oder Mangel an Erfahrung und
Wissen benutzt werden, wenn sie beaufsichtigt
oder bezüglich des sicheren Gebrauchs des
Gerätes unterwiesen wurden und die daraus
resultierenden Gefahren verstehen. Kinder dür-
fen nicht mit dem Gerät spielen. Reinigung und
Benutzerwartung dürfen nicht von Kindern ohne
Beaufsichtigung durchgeführt werden.
Einleitung Einleitung / Sicherheit

8 DE/AT/CH
Vermeiden Sie Lebensgefahr
durch elektrischen Schlag
Überprüfen Sie vor jedem Netzanschluss die
Leuchte, das Netzkabel sowie ggf. das Verbin-
dungskabel auf etwaige Beschädigungen.
Benutzen Sie Ihre Leuchte niemals, wenn Sie
irgendwelche Beschädigungen feststellen.
Beschädigte Netzkabel und Verbindungskabel
bedeuten Lebensgefahr durch elektrischen Schlag.
Vergewissern Sie sich vor der Montage, dass
die vorhandene Netzspannung mit der benötigten
Betriebsspannung der Leuchte übereinstimmt
(siehe „Technische Daten“).
Vermeiden Sie unbedingt die Berührung der
Leuchte mit Wasser oder anderen Flüssigkeiten.
Öffnen Sie niemals eines der elektrischen Be-
triebsmittel (z. B. Schalter, Fassung o. Ä.) oder
stecken irgendwelche Gegenstände in dieselben.
Derartige Eingriffe bedeuten Lebensgefahr
durch elektrischen Schlag.
Fassen Sie nur den isolierten Bereich des Netz-
steckers beim Anschluss oder Trennen vom
Netzstrom an!
Die Lichtquelle dieser Leuchte ist nicht ersetzbar;
wenn die Lichtquelle das Ende ihrer Lebensdauer
erreicht hat, ist die gesamte Leuchte zu ersetzen.
Wenn die äußere flexible Leitung dieser Leuchte
beschädigt ist, darf sie nur durch eine spezielle
Leitung oder durch eine Leitung ersetzt werden,
die ausschließlich über den Hersteller oder
seinen Servicevertreter erhältlich ist.
Schließen Sie die Unterbauleuchte nur mit dem
Original-Netzkabel an den Netzstrom an.
Verbinden Sie nur original Unterbauleuchten des
gleichen Typs (14139304L / 14139306L).
Schließen Sie miteinander verbundene Unter-
bauleuchten nur an eine Steckdose an. Achten
Sie darauf, dass Sie nur maximal 10 Unterbau-
leuchten des gleichen Typs über eine Steckdose
zusammenschalten. Andernfalls kann es zu Über-
lastungen der Anschlüsse und Kabel kommen.
Achten Sie darauf, dass erst alle Unterbau-
leuchten mittels Verbindungskabel verbunden
sein müssen, bevor Sie den Netzstecker in die
Steckdose stecken.
Vermeiden Sie Brand- und
Verletzungsgefahr
VERLETZUNGSGEFAHR!
Überprüfen Sie unmittelbar nach dem Auspacken
jede Leuchte und jedes Lampenglas auf Beschä-
digungen. Betreiben Sie die Leuchte nicht mit
defekter Lichtquelle und / oder defektem Lam-
penglas. Setzen Sie sich in diesem Fall für Ersatz
mit der Servicestelle in Verbindung.
VERBRENNUNGSGEFAHR!
Stellen Sie sicher, dass die Leuchte ausgeschaltet
und abgekühlt ist, bevor Sie diese berühren, um
Verbrennungen zu vermeiden. Leuchtmittel
entwickeln eine starke Hitze.
Dieser Artikel enthält keine Teile, die vom Ver-
braucher gewartet werden können.
Bei Betrieb nicht aus kurzem Abstand in die
LED schauen. Die LED nicht mit einem optischen
Instrument (z. B. Lupe) betrachten.
Verwenden Sie diese Leuchte nicht für
Dimmer und elektronische Schalter.
Sie ist dafür nicht geeignet.
So verhalten Sie sich richtig
Montieren Sie die Leuchte so, dass sie vor
Feuchtigkeit und Verschmutzung geschützt ist.
Bereiten Sie die Montage sorgfältig vor und
nehmen Sie sich ausreichend Zeit. Legen Sie
alle Einzelteile und zusätzlich benötigtes Werk-
zeug oder Material vorher übersichtlich und
griffbereit zurecht.
Seien Sie stets aufmerksam! Achten Sie immer
darauf was Sie tun und gehen Sie stets mit Ver-
nunft vor. Montieren Sie die Leuchte in keinem
Fall, wenn Sie unkonzentriert sind oder sich
unwohl fühlen.
Vorbereitung
Benötigtes Werkzeug
und Material
Die genannten Werkzeuge und Materialien sind
nicht im Lieferumfang enthalten. Es handelt sich hierbei
Sicherheit / Vorbereitung Vorbereitung / Inbetriebnahme

9 DE/AT/CH
um unverbindliche Angaben und Werte zur Orien-
tierung. Die Beschaffenheit des Materials richtet
sich nach den individuellen Gegebenheiten vor Ort.
- Bleistift / Markierwerkzeug
- Schraubendreher
- Bohrmaschine
- Bohrer (Ø 6 mm)
- Wasserwaage
- Maßband
Inbetriebnahme
Leuchte montieren
Hinweis: Vergewissern Sie sich vor der Montage,
dass eine Steckdose in der Nähe ist, die mit dem
mitgelieferten Netzkabel 3 erreichbar ist.
Hinweis: Die Leuchte ist über den EIN- / AUS-
Schalter 5 in 2 Lichtstufen einstellbar.
1. Vermessen Sie die Wand bzw. Montagefläche
für die Bohrungen. Verwenden Sie zur genauen
Ausrichtung eine Wasserwaage.
2. Markieren Sie den Abstand der Montagelöcher
1 oder 11 .
3. Bohren Sie nun die Befestigungslöcher
(ø ca. 6 mm, Tiefe ca. 40 mm). Stellen Sie
sicher, dass Sie keine Zuleitung beschädigen.
4. Führen Sie die beigefügten Dübel 10 in die
Bohrlöcher ein. Drehen Sie die beigefügten
Schrauben in die Dübel 10 ein und lassen diese
ca. 3 mm von der Wand bzw. Montagefläche
abstehen (Abb. A).
5.
Befestigen Sie die Leuchte mit den entsprechenden
Montagelöchern 11 oder 1 an den Schrauben.
6. Wenn Sie die Leuchte über den Montagelöchern
11 befestigt haben, müssen Sie zusätzlich das
Leuchtengehäuse 9 bis zum Anschlag nach
links schieben.
7. Stecken Sie den Anschluss des Netzkabels 3
in die Leuchtensteckdose 2.
8. Stecken Sie den Netzstecker 4 in die Steck-
dose. Ihre Leuchte ist nun betriebsbereit.
Mehrere Leuchten
miteinander verbinden
VORSICHT!
Achten Sie darauf, dass erst alle Unterbauleuchten
mittels Verbindungskabel 8 verbunden sein müssen,
bevor Sie den Netzstecker 4 in die Steckdose
stecken.
Hinweis: Achten Sie darauf, dass Sie nur maximal
10 Unterbauleuchten des gleichen Typs über eine
Steckdose zusammenschalten.
Montieren Sie bis zu 10 Leuchten des gleichen
Typs nebeneinander. Befolgen Sie dazu die
Arbeitsschritte 1.–5. des Kapitels „Leuchte
montieren“.
Hinweis: Achten Sie darauf, dass der Abstand
zwischen den Leuchten nicht größer als 15 cm ist.
Hinweis: Achten Sie darauf, dass der Abstand
zwischen den Leuchten nicht kleiner als 10 cm ist.
Entfernen Sie die Schutzkappe 7.
Stecken Sie das Verbindungskabel 8 in die
Verbindungssteckdose 6 der Leuchte.
Stecken Sie den zweiten Anschluss des Verbin-
dungskabels 8 in die Leuchtensteckdose 2
der anderen Leuchte.
Stecken Sie den Anschluss des Netzkabels 3
in die Leuchtensteckdose 2 der äußeren,
linken Leuchte.
Stecken Sie den Netzstecker 4 in die Steck-
dose. Ihre Leuchten sind nun betriebsbereit.
Lichtfarbe wechseln
Um die Lichtfarbe zu wechseln, stellen Sie den
EIN- / AUS-Schalter 5 auf die verschiedenen
Stufen ein.
‒ Stufe I = warmweiß
‒ Stufe II = kaltweiß
Ein- / Ausschalten
Betätigen Sie den EIN- / AUS-Schalter 5, um
die Leuchte ein- oder auszuschalten.
Sicherheit / Vorbereitung Vorbereitung / Inbetriebnahme

10 DE/AT/CH
Garantie und Service
Bringen Sie den EIN- / AUS-Schalter 5 in
Mittelstellung, um die Leuchte auszuschalten.
Leuchte ausrichten
Verändern Sie die Ausrichtung der Leuchte nur,
wenn die Leuchte ausgeschaltet ist.
VERBRENNUNGSGEFAHR!
Stellen Sie sicher, dass die Leuchte ausgeschal-
tet und abgekühlt ist, bevor Sie diese berühren,
um Verbrennungen zu vermeiden. Leuchtmittel
entwickeln eine starke Hitze.
Lassen Sie die Leuchte vollständig abkühlen.
Schwenken Sie die Lichtleiste 12 in die ge-
wünschte Richtung.
Wartung und Reinigung
STROMSCHLAGGEFAHR!
Ziehen Sie den Netzstecker 4 aus der Steck-
dose.
STROMSCHLAGGEFAHR!
Aus Gründen der elektrischen Sicherheit darf
die Leuchte niemals mit Wasser oder anderen
Flüssigkeiten gereinigt oder gar in Wasser
getaucht werden. Verwenden Sie zur Reinigung
nur ein trockenes, fusselfreies Tuch.
Benutzen Sie keine Lösungsmittel, Benzin o. Ä.
Die Leuchte würde hierbei Schaden nehmen.
Lassen Sie die Leuchte vollständig abkühlen.
Entsorgung
Die Verpackung besteht aus umweltfreundlichen
Materialien, die Sie über die örtlichen Recyclingstellen
entsorgen können.
b
a
Beachten Sie die Kennzeichnung der
Verpackungsmaterialien bei der Abfall-
trennung, diese sind gekennzeichnet mit
Abkürzungen (a) und Nummern (b) mit
folgender Bedeutung: 1–7: Kunststoffe /
20–22: Papier und Pappe / 80–98:
Verbundstoffe.
Das Produkt und die Verpackungsmateri-
alien sind recycelbar, entsorgen Sie
diese getrennt für eine bessere Abfallbe-
handlung. Das Triman-Logo gilt nur für
Frankreich.
Werfen Sie Ihr Produkt, wenn es ausge-
dient hat, im Interesse des Umweltschut-
zes nicht in den Hausmüll, sondern
führen Sie es einer fachgerechten Entsor-
gung zu. Über Sammelstellen und deren
Öffnungszeiten können Sie sich bei Ihrer
zuständigen Verwaltung informieren.
Die Verpackung besteht aus 100 %
recyceltem Papier.
Garantie und Service
Garantie
Sie erhalten zum Zeitpunkt des Kaufs auf dieses Gerät
36 Monate Garantie. Das Gerät wurde sorgfältig
produziert und einer genauen Qualitätskontrolle
unterzogen. Innerhalb der Garantiezeit beheben wir
kostenlos alle Material- oder Herstellerfehler. Sollten
sich dennoch während der Garantiezeit Mängel
herausstellen, senden Sie das Gerät bitte an die
aufgeführte Service-Adresse unter Angabe folgender
Artikel-Nummer: 14139304L / 14139306L.
Von der Garantie ausgeschlossen sind Schäden
durch nicht sachgemäße Handhabung, Nichtbe-
achtung der Bedienungsanleitung oder Eingriff durch
nicht autorisierte Personen sowie Verschleißteile (wie
z. B. Leuchtmittel). Durch die Garantieleistung wird
die Garantiezeit weder verlängert noch erneuert.
Konformitätserklärung
Dieses Produkt erfüllt die Anforderungen der
geltenden europäischen und nationalen Richtlinien.
Die Konformität wurde nachgewiesen. Entsprechende
Erklärungen und Unterlagen sind beim Hersteller
hinterlegt.
Inbetriebnahme / Wartung und Reinigung / Entsorgung / Garantie und Service

11 DE/AT/CH
Garantie und Service
Hersteller / Service
Briloner Leuchten GmbH & Co. KG
Im Kissen 2,
59929 Brilon
DEUTSCHLAND
Tel.: +49 29 61 / 97 12–800
Fax: +49 29 61 / 97 12–199
E-Mail: [email protected]
www.briloner.com
Kostenlose Servicenummer:
Tel.: 00800 / 27456637
IAN 336846_2001
Bitte halten Sie für alle Anfragen den Kassenbon
und die Artikelnummer (z. B. IAN 123456_7890)
als Nachweis für den Kauf bereit.
Inbetriebnahme / Wartung und Reinigung / Entsorgung / Garantie und Service

12 12
Table of contents

13 GB/IE
List of pictograms used ........................................................................................................ Page 14
Introduction ................................................................................................................................... Page 14
Proper use ............................................................................................................................................Page 14
Included items .....................................................................................................................................Page 15
Description of parts ............................................................................................................................. Page 15
Technical data ..................................................................................................................................... Page 15
Safety .................................................................................................................................................Page 15
Safety advice .......................................................................................................................................Page 15
Preparation ...................................................................................................................................Page 16
Required tools and materials ..............................................................................................................Page 16
Preparations for use .............................................................................................................. Page 17
Fitting the light .....................................................................................................................................Page 17
Connecting several lights together .....................................................................................................Page 17
Changing the light colour ................................................................................................................... Page 17
Switching On / Off .............................................................................................................................. Page 17
Directing the light ................................................................................................................................Page 17
Maintenance and cleaning ............................................................................................... Page 18
Disposal ............................................................................................................................................Page 18
Warranty and service ...........................................................................................................Page 18
Warranty .............................................................................................................................................Page 18
Declaration of Conformity ..................................................................................................................Page 18
Manufacturer / Service .......................................................................................................................Page 18
Table of contents

14 GB/IE
List of pictograms used
Read the instructions! Electric shock warning!
Danger to life!
This light is only suitable for indoor
use in dry and enclosed spaces. For your safety
Alternating current / voltage Caution! Risk of burns due to hot
surfaces!
Hertz (frequency)
b
a
Dispose of the packaging and device
in an environmentally-friendly manner!
Watt (effective power) Danger to life and risk of accidents
for infants and children!
Safety class II ON OFF Switching cycles
Operating life Observe the warnings and safety
notices!
Do not operate this light with a dim-
mer or an electronic switch. It is not
suitable for this mode of operation.
The packaging is made from 100%
recycled paper.
Volt
LED Under-Cabinet Light with
Adjustable Light Colour
Q Introduction
Congratulations on your new product.
You have selected a high quality product.
Please read carefully and completely
through these operating instructions. Fold out the
page with the illustrations. These instructions form
part of the product and contain important information
about bringing the product into use and its handling.
Always observe all the safety advice. Check that
the correct mains voltage is available and that all
the parts have been properly assembled before
bringing into use. Should you have any questions
or be uncertain as to how to operate the device,
please get in touch with your dealer or service point.
Please keep these instructions in a safe place and
hand them on to a third party if necessary.
Proper use
This light is suitable only for interior use,
in dry and enclosed spaces. The light
should be positioned within reach so
that the switch can be operated conveniently. The
light can be fitted to all normally inflammable sur-
faces. Any use other than that described above or
modification to the lamp is not permitted and may
lead to damage to people or property. Moreover,
there is the risk of injury or loss of life and that the
lamp may develop technical faults such as short
Introduction Introduction / Safety

15 GB/IE
Introduction
circuit or fire or give an electric shock. This lamp is
intended for use only in a domestic environment.
This product is intended for normal operation.
Included items
Check that all the items and accessories are present
and that the lamp is in perfect condition immediately
after unpacking.
1 LED Under-Cabinet Light with Adjustable Light
Colour, Model 14139304L / 14139306L
1 Power cable
1 Connection cable
2 Dowels
2 Screws
1 Operating instructions
Description of parts
1 Mounting holes for wall fastening
2 Light connector socket
3 Mains cable
4 Mains plug
5 ON / OFF switch
6 Connection socket
7 Protective cap
8 Connection cable
9 Lamp housing
10 Wall plug
11 Mounting holes for base fastening
12 Swivel-mounted light strip
Technical data
Lamp:
Item number: 14139304L / 14139306L
Operating voltage: 230‒240 V~ 50 Hz
Rated power: LED, 6.8 W
Protection class: II /
Protection type: IP20
LED:
Illuminant: LED module
Rated power: 6 W
Q Safety
Safety advice
The right to claim under the guarantee shall be
rendered invalid in respect of damage caused by
the non-observance of these operating instructions.
No liability is accepted for consequent damage.
No liability is accepted for damage to property
or persons caused by improper handling or non-
observance of the safety advice.
DANGER TO LIFE AND
ACCIDENT HAZARD FOR TOD-
DLERS AND SMALL CHILDREN!
Never leave children unsupervised with the
packaging material. The packaging material
poses a suffocation hazard. Children frequently
underestimate the dangers. Always keep chil-
dren away from the product.
This device may be used by children age
8 years and up, as well as by persons with
reduced physical, sensory or mental capacities,
or lacking experience and/or knowledge, so
long as they are supervised or instructed in the
safe use of the device and understand the asso-
ciated risks. Do not allow children to play with
the product. Cleaning and user maintenance
must not be performed by children without
supervision.
To avoid danger to life
from electric shock
Before connecting it to the mains, always check
the light, the power cable as well as the con-
necting cable if need be for any damage.
Never use the light if you see any damage.
Damaged power cables and connecting cables
are a danger to life as you could suffer an
electric shock.
Before assembly, ensure that the mains voltage
available corresponds to the operating voltage
necessary of the light (see „Technical data“).
Introduction / Safety

16 GB/IE
Never let the lamp come into contact with
water or other liquids.
Never open or insert anything into electrical
fittings or equipment. Doing this sort of thing can
lead to a serious danger to life from electric
shock.
Touch only the insulated part of the plug when
connecting to or disconnecting from the mains
supply.
The lamp's illuminant is not replaceable. The
entire lamp needs to be replaced if the illumi-
nant reaches the end of its service life.
If the external flexible cable of this lamp is
damaged, it may only be replaced by a special
cable or a cable that is only available from the
manufacturer or his service representative.
Only connect the under-cabinet light to the
mains current using the original power cable.
Only connect original under-cabinet lights of
the same type (Model 14139304L /
14139306L) with each other. Only use the
original connecting cable supplied to do so.
Connect the under-cabinet lights that are linked
up together to one socket only. Make sure that
you only connect a maximum of 10 linked-up
under-cabinet lights of the same type to one
socket. Otherwise this might overload the
connections and cables.
Please ensure all under-cupboard lamps have
been connected with the connection lead before
connecting the mains plug to the mains socket.
Prevent fire and injury
hazards
RISK OF INJURY!
Immediately after unpacking check each
light and the lamp glass for damage. Do not
operate the lamp with defective bulbs and/or
defective lamp glass. In this case, contact
the service centre for a replacement.
RISK OF BURNS!
To prevent burns, be sure the light is switched
off and has cooled down before touching it.
The illuminants become very hot.
This product does not contain any parts that
can be serviced by the user.
Do not look into the LED from a close distance
during operation. Do not look at the LED with
an optical instrument (e.g. magnifying glass).
Do not operate this light with a dim-
mer or an electronic switch. It is not
suitable for this mode of operation.
Working safely
Fit the light in such a way to ensure it is
protected from damp and dirt.
Make careful preparations for the assembly
and take sufficient time. Clearly lay out all com-
ponents and any additional tools or materials
that might be required so that they are readily
to hand.
Remain alert at all times and always watch
what you are doing. Always proceed with
caution and do not assemble the lamp if you
cannot concentrate or feel unwell.
Q Preparation
Q Required tools and materials
The tools and materials mentioned are not included
in the delivery. The details and values given are
non-binding and for guidance only. The nature of
the material depends on the individual circumstances
on site.
- Pencil / Marking tool
- Screwdriver
- Electric drill
- Drill (Ø 6 mm)
- Spirit level
- Measuring tape
Safety /Preparation Preparations for use

17 GB/IE
Safety /Preparation
Q Preparations for use
Q Fitting the light
Note: Prior to installation, verify there is a socket
nearby within reach of the included power cable 3.
Note: The light can be adjusted to 2 light levels
using the ON / OFF switch 5.
1. Measure up the wall or mounting surface for
drilling the holes. Use a spirit level to improve
accuracy.
2. Mark the distance for the mounting holes 1
or 11 .
3. Now drill the mounting holes (ø approx. 6 mm,
depth approx. 40 mm). Make sure that you do
not damage any electrical cables during this
operation.
4. Insert the supplied wall plugs 10 into the drilled
holes. Insert the supplied screws into the wall
plugs 10 and tighten them, stopping when they
project about 3 mm out of the wall or mounting
surface (fig. A).
5. Attach the light using the appropriate mounting
holes 11 or 1 to the screws.
6. When you have attached the light above the
assembly holes 11 , slide the light housing 9
to the left until it clicks into place.
7. Insert the light connector plug of the mains
lead 3 into the light connector socket 2.
8. Insert the mains plug of the mains lead 4 into
a convenient mains socket. Your light is now
ready for operation.
Q
Connecting several
lights together
CAUTION!
Please ensure all under-cupboard lamps have been
connected with the connection cable 8 before
connecting the mains plug 4 to the mains socket.
Note: Make sure that you only connect a maximum
of 10 linked-up under-cabinet lights of the same
type to one socket.
Install up to 10 lights of the same model next
to each other. To do so, follow steps 1–5 of
the section called “Fitting the light”.
Note: Make sure that the distance between
the lights is not more than 15 cm.
Note: Make sure that the distance between
the lights is not less than 10 cm.
Remove the protective head guard 7.
Insert the connecting cable 8 into the con-
necting socket 6 of the light.
Insert the second connection of the connecting
cable 8 into the socket 2 of the other light.
Insert the connection of the power cable 3
into the socket 2 of the outer, left-hand light.
Connect the mains plug 4 to the mains
socket. Your lights are now ready for opera-
tion.
Changing the light colour
To change the light colour, set the ON / OFF
switch 5 to the different levels.
‒ Level I = Warm white
‒ Level II = Cold white
Q Switching On / Off
Switch the ON / OFF switch 5 to turn the
light on or off.
Move the ON / OFF switch 5 to the centre
position to switch the light off.
Q Directing the light
Never change the direction of the light while
it is switched on.
RISK OF BURNS!
To prevent burns, be sure the light is switched
off and cooled down before touching it. The
illuminants become very hot.
Allow the light to cool down completely.
Turn the strip light 12 into the desired direction.
Preparations for use

18 GB/IE
Q Maintenance and cleaning
DANGER OF ELECTRIC
SHOCK!
To do this pull the mains plug on the mains
lead 4 out of the socket.
DANGER OF ELECTRIC
SHOCK!
For reasons of electrical safety, the light must
never be cleaned with water or other fluids or
be immersed in water. When cleaning, only
use a dry, lint-free cloth.
Do not use solvents, benzene or similar
substances. They could damage the light.
Allow the lamp to cool down completely.
Q Disposal
The packaging is made entirely of recyclable mate-
rials, which you may dispose of at local recycling
facilities.
b
a
Observe the marking of the packaging
materials for waste separation, which
are marked with abbreviations (a) and
numbers (b) with following meaning:
1–7: plastics / 20–22: paper and fibre-
board / 80–98: composite materials.
The product and packaging materials
are recyclable, dispose of it separately
for better waste treatment. The Triman
logo is valid in France only.
To help protect the environment, please
dispose of the product properly when it
has reached the end of its useful life and
not in the household waste. Information
on collection points and their opening
hours can be obtained from your local
authority.
The packaging is made from
100 % recycled paper.
Warranty and service
Warranty
You receive a 36 month warranty on this product,
valid from the date of purchase.
The device has been carefully produced under strict
quality control.
Within the warranty period we shall rectify without
charge all material and manufacturing defects. In
the event of a defect arising during the warranty
period, please send the device to the listed Service
Centre address, making reference to the following
article number: 14139304L / 14139306L.
Wear parts (such as bulbs) and damage caused
by improper handling, non-observance of the oper-
ating instructions or unauthorised interference are
excluded from the warranty.
The performance of services under the warranty
does not extend or renew the warranty period.
Q Declaration of Conformity
This product conforms to the requirements of the
applicable European and national directives. Con-
formity has been demonstrated. The relevant decla-
rations and documents are held by the manufacturer.
Q Manufacturer / Service
Briloner Leuchten GmbH & Co. KG
Im Kissen 2 · 59929 Brilon · GERMANY
Tel.: +49 29 61 / 97 12–800
Fax: +49 29 61 / 97 12–199
E-Mail: [email protected]
www.briloner.com
Free service number:
Tel.: 00800 / 27456637
IAN 336846_2001
When inquiring about your product, please have
your receipt and product number (e.g. IAN
123456_7890) ready as your proof of purchase.
Maintenance and cleaning / Disposal / Warranty and service Table des matières

19 FR/BE
Maintenance and cleaning / Disposal / Warranty and service
Légende des pictogrammes utilisés .......................................................................... Page 20
Introduction ................................................................................................................................... Page 20
Utilisation conforme à l‘usage prévu .................................................................................................Page 20
Contenu de la livraison .......................................................................................................................Page 21
Description des pièces ........................................................................................................................ Page 21
Caractéristiques techniques ................................................................................................................Page 21
Sécurité .............................................................................................................................................Page 21
Consignes de sécurité ......................................................................................................................... Page 21
Préparation ...................................................................................................................................Page 23
Outils et matériels nécessaires ...........................................................................................................Page 23
Mise en marche .......................................................................................................................... Page 23
Montage de la lampe .........................................................................................................................Page 23
Connexion de plusieurs lampes les unes aux autres ........................................................................Page 23
Modifier la couleur de lumière ...........................................................................................................Page 23
Allumage / extinction ..........................................................................................................................Page 24
Orientation de la lampe .....................................................................................................................Page 24
Entretien et nettoyage..........................................................................................................Page 24
Mise au rebut ............................................................................................................................... Page 24
Garantie et service après-vente ..................................................................................Page 24
Garantie ..............................................................................................................................................Page 24
Déclaration de conformité .................................................................................................................. Page 25
Fabricant / service ...............................................................................................................................Page 25
Table des matières

20 FR/BE
Légende des pictogrammes utilisés
Lisez les instructions! Attention au risque d‘électrocution !
Danger de mort !
Cette lampe est exclusivement conçue
pour un usage intérieur, dans des
locaux secs et fermés.
Conduite à tenir
Courant alternatif / Tension alternative Attention ! Risque de brûlures à
cause des surfaces très chaudes !
Hertz (fréquence)
b
a
Mettez l’emballage et l’appareil au
rebut dans le respect de
l'environnement !
Watt (puissance active) Danger de mort et risque de blessures
pour les enfants en bas âge et les
enfants !
Classe de protection II ON OFF Cycles de commutation
Durée de vie Respecter les avertissements et
consignes de sécurité !
N’utilisez pas cette lampe pour des
variateurs ni des commutateurs électro-
niques. Elle n‘est pas conçue à cet effet.
L'emballage est composé à
100 % de papier recyclé.
Volt
Réglette sous meuble LED
à blanc variable
Introduction
Nous vous félicitons pour l‘achat de votre
nouvel appareil. Vous avez opté pour
un produit de grande qualité. Veuillez
lire ce mode d‘emploi intégralement et attentivement.
Ouvrez la page contenant les illustrations. Le présent
mode d‘emploi fait partie de ce produit et contient
des instructions essentielles pour sa mise en service
et sa manipulation. Respectez toujours toutes les
consignes de sécurité. Avant la mise en service, vé-
rifiez si la tension est correcte et si toutes les pièces
sont correctement montées. Si vous avez des
questions ou des doutes concernant la manipula-
tion de l‘appareil, veuillez contacter votre reven-
deur ou le service après-vente. Veuillez conserver
soigneusement
ce mode d‘emploi et remettez-le aux
autres utilisateurs.
Q
Utilisation conforme
à l‘usage prévu
Cette lampe est exclusivement conçue
pour un usage intérieur, dans des locaux
secs et fermés. Étant donné que la lampe
est équipée d‘un interrupteur, il convient de l‘instal-
ler à portée de main. Cette lampe peut être fixée sur
toutes les surfaces normalement inflammables. Toute
utilisation autre que celle décrite ou toute
Introduction

21 FR/BE
modification de l’appareil est interdite et entraîne
un endommagement de l’appareil. Un usage non
conforme peut en outre provoquer d‘autres dangers
mortels et blessures ainsi que des défaillances tech-
niques (par ex. court-circuit, incendie, décharge
électrique). Cet appareil est uniquement destiné à
un usage domestique privé.
Ce produit est conçu pour une utilisation normale.
Q Contenu de la livraison
Contrôlez toujours immédiatement après le déballage
du produit que le contenu de la livraison est complet
et que l’appareil se trouve en parfait état.
1 Réglette sous meuble LED à blanc variable,
modèle 14139304L / 14139306L
1 Cordon d‘alimentation
1 Cordon de connexion
2 Chevilles
2 Vis
1 Mode d‘emploi
Q Description des pièces
1 Trous de montage pour fixation murale
2 Prise femelle de la lampe
3 Câble d'alimentation
4 Fiche secteur
5 Commutateur MARCHE / ARRÊT
6 Prise femelle de connexion
7 Cache de protection
8 Câble de connexion
9 Boîtier de la lampe
10 Cheville
11 Trous de montage pour fixation sous meuble
12 Réglette lumineuse inclinable
Caractéristiques techniques
Lampe :
Numéro d'article : 14139304L / 14139306L
Tension de
fonctionnement : 230‒240 V~ 50 Hz
Puissance nominale : LED, 6,8 W
Classe de protection : II /
Indice de protection : IP20
LED :
Ampoule : Module LED
Puissance nominale : 6 W
Sécurité
Consignes de sécurité
Les droits de recours en garantie sont annulés en
cas de dommages résultant du non-respect du pré-
sent mode d’emploi ! Le fabricant décline toute res-
ponsabilité pour les dommages consécutifs !
Toute responsabilité est déclinée pour les dommages
matériels ou corporels causés par une manipulation
incorrecte ou par le non-respect des consignes de
sécurité !
DANGER DE MORT ET D'ACCI-
DENT POUR LES ENFANTS EN
BAS ÂGE ET LES ENFANTS !
Ne jamais laisser les enfants manipuler sans
surveillance le matériel d'emballage. Le matériel
d'emballage présente un risque d'étouffement.
Les enfants sous-estiment souvent les dangers.
Toujours tenir le produit à l'écart des enfants.
Ce produit peut être utilisé par des enfants
de 8 ans et plus, ainsi que par des personnes
avec des capacités physiques, psychiques ou
sensorielles réduites ou manquant d'expérience
ou de connaissance s'ils sont surveillés ou s'ils
ont été instruits de l'utilisation du produit de
manière sûre et comprennent les risques liés à
son utilisation. Les enfants ne doivent pas jouer
avec ce produit. Le nettoyage et l'entretien du
produit ne doivent pas être effectués par des
enfants laissés sans surveillance.
Introduction / Sécurité

22 FR/BE
Prévention de risques mortels
par électrocution
Avant chaque branchement au secteur, contrôlez
la lampe, le cordon secteur, ainsi que le cas
échéant le cordon de connexion afin de détec-
ter d’éventuels endommagements. N‘utilisez ja-
mais la lampe si vous constatez le moindre
dommage.
Un cordon secteur et un câble de raccordement
endommagés représentent un danger de mort
par électrocution.
Avant d‘effectuer le montage, vérifiez que la
tension secteur correspond à la tension de ser-
vice requise de la lampe (voir „Caractéristiques
techniques“).
Évitez impérativement tout contact de la lampe
avec de l‘eau ou d‘autres liquides.
N‘ouvrez jamais les composants électriques
(par ex. interrupteur, douille et.) et n‘insérez
aucun objet quelconque dans ceux-ci. De telles
interventions impliquent un danger de mort par
électrocution.
Uniquement saisir la fiche secteur par les parties
isolées pour la brancher ou la débrancher !
La source lumineuse de cette lampe n'est pas
remplaçable. Lorsque la source lumineuse ar-
rive en fin de vie, l'ensemble de la lampe doit
être remplacé.
Si la conduite flexible externe de cette lampe
est endommagée, elle doit uniquement être
remplacée par une conduite spéciale ou par
une conduite exclusivement disponible auprès
du fabricant ou d’un de ses représentants agréés.
Ne branchez la réglette au secteur qu’avec le
cordon secteur d’origine.
Ne connectez entre elles que des réglettes
d’origine de même type (14139304L /
14139306L).
Ne branchez les réglettes reliées entre elles qu’à
une seule prise de courant. Veuillez noter qu‘un
nombre maximal de 10 réglettes de même type
peuvent fonctionner par l’intermédiaire d’une
même prise de courant. Si plus de 10 réglettes
sont branchées de cette manière, il existe un
risque de surcharge des raccordements et des
câbles.
Tenez compte du fait que toutes les réglettes
doivent d'abord être reliées entre elles par l'in-
termédiaire de câbles de connexion avant de
brancher la fiche secteur.
Prévention de risque d'incendies
et de blessures
RISQUE DE BLESSURES !
Vérifiez immédiatement l'état de chaque
lampe, et de chaque verre de lampe, après le
déballage du produit. Ne pas utiliser la lampe
avec une source lumineuse défectueuse et / ou
un verre de lampe défectueux. Si vous constatez
des dommages, veuillez contacter le service
après-vente pour procéder au remplacement
de la pièce défectueuse.
RISQUE DE BRÛLURE!
Afin d'éviter toute brûlure, vérifiez que la lampe
soit éteinte et suffisamment froide avant de la
manipuler. L'ampoule dégage une forte chaleur.
Ce produit ne contient aucune pièce nécessi-
tant une maintenance de la part de l'utilisateur.
Lorsque les LED sont allumées, évitez de les re-
garder de trop près. Ne pas regarder les LED
à l'aide d'un instrument optique (par exemple
une loupe).
N’utilisez pas cette lampe pour des
variateurs ni des commutateurs élec-
troniques. Elle n‘est pas conçue à
cet effet.
Veuillez vous conformer aux
points suivants
Montez la lampe de telle sorte qu‘elle soit pro-
tégée de l‘humidité et des salissures.
Soigneusement préparer le montage et l‘effec-
tuer sans précipitation. Préparez toutes les
pièces détachées et l‘outillage ou le matériel
requis et posez-les à portée de main.
Soyez toujours vigilant ! Faites toujours attention
à ce que vous faites et agissez raisonnablement.
N‘effectuez jamais le montage de la lampe si vous
n‘êtes pas concentré ou si vous vous sentez mal.
Sécurité

23 FR/BE
Q Préparation
Q
Outils et matériels nécessaires
Les outils et matériels indiqués ne sont pas inclus dans
le contenu de la livraison. Il s‘agit là de données et
de valeurs indicatives vous permettant de vous
orienter. Les caractéristiques du matériel dépendent
des conditions spécifiques sur place.
- Crayon / outil marqueur
- Tournevis
- Perceuse
- Foret (ø 6 mm)
- Niveau à bulle
- Mètre ruban
Mise en marche
Q
Montage de la lampe
Remarque : Avant le montage, assurez-vous
qu’une prise électrique se trouve à proximité, et
peut être connectée au câble secteur 3 fourni.
Remarque : L'éclairage peut ajusté sur 2 niveaux
lumineux au moyen de l'interrupteur MARCHE/
ARRÊT 5.
1. Mesurez le mur ou la surface de montage pour
les trous à forer. Pour un alignement précis,
utilisez un niveau à bulle.
2. Marquez l'écartement des trous de fixation 1
ou 11 .
3. Percez à présent les trous de fixation (ø d‘env.
6 mm, profondeur d‘env. 40 mm). Veillez à ne
pas endommager de ligne électrique.
4. Introduisez les chevilles fournies 10 dans les
trous. Insérez les vis fournies dans les chevilles
10 et laissez-les sortir d‘environ 3 mm du mur
ou de la surface de montage (ill. A).
5. Fixer la lampe à l‘aide des trous de montage
correspondants 11 ou 1 sur les vis.
6. Lorsque vous avez fixé la lampe par le biais
des trous de montage 11 , vous devez en outre
faire coulisser le boîtier de la lampe 9 vers la
gauche jusqu'en butée.
7. Branchez le raccordement du cordon secteur 3
dans la prise femelle de la lampe 2.
8. Insérez la fiche secteur 4 dans une prise de
courant. Votre lampe est alors prête à l‘emploi.
Q
Connexion de plusieurs lampes
les unes aux autres
ATTENTION !
Tenez compte du fait que toutes les réglettes doivent
d'abord être reliées entre elles par l'intermédiaire
de câbles de connexion 8 avant de brancher la
fiche secteur 4.
Remarque : Veillez à brancher ensemble un
nombre maximum de 10 réglettes de même type
par l’intermédiaire d’une même prise de courant.
Montez jusqu’à 10 lampes de même type
l’une à côté de l’autre. Pour ce faire, suivez les
étapes de travail 1. à 5. du chapitre «Monter
la lampe».
Avis: Veillez à ce que l’écart entre les lampes
ne soit pas supérieur à 15 cm.
Remarque : veillez à ce que l’écart entre les
lampes ne soit pas inférieur à 10 cm.
Retirez le capuchon de protection 7.
Branchez le cordon de connexion 8 dans la
prise femelle de connexion 6 de la lampe.
Branchez le second raccordement du cordon
de connexion 8 dans la prise femelle 2 de
l’autre lampe.
Branchez le raccordement du cordon secteur 3
dans la prise femelle de la lampe 2 extérieure
gauche.
Branchez la fiche secteur 4 dans la prise.
Vos lampes sont alors prêtes à l'emploi.
Modifier la couleur de lumière
Afin de modifier la couleur de lumière, placez
l'interrupteur MARCHE/ARRÊT 5 sur les ni-
veaux correspondants.
‒ Niveau I = blanc chaud
‒ Niveau II = blanc froid
Préparation / Mise en marche

24 FR/BE
Garantie et service après-vente
Q Allumage / extinction
Pour allumer ou éteindre la lampe, actionnez
le commutateur MARCHE / ARRET 5.
Amenez l'interrupteur MARCHE / ARRÊT 5 en
position centrale pour éteindre la lampe.
Q Orientation de la lampe
Ne modifiez l‘orientation de la lampe que
lorsque qu‘elle se trouve éteinte.
RISQUE DE BRÛLURES!
Afin d'éviter toute brûlure, vérifiez que la lampe
soit éteinte et suffisamment froide avant de la
manipuler. L'ampoule dégage une forte chaleur.
Laissez refroidir la lampe complètement.
Faites pivoter la réglette 12 dans la direction
voulue.
Entretien et nettoyage
RISQUE D‘ÉLECTRO
CUTION !
Débranchez la fiche secteur 4 de la prise de
courant.
RISQUE D‘ÉLECTRO-
CUTION !
Pour des raisons de sécurité électrique, il est
interdit de nettoyer la lampe à l‘eau ou avec
d‘autres liquides ou encore de la plonger dans
de l‘eau. Pour le nettoyage, utilisez uniquement
un chiffon sec qui ne peluche pas.
N‘utilisez ni solvants, ni benzine, ni autres pro-
duits similaires. Ceci endommagerait la lampe.
Laissez refroidir la lampe complètement.
Mise au rebut
L’emballage se compose de matières recyclables
pouvant être mises au rebut dans les déchetteries
locales.
b
a
Veuillez respecter l‘identification des ma-
tériaux d‘emballage pour le tri sélectif, ils
sont identifiés avec des abbréviations (a)
et des chiffres (b) ayant la signification
suivante : 1–7 : plastiques / 20–22 :
papiers et cartons / 80–98 : matériaux
composite.
Le produit est recyclable, soumis à la
responsabilité élargie du fabricant et
collecté séparément.
Afin de contribuer à la protection de
l’environnement, veuillez ne pas jeter votre
produit usagé dans les ordures ménagères,
mais éliminez-le de manière appropriée.
Pour obtenir des renseignements concer-
nant les points de collecte et leurs horaires
d’ouverture, vous pouvez contacter votre
municipalité.
L'emballage est composé à 100 %
de papier recyclé.
Garantie et service après-vente
Garantie
Article L217-16 du Code de la
consommation
Lorsque l‘acheteur demande au vendeur, pendant
le cours de la garantie commerciale qui lui a été
consentie lors de l‘acquisition ou de la réparation
d‘un bien meuble, une remise en état couverte par
la garantie, toute période d‘immobilisation d‘au m
oins
sept jours vient s‘ajouter à la durée de la garantie
qui restait à courir. Cette période court à compter
de la demande d‘intervention de l‘acheteur ou de
la mise à disposition pour réparation du bien en
cause, si cette mise à disposition est postérieure à
la demande d‘intervention.
Indépendamment de la garantie commerciale sous-
crite, le vendeur reste tenu des défauts de conformité
du bien et des vices rédhibitoires dans les conditions
prévues aux articles L217-4 à L217-13 du Code
... / Entretien et nettoyage / Mise au rebut / Garantie et service après-vente

25 FR/BE
Garantie et service après-vente
de la consommation et aux articles 1641 à 1648
et 2232 du Code Civil.
Article L217-4 du Code de la consommation
Le vendeur livre un bien conforme au contrat et ré-
pond des défauts de conformité existant lors de la
délivrance.
Il répond également des défauts de conformité ré-
sultant de l‘emballage, des instructions de montage
ou de l‘installation lorsque celle-ci a été mise à sa
charge par le contrat ou a été réalisée sous sa res-
ponsabilité.
Article L217-5 du Code de la consommation
Le bien est conforme au contrat :
1° S´il est propre à l‘usage habituellement attendu
d‘un bien semblable et, le cas échéant :
- s‘il correspond à la description donnée par le
vendeur et posséder les qualités que celui-ci a
présentées à l‘acheteur sous forme d‘échantil-
lon ou de modèle ;
- s‘il présente les qualités qu‘un acheteur peut
l
égitimement attendre eu égard aux déclaratio
ns
publiques faites par le vendeur, par le produc-
teur ou par son représentant, notamment dans
la publicité ou l‘étiquetage ;
2° Ou s‘il présente les caractéristiques définies d‘un
commun accord par les parties ou être propre
à tout usage spécial recherché par l‘acheteur,
porté à la connaissance du vendeur et que ce
dernier a accepté.
Article L217-12 du Code de la
consommation
L‘action résultant du défaut de conformité se prescrit
par deux ans à compter de la délivrance du bien.
Article 1641 du Code civil
Le vendeur est tenu de la garantie à raison des
défauts cachés de la chose vendue qui la rendent
impropre à l‘usage auquel on la destine, ou qui
diminuent tellement cet usage que l‘acheteur ne
l‘aurait pas acquise, ou n‘en aurait donné qu‘un
moindre prix, s‘il les avait connus.
Article 1648 1er alinéa du Code civil
L‘action résultant des vices rédhibitoires doit être in-
tentée par l‘acquéreur dans un délai de deux ans
à compter de la découverte du vice.
Les pièces détachées indispensables à l’utilisation
du produit sont disponibles pendant la durée de la
garantie du produit.
Vous bénéficiez d’une garantie de 36 mois à partir
de la date d’achat de l’appareil. Cet appareil a été
fabriqué avec soin et soumis à un contrôle qualité
minutieux. Pendant la durée de la garantie, nous
réparons gratuitement tous les défauts de matériaux
ou de fabrication. Si vous deviez constater des dé-
fauts pendant la période de garantie, envoyez-nous
l‘appareil à l‘adresse du SAV mentionnée ci-dessous
en mentionnant le numéro d‘article : 14139304L /
14139306L.
La garantie exclut les dommages dus à une mani-
pulation incorrecte, au non-respect des instructions
du mode d’emploi ou à une intervention par une
personne non autorisée, ainsi que les pièces d’usure
(p. ex. les ampoules). La durée de garantie n’est
aucunement prolongée ou renouvelée par une pres-
tation de garantie.
Q Déclaration de conformité
Ce produit remplit les critères des réglementations
européennes et nationales. La conformité a été at-
testée. Les déclarations et documents correspondants
sont en possession du fabricant.
Q Fabricant / service
Briloner Leuchten GmbH & Co. KG
Im Kissen 2,
59929Brilon
ALLEMAGNE
Tel. : +49 29 61 / 97 12–800
Fax : +49 29 61 / 97 12–199
www.briloner.com

26 FR/BE
Garantie et service après-vente
Numero de service gratuit
Tél. : 00800 / 27456637
IAN 336846_2001
Veuillez conserver le ticket de caisse et la référence
de l’article (par ex. IAN 123456_7890) comme
preuve d‘achat.
Inhoudsopgave

27 NL/BE
Garantie et service après-vente Inhoudsopgave
Legenda van de gebruikte pictogrammen ..................................................... Pagina 28
Inleiding ....................................................................................................................................... Pagina 28
Doelmatig gebruik........................................................................................................................... Pagina 28
Leveringsomvang ............................................................................................................................ Pagina 29
Beschrijving van de onderdelen ..................................................................................................... Pagina 29
Technische gegevens ...................................................................................................................... Pagina 29
Veiligheid .................................................................................................................................... Pagina 29
Veiligheidsinstructies ....................................................................................................................... Pagina 29
Voorbereiding ........................................................................................................................ Pagina 30
Vereist gereedschap en materiaal ................................................................................................. Pagina 30
Ingebruikname ...................................................................................................................... Pagina 31
Lamp monteren ................................................................................................................................ Pagina 31
Meerdere lampen met elkaar verbinden ....................................................................................... Pagina 31
Lichtkleur wisselen ........................................................................................................................... Pagina 31
Aan- / uitschakelen .......................................................................................................................... Pagina 31
Lamp richten .................................................................................................................................... Pagina 31
Onderhoud en reiniging ................................................................................................. Pagina 32
Afvoer ............................................................................................................................................ Pagina 32
Garantie en service ............................................................................................................ Pagina 32
Garantie .......................................................................................................................................... Pagina 32
Conformiteitsverklaring ................................................................................................................... Pagina 32
Producent / Service ......................................................................................................................... Pagina 32

28 NL/BE
Inleiding
Legenda van de gebruikte pictogrammen
Instructies lezen! Waarschuwing voor een elektrische
schok! Levensgevaar!
Deze lamp is uitsluitend bedoeld voor
gebruik binnenshuis, in droge en
afgesloten ruimtes.
Zo handelt u correct
Wisselstroom / -spanning Voorzichtig! Kans op brandwonden
door hete oppervlakken!
Hertz (frequentie)
b
a
Voer verpakking en apparaat op een
milieuvriendelijke manier af!
Watt (nuttig vermogen) Levensgevaar en kans op ongevallen
voor kleuters en kinderen!
Beschermingsklasse II ON OFF Schakelcycli
Levensduur Waarschuwingen en veiligheidsin-
structies in acht nemen!
Gebruik deze lamp niet met dimmer
en elektronische schakelaar. De lamp
is daarvoor niet geschikt.
De verpakking bestaat uit 100%
gerecycled papier.
Volt
LED-onderbouwlamp
met kleurenkeuze
Q Inleiding
Gefeliciteerd met de koop van uw nieuwe
apparaat. U heeft gekozen voor een
hoogwaardig product. Lees deze ge
bruiks-
aanwijzing en de veiligheidsinstructies volledig en
zorgvuldig door. Vouw de pagina met de afbeel-
dingen open. Deze gebruiksaanwijzing hoort bij
dit product en bevat belangrijke aanwijzingen voor
de ingebruikname en de bediening. Neem altijd
de veiligheidsinstructies in acht. Controleer vóór de
ingebruikname of de juiste spanning beschikbaar
is en of alle onderdelen goed gemonteerd zijn.
Wanneer u vragen hebt of onzeker bent in ver-
band met de bediening van het apparaat, kunt
u contact opnemen met uw leverancier of met
het servicepunt. Bewaar deze handleiding op een
veilige plaats en geef ze evt. aan derden door.
Q Doelmatig gebruik
Deze lamp is uitsluitend bedoeld voor
gebruik binnenshuis, in droge en gesloten
ruimten. Op grond van de schakelbedie-
ning moet de lamp binnen reikhoogte worden aan-
gebracht. De lamp kan op alle normaal ontvlambare
oppervlakken bevestigd worden. Een ander gebruik
dan tevoren beschreven of een verandering aan het
product is niet toegestaan en leidt tot schade aan
het product. Bovendien kunnen daardoor andere
dodelijke gevaren en letsels evenals technische
storingen (kortsluiting, brand, elektrische schok)
ontstaan. Dit product is bestemd voor het gebruik
in privé-huishoudens.
Dit product is bestemd voor het normale gebruik.
Inleiding / Veiligheid

29 NL/BE
Inleiding Inleiding / Veiligheid
Q Leveringsomvang
Controleer de levering altijd direct na het uitpakken
op volledigheid en de optimale staat van het product.
1 LED-onderbouwlamp met kleurenkeuze, model
14139304L / 14139306L.
1 Netkabel
1 Verbindingskabel
2 Pluggen
2 Schroeven
1 Gebruiksaanwijzing
Q Beschrijving van de onderdelen
1 Montageboringen voor de wandbevestiging
2 Contactdoos voor de lamp
3 Stroomkabel
4 Stekker
5 AAN- / UIT-schakelaar
6 Verbindingscontactdoos
7 Beschermkap
8 Verbindingskabel
9 Lampbehuizing
10 Plug
11 Montageboringen voor de onderbouwmontage
12 Zwenkbaar lichtpaneel
Technische gegevens
Lamp:
Artikelnummer: 14139304L / 14139306L
Bedrijfsspanning: 230‒240 V~ 50 Hz
Nominaal vermogen: LED, 6,8 W
Beschermingsklasse: II /
Beschermingsgraad: IP20
LED:
Verlichtingsmiddel: led-module
Nominaal vermogen: 6 W
Q Veiligheid
Veiligheidsinstructies
Bij schade die ontstaat door het negeren van deze
gebruiksaanwijzing komt de garantieverlening te
vervallen. Voor volgschade zijn wij niet aansprakelijk!
Wij zijn niet aansprakelijk in geval van materiële
schade of persoonlijk letsel als gevolg van ondes-
kundig gebruik of het negeren van de veiligheidsin-
structies!
LEVENSGEVAAR EN KANS OP
ONGEVALLEN BIJ KLEUTERS
EN KINDEREN!
Laat kinderen nooit zonder toezicht bij het
verpakkingsmateriaal. Er bestaat gevaar voor
verstikking door verpakkingsmateriaal. Kinderen
onderschatten de gevaren vaak. Houd kinderen
altijd uit de buurt van het product.
Dit apparaat kan door kinderen vanaf 8 alsmede
personen met verminderde fysieke, sensorische
of mentale vaardigheden of een gebrek aan er-
varing en kennis worden gebruikt, als zij onder
toezicht staan of geïnstrueerd werden met be-
trekking tot het veilige gebruik van het apparaat
en de hieruit voortvloeiende gevaren begrijpen.
Kinderen mogen niet met het apparaat spelen.
Reiniging en onderhoud mag niet door kinderen
zonder toezicht worden uitgevoerd.
Levensgevaar door
elektrische schok
Controleer de lamp, de voedingskabel en de
verbindingskabel vóór iedere aansluiting op
het stroomnet op eventuele beschadigingen.
Gebruik de lamp niet wanneer u ongeacht
welke beschadiging ook hebt geconstateerd.
Bij beschadigde net- en verbindingskabels be-
staat levensgevaar door elektrische schokken.
Overtuig u er vóór de montage van dat de
bestaande netspanning overeenstemt met
de vereiste bedrijfsspanning van de lamp
(zie ‚Technische gegevens‘).

30 NL/BE
Veiligheid / Voorbereiding
Vermijd elk contact van de lamp met water
of andere vloeistoffen.
Open nooit een van de elektrische bedrijfsmid-
delen en steek ook geen voorwerpen in deze
onderdelen. Bij dergelijke ingrepen bestaat
levensgevaar door elektrische schokken.
Pak bij het aansluiten of het onderbreken van
de netvoeding alléén het geïsoleerde gedeelte
van de netsteker beet!
De lichtbron van deze lamp kan niet worden
vervangen; als de lichtbron het einde van zijn
levensduur heeft bereikt, dient de complete
lamp te worden vervangen.
Wanneer de externe, flexibele leiding van deze
lamp beschadigd is, mag hij alleen worden
vervangen door een speciale leiding of door
een leiding die uitsluitend via de fabrikant of
zijn servicevertegenwoordiger verkrijgbaar is.
Sluit de onderbouwlamp alleen met de originele
netkabel aan op de netstroom.
Verbind alleen originele onderbouwlampen van
hetzelfde type (14139304L / 14139306L)
met elkaar.
Sluit met elkaar verbonden onderbouwlampen
alleen aan op een contactdoos. Let op dat u
slechts max. 10 onderbouwlampen van het-
zelfde type via een contactdoos met elkaar
mag verbinden. In het andere geval kunnen
de aansluitingen en kabels overbelast raken.
Let erop dat eerst alle onderbouwlampen
met behulp van verbindingskabels moeten zijn
verbonden, voordat u de stekker in het stop-
contact steekt.
Vermijd brandgevaar
en kans op letsel
GEVAAR VOOR LETSEL!
Controleer direct na het uitpakken elke lamp en
ieder lampenglas op beschadigingen. Gebruik
de lamp niet met defecte lichtbron en / of een
defect lampenglas. Neem in dit geval contact
op met de klantenservice.
GEVAAR VOOR BRANDWONDEN!
Zorg ervoor dat de lamp uitgeschakeld en
afgekoeld is voordat u deze aanraakt om
brandwonden te vermijden. Verlichtingsmidde-
len ontwikkelen een grote hitte.
Dit artikel bevat geen delen die door de
verbruiker kunnen worden onderhouden.
Tijdens het gebruik niet van dichtbij in de LED
kijken. De LED niet met behulp van een optisch
instrument (bijv. vergrootglas) bekijken.
Gebruik deze lamp niet met dimmer
en elektronische schakelaar.
De lamp is daarvoor niet geschikt.
Zo handelt u correct
Monteer de lamp zodanig dat hij beschermd
wordt tegen vocht en verontreiniging.
Bereid de montage zorgvuldig voor en neem
daarvoor voldoende tijd. Leg alle onderdelen
en het benodigde gereedschap of materiaal
tevoren overzichtelijk en binnen handbereik klaar.
Wees steeds opmerkzaam! Let altijd op wat u
doet en ga steeds met overleg te werk. Monteer
de lamp in geen geval wanneer u ongeconcen-
treerd bent of zich niet goed voelt.
Q Voorbereiding
Q
Vereist gereedschap
en materiaal
De genoemde gereedschappen en materialen zijn
niet bij de leveringsomvang inbegrepen. Het gaat
hierbij om niet-bindende gegevens en waarden ter
oriëntatie. De hoedanigheid van het materiaal is
af-
hankelijk van de individuele voorwaarden ter plekke.
- Potlood / Markeergereedschap
- Schroevendraaier
- Boormachine
- Boor (Ø 6 mm)
- Waterpas
- Meetlint
Ingebruikname

31 NL/BE
Veiligheid / Voorbereiding Ingebruikname
Q Ingebruikname
Q Lamp monteren
Opmerking: controleer voor de montage, of er
een stopcontact in de buurt is, dat binnen reikwijdte
van de stroomkabel 3 ligt.
Opmerking: de lamp is via de AAN-/UIT-scha-
kelaar 5 instelbaar in 2 verlichtingsmodi.
1. Meet de wand / het montagevlak uit voor de
boringen. Gebruik een waterpas voor de
correcte uitlijning.
2. Markeer de afstand van de montagegaten 1
of 11 .
3. Boor nu de bevestigingsgaten (ø ca. 6 mm,
diepte ca. 40 mm). Let op dat u geen toevoer-
leidingen beschadigt.
4. Plaats de meegeleverde pluggen 10 in de
boorgaten. Draai de bijgevoegde schroeven
in de pluggen 10 en laat ze ca. 3 mm uit de
wand / het montagevlak steken (afb. A).
5. Bevestig de lamp met via de desbetreffende
montagegaten 11 of 1 aan de schroeven.
6. Als u de lamp met behulp van de montagega-
ten 11 heeft bevestigd, moet u bovendien de
lampenbehuizing 9 tot aan de aanslag naar
links schuiven.
7. Steek de steker van de voedingskabel 3 in
de contactdoos van de lamp 2.
8. Steek de netsteker 4 in de contactdoos.
De spot is nu gereed voor gebruik.
Q
Meerdere lampen
met elkaar verbinden
VOORZICHTIG!
Let erop dat eerst alle onderbouwlampen met behulp
van verbindingskabels 8 moeten zijn verbonden,
voordat u de stekker 4 in het stopcontact steekt.
Opmerking: let op dat u slechts max. 10 onder-
bouwlampen van hetzelfde type via een contactdoos
met elkaar mag verbinden.
Monteer tot max. 10 lampen van hetzelfde type
naast elkaar. Volg hiervoor de arbeidsstappen
1 tot 5 van het hoofdstuk ‘Lamp monteren’ op.
Opmerking: let op dat de afstand tussen de
lampen niet groter is dan 15 cm.
Opmerking: let erop, dat de afstand tussen
de lampen niet kleiner dan 10 cm is.
Verwijder de beschermkap 7.
Steek de verbindingskabel 8 in de aansluit-
contactdoos 6 van de lamp.
Steek de tweede aansluiting van de verbindings-
kabel 8 in de lampcontactdoos 2 van de
andere lamp.
Steek de aansluiting van de netkabel 3 in de
contactdoos 2 van de buitenste, linker lamp.
Steek de stekker 4 in het stopcontact. Uw
lampen zijn nu gereed voor gebruik.
Lichtkleur wisselen
Om de lichtkleur te wisselen, zet u de AAN-/
UIT-schakelaar 5 op de verschillende standen.
‒ Stand I = warm wit
‒ Stand II = koud wit
Q Aan- / uitschakelen
Bedien de AAN- / UIT-schakelaar 5 om de
lamp in of uit te schakelen.
Zet de AAN- / UIT-schakelaar 5 in de
middelste positie om de lamp uit te schakelen.
Q Lamp richten
Verander de richting van de lamp alleen
wanneer deze uitgeschakeld is.
KANS OP BRANDWONDEN!
Zorg ervoor dat de lamp uitgeschakeld en af-
gekoeld is voordat u deze aanraakt om brand-
wonden te vermijden. Verlichtingsmiddelen
ontwikkelen een grote hitte.
Laat de lamp volledig afkoelen.
Zwenk het lichtpaneel 12 in de gewenste
richting.

32 NL/BE
Onderhoud en reiniging / Afvoer / Garantie en service
Q Onderhoud en reiniging
GEVAAR VOOR
ELEKTRISCHE SCHOK!
Trek hiervoor de steker 4 uit de contactdoos.
GEVAAR VOOR
ELEKTRISCHE SCHOK!
Omwille van de elektrische veiligheid mag de
lamp nooit met water of andere vloeistoffen ge-
reinigd en zeker niet daarin ondergedompeld
worden. Gebruik voor de reiniging alleen een
droge, pluisvrije doek.
Gebruik geen oplosmiddel, benzine e.d. De
lamp kan hierdoor beschadigd raken.
Laat de lamp volledig afkoelen.
Q Afvoer
De verpakking bestaat uit milieuvriendelijke grond-
stoffen die u via de plaatselijke recyclingcontainers
kunt afvoeren.
b
a
Neem de aanduiding van de verpakkings-
materialen voor de afvalscheiding in acht.
Deze zijn gemarkeerd met de afkortingen
(a) en een cijfers (b) met de volgende
betekenis: 1–7: kunststoffen / 20–22:
papier en vezelplaten / 80–98: compo-
sietmaterialen.
Het product en de verpakkingsmaterialen
zijn recyclebaar; verwijder deze afzon-
derlijk voor een betere afvalbehandeling.
Het Triman-logo geldt alleen voor
Frankrijk.
Gooi het afgedankte product omwille van
het milieu niet weg via het huisvuil, maar
geef het af bij het daarvoor bestemde
depot of het gemeentelijke milieupark.
Over afgifteplaatsen en hun openingstij-
den kunt u zich bij uw aangewezen in-
stantie informeren.
De verpakking bestaat uit 100%
gerecycled papier.
Garantie en service
Garantie
Op dit product verlenen wij 36 maanden garantie
vanaf koopdatum.
Het apparaat werd zorgvuldig vervaardigd en aan
een nauwkeurige kwaliteitscontrole onderworpen.
Binnen de garantieperiode herstellen wij kosteloos
alle materiaal- of productiefouten. Indien tijdens de
garantieperiode gebreken worden vastgesteld, kunt
u het product naar het onderstaande serviceadres
sturen met vermelding van het volgende
artikelnummer: 14139304L / 14139306L.
Beschadigingen door ondeskundig gebruik, negeren
van de handleiding of ingrepen door niet-geautori-
seerde personen zijn van de garantieverlening uitgeslo-
ten
. Dit geldt eveneens voor slijtende delen (zoals
bijv. gloeilampen). Door de garantieservice wordt
de garantieperiode noch verlengd noch vernieuwd.
Q Conformiteitsverklaring
Dit product voldoet aan de eisen van de van
toepassing zijnde Europese en nationale richtlijnen
.
De conformiteit werd aangetoond. Desbetreffende
verklaringen liggen ter inzage bij de fabrikant.
Q Producent / Service
Briloner Leuchten GmbH & Co. KG
Im Kissen 2 · 59929 Brilon · DUITSLAND
Tel.: +49 29 61 / 97 12–800
Fax: +49 29 61 / 97 12–199
E-Mail: kundenservice@briloner.com
www.briloner.com
Gratis servicenummer:
Tel.: 00800 / 27456637
IAN 336846_2001
Houd alstublieft de kassabon en het artikelnummer
(bijv. IAN 123456_7890) voor alle aanvragen als
bewijs voor de koop gereed.
Spis zawartości

33 PL
Onderhoud en reiniging / Afvoer / Garantie en service Spis zawartości
Legenda zastosowanych piktogramów ...........................................................Strona 34
Instrukcja ......................................................................................................................................Strona 34
Użycie zgodne z przeznaczeniem ................................................................................................. Strona 34
Zakres dostawy ................................................................................................................................Strona 35
Opis części ....................................................................................................................................... Strona 35
Dane techniczne ..............................................................................................................................Strona 35
Bezpieczeństwo ......................................................................................................................Strona 35
Wskazówki bezpieczeństwa...........................................................................................................Strona 35
Przygotowanie .......................................................................................................................Strona 37
Potrzebne narzędzia i materiał .......................................................................................................Strona 37
Uruchomienie............................................................................................................................Strona 37
Montaż lampy ..................................................................................................................................Strona 37
Połączenie ze sobą kilku lamp ........................................................................................................Strona 37
Zmiana koloru światła .....................................................................................................................Strona 38
Włączanie / Wyłączanie ................................................................................................................Strona 38
Ustawienie lampy.............................................................................................................................Strona 38
Konserwacja i czyszczenie............................................................................................Strona 38
Utylizacja .....................................................................................................................................Strona 38
Gwarancja i serwis ..............................................................................................................Strona 38
Gwarancja .......................................................................................................................................Strona 38
Deklaracja zgodności ......................................................................................................................Strona 39
Adres serwisu / Producent ...............................................................................................................Strona 39

34 PL
Legenda zastosowanych piktogramów
Należy przeczytać instrukcję! Ostrzeżenie o możliwości porażenia
prądem! Zagrożenie życia!
Niniejsza lampa nadaje się wyłącznie
do pracy wewnątrz, w suchych i
zamkniętych pomieszczeniach.
Prawidłowy sposób postępowania
Prąd zmienny / napięcie zmienne
Ostrożnie! Niebezpieczeństwo
poparzenia przez gorące powierzchnie!
Herc (częstotliwość)
b
a
Opakowanie i urządzenie przekazać
do utylizacji zgodnie zprzepisami
oochronie środowiska!
Wat (moc czynna) Niebezpieczeństwo utraty życia lub
odniesienia obrażeń przez dzieci!
Klasa ochrony II ON OFF Cykle włączania
Żywotność Przestrzegać wskazówek
ostrzegawczych i bezpieczeństwa!
Tej lampy nie należy używać z
regulatorem jasności światła i wyłącz-
nikami elektronicznymi. Nie jest do
tego przeznaczona.
Opakowanie składa się w 100 % ze
zutylizowanego papieru.
Wolt
Lampa LED do zabudowy z
możliwością wyboru koloru
Instrukcja
Proszę dokładnie przeczytać całą niniej-
szą instrukcję obsługi. Niniejsza instrukcja
obsługi należy do produktu. Zawiera
ona ważne wskazówki dotyczące uruchamiania
i posługiwania się produktem. Zawsze należy prze-
strzegać wszystkich wskazówek dotyczących bez-
pieczeństwa. Przed uruchomieniem proszę sprawdzić,
czy występuje prawidłowe napięcie, i czy wszystkie
części są prawidłowo zamontowane. W przypadku
zapytań lub niepewności odnośnie obchodzenia się
z urządzeniem, prosimy o kontakt ze sprzedawcą lub
punktem serwisowym. Proszę starannie przechowy-
wać niniejszą instrukcję obsługi, a w razie oddania
urządzenia osobom trzecim przekazać ją wraz z nim.
Q
Użycie zgodne z
przeznaczeniem
Niniejsza lampa nadaje się wyłącznie
do pracy wewnątrz, w suchych i zamknię-
tych pomieszczeniach. Z uwagi na ob-
sługę wyłącznika lampa powinna być umieszczona
w zasięgu ręki. Lampa może być mocowana na
wszystkich powierzchniach o normalnym stopniu
palności. Użycie lampy w sposób inny od wyżej
opisanego lub zmiany dokonywane w urządzeniu
są niedopuszczalne i prowadzą do uszkodzenia
Instrukcja Instrukcja / Bezpieczeństwo

35 PL
Instrukcja
produktu. Skutkiem mogą być ponadto dalsze z
agrożenia niebezpieczne dla życia i obrażenia
ciała oraz nieprawidłowe funkcjonowanie tech-
niczne (na przykład zwarcie, pożar, porażenie prą-
dem elektrycznym). To urządzenie przewidziano
do użytku w prywatnym gospodarstwie domowym.
Produkt ten jest przeznaczony do normalnej pracy.
Q Zakres dostawy
Bezpośrednio po wypakowaniu należy sprawdzić,
czy zestaw jest kompletny oraz czy urządzenie
znajduje się w nienagannym stanie.
1 lampa LED do zabudowy z możliwością wyboru
koloru, model 14139304L / 14139306L
1 przewód sieciowy
1 przewód połączeniowy
2 kołki
2 śruby
1 instrukcja obsługi
Q Opis części
1 Otwory montażowe do zamocowania
na ścianie
2 Gniazdo wtykowe lampy
3 Przewód sieciowy
4 Wtyczka
5 Przełącznik WŁĄCZ / WYŁĄCZ
6 Gniazdo wtykowe przyłączeniowe
7 Kapturek ochronny
8 Przewόd połączeniowy
9 Obudowa lampy
10 Kołki
11 Otwory montażowe do podwieszania
12 Ruchoma listwa oświetleniowa
Dane techniczne
Lampa:
Numer artykułu: 14139304L / 14139306L
Napięcie robocze: 230–240 V~ 50 Hz
Moc znamionowa: LED, 6,8 W
Klasa ochrony: II /
Rodzaj ochrony: IP20
LED
Źródło światła: moduł LED
Moc znamionowa: 6 W
Bezpieczeństwo
Wskazówki
bezpieczeństwa
W przypadku szkód spowodowanych nieprzestrze-
ganiem niniejszej instrukcji obsługi prawo do gwa-
rancji wygasa! Za szkody pośrednie producent nie
ponosi odpowiedzialności! W przypadku szkód
materialnych lub osobowych, które powstały wsku-
tek niewłaściwego obchodzenia się z urządzeniem
lub nieprzestrzegania wskazówek dotyczących
bezpieczeństwa, nie ponosimy żadnej odpowie-
dzialności!
ZAGROŻENIE ŻYCIA I
NIEBEZPIECZEŃSTWO
WYPADKU DLA DZIECI!
Nigdy nie należy pozostawiać dzieci bez nad-
zoru z materiałem opakowaniowym. Istnieje
zagrożenie uduszeniem wywołane przez materiał
opakowaniowy. Dzieci często nie dostrzegają
niebezpieczeństwa. Dzieci nie powinny mieć
dostępu do produktu.
Niniejsze urządzenie może być używane przez
dzieci od lat 8 oraz przez osoby z obniżonymi
zdolnościami fizycznymi, sensorycznymi lub
mentalnymi lub brakiem doświadczenia i/lub
wiedzy, jeśli pozostają pod nadzorem lub zo-
stały pouczone w kwestii bezpiecznego użycia
urządzenia i rozumieją wynikające z niego
zagrożenia. Dzieci nie mogą bawić się
Instrukcja / Bezpieczeństwo

36 PL
urządzeniem.
Czyszczenie i konserwacja nie
mogą być wykonywane przez dzieci bez nad-
zoru.
Porażenie prądem elektrycznym
grozi śmiercią
Przed każdym podłączeniem do sieci należy
skontrolować lampę, przewód sieciowy, jak
rόwnież ewentualnie przewόd połączeniowy
pod względem instniejących uszkodzeń. Nigdy
nie używać lampy w razie stwierdzenia jakich-
kolwiek uszkodzeń.
Uszkodzony przewόd sieciowy oraz przewόd
połączeniowy oznaczają zagrożenie życia
poprzez porażenie prądem.
Przed montażem należy upewnić się, że istnie-
jące napięcie sieci jest zgodne z wymaganym
napięciem roboczym oprawy oświetleniowej
(patrz „Dane techniczne“).
Bezwzględnie unikać kontaktu lampy z wodą
lub innymi cieczami.
Nigdy nie należy otwierać żadnej elektrycznej
części roboczej (np. włącznik, oprawa itp.) lub
wtykać do niej jakichkolwiek przedmiotów. Tego
rodzaju ingerencje oznaczają zagrożenie ży-
cia wskutek porażenia prądem elektrycznym.
Podczas włączania i wyłączania z sieci należy
chwytać za izolowaną część wtyczki sieciowej!
Źródło światła tej lampy nie podlega wymianie;
jeśli czas działania źródła światła się zakończy,
należy wymienić całą lampę.
W przypadku, kiedy zewnętrzne giętkie prze-
wody niniejszej lampy uszkodzone są, mogą
one wymienione być jedynie przez specjalne
przewody lub przewody, ktόre osiągalne są
wyłącznie za pośrednictwem producenta lub
jego przedstawiciela serwisowego.
Lampę podwieszaną należy podłączyć do sieci
energetycznej jedynie za pomocą oryginalnego
przewodu sieciowego.
Należy połączyć ze sobą jedynie lampy
podwieszane tego samego typu (14139304L /
14139306L).
Lampy podwieszane, połączone ze sobą, należy
podłączyć jedynie do jednego gniazdka. Na-
leży przy tym przestrzegać, aby podłączyć je-
dynie maksymalnie 10 lampy tego samego
typu do jednego gniazdka. W przeciwnym ra-
zie może dojść do przeciążenia połączeń oraz
kabli.
Przed podłączeniem wtyczki do gniazdka na-
leży mieć na uwadze, że najpierw należy pod-
łączyć ze sobą wszystkie lampy za pomocą
przewodu połączeniowego.
Jak uniknąć zagrożenia
pożarowego i obrażeń ciała
NIEBEZPIECZEŃSTWO OBRAŻEŃ CIAŁA!
Zaraz po rozpakowaniu należy sprawdzić,
czy żadna z lamp i żaden z kloszy nie są
uszkodzone. Nie włączać lampy z uszkodzo-
nym źródłem światła i / lub uszkodzonym klo-
szem lampy. W takim przypadku należy
skontaktować się z punktem serwisowym.
ZAGROŻENIE POPARZENIEM!
Upewnić się, że lampa jest wyłączona i wysty-
gła, zanim się ją dotknie, aby uniknąć popa-
rzenia. Żarówka wydziela dużo ciepła.
Artykuł ten nie zawiera elementów wymagają-
cych konserwacji przez użytkownika.
Podczas uruchomienia nie patrzeć w diody LED z
bliskiej odległości. Diod LED nie należy oglądać
za pomocą optycznego instrumentu (np. lupy).
Tej lampy nie należy używać z regu-
latorem jasności światła i wyłączni-
kami elektronicznymi. Nie jest do
tego przeznaczona.
Prawidłowy sposób
postępowania
Lampę zamontować w taki sposób, aby była
zabezpieczona przed wilgocią, wiatrem
i zanieczyszczeniami.
Starannie przygotować montaż izarezerwować
sobie wystarczającą ilość czasu. Wszystkie
pojedyncze części oraz dodatkowo potrzebne
narzędzia należy uprzednio rozłożyć w przej-
rzysty sposób i w zasięgu ręki.
Bezpieczeństwo Bezpieczeństwo / Przygotowanie / Uruchomienie

37 PL
Bezpieczeństwo
Zachować ostrożność! Zawsze zwracać uwagę
na wykonywane czynności i kierować się roz-
sądkiem. Nie należy wykonywać montażu lampy
w przypadku braku koncentracji lub złego sa-
mopoczucia.
Przygotowanie
Potrzebne narzędzia i materiał
Wymienione narzędzia i materiały nie są częścią
zestawu. Są to jedynie niewiążące informacje i
wartości orientacyjne. Właściwości materiału
zależą od warunków w pomieszczeniu.
- ołόwek / narzędzie do oznaczania
- śrubokręt
- wiertarka
- wiertło (Ø 6 mm)
- poziomica
- miara krawiecka
Uruchomienie
Montaż lampy
Wskazówka: Przed montażem należy upewnić
się, że gniazdo wtykowe jest w pobliżu i jest dostępne
przy użyciu dołączonego kabla sieciowego 3.
Wskazówka: Lampę można przyciskiem WŁĄCZ /
WYŁĄCZ 5 ustawiać w 2 poziomach świecenia.
1. Należy zmierzyć ścianę lub powierzchnię mon-
tażową na wiercone otwory. W celu dokład-
nego ustawienia użyć poziomicy.
2. Zaznaczyć odległość otworów montażowych
1 lub 11 .
3. Teraz należy wywiercić otwory na mocowania
(ø ok. 6 mm, głębokość ok. 40 mm). Uważać,
aby nie uszkodzić żadnego przewodu.
4. Włożyć kołki 10 do nawierconych otworów.
Wkręcić dołączone śruby do kołków 10 tak,
by odstawały od ściany lub powierzchni mon-
tażowej na ok. 3 mm (rys. A).
5.
Zamocować lampę za pomocą odpowiednich
otworów montażowych
11
lub
1
na śrubach.
6. Jeśli lampę zamontowało się przy pomocy
otworów montażowych 11 , to dodatkowo
obudowę lampy 9 należy przesunąć aż do
oporu w lewo.
7. Należy włożyć złącze przewodu sieciowego
3 do gniazda lampy 2.
8. Włożyć wtyczkę sieciową do gniazdka 4.
Lampa jest gotowa do zastosowania.
Połączenie ze sobą kilku lamp
OSTROŻNIE!
Przed podłączeniem wtyczki 4 do gniazdka należy
mieć na uwadze, że najpierw należy podłączyć ze
sobą wszystkie lampy za pomocą przewodu połą-
czeniowego 8.
Wskazówka: Należy przy tym pamiętać, aby pod-
łączyć jedynie maksymalnie 10 lamp tego samego
typu do jednego gniazdka.
Można zmontować do 10 lamp tego samego
typu ze sobą. Należy postępować zgodnie z kro-
kami roboczymi 1 – 5 rodziału „Montaż lampy“.
Wskazόwka: Należy pamiętać, aby odstęp
pomiędzy lampami nie był większy niż 15 cm.
Wskazόwka: Należy przestrzegać, aby
odstęp pomiędzy lampami nie był większy,
aniżeli 10 cm.
Usunąć kapturek ochronny 7.
Włożyć przewόd połączeniowy 8 do gniazdka
połączeniowego lampy 6.
Należy włożyć drugie złącze przewodu połą-
czeniowego 8 do gniazda lampy 2 następ-
nej lampy.
Należy włożyć złącze przewodu sieciowego 3
do gniazda lampy 2 zewnętrznej, lewej lampy.
Włożyć wtyczkę 4 do gniazdka. Lampy są
gotowe do zastosowania.
Bezpieczeństwo / Przygotowanie / Uruchomienie

38 PL
Zmiana koloru światła
Aby zmienić kolor światła, należy ustawić
przycisk WŁĄCZ / WYŁĄCZ 5 na różnych
poziomach.
‒ poziom I = ciepła biel
‒ poziom II = zimna biel
Włączanie / Wyłączanie
Należy uruchomić przełącznik WŁĄCZ / WY-
ŁĄCZ 5, aby włączyć oraz wyłączyć lampę.
WŁĄCZNIK / WYŁĄCZNIK 5 ustawić w
pozycji środkowej, aby wyłączyć lampę.
Ustawienie lampy
Pozycję lampy należy zmieniać jedynie wtedy,
kiedy lampa jest wyłączona.
NIEBEZPIECZEŃSTWO OPARZENIA!
Aby uniknąć oparzenia, należy upewnić się
przed dotknięciem lampy, że jest ona wyłą-
czona i ochłodzona. Żarówka wydziela dużo
ciepła.
Lampa musi się zupełnie ochłodzić.
Proszę nastawić listwę oświetleniową 12 w
wymaganym kierunku.
Konserwacja i czyszczenie
NIEBEZPIECZEŃSTWO
PORAŻENIA PRĄDEM ELEKTRYCZNYM!
Wyjąć wtyczkę z gniazdka sieciowego 4.
NIEBEZPIECZEŃSTWO
PORAŻENIA PRĄDEM ELEKTRYCZNYM!
Ze względu na zachowanie bezpieczeństwa w
zakresie elektryczności nie wolno czyścić lampy
za pomocą wody lub innych płynόw, ani też
zanurzać w wodzie. Do czyszczenia należy
używać wyłącznie suchej, niestrzępiącej się
ściereczki.
Nie używać rozpuszczalników, benzyny i
podobnych substancji. W przeciwnym razie
lampa może zostać uszkodzona.
Lampa musi się zupełnie ochłodzić.
Utylizacja
Opakowanie wykonane jest z materiałów przyjaznych
dla środowiska, które można przekazać do utylizacji w
lokalnym punkcie przetwarzania surowców wtórnych.
b
a
Przy segregowaniu odpadów prosimy
zwrócić uwagę na oznakowanie mate-
riałów opakowaniowych, oznaczone są
one skrótami (a) i numerami (b) o nastę-
pującym znaczeniu: 1-7: Tworzywa
sztuczne / 20-22: Papier i tektura /
80-98: Materiały kompozytowe.
Produkt i materiał opakowania nadają
się do ponownego przetworzenia, należy
je zutylizować osobno w celu lepszego
przetworzenia odpadów. Logo Triman
jest ważne tylko dla Francji.
Z uwagi na ochronę środowiska nie
wyrzucać urządzenia po zakończeniu
eksploatacji do odpadów domowych,
lecz prawidłowo zutylizować. Informacji
o punktach zbiorczych i ich godzinach
otwarcia udziela odpowiedni urząd.
Opakowanie składa się w 100 % ze zu-
tylizowanego papieru.
Gwarancja i serwis
Gwarancja
W momencie zakupu otrzymują Państwo na to
urządzenie 36 miesięcy gwarancji. Urządzenie
wyprodukowano starannie i poddano dokładnej
kontroli jakości. Wokresie gwarancji usuwamy
bezpłatnie wszystkie wady materiałowe ifabryczne.
Jeśli mimo to w okresie gwarancji pojawią się usterki,
Uruchomienie / Konserwacja i czyszczenie / Utylizacja / Gwarancja i serwis Gwarancja i serwis

39 PL
Uruchomienie / Konserwacja i czyszczenie / Utylizacja / Gwarancja i serwis Gwarancja i serwis
urządzenie należy przesłać na podany adres ser-
wisowy, podając następujący numer artykułu:
14139304L / 14139306L.
Gwarancji nie podlegają uszkodzenia spowodow
ane
pr
zez nieprawidłowe użytkowanie, nieprzestrzeganie
instrukcji obsługi lub ingerencję nieautoryzowanyc
h
osób, a także części szybkozużywające się (jak np.
elementy świetlne). Usługa gwarancyjna nie prze-
dłuża ani nie odnawia okresu gwarancji.
Zgodnie z Kodeksem Cywilnym art. 581 §1 wraz
z wymianą urządzenia lub ważnej części czas
gwarancji rozpoczyna się na nowo.
Deklaracja zgodności
Niniejszy produkt spełnia wymagania obowiązują-
cych dyrektyw europejskich i przepisów krajowych.
Zgodność została wykazana. Odpowiednie obja-
śnienia i podkładki dokumentacyjne są zdepono-
wane u producenta.
Adres serwisu / Producent
Briloner Leuchten GmbH & Co. KG
Im Kissen 2
59929 Brilon
NIEMCY
Tel.: +49 29 61 / 97 12–800
Faks: +49 29 61 / 97 12–199
E-mail: [email protected]
www.briloner.com
Bezpłatny numer serwisu:
Tel.: 00800 / 27456637
IAN 336846_2001
Przed skontaktowaniem się z działem serwisowym
należy przygotować paragon i numer artykułu
(np. IAN 123456_7890) jako dowód zakupu.

40 40

41 CZ
Obsah
Vysvětlení použitých piktogramů ...........................................................................Strana 42
Úvod .................................................................................................................................................Strana 42
Použití ke stanovenému účelu..........................................................................................................Strana 42
Rozsah dodávky ..............................................................................................................................Strana 43
Popis dílů ..........................................................................................................................................Strana 43
Technické údaje ...............................................................................................................................Strana 43
Bezpečnost ..................................................................................................................................Strana 43
Bezpečnostní pokyny .......................................................................................................................Strana 43
Příprava ........................................................................................................................................Strana 44
Potřebné nástroje a materiál ...........................................................................................................Strana 44
Uvedení do provozu ...........................................................................................................Strana 44
Namontování svítidla .......................................................................................................................Strana 44
Propojení spolu několika svítidel ..................................................................................................... Strana 45
Měnění barvy světla ........................................................................................................................Strana 45
Zapínání / vypínání .......................................................................................................................... Strana 45
Seřízení světla ..................................................................................................................................Strana 45
Údržba a čistění ......................................................................................................................Strana 45
Zlikvidování ...............................................................................................................................Strana 46
Záruka a servis ....................................................................................................................... Strana 46
Záruka ..............................................................................................................................................Strana 46
Evropské prohlášení o shodě ..........................................................................................................Strana 46
Výrobce / Servis ...............................................................................................................................Strana 46

42 CZ
Vysvětlení použitých piktogramů
Přečtěte si pokyny! Varování před zásahem elektrického
proudu! Nebezpečí ohrožení života!
Toto svítidlo je určené výhradně pro
provoz vinteriérech, vsuchých a
uzavřených místnostech.
Tak postupujete správně
Střídavý proud / střídavé napětí Pozor! Nebezpečí popálení horkými
povrchy!
Hertz (kmitočet)
b
a
Obal i výrobek odstraňujte do
odpadu ekologicky!
Watt (činný výkon) Nebezpečí ohrožení života a nehody
pro malé i velké děti!
Ochranná třída II ON OFF Spínací cykly
Životnost Dbejte na výstrahy a řiďte se
bezpečnostními pokyny!
Toto světlo nepoužívejte pro tlumicí
systémy a elektrické spínače. Ktomu
se nehodí.
Obal je vyroben ze 100% recyklova-
telného papíru.
Volt
LED svítidlo pod skřínku s
nastavitelnými tóny bílé
Q Úvod
Blahopřejeme vám ke koupi nového vý-
robku. Rozhodli jste se pro vysoce kva-
litní výrobek. Přečtěte si laskavě kompletně
a pečlivě tento návod k obsluze. Rozevřete stránku s
obrázky. Tento návod patří k tomuto výrobku a
obsa-
huje důležitá upozornění k uvedení zařízení do provozu
a k zacházení s ním. Řiďte se vždy bezpečnostními
pokyny. Před uvedením do provozu přezkoušejte,
je-li k dispozici správné napětí a jsou-li všechny díly
namontované. V případě, že máte dotazy nebo si
nejste jisti se zacházením se zařízením, spojte se
laskavě se svým prodejcem nebo místem servisu.
Návod pečlivě uschovejte a předejte jej případně
třetímu.
Q Použití ke stanovenému účelu
Svítidlo je výhradně určeno pro provoz ve
vnitřní oblasti, v suchých a uzavřených míst-
nostech. Kvůli obsluze spínače by se
mělo světlo umístit voblasti rukou. Svítidlo lze upevnit
na všech normálních nehořlavých povrchových plo-
chách. Jiné než předtím popsané použití nebo změna
výrobku nejsou povoleny a vedou k poškození. Kromě
toho mohou být následkem další nebezpečí a pora-
nění, jakož i technické chybné funkce (např.
zkrat nebo
požár, úraz elektrickým proudem).
Tento přístroj se hodí
jen pro použití v soukromých domácnostech.
Tento výrobek je určen pro normální provoz.
Úvod

43 CZ
Q Rozsah dodávky
Bezprostředně po vybavení vždy zkontrolujte úplnost
rozsahu dodávky a bezvadný stav přístroje.
1 LED svítidlo pod skřínku s nastavitelnými barev-
nými odstíny, model 14139304L / 14139306L
1 napájecí kabel
1 spojovací kabel
2 hmoždíky
2 šrouby
1 návod k obsluze
Q Popis dílů
1 Otvory k připevnění na stěnu
2 Zásuvka svítidla
3 Síťový kabel
4 Síťová zástrčka
5 Vypínač
6 Spojovací zásuvka
7 Krytka
8 Spojovací kabel
9 Těleso svítidla
10 Hmoždinka
11 Otvory k připevnění pod skříňku
12 Výkyvná světelná lišta
Technické údaje
Svítidlo:
Výrobek číslo: 14139304L /
14139306L
Provozní napětí: 230‒240 V~ 50 Hz
Jmenovitý výkon: LED, 6,8 W
Ochranná třída: II /
Druh ochrany: IP20
LED:
Osvětlovací prostředek: LED modul
Jmenovitý výkon: 6 W
Q Bezpečnost
Bezpečnostní pokyny
U škod způsobených nedodržováním tohoto
návodu k obsluze zaniká nárok na záruku. Za ná-
sledovné škody se nepřevezme záruka! U věcných
škod nebo poškození osob, které byly způsobeny
neodborným zacházením nebo nedbáním bezpeč-
nostních pokynů, se nepřevezme záruka!
NEBEZPEČÍ OHROŽENÍ
ŽIVOTA A ÚRAZU PRO
MALÉ DĚTI A DĚTI!
Nenechávejte děti nikdy bez dozoru sobalo-
vým materiálem. Hrozí jim nebezpečí udušení
obalovým materiálem. Děti často podcení
nebezpečí. Výrobek chraňte před dětmi.
Tento výrobek mohou používat děti starší
8 let, osoby se sníženými fyzickými, smyslovými
nebo duševními schopnosti nebo s nedostateč-
nými zkušenostmi a znalostmi, jestliže budou
pod dohledem nebo byly poučeny o bezpečném
používání výrobku a chápou nebezpečí, která
z jeho používání vyplývají. Svýrobkem si děti
nesmí hrát. Děti nesmí bez dohledu provádět
čištění ani uživatelskou údržbu výrobku.
Zabraňte ohrožení života
v důsledku úrazu elektrickým
proudem
Před každým připojením ksíti přezkoušejte svíti-
dlo, napájecí kabel, jakož i popřípadě spojovací
kabel vzhledem kpřípadným poškozením.
Svítidlo nikdy nepoužívejte, stanovili-li jste nějaká
poškození.
Poškozené napájecí kabely znamenají nebezpečí
ohrožení života úrazem elektrickým proudem.
Před montáží se ujistěte, že dané síťové napětí
souhlasí s potřebným provozním napětím svítidla
(viz „Technická údaje“).
Bezpodmínečně se vyhněte dotyku svítidla
s vodou nebo jinými kapalinami.
Úvod / Bezpečnost

44 CZ
Nikdy neotvírejte některý z elektrických provoz-
ních prostředků, nebo do nich nestrkejte nějaké
předměty. Takové zásahy znamenají ohrožení
života v důsledku úrazu elektrickým proudem.
Při připojení nebo odpojení napájecího zdroje
se dotýkejte jen izolované oblasti síťové zástrčky!
Osvětlovací prostředek tohoto svítidla nelze
vyměnit; jestliže je vadný, musí se vyměnit celé
svítidlo.
Je-li vnější pružný vodič tohoto svítidla poškozen,
smí se jen nahradit speciálním vodičem nebo
vodičem, který lze obdržet u výrobce nebo jeho
servisního zástupce.
Svítidlo pro dolní montáž připojte jen originál-
ním napájecím kabelem knapájecí síti.
Propojte spolu jen originální svítidla pro
dolní montáž stejného typu (14139304L /
14139306L).
Spolu propojená svítidla pro dolní montáž
připojte jen kjedné zásuvce. Dbejte na to, abyste
jen maximálně 10 svítidla pro dolní montáž
stej-
ného typu zapojili prostřednictvím jedné zásuvky.
Jinak může dojít kpřetížením přípojek a kabelu.
Nezapoměňte, že musí být všechna vestavná
světla nejprve spojena spojovacím kabelem,
než zastrčíte síťový kabel do zásuvky.
Vyvarujte se nebezpečí
požáru a poranění
NEBEZPEČÍ ZRANĚNÍ!
Bezprostředně po vybalení zkontrolujte každé
svítidlo, a každé stínidlo jestli nejsou poškozené.
Svítidlo nepoužívejte s vadným osvětlovacím
prostředkem a / nebo s vadným stínidlem. V
takovém případě se obraťte na servis se žádostí
o náhradu.
NEBEZPEČÍ POPÁLENÍ!
Před dotykem se ujistěte, že je svítidlo vypnuté a
vychladlé, aby jste se vyhnuli popálení. Osvětlo-
vací prostředky se zahřívají na vysokou teplotu.
Tento artikl neobsahuje žádné díly, u nichž by
spotřebitel musel provádět údržbu.
Nedívejte se za provozu zblízka do LED. Nedí-
vejte se na LED optickou pomůckou (např. lupou).
Toto světlo nepoužívejte pro tlumicí
systémy a elektrické spínače. Ktomu
se nehodí.
Tak se budete bezpečně chovat
Svítidlo namontujte tak, aby bylo chráněné
před vlhkostí a znečištěním.
Montáž pečlivě připravte a věnujte jí dostateč-
nou časovou dobu. Položte předtím všechny
jednotlivé díly a přídavné nástroje nebo materiál
přehledně a připraveny k uchopení.
Buďte vždy pozorní! Dbejte vždy na to, co
činíte a postupujte vždy s rozumem. Nikdy
nepoužívejte svítidla, nejste-li soustředěný nebo
dokonce necítíte-li se dobře.
Q Příprava
Q Potřebné nástroje a materiál
Vyjmenované nástroje a materiály nejsou zahrnuty
v rozsahu dodávky. Jedná se přitom o nezávazné
údaje a hodnoty k orientaci. Vlastnost materiálu se
řídí podle individuálních vlastností na místě.
- tužka / nástroj k označení
- šroubovák
- vrtačka
- vrták (Ø 6 mm)
- vodováha
- metr
Q Uvedení do provozu
Q Namontování svítidla
Upozornění: Před montáží se přesvědčte, že je
v blízkosti zásuvka dosažitelná dodaným síťovým
kabelem 3.
Upozornění: Svítidlo lze vypínačem ZAP/ VYP
5 nastavit ve 2 stupních svícení.
Bezpečnost / Příprava / Uvedení do provozu

45 CZ
1. Změřte stěnu, popř. montážní plochu pro vývrty.
K přesnému seřízení použijte vodováhu.
2. Označte si rozestup montážních otvorů 1
nebo 11 .
3. Nyní vyvrtejte upevňovací díry (ø cca. 6 mm,
hloubka cca. 40 mm). Ujistěte se, že nepoškodíte
přívodní vedení.
4. Vložte přiložené hmoždinky 10 do vyvrtaných
otvorů. Zašroubujte dodané šrouby do hmoždi-
nek 10 tak, aby cca 3 mm vyčnívaly ze stěny
nebo montážní plochy (viz obr. A).
5. Upevněte světlo příslušnými montážními dírami
11 nebo 1 na šroubech.
6. Při připevňování svítidla pomocí montážních ot-
vorů 11 , musíte jeho těleso 9 ještě přídavně
posunout doleva až na doraz.
7. Přípojku síťového kabelu 3 zastrčte do zásuvky
pro světlo 2.
8. Zastrčte síťovou zástrčku 4 do síťové zásuvky.
Vaše světlo je nyní připraveno k provozu.
Propojení spolu
několika svítidel
POZOR!
Nezapomeňte, že musí být všechna svítidla nejprve
spojena kabelem 8, než zastrčíte síťovou zástrčku
4 do zásuvky.
Upozornění: Dbejte na to, abyste jen maximálně
10 svítidla pro dolní montáž stejného typu zapojili
prostřednictvím jedné zásuvky.
Namontujte až 10 svítidla stejného typu vedle
sebe. Postupujte podle pracovních kroků 1. –
5. kapitoly „Namontování svítidla“.
Upozornění: Dbejte na to, aby nebyla vzdá-
lenost mezi svítidly větší než 15 cm.
Upozornění: Dbejte na to, aby odstup mezi
jednotlivými svítidly nebyl menší než 10 cm.
Odstraňte krytku 7.
Zastrčte spojovací kabel 8 do spojovací
zásuvky 6 svítidla.
Zastrčte přípojku spojovacího kabelu 8 do
zásuvky svítidla 2 jiného svítidla.
Zastrčte přípojku napájecího kabelu 3 do
zásuvky svítidla 2 vnějšího, levého svítidla.
Zapojte jeho zástrčku 4 do zásuvky. Vaše
svítidla jsou nyní připravena k provozu.
Měnění barvy světla
Pro změnu barvy světla nastavte vypínač
ZAP/ VYP 5 na různé stupně.
‒ stupeňI = teplá bílá
‒ stupeňII = studená bílá
Zapínání / vypínání
Abyste světlo zapnuli nebo vypnuli, stiskněte
vypínač ZAP / VYP 5.
Přepněte vypínač ZAP / VYP 5 do polohy
uprostřed, tím svítidlo zhasnete.
Seřízení světla
Seřízení světla změňte jen tehdy, je-li světlo
vypnuté.
NEBEZPEČÍ POPÁLENÍ!
Před dotykem se ujistěte, že je svítidlo vypnuté
a vychladlé, aby jste se vyhnuli popálení.
Osvětlovací prostředky se zahřívají na vysokou
teplotu.
Světlo nechejte úplně vychladnout.
Vytočte lištu světla 12 do žádoucího směru.
Q Údržba a čistění
NEBEZPEČÍ ÚRAZU
ELEKTRICKÝM PROUDEM!
Síťovou zástrčku 4 vytáhněte ze zásuvky.
NEBEZPEČÍ ÚRAZU
ELEK TRICKÝM PROUDEM!
Z důvodů elektrické bezpečnosti se svítidlo
nikdy nesmí čistit vodou nebo jinými kapalinami
nebo dokonce ponořit do vody. K čistění pou-
žijte jen suché tkaniny bez nitek.
Uvedení do provozu / Údržba a čistění

46 CZ
Nepoužívejte na čištění rozpouštědla, benzín
nebo podobné látky, lampu můžete poškodit.
Stolní lampu nechejte úplně vychladnout.
Q
Zlikvidování
Obal se skládá zekologických materiálů, které
můžete zlikvidovat prostřednictvím místních sběren
recyklovatelných materiálů.
b
a
Při třídění odpadu se řiďte podle ozna-
čení obalových materiálů zkratkami (a)
a čísly (b), s následujícím významem:
1–7: umělé hmoty / 20–22: papír a
lepenka / 80–98: složené látky.
Výrobek a obalové materiály jsou recy-
klovatelné, zlikvidujte je odděleně pro
lepší odstranění odpadu. Logo Triman
platí jen pro Francii.
Vzájmu ochrany životního prostředí
vysloužilý výrobek nevyhazujte do do-
movního odpadu, ale předejte k odborné
likvidaci. O sběrnách a jejich otevíracích
hodinách se můžete informovat u přís
lušné
správy města nebo obce.
Obal je vyroben ze 100% recyklovatel-
ného papíru.
Záruka a servis
Záruka
K okamžiku koupě obdržíte na toto zařízení záruku
po dobu 36 měsíců.
Zařízení bylo svědomitě vyrobeno a podrobeno
přesné kontrole jakosti. Během záruční doby od-
straníme bezplatně všechny chyby materiálu a
výrobce. V případě, že se však během záruční doby
vyskytnou nedostatky, zašlete laskavě zařízení na
uvedenou adresu servisu při udání následujícího
čísla sort. položky: 14139304L / 14139306L.
Ze záruky vyloučeny škody vzhledem k neodbornému
zacházení, nedbání na návod k obsluze nebo zá-
sahu neautorizovanou osobou, jakož i poškození
rychleopotřebitelných dílů (např. svíticí prostředky).
Záručním výkonem se záruční doba ani neprodlouží
ani neobnoví.
Q Evropské prohlášení o shodě
Tento výrobek splňuje požadavky platných evrop-
ských a národních směrnic. Shoda byla prokázána.
Příslušná prohlášení a podklady jsou uloženy u
výrobce.
Q Výrobce / Servis
Briloner Leuchten GmbH & Co. KG
Im Kissen 2
59929 Brilon
NĚMECKO
Tel.: +49 29 61 / 97 12–800
Fax: +49 29 61 / 97 12–199
E-Mail: [email protected]
www.briloner.com
Servisní číslo zdarma:
Tel.: 00800 / 27456637
IAN 336846_2001
Pro všechny požadavky si připravte pokladní blok
a číslo výrobku (např. IAN 123456_7890) jako
doklad o zakoupení.
Údržba a čistění / Zlikvidování / Záruka a servis

47 SK
Obsah
Legenda použitých piktogramov ............................................................................ Strana 48
Úvod .................................................................................................................................................Strana 48
Používanie v súlade s určeným účelom ..........................................................................................Strana 48
Obsah dodávky ............................................................................................................................... Strana 49
Popis dielov ......................................................................................................................................Strana 49
Technické údaje ...............................................................................................................................Strana 49
Bezpečnosť ................................................................................................................................. Strana 49
Bezpečnostné upozornenia .............................................................................................................Strana 49
Príprava ........................................................................................................................................Strana 50
Potrebné náradie a materiál ...........................................................................................................Strana 50
Uvedenie do prevádzky ................................................................................................. Strana 51
Montáž svietidla...............................................................................................................................Strana 51
Vzájomné prepojenie viacerých svietidiel ...................................................................................... Strana 51
Zmena farby svetla ..........................................................................................................................Strana 51
Zapnutie / Vypnutie ..........................................................................................................................Strana 51
Nasmerovanie svietidla ................................................................................................................... Strana 51
Údržba a čistenie ...................................................................................................................Strana 52
Likvidácia .....................................................................................................................................Strana 52
Záruka a servis ....................................................................................................................... Strana 52
Záruka ..............................................................................................................................................Strana 52
Konformitné prehlásenie ..................................................................................................................Strana 52
Výrobca / Servis ............................................................................................................................... Strana 52

48 SK
Legenda použitých piktogramov
Prečítajte si pokyny! Pozor na zásah elektrickým prúdom!
Nebezpečenstvo ohrozenia života!
Toto svietidlo je určené výhradne na
prevádzku v interiéri, v suchých a
uzatvorených priestoroch.
Takto postupujete správne
Striedavý prúd / napätie Pozor! Nebezpečenstvo popálenia
skrze horúce povrchy!
Hertz (frekvencia)
b
a
Obal a zariadenie ekologicky
zlikvidujte!
Watt (efektívny výkon) Nebezpečenstvo ohrozenia života a
nebezpečenstvo úrazu pre malé i
staršie deti!
Trieda ochrany II ON OFF Spínacie cykly
Životnosť Rešpektujte výstražné a bezpečnostné
upozornenia!
Toto svietidlo nepoužívajte na tlmiče
svetla a elektronické spínače. Nie je
na to vhodné.
Obal je vyrobený zo 100% recyklo-
vaného papiera.
Volt
Svietidlo pod skrinku s
farebným LED
Úvod
Blahoželáme Vám ku kúpe Vášho nového
prístroja. Rozhodli ste sa tým pre veľmi
kvalitný výrobok. Dôkladne si prečítajte
celý tento návod na obsluhu. Otvorte stranu s
obrázkami. Tento návod patrí k tomuto výrobku a
obsahuje dôležité upozornenia pre uvedenie do
prevádzky a manipuláciu. Dodržiavajte vždy všetky
bezpečnostné upozornenia. Pred uvedením do
pre-
vádzky prekontrolujte, či je k dispozícii správne napätie
a či sú všetky diely správne namontované. V prípade
otázok alebo neistoty ohľadom manipulácie s prí-
strojom sa prosím spojte s Vaším predajcom alebo
servisným pracoviskom. Tento návod si starostlivo
uschovajte a prípadne ho odovzdajte tretej osobe.
Q
Používanie v súlade s
určeným účelom
Toto svietidlo je určené výhradne na pre-
vádzku v interiéri, v suchých a uzatvore-
ných priestoroch. Z dôvodu ovládaniu
pomocou spínača by sa svietidlo malo namontovať
v dosahu rúk. Svietidlo sa môže pripevniť na všetky
normálne zápalné povrchy. Iné použitie ako je po-
písané vyššie alebo úprava prístroja nie je dovolená a
vedie k poškodeniu. To môže mať za následok ďal-
šie život ohrozujúce nebezpečenstvá a poranenia,
ako aj technicky chybné funkcie (napr. skrat, požiar,
zásah elektrickým prúdom). Tento výrobok je určený
len na používanie v súkromných domácnostiach.
Tento produkt je určený pre normálnu prevádzku.
Úvod

49 SK
Q Obsah dodávky
Bezprostredne po vybalení vždy skontrolujte úplnosť
dodávky ako aj bezchybný stav zariadenia.
1 LED svietidlo pod skrinku s nastaviteľnými fareb-
nými odtieňmi, model 14139304L / 14139306L
1 sieťový kábel
1 spojovací kábel
2 hmoždinky
2 skrutky
1 návod na obsluhu
Q Popis dielov
1 Montážne otvory pre upevnenie na stenu
2 Zásuvka svietidla
3 Sieťový kábel
4 Sieťová zástrčka
5 ZAPÍNAČ / VYPÍNAČ
6 Spojovacia zásuvka
7 Ochranný kryt
8 Spojovací kábel
9 Schránka svietidla
10 Hmoždinky
11 Montážne otvory pre upevnenie podkladu
12 Výkyvná svetelná lišta
Technické údaje
Svietidlo:
Číslo výrobku: 14139304L / 14139306L
Prevádzkové napätie: 230‒240 V ~ 50 Hz
Menovitý výkon: LED, 6,8 W
Trieda ochrany: II /
Druh ochrany: IP20
LED:
Osvetľovací
prostriedok: LED-modul
Menovitý výkon: 6 W
Bezpečnosť
Bezpečnostné
upozornenia
V prípade škôd, ktoré vzniknú nedodržiavaním
tohto návodu na obsluhu, zaniká garančný nárok!
Pri následných škodách nepreberá výrobca ručenie!
V prípade vecných škôd alebo poranenia osôb,
ktoré boli zapríčinené neodbornou manipuláciou
alebo nedodržiavaním bezpečnostných pokynov,
nepreberá výrobca ručenie!
NEBEZPEČENSTVO OHROZE-
NIA ŽIVOTA A NEBEZPEČEN-
STVO ÚRAZU PRE MALÉ I
STARŠIE DETI!
Nikdy nenechávajte deti bez dozoru s obalo-
vým materiálom. Existuje nebezpečenstvo
zadusenia obalovým materiálom. Deti často
podceňujú nebezpečenstvo. Držte deti vždy
v bezpečnej vzdialenosti od výrobku.
Tento prístroj môžu používať deti od 8 rokov
ako aj osoby so zníženými psychickými, senzo-
rickými alebo duševnými schopnosťami alebo
s nedostatkom skúseností a vedomostí, ak sú
pod dozorom, alebo ak boli poučené ohľa-
dom bezpečného používania prístroja, a ak
porozumeli nebezpečenstvám spojeným s jeho
používaním. Deti sa s prístrojom nesmú hrať.
Čistenie a údržbu nesmú vykonávať deti bez
dozoru.
Vyhnite sa ohrozeniu života
zásahom elektrickým prúdom
Pred každým zapojením do siete skontrolujte,
či svietidlo, sieťový kábel, poprípade spojovací
kábel nie sú poškodené. Ak zistíte akékoľvek
poškodenia, svietidlo za žiadnych okolností
nepoužívajte.
Poškodený sieťový kábel a spojovací kábel
predstavuje nebezpečenstvo ohrozenia života
v dôsledku zásahu elektrickým prúdom.
Pred montážou sa uistite, že sa prítomné sie-
ťové napätie zhoduje s potrebným prevádzko-
vým napätím lampy (pozri „Technické údaje“).
Úvod / Bezpečnosť

50 SK
Bezpodmienečne zabráňte kontaktu svietidla
s vodou alebo inými kvapalinami.
Nikdy neotvárajte elektrické prevádzkové pro-
striedky (napr. spínač, objímka a.i.) ani do nich
nestrkajte cudzie predmety. Takéto zásahy
predstavujú ohrozenie života v dôsledku zásahu
elektrickým prúdom.
Pri pripájaní alebo odpájaní zo sieťového prúdu
sa dotýkajte len izolovanej oblasti sieťovej
zástrčky!
Svetelný zdroj tohto svietidla nie je možné
vymeniť; keď dosiahne koniec svojej životnosti,
je potrebné vymeniť celé svietidlo.
Ak je vonkajšie ohybné vedenie tohto svietidla
poškodené, smie sa nahradiť len špeciálnym
vedením alebo takým vedením, ktoré je výhradne
od výrobcu alebo od jeho servisného zástupca.
Podhľadové svietidlo zapájajte do sieťového
prúdu len prostredníctvom originálneho sieťo-
vého kábla.
Spájajte iba originálne podhľadové svietidlá
rovnakého typu (
14139304L / 14139306L
).
Navzájom spojené podhľadové svietidlá za-
pojte iba do jednej zásuvky. Dbajte na to, aby
ste do jednej zásuvky zapojili maximálne 10
podhľadových svietidiel rovnakého typu. Inak
môže dôjsť k preťaženiu prípojok a káblov.
Myslite na to, že najskôr musíte všetky podhľa-
dové svietidlá spojiť pomocou spojovacieho
kábla, a až následne zapojiť sieťovú zástrčku
do zásuvky.
Zabráňte nebezpečenstvu
požiaru a poranení
NEBEZPEČENSTVO PORANENIA!
Bezprostredne po vybalení skontrolujte každé
svietidlo a každé sklenené tienidlo ohľadom prí-
padných poškodení. Svietidlo nikdy neprevádz-
kujte s defektným zdrojom svetla a / alebo
defektným lampovým sklom. V takom prípade
sa spojte so servisným strediskom kvôli výmene.
NEBEZPEČENSTVO POPÁLENIA!
Zabezpečte, aby bolo svietidlo vypnuté a vy-
chladnuté skôr, ako sa ho budete dotýkať, pre-
tože inak hrozí nebezpečenstvo popálenia.
Osvetľovacie prostriedky vytvárajú silné teplo.
Tento výrobok neobsahuje diely, ktoré môže
udržiavať spotrebiteľ.
Počas prevádzky nepozerajte z krátkej vzdiale-
nosti do LED. Nepozerajte do LED pomocou
optického nástroja (napr. lupy).
Toto svietidlo nepoužívajte na tlmiče
svetla a elektronické spínače. Nie je
na to vhodné.
Takto postupujete správne
Svietidlo namontujte tak, aby bolo chránené
pred vlhkom a znečistením.
Montáž si starostlivo pripravte a doprajte si
dostatok času. Dopredu si pripravte všetky
jednotlivé diely a dodatočne potrebné náradie
alebo materiál prehľadne a na dosah ruky.
Buďte neustále opatrný! Dávajte vždy pozor
na to, čo robíte, a vždy konajte uvážlivo. Svie-
tidlo v žiadnom prípade nemontujte, ak ste
práve nesústredený alebo sa necítite dobre.
Príprava
Q
Potrebné náradie a materiál
Uvedené náradie/nástroje a materiál nie sú súčas-
ťou dodávky. Ide tu o nezáväzné údaje a hodnoty
pre orientáciu. Charakter materiálu sa riadi podľa
individuálnych daností na mieste.
- ceruzka / nástroj na označovanie
- skrutkovač
- vŕtačka
- vrták (ø 6 mm)
- vodováha
- krajčírsky meter
Bezpečnosť / Príprava

51 SK
Uvedenie do prevádzky
Q
Montáž svietidla
Poznámka: Pred montážou sa uistite, že je
v blízkosti zásuvka, ktorá je dosiahnuteľná
priloženým sieťovým káblom 3.
Poznámka: Svietidlo možno nastaviť pomocou
ZA- / VYPÍNAČA 5 do 2 svetelných stupňov.
1. Odmerajte stenu, resp. montážnu plochu
pre stanovenie otvorov na vŕtanie. Na presné
vyrovnanie použite vodováhu.
2. Označte odstup upevňovacích otvorov 1
alebo 11 .
3. Teraz vyvŕtajte upevňovacie otvory (ø cca. 6 mm,
hĺbka cca. 40 mm). Zabezpečte, aby sa nepo-
škodilo prívodné vedenie.
4. Vložte priložené hmoždinky 10 do vyvŕtaných
otvorov. Priložené skrutky zaskrutkujte do hmož-
diniek 10 a nechajte ich odstávať od steny
resp. montážnej plochy cca. 3 mm (obr. A).
5. Upevnite svietidlo pomocou príslušných mon-
tážnych otvorov 11 alebo 1 na skrutkách.
6. Keď lampu upevníte do montážnych otvorov
11 , kryt lampy 9 potom ešte posuňte doľava
až na doraz.
7. Prípojku sieťového kábla 3 zasuňte do zásuvky
svietidla 2.
8. Sieťovú zástrčku 4 zastrčte do zásuvky.
Svietidlo je teraz pripravené na prevádzku.
Q
Vzájomné prepojenie
viacerých svietidiel
POZOR!
Myslite na to, že najskôr musíte všetky podhľadové
svietidlá spojiť pomocou spojovacieho kábla 8,
až následne môžete zapojiť sieťovú zástrčku 4
do zásuvky.
Upozornenie: Dbajte na to, aby ste do jednej
zásuvky zapojili maximálne 10 podhľadových
svietidiel rovnakého typu.
Súbežne namontujte maximálne 10 svietidiel
rovnakého typu. Riaďte sa pritom pracovnými
krokmi 1. – 5. z kapitoly „Montáž svietidla“.
Upozornenie: Dbajte na to, aby vzdialenosť
medzi svietidlami nebola väčšia ako 15 cm.
Upozornenie: Dbajte na to, aby vzdialenosť
medzi svietidlami nebola menšia ako 10 cm.
Odstráňte ochranný kryt 7.
Zapojte spojovací kábel 8 do spojovacej
zásuvky 6 svietidla.
Druhú prípojku spojovacieho kábla 8 zapojte
do zásuvky 2 druhého svietidla.
Prípojku sieťového kábla 3 zasuňte do zásuvky
svietidla 2 vonkajšieho, ľavého svietidla.
Zapojte sieťovú zástrčku 4 do zásuvky. Vaše
svietidlá sú teraz prevádzkyschopné.
Zmena farby svetla
Pre zmenu farby svetla nastavte ZA- / VYPÍNAČ
5 na rôzne stupne.
‒ Stupeň I = teplá biela
‒ Stupeň II = studená biela
Q Zapnutie / Vypnutie
Ak chcete svietidlo zapnúť alebo vypnúť, stlačte
ZAPÍNAČ / VYPÍNAČ 5.
Uveďte ZA- / VYPÍNAČ 5 do strednej polohy
pre vypnutie svietidla.
Q Nasmerovanie svietidla
Nasmerovanie svietidla meňte len vtedy, keď
je vypnuté.
NEBEZPEČENSTVO POPÁLENIA!
Zabezpečte, aby bolo svietidlo vypnuté a
vychladnuté skôr, ako sa ho budete dotýkať,
pretože inak hrozí nebezpečenstvo popálenia.
Osvetľovacie prostriedky vytvárajú silné teplo.
Nechajte svietidlo úplne vychladnúť.
Svetelnú lištu 12 nastavte do želaného smeru.
Uvedenie do prevádzky

52 SK
Údržba a čistenie
NEBEZPEČENSTVO
ZÁSAHU ELEKTRICKÝM PRÚDOM!
Sieťovú zástrčku 4 vytiahnite zo zásuvky.
NEBEZPEČENSTVO
ZÁSAHU ELEKTRICKÝM PRÚDOM!
Z dôvodu elektrickej bezpečnosti sa lampa ne-
smie nikdy čistiť vodou alebo inými kvapalinami
a v žiadnom prípade sa nesmie ponárať do
vody. Na čistenie používajte iba suchú han-
dričku, ktorá nepúšťa vlákna.
Nepoužívajte rozpúšťadlá, benzín a pod.
Svietidlo by sa pritom poškodilo.
Nechajte svietidlo úplne vychladnúť.
Likvidácia
Obal pozostáva z ekologických materiálov, ktoré
môžete odovzdať na miestnych recyklačných
zberných miestach.
b
a
Všímajte si prosím označenie obalových
materiálov pre triedenie odpadu, sú
označené skratkami (a) a číslami (b) s
nasledujúcim významom: 1–7: Plasty /
20–22: Papier a kartón / 80–98:
Spojené látky.
Výrobok a obalové materiály sú recyklo-
vateľné, zlikvidujte ich oddelene pre
lepšie spracovanie odpadu. Triman-Logo
platí iba pre Francúzsko.
Ak výrobok doslúžil, v záujme ochrany
životného prostredia ho neodhoďte do
domového odpadu, ale odovzdajte na
odbornú likvidáciu. Informácie o zberných
miestach a ich otváracích hodinách
získate na Vašej príslušnej správe.
Obal je vyrobený zo 100 % recyk-
lovaného papiera.
Záruka a servis
Záruka
Na tento prístroj poskytujeme záruku 36 mesiacov
od dátumu kúpy. Prístroj bol starostlivo vyrobený a
podrobený dôkladnej kontrole kvality. Vrámci zá-
ručnej doby bezplatne opravíme všetky chyby ma-
teriálu a výrobné chyby. Ak by sa však počas
záručnej doby vyskytli nedostatky, odošlite prístroj
na uvedenú adresu servisu s uvedením nasledov-
ného čísla výrobku: 14139304L / 14139306L.
Zo záruky sú vylúčené škody spôsobené neodbor-
nou manipuláciou, nedodržaním návodu na ob-
sluhu alebo zásahom neautorizovanej osoby, ako
aj diely podliehajúce opotrebovaniu (napr. osvetľo-
vacie prostriedky). Poskytnutím záruky sa záručná
doba nepredlžuje ani neobnovuje.
Q Konformitné prehlásenie
Tento výrobok spĺňa požiadavky platných európskych
a národných smerníc. Konformita bola preukázaná.
Príslušné prehlásenia a podklady sú uložené u vý-
robcu.
Q Výrobca / Servis
Briloner Leuchten GmbH & Co. KG
Im Kissen 2
59929 Brilon
NEMECKO
Tel.: +49 29 61 / 97 12–800
Fax: +49 29 61 / 97 12–199
Email: [email protected]
www.briloner.com
Bezplatné servisné číslo:
Tel.: 00800 / 27456637
IAN 336846_2001
Pre všetky otázky majte pripravený pokladničný
doklad a číslo výrobku (napr. IAN 123456_7890)
ako dôkaz o kúpe.
Údržba a čistenie / Likvidácia / Záruka a servis

BRILONER LEUCHTEN GMBH & CO. KG
Im Kissen 2
59929 Brilon
GERMANY
Stand der Informationen · Last Information Update
Version des informations · Stand van de informatie · Stan
informacji · Stav informací · Stav informácií: 04 / 2020
Ident.-No.: 14139304L / 14139306L042020-8
IAN 336846_2001
-
 1
1
-
 2
2
-
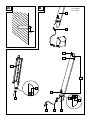 3
3
-
 4
4
-
 5
5
-
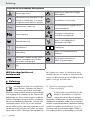 6
6
-
 7
7
-
 8
8
-
 9
9
-
 10
10
-
 11
11
-
 12
12
-
 13
13
-
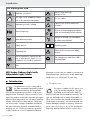 14
14
-
 15
15
-
 16
16
-
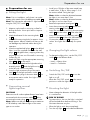 17
17
-
 18
18
-
 19
19
-
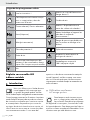 20
20
-
 21
21
-
 22
22
-
 23
23
-
 24
24
-
 25
25
-
 26
26
-
 27
27
-
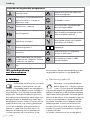 28
28
-
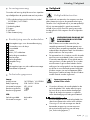 29
29
-
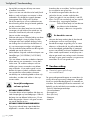 30
30
-
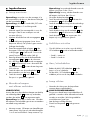 31
31
-
 32
32
-
 33
33
-
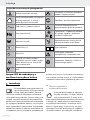 34
34
-
 35
35
-
 36
36
-
 37
37
-
 38
38
-
 39
39
-
 40
40
-
 41
41
-
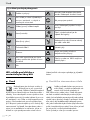 42
42
-
 43
43
-
 44
44
-
 45
45
-
 46
46
-
 47
47
-
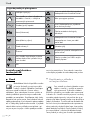 48
48
-
 49
49
-
 50
50
-
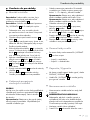 51
51
-
 52
52
-
 53
53


in andere talen
- français: LIVARNO 336846 Le manuel du propriétaire
- Deutsch: LIVARNO 336846 Bedienungsanleitung
- slovenčina: LIVARNO 336846 Návod na obsluhu
- polski: LIVARNO 336846 Instrukcja obsługi
Gerelateerde papieren
-
LIVARNO 393232 de handleiding
-
-
-
-
-
-
-
-
-