TurboTronics TT-CV09 Handleiding
- Categorie
- Stofzuigers
- Type
- Handleiding

EN
INSTRUCTION MANUAL
TT-CV09
www.zline-world.com

2
1
Safety Instructions
For household use only!
When using your vacuum, basic safety precautions should always be observed, including the
following
1. Do not leave vacuum cleaner unattended when it is plugged in. Unplug from outlet when not
in use and before pulling filters out.
2. To reduce the risk of electric shock-do not use outdoors or on wet surfaces.
3. Do not allow children to use as a toy. Close attention is necessary when used near children.
4. Use only as described in this manual. Use only manufacturer’s recommended attachments.
5. Do not use with damaged cord or plug. Do not use vacuum cleaner if it has been dropped 、
damaged、left outdoor、or dropped into water. Return appliance to the appliance customer
service for examination repair or adjustment.
6. Do not pull or carry by cord. Do not use cord as a handle. Close a door on cord, or pull cord
around sharp edges or corners. Do not run appliance over cord. Keep cord away from heated
surfaces.
7. Do not unplug by pulling on cord. To unplug, grasp the plug, not the cord.
8. Do not handle plug or vacuum cleaner with wet hands. Dot not use outdoors or on wet
surfaces.
9. Do not put any objects into openings. Do not use with any openings blocked and do not
restrict airflow. Keep all opening free of dust, lint, hair, and anything that may reduce airflow.
10. Keep hair, loose clothing, fingers, and all parts of body away from openings and moving
parts.
11. Do not pick up hard or sharp objects such as glass nails, screws, coins, etc.
12. Do not pick up hot coals, cigarette, matches or any hot, smoking, or burning objects.
13. Do not use without filters in place.
14. Turn off all controls before plugging or unplugging vacuum cleaner.
15. Use extra care when vacuuming on stairs.
16. Do not pick up flammable or combustible materials (lighter fluid, gasoline, etc.) or use in the
presence of explosive liquids or vapor.
17. Do not pick up toxic material (chlorine bleach, ammonia, drain cleaner, etc.)
18. Do not in an enclosed space filled with vapors given off by oil based paints, paint thinner,
moth proofing, flammable dust, or other explosive or toxic vapors.
19. Always unplug this appliance before connecting or disconnecting vacuum hose. Do not allow
plug to whip when rewinding.
20. Use only on dry, indoor surfaces.
21. Do not use for any purpose other than described in this user’s guide.
22. Store your appliance indoor in a cool, dry area.
23. Keep your work area well dry.
24. Do not immerse the hand vacuum into water or other liquids.
25. Keep end of hose, wands and other openings away from your face and body.
26. Do not use the cleaner to clean your pets or any animal.
27. Keep the head (eyes, ear, mouth, etc.) away from the openings, when the cleaner is working or
plugging.

3
WARNI N G :
Important:
If the suction opening of the unit, the hose or the tube is blocked, switch off the vacuum clearer
and remove the blocking substance before you start the unit again.
1. Do not operate the vacuum cleaner too close to hearter or radiators.
2. Before inserting the power plug into the wall outlet, make sure that your hands are dry.
3. Before you start the unit, make sure to remove large or sharp objects that might damage the
dust tank and hose.
4. When pulling out the power plug from the wall outlet, pull the plug not the power cord.
5. Do not use without all filters in place.
6. When using, if you learn of squeak from the cleaner, it must be suction appears to be reduced,
so you must stop (make sure the cleaner is not plugging), then clean the all air filter.
Note:
If the supply cord is damaged, it must be replaced by manufacture, service agent or similarly
qualified person in order to avoid a hazard.
WARNI N G :
Hold the plug when rewinding the cord. Do not allow the cord to whip when rewinding.
Use and function
Assembling vacuum cleane
r
Note:
Always remove the power plug from the wall outlet before assembling or removing accessories.
1. Attaching the Flexible Hose into the vacuum connect the flexible hose into the air intake duct,
push in until you hear a “click”, indicating it is in its locked position.
2. Fitting the tube to the curved wand/hose extension. Push the tube into the curved wand/hose
extension.
3. Fitting the Floor Brush to the tube. Push the tube into the floor brush. Adjust the tube to the
desired length.

4
Variable suction control
Note:
Once all attachments are in place, unwind a sufficient length of cable and insert the plug into the
wall outlet. A yellow mark on the power cord shows the ideal cable lenghth. Do not pull the power
cord beyond the red mark.
1. Insert the power plug into the wall outlet.
2. Press the power on/off button located the unit to turn the vacuum cleaner “on”.
3. To rewind the power cord, press the cord rewind button with one hand and guide the power
cord with the other hand to ensure that it dose not whip causing damage or injury.
4. To adjust the suction, slide the speed control button on the suction hand to control the suction
power of the vacuum cleaner.
Change dust bag.
1. Open the front cover.
2. Change dust bag.
12
Rewind button
On/off button

5
Carry and move away the cleaner:
Note:
This cleaner have a special feature for handle. There is a handle on the top. In addition, another
carry-handle is in front. You can use it to conveniently carry the cleaner when the cleaner is in
vertical
Removing & cleaning pre-motor filter and air outlet filter
Warning:
Always unplug the unit from electrical outlet before getting out the dust barrel.
a. Pre-motor filter
1. Open the front cover.
2. Clean or change filter.
12
b. Air outlet filter
1. Press the air outlet grid knob to open
2. Take out the air outlet filter for clean and change.
Pre-motor
filter

6
12
Please note:
The sponge filter material in the cleaner will became dusty over time. This is normal and will not
affect the performance of the filter. If the sponge filter is so dusty that suction does not return to
100%, then we suggest that the filter be removed then rinsed under the faucet and allowed to dry
for 24 hours by airing not near the fire or some high temperature objects before refitting into the
vacuum. This should be done once six months or when suction appears to be reduced obviously.
Important:
Please note that there is a safety valve inside the vacuum to prevent the unit from being run with
high vacuum rate. If the vacuum is too high ,the safety valve will be turned on. In this case, it can
minish the vacuum rate and protect the motor from being broken.
Note:
The suction hole must be open, free of any obstructions at all times. Otherwise, the motor will
overheat and could become damaged.
Important:
All filters should be checked regularly for signs of damage, preferably after each cleaning task.
The filters must be replaced immediately if they become damaged. Always disconnect the vacuum
from the electrical outlet when checking the filters.

RO
Manualul de utilizare
TT-CV09
www.zline-world.com
1

2
instrucţiunile de securitate
numai pentru uz casnic!
atunci când se utilizeazăvidul tău, de măsurile de siguranță ar trebui săfie întotdeauna
observate, inclusiv următoarele
1. nu părăsi aspirator nesupravegheat când e conectat.scoate din priză, atunci când nu
sunt utilizate şiînaintesăfiltrăm.
(2) pentru a reduce riscul de şoc electric nu utilizaţi în aer liber sau pe suprafețe umede.
(3) nu permit copiilor săfoloseşti o jucărie.atenţie este necesar atunci când este utilizat la
copii.
4. folosesc doar descrise în prezentul manual.utilizare recomandatăde constructorul
ataşamente.
(5) nu utilizaţi cu deteriorate sau conecteazăcordonul.nu utilizaţi aspirator, dacăafost
aruncat 、deteriorat 、lăsat 、exterioare sau a căzut în apă.întoarce aparat pe aparat
serviciul clienţi pentru examinarea repararea sau ajustare.
6. nu trage sau purta prin cablu.nu utilizaţi cablu ca un mâner.închide uşapecoardă,sau
trage cablul pe margini ascuțite sau colţuri.nu fugi, aparat de coardă.păstreazăcordonul
de suprafețeîncălzite.
7. nu deconecta de trage de coardă.săscoatem din priză,apucă- l, nu frânghia.
8. nu se conecteazăsau aspirator cu mâinile ude.dot nu folosite în aer liber sau pe
suprafețeumede.
9. nu pune obiecte în locuri libere.nu utilizaţi cu orice ocazie blocat și nu limiteazădebitul
de aer.sădeschid fărăpraf, scame, păr, nimic care ar putea reduce debitul de aer.
10. tot părul, hainele largi, degetele, şi toate părţile corpului de deschidere şipărţiîn
mişcare.
11. nu ridica greu sau obiecte ascuţite precum sticla cuie, şuruburi, monede, etc.
12. nu răspunde la cărbuni încinşi, o ţigară,sepotriveşte ceva cald, fumat, sau arderea
obiecte.
13. nu folosi fărăfiltre în loc.
14. închideţi toate controalele înainte să- i sau deconecta aspiratorul.
15. foloseşte mai multăgrijăcând dădeam cu aspiratorul pe scări.
16. nu lua inflamabile sau materiale combustibile (gaz de brichetă,benzină,etc.)sau
utilizarea în prezenţa explozive lichide sau vapori.
17. nu lua materiale toxice (clor înălbitor, amoniac, detergent, etc.)
18. nu într - un spaţiu închis, plin cu vapori de date de bazăde ulei de vopsele, diluant,
molie revizuit, inflamabil praf sau alte explozive sau toxice vapori.
19. întotdeauna opresc acest dispozitiv conectat sau deconectarea vid furtun.nu permit să
fac prizăcând înapoi.
20. folosesc doar pe uscat, suprafețele interioare.
21. nu se utilizeazăpentru orice alt scop decât descrise în prezentul ghid al utilizatorului.
22. păstraţi într - un aparat de interior, zonăuscată.
23. păstrează-ţi merge bine zona uscată.
24. nu se scufundăaspiratorul în apăsau alte lichide.

3
25. tine de furtun, baghete și alte deschideri de pe faţă şi de pe corp.
26. nu folosi asta să-ţicureţe animale sau vreun animal.
27. tine capul (ochi, urechi, gura, etc.), departe de ferestre, când îngrijitorul lucreazăsau
săîncerc.
avertisment:
important:
dacăse deschide de unitate, furtunul sau tubul e blocat, opreşte aspiratorul mai clare șieliminarea
substanței blocheazăînainte săîncepi cu unitatea din nou.
(1) nu utilizeazăaspirator prea aproape de hearter sau radiatoare.
(2) înainte de introducerea puterea prizăîn priză,asigură-tecămâinile tale sunt uscate.
(3) înainte de a începe unitatea, asigură-tesăelimine mari sau obiecte ascuţite, care ar putea
afecta praf tank şiciorapi.
(4) când trage curentul priza din priză,deconecteazănu firul.
(5) nu utilizaţifărăfiltre în loc.
(6) atunci când se utilizează,dacăînveţi de sunet de la curăţătorie, trebuie săfie de aspirare pare
săfie redusă,aşacătrebuie săopreşti (asigură-tecuratnueon-line),apoicurăţaţitoatăfiltrul de
aer.
notă:
dacăfurnizarea cablu este deteriorat, trebuie săfie înlocuit cu fabricarea, serviciul sau, în mod
similar, persoana calificatăpentru a evita un pericol.
avertisment:
Ţine - l când derulat cordonul ombilical.nu permit cordonul de bici când înapoi.
utilizarea șifuncții
asamblarea aspirator
notă:
întotdeauna scoateţi puterea priza din prizăînainte de asamblare sau eliminarea accesorii.
prin furtun flexibil în vid conecta furtunurile flexibile în aerul de admisie conducte, împinge până
când auzi un "clic", care indicăcăeste în poziţie fixă.
1. Fitting the tube to the curved wand/hose extension. Push the tube into the curved wand/hose
extension.

4
2. Fitting the Floor Brush to the tube. Push the tube into the floor brush. Adjust the tube to the
desired length.
variabila de control
notă:
odatăce toate relatiile sunt în locul corect o lungime suficientăde cablu şiintroduceţi-lîn
priză.un semn pe firul galben aratăidealul cablu lenghth.nu trage de firul de dincolo de linia roşie.
1. se introduce puterea bagăîn priză.
2. presa puterea pe butonul situatăunitatea sătransforme aspiratorul "."
(3) pentru a derula încărcătorul, apăsaţi butonul cablul înapoi cu o mânăşi un ghid firul cu mâna
cealaltă, pentru a se asigura cădoza nu whip daune sau prejudicii.
(4) pentru ajustarea aspiră, cu viteza de control pe butonul de mânăpentruacontrolaputerede
aspirare de aspirator.
schimbare de praf
1. deschide capota.
2.schimbaredepraf.
12
deruleazăînapoi "
buton de pornire /
oprire

5
Şi poartăpleacăcurat
notă:
ăstadeocaracteristicăspecialăpentru faţă.- e un mâner pe deasupra.în plus, un alt port faţă în
faţă.o poţi folosi pentru a transporta curate când curăţitorul e verticală
îndepărtarea & de pre - motor filtru și evacuarea aerului de filtru
avertisment:
întotdeauna deconecta unitatea din prizăînaintedeaieşi praful de butoi.
un filtru de pre - motor
1. deschide capota.
2. curat sau schimbarea filtrului.
12
b. evacuarea aerului de filtru
1. apasăbutonul pentru a deschide grila de evacuarea aerului
2. scoate aerul curat şi de filtru pentru schimbare.
Pre-motor
filter

6
12
notă:
buretele material filtrant în curăţitorul va a devenit praf în timp.asta este normal şinuvaafecta
performanța de filtru.dacăburetele filtru este atât de prăfuit aspiraţia nu se întoarce la 100%,
atunci ne sugereazăcăfiltrul îndepărtate apoi se clătește sub robinet şisăseusucetimpde24de
ore pânăsănu lângăfoc sau o temperaturăridicatăobiecte înainte de reîncărcareînvid.astaar
trebui săfie făcut dupăşase luni sau când aspirăpare săfie redusă, evident.
important:
notează,terog,cănu este o supapăde siguranţă în vid pentru a preveni unitatea de a fugi cu vid
înalt ritm.dacăaspiratorul e prea mare, supapa va fi pornit.în acest caz, poate minish aspiratorul
rata șiprotejamotorsăfie rupt.
notă:
-gaurătrebuie săfie deschisă,fărăobstacole, tot timpul.altfel, motorul se va supraîncălzi şiar
putea deveni avariată.
important:
toate filtrele trebuie verificat cu regularitate pentru semne de leziune, preferabil dupăfiecare
sarcinăde serviciu.filtrele trebuie înlocuit imediat dacăsunt avariate.întotdeauna deconecta
aspiratorul din prizăla verificarea filtre.

PL
Instrukcja użytkowania
TT-CV09
www.zline-world.com
1

2
Instrukcji bezpieczeństwa
Do użytku domowego.
kiedy używasz odkurzacza, zawsze należy przestrzegaćpodstawowych zasad bezpieczeństwa, w
tym następujące
1. nie zostawiaj odkurzacz bez opieki, gdy jest podłączone.odłączyćod wylotu nieużywane filtry i
przed pociągnięciem.
2. w celu zmniejszenia ryzyka prądem nie stosowaćna zewnątrz lub na mokrych nawierzchniach.
3. nie pozwalająna dzieci, do stosowania jako zabawkę.szczególnąuwagęnależystosowaćprzy
dzieciach.
4. należystosowaćwyłącznie zgodnie z opisanąw niniejszym podręczniku.używaćwyłącznie
producent zaleca sięprzywiązywać.
5. nie używaćz uszkodzony przewód lub wtyczki.nie używaćodkurzacza, jeżeli zostały
wycofane 、uszkodzone 、wyszedłna zewnątrz 、lub spadłdo wody.zwrot urządzenia z
urządzenia obsługi klienta na badania, naprawy lub modyfikacji.
6. nie ciągnij lub przewozu przez rdze ńkręgowy.nie używaćsznura,jaksobieztym
poradzić.zamknij drzwi na sznurek, lub linkądookołaostrekrawędzie i narożniki.nie uciekaj,
urządzenia na sznurek.trzymaj linkęzdalaodgorących powierzchni.
7. nie odłączyć,ciągnąc liny.odłączyć,chwycićkabel, nie przewód.
8. nie zbliżaćsiępodłączyć, czy odkurzacz z mokrymi rękami.- nie używanenazewnątrz
pomieszczeńlub na mokrych nawierzchniach.
9. nie rób żadnych przedmiotów w otwory.nie stosowaćwszelkie otwory zablokowane i nie
ograniczająprzepływ powietrza.zatrzymaćotwarcie wolny pyłu, krosty, włosy, i wszystko, co
możeobniżyćprzepływ powietrza.
10. trzymaćwłosy, luźne ubrania, palce, i wszystkie części ciała, z dala od otworów i ruchomych
części.
11. nie odbieraj trudne lub ostrych przedmiotów takich jak szkło, gwoździe, śruby, monety, itp.
12. nie po węglach, papierosy, zapałkiiciepłej, palić,albopłonących przedmiotów.
13. nie stosowaćbez filtrów w miejscu.
14. wyłącz wszystkie kontrole przed wykryciem albo wyłącz odkurzacz.
15. stosowaćszczególnąostrożność podczas odkurzania na schodach.
16. nie odbieraj łatwopalne lub materiałypalne(płyn do zapalniczek, benzyna, itp.) lub
stosowania w obecności wybuchowych cieczy i pary.
17. nie odbieraj toksycznych materiałów (chlorowy wybielacz, amoniak, odpływem itp.)
18. nie w zamkniętym pomieszczeniu wypełnionym opary z uwagi na bazie oleju farby, farb, molu
kończę,łatwopalne, pyłu lub innych wybuchowych lub toksyczne opary.
19. zawsze wyłączyćto urządzeńłączących lub rozłączenie odkurzacza.nie pozwól podłączyćdo
bicz, kiedy sięprzewijać.
20. wyłącznie w przeliczeniu na suchą,dopowierzchni.
21. nie używaćdo celów innych niżopisane w niniejszym przewodniku użytkownika.
22. przechowywaćwewnątrz urządzenia w chłodnym, suchy teren.
23. utrzymaćmiejsca pracy i suche.
24. nie zanurzyćrękęodkurzacz do wody lub innych płynów.
25. trzymaj koniec węża, różdżki i inne otwory z twarzy i ciała.
26. nie używaj czystsze posprzątaćzwierzątlubzwierząt.

3
27. trzymaj głowę(wzrok, słuch, usta, itp.), z dala od otworów, kiedy czystsze pracuje lub
ładowanie.
Ostrzeżenie:
ważne:
jeśli ssawnego jednostki, przewód, czy rurka jest zablokowany, wyłącz odkurzacz
jaśniejsze i usunąć blokowanie substancji, zanim zaczniesz jednostki.
1. nie działająodkurzacz zbyt blisko hearter lub grzejników.
2. przed włożeniem moc siępodłączyćdo ściennego, upewnij się,żetwojeręce są
suche.
3. zanim zaczniesz jednostki, upewnij się,że w celu usunięcia dużych lub ostrych
przedmiotów, które mogłyby zaszkodzićpyłzbiornika i węża.
4. kiedy pociągnąć prąd wtyczki z ściennego wyciągnąć wtyczkęnie ładowarki.
5. nie stosowaćbez filtrów w miejscu.
6. stosując, jeśli nauczysz sięz skrzypiąz pralni, to musi byćssanie wydaje siębyć
zmniejszona, więcmusiszprzestać(upewnićsię,że sprzątacz nie jest zaślepianie), a
następnie oczyścićcały filtr powietrza.
uwaga:
jeżeli dostawy sznurek jest uszkodzony, należy zastąpićprodukcję, agent służblub
podobnie wykwalifikowanej osoby w celu uniknięcia zagrożenia.
ostrzeżenie:
trzymaj go, gdy przekracza pępowinę.nie pozwalająna sznurek do bicz, kiedy się
przewijać.
wykorzystanie i funkcji
łączenie odkurzacz
uwaga:
zawsze usunąć moc wtyczki z ściennego przed montażulubusunięcie akcesoriów.
1. mocowania przewód elastyczny do odkurzacza, podłączyćprzewód elastyczny do powietrza w
przewodzie wlotowym, naciskać,ażusłyszysz "click", wskazuje, że to jest zablokowane.
2. montażrurkędo zakrzywionej różdżkę./wąż rozszerzenia.- rurka do zakrzywionej różdżkę./
wąż rozszerzenia.

4
3. montażpodłodze szczotka do metra.- rury na podłogęszczoteczką.dostosowanie rurkędo
pożądanej długości.
zmienna ssania kontroli
uwaga:
kiedy wszystkie dodatki sąna miejscu, odprężyłwystarczającądługość kabla i włożyćwtyczkędo
gniazdka w ścianie.żółty znak na ładowarki pokazuje idealnym kabel lenghth.nie ciągnij tej
ładowarki poza czerwony ślad.
1. dodaje sięmoc wtyczkęwścianie gniazdko.
2. prasa zasilania / wyłącznika położone jednostki wyłącz odkurzacz "na".
3. do przewijania ładowarki, naciśnij hamulec przewińguzik z jednej strony i przewodnik kabel
zasilania z drugiej strony, w celu zapewnienia, że dawka nie whip powoduje uszkodzenie.
4. w celu dostosowania ssania, przesuńkontroli prędkości przycisk na ssanie rękędo kontroli jest
moc odkurzacz.
zmiana zapełnienie worka.
1. otwórz okładkę.
2. zmiana zapełnienie worka.
12
przewińprzycisk
On/off

5
unieść iodsuńsięwpralni.
uwaga:
ten specjalny program dla rady.jest sięna szczycie.ponadto inne przenieść siędo przodu.możesz
go użyć,byskutecznienieść czystszy gdy sprzątacz pionowego
usuwanie i czyszczenie wstępne filtr i filtr powietrza na wylocie silnika
ostrzeżenie:
zawsze wyłączyćjednostkęz gniazdka elektrycznego, zanim siępyłw beczce.
a przed filtrem silnikowych
1. otwórz okładkę.
2. czysty lub zmiany filtr.
12
wylot powietrza z filtrem.
1. prasa wylotu powietrza do otwarcia sieci.
2. wyjmij filtr powietrza na wylocie na ekologicznie czyste i zmiany.
12
Pre-motor
filter

6
uwaga:
gąbka materiału filtra w pralni będzie stałsiędusty w czasie.jest to prawidłowe i nie wpływa na
działania filtra.jeśli gąbka filtr jest bardzo zakurzony odsysaniem nie wróci do 100%, a potem
sugerują,że filtr należyusunąć następnie pod kran i zezwolićna sucho przez 24 godziny nie
całkiem blisko ognia lub w wysokiej temperaturze obiekty, zanim remont w próżnię.należyto
zrobićraz na sześć miesięcy lub gdy nie wydaje siębyćzmniejszona, oczywiście.
ważne:
proszęzauważyć,że istnieje zawór bezpiecze ństwa w próżni, w celu zapobieżenia jednostki od
ucieczki z wysokiej próżni stawki.jeśli próżnia jest zbyt wysoka, zawór bezpieczeństwa zostaną
uruchomione.w tym przypadku, to możeminishpróżni stawkęi ochrony silnika do złamania.
uwaga:
jest dziura, musząbyćotwarte, wolne od jakichkolwiek przeszkód przez cały czas.w przeciwnym
razie, silnik sięprzegrzewa i możezostaćzniszczony.
ważne:
wszystkie filtry powinny byćregularnie sprawdzane pod kątem oznak uszkodze ń,najlepiejpo
każdym czyszczeniu zadanie.filtry musząbyćzastąpiony natychmiast, jeśli sąuszkodzone.zawsze
odłączyćpróżni z gniazdka elektrycznego przy sprawdzaniu filtry.

IT
Manuale di istruzioni
TT-CV09
www.zline-world.com
1

2
Le istruzioni di sicurezza
Per uso domestico!
quando si usa il vuoto, le precauzioni di sicurezza dovrebbe sempre essere rispettati, anche i
seguenti
1. non lasciare aspirapolvere incustodito quando viene inserito.staccatevi dalla presa quando non
in uso, e prima di premere i filtri.
2. per ridurre il rischio di shock elettrico non usi all'aperto o in superficie bagnata.
3. non lasciare che i bambini da usare come giocattolo.particolare attenzione è necessario
quando usato nei pressi di bambini.
4. usare solo come indicato nel presente manuale.usare solo produttore raccomanda allegati.
5. non usare con danni corda o spina.non utilizzare aspirapolvere se è stato lanciato 、
danneggiato 、lasciato all'aperto 、o gettato in acqua.cambio apparecchio al servizio clienti
per l'esame di riparazione di elettrodomestici o adattamento.
6. non tirare o portare dal cordone ombelicale.non usare la corda come una maniglia.chiudere
una porta sulla corda, o tirare cordone attorno i bordi taglienti o angoli.non correre
apparecchio su cavo.tenere lontano da superfici riscaldate del cordone ombelicale.
7. non stacca tirando la corda.scollegare, afferra il cavo, il cavo.
8. non maneggiare spina o aspirapolvere con le mani bagnate.- non uso all'aperto o in superficie
bagnata.
9. non mettere nessun oggetto in aperture.non usi con aperture bloccato e non limitare il flusso
d'aria.- apertura di polvere, lint, capelli e niente che possono ridurre il flusso d'aria.
10. tenere i capelli, abiti larghi, le dita, e tutte le parti del corpo di aperture e di parti in
movimento.
11. non alzare forte o oggetti taglienti come vetro, chiodi, viti, monete, ecc.
12. non tirare su carboni ardenti, sigaretta, corrisponde o calda, fumo, oppure oggetti.
13. non usare senza filtri.
14. spegnere tutti i controlli prima di colmare o staccando aspirapolvere.
15. usa più attenzione quando l'aspirapolvere sulle scale.
16. non rispondi infiammabili o materiali combustibili (benzina, benzina, ecc.) o in presenza di
liquidi esplosivi o vapore.
17. non prendere materiale tossico (cloro, candeggina, ammoniaca, acido muriatico, ecc.)
18, non in uno spazio chiuso pieno di vapore prodotto da vernici a base di petrolio, diluente, tarma
prova, le polveri infiammabili, o di altro esplosivo o vapori tossici.
19. sempre interrompere questo elettrodomestico prima di connettere o disconnettere tubo
dell'aspirapolvere.non permettere a spina di frusta, quando va bene.
20. usa solo a secco, la superficie.
21. non usare per scopi diversi da quelli descritti nella presente guida dell'utente.
22. salvare il tuo apparecchio domesticoinunfrescoeasciutto.
23. mantenere la superficie di lavoro ben asciutto.
24. non immergere la mano sotto vuoto in acqua o altri liquidi.
25. - fine del tubo, bacchette e altre aperture lontano dal tuo viso e corpo.
26. non usare la donna delle pulizie per pulire la tua compagnia o un animale.

3
27. tenere la testa (occhi, orecchie e bocca, ecc.) a partire dal aperture, quando il pulitore sta
funzionando o colmare.
Avvertenza:
E 'importante:
se l'aspirazione di apertura dell'unità, il tubo o il tubo è bloccato, spegnere l'aspirapolvere più
chiare e di rimuovere il blocco sostanza prima di iniziare l'unita 'di nuovo.
1. non operano l'aspirapolvere troppo vicino a hearter o radiatori.
2. prima di inserire il potere spina nel muro outlet, assicurarsi che le mani asciutte.
3. prima di iniziare a l'unità, assicurati di rimuovere grandi o oggetti taglienti che potrebbe
danneggiare la polvere tank e tubo.
4. quando tira fuori il potere spina dal muro outlet, staccare la spina del cavo.
5. non usare senza filtri.
6. quando usi, se impari di squeak dalla lavanderia, si deve aspirare sembra ridotta, quindi devi
fermare (assicurarsi il pulitore non è così), poi pulito il filtro dell'aria.
Nota:
se la fornitura cordone è danneggiato, e deve essere sostituito con la fabbricazione, l'agente
dei servizi o in persona qualificata per evitare un rischio.
Avvertenza:
la spina quando trova il midollo.non permettere che il cordone di frusta, quando va bene.
Uso e funzione
Raccogliendo aspirapolvere
Nota:
rimuovere sempre il potere spina dal muro posto prima di montare o rimozione di accessori.
1. a collegare il tubo flessibile nel vuoto collegare il tubo flessibile per l'aspirazione dell'aria
isolante, spingi finche 'non senti un "click", indicando è in posizione chiusa.
2. prova il tubo alla curva bacchetta / tubo interno.spingi il tubo nella curva bacchetta / tubo
interno.
3. prova la parola spazzola per il tubo.spingi tubo sul pavimento, il pennello.adeguare il tubo per
la lunghezza desiderata.Variable suction control

4
Nota:
una volta che tutti gli allegati sono a posto, ci rilassiamo un sufficiente lunghezza del cavo e
inserire la spina nel muro sfogo.un contrassegno giallo sull'alimentatore indica l'ideale lenghth via
cavo.non tirare il cavo di alimentazione oltre il segno rosso.
1. inserisci il potere spina nel muro sfogo.
2. premi il potere interruttore situato all'unità di trasformare l'aspirapolvere "su".
3. di riavvolgere il filo elettrico, premi il tasto rewind corde con una mano e guida il cavo di
alimentazione con l'altra mano per garantire la dose non frusta causando danni o lesioni.
4. per regolare l'aspirazione, scivolare il controllo della velocità bottone con l'aspirazione mano
per controllare l'aspirazione potere dell'aspirapolvere.
Cambiare le polveri borsa
1. apri la copertina.
2. il cambiamento di polvere borsa.
12
tasto rewind
On/off

5
Trasportare e via della lavanderia
Nota:
questo detergente è una caratteristica speciale per gestire.c'è una maniglia sulla cima.inoltre, un
altro continuare a gestire è davanti.puoi usarlo per portare il più convenientemente quando
avranno in verticale
Rimozione & pulizia filtro filtro aria e pre - motore
Avvertenza:
Sempre staccate le unità dalla presa elettrica prima di ottenere la polvere di barile.a.
pre - filtro a motore
1. apri la copertina.
2. pulita o cambiare il filtro.
12
b. l'uscita del filtro
1. premi il pulsante per aprire bocca d'aria griglia
2. fare fuori l'aria pulita e sbocco filtro per cambiare.
pre - filtro
amotore

6
12
Nota:
la spugna materiale filtrante in più si è diventato dusty nel tempo.ciò è normale e non influenzi le
prestazioni del filtro.se il filtro di spugna è così polverosa che l'aspirazione di non tornare al 100%,
noi proponiamo che il filtro sia rimosso poi sciacquato sotto il rubinetto e lasciato asciugare per 24
ore in onda non vicino al fuoco o alta temperatura gli oggetti prima di restaurare nel vuoto.questo
dovrebbe essere fatto dopo sei mesi o quando l'aspirazione sembra essere ridotto, ovviamente.
importante:
vi prego di notare che c'è una valvola di sicurezza nel vuoto per evitare che l'unità di scappare con
alto tasso di vuoto.se il vuoto è troppo alto, la valvola di sicurezza sarà acceso.in questo caso, si
può diminuire il tasso di vuoto e proteggere il motore sia rotto.
Nota:
l'aspirazione buco deve essere aperto, libero da ostacoli per tutto il tempo.altrimenti, il motore si
surriscalda e potrebbe essere danneggiato.
E'importante:
Tutti i filtri deve essere controllato regolarmente per segni di danni, preferibilmente dopo ogni
attività di pulizia.i filtri dev'essere sostituito immediatamente se verranno danneggiati.sempre
sconnettere il vuoto della presa elettrica per controllare i filtri.

GR
Manuál
TT-CV09
www.zline-world.com
1

2
bezpečnostní pokyny.
pro použití v domácnostech.
když se pomocí vakua, základní bezpečnostní opatření, by měly
být vždy dodržovat, včetněnásledujících
1. nenechávejte vysavačbez dozoru, když je v zásuvce.odpoutejte se
od zásuvky, když se nepoužívá, a než si filtruje.
2. pro snížení rizika elektrického šoku nepoužívejte venku nebo na
mokrých površích.
3. nedovolte dětem, aby je použili jako hračka.zvláštní pozornost je
nutné připoužitíudětí.
4. použití, jak je popsáno v této příručce.používejte pouze doporučuje
výrobce příslušenství.
5. nepoužívejte s poškozené šňůry nebo zásuvky.nepoužívat vysavač,
jestli to byla stažena 、poškozené 、levé venkovní 、nebo spadl
do vody.návratnost spotřebičespotřebiče zákaznický servis pro
zkoumání, opravy nebo úpravy.
6. netrhejte nebo přepravěšňůru.nepoužívejte šňůru jako
zvládnout.zavřete dveře, na šňůru, nebo vytáhnout šňůru kolem ostré
hrany a rohy.neutíkej, zařízení na šňůru.udržet šňůru od horké plochy.
7. - vypněte tažením za šňůru.odpojit, moci odpojit, ne provaz.
8. nemanipulujte s plug nebo vysavačs mokrýma rukama.tečka není
použití ve venkovních prostorách nebo na mokrých površích.

3
9. nedávejte žádné předměty do otvorů.nepoužívejte žádné otvory
zablokovány a neomezují proudění vzduchu.nechat všechny úvodní
volný prach, prach, vlasy, a něco, co může snížit průtok vzduchu.
10. držet vlasy, volné oblečení, prsty, a všechny části těla pryčz místa
a pohyblivé části.
11. nezvedej tvrdé nebo ostré předměty,jakojesklohřebíky, šrouby,
mince, atd.
12. nezvedej horký uhlíky, cigarety, zápalky nebo sexy, kouření nebo
hořící předměty.
13. nepoužívejte bez filtrůna místě.
14. vypněte všechny kontroly, než zastrčením nebo odpojovat
vysavač.
15. použít extra péčipři luxování na schodech.
16. nezvedej hořlavé nebo hořlavých materiálů(benzín, benzín atd.)
nebo použití v přítomnosti výbušné kapaliny nebo páry.
17. nezvedej toxického materiálu (chlorové bělidlo, čpavek, čistič
odpadu atd.),
18. ne v uzavřeném prostoru, plná páry vydává olej na barvy, ředidla,
můra korigoval, hořlavý prach, nebo další výbušná nebo toxické
výpary.
19. vždycky to odpojit přístroj před připojením nebo odpojení
vakuové hadice.neumožňují připojit bičovat až moc.

4
20. použití pouze na suché, vnitřní povrchy.
21. nepoužívejte pro jakýkoli jiný účel než popsaná v uživatelské
příručce.
22. v obchoděváš spotřebičkrytý v chladné, suché oblasti.
23. udržujte prostor tak suché.
24. - ponořte vysavačdo vody nebo jiné kapaliny.
25. - konec hadice, hůlky a jiné otvory pryčzobličejeatěla.
26. nepoužívejte čistší vyčistit zvířata nebo zvířata.
27. držet hlavy (oči, uši, úst, atd.) od premiéry, kdy vysavačpracuje
nebo předvádění se.

5
varování:
důležité:
pokud sacího otvoru z jednotky, hadice nebo trubice je zablokovaná, vypni vysavač,
jasnější a odstranit blokuje látky, než začnete jednotky znovu.
1. nejsou v provozu vysavačepříliš blízko hearter čiradiátory.
2. před vložením moci zapojit do zásuvky, ujistěte se, že vaše ruce jsou suché.
3. předtím, než začnete jednotku, ujisti se, že odstranit velké nebo ostré předměty,
které mohou poškodit prach tank a hadice.
4. když vytáhl zástrčku ze zásuvky moc ne, odpojit napájecí kabel.
5. nepoužívejte bez filtrůna místě.
6. při použití, pokud se dozvíte o pískle z čistírny, musí to být sání se zdá být snížena,
takže musíte zastavit a ujistit se, že čistší není uzavírání), pak uklidit všechny
vzduchový filtr.
poznámka:
pokud dodávky šňůra je poškozené, musí být nahrazena výrobou, agent nebo podobně
kvalifikovaná osoba, aby se předešlo nebezpečí.
varování:
- vypnout, když se přetáčíšňůru.neumožňují šňůru bičovat až moc.
použití a funkce
montáž vysavač
poznámka:
vždycky odstranit silou zástrčku ze zásuvky, než montáž nebo odstranění
příslušenství.
1.k pružné hadice do vakuové spojit ohebná hadice do sací potrubí, prosadit,
dokud neuslyšíte cvaknutí, což naznačuje, že je ve své poloze.

6
1. montáž trubice do oblouku hůlku / hadice prodloužení.strčit zkumavku do
zakřiveného hůlku / hadice prodloužení.
2. odpovídající zemi štětec do metra.strčit zkumavku do podlahy čistit.upravit
trubici na požadovanou délku.
variabilní sání kontrolu
poznámka:
jakmile všechny vztahy jsou na místě, uvolnit dostatečné délky kabelůavlož
zástrčku do zásuvky.žlutá značka na nabíječku ukazuje ideální kabel lenghth.-
vytáhněte napájecí kabel za červenou značku.
1. vlož moci zapojit do zásuvky.
2. tisk moci zapnout / vypnout umístěna jednotka z vysavače"na".
3. přetočit napájecí kabel, stiskněte šňůru tiačítko přetáčení na jedné straněa
průvodce napájecí kabel s druhou stranu, aby se zajistilo, že dávka není bič
způsobily škody nebo zranění.
4. úpravy sání, po regulaci rychlosti tlačítkem na odsávání rukou sací výkon vysavače.
změna sáčku na prach.
1. otevřete obálku.
2. změny sáčku na prach.
přetočte čudlík
vypínač

7
12
nosit a dál čistější.
poznámka:
tento vysavač, mají zvláštní vlastnost pro zvládnout.je na vrcholu.kromětoho další
nést zvládnout je vepředu.můžeš to použít, aby pohodlněnosit čistší, když čistší je
vertikální
odstraňování a čištění před motorem filtr a filtr výstupu vzduchu
varování:
vždy odpojte jednotky z elektrické zásuvky, než se z prachu sud.
a pre motorové filtry
1. otevřete obálku.
2. čisté nebo změnit filtr.

8
12
výstup vzduchu filtrem.
1. tiskový výstup vzduchu otevřít síť.
2. na výstupu vzduchu filtr pro čisté a změnit.
12
upozornění:
houba filtrační materiál v čistší se stal dustyho.to je normální a neovlivní filtru.když
houbu filtr je tolik prachu, že sání nevrátí do 100%, pak naznačují, že filtr odstraní,
pak opláchnout pod kohoutek a oschnout na 24 hodin do vysílat ani u ohněnebo
vysoká teplota předměty před napasovat do vakua.to by mělo být provedeno až šest
měsícůnebo při sání se zdá být snížena, samozřejmě.
důležité:
vezměte prosím na vědomí, že existuje bezpečnostní ventil do vakua, aby jednotky z
běžet s vysokovakuové sazby.pokud je vakuum příliš vysoko, pojistka bude zapnutý.v
tomto případěto může minish vakuu rychlostí a chránit motor před porušena.
poznámka:
sací otvor musí být otevřený, bez jakýchkoli překážek za všech okolností.jinak bude
motor přehřívat a může být poškozen.
důležité:
všechny filtry musí být pravidelněkontrolovány známky poškození, nejlépe po
každém čištění úkol.filtry musí být ihned vyměnit, když jsou poškozené.kdykoli
odpojit od elektrické zásuvky i vakuové při kontrole filtry.
pre motorové
filtry

FR
Manuel d'instructions
TT-CV09
www.zline-world.com
1

2
les consignes de sécurité
pour le ménage.
en utilisant votre aspirateur, doivent prendre des
précautions de base devraient toujours être
observées, y compris les suivantes
1. ne laissez pas aspirateur sans surveillance quand il est
branché.lorsque vous ne l'utilisez pas débrancher et avant la sortie sur
filtre.
2. afin de réduire le risque de choc électrique ne pas utiliser à
l'extérieur ou sur sol mouillé.
3. ne pas permettre aux enfants d'utiliser comme jouet.une attention
particulière est nécessaire lorsque utilisé près d'enfants.
4. utilisation comme décrit dans le présent manuel.utiliser uniquement
des attaches recommandées par le fabricant.
5. ne pas utiliser de corde ou de bouchon endommagés.ne pas utiliser
d'aspirateur si elle a été abandonnée 、endommagé 、laissé 、
extérieur ou tomber dans l'eau.retour à l'appareil du service à la
clientèle d'examen de réparation ou d'ajustement.
6. ne pas tirer ou par câble.ne pas utiliser la corde comme un
manche.fermer une porte sur la corde, corde autour des arêtes vives
ou des coins.ne courez pas d'appareils plus de corde.continue de

3
moelle de surfaces chauffées.
7. ne pas débrancher en tirant sur la corde.pour débrancher, saisir le
bouchon, pas le cordon.
8. ne pas manipuler bouchon ou un aspirateur avec les mains
mouillées.ne pas utiliser à l'extérieur ou sur sol mouillé.
9. ne pas mettre des objets dans des ouvertures.ne pas utiliser avec
ouvertures bloquées et ne restreignent pas d'air.gardez tous ouverture
libre de poussière, de fibres, de cheveux et de tout ce qui peut réduire
le débit d'air.
10. garder les cheveux, les vêtements amples, les doigts, et toutes les
parties du corps d'ouvertures et de pièces mobiles.
11. ne décroche dur ou d'objets pointus tels que du verre, clous, vis,
pièces, etc.
12. ne pas ramasser des charbons ardents, cigarette, des allumettes ou
tout chaud, de fumer ou de brûler des objets.
13. ne pas utiliser sans filtres en place.
14. Éteignez tous les contrôles avant de brancher et débrancher
aspirateur.
15. l'utilisation de soins supplémentaires lorsque l'aspirateur sur les
escaliers.
16. ne pas ramasser des matières inflammables ou combustibles
(essence, essence, etc.) ou d'utiliser des liquides explosifs ou en

4
présence de vapeur.
17. ne pas ramasser des matières toxiques (chlore, de l'ammoniac,
déboucheur, etc.)
18. - pas dans un espace fermé rempli de vapeurs émises par des
peintures à l'huile, diluant, traitement antimite, poussières
inflammables, explosives ou toxiques, ou d'autres vapeurs.
19. toujours débrancher cet appareil avant assemblage ou
désassemblage de tuyau d'aspirateur.ne permettent pas à brancher de
fouet quand ma femme.
20. utilisation uniquement sur sec, les surfaces intérieures.
21. ne pas utiliser à des fins autres que celles décrites dans ce guide de
l'utilisateur.
l'intérieur de votre appareil 22. stocker dans un endroit frais et sec.
23. gardez votre aire de travail bien secs.
24. ne pas plonger la main vide, dans l'eau ou d'autres liquides.
25. gardez fin de tuyau, baguettes et autres ouvertures loin de ton
visage et corps.
26. ne pas utiliser la pour nettoyer vos animaux de compagnie ou de
tout animal.
27. gardez la tête (yeux, oreilles, la bouche, etc.) des ouvertures,
quand ça fonctionne ou colmatage.
avertissement:
important:
si l'ouverture d'aspiration de l'unité, le tuyau ou le tube est bloquée, couper le vide

5
plus claires et de supprimer le blocage substance avant de commencer à l'unité.
1. ne pas exploiter l'aspirateur trop près de hearter ou des radiateurs.
2. avant de mettre le pouvoir brancher la prise murale, assurez - vous que vos mains
sont sèches.
3. avant de commencer à l'unité, s'assurer d'éliminer les grands ou les objets
tranchants qui pourraient endommager la poussière tank et le tuyau.
4. lorsque retire le pouvoir brancher la prise murale, débrancher le cordon
d'alimentation.
5. ne pas utiliser sans tous les filtres en place.
6. lorsque, si vous apprenez de grincement de la femme de ménage, elle doit être
l'aspiration semble être réduit, vous devez arrêter (assurez - vous que le nettoyage
n'est pas boucher), puis nettoyer le filtre à air.
note:
si le cordon d'alimentation est endommagé, il doit être remplacé par la fabrication,
l'agent de service ou de même personne qualifiée afin d'éviter un danger.
avertissement:
tenir la prise quand ma femme le cordon.ne permettent pas la moelle de fouet quand
ma femme.
l'utilisation et la fonction
l'assemblage aspirateur
note:
toujours retirer le bouchon de la prise murale avant de pouvoir assembler ou
enlever des accessoires.
1.fixer le tuyau flexible dans le vide se connecter le tuyau flexible dans la prise
d'air conduits, pousser jusqu'à entendre un « clic», indiquant qu'elle
est en position verrouillée.
1. installation du tube à la courbure baguette / tuyau extension.poussez le tube dans la
courbe baguette / tuyau extension.
2.juste la parole brosse pour le tube.poussez le tube dans la parole de
brosse.ajuster le tube à la longueur voulue.

6
note:
une fois que toutes les pièces sont en place, avec une longueur suffisante de câble et
insérer le bouchon dans la prise de courant.une marque jaune sur le cordon
d'alimentation montre l'idéal cable lenghth.ne tirez pas sur le cordon d'alimentation au
- delà de la marque rouge.
1. insérer le pouvoir brancher la prise murale.
2. appuyez sur le bouton on / off puissance l'unité de transformer l'aspirateur "».
3. à rembobiner le cordon d'alimentation, appuyez sur le bouton de remise à zéro avec
une main et cordon guide le cordon d'alimentation de l'autre main pour s'assurer qu'il
dose fouet causant des dommages ou blessures.
4. pour ajuster la vitesse de succion, glisser le bouton de commande sur l'aspiration
part à contrôler la puissance d'aspiration de l'aspirateur.
changer de sac à poussières.
1. la couverture.
2. changement de sac à poussières.
12
bouton de remise à zéro
bouton on / off

7
et passer le nettoyeur.
note:
il est plus propre pour gérer un dossier spécial.il y a un manche en haut.en outre,
une autre porte est devant.vous pouvez l'utiliser pour bien porter le nettoyeur quand le
nettoyage est vertical
nettoyage et enlèvement et pré filtre filtre moteur sortie d'air
avertissement:
toujours débrancher l'unité de prise électrique avant de sortir la poussière baril.
a. pré filtre automobile
1. la couverture.
2. nettoyer ou changer le filtre.
12
b. sortie d'air filtre
les filtres
automobiles

8
1. appuyez sur le bouton pour ouvrir la grille de sortie d'air
2. prendre la sortie d'air filtre pour nettoyer et changement.
12
veuillez noter:
l'éponge de matériau filtrant dans le propre est devenu poussiéreux au fil du
temps.c'est normal et n'aura pas d'incidence sur la performance du filtre.si le filtre est
poussiéreuse que l'éponge aspiration ne revient pas à 100%, nous suggérons que le
filtre soit enlevée puis rincés sous le robinet et laisser sécher pendant 24 heures en
diffusant pas près du feu, ou des objets à haute température avant réaménagement
dans le vide.cela devrait être fait dès six mois ou lorsque la succion semble être réduit
évidemment.
important:
veuillez noter qu'il existe une soupape de sécurité à l'intérieur de l'aspirateur pour
prévenir l'unité d'être gérés avec des taux de vide poussé.si le vide est trop élevée, la
soupape de sécurité sera allumé.dans ce cas, il peut réduire le taux de vide et de
protéger le moteur est cassé.
note:
l'aspiration trou doit être ouvert, libre de toute obstruction à tout moment.sinon, le
moteur va surchauffer et pourraient être endommagées.
important:
tous les filtres doivent être vérifiés régulièrement pour des signes de dommages, de
préférence après chaque tâche de nettoyage.les filtres doivent être remplacés
immédiatement si elles sont endommagées.toujours débrancher le vide de la prise
électrique lors de la vérification des filtres.

ES
Manual de instrucciones
TT-CV09
www.zline-world.com
1

2
Instrucciones de Seguridad
Solo para uso domestico!
Al usar tu vacio, siempre deben observarse las precauciones básicas de seguridad, incluyendo las
siguientes
1. No deje aspirador desatendido cuando está enchufado.Desenchufe del tomacorriente cuando no
este en uso y antes de tirar de filtros.
2. Para reducir el riesgo de shock eléctrico no usar al aire libre o en superficies mojadas.
3. No se permiten los niños a usar como juguete.La atención es necesaria cuando se utiliza cerca
de los niños.
4. Uso solo como se describe en este manual.Uso recomendado por el fabricante adjuntos.
5. No utilizar con cable o un enchufe dañados.No use la aspiradora si se ha caído, dañado, o al aire
libre, dejó caer en el agua.Aparato para regresar el aparato a servicio al cliente para examen de
reparación o ajuste.
6. No tire o llevar por cable.No use la cuerda como un mango.Cerrar una puerta a la cuerda, o
tirar de cuerda alrededor de aristas o esquinas.No corras Appliance en cordón.Mantenga la cuerda
lejos de superficies calientes.
7. No desenchufe tirando del cable.Desconectar, sujete el enchufe y no el cable.
8. No manejar plug o aspiradora con las manos mojadas.Dot no usar al aire libre o en superficies
mojadas.
9. No coloque ningún objeto en las aberturas.No utilizar con cualquier abertura bloqueado y no
restringir el flujo de aire.Mantener toda la apertura libre de polvo, pelusa, pelo, y algo que puede
reducir el flujo de aire.
10. Mantenga el pelo, ropa suelta, dedos, y todas las partes del cuerpo lejos de aberturas y piezas
móviles.
11. No recoger objetos duros y cortantes como vidrios clavos, tornillos, monedas, etc.
12. No recoger carbones calientes, cigarrillos, fósforos, o cualquier hot, fumar, o la quema de
objetos.
13. No utilice sin filtros en su lugar.
14. Apagar todos los controles antes de enchufar o desenchufar la aspiradora.
15. Uso cuidado extra cuando de aspirar en las escaleras.
16. No recoger materiales inflamables o combustibles (líquido para encendedores, gasolina, etc.) o
usar en presencia de líquidos explosivos o vapor.
17. No recoger material tóxico (cloro, amoníaco, Drain Cleaner, etc.)
18. No en un espacio cerrado lleno de vapores emitidos por pinturas a base de aceite, diluyente de
pintura, moth proofing, polvos inflamables, explosivas o tóxicas u otros vapores.
19. Desenchufe siempre el aparato antes de conectar o desconectar la manguera de vacío.No
permiten conectar a látigo cuando rebobinado.
20. Sólo uso en seco, las superficies indoor.
21. No utilice para ningun otro proposito que descritos en esta guía del usuario.
22. Tienda de su aparato indoor en un lugar fresco, lugar seco.
23. Mantener tu area de trabajo bien seco.

3
24. No sumerja el vacio de la mano en agua u otros líquidos.
25. Mantener a fin de manguera, varitas y otras aberturas lejos de su cara y cuerpo.
26. No use el limpiador para limpiar tus mascotas o cualquier animal.
27. Mantenga la cabeza (ojos, oídos, boca, etc.) lejos de las aperturas, cuando el limpiador está
trabajando o plugging.
Advertencia:
Importante:
Si la abertura de aspiración de la unidad, la manguera o el tubo se bloquea, apague la aspiradora
más clara y quitar el bloqueo de contenido antes de empezar la unidad de nuevo.
1. No haga funcionar la aspiradora demasiado cerca de hearter o radiadores.
2. Antes de insertar el enchufe en el enchufe de pared, asegúrese de que sus manos estén
secas.
3. Antes de iniciar la unidad, asegúrese de eliminar grandes o objetos punzantes que puedan
dañar el polvo tanque y manguera.
4. Cuando sacar el enchufe del tomacorriente de pared, tirar del enchufe y no el cable de
alimentación.
5. No utilice sin todos los filtros en su lugar.
6. Cuando se utiliza, si aprendes de Squeak en el limpiador, debe ser la aspiración parece
reducirse, entonces usted debe parar (asegúrese de que el limpiador no es enchufe), y luego
limpiar el filtro de aire.
NOTA:
Si el cable de alimentacion esta dañado, debe ser sustituido por la fabricación, el agente de
servicio o similar persona cualificada para evitar un peligro.
Advertencia:
Sostenga el enchufe cuando rebobinado de la cuerda.No permita que el cordón a látigo cuando
rebobinado.
Uso y función
Montaje de aspiradora
NOTA:
Siempre quite el enchufe del tomacorriente de pared antes de ensamblar o quitar accesorios.
1. Conectar la manguera flexible en el vacío que conecte la manguera flexible del conducto de
admision de aire, empujar hasta oir un "clic", indicando que esta en su posicion de bloqueo

4
2. Instalar el tubo de la varilla curva / extension de manguera.Empuje el tubo en el tubo curvado /
extension de manguera.
3. El montaje de la planta cepillo para el tubo.Empuje el tubo en el suelo cepillo.Ajustar el tubo
a la longitud deseada.
La variable de control de succion
NOTA:
Una vez que todos los archivos adjuntos son en lugar, desenrollar una longitud suficiente de cable
e insertar el conector en el enchufe de pared.Una marca amarilla sobre el cable de alimentación
cable ideal muestra la longitud.No tire del cable de alimentación más allá de la marca roja.
1. Inserte el enchufe en el enchufe de pared.
2. Presione el boton de encendido / apagado ubicado la unidad para encender el aspirador "en".
3. Para rebobinar el cable de alimentacion, presione el botón de rebobinado de cordón con una
mano y guiar el cable de alimentacion con la otra mano para asegurar que la dosis no Whip
causando daños o lesiones.
4. Para ajustar la succión, deslice el boton de control de velocidad en la aspiracion de mano para el
controldelapotenciadeaspiracióndela aspiradora.
Cambiar la bolsa de polvo.
1. Abra la cubierta frontal.
2. Cambie la bolsa de polvo.
Botón de
rebobinado
Boton de encendido /
apagado

5
12
Llevar y pasar el limpiador:
NOTA:
Este limpiador tienen una característica especial para manejar.Hay un asa en la parte
superior.Además, un asa de transporte está en el frente.Usted puede utilizar convenientemente para
llevar el limpiador cuando el limpiador es en vertical
Quitar y limpieza de filtro y filtro de salida de aire pre - motor
Advertencia:
Siempre desconecte la unidad de toma de corriente antes de salir el polvo barril.
A. Pre - filtro de motor
1. Abra la cubierta frontal.
2. Limpiar o cambiar filtro.
12
Pre-motor
filter

6
B. Filtro de salida de aire
1. Pulse el botón para abrir la rejilla de salida de aire
2. Tomar la salida de aire filtro para limpiar y cambiar.
12
Por favor Nota:
El filtro de esponja de material en el limpiador se convirtió en polvo con el tiempo.Esto es normal
y no afecta el rendimiento del filtro.Si el filtro de esponja es muy polvoriento que la succión no
volver al 100%, entonces le sugerimos que el filtro se elimina luego enjuagar bajo el grifo y se
dejan secar durante 24 horas por ventilar no cerca del fuego o algunos objetos de alta temperatura
antes de montar en el vacío.Esto debería hacerse una vez seis meses o cuando la succión parece
reducirse obviamente.
Importante:
Por favor nota que hay una válvula de seguridad en el interior del vacío para evitar la Dependencia
de ser correr con alto caudal de vacio.Si el vacío es demasiado alto, la valvula de seguridad se
encenderá.En este caso, puede Minish el caudal de vacio y proteger el motor de ser roto.
NOTA:
El agujero de succion debe ser abierto, libre de cualquier obstrucción en todo momento.De lo
contrario, el motor se sobrecaliente y podría dañarse.
Importante:
Todos los filtros deben ser revisadas periódicamente para detectar signos de daños,
preferentemente despues de cada tarea de limpieza.Los filtros deben ser sustituidos
inmediatamente si se daña.Desconecte siempre el vacío a partir de la toma de corriente al
comprobar los filtros.

Dutch
De handleiding
TT-CV09
www.zline-world.com
1

2
De veiligheidsvoorschriften
Alleen thuis.
Het gebruik van een vacuüm, moet altijd in overeenstemming zijn
met de fundamentele maatregelen op het gebied van de veiligheid,
met inbegrip van de volgende gegevens
1, de stofzuiger is aangesloten, laat het niet onbeheerd achter.Niet
gebruiken als de stekker eruit zit, en trek de filter.
2, voor de vermindering van het risico van een elektrische schok, niet
buitenshuis of op een nat wegdek worden gebruikt.
3, laat de kinderen niet als een speeltje.Bij kinderen moeten nauwlettend
in de gaten.
4, gebruik alleen in dit handboek beschreven.De bijlage bij de
aanbeveling van de fabrikant alleen gebruiken.
5, gebruik geen beschadigde kabels of de stekker eruit.Als stofzuigers
vallen, de schade, weg van buiten of in het water, geen gebruik maken
van een stofzuiger.Elektrische huishoudelijke apparaten zullen terug de
dienstverlening aan de klant, controleer de reparatie of aan te passen.
6, niet met een touw of dragen.Niet met een touw aan.Sluit de deur op de
draad, of om de draad aan de scherpe rand of in de hoek.Niet rennen in de
elektrische apparaten.Om de draad van het verhittend oppervlak.
7, niet trekken de stekker eruit.De stekker eruit trekken, pak de stekker

3
niet het snoer.
8, niet met natte handen met plug of een stofzuiger.Niet buitenshuis of op
een nat wegdek worden gebruikt.
9, geen voorwerpen of in de opening.Gebruik geen verstopping van de
opening van de luchtstroom, niet beperken.Om alle openingen geen stof,
katoen, haar en eventuele vermindering van de dingen.
10, het behoud van haar, losse kleding, vingers en elk deel van het
lichaam en de delen van de opening.
11, neem niet hard en scherp voorwerp, zoals glas, nagels, schroeven,
munten.
12, niet op hete kolen, sigaretten, lucifers of een hete, roken of brandende
voorwerpen.
13, niet in de situatie zonder filter.
14. Het sluiten van ingevoegd vóór de stofzuiger of trek alle controle.
15, op de trap stof moet voorzichtig zijn.
16, niet het gebruik van ontvlambare of ontvlambare materialen (lichtere
vloeistof, benzine, enz.) of een explosieve vloeistoffen of gassen in de
omstandigheden.
17, geen pak van giftige stoffen (bleekmiddel, ammonia en
gootsteenontstopper, enz.).
18, niet met de olie met de verf, terpentine, mot agent, brandbare stof of
andere explosieve of giftige gassen die door de stoom in een gesloten

4
ruimte.
19, in verband met de vacuüm slang of afgesloten, voordat je je de
stekker eruit trekken.Laat de stekker eruit slaan... Terugspoelen.
20, alleen in een kamer boven.
21, geen gebruik maken van de gids voor de gebruiker bij de andere
doeleinden dan in.
22, zet je gereedschap bewaren op een koele, droge plek.
23, het behoud van werkgelegenheid in de droger.
24, geen hand vacuüm in water of een andere vloeistof.
25, de slang, aan het einde van de staf en andere openingen, ver weg van
je gezicht en lichaam.
26, niet met de reiniging van huisdieren of een dier.
27, als wasmiddel of geblokkeerd is, houden het hoofd (ogen, oren en
mond, enz.) van de opening.
Waarschuwing:
Belangrijk:
Als het apparaat aan de haven, slangen of pijp geblokkeerd worden, bij het starten van apparatuur
voor de stofzuiger uit gesloten en de blokkade.
1. Niet stofzuigen te dicht bij de verwarming of de radiator.
2, in de steek de stekker in het stopcontact, zorg dat je handen zijn droog.
3, bij het begin van een eenheid voor de schade kan toebrengen aan de stof te verwijderen en de
grote slang tank of scherpe objecten.
Uit het stopcontact 4, trek de stekker, alsjeblieft, trek de stekker eruit trekken, niet de lijn.
5, niet in alle omstandigheden het gebruik van filters niet.
6, bij gebruik van een stofzuiger, als je dat geluid, dat een vermindering van het bedrag van zijn
adem, dus je moet stoppen om ervoor te zorgen dat de voor het reinigen van alle geen verstopping),
en de lucht schoner.
Noot:
Als de lijn schade, moeten door de producenten, de dienst of soortgelijke gekwalificeerd personeel

5
te vervangen, om te voorkomen dat er risico 's.
Waarschuwing:
Terugspoelen, de stekker.Spoel de band terug laat het touw zweepslagen.
Gebruik en werking
Vergadering van de stofzuiger.
Noot:
In de bijlage worden gemonteerd of gedemonteerd vóór uit het
stopcontact verwijder de stekker eruit.
1, de slang naar de vacuüm slang, een slang aan de inlaat, tot ik hoorde
dat in de "klik", dat is in positie.
1, de pijp in de BAR / uitbreiding van de positie van de slang.Heeft de buis in de
staf / slang zich buigen.
2, zal de installatie aan de pijp op de vloer poetsen.Haal de Tube op de vloer
poetsen.De buizen worden aangepast aan de gewenste lengte.
Variabele - controle
Noot:
Zodra alle in de bijlage, los van de kabels en lang genoeg zal de stekker in het
stopcontact.In de lijn van de ideale gele label van de lengte van de leidingen.Laat de
lijn trekken naar de rode punt buiten.
1, steek de stekker in het stopcontact.
Volgens de eenheid 2, de kracht van de aan / uit - knop open stofzuiger "open".
3, zal de lijn terugspoelen, met één hand op de knop. Terugspoelen, en met de
andere hand geleide snoer, om ervoor te zorgen dat er geen wonden of schade
veroorzaakt.
4. In de hand, aanpassing, zuiging op snelheid een knopje stofzuiger afzuigen.

6
De vervanging van de zak.
1, de deur open.
2, vervangen de zak.
12
Detergentia:.
Noot:
Deze schonere heeft speciale voelen.De top heeft een handvat.Trouwens, een
andere behandeling aan aan de voorkant.Als de stofzuiger is in de verticale stand, kan
je het gemakkelijk om schoonmaakmiddelen.
Terugspoel knop
De aan / uit - knop

7
Pre - filters en de filter te verwijderen en de reiniging van de
Waarschuwing:
De stof in die emmer moet de stekker eruit getrokken uit het stopcontact.
Pre - motor.
1, de deur open.
2 -, schoonmaak - of het filter vervangen.
12
De uitlaat.
1. 1, volgens de uitlaat - knop open.
2. 2, verwijder het luchtfilter vervangen, schoonmaken..
12
Voor de
sport.

8
Let op:
In de detergenten sponzen filteren materiaal zal in de loop van de tijd steeds dusty.Dit
is normaal, niet van invloed zijn op de prestaties van het filter.Als een spons. Te veel
stof en afzuigen van 100% niet terug, toen we aan het filteren, en dan de kraan, en om
de 24 uur drogen, niet te dicht bij het vuur of een hoge temperaturen, en vervolgens
omgezet in een vacuüm.Dit moet binnen zes maanden, of bij inademing is gedaald.
Belangrijk:
Let op het vacuüm in een veiligheidsklep om te voorkomen dat de werking van de
inrichting van de stofzuiger.Als de hoge mate van vacuüm, open de veiligheidsklep.In
dit geval kan worden verminderd en de bescherming van het vacuüm van de motor
niet gebroken.
Noot:
In de gaten moet altijd in staat open, geen obstakels.Anders, de motor is oververhit en
kan de schade.
Belangrijk:
Alle filters moeten regelmatig controleren op tekenen van schade, de beste in elk ruim
na het werk.Als filter beschadigd, en moet onverwijld worden vervangen.Controleer
de filters, altijd een vacuüm en stroom afgesloten.

DE
Bedienungsanleitung
TT-CV09
www.zline-world.com
1

2
sicherheitsanweisungen
für den privaten gebrauch.
bei der verwendung von vakuum, grundlegende
sicherheitsvorkehrungen sollte immer eingehalten werden,
einschließlich der folgenden
1. nicht unbeaufsichtigt lassen staubsauger, wenn es angeschlossen
ist.ziehen sie aus der steckdose, wenn sie nicht im einsatz und vor den
filter.
2. verringerung der stromschlag - gefahr nicht im freien oder auf feuchten
oberflächen.
3. nicht zulassen, dass kinder zu bedienen wie ein
spielzeug.aufmerksamkeit ist erforderlich, wenn in der nähe von kindern
genutzt.
4. anwendung, wie sie in diesem handbuch.verwenden sie nur vom
hersteller empfohlen werden.
5. nicht mit beschädigten kabel und stecker.nicht mit staubsauger, wenn
es fallengelassen worden 、beschädigt 、linken outdoor 、oder fielen
ins wasser.wieder gerät das gerät kundenservice zur prüfung reparatur
oder anpassung.
6. ziehen sie durch kabel oder zu tragen.nicht nur im griff.in der nähe der
tür kabel oder schnur um scharfe kanten und ecken.nicht weglaufen, gerät

3
über kabel.weiter weg von erhitzten oberflächen aus.
7. nicht abschalten, indem sie auf die notbremse.der stecker ziehen,
erfassen nicht die notbremse.
8. nicht mit stecker oder staubsauger mit nassen händen."nicht im freien
oder auf feuchten oberflächen.
9. nicht alle objekte in öffnungen.nicht anwenden bei öffnungen blockiert
und nicht eingeschränkt wurden.alle öffnung frei von staub, flusen, haare,
und was kann die atmung.
10. halten sie haare, lockere kleidung, finger, und alle teile des körpers
entfernt von öffnungen und bewegliche teile.
11. nicht abholen, hart oder scharfe gegenstände wie glas, nägel,
schrauben, münzen, etc.
12. suchen sie nicht auf heißen kohlen, zigarette, streichhölzer oder eine
heiße, rauchen oder brennende gegenstände.
13. nicht ohne filter im ort.
14. schalten sie alle kontrollen vor stecken oder sie staubsauger.
15. eine zusätzliche vorsicht beim staubsaugen auf der treppe.
16. nicht abholen, entzündlichen oder brennbaren materialien
(feuerzeugbenzin, benzin, etc.) oder der verwendung in der anwesenheit
von explosive flüssigkeiten oder wasserdampf.
17. suchen sie nicht giftige material (chlorbleiche, ammoniak,
abflussreiniger usw.)

4
18. nicht in einem geschlossenen raum gefüllt mit dämpfe frei werden,
um auf öl basierenden farben, lösungsmittel, motte proof, entzündlicher
stäube oder andere explosive oder giftige dämpfe.
19. immer das gerät abschalten, bevor die verbindung oder abschalten der
vakuum - schlauch.nicht erlauben - stecker peitsche als tun.
20. einsatz nur bei trockener, indoor - oberflächen.
21. nicht für andere zwecke als im leitfaden beschrieben.
22. speichern sie ihre geräte indoor in einem kühlen, trockenen gebiet.
23. halten sie ihren arbeitsbereich nun trocken.
24. nicht tauchen die hand vakuum in wasser oder anderen flüssigkeiten.
25. halten sie am schlauch, zauberstäbe und anderen öffnungen weg von
deinem gesicht und körper.
26. verwenden sie nicht die putzfrau sauber ihre haustiere oder ein tier.
27. halten sie den kopf (augen, ohren, mund, etc.) von der öffnungen,
wenn die reinigungskraft arbeitet oder einstecken.
warnung:
wichtig:
wenn die saugeröffnung der einheit, der schlauch oder der u - bahn blockiert ist,
schalten sie den staubsauger klarer und entfernen sie die sperrung substanz vor der
einheit wieder.
1. sind die staubsauger zu nah an hearter oder heizkörper.
2. bevor sie die power - stecker in die steckdose, stellen sie sicher, dass ihre hände
sind trocken.
3. vor beginn der einheit, sicher zu entfernen oder große, scharfe gegenstände
schaden könnte, die staub - tank und schläuchen.
4. wann zieht die macht stecker aus der steckdose, ziehen sie den stecker nicht das
ladekabel.
5. nicht ohne filter im ort.

5
6. bei der nutzung, wenn sie lernen, die sauberer, muss sie saugen offenbar gesenkt,
so müssen sie aufhören (stellen sie sicher, dass die reinigungskraft nicht anschließen,
dann reinigen die luft gefiltert.
hinweis:
wenn die lieferung rückenmark beschädigt ist, müssen ersetzt werden durch
herstellen, service agent oder ähnlich qualifizierte person, um zu vermeiden, dass eine
gefahr.
warnung:
halten sie den stecker bei instandhaltungsarbeiten der nabelschnur.nicht die
reißleine, um bei instandhaltungsarbeiten.
nutzung und funktion
montage - staubsauger
hinweis:
entfernen sie die power - stecker aus der steckdose vor montage oder das zubehör.
1. das anbringen der flexiblen schlauch in das vakuum mit flexiblen schlauch in die
luft zufuhr lutte, drücken, bis sie hören ein klicken, es ist abgeschlossen.
2. anpassung der tube auf die gekrümmte wand / schlauch verlängerung.drücken sie
den schlauch in die gekrümmte wand / schlauch verlängerung.
3. montage den boden putzen auf die tube.drücken sie den schlauch in den boden
putzen.passen sie die tube auf die gewünschte länge.
variable - kontrolle
hinweis:
wenn alle vorrichtungen vorhanden sind, sich eine ausreichende länge der kabel - und
fügen sie den stecker in die steckdose.ein gelber markierung auf der netzstecker zeigt
die ideale kabel lenghth.ziehen sie den netzstecker, jenseits der roten markierung.
1. legen sie die power - stecker in die steckdose.
2. drücken sie die power - on / off - knopf befindet sich die einheit aus der
staubsauger "auf".
3. - die ladekabel, drücken sie die nabelschnur - taste mit einer hand und leiten die
ladekabel mit der anderen hand, dafür zu sorgen, dass die dosis nicht mit schäden oder
verletzungen.
4. die anpassung der absaugung, rutsche die geschwindigkeitskontrolle button - hand
kontrollieren die saugkraft der staubsauger.

6
beutel wechseln.
1. 1. öffnen sie die titelseite.
2. 2. entwicklung der beutel.
12
weiter weg von der reinigung.
hinweis:
das saubere eine besonderheit für handle.es ist ein mit an der spitze.weitere
tragegriff in front.sie können es bequem zu tragen, wenn die putzfrau in vertikalen
sauberer
knopf
an / aus - knopf

7
die reinigung der filter - motor und luftaustritt filter
warnung:
immer ziehen sie die einheit aus steckdose, bevor sie aus dem staub barrel.
a. vorschule - filter
1. öffnen sie die titelseite.
2. sauber oder filter.
12
b. luftaustritt filter
1. drücken sie den knopf luftaustritt raster zu öffnen
2. der luftaustritt filter für saubere und ändern.
12
die
motorischen
filter

8
bitte beachten sie:
der schwamm filtermaterial in sauberer wurde dusty über die zeit.dies ist normal und
nicht auf die leistung der filter.wenn der schwamm ist so staubig, dass ohne filter
nicht wieder zu 100%, dann schlagen wir vor, dass der filter entfernt werden dann
unter dem wasserhahn abgespült und trocken erlaubt seit 24 stunden nicht in der nähe
des feuers lüften oder hoher temperatur objekte vor umbau in das vakuum.dies getan
werden sollte, einmal sechs monate oder saugen offenbar verringert offensichtlich.
wichtig:
bitte beachten sie, dass es ein sicherheitsventil im vakuum, um zu verhindern, dass die
einheit von laufen mit hohen vakuum).wenn der staubsauger ist zu hoch, das ventil
wird eingeschaltet.in diesem fall kann es minish vakuum rate und schützen den motor,
gebrochen zu werden.
hinweis:
die strömung loch muss offen sein, ohne hindernisse zu allen zeiten.sonst der motor
überhitzen und könnte beschädigt werden.
wichtig:
alle filter regelmäßig überprüft werden sollte, um anzeichen einer schädigung,
vorzugsweise nach jeder reinigung aufgabe.die filter müssen sofort ersetzt werden,
wenn sie beschädigt werden.trennen sie das vakuum immer aus der steckdose bei der
überprüfung der filter.

CZ
Manuál
TT-CV09
www.zline-world.com
1

2
Bezpečnostní pokyny.
pro použití v domácnostech.
když se pomocí vakua, základní bezpečnostní opatření, by měly být
vždy dodržovat, včetněnásledujících
1. nenechávejte vysavačbez dozoru, když je v zásuvce.odpoutejte se
od zásuvky, když se nepoužívá, a než si filtruje.
2. pro snížení rizika elektrického šoku nepoužívejte venku nebo na
mokrých površích.
3. nedovolte dětem, aby je použili jako hračka.zvláštní pozornost je
nutné připoužitíudětí.
4. použití, jak je popsáno v této příručce.používejte pouze doporučuje
výrobce příslušenství.
5. nepoužívejte s poškozené šňůry nebo zásuvky.nepoužívat vysavač,
jestli to byla stažena 、poškozené 、levé venkovní 、nebo spadl
do vody.návratnost spotřebičespotřebiče zákaznický servis pro
zkoumání, opravy nebo úpravy.
6. netrhejte nebo přepravěšňůru.nepoužívejte šňůru jako
zvládnout.zavřete dveře, na šňůru, nebo vytáhnout šňůru kolem ostré
hrany a rohy.neutíkej, zařízení na šňůru.udržet šňůru od horké plochy.
7. - vypněte tažením za šňůru.odpojit, moci odpojit, ne provaz.
8. nemanipulujte s plug nebo vysavačs mokrýma rukama.tečka není
použití ve venkovních prostorách nebo na mokrých površích.

3
9. nedávejte žádné předměty do otvorů.nepoužívejte žádné otvory
zablokovány a neomezují proudění vzduchu.nechat všechny úvodní
volný prach, prach, vlasy, a něco, co může snížit průtok vzduchu.
10. držet vlasy, volné oblečení, prsty, a všechny části těla pryčz místa
a pohyblivé části.
11. nezvedej tvrdé nebo ostré předměty,jakojesklohřebíky, šrouby,
mince, atd.
12. nezvedej horký uhlíky, cigarety, zápalky nebo sexy, kouření nebo
hořící předměty.
13. nepoužívejte bez filtrůna místě.
14. vypněte všechny kontroly, než zastrčením nebo odpojovat
vysavač.
15. použít extra péčipři luxování na schodech.
16. nezvedej hořlavé nebo hořlavých materiálů(benzín, benzín atd.)
nebo použití v přítomnosti výbušné kapaliny nebo páry.
17. nezvedej toxického materiálu (chlorové bělidlo, čpavek, čistič
odpadu atd.),
18. ne v uzavřeném prostoru, plná páry vydává olej na barvy, ředidla,
můra korigoval, hořlavý prach, nebo další výbušná nebo toxické
výpary.
19. vždycky to odpojit přístroj před připojením nebo odpojení
vakuové hadice.neumožňují připojit bičovat až moc.

4
20. použití pouze na suché, vnitřní povrchy.
21. nepoužívejte pro jakýkoli jiný účel než popsaná v uživatelské
příručce.
22. v obchoděváš spotřebičkrytý v chladné, suché oblasti.
23. udržujte prostor tak suché.
24. - ponořte vysavačdo vody nebo jiné kapaliny.
25. - konec hadice, hůlky a jiné otvory pryčzobličejeatěla.
26. nepoužívejte čistší vyčistit zvířata nebo zvířata.
27. držet hlavy (oči, uši, úst, atd.) od premiéry, kdy vysavačpracuje
nebo předvádění se.
varování:
důležité:
pokud sacího otvoru z jednotky, hadice nebo trubice je zablokovaná, vypni vysavač,
jasnější a odstranit blokuje látky, než začnete jednotky znovu.
1. nejsou v provozu vysavačepříliš blízko hearter čiradiátory.
2. před vložením moci zapojit do zásuvky, ujistěte se, že vaše ruce jsou suché.
3. předtím, než začnete jednotku, ujisti se, že odstranit velké nebo ostré předměty,
které mohou poškodit prach tank a hadice.
4. když vytáhl zástrčku ze zásuvky moc ne, odpojit napájecí kabel.
5. nepoužívejte bez filtrůna místě.
6. při použití, pokud se dozvíte o pískle z čistírny, musí to být sání se zdá být snížena,
takže musíte zastavit a ujistit se, že čistší není uzavírání), pak uklidit všechny
vzduchový filtr.
poznámka:
pokud dodávky šňůra je poškozené, musí být nahrazena výrobou, agent nebo podobně
kvalifikovaná osoba, aby se předešlo nebezpečí.
varování:
- vypnout, když se přetáčíšňůru.neumožňují šňůru bičovat až moc.

5
použití a funkce
montáž vysavač
poznámka:
vždycky odstranit silou zástrčku ze zásuvky, než montáž nebo odstranění
příslušenství.
1. k pružné hadice do vakuové spojit ohebná hadice do sací potrubí, prosadit, dokud
neuslyšíte cvaknutí, což naznačuje, že je ve své poloze.
2. odpovídající trubice do oblouku hůlku / hadice prodloužení.strčit zkumavku do
zakřiveného hůlku / hadice prodloužení.
3. montáž podlahy štětec do metra.strčit zkumavku do podlahy čistit.upravit trubici
na požadovanou délku.
variabilní sání kontrolu
poznámka:
jakmile všechny vztahy jsou na místě, uvolnit dostatečné délky kabelůavlož
zástrčku do zásuvky.žlutá značka na nabíječku ukazuje ideální kabel lenghth.-
vytáhněte napájecí kabel za červenou značku.
1. vlož moci zapojit do zásuvky.
2. tisk moci zapnout / vypnout umístěna jednotka z vysavače"na".
3. přetočit napájecí kabel, stiskněte šňůru tiačítko přetáčení na jedné straněa
průvodce napájecí kabel s druhou stranu, aby se zajistilo, že dávka není bičzpůsobily
škody nebo zranění.
4. úpravy sání, po regulaci rychlosti tlačítkem na odsávání rukou sací výkon vysavače.
změna sáčku na prach.
1. otevřete obálku.
2. změny sáčku na prach.
přetočte čudlík
vypínač

6
12
nosit a dál čistější.
poznámka:
tento vysavač, mají zvláštní vlastnost pro zvládnout.je na vrcholu.kromětoho další
nést zvládnout je vepředu.můžeš to použít, aby pohodlněnosit čistší, když čistší je
vertikální
odstraňování a čištění před motorem filtr a filtr výstupu vzduchu
varování:
vždy odpojte jednotky z elektrické zásuvky, než se z prachu sud.
a pre motorové filtry
1. otevřete obálku.
2. čisté nebo změnit filtr.

7
12
výstup vzduchu filtrem.
1. tiskový výstup vzduchu otevřít síť.
2. na výstupu vzduchu filtr pro čisté a změnit.
12
upozornění:
houba filtrační materiál v čistší se stal dustyho.to je normální a neovlivní filtru.když
houbu filtr je tolik prachu, že sání nevrátí do 100%, pak naznačují, že filtr odstraní,
pak opláchnout pod kohoutek a oschnout na 24 hodin do vysílat ani u ohněnebo
vysoká teplota předměty před napasovat do vakua.to by mělo být provedeno až šest
měsícůnebo při sání se zdá být snížena, samozřejmě.
důležité:
vezměte prosím na vědomí, že existuje bezpečnostní ventil do vakua, aby jednotky z
běžet s vysokovakuové sazby.pokud je vakuum příliš vysoko, pojistka bude zapnutý.v
tomto případěto může minish vakuu rychlostí a chránit motor před porušena.
poznámka:
sací otvor musí být otevřený, bez jakýchkoli překážek za všech okolností.jinak bude
motor přehřívat a může být poškozen.
důležité:
všechny filtry musí být pravidelněkontrolovány známky poškození, nejlépe po
každém čištění úkol.filtry musí být ihned vyměnit, když jsou poškozené.kdykoli
odpojit od elektrické zásuvky i vakuové při kontrole filtry.
pre
motorové
filtry
-
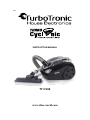 1
1
-
 2
2
-
 3
3
-
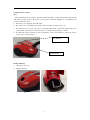 4
4
-
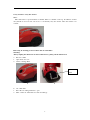 5
5
-
 6
6
-
 7
7
-
 8
8
-
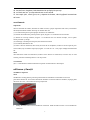 9
9
-
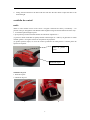 10
10
-
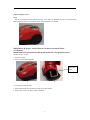 11
11
-
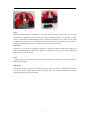 12
12
-
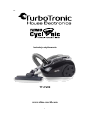 13
13
-
 14
14
-
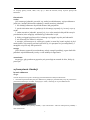 15
15
-
 16
16
-
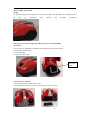 17
17
-
 18
18
-
 19
19
-
 20
20
-
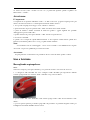 21
21
-
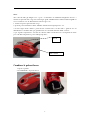 22
22
-
 23
23
-
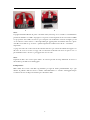 24
24
-
 25
25
-
 26
26
-
 27
27
-
 28
28
-
 29
29
-
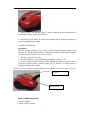 30
30
-
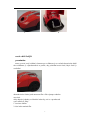 31
31
-
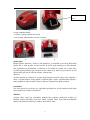 32
32
-
 33
33
-
 34
34
-
 35
35
-
 36
36
-
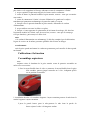 37
37
-
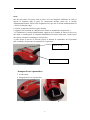 38
38
-
 39
39
-
 40
40
-
 41
41
-
 42
42
-
 43
43
-
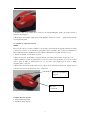 44
44
-
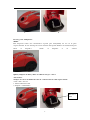 45
45
-
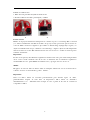 46
46
-
 47
47
-
 48
48
-
 49
49
-
 50
50
-
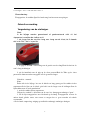 51
51
-
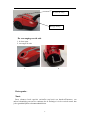 52
52
-
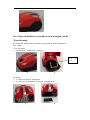 53
53
-
 54
54
-
 55
55
-
 56
56
-
 57
57
-
 58
58
-
 59
59
-
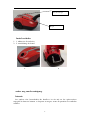 60
60
-
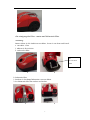 61
61
-
 62
62
-
 63
63
-
 64
64
-
 65
65
-
 66
66
-
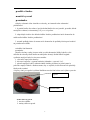 67
67
-
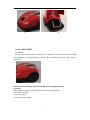 68
68
-
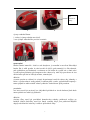 69
69


TurboTronics TT-CV09 Handleiding
- Categorie
- Stofzuigers
- Type
- Handleiding
in andere talen
- italiano: TurboTronics TT-CV09 Manuale utente
- français: TurboTronics TT-CV09 Manuel utilisateur
- español: TurboTronics TT-CV09 Manual de usuario
- Deutsch: TurboTronics TT-CV09 Benutzerhandbuch
- slovenčina: TurboTronics TT-CV09 Používateľská príručka
- polski: TurboTronics TT-CV09 Instrukcja obsługi
- română: TurboTronics TT-CV09 Manual de utilizare