Hieronder vindt u beknopte informatie voor OBD2 Scanner SP50. De STREX OBD2 Scanner is een hulpmiddel dat wordt gebruikt om diagnostische foutcodes (DTC's) op te halen en te diagnosticeren vanuit het computersysteem van een voertuig. De scanner communiceert met de boordcomputer van het voertuig om informatie op te halen over de motor-, transmissie- en emissiesystemen. Het kan ook worden gebruikt om DTC's te wissen nadat een probleem is opgelost en om de prestaties en emissies van het voertuig in de loop van de tijd te monitoren.
Hieronder vindt u beknopte informatie voor OBD2 Scanner SP50. De STREX OBD2 Scanner is een hulpmiddel dat wordt gebruikt om diagnostische foutcodes (DTC's) op te halen en te diagnosticeren vanuit het computersysteem van een voertuig. De scanner communiceert met de boordcomputer van het voertuig om informatie op te halen over de motor-, transmissie- en emissiesystemen. Het kan ook worden gebruikt om DTC's te wissen nadat een probleem is opgelost en om de prestaties en emissies van het voertuig in de loop van de tijd te monitoren.


-
 1
1
-
2
-
3
-
4
-
5
-
6
-
7
-
8
-
9
-
10
-
11
-
12
-
13
-
14
-
15
-
16
-
17
-
18
-
19
-
20
-
21
-
22
-
23
-
24
-
25
-
26
-
27
-
28
-
29
-
30
-
31
-
32
-
33
-
34
-
35
-
36
-
37
-
38
-
39
-
40
-
41
-
42
-
43
-
44
-
45
-
46
-
47
-
48
-
49
-
50
-
51
-
52
-
53
-
54
-
55
-
56
-
57
-
58
-
59
-
60
-
61
-
62
-
63
-
64
-
65
-
66
-
67
-
68
-
69
-
70
-
71
-
72
-
73
-
74
Hieronder vindt u beknopte informatie voor OBD2 Scanner SP50. De STREX OBD2 Scanner is een hulpmiddel dat wordt gebruikt om diagnostische foutcodes (DTC's) op te halen en te diagnosticeren vanuit het computersysteem van een voertuig. De scanner communiceert met de boordcomputer van het voertuig om informatie op te halen over de motor-, transmissie- en emissiesystemen. Het kan ook worden gebruikt om DTC's te wissen nadat een probleem is opgelost en om de prestaties en emissies van het voertuig in de loop van de tijd te monitoren.
in andere talen
- English: STREX OBD2 User manual
Andere documenten
-
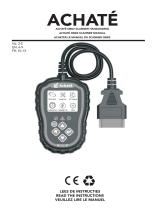 ACHAT OBD2 Handleiding
-
Perel AOBD2 Handleiding
-
VDO CONTISYS OBD Handleiding
-
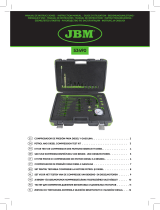 JBM 53490 Gebruikershandleiding
-
 iCarsoft POR V1.0 Handleiding
-
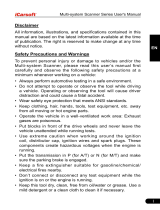 iCarsoft Multi-system Scanner i902 Handleiding
-
ANCEL 13 Handleiding
-
Draper Diagnostic Multi-Service Tool Handleiding
-
Norauto BT36044 Handleiding
-
Bahco BELMS12OBDL Handleiding


