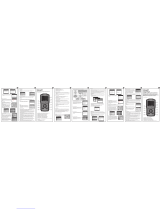
Pagina wordt geladen...

ACHATÉ OBD2 SCANNER HANDLEIDING
ACHATÉ OBD2 SCANNER MANUAL
ACHETER LE MANUEL DU SCANNER OBD2
NL: 2-5
EN: 6-9
FR: 10-13

2 3
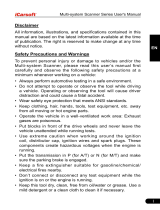
ALGEMENE INFORMATIE:
De Achaté OBD2 scanner wordt gebruikt om motors van bijna alle
auto’s te controleren die obd 2 ondersteunen. Bij de meeste auto’s zit
de dlc-stekker aan de kant van de bestuurder.
1. PRODUCTINFORMATIE
1.1 PRODUCTSPECIFICATIES
Werkspanning 8v-25v
Werking stroom 52ma
Gebruikstemperatuur -20°C - 70°C
Opslagtemperatuur -30°C - 80°C
Lcd-scherm 2,4” TFT-kleurenscherm
Afmetingen 132mm x 85mm x 22mm
Ondersteund data stream type 249
Foutcode analysenummer 16929
1.2 BESCHRIJVING VAN HET APPARAAT
1. Lcd-display
2. Rood lampje : wijst op een probleem met de motor.
3. Geel lampje: wijst op een mogelijk probleem. sommige diagnoses konden niet worden
Uitgevoerd en/of er is een DTC in behandeling.
4. Groen licht: wijst op een correcte werking van de motor, geen diagnostische foutcode.
5. Fn-toets
6. Terug- of uitgangstoets
7. OBD 2 CONNECTOR
8. Omhoog-toets
9. Enter-toets
10. Omlaag-toets

4 5
4. DTC ZOEKEN
Er zijn 16929 DTC gegevens in
de database, voer dec DTC in
en druk op de center knop.
Toont gedetailleerde foutcode
voor onderhoud.
5. CRANKING TEST
1. Selecteer “cranking test” en druk op de enter toets om de
cranking test te starten.
2. Start de motor wanneer daarom wordt gevraagd, de tester
zal automatisch afronden en het resultaat weergeven.
3. Wanneer het toerental wordt gedetecteerd, verschijnt dit op
het scherm.
4. Normaal is de aanloopspanning waarde lager dan 9.6v
5. Het testresultaat van de tester zal het actuele aanloopvolt-
age en de actuele aanloopduur bevatten.
6. Dit is voor het gemak van de onderhoudspersoon om snel de
gehele staat van het cranking systeem volgens de gegevens
te kennen
6. LAADTEST
1. Selecteer “laadtest” en druk op de enter toets om te starten.
2. Opmerking: Zet de motor niet uit tijdens de test. Volg de
stappen volgens de instructies op het scherm
3. Na aoop van de test toont de tester de geladen en onbe-
laste laadspanningen, de rimpelspanning en het resultaat van
de laadtest.
4. Opmerking: “NO OUTPUT” betekent dat het laadsysteem
geen output geeft. Het voertuig zal ophouden met werken
wanneer de batterij uitgeput is. gelieve de alternator te
controleren of onmiddellijk het onderhoudsdienstcentrum te
contacteren
1.3 FUNCTIEBESCHRIJVING
1. Dual-system diagnostic, motor en transmission.
2. Geeft snel motorstoringen aan met verschillende lichtsignalen.
3. Om foutcodes te lezen of te wissen, kunnen er 16929 verschillende diagnostic fout codes
worden opgezocht.
4. Dynamische weergave van sensor data informatie, met ondersteuning van 249 soorten
sensoren.
5. Bekijk freeze frame data en I/M status informatie.
6. Lees verschillende voertuiginformatie: vehicle identication number (vin),
calibration identication numbers(ids), calibration verication number(cvns).
7. Test het start- en laadsysteem van het voertuig
8. Meertalig
2. HOOFDINSTELLINGEN
2.1 CONFIGURATIE
1. Taal: de fabrieksinstelling is engels, andere talen kunnen
handmatig worden geselecteerd.
2. Meeteenheid: ondersteunt metrische en imperiale eenheden,
fabrieksinstelling is metrisch.
3. Fn toets instellen: stel een fn toets in als één-klik sneltest voor
de volgende opties: “Gebruikelijke gegevens”,
“alle gegevens”, “I/M betrouwbaarheid”, “Lees codes”.
3. DIAGNOSE
3.1 DUAL-SYSTEEM SELECTIE
Ga de hoofdinterface in, klik op de enter knop om te starten met
de auto te scannen met het (DLC) systeem. Wanneer er meerd-
ere systemen worden gedetecteerd, Komt er eerst een lijst met
systemen waar je een diagnose op uit kan voeren.
$ 7e8: engine. staat voor het Motorsysteem
$ 7e9: a/t. staat voor het transmissiesysteem
3.2 DIAGNOSE MENU
1. Lees codes: lees de diagnostische code (DTC) in het motor- of transmissiesysteem
2. Codes wissen: wis alle DTC’s in het systeem.
3. Gegevensstroom: lees en toon alle gesteunde sensorgegevens.
I/M readiness: deze functie wordt gebruikt om de status van het emissiesysteem van een obd 2
voertuig te controleren.
Sommige nieuwe voertuigmodellen kunnen twee types I/M I/M readiness ondersteunen:
A. Geeft de status van de motor aan wanneer de DTC’s worden gewist
B. Wijst op status van motor sinds het begin van de huidige rijcyclus
“OK“ = diagnose test voltooid
“INC“ = diagnose test niet voltooid
“N/A” = niet ondersteund
Voertuig informatie:
Review vehicle identication number (vin)
Calibration identication number (ids)
Calibration verication number (cvns)

6 7
GENERAL INFORMATION:
The Achaté OBD2 scanner is used to check engines of almost all
cars that support obd 2. On most cars, the dlc connector is on the
driver’s side.
1. PRODUCT INFORMATION
1.1 PRODUCT SPECIFICATIONS
Working voltage 8v-25v
Operation current 52ma
Operating temperature -20°C - 70°C
Storage temperature -30°C - 80°C
LCD display 2,4” TFT-color screen
Dimensions 132mm x 85mm x 22mm
Supported data stream type 249
Error code analysis number 16929
1.2 DESCRIPTION OF THE DEVICE
1. LCD display
2. Red light : indicates a problem with the engine.
3. Yellow light : indicates a possible problem. some diagnostics could not be Performed and/or
a DTC is pending.
4. Green light : indicates correct operation of the engine, no diagnostic error code.
5. Fn key
6. Return or Exit key
7. OBD 2 CONNECTOR
8. Up Key
9. Enter Key
10. Down key

8 9
4. DTC LOOKUP
There are 16929 DTC data in
the database, enter dec DTC
and press the center button.
Displays detailed error code for
maintenance.
5. CRANKING TEST
1. Select “cranking test” and press the enter key to start the
cranking test.
2. Start the engine when prompted, the tester will automatically
complete and display the result.
3. When the RPM is detected, it will appear on the screen.
4. Normally the cranking voltage value is lower than 9.6v
5. The test result of the tester will contain the current starting
voltage and the current starting time.
6. This is for the convenience of the maintenance person to
quickly know the whole state of the cranking system accord-
ing to the data
6. CHARGING TEST
1. Select “load test” and press the enter key to start.
2. Note: Do not turn off the engine during the test. Follow the
steps according to the instructions on the screen
3. Upon completion of the test, the tester will display the
charged and uncharged charge voltages, ripple voltage and
the result of the charge test.
4. Note: “NO OUTPUT” means that the charging system is not
giving any output. The vehicle will stop working when the
battery is exhausted. please check the alternator or contact
the maintenance service center immediately
1.3 FUNCTION DESCRIPTION
1. Dual-system diagnostic, engine and transmission.
2. Quickly indicates engine faults with various light signals.
3. To read or clear fault codes, 16929 different diagnostic fault codes can be looked up.
4. Dynamic display of sensor data information, supporting 249 types of sensors.
5. View freeze frame data and I/M status information.
6. Read various vehicle information: vehicle identication number (vin), calibration identication
numbers(ids), calibration verication number(cvns).
7. Test the vehicle’s starting and loading system
8. Multilingual
2. MAIN SETTINGS
2.1 CONFIGURATION
1. Language: factory setting is english, other languages can be
selected manually.
2. Measurement unit: supports metric and imperial units, factory
setting is metric.
3. Set fn key: set fn key as one-click quick test for the follow-
ing options: “Usual data”, “All data”, “I/M reliability”, “Read
codes”.
3. DIAGNOSTIC
3.1 DUAL-SYSTEM SELECTION
Enter the main interface, click the enter button to start scanning
the car with the (DLC) system. If multiple systems are detected,
First comes a list of systems that you can run a diagnostic on.
$ 7e8: engine. stands for the Engine System
$ 7e9: a/t. represents the transmission system
3.2 DIAGNOSTIC MENU
1. Read codes: read the diagnostic code (DTC) in the engine or transmission system
2. Clear codes: clear all DTCs in the system.
3. Data ow: read and display all supported sensor data.
I/M readiness: this function is used to check the status of the emission system of an obd 2
vehicle.
Some new vehicle models may support two types of I/M I/M readiness:
A. Indicates the status of the engine when the DTCs are cleared
B. Indicates status of engine since the beginning of the current driving cycle
“OK” = diagnostic test completed
“INC” = diagnostic test not completed
“N/A” = not supported
Vehicle Information:
Review vehicle identication number (vin)
Calibration identication number (ids)
Calibration verication number (cvns)

10 11
INFORMATIONS GÉNÉRALES:
Le scanner OBD2 Achaté est utilisé pour vérier les moteurs de pr-
esque toutes les voitures qui supportent l’OBD2.
voitures qui supportent l’OBD2. Sur la plupart des voitures, le connect-
eur dlc se trouve du
côté du conducteur.
1. INFORMATIONS SUR LE PRODUIT
1.1 SPÉCIFICATIONS DU PRODUIT
Tension de fonctionnement 8v-25v
Courant de fonctionnement 52ma
Température de fonctionnement -20°C - 70°C
Température de stockage -30°C - 80°C
Afchage LCD 2,4” TFT-color screen
Mesures 132mm x 85mm x 22mm
Type de ux de données pris en charge 249
Numéro d’analyse du code d’erreur 16929
1.2 DESCRIPTION DE L’APPAREIL
1. Afchage LCD
2. Lumière rouge : indique un problème avec le moteur.
3. Lumière jaune : indique un problème possible. Certains diagnostics n’ont pas pu être effec-
tués et/ou un DTC est en attente.
4. Voyant vert : indique un fonctionnement correct du moteur, aucun code d’erreur de diagnos-
tic.
5. Touche Fn
6. Touche de retour ou de sortie
7. CONNECTEUR OBD 2
8. Touche Haut
9. Touche Entrée
10. Touche bas

12 13
Informations sur le véhicule:
Review vehicle identication number (vin) Calibration identication number (ids)
Calibration verication number (cvns)
4. RECHERCHE DE DTC
Il y a 16929 données DTC dans
la base de données, entrez dec
DTC et appuyez sur le bouton
central.
Afche le code d’erreur détaillé
pour la maintenance.
5. ESSAI DE DÉMARRAGE
1. Sélectionnez “test de démarrage” et appuyez sur la touche
Entrée pour lancer le test de démarrage.
2. Démarrez le moteur lorsque vous y êtes invité, le testeur se
termine automatiquement et afche le résultat.
3. Lorsque le RPM est détecté, il s’afche à l’écran.
4. Normalement, la valeur de la tension de démarrage est in-
férieure à 9,6 V.
5. Le résultat du test du testeur contient la tension de démar-
rage actuelle et le temps de démarrage actuel.
6. Cela permet à la personne chargée de l’entretien de con-
naître rapidement l’état complet du système de démarrage
en fonction des données.
6. TEST DE CHARGE
1. Sélectionnez “test de charge” et appuyez sur la touche En-
trée pour démarrer.
2. Note : Ne coupez pas le moteur pendant le test. Suivez les
étapes selon les instructions afchées à l’écran.
3. Une fois le test terminé, le testeur afche les tensions de
charge chargées et non chargées, la tension d’ondulation et
le résultat du test de charge.
4. Note : “NO OUTPUT” signie que le système de charge ne
donne aucune sortie. Le véhicule s’arrête de fonctionner
lorsque la batterie est épuisée. Veuillez vérier l’alternateur
ou contacter le centre de service d’entretien immédiatement.
1.3 DESCRIPTION DE LA FONCTION
1. Diagnostic à double système, moteur et transmission.
2. Indique rapidement les défauts du moteur à l’aide de divers signaux lumineux.
3. Pour lire ou effacer les codes d’erreur, 16929 codes d’erreur de diagnostic différents peu-
vent être consultés.
4. Afchage dynamique des informations sur les données des capteurs, prenant en charge 249
types de capteurs.
5. Afchage des données d’arrêt sur image et des informations sur l’état I/M.
6. Lecture de diverses informations sur le véhicule : numéro d’identication du véhicule (vin),
numéros d’identication d’étalonnage (ids), numéros de vérication d’étalonnage (cvns).
7. Testez le système de démarrage et de chargement du véhicule
8. Multilingue
2. PARAMÈTRES PRINCIPAUX
2.1 CONFIGURATION
1. Langue : le réglage d’usine est l’anglais, les autres langues
peuvent être sélectionnées manuellement.
2. Unité de mesure : supporte les unités métriques et impériales,
le réglage d’usine est métrique.
3. Dénir la touche fn : dénit la touche fn comme un test rapide
en un clic pour les options suivantes : “Données habituelles”,
“Toutes les données”, “Fiabilité I/M”, “Codes de lecture”.
3. DIAGNOSTIC
3.1 CHOIX DU DOUBLE SYSTÈME
Entrez dans l’interface principale, cliquez sur le bouton d’entrée
pour commencer à scanner la voiture avec le système (DLC). Si
plusieurs systèmes sont détectés, une liste des systèmes sur
lesquels vous pouvez effectuer un diagnostic apparaît d’abord.
$ 7e8 : engine. représente le système moteur
$ 7e9 : a/t. représente le système de transmission
3.2 MENU DE DIAGNOSTIC
Lire les codes : lire le code de diagnostic (DTC) dans le moteur ou le système de transmission.
Effacer les codes : efface tous les DTCs dans le système.
Flux de données : lire et afcher toutes les données de capteur prises en charge.
Préparation I/M : cette fonction est utilisée pour vérier l’état du système d’émission d’un
véhicule obd 2
d’un véhicule.
Certains nouveaux modèles de véhicules peuvent prendre en charge deux types d’état de
préparation I/M :
A. Indique l’état du moteur lorsque les DTC sont effacés.
B. Indique l’état du moteur depuis le début du cycle de conduite actuel.
“OK” = test de diagnostic terminé
“INC” = test de diagnostic non terminé
“N/A” = non pris en charge
1/7