
Über den Link
http://www.medion.com/lifecloud/
können Sie die erforderlichen Apps für Ihr
Apple/Android Endgerät herunterladen.
MSN 2005 9952
Netzwerkfestplatte/NAS
mit zwei integrierten Festplatten 2 x 6 TB (2 x 6000 GB)
MEDION
®
LifeCloud
®
X88300 (MD 90245)
Bedienungsanleitung
Handleiding
Mode d‘emploi
Instruction Manual
Network hard drive/NAS
Disque dur résau/NAS
Netwerkschijf/NAS
Via the link
http://www.medion.com/lifecloud/ you
can download the required apps for your
Apple/Android device.
Vous pouvez télécharger les applications
nécessaires pour votre terminal Apple/
Android sous le lien
http://www.medion.com/lifecloud/.
Via de koppeling
http://www.medion.com/lifecloud/ kunt
u de vereiste apps voor uw Apple/Andro-
id-eindapparaat downloaden.
90245 50049999 DE EN FR NL eCommerce Cover RC1.indd 190245 50049999 DE EN FR NL eCommerce Cover RC1.indd 1 10.04.2015 09:02:2210.04.2015 09:02:22

1 von 218
DE
FR
NL
GPL
EN
Inhaltverzeichnis
1. Hinweise zu dieser Anleitung ...........................................................3
1.1. In dieser Anleitung verwendete Warnsymbole und
Signalwörter ............................................................................................... 3
2. Bestimmungsgemäßer Gebrauch ....................................................4
3. Sicherheitshinweise ...........................................................................5
3.1. Elektrische Geräte nicht in Kinderhände .......................................... 5
3.2. Allgemeines ................................................................................................ 5
3.3. Aufstellort .................................................................................................... 6
3.4. Niemals selbst reparieren! ..................................................................... 7
3.5. Reinigung und Pflege.............................................................................. 7
3.6. Datensicherung ......................................................................................... 7
3.7. Stromversorgung ...................................................................................... 7
3.8. Hinweis zur elektrostatischen Aufladung ........................................ 8
3.9. Hinweise zur Konformität ...................................................................... 9
4. Allgemeines........................................................................................9
4.1. Unterstützte Systeme und Formate ................................................... 9
4.2. Einsatzmöglichkeiten des Lifecloud Systems ...............................10
4.3. Funktionsweise des Lifecloud Systems und der
mitgelieferten Komponenten ...........................................................................10
4.4. Ausstattung des Lifecloud Systems .................................................11
4.5. Systemvoraussetzungen ......................................................................11
5. Lieferumfang ................................................................................... 11
6. Geräteübersicht .............................................................................. 12
6.1. Gerätevorderseite und Rückseite ......................................................12
7. Über die Lifecloud .......................................................................... 13
8. Inbetriebnahme .............................................................................. 13
8.1. Anschluss an ein Netzwerk..................................................................13
9. Das Gerät ein- und ausschalten ..................................................... 14
10. Erstinbetriebnahme ....................................................................... 14
10.1. Konto für das Lifecloud System einrichten ....................................14
10.2. Bei Erstinbetriebnahme: Festplattenkonfiguration
festlegen ....................................................................................................18
11. Daten kopieren mit der OTC-Taste ................................................ 20
12. Die RESET-Taste ............................................................................... 20
12.1. Kennwort zurücksetzen ........................................................................20
12.2. System auf Standardeinstellungen zurücksetzen .......................23
90245 50049999 DE EN FR NL content RC1.indb 190245 50049999 DE EN FR NL content RC1.indb 1 13.04.2015 16:23:2313.04.2015 16:23:23

2 von 218
13. LifeCloud Agent verwenden .......................................................... 23
13.1. LifeCloud Agent installieren ...............................................................23
13.2. LifeCloud Desktop verwenden ..........................................................24
14. Das Web-Interface .......................................................................... 26
14.1. Web-Interface aufrufen ........................................................................26
14.2. Funktionen und Einstellungen des Web-Interface .....................26
15. Medienbibliothek ........................................................................... 27
15.1. Meine Ordner/Unsere Ordner ............................................................27
15.2. Neuen Ordner erstellen/Ordner löschen .......................................28
15.3. Kontextmenü für Ordner und Dateien öffnen .............................28
15.4. Alben ...........................................................................................................30
15.5. Dateien auf das Lifecloud System hochladen ..............................31
15.6. Einträge im Kontextmenü bei Mediendateien .............................31
16. Alben ................................................................................................ 32
17. Einstellungen .................................................................................. 33
17.1. Benutzereinstellungen .........................................................................33
17.2. Servereinstellungen ...............................................................................35
17.3. Administration .........................................................................................36
18. Verwenden der Life Cloud App auf Smart-Geräten ..................... 38
18.1. Hauptmenü ...............................................................................................38
18.2. Medienbibliothek Ansicht ...................................................................39
18.3. Alben Ansicht ...........................................................................................40
19. Memeo Backup verwenden ........................................................... 41
20. LifecloudDetect ausführen ............................................................ 42
20.1. Benötigen Sie weitere Unterstützung? ...........................................43
21. Reinigung ........................................................................................ 43
22. Entsorgung ...................................................................................... 44
23. Technische Daten ............................................................................ 45
24. Glossar ............................................................................................. 46
25. Impressum ....................................................................................... 50
90245 50049999 DE EN FR NL content RC1.indb 290245 50049999 DE EN FR NL content RC1.indb 2 13.04.2015 16:23:5013.04.2015 16:23:50

3 von 218
Hinweise zu dieser Anleitung
DE
FR
NL
GPL
EN
1. Hinweise zu dieser Anleitung
Lesen Sie vor der ersten Inbetriebnahme diese Bedie-
nungsanleitung gründlich durch und befolgen Sie vor al-
len Dingen die Sicherheitshinweise!
Alle Tätigkeiten an und mit diesem Gerät dürfen nur so-
weit ausgeführt werden, wie sie in dieser Bedienungsan-
leitung beschrieben sind.
Bewahren Sie diese Bedienungsanleitung für den weite-
ren Gebrauch auf. Falls Sie das Gerät weitergeben, händi-
gen Sie bitte auch diese Bedienungsanleitung aus.
1.1. In dieser Anleitung verwendete Warnsymbole
und Signalwörter
GEFAHR!
Warnung vor unmittelbarer Lebensgefahr!
WARNUNG!
Warnung vor möglicher Lebensgefahr und/oder
schweren irreversiblen Verletzungen!
VORSICHT!
Hinweise beachten, um Verletzungen und Sachschä-
den zu vermeiden!
ACHTUNG!
Hinweise beachten, um Sachschäden zu vermeiden!
HINWEIS!
Hinweise in der Bedienungsanleitung beachten!
HINWEIS!
Weiterführende Informationen für den Gebrauch
des Gerätes!
90245 50049999 DE EN FR NL content RC1.indb 390245 50049999 DE EN FR NL content RC1.indb 3 13.04.2015 16:23:5013.04.2015 16:23:50

4 von 218
Bestimmungsgemäßer Gebrauch
WARNUNG!
Warnung vor Gefahr durch elektrischen Schlag!
• Aufzählungspunkt / Information über Ereignisse während der
Bedienung
Auszuführende Handlungsanweisung
2. Bestimmungsgemäßer Gebrauch
Dieses Gerät dient zur Bereitstellung von Daten in einem Netz-
werk sowie zur Verwaltung von Audio-, Video- und Bilddateien
von Datenträgern, die direkt oder über ein Netzwerk mit dem
Gerät verbunden sind.
Das Lifecloud System ist ein Dateiserver. Ein Server ist ein Ge-
rät, das verwendet wird, um verschiedene Arten von Dateien
zu speichern und den Benutzern in einem lokalen Netzwerk zur
Verfügung zu stellen.
Der Server wird mit einer Software ausgeliefert, über die mehre-
re Benutzer ihre Dateien auf der eingebauten Festplatte sichern,
speichern, freigeben und schützen können.
Dieses Gerät ist nur für den Gebrauch in trockenen Innenräu-
men geeignet.
Dieses Gerät ist für den Privatgebrauch gedacht und nicht für in-
dustrielle oder kommerzielle Nutzung vorgesehen.
90245 50049999 DE EN FR NL content RC1.indb 490245 50049999 DE EN FR NL content RC1.indb 4 13.04.2015 16:23:5013.04.2015 16:23:50

5 von 218
Sicherheitshinweise
DE
FR
NL
GPL
EN
3. Sicherheitshinweise
3.1. Elektrische Geräte nicht in Kinderhände
• Dieses Gerät kann von Kindern ab 8 Jahren und darüber und
von Personen mit reduzierten physischen, sensorischen oder
mentalen Fähigkeiten oder Mangel an Erfahrung und/oder
Wissen benutzt werden, wenn sie beaufsichtigt oder bezüg-
lich des sicheren Gebrauchs des Gerätes unterwiesen wur-
den und die daraus resultierenden Gefahren verstanden ha-
ben. Kinder dürfen nicht mit dem Gerät spielen. Reinigung
und Benutzer-Wartung dürfen nicht durch Kinder durchge-
führt werden, es sei denn, sie sind 8 Jahre und älter und wer-
den beaufsichtigt;
• Kinder jünger als 8 Jahre sollen vom Gerät und der An-
schlussleitung ferngehalten werden.
• Lassen Sie Kinder niemals unbeaufsichtigt elektrische Geräte
benutzen.
GEFAHR!
Halten Sie das Verpackungsmaterial, wie z. B. Folien von
Kindern fern. Bei Missbrauch besteht Erstickungsgefahr.
3.2. Allgemeines
• Öffnen Sie niemals das Gehäuse des Gerätes oder des Netz-
adapters (elektrischer Schlag, Kurzschluss- und Brandgefahr)!
• Führen Sie keine Gegenstände durch die Schlitze und Öff-
nungen ins Innere des Geräts (elektrischer Schlag, Kurz-
schluss und Brandgefahr)!
• Schlitze und Öffnungen des Geräts dienen der Belüftung. De-
cken Sie diese Öffnungen nicht ab (Überhitzung, Brandgefahr)!
• Stellen Sie keine mit Flüssigkeit gefüllten Gefäße, wie z.B. Va-
sen, auf das Gerät, den Netzadapter oder in die nähere Um-
gebung und schützen Sie alle Teile vor Tropf- und Spritzwas-
ser. Das Gefäß kann umkippen und die Flüssigkeit kann die
elektrische Sicherheit beeinträchtigen.
90245 50049999 DE EN FR NL content RC1.indb 590245 50049999 DE EN FR NL content RC1.indb 5 13.04.2015 16:23:5113.04.2015 16:23:51

6 von 218
Sicherheitshinweise
• Ziehen Sie bei Beschädigungen des Steckers, der Anschlusslei-
tung oder des Gerätes sofort den Stecker aus der Steckdose.
• Warten Sie mit dem Anschluss des Netzteils, wenn das Gerät
von einem kalten in einen warmen Raum gebracht wird. Das
dabei entstehende Kondenswasser kann unter Umständen
das Gerät zerstören. Wenn das Gerät Zimmertemperatur er-
reicht hat, kann es gefahrlos in Betrieb genommen werden.
3.3. Aufstellort
• Stellen und betreiben Sie alle Komponenten auf einer stabi-
len, ebenen und vibrationsfreien Unterlage, um Stürze des
Gerätes zu vermeiden.
• Setzen Sie das Gerät keinen Erschütterungen aus. Erschütte-
rungen können der empfindlichen Elektronik schaden.
• Achten Sie darauf, dass keine direkten Wärmequellen (z. B.
Heizungen) auf das Gerät wirken.
• Es dürfen keine offenen Brandquellen (z. B. brennende Ker-
zen) auf oder in der Nähe des Gerätes stehen.
• Achten Sie darauf, dass die Lüftungsschlitze nicht verdeckt sind,
damit immer eine ausreichende Belüftung gewährleistet ist.
• Stellen Sie keine Gegenstände auf die Kabel, da diese sonst
beschädigt werden könnten.
• Halten Sie einen Mindestabstand von ca. 10 cm zwischen
Wänden und Gerät bzw. Netzteil ein. Sorgen Sie für eine aus-
reichende Belüftung.
• Betreiben Sie Ihr Gerät nicht im Freien, da äußere Einflüsse
wie Regen, Schnee etc. das Gerät beschädigen könnten.
• Halten Sie mindestens einen Meter Abstand von hochfre-
quenten und magnetischen Störquellen (Fernsehgerät, Laut-
sprecherboxen, Mobiltelefon usw.) ein, um Funktionsstörun-
gen zu vermeiden.
• Bei großen Temperatur- oder Feuchtigkeitsschwankungen
kann es durch Kondensation zur Feuchtigkeitsbildung inner-
halb des Gerätes kommen, die einen elektrischen Kurzschluss
verursachen kann.
90245 50049999 DE EN FR NL content RC1.indb 690245 50049999 DE EN FR NL content RC1.indb 6 13.04.2015 16:23:5113.04.2015 16:23:51

7 von 218
Sicherheitshinweise
DE
FR
NL
GPL
EN
3.4. Niemals selbst reparieren!
Ziehen Sie bei Beschädigung des Netzteils, der Anschlussleitung
oder des Gerätes sofort den Stecker aus der Steckdose.
Nehmen Sie das Gerät nicht in Betrieb, wenn Gerät oder An-
schlussleitung sichtbare Schäden aufweisen oder das Gerät her-
untergefallen ist.
WARNUNG!
Versuchen Sie auf keinen Fall, das Gerät selber zu
öffnen und/oder zu reparieren. Es besteht die Gefahr
des elektrischen Schlags!
Wenden Sie sich im Störungsfall an das Medion Service Center
oder eine andere geeignete Fachwerkstatt, um Gefährdungen
zu vermeiden.
3.5. Reinigung und P ege
• Bevor Sie das Gerät reinigen, ziehen Sie unbedingt immer zu-
erst das Netzteil aus der Steckdose.
• Verwenden Sie für die Reinigung nur ein trockenes, weiches
Tuch. Benutzen Sie keine chemischen Lösungs- und Reini-
gungsmittel, weil diese die Oberfläche und/oder die Beschrif-
tungen des Geräts beschädigen können.
3.6. Datensicherung
Achtung! Machen Sie nach jeder Aktualisierung Ihrer Daten Siche-
rungskopien auf externe Speichermedien. Die Geltendmachung
von Schadensersatzansprüchen für Datenverlust und dadurch
entstandene Folgeschäden wird ausgeschlossen.
3.7. Stromversorgung
Bitte beachten Sie: Auch bei ausgeschaltetem Gerät sind Teile
des Gerätes unter Spannung. Um die Stromversorgung zu Ihrem
Gerät zu unterbrechen oder das Gerät gänzlich von Spannung
frei zu schalten, trennen Sie das Gerät vollständig vom Netz.
• Betreiben Sie das Netzteil nur an geerdeten Steckdosen mit
AC 100-240 V~ 50 Hz. Wenn Sie sich der Stromversorgung am
90245 50049999 DE EN FR NL content RC1.indb 790245 50049999 DE EN FR NL content RC1.indb 7 13.04.2015 16:23:5113.04.2015 16:23:51

8 von 218
Sicherheitshinweise
Aufstellort nicht sicher sind, fragen Sie bei Ihrem Energiever-
sorger nach.
• Verwenden Sie ausschließlich das mitgelieferte Netzteil.
(Ktec KSAP0361200300HE). Versuchen Sie nie, den Stecker
des Netzteils an andere Buchsen anzuschließen, da sonst
Schäden verursacht werden können.
• Wir empfehlen zur zusätzlichen Sicherheit die Verwendung
eines Überspannungsschutzes, um das Gerät vor Beschä-
digung durch Spannungsspitzen oder Blitzschlag aus dem
Stromnetz zu schützen.
• Um die Stromversorgung zu unterbrechen, ziehen Sie das
Netzteil aus der Steckdose.
• Das Netzteil muss auch nach dem Anschließen leicht erreich-
bar sein, damit es im Bedarfsfall schnell vom Netz getrennt
werden kann.
• Decken Sie das Netzteil nicht ab, um eine Überhitzung zu ver-
meiden.
• Sollten Sie ein Verlängerungskabel einsetzen, achten Sie da-
rauf, dass dieses den VDE-Anforderungen entspricht. Fragen
Sie ggf. Ihren Elektroinstallateur.
• Verlegen Sie die Kabel so, dass niemand darauf treten oder
darüber stolpern kann.
• Stellen Sie keine Gegenstände auf die Kabel, da diese sonst
beschädigt werden könnten.
3.8. Hinweis zur elektrostatischen Au adung
Sollte das Gerät aufgrund elektrostatischer Aufladung nicht ord-
nungsgemäß funktionieren, setzen Sie das Gerät zurück, indem
Sie es vorübergehend vom Stromnetz trennen.
90245 50049999 DE EN FR NL content RC1.indb 890245 50049999 DE EN FR NL content RC1.indb 8 13.04.2015 16:23:5113.04.2015 16:23:51

9 von 218
Allgemeines
DE
FR
NL
GPL
EN
3.9. Hinweise zur Konformität
Ihr Gerät erfüllt die Anforderungen der elektromagnetischen
Kompatibilität und elektrischen Sicherheit.
Hiermit erklärt die MEDION AG, dass sich diese Geräte in Über-
einstimmung mit den grundlegenden Anforderungen und den
übrigen einschlägigen Bestimmungen der Richtlinien 2006/95/
EG und 2011/65/EU befinden.
Dieses Gerät erfüllt die grundlegenden Anforderungen und re-
levanten Vorschriften der Ökodesign Richtlinie 2009/125/EG
(Verordnung 1275/2008).
Allerdings ist für dieses Gerät aufgrund seiner Funktionsweise
(dauerhafte Bereitstellung von Daten im Netzwerk) keine Mini-
mierung des Verbrauchs gemäß der Ökodesign-Richtlinie vorge-
sehen.
Um den Stromverbrauch zu minimieren, schalten Sie es mit der
Ein-/Aus-Taste aus oder trennen Sie das Gerät bei Nichtbedarf
vom Stromnetz.
Vollständige Konformitätserklärungen sind erhältlich unter
www.medion.com/conformity.
4. Allgemeines
4.1. Unterstützte Systeme und Formate
Ihr Lifecloud System unterstützt folgende Dateisysteme, Protokolle und Applika-
tionen:
• TCP/IP Netzwerkprotokoll
• UPNP, integrierter DLNA-Server
• Samba–Server
• FTP-Server
• FAT32, NTFS, XFS
• Time Machine für MAC
• iTunes Server
• Windows Backup
• WOL (Wake on LAN)
90245 50049999 DE EN FR NL content RC1.indb 990245 50049999 DE EN FR NL content RC1.indb 9 13.04.2015 16:23:5113.04.2015 16:23:51

10 von 218
Allgemeines
4.2. Einsatzmöglichkeiten des Lifecloud Systems
Das Lifecloud System kann für folgende Aufgaben im Netzwerk verwendet
werden:
• Als zentraler Speicherort für Dateien, die Sie über das lokale Netzwerk
oder das Internet für andere Benutzer verfügbar machen wollen.
• Zum automatischen Erstellen und Fortschreiben von Sicherungskopien
aller Ihrer Dateien.
• Zur Bereitstellung von Dateien wie etwa Verträgen, Präsentationen und
Berichten über das lokale Netzwerk oder das Internet.
• Im Falle eines Computerschadens oder einem Datenverlust wie Festplat-
tenausfall, Diebstahl usw. können Sie Ihre Daten rasch wiederherstellen
und weiter arbeiten. Daten können auf beiden Festplatten des Lifecloud
Systems gespiegelt abgelegt werden (RAID-System), so dass im Falle ei-
nes Ausfalls von Festplatte 1 die Daten auf Festplatte 2 zur Verfügung ste-
hen.
• Sie können von jedem Ort der Welt über das Internet auf das Lifecloud
System zugreifen, um Dateien herunterzuladen oder Dateien hochzula-
den, die Sie sicher speichern oder für andere verfügbar machen möchten,
während Sie unterwegs sind.
• Sie können einen USB-Drucker an das Lifecloud System anschließen und
so für andere Benutzer im lokalen Netzwerk verfügbar machen.
• Über den integrierten Media Server können alle Benutzer mit DLNA-fähi-
gen Geräten im lokalen Netzwerk auf die Fotos, Videos und Musik auf das
Lifecloud System zugreifen.
4.3. Funktionsweise des Lifecloud Systems und
der mitgelieferten Komponenten
• Lifecloud (Gerät): Die Hardware mit eingebauter Festplatte, auf der Ihre
Dateien gespeichert und gesichert werden.
• Lifecloud Web Interface: Eine in den Server integrierte Benutzeroberflä-
che, mit der Sie über einen Webbrowser von Ihrem Computer aus (oder
sogar per Fernzugriff) das Lifecloud System einrichten, ändern und über-
wachen können.
• LifeCloud Agent: Eine Software für PC oder MAC, über die Sie sich von Ih-
rem Desktop-Rechner im lokalen Netzwerk am Lifecloud System anmel-
den und so auf das Web-Interface, sowie die Netzwerkordner des Lifec-
loud Systems zugreifen können.
• LifeCloud App: Eine App für mobile iOS oder Android Geräte, wie etwa Ta-
blet-PCs oder Smartphones. Über diese App kann mit diesen Geräten auf
das Lifecloud System zugegriffen werden.
90245 50049999 DE EN FR NL content RC1.indb 1090245 50049999 DE EN FR NL content RC1.indb 10 13.04.2015 16:23:5113.04.2015 16:23:51

11 von 218
Allgemeines
DE
FR
NL
GPL
EN
4.4. Ausstattung des Lifecloud Systems
Die Ausstattung des Lifecloud Systems umfasst:
• Zwei SATA-Festplatten (Serial ATA)
• Einen Ethernet- bzw. LAN-Anschluss, der den Zugriff auf den Server über
das lokale Netzwerk oder das Internet ermöglicht.
• 2 USB-Anschlüsse auf der Rückseite (1x USB 2.0, 1x USB 3.0)
• 1 USB-Anschluss an der Vorderseite (1x USB 3.0)
• OTC (One-Touch-Copy) Taste zum Kopieren von Daten zwischen USB-Da-
tenträgern und der internen Festplatte des Lifecloud Systems.
4.5. Systemvoraussetzungen
Für den Zugriff über den Browser an einem Desktop-PC:
• Java Runtime Environment ab Version 7
• Adobe Flash Player ab Version 11
Für den Zugriff über ein mobiles iOS oder Android Gerät:
• Adobe Integrated Runtime (Abk. „Adobe AIR“) App.
4.6. Info zu Sicherheitswarnungen
Beim Anmelden an der Lifecloud über den Webbrowser wird möglicherweise
ein Warnhinweis Ihres Browsers angezeigt.
Ihre Lifecloud verwendet ein Sicherheitszertifikat, damit Sie sich über eine
verschlüsselte Verbindung an der Lifecloud anmelden können. Da Ihr Brow-
ser dieses Zertifikat nicht kennt, ist hier eine Bestätigung erforderlich.
Warnhinweis von Firefox umgehen:
90245 50049999 DE EN FR NL content RC1.indb 1190245 50049999 DE EN FR NL content RC1.indb 11 13.04.2015 16:23:5113.04.2015 16:23:51

12 von 218
Allgemeines
Gehen Sie dazu wie folgt vor:
Klicken Sie auf den Eintrag “Ich kenne das Risiko”.
Wählen Sie anschließend den Eintrag “Ausnahmen hinzufügen” aus, um die Zerti-
fikatsabfrage zu Ihrer Lifecloud als Sicherheits-Ausnahmeregel zu bestätigen.
Klicken Sie hierzu auf “Sicherheits-Ausnahmeregel bestätigen”.
90245 50049999 DE EN FR NL content RC1.indb 1290245 50049999 DE EN FR NL content RC1.indb 12 13.04.2015 16:23:5113.04.2015 16:23:51

13 von 218
Lieferumfang
DE
FR
NL
GPL
EN
Warnhinweis von Internet Explorer
Klicken Sie auf “Laden dieser Webseite fortsetzen (nicht empfohlen)”.
5. Lieferumfang
Bitte überprüfen Sie die Vollständigkeit der Lieferung und benachrichtigen
Sie uns innerhalb von 14 Tagen nach dem Kauf, falls die Lieferung nicht kom-
plett ist.
Mit dem von Ihnen erworbenen Produkt haben Sie erhalten:
• Lifecloud (Gerät)
• LAN Kabel
• Netzteil
• Software CD (optional)
• Bedienungsanleitung und Garantiedokumente
HINWEIS!
Entfernen Sie vor dem Gebrauch die Schutzfolien vom
Gerät!
GEFAHR!
Halten Sie das Verpackungsmaterial, wie z. B. Foli-
en von Kindern fern. Bei Missbrauch besteht Ersti-
ckungsgefahr.
90245 50049999 DE EN FR NL content RC1.indb 1390245 50049999 DE EN FR NL content RC1.indb 13 13.04.2015 16:23:5213.04.2015 16:23:52

14 von 218
Geräteübersicht
6. Geräteübersicht
6.1. Gerätevorderseite und Rückseite
13
12
11
10
9
8
4
6
5
7
1
3
2
1) LED 1 (BLAU/ROT): Betriebsanzeige Festplatte 1 (leuchtet im einge-
schalteten Zustand blau, blinkt blau bei Datenübertragung, leuchtet
rot bei Hardwarefehlern)
2) LED 2 (BLAU/ROT): Betriebsanzeige Festplatte 2(leuchtet im einge-
schalteten Zustand blau, blinkt blau bei Datenübertragung, leuchtet
rot bei Hardwarefehlern)
3) LED 3 (BLAU/ROT): Betriebsanzeige (leuchtet im eingeschalteten Zu-
stand blau, blinkt blau während des Systemstarts, leuchtet rot bei
Hardwarefehlern
4) LED (GRÜN): LAN-Anzeige (leuchtet, wenn eine Netzwerkverbindung
hergestellt ist, blinkt bei Datenübertragung)
5) LED ORANGE: OTC-Anzeige des vorderen USB-Anschlusses (leuch-
tet wenn ein Datenträger am vorderen USB-Anschluss erkannt wurde,
blinkt beim Kopieren von Daten zwischen Lifecloud System und dem
USB-Datenträger
6) USB: USB-Anschluss (USB 3.0)
zur Verwendung der One-Touch-Copy Funktion
7)
OTC: One-Touch-Copy Taste
8)
RESET: RESET-Taste
9) USB: USB-Anschluss (USB 3.0)
10)
USB: USB-Anschluss (USB 2.0)
11) Ein-/Aus-Taste
12)
RJ45: LAN-Anschluss für Netzwerkkabel
13)
DC: Eingang Netzadapter
90245 50049999 DE EN FR NL content RC1.indb 1490245 50049999 DE EN FR NL content RC1.indb 14 13.04.2015 16:23:5213.04.2015 16:23:52

15 von 218
Über die Lifecloud
DE
FR
NL
GPL
EN
HINWEIS!
Bevor die Festplattenkonfiguration vorgenommen
wurde (Siehe 10.2 auf Seite 20) leuchten die LED 1
und LED 2 rot.
7. Über die Lifecloud
In der Grundversion können Sie bis zu 5 Benutzerkonten auf Ihrer Lifecloud
anlegen.
Wenn Sie über ein Premium Konto auf www.lifecloudmedion.com verfügen,
können Sie unbegrenzt Benutzerkonten anlegen, sowie die Lifecloud um ei-
nen Torrent-Client und eine USB-Backup-Lösung erweitern.
8. Inbetriebnahme
8.1. Anschluss an ein Netzwerk
Verbinden Sie die RJ45-Buchse (Ethernet/LAN) am Lifecloud System über
ein Netzwerkkabel mit einer freien Netzwerkbuchse an einer Netzwerk-
schnittstelle (z. B. einem Router).
Stellen Sie sicher, dass am Router DHCP aktiviert ist, da das Lifecloud Sys-
tem als DHCP-Client eingerichtet ist!
Stecken Sie den Hohlstecker des Netzteils in die Buchse
DC IN am Lifec-
loud System und schließen Sie das Netzteil anschließend an eine Netz-
steckdose an.
90245 50049999 DE EN FR NL content RC1.indb 1590245 50049999 DE EN FR NL content RC1.indb 15 13.04.2015 16:23:5313.04.2015 16:23:53

16 von 218
Das Gerät ein- und ausschalten
Stellen Sie sicher, das sich Ihr Computer, über den Sie das Lifecloud Sys-
tem konfigurieren wollen, im selben Netzwerk befindet.
Anschlüsse für USB-Geräte
An die USB-Anschlüsse können Sie externe USB-Laufwerke oder einen
USB-Drucker anschließen, der allen Benutzern im lokalen Netzwerk zur
Verfügung steht.
Der USB-Anschluss an der Vorderseite des Servers kann auch für die One-
Touch-Copy-Funktion verwendet werden.
HINWEIS!
Lesen Sie vor dem Gebrauch der One-Touch-Copy-
Funktion die entsprechenden Hinweise unter „Daten
kopieren mit der OTC-Taste“ auf Seite 22.
9. Das Gerät ein- und ausschalten
Um das Lifecloud System einzuschalten, drücken Sie den Ein-/Ausschalter
etwa 3 Sekunden lang, bis ein kurzer Signalton zu hören ist.
Das Betriebssystem des Lifecloud Systems fährt nun hoch. Anschließend
leuchtet die LED 3 dauerhaft blau.
10. Erstinbetriebnahme
HINWEIS!
Stellen Sie vor der Erstinbetriebnahme sicher, dass kei-
ne Geräte an die USB-Anschlüsse des Lifecloud Sys-
tems angeschlossen sind.
Bevor Sie das Gerät zum ersten Mal in Betrieb nehmen, müssen Sie über Ih-
ren Browser (am Computer oder Smartgerät) zunächst einen Namen für das
Lifecloud System und ein Benutzerkonto einrichten.
10.1. Konto für das Lifecloud System einrichten
So richten Sie ein Konto für den Zugriff ein.
Öffnen Sie im Webbrowser Ihres PC die Seite
www.lifecloudmedion.com.
90245 50049999 DE EN FR NL content RC1.indb 1690245 50049999 DE EN FR NL content RC1.indb 16 13.04.2015 16:23:5313.04.2015 16:23:53

17 von 218
Erstinbetriebnahme
DE
FR
NL
GPL
EN
Klicken Sie auf den Eintrag Neues Gerät einrichten.
Im nächsten Fenster werden Sie dazu aufgefordert, die Fronttaste
(OTC-TASTE) des Lifecloud Systems 5 Sekunden lang gedrückt zu hal-
ten, bis ein Signalton zu hören ist. Der blaue Balken muss dabei angezeigt
werden.
Der LifeCloud-Server registriert nun Ihr Lifecloud System. Der Fortschritt wird
über einen blauen Balken angezeigt.
Legen Sie anschließend ein Benutzerkonto an, indem Sie einen Namen
für Ihr Lifecloud System, sowie einen Benutzernamen und ein Passwort
für den LifeCloud-Zugang anlegen.
90245 50049999 DE EN FR NL content RC1.indb 1790245 50049999 DE EN FR NL content RC1.indb 17 13.04.2015 16:23:5413.04.2015 16:23:54

18 von 218
Erstinbetriebnahme
Tippen Sie auf den Pfeil nach rechts.
HINWEIS!
Sie können nach Anmeldung bis zu 5 Benutzerkonten
auf dem Lifecloud System anlegen. Wenn Sie über ein
Premium-Konto von www.lifecloudmedion.com verfü-
gen, können Sie unbegrenzt Benutzerkonten auf dem
Lifecloud System erstellen.
Über den ebenfalls im Webbrowser angezeigten QR-Code können Sie
jetzt die App für ihr mobiles Endgerät (Tablet-PC/Smartphone) anlegen.
90245 50049999 DE EN FR NL content RC1.indb 1890245 50049999 DE EN FR NL content RC1.indb 18 13.04.2015 16:23:5413.04.2015 16:23:54

19 von 218
Erstinbetriebnahme
DE
FR
NL
GPL
EN
Öffnen Sie den QR-Code Link, um die App auf Ihrem Tablet-PC/Smartpho-
ne zu installieren (Zur Verwendung der App, siehe „18. Verwenden der Life
Cloud App auf Smart-Geräten“ auf Seite 40).
Klicken Sie auf den Pfeil nach rechts.
Beenden Sie die Einrichtung, indem Sie auf den Pfeil nach rechts klicken.
Das Web-Interface des Lifecloud Systems wird nun angezeigt (Lesen Sie wei-
ter unter „14. Das Web-Interface“ auf Seite 28).
90245 50049999 DE EN FR NL content RC1.indb 1990245 50049999 DE EN FR NL content RC1.indb 19 13.04.2015 16:23:5513.04.2015 16:23:55

20 von 218
Erstinbetriebnahme
10.2. Bei Erstinbetriebnahme:
Festplattenkon guration festlegen
Nach der Inbetriebnahme des Lifecloud Systems erscheint beim ersten An-
melden an der Lifecloud die Auswahl der Festplattenkonfiguration für die
Datenspeicherung.
RAID I
(engl. „Redundant Array of Independent Disks“, = „Redundante Anordnung unab-
hängiger Festplatten)
In der Konfiguration RAID 1 werden beide Festplatten des Lifecloud Systems
(je 6 TB) im Verbund verwendet. Auf beiden Festplatten werden die gleichen
Daten (Spiegelung) gespeichert, so dass die volle Redundanz Ihrer Daten
gegeben ist. Die Kapazität von RAID 1 ist hierbei höchstens so groß wie die
kleinste beteiligte Festplatte, in diesem Fall also 6 TB.
Da beide Platten identisch beschrieben sind auf beiden Platten alle Daten
des Systems enthalten, was einen enormen Vorteil im Hinblick auf die Daten-
sicherung hat:
Fällt eine der gespiegelten Platten aus, kann die andere weiterhin alle Daten
liefern. RAID 1 bietet somit eine hohe Ausfallsicherheit, denn zum Totalver-
lust der Daten führt erst der Ausfall beider Platten.
JBOD
(engl. „Just a Bunch of Disks“, = „Nur ein Haufen Festplatten“)
Bei JBOD fehlt die Redundanz (Spiegelung) der Daten, es ist nur eine einfa-
che „Anordnung von unabhängigen Festplatten“.
In dieser Konfiguration werden beide 6 TB Festplatten des Lifecloud Systems
aneinander gereiht, und erscheinen so als ein einziges 12 TB Laufwerk.
90245 50049999 DE EN FR NL content RC1.indb 2090245 50049999 DE EN FR NL content RC1.indb 20 13.04.2015 16:23:5513.04.2015 16:23:55

21 von 218
Erstinbetriebnahme
DE
FR
NL
GPL
EN
Der Vorteil in dieser Festplattenkonfiguration liegt also in der größeren Da-
tenkapazität.
ACHTUNG!
Die Festplattenkonfiguration kann nur bei der ers-
ten Inbetriebnahme oder nachträglich im Systemme-
nü festgelegt werden! Eine Änderung der Festplat-
tenkonfiguration geht mit einem Totalverlust aller
auf den beiden Festplatten gespeicherten Daten ein-
her. Sichern Sie Ihre Daten daher auf anderen Daten-
trägern, BEVOR Sie eine Änderung der Konfiguration
vornehmen!
Wählen Sie Ihre bevorzugte Festplattenkonfiguration aus und bestätigen
Sie mit OK.
Das Lifecloud System konfiguriert nun die zwei eingebauten Festplatten.
Dies kann einige Minuten dauern.
90245 50049999 DE EN FR NL content RC1.indb 2190245 50049999 DE EN FR NL content RC1.indb 21 13.04.2015 16:23:5513.04.2015 16:23:55

22 von 218
Daten kopieren mit der OTC-Taste
11. Daten kopieren mit der OTC-Taste
Schließen Sie einen USB-Datenträger, den Sie zum Kopieren von Daten zwi-
schen dem Lifecloud System und dem USB-Datenträger verwenden wollen,
an den USB-Anschluss an der Vorderseite des Lifecloud Systems an.
Warten Sie, bis die OTC-Anzeige orange aufleuchtet und das Lifecloud
System den USB-Datenträger erkannt hat.
Mit der OTC-Taste können Sie nun folgende Funktion ausführen:
Drücken Sie die OTC-Taste einmal kurz, um die Daten direkt vom USB-Da-
tenträger direkt in das Verzeichnis /UnsereOrdner/USB-Downloads /[DA-
TUM] [UHRZEIT] auf dem Lifecloud System zu kopieren.
Während des Kopiervorgangs blinkt die OTC-Anzeige orange.
Sobald der Kopiervorgang beendet ist, leuchtet die OTC-Anzeige dauer-
haft orange.
12. Die RESET-Taste
Mit der RESET-Taste an der Rückseite des Lifecloud Systems können Sie das
Lifecloud System zurücksetzen für den Fall, dass Sie das System neu aufset-
zen müssen.
Sie können die RESET-Taste mit einem spitzen Gegenstand (etwa einer Büro-
klammer) eindrücken.
12.1. Kennwort zurücksetzen
Für den Fall, das Sie einmal das Kennwort vergessen haben sollten, können
Sie das Passwort mit der RESET-Taste zurücksetzen.
Halten Sie die RESET-Taste für etwa 3 Sekunden lang gedrückt und lassen Sie
die Taste los, sobald ein kurzer Signalton am Gerät zu hören ist.
Öffnen Sie im Webbrowser Ihres PC die Seite
www.lifecloudmedion.com
.
Klicken Sie auf den Eintrag
Neues Gerät einrichten oder Kennwort zurücksetzen.
90245 50049999 DE EN FR NL content RC1.indb 2290245 50049999 DE EN FR NL content RC1.indb 22 13.04.2015 16:23:5613.04.2015 16:23:56

23 von 218
Die RESET-Taste
DE
FR
NL
GPL
EN
Im nächsten Fenster werden Sie dazu aufgefordert, die Fronttaste
(OTC-TASTE) des Lifecloud Systems 5 Sekunden lang gedrückt zu halten.
Das Lifecloud-Webinterface hat nun erkannt, dass zuvor die RESET-Taste
am Gerät gedrückt wurde und folgender Dialog erscheint.
Wählen Sie hier den Eintrag
Ich möchte mein Kennwort zurücksetzen aus und folgen Sie den
Anweisungen.
90245 50049999 DE EN FR NL content RC1.indb 2390245 50049999 DE EN FR NL content RC1.indb 23 13.04.2015 16:23:5613.04.2015 16:23:56

24 von 218
Die RESET-Taste
Wählen Sie das entsprechende Benutzerkonto aus, und vergeben Sie ein
neues Passwort.
Klicken Sie anschließend auf den Pfeil nach rechts, um das Zurücksetzen
abzuschließen:
90245 50049999 DE EN FR NL content RC1.indb 2490245 50049999 DE EN FR NL content RC1.indb 24 13.04.2015 16:23:5613.04.2015 16:23:56

25 von 218
LifeCloud Agent verwenden
DE
FR
NL
GPL
EN
12.2. System auf Standardeinstellungen
zurücksetzen
Wenn das Lifecloud System fehlerhaft reagieren sollte oder Einstellungen
dazu geführt haben, dass Sie keinen Zugriff mehr auf das System haben,
kann ein Zurücksetzen des Systems auf die Standardeinstellungen erforder-
lich sein.
Um das System zurückzusetzen, halten Sie die RESET-Taste für etwa 30
Sekunden lang gedrückt. Nach 3 Sekunden ertönt ein kurzer und nach 30
Sekunden ein langer Signalton.
Lassen Sie nun die RESET-Taste los. Das System wird nun auf die Standar-
deinstellungen zurückgesetzt und neu gestartet und Sie können die Er-
stinbetriebnahme wieder durchführen.
13. LifeCloud Agent verwenden
13.1. LifeCloud Agent installieren
• Über den LifeCloud Agent können Sie sich an Ihrem Computer im lokalen
Netzwerk am Lifecloud System anmelden und so auf das Web-Interface,
sowie die Netzwerkordner des Lifecloud Systems zugreifen.
So installieren Sie die LifeCloud Agent:
• Legen Sie die mitgelieferte Software-CD in das Disklaufwerk Ihres Com-
puters ein und öffnen Sie die Datei Autorun.exe.
• Folgen Sie den Anweisungen des Installationsassistenten.
• Wenn Sie die Backup-Software Memeo Instant Backup verwenden wol-
len, können Sie diese in einem nächsten Schritt ebenfalls installieren
(„Memeo Backup verwenden“ auf Seite 43.
Nach Abschluss der Installation können Sie den LifeCloud Agent über das
Symbol in der Taskleiste öffnen:
HINWEIS!
Das Lifecloud-System wird erst im Netzwerk erkannt,
wenn Sie alle Schritte zur Erstinbetriebnahme, wie un-
ter „10. Erstinbetriebnahme“ auf Seite 16 beschrie-
ben, durchgeführt haben.
90245 50049999 DE EN FR NL content RC1.indb 2590245 50049999 DE EN FR NL content RC1.indb 25 13.04.2015 16:23:5613.04.2015 16:23:56

26 von 218
LifeCloud Agent verwenden
13.2. LifeCloud Desktop verwenden
• Im obersten Eintrag des Menüs sehen Sie den Anmeldestatus. Wenn der
Status „Nicht angemeldet“ zeigt, müssen Sie sich mit Ihrem LifeCloud-
Namen, sowie einem Benutzernamen und Passwort anmelden, um im lo-
kalen Netzwerk auf dem Lifecloud System zugreifen zu können.
• Klicken Sie dazu auf den Eintrag Anmelden....
Nach erfolgreicher Anmeldung können Sie die folgenden Menüfunktionen
des LifeCloud Agent verwenden:
Benutzer wechseln
Hier können Sie sich mit einem anderen Benutzernamen am Lifecloud Sys-
tem anmelden.
Abmelden
Hier können Sie den LifeCloud Agent vom Lifecloud System abmelden, um
90245 50049999 DE EN FR NL content RC1.indb 2690245 50049999 DE EN FR NL content RC1.indb 26 13.04.2015 16:23:5613.04.2015 16:23:56

27 von 218
LifeCloud Agent verwenden
DE
FR
NL
GPL
EN
sich z.B. an einer anderen LifeCloud anmelden zu können.
Durchsuchen der LifeCloud-Ordner
Über diesen Eintrag rufen Sie den Windows-Explorer bzw. MAC-Finder auf,
um die Ordner des Lifecloud Systems als Netzwerkfreigaben zu öffnen.
Navigation zum Lifecloud (www)
Über diesen Eintrag öffnen Sie das Web-Interface im Standardbrowser Ihres
Computers.
Einstellungen
Hier können Sie nach verfügbaren Software-Updates für den LifeCloud
Agent suchen und die IP-Adresse des Lifecloud Systems anzeigen.
Über „Wake On LAN“ einschalten
Hier können Sie die Wake On LAN (WON) Funktion des Lifecloud Systems ak-
tivieren und deaktivieren (Siehe „Wake ON LAN“ auf Seite 37).
Über
Hier finden Sie die Hersteller und Lizenzinformationen zum LifeCloud Agent.
LifeCloud Agent Beenden
Über diesen Eintrag beenden Sie den LifeCloud Agent.
90245 50049999 DE EN FR NL content RC1.indb 2790245 50049999 DE EN FR NL content RC1.indb 27 13.04.2015 16:23:5713.04.2015 16:23:57

28 von 218
Das Web-Interface
14. Das Web-Interface
Das Web-Interface ist eine auf HTML basierende Benutzeroberfläche des Life-
cloud Systems, die Sie über Ihren Webbrowser aufrufen können.
• Verwenden Sie mindestens den Internet Explorer 6.0 oder Mozilla Firefox
2.00 oder neuere Versionen dieser Browser.
• Die Bildschirmauflösung sollte 1024 x 768 Pixel oder höher sein.
• Die aktuellen Java- und Flash-Plug-ins müssen im Browser aktiviert sein.
• Pop-up Fenster müssen im Webbrowser erlaubt sein und der Windows Pop-
up Blocker ausgeschaltet sein.
14.1. Web-Interface aufrufen
• Öffnen Sie Ihren Standard Webbrowser und geben Sie die im Medion Life
Cloud Agent angezeigte IP-Adresse in der Adresszeile des Webbrowsers
ein.
oder
• Geben Sie „http://www.lifecloudmedion.com“ in der Adresszeile des
Webbrowsers ein
oder
• klicken Sie mit der rechten Maustaste auf das Icon des Medion Life Cloud
Agent und dann auf den Eintrag Navigation zum Lifecloud (www).
14.2. Funktionen und Einstellungen des Web-
Interface
Der Standard Web-Browser öffnet sich und die Anmeldeseite erscheint.
Für alle Benutzer (auch dem Administrator) wird zunächst die Startseite
(Home)nach dem Einloggen angezeigt.
In den folgenden Abschnitten werden die einzelnen Menüs und Funktionen
erläutert.
90245 50049999 DE EN FR NL content RC1.indb 2890245 50049999 DE EN FR NL content RC1.indb 28 13.04.2015 16:23:5713.04.2015 16:23:57

29 von 218
Medienbibliothek
DE
FR
NL
GPL
EN
15. Medienbibliothek
In der Medienbibiothek nehmen Sie die Verwaltung der auf dem Lifecloud
System gespeicherten Mediendateien vor.
Über die obere Menüleiste können Sie die Dateiansicht sortieren, anpassen
und nach Dateien suchen.
Die vorinstallierten Stammverzeichnisse Unsere Ordner und
Meine Ordner können nicht gelöscht werden, wohl aber ihre Unterver-
zeichnisse.
Wenn Datenträger an die hinteren USB-Anschlüsse angeschlossen sind, er-
scheinen diese ebenfalls in der Bibliothek.
15.1. Meine Ordner/Unsere Ordner
Unsere Ordner
Die Ordner und Inhalte in der Unsere Ordner können von allen Benutzern,
die sich an der Lifecloud angemeldet haben, angezeigt und bearbeitet wer-
den.
HINWEIS!
Sie können in den Systemeinstellungen den Zugriff
auf die
Unsere Ordner für Benutzer ein- oder ausschal-
ten.
Meine Ordner
Hier befinden sich die Ordner und Inhalte, die nur der aktuell an der Lifec-
loud angemeldete Benutzer anzeigen und bearbeiten kann.
90245 50049999 DE EN FR NL content RC1.indb 2990245 50049999 DE EN FR NL content RC1.indb 29 13.04.2015 16:23:5713.04.2015 16:23:57

30 von 218
Medienbibliothek
15.2. Neuen Ordner erstellen/Ordner löschen
Markieren Sie den Ordner/das Stammverzeichnis, in dem Sie einen neuen
Ordner anlegen wollen.
Klicken Sie auf das Pluszeichen über der Ordneransicht, geben Sie an-
schließend einen Namen für das neue Unterverzeichnis an. Bestätigen Sie
Ihre Eingabe mit Anlegen.
Um einen Ordner zu löschen, markieren Sie den Ordner und wählen Sie
anschließend das Minuszeichen über der Ordneransicht. Bestätigen Sie
Ihre Eingabe mit Ja.
15.3. Kontextmenü für Ordner und Dateien ö nen
Bewegen Sie den Mauszeiger über einen Ordner/eine Datei und klicken
Sie auf den Pfeil neben dem Ordner-/Dateinamen, um das Kontextmenü
zu öffnen:
Klicken Sie auf den Eintrag Öffnen, um den Ordnerinhalt im rechten
Fenster zu öffnen bzw. eine Mediendatei direkt wiederzugeben.
Automatische Wiedergabe von Medieninhalten (nur für
Ordner)
Über den Eintrag Diashow starten Sie die Wiedergabe aller Bilder in die-
sem Ordner als Diashow.
90245 50049999 DE EN FR NL content RC1.indb 3090245 50049999 DE EN FR NL content RC1.indb 30 13.04.2015 16:23:5713.04.2015 16:23:57

31 von 218
Medienbibliothek
DE
FR
NL
GPL
EN
Mit dem Eintrag Automatische Wiedergabe starten Sie die Wiederga-
be aller Audiodateien in diesem Ordner mit dem Musikplayer.
Herunterladen
Über den Eintrag Herunterladen können Sie den Ordner direkt als .zip-Da-
tei auf Ihr Gerät herunterladen.
Hochladen (nur für Ordner)
Über den Eintrag Hochladen öffnen Sie das Fenster zum Hochladen von Da-
teien. Hier können Sie Dateien per Dateipfad oder per Drag und Drop in
den aktuellen Ordner hochladen (Siehe unter „15.5. Dateien auf das Lifecloud
System hochladen“ auf Seite 33).
Dem Album hinzufügen
Wählen Sie hier ein Album aus oder erstellen Sie ein neues Album, dem Sie
diesen Ordner hinzufügen wollen (Siehe auch unter „16. Alben“ auf Seite
34).
Freigabe ausgewählter Elemente
Hier können Sie direkt ein Album für diesen Ordner erstellen, um es per Di-
rektlink im Netz zu teilen (Siehe auch unter „16. Alben“ auf Seite 34).
Freigabe für DMA
Klicken Sie auf den Eintrag Freigabe für DMA, um die Medieninhalte
dieses Ordners über den digitalen Medienadapter des Lifecloud Systems
(DMA) für UPnP-fähige Medienplayer im Netzwerk verfügbar zu machen.
Freigebene Medienordner werden mit einem Fernsehersymbol über dem
Ordnersymbol dargestellt.
Um die Medienfreigabe für diesen Ordner wieder zu entfernen, klicken
Sie auf den Eintrag Freigabe für DMA beenden.
Details anzeigen
Klicken Sie auf diesen Eintrag, um die Ordner-/Dateieigenschaften einzu-
blenden.
• In den Ordner-/Dateieigenschaften können Sie Dateinamen, Datei-Tags
(Audio-/Videodateien) direkt ändern.
• Um die Ordner-/Dateieigenschaften wieder auszublenden, klicken Sie auf
den „Info“-Button rechts oben.
Kopieren/Ausschneiden/Einfügen/Umbenennen/Löschen
Über diese Funktionen können Sie die Dateiverwaltung für Ordner und Da-
teien wie an Ihrem Computer nutzen.
90245 50049999 DE EN FR NL content RC1.indb 3190245 50049999 DE EN FR NL content RC1.indb 31 13.04.2015 16:23:5713.04.2015 16:23:57

32 von 218
Medienbibliothek
15.4. Alben
Hier können Sie neue Alben anlegen oder Alben löschen und die Inhalte von
Alben ansehen.
Ein neues Album anlegen
Klicken Sie auf das +-Symbol neben dem Eintrag Alben.
Geben Sie einen Namen und eine Beschreibung für das Album an.
Wählen Sie ein Thema aus, das als Hintergrund beim Betrachten des Al-
bums angezeigt werden soll.
Unten sehen Sie die voreingestellte Art der Freigabe (Freunde). Klicken
Sie auf Weitere Freigabeoptionen, um eine andere Art der Freigabe
einzustellen.
Klicken Sie abschließend auf Anlegen, um das Album zu erstellen.
Ein Album löschen
Markieren Sie ein Album, dass Sie löschen wollen und klicken Sie auf das
--Symbol.
Bestätigen Sie die anschließende Abfrage mit Ja.
90245 50049999 DE EN FR NL content RC1.indb 3290245 50049999 DE EN FR NL content RC1.indb 32 13.04.2015 16:23:5713.04.2015 16:23:57

33 von 218
Medienbibliothek
DE
FR
NL
GPL
EN
15.5. Dateien auf das Lifecloud System hochladen
Um Dateien auf das Lifecloud System hochzuladen gehen Sie wie folgt vor:
Klicken Sie in der Medienbibliothek auf einen Ordner, in den Sie die Datei-
en hochladen wollen.
Wählen Sie im Kontextmenü des Ordners den Eintrag Hochladen oder
klicken Sie auf den Pfeil über der Ordneransicht.
Das Upload-Fenster öffnet sich.
• In der Ansicht Manuell Hochladen klicken Sie auf den Eintrag
Datei hinzufügen und wählen anschließend eine Datei von Ihrem
Computer aus, die Sie der Upload-Liste hinzufügen wollen.
• In der Ansicht Drag und Drop können Sie eine Datei von Ihrem Compu-
ter mit der Maus in das weiße Feld unten im Upload-Fenster ziehen um
Sie der Upload-Liste hinzuzufügen.
HINWEIS!
Für den Datei-Upload per Drag und Drop muss die ak-
tuelle Version von Java Script in Ihrem Browser akti-
viert sein.
Fügen Sie mit Hilfe einer der beiden Methoden Dateien der Upload-Lis-
te hinzu und klicken Sie anschließend auf Hochladen, um die Dateien in
den zuvor gewählten Ordner hochzuladen.
15.6. Einträge im Kontextmenü bei Mediendateien
Bei Mediendateien wie Foto-, Audio- und Videodateien erscheinen zusätzli-
che Einträge im Kontextmenü.
Fotodateien
Anzeigen, öffnet das Foto direkt im Fotobetrachter. Desweiteren können Sie
das Foto Im Uhrzeigersinn und Gegen den Uhrzeigersinn drehen, so-
wie als Starthintergrund für die Startseite verwenden.
Audiodateien
Abspielen öffnet die Audiodatei direkt im Musikplayer.
Videodateien
Abspielen öffnet die Videodatei direkt im Videoplayer.
90245 50049999 DE EN FR NL content RC1.indb 3390245 50049999 DE EN FR NL content RC1.indb 33 13.04.2015 16:23:5713.04.2015 16:23:57

34 von 218
Alben
16. Alben
Hier erscheinen die Alben, die Sie in der Medienbilbiothek angelegt haben.
Alben enthalten Verknüpfungen zu Dateien, die sie in der Medienbibliothek
markiert und einem Album hinzugefügt haben.
• Alben können auch mit Benutzern außerhalb der Lifecloud geteilt wer-
den, indem Sie einen Link zum Album mit diesen Benutzern teilen. Dieser
Link kann dauerhaft oder befristet gültig sein.
• Neue Alben richten Sie in der Medienbibliothek ein.
90245 50049999 DE EN FR NL content RC1.indb 3490245 50049999 DE EN FR NL content RC1.indb 34 13.04.2015 16:23:5813.04.2015 16:23:58

35 von 218
Einstellungen
DE
FR
NL
GPL
EN
17. Einstellungen
Auf dieser Seite nehmen Sie sämtliche Einstellungen für das Lifecloud Sys-
tem vor.
Wenn Sie als Administrator am Lifecloud System angemeldet sind, können
Sie als Administrator alle Systemeinstellungen aufrufen. Als Benutzer können
Sie nur die Benutzereinstellungen konfigurieren:
17.1. Benutzereinstellungen
Benutzer
Im Benutzermenü passen Sie das Erscheinungsbild und die Konfiguration für
den aktuell angemeldeten Benutzer an.
Sprache
Stellen Sie hier die Sprache ein, in welcher der Benutzer die Menüs des Lifec-
loud Systems angezeigt werden sollen.
Email
Geben Sie hier eine Email-Adresse ein, über die der Benutzer Benachrichti-
gungen des Lifecloud Systems erhalten soll.
Position des Starthintergrunds
Sie können Bilder, die auf dem Lifecloud System abgelegt sind, in der Medi-
enbibliothek als Starthintergrund definieren.
Stellen Sie hier ein, wie der Starthintergrund im Browser angezeigt werden
soll.
90245 50049999 DE EN FR NL content RC1.indb 3590245 50049999 DE EN FR NL content RC1.indb 35 13.04.2015 16:23:5813.04.2015 16:23:58

36 von 218
Einstellungen
Starthintergrund löschen
Hier löschen Sie den aktuell verwendeten Starthintergrund und setzen ihn
auf den Standardhintergrund zurück.
Erforderliche Schritte, wenn eine Datei bereits existiert
Hier geben Sie an, wie das Lifecloud System beim Hochladen von Dateien
mit Dateien umgehen soll, die bereits existieren.
Was soll passieren wenn Dateien zu Alben hinzugefügt werden
• Jedesmal fragen
• Unterordner einbeziehen
• Unterordner nicht einbeziehen
Standardmäßige Freigabe neuer Alben für andere Familienkonten
Wenn Sie diese Funktion auf JA stellen, werden neue Alben standardmäßig
mit der Freigabe Familienkonten erstellt.
Standardmäßige Freigabe neuer Alben für Media Player
Wenn Sie diese Funktion auf JA stellen, werden neue Alben standardmäßig
mit der Freigabe Mediaplayer erstellt.
Tipps ausblenden
Wenn Sie diese Funktion auf JA stellen, werden keine Tipps mehr nach dem
Anmelden an der Lifecloud angezeigt.
Audiowiedergabe wiederaufnehmen
Wenn Sie diese Funktion auf JA stellen, wird die Medienwiedergabe beim
nächsten Öffnen einer zuvor bereits abgespielten Mediendatei an der letzen
Wiedergabestelle fortgesetzt.
Setzen Sie alle Ankreuzfelder „Nicht mehr anzeigen“ zurück
Hier können Sie sämtliche Ankreuzfelder wieder einblenden, bei denen Sie
zuvor den Haken „Nicht mehr anzeigen“ gesetzt haben.
Speicherplatz
Hier können Sie den frei verfügbaren und den genutzten Speicherplatz der
Festplatten ablesen.
Passwort ändern
Um das aktuelle Passwort zu ändern, geben Sie hier ein neues Passwort an
und bestätigen Sie, indem Sie auf Senden klicken.
90245 50049999 DE EN FR NL content RC1.indb 3690245 50049999 DE EN FR NL content RC1.indb 36 13.04.2015 16:23:5813.04.2015 16:23:58

37 von 218
Einstellungen
DE
FR
NL
GPL
EN
17.2. Servereinstellungen
Netzwerkfreigabe
Geben Sie hier den Namen Ihrer Windows-Heimnetzgruppe an und stellen
Sie die Funktion auf Ja, um Ihre Dateien und Ordner in der Heimnetzgruppe
verfügbar zu machen.
Wake ON LAN
Stellen Sie diese Funktion auf Ja, damit Netzwerkgeräte das Lifecloud Sys-
tem einschalten („aufwecken“) können, wenn sich dieses im Ruhemodus be-
findet.
UPNP-Konfiguration des Routers
Stellen Sie die Funktion „Router über UPNP konfigurieren“ auf Ja, da-
mit das Lifecloud System Ihren Router für die Portfreigabe konfigurieren
kann.
Im nächsten Eintrag können Sie angeben, ob das Lifecloud System die aktu-
elle Konfiguration Ihres Routers aufheben kann.
Benachrichtigungen
Geben Sie hier an, an welche Email-Adressen Systemmeldungen gesendet
werden sollen. Trennen Sie mehrere Email-Adressen durch Komma voneinan-
der.
Systemmeldungungen werden gesendet, wenn ein Problem mit der Festplat-
te aufgetreten ist oder wenn die Festplatte voll ist.
Netzwerkdienste
Hier richten Sie den FTP-Zugang zum Lifecloud System ein.
Stellen Sie die Funktion für das lokale Netzwerk und/oder das Internet auf
Ja, um den FTP-Zugriff auf die Ordner des Lifecloud Systems zu aktivie-
ren.
LAN-Verbindung
Hier können Sie dem Lifecloud System mit Ihrem LAN-Netzwerk über DHCP
verbinden, oder ihm eine feste IP-Adresse zuweisen
Stellen Sie die Funktion
IP-Adresse automatisch beziehen auf Ja,
damit IP-Adressen vom DHCP-Server des Routers bezogen werden.
Wenn Sie die IP-Adresse manuell konfigurieren wollen, stellen Sie die
Funktion auf
Nein und geben Sie anschließend IP-Adresse, Subnetzmas-
ke, Gateway und DNS-Server manuell ein.
90245 50049999 DE EN FR NL content RC1.indb 3790245 50049999 DE EN FR NL content RC1.indb 37 13.04.2015 16:23:5813.04.2015 16:23:58

38 von 218
Einstellungen
Datum und Uhrzeit
Das Lifecloud System kann die Datums- und Uhrzeiteinstellungen über einen
Zeitserver aus dem Internet beziehen oder Sie können die Einstellung selbst
vornehmen.
Wenn Sie die Einstellung Datum und Zeit aus dem Internet abrufen auf
Ja stellen, müssen Sie anschließend einen Standard-NTP-Server (Net-
work Time Protocol) angeben, über den die Einstellungen bezogen wer-
den können.
Fernzugriff
Hier können Sie den Fernzugriff auf das Lifecloud System über das Internet
aktivieren und deaktivieren.
17.3. Administration
Neuen Benutzer hinzufügen
Um dem System einen neuen Benutzer hinzuzufügen, geben Sie den Be-
nutzernamen in das Feld Benutzername ein.
Benutzernamen müssen mit einem Buchstaben beginnen und aus mindes-
tens drei Zeichen bestehen. Dabei wird die Groß-/Kleinschreibung nicht be-
rücksichtigt. Sie können keine zwei Benutzer mit demselben Benutzernamen
hinzufügen.
Geben Sie einen Anzeigenamen für den Benutzer ein. Dieser Name kann
sich von dem Benutzernamen für das Konto unterscheiden.
Geben Sie ein Kennwort ein und bestätigen Sie es.
Das Kennwort muss aus mindestens sechs Zeichen bestehen und eine Ziffer
enthalten. Dabei wird die Groß-/Kleinschreibung berücksichtigt.
Wählen Sie
Als Administrator erstellen, um den neuen Benutzer
mit Administrator-Rechten auszustatten.
Wählen Sie
Benutzer darf auf Familienordner zugreifen, um dem
neuen Benutzer Zugriff auf die Dateien und Ordner im Stammverzeichnis
Unsere Ordner zu gestatten.
Benutzer bearbeiten
Wählen Sie hier einen bestehenden Benutzer aus, dessen Namen, Passwort
oder Rechte Sie nachträglich bearbeiten wollen.
Herunterfahren
Hier können Sie das Lifecloud System Herunterfahren oder neu starten.
Software-Updates
Hier können Sie prüfen, ob neue Updates über das Internet verfügbar sind.
90245 50049999 DE EN FR NL content RC1.indb 3890245 50049999 DE EN FR NL content RC1.indb 38 13.04.2015 16:23:5813.04.2015 16:23:58

39 von 218
Einstellungen
DE
FR
NL
GPL
EN
Abonnement für Medion LifeCloud Premium
Hier können Sie ein Medion Life Cloud Premium Account erwerben, bzw. Ih-
ren Status zu einem Medion Life Cloud Premium Account einsehen.
Datenträgerverwaltung
Hier können Sie den Status der Festplattenkonfiguration ablesen.
Um beide Festplatten zu formatieren, um Sie anschließend neu aufzuset-
zen, wählen Sie den Eintrag
Format.
Um die Konfiguration (RAID 1 oder JBOD) neu vorzunehmen, wählen Sie
den Eintrag
Neu konfigurieren.
Externes Speichermedium
Hier können Sie die Speicherbelegung eines externen, an den USB-Anschluss
des Lifecloud Systems angeschlossenen Datenträgers ablesen.
Power Timer
• Hier können Sie den Power Timer aktivieren und einstellen. Bei aktivier-
tem Power Timer schaltet sich das Lifecloud System nach einem festge-
legten Zeitplan automatisch ein- und aus. Beachten Sie, dass nach dem
Festlegen einer Ausschaltzeit für das Gerät Datenübertragungen unter-
brochen und anstehende Backup-Jobs nicht ausgeführt werden.
• Netzwerkgeräte können das ausgeschaltete Lifecloud System einschal-
ten, wenn zuvor die Funktion WOL (Wake On LAN) aktiviert wurde (Siehe
„Wake ON LAN“ auf Seite 37).
HINWEIS!
Der frühstmögliche Zeitpunkt für das automatische
Ausschalten liegt etwa 5 Minuten ab der Uhrzeit, wo
Sie diese Einstellung vornehmen.
90245 50049999 DE EN FR NL content RC1.indb 3990245 50049999 DE EN FR NL content RC1.indb 39 13.04.2015 16:23:5813.04.2015 16:23:58

40 von 218
Verwenden der Life Cloud App auf Smart-Geräten
18. Verwenden der Life Cloud App auf
Smart-Geräten
Laden Sie die LifeCloud-App für Smart-Geräte über den auf dem
Umschlag angegebenen Link herunter und installieren Sie die App
Nach erfolgreicher Installation tippen Sie auf das Icon der LifeCloud-
App auf Ihrem mobilen Smart-Gerät.
Die LifeCloud App wird gestartet (hier am Beispiel der Android-App).
Geben Sie den Namen Ihrer Lifecloud, sowie den entsprechenden Benut-
zernamen und ein Passwort für die Anmeldung der App an der Lifecloud
an.
Sie können Ihre LifeCloud bzw. Ihr Lifecloud System nun über die App an Ih-
rem Mobilgerät von jedem Ort aus über das Internet erreichen.
18.1. Hauptmenü
In der Startseite der Life Cloud App können Sie die Alben oder die Medienbi-
bliothek des Lifecloud Systems aufrufen.
Tippen Sie auf ein Symbol, um zum entsprechenden Menü zu gelangen.
90245 50049999 DE EN FR NL content RC1.indb 4090245 50049999 DE EN FR NL content RC1.indb 40 13.04.2015 16:23:5813.04.2015 16:23:58

41 von 218
Verwenden der Life Cloud App auf Smart-Geräten
DE
FR
NL
GPL
EN
18.2. Medienbibliothek Ansicht
Klicken Sie im Hauptmenü auf den Eintrag Medienbibliothek, um die
Medienbibliothek der Lifecloud anzuzeigen.
In der Medienbibliothek werden Ihnen die öffentlichen und privaten Ordner
angezeigt.
Öffnen Sie eines der Stammverzeichnisse Unsere Ordner oder
Meine Ordner.
Über die Menü-Icons am unteren Bildrand können Sie die Ansicht der Ordne-
rinhalte anpassen.
Tippen Sie auf den Button
am unteren Displayrand, um die Menüleis-
te einzublenden.
Über die einzelnen Einträge können Sie nach Dateien suchen, die Ansicht ak-
90245 50049999 DE EN FR NL content RC1.indb 4190245 50049999 DE EN FR NL content RC1.indb 41 13.04.2015 16:23:5913.04.2015 16:23:59

42 von 218
Verwenden der Life Cloud App auf Smart-Geräten
tualisieren, Ordner erstellen, Dateien in den aktuellen Ordner hochladen bzw.
sich von der Lifecloud abmelden.
18.3. Alben Ansicht
Klicken Sie im Hauptmenü auf den Eintrag Alben, um die Alben der Lifec-
loud anzuzeigen.
Über die Menü-Icons am unteren Bildrand können Sie die Ansicht der Ordne-
rinhalte anpassen.
Tippen Sie auf den Button am unteren Displayrand, um die Menüleis-
te einzublenden.
Über die einzelnen Einträge können Sie nach Dateien suchen, die Ansicht ak-
tualisieren, bzw. sich von der Lifecloud abmelden.
90245 50049999 DE EN FR NL content RC1.indb 4290245 50049999 DE EN FR NL content RC1.indb 42 13.04.2015 16:24:0013.04.2015 16:24:00

43 von 218
Memeo Backup verwenden
DE
FR
NL
GPL
EN
19. Memeo Backup verwenden
Auf der mitgelieferten Software-CD finden Sie die Backup-Software Memeo-
Instant Backup, die Sie im Rahmen der Installation des LifeCloud Agent ins-
tallieren können („LifeCloud Agent verwenden“ auf Seite 25).
So richten Sie die Backup-Funktion mit Memeo-Instant-Backup auf Ihrem
Lifecloud System ein:
Netzlaufwerk für die Datensicherung erstellen
Verbinden Sie sich an Ihrem PC über den LifecloudAgent mit dem Life-
cloud System, wie unter „Durchsuchen der LifeCloud-Ordner“ auf Seite
27 beschrieben.
Klicken Sie das Icon „Netzlaufwerk(e)“ an.
Für eine Datensicherung in einen öffentlichen Ordner melden Sie sich mit
dem entsprechenden Benutzerkonto an.
Wählen Sie einen Laufwerksbuchstaben aus (z.B. „Z:“).
Wählen Sie einen Ordner aus, in den die Sicherungskopien der Daten ge-
speichert werden sollen (z.B. „Z:“).
Setzen Sie ein Häkchen im Feld
„Verbindung bei Windows-Anmeldung wiederherstellen“.
Daten sichern mit Memeo Backup
Starten Sie Memeo Instant Backup, indem Sie auf das Icon „Memeo Back-
up“ auf dem Desktop klicken.
Klicken Sie im Menü „Hilfe“ auf den Eintrag „Registrieren“ und ge-
ben Sie dort den Product-Key ein, der sich auf der Hülle der mitgeliefer-
ten Software-CD befindet.
Überspringen Sie die Startseite, in dem Sie auf den Eintrag
„Nein danke, ich möchte jetzt ein Backup erstellen“ klicken.
Wählen Sie nun als Ziel für die Datensicherung das eben erstellte Netz-
laufwerk (im Beispiel oben: (Z:)) aus.
Klicken Sie auf „Backup starten“.
90245 50049999 DE EN FR NL content RC1.indb 4390245 50049999 DE EN FR NL content RC1.indb 43 13.04.2015 16:24:0113.04.2015 16:24:01

44 von 218
LifecloudDetect ausführen
Es werden nun alle Dateien vom Laufwerk C: des Computers auf dem Lifec-
loud System gesichert. Folgende Ordner auf C: werden nicht gesichert:
• Der Ordner „Programme“
• Temporäre Dateien und Protokolldateien, sowie virtuelle Festplattendateien
• Der Ordner „Windows“
HINWEIS!
Für weitere Informationen zu Memeo Instant Backup
rufen Sie im Menü „Hilfe“ den Eintrag „Kurzleitfaden“
auf.
20. LifecloudDetect ausführen
Sie können das Lifecloud-System im Netzwerk suchen, indem Sie die Da-
tei medionlifeclouddetect.exe ausführen, die sich auf der mitgelieferten
Software-CD im Ordner util befindet.
Nach dem Ausführen der Datei erscheint ein Fenster, in dem Sie dazu auf-
gefordert werden, die Fronttaste am Gerät zu drücken, damit das Lifec-
loud-System im Netzwerk gefunden werden kann.
90245 50049999 DE EN FR NL content RC1.indb 4490245 50049999 DE EN FR NL content RC1.indb 44 13.04.2015 16:24:0113.04.2015 16:24:01

45 von 218
Reinigung
DE
FR
NL
GPL
EN
20.1. Benötigen Sie weitere Unterstützung?
Wenn die Vorschläge in den vorangegangenen Abschnitten Ihr Problem
nicht behoben haben, nehmen Sie bitte Kontakt mit uns auf. Sie würden uns
sehr helfen, wenn Sie uns folgende Informationen zur Verfügung stellen:
• Welche externen Geräte sind angeschlossen?
• Welche Meldungen erscheinen auf dem Bildschirm?
• Bei welchem Bedienungsschritt ist das Problem aufgetreten?
• Wie sieht Ihre Rechnerkonfiguration aus?
• Welche Software haben Sie beim Auftreten des Fehlers verwendet?
• Welche Schritte haben Sie zur Lösung des Problems bereits unternom-
men?
• Wenn Sie bereits eine Kundennummer erhalten haben, teilen Sie uns die-
se mit.
21. Reinigung
Die Lebensdauer des Gerätes können Sie durch folgende Maßnahmen ver-
längern:
• Ziehen Sie vor dem Reinigen immer den Netzadapter und alle Verbin-
dungskabel.
• Verwenden Sie keine Lösungsmittel, ätzende oder gasförmige Reini-
gungsmittel.
• Reinigen Sie das Gerät mit einem weichen, fusselfreien Tuch.
Bitte bewahren Sie das Verpackungsmaterial gut auf und benutzen Sie aus-
schließlich dieses, um das Gerät zu transportieren.
ACHTUNG!
Es befinden sich keine zu wartenden oder zu reinigenden
Teile innerhalb des Gerätes.
90245 50049999 DE EN FR NL content RC1.indb 4590245 50049999 DE EN FR NL content RC1.indb 45 13.04.2015 16:24:0313.04.2015 16:24:03

46 von 218
Entsorgung
22. Entsorgung
Verpackung
Ihr Gerät befindet sich zum Schutz vor Transportschäden in ei-
ner Verpackung. Verpackungen sind Rohstoffe und somit wie-
derverwendungsfähig oder können dem Rohstoffkreislauf zu-
rückgeführt werden.
Gerät
Werfen Sie Ihr Gerät am Ende seiner Lebenszeit keinesfalls in
den normalen Hausmüll! Erkundigen Sie sich bei Ihrer Stadt-
oder Gemeindeverwaltung nach einer umwelt- und sachgerech-
ten Entsorgung.
90245 50049999 DE EN FR NL content RC1.indb 4690245 50049999 DE EN FR NL content RC1.indb 46 13.04.2015 16:24:0313.04.2015 16:24:03

47 von 218
Technische Daten
DE
FR
NL
GPL
EN
23. Technische Daten
Stromversorgung Netzadapter Ktec KSAP0361200300HE
Eingang (primär):
100-240 V ~ 50/60 Hz, 0,8 A
Ausgang (sekundär): 12 V 3 A
Anschlüsse
3 USB Anschlüsse (vorne/hinten): 2x USB 3.0 (blau), 1x USB 2.0 (weiß)
LAN-Netzwerkbuchse: RJ-45
(Ethernet 10/100 MBit & Gigabit)
Netzadapter-Eingang: 12 V 3 A
Festplatten
Schnittstellen: 2x SATA
Kapazität: 2x 6 TB (entspricht 6000 GB*)
Allgemein
Abmessungen (ca.) 134 x 97 x 195 mm (B x H x T)
Gesamtgewicht (ca.) ca. 2 kg
Betriebstemperatur 5°C bis 35°C
Luftfeuchtigkeit während des Betriebs 5 % bis 65 %
* 1 GB entspricht 1 Milliarde Bytes. Die tatsächlich nutzbare Speicherkapazi-
tät kann abweichen.
90245 50049999 DE EN FR NL content RC1.indb 4790245 50049999 DE EN FR NL content RC1.indb 47 13.04.2015 16:24:0313.04.2015 16:24:03

48 von 218
Glossar
24. Glossar
BitTorrent
Siehe Torrent.
CIFS – Common Internet File System
Das empfohlene Dateifreigabeprotokoll für die Windows-Plattform, bei dem
Benutzer über die Netzwerkumgebung auf Freigaben zugreifen können. Mac
OS X oder neuere Versionen unterstützen ebenfalls das CIFS-Protokoll. Siehe
auch Protokoll.
DHCP – Dynamic Host Configuration Protocol
Ein Protokoll, um Geräten im Netzwerk eine IP-Adresse zuzuweisen. Mit den
dynamischen Adressen kann ein Gerät jedes Mal eine andere IP-Adresse ha-
ben, wenn es sich mit einem Netzwerk verbindet. In manchen Systemen
ändert sich die IP-Adresse selbst, während das Gerät verbunden ist. DHCP
unterstützt auch eine Kombination aus statischen und dynamischen IP-Ad-
ressen. Siehe auch Protokoll.
DLNA – Digital Living Network Alliance
Die Gruppe von Unternehmen aus der Unterhaltungselektronik, der Compu-
terbranche sowie Mobilgerätehersteller, die Standards für die Produktkom-
patibilität festlegt und so den Benutzern ermöglicht, Inhalte zu Hause ge-
meinsam zu verwenden.
DMA – Digitaler Medienadapter
Ein Gerät, mit dem Heimunterhaltungsgeräte, Medien, wie Musik, Fotos und
Videos, über ein Netzwerk von und zu anderen Geräten übertragen können.
DNS – Domain Name Service
Ein System, mit dem ein Netzwerk-Nameserver Text-Hostnamen in nume-
rische IP-Adressen übersetzen kann, um ein mit dem Internet verbundenes
Gerät eindeutig zu identifizieren.
Ethernet
Eine Standardmethode, um Computer an ein lokales Netzwerk (LAN) anzu-
schließen.
FTP (File Transfer Protocol – Dateiübertragungsprotokoll)
Ein Netzwerkprotokoll, das verwendet wird, um Daten über ein Netzwerk
von einem Computer auf einen anderen zu übertragen. FTP wird häufig ver-
wendet, um Dateien unabhängig von den verwendeten Betriebssystemen
auszutauschen.
90245 50049999 DE EN FR NL content RC1.indb 4890245 50049999 DE EN FR NL content RC1.indb 48 13.04.2015 16:24:0313.04.2015 16:24:03

49 von 218
Glossar
DE
FR
NL
GPL
EN
Host
Der Computer, mit dem sich die anderen Computer und Peripheriegeräte
verbinden.
Hostadapter
Eine Steckkarte, die als Schnittstelle zwischen dem System-Bus des Compu-
ters und der Festplatte fungiert.
Host-Schnittstelle
Der Punkt, an dem ein Host und ein Laufwerk miteinander verbunden sind.
Host-Übertragungsrate
Die Geschwindigkeit, mit der ein Host-Computer Daten über eine Schnittstel-
le übertragen kann.
HTTP – Hypertext Transfer Protocol
Vom World Wide Web verwendetes Protokoll, um Informationen zwischen
Servern und Browsern zu übertragen. Siehe auch Protokoll.
IP – Internetprotokoll
Ein System, das regelt, wie Datenmitteilungen in Pakete aufgeteilt, vom Sen-
der zum Empfänger geleitet und am Ziel wieder zusammengesetzt werden.
Siehe auch Protokoll.
IP-Adresse
Eine binäre 32-Bit-Nummer, die jeden mit dem Internet verbundenen Com-
puter eindeutig identifiziert.
iTunes
Ein Programm zur Audiowiedergabe, das zum Importieren von Songs und
anderen Mediendateien von Ihrer Festplatte verwendet wird.
LAN – Local Area Network (Lokales Netzwerk)
Ein System, bei dem Computerbenutzer innerhalb eines Unternehmen oder
einer Organisation miteinander und oftmals auch mit zentral auf LAN-Ser-
vern gespeicherten Datensammlungen verbunden sind.
Medienserver
Ein Gerät, das Mediendateien speichert und freigibt (digitale Audio-, Video-
und Fotodateien).
Medienspeichergerät
Ein Gerät, das Mediendateien speichert (digitale Audio-, Video- und Fotoda-
teien).
90245 50049999 DE EN FR NL content RC1.indb 4990245 50049999 DE EN FR NL content RC1.indb 49 13.04.2015 16:24:0413.04.2015 16:24:04

50 von 218
Glossar
NAS
Network Attached Storage (Netzwerkspeichergerät). Ein Festplattenspeicher-
gerät, das mit einer eigenen Netzwerkadresse eingerichtet wird, anstatt mit
dem Computer verbunden zu werden, der Workstation-Benutzern im Netz-
werk dient.
Betriebssystem
Eine Software, mit der der Benutzer und auf dem System installierte Software
mit der Computerhardware kommunizieren kann, wie der Festplatte.
Partition
Ein logischer Teil auf einer Festplatte, den das Betriebssystem als separate
Festplatte behandelt. Jeder Partition wird ein eindeutiger Laufwerksbuchsta-
be zugewiesen. Partitionen, die als festes Laufwerk eingebunden sind, wer-
den auch als „Volumen“ bezeichnet.
Peer
Siehe Torrent.
Port (Hardware)
Ein spezieller Ausgang an einem Gerät zum Verbinden mit anderen Geräten
mittels eines Kabels oder Steckers. Beispiele dafür sind Ethernet- Ports, Stro-
manschlüsse und USB-Ports.
Protokoll
Eine Konvention zur Datenübertragung, die das Zeitverhalten, das Steue-
rungsformat und die Datendarstellung festlegt.
Freigabe
Ein Bereich, ähnlich einem Ordner oder Verzeichnis, der zum Organisieren
von Dateien und dem Zugriff aus dem Netzwerk eingerichtet ist. Freigaben
können „öffentlich“, also für jeden im Netzwerk zugänglich, oder „privat“ sein,
also nur für ausgewählte Benutzer in Ihrem Netzwerk zugänglich.
Seeder
Siehe Torrent.
Streaming
Medien, wie Audio, Video und Fotos, die konstant empfangen werden, wäh-
rend sie gleichzeitig von einem Streaminganbieter geliefert werden.,
90245 50049999 DE EN FR NL content RC1.indb 5090245 50049999 DE EN FR NL content RC1.indb 50 13.04.2015 16:24:0413.04.2015 16:24:04

51 von 218
Glossar
DE
FR
NL
GPL
EN
TCP/IP
Transmission Control Protocol/Internet Protocol (Übertragungssteuerungs-
protokoll/Internetprotokoll). Eine Reihe von Protokollen zur Kommunikation
über miteinander verbundene Netzwerke. Der Standard für die Datenüber-
tragung über Netzwerke. Siehe auch Protokoll.
Torrent
BitTorrent (Bit: kleinste Daten-Einheit, engl. torrent: reißender Strom od.
Sturzbach, von lat. torrens) ist ein Filesharing-Protokoll, das sich besonders
für die schnelle Verteilung großer Datenmengen eignet. Torrents sind übli-
cherweise wenige dutzend Kilobytes groß und werden auf der Website des
Anbieters oder über Index-Sites zum Herunterladen bereitgestellt.
Der initiale Seeder-Peer (von engl. to seed: säen) stellt die Verknüpfung zur
als Torrent anzubietenden Datei her und hält diese verfügbar.
Die Client-Software erhält vom Tracker eine Liste von Gegenstellen, die die
Daten oder Teile davon haben oder interessiert sind. Sobald ein Peer ein Seg-
ment der Datei erhalten und die Prüfsumme verifiziert hat, meldet er dies
dem Tracker und kann dieses Dateistück nun schon an die anderen Peers
weitergeben.
Die Menge aller Peers, die am gleichen Torrent interessiert sind, nennt man
Schwarm. Peers, die im Besitz des kompletten Inhalts des Torrents sind, und
somit nichts von anderen Clients herunterladen, sondern lediglich Daten
verteilen, nennt man Seeder. Als Leecher (von engl. leech: Blutegel; -sauger)
werden in der Regel die Peers bezeichnet, die noch nicht über den gesamten
Torrent-Inhalt verfügen und noch weitere Segmente herunterladen.
UPnP
Universal Plug n Play. Eine Reihe von Computernetzwerkprotokollen, die die
Implementierung von Netzwerken zu Hause vereinfachen, indem die Geräte
nahtlos miteinander verbunden werden können. Siehe auch Protokoll.
Volumen
Siehe Partition.
90245 50049999 DE EN FR NL content RC1.indb 5190245 50049999 DE EN FR NL content RC1.indb 51 13.04.2015 16:24:0413.04.2015 16:24:04

52 von 218
Impressum
25. Impressum
Copyright © 2015
Alle Rechte vorbehalten.
Diese Bedienungsanleitung ist urheberrechtlich geschützt.
Vervielfältigung in mechanischer, elektronischer und jeder anderen Form
ohne die schriftliche Genehmigung des Herstellers ist verboten.
Das Copyright liegt bei der Firma:
Medion AG
Am Zehnthof 77
45307 Essen
Deutschland
Technische und optische Änderungen sowie Druckfehler vorbehalten.
Die Anleitung kann über die Service Hotline nachbestellt werden und steht
über das Serviceportal zum Download zur Verfügung.
Sie können auch den unten stehenden QR Code scannen und die Anleitung
über das Serviceportal auf Ihr mobiles Endgerät laden.
URL QR Code
DE www.medionservice.de
AT www.medion.com/at/service/start/
BE
www.medion.com/be/nl/service/
start/
CH
www.medion.com/ch/de/service/
start/
LUX www.medion.com/lu/de/
90245 50049999 DE EN FR NL content RC1.indb 5290245 50049999 DE EN FR NL content RC1.indb 52 13.04.2015 16:24:0413.04.2015 16:24:04

53 of 218
DE
FR
NL
GPL
EN
Contents
1. Notes on how to use these instructions ........................................ 55
1.1. Warning symbols and key words used in these instructions ..55
2. Proper use ....................................................................................... 56
3. Safety instructions .......................................................................... 57
3.1. Keep electrical equipment out of reach of children ..................57
3.2. General points ..........................................................................................57
3.3. Set-up location ........................................................................................58
3.4. Never attempt to repair the product! ..............................................58
3.5. Cleaning and care ...................................................................................59
3.6. Data backup ..............................................................................................59
3.7. Power supply ............................................................................................59
3.8. Information on electrostatic charge ................................................60
3.9. Notes on conformity ..............................................................................61
4. General information ....................................................................... 61
4.1. Supported systems and formats .......................................................61
4.2. Capabilities of the LifeCloud system................................................62
4.3. How the LifeCloud system and its components work ...............62
4.4. Features of the LifeCloud system ......................................................63
4.5. System requirements ............................................................................63
4.6. Information on security warnings ....................................................63
5. Package contents ............................................................................ 65
6. Overview of the product ................................................................ 66
6.1. Hardware front and rear .......................................................................66
7. About the LifeCloud ....................................................................... 67
8. Start of operation ........................................................................... 67
8.1. Connecting to a network .....................................................................67
9. Switching the system on or off ...................................................... 68
10. Initial operation .............................................................................. 68
10.1. Setting up an account for the LifeCloud system .........................68
10.2. On initial start-up: hard drive configuration .................................72
11. Copying files with the OTC button ................................................ 74
12. RESET button ................................................................................... 74
12.1. Reset password ........................................................................................74
12.2. Resetting to the system to the default settings ...........................77
13. Using the LifeCloud agent .............................................................. 77
13.1. Installing the LifeCloud agent ............................................................77
90245 50049999 DE EN FR NL content RC1.indb 5390245 50049999 DE EN FR NL content RC1.indb 53 13.04.2015 16:24:0413.04.2015 16:24:04

54 of 218
13.2. Using the LifeCloud desktop ..............................................................78
14. The web interface ........................................................................... 80
14.1. Opening the web interface .................................................................80
14.2. Features and settings of the web interface ...................................80
15. Media library ................................................................................... 81
15.1. My Library/Family Library ....................................................................81
15.2. New folder/delete folder ......................................................................82
15.3. Context menu for opening folders and files .................................82
15.4. Albums ........................................................................................................84
15.5. Uploading files to the LifeCloud system ........................................85
15.6. Entries in the media file context menu ...........................................85
16. Albums ............................................................................................. 86
17. Settings ............................................................................................ 87
17.1. User settings .............................................................................................87
17.2. Server Preferences ..................................................................................89
17.3. Administration .........................................................................................90
18. Using the LifeCloud app on smart devices ................................... 92
18.1. Main menu ................................................................................................92
18.2. Media library view ..................................................................................92
18.3. Album view ...............................................................................................93
19. Using Memeo Backup ..................................................................... 95
20. Run LifeCloudDetect ...................................................................... 96
20.1. Do you need more help? ......................................................................97
21. Cleaning ........................................................................................... 97
22. Disposal ........................................................................................... 98
23. Technical data ................................................................................. 99
24. Glossary ......................................................................................... 100
25. Legal notice ................................................................................... 104
90245 50049999 DE EN FR NL content RC1.indb 5490245 50049999 DE EN FR NL content RC1.indb 54 13.04.2015 16:24:0413.04.2015 16:24:04

55 of 218
Notes on how to use these instructions
DE
FR
NL
GPL
EN
1. Notes on how to use these instructions
Before using the product for the first time, you should
read these operating instructions thoroughly and fol-
low the safety advice!
This product should only be used as directed and
specified in these instructions.
Please keep these instructions in a safe place for future
reference. and pass them on with the product to any
new owner.
1.1. Warning symbols and key words used in these
instructions
DANGER!
Warning of immediate risk of fatal injury!
WARNING!
Warning of possible risk of fatal injury and/or se-
rious irreversible injuries!
CAUTION!
Please follow the instructions to prevent injuries and
property damage!
ATTENTION!
Please follow the instructions to prevent property
damage!
PLEASE NOTE!
Please follow the operating instructions!
PLEASE NOTE!
Additional information on using the product.
90245 50049999 DE EN FR NL content RC1.indb 5590245 50049999 DE EN FR NL content RC1.indb 55 13.04.2015 16:24:0413.04.2015 16:24:04

56 of 218
Proper use
WARNING!
Warning of risk of electric shock!
• Bullet point / information on operating steps and results
Instructions to be carried out
2. Proper use
This product is designed for the provision of data to a network
and for the management of audio, video and image files stored
on data media which are connected to the product directly or
via a network.
The LifeCloud System is a file server. A server is a device which is
used to store various types of files and to make them available
to the users in a local network.
The server is supplied with software which allows multiple us-
ers to back up, store, share and protect their files on the built-in
hard disk drive.
This product is intended for use in dry, indoor areas only.
The product is only intended for private use and not for industri-
al or commercial use.
90245 50049999 DE EN FR NL content RC1.indb 5690245 50049999 DE EN FR NL content RC1.indb 56 13.04.2015 16:24:0513.04.2015 16:24:05

57 of 218
Safety instructions
DE
FR
NL
GPL
EN
3. Safety instructions
3.1. Keep electrical equipment out of reach of
children
• This product may be used by children aged 8 and above and
by people with reduced physical, sensory or mental abilities
or who lack the experience and/or knowledge to use it if they
are supervised or have been instructed in the safe use of the
product and have understood the dangers that result from it.
Children must not play with the product. Cleaning and prod-
uct care must not be carried out by children unless they are
aged 8 or above and are supervised.
• Children below the age of 8 should be kept away from the
product and the mains cable.
• Never allow children to use electrical devices unattended.
DANGER!
Keep packaging material, e.g. plastic bags, out of
reach of children. Failure to do so may lead to suffo-
cation.
3.2. General points
• Never open the product casing or the mains adapter (risk of
electric shock, short circuit and fire hazard).
• Never insert any objects through the slots and openings (risk
of electric shock, short circuit and fire hazard).
• The slots and openings on the product are for ventilation
purposes. Do not cover these openings (risk of overheating,
fire hazard).
• Do not place containers containing liquid, e.g. vases, on or
near the product or the mains adapter, and protect all the
parts from water and splashes. The container may tip over
and the liquid may impair the electrical safety of the product.
• If the plug, cable or product is damaged, remove the plug
from the power supply immediately.
90245 50049999 DE EN FR NL content RC1.indb 5790245 50049999 DE EN FR NL content RC1.indb 57 13.04.2015 16:24:0513.04.2015 16:24:05

58 of 218
Safety instructions
• If the product has been moved from a cold room to a warm
room, wait before connecting it to the power supply. The re-
sulting condensation may damage the product. The product
can be plugged in and operated safely as soon as it reaches
room temperature.
3.3. Set-up location
• Set up and operate all the components on a stable, level and
vibration-free surface to prevent the product from falling.
• Do not subject the product to knocks and vibrations. Knocks
and vibrations may damage the sensitive electronics.
• Do not place the product near heat sources (e.g. heaters) that
could affect it.
• Do not place naked flames (e.g. lit candles) on or near the
product.
• Make sure that the vents are never covered so as to ensure
that there is always adequate ventilation.
• Do not place any objects on the cables to avoid damaging
them.
• Maintain a minimum distance of approx. 10 cm between the
product or mains adapter and any walls. Ensure adequate
ventilation.
• Do not use the product outdoors as it could be damaged by
rain, snow, etc.
• To avoid malfunctions, keep the product at a distance of at
least one metre from high frequency or magnetic interfer-
ence sources (televisions, loudspeakers, mobile telephones,
etc.).
• Major changes in temperature or fluctuations in humidity can
cause moisture to build up within the product due to con-
densation – this can cause an electrical short circuit.
3.4. Never attempt to repair the product!
If the mains adapter, connecting cable or product is damaged,
remove the plug from the power outlet immediately.
90245 50049999 DE EN FR NL content RC1.indb 5890245 50049999 DE EN FR NL content RC1.indb 58 13.04.2015 16:24:0513.04.2015 16:24:05

59 of 218
Safety instructions
DE
FR
NL
GPL
EN
Do not use the product if the product or the connecting cable is
visibly damaged or if the product itself has been dropped.
WARNING!
Never try to open and/or repair the product yourself.
There is a risk of electric shock!
If there is a fault, contact the MEDION Service Centre or another
specialist repair shop in the interests of safety.
3.5. Cleaning and care
• Always disconnect the mains adapter from the power outlet
before cleaning the product.
• Only use a dry, soft cloth to clean the product. Do not use
chemical solutions and cleaning products because these may
damage the surface and/or the inscriptions on the product.
3.6. Data backup
Attention! Back up your data on external storage media after
each update. We do not accept any liability for claims for com-
pensation arising from a loss of data or for any consequential
damages.
3.7. Power supply
Please note that even when the mains switch is off, some com-
ponents of the product are live. To disconnect the product from
the power supply or to completely isolate the product from volt-
age sources, unplug the product completely from the mains.
• Only operate the mains adapter on earthed AC 100-240 V~
50 Hz power outlets. Contact your electricity provider if you
are not sure if the socket is earthed or not.
• Only use the power cable supplied with the product
(Ktec KSAP0361200300HE). Never try to connect the mains
adapter plug to other sockets as this may cause damage.
• For extra safety, we recommend using an overvoltage protec-
tor to prevent the product from being damaged as a result of
power surges or lightning strikes.
90245 50049999 DE EN FR NL content RC1.indb 5990245 50049999 DE EN FR NL content RC1.indb 59 13.04.2015 16:24:0513.04.2015 16:24:05

60 of 218
Safety instructions
• To interrupt the power supply, pull the plug out of the mains
socket.
• The mains adapter must remain easily accessible after con-
nection so that it can be unplugged quickly in an emergency.
• To avoid overheating, do not cover the mains adapter.
• If you are using an extension cable, make sure that it com-
plies with VDE requirements. If in doubt, contact your electri-
cian.
• Position the cables so that they cannot be stepped on or
tripped over.
• Do not place any objects on the cables to avoid damaging
them.
3.8. Information on electrostatic charge
If the product does not work correctly due to an electrostat-
ic charge, reset it by disconnecting it from the mains for a short
time.
90245 50049999 DE EN FR NL content RC1.indb 6090245 50049999 DE EN FR NL content RC1.indb 60 13.04.2015 16:24:0613.04.2015 16:24:06

61 of 218
General information
DE
FR
NL
GPL
EN
3.9. Notes on conformity
The product fulfils the requirements for electromagnetic com-
patibility and electrical safety.
MEDION AG hereby declares that these products comply with
the fundamental requirements and the other relevant regula-
tions set out in Directives 2006/95/EC and 2011/65/EU.
This product satisfies the basic requirements and relevant reg-
ulations of the Ecodesign Directive 2009/125/EC (Commission
Regulation 1275/2008).
However, due to its mode of operation (continuous permanent
provision of data on a network), no provision is made in respect
of this product to minimise power consumption in accordance
with the Ecodesign Directive.
To minimise power consumption, switch it off using the on/off
button or disconnect the product from the power outlet when
not required.
Full declarations of conformity are available at www.medion.
com/conformity.
4. General information
4.1. Supported systems and formats
Your LifeCloud system supports the following file systems, protocols and ap-
plications:
• TCP/IP network protocol
• UPnP, integrated DLNA server
• Samba server
• FTP server
• FAT32, NTFS, XFS
• Time Machine for MAC
• iTunes server
• Windows Backup
• WOL (Wake on LAN)
90245 50049999 DE EN FR NL content RC1.indb 6190245 50049999 DE EN FR NL content RC1.indb 61 13.04.2015 16:24:0613.04.2015 16:24:06

62 of 218
General information
4.2. Capabilities of the LifeCloud system
The LifeCloud system can be used for the following network tasks:
• As a central storage location for files that you want to make available to
other users via the local network or the internet.
• For the automatic creation and updating of backup copies of all your files.
• For the provision of files, such as contracts, presentations and reports, via
the local network or the internet.
• To be able to restore your data quickly and keep on working in the event
of computer damage or data loss, such as hard drive failure, computer
theft, etc. To store data on both hard drives of the LifeCloud system (RAID
system) so that in the event of failure of hard drive 1, the data on hard
drive 2 will still be available.
• To be able to access the LifeCloud system from anywhere in the world via
the internet to download or upload files that you want to store securely
or make available for other users while you are travelling.
• To be able to connect a USB printer to the LifeCloud system so that other
users on the local network can also use it.
• To enable any user with DLNA-enabled equipment to access the photos,
videos and music on the LifeCloud system in the local network via the in-
tegrated media server.
4.3. How the LifeCloud system and its components
work
• LifeCloud (hardware): the hardware with built-in hard drive where you
can store and back up your files.
• LifeCloud web interface: a built-in user interface with which you can set
up, customise and monitor the LifeCloud system via a web browser from
your computer (or even remotely).
• LifeCloud agent: a program for PCs or MACs with which you can log on to
the LifeCloud system from your desktop computer in the local network
and access the web interface as well as the network folders of the Life-
Cloud system.
• LifeCloud app: an app for iOS or Android mobile devices, such as tablet
PCs or smartphones. You can access the LifeCloud system on these devic-
es using this app.
90245 50049999 DE EN FR NL content RC1.indb 6290245 50049999 DE EN FR NL content RC1.indb 62 13.04.2015 16:24:0613.04.2015 16:24:06

63 of 218
General information
DE
FR
NL
GPL
EN
4.4. Features of the LifeCloud system
The features of the LifeCloud system are as follows:
• Two SATA hard drives (Serial ATA)
• An Ethernet or LAN connection which allows access to the server via the
local network or the internet.
• 2 USB ports on the rear (1x USB 2.0, 1x USB 3.0)
• 1 USB port on the front (1x USB 3.0)
• OTC (one-touch copy) button to copy data between USB data media and
the internal hard disk of the LifeCloud system.
4.5. System requirements
For access via the browser on a desktop PC:
• Java Runtime Environment from version 7
• Adobe Flash Player from version 11
For access via a mobile iOS or Android device:
• Adobe Integrated Runtime (abbreviated to "Adobe AIR") app
4.6. Information on security warnings
When you log in to Lifecloud via a web browser, it is possible that your
browser will display a warning message.
Your Lifecloud uses a security certificate to enable you to log in to Lifecloud
via an encrypted connection. As your browser does not recognise this certifi-
cate, it is necessary to confirm this connection.
Bypassing the Firefox warning message:
Proceed as follows:
Click on the option “I Understand the Risks”.
90245 50049999 DE EN FR NL content RC1.indb 6390245 50049999 DE EN FR NL content RC1.indb 63 13.04.2015 16:24:0613.04.2015 16:24:06

64 of 218
General information
Then select the option “Add Exception” to add the security certificate warn-
ing about your Lifecloud as a security exception.
Click here on “Confirm Security Exception”.
90245 50049999 DE EN FR NL content RC1.indb 6490245 50049999 DE EN FR NL content RC1.indb 64 13.04.2015 16:24:0613.04.2015 16:24:06

65 of 218
Package contents
DE
FR
NL
GPL
EN
Warning message from Internet Explorer
Click on “Continue to this website (not recommended)”.
5. Package contents
Please check your purchase to ensure that all the items are included and con-
tact us within 14 days of purchase if any parts are missing.
The following items are supplied with the product you have purchased:
• LifeCloud (hardware)
• LAN cable
• Mains adapter
• Software CD (optional)
• Operating instructions and warranty documents
NOTE!
Remove the protective films from the product before
use!
DANGER!
Keep packaging material, e.g. plastic bags, out of
reach of children. Failure to do so may lead to suffo-
cation.
90245 50049999 DE EN FR NL content RC1.indb 6590245 50049999 DE EN FR NL content RC1.indb 65 13.04.2015 16:24:0613.04.2015 16:24:06

66 of 218
Overview of the product
6. Overview of the product
6.1. Hardware front and rear
13
12
11
10
9
8
4
6
5
7
1
3
2
1) LED 1 BLUE/RED: Power indicator hard drive 1 (lights up blue when
switched on, lights up red in the event of a hardware failure)
2) LED 2 BLUE/RED: Power indicator hard drive 2 (lights up blue when
switched on, lights up red in the event of a hardware failure)
3) LED 3 BLUE/RED: Power indicator (lights up blue when switched on,
flashes blue during system boot, lights up red in the event of a hard-
ware failure)
4) LED GREEN: LAN display (lights up when a network connection is es-
tablished, flashes during data transfer)
5) LED ORANGE: OTC display for the front USB port (lights up when a
data carrier is detected on the front USB port, flashes during transfer
of data between the LifeCloud system and the USB data carrier
6) USB: USB port (USB 3.0 ) for using the one-touch copy function
7)
OTC: One-touch copy button
8)
RESET: RESET button
9) USB: USB port (USB 3.0)
10)
USB: USB port (USB 2.0)
11) On/off switch
12)
RJ45: LAN port for network cable
13)
DC: Mains adapter input
90245 50049999 DE EN FR NL content RC1.indb 6690245 50049999 DE EN FR NL content RC1.indb 66 13.04.2015 16:24:0613.04.2015 16:24:06

67 of 218
About the LifeCloud
DE
FR
NL
GPL
EN
NOTE!
LED 1 and LED 2 light up red before the hard disk con-
figuration process has been carried out (see 10.2 on
page 72).
7. About the LifeCloud
In the basic version, you can create up to five user accounts on your Life-
Cloud.
If you have a premium account on www.lifecloudmedion.com, you can set
up unlimited user accounts and also upgrade the LifeCloud with a torrent cli-
ent and a USB backup solution.
8. Start of operation
8.1. Connecting to a network
Connect the RJ45 socket (Ethernet/LAN) on the LifeCloud system to a
network interface (e.g. a router) by attaching a network cable to a vacant
network port.
Ensure that DHCP is activated on the router as the LifeCloud system is set
up as a DHCP client.
Attach the barrel jack of the mains adapter to the
DC IN socket on the Li-
feCloud system and then connect the mains adapter to a wall outlet.
Ensure that the computer that you want to use to configure the LifeCloud
90245 50049999 DE EN FR NL content RC1.indb 6790245 50049999 DE EN FR NL content RC1.indb 67 13.04.2015 16:24:0713.04.2015 16:24:07

68 of 218
Switching the system on or o
system is in the same network.
Ports for USB devices
You can connect external USB drives to the USB ports or a USB printer
which will be available to all the users in the local network.
The USB port on the front of the server can also be used for the one-
touch copy function.
NOTE!
Before using the one-touch copy function, please read
the relevant instructions in “Copying files with the OTC
button” on page 74
9. Switching the system on or o
To switch the LifeCloud system on, press the on/off button for about 3
seconds until you hear a short beep.
The operating system of the LifeCloud system will boot up. Afterwards,
LED 3 lights up permanently blue.
10. Initial operation
NOTE!
Make sure that no devices are connected to the USB
ports of the LifeCloud system before initial start-up.
Before you use the product for the first time, you are required to
enter a name for the LifeCloud system and to set up a user account via your
browser (on your computer or smart device).
10.1. Setting up an account for the LifeCloud
system
Follow these instructions to set up an account for access.
Open the site www.lifecloudmedion.com in the web browser of your
PC.
90245 50049999 DE EN FR NL content RC1.indb 6890245 50049999 DE EN FR NL content RC1.indb 68 13.04.2015 16:24:0713.04.2015 16:24:07

69 of 218
Initial operation
DE
FR
NL
GPL
EN
Click on the entry Setup New Device.
In the next window, you will be prompted to press the front button
(OTC BUTTON) on the LifeCloud system for 5 seconds until you hear a
beep. The blue bar must be displayed.
The LifeCloud server will now register your LifeCloud system. The progress
will be displayed on a blue bar.
Then set up a user account by specifying a name for your LifeCloud sys-
tem and a user name and password for LifeCloud access.
90245 50049999 DE EN FR NL content RC1.indb 6990245 50049999 DE EN FR NL content RC1.indb 69 13.04.2015 16:24:0813.04.2015 16:24:08

70 of 218
Initial operation
Tap the arrow pointing right.
NOTE!
After registration, you can create up to 5 user accounts
on the LifeCloud system. If you have a premium ac-
count on www.lifecloudmedion.com, you can open an
unlimited number of user accounts on the LifeCloud
system.
Using the QR code (also shown in the web browser) you can download
the app for your mobile device (tablet PC/smartphone).
90245 50049999 DE EN FR NL content RC1.indb 7090245 50049999 DE EN FR NL content RC1.indb 70 13.04.2015 16:24:0813.04.2015 16:24:08

71 of 218
Initial operation
DE
FR
NL
GPL
EN
Open the QR code link to install the app on your tablet PC/smartphone
(see “18. Using the LifeCloud app on smart devices” on page 92 on how
to use the app).
Click on the arrow pointing right.
Finish the set-up process by pressing the right arrow.
The web interface of the LifeCloud system will now be displayed (see “14. The
web interface” on page 80 for more information).
90245 50049999 DE EN FR NL content RC1.indb 7190245 50049999 DE EN FR NL content RC1.indb 71 13.04.2015 16:24:0913.04.2015 16:24:09

72 of 218
Initial operation
10.2. On initial start-up: hard drive con guration
After the starting the LifeCloud system for the first time, a hard disk configu-
ration wizard will appear when you first log in to the LifeCloud.
RAID I
(“Redundant Array of Independent Disks”)
The two hard drives of the LifeCloud system (6 TB each) are used in conjunc-
tion in the RAID 1 configuration. The same files are saved on both hard drives
(mirroring) so that full redundancy of data is provided. The capacity of RAID
1 is therefore at most as large as the smallest hard drive being used (in this
case 6TB).
As the two disks are written identically, both disks contain all of the system’s
data which is a great advantage with respect to data security.
If one of the mirrored disks breaks down, the other will continue to provide
all of the data. RAID 1 thus provides a high level of stability because both
hard disks would have to fail to entail a total loss of data.
JBOD
(“Just a Bunch of Disks”)
JBOD does not offer the redundancy (mirroring) of data, it is merely a simple
“arrangement of independent disks”.
In this configuration both 6 TB hard disks of the LifeCloud system are lined
up and appear as a single 12 TB drive.
The advantage of this hard disk configuration is therefore the larger data ca-
pacity.
90245 50049999 DE EN FR NL content RC1.indb 7290245 50049999 DE EN FR NL content RC1.indb 72 13.04.2015 16:24:0913.04.2015 16:24:09

73 of 218
Initial operation
DE
FR
NL
GPL
EN
ATTENTION!
The hard disk configuration can only be set up dur-
ing the initial start-up or later in the system menu.
Any change to the disk configuration will lead to
a total loss of all the data on both disks. Therefore
back up your data on other media BEFORE making
any changes to the configuration!
Select the required hard disk configuration and press OK to confirm.
The LifeCloud system will then configure the two built-in hard disks. This pro-
cess can take several minutes to complete.
90245 50049999 DE EN FR NL content RC1.indb 7390245 50049999 DE EN FR NL content RC1.indb 73 13.04.2015 16:24:0913.04.2015 16:24:09

74 of 218
Copying les with the OTC button
11. Copying les with the OTC button
Connect a USB data carrier, which you want to use to copy data between the
LifeCloud system and the USB data carrier, to the USB port on the front side
of the LifeCloud system.
Wait until the OTC indicator lights up orange and the LifeCloud system
has detected the USB data carrier.
You can now perform the following functions with the OTC button:
Press the OTC button once briefly to copy the files from the USB data car-
rier into the directory /OurFolders/USB-Downloads/[DATE] [TIME] on the
LifeCloud system.
The OTC indicator flashes orange during the copying process.
As soon as the copying process has finished, the OTC indicator lights up
permanently orange.
12. RESET button
You can use RESET button on the back of the LifeCloud system if you need to
reset the LifeCloud system.
You can push the RESET button with a pointed object (such as a paper clip).
12.1. Reset password
If you forget your password, you can use the RESET button to reset the pass-
word.
Press and hold the RESET button for about 3 seconds and release the button
as soon as you hear a short beep.
Open the site www.lifecloudmedion.com in the web browser of your
PC.
Click on the entry Setup New Device or Reset Password.
90245 50049999 DE EN FR NL content RC1.indb 7490245 50049999 DE EN FR NL content RC1.indb 74 13.04.2015 16:24:0913.04.2015 16:24:09

75 of 218
RESET button
DE
FR
NL
GPL
EN
In the next window, you will be prompted to press the front button
(OTC BUTTON) on the LifeCloud system for 5 seconds until you hear a
beep.
The LifeCloud web interface has now detected that the RESET button on
the system has been pressed and the following dialogue box will appear.
Select the entry I want to reset my password and follow the in-
structions.
90245 50049999 DE EN FR NL content RC1.indb 7590245 50049999 DE EN FR NL content RC1.indb 75 13.04.2015 16:24:1013.04.2015 16:24:10

76 of 218
RESET button
Select the appropriate user account and assign a new password.
Afterwards, click the right arrow to finish the reset process.
90245 50049999 DE EN FR NL content RC1.indb 7690245 50049999 DE EN FR NL content RC1.indb 76 13.04.2015 16:24:1013.04.2015 16:24:10

77 of 218
Using the LifeCloud agent
DE
FR
NL
GPL
EN
12.2. Resetting to the system to the default settings
It may be necessary to restore the default settings of the LifeCloud system if
it fails to react correctly or if you no longer have access to the system.
To reset the system, hold down the RESET button for approximately 30
seconds. You will hear a short beep after 3 seconds and a long beep after
30 seconds.
Now release the RESET button. The system will be reset to the default set-
tings and will then reboot. You can now perform the initial start-up again.
13. Using the LifeCloud agent
13.1. Installing the LifeCloud agent
• You can log on to the LifeCloud system on your computer in the local net-
work via the LifeCloud agent. This allows you to access the web interface
as well as the network folders of the LifeCloud system.
How to install the LifeCloud agent:
• Insert the software CD supplied with the system into the disk drive of
your computer and open the Autorun.exe file.
• Follow the instructions in the installation wizard.
• If you want to use the backup software Memeo Instant Backup, you can
also install it in the next step (“Using Memeo Backup” on page 95).
After the installation, you can open the LifeCloud agent via the icon in the
system:
NOTE!
The LifeCloud system will not be detected in the net-
work until all the steps for initial start-up have been
carried out, as instructed in “10. Initial operation” on
page 68.
90245 50049999 DE EN FR NL content RC1.indb 7790245 50049999 DE EN FR NL content RC1.indb 77 13.04.2015 16:24:1013.04.2015 16:24:10

78 of 218
Using the LifeCloud agent
13.2. Using the LifeCloud desktop
• You can see the login status in the top entry in the menu. If the status is
“Not logged in”, you will need to enter the name of your LifeCloud sys-
tem and a user name and password in order to log on and access the Life-
Cloud system on the local network.
• Click on the entry Sign in....
After logging on, you can use the following functions of the LifeCloud agent:
Change user
Here you can log on to the LifeCloud system with a different user name.
Log out
Here you can log the LifeCloud agent off from the LifeCloud system, in order,
for example, to log onto another LifeCloud.
Explore my LifeCloud folders
Use this entry to call up the Windows Explorer or Mac Finder to open the
folders on the LifeCloud system as network shares.
90245 50049999 DE EN FR NL content RC1.indb 7890245 50049999 DE EN FR NL content RC1.indb 78 13.04.2015 16:24:1013.04.2015 16:24:10

79 of 218
Using the LifeCloud agent
DE
FR
NL
GPL
EN
Open Lifecloud application
Use this entry to open the web interface in your computer’s default browser.
Preferences
Here you can search for available software updates for the LifeCloud agent
and display the IP address of the LifeCloud system.
Wake up using “Wake On LAN”
Here you can activate or deactivate the wake on LAN (WOL) function of the
LifeCloud system (see “Wake ON LAN” on page 89).
About...
Here you will find the manufacturer and licensing information for the Life-
Cloud agent.
Exit LifeCloud Agent
Use this entry to close the LifeCloud agent.
90245 50049999 DE EN FR NL content RC1.indb 7990245 50049999 DE EN FR NL content RC1.indb 79 13.04.2015 16:24:1013.04.2015 16:24:10

80 of 218
The web interface
14. The web interface
The web interface is an HTML-based user interface of the LifeCloud system
which you can access via your web browser.
• You will need at least Internet Explorer 6.0 or Mozilla Firefox 2.00 or newer
versions of these browsers.
• The screen resolution should be 1024 x 768 pixels or higher.
• The latest Java and Flash plug-ins must be enabled in the browser.
• Pop-ups must be allowed in the web browser and the Windows pop-up
blocker turned off.
14.1. Opening the web interface
• Open your default web browser and enter the IP address displayed in the
Medion LifeCloud agent in the address bar of your web browser
or
• Enter “http://www.lifecloudmedion.com” in the address bar of the
web browser
or
• Click with the right mouse button on the Medion LifeCloud agent icon
and then select the entry Navigate to LifeCloud (www).
14.2. Features and settings of the web interface
The standard web browser will open and the login page will appear.
The start page (Home) will be initially displayed for all users (including the
administrator) after logging in.
The various menus and functions are explained in the following sections.
90245 50049999 DE EN FR NL content RC1.indb 8090245 50049999 DE EN FR NL content RC1.indb 80 13.04.2015 16:24:1013.04.2015 16:24:10

81 of 218
Media library
DE
FR
NL
GPL
EN
15. Media library
You can manage the media files stored on the LifeCloud system in the media
library.
You can use the top menu bar to sort or customise the file view or search for
files.
The pre-installed root directories Family Library and My Library cannot
be deleted but their subdirectories can.
If there are data media connected to the rear USB ports, these will also ap-
pear in the library.
15.1. My Library/Family Library
Our Folders
The folders and content in Family Library can be displayed and edited by
any user who is logged in to the LifeCloud.
NOTE!
You can enable or disable user access to
Family Library via the settings.
My Folders
The folders and content located here can only be viewed and edited by the
LifeCloud user who is currently logged in.
90245 50049999 DE EN FR NL content RC1.indb 8190245 50049999 DE EN FR NL content RC1.indb 81 13.04.2015 16:24:1013.04.2015 16:24:10

82 of 218
Media library
15.2. New folder/delete folder
Select the folder/root directory in which you want to open a new folder.
Click on the plus sign at the top of the folder view and then enter a name
for the new subdirectory. Confirm your selection by pressing Create.
To delete a folder, select the folder and then select the minus sign at the
top of the folder view. Confirm your selection by pressing Yes.
15.3. Context menu for opening folders and les
Move the mouse pointer over a folder/file and click on the arrow next to
the folder/file name to open the context menu:
Click on Open to see the contents of the folder in the right-hand window
or to play a media file.
Automatic playback of media content (only for folders)
Click on Slideshow to start a slide show of all the images in this folder.
Click on
Autoplay to play back all the audio files in this folder with the
music player.
Download
Click on Download to download the folder onto your device as a .zip file.
90245 50049999 DE EN FR NL content RC1.indb 8290245 50049999 DE EN FR NL content RC1.indb 82 13.04.2015 16:24:1113.04.2015 16:24:11

83 of 218
Media library
DE
FR
NL
GPL
EN
Upload (only for folders)
Click on Upload to open the window to upload files. Here you can upload
files into Upload current folder via the file path or via the Drag und Drop
function (see “15.5. Uploading files to the LifeCloud system” on page 85).
Add to album
Select an album here or create a new album to which you would like to add
this folder (see also “16. Albums” on page 86).
Share selected items
Here you can create an album for this folder to share it via direct link on the
network (see also “16. Albums” on page 86).
Share with DMA
Click on Share with DMA to share the media content of this folder via
the digital media adapter (DMA) of the LifeCloud system with UPnP-ena-
bled media players in the network.
Shared media files are displayed with a TV icon above the folder icon.
To cancel the media sharing facility for this folder, click on
Unshare with DMA.
View details
Click on this entry to display the folder/file properties.
• You can change file names, file tags (audio/video files) under the folder/
file properties.
• Click on the “Info” button in the top right-hand corner to hide the folder/
file properties again.
Copy/cut/paste/rename/delete
You can use these functions to manage folders and files as you would on
your computer.
90245 50049999 DE EN FR NL content RC1.indb 8390245 50049999 DE EN FR NL content RC1.indb 83 13.04.2015 16:24:1113.04.2015 16:24:11

84 of 218
Media library
15.4. Albums
Here you can create new albums or delete albums and also view the contents
of an album.
Creating a new album
Click on the + symbol next to the item Albums.
Enter a name and description for the album.
Select a theme to be displayed as the background when viewing the al-
bum.
The default share type is shown below (friends). Click on
More Sharing Options to select a different type of sharing.
Then click on Create to create the album.
Deleting an album
Select the album that you want to delete and click on the - symbol.
Confirm the following query by pressing Yes.
90245 50049999 DE EN FR NL content RC1.indb 8490245 50049999 DE EN FR NL content RC1.indb 84 13.04.2015 16:24:1113.04.2015 16:24:11

85 of 218
Media library
DE
FR
NL
GPL
EN
15.5. Uploading les to the LifeCloud system
Proceed as follows to upload files to the LifeCloud system:
Click on a folder in the media library into which you want to upload the
files.
Select Upload in the context menu of the folder or click the arrow at
the top of the folder view.
The upload window will open.
• In the Manual Upload view, click on Add File and then select a file
from your computer that you want to add the upload list.
• In the Drag und Drop view you can use the mouse to drag a file from
your computer and drop it into the white box at the bottom of the upload
window in order to add it to the upload list.
NOTE!
The latest version of JavaScript must be enabled in
your browser to use the drag and drop function to up-
load files.
Use one of the two methods described to add files the upload list and
then click Upload to upload the files into the previously selected folder.
15.6. Entries in the media le context menu
Additional entries appear in the context menu for media files, such as photo,
audio and video files.
Photo files
View, opens the photo directly in the Photo Viewer. You can also rotate the
image Rotate Clockwise or Rotate Counterclockwise or set it as the
Use as Home Backround for the start page.
Audio files
The play option opens the audio file directly in the music player.
Video files
The play option opens the video file directly in the video player.
90245 50049999 DE EN FR NL content RC1.indb 8590245 50049999 DE EN FR NL content RC1.indb 85 13.04.2015 16:24:1113.04.2015 16:24:11

86 of 218
Albums
16. Albums
Here you will see the albums you have created in the media library.
The albums list contain links to files which you highlighted in the media li-
brary and added to an album.
• Albums can also be shared with users outside the LifeCloud by sending
them a link to the album. This link can be permanent or temporary.
• You can create new albums in the media library.
90245 50049999 DE EN FR NL content RC1.indb 8690245 50049999 DE EN FR NL content RC1.indb 86 13.04.2015 16:24:1113.04.2015 16:24:11

87 of 218
Settings
DE
FR
NL
GPL
EN
17. Settings
You can enter all the settings for the LifeCloud system on this screen.
If you are logged onto the LifeCloud system as an administrator, you can ac-
cess all the system settings. As a normal user, you can only configure the user
settings:
17.1. User settings
User
You can customise the profile and the configuration for the current user in
the user menu.
Language
Enter the language in which the menus will be displayed in the LifeCloud sys-
tem.
Your email
Enter an email address here that is to be used to send the user notifications
from the LifeCloud system.
Home Backround Position
You can use images that are stored in the media library on the LifeCloud sys-
tem as wallpaper.
Here you can set how the start wallpaper is to be displayed.
90245 50049999 DE EN FR NL content RC1.indb 8790245 50049999 DE EN FR NL content RC1.indb 87 13.04.2015 16:24:1213.04.2015 16:24:12

88 of 218
Settings
Clear Home Backround
Here you can delete the current wallpaper and reset it to the default wallpa-
per.
What to do when a file already exists
Here you can set the desired response of the LifeCloud system on uploading
files that already exist on the server.
What to do when adding files to albums
• Ask each time
• Include subfolders
• Don’t include subfolders
Share new albums with other family accounts by default
If you set this function to YES, all new albums will be shared with family ac-
counts by default.
Share new albums with media players by default
If you set this function to YES, all new albums will be shared with the media
player by default.
Hide help tips
If you set this function to YES, tips will no longer be displayed after logging
on to the LifeCloud.
Resume Audio Playback
If you set this function to YES, playback will be resumed at the same point
the next time you open a previously played media file.
Reset all «Do not show again» prompts
Here you can see all the checkboxes in which you have previously selected
“Do not show again”.
Diskspace
Here you can see the available and used disk space.
Change password
To change the current password, enter a new password here and confirm by
clicking Senden.
90245 50049999 DE EN FR NL content RC1.indb 8890245 50049999 DE EN FR NL content RC1.indb 88 13.04.2015 16:24:1313.04.2015 16:24:13

89 of 218
Settings
DE
FR
NL
GPL
EN
17.2. Server Preferences
Network Sharing
Enter the name of your Windows homegroup here and set the function to
Yes to make your files and folders available to the homegroup
Wake ON LAN
Set this function to Yes so that network devices can switch on (“wake”) the
LifeCloud system when it is in sleep mode.
UPNP Router Configuration
Set the “Configure router via UPNP” function to Yes so that the Life-
Cloud system can configure the port sharing function on your router.
In the next field, you can specify whether the LifeCloud system can overwrite
the current configuration of your router.
Notification
Here you can enter the email address which is to be used for system notifica-
tions. Separate multiple email addresses with commas.
System notifications are sent when there is a problem with the hard drive or
if the hard drive is full.
Network Services
Here you can set up FTP access to the LifeCloud system.
Set the function for the local network and/or the internet to Yes to ena-
ble FTP access to the folders on the LifeCloud system.
LAN Connection
Here you can connect the LifeCloud system to a LAN network via DHCP or as-
sign it a fixed IP address.
Set the function “
Optain IP address automatically” to Yes so that
IP addresses can be obtained automatically from the DHCP server of the
router.
If you want to configure the IP address manually, set the function to
No
and then enter the IP address, subnet mask, gateway and DNS server
manually.
90245 50049999 DE EN FR NL content RC1.indb 8990245 50049999 DE EN FR NL content RC1.indb 89 13.04.2015 16:24:1313.04.2015 16:24:13

90 of 218
Settings
Date and Time
The LifeCloud system can update the date and time settings via a time server
on the internet or you can set the time and date yourself.
If you select Yes to set the date and time from the internet, you must
then enter a standard NTP server (Network Time Protocol) via which the
settings can be obtained.
Remote Access
Here you can activate or deactivate remote access to the LifeCloud system
via the internet.
17.3. Administration
Add new user
To add a new user to the system, enter the user name in the field
Account User Name.
User names must begin with a letter and contain at least three characters.
They are not case-sensitive. You cannot add two users with the same user
name.
Enter a display name for the user. This name can be different from the
user name for the account.
Enter a password and confirm.
The password must be at least six characters long and contain a digit. Pass-
words are case-sensitive.
Select Create as Administrator to provide the new user with admin-
istrator rights.
Select Let user access family folder to allow the new user access
to the files and folders in the root directory FamilyFolder.
Edit User
Select an existing user whose name, password or rights you want to change.
Shut down
Here you can select Shut down or Restart to shut down or restart the Life-
Cloud system.
Software Updates
Here you can check if new updates are available via the internet.
Medion LifeCloud Pro
Here you can purchase a subscription to a Medion LifeCloud Pro account or
view your status with reference to a Medion LifeCloud Pro account.
90245 50049999 DE EN FR NL content RC1.indb 9090245 50049999 DE EN FR NL content RC1.indb 90 13.04.2015 16:24:1313.04.2015 16:24:13

91 of 218
Settings
DE
FR
NL
GPL
EN
Disk Management
Here you can see the status of the disk configuration.
To format both hard drives so that you can subsequently reinstall them,
select the entry Format.
To start a reconfiguration process (RAID 1 or JBOD), select the entry
Reconfigure.
External Storage
Here you can see the status of any external storage medium that is connect-
ed to the USB port of the LifeCloud system.
Power Timer
• Here you can activate and set the power timer function. When the pow-
er timer is activated, the LifeCloud system switches itself on and off au-
tomatically according to a preset schedule. Please note that if you set a
switch-off time for the system, data transfer processes may be interrupted
and pending backups may not be carried out.
• Network devices can switch the LifeCloud system back on if the WOL
(Wake On LAN) feature has been enabled (see “Wake ON LAN” on page
89).
NOTE!
The earliest possible time for the automatic shut-off is
around 5 minutes from the time when you make this
setting.
90245 50049999 DE EN FR NL content RC1.indb 9190245 50049999 DE EN FR NL content RC1.indb 91 13.04.2015 16:24:1313.04.2015 16:24:13

92 of 218
Using the LifeCloud app on smart devices
18. Using the LifeCloud app on smart devices
Download the LifeCloud app for smart devices via the link provided
on the cover and install the app.
After successful installation, tap on the icon of the LifeCloud app on
your mobile smart device.
The LifeCloud app will start up (the Android app is shown in this example).
Enter the name of your LifeCloud as well as the relevant user name and
password to register the app on the LifeCloud.
You can now access your LifeCloud or your LifeCloud system via the app on
your mobile device from anywhere via the internet.
18.1. Main menu
You can access albums or the media library of the LifeCloud system on the
start screen of the LifeCloud app.
Tap on an icon to call up the corresponding menu.
18.2. Media library view
In the main menu, click on Medion Library to display the LifeCloud me-
dia library.
In the media library, the public and private folders will be displayed.
90245 50049999 DE EN FR NL content RC1.indb 9290245 50049999 DE EN FR NL content RC1.indb 92 13.04.2015 16:24:1313.04.2015 16:24:13

93 of 218
Using the LifeCloud app on smart devices
DE
FR
NL
GPL
EN
Open one of the root directories FamilyLibrary or MyLibrary.
You can customise the view of the folder contents via the menu icons at the
bottom edge of the screen.
Tap on the button at the bottom of the screen to display the menu bar.
You can search for files, refresh the view, create folders, upload files to the
current folder or log off from the LifeCloud.
18.3. Album view
In the main menu, click on Albums to display the albums on the Life-
Cloud.
90245 50049999 DE EN FR NL content RC1.indb 9390245 50049999 DE EN FR NL content RC1.indb 93 13.04.2015 16:24:1313.04.2015 16:24:13

94 of 218
Using the LifeCloud app on smart devices
You can customise the view of the folder contents via the menu icons at the
bottom edge of the screen.
Tap on the button at the bottom of the screen to display the menu
bar.
You can search for files, refresh the view or log off from the LifeCloud.
90245 50049999 DE EN FR NL content RC1.indb 9490245 50049999 DE EN FR NL content RC1.indb 94 13.04.2015 16:24:1313.04.2015 16:24:13

95 of 218
Using Memeo Backup
DE
FR
NL
GPL
EN
19. Using Memeo Backup
You will find the backup software Memeo Instant Backup on the software CD
supplied with the product. You can install this when installing the LifeCloud
agent (“Using the LifeCloud agent” on page 77).
How to set up the backup function with Memeo Instant Backup on your Life-
Cloud system:
Creating a network drive for data backup
Connect to the LifeCloud system via the LifeCloud agent on your PC as
described in “Explore my LifeCloud folders” on page 78.
Click on the icon “network drive(s)”.
To back up data in a public folder, log in with the appropriate user ac-
count.
Select a drive letter (e.g. “Z:”).
Select the folder in which the backup copies of the data are to be stored
(e.g. “Z:”).
Check the box “Restore Connection at Windows logon”.
Backing up data with Memeo Backup
Start Memeo Instant Backup by clicking on the “Memeo Backup” icon on
the desktop.
In the “Help” menu, click on the entry “Register” and enter the product
key which is located on the sleeve of the software CD supplied with the
product.
Skip the start page by clicking on
“No Thanks, I want to start a Backup now”.
Now select the network drive you have just created as the target for the
data backup (in the example above: (Z:))
Click on “Start Backup”.
90245 50049999 DE EN FR NL content RC1.indb 9590245 50049999 DE EN FR NL content RC1.indb 95 13.04.2015 16:24:1413.04.2015 16:24:14

96 of 218
Run LifeCloudDetect
Now all the files from the C: drive of your computer will be backed up on the
LifeCloud system. The following folders on the C: drive will not be backed
up:
• The folder “Program Files”
• Temporary files and log files as well as virtual disk files
• The "Windows" folder.
NOTE!
For more information on Memeo Instant Backup,
call up the item “Getting Started Guide” in the “Help”
menu.
20. Run LifeCloudDetect
You can search for the LifeCloud system in the network by executing the
medionlifeclouddetect.exe file which is located in the util folder on the
software CD supplied with the product.
After running the file, a window will appear in which you will be prompt-
ed to press the front button on the device so that the LifeCloud system
can be found on the network.
90245 50049999 DE EN FR NL content RC1.indb 9690245 50049999 DE EN FR NL content RC1.indb 96 13.04.2015 16:24:1413.04.2015 16:24:14

97 of 218
Cleaning
DE
FR
NL
GPL
EN
20.1. Do you need more help?
If the above suggestions did not solve a specific problem, please contact us.
The following information would help us:
• What external devices are connected?
• What messages appear on the screen?
• When operating the product, at which step did the problem occur?
• How is your computer configured?
• What software were you using when the problem occurred?
• What steps have you already taken to try and rectify the problem?
• Please provide your customer number if you have one.
21. Cleaning
Follow the instructions below to increase the service life of the product:
• Always unplug the mains adapter and disconnect all the cables before
cleaning the product.
• Do not use solvents, corrosive agents or aerosol-based detergents to
clean the product.
• Clean the product with a soft, lint-free cloth.
Please keep the packaging and do not use anything other than this packag-
ing to transport the product.
ATTENTION!
None of the parts inside the device require cleaning or
maintenance.
90245 50049999 DE EN FR NL content RC1.indb 9790245 50049999 DE EN FR NL content RC1.indb 97 13.04.2015 16:24:1513.04.2015 16:24:15

98 of 218
Disposal
22. Disposal
Packaging
The product is packaged to protect it from damage in transit.
Packaging materials are raw materials and can therefore be re-
used or recycled.
Hardware
Do not under any circumstances dispose of the product with the
household rubbish at the end of its service life. Please consult
your local authority for advice on correct and eco-friendly meth-
ods of disposal.
90245 50049999 DE EN FR NL content RC1.indb 9890245 50049999 DE EN FR NL content RC1.indb 98 13.04.2015 16:24:1513.04.2015 16:24:15

99 of 218
Technical data
DE
FR
NL
GPL
EN
23. Technical data
Power supply mains adapter Ktec KSAP0361200300HE
Input (primary):
100-240 V ~ 50/60 Hz, 0.8 A
Output (secondary):
12V 3A
Connections
3 USB ports (front/rear): 2x USB 3.0 (blue), 1x USB 2.0 (white)
LAN port: RJ45
(Ethernet 10/100 MBit & Gigabit)
Network adaptor input: 12V 3A
Hard drives
Interfaces: 2x SATA
Capacity: 2x 6TB (corresponds to 6000 GB*)
General data
Dimensions (approx.): 134 x 97 x 195mm (W x H x D)
Total weight (approx.) appr. 2 kg
Operating temperature 5°C to 35°C
Humidity during operation 5% to 65%
*1 GB is equal to 1 billion bytes. The available memory capacity may vary.
90245 50049999 DE EN FR NL content RC1.indb 9990245 50049999 DE EN FR NL content RC1.indb 99 13.04.2015 16:24:1513.04.2015 16:24:15

100 of 218
Glossary
24. Glossary
BitTorrent
See Torrent.
CIFS – Common Internet File System
The recommended data sharing protocol for the Windows platform in which
users can access shares over the network. Mac OS X and newer versions also
support the CIFS protocol. See also Protocol.
DHCP – Dynamic Host Configuration Protocol
A protocol to assign an IP address to devices in the network. Dynamic ad-
dresses allow a device to have a different IP address each time it connects to
a network. In some systems, the IP address changes automatically while the
device is connected. DHCP also supports a combination of static and dynam-
ic IP addresses. See also Protocol.
DLNA – Digital Living Network Alliance
The group of companies in the consumer electronics and computer indus-
try as well as mobile device manufacturers who define standards for product
compatibility and thus enable users to share contents at home.
DMA – Digital media adapter
A device that allows home entertainment devices to transfer media, such as
music, photos and videos, to and from other devices over a network.
DNS – Domain Name Service
A system used by a network name server to translate text host names into
numerical IP addresses in order to uniquely identify a device connected to
the internet.
Ethernet
A standard method for connecting a computer to a local network (LAN).
FTP – File Transfer Protocol
A network protocol for transferring files from one computer to another via a
network. FTP is frequently used to exchange files regardless of the operating
system used.
Host
The computer via which the other computers and peripherals are connected.
Host adapter
A plug-in card that functions as the interface between the system bus of the
90245 50049999 DE EN FR NL content RC1.indb 10090245 50049999 DE EN FR NL content RC1.indb 100 13.04.2015 16:24:1613.04.2015 16:24:16

101 of 218
Glossary
DE
FR
NL
GPL
EN
computer and the hard drive.
Host interface
The point at which a host and a drive are connected to each other.
Host transfer rate
The speed at which a host computer can transfer data via an interface.
HTTP – HyperText Transfer Protocol
The protocol used by the World Wide Web to transfer information between
servers and browsers. See also Protocol.
IP – Internet Protocol
A system that controls how data messages are split into packets, transferred
from the sender to the recipient, and reassembled at their destination. See
also Protocol.
IP address
A binary 32-bit number that uniquely identifies any computer connected to
the internet.
iTunes
An audio playback program that is used for importing songs and other me-
dia files from your hard drive.
LAN – Local Area Network
A system in which computer users are connected within a company or an or-
ganisation and are often also connected to central data collections stored on
LAN servers.
Media server
A device which stores and releases media files (digital audio, video and pho-
to files).
Media storage device
A device which stores media files (digital audio, video and photo files).
NAS
Network-attached storage – a hard disk storage device which is set up with
its own network address instead of being connected to the computer and
which is used by workstation users in the network.
Operating system
Software with which the user and the other software installed on the system
can communicate with the computer hardware and the hard drive.
90245 50049999 DE EN FR NL content RC1.indb 10190245 50049999 DE EN FR NL content RC1.indb 101 13.04.2015 16:24:1613.04.2015 16:24:16

102 of 218
Glossary
Partition
A logical area of a hard drive which the operating system treats as a separate
hard drive. Each partition is assigned a unique drive letter. Partitions which
are connected as fixed drives are also known as “volumes”.
Peer
See Torrent.
Port (hardware)
A special output on a device to connect with other devices by means of a ca-
ble or connector. Examples include Ethernet ports, power connections and
USB ports.
Protocol
A convention for data transmission which determines the run-time perfor-
mance, control format and data markers.
Share
An area, similar to a folder or directory, which has been set up to organise
files and access them from the network. Shares can be “public”, i.e. available
to everyone on the network, or “private”, i.e. only accessible to selected users
on your network.
Seeder
See Torrent.
Streaming
Media, such as audio, video and photos, which can be continuously received
at the same time as being delivered by a streaming supplier.
90245 50049999 DE EN FR NL content RC1.indb 10290245 50049999 DE EN FR NL content RC1.indb 102 13.04.2015 16:24:1613.04.2015 16:24:16

103 of 218
Glossary
DE
FR
NL
GPL
EN
TCP/IP
Transmission Control Protocol/Internet protocol – a series of protocols used
for communication via connected networks. The standard for data transmis-
sion via networks. See also Protocol.
Torrent
BitTorrent (bit: smallest data unit, torrent: fast-moving stream of water, from
the Latin torrens) is a file-sharing protocol which is particularly suitable for
rapid distribution of large amounts of data. Torrents are usually a few dozen
kilobytes in size and are available for download on the provider's website or
on index sites.
The initial seeder peer provides the link to the file which will be offered as a
torrent and keeps this available to other peers.
The client software receives a list of remote stations from the tracker which
have all or some of the data or are interested. As soon as one peer has a seg-
ment of a file and the checksum has been verified, this is reported to the
tracker and this piece of data can now be passed on to the other peers.
The group of peers who are interested in the same torrent is known as the
swarm. Peers who are in possession of the complete file and are therefore no
longer downloading from other clients but only distributing data are known
as seeders. Peers who do not yet have the entire torrent content and are still
downloading segments are usually called leechers.
UPnP
Universal Plug and Play – a series of computer network protocols which sim-
plify the implementation of networks at home by device-to-device connec-
tion. See also Protocol.
Volume
See Partition
90245 50049999 DE EN FR NL content RC1.indb 10390245 50049999 DE EN FR NL content RC1.indb 103 13.04.2015 16:24:1613.04.2015 16:24:16

104 of 218
Legal notice
25. Legal notice
Copyright © 2015
All rights reserved.
This operating manual is protected by copyright.
Mechanical, electronic and any other form of reproduc-
tion is prohibited without the written permission of the
manufacturer
Copyright is owned by the company:
Medion AG
Am Zehnthof 77
45307 Essen
Germany
The operating manual can be reordered via the service hotline and is availab-
le for download via the service portal at www.medion.com/gb/service/start/.
You can also scan the QR code above and download the operating manual
onto your mobile device via the service portal.
90245 50049999 DE EN FR NL content RC1.indb 10490245 50049999 DE EN FR NL content RC1.indb 104 13.04.2015 16:24:1613.04.2015 16:24:16

105 / 218
DE
FR
NL
GPL
EN
Sommaire
1. Remarques concernant le présent mode d'emploi .................... 107
1.1. Symboles et avertissements utilisés dans ce mode d'emploi 107
2. Utilisation conforme ..................................................................... 108
3. Consignes de sécurité ................................................................... 109
3.1. Ne pas laisser d'appareils électriques entre les mains des en-
fants .......................................................................................................... 109
3.2. Généralités ............................................................................................. 109
3.3. Lieu d'installation ................................................................................. 110
3.4. Ne jamais réparer soi-même l'appareil ! ...................................... 111
3.5. Nettoyage et entretien ...................................................................... 111
3.6. Sauvegarde des données .................................................................. 111
3.7. Alimentation .......................................................................................... 112
3.8. Remarque concernant la charge électrostatique ..................... 113
3.9. Remarques relatives à la conformité............................................. 113
4. Généralités .................................................................................... 114
4.1. Systèmes et formats compatibles .................................................. 114
4.2. Possibilités d'utilisation du système Lifecloud .......................... 114
4.3. Fonctionnement du système Lifecloud et des composants li-
vrés ............................................................................................................ 115
4.4. Équipement du système Lifecloud ................................................ 115
4.5. Configuration système requise ....................................................... 115
4.6. Informations concernant les avertissements de sécurité ..... 116
5. Contenu de l'emballage ............................................................... 118
6. Vue d'ensemble de l'appareil ....................................................... 119
6.1. Vue avant et arrière ............................................................................. 119
7. À propos du Lifecloud .................................................................. 120
8. Mise en service .............................................................................. 120
8.1. Raccordement à un réseau ............................................................... 120
9. Allumer et éteindre l'appareil ...................................................... 121
10. Première mise en service.............................................................. 121
10.1. Configurer un compte pour le système Lifecloud ................... 121
10.2. Lors de la première mise en service : définir la configuration
des disques durs ................................................................................... 124
11. Copier des données avec la touche OTC ..................................... 127
12. La touche RESET ............................................................................ 127
12.1. Réinitialiser le mot de passe ............................................................ 127
90245 50049999 DE EN FR NL content RC1.indb 10590245 50049999 DE EN FR NL content RC1.indb 105 13.04.2015 16:24:1613.04.2015 16:24:16

106 / 218
12.2. Restaurer les paramètres par défaut sur le système ............... 130
13. Utiliser le logiciel LifeCloud Agent .............................................. 130
13.1. Installer le logiciel LifeCloud Agent .............................................. 130
13.2. Utiliser le Bureau du LifeCloud ........................................................ 131
14. L'interface Web .............................................................................. 133
14.1. Ouvrir l'interface Web ......................................................................... 133
14.2. Fonctions et paramètres de l'interface Web .............................. 133
15. Media Library ................................................................................ 134
15.1. MyLibrary/FamilyLibrary ................................................................... 134
15.2. Créer un nouveau dossier/supprimer un dossier ..................... 135
15.3. Ouvrir le menu contextuel pour des dossiers et fichiers ....... 135
15.4. Albums ..................................................................................................... 137
15.5. Téléverser des fichiers sur le système Lifecloud ....................... 137
15.6. Options du menu contextuel avec les fichiers multimédia .. 138
16. Albums ........................................................................................... 139
17. Preferences .................................................................................... 140
17.1. User Preferences ................................................................................... 140
17.2. Server Preferences ............................................................................... 142
17.3. Administration ...................................................................................... 143
18. Utilisation de l'application LifeCloud sur des appareils Smart . 145
18.1. Menu principal ...................................................................................... 145
18.2. Affichage de la bibliothèque multimédia ................................... 146
18.3. Affichage des albums ......................................................................... 147
19. Utiliser Memeo Backup ................................................................ 148
20. Exécuter LifecloudDetect ............................................................. 149
20.1. Vous avez besoin d'une aide supplémentaire? ........................ 149
21. Nettoyage ...................................................................................... 150
22. Recyclage ....................................................................................... 150
23. Caractéristiques techniques ........................................................ 151
24. Glossaire ........................................................................................ 152
25. Mentions légales ........................................................................... 156
90245 50049999 DE EN FR NL content RC1.indb 10690245 50049999 DE EN FR NL content RC1.indb 106 13.04.2015 16:24:1613.04.2015 16:24:16

107 / 218
Remarques concernant le présent mode d'emploi
DE
FR
NL
GPL
EN
1. Remarques concernant le présent mode
d'emploi
Avant d'utiliser l'appareil pour la première fois, lisez at-
tentivement le présent mode d'emploi et veillez sur-
tout à respecter les consignes de sécurité!
Toutes les opérations sur et avec le présent appareil
doivent être exécutées uniquement comme décrit
dans ce mode d'emploi.
Conservez ce mode d'emploi pour pouvoir vous y réfé-
rer ultérieurement. Si vous donnez ou vendez l'appa-
reil, veuillez également y joindre ce mode d'emploi.
1.1. Symboles et avertissements utilisés dans ce
mode d'emploi
DANGER !
Avertissement d'un risque vital immédiat !
AVERTISSEMENT!
Avertissement d'un risque vital possible et/ou de
blessures graves irréversibles!
PRUDENCE !
Respecter les consignes pour éviter toute blessure et
tout dommage matériel !
ATTENTION!
Respecter les consignes pour éviter tout dommage
matériel !
REMARQUE !
Respecter les consignes du mode d'emploi !
REMARQUE !
Informations supplémentaires pour l'utilisation de
l'appareil !
90245 50049999 DE EN FR NL content RC1.indb 10790245 50049999 DE EN FR NL content RC1.indb 107 13.04.2015 16:24:1613.04.2015 16:24:16

108 / 218
Utilisation conforme
AVERTISSEMENT!
Avertissement d'un risque d'électrocution !
• Énumération / information sur des événements se produisant
en cours d'utilisation
Action à exécuter
2. Utilisation conforme
Cet appareil sert à mettre des données à disposition dans un ré-
seau ainsi qu'à gérer des fichiers audio, vidéo et photo de sup-
ports de données qui sont reliés à l'appareil directement ou via
un réseau.
Le système Lifecloud est un serveur de fichiers. Un serveur est
un appareil utilisé pour sauvegarder différents types de fichier
et les mettre à la disposition des utilisateurs dans un réseau lo-
cal.
Le serveur est livré avec un logiciel avec lequel plusieurs utilisa-
teurs peuvent sécuriser, sauvegarder, partager et protéger leurs
fichiers sur le disque dur intégré.
Cet appareil est destiné uniquement à un usage à l'intérieur de
pièces sèches.
Cet appareil est conçu pour un usage privé et n'est pas destiné à
une utilisation industrielle ou commerciale.
90245 50049999 DE EN FR NL content RC1.indb 10890245 50049999 DE EN FR NL content RC1.indb 108 13.04.2015 16:24:1713.04.2015 16:24:17

109 / 218
Consignes de sécurité
DE
FR
NL
GPL
EN
3. Consignes de sécurité
3.1. Ne pas laisser d'appareils électriques entre les
mains des enfants
• Le présent appareil peut être utilisé par des enfants à par-
tir de 8 ans et par des personnes à capacités physiques, sen-
sorielles ou mentales restreintes ou manquant d'expériences
et/ou de connaissances s'ils sont surveillés ou s'ils ont reçu
des instructions pour pouvoir utiliser l'appareil en toute sécu-
rité et ont compris les dangers en résultant. Ne pas laisser les
enfants jouer avec l'appareil. Le nettoyage et la maintenance
de l'appareil par l'utilisateur ne doivent pas être exécutés par
des enfants, sauf si ceux-ci sont âgés de 8 ans et plus et sont
surveillés.
• Conservez l'appareil hors de la portée des enfants de moins
de 8 ans.
• Ne laissez jamais les enfants utiliser des appareils électriques
sans surveillance.
DANGER !
Conservez les emballages, p. ex. les plastiques, hors
de la portée des enfants: risque d'asphyxie!
3.2. Généralités
• N'ouvrez jamais le boîtier de l'appareil ou de l'adaptateur sec-
teur (risque d'électrocution, de court-circuit et d'incendie)!
• N'introduisez aucun objet à l'intérieur de l'appareil par les
fentes et ouvertures (risque d'électrocution, de court-circuit
et d'incendie)!
• Les fentes et ouvertures de l'appareil servent à son aération.
Ne recouvrez pas ces ouvertures (risque de surchauffe et d'in-
cendie)!
• Ne posez pas sur l'appareil et sur l'adaptateur secteur ni à
leur proximité de récipients contenant du liquide, tels que
des vases, et protégez toutes les pièces contre les gouttes
90245 50049999 DE EN FR NL content RC1.indb 10990245 50049999 DE EN FR NL content RC1.indb 109 13.04.2015 16:24:1713.04.2015 16:24:17

110 / 218
Consignes de sécurité
d'eau et éclaboussures. Le récipient pourrait se renverser et le
liquide porter atteinte à la sécurité électrique.
• Si la fiche, le cordon d'alimentation ou l'appareil est endom-
magé(e), débranchez immédiatement la fiche de la prise de
courant.
• Si l'appareil a été transporté d'une pièce froide dans une
chaude, attendez avant de raccorder l'adaptateur secteur.
L'eau de condensation due au changement de température
pourrait détruire l'appareil. Lorsque l'appareil a atteint la tem-
pérature ambiante, il peut être mis en marche sans danger.
3.3. Lieu d'installation
• Placez et utilisez tous les composants sur une surface stable,
plane et exempte de vibrations afin d'éviter que l'appareil ne
tombe.
• N'exposez pas l'appareil à des vibrations. Les vibrations
peuvent endommager l'électronique sensible.
• Veillez à ce que l'appareil ne soit pas exposé à une source de
chaleur directe (p. ex. des radiateurs).
• Aucune source de feu nu (p. ex. des bougies allumées) ne
doit se trouver sur ou à proximité de l'appareil.
• Veillez à ce que les fentes d'aération ne soient pas obstruées
afin de toujours garantir une aération suffisante.
• Ne posez aucun objet sur les câbles, ils pourraient être en-
dommagés.
• Conservez une distance minimale d'environ 10cm entre les
murs et l'appareil ou l'adaptateur secteur. Garantissez une aé-
ration suffisante de l'appareil.
• N'utilisez jamais votre appareil en plein air, des facteurs ex-
ternes (pluie, neige, etc.) pourraient l'endommager.
• Prévoyez au moins un mètre de distance entre l'appareil et
les sources hautes fréquences et magnétiques (téléviseur,
haut-parleurs, téléphone portable, etc.) afin d'éviter tout dys-
fonctionnement.
• En cas de fortes variations de température ou d'humidité, il
90245 50049999 DE EN FR NL content RC1.indb 11090245 50049999 DE EN FR NL content RC1.indb 110 13.04.2015 16:24:1713.04.2015 16:24:17

111 / 218
Consignes de sécurité
DE
FR
NL
GPL
EN
est possible que, par condensation, de l'humidité se forme à
l'intérieur de l'appareil, pouvant provoquer un court-circuit.
3.4. Ne jamais réparer soi-même l'appareil !
Si l'adaptateur secteur, le cordon d'alimentation ou l'appareil est
endommagé, débranchez immédiatement la fiche de la prise de
courant.
Ne mettez jamais l'appareil en marche si vous constatez des
dommages visibles de l'appareil ou du cordon d'alimentation ni
si l'appareil est tombé par terre.
AVERTISSEMENT !
N'essayez en aucun cas d'ouvrir et/ou de réparer
vous-même l'appareil. Vous risqueriez de vous élec-
trocuter!
Pour éviter tout danger, adressez-vous en cas de problème au
centre de service après-vente Medion ou à un autre atelier spé-
cialisé.
3.5. Nettoyage et entretien
• Avant de nettoyer l'appareil, débranchez toujours tout
d'abord impérativement l'adaptateur secteur de la prise de
courant.
• Pour nettoyer l'appareil, utilisez uniquement un chiffon doux
et sec. N'utilisez ni solvants ni détergents chimiques qui
pourraient endommager la surface et/ou les inscriptions fi-
gurant sur l'appareil.
3.6. Sauvegarde des données
Attention! Après chaque actualisation de vos données, faites
des copies de sauvegarde sur des supports de stockage ex-
ternes. Toute demande de dommages et intérêts en cas de perte
de données et de dommages consécutifs en résultant est ex-
clue.
90245 50049999 DE EN FR NL content RC1.indb 11190245 50049999 DE EN FR NL content RC1.indb 111 13.04.2015 16:24:1713.04.2015 16:24:17

112 / 218
Consignes de sécurité
3.7. Alimentation
Remarque importante : certaines pièces de l'appareil restent
sous tension même si l'appareil est éteint. Pour interrompre l'ali-
mentation de votre appareil ou pour le mettre totalement hors
tension, débranchez-le complètement du courant secteur.
• Branchez l'adaptateur secteur uniquement sur des prises
mises à la terre AC 100-240 V~ 50 Hz. Si vous avez des doutes
en ce qui concerne l'alimentation électrique sur le lieu d'ins-
tallation, demandez conseil à votre fournisseur d'électricité.
• Utilisez uniquement l'adaptateur secteur fourni
(Ktec KSAP0361200300HE). N'essayez jamais de brancher la
fiche de l'adaptateur secteur sur d'autres prises: vous pour-
riez endommager l'appareil.
• Pour une sécurité supplémentaire, nous conseillons l'utilisa-
tion d'une protection contre les surtensions de manière à évi-
ter que l'appareil ne soit endommagé par des pics de tension
ou la foudre à travers le réseau électrique.
• Pour couper l'alimentation, débranchez l'adaptateur secteur
de la prise de courant.
• L'adaptateur secteur doit rester facilement accessible, même
une fois branché, de manière à pouvoir être rapidement dé-
branché en cas de besoin.
• Ne recouvrez pas l'adaptateur secteur de manière à éviter
toute surchauffe.
• Si vous utilisez une rallonge, celle-ci doit impérativement sa-
tisfaire aux exigences VDE. Demandez éventuellement les
conseils de votre électricien.
• Disposez les câbles de manière à ce que personne ne puisse
marcher ou trébucher dessus.
• Ne posez aucun objet sur les câbles, ils pourraient être en-
dommagés.
90245 50049999 DE EN FR NL content RC1.indb 11290245 50049999 DE EN FR NL content RC1.indb 112 13.04.2015 16:24:1713.04.2015 16:24:17

113 / 218
Consignes de sécurité
DE
FR
NL
GPL
EN
3.8. Remarque concernant la charge
électrostatique
En cas de dysfonctionnement de l'appareil dû à une charge
électrostatique, réinitialisez l'appareil en le débranchant provi-
soirement du réseau électrique.
3.9. Remarques relatives à la conformité
Votre appareil respecte les exigences de compatibilité électro-
magnétique et de sécurité électrique.
Par la présente, la société MEDION AG déclare que cet appareil
est conforme aux exigences essentielles et autres dispositions
pertinentes des directives 2006/95/CE et 2011/65/UE.
Le présent appareil satisfait aux exigences essentielles et
prescriptions pertinentes de la directive sur l'écoconception
2009/125/CE (Règlement n° 1275/2008).
Aucune minimisation de la consommation conformément à la
directive sur l'écoconception n'est toutefois prévue pour cet ap-
pareil en raison de son mode de fonctionnement (mise à dispo-
sition permanente de données dans le réseau).
Pour minimiser la consommation de courant, éteignez l'appareil
avec le bouton ON/OFF ou débranchez-le du courant secteur
lorsque vous n'en avez pas besoin.
Vous pouvez obtenir les déclarations de conformité complètes
sur www.medion.com/conformity.
90245 50049999 DE EN FR NL content RC1.indb 11390245 50049999 DE EN FR NL content RC1.indb 113 13.04.2015 16:24:1713.04.2015 16:24:17

114 / 218
Généralités
4. Généralités
4.1. Systèmes et formats compatibles
Votre système Lifecloud prend en charge les systèmes de fichiers, protocoles
et applications suivants:
• Protocole réseau TCP/IP
• UPNP, serveur DLNA intégré
• Serveur Samba
• Serveur FTP
• FAT32, NTFS, XFS
• Time Machine pour MAC
• Serveur iTunes
• Backup Windows
• WOL (Wake on LAN)
4.2. Possibilités d'utilisation du système Lifecloud
Le système Lifecloud peut être utilisé pour les tâches suivantes dans le ré-
seau:
• Comme emplacement de stockage centralisé pour les fichiers que vous
souhaitez mettre à la disposition d'autres utilisateurs via le réseau local ou
Internet.
• Pour la création et l'actualisation automatiques de copies de sauvegarde
de tous vos fichiers.
• Pour la mise à disposition de fichiers tels que contrats, présentations et
rapports via le réseau local ou Internet.
• En cas de dommage de l'ordinateur ou de perte de données telle que dé-
faillance du disque dur, vol, etc., vous pouvez restaurer rapidement vos
données pour poursuivre votre travail. Les données peuvent être stockées
par mise en miroir sur les deux disques durs (système RAID) du système
Lifecloud si bien qu'en cas de défaillance du disque dur 1, les données
sont disponibles sur le disque dur 2.
• De n'importe où dans le monde, vous pouvez accéder via Internet au sys-
tème Lifecloud pour télécharger ou téléverser des fichiers que vous sou-
haitez sauvegarder en toute sécurité ou mettre à la disposition d'autres
utilisateurs quand vous êtes en déplacement.
• Vous pouvez raccorder une imprimante USB au système Lifecloud pour
que d'autres utilisateurs puissent s'en servir dans le réseau local.
• Via le serveur multimédia intégré, tous les utilisateurs avec appareils com-
patibles DLNA peuvent accéder dans le réseau local aux photos, vidéos et
titres musicaux stockés sur le système Lifecloud.
90245 50049999 DE EN FR NL content RC1.indb 11490245 50049999 DE EN FR NL content RC1.indb 114 13.04.2015 16:24:1713.04.2015 16:24:17

115 / 218
Généralités
DE
FR
NL
GPL
EN
4.3. Fonctionnement du système Lifecloud et des
composants livrés
• Lifecloud (appareil) : le matériel avec disque dur intégré sur lequel vos fi-
chiers sont sauvegardés et sécurisés.
• Interface Web du Lifecloud : une interface utilisateur intégrée au serveur
avec laquelle vous pouvez configurer, modifier et surveiller le système Li-
fecloud via un navigateur Web depuis votre ordinateur (ou même par ac-
cès à distance).
• LifeCloud Agent : un logiciel pour PC ou MAC via lequel vous pouvez vous
connecter depuis votre ordinateur de bureau au système Lifecloud dans
le réseau local pour accéder ainsi à l'interface Web ainsi qu'aux dossiers
du système Lifecloud partagés en réseau.
• Application LifeCloud : une application pour appareils iOS ou Android
mobiles tels que tablettes PC ou smartphones. Cette application permet
d'accéder au système Lifecloud avec ces appareils.
4.4. Équipement du système Lifecloud
L'équipement du système Lifecloud comprend :
• Deux disques durs SATA (Serial ATA)
• Une prise Ethernet ou LAN permettant l'accès au serveur via le réseau lo-
cal ou Internet
• 2 ports USB au dos (1x USB 2.0, 1x USB 3.0)
• 1 port USB en façade (1x USB 3.0)
• Touche OTC (One Touch Copy) pour copier des données entre des sup-
ports de données USB et le disque dur interne du système Lifecloud.
4.5. Con guration système requise
Pour l'accès via le navigateur à un ordinateur de bureau :
• Java Runtime Environment à partir de la version 7
• Adobe Flash Player à partir de la version 11
Pour l'accès via un appareil iOS ou Android mobile :
• Application Adobe Integrated Runtime (abrégée «Adobe AIR»)
90245 50049999 DE EN FR NL content RC1.indb 11590245 50049999 DE EN FR NL content RC1.indb 115 13.04.2015 16:24:1813.04.2015 16:24:18

116 / 218
Généralités
4.6. Informations concernant les avertissements
de sécurité
Lorsque vous vous connectez sur le Lifecloud depuis votre navigateur Web, il
est possible que ce dernier affiche un avertissement.
Votre Lifecloud utilise un certificat de sécurité pour que vous puissiez vous
connecter sur le Lifecloud avec une connexion sécurisée. Votre navigateur ne
connaissant pas ce certificat, une confirmation est ici nécessaire.
Contourner l’avertissement de Firefox :
Procédez comme suit :
Cliquez sur l’option « Je comprends les risques ».
Sélectionnez ensuite l’option « Ajouter une exception » pour confirmer la de-
mande de certificat pour votre Lifecloud comme exception de sécurité.
Puis cliquez sur « Confirmer l’exception de sécurité »
90245 50049999 DE EN FR NL content RC1.indb 11690245 50049999 DE EN FR NL content RC1.indb 116 13.04.2015 16:24:1813.04.2015 16:24:18

117 / 218
Généralités
DE
FR
NL
GPL
EN
Avertissement d’Internet Explorer
Cliquez sur « Poursuivre sur ce site Web (non recommandé) ».
90245 50049999 DE EN FR NL content RC1.indb 11790245 50049999 DE EN FR NL content RC1.indb 117 13.04.2015 16:24:1813.04.2015 16:24:18

118 / 218
Contenu de l'emballage
5. Contenu de l'emballage
Veuillez vérifier si la livraison est complète et nous informer dans un délai de
deux semaines à compter de la date d'achat si ce n'est pas le cas.
Avec le produit que vous venez d'acheter, vous recevez:
• Lifecloud (appareil)
• Câble LAN
• Adaptateur secteur
• CD avec logiciels (en option)
• Mode d'emploi et documents relatifs à la garantie
REMARQUE !
Enlevez les films protecteurs de l'appareil avant de
l'utiliser!
DANGER !
Conservez les emballages, p. ex. les plastiques, hors
de la portée des enfants: risque d'asphyxie!
90245 50049999 DE EN FR NL content RC1.indb 11890245 50049999 DE EN FR NL content RC1.indb 118 13.04.2015 16:24:1813.04.2015 16:24:18

119 / 218
Vue d'ensemble de l'appareil
DE
FR
NL
GPL
EN
6. Vue d'ensemble de l'appareil
6.1. Vue avant et arrière
13
12
11
10
9
8
4
6
5
7
1
3
2
1) LED 1 (BLEUE/ROUGE) : voyant de fonctionnement du disque dur
1 (est allumé en bleu si l'appareil est en marche, clignote pendant le
transfert de données et en rouge en cas d'erreurs de matériel)
2) LED 2 (BLEUE/ROUGE) : voyant de fonctionnement du disque dur
2 (est allumé en bleu si l'appareil est en marche, clignote pendant le
transfert de données et en rouge en cas d'erreurs de matériel)
3) LED 3 (BLEUE/ROUGE) : voyant de fonctionnement (est allumé en
bleu si l'appareil est en marche, clignote en bleu pendant le démar-
rage du système et est allumé en rouge en cas d'erreurs de matériel)
4) LED (VERTE): voyant LAN (est allumé lorsqu'une connexion est éta-
blie avec le réseau, clignote pendant le transfert de données)
5) LED (ORANGE) : voyant OTC du port USB en façade (est allumé si un
support de données a été reconnu sur le port USB en façade, clignote
pendant la copie de données entre le système Lifecloud et le support
de données USB)
6) USB: port USB (USB 3.0)
pour l'utilisation de la fonction One Touch Copy
7)
OTC : touche One Touch Copy
8)
RESET : touche de reset
9) USB: port USB (USB 3.0)
10)
USB: port USB (USB 2.0)
11) Bouton ON/OFF
12)
RJ45 : prise LAN pour le câble réseau
13)
DC : entrée adaptateur secteur
90245 50049999 DE EN FR NL content RC1.indb 11990245 50049999 DE EN FR NL content RC1.indb 119 13.04.2015 16:24:1813.04.2015 16:24:18

120 / 218
À propos du Lifecloud
REMARQUE !
Avant que les disques durs aient été configurés (voir
10.2 à la page 124), la LED 1 et la LED 2 sont allumées
en rouge.
7. À propos du Lifecloud
Dans la version de base, vous pouvez créer sur votre Lifecloud jusqu'à 5
comptes utilisateur.
Si vous possédez un compte premium sur www.lifecloudmedion.com, vous
pouvez créer autant de comptes utilisateur que vous voulez ainsi qu'ajouter
au Lifecloud un client Torrent et une solution de sauvegarde USB.
8. Mise en service
8.1. Raccordement à un réseau
Raccordez la prise RJ45 (Ethernet/LAN) du système Lifecloud à la prise
correspondante d'une interface réseau (p. ex. un routeur) à l'aide d'un
câble réseau.
Le système Lifecloud étant configuré comme client DHCP, vérifiez si DHCP
est activé sur le routeur!
Branchez le connecteur creux de l'adaptateur secteur dans la prise DC IN
du système Lifecloud puis raccordez l'adaptateur secteur à une prise de
courant.
90245 50049999 DE EN FR NL content RC1.indb 12090245 50049999 DE EN FR NL content RC1.indb 120 13.04.2015 16:24:1813.04.2015 16:24:18

121 / 218
Allumer et éteindre l'appareil
DE
FR
NL
GPL
EN
Assurez-vous que votre ordinateur, sur lequel vous voulez configurer le
système Lifecloud, se trouve dans le même réseau.
Ports pour appareils USB
Vous pouvez raccorder aux ports USB des lecteurs USB externes ou une
imprimante USB pour les partager avec tous les utilisateurs dans le réseau
local.
Le port USB sur la façade du serveur peut aussi être utilisé pour la fonc-
tion One Touch Copy.
REMARQUE !
Avant d'utiliser la fonction One Touch Copy, lisez les
remarques correspondantes sous «Copier des don-
nées avec la touche OTC» à la page 127.
9. Allumer et éteindre l'appareil
Pour allumer le système Lifecloud, appuyez sur le bouton ON/OFF pen-
dant env. 3 secondes jusqu'à ce qu'un bref signal sonore retentisse.
Le système d'exploitation du système Lifecloud démarre. Puis la LED 3
reste allumée en bleu en permanence.
10. Première mise en service
REMARQUE!
Lors de la première mise en service, assurez-vous
qu‘aucun appareil n‘est raccordé aux ports USB du sys-
tème Lifecloud.
Avant de mettre l'appareil en service pour la première fois, vous devez tout
d'abord attribuer un nom au système Lifecloud et configurer un compte utili-
sateur avec votre navigateur (sur un ordinateur ou un périphérique mobile).
10.1. Con gurer un compte pour le système
Lifecloud
Pour configurer un compte d'accès au LifeCloud, procédez comme suit :
Tapez www.lifecloudmedion.com dans la ligne d'adresse du naviga-
teur Web de votre ordinateur.
90245 50049999 DE EN FR NL content RC1.indb 12190245 50049999 DE EN FR NL content RC1.indb 121 13.04.2015 16:24:1913.04.2015 16:24:19

122 / 218
Première mise en service
Cliquez sur l'option Setup New Device.
Dans la fenêtre suivante, vous êtes invité à maintenir la touche en façade
(touche OTC) du système Lifecloud enfoncée pendant 5 secondes jusqu’à
ce qu’un signal sonore retentisse.
La poutre bleue doit être à cette occasion affichée.
Le serveur LifeCloud enregistre alors votre système Lifecloud. La progression
de l'enregistrement est affichée sous forme de barre bleue.
Créez ensuite un compte utilisateur en attribuant un nom à votre système
Lifecloud ainsi qu'un identifiant et un mot de passe pour l'accès au Life-
Cloud.
90245 50049999 DE EN FR NL content RC1.indb 12290245 50049999 DE EN FR NL content RC1.indb 122 13.04.2015 16:24:1913.04.2015 16:24:19

123 / 218
Première mise en service
DE
FR
NL
GPL
EN
Tapotez sur la flèche dirigée vers la droite.
REMARQUE !
Après la connexion, vous pouvez créer jusqu'à 5
comptes utilisateur sur le système Lifecloud. Si vous
possédez un compte premium sur www.lifecloudme-
dion.com, vous pouvez créer autant de comptes utilisa-
teur que vous voulez.
Avec le code QR également affiché dans le navigateur Web, vous pouvez
maintenant créer l'application pour votre terminal mobile (tablette PC/
smartphone).
90245 50049999 DE EN FR NL content RC1.indb 12390245 50049999 DE EN FR NL content RC1.indb 123 13.04.2015 16:24:1913.04.2015 16:24:19

124 / 218
Première mise en service
Ouvrez le lien du code QR pour installer l'application sur votre tablette PC
ou smartphone (concernant l'utilisation de l'application, voir «18. Utilisa-
tion de l’application LifeCloud sur des appareils Smart» à la page 145).
Cliquez sur la flèche dirigée vers la droite.
Finalisez la configuration en cliquant sur la flèche dirigée vers la droite.
L'interface Web du système Lifecloud est alors affichée (lisez la suite sous
«14. L’interface Web» à la page 133).
10.2. Lors de la première mise en service : dé nir la
con guration des disques durs
La première fois que vous vous connectez sur le Lifecloud après la mise en
service du système Lifecloud, vous êtes invité à sélectionner la configuration
des disques durs pour la sauvegarde des données.
90245 50049999 DE EN FR NL content RC1.indb 12490245 50049999 DE EN FR NL content RC1.indb 124 13.04.2015 16:24:1913.04.2015 16:24:19

125 / 218
Première mise en service
DE
FR
NL
GPL
EN
RAID I
(Anglais : «Redundant Array of Independent Disks» = matrice redondante de
disques indépendants)
Avec la configuration RAID 1, les deux disques durs du système Lifecloud (de
6 To chacun) sont utilisés dans une matrice. Les mêmes données (mise en
miroir) sont sauvegardées sur les deux disques durs en même temps, ce qui
vous permet d'obtenir une redondance complète de vos données. La capa-
cité de RAID 1 est à cette occasion inférieure ou égale à celle du plus petit
disque dur, donc dans le cas présent 6 To.
Toutes les données du système sont écrites de manière synchrone et donc
contenues sur les deux disques durs, ce qui présente un énorme avantage du
point de vue de la sécurisation des données :
Si un des disques durs en miroir lâche, vos données sont toujours disponibles
sur l'autre disque. RAID 1 vous offre donc une sécurité très élevée puisque
pour que vous perdiez complètement vos données, il faut que les deux
disques durs soient défaillants.
JBOD
(Anglais : « Just a Bunch of Disks» = juste un tas de disques durs)
Avec JBOD, il n'y a pas de redondance (mise en miroir) des données, il s'agit
d'une simple «matrice de disques durs indépendants».
Dans cette configuration, les deux disques durs de 6 To du système Lifecloud
sont combinés pour n'en former qu'un seul d'une capacité de 12 To.
L'avantage de cette configuration est donc une capacité de données plus im-
portante.
90245 50049999 DE EN FR NL content RC1.indb 12590245 50049999 DE EN FR NL content RC1.indb 125 13.04.2015 16:24:2013.04.2015 16:24:20

126 / 218
Première mise en service
ATTENTION!
La configuration des disques durs ne peut être dé-
finie qu'à la première mise en service ou ultérieure-
ment dans le menu système ! Une modification de la
configuration des disques durs entraîne une perte
totale de toutes les données stockées sur les deux
disques durs. Sauvegardez donc vos données sur
d'autres supports de stockage AVANT de procéder à
toute modification de la configuration !
Sélectionnez la configuration des disques durs que vous préférez et
confirmez avec OK.
Le système Lifecloud configure alors les deux disques durs intégrés. Cela
peut prendre quelques minutes.
90245 50049999 DE EN FR NL content RC1.indb 12690245 50049999 DE EN FR NL content RC1.indb 126 13.04.2015 16:24:2013.04.2015 16:24:20

127 / 218
Copier des données avec la touche OTC
DE
FR
NL
GPL
EN
11. Copier des données avec la touche OTC
Raccordez un support de données USB que vous voulez utiliser pour copier
des données entre le système Lifecloud et le support de données USB au
port USB situé sur la façade du système Lifecloud.
Attendez que le voyant OTC s'allume en orange et que le système Life-
cloud ait reconnu le support de données USB.
La touche OTC vous permet alors d'exécuter les fonctions suivantes:
Appuyez une fois brièvement sur la touche OTC pour copier les données
directement du support de données USB dans le répertoire /NosDossiers/
Téléchargements USB /[DATE] [HEURE] du système Lifecloud.
Le voyant OTC clignote en orange pendant la copie.
Dès que la copie est terminée, le voyant OTC reste allumé en orange en
permanence.
12. La touche RESET
La touche RESET au dos du système Lifecloud vous permet de réinitialiser ce
dernier pour le cas où vous devez reconfigurer le système.
Vous pouvez appuyer sur la touche RESET avec un objet pointu (p. ex. un
trombone déplié).
12.1. Réinitialiser le mot de passe
Si vous avez oublié le mot de passe, vous pouvez le réinitialiser avec la
touche RESET.
Maintenez la touche RESET enfoncée pendant environ 3 secondes puis relâ-
chez-la dès que l'appareil émet un bref signal sonore.
Tapez www.lifecloudmedion.com dans la ligne d'adresse du naviga-
teur Web de votre ordinateur.
Cliquez sur l'option Setup New Device or Reset Password.
90245 50049999 DE EN FR NL content RC1.indb 12790245 50049999 DE EN FR NL content RC1.indb 127 13.04.2015 16:24:2013.04.2015 16:24:20

128 / 218
La touche RESET
Dans la fenêtre suivante, vous êtes invité à maintenir la touche en façade
(TOUCHE OTC) du système Lifecloud enfoncée pendant 5 secondes.
L'interface Web du Lifecloud a alors reconnu que la touche RESET avait
été auparavant actionnée sur l'appareil et la fenêtre de dialogue suivante
s'ouvre.
Sélectionnez ici l'option I want to reset my password et suivez les
instructions.
90245 50049999 DE EN FR NL content RC1.indb 12890245 50049999 DE EN FR NL content RC1.indb 128 13.04.2015 16:24:2013.04.2015 16:24:20

129 / 218
La touche RESET
DE
FR
NL
GPL
EN
Sélectionnez le compte utilisateur correspondant et attribuez un nou-
veau mot de passe.
Puis cliquez sur la flèche dirigée vers la droite pour finaliser la réinitialisa-
tion :
90245 50049999 DE EN FR NL content RC1.indb 12990245 50049999 DE EN FR NL content RC1.indb 129 13.04.2015 16:24:2013.04.2015 16:24:20

130 / 218
Utiliser le logiciel LifeCloud Agent
12.2. Restaurer les paramètres par défaut sur le
système
Si le système Lifecloud réagit incorrectement ou si vous n'avez plus accès au
système suite à certains réglages, une restauration des paramètres par défaut
sur le système peut être nécessaire.
Pour réinitialiser le système, maintenez la touche RESET enfoncée pen-
dant environ 30 secondes. Un bref signal sonore retentit au bout de 3 se-
condes puis un signal sonore long au bout de 30 secondes.
Relâchez la touche RESET. Les paramètres par défaut ont alors été restau-
rés sur le système, celui-ci redémarre et vous pouvez réexécuter la pre-
mière mise en service.
13. Utiliser le logiciel LifeCloud Agent
13.1. Installer le logiciel LifeCloud Agent
• Le logiciel LifeCloud Agent vous permet de vous connecter depuis votre
ordinateur de bureau au système Lifecloud dans le réseau local pour ac-
céder ainsi à l'interface Web ainsi qu'aux dossiers du système Lifecloud
partagés en réseau.
Pour installer le logiciel LifeCloud Agent, procédez comme suit :
• Insérez le CD de logiciels fourni dans le lecteur CD de votre ordinateur et
ouvrez le fichier Autorun.exe.
• Suivez les instructions de l'assistant d'installation.
• Si vous voulez utiliser le logiciel de sauvegarde Memeo Instant Backup,
vous pouvez également l'installer dans une prochaine étape («Utiliser
Memeo Backup» à la page 148).
Une fois l'installation terminée, vous pouvez ouvrir le logiciel LifeCloud Agent
avec l'icône suivante dans la barre des tâches :
REMARQUE!
Le système Lifecloud n‘est reconnu dans le réseau
qu‘une fois que vous avez suivi toutes les étapes néces-
saires pour la première mise en service, comme décrit
sous «10. Première mise en service» à la page 121.
90245 50049999 DE EN FR NL content RC1.indb 13090245 50049999 DE EN FR NL content RC1.indb 130 13.04.2015 16:24:2013.04.2015 16:24:20

131 / 218
Utiliser le logiciel LifeCloud Agent
DE
FR
NL
GPL
EN
13.2. Utiliser le Bureau du LifeCloud
• Vous voyez dans la première option du menu l'état de la connexion. Si
l'état « Not logged in» est affiché, vous devez vous connecter avec le
nom de votre LifeCloud ainsi qu'avec un identifiant et un mot de passe
pour pouvoir accéder au système Lifecloud dans le réseau local.
• Cliquez pour cela sur l'option Sign in.
Une fois que vous vous êtes connecté, vous pouvez utiliser les fonctions de
menu suivantes du logiciel LifeCloud Agent :
Switch User
Vous pouvez ici vous connecter au système Lifecloud avec un autre identi-
fiant.
90245 50049999 DE EN FR NL content RC1.indb 13190245 50049999 DE EN FR NL content RC1.indb 131 13.04.2015 16:24:2013.04.2015 16:24:20

132 / 218
Utiliser le logiciel LifeCloud Agent
Log out
Vous pouvez ici déconnecter le LifeCloud Agent du système Lifecloud p. ex.
pour pouvoir vous connecter à un autre LifeCloud.
Explore my LifeCloud folders
Cette option vous permet d'afficher l'explorateur Windows ou le Finder MAC
pour ouvrir les dossiers du système Lifecloud sous forme de partages réseau.
Open Lifecloud application
Avec cette option, vous ouvrez l'interface Web dans le navigateur standard
de votre ordinateur.
Preferences
Vous pouvez ici rechercher les mises à jour disponibles pour le logiciel Life-
Cloud Agent et afficher l'adresse IP du système Lifecloud.
Wake up using «Wake On LAN»
Vous pouvez ici activer et désactiver la fonction Wake On LAN (WON) du sys-
tème Lifecloud (voir «Wake ON LAN» à la page 142).
About...
Vous trouvez ici les informations relatives au fabricant et à la licence du logi-
ciel LifeCloud Agent.
Exit LifeCloud Agent
Cette option ferme le logiciel LifeCloud Agent.
90245 50049999 DE EN FR NL content RC1.indb 13290245 50049999 DE EN FR NL content RC1.indb 132 13.04.2015 16:24:2113.04.2015 16:24:21

133 / 218
L'interface Web
DE
FR
NL
GPL
EN
14. L'interface Web
L'interface Web est une interface utilisateur du système Lifecloud basée sur
HTML que vous pouvez ouvrir avec votre navigateur Web.
• Utilisez au minimum l'Internet Explorer 6.0 ou Mozilla Firefox 2.0 ou des
versions plus récentes de ces navigateurs.
• La résolution d'écran doit être de 1024 x 768 pixels ou supérieure.
• Les plug-ins Java et Flash actuels doivent être activés dans le navigateur.
• Les fenêtres pop-up doivent être autorisées dans le navigateur Web et le
bloqueur de fenêtres pop-up, désactivé.
14.1. Ouvrir l'interface Web
• Ouvrez votre navigateur Web standard et tapez l'adresse IP affichée dans
le Medion Life Cloud Agent dans la ligne d'adresse du navigateur Web
ou
• tapez « http://www.lifecloudmedion.com » dans la ligne d'adresse
du navigateur Web
ou
• cliquez avec le bouton droit de la souris sur l'icône du Medion Life Cloud
Agent puis sur l'option Navigation zum Lifecloud (www).
14.2. Fonctions et paramètres de l'interface Web
Le navigateur Web standard s'ouvre et la page de connexion s'affiche.
Après la connexion, tous les utilisateurs (également l'administrateur) voient
tout d'abord apparaître la page d'accueil (Home).
Les différents menus et fonctions sont expliqués dans les sections suivantes.
90245 50049999 DE EN FR NL content RC1.indb 13390245 50049999 DE EN FR NL content RC1.indb 133 13.04.2015 16:24:2113.04.2015 16:24:21

134 / 218
Media Library
15. Media Library
C'est ici que vous gérez les fichiers multimédia sauvegardés sur le système Li-
fecloud.
La barre de menu supérieure vous permet de classer et d'adapter l'affichage
des fichiers ainsi que de rechercher des fichiers.
Vous pouvez supprimer vos propres sous-répertoires, mais pas les répertoires
racine FamilyLibrary et MyLibrary préinstallés.
Si des supports de données sont raccordés aux ports USB arrière, ils appa-
raissent aussi dans la bibliothèque.
15.1. MyLibrary/FamilyLibrary
FamilyLibrary
Les dossiers et contenus du répertoire FamilyLibrary peuvent être consul-
tés et modifiés par tous les utilisateurs qui se sont connectés au Lifecloud.
REMARQUE !
Vous pouvez activer ou désactiver l'accès des utilisa-
teurs à
FamilyLibrary dans les paramètres système.
My Library
Se trouvent ici les dossiers et contenus que seul l'utilisateur actuellement
connecté au Lifecloud peut consulter et modifier.
90245 50049999 DE EN FR NL content RC1.indb 13490245 50049999 DE EN FR NL content RC1.indb 134 13.04.2015 16:24:2113.04.2015 16:24:21

135 / 218
Media Library
DE
FR
NL
GPL
EN
15.2. Créer un nouveau dossier/supprimer un dossier
Marquez le dossier/répertoire racine dans lequel vous souhaitez créer un
nouveau dossier.
Cliquez sur le signe plus au-dessus de l'affichage des dossiers puis attri-
buez un nom pour le nouveau sous-répertoire. Confirmez votre saisie
avec Create.
Pour supprimer un dossier, marquez-le puis cliquez sur le signe moins
au-dessus de l'affichage des dossiers. Confirmez votre saisie avec Yes.
15.3. Ouvrir le menu contextuel pour des dossiers
et chiers
Placez le pointeur de la souris sur un dossier/fichier et cliquez sur la flèche
à côté du nom du dossier/fichier pour ouvrir le menu contextuel :
Cliquez sur l'option Open pour ouvrir le contenu du dossier dans la fe-
nêtre de droite ou lire directement un fichier multimédia.
Lecture automatique de contenus multimédia (uniquement
pour dossiers)
Avec l'option Slideshow, vous lancez la lecture d'un diaporama de
toutes les photos contenues dans ce dossier.
90245 50049999 DE EN FR NL content RC1.indb 13590245 50049999 DE EN FR NL content RC1.indb 135 13.04.2015 16:24:2213.04.2015 16:24:22

136 / 218
Media Library
L'option Autoplay vous permet de lancer l'écoute via le lecteur de mu-
sique de tous les fichiers audio contenus dans ce dossier.
Télécharger
Avec l'option Download, vous pouvez télécharger le dossier sur votre appa-
reil directement sous forme de fichier zip.
Téléverser (uniquement pour dossiers)
Avec l'option Upload, vous ouvrez la fenêtre pour le téléversement de fi-
chiers. Vous pouvez ici téléverser des fichiers dans le dossier actuel en indi-
quant un chemin d'accès ou par Drag and Drop (voir «15.5. Téléverser des
fichiers sur le système Lifecloud» à la page 137).
Add to Album
Sélectionnez ici un album ou créez un nouvel album auquel vous voulez
ajouter ce dossier (voir aussi «16. Albums» à la page 139).
Share Selected Items
Vous pouvez ici créer directement un album pour ce dossier pour le partager
dans le réseau par lien direct (voir aussi «16. Albums» à la page 139).
Share with DMA
Cliquez sur l'option Share with DMA pour que les contenus multimé-
dia de ce dossier soient disponibles dans le réseau pour des lecteurs mul-
timédia compatibles UPnP via l'adaptateur média numérique (DMA) du
système Lifecloud.
Les dossiers multimédia partagés sont signalés par une icône de téléviseur
au-dessus de l'icône de dossier.
Pour ne plus partager ces dossiers, cliquez sur l'option
Unshare with DMA.
View Details
Cliquez sur cette option pour afficher les propriétés des dossiers/fichiers.
• Dans les propriétés des dossiers/fichiers, vous pouvez modifier directe-
ment le nom des fichiers et les balises des fichiers (audio/vidéo).
• Pour masquer à nouveau les propriétés des dossiers/fichiers, cliquez sur le
bouton «Info» en haut à droite.
Copy/Cut/Paste/Rename/Delete
Ces fonctions vous permettent d'utiliser le gestionnaire de fichiers pour les
dossiers et fichiers comme vous en avez l'habitude sur votre ordinateur.
90245 50049999 DE EN FR NL content RC1.indb 13690245 50049999 DE EN FR NL content RC1.indb 136 13.04.2015 16:24:2313.04.2015 16:24:23

137 / 218
Media Library
DE
FR
NL
GPL
EN
15.4. Albums
Vous pouvez ici créer de nouveaux albums, supprimer des albums ou consul-
ter les contenus d'albums.
Créer un nouvel album
Cliquez sur le signe + situé à côté de l'option Albums.
Attribuez un nom et une description pour l'album.
Sélectionnez un thème devant être affiché en arrière-plan lorsque l'album
est regardé.
Vous voyez en bas le type de partage (Amis) préréglé. Cliquez sur
More Sharing Options pour régler un autre type de partage.
Puis cliquez sur Create pour créer l'album.
Supprimer un album
Marquez l'album que vous voulez supprimer et cliquez sur le signe -.
Puis confirmez l'interrogation avec Yes.
15.5. Téléverser des chiers sur le système
Lifecloud
Pour téléverser des fichiers sur le système Lifecloud, procédez comme suit :
Dans la bibliothèque multimédia, cliquez sur un dossier dans lequel vous
voulez téléverser des fichiers.
Dans le menu contextuel du dossier, sélectionnez l'option Upload ou cli-
quez sur la flèche au-dessus de l'affichage des dossiers.
La fenêtre de téléversement s'ouvre.
90245 50049999 DE EN FR NL content RC1.indb 13790245 50049999 DE EN FR NL content RC1.indb 137 13.04.2015 16:24:2313.04.2015 16:24:23

138 / 218
Media Library
• Dans l'affichage Manual Upload, cliquez sur l'option Add file puis sé-
lectionnez sur votre ordinateur le fichier que vous voulez ajouter à la liste
de téléversement.
• Dans l'affichage Drag und Drop, vous pouvez tirer un fichier avec la sou-
ris de votre ordinateur dans le champ blanc en bas de la fenêtre de télé-
versement pour l'ajouter à la liste de téléversement.
REMARQUE !
Pour téléverser des fichiers par Drag & Drop (glisser/
déposer), la version actuelle de Java Script doit être
activée dans votre navigateur.
Ajoutez des fichiers à la liste de téléversement à l'aide d'une des deux mé-
thodes décrites puis cliquez sur Upload pour téléverser les fichiers dans
le dossier auparavant sélectionné.
15.6. Options du menu contextuel avec les chiers
multimédia
Avec les fichiers multimédia photo, audio et vidéo, des options supplémen-
taires apparaissent dans le menu contextuel.
Fichiers photo
View ouvre la photo directement dans la visionneuse de pho-
tos. Vous pouvez en outre tourner la photo Rotate Clockwise
et Rotate Counterclockwise ainsi que l'utiliser comme
Use as Home Backround pour la page d'accueil.
Fichiers audio
Abspielen ouvre le fichier audio directement dans le lecteur de musique.
Fichiers vidéo
Abspielen ouvre le fichier vidéo directement dans le lecteur vidéo.
90245 50049999 DE EN FR NL content RC1.indb 13890245 50049999 DE EN FR NL content RC1.indb 138 13.04.2015 16:24:2313.04.2015 16:24:23

139 / 218
Albums
DE
FR
NL
GPL
EN
16. Albums
Vous voyez ici les albums que vous avez créés dans la bibliothèque multimé-
dia.
Les albums contiennent des liens avec des fichiers que vous avez marqués
dans la bibliothèque multimédia et ajoutés à un album.
• Les albums peuvent aussi être partagés avec des utilisateurs en dehors du
Lifecloud : vous partagez alors un lien vers l'album avec ces utilisateurs.
Ce lien peut être valable durablement ou pour une période limitée.
• Les nouveaux albums se créent dans la bibliothèque multimédia.
90245 50049999 DE EN FR NL content RC1.indb 13990245 50049999 DE EN FR NL content RC1.indb 139 13.04.2015 16:24:2313.04.2015 16:24:23

140 / 218
Preferences
17. Preferences
Sur cette page, vous réglez tous les paramètres pour le système Lifecloud.
Si vous êtes connecté au système Lifecloud en tant qu'administrateur, vous
pouvez en tant que tel consulter tous les paramètres système. En tant qu'uti-
lisateur, vous ne pouvez configurer que les paramètres utilisateur :
17.1. User Preferences
User
Dans ce menu, vous pouvez adapter l'apparence et la configuration pour
l'utilisateur actuellement connecté.
Language
Réglez ici la langue devant être affichée à l'utilisateur dans les menus du sys-
tème Lifecloud.
Your Email
Saisissez ici l'adresse électronique via laquelle l'utilisateur doit recevoir des
notifications du système Lifecloud.
Home Backround Position
Vous pouvez définir des photos qui sont stockées sur le système Lifecloud
comme arrière-plan d'accueil dans la bibliothèque multimédia.
Réglez ici comment l'arrière-plan d'accueil doit être affiché dans le naviga-
teur.
90245 50049999 DE EN FR NL content RC1.indb 14090245 50049999 DE EN FR NL content RC1.indb 140 13.04.2015 16:24:2413.04.2015 16:24:24

141 / 218
Preferences
DE
FR
NL
GPL
EN
Clear Home Backround
Vous pouvez ici supprimer l'arrière-plan d'accueil actuellement utilisé et res-
taurer l'arrière-plan par défaut.
What to do when a file already exists
Indiquez ici comment le système Lifecloud doit, lors du téléversement de fi-
chiers, traiter les fichiers qui existent déjà.
What to do when adding files to albums
• Demander chaque fois
• Intégrer les sous-dossiers
• Ne pas intégrer les sous-dossiers
Share new albums with other family accounts by default
Si vous réglez cette fonction sur Yes, les nouveaux albums sont créés en
standard avec le partage «Comptes familiaux».
Share new albums with media players by default
Si vous réglez cette fonction sur Yes, les nouveaux albums sont créés en
standard avec le partage «Lecteur multimédia ».
Hide help tips
Si vous réglez cette fonction sur Yes, des conseils ne seront plus affichés
après la connexion au Lifecloud.
Resume Audio Playback
Si vous réglez cette fonction sur JA, la prochaine fois que vous ouvrirez un fi-
chier multimédia déjà lu auparavant, la lecture multimédia reprendra au der-
nier endroit où vous l'avez arrêtée.
Reset all «Do not show again» prompts
Vous pouvez ici faire réapparaître toutes les cases à cocher pour lesquelles
vous avez auparavant coché l'option «Reset».
Diskspace
Vous pouvez voir ici l'espace mémoire encore libre et déjà utilisé sur les
disques durs.
Change password
Pour modifier le mot de passe actuel, saisissez ici un nouveau mot de passe
et confirmez-le en cliquant sur Submit.
90245 50049999 DE EN FR NL content RC1.indb 14190245 50049999 DE EN FR NL content RC1.indb 141 13.04.2015 16:24:2513.04.2015 16:24:25

142 / 218
Preferences
17.2. Server Preferences
Network Sharing
Indiquez ici le nom de votre groupe résidentiel Windows et réglez la fonction
sur Yes pour que vos fichiers et dossiers soient disponibles dans le groupe
résidentiel.
Wake ON LAN
Réglez cette fonction sur Yes pour que des périphériques en réseau puissent
activer (« réveiller ») le système Lifecloud lorsque ce dernier est en mode
Veille.
UPNP Router Configuration
Réglez la fonction « Configure router via UPNP » sur Yes pour que le
système Lifecloud puisse configurer votre routeur pour le déverrouillage du
port.
Dans l'option suivante, vous pouvez indiquer si le système Lifecloud peut an-
nuler la configuration actuelle de votre routeur.
Notification
Indiquez ici à quelles adresses électroniques les messages du système
doivent être envoyés. Séparez plusieurs adresses électroniques par une vir-
gule.
Des messages du système sont envoyés en cas de problème avec le disque
dur ou lorsque le disque dur est plein.
Network Services
Vous configurez ici l'accès FTP au système Lifecloud.
Réglez la fonction pour le réseau local et/ou l'Internet sur Yes pour acti-
ver l'accès FTP aux dossiers du système Lifecloud.
LAN Connection
Vous pouvez ici connecter le système Lifecloud à votre réseau LAN via DHCP
ou lui attribuer une adresse IP fixe.
Réglez la fonction
Optain IP address automatically sur Yes pour
que les adresses IP soient obtenues du serveur DHCP du routeur.
Si vous voulez configurer l'adresse IP manuellement, réglez la fonction sur
No puis saisissez manuellement adresse IP, masque subnet, passerelle et
serveur DNS.
90245 50049999 DE EN FR NL content RC1.indb 14290245 50049999 DE EN FR NL content RC1.indb 142 13.04.2015 16:24:2513.04.2015 16:24:25

143 / 218
Preferences
DE
FR
NL
GPL
EN
Date and Time
Le système Lifecloud peut recevoir la date et l'heure d'un serveur de temps
via Internet ou vous pouvez les régler vous-même.
Si vous réglez l'option «Datum und Zeit aus dem Internet abrufen» sur
Yes, vous devez ensuite indiquer un serveur NTP (Network Time Protocol)
standard via lequel la date et l'heure peuvent être reçues.
Remote Acces
Vous pouvez ici activer et désactiver l'accès à distance au système Lifecloud
via Internet.
17.3. Administration
Add New User
Pour ajouter un nouvel utilisateur au système, saisissez un identifiant
dans le champ Account User Name.
Les identifiants doivent commencer par une lettre et se composer d'au moins
trois caractères. Les majuscules/minuscules ne sont pas prises en compte.
Vous ne pouvez pas ajouter deux utilisateurs ayant le même identifiant.
Saisissez un nom d'affichage pour l'utilisateur. Ce nom peut être différent
de l'identifiant choisi pour le compte.
Saisissez un mot de passe et confirmez-le.
Ce mot de passe doit se composer d'au moins six caractères et contenir un
chiffre. Les majuscules/minuscules sont prises en compte.
Sélectionnez Create as Administrator pour attribuer des droits
d'administrateur au nouvel utilisateur.
Sélectionnez Let user access family folder pour autoriser au
nouvel utilisateur l'accès aux fichiers et dossiers contenus dans le réper-
toire racine FamilyFolder.
Edit User
Sélectionnez ici un utilisateur existant dont vous voulez modifier ultérieure-
ment le nom, le mot de passe ou les droits.
Shut down
Vous pouvez ici Shut down ou Restart le système Lifecloud.
Software Updates
Vous pouvez ici vérifier si de nouvelles mises à jour sont disponibles sur Inter-
net.
90245 50049999 DE EN FR NL content RC1.indb 14390245 50049999 DE EN FR NL content RC1.indb 143 13.04.2015 16:24:2513.04.2015 16:24:25

144 / 218
Preferences
Medion LifeCloud Premium
Vous pouvez acquérir ici un compte premium Medion Life Cloud et/ou
consulter le statut de votre compte premium Medion Life Cloud.
Disk Management
Vous pouvez consulter ici le statut de la configuration des disques durs.
Pour formater les deux disques durs afin de pouvoir ensuite les reconfigu-
rer, sélectionnez l'option
Format.
Pour recommencer la configuration (RAID 1 ou JBOD), sélectionnez l'op-
tion
Reconfigure.
External Storage
Vous pouvez consulter ici l'occupation de la mémoire d'un support de don-
nées externe raccordé au port USB du système Lifecloud.
Power Timer
• Vous pouvez ici activer et régler le Power Timer. Si le Power Timer est ac-
tivé, le système Lifecloud s'allumera et s'éteindra automatiquement au
bout d'une durée définie. Veuillez noter que si vous avez réglé une durée
avant arrêt automatique de l'appareil, les transferts de données seront in-
terrompus et les tâches de sauvegarde imminentes, non exécutées.
• Lorsque le système Lifecloud est désactivé, des périphériques en réseau
peuvent le « réveiller » si la fonction WOL (Wake On LAN) a été auparavant
activée (voir «Wake ON LAN» à la page 142).
REMARQUE !
La durée avant arrêt automatique de l'appareil ne peut
pas être inférieure à cinq minutes à compter de l'heure
à laquelle vous l'avez réglée.
90245 50049999 DE EN FR NL content RC1.indb 14490245 50049999 DE EN FR NL content RC1.indb 144 13.04.2015 16:24:2513.04.2015 16:24:25

145 / 218
Utilisation de l'application LifeCloud sur des appareils Smart
DE
FR
NL
GPL
EN
18. Utilisation de l'application LifeCloud sur
des appareils Smart
Téléchargez l'application LifeCloud pour appareils Smart sous le lien
indiqué sur l'enveloppe et installez-la.
Une fois l'application installée, tapotez sur l'icône de l'application Li-
feCloud sur votre appareil Smart mobile.
L'application LifeCloud démarre (exemple de l’application Android).
Indiquez le nom de votre Lifecloud ainsi que l'identifiant correspondant
et un mot de passe pour la connexion de l'application au Lifecloud.
Vous pouvez alors accéder de n'importe où via Internet à votre LifeCloud ou
à votre système Lifecloud depuis votre appareil mobile avec l'application.
18.1. Menu principal
Sur la page d'accueil de l'application LifeCloud, vous pouvez consulter les al-
bums ou la bibliothèque multimédia du système Lifecloud.
Tapotez sur une icône pour accéder au menu correspondant.
90245 50049999 DE EN FR NL content RC1.indb 14590245 50049999 DE EN FR NL content RC1.indb 145 13.04.2015 16:24:2513.04.2015 16:24:25

146 / 218
Utilisation de l'application LifeCloud sur des appareils Smart
18.2. A chage de la bibliothèque multimédia
Dans le menu principal, cliquez sur l'option Medion Library pour affi-
cher la bibliothèque multimédia du Lifecloud.
Dans la bibliothèque multimédia, vous voyez les dossiers publics et privés.
Ouvrez un des répertoires racine FamilyLibrary ou MyLibrary.
Les icônes de menu en bas de l'écran vous permettent d'adapter l'affichage
des contenus des dossiers.
Tapotez sur le bouton
en bas de l'écran pour afficher la barre de
menu.
Avec les différentes options, vous pouvez rechercher des fichiers, actualiser
l'affichage, créer des dossiers, téléverser des fichiers dans le dossier actuel et/
ou vous déconnecter du Lifecloud.
90245 50049999 DE EN FR NL content RC1.indb 14690245 50049999 DE EN FR NL content RC1.indb 146 13.04.2015 16:24:2513.04.2015 16:24:25

147 / 218
Utilisation de l'application LifeCloud sur des appareils Smart
DE
FR
NL
GPL
EN
18.3. A chage des albums
Dans le menu principal, cliquez sur l'option Albums pour afficher les al-
bums du Lifecloud.
Les icônes de menu en bas de l'écran vous permettent d'adapter l'affichage
des contenus des dossiers.
Tapotez sur le bouton en bas de l'écran pour afficher la barre de
menu.
Avec les différentes options, vous pouvez rechercher des fichiers, actualiser
l'affichage et/ou vous déconnecter du Lifecloud.
90245 50049999 DE EN FR NL content RC1.indb 14790245 50049999 DE EN FR NL content RC1.indb 147 13.04.2015 16:24:2613.04.2015 16:24:26

148 / 218
Utiliser Memeo Backup
19. Utiliser Memeo Backup
Vous trouverez sur le CD fourni avec l'appareil le logiciel de sauvegarde Me-
meo Instant Backup que vous pouvez installer en même temps que le logiciel
LifeCloud Agent («Utiliser le logiciel LifeCloud Agent» à la page 130).
Pour configurer la fonction de sauvegarde avec Memeo Instant Backup sur
votre système LifeCloud, procédez comme suit:
Créer un lecteur réseau pour la sauvegarde des données
Connectez-vous sur votre ordinateur au système Lifecloud via le Lifecloud
Agent comme décrit sous «Explore my LifeCloud folders» à la page 132.
Cliquez sur l'icône «Lecteur(s) réseau».
Pour une sauvegarde des données dans un dossier public, connec-
tez-vous sur le compte utilisateur correspondant.
Sélectionnez une lettre de lecteur (p. ex. «Z:»).
Sélectionnez un dossier dans lequel les copies de sauvegarde des don-
nées doivent être enregistrées (p.ex. «Z:»).
Cochez le champ «Restore Connection at Windows logon».
Sauvegarder des données avec Memeo Backup
Démarrez Memeo Instant Backup en cliquant sur l'icône « Memeo Backup
» sur le Bureau.
Cliquez dans le menu «Help» sur l'option «Register» puis saisissez la
clé de produit qui se trouve sur la couverture du CD de logiciels fourni.
Sautez la page d'accueil en cliquant sur la mention
«No Thanks, I want to start a Backup now».
Puis sélectionnez comme cible pour la sauvegarde des données le lecteur
réseau tout juste créé (dans l'exemple ci-dessus: (Z:)).
Cliquez sur «Start Backup».
Tous les fichiers du lecteur C: de l'ordinateur sont alors sauvegardés sur le
système Lifecloud. Les dossiers suivants sur C: ne sont pas sauvegardés:
• Le dossier « Programs »
• Les fichiers temporaires et fichiers de protocole ainsi que les fichiers de
disque dur virtuels
• Le dossier « Windows »
REMARQUE !
Vous trouverez de plus amples informations sur Me-
meo Instant Backup en ouvrant l'option « Quick Start
Guide » dans le menu « Help ».
90245 50049999 DE EN FR NL content RC1.indb 14890245 50049999 DE EN FR NL content RC1.indb 148 13.04.2015 16:24:2613.04.2015 16:24:26

149 / 218
Exécuter LifecloudDetect
DE
FR
NL
GPL
EN
20. Exécuter LifecloudDetect
Vous pouvez rechercher le système Lifecloud dans le réseau en exécutant
le fichier medionlifeclouddetect.exe qui se trouve dans le dossier util sur le
CD de logiciels fournis.
Une fois le fichier exécuté, vous voyez apparaître une fenêtre dans la-
quelle vous êtes invité à appuyer sur la touche en façade de l'appareil
pour que le système Lifecloud puisse être trouvé dans le réseau.
20.1. Vous avez besoin d'une aide supplémentaire?
Si les solutions proposées aux paragraphes précédents n'ont donné aucun
résultat, veuillez nous contacter. Les informations suivantes nous seraient
alors très utiles:
• Quels périphériques externes sont raccordés à l'appareil?
• Quels sont les messages affichés à l'écran?
• Au cours de quelle commande le problème s'est-il produit?
• Quelle est la configuration de votre ordinateur?
• Quel logiciel utilisiez-vous lorsque l'erreur s'est produite?
• Qu'avez-vous déjà tenté pour résoudre le problème?
• Si vous possédez déjà un numéro de client, veuillez nous le communi-
quer.
90245 50049999 DE EN FR NL content RC1.indb 14990245 50049999 DE EN FR NL content RC1.indb 149 13.04.2015 16:24:2613.04.2015 16:24:26

150 / 218
Nettoyage
21. Nettoyage
Vous pouvez prolonger la durée de vie de l'appareil en respectant les
consignes suivantes:
• Avant de nettoyer l'appareil, débranchez toujours l'adaptateur secteur et
tous les câbles de connexion.
• N'utilisez ni solvants ni détergents corrosifs ou gazeux.
• Nettoyez l'appareil avec un chiffon doux et non pelucheux.
Veuillez conserver soigneusement les emballages et utiliser uniquement
ceux-ci pour transporter l'appareil.
ATTENTION!
L'intérieur de l'appareil ne comporte aucune pièce néces-
sitant un entretien ou un nettoyage.
22. Recyclage
Emballage
Votre appareil se trouve dans un emballage de protection afin
d'éviter qu'il ne soit endommagé au cours du transport. Les em-
ballages sont des matières premières et peuvent être recyclés
ou réintégrés dans le circuit des matières premières.
Appareil
Une fois l'appareil arrivé en fin de vie, ne le jetez en aucun cas
dans une poubelle classique. Informez-vous auprès de votre
municipalité des possibilités de recyclage écologique et adapté.
90245 50049999 DE EN FR NL content RC1.indb 15090245 50049999 DE EN FR NL content RC1.indb 150 13.04.2015 16:24:2613.04.2015 16:24:26

151 / 218
Caractéristiques techniques
DE
FR
NL
GPL
EN
23. Caractéristiques techniques
Alimentation adaptateur secteur: Ktec KSAP0361200300HE
Entrée (primaire) :
100-240 V ~ 50/60 Hz, 0,8 A
Sortie (secondaire): 12 V 3 A
Connectique
3 ports USB (façade/arrière) : 2x USB 3.0 (bleu), 1x USB 2.0 (blanc)
Prise réseau LAN : RJ-45
(Ethernet 10/100 MBit & Gigabit)
Entrée adaptateur secteur : 12 V 3 A
Disques durs
Interfaces : 2x SATA
Capacité: 2x 6 To (correspond à 6000 Go*)
Généralités
Dimensions(env.) : 134 x 97 x 195 mm (l x H x P)
Poids total (env.) : approx. 2 kg
Température en fonctionnement: 5° C à 35°C
Humidité de l'air en fonctionnement: 5 % à 65 %
*1 Go correspond à 1 milliard d'octets. La capacité de mémoire effectivement
utilisable peut varier.
90245 50049999 DE EN FR NL content RC1.indb 15190245 50049999 DE EN FR NL content RC1.indb 151 13.04.2015 16:24:2713.04.2015 16:24:27

152 / 218
Glossaire
24. Glossaire
BitTorrent
Voir Torrent.
CIFS – Common Internet File System
Le protocole de partage de fichiers recommandé pour la plateforme Win-
dows, avec lequel des utilisateurs peuvent accéder à des partages via l'envi-
ronnement réseau. Mac OS X ou des versions plus récentes prennent aussi en
charge le protocole CIFS. Voir aussi protocole.
DHCP – Dynamic Host Configuration Protocol
Un protocole pour assigner une adresse IP à des appareils dans le réseau.
Avec les adresses dynamiques, un appareil peut avoir une autre adresse IP
chaque fois qu'il se connecte à un réseau. Dans certains systèmes, l'adresse IP
se modifie d'elle-même pendant que l'appareil est connecté. DHCP supporte
aussi une combinaison d'adresses IP statiques et dynamiques. Voir aussi pro-
tocole.
DLNA – Digital Living Network Alliance
Alliance d'entreprises de l'électronique grand public et du secteur informa-
tique ainsi que de constructeurs d'appareils mobiles définissant des stan-
dards de compatibilité des produits, permettant ainsi aux utilisateurs de par-
tager des contenus à domicile.
DMA – Digital Media Adapter (adaptateur média numérique)
Un appareil avec lequel les appareils de divertissement à domicile peuvent
transférer des médias tels que musique, photos et vidéos à et depuis d'autres
appareils via un réseau.
DNS – Domain Name Service
Un système avec lequel un serveur de noms de domaine en réseau peut
convertir des noms d'hôte sous forme de texte en adresses IP numériques
pour identifier sans équivoque un appareil connecté à Internet.
Ethernet
Une méthode standard pour raccorder des ordinateurs à un réseau local
(LAN).
FTP (File Transfer Protocol – protocole de transfert de fichiers)
Un protocole de réseau qui est utilisé pour transférer des données d'un ordi-
nateur à un autre via un réseau. FTP est souvent utilisé pour échanger des fi-
chiers indépendamment des systèmes d'exploitation utilisés.
90245 50049999 DE EN FR NL content RC1.indb 15290245 50049999 DE EN FR NL content RC1.indb 152 13.04.2015 16:24:2713.04.2015 16:24:27

153 / 218
Glossaire
DE
FR
NL
GPL
EN
Host
L'ordinateur auquel les autres ordinateurs et périphériques se connectent.
Adaptateur de bus hôte
Une carte à enficher qui sert d'interface entre le bus frontal de l'ordinateur et
le disque dur.
Interface hôte
Le point auquel un hôte et un lecteur sont reliés l'un à l'autre.
Taux de transfert d'hôte
La vitesse à laquelle un ordinateur hôte peut transférer des données via une
interface.
HTTP – Hypertext Transfer Protocol
Protocole utilisé par le World Wide Web pour transférer des informations
entre serveurs et navigateurs. Voir aussi protocole.
IP – Internet Protocol
Un système qui règle comment des messages de données sont répartis en
paquets, dirigés de l'expéditeur au destinataire et de nouveau regroupés à
destination. Voir aussi protocole.
Adresse IP
Un numéro binaire de 32 bits qui identifie sans équivoque chaque ordinateur
connecté à Internet.
iTunes
Un programme de lecture audio qui est utilisé pour importer des titres musi-
caux et d'autres fichiers multimédia depuis votre disque dur.
LAN – Local Area Network (réseau local)
Un système avec lequel les utilisateurs d'ordinateurs au sein d'une entreprise
ou d'une organisation sont reliés entre eux et souvent aussi à des compila-
tions de données sauvegardées de manière centralisée sur des serveurs LAN.
Serveur multimédia
Un appareil qui sauvegarde et partage des fichiers multimédia (fichiers au-
dio, vidéo et photo numériques).
Appareil de stockage multimédia
Un appareil qui sauvegarde des fichiers multimédia (fichiers audio, vidéo et
photo numériques).
90245 50049999 DE EN FR NL content RC1.indb 15390245 50049999 DE EN FR NL content RC1.indb 153 13.04.2015 16:24:2713.04.2015 16:24:27

154 / 218
Glossaire
NAS
Network Attached Storage (serveur de stockage en réseau). Un appareil de
stockage avec disque dur, qui est configuré avec une propre adresse de ré-
seau au lieu d'être relié à l'ordinateur qui sert aux utilisateurs de poste de tra-
vail dans le réseau.
Système d'exploitation
Un logiciel avec lequel l'utilisateur et les logiciels installés sur le système
peuvent communiquer avec le matériel de l'ordinateur, tel que le disque dur.
Partition
Une partie logique sur un disque dur que le système d'exploitation traite
comme un disque dur séparé. Une lettre de lecteur sans équivoque est assi-
gnée à chaque partition. Les partitions qui sont intégrées en tant que lecteur
fixe sont également qualifiées de « volumes ».
Peer
Voir Torrent.
Port (matériel)
Une sortie spéciale d'un appareil destinée au raccordement avec d'autres ap-
pareils au moyen d'un câble ou d'un connecteur. Des exemples en sont les
ports Ethernet, les connecteurs d'alimentation électrique et les ports USB.
Protocole
Une convention pour le transfert de données qui définit la synchronisation,
le format de contrôle et la représentation des données.
Partage
Une zone similaire à un dossier ou répertoire qui est configurée pour l'organi-
sation de fichiers et l'accès depuis le réseau. Les partages peuvent être «pu-
blics», donc accessibles pour chacun dans le réseau, ou « privés » et donc ac-
cessibles uniquement pour des utilisateurs sélectionnés de votre réseau.
Seeder
Voir Torrent.
Streaming
Médias tels que fichiers audio, vidéo et photo qui sont reçus de manière
constante pendant qu'ils sont simultanément livrés par un fournisseur de
streaming.
90245 50049999 DE EN FR NL content RC1.indb 15490245 50049999 DE EN FR NL content RC1.indb 154 13.04.2015 16:24:2713.04.2015 16:24:27

155 / 218
Glossaire
DE
FR
NL
GPL
EN
TCP/IP
Transmission Control Protocol/Internet Protocol (protocole de contrôle de
transmission/protocole Internet). Une série de protocoles pour la communi-
cation via des réseaux reliés entre eux. Le standard pour le transfert de don-
nées via des réseaux. Voir aussi protocole.
Torrent
BitTorrent (bit = plus petite unité de données, torrent comme en français, du
latin torrens) est un protocole de partage de fichiers qui convient particuliè-
rement à la distribution rapide de grandes quantités de données. Les torrents
ont généralement une taille de quelques douzaines de kilooctets et sont mis
à disposition pour téléchargement sur le site Web du fournisseur ou via des
pages d'index.
Le seeder-peer initial (de l'anglais to seed : semer) établit le lien avec le fichier
à proposer comme torrent et le tient à disposition.
Le logiciel Client reçoit du tracker une liste de stations distantes qui pos-
sèdent les données ou des parties de celles-ci ou s'y intéressent. Dès qu'un
peer a reçu un segment du fichier et a vérifié la somme de contrôle, il le com-
munique au tracker et peut déjà transmettre cette partie de fichier aux autres
peers.
On appelle « swarm » (essaim) la quantité de tous les peers qui sont intéres-
sés par le même torrent. Les peers qui possèdent la totalité du contenu du
torrent et ne téléchargent donc rien d'autres Clients, mais se contentent de
répartir des données sont appelés seeders. On qualifie généralement de lee-
chers (de l'anglais leech: sangsue) les peers qui ne possèdent pas encore la
totalité du contenu torrent et téléchargent encore d'autres segments.
UPnP
Universal Plug and Play. Une série de protocoles de réseau d'ordinateurs qui
simplifie l'implémentation de réseaux à domicile en permettant de raccorder
les appareils entre eux sans fil. Voir aussi protocole.
Volume
Voir partition.
90245 50049999 DE EN FR NL content RC1.indb 15590245 50049999 DE EN FR NL content RC1.indb 155 13.04.2015 16:24:2713.04.2015 16:24:27

156 / 218
Mentions légales
25. Mentions légales
Copyright © 2015
Tous droits réservés.
Le présent mode d‘emploi est protégé par le copyright.
La reproduction sous forme mécanique, électronique ou sous toute autre for-
me que ce soit est interdite sans l‘autorisation écrite du fabricant.
Le copyright est la propriété de la société :
Medion AG
Am Zehnthof 77
45307 Essen
Allemagne
Sous réserve de modifications techniques et visuelles ainsi que d’erreurs
d’impression.
Le mode d‘emploi peut être à nouveau commandé via la hotline de service et
téléchargé sur le portail de service.
Vous pouvez aussi scanner le code QR ci-dessous et charger le mode
d‘emploi sur votre terminal mobile via le portail de service.
URL QR Code
FR www.medion.com/fr/service/accueil/
90245 50049999 DE EN FR NL content RC1.indb 15690245 50049999 DE EN FR NL content RC1.indb 156 13.04.2015 16:24:2713.04.2015 16:24:27

157 van 218
DE
FR
NL
GPL
EN
Inhoudsopgave
1. Over deze handleiding ................................................................. 159
1.1. In deze handleiding gebruikte waarschuwingspictogrammen
en -woorden .......................................................................................... 159
2. Gebruik voor het beoogde doel .................................................. 160
3. Veiligheidsinstructies ................................................................... 161
3.1. Elektrische apparaten zijn geen speelgoed ............................... 161
3.2. Algemeen ............................................................................................... 161
3.3. Plaats van installatie ........................................................................... 162
3.4. Nooit zelf repareren! ........................................................................... 163
3.5. Reiniging en onderhoud ................................................................... 163
3.6. Back-up van gegevens ....................................................................... 163
3.7. Voeding ................................................................................................... 163
3.8. Opmerking over elektrostatische lading ..................................... 164
3.9. Opmerkingen over de conformiteit .............................................. 165
4. Algemeen ...................................................................................... 165
4.1. Ondersteunde systemen en bestandsformaten ....................... 165
4.2. Toepassingsmogelijkheden van het Lifecloud-systeem ....... 166
4.3. Werking van het Lifecloud-systeem en de meegeleverde com-
ponenten ................................................................................................ 166
4.4. Uitrusting van het Lifecloud-systeem .......................................... 167
4.5. Systeemeisen......................................................................................... 167
4.6. Informatie over veiligheidswaarschuwingen ............................ 167
5. Inhoud van de verpakking ........................................................... 169
6. Overzicht van het apparaat ......................................................... 170
6.1. Voorzijde en achterzijde van het apparaat ................................. 170
7. Over het Lifecloud-systeem ........................................................ 171
8. Ingebruikname ............................................................................. 171
8.1. Aansluiting op een netwerk ............................................................. 171
9. Het apparaat in- en uitschakelen ................................................ 172
10. Eerste ingebruikname .................................................................. 172
10.1. Account aanmaken voor het Lifecloud-systeem ...................... 172
10.2. Bij eerste ingebruikname: configuratie van harde schijven be-
palen ......................................................................................................... 175
11. Gegevens kopiëren met de OTC-toets ........................................ 178
12. De RESET-toets .............................................................................. 178
12.1. Wachtwoord opnieuw instellen ..................................................... 178
90245 50049999 DE EN FR NL content RC1.indb 15790245 50049999 DE EN FR NL content RC1.indb 157 13.04.2015 16:24:2713.04.2015 16:24:27

158 van 218
12.2. Systeem resetten naar standaard instellingen .......................... 181
13. LifeCloud Agent gebruiken .......................................................... 181
13.1. LifeCloud Agent installeren .............................................................. 181
13.2. LifeCloud Desktop gebruiken ......................................................... 182
14. De webinterface ............................................................................ 183
14.1. Webinterface oproepen .................................................................... 184
14.2. Functies en instellingen van de webinterface .......................... 184
15. Media Library ................................................................................ 185
15.1. My Library/FamilyLibrary .................................................................. 185
15.2. Nieuwe map maken/Map wissen................................................... 186
15.3. Contextmenu voor mappen en bestanden openen ............... 186
15.4. Albums ..................................................................................................... 188
15.5. Bestanden uploaden naar het Lifecloud-systeem ................... 189
15.6. Opties in het contextmenu bij mediabestanden ..................... 189
16. Albums ........................................................................................... 190
17. Preferences .................................................................................... 190
17.1. User Preferences ................................................................................... 191
17.2. Server Preferences ............................................................................... 192
17.3. Administration ...................................................................................... 193
18. De LifeCloud-app gebruiken op smart-apparaten ..................... 195
18.1. Hoofdmenu ............................................................................................ 195
18.2. Mediabibliotheekweergave ............................................................. 196
18.3. Albumweergave ................................................................................... 197
19. Werken met Memeo Backup ........................................................ 197
20. LifecloudDetect uitvoeren ........................................................... 199
20.1. Heeft u nog verdere ondersteuning nodig? .............................. 199
21. Reiniging ....................................................................................... 200
22. Afvoeren ........................................................................................ 200
23. Technische specificaties ............................................................... 201
24. Woordenlijst .................................................................................. 202
25. Colofon .......................................................................................... 206
90245 50049999 DE EN FR NL content RC1.indb 15890245 50049999 DE EN FR NL content RC1.indb 158 13.04.2015 16:24:2713.04.2015 16:24:27

159 van 218
Over deze handleiding
DE
FR
NL
GPL
EN
1. Over deze handleiding
Lees deze handleiding zorgvuldig door voordat u het
apparaat voor het eerst gebruikt en neem vooral de
veiligheidsinstructies in acht!
Alle handelingen op en met dit apparaat mogen uit-
sluitend worden uitgevoerd zoals in deze handleiding
beschreven.
Bewaar deze handleiding voor toekomstig gebruik.
Overhandig deze handleiding samen met het appa-
raat als u het aan anderen doorgeeft.
1.1. In deze handleiding gebruikte
waarschuwingspictogrammen en -woorden
GEVAAR!
Waarschuwing voor direct levensgevaar!
WAARSCHUWING!
Waarschuwing voor mogelijk levensgevaar en/of
ernstig onherstelbaar letsel!
VOORZICHTIG!
Neem alle aanwijzingen in acht om letsel en materië-
le schade te voorkomen!
LET OP!
Neem de aanwijzingen in acht om materiële schade
te voorkomen!
OPMERKING!
Neem de aanwijzingen in de handleiding in acht!
OPMERKING!
Aanvullende informatie over het gebruik van dit
apparaat!
90245 50049999 DE EN FR NL content RC1.indb 15990245 50049999 DE EN FR NL content RC1.indb 159 13.04.2015 16:24:2713.04.2015 16:24:27

160 van 218
Gebruik voor het beoogde doel
WAARSCHUWING!
Waarschuwing voor het gevaar van elektrische
schokken!
• Opsomming van/informatie over voorvallen die zich tijdens
de bediening kunnen voordoen
Advies over uit te voeren handelingen
2. Gebruik voor het beoogde doel
Dit apparaat dient om gegevens in een netwerk beschikbaar te
stellen en om audio-, video- en fotobestanden te beheren op
opslagmedia die rechtstreeks of via een netwerk met het appa-
raat zijn verbonden.
Het Lifecloud-systeem is een bestandsserver. Een server is een
apparaat dat dient om diverse soorten bestanden op te slaan en
ter beschikking te stellen aan gebruikers in een lokaal netwerk.
De server wordt geleverd met software waarmee meerdere ge-
bruikers back-ups van hun bestanden kunnen maken op de in-
gebouwde harde schijf en deze daar kunnen opslaan, delen en
beveiligen.
Dit apparaat is uitsluitend geschikt voor gebruik in droge omge-
vingen binnenshuis.
Dit apparaat is bedoeld voor privégebruik en niet voor industri-
ele of zakelijke toepassingen.
90245 50049999 DE EN FR NL content RC1.indb 16090245 50049999 DE EN FR NL content RC1.indb 160 13.04.2015 16:24:2813.04.2015 16:24:28

161 van 218
Veiligheidsinstructies
DE
FR
NL
GPL
EN
3. Veiligheidsinstructies
3.1. Elektrische apparaten zijn geen speelgoed
• Dit apparaat kan gebruikt worden door kinderen vanaf 8 jaar
en door personen met beperkte lichamelijke, zintuiglijke of
geestelijke vermogens of met onvoldoende ervaring en/of
kennis, mits deze personen onder toezicht staan of zijn ge-
instrueerd in het gebruik van het apparaat zodat zij de daar-
mee samenhangende gevaren begrijpen. Kinderen mogen
niet met het apparaat spelen. Reiniging en door gebruikers
uit te voeren onderhoud mogen niet worden uitgevoerd
door kinderen, tenzij deze 8 jaar of ouder zijn en onder toe-
zicht staan.
• Kinderen die jonger zijn dan 8 jaar moeten uit de omgeving
van het apparaat en het netsnoer worden gehouden.
• Laat kinderen nooit zonder toezicht gebruik maken van elek-
trische apparatuur.
GEVAAR!
Houd het verpakkingsmateriaal, zoals bv. folie, uit
de buurt van kinderen. Bij onjuist gebruik bestaat
gevaar voor verstikking.
3.2. Algemeen
• De behuizing van het apparaat en/of de netadapter mag niet
worden geopend (gevaar voor elektrische schokken, kortslui-
ting en brand)!
• Steek geen voorwerpen via de sleuven en openingen in het
apparaat (gevaar voor elektrische schokken, kortsluiting en
brand)!
• De sleuven en openingen van het apparaat dienen voor de
ventilatie. Dek deze openingen niet af (oververhitting, brand-
gevaar)!
• Plaats geen met vloeistof gevulde voorwerpen, zoals vazen,
op het apparaat of de netadapter of in de onmiddellijke om-
90245 50049999 DE EN FR NL content RC1.indb 16190245 50049999 DE EN FR NL content RC1.indb 161 13.04.2015 16:24:2813.04.2015 16:24:28

162 van 218
Veiligheidsinstructies
geving hiervan en bescherm alle onderdelen tegen drup- en
spatwater. Deze voorwerpen kunnen omvallen, waarbij de
vloeistof de elektrische veiligheid kan aantasten.
• Trek bij beschadiging van de stekker, het netsnoer of het ap-
paraat meteen de stekker uit het stopcontact.
• Wacht even met het aansluiten van de netadapter als het
apparaat van een koude naar een warme ruimte wordt ge-
bracht. Door de condensatie die daarbij kan optreden, kan
het apparaat onder bepaalde omstandigheden onherstel-
baar worden beschadigd. Als het apparaat op kamertempe-
ratuur is, kan het zonder gevaar in gebruik worden genomen.
3.3. Plaats van installatie
• Plaats en gebruik alle onderdelen op een stabiele, vlakke en
trillingsvrije ondergrond zodat het apparaat niet kan vallen.
• Stel het apparaat niet bloot aan schokken. Door schokken
kan gevoelige elektronica worden beschadigd.
• Stel het apparaat niet bloot aan directe warmtebronnen (bv.
verwarmingsradiatoren).
• Zet geen voorwerpen met open vuur (bv. brandende kaar-
sen) op of in de buurt van het apparaat.
• Dek de ventilatieopeningen niet af – het apparaat heeft vol-
doende ventilatie nodig.
• Plaats geen voorwerpen op de snoeren omdat deze daardoor
beschadigd kunnen raken.
• Laat minimaal 10 cm vrije ruimte tussen muren en het appa-
raat resp. de netadapter. Zorg voor voldoende ventilatie.
• Gebruik het apparaat niet in de buitenlucht. Invloeden van
buitenaf, zoals regen, sneeuw etc. kunnen schade toebren-
gen aan het apparaat.
• Houd minstens één meter afstand aan tot hoogfrequente en
magnetische storingsbronnen (televisietoestel, luidspreker-
boxen, mobiele telefoon etc.) om storingen in de werking te
voorkomen.
• Bij grote schommelingen in temperatuur of luchtvochtigheid
90245 50049999 DE EN FR NL content RC1.indb 16290245 50049999 DE EN FR NL content RC1.indb 162 13.04.2015 16:24:2813.04.2015 16:24:28

163 van 218
Veiligheidsinstructies
DE
FR
NL
GPL
EN
kan er door condensatie vochtvorming in het apparaat ont-
staan, die kortsluiting kan veroorzaken.
3.4. Nooit zelf repareren!
Trek bij beschadiging van de netadapter, het snoer of het appa-
raat meteen de stekker uit het stopcontact.
Neem het apparaat niet in gebruik, als het apparaat of het aan-
sluitsnoer zichtbaar zijn beschadigd of als het apparaat is geval-
len.
WAARSCHUWING!
Probeer in geen geval het apparaat zelf te openen
en/of te repareren. Daardoor loopt u gevaar op elek-
trische schokken!
Om risico's te vermijden kunt u bij storingen contact opnemen
met het Medion Service Center of een deskundig reparatiebe-
drijf.
3.5. Reiniging en onderhoud
• Trek altijd eerst de netadapter uit het stopcontact voordat u
het apparaat schoonmaakt.
• Gebruik voor het schoonmaken een droge, zachte doek. Ge-
bruik geen chemische oplos- en schoonmaakmiddelen om-
dat deze het oppervlak en/of de opschriften van het appa-
raat kunnen beschadigen.
3.6. Back-up van gegevens
Let op! Maak na elke update van uw gegevens een back-up op
een externe opslagmedium. Er kan in geen geval aanspraak
worden gemaakt op schadevergoeding wegens verlies van ge-
gevens en daardoor ontstane schade!
3.7. Voeding
Let op: Ook bij een uitgeschakeld apparaat staan onderdelen
van het apparaat onder spanning. Onderbreek de stroomvoor-
ziening van uw apparaat of schakel alle spanning uit door de
90245 50049999 DE EN FR NL content RC1.indb 16390245 50049999 DE EN FR NL content RC1.indb 163 13.04.2015 16:24:2813.04.2015 16:24:28

164 van 218
Veiligheidsinstructies
stekker van het netsnoer uit het stopcontact te trekken.
• Sluit de netadapter alleen aan op een geaard stopcontact
100-240 V~ / 50 Hz. Als u niet zeker bent van de netspanning
op de plaats van installatie kunt u contact opnemen met uw
energieleverancier.
• Gebruik uitsluitend de meegeleverde netadapter.
(Ktec KSAP0361200300HE). Probeer de stekker van de net-
adapter nooit aan te sluiten op een ander type stopcontact.
Daardoor kan schade ontstaan.
• Voor extra veiligheid adviseren wij u om gebruik te maken
van een overspanningsbeveiliging, zodat het apparaat be-
schermd is tegen beschadiging door spanningspieken of
blikseminslag op het elektriciteitsnet.
• Onderbreek de stroomvoorziening van uw apparaat door de
stekker van het netsnoer uit het stopcontact te halen.
• De netadapter moet ook na het aansluiten gemakkelijk be-
reikbaar zijn zodat de stekker, indien nodig, snel uit het stop-
contact kan worden getrokken.
• Dek de netadapter niet af om oververhitting te voorkomen.
• Wanneer u een verlengsnoer gebruikt moet dit voldoen aan
de VDE-normen. Neem eventueel contact op met uw elek-
tra-installateur.
• Leg de kabels zo neer dat niemand erop kan trappen of er-
over kan struikelen.
• Plaats geen voorwerpen op de snoeren omdat deze daardoor
beschadigd kunnen raken.
3.8. Opmerking over elektrostatische lading
Als het apparaat als gevolg van elektrostatische lading niet cor-
rect werkt, kunt u het apparaat resetten door het tijdelijk los te
koppelen van het elektriciteitsnet.
90245 50049999 DE EN FR NL content RC1.indb 16490245 50049999 DE EN FR NL content RC1.indb 164 13.04.2015 16:24:2813.04.2015 16:24:28

165 van 218
Algemeen
DE
FR
NL
GPL
EN
3.9. Opmerkingen over de conformiteit
Uw apparaat voldoet aan de richtlijnen voor elektromagneti-
sche compatibiliteit en elektrische veiligheid.
Bij deze verklaart MEDION AG dat deze apparaten voldoen aan
de elementaire eisen en de andere geldende voorschriften van
de richtlijnen 2006/95/EG en 2011/65/EU.
Dit apparaat voldoet aan de basiseisen en relevante voor-
schriften van de Ecodesign-richtlijn 2009/125/EG (Verordening
1275/2008).
Dit apparaat is echter vanwege de functionaliteit (continue be-
schikbaarstelling van gegevens in het netwerk) niet uitgerust
met een functie voor het minimaliseren van het verbruik con-
form de Ecodesign-richtlijn.
U kunt het stroomverbruik tot een minimum beperken door het
apparaat met de aan/uit toets uit te schakelen of de stekker van
het netsnoer uit het stopcontact te verwijderen wanneer het ap-
paraat niet wordt gebruikt.
Volledige conformiteitsverklaringen zijn beschikbaar op www.
medion.com/conformity.
4. Algemeen
4.1. Ondersteunde systemen en
bestandsformaten
Uw Lifecloud-systeem ondersteunt de volgende bestandssystemen, proto-
collen en toepassingen:
• TCP/IP-netwerkprotocol
• UPNP, ingebouwde DLNA-server
• Samba-server
• FTP-server
• FAT32, NTFS, XFS
• Time Machine voor MAC
• iTunes Server
• Windows Backup
• WOL (Wake on LAN)
90245 50049999 DE EN FR NL content RC1.indb 16590245 50049999 DE EN FR NL content RC1.indb 165 13.04.2015 16:24:2813.04.2015 16:24:28

166 van 218
Algemeen
4.2. Toepassingsmogelijkheden van het Lifecloud-
systeem
Het Lifecloud-systeem kan worden gebruikt voor de volgende taken op het
netwerk:
• Als centrale opslagplaats voor bestanden die u aan andere gebruikers be-
schikbaar wilt stellen op het lokale netwerk of via internet.
• Om automatisch back-ups en kopieën te maken van al uw bestanden.
• Om bestanden, zoals overeenkomsten, presentaties en berichten, op het
lokale netwerk of via internet beschikbaar stellen.
• Bij een storing aan de computer(s) of gegevensverlies, zoals een defec-
te harde schijf, diefstal etc., kunt u uw gegevens snel herstellen en verder
werken. Gegevens kunnen op beide harde schijven van het Lifecloud-sys-
teem gespiegeld worden opgeslagen (RAID-mirroring), zodat de gege-
vens bij uitval van de eerste harde schijf, op de tweede harde schijf be-
schikbaar zijn.
• U kunt vanaf overal ter wereld via internet het Lifecloud-systeem openen
om onderweg bestanden te downloaden of te uploaden, deze veilig op
te slaan of beschikbaar te maken voor anderen.
• U kunt een USB-printer aansluiten op het Lifecloud-systeem en beschik-
baar maken voor andere gebruikers op het lokale netwerk.
• Alle gebruikers met DLNA-compatibele apparatuur kunnen via de geïn-
tegreerde mediaserver op het lokale netwerk de foto's, video's en muziek
op het Lifecloud-systeem openen.
4.3. Werking van het Lifecloud-systeem en de
meegeleverde componenten
• Lifecloud (apparaat): De hardware met ingebouwde harde schijf, waarop
uw bestanden worden opgeslagen en beveiligd.
• Lifecloud-webinterface: Een in de server geïntegreerde gebruikersinterfa-
ce waarmee u het Lifecloud-systeem via een webbrowser vanaf uw com-
puter (of zelfs vanaf externe apparaten) kunt instellen, wijzigen en bewa-
ken.
• LifeCloud Agent: Een programma voor PC of Mac waarmee u zich vanaf
uw desktopcomputer in het lokale netwerk kunt aanmelden bij uw Life-
cloud-systeem en zo toegang kunt krijgen tot de webinterface en de net-
werkmappen van het Lifecloud-systeem.
• LifeCloud-app: Een app voor mobiele iOS- of Android-apparaten, zoals ta-
blet-PC's of smartphones. Via deze app kunt u met deze apparaten toe-
gang krijgen tot het Lifecloud-systeem.
90245 50049999 DE EN FR NL content RC1.indb 16690245 50049999 DE EN FR NL content RC1.indb 166 13.04.2015 16:24:2913.04.2015 16:24:29

167 van 218
Algemeen
DE
FR
NL
GPL
EN
4.4. Uitrusting van het Lifecloud-systeem
Het Lifecloud-systeem is uitgerust met:
• Twee SATA (Serial ATA) harde schijven
• Een Ethernet- of LAN-aansluiting die via het lokale netwerk of internet
toegang geeft tot de server.
• 2 USB-aansluitingen aan de achterzijde (1x USB 2.0, 1x USB 3.0)
• 1 USB-aansluiting aan de voorzijde (1x USB 3.0)
• OTC-toets (One-Touch-Copy) waarmee u bestanden kunt kopiëren tussen
USB-opslagmedia en de interne harde schijf van het Lifecloud-systeem.
4.5. Systeemeisen
Voor toegang via de browser van een desktop-PC:
• Java Runtime Environment vanaf versie 7
• Adobe Flash Player vanaf versie 11
Voor toegang via een mobiel iOS- of Android-apparaat:
• Adobe Integrated Runtime (afgekort "Adobe AIR") app.
4.6. Informatie over veiligheidswaarschuwingen
Bij het aanmelden bij de Lifecloud via de browser, wordt mogelijk een waar-
schuwing van uw browser weergegeven.
Uw Lifecloud maakt gebruik van een beveiligingscertificaat waarmee u zich
via een beveiligde verbinding bij de Lifecloud kunt aanmelden. Omdat uw
browser dit certificaat niet herkend, is er een bevestiging vereist.
Waarschuwing van Firefox passeren:
Klik op de tekst “Ik begrijp de risico’s”.
90245 50049999 DE EN FR NL content RC1.indb 16790245 50049999 DE EN FR NL content RC1.indb 167 13.04.2015 16:24:2913.04.2015 16:24:29

168 van 218
Algemeen
Klik vervolgens op de knop “Uitzondering toevoegen” om de vraag naar het
beveiligingscertificaat van uw Lifecloud als uitzondering te bevestigen.
Klik vervolgens op “Uitzondering toevoegen”.
90245 50049999 DE EN FR NL content RC1.indb 16890245 50049999 DE EN FR NL content RC1.indb 168 13.04.2015 16:24:2913.04.2015 16:24:29

169 van 218
Inhoud van de verpakking
DE
FR
NL
GPL
EN
Waarschuwing van Internet Explorer
Klik op “Doorgaan naar deze website (niet aanbevolen)”.
5. Inhoud van de verpakking
Controleer of alles in de verpakking aanwezig is en stel ons binnen 14 dagen
na aanschaf op de hoogte van eventueel ontbrekende onderdelen.
De levering van het door u aangeschafte product omvat:
• Lifecloud (apparaat)
• LAN-kabel
• Netadapter
• Software-CD (optioneel)
• Handleiding en garantiedocumenten
OPMERKING!
Verwijder vóór gebruik de beschermende folie van het
apparaat
GEVAAR!
Houd het verpakkingsmateriaal, zoals bv. folie, uit
de buurt van kinderen. Bij onjuist gebruik bestaat
gevaar voor verstikking.
90245 50049999 DE EN FR NL content RC1.indb 16990245 50049999 DE EN FR NL content RC1.indb 169 13.04.2015 16:24:2913.04.2015 16:24:29

170 van 218
Overzicht van het apparaat
6. Overzicht van het apparaat
6.1. Voorzijde en achterzijde van het apparaat
13
12
11
10
9
8
4
6
5
7
1
3
2
1) LED 1 (BLAUW/ROOD): Statuslampje harde schijf 1 (brandt blauw in
ingeschakelde toestand, knippert blauw tijdens gegevensoverdracht
en brandt rood bij hardwarefouten)
2) LED 2 (BLAUW/ROOD): Statuslampje harde schijf 2 (brandt blauw in
ingeschakelde toestand, knippert blauw tijdens gegevensoverdracht
en brandt rood bij hardwarefouten)
3) LED 3 (BLAUW/ROOD): Statuslampje (brandt blauw indien ingescha-
keld, knippert blauw tijdens het opstarten van het systeem, brandt
rood bij hardwarefouten)
4) LED (GROEN): LAN-lampje (brandt wanneer er een netwerkverbin-
ding tot stand is gebracht, knippert tijdens gegevensoverdracht)
5) LED ORANJE: OTC-lampje van de USB-aansluiting vooraan (brandt
wanneer een opslagmedium op de USB-aansluiting vooraan wordt
gedetecteerd, knippert tijdens het kopiëren/synchroniseren van ge-
gevens tussen het Lifecloud-systeem en het USB-opslagmedium)
6) USB: USB-aansluiting (USB 3.0)
voor gebruik van de One-Touch-Copy functie
7)
OTC: One-Touch-Copy toets
8)
RESET: RESET-toets
9) USB: USB-aansluiting (USB 3.0)
10)
USB: USB-aansluiting (USB 2.0)
11) Aan/uit toets
12)
RJ45: LAN-aansluiting voor netwerkkabels
13)
DC: Ingang netadapter
90245 50049999 DE EN FR NL content RC1.indb 17090245 50049999 DE EN FR NL content RC1.indb 170 13.04.2015 16:24:3013.04.2015 16:24:30

171 van 218
Over het Lifecloud-systeem
DE
FR
NL
GPL
EN
OPMERKING!
Voordat de configuratie van de harde schijven is uitge-
voerd (zie 10.2 op pagina 175) branden LED 1 en LED
2 rood.
7. Over het Lifecloud-systeem
In de basisversie kunt u op uw Lifecloud-systeem maximaal 5 gebruikersac-
counts aanmaken.
Als u over een Premium-account op www.lifecloudmedion.com beschikt,
kunt u een onbeperkt aantal gebruikersaccounts aanmaken en het Lifecl-
oud-systeem uitbreiden met een Torrent-client en een USB-back-up oplos-
sing.
8. Ingebruikname
8.1. Aansluiting op een netwerk
Verbind de RJ45-aansluiting (ethernet/LAN) van het Lifecloud-systeem
via een netwerkkabel met de bijbehorende aansluiting op een netwerkin-
terface (bv. een router).
Zorg dat DHCP op de router is ingeschakeld omdat het Lifecloud-systeem
is ingesteld als DHCP-client.
Steek de connector van de voedingsadapter in de DC IN-aansluiting op
het Lifecloud-systeem en steek de adapter vervolgens in een stopcontact.
90245 50049999 DE EN FR NL content RC1.indb 17190245 50049999 DE EN FR NL content RC1.indb 171 13.04.2015 16:24:3013.04.2015 16:24:30

172 van 218
Het apparaat in- en uitschakelen
Zorg dat uw computer, waarmee u het Lifecloud-systeem wilt configure-
ren, binnen hetzelfde netwerk is aangemeld.
Aansluitingen voor USB-apparaten:
Op de USB-aansluitingen kunt u externe USB-opslagmedia of USB-prin-
ters aansluiten die voor alle gebruikers op het lokale netwerk beschikbaar
kunnen worden gesteld.
De USB-aansluiting op de voorkant van de server is tevens bruikbaar voor
de One-Touch-Copy functie.
OPMERKING!
Lees voor het gebruik van de One-Touch-Copy functie
de bijbehorende opmerking onder “Gegevens kopië-
ren met de OTC-toets” op pagina 178 door.
9. Het apparaat in- en uitschakelen
U kunt het Lifecloud-systeem inschakelen door de aan/uit-schakelaar on-
geveer 3 seconden lang ingedrukt te houden totdat een waarschuwings-
signaal te horen is.
Het besturingssysteem van het Lifecloud-systeem wordt nu opgestart.
Vervolgens gaat LED 3 continu blauw branden.
10. Eerste ingebruikname
OPMERKING!
Zorg er bij de eerste ingebruikname voor dat er geen
apparatuur is aangesloten op de USB-aansluitingen
van het Lifecloud systeem.
Voordat u het apparaat voor het eerst in gebruik neemt, moet u via uw brow-
ser (op de computer of het mobiele apparaat) eerst een naam voor het Lifecl-
oud-systeem en een gebruikersaccount aanmaken.
10.1. Account aanmaken voor het Lifecloud-
systeem
U kunt als volgt een account aanmaken om toegang te krijgen.
Open in de webbrowser van uw PC de pagina
www.lifecloudmedion.com.
90245 50049999 DE EN FR NL content RC1.indb 17290245 50049999 DE EN FR NL content RC1.indb 172 13.04.2015 16:24:3013.04.2015 16:24:30

173 van 218
Eerste ingebruikname
DE
FR
NL
GPL
EN
Klik op de optie Setup New Device.
In het volgende venster wordt u gevraagd om de toets aan de voorzijde
(OTC-toets) van het Lifecloud-systeem 5 seconden lang ingedrukt te hou-
den.
Hierbij moet de blauwe balk worden weergegeven.
De Lifecloud-server registreert nu uw Lifecloud-systeem. De voortgang
wordt via een blauwe balk weergegeven.
Maak vervolgens een gebruikersaccount aan door een naam voor uw het
Lifecloud-systeem, een gebruikersnaam en een wachtwoord voor toe-
gang tot het Lifecloud-systeem op te geven.
90245 50049999 DE EN FR NL content RC1.indb 17390245 50049999 DE EN FR NL content RC1.indb 173 13.04.2015 16:24:3013.04.2015 16:24:30

174 van 218
Eerste ingebruikname
Tik op de pijl naar rechts.
OPMERKING!
U kunt na aanmelding maximaal 5 gebruikersaccounts
op het Lifecloud-systeem aanmaken. Als u over een
Premium-account van www.lifecloudmedion.com be-
schikt, kunt u een onbeperkt aantal gebruikersaccounts
op het Lifecloud-systeem aanmaken.
Via de QR-code die eveneens in de webbrowser wordt weergegeven,
kunt u nu de app voor uw mobiele eindapparaat (tablet-PC/smartphone)
aanmaken.
90245 50049999 DE EN FR NL content RC1.indb 17490245 50049999 DE EN FR NL content RC1.indb 174 13.04.2015 16:24:3113.04.2015 16:24:31

175 van 218
Eerste ingebruikname
DE
FR
NL
GPL
EN
Open de koppeling van de QR-code om de app op uw tablet-PC/smart-
phone te installeren (voor gebruik van de app raadpleegt “18. De LifeCl-
oud-app gebruiken op smart-apparaten” op pagina 195).
Klik op de pijl naar rechts.
Beëindig de instelling door op de pijl naar rechts te klikken.
De webinterface van het Lifecloud-systeem wordt nu weergegeven (lees ver-
der onder “14. De webinterface” op pagina 183).
10.2. Bij eerste ingebruikname: con guratie van
harde schijven bepalen
Na de ingebruikname van het Lifecloud-systeem verschijnt bij de eerste aan-
melding bij het Lifecloud-systeem de selectie voor de configuratie van de
harde schijven voor de gegevensopslag.
90245 50049999 DE EN FR NL content RC1.indb 17590245 50049999 DE EN FR NL content RC1.indb 175 13.04.2015 16:24:3113.04.2015 16:24:31

176 van 218
Eerste ingebruikname
RAID I
(Engels "Redundant Array of Independent Disks“ = "Redundante reeks van onaf-
hankelijke harde schijven")
In de configuratie RAID 1 worden beide harde schijven van het Lifecloud-sys-
teem (elk 6 TB) in combinatie gebruikt. Op beide harde schijven worden de-
zelfde gegevens opgeslagen (mirroring), zodat sprake is van volledige re-
dundantie van uw gegevens. De capaciteit van RAID 1 is hierbij maximaal zo
groot als de kleinste harde schijf die bij de configuratie is betrokken. In dit
geval dus 6 TB.
Aangezien beide schijven identiek beschreven zijn, blijven op beide schijven
alle gegevens van het systeem behouden. Dit biedt een enorm voordeel met
betrekking tot de gegevensbeveiliging:
als één van de gemirrorde schijven uitvalt, kan de andere nog steeds alle ge-
gevens leveren. RAID 1 biedt derhalve een hoge bescherming tegen gege-
vensverlies omdat de gegevens alleen volledig verloren gaan als beide schij-
ven uitvallen.
JBOD
(Engels "Just a Bunch of Disks" = "Zomaar een reeks harde schijven")
Bij JBOD ontbreekt de redundantie (mirroring) van de gegevens. Er is alleen
sprake van een simpele "reeks van onafhankelijke harde schijven".
In deze configuratie worden beide harde schijven van 6 TB van het Lifecl-
oud-systeem aan elkaar gekoppeld en worden als één station van 12 TB
weergegeven.
Het voordeel van deze configuratie van harde schijven is dus de grotere op-
slagcapaciteit.
90245 50049999 DE EN FR NL content RC1.indb 17690245 50049999 DE EN FR NL content RC1.indb 176 13.04.2015 16:24:3113.04.2015 16:24:31

177 van 218
Eerste ingebruikname
DE
FR
NL
GPL
EN
LET OP!
De configuratie van de harde schijven kan alleen bij
de eerste ingebruikname of achteraf in het systeem-
menu worden bepaald! Een verandering van de con-
figuratie van de harde schijven resulteert in volledig
verlies van alle gegevens die op beide harde schij-
ven zijn opgeslagen. Maak daarom een back-up van
uw gegevens op andere opslagmedia VOORDAT u de
configuratie wijzigt.
Selecteer de gewenste configuratie voor de harde schijven en bevestig
uw keuze met OK.
Het Lifecloud-systeem configureert nu de twee ingebouwde harde schijven.
Dit kan enkele minuten in beslag nemen.
90245 50049999 DE EN FR NL content RC1.indb 17790245 50049999 DE EN FR NL content RC1.indb 177 13.04.2015 16:24:3113.04.2015 16:24:31

178 van 218
Gegevens kopiëren met de OTC-toets
11. Gegevens kopiëren met de OTC-toets
Sluit een USB-opslagmedium dat u wilt gebruiken om gegevens te kopiëren
tussen het Lifecloud-systeem en het USB-opslagmedium aan op de USB-aan-
sluiting aan de Vorderseite van het Lifecloud-systeem.
Wacht tot het OTC-lampje oranje brandt en het Lifecloud-systeem het
USB-opslagmedium heeft gedetecteerd.
Met de OTC-toets kunt u de volgende functie uitvoeren:
Druk eenmaal kort op de OTC-toets om de gegevens rechtstreeks van het
USB-opslagmedium rechtstreeks in de map /UnsereOrdner/USB-Down-
loads/[DATUM] [TIJD] op het Lifecloud-systeem te kopiëren.
Het OTC-lampje knippert tijdens het kopiëren oranje.
Zodra het kopiëren is voltooid, brandt het OTC-lampje continu oranje.
12. De RESET-toets
Met de RESET-toets aan de achterzijde van het Lifecloud-systeem kunt u het
Lifecloud-systeem opnieuw instellen als u het systeem opnieuw moet instal-
leren.
U kunt de RESET-toets met een puntig voorwerp (zoals een paperclip) in-
drukken.
12.1. Wachtwoord opnieuw instellen
Als u het wachtwoord bent vergeten, kunt u dit opnieuw instellen met de RE-
SET-toets.
Houd de RESET-toets omgeveer 3 seconden lang ingedrukt en laat de toets
los zodra u een kort geluidssignaal op het apparaat hoort.
Open in de webbrowser van uw PC de pagina
www.lifecloudmedion.com
.
Klik op de optie Setup New Device or Reset Password.
90245 50049999 DE EN FR NL content RC1.indb 17890245 50049999 DE EN FR NL content RC1.indb 178 13.04.2015 16:24:3313.04.2015 16:24:33

179 van 218
De RESET-toets
DE
FR
NL
GPL
EN
In het volgende venster wordt u gevraagd om de toets aan de voorzijde
(OTC-TOETS) van het Lifecloud-systeem 5 seconden lang ingedrukt te
houden.
De Lifecloud-webinterface heeft nu herkend dat op de RESET-toets van
het apparaat is gedrukt en het volgende dialoogvenster wordt geopend.
Kies hier de optie I want to reset my password en volg de aanwij-
zingen.
90245 50049999 DE EN FR NL content RC1.indb 17990245 50049999 DE EN FR NL content RC1.indb 179 13.04.2015 16:24:3413.04.2015 16:24:34

180 van 218
De RESET-toets
Selecteer het betreffende gebruikersaccount en voer een nieuw wacht-
woord in.
Klik vervolgens op de pijl naar rechts om het resetten te voltooien.
90245 50049999 DE EN FR NL content RC1.indb 18090245 50049999 DE EN FR NL content RC1.indb 180 13.04.2015 16:24:3413.04.2015 16:24:34

181 van 218
LifeCloud Agent gebruiken
DE
FR
NL
GPL
EN
12.2. Systeem resetten naar standaard instellingen
Als het Lifecloud-systeem niet meer correct reageert of u door bepaalde in-
stellingen geen toegang meer krijgt tot het systeem, kan een reset naar de
standaard systeeminstellingen nodig zijn.
U kunt het systeem resetten door de RESET-toets ongeveer 30 seconden
lang ingedrukt te houden.. Na 3 seconden hoort u een kort geluidssignaal
en na 30 seconden nog een lang geluidssignaal.
Laat nu de RESET-toets los. Het systeem wordt nu teruggezet naar de
standaardinstellingen en opnieuw opgestart zodat u de eerste ingebruik-
name opnieuw kunt uitvoeren.
13. LifeCloud Agent gebruiken
13.1. LifeCloud Agent installeren
• Met LifeCloud Agent kunt u zich vanaf uw desktopcomputer in het lokale
netwerk aanmelden bij uw Lifecloud-systeem en op die manier toegang
krijgen tot de webinterface en de netwerkmappen van het Lifecloud-sys-
teem.
Installeer LifeCloud Agent als volgt:
• Plaats de meegeleverde software-CD in het CD-/DVD-station van uw
computer en open het bestand Autorun.exe.
• Volg de aanwijzingen van de installatiewizard
• Als u het back-up programma Memeo Instant Backup wilt gebruiken,
kunt u dit in de volgende stap eveneens installeren (“Werken met Memeo
Backup” op pagina 197).
Nadat de installatie is voltooid, kunt u LifeCloud Agent openen via het picto-
gram op de taakbalk:
OPMERKING!
Het Lifecloud-systeem wordt pas in het netwerk her-
kend wanneer alle stappen voor de eerste ingebruik-
name, zoals beschreven bij “10. Eerste ingebruikname”
op pagina 172, zijn uitgevoerd.
90245 50049999 DE EN FR NL content RC1.indb 18190245 50049999 DE EN FR NL content RC1.indb 181 13.04.2015 16:24:3413.04.2015 16:24:34

182 van 218
LifeCloud Agent gebruiken
13.2. LifeCloud Desktop gebruiken
• Boven aan het menu ziet u de aanmeldingsstatus. Als de status "Not logged in"
is, moet u zich met uw LifeCloud-naam, een gebruikersnaam en het bijbeho-
rende wachtwoord aanmelden om in het lokale netwerk toegang te krijgen tot
het Lifecloud-systeem.
• Klik daartoe op de optie Sign in.
Nadat de aanmelding is geslaagd, kunt u de volgende menufuncties van Li-
feCloud Agent gebruiken:
Switch User
Hiermee kunt u zich met een andere gebruikersnaam aanmelden bij het Life-
cloud-systeem.
Log out
Hiermee kunt u LifeCloud Agent afmelden van het Lifecloud-systeem om u
bijvoorbeeld te kunnen aanmelden bij een ander Lifecloud-systeem.
90245 50049999 DE EN FR NL content RC1.indb 18290245 50049999 DE EN FR NL content RC1.indb 182 13.04.2015 16:24:3513.04.2015 16:24:35

183 van 218
De webinterface
DE
FR
NL
GPL
EN
Explore my LifeCloud folders
Via deze optie opent u Windows Verkenner resp. Mac Finder om de mappen
van het Lifecloud-systeem als vrijgegeven netwerkmappen te openen.
Open Lifecloud application
Via deze optie opent u de webinterface in de standaardbrowser van uw com-
puter.
Preferences
Hiermee kunt u naar beschikbare software-updates voor LifeCloud Agent
zoeken en het IP-adres van het Lifecloud-systeem weergeven.
Wake up using “Wake On LAN”
Hiermee kunt u de functie Wake On LAN (WON) van het Lifecloud-systeem
in- en uitschakelen (zie “Wake ON LAN” op pagina 192).
About...
Hier vindt u de informatie over fabrikant en licentie van LifeCloud Agent.
Exit LifeCloud Agent
Met deze optie beëindigt u LifeCloud Agent.
14. De webinterface
De webinterface is de op HTML gebaseerde gebruikersinterface van het Life-
cloud-systeem, die u vanuit uw webbrowser kunt openen.
• Gebruik minimaal Internet Explorer 6.0 of Mozilla Firefox 2.00 of nieuwere
versies van deze browsers.
• De schermresolutie moet minimaal1024 x 768 pixels bedragen.
• In de browser moeten de laatste versies van Java- en Flash-plugins geac-
tiveerd zijn.
• Pop-up vensters in de webbrowser moeten toegestaan zijn en de pop-up
blokkering van Windows moet zijn uitgeschakeld.
90245 50049999 DE EN FR NL content RC1.indb 18390245 50049999 DE EN FR NL content RC1.indb 183 13.04.2015 16:24:3513.04.2015 16:24:35

184 van 218
De webinterface
14.1. Webinterface oproepen
• Open uw standaard webbrowser en voer in de adresbalk van de web-
browser het IP-adres in dat in de Medion Life Cloud Agent wordt weerge-
geven
of
• voer in de adresbalk van de webbrowser
"http://www.lifecloudmedion.com" in.
of
• Klik met de rechtermuisknop op het pictogram van Medion LifeCloud
Agent en vervolgens op de optie Navigation zum Lifecloud (www).
14.2. Functies en instellingen van de webinterface
De standaard webbrowser wordt geopend en de aanmeldingspagina ver-
schijnt.
Alle gebruikers (ook de beheerder) krijgen nadat ze zich hebben aangemeld
eerst de startpagina te zien.
In de volgende paragrafen komen de afzonderlijke menu's en functies aan
bod.
90245 50049999 DE EN FR NL content RC1.indb 18490245 50049999 DE EN FR NL content RC1.indb 184 13.04.2015 16:24:3513.04.2015 16:24:35

185 van 218
Media Library
DE
FR
NL
GPL
EN
15. Media Library
In de mediabibliotheek kunnen de bestanden worden beheerd die op het Li-
fecloud-systeem zijn opgeslagen.
Via de bovenste menubalk kunt u de bestandsweergave sorteren, aanpassen
en doorzoe ken op bestanden.
De vooraf geïnstalleerde hoofdmappen FamilyLibrary en MyLibrary
kunnen niet worden gewist. De onderliggende mappen echter wel.
Als gegevensdragers worden aangesloten op de USB-aansluitingen op de
achterzijde, worden deze eveneens in de bibliotheek weergegeven.
15.1. My Library/FamilyLibrary
FamilyLibrary
De mappen en inhoud in FamilyLibrary kunnen worden bekeken en be-
werkt door alle gebruikers die zich bij het Lifecloud-systeem hebben aange-
meld.
OPMERKING!
U kunt in de systeeminstellingen de toegang tot
FamilyLibrary voor gebruikers in- of uitschakelen.
My Library
Hier bevinden zich de mappen en inhoud die alleen door de momenteel bij
het Lifecloud-systeem aangemelde gebruikers kunnen worden weergegeven
en bewerkt.
90245 50049999 DE EN FR NL content RC1.indb 18590245 50049999 DE EN FR NL content RC1.indb 185 13.04.2015 16:24:3613.04.2015 16:24:36

186 van 218
Media Library
15.2. Nieuwe map maken/Map wissen
Markeer de (hoofd)map waarin u een nieuwe map wilt maken.
Klik op het plusteken boven de mapweergave en voer vervolgens een
naam voor de nieuwe submap in. Bevestig uw invoer met Create.
U kunt een map wissen door deze te selecteren en vervolgens het minte-
ken boven de mapweergave te selecteren. Bevestig uw invoer met Yes.
15.3. Contextmenu voor mappen en bestanden
openen
Plaats de muiscursor op een map of bestand en klik op de pijl naast de
naam van de map of het bestand om het contextmenu te openen
Klik op de optie Open om de inhoud van de map in het rechtervenster te
openen resp. een mediabestand direct weer te geven.
Automatische weergave van media-inhoud (alleen voor
mappen)
Via de optie Slideshow start u de weergave van alle afbeeldingen in
deze map als diashow.
Met de optie Autoplay start u de weergave van alle audiobestanden in
deze map met de muziekspeler.
90245 50049999 DE EN FR NL content RC1.indb 18690245 50049999 DE EN FR NL content RC1.indb 186 13.04.2015 16:24:3613.04.2015 16:24:36

187 van 218
Media Library
DE
FR
NL
GPL
EN
Download
Via de optie Download kunt u de mappen rechtstreeks als ZIP-bestand
downloaden naar uw apparaat.
Upload (alleen voor mappen)
Via de optie Upload opent u het venster voor het uploaden van be-
standen. Hier kunt u bestanden met behulp van het bestandspad of via
Drag and Drop uploaden naar de huidige map (zie onder “15.5. Bestanden
uploaden naar het Lifecloud-systeem” op pagina 189).
Add to Album
Selecteer een album of maak een nieuw album om aan deze map toe te voe-
gen (zie ook onder “16. Albums” op pagina 190).
Share Selected Items
Hier kunt u direct een album voor deze map maken en per directe koppeling
in het netwerk delen (zie ook onder “16. Albums” op pagina 190).
Share with DMA
Klik op de optie Share with DMA om de media-inhoud van deze map in
het netwerk beschikbaar te stellen via de digitale media-adapter van het
Lifecloud-systeem (DMA) voor mediaspelers die UPnP ondersteunen.
Vrijgegeven mediamappen worden met een televisiepictogram boven het
mappictogram weergegeven.
U kunt de mediavrijgave voor deze map weer intrekken door op de optie
Unshare with DMA te klikken.
View Details
Klik op deze optie om de eigenschappen van mappen/bestanden weer te
geven.
• In de eigenschappen van mappen/bestanden kunt u direct bestandsna-
men en bestandstags (audio-/videobestanden) wijzigen.
• Als u de eigenschappen van mappen/bestanden weer wilt verbergen,
klikt u op de knop "Info" in de rechterbovenhoek.
Copy/Cut/Paste/Rename/Delete
Via deze functies kunt u het bestandsbeheer voor mappen en bestanden ge-
bruiken zoals op uw computer.
90245 50049999 DE EN FR NL content RC1.indb 18790245 50049999 DE EN FR NL content RC1.indb 187 13.04.2015 16:24:3713.04.2015 16:24:37

188 van 218
Media Library
15.4. Albums
Hier kunt u nieuwe albums maken of albums wissen en de inhoud van al-
bums bekijken.
Een nieuw album maken
Klik op het symbool + naast de optie Albums.
Geef een naam en beschrijving op voor het album.
Selecteer een thema dat u als achtergrond wilt weergeven bij het bekij-
ken van het album.
Hieronder ziet u het vooraf ingestelde type vrijgave (Vrienden). Klik op
More Sharing Options om een ander type vrijgave in te stellen.
Klik tot slot op Create om het album te maken.
Een album wissen
Markeer een album dat u wilt wissen en klik op het symbool -.
Bevestig de daarop volgende vraag met Yes.
90245 50049999 DE EN FR NL content RC1.indb 18890245 50049999 DE EN FR NL content RC1.indb 188 13.04.2015 16:24:3713.04.2015 16:24:37

189 van 218
Media Library
DE
FR
NL
GPL
EN
15.5. Bestanden uploaden naar het Lifecloud-
systeem
Ga als volgt te werk om bestanden te uploaden naar het Lifecloud-systeem:
Klik in de mediabibliotheek op een map waarin u de bestanden wilt up-
loaden.
Selecteer in het contextmenu van de map de optie Upload of klik op de
pijl boven de mapweergave.
Het uploadvenster wordt geopend.
• Klik in de weergave Manual Upload op de optie Add file en selecteer
vervolgens een bestand op uw computer dat u wilt toevoegen aan uw
uploadlijst.
• In de weergave Drag and Drop kunt u een bestand van uw computer
met de muis naar het witte veld onder het uploadvenster slepen om dit
aan de uploadlijst toe te voegen.
OPMERKING!
Voor de bestandsupload via Drag & Drop moet de
laatste versie van JavaScript in uw browser zijn geacti-
veerd.
Voeg met behulp van een van beide methoden bestanden aan de up-
loadlijst toe en klik vervolgens op Upload om de bestanden te uploaden
naar de daarvoor geselecteerde map.
15.6. Opties in het contextmenu bij
mediabestanden
Bij mediabestanden als foto-, audio- en videobestanden worden extra opties
weergegeven in het contextmenu.
Fotobestanden
View, opent de foto rechtstreeks in de fotoviewer. Desweiteren können Sie
das Foto Rotate Clockwise und Rotate Counterclockwise drehen, so-
wie als Use as Home Backround für die Startseite verwenden.
Audiobestanden
Met "Afspelen " wordt het audiobestand rechtstreeks in de muziekspeler ge-
opend.
Videobestanden
Met "Afspelen" wordt het videobestand rechtstreeks in de videospeler geo-
pend.
90245 50049999 DE EN FR NL content RC1.indb 18990245 50049999 DE EN FR NL content RC1.indb 189 13.04.2015 16:24:3713.04.2015 16:24:37

190 van 218
Albums
16. Albums
Hier worden de albums weergegeven die u in de mediabibliotheek heeft
aangemaakt.
Albums bevatten koppelingen naar bestanden die u in de mediabibliotheek
heeft gemarkeerd en toegevoegd aan een album.
• Albums kunnen tevens worden gedeeld met gebruikers buiten de Life-
cloud door een koppeling naar het album met deze gebruikers te delen.
Deze koppeling kan permanent of voor beperkte tijd geldig zijn.
• Nieuwe albums worden ingesteld in de mediabibliotheek.
17. Preferences
Op deze pagina voert u alle instellingen voor het Lifecloud-systeem uit.
Als u als beheerder bij het Lifecloud-systeem bent aangemeld, kunt u als be-
heerder alle systeeminstellingen oproepen. Als gebruiker kunt u alleen de
gebruikersinstellingen configureren:
90245 50049999 DE EN FR NL content RC1.indb 19090245 50049999 DE EN FR NL content RC1.indb 190 13.04.2015 16:24:3713.04.2015 16:24:37

191 van 218
Preferences
DE
FR
NL
GPL
EN
17.1. User Preferences
User
In het gebruikersmenu past u het weergavebeeld en de configuratie voor de
huidige aangemelde gebruiker aan.
Language
Stel hier de taal in waarin de menu's van het Lifecloud-systeem moeten wor-
den weergegeven.
Your Email
Voer hier een e-mailadres in waar de gebruiker meldingen van het Lifecl-
oud-systeem moet ontvangen.
Home Backround Position
U kunt foto's die op het Lifecloud-systeem zijn opgeslagen in de mediabi-
bliotheek instellen als achtergrond bij het opstarten.
Stel hier in hoe de achtergrond bij het opstarten moet worden weergegeven.
Clear Home Backround
Hier wist u de momenteel gebruikte achtergrond bij het opstarten en wordt
de standaardachtergrond hersteld.
What to do when a file already exists
Hier geeft u aan hoe het Lifecloud-systeem bij het uploaden van bestanden
moet omgaan met bestanden die al bestaan.
What to do when adding files to albums
• Telkens vragen
• Onderliggende mappen meenemen
• Onderliggende mappen niet meenemen
Share new albums with other family accounts by default
Als u deze functie instelt op Yes, worden nieuwe albums standaard voorzien
van de vrijgave "Familieaccounts".
Share new albums with media players by default
Als u deze functie instelt op Yes, worden nieuwe albums standaard voorzien
van de vrijgave "Mediaplayer".
Hide help tips
Als u deze functie instelt op Yes, worden geen tips meer weergegeven na
aanmelding bij de Lifecloud.
90245 50049999 DE EN FR NL content RC1.indb 19190245 50049999 DE EN FR NL content RC1.indb 191 13.04.2015 16:24:3813.04.2015 16:24:38

192 van 218
Preferences
Resume Audio Playback
Als u deze functie instelt op Yes, wordt de mediaweergave voortgezet vanaf
de laatste positie als een reeds afgespeeld mediabestand opnieuw wordt ge-
opend.
Reset all «Do not show again» prompts
Hier kunt u alle selectievakjes weergeven waarvoor u eerder "Reset" had in-
geschakeld.
Diskspace
Hier kunt u de beschikbare en gebruikte opslagcapaciteit van de harde schij-
ven weergeven.
Change password
Als u het huidige wachtwoord wilt wijzigen, voert u hier een nieuw wacht-
woord in en bevestigt u dit door op Submit te klikken.
17.2. Server Preferences
Network Sharing
Voor hier de naam van uw Windows-thuisnetwerkgroep in en stel de functie
in op Yes om uw bestanden en mappen beschikbaar te stellen in de thuis-
netwerkgroep.
Wake ON LAN
Stel deze functie in op Yes, zodat netwerkapparaten het Lifecloud-systeem
kunnen inschakelen ("wekken") als dit zich in de slaapstand bevindt.
UPNP Router Configuration
Stel de functie "Configure router via UPNP" in op Yes, zodat het Lifecl-
oud-systeem uw router kan configureren voor de poortvrijgave.
Bij de volgende optie kunt u aangeven of het Lifecloud-systeem de huidige
configuratie van uw router kan opheffen.
Notification
Geef hier aan naar welke e-mailadressen systeemmeldingen moeten worden
verzonden. Meerdere e-mailadressen kunnen met behulp van een komma
van elkaar worden gescheiden.
Systeemmeldingen worden verzonden als er een probleem met de harde
schijf is opgetreden of als de harde schijf vol is.
Network Services
Hier stelt u de FTP-toegang tot het Lifecloud-systeem in.
90245 50049999 DE EN FR NL content RC1.indb 19290245 50049999 DE EN FR NL content RC1.indb 192 13.04.2015 16:24:3813.04.2015 16:24:38

193 van 218
Preferences
DE
FR
NL
GPL
EN
Stel de functie voor het lokale netwerk en/of internet in op Ja om de
FTP-toegang tot de mappen van het Lifecloud-systeem te activeren.
LAN Connection
Hier kunt u het Lifecloud-systeem via DHCP met uw LAN-netwerk verbinden
of hieraan een vast IP-adres toewijzen
Stel de functie Optain IP address automatically in op Yes, zodat
IP-adressen worden opgehaald van de DHCP-server van de router.
Als u het IP-adres handmatig wilt configureren, stelt u de functie in op No
en voert u vervolgens handmatig het IP-adres, het subnetmasker, de ga-
teway en de DNS-server in.
Date and Time
Het Lifecloud-systeem kan de datum- en tijdinstellingen ophalen van een
tijdserver op internet of u kunt de instelling zelf uitvoeren.
Als u de instelling voor het ophalen van datum en tijd via internet instelt
op Yes, moet u vervolgens een standaard NTP-server (Network Time Pro-
tocol) aangeven die moet worden gebruikt voor het ophalen van de in-
stellingen.
Remote Acces
Hier kunt u de externe toegang tot het Lifecloud-systeem via internet active-
ren of deactiveren.
17.3. Administration
Add New User
U kunt een nieuwe gebruiker aan het systeem toevoegen door de gebrui-
kersnaam in te voeren in het veld Account User Name.
Gebruikersnamen moeten beginnen met een letter en minimaal drie tekens
lang zijn. Daarbij wordt geen onderscheid gemaakt tussen hoofdletters en
kleine letters. U kunt geen twee gebruikers met dezelfde gebruikersnaam
toevoegen.
Voer een weergavenaam voor de gebruiker in. Deze naam kan afwijken
van de gebruikersnaam voor de account.
Voer een wachtwoord in en bevestig dit.
Het wachtwoord moet minimaal zes tekens lang zijn en een cijfer bevatten.
Daarbij wordt onderscheid gemaakt tussen hoofdletters en kleine letters.
Selecteer Create as Administrator om de nieuwe gebruiker van be-
heerdersrechten te voorzien.
Selecteer Let user access family folder om de nieuwe gebruiker
toegang tot de bestanden en mappen in de hoofdmap FamilyFolder te
90245 50049999 DE EN FR NL content RC1.indb 19390245 50049999 DE EN FR NL content RC1.indb 193 13.04.2015 16:24:3813.04.2015 16:24:38

194 van 218
Preferences
verlenen.
Edit User
Selecteer hier een bestaande gebruiker van wie u de naam, het wachtwoord
of de bevoegdheden achteraf wilt bewerken.
Shut down
Hier kunt u het Lifecloud-systeem afsluiten met Shut down of opnieuw star-
ten met Restart.
Software Updates
Hier kunt u controleren of nieuwe updates via internet beschikbaar zijn.
Medion LifeCloud Premium
Hier kunt u een Medion Life Cloud Premium-account aanschaffen, resp. de
status van uw Medion Life Cloud Premium-account bekijken.
Disk Management
Hier kunt u de status van de configuratie van uw harde schijven bekijken.
Als u beide harde schijven wilt formatteren en deze vervolgens opnieuw
wilt instellen, kiest u de optie Format.
Als u de configuratie (RAID 1 of JBOD) opnieuw wilt uitvoeren, kiest u de
optie Reconfigure.
External Storage
Hier kunt u de geheugenlocatie bekijken van een externe gegevensdrager
die op de USB-aansluiting van het Lifecloud-systeem is aangesloten.
Power Timer
• Hier kunt u de Power Time activeren en instellen. Als de Power Timer is
geactiveerd, wordt het Lifecloud-systeem na een vast ingestelde perio-
de automatisch in- en uitgeschakeld. Let erop dat na het instellen van een
uitschakeltijd voor het apparaat, gegevensoverdrachten worden onder-
broken en dat geplande back-up taken niet worden uitgevoerd.
• Netwerkapparaten kunnen het uitgeschakelde Lifecloud-systeem in-
schakelen als eerder de functie
WOL (Wake On LAN) was geactiveerd (zie
“Wake ON LAN” op pagina 192).
OPMERKING!
Het vroegst mogelijk tijdstip voor automatisch uit-
schakelen ligt op ongeveer 5 minuten na het tijdstip
waarop u deze instelling uitvoert.
90245 50049999 DE EN FR NL content RC1.indb 19490245 50049999 DE EN FR NL content RC1.indb 194 13.04.2015 16:24:3813.04.2015 16:24:38

195 van 218
De LifeCloud-app gebruiken op smart-apparaten
DE
FR
NL
GPL
EN
18. De LifeCloud-app gebruiken op
smart-apparaten
Download de LifeCloud-app voor smart-apparaten via de op de om-
slg aangegeven koppeling en installeer de app.
Nadat de installatie is geslaagd tikt u op het pictogram van de Life-
Cloud-app op uw mobiele smart-apparaat.
De LifeCloud-app wordt gestart (bijvoorbeeld van de Android app).
Voer de naam van uw Lifecloud-systeem in, alsmede de betreffende ge-
bruikersnaam en een wachtwoord voor aanmelding van de app bij het Li-
fecloud-systeem.
U kunt uw LifeCloud resp. uw Lifecloud-systeem nu via de app op uw mobie-
le apparaat op elke locatie via internet bereiken.
18.1. Hoofdmenu
Op de startpagina van de LifeCloud-app kunt u de albums of de mediabiblio-
theek van het Lifecloud-systeem oproepen.
Tik op een pictogram om naar het betreffende menu te gaan.
90245 50049999 DE EN FR NL content RC1.indb 19590245 50049999 DE EN FR NL content RC1.indb 195 13.04.2015 16:24:3813.04.2015 16:24:38

196 van 218
De LifeCloud-app gebruiken op smart-apparaten
18.2. Mediabibliotheekweergave
Klik in het hoofdmenu op de optie Medion Library om de mediabiblio-
theek van het Lifecloud-systeem weer te geven.
In de mediabibliotheek worden de openbare en privémappen weergegeven.
Open één van de hoofdmappen FamilyLibrary of MyLibrary.
Via de menupictogrammen onderaan het scherm kunt u de weergave van de
mapinhoud aanpassen.
Tik op de knop
onder aan het scherm om de menulijst weer te geven.
Via de afzonderlijke opties kunt u naar bestanden zoeken, de weergave bij-
werken, mappen maken, bestanden in de huidige map uploaden of u van
het Lifecloud-systeem afmelden.
90245 50049999 DE EN FR NL content RC1.indb 19690245 50049999 DE EN FR NL content RC1.indb 196 13.04.2015 16:24:3813.04.2015 16:24:38

197 van 218
Werken met Memeo Backup
DE
FR
NL
GPL
EN
18.3. Albumweergave
Klik in het hoofdmenu op de optie Albums om de albums van het Lifecl-
oud-systeem weer te geven.
Via de menupictogrammen onderaan het scherm kunt u de weergave van de
mapinhoud aanpassen.
Tik op de knop onder aan het scherm om de menulijst weer te geven.
Via de afzonderlijke opties kunt u naar bestanden zoeken, de weergave bij-
werken of u van het Lifecloud-systeem afmelden.
19. Werken met Memeo Backup
Op de meegeleverde software-CD vindt u het back-up programma Memeo
Instant Backup, dat u kunt installeren tijdens de installatie van LifeCloud
Agent (“LifeCloud Agent gebruiken” op pagina 181).
Ga als volgt te werk om de back-up functie met Memeo Instant Backup op
uw Lifecloud-systeem in te stellen:
Netwerkstation aanmaken voor back-up van gegevens
Breng via Lifecloud Agent een verbinding tot stand tussen uw PC en het
Lifecloud-systeem, zoals beschreven onder “Explore my LifeCloud folders”
op pagina 183.
Klik op het pictogram "Netwerkstation(s)".
Voor beveiliging van de gegevens in een openbare map meldt u zich met
het betreffende gebruikersaccount aan.
Selecteer een letter voor het station (bv. "Z:").
Selecteer een map waarin de back-ups van gegevens moeten worden op-
90245 50049999 DE EN FR NL content RC1.indb 19790245 50049999 DE EN FR NL content RC1.indb 197 13.04.2015 16:24:3813.04.2015 16:24:38

198 van 218
Werken met Memeo Backup
geslagen (bv. "Z:").
Zet een vinkje in het veld "Restore Connection at Windows logon".
Back-up van gegevens maken met Memeo Backup
Open Memeo Instant Backup door op het pictogram "Memeo Backup" op
de desktop te klikken.
Klik in het menu "Help" op de optie "Register" en voer daar de pro-
ductcode in die u kunt vinden op het hoesje van de meegeleverde soft-
ware-CD.
Sla de startpagina over door op de optie
"
No Thanks, I want to start a Backup now" te klikken.
Selecteer nu als bestemming voor de back-up, het zojuist aangemaakte
netwerkstation (in bovenstaand voorbeeld:
(Z:)).
Klik op "Start Backup".
Nu wordt van alle bestanden op het station C: van de computer een back-up
gemaakt op het Lifecloud-systeem. Van de volgende mappen op C: worden
geen back-ups gemaakt:
• De map "Programma's"
• Tijdelijke bestanden, protocolbestanden en virtuele bestanden op de har-
de-schijf
• De map "Windows"
OPMERKING!
Open voor meer informatie over Memeo Instant Back-
up het menu "Help", optie "Quick Start Guide".
90245 50049999 DE EN FR NL content RC1.indb 19890245 50049999 DE EN FR NL content RC1.indb 198 13.04.2015 16:24:3913.04.2015 16:24:39

199 van 218
LifecloudDetect uitvoeren
DE
FR
NL
GPL
EN
20. LifecloudDetect uitvoeren
U kunt het Lifecloud-systeem in het netwerk zoeken door het bestand
medionlifeclouddetect.exe uit te voeren, dat zich op de meegeleverde soft-
ware-CD in de map util bevindt.
Nadat u dit bestand heeft uitgevoerd, wordt er een venster weergegeven
waarin u wordt gevraagd op de toets aan de voorzijde van het apparaat
te drukken zodat het Lifecloud-systeem in het netwerk kan worden gede-
tecteerd.
20.1. Heeft u nog verdere ondersteuning
nodig?
Neem voor verdere ondersteuning contact met ons op, wanneer de sugges-
ties in de voorgaande paragrafen uw probleem niet opgelost hebben. Wij
verzoeken u de volgende informatie bij de hand te houden:
• Welke externe apparaten zijn aangesloten?
• Welke meldingen verschijnen er op het scherm?
• Tijdens welke bedieningsstap is het probleem opgetreden?
• Hoe ziet uw systeemconfiguratie eruit?
• Welke software gebruikte u toen het probleem zich voordeed?
• Welke stappen heeft u reeds ondernomen om het probleem op te lossen?
• Geef ons uw klantnummer door als u dit heeft.
90245 50049999 DE EN FR NL content RC1.indb 19990245 50049999 DE EN FR NL content RC1.indb 199 13.04.2015 16:24:3913.04.2015 16:24:39

200 van 218
Reiniging
21. Reiniging
De levensduur van het apparaat kan worden verlengd door de volgende
maatregelen:
• Trek voorafgaand aan de reiniging altijd de netadapter en alle aansluitka-
bels los.
• Gebruik geen oplosmiddelen, bijtende of gasvormige schoonmaakmid-
delen.
• Reinig het apparaat met een zacht, pluisvrij doekje.
Bewaar het verpakkingsmateriaal goed en gebruik alleen dit materiaal om
het apparaat te vervoeren.
LET OP!
Het apparaat bevat geen onderdelen die moeten worden
gereinigd of onderhouden.
22. Afvoeren
Verpakking
Dit product is verpakt voor bescherming tijdens transport. Ver-
pakkingen zijn grondstoffen en kunnen worden hergebruikt of
teruggebracht in de grondstoffenkringloop.
Apparaat
Gooi het apparaat aan het einde van de levensduur in geen ge-
val weg als gewoon huisvuil! Informeer bij uw gemeente hoe u
het apparaat op een milieubewuste en correcte wijze kunt af-
voeren.
90245 50049999 DE EN FR NL content RC1.indb 20090245 50049999 DE EN FR NL content RC1.indb 200 13.04.2015 16:24:3913.04.2015 16:24:39

201 van 218
Technische speci caties
DE
FR
NL
GPL
EN
23. Technische speci caties
Stroomvoorziening voedingsadapter Ktec KSAP0361200300HE
Ingang (primair):
100-240 V~ / 50/60 Hz, 0,8 A
Uitgang (secundair): 12 V 3 A
Aansluitingen
3 USB-aansluitingen (voor/achter): 2x USB 3.0 (blauw), 1x USB 2.0 (wit)
LAN-netwerkaansluiting: RJ-45
(Ethernet 10/100 MBit en Gigabit)
Ingang netadapter: 12 V 3 A
Harde schijven
Interfaces: 2x SATA
Capaciteit: 2x 6 TB (komt overeen met 6000 GB*)
Algemeen
Afmetingen (ca.) 134 x 97 x 195 mm (B x H x D)
Totaalgewicht (ca.) ca. 2 kg
Bedrijfstemperatuur 5 °C tot 35 °C
Luchtvochtigheid tijdens bedrijf 5% tot 65%
*1 GB komt overeen met 1 miljard bytes. De daadwerkelijk bruikbare opslag-
capaciteit kan afwijken.
90245 50049999 DE EN FR NL content RC1.indb 20190245 50049999 DE EN FR NL content RC1.indb 201 13.04.2015 16:24:4013.04.2015 16:24:40

202 van 218
Woordenlijst
24. Woordenlijst
BitTorrent
Zie Torrent.
CIFS – Common Internet File System
Het aanbevolen protocol om bestanden te delen voor het Windows-plat-
form, waarmee gebruikers via de netwerkomgeving gedeelde mappen kun-
nen openen. Mac OS X of nieuwere versies ondersteunen eveneens het
CIFS-protocol. Zie ook Protocol.
DHCP – Dynamic Host Configuration Protocol
Een protocol om aan apparaten in een netwerk een IP-adres toe te wijzen.
Met de dynamische adressen kan een apparaat elke keer wanneer er een ver-
binding met het netwerk wordt gemaakt een ander IP-adres krijgen. In som-
mige systemen verandert het IP-adres zelfs terwijl het apparaat verbonden
is. DHCP ondersteunt tevens een combinatie van statische en dynamische
IP-adressen. Zie ook Protocol.
DLNA – Digital Living Network Alliance
De groep van ondernemingen in de consumentenelektronica, de computer-
sector en fabrikanten van mobiele apparatuur die de normen voor product-
compatibiliteit vaststelt en waarmee gebruikers thuis gezamenlijk inhoud
kunnen delen.
DMA - Digitale media-adapter
Een apparaat waarmee waarmee home-entertainment apparatuur media,
zoals muziek, foto's en video, via een netwerk van en naar andere apparaten
kunnen overdragen.
DNS – Domain Name Service
Een systeem waarmee een netwerknaamserver hostnamen in leesbare tekst
kan vertalen naar numerieke IP-adressen om met internet verbonden appa-
raten eenduidig te identificeren.
Ethernet
Een standaardprotocol om computers op een lokaal netwerk (LAN) aan te
sluiten.
FTP (File Transfer Protocol - protocol voor bestandsoverdracht)
Een netwerkprotocol dat dient om gegevens via een netwerk van de ene
computer naar de andere over te dragen. FTP wordt vaak gebruikt voor het
uitwisselen van bestanden, ongeacht de gebruikte besturingssystemen.
90245 50049999 DE EN FR NL content RC1.indb 20290245 50049999 DE EN FR NL content RC1.indb 202 13.04.2015 16:24:4013.04.2015 16:24:40

203 van 218
Woordenlijst
DE
FR
NL
GPL
EN
Host
De computer waarmee de andere computers en randapparatuur een verbin-
ding maken.
Hostadapter
Een kaart die als interface fungeert tussen de systeembus van de computer
en de harde schijf.
Hostinterface
Het punt waarop een host en een station met elkaar zijn verbonden.
Hostoverdrachtsnelheid
De snelheid waaraan een hostcomputer gegevens kan overdragen via een
interface.
HTTP – Hypertext Transfer Protocol
Het door het World Wide Web gebruikte protocol voor de overdracht van in-
formatie tussen servers en browsers. Zie ook Protocol.
IP - Internetprotocol
Een systeem dat regelt hoe gegevensberichten in pakketjes verdeeld van
de afzender naar de ontvanger worden gestuurd en op de bestemming op-
nieuw worden samengevoegd. Zie ook Protocol.
IP-adres
Een binair getal van 32-bits, waarmee elke met internet verbonden computer
eenduidig wordt geïdentificeerd.
iTunes
Een programma om audio af te spelen, dat wordt gebruikt om songs en an-
dere mediabestanden van uw harde schijf te importeren.
LAN – Local Area Network (lokaal netwerk)
Een systeem waarbij de computergebruikers binnen een onderneming of or-
ganisatie met elkaar, en vaak ook met centraal op LAN-servers opgeslagen
databases, verbonden zijn.
Mediaserver
Een apparaat dat mediabestanden opslaat en deelt (digitale audio-, video-
en fotobestanden).
Media-opslagapparaat
Een apparaat dat mediabestanden opslaat (digitale audio-, video- en fotobe-
standen).
90245 50049999 DE EN FR NL content RC1.indb 20390245 50049999 DE EN FR NL content RC1.indb 203 13.04.2015 16:24:4013.04.2015 16:24:40

204 van 218
Woordenlijst
NAS
Network Attached Storage (netwerkopslagapparaat). Een netwerkopslagap-
paraat dat wordt ingesteld met een eigen netwerkadres in plaats van op de
computer te worden aangesloten en dat gebruikers op werkstations bedient.
Besturingssysteem
Software waarmee de gebruiker en de op het systeem geïnstalleerde soft-
ware met de computerhardware kan communiceren, zoals met de harde
schijf.
Partitie
Een logisch gedeelte van een harde schijf dat door het besturingssysteem als
een afzonderlijke harde schijf wordt behandeld. Elke partitie krijgt als station
een unieke letter toebedeeld. Partities die als vast station zijn ingesteld wor-
den ook wel "volumes" genoemd.
Peer
Zie Torrent.
Poort (hardware)
Een specifieke uitgang op een apparaat om andere apparaten via een ka-
bel of stekker mee te verbinden. Voorbeelden hiervan zijn ethernetpoorten,
netstroomaansluitingen en USB-poorten.
Protocol
Een conventie voor gegevensoverdracht waarin de timing, de besturing en
de gegevensweergave is vastgelegd.
Gedeelde map
Een gebied, vergelijkbaar met een map, dat is ingesteld om bestanden te or-
ganiseren en via het netwerk te openen. Gedeelde mappen kunnen "pu-
bliek" toegankelijk zijn, d.w.z. voor iedereen op het netwerk, of "privé", dus al-
leen voor bepaalde gebruikers op het netwerk.
Seeder
Zie Torrent.
Streaming
Media, zoals audio, video en foto's, die doorlopend worden ontvangen ter-
wijl ze gelijktijdig door een streamingprovider worden aangeleverd.
90245 50049999 DE EN FR NL content RC1.indb 20490245 50049999 DE EN FR NL content RC1.indb 204 13.04.2015 16:24:4013.04.2015 16:24:40

205 van 218
Woordenlijst
DE
FR
NL
GPL
EN
TCP/IP
Transmission Control Protocol/Internet Protocol (overdrachtsprotocol/inter-
netprotocol). Een serie van protocollen voor communicatie via met elkaar
verbonden netwerken. De standaard voor de overdracht van gegevens via
netwerken. Zie ook Protocol.
Torrent
BitTorrent (Bit: de kleinste gegevenseenheid, Eng. torrent: krachtige stroom
of stortvloed, uit het Latijn torrens) is een protocol voor het delen van be-
standen dat bijzonder geschikt is om snel grote hoeveelheden gegevens te
distribueren. Torrents zijn doorgaans enkele tientallen kilobyte groot en wor-
den op de website of op via indexsites ter beschikking gesteld om te down-
loaden.
De eerste seeder peer (van het Eng. to seed: zaaien) creëert de koppeling
naar het als torrentbestand aan te bieden bestand en houdt dit beschikbaar.
De clientsoftware ontvangt van de tracker een lijst van peers die geheel of
gedeeltelijk over de gegevens beschikken of erin geïnteresseerd zijn. Zodra
een peer een segment van het bestand heeft ontvangen en de controlesom
heeft geverifieerd, meldt deze dit aan de tracker en kan deze het gegevens-
blok aan de andere peers doorgeven.
Het geheel van alle peers die in dezelfde torrent geïnteresseerd zijn, wordt
de swarm ("zwerm") genoemd. Peers die over de volledige inhoud van de
torrent beschikken, en dus niets downloaden van andere clients, maar louter
gegevens verdelen, worden seeders genoemd. De term leechers (uit het En-
gels leech: bloedzuiger) wordt gebruikt voor peers die nog niet over de hele
inhoud van de torrent beschikken en nog verder segmenten downloaden.
UPnP
Universal Plug 'n Play. Een reeks computernetwerkprotocollen die de toepas-
sing van netwerken thuis vereenvoudigt door de mogelijkheid te bieden om
de apparaten naadloos met elkaar te verbinden. Zie ook Protocol.
Volume
Zie Partitie
90245 50049999 DE EN FR NL content RC1.indb 20590245 50049999 DE EN FR NL content RC1.indb 205 13.04.2015 16:24:4013.04.2015 16:24:40

206 van 218
Colofon
25. Colofon
Copyright © 2015
Alle rechten voorbehouden.
Deze handleiding is auteursrechtelijk beschermd.
Vermenigvuldiging in mechanische, elektronische of enige andere vorm zon-
der schriftelijke toestemming van de fabrikant is verboden.
Het copyright berust bij de firma:
Medion AG
Am Zehnthof 77
45307 Essen
Duitsland
Technische wijzigingen voorbehouden.
De handleiding is via de Service Hotline te bestellen en is via het servicepor-
tal
beschikbaar voor download.
U kunt ook de bovenstaande QR-code scannen en de handleiding via het
serviceportal naar uw mobiele toestel downloaden.
URL QR Code
NL www.medion.com/nl/service/start/
BE www.medion.com/be/nl/service/start/
90245 50049999 DE EN FR NL content RC1.indb 20690245 50049999 DE EN FR NL content RC1.indb 206 13.04.2015 16:24:4013.04.2015 16:24:40

207 / 218
DE
FR
NL
GPL
EN
Lizenzinformation
HINWEIS!
Sehr geehrte Kundin, sehr geehrter Kunde,
Im Folgenden wird hier aus juristischen Gründen die GPL/LG-
PL-Lizenz in der englischen Originalfassung abgebildet. Über-
setzungen in andere Sprachen stellen keine von der FSF (Free
Software Foundation) autorisierte Versionen der GPL dar.
Die Kenntnisnahme der GPL/LGPL-Lizenz ist für den Gebrauch
des Gerätes unerheblich, sondern dient der Verpflichtung zur
Veröffentlichung bei der Verwendung von Open-Source Soft-
ware.
Bei Interesse können Sie den Quelltext der verwendeten GPL/
LGPL unter folgendem Link herunterladen:
http://www.medion.com. Bitte geben Sie im Download Center
die entsprechende MD Nummer oder MSN Nummer an. Diese
Nummern finden Sie auf dem jeweiligen Gerät.
Weitere Informationen über die GPL/LGPL-Lizenzen finden Sie
unter www.gnu.org.
Information relative à la licence
REMARQUE !
Chère Cliente, Cher Client,
Pour des raisons juridiques, la licence GPL/LGPL est reproduite ici
dans la version originale anglaise. Les traductions dans d’autres
langues ne sont pas des versions de la GPL autorisées par la FSF
(Free Software Foundation).
La prise de connaissance de la licence GPL/LGPL n’est pas impor-
tante pour l’utilisation de l’appareil, mais sert à l’obligation de pu-
blication en cas d’utilisation de logiciels Open Source.
Si cela vous intéresse, vous pouvez télécharger le texte source
des GPL/LGPL utilisées sous le lien suivant:
http://www.medion.com. Veuillez indiquer le numéro MD ou
MSN correspondant dans le centre de téléchargement. Vous trou-
verez ces numéros sur l’appareil respectif.
Vous trouverez de plus amples informations sur les licences GPL/
LGPL sur www.gnu.org.
90245 50049999 DE EN FR NL content RC1.indb 20790245 50049999 DE EN FR NL content RC1.indb 207 13.04.2015 16:24:4113.04.2015 16:24:41

208 / 218
Licentiegegevens
OPMERKING!
Geachte klant,
Hieronder is om juridische redenen de GPL/LGPL-licentie in de
Originele Engelse versie opgenomen. Vertalingen vormen voor
de FSF (Free Software Foundation) geen geautoriseerde versie
van de GPL.
De kennisname van de GPL/LGPL-licentie is voor het gebruik van
het apparaat niet van belang maar dient om te voldoen aan de verplichting
van publicatie bij toepassing van Open Source software.
Indien u interesse hebt in de originele tekst van de gebruikte GPL/LGPL, kunt
u deze downloaden via de volgende link: http://www.medion.com. Voer in
het Download Center het juiste MD-nummer of MSN-nummer in. Deze num-
mers vindt u op het betreffende apparaat.
Verdere informatie over de GPL/LGPL-licenties vindt u op www.gnu.org.
90245 50049999 DE EN FR NL content RC1.indb 20890245 50049999 DE EN FR NL content RC1.indb 208 13.04.2015 16:24:4213.04.2015 16:24:42

209 / 218
GNU General Public Licence
DE
FR
NL
GPL
EN
I. GNU General Public Licence
Version 2, June 1991
Copyright (C) 1989,
1991 Free Software Foundation, Inc.
51 Franklin Street, Fifth Floor, Boston,
MA 02110-1301, USA
Everyone is permitted to copy and distribute verbatim copies
of this license document, but changing it is not allowed.
Preamble
The licenses for most software are designed to take away your freedom to share and change it.
By contrast, the GNU General Public License is intended to guarantee your freedom to share and
change free software--to make sure the software is free for all its users. This General Public Licen-
se applies to most of the Free Software Foundation‘s software and to any other program who-
se authors commit to using it. (Some other Free Software Foundation software is covered by the
GNU Lesser General Public License instead.) You can apply it to your programs, too.
When we speak of free software, we are referring to freedom, not price. Our General Public Li-
censes are designed to make sure that you have the freedom to distribute copies of free soft-
ware (and charge for this service if you wish), that you receive source code or can get it if you
want it, that you can change the software or use pieces of it in new free programs; and that you
know you can do these things.
To protect your rights, we need to make restrictions that forbid anyone to deny you these rights
or to ask you to surrender the rights. These restrictions translate to certain responsibilities for
you if you distribute copies of the software, or if you modify it.
For example, if you distribute copies of such a program, whether gratis or for a fee, you must
give the recipients all the rights that you have. You must make sure that they, too, receive or can
get the source code. And you must show them these terms so they know their rights.
We protect your rights with two steps: (1) copyright the software, and (2) offer you this license
which gives you legal permission to copy, distribute and/or modify the software.
Also, for each author‘s protection and ours, we want to make certain that everyone understands
that there is no warranty for this free software. If the software is modified by someone else and
passed on, we want its recipients to know that what they have is not the original, so that any
problems introduced by others will not reflect on the original authors‘ reputations.
Finally, any free program is threatened constantly by software patents. We wish to avoid the dan-
ger that redistributors of a free program will individually obtain patent licenses, in effect making
the program proprietary. To prevent this, we have made it clear that any patent must be licensed
for everyone‘s free use or not licensed at all.
The precise terms and conditions for copying, distribution and modification follow.
TERMS AND CONDITIONS FOR COPYING, DISTRIBUTION AND MODIFICATION
0. This License applies to any program or other work which contains a notice placed by the copy-
right holder saying it may be distributed under the terms of this General Public License. The „Pro-
gram“, below, refers to any such program or work, and a „work based on the Program“ means eit-
her the Program or any derivative work under copyright law: that is to say, a work containing the
Program or a portion of it, either verbatim or with modifications and/or translated into another
language. (Hereinafter, translation is included without limitation in the term „modification“.) Each
licensee is addressed as „you“.
Activities other than copying, distribution and modification are not covered by this License; they are
outside its scope. The act of running the Program is not restricted, and the output from the Program
is covered only if its contents constitute a work based on the Program (independent of having been
made by running the Program). Whether that is true depends on what the Program does.
90245 50049999 DE EN FR NL content RC1.indb 20990245 50049999 DE EN FR NL content RC1.indb 209 13.04.2015 16:24:4213.04.2015 16:24:42

210 / 218
GNU General Public Licence
1. You may copy and distribute verbatim copies of the Program‘s source code as you receive it,
in any medium, provided that you conspicuously and appropriately publish on each copy an ap-
propriate copyright notice and disclaimer of warranty; keep intact all the notices that refer to
this License and to the absence of any warranty; and give any other recipients of the Program a
copy of this License along with the Program.
You may charge a fee for the physical act of transferring a copy, and you may at your option offer
warranty protection in exchange for a fee.
2. You may modify your copy or copies of the Program or any portion of it, thus forming a work
based on the Program, and copy and distribute such modifications or work under the terms of
Section 1 above, provided that you also meet all of these conditions:
a) You must cause the modified files to carry prominent notices stating that you changed the
files and the date of any change.
b) You must cause any work that you distribute or publish, that in whole or in part contains or is
derived from the Program or any part thereof, to be licensed as a whole at no charge to all third
parties under the terms of this License.
c) If the modified program normally reads commands interactively when run, you must cause it,
when started running for such interactive use in the most ordinary way, to print or display an an-
nouncement including an appropriate copyright notice and a notice that there is no warranty
(or else, saying that you provide a warranty) and that users may redistribute the program under
these conditions, and telling the user how to view a copy of this License. (Exception: if the Pro-
gram itself is interactive but does not normally print such an announcement, your work based
on the Program is not required to print an announcement.)
These requirements apply to the modified work as a whole. If identifiable sections of that work
are not derived from the Program, and can be reasonably considered independent and separa-
te works in themselves, then this License, and its terms, do not apply to those sections when you
distribute them as separate works. But when you distribute the same sections as part of a whole
which is a work based on the Program, the distribution of the whole must be on the terms of this
License, whose permissions for other licensees extend to the entire whole, and thus to each and
every part regardless of who wrote it.
Thus, it is not the intent of this section to claim rights or contest your rights to work written en-
tirely by you; rather, the intent is to exercise the right to control the distribution of derivative or
collective works based on the Program.
In addition, mere aggregation of another work not based on the Program with the Program (or
with a work based on the Program) on a volume of a storage or distribution medium does not
bring the other work under the scope of this License.
3. You may copy and distribute the Program (or a work based on it, under Section 2) in object
code or executable form under the terms of Sections 1 and 2 above provided that you also do
one of the following:
a) Accompany it with the complete corresponding machine-readable source code, which must
be distributed under the terms of Sections 1 and 2 above on a medium customarily used for
software interchange; or,
b) Accompany it with a written offer, valid for at least three years, to give any third party, for a
charge no more than your cost of physically performing source distribution, a complete machi-
ne-readable copy of the corresponding source code, to be distributed under the terms of Sec-
tions 1 and 2 above on a medium customarily used for software interchange; or,
c) Accompany it with the information you received as to the offer to distribute corresponding
source code. (This alternative is allowed only for noncommercial distribution and only if you re-
ceived the program in object code or executable form with such an offer, in accord with Subsec-
tion b above.)
The source code for a work means the preferred form of the work for making modifications to it.
For an executable work, complete source code means all the source code for all modules it con-
tains, plus any associated interface definition files, plus the scripts used to control compilation
90245 50049999 DE EN FR NL content RC1.indb 21090245 50049999 DE EN FR NL content RC1.indb 210 13.04.2015 16:24:4213.04.2015 16:24:42

211 / 218
GNU General Public Licence
DE
FR
NL
GPL
EN
and installation of the executable. However, as a special exception, the source code distributed
need not include anything that is normally distributed (in either source or binary form) with the
major components (compiler, kernel, and so on) of the operating system on which the executab-
le runs, unless that component itself accompanies the executable.
If distribution of executable or object code is made by offering access to copy from a designa-
ted place, then offering equivalent access to copy the source code from the same place counts
as distribution of the source code, even though third parties are not compelled to copy the sour-
ce along with the object code.
4. You may not copy, modify, sublicense, or distribute the Program except as expressly provided
under this License. Any attempt otherwise to copy, modify, sublicense or distribute the Program
is void, and will automatically terminate your rights under this License. However, parties who
have received copies, or rights, from you under this License will not have their licenses termina-
ted so long as such parties remain in full compliance.
5. You are not required to accept this License, since you have not signed it. However, nothing
else grants you permission to modify or distribute the Program or its derivative works. These ac-
tions are prohibited by law if you do not accept this License. Therefore, by modifying or distri-
buting the Program (or any work based on the Program), you indicate your acceptance of this
License to do so, and all its terms and conditions for copying, distributing or modifying the Pro-
gram or works based on it.
6. Each time you redistribute the Program (or any work based on the Program), the recipient au-
tomatically receives a license from the original licensor to copy, distribute or modify the Program
subject to these terms and conditions. You may not impose any further restrictions on the recipi-
ents‘ exercise of the rights granted herein. You are not responsible for enforcing compliance by
third parties to this License.
7. If, as a consequence of a court judgment or allegation of patent infringement or for any other
reason (not limited to patent issues), conditions are imposed on you (whether by court order,
agreement or otherwise) that contradict the conditions of this License, they do not excuse you
from the conditions of this License.
If you cannot distribute so as to satisfy simultaneously your obligations under this License and
any other pertinent obligations, then as a consequence you may not distribute the Program at
all. For example, if a patent license would not permit royalty-free redistribution of the Program
by all those who receive copies directly or indirectly through you, then the only way you could
satisfy both it and this License would be to refrain entirely from distribution of the Program.
If any portion of this section is held invalid or unenforceable under any particular circumstance,
the balance of the section is intended to apply and the section as a whole is intended to apply in
other circumstances.
It is not the purpose of this section to induce you to infringe any patents or other property right
claims or to contest validity of any such claims; this section has the sole purpose of protecting
the integrity of the free software distribution system, which is implemented by public license
practices. Many people have made generous contributions to the wide range of software distri-
buted through that system in reliance on consistent application of that system; it is up to the au-
thor/donor to decide if he or she is willing to distribute software through any other system and a
licensee cannot impose that choice.
This section is intended to make thoroughly clear what is believed to be a consequence of the
rest of this License.
8. If the distribution and/or use of the Program is restricted in certain countries either by patents
or by copyrighted interfaces, the original copyright holder who places the Program under this Li-
cense may add an explicit geographical distribution limitation excluding those countries, so that
distribution is permitted only in or among countries not thus excluded. In such case, this License
incorporates the limitation as if written in the body of this License.
9. The Free Software Foundation may publish revised and/or new versions of the General Public
License from time to time. Such new versions will be similar in spirit to the present version, but
90245 50049999 DE EN FR NL content RC1.indb 21190245 50049999 DE EN FR NL content RC1.indb 211 13.04.2015 16:24:4213.04.2015 16:24:42

212 / 218
GNU General Public Licence
may differ in detail to address new problems or concerns.
Each version is given a distinguishing version number. If the Program specifies a version number
of this License which applies to it and „any later version“, you have the option of following the
terms and conditions either of that version or of any later version published by the Free Software
Foundation. If the Program does not specify a version number of this License, you may choose
any version ever published by the Free Software Foundation.
10. If you wish to incorporate parts of the Program into other free programs whose distributi-
on conditions are different, write to the author to ask for permission. For software which is copy-
righted by the Free Software Foundation, write to the Free Software Foundation; we sometimes
make exceptions for this. Our decision will be guided by the two goals of preserving the free sta-
tus of all derivatives of our free software and of promoting the sharing and reuse of software ge-
nerally.
NO WARRANTY
11. BECAUSE THE PROGRAM IS LICENSED FREE OF CHARGE, THERE IS NO WARRANTY FOR THE
PROGRAM, TO THE EXTENT PERMITTED BY APPLICABLE LAW. EXCEPT WHEN OTHERWISE STATED
IN WRITING THE COPYRIGHT HOLDERS AND/OR OTHER PARTIES PROVIDE THE PROGRAM „AS IS“
WITHOUT WARRANTY OF ANY KIND, EITHER EXPRESSED OR IMPLIED, INCLUDING, BUT NOT LIMI-
TED TO, THE IMPLIED WARRANTIES OF MERCHANTABILITY AND FITNESS FOR A PARTICULAR PUR-
POSE. THE ENTIRE RISK AS TO THE QUALITY AND PERFORMANCE OF THE PROGRAM IS WITH YOU.
SHOULD THE PROGRAM PROVE DEFECTIVE, YOU ASSUME THE COST OF ALL NECESSARY SERVI-
CING, REPAIR OR CORRECTION.
12. IN NO EVENT UNLESS REQUIRED BY APPLICABLE LAW OR AGREED TO IN WRITING WILL ANY
COPYRIGHT HOLDER, OR ANY OTHER PARTY WHO MAY MODIFY AND/OR REDISTRIBUTE THE
PROGRAM AS PERMITTED ABOVE, BE LIABLE TO YOU FOR DAMAGES, INCLUDING ANY GENERAL,
SPECIAL, INCIDENTAL OR CONSEQUENTIAL DAMAGES ARISING OUT OF THE USE OR INABILITY TO
USE THE PROGRAM (INCLUDING BUT NOT LIMITED TO LOSS OF DATA OR DATA BEING RENDERED
INACCURATE OR LOSSES SUSTAINED BY YOU OR THIRD PARTIES OR A FAILURE OF THE PROGRAM
TO OPERATE WITH ANY OTHER PROGRAMS), EVEN IF SUCH HOLDER OR OTHER PARTY HAS BEEN
ADVISED OF THE POSSIBILITY OF SUCH DAMAGES.
END OF TERMS AND CONDITIONS
LGPL VERSION 2.1
GNU LESSER GENERAL PUBLIC LICENSE
Version 2.1, February 1999
Copyright (C) 1991, 1999 Free Software Foundation, Inc.
51 Franklin Street, Fifth Floor, Boston, MA 02110-1301 USA
Everyone is permitted to copy and distribute verbatim copies
of this license document, but changing it is not allowed.
[This is the first released version of the Lesser GPL. It also counts as the successor of the GNU Li-
brary Public License, version 2, hence the version number 2.1.]
Preamble
The licenses for most software are designed to take away your freedom to share and change it.
By contrast, the GNU General Public Licenses are intended to guarantee your freedom to share
and change free software--to make sure the software is free for all its users.
This license, the Lesser General Public License, applies to some specially designated software pa-
ckages--typically libraries--of the Free Software Foundation and other authors who decide to use
it. You can use it too, but we suggest you first think carefully about whether this license or the or-
dinary General Public License is the better strategy to use in any particular case, based on the ex-
planations below.
When we speak of free software, we are referring to freedom of use, not price. Our General Pu-
90245 50049999 DE EN FR NL content RC1.indb 21290245 50049999 DE EN FR NL content RC1.indb 212 13.04.2015 16:24:4213.04.2015 16:24:42

213 / 218
GNU General Public Licence
DE
FR
NL
GPL
EN
blic Licenses are designed to make sure that you have the freedom to distribute copies of free
software (and charge for this service if you wish); that you receive source code or can get it if you
want it; that you can change the software and use pieces of it in new free programs; and that
you are informed that you can do these things.
To protect your rights, we need to make restrictions that forbid distributors to deny you these
rights or to ask you to surrender these rights. These restrictions translate to certain responsibili-
ties for you if you distribute copies of the library or if you modify it.
For example, if you distribute copies of the library, whether gratis or for a fee, you must give the
recipients all the rights that we gave you. You must make sure that they, too, receive or can get
the source code. If you link other code with the library, you must provide complete object files to
the recipients, so that they can relink them with the library after making changes to the library
and recompiling it. And you must show them these terms so they know their rights.
We protect your rights with a two-step method: (1) we copyright the library, and (2) we offer you
this license, which gives you legal permission to copy, distribute and/or modify the library.
To protect each distributor, we want to make it very clear that there is no warranty for the free li-
brary. Also, if the library is modified by someone else and passed on, the recipients should know
that what they have is not the original version, so that the original author‘s reputation will not
be affected by problems that might be introduced by others.
Finally, software patents pose a constant threat to the existence of any free program. We wish to
make sure that a company cannot effectively restrict the users of a free program by obtaining a
restrictive license from a patent holder. Therefore, we insist that any patent license obtained for a
version of the library must be consistent with the full freedom of use specified in this license.
Most GNU software, including some libraries, is covered by the ordinary GNU General Public Li-
cense. This license, the GNU Lesser General Public License, applies to certain designated libraries,
and is quite different from the ordinary General Public License. We use this license for certain lib-
raries in order to permit linking those libraries into non-free programs.
When a program is linked with a library, whether statically or using a shared library, the combi-
nation of the two is legally speaking a combined work, a derivative of the original library. The
ordinary General Public License therefore permits such linking only if the entire combination
fits its criteria of freedom. The Lesser General Public License permits more lax criteria for linking
other code with the library.
We call this license the „Lesser“ General Public License because it does Less to protect the user‘s
freedom than the ordinary General Public License. It also provides other free software develo-
pers Less of an advantage over competing non-free programs. These disadvantages are the re-
ason we use the ordinary General Public License for many libraries. However, the Lesser license
provides advantages in certain special circumstances.
For example, on rare occasions, there may be a special need to encourage the widest possib-
le use of a certain library, so that it becomes a de-facto standard. To achieve this, non-free pro-
grams must be allowed to use the library. A more frequent case is that a free library does the
same job as widely used non-free libraries. In this case, there is little to gain by limiting the free
library to free software only, so we use the Lesser General Public License.
In other cases, permission to use a particular library in non-free programs enables a greater
number of people to use a large body of free software. For example, permission to use the GNU
C Library in non-free programs enables many more people to use the whole GNU operating sys-
tem, as well as its variant, the GNU/Linux operating system.
Although the Lesser General Public License is Less protective of the users‘ freedom, it does ensu-
re that the user of a program that is linked with the Library has the freedom and the wherewithal
to run that program using a modified version of the Library.
The precise terms and conditions for copying, distribution and modification follow. Pay close at-
tention to the difference between a „work based on the library“ and a „work that uses the lib-
rary“. The former contains code derived from the library, whereas the latter must be combined
with the library in order to run.
90245 50049999 DE EN FR NL content RC1.indb 21390245 50049999 DE EN FR NL content RC1.indb 213 13.04.2015 16:24:4213.04.2015 16:24:42

214 / 218
GNU General Public Licence
TERMS AND CONDITIONS FOR COPYING, DISTRIBUTION AND MODIFICATION
0. This License Agreement applies to any software library or other program which contains a
notice placed by the copyright holder or other authorized party saying it may be distributed un-
der the terms of this Lesser General Public License (also called „this License“). Each licensee is
addressed as „you“.
A „library“ means a collection of software functions and/or data prepared so as to be conveni-
ently linked with application programs (which use some of those functions and data) to form
executables.
The „Library“, below, refers to any such software library or work which has been distributed un-
der these terms. A „work based on the Library“ means either the Library or any derivative work
under copyright law: that is to say, a work containing the Library or a portion of it, either verba-
tim or with modifications and/or translated straightforwardly into another language. (Hereinaf-
ter, translation is included without limitation in the term „modification“.)
„Source code“ for a work means the preferred form of the work for making modifications to it.
For a library, complete source code means all the source code for all modules it contains, plus
any associated interface definition files, plus the scripts used to control compilation and installa-
tion of the library.
Activities other than copying, distribution and modification are not covered by this License; they
are outside its scope. The act of running a program using the Library is not restricted, and output
from such a program is covered only if its contents constitute a work based on the Library (inde-
pendent of the use of the Library in a tool for writing it). Whether that is true depends on what
the Library does and what the program that uses the Library does.
1. You may copy and distribute verbatim copies of the Library‘s complete source code as you re-
ceive it, in any medium, provided that you conspicuously and appropriately publish on each
copy an appropriate copyright notice and disclaimer of warranty; keep intact all the notices that
refer to this License and to the absence of any warranty; and distribute a copy of this License
along with the Library.
You may charge a fee for the physical act of transferring a copy, and you may at your option offer
warranty protection in exchange for a fee.
2. You may modify your copy or copies of the Library or any portion of it, thus forming a work
based on the Library, and copy and distribute such modifications or work under the terms of
Section 1 above, provided that you also meet all of these conditions:
a) The modified work must itself be a software library.
b) You must cause the files modified to carry prominent notices stating that you changed the
files and the date of any change.
c) You must cause the whole of the work to be licensed at no charge to all third parties under the
terms of this License.
d) If a facility in the modified Library refers to a function or a table of data to be supplied by an
application program that uses the facility, other than as an argument passed when the facility is
invoked, then you must make a good faith effort to ensure that, in the event an application does
not supply such function or table, the facility still operates, and performs whatever part of its
purpose remains meaningful.
(For example, a function in a library to compute square roots has a purpose that is entirely well-
defined independent of the application. Therefore, Subsection 2d requires that any application-
supplied function or table used by this function must be optional: if the application does not
supply it, the square root function must still compute square roots.)
These requirements apply to the modified work as a whole. If identifiable sections of that work
are not derived from the Library, and can be reasonably considered independent and separate
works in themselves, then this License, and its terms, do not apply to those sections when you
distribute them as separate works. But when you distribute the same sections as part of a whole
which is a work based on the Library, the distribution of the whole must be on the terms of this
License, whose permissions for other licensees extend to the entire whole, and thus to each and
90245 50049999 DE EN FR NL content RC1.indb 21490245 50049999 DE EN FR NL content RC1.indb 214 13.04.2015 16:24:4313.04.2015 16:24:43

215 / 218
GNU General Public Licence
DE
FR
NL
GPL
EN
every part regardless of who wrote it.
Thus, it is not the intent of this section to claim rights or contest your rights to work written en-
tirely by you; rather, the intent is to exercise the right to control the distribution of derivative or
collective works based on the Library.
In addition, mere aggregation of another work not based on the Library with the Library (or with
a work based on the Library) on a volume of a storage or distribution medium does not bring
the other work under the scope of this License.
3. You may opt to apply the terms of the ordinary GNU General Public License instead of this Li-
cense to a given copy of the Library. To do this, you must alter all the notices that refer to this Li-
cense, so that they refer to the ordinary GNU General Public License, version 2, instead of to this
License. (If a newer version than version 2 of the ordinary GNU General Public License has ap-
peared, then you can specify that version instead if you wish.) Do not make any other change in
these notices.
Once this change is made in a given copy, it is irreversible for that copy, so the ordinary GNU Ge-
neral Public License applies to all subsequent copies and derivative works made from that copy.
This option is useful when you wish to copy part of the code of the Library into a program that is
not a library.
4. You may copy and distribute the Library (or a portion or derivative of it, under Section 2) in ob-
ject code or executable form under the terms of Sections 1 and 2 above provided that you ac-
company it with the complete corresponding machine-readable source code, which must be
distributed under the terms of Sections 1 and 2 above on a medium customarily used for soft-
ware interchange.
If distribution of object code is made by offering access to copy from a designated place, then
offering equivalent access to copy the source code from the same place satisfies the require-
ment to distribute the source code, even though third parties are not compelled to copy the
source along with the object code.
5. A program that contains no derivative of any portion of the Library, but is designed to work
with the Library by being compiled or linked with it, is called a „work that uses the Library“. Such
a work, in isolation, is not a derivative work of the Library, and therefore falls outside the scope
of this License.
However, linking a „work that uses the Library“ with the Library creates an executable that is a
derivative of the Library (because it contains portions of the Library), rather than a „work that
uses the library“. The executable is therefore covered by this License. Section 6 states terms for
distribution of such executables.
When a „work that uses the Library“ uses material from a header file that is part of the Libra-
ry, the object code for the work may be a derivative work of the Library even though the source
code is not. Whether this is true is especially significant if the work can be linked without the Li-
brary, or if the work is itself a library. The threshold for this to be true is not precisely defined by
law.
If such an object file uses only numerical parameters, data structure layouts and accessors, and
small macros and small inline functions (ten lines or less in length), then the use of the object file
is unrestricted, regardless of whether it is legally a derivative work. (Executables containing this
object code plus portions of the Library will still fall under Section 6.)
Otherwise, if the work is a derivative of the Library, you may distribute the object code for the
work under the terms of Section 6. Any executables containing that work also fall under Section
6, whether or not they are linked directly with the Library itself.
6. As an exception to the Sections above, you may also combine or link a „work that uses the Li-
brary“ with the Library to produce a work containing portions of the Library, and distribute that
work under terms of your choice, provided that the terms permit modification of the work for
the customer‘s own use and reverse engineering for debugging such modifications.
You must give prominent notice with each copy of the work that the Library is used in it and that
the Library and its use are covered by this License. You must supply a copy of this License. If the
90245 50049999 DE EN FR NL content RC1.indb 21590245 50049999 DE EN FR NL content RC1.indb 215 13.04.2015 16:24:4313.04.2015 16:24:43

216 / 218
GNU General Public Licence
work during execution displays copyright notices, you must include the copyright notice for the
Library among them, as well as a reference directing the user to the copy of this License. Also,
you must do one of these things:
a) Accompany the work with the complete corresponding machine-readable source code for the
Library including whatever changes were used in the work (which must be distributed under
Sections 1 and 2 above); and, if the work is an executable linked with the Library, with the com-
plete machine-readable „work that uses the Library“, as object code and/or source code, so that
the user can modify the Library and then relink to produce a modified executable containing the
modified Library. (It is understood that the user who changes the contents of definitions files in
the Library will not necessarily be able to recompile the application to use the modified defini-
tions.)
b) Use a suitable shared library mechanism for linking with the Library. A suitable mechanism
is one that (1) uses at run time a copy of the library already present on the user‘s computer sys-
tem, rather than copying library functions into the executable, and (2) will operate properly with
a modified version of the library, if the user installs one, as long as the modified version is inter-
face-compatible with the version that the work was made with.
c) Accompany the work with a written offer, valid for at least three years, to give the same user
the materials specified in Subsection 6a, above, for a charge no more than the cost of perfor-
ming this distribution.
d) If distribution of the work is made by offering access to copy from a designated place, offer
equivalent access to copy the above specified materials from the same place.
e) Verify that the user has already received a copy of these materials or that you have already
sent this user a copy.
For an executable, the required form of the „work that uses the Library“ must include any data
and utility programs needed for reproducing the executable from it. However, as a special ex-
ception, the materials to be distributed need not include anything that is normally distributed
(in either source or binary form) with the major components (compiler, kernel, and so on) of the
operating system on which the executable runs, unless that component itself accompanies the
executable.
It may happen that this requirement contradicts the license restrictions of other proprietary li-
braries that do not normally accompany the operating system. Such a contradiction means you
cannot use both them and the Library together in an executable that you distribute.
7. You may place library facilities that are a work based on the Library side-by-side in a single lib-
rary together with other library facilities not covered by this License, and distribute such a com-
bined library, provided that the separate distribution of the work based on the Library and of the
other library facilities is otherwise permitted, and provided that you do these two things:
a) Accompany the combined library with a copy of the same work based on the Library, uncom-
bined with any other library facilities. This must be distributed under the terms of the Sections
above.
b) Give prominent notice with the combined library of the fact that part of it is a work based on the
Library, and explaining where to find the accompanying uncombined form of the same work.
8. You may not copy, modify, sublicense, link with, or distribute the Library except as expressly
provided under this License. Any attempt otherwise to copy, modify, sublicense, link with, or dis-
tribute the Library is void, and will automatically terminate your rights under this License. Howe-
ver, parties who have received copies, or rights, from you under this License will not have their li-
censes terminated so long as such parties remain in full compliance.
9. You are not required to accept this License, since you have not signed it. However, nothing
else grants you permission to modify or distribute the Library or its derivative works. These ac-
tions are prohibited by law if you do not accept this License. Therefore, by modifying or distribu-
ting the Library (or any work based on the Library), you indicate your acceptance of this Licen-
se to do so, and all its terms and conditions for copying, distributing or modifying the Library or
works based on it.
90245 50049999 DE EN FR NL content RC1.indb 21690245 50049999 DE EN FR NL content RC1.indb 216 13.04.2015 16:24:4313.04.2015 16:24:43

217 / 218
GNU General Public Licence
DE
FR
NL
GPL
EN
10. Each time you redistribute the Library (or any work based on the Library), the recipient auto-
matically receives a license from the original licensor to copy, distribute, link with or modify the
Library subject to these terms and conditions. You may not impose any further restrictions on
the recipients‘ exercise of the rights granted herein. You are not responsible for enforcing com-
pliance by third parties with this License.
11. If, as a consequence of a court judgment or allegation of patent infringement or for any other
reason (not limited to patent issues), conditions are imposed on you (whether by court order,
agreement or otherwise) that contradict the conditions of this License, they do not excuse you
from the conditions of this License. If you cannot distribute so as to satisfy simultaneously your
obligations under this License and any other pertinent obligations, then as a consequence you
may not distribute the Library at all. For example, if a patent license would not permit royalty-
free redistribution of the Library by all those who receive copies directly or indirectly through
you, then the only way you could satisfy both it and this License would be to refrain entirely
from distribution of the Library.
If any portion of this section is held invalid or unenforceable under any particular circumstance,
the balance of the section is intended to apply, and the section as a whole is intended to apply
in other circumstances.
It is not the purpose of this section to induce you to infringe any patents or other property right
claims or to contest validity of any such claims; this section has the sole purpose of protecting
the integrity of the free software distribution system which is implemented by public license
practices. Many people have made generous contributions to the wide range of software distri-
buted through that system in reliance on consistent application of that system; it is up to the au-
thor/donor to decide if he or she is willing to distribute software through any other system and a
licensee cannot impose that choice.
This section is intended to make thoroughly clear what is believed to be a consequence of the
rest of this License.
12. If the distribution and/or use of the Library is restricted in certain countries either by patents
or by copyrighted interfaces, the original copyright holder who places the Library under this Li-
cense may add an explicit geographical distribution limitation excluding those countries, so that
distribution is permitted only in or among countries not thus excluded. In such case, this License
incorporates the limitation as if written in the body of this License.
13. The Free Software Foundation may publish revised and/or new versions of the Lesser General
Public License from time to time. Such new versions will be similar in spirit to the present versi-
on, but may differ in detail to address new problems or concerns.
Each version is given a distinguishing version number. If the Library specifies a version number
of this License which applies to it and „any later version“, you have the option of following the
terms and conditions either of that version or of any later version published by the Free Software
Foundation. If the Library does not specify a license version number, you may choose any versi-
on ever published by the Free Software Foundation.
14. If you wish to incorporate parts of the Library into other free programs whose distribution
conditions are incompatible with these, write to the author to ask for permission. For software
which is copyrighted by the Free Software Foundation, write to the Free Software Foundation;
we sometimes make exceptions for this. Our decision will be guided by the two goals of preser-
ving the free status of all derivatives of our free software and of promoting the sharing and reu-
se of software generally.
90245 50049999 DE EN FR NL content RC1.indb 21790245 50049999 DE EN FR NL content RC1.indb 217 13.04.2015 16:24:4313.04.2015 16:24:43

218 / 218
GNU General Public Licence
NO WARRANTY
15. BECAUSE THE LIBRARY IS LICENSED FREE OF CHARGE, THERE IS NO WARRANTY FOR THE LI-
BRARY, TO THE EXTENT PERMITTED BY APPLICABLE LAW. EXCEPT WHEN OTHERWISE STATED IN
WRITING THE COPYRIGHT HOLDERS AND/OR OTHER PARTIES PROVIDE THE LIBRARY „AS IS“ WI-
THOUT WARRANTY OF ANY KIND, EITHER EXPRESSED OR IMPLIED, INCLUDING, BUT NOT LIMI-
TED TO, THE IMPLIED WARRANTIES OF MERCHANTABILITY AND FITNESS FOR A PARTICULAR PUR-
POSE. THE ENTIRE RISK AS TO THE QUALITY AND PERFORMANCE OF THE LIBRARY IS WITH YOU.
SHOULD THE LIBRARY PROVE DEFECTIVE, YOU ASSUME THE COST OF ALL NECESSARY SERVI-
CING, REPAIR OR CORRECTION.
16. IN NO EVENT UNLESS REQUIRED BY APPLICABLE LAW OR AGREED TO IN WRITING WILL ANY
COPYRIGHT HOLDER, OR ANY OTHER PARTY WHO MAY MODIFY AND/OR REDISTRIBUTE THE LIB-
RARY AS PERMITTED ABOVE, BE LIABLE TO YOU FOR DAMAGES, INCLUDING ANY GENERAL, SPE-
CIAL, INCIDENTAL OR CONSEQUENTIAL DAMAGES ARISING OUT OF THE USE OR INABILITY TO
USE THE LIBRARY (INCLUDING BUT NOT LIMITED TO LOSS OF DATA OR DATA BEING RENDERED
INACCURATE OR LOSSES SUSTAINED BY YOU OR THIRD PARTIES OR A FAILURE OF THE LIBRARY
TO OPERATE WITH ANY OTHER SOFTWARE), EVEN IF SUCH HOLDER OR OTHER PARTY HAS BEEN
ADVISED OF THE POSSIBILITY OF SUCH DAMAGES.
END OF TERMS AND CONDITIONS
x
90245 50049999 DE EN FR NL content RC1.indb 21890245 50049999 DE EN FR NL content RC1.indb 218 13.04.2015 16:24:4313.04.2015 16:24:43

Über den Link
http://www.medion.com/lifecloud/
können Sie die erforderlichen Apps für Ihr
Apple/Android Endgerät herunterladen.
MSN 2005 9952
Netzwerkfestplatte/NAS
mit zwei integrierten Festplatten 2 x 6 TB (2 x 6000 GB)
MEDION
®
LifeCloud
®
X88300 (MD 90245)
Bedienungsanleitung
Handleiding
Mode d‘emploi
Instruction Manual
Network hard drive/NAS
Disque dur résau/NAS
Netwerkschijf/NAS
Via the link
http://www.medion.com/lifecloud/ you
can download the required apps for your
Apple/Android device.
Vous pouvez télécharger les applications
nécessaires pour votre terminal Apple/
Android sous le lien
http://www.medion.com/lifecloud/.
Via de koppeling
http://www.medion.com/lifecloud/ kunt
u de vereiste apps voor uw Apple/Andro-
id-eindapparaat downloaden.
90245 50049999 DE EN FR NL eCommerce Cover RC1.indd 190245 50049999 DE EN FR NL eCommerce Cover RC1.indd 1 10.04.2015 09:02:2210.04.2015 09:02:22
-
 1
1
-
 2
2
-
 3
3
-
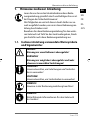 4
4
-
 5
5
-
 6
6
-
 7
7
-
 8
8
-
 9
9
-
 10
10
-
 11
11
-
 12
12
-
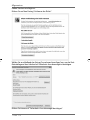 13
13
-
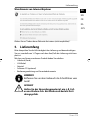 14
14
-
 15
15
-
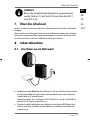 16
16
-
 17
17
-
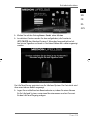 18
18
-
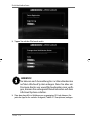 19
19
-
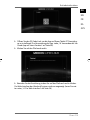 20
20
-
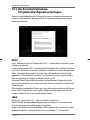 21
21
-
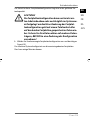 22
22
-
 23
23
-
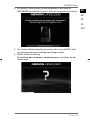 24
24
-
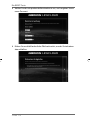 25
25
-
 26
26
-
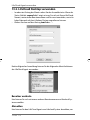 27
27
-
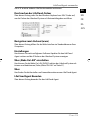 28
28
-
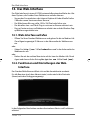 29
29
-
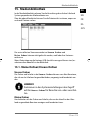 30
30
-
 31
31
-
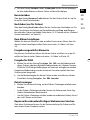 32
32
-
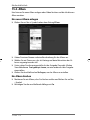 33
33
-
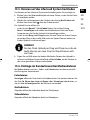 34
34
-
 35
35
-
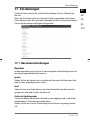 36
36
-
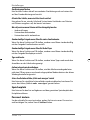 37
37
-
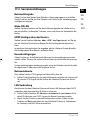 38
38
-
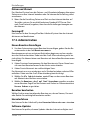 39
39
-
 40
40
-
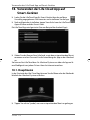 41
41
-
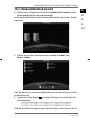 42
42
-
 43
43
-
 44
44
-
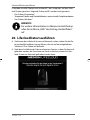 45
45
-
 46
46
-
 47
47
-
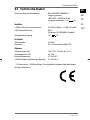 48
48
-
 49
49
-
 50
50
-
 51
51
-
 52
52
-
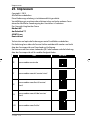 53
53
-
 54
54
-
 55
55
-
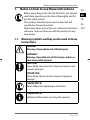 56
56
-
 57
57
-
 58
58
-
 59
59
-
 60
60
-
 61
61
-
 62
62
-
 63
63
-
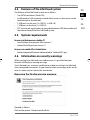 64
64
-
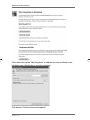 65
65
-
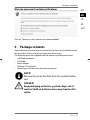 66
66
-
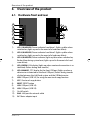 67
67
-
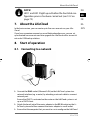 68
68
-
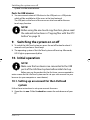 69
69
-
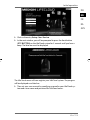 70
70
-
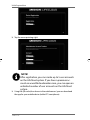 71
71
-
 72
72
-
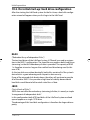 73
73
-
 74
74
-
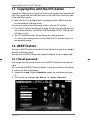 75
75
-
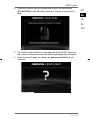 76
76
-
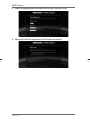 77
77
-
 78
78
-
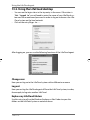 79
79
-
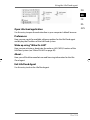 80
80
-
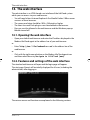 81
81
-
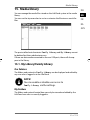 82
82
-
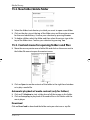 83
83
-
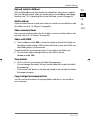 84
84
-
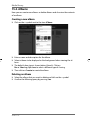 85
85
-
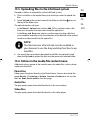 86
86
-
 87
87
-
 88
88
-
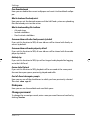 89
89
-
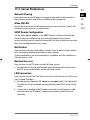 90
90
-
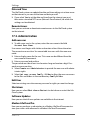 91
91
-
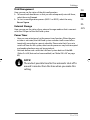 92
92
-
 93
93
-
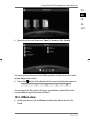 94
94
-
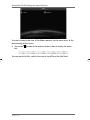 95
95
-
 96
96
-
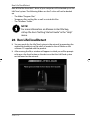 97
97
-
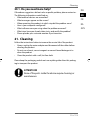 98
98
-
 99
99
-
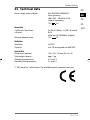 100
100
-
 101
101
-
 102
102
-
 103
103
-
 104
104
-
 105
105
-
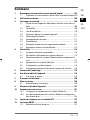 106
106
-
 107
107
-
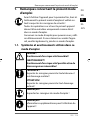 108
108
-
 109
109
-
 110
110
-
 111
111
-
 112
112
-
 113
113
-
 114
114
-
 115
115
-
 116
116
-
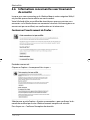 117
117
-
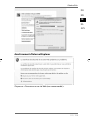 118
118
-
 119
119
-
 120
120
-
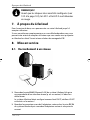 121
121
-
 122
122
-
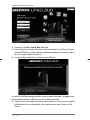 123
123
-
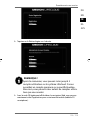 124
124
-
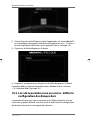 125
125
-
 126
126
-
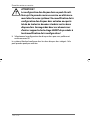 127
127
-
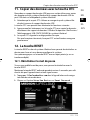 128
128
-
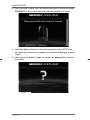 129
129
-
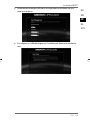 130
130
-
 131
131
-
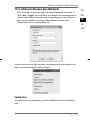 132
132
-
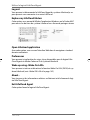 133
133
-
 134
134
-
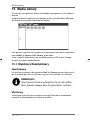 135
135
-
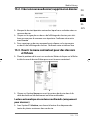 136
136
-
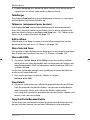 137
137
-
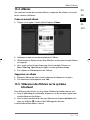 138
138
-
 139
139
-
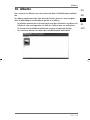 140
140
-
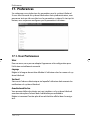 141
141
-
 142
142
-
 143
143
-
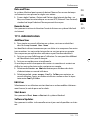 144
144
-
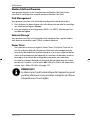 145
145
-
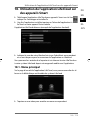 146
146
-
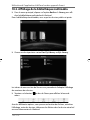 147
147
-
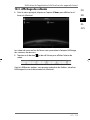 148
148
-
 149
149
-
 150
150
-
 151
151
-
 152
152
-
 153
153
-
 154
154
-
 155
155
-
 156
156
-
 157
157
-
 158
158
-
 159
159
-
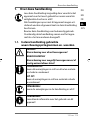 160
160
-
 161
161
-
 162
162
-
 163
163
-
 164
164
-
 165
165
-
 166
166
-
 167
167
-
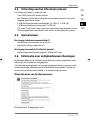 168
168
-
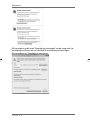 169
169
-
 170
170
-
 171
171
-
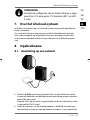 172
172
-
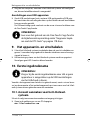 173
173
-
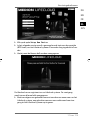 174
174
-
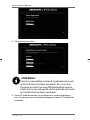 175
175
-
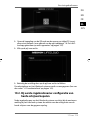 176
176
-
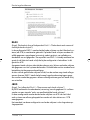 177
177
-
 178
178
-
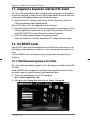 179
179
-
 180
180
-
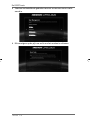 181
181
-
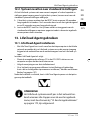 182
182
-
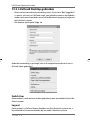 183
183
-
 184
184
-
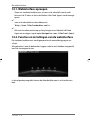 185
185
-
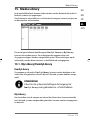 186
186
-
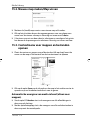 187
187
-
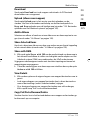 188
188
-
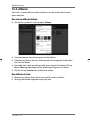 189
189
-
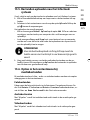 190
190
-
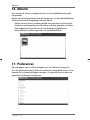 191
191
-
 192
192
-
 193
193
-
 194
194
-
 195
195
-
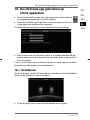 196
196
-
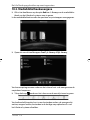 197
197
-
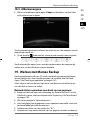 198
198
-
 199
199
-
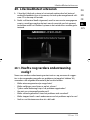 200
200
-
 201
201
-
 202
202
-
 203
203
-
 204
204
-
 205
205
-
 206
206
-
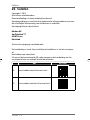 207
207
-
 208
208
-
 209
209
-
 210
210
-
 211
211
-
 212
212
-
 213
213
-
 214
214
-
 215
215
-
 216
216
-
 217
217
-
 218
218
-
 219
219
-
 220
220


in andere talen
- English: Medion LifeCloud X88300 User manual
- français: Medion LifeCloud X88300 Manuel utilisateur
- Deutsch: Medion LifeCloud X88300 Benutzerhandbuch
Gerelateerde papieren
Andere documenten
-
Conrad N150 Operating Instructions Manual
-
Renkforce RF-3570312 de handleiding
-
PARYA Y-Disk Handleiding
-
Philips LFH 9160 Handleiding
-
-
 Konic CMP-PCTOTV10 Handleiding
-
AmazonBasics U3-3UE04-Grey Handleiding
-
Abus TVVR35011 Handleiding
-
Samsung BD-C8200 Handleiding
-
Amazon Basics B07V3G97KZ Handleiding
