Lenco DF-241 de handleiding
- Categorie
- Digitale fotolijsten
- Type
- de handleiding

DIGITAL PHOTO FRAME
DF-241

Table of Contents
Table of Contents.......................................................................1
ENGLISH...........................................................................2-11
DEUTSCH..........................................................................12-21
Español..............................................................................22-31
NEDERLANDS....................................................................32-41
FRANCAIS..........................................................................42-51
1

SYSTEM REQUIREMENTS:
INSTALLATION PROCEDURE:
Microsoft OS UserManual ENGLISH
DIGITAL PHOTO FRAME
Windows 98 / 2000 / ME / XP / Vista
Read First
Quick Installation Guide
** Important: Install application software before connect device to PC. **
2
1. Disconnect device USB cable from PC if it is connected.
2. Insert CD and follow the on-screen instruction to install “Photo
Viewer”.
3. After the application software has been successfully installed,
you could connect device to PC with the provided USB cable.
4. Windows OS will set up hardware driver automatically.
5. Launch “Photo Viewer” and enjoy.
NOTE: The software can not initialize with the unit if plugged
in while running in automatic slide show mode.
For Windows 98 SE user, you need to install the driver
software in the CD provided.

Important Safety Instructions
Introduction
This Digital Photo Frame is a stand-alone device that is designed to
transfer and store images from a PC and then display the images. Using
the application software supplied with this device, you can organize,edit,
enhance and download the image in your PC to this device using USB.
WARNING:
This device will be fully charged after two hours charging through USB
cable.
Do not leave the device connected to the USB for longer than 12
consecutive hours otherwise damage and overheating of the device
may occur.
Do not expose this device to water or moisture.
Do not remove cover. No user serviceable parts inside. Refer servicing
to qualified personnel.
The device should be away from sources of high heat such as Radiators
or stoves.
The device should be connected to a power supplyonly of the type
described in the operating instructions or as markedon the unit.
Care should be taken so that objects are not placed on, nor liquids
spilled on or inside the device.
The user should not attempt to service the device beyond those means
described in these operating instructions. All other servicing should be
referred to qualified service personnel. .
3

4
Placing the Photo Viewer
----------------- ---------------------------------------------------
----------------- ---------------------------------------------------
----------------- ---------------------------------------------------
1. Press down the locking tab and
pull away the main unit from the
frame to separate the main unit.
2. Press down the left end of the rod,
and grab the other end to remove
the rod from the main unit.
3. Replace the frame by inserting
the two tabs on the main unit to
the two holes at the top of the
frame.
Bring the main unit and frame
together, then press at the
bottom until it clicks in place.
4. Screw in the rod to one of the two
screw holes on the back of the
main unit.

IMPORTANT: You must install the software to your computer before
connecting the device to your computer for the first time.
1. Insert the CD-ROM and run the file Photo Viewer SETUP;
follow the onscreen instructions.
2. The application Photo Viewer will be installed on your computerand a
shortcut to the application will appear on your desktop.
DO NOT LAUNCH THE SOFTWARE YET.
3. After the software is installed, connect the device to the computer with
the USB cable supplied. The hardware drivers will be installed
automatically. Follow the on-screen instructions and accept the
installation screens that appear.
4. After hardware installation is complete, launch the PhotoViewer
application from the shortcut on your PC desktop.
NOTE: If you are unable to launch the software or connect to your device,
go to the Troubleshooting of this manual for more information.
Installing the Software / Hardware
The internal battery of the device may be charged using the USB cable
when connected to a powered USB port(such as USB port on your
computer) or hub. At full charge, the device can provide up to 3 hours
of run time.
5
Charging the Battery

Attention: You must connect the Photo Viewer to the PC before
launching the software.
USB on computer
Mini B on Photo Album
USB Cable
6
Downloading Photos from Your Computer to Photo Frame
1. Insert one end of the USB Cable into USB on your computer's USB port
and the other end into the Photo Viewer.
2. " Connect?" appears on the Photo Viewer, press MODE to confirm, and
"Download" appears, indicating the connection is complete, If no key is
pressed during 1 minute, the Photo Frame will enter battery charging
mode. You need to disconnect the USB cable and connect it again.
3. Launch the software by double clicking the Photo Viewer shortcut on your
computer's desktop.
Save selected photo on Collection Panel to your computer.
Delete selected photos.
Click to download photos on Collection Panel to
your Photo Viewer

7
Click to rotate your photos
Click to post photos in Preview Area to Collection Panel.
- Number of photos on Collection Panel.
- Maximum number of photos can be stored in the Photo Frame.
- Preview Area.
- Collection Panel.

8
4. Browse your computer for photo(s) you want to download. The selected
photo is displayed in the Preview Area.
Note: The Photo Frame reads JPG/ BMP/ TIF/ GIF/ PNG images.
5. If the photo is too big, a red box appears on the photo, and you can click
the red box and mover around the box to crop the photo.
You can also rotate the photo by clicking" ".
6. Click to move the photo displayed in the Preview Area to the
Collection Panel.
7. If you want to delete the photo on Collection Panel, select the photo and
press to delete. If you want to save the photo on Collection Panel
to your computer, select he photo and press to save.
8. Click to download photos on Collection Panel onto your
Photo Frame.
9. Wait for download to complete, then close the software and remove the
Photo Frame from your computer.
NOTE: If you want to download again, you need to re-start the Photo
Viewer software.

9
1
4
5
3
2
1. Monitor
2. /MODE
3. Previous Image
Delete images
4. Next Image
Delete all Images.
5. Mini USB Connection
Using the Function Keys
Electromagnetic Emissions Statement

10
Press and hold /MODE for about 4 seconds to turn the unit on.
Press and hold again /MODE for about 4 seconds to turn the unit off.
Using the Photo Viewer
Note: You need to turn off the slideshow before you can turn off the
Photo Viewer.
Viewing Photos
1. Turn the Photo Frame on by pressing and holding down the /MODE for
around 4 seconds.
2. Press to browse through your photos. Press to return to a previous photo.
Using Slideshow ( Automatic Display of Photos)
With the unit on, press /MODE. The Photo Frame scrolls through all
photos automatically.
Press /MODE again to turn off the slideshow feature.
1. In browse mode, use and to locate the photo you wantto delete.
2. Press and hold for 3 seconds. Delete appears on the display.
3. Press to delete the photo, or press to cancel the operation.
1. In browse mode, use and to locate the photo you want to delete.
2. Press and hold for 3 seconds. Delete All appears on the display.
3. Press to delete the photo, or press to cancel the operation.
Deleting a Single Photo
Deleting All Photos

11
If the device displays error message “Device not connected” during
installation, follow these steps to resolve:
A. For Software issues (Photo Viewer software can not launch)
1. Re-insert and launch the installation CD and choose “Remove” or
“Uninstall” from the Installer Menu.
2. Disconnect the USB cable and device from the computer and restart.
3. After computer has restarted, launch the installer again and reinstall
the software.
Note: DO NOT connect the USB cable until after the software is
installed.
B. For Hardware installation issues (Device not recognized)
1. With the Viewer connected to the computer via USB go to the Start
Menu / Control Panels / Add Hardware.
2. When the Dialog box comes up, click the option that says “Yes, I have
already connectecd the software”.
3. In the list of Devices-Find “Photo Viewer” click NEXT and this will
give the status of the device. If a warning icon appears next to the
Photo Viewer then double click the icon and select the option to
“Reinstall the software”.
Troubleshooting for Installation

SOFTWAREINSTALLATION:
Microsoft OS UserManual DEUTSCH
DIGITALER BILDERRAHMEN
Windows 98 / 2000 / ME / XP/ Vista
** Wichtig: Installieren Sie die Software, bevor Sie das Gerät an einen
PC anschließen. **
12
1. Trennen Sie das Gerät vom USB-Kabel ab, wenn es an einen
PC angeschlossen ist.
2. Legen Sie die CD ein und befolgen Sie die
Bildschirmanweisungen zur Installation von “Photo Album”.
3. Nach erfolgreicher Installation der Software können Sie das
Gerät mithilfe des mitgelieferten USB-Kabels an den PC
anschließen.
4. Windows richtet dann die Hardware-Treiber automatisch ein.
5. Starten Sie das Programm und Sie können mit der Benutzung
anfangen.
HINWEIS: Die Software kann nicht initialisiert werden, wenn das Gerät
im Diashowmodus ist.
Windows 98 SE Benutzer, installieren Sie der Treiber Software,
die mitgelieferte CD-ROM enth-lt diese software
Bitte lesen!
Kurzinstallationsanleitung
SYSTEMANFORDERUNGEN

Wichtige Sicherheitshinweise
Einleitung
Dieses digitale Fotoalbum ist ein eigenständiges Gerät, auf das Sie
Bilder vom PC kopieren und dann damit betrachten können. Benutzen
Sie die mitgelieferte Software zum Verwalten, Bearbeiten, Verbessern
und Kopieren der Bilder vom PC auf das Gerät. Dieses Fotoalbum kann
tausende von Fotos speichern
WARNUNG:
Dieses Gerät ist nach zwei Stunden Ladezeit vollständig aufgeladen.
Achten Sie bitte darauf, dass es nicht länger als 12 Stunden am USB-
Port Ihres Computers angeschlossen bleibt, um zu vermeiden, dass
es sich überhitzt und beschädigt wird.
Setzen Sie dieses Gerät niemals Wasser oder Feuchtigkeit aus.
Das Gerät sollte in ausreichender Entfernung zu Hitzequellen wie
z. B. Heizkörpern bzw. Öfen aufgestellt werden.
Das Gerät sollte nur mit einem dafür vorgesehenen Netzteil betrieben
werden.
Achten Sie darauf, dass keine anderen Gegenstände auf das Gerät
gestellt werden und dass keine Flüssigkeiten auf bzw. in das Gerät
gelangen.
Der Benutzer sollte keine Versuche anstellen das Gerät eigenhändig
zu warten, es sei denn es wurde entsprechend in der
Bedienungsanleitung beschrieben. Wenden Sie sich bei weiterem
Wartungsbedarf immer an ausgebildetes Wartungspersonal.
13

14
Aufstellung
----------------- ---------------------------------------------------
----------------- ---------------------------------------------------
----------------- ---------------------------------------------------
1. Drücken Sie die Sperrlasche nach
unten und ziehen Sie das Gerät aus
dem Rahmen heraus.
2. Drücken Sie das linke Ende der
Stange nach unten und ziehen
Sie die sie am anderen Ende
heraus.
3. Setzen Sie den Rahmen wieder auf das Gerät,
indem Sie die beiden Laschen oben in den
Rahmen schieben.Setzen Sie
das Gerät und den Rahmen
zusammen und drücken Sie
an der Unterseite, bis der
Rahmen einrastet.
4. Schrauben Sie die Stange in eine
der beiden Gewinde an der
Rückseite des Geräts.
Der Fotorahmen kann entweder im Hochformat (vertikal) oder im
Querformat (horizontal) aufgestellt werden.

WICHTIG: Sie müssen die Software auf Ihrem Computer installieren,
bevor Sie das Gerät das erste Mal am Computer anschließen.
1. Legen Sie die CD-ROM ein und starten Sie das Programm SETUP.
EXE. Folgen Sie dann einfach den Bildschirmanweisungen.
2. Die Anwendung “Photo Viewer” wird dann auf Ihrem Computer
installiert und ein Shortcut erscheint auf Ihrem Desktop.
STARTEN SIE DIE SOFTWARE NOCH NICHT
3. Nach der Softwareinstallation können Sie das Gerät mit dem
mitgelieferten USB-Kabel am Computer anschließen. Die
Hardwaretreiber werden dann automatisch installiert. Folgen Sie den
Bildschirmanweisungen und bestätigen Sie die folgenden
Installationsdialoge.
4. Nach der Hardwareinstallation können Sie das Programm “Photo
Viewer” über den Shortcut auf Ihrem Desktop starten.
HINWEIS: Wenn Sie die Software nicht starten oder das Fotoalbum
nicht anschließen können, gehen Sie bitte zum Abschnitt“
Fehlerbehebung” am Ende dieser Anleitung.
Software- und Hardwareinstallation
Der eingebaute Akku des Geräts kann mithilfe der USB-Kabels
aufgeladen werden, wenn das Gerät an einen Strom führenden USB-
Port (z. B. der USB-Port Ihres Computers oder ein USB-Hub)
angeschlossen wird. Voll aufgeladen kann das Gerät bis zu 3 Stunden
ohne Unterbrechung benutzt werden.
15
Aufladen des eingebauten Akkus

Achtung: Sie müssen den Fotobetrachter an den PC anschließen,
bevor Sie die Software starten.
USB-Port am Computer
Min i-USB-Port am Fotoalbum
USB Cable
16
Kopieren von Fotos von Ihrem Computer auf den Fotorahmen
1. Verbinden Sie das eine Ende des USB-Kabels mit dem USB-
Anschluss Ihres Computers und das andere Ende mit dem
Fotobetrachter.
2. Auf dem Bildschirm des Fotobetrachters erscheint “Connect?”.
Betätigen Sie dann die MODE-Taste zur Bestätigung. Auf dem
Bildschirm erscheint „Download“ und der Verbindungsaufbau ist
abgeschlossen. Wenn dann innerhalb von 1 Minuten keine Taste
betätigt wird, geht der Fotorahmen in den Auflademodus über. Sie
müssen das Gerät dann vom Computer trennen und erneut
anschließen.
Speichern Sie die markierten Fotos im Auswahlfenster auf Ihrem
Computer.
Löschen Sie die markierten Fotos.
Klicken Sie die Fotos im Auswahlfenster zum Kopieren
auf den Fotobetrachter.
3. Starten Sie die Software, indem Sie auf den “Photo View”-Shortcut
auf Ihrem Desktop doppelklicken.

17
Klicken Sie hier zum Drehen Ihrer Fotos.
Klicken Sie hier, um die Fotos vom Vorschaubereich zum
Auswahlfenster zu kopieren.
- Anzahl der Fotos im Auswahlfenster
- Maximale Anzahl der Fotos, die auf dem Fotorahmen
gespeichert werden können.
- Vorschaubereich
- Auswahlfenster

18
4. Suchen Sie nach Fotos auf Ihrem Computer, die Sie auf dem
Fotorahmen kopieren wollen.
Die markierten Fotos werden im Vorschaubereich abgebildet.
Hinweis: Das Gerät unterstützt JPG-, BMP-, TIF-, FIF- und PNG-
Bilder.
5. Wenn die Fotos zu groß sind, erscheint ein roter Kasten auf dem
Fotos. Klicken Sie auf den roten Kasten, um das Foto zu
verkleinern.
Sie können das Foto auf drehen, indem Sie auf “ ”klicken.
6. Klicken Sie auf , um das Foto vom Vorschaubereich ins
Auswahlfenster zu verschieben.
7. Wenn Sie das Foto vom Auswahlfenster entfernen wollen,
markieren Sie das Foto und betätigen Sie ,um es zu
löschen. Wenn Sie das Foto im Auswahlfenster auf Ihrem
Computer speichern wollen, markieren Sie das Foto und betätigen
Sie ,um es zu speichern.
8. Klicken Sie auf , um die Fotos im Auswahlfenster auf
den Fotorahmen zu kopieren.
9. Warten Sie bis der Kopiervorgang abgeschlossen ist und
verlassen Sie die Software. Trennen Sie dann den Fotorahmen von
Ihrem Computer ab.
HINWEIS: Wenn Sie weitere Fotos kopieren möchten, müssen Sie
die Fotobetrachter-Software erneut starten.

1
4
5
3
2
1. Monitor
2. /MODE
3. Voriges Bild
Bilder löschen
4. Nächstes Bild
Alle Bilder löschen
5. Mini-USB-Anschluss
Benutzung der Funktionstasten
(1) Das Gerät darf keine schädigenden Störstrahlungen verursachen.
(2) Das Gerät muss alle eingehenden Störstrahlungen tolerieren, einschließlich solcher Störstrahlu
ngen, durch die der Betrieb in ungewollter Weise beeinträchtigt werden könnte.
Dieses Gerät erfüllt die Anforderungen des Paragrafen 15 der FCC-Verordnung und die
Anforderungen des CE-Standards. Zum Betrieb des Geräts müssen folgende Bedingungen erfüllt sein:
THIS CLASS B DIGITAL APPARATUS COMPLIES WITH CANADIAN ICES-003. / CET APPAREIL
NUMÉRIQUE DE LA CLASSE B EST CONFORME À LA NORME NMB -003 DU CANADA.
Erklärung zu elektromagnetischer Strahlung
19

20
Halten Sie die /MODE-Taste für 4 Sekunden gedrückt, um das Gerät
einzuschalten. Um das Gerät wieder auszuschalten, halten Sie bitte die
/MODE-Taste erneut für 4 Sekunden gedrückt.
Ein-/Ausschalten des Fotorahmens
Hinweis: Bevor Sie das Gerät ausschalten können, müssen Sie die
Diashow stoppen.
Bilder ansehen
1. Schalten Sie den Fotorahmen an, indem Sie die /MODE-Taste für 4
Sekunden gedrückt halten.
2. Betätigen Sie die Taste zur Bildauswahl. Betätigen Sie diese
Taste, um zum vorigen Bild zurückzukehren.
Benutzung der Diashowfunktion (Automatischer Bildwechsel)
Wenn Sie das Gerät eingeschaltet haben, betätigen Sie bitte die /
MODE-Taste. Der Fotorahmen wechseln dann automatisch zum jeweils
nächsten Bild.
Betätigen Sie die /MODE-Taste erneut, um die Diashowfunktion
wieder auszuschalten.
1. Benutzen Sie die Tasten und zur Auswahl des Fotos, dass Sie
löschen möchten.
2. Halten Sie die Taste für 3 Sekunden gedrückt. “Delete”erscheint
in der Anzeige.
3. Betätigen Sie die Taste , um das Foto zu löschen oder betätigen
Sie zum Abbrechen des Vorgangs.
1. Benutzen Sie die Tasten und zur Auswahl eines Fotos, dass
Sie löschen möchten.
2. Halten Sie die für 3 Sekunden gedrückt. “Delete All”erscheint in
der Anzeige.
3. Betätigen Sie , um das Foto zu löschen oder betätigen Sie zum
Abbrechen des Vorgangs.
Löschen einzelner Fotos
Löschen aller Fotos

IWenn während der Installation die Fehlermeldung „Device not
connected“ erscheint, gehen Sie bitte auf folgendende Weise vor,
um das Problem zu beheben:
Fehlerbehebung
21
A.Softwareproblem (die Photo Viewer Software kann nicht gestartet werden)
1. Legen Sie die Installations-CD erneut ein und wählen Sie im
Installationsmenü „Remove“ oder „Uninstall“.
2. Trennen Sie das USB-Kabel und das Gerät vom Computer und führen Sie
einen Neustart aus.
3. Nach dem Neustart des Computers starten Sie den Installationsdialog und
installieren Sie die Software erneut.
HINWEIS: Schließen Sie das USB-Kabel NICHT an den Computer an,
bevor Sie die Software installiert haben.
B.Hardwareproblem (Gerät wird nicht erkannt)
1. Schließen Sie das Fotoalbum über das USB-Kabel an den Computer und
gehen Sie auf Start -> Systemkonfiguration -> Hardware hinzufügen.
2. Sobald ein Dialogfenster erscheint, klicken Sie auf die Option „Ja, die
Hardware ist bereits angeschlossen.“.
3. Klicken Sie in der Geräteliste auf „Photo Viewer“ und dann auf WEITER.
Danach erscheint der Status des Geräts. Wenn ein Warnsymbol neben
dem Fotoalbum erscheint, klicken Sie auf das Symbol und wählen Sie
“Treiber neu installieren”.

REQUISITOS DEL SISTEMA
PROCEDIMIENTO DE INSTALACIÓN:
Manual de Usuario Microsoft
PORTARETRATO DIGITAL
1.Windows 98/2000/ME/XP/VISTA
Lea Primero
22
**
**
Importante: instale el software de aplicación antes de conectar
el dispositivo al PC.
1. Desconecte el cable USB del PC si está conectado.
2. Inserte el CD y siga las instrucciones en la pantalla para instalar
“PhotoAlbum”.
3. Después de instalar el software de aplicación, puede conectar el
dispositivo al PC con el cable USB proporcionado.
4. Windows OS instalará el driver o controlador del hardware
automáticamente.
5. Ejecute “Photo Viewer” y disfrute.
NOTA: El software no puede iniciarse con la unidad si está
conectado mientras funciona en modo de presentación
automática.
Español
Para usuario de Windows 98 SE, necesita instalar el programa
facilitado en el CD
Guía rápida de instalación

Instrucciones importantes de seguridad
INTRODUCCIÓN
Este álbum de fotos digitales es un dispositivo que ha sido diseñado
para transferir y almacenar imágenes desde un PC y luego poder
visualizar las imágenes. Usando el software de la aplicación
proporcionado con este dispositivo, puede organizar, editar,
mejorar y descargar sus imágenes en su PC hasta el dispositivo
usando el USB. Este Álbum de Fotos almacena miles de fotos.
ADVERTENCIA
23
Este dispositivo será cargado completamente después de tres horas.
No deje este dispositivo conectado al USB durante más de 12 horas
consecutivas de lo contrario puede dañar y sobrecalentar el
dispositivo.
No exponga el dispositivo al agua o humedad.
El dispositivo tiene que estar situado lejos de fuentes de calor tales
como radiadores o estufas.
El dispositivo debe estar conectado a un tipo de toma de corriente
que se describe en las instrucciones de funcionamiento o como está
señalado en la unidad.
Tenga cuidado con su dispositivo, no coloque ningún objeto en la
parte superior ni ningún líquido ya que podría dañar el dispositivo.
El usuario no debe intentar reparar el aparato más allá de los medios
descritos en este manual de instrucciones.
Refiérase a su personal de servicio cualificado.

24
Colocar el Álbum de Fotos
----------------- ---------------------------------------------------
----------------- ---------------------------------------------------
----------------- ---------------------------------------------------
1. Pulse la lengüeta de bloqueo y tire de la
unidad principal del marco para separar
la unidad principal.
2. Pulse la extremidad izquierda de la barra
y agarre la otra extremidad para retirar la
barra de la unidad principal.
3. Cambie el marco insertando las dos
lengüetas en la unidad principal A los
dos agujeros del marco.
Junte la unidad principal y el
marco, luego pulse la parte
inferior hasta que se coloque
en su sitio.
4. Atornille la barra en uno de los agujeros
en la parta trasera de la unidad.
El marco de fotos puede ser colocado verticalmente o (retrato) o de
horizontalmente (paisajes).

IMPORTANTE: tiene que instalar el software en su ordenador antes
de conectar el dispositivo a su ordenador por la primera vez.
1. Inserte el CD-ROM y ejecute el archivo SETUP.EXE, siga las
instrucciones en la pantalla.
2. La aplicación Photo Viewer será instalado en su ordenador y
aparecerá un atajo a la aplicación en su escritorio.
NO EJECUTE EL SOFTWARE TODAVÍA.
3. Cuando haya instalado el software, conecte el dispositivo a su
ordenador con el cable USB proporcionado. Los drivers o
controladores del hardware serán instalados automáticamente.
Siga las instrucciones en la pantalla y acepte las pantallas de
instalación que aparecen.
4. Después de instalar el hardware, ejecute la aplicación Photo Viewer
desde el atajo en su escritorio.
NOTA: si no puede ejecutar el software o conectarse a Photo Album,
vaya a la guía de problemas y soluciones de este manual para
obtener más información.
INSTALACIÓN DEL SOFTWARE /HARDWARE
La batería interna del dispositivo puede ser cargada usando el cable
USB cuando está conectado a un puerto USB (como un puerto USB
en su ordenador) o concentrador. En plena carga, el dispositivo
puede proporcionar más de 3 horas de funcionamiento.
25
CARGAR LA BATERÍA INCORPORADA

Attención: debe conectar su Photo Viewer a un PC antes de ejecutar
el software.
USB en su ordenador
USB Cable
26
Escargar fotos desde su pc al Álbum de fotos digitales
1. Inserte una extremidad del cable USB en el puerto USB de su
ordenador y la otra extremidad a Photo Viewer.
2. " Connected" (conectado) aparecerá en el Photo Viewer, pulse
MODE para confirmar, Y aparecerá " Download", (descargar)
indicando que la conexión se ha completado. Si no pulsa ninguna
tecla durante 5 minutos, el Marco de Fotos entrará en modo de
cargar de batería. Necesita desconectar el cable USB y conectarlo
de nuevo.
3. Ejecute el software haciendo doble clic en el atajo de Photo Viewer
en el escritorio de su ordenador.
Guarde la foto seleccionada en panel de colección en su
ordenador.
Elimine las fotos seleccionadas.
Haga clic para descargar fotos en su panel de colección
a su Photo Viewer.
Min i B on Album de Fotos

27
Haga clic para girar sus fotos
Haga clic para mostrar las fotos en un Área Previa a su Panel de
Colección.
-
-
Número de fotos en Panel de Colección.
Número máximo de fotos que pueden ser guardadas en su Marco
de Fotos.
- Área Previa.
- Panel de Colección.

28
4. Explore su ordenador para descargar la(s) foto(s) deseada(s).
Se visualiza la foto seleccionada en el Área Previa.
Nota: El marco de fotos lee imágenes JPG/ BMP/ TIF/ GIF/ PNG.
5. Si la foto es demasiado grande, aparecerá un cuadro rojo en la foto,
y puede hacer clic en el cuadro rojo y desplazarse alrededor del
cuadro rojo para trabajar con la foto. Puede girar la foto haciendo
clic en " ".
6. Haga clic en “ ”para mover la foto visualizada en el Área
Previa al Panel de Colección.
7. Si desea eliminar la foto del Panel de Colección, seleccione la foto
y pulse “ ” para eliminarla. Si desea guardar la foto en el Panel
de Colección de su ordenador, seleccione la foto y pulse “ ”
para guardarla.
8. Haga clic en “ ” para descargar las fotos en el Panel de
Colección a su Marco de Fotos.
9. Espere que la descarga se haya completado, luego cierre el
software y retire el Marco de Fotos de su ordenador.
NOTA: si desea descargar de nuevo, necesita volver a ejecutar el
software de Photo Viewer.

29
1.Pantalla
2. /MODE
3. Imagen anterior
Eliminar imágenes
4. Imagen siguiente
Eliminar todas las imágenes.
5.Conexión mini USB
Usar las teclas de función
1
4
5
3
2
DECLARACIÓN DE EMISIONES ELECTROMAGNÉTICAS
Este aparato cumple con la Parte 15 de las normas de la FCC y CE. El funcionamiento está sujeto a
las condiciones siguientes:
(1)Este aparato no debería causar interferencias dañinas.
(2)Este aparato debe aceptar cualquier interferencia recibida, incluida la interferencia que podría
causar el funcionamiento no deseado.
ESTE APARATO DIGITAL DE CLASE B CUMPLE CON LAS NORMAS CANADIENSES IC ES-003.
CET APPAREIL NUMEERIQUE DE LA CLASSE B SET CONFORME A LA NORME NMB-003 DU
CANADA.

30
Usar el Photo Viewer
Visualizar fotos
1. Encienda el Marco de Fotos pulsando y manteniendo pulsando
/MODE durante 4 segundos.
2. Pulse para explorar a través de las fotos. Pulse para volver a la foto
anterior.
Usar el Slideshow (Visualización automática de fotos)
Con la unidad encendida, pulse /MODE. El Marco de Fotos
explorará todas las fotos de forma automática.
Pulse /MODE de nuevo para apagar el slideshow o
visualización automática de fotos.
Eliminar una foto
Eliminar todas las fotos
Pulse y mantenga pulsando /MODE durante 4 segundos para
encender la unidad. Pulse y mantenga pulsando de nuevo /MODE
durante 4 segundos para apagar la unidad.
Nota: necesita apagar el slideshow o Visualización automática de fotos
presentación antes para apagar el Photo Viewer (Visualizador de
fotos).
1. En modo de exploración, use y para localizar la foto que desea
eliminar.
2. Pulse y mantenga pulsando durante 3 segundos. Delete
(Eliminar) aparecerá en la pantalla.
3. Pulse para eliminar la foto, o pulse para cancelar la operación.
1. En modo de exploración, use y para localizar las fotos que desea
eliminar.
2. Pulse y mantenga pulsando durante 3 segundos. Delete All (Eliminar
todas) aparecerá en la pantalla.
3. Pulse para eliminar la foto o pulse para cancelar la operación.

Si el dispositivo muestra el mensaje de error “Device not
connected” (dispositivo no conectado) durante la instalación,
siga los pasos siguientes:
A. Para problemas de Software (el software de Photo Viewer no puede
ejecutarse)
1. Vuelva a insertar y ejecutar el CD de instalación CD y elija “Remove”
(retirar) o “Uninstall” (desinstalar) del menú de instalación.
2. Desconecte el cable USB y el dispositivo de su ordenador y reinicie.
3. Después de reiniciar el ordenador, ejecute el instalador de nuevo y
vuelva a instalar el software.
Nota: NO CONECTE el cable USB hasta que no se haya instalado el
software.
B. Para problemas de instalación de Hardware (no reconoce el
dispositivo)
1. Con el Photo Viewer conectado a su ordenador a través de USB
vaya a Menú Inicio / Panel de control / Añadir Hardware.
2. Cuando aparezca el cuadro de diálogo, haga clic en la opción que
dice “Yes, I have already connectecd the software”. (Sí, ya he
conectado el software).
3. En la lista de los dispositivos, busque “Photo Viewer” haga clic en
NEXT y esto dará el estado del dispositivo. Si aparece un icono de
advertencia al lado de Photo Viewer haga doble clic en el icono y
seleccione la opción “Reinstall the software” (Volver a instalar el
software).
31
Guía de problemas y soluciones para la instalación

DIGITALE FOTOALBUM
INSTALLATIEPROCEDURE:
Microsoft OS Gebruiksaanwijzing
DIGITALE FOTOALBUM
Windows 98 / 2000 / ME / XP / Vista
32
Lees Eerst
Snelle Installatiegids
1. Ontkoppel de USB-kabel van de PC (indien aangesloten).
2. Plaats de CD in de CD-ROM en volg de instructies op het Scherm
om de “Photo Album” software te installeren.
3. Sluit na de installatie uw apparaat met de meegeleverde USB-kabel
aan op de PC.
4. Windows OS stelt automatisch het hardware stuurprogramma in.
5. Start “Photo Viewer” en geniet ervan.
** Belangrijk: Installeer applicatiesoftware vóór aansluiten op de PC. **
LET OP: De software kan niet initialiseren als het apparaat
aangesloten is en een fotopresentatie draait.
NEDERLANDS
Windows 98 SE gebruikers, installeer de driver
software in de meegeleverde CD-ROM.

Belangrijke Veiligheidsvoorschriften
Introductie
Dit Digitale Fotoalbum is een 'stand-alone' apparaat, dat plaatjes van
een PC kan opslaan, en vervolgens weergeven. Met de meegeleverde
software kunt u plaatjes bewerken, organiseren en mooier maken, en
via de USB downloaden naar dit apparaat. U kunt op dit Fotoalbum
duizenden foto's opslaan
WAARSCHUWING:
Het volledig opladen van dit apparaat duurt drie uur.
Laat het apparaat niet langer dan 12 uur aaneengesloten op de USB
aangesloten. Het apparaat kan oververhit, en beschadigd raken
Stel het apparaat niet bloot aan water en vochtigheid
Houd dit apparaat uit de buurt van warmtebronnen, zoals radiators
en fornuizen
Sluit dit apparaat alleen aan op een voedingsbron volgens het type
dat omschreven is in de gebruiksinstructies, of aangegeven is op het
apparaat
Plaats geen voorwerpen op het apparaat; mors geen vloeistoffen op
of in het apparaat
voer geen onderhoud, anders dan omschreven is in de
gebruiksinstructies. Laat onderhoud doen door gekwalificeerd
personeel .
33

34
----------------- ---------------------------------------------------
----------------- ---------------------------------------------------
----------------- ---------------------------------------------------
Het Fotoframe Neerzetten
De Fotolijst kan verticaal (portret)en horizontaal (landschap)
neergezet worden.
2. Druk het linker eind van het
staafje naar beneden en grijp
het andere eind om het staafje
van het apparaat te verwijderen.
3. Zet de lijst terug, door de twee
lipjes op het apparaat in de twee
gaatjes aan de bovenzijde van
de lijst te steken.
Breng het apparaat en de lijst
weer naar elkaar toe en druk
aan de onderzijde totdat ze
vastklikken.
4. Schroef het staafje vast in één
van de twee schroefgaatjes aan
de achterzijde van het apparaat.
1. Druk de borglip naar beneden
en trek het apparaat en de lijst
uit elkaar.

35
1. Plaats de CD-ROM erin, en start het programma SETUP.EXE; volg
de instructies op het scherm.
2. Het programma 'Photo Viewer wordt op uw PC geïnstalleerd en een
snelkoppeling verschijnt op het bureablad.
WACHT MET HET STARTEN VAN DE SOFTWARE.
3. Sluit, na het installeren van de software, het apparaat met de
USB-kabel aan op de computer. Het stuurprogramma wordt
automatisch geïnstalleerd. Volg de instructies op het scherm, en
accepteer het installatiescherm dat verschijnt.
4. Na de installatie van de hardware, kunt u het Photo Viewer
programma via de snelkoppeling op het bureaublad starten.
De Software/Hardware Installeren
De interne batterij van het apparaat kan opgeladen worden, als deze
via de USB-kabel op een actieve USB-poort (zoals de USB-poort van
de computer) of een hub is aangesloten. Als de batterij volledig
opgeladen is, kan het apparaat zo'n 3 uur werken.
De Ingebouwde Batterij Opladen
BELANGRIJK: Installeer eerst de software, vóór u het apparaat voor
de eerste keer op de computer aansluit.
LET OP: Als de software niet start, of u uw Fotoalbum niet kunt
aansluiten, raadpleeg dan voor meer informatie het
onderdeel 'Probleem Oplossen' in de handleiding

USB op computer
Mini B op Fotoalbum
USB Cable
36
1. Steek één eind van de USB-kabel in de USB-poort van uw computer,
en het andere eind in de USB-aansluiting van uw Fotokijker.
2. "Op de Fotokijker verschijnt “Connect?”; druk ter bevestiging op MODE.
In het scherm verschijnt “ Download” als het apparaat goed aangesloten
is. Als binnen 5 minuten geen knop wordt ingedrukt, dan schakelt de
Fotolijst naar de oplaadstand voor de batterij. U moet de USB-kabel
afkoppelen en opnieuw aansluiten.
Foto's van uw Computer naar uw Fotolijst Downloaden
Let op: u moet de Fotokijker op de PC aansluiten, vóór u de software start.
3. Start de software door dubbel op de Photo Viewer snelkoppeling op het
bureaublad van uw computer te klikken.
Bewaar de geselecteerde foto op het Collectiescherm
('Collection') van uw computer.
Wis geselecteerde foto's.
Klik hierop om de foto's op het Collectiescherm
( 'Collection') naar uw Fotokijker te downloaden.

37
-
-
Aantal foto's op het Collectiescherm ('Collection')
Maximum aantal foto's dat op de Fotolijst opgeslagen kan worden
- Voorvertoongebied ('Preview area')
- Collectiescherm ('Collection')
Klik hierop om uw foto's te roteren.
Klik hierop om foto's in het Voorvertoongebied ('Preview
area) naar het Collectiescherm ('Collection') te brengen.

38
4. Blader op uw computer naar foto('s) die u wilt downloaden.De
geselecteerde foto wordt getoond in het Voorvertoongebied
('Preview Area').
Let op: de Fotolijst leest JPG/ BMP/ TIF/ GIF/ PNG plaatjes.
5. Als de foto te groot is, dan verschijnt een rood vak op de foto. U
kunt op het rode vak klikken en het heen en weer bewegen om een
gedeelte van de foto af te snijden.
U kunt de foto ook roteren door op te klikken.
6. Klik op om de foto die in het Voorvertoongebied ('Preview Area')
getoond wordt, naar het Collectiescherm ('Collection') te verplaatsen.
7. Als u een foto in het Collectiescherm ('Collection') wilt wissen, selecteer
dan de foto en druk op om hem te wissen. Als u een foto in het
Collectiescherm ('Collection') op uw computer wilt opslaan, selecteer dan
de foto en druk op .
8. Klik op om foto's op het Collectiescherm
('Collection') naar uw Fotolijst te synchroniseren.
9. Wacht tot de software klaar is met downloaden. Sluit dan de
software en ontkoppel de Fotolijst van uw computer.
LET OP: Als u opnieuw foto's wilt downloaden, dan moet u de Photo
Viewer software opnieuw opstarten.

39
1
4
5
3
2
De Functieknoppen Gebruiken
1. Scherm
2. /MODE
3. Vorige Plaatje
Wis Plaatjes
4.
Wis alle Plaatjes
5. Mini USB Aansluiting
Volgende Plaatje
Verklaring Betreffende Elektromagnetische Emissies

40
Let op: u moet de fotopresentatie uitzetten, voor u de Fotolijst uit
kunt zetten.
Foto's Bekijken
1. Zet de Fotolijst aan door /MODUS zo'n 4 seconden ingedrukt te houden.
2. Druk op VOLGENDE om door uw foto's te bladeren. Druk op VORIGE om
terug te gaan naar een vorige foto.
De Fotopresentatie Gebruiken (Foto's Automatisch Afspelen)
Druk, terwijl het apparaat aanstaat, op /MODUS. De Fotolijst bladert
automatisch door de foto's.
Druk nogmaals op /MODUS om de fotopresentatie weer uit te zetten.
Een Enkele Foto Wissen
Alle Foto's Wissen
De Fotolijst Aan/Uit Zetten
Houd /MODUS zo'n 4 seconden ingedrukt om het apparaa t aan te
zetten. Houd /MODUS nogmaals zo'n 4 seconden ingedrukt om het
apparaat weer uit te zetten.
1. Druk in de bladerstand op VORIGE en VOLGENDE om het plaatje,
dat u wilt wissen, op te zoeken.
2. Houd 3 seconden ingedrukt. In het scherm verschijnt “Delete”.
3. Druk op om de foto te wissen, of druk op om te annuleren.
1. Druk in de bladerstand op VORIGE en VOLGENDE om het plaatje,
dat u wilt wissen, op te zoeken.
2. Houd 3 seconden ingedrukt. In het scherm verschijnt “Delete All”.
3. Druk op om alle foto's te wissen, of druk op om te annuleren.

Volg deze stappen, als het apparaat bij de installatie de foutmelding
“Device not connected” toont:
A. Bij problemen met de software (U kunt de Photo Viewer software
niet starten)
1. Plaats de installatie CD er opnieuw in en kies “Remove” of “Uninstall”
uit het menu.
2. Ontkoppel de USB-kabel en het apparaat van de computer en start
de computer opnieuw op.
3. Start nu op nieuw het installatieprogramma en installeer de software.
41
B. Bij problemen met de hardware (Apparaat niet herkend)
1. Ga, als de Fotokijker via de USB op de computer aangesloten is,
naar Start / Configuratiescherm / Hardware.
2. Als de dialoog opkomt, klik dan op de optie die zegt: “Ja, ik heb de
hardware al aangesloten.
3. Zoek in de lijst met apparaten “Photo Viewer” op, en klik op Volgende
om de status van het apparaat te bekijken. Als naast Photo Viewer
een waarschuwingssymbool verschijnt, dubbelklik dan op het
symbool en selecteer de optie “De software opnieuw installeren”.
Problemen bij de Installatie Oplossen
Let op: SLUIT de USB-kabel NIET aan, als de software nog niet
geïnstalleerd is.

INSTALLATION:
S.E.Microsoftft Manuel d'utilisation FRANCAIS
42
CADRE PHOTO DIGITAL
Windows 98 / 2000 / ME / XP/Vista
** Important: Installez le logiciel fourni avec l'appareil avant de raccorder
celui-ci à votre ordinateur. **
1. Si déjà raccordé à votre ordinateur, déconnectez le cordon USB
de votre ordinateur.
2. Insérez le CD et suivez les instructions affichées à l'écran pour
installer le “Cadre photo”.
3. Une fois le logiciel installé, vous pouvez raccorder le cadre
photo à votre ordinateur avec le cordon USB fourni.
4. Le système d'exploitation Windows installe le pilote de
l'appareil automatiquement.
5. Lancez “Photo Viewer” et appréciez vos photos.
REMARQUE: le logiciel ne se lancera pas lorsque le cadre photo
est raccordé à l'ordinateur ou si le mode Diaporama
automatique est activé.
Pour les utilisateurs de Windows 98 SE , installer le
driver qui se trouve sur le CD-rom
premier
A lire en
Guide d'installation rapide
CONFIGURATION SYSTEME REQUISE:

Introduction
43
Ce cadre photo numérique est un périphérique autonome conçu pour
transférer et stocker des images à partir d'un ordinateur ainsi que de
les afficher. En utilisant le logiciel fourni avec cet appareil, vous pouvez
organiser, modifier, améliorer et transférer les images de votre
ordinateur sur cet appareil via USB. Ce cadre photo peut stocker
des milliers de photos.
Consignes de sécurité importantes
AVERTISSEMENT:
3 heures de mise en charge sont nécessaires pour recharger
complètement la batterie. Ne laissez pas l'appareil raccordé au port
USB de votre ordinateur pendant plus de 12 heures consécutives,
l'appareil pourrait en effet s'endommager et une surchauffe pourrait
se produire.
N'exposez pas cet appareil à l'eau et l'humidité.
N'utilisez pas cet appareil près de sources de chaleur comme des
radiateurs et poêles.
L'appareil doit seulement être raccordé à une source d'alimentation
indiquée sur le manuel d'utilisation ou sur l'appareil.
Attention à ce qu'aucun objet ne soit placé sur l'appareil, et qu'aucun
liquide ne soit versé sur ou à l'intérieur de l'appareil.
L'utilisateur est tenu de ne pas tenter d'entretenir l'appareil au delà
des consignes du manuel d'utilisation. Confiez l'entretien de cet
appareil à de personnel qualifié.

44
----------------- ---------------------------------------------------
----------------- ---------------------------------------------------
----------------- ---------------------------------------------------
Installation du cadre photo
2. Appuyez sur l'extrémité gauche de la tige,
et tenez l'autre extrémité pour détacher.
3. Replacez le cadre en insérant les
deux tiges de l'appareil dans les
deux trous situés sur la partie
supérieure du cadre.
Assemblez le cadre et l'appareil,
appuyez ensuite sur la partie
inférieure jusqu'à ce que le
cadre soit bien fixé.
4. Vissez le pied à un des deux trous
à vis situés à l'arrière de l'appareil.
Le cadre photo peut être positionné verticalement (portrait) ou
horizontalement(paysage).
1. Appuyez sur la touche de verrouillage et tirez l
unité principale pour détacher celle-ci du cadre.

45
Installation du logiciel / pilote
IMPORTANT: Vous devez d'abord installer le logiciel sur votre
ordinateur avant de raccorder le cadre photo à celui-ci.
1. Insérez le CD-ROM et double cliquez sur le fichier SETUP.EXE;
suivez les instructions affichées à l'écran.
2. Le logiciel Photo Viewer va être installé sur votre ordinateur et un
raccourci sera présent sur votre bureau.
NE PAS LANCER LE LOGICIEL MAINTENANT.
3. Une fois le logiciel installé, raccordez le cadre photo à votre
ordinateur avec le cordon USB fourni. Le pilote du cadre photo
est installé automatiquement. Suivez les instructions affichées
à l'écran et acceptez lorsque des fenêtres d'installation s'affichent
à l'écran.
4. Une fois le pilote installé, lancez le logiciel Photo Viewer
Qiu se trouve sur le bureau.
REMARQUE: S'il vous est impossible de lancer le logiciel ou de
connecter le cadre photo à l'ordinateur, reportez-vous
à la section Dépannage du manuel pour obtenir de l'aide.
Mise en charge de la batterie intégrée
La batterie interne de l'appareil peut être mise en charge via le câble
USB lorsque relié à un port USB (port USB de votre ordinateur) ou un
hub USB. Une fois la batterie complètement chargée, l'appareil
dispose d'une autonomie de 3 heures en lecture.

46
Pour supprimer les photos sélectionnées.
Cliquez pour transférer les images de la fenêtre
Collection sur le cadre photo
Transférer des photos sur le cadre photo numérique à partir de l'ordinateur
Attention: Raccordez le cadre photo à votre ordinateur avant de
lancer le logiciel.
1. Raccordez une extrémité du câble USB à un port USB de votre
ordinateur, et l'autre extrémité au cadre photo.
Port USB de l'ordinateur
Port mini USB du cadre photo
Câble USB
2. " Connecter?" s'affiche sur l'écran du cadre photo, appuyez sur la
touche MODE pour confirmer," Transférer" s'affiche, indiquant
l'établissement de la connexion, au bout de 5 minutes d'inactivité,
le cadre photo bascule en mode économie d'énergie. Vous devez
alors déconnecter et reconnecter le câble USB.
3. Lancez le logiciel en double cliquant sur le raccourci Photo Viewer
situé sur le bureau.
Sauvegarder les photos sélectionnées dans la fenêtre
Collection sur votre ordinateur.

47
Cliquez pour effectuer une rotation sur image
Cliquez pour transférer une image en cours de prévisualisation
vers la fenêtre Collection.
- Espace de prévisualisation.
- Fenêtre Collection.
- Nombre de photos de la fenêtre Collection.
- Nombre maximal de photos pouvant être stockées sur le cadre photo

48
4. Parcourez les dossiers de votre ordinateur pour rechercher des
photos à transférer.La photo sélectionnée est affichée dans l'espace
de prévisualisation.Remarque: Le cadre photo prend en charge les
formats de fichiers image suivants : JPG / BMP / TIF / GIF / PNG.
5. Lorsque la photo est trop grande, une boîte rouge apparait sur la
photo, vous pouvez cliquer sur cette boîte rouge et la déplacer pour
recadrer la photo.Vous pouvez également effectuer une rotation sur
la photo en cliquant sur " "
6. Cliquez sur “ ” pour transférer la photo affichée dans l'espace
de prévisualisation vers la fenêtre Collection.
7. Lorsque vous souhaitez supprimer une photo de la fenêtre Collection,
sélectionnez la photo et appuyez sur la touche ” ” pour la
supprimer. Lorsque vous souhaitez sauvegarder une photo de la
fenêtre Collection sur votre ordinateur, sélectionnez la photo et
appuyez sur la touche “ ” pour la sauvegarder.
8. Cliquez sur “ ” pour transférer les photos de la fenêtre
Collection vers votre cadre photo.
9. Attendez la fin du transfert, quittez le logiciel et déconnectez le cadre
photo de votre ordinateur
REMARQUE: Lorsque vous souhaitez à nouveau transférer des images,
vous devez relancer le logiciel Photo Viewer.

49
1
4
5
3
2
Déclaration sur les emissions électromagnetiques
Fonctionnement des touches
1. Ecran
2. / MODE
3. Image précédente
Supprimer les images
4. Image suivante
Supprimer toutes les images.
5. Connecteur Mini USB
Cet équipement est conforme à la partie 15 des règlements de la FCC et de la CE.
L'utilisation de l'appareil est soumise aux deux conditions. suivantes:
(1) Cet appareil ne doit pas provoquer d'interférences et.
(2) il doit accepter toute interférence, y compris celles susceptibles de provoquer un
fonctionnement indésirable de l'appareil.
THIS CLASS B DIGITAL APPARATUS COMPLIES WITH CANADIAN ICES-003. /
CET APPAREIL NUMÉRIQUE DE LA CLASSE B EST CONFORME A LA NORME
NMB-003 DU CANADA.

50
Mise en marche/arrêt du cadre photo
Appuyez et maintenez enfoncée la touche / MODE pendant 4
secondes pour mettre l'appareil en marche. Appuyez et maintenez
enfoncée la touche à nouveau / MODE pendant 4 secondes pour
éteindre l'appareil
Remarque: vous devez désactiver le Diaporama avant d'éteindre le
cadre photo.
Visionner des photos
1. Mettez en marche le cadre photo en appuyant et maintenant enfoncée
la touche / MODE pendant environ 4 secondes.
2. Appuyez sur la touche pour naviguer parmi vos photos. Appuyez sur
la touche pour revenir à la photo précédente.
Activer le Diaporama (affichage automatique des photos)
Lorsque le cadre photo est en marche, appuyez sur la touche / MODE.
Le cadre photo affiche les photos une par une et de manière automatique.
Appuyez sur la touche / MODE à nouveau pour désactiver le
Diaporama.
Supprimer une photo
1. En mode Navigation, utilisez la touche et pour sélectionner la photo
que vous souhaitez supprimer.
2. Appuyez et maintenez enfoncée la touchep endant 3 secondes.
Le message Supprimer s'affiche.
3. Appu yez sur la t ouche po ur supprimer la photo, ou appuyez sur la touche
pour annuler l'opération
Supprimer toutes les photos
1. En mode Navigation, utilisez la touche et pour sélectionner la photo
que vous souhaitez supprimer.
2. Appuyez et maintenez enfoncée la touche pendant 3 secondes.
Le message Supprimer tout s'affiche.
3. Appuyez sur la touche pour supprimer la photo, ou appuyez sur la
touche pour annuler l'opération.

51
Résolution des problèmes survenant lors de l'installation
Lorsque l'écran affiche un message d'erreur “Périphérique non
connecté” durant l'installation, suivez les étapes suivantes pour
résoudre ce problème:
A. Problèmes avec le logiciel (impossible de lancer le logiciel Photo
Viewer)
1. Réinsérez et lancez à nouveau le CD d'installation et sélectionnez
“Supprimer” ou “Désinstaller” à partir du menu d'installation.
2. Déconnectez le cordon USB de l'ordinateur puis redémarrez.
3. Une fois l'ordinateur prêt, lancez l'installateur à nouveau et réinstallez
le logiciel.
REMARQUE: NE PAS raccorder le cordon USB avant la fin de
l'installation du logiciel.
B. Pour les problèmes matériels (Périphérique non reconnu)
1. Après avoir raccordé le cadre photo numérique via USB, allez dans
le menu Démarrer / Panneau de configuration/ Ajouter un nouveau
périphérique.
2. Lorsque la boîte de dialogue apparait, cliquez sur “Oui, j'ai déjà
raccordé le périphérique”.
3. Dans la liste des périphériques, sélectionnez “Photo Viewer” et
cliquez sur SUIVANT, l'état du périphérique est alors affiché.
Lorsqu'une icône d'avertissement apparaît à côté du cadre photo,
double cliquez sur l'icône et sélectionnez “Réinstaller le pilote”.

If at any time in the future you should need to dispose of this product please note that:
Waste electrical products should not be disposed of with household waste. Please
recycle where facilities exist. Check with your Local Authority or retailer for recycling
advice. (Waste Electrical and Electronic Equipment Directive)
Si en el futuro necesita deshacerse de este producto, tenga en cuenta lo siguiente: no
debe deshacerse de los residuos de productos eléctricos como si fueran residuos
domésticos. Por favor, recicle en los sitios en los que esto sea posible. Acuda a las
autoridades locales o al vendedor en busca de asesoramiento sobre reciclaje.
(Directiva sobre residuos eléctricos y equipos electrónicos).
Si vous souhaitez vous débarrasser ultérieurement du produit, veuillez noter que : les
déchets électriques ne doivent pas être jetés avec les déchets domestiques. Veuillez
les faire déposer dans les centres de recyclage existants. Contactez les autorités
locales ou distributeurs pour obtenir de plus amples informations. (Directive de
l'équipement électronique et des déchets électriques).
Sollten Sie irgendwann zu späterer Zeit dieses Produkt entsorgen wollen, beachten Sie
bitte Folgendes: Elektroschrott sollte nicht mit dem Haushaltsmüll entsorgt werden.
Bitte recyceln Sie ihn, sofern Ihnen entsprechende Möglichkeiten zur Verfügung stehen.
Setzen Sie sich mit Ihren kommunalen Behörden oder Ihrem Einzelhändler in Verbindung
und fragen Sie diese um Rat bezüglich der Wiederverwertung. (Elektro- und
Elektronik-Altgeräte-Richtlinie (WEEE))
Indien u zich in de toekomst van dit toestel wenst te ontdoen, let er dan op dat elektrisch
afvalmateriaal niet met het huishoudelijk afval mag worden verwijderd. Breng het toestel
naar een kringloopwinkel of anderevoorziening voor recycling. Neem contact op met uw
plaatselijke autoriteit of winkelier indien u meer informatie wenst over recycling. (Richtlijn
voor Afval van Elektrische en Elektronische Apparaten, AEEA).
Documenttranscriptie
DIGITAL PHOTO FRAME DF-241 Table of Contents Table of Contents.......................................................................1 ENGLISH...........................................................................2-11 DEUTSCH..........................................................................12-21 Español..............................................................................22-31 NEDERLANDS....................................................................32-41 FRANCAIS..........................................................................42-51 1 Microsoft OS UserManual ENGLISH DIGITAL PHOTO FRAME Read First Quick Installation Guide SYSTEM REQUIREMENTS: Windows 98 / 2000 / ME / XP / Vista INSTALLATION PROCEDURE: ** Important: Install application software before connect device to PC. ** 1. Disconnect device USB cable from PC if it is connected. 2. Insert CD and follow the on-screen instruction to install “Photo Viewer”. 3. After the application software has been successfully installed, you could connect device to PC with the provided USB cable. 4. Windows OS will set up hardware driver automatically. 5. Launch “Photo Viewer” and enjoy. NOTE: The software can not initialize with the unit if plugged in while running in automatic slide show mode. For Windows 98 SE user, you need to install the driver software in the CD provided. 2 Introduction This Digital Photo Frame is a stand-alone device that is designed to transfer and store images from a PC and then display the images. Using the application software supplied with this device, you can organize,edit, enhance and download the image in your PC to this device using USB. Important Safety Instructions WARNING: This device will be fully charged after two hours charging through USB cable. Do not leave the device connected to the USB for longer than 12 consecutive hours otherwise damage and overheating of the device may occur. Do not expose this device to water or moisture. Do not remove cover. No user serviceable parts inside. Refer servicing to qualified personnel. The device should be away from sources of high heat such as Radiators or stoves. The device should be connected to a power supplyonly of the type described in the operating instructions or as markedon the unit. Care should be taken so that objects are not placed on, nor liquids spilled on or inside the device. The user should not attempt to service the device beyond those means described in these operating instructions. All other servicing should be referred to qualified service personnel. . 3 Placing the Photo Viewer 1. Press down the locking tab and pull away the main unit from the frame to separate the main unit. ----------------- ------------------------------------------------ --2. Press down the left end of the rod, and grab the other end to remove the rod from the main unit. ----------------- ------------------------------------------------ --3. Replace the frame by inserting the two tabs on the main unit to the two holes at the top of the frame. Bring the main unit and frame together, then press at the bottom until it clicks in place. ----------------- ------------------------------------------------ --4. Screw in the rod to one of the two screw holes on the back of the main unit. 4 Installing the Software / Hardware IMPORTANT: You must install the software to your computer before connecting the device to your computer for the first time. 1. Insert the CD-ROM and run the file Photo Viewer SETUP; follow the onscreen instructions. 2. The application Photo Viewer will be installed on your computerand a shortcut to the application will appear on your desktop. DO NOT LAUNCH THE SOFTWARE YET. 3. After the software is installed, connect the device to the computer with the USB cable supplied. The hardware drivers will be installed automatically. Follow the on-screen instructions and accept the installation screens that appear. 4. After hardware installation is complete, launch the PhotoViewer application from the shortcut on your PC desktop. NOTE: If you are unable to launch the software or connect to your device, go to the Troubleshooting of this manual for more information. Charging the Battery The internal battery of the device may be charged using the USB cable when connected to a powered USB port(such as USB port on your computer) or hub. At full charge, the device can provide up to 3 hours of run time. 5 Downloading Photos from Your Computer to Photo Frame Attention: You must connect the Photo Viewer to the PC before launching the software. 1. Insert one end of the USB Cable into USB on your computer's USB port and the other end into the Photo Viewer. USB on computer Mini B on Photo Album USB Cable 2. " Connect?" appears on the Photo Viewer, press MODE to confirm, and "Download" appears, indicating the connection is complete, If no key is pressed during 1 minute, the Photo Frame will enter battery charging mode. You need to disconnect the USB cable and connect it again. 3. Launch the software by double clicking the Photo Viewer shortcut on your computer's desktop. Save selected photo on Collection Panel to your computer. Delete selected photos. Click to download photos on Collection Panel to your Photo Viewer 6 Click to rotate your photos Click to post photos in Preview Area to Collection Panel. - Preview Area. - Collection Panel. - Number of photos on Collection Panel. - Maximum number of photos can be stored in the Photo Frame. 7 4. Browse your computer for photo(s) you want to download. The selected photo is displayed in the Preview Area. Note: The Photo Frame reads JPG/ BMP/ TIF/ GIF/ PNG images. 5. If the photo is too big, a red box appears on the photo, and you can click the red box and mover around the box to crop the photo. You can also rotate the photo by clicking" ". 6. Click to move the photo displayed in the Preview Area to the Collection Panel. 7. If you want to delete the photo on Collection Panel, select the photo and press to delete. If you want to save the photo on Collection Panel to your computer, select he photo and press to save. 8. Click to download photos on Collection Panel onto your Photo Frame. 9. Wait for download to complete, then close the software and remove the Photo Frame from your computer. NOTE: If you want to download again, you need to re-start the Photo Viewer software. 8 Using the Function Keys 1. Monitor 2. /MODE 3. Previous Image Delete images 4. Next Image Delete all Images. 5. Mini USB Connection 4 3 2 1 5 Electromagnetic Emissions Statement 9 Using the Photo Viewer Press and hold /MODE for about 4 seconds to turn the unit on. Press and hold again /MODE for about 4 seconds to turn the unit off. Note: You need to turn off the slideshow before you can turn off the Photo Viewer. Viewing Photos 1. Turn the Photo Frame on by pressing and holding down the /MODE for around 4 seconds. 2. Press to browse through your photos. Press to return to a previous photo. Using Slideshow ( Automatic Display of Photos) With the unit on, press /MODE. The Photo Frame scrolls through all photos automatically. Press /MODE again to turn off the slideshow feature. Deleting a Single Photo 1. In browse mode, use and to locate the photo you wantto delete. 2. Press and hold for 3 seconds. Delete appears on the display. 3. Press to delete the photo, or press to cancel the operation. Deleting All Photos 1. In browse mode, use and to locate the photo you want to delete. 2. Press and hold for 3 seconds. Delete All appears on the display. 3. Press to delete the photo, or press to cancel the operation. 10 Troubleshooting for Installation If the device displays error message “Device not connected” during installation, follow these steps to resolve: A. For Software issues (Photo Viewer software can not launch) 1. Re-insert and launch the installation CD and choose “Remove” or “Uninstall” from the Installer Menu. 2. Disconnect the USB cable and device from the computer and restart. 3. After computer has restarted, launch the installer again and reinstall the software. Note: DO NOT connect the USB cable until after the software is installed. B. For Hardware installation issues (Device not recognized) 1. With the Viewer connected to the computer via USB go to the Start Menu / Control Panels / Add Hardware. 2. When the Dialog box comes up, click the option that says “Yes, I have already connectecd the software”. 3. In the list of Devices-Find “Photo Viewer” click NEXT and this will give the status of the device. If a warning icon appears next to the Photo Viewer then double click the icon and select the option to “Reinstall the software”. 11 Microsoft OS UserManual DEUTSCH DIGITALER BILDERRAHMEN Bitte lesen! Kurzinstallationsanleitung SYSTEMANFORDERUNGEN Windows 98 / 2000 / ME / XP/ Vista SOFTWAREINSTALLATION: ** Wichtig: Installieren Sie die Software, bevor Sie das Gerät an einen PC anschließen. ** 1. Trennen Sie das Gerät vom USB-Kabel ab, wenn es an einen PC angeschlossen ist. 2. Legen Sie die CD ein und befolgen Sie die Bildschirmanweisungen zur Installation von “Photo Album”. 3. Nach erfolgreicher Installation der Software können Sie das Gerät mithilfe des mitgelieferten USB-Kabels an den PC anschließen. 4. Windows richtet dann die Hardware-Treiber automatisch ein. 5. Starten Sie das Programm und Sie können mit der Benutzung anfangen. HINWEIS: Die Software kann nicht initialisiert werden, wenn das Gerät im Diashowmodus ist. Windows 98 SE Benutzer, installieren Sie der Treiber Software, die mitgelieferte CD-ROM enth-lt diese software 12 Einleitung Dieses digitale Fotoalbum ist ein eigenständiges Gerät, auf das Sie Bilder vom PC kopieren und dann damit betrachten können. Benutzen Sie die mitgelieferte Software zum Verwalten, Bearbeiten, Verbessern und Kopieren der Bilder vom PC auf das Gerät. Dieses Fotoalbum kann tausende von Fotos speichern Wichtige Sicherheitshinweise WARNUNG: Dieses Gerät ist nach zwei Stunden Ladezeit vollständig aufgeladen. Achten Sie bitte darauf, dass es nicht länger als 12 Stunden am USBPort Ihres Computers angeschlossen bleibt, um zu vermeiden, dass es sich überhitzt und beschädigt wird. Setzen Sie dieses Gerät niemals Wasser oder Feuchtigkeit aus. Das Gerät sollte in ausreichender Entfernung zu Hitzequellen wie z. B. Heizkörpern bzw. Öfen aufgestellt werden. Das Gerät sollte nur mit einem dafür vorgesehenen Netzteil betrieben werden. Achten Sie darauf, dass keine anderen Gegenstände auf das Gerät gestellt werden und dass keine Flüssigkeiten auf bzw. in das Gerät gelangen. Der Benutzer sollte keine Versuche anstellen das Gerät eigenhändig zu warten, es sei denn es wurde entsprechend in der Bedienungsanleitung beschrieben. Wenden Sie sich bei weiterem Wartungsbedarf immer an ausgebildetes Wartungspersonal. 13 Aufstellung Der Fotorahmen kann entweder im Hochformat (vertikal) oder im Querformat (horizontal) aufgestellt werden. 1. Drücken Sie die Sperrlasche nach unten und ziehen Sie das Gerät aus dem Rahmen heraus. ----------------- ------------------------------------------------ --2. Drücken Sie das linke Ende der Stange nach unten und ziehen Sie die sie am anderen Ende heraus. ----------------- ------------------------------------------------ --3. Setzen Sie den Rahmen wieder auf das Gerät, indem Sie die beiden Laschen oben in den Rahmen schieben.Setzen Sie das Gerät und den Rahmen zusammen und drücken Sie an der Unterseite, bis der Rahmen einrastet. ----------------- ------------------------------------------------ --4. Schrauben Sie die Stange in eine der beiden Gewinde an der Rückseite des Geräts. 14 Software- und Hardwareinstallation WICHTIG: Sie müssen die Software auf Ihrem Computer installieren, bevor Sie das Gerät das erste Mal am Computer anschließen. 1. Legen Sie die CD-ROM ein und starten Sie das Programm SETUP. EXE. Folgen Sie dann einfach den Bildschirmanweisungen. 2. Die Anwendung “Photo Viewer” wird dann auf Ihrem Computer installiert und ein Shortcut erscheint auf Ihrem Desktop. STARTEN SIE DIE SOFTWARE NOCH NICHT 3. Nach der Softwareinstallation können Sie das Gerät mit dem mitgelieferten USB-Kabel am Computer anschließen. Die Hardwaretreiber werden dann automatisch installiert. Folgen Sie den Bildschirmanweisungen und bestätigen Sie die folgenden Installationsdialoge. 4. Nach der Hardwareinstallation können Sie das Programm “Photo Viewer” über den Shortcut auf Ihrem Desktop starten. HINWEIS: Wenn Sie die Software nicht starten oder das Fotoalbum nicht anschließen können, gehen Sie bitte zum Abschnitt“ Fehlerbehebung” am Ende dieser Anleitung. Aufladen des eingebauten Akkus Der eingebaute Akku des Geräts kann mithilfe der USB-Kabels aufgeladen werden, wenn das Gerät an einen Strom führenden USBPort (z. B. der USB-Port Ihres Computers oder ein USB-Hub) angeschlossen wird. Voll aufgeladen kann das Gerät bis zu 3 Stunden ohne Unterbrechung benutzt werden. 15 Kopieren von Fotos von Ihrem Computer auf den Fotorahmen Achtung: Sie müssen den Fotobetrachter an den PC anschließen, bevor Sie die Software starten. 1. Verbinden Sie das eine Ende des USB-Kabels mit dem USBAnschluss Ihres Computers und das andere Ende mit dem Fotobetrachter. USB-Port am Computer Min i-USB-Port am Fotoalbum USB Cable 2. Auf dem Bildschirm des Fotobetrachters erscheint “Connect?”. Betätigen Sie dann die MODE-Taste zur Bestätigung. Auf dem Bildschirm erscheint „Download“ und der Verbindungsaufbau ist abgeschlossen. Wenn dann innerhalb von 1 Minuten keine Taste betätigt wird, geht der Fotorahmen in den Auflademodus über. Sie müssen das Gerät dann vom Computer trennen und erneut anschließen. 3. Starten Sie die Software, indem Sie auf den “Photo View”-Shortcut auf Ihrem Desktop doppelklicken. Speichern Sie die markierten Fotos im Auswahlfenster auf Ihrem Computer. Löschen Sie die markierten Fotos. Klicken Sie die Fotos im Auswahlfenster zum Kopieren auf den Fotobetrachter. 16 Klicken Sie hier zum Drehen Ihrer Fotos. Klicken Sie hier, um die Fotos vom Vorschaubereich zum Auswahlfenster zu kopieren. - Vorschaubereich - Auswahlfenster - Anzahl der Fotos im Auswahlfenster - Maximale Anzahl der Fotos, die auf dem Fotorahmen gespeichert werden können. 17 4. Suchen Sie nach Fotos auf Ihrem Computer, die Sie auf dem Fotorahmen kopieren wollen. Die markierten Fotos werden im Vorschaubereich abgebildet. Hinweis: Das Gerät unterstützt JPG-, BMP-, TIF-, FIF- und PNGBilder. 5. Wenn die Fotos zu groß sind, erscheint ein roter Kasten auf dem Fotos. Klicken Sie auf den roten Kasten, um das Foto zu verkleinern. Sie können das Foto auf drehen, indem Sie auf “ ”klicken. 6. Klicken Sie auf , um das Foto vom Vorschaubereich ins Auswahlfenster zu verschieben. 7. Wenn Sie das Foto vom Auswahlfenster entfernen wollen, markieren Sie das Foto und betätigen Sie ,um es zu löschen. Wenn Sie das Foto im Auswahlfenster auf Ihrem Computer speichern wollen, markieren Sie das Foto und betätigen Sie ,um es zu speichern. 8. Klicken Sie auf , um die Fotos im Auswahlfenster auf den Fotorahmen zu kopieren. 9. Warten Sie bis der Kopiervorgang abgeschlossen ist und verlassen Sie die Software. Trennen Sie dann den Fotorahmen von Ihrem Computer ab. HINWEIS: Wenn Sie weitere Fotos kopieren möchten, müssen Sie die Fotobetrachter-Software erneut starten. 18 Benutzung der Funktionstasten 1. Monitor 2. /MODE 3. Voriges Bild Bilder löschen 4. Nächstes Bild Alle Bilder löschen 5. Mini-USB-Anschluss 4 3 2 1 5 Erklärung zu elektromagnetischer Strahlung Dieses Gerät erfüllt die Anforderungen desParagrafen 15 der FCC-Verordnung und die Anforderungen des CE-Standards. Zum Betrieb des Geräts müssenfolgende Bedingungen erfüllt sein: (1) Das Gerät darf keine schädigendenStörstrahlungen verursachen. (2) Das Gerät muss alle eingehendenStörstrahlungen tolerieren, einschließlich solcher Störstrahlu ngen, durch die der Betrieb inungewollter Weise beeinträchtigt werden könnte. THIS CLASS B DIGITALAPPARATUS COMPLIESWITH CANADIAN ICES-003. / CET APPAREIL NUMÉRIQUE DE LA CLASSE BEST CONFORME À LA NORME NMB -003 DU CANADA. 19 Ein-/Ausschalten des Fotorahmens Halten Sie die /MODE-Taste für 4 Sekunden gedrückt, um das Gerät einzuschalten. Um das Gerät wieder auszuschalten, halten Sie bitte die /MODE-Taste erneut für 4 Sekunden gedrückt. Hinweis: Bevor Sie das Gerät ausschalten können, müssen Sie die Diashow stoppen. Bilder ansehen 1. Schalten Sie den Fotorahmen an, indem Sie die /MODE-Taste für 4 Sekunden gedrückt halten. 2. Betätigen Sie die Taste zur Bildauswahl. Betätigen Sie diese Taste, um zum vorigen Bild zurückzukehren. Benutzung der Diashowfunktion (Automatischer Bildwechsel) Wenn Sie das Gerät eingeschaltet haben, betätigen Sie bitte die / MODE-Taste. Der Fotorahmen wechseln dann automatisch zum jeweils nächsten Bild. Betätigen Sie die /MODE-Taste erneut, um die Diashowfunktion wieder auszuschalten. Löschen einzelner Fotos 1. Benutzen Sie die Tasten und zur Auswahl des Fotos, dass Sie löschen möchten. 2. Halten Sie die Taste für 3 Sekunden gedrückt. “Delete”erscheint in der Anzeige. 3. Betätigen Sie die Taste , um das Foto zu löschen oder betätigen Sie zum Abbrechen des Vorgangs. Löschen aller Fotos 1. Benutzen Sie die Tasten und zur Auswahl eines Fotos, dass Sie löschen möchten. 2. Halten Sie die für 3 Sekunden gedrückt. “Delete All”erscheint in der Anzeige. 3. Betätigen Sie , um das Foto zu löschen oder betätigen Sie zum Abbrechen des Vorgangs. 20 Fehlerbehebung IWenn während der Installation die Fehlermeldung „Device not connected“ erscheint, gehen Sie bitte auf folgendende Weise vor, um das Problem zu beheben: A.Softwareproblem (die Photo Viewer Software kann nicht gestartet werden) 1. Legen Sie die Installations-CD erneut ein und wählen Sie im Installationsmenü „Remove“ oder „Uninstall“. 2. Trennen Sie das USB-Kabel und das Gerät vom Computer und führen Sie einen Neustart aus. 3. Nach dem Neustart des Computers starten Sie den Installationsdialog und installieren Sie die Software erneut. HINWEIS: Schließen Sie das USB-Kabel NICHT an den Computer an, bevor Sie die Software installiert haben. B.Hardwareproblem (Gerät wird nicht erkannt) 1. Schließen Sie das Fotoalbum über das USB-Kabel an den Computer und gehen Sie auf Start -> Systemkonfiguration -> Hardware hinzufügen. 2. Sobald ein Dialogfenster erscheint, klicken Sie auf die Option „Ja, die Hardware ist bereits angeschlossen.“. 3. Klicken Sie in der Geräteliste auf „Photo Viewer“ und dann auf WEITER. Danach erscheint der Status des Geräts. Wenn ein Warnsymbol neben dem Fotoalbum erscheint, klicken Sie auf das Symbol und wählen Sie “Treiber neu installieren”. 21 Manual de Usuario Microsoft Español PORTARETRATO DIGITAL Lea Primero Guía rápida de instalación REQUISITOS DEL SISTEMA 1.Windows 98/2000/ME/XP/VISTA PROCEDIMIENTO DE INSTALACIÓN: ** Importante: instale el software de aplicación antes de conectar el dispositivo al PC.** 1. Desconecte el cable USB del PC si está conectado. 2. Inserte el CD y siga las instrucciones en la pantalla para instalar “PhotoAlbum”. 3. Después de instalar el software de aplicación, puede conectar el dispositivo al PC con el cable USB proporcionado. 4. Windows OS instalará el driver o controlador del hardware automáticamente. 5. Ejecute “Photo Viewer” y disfrute. NOTA: El software no puede iniciarse con la unidad si está conectado mientras funciona en modo de presentación automática. Para usuario de Windows 98 SE, necesita instalar el programa facilitado en el CD 22 INTRODUCCIÓN Este álbum de fotos digitales es un dispositivo que ha sido diseñado para transferir y almacenar imágenes desde un PC y luego poder visualizar las imágenes. Usando el software de la aplicación proporcionado con este dispositivo, puede organizar, editar, mejorar y descargar sus imágenes en su PC hasta el dispositivo usando el USB. Este Álbum de Fotos almacena miles de fotos. Instrucciones importantes de seguridad ADVERTENCIA Este dispositivo será cargado completamente después de tres horas. No deje este dispositivo conectado al USB durante más de 12 horas consecutivas de lo contrario puede dañar y sobrecalentar el dispositivo. No exponga el dispositivo al agua o humedad. El dispositivo tiene que estar situado lejos de fuentes de calor tales como radiadores o estufas. El dispositivo debe estar conectado a un tipo de toma de corriente que se describe en las instrucciones de funcionamiento o como está señalado en la unidad. Tenga cuidado con su dispositivo, no coloque ningún objeto en la parte superior ni ningún líquido ya que podría dañar el dispositivo. El usuario no debe intentar reparar el aparato más allá de los medios descritos en este manual de instrucciones. Refiérase a su personal de servicio cualificado. 23 Colocar el Álbum de Fotos El marco de fotos puede ser colocado verticalmente o (retrato) o de horizontalmente (paisajes). 1. Pulse la lengüeta de bloqueo y tire de la unidad principal del marco para separar la unidad principal. ----------------- ------------------------------------------------ --2. Pulse la extremidad izquierda de la barra y agarre la otra extremidad para retirar la barra de la unidad principal. ----------------- ------------------------------------------------ --3. Cambie el marco insertando las dos lengüetas en la unidad principal A los dos agujeros del marco. Junte la unidad principal y el marco, luego pulse la parte inferior hasta que se coloque en su sitio. ----------------- ------------------------------------------------ --4. Atornille la barra en uno de los agujeros en la parta trasera de la unidad. 24 INSTALACIÓN DEL SOFTWARE /HARDWARE IMPORTANTE: tiene que instalar el software en su ordenador antes de conectar el dispositivo a su ordenador por la primera vez. 1. Inserte el CD-ROM y ejecute el archivo SETUP.EXE, siga las instrucciones en la pantalla. 2. La aplicación Photo Viewer será instalado en su ordenador y aparecerá un atajo a la aplicación en su escritorio. NO EJECUTE EL SOFTWARE TODAVÍA. 3. Cuando haya instalado el software, conecte el dispositivo a su ordenador con el cable USB proporcionado. Los drivers o controladores del hardware serán instalados automáticamente. Siga las instrucciones en la pantalla y acepte las pantallas de instalación que aparecen. 4. Después de instalar el hardware, ejecute la aplicación Photo Viewer desde el atajo en su escritorio. NOTA: si no puede ejecutar el software o conectarse a Photo Album, vaya a la guía de problemas y soluciones de este manual para obtener más información. CARGAR LA BATERÍA INCORPORADA La batería interna del dispositivo puede ser cargada usando el cable USB cuando está conectado a un puerto USB (como un puerto USB en su ordenador) o concentrador. En plena carga, el dispositivo puede proporcionar más de 3 horas de funcionamiento. 25 Escargar fotos desde su pc al Álbum de fotos digitales Attención: debe conectar su Photo Viewer a un PC antes de ejecutar el software. 1. Inserte una extremidad del cable USB en el puerto USB de su ordenador y la otra extremidad a Photo Viewer. USB en su ordenador Min i B on Album de Fotos USB Cable 2. " Connected" (conectado) aparecerá en el Photo Viewer, pulse MODE para confirmar, Y aparecerá " Download", (descargar) indicando que la conexión se ha completado. Si no pulsa ninguna tecla durante 5 minutos, el Marco de Fotos entrará en modo de cargar de batería. Necesita desconectar el cable USB y conectarlo de nuevo. 3. Ejecute el software haciendo doble clic en el atajo de Photo Viewer en el escritorio de su ordenador. Guarde la foto seleccionada en panel de colección en su ordenador. Elimine las fotos seleccionadas. Haga clic para descargar fotos en su panel de colección a su Photo Viewer. 26 Haga clic para girar sus fotos Haga clic para mostrar las fotos en un Área Previa a su Panel de Colección. - Área Previa. - Panel de Colección. - Número de fotos en Panel de Colección. - Número máximo de fotos que pueden ser guardadas en su Marco de Fotos. 27 4. Explore su ordenador para descargar la(s) foto(s) deseada(s). Se visualiza la foto seleccionada en el Área Previa. Nota: El marco de fotos lee imágenes JPG/ BMP/ TIF/ GIF/ PNG. 5. Si la foto es demasiado grande, aparecerá un cuadro rojo en la foto, y puede hacer clic en el cuadro rojo y desplazarse alrededor del cuadro rojo para trabajar con la foto. Puede girar la foto haciendo clic en " ". 6. Haga clic en “ ”para mover la foto visualizada en el Área Previa al Panel de Colección. 7. Si desea eliminar la foto del Panel de Colección, seleccione la foto y pulse “ ” para eliminarla. Si desea guardar la foto en el Panel de Colección de su ordenador, seleccione la foto y pulse “ ” para guardarla. 8. Haga clic en “ ” para descargar las fotos en el Panel de Colección a su Marco de Fotos. 9. Espere que la descarga se haya completado, luego cierre el software y retire el Marco de Fotos de su ordenador. NOTA: si desea descargar de nuevo, necesita volver a ejecutar el software de Photo Viewer. 28 Usar las teclas de función 1.Pantalla 2. /MODE 3. Imagen anterior Eliminar imágenes 4. Imagen siguiente Eliminar todas las imágenes. 5.Conexión mini USB 4 3 2 1 5 DECLARACIÓN DE EMISIONES ELECTROMAGNÉTICAS Este aparato cumple con la Parte 15 de las normas de la FCC y CE. El funcionamiento está sujeto a las condiciones siguientes: (1)Este aparato no debería causar interferencias dañinas. (2)Este aparato debe aceptar cualquier interferencia recibida, incluida la interferencia que podría causar el funcionamiento no deseado. ESTE APARATO DIGITAL DE CLASE B CUMPLE CON LAS NORMAS CANADIENSES IC ES-003. CET APPAREIL NUMEERIQUE DE LA CLASSE B SET CONFORMEA LA NORME NMB-003 DU CANADA. 29 Usar el Photo Viewer Pulse y mantenga pulsando /MODE durante 4 segundos para encender la unidad. Pulse y mantenga pulsando de nuevo /MODE durante 4 segundos para apagar la unidad. Nota: necesita apagar el slideshow o Visualización automática de fotos presentación antes para apagar el Photo Viewer (Visualizador de fotos). Visualizar fotos 1. Encienda el Marco de Fotos pulsando y manteniendo pulsando /MODE durante 4 segundos. 2. Pulse para explorar a través de las fotos. Pulse para volver a la foto anterior. Usar el Slideshow (Visualización automática de fotos) Con la unidad encendida, pulse /MODE. El Marco de Fotos explorará todas las fotos de forma automática. Pulse /MODE de nuevo para apagar el slideshow o visualización automática de fotos. Eliminar una foto 1. En modo de exploración, use y para localizar la foto que desea eliminar. 2. Pulse y mantenga pulsando durante 3 segundos. Delete (Eliminar) aparecerá en la pantalla. 3. Pulse para eliminar la foto, o pulse para cancelar la operación. Eliminar todas las fotos 1. En modo de exploración, use y para localizar las fotos que desea eliminar. 2. Pulse y mantenga pulsando durante 3 segundos. Delete All (Eliminar todas) aparecerá en la pantalla. 3. Pulse para eliminar la foto o pulse para cancelar la operación. 30 Guía de problemas y soluciones para la instalación Si el dispositivo muestra el mensaje de error “Device not connected” (dispositivo no conectado) durante la instalación, siga los pasos siguientes: A. Para problemas de Software (el software de Photo Viewer no puede ejecutarse) 1. Vuelva a insertar y ejecutar el CD de instalación CD y elija “Remove” (retirar) o “Uninstall” (desinstalar) del menú de instalación. 2. Desconecte el cable USB y el dispositivo de su ordenador y reinicie. 3. Después de reiniciar el ordenador, ejecute el instalador de nuevo y vuelva a instalar el software. Nota: NO CONECTE el cable USB hasta que no se haya instalado el software. B. Para problemas de instalación de Hardware (no reconoce el dispositivo) 1. Con el Photo Viewer conectado a su ordenador a través de USB vaya a Menú Inicio / Panel de control / Añadir Hardware. 2. Cuando aparezca el cuadro de diálogo, haga clic en la opción que dice “Yes, I have already connectecd the software”. (Sí, ya he conectado el software). 3. En la lista de los dispositivos, busque “Photo Viewer” haga clic en NEXT y esto dará el estado del dispositivo. Si aparece un icono de advertencia al lado de Photo Viewer haga doble clic en el icono y seleccione la opción “Reinstall the software” (Volver a instalar el software). 31 Microsoft OS Gebruiksaanwijzing NEDERLANDS DIGITALE FOTOALBUM Lees Eerst Snelle Installatiegids DIGITALE FOTOALBUM Windows 98 / 2000 / ME / XP / Vista INSTALLATIEPROCEDURE: ** Belangrijk: Installeer applicatiesoftware vóór aansluiten op de PC. ** 1. Ontkoppel de USB-kabel van de PC (indien aangesloten). 2. Plaats de CD in de CD-ROM en volg de instructies op het Scherm om de “Photo Album” software te installeren. 3. Sluit na de installatie uw apparaat met de meegeleverde USB-kabel aan op de PC. 4. Windows OS stelt automatisch het hardware stuurprogramma in. 5. Start “Photo Viewer” en geniet ervan. LET OP: De software kan niet initialiseren als het apparaat aangesloten is en een fotopresentatie draait. Windows 98 SE gebruikers, installeer de driver software in de meegeleverde CD-ROM. 32 Introductie Dit Digitale Fotoalbum is een 'stand-alone' apparaat, dat plaatjes van een PC kan opslaan, en vervolgens weergeven. Met de meegeleverde software kunt u plaatjes bewerken, organiseren en mooier maken, en via de USB downloaden naar dit apparaat. U kunt op dit Fotoalbum duizenden foto's opslaan Belangrijke Veiligheidsvoorschriften WAARSCHUWING: Het volledig opladen van dit apparaat duurt drie uur. Laat het apparaat niet langer dan 12 uur aaneengesloten op de USB aangesloten. Het apparaat kan oververhit, en beschadigd raken Stel het apparaat niet bloot aan water en vochtigheid Houd dit apparaat uit de buurt van warmtebronnen, zoals radiators en fornuizen Sluit dit apparaat alleen aan op een voedingsbron volgens het type dat omschreven is in de gebruiksinstructies, of aangegeven is op het apparaat Plaats geen voorwerpen op het apparaat; mors geen vloeistoffen op of in het apparaat voer geen onderhoud, anders dan omschreven is in de gebruiksinstructies. Laat onderhoud doen door gekwalificeerd personeel . 33 Het Fotoframe Neerzetten De Fotolijst kan verticaal (portret)en horizontaal (landschap) neergezet worden. 1. Druk de borglip naar beneden en trek het apparaat en de lijst uit elkaar. ----------------- ------------------------------------------------ --2. Druk het linker eind van het staafje naar beneden en grijp het andere eind om het staafje van het apparaat te verwijderen. ----------------- ------------------------------------------------ --3. Zet de lijst terug, door de twee lipjes op het apparaat in de twee gaatjes aan de bovenzijde van de lijst te steken. Breng het apparaat en de lijst weer naar elkaar toe en druk aan de onderzijde totdat ze vastklikken. ----------------- ------------------------------------------------ --4. Schroef het staafje vast in één van de twee schroefgaatjes aan de achterzijde van het apparaat. 34 De Software/Hardware Installeren BELANGRIJK: Installeer eerst de software, vóór u het apparaat voor de eerste keer op de computer aansluit. 1. Plaats de CD-ROM erin, en start het programma SETUP.EXE; volg de instructies op het scherm. 2. Het programma 'Photo Viewer wordt op uw PC geïnstalleerd en een snelkoppeling verschijnt op het bureablad. WACHT MET HET STARTEN VAN DE SOFTWARE. 3. Sluit, na het installeren van de software, het apparaat met de USB-kabel aan op de computer. Het stuurprogramma wordt automatisch geïnstalleerd. Volg de instructies op het scherm, en accepteer het installatiescherm dat verschijnt. 4. Na de installatie van de hardware, kunt u het Photo Viewer programma via de snelkoppeling op het bureaublad starten. LET OP: Als de software niet start, of u uw Fotoalbum niet kunt aansluiten, raadpleeg dan voor meer informatie het onderdeel 'Probleem Oplossen' in de handleiding De Ingebouwde Batterij Opladen De interne batterij van het apparaat kan opgeladen worden, als deze via de USB-kabel op een actieve USB-poort (zoals de USB-poort van de computer) of een hub is aangesloten. Als de batterij volledig opgeladen is, kan het apparaat zo'n 3 uur werken. 35 Foto's van uw Computer naar uw Fotolijst Downloaden Let op: u moet de Fotokijker op de PC aansluiten, vóór u de software start. 1. Steek één eind van de USB-kabel in de USB-poort van uw computer, en het andere eind in de USB-aansluiting van uw Fotokijker. USB op computer Mini B op Fotoalbum USB Cable 2. "Op de Fotokijker verschijnt “Connect?”; druk ter bevestiging op MODE. In het scherm verschijnt “ Download” als het apparaat goed aangesloten is. Als binnen 5 minuten geen knop wordt ingedrukt, dan schakelt de Fotolijst naar de oplaadstand voor de batterij. U moet de USB-kabel afkoppelen en opnieuw aansluiten. 3. Start de software door dubbel op de Photo Viewer snelkoppeling op het bureaublad van uw computer te klikken. Bewaar de geselecteerde foto op het Collectiescherm ('Collection') van uw computer. Wis geselecteerde foto's. Klik hierop om de foto's op het Collectiescherm ( 'Collection') naar uw Fotokijker te downloaden. 36 Klik hierop om uw foto's te roteren. Klik hierop om foto's in het Voorvertoongebied ('Preview area) naar het Collectiescherm ('Collection') te brengen. - Voorvertoongebied ('Preview area') - Collectiescherm ('Collection') - Aantal foto's op het Collectiescherm ('Collection') - Maximum aantal foto's dat op de Fotolijst opgeslagen kan worden 37 4. Blader op uw computer naar foto('s) die u wilt downloaden.De geselecteerde foto wordt getoond in het Voorvertoongebied ('Preview Area'). Let op: de Fotolijst leest JPG/ BMP/ TIF/ GIF/ PNG plaatjes. 5. Als de foto te groot is, dan verschijnt een rood vak op de foto. U kunt op het rode vak klikken en het heen en weer bewegen om een gedeelte van de foto af te snijden. U kunt de foto ook roteren door op te klikken. 6. Klik op om de foto die in het Voorvertoongebied ('Preview Area') getoond wordt, naar het Collectiescherm ('Collection') te verplaatsen. 7. Als u een foto in het Collectiescherm ('Collection') wilt wissen, selecteer dan de foto en druk op om hem te wissen. Als u een foto in het Collectiescherm ('Collection') op uw computer wilt opslaan, selecteer dan de foto en druk op 8. Klik op . om foto's op het Collectiescherm ('Collection') naar uw Fotolijst te synchroniseren. 9. Wacht tot de software klaar is met downloaden. Sluit dan de software en ontkoppel de Fotolijst van uw computer. LET OP: Als u opnieuw foto's wilt downloaden, dan moet u de Photo Viewer software opnieuw opstarten. 38 De Functieknoppen Gebruiken 1. Scherm 2. /MODE 3. Vorige Plaatje Wis Plaatjes 4. Volgende Plaatje Wis alle Plaatjes 5. Mini USB Aansluiting 4 3 2 1 5 Verklaring Betreffende Elektromagnetische Emissies 39 De Fotolijst Aan/Uit Zetten Houd /MODUS zo'n 4 seconden ingedrukt om het apparaa t aan te zetten. Houd /MODUS nogmaals zo'n 4 seconden ingedrukt om het apparaat weer uit te zetten. Let op: u moet de fotopresentatie uitzetten, voor u de Fotolijst uit kunt zetten. Foto's Bekijken 1. Zet de Fotolijst aan door /MODUS zo'n 4 seconden ingedrukt te houden. 2. Druk op VOLGENDE om door uw foto's te bladeren. Druk op VORIGE om terug te gaan naar een vorige foto. De Fotopresentatie Gebruiken (Foto's Automatisch Afspelen) Druk, terwijl het apparaat aanstaat, op /MODUS. De Fotolijst bladert automatisch door de foto's. Druk nogmaals op /MODUS om de fotopresentatie weer uit te zetten. Een Enkele Foto Wissen 1. Druk in de bladerstand op VORIGE en VOLGENDE om het plaatje, dat u wilt wissen, op te zoeken. 2. Houd 3 seconden ingedrukt. In het scherm verschijnt “Delete”. 3. Druk op om de foto te wissen, of druk op om te annuleren. Alle Foto's Wissen 1. Druk in de bladerstand op VORIGE en VOLGENDE om het plaatje, dat u wilt wissen, op te zoeken. 2. Houd 3 seconden ingedrukt. In het scherm verschijnt “Delete All”. 3. Druk op om alle foto's te wissen, of druk op om te annuleren. 40 Problemen bij de Installatie Oplossen Volg deze stappen, als het apparaat bij de installatie de foutmelding “Device not connected” toont: A. Bij problemen met de software (U kunt de Photo Viewer software niet starten) 1. Plaats de installatie CD er opnieuw in en kies “Remove” of “Uninstall” uit het menu. 2. Ontkoppel de USB-kabel en het apparaat van de computer en start de computer opnieuw op. 3. Start nu op nieuw het installatieprogramma en installeer de software. Let op: SLUIT de USB-kabel NIET aan, als de software nog niet geïnstalleerd is. B. Bij problemen met de hardware (Apparaat niet herkend) 1. Ga, als de Fotokijker via de USB op de computer aangesloten is, naar Start / Configuratiescherm / Hardware. 2. Als de dialoog opkomt, klik dan op de optie die zegt: “Ja, ik heb de hardware al aangesloten. 3. Zoek in de lijst met apparaten “Photo Viewer” op, en klik op Volgende om de status van het apparaat te bekijken. Als naast Photo Viewer een waarschuwingssymbool verschijnt, dubbelklik dan op het symbool en selecteer de optie “De software opnieuw installeren”. 41 S.E.Microsoftft Manuel d'utilisation FRANCAIS CADRE PHOTO DIGITAL A lire en premier Guide d'installation rapide CONFIGURATION SYSTEME REQUISE: Windows 98 / 2000 / ME / XP/Vista INSTALLATION: ** Important: Installez le logiciel fourni avec l'appareil avant de raccorder celui-ci à votre ordinateur. ** 1. Si déjà raccordé à votre ordinateur, déconnectez le cordon USB de votre ordinateur. 2. Insérez le CD et suivez les instructions affichées à l'écran pour installer le “Cadre photo”. 3. Une fois le logiciel installé, vous pouvez raccorder le cadre photo à votre ordinateur avec le cordon USB fourni. 4. Le système d'exploitation Windows installe le pilote de l'appareil automatiquement. 5. Lancez “Photo Viewer” et appréciez vos photos. REMARQUE: le logiciel ne se lancera pas lorsque le cadre photo est raccordé à l'ordinateur ou si le mode Diaporama automatique est activé. Pour les utilisateurs de Windows 98 SE , installer le driver qui se trouve sur le CD-rom 42 Introduction Ce cadre photo numérique est un périphérique autonome conçu pour transférer et stocker des images à partir d'un ordinateur ainsi que de les afficher. En utilisant le logiciel fourni avec cet appareil, vous pouvez organiser, modifier, améliorer et transférer les images de votre ordinateur sur cet appareil via USB. Ce cadre photo peut stocker des milliers de photos. Consignes de sécurité importantes AVERTISSEMENT: 3 heures de mise en charge sont nécessaires pour recharger complètement la batterie. Ne laissez pas l'appareil raccordé au port USB de votre ordinateur pendant plus de 12 heures consécutives, l'appareil pourrait en effet s'endommager et une surchauffe pourrait se produire. N'exposez pas cet appareil à l'eau et l'humidité. N'utilisez pas cet appareil près de sources de chaleur comme des radiateurs et poêles. L'appareil doit seulement être raccordé à une source d'alimentation indiquée sur le manuel d'utilisation ou sur l'appareil. Attention à ce qu'aucun objet ne soit placé sur l'appareil, et qu'aucun liquide ne soit versé sur ou à l'intérieur de l'appareil. L'utilisateur est tenu de ne pas tenter d'entretenir l'appareil au delà des consignes du manuel d'utilisation. Confiez l'entretien de cet appareil à de personnel qualifié. 43 Installation du cadre photo Le cadre photo peutêtre positionné verticalement (portrait)ou horizontalement(paysage). 1. Appuyez sur la touche de verrouillage et tirez l unité principale pour détacher celle-ci du cadre. ----------------- ------------------------------------------------ --2. Appuyez sur l'extrémité gauche de la tige, et tenez l'autre extrémité pour détacher. ----------------- ------------------------------------------------ --3. Replacez le cadre en insérant les deux tiges de l'appareil dans les deux trous situés sur la partie supérieure du cadre. Assemblez le cadre et l'appareil, appuyez ensuite sur la partie inférieure jusqu'à ce que le cadre soit bien fixé. ----------------- ------------------------------------------------ --4. Vissez le pied à un des deux trous à vis situés à l'arrière de l'appareil. 44 Installation du logiciel / pilote IMPORTANT: Vous devez d'abord installer le logiciel sur votre ordinateur avant de raccorder le cadre photo à celui-ci. 1. Insérez le CD-ROM et double cliquez sur le fichier SETUP.EXE; suivez les instructions affichées à l'écran. 2. Le logiciel Photo Viewer va être installé sur votre ordinateur et un raccourci sera présent sur votre bureau. NE PAS LANCER LE LOGICIEL MAINTENANT. 3. Une fois le logiciel installé, raccordez le cadre photo à votre ordinateur avec le cordon USB fourni. Le pilote du cadre photo est installé automatiquement. Suivez les instructions affichées à l'écran et acceptez lorsque des fenêtres d'installation s'affichent à l'écran. 4. Une fois le pilote installé, lancez le logiciel Photo Viewer Qiu se trouve sur le bureau. REMARQUE: S'il vous est impossible de lancer le logiciel ou de connecter le cadre photo à l'ordinateur, reportez-vous à la section Dépannage du manuel pour obtenir de l'aide. Mise en charge de la batterie intégrée La batterie interne de l'appareil peut être mise en charge via le câble USB lorsque relié à un port USB (port USB de votre ordinateur) ou un hub USB. Une fois la batterie complètement chargée, l'appareil dispose d'une autonomie de 3 heures en lecture. 45 Transférer des photos sur le cadre photo numérique à partir de l'ordinateur Attention: Raccordez le cadre photo à votre ordinateur avant de lancer le logiciel. 1. Raccordez une extrémité du câble USB à un port USB de votre ordinateur, et l'autre extrémité au cadre photo. Port USB de l'ordinateur Port mini USB du cadre photo Câble USB 2. " Connecter?" s'affiche sur l'écran du cadre photo, appuyez sur la touche MODE pour confirmer," Transférer" s'affiche, indiquant l'établissement de la connexion, au bout de 5 minutes d'inactivité, le cadre photo bascule en mode économie d'énergie. Vous devez alors déconnecter et reconnecter le câble USB. 3. Lancez le logiciel en double cliquant sur le raccourci Photo Viewer situé sur le bureau. Sauvegarder les photos sélectionnées dans la fenêtre Collection sur votre ordinateur. Pour supprimer les photos sélectionnées. Cliquez pour transférer les images de la fenêtre Collection sur le cadre photo 46 Cliquez pour effectuer une rotation sur image Cliquez pour transférer une image en cours de prévisualisation vers la fenêtre Collection. - Espace de prévisualisation. - Fenêtre Collection. - Nombre de photos de la fenêtre Collection. - Nombre maximal de photos pouvant être stockées sur le cadre photo 47 4. Parcourez les dossiers de votre ordinateur pour rechercher des photos à transférer.La photo sélectionnée est affichée dans l'espace de prévisualisation.Remarque: Le cadre photo prend en charge les formats de fichiers image suivants : JPG / BMP / TIF / GIF / PNG. 5. Lorsque la photo est trop grande, une boîte rouge apparait sur la photo, vous pouvez cliquer sur cette boîte rouge et la déplacer pour recadrer la photo.Vous pouvez également effectuer une rotation sur la photo en cliquant sur " " 6. Cliquez sur “ ” pour transférer la photo affichée dans l'espace de prévisualisation vers la fenêtre Collection. 7. Lorsque vous souhaitez supprimer une photo de la fenêtre Collection, sélectionnez la photo et appuyez sur la touche ” ” pour la supprimer. Lorsque vous souhaitez sauvegarder une photo de la fenêtre Collection sur votre ordinateur, sélectionnez la photo et appuyez sur la touche “ ” pour la sauvegarder. 8. Cliquez sur “ ” pour transférer les photos de la fenêtre Collection vers votre cadre photo. 9. Attendez la fin du transfert, quittez le logiciel et déconnectez le cadre photo de votre ordinateur REMARQUE: Lorsque vous souhaitez à nouveau transférer des images, vous devez relancer le logiciel Photo Viewer. 48 Fonctionnement des touches 1. Ecran 2. / MODE 3. Image précédente Supprimer les images 4. Image suivante Supprimer toutes les images. 5. Connecteur Mini USB 4 3 2 1 5 Déclaration sur les emissions électromagnetiques Cet équipement est conforme à la partie 15 des règlements de la FCC et de la CE. L'utilisation de l'appareil est soumise aux deux conditions. suivantes: (1) Cet appareil ne doit pas provoquer d'interférences et. (2) il doit accepter toute interférence, y compris celles susceptibles de provoquer un fonctionnement indésirable de l'appareil. THIS CLASS B DIGITAL APPARATUS COMPLIES WITH CANADIAN ICES-003. / CET APPAREIL NUMÉRIQUE DE LA CLASSE B EST CONFORME ALA NORME NMB-003 DU CANADA. 49 Mise en marche/arrêt du cadre photo Appuyez et maintenez enfoncée la touche / MODE pendant 4 secondes pour mettre l'appareil en marche. Appuyez et maintenez enfoncée la touche à nouveau / MODE pendant 4 secondes pour éteindre l'appareil Remarque: vous devez désactiver le Diaporama avant d'éteindre le cadre photo. Visionner des photos 1. Mettez en marche le cadre photo en appuyant et maintenant enfoncée la touche / MODE pendant environ 4 secondes. 2. Appuyez sur la touche pour naviguer parmi vos photos. Appuyez sur la touche pour revenir à la photo précédente. Activer le Diaporama (affichage automatique des photos) Lorsque le cadre photo est en marche, appuyez sur la touche / MODE. Le cadre photo affiche les photos unepar une et demanière automatique. Appuyez sur la touche / MODE à nouveau pour désactiver le Diaporama. Supprimer une photo 1. En mode Navigation, utilisez la touche et pour sélectionner la photo que vous souhaitez supprimer. 2. Appuyez et maintenez enfoncée la touchep endant 3 secondes. Le message Supprimer s'affiche. 3. Appu yez sur la t ouche po ur supprimer laphoto, ou appuyez sur la touche pour annuler l'opération Supprimer toutes les photos 1. En mode Navigation, utilisez la touche et pour sélectionner la photo que vous souhaitez supprimer. 2. Appuyez et maintenez enfoncée la touche pendant 3 secondes. Le message Supprimer tout s'affiche. 3. Appuyez sur la touche pour supprimer la photo, ou appuyez sur la touche pour annuler l'opération. 50 Résolution des problèmes survenant lors de l'installation Lorsque l'écran affiche un message d'erreur “Périphérique non connecté” durant l'installation, suivez les étapes suivantes pour résoudre ce problème: A. Problèmes avec le logiciel (impossible de lancer le logiciel Photo Viewer) 1. Réinsérez et lancez à nouveau le CD d'installation et sélectionnez “Supprimer” ou “Désinstaller” à partir du menu d'installation. 2. Déconnectez le cordon USB de l'ordinateur puis redémarrez. 3. Une fois l'ordinateur prêt, lancez l'installateur à nouveau et réinstallez le logiciel. REMARQUE: NE PAS raccorder le cordon USB avant la fin de l'installation du logiciel. B. Pour les problèmes matériels (Périphérique non reconnu) 1. Après avoir raccordé le cadre photo numérique via USB, allez dans le menu Démarrer / Panneau de configuration/ Ajouter un nouveau périphérique. 2. Lorsque la boîte de dialogue apparait, cliquez sur “Oui, j'ai déjà raccordé le périphérique”. 3. Dans la liste des périphériques, sélectionnez “Photo Viewer” et cliquez sur SUIVANT, l'état du périphérique est alors affiché. Lorsqu'une icône d'avertissement apparaît à côté du cadre photo, double cliquez sur l'icône et sélectionnez “Réinstaller le pilote”. 51 If at any time in the future you should need to dispose of this product please note that: Waste electrical products should not be disposed of with household waste. Please recycle where facilities exist. Check with your Local Authority or retailer for recycling advice. (Waste Electrical and Electronic Equipment Directive) Si en el futuro necesita deshacerse de este producto, tenga en cuenta lo siguiente: no debe deshacerse de los residuos de productos eléctricos como si fueran residuos domésticos. Por favor, recicle en los sitios en los que esto sea posible. Acuda a las autoridades locales o al vendedor en busca de asesoramiento sobre reciclaje. (Directiva sobre residuos eléctricos y equipos electrónicos). Si vous souhaitez vous débarrasser ultérieurement du produit, veuillez noter que : les déchets électriques ne doivent pas être jetés avec les déchets domestiques. Veuillez les faire déposer dans les centres de recyclage existants. Contactez les autorités locales ou distributeurs pour obtenir de plus amples informations. (Directive de l'équipement électronique et des déchets électriques). Sollten Sie irgendwann zu späterer Zeit dieses Produkt entsorgen wollen, beachten Sie bitte Folgendes: Elektroschrott sollte nicht mit dem Haushaltsmüll entsorgt werden. Bitte recyceln Sie ihn, sofern Ihnen entsprechende Möglichkeiten zur Verfügung stehen. Setzen Sie sich mit Ihren kommunalen Behörden oder Ihrem Einzelhändler in Verbindung und fragen Sie diese um Rat bezüglich der Wiederverwertung. (Elektro- und Elektronik-Altgeräte-Richtlinie (WEEE)) Indien u zich in de toekomst van dit toestel wenst te ontdoen, let er dan op dat elektrisch afvalmateriaal niet met het huishoudelijk afval mag worden verwijderd. Breng het toestel naar een kringloopwinkel of anderevoorziening voor recycling. Neem contact op met uw plaatselijke autoriteit of winkelier indien u meer informatie wenst over recycling. (Richtlijn voor Afval van Elektrische en Elektronische Apparaten, AEEA).-
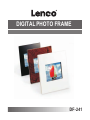 1
1
-
 2
2
-
 3
3
-
 4
4
-
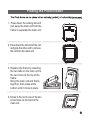 5
5
-
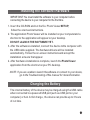 6
6
-
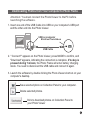 7
7
-
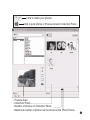 8
8
-
 9
9
-
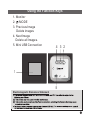 10
10
-
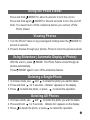 11
11
-
 12
12
-
 13
13
-
 14
14
-
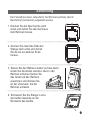 15
15
-
 16
16
-
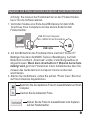 17
17
-
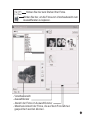 18
18
-
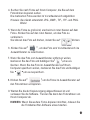 19
19
-
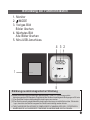 20
20
-
 21
21
-
 22
22
-
 23
23
-
 24
24
-
 25
25
-
 26
26
-
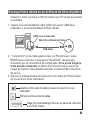 27
27
-
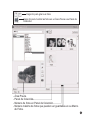 28
28
-
 29
29
-
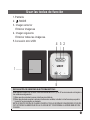 30
30
-
 31
31
-
 32
32
-
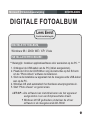 33
33
-
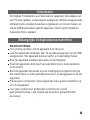 34
34
-
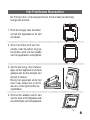 35
35
-
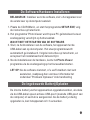 36
36
-
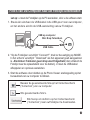 37
37
-
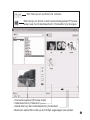 38
38
-
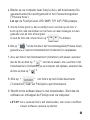 39
39
-
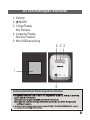 40
40
-
 41
41
-
 42
42
-
 43
43
-
 44
44
-
 45
45
-
 46
46
-
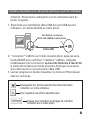 47
47
-
 48
48
-
 49
49
-
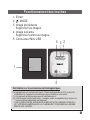 50
50
-
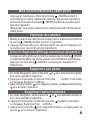 51
51
-
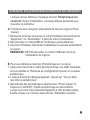 52
52
-
 53
53


Lenco DF-241 de handleiding
- Categorie
- Digitale fotolijsten
- Type
- de handleiding
in andere talen
- English: Lenco DF-241 Owner's manual
- français: Lenco DF-241 Le manuel du propriétaire
- español: Lenco DF-241 El manual del propietario
- Deutsch: Lenco DF-241 Bedienungsanleitung
Gerelateerde papieren
Andere documenten
-
Lexibook DKC01 Handleiding
-
-
Parrot PHOTO VIEWER 7CC Handleiding
-
Belkin Slideshow Viewer Handleiding
-
-
Telefunken DPF 9323 de handleiding
-
AIPTEK POCKETCAM SLIM 3000 Handleiding
-
Hama 00095253 de handleiding
-
Philips SPV3000/12 Handleiding
-
Philips SPV3000/12 Snelstartgids