

Gebruikershandleiding
• Bepaaldeinhoudenafbeeldingenwijkenmogelijkafvanuwapparaat,afhankelijk
vanderegio,serviceprovider,softwareversieofOS-versiedieugebruikt,en
kunnenzonderaankondigingvoorafwordengewijzigd.
• GebruikaltijdorigineleLG-accessoires.Demeegeleverdeitemszijnalleenvoordit
apparaatontwikkeldenzijnmogelijknietcompatibelmetandereapparaten.
• Ditapparaatisvanwegehettoetsenbordophetaanraakschermnietgeschiktvoor
mensenmeteenvisuelehandicap.
• Copyright©2016LGElectronics,Inc.Allerechtenvoorbehouden.LGenhet
LG-logozijngeregistreerdehandelsmerkenvanLGGroupendiensgelieerde
partners.Alleanderehandelsmerkenzijnheteigendomvanhunrespectieve
eigenaren.
• Google™,GoogleMaps™,Gmail™,YouTube™,Hangouts™enPlayStore™
zijnhandelsmerkenvanGoogle,Inc.
NEDERLANDS

2
Inhoud
Richtlijnen voor veilig en efficiënt
gebruik ......................................................4
Belangrijke notificatie ............................13
Meer informatie over uw telefoon ..........16
Telefoonlay-out ...................................... 16
De SIM- of USIM-kaart en batterij
plaatsen ................................................18
De batterij opladen ................................20
Een geheugenkaart plaatsen ..................21
De geheugenkaart verwijderen ..............22
Het apparaat vergrendelen en
ontgrendelen .........................................22
Het Homescreen ......................................24
Tips voor het aanraakscherm .................24
Homescreen ..........................................25
Het Homescreen aanpassen ..................26
Terugkeren naar recent gebruikte
applicaties ............................................. 28
Notificatiescherm ..................................28
Schermtoetsenbord ...............................31
Speciale functies ....................................32
Gebaaropname ......................................32
Vluchtige weergave ...............................33
Zet het scherm aan ................................ 33
Knock Code ...........................................34
Capture+ ............................................... 35
Google-account instellen .......................37
Uw Google-account maken ....................37
Aanmelden bij uw Google-account ......... 37
Verbinden met netwerken en
apparaten ................................................ 39
Wi-Fi .....................................................39
Bluetooth ...............................................40
Wi-Fi Direct ...........................................41
Data overdragen tussen een PC en
het apparaat ..........................................42
Oproepen ................................................. 43
Een oproep plaatsen ..............................43
Uw contacten bellen ..............................43
Een oproep beantwoorden of weigeren ..43
Een tweede oproep plaatsen .................. 44
Oproepinfo tonen ...................................44
Oproepinstellingen ................................. 44
Contacten ................................................ 45
Een contact zoeken ...............................45
Een nieuw contact toevoegen ................45
Favoriete contacten ...............................45
Een groep maken ..................................46
Berichten ................................................. 47
Een bericht verzenden ...........................47
Gegroepeerde weergave ........................ 48
Uw berichtinstellingen wijzigen .............. 48
Inhoud

3
Inhoud
E-mail ......................................................49
E-mailaccounts beheren ........................49
Accountmappen gebruiken ....................49
E-mailberichten schrijven en
verzenden ..............................................50
Camera en video .....................................51
Cameraopties in de zoeker ....................51
De geavanceerde instellingen
gebruiken ..............................................52
Een foto maken .....................................53
Als u een foto hebt gemaakt ..................53
Een video opnemen ...............................54
Na het opnemen van een video .............. 54
Galerij .................................................... 55
Multimedia ..............................................58
Muziek ..................................................58
Accessoires ............................................. 61
Klok ....................................................... 61
Rekenmachine ....................................... 62
Agenda ..................................................63
Spraakrecorder ...................................... 63
Voice Search..........................................63
Downloads ............................................64
FM-radio ...............................................64
LG SmartWorld ......................................64
Webbrowser ............................................66
Internet .................................................. 66
Chrome .................................................67
Instellingen .............................................69
Netwerken ............................................. 69
Geluid & Notificaties ..............................72
Weergave ..............................................73
Algemeen ..............................................75
PC software (LG PC Suite) ......................82
Voor Windows OS ..................................82
Voor Mac OS ..........................................83
Software-update voor telefoon ..............85
Software-update voor telefoon ............... 85
Informatie over deze
gebruikershandleiding ...........................87
Informatie over deze
gebruikershandleiding ...........................87
Handelsmerken .....................................88
Accessoires ............................................. 89
Problemen oplossen ...............................90
Veelgestelde vragen ...............................94

4
Richtlijnen voor veilig en efficiënt gebruik
Leesdezeeenvoudigerichtlijnendoor.Dezerichtlijnenmoetenwordengevolgd.
Eriseenhulpprogrammaopuwapparaatgeïnstalleerddateventuelefoutenregistreert.
Dithulpprogrammaregistreertalleenspecifiekegegevensmetbetrekkingtotde
fout,zoalssignaalsterkte,deCellIDPositionbijhetonverwachtwegvallenvaneen
telefoongesprekengeactiveerdeapps.Hetlogboekkanalsreferentiewordengebruikt
bijhetbepalenvandeoorzaakvaneenfout.Delogbestandenzijngecodeerd.Alleen
medewerkersvanLGRepairCentreshebbentoegangtotdezebestanden.Zijzullen
dezebestandenraadplegenalsuuwapparaatterreparatieopstuurt.
Blootstelling aan radiogolven
InformatieoverblootstellingaanradiogolvenenSAR(SpecificAbsorptionRate).
Dezemobieletelefoon,modelLG-H420,isontwikkeldconformdegeldende
veiligheidsvoorschriftenvoorblootstellingaanradiogolven.Dezevoorschriftenworden
gebaseerdopwetenschappelijkerichtlijnenwaarinveiligheidsmargeszijningebouwd
omdeveiligheidvanallepersonentekunnenwaarborgen,ongeachtdeleeftijdof
gezondheidstoestand.
• Voorderichtlijnenvoorblootstellingaanradiogolvenwordtdemaateenheid
SAR(SpecificAbsorptionRate)gehanteerd.BijtestsvoorSARwordende
standaardmethodengebruikt,waarbijdetelefooninallegemetenfrequentiebanden
hethoogsttoegestaneenergieniveaugebruikt.
• HoeweldeverschillendemodellentelefoonsvanLGkunnenopererenoponderling
verschillendeSAR-niveaus,zijnzeallemaalzodanigontwikkelddatnalevingvande
geldenderichtlijnenwordtgewaarborgd.
• DeSAR-limietdiewordtaanbevolendoordeICNIRP(InternationalCommissionon
Non-IonizingRadiationProtection)bedraagt2W/kgevenredigverdeeldovertien
gramlichaamsweefsel.
Richtlijnen voor veilig en efficiënt gebruik

5
Richtlijnen voor veilig en efficiënt gebruik
• DehoogstgetesteSAR-waardevoorditmodeltelefoonvoorgebruikophetooris
0,676W/kg(10g)envoorgebruikophetlichaam0,667W/kg(10g).
• DitapparaatvoldoetaanderichtlijnenvoorblootstellingaanRF-signalenwanneer
hetopnormalewijzetegenhetoorwordtgehoudenofwanneerhetzichopeen
afstandvanminimaal1,5cmvanhetlichaambevindt.Wanneerhetapparaat
ineendraagtasje,riemclipofhouderophetlichaamwordtgedragen,mogen
dezehulpmiddelengeenmetaalbevattenenmoethetproductzichopeen
afstandvanminimaal1,5cmvanhetlichaambevinden.Voorhetoverbrengen
vandatabestandenofberichtenmoetditapparaatkunnenbeschikkenovereen
goedeverbindingmethetnetwerk.Insommigegevallenkanhetoverbrengen
vandatabestandenofberichtenvertragingoplopentoteendergelijkeverbinding
beschikbaaris.Houduaandebovenstaandeafstandsrichtlijnentotde
gegevensoverdrachtisvoltooid.
Onderhoud van het product
WAARSCHUWING
Gebruik alleen batterijen, laders en accessoires die voor gebruik bij dit type
telefoon zijn goedgekeurd. Het gebruik van andere typen batterijen kan
gevaarlijk zijn en kan ertoe leiden dat de garantie vervalt.
• Demonteerhetapparaatniet.Laateventuelenoodzakelijkereparatiesuitvoeren
dooreengekwalificeerdonderhoudstechnicus.
• ReparatiesdienabeoordelingvanLGonderdegarantievallen,omvattenmogelijk
vervangendeonderdelenofkaartendieofwelnieuwofwelgereviseerdzijn,op
voorwaardedatdezeonderdelenofkaarteneengelijkwaardigewerkinghebbenals
deonderdelendiewordenvervangen.
• Houdhetapparaatuitdebuurtvanelektrischeapparatenzoalstv’s,radio’senpc’s.
• Houdhetapparaatuitdebuurtvanwarmtebronnenzoalsradiatorenenkookplaten.
• Laathetapparaatnietvallen.

6
Richtlijnen voor veilig en efficiënt gebruik
• Stelhetapparaatnietblootaanmechanischetrillingenofschokken.
• Schakeldetelefoonuitwanneerditdoorspecialevoorschriftenwordtvereist.
Gebruikdetelefoonbijvoorbeeldnietinziekenhuizen,aangeziendoorhetgebruik
gevoeligemedischeapparatuurbeschadigdkanrakenofkanwordenbeïnvloed.
• Houddetelefoontijdenshetopladennietmetnattehandenvast.Hierdoorzou
unamelijkelektrischeschokkenkunnenoplopenendetelefoonzoukunnen
beschadigen.
• Laadeentelefoonnietopindebuurtvanbrandbarematerialen.Detelefoonkan
heetworden,waardoorbrandkanontstaan.
• Gebruikeendrogedoekomhettoestelaandebuitenzijdetereinigen(gebruik
geenoplosmiddelenzoalsbenzeen,verdunnersofalcohol).
• Laaddetelefoonnietopwanneerdezeopzachtebekledingligt.
• Laaddetelefoonopineengoedgeventileerderuimte.
• Stelhetapparaatnietblootaanextremeomstandighedenmetrookenstof.
• Bewaardetelefoonnietindebuurtvancreditcards,bibliotheekpasjesen
dergelijke,omdatdetelefoondeinformatieopdemagnetischestripkan
beïnvloeden.
• Tiknietophetschermmeteenscherpvoorwerp,ombeschadigingvandetelefoon
tevoorkomen.
• Steldetelefoonnietblootaanvloeistoffenenvocht.
• Gabehoedzaamommetdeaccessoires,zoalsoordopjes.Raakdeantenneniet
onnodigaan.
• Gebruiknooitgebroken,gesplinterdofgebarstenglas,raakhetnietaanenprobeer
hetnietteverwijderenofterepareren.Schadeaanhetglazenweergavescherm
tengevolgevanverwaarlozingofverkeerdgebruikwordtnietdoordegarantie
gedekt.
• Uwtelefooniseenelektronischapparaatdattijdensnormaalgebruikwarmte
genereert.Langdurigdirectcontactmetdehuidzondervoldoendeventilatieleidt
mogelijktotongemakofkleinebrandwonden.Weesdaaromvoorzichtigtijdensen
vlaknahetgebruikvanuwtelefoon.

7
Richtlijnen voor veilig en efficiënt gebruik
• Alsuwtelefoonnatisgeworden,koppeltudezedanonmiddellijklosenlaathet
toestelvolledigopdrogen.Probeerdetelefoonnietsnelleroptedrogenmetbehulp
eenexternehittebron,zoalseenoven,magnetronofhaardroger.
• Doorhetvochtinuwnattetelefoonverandertdekleurvanhetproductlabelbinnen
inuwtelefoon.Schadeaanhetapparaattengevolgevanblootstellingaanvloeistof
wordtnietdoordegarantiegedekt.
Efficiënt telefoongebruik
Elektronische apparate
Allemobieletelefoonskunnenstoringenopvangendiedewerkingkunnenbeïnvloeden.
• Vraageersttoestemmingvoordatuuwtelefoonindebuurtvanmedische
apparatuurgebruikt.Bewaardetelefoonnietindebuurtvaneenpacemaker(zoals
inuwborstzak).
• Sommigehoortoestellenzijngevoeligvoorstoringdoormobieletelefoons.
• EengeringestoringkanalvaninvloedzijnopTV’s,radio’s,PC’senz.
• Gebruikuwtoestelbijtemperaturentussen0ºCen40ºC,indienmogelijk.
Blootstellenvandetelefoonaanextreemlageofhogetemperaturenkanleidentot
schade,storingenofzelfsexplosie.
Veiligheid onderweg
Steluopdehoogtevandewettenenvoorschriftenvoorhetgebruikvanmobiele
telefoonsindegebiedenwaarurijdt.
• Gebruiktijdenshetrijdengeenhandheld-telefoon.
• Concentreeruophetrijden.
• Verlaatdewegenparkeerdeautovoordatueenoproepbeantwoordt,alsde
verkeerssituatiedatvereist.
• RF-energiekanbepaaldeelektronischesystemenindeautoontregelen,zoals
stereo-apparatuurenveiligheidsfuncties.

8
Richtlijnen voor veilig en efficiënt gebruik
• Alsuwautoisvoorzienvaneenairbag,magudezenietdoorgeïnstalleerdeof
draagbare,draadlozeapparatuurblokkeren.Alsuditweldoet,kanditertoeleiden
datdeairbagnietofnietgoedfunctioneertmetmogelijkernstigeverwondingentot
gevolg.
• Zethetvolumeniettehoogalsubuitenshuisnaarmuziekluistert,zodatude
geluidenuituwomgevingnogkunthoren.Ditisvooralbelangrijkinhetverkeer.
Voorkom gehoorbeschadiging
Vermijd lang muziek luisteren op hoge geluidsniveaus om mogelijke
gehoorschade te voorkomen.
Gehoorbeschadigingkanoptredenalsutelangaanhardgeluidwordtblootgesteld.
Daaromradenwijuaandehandsetniettedichtbijuworeninofuitteschakelen.Zet
hetmuziek-engespreksvolumeniettehoog.
• Alsueenhoofdtelefoongebruikt,zethetvolumedanlaagalsupersonendie
vlakbijustaannietkuntverstaanofalsdepersoondienaastuzit,kanhorenwaar
unaarluistert.
OPMERKING: hoge geluidsniveaus en overmatige druk van uw oordopjes en
hoofdtelefoon kunnen leiden tot gehoorbeschadiging.
Onderdelen van glas
Bepaaldeonderdelenvanuwmobieletelefoonzijnvanglas.Ditglaskanbrekenalsu
uwmobieletelefoonopeenhardoppervlaklaatvallenofalsheteenhardeklapkrijgt.
Raakgebrokenglasnietaanenprobeerhetnietteverwijderen.Gebruikuwmobiele
telefoonniettotdathetglasdooreengeautoriseerdeserviceproviderisvervangen.

9
Richtlijnen voor veilig en efficiënt gebruik
Explosiewerkzaamheden
Gebruikdetelefoonnietindebuurtvanexplosiewerkzaamheden.Neembeperkende
maatregeleninachtenhouduaanregelsenvoorschriften.
Explosiegevaar
• Gebruikdetelefoonnietbijpompstations.
• Gebruikdetelefoonnietindebuurtvanbrandstoffenenchemicaliën.
• Vervoergeenbrandbaregassen,vloeistoffenenexplosievenensladezeookniet
opindezelfderuimtevaneenvoertuigwaarinzichookdemobieletelefoonen
eventueleaccessoiresbevinden.
In vliegtuigen
Draadlozeapparatenkunnenstoringenveroorzakeninvliegtuigen.
• Schakeluwmobieletelefoonuitvoordatuaanboordvaneenvliegtuiggaat.
• Gebruikhettoestelnietophetterreinvandeluchthavenzondertoestemmingvan
debemanning.
Kinderen
Bewaardetelefoonopeenveiligeplaats,buitenhetbereikvankleinekinderen.
Detelefoonbevatkleineonderdelendie,indienlosgemaakt,verstikkingkunnen
veroorzaken.
Noodoproepen
Noodoproepenzijnmogelijknietviaalledraadlozenetwerkenbeschikbaar.Udient
daaromvoornoodoproepennooitvolledigafhankelijktezijnvandetelefoon.Vraagdit
nabijuwplaatselijkeserviceprovider.

10
Richtlijnen voor veilig en efficiënt gebruik
Batterij en onderhoud
• Debatterijhoeftnietvolledigontladentezijnvoordatudezeweerkuntopladen.In
tegenstellingtotanderetypenbatterijenheeftdebatterijgeengeheugendatvan
invloedisopdeprestaties.
• GebruikalleenbatterijenenladersvanLG.DeladersvanLGzijnzodanig
ontwikkelddatdezedelevensduurvandebatterijoptimaliseren.
• Demonteerdebatterijnietenvoorkomkortsluiting.
• Houddemetalencontactpuntenvandebatterijschoon.
• Vervangdebatterijwanneerdezenietmeervoldoendepresteert.Debatterijkan
honderdenkerenwordenopgeladen,voordatdezemoetwordenvervangen.
• Laaddebatterijopnieuwopalsdezegedurendelangeretijdnietisgebruikt,omde
levensduurteverlengen.
• Steldebatterijladernietblootaandirectzonlichtengebruikdezenietinvochtige
ruimtenzoalseenbadkamer.
• Bewaardebatterijnietinergwarmeofkouderuimten;datkantenkostegaanvan
deprestatiesvandebatterij.
• Erbestaatexplosiegevaaralsdebatterijwordtvervangendooreenbatterijvaneen
verkeerdtype.
• Verwijdergebruiktebatterijenvolgensdeinstructiesvandefabrikant.Zorgindien
mogelijkvoorrecycling.Doegebruiktebatterijennietbijhetgewonehuishoudelijk
afval.
• Alsdebatterijmoetwordenvervangen,kuntuditlatendoenbijhetdichtstbijzijnde
erkendeLGElectronics-servicepuntofdedichtstbijzijndedealervanLGElectronics.
• Haaldestekkervandeladeruithetstopcontactalsdebatterijvandetelefoon
volledigisopgeladen,omtevoorkomendatdeladeronnodigenergieverbruikt.
• Dewerkelijkelevensduurvandebatterijhangtafvandenetwerkconfiguratie,de
productinstellingen,degebruikspatronenendeomstandighedenwaarindebatterij
wordtgebruikt.
• Zorgdatergeenscherpevoorwerpenzoalstandenennagelsvanhuisdierenin
contactkomenmetdebatterij.Ditkanbrandveroorzaken.

11
Richtlijnen voor veilig en efficiënt gebruik
Informatiebericht over Open Source-software
Ga naar http://opensource.lge.com om de broncode onder GPL, LGPL, MPL
en andere licenties voor open sources in dit product te achterhalen.
Naast de broncode zijn alle licentievoorwaarden, beperkingen van garantie en
auteursrechtaanduidingen beschikbaar om te downloaden.
LG Electronics verleent u de open source-code op cd-rom tegen een
vergoeding die de kosten van een dergelijke levering dekt, zoals de kosten
van de media, de verzending en de verwerking. Een dergelijk verzoek kunt u
per e-mail richten aan: [email protected]. Dit aanbod is drie (3) jaar geldig
vanaf de dag van aankoop van het product.
UW APPARAAT BIJWERKEN
Toegang tot de meest recente firmware releases, nieuwe softwarefuncties en
verbeteringen.
• Selecteer de software-update in het instellingenmenu op uw apparaat.
• Werk uw apparaat bij door het op uw PC aan te sluiten. Ga voor meer
informatie over het gebruik van deze functie naar http://www.lg.com/
common/index.jsp en selecteer uw land en taal.
VERKLARING VAN OVEREENSTEMMING
Hierbij verklaart LG Electronics dat dit LG-H420-product voldoet aan
de belangrijkste voorschriften en andere relevante bepalingen van richtlijn
1999/5/EC. U vindt een kopie van de verklaring van overeenstemming op
http://www.lg.com/global/declaration
Neem contact op met het kantoor voor instructies bij dit product:
LG Electronics Inc.
EU Representative, Krijgsman 1,
1186 DM Amstelveen, The Netherlands

12
Richtlijnen voor veilig en efficiënt gebruik
Uw oude toestel wegdoen
1 Elektrischeenelektronischeproductenmogennietworden
meegegevenmethethuishoudelijkafval,maarmoetenworden
ingeleverdbijspecialeinzamelingspuntendiedoordelokaleof
landelijkeoverheidzijnaangewezen.
2 Decorrecteverwijderingvanuwoudetoestelhelptnegatievegevolgen
voorhetmilieuendemenselijkegezondheidvoorkomen.
3 Wiltumeerinformatieoverdeverwijderingvanuwoudetoestel?Neem
dancontactopmetdeplaatselijkeautoriteiten,deafvalophaaldienstof
dewinkelwaaruhetproducthebtgekocht.
Batterijen wegdoen
1 Ditsymboolkanwordengebruiktincombinatiemetchemische
symbolenvoorkwik(Hg),cadmium(Cd)oflood(Pb)alsdeaccumeer
dan0,0005%kwik,0,002%cadmiumof0,004%loodbevat.
2 Allebatterijen/accu'smogennietwordenmeegegevenmethet
huishoudelijkafval,maarmoetenwordeningeleverdbijspeciale
inzamelingspuntendiedoordelokaleoflandelijkeoverheidzijn
aangewezen.
3 Decorrecteverwijderingvanuwoudebatterijen/accu'shelptnegatieve
gevolgenvoorhetmilieuendegezondheidvanmensendier
voorkomen.
4 Wiltumeerinformatieoverdeverwijderingvanuwoudebatterijen/
accu's?Neemdancontactopmetdeplaatselijkeautoriteiten,de
afvalophaaldienstofdewinkelwaaruhetproducthebtgekocht.

13
Belangrijke notificatie
Lees de volgende informatie voordat u uw telefoon gaat
gebruiken!
Controleerofdeproblemendieuhebtervarenmetuwtelefooninditgedeelteworden
beschrevenvoordatudetelefoonterugbrengtmeteenserviceverzoekofvoordatude
klantenservicebelt.
1. Telefoongeheugen
Alserminderdan10MBruimtebeschikbaarisinuwtelefoongeheugen,kanuw
apparaatgeennieuweberichtenontvangen.Umoetmogelijkuwtelefoongeheugen
controlerenendata,zoalsapplicatiesofberichten,wissenomruimtevrijtemakenin
hetgeheugen.
Applicaties verwijderen:
1 Tikop > >tabbladApplicaties> >tabbladAlgemeen>Applicaties.
2 Alsalleapplicatieswordengetoond,bladertuerdoorheenenkiestudeapplicatie
dieuwiltverwijderen.
3 TikopWissen.
2. De levensduur van de batterij optimaliseren
Ukuntdelevensduurvanuwbatterijverlengendoorfunctiesuitteschakelendie
unietconstantopdeachtergrondnodighebt.Ukuntbijhoudenhoeapplicatiesen
systeembronnenenergieverbruiken.
Belangrijke notificatie

14
Belangrijke notificatie
Levensduur van de batterij van uw telefoon verlengen:
• Schakelradiocommunicatieuitalsuditnietgebruikt.SchakelWi-Fi,Bluetooth
®
of
GPSuitalsudezenietgebruikt.
• Verlaagdehelderheidvanhetschermensteleenkorteretime-outvanhetscherm
in.
• SchakelautomatischsynchroniserenmetGoogleMail,Agenda,Contactenen
andereapplicatiesuit.
• Sommigeapplicatiesdieudownloadt,verbruikenmogelijkstroom.
• Controleerhetbatterijniveautijdenshetgebruikvangedownloadeapplicaties.
3. Voordat u een open source-applicatie en besturingssysteem
installeert
WAARSCHUWING
Als u een ander besturingssysteem installeert en gebruikt dan door de
fabrikant is meegeleverd, werkt uw telefoon mogelijk niet goed. Bovendien
wordt uw telefoon in dat geval niet gedekt door de garantie.
WAARSCHUWING
Download applicaties alleen vanuit vertrouwde bronnen zoals Play Store™
om uw telefoon en persoonlijke data te beschermen. Als er zich onjuist
geïnstalleerde applicaties op uw telefoon bevinden, werkt de telefoon mogelijk
niet naar behoren of kan er een ernstige fout optreden. Verwijder dergelijke
applicaties en alle bijbehorende data en instellingen van de telefoon.

15
Belangrijke notificatie
4. Applicaties openen en tussen applicaties schakelen
Multi-taskingiseenvoudigmetAndroid.Ukuntmeerdereapplicatiestegelijkuitvoeren.
Uhoefteenapplicatieniettesluitenomeenanderetekunnenopenen.Ukunt
verschillendeapplicatiestegelijkgebruikenentussendezeapplicatiesschakelen.
Androidbeheertelkeapplicatie,enbeëindigtenstartdezewanneerditnodigis,zodat
ongebruikteapplicatiesnietonnodigenergieverbruiken.
1 Tikop
.Erwordenvoorbeeldenvanrecentgebruikteapplicatiesgetoond.
2 Tikvervolgensopdeapplicatiedieuwiltopenen.Devorigeapplicatieblijftopde
achtergrondactief.Tikop
omeenapplicatienagebruikweeraftesluiten.
• Usluiteenapplicatieindelijstmetrecenteapplicatiesafdoorhet
applicatievoorbeeldnaarlinksofrechtstevegen.Uwistalleapplicatiesdoorte
tikkenopWis alles.

16
Meer informatie over uw telefoon
Telefoonlay-out
Aanraakscherm
Nabijheidssensor
Oortelefoon
Hoofdtelefoonaansluiting
Cameralens voorzijde
Microfoon
OPMERKING: Nabijheidssensor
Als u oproepen plaatst en ontvangt, schakelt de nabijheidssensor automatisch
de verlichting uit en vergrendelt de sensor het aanraakscherm wanneer
wordt gedetecteerd dat de telefoon bij het oor wordt gehouden. Dit verlengt
de batterijduur en voorkomt dat u het scherm per ongeluk activeert tijdens
telefoongesprekken.
Meer informatie over uw telefoon

17
Meer informatie over uw telefoon
WAARSCHUWING
Als u een zwaar object op de telefoon plaatst of op de telefoon gaat zitten,
kan het weergavescherm beschadigd raken en werkt het aanraakscherm
mogelijk niet meer. Dek de nabijheidssensor niet af met schermbeschermers
of een andere soort beschermfolie. De sensor functioneert dan mogelijk niet
meer naar behoren.
Microfoon
Volumeknoppen
Lader/USB-poort
Aan/uit-knop/
Vergrendelknop
Cameralens achterzijde
Luidspreker
Flitser
Aan/uit-knop/
Vergrendelknop
• Doordezeknopingedrukttehouden,schakeltuuwapparaat
inofuit
• Kortindrukkenomhetschermtevergrendelen/ontgrendelen
Volumeknoppen (Wanneer het scherm uit is)
• ToetsomhooglangindrukkenvoorCapture+
• ToetsomlaaglangindrukkenvoorCamera

18
Meer informatie over uw telefoon
De SIM- of USIM-kaart en batterij plaatsen
PlaatsdeSIM-kaartofUSIM-kaartvandemobieletelefoonproviderendemeegeleverde
batterij.
1 Omhetklepjeaandeachterzijdeteverwijderen,paktudetelefoonstevigvastin
éénhand.Tilmetdeduimnagelvandeanderehanddebatterijafdekkingopzoals
getoondindeonderstaandeafbeelding.
2 SchuifdeSIM-kaartindeonderstesleufvoordeSIM-kaart,zoalsindeafbeelding
wordtgetoond.ZorgdatdeSIM-kaartmethetgoudkleurigecontactpuntnaar
benedenisgeplaatst.

19
Meer informatie over uw telefoon
WAARSCHUWING
Plaats geen geheugenkaart in het SIM-kaartslot. Als er een geheugenkaart
in het SIM-kaartslot blijft vastzitten, neemt u het apparaat naar een
LG-servicecentrum om de geheugenkaart te laten verwijderen.
OPMERKING: u kunt alleen microSIM-kaarten in dit apparaat gebruiken.
3 Plaatsdebatterij.
4 Uplaatstdeafdekkingweerterugophetapparaatdoorhetklepjeaandeachterzijde
overhetbatterijvakteleggen
enditnaarbenedentedrukkentothetopzijn
plaatsvastklikt
.

20
Meer informatie over uw telefoon
De batterij opladen
Laaddebatterijopvoordatudezevoorheteerstgebruikt.Gebruikdeopladeromde
batterijopteladen.Ukuntdebatterijookviaeencomputeropladendoordetelefoon
meteenUSB-kabelopdecomputeraantesluiten.
WAARSCHUWING
Gebruik uitsluitend door LG goedgekeurde laders, batterijen en kabels. Als u
niet-goedgekeurde laders, batterijen of kabels gebruikt, kan het opladen van
de batterij worden vertraagd. Ook kan hierdoor de batterij exploderen of het
apparaat beschadigd raken. Dit wordt niet gedekt door de garantie.
Deopladeraansluitingbevindtzichaandeonderkantvandetelefoon.Sluitdeoplader
opdetelefoonenopeenstopcontactaan.
OPMERKING: open de klep aan de achterzijde niet terwijl uw apparaat wordt
opgeladen.

21
Meer informatie over uw telefoon
Een geheugenkaart plaatsen
UwapparaatondersteunteenmicroSD-kaartvanmaximaal32GB.Afhankelijk
vandefabrikantvandegeheugenkaartenhettypegeheugenkaartzijnsommige
geheugenkaartenmogelijknietcompatibelmetuwapparaat.
WAARSCHUWING
Sommige geheugenkaarten zijn mogelijk niet volledig compatibel met het
apparaat. Wanneer u een niet-compatibele kaart gebruikt, kan het apparaat
of de geheugenkaart defect raken of kunnen de opgeslagen data beschadigd
raken.
OPMERKING: als data regelmatig worden weggeschreven en gewist, wordt
de levensduur van geheugenkaarten verkort.
1 Verwijderhetklepjeaandeachterzijde.
2 Plaatseengeheugenkaartmetdegoudkleurigecontactpuntenomlaag.
3 Plaatshetklepjeaandeachterzijdeterug.

22
Meer informatie over uw telefoon
De geheugenkaart verwijderen
Voordatudegeheugenkaartverwijdert,ontkoppeltudegeheugenkaarteerstzodatu
dezeveiligkuntverwijderen.
1 Tikop
> > >tabbladAlgemeen>Opslagruimte & USB> .
2 Verwijderdeklepaandeachterzijdeenverwijderdegeheugenkaart.
WAARSCHUWING
Verwijder de geheugenkaart niet terwijl het apparaat bezig is met het
overbrengen of openen van informatie. Hierdoor kunnen data verloren gaan
of beschadigd raken of kan de geheugenkaart of het apparaat defect raken.
Het is niet verantwoordelijk voor verliezen die voortvloeien uit het oneigenlijk
gebruik van beschadigde geheugenkaarten, waaronder verlies van data.
Het apparaat vergrendelen en ontgrendelen
AlsuopdeAan/uit-knop/Vergrendelknopdrukt,wordthetschermuitgeschakelden
wordthetapparaatindevergrendelingsmodusgezet.Hetapparaatwordtautomatisch
vergrendeldwanneerdezegedurendeeenbepaaldetijdnietwordtgebruikt.Hiermee
voorkomtudatudoortikkenperongelukeenfunctieactiveertenbespaartu
batterijstroom.
UontgrendelthetapparaatdooropdeAan/uit-knop/Vergrendelknoptedrukkenen
hetschermineenwillekeurigerichtingteschuiven.
OPMERKING: u kunt tweemaal op het scherm tikken om het scherm uit de
slaapstand te halen in plaats van de Aan/uit-knop/Vergrendelknop.

23
Meer informatie over uw telefoon
De methode voor schermvergrendeling wijzigen
Ukuntdemanierwijzigenwaaropuhetschermvergrendelt,omtevoorkomendat
anderentoegangkrijgentotuwpersoonlijkeinformatie.
1 Tikop
> > >tabbladWeergave>Homescreen vergrendelt>Kies
scherm slot.
2 KiesdegewensteschermvergrendelinguitGeen,Schuiven,KnockCode,Patroon,
PINofWachtwoord.
OPMERKING: maak een Google-account voordat u een
ontgrendelingspatroon instelt en onthoud de back-up PIN die u hebt
ingevoerd bij het aanmaken van uw ontgrendelingspatroon.
Let op! Als u geen Google-account op de telefoon hebt gemaakt en uw
PIN, wachtwoord en de back-up PIN bent vergeten, moet u een volledige
reset uitvoeren. Wanneer u echter een volledige reset uitvoert, worden alle
gebruikersapplicaties en -data gewist. Maak een back-up van alle belangrijke
data voordat u een volledige reset uitvoert.
TIP! Slim Slot
Met Slim Slot kunt u uw telefoon eenvoudiger ontgrendelen. U kunt Slim Slot
zo instellen dat uw telefoon ontgrendeld blijft wanneer u een betrouwbaar
Bluetooth-apparaat hebt aangesloten, wanneer uw telefoon zich op een
vertrouwde plek zoals bij u thuis of uw werk bevindt, of wanneer uw gezicht
wordt herkend door de telefoon.
Slim Slot instellen
1 Tik op
> > tabblad Applicaties > .
2 Tik op tabblad Weergave > Homescreen vergrendelt > Slim Slot.
3 Voordat u vertrouwde apparaten, plaatsen of gezichten toevoegt, moet
u eerst een schermvergrendeling instellen (Knock Code, Patroon, PIN of
Wachtwoord).

24
Het Homescreen
Tips voor het aanraakscherm
Hiervolgenenkeletipsoverhoeuopuwtelefoonkuntnavigeren.
• Tikken–meteenenkelevingeraanrakingkuntuitems,koppelingen,sneltoetsen
enlettersophetschermtoetsenbordkiezen.
• Tikken en vasthouden–tikopeenschermitem,houdhetitemvastentiluw
vingerpasopalsereenactieplaatsvindt.
• Slepen–tikopeenitemenhoudheteenmomentvastenverplaatsvervolgens
zonderuwvingeroptetillenuwvingeroverhetschermtotdatudegewenste
plaatshebtbereikt.UkuntitemsophetHomescreenverslepenomdezeandersin
tedelen.
• Vegen of schuiven–ukuntvegenofschuivendooruwvingersneloverhet
schermoppervlaktebewegen.Houduwvingernietstilwanneeruhetschermvoor
heteerstaanraakt(anderswordthetitemgesleept).
• Dubbeltikken–tiktweemaalomopeenwebpaginaofeenkaarttezoomen.
• Zoomen met uw vingers–schuifuwwijsvingerenduimnaarelkaartoeofvan
elkaarafomindewebbrowser,opeenkaartofopfoto'sinofuittezoomen.
• Het scherm roteren–vanuitveleapplicatiesenmenu'swordtderichtingvanhet
schermaangepastaandefysiekerichtingvanhetapparaat.
OPMERKING:
• U hoeft niet hard te drukken; het aanraakscherm is gevoelig genoeg om een
lichte maar vaste druk te herkennen.
• Raak de gewenste optie met een vingertop aan. Zorg dat u niet op andere
toetsen tikt.
Het Homescreen

25
Het Homescreen
Homescreen
HetHomescreenishetstartpuntvoorveelapplicatiesenfuncties.Hieropkuntu
applicatiesnelkoppelingenenGoogle-widgetstoevoegenvoorrechtstreeksetoegangtot
informatieenapplicaties.Ditishetstandaardschermenhetistoegankelijkviaelkmenu
dooropdetoets
tetikken.
Statusbalk
Applicatiepictogrammen
Indicator locatie
Sneltoetsgedeelte
Aanraaktoetsen voor het Homescreen
Destatusbalktoontinformatieoverdeapparaatstatus,waaronderdetijd,
signaalsterkte,batterijstatusenpictogrammenvoornotificaties.
Tikopeenpictogram(applicatie,map,enz.)omdezeteopenenentegebruiken.
GeeftaanwelkHomescreenumomenteelbekijkt.
HiermeehebtumetéénkeertikkentoegangtotallefunctiesinhetHomescreen.

26
Het Homescreen
Terug-toets
Hiermeekeertuterugnaarhetvorigescherm.Hiermee
wordentevenspop-upitemsgesloten,zoalsmenu's,
dialoogvenstersenhetschermtoetsenbord.
Home-toets
Hiermeekeertuvanafelkwillekeurigschermterugnaar
hetHomescreen.
Toets Recent
Hiermeekunturecentgebruikteapplicatiesweergeven.
Alsudezetoetsingedrukthoudt,wordteenmenumet
beschikbareoptiesgeopend.
Uitgebreid Homescreen
HetbesturingssysteembiedtmeerdereHomescreenszodatumeerruimtehebtvoorhet
toevoegenvanpictogrammen,widgetsennogveelmeer.
• SchuifmetuwvingernaarlinksofrechtsoverhetHomescreenvoorextra
schermen.
Het Homescreen aanpassen
UkunthetHomescreenaanpassendoorapplicatiesenwidgetstoetevoegenof
achtergrondentewijzigen.
Items toevoegen aan uw Homescreen
1 HoudhetlegegedeeltevanhetHomescreenlangingedrukt.
2 KieshetitemdatuwilttoevoegeninhetmenuModusNieuw.Uziethettoegevoegde
itemophetHomescreen.
3 Sleephetnaardegewenstelocatieentiluwvingerop.

27
Het Homescreen
TIP! Als u een applicatiepictogram uit het scherm Applicaties aan het
Homescreen wilt toevoegen, tikt u op de gewenste applicatie en houdt u deze
vast.
Een item wissen van het Homescreen
• HoudophetHomescreenhetpictogramvastdatuwiltwissen>sleephetnaar
.
Een applicatie aan het sneltoetsgedeelte toevoegen
• TikophetschermApplicatiesofophetHomescreenopeenapplicatiepictogram,
houdhetingedruktensleephetnaarhetsneltoetsgedeelte.Laathetvervolgens
losopdegewenstelocatie.
Een applicatie uit het sneltoetsgedeelte wissen
• Houddegewenstesneltoetsingedruktensleepdezenaar .
OPMERKING: de toets Applicaties kan niet worden gewist.
App-pictogrammen op het Homescreen aanpassen
1 Tikopeenapplicatiepictogramenhoudditingedrukttothetwordtontgrendeldvan
zijnhuidigelocatieenlaathetlos.HetpictogramBewerken
verschijntinde
rechterbovenhoekvandeapplicatie.
2 Tiknogmaalsophetapplicatiepictogramenkieshetgewensteontwerpende
groottevoorhetpictogram.
3 TikopOKomdewijzigingenopteslaan.

28
Het Homescreen
Terugkeren naar recent gebruikte applicaties
1 Tikop .Erwordenvoorbeeldenvanrecentgebruikteapplicatiesgetoond.
2 Tikopeenapplicatievoorbeeldomdebijbehorendeapplicatieteopenen.Oftikop
omterugtekerennaarhetvorigescherm.
Notificatiescherm
Notificatiesinformerenuovernieuweberichten,agendanotificatiesenalarmen,enover
actievegebeurtenissen,bijvoorbeeldwanneeruingesprekbent.
Wanneerereennotificatiebinnenkomt,verschijnthetbijbehorendepictogramboven
aanhetscherm.Pictogrammenvoorhuidigenotificatiesverschijnenaandelinkerkant
ensysteempictogrammen,zoalsdesterktevanhetWi-Fi-signaalenvandebatterij,aan
derechterkant.
OPMERKING: de beschikbare opties zijn afhankelijk van de regio of
serviceprovider.
StatuspictogrammenNotificatiepictogrammen
Het notificatiescherm openen
Veegvanafdestatusbalknaarbenedenomhetnotificatieschermteopenen.Alsuhet
notificatieschermwiltsluiten,veegtuoverhetschermnaarbovenoftiktuop
.

29
Het Homescreen
Het gedeelte Snel
instellingen
Notificaties
Wissen
TikopelketoetsSnelinstellingenomdezeinofuitteschakelen.Houddegewenste
toetsingedruktomhetinstellingenmenuvoordefunctiedirectteopenen.Veegnaar
linksofnaarrechtsvoormeerwisseltoetsen.Tikop
omtoetsenSnelinstellingen
tewissen,toetevoegenofteverplaatsen.
Dehuidigenotificatieswordenelkmeteenkortebeschrijvingweergegeven.Tikop
eennotificatieomdezetetonen.
Tikhieropomallenotificatiestewissen.
Indicatiepictogrammen op de statusbalk
Indicatiepictogrammenverschijnenopdestatusbalkbovenaanhetschermomgemiste
oproepen,nieuweberichten,agendanotificaties,apparaatstatusenmeeraantegeven.

30
Het Homescreen
Degetoondepictogrammenbovenaanhetschermverschaffeninformatieoverde
statusvanhetapparaat.Indeonderstaandetabelstaanenkeleveelvoorkomende
pictogrammen.
Pictogram Omschrijving Pictogram Omschrijving
GeenSIM-kaartgeplaatst
Erwordteennummer
afgespeeld
Geennetwerksignaal
beschikbaar
Belsignaalisuit
Flightmodeisaan Trilstandisaan
Verbondenmeteen
Wi-Fi-netwerk
Batterijvolledig
opgeladen
Bekabeldeheadset
aangesloten
Batterijwordtopgeladen
Actieveoproep
Detelefoonismeteen
PCverbondenviaeen
USB-kabel
Gemisteoproep Datadownloaden
Bluetoothisaan Datauploaden
Systeemwaarschuwing GPSingeschakeld
Alarmisingesteld
Dataworden
gesynchroniseerd
Nieuwevoicemail
beschikbaar
Kiesinvoermethode
Nieuwtekst-of
multimediabericht
beschikbaar
Wi-Fi-hotspotisactief

31
Het Homescreen
OPMERKING: de locatie van pictogrammen op de statusbalk kan verschillen,
afhankelijk van de functie of service.
Schermtoetsenbord
Ukunttekstinvoerenmetbehulpvanhetschermtoetsenbord.Hetschermtoetsenbord
verschijntophetschermwanneeruopeenbeschikbaartekstinvoerveldtikt.
Het toetsenblok gebruiken en tekst invoeren
Tikeenmaalomdevolgendeletteralshoofdlettertetypen.Tiktweemaalomvan
allelettershoofdletterstemaken.
Tikomdetoetsenbordinstellingenteopenen.Houdingedruktomspraaktekstinte
voerenofdeClip-ladeteopenen.
Tikhieropomeenspatieintevoeren.
Tikhieropomeennieuweregeltemaken.
Tikhieropomhetvorigetekentewissen.
Tekens met accenten invoeren
AlsuFransofSpaansalstekstinvoertaalkiest,kuntuspecialeFranseofSpaanse
tekensinvoeren(bijvoorbeeld"á").
Alsubijvoorbeeld"á"wiltinvoeren,houddandetoets"a"ingedrukttotdeinzoomtoets
groterwordtentekensuitverschillendetalenwordengetoond.Kiesvervolgenshet
gewenstespecialeteken.

32
Speciale functies
Gebaaropname
MetdefunctieGebaaropnamekuntumetdecameraaandevoorzijdeeenfotomaken
meteenhandgebaar.
Foto's nemen
ErzijntweemethodenomdefunctieGebaaropnametegebruiken.
• Steekuwhandomhoogmeteenopenhandpalmtotdecameraaandevoorzijde
uwhanddetecteertenereenkaderophetschermverschijnt.Maakvervolgens
vanuwhandeenvuistenerzaleentimergaanlopen,waardoorudetijdhebtom
uklaartemaken.
• Hefuwhandopineenvuisttotdatdecameraditdetecteerteneenkaderophet
schermverschijnt.Openvervolgensuwvuistomdetimertestarten,waardooru
detijdhebtomuklaartemaken.
of
Speciale functies

33
Speciale functies
Vluchtige weergave
Wanneerhettelefoonschermisuitgeschakeld,kuntudestatusbalk,tijdendatumzien
dooruwvingeromlaagoverhetschermteslepen.
Zet het scherm aan
MetdefunctieZethetschermaankuntuhetschermeenvoudigin-ofuitschakelen
dooreroptedubbeltikken.
Het scherm inschakelen
1 Tiktweemaalophetmiddenvanhetvergrendelingsschermomhetscherminte
schakelen.
2 Ontgrendelhetschermofopeneenvandebeschikbaresneltoetsenofwidgets.
Het scherm uitschakelen
1 TiktweemaalopeenleeggedeeltevanhetHomescreenofdestatusbalk.
2 Hetschermwordtuitgeschakeld.
OPMERKING: tik op het midden van het scherm. Als u op het onderste of
bovenste gedeelte tikt, kan de herkenning afnemen.

34
Speciale functies
Knock Code
MetdeKnockCode-functiekuntuuweigenontgrendelingscodemakendoor
middelvaneencombinatievantikkenophetscherm.WanneerhetHomescreenis
uitgeschakeld,hebturechtstreekstoegangtothetschermdoordezelfdevolgordeinte
tikkenophetscherm.
OPMERKING:
• Als u 6 keer de verkeerde Knock Code invoert, moet u zich verplicht
aanmelden bij uw Google-account/moet u uw back-up PIN invoeren.
• Tik met uw vingertop in plaats van uw nagel op het scherm om het apparaat
in of uit te schakelen.
• Als de Knock Code niet wordt gebruikt, kunt u gebruikmaken van de functie
Zet het scherm aan door op het scherm te tikken.
1 Tikop > >tabbladApplicaties> >tabbladWeergave>
Homescreen vergrendelt>Kies scherm slot>Knock Code.
2 TikineenpatroonopdevierkantenomuwKnockCodeintestellen.UwKnock
Code-patroonmaguit6tot8keertikkenbestaan.
Het scherm ontgrendelen met behulp van de Knock Code
UkunthetschermontgrendelendoorophetKnockCode-patroontetikkendatual
hebtingesteld,wanneerhetschermwordtuitgeschakeld.

35
Speciale functies
Capture+
MetdefunctieCapture+kuntumemo'senschermafbeeldingenmaken.
MetdefunctieCapture+kuntutijdenseengesprekopeenvoudigeenefficiëntewijze
memo'smakenmeteenopgeslagenfotoofophethuidigetelefoonscherm.
1 Tikopdestatusbalk,sleepdezeomlaagentikvervolgensop
.
2 Maakeenmemometbehulpvandevolgendeopties:
Tikomdedoorugemaaktememoopteslaan.
Tikomdemeestrecentebewerkingongedaantemaken.
Tikomdemeestrecenteongedaangemaaktebewerkingopnieuwuitte
voeren.
Tikomtekstinuwmemointevoegen.
Tikomhettypeendekleurvandepentekiezen.
Tikompotloodmarkeringenopdememotewissenmetdegum.
Tikhieropomdeafbeeldingvandememobijtesnijden.
Tikomdewerkbalkweertegevenofteverbergen.

36
Speciale functies
OPMERKING: gebruik uw vingertoppen wanneer u de functie QuickMemo+
gebruikt. Gebruik niet uw nagels.
3 Tikop omdehuidigememoopteslaaninQuickMemo+ ofGalerij.
QuickMemo's ongedaan maken
• Tikop .
De opgeslagen memo bekijken
TikophetHomescreenop >Galerij enkieshetalbumCapture+oftikop
QuickMemo+
enkiesdegewenstememo.

37
Google-account instellen
DeeerstekeerdatueenGoogle-applicatieopuwtelefoongebruikt,dientuzichaante
meldenmetuwbestaandeGoogle-account.IndienugeenGoogle-accounthebt,wordt
ugevraagdeenaccounttemaken.
Uw Google-account maken
1 TikophetHomescreenop .
2 Tikop
>tabbladAlgemeen>Accounts en synchronisatie>
ACCOUNTTOEVOEGEN>Google>Of maak een nieuw account.
3 Voeruwvoor-enachternaaminentikopVolgende.
4 VoereengebruikersnaaminentikopVolgende.Uwtelefoonmaaktvervolgens
contactmetdeGoogle-serversencontroleertofuwgebruikersnaambeschikbaaris.
5 VoeruwwachtwoordinentikopVolgende.
6 Volgdeaanwijzingenenvoerdeverplichteenoptioneledatavoorhetaccountin.
Wachtterwijluwaccountopdeserverwordtgemaakt.
Aanmelden bij uw Google-account
1 TikophetHomescreenop .
2 Tikop
>tabbladAlgemeen>Accounts en synchronisatie>
ACCOUNTTOEVOEGEN>Google.
3 Voeruwe-mailadresinentikopVolgende.
4 Nadatuzichhebtaangemeld,kuntuGmailenandereGoogle-servicesopuw
telefoongebruiken.
5 ZodrauuwGoogle-accounthebtingesteld,wordtuwtelefoonautomatisch
gesynchroniseerdmetuwGoogle-accountophetweb(alsereendataverbinding
beschikbaaris).
Google-account instellen

38
Google-account instellen
Nadatubentaangemeld,synchroniseertuwtelefoonmetuwGoogle-services,zoals
Gmail,ContactenenGoogleAgenda.UkuntMapsgebruiken,applicatiesdownloaden
uitdePlayStore,eenback-upvanuwinstellingenopGoogle-serversmaken,en
gebruikmakenvanandereGoogle-servicesopuwtelefoon.
BELANGRIJK
• Sommige applicaties, zoals Agenda, werken alleen met het eerste Google-
account dat u toevoegt. Als u meerdere Google-accounts bij uw telefoon wilt
gebruiken, zorg er dan voor dat u zich als eerste aanmeldt bij het account die
u met dergelijke applicaties wilt gebruiken. Wanneer u zich aanmeldt, worden
uw contacten, Gmail-berichten, agendagebeurtenissen en andere informatie
uit deze applicaties en services op het web gesynchroniseerd met uw telefoon.
Als u zich tijdens de installatie niet bij een Google-account aanmeldt, wordt
u gevraagd om u aan te melden bij een Google-account of om een Google-
account te maken wanneer u de eerste keer een applicatie start waarvoor een
Google-account nodig is (bijvoorbeeld Gmail of Play Store).
• Als u via uw bedrijf of een andere organisatie een zakelijk account hebt, heeft
de IT-afdeling waarschijnlijk specifieke instructies voor het aanmelden bij dat
account.

39
Verbinden met netwerken en apparaten
Wi-Fi
Ukunteensnelleinternetverbindinggebruikenbinnenhetdekkingsgebiedvanhet
draadlozetoegangspunt(AP).
Verbinding maken met Wi-Fi-netwerken
1 Tikop > >tabbladApplicaties> >tabbladNetwerken>Wi-Fi.
2 Tikop
omWi-FiinteschakelenennaarbeschikbareWi-Fi-netwerkente
zoeken.
3 Tikopeennetwerkomerverbindingmeetemaken.
• Alshetnetwerkisbeveiligdmeteenvergrendelingspictogram,moetueen
beveiligingssleutelofwachtwoordinvoeren.
4 DestatusbalkgeeftpictogrammenweerdiedeWi-Fi-statusaangeven.
OPMERKING: als u zich buiten de Wi-Fi-zone bevindt of Wi-Fi hebt
uitgeschakeld, kan het voorkomen dat het apparaat automatisch verbinding
met internet maakt via mobiele gegevens, waarvoor kosten berekend kunnen
worden.
TIP! Een MAC-adres verkrijgen
Tik op
> > tabblad Applicaties > > tabblad Netwerken > Wi-Fi >
> Geavanceerd > MAC-adres.
Verbinden met netwerken en apparaten

40
Verbinden met netwerken en apparaten
Bluetooth
Bluetoothisdraadloze-communicatietechnologievoorkorteafstandenwaarmeeu
draadloosverbindingkuntmakenmetdiverseBluetooth-apparatenzoalsheadsetsen
handsfreecarkitsenBluetooth-handhelds,computers,printersendraadlozeapparaten.
DeBluetooth-communicatieheeftmeestaleenbereikvancirca10meter.
OPMERKING:
• LG is niet verantwoordelijk voor het verlies, onderscheppen of misbruik van
data die worden verzonden of ontvangen via de Bluetooth-functie.
• Zorg er altijd voor dat u data deelt en ontvangt met apparaten die vertrouwd
en goed beveiligd zijn.
• Als er obstakels zijn tussen de apparaten, kan de afstand tussen de
apparaten worden verkort.
• Sommige apparaten, vooral apparaten die niet zijn getest of goedgekeurd
door Bluetooth SIG, zijn mogelijk niet compatibel met uw apparaat.
Uw telefoon aan een ander Bluetooth-apparaat koppelen
1 Tikop > >tabbladApplicaties> >tabbladNetwerken>Bluetooth.
2 Tikop
omBluetoothinteschakelen.
3 TikopZOEKENomalleapparatenbinnenhetbereiktetonen.
4 Kieshetapparaatwaarmeeudekoppelingtotstandwiltbrengenindelijst.Alshet
koppelenisgelukt,wordtuwtelefoonmethetandereapparaatverbonden.
OPMERKING: het koppelen van twee Bluetooth-apparaten hoeft slechts
eenmalig te worden uitgevoerd. Zodra een koppeling tot stand is gebracht,
blijven de apparaten hun relatie herkennen en informatie uitwisselen.
TIP! Raadpleeg de documentatie die bij het Bluetooth-apparaat werd geleverd
voor informatie over de koppelingsmodus en het wachtwoord (meestal 0 0 0
0 – vier nullen).

41
Verbinden met netwerken en apparaten
Data verzenden via Bluetooth
1 Kieseenbestandofeenitem,zoalseencontactofeenmediabestand.
2 KiesdeoptievoorhetverzendenvandataviaBluetooth.
3 ZoekeenBluetooth-apparaatenmaakeenkoppeling.
• VanwegedeverschillendespecificatiesenfunctiesvanandereBluetooth-
apparaten,kunnenhetweergaveschermendebewerkingenafwijkenenzijn
functieszoalsoverdrachtofuitwisselingwellichtnietmogelijkmetalleBluetooth-
apparaten.
Data ontvangen via Bluetooth
1 Tikop > >tabbladApplicaties> >tabbladNetwerken>Bluetooth.
2 Tikop
omBluetoothinteschakelen.
3 Uontvangteenverzoekomeenpogingtotkoppelingvanhetverzendendeapparaat
teaccepteren.ZorgervoordatuACCEPTERENselecteert.
Wi-Fi Direct
MetWi-FiDirectkuntueendirecteverbindingmakentussenWi-Fi-apparatenzonder
dateentoegangspuntnodigis.
Wi-Fi Direct inschakelen
1 Tikop > >tabbladApplicaties> >tabbladNetwerken > Wi-Fi.
2 Tikop
> Geavanceerd > Wi-Fi Direct.
OPMERKING: in dit menu is uw apparaat nu zichtbaar voor andere zichtbare
Wi-Fi Direct-apparaten in de buurt.

42
Verbinden met netwerken en apparaten
Data overdragen tussen een PC en het apparaat
UkuntdatakopiërenofverplaatsentusseneenPCenhetapparaat.
Data overdragen
1 VerbinduwtelefoonmeteenpcviadeUSB-kabeldiemetuwtelefoonis
meegeleverd.
2 Openhetnotificatiescherm,tikophethuidigeverbindingstypeenkiesMedia
apparaat (MTP).
3 Erverschijnteenvensteropuwpc,zodatudegewenstegegevenskunt
overbrengen.
OPMERKING: de LG Android-Platform Driver moet op uw PC zijn
geïnstalleerd om de telefoon te kunnen detecteren.
Items Vereiste
Besturingssysteem MicrosoftWindowsXPSP3,Vistaofhoger
WindowsMediaPlayer-versie WindowsMediaPlayer10ofhoger

43
Oproepen
Een oproep plaatsen
1 Tikop omdekiezerteopenen.
2 Voerhetnummerinmetdekiezer.Tikop
omeencijfertewissen.
3 Nahetinvoerenvanhetgewenstenummertiktuop
omhetnummerte
bellen.
4 Tikop
omdeoproeptebeëindigen.
TIP! Als u een + wilt invoeren voor een internationale oproep, tik dan op
en houd deze toets ingedrukt.
Uw contacten bellen
1 Tikop omuwlijstmetcontactenteopenen.
2 Bladerdoordelijstmetcontacten.Ukuntookdenaamvanhetcontactinhetveld
Zoekeninvoerenoflangsdealfabetischelettersaanderechterkantvanhetscherm
bladeren.
3 Tikindegetoondelijstophetcontactdatuwiltbellen.
Een oproep beantwoorden of weigeren
• Veeg ineenwillekeurigerichtingomdeinkomendeoproeptebeantwoorden.
• Veeg ineenwillekeurigerichtingomeeninkomendeoproepaftewijzen.
OPMERKING: tik of veeg Afwijzen met bericht als u een bericht naar de
beller wilt verzenden.
Oproepen

44
Oproepen
Een tweede oproep plaatsen
1 Tiktijdensuweersteoproepop >Toevoegen envoerhetnummerin.
2 Tikop
omhetnummertebellen.
3 Beideoproepenwordenophetoproepschermgetoond.Heteerstegesprekwordt
vergrendeldenindewachtstandgezet.
4 Tikophetgetoondenummeromtussendeoproepenteschakelen.Oftikop
om
eenvergaderingtestarten.
5 Tikop
omalleoproepentebeëindigen.
OPMERKING: voor elk gesprek worden kosten in rekening gebracht.
Oproepinfo tonen
TikophetHomescreenop enkiesOproepinfo.
Eenlijstmetallegekozen,ontvangenengemisteoproepentonen.
TIP!
• Als u op een vermelding in de oproepinfo tikt, worden de datum, het tijdstip
en de duur van de oproep getoond.
• Tik op en vervolgens op Alles wissen om alle opgeslagen items te
wissen.
Oproepinstellingen
Ukuntoproepinstellingenvoordetelefoonconfigureren,zoalshetdoorschakelenvan
oproepenenanderespecialeservicesvanuwprovider.
1 TikophetHomescreenop
omdekiezerteopenen.
2 Tikop
omdebeschikbareoptiestetonen.
3 TikopOproepinstellingenenconfigureerdegewensteopties.

45
Contacten
Ukuntcontactenopuwtelefoontoevoegenenzesynchroniserenmetdecontacten
inuwGoogle-accountofandereaccountsdiedesynchronisatievancontacten
ondersteunen.
Een contact zoeken
1 Tikop omuwlijstmetcontactenteopenen.
2 TikopZoekenenvoermethettoetsenborddenaamvanhetcontactin.
Een nieuw contact toevoegen
1 Tikop envoerhetnummervanhetnieuwecontactin.TikophetveldContact
makenof
>Toevoegen aan contacten.
2 Tikophetafbeeldingsgedeeltealsueenfotowilttoevoegenaanhetnieuwecontact.
KiesuitFoto nemenofKies uit de galerij.
3 Voerdegewensteinformatievoorhetcontactin.
4 TikopOPSLAAN.
Favoriete contacten
Ukuntveelgebeldecontactenalsfavorieteninstellen.
Een contact toevoegen aan uw favorieten
1 Tikop omuwlijstmetcontactenteopenen.
2 Tikopeencontactomdebijbehorendegegevenstetonen.
3 Tikopdesterrechtsboveninhetscherm.Desterwordtgeel.
Contacten

46
Contacten
Een contact in de lijst met favorieten wissen
1 Tikop omuwlijstmetcontactenteopenen.
2 TikophettabbladFavorietenenkieshetcontactvanwieudeinformatiewilttonen.
3 Tikopdegelesterrechtsboveninhetscherm.Desterwordtdonkerenhetcontact
wordtuitdefavorietengewist.
Een groep maken
1 Tikop omuwlijstmetcontactenteopenen.
2 TikopGroepen>
>Nieuwe groep.
3 Voereennaaminvoordenieuwegroep.Ukuntookeenspecialebeltooninstellen
voordenieuwegroep.
4 TikopLeden toevoegenomcontactentoetevoegenaandegroep.
5 TikopOPSLAANomdegroepopteslaan.
OPMERKING:
• As u een groep verwijdert, gaan de contacten in die groep niet verloren. Ze
blijven in de lijst met contacten staan.

47
Berichten
UwtelefooncombineertSMSenMMSinéénintuïtief,eenvoudigtegebruikenmenu.
Een bericht verzenden
1 TikophetHomescreenop entikop omeennieuwberichttemaken.
2 VoerdenaamofhettelefoonnummervanhetcontactinhetveldAanin.Terwijlude
naamvanhetcontactinvoert,wordenovereenkomendecontactengetoond.Ukunt
opeenvoorgesteldcontacttikkenenmeerdanééncontacttoevoegen.
OPMERKING: mogelijk worden er kosten in rekening gebracht voor elke SMS
die u verzendt. Raadpleeg uw serviceprovider.
3 Tikophettekstveldenvoeruwberichtin.
4 Tikop
omhetmenuOptiesteopenen.Kieseenofmeervandebeschikbare
opties.
TIP! U kunt op tikken om het bestand dat u wilt delen aan uw bericht toe
te voegen.
5 TikopZendenomuwberichtteverzenden.
TIP!
• De limiet van 160 tekens verschilt per land en is afhankelijk van de codering
van de SMS en de taal die in het bericht wordt gebruikt.
• Als u een afbeelding, video of geluid toevoegt aan een SMS, wordt het
bericht automatisch omgezet in een MMS en worden de daarbij behorende
kosten in rekening gebracht.
Berichten

48
Berichten
OPMERKING: wanneer u een tekstbericht ontvangt tijdens een oproep, hoort
u een geluidsmelding.
Gegroepeerde weergave
Ukuntberichtendieumetanderenhebtuitgewisseldinchronologischevolgordetonen,
zodatuuwgesprekkeneenvoudigkuntzienenvinden.
Uw berichtinstellingen wijzigen
Deberichtinstellingenvanuwtelefoonzijnvoorafgedefinieerd,zodatudirectberichten
kuntverzenden.Ukuntdeinstellingenaanpassenaanuwvoorkeuren.
• TikophetHomescreenop ,tikop >Opties.

49
E-mail
UkuntdeapplicatieE-mailgebruikenome-mailberichtenvanandereprovidersdan
Gmailtelezen.DeapplicatieE-mailondersteuntdevolgendeaccounttypen:POP3,
IMAPenMicrosoftExchange(voorEnterprise-gebruikers).
E-mailaccounts beheren
De applicatie E-mail openen
Tikop > >tabbladApplicaties> .
WanneerudeapplicatieE-mailvoorheteerstopent,verschijnteeninstellingswizard
waarmeeueene-mailaccountkunttoevoegen.
Een andere e-mailaccount toevoegen:
• Tikop > >tabbladApplicaties> > >Opties > Aan contact.
De algemene e-mailinstellingen wijzigen:
• Tikop > >tabbladApplicaties> > >Opties>Algemene
instellingen.
Een e-mailaccount wissen:
• Tikop > >tabbladApplicaties> > >Opties> >Account
verwijderen>kiesdeaccountdieuwiltwissen>WISSEN>JA.
Accountmappen gebruiken
Tikop > >tabbladApplicaties> > >Mappen.
ElkaccountbeschiktoverdemappenInbox,Outbox,VerzondenenConcepten.
Erkunnennoganderemappenzijn,afhankelijkvandefunctiesdiewordenondersteund
dooruwserviceprovider.
E-mail

50
E-mail
E-mailberichten schrijven en verzenden
1 Tikindeapplicatie op omeennieuwee-mailtemaken.
2 Voerhetadresvandeontvangerin.Terwijlutekstinvoert,wordenovereenkomende
e-mailadressenuituwcontactenweergegeven.Scheidmeerderee-mailadressen
metpuntkomma's.
3 TikophetveldCC/BCComeenkopieofblindekopieteverzendennaarandere
contacten/e-mailadressen.
4 Tikophetberichtveldenvoeruwberichtin.
5 Tikop
omhetbestanddatuwiltverzendenbijuwberichttoetevoegen.
6 Tikop
omhetberichtteverzenden.

51
Camera en video
Cameraopties in de zoeker
Drukop > >tabbladApplicaties> omdeapplicatieCamerateopenen.
Ukuntgebruikmakenvandecameraofcamcorderomfoto'senvideo'stemakenen
tedelen.
OPMERKING: reinig de beschermende lenskap altijd met een microvezeldoek
voordat u foto's neemt. Een lenskap met vlekken van vingers kan leiden tot
onscherpe foto's met een "halo"-effect.
Opties weergeven/verbergen–tikhieropomdecameraoptiesindebeeldzoeker
teverbergen/tonen.
Flitser–hiermeekuntudeflitservandecamerabeheren.
Camera wisselen–tikhieropomtewisselentussendecameralensaande
achterzijdeendecameralensaandevoorzijde.
Opties–tikopditpictogramomhetmenumetcamera-instellingenteopenen.
Galerij–tikhieropomdelaatstefotoofvideotetonendieuhebtgemaakt.
Camera en video

52
Camera en video
Record–tikhieropomhetopnementestarten.
Vastleggen –tikhieropomeenfototenemen.
Terug-toets –tikhieropomdecameraaftesluiten.
De geavanceerde instellingen gebruiken
Tikindebeeldzoekervandecameraop omdegeavanceerdeoptiestetonen.Tik
opelkpictogramomdevolgendecamera-instellingenaantepassen.
Hiermeekuntudegroottevanuwfotoofvideoinstellen.
Hiermeekuntufoto'smakenviastemopdrachten.Alsdezefunctieis
ingeschakeld,kuntueenfotomakendoorsimpelweg"Cheese","Smile",
"LG"enz.tezeggen.
Hiermeekuntudetimervanuwcamerainstellen.Ditisideaalalsuzelfook
opdefotoofvideowiltstaan.
Hiermeekuntubeterefoto'smakenenbeterevideo'sopnemendooreen
rasterlijntetonenvoorhulpbijhetuitlijnen.
Steldeopslagruimteinvooruwfoto'senvideo's.KiesuitIN(intern
geheugen)enSD(geheugenkaart).Ditmenuverschijntalleenalsde
MicroSDisgeplaatst.
Hiermeekrijgtumeerinformatieoverhoeeenfunctiewerkt.Metdit
pictogramwordteenhandleidinggetoond.
OPMERKING: het sluitergeluid is niet beschikbaar wanneer de Trilstand of de
Stille modus is ingeschakeld.

53
Camera en video
Een foto maken
1 Tikop > > .
2 Kaderuwonderwerpinophetscherm.
3 Eenvierkantrondhetonderwerpgeeftaandatdecameraisscherpgesteld.
4 Tikop
.UwfotowordtautomatischopgeslagenindeGalerij.
TIP! Als de cameraopties verborgen zijn op het scherm, tikt u gewoon op het
scherm om een foto te nemen.
Als u een foto hebt gemaakt
Tikopdeminiatuurweergaveophetschermomdelaatstgenomenfototetonen.
Tikhieropomdefototebewerken.
Tikhieropommeteeneenvolgendeopnametemaken.
Tikhieropomuwfotonaaranderenteverzendenofomuwfototedelenvia
eenvandebeschikbaresocialenetwerken.
Tikhieropomdefototewissen.
Tikhieropvoortoegangtotextraopties.
Tikhieropomdefotoaanuwfavorietentoetevoegen.

54
Camera en video
Een video opnemen
1 Tikop > > .
2 Kaderuwonderwerpinophetscherm.
3 Tikop
omtebeginnenmethetopnemenvandevideo.
4 Deduurvandeopnamewordtbovenaanhetschermweergegeven.
OPMERKING: Tik op om foto's te maken tijdens het opnemen van video.
5 Tikop omdeopnameteonderbreken.Ukuntdeopnamehervattendooropnieuw
op
tetikken.
OF
Tikop
omdeopnametebeëindigen.Uwvideowordtautomatischopgeslagen
indeGalerij.
Na het opnemen van een video
Tikopdeminiatuurweergaveophetschermomdelaatstevideodieuhebtopgenomen
tetonen.
Tikhieropommeteennogeenvideooptenemen.
Tikhieropomdebeschikbareoptiesvoordelen(zoalsBerichtenof
Bluetooth)tedelen.
Tikhieropomdevideotewissen.
Tikhieropvoortoegangtotextraopties.
TikhieropomdevideoaanuwFavorietentoetevoegen.

55
Camera en video
Galerij
DeapplicatieGalerijtoontuwopgeslagenfoto'senvideo's,inclusiefdefoto'sen
video'sdieumetdeapplicatieCamerahebtgemaaktenfoto'senvideo'sgedownload
vanhetinternetofanderelocaties.
1 Tikop
> >tabbladApplicaties> omdeopgeslagenafbeeldingente
tonen.
2 Tikopeenalbumomdezeteopenenendeinhoudervantetonen.(Defoto'sen
video'sinhetalbumwordenweergegeveninchronologischevolgorde.)
3 Tikopeenfotoineenalbumomdezetebekijken.
OPMERKING:
• Afhankelijk van de geïnstalleerde software worden sommige
bestandsindelingen mogelijk niet ondersteund.
• Sommige bestanden worden mogelijk niet goed afgespeeld vanwege hun
codering.
Foto's tonen
DeGalerijtoontuwfoto'sinmappen.WanneerueenfotoineenapplicatiezoalsE-mail
opslaat,wordterautomatischeendownloadmapgemaaktvoordefoto.Opdezelfde
manierwordterautomatischeenmapvoorschermafbeeldingengemaaktalsueen
schermafbeeldingmaakt.
Foto'swordengetoondindevolgordevandedatumwaaropzezijngemaakt.Kies
eenfotoomdezeophetvolledigeschermtetonen.Bladernaarlinksofrechtsomde
volgendeofvorigefototetonen.

56
Camera en video
In- en uitzoomen
Gebruikeenvandevolgendemethodenomopeenfotointezoomen:
• Tiktweemaalopeenwillekeurigeplekomintezoomen.
• Schuiftweevingersopeenwillekeurigeplekopdefotouitelkaaromintezoomen.
Schuiftweevingersnaarelkaartoeofdubbeltikopdeafbeeldingomuitte
zoomen.
Video-opties
1 Tikop >tabbladApplicaties> .
2 Kiesdevideodieuwiltbekijken.
Tikhieropomhetafspelenvandevideotepauzeren/hervatten.
Tikhieropomsnel10secondenvooruittespoelen.
Tikhieropomsnel10secondenterugtespoelen.
Tikhieropomhetvolumevandevideoaantepassen.
Tikhieropomhetschermtevergrendelen/ontgrendelen.
Tikhieropvoortoegangtotextraopties.

57
Camera en video
OPMERKING:
• Wanneer u een video afspeelt, kunt u het geluid aanpassen door aan de
rechterzijde van het scherm omhoog of omlaag te schuiven.
• Wanneer u een video afspeelt, kunt u de helderheid aanpassen door aan de
linkerzijde van het scherm omhoog of omlaag te schuiven.
• Wanneer u een video afspeelt, kunt u vooruit- en terugspoelen door met uw
vinger van links naar rechts te schuiven (of vice versa).
Foto's bewerken
Tikbijweergavevaneenfotoop .
Foto's/video's verwijderen
Gebruikeenvandevolgendemethoden:
• Tikineenmapop ,kiesdefoto's/video'sentikvervolgensopWISSEN.
• Tikbijweergavevaneenfotoop .
Achtergrond instellen
Tikbijweergavevaneenfotoop >Instellen alsomdeafbeeldingalsachtergrond
intestellenofaaneencontacttoetewijzen.
OPMERKING:
• Afhankelijk van de geïnstalleerde software worden sommige
bestandsindelingen mogelijk niet ondersteund.
• Als de bestandsgrootte de hoeveelheid beschikbaar geheugen overschrijdt,
kan er een fout optreden bij het openen van bestanden.

58
Multimedia
Muziek
Uwtelefoonbeschiktovereenmuziekspelerwaaropualuwfavorietenummerskunt
afspelen.
Een nummer afspelen
1 Tikop > >tabbladApplicaties> .
2 TikophettabbladNummers.
3 Kieshetgewenstenummer.
4 Devolgendeoptieszijnbeschikbaar.
Tikomhetnummeraanuwfavorietentoetevoegen.
Tikomdehuidigeafspeellijstteopenen.
Tikhieropvoortoegangtotextraopties.
Multimedia

59
Multimedia
Tikhieropomdehuidigeafspeellijstinwillekeurigevolgordeaftespelen
(nummerswordeninwillekeurigevolgordeafgespeeld).
Tikhieropomteschakelentussenallenummersherhaaldafspelen,het
huidigenummerherhaaldafspelenofomhetherhaaldafspelenuitte
schakelen.
Tikhieropomhetvolumeaantepassen.
Tikhieropomhethuidigenummeropnieuwaftespelenofomnaarhet
vorigenummerinhetalbum,deafspeellijstofdewillekeurigeafspeellijst
tegaan.Tikenhoudingedruktomsnelterugtespoelen.
Tikomhetafspelentepauzeren.
Tikomhetafspelentehervatten.
Tikomnaarhetvolgendenummerinhetalbum,deafspeellijstofde
willekeurigeafspeellijsttegaan.Tikenhoudingedruktomsnelvooruitte
spoelen.
Tikomaudio-effectenintestellen.
Ukunttijdenshetafspelenvanmuziekhetvolumeaanpassendooropdeknoppen
Volume hoger/lageraandeachterkantvandetelefoontedrukken.
OPMERKING:
• Afhankelijk van de geïnstalleerde software worden sommige
bestandsindelingen mogelijk niet ondersteund.
• Als de bestandsgrootte de hoeveelheid beschikbaar geheugen overschrijdt,
kan er een fout optreden bij het openen van bestanden.

60
Multimedia
OPMERKING: de auteursrechten van muziekbestanden zijn mogelijk
beschermd door internationale verdragen en nationale wetgeving met
betrekking tot auteursrechten. Het kan daarom gebeuren dat u toestemming
of een licentie dient aan te vragen om muziek te reproduceren of te kopiëren.
Volgens de nationale wetgeving van bepaalde landen is het verboden kopieën
voor privégebruik te maken van auteursrechtelijk beschermd materiaal.
Controleer de wetgeving van het betreffende land met betrekking tot het
gebruik van dergelijk materiaal, voordat u het bestand gaat downloaden of
kopiëren.

61
Accessoires
Klok
MetdeappKlokhebtutoegangtotdefunctiesAlarm,Timer,WereldklokenStopwatch.
Ukuntdezefunctiesgebruikendooropdetabbladenbovenaanhetschermtetikkenof
horizontaaloverhetschermtevegen.
Tikop
> >tabbladApplicaties> .
Alarmen
MethettabbladAlarmkuntualarmeninstellen.
1 Opendeapp
enkiesvervolgenshettabbladAlarm.
2 Tikop
omeennieuwalarmtoetevoegen.
3 PasdeinstellingenzonodigaanentikopOPSLAAN.
OPMERKING: u kunt ook op een bestaand alarm tikken om het te bewerken.
Timer
MethettabbladTimerkuntumeteenhoorbaarsignaalgewaarschuwdwordenalser
eenbepaaldetijdisverstreken.
1 Opendeapp
enkiesvervolgenshettabbladTimer.
2 Steldegewenstetijdopdetimerin.
3 TikopStartomdetimertestarten.
4 TikopStopomdetimertestoppen.
Accessoires

62
Accessoires
Wereldklok
MethettabbladWereldklokkuntueenvoudigdehuidigetijdinanderestedenoverde
helewereldbekijken.
1 Opendeapp
enkieshettabbladWereldklok.
2 Tikop
enkiesdegewenstestad.
Stopwatch
MethettabbladStopwatchkuntudetelefoonalsstopwatchgebruiken.
1 Opendeapp
enkiesvervolgenshettabbladStopwatch.
2 TikopStartomdestopwatchtestarten.
• TikopRondeomrondetijdenvastteleggen.
3 TikopStoppenomdestopwatchtestoppen.
Rekenmachine
MetdeappCalculatorkuntuwiskundigeberekeningenuitvoerenmetbehulpvaneen
standaardofwetenschappelijkerekenmachine.
1 Tikop
> >tabbladApplicaties> .
2 Tikopdenumerieketoetsenomcijfersintevoeren.
3 Tikvooreenvoudigeberekeningenopdegewenstefunctie(+,–,xof÷)en
vervolgensop=.
OPMERKING: tik voor ingewikkeldere berekeningen op .

63
Accessoires
Agenda
MetdeappAgendakuntuuwgeplandegebeurtenissenbijhouden.
1 Tikop
> >tabbladApplicaties> .
2 Tikopdedatumwaaraanueengebeurteniswilttoevoegen.Tikvervolgensop
.
Spraakrecorder
MetdeappVoice-recorderkuntugeluidsbestandenopnemenenopverschillende
manierengebruiken.
Een geluid of stem opnemen
1 Tikop > > .
2 Tikop
omdeopnametestarten.
3 Tikop
omdeopnametebeëindigen.
4 Tikop
omdeopnametebeluisteren.
OPMERKING: tik op voor toegang tot uw opnamen. U kunt luisteren naar
uw opgeslagen opnamen.
Voice Search
Gebruikdezeapplicatieommetbehulpvanspraaknaarinternetpagina'stezoeken.
1 Tikop
> >tabbladApplicaties>mapGoogle> .
2 WanneerLuisteren...ophetschermverschijnt,zegtueentrefwoordofzin.Kieseen
vandevoorgesteldetrefwoordendiewordenweergegeven.
OPMERKING: afhankelijk van uw regio of serviceprovider is deze applicatie
mogelijk niet beschikbaar.

64
Accessoires
Downloads
Gebruikdezeapplicatieomtezienwelkebestandenzijngedownloadviadeapplicaties.
• Tikop > >tabbladApplicaties> .
OPMERKING: afhankelijk van uw regio of serviceprovider is deze applicatie
mogelijk niet beschikbaar.
FM-radio
DetelefoonkanFM-radioontvangen.Daardoorkuntuonderwegnaaruwfavoriete
radiozendersluisteren.
• Tikop > >tabbladApplicaties> .
TIP! Sluit uw oortelefoon aan om deze als antenne te gebruiken.
OPMERKING: afhankelijk van uw regio of serviceprovider is deze applicatie
mogelijk niet beschikbaar.
LG SmartWorld
LGSmartWorldbiedteenassortimentvaninteressanteinhoud-lettertypen,thema's,
games,applicaties.
Hoe u met uw telefoon op LG SmartWorld komt
1 Tikop > >tabbladApplicaties> .
2 TikopAanmeldenenvoerdegebruikersnaamenhetwachtwoordvoor
LGSmartWorldin.Alsuzichnogniethebtgeregistreerd,tiktuopRegistrerenomlid
tewordenvanLGSmartWorld.
3 Downloadhetmateriaaldatuwilt.

65
Accessoires
OPMERKING:
• Als u gebruikmaakt van een mobiel netwerk, worden er mogelijk
gegevenskosten berekend op basis van uw gegevensabonnement bij uw
provider.
• LG SmartWorld is mogelijk niet bij alle providers of in alle landen
beschikbaar.
OPMERKING: wat moet ik doen als er geen pictogram is?
1 Open LG SmartWorld met een mobiele webbrowser (www.lgworld.com)
enkies uw land.
2 Download de LG SmartWorld-app.
3 Voer het gedownloade bestand uit en installeer het.
4 Open LG SmartWorld door op het pictogram
te tikken.
Speciaal voordeel alleen beschikbaar in LG SmartWorld
1 Creëer uw eigen stijl op uw smartphone. Gebruik Thuisthema,
Toetsenbordthema en Lettertype van LG SmartWorld. (Deze service
is alleen beschikbaar op bepaalde apparaten. Controleer op de LG
SmartWorld-website of het beschikbaar is of niet.)
2 Geniet van de speciale service van LG SmartWorld door deel te nemen aan
de doorlopende promotie.

66
Webbrowser
Internet
Hetinternetopentdewegnaardesnelle,kleurrijkewereldvangames,muziek,nieuws,
sport,entertainmentennogveelmeer,endatallesrechtstreeksopuwmobiele
telefoon.
Opmerking: er worden extra kosten in rekening gebracht als u verbinding met
deze services maakt en inhoud downloadt. Vraag uw netwerkprovider naar de
tarieven.
1 Tikop > >tabbladApplicaties> .
De browserwerkbalk gebruiken
Bladernaardebovenkantvandewebpaginavoortoegangtotdewerkbalkvande
browser.
Tikomeenpaginaterugtegaan.
Tikomeenpaginaverdertegaan.
Tikomterugtegaannaardestartpagina.
Tikomeennieuwvensterteopenen.
Tikomuwfavorietenteopenen.
Webpagina's tonen
Tikophetadresveld,voerhetwebadresinentikopGaophettoetsenbord.
Webbrowser

67
Webbrowser
Een pagina openen
Tikop > omnaareennieuwepaginategaan.
Omnaareenanderewebpaginategaan,tiktuop
,bladertunaarbenedenenkiest
udepaginadooreroptetikken.
Op het web zoeken met behulp van spraak
Tikophetadresveldentikvervolgensop .Zegeentrefwoordalsuhieromwordt
gevraagdenkieseenvandevoorgesteldetrefwoordendieverschijnen.
OPMERKING: afhankelijk van uw regio of serviceprovider is deze applicatie
mogelijk niet beschikbaar.
Favorieten
Tikop >Toevoegen aan favorieten>OKomdehuidigewebpaginaalsfavorietop
teslaan.
Tikop
enkiesdegewenstefavorietomeenfavorietewebpaginateopenen.
Geschiedenis
Tikop >tabbladGeschiedenisomeenlijstmetonlangsbezochtewebpagina'ste
openen.Omdevolledigegeschiedenistewissen,tiktuop
>JA.
Chrome
GebruikChromeominformatieoptezoekenennaarwebpagina'stebladeren.
1 Tikop
> >tabbladApplicaties> .
OPMERKING: afhankelijk van uw regio en serviceprovider is deze applicatie
mogelijk niet beschikbaar.

68
Webbrowser
Webpagina's tonen
Tikophetadresveldenvoervervolgenseenwebadresofzoekcriteriain.
Een pagina openen
Omeennieuwepaginateopenen,tiktuop >Nieuw tabblad.
Omnaareenanderewebpaginategaan,tiktuop
enkiestudepaginadoorerop
tetikken.

69
Instellingen
DeapplicatieOptiesbevathetmerendeelvandefunctieswaarmeeuuwtelefoonkunt
aanpassenenconfigureren.AlleinstellingenvandeapplicatieOptieswordenindeze
sectiebeschreven.
De applicatie Opties openen
• Tikop >houd ingedrukt>Systeeminstellingen.
-of-
• Tikop > >tabbladApplicaties> .
Netwerken
< DRAADLOZE NETWERKEN >
Wi-Fi
HiermeeschakeltuWi-FiinomverbindingtemakenmetbeschikbareWi-Fi-netwerken.
Bluetooth
HiermeeschakeltudeBluetooth-functieinofuitomBluetoothtegebruiken.
Mobiele gegevens
Toonthetdatagebruikendegebruikslimietvoormobieledata.
Oproep
Hiermeekuntuoproepinstellingenvoordetelefoonconfigureren,zoalshet
doorschakelenvanoproepenenanderespecialeservicesvanuwprovider.
• Voicemail –hiermeekuntudevoicemailservicevanuwproviderkiezen.
• Vaste nummers–schakeldezefunctieensteleenlijstsamenmetnummersdie
vanafuwtelefoonkunnenwordengebeld.HiervoorhebtudePIN2-codenodig.
Dezeisverkrijgbaarbijuwoperator.Alleennummersdieindelijstzijnopgenomen,
kunnenmetdetelefoonwordengebeld.
Instellingen

70
Instellingen
• Binnenkomende oproep pop-up –weergavevaneenpop-upvoorde
binnenkomendeoproepwanneereenappingebruikis.
• Oproep afwijzen–hiermeekuntudefunctievoorhetafwijzenvanoproepen
instellen.
• Afwijzen met bericht–wanneerueeninkomendeoproepwiltafwijzen,kuntu
metdezefunctiesneleenberichtverzenden.Ditishandigwanneerutijdenseen
vergaderingeenoproepmoetafwijzen.
• Oproep doorschakelen–hiermeekuntudeoptiesvoorhetdoorschakelenvan
oproepeninstellen.
• Automatisch beantwoorden–hiermeesteltudetijdinvoordateenverbonden
handsfree-apparaatautomatischeeninkomendeoproepopneemt.
• Trilfunctie inschakelen–uwtelefoontriltwanneerdeanderdeoproep
beantwoordt.
• Bewaar onbekende nummers–hiermeekuntuonbekendenummersaan
contactentoevoegennaeenoproep.
• Aan-/uittoets beëindigt oproep–hiermeekuntukiezenhoeueenoproep
beëindigt.
• Mute binnenkomend gesprek –schakeldezeoptieinalsuinkomendeoproepen
wiltdempendoordetelefoontedraaien.
• Oproep blokkeren–hiermeewordeninkomende,uitgaandeofbuitenlandse
oproepengeblokkeerd.
• Oproepduur–hiermeekuntudeduurvanoproepen,waaronderdelaatste
oproep,uitgaandeoproepen,inkomendeoproepenenalleoproepen,tonen.
• Overige instellingen–hiermeekuntudevolgendeinstellingenwijzigen.
Beller-ID: hiermeekuntustandaardinstellingenvoordeoperatorinstellenvoor
weergavevanuwnummerinuitgaandeoproepen.
Wisselgesprek:alsWisselgesprekisgeactiveerd,krijgtueennotificatievaneen
inkomendeoproepwanneerueenandergesprekaanhetvoerenbent(afhankelijk
vanuwnetwerkprovider).

71
Instellingen
< CONNECTIVITEIT >
Share & Connect
• LG PC Suite–sluitLGPCSuiteaanopuwtelefoonomopeenvoudigewijze
multimedia-inhoudenapplicatiestebeheren.
• Afdrukken–hiermeekuntudeinhoudvanbepaaldeschermen(zoalsinChrome
weergegevenwebpagina's)afdrukkenviaeenprinterdieverbondenismet
hetzelfdeWi-Fi-netwerkalsuwAndroid-toestel.
Tetheren
• USB-tethering–hiermeekuntudedataverbindingvanuwtelefoondelenmet
eencomputer,doorUSB-tetheringinteschakelen.
• Wi-Fi hotspot–ukuntuwtelefoongebruikenomeenmobiele
breedbandverbindingtotstandtebrengen.Maakeenhotspotendeeluw
verbinding.
• Bluetooth-tethering–hiermeekuntuandereapparatenopuwtelefoon
aansluitenviaBluetoothendeinternetverbindingdelen.
• Help–toontinformatieoverUSB-tethering,Wi-FihotspotenBluetooth-tethering.
Meer
• Flightmode–schakeldezeoptieinomalledraadlozeverbindingenenoproepen
uitteschakelen.
• Mobiele netwerken–hierkuntuoptiesinstellenvoordenetwerkmodus,
netwerkoperators,toegangspuntenenz.
• VPN–hiermeekuntuvanafuwtelefoonvirtueleparticulierenetwerken(VPN's)
toevoegen,instellenenbeheren,zodatuverbindingentoeganghebttot
hulpbronnenineenbeveiligdlokaalnetwerk,zoalsuwbedrijfsnetwerk.

72
Instellingen
Geluid & Notificaties
< BASIS >
Geluidsprofiel
HiermeekuntuhetgeluidsprofielinstellenopGeluid,Alleen trilfunctieofStil.
< GELUID >
Volume
Hiermeekuntudevolume-instellingenvanuwtelefoonaanpassenaanuwbehoeften
enomgeving.
Beltoon
Kiesdebeltoonvoorinkomendeoproepen.
Beltoon voor contact
Hiermeekuntubeltonenopstellenopbasisvanhettelefoonnummervaneen
inkomendeoproep.
< TRILFUNCTIE >
Geluid met trillingen
Schakeldezeoptieinalsudetrilfunctiewiltgebruikenvooroproepen.
Triltype
Hiermeekuntueentriltypeinstellenvoornotificaties.
< NOTIFICATIES >
Niet storen
Tikhieropomnotificatiesintestellen.UkuntkiezenvoorGeenonderbrekingenvan
notificaties.
Homescreen vergrendelt
Hiermeekuntuallenotificatiesophetvergrendelingsschermtonen.
Applicaties
Hiermeekuntunotificatiesvoorapplicatiesinstellen.

73
Instellingen
< GEAVANCEERDE INSTELLING >
Meer
• Notificatie geluid –hiermeekuntuhetgeluidvoornotificatiesinstellen.Ukunt
ookgeluidsmeldingentoevoegendoortetikkenop
rechtsbovenophetscherm.
• Trillen bij het aantikken–schakeldezeoptieinvoortrillenbijhettikkenop
deaanraaktoetsenophetHomescreenentijdensandereinteractiesopde
gebruikersinterface.
• Geluidseffecten–metditmenukuntukiezenofutonenhoortalsucijfers
aanraaktophettoetsenblok,optiesophetschermkiestennogveelmeer.
- Aanraakgeluiden toetsenblok –schakeldezeoptieinomtonenaftespelenbij
gebruikvanhettoetsenblok.
- Touchtoon –schakeldezeoptieinomtonenaftespelenbijhetmakenvan
schermselecties.
- Schermblokkeringstoon –schakeldezeoptieinomeentoonaftespelenbij
hetvergrendelenenontgrendelenvanhetscherm.
• Spraakmeldingen bericht/oproep–hiermeestaathetapparaatautomatisch
ingesteldominkomendeoproepenenberichtmeldingenvoortelezen.
Weergave
< HOMESCREEN & LOCKSCREEN >
Homescreen
• Selecteer Startpagina –kieshetgewensteThuisthema.KiesuitThuis(standaard
Android-indeling)ofEasyHome(vereenvoudigdeversievoorgebruikersdieminder
vertrouwdzijnmetAndroid-navigatie).
• Thema–hiermeesteltuhetschermthemainvooruwtoestel.
• Achtergrond –hiermeesteltudeachtergrondvoorhetHomescreenin.
• Schermveegeffect–hiermeesteltudeeffectenvoorhetvegenoverhetscherm
in.

74
Instellingen
• Homescreen looping toestaan –schakeldezeoptieinomdoorlopenddoorhet
Homescreentescrollen(terugnaareersteschermnahetlaatstescherm).
• Help –tikhieropominformatieweertegevenoverhetgebruikvanhet
Homescreenvanuwapparaat.
Homescreen vergrendelt
• Kies scherm slot–steleenschermvergrendelinginomuwtelefoontebeveiligen.
Erwordeneenaantalschermengeopenddiehelpenbijhettekenenvaneen
ontgrendelingspatroon.Alsueenontgrendelingspatroonhebtingeschakeldvoor
wanneeruuwtelefooninschakeltofhetschermuitdeslaapstandhaalt,wordtu
gevraagduwontgrendelingspatroontetekenenomhetschermteontgrendelen.
• Slim Slot–ukuntditzoinstellendatuwtelefoonontgrendeldwordtwanneeruer
eenbetrouwbaarBluetooth-apparaatopaansluit,alsuwtelefoonineenvertrouwde
locatieis,zoalsthuisofophetwerk,ofwanneeruwtelefoonuwgezichtherkent.
• Achtergrond–kiesdeachtergronddiemoetwordenweergegevenvooruw
vergrendelingsscherm.
• Sneltoetsen–hiermeekuntudesneltoetsenophetvergrendelingsscherm
aanpassen.
• Contactinfo voor verloren telefoon–kiesdezeoptiealsudeinformatievande
eigenaarophetvergrendelingsschermwiltweergevenendeinformatievande
eigenaarwiltaanpassen.
• Vergrendel timer–hiermeekuntuinstellennahoeveeltijdhetscherm
automatischwordtvergrendeldnadatereentime-outisopgetredenvoorhet
scherm.
• Uit-knop blokkeert onmiddellijk–schakelditinomhetschermdirectte
vergrendelenalsuopdetoets Aan-uit/Vergrendelendrukt.Dezeinstelling
overschrijftdeinstellingvoordevergrendeltimervandebeveiliging.
Aanraakknoppen voor het Homescreen
KiesdecombinatieenkleurvandeaanraaktoetsenophetHomescreen,enkiesofu
eentransparanteachtergrondwiltgebruiken.

75
Instellingen
< LETTERTYPE >
Lettertype
Kieshetgewenstelettertype.
Lettergrootte
Kiesdegewenstelettergrootte.
< BASISINSTELLINGEN >
Helderheid
Pasdehelderheidvanhetschermaanmetbehulpvandeschuifregelaar.
Auto-rotatie scherm
Hiermeewordthetschermautomatischgedraaidwanneerudetelefoondraait.
Time-out scherm
Hiermeesteltudetijdinwaarnahetschermautomatischwordtuitgeschakeld.
< GEAVANCEERDE INSTELLING >
Meer
• Dagdromen–hiermeeselecteertudescreensaverdiewordtweergegeven
wanneerdetelefoonzichindeslaapstandbevindtalsdieinhetdockstaaten/of
wordtopgeladen.
• Calibratie van bewegingssensor–hiermeekuntudenauwkeurigheidvanhet
kantelenendesnelheidvandesensorverbeteren.
Algemeen
< PERSOONLIJK >
Taalinstellingen
Kiesdetaalvoordetekstopuwtelefoonenvoorhetconfigurerenvanhet
schermtoetsenbord,inclusiefwoordendieuaanhetwoordenboekhebttoegevoegd.
• Taal –kiesdetaaldieuopuwtelefoonwiltgebruiken.
• Huidig toetsenbord –hiermeekiestuhetstandaardtypetoetsenbord.

76
Instellingen
• LG Toetsenbord –tikophetpictogramOptiesomdeLGToetsenbordinstellingen
tewijzigen.
• Google-spraaktypen –schakeldezeoptieinomGoogle-spraaktypentekiezen
omdataintevoeren.TikophetpictogramOptiesomdeGoogle-spraakinstellingen
tewijzigen.
• Voice Search–tikhieropomdeinstellingenvoorVoiceSearchteconfigureren.
• Text-to-speech uitvoer –tikhieropomdeverkozenmotorofalgemene
instellingenvoordeuitvoervantekst-naar-spraakintestellen.
• Pointer snelheid –hierkuntudepointersnelheidaanpassen.
• Knoppen omkeren–hierkuntudemuisknoppenomkerenende
rechtermuisknopalsprimaireknoptegebruiken.
Locatie
Wanneerdelocatieserviceisingeschakeld,bepaaltuwtelefoonbijbenaderinguw
locatiemiddelsWi-Fienmobielenetwerken.Wanneeruopdezeoptietikt,wordtu
gevraagdofGoogleuwlocatiemaggebruikenvoordezeservices.
• Modus –hiermeesteltuinhoedeinformatieoveruwhuidigelocatiewordt
bepaald.
• Camera –schakeldezeoptieinomfoto'sofvideo'svanhunlocatietevoorzien.
• Google-locatiegeschiedenis –hiermeekuntudeinformatie-instellingenoveruw
locatiekiezen,diewordengebruiktdoorGoogleenproductenvanGoogle.
Accounts en synchronisatie
GebruikhetmenuAccountsensynchronisatieomuwGoogle-enandereondersteunde
accountstoetevoegen,tewissenentebeheren.Ukuntmetdezeinstellingenook
bepalenofenhoealleapplicatiesdatavolgenshuneigenschemasynchroniseren,
verzendenenontvangenenofalleapplicatiesautomatischgebruikersdatamogen
synchroniseren.
Gmail™,Agendaenandereapplicatieshebbenmogelijkookhuneigeninstellingenom
tebepalenhoedatawordengesynchroniseerd.Ziedesectiesoverdieapplicatiesvoor
meerinformatie.TikopACCOUNT TOEVOEGENomeennieuweaccounttoetevoegen.

77
Instellingen
Toegankelijkheid
UkuntdeinstellingenbijToegankelijkheidgebruikenomeventuele
toegankelijkheidsplug-insteconfigurerendieuopuwtelefoonhebtgeïnstalleerd.
• Visie
- TalkBack–hiermeesteltudeTalkBack-functieindiemensenmeteenbeperkt
gezichtsvermogenmondelingefeedbackgeeft.
- Spraakmeldingen bericht/oproep –tikop
omtussenAanenUitte
schakelen.MetAankuntuautomatischegesprokennotificatiesvoorinkomende
oproepenenberichtenhoren.
- Schermtinten –schakeldezeoptieinomhetschermopeendonkerder
contrastintestellen.
- Lettergrootte –hiermeesteltudelettergroottein.
- Aanraakzoom–hiermeekuntuin-enuitzoomendoordriemaalophetscherm
tetikken.
- Omkering schermkleur –schakeldezeoptieinomdekleurenvanhetscherm
endeinhoudomtekeren.
- Kleurenfilter scherm –hiermeekuntudekleurenvanhetschermende
inhoudomkeren.
- Aan-/uittoets beëindigt oproep –schakelditinomoproepentebeëindigen
dooropdeknop Aan-uit/Vergrendelentedrukken.
• Horend
- Bijschrift–hiermeekuntuinstellingenvoorondertitelingaanpassenvoor
slechthorenden.
- Flash waarschuwingen–schakeldezeoptieinomdeflitsertelatenknipperen
bijinkomendeoproepenennotificaties.
- Zet alle geluiden uit–schakeldezeoptieinomallegeluidenvanhetapparaat
uitteschakelen.
- Audiotype–hiermeesteltuhetaudiotypein.
- Geluidsbalans–hiermeebepaaltudeverdelingvanhetaudiovolume.Steldeze
inmetdeschuifregelaaropdeschuifbalk.

78
Instellingen
• Motoriek & cognitie
- Aanraakterugkoppelingstijd–hiermeesteltudeaanraakterugkoppelingstijdin.
- Touch assistant –toonteenaanraakbordvoorgemakkelijketoegangtot
algemeneacties.
- Time-out scherm–hiermeesteltudetijdinwaarnadeschermverlichting
automatischwordtuitgeschakeld.
- Aanraakcontrolegebieden –hiermeekuntueengebiedvanhetschermkiezen
omaanraakactiveringtotdatgedeeltevanhetschermtebeperken.
• Snelkoppeling toegankelijkheidsfuncties –hiermeekuntusneltoegangkrijgen
totgekozenfunctiesalsudriekeeropdeknopStartpaginatikt.
• Auto-rotatie scherm –schakeldezeoptieinomhetschermtelatenmeedraaien
metdefysiekestandvandetelefoon(staandofliggend).
• Toegang schakelen –hiermeekuntumetuwapparaatcommunicerenmetéén
ofmeerschakelaarsdiewerkenalstoetsenbordtoetsen.Ditmenukanhandig
zijnvoormindervalidegebruikersvoorwiegeenrechtstreekseinteractiemetuw
apparaatmogelijkis.
Sneltoets
Hiermeekrijgtusnelletoegangtotapplicatiesdoordevolumeknoppeningedruktte
houdenalshetschermuitstaatofisvergrendeld.
Google
GebruikGoogle-instellingenomuwGoogle-appsen-accountinstellingentebeheren.
< PRIVACY >
Beveiliging
GebruikhetmenuBeveiligingomuwtelefoonendedataopuwtelefoontebeveiligen.
• Contentvergrendeling–selecteerdevergrendelingstypenommemo'ste
vergrendelenvoorQuickMemo+.
• Telefoon encrypten–hiermeekuntuuitveiligheidsoverwegingendedataopde
telefoonversleutelen.IndatgevalmoetueenPINofwachtwoordinvoerenomde
telefoontedecoderenwanneerudetelefooninschakelt.

79
Instellingen
• MicroSD-opslag coderen–hiermeekuntudemicroSD-kaartcoderenzodat
gegevensnietbeschikbaarzijnvoorandereapparaten.
• SIM-vergrendeling instellen–hiermeekuntudePIN-codeinstellenomuwSIM-
kaarttevergrendelenenkuntudePIN-codewijzigen.
• Wachtwoord typen zichtbaar–schakeldezeoptieinomelktekenvanuw
wachtwoordkorttetonenterwijluhetinvoert,zodatukuntzienwatuinvoert.
• Apparaatbeheerders–apparaatbeheerderstonenofuitschakelen.
• Onbekende bronnen–hiermeekuntuapplicatiesinstallerendienietuitdePlay
Storeafkomstigzijn.
• Controleer apps–hiermeekuntuinstellendatschadelijkeapplicatiesnietkunnen
wordengeïnstalleerdofdatuvoordergelijkeapplicatieswordtgewaarschuwd
wanneeruzegaatinstalleren.
• Opslagtype –hardware-ondersteund.
• Certificaatbeheer
- Vertrouwde referenties–schakeldezeoptieinalsuapplicatiestoegangwilt
geventotdeopslagmetencryptieenbeveiligingscertificaten,bijbehorende
wachtwoordenenoverigereferentiesopuwtelefoon.Ugebruiktdeopslagvan
referentiesvoorhettotstandbrengenvanbepaaldeVPN-enWi-Fi-verbindingen.
- Installeer vanuit opslagruimte –tikopdezeoptieomeenbeveiligdcertificaat
teinstalleren.
- Opslag wissen –hiermeewistualleveiligecertificatenenbijbehorende
referentiesenhetwachtwoordvandeopslagzelf.
• Trust agents–kiesapplicatiesdieukuntgebruikenzonderhetschermte
ontgrendelen.
• Scherm vastpennen –hiermeekuntualleenhetschermvaneenbepaaldeapp
latenweergevenopuwapparaatmetbehulpvanSchermvastpennen.
• Gebruikstoegang voor applicaties–hiermeebekijktugebruiksinformatievan
applicatiesopuwtoestel.

80
Instellingen
< SLIMME FUNCTIES >
QuickCircle-cover
Metditmenukuntuapplicatiesselecterendierechtstreeksinhetkleinevenster
opdehoesgebruiktkunnenwordenviaQuickCircle.Houderrekeningmeedathet
inschakelenvandezeQuickCircle-instellingenkanleidentoteenafwijkendewerking
vanhetapparaat.
< APPARAATBEHEER >
Datum en tijd
Steluwvoorkeureninvoordemanierwaaropdedatumentijdwordenweergegeven.
Opslagruimte & USB
Ukunthetgebruikteenbeschikbareinternegeheugenvanhetapparaatcontroleren.
Batterij & energiebesparing
• Batterijgebruik –toonthetgebruikvandebatterij.
• Accuniveau op statusbalk–schakeldezeoptieinomhetbatterijpercentageop
destatusbalknaasthetbatterijpictogramweertegeven.
• Spaarstand–tikopdeschakeloptieSpaarstandomdezeoptieinofuitte
schakelen.Hiermeesteltuinbijwelkbatterijniveaudespaarstandautomatisch
wordtingeschakeld.KiesOnmiddellijk,5% batterijof15% batterij.
• Help –weergavevaninformatieoverbatterijbesparing.
Geheugen
Ukunthetgeheugendatnormaalwordtgebruiktenhetgeheugendatdoorapplicaties
wordtgebruiktcontroleren.
Applicaties
Hiermeekuntudetailsweergevenoverdegeïnstalleerdeapplicatiesopuwtelefoon,de
bijbehorendegegevensbeherenofdeapplicatiessluiten.
Berichten-applicatie
Inditmenukuntukiezenwelkeberichten-applicatieuwiltgebruikenalsdestandaard
berichten-applicatie.

81
Instellingen
Back-up & reset
Wijzigdeinstellingenomuwinstellingenendatatebeheren.
• LG Backup –hiermeekuntueenback-upmakenvanalleinformatiedieophet
toestelstaat,endieinformatieherstelleningevalvandataverliesofwanneerdata
moetwordenvervangen.
• Back-up maken–hiermeekuntueenback-upmakenvanuwapplicatiedata,
Wi-Fi-wachtwoordenenandereinstellingenopdeGoogle-servers.
• Back-upaccount –geeftdeaccountweerwaarvanmomenteeleenback-up
wordtgemaakt.
• Automatisch terugzetten –instellingenendatawaarvaneenback-upis
gemaakt,terugzettenbijhetopnieuwinstallerenvaneenapplicatie.
• Netwerkinstellingen herstellen –hiermeehersteltuallenetwerkinstellingen.
• Fabrieksinstellingen–hersteldefabrieksinstellingenvanhetapparaaten
verwijderalledata.Alsudefabrieksinstellingenvandetelefoonopdezewijze
herstelt,wordtugevraagdomdezelfdesoortgegevensintevoerenalsbijuw
eerstegebruikvanAndroid.
Over de telefoon
Juridischeinformatie,telefoonstatusensoftwareversiecontrolereneneensoftware-
updateuitvoeren.

82
PC software (LG PC Suite)
Voor Windows OS
LGPCSuitehelptubijhetbeheervanmedia-inhoudentoepassingenopuwtelefoon
doormiddelvaneenverbindingtussenuwtelefoonenuwPC.
Met de PC-software LG PC Suite kunt u...
• Uwmedia(muziek,films,afbeeldingen)afspelenopuwPC.
• Multimedianaaruwapparaatsturen.
• Data(agenda's,contacten,favorieten)synchroniserentussenuwapparaatenPC.
• Eenback-upmakenvandeapplicatiesopuwapparaat.
• Desoftwareopuwapparaatbijwerken.
• MultimediaopuwPCafspelenvanafeenanderapparaat.
OPMERKING: sommige functies zijn mogelijk niet beschikbaar, afhankelijk
van het model.
OPMERKING: u kunt het menu Help in de applicatie gebruiken voor meer
informatie over het gebruik van de PC-software LG PC Suite.
De PC-software LG PC Suite installeren
UkuntdePC-softwareLGPCSuitealsvolgtdownloaden:
1 Ganaarwww.lg.com.
2 GanaarSUPPORT>MOBILE SUPPORT>PC Sync.
3 KiesdemodelinformatieenklikopGO.
4 Bladeromlaag,kieshettabbladPC SYNC> Windows> DOWNLOADendownload
LGPCSuite.
PC software (LG PC Suite)

83
PC software (LG PC Suite)
Systeemvereisten voor de PC-software LG PC Suite
• OS:WindowsXP(Servicepack3)32bit,WindowsVista,Windows7,Windows8
• CPU:1GHz-processorofhoger
• Geheugen:512MBofmeerRAM
• Grafischekaart:resolutie1024x768,32-bitskleurenofhoger
• Vasteschijf:500MBofmeervrijeruimteopdevasteschijf(afhankelijkvande
hoeveelheidopgeslagendatakanermeerruimtenodigzijn.)
• Benodigdesoftware:LGUnited-stuurprogramma's,WindowsMediaPlayer10of
hoger.
OPMERKING: LG United-stuurprogramma voor USB
Het LG United-stuurprogramma voor USB is vereist om een LG-toestel met
een PC te verbinden. Het stuurprogramma wordt automatisch geïnstalleerd
wanneer u de PC-software LG PC Suite installeert.
Voor Mac OS
Met de PC-software LG PC Suite kunt u...
• Uwmedia(muziek,films,afbeeldingen)afspelenopuwPC.
• Multimedianaaruwapparaatsturen.
• Data(agenda's,contacten,favorieten)synchroniserentussenuwapparaatenPC.
OPMERKING: sommige functies zijn mogelijk niet beschikbaar, afhankelijk
van het model.
OPMERKING: u kunt het menu Help in de applicatie gebruiken voor meer
informatie over het gebruik van de PC-software LG PC Suite.

84
PC software (LG PC Suite)
De PC-software LG PC Suite installeren
UkuntdePC-softwareLGPCSuitealsvolgtdownloaden:
1 Ganaarwww.lg.com.
2 GanaarSUPPORT>MOBILE SUPPORT>PC Sync.
3 KiesdemodelinformatieenklikopGO.
4 Bladeromlaag,kieshettabbladPC SYNC> Mac OS> DOWNLOADendownload
LGPCSuite.
Systeemvereisten voor de PC-software LG PC Suite
• Besturingssysteem:MacOSX(10.6.8)ofhoger
• Geheugen:2GBRAMofmeer
• Grafischekaart:1024x768schermresolutieofhogeren32-bitskleuren
• Vasteschijf:opslagruimtevan500MBofmeer(erkanmeerruimtenodigzijnvoor
data)
• Vereistesoftware:LGUnitedMobile-stuurprogramma
OPMERKING: LG United-stuurprogramma voor USB
Het LG United-stuurprogramma voor USB is vereist om een LG-toestel met
een PC te verbinden. Het stuurprogramma wordt automatisch geïnstalleerd
wanneer u de PC-software LG PC Suite installeert.

85
Software-update voor telefoon
Software-update voor telefoon
Software-update voor mobiele telefoons van LG via internet
Gavoormeerinformatieoverhetgebruikvandezefunctienaar
http://www.lg.com/common/index.jsp
kiesuwlandentaal.
Metdezefunctiekuntudefirmwarevanuwtelefooneenvoudigviainternetnaar
denieuwereversiebijwerkenzonderdatudaarvoornaareenservicecenterhoeftte
gaan.DezefunctieisalleenbeschikbaaralsLGeennieuwereversievandefirmware
beschikbaarsteltvooruwtoestel.
Defirmware-updatevoordemobieletelefoonvereistvolledigeaandachtvande
gebruikergedurendehetgeheleupdateproces.Leesalleinstructiesenopmerkingen
voordatudoorgaatnaardevolgendestap.Letop:verwijderdeUSB-datakabelniet
tijdensdeupgrade.Hierdoorkanuwmobieletelefoonernstigbeschadigdraken.
OPMERKING: LG behoudt zich het recht voor om naar eigen inzicht
updates alleen beschikbaar te stellen voor bepaalde modellen en kan de
beschikbaarheid van de nieuwere versie van de firmware niet garanderen voor
alle handset-modellen.
Software-update LG Mobiele telefoon via Over-the-Air (OTA)
MetdezefunctiekuntudesoftwarevanuwtelefooneenvoudigviaOTAnaarde
nieuwereversiebijwerkenzonderdatudaarvooreenUSB-datakabelhoeftaante
sluiten.DezefunctieisalleenbeschikbaaralsLGeennieuwereversievandefirmware
beschikbaarsteltvooruwtoestel.
Controleereerstdesoftwareversieopuwmobieletelefoon:Opties>tabblad
Algemeen>Over de telefoon>Update Center > Software-update > Controleer
nu voor update.
Software-update voor telefoon

86
Software-update voor telefoon
OPMERKING: uw persoonlijke data in het interne telefoongeheugen kunnen
verloren gaan terwijl u de software van uw telefoon bijwerkt. Het betreft
onder andere informatie over uw Google-account en andere accounts,
systeem/applicatiedata en instellingen, gedownloade applicaties en uw DRM-
licentie. LG adviseert u daarom een back-up te maken van uw persoonlijke
data voordat u de software van uw telefoon bijwerkt. LG aanvaardt geen
verantwoordelijkheid voor eventueel verlies van persoonlijke data.
OPMERKING: de beschikbaarheid van deze functie is afhankelijk van uw
netwerkprovider, regio en land.

87
Informatie over deze gebruikershandleiding
Informatie over deze gebruikershandleiding
• Leesdezehandleidingzorgvuldigdoorvoordatuhetapparaatgaatgebruiken.
Hiermeezorgtuervoordatuuwapparaatopveiligeenjuistewijzegebruikt.
• Sommigeafbeeldingenenschermafbeeldingenindezehandleidingzieneropuw
telefoonmogelijkandersuit.
• Uwinhoudkanafwijkenvanhetuiteindelijkeproductofvandesoftwarediedoor
uwserviceprovideroftelefoonmaatschappijwordtgeleverd.Dezeinhoudkan
zonderkennisgevingwordengewijzigd.Gavoordenieuwsteversievandeze
handleidingnaardewebsitevanLG:www.lg.com.
• Deapplicatiesenfunctiesopuwtelefoonkunnenperland,regioof
hardwarespecificatiesvariëren.LGisnietaansprakelijkvoormogelijke
prestatieproblemendoorhetgebruikvanapplicatiesdiedoorandereprovidersdan
LGzijnontwikkeld.
• LGisnietaansprakelijkvoorprestatie-ofcompatibiliteitsproblemenalsgevolg
vangewijzigderegisterinstellingenofaanpassingenindesoftwarevanhet
besturingssysteem.Alsuprobeertuwbesturingssysteemaantepassen,werken
hetapparaatendebijbehorendeapplicatiesmogelijknietlangernaarbehoren.
• Delicentievandesoftware,audio,achtergronden,afbeeldingenenanderemedia
diebijuwapparaatzijngeleverd,isvoorbeperktgebruik.Alsuditmateriaaluitpakt
envoorcommerciëleofanderedoeleindengebruikt,overtreedtumogelijkde
auteursrechtelijkewetgeving.Ubentalsgebruikervolledigverantwoordelijkvoor
hetonwettiggebruikvanmedia.
• Aandataservices,zoalsberichten,uploadenendownloaden,auto-synchronisatie
enlocatiedienstenzijnmogelijkextrakostenverbonden.Kieseenabonnement
datbijupastomaanvullendekostentevoorkomen.Neemcontactopmetuw
serviceprovidervoormeerinformatie.
Informatie over deze gebruikershandleiding

88
Informatie over deze gebruikershandleiding
Handelsmerken
• LGenhetLG-logozijngedeponeerdehandelsmerkenvanLGElectronics.
• Bluetooth
®
iseengedeponeerdhandelsmerkvanBluetoothSIG,Inc.wereldwijd.
• Wi-Fi
®
enhetWi-Fi-logozijngedeponeerdehandelsmerkenvandeWi-FiAlliance.
• Alleanderehandelsmerkenenauteursrechtenzijnheteigendomvanhun
respectieveeigenaren.

89
Accessoires
Dezeaccessoireszijnbeschikbaarvoorgebruikmetuwtelefoon.(Onderstaande items
zijn mogelijk optioneel.)
• Reisadapter
• Snelstartgids
• Stereoheadset
• USB-kabel
• Batterij
OPMERKING:
• Gebruik altijd originele LG-accessoires. De meegeleverde items zijn alleen
voor dit apparaat ontwikkeld en zijn mogelijk niet compatibel met andere
apparaten.
• De items die bij het apparaat zijn meegeleverd kunnen variëren, afhankelijk
van de regio of de serviceprovider.
Accessoires

90
Problemen oplossen
Indithoofdstukwordenproblemenbehandeldwaarmeeumogelijktemakenkrijgt
tijdenshetgebruikvanuwtelefoon.Voorsommigeproblemendientucontactopte
nemenmetuwserviceprovider,maardemeesteproblemenkuntueenvoudigzelf
verhelpen.
Bericht
Mogelijke
oorzaken
Mogelijke oplossingen
SIM- of USIM-
kaartfout
Er is geen SIM- of
USIM-kaart in de
telefoon geplaatst of
de kaart is verkeerd
geplaatst.
Plaats de SIM- of USIM-kaart
op de juiste manier.
Netwerk niet
beschikbaar/
netwerkverbinding
uitgevallen
Signaal is zwak
of u bent buiten
het bereik van het
netwerk.
Ga naar een raam of een
open ruimte. Ga na in welke
gebieden de netwerkprovider
dekking heeft.
Beheerder heeft
nieuwe services
toegepast.
Controleer of de SIM- of
USIM-kaart meer dan 6~12
maanden oud is. Wissel uw
SIM- of USIM-kaart om bij uw
netwerkprovider als dit het
geval is. Neem contact met
uw serviceprovider op.
Problemen oplossen

91
Problemen oplossen
Bericht
Mogelijke
oorzaken
Mogelijke oplossingen
Codes komen niet
overeen
Als u een andere
beveiligingscode
wilt instellen, dient
u de nieuwe code
te bevestigen door
deze opnieuw in te
voeren.
Neem contact op met uw
serviceprovider als u de code
bent kwijtgeraakt.
De twee door u
ingevoerde codes
komen niet met
elkaar overeen.
Er kunnen geen
applicaties worden
ingesteld
Geen ondersteuning
door serviceprovider
of registratie is
vereist.
Neem contact met uw
serviceprovider op.
Oproepen niet
beschikbaar
Foutief gekozen
nummer
Nieuw netwerk niet
toegestaan.
Nieuwe SIM- of
USIM-kaart
geplaatst.
Controleer op nieuwe
beperkingen.
Prepaidlimiet
bereikt.
Neem contact op met de
serviceprovider of stel limiet
opnieuw in met PIN2.

92
Problemen oplossen
Bericht
Mogelijke
oorzaken
Mogelijke oplossingen
Telefoon kan
niet worden
ingeschakeld
Aan-uitknop te kort
ingedrukt.
Druk minimaal twee seconden
op de aan-uitknop.
Batterij is niet
geladen.
Laad de batterij op. Controleer
de laadindicator op het
scherm.
Fout tijdens laden
Batterij is niet
geladen.
Laad de batterij op.
De
buitentemperatuur
is te hoog of te
laag.
Zorg ervoor dat de telefoon
bij een normale temperatuur
wordt opgeladen.
Probleem bij
contactpunten
Controleer de lader en de
aansluiting op de telefoon.
Geen voeding
Gebruik een ander
stopcontact voor de oplader.
Storing bij lader Vervang de lader.
Verkeerde lader
Gebruik alleen originele
LG-accessoires.
Nummer niet
toegestaan.
De functie Vast
oproepnummer is
ingeschakeld.
Controleer het menu
Instellingen en schakel de
functie uit.

93
Problemen oplossen
Bericht
Mogelijke
oorzaken
Mogelijke oplossingen
Ontvangen/
verzenden van
SMS en foto's lukt
niet
Geheugen vol
Verwijder enkele berichten van
uw telefoon.
Bestanden worden
niet geopend
Bestandsindeling
wordt niet
ondersteund
Controleer de ondersteunde
bestandsindelingen.
Het scherm wordt
niet ingeschakeld
wanneer ik een
oproep ontvang.
Probleem met
nabijheidssensor
Als u gebruikmaakt van
beschermtape of een
beschermhoes, controleer
dan of het gedeelte rond de
nabijheidssensor is bedekt.
Zorg dat het gedeelte rond
de nabijheidssensor niet is
bedekt.
Geen geluid Trilfunctie
Controleer in het geluidsmenu
of u de trilfunctie of de stille
modus hebt ingeschakeld.
Het toestel loopt
vast
Zo nu en dan
problemen met
software
Probeer de software bij te
werken via de website.

94
Veelgestelde vragen
Categorie Vraag Antwoord
Bluetooth-
apparaten
Welke functies zijn
beschikbaar via
Bluetooth?
U kunt een Bluetooth-
audioapparaat zoals een stereo/
monoheadset of carkit aansluiten.
Back-up maken van
contacten
Hoe maak ik een
back-up van mijn
contacten?
Contactdata kunnen worden
gesynchroniseerd tussen uw
telefoon en uw Google-account.
Synchronisatie
Is het mogelijk om
in één richting te
synchroniseren,
namelijk naar Gmail?
Alleen synchronisatie in twee
richtingen is mogelijk.
Synchronisatie
Is het mogelijk alle
e-mailmappen te
synchroniseren?
Het Postvak IN wordt automatisch
gesynchroniseerd. U kunt andere
mappen bekijken door op te
tikken en Mappen te selecteren
om een map te kiezen.
Aanmelden bij
Gmail
Moet ik me altijd
aanmelden bij Gmail
als ik Gmail wil
openen?
Als u eenmaal bent aangemeld bij
Gmail, hoeft u zich niet opnieuw
bij Gmail aan te melden.
Google-account
Is het mogelijk om
e-mailberichten te
filteren?
Nee, de telefoon biedt geen
ondersteuning voor het filteren
van e-mailberichten.
Veelgestelde vragen

95
Veelgestelde vragen
Categorie Vraag Antwoord
E-mail
Wat gebeurt er
als ik een andere
applicatie start terwijl
ik een e-mailbericht
schrijf?
Uw e-mailbericht wordt
automatisch als concept
opgeslagen.
Beltoon
Is er een maximale
bestandsgrootte
voor MP3-bestanden
als beltoon?
Er is geen limiet voor de
bestandsgrootte.
Berichttijd
De telefoon toont
niet de ontvangsttijd
van berichten die
ouder zijn dan 24
uur. Hoe kan ik de
tijd zien?
Open het gesprek en houd het
gewenste bericht ingedrukt. Tik
vervolgens op Details.
Navigatie
Is het mogelijk
een andere
navigatieapplicatie
op mijn telefoon te
installeren?
Elke applicatie die beschikbaar is
bij Play Store™ en die compatibel
is met de hardware kan worden
geïnstalleerd en gebruikt.
Synchronisatie
Is het mogelijk de
contacten van al
mijn e-mailaccounts
te synchroniseren?
Alleen contacten van Gmail
en MS Exchange-server
(bedrijfsmailserver) kunnen worden
gesynchroniseerd.

96
Veelgestelde vragen
Categorie Vraag Antwoord
Wacht en Pauze
Kan een
contactpersoon
worden opgeslagen
met Wacht en Pauze
in de nummers?
Als u een contactpersoon hebt
gekopieerd met de functies Wacht
en Pauze in de nummers, kunt
u die functies niet gebruiken.
U moet elk nummer opnieuw
opslaan.
Opslaan met Wacht en Pauze:
1. Tik op het Homescreen op
.
2. Kies het nummer en tik
vervolgens op
.
3. Tik op Pauze van 2 seconden
toevoegen of Wachten
toevoegen.
Beveiliging
Wat zijn de
beveiligingsfuncties
van de telefoon?
U kunt de telefoon zodanig
instellen dat er een
ontgrendelingspatroon ingevoerd
moet worden om de telefoon te
kunnen gebruiken.

97
Veelgestelde vragen
Categorie Vraag Antwoord
Ontgrendelingspatroon
Hoe maak ik een
ontgrendelingspatroon?
1. Houd op het Homescreen
ingedrukt.
2. Tik op Systeeminstellingen
> tabblad Weergave >
Homescreen vergrendelt.
3. Tik op Kies scherm slot >
Patroon. Wanneer u dit voor
het eerst doet, verschijnt er een
korte instructie voor het maken
van een ontgrendelingspatroon.
4. Stel uw patroon in door het
patroon te tekenen en het
daarna nogmaals te tekenen
ter bevestiging.
Voorzorgsmaatregelen
bij het gebruik van het
ontgrendelingspatroon.
Het is van groot belang dat u
het ontgrendelingspatroon dat u
instelt, onthoudt. Als u vijf keer
een onjuist patroon invoert, hebt
u geen toegang meer tot uw
apparaat. U kunt vijf keer proberen
uw ontgrendelingspatroon, PIN of
wachtwoord in te voeren. Als u
deze 5 mogelijkheden hebt gebruikt,
kunt u het na 30 seconden opnieuw
proberen. (Als u de back-up PIN
vooraf instelt, kunt u de back-up
PIN-code gebruiken om het patroon
te ontgrendelen.)

98
Veelgestelde vragen
Categorie Vraag Antwoord
Ontgrendelingspatroon
Wat moet ik
doen als ik het
ontgrendelingspatroon
ben vergeten en geen
Google-account op de
telefoon heb gemaakt?
Als u het patroon bent vergeten:
Als u zich op de telefoon bij uw
Google-account hebt aangemeld,
maar 5 keer een onjuist patroon
hebt ingevoerd, tikt u op de knop
Patroon vergeten. Vervolgens
moet u zich aanmelden bij
uw Google-account om de
telefoon te ontgrendelen. Als
u geen Google-account op de
telefoon hebt gemaakt of de
aanmeldingsgegevens bent
vergeten, moet u een volledige
reset uitvoeren.
Let op: wanneer u een volledige
reset uitvoert, worden alle
gebruikersapplicaties en -data
gewist. Maak een back-up van
alle belangrijke data voordat u de
fabrieksinstellingen herstelt.
Geheugen
Hoe weet ik wanneer
het geheugen vol is?
U ontvangt dan een notificatie.

99
Veelgestelde vragen
Categorie Vraag Antwoord
Taalondersteuning
Kan ik de taal
van mijn telefoon
wijzigen?
De telefoon heeft meertalige
mogelijkheden.
Zo wijzigt u de taal:
1. Houd op het Homescreen
ingedrukt en tik op
Systeeminstellingen.
2. Tik op het tabblad Algemeen
> Taalinstellingen > Taal.
3. Tik op de gewenste taal.
VPN
Hoe stel ik een VPN
in?
Hoe u VPN configureert, hangt
af van uw bedrijf. Als u VPN-
toegang op het apparaat
wilt configureren, dient u de
benodigde informatie op te vragen
bij de netwerkbeheerder van uw
werkgever.
Time-out van
beeldscherm
Het scherm wordt
al na 15 seconden
uitgeschakeld.
Hoe kan ik de
instelling van de
time-out wijzigen
zodat het scherm
na een andere
periode wordt
uitgeschakeld?
1. Houd op het Homescreen
ingedrukt.
2. Tik op Systeeminstellingen >
tabblad Display.
3. Tik op Time-out scherm.
4. Tik op de gewenste periode
waarna het scherm moet
worden uitgeschakeld.

100
Veelgestelde vragen
Categorie Vraag Antwoord
Wi-Fi & Mobiel
netwerk
Van welke service
maakt de telefoon
gebruik als zowel
Wi-Fi als mobiele
netwerken
beschikbaar zijn?
Als u gebruikmaakt van data kan
de telefoon standaard voor de
Wi-Fi-verbinding kiezen (als Wi-Fi-
verbindingen op de telefoon is
ingeschakeld). U ontvangt echter
geen notificatie wanneer uw
apparaat naar de andere service
overschakelt.
Als u wilt weten welke
dataverbinding wordt gebruikt,
kijkt u naar het pictogram voor het
mobiele netwerk of Wi-Fi boven in
het scherm.
Homescreen
Is het mogelijk een
applicatie uit het
Homescreen te
verwijderen?
Ja. Houd het pictogram vast
totdat de prullenbak bovenaan
in het midden van het scherm
verschijnt. Sleep het pictogram
dan zonder uw vinger op te tillen
naar de prullenbak.
Applicatie
Ik heb een applicatie
gedownload
die veel fouten
veroorzaakt. Hoe
kan ik die applicatie
verwijderen?
1. Houd op het Homescreen
ingedrukt.
2. Tik op Systeeminstellingen
> tabblad Algemeen >
Applicaties > Gedownload.
3. Tik op de applicatie en tik
vervolgens op Verwijderen.

101
Veelgestelde vragen
Categorie Vraag Antwoord
Lader
Kan ik mijn
telefoon opladen
met een USB-
datakabel zonder
het nodige USB-
stuurprogramma te
installeren?
Ja, de telefoon wordt opgeladen
via de USB-kabel, ongeacht of
de juiste stuurprogramma's zijn
geïnstalleerd.
Alarm
Kan ik
muziekbestanden
gebruiken voor mijn
alarm?
Ja. Nadat u een muziekbestand
hebt opgeslagen als beltoon, kunt
u deze als alarm gebruiken.
1. Houd een nummer ingedrukt
in een bibliotheeklijst. In het
menu dat wordt weergegeven,
tikt u op Beltoon instellen >
Beltoon telefoon of
Beltoon
voor groep
.
2. Kies het nummer als beltoon
op het scherm Alarm/
Klokinstelling.
Alarm
Is het alarm
hoorbaar of gaat het
af als de telefoon is
uitgeschakeld?
Nee, dit wordt niet ondersteund.
Alarm
Als mijn belvolume is
ingesteld op Trillen,
hoor ik dan het
alarm wel?
Alarmen zijn standaard ook in
dergelijke situaties hoorbaar.

102
Veelgestelde vragen
Categorie Vraag Antwoord
Volledige reset
(fabrieksinstellingen
terugzetten)
Hoe kan ik de
fabrieksinstellingen
herstellen als ik geen
toegang heb tot het
menu Opties van de
telefoon?
Als uw telefoon niet teruggaat
naar de oorspronkelijke staat,
gebruik dan een volledige reset
(fabrieksinstellingen herstellen) om
het apparaat te initialiseren.

Guide de l’utilisateur
• Certainscontenusetillustrationspeuventdifférerdevotreappareilenfonctionde
larégion,dufournisseurdeservice,delaversiondulogiciel,oudelaversiondu
systèmed'exploitation,etsontsujetsàmodificationsanspréavis.
• Utiliseztoujoursdesaccessoiresd’origineLG.Lesélémentsfournissontconçus
uniquementpourcetappareiletpeuventnepasêtrecompatiblesavecd'autres
appareils.
• Danslamesureoùsonécrantactileestutilisécommeclavier,cetappareiln'est
pasrecommandépourlespersonnesmalvoyantes.
• Copyright©2016LGElectronics,Inc.Tousdroitsréservés.LGetlelogoLGsont
desmarquesdéposéesdeLGGroupetdesesentitésapparentées.Toutesles
autresmarquescommercialesappartiennentàleurspropriétairesrespectifs.
• Google™,GoogleMaps™,Gmail™,YouTube™,Hangouts™etPlayStore™
sontdesmarquescommercialesdeGoogle,Inc.
FRANÇAIS

2
Sommaire
Recommandations pour une utilisation
sûre et efficace .........................................4
Avertissement .........................................14
Présentation du téléphone .....................17
Présentation du téléphone .....................17
Installation de la carte SIM ou USIM
et de la batterie .....................................19
Chargement de la batterie .....................21
Insertion d'une carte mémoire ...............22
Retrait de la carte mémoire ...................23
Verrouillage et déverrouillage du
téléphone ..............................................23
Votre écran d'accueil ..............................25
Conseils d'utilisation de l'écran tactile ...25
Écran d'accueil ......................................26
Personnalisation de l'écran d'accueil .....27
Retour à une application récemment
utilisée ..................................................29
Volet Notifications ..................................29
Clavier visuel .........................................32
Fonctionnalités particulières .................33
Prise de photo avec geste ...................... 33
Vue d’un coup d’œil ...............................34
KnockON ...............................................34
Knock Code ...........................................35
Capture+ ............................................... 36
Configuration d'un compte Google ........38
Création de votre compte Google ...........38
Connexion à votre compte Google .......... 38
Connexion à des réseaux et
périphériques .......................................... 40
Wi-Fi .....................................................40
Bluetooth ...............................................41
Wi-Fi Direct ...........................................42
Transfert de données entre un PC et le
téléphone ..............................................43
Appels .....................................................44
Émission d'un appel ..............................44
Appel des contacts ................................44
Réponse à un appel et rejet d'un
appel .....................................................44
Émettre un second appel .......................45
Affichage des journaux d'appel .............. 45
Paramètres d'appel ...............................45
Répertoire ...............................................46
Recherche d'un contact .........................46
Ajout d'un nouveau contact ...................46
Contacts préférés ..................................46
Création d'un groupe .............................47
Messagerie..............................................48
Envoi d'un message ..............................48
Affichage conversation ..........................49
Sommaire

3
Sommaire
Modification des paramètres de
messagerie ............................................49
Email .......................................................50
Gestion de comptes de messagerie .......50
Utilisation des dossiers de comptes .......51
Composition et envoi d'un e-mail ........... 51
Appareil Photo et vidéo ..........................52
Options de l'appareil photo sur le
viseur ....................................................52
Utilisation des paramètres avancés ........53
Prendre une photo .................................54
Une fois que vous avez pris une photo ...54
Enregistrement d’une vidéo ...................55
Après l'enregistrement d'une vidéo ........55
Galerie ................................................... 56
Multimédia ..............................................59
Musique ................................................59
Utilitaires ................................................. 62
Horloge .................................................. 62
Calculatrice ...........................................63
Agenda ..................................................63
Dictaphone ............................................64
Recherche vocale ..................................64
Téléchargements ...................................64
Radio FM ...............................................65
LG SmartWorld ......................................65
Navigateur Web ......................................67
Internet .................................................. 67
Chrome .................................................68
Paramètres ..............................................69
Réseaux ................................................69
Son et Notification .................................71
Écran ..................................................... 73
Général .................................................. 75
Logiciel PC (LG PC Suite) ........................ 82
Pour système d'exploitation Windows ....82
Pour Mac OS..........................................83
Mise à jour du logiciel du téléphone ...... 85
Mise à jour du logiciel du téléphone ....... 85
À propos de ce manuel de
l'utilisateur .............................................. 87
À propos de ce manuel de l'utilisateur ...87
Marques commerciales .........................88
Accessoires ............................................. 89
Dépannage ..............................................90
FAQ ..........................................................94

4
Recommandations pour une utilisation sûre et efficace
Veuillezlirecesrecommandations.Leurnon-respectpeuts’avérerdangereux,voire
illégal.
Encasdepanne,unoutillogicielintégréàvotreappareilcréeunhistoriquedes
pannes.Cetoutilrecueilleuniquementlesdonnéesspécifiquesàlapanne,comme
l’intensitédusignal,lapositiondel’IDdecellulelorsd’uneperted’appelsoudaine,
etlesapplicationschargées.L’historiquen’estutiliséquepourdéterminerlaraison
delapanne.Ceshistoriquessontchiffréset,sivousdevezretournerl’appareilpour
réparation,nepeuventêtreconsultésqueparuncentrederéparationagrééLG.
Exposition aux radiofréquences
Informationssurl’expositionauxondesradioetsurledébitd’absorptionspécifique
(SAR,SpecificAbsorptionRate).
LetéléphoneportableLG-H420estconformeauxexigencesdesécuritérelativesà
l’expositionauxondesradio.Cesexigencessontbaséessurdesrecommandations
scientifiquesquicomprennentdesmargesdesécuritédestinéesàgarantirlasécurité
detouteslespersonnes,quelsquesoientleurâgeetleurconditionphysique.
• Lesrecommandationsrelativesàl’expositionauxondesradioutilisentuneunité
demesureconnuesouslenomdedébitd’absorptionspécifique(DAS).Lestests
demesureduDASsonteffectuésàl’aidedeméthodesnormalisées,enutilisantle
niveaudepuissancecertifiéleplusélevédutéléphone,danstouteslesbandesde
fréquenceutilisées.
• MêmesitouslesmodèlesdetéléphonesLGn’appliquentpaslesmêmesniveaux
deDAS,ilssonttousconformesauxrecommandationsappropriéesenmatière
d’expositionauxondesradio.
• LalimitedeDASrecommandéeparl’ICNIRP(Commissioninternationalede
protectioncontrelesrayonnementsnonionisants)estde2W/kgenmoyennesur
10grammesdetissuhumain.
Recommandations pour une utilisation sûre et efficace

5
Recommandations pour une utilisation sûre et efficace
• LavaleurDASlaplusélevéepourcemodèledetéléphoneaétémesuréeà
0,676W/kg(10g)pouruneutilisationàl'oreilleetà0,667W/kg(10g)quandil
estportéauniveauducorps.
• Cetappareilestconformeauxdirectivesenmatièred’expositionauxfréquences
radioélectriqueslorsqu’ilestutilisésoitdanssapositionnormalecontrel’oreille,
soitàunedistanceminimalede1,5cmducorps.Lorsqu’unétui,unclipceinture
ouunsupportestutiliséàdesfinsdetransport,ilnedoitpascontenirdeparties
métalliquesetdoitgarantirunedistanceminimalede1,5cmentreleproduitet
lecorps.Pourpouvoirtransmettredesfichiersdedonnéesoudesmessages,
cetappareilrequiertuneconnexiondequalitéauréseau.Danscertainscas,la
transmissiondefichiersdedonnéesoudemessagespeutêtreretardéejusqu’àce
qu’unetelleconnexionsoitpossible.Veillezàbiensuivrelesinstructionsrelativesà
ladistancedeséparationpourl’établissementdelatransmission.
Entretien et réparation
AVERTISSEMENT
Utilisez uniquement des batteries, chargeurs et accessoires agréés pour
ce modèle de téléphone. L’utilisation de tout autre type de batteries, de
chargeurs et d’accessoires peut s’avérer dangereuse et peut annuler tout
accord ou garantie applicable au téléphone.
• Nedémontezpasvotretéléphone.Siuneréparations’avèrenécessaire,confiez-le
àuntechnicienqualifié.
• Lesréparationscouvertesparcettegarantiepeuventinclure,àladiscrétiondeLG,
despiècesoucircuitsderemplacementneufsoureconditionnés,sousréserveque
leursfonctionnalitéssoientéquivalentesàcellesdespiècesremplacées.
• Tenezvotretéléphoneéloignédesappareilsélectriques,telsquetéléviseurs,postes
radioetordinateurspersonnels.
• Neplacezpasvotretéléphoneàproximitédesourcesdechaleur,tellesqu’un
radiateurouunecuisinière.

6
Recommandations pour une utilisation sûre et efficace
• Nelefaitespastomber.
• Nesoumettezpasvotretéléphoneàdesvibrationsmécaniquesouàdeschocs.
• Éteignezvotretéléphonedansleszonesoùdesrèglementsspéciauxl’exigent.
Parexemple,n’utilisezpasvotretéléphonedansleshôpitaux,carcelui-cipourrait
perturberlebonfonctionnementdeséquipementsmédicauxsensibles.
• Sivosmainssontmouillées,éviteztoutcontactavecletéléphonelorsqu’ilesten
coursdecharge.Cecipeutprovoquerunchocélectriqueetendommagervotre
téléphone.
• Nemettezpasuntéléphoneenchargeàproximitédematièresinflammables.En
effet,ilpourraitchaufferetdéclencherunincendie.
• Pournettoyerl’extérieurducombiné,utilisezunchiffonsec.N’utilisezpasde
solvant,telquedubenzène,undiluantoudel’alcool.
• Nerechargezpasvotretéléphonelorsqu’ilestposésurdutissu.
• Rechargezvotretéléphonedansunezonebienventilée.
• N’exposezpasletéléphoneàdelafuméeoudelapoussièreenquantité
excessive.
• Neplacezvotretéléphoneàproximitédecartesdecréditoudetitresdetransport,
carilpourraitaltérerlesdonnéesdesbandesmagnétiques.
• Netouchezpasl’écranavecunobjetpointuquirisqueraitd’endommagervotre
téléphone.
• Nemettezpasvotretéléphoneencontactavecdesliquidesoudeséléments
humides.
• Utilisezlesaccessoirestelsquelesoreillettesavecprécaution.Nemanipulezpas
l’antenneinutilement.
• Évitezd’utiliser,detoucheroudetenterderetirerouderéparerduverrecassé,
ébréchéoufissuré.Unendommagementdel’écranenverrecauséparune
utilisationabusiveouincorrecten’estpascouvertparlagarantie.

7
Recommandations pour une utilisation sûre et efficace
• Votretéléphoneestunappareilélectroniquequiproduitdelachaleuren
fonctionnementnormal.Lorsd’uneutilisationprolongéedansunenvironnement
malventilé,lecontactdirectaveclapeaupeutprovoquerunegêneoudes
brûluresbénignes.Manipulezdoncvotretéléphoneavecprécautionlorsdeson
fonctionnementouimmédiatementaprèsutilisation.
• Sivotretéléphoneestmouillé,débranchez-leimmédiatementetlaissez-lesécher
totalement.Netentezpasd’accélérerleséchageavecunesourcedechaleur
externe(fourclassiqueoumicro-ondes,sèche-cheveux...).
• Leliquidecontenudansvotretéléphonemouillémodifielacouleurdel’étiquette
produitsetrouvantàl’intérieurdutéléphone.Unendommagementdel’appareil
consécutifàuneexpositionàdesliquidesn’estpascouvertparlagarantie.
Fonctionnement optimal du téléphone
Appareils électroniques
Touslestéléphonesportablespeuventêtresoumisàdesinterférencespouvantaffecter
lesperformancesdesappareilsélectroniques.
• N’utilisezpasvotretéléphoneàproximitéd’équipementsmédicauxsans
autorisation.Évitezdeplacervotretéléphoneàproximitédevotrestimulateur
cardiaque(parexemple,dansvotrepochepoitrine).
• Lestéléphonesportablespeuventnuireaubonfonctionnementdecertaines
prothèsesauditives.
• Desinterférencesmineurespeuventperturberlebonfonctionnementdes
téléviseurs,radios,ordinateurs,etc.
• Utilisezvotretéléphonedansdesconditionsdetempératurescomprisesentre0ºC
et40ºCdanslamesuredupossible.Exposervotretéléphoneàdestempératures
extrêmementbassesouhautespeutendommagervotreappareilouprovoquerdes
dysfonctionnements,voirelefaireexploser.

8
Recommandations pour une utilisation sûre et efficace
Sécurité au volant
Vérifiezlesloisetrèglementsenvigueurenmatièred’utilisationdestéléphones
portablesdanslazoneoùvousconduisez.
• Netenezpasletéléphonedansvotremainalorsquevousconduisez.
• Concentreztoutevotreattentionsurlaconduite.
• Silesconditionsdeconduitelepermettent,quittezlarouteetgarez-vousavant
d’émettreouderecevoirunappel.
• Lesradiofréquencespeuventaffectercertainssystèmesélectroniquesdevotre
véhiculemotorisé,telsquelesystèmeaudiostéréoouleséquipementsde
sécurité.
• Lorsquevotrevéhiculeestéquipéd’unairbag,negênezpassondéclenchement
avecunéquipementsansfilportableoufixe.Ilrisqueraitdel’empêcherdes’ouvrir
ouprovoquerdegravesblessuresenraisondeperformancesinadéquates.
• Lorsquevousécoutezdelamusiqueenextérieur,veuillezvousassurerquele
volumen’estpastropélevédefaçonàbienentendrecequ’ilsepasseautourde
vous.Ceciestparticulièrementimportantlorsquevousvoustrouvezàproximité
d’uneroute.
Évitez toute nuisance auditive
Afin d’éviter des dommages auditifs éventuels, ne pas écouter à un
niveau sonore élevé pendant une longue durée.
Afindeprotégervoscapacitésauditives,n’exposezpasvotreouïeàdehautsvolumes
sonorespendantdelonguespériodes.Nousvousrecommandonsdenepastenir
l’appareilprèsdevotreoreillelorsquelemodemainslibresestactivé.Pendantles
communicationsoulorsquevousécoutezdelamusique,réglezlevolumeàunniveau
raisonnable.
• Lorsquevousutilisezlekitmainlibre,baissezlevolumesivousnepouvezpas
entendrelesgensparlerautourdevousousilapersonneàcôtédevouspeut
entendrecequevousécoutez.

9
Recommandations pour une utilisation sûre et efficace
REMARQUE : Un volume sonore trop élevé provenant des vos écouteurs
(oreillettes, casques) pourrait entraîner d’éventuels dommages auditifs.
Parties en verre
Certainespartiesdevotretéléphoneportablesontenverre.Ceverrepourraitsebriser
encasdechutesurunesurfacedureoud’impactconsidérable.Lecaséchéant,évitez
detoucherouderetirerleverrebrisé.N’utilisezplusvotretéléphoneportablejusqu’à
cequeceverresoitremplacéparunfournisseurdeserviceagréé.
Zone de déminage
N’utilisezpasvotretéléphonelorsquedesopérationsdedynamitagesontencours.
Respectezlesrestrictions,lesrèglementsetlesloisenvigueur.
Zones à atmosphère explosive
• N’utilisezpasvotretéléphonedansunestation-service.
• N’utilisezpasvotretéléphoneàproximitédecarburantoudeproduitschimiques.
• Netransportezpasetnestockezpasdeproduitsdangereux,deliquidesoudegaz
inflammablesdanslemêmecompartimentdevotrevoiturequevotretéléphone
portableetsesaccessoires.
En avion
Lesappareilssansfilpeuventgénérerdesinterférencesdanslesavions.
• Éteignezvotretéléphoneavantd’embarquerdansunavion.
• Nel’utilisezpasausolsansautorisationdel’équipage.

10
Recommandations pour une utilisation sûre et efficace
Enfants
Conservezvotretéléphonedansunendroitsûr,horsdelaportéedesjeunesenfants.
Votretéléphonecomprenddespetitespiècesquipeuventprésenterunrisquede
suffocation.
Appels d’urgence
Ilestpossiblequelesnumérosd’urgencenesoientpasdisponiblessurtousles
réseauxdetéléphoniemobile.Vousnedevezdoncpasdépendreuniquementdevotre
téléphoneportablepourémettreunappeld’urgence.Renseignez-vousauprèsdevotre
opérateur.
Informations sur la batterie et précautions d’usage
• Iln’estpasnécessairededéchargercomplètementlabatterieavantdela
recharger.Contrairementauxautresbatteries,ellen’apasd’effetmémoirepouvant
compromettresesperformances.
• UtilisezuniquementlesbatteriesetchargeursLG.LeschargeursLGsontconçus
pouroptimiserladuréedeviedevotrebatterie.
• Nedémontezpasetnecourt-circuitezpaslabatterie.
• Lescontactsmétalliquesdelabatteriedoiventtoujoursresterpropres.
• Procédezauremplacementdelabatterielorsquecelle-cin’offreplusdes
performancesacceptables.Labatteriepeutêtrerechargéedescentainesdefois
avantqu’unremplacementnesoitnécessaire.
• Rechargezlabatterieencasdenon-utilisationprolongéeafind’optimisersadurée
d’utilisation.
• N’exposezpaslechargeurdelabatterieaurayonnementdirectdusoleil.Ne
l’utilisezpasnonplusdansdeslieuxtrèshumides,telsqu’unesalledebains.
• N’exposezpaslabatterieàdestempératuresélevéesoubasses,cecipourrait
affectersesperformances.

11
Recommandations pour une utilisation sûre et efficace
• Leremplacementdelabatterieparunmodèleinadaptérisqued’entraînerune
explosiondecettedernière.
• Respectezlesinstructionsdufabricantrelativesàlamiseaurebutdesbatteries
usagées.Veuillezrecyclerautantquefairesepeut.Nevousendébarrassezpas
aveclesdéchetsménagers.
• Silabatterieesthorsd’usage,veuillezlarapporterauserviceaprès-venteouau
revendeurLGElectronicsagrééleplusproche.
• Débranchezsystématiquementlechargeurdelaprisemuralelorsquele
chargementdelabatterieestterminépouréviterqu’ilneconsommeinutilement
del’énergie.
• Laduréedevieréelledelabatteriedépenddelaconfigurationduréseau,des
paramètresduproduit,del’utilisation,delabatterieetdesconditionsextérieures.
• Tenezlabatteriehorsdeportéedesanimauxetdeleurscrocsougriffes,ainsique
desobjetspointusengénéral.Lenon-respectdecetteconsignepeutentraînerun
incendie.
Informations sur les logiciels libres
Pour obtenir le code source sous la licence publique générale, la licence
publique générale limitée, la licence publique Mozilla ou les autres licences
libres de ce produit, rendez-vous sur http://opensource.lge.com.
En plus du code source, tous les termes de la licence, ainsi que les exclusions
de responsabilité et les droits d’auteur, sont disponibles au téléchargement.
LG Electronics propose de vous fournir le code open source sur CD-ROM
en échange des coûts couvrant cet envoi, notamment le coût du support,
des frais de port et de prise en charge, une fois la demande reçue par
LGElectronics à l’adresse suivante : [email protected]. La validité de
cette offre est de trois (3) ans à partir de la date d’achat du produit.

12
Recommandations pour une utilisation sûre et efficace
COMMENT METTRE À JOUR VOTRE APPAREIL
Accès aux dernières versions du micrologiciel et aux nouvelles fonctions et
améliorations du logiciel.
• Sélectionnez la mise à jour logicielle dans le menu Paramètres de votre
appareil.
• Mettez votre appareil à jour en le connectant à votre PC. Pour plus
d'informations sur l'utilisation de cette fonction, consultez le site
http://www.lg.com/common/index.jsp et sélectionnez votre pays et votre
langue.
DÉCLARATION DE CONFORMITÉ
Par la présente, LG Electronics déclare que le produit LG-H420 est
conforme aux exigences fondamentales et aux autres dispositions
pertinentes de la directive 1999/5/EC. Consultez la Déclaration de conformité
sur http://www.lg.com/global/declaration
Contactez notre service pour connaître les normes auxquelles ce
produit est conforme:
LG Electronics Inc.
EU Representative, Krijgsman 1,
1186 DM Amstelveen, The Netherlands

13
Recommandations pour une utilisation sûre et efficace
Recyclage de votre ancien téléphone
1 Lesélémentsélectriquesetélectroniquesdoiventêtrejetés
séparément,danslesvide-orduresprévusàceteffetparvotre
municipalitéouêtrerapportésdansunmagasindetéléphoniemobile.
2 Lerecyclagedevotretéléphonedansunepoubelleappropriéeoudans
unmagasindetéléphoniemobileaideraàréduirelesrisquespour
l’environnementetvotresanté.
3 Pourplusd’informationsconcernantl’éliminationdevotreancien
appareil,veuillezcontactervotremairie,leservicedesordures
ménagèresouencorelemagasinoùvousavezachetéceproduit.
Recyclage des batteries/accumulateurs usagés
1 Cesymbolepeutêtreassociéauxsymboleschimiquesdumercure
(Hg),ducadmium(Cd)ouduplomb(Pb)silabatteriecontientplusde
0,0005%demercure,0,002%decadmiumou0,004%deplomb.
2 Lesbatteries/accumulateursdoiventêtrejetésséparément,dansles
déchetteriesprévuesàceteffetparvotremunicipalitéouêtrerapportés
dansunmagasindetéléphoniemobile.
3 Lamiseaurebutdevosbatteries/accumulateursdansunepoubelle
appropriéeoudansunmagasindetéléphoniemobileaideraàréduire
lesrisquespourl’environnementetvotresanté.
4 Pourplusd’informationsconcernantlerecyclagedevosbatteries/
accumulateurs,veuillezcontactervotremairie,leservicedesordures
ménagèresouencorelemagasinoùvousavezachetéceproduit.

14
Avertissement
Veuillez lire ces informations avant d'utiliser votre téléphone.
Encasdeproblèmeavecvotretéléphone,consultezcettesectionavantdelefaire
répareroud'appelerl'assistanceclientèle.
1. Mémoire téléphone
Lorsqu'ilrestemoinsde10Mod'espacedisponibledanslamémoiredevotre
téléphone,cederniernepeutplusrecevoirdenouveauxmessages.Ilconvientalors
devérifierl'étatdelamémoiredevotretéléphoneetdesupprimercertainesdonnées
(desapplicationsoudesmessages,parexemple)pourlibérerdel'espace.
Pour désinstaller des applications:
1 Appuyezsur > >ongletApplications> >ongletGénéral>
Applications.
2 Unefoistouteslesapplicationsaffichées,faites-lesdéfileretsélectionnez
l'applicationquevoussouhaitezdésinstaller.
3 AppuyezsurDésinstaller.
2. Optimisation de l'autonomie de la batterie
Vouspouvezprolongerl'autonomiedelabatterieendésactivantlesfonctions
dontl'exécutionentâchedefondn'estpasnécessaire.Vouspouvezcontrôlerla
consommationdebatterieparlesressourcessystèmeetlesapplications.
Avertissement

15
Avertissement
Prolonger l'autonomie de la batterie de votre téléphone:
• Éteignezlessignauxradioquevousn'utilisezpas.Sivousn'utilisezpasles
fonctionsWi-Fi,Bluetooth
®
ouGPS,désactivez-les.
• Réduisezlaluminositédel'écranetdéfinissezundélaidemiseenveillepluscourt.
• Désactivezlasynchronisationautomatiquedediversesapplications,notamment
Gmail,AgendaetRépertoire.
• Certainesapplicationsquevoustéléchargezpeuventconsommerdel'énergie.
• Lorsquevousutilisezdesapplicationstéléchargées,vérifiezleniveaudechargede
labatterie.
3. Avant d'installer une application et un système d'exploitation
Open Source
AVERTISSEMENT
Si vous installez et utilisez un système d'exploitation autre que celui fourni
par le fabricant, cela risque de provoquer des dysfonctionnements. et votre
téléphone ne sera plus couvert par la garantie.
AVERTISSEMENT
Pour protéger votre téléphone et les données personnelles qu'il contient,
téléchargez des applications uniquement depuis des sources sécurisées,
telles que Play Store™. Si certaines applications ne sont pas installées
correctement sur votre téléphone, il se peut que ce dernier ne fonctionne pas
normalement ou qu'une erreur grave se produise. Vous devez désinstaller ces
applications et supprimer l'ensemble des données et paramètres associés.

16
Avertissement
4. Lancement et changement d'applications
Exécuterplusieurstâchesàlafoisestunvéritablejeud'enfantavecAndroid:vous
pouvezexécuterplusieursapplicationssimultanément.Plusbesoindequitterune
applicationavantd'enouvriruneautre.Vouspouvezutiliserplusieursapplications
encoursd'exécutionetpasserd'unprogrammeàunautre.Androidgèrechacune
desapplicationsenlesinterrompantetenleslançantenfonctiondesbesoinsde
l'utilisateurpouréviterquelesapplicationsenveillenesollicitentdesressources
inutilement.
1 Appuyezsur
.L'aperçudesapplicationsrécemmentutiliséess'affiche.
2 Appuyezensuitesurl'applicationàlaquellevousvoulezaccéder.Laprécédente
applicationcontinued'êtreexécutéeentâchedefond.Assurez-vousd'appuyersur
pourquitteruneapplicationaprèsl'avoirutilisée.
• Pourfermeruneapplicationdelalistedesapplicationsrécentes,faitesglisser
l'aperçudel'applicationverslagaucheouladroite.Poursupprimertoutesles
applicationsdelaliste,appuyezsurTout effacer.

17
Présentation du téléphone
Présentation du téléphone
Écran tactile
Capteur de proximité
Écouteur
Prise casque
Objectif avant de
l'appareil photo
Microphone
REMARQUE: Capteur de proximité
Au cours de la réception ou de l'émission d'appels, ce capteur détecte
lorsque le téléphone est à proximité de l'oreille, et désactive le rétroéclairage et
verrouille l'écran tactile de manière automatique. Cela prolonge l'autonomie de
la batterie et évite d'activer l'écran tactile par inadvertance durant les appels.
AVERTISSEMENT
Le fait de poser un objet lourd ou de s'asseoir sur le téléphone risque
d'endommager l'écran et les fonctionnalités tactiles. N'obstruez pas le capteur
de proximité avec des protecteurs d'écran ou tout autre type de film de
protection. Vous risqueriez de provoquer un dysfonctionnement du capteur.
Présentation du téléphone

18
Présentation du téléphone
Microphone
Boutons du volume
Chargeur/Port USB
Bouton Marche-Arrêt/
Verrouillage
Objectif arrière de
l'appareil photo
Haut-parleur
Flash
Bouton Marche-Arrêt/
Verrouillage
• Permetd'allumeroud'éteindrevotretéléphone;pour
cefaire,appuyezdemanièreprolongéesurlebouton.
• Permetdeverrouiller/déverrouillerl'écrandevotre
téléphoneavecunepressionbrève.
Boutons du volume (Lorsque l'écran est éteint)
• Appuyezlongtempssurlatouchehautpourlancer
Capture+
• AppuyezlongtempssurlatoucheBaspourlancer
l'appareilphoto

19
Présentation du téléphone
Installation de la carte SIM ou USIM et de la batterie
InsérezlacarteSIMouUSIMremiseparlefournisseurdeservicedetéléphoniemobile
etlabatterieincluse.
1 Pourretirerlecachedelafaçadearrière,tenezletéléphonefermementdansune
main.Aveclepoucedel'autremain,soulevezlafaçadearrièrecommeillustrésurla
figureci-dessous.
2 FaitesglisserlacarteSIMdansl'emplacementinférieurdédié,commeillustrésurla
figure.Assurez-vousquelazonedecontactdoréedelacarteestbienorientéevers
lebas.

20
Présentation du téléphone
AVERTISSEMENT
N'insérez pas de carte mémoire dans l'emplacement de la carte SIM. Si une
carte mémoire est introduite dans l'emplacement de la carte SIM, apportez le
téléphone dans un centre de services LG pour la faire retirer.
REMARQUE: seules les cartes microSIM fonctionnent avec l'appareil.
3 Insérezlabatterie.
4 Pourreplacerlecachesurl'appareil,alignezlafaçadearrièresurlecompartiment
delabatterie
etappuyezdessusjusqu'àentendreundécliccaractéristique .

21
Présentation du téléphone
Chargement de la batterie
Chargezlabatterieavantd'utiliserl'appareilpourlapremièrefois.Chargezletéléphone
àl'aidedelabatterie.Vouspouvezégalementchargerlabatterieenconnectantle
téléphoneàunordinateuràl'aideducâbleUSB.
AVERTISSEMENT
Utilisez uniquement la batterie, le chargeur et le câble de données agréés
par LG. Si vous utilisez des chargeurs, des batteries ou des câbles non
approuvés, le chargement de la batterie peut être ralenti. La batterie de
l'appareil peut également être endommagée, voire exploser, ce qui ne sera
pas couvert par la garantie.
Lapriseduchargeurestsituéesurlapartieinférieuredutéléphone.Insérezle
chargeur,puisbranchez-lesuruneprisemurale.
REMARQUE: n'ôtez pas la façade arrière pendant le chargement de votre
téléphone.

22
Présentation du téléphone
Insertion d'une carte mémoire
VotreappareilprendenchargelescartesmicroSDjusqu'à32Go.Enfonctiondeleur
typeetdeleurfabricant,certainescartesmémoirepeuventnepasêtrecompatibles
avecvotreappareil.
AVERTISSEMENT
Certaines cartes mémoire ne sont pas totalement compatibles avec l'appareil.
Si vous utilisez une carte incompatible, cela peut endommager l'appareil ou la
carte mémoire, ou corrompre les données enregistrées sur la carte.
REMARQUE: l'écriture et l'effacement fréquents de données réduisent la
durée de vie des cartes mémoire.
1 Retirezlecachearrière.
2 Insérezunecartemémoireaveclazonedecontactdoréeorientéeverslebas.
3 Remettezenplacelafaçadearrière.

23
Présentation du téléphone
Retrait de la carte mémoire
Pourretirerlacartemémoireentoutesécurité,commencezparladésactiver.
1 Appuyezsur
> >ongletApplications> >ongletGénéral>
Stockageet USB>
.
2 Retirezlafaçadearrièreetsortezlacartemémoire.
AVERTISSEMENT
Ne retirez pas la carte mémoire pendant que le téléphone effectue le transfert
d'informations ou pendant qu'il accède à des informations. Cela risque de
provoquer la perte ou la corruption de données, ou endommager la carte
mémoire ou le téléphone. LG n'est pas responsable des pertes résultant de la
mauvaise utilisation de cartes mémoire endommagées, y compris de la perte
de données.
Verrouillage et déverrouillage du téléphone
Appuyezsurlebouton Marche-Arrêt/Verrouillagepouréteindrel'écranetplacer
letéléphoneenmodeVerrouillage.Letéléphoneseverrouilleautomatiquements'il
n'estpasutilisépendantunepériodespécifiée.Celapermetdeprévenirlespressions
accidentellesetd'économiserlabatterie.
Pourdéverrouillerletéléphone,appuyezsurlebouton Marche-Arrêt/Verrouillageet
faitesglisserl'écrandansn'importequelledirection.
REMARQUE: Vous pouvez aussi appuyer deux fois sur l'écran pour le
déverrouiller plutôt qu'utiliser le bouton Marche-Arrêt/Verrouillage.

24
Présentation du téléphone
Changement de méthode de verrouillage de l'écran
Vouspouvezchangerlamanièredeverrouillerl'écranpouréviterqued'autres
utilisateursaccèdentàvosinformationspersonnelles.
1 Appuyezsur
> >ongletApplications> >ongletÉcran>Écran de
verrouillage>Choisir l'écran de verrouillage.
2 Sélectionnezleverrouillagedel'écranquevousdésirezparmiAucun,Glisser,Knock
Code,Schéma,CodePINetMotdepasse.
REMARQUE: Vous devez d'abord créer un compte Google avant de définir
un schéma de déverrouillage. Vous devez également vous souvenir du code
PIN de secours que vous avez saisi lors de la création du verrouillage par
schéma.
Attention! Si vous n'avez pas créé de compte Google sur le téléphone ou
si vous avez oublié votre code PIN, votre mot de passe et le code PIN de
secours, vous devez effectuer une réinitialisation matérielle. Dans ce cas,
toutes les applications et données utilisateur seront supprimées. Veillez à
sauvegarder vos données importantes avant d'effectuer une réinitialisation
matérielle.
ASTUCE! Smart Lock
Vous pouvez utiliser le Smart Lock pour déverrouiller plus facilement
votre téléphone. Vous pouvez le configurer pour que votre téléphone reste
déverrouillé lorsqu'un périphérique Bluetooth de confiance y est connecté,
quand il se trouve dans un endroit que vous connaissez bien, comme votre
domicile ou sur votre lieu de travail, ou quand il reconnaît votre visage.
Configuration du Smart Lock
1 Appuyez sur
> > onglet Applications > .
2 Appuyez sur l'onglet Écran > Écran de verrouillage > Smart Lock.
3 Avant d'ajouter des appareils sécurisés, des lieux sécurisés ou un visage
sécurisé, vous devez configurer un verrouillage de l'écran (Knock Code,
Schéma, Code PIN ou Mot de passe).

25
Votre écran d'accueil
Conseils d'utilisation de l'écran tactile
Voiciquelquesastucespourvousfamiliariseravecvotretéléphone.
• Appuyer sur:unsimpleappuiavecledoigtpermetdesélectionnerdeséléments,
desliens,desraccourcisetdeslettressurleclaviervisuel.
• Exercer une pression prolongée:maintenezledoigtappuyésurunélémentde
l'écransanslereleverjusqu'àcequ'uneactionseproduise.
• Faire glisser (glisser-déplacer):maintenezledoigtsurunélémentpendant
quelquesinstants,puis,sansreleverledoigt,déplacez-lesurl'écranjusqu'àla
positionvoulue.Vouspouvezfaireglisserdesélémentssurl'écrand'accueilpour
lesrepositionner.
• Faire glisser le doigt:passezrapidementledoigtsurlasurfacedel'écransans
lereleveraprèslepremiercontact(demanièreànepasdéplacerunélémentpar
glisser-déplacer).
• Appuyer deux fois:appuyezdeuxfoispoureffectuerunzoomsurunepageWeb
ousurunecarte.
• Pincer pour zoomer:utilisezl'indexetlepouceavecunmouvementde
pincementoud'écartementpouragrandirouréduirelorsquevousutilisezle
navigateur,lesCartesoupourvoirdesphotos.
• Pivoter l'écran:dansdenombreuxmenusetapplications,l'orientationdel'écran
s'ajusteselonl'orientationphysiquedutéléphone.
REMARQUE:
• N'exercez pas une pression trop forte sur l'écran tactile; celui-ci est
suffisamment sensible pour détecter une pression légère et sûre.
• Utilisez le bout du doigt pour appuyer sur l'option voulue. Veillez à ne pas
appuyer sur d'autres touches.
Votre écran d'accueil

26
Votre écran d'accueil
Écran d'accueil
L'écrand'accueilestlepointdedépartdenombreusesapplicationsetfonctions.Vous
pouvezyajouterdesélémentscommedesraccourcisd'applicationsetdeswidgets
Googleafind'accéderrapidementauxinformationsetauxapplications.Ils'agitdela
pagepardéfaut,accessibleàpartirden'importequelmenuenappuyantsur
.
Barre d'état
Icônes des applications
Indicateur de positionnement
Zone Quick Key (Touche de raccourci)
Touches tactiles de l'écran d'accueil
Donnedesinformationssurl'étatdutéléphone,ycomprisl'heure,l'intensitédu
signal,l'étatdelabatterieetlesicônesdenotification.
Appuyezsuruneicône(application,dossier,etc.)pourl'ouvriretl'utiliser.
Indiquelapagedel'écrand'accueilsurlaquellevousvoustrouvezactuellement.
Permetd'accéderàlafonctiond'unesimplepressiondepuisn'importequellepage
del'écrand'accueil.

27
Votre écran d'accueil
Touche Retour
Permetdereveniràl'écranprécédent.Ferme
égalementlesélémentscontextuelstelsqueles
menus,lesboîtesdedialogueetleclavieràl'écran.
Touche Accueil
Permetdereveniràl'écrand'accueilàpartirde
n'importequelécran.
Touche Récentes
Permetd'afficherlesapplicationsrécemment
utilisées.Lorsquevousmaintenezledoigtenfoncé
dessus,unmenud'optionsdisponibless'ouvre.
Écran d'accueil étendu
Lesystèmed'exploitationfournitplusieurspagesd'écrand'accueilpourquevousayez
plusdeplacepourajouterdesicônes,deswidgets,etc.
• Faitesglisservotredoigtversladroiteoulagauchepourparcourirl'écrand'accueil
étenduetaccéderàd'autrespages.
Personnalisation de l'écran d'accueil
Vouspouvezpersonnaliserl'écrand'accueilenyajoutantdesapplications,deswidgets
ouenchangeantdefondd'écran.
Ajout d'éléments à l'écran d'accueil
1 Appuyezdefaçonprolongéesurlapartieviergedel'écrand'accueil.
2 DanslemenuModed'ajout,sélectionnezl'élémentàajouter.Lesélémentsajoutés
apparaissentalorssurl'écrand'accueil.
3 Faitesglisserchaqueélémentàl'endroitvoulu,puisrelevezledoigt.
ASTUCE! Pour ajouter une icône d'application à l'écran d'accueil à partir de
l'écran des applications, appuyez de façon prolongée sur l'application que
vous souhaitez ajouter.

28
Votre écran d'accueil
Suppression d'un élément de l'écran d'accueil
• Depuisl'écrand'accueil,appuyezlonguementsurl'icônequevoussouhaitez
supprimer,puisfaites-laglisserjusqu'à
.
Ajout d'une application à la zone de raccourci
• Àpartirdel'écrandesapplicationsoudel'écrand'accueil,exercezunepression
prolongéesurl'icôned'uneapplicationetfaites-laglisserdanslazonede
raccourci.Puisrelâchez-laàl'emplacementsouhaité.
Suppression d'une application de la zone de raccourci
• Exercezunepressionprolongéesurlatouchederaccourcicorrespondanteet
faites-laglissersur
.
REMARQUE: La touche Applications ne peut pas être supprimée.
Personnalisation des icônes des applications sur l'écran d'accueil
1 Exercezunepressionprolongéesurl'icônejusqu'àcequevouspuissiezla
déplacer,puisrelâchez-la.L'icônedemodification
apparaîtenhautàdroitede
l'application.
2 Appuyezànouveausurl'icône,puissélectionnezlemodèleetlatailled'icônede
votrechoix.
3 AppuyezsurOKpourenregistrerlesmodifications.

29
Votre écran d'accueil
Retour à une application récemment utilisée
1 Appuyezsur .L'aperçudesapplicationsrécemmentutiliséess'affiche.
2 Appuyezsurl'aperçud'uneapplicationpourouvrirl'applicationcorrespondante.
Ouappuyezsur
pourreveniràl'écranprécédent.
Volet Notifications
Lesnotificationsvouspréviennentdelaréceptiondenouveauxmessages,des
événementsducalendrier,desalarmes,ainsiquedesévénementsencours(par
exemplelorsquevousêtesautéléphone).
Lorsqu'unenotificationarrive,uneicônes'afficheenhautdel'écran.Lesicônesdes
notificationsenattentes'affichentàgaucheetlesicônesdusystèmetellesqueleWi-Fi
etleniveaudechargedelabatteries'affichentàdroite.
REMARQUE: Les options disponibles peuvent varier selon les régions ou les
opérateurs.
Icônes de statutIcônes de notification
Ouvrir le volet Notifications
Faitesglisservotredoigtverslebasàpartirdelabarred'étatpourouvrirlevolet
Notifications.PourfermerlevoletNotifications,faitesglisserl'écranverslehautou
appuyezsur
.

30
Votre écran d'accueil
Zone de paramètres rapides
Notifications
Effacer
Appuyezsurchaquetouchedeparamètrerapidepourl'activer/ledésactiver.
Exercezunepressionprolongéesurlatouchedevotrechoixpouraccéder
directementaumenuParamètresdelafonction.Pourafficherdavantagede
touchesdecommutation,faitesglisservotredoigtversladroiteoulagauche.
Appuyezsur
poursupprimer,ajouterouréorganiserlestouchesdeparamètres
rapides.
Lesnotificationscourantess'affichentavecunebrèvedescription.Appuyezsurune
notificationpourl'afficher.
Appuyezpoureffacertouteslesnotifications.
Icônes dans la barre d'état
Lesicônesapparaissentdanslabarred'étatenhautdel'écranpourindiquerdes
appelsmanqués,desnouveauxmessages,desévénementsducalendrier,l'étatdu
périphériqueetbienplus.

31
Votre écran d'accueil
Lesicônesaffichéesenhautdel'écranfournissentdesinformationsrelativesàl'étatde
l'appareil.Lesicônesrépertoriéesdansletableauci-dessoussontlespluscourantes.
Icône Description Icône Description
AucunecarteSIMinsérée Chansonencoursdelecture
Aucunsignalréseau
disponible
Sonneriedésactivée
ModeAvionactivé ModeVibreuractivé
ConnectéàunréseauWi-Fi Batteriechargée
Casqueavecfilconnecté Batterieencharge
Appelencours
Letéléphoneestconnectéà
unPCviauncâbleUSB
Appelmanqué
Téléchargementdesdonnées
encours
Bluetoothactivé
Chargementdesdonnéesen
cours
Avertissementsystème GPSactivé
Alarmeactivée
Donnéesencoursde
synchronisation
Nouvelleboîtevocale
disponible
Choisirlaméthodedesaisie
NouveauSMSouMMS
disponible
Lepointd'accèsWi-Fiest
activé

32
Votre écran d'accueil
REMARQUE: l'emplacement de l'icône dans la barre d'état peut varier selon
la fonction ou le service.
Clavier visuel
Vouspouvezsaisirvotretexteàl'aideduclaviervisuel.Leclavierapparaîtsurl'écran
lorsquevousappuyezsurunchampdesaisiedetexte.
Utilisation du clavier et saisie de texte
Appuyezunefoispourquelalettresuivantes'inscriveenmajuscule.Appuyezdeux
foispournesaisirquedesmajuscules.
Appuyezpouraccéderauxparamètresduclavier.Maintenezledoigtenfoncépour
effectuerunesaisievocaleouaccéderaupresse-papier.
Appuyezsurcettetouchepoursaisirunespace.
Appuyezpourcréeruneligne.
Appuyezsurcettetouchepoursupprimerlecaractèreprécédent.
Saisie des lettres accentuées
LorsquevoussélectionnezFrançaisouEspagnolcommelanguedesaisiedetexte,vous
pouvezsaisirlescaractèresspéciauxfrançaisouespagnols(parexemple,«à»).
Parexemple,pourinsérerlecaractère«à»,maintenezledoigtenfoncésurlatouche
«a»jusqu'àcequelatouchedezoomavantgrandisseetaffichelescaractèresdes
autreslangues.Sélectionnezensuitelecaractèrespécialsouhaité.

33
Fonctionnalités particulières
Prise de photo avec geste
LafonctionPrisedephotoavecgestepermetdeprendreunephotoavecuneseule
mainenutilisantl'appareilphotoorientéversl'avant.
Pour prendre une photo
Ilexistedeuxfaçonsd'utiliserlafonctionPrisedephotoavecgeste.
• Levezlamainaveclapaumeouvertejusqu'àcequel'appareilphotoladétecteet
qu'uncadreapparaisseàl'écran.Fermezensuitelepoingpourlanceruncompte
àrebours,cequivouslaisseletempsdevouspréparer.
• Levezvotrepoingferméjusqu'àcequel'appareilphotofrontalledétecte.Un
rectangleapparaîtalorssurl'écran.Ouvrezensuitelamainpourlancerlecompte
àrebours,cequivouslaisseletempsdevouspréparer.
ou
Fonctionnalités particulières

34
Fonctionnalités particulières
Vue d’un coup d’œil
Lorsquel'écrandevotretéléphoneestéteint,vouspouvezvoirlabarred'état,l'heureet
ladateenfaisantglisservotredoigtverslebasdel'écran.
KnockON
LafonctionKnockONvouspermetdetoucherdeuxfoisl'écranpourl'activeroule
désactiverfacilement.
Pour allumer l'écran
1 Appuyezdeuxfoissurlecentredel'écranpourl'activer.
2 Déverrouillezl'écranouaccédezàunraccourciouwidgetdisponible.
Pour éteindre l'écran
1 Appuyezdeuxfoissurunemplacementvidedel'écrand'accueiloudelabarre
d'état.
2 L'écrans'éteint.
REMARQUE: Appuyez au centre de l'écran. Si vous appuyez en bas ou en
haut, il se peut que le taux de réussite diminue.

35
Fonctionnalités particulières
Knock Code
LafonctionKnockCodevouspermetdecréervotreproprecodededéverrouillageen
utilisantunecombinaisondefrappessurl'écran.Vouspouvezaccéderdirectementà
l'écrand'accueillorsquel'écranestéteintensaisissantlamêmeséquencesurl'écran.
REMARQUE:
• Si vous saisissez sixfois une séquence Knock Code erronée, vous êtes
automatiquement redirigé vers la page de connexion/le code PIN de
secours de votre compte Google.
• Utilisez de préférence le bout du doigt plutôt que l'ongle pour activer ou
désactiver l'écran.
• Si la fonction Knock Code n'est pas activée, vous pouvez l'activer en
appuyant sur l'écran.
1 Appuyezsur > >ongletApplications> >ongletÉcran>Écran de
verrouillage>Choisir l'écran de verrouillage>Knock Code.
2 PourdéfinirvotreKnockCode,appuyezsurlescarrésselonleschémaquevous
souhaitez.VotreKnockCodepeutsecomposerde6à8pressions.
Déverrouillage de l'écran à l'aide du Knock Code
Vouspouvezdéverrouillerl'écranensaisissantlemotifKnockCodequevousavezdéjà
défini.

36
Fonctionnalités particulières
Capture+
LafonctionCapture+vouspermetdecréerdesmémosetderéaliserdescaptures
d'écran.
VouspouvezutiliserCapture+pourcréerfacilementetefficacementdesmémoslors
d'unappel,avecuneimageenregistréeousurl'écranactueldutéléphone.
1 Faitesglisserlabarred'étatverslebasetappuyezsur
.
2 Créezunmémoàl'aidedesoptionssuivantes:
Appuyezpourenregistrerlemémoquevousavezcréé.
Appuyezpourannulerladernièreaction.
Appuyezpourrétablirledernierchangementannulé.
Appuyezpourinsérerdutextedansvotremémo.
Appuyezpoursélectionnerletypeetlacouleurdustylo.
Appuyezpourutiliserlagommepoureffacerlesmarquesdestylosurle
mémo.
Appuyezpourrognerl'imagedumémo.
Appuyezpourafficheroumasquerlabarred'outils.

37
Fonctionnalités particulières
REMARQUE: Appuyez sur l'écran tactile du bout du doigt pour utiliser la
fonction QuickMemo+. N'utilisez pas vos ongles pour appuyer sur l'écran.
3 Appuyezsur pourenregistrerlemémoencoursdansQuickMemo+ oudansla
Galerie.
Supprimer des QuickMemos
• Appuyezsur .
Afficher les mémos enregistrés
Depuisl'écrand'accueil,appuyezsur >ongletApplications>Galerie et
sélectionnezl'albumCapture+ouappuyezsurQuickMemo+
etsélectionnezle
mémodevotrechoix.

38
Configuration d'un compte Google
Lapremièrefoisquevousouvrezl'applicationGooglesurvotretéléphone,vousdevez
vousconnecteràl'aidedevotrecompteGoogleexistant.Sivousn'avezpasdecompte
Google,unmessagevousinviteàencréerun.
Création de votre compte Google
1 Surl'écrand'accueil,appuyezsur .
2 Appuyezsur
>ongletGénéral>Comptes et synchronisation>
AJOUTERUN COMPTE>Google>Ou créez un compte.
3 Entrezvotreprénometvotrenom,puisappuyezsurSUIVANT.
4 Saisissezunnomd'utilisateuretappuyezsurSuivant.Votretéléphonecommunique
aveclesserveursGoogleetvérifiequelenomd'utilisateurestdisponible.
5 SaisissezvotremotdepasseetappuyezsurSUIVANT.
6 Suivezlesinstructionsetsaisissezlesinformationsrequisesetfacultatives
concernantlecompte.Patientezpendantlacréationdevotrecompteparleserveur.
Connexion à votre compte Google
1 Surl'écrand'accueil,appuyezsur .
2 Appuyezsur
>ongletGénéral>Comptes et synchronisation>
AJOUTERUN COMPTE>Google.
3 Saisissezvotreadressee-mailetappuyezsurSUIVANT.
4 Lorsquelaconnexionestétablie,ellepermetd'utiliserGmailetdebénéficierdes
servicesGooglesurvotretéléphone.
5 UnefoisvotrecompteGoogleconfiguré,votretéléphonesesynchronisera
automatiquementavecvotrecompteGooglesurleWeb(siuneconnexionaux
donnéesestdisponible).
Configuration d'un compte Google

39
Configuration d'un compte Google
Lorsquelaconnexionestétablie,votretéléphonesesynchroniseraavecvosservices
Google,telsqueGmail,ContactsetGoogleAgenda.Vouspouvezégalementutiliser
Maps,téléchargerdesapplicationsdePlayStore,sauvegardervosparamètressurles
serveursGoogleetprofiterdesautresservicesdeGooglesurvotretéléphone.
IMPORTANT
• Certaines applications telles que le Calendrier ne fonctionnent qu'avec le
premier compte Google que vous avez ajouté. Si vous prévoyez d'utiliser
plus d'un compte Google sur votre téléphone, assurez-vous de bien vous
connecter avec le compte que vous avez choisi. Lors de la connexion, vos
contacts, vos messages Gmail, vos événements et les autres informations liées
à ces applications ou services Web sont synchronisés avec votre téléphone. Si
vous ne vous connectez pas à un compte Google lors de la configuration du
téléphone, vous devrez vous connecter ou créer un compte Google lorsque
vous utiliserez pour la première fois une application nécessitant un compte
Google (Gmail ou Play Store, par exemple).
• Si vous disposez d'un compte professionnel lié à votre entreprise ou à une
organisation, contactez le service informatique concerné pour connaître les
dispositions à prendre pour se connecter.

40
Connexion à des réseaux et périphériques
Wi-Fi
VouspouvezaccéderàInternetenhaut-débitdanslazonedecouvertured'unpoint
d'accèssansfil(PA).
Connexion aux réseaux Wi-Fi
1 Appuyezsur > >ongletApplications> >ongletRéseaux>Wi-Fi.
2 Appuyezsur
pouractiverleWi-Fietcommencerlarecherchedesréseaux
Wi-Fidisponibles.
3 Appuyezsurunréseaupourétablirlaconnexionàceréseau.
• Sileréseauestsécuriséavecuneicônedeverrouillage,vousdevrezsaisiruneclé
desécuritéouunmotdepasse.
4 Danslabarred'état,différentesicônesindiquentl'étatduréseauWi-Fi.
REMARQUE: Si vous êtes en dehors de la zone Wi-Fi ou si vous avez réglé
Wi-Fi sur Désactivé, le téléphone peut se connecter automatiquement à
Internet à l'aide des données mobiles, ce qui peut entraîner des frais.
ASTUCE! Pour déterminer l'adresse MAC
Appuyez sur
> > onglet Applications > > onglet Réseaux >
Wi-Fi > > Paramètres Wi-Fi avancés > Adresse MAC.
Connexion à des réseaux et périphériques

41
Connexion à des réseaux et périphériques
Bluetooth
Bluetoothestunetechnologiedecommunicationsdecourteportéequivouspermetde
vousconnectersansfilàuncertainnombred'appareilsBluetooth,telsquelescasques
etleskitsmainslibresvoiture,lesappareilsmobiles,lesordinateurs,lesimprimanteset
lespériphériquessansfilcompatiblesBluetooth.LaportéedecommunicationBluetooth
s'étendgénéralementà9mètresenviron.
REMARQUE:
• LG décline toute responsabilité en cas de perte, d'interception ou de
mauvaise utilisation de données envoyées ou reçues via la fonction
Bluetooth.
• Veillez à ce que les périphériques avec lesquels vous échangez des données
ou dont vous recevez des données soient toujours de confiance et bien
sécurisés.
• Si des obstacles se trouvent entre les périphériques, la distance d'utilisation
pourrait être réduite.
• Certains appareils, notamment ceux non testés ou approuvés par
BluetoothSIG, peuvent être incompatibles avec votre téléphone.
Couplage de votre téléphone avec un autre appareil Bluetooth
1 Appuyezsur > >ongletApplications> >ongletRéseaux>
Bluetooth.
2 Appuyezsur
pouractiverleBluetooth.
3 AppuyezsurRECHERCHERpourtrouverlestéléphonesvisiblesàportée.
4 Sélectionnezl'appareilquevoussouhaitezcouplerdanslaliste.Unefoislecouplage
réussi,votretéléphoneseconnecteàl'autreappareil.
REMARQUE: Le couplage entre deux appareils Bluetooth ne doit se
faire qu'une seule fois. Une fois qu'un couplage a été créé, les appareils
reconnaissent toujours leur partenariat et continuent de s'échanger des
informations.

42
Connexion à des réseaux et périphériques
ASTUCE! Consultez la documentation accompagnant le périphérique
Bluetooth pour obtenir des informations sur le mode d'association et le mot
de passe (en général, 0000 – quatre zéros).
Envoi de données via Bluetooth
1 Sélectionnezunfichierouunélémenttelqu'uncontactouunfichiermultimédia.
2 Sélectionnezl'optiond'envoidedonnéesparBluetooth.
3 RecherchezunpériphériquecompatibleBluetoothetprocédezàunjumelage.
• Enraisondesdifférentesspécificationsetcaractéristiquesdespériphériques
Bluetooth,l'affichageetlesopérationspeuventêtredifférents.Desfonctionstelles
queletransfertoul'échange,parexemple,peuventnepasêtredisponiblesavec
certainsappareilsBluetooth.
Réception de données via Bluetooth
1 Appuyezsur > >ongletApplications> >ongletRéseaux>
Bluetooth.
2 Appuyezsur
pouractiverleBluetooth.
3 Vousrecevrezunedemandedecouplagedel'appareildontprovientl'envoi.Veillezà
biensélectionnerACCEPTER.
Wi-Fi Direct
Wi-FiDirectoffreuneconnexiondirecteentrelespériphériquescompatiblesWi-Fisans
nécessiterdepointd'accès.
Activation de Wi-Fi Direct
1 Appuyezsur > >ongletApplications> >ongletRéseaux > Wi-Fi.
2 Appuyezsur
> Paramètres Wi-Fi avancés > Wi-Fi Direct.

43
Connexion à des réseaux et périphériques
REMARQUE: Votre téléphone est alors visible pour les autres appareils Wi-Fi
Direct visibles à proximité.
Transfert de données entre un PC et le téléphone
VouspouvezcopieroudéplacerdesdonnéesentreunPCetletéléphone.
Transfert de données
1 ConnectezvotretéléphoneàunPCàl'aideducâbleUSBfourniavecletéléphone.
2 OuvrezlevoletNotifications,appuyezsurletypedeconnexionactueletsélectionnez
Appareil média (MTP).
3 Unefenêtrecontextuelles'afficherasurvotrePC,vouspermettantdetransférerles
donnéesdevotrechoix.
REMARQUE: Vous devez avoir installé le pilote LG Android Platform Driver
sur votre PC pour pouvoir détecter le téléphone.
Éléments Condition requise
Systèmed'exploitation
MicrosoftWindowsXPSP3,Vistaouversion
ultérieure
VersiondeWindowMediaPlayer WindowsMediaPlayer10ouversionultérieure

44
Appels
Émission d'un appel
1 Appuyezsur pourouvrirleclavierdenumérotation.
2 Composezlenumérosurleclavierdenumérotation.Poursupprimerunchiffre,
appuyezsur
.
3 Aprèsavoirsaisilenumérosouhaité,appuyezsur
pourlancerl'appel.
4 Pourmettrefinàunappel,appuyezsur
.
ASTUCE! Pour saisir le signe «+» au début d'un numéro international,
appuyez de façon prolongée sur .
Appel des contacts
1 Appuyezsur pourouvrirvotrelistedecontacts.
2 Parcourezlalistedecontacts.Vouspouvezégalementsaisirlenomducontactdans
lechampderechercheoufairedéfilerleslettresdel'alphabetsurleborddroitde
l'écran.
3 Danslalistequis'affiche,appuyezsurlecontactvoulu.
Réponse à un appel et rejet d'un appel
• Glissez dansn'importequelledirectionpourrépondreàl'appelentrant.
• Glissez dansn'importequelledirectionpourrejeterunappelentrant.
REMARQUE: Appuyez sur Refuser avec un message ou faites-le glisser si
vous voulez envoyer un message à la personne qui appelle.
Appels

45
Appels
Émettre un second appel
1 Pendantvotrepremierappel,appuyezsurlatouche >Ajouter un appeletentrez
lenuméro.
2 Appuyezsur
pourlancerl'appel.
3 Lesdeuxappelss'affichentsurl'écrand'appel.L'appelinitialestverrouilléetmisen
attente.
4 Appuyezsurlenuméroquis'affichepourbasculerentrelesappels.Ouappuyezsur
poureffectueruneconférencetéléphonique.
5 Pourmettrefinàtouslesappels,appuyezsur
.
Remarque: Vous serez facturé pour chaque appel émis.
Affichage des journaux d'appel
Dansl'écrand'accueil,appuyezsur etsélectionnezJournal des appels.
Unelistedetouslesappelsémis,reçusetmanquésestaffichée.
ASTUCE!
• Pour afficher les détails de chaque appel (date, heure et durée), appuyez sur
la ligne correspondante.
• Appuyez sur , puis appuyez sur Supprimer tout pour supprimer tous les
éléments enregistrés.
Paramètres d'appel
Vouspouvezconfigurerlesparamètresd'appel,telsqueletransfertd'appel,etd'autres
fonctionsparticulièresproposéesparvotreopérateur.
1 Dansl'écrand'accueil,appuyezsur
pourouvrirleclavierdenumérotation.
2 Appuyezsur
pourafficherlesoptionsdisponibles.
3 AppuyezsurParamètres d'appeletconfigurezlesoptionsdevotrechoix.

46
Répertoire
Vousavezlapossibilitéd'ajouterdescontactssurvotretéléphoneetdeles
synchroniseravecceuxdevotrecompteGoogleoud'autrescomptesprenanten
chargelasynchronisationdescontacts.
Recherche d'un contact
1 Appuyezsur pourouvrirvotrelistedecontacts.
2 AppuyezsurRechercher un contactetsaisissezlenomducontactàl'aidedu
clavier.
Ajout d'un nouveau contact
1 Appuyezsur etsaisissezlenumérodunouveaucontact.Appuyezsurlechamp
Créer un contactou
>Ajouter aux contacts.
2 Pourajouteruneimageaunouveaucontact,touchezlazonedel'image.
ChoisissezentrePrendre une photoetSélectionner à partir de la Galerie.
3 Saisissezlesinformationsdevotrechoixpourlecontact.
4 AppuyezsurENREGISTRER.
Contacts préférés
Permetdeclasserdanslesfavorislescontactsquevousappelezfréquemment.
Ajout d'un contact à vos favoris
1 Appuyezsur pourouvrirvotrelistedecontacts.
2 Appuyezsuruncontactpourafficherlesinformationsleconcernant.
3 Appuyezsurl'étoileenhautàdroitedel'écran.L'étoiledevientjaune.
Répertoire

47
Répertoire
Suppression d'un contact de votre liste de favoris
1 Appuyezsur pourouvrirvotrelistedecontacts.
2 Appuyezsurl'ongletFavorisetsélectionnezuncontactpourafficherles
informationsleconcernant.
3 Appuyezsurl'étoilejauneenhautàdroitedel'écran.L'étoiledevientfoncéeetle
contactestsupprimédevosfavoris.
Création d'un groupe
1 Appuyezsur pourouvrirvotrelistedecontacts.
2 AppuyezsurGroupes>
>Nouveau groupe.
3 Saisissezunnompourcenouveaugroupe.Vouspouvezaussiattribuerunesonnerie
distincteaunouveaugroupecréé.
4 AppuyezsurAjouter des membrespourajouterdescontactsaugroupe.
5 Poursauvegarderlegroupe,appuyezsurENREGISTRER.
REMARQUE:
• La suppression d'un groupe n'entraîne pas la suppression des contacts
qui lui sont affectés. Ces derniers seront conservés dans la liste de vos
contacts.

48
Messagerie
VotretéléphoneréunitlesfonctionsSMSetMMSdansunmenuintuitifetconvivial.
Envoi d'un message
1 Appuyezsur del'écrand'accueiletappuyezsur pourcréerunnouveau
message.
2 Saisissezlenomoulenumérod'appelducontactdanslechampÀ.Aufuret
àmesurequevoussaisissezlenomducontact,lescontactscorrespondants
s'affichent.Vouspouvezappuyersurundestinatairesuggéréetajouterplusieurs
contacts.
REMARQUE: Vous devrez peut-être payer pour chaque SMS que vous
envoyez. Veuillez contacter votre fournisseur de services.
3 Appuyezsurlechampdetextepourcommencerlasaisiedumessage.
4 Appuyezsur
pourouvrirlemenud'options.Choisissezl'unedesoptions
disponibles.
ASTUCE! Vous pouvez appuyer sur pour joindre un fichier à votre
message.
5 AppuyezsurEnvoyerpourenvoyervotremessage.
ASTUCE!
• La limite de 160caractères peut varier d'un pays à l'autre, selon la méthode
de codage du SMS et la langue utilisée.
• Si une image, une vidéo ou un contenu audio est ajouté à un SMS,
celui-ci est automatiquement converti en MMS et il vous est facturé en
conséquence.
Messagerie

49
Messagerie
REMARQUE: Lorsque vous recevez un SMS pendant une communication,
une sonnerie vous en avertit.
Affichage conversation
Lesmessageséchangésavecuneautrepersonnesontaffichésdansl'ordre
chronologique.Vousavezainsifacilementaccèsàl'historiquedevosconversations.
Modification des paramètres de messagerie
Lesparamètresdemessageriedutéléphonesontprédéfinisdemanièreàvous
permettred'envoyerdesmessagesimmédiatement.Vouspouveztoutefoismodifierles
paramètresenfonctiondevospréférences.
• Appuyezsur dansl'écrand'accueil,appuyezsur >Paramètres.

50
Email
Vouspouvezvousservirdel'applicationE-mailpourliredese-mailsprovenantde
servicesdemessagerieautresqueGmail.L'applicationE-mailprendenchargeles
typesdecomptessuivants:POP3,IMAPetMicrosoftExchange(pourlesutilisateurs
d'Enterprise).
Gestion de comptes de messagerie
Ouverture de l'application E-mail
Appuyezsur > >ongletApplications> .
Lapremièrefoisquevousouvrezl'applicationE-mail,unassistantdeconfiguration
s'affichepourvousaideràajouteruncomptedemessagerie.
Ajout d'un compte de messagerie:
• Appuyezsur > >ongletApplications> > >Paramètres >
Ajouter un compte.
Modification des paramètres de messagerie généraux:
• Appuyezsur > >ongletApplications> > >Paramètres>
Paramètres généraux.
Suppression d'un compte de messagerie:
• Appuyezsur > >ongletApplications> > >Paramètres>
>Supprimer le compte>Sélectionnezlecompteàsupprimer>SUPPRIMER
>OUI.
Email

51
Email
Utilisation des dossiers de comptes
Appuyezsur > >ongletApplications> > >Dossiers.
TouslescomptespossèdentdesdossiersReçus,Envoyés,EnvoyéetBrouillons.Selon
lesfonctionsprisesenchargeparlefournisseurdeservicesdevotrecompte,ilexiste
peut-êtreaussid'autresdossiers.
Composition et envoi d'un e-mail
1 Dansl'application ,touchez pourcréerunnouvele-mail.
2 Saisissezl'adressedudestinatairedumessage.Aufuretàmesurequevous
saisissezl'adresse,lesadressescorrespondantesfigurantdansvoscontactsvous
sontproposées.Sivousajoutezplusieursadresses,séparez-lespardespoints-
virgules.
3 AppuyezsurlechampCc/Ccipourpouvoirenvoyerunecopiecarboneouunecopie
carboneinvisibleàd'autrescontacts/adressese-mail.
4 Appuyezsurlechampmessageetsaisissezvotremessage.
5 Appuyezsur
pourjoindreunfichieraumessage.
6 Appuyezsur
pourenvoyerlemessage.

52
Appareil Photo et vidéo
Options de l'appareil photo sur le viseur
Pourouvrirl'applicationAppareilphoto,appuyezsur > >ongletApplications
>
.
VouspouvezutiliserlafonctionAppareilphotoouCamérapourprendreetpartagerdes
photosetdesvidéos.
REMARQUE: Nettoyez le cache à l'aide d'un chiffon microfibre avant de
prendre des photos. S'il y a des traces de doigt sur le cache, les images
peuvent être floues avec un effet «halo».
Options Masquer/Afficher:permetdemasquer/afficherlesoptionsdel'appareil
photosurleviseur.
Flash:permetdegérerleflashdel'appareilphoto.
Échanger appareil photo:permetdebasculerentrel'objectifarrièreetl'objectif
avantdel'appareilphoto.
Paramètres:appuyezsurcetteicônepourouvrirlemenudesparamètresde
l'appareilphoto.
Appareil Photo et vidéo

53
Appareil Photo et vidéo
Galerie:permetd'afficherladernièrephotoouvidéoprise.
Enregistrer:appuyezsurcetteicônepourcommencerl'enregistrement.
Capturer:appuyezsurcetteicônepourprendreunephoto.
Touche Retour:appuyezpourquitterl'appareilphoto.
Utilisation des paramètres avancés
Dansleviseurdel'appareilphoto,appuyezsur pourafficherlesoptionsavancées.
Appuyezsurchaqueicônepourréglerlesparamètressuivantsdel'appareilphoto.
Permetdedéfinirlatailledevotrephotoetdevotrevidéo.
Permetdedéclencherlaprisedephotosavecvotrevoix.Lorsquecette
optionestactivée,ilvoussuffitdedire«Cheese»,«Smile»ou«LG»etc.
pourprendreunephoto.
Permetderéglerleminuteurdevotreappareilphoto.Cetteoptionest
pratiquesivousvoulezêtresurlaphotoousurlavidéo.
Permetdeprendredesphotosencoreplusbellesetd'enregistrerde
meilleuresvidéosenaffichantunquadrillagepourfaciliterlecadrage.
Permetdechoisirl'emplacementdestockagedevosphotosetvidéos.
Choisissezentrelesoptionssuivantes:IN(mémoireinterne)ouSD(carte
SD).Cemenus'afficheuniquementlorsquelacarteSDestinsérée.
Indiquecommentutiliserunefonction.Cetteicônevousfourniraunguide
d'aide.
REMARQUE: Le son prise photo n'est pas disponible lorsque le mode
vibreur ou le mode silencieux est activé.

54
Appareil Photo et vidéo
Prendre une photo
1 Appuyezsur > >ongletApplications> .
2 Cadrezvotresujetpourqu'ilapparaisseàl'écran.
3 Uncarréapparaîtautourdusujetpourindiquerquel'appareilafaitlamiseaupoint.
4 Appuyezsur
.VotrephotoestautomatiquementenregistréedanslaGalerie.
ASTUCE! Si les options de l'appareil photo sont masquées sur l'écran, il
vous suffit d'appuyer sur l'écran pour prendre une photo.
Une fois que vous avez pris une photo
Appuyezsurl'imageminiaturesurl'écranpourafficherladernièrephotoprise.
Appuyezpourmodifierlaphoto.
Permetdeprendreimmédiatementuneautrephoto.
Permetd'envoyervotrephotoàd'autrespersonnesoudelapartagerviales
servicesderéseauxsociauxdisponibles.
Permetdesupprimerlaphoto.
Permetd'accéderàdesoptionssupplémentaires.
Permetd'ajouterlaphotoàvosfavoris.

55
Appareil Photo et vidéo
Enregistrement d’une vidéo
1 Appuyezsur > >ongletApplications> .
2 Cadrezvotresujetpourqu'ilapparaisseàl'écran.
3 Appuyezsur
pourlancerl'enregistrementdevotrevidéo.
4 Laduréedel'enregistrements'afficheenhautdel'écran.
REMARQUE: Appuyez sur pour prendre des photos pendant que vous
enregistrez une vidéo.
5 Appuyezsur pourfaireunepausedansl'enregistrement.Vouspouvezreprendre
l'enregistrementenappuyantsur
.
OU
Appuyezsur
pourarrêterl'enregistrement.Votrevidéoestautomatiquement
enregistréedanslaGalerie.
Après l'enregistrement d'une vidéo
Appuyezsurlavidéominiaturesurl'écranpourvoirvotredernièrevidéoenregistrée.
Permetd'enregistreruneautrevidéoimmédiatement.
Permetd'ouvrirlesoptionsdepartagedisponibles(commelamessagerie
ouBluetooth).
Permetdesupprimerlavidéo.
Permetd'accéderàdesoptionssupplémentaires.
Permetd'ajouterlavidéoàvosFavoris.

56
Appareil Photo et vidéo
Galerie
L'applicationGalerieregroupelesimagesetlesvidéosquevousavezenregistrées,y
compriscellesquevousavezprisesavecl'applicationAppareilPhotoetcellesquevous
aveztéléchargéessurInternetouàpartird'autressources.
1 Appuyezsur
> >ongletApplications> pourafficherlesimages
enregistrées.
2 Appuyezsurunalbumpourl'ouvriretaffichersoncontenu.(Lesimagesetvidéos
contenuesdansl'albums'affichentparordrechronologique.)
3 Appuyezsuruneimaged'unalbumpourl'afficher.
REMARQUE:
• Selon le logiciel installé, il se peut que certains formats de fichier ne soient
pas pris en charge.
• La lecture de certains fichiers peut être incorrecte à cause de leur encodage.
Affichage des photos
Lagalerieaffichevosphotosdansdesdossiers.Lorsqu'uneapplication,tellequ'E-
mail,enregistreunephoto,ledossierdetéléchargementestautomatiquementcréé
pouryenregistrerlaphoto.Delamêmefaçon,prendreunecaptured'écrancrée
automatiquementledossierCapturesd'écran.
Lesphotoss'affichentpardatedecréation.Sélectionnezunephotopourl'afficheren
pleinécran.Faitesdéfilerl’écranversladroiteouverslagauchepourafficherlaphoto
précédenteousuivante.
Zoom avant et arrière
Utilisezunedesméthodessuivantespoureffectuerunzoomavantsuruneimage:
• Appuyezdeuxfoisn'importeoùpoureffectuerunzoomavant.
• Écartezdeuxdoigtsn'importeoùsurlaphotopoureffectuerunzoomavant.
Rapprochezvosdoigtsouappuyezdeuxfoissurlaphotopoureffectuerunzoom
arrière.

57
Appareil Photo et vidéo
Options vidéo
1 Appuyezsur >ongletApplications> .
2 Sélectionnezlavidéoquevoussouhaitezregarder.
Permetdesuspendre/reprendrelalecturedelavidéo.
Permetd'effectueruneavancerapidede10secondes.
Permetd'effectuerunretourrapidede10secondes.
Permetderéglerlevolumedelavidéo.
Appuyezpourverrouiller/déverrouillerl'écran
Permetd'accéderàdesoptionssupplémentaires.
REMARQUE:
• Pendant la lecture d'une vidéo, faites glisser le côté droit l'écran vers le haut
ou le bas pour régler le son.
• Pendant la lecture d'une vidéo, faites glisser le côté gauche de l'écran vers
le haut ou le bas pour régler la luminosité.
• Pendant la lecture d'une vidéo, faites glisser votre doigt de gauche à droite
(ou vice versa) pour faire une avance rapide ou revenir en arrière.

58
Appareil Photo et vidéo
Modification des photos
Lorsdel'affichaged'unephoto,appuyezsur .
Suppression de photos et vidéos
Utilisezl'unedesméthodessuivantes:
• Depuisundossier,appuyezsur ,sélectionnezlesphotos/vidéos,puisappuyez
surSUPPRIMER.
• Lorsdel'affichaged'unephoto,appuyezsur .
Définition du fond d'écran
Lorsdel'affichaged'unephoto,appuyezsur >Configurer l'image commepour
définirl'imagecommefondd'écranoupourl'affecteràuncontact.
REMARQUE:
• Selon le logiciel installé, il se peut que certains formats de fichier ne soient
pas pris en charge.
• Si la taille de fichier dépasse la mémoire disponible, une erreur risque de se
produire à l'ouverture des fichiers.

59
Multimédia
Musique
Votretéléphoneestéquipéd'unlecteuraudioquipermetd'écoutervosmorceaux
préférés.
Lecture d’une chanson
1 Appuyezsur > >ongletApplications> .
2 Appuyezsurl'ongletChansons.
3 Sélectionnezlachansonquevoussouhaitezlire.
4 Lesoptionssuivantesvoussontproposées.
Permetd'ajouterlachansonàvosfavoris.
Permetd'afficherlalisted'écouteencours.
Permetd'accéderàdesoptionssupplémentaires.
Multimédia

60
Multimédia
Permetdelirelalisted'écouteencoursenmodealéatoire(lesmorceaux
sontjouésdansunordrealéatoire).
Permetdebasculerentrelesoptionsdelectureenboucledetoutesles
chansons,derépétitiondelachansonactuelleoudedésactivationdela
lectureenboucle.
Permetderéglerlevolume.
Permetdereveniraudébutdelapisteencoursdelectureouderevenir
aumorceauprécédentdel'album,delalisted'écouteoudelalistede
lecturealéatoire.Appuyeretmaintenirpourfaireunretourrapide.
Permetd'interromprelalecture.
Permetdereprendrelalecture.
Permetdepasseraumorceausuivantdel'album,delalisted'écoute
oudelalistedelecturealéatoire.Maintenezledoigtenfoncépourfaire
avancerapide.
Permetdeconfigurerleseffetsaudio.
Pourchangerlevolumeencoursd'écoute,utilisezlesboutons de réglage du volume
situésaudosdutéléphone.
REMARQUE:
• Selon le logiciel installé, il se peut que certains formats de fichier ne soient
pas pris en charge.
• Si la taille de fichier dépasse la mémoire disponible, une erreur risque de se
produire à l'ouverture des fichiers.

61
Multimédia
REMARQUE: Les contenus musicaux peuvent être protégés par des traités
internationaux, ainsi que par les législations nationales en vigueur en matière
de copyright. Par conséquent, la copie ou la reproduction d'un contenu
musical peut être soumise à l'obtention d'autorisations ou de licences
particulières. Dans certains pays, la législation en vigueur interdit la copie à
usage privé de tout contenu protégé par un copyright. Avant de télécharger
ou de copier le fichier, veuillez prendre connaissance de la législation en
vigueur dans votre pays concernant l'utilisation d'un tel contenu.

62
Utilitaires
Horloge
L'applicationHorlogevousdonneaccèsauxalarmes,auminuteur,auxfuseauxhoraires
etauchronomètre.Pouraccéderàcesfonctions,appuyezsurlesongletsenhautde
l'écranouglissezledoigthorizontalementàtraversl'écran.
Appuyezsur
> >ongletApplications> .
Alarmes
L'ongletAlarmesvouspermetdedéfinirdesalarmes.
1 Ouvrezl'application
,puissélectionnezl'ongletAlarmes.
2 Appuyezsur
pourajouterunenouvellealarme.
3 RéglezlesparamètresenfonctiondevosbesoinsetappuyezsurENREGISTRER.
REMARQUE: Vous pouvez également appuyer sur une alarme existante
pour la modifier.
Minuteur
L'ongletMinuteurvousprévientparunsignalsonorelorsqueledélaidéfinis'estécoulé.
1 Ouvrezl'application
,puissélectionnezl'ongletMinuteur.
2 Réglezladuréedevotrechoixpourleminuteur.
3 AppuyezsurDémarrerpourlancerleminuteur.
4 AppuyezsurArrêterpourarrêterleminuteur.
Fuseaux horaires
L'ongletFuseauxhorairesvouspermetdevérifierfacilementl'heureactuelledans
d'autresvillesdumondeentier.
1 Ouvrezl'application
,puissélectionnezl'ongletFuseaux horaires.
2 Appuyezsur
etsélectionnezlavilledevotrechoix.
Utilitaires

63
Utilitaires
Chronomètre
L'ongletChronomètrevouspermetd'utiliservotretéléphonecommechronomètre.
1 Ouvrezl'application
,puissélectionnezl'ongletChronomètre.
2 AppuyezsurlatoucheDémarrerpourlancerlechronomètre.
• AppuyezsurlatoucheTourpourenregistrerdestempspartour.
3 AppuyezsurleboutonArrêterpourarrêterlechronomètre.
Calculatrice
L'applicationCalculatricevouspermetd'effectuerdescalculsmathématiquesavecune
calculatricestandardouscientifique.
1 Appuyezsur
> >ongletApplications> .
2 Saisissezlesnombresàl'aidedestouchesnumériques.
3 Pourlescalculssimples,appuyezsurlafonctionquevoussouhaitezeffectuer
(+,–,xou÷),suiviede=.
REMARQUE: Pour des calculs plus complexes, appuyez sur .
Agenda
L'applicationCalendriervouspermetdesuivrevotrelisted'événements.
1 Appuyezsur
> >ongletApplications> .
2 Appuyezsurladatepourlaquellevousvoulezajouterunévénement.Puisappuyez
sur
.

64
Utilitaires
Dictaphone
L'applicationEnregistreurvocalenregistredesfichierssonoresquevouspourrezutiliser
dedifférentesfaçons.
Enregistrement d’un son ou d’une voix
1 Appuyezsur > >ongletApplications> .
2 Appuyezsur
pourlancerl'enregistrement.
3 Appuyezsur
pourquitterl'enregistrement.
4 Appuyezsur
pourécouterl'enregistrement.
REMARQUE: Appuyez sur pour accéder à vos enregistrements. Vous
pouvez écouter vos enregistrements sauvegardés.
Recherche vocale
UtilisezcetteapplicationpourrechercherdespagesWebavecvotrevoix.
1 Appuyezsur
> >ongletApplications>dossierGoogle> .
2 Ditesunmot-cléouuneexpressionlorsqueÉcoute en cours…s'afficheàl'écran.
Sélectionnezl'undesmots-clésproposés.
REMARQUE: Selon la région ou l'opérateur, cette application peut ne pas
être disponible.
Téléchargements
Utilisezcetteapplicationpourvoirlesfichierstéléchargésparlesapplications.
• Appuyezsur > >ongletApplications> .
REMARQUE: Selon la région ou l'opérateur, cette application peut ne pas
être disponible.

65
Utilitaires
Radio FM
VotretéléphonecomporteuneradioFMintégréequivouspermetd'écoutervosstations
deradiopréféréeslorsdevosdéplacements.
• Appuyezsur > >ongletApplications> .
ASTUCE! Vous devez brancher vos écouteurs pour qu'ils servent d'antenne.
REMARQUE: Selon la région ou l'opérateur, cette application peut ne pas
être disponible.
LG SmartWorld
LGSmartWorldoffreunlargechoixdecontenusintéressants(polices,thèmes,jeux,
applications).
Accès à LG SmartWorld à partir d'un téléphone
1 Appuyezsur > >ongletApplications> .
2 AppuyezsurConnexionetentrezID/PWpourLGSmartWorld.Sivousn'êtespas
encoreinscrit,appuyezsurEnregistrerafindedevenirmembredeLGSmartWorld.
3 Téléchargezlecontenusouhaité.
REMARQUE:
• Lorsque vous utilisez le réseau cellulaire, les frais de données sont facturés
conformément au contrat signé avec votre opérateur.
• LGSmartWorld n'est pas disponible chez tous les opérateurs et dans tous
les pays.

66
Utilitaires
REMARQUE: Que faire s'il n'y a pas d'icône ?
1 À l'aide d'un navigateur Web mobile, accédez à LG SmartWorld
(www.lgworld.com) et sélectionnez votre pays.
2 Téléchargez l'application LG SmartWorld.
3 Exécutez et installez le fichier téléchargé.
4 Accédez à LGSmartWorld en appuyant sur l'icône
.
Avantage spécial uniquement dans LG SmartWorld
1 Décorez votre propre style sur votre Smartphone, utilisez le thème de
l'accueil et le thème du clavier et la police de LG SmartWorld. (Attention,
ce service est disponible uniquement pour un appareil spécifique. Veuillez
vérifier sur le site Web LGSmartWorld si vous pouvez en bénéficier.)
2 Bénéficiez du service spécial de LG SmartWorld en adhérant à la promotion
offerte.

67
Navigateur Web
Internet
Internetvouspermetd'accéderrapidementàununiverscolorédejeux,musiques,
informations,sports,divertissements,etc.,directementsurvotretéléphonemobile.
REMARQUE: Lorsque vous vous connectez à ces services et que vous
téléchargez du contenu, des frais supplémentaires vous sont facturés. Vérifiez
le coût des données auprès de votre fournisseur réseau.
1 Appuyezsur > >ongletApplications> .
Utilisation de la barre d'outils Web
Faitesdéfilerl'écranverslehautdelapageWebpouraccéderàlabarred'outilsdu
navigateur.
Permetdereveniràlapageprécédente.
Permetd'avanceràlapagesuivante.
Permetd'accéderàlapaged'accueil.
Permetd'ouvrirunenouvellefenêtre.
Touchezpouraccéderàvossignets.
Affichage des pages Web
Appuyezsurlechampdel'adresse,saisissezl'adresseInternetetappuyezsurAllersur
leclavier.
Ouvrir une page
Pourouvrirunenouvellepage,appuyezsur > .
PourouvriruneautrepageWeb,appuyezsur
,faitesdéfilerl'écranverslehautou
verslebas,puisappuyezsurunepagepourlasélectionner.
Navigateur Web

68
Navigateur Web
Effectuer une recherche vocale sur Internet
Appuyezsurlechampd'adresse,puisappuyezsur .Lorsquevousyêtesinvité,dites
unmot-cléetsélectionnezl'undesmots-cléssuggérésquiapparaissent.
REMARQUE: Selon la région ou l'opérateur, cette fonction peut ne pas être
disponible.
Favoris
PourenregistrerlapageWebactuelledanslesfavoris,appuyezsur > Ajouter aux
signets>OK.
PourouvrirunepageWebenregistréedanslesfavoris,appuyezsur
etsélectionnez
lefavoridevotrechoix.
Historique
Appuyezsur >ongletHistoriquepourouvrirunelistedepagesWebrécemment
visitées.Poureffacertoutvotrehistorique,appuyezsur
>OUI.
Chrome
UtilisezChromepourrechercherdesinformationsetparcourirdespagesWeb.
1 Appuyezsur
> >ongletApplications> .
REMARQUE: Selon la région ou l'opérateur, cette application peut ne pas
être disponible.
Affichage des pages Web
Appuyezsurlechampadresse,puissaisissezuneadresseWeboueffectuezunerecherche.
Ouvrir une page
Pourouvrirunenouvellepage,appuyezsur >Nouvel onglet.
PourouvriruneautrepageWeb,appuyezsur
etappuyezsurunepagepourla
sélectionner.

69
Paramètres
L'applicationParamètrescontientlaplupartdesoutilspermettantdepersonnaliseret
deconfigurervotretéléphone.Touslesparamètresdecetteapplicationsontdécrits
danscettesection.
Pour ouvrir l'application Paramètres
• Appuyezsur >maintenezledoigtenfoncésur >Paramètres système.
-ou-
• Appuyezsur > >ongletApplications> .
Réseaux
< RÉSEAUX SANS FIL >
Wi-Fi
Permetd'activerlafonctionWi-FipourpouvoirseconnecterauxréseauxWi-Fi
disponibles.
Bluetooth
Permetd'activeroudedésactiverlafonctionsansfilBluetoothafindel'utiliser.
Données mobiles
Permetd'afficherl'utilisationdesdonnéesetdedéfinirlalimited'utilisationdes
donnéesmobiles.
Appels
Configurezlesparamètresd'appel,telsquelerenvoid'appeletd'autresfonctions
particulièresproposéesparvotreopérateur.
• Boîte vocale:permetdesélectionnerleservicedemessageriedevotreopérateur.
• Numéros autorisés: permetd'activeretdecompilerunelistedesnuméros
pouvantêtreappelésàpartirdevotretéléphone.VousdevezsaisirlecodePIN2
quivousaétécommuniquéparvotreopérateur.Depuisvotretéléphone,vous
pouvezuniquementappelerlesnumérosdelalistedesnumérosautorisés.
Paramètres

70
Paramètres
• Notification des appels entrants:permetd'afficherunenotificationvous
signalantunappelentrantlorsquevousêtesentraind'utiliseruneapplication.
• Rejet d'appel:permetd'activerlafonctionderejetd'appel.
• Refuser avec un message:permetd'envoyerunmessagerapidelorsquevous
souhaitezrejeterunappel.Cettefonctionpeuts'avérerparticulièrementutilesi
vousdevezrejeterunappelpendantuneréunion.
• Renvoi d'appel:permetdedéfinirlesoptionsderenvoid'appel.
• Réponse auto:permetdedéfinirledélaiavantqu'unappareilconnectéenmode
mainslibresrépondeautomatiquementàunappel.
• Vibrer lors de la réponse:permetdefairevibrervotretéléphonelorsquevotre
correspondantdécroche.
• Enregistrer des numéros inconnus:permetd'ajouterdesnumérosinconnus
danslerépertoireaprèsunappel.
• Bouton d'alimentation pour raccrocher:permetdesélectionnervotrefin
d'appel.
• Mode Silence pour appel entrant: cochezcetteoptionpourquel'appareil
s'arrêtedesonneravecunesimplerotationencasd'appelentrant.
• Interdiction d'appels:exclutlesappelsentrants,sortantsetinternationaux.
• Durées des appels:permetd'afficherladuréedesappels,ycomprispourle
Dernierappel,lesAppelssortants,lesAppelsentrantsetTouslesappels.
• Paramètres supplémentaires:permetdemodifierlesparamètressuivants.
Numéro de l'appelant:vouspermetdedéfinirlesparamètresd'opérateurpar
défautafind'affichervotrenumérolorsdesappelssortants.
Appel en attente:sicettefonctionestactivée,letéléphonevousprévientlorsque
vousrecevezunappelentrantetquevousêtesdéjàenligne(enfonctiondevotre
opérateurréseau).
< CONNECTIVITÉ >
Partage et connexion
• LG PC Suite:connectezLGPCSuiteàvotretéléphonepourpouvoirgérer
facilementlecontenumultimédiaetlesapplications.

71
Paramètres
• Impression:permetd'imprimerlecontenudecertainsécrans(commedespages
WebaffichéesdansChrome)àl'aided'uneimprimanteconnectéeaumême
réseauWi-FiquevotrepériphériqueAndroid.
Partage de connexion
• Partager connexion USB:vouspouvezpartagerlaconnexiondedonnéesde
votretéléphoneavecunordinateurenactivantlepartagedeconnexionUSB.
• Hotspot Wi-Fi:vouspouvezégalementutiliservotretéléphonepourbénéficier
d'unpartagedeconnexionparUSB.Créezunpointd'accèsetpartagezvotre
connexion.
• Partage de connexion Bluetooth:vouspermetdeconnecterd'autresappareilsà
votretéléphoneviaBluetoothetdepartagersaconnexionInternet.
• Aide:affichedesinformationsconcernantlepartagedeconnexionUSB,lehotspot
Wi-FietlepartagedeconnexionBluetooth.
Plus
• Mode Avion:cochezcetteoptionpourdésactivertouteslesconnexionssansfilet
lesappels.
• Réseaux mobiles:permetdedéfinirlemoderéseau,lesopérateursréseau,le
nomdespointsd'accès,etc.
• VPN:survotretéléphone,vouspouvezajouter,configureretgérerdesréseaux
privésvirtuels(VPN,VirtualPrivateNetwork)quivouspermettentdevousconnecter
etd'accéderàdesressourcesauseind'unréseaulocalsécurisé,commevotre
réseaud'entreprise.
Son et Notification
< BASIQUE >
Profil des sons
Vouspermetdedéfinirleprofildessons:Son,Vibreur seulementouSilencieux.

72
Paramètres
< SON >
Volume
Réglezlevolumedutéléphoneenfonctiondevosbesoinsetdevotreenvironnement.
Sonnerie
Sélectionnezlasonneriepourlesappelsentrants.
Ring ID
Permetdecomposerdessonneriesenfonctiondunumérodetéléphonedel'appel
entrant.
< VIBRATION >
Son avec vibration
Cochezcetteoptionpourqueletéléphonevibrequandilsonne.
Type de vibration
Vouspermetdedéfiniruntypedevibrationpourlesnotifications.
< NOTIFICATIONS >
Ne pas déranger
Appuyezpourdéfinirlesnotifications.Vouspouvezchoisirdenepasêtreinterrompu
parlesnotifications.
Écran de verrouillage
Vouspermetd'affichertouteslesnotificationssurl'écrandeverrouillage.
Applications
Vouspermetdedéfinirdesnotificationspourlesapplications.
< PARAMÈTRES AVANCÉS >
Plus
• Son de notification:permetdedéfinirlesondesnotifications.Vouspouvez
égalementajouterunsondenotificationenappuyantsur
danslecoin
supérieurdroitdel'écran.
• Vibration lorsqu'on appuie:cochezcetteoptionpouractiverlevibreurlorsque
vousappuyezsurlestouchestactilesdel'écrand'accueiloulorsd'autres
interactionsavecl'interfaceutilisateur.

73
Paramètres
• Effets sonores:cemenuvouspermetdechoisird'entendreounondessons
lorsquevousappuyezsurlesnumérosduclavierdenumérotation,sélectionnez
desoptionsàl'écran,etc.
- Son tactile du pavé numérique:cochezcetteoptionpourquel'appareil
émettedestonalitéslorsquevousutilisezlepavénumérique.
- Son touches:cochezcetteoptionpourquel'appareilémetteunsonlorsdes
sélectionsàl'écran.
- Son verrouillage écran:cochezcetteoptionpourquel'appareilémetteunson
lorsquel'écranestverrouilléoudéverrouillé.
• Notifications vocales de messages et d'appels:permetàl'appareildelire
automatiquementlesappelsentrantsetlesmessages.
Écran
< ACCUEIL & VERROUILLAGE >
Écran d'accueil
• Sélectionnez Accueil:sélectionnezlethèmeprincipaldevotrechoix.Choisissez
Accueil(présentationAndroidstandard)ouEasyHome(versionsimplifiéepourles
utilisateursmoinshabituésàlanavigationAndroid).
• Thème:permetdesélectionnerlethèmedel'écrandevotreappareil.
• Fond d'écran:définitlefondd'écranàutilisersurvotreécrand'accueil.
• Effet de défilement des écrans d'accueil:définitlesoptionsdedéfilementdes
écransd'accueil.
• Laisser l'écran d'accueil tourner en boucle:cochezcetteoptionpourpermettre
àl'écrand'accueildedéfilersansinterruption(revientaupremierécranaprèsle
dernier).
• Aide:appuyezsurcetteoptionpourobtenirdesinformationssurl'utilisationde
l'écrand'accueildevotreappareil.

74
Paramètres
Écran de verrouillage
• Choisir l'écran de verrouillage:permetdedéfiniruntyped'écrandeverrouillage
poursécuriservotretéléphone.Grâceàcetteoption,vouspouvezafficherune
séried'écransquivousaideraàdessinerunschémadedéverrouillagedel'écran.
Sivousavezactivéunschémadeverrouillage,ilvousseraalorsdemandéde
tracerceschémadedéverrouillagelorsquevousallumerezvotreappareilou
activerezl'écranpourledéverrouiller.
• Smart Lock:permetdegardervotretéléphonedéverrouillélorsqu'unpériphérique
Bluetoothsécuriséyestconnecté,lorsqu'ilsetrouvedansunendroitfamilier,par
exemplevotredomicileouvotrelieudetravail,oulorsqu'ilreconnaîtvotrevisage.
• Fond d'écran:permetdesélectionnerlefondd'écranàafficherpourvotreécran
deverrouillage.
• Raccourcis:personnalisezlesraccourcissurl'écrandeverrouillage.
• Personne à contacter en cas de perte du téléphone:choisissezd'afficherou
nonlesinformationsdupropriétairedutéléphonesurl'écrandeverrouillageet
personnalisezlesinformationsleconcernant.
• Minuterie du verrouillage: permetdedéfinirladuréedemiseenveillequi
précèdeleverrouillagedel'écran.
• Verrouillage instantané par bouton d'alimentation:cochezcetteoption
pourverrouillerimmédiatementl'écranlorsquevousappuyezsurlatouche
Marche-Arrêt/Verrouillage.CeréglageannuleleMinuteurdeverrouillage
sécurité.
Touches tactiles
Sélectionnezlacombinaisondetouchestactilesdel'écrand'accueil,leurcouleuretsi
voussouhaitezutiliserunarrière-plantransparent.
< POLICE >
Type de police
Sélectionnezletypedepolicesouhaité.
Taille de police
Sélectionnezlatailledepolicesouhaitée.

75
Paramètres
< PARAMÈTRES DE BASE >
Luminosité
Ajustezlaluminositédel'écranàl'aideducurseur.
Rotation automatique de l'écran
Permetdechangerautomatiquementd'orientationlorsdelarotationdevotre
téléphone.
Mise en veille de l'écran
Permetderéglerladuréequiprécèdeladésactivationautomatiquedel'écran.
< PARAMÈTRES AVANCÉS >
Plus
• Écran de veille interactif:sélectionnezl'écrandeveilleàafficherlorsquele
téléphoneestbranchéàunDocket/ouqu'ilestencharge.
• Calibration des capteurs de mouvement:permetd'améliorerl'exactitudede
l'inclinaisonetlavitesseducapteur.
Général
< PERSONNEL >
Par. régionaux et texte
Sélectionnezlalanguedutextequiapparaîtsurvotretéléphoneetpourlaconfiguration
duclavieràl'écran,avecnotammentlesmotsajoutésaudictionnaire.
• Langue:choisissezlalangueàutilisersurletéléphone.
• Clavier actuel:vouspermetdesélectionnerletypedeclavierpardéfaut.
• Clavier LG:appuyezsurl'icôneParamètrespourmodifierlesparamètresdu
clavierLG.
• Saisie vocale Google:cochezcetteoptionpourchoisirGoogleVoiceTypingpour
lasaisiededonnées.Appuyezsurl'icôneParamètrespourmodifierlesparamètres
GoogleVoiceTyping.

76
Paramètres
• Recherche vocale:permetdeconfigurerlesparamètresdelarecherchevocale.
• Paramètres de la synthèse vocale:permetdedéfinirlemoteurpréféréoules
paramètresgénérauxpourlesparamètresdesynthèsevocale.
• Vitesse du curseur:permetderéglerlavitesseducurseur.
• Inverser les boutons:inversezlesboutonsdelasourispourutiliserlebouton
droitdelasouriscommeboutonprincipal.
Position
Quandleservicedelocalisationestactivé,letéléphonedéterminevotrelocalisation
approximativegrâceauWi-Fietauxréseauxmobiles.Quandvoussélectionnezcette
option,vousautorisezGoogleàenregistrervotrepositionnementpourvosrecherches
Google.
• Mode:définitlamanièredontvosinformationsgéographiquesactuellessont
déterminées.
• Appareil Photo:cochezcetteoptionpourtaguerdesphotosoudesvidéosavec
leurpositiongéographique.
• Historique de localisation Google:vouspermetdechoisirlesparamètresdevos
informationsgéographiquesaccessiblesparGoogleetsesproduits.
Comptes et synchronisation
UtilisezlemenuComptesetsynchronisationpourajouter,supprimeretgérervotre
compteGoogleetlesautrescomptesprisencharge.Cesparamètresservent
égalementàcontrôlercommenttouteslesapplicationsenvoient,reçoiventet
synchronisentdesdonnéesselonleurpropreprogrammationetsielleslefont,etsi
touteslesapplicationspeuventsynchroniserautomatiquementlesdonnéesutilisateur.
Gmail™,GoogleAgendaetd'autresapplicationspeuventégalementinclureleurs
propresparamètrespourcontrôlerlasynchronisationdesdonnées;pourdeplus
amplesinformations,reportez-vousauxsectionsconsacréesàcesapplications.
AppuyezsurAJOUTER UN COMPTEpourajouterunnouveaucompte.

77
Paramètres
Accessibilité
LesparamètresAccessibilitépermettentdeconfigurertoutmoduled'accessibilité
installésurvotreappareil.
• Vision
- TalkBack:permetdeconfigurerlafonctionTalkbackdestinéeàassisterles
personnessouffrantdeproblèmesdevueenleurdélivrantunmessagevocal.
- Notifications vocales de messages et d'appels:appuyezsur
pour
activeroudésactivercettefonction.Lorsquelafonctionestactivée,vousrecevez
desalertesautomatiquesvocalesàl'arrivéed'unmessageoud'unappel.
- Niveaux de gris de l'écran:cochezlacasepourdiminuerlecontrastede
l'écran.
- Taille de police:permetdedéfinirlatailledepolice.
- Zoom tactile:vouspermetdezoomeretdézoomerentapotantl'écranàtrois
reprises.
- Inversion les couleurs de l'écran:cochezcetteoptionpourinverserles
couleursdel'écranetdesoncontenu.
- Filtre des couleurs de l'écran:permetdemodifierlescouleursdel'écranet
desoncontenu.
- Bouton d'alimentation pour raccrocher:cochezpourvouspermettrede
mettrefinauxappelsvocauxenappuyantsurla touche d'alimentation/
Verrouillage.
• Mode de reproduction sonore
- Légende:permetdepersonnaliserlesparamètresdelégendepourles
malentendants.
- Alertes flash:cochezcettecasepourfaireclignoterleflashlorsd'appels
entrantsetdenotifications.
- Désactiver tous les sons:cochezcettecasepourdésactivertouslessonsde
l'appareil.
- Type de son:définitletypedeson.
- Balance du son:définitlecheminaudio.Déplacezlecurseursurlabarrede
réglage.

78
Paramètres
• Motricité et cognition
- Temps de réponse tactile:permetdedéfinirletempsderéponsetactile.
- Touch assistant:afficheunpanneautactilepermettantd'accéderfacilement
auxactionslespluscourantes.
- Mise en veille de l'écran:permetdedéfinirledélaiavantladésactivation
automatiquedurétroéclairage.
- Zones de commande tactile:permetdelimiterlapossibilitéd'interactions
tactilesàunezonedel'écran.
• Raccourci vers les fonctions d’accessibilité:permetd'accéderrapidement
àdesfonctionnalitéssélectionnéesenappuyantàtroisreprisessurlatouche
Accueil.
• Rotation automatique de l'écran:cochezcetteoptionpourpermettreà
l'appareildefairepivoterl'écranenfonctiondel'orientation(portraitoupaysage).
• Switch Access:vouspermetd'interagiravecvotreappareilàl'aided'unou
plusieurscommutateursquifonctionnentcommedestouchesdeclavier.Cemenu
peutêtreutilepourlesutilisateursdontlamobilitéestréduite,cequilesempêche
d'interagirdirectementavecl'appareil.
Touche de raccourci
Accédezrapidementauxapplicationsenmaintenantlesboutons du volumeenfoncés
lorsquel'écranestéteintouverrouillé.
Google
UtilisezParamètresGooglepourgérerlesparamètresdevosapplicationsGoogleetde
votrecompte.
< CONFIDENTIALITÉ >
Sécurité
UtilisezlemenuSécuritépoursécuriservotretéléphoneetsesdonnées.
• Verrouillage du contenu:sélectionnezdestypesdeverrouillagepourverrouiller
desmémosdansQuickMemo+.

79
Paramètres
• Cryptez le téléphone:permetdecrypterlesdonnéescontenuesdansle
téléphonepourplusdesécurité.VousserezinvitéàsaisiruncodePINouunmot
depassepourdécryptervotretéléphonechaquefoisquevousl'allumez.
• Crypter le stockage de la carte SD:permetdecrypterlacarteSDetderendre
lesdonnéesindisponiblespourlesautresappareils.
• Configurer verrouillage SIM:permetdedéfiniruncodePINpourverrouillerla
carteSIMetdelemodifier.
• Mot de passe visible:cochezcetteoptionpourafficherbrièvementchaque
caractèredesmotsdepasselorsdeleursaisieetvoirainsicequevoustapez.
• Administrateurs de l'appareil:permetd'afficheroudedésactiverles
administrateursdupériphérique.
• Sources inconnues:autorisel'installationd'applicationsautresquecelles
disponiblessurPlayStore.
• Vérifier les applications:permetd'interdireoud'avertiravantl'installation
d'applicationsquipeuventcauserdesdommages.
• Type de stockage:basésurlematériel.
• Gestion des certificats
- Certificats de confiance:cochezcettecasepourautoriserlesapplicationsà
accéderaudossiercryptédevotretéléphoneoùsontenregistrésvoscertificats
desécurité,lesmotsdepasseassociésetd'autresidentifiantsdeconnexion.
LagestiondescertificatsestnécessaireàlamiseenplacedecertainsVPNou
certainesconnexionsWi-Fi.
- Installer depuis la mémoire:permetd'installeruncertificatdesécurité.
- Effacer les certificats: permetdesupprimertouslescertificatsdesécurité
etlesidentifiantsassociés,ainsiquelemotdepassedudossierdestockage
sécurisé.
• Trust agents:permetdesélectionnerlesapplicationspouvantêtreutiliséessans
déverrouillerl'écran.
• Épinglage de l'écran:permetd'activervotreappareilpourqu'iln'affichequ'un
certainécrand'applications.

80
Paramètres
• Accès d'utilisation pour les apps:permetd'afficherlesinformationsrelativesà
l'utilisationdesapplicationssurvotreappareil.
< FONCTIONS INTELLIGENTES >
Étui QuickCircle
Cemenuvouspermetdesélectionnerdirectementlesapplicationsàutiliserenvue
réduitesurlerabatdel'étui,àl'aidedeQuickCircle.Veuilleznoterquel'activation
decesparamètresd'étuiQuickCirclepeutentraînerunfonctionnementaléatoirede
l'appareil.
< GESTION DU MOBILE >
Date et heure
Déterminezvospréférencesd'affichagepourladateetl'heure.
Stockage et USB
Vouspouvezvérifierl'espaceutiliséetdisponibledelamémoireinternedel'appareil.
Batterie et économie d'énergie
• Utilisation batterie:permetdeconsulterl'utilisationdelabatterie.
• Pourcentage de la batterie dans la barre d'état:cochezcetteoptionpourque
lepourcentagedelabatteries'affichedanslabarred'étatprèsdel'icôneBatterie.
• Économie d'énergie:appuyezsurleboutonÉconomied'énergiepourl'activer
ouladésactiver.Permetdedéfinirlepourcentagedechargedelabatterieàpartir
duquell'appareilactiveautomatiquementlafonctiond'Économied'énergie.Vous
avezlechoixentreImmédiatement,Batterie 5%etBatterie 15%.
• Aide:affichedesinformationssurlesélémentspermettantd'économiserla
batterie.
Mémoire
Vouspouvezsurveillerlamémoireutiliséeetlamémoireutiliséeenmoyennepar
chaqueapplicationdansl'appareil.
Applications
Permetdevoirledétaildesapplicationsinstalléessurletéléphone,degérerleurs
donnéesetdelesforceràs'arrêter.

81
Paramètres
Application de messages par défaut
Cemenuvouspermetdechoisirl'applicationdemessageriequiserautiliséepar
défaut.
Sauvegarder & Réinitialiser
Permetdemodifierlesréglagesdegestiondevosparamètresetdonnées.
• LG Backup:permetdesauvegardertouteslesinformationscontenuesdans
l'appareiletdelesrestaurerencasdepertededonnéesouderemplacementdu
téléphone.
• Sauvegarder mes données:permetdesauvegardervosdonnéesd'applications,
vosmotsdepasseWi-Fietd'autresparamètressurlesserveursdeGoogle.
• Compte de sauvegarde:affichelecompteactuellementutilisépoursauvegarder
lesinformations.
• Restaurer automatiquement:lorsderestaurationd'uneapplication,restaurez
vosparamètresetdonnéessauvegardés.
• Réinitialisation des paramètres réseau:permetderéinitialisertousles
paramètresréseau.
• Réinitialiser valeurs d'usine:permetderestaurervosparamètresselonles
valeursd'usineetdesupprimertoutesvosdonnées.Lorsdecetteréinitialisation,
vousdevezsimplementfournirlesmêmesinformationsquelorsdevotrepremière
utilisationd'Android.
À propos du téléphone
Permetd'afficherlesinformationslégales,devérifierl'étatdutéléphoneetlesversions
logicielles,etdeprocéderàunemiseàjourlogicielle.

82
Logiciel PC (LG PC Suite)
Pour système d'exploitation Windows
LGPCSuitevousaideàgérervoscontenusmultimédiaetvosapplicationsdansvotre
téléphoneenvouspermettantdeconnectervotretéléphoneàvotreordinateur.
Grâce au logiciel LG PC Suite, vous pouvez:
• Géreretlirevoscontenusmultimédia(musique,films,images)survotrePC.
• Transférerdescontenusmultimédiasurvotreappareil.
• Synchroniserdesdonnées(agendas,répertoire,favoris)entrevotreappareilet
votrePC.
• Sauvegarderlesapplicationssurvotreappareil.
• Mettreàjourlelogicieldevotreappareil.
• LirelescontenusmultimédiadevotrePCàpartird'unautrepériphérique.
REMARQUE: Selon les modèles, certaines fonctions peuvent ne pas être
disponibles.
REMARQUE: Pour savoir comment utiliser le logiciel «LGPCSuite»,
reportez-vous au menu Aide de l'application.
Installation du logiciel LGPCSuite
PourtéléchargerlelogicielLGPCSuite,veuillezeffectuerlesopérationssuivantes:
1 Rendez-voussurwww.lg.com.
2 AppuyezsurSERVICE CLIENTS>ASSISTANCE TÉLÉPHONIE MOBILE>PC Sync.
3 Sélectionnezlesinformationsrelativesaumodèle,puiscliquezsurALLER.
4 Faitesdéfilerlemenuverslebas,sélectionnezl'ongletPC SYNC> Windows>
TÉLÉCHARGERpourtéléchargerLGPCSuite.
Logiciel PC (LG PC Suite)

83
Logiciel PC (LG PC Suite)
Configuration requise pour le logiciel LGPCSuite
• Systèmed'exploitation:WindowsXP(Servicepack3)32bit,WindowsVista,
Windows7,Windows8
• Processeur:1GHzouplus
• Mémoire:512Moouplus
• Cartegraphique:résolutionde1024x768,couleurs32bitsouplus
• Espacedisque:500Moouplus(selonlevolumedesdonnéesstockées)
• Logicielrequis:pilotesLGUnited,WindowsMediaPlayer10ouversionultérieure.
REMARQUE: PiloteLG United USB
Le pilote LG United USB est nécessaire pour connecter un périphériqueLG
à un ordinateur. Le pilote s'installe automatiquement lorsque vous installez
l'application logicielle LGPCSuite.
Pour Mac OS
Grâce au logiciel LG PC Suite, vous pouvez:
• Géreretlirevoscontenusmultimédia(musique,films,images)survotrePC.
• Transférerdescontenusmultimédiasurvotreappareil.
• Synchroniserdesdonnées(agendas,répertoire,favoris)entrevotreappareilet
votrePC.
REMARQUE: Selon les modèles, certaines fonctions peuvent ne pas être
disponibles.
REMARQUE: Pour savoir comment utiliser le logiciel «LGPCSuite»,
reportez-vous au menu Aide de l'application.

84
Logiciel PC (LG PC Suite)
Installation du logiciel LGPCSuite
PourtéléchargerlelogicielLGPCSuite,veuillezeffectuerlesopérationssuivantes:
1 Rendez-voussurwww.lg.com.
2 AppuyezsurSERVICE CLIENTS>ASSISTANCE TÉLÉPHONIE MOBILE>PC Sync.
3 Sélectionnezlesinformationsrelativesaumodèle,puiscliquezsurALLER.
4 Faitesdéfilerl'écranverslebas,sélectionnezl'ongletPC SYNC>Mac OS>
TÉLÉCHARGERpourtéléchargerLGPCSuite.
Configuration requise pour le logiciel LGPCSuite
• Systèmed'exploitation:MacOSX(10.6.8)ouversionultérieure
• Mémoire:RAM2Gominimum
• Cartegraphique:résolutiond'écran1024x768ousupérieureetcouleur32bits
• Disquedur:stockagede500Mominimum(del'espacesupplémentairepeutêtre
requispourlesdonnées)
• Logicielsrequis:piloteLGUnitedMobile
REMARQUE: PiloteLG United USB
Le pilote LG United USB est nécessaire pour connecter un périphériqueLG
à un ordinateur. Le pilote s'installe automatiquement lorsque vous installez
l'application logicielle LGPCSuite.

85
Mise à jour du logiciel du téléphone
Mise à jour du logiciel du téléphone
Mise à jour du logiciel LG Mobile Phone à partir d'Internet
Pourplusd'informationssurl'utilisationdecettefonction,consultezlesite
http://www.lg.com/common/index.jsp
etsélectionnezvotrepaysetvotrelangue.
Cettefonctionvouspermetdemettreàjourlemicrologicielsurvotretéléphoneet
detéléchargerlaversionlaplusrécentedepuisInternet,sansfaireappelàuncentre
deservices.CettefonctionseradisponibleuniquementsiLGfournituneversionplus
récentedumicrologicielpourvotretéléphone.
Lamiseàjourdumicrologicieldutéléphonemobilerequiertl'attentioncomplètede
l'utilisateurpendanttouteladuréeduprocessus.Assurez-vousdebienliretoutesles
instructionsetremarquesquis'affichentàchaqueétapeavantdecontinuer.Attention:
RetirerlecâbleUSBdurantlamiseàjourlogiciellepeutgravementendommagervotre
téléphonemobile.
REMARQUE: LG se réserve le droit de mettre à disposition les mises à
jour micrologicielles de certains modèles uniquement, et ce à son entière
discrétion, et ne garantit pas la disponibilité de versions micrologicielles plus
récentes pour l'ensemble de ses modèles de téléphones portables.
Mise à jour du logiciel LG Mobile Phone par radio (Over-the-Air - OTA)
Cettefonctionvouspermetdemettreàjourlelogicieldevotretéléphoneetde
téléchargerlaversionlaplusrécenteviaOTA,sansutiliserdecâblededonnéesUSB.
CettefonctionseradisponibleuniquementsiLGfournituneversionplusrécentedu
micrologicielpourvotretéléphone.
Vérifiezd'abordlaversiondulogicielinstalléesurvotretéléphonemobile:Paramètres
>ongletGénéral>À propos du téléphone>Centre de mises à jour > Mise à
jour logicielle> Rechercher les mises à jour maintenant.
Mise à jour du logiciel du téléphone

86
Mise à jour du logiciel du téléphone
REMARQUE: Vos données personnelles enregistrées sur le téléphone, y
compris les informations relatives à votre compte Google et à tout autre
compte, les données et paramètres système et d'application, ainsi que toutes
les applications téléchargées et vos licencesDRM, peuvent être perdues
lorsque vous mettez à jour le logiciel de votre téléphone. Par conséquent, LG
vous recommande de sauvegarder vos données personnelles avant de mettre
à jour le logiciel de votre téléphone. LG ne peut être tenu responsable de
toute perte de données personnelles.
REMARQUE: Cette fonctionnalité dépend de votre opérateur réseau, de
votre région et de votre pays.

87
À propos de ce manuel de l'utilisateur
À propos de ce manuel de l'utilisateur
• Avantd'utiliserletéléphone,veuillezlireattentivementceguide.Decettemanière,
vousêtessûrdel'utilisercorrectementetentoutesécurité.
• Certainesdesimagesetdescapturesd'écranillustréesdansceguidepeuvent
s'afficherdifféremmentsurvotretéléphone.
• Lecontenudevotretéléphonepeutêtredifférentdeceluiduproduitfinaloudu
logicielfourniparvotreopérateurtéléphoniqueouvotrefournisseurdeservices
Internet.Lecontenudeceguidepeutêtremodifiésanspréavis.Pourobtenir
laversionlaplusrécentedeceguide,consultezlesiteWebdeLGàl'adresse
suivante:www.lg.com.
• Lesapplicationsdevotretéléphoneetleursfonctionspeuventvarierselonle
pays,larégionoulesspécificationsmatérielles.LGnepeutêtretenuresponsable
desproblèmesdeperformanceliésàl'utilisationd'applicationsdéveloppéespar
d'autresfournisseursqueLG.
• LGnepeutêtretenuresponsabledesproblèmesdeperformanceou
d'incompatibilitéliésàlamodificationdesparamètresd'enregistrement
ouàlamodificationdelogicielsdesystèmed'exploitation.Toutetentative
depersonnalisationdevotresystèmed'exploitationpeutentraînerle
dysfonctionnementdutéléphoneoudesesapplications.
• Leslogiciels,l'audio,lesfondsd'écran,lesimagesetlesautreséléments
multimédiasfournisavecvotreappareilsontprotégésparunelicenced'utilisation
limitée.Sivousrecopiezetutilisezcesélémentsàdesfinscommercialesou
touteautre,vouspouvezenfreindrelesdroitsdecopyright.Entantqu'utilisateur,
vousêtesentièrementresponsableencasd'utilisationillégaledeséléments
multimédias.
À propos de ce manuel de l'utilisateur

88
À propos de ce manuel de l'utilisateur
• Desfraissupplémentairespeuvents'appliquerpourlesservicesdedonnées,
telsquelamessagerie,lechargement,letéléchargement,lasynchronisation
automatiqueetlesservicesdelocalisation.Pouréviterl'applicationdefrais
supplémentaires,choisissezunabonnementadaptéàvosbesoins.Contactezvotre
opérateurpourplusd'informations.
Marques commerciales
• LGetlelogoLGsontdesmarquesdéposéesdeLGElectronics.
• Bluetooth
®
estunemarquedéposéedeBluetoothSIG,Inc.danslemondeentier.
• Wi-Fi
®
etlelogoWi-FisontdesmarquesdéposéesdeWi-FiAlliance.
• Touslesautresmarquescommercialesetdroitsd'auteurssontlapropriétéde
leurspropriétairesrespectifs.

89
Accessoires
Lesaccessoiressuivantspeuventêtreutilisésavecvotretéléphone.(Les éléments
décrits ci-dessous sont parfois disponibles en option.)
• Chargeurdevoyage
• Guidededémarragerapide
• Casquestéréo
• CâbleUSB
• Batterie
REMARQUE:
• Utilisez toujours des accessoires d’origine LG. Les éléments fournis sont
conçus uniquement pour ce téléphone et peuvent ne pas être compatibles
avec d'autres appareils.
• Les éléments fournis avec le téléphone et les accessoires disponibles
peuvent varier selon la région ou le fournisseur de services.
Accessoires

90
Dépannage
Cechapitrerépertoriequelques-unsdesproblèmesquevouspouvezrencontrerlorsde
l'utilisationdevotretéléphone.Certainsproblèmespeuventnécessiterquevousfassiez
appelàvotreprestatairedeservices,vouspouvezcependantfacilementenrésoudrela
plupartparvous-même.
Message Causes possibles Actions correctives possibles
Erreur de
carte SIM ou
USIM
Aucune carte SIM
ou USIM n'est
insérée dans le
téléphone, ou
cette dernière est
insérée de façon
incorrecte.
Vérifiez que la carte SIM ou USIM
est correctement insérée.
Aucune
connexion
réseau/
Baisse du
réseau
Le signal est faible
ou vous vous
trouvez hors de
portée du réseau
de votre opérateur.
Déplacez-vous vers une fenêtre ou
une zone en plein air. Vérifiez la carte
de couverture du fournisseur réseau.
Le fournisseur
a appliqué de
nouveaux services.
Vérifiez que la carte SIM ou USIM
n'a pas plus de 6à12mois. Si
c'est le cas, changez la carte SIM
ou USIM dans l'agence de votre
opérateur réseau. Contactez votre
fournisseur de services.
Dépannage

91
Dépannage
Message Causes possibles Actions correctives possibles
Codes non
concordants
Pour changer
un code de
sécurité, vous
devez confirmer le
nouveau code en
le saisissant une
deuxième fois.
Si vous oubliez le code, contactez
également votre prestataire de
services.
Les deux codes
que vous avez
saisis ne sont pas
les mêmes.
Aucune
application
ne peut être
configurée.
Non pris en charge
par le fournisseur
de services ou
enregistrement
requis.
Contactez votre fournisseur de
services.
Appels
indisponibles
Erreur de
numérotation
Nouveau réseau non autorisé.
Vous avez inséré
une nouvelle carte
SIM ou USIM.
Vérifiez les nouvelles restrictions.
Limite de la carte
prépayée atteinte.
Contactez votre fournisseur de
services ou redéfinissez votre limite
de facturation à l'aide du code PIN2.

92
Dépannage
Message Causes possibles Actions correctives possibles
Impossible
d'allumer le
téléphone
Vous avez appuyé
trop brièvement
sur la touche
Marche/Arrêt.
Appuyez sur la touche Marche/Arrêt
pendant au moins deux secondes.
La batterie n'est
pas chargée.
Rechargez la batterie. Vérifiez
l'indicateur de charge sur l'écran.
Erreur de
chargement
La batterie n'est
pas chargée.
Rechargez la batterie.
La température
externe est trop
élevée ou trop
basse.
Chargez votre téléphone dans
des conditions de températures
normales.
Problème de
contact
Vérifiez le chargeur et sa connexion
au téléphone.
Absence de
tension
Branchez le chargeur sur une autre
prise.
Chargeur
défectueux
Remplacez le chargeur.
Chargeur incorrect
N'utilisez que des accessoires de
marque LG.
Numéro non
autorisé.
La fonction
Numéro fixe est
activée.
Vérifiez le menu des réglages et
désactivez la fonction.

93
Dépannage
Message Causes possibles Actions correctives possibles
Impossible
de recevoir/
d'envoyer des
SMS et des
photos
Mémoire pleine
Supprimez des messages de votre
téléphone.
Les fichiers
ne s'ouvrent
pas
Format de fichier
non pris en charge
Vérifiez les formats de fichiers pris
en charge.
L'écran ne
s'allume pas
lorsque je
reçois un
appel.
Problème lié
au capteur de
proximité
Si vous utilisez un étui ou un film de
protection, vérifiez qu'il ne couvre
pas la zone située autour du capteur
de proximité. Vérifiez que la zone
entourant le capteur de proximité est
propre.
Aucun son Mode Vibreur
Vérifiez les paramètres dans le menu
Son pour vous assurer que vous
n'êtes pas en mode Vibreur ou
Silencieux.
Le téléphone
raccroche ou
se bloque
Problème logiciel
intermittent
Effectuez une mise à jour du logiciel
depuis le site Web.

94
FAQ
Catégorie Question Réponse
Appareils
Bluetooth
Quelles sont les
fonctions disponibles
via Bluetooth?
Vous pouvez connecter un appareil
audio Bluetooth, par exemple un
casque stéréo/mono ou un kit
voiture.
Sauvegarde des
contacts
Comment sauvegarder
des contacts?
Vos contacts peuvent être
synchronisés entre votre téléphone
et votre compte Google.
Synchronisation
Est-il possible
de définir une
synchronisation
unidirectionnelle avec
Gmail?
Seule la synchronisation
bidirectionnelle est disponible.
Synchronisation
Est-il possible de
synchroniser tous les
dossiers d'e-mail?
La synchronisation avec la
boîte de réception s'effectue
automatiquement. Vous pouvez
afficher d'autres dossiers en
appuyant sur
et en sélectionnant
Dossiers pour choisir un dossier.
Connexion à
Gmail
Dois-je me connecter
à Gmail pour accéder
à ce service?
Une fois connecté à Gmail, vous
n'avez plus besoin de vous y
reconnecter.
Compte Google
Est-il possible de filtrer
les e-mails?
Non, le téléphone ne prend pas en
charge le filtrage des e-mails.
FAQ

95
FAQ
Catégorie Question Réponse
E-mail
Que se passe-t-il
si une application
s'exécute pendant
la rédaction d'un
e-mail?
Votre e-mail est automatiquement
enregistré en tant que brouillon.
Sonnerie
La taille des
fichiersMP3 pouvant
être utilisés comme
sonnerie est-elle
limitée?
Il n'existe aucune limite de taille
pour ces fichiers.
Heure des
messages
Mon téléphone
n'affiche pas l'heure
de réception des
messages antérieurs à
24heures. Comment
afficher l'heure?
Ouvrez la conversation et appuyez
longuement sur le message désiré.
Puis appuyez sur Détails.
Navigation
Est-il possible
d'installer un autre
navigateur sur mon
téléphone?
Vous pouvez installer et utiliser
toutes les applications disponibles
sur Play Store™, à condition
qu'elles soient compatibles avec
votre matériel.
Synchronisation
Est-il possible de
synchroniser mes
contacts depuis tous
mes comptes de
messagerie?
Seuls les contacts d'une
messagerie Gmail ou d'un
serveur MSExchange (serveur de
messagerie de société) peuvent être
synchronisés.

96
FAQ
Catégorie Question Réponse
Attente et pause
Est-il possible
d'ajouter des fonctions
d'attente et de pause
dans un numéro
de téléphone d'un
contact?
Si vous avez transféré un
contact dont un numéro inclut
des fonctionsWait (attendre) et
Pause (mettre en pause), vous ne
pouvez pas utiliser ces dernières.
Vous devez enregistrer à nouveau
chaque numéro.
Enregistrer un numéro avec les
fonctions d'attente et de pause:
1. Sur l'écran d'accueil, appuyez
sur
.
2. Composez le numéro, puis
appuyez sur
.
3. Appuyez sur Ajouter une pause
de 2 s ou Ajouter pause.
Sécurité
Quelles sont les
fonctionnalités
de sécurité du
téléphone?
Vous pouvez définir un Schéma
de déverrouillage devant être saisi
avant de pouvoir activer ou utiliser
le téléphone.

97
FAQ
Catégorie Question Réponse
Schéma de
déverrouillage
Comment créer
un schéma de
déverrouillage?
1. Sur l'écran d'accueil, appuyez de
façon prolongée sur
.
2. Appuyez sur Paramètres
système > onglet Écran >
Écran de verrouillage.
3. Appuyez sur Choisir l'écran
de verrouillage > Schéma. La
première fois que vous utilisez
cette option, un didacticiel
apparaît pour vous aider à créer
un schéma de déverrouillage.
4. Définissez votre schéma en le
dessinant une première fois,
puis une seconde fois pour le
confirmer.
Consignes relatives au verrouillage
par schéma.
Veillez à ne pas oublier le schéma
de déverrouillage que vous avez
défini. Si vous utilisez un schéma
incorrect cinq fois consécutives,
vous ne pourrez plus accéder à
votre téléphone. Vous disposez de
cinqtentatives pour saisir le bon
schéma de déverrouillage, code
PIN ou mot de passe. Si vous
avez épuisé vos cinq tentatives,
vous pouvez réessayer au bout de
30secondes. (si vous prédéfinissez
le codePIN de sauvegarde, vous
pouvez également l'utiliser pour
déverrouiller le schéma).

98
FAQ
Catégorie Question Réponse
Schéma de
déverrouillage
Que faire en cas
d'oubli du schéma
de déverrouillage et
quand aucun compte
Google n'a été créé
sur le téléphone?
Si vous avez oublié votre schéma:
Si vous vous connectez à votre
compte Google depuis votre
téléphone et qu'après cinq
tentatives vous n'avez toujours
pas pu indiquer le schéma correct,
appuyez sur le bouton Schéma
oublié. Pour déverrouiller le
téléphone, vous devez ensuite vous
connecter à l'aide de votre compte
Google. Si vous n'avez pas créé
de compte Google sur le téléphone
ou si vous l'avez oublié, il vous
faut effectuer une réinitialisation
matérielle.
Attention: Si vous effectuez une
réinitialisation d'usine, toutes
les applications et données
utilisateur sont supprimées. Veillez
à sauvegarder vos données
importantes avant d'effectuer une
réinitialisation.
Mémoire
Comment savoir si la
mémoire est pleine?
Vous recevrez une notification.

99
FAQ
Catégorie Question Réponse
Configuration de
la langue
Est-il possible de
modifier la langue du
téléphone?
Le téléphone dispose de fonctions
multilingues.
Pour modifier la langue:
1. Sur l'écran d'accueil, appuyez
de façon prolongée sur
et appuyez sur Paramètres
système.
2. Appuyez sur l'onglet Général
> Par. régionaux et texte >
Langue.
3. Appuyez sur la langue de votre
choix.
VPN
Comment définir un
point d'accès VPN?
La configuration d'un accès
VPN diffère selon les sociétés.
Contactez l'administrateur réseau
de votre société pour obtenir plus
d'informations sur la configuration
d'un point d'accèsVPN sur votre
téléphone.
Délai de mise en
veille de l'écran
Mon écran s'éteint
après seulement
15secondes
d'inactivité.
Comment modifier
la durée d'inactivité
après laquelle le
rétroéclairage est
désactivé?
1. Sur l'écran d'accueil, appuyez de
façon prolongée sur
.
2. Appuyez sur Paramètres
système > onglet Écran.
3. Appuyez sur Mise en veille de
l'écran.
4. Appuyez sur le délai de mise en
veille de l'écran souhaité.

100
FAQ
Catégorie Question Réponse
Réseau Wi-Fi et
mobile
Lorsque les réseaux
Wi-Fi et mobile sont
tous deux disponibles,
quel service mon
téléphone utilise-t-il?
Pour le traitement des données,
votre téléphone utilise par défaut la
connexion Wi-Fi (si la connectivité
Wi-Fi est activée sur l'appareil).
Cependant, vous ne recevez
aucune notification vous indiquant
que votre téléphone passe d'un
réseau à l'autre.
Pour connaître la connexion de
données utilisée, vérifiez quelle
icône s'affiche en haut de votre
écran (réseau mobile ou Wi-Fi).
Écran d'accueil
Est-il possible de
supprimer une icône
de l'écran d'accueil?
Oui. Appuyez de façon prolongée
sur l'icône jusqu'à ce qu'une icône
de corbeille apparaisse en haut au
centre de l'écran. Sans relever le
doigt, faites glisser l'icône vers la
corbeille.
Application
Le téléchargement
d’une application
a provoqué de
nombreuses erreurs.
Comment supprimer
cette application?
1. Sur l'écran d'accueil, appuyez de
façon prolongée sur
.
2. Appuyez sur Paramètres
système > onglet
Général > Applications >
TÉLÉCHARGÉES.
3. Appuyez sur l'application, puis
sur Désinstaller.

101
FAQ
Catégorie Question Réponse
Chargeur
Est-il possible de
recharger mon
téléphone via le câble
de donnéesUSB sans
installer le piloteUSB
nécessaire?
Oui, le téléphone est rechargé
par le câbleUSB, que les pilotes
nécessaires aient été installés ou
non.
Alarme
Puis-je utiliser mes
fichiers musicaux pour
l'alarme?
Oui. Une fois défini comme
sonnerie, un fichier de musique
peut être utilisé pour une alarme.
1. Appuyez de façon prolongée sur
une chanson figurant dans une
liste de la bibliothèque. Dans le
menu qui s'affiche, appuyez sur
Définir en tant que sonnerie
> Sonnerie du téléphone ou
Sonnerie appelant.
2. Sur l'écran de configuration de
l'alarme, sélectionnez la chanson
comme sonnerie.
Alarme
L'alarme se
déclenche-t-elle de
façon audible même
quand mon téléphone
est éteint?
Non, cette fonctionnalité n'est pas
prise en charge.
Alarme
L'alarme se
déclenche-t-elle
lorsque mon
téléphone est en
mode Vibreur?
Oui, l'alarme est programmée pour
être audible dans ce cas de figure.

102
FAQ
Catégorie Question Réponse
Réinitialisation
matérielle
(réinitialisation
d'usine)
Comment puis-
je effectuer une
réinitialisation d'usine
si le menu Paramètres
de mon téléphone est
inaccessible?
Si votre téléphone ne parvient pas à
restaurer ses paramètres d'origine,
utilisez la fonction de réinitialisation
matérielle (réinitialisation d'usine).

User Guide
• Somecontentandillustrationsmaydifferfromyourdevicedependingonthe
region,serviceprovider,softwareversion,orOSversion,andaresubjectto
changewithoutpriornotice.
• AlwaysusegenuineLGaccessories.Thesupplieditemsaredesignedonlyforthis
deviceandmaynotbecompatiblewithotherdevices.
• Thisdeviceisnotsuitableforpeoplewhohaveavisualimpairmentduetothe
touchscreenkeyboard.
• Copyright©2016LGElectronics,Inc.Allrightsreserved.LGandtheLGlogoare
registeredtrademarksofLGGroupanditsrelatedentities.Allothertrademarks
arethepropertyoftheirrespectiveowners.
• Google™,GoogleMaps™,Gmail™,YouTube™,Hangouts™andPlayStore™
aretrademarksofGoogle,Inc.
ENGLISH

2
Table of contents
Guidelines for safe and efficient use .......4
Important notice .....................................13
Getting to know your phone ................... 15
Phone layout .......................................... 15
Installing the SIM or USIM card and
battery ...................................................17
Charging the battery .............................. 19
Inserting a memory card ........................ 20
Removing the memory card ................... 21
Locking and unlocking the device ..........21
Your Home screen ................................... 23
Touch screen tips ..................................23
Home screen .........................................24
Customizing the Home screen ...............25
Returning to recently-used
applications ........................................... 26
Notifications panel .................................26
On-screen keyboard ..............................29
Special Features .....................................30
Gesture shot ..........................................30
Glance View ........................................... 31
KnockON ...............................................31
Knock Code ...........................................31
Capture+ ............................................... 32
Google account setup ............................. 34
Creating your Google account ................34
Signing into your Google account ........... 34
Connecting to Networks and Devices .... 36
Wi-Fi .....................................................36
Bluetooth ...............................................37
Wi-Fi Direct ...........................................38
Transferring data between a PC and
the device .............................................. 39
Calls ........................................................40
Making a call .........................................40
Calling your contacts .............................40
Answering and rejecting a call ...............40
Making a second call .............................41
Viewing your call logs ............................41
Call settings ........................................... 41
Contacts ..................................................42
Searching for a contact .......................... 42
Adding a new contact ............................42
Favourites contacts ................................42
Creating a group .................................... 43
Messaging ............................................... 44
Sending a message ...............................44
Conversation view .................................45
Changing your messaging settings ........45
E-mail ......................................................46
Managing email accounts ......................46
Working with account folders .................46
Table of contents

3
Table of contents
Composing and sending email ...............47
Camera and Video ...................................48
Camera options on the viewfinder .......... 48
Using the advanced settings ..................49
Taking a photo .......................................50
Once you have taken a photo ................. 50
Recording a video ..................................51
After recording a video...........................51
Gallery ................................................... 52
Multimedia ..............................................55
Music ....................................................55
Utilities ....................................................57
Clock .....................................................57
Calculator ..............................................58
Calendar ................................................ 59
Voice Recorder ......................................59
Voice Search..........................................59
Downloads ............................................60
FM Radio ...............................................60
LG SmartWorld ......................................60
Web Browser ...........................................62
Internet .................................................. 62
Chrome .................................................63
Settings ...................................................64
Networks ...............................................64
Sound & notification ..............................66
Display ..................................................68
General .................................................. 69
PC software (LG PC Suite) ......................75
For Windows OS ....................................75
For Mac OS ............................................76
Phone software update ..........................78
Phone software update ..........................78
About this user guide .............................80
About this user guide ............................. 80
Trademarks ...........................................81
Accessories ............................................. 82
Troubleshooting ......................................83
FAQ ..........................................................86

4
Guidelines for safe and efficient use
Pleasereadthesesimpleguidelines.Notfollowingtheseguidelinesmaybedangerous
orillegal.
Shouldafaultoccur,asoftwaretoolisbuiltintoyourdevicethatwillgatherafaultlog.
Thistoolgathersonlydataspecifictothefault,suchassignalstrength,cellIDposition
insuddencalldropandapplicationsloaded.Thelogisusedonlytohelpdeterminethe
causeofthefault.Theselogsareencryptedandcanonlybeaccessedbyanauthorized
LGRepaircentreshouldyouneedtoreturnyourdeviceforrepair.
Exposure to radio frequency energy
RadiowaveexposureandSpecificAbsorptionRate(SAR)information.
ThismobilephonemodelLG-H420hasbeendesignedtocomplywithapplicablesafety
requirementsforexposuretoradiowaves.Theserequirementsarebasedonscientific
guidelinesthatincludesafetymarginsdesignedtoassurethesafetyofallpersons,
regardlessofageandhealth.
• Theradiowaveexposureguidelinesemployaunitofmeasurementknownasthe
SpecificAbsorptionRate,orSAR.TestsforSARareconductedusingstandardised
methodswiththephonetransmittingatitshighestcertifiedpowerlevelinallused
frequencybands.
• WhiletheremaybedifferencesbetweentheSARlevelsofvariousLGphone
models,theyarealldesignedtomeettherelevantguidelinesforexposuretoradio
waves.
• TheSARlimitrecommendedbytheInternationalCommissiononNon-Ionizing
RadiationProtection(ICNIRP)is2W/kgaveragedover10goftissue.
• ThehighestSARvalueforthismodelphonetestedforuseattheearis
0.676W/kg(10g)andwhenwornonthebodyis0.667W/Kg(10g).
Guidelines for safe and efficient use

5
Guidelines for safe and efficient use
• ThisdevicemeetsRFexposureguidelineswhenusedeitherinthenormaluse
positionagainsttheearorwhenpositionedatleast1.5cmawayfromthebody.
Whenacarrycase,beltcliporholderisusedforbody-wornoperation,itshould
notcontainmetalandshouldpositiontheproductatleast1.5cmawayfromyour
body.Inordertotransmitdatafilesormessages,thisdevicerequiresaquality
connectiontothenetwork.Insomecases,transmissionofdatafilesormessages
maybedelayeduntilsuchaconnectionisavailable.Ensuretheaboveseparation
distanceinstructionsarefolloweduntilthetransmissioniscompleted.
Product care and maintenance
WARNING
Only use batteries, chargers and accessories approved for use with this
particular phone model. The use of any other types may invalidate any
approval or warranty applying to the phone and may be dangerous.
• Donotdisassemblethisunit.Takeittoaqualifiedservicetechnicianwhenrepair
workisrequired.
• Repairsunderwarranty,atLG'sdiscretion,mayincludereplacementpartsor
boardsthatareeitherneworreconditioned,providedthattheyhavefunctionality
equaltothatofthepartsbeingreplaced.
• KeepawayfromelectricalappliancessuchasTVs,radiosandpersonalcomputers.
• Theunitshouldbekeptawayfromheatsourcessuchasradiatorsorcookers.
• Donotdrop.
• Donotsubjectthisunittomechanicalvibrationorshock.
• Switchoffthephoneinanyareawhereyouarerequiredtobyspecialregulations.
Forexample,donotuseyourphoneinhospitalsasitmayaffectsensitivemedical
equipment.
• Donothandlethephonewithwethandswhileitisbeingcharged.Itmaycausean
electricshockandcanseriouslydamageyourphone.

6
Guidelines for safe and efficient use
• Donotchargeahandsetnearflammablematerialasthehandsetcanbecomehot
andcreateafirehazard.
• Useadryclothtocleantheexterioroftheunit(donotusesolventssuchas
benzene,thinneroralcohol).
• Donotchargethephonewhenitisonsoftfurnishings.
• Thephoneshouldbechargedinawellventilatedarea.
• Donotsubjectthisunittoexcessivesmokeordust.
• Donotkeepthephonenexttocreditcardsortransporttickets;itcanaffectthe
informationonthemagneticstrips.
• Donottapthescreenwithasharpobjectasitmaydamagethephone.
• Donotexposethephonetoliquidormoisture.
• Useaccessorieslikeearphonescautiously.Donottouchtheantennaunnecessarily.
• Donotuse,touchorattempttoremoveorfixbroken,chippedorcrackedglass.
Damagetotheglassdisplayduetoabuseormisuseisnotcoveredunderthe
warranty.
• Yourphoneisanelectronicdevicethatgeneratesheatduringnormaloperation.
Extremelyprolonged,directskincontactintheabsenceofadequateventilation
mayresultindiscomfortorminorburns.Therefore,usecarewhenhandlingyour
phoneduringorimmediatelyafteroperation.
• Ifyourphonegetswet,immediatelyunplugittodryoffcompletely.Donotattempt
toacceleratethedryingprocesswithanexternalheatingsource,suchasanoven,
microwaveorhairdryer.
• Theliquidinyourwetphone,changesthecoloroftheproductlabelinsideyour
phone.Damagetoyourdeviceasaresultofexposuretoliquidisnotcovered
underyourwarranty.

7
Guidelines for safe and efficient use
Efficient phone operation
Electronics devices
Allmobilephonesmayreceiveinterference,whichcouldaffectperformance.
• Donotuseyourmobilephonenearmedicalequipmentwithoutrequesting
permission.Avoidplacingthephoneoverpacemakers,forexample,inyourbreast
pocket.
• Somehearingaidsmightbedisturbedbymobilephones.
• MinorinterferencemayaffectTVs,radios,PCsetc.
• Useyourphoneintemperaturesbetween0ºCand40ºC,ifpossible.Exposing
yourphonetoextremelyloworhightemperaturesmayresultindamage,
malfunction,orevenexplosion.
Road safety
Checkthelawsandregulationsontheuseofmobilephonesintheareawhenyou
drive.
• Donotuseahand-heldphonewhiledriving.
• Givefullattentiontodriving.
• Pullofftheroadandparkbeforemakingoransweringacallifdrivingconditions
sorequire.
• RFenergymayaffectsomeelectronicsystemsinyourvehiclesuchascarstereos
andsafetyequipment.
• Whenyourvehicleisequippedwithanairbag,donotobstructwithinstalledor
portablewirelessequipment.Itcancausetheairbagtofailorcauseseriousinjury
duetoimproperperformance.
• Ifyouarelisteningtomusicwhilstoutandabout,pleaseensurethatthevolume
isatareasonablelevelsothatyouareawareofyoursurroundings.Thisisof
particularimportancewhennearroads.

8
Guidelines for safe and efficient use
Avoid damage to your hearing
To prevent possible hearing damage, do not listen at high volume
levels for long periods.
Damagetoyourhearingcanoccurifyouareexposedtoloudsoundforlongperiodsof
time.Wethereforerecommendthatyoudonotturnonoroffthehandsetclosetoyour
ear.Wealsorecommendthatmusicandcallvolumesaresettoareasonablelevel.
• Whenusingheadphones,turnthevolumedownifyoucannothearthepeople
speakingnearyou,orifthepersonsittingnexttoyoucanhearwhatyouare
listeningto.
NOTE: Excessive sound pressure from earphones and headphones can
cause hearing loss.
Glass Parts
Somepartsofyourmobiledevicearemadeofglass.Thisglasscouldbreakifyour
mobiledeviceisdroppedonahardsurfaceorreceivesasubstantialimpact.Iftheglass
breaks,donottouchorattempttoremoveit.Stopusingyourmobiledeviceuntilthe
glassisreplacedbyanauthorisedserviceprovider.
Blasting area
Donotusethephonewhereblastingisinprogress.Observerestrictionsandfollowany
regulationsorrules.

9
Guidelines for safe and efficient use
Potentially explosive atmospheres
• Donotuseyourphoneatarefuelingpoint.
• Donotusenearfuelorchemicals.
• Donottransportorstoreflammablegas,liquidorexplosivesinthesame
compartmentofyourvehicleasyourmobilephoneoraccessories.
In aircraft
Wirelessdevicescancauseinterferenceinaircraft.
• Turnyourmobilephoneoffbeforeboardinganyaircraft.
• Donotuseitonthegroundwithoutpermissionfromthecrew.
Children
Keepthephoneinasafeplaceoutofthereachofsmallchildren.Itincludessmallparts
whichmaycauseachokinghazardifdetached.
Emergency calls
Emergencycallsmaynotbeavailableonallmobilenetworks.Thereforeyoushould
neverdependsolelyonyourphoneforemergencycalls.Checkwithyourlocalservice
provider.

10
Guidelines for safe and efficient use
Battery information and care
• Youdonotneedtocompletelydischargethebatterybeforerecharging.Unlike
otherbatterysystems,thereisnomemoryeffectthatcouldcompromisethe
battery'sperformance.
• UseonlyLGbatteriesandchargers.LGchargersaredesignedtomaximisethe
batterylife.
• Donotdisassembleorshort-circuitthebattery.
• Keepthemetalcontactsofthebatteryclean.
• Replacethebatterywhenitnolongerprovidesacceptableperformance.The
batterypackmayberechargedhundredsoftimesbeforeitneedsreplacing.
• Rechargethebatteryifithasnotbeenusedforalongtimetomaximiseusability.
• Donotexposethebatterychargertodirectsunlightoruseitinhighhumidity,such
asinthebathroom.
• Donotleavethebatteryinhotorcoldplaces,asthismaydeterioratebattery
performance.
• Thereisriskofexplosionifthebatteryisreplacedwithanincorrecttype.
• Disposeofusedbatteriesaccordingtothemanufacturer'sinstructions.Please
recyclewhenpossible.Donotdisposeashouseholdwaste.
• Ifyouneedtoreplacethebattery,takeittothenearestauthorisedLGElectronics
servicepointordealerforassistance.
• Alwaysunplugthechargerfromthewallsocketafterthephoneisfullychargedto
saveunnecessarypowerconsumptionofthecharger.
• Actualbatterylifewilldependonnetworkconfiguration,productsettings,usage
patterns,batteryandenvironmentalconditions.
• Makesurethatnosharp-edgeditemssuchasanimal'steethornails,comeinto
contactwiththebattery.Thiscouldcauseafire.

11
Guidelines for safe and efficient use
Open Source Software Notice Information
To obtain the source code under GPL, LGPL, MPL, and other
open source licenses, that is contained in this product, please
visit http://opensource.lge.com.
In addition to the source code, all referred license terms, warranty
disclaimers and copyright notices are available for download.
LG Electronics will also provide open source code to you on CD-ROM for a
charge covering the cost of performing such distribution (such as the cost of
media, shipping, and handling) upon email request to opensour[email protected].
This offer is valid for three (3) years from the date on which you purchased the
product.
HOW TO UPDATE YOUR DEVICE
Access to latest firmware releases, new software functions and improvements.
• Select the software update in settings menu on your device.
• Update your device by connecting it to your PC. For more information
about using this function, please visit http://www.lg.com/common/index.jsp
select country and language.
DECLARATION OF CONFORMITY
Hereby, LG Electronics declares that this LG-H420 product is in
compliance with the essential requirements and other relevant provisions of
Directive 1999/5/EC. A copy of theDeclaration of Conformity can be found
at http://www.lg.com/global/declaration
Contact office for compliance of this product:
LG Electronics Inc.
EU Representative, Krijgsman 1,
1186 DM Amstelveen, The Netherlands

12
Guidelines for safe and efficient use
Disposal of your old appliance
1 Allelectricalandelectronicproductsshouldbedisposedofseparately
fromthemunicipalwastestreamviadesignatedcollectionfacilities
appointedbythegovernmentorthelocalauthorities.
2 Thecorrectdisposalofyouroldappliancewillhelppreventpotential
negativeconsequencesfortheenvironmentandhumanhealth.
3 Formoredetailedinformationaboutdisposalofyouroldappliance,
pleasecontactyourcityoffice,wastedisposalserviceortheshop
whereyoupurchasedtheproduct.
Disposal of waste batteries/accumulators
1 Thissymbolmaybecombinedwithchemicalsymbolsformercury(Hg),
cadmium(Cd)orlead(Pb)ifthebatterycontainsmorethan0.0005%
ofmercury,0.002%ofcadmiumor0.004%oflead.
2 Allbatteries/accumulatorsshouldbedisposedseparatelyfromthe
municipalwastestreamviadesignatedcollectionfacilitiesappointedby
thegovernmentorthelocalauthorities.
3 Thecorrectdisposalofyouroldbatteries/accumulatorswillhelpto
preventpotentialnegativeconsequencesfortheenvironment,animal
andhumanhealth.
4 Formoredetailedinformationaboutdisposalofyouroldbatteries/
accumulators,pleasecontactyourcityoffice,wastedisposalserviceor
theshopwhereyoupurchasedtheproduct.

13
Important notice
Please read this before you start using your phone!
Pleasechecktoseewhetheranyproblemsyouencounteredwithyourphoneare
describedinthissectionbeforetakingthephoneinforserviceorcallingaservice
representative.
1. Phone memory
Whenthereislessthan10MBofspaceavailableinyourphonememory,yourphone
cannotreceivenewmessages.Youmayneedtocheckyourphonememoryanddelete
somedata,suchasapplicationsormessages,tomakemorememoryavailable.
To uninstall applications:
1 Tap > >Appstab> >Generaltab>Apps.
2 Onceallapplicationsappear,scrolltoandselecttheapplicationyouwantto
uninstall.
3 TapUninstall.
2. Optimizing battery life
Extendyourbattery'spowerbyturningofffeaturesthatyoudonotneedtorun
constantlyinthebackground.Youcanmonitorhowapplicationsandsystemresources
consumebatterypower.
Extending your phone's battery life:
• Turnoffradiocommunicationswhenyouarenotusing.IfyouarenotusingWi-Fi,
Bluetooth
®
orGPS,turnthemoff.
• Reducescreenbrightnessandsetashorterscreentimeout.
• TurnoffautomaticsyncingforGmail,Calendar,Contactsandotherapplications.
Important notice

14
Important notice
• Someapplicationsyoudownloadmayconsumebatterypower.
• Whileusingdownloadedapplications,checkthebatterychargelevel.
3. Before installing an open source application and OS
WARNING
If you install and use an OS other than the one provided by the manufacturer
it may cause your phone to malfunction. In addition, your phone will no longer
be covered by the warranty.
WARNING
To protect your phone and personal data, only download applications from
trusted sources, such as Play Store™. If there are improperly installed
applications on your phone, the phone may not work normally or a serious
error may occur. You must uninstall those applications and all associated data
and settings from the phone.
4. Opening and switching applications
MultitaskingiseasywithAndroid;youcankeepmorethanoneapplicationrunningat
thesametime.Thereisnoneedtoquitanapplicationbeforeopeninganother.Useand
switchbetweenseveralopenapplications.Androidmanageseachapplication,stopping
andstartingthemasneededtomakesurethatidleapplicationsdon'tconsume
resourcesunnecessarily.
1 Tap
.Apppreviewsofrecentlyusedapplicationswillbedisplayed.
2 Taptheapplicationyouwanttoaccess.Thisdoesnotstopthepreviousappfrom
runninginthebackground.Makesuretotap
tobackoutofanappafterusingit.
• Tocloseanappfromtherecentappslist,swipetheapppreviewtotheleftorright.
Toclearallapps,tapClear all.

15
Getting to know your phone
Phone layout
Touch Screen
Proximity Sensor
Earpiece
Headset Jack
Front Camera Lens
Microphone
NOTE: Proximity Sensor
When receiving and making calls, the proximity sensor automatically turns
the backlight off and locks the touch screen by sensing when the phone is
near your ear. This extends battery life and prevents you from unintentionally
activating the touch screen during calls.
WARNING
Placing a heavy object on the phone or sitting on it can damage the display
and touch screen functions. Do not cover the proximity sensor with screen
protectors or any other type of protective film. This could cause the sensor to
malfunction.
Getting to know your phone

16
Getting to know your phone
Microphone
Volume Buttons
Charger/USB port
Power/Lock Button
Rear Camera Lens
Speaker
Flash
Power/Lock
Button
• Turnyourphoneon/offbypressingandholdingthisbutton
• Shortpresstolock/unlockthescreen
Volume Buttons (While screen is off)
• LongPressUptolaunchCapture+
• LongPressDowntolaunchCamera

17
Getting to know your phone
Installing the SIM or USIM card and battery
InserttheSIMorUSIMcardprovidedbythemobiletelephoneserviceprovider,andthe
includedbattery.
1 Toremovethebackcover,holdthephonefirmlyinonehand.Withyourotherhand,
liftoffthebackcoverwithyourthumbnailasshowninthefigurebelow.
2 SlidetheSIMcardintothelowerslotfortheSIMcardasshowninthefigure.Make
surethegoldcontactareaonthecardisfacingdownward.

18
Getting to know your phone
WARNING
Do not insert a memory card into the SIM card slot. If a memory card
happens to be lodged in the SIM card slot, take the device to a LG Service
Centre to remove the memory card.
NOTE: Only the microSIM cards work with the device.
3 Insertthebattery.
4 Toreplacethecoverontothedevice,alignthebackcoveroverthebattery
compartment
andpressitdownuntilitclicksintoplace .

19
Getting to know your phone
Charging the battery
Chargethebatterybeforeusingitforfirsttime.Usethechargertochargethebattery.
Acomputercanalsobeusedtochargethebatterybyconnectingthephonetoitusing
theUSBcable.
WARNING
Use only LG-approved chargers, batteries and cables. If you use unapproved
chargers, batteries or cables, it may cause battery charging delay. Or this can
cause the battery to explode or damage the device, which are not covered by
the warranty.
Thechargerconnectorislocatedatthebottomofthephone.Insertthechargerand
plugitintoapoweroutlet.
NOTE: Do not open the back cover while your phone is charging.

20
Getting to know your phone
Inserting a memory card
Yourdevicesupportsuptoa32GBmicroSDcard.Dependingonthememorycard
manufacturerandtype,somememorycardsmaynotbecompatiblewithyourdevice.
WARNING
Some memory cards may not be fully compatible with the device. Using an
incompatible card may damage the device or the memory card, or corrupt the
data stored in it.
NOTE: Frequent writing and erasing of data shortens the lifespan of memory
cards.
1 Removethebackcover.
2 Insertamemorycardwiththegold-colouredcontactsfacingdownwards.
3 Replacethebackcover.

21
Getting to know your phone
Removing the memory card
Beforeremovingthememorycard,firstunmountitforsaferemoval.
1 Tap
> >Appstab> >Generaltab>Storage & USB> .
2 Removethebackcoverandpulloutthememorycard.
WARNING
Do not remove the memory card while the device is transferring or accessing
information. Doing so can cause data to be lost or corrupted or damage to
the memory card or device. It is not responsible for losses that result from the
misuse of damaged memory cards, including the loss of data.
Locking and unlocking the device
PressingthePower/Lock Buttonturnsoffthescreenandputsthedeviceintolock
mode.Thedeviceautomaticallygetslockedifitisnotusedforaspecifiedperiod.This
helpstopreventaccidentaltapsandsavesbatterypower.
Tounlockthedevice,pressthePower/Lock Buttonandswipethescreeninany
direction.
NOTE: Double-tapping on the screen also can wake up the screen instead of
the Power/Lock Button.
Changing the screen lock method
Youcanchangethewaythatyoulockthescreentopreventothersaccessingyour
personalinformation.
1 Tap
> >Appstab> >Displaytab>Lock screen>Select screen
lock.
2 SelectadesiredscreenlockfromNone,Swipe,KnockCode,Pattern,PINand
Password.

22
Getting to know your phone
NOTE: Create a Google account before setting an unlock pattern and
remember the Backup PIN you created when creating your pattern lock.
Caution! If you haven't created a Google account on the phone and you
forgot your PIN, Password, and the backup PIN, you need to perform a
hard reset. But if you perform a hard reset, all user applications and user
data will be deleted. Please remember to back up any important data before
performing a hard reset.
TIP! Smart Lock
You can use Smart Lock to make unlocking your phone easier. You can set
it to keep your phone unlocked when you have a trusted Bluetooth device
connected to it, when it's in a familiar location like your home or work, or
when it recognises your face.
Setting up Smart Lock
1 Tap
> > Apps tab > .
2 Tap Display tab > Lock screen > Smart Lock.
3 Before you add any trusted devices, trusted places, or trusted face, you
need to set up a screen lock (Knock Code, Pattern, PIN, or Password).

23
Your Home screen
Touch screen tips
Herearesometipsonhowtonavigateonyourphone.
• Tap or touch–Asinglefingertapselectsitems,links,shortcutsandlettersonthe
on-screenkeyboard.
• Touch and hold–Touchandholdanitemonthescreenbytappingitandnot
liftingyourfingeruntilanactionoccurs.
• Drag–Touchandholdanitemforamomentandthen,withoutliftingyourfinger,
moveyourfingeronthescreenuntilyoureachthetargetposition.Youcandrag
itemsontheHomescreentorepositionthem.
• Swipe or slide–Toswipeorslide,quicklymoveyourfingeracrossthesurface
ofthescreen,withoutpausingwhenyoufirsttapit(soyoudon'tdraganitem
instead).
• Double-tap–Double-taptozoomonawebpageoramap.
• Pinch-to-Zoom–Useyourindexfingerandthumbinapinchingorspreading
motiontozoominoroutwhenusingthebrowser,Maps,orwhenviewingpictures.
• Rotate the screen–Frommanyapplicationsandmenus,thescreenorientation
adjuststothedevice'sphysicalorientation.
NOTE:
• Do not press too hard; the tap screen is sensitive enough to pick up a light,
yet firm tap.
• Use the tip of your finger to tap the option you want. Be careful not to tap
any other keys.
Your Home screen

24
Your Home screen
Home screen
TheHomescreenisthestartingpointformanyapplicationsandfunctions.Itallows
youtoadditemslikeappshortcutsandGooglewidgetstogiveyouinstantaccessto
informationandapplications.Thisisthedefaultcanvasandaccessiblefromanymenu
bytapping
.
Status Bar
Application Icons
Location Indicator
Quick Key Area
Home touch keys
Showsthephone'sstatusinformation,includingthetime,signalstrength,battery
statusandnotificationicons.
Tapanicon(application,folder,etc.)toopenanduseit.
IndicateswhichHomescreencanvasyouarecurrentlyviewing.
Providesone-touchaccesstothefunctioninanyHomescreencanvas.
Back Key
Returnstothepreviousscreen.Alsoclosespop-upitems,
suchasmenus,dialogboxesandtheon-screenkeyboard.
Home Key
ReturntotheHomescreenfromanyscreen.
Recent Key
Displaysrecentlyusedapplications.Ifyoutouchandholdthis
key,itopensamenuofavailableoptions.

25
Your Home screen
Extended Home screen
TheoperatingsystemprovidesmultipleHomescreencanvasestoprovidemorespace
foraddingicons,widgetsandmore.
• SlideyourfingerleftorrightacrosstheHomescreentoaccessadditional
canvases.
Customizing the Home screen
YoucancustomizeyourHomescreenbyaddingappsandwidgetsandchanging
wallpapers.
Adding items on your Home screen
1 TouchandholdtheemptypartoftheHomescreen.
2 IntheAddModemenu,selecttheitemyouwanttoadd.Youthenseethisadded
itemontheHomescreen.
3 Dragittothedesiredlocationandliftyourfinger.
TIP! To add an application icon to the Home screen from the Apps screen,
touch and hold the application you want to add.
Removing an item from the Home screen
• WhileontheHomescreen,touchandholdtheiconyouwanttoremove>dragit
to
.
Adding an app to the Quick Key area
• FromtheAppsscreenorontheHomescreen,touchandholdanapplicationicon
anddragittotheQuickKeyarea.Thenreleaseitinthedesiredlocation.
Removing an app from the Quick Key area
• TouchandholdthedesiredQuickKey,dragitto .

26
Your Home screen
NOTE: The Apps Key cannot be removed.
Customizing app icons on the Home screen
1 Touchandholdanapplicationiconuntilitunlocksfromitscurrentposition,then
releaseit.Theeditingicon
appearsintheupper-rightcorneroftheapplication.
2 Taptheapplicationiconagainandselectthedesiredicondesignandsize.
3 TapOKtosavethechange.
Returning to recently-used applications
1 Tap .Apppreviewsofrecentlyusedapplicationswillbedisplayed.
2 Tapanapppreviewtoopentheapplication.Ortap
toreturntoyourprevious
screen.
Notifications panel
Notificationsalertyoutothearrivalofnewmessages,calendareventsandalarms,as
wellasongoingevents,suchaswhenyouareonacall.
Whenanotificationarrives,itsiconappearsatthetopofthescreen.Iconsforpending
notificationsappearontheleft,andsystemicons,suchasWi-Fiandbatterystrength
areshownontheright.
NOTE: The available options may vary depending on the region or service
provider.
Status iconsNotification icons

27
Your Home screen
Opening the notifications panel
Swipedownfromthestatusbartoopenthenotificationspanel.Toclosethe
notificationspanel,swipethescreenupwardsortap
.
Quick Settings Area
Notifications
Clear
Tapeachquicksettingkeytotoggleiton/off.Touchandholdthedesiredkeyto
directlyaccessthesettingsmenuforthefunction.Toseemoretogglekeys,swipe
leftorright.Tap
toremove,addorrearrangequicksettingkeys.
Currentnotificationsarelisted,eachwithabriefdescription.Tapanotificationto
viewit.
Taptoclearallthenotifications.
Indicator icons on the Status Bar
Indicatoriconsappearonthestatusbaratthetopofthescreentoreportmissedcalls,
newmessages,calendarevents,devicestatusandmore.

28
Your Home screen
Theiconsdisplayedatthetopofthescreenprovideinformationaboutthestatusofthe
device.Theiconslistedinthetablebelowaresomeofthemostcommonones.
Icon Description Icon Description
NoSIMcardinserted Asongiscurrentlyplaying
Nonetworksignalavailable Ringerissilenced
Airplanemodeison Vibratemodeison
ConnectedtoaWi-Finetwork Batteryfullycharged
Wiredheadsetconnected Batteryischarging
Callinprogress
Thephoneisconnectedtoa
PCviaaUSBcable
Missedcall Downloadingdata
Bluetoothison Uploadingdata
Systemwarning GPSison
Analarmisset Dataissynchronizing
Newvoicemailavailable Chooseinputmethod
Newtextormultimedia
message
Wi-Fihotspotisactive
NOTE: The icon's location in the status bar may differ according to the
function or service.

29
Your Home screen
On-screen keyboard
Youcanentertextusingtheon-screenkeyboard.Theon-screenkeyboardappearson
thescreenwhenyoutapanavailabletextentryfield.
Using the keypad and entering text
Taponcetocapitalizethenextletteryoutype.Double-tapforallcaps.
Taptogotothekeyboardsettings.Touchandholdtoentertextbyvoiceoraccess
thecliptray.
Taptoenteraspace.
Taptocreateanewline.
Taptodeletethepreviouscharacter.
Entering accented letters
WhenyouselectFrenchorSpanishasthetextentrylanguage,youcanenterspecial
FrenchorSpanishcharacters(e.g."á").
Forexample,toinput"á",touchandholdthe"a"keyuntilthezoom-inkeyexpands
anddisplayscharactersfromdifferentlanguages.Thenselectthespecialcharacteryou
want.

30
Special Features
Gesture shot
TheGestureshotfeatureallowsyoutotakeapicturewithahandgestureusingthe
frontcamera.
To take photo
TherearetwomethodsforusingtheGestureshotfeature.
• Raiseyourhand,withanopenpalm,untilthefrontcameradetectsitandabox
appearsonthescreen.Thencloseyourhandintoafisttostartthetimer,allowing
youtimetogetready.
• Raiseyourhand,inaclenchedfist,untilthefrontcameradetectsitandabox
appearsonthescreen.Thenunclenchyourfisttostartthetimer,allowingyoutime
togetready.
or
Special Features

31
Special Features
Glance View
Whenthephonescreenisoff,youcanseethestatusbar,timeanddatebydragging
yourfingerdownonthescreen.
KnockON
TheKnockONfeatureallowsyoutodouble-tapthescreentoeasilyturnitonoroff.
To turn the screen on
1 Double-tapthecenteroftheLockscreentoturnthescreenon.
2 Unlockthescreenoraccessanyoftheavailableshortcutsorwidgets.
To turn the screen off
1 Double-tapanemptyareaoftheHomescreenortheStatusBar.
2 Thescreenwillturnoff.
NOTE: Tap on the center area of the screen. If you tap on the bottom or the
top area, the recognition rate may decrease.
Knock Code
TheKnockCodefeatureallowsyoutocreateyourownunlockcodeusinga
combinationofknocksonthescreen.YoucanaccesstheHomescreendirectlywhen
thescreenisoffbytappingthesamesequenceonthescreen.

32
Special Features
NOTE:
• If you enter the wrong Knock Code 6 times, it will compulsorily take you to
your google account log in/backup PIN.
• Use the fingertip instead of finger nail to tap the screen for turning it on or
off.
• When the Knock Code is not in use, you can use Knock On function by
taping the screen.
1 Tap > >Appstab> >Display tab>Lock screen>Select screen
lock>Knock Code.
2 TapthesquaresinapatterntosetyourKnockCode.YourKnockCodepatterncan
be6to8taps.
Unlocking the screen using the Knock Code
YoucanunlockthescreenbytappingtheKnockCodepatternyoualreadyset,when
thescreenturnsoff.
Capture+
TheCapture+featureallowsyoutocreatememosandcapturescreenshots.
YoucanuseCapture+toeasilyandefficientlycreatememosduringacall,withasaved
pictureoronthecurrentphonescreen.
1 TouchanddragtheStatusBardownandtap
.

33
Special Features
2 Createamemousingthefollowingoptions:
Taptosavethememoyou'vecreated.
Taptoundothemostrecentaction.
Taptoredothemostrecentlydeletedaction.
Taptoinserttextintoyourmemo.
Taptoselectthepentypeandcolor.
Taptousetheerasertoerasethepenmarksonthememo.
Taptocroptheimageofmemo.
Taptohideordisplaythetoolbar.
NOTE: Please use a fingertip while using the QuickMemo+ feature. Do not
use your fingernail.
3 Tap tosavethecurrentmemototheQuickMemo+ orGallery.
Discard QuickMemos
• Tap .
View the Saved Memo
FromtheHomescreentap >Appstab>Gallery andselecttheCapture+
albumortapQuickMemo+
andselectthedesiredmemo.

34
Google account setup
ThefirsttimeyouopenaGoogleapplicationonyourphone,youwillberequiredtosign
inwithyourexistingGoogleaccount.IfyoudonothaveaGoogleaccount,youwillbe
promptedtocreateone.
Creating your Google account
1 FromtheHomescreen,tap .
2 Tap
>Generaltab>Accounts & sync>ADD ACCOUNT >Google>
Orcreate a new account.
3 Enteryourfirstandlastname,thentapNEXT.
4 EnterausernameandtapNext.YourphonewillcommunicatewithGoogleservers
andcheckforusernameavailability.
5 EnteryourpasswordandtapNEXT.
6 Followtheinstructionsandentertherequiredandoptionalinformationaboutthe
account.Waitwhiletheservercreatesyouraccount.
Signing into your Google account
1 FromtheHomescreen,tap .
2 Tap
>Generaltab>Accounts & sync>ADD ACCOUNT>Google.
3 EnteryouremailaddressandtapNEXT.
4 Aftersigningin,youcanuseGmailandtakeadvantageofGoogleservicesonyour
phone.
5 OnceyouhavesetupyourGoogleaccount,yourphonewillautomatically
synchronisewithyourGoogleaccountontheweb(ifadataconnectionisavailable).
Google account setup

35
Google account setup
Aftersigningin,yourphonewillsyncwithyourGoogleservices,suchasGmail,
Contacts,andGoogleCalendar.YoucanalsouseMaps,downloadapplicationsfrom
PlayStore,backupyoursettingstoGoogleservers,andtakeadvantageofotherGoogle
servicesonyourphone.
IMPORTANT
• Some applications, such as Calendar, work only with the first Google Account
you add. If you plan to use more than one Google Account with your phone,
be sure to sign into the one you want to use with such applications first. When
you sign in, your contacts, Gmail messages, Calendar events, and other
information from these applications and services on the web are synchronized
with your phone. If you don't sign into a Google Account during setup, you will
be prompted to sign in or to create a Google Account the first time you start
an application that requires one, such as Gmail or Play Store.
• If you have an enterprise account through your company or other organization,
your IT department may have special instructions on how to sign into that
account.

36
Connecting to Networks and Devices
Wi-Fi
Youcanusehigh-speedInternetaccesswhilewithinthecoverageofthewireless
accesspoint(AP).
Connecting to Wi-Fi networks
1 Tap > >Apps tab> >Networks tab>Wi-Fi.
2 Tap
toturnWi-FionandstartscanningforavailableWi-Finetworks.
3 Tapanetworktoconnecttoit.
• Ifthenetworkissecuredwithalockicon,youwillneedtoenterasecuritykeyor
password.
4 ThestatusbardisplaysiconsthatindicateWi-Fistatus.
NOTE: If you are out of the Wi-Fi zone or have set Wi-Fi to Off, the device
may automatically connect to the Web using mobile data, which may incur
data charges.
TIP! How to obtain the MAC address
Tap
> > Apps tab > > Networks tab > Wi-Fi > > Advanced
Wi-Fi > MAC address.
Connecting to Networks and Devices

37
Connecting to Networks and Devices
Bluetooth
Bluetoothisashort-rangecommunicationstechnologythatallowsyoutoconnect
wirelesslytoanumberofBluetoothdevices,suchasheadsetsandhands-freecar
kits,andBluetooth-enabledhandhelds,computers,printers,andwirelessdevices.
TheBluetoothcommunicationrangeisusuallyuptoapproximately30feet.
NOTE:
• LG is not responsible for the loss, interception or misuse of data sent or
received via the Bluetooth feature.
• Always make sure that you share and receive data with devices that are
trusted and properly secured.
• If there are obstacles between the devices, the operating distance may be
reduced.
• Some devices, especially those that are not tested or approved by Bluetooth
SIG, may be incompatible with your device.
Pairing your phone with another Bluetooth device
1 Tap > >Apps tab> >Networks tab>Bluetooth.
2 Tap
toturnBluetoothon.
3 TapSEARCHtoviewthevisibledevicesinrange.
4 Choosethedeviceyouwanttopairwithfromthelist.Oncetheparingissuccessful,
yourphoneconnectstotheotherdevice.
NOTE: Pairing between two Bluetooth devices is a one-time process. Once
a pairing has been created, the devices will continue to recognize their
partnership and exchange information.
TIP! Please consult documentation included with Bluetooth device for
information on pairing mode and passcode (typically 0 0 0 0 – four zeroes).

38
Connecting to Networks and Devices
Sending data via Bluetooth
1 Selectafileoritemsuchasacontactormediafile.
2 SelecttheoptionforsendingdataviaBluetooth.
3 SearchforandpairwithaBluetooth-enableddevice.
• DuetodifferentspecificationsandfeaturesofotherBluetooth-compatibledevices,
displayandoperationsmaybedifferent,andfunctionssuchastransferor
exchangemaynotbepossiblewithallBluetoothcompatibledevices.
Receiving data via Bluetooth
1 Tap > >Apps tab> >Networks tab>Bluetooth.
2 Tap
toturnBluetoothon.
3 Youwillreceivearequesttoacceptapairingattemptfromthesendingdevice.Be
suretoselectACCEPT.
Wi-Fi Direct
Wi-FiDirectprovidesadirectconnectionbetweenWi-Fienableddeviceswithout
requiringanaccesspoint.
Turning on Wi-Fi Direct
1 Tap > >Apps tab> > Networks tab > Wi-Fi.
2 Tap
> Advanced Wi-Fi > Wi-Fi Direct.
NOTE: When in this menu, your device is visible to other visible Wi-Fi Direct
devices nearby.

39
Connecting to Networks and Devices
Transferring data between a PC and the device
YoucancopyormovedatabetweenaPCandthedevice.
Transferring data
1 ConnectyourdevicetoaPCusingtheUSBcablethatcamewithyourphone.
2 OpentheNotificationspanel,tapthecurrentconnectiontype,andselectMedia
device (MTP).
3 Awindowwillpop-uponyourPC,allowingyoutotransferthedesireddata.
NOTE: The LG Android Platform Driver is required to be installed on your PC
to be able to detect the phone.
Items Requirement
OS MicrosoftWindowsXPSP3,Vistaorhigher
WindowMediaPlayerversion WindowsMediaPlayer10orhigher

40
Calls
Making a call
1 Tap toopenthedialer.
2 Enterthenumberusingthedialer.Todeleteadigit,tap
.
3 Afterenteringthedesirednumber,tap
toplacethecall.
4 Toendthecall,tap
.
TIP! To enter "+" to make international calls, touch and hold .
Calling your contacts
1 Tap toopenyourcontacts.
2 Scrollthroughthecontactlist.Youcanalsoenterthecontact'snameintheSearch
fieldorscrollalongthealphabetlettersontherightedgeofthescreen.
3 Inthelistthatisdisplayed,tapthecontactyouwanttocall.
Answering and rejecting a call
• Swipe inanydirectiontoanswertheincomingcall.
• Swipe inanydirectiontodeclineanincomingcall.
NOTE: Tap or swipe the Decline with message if you want to send a
message to the caller.
Calls

41
Calls
Making a second call
1 Duringyourfirstcall,tap >Add callandenterthenumber.
2 Tap
toplacethecall.
3 Bothcallsaredisplayedonthecallscreen.Yourinitialcallislockedandputonhold.
4 Tapthedisplayednumbertotogglebetweencalls.Ortap
tostartaconference
call.
5 Toendallcalls,tap
.
NOTE: You are charged for each call you make.
Viewing your call logs
OntheHomescreen,tap andselectCall logs.
Viewalistofalldialed,receivedandmissedcalls.
TIP!
• Tap any call log entry to view the date, time and duration of the call.
• Tap , then tap Delete all to delete all of the recorded items.
Call settings
Youcanconfigurephonecallsettings,suchascallforwarding,aswellasotherspecial
featuresofferedbyyourcarrier.
1 OntheHomescreen,tap
toopenthedialer.
2 Tap
todisplaytheavailableoptions.
3 TapCall settingsandconfigurethedesiredoptions.

42
Contacts
Youcanaddcontactsonyourphoneandsynchronizethemwiththecontactsinyour
GoogleAccountorotheraccountsthatsupportsyncingcontacts.
Searching for a contact
1 Tap toopenyourcontacts.
2 TapSearch contactsandenterthecontactnameusingthekeyboard.
Adding a new contact
1 Tap andenterthenewcontact'snumber.TaptheCreate contactfield,or >
Add to Contacts.
2 Ifyouwanttoaddapicturetothenewcontact,taptheimagearea.
ChooseTake photoorSelect from Gallery.
3 Enterthedesiredinformationforthecontact.
4 TapSAVE.
Favourites contacts
Youcanclassifyfrequentlycalledcontactsasfavourites.
Adding a contact to your favourites
1 Tap toopenyourcontacts.
2 Tapacontacttoviewitsdetails.
3 Tapthestaratthetoprightofthescreen.Thestarturnsyellow.
Contacts

43
Contacts
Removing a contact from your favourites list
1 Tap toopenyourcontacts.
2 TaptheFavouritestab,andchooseacontacttoviewitsdetails.
3 Taptheyellowstaratthetoprightofthescreen.Thestarturnsadarkcolorandthe
contactisremovedfromyourfavourites.
Creating a group
1 Tap toopenyourcontacts.
2 TapGroups>
>New group.
3 Enteranameforthenewgroup.Youcanalsosetadistinctringtoneforthenewly
createdgroup.
4 TapAdd memberstoaddcontactstothegroup.
5 TapSAVEtosavethegroup.
NOTE:
• If you delete a group, the contacts assigned to that group will not be lost.
They will remain in your contact list.

44
Messaging
Yourphonecombinestextandmultimediamessagingintooneintuitive,easyto-use
menu.
Sending a message
1 Tap ontheHomescreenandtap tocreateanewmessage.
2 EnteracontactnameorcontactnumberintotheTofield.Asyouenterthecontact
name,matchingcontactsappear.Youcantapasuggestedrecipientandaddmore
thanonecontact.
NOTE: You may be charged for each text message you send. Please consult
with your service provider.
3 Tapthetextfieldandstartenteringyourmessage.
4 Tap
toopentheoptionsmenu.Choosefromanyoftheavailableoptions.
TIP! You can tap to attach the file that you want to share with message.
5 TapSendtosendyourmessage.
TIP!
• The 160-character limit may vary from country to country depending on how
the text message is coded and the language used in the message.
• If an image, video, or audio file is added to a text message, it will be
automatically converted into a multimedia message and you will be charged
accordingly.
NOTE: When you get a text message during a call, there will be an audible
notification.
Messaging

45
Messaging
Conversation view
Messagesexchangedwithanotherpartyaredisplayedinchronologicalordersothat
youcanconvenientlyseeandfindyourconversations.
Changing your messaging settings
Yourphone'smessagingsettingsarepredefinedtoallowyoutosendmessages
immediately.Youcanchangethesettingsbasedonyourpreferences.
• Tap ontheHomescreen,tap >Settings.

46
E-mail
YoucanusetheEmailapplicationtoreademailfromprovidersotherthanGmail.
TheEmailapplicationsupportsthefollowingaccounttypes:POP3,IMAPandMicrosoft
Exchange(forEnterpriseusers).
Managing email accounts
To open the Email application
Tap > >Appstab> .
ThefirsttimeyouopentheEmailapplication,asetupwizardopenstohelpyouaddan
emailaccount.
Adding another email account:
• Tap > >Apps tab> > >Settings > Add account.
Changing an email general settings:
• Tap > >Apps tab> > >Settings>General settings.
Deleting an email account:
• Tap > >Apps tab> > >Settings> >Remove account>
Selecttheaccounttodelete>REMOVE>YES.
Working with account folders
Tap > >Apps tab> > >Folders.
EachaccounthasInbox,Outbox,SentandDraftsfolders.Dependingonthefeatures
supportedbyyouraccount'sserviceprovider,youmayhaveadditionalfolders.
E-mail

47
E-mail
Composing and sending email
1 Inthe application,tap tocreateanewemail.
2 Enteranaddressforthemessage'sintendedrecipient.Asyouentertext,matching
addresseswillbeofferedfromyourcontacts.Separatemultipleaddresseswith
semicolons.
3 TaptheCc/Bccfieldtocopyorblindcopytoothercontacts/emailaddresses.
4 Tapthetextfieldandenteryourmessage.
5 Tap
toattachthefileyouwanttosendwithyourmessage.
6 Tap
tosendthemessage.

48
Camera and Video
Camera options on the viewfinder
ToopentheCameraapplication,tap > >Appstab> .
Youcanusethecameraorcamcordertotakeandsharepicturesandvideos.
NOTE: Be sure to clean the protective lens cover with a microfiber cloth
before taking pictures. A lens cover with smudges from fingers can cause
blurry pictures with a "halo" effect.
Hide/Display Options–Taptohide/displaythecameraoptionsontheviewfinder.
Flash–Allowsyoutomanagethecamera'sflash.
Swap camera–Taptoswapbetweentherearcameralensandthefrontcamera
lens.
Settings–Tapthisicontoopenthecamerasettingsmenu.
Gallery–Taptoviewthelastphotoorvideoyoucaptured.
Record–Taptostartrecording.
Camera and Video

49
Camera and Video
Capture –Taptotakeaphoto.
Back Key –Taptoexitthecamera.
Using the advanced settings
Inthecameraviewfinder,tap toshowtheadvancedoptions.Tapeachiconto
adjustthefollowingcamerasettings.
Setthesizeofyourpictureandvideo.
Allowsyoutotakepictureswithvoicecommands.Whenon,youjustsay
"Cheese","Smile","LG",etc.totakeapicture.
Setyourcamera'stimer.Thisisidealifyouwanttobeapartofthepicture
orvideo.
Allowsyoutotakebetterpicturesandrecordbettervideosbydisplayinga
gridlineforhelpwithalignment.
Setthestoragelocationforyourpicturesandvideos.ChoosefromIN
(internalmemory)andSD(memorycard).Thismenuappearsonlywhenthe
SDcardisinserted.
Allowsyoutolearnhowafunctionworks.Thisiconwillprovideyouwitha
helpguide.
NOTE: The shutter sound is not available when Vibrate mode or Silent mode
is enabled.

50
Camera and Video
Taking a photo
1 Tap > >Appstab> .
2 Frameyoursubjectonthescreen.
3 Asquarearoundthesubjectindicatesthatthecamerahasfocused.
4 Tap
.YourpicturewillbeautomaticallysavedtotheGallery.
TIP! If the camera options are hidden on the screen, simply tap the screen to
take a photo.
Once you have taken a photo
Taptheimagethumbnailonthescreentoviewthelastphotoyoutook.
Taptoeditthephoto.
Taptotakeanotherphotoimmediately.
Taptosendyourphototoothersorshareitviaanyavailablesocialnetwork
services.
Taptodeletethephoto.
Taptoaccessadditionaloptions.
Taptoaddthephototoyourfavourites.

51
Camera and Video
Recording a video
1 Tap > >Appstab> .
2 Frameyoursubjectonthescreen.
3 Tap
tostartrecordingthevideo.
4 Thelengthoftherecordingisdisplayedonthetopofthescreen.
NOTE: Tap to take pictures while recording video.
5 Tap topauserecordingvideo.Youcanresumerecordingagainbytapping .
OR
Tap
tostoprecording.YourvideowillbeautomaticallysavedtotheGallery.
After recording a video
Tapthevideothumbnailonthescreentoviewthelastvideoyourecorded.
Taptorecordanothervideoimmediately.
Taptoopentheavailablesharingoptions(suchasMessagingorBluetooth)
toshare.
Taptodeletethevideo.
Taptoaccessadditionaloptions.
TaptoaddthevideotoFavourites.

52
Camera and Video
Gallery
TheGalleryapplicationpresentsthepicturesandvideosinyourstorage,includingthose
you'vetakenwiththeCameraapplicationandthoseyoudownloadedfromthewebor
otherlocations.
1 Tap
> >Apps tab> toviewtheimagesstoredinthestorage.
2 Tapanalbumtoopenitandviewitscontents.(Thepicturesandvideosinthealbum
aredisplayedinchronologicalorder.)
3 Tapapictureinanalbumtoviewit.
NOTE:
• Depending on the software installed, some file formats may not be
supported.
• Some files may not play properly due to their encoding.
Viewing pictures
TheGallerydisplaysyourpicturesinfolders.Whenanapplication,suchasE-mail,saves
apicture,thedownloadfolderisautomaticallycreatedtocontainthepicture.Likewise,
capturingascreenshotautomaticallycreatestheScreenshotsfolder.
Picturesaredisplayedbythedatetheywerecreated.Selectapicturetoviewitfull
screen.Scrollleftorrighttoviewthenextorpreviousimage.
Zooming in and out
Useoneofthefollowingmethodstozoominonanimage:
• Double-tapanywheretozoomin.
• Spreadtwofingersapartonanyplaceinthepicturezoomin.Pinchinordouble-
taptheimagetozoomout.

53
Camera and Video
Video options
1 Touch >Apps tab> .
2 Selectthevideoyouwanttowatch.
Touchtopause/resumevideoplayback.
Touchtofast-forward10seconds.
Touchtorewind10seconds.
Touchtoadjustvideovolume.
Touchtolock/unlockthescreen.
Taptoaccessadditionaloptions.
NOTE:
• While a video is playing, slide the right side of the screen up or down to
adjust the sound.
• While a video is playing, slide the left side of the screen up or down to adjust
the brightness.
• While playing a video, slide your finger from left to right (or vice versa) to
fast-forward and rewind.

54
Camera and Video
Editing photos
Whileviewingaphoto,tap .
Deleting photos/videos
Useoneofthefollowingmethods:
• Whileinafolder,tap ,selectthephotos/videosandthentapDELETE.
• Whileviewingaphoto,tap .
Setting wallpaper
Whileviewingaphoto,tap >Set image astosettheimageaswallpaperorassign
ittoacontact.
NOTE:
• Depending on the software installed, some file formats may not be
supported.
• If the file size exceeds the available memory, an error can occur when you
open files.

55
Multimedia
Music
Yourphonehasamusicplayerthatletsyouplayallyourfavoritetracks.
Playing a song
1 Tap > >Apps tab> .
2 TaptheSongstab.
3 Selectthesongyouwanttoplay.
4 Thefollowingoptionsareavailable.
Taptoaddthesongtoyourfavourites.
Taptoopenthecurrentplaylist.
Taptoaccessadditionaloptions.
Taptoplaythecurrentplaylistinshufflemode(tracksareplayedin
randomorder).
Multimedia

56
Multimedia
Taptotogglethroughrepeatallsongs,repeatcurrentsongandrepeat
off.
Taptoadjustthevolume.
Taptorestartthecurrenttrackorskiptotheprevioustrackinthealbum,
playlistorshufflelist.Touchandholdtorewind.
Taptopauseplayback.
Taptoresumeplayback.
Taptoskiptothenexttrackinthealbum,playlistorshufflelist.Touch
andholdtofast-forward.
Taptosetaudioeffects.
Tochangethevolumewhilelisteningtomusic,presstheVolume Up/Down Buttons
onthebacksideofthephone.
NOTE:
• Depending on the software installed, some file formats may not be
supported.
• If the file size exceeds the available memory, an error can occur when you
open files.
NOTE: Music file copyrights may be protected by international treaties and
national copyright laws. Therefore, it may be necessary to obtain permission
or a licence to reproduce or copy music. In some countries, national laws
prohibit private copying of copyrighted material. Before downloading or
copying the file, please check the national laws of the relevant country
concerning the use of such material.

57
Utilities
Clock
TheClockappgivesyouaccesstotheAlarms,Timer,WorldclockandStopwatch
functions.Accessthesefunctionsbytappingthetabsacrossthetopofthescreenor
swipinghorizontallyacrossthescreen.
Tap
> >Apps tab> .
Alarms
TheAlarmstaballowsyoutosetalarms.
1 Openthe
app,thenselecttheAlarmstab.
2 Tap
toaddanewalarm.
3 AdjustthesettingsasnecessaryandtapSAVE.
NOTE: You can also tap an existing alarm to edit it.
Timer
TheTimertabcanalertyouwithanaudiblesignalwhenasetamountoftimehas
passed.
1 Openthe
app,thenselecttheTimertab.
2 Setthedesiredtimeonthetimer.
3 TapStarttostartthetimer.
4 TapStoptostopthetimer.
Utilities

58
Utilities
World clock
TheWorldclocktaballowsyoutoeasilycheckthecurrenttimeinothercitiesaround
theworld.
1 Openthe
app,thenselecttheWorld clocktab.
2 Tap
andselectthedesiredcity.
Stopwatch
TheStopwatchtaballowsyoutouseyourphoneasastopwatch.
1 Openthe
app,thenselecttheStopwatchtab.
2 TaptheStartkeytoinitiatethestopwatch.
• TaptheLapkeytorecordlaptimes.
3 TaptheStopbuttontostopstopwatch.
Calculator
TheCalculatorappallowsyoutoperformmathematicalcalculationsusingastandardor
scientificcalculator.
1 Tap
> >Apps tab> .
2 Tapthenumberkeystoenternumbers.
3 Forsimplecalculations,tapthefunctionyouwanttoperform(+,–,xor÷)followed
by=.
NOTE: For more complex calculations, tap .

59
Utilities
Calendar
TheCalendarappallowsyoutotrackyourscheduleofevents.
1 Tap
> >Apps tab> .
2 Tapthedateyouwanttoaddaneventto.Thentap
.
Voice Recorder
TheVoiceRecorderapprecordsaudiblefilesforyoutouseinavarietyofways.
Recording a sound or voice
1 Tap > >Appstab> .
2 Tap
tobeginrecording.
3 Tap
toendtherecording.
4 Tap
tolistentotherecording.
NOTE: Tap to access your recordings. You can listen to your saved
recordings.
Voice Search
Usethisapplicationtosearchwebpagesusingvoice.
1 Tap
> >Apps tab>Google folder> .
2 SayakeywordorphrasewhenListening...appearsonthescreen.Selectoneofthe
suggestedkeywordsthatappear.
NOTE: This application may not be available depending on the region or
service provider.

60
Utilities
Downloads
Usethisapplicationtoseewhatfileshavebeendownloadedthroughtheapplications.
• Tap > >Appstab> .
NOTE: This application may not be available depending on the region or
service provider.
FM Radio
Yourphonehasabuilt-inFMradiosoyoucantuneintoyourfavoritestationsand
listenonthego.
• Tap > >Appstap> .
TIP! You must plug in your earphones in order to use them as an antenna.
NOTE: This application may not be available depending on the region or
service provider.
LG SmartWorld
LGSmartWorldoffersanassortmentofexcitingcontent–fonts,themes,games,
applications.
How to Get to LG SmartWorld from Your Phone
1 Tap > >Apps tab> .
2 TapSigninandenterID/PWforLGSmartWorld.Ifyouhavenotsignedupyet,tap
RegistertoreceiveyourLGSmartWorldmembership.
3 Downloadthecontentyouwant.

61
Utilities
NOTE:
• When you use cellular network, data fee could be charged by data plan that
you signed-up with carrier.
• LG SmartWorld may not be available from all carriers or in all countries.
NOTE: What if there is no icon?
1 Using a mobile Web browser, access LG SmartWorld (www.lgworld.com)
and select your country.
2 Download the LG SmartWorld App.
3 Run and install the downloaded file.
4 Access LG SmartWorld by tapping the
icon.
Special benefit only in LG SmartWorld
1 Decorate your own style on your Smartphone, Use Home Theme &
Keyboard Theme & Font that provided on LG SmartWorld. (However this
service is available to specific device. Please check in LG SmartWorld
website whether it is feasible or not whether it is feasible or not)
2 Enjoy LG SmartWorld's special service by joining promotion that
consistently provided.

62
Web Browser
Internet
Theinternetgivesyouafast,full-colorworldofgames,music,news,sports,
entertainment,andmuchmore,rightonyourmobilephone.
NOTE: Additional charges apply when connecting to these services and
downloading content. Check data charges with your network provider.
1 Tap > >Apps tab> .
Using the Web toolbar
Scrolltowardsthetopofthewebpagetoaccessthebrowsertoolbar.
Taptogobackonepage.
Taptogoforwardonepage.
TaptogototheHomepage.
Taptoopenanewwindow.
Taptoaccessyourbookmarks.
Viewing webpages
Taptheaddressfield,enterthewebaddressandtapGoonthekeyboard.
Opening a page
Togotoanewpage,tap > .
Togotoanotherwebpage,tap
,scrollupordown,andtapthepagetoselectit.
Web Browser

63
Web Browser
Searching the web by voice
Taptheaddressfieldandthentap .Whenprompted,sayakeywordandselectone
ofthesuggestedkeywordsthatappear.
NOTE: This feature may not be available depending on the region or service
provider.
Bookmarks
Tobookmarkthecurrentwebpage,tap >Add bookmark>SAVE.
Toopenabookmarkedwebpage,tap
andselectthedesiredbookmark.
History
Tap >Historytabtoopenalistofrecentlyvisitedwebpages.Toclearallofyour
history,tap
>YES.
Chrome
UseChrometosearchforinformationandbrowsewebpages.
1 Tap
> >Apps tab> .
NOTE: This application may not be available depending on your region and
service provider.
Viewing webpages
Taptheaddressfield,andthenenterawebaddressorsearchcriteria.
Opening a page
Toopenanewpage,tab >New tab.
Togotoanotherwebpage,tap
andtapthepagetoselectit.

64
Settings
TheSettingsapplicationcontainsmostofthetoolsforcustomizingandconfiguringyour
phone.AllofthesettingsintheSettingsapplicationaredescribedinthissection.
To open the Settings application
• Tap >Tapandhold >System settings.
-or-
• Tap > >Apps tab> .
Networks
< WIRELESS NETWORKS >
Wi-Fi
TurnsonWi-FitoconnecttoavailableWi-Finetworks.
Bluetooth
TurnstheBluetoothwirelessfeatureonorofftouseBluetooth.
Mobile data
Displaysthedatausageandmobiledatausagelimit.
Call
Configurephonecallsettings,suchascallforwardingandotherspecialfeaturesoffered
byyourcarrier.
• Voicemail –Allowsyoutoselectyourcarrier'svoicemailservice.
• Fixed dialing numbers–Turnonandcompilealistofnumbersthatcanbe
calledfromyourphone.YouneedyourPIN2,whichisavailablefromyouroperator.
Onlynumbersinthefixeddiallistcanbecalledfromyourphone.
• Incoming voice call pop-up–Displaysincomingvoicecallpop-upwhenanapp
isinuse.
• Call reject–Allowsyoutosetthecalldeclinefunction.
Settings

65
Settings
• Decline with message–Whenyouwanttodeclineacall,youcansendaquick
messageusingthisfunction.Thisisusefulifyouneedtodeclineacallduringa
meeting.
• Call forwarding–Allowsyoutosetthecallforwardingoptions.
• Auto answer–Setsthetimebeforeaconnectedhands-freedeviceautomatically
answersanincomingcall.
• Connection vibration–Vibratesyourphonewhentheotherpartyanswersthe
call.
• Save unknown numbers–Addsunknownnumberstocontactsafteracall.
• Power key ends call–Allowsyoutoselectyourendcall.
• Silence incoming calls–Checkmarktoallowyoutoflipthedevicetosilence
incomingcalls.
• Call barring–Locksincoming,outgoingorinternationalcalls.
• Call duration–Viewthedurationofcalls,includingLastcall,Outgoingcalls,
IncomingcallsandAllcalls.
• Additional settings–Allowsyoutochangethefollowingsettings.
Caller ID: Allowsyoutosetdefaultoperatorsettingstodisplayyournumberin
outgoingcalls.
Call waiting:Ifcallwaitingisactivated,thehandsetwillnotifyyouofanincoming
callwhileyouareonacall(dependingonyournetworkprovider).
< CONNECTIVITY >
Share & connect
• LG PC Suite–ConnectLGPCSuitewithyourphonetoeasilymanagemultimedia
contentandapps.
• Printing–Allowsyoutoprintthecontentofcertainscreens(suchaswebpages
displayedinChrome)toaprinterconnectedtothesameWi-Finetworkasyour
Androiddevice.

66
Settings
Tethering
• USB tethering–Youcanshareyourphone'sdataconnectionwithacomputerby
turningonUSBtethering.
• Wi-Fi hotspot–Youcanalsouseyourphonetoprovideamobilebroadband
connection.Createahotspotandshareyourconnection.
• Bluetooth tethering–Allowsyoutoconnectotherdevicestoyourphonevia
Bluetoothandshareitsinternetconnection.
• Help–DisplaysinformationregardingUSBtethering,Wi-Fihotspot,andBluetooth
tethering.
More
• Airplane mode–Checkmarktoturnoffallwirelessconnectionsandcalls.
• Mobile networks–Setoptionsfornetworkmode,networkoperators,access
pointnames,etc.
• VPN–Fromyourphone,youcanadd,setup,andmanagevirtualprivatenetworks
(VPNs)thatallowyoutoconnectandaccessresourcesinsideasecuredlocal
network,suchasyourcorporatenetwork.
Sound & notification
< BASIC >
Sound profile
AllowsyoutosetthesoundprofiletoSound,Vibrate onlyorSilent.
< SOUND >
Volume
Adjustthephone'svolumesettingstosuityourneedsandenvironment.
Ringtone
Selecttheringtoneforincomingcalls.
Ringtone ID
Allowsyoutocomposeringtonesbasedonphonenumberofincomingcall.

67
Settings
< VIBRATION >
Sound with vibration
Checkmarkforvibrationfeedbackforcalls.
Vibration type
Allowsyoutosetavibrationtypefornotifications.
< NOTIFICATIONS >
Do not disturb
Taptosetnotifications.Youcanhavenointerruptionsfromnotifications.
Lock screen
AllowsyoutoshowallnotificationsontheLockscreen.
Apps
Allowsyoutosetnotificationsforapps.
< ADVANCED SETTINGS >
More
• Notification sound–Allowsyoutosetthenotificationsound.Youcanalsoadda
notificationsoundbytapping
intheupper-rightcornerofthescreen.
• Vibrate on tap–CheckmarktovibratewhentappingtheHometouchkeysand
duringotherUIinteractions.
• Sound effects–Thismenuletsyouselectwhetheryouheartoneswhentouching
numbersonthedialpad,selectingon-screenoptions,andmore.
- Dialpad touch sounds –Checkmarktoplaytoneswhileusingthedialpad.
- Touch sound –Checkmarktoplaysoundwhenmakingscreenselections.
- Screen lock sound –Checkmarktoplayasoundwhenlockingandunlocking
thescreen.
• Message/call voice notifications–Allowsthedevicetoreadouttheincoming
callandthemessageeventautomatically.

68
Settings
Display
< HOME & LOCK >
Home screen
• Select Home –SelectthedesiredHometheme.ChoosefromHome(standard
Androidlayout)orEasyHome(simplifiedversionforuserslessfamiliarwith
Androidnavigation).
• Theme–Setsthescreenthemeforyourdevice.
• Wallpaper –SetsthewallpapertouseonyourHomescreen.
• Screen swipe effect–Setsthescreenswipeeffectoptions.
• Allow Home screen looping –CheckmarktoallowcontinuousHomescreen
scrolling(loopbacktofirstscreenafterlastscreen).
• Help –TouchtogetinformationonusingtheHomescreenofyourdevice.
Lock screen
• Select screen lock–Setascreenlocktypetosecureyourphone.Opensasetof
screensthatguideyouthroughdrawingascreenunlockpattern.
IfyouenabledaPatternlocktypewhenyouturnonyourphoneorwakeupthe
screen,youareaskedtodrawyourunlockpatterntounlockthescreen.
• Smart Lock–Setstokeepyourphoneunlockedwhenyouhaveatrusted
Bluetoothdeviceconnectedtoit,whenit'sinafamiliarlocationlikeyourhomeor
work,orwhenitrecognizesyourface.
• Wallpaper–Selectthewallpapertodisplayforyourlockscreen.
• Shortcuts–Customizeshortcutsonthelockscreen.
• Contact info for lost phone–Selectwhethertodisplaytheownerinformationon
thelockscreenandcustomizetheownerinformation.
• Lock timer–Allowsyoutosettheamountoftimebeforethescreenautomatically
locksafterthescreenhastimed-out.
• Power key instantly locks–Checkmarktoinstantlylockthescreenwhenthe
Power/Lock keyispressed.ThissettingoverridestheSecuritylocktimersetting.

69
Settings
Home touch buttons
Selectthehometouchkeycombination,colorandifyouwanttouseatransparent
background.
< FONT >
Font type
Selectthedesiredfonttype.
Font size
Selectthedesiredfontsize.
< BASIC SETTINGS >
Brightness
Adjustthescreenbrightnessbyusingtheslider.
Auto-rotate screen
Settoswitchorientationautomaticallywhenyourotatethephone.
Screen timeout
Setthetimedelaybeforethescreenautomaticallyturnsoff.
< ADVANCED SETTINGS >
More
• Daydream–Selectthescreensavertodisplaywhenthephoneissleepingwhile
dockedand/orcharging.
• Motion sensor calibration–Allowsyoutoimprovetheaccuracyofthetiltand
speedofthesensor.
General
< PERSONAL >
Language & keyboard
Selectthelanguageforthetextonyourphoneandforconfiguringtheon-screen
keyboard,includingwordsthatyou'veaddedtoitsdictionary.
• Language –Choosealanguagetouseonyourphone.

70
Settings
• Current keyboard –Allowsyoutoselectthedefaultkeyboardtype.
• LG Keyboard –TaptheSettingsicontochangetheLGKeyboardsettings.
• Google voice typing –CheckmarktoselectGooglevoicetypingtoenterdata.Tap
theSettingsicontochangetheGooglevoicesettings.
• Voice Search–TouchtoconfiguretheVoiceSearchsettings.
• Text-to-speech output –Touchtosetthepreferredengineorgeneralsettingsfor
text-to-speechoutput.
• Pointer speed –Adjustthepointerspeed.
• Reverse buttons–Reversethemousebuttonstouseprimarybuttononright.
Location
Turnonlocationservice,yourphonedeterminesyourapproximatelocationusingWi-Fi
andmobilenetworks.Whenyouselectthisoption,you'reaskedwhetheryouconsentto
allowingGoogletouseyourlocationwhenprovidingtheseservices.
• Mode –Setsthehowyourcurrentlocationinformationisdetermined.
• Camera –Checkmarktotagphotosorvideoswiththeirlocations.
• Google Location History –Allowsyoutochooseyourlocationinformationsettings
asaccessedbyGoogleanditsproducts.
Accounts & sync
UsetheAccounts&syncsettingsmenutoadd,remove,andmanageyourGoogleand
othersupportedaccounts.Youalsousethesesettingstocontrolhowandwhether
allapplicationssend,receive,andsyncdataontheirownschedulesandwhetherall
applicationscansynchronizeuserdataautomatically.
Gmail™,Calendar,andotherapplicationsmayalsohavetheirownsettingstocontrol
howtheysynchronizedata;seethesectionsonthoseapplicationsfordetails.Touch
ADD ACCOUNTtoaddnewaccount.
Accessibility
UsetheAccessibilitysettingstoconfigureaccessibilityplug-insyouhaveinstalledon
yourphone.
• Vision
- TalkBack–AllowsyoutosetuptheTalkBackfunctionwhichassistspeoplewith
impairedvisionbyprovidingverbalfeedback.

71
Settings
- Message/call voice notifications–Tap totoggleitOnorOff.Onallows
youtohearautomaticspokenalertsforincomingcallsandmessages.
- Screen shade–Checkmarktosetthescreentoadarkercontrast.
- Font size–Setsthefontsize.
- Touch zoom–Allowsyoutozoominandoutbytriple-tappingthescreen.
- Screen colour inversion–Checkmarktoinvertthecoloursofthescreenand
content.
- Screen colour filter–Allowsyoutochangethecoloursofscreenandcontent.
- Power key ends call –Checkmarksothatyoucanendvoicecallsbypressing
thePower/Lock Key.
• Hearing
- Captions–Allowsyoutocustomisecaptionsettingsforthosewithhearing
impairments.
- Flash alerts–Checkmarktosettheflashtoblinkforincomingcallsand
notifications.
- Turn off all sounds–Checkmarktoturnoffalldevicesounds.
- Audio type–Setstheaudiotype.
- Sound balance–Setstheaudioroute.Movethesliderontheslidebartosetit.
• Motor & cognition
- Touch feedback time–Setsthetouchfeedbacktime.
- Touch assistant–Showatouchboardwitheasyaccesstocommonactions.
- Screen timeout–Setstheamountoftimebeforethebacklightturnsoff
automatically.
- Touch control areas–Allowsyoutoselectanareaofthescreentolimittouch
activationtojustthatareaofthescreen.
• Accessibility features shortcut–Allowyoutoaccessselectedfeaturesquickly
whentriple-tappingtheHomebutton.
• Auto-rotate screen–Checkmarktoallowthephonetorotatethescreen
dependingonthephysicalphoneorientation(portraitorlandscape).

72
Settings
• Switch Access–Allowsyoutointeractwithyourdeviceusingoneormore
switchesthatworklikekeyboardkeys.Thismenucanbehelpfulforuserswith
mobilitylimitationsthatpreventthemfrominteractingdirectlywiththeyourdevice.
Shortcut key
GetquickaccesstoappsbypressingandholdingtheVolume Buttonswhenthe
screenisofforlocked.
Google
UseGoogleSettingstomanageyourGoogleappsandaccountsettings.
< PRIVACY >
Security
UsetheSecuritymenutoconfigurehowtohelpsecureyourphoneanditsdata.
• Content lock–SelectlocktypestolockmemosforQuickMemo+.
• Encrypt phone–Allowsyoutoencryptdataonthephoneforsecurity.Youwillbe
requiredtoenteraPINorpasswordtodecryptyourphoneeachtimeyoupower
iton.
• Encrypt SD card storage–EncryptSDcardstorageandkeepdataunavailable
forotherdevices.
• Set up SIM card lock–SetsthePINtolockyourSIMcardandallowsyouto
changethePIN.
• Password typing visible–Checkmarktobrieflyshoweachcharacterof
passwordsasyouenterthemsothatyoucanseewhatyouenter.
• Phone administrators–Viewordeactivatephoneadministrators.
• Unknown sources–Allowinstallationofnon-PlayStoreapplications.
• Verify apps –Disalloworwarnbeforeinstallationofappsthatmaycauseharm.
• Storage type –Hardware-backed.
• Certificate management
- Trusted credentials –ShowssystemrootCAcertificatesanduseraddedCA
certificates.Checkmarkallowsapplicationstousethecertificates.Itcanbeused
whenyouestablishsometypesofVPNandWi-Ficonnections.

73
Settings
- Install from storage –Taptoinstallasecurecertificate.
- Clear credentials –Deletesuseraddedsecurecertificatesandrelated
credentials.
• Trust agents –Selectappstousewithoutunlockingscreen.
• Screen pin –Youcanenableyourdevicetoonlyshowacertainapp'sscreen
usingscreenpin.
• Usage access for apps–Allowsyoutoviewusageinformationofappsonyour
device.
< SMART FUNCTIONS >
QuickCircle case
Thismenuallowsyoutoselectappstobeuseddirectlyonthecoverinsmallview
usingQuickCircle.KeepinmindthatturningontheseQuickCirclecasesettingsmay
resultinirregulardevicebehavior.
< PHONE MANAGEMENT >
Date & time
Setyourpreferencesforhowthedateandtimeisdisplayed.
Storage & USB
Youcanmonitortheusedandavailableinternalmemoryinthedevice.
Battery & power saving
• Battery usage –Viewbatteryusage.
• Battery percentage on status bar –Checkmarktodisplaythebatterylevel
percentageontheStatusBarnexttotheBatteryicon.
• Battery saver–TaptheBatterySaverswitchtotoggleitonoroff.Setsthebattery
chargepercentlevelthatautomaticallyturnsonBatterySaver.Chooserfrom
Immediately,5% battery,and15% battery.
• Help –Displaysbatterysavingitemsinformation.
Memory
Youcanmonitorthememoryusedaveragelyandthememoryusedbyappsinthe
device.

74
Settings
Apps
Allowsyoutoviewdetailsabouttheappsinstalledonyourphone,managetheirdata,
andforcethemtostop.
Default message app
Thismenuallowsyoutochoosewhatmessagingapptouseasyourdefaultmessaging
app.
Backup & reset
Changethesettingsformanagingyoursettingsanddata.
• LG Backup–Backsupallinformationonthedeviceandrestoresitintheeventof
datalossorreplacement.
• Backup my data –Backupappdata,Wi-Fipasswords,andothersettingsto
Googleservers.
• Backup account –Displaystheaccountthatiscurrentlybeingusedtobackup
information.
• Automatic restore –Whenreinstallinganapp,restorebackedupsettingsand
data.
• Network settings reset–Resetallnetworksettings.
• Factory data reset –Resetyoursettingstothefactorydefaultvaluesanddelete
allyourdata.Ifyouresetthephonethisway,youarepromptedtore-enterthe
sameinformationaswhenyoufirststartedAndroid.
About phone
Viewlegalinformation,checkphonestatusandsoftwareversions,andperforma
softwareupdate.

75
PC software (LG PC Suite)
For Windows OS
LGPCSuitehelpsyoumanagemediacontentsandapplicationsinyourphoneby
allowingyoutoconnecttoyourphonetoyourPC.
With the LG PC Suite software, you can...
• Manageandplayyourmediacontents(music,movie,pictures)onyourPC.
• Sendmultimediacontentstoyourdevice.
• Synchronizesdata(schedules,contacts,bookmarks)inyourdeviceandPC.
• Backuptheapplicationsinyourdevice.
• Updatethesoftwareinyourdevice.
• PlaymultimediacontentsofyourPCfromotherdevice
NOTE: Some functions may not be available, depending on the model.
NOTE: You can use the Help menu from the application to find out how to
use the LG PC Suite software.
Installing the LG PC Suite Software
TodownloadtheLGPCSuitesoftware,pleasedothefollowing:
1 Gotowww.lg.com.
2 GotoSUPPORT>MOBILE SUPPORT>PC Sync.
3 SelectthemodelinformationandclickGO.
4 Scrolldown,selectthePC SYNC tab> Windows > DOWNLOAD todownload
LGPCSuite.
PC software (LG PC Suite)

76
PC software (LG PC Suite)
System Requirements for LG PC Suite software
• OS:WindowsXP(Servicepack3)32bit,WindowsVista,Windows7,Windows8
• CPU:1GHzorhigherprocessors
• Memory:512MBorhigherRAMs
• Graphiccard:1024x768resolution,32bitcolororhigher
• HDD:500MBormorefreeharddiskspace(Morefreeharddiskspacemaybe
neededdependingonthevolumeofdatastored.)
• Requiredsoftware:LGUniteddrivers,WindowsMediaPlayer10orlater.
NOTE: LG United USB Driver
The LG United USB driver is required to connect an LG device and PC. It is
installed automatically when you install the LG PC Suite software application.
For Mac OS
With the LG PC Suite software, you can...
• Manageandplayyourmediacontents(music,movie,pictures)onyourPC.
• Sendmultimediacontentstoyourdevice.
• Synchronizesdata(schedules,contacts,bookmarks)inyourdeviceandPC.
NOTE: Some functions may not be available, depending on the model.
NOTE: You can use the Help menu from the application to find out how to
use the LG PC Suite software.

77
PC software (LG PC Suite)
Installing the LG PC Suite Software
TodownloadtheLGPCSuitesoftware,pleasedothefollowing:
1 Gotowww.lg.com.
2 GotoSUPPORT>MOBILE SUPPORT>PC Sync.
3 SelectthemodelinformationandclickGO.
4 Scrolldown,selectthePC SYNCtab>Mac OS>DOWNLOADtodownloadLGPC
Suite.
System Requirements for LG PC Suite software
• OS:MacOSX(10.6.8)orhigher
• Memory:2GBRAMorhigher
• Graphicscard:1024x768screenresolutionorhigherand32-bitcolor
• Harddisc:Storageof500MBorhigher(Additionalspacemayberequiredfordata)
• Requiredsoftware:LGUnitedMobiledriver
NOTE: LG United USB Driver
The LG United USB driver is required to connect an LG device and PC. It is
installed automatically when you install the LG PC Suite software application.

78
Phone software update
Phone software update
LG Mobile Phone software update from the Internet
Formoreinformationaboutusingthisfunction,pleasevisit
http://www.lg.com/common/index.jsp
selectyourcountryandlanguage.
Thisfeatureallowsyoutoconvenientlyupdatethefirmwareonyourphonetoanewer
versionfromtheInternetwithoutneedingtovisitaservicecenter.Thisfeaturewillonly
beavailableifandwhenLGmakesanewerfirmwareversionavailableforyourdevice.
Becausethemobilephonefirmwareupdaterequirestheuser'sfullattentionforthe
durationoftheupdateprocess,pleasemakesureyoucheckallinstructionsandnotes
thatappearateachstepbeforeproceeding.PleasenotethatremovingtheUSBdata
cableduringtheupgrademayseriouslydamageyourmobilephone.
NOTE: LG reserves the right to make firmware updates available only for
selected models at its own discretion and does not guarantee the availability
of the newer version of the firmware for all handset models.
LG Mobile Phone software update via Over-the-Air (OTA)
Thisfeatureallowsyoutoconvenientlyupdateyourphone'ssoftwaretoanewer
versionviaOTA,withoutconnectingusingaUSBdatacable.Thisfeaturewillonlybe
availableifandwhenLGmakesanewerfirmwareversionavailableforyourdevice.
Youshouldfirstcheckthesoftwareversiononyourmobilephone:Settings>General
tab>About phone>Update Center > Software Update > Check now for update.
Phone software update

79
Phone software update
NOTE: Your personal data from internal phone storage—including information
about your Google account and any other accounts, your system/application
data and settings, any downloaded applications and your DRM licence—
might be lost in the process of updating your phone's software. Therefore,
LG recommends that you backup your personal data before updating your
phone's software. LG does not take responsibility for any loss of personal
data.
NOTE: This feature depends on your network service provider, region and
country.

80
About this user guide
About this user guide
• Beforeusingyourdevice,pleasecarefullyreadthisguide.Thisensuresthatyou
useyourphonesafelyandcorrectly.
• Someoftheimagesandscreenshotsprovidedinthisguidemayappeardifferently
onyourphone.
• Yourcontentmaydifferfromthefinalproductorfromsoftwaresuppliedbyservice
providersorcarriers.Thiscontentissubjecttochangewithoutpriornotice.Forthe
latestversionofthisguide,pleasevisittheLGwebsiteatwww.lg.com.
• Yourphone'sapplicationsandtheirfunctionsmayvarybycountry,regionor
hardwarespecifications.LGcannotbeheldliableforanyperformanceissues
resultingfromtheuseofapplicationsdevelopedbyprovidersotherthanLG.
• LGcannotbeheldliableforperformanceorincompatibilityissuesresultingfrom
editedregistrysettingsormodifiedoperatingsystemsoftware.Anyattemptto
customizeyouroperatingsystemmaycausethedeviceoritsapplicationstowork
incorrectly.
• Software,audio,wallpaper,images,andothermediasuppliedwithyourdeviceare
licensedforlimiteduse.Ifyouextractandusethesematerialsforcommercialor
otherpurposes,youmaybeinfringingcopyrightlaws.Asauser,youarefullyare
entirelyresponsiblefortheillegaluseofmedia.
• Additionalchargesmayapplyfordataservices,suchasmessaging,
uploading,downloading,auto-syncingandlocationservices.Toavoidadditional
charges,selectadataplansuitabletoyourneeds.Contactyourserviceproviderto
obtainadditionaldetails.
About this user guide

81
About this user guide
Trademarks
• LGandtheLGlogoareregisteredtrademarksofLGElectronics.
• Bluetooth
®
isaregisteredtrademarkofBluetoothSIG,Inc.worldwide.
• Wi-Fi
®
andtheWi-FilogoareregisteredtrademarksoftheWi-FiAlliance.
• Allothertrademarksandcopyrightsarethepropertyoftheirrespectiveowners.

82
Accessories
Theseaccessoriesareavailableforusewiththeyourphone.(Items described below
may be optional.)
• Traveladaptor
• QuickStartGuide
• Stereoheadset
• USBcable
• Battery
NOTE:
• Always use genuine LG accessories. The supplied items are designed only
for this device and may not be compatible with other devices.
• The items supplied with the device and any available accessories may vary
depending on the region or service provider.
Accessories

83
Troubleshooting
Thischapterlistssomeproblemsyoumightencounterwhenusingyourphone.Some
problemsrequireyoutocallyourserviceprovider,butmostareeasytofixyourself.
Message Possible causes Possible corrective measures
SIM or
USIM card
error
There is no SIM
or USIM card in
the phone or it is
inserted incorrectly.
Make sure that the SIM or USIM card
is correctly inserted.
No network
connection/
Dropped
network
Signal is weak or
you are outside the
carrier network.
Move toward a window or into
an open area. Check the network
operator coverage map.
Operator applied
new services.
Check whether the SIM or USIM card
is more than 6~12 months old. If so,
change your SIM or USIM card at your
network provider's nearest branch.
Contact your service provider.
Codes do
not match
To change a
security code,
must need to
confirm the
new code by
re-entering it.
If you forget the code, contact your
service provider.
The two codes
you entered do not
match.
Troubleshooting

84
Accessories
Message Possible causes Possible corrective measures
No
applications
can be set
Not supported by
service provider
or registration
required.
Contact your service provider.
Calls not
available
Dialing error New network not authorized.
New SIM or USIM
card inserted.
Check for new restrictions.
Pre-paid charge
limit reached.
Contact service provider or reset limit
with PIN2.
Phone
cannot be
turned on
On/Off key pressed
too briefly.
Press the On/Off key for at least two
seconds.
Battery is not
charged.
Charge battery. Check the charging
indicator on the display.
Charging
error
Battery is not
charged.
Charge battery.
Outside
temperature is too
hot or cold.
Make sure phone is charging at a
normal temperature.
Contact problem
Check the charger and its connection
to the phone.
No voltage Plug the charger into a different outlet.
Charger defective Replace the charger.
Wrong charger Use only original LG accessories.

85
Accessories
Message Possible causes Possible corrective measures
Number not
allowed.
The Fixed dialling
number function
is on.
Check the Settings menu and turn the
function off.
Impossible
to receive/
send SMS
& photos
Memory full
Delete some messages from your
phone.
Files do not
open
Unsupported file
format
Check the supported file formats.
The screen
does not
turn on
when I
receive a
call.
Proximity sensor
problem
If you use a protection tape or case,
make sure it has not covered the area
around the proximity sensor. Make
sure that the area around the proximity
sensor is clean.
No sound Vibration mode
Check the settings status in the sound
menu to make sure you are not in
vibration or silent mode.
Hangs up
or freezes
Intermittent
software problem
Try to perform a software update
through the website.

86
FAQ
Category Question Answer
Bluetooth
Devices
What functions
are available via
Bluetooth?
You can connect a Bluetooth audio
device, such as a Stereo/Mono
headset or car kit.
Contacts
Backup
How can I back up
Contacts?
Contacts data can be synchronized
between your phone and your Google
account.
Synchronization
Is it possible to set up
one-way sync with
Gmail?
Only two-way synchronization is
available.
Synchronization
Is it possible to
synchronize all email
folders?
The Inbox is automatically
synchronized. You can view other
folders by tapping
and selecting
Folders to choose a folder.
Gmail Log-In
Do I have to log into
Gmail whenever I want
to access Gmail?
Once you have logged into Gmail, there
is no need to log into Gmail again.
Google
Account
Is it possible to filter
emails?
No, the phone does not support email
filtering.
Email
What happens when
I execute another
application while
writing an email?
Your email is automatically saved as
a draft.
Ringtone
Is there a file size limit
for using MP3 files as
ringtones?
There is no file size limit.
FAQ

87
FAQ
Category Question Answer
Message
Time
My phone does not
display the time of
receipt for messages
older than 24 hrs.
How can I view the
time?
Open the conversation and touch and
hold the desired message. Then tap
Details.
Navigation
Is it possible to install
another navigation
application on my
phone?
Any application that is available at
PlayStore™ and is compatible with the
hardware can be installed and used.
Synchronisation
Is it possible to
synchronize my
contacts from all my
email accounts?
Only Gmail and MS Exchange server
(company email server) contacts can
be synchronized.
Wait and
Pause
Is it possible to save
a contact with Wait
and Pause in the
numbers?
If you transferred a contact using the
Wait & Pause functions saved into the
number, you cannot use those features.
You must save each number again.
How to save with Wait and Pause:
1. From the Home screen, tap
.
2. Dial the number, then tap
.
3. Tap Add 2-sec pause or Add wait.
Security
What are the phone's
security functions?
You can set the phone to require an
Unlock Pattern to be entered before
the phone can be accessed or used.

88
FAQ
Category Question Answer
Unlock
Pattern
How do I create the
Unlock Pattern?
1. From the Home screen, tap and
hold
.
2. Tap System settings > Display tab
> Lock screen.
3. Tap Select screen lock > Pattern.
The first time you do this, a short
tutorial about creating an Unlock
Pattern appears.
4. Set up your pattern by drawing it
then drawing it a second time for
confirmation.
Precautions to take when using the
pattern lock.
It is very important to remember the
unlock pattern you set. You can no
longer access your phone if you use
an incorrect pattern five times. You
have five chances to enter your unlock
pattern, PIN or password. If you have
used all 5 opportunities, you can try
again after 30 seconds. (Or, if you
preset the backup PIN, you can use
the backup PIN code to unlock the
pattern.)

89
FAQ
Category Question Answer
Unlock
Pattern
What should I do if
I forget the unlock
pattern and I did not
create my Google
account on the
phone?
If you forgot your pattern:
If you logged into your Google account
on the phone but failed to enter the
correct pattern 5 times, tap the Forgot
pattern button. You are then required
to log in with your Google account
to unlock your phone. If you have
not created a Google account on the
phone or you have forgotten it, you
must perform a hard reset.
Caution: If you perform a factory reset,
all user applications and user data are
deleted. Please remember to back up
any important data before performing a
factory reset.
Memory
Will I know when my
memory is full?
Yes, you will receive a notification.
Language
Support
Is it possible to
change my phone's
language?
The phone has multilingual capabilities.
To change the language:
1. From the Home screen, tap and
hold
and tap System settings.
2. Tap General tab > Language &
keyboard > Language.
3. Tap the desired language.
VPN
How do I set up a
VPN?
VPN access configuration is different
for each company. To configure VPN
access on your phone, you must
obtain the details from your company's
network administrator.

90
FAQ
Category Question Answer
Screen time
out
My screen turns off
after only 15 seconds.
How can I change the
amount of time for the
backlight to turn off?
1. From the Home screen, tap and
hold
.
2. Tap System settings > Display tab.
3. Tap Screen timeout.
4. Tap the preferred screen backlight
timeout time.
Wi-Fi &
mobile
network
When the Wi-Fi and
mobile networks are
both available, which
service does my
phone use?
When using data, your phone may
default to the Wi-Fi connection (if Wi-Fi
connectivity on your phone is set to
On). However, there is no notification
when your phone switches from one to
the other.
To know which data connection is
being used, view the mobile network or
Wi-Fi icon at the top of your screen.
Home
screen
Is it possible to
remove an application
from the Home
screen?
Yes. Just touch and hold the icon until
the trash can icon appears at the top
and center of the screen. Then, without
lifting your finger, drag the icon to the
trash can.
Application
I downloaded an
application and it
causes a lot of errors.
How do I remove it?
1. From the Home screen, tap and
hold
.
2. Tap System settings > General tab
> Apps > DOWNLOADED.
3. Tap the application, then tap
Uninstall.
Charger
Is it possible to charge
my phone using
a USB data cable
without installing the
necessary USB driver?
Yes, the phone is charged through the
USB cable regardless of whether the
necessary drivers are installed.

91
FAQ
Category Question Answer
Alarm
Can I use music files
for my alarm?
Yes. After saving a music file as a
ringtone, you can use it as an alarm.
1. Touch and hold a song in a library
list. In the menu that opens, tap Set
as ringtone > Phone ringtone or
Caller ringtones.
2. On the Alarm Clock Setting screen,
select the song as a ringtone.
Alarm
Will my alarm be
audible or will it go off
if the phone is turned
off?
No, this is not supported.
Alarm
If my ringer volume
is set to Vibrate, will I
hear my alarm?
Your alarm is programmed to be
audible even in these scenarios.
Hard Reset
(Factory
Reset)
How can I perform a
factory reset if I cannot
access the phone's
Settings menu?
If your phone does not restore to its
original condition, use a hard reset
(factory reset) to initialize it.

A QUESTION ABOUT
YOUR MOBILE PHONE?
0900 - 543 5454 (NL)
Our Customer Service is there to support you:
015 - 200 255 (BE)
-
 1
1
-
 2
2
-
 3
3
-
 4
4
-
 5
5
-
 6
6
-
 7
7
-
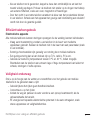 8
8
-
 9
9
-
 10
10
-
 11
11
-
 12
12
-
 13
13
-
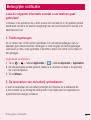 14
14
-
 15
15
-
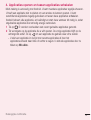 16
16
-
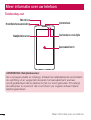 17
17
-
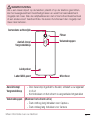 18
18
-
 19
19
-
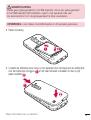 20
20
-
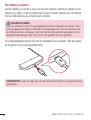 21
21
-
 22
22
-
 23
23
-
 24
24
-
 25
25
-
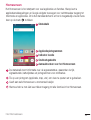 26
26
-
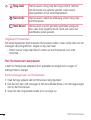 27
27
-
 28
28
-
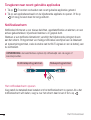 29
29
-
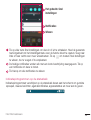 30
30
-
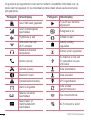 31
31
-
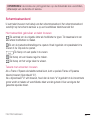 32
32
-
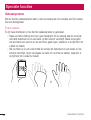 33
33
-
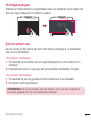 34
34
-
 35
35
-
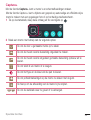 36
36
-
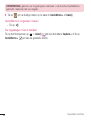 37
37
-
 38
38
-
 39
39
-
 40
40
-
 41
41
-
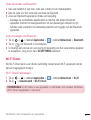 42
42
-
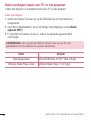 43
43
-
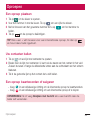 44
44
-
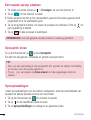 45
45
-
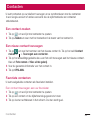 46
46
-
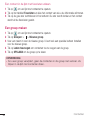 47
47
-
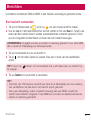 48
48
-
 49
49
-
 50
50
-
 51
51
-
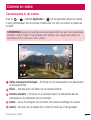 52
52
-
 53
53
-
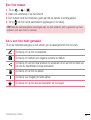 54
54
-
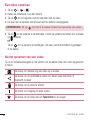 55
55
-
 56
56
-
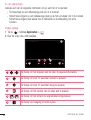 57
57
-
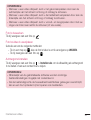 58
58
-
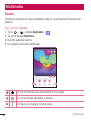 59
59
-
 60
60
-
 61
61
-
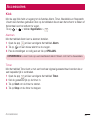 62
62
-
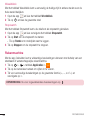 63
63
-
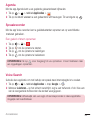 64
64
-
 65
65
-
 66
66
-
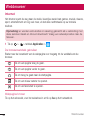 67
67
-
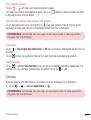 68
68
-
 69
69
-
 70
70
-
 71
71
-
 72
72
-
 73
73
-
 74
74
-
 75
75
-
 76
76
-
 77
77
-
 78
78
-
 79
79
-
 80
80
-
 81
81
-
 82
82
-
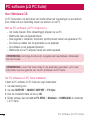 83
83
-
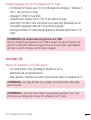 84
84
-
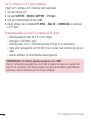 85
85
-
 86
86
-
 87
87
-
 88
88
-
 89
89
-
 90
90
-
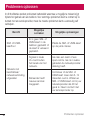 91
91
-
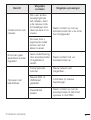 92
92
-
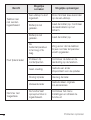 93
93
-
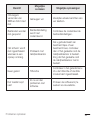 94
94
-
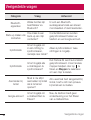 95
95
-
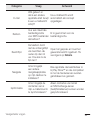 96
96
-
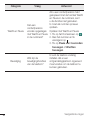 97
97
-
 98
98
-
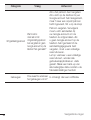 99
99
-
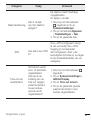 100
100
-
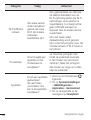 101
101
-
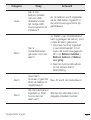 102
102
-
 103
103
-
 104
104
-
 105
105
-
 106
106
-
 107
107
-
 108
108
-
 109
109
-
 110
110
-
 111
111
-
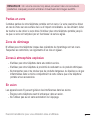 112
112
-
 113
113
-
 114
114
-
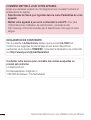 115
115
-
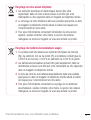 116
116
-
 117
117
-
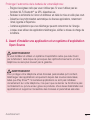 118
118
-
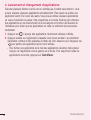 119
119
-
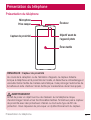 120
120
-
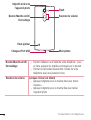 121
121
-
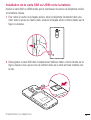 122
122
-
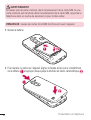 123
123
-
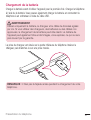 124
124
-
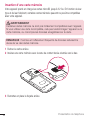 125
125
-
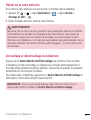 126
126
-
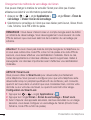 127
127
-
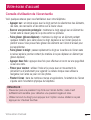 128
128
-
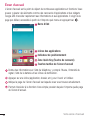 129
129
-
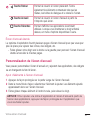 130
130
-
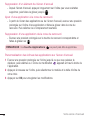 131
131
-
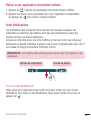 132
132
-
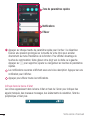 133
133
-
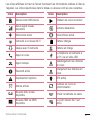 134
134
-
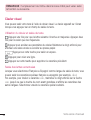 135
135
-
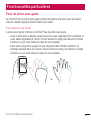 136
136
-
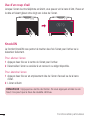 137
137
-
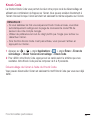 138
138
-
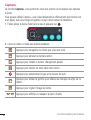 139
139
-
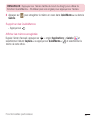 140
140
-
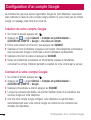 141
141
-
 142
142
-
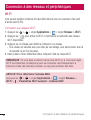 143
143
-
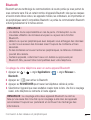 144
144
-
 145
145
-
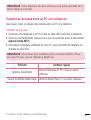 146
146
-
 147
147
-
 148
148
-
 149
149
-
 150
150
-
 151
151
-
 152
152
-
 153
153
-
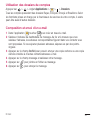 154
154
-
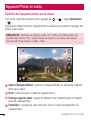 155
155
-
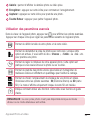 156
156
-
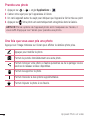 157
157
-
 158
158
-
 159
159
-
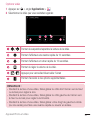 160
160
-
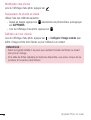 161
161
-
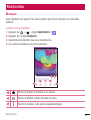 162
162
-
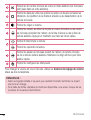 163
163
-
 164
164
-
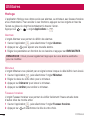 165
165
-
 166
166
-
 167
167
-
 168
168
-
 169
169
-
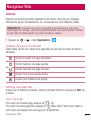 170
170
-
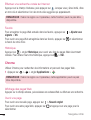 171
171
-
 172
172
-
 173
173
-
 174
174
-
 175
175
-
 176
176
-
 177
177
-
 178
178
-
 179
179
-
 180
180
-
 181
181
-
 182
182
-
 183
183
-
 184
184
-
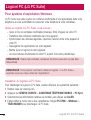 185
185
-
 186
186
-
 187
187
-
 188
188
-
 189
189
-
 190
190
-
 191
191
-
 192
192
-
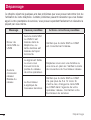 193
193
-
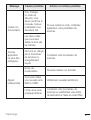 194
194
-
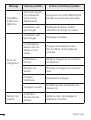 195
195
-
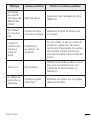 196
196
-
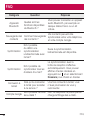 197
197
-
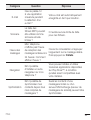 198
198
-
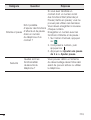 199
199
-
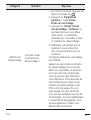 200
200
-
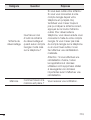 201
201
-
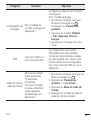 202
202
-
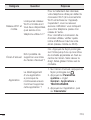 203
203
-
 204
204
-
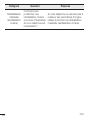 205
205
-
 206
206
-
 207
207
-
 208
208
-
 209
209
-
 210
210
-
 211
211
-
 212
212
-
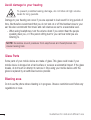 213
213
-
 214
214
-
 215
215
-
 216
216
-
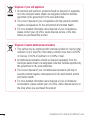 217
217
-
 218
218
-
 219
219
-
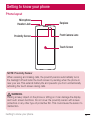 220
220
-
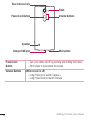 221
221
-
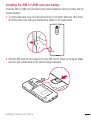 222
222
-
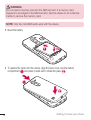 223
223
-
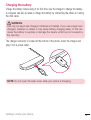 224
224
-
 225
225
-
 226
226
-
 227
227
-
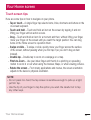 228
228
-
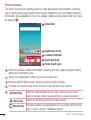 229
229
-
 230
230
-
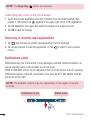 231
231
-
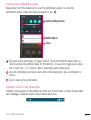 232
232
-
 233
233
-
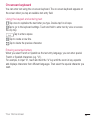 234
234
-
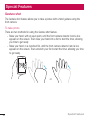 235
235
-
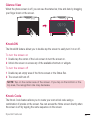 236
236
-
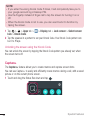 237
237
-
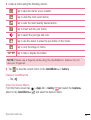 238
238
-
 239
239
-
 240
240
-
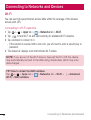 241
241
-
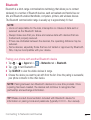 242
242
-
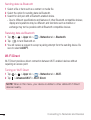 243
243
-
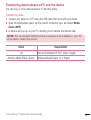 244
244
-
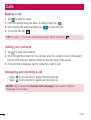 245
245
-
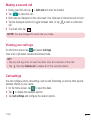 246
246
-
 247
247
-
 248
248
-
 249
249
-
 250
250
-
 251
251
-
 252
252
-
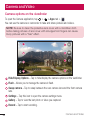 253
253
-
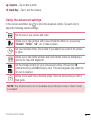 254
254
-
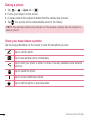 255
255
-
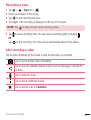 256
256
-
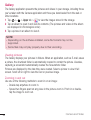 257
257
-
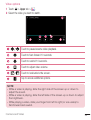 258
258
-
 259
259
-
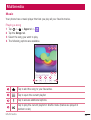 260
260
-
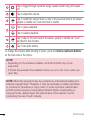 261
261
-
 262
262
-
 263
263
-
 264
264
-
 265
265
-
 266
266
-
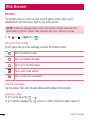 267
267
-
 268
268
-
 269
269
-
 270
270
-
 271
271
-
 272
272
-
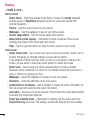 273
273
-
 274
274
-
 275
275
-
 276
276
-
 277
277
-
 278
278
-
 279
279
-
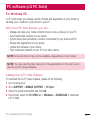 280
280
-
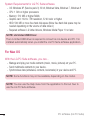 281
281
-
 282
282
-
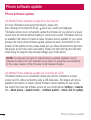 283
283
-
 284
284
-
 285
285
-
 286
286
-
 287
287
-
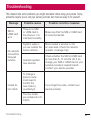 288
288
-
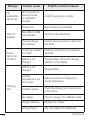 289
289
-
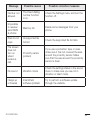 290
290
-
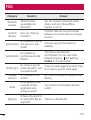 291
291
-
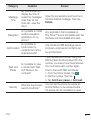 292
292
-
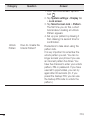 293
293
-
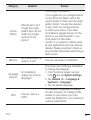 294
294
-
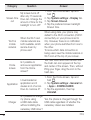 295
295
-
 296
296
-
 297
297


in andere talen
- English: LG H420 User manual
- français: LG H420 Manuel utilisateur