MPMan T500BT de handleiding
- Categorie
- Draagbare speakers
- Type
- de handleiding

Bluetooth tower speaker
T500BT
INSTRUCTION MANUAL
READ THIS INSTRUCTION MANUAL BEFORE OPERATING THE APPLIANCE.AND
SAVE IT FOR FUTURE REFERENCE.

Thank you for purchasing Tower Speaker
Getting started
Remove the equipment from the box.
Remove packaging and place inside the box to store for future reference and / or use
In the box
Tower speaker unit (including the Stainless Steel Stand)
Tower base and 7pc screws
3.5mm Aux cable
Instruction manual
Remote control
Features
2 Stereo Speakers.
Built in Subwoofer.
Bluetooth® Connectivity
Aux in Jack
USB Port for both playing and charging
5V 1A
!
FM radio
Blue LED display

Safety instructions
When using electrical equipments basic safety precautions should always be followed
This equipment is not intended for use by persons (including children)with reduced physical,
sensory or mental capabilities or lack of experience or knowledge. They should be given
appropriate supervision and instructions to use the equipment by a person responsible for their
safety.
Ensure the equipment is not too close to heat emitting appliances or placed in direct sunlight.
Check that the voltage indicated on the data plate corresponds with that of the local network
before connecting the equipment to the mains power supply.
Do not leave the equipment unattended while connected to the power supply
Do not immerse the equipment in water or any other liquids.
It is imperative to unplug the power cord after the equipment has been used, before it is cleaned
and while being repaired.
Close supervision is required when using this equipment near children.
Never leave the equipment within reach of children.
Repairs to electrical appliances should only be performed by qualified personnel. Improper repairs
may place the user and/or equipment at serious risk.
This equipments intended for household use only and should not be used for industrial or
commercial purposes.
Do not operate this appliance with a damaged plug or cord, after a malfunction or after being
dropped or damaged in any way.
Do not use this equipment for anything other than its intended use.
This equipment must be placed on a stable, heat resistant surface.
Do not push objects into any openings as damage to the equipment and/or electric shock may
occur.
Do not use this product in wet or bad weather conditions.
This product is not a toy.
Do not play music at excessive levels especially near children.

Description of parts
Top panel
1. Standby
2. Mode
3. Mute
4. LED display
5. Volume control
6. Play/pause
7. Skip forward
8. Skip backward
Back top panel
1. USB port (Output DC 5V 1A) for both playing and charging.
2. 3.5mm Aux-in Jack
Back panel
1. FM antenna
2. Main Power Switch
Remote Control
**Point remote at middle of speaker**
1. STNDBY
2. Mp3 button
3. Mute button
4. Aux in button
5. FM radio button
6. Bluetooth button
7. Skip backward button
8. Play/Pause button
9. Skip forward
10. Scan button
11. CH-
12. CH+
13. Bass+ effect button
14. Bass- effect button
15. Treb+ effect button
16. Treb- effect button
17. Volume+ button
18. Volume- button

INSTALLATION THE BASE
Take out the tower body and tower base carefully from the color box; find the 7pcs screws and speaker
holder, speaker base from the box. Assemble the speaker base, holder and the body by the screwier (not
included) as per the image as below, and then put the tower standing on the floor, now the speaker is
ready for using. Make sure all accessories are available.
CONNECTING POWER SOURCE
This unit was designed to operate with an AC 230V~50Hz power supply.
Connecting this system to any other power source may cause damage to the system.
Unwind the AC power cord to its full length. Connect the plug to the AC mains
inlet of the unit, and then the mains plug into a standard AC socket outlet.
Make sure the AC plug is fully inserted into the socket outlet. The set is now
connected and ready to use.
To switch the unit off completely, withdraw the power cord form the wall outlet.
1. Unwind the AC power cord on the rear of the unit. Do not plug or unplug
the power cable in wet hands.
2. Once connected to the power supply, the unit will enter standby mode. Press the Power
button on the remote control or the unit to power the unit on.
3. Please disconnect the mains plug from the AC outlet if the appliance is not going to be used
for a long period of time.

Using the remote control
The battery
To get your remote control working intially, pull the clear tab from the
battery compartment located at the bottom of the remote.
If your remote becomes intermittent or you find you have to move closer
the unit to operate, then probably batteries need to be replaced.
To replace batteries, slide the holder out from the base of the remote.
Remove the battery and replace with a 3 volt Lithium CR2025.
OPERATING INSTRUCTIONS
Playing the FM radio
1) Press the "STANDBY" button to turn the unit on, the unit will enter the “FM” mode
automatically.
2) Pls. ensure the FM Antenna has been fully.
3) Press the "Skip forward" and "Skip backward" to select the desired FM radio station. Press “Skip
forward” or “Skip backward” and hold, the unit will scan the radio station, and stop once found
one.
Radio Presets Automatically
1) Follow the steps for Playing the FM Radio.
Press "Scan"button on the remote to search and preset stations in memory automatically, (i.e.
“P01” – this will blink on the display - and then the preset station frequency number will show on the
display).
2) Note: 20 FM stations can be preset.
3) To play the preset Radio Stations, press the "CH-" or "CH+" buttons to cycle through the preset
FM radio stations.

Using Bluetooth
1) Power on the unit, press MODE switch to the Bluetooth mode, the LED will indicate
2) Long press “Play/Pause” key on unit around 3-5 second , will hear the “DU” sound and LED will
blinking, it meaning the speaker unit ready to Pairing mode.
3) Turn on Bluetooth in your smart-phone /tablet, and ensure it at “SEARCHING DEVICE” mode ,
Found “T500BT” and select.
4) Once the unit is found, enter password 0000 to connect with smart phone/tablet (some devices
may not need password)
5) The LED will lit as and will hear “DU” sound , if connect was success.
6) If the smart-phone/tablet cannot find the unit or can’t pairing , please power on again and repeat
again the above step
7! It will auto reconnect the previous paired device when each time power on the unit
If the unit cannot auto connect the previous paired device, please power off the speaker and turn on
again after 10seconds, or restart the Bluetooth in the smart phone/tablet, then follow above steps to
finish connection
8
Manually turn off the Bluetooth in smart-phone or the smart-phone is far away from the unit (over
10m), the connection between speaker and smart-phone will lose, the unit will go back to Bluetooth
standby mode.
Ensure the Bluetooth in your smart phone at “searching device” mode, keep on pressing “pairing” on
the top panel, and then follow above steps to reconnect it
USB port for both playing MP3 and charging
USB port for playing MP3
1. Power on the unit and insert a USB Flash Drive (not supplied) into
the USB Port, ensuring the plug is fully inserted at the correct way.
2. The tower will play music from the USB automatically or press “MP3” button on the remote. The
maximum size of Flash Drive that can be connected is 8GB max.
USB port for charging
1. USB port for charging, does not support any media feature.
2. USB output power source DC5V 1A.
3. You can change your phone & device via the USB port in either standby or operation mode (not
including USB playing mode).

Aux-In line in type
Requires a 3.5mm cable (included)
1) When the Tower is powered on, press "STANDBY", then press “MODE” repeatedly to select the
AUX mode. .
2) Connect a 3.5mm cable to the Aux-in jack at the rear. Connect the other end of the 3.5mm cable
to an MP3 player or other audio source.
3) Use the controls on the top panel to begin playing audio routed through the unit or press “AUX”
button on the remote.

Care of the appliance
Disconnect the appliance from the power source when cleaning.
If the unit becomes dusty, wipe it with a soft and dry duster. Use a soft cloth to clean this appliance. Do
not use any wax, polish sprays, or abrasive cleaners on the unit.
The normal function of the product may be disturbed by strong Electromagnetic Interference. If so,
simply reset the product to resume normal operation by following the instruction manual. In case the
function could not resume, please use the product in other location.
Caution
Never allow any water or other liquids to get inside the unit while cleaning. Dispose of used batteries in
an environmental-responsible manner. This product is not intended for commercial use. Household use
only.
SPECIFICATIONS
Made in PRC
For more information please visit our website
www.mpmaneurope.com
Power Supply AC Operated 230v~50 Hz
Speaker Units 2x 4” Speakers, 1 x 4.5” subwoofer
Speaker output power 2x10watts + 25watts=45W (RMS)
Speaker consumption power 60W
Power in standby Less than 1W
3.5mm Aux in 1V input
This is to certify that T500BT is in conformity with:
Council
directive 89/336/EEC (EMC direction):
Applicable
standards:
EN55013:2001+A1:2003+A2:2006
EN61000-3-2:2006+A1:2009+A2:2009
EN61000-3-3:2008
EN55020:2007

Tour d'enceinte Bl uetooth
T500BT
MANUEL D'INSTRUCTION
LISEZ CE MANUEL D'INSTRUCTIONS AVANT D'UTILISER L'APPAREIL ET
CONSERVEZ-LE POUR RÉFÉRENCE ULTÉRIEURE.

Merci d’avoir acheté cet te tour d'encein te.
Pour commencer
Sortez l’équipement du boitier.
Enlevez l'emballage et placez-le à l'intérieur du boitier pour le rangement et/ou l'utilisation par la
suite.
Contenu du paquet
Unité de l'enceinte (avec le pied en acier inoxydable)
Base de la tour et 7 vis.
Câble AUX 3,5mm
Manuel d’instruction
Télécommande
Caractéristiques
2 Enceintes stéréo
Caisson de graves torche intégré
Connectivité Bluetooth®
Prise Entrée auxiliaire
Port USB pour la lecture et le chargement (5V 1A)
Radio FM
Écran LED bleu

Précautions de sécurité
Lorsque vous utilisez des appareils électriques, des précautions de sécurité élémentaires doivent
systématiquement être suivies.
Cet appareil n’est pas conçu pour être utilisé par des personnes (y compris les enfants) aux
capacités physiques, sensorielles ou mentales réduites, ou manquant d’expérience et de
connaissance. Elles doivent être surveillées et formées concernant l'usage de l'équipement par une
personne responsable de leur sécurité.
Assurez-vous que l'équipement n'est pas trop proche d'appareils émettant de la chaleur ou placé à
la lumière directe du soleil.
Vérifiez que la tension indiquée sur la plaque signalétique corresponde à celle du réseau local
avant de connecter l'équipement sur l'alimentation secteur.
Ne laissez pas l'équipement sans surveillance lorsqu'il est connecté à l'alimentation
N’immergez pas l’appareil dans l’eau ou tout autre liquide.
Il est impératif de débrancher le cordon d'alimentation après que l'équipement ait été utilisé, avant
son nettoyage et pendant les réparations.
Une surveillance proche est nécessaire lorsque cet équipement est utilisé en présence d'enfants.
Ne laissez jamais l'équipement à la portée des enfants.
Les réparations sur les appareils électriques ne doivent être effectuées que par du personnel
qualifié. Des réparation incorrectes peuvent placer l'utilisateur et/ou l'équipement dans des
situations de risque.
Cet équipement est conçu pour une utilisation domestique uniquement et ne doit pas être utilisé
pour des fins commerciales ou industrielles.
Ne faites pas fonctionner un appareil avec un cordon ou une prise endommagée ou après un
dysfonctionnement, une chute ou un dégât quelconque de l’appareil.
N’utilisez pas l’appareil pour un usage autre que celui auquel il est destiné.
Cet équipement doit être placé sur une surface stable et résistante à la chaleur.
Ne poussez pas les objets dans les ouvertures car cela créerait un risque de dégâts sur
l'équipement et/ou d'électrochoc.
N'utilisez pas ce produit dans des conditions humides ou par mauvais temps.
Ce produit n'est pas un jouet.
Ne jouez pas de musique à volume excessif, particulièrement à proximité d'enfants.

Descriptio n des éléments
Panneau supérieur
1. Veille
2. Mode
3. Muet
4. Écran LED
5. Contrôle du volume
6. Lecture/Pause
7. Piste suivante
8. Reculer d'une piste
Panneau supérieur ar rière
1. Port USB pour la lecture et le chargemehh

INSTALLATI ON DE LA B ASE
Sortez le corps de la tour et la base de la tour soigneusement du boitier couleur; trouvez les 7 vis et le
support de l'enceinte, et la base de l'enceinte dans le boitier. Assemblez la base de l'enceinte, le support
et le corps avec un tournevis (non fourni) comme sur l'image ci-dessous, puis mettez la tour debout sur
le sol, l'enceinte est désormais prête à être utilisée. Assurez-vous que tous les accessoires sont
disponibles.
CONNEXION À UNE SOU RCE D'A LIMENTATION
Cette unité à été conçue pour fonctionner avec une alimentation électrique CA230V- 50Hz.
Connecter ce système à une autre source d'alimentation peut causer des dégâts sur le système.
Déroulez le câble d'alimentation CA sur sa longueur complète. Connectez la prise sur l'alimentation
CA
de l'unité, puis branchez l'alimentation secteur sur une prise murale CA standard.
Assurez-vous que la prise secteur CA est complètement insérée dans la fente secteur. L'installation est
désormais connectée et prête à être utilisée.
Pour éteindre complètement l'unité, retirez le cordon d'alimentation de la fente murale.
1. Déroulez le cordon d'alimentation CA à l'arrière de l'unité. Ne branchez pas ou ne débranchez
pas le câble d'alimentation avec les mains humides.
2. Une fois connecté à l'alimentation, l'unité passera en mode veille. Appuyez sur la touche
d'alimentation sur l’unité ou sur la télécommande pour allumer l’unité.

3. Déconnectez la prise secteur de l'installation CA si l'appareil n'est pas utilisé pendant une
longue période de temps.
Utiliser la télécomma nde
La batterie
Afin de faire fonctionner votre télécommande pour la première fois, tirez
l'onglet en plastique du compartiment à la base de la télécommande.
Si votre télécommande ne fonctionne plus que par intermittence ou si
vous vous rendez compte qu'il vous faut vous approcher plus près de
l'unité pour la faire fonctionner, alors la pile devra probablement être
changée.
Pour changer les piles, faites glisser le support hors de la base de la
télécommande. Enlevez la pile et replacez avec une pile CR2025 3
volts Lithium.
INSTRUCTI ONS D ’UTILISATION
Jouer la radio FM
1) Appuyez sur la touche « STANDBY » pour allumer l'unité, l'unité passera en mode « FM »
automatiquement.
2) Assurez-vous que l'antenne FM est complètement déployée.
3) Appuyez sur « piste suivante » et « piste précédente » pour sélectionner la station de radio FM de
votre choix. Tenez appuyé sur « piste suivante » et « piste précédente », l'unité recherchera les
stations de radio et s'arrêtera quand elle en aura détecté une.
Présélectionner des stations automatiquement
1) Suivez les instructions pour Écouter la radio.
2) Appuyez sur la touche « Scan » sur la télécommande pour rechercher et présélectionner les
stations automatiquement dans la mémoire (ex : « P01 » - clignotera sur l'écran - alors le numéro
de fréquence de station présélectionnée s'affichera sur l'écran.
3) Remarque: Vous pouvez présélectionner 20 stations.
4) Pour lire les stations de radio présélectionnées, appuyez sur les touches « CH- » ou « CH+ » pour
circuler entre les stations de radio FM.

Utiliser le Bluetooth
1) Allumez l'unité, appuyez sur l'interrupteur MODE pour passer en mode Bluetooth,la DEL
s'allumera.
2) Appuyez longuement sur la touche « Lecture / Pause » sur l'unité pendant environ 3-5 secondes,
vous entendrez un son « Du » et la DEL clignotera pour signifier que l'unité d'enceinte est prête à être
couplée.
3) Activez le Bluetooth sur votre Smartphone/tablette, et assurez-vous qu'elle est en mode
« RECHERCHE D'APPAREIL », détectez « T5 00BT » et sélectionnez.
4) Une fois que l'unité est détectée, saisissez le mot de passe 0000 pour connecter avec le
smartphone / la tablette (certains appareils n'ont peut-être pas besoin de mot de passe)
5) La DEL s'allumera et vous entendrez une tonalité « DU » si la connexion a été réussie.
6) Si le smartphone / la tablette ne peut pas trouver l'unité ou ne peut pas se coupler, veuillez
réinitialiser et répéter les étapes ci-dessus à nouveau.
7

Ligne d'entrée de type auxiliaire
Nécessite un câble audio 3,5 mm (inclus).
1) Lorsque la tour est alimentée, appuyez sur « STANDBY », puis appuyez sur « MODE » à
plusieurs reprises pour choisir le mode AUX. .
2) Connectez un câble 3,5mm sur la prise d'entrée auxiliaire à l'arrière. Connectez l'autre extrémité
du câble 3,5mm sur un lecteur MP3 ou sur une autre source audio.
3) Utilisez les commandes sur le panneau supérieur pour commencer à lire du son dirigé par l'unité,
ou appuyez sur la touche « AUX » sur la télécommande.
Résolution des problèmes
Avant d'amener l'unité pour réparation, veuillez vérifier dans le tableau suivant lorsqu'un problème se
présente. Consultez votre vendeur ou votre centre d'assistance si le problème ne peut être résolu avec
les informations suivantes :
Problème Solution
Alimentat ion
Le système ne s'allume pas ou ne répond
pas à la télécommande.
- Assurez-vous que la prise d'alimentation CA
est
connectée sur la prise murale correctement et qu'elle
est
bien alimentée.
- Si cela ne fonctionne pas, laissez l'unité débranch
ée
avant de demander des conseils.
Télécommande
Pas de fonctionnement u portée réduite.
- Insérez une pile neuve
- Visez directement la télécommande en direction
du
capteur distant situé au centre de l'enceinte.
Coupler l'unité
Impossible de coupler correctement
- Vérifiez si l'enceinte est éteinte ou en mode de
recherche.
- Vérifiez s'il y a des récepteurs Bluetooth à proximité
de
l'appareil Bluetooth. Éteignez-les pour éviter
les
perturbations. Essayez de coupler à nouveau.
- Vous pouvez cliquer sur « Oublier cet appareil »
et
couplez de nouveau si nécessaire. Recherchez « T500BT
»
sur l'appareil Bluetooth et connectez de nouveau.
Impossible de lire correctement, la
musique est jouée par intermittence.
Vérifiez si la distance entre l'enceinte et votre
appareil
Bluetooth est hors de la distance de fonctionnement
(10m),
ou s'il y a des obstacles bloquant la communication
entre
l'enceinte et l'appareil Bluetooth. Déplacez l'enceinte
ou
l'appareil Bluetooth pour obtenir la meilleure ré
ception
possible.
Le son est distordu
Vérifiez le réglage du son sur votre haut-parleur et
sur
votre appareil, et réglez le son à un niveau correct.
Bruit ou distorsions sonores en mode
FM
Réglez la station diffusée plus précisément.
Assurez-vous que l'antenne FM est complètement é
tendue.

Entretien de l 'appareil
Déconnectez l'appareil de la source d'alimentation lors du nettoyage.
Si l'unité devient poussiéreuse, essuyez-la avec un plumeau doux et sec. Utilisez un linge doux pour
nettoyer cet appareil. N'utilisez pas de cire, de spray polisseur, ou de nettoyants abrasifs sur l'unité.
Le fonctionnement normal du produit peut être perturbé par des interférences électromagnétiques fortes.
Si cela venait à se produire, réinitialisez simplement le produit pour reprendre le fonctionnement
normal. Au cas où le fonctionnement ne reprenait pas, veuillez utiliser le produit dans un autre endroit.
Précautions
Ne laissez jamais d'eau ou d'autres liquide entrer dans l'un

La société MPMAN déclare que cet appareil est
conforme à la directive européenne 1999/5/CE
dite "R&TTE" (Radio And Terminal
Telecommunication Equipement)
Pour toute information, veui llez contacter :
JME SA
Service Technique
M. Michel
77 rue dodonée
1180 Bruxelles
Belgique
Pour toutes questions :
MPMAN / JME SAService consommateur
M. Cavell
77 rue dodonée
1180 Bruxelles
Belgique
12 décembre, 2014

Bluetooth torenluidspreker
T500BT
HANDLEIDING
LEES DEZE HANDLEIDING VOORDAT U HET APPARAAT GEBRUIKT EN
BEWAAR DE HANDLEIDING VOOR TOEKOMSTIGE REFERENTIE.

Bedankt voor de aanschaf van de torenluidspreker
Aan de slag
Haal de apparatuur uit de doos.
Verwijder het verpakkingsmateriaal en plaats het in de doos om het te bewaren voor toekomstige
referentie en / of toekomstig gebruik
In de doos
Torenluidspreker (inclusief de roestvrijstalen standaard)
Voetstuk toren en 7 schroeven
3,5mm Aux-kabel
Handleiding
Afstandsbediening
Eigenschappen
2 Stereo luidsprekers.
Ingebouwde Subwoofer.
Bluetooth® connectiviteit
Aux-ingang
USB-poort voor zowel afspelen als opladen
5V 1A
!
FM-radio
Blauw LED-display

Veiligheidsinstructies
Bij het gebruik van elektrische apparatuur moeten altijd elementaire voorzorgsmaatregelen worden
opgevolgd
Deze apparatuur is niet bedoeld voor gebruik door personen (inclusief kinderen) met verminderde
lichamelijke, zintuiglijke of verstandelijke vermogens of gebrek aan ervaring of kennis. Zij
moeten de benodigde begeleiding en instructies voor het gebruik van de apparatuur ontvangen van
een persoon die verantwoordelijk is voor hun veiligheid.
Zorg ervoor dat de apparatuur niet te dicht bij apparaten die warmte uitstralen of in direct zonlicht
wordt geplaatst.
Controleer voordat u het apparaat aansluit op het lichtnet of de spanning die is aangegeven op het
typeplaatje overeenkomt met de lokale netspanning.
Laat het apparaat niet onbeheerd achter als het is aangesloten op het lichtnet
Dompel de apparatuur niet onder in water of andere vloeistoffen.
Het is noodzakelijk om de stekker van het netsnoer uit het stopcontact te halen als u klaar bent
met het gebruik of voordat het apparaat wordt gereinigd en tijdens reparatie.
Er is nauw toezicht vereist als het apparaat wordt gebruikt in de buurt van kinderen.
Laat de apparatuur nooit achter binnen bereik van kinderen.
Reparaties aan elektrische apparaten mogen alleen worden uitgevoerd door gekwalificeerd
personeel. Ondeskundige reparaties kunnen de gebruiker en/of apparatuur ernstig in gevaar
brengen.
Deze apparatuur is uitsluitend bestemd voor huishoudelijk gebruik en mag niet worden gebruikt
industriële of commerciële doeleinden.
Gebruik dit apparaat niet met een beschadigde stekker of beschadigd netsnoer, na een defect, als
het is gevallen of nadat het op enige wijze is beschadigd.
Gebruik deze apparatuur uitsluitend voor het bestemde gebruik.
Deze apparatuur moet op een stabiele, hittebestendige ondergrond worden geplaatst.
Druk geen voorwerpen door de openingen in het product, omdat dit kan leiden tot schade aan het
product en/of elektrische schokken.
Gebruik dit product niet in natte omstandigheden of bij slecht weer.
Dit product is geen speelgoed.
Speel muziek niet met een te hoog volume af, vooral in de buurt van kinderen.

Beschrijving van onderdelen
Bovenpaneel
1. Standby
2. Mode
3. Mute
4. LED-display
5. Volumeregeling
6. Play/pause
7. Skip forward
8. Skip backward
Achterkant bovenpaneel

HET VOETSTUK INSTALLEREN
Haal de torenluidspreker en het voetstuk van de luidspreker voorzichtig uit de gekleurde doos; zoek de
7 schroeven, de luidsprekerhouder en het voetstuk van de luidspreker in de doos. Monteer het voetstuk
van de luidspreker, de houder en de luidspreker met de schroevendraaier (niet meegeleverd) zoals
aangegeven in de afbeelding hieronder, en plaats de toren op de vloer. De luidspreker is nu klaar voor
gebruik. Controleer of alle accessoires beschikbaar zijn.
AANSLUITEN OP HET LICHTNET
Het apparaat is ontworpen om te werken met een stroombron die AC 230V~50Hz levert.
Het systeem aansluiten op een andere stroombron kan schade aan het systeem
veroorzaken. Rol het netsnoer volledig uit. Steek de stekker in de stroomingang op het
apparaat en steek daarna te stekker in een normaal stopcontact.
Zorg ervoor dat de stekker volledig in het stopcontact wordt gestoken.
De luidspreker is nu aangesloten en klaar voor gebruik.
Als u het apparaat volledig wilt uitschakelen, haal de stekker dan uit het stopcontact.
1. Rol het netsnoer op de achterkant van het apparaat uit. Steek de stekker nooit
met natte handen in het stopcontact en trek de stekker niet met natte handen uit het
stopcontact.
2. De torenluidspreker zal, zodra deze is aangesloten op het lichtnet, naar de standbymodus
schakelen. Druk op Power op de afstandsbediening of het apparaat om het apparaat in te
schakelen.
3. Haal de stekker uit het stopcontact als u de luidspreker voor lange tijd niet gebruikt.

De afstandsbediening gebruiken
De batterij
Als u de afstandsbediening voor het eerst wilt gebruiken, trek dan het
doorzichtige lipje uit het batterijvak dat zich aan de onderkant van de
afstandsbediening bevindt.
Als uw afstandsbediening niet goed werkt of als de afstandsbediening
alleen dicht bij de luidspreker werkt, dan moet de batterij waarschijnlijk
worden vervangen.
U kunt de batterijen vervangen door de batterijhouder uit de
afstandsbediening te schuiven. Verwijder de batterij en plaats een nieuwe
3 volt lithium CR2025 batterij.
GEBRUIKSAANWIJZING
Afspelen met de FM-radio
1) Druk op "STANDBY" om het apparaat in te schakelen, het apparaat schakelt automatisch naar de
“FM” modus.
2) Zorg ervoor dat de FM-antenne volledig is uitgestrekt.
3) Druk op "Skip forward" of "Skip backward" om de gewenste FM-zender te selecteren. Houd
“Skip forward” of “Skip backward” ingedrukt om automatisch naar een zender met een hogere of
lagere frequentie te zoeken. De luidspreker stopt met zoeken als er een zender is gevonden.
Automatisch voorkeurszenders instellen
1) Volg de stappen onder “Afspelen met de FM-radio”.
2) Druk op "Scan" op de afstandsbediening om automatisch naar voorkeurszenders te zoeken en
deze op te slaan in het geheugen, (d.w.z. “P01” – dit knippert op het display – en daarna wordt de
frequentie van de voorkeurszender op het display getoond).
3) Opmerking: Er kunnen tot 20 FM-zenders worden ingesteld als voorkeurszenders.
4) Druk op "CH-" of "CH+" om door de voorkeurszenders te bladeren en een voorkeurszender af te
spelen.

Het gebruik van Bluetooth
1) Schakel het apparaat in en druk op MODE om naar de Bluetooth-modus te schakelen, het
symbool verschijnt op het LED-display.
2) Druk lang, voor ongeveer 3-5 seconden, op “Play/Pause”, u hoort een pieptoon en de LED begint
te knipperen. Dit bekent dat de luidspreker in de koppelmodus staat.
3) Schakel Bluetooth in op uw smartphone /tablet en zoek met de smartphone/tablet naar
Bluetooth-apparaten. Selecteer de “T500BT” als de lijst met gevonden apparaten wordt getoond.
4) Voer na het selecteren van het apparaat het wachtwoord 0000 in om verbinding te maken met de
smartphone/tablet (op sommige apparaten hoeft u geen wachtwoord in te voeren)
5) Het symbool licht op en u hoort een pieptoon als het verbinden succesvol is.
6) Als de smartphone/tablet het apparaat niet kan vinden of het koppelen niet lukt, schakel het
apparaat dan opnieuw in en herhaal de bovenstaande stappen.
7! Er zal elke keer wanneer het apparaat opnieuw wordt ingeschakeld automatisch opnieuw
verbinding worden gemaakt met het laatst gekoppelde apparaat.
Als de luidspreker niet opnieuw verbinding kan maken met het laatst gekoppelde apparaat, schakel de
luidspreker dan uit, wacht 10 seconden en schakel de luidspreker opnieuw in of schakel Bluetooth uit
en daarna weer in op uw smartphone/tablet en volg daarna de bovenstaande stappen om verbinding te
maken.
8
Als u Bluetooth handmatig uitschakelt op uw smartphone of als u de smartphone buiten het bereik
van de luidspreker verplaatst (meer dan 10m), dan zal de verbinding tussen de luidspreker en de
smartphone verbroken worden. De luidspreker schakelt nu terug naar de Bluetooth-standbymodus.
Als u opnieuw verbinding wilt maken, zorg er dan voor dat u op uw smartphone naar
Bluetooth-apparaten zoekt en blijf tegelijkertijd op “pairing” op het bovenpaneel van de luidspreker
drukken.
USB-poort voor afspelen van MP3’s en opladen
USB-poort voor afspelen MP3’s
1. Schakel de luidspreker in en steek een USB-stick (niet meegeleverd) in de USB-poort. Zorg
ervoor dat de USB-stick volledig en juist in de poort wordt gestoken.
2. De luidspreker speelt automatisch muziek af van de USB-stick of druk op “MP3” op de
afstandsbediening. Er worden USB-sticks ondersteund met een maximale grootte van 8GB.

USB-poort voor opladen
1. De USB-poort voor het opladen ondersteunt geen mediafuncties.
2. De USB-poort voor opladen levert DC5V 1A.
3. U kunt uw telefoon & apparaten in de standbymodus of tijdens gebruik opladen met de USB-poort
(maar niet in de USB-afspeelmodus).
Aux-ingang
Vereist een 3,5mm kabel (meegeleverd)
1) Druk wanneer de luidspreker is ingeschakeld op "STANDBY" en daarna herhaaldelijk op
“MODE” om de AUX-modus te selecteren.
2) Sluit een 3,5mm kabel aan op de Aux-ingang op de achterkant van de luidspreker. Sluit het andere
uiteinde van de 3,5mm kabel aan op een MP3-speler of andere audiobron.
3) Gebruik de bedieningselementen op het bovenpaneel om het afspelen van audio door de
luidspreker te starten of druk op “AUX” op de afstandsbediening.
Problemen oplossen
Alvorens het apparaat te repareren wordt aanbevolen de onderstaande tabel te raadplegen wanneer een
probleem optreedt. Raadpleeg uw dealer of servicecentrum als het probleem niet kan worden opgelost
met de onderstaande informatie.

Onderhoud van het apparaat
Haal de stekker uit het stopcontact tijdens het reinigen.
Als het apparaat stoffig wordt, veeg het dan af met een zachte en droge stofdoek. Gebruik een zachte
doek om dit apparaat te reinigen. Gebruik geen was, poetssprays of schuurmiddelen om het apparaat te
reinigen.
De normale functionaliteit van het product kan worden verstoord door sterke elektromagnetische
interferentie. Als dit het geval is, reset het product dan volgens de handleiding om het normale gebruik
te hervatten. Als u het product nog altijd niet kunt gebruiken, gebruik het product dan op een andere
locatie.
Probleem Oplossing
Stroom
Het systeem schakelt niet in of reageert
niet op de afstandsbediening.
-Zorg ervoor dat het netsnoer juist is aangesloten op
een
stopcontact en dat het stopcontact stroom levert.
-Als dit niet helpt, haal de stekker dan875143.94 l4395.18.51768(o)-6.51o nielat het stopcontact stroom levroit dt asrovt e a2onnat-i4(t)-239.n585(h)-5.232(t)2.106115(t)-250.62(t)-361.812(d)-6.-(e)-2.51517(e)-253.0897(n)5.5708(e)-2.51322(d)-6.51149(o)-6.51444-2.5221(n2829(3370312521(81842(r)-4.59b.51518(c)-.51915(e)-231252148)5.56571(e)-2.51915(-301.2r)-4.590i621(t)-301n12521(8182.51621(a03 Td[(P)-4.34738(r548(o)-6.512W09(a03)-426(l)0.34178(e)-2.5191k65(n)5.568832(p)1793.848]TJ-259.027 -151008 TLT*[8832(p)1-1.53948(b)-7.4941(n)87.7502(s)-33.483 0 Td[(l)0.3487013(t52 l3)0.35061)-4.571(g)-296.417(o)-)5.56865(t)0.359458751(t)k5.5888 TLT*[(n)5.568-361.812(d)-6.(e)-2.512(a0(81253.(-)Tja03 Td[(P)-4.3473(r)(t)6604(n)5.P.51518127[(S)1.57116(444(f)-282.098(s)(e)-1.033(r)-4.5905(t)-912.51621(r)-4.58751149(m)5.8(e)-u.51444(t)-487(o)-15.568667.024007(h)5.56865.639(h)5.56865(e)-2.516)-6.51149(m)5.8498.335(o)-66(u)1915(t43350619(t)-11e)9-2.517616(o)-6.5144*[(n)5.-(r)(t)66-8(r)-2(h)5.56-9146(603(R51766.509-259.027 -1556865(i)0.350619(k)-291621338)-6-1.54685(b)-7.44989)17739(e)-2.519f9146(603(59046(d)-597.795(i)0.350619)-6.51591(k)5.d]TJ-246.4330.60399.007(h)5.5686.51915(e)-23151621(g)5.56571(e)-2.51915g)5.56865(e)-]TJ/R170 9.94(o)-6.51g621333.85.417(o)-)5.56865(t)0.3)3.38539(i)0.34735(o)5.57162.51842(r)-.51149(7(a)-3619(e)-2.5176TJ246.433 0 Td[(n)57502(s)-392(t6.5.660.350619(k)-6.15(t)290.396(h)-5.2377(e)-4.12115(l)3.08314(p)-6.21679(t)2.10686(,)-795.14(h)-5.23489(a)-4.12115(a)-4.12676(l)-790.348(d)-5.22928(e)-785.102(s)-1.10253(t)2.10967(e)-4.12395(k)6.28131(k)-5.23209(e)-4.118341.812(d)-6.(c)-4.115050.72 633.279)6.2861.54685(b)-7.56865(i)0.3-6.51o)-443.848]TJ-2462.51621(n)5.2.51)2.1040675(f)-4.594928(e)-785.-[(n)5.5692(i)29(e)-2.51473(l)0-2.519123209(a)-4.12115(t)-250.624(h)-5.2377(e)-4.11834(t)-250.717(s)-1.09972(t)2.10686(o)-4.26142(1.812(d)-6.(c)-4.11554(o)-5.(r)691)6.2865.639(h)5.5f9146(8-4.59046(d)-597.795r)-4.621(r)-4.5934.566(o)-6.5129746.4330.609(r)-4.5934(e)-2.51768(a)-2.5162-6.51739(d)(e)-2.51915(e)-2.5162(k)5.739(d)68129.94(o)-6.51g62.51768(m)-135.1239.953(v)5.542(r)-.5110 Td[(n)5.57129746.4330768(t)-33.483 0 Td[(l1l3-2.-]TJ/R170 9.941l468()0.3473.51149(50619(e)-2.)-21(n619(g)-6.517558(r)-4.59046(o)-6.519193(e)-2.52063[(n)5.575.22)69716(e)-.51139(e)-2.519n.51621(a6(h)-5.2377(e)-4.12115(l)3.08314(p)-6.21679(t)2.10686(,)-795.14(h)-5.23489(a)-4.12115(a)-4.12676(l)-790.348(d)-5.22928(e)-785.102(s)-1.10253(t)2.10967(e)-4.12395(k)6.28131(k)-5.23209(e)-4.118341.812(d)-6.(c)-4.1150251515.(r)691)6.2861.54685(b)-7.56865(i)0.3-6.51o)-443.848]TJ-2462.51621(n)5.2.51)2.1040675(f)-4.594928(e)-785.-[(n)5.5692(i)29(e)-2.51473(l)0-2.519123209(a)-4.12115(t)-250.624(h)-5.2377(e)-4.11834(t)-250.717(s)-1.09972(t)2.10686(o)-4.26142(1.812(d)-6.(c)-4.11554(o)-5.0251)6.28615(n)5.5657u6865(e)-]TJ/R170 91.54685(b)-330.60399.0-373.76(k)5.5716(u)5.03(v)-3.88832(e)-2.51621(k)-6.r407 Tf1 0 0 1 -361.812(d)-6.-(e)-2.51561.99)0.35356H4(t)-41ert

Let op
Laat nooit water of andere vloeistoffen in het apparaat lopen tijdens het reinigen. Denk aan het milieu
bij het weggooien van batterijen. Dit product is niet bedoeld voor commercieel gebruik. Alleen voor
huishoudelijk gebruik.
SPECIFICATIES
Gemaakt in de Volksrepubliek China
Voor meer informatie bezoek onze website
www.mpmaneurope.com
Voeding AC 230v~50 Hz
Luidsprekers 2x 4” Luidsprekers, 1 x 4.5” subwoofer
Vermogen luidspreker 2x10watt + 25watt=45W (RMS)
Stroomverbruik luidspreker 60W
Stroomverbruik in standbymodus Minder dan 1W
3.5mm aux-ingang 1V invoer
Dit is om te certificeren dat T500BT in overeenstemming is
met:
Richtlijn
van de Raad 89/336/EEC(EMC richtlijn):
Toepasselijke
normen:
EN55013:2001
+ A1:2003 + A2:2006
EN61000-3-2:2006
+ A1:2009 + A2:2009
EN61000-3-3:2008
EN55020:2007

Bluetooth-Lautsprecherturm
T500BT
BEDIENUNGSANLEITUNG
DIESE BEDIENUNGSANLEITUNG VOR DEM GEBRAUCH DES GERÄTS
DURCHLESEN UND FÜR EIN ZUKÜNFTIGES NACHSCHLAGEN AUFBEWAHREN.

Vielen Dank für den Kauf dieses Lautsprecherturms
Erste Schritte
Nehmen Sie das Gerät aus dem Karton.
Entfernen Sie die Verpackungen und bewahren Sie diese für zukünftige Verwendungszwecke im
Karton auf.
Lieferumfang
Lautsprecherturm (einschließlich Standrohr aus Edelstahl)
Standfuß und 7 Schrauben
3,5 mm Aux-Kabel
Bedienungsanleitung
Fernbedienung
Produktmerkmale
2 Stereolautsprecher
Integrierter Subwoofer
Bluetooth®-Verbindungsfähigkeit
Aux-Eingang
USB-Port für die Wiedergabe und zum Aufladen
5V 1A
!
FM-Radio
Blaues LED-Display

Sicherheitsvorkehrungen
Bei der Verwendung elektrischer Geräte müssen grundlegende Sicherheitsvorkehrungen eingehalten
werden.
Dieses Gerät ist nicht geeignet für Personen (einschließlich Kinder) mit eingeschränkten
körperlichen, sensorischen oder geistigen Fähigkeiten oder ohne Erfahrung und Wissen. Diese
müssen von einer für ihre Sicherheit zuständigen Person beaufsichtigt oder über den Gebrauch des
Geräts angeleitet werden.
Stellen Sie das Gerät nicht in der Nähe von wärmeabstrahlenden Geräten auf und schützen Sie es
vor direkter Sonneneinstrahlung.
Vergewissern Sie sich, dass die Spannungsangaben auf dem Typenschild mit der zu
verwendenden lokalen Netzspannung übereinstimmen.
Lassen Sie das Gerät nicht unbeaufsichtigt, während es mit der Stromversorgung verbunden ist.
Gerät nicht in Wasser oder andere Flüssigkeiten tauchen.
Trennen Sie den Netzstecker nach dem Gebrauch, vor der Reinigung und während Reparaturen
vom Netzstrom.
Strenge Aufsicht ist erforderlich, wenn sich während des Gebrauchs Kinder in der Nähe des
Geräts aufhalten.
Halten Sie Kinder vom Gerät fern.
Reparaturen an elektrischen Geräten dürfen nur von qualifizierten Fachkräften durchgeführt
werden. Unsachgemäße Reparaturen stellen für den Nutzer und/oder das Gerät ernsthafte
Gefahren dar.
Dieses Gerät ist nur für den privaten Heimgebrauch bestimmt und darf nicht für industrielle oder
gewerbliche Zwecke verwendet werden.
Verwenden Sie das Gerät nicht, wenn der Stecker oder das Kabel beschädigt sind, nachdem
Fehlfunktionen aufgetreten sind, oder falls das Gerät fallengelassen oder anderweitig beschädigt
wurde.
Verwenden Sie dieses Gerät nur bestimmungsgemäß.
Stellen Sie das Gerät auf einen stabilen, hitzebeständigen Untergrund.
Stecken Sie keine Gegenstände in die Öffnungen des Geräts, da dadurch Schäden am Gerät
und/oder Stromschläge verursacht werden könnten.
Verwenden Sie dieses Gerät nicht in nassen Umgebungen oder bei schlechtem Wetter.
Dieses Produkt ist kein Spielzeug.
Geben Sie Musik nicht mit extremer Lautstärke wieder, insbesondere wenn sich Kinder in der
Nähe aufhalten.

Übersicht des Geräts
Oberseite
1. Standby
2. Modus
3. Lautlos
4. LED-Display
5. Lautstärkeregler
6. Wiedergabe/Pause
7. Vorspulen
8. Zurückspulen
Oberseite hinten
1. USB-Port (Ausgang DC 5V 1A) für die Wiedergabe und zum Aufladen
2. 3,5 mm Aux-Eingang
Rückseite
1. FM-Antenne
2. Netzschalter
Fernbedienung
**Fernbedienung auf die Mitte des Lautsprechers richten**
1. STANDBY
2. MP3-Taste
3. Lautlos
4. Aux-In
5. FM-Radio
6. Bluetooth
7. Zurückspulen
8. Wiedergabe/Pause
9. Vorspulen
10. Suche
11. CH-
12. CH+
13. Bass+
14. Bass-
15. Treble+
16. Treble-
17. Lautstärke+
18. Lautstärke-

INSTALLATION DES STANDFUSSES
Nehmen Sie den Lautsprecher und den Standfuß vorsichtig aus dem farbigen Karton. Im Lieferumfang
sind außerdem 7 Schrauben und eine Lautsprecherhalterung enthalten. Installieren Sie den Standfuß,
die Halterung und den Lautsprecher unter Verwendung eines Schraubenziehers (nicht enthalten) gemäß
der nachfolgenden Abbildung. Stellen Sie den Lautsprecherturm auf den Boden; das Gerät ist nun
betriebsbereit. Vergewissern Sie sich, dass alle Zubehörteile vorhanden sind.
ANSCHLUSS AN DIE STROMVERSORGUNG
Das Gerät muss an eine AC 230V~50Hz Stromversorgung angeschlossen werden.
Die Verbindung mit einer anderen Stromversorgung kann Schäden am Gerät verursachen.
Wickeln Sie das AC-Netzkabel vollständig ab und schließen Sie den Stecker an den
AC-Netzeingang des Geräts und dann das Kabel an eine herkömmliche AC-Steckdose an.
Vergewissern Sie sich, dass der AC-Stecker vollständig in der Steckdose steckt.
Das Gerät ist nun verbunden und betriebsbereit.
Um das Gerät vollständig auszuschalten, muss der Netzstecker aus der Steckdose gezogen werden.
1. Wickeln Sie das AC-Netzkabel an der Rückseite des Geräts ab.
Verbinden oder trennen Sie das Netzkabel nicht mit nassen Händen.
2. Nach der Verbindung mit der Stromversorgung aktiviert das Gerät den Standby-Modus.
Drücken Sie die Betriebstaste auf der Fernbedienung oder am Gerät, um den Lautsprecher
einzuschalten.
3. Ziehen Sie den Stecker aus der Steckdose, falls Sie das Gerät längere Zeit nicht verwenden
werden.

Verwendung der Fernbedienung
Batterie
Ziehen Sie für die Inbetriebnahme der Fernbedienung die durchsichtige
Folie aus dem Batteriefach an der Unterseite der Fernbedienung.
Falls der Betrieb der Fernbedienung unterbrochen wird oder Sie näher an
das Gerät herangehen müssen, dann müssen wahrscheinlich die Batterien
ersetzt werden.
Um die Batterien zu ersetzen, ziehen Sie die Halterung an der Unterseite
der Fernbedienung heraus. Entnehmen Sie die Batterie und legen Sie
eine neue 3V Lithium-Batterie des Typs CR2025 ein.
GEBRAUCHSANLEITUNGEN
FM-Radio anhören
1) Drücken Sie die Taste „STANDBY“ zum Einschalten des Geräts. Das Gerät aktiviert automatisch
den „FM“-Modus.
2) Vergewissern Sie sich, dass die FM-Antenne vollständig abgewickelt ist.
3) Drücken Sie die Tasten „Vorspulen“ und „Zurückspulen“ zur Auswahl des gewünschten
FM-Radiosenders. Halten Sie die Tasten „Vorspulen“ oder „Zurückspulen“ gedrückt, um nach
Radiosendern zu suchen. Die Suche wird beendet, sobald das Gerät einen Sender gefunden hat.
Automatische Speicherung von Radiosendern
1) Folgen Sie den Schritten für die Wiedergabe von FM-Radio.
Drücken Sie die Taste „Suche“ auf der Fernbedienung, um Sender automatisch zu suchen und zu
speichern (z.B. blinkt die Anzeige „P01“im Display – und dann wird die Frequenz des Senders
angezeigt).
2) Hinweis: Sie können bis zu 20 FM-Radiosender speichern.
3) Für die Wiedergabe gespeicherter Radiosender drücken Sie die Tasten „CH-“ oder „CH+“, um
durch die gespeicherten Radiosender zu scrollen.

Bluetooth-Funktion
1) Schalten Sie das Gerät ein. Drücken Sie die MODUS-Taste, u

USB-Port zum Aufladen
1. Der USB-Port zum Aufladen unterstützt keine Mediafunktionen.
2. Ausgangsspannung des USB-Ports DC 5V 1A.
3. Sie können Ihr Telefon & Gerät via USB-Port in den Standby- oder Betriebsmodus (kein
USB-Wiedergabemodus) versetzen.
Aux-Eingang
3,5 mm Kabel erforderlich (enthalten)
1) Drücken Sie im eingeschalteten Zustand die „STANDBY“-Taste und anschließend wiederholt die
„MODE“-Taste, um den AUX-Modus auszuwählen.
2) Schließen Sie das 3,5 mm Kabel an den Aux-Eingang an der Rückseite des Geräts an. Verbinden
Sie das andere Ende des 3,5 mm Kabels mit einem MP3-Player oder anderem Audiogerät.
3) Verwenden Sie die Tasten an der Oberseite, um Audio über den Lautsprecherturm abzuspielen,
oder drücken Sie die „AUX“-Taste auf der Fernbedienung.
Störbehebung
Informieren Sie sich in der nachfolgenden Tabelle, bevor Sie das Gerät im Fall eines Problems zur
Reparatur schaffen. Wenden Sie sich an Ihren Händler oder den Kundendienst, falls Sie das Problem
nicht anhand der nachfolgenden Informationen beheben können.

Wartung des Geräts
Trennen Sie das Gerät während der Reinigung vom Netzstrom.
Wischen Sie Staub mit einem weichen und trockenen Staubwedel ab. Reinigen Sie das Gerät mit einem
weichen Lappen. Verwenden Sie weder Wachs, Poliersprays noch Scheuermittel an diesem Gerät.
Die normale Funktionsweise des Geräts kann von starken elektromagnetischen Interferenzen gestört
werden. Setzen Sie das Gerät in solch einem Fall gemäß der Bedienungsanleitung zurück. Falls das
Gerät dann immer noch nicht funktioniert, verwenden Sie das Gerät an einem anderen Ort.
Problem Lösung
Betrieb
System lässt sich nicht einschalten oder
reagiert nicht auf die Fernbedienung.
-Vergewissern Sie sich, dass der AC-Netzstecker
richtig
mit der Steckdose verbunden ist und dass diese
Strom
führt.
-Falls dies nicht hilft, lassen Sie das Gerät vom
Netz
getrennt und suchen Sie sich Hilfe.
Fernbedienung
Ohne Funktion oder nur kurze
Reichweite.
-Legen Sie neue Batterien ein.
-Richten Sie die Fernbedienung direkt auf den Empfä
nger
in der Mitte des Lautsprechers.
Kopplung des Produkts
Kann nicht erfolgreich gekoppelt werden
-Überprüfen Sie, ob der Lautsprecher aus ist oder
der
Suchmodus aktiviert ist.
-Überprüfen Sie, ob sich andere Bluetooth-Geräte in
der
Nähe Ihres Bluetooth-Geräts befinden. Schalten Sie
diese
aus, um Störungen zu vermeiden. Führen Sie die
Kopplung
dann erneut durch.
-Klicken Sie auf „Gerät löschen“ und verbinden Sie
es
dann erneut, falls erforderlich. Suchen Sie „T500BT“
am
Bluetooth-Gerät und koppeln Sie es erneut.
Wiedergabe nicht ordnungsgemäß oder
mit Unterbrechungen
Überprüfen Sie, ob die Entfernung zwischen
dem
Lautsprecher und Ihrem Bluetooth-Gerät außerhalb
der
Reichweite liegt (10 m) oder ob Hindernisse
die
Kommunikation zwischen dem Lautsprecher
und
Bluetooth-Gerät beeinträchtigen. Stellen Sie
den
Lautsprecher oder das Bluetooth-Gerät für einen
besseren
Empfang um.
Ton verzerrt
Überprüfen Sie die Lautstärkeeinstellung am
Lautsprecher
und an Ihrem Bluetooth-Gerät und stellen Sie
die
Lautstärke entsprechend ein.
Rauschen oder Tonstörungen im
FM-Modus.
Stellen Sie den FM-Radiosender per Feinabstimmung ein.
Vergewissern Sie sich, dass die FM-Antenne vollstä
ndig
abgewickelt ist.
Kein Ton im FM-Modus.
Vergewissern Sie sich, dass der Radiomodus aktiviert ist.
Vergewissern Sie sich, dass die Lautlos-Taste
nicht
gedrückt wurde.

Vorsicht
Lassen Sie während der Reinigung kein Wasser und keine anderen Flüssigkeiten in das Innere des
Geräts eindringen. Entsorgen Sie Altbatterien umweltgerecht. Dieses Produkt ist nicht für den
gewerblichen Gebrauch geeignet. Nur für den privaten Heimgebrauch.
TECHNISCHE DATEN
Made in China
Für weitere Informationen besuchen Sie bitte unsere Website unter:
www.mpmaneurope.com
Stromversorgung AC-Stromversorgung 230V~ 50 Hz
Lautsprechereinheiten 2x 4" Lautsprecher, 1x 4,5" Subwoofer
Ausgangsleistung Lautsprecher 2x 10 Watt + 25 Watt = 45W (RMS)
Energieverbrauch Lautsprecher 60W
Verbrauch während Standby Weniger als 1W
3,5 mm Aux-Eingang 1V Eingang
Hiermit wird bescheinigt, dass T500BT konform ist
mit:
Richtlinie
des Rates 89/336/EWG (EMV-Vorschrift)
Geltenden
Standards:
EN55013:2001+
A1:2003+A2:2006
EN61000-3-2:
2006+ A1:2009+ A2:2009
EN61000-3-3:2008
EN55020:2007

Altoparlante a torre Bluetooth
T500BT
MANUALE DI ISTRUZIO NI
PRIMA DI INIZIARE A UTILIZZARE L’UNITÀ, LEGGERE IL PRESENTE MANUALE.
CONSERVARE IL MANUALE PER CONSULTAZIONI FUTURE.

Grazie per aver acquistato l’a ltoparlante a torre T500BT.
Operazioni preliminari
Estrarre l’unità dalla confezione.
Rimuovere i materiali di imballaggio e riporli nella confezione per possibili usi futuri.
Contenuto della confezione
Altoparlante a torre (con piedistallo in acciaio inox)
Base dell’altoparlante accompagnata da 7 viti
Cavo audio ausiliario da 3,5 mm
Manuale di istruzioni
Telecomando
Caratteristiche del prodotto
2 altoparlanti stereo
Subwoofer integrato
Connettività Bluetooth®
Connettore AUX-IN
Porta USB per la riproduzione e il caricamento (5 V, 1 A)
Radio FM
Display a LED con retroilluminazione blu

Istruzioni di sicurezza
Durante l’utilizzo di apparecchi elettrici seguire sempre le precauzioni basiche indicate a
continuazione.
L’apparecchio non è progettato per l’uso da parte di soggetti (inclusi bambini) con ridotte capacità
fisiche, sensoriali o psichiche, o da soggetti senza esperienza o conoscenza nell’uso
dell’apparecchio, a meno che non siano supervisionati o siano stati istruiti da una persona
responsabile della loro sicurezza.
Mantenere l’apparecchio al riparo da fonti di calore o dalla luce diretta del sole.
Prima di collegare l’apparecchio alla presa di corrente, verificare che la tensione indicata
sull’etichetta corrisponda a quella della rete locale.
Non lasciare l’apparecchio incustodito se collegato alla presa di corrente.
Non immergere l’apparecchio nell’acqua o in altri liquidi.
Scollegare sempre il cavo di alimentazione dopo l’uso, prima di pulire l’apparecchio e durante un
intervento di riparazione.
In presenza di bambini, mantenere l’apparecchio sempre sorvegliato.
Mantenere l’apparecchio fuori dalla portata dei bambini.
L’apparecchio può essere riparato solo da tecnici qualificati. Una riparazione incorretta potrebbe
mettere in serio pericolo l’utente e/o l’apparecchio.
L’apparecchio è stato progettato per esclusivo uso domestico e non può essere utilizzato per scopi
industriali o commerciali.
Se il cavo di alimentazione o la spina sono danneggiati, oppure se l’apparecchio non funziona
correttamente o ha subito cadute o altri danni, sospenderne l’utilizzo.
Non utilizzare l’apparecchio per scopi differenti da quello per cui è stato progettato.
Collocare l’apparecchio su una superficie stabile e resistente al calore.
Non introdurre oggetti nell’apparecchio attraverso le fessure, ciò potrebbe danneggiare
l’apparecchio o provocare shock elettrici.
Non utilizzare l’apparecchio in ambienti umidi o durante i temporali.
Questo apparecchio non è un giocattolo.
In presenza di bambini, non riprodurre musica a volumi troppo elevati.

Panoramica del prodot to
Pannello superio re
1. Tasto STANDBY
2. Tasto MODE (modalità)
3. Tasto di attivazione/disattivazione audio
4. Display a LED
5. Manopola di regolazione volume
6. Tasto di riproduzione/sospensione
7. Tasto di avanzamento rapido
8. Tasto di riavvolgimento rapido
Retro del pannello superio re
1. Porta USB per la riproduzione e il caricamento (CC, 5 V, 1 A)
2. Connettore AUX-IN da 3,5 mm
Pannello posterio re
1. Antenna radio FM
2. Interruttore di accensione/spegnimento
Telecomando
** Puntare il telecomando verso il centro dell’altoparlante **
1. Tasto STANDBY
2. Tasto MP3
3. Tasto di attivazione/disattivazione audio
4. Tasto AUX
5. Tasto radio FM
6. Tasto Bluetooth
7. Tasto di riavvolgimento rapido
8. Tasto di riproduzione/sospensione
9. Tasto di avanzamento rapido
10. Tasto SCAN (ricerca)
11. Tasto CH- (canale -)
12. Tasto CH+ (canale +)
13. Tasto BASS+ (effetto bassi +)
14. Tasto BASS- (effetto bassi -)
15. Tasto TREB+ (effetto alti +)
16. Tasto TREB- (effetto alti -)
17. Tasto VOL+ (volume +)
18. Tasto VOL- (volume -)

FISSAGGIO DEL LA B ASE
Estrarre con attenzione il corpo della torre e la base dalla confezione. Verificare che il piedistallo e le 7
viti siano contenuti nella confezione. Assemblare la base dell’altoparlante, il piedistallo e il corpo
principale come indicato nell’immagine a continuazione, utilizzando un cacciavite (non fornito), quindi
collocare il piedistallo sul pavimento. A quel punto l’altoparlante è pronto per l’uso. Assicurarsi che
tutte le parti siano presenti.
COLLEGAM ENTO A LL’ALIMENTAZIO NE
L’unità è sta progettata per funzionare con alimentazione CA a 230 V-50 Hz.
Il collegamento dell’unità a una diversa fonte di alimentazione, può danneggiare l’unità.

Utilizzo del telecomand o
Batteria del teleco mando
Per poter iniziare a utilizzare il telecomando, estrarre la linguetta dal
vano batteria nella parte inferiore del telecomando.
Se il telecomando inizia a funzionare a intermittenza o se per funzionare
deve essere avvicinato all’unità, probabilmente è necessario sostituire la
batteria.
Per sostituire la batteria, scorrere il coperchio nella parte inferiore del
telecomando verso l’esterno. Rimuovere la batteria e inserire una batteria
CR2025 al litio da 3 volt nuova.
ISTRUZIONI D’USO
Ascolto della radio FM
1) Per accendere l’unità premere il tasto "STANDBY"; l’unità entra in automatico in modalità
“FM”.
2) Assicurarsi di estendere completamente l’antenna FM.
3) Per selezionare la stazione FM desiderata, premere il tasto di avanzamento rapido o di
riavvolgimento rapido. Tenere premuto il tasto di avanzamento rapido o di riavvolgimento rapido
per ricercare una stazione radio; l’unità arresta la ricerca quando ne incontra una.
Preselezione automatica delle stazioni radio
1) Accedere alla radio FM.
2) Per avviare la ricerca e la preselezione automatica delle stazioni, premere il tasto “SCAN” sul
telecomando. Esempio: la dicitura “P01” lampeggia sul display, quindi viene visualizzata la
frequenza della stazione preselezionata.
3) Nota: l’unità è in grado di memorizzare fino a 20 stazioni.
4) Per sfogliare le stazioni FM memorizzate e selezionarne una da riprodurre, premere il tasto "CH-"
o “CH+”.

Utilizzo della connettività Bluetooth
1) Accendere l’unità, quindi premere più volte il tasto MODE per selezionare la modalità Bluetooth.
Sul display viene visualizzata l'icona .
2) Tenere premuto il tasto di riproduzione/sospensione sull’unità per 3-5 secondi. L’unità emette un
segnale acustico (DU) e la spia LED inizia a lampeggiare, indicando che l’unità è in modalità di
associazione.
3) Attivare la funzionalità Bluetooth sul proprio smartphone /tablet e avviare la ricerca di dispositivi.
Una volta rilevata l’unità “T500B T”, selezionarla.
4) Per avviare l’associazione immettere la password 0000 (alcuni dispositivi potrebbero non
richiedere l’immissione di una password).
5) Una volta riuscita l’associazione, sul display viene visualizzata l’icona e l’unità emette un
segnale acustico (DU).
6) Se il proprio smartphone/tablet non è in grado di rilevare l’unità o di associarsi all’unità,
spegnerlo e riaccenderlo, quindi ripetere i passaggi descritti in precedenza.
7 A ogni successiva accensione, l’unità si associa in automatico all’ultimo dispositivo associato.
Nel caso in cui l’unità non fosse in grado di associarsi in automatico, spegnerla e riaccenderla dopo 10
secondi oppure disattivare e riattivare il Bluetooth sul proprio smartphone/tablet, quindi ripetere i
passaggi sopra indicati per completare l’associazione.
8 Disattivare il Bluetooth sul proprio dispositivo oppure allontanarlo dall’unità (oltre 10 m) per
disassociarlo dall’unità. L’unità entra in modalità di standby.
Assicurarsi che il proprio dispositivo sia in modalità di ricerca dispositivi, quindi premere “Associa” e
ripetere i passaggi sopra indicati per completare l’associazione.
Porta USB per la riproduzione di file MP3 e il
caricamento
Porta USB per l a r iproduzione di file MP3
1. Accendere l’unità e collegare un’unità USB Flash (non fornita) alla
porta USB, assicurandosi che sia completamente e correttamente inserita.
2. L’altoparlante avvia in automatico la riproduzione dei file contenuti nell’unità USB; in alternativa,
è possibile premere il tasto “MP3” sul telecomando. L’altoparlante supporta unità Flash di
capacità non superiori a 8 GB.
.

Porta USB per i l caricamento
1. La porta USB per il caricamento non supporta funzionalità multimediali.
2. Potenza in uscita : CC 5 V, 1 A.
3. Mediante la porta USB è possibile caricare i propri dispositivi mobili sia dalla modalità di standby
sia durante l’utilizzo dell’unità (eccetto in modalità di riproduzione USB).32.5333(N)-8.D” .q-11.7487((m)5.84119(n)-4.5963.5.56865(t)0.344726(a)-30.4957(d)-6.51444(u)5.56865(ze)145.952(a)-2.5221(e)-6255.77u)5.56.5223(e).36.5716ùolot5902 Td[((e).3503498(s)3.38539(i)-7.49329(d)-5.1739(d)-62.51768)-6.591206(i)0.350619n“ ((r)0.2968T*[(10.8029(è)-290.345(X(10.8029(41 -24(d)ETQQ0.671875 l44936.50.6688 0644936.50l6688 06475650l6671875 l475650l69 4957.0.75 0.679688 0.669922 0.902344 kq8.33333 0 0 8.33333 0 0 cm BT/R288 11.0426 Tf1 0 0 1 89.948 7486.51444(.)-1004768(o)0.48551357.46271292(t2)-254.866(07 T0455.07(V)-1.24214)-1.27873(S(m)5.84561(o)-6..709(m(’)-4.57278g1.32734(b)i)-288.235(p)-7.49264(r)462 018o)-6.51444(n)0.36.358i)0.3521465(a)-2.52092n)-6.51739(d)-5.709(mr)-2.51473(e)-2.5149(t)0.344726(:)-253.008(C)-2.56675(c)4604471((n)5.57013(et)-12.145(à)-40.0778(e)-2.51621(n)-6.517278v-6.51444()-1477.23(pn)-6255.77-11.7487((n)5.577673(i)0.353(U)-1558d[96(l)0.13565(ac)46044498(e)-2.51989,2.5023569(1)-4 Td77(a)-2.5221(m-1476.7246(t)-12.145(à)147671668(t)0.351768l)0.353565(i)0.344726i)0.347483(e)-2.5149((d)-5.709(mt)-4.5978.69)5.56865(a)-255.975(f))-2.51621B)-462 02*[(3)-6.74())-502981(X(10.80955(-))-2.51621I2.50618768Nc)46047658n)-6.528(o)-0.344726(à)147671TJ(a)-2.51621Bp o0.148324(p)4.5934(re)-6255.77ureirepre t-5.539455(vn)5.53329(t)0.352092((t)-12.145()0.3520 01s(e).4k439(i)0.350619(l)0.24521(a)-0.3534a)-260.350619(v493218(St)0.350619()0.3520 01so)0.347483t-11.7487(2.51768(l)0r)-4.5934(ei)0.343329()1.57042(B)-2.5.696((t)-12.145(-11.7487((n)5.53565(r)-4.5934(ei)000]TJ26m(l)0.344726)00.344726(p)4.5934(ru5.539455(r Tf-26214B)-224.56(d)-6.51444(u)5.568473(e)-2.51768t)0.31001(e)-6255.77u)5.5651621B)-.4k439(o)-6.51739(i)-736.5729(d)-5.1739(d)-62.5.77 o m(l3.3876(ETQQ0.671875 l4957.93 0.671875 l4957.93 7016.67 lhW n0 0 0 0 k0.0703125 3.42969 4957.0.75 0.679688 0.669922 0.902344 kq8.33333 0 0 8.33333 0 0 cm BT/R288 11.0426 Tf1 0 0 1 89.948 7486.51444(.)-1004768(o)0122 074 54-2.571292(t“)-625019([(3)-6.36())-502915(X))-505386(”)-61.5125(d)-6.91206(i)0.353565(m-259.8229(a)-303.116(p)-4.57278(u)5.54561(B)-89250619(t)0.351768l)0.3534596t)0.344.04a)-8.351768npa 41 -24(d)-5.53919(b)-1620.8.51 -4k4328350619Remnl24.558167u12 05171SzrnMBBp12 05171SrnUbluBms(l)0.347729bsla ptr e,2.522.303(t)0.350619(u)5.56621(r)-4.5934(ea)-2.5221(a1 50962036(l)0.10459641 5066305()0.352502(s)5.84856(o)-5.53.9166o-0.344726(à))-303.116g (p)-4.5149(u)5.56621()-6.59423(41 514566(a1 5096051()-6.51444(n)00-501177)-6.5528(oeb)-7.49558u)5.5651621vo d

Manutenzione dell’unità
Prima di iniziare a pulire l’unità, scollegare il cavo di alimentazione dalla presa di corrente.
Rimuovere la polvere accumulata con un panno catturapolvere morbido e asciutto. Per pulire l’unità
utilizzare un panno morbido. Non utilizzare cere, spray pulenti o detergenti abrasivi.
Il normale funzionamento dell’unità potrebbe essere disturbato da interferenze elettromagnetiche di
intensità elevata. In tal caso, resettare l’unità per ristabilirne il normale funzionamento. Se il normale
funzionamento non può essere ristabilito, spostare l’unità in un altro luogo.
Problema Soluzione
Alimentaz ione
L’unità non si accende o non funziona
mediante telecomando.
- Assicurarsi che la spina sia inserita correttamente
nella
presa a muro e che riceva corrente.
- Se il problema persiste, scollegare l’unità e
consultare
il servizio di assistenza.
Telecomando
Il telecomando non funziona o funziona
solo a distanza ravvicinata.
- Sostituire la batteria.
- Puntare il telecomando direttamente verso il
relativo
sensore al centro dell’altoparlante.
Associazione dell ’unità
Non è possibile effettuare l’associazione.
- Verificare che l’unità sia in modalità di ricerca.
- Verificare se nel raggio d’azione dell’unità sono
presenti
altri dispositivi Bluetooth. Per evitare
interferenze,
disattivarne il Bluetooth, quindi avviare nuovamente
il
processo di associazione.
- Se necessario, è possibile selezionare “Dimentica
questo
dispositivo”, quindi avviare nuovamente l’
associazione.
Rilevare "T500BT" sul proprio dispositivo Bluetooth
e
riavviare l’associazione.
L’unità non riproduce correttamente i
file audio, l’audio è intermittente.
Verificare che la distanza tra l’unità e il proprio
dispositivo
Bluetooth non sia superiore al raggio d’azione dell’
unità
(10 m) o che non siano presenti ostacoli che blocchino
la
comunicazione tra l’unità e il dispositivo Bluetooth.
Per
migliorare la ricezione, avvicinare l’unità o il
dispositivo
Bluetooth.
L’audio è distorto.
Verificare il livello del volume sia sull’unità sia sul
proprio
dispositivo Bluetooth e regolarli adeguatamente.
In modalità radio FM l’audio è
distorto.
Regolare la sintonizzazione.
Assicurarsi che l’antenna FM sia completamente estesa.
In modalità FM l’audio è assente.
Assicurarsi che l’unità sia impostata sulla modalità
radio
FM.
Assicurarsi che il tasto di disattivazione dell’audio non
sia
stato premuto.

Attenzione
Durante la pulizia, evitare che si verifichino infiltrazioni d’acqua o altri liquidi nell’unità. Smaltire le
batterie obsolete nel rispetto dell’ambiente. Questo apparecchio è stato progettato esclusivamente per
uso domestico, non per uso commerciale.
SPECIFICHE
Costruito nella RPC
Per ulteriori informazioni, siere pregati di far visita al nostro sito:
www.mpmaneurope.com
Alimentazione CA 230 V-50 Hz
Altoparlanti 2 da 4” + 1 subwoofer da 4,5”
Potenza in uscita: 2 x10W + 25W = 45 W (RMS)
Consumo energetico: 60 W
Consumo energetico in modalità di
standby
Meno di 1 W
Connettore audio da 3,5 mm 1 V
Questo marchio T500BT certifica la conformità con:
Direttiva
Comunitaria 89/336/EEC (EMC direction):

Caixa de Som em Torre com Bluetooth
T500BT
MANUAL DE INSTRUÇÕES
LEIA ESSE MANUAL DE INSTRUÇÕ ES ANT ES DE UTILIZAR O DI SPOSITIVO E
GUARDE-O PARA SER UT ILIZADO COMO FONT E DE CONSULT A NO FUT URO.

Agradecemos pela compra da Caixa de Som em Torre
Primeiros Passos
Remova o equipamento d a caixa.
Remova a embalagem e coloque-a dentro da ca ixa para armazenamento e e fonte de consulta no
future.
Conteúdo da caixa
Caixa de som em torre (incluindo o Suporte d e Aço Inoxidá vel)
Base da torre e 7x p arafusos
Fio auxliar de 3 ,5mm
Manual de instruções
Controle remoto
Características
2 caixas d e som estér eo.
Subwoofer interno.
Conectivid ade Bluetoo th®
Conector de entrada auxiliar
Porta USB para reprod uzir e recar regar (5V 1A)
Rádio
Indicador luminoso az ul

Instruções de segurança
As instruções de segurança b ásicas deverão ser sempre seguidas durante a utiliza ção de equip amentos
eletrônicos
Esse equipamento não foi criad o pa ra ser utilizado por pessoas (incluin do crianças) co m
capacida de f ísica, mental e sensor ial reduzida ou falta de experiência e c onhecimento. Eles
deverão ser supervisionad os e instruíd os sobr e a util ização d o equipamento pe la p essoa autoriz ada
para sua própria seguran ça.
Certifique-se de que o eq uipamento não esteja muito próximo a ap arelhos q ue emitam calo r ou
instalado dir etamente so b a luz d o so l.
Verifique se a tensão indicada na plaq ueta de informa ções cor responde co m a tensão da rede loca l
antes de c onectar o equipamento na tomada.
Não deixe o e quipamento sem supervisã o enquan to ele estive r conectad o na tomada .
Não coloque o equipamento su bmerso em água ou q uaisquer outros líquidos.
É essencial que o equipamen to seja r etirado d a tomada d epois que tiver terminad o de utilizá-lo,
antes de limp á-la e durante reparos.
É necessário supervisio nar a utilizaç ão d o equipamen to na pr esença de crianç as.
Nunca deixo o equipamento a o alcance d e criança s.
Reparos em equipamentos deverão ser apenas r ealizados por pessoal qualif icado. Reparos
desnecessário s poderã o coloc ar o usuár io e/ou o equipamento em grande s r iscos.
Esses eq uipamentos foram c riados para sere m utilizado s em re sidências e não deverão ser
utilizados para fins comer ciais ou industriais .
Não utilize esse aparelho com o conector ou fio da to mada da nificado , d epois de um de feito ou ter
sido derrubado , ou danificado d e alguma forma.
Não utilize esse equipamento para quaisquer outros fins diferentes do seu uso pr etendido.
Esse e quipamento deve ser instalad o em uma super fície e stável e resistente ao ca lor.
Não coloque objetos em quaisquer ab erturas po is isso p oderá d anificar o equipa mento e c riar
curtos circuitos.
Não utilize esse produto em climas molha dos o u úmidos.
Esse p roduto n ão é um br inquedo.
Não reproduza músicas e m níveis excessiv os, esp ecialmente próximo a crianç as.

Localização dos controles
Painel superior
1. Espera
2. Modo
3. Mudo
4. Tela LED
5. Controle do volume
6. Reproduzir/P ausar
7. Avançar
8. Retornar
Parte de trás do painel superior
1. Porta USB (Tensão de saída 5V 1A) para repro duzir e recar regar.
2. Conector de entrada auxiliar d e 3,5mm
Painel traseiro
1. A ntena d e rád io
2. I nterruptor de energia
Controle remoto
**Aponto o contro le remoto par a o meio da caixa de som**
1. ESPERA
2. Botão Mp3
3. Botão Mudo
4. Botão Entrada Auxiliar
5. Botão Rádio
6. Botão Bluetooth
7. Botão Retornar
8. Botão Reproduzir/P ausar
9. Botão Avançar
10. Botão Buscar
11. CH-
12. CH+
13. Botão Graves+
14. Botão Graves-
15. Botão Agudos+
16. Botão Agudos-
17. Botão Volume+
18. Botão Volume-

INSTALAÇÃO DA BASE
Retire o co rpo e a b ase da torre com muito cuidad o d a caixa colorida ; encontre os 7 para fusos, o
suporte do alto falante, e a b ase da caixa de som na caixa. Monte a c aixa de som na ba se, supo rte e
corpo c om uma chave d e fenda (não inclusa) confo rme mostr ado na figura abaixo, e então co loque a
torre no chão, agora uma caixa de som pronta p ara ser utilizada. Certifique-se de que todos os
acessórios estão dispo níveis.
CONECTANDO NA TOMADA
Esse ap arelho foi criado para funcionar co m uma fonte d e energia de AC 230V~50 Hz.
A utili zação d e outro s tipo s de fonte de energia po derão causar da nos ao equipa mento.
Desenrole o fio de energia completame nte. Conect e-o no adaptador da fonte e então
na to mada.
Certifique-se d e que o adaptado r da tomada tenha sido co mpletamente inserido na
tomada. O seu aparelho agora está co nectado e pr onto para ser utilizad o.
Para desligar o aparelho completame nte, retire o fio da to mada.
1. De senrole o fio de energia da parte de trás do apare lho.
Não cone cte ou desco necte o fio de energia co m a s mãos molhad as.
2. Um a vez que o aparelho esteja conectado na tomada, ele en trará no modo de esp era. Pressio ne
o botão de energia n o controle remo to ou no aparelho p ara lig á-lo.
3. De sconecte o aparelho da tomada caso ele não vá ser utilizado por um longo períod o de
tempo.

Utilizando o controle remoto
As baterias
Para co meçar a utilizar o seu controle r emoto, retire o plástico do
compartimento d a bateria , localizado na parte inferior do controle
remoto.
Caso o seu controle remo to se to rne ins tável o u voc ê p erceba que é
necessário se ap roximar do apa relho p ara utiliz á-lo, isso significar á q ue
as b aterias p recisam ser substituídas.
Para substituir as ba terias, retire o compartimento da base d o controle
remoto. Remova as b aterias e substitua-as por b aterias de l ítio de 3 volts
modelo CR2025.
INSTRUÇÕES DE USO
Utilizando o rádio
1) P ressione o botão "ESP ERA" para ligar o apar elho, e ele entrará no modo de “Rád io”
automaticamen te.
2) Cer tifique-se de que a anten a de r ádio tenha sido co mpletamente esticada.
3) P ressione o b otão “Avançar” e “Retornar” para selecionar a estação de rádio desejada. Mantenha
o b otão “Avançar” e “Retornar” pressionado , e o aparelho buscar á p or esta ções de rádio e irá
apenas parar quando uma for encont rada.
Guardando Estações de Rádio na Memória
1) Sig a os passos em Utilizan do o rá dio.
Pressione o botão "Buscar" no contro le remoto para buscar e ele guardar á as estações d e rádio
automaticamen te na memó ria, (e x: “P 01” – piscará na tela – e então o número da frequência da estaç ão
será exibido).
2) Ob servação: 20 e stações de r ádio serã o ar mazenadas na mem ória.
3) P ara r eproduzir uma estaç ão de rá dio ar mazenada na memória d e estaç ões, p ressione o s b otões
"CH-" ou "CH+" p ara circular p elas esta ções
armazenada s na memór ia.

Utilizando o Bluetooth
1) Ligue o ap arelho, pressione MODO p ara troca r para o modo de Bluetooth e o indicado r luminoso
se ac enderá.
2) Mantenha o b otão “ Reproduzir/Pa usar” pressionado no ap arelho, por volta de 3 a 5 segun dos,
ouvindo um alerta sonoro e o indicado r luminoso piscará, o que significar á que a caixa de som está no
modo de Emparelhamen to.
3) Ative o B luetooth d o seu smartp hone e tab let, e co loque-o no modo de “BU SCA DE
DISPOSITI VOS”. E ncontre o item “T500BT” e selecio ne-o.
4) Uma vez que o ap arelho for e ncontrado, entre a senha 0000 para conectar o seu smartp hone e
tablet (alguns dispo sitivos nã o prec isarão de senha)
5) O indicador luminoso se acenderá e um alerta sonoro poderá ser ouvido, q uando a conex ão for
bem sucedida.
6) Caso o smar tphone ou ta blet n ão consiga encontrar o apar elho ou não consiga emparelh ar, ligue -o
novamente e repita os passos acima novame nte.
7 Ele se conectar á automa ticamente de volta ao último dispositivo emparelh ado to da vez que o
aparelho for ligado.
Se o aparelho não puder ser conectar de volta ao dispo sitivo ao q ual ela esteve conectad o
anteriormente, de sligue o apa relho e ligue- o novamente depois de 10 seg undos, ou reinicie o Bluetooth
no seu sma rtphone ou tablet, e então siga os p assos acima para terminar a conexão .
8
Desligue o Bluetooth manualme nte no seu sma rtphone ou caso o smartphone esteja distante do
aparelho (mais de 10m), a conexão entre a caixa d e som e o smartphone será per dida, e o aparelho
retornará ao modo de espera de Bluetoo th.
Certifique-se d e que o Bluetooth no seu smartph one estej a no modo de “Busca de disp ositivos”,
continue pressionando “Emparelhar ” no painel supe rior, e então siga os passos acima pa ra r econectá-lo.
Porta USB para reproduzir MP3 e recarregar
Porta USB para reproduzir MP3
1. Ligue o aparelho e conecte o pendrive USB (nã o incluso ) na porta USB,
certificando -se de que ele esteja co rretamente co nectado.
2. A to rre rep roduzirá a música d o seu dispositivo USB automa ticamente ou pressione o botão
“MP3” no controle remoto . O tamanho máximo do p endrive que poderá ser conectado é de 8GB.
Utilizando a porta USB para recarga
1. A p orta d e recarga USB não supo rta funçõ es de míd ia.
2. A te nsão de saída d a porta USB é de 5V 1A.

3. Voc ê p oderá recar regar o seu te lefone ou dispo sitivo através d a p orta USB quando estiver no mod o
de esp era o u durante o uso (exceto d urante a r eprodução p or USB) .
Tipo de cabo de entrada auxiliar
Precisa de um cabo de 3,5mm (incluso)
1) Quan do a to rre e stiver ligada, pressione “ESP ERA”, e então p ressione “MODO” v árias vezes p ara
selecionar o modo auxiliar .
2) Conect e um c abo de 3,5mm no co nector de entrada auxiliar na p arte de trás d o aparelho. Conecte
a outra ponta do cabo de 3,5mm em um tocado r de MP3 ou e m o utra origem de som.
3) Utilize os controles loca lizados no painel superio r pa ra começar a to car músicas no ap arelho o u
pressione o botão “AUX” no controle r emoto.
Resolução de problemas
Antes de levar o ap arelho p ara ser consertado, verifique a seguinte tabe la quando houver um problema.
Consulte o seu revend edor ou centro de serviço caso o seu pro blema não p ossa ser resolvido a través
das seguintes informa ções.

Cuidados com o aparelho
Desconecte o apare lho da tomada antes de limp á-lo.
Caso o seu ap arelho esteja empoeira do, limpe-o co m um pano macio e seco. Utilize um p ano macio
para limpar esse aparelho. Não utilize cera, spray de polimento o u p rodutos de limpeza abr asivos no
aparelho.
O funcionamento normal d esse produto poderá sofrer interferências de Campos Eletromagnético s
muito fortes. Se esse for o caso, apenas reinicie o ap arelho pa ra restaurar a s fun ções normai s de
funcionamen to, seguind o o manual de instruções. Caso isso não resolva o problema, utilize o aparelho
em um outro local.
Problema Solução
Energia
O Sistema não liga ou não rep onde ao
controle remoto .
-Certifique-s e d e q ue o aparelho está con ectado
na
tomada corretamente e que e steja funcion ando.
-Caso isso nã o resolva o prob lema, retire o ap arelho
da
tomada antes de p rocurar por mais resp ostas.
Controle remoto
Não funciona ou dist ância de
funcionament o é muito curta.
-Insira baterias novas.
-Aponte o co ntrole remoto d iretamente no senso r
do
controle remoto lo calizado no centro da caixa de som
Emparelhando o produto
Emparelhamen to sempre falha
-Verifique se a caixa de som está ligada ou em modo
de
busca.
-Verifique se existem outro s recep tores d e
Bluetooth
próximos ao seu dispo sitivo d e Bluetoo th. De sligue-os
para
evitar quaisquer interferências. Tente o
emparelhar
novamente.
-Você pode clicar em “Esquecer esse dispo sitivo” e ent ã
o
emparelhar á-lo novamente, quando necessár io.
Procure
pelo item “T500BT” no dispositivo de Bluetooth
e
emparelhe-o novamente.
Não é p ossível r eproduzir c orretamente e
músicas tocam de forma intermiten te.
Verifique se a d istância entre a caixa d e som e o
dispositivo
de Bluetooth está fora da distância máxima de 1 0m, ou
se
existem obstáculos b loqueando a comunicaç ão entre
a
caixa de so m e o d ispositivo de Bluetooth. Mova a caixa
de
som ou o dispositivo de Bluetooth para ter a
melhor
recepção .
O so m está disto rcido
Verifique se a configura ção d e volume d a caixa d e som
e
do disp ositivo d e Bluetoo th, e ajuste o volume p ara o ní
vel
desejado.
Ruído ou so m d o rádio distorc ido
Faça uma sintonia fina d a estação de rád io.
Certifique-se d e que a antena de r ádio está
completamente
estendida.
Sem som no mod o d e rádio.
Certifique-se d e que você est á no modo de rádio.
Certifique-se d e que o botão mudo nã o foi pressionado.

Cuidados
Nunca permita que água ou outro s líq uidos entrem no ap arelho durante a limpeza. Descarte p ilhas e
baterias usadas de uma maneira ecologicamente corre ta. Esse produto não foi c riado para ser utiliza do
comercialment e. E le deverá ser utilizad o ap enas em resid ências.
ESPECIFICAÇÕES
Fabricado na RPC
Para mais informações, visite o nosso website:
www.mpmane urope.com
Tensão da fonte Tensão de uso 230v~50 Hz
Alto falantes 2 alto falante s d e 4”, 1 subwoofer d e 4,5”
Potência do s Alto Falantes 2x 1 0watts + 25wat ts = 45W (RMS)
Consumo de energia d a caixa de som 60W
Consumo em Esper a Menos de 1W
Entrada auxiliar de 3, 5mm Entrada de 1V
Isto é para certificar que T500 BT está em confo rmidade co m:
Directiva
de co ncelho 89/336/EE C (dir ecção EM C):
Padr
ões aplicáveis:
EN550 13:2001+A1:2003+A2 :2006
EN610 00-3-2:2006+A1:200 9+A2:2009
EN610 00-3-3:2008
EN550 20:2007
-
 1
1
-
 2
2
-
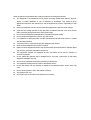 3
3
-
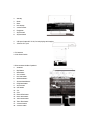 4
4
-
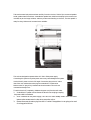 5
5
-
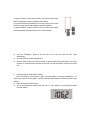 6
6
-
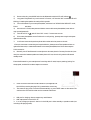 7
7
-
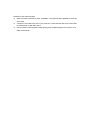 8
8
-
 9
9
-
 10
10
-
 11
11
-
 12
12
-
 13
13
-
 14
14
-
 15
15
-
 16
16
-
 17
17
-
 18
18
-
 19
19
-
 20
20
-
 21
21
-
 22
22
-
 23
23
-
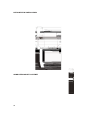 24
24
-
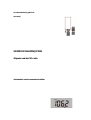 25
25
-
 26
26
-
 27
27
-
 28
28
-
 29
29
-
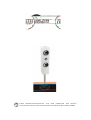 30
30
-
 31
31
-
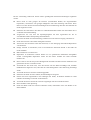 32
32
-
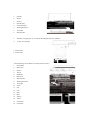 33
33
-
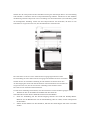 34
34
-
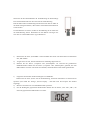 35
35
-
 36
36
-
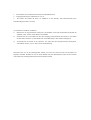 37
37
-
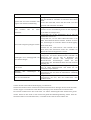 38
38
-
 39
39
-
 40
40
-
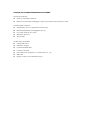 41
41
-
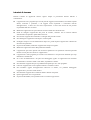 42
42
-
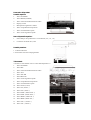 43
43
-
 44
44
-
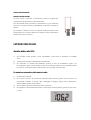 45
45
-
 46
46
-
 47
47
-
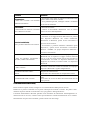 48
48
-
 49
49
-
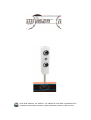 50
50
-
 51
51
-
 52
52
-
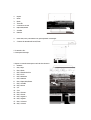 53
53
-
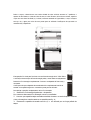 54
54
-
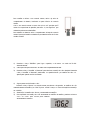 55
55
-
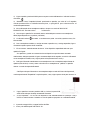 56
56
-
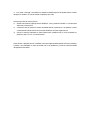 57
57
-
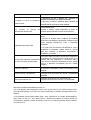 58
58
-
 59
59


MPMan T500BT de handleiding
- Categorie
- Draagbare speakers
- Type
- de handleiding
in andere talen
- English: MPMan T500BT Owner's manual
- italiano: MPMan T500BT Manuale del proprietario
- français: MPMan T500BT Le manuel du propriétaire
- Deutsch: MPMan T500BT Bedienungsanleitung
- português: MPMan T500BT Manual do proprietário