Silvercrest RT2000 Handleiding
- Categorie
- Accessoires voor het maken van koffie
- Type
- Handleiding

Programmeerbare radiatorthermo-
staat rt2000 Gebruiksaanwijzing
rt2000 Programmable radiator
thermostat Operating Manual
Fabrikant / Manufacturer
Olympia Business Systems Vertriebs GmbH
Zum Kraftwerk 1
45527 Hattingen (D)
GERMANY
www.olympia-vertrieb.de
Versie van de informatie
02/2018 - ID-nr.: 0602208
Information Status
02/2018 - Id. No.: 0602208
nG
Vouw voor het lezen de pagina met de afbeeldingen uit en
maak uzelf vervolgens vertrouwd met alle functies van het ap-
paraat.
Before starting to read the information, fold out the page con-
taining the illustrations and then familiarise yourself with all the
elements and functions provided by the device.
nG Gebruiksaanwijzing / Operating Manual
nG
IAN 300230IAN 300230

OK
Menu
Time
7
8 a - d
2
3
4 a
5
9
6
1
4 b
4 c
4
1
2
3
n
Inhoud van de verpakking:
1 radiatorthermostaat RT2000
3 adapters (Danfoss RA, Danfoss RAV, Danfoss RAVL)
1 stoterverlenging
2 batterijen (penlite, AA), 1,5 V
1 gebruiksaanwijzing
G
Scope of Delivery
1 RT2000 radiator thermostat
3 Adapters (Danfoss RA, Danfoss RAV, Danfoss RAVL)
1 Spindle extension
2 Batteries (mignon, AA), 1.5 V
1 Operating manual
1 Wartelmoer Union nut
2 Verwarmingstijden Heating times
3 AUTO- / MANU-modus AUTO / MANU mode
4a
Time
Timerfunctie
Time
Timer function
4b
Menu
Menu openen/terug
Menu
Open menu / Move
back in menu
4c
OK
Keuze bevestigen
OK
Conrm selection
5 Instelwieltje Adjusting wheel
6
Kinderslot Child safety lock
7
Batterijpictogram Battery icon
8a Vakantiefunctie Holiday function
8b
Comforttemperatuur Comfort temperature
8c Besparingstemperatuur Energy-save temperature
8d
Vorstbeveiligingsfunctie Frost protection function
9 Batterijvakje Battery compartment
10 Vergrendeling Fixation
11 Maximale waarde
verwarming
Maximum value, radiator
12 Thermostaatkop Thermostat head
13 Inkeping Notch
14 Adapter Adapters
15 Stoterverlenging Spindle extension
10
11
12
13
14
15
1314
13
14

5
n
Inleiding ��������������������������������������������� 9
Beoogd gebruik ��������������������������������� 9
Veiligheidsinformatie ����������������������� 10
Bedienings- en weergave-elementen 12
Menu ������������������������������������������������ 12
Monteren ����������������������������������������� 14
Oude thermostaatkop demonteren ���������������������������� 14
Nieuwe thermostaatkop monteren ����������������������������� 15
Demonteren ������������������������������������� 17
Bedienen ������������������������������������������ 17
Automatische modus ��������������������������������������������������� 17
Comfort- en besparingstijden instellen ����������������������� 18
Individueel programma instellen �������������������������������� 19
Comfort- en besparingstemperatuur instellen ������������ 20
Handmatige modus ����������������������������������������������������� 20
Datum en tijd instellen ������������������������������������������������� 20
Timerfunctie ������������������������������������������������������������������ 21
Oset ��������������������������������������������������������������������������� 21

6
n
Raamfunctie ����������������������������������������������������������������� 22
Vakantiefunctie ������������������������������������������������������������ 23
Verwarmingspauze ����������������������������������������������������� 24
Zomer-/wintertijd �������������������������������������������������������� 24
Versienummer ������������������������������������������������������������� 24
Terugzetten naar fabrieksinstellingen ������������������������� 25
Vorstbeveiligingsfunctie ����������������������������������������������� 25
Antikalkfunctie ������������������������������������������������������������� 26
Problemen oplossen ������������������������� 26
Reinigen ������������������������������������������� 29
Verwijderen ������������������������������������� 29
Garantie ������������������������������������������� 30
Fabrikant ������������������������������������������ 31
Juridische informatie ������������������������ 31

7
G
Introduction �������������������������������������� 32
Intended Use ������������������������������������ 32
Safety Instructions ���������������������������� 33
Operating and Display Elements ������� 35
Menu ������������������������������������������������ 35
Installation ��������������������������������������� 37
Disassembling the Old Thermostat Head ������������������ 37
Installing the New Thermostat Head �������������������������� 38
Disassembly ������������������������������������� 39
Operation����������������������������������������� 40
Automatic Mode ��������������������������������������������������������� 40
Setting Comfort and Energy-Save Times �������������������� 41
Setting an Individual Programme ������������������������������� 42
Setting Comfort and Energy-Save Temperatures ������� 43
Manual Mode ������������������������������������������������������������� 43
Setting the Date and Time ������������������������������������������ 43
Timer Function �������������������������������������������������������������� 44
Oset ��������������������������������������������������������������������������� 44

8
G
Window Function �������������������������������������������������������� 45
Holiday Function ��������������������������������������������������������� 45
Heating Pause ������������������������������������������������������������� 46
Summertime/Wintertime �������������������������������������������� 47
Version Number ��������������������������������������������������������� 47
Resetting the Default Factory Settings ������������������������ 47
Frost Protection Function���������������������������������������������� 48
Calcication Protection Function �������������������������������� 48
Troubleshooting ������������������������������� 49
Cleaning ������������������������������������������� 52
Disposal ������������������������������������������� 52
Guarantee ���������������������������������������� 53
Manufacturer ����������������������������������� 54
Legal Notice ������������������������������������� 54

9
n
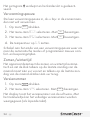
Inleiding
Lees de volgende gebruiksaanwijzing en
veiligheidsinstructies aandachtig door� Gebruik
het apparaat alleen zoals beschreven en voor de
genoemde doeleinden� Berg deze gebruiksaan-
wijzing goed op� Geef de volledige documentatie
door aan de volgende eigenaar van het
apparaat�
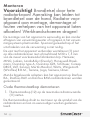
Beoogd gebruik
De programmeerbare radiatorthermostaat RT2000
- hierna "apparaat" genoemd - dient voor het regelen van
een standaard radiatorkraan�
Met het apparaat is het mogelijk om de kamertemperatuur
tijdgestuurd te regelen� Het apparaat drijft een radiator-
kraan aan om de toestroom van warmte naar de radiator te
regelen� Het apparaat past op alle standaard radiatorkra-
nen en kan eenvoudig worden gemonteerd�
Gebruik het apparaat alleen binnenshuis� Elke andere toe-
passing dan in deze gebruiksaanwijzing beschreven dient
niet voor het beoogde gebruik en leidt tot verlies van de
garantie en uitsluiting van aansprakelijkheid� Dit geldt ook
voor ombouw en wijzigingen� Het apparaat is uitsluitend
voor particulier gebruik bedoeld�

10
n
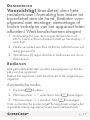
Veiligheidsinformatie
Vermijd mogelijke gevaren door de vol-
gende veiligheidsinstructies aandachtig te
lezen�
Waarschuwing! Levensgevaar en
gevaar voor ongevallen voor kleuters en
kinderen! Er bestaat gevaar voor verstik-
king door het verpakkingsmateriaal� Laat
kinderen nooit zonder toezicht spelen
met het verpakkingsmateriaal� Kinderen
onderschatten vaak de gevaren� Houd
kinderen altijd weg van het verpakkings-
materiaal� Het apparaat is geen speel-
goed�
Let op! Dit apparaat kan worden ge-
bruikt door kinderen vanaf 8 jaar en
door personen met verminderde fysieke,
sensorische of mentale vaardigheden of
gebrek aan ervaring en kennis, indien zij
onder toezicht werken of onderricht zijn
over het veilige gebruik van het appa-
raat en de hieruit resulterende gevaren
begrijpen� Kinderen mogen niet met het
apparaat spelen� Reiniging en onder-

11
n
houd mogen niet door kinderen zonder
toezicht worden uitgevoerd�
Belangrijk! Open het apparaat niet;
het bevat geen onderdelen die moeten
worden onderhouden door de gebruiker�
In geval van een fout stuurt u het appa-
raat naar de service�
Belangrijk! Probeer nooit om niet-op-
laadbare batterijen weer op te laden,
sluit u batterijen niet kort en/of maak bat-
terijen niet open� Oververhitting, gevaar
voor brand of uiteenbarsten kunnen het
gevolg zijn� Werp batterijen nooit in vuur
of water� De batterijen kunnen explode-
ren�
Belangrijk! Lekkende batterijen kun-
nen het apparaat beschadigen� Wees
bij de omgang met beschadigde of lek-
kende batterijen uiterst voorzichtig en ge-
bruik veiligheidshandschoenen�
Schakel het apparaat uit en verwijder de
batterijen als u het lange tijd niet gebruikt�

12
n
Bedienings- en weergave-elementen
Een overzicht van de bedienings- en weergave-elementen
van het apparaat vindt u op de uitklapbare pagina van
deze gebruiksaanwijzing�
Menu
Druk op de toets
Menu
om het menu te openen�
Met het instelwieltje selecteert u de gewenste functie�
Met de toets
OK
navigeert u naar de instellingen van deze
functie� Met het instelwieltje kunt u de aangeboden instellin-
gen wijzigen�
Met de toets
OK
bevestigt u uw invoer�
Met de toets
Menu
schakelt u binnen een menu één niveau
terug tot aan de standaardweergave�
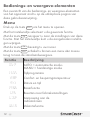
Functie Beschrijving
MO
D
E
AUTO = automatische modus
MANU = handmatige modus
PROG
Tijdprogramma
TEMP
Comfort- en besparingstemperatuur
ZEIT
Datum en tijd
FENS
Raamfunctie
RES
Resetten naar fabrieksinstellingen
A
D
AP
Aanpassing aan de
radiatorkraan
URLA
Vakantiefunctie

13
n
INST
Installatiefunctie
OFFS
Temperatuuraanpassing aan plaatselijke
omstandigheden of temperatuursbeleving
STBY
Stand-bymodus
VERS
Versienummer
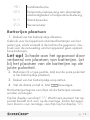
Batterijen plaatsen
1� Deksel van het batterijvakje afnemen�
Gebruik voor het apparaat uitsluitend batterijen van het
juiste type, zoals vermeld in de technische gegevens� Ge-
bruik voor de netvoeding van het apparaat geen oplaad-
bare batterijen�
Let op! Schade aan het apparaat door
verkeerd om plaatsen van batterijen� Let
bij het plaatsen van de batterijen op de
juiste polariteit�
2� Batterijen (2 x type penlite, AA) met de juiste polariteit
in het batterijvakje plaatsen�
3� Deksel van het batterijvakje erop zetten�
4� Stel de datum en tijd in� Met
OK
bevestigen�
Het batterijpictogram verschijnt als de batterijen moeten
worden vervangen�
Op het display verschijnt PREP� Wacht een moment: het ap-
paraat bereidt zich voor op de montage� Zodra het appa-
raat klaar is voor montage, verschijnt op het display INST�

14
n
Monteren
Voorzichtig! Brandletsel door hete
radiatorkraan! Aanraking kan leiden tot
brandletsel aan de hand� Radiator voor-
afgaand aan montage, demontage of
fouten verhelpen van het apparaat laten
afkoelen! Werkhandschoenen dragen!
De montage van het apparaat is eenvoudig en kan zonder
aftappen van verwarmingswater of ingrepen in het verwar-
mingssysteem plaatsvinden� Speciaal gereedschap of het
uitschakelen van de verwarming is niet nodig�
De vast met het apparaat verbonden wartelmoer (1) past
op alle radiatorkranen met schroefdraad M30 x 1,5 mm
van de meest voorkomende fabrikanten bijv� Heimeier,
MNG, Junkers, Landis&Gyr (Duodyr), Honeywell-Brauk-
mann, Oventrop type A, Oventrop AV6, Schlösser, Comap
D805, Valf, Sanayii, Mertik Maxitrol, Watts, Wingenroth
(Wiroex) R.B.M., Tiemme, Jaga, Siemens, Idmar.
Met de bijgeleverde adapters kan het apparaat op Danfoss
RA-, Danfoss RAV- en Danfoss RAVL-radiatorkranen worden
gemonteerd�
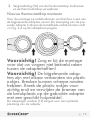
Oude thermostaatkop demonteren
1� Thermostaatkop (12) op de maximale radiatorwaarde
(11) z et t e n�
De thermostaatkop drukt nu niet meer op de spindel van de
radiatorkraan en kan zo eenvoudiger worden gedemon-
teerd�

15
n
2� Vergrendeling (10) van de thermostaatkop losdraaien
en de thermostaatkop verwijderen�
Nieuwe thermostaatkop monteren
Voor de montage op radiatorkranen van Danfoss is een van
de bijgeleverde adapters vereist� De toewijzing van de pas-
sende adapter (14) aan de betreende radiatorkraan vindt
u in g. 2-4 op de uitklapbare pagina.
Voorzichtig! Zorg er bij de montage
voor dat uw vingers niet bekneld raken
tussen de adapterhelften!
Voorzichtig! De bijgeleverde adap-
ters zijn met elkaar verbonden via plastic
nokjes� Breuken kunnen scherpe randen
hebben� Breek de plastic nokjes voor-
zichtig eruit en verwijder de bramen van
de breukplaats op de gebruikte adapter
met een geschikt hulpmiddel�
De inkepingen rondom (13) zorgen voor een optimale
plaatsing van de adapter�

16
n
1� Indien nodig, de bij de radiatorkraan passende adap-
ter (14) op de radiatorkraan schuiven totdat de adap-
ter wordt vergrendeld�
Gebruik bij de montage indien nodig een schroevendraaier,
om de adapter bij de schroef iets open te buigen�
2� Adapter met de bijgeleverde bout en moer (zie g. 2 of
g. 3 op de uitklapbare pagina) bevestigen.
Op de pen van kranen van het type RAV moet de stoterver-
lenging (15) worden geplaatst (zie g. 2 op de uitklapbare
pagina)�
3� Het apparaat met behulp van de wartelmoer (1) op de
gemonteerde adapter of rechtstreeks op de radiator-
kraan schroeven�
4� Op toets
OK
drukken� De aanpassing begint auto-
matisch�
Het apparaat past zich aan de slag van uw radiatorkraan
aan� Hiervoor wordt de radiatorkraan meermaals geopend
en gesloten, om de betreende eindpunten te leren. Dit
proces kan in bepaalde gevallen enkele minuten in beslag
nemen�
Door een eindloze schroefdraad kan het
drukstuk eruit vallen dat aan de onderzijde zit,
indien het apparaat niet op de kraan is
gemonteerd� Zet het drukstuk in dit geval weer
erin� De eindloze schroefdraad draait en trekt het drukstuk
vast� Start de aanpassing indien nodig opnieuw�
Nadat de aanpassing is geslaagd, wordt het apparaat om-
geschakeld naar de automatische modus AUTO�

17
n
Demonteren
Voorzichtig! Brandletsel door hete
radiatorkraan! Aanraking kan leiden tot
brandletsel aan de hand� Radiator voor-
afgaand aan montage, demontage of
fouten verhelpen van het apparaat laten
afkoelen! Werkhandschoenen dragen!
1� Instelwieltje (5) over de hoogste temperatuur van
28 °C heen rechtsom draaien totdat op het display AN
verschijnt�
2� Enkele seconden wachten totdat de radiatorkraan vol-
ledig geopend is�
3� Wartelmoer (1) tegen de klok in losdraaien van de ra-
diatorkraan�
Bedienen
Alle gebruikstoestanden worden weergegeven op het dis-
play van het apparaat�
Bedien het apparaat zoals beschreven in de volgende pa-
ragrafen�
Automatische modus
1� Op toets
Menu
drukken�
2� Het menu-item MODE selecteren� Met
OK
bevestigen�
3� Het menu-item AUTO instellen� Met
OK
bevestigen�
In de automatische modus regelt het apparaat volgens het
ingestelde timerprogramma tussen twee temperaturen :

18
n
Comforttemperatuur (fabrieksinstelling: 21°C)
Besparingstemperatuur (fabrieksinstelling 16°C)
De comfort- en besparingstijden kunnen worden ingesteld
door het vrij instelbare timerprogramma� Er kunnen acht
schakelpunten (vier comfort- en vier besparingstijden) per
dag worden ingesteld�
In de fabriek zijn de volgende comfort- en besparingstijden
geprogrammeerd:
Comforttijd: 07:00 uur
Besparingstijd: 22:00 uur
Als u in de automatische modus de temperatuur verstelt via
het instelwieltje (5), blijft de handmatig ingestelde tempera-
tuur actief tot aan het volgende schakelpunt�
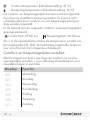
Comfort- en besparingstijden instellen
Met het apparaat kunt u per dag vier comfort- en vier be-
sparingstijden instellen – voor elke dag afzonderlijk of voor
meerdere dagen in een blok�
Display Functie
T A G1
Maandag
TAG2
Dinsdag
TAG3
Woensdag
TAG4
Donderdag
TAG5
Vrijdag
TAG6
Zaterdag
TAG7
Zondag

19
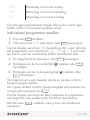
n
T1-5
Maandag tot en met vrijdag
T1-6
Maandag tot en met zaterdag
T1 -7
Maandag tot en met zondag
Op niet geprogrammeerde dagen blijven de vooraf inge-
stelde comfort- en besparingstijden actief�
Individueel programma instellen
1� Op toets
Menu
drukken�
2� Het menu-item PROG selecteren� Met
OK
bevestigen�
Op het display verschijnt TAG (maandag)� Als u een individu-
eel programma voor een blok (T1-5 , T1-6 of T1 -7 ) wilt instel-
len, kiest u met het instelwieltje (5)het betreende item.
3� De dag/het blok selecteren� Met
OK
bevestigen�
4� Het begin van de 1e comforttijd ( ) instellen� Met
OK
bevestigen�
5� Het begin van de 1e besparingstijd ( ) instellen� Met
OK
bevestigen�
Vervolgens kunt u een tweede, derde en vierde comfort-/
besparingstijd instellen�
Als u geen andere comfort-/besparingstijd wilt instellen, be-
vestigt u de weergave met
OK
�
Op het display verschijnt de (het) volgende te programme-
ren dag/blok� Ga verder zoals hierboven beschreven�
Met de toets
Menu
schakelt u terug naar de standaard-
weergave�

20
n
Comfort- en besparingstemperatuur instellen
1� Op toets
Menu
drukken�
2� Het menu-item TEMP selecteren� Met
OK
bevestigen�
3� De gewenste comforttemperatuur ( ) instellen� Met
OK
bevestigen�
4� De gewenste besparingstemperatuur ( ) instellen� Met
OK
bevestigen�
Gebied Functie
AUS
onder 8 °C, vorstbeveiligingsfunctie actief
AN
vanaf 28°C, radiatorkraan volledig geopend
Handmatige modus
In de handmatige modus regelt het apparaat naar de met
het instelwieltje (5) ingestelde temperatuur �
1� Op toets
Menu
drukken�
2� Het menu-item MODE selecteren� Met
OK
bevestigen�
3� Het menu-item MANU instellen� Met
OK
bevestigen�
4� Met het instelwieltje (5) de temperatuur instellen�
De ingestelde temperatuur wordt gehandhaafd totdat u om-
schakelt naar de automatische modus of de temperatuur wij-
zigt via het instelwieltje (5)�
Datum en tijd instellen
U kunt de datum en tijd in het menu van het apparaat in-
stellen�

21
n
1� Op toets
Menu
drukken�
2� Het menu-item ZEIT selecteren� Met
OK
bevestigen�
3� Het huidige jaar instellen� Met
OK
bevestigen�
4� De huidige maand instellen� Met
OK
bevestigen�
5� De huidige dag instellen� Met
OK
bevestigen�
6� Het huidige uur instellen� Met
OK
bevestigen�
7� De huidige minuut instellen� Met
OK
bevestigen�
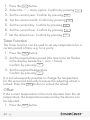
Timerfunctie
Met de timerfunctie wordt een willekeurige temperatuur
voor een bepaalde tijdsduur ingesteld, bijv� bij een feest�
1� Op toets
Time
drukken�
2� De gewenste tijdsduur instellen (op het display knippert
de in te stellen tijd naast de weergave H = uur)� Met
OK
bevestigen�
3� De gewenste temperatuur instellen� Met
OK
bevesti-
gen�
Een handmatige wijziging van de temperatuur is dan niet
mogelijk voor de ingestelde tijdsduur, het instelwieltje is ver-
grendeld� Door te drukken op de toets
Menu
wordt de ver-
grendeling opgeheven�
Oset
Als de huidige temperatuur in de ruimte afwijkt van de in-
gestelde temperatuur, kan de door het apparaat bepaalde
temperatuur worden aangepast�

22
n
1� Op toets
Menu
drukken�
2� Het menu-item OFFS selecteren� Met
OK
bevestigen�
Op het display knippert 0,0°C�
3� Met het instelwieltje de gewenste aanpassing van de
temperatuur (van –5 °C tot +5 °C) instellen� Met
OK
bevestigen�
De temperatuurweergave op het display verandert door de
aanpassing niet�
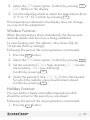
Raamfunctie
Wanneer de temperatuur in de ruimte sterk daalt, herkent het
apparaat automatisch dat er wordt geventileerd�
Om te besparen op de verwarmingskosten, wordt de radia-
torkraan gedurende 10 minuten (fabrieksinstelling) volledig
gesloten�
Vervolgens is het ingestelde programma weer actief�
1� Op toets
Menu
drukken�
2� Het menu-item FENS selecteren� Met
OK
bevestigen�
3� De gevoeligheid instellen (HIGH = hoge gevoeligheid,
MID = gemiddelde gevoeligheid, LOW = lage gevoelig-
heid)� Met
OK
bevestigen�
4� De periode 10 M - 60 M (10 tot 60 minuten) selecteren,
waarin de radiatorkraan gesloten moet blijven� Met
OK
bevestigen�

23
n
Vakantiefunctie
Voor de duur van uw afwezigheid kunt u een vrij instelbare
temperatuur bepalen�
Vervolgens is het ingestelde programma weer actief�
1� Op toets
Menu
drukken�
2� Het menu-item URLA selecteren� Met
OK
bevestigen�
3� De datum van uw terugkomst selecteren� Met
OK
be-
vestigen�
4� De tijd invoeren� Met
OK
bevestigen� Op het display
knippert AUS�
5� De temperatuur instellen� Met
OK
bevestigen�
Het pictogram verschijnt op het display�
Door te drukken op de toets
Menu
kunt u de functie deactive-
ren� Het pictogram gaat uit�
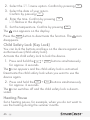
Kinderslot (toetsvergrendeling)
Als bescherming tegen ongeoorloofd gebruik (kinderslot)
kunt u de knoppen van het apparaat blokkeren�
Activeer het kinderslot om het apparaat te vergrendelen�
1� Toetsen
OK
+
Time
gelijktijdig ong� 2 sec� ingedrukt
houden�
Het pictogram verschijnt en het kinderslot is geactiveerd�
Deactiveer het kinderslot als u het apparaat weer wilt ge-
bruiken�
2� Toetsen
OK
+
Time
gelijktijdig ong� 2 sec� ingedrukt
houden�

24
n
Het pictogram verdwijnt en het kinderslot is gedeacti-
veerd�
Verwarmingspauze
Stel een verwarmingspauze in, als u bijv� in de zomermaan-
den niet wilt verwarmen�
1� Op toets
Menu
drukken�
2� Het menu-item MODE selecteren� Met
OK
bevestigen�
3� Het menu-item MANU selecteren� Met
OK
bevestigen�
4� De temperatuur op AUS zetten�
Schakel aan het einde van een verwarmingspauze weer om
naar de automatische modus of programmeer nieuwe com-
fort- en besparingstijden�
Zomer-/wintertijd
Het apparaat detecteert de zomer- en wintertijd automa-
tisch en zet de klok telkens op de laatste zondag van de
maand maart één uur vooruit en telkens op de laatste zon-
dag van de maand oktober één uur terug�
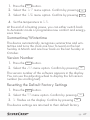
Versienummer
1� Op toets
Menu
drukken�
2� Het menu-item VERS selecteren� Met
OK
bevestigen�
Het display toont het versienummer van de software� Met
het instelwieltje kan het volledige versienummer worden
weergegeven (als lopende tekst)�

25
n
Terugzetten naar fabrieksinstellingen
1� Op toets
Menu
drukken�
2� Het menu-item RES selecteren� Met
OK
bevestigen�
3� Op het display knippert OK � Met
OK
bevestigen�
Het apparaat is naar de fabrieksinstellingen gereset en be-
vindt zich weer in aeveringstoestand.
Het display toont ADAP en vervolgens INST� Het apparaat is
klaar voor aanpassing� Bevestig met
OK
, om deaanpas-
sing te starten�
Stand-by
1� Op toets
Menu
drukken�
2� Het menu-item STBY selecteren� Met
OK
bevestigen�
3� Het menu-item AN selecteren�
4� Met
OK
bevestigen� Na ong� 30 seconden, schakelt
het display automatisch over naar de stand-bymodus�
Selecteer in stap 3 AUS om de stand-bymodus uit te scha-
kelen�
Vorstbeveiligingsfunctie
Deze functie wordt automatisch geactiveerd�
Door de vorstbeveiligingsfunctie wordt het bevriezen van de
radiatoren voorkomen�
Als de temperatuur tot onder 6 °C is gedaald, opent het ap-
paraat de radiatorkraan totdat de temperatuur weer tot bo-
ven 8 °C is gestegen�

26
n
Antikalkfunctie
Deze functie wordt automatisch geactiveerd�
Het apparaat voert één keer per week een antikalkfunctie
uit, om het verkalken van de radiatorkranen te voorkomen�
Problemen oplossen
Het apparaat werkt niet meer zoals u verwacht? Probeer
om het probleem op te lossen met behulp van de onder-
staande oplossingen�
Voorzichtig! Brandletsel door
hete radiatorkraan! Aanraking
kan leiden tot brandletsel aan de
hand� Radiator voorafgaand aan mon-
tage, demontage of fouten verhelpen
van het apparaat laten afkoelen! Werk-
handschoenen dragen!
Op het display wordt het batterijpictogram
weergegeven� Vervang de batterijen�
Op het display wordt de foutmelding E1
weergegeven� Een aanpassing van het apparaat
is niet mogelijk� Is het apparaat goed op de radiator
gemonteerd? Volg de instructies op in het gedeelte
Monteren ob pagina 14�

27
n
Door een eindloze schroefdraad kan het
drukstuk eruit vallen dat aan de onderzijde zit,
indien het apparaat niet op de kraan is
gemonteerd� Drukstuk erin zetten� De eindloze
schroefdraad draait en trekt het drukstuk vast�
Apparaat op de radiator aanbrengen en opnieuw
adapteren�
Op het display wordt de foutmelding E2
weergegeven� De slag van de radiatorkraan is te
kort of de batterijspanning is te laag� Pas het
apparaat opnieuw aan� Vervang de batterijen�
Op het display wordt de foutmelding E3
weergegeven� Er is geen klepbeweging mogelijk�
Is de klepstoter vrij beweegbaar? Probeer indien
nodig om de klepstoter beweegbaar te maken�
Als op het display de foutmelding E1, E2 of E3 verschijnt en
u de fout hebt verholpen, drukt u op een willekeurige toets�
Het apparaat wordt automatisch opnieuw aangepast en
kan hierna weer zoals gebruikelijk worden gebruikt�

28
n
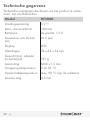
Technische gegevens
Technische wijzigingen die dienen om het product te verbe-
teren, zijn voorbehouden�
Model RT2000
Voedingsspanning 3 V ⎓
Max� stroomverbruik 100 mA
Batterijen 2x penlite, 1,5 V
Levensduur van de bat-
terij
tot 2 jaar
Display LCD
Afmetingen 74 x 65 x 54 mm
Gewicht (incl� adapter
en batterijen)
191 g
Aansluiting M30 x 1,5 mm
Omgevingstemperatuur 5 tot 55 °C
Oppervlaktetemperatuur max� 90 °C (op de radiator)
Lineaire slag 4,3 mm

29
n
Reinigen
Reinig het apparaat regelmatig met een droge, niet-plui-
zende doek�
Verwijderen
De verpakking bestaat uit milieuvriendelijke
materialen, die kunnen worden ingeleverd bij de
plaatselijke inzamelingspunten�
Raadpleeg uw gemeente om te horen waar u
oude apparaten kunt inleveren� Gooi oude appa-
raten in het belang van het milieu niet in het huis-
vuil, maar bied ze aan voor vakkundige verwer-
king� Informatie over inzamelingspunten en ope-
ningstijden verkrijgt u bij uw gemeente�
Defecte of lege batterijen moeten volgens richtlijn
2006/66/EC worden gerecycled� Lever batterijen
en/of het apparaat in bij de daarvoor bestemde
inzamelingspunten� Batterijen mogen niet worden
weggegooid met het huishoudelijk afval� Ze kun-
nen giftige zware metalen bevatten en moeten
worden behandeld als gevaarlijke afvalstoen.
De chemische symbolen van de zware metalen
zijn: Cd = cadmium, Hg = kwik, Pb = lood� Geef
daarom lege batterijen af bij een gemeentelijk in-
zamelingspunt�

30
n
Garantie
LET OP!
BELANGRIJK DOCUMENT VOOR DE GARANTIE!
BESLIST GOED BEWAREN!
Geachte klant,
U krijgt op dit apparaat 3 jaar garantie vanaf datum van
aankoop� Als er een probleem optreedt, verzoeken we u
eerst onze hotline te bellen:
00800 100 22 100 (internationaal)
Ons deskundig personeel kan u vaak al telefonisch verder
helpen�
service�nl@gsl-servicenet�de
Als de fout echter niet telefonisch kan worden verholpen,
verzoeken we u om het apparaat in de originele verpakking
op te sturen naar onze servicepartner:
GSL mbH
Am Weimarer Berg 6
99510 Apolda
Duitsland

31
n
Fabrikant
Olympia Business Systems Vertriebs GmbH
Zum Kraftwerk 1
45527 Hattingen (D)
GERMANY
www�olympia-vertrieb�de
Juridische informatie
Handelsmerken of handelsnamen die worden gebruikt in
deze gebruiksaanwijzing, zijn in elk geval eigendom van de
betreende houder van de rechten.

32
G
Introduction
Read this instruction manual and the safety
instructions carefully� Only use the device as
described and for the purpose for which it was
intended� Keep this operating instruction manual
in a safe place� Hand over all the documents with
the device if it is transferred to third parties�
Intended Use
The RT2000 programmable radiator thermostat, subse-
quently referred to as "device", serves to regulate a common
radiator valve�
The device can be used for time regulation of the room tem-
perature� The device adjusts a radiator valve to control the
heat ow to the radiator. The device ts on all common radi-
ator valves and is easy to install�
The device may only be operated indoors� Any use other
than that described in this operating manual is considered
unintended use and results in loss of rights related to the
terms of guarantee and exemption of liability� This also ap-
plies to any reconstruction and modication. The device is
exclusively intended for private use�

33
G
Safety Instructions
Avoid potential dangers by reading the fol-
lowing safety instructions carefully�
Warning! Risk of fatal injury and acci-
dents to infants and children! The pack-
aging material represents a risk of suo-
cation� Never leave children unattended
when the packaging material is nearby�
Children often underestimate the risks in-
volved� Always keep children away from
the packaging material� The device is not
a toy�
Attention! This device can be used by
children from the age of 8 and persons
with restricted physical, sensory or men-
tal capabilities or a lack of experience
and knowledge under supervision or if
they have been instructed in safe use
of the device and understand the result-
ing dangers� Children must never play
with the device� The device must not be
cleaned or serviced by children without
appropriate supervision�

34
G
Important! Do not open the device; it
does not contain any parts which can be
serviced by the user� In the event of any
faults, send the device to the Service De-
partment�
Important! Never attempt to recharge
non-rechargeable batteries and do not
short circuit or open them� This could
result in the risk of overheating, re or
bursting. Never throw batteries in a re
or water� The batteries could explode�
Important! Leaking batteries could
damage the device� Be particularly care-
ful when handling damaged or leaking
batteries and wear protective gloves�
Switch the device o and remove the batter-
ies if the device will not be used for a longer
period�

35
G
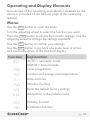
Operating and Display Elements
An overview of the operating and indicator elements on the
device is provided on the fold-out page of this operating
manual�
Menu
Use the
Menu
button to open the menu�
Turn the adjusting wheel to select the function you want�
Press the
OK
button to access the function settings� Use the
adjusting wheel to change the settings available�
Use the
OK
button to conrm your settings.
Use the
Menu
button to go back one menu level at a time
and eventually return to the standard display�
Function Explanation
MO
D
E
AUTO = automatic mode
MANU = manual mode
PROG
Timer programme
TEMP
Comfort and energy-save temperature
ZEIT
Date and time
FENS
Window Function
RES
Reset the default factory settings
A
D
AP
Adaptation to the radiator valve
URLA
Holiday function
INST
Installation function

36
G
OFFS
Adapt the temperature to local characteris-
tics or temperature perception
STBY
Standby mode
VERS
Version number
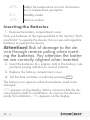
Inserting the Batteries
1� Remove the battery compartment cover�
Only use batteries of the type specied in the Section "Tech-
nical Data" to operate the device� Do not use rechargeable
batteries to operate the device�
Attention! Risk of damage to the de-
vice through reverse poling when insert-
ing the batteries� Pay attention the batter-
ies are correctly aligned when inserted�
2� Insert the batteries (2 x mignon, AA) in the battery com-
partment paying attention to correct polarity�
3� Replace the battery compartment cover�
4� Set the date and time. Conrm by pressing
OK
�
The battery icon appears when the batteries need to be
changed�
PREP appears on the display� Wait a moment while the de-
vice prepares itself for installation� As soon as the device is
ready for installation, INST appears on the display�

37
G
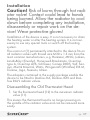
Installation
Caution! Risk of burns through hot radi-
ator valve! Contact could lead to hands
being burned� Allow the radiator to cool
down before completing any installation,
disassembly or repair work on the de-
vice! Wear protective gloves!
Installation of the device is easy� It is not necessary to drain
the heating water or alter the heating system� It is not nec-
essary to use any special tools or switch o the heating
system�
The union nut (1) permanently attached to the device ts on
all radiator valves with thread size M30 x 1�5 mm from the
most common manufacturers, e�g� Heimeier, MNG, Junkers,
Landis&Gyr (Duodyr), Honeywell-Braukmann, Oventrop
type A, Oventrop AV6, Schlösser, Comap D805, Valf, San-
ayii, Mertik Maxitrol, Watts, Wingenroth (Wiroex) R.B.M,
Tiemme, Jaga, Siemens, Idmar�
The adapters contained in the supply package enable the
device to be tted to Danfoss RA, Danfoss RAV and Dan-
foss RAVL radiator valves�
Disassembling the Old Thermostat Head
1� Set the thermostat head (12) to the maximum radiator
value (11)�
This means the thermostat head is no longer pressing on
the spindle of the radiator valve and can be removed more
easily�

38
G
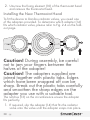
2� Unscrew the xing element (10) of the thermostat head
and remove the thermostat head�
Installing the New Thermostat Head
To t the device to Danfoss radiator valves, you need one
of the adapters provided� To determine which adapter (14)
ts which radiator valve, please refer to Fig. 2-4 on the fold-
out page�
Caution! During assembly, be careful
not to jam your ngers between the
halves of the adapter!
Caution! The adapters supplied are
joined together with plastic tabs� Edges
which have been snapped o can be
sharp� Break out the plastic tabs carefully
and smoothen the sharp edges on the
adapter you use with a suitable tool�
The notches (13) on the circumference ensure the adapter
ts perfectly.
1� If required, slip the adapter (14) that ts the radiator
valve onto the valve until the adapter snaps into place�

39
G
If necessary, use a screwdriver to slightly prise open the
adapter in the area of the screw�
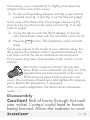
2� Fix the corresponding adapter with the screw and nut
supplied (see Fig� 2 and Fig� 3 on the fold-out page)�
In the case of the RAV valve, the plunger extension (15)
must also be mounted on the valve pin (see Fig� 2 on the
fold-out page)�
3� Screw the device onto the tted adapter or directly
onto the radiator valve with the aid of the union nut (1)�
4� Press the
OK
button� The adaptation starts automat-
ically�
The device adjusts to the stroke of your radiator valve� For
this purpose, the radiator valve is opened and closed sev-
eral times so that the device determines the end points�
This process may take a few minutes under certain circum-
stances�
Due to the continuous thread, the pressure
piece tted on the underside can drop out if the
regulator has not been mounted on the valve�
Fit the pressure piece back in place in such
cases� The continuous thread turns and tightens the pressure
piece� Restart the adaptation, if necessary�
After successful adaptation, the device enters Automatic
mode AUTO�
Disassembly
Caution! Risk of burns through hot radi-
ator valve! Contact could lead to hands
being burned� Allow the radiator to cool

40
G
down before completing any installation,
disassembly or repair work on the de-
vice! Wear protective gloves!
1� Turn the adjusting wheel (5) clockwise beyond the
maximum temperature of 28 °C until AN appears in the
display�
2� Wait a few seconds until the radiator valve is fully
open�
3� Turn the nut (1) counterclockwise to release it from the
heater valve�
Operation
All operating modes are shown on the device display�
Operate the device as described in the following sections�
Automatic Mode
1� Press the
Menu
button�
2� Select the MODE menu option. Conrm by pressing
OK
�
3� Select the AUTO menu option. Conrm by pressing
OK
�
When in Automatic mode, the device regulates the temper-
ature between two temperatures according to the time pro-
gramme set:
Comfort temperature
(factory setting: 21 °C)
Energy-save temperature
(factory setting: 16 °C)

41
G
You can dene the comfort and energy-save times using
the freely adjustable timer programme� You can set eight
switching points (four comfort and four energy-save times)
per day�
The following comfort and energy-save times are pre-pro-
grammed in the factory settings:
Comfort time
07:00 a�m�
Energy-save time
22:00 p�m�
If Automatic mode is active and you adjust the temperature
using the adjusting wheel, the manually set temperature re-
mains active until the next programmed switching point�
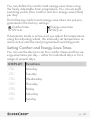
Setting Comfort and Energy-Save Times
You can use the device to set four comfort times and four en-
ergy-save times per day – either for individual days or for a
range of several days�
DISPLAY Function
T A G1
Monday
TAG2
Tuesday
TAG3
Wednesday
TAG4
Thursday
TAG5
Friday
TAG6
Saturday
TAG7
Sunday

42
G
T1-5
Monday to Friday
T1-6
Monday to Saturday
T1 -7
Monday to Sunday
In the case of days which are not programmed, the preset
comfort and energy-save times remain active�
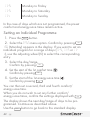
Setting an Individual Programme
1� Press the
Menu
button�
2� Select the PROG menu option. Conrm by pressing
OK
�
TAG (Monday) appears in the display� If you want to set an
individual program for a range of days (T1-5, T1-6 or T1-
7), use the adjusting wheel (5) to select the corresponding
entry�
3� Select the day/range�
Conrm by pressing
OK
�
4� Set the start of the 1st comfort time ( )�
Conrm by pressing
OK
�
5� Set the start of the 1st energy-save time ( )�
Conrm by pressing
OK
�
You can then set a second, third and fourth comfort/
energy-save time�
When you do not wish to set any further comfort/
energy-save times, conrm the settings displayed with
OK
�
The display shows the next day/range of days to be pro-
grammed� Continue as described above�
Use the
Menu
button to go back to the standard display�

43
G
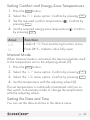
Setting Comfort and Energy-Save Temperatures
1� Press the
Menu
button�
2� Select the TEMP menu option. Conrm by pressing
OK
�
3� Set the required comfort temperature ( ). Conrm by
pressing
OK
�
4� Set the required energy-save temperature ( ). Conrm
by pressing
OK
�
Area Function
AUS
Under 8 °C, frost monitoring function active
AN
From 28°C, radiator valve fully open
Manual Mode
When Manual mode is activated, the device regulates itself
to the temperature set on the adjusting wheel (5)�
1� Press the
Menu
button�
2� Select the MODE menu option. Conrm by pressing
OK
�
3� Select the MANU menu option. Conrm by pressing
OK
�
4� Set the temperature with the adjusting wheel (5)�
The set temperature is continually maintained until you ei-
ther switch to Automatic mode or change the temperature
with the adjusting wheel�
Setting the Date and Time
You can set the date and time in the device menu�

44
G
1� Press the
Menu
button�
2� Select the ZEIT menu option. Conrm by pressing
OK
�
3� Set the current year. Conrm by pressing
OK
�
4� Set the current month. Conrm by pressing
OK
�
5� Set the current day. Conrm by pressing
OK
�
6� Set the current hour. Conrm by pressing
OK
�
7� Set the minute hour. Conrm by pressing
OK
�
Timer Function
The Timer function can be used to set any temperature for a
certain period of time, e�g� for a party�
1� Press the
Time
button�
2� Set the required time period (the time to be set ashes
in the display beside the H icon = hours)�
Conrm by pressing
OK
�
3� Set the required temperature�
Conrm by pressing
OK
�
It is not subsequently possible to change the temperature
for the set period manually because the adjusting wheel is
locked� Press the
Menu
button to unlock the wheel�
Oset
If the current temperature in the room deviates from the set
temperature, the temperature measured by the device can
be adjusted�
1� Press the
Menu
button�

45
G
2� Select the OFFS menu option. Conrm by pressing
OK
�
0,0°C ashes in the display.
3� Turn the adjusting wheel to adjust the temperature (from
-5 °C to +5 °C). Conrm by pressing
OK
�
The temperature indicated in the display does not change
as a result of the adaptation!
Window Function
When the temperature drops dramatically, the device auto-
matically detects that the room is being ventilated�
To save heating costs, the radiator valve closes fully for
10 minutes (factory settings)�
Following this period, the set programme is reactivated�
1� Press the
Menu
button�
2� Select the FENS menu option. Conrm by pressing
OK
�
3� Set the sensitivity (HIGH = high sensitivity, MID = moder-
ate sensitivity, LOW = low sensitivity)�
Conrm by pressing
OK
�
4� Select the period of time 10 M - 60 M (10 to 60 minutes)
for which the radiator valve should remain closed�
Conrm by pressing
OK
�
Holiday Function
You can dene a freely selectable temperature which
should be active for the period you are absent�
Following this period, the set programme is reactivated�
1� Press the
Menu
button�

46
G
2� Select the URLA menu option. Conrm by pressing
OK
�
3� Select the date of your return�
Conrm by pressing
OK
�
4� Enter the time. Conrm by pressing
OK
�
AUS ashes in the display.
5� Set the temperature. Conrm by pressing
OK
�
The icon appears on the display�
Press the
Menu
button to deactivate the function� The icon
disappears�
Child Safety Lock (Key Lock)
You can lock the buttons and keys on the device against un-
authorised use (child safety lock)�
Activate the child safety lock to lock the device�
1� Press and hold the
OK
+
Time
buttons simultaneously
for approx� 2 seconds�
The icon appears and the child safety lock is activated�
Deactivate the child safety lock when you want to use the
device again�
2� Press and hold the
OK
+
Time
buttons simultaneously
for approx� 2 seconds�
The icon switches o and the child safety lock is deacti-
vated�
Heating Pause
Set a heating pause, for example, when you do not want to
use the heating during the summer months�

47
G
1� Press the
Menu
button�
2� Select the MODE menu option. Conrm by pressing
OK
�
3� Select the MANU menu option. Conrm by pressing
OK
�
4� Set the temperature to AUS�
At the end of a heating pause, you can either switch back
to Automatic mode or programme new comfort and energy-
save times�
Summertime/Wintertime
The device automatically recognises summertime and win-
tertime and turns the clock one hour forward on the last
Sunday in March and one hour back on the last Sunday in
October�
Version Number
1� Press the
Menu
button�
2� Select the VERS menu option. Conrm by pressing
OK
�
The version number of the software appears in the display�
You can use the adjusting wheel to display the full version
number (as scrolling text)�
Resetting the Default Factory Settings
1� Press the
Menu
button�
2� Select the RES menu option. Conrm by pressing
OK
�
3� OK ashes on the display. Conrm by pressing
OK
�
The device settings are returned to their default factory

48
G
values and the device is in the state it was when delivered�
ADAP and then INST appear in the display� The device is
ready for adaptation. Conrm starting adaptation by press-
ing
OK
�
Standby Mode
1� Press the
Menu
button�
2� Select the STBY menu option. Conrm by pressing
OK
�
3� Select the AN menu option�
4� Conrm by pressing
OK
� After approx� 30 seconds,
the display automatically switches back to Standby
mode�
In Step 3, select AUS to switch Standby mode o.
Frost Protection Function
This function is automatically active�
The frost protection function prevents the radiator from
freezing�
If the temperature drops to below 6 °C, the device opens
the radiator valve until the temperature increases again to
over 8 °C�
Calcication Protection Function
This function is automatically active�
The device performs a calcication protection operation
weekly to prevent calcication of the radiator valves.

49
G
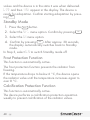
Troubleshooting
The equipment does not function as you want! Try and solve
the problem with the aid of the solutions proposed below�
Caution! Risk of burns through
hot radiator valve! Contact could
lead to hands being burned�
Allow the radiator to cool down before
completing any installation, disassembly
or repair work on the device! Wear work
gloves!
Battery icon appears in the display� Change
the batteries�
Fault message E1 appears in the display�
Adaptation of the device is not possible� Is the device
correctly assembled on the radiator? Follow the
instructions in Section Installation ob pagina 37�
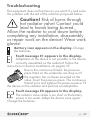
Due to the continuous thread, the pressure
piece tted on the underside can drop out if
the regulator has not been mounted on the
valve� Insert the pressure piece� The continuous
thread turns and tightens the pressure piece� Fit
the device on the radiator and perform an adaptation�
Fault message E2 appears in the display�
The radiator valve stroke is too short or the battery
power is too weak� Adapt the device once again�
Change the batteries�

50
G
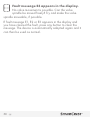
Fault message E3 appears in the display�
No valve movement is possible� Can the valve
spindle be moved freely? Try and make the valve
spindle moveable, if possible�
If fault message E1, E2 or E3 appears in the display and
you have cleared the fault, press any button to clear the
message� The device is automatically adapted again and it
can then be used as normal�

51
G
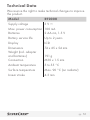
Technical Data
We reserve the right to make technical changes to improve
the product�
Model RT2000
Supply voltage 3 V ⎓
Max� power consumption 100 mA
Batteries 2 AA mn, 1�5 V
Battery service life Up to 2 years
Display LCD
Dimensions 74 x 65 x 54 mm
Weight (incl� adapter
and batteries)
191 g
Connection M30 x 1�5 mm
Ambient temperature 5 to 55 °C
Surface temperature Max� 90 °C (on radiator)
Linear stroke 4�3 mm

52
G
Cleaning
Clean the device regularly using a dry, lint-free cloth�
Disposal
The packing is made of environmentally friendly
materials which can be disposed of through the
local recycling centres�
Refer to your local authorities or municipal oces
for information on how to dispose of the device
when no longer functional� Never throw old de-
vices in household waste in the interest of environ-
mental protection but dispose of them according
to the applicable local regulations� Your local au-
thorities can provide information regarding collec-
tion points and opening times�
Defective or empty batteries must be recycled
according to Directive 2006/66/EC� Return bat-
teries and / or the device via the recycling ser-
vices oered. Batteries must not be disposed of in
household waste� They may contain toxic heavy
metals and are subject to requirements on the
treatment and disposal of hazardous waste� The
chemical symbols of the heavy metals are as fol-
lows: Cd = cadmium, Hg = mercury, Pb = lead�
Therefore, return used batteries to the appropriate
local collection point�

53
G
Guarantee
ATTENTION!
IMPORTANT GUARANTEE CERTIFICATE!
KEEP IN A SAFE PLACE!
Dear Customer,
The period of guarantee for this device is 3 years from the
date of purchase� If problems occur, please contact our hot-
line at : 00800 100 22 100 (international)
Our expert personnel can frequently provide help over the
phone�
service�uk@gsl-servicenet�de
If the problem cannot be solved via telephone, please send
the equipment our service partner at the following address
in its original packaging:
GSL mbH
Am Weimarer Berg 6
99510 Apolda
Germany

54
G
Manufacturer
Olympia Business Systems Vertriebs GmbH
Zum Kraftwerk 1
45527 Hattingen
GERMANY
www�olympia-vertrieb�de
Legal Notice
Trademarks or trade names which appear in this operating
manual are the property of the owner of the corresponding
rights in all cases�

55
G

-
 1
1
-
 2
2
-
 3
3
-
 4
4
-
 5
5
-
 6
6
-
 7
7
-
 8
8
-
 9
9
-
 10
10
-
 11
11
-
 12
12
-
 13
13
-
 14
14
-
 15
15
-
 16
16
-
 17
17
-
 18
18
-
 19
19
-
 20
20
-
 21
21
-
 22
22
-
 23
23
-
 24
24
-
 25
25
-
 26
26
-
 27
27
-
 28
28
-
 29
29
-
 30
30
-
 31
31
-
 32
32
-
 33
33
-
 34
34
-
 35
35
-
 36
36
-
 37
37
-
 38
38
-
 39
39
-
 40
40
-
 41
41
-
 42
42
-
 43
43
-
 44
44
-
 45
45
-
 46
46
-
 47
47
-
 48
48
-
 49
49
-
 50
50
-
 51
51
-
 52
52
-
 53
53
-
 54
54


Silvercrest RT2000 Handleiding
- Categorie
- Accessoires voor het maken van koffie
- Type
- Handleiding
in andere talen
Andere documenten
-
eQ-3 Classic de handleiding
-
 Oregon Scientific BAR 926HG Wetterstation Handleiding
-
Honeywell HR40 de handleiding
-
RADSON TEMPCO Series Maintenance Manual
-
-
-
Hager TX502 Handleiding
-
Oventrop 1061808 de handleiding
-
REMEHA iSense Handleiding
-
REMEHA Timer thermostat Handleiding
