
179803
Big ZapperUniversal Fernbedienung
Universal Remote Control 2in1
E
F
GB
I
P
NL
H
PL
Bedienungsanleitung
Operating Instructions
Mode d‘emploi
Instrucciones de uso
Istruzioni per l‘uso
Gebruiksaanwijzing
Instrukcja obsługi
Használati útmutató
Manual de instruções
D


AA
2in1
Art.Nr.: 00179803
Exit
Menu AV
2
8
3
4
6
7
12
11
10
9
1
5

2
DBedienungsanleitung
Universal-Fernbedienung
Danke, dass Sie sich für den Kauf eines Hama-Produkts entschieden haben.
Nehmen Sie sich die Zeit, und lesen Sie die folgenden Anweisungen und
Informationen vollständig durch. Bitte bewahren Sie diese Anleitung zum
späteren Nachschlagen an einem sicheren Platz auf.
Funktionstasten
1. EIN/AUS / LED Indikator
2. Tasten zur Geräteauswahl
3. Vol+/Vol-: Lautstärkeregulierung
4. Stummschalter
5. Zifferntasten 0-9
6. -/-- Zu zweistelligen Sendernummern wechseln
7. Setup – Einstellungen der Fernbedienung
8. Menu – Gerätemenü öffnen
9. AV – externe AV Quelle wählen
10. Auswahl bestätigen
11. Exit – Auswahl bestätigen
12. CH +/- - Programmauswahl
1. Erläuterung des Hinweissymbols
Hinweis
•Dieses Symbol deutet auf zusätzliche Informationen oder wichtige Hinweise
hin.
2. Lieferumfang
- Universal-Fernbedienung
- Codeliste
- Diese Bedienungsanleitung
3. Sicherheitshinweise
• Verwenden Sie die Universal-Fernbedienung nicht in feuchten Umge-
bungen, und vermeiden Sie Kontakt mit Spritzwasser.
• Halten Sie die Universal-Fernbedienung von Wärmequellen fern, und
setzen Sie sie keinem direkten Sonnenlicht aus.
• Lassen Sie die Universal-Fernbedienung nicht fallen.
• Öffnen Sie die Universal-Fernbedienung nicht. Sie enthält keine vom
Benutzer zu wartenden Teile.
• Die Universal-Fernbedienung gehört wie alle elektrischen Geräte nicht in
Kinderhände.
4. Erste Schritte – Einsetzen der Batterien
Hinweis
•Es werden Alkalibatterien empfohlen. Verwenden Sie zwei Batterien vom
Typ „AA” (LR 6/Mignon).
•Entfernen Sie die Batteriefachabdeckung auf der Rückseite der Universal-
Fernbedienung (A).
•Setzen Sie die Batterien unter Berücksichtigung der „+/-”-Markierungen
für die Polarität ein (B).
•Schließen Sie das Batteriefach (C).
Hinweis: Codespeicher
•Diese Fernbedienung speichert die Einstellungen auch während eines
Batteriewechsels.

3
Hinweis: Energiesparfunktion
•Die Fernbedienung schaltet sich automatisch aus, wenn eine Taste länger
als 15 Sekunden gedrückt wird. Dies verlängert die Lebensdauer der Batte-
rien, sollte die Fernbedienung an einer Stelle feststecken, an der die Tasten
dauerhaft gedrückt werden, z. B. zwischen Sofakissen.
5. Setup
Hinweis
•Halten Sie die Fernbedienung für eine ordnungsgemäße Infrarotübertra-
gung immer in die ungefähre Richtung des zu bedienenden Geräts.
•Falls innerhalb von 30 Sekunden keine Eingabe erfolgt, wird der SETUP-
Mode automatisch beendet. Die LED blinkt sechsmal und geht dann aus.
•Sie können mit der Universal-Fernbedienung kein Gerät bedienen, solange
sich diese im Setup-Modus bendet. Verlassen Sie den Setup-Modus, und
wählen Sie das zu bedienende Gerät über die Tasten zur Geräteauswahl aus.
5.1 Direkte Codeeingabe
Im Lieferumfang der Universal-Fernbedienung ist eine Codeliste enthalten.
Die Codeliste zeigt fünfstellige Codes der meisten TV/STB-Gerätehersteller in
alphabetischer Reihenfolge an. Wenn das zu bedienende Gerät in der Codeliste
enthalten ist, ist die direkte Codeeingabe die einfachste Eingabemethode.
5.1.1 Schalten Sie das zu bedienende Gerät ein.
5.1.2 Drücken Sie die Taste „SETUP”, bis die LED dauerhaft leuchtet.
5.1.3 Wählen Sie über die Gerätetaste das zu bedienende Gerät aus (z. B. TV).
Bei erfolgreicher Auswahl blinkt die LED einmal und leuchtet danach
dauerhaft.
5.1.4
Suchen Sie in der Codeliste nach Marke und Typ des zu bedienenden Geräts.
5.1.5 Geben Sie den entsprechenden fünfstelligen Code über die Zifferntasten
0-9 ein. Die LED bestätigt die Eingabe der einzelnen Ziffern jeweils mit
einem kurzen Blinken und erlischt nach der fünften Ziffer.
Hinweis
•Ein gültiger Code wird automatisch gespeichert.
•Bei einem ungültigem Code blinkt die LED sechsmal und erlischt anschlie-
ßend. Wiederholen Sie die Schritte 5.1.1 bis 5.1.5, oder verwenden Sie eine
andere Methode zur Codeeingabe.
5.2 Manuelle Codesuche
Die Universal-Fernbedienung verfügt über einen internen Speicher, in dem
bereits bis zu 350 Codes pro Gerätetyp für die gängigsten TV/STB-Geräte ent-
halten sind. Sie können diese Codes durchgehen, bis das zu bedienende Gerät
eine Reaktion zeigt. Beispielsweise schaltet sich das zu bedienende Gerät aus
(Taste „POWER”) oder wechselt den Sender (Taste „CH+/CH-”).
5.2.1 Schalten Sie das zu bedienende Gerät ein.
5.2.2 Drücken Sie die SETUP-Taste, bis die LED dauerhaft leuchtet.
5.2.3 Wählen Sie über die Gerätetaste das zu bedienende Gerät aus (z. B. TV).
Bei erfolgreicher Auswahl blinkt die LED einmal und leuchtet danach
dauerhaft.
5.2.4 Drücken Sie die Taste „POWER” oder
„CH+/CH-”, um durch die voreingestellten Codes zu blättern, bis das zu
bedienende Gerät eine Reaktion zeigt.
5.2.5 Drücken Sie „MUTE”, um den Code zu speichern und die Codesuche zu
verlassen. Die LED erlischt.

4
Hinweis
•Im internen Speicher können maximal 350 Codes der gängigsten Geräte
gespeichert werden. Aufgrund der zahlreichen auf dem Markt erhältlichen
TV/STB-Geräte kann es passieren, dass nur die gängigsten Hauptfunktionen
verfügbar sind. Ist dies der Fall, wiederholen Sie die Schritte 5.2.1 bis 5.2.5,
um einen kompatibleren Code zu nden. Für einige spezielle Gerätemodelle
ist möglicherweise kein Code verfügbar.
5.3 Automatische Codesuche
Die automatische Codesuche verwendet dieselben voreingestellten Codes wie
die manuelle Codesuche (5.2). Die Universal-Fernbedienung durchsucht die
Codes jedoch automatisch, bis das zu bedienende Gerät eine Reaktion zeigt.
Beispielsweise schaltet sich das zu bedienende Gerät aus (Taste „POWER”)
oder wechselt den Sender (Tasten „CH+/CH-”).
5.3.1 Schalten Sie das zu bedienende Gerät ein.
5.3.2 Drücken Sie die Taste „SETUP”, bis die LED dauerhaft leuchtet.
5.3.3 Wählen Sie über die Gerätetaste das zu bedienende Gerät aus (z. B. TV).
Bei erfolgreicher Auswahl blinkt die LED einmal und leuchtet danach
dauerhaft.
5.3.4 Drücken Sie die Taste „CH+/CH-” oder „POWER”, um die automatische
Codesuche zu starten. Die LED blinkt einmal und leuchtet danach
dauerhaft. Es dauert 6 Sekunden, bis die Universal-Fernbedienung mit
der ersten Suche beginnt.
Hinweis: Einstellen der Suchgeschwindigkeit
•Die Standardeinstellung für die Suchzeit pro Code ist 1 Sekunde. Wenn
Ihnen dies nicht zusagt, können Sie zu einer Suchzeit von 3 Sekunden pro
Code wechseln. Um zwischen den Suchzeiten zu wechseln, drücken Sie
„CH+” oder „CH-” innerhalb der 6 Sekunden vor dem Beginn der automa-
tischen Codesuche.
5.3.5 Die LED bestätigt die jeweiligen Codesuchen mit einem einzelnen
Blinken.
5.3.6 Drücken Sie „MUTE”, um den Code zu speichern und die Codesuche zu
verlassen. Die LED erlischt.
5.3.7 Um die automatische Suche während des Suchvorgangs abzubrechen,
drücken Sie die Taste „EXIT”.
Hinweis
•Wenn alle Codes ohne Erfolg durchsucht wurden, verlässt die Universal-
Fernbedienung die automatische Codesuche und kehrt automatisch in den
Betriebsmodus zurück. Der aktuell gespeicherte Code bleibt unverändert.
5.4 Codeerkennung
Die Codeerkennung bietet Ihnen die Möglichkeit, einen bereits eingegebenen
Code zu ermitteln.
5.4.1 Drücken Sie die Taste „SETUP”, bis die LED dauerhaft leuchtet.
5.4.2 Wählen Sie über die Gerätetaste das zu bedienende Gerät aus (z. B. TV).
Bei erfolgreicher Auswahl blinkt die LED einmal und leuchtet danach
dauerhaft.
5.4.3 Drücken Sie die Taste „SETUP”. Die LED blinkt einmal und leuchtet
danach dauerhaft.
5.4.4 Drücken Sie zur Suche der ersten Ziffer eine der Nummerntasten von 0
bis 9. Die LED blinkt einmal für die erste Ziffer der fünfstelligen Code-
nummer.

5
5.4.5 Wiederholen Sie den Schritt 5.4.4 für die zweite, dritte, vierte und fünfte
Ziffer.
CODES
TV SAT
6. Sonderfunktionen
6.1 Sender-Punch-Through
Mit der Sender-Punch-Through-Funktion können die Befehle CH+ oder CH- das
aktuell gesteuerte Gerät umgehen, und die Sender eines zweiten Gerätes
wechseln. Alle anderen Befehle sind davon nicht betroffen.
So aktivieren Sie die Sender-Punch-Through-Funktion:
• Drücken Sie die gewünschte Gerätetaste (z.B. TV).
• Halten Sie die Taste „CH+” gedrückt.
• Drücken Sie die gewünschte Gerätetaste (z.B. SAT).
• Lassen Sie die Taste „CH+” wieder los (die LED blinkt einmal bei aktivierter
Einstellung).
So deaktivieren Sie die Sender-Punch-Through-Funktion:
• Drücken Sie die gewünschte Gerätetaste (z.B. TV).
• Halten Sie die Taste „CH-” gedrückt.
• Drücken Sie die gewünschte Gerätetaste (z.B. SAT).
• Lassen Sie die Taste „CH-” wieder los (die LED
blinkt zweimal wenn die
Einstellung deaktiviert wird).
6.2 Lautstärke-Punch-Through
Mit der Lautstärke-Punch-Through-Funktion können die Befehle VOL + oder VOL- das
aktuell gesteuerte Gerät umgehen, und die Lautstärke eines zweiten Gerätes einstel-
len. Alle anderen Befehle sind davon nicht betroffen.
So aktivieren Sie die Lautstärke-Punch-Through-Funktion:
• Drücken Sie die gewünschte Gerätetaste (z.B. TV).
• Halten Sie die Taste „VOL+” gedrückt.
• Drücken Sie die gewünschte Gerätetaste (z.B. SAT).
• Lassen Sie die Taste „VOL+” wieder los (die LED blinkt einmal bei aktivierter
Einstellung).
So deaktivieren Sie die Sender-Punch-Through-Funktion:
• Drücken Sie die gewünschte Gerätetaste (z.B. TV).
• Halten Sie die Taste „VOL-” gedrückt.
• Drücken Sie die gewünschte Gerätetaste (z.B. SAT).
• Lassen Sie die Taste „VOL-” wieder los (die LED
blinkt zweimal wenn die
Einstellung deaktiviert wird).
6.3 Macro Power
Mit Macro Power können Sie zwei TV/STB-Geräte gleichzeitig ein-/ausschalten.
So aktivieren Sie die Macro Power-Funktion:
• Drücken Sie die gewünschte Gerätetaste (z.B. TV).
• Halten Sie die Taste „POWER” gedrückt.
• Drücken Sie die gewünschte Gerätetaste (z.B. SAT).
• Lassen Sie die Taste „POWER” wieder los (die LED blinkt einmal bei
aktivierter Einstellung).
So deaktivieren Sie die Macro Power-Funktion:
• Drücken Sie die gewünschte Gerätetaste (z.B. TV).
• Halten Sie die Taste „POWER” gedrückt.
• Drücken Sie die gewünschte Gerätetaste (z.B. SAT).
• Lassen Sie die Taste „POWER” wieder los (die LED
blinkt zweimal wenn die
Einstellung deaktiviert wird)

6
7. LERNFUNKTION
Diese Fernbedienung ist mit einer Lernfunktion ausgestattet. Dadurch können
Sie Funktionen Ihrer Originalfernbedienung auf diese Universalfernbedienung
übertragen.
7.1 Bevor Sie die Lernfunktion starten
• Achten Sie auf einen einwandfreien Zustand aller verwendeten Batterien in
beiden Fernbedienungen. Wechseln Sie diese gegebenenfalls.
• Legen Sie Ihre Originalfernbedienung und die Universalfernbedienung so
nebeneinander, dass sich die Infrarotdioden der Fernbedienungen direkt
gegenüberliegen.
• Korrigieren Sie, wenn nötig, die Höhe beider Fernbedienungen, um eine
optimale Ausrichtung zu erzielen.
• Der Abstand beider Fernbedienungen sollte ca. 3 cm betragen.
Hinweis
• Bewegen Sie die Fernbedienungen während des Lernvorgangs nicht.
• Stellen Sie sicher, dass es sich bei der Raumbeleuchtung nicht um
Leuchtstoffröhren oder Energiesparlampen handelt, da diese Störungen
verursachen und damit den Lernvorgang behindern könnten.
• Die Entfernung der beiden Fernbedienungen zur nächsten Lichtquelle
sollte mindestens 1 Meter betragen.
• Der Lernvorgang wird ohne Speichern beendet, wenn während des
aktivierten Lernmodus 30 Sek. lang keine Taste betätigt wird oder kein Signal
empfangen wird.
• Im Lernmodus kann jede Taste nur mit einer Funktion belegt werden. Eine
neue Funktion überschreibt die auf dieser Taste bisher angelernte Funktion.
• Die Tasten TV, STB und Setup können nicht mit neuen Funktionen belegt
werden.
7.2 Aktivieren des Lernmodus
1. Drücken und halten Sie die Tasten [MUTE] und [VOL+] gleich-
zeitig für ca. 3 Sek. bis die Status-LED dauerhaft leuchtet.
2. Geben Sie den Code [9] [8] [0] ein, die Status-LED blinkt 2mal und leuchtet
dann dauerhaft.
3. Die Universal-Fernbedienung bendet sich jetzt im Lernmodus.
7.3 Übertragen der Tastenfunktion
1. Drücken Sie die Taste auf der Originalfernbedienung, deren Funktion Sie
übertragen möchten. Zur Bestätigung, dass der Befehl empfangen wurde,
blinkt die Status-LED der Universal-Fernbedienung.
2. Drücken Sie nun die Taste der Universal-Fernbedienung, auf die die Funkti-
on übertragen werden soll.
3. Die Funktions-LED der Universal-Fernbedienung blinkt 3mal zur Bestäti-
gung und leuchtet anschließend wieder dauerhaft. Die neue Funktion ist
nun gespeichert.
4. Um die Funktionen weiterer Tasten zu übertragen, wiederholen Sie diese
Schritte.
5. Drücken Sie die Taste [SETUP], um alle angelernten Funktionen zu spei-
chern und den Lernmodus zu verlassen.
BIG ZAPPER
ca. 3 cm
ORIGINAL

7
Hinweis
Beim Wechsel der Batterien der Universal-fernbedienung bleiben die
Funktionen der angelernten Tasten erhalten.
7.4 Löschen angelernter Funktionen
7.4.1 Löschen einer angelernten Funktion
1. Drücken und halten Sie die Tasten [MUTE] und [VOL+] gleich-
zeitig für ca. 3 Sek. bis die Status-LED dauerhaft leuchtet.
2. Geben Sie den Code [9] [8] [1] ein, die Status-LED blinkt 2mal und leuchtet
anschließend wieder dauerhaft.
3.
Drücken Sie die Taste, deren Funktion Sie
löschen möchten. Die Status-LED blinkt 3mal und die gewünschte Funktion
ist gelöscht.
7.4.2 Löschen aller angelernten Funktionen
1. Drücken und halten Sie die Tasten [MUTE] und [VOL+] gleichzeitig für ca. 3
Sek. bis die Status-LED dauerhaft leuchtet.
2. Geben Sie den Code [9] [8] [2] ein, die Status-LED blinkt 2mal und leuchtet
anschließend wieder dauerhaft.
3. Drücken Sie die Taste [SETUP], die Status-LED blinkt 3mal und alle
angelernten Funktionen sind gelöscht.
8. Wartung
• Verwenden Sie nie gleichzeitig alte und neue Batterien in der Universal-
Fernbedienung, da alte Batterien zum Auslaufen neigen und zu einem
Leistungsverlust führen können.
•
Reinigen Sie die Universal-Fernbedienung keinesfalls mit Scheuermitteln oder
scharfen Reinigungsmitteln.
• Halten Sie die Universal-Fernbedienung frei von Staub, indem Sie sie mit
einem trockenen weichen Tuch reinigen.
9. Fehlerbehebung
F.
Meine Universal-Fernbedienung funktioniert nicht!
A.
Überprüfen Sie das
TV/STB
-Gerät. Wenn der Hauptschalter des Geräts ausge-
schaltet ist, kann die Universal-Fernbedienung das Gerät nicht bedienen.
A. Überprüfen Sie, dass die Batterien korrekt eingesetzt sind und die Polarität
beachtet wurde.
A. Überprüfen Sie, ob Sie die entsprechende Gerätetaste für das Gerät
gedrückt haben.
A. Tauschen Sie die Batterien bei niedrigem Batteriestand aus.
F. Wenn für die Marke meines TV/STB-Geräts mehrere Gerätecodes aufgelistet
sind, wie wähle ich den korrekten Gerätecode aus?
A. Um den korrekten Gerätecode für das
TV/STB-Gerät zu bestimmen, testen Sie die Codes nacheinander, bis die
meisten Tasten ordnungsgemäß funktionieren.
F. Mein TV/STB-Gerät reagiert nur auf einige Tastenbefehle.
A. Probieren Sie andere Codes, bis die meisten Tasten ordnungsgemäß
funktionieren.

8
10. Service und Support
Bitte wenden Sie sich bei Fragen zum Produkt gerne an die Hama-Produktbe-
ratung.
Hotline: +49 9091 502-0 (Deu/Eng)
Weitere Supportinformationen nden sie hier:
www.hama.com

9
GOperating instruction
Universal Remote Control
Thank you for your decision for a Hama product.
Take your time and read the following instructions and information
completely. Please keep these instructions in a safe place for future reference.
Function buttons
1. ON/OFF / LED Indicator
2. Device selection keys
3. Vol +/- Volume settings
4. Mute
5. Number keys 0-9
6. -/-- switch to two-digit channel numbers
7. Setup – Remote control settings
8. Menu – to enter On-screen menu
9. AV – Select external AV source
10. To confirm a selection
11. Exit – to exit on-screen Menu
12. CH +/- - Channel Selection
1. Explanation of the Note symbol
Note
•This symbol is used to indicate additional information or important notes.
2. Package Contents
- Universal Remote Control (URC)
- Code List
- This operating instructions
3. Safety notes
• Do not use the Universal Remote Control in moist or wet environments and
avoid spray-water contact.
•
Do not expose the Universal Remote Control to heat sources or direct sunlight.
• Do not drop the Universal Remote Control.
• Never open the Universal Remote Control.
It contains no user-serviceable parts.
• As with all electrical devices, keep the Universal Remote Control away
from children.
4. Getting started – installing the Batteries
Note
•Alkaline batteries are recommended. Use 2 „AA“ (LR 6/Mignon) type
batteries.
•Remove the battery compartment lid on the back of your URC (A).
•Check the required battery polarity and insert batteries according to the
“+/–” marks inside the compartment (B).
•Close battery compartment lid (C).
Note: Code saver
•This remote control saves the settings during battery change.

10
Note: Battery saving function
•The remote control switches off automatically when a button is pressed
down for more than 15 seconds. This conserves battery power if the remote
control gets stuck in a position where the buttons are continually pressed
down, such as between sofa cushions.
5. Setup
Note
•To obtain a proper infrared (IR) transmission,
allways point your Remote
control in the approximate direction of the device you want to control.
•No entry for approx. 30 seconds will time out the Setup mode. The LED
indicator shows six ashes and turns off.
•If you want to control a device , it´s not possible while the Universal Remote
Control is in the Setup Mode. Exit the Setup mode and select the device you
want to control using the device selection keys.
5.1 Direct Code Entry
Your Universal Remote Control Package contains a code list. The code list
displays ve-digit codes for most TV/STB device manufacturers in alphabetical
order. If the device you want to control is covered by the code list, the Direct
Code Entry is the most convenient entry method.
5.1.1 Turn on the device you want to control
5.1.2 Press the SETUP key until the LED indicator is permanently lit.
5.1.3 Select the device you want to control using the device key (e.g. TV). A
successful selection is indicated by the LED with one ash followed by
permanent light.
5.1.4 Check code list for brand and type of the device you want to control.
5.1.5 Enter the corresponding ve-digit code using the number buttons 0-9.
The LED conrms the entry of each digit with a short ash and goes out
after the fth digit.
Note
•If the code is valid, it is saved automatically.
•If code is invalid, the LED indicator ashes six times and then turns off.
Repeat steps 5.1.1 to 5.1.5 or use a different code entry method.
5.2 Manual code search
Your Universal Remote Control is equipped with an internal memory, which is
preloaded with up to
350 codes per device type for the most common
TV/STB devices. You can zap through these codes until the device you want to
control shows a
reaction. This might be that the device you want to control switches off
(POWER key) or changes the channel (CH+/CH- keys).
5.2.1 Turn on the device you want to control
5.2.2 Press the SETUP key until the LED indicator
is permanently lit.
5.2.3 Select the device you want to control using the device key (e.g. TV). A
successful selection is indicated by the LED with one ash followed by
permanent light.
5.2.4 Press the “POWER” or the CH+/CH- key to zap through the preloaded
codes until the device you want to control reacts.

11
5.2.5 Press MUTE to save the code and exit the code search. The LED indicator
turns off.
Note
•Internal memory limitations allow only up to 350 most common device codes to
be preloaded. Due to the extensive number of different available TV/STB devices
on the market, it may be possible that only the most common main functions are
available. If so, repeat steps 5.2.1 to 5.2.5 to nd a more compatible code. No
code may be available for some special device models.
5.3 Auto Code Search
Auto Code Search uses the same preloaded codes as the Manual Code
Search (5.2) but your Universal Remote Control scanns through the codes
automatically until the device you want to control shows a reaction. This might
be that the device you want to control switches off (POWER key) or changes
the channel (CH+/CH- keys).
5.3.1 Turn on the device you want to control
5.3.2 Press the SETUP key until the LED indicator is permanently lit.
5.3.3 Select the device you want to control using the device key (e.g. TV). A
successful selection is indicated by the LED with one ash followed by
permanent light.
5.3.4 Press the CH+/CH- keys or POWER to start the Auto Code Search. The
LED indicator ashes once followed by permanent light. The Universal
Remote Control has a latency of 6 seconds before the rst scan starts.
Note: Scan Speed Settings
•Scan Speed Settings can be set at either 1 or 3 seconds. The default setting
for the scan time per single code is 1 sec. If this feels uncomfortable , you
can switch to 3 sec. scan time per single code. To switch between the scan
times, press CH+ or CH- during the
6 sec. latency before Auto Code Search starts scanning.
5.3.5 The LED indicator conrms each single code scan with a single ash.
5.3.6 Press MUTE to save the code and exit the code search. The LED indicator
turns off.
5.3.7 To stop the Auto Code Search during the scan process, press the EXIT
key.
Note
•When all codes are searched without success, the Universal Remote Control
exits Auto Code Search and returns to operational mode automatically.
Currently stored code is not changed.
5.4 Code Identification
The Code identication offers you the possibility, to determine an already
entered code.
5.4.1 Press the SETUP key until the LED indicator is permanently lit.
5.4.2 Select the device you want to control using the device key (e.g. TV). A
successful selection is indicated by the LED with one ash followed by
permanent light.
5.4.3 Press SETUP key. The LED indicator ashes once followed by permanent
light.
5.4.4 To nd the rst digit, press the numeric keys from 0 to 9. The LED ashes
once for the rst digit of the ve-digit code number.
5.4.5 Repeat step 5.4.4 for the second, third, fourth and fth digits
respectively.

12
CODES
TV SAT
6. Special Functions
6.1 Punch Through Channel
The Punch Through Channel allows the CH+ or CH- commands to bypass the
currently controlled device and switch the channels on a second device.All
other commands remain uninuenced.
To activate the punch through channel setting:
• Press desired device mode key (e.g. TV).
• Press and hold “CH+” key.
• Press desired device mode key (e.g. SAT).
• Release “CH+” (the indicator ashes once if the setting is activated).
To deactivate the punch through channel setting:
• Press desired device mode key (e.g. TV).
• Press and hold “CH-” key.
• Press desired device mode key (e.g. SAT).
• Release “CH-” (the indicator is ashing twice if the setting is deactivated).
6.2 Punch Through Volume
The Punch Through Volume allows the VOL+ or VOL- commands to bypass the
currently controlled device and adjust the volume on a second device. All other
commands remain uninuenced.
To activate the punch through volume setting:
• Press desired device mode key (e.g. TV).
• Press and hold “VOL+” key.
• Press desired device mode key (e.g. SAT).
• Release “VOL+” (the indicator ashes once if the setting is activated).
To deactivate the punch through volume setting:
• Press desired device mode key (e.g. TV).
• Press and hold “VOL-” key.
• Press desired device mode key (e.g. SAT).
• Release “VOL-” (the indicator is ashing twice if the setting is deactivated).
6.3 Macro Power
Macro Power enables you to turn two TV/STB devices on/off simultaneously.
To activate the macro power setting:
• Press desired device mode key (e.g. TV).
• Press and hold “POWER” key.
• Press desired device mode key (e.g. SAT).
• Release “POWER” (the indicator ashes once if the setting is activated).
To deactivate the macro power setting:
• Press desired device mode key (e.g. TV).
• Press and hold “POWER” key.
• Press desired device mode key (e.g. SAT).
• Release “POWER” (the indicator is ashing twice if the setting is
deactivated).
7. LEARN MODE
This remote control is equipped with a learning function. Thus, you could learn
functions of your original remote to this remote control.
7.1 BEFORE STARTING LEARN MODE
• The batteries in the two remote controls have to be in good condition.
Replace them if necessary.
• Place the remote controls with the infrared diodes so that they point
towards each other.

13
• Where necessary adjust the height of both remotes so that infrared diodes
are properly aligned.
• The distance between the remote controls should be about 3 cm.
ca. 3 cm
ROC1117GRU ORIGINAL
Note
• Do not move the remote controls during the learning procedure.
• Ensure that the room is not lit by uorescents tubes or low energy
consumption lamps since such light sources could interfere with the copying.
• The 2 remote controls must be at least 1 meter away from any light source.
• During learning mode, if no key is selected for more than 30 seconds, the
learning mode will exit automatically or if no other remote signal is received.
• Each function key will hold only one command. A new command to be
learned will automatically replace the previous one.
• It is not possible to learn any new functions to the TV, STB and Setup key.
7.2 ENTER LEARN MODE
1. Press and hold the [MUTE] and [VOL+] keys for approx. 3 seconds until the
LED will be lit.
2. Enter the code [9] [8] [0], the LED will ash
2 times and then remain on.
3. The Universal Remote Control is now ready to learn new commands.
7.3 LEARNING OF KEYS
1. Press and release the desired key on the original remote control which
you want the command to be learned. The LED at your Universal Remote
Control will ash to conrm that the information has been received.
2. Then press and release the target key on the Universal Remote Control you
want learned.
3. If the LED ashes 3 times and then remain on, the command has been
learned successfully.
4. Repeat these steps to learn other key functions.
5. Please press the [SETUP] key to save the code and exit learning mode.
Note
While replacing the batteries, the remote control will keep the functions of the
learned keys.
7.4 CLEARING OF LEARNED KEYS
7.4.1 CLEARING OF ONE LEARNED KEY
1. Press and hold [MUTE] and [VOL+] keys for 3 seconds until the LED will be
lit.
2. Enter the code [9] [8] [1], the LED will ash
2 times and then remain on.
3. Press and release the desired key at the Universal Remote Control which
you want to clear the learned command. If the LED ashes 3 times, the
learned command has been cleared successfully.
BIG ZAPPER

14
7.4.2 CLEARING OF ALL LEARNED KEYS
1. Press and hold [MUTE] and [VOL+] keys for 3 seconds until the LED will be
lit.
2. Enter the code [9] [8] [2], the LED will ash
2 times and then remain on.
3. Press and release the [SETUP] key at the
Universal Remote Control. If the LED ashes 3 times, all commands have
been cleared successfully.
8. Maintenance
• Do not mix new and used batteries for powering the Universal Remote
Control, as old batteries tend to leak and may cause power drain.
• Do not use corrosive or abrasive cleaners on your Universal Remote Con-
trol.
• Keep the Universal Remote Control dust free by wiping it with a soft, dry
cloth.
9. Troubleshooting
Q. My Universal Remote Control does not work at all!
A. Check your TV/STB device. If the device’s main switch is turned off, your
URC cannot operate your device.
A. Check whether your batteries are inserted properly and are in the correct
+/- position.
A. Check whether you have pressed the corresponding device mode key for
your device.
A. If the batteries are low, replace the batteries.
Q. If several Device Codes are listed under the brand of my TV/STB device,
how
can I select the correct Device Code?
A. To determine the correct Device Code for your TV/STB device, test the codes
one by one until most keys work properly.
Q. My TV/STB equipment responds only to some of the commands.
A. Try other codes until most keys work properly.
10. Service and Support
If you have questions on the product, you are welcome to contact Hama
Product Consulting.
Hotline: +49 9091 502-0
For further support information please visit:
www.hama.com

15
FMode d‘emploi
Télécommande universelle
Nous vous remercions d’avoir choisi un produit Hama.
Veuillez prendre le temps de lire l'ensemble des consignes et informations
suivantes. Veuillez conserver ces instructions dans un endroit sûr afin de
pouvoir les consulter en cas de besoin.
Touches de fonction
1. Témoin LED ON/OFF
2. Touches de sélection de l’appareil
3. Vol+ / Vol- : réglage du volume
4. Commutateur sourdine
5. Bloc numérique 0-9
6. -/-- Sélection de numéros de stations à deux chiffres
7. Setup – paramètres de la télécommande
8. Menu – ouverture du menu de l’appareil
9. AV –
sélection de la source AV externe
10. Confirmer la sélection
11. Exit – quitter le menu de l’appareil
12. CH +/- - sélection du programme
1. Explication des symboles
Remarque
•Ce symbole est utilisé pour indiquer des informations supplémentaires ou des
remarques importantes.
2. Matériel livré
- Télécommande universelle
- Liste de codes
- Mode d‘emploi
3. Consignes de sécurité
• N‘utilisez pas la télécommande universelle dans un environnement humide
et évitez toute projection d‘eau.
• Protégez votre télécommande universelle de toute source de chaleur et ne
l‘exposez pas aux rayons directs du soleil.
• Ne laissez pas votre télécommande tomber par terre.
• N‘ouvrez pas votre télécommande ; elle ne comprend aucune pièce néces-
sitant un entretien.
• Cette télécommande universelle, comme tout autre appareil électrique, ne
doit pas se trouver à portée des enfants.
4. Premiers pas - insertion des piles
Remarque
•Nous vous recommandons d‘utiliser des piles alcalines. Utilisez 2 piles
(AA / LR 6 /Mignon).
•Ouvrez le couvercle du compartiment à piles sur la face arrière de la
télécommande.
•Insérez deux piles dans le logement en respectant les indications de
polarité (+/-).
•Refermez le compartiment à piles.
Remarque: mémoire des codes
•Cette télécommande conserve les paramètres programmés, même lors
d’un remplacement des piles.

16
Remarque: Fonction d‘économie des piles
•La télécommande se met automatiquement hors service lorsque vous
appuyez sur une touche pendant plus de 15 secondes. Cette fonction
permet de ne pas vider les piles de votre télécommande si cette dernière
est coincée (entre les coussins d‘un divan, par exemple) et qu‘une touche
reste enfoncée.
5. Configuration
Remarque
•Pointez la télécommande en direction de l‘appareil que vous désirez piloter
an de garantir une excellente transmission infrarouge.
•Le mode de conguration s‘interrompt automatiquement lorsque vous
n‘appuyez sur au cune touche pendant plus de 30 secondes. La LED
clignote six fois, puis s’éteint.
•Vous ne pouvez pas piloter un appareil à l‘aide de la télécommande
lorsqu‘il se trouve en mode de conguration. Vous pouvez quitter le mode
de conguration et sélectionner l‘appareil que vous désirez piloter à l‘aide
des touches de sélection de l’appareil.
5.1 Saisie directe du code
Une liste de codes fait partie des éléments fournis avec la télécommande. La
liste des codes ache les codes à cinq chiffres de la plupart des fabricants de
téléviseurs/décodeurs dans l’ordre alphabétique. La saisie directe du code est
la méthode la plus simple dans le cas où le code de votre appareil est compris
dans la liste.
5.1.1 Mettez l’appareil que vous désirez utiliser sous tension.
5.1.2 Appuyez sur la touche « SETUP » jusqu‘à ce que la LED s‘allume en
permanence.
5.1.3 Sélectionnez l’appareil que vous désirez piloter (TV, etc.) à l‘aide de la
touche de l‘appareil. La LED clignote une fois, puis s‘allume en perma-
nence en cas de sélection correcte.
5.1.4 Recherchez le code de l’appareil que vous désirez utiliser à l’aide de la
liste des codes par marque et par type.
5.1.5 Saisissez le code correspondant à cinq chiffres à l’aide des touches
numériques de 0 à 9. La LED conrme la saisie des différents chiffres par
un bref clignotement et s’éteint après le cinquième chiffre.
Remarque
•Un code valide est sauvegardé automatiquement.
•En cas de code erroné, la LED clignote six fois, puis s‘éteint. Répétez les
étapes 5.1.1 à 5.1.5 ou utilisez une autre méthode pour la saisie du code.
5.2 Recherche manuelle du code
La télécommande dispose d‘une mémoire interne contenant jusqu‘à 350 codes
par type d‘appareil adaptés à tous les appareils TV / STB courants. Vous pouvez
passer tous ces codes en revue jusqu‘à ce que l‘appareil que vous désirez utili-
ser réagisse ; l‘appareil se met, par exemple, hors tension (touche « POWER »)
ou change de station (touche « CH+ / CH- »).
5.2.1 Mettez l’appareil que vous désirez utiliser sous tension.
5.2.2 Appuyez sur la touche « SETUP » jusqu‘à ce que la LED s‘allume en
permanence.
5.2.3 Sélectionnez l’appareil que vous désirez piloter (TV, etc.) à l‘aide de la
touche de l‘appareil. La LED clignote une fois, puis s‘allume en perma-
nence en cas de sélection correcte.

17
5.2.4 Appuyez sur la touche « POWER » ou « CH+ / CH- » an de faire déler les
codes présélectionnés jusqu‘à ce que l‘appareil que vous désirez utiliser
réagisse.
5.2.5 Appuyez sur la touche « MUTE » an de sauvegarder le code et quitter la
recherche du code ; la LED s’éteint.
Remarque
•La télécommande dispose d‘une mémoire interne contenant 350 codes
adaptés aux appareils TV/STB courants. En raison de la quantité d‘appareils
TV/STB disponibles sur le marché, il est possible que seules les fonctions
principales soient disponibles. Si tel est le cas, répétez les étapes 5.2.1 à
5.2.5 an de trouver un code compatible. Il est possible qu‘aucun code ne
fonctionne pour certains modèles spéciaux.
5.3 Recherche automatique du code
La recherche automatique du code utilise les mêmes codes présélectionnés que
ceux de la recherche manuelle (5.2). La télécommande universelle recherche
automatiquement le code jusqu‘à ce que l‘appareil que vous désirez utiliser
réagisse ; l‘appareil se met, par exemple, hors tension (touche « POWER ») ou
change de station (touches «
CH
+ /
CH
- »).
5.3.1 Mettez l’appareil que vous désirez utiliser sous tension.
5.3.2 Appuyez sur la touche « SETUP » jusqu‘à ce que la LED s‘allume en vert
en permanence.
5.3.3 Sélectionnez l’appareil que vous désirez piloter (TV, etc.) à l‘aide de la
touche de l‘appareil. La LED clignote une fois, puis s‘allume en perma-
nence en cas de sélection correcte.
5.3.4 Appuyez sur la touche «
CH
+ /
CH
- » ou
« POWER » an de lancer une recherche automatique de code. La LED
clignote une fois, puis s‘allume en permanence.
La télécommande universelle commence la première recherche après
6 secondes.
Remarque : réglage de la vitesse de recherche
•Le réglage par défaut de la vitesse de recherche par code est de 1 seconde. Vous
pouvez modier ce réglage et congurer une vitesse de 3 secondes par code.
Appuyez sur la touche «
CH
+ /
CH
- » pendant les 6 secondes précédent le début
de la recherche automatique.
5.3.5 La LED conrme la recherche du code à l‘aide d‘un clignotement unique.
5.3.6 Appuyez sur la touche « MUTE » an de sauvegarder le code et quitter la
recherche du code ; la LED s’éteint.
5.3.7 Appuyez sur la touche « EXIT » an d‘interrompre la recherche automa-
tique.
Remarque
•La télécommande universelle quitte le mode de recherche automatique et
retourne en mode de fonctionnement normal si elle ne détecte aucun code
adapté. Le code sauvegardé actuellement ne change pas.
5.4 Reconnaissance de code
La reconnaissance de code vous permet de rechercher un code déjà attribué.
5.4.1 Appuyez sur la touche « SETUP » jusqu‘à ce que la LED s‘allume en vert
en permanence.
5.4.2
Sélectionnez l’appareil que vous désirez piloter (TV, etc.) à l‘aide de la
touche de l‘appareil. La LED clignote une fois, puis s‘allume en perma-
nence en cas de sélection correcte.

18
5.4.3 Appuyez sur la touche « SETUP ». La LED clignote une fois, puis s‘allume
en permanence.
5.4.4 Appuyez sur une des touches numériques de 0 à 9 an de lancer la
recherche du premier chiffre. La LED clignote une fois pour le premier
chiffre du numéro de code à cinq chiffres.
5.4.5 Répétez les étapes 5.4.4 pour le deuxième, le troisième et le quatrième
chiffre.
CODES
TV SAT
6. Fonctions spéciales
6.1 Recherche de stations en maintenant la
touche enfoncée (« punch through »)
La fonction de recherche de Chaînes en maintenant la touche enfoncée («
punch through ») vous permet de contourner les commandes
CH
+ ou
CH
- de
l‘appareil utilisé actuellement et piloter un deuxième appareil. Les autres
commandes ne sont pas affectées.
Activadon de la fonction de recherche de chaînes
(« punch through »):
• Appuyez sur la touche de l‘appareil désiré (TV, etc.).
• Maintenez la touche « CH+ » enfoncée.
• Appuyez sur la touche de l‘appareil désiré (SAT, etc.).
• Relâchez la touche « CH+ » (la LED clignote une fois en cas d‘activation du
paramètre).
Désactivadon de la fonction de recherche de chaînes
(« punch through »):
• Appuyez sur la touche de l‘appareil désiré (TV, etc.).
• Maintenez la touche « CH- » enfoncée.
• Appuyez sur la touche de l‘appareil désiré (SAT, etc.).
• Relâchez la touche « CH- » (la LED clignote deux fois en cas de désactivation
du paramètre).
6.2 Réglage du volurne en maintenant la touche enfoncée (« punch
through »)
La fonction de réglage du volume en maintenant la touche enfoncée (« punch
through ») vous permet de contourner les commandes VOL+ ou VOL- de
l‘appareil utilisé actuellement et régler Ie volume d‘un deuxième appareil. Les
autres commandes ne sont pas affectées.
Activation de la fonction de réglage du volume par touche enfoncée « punch
through »:
• Appuyez sur la touche de l‘appareil désiré (TV, etc.).
• Maintenez la touche « VOL+ » enfoncée.
• Appuyez sur la touche de l‘appareil désiré (SAT, etc.).
• Relâchez la touche « VOL+ » (la LED clignote une fois en cas d‘activation du
paramètre).
Désactivation de la fonction de réglage du volume par touche enfoncée « punch
through »:
• Appuyez sur la touche de l‘appareil désiré (TV, etc.).
• Maintenez la touche « VOL- » enfoncée.
• Appuyez sur la touche de l‘appareil désiré (SAT, etc.).
• Relâchez la touche « VOL- » (la LED clignote deux fois en cas de désactivation
du paramètre).
6.3 Macro Power
La fonction MACRO POWER vous permet de mettre deux appareils TV / STB
simultanément sous/hors tension.
Activation de la fonction MACRO POWER:

19
• Appuyez sur la touche de l‘appareil désiré (TV, etc.).
• Maintenez la touche « POWER » enfoncée.
• Appuyez sur la touche de l‘appareil désiré (SAT, etc.).
• Relâchez la touche « POWER » (la LED clignote une fois en cas d‘activation du
paramètre).
Désactivation de la fonction MACRO POWER:
• Appuyez sur la touche de l‘appareil désiré (TV, etc.).
• Maintenez la touche « POWER » enfoncée.
• Appuyez sur la touche de l‘appareil désiré (SAT, etc.).
• Relâchez la touche « POWER » (la LED clignote deux fois en cas de désactivation
du paramètre).
7. FONCTION D’APPRENTISSAGE
Cette télécommande est équipée d’une fonction d’apprentissage. Elle vous
permet de transférer des fonctions de votre télécommande d’origine à cette
télécommande universelle.
7.1 Avant de lancer le mode d’apprentissage
• Veillez à ce que les piles des deux télécommandes soient en parfait état.
Remplacez-les, le cas échéant.
• Placez votre télécommande d’origine et la télécommande universelle côte à côte,
les diodes infrarouges des télécommandes devant se faire face.
• Au besoin, corrigez la hauteur des deux télécommandes an d’optimiser leur
positionnement.
• La distance entre les deux télécommandes doit être d’env. 3 cm.
ca. 3 cm
ROC1117GRU ORIGINAL
Remarque
• Ne déplacez pas les télécommandes pendant la procédure d’apprentissage.
• Assurez-vous que la pièce dans laquelle vous vous trouvez n’est pas
éclairée à l’aide de tubes uorescents ou de lampes basse consommation ;
ce type d’éclairage est susceptible de provoquer des perturbations et
gêner la procédure d’apprentissage.
• La distance entre les deux télécommandes et la source de lumière la plus
proche doit être d’au moins 1 mètre.
• La procédure d’apprentissage s’interrompt automatiquement, sans aucune
sauvegarde si vous n’appuyez sur aucune touche ou qu’aucun signal n’est
capté pendant 30 secondes après l’activation du mode d’apprentissage.
• En mode d’apprentissage, vous ne pourrez affecter qu’une seule fonction
à une touche. Toute nouvelle fonction écrasera la fonction qui avait été
programmée auparavant pour cette touche.
• Les touches TV, STB et Setup ne peuvent pas être assignées à d’autres
fonctions.
7.2 Activation du mode d’apprentissage
1. Appuyez simultanément sur les touches [MUTE] et [VOL+] pendant
env. 3 secondes jusqu’à ce que la LED d’état s’allume en continu.
2. Saisissez le code [9] [8] [0] ; la LED d’état clignote deux fois, puis s’allume
en continu.
3. La télécommande universelle est alors en mode d’apprentissage.
BIG ZAPPER

20
7.3 Transfert de la fonction d’une touche
1. Appuyez sur la touche de la télécommande
d’origine dont vous souhaitez transférer la fonction. La LED d’état de la
télécommande universelle clignote pour conrmer la bonne réception de
la commande.
2. Appuyez sur la touche de la télécommande
universelle sur laquelle vous souhaitez transférer la fonction.
3. La LED de fonctionnement de la télécommande universelle clignote 3 fois
pour conrmer le transfert, puis reste allumée en continu. La nouvelle
fonction est désormais sauvegardée.
4. Répétez ces étapes pour transférer les fonctions d’autres touches.
5. Appuyez sur la touche [SETUP] pour sauvegarder toutes les fonctions
programmées et quitter le mode d’apprentissage.
Remarque
Les fonctions des touches reprogrammées seront conservées lorsque vous
remplacez les piles de la télécommande universelle.
7.4 Suppression des fonctions programmées
7.4.1 Suppression d’une fonction
programmée
1. Appuyez simultanément sur les touches [MUTE] et [VOL+] pendant
env. 3 secondes jusqu’à ce que la LED d’état s’allume en continu.
2. Saisissez le code [9] [8] [1] ; la LED d’état clignote deux fois, puis reste
allumée en continu.
3. Appuyez sur la touche dont vous souhaitez supprimer la fonction. La LED
d’état clignote 3 fois ; la fonction souhaitée est supprimée.
7.4.2 Suppression de toutes les fonctions programmées
1. Appuyez simultanément sur les touches [MUTE] et [VOL+] pendant
env. 3 secondes jusqu’à ce que la LED d’état s’allume en continu.
2. Saisissez le code [9] [8] [2]. La LED d’état clignote deux fois, puis s’allume
en continu.
3. Appuyez sur la touche [SETUP] ; la LED d’état clignote 3 fois ; toutes les
fonctions programmées sont supprimées.
8. Entretien
• N‘utilisez pas de piles neuves avec des piles usagées dans la télécomman-
de universelle; les piles usagées sont susceptibles de couler et provoquer
une détérioration de l‘appareil.
• N‘utilisez en aucun cas des produits abrasifs ou des produits nettoyants
agressifs pour le nettoyage de votre télécommande universelle.
•
Vous pouvez éliminer la poussière de votre télécommande en l‘essuyant à l‘aide
d‘un chiffon sec et doux.
9. Élimination des pannes
Q.
Ma télécommande universelle ne fonctionne pas.
R.
Contrôlez l’appareil
TV/STB
. Vous ne pourrez pas utiliser la télécommande sur
un appareil mis hors tension à l’aide de la touche d’alimentation principale.
R. Vériez que les piles sont correctement insérées dans la télécommande
(polarité +/–).
R. Vériez que vous avez bien appuyé sur la touche de l‘appareil correspon-
dant au système désiré.

21
R. Remplacez les piles en cas de niveau faible.
Q.
Plusieurs codes d’appareils sont mentionnés pour la marque de mon
appareil ; lequel choisir ?
R. Pour déterminer le bon code de votre appareil TV/STB, testez successive-
ment les codes, l’un après l’autre, jusqu’à ce que la plupart des fonctions
de votre appareil fonctionnent correctement.
Q. Mon appareil TV/STB réagit uniquement à certaines commandes de la
télécommande.
R. Testez d‘autres codes jusqu’à ce que la plupart des fonctions de votre
appareil fonctionnent correctement.
10. Service et assistance
En cas de question concernant le produit, veuillez vous adresser au service de
conseil produits de Hama.
Ligne téléphonique directe : +49 9091 502-0 (allemand/anglais)
Vous trouverez ici de plus amples informations concernant l‘assistance :
www.hama.com

22
EInstrucciones de uso
Mando a distancia universal
Le agradecemos que se haya decidido por la compra de un producto
de Hama. Tómese tiempo y léase primero las siguientes instrucciones e
informaciones. Por favor, guarde estas instrucciones en un lugar seguro para
poder consultarlas cuando sea necesario.
Teclas de función
1. Indicador LED / ON/OFF
2. Teclas de selección de aparatos
3. Vol+/Vol-: Regulación de volumen
4. Conmutador de reproducción sin sonido
5. Cifras numéricas 0-9
6. -/-- Cambiar a números de emisoras de dos cifras
7. Setup – Ajustes del mando a distancia
8. Menu – Abrir el menú del aparato
9. AV – seleccionar fuente AV externa
10. Confirmar selección
11. Exit – Salir del menú del aparato
12. CH +/- - Selección de programa
1. Explicación del símbolo de nota
Nota
•Este símbolo hace referencia a informaciones adicionales o indicaciones
importantes.
2. Volumen de suministro
- Mando a distancia universal
- Lista de códigos
- Estas instrucciones de manejo
3. Instrucciones de seguridad
• No utilice el mando a distancia universal en entornos húmedos y evite el
contacto con las salpicaduras de agua.
• Mantenga alejado el mando a distancia de las fuentes de calor y no lo
exponga a la radiación directa del sol.
• No deje caer el mando a distancia universal.
• No abra el mando a distancia universal. No contiene piezas que pueda
reparar el usuario.
• El mando a distancia universal, como todos los aparatos eléctricos, no
debe estar en manos de los niños.
4. Primeros pasos – Colocar las pilas
Nota
•Se recomienda utilizar pilas alcalinas. Utilice dos pilas del tipo „AA” (LR 6/
Mignon).
•Retire la cubierta del compartimento de pilas en el lado posterior del
mando a distancia universal.
•Teniendo en cuenta las marcas de polaridad “+/ -”, coloque las pilas.
•Cierre el compartimento de las pilas.
Nota: Memoria de códigos
•Este mando a distancia guarda los ajustes incluso durante un cambio de pilas.

23
Nota: Función de ahorro de la pila
•El mando a distancia se apaga automáticamente si se mantiene pulsada
una tecla durante más de 15 segundos. Esto conserva la carga de la pila
si el mando a distancia se queda atrapado en un lugar donde las teclas se
vean continuamente pulsadas, como entre los cojines de un sofá.
5. Configuración
Nota
•Para que la transmisión de infrarrojos sea correcta, sujete el mando a
distancia siempre orientado hacia el aparato a manejar.
•Si no se realiza ninguna entrada en 30 segundos, el modo de conguración
naliza. El LED parpadea seis veces y se apaga.
•Con el mando a distancia universal no se puede manejar ningún aparato
que se encuentre en el modo de conguración. Salga del modo de
conguración y seleccione el aparato a manejar con ayuda de las teclas de
selección de aparatos.
5.1 Entrada directa de códigos
El volumen de suministro del mando a distancia universal incluye una lista de
códigos. La lista de códigos muestra los códigos de cinco dígitos de la mayoría
de los fabricantes de TV/STB en orden alfabético. Si el aparato a manejar se
encuentra en la lista de códigos, la entrada directa del código es el método
más sencillo para introducir el código.
5.1.1 Encienda el aparato a manejar.
5.1.2 Pulse y mantenga pulsada la tecla „SETUP” hasta que el LED luzca de
forma permanente.
5.1.3 Seleccione el aparato a manejar (p. ej., TV) mediante la tecla de
selección de aparatos. Si la selección se ha realizado con éxito, el LED
parpadea una vez y después luce de forma permanente.
5.1.4 En la lista de códigos, busque la marca y el modelo del aparato a
manejar.
5.1.5 Introduzca el código de cinco dígitos correspondiente mediante los
botones numéricos 0-9. El LED conrma la introducción de cada cifra
con un breve parpadeo y se apaga después de la quinta cifra.
Nota
•Si el código es correcto, éste se guarda automáticamente.
•Si el código no es correcto, el LED parpadea seis veces y se apaga a con-
tinuación. Repita los pasos 5.1.1 a 5.1.5 o utilice otro método de entrada
de códigos.
5.2 Búsqueda manual de códigos
El mando a distancia universal dispone de una memoria interna que incluye
hasta 350 códigos por tipo de aparato para los aparatos de TV/STB más
corrientes. Puede ir probando estos códigos hasta que el aparato a manejar
muestre una reacción. Por ejemplo, el aparato a manejar se apaga (tecla
„POWER”) o cambia de emisora (tecla „CH+/CH-”).
5.2.1
Encienda el aparato a manejar.
5.2.2
Pulse y mantenga pulsada la tecla SETUP hasta que el LED luzca de
forma permanente.
5.2.3
Seleccione el aparato a manejar (p. ej., TV) mediante la tecla de
selección de aparatos. Si la selección se ha realizado con éxito, el LED
parpadea una vez y después luce de forma permanente.
5.2.4 Pulse la tecla „POWER” o la tecla „CH+/CH-” para desplazarse por los có-
digos preajustados hasta que el aparato a manejar muestre una reacción.

24
5.2.5
Pulse „MUTE” para guardar el código y salir de la búsqueda de códigos.
El LED se apaga.
Nota
•En la memoria interna se pueden guardar como máximo 350 códigos de
los aparatos más corrientes. Debido al gran número de aparatos de TV/STB
existentes en el mercado, puede ocurrir que sólo se disponga de las fun-
ciones principales más corrientes. De ser éste el caso, repita los pasos 5.2.1
a 5.2.5 para encontrar un código más compatible. Es posible que para
algunos modelos especiales de aparatos no se disponga de ningún código.
5.3 Búsqueda automática de códigos
La búsqueda automática de códigos utiliza los mismos códigos preajustados
que la búsqueda manual de códigos (5.2). El mando a distancia universal
comprueba estos códigos automáticamente hasta que el aparato a manejar
muestra una reacción. Por ejemplo, el aparato a manejar se apaga (tecla
„POWER”) o cambia de emisora (teclas „CH+/CH-”).
5.3.1 Encienda el aparato a manejar.
5.3.2 Pulse y mantenga pulsada la tecla „SETUP” hasta que el LED luzca de
forma permanente.
5.3.3 Seleccione el aparato a manejar (p. ej., TV) mediante la tecla de
selección de aparatos. Si la selección se ha realizado con éxito, el LED
parpadea una vez y después luce de forma permanente.
5.3.4 Pulse la tecla „CH+/CH-” o „POWER” para iniciar la búsqueda automá-
tica de códigos. El LED parpadea una vez y luego luce de forma perma-
nente. Deben transcurrir 6 segundos hasta que el mando a distancia
universal inicie la primera búsqueda.
Nota: Ajuste de la velocidad de búsqueda
•El ajuste standard para el tiempo de búsqueda por código es de 1 segundo. Si
este ajuste no es de su agrado, puede cambiar a un tiempo de búsqueda de
3 segundos por código. Para cambiar entre los tiempos de búsqueda, pulse
„CH+” o „CH-” en los 6 segundos previos al inicio de la búsqueda automática
de códigos.
5.3.5 El LED conrma cada búsqueda de código con un solo parpadeo.
5.3.6 Pulse „MUTE” para guardar el código y salir de la búsqueda de códigos.
El LED se apaga.
5.3.7 Para cancelar la búsqueda automática en marcha, pulse la tecla “EXIT”.
Nota
•Si se han comprobado todos los códigos sin éxito, el mando a distancia
universal sale de la búsqueda automática de códigos y vuelve automá-
ticamente al modo de funcionamiento. El código actualmente ajustado
permanece invariable.
5.4 Detección de códigos
La detección de códigos le ofrece la posibilidad de detectar un código ya
introducido.
5.4.1 Pulse y mantenga pulsada la tecla „SETUP” hasta que el LED luzca de
forma permanente.
5.4.2 Seleccione el aparato a manejar (p. ej., TV) mediante la tecla de
selección de aparatos. Si la selección se ha realizado con éxito, el LED
parpadea una vez y después luce de forma permanente.
5.4.3 Pulse la tecla „SETUP”. El LED parpadea una vez y luego luce de forma
permanente.
5.4.4 Para buscar la primera cifra, pulse una de las teclas numéricas de 0 a
9. De led knippert één keer voor het eerste cijfer van het vijfcijferige
codenummer.

25
5.4.5 Repita el paso 5.4.4 para la segunda, tercera y cuarta cifra.
CODES
TV SAT
6. Funciones especiales
6.1 Punch-Through de emisora
Con la función Punch-Through de emisora, los comandos CH+ o CH- pueden
evitar el aparato actualmente controlado para cambiar la emisora de un
segundo aparato. Los dermás comandos no se ven afectados por ello.
Para activar la función Punch-Through de emisora:
• Pulse la tecla del aparato que desee (p. ej., TV).
• Mantenga pulsada la tecla „CH+”.
• Pulse la tecla del aparato que desee (p. ej., SAT).
• Suelte la tecla „CH+” de nuevo (el LED parpadea una vez con el ajuste
activado).
Para desactivar la función Punch-Through de emisora:
• Pulse la tecla del aparato que desee (p. ej., TV).
• Mantenga pulsada la tecla „CH-”.
• Pulse la tecla del aparato que desee (p. ej., SAT).
• Suelte la tecla „CH-” de nuevo (el LED parpadea dos veces cuando se
desactiva el ajuste).
6.2 Punch-Through de volumen
Con la función Punch-Through de volumen, los comandos VOL+ o VOL- pueden
evitar el aparato
actualmente contralado para ajustar el volumen de un segundo aparato. Los
demás comandos no se ven afectados por ello.
Para activar la función Punch-Through de volumen:
• Pulse la tecla del aparato que desee (p. ej., TV).
• Mantenga pulsada la tecla „VOL+”.
• Pulse la tecla del aparato que desee (p. ej., SAT).
• Suelte la tecla „VOL+” de nuevo (el LED parpadea una vez con el ajuste
activado).
Para desactivar la función Punch-Through de volumen:
• Pulse la tecla del aparato que desee (p. ej., TV).
• Mantenga pulsada la tecla „VOL-”.
• Pulse la tecla del aparato que desee (p. ej., SAT).
• Suelte la tecla „VOL-” de nuevo (
el LED parpadea dos veces cuando se
desactiva el ajuste
).
6.3 Macro Power
Con Macro Power puede encender/apagar dos aparatos de TV/STB al mismo
tiempo.
Para activar la función Macro Power:
• Pulse la tecla del aparato que desee (p. ej., TV).
• Mantenga pulsada la tecla „POWER”.
• Pulse la tecla del aparato que desee (p. ej., SAT).
• Suelte la tecla „POWER” de nuevo (el LED parpadea una vez con el ajuste
activado).
Para desactivar la función Macro Power:
• Pulse la tecla del aparato que desee (p. ej., TV).
• Mantenga pulsada la tecla „POWER”.
• Pulse la tecla del aparato que desee (p. ej., SAT).
• Suelte la tecla „POWER” de nuevo (el LED parpadea dos veces cuando se
desactiva el ajuste).

26
7. FUNCIÓN DE APRENDIZAJE
Este mando a distancia está dotado de una función de aprendizaje. Esto le
permite transmitir funciones de su mando a distancia original a este mando a
distancia universal.
7.1 Antes de iniciar la función de aprendizaje
• Asegúrese del perfecto estado de todas las pilas utilizadas en ambos
mandos
a distancia. Cámbielas si fuera preciso.
• Coloque su mando a distancia original y el mando a distancia universal
uno al lado del otro de modo que los diodos de infrarrojos de los mandos a
distancia se encuentren directamente opuestos.
• Si fuera preciso, corrija la altura de ambos mandos a distancia para obtener
una alineación óptima .
• La distancia de ambos mandos a distancia debería ser de aprox. 3 cm.
ca. 3 cm
ROC1117GRU ORIGINAL
Nota
• No mueva los mandos a distancia durante el proceso de aprendizaje.
• Asegúrese de que la iluminación de la habitación no se realiza con
tubos uorescentes o con bombillas de ahorro de energía ya que éstos
pueden causar interferencias e inuir de forma negativa en el proceso de
aprendizaje.
• La distancia de los dos mandos a distancia a la fuente de luz más próxima
debería ser de 1 metro como mínimo.
• El proceso de aprendizaje se terminará sin guardar, si durante el modo
de aprendizaje activado no se pulsa ninguna tecla o no se recibe ninguna
señal durante 30 seg.
• En el modo de aprendizaje se puede asignar a cada tecla solo una
función. Una nueva función sobrescribe la función asignada anteriormente
a esta tecla.
• No es posible asignar nuevas funciones a las teclas TV, STB y Setup
7.2 Activar el modo de aprendizaje
1. Pulse simultáneamente las teclas [MUTE] y [VOL+] durante aprox.
3 seg., hasta que el LED de estado se ilumine de forma continua.
2. Introduzca el código [9] [8] [0], el LED
de estado parpadea 2 veces y después
se ilumina de forma continua.
3. El mando a distancia universal se encuentra ahora en el modo de
aprendizaje.
7.3 Transferencia de la función de tecla
1. Pulse la tecla en el mando a distancia original cuya función desea trans-
ferir. Para conrmar que se ha recibido el comando, el LED de estado del
mando a distancia universal parpadea.
2. Pulse ahora la tecla del mando a distancia universal a la que se debe
transferir la función.
3. El LED de función del mando a distancia universal parpadea 3 veces a
modo de conrmación y a continuación vuelve a encenderse de forma
permanente. Ahora, la nueva función está guardada.
BIG ZAPPER

27
4. Para transferir las funciones de otras teclas adicionales, repita estos pasos.
5. Pulse la tecla [SETUP] para guardar todas las funciones transferidas y
abandonar
el modo de aprendizaje.
Nota
Al cambiar las pilas del mando a distancia
universal se mantienen las funciones de las
teclas transferidas.
7.4 Borrado de funciones transferidas
7.4.1 Borrado de una función transferida
1. Pulse simultáneamente las teclas [MUTE] y [VOL+] durante aprox.
3 seg., hasta que el LED de estado se ilumine de forma continua.
2. Introduzca el código [9] [8] [1], el LED de estado parpadea 2 veces y
después vuelve a encenderse de forma continua.
3. Pulse la tecla cuya función desea borrar. El LED de estado parpadea 3
veces y la función deseada será borrada.
7.4.2 Borrado de todas las funciones transferidas
1. Pulse simultáneamente las teclas [MUTE] y [VOL+] durante aprox. 3 seg.,
hasta que el LED de estado se ilumine de forma continua.
2. Introduzca el código [9] [8] [2], el LED de estado parpadea 2 veces y
después se ilumina de forma continua.
3. Pulse la tecla [SETUP], el LED de estado parpadea 3 veces y todas las
funciones transferidas serán borradas.
8. Mantenimiento
• No utilice pilas viejas y nuevas al mismo tiempo en el mando a distancia
universal ya que las pilas viejas tienden a derramarse y pueden provocar
una pérdida de rendimiento.
•
No limpie nunca el mando a distancia universal con sustancias abrasivas ni con
detergentes agresivos.
• Mantenga el mando a distancia universal libre de polvo limpiándolo con
un paño suave y seco.
9. Solución de fallos
C. Mi mando a distancia universal no funciona.
R.
Compruebe el aparato de
TV/STB
. Si el interruptor principal del aparato está
apagado, el mando a distancia universal no puede manejar el aparato.
R. Compruebe si las pilas están correctamente colocadas y si la polaridad es
correcta.
R. Compruebe si ha pulsado la tecla de aparato correspondiente para el
aparato.
R. Cambie las pilas si están próximas a gastarse.
C.
Si para la marca de mi aparato de
TV/STB
se encuentran varios códigos de
aparato en la lista, ¿cómo selecciono el código de aparato correcto?
R. Para encontrar el código de aparato correcto para el aparato de TV/STB,
pruebe los códigos sucesivamente hasta que la mayoría de las teclas
funcionen correctamente.
C. Mi aparato de TV/STB sólo reacciona a algunos comandos de teclas.
R. Pruebe otros códigos hasta que funcione la mayoría de las teclas.

28
10. Servicio y soporte
Si tiene que hacer alguna consulta sobre el producto, diríjase al asesoramiento
de productos Hama.
Línea directa: +49 9091 502-0 (Alemán/Inglés)
Podrá encontrar más informacion:
www.hama.com

29
IIstruzioni per l‘uso
Telecomando universale
Grazie per avere acquistato un prodotto Hama. Prima della messa in esercizio,
leggete attentamente le seguenti istruzioni e avvertenze. Conservate le
istruzioni in un luogo sicuro per una eventuale consultazione.
Tasti funzione
1. LED indicatore ON / OFF
2. Tasti per la selezione apparecchio
3. Vol+/Vol-: regolazione del volume
4. Pulsante Mute
5. Tasti numerici 0-9
6. -/-- passare ai numeri del trasmettitore a due cifre
7. Setup – impostazioni del telecomando
8. Menu – menu apparecchi
9. AV – selezione sorgente AV esterna
10. Confermare la selezione
11. Exit – uscire dal menu apparecchio
12. CH +/- - scelta programma, verso l'alto/verso il basso
1. Spiegazione del simbolo di avvertenza
Avvertenza
•Questo simbolo rimanda a informazioni
supplementari o indicazioni importanti.
2. Volume di fornitura
- Telecomando universale
- Elenco codici
- Queste istruzioni per l’uso
3. Indicazioni di sicurezza
• Non usare il telecomando universale in ambienti umidi ed evitare il contat-
to con gli spruzzi.
•
Tenere il telecomando universale lontano da fonti di calore e non esporlo
alla luce diretta del sole.
• Non fare cadere il telecomando universale.
• Non aprire il telecomando universale. Non contiene parti soggette a
manutenzione da parte dell‘utente.
• Tenere il telecomando universale, come tutte le apparecchiature elettriche,
fuori dalla portata dei bambini.
4. Primi passi - inserimento delle batterie
Avvertenza
•Si consiglia di utilizzare batterie alcaline. Utilizzare due batterie del tipo
„AA” (LR 6/Mignon).
•Aprire il coperchio del vano batterie sul retro del telecomando universale.
•Introdurre due batterie con la corretta polarità (+ / -).
•Richiudere il vano batterie.
Avvertenza: salvacodice
•Questo telecomando memorizza le impostazioni anche durante la sostituzi-
one di una batteria.

30
Avvertenza
: Funzione di risparmio batteria
•Il telecomando si spegne automaticamente se si tiene premuto un pulsante
per più di 15 secondi. Questo consente di preservare la batteria se il
telecomando resta bloccato in una posizione in cui i pulsanti vengono
continuamente premuti, come tra i cuscini del divano.
5. Setup
Avvertenze
•Per una corretta trasmissione a infrarossi, tenere sempre il telecomando
nella direzione dell‘apparecchio da comandare.
•Se per 30 secondi non si preme nulla, si esce dal modo Setup. Il LED
lampeggia 6 volte, quindi si spegne.
•Con il telecomando universale non si possono comandare apparecchi che si
trovano nel modo Setup. Per uscire dal modo Setup, scegliere l‘apparecchio
da comandare mediante i tasti per la scelta apparecchio.
5.1 Immissione diretta del codice
Nella confezione del telecomando universale è contenuto un elenco dei codici.
L’elenco riporta i codici a cinque cifre della gran parte delle marche TV/STB
in ordine alfabetico. Se l‘apparecchio da comandare è riportato nell‘elenco,
l‘immissione diretta del codice è il metodo più immediato.
5.1.1 Accendere l’apparecchio da comandare.
5.1.2 Premere il tasto „SETUP”, nché il LED non si accende a luce ssa.
5.1.3 Mediante il tasto apparecchio, scegliere l‘apparecchio da comandare
(ad es. TV). A scelta avvenuta, il LED lampeggia una volta, quindi resta
acceso.
5.1.4 Nell‘elenco codici, cercare la marca e il tipo di apparecchio da coman-
dare.
5.1.5 Inserire il codice a cinque cifre tramite i tasti numerici 0-9. Il LED con-
ferma l’immissione delle singole cifre con un breve lampeggiamento e si
spegne dopo l’inserimento della quinta cifra.
Avvertenza
•Un codice valido viene salvato automaticamente.
•In caso di codice non valido, il LED lampeggia sei volte, quindi si
spegne. Ripetere i passi da 5.1.1 a 5.1.5 o utilizzare un altro metodo per
l‘immissione dei codici.
5.2 Ricerca codice manuale
Il telecomando universale dispone di una memoria interna che contiene già
350 codici per apparecchio, per ciascuno dei più comuni apparecchi
TV/STB. È possibile fare scorrere i vari codici, nché l‘apparecchio da coman-
dare non mostra una reazione, ad esempio l’apparecchio da comandare si
spegne (tasto „POWER”) oppure cambia il programma (tasto „CH+/CH-”).
5.2.1 Accendere l’apparecchio da comandare.
5.2.2 Premere il tasto „SETUP”, nché il LED non si accende a luce ssa.
5.2.3 Mediante il tasto apparecchio, scegliere l‘apparecchio da comandare (ad
es. TV).
A scelta avvenuta, il LED lampeggia una volta, quindi resta acceso.
5.2.4 Premere il tasto „POWER” o „CH+/CH-” per scorrere i codici preimpostati,
nché l‘apparecchio da comandare non mostra una reazione.
5.2.5 Premere „MUTE” per memorizzare il codice e uscire dalla ricerca codice.
Il LED si spegne.

31
Avvertenza
•Nella memoria interna si possono memorizzare massimo 350 codici degli
apparecchi più comuni. Per via dei numerosi apparecchi TV/STB presenti
sul mercato, può accadere che siano disponibili solo le funzioni principali
più comuni. In questo caso, ripetere i passaggi da 5.2.1 a 5.2.5 per trovare
un codice compatibile. Per alcuni modelli speciali di apparecchi, potrebbero
non esserci codici disponibili.
5.3 Ricerca codice automatica
La ricerca automatica del codice utilizza gli stessi codici preimpostati della
ricerca manuale del codice (5.2). Il telecomando universale ricerca i codici
manualmente, nché l‘apparecchio da comandare non mostra una reazione,
ad esempio l’apparecchio da comandare si spegne (tasto „POWER”) oppure
cambia il programma (tasto „CH+/CH-”).
5.3.1 Accendere l’apparecchio da comandare.
5.3.2 Premere il tasto „SETUP”, nché il LED non si accende a luce ssa.
5.3.3 Mediante il tasto apparecchio, scegliere l‘apparecchio da comandare
(ad es. TV). A scelta avvenuta, il LED lampeggia una volta, quindi resta
acceso.
5.3.4 Premere il tasto „CH+/CH-” o „POWER” per avviare la ricerca automatica
del codice. Il LED lampeggia una volta, quindi resta acceso. Occorrono
6 secondi anché il telecomando universale inizi a effettuare la prima
ricerca.
Avvertenza: impostazione della velocità di ricerca
•L‘impostazione standard del tempo di ricerca per ciascun codice è
1 secondo. Se si preferisce, si può passare a un tempo di ricerca di
3 secondi. Per passare tra i tempi di ricerca, premere „CH+” o „CH-”
entro 6 secondi dall‘avvio della ricerca automatica del codice.
5.3.5 Il LED conferma le ricerche dei codici con un singolo lampeggio.
5.3.6 Premere „MUTE” per memorizzare il codice e uscire dalla ricerca codice.
Il LED si spegne.
5.3.7 Per interrompere la ricerca automatica, premere il tasto „EXIT”.
Avvertenza
•Se si provano tutti i codici senza successo, il telecomando universale esce
dalla ricerca automatica e torna automaticamente nel modo di esercizio. Il
codice attualmente memorizzato resta invariato.
5.4 Riconoscimento del codice
Il riconoscimento del codice consente di rilevare i codici già immessi.
5.4.1 Premere il tasto „SETUP”, nché il LED non si accende a luce ssa.
5.4.2 Mediante il tasto apparecchio, scegliere l‘apparecchio da comandare
(ad es. TV). A scelta avvenuta, il LED lampeggia una volta, quindi resta
acceso.
5.4.3 Premere il tasto SETUP. Il LED lampeggia una volta, quindi resta acceso.
5.4.4 Per la ricerca della prima cifra, premere uno dei tasti numerici da 0 a 9. Il
LED lampeggia una volta per la prima delle cinque cifre del codice.
5.4.5 Ripetere il passaggio 5.4.4 per la seconda, terza e quarta cifra.

32
CODES
TV SAT
6. Funzioni speciali
6.1 Punch through canale
Con la funzione Punch through canale, i comandi CH+ o CH- possono eludere
l‘apparecchio attualmente comandato e cambiare i programmi di un secondo
apparecchio. Tutti gli altri comandi non sono interessati.
Ecco come attivare la funzione Punch through canale:
• Premere il tasto dell‘apparecchio desiderato (ad es. TV)
• Tenere premuto il tasto „CH+”.
• Premere il tasto dell‘apparecchio desiderato (ad es. SAT)
• Rilasciare il tasto „CH+” (il LED lampeggia una volta quando l‘impostazione
è attivata).
Ecco come disattivare la funzione Punch through canale:
• Premere il tasto dell‘apparecchio desiderato (ad es. TV)
• Tenere premuto il tasto „CH-”.
• Premere il tasto dell‘apparecchio desiderato (ad es. SAT)
• Rilasciare il tasto „CH-” (il LED lampeggia due volte se viene disattivata
l‘impostazione).
6.2 Punch through volume
Con la funzione Punch through volume, i comandi VOL+ o VOL- possono elu-
dere l‘apparecchio attualmente comandato e variare il volume di un secondo
apparecchio. Tutti gli altri comandi non sono interessati.
Ecco come attivare la funzione Punch through volume:
• Premere il tasto dell‘apparecchio desiderato (ad es. TV)
• Tenere premuto il tasto „VOL+”.
• Premere il tasto dell‘apparecchio desiderato (ad es. SAT)
• Rilasciare il tasto „VOL+” (il LED lampeggia una volta quando l‘impostazione
è attivata).
Ecco come disattivare la funzione Punch through volume:
• Premere il tasto dell‘apparecchio desiderato (ad es. TV)
• Tenere premuto il tasto „VOL-”.
• Premere il tasto dell‘apparecchio desiderato (ad es. SAT)
• Rilasciare il tasto „VOL-” (il LED lampeggia due volte se viene disattivata
l‘impostazione).
6.3 Macro Power
Con il tasto Macro Power è possibile accendere
e spegnere contemporaneamente due apparecchi TV/STB.
Ecco come attivare la funzione Macro Power:
• Premere il tasto dell‘apparecchio desiderato (ad es. TV)
• Tenere premuto il tasto „POWER”.
• Premere il tasto dell‘apparecchio desiderato (ad es. SAT)
• Rilasciare il tasto „POWER” (il LED lampeggia una volta quando l‘impostazio
ne è attivata).
Ecco come disattivare la funzione Macro Power:
• Premere il tasto dell‘apparecchio desiderato (ad es. TV)
• Tenere premuto il tasto „POWER”.
• Premere il tasto dell‘apparecchio desiderato (ad es. SAT)
• Rilasciare il tasto „POWER” (il LED lampeggia due volte se viene disattivata
l‘impostazione).

33
7. FUNZIONE DI APPRENDIMENTO
Questo telecomando è fornito di una funzione di apprendimento. Grazie a
questa funzione è possibile trasferire le funzioni del telecomando originale su
questo telecomando universale.
7.1 Prima di avviare la funzione di apprendimento
• Fare attenzione che le batterie utilizzate in entrambi i telecomandi siano in
perfetto stato. Se necessario sostituirle.
• Mettere il telecomando originale e il telecomando universale l’uno vicino
all’altro, in modo tale che i diodi a infrarossi siano l’uno difronte all’altro.
• Correggere se necessario l’altezza di entrambi i telecomandi in modo da
ottenere una posizione ottimale.
• La distanza tra i due telecomandi deve essere di ca. 3 cm.
ca. 3 cm
ROC1117GRU ORIGINAL
Avvertenza
• Non muovere i telecomandi durante la procedura di apprendimento.
• Assicurarsi che l’ambiente non sia illuminato con lampade al neon o
lampade a risparmio energetico, dato che queste lampade possono
causare delle interferenze e disturbare il processo di apprendimento.
• La distanza di entrambi i telecomandi dalla fonte di luce più vicina deve
essere come minimo 1 metro.
• La procedura di apprendimento viene interrotta senza memorizzazione se
durante la modalità di apprendimento non viene premuto alcun pulsante
per 30 sec. o se non viene emesso alcun segnale.
• Nella modalità di apprendimento ogni pulsante può memorizzare una
sola funzione. Una nuova funzione sovrascrive la funzione memorizzata
precedentemente su questo pulsante.
• I tasti TV, STB non possono essere programmati con nuove funzioni.
7.2 Attivazione della modalità di apprendimento
1. Premere e tenere premuti contemporaneamente i pulsanti [MUTE] e
[VOL+] per ca. 3 sec. nché il LED di stato si accende e resta acceso.
2. Digitare il codice [9] [8] [0], il LED di stato lampeggia 2 volte e resta poi
acceso.
3. Il telecomando universale si trova ora nella modalità di apprendimento.
7.3 Trasferimento della funzione pulsanti
1. Premere il pulsante sul telecomando originale di cui si vuole traferire a
funzione. Per confermare che il comando è stato ricevuto il LED di stato
lampeggia sul telecomando universale.
2. Premere ora il pulsante del telecomando universale su cui si vuole trasferire
la funzione.
3. Il LED di funzione del telecomando universale lampeggia 3 volte come
conferma e resta poi acceso. La nuova funzione è così memorizzata.
4. Per trasferire le funzioni di altri pulsanti, ripetere questi passi.
5. Premere il pulsante [SETUP] per memorizzare tutte le funzioni impostate
e per lasciare la modalità di apprendimento.
BIG ZAPPER

34
Avvertenza
Le funzioni impostate dei pulsanti restano invariate anche quando le
batterie del telecomando universale vengono sostituite.
7.4 Cancellare funzioni impostate
7.4.1 Come cancellare una funzione impostata
1. Premere e tenere premuti contemporaneamente i pulsanti [MUTE] e
[VOL+] per ca. 3 sec. nché il LED di stato si accende e resta acceso.
2. Digitare il codice [9] [8] [1], il LED di stato lampeggia 2 volte e resta poi
acceso.
3.
Premere il pulsante la cui funzione si desidera cancellare. Il LED di stato lampeg-
gia 3 volte e la funzione desiderata è stata cancellata.
7.4.2 Come cancellare tutte le funzioni impostate
1. Premere e tenere premuti contemporaneamente i pulsanti [MUTE]
e [VOL+] per ca. 3 sec. nché il LED di stato si accende e resta acceso.
2. Digitare il codice [9] [8] [2], il LED di stato lampeggia 2 volte e resta poi
acceso.
3. Premere il pulsante [SETUP], il LED di stato lampeggia 3 volte e quindi
tutte le funzioni impostate sono state cancellate.
8. Manutenzione
• Non inserire mai contemporaneamente batterie vecchie e nuove nel teleco-
mando universale, poiché le batterie vecchie tendono a scaricarsi causando
una perdita di potenza.
• Non pulire mai il telecomando universale con sostanze abrasive o deter-
genti aggressivi.
• Togliere la polvere con un panno morbido e asciutto.
9. Ricerca Guasti
Q. Il mio telecomando universale non funziona!
R. Vericare l‘apparecchio TV/STB. Se l‘interruttore principale dell‘apparecchio
è spento, non utilizzare il telecomando universale dell‘apparecchio.
R. Vericare che le batterie del telecomando siano inserite correttamente e
che la polarità +/– corrisponda.
R. Vericare di avere premuto il corrispondente tasto dell‘apparecchio.
R. Sostituire le batterie se sono scariche.
Q. Se per la marca del mio apparecchio TV/STB sono elencati numerosi codici,
come scelgo quello corretto?
R. Per determinare il codice corretto per l‘apparecchio TV/STB, provare i codici
uno dopo l‘altro nché la maggior parte dei tasti dell‘apparecchio non
funzionano correttamente.
Q. Il mio apparecchio TV/STB reagisce solo ad alcuni comandi dei tasti.
R. Provare un altro codice nché la maggior parte dei tasti non funzionano
correttamente.
10.
Assistenza e supporto
In caso di domande sul prodotto, rivolgersi alla Consulenza prodotto Hama.
Hotline: +49 9091 502-0 (ted./ing.)
Ulteriori informazioni sul supporto sono disponibili qui:
www.hama.com

35
NGebruiksaanwijzing
Universele afstandsbediening
Hartelijk dank dat u voor een Hama-product heeft gekozen. Neemt u zich de tijd en
lees de onderstaande aanwijzingen en informatie allereerst geheel door. Bewaar
deze instructies op een veilige plek als naslagwerk voor op een later tijdstip.
Functietoetsen
1. AAN/UIT / LED indicator
2. Toetsen voor de apparatuurselectie
3. Vol+/Vol-: volumeregeling
4. Mute-schakelaar
5. Cijfertoetsen 0-9
6. -/-- naar tweecijferig zendernummer omschakelen
7. Setup – instellingen van de afstandsbediening
8. Menu – apparatuurmenu openen
9. AV – externe AV bron selecteren
10. Selectie bevestigen
11. Exit – apparatuurmenu verlaten
12. CH +/- - programmaselectie
1. Verklaring van het aanwijzing-symbool
Aanwijzing
•Dit symbool duidt op extra informatie of belangrijke aanwijzingen.
2. Bij de verpakking inbegrepen
- Universele afstandsbediening
- Codelijst
- Deze bedieningsinstructies
3. Veiligheidsinstructies
• Gebruik de universele afstandsbediening niet in vochtige omgevingen en
voorkom contact met spatwater.
• Houd de universele afstandsbediening uit de buurt van warmtebronnen en
stel de afstandsbediening niet bloot aan direct zonlicht.
• Laat de universele afstandsbediening niet vallen.
• De universele afstandsbediening niet openen. De afstandsbediening bevat
geen onderdelen die door de gebruiker dienen te worden onderhouden.
• De universele afstandsbediening dient, net als alle elektrische apparatuur,
buiten het bereik van kinderen gehouden te worden.
4. Eerste stappen – plaatsen van de batterijen
Aanwijzing
•Wij adviseren alkaline batterijen. Gebruik twee batterijen van het type
„AA” (LR 6/Mignon).
•Verwijder het batterijdeksel aan de achterzijde van de universele afstands-
bediening.
•Plaats vervolgens de batterijen met inachtneming van de polariteit (+/-),
zoals in het batterijvak is aangegeven.
•Sluit het batterijvak.
Aanwijzing: Code-opslag
•Deze afstandsbediening slaat de instellingen ook tijdens het vervangen van
de batterijen op.

36
Aanwijzing: Batterijspaarfunctie
•Indien er een toets langer dan 15 seconden wordt ingedrukt, dan zal de
afstandsbediening automatisch uitschakelen. Dit is een energiebesparende
functie voor de batterijen indien de afstandsbediening wordt ingeklemd en
dientengevolge toets(en) continu worden ingedrukt, zoals bijv. tussen de
kussens van het bankstel.
5. Setup
Aanwijzing
•Houd de afstandsbediening voor een correcte infrarood-overdracht altijd in
de richting van het te bedienen toestel.
•Indien gedurende ca. 30 seconden niets wordt ingevoerd, wordt de Setup-
modus beëindigd. De LED knippert zesmaal en gaat vervolgens uit.
•U kunt met de universele afstandsbediening geen toestel bedienen, zolang
zich dit in de Setup-modus bevindt. Verlaat de Setup-modus, en selecteer het
te bedienen toestel met behulp van de toetsen voor de apparatuurselectie.
5.1 Directe code-invoer
Bij de levering van de universele afstandsbediening is een codelijst inbegre-
pen. De codelijst toont vijfcijferige codes van de meeste fabrikanten van TV/
STB-apparaten in alfabetische volgorde. Indien het te bedienen toestel in de
codelijst is vermeld, is de directe code-invoer de eenvoudigste invoermethode.
5.1.1 Schakel het toestel dat bediend moet worden in.
5.1.2 Druk op de toets „SETUP” totdat de LED continu brandt.
5.1.3 Selecteer met behulp van de apparatuurtoets het toestel dat bediend
moet worden, (bijv. tv). Bij succesvolle selectie knippert de LED eenmaal
en brandt daarna continu.
5.1.4 Zoek in de codelijst naar het merk en type van het te bedienen toestel.
5.1.5 Voer de juiste vijfcijferige code in met de cijferknoppen 0-9. De led
bevestigt de invoer van de afzonderlijke cijfers door kort te knipperen en
dooft na het vijfde cijfer.
Aanwijzing
•Een geldige code wordt automatisch opgeslagen.
•Bij een ongeldige code knippert de LED zesmaal en gaat vervolgens uit.
Herhaal de stappen 5.1.1 tot 5.1.5, of maak gebruik van een andere
methode om de codes in te voeren.
5.2 Handmatig codes zoeken
De universele afstandsbediening beschikt over een intern geheugen, waarin
reeds max. 350 codes per soort toestel voor de meest gangbare TV/STB-appa-
ratuur zijn opgeslagen. U kunt deze codes doorlopen totdat het te bedienen
toestel een reactie toont. Het te bedienen toestel schakelt zich bijvoorbeeld uit
(toets „POWER”) of schakelt om naar een andere zender (toets „CH+/CH-”).
5.2.1 Schakel het toestel dat bediend moet worden in.
5.2.2 Druk op de toets „SETUP” totdat de LED continu brandt.
5.2.3 Selecteer met behulp van de apparatuurtoets het toestel dat bediend
moet worden, (bijv. tv). Bij succesvolle selectie knippert de LED eenmaal
en brandt daarna continu.
5.2.4 Druk op de toets „POWER” of „CH+/CH-”, teneinde door de vooraf reeds
ingevoerde codes te bladeren totdat het te bedienen toestel een reactie
toont.
5.2.5 Druk op „MUTE” teneinde de code op te slaan en de code-
zoekfunctie te verlaten. De LED gaat uit.

37
Aanwijzing
•In het interne geheugen kunnen maximaal 350 codes van de meest
gangbare apparatuur worden opgeslagen. Vanwege de talrijke op de
markt te verkrijgen TV/STB-apparatuur kan het voorkomen dat alleen de
meest gebruikelijke hoofdfuncties te beschikking zijn. Is dit het geval dan
herhaalt u de stappen 5.2.1 tot 5.2.5 teneinde een meer compatibele code
te vinden. Voor enige speciale apparatuurmodellen is mogelijk geen code
ter beschikking.
5.3 Automatische code-zoekfunctie
De automatische code-zoekfunctie maakt gebruik van dezelfde vooraf
ingevoerde codes zoals de handmatige code-zoekfunctie (5.2). De universele
afstandsbediening doorzoekt de codes echter automatisch totdat het te
bedienen toestel een reactie toont. Het te bedienen toestel schakelt zich
bijvoorbeeld uit (toets „POWER”) of schakelt om naar een andere zender (toets
„CH+/CH-”).
5.3.1 Schakel het toestel dat bediend moet
worden in.
5.3.2 Druk op de toets „SETUP” totdat de LED continu brandt.
5.3.3 Selecteer met behulp van de apparatuurtoets het toestel dat bediend
moet worden, (bijv. tv). Bij succesvolle selectie knippert de LED eenmaal
en brandt daarna continu.
5.3.4 Druk op de toets „CH+/CH-” of „POWER” teneinde de automatische
code-zoekfunctie te starten. De LED knippert eenmaal en brandt daarna
continu. Het duurt 6 seconden totdat de universele afstandsbediening
met de eerste zoektocht begint.
Aanwijzing: instellen van de zoeksnelheid
•De standaardinstelling voor de zoektijd per code is 1 seconde. Indien deze
instelling u niet bevalt kunt u naar een zoektijd van 3 seconden per code
omschakelen. Om tussen de zoektijden om te schakelen drukt u op „
CH
+”
of „
CH
-” binnen de 6 seconden voor het begin van de automatische code-
zoekfunctie.
5.3.5 De LED bevestigt de desbetreffende code-zoekfuncties door eenmaal te
knipperen.
5.3.6 Druk op „MUTE” teneinde de code op te slaan en de code-zoekfunctie te
verlaten. De LED gaat uit.
5.3.7 Teneinde de automatische zoekfunctie tijdens het zoeken af te breken drukt u
op de toets „EXIT”.
Aanwijzing
•Indien alle codes zonder succes werden doorzocht, verlaat de universele af-
standsbediening de automatische code-zoekfunctie en keert automatisch naar
de bedrijfsmodus terug. De actueel opgeslagen code blijft ongewijzigd.
5.4 Codeherkenning
De codeherkenning biedt aan u de mogelijkheid een reeds ingevoerde code te
achterhalen.
5.4.1 Druk op de toets „SETUP” totdat de LED continu brandt.
5.4.2 Selecteer met behulp van de apparatuurtoets het toestel dat bediend
moet worden, (bijv. tv). Bij succesvolle selectie knippert de LED eenmaal
en brandt daarna continu.
5.4.3 Druk op de toets „SETUP”. De LED knippert eenmaal en brandt daarna
continu.

38
5.4.4 Druk, om het eerste getal te zoeken, op één van de cijfertoetsen
0 tot 9. De led knippert één keer voor het eerste cijfer van het vijfcijferige
codenummer.
5.4.5 Herhaal de stap 5.4.4 voor het tweede, derde en vierde getal.
CODES
TV SAT
6. Speciale functies
6.1 Sender-Punch-Through
Met de Sender-Punch-Through-functie kunnen de commando‘s CH+ of CH- hel
actueel bediende toestel omzeilen, en de zenders va n een tweede toestel
omschakelen. Alle andere commando‘s zijn daarvan uitgesloten.
Zo activeert u de Sender-Punch-Through-functie:
• Druk op de gewenste apparatuurtoets (bijv. tv).
• Houd de toets „CH+” ingedrukt.
• Druk op de gewenste apparatuurtoets (bijv. SAl).
• Laat de toets „CH+” weer los (de LED knippert eenmaal bij geactiveerde
instelling).
Zo deactiveert u de Sender-Punch-Through-functie:
• Druk op de gewenste apparatuurtoets (bijv. tv).
• Houd de toets „CH-” ingedrukt.
• Druk op de gewenste apparatuurtoets (bijv. SAl).
• Laat de toets „CH-” weer los (de LED knippert tweemaal indien de instelling
wordt gedeactiveerd).
6.2 Geluidssterkte-Punch-Through
Met de Geluidssterkte-Punch-Through-functie kunnen de commando‘s VOL+
of VOL- het actueel bediende toestel omzeilen, en de geluidssterkte van een
tweede toestel instellen. Alle andere commando‘s zijn daarvan uitgesloten.
Zo activeert u de Geluidssterkte-Punch-Through-functie:
• Druk op de gewenste apparatuurtoets (bijv. tv).
• Houd de toets „VOL+” ingedrukt.
• Druk op de gewenste apparatuurtoets (bijv. SAl).
• Laat de toets „VOL+” weer los (de LED knippert eenmaal bij geactiveerde
instelling).
Zo deactiveert u de Geluidssterkte-Punch-Through-functie:
• Druk op de gewenste apparatuurtoets (bijv. tv).
• Houd de toets „VOL-” ingedrukt.
• Druk op de gewenste apparatuurtoets (bijv. SAl).
• Laat de toets „VOL-” weer los (de LED knippert tweemaal indien de instelling
wordt gedeactiveerd).
6.3 Macro Power
Met Macro Power kunt u twee TV/STB-toestellen tegelijkertijd in-/uitschakelen.
Zo activeert u de Macro Power-functie:
• Druk op de gewenste apparatuurtoets (bijv. tv).
• Houd de toets „POWER” ingedrukt.
• Druk op de gewenste apparatuurtoets (bijv. SAl).
• Laat de toets „POWER” weer los (de LED knippert eenmaal bij geactiveerde
instelling).
Zo deactiveert u de Macro Power-functie:
• Druk op de gewenste apparatuurtoets (bijv. tv).
• Houd de toets „POWER” ingedrukt.
• Druk op de gewenste apparatuurtoets (bijv. SAl).
• Laat de toets „POWER” weer los (de LED knippert tweemaal indien de
instelling wordt gedeactiveerd)

39
7. LEERFUNCTIE / TEACHEN
Deze afstandsbediening is met een leerfunctie uitgerust. Daardoor
kunt u functies van uw originele afstandsbediening op deze universele
afstandsbediening overbrengen.
7.1 Voordat u de leerfunctie start
• Zorg ervoor dat alle batterijen in beide afstandsbedieningen zich in
uitstekende toestand bevinden. Vervang deze batterijen indien nodig.
• Leg nu uw originele afstandsbediening en de universele afstandsbediening
zodanig naast elkaar dat de infrarood-dioden van de afstandsbedieningen
direct tegenover elkaar liggen.
• Corrigeer, indien nodig, de hoogte van beide afstandsbedieningen zodat de
dioden zich perfect tegenover elkaar bevinden.
• De afstand tussen beide afstandsbedieningen dient ca. 3 cm te zijn.
ca. 3 cm
ROC1117GRU ORIGINAL
Aanwijzing
• Beweeg de afstandsbedieningen tijdens het teachen resp. leren niet.
• Controleer of de ruimte door tl-buizen of spaarlampen wordt verlicht,
omdat een dergelijke verlichting storingen kunnen veroorzaken en
bijgevolg het teachen/leren zouden kunnen hinderen.
• De afstand van beide afstandsbedieningen naar de eerstvolgende
verlichtingsbron dient ten minste 1 meter te bedragen.
• Het teachen/leren wordt zonder opslaan beëindigd indien er tijdens de
geactiveerde leermodus gedurende 30 sec. geen toets wordt bediend of
geen signaal wordt ontvangen.
• In de leermodus kan aan iedere toets slechts één functie worden
toegewezen. Een nieuwe functie overschrijft de op de betreffende toets
bestaande resp. aangeleerde functie.
• Aan de toetsen TV, STB en Setup kunnen geen nieuwe functies worden
toegewezen
7.2 Activeren van de leermodus
1. Druk tegelijkertijd gedurende ca. 3 sec. op de toetsen [MUTE] en [VOL+]
totdat de status-LED constant brandt.
2. Voer nu de code [9] [8] [0] in, de status-LED knippert tweemaal en brandt
vervolgens constant.
3. De universele afstandsbediening bevindt zich nu in de leermodus
(teaching).
7.3 Overbrengen van de toetsfunctie
1. Druk op de originele afstandsbediening op de betreffende toets waarvan u
de functie wenst over te brengen. Ter bevestiging dat het commando werd
ontvangen, knippert de status-LED van de universele afstandsbediening.
2. Druk nu op de universele afstandsbediening op de toets, waarop de functie
dient te worden overgebracht.
3. De status-LED van de universele afstandsbediening knippert driemaal ter
bevestiging en brandt vervolgens weer constant. De nieuwe functie is nu
opgeslagen.
4. Teneinde de functies van andere toetsen over te brengen, herhaalt u de
hierboven vermelde stappen.
BIG ZAPPER

40
5. Druk op de toets [SETUP] teneinde alle aangeleerde functies op te slaan en
de leermodus te verlaten.
Aanwijzing
Bij het vervangen van de batterijen in de universele afstandsbediening
blijven de functies van de aangeleerde toetsen behouden.
7.4 Wissen van aangeleerde functies
7.4.1 Wissen van een aangeleerde functie
1. Druk tegelijkertijd gedurende ca. 3 sec. op de toetsen [MUTE] en [VOL+]
totdat de status-LED constant brandt.
2. Voer nu de code [9] [8] [1] in, de status-LED knippert tweemaal en brandt
vervolgens weer constant.
3. Druk op de toets, waarvan u de functie wilt wissen. De status-LED knippert
driemaal en de gewenste functie is gewist.
7.4.2 Wissen van alle aangeleerde functies
1. Druk tegelijkertijd gedurende
ca. 3 sec. op de toetsen [MUTE] en [VOL+] totdat de status-LED constant
brandt.
2. Voer nu de code [9] [8] [2] in, de status-LED knippert tweemaal en brandt
vervolgens weer constant.
3. Druk op de toets [SETUP], de status-LED knippert driemaal en alle aange-
leerde functies zijn nu gewist.
8. Onderhoud
• Gebruik nimmer tegelijkertijd oude en nieuwe batterijen in de universele
afstandsbediening omdat oude batterijen kunnen lekken en tot vermogens-
verlies kunnen leiden.
•
Reinig de universele afstandsbediening nimmer met een schuurmiddel of
scherpe reinigingsmiddelen.
• Houd de universele afstandsbediening vrij van stof door haar regelmatig
met een droge zachte doek te reinigen.
9. Het Oplossen van Storingen
V. Mijn universele afstandsbediening doet het niet!
A. Controleer het TV/STB-toestel. Indien de hoofdschakelaar van het toestel is
uitgeschakeld kan de universele afstandsbediening het toestel niet bedienen.
A.
Controleer of de batterijen van de afstandsbediening juist zijn geplaatst en of de
polariteit in orde is.
A. Controleer of de desbetreffende toets voor het toestel is ingedrukt.
A. Vervang de batterijen bij een laag laadniveau.
V. Indien voor het merk van mijn TV/STB-toestel meerdere toestelcodes zijn
opgesomd, hoe selecteer dan de juiste toestelcode?
A. Om de correcte toestelcode voor het TV/STB-toestel te achterhalen, test u
de codes één voor één uit tot de meeste toetsen/functies van uw toestel
naar behoren functioneren.
V. Mijn TV/STB-toestel reageert alleen op een paar toetsen.
A. Probeer andere codes totdat de meeste toetsen correct functioneren.

41
10. Service en support
Neem bij vragen over het product contact op met de afdeling Productadvies
van HAMA.
Hotline: +49 9091 502-0 (Duits/Engels)
Meer support-informatie vindt u hier:
www.hama.com

42
PInstrukcja obsługi
Uniwersalny pilot zdalnego sterowania
Dziękujemy, że zdecydowali sięPaństwo na zakup produktu firmy Hama.
Prosimy poświęcićtrochęczasu na uważne przeczytanie poniższych instrukcji
i informacji. Instrukcjęnależy przechowywaćw bezpiecznym miejscu do
późniejszego użytku.
Przyciski funkcyjne
1.
Włączanie/wyłączanie/wskaźnik LED
2. Przyciski wyboru urządzenia
3. Vol+/Vol-: regulacja głośności
4. Wyciszanie dźwięku
5. Przyciski numeryczne 0-9
6. -/-- przełączanie na dwucyfrowy numer radiostacji
7. Setup – ustawienia pilota
8. Menu – otwieranie menu urządzenia
9. AV –
wybór zewnętrznego źródła AV
10. Potwierdzanie wyboru
11. Exit – zamykanie menu urządzenia
12. CH +/- - wybór programu do góry/na dół
1. Objaśnienie symboli informacyjnych
Wskazówka
•Symbol ten oznacza, że dostępne sądodatkowe informacje lub ważne
wskazówki.
2. Zakres dostawy
- uniwersalny pilot zdalnego sterowania
- lista kodów
- niniejsza instrukcja obsługi
3. Wskazówki bezpieczeństwa
• Uniwersalnego pilota zdalnego sterowania nie należy używaćw wilgotnym
otoczeniu oraz należy go chronićprzed bryzgami wody.
• Trzymaćuniwersalny pilot zdalnego sterowania z dala od źródełciepła i nie
wystawiaćna bezpośrednie promieniowanie słoneczne.
• Chronićpilota przed upadkiem.
• Nie otwieraćuniwersalnego pilota zdalnego sterowania. Nie zawiera on
żadnych części wymagających konserwacji przez użytkownika.
• Trzymaćpilota, jak wszystkie urządzenia elektryczne, z dala od dzieci!
4. Pierwsze kroki – wkładanie baterii
Wskazówka
•Zaleca sięużywanie baterii alkalicznych. Stosowaćdwie baterie typu
„AA” (LR 6/Mignon).
•Zdjąć pokrywęschowka na baterie z tyłu uniwersalnego pilota zdalnego
sterowania.
•Włożyćbaterie, zwracając uwagęna oznaczenie biegunowości „+/-”.
•Zamknąć schowek na baterie.
Wskazówka: Pamięć kodów
•Niniejszy pilot zapisuje ustawienia także podczas wymiany baterii.

43
Wskazówka: Funkcja energooszczędna
•Pilot zdalnego sterowania wyłącza sięautomatycznie, jeżeli przycisk będzie
wciśnięty przez dłużej niż15 sekund. Wydłuża to trwałość baterii, jeżeli
przyciski zostanąprzypadkowo zakleszczone, np. między poduszkami na
wersalce.
5. Setup
Wskazówka
•Aby transfer danych w podczerwieni byłprawidłowy, zawsze trzymaćpilota
zwróconego w kierunku obsługiwanego urządzenia.
•Jeżeli przez ok. 30 sekund nie zostanie wprowadzone żadne ustawienie, tryb
ustawień(Setup) jest zamykany. Dioda LED miga sześciokrotnie i gaśnie.
•Jeżeli urządzenie znajduje siętrybie Setup, nie można obsługiwaćgo
za pomocąuniwersalnego pilota zdalnego sterowania. Zamknąć tryb
Setup i przyciskami wyboru urządzenia wybraćurządzenie, które ma być
obsługiwane.
5.1 Bezpośrednie wprowadzanie kodu
Do zakresu dostawy uniwersalnego pilota zdalnego sterowania należy lista
kodów. Lista kodów przedstawia pięciocyfrowe kody większości producentów
urządzeńTV/STB w kolejności alfabetycznej. Jeżeli obsługiwane urządzenie
znajduje sięna liście kodów, bezpośrednie wpisanie kodu jest najprostszą
metodąwprowadzenia kodu
5.1.1 Włączyćurządzenie, które ma byćobsługiwane.
5.1.2 Nacisnąć przycisk „SETUP”, ażdioda LED zacznie świecićsięciągle.
5.1.3 Przyciskami wyboru urządzenia wybraćurządzenie, które ma być
obsługiwane (np. TV). Po udanym wyborze dioda LED miga jednokrotnie,
a następnie świeci sięciągle.
5.1.4 W liście kodów wyszukaćmarkęi typ obsługiwanego urządzenia.
5.1.5 Wprowadzićodpowiedni pięciocyfrowy kod za pomocąprzycisków nume-
rycznych 0–9. Dioda LED potwierdza wprowadzenie poszczególnych cyfr
krótkim mignięciem i gaśnie po piątej cyfrze.
Wskazówka
•Prawidłowy kod jest automatycznie zapamiętywany.
•W przypadku wprowadzenia nieprawidłowegokodu dioda LED miga
sześciokrotnie, a następnie gaśnie. Powtórzyćpunkty od 5.1.1 do 5.1.5 lub
użyćinnej metody wprowadzania kodów.
5.2 Ręczne wyszukiwanie kodu
Uniwersalny pilot zdalnego sterowania posiada wewnętrznąpamięć, która
zawiera maks. 350 kodów dla najbardziej popularnych typów urządzeńTV/STB.
Można wertowaćte kody, ażobsługiwane urządzenie zareaguje. Na przykład
obsługiwane urządzenie wyłącza się(przycisk „POWER”) lub zmienia program
(przycisk „CH+/CH-”).
5.2.1 Włączyćurządzenie, które ma byćobsługiwane.
5.2.2 Nacisnąć przycisk SETUP, ażdioda LED zacznie świecićsięciągle.
5.2.3 Przyciskami wyboru urządzenia wybraćobsługiwane urządzenie (np. TV).
Po udanym wyborze dioda LED miga jednokrotnie, a następnie świeci się
ciągle.
5.2.4 Nacisnąć przycisk „POWER” lub „CH+/CH-”, aby wertowaćzaprogramo-
wane kody, ażobsługiwane urządzenie zareaguje.
5.2.5 Nacisnąć „MUTE”, aby zapisaćkod i zamknąć funkcjęwyszukiwania
kodów. Dioda LED gaśnie.

44
Wskazówka
•W wewnętrznej pamięci można zapisaćmaks. 350 kodów dla najbardziej
popularnych urządzeń. Ze względu na dużą liczbędostępnych na rynku
urządzeńTV/STB może sięzdarzyć,że funkcjonowaćbędątylko podsta-
wowe funkcje. W takim przypadku powtórzyćkroki od 5.2.1 do 5.2.5, aby
znaleźć bardziej kompatybilny kod. W przypadku niektórych specjalnych
modeli urządzeńmoże sięzdarzyć,że nie będzie dostępny żaden kod.
5.3 Automatyczne wyszukiwanie kodu
Funkcja automatycznego wyszukiwania kodu używa tego samego zaprogra-
mowanego kodu jak funkcja ręcznego wyszukiwania kodu (5.2). Jednakże
uniwersalny pilot zdalnego sterowania przeszukuje automatycznie kody, aż
obsługiwane urządzenie zareaguje. Na przykład obsługiwane urządzenie
wyłącza się(przycisk „POWER”) lub zmienia program (przyciski „CH+/CH-”).
5.3.1 Włączyćurządzenie, które ma byćobsługiwane.
5.3.2 Nacisnąć przycisk „SETUP”, ażdioda LED zacznie świecićsięciągle.
5.3.3
Przyciskami wyboru urządzenia wybraćobsługiwane urządzenie (np. TV). Po
udanym wyborze dioda LED miga jednokrotnie, a następnie świeci sięciągle.
5.3.4 Nacisnąć przycisk „CH+/CH-” lub „POWER”, aby uruchomićautoma-
tyczne wyszukiwanie kodu. Dioda LED miga jednokrotnie, a następnie
świeci sięciągle. Po 6 sekundach uniwersalny pilot zdalnego sterowania
rozpoczyna pierwsze wyszukiwanie.
Wskazówka: ustawianie prędkości wyszukiwania
•Domyślnym ustawieniem czasu wyszukiwania jest 1 sekunda na kod. Jeżeli
to nie wystarcza, czas wyszukiwania można zmienićna 3 sekundy na kod.
Aby zmienićczas wyszukiwania, w ciągu 6 sekund przed rozpoczęciem
automatycznego wyszukiwania kodu nacisnąć przycisk „CH+” lub „CH-”.
5.3.5 Każdorazowe wyszukiwanie kodu potwierdzane jest jednym mignięciem
diody LED.
5.3.6 Nacisnąć „MUTE”, aby zapisaćkod i zamknąć funkcjęwyszukiwania
kodów. Dioda LED gaśnie.
5.3.7 Aby w trakcie procesu wyszukiwania zakończyćautomatyczne wyszuki-
wanie, nacisnąć przycisk „EXIT”.
Wskazówka
•Jeżeli wyszukiwanie kodów nie zakończy siępomyślnie, pilot automatycznie
zamyka funkcjęwyszukiwania i automatycznie powraca do trybu pracy.
Aktualnie zapisany kod pozostaje niezmieniony.
5.4 Identyfikacja kodów
Funkcja identykacji kodów oferuje możliwość rozpoznania wprowadzonego
jużkodu.
5.4.1 Nacisnąć przycisk „SETUP”, ażdioda LED zacznie świecićsięciągle.
5.4.2 Przyciskami wyboru urządzenia wybraćobsługiwane urządzenie (np. TV).
Po udanym wyborze dioda LED miga jednokrotnie, a następnie świeci się
ciągle.
5.4.3 Nacisnąć przycisk „SETUP”. Dioda LED miga jednokrotnie, a następnie
świeci sięciągle.
5.4.4 Aby wyszukaćpierwszącyfrę, nacisnąć jeden z przycisków numerycznych
od 0 do 9. Dioda LED zamiga raz dla pierwszej cyfry pięciocyfrowego
kodu.
5.4.5 Powtórzyćkrok 5.4.4 dla drugiej, trzeciej i czwartej cyfry.

45
CODES
TV SAT
6. Funkcje specjalne
6.1 Funkcja przekierowania Punch-Through do
przełączania stacji
Za pomocąfunkcji przekierowania Punch-Through do przełączania stacji komendami
CH
+ lub
CH
- można obejść aktualnie sterowane urządzenie i przełączac stacje innego
urządzenia. Nie dotyczy to żadnych innych komend.
FunkcjęPunch-Through do przełączania stacji włącza sięw sposób
następujący:
• Nadsnąć wybrany przycisk urządzenia (np. TV).
• Trzymaćwciśnięty przycisk „CH+”.
• Nadsnąć wybrany przycisk urządzenia (np. SAT).
• Ponownie zwolnićprzydsk „
CH
+” (przy aktywnym ustawieniu dioda LED miga
jednokrotnie).
FunkcjęPunch-Through wyłącza sięw sposób
następujący:
• Nadsnąć wybrany przycisk urządzenia (np. TV).
• Trzymaćwciśnięty przycisk „CH-”.
• Nadsnąć wybrany przycisk urządzenia (np. SAT).
• Ponownie zwolnićprzydsk „CH-” (dioda LED miga dwukrotnie przy
wyłączonym ustawieniu).
6.2 Funkcja przekierawania Punch-Through do
regulacji głośności
Za pomocąfunkcji przekierowania Punch-Through komendami VOL+ lub VOL-
można obejść aktualnie sterowane urządzenie i wyregulowaćgłośności innego
urządzenia. Nie dotyczy to żadnych innych komend.
FunkcjęPunch-Through do regulacji głośności włącza sięw sposób
następujący:
• Nadsnąć wybrany przycisk urządzenia (np. TV).
• Trzymaćwciśnięty przycisk „VOL+”.
• Nadsnąć wybrany przycisk urządzenia (np. SAT).
• Ponownie zwolnićprzydsk „VOL+” (przy aktywnym ustawieniu dioda LED
miga jednokrotnie).
FunkcjęPunch-Through do regulacji głośności wyłącza sięw sposób
następujący:
• Nadsnąć wybrany przycisk urządzenia (np. TV).
• Trzymaćwciśnięty przycisk „VOL-”.
• Nadsnąć wybrany przycisk urządzenia (np. SAT).
• Ponownie zwolnićprzydsk „VOL-” (dioda LED miga dwukrotnie przy
wyłączonym ustawieniu).
6.3 Macro Power
Za pomocąfunkcji Macro Power można jednoaeśnie włączać/wyłączaćdwa
urządzenia TV/STB.
Sposób włączania funkcji Macro-Power.
• Nadsnąć wybrany przycisk urządzenia (np. TV).
• Trzymaćwciśnięty przycisk „POWER”.
• Nadsnąć wybrany przycisk urządzenia (np. SAT).
• Ponownie zwolnićprzydsk „POWER” (przy aktywnym ustawieniu dioda LED miga
jednokrotnie).
Sposób wyłączania funkcji Macro-Power.
• Nadsnąć wybrany przycisk urządzenia (np. TV).
• Trzymaćwciśnięty przycisk „POWER”.

46
• Nadsnąć wybrany przycisk urządzenia (np. SAT).
• Ponownie zwolnićprzydsk „POWER” (dioda LED miga dwukrotnie przy
wyłączonym ustawieniu).
7. FUNKCJA ZAPAMIĘTYWANIA
Niniejszy pilot zdalnego sterowania jest wyposażony w funkcję
zapamiętywania. Dzięki temu funkcje oryginalnego pilota można przenieść na
niniejsze, uniwersalne urządzenie.
7.1 Przed uruchomieniem funkcji zapamiętywania
• Zwrócićuwagęna nienaganny stan wszystkich baterii stosowanych w obu
pilotach. W razie potrzeby wymienićje.
• Ułożyćoryginalny i uniwersalny pilot zdalnego sterowania w ten sposób, aby ich
diody podczerwieni leżały bezpośrednio naprzeciwko siebie.
• W razie potrzeby poprawićwysokość obu pilotów, aby w ten sposób
zapewnićoptymalne ustawienie.
• Odstęp między pilotami powinien wynosićok. 3 cm.
ca. 3 cm
ROC1117GRU ORIGINAL
Wskazówki
• W trakcie procesu zapamiętywania nie poruszaćpilotami.
• Upewnićsię,że pomieszczenie nie jest oświetlane jarzeniówkami ani
świetlówkami energooszczędnymi, ponieważmogąone być źródłem
zakłóceńi stanowićtym samym przeszkodędla procesu zapamiętywania.
• Odległość obu pilotów od najbliższego źródłaświatła powinna wynosićco
najmniej 1 metr.
• Proces zapamiętywania kończony jest bez zapisu, jeśli w trakcie
włączonego trybu zapamiętywania przez 30 sek. żaden przycisk nie
zostanie wciśnięty lub nie zostanie odebrany żaden sygnał.
• W trybie zapamiętywania każdemu przyciskowi można przypisaćtylko jedną
funkcję. Nowa funkcja nadpisuje funkcjęzapamiętanądla tego przycisku
do tej pory.
• Przyciskom TV, STB i Setup nie można przypisaćnowych funkcji.
7.2 Włączanie trybu zapamiętywania
1. Wcisnąć jednocześnie i przytrzymaćprzez ok. 3 s przyciski [MUTE]
i [VOL+], ażdioda LED stanu zacznie świecić światłem ciągłym.
2. Wprowadzićkod [9] [8] [0]; dioda LED stanu miga dwukrotnie, a następnie
świeci światłem ciągłym.
3. Uniwersalny pilot zdalnego sterowania jest teraz w trybie zapamiętywania.
7.3 Przenoszenie funkcji przycisków
1. Wcisnąć na oryginalnym pilocie przycisk, którego funkcja ma byćprzenie-
siona. Jako potwierdzenie otrzymania polecenia miga dioda LED stanu
pilota zapasowego.
2. Teraz wcisnąć przycisk pilota zapasowego, na który ma byćprzeniesiona
funkcja.
3. Dioda LED funkcji na pilocie zapasowym miga trzykrotnie jako potwierdze-
nie, a następnie świeci światłem ciągłym. Nowa funkcja została zapisana.
4. W celu przeniesienia funkcji kolejnych przycisków powtórzyćte same
czynności.
BIG ZAPPER

47
5. Wcisnąć przycisk [SETUP] w celu zapisania wszystkich zapamiętanych
funkcji i opuszczenia trybu zapamiętywania.
Wskazówki
Podczas wymiany baterii w pilocie uniwersalnym funkcje zapamiętane dla
przycisków pozostajązapisane.
7.4 Usuwanie zapamiętanych funkcji
7.4.1 Usuwanie zapamiętanej funkcji
1. Wcisnąć jednocześnie i przytrzymaćprzez ok. 3 s przyciski [MUTE]
i [VOL+], ażdioda LED stanu zacznie świecić światłem ciągłym.
2. Wprowadzićkod [9] [8] [1]; dioda LED stanu miga dwukrotnie, a następnie
świeci ponownie światłem ciągłym.
3. Nacisnąć przycisk, którego funkcja ma byćusunięta. Dioda LED stanu miga
trzykrotnie, a żądana funkcja jest usunięta.
7.4.2 Usuwanie wszystkich zapamiętanych funkcji
1. Wcisnąć jednocześnie i przytrzymaćprzez ok. 3 s przyciski [MUTE] i [VOL+],
ażdioda LED stanu zacznie świecić światłem ciągłym.
2. Wprowadzićkod [9] [8] [2]; dioda LED stanu miga dwukrotnie, a następnie
świeci ponownie światłem ciągłym.
3. Nacisnąć przycisk [SETUP], dioda LED stanu miga trzykrotnie, a wszystkie
zapamiętane funkcje sąusunięte.
8. Konserwacja
• W uniwersalnym pilocie zdalnego sterowania nie stosowaćjednocześnie
starych i nowych baterii, gdyżw starych bateriach może dojść do wycieku
elektrolitu i zaniku mocy.
• Nie używaćdo czyszczenia pilota środków szorujących ani ostrych przedmi-
otów.
• Chronićpilota przed zakurzeniem, czyszcząc go suchąmiękką ściereczką.
9. Usuwanie usterek
P.
Mój uniwersalny pilot zdalnego sterowania nie działa!
O. Sprawdzićurządzenie TV/STB. Jeżeli główny wyłącznik urządzenia jest
wyłączony, pilot nie może go obsługiwać.
O. Upewnićsię,że baterie zostały prawidłowo włożone z uwzględnieniem
biegunowości.
O. Upewnićsię, czy na pilocie wciśnięto właściwy przycisk urządzenia.
O. W przypadku słabych baterii wymienićje.
P. Jeżeli w liście kodów znajduje sięwięcej kodów dla marki mojego
urządzenia TV/STB, jak wybraćten właściwy?
O. Aby wybraćwłaściwy kod dla urządzenia
TV/STB, sprawdzaćpo kolei kody, ażwiększość przycisków będzie
prawidłowo funkcjonowała.
P. Moje urządzenie TV/STB reaguje tylko na niektóre komendy przycisków.
O. Wypróbowaćinne kody, ażwiększość przycisków będzie prawidłowo
funkcjonowała.

48
10.
Serwis i pomoc techniczna
W razie pytańdotyczących produktu prosimy zwrócićsiędo infolinii Hama.
Gorąca linia: +49 9091 502-0 (niem./ang.)
Dodatkowe informacje sądostępne na stronie:
www.hama.com

49
HHasználati útmutató
Univerzális távirányító
Köszönjük, hogy ezt a Hama-terméket választotta.
Kérjük, szánjon rá időt, és olvassa végig a következőútmutatót és a
használathoz szükséges információkat. A későbbi fellapozáshoz biztonságos
helyen őrizze ezt az útmutatót.
Funkciógombok
1.
BE/KI / LED-kijelző
2. Eszközkiválasztó gombok
3. Vol+/Vol-: hangerőszabályozás
4. Némító kapcsoló
5. 0-9 számjegygombok
6. -/-- Váltás a kétjegyűadószámokhoz
7. Setup – a távirányító beállításai
8. Menu – eszközmenü megnyitása
9. AV – külsőAV-forrás kiválasztása
10. Kiválasztás megerősítése
11. Exit – kilépés az eszközmenüből
12. CH +/- - programkiválasztás
1. A megjegyzés ikon magyarázata
Megjegyzés
•Ez az ikon kiegészítőinformációkra vagy fontos megjegyzésekre utal.
2. A doboz tartalma
- univerzális távirányító
- kódlista
- ez a használati útmutató
3. Biztonsági tudnivalók
• Ne használja az univerzális távirányítót párás környezetben, és kerülje el,
hogy víz fröccsenjen rá.
• Tartsa távol az univerzális távirányítót hőforrástól, és ne tegye ki közvetlen
napfény hatásának.
• Ne ejtse le az univerzális távirányítót.
• Ne bontsa szét az univerzális távirányítót. Az eszköz nem tartalmaz
a felhasználó által karbantartandó alkatrészt.
• Az univerzális távirányító, mint minden más elektromos eszköz, gyermek
kezébe nem adható, nem gyermekjáték.
4. Elsőlépések – az elemek behelyezése
Megjegyzés
•Alkálielemek használata ajánlott. Használjon két „AA” (LR 6/Mignon) típusú
elemet.
•Vegye ki az elemfészek fedelét az univerzális távirányító hátoldalán.
•Tegye bele az elemeket, ügyelve a polaritás „+/-” jelzésére.
•Tegye vissza az elemfészek fedelét.
Megjegyzés: kódmemória
•Ez a távirányító elmenti a beállításokat, még elemcsere esetén is.

50
Megjegyzés: Energiatakarékosság funkció
•A távirányító automatikusan kikapcsol, ha egy gomb 15 másodpercnél
tovább van nyomva tartva. Ez megnöveli elemek élettar tamát, ha a távirá-
nyító olyan helyre van beszorulva, ahol a gombok folyamatosan nyom-
va maradnak, pl. a díványpárnák között.
5. Használatba vétel
Megjegyzés
•A megfelelőinfravörös átvitel érdekében a távirányítót mindig nagyjából
a kezelendőkészülék felé tartsa.
•Ha mintegy 30 másodpercig nincs működtetés, akkor a használatba vétel
befejeződik. A LED hatszor villan, majd kialszik.
•Az univerzális távirányítóval addig nem kezelhet készüléket, amíg az
a használatba vételi üzemmódban van. Lépjen ki a használatba vételi
üzemmódból, és válassza ki a kezelendőkészüléket az eszközkiválasztó
gombokkal.
5.1 Közvetlen kódbevitel
Az univerzális távirányítóhoz kódlistát is mellékelünk. A kódlista a legtöbb TV/
STB eszköz gyártójának öt-számjegyűkódját jelenít meg ábécé sorrendben. Ha
a kezelendőkészüléket a kódlista tartalmazza, akkor a közvetlen kódbevitel a
legegyszerűbb beviteli módszer.
5.1.1 Kapcsolja be a kezelendőkészüléket.
5.1.2 Nyomja meg a „SETUP” gombot, amíg a LED folyamatosan nem világít.
5.1.3 Válassza ki a készülékgombbal a kezelendőkészüléket (pl. TV). Sikeres
kiválasztásnál a LED egyszer felvillan, majd folyamatosan ég.
5.1.4 Keresse meg a kódlistában a kezelendőkészülék márkáját és típusát.
5.1.5 Írja be a megfelelőötjegyűkódot a 0–9 számgombokkal. A LED rövid
villanással megerősíti az egyes számjegyek beírását, és az ötödik szám
után kialszik.
Megjegyzés
•Az érvényes kódot az eszköz automatikusan eltárolja.
•Érvénytelen kód esetén hatszor villan a LED, majd elalszik. Ismételje meg az
5.1.1 … 5.1.5 lépéseket, vagy használjon más mód-
szert a kódbevitelre.
5.2 Manuális kódkeresés
Az univerzális távirányító belsőmemóriával rendelkezik, amely készüléktí-
pusonként max. 350 kódot tartalmaz a leggyakoribb TV/STB-készülékekhez. Így
végigmehet ezeken a kódokon, amíg a kezelendőkészülék reakciót nem mutat.
Pl.: a kezelendőkészülék kikapcsol („POWER” gomb), vagy adót vált („CH+/
CH-” gomb).
5.2.1 Kapcsolja be a kezelendőkészüléket.
5.2.2 Nyomja meg a SETUP gombot, amíg a LED folyamatosan nem világít.
5.2.3 Válassza ki a készülékgombbal a kezelendőkészüléket (pl. TV). Sikeres
kiválasztásnál a LED egyszer felvillan, majd folyamatosan ég.
5.2.4 Nyomja meg a „POWER” vagy a „CH+/CH-” gombot, hogy végigpróbálja
az előre beállított kódokat, amíg a kezelendőkészülék reakciót nem
mutat.
5.2.5 Nyomja meg a „MUTE” gombot a kód eltárolására és a kódkeresés
befejezésére.
A LED kialszik.

51
Megjegyzés
•A belsőmemóriában max. 350 kód tárolható a leggyakoribb készülékekhez.
A kereskedelemben kapható számtalan TV/STB-készülék alapján
előfordulhat, hogy csak a leggyakoribb főfunkciók állnak rendelkezésre.
Ebben az esetben ismételje meg az 5.2.1 … 5.2.5 szerinti lépéseket
megfelelőbb kód megtalálásához. Néhány különleges készüléktípushoz
lehetséges, hogy nem áll rendelkezésre a szükséges kód.
5.3 Automatikus kódkeresés
Az automatikus kódkeresésnél ugyanazon előre beállított kódok használhatók,
mint a manuális kódkeresésnél (5.2). Az univerzális távirányító azonban
automatikusan kutatja át a kódokat, amíg a kezelendőkészülék reakciót nem
mutat. Pl.: a kezelendőkészülék kikapcsol („POWER” gomb), vagy adót vált
(„CH+/CH-” gomb).
5.3.1 Kapcsolja be a kezelendőkészüléket.
5.3.2 Nyomja meg a „SETUP” gombot, amíg a LED folyamatosan nem világít.
5.3.3 Válassza ki a készülékgombbal a kezelendőkészüléket (pl. TV). Sikeres
kiválasztásnál a LED egyszer felvillan, majd folyamatosan ég.
5.3.4 Nyomja meg a „CH+/CH-” vagy „POWER” gombot az automatikus
kódkeresés indításához. A LED egyszer felvillan, majd folyamatosan
világít. 6 másodpercig tart, amíg az univerzális távirányító megkezdi az
elsőkeresést.
Megjegyzés: a keresési sebesség beállítása
•A keresési időalapbeállítása 1 másodperc kódonként. Ha ez Önnek nem
felel meg, kódonként 3 másodperc keresési időre válthat. A keresési idők
közötti váltáshoz nyomja meg a „CH+” vagy „CH-” gombot 6 másodpercen
belül az automatikus kódkeresés kezdete előtt.
5.3.5 A LED a megfelelőkódkereséseket egyedi villanással jelzi.
5.3.6 Nyomja meg a „MUTE” gombot a kód eltárolására és a kódkeresés
befejezésére.
A LED kialszik.
5.3.7 Az automatikus keresés megszakítására a keresési folyamat közben
nyomja meg az „EXIT” gombot.
Megjegyzés
•Az összes kód eredménytelen végigkeresése esetén az univerzális távirányító
kilép az automatikus kódkeresésből és visszatér az üzemi módba. Az
aktuálisan tárolt kód változatlan marad.
5.4 Kódfelismerés
A kódfelismerés lehetőséget kínál Önnek egy már bevitt kód megállapítására.
5.4.1 Nyomja meg a „SETUP” gombot, amíg a LED folyamatosan nem világít.
5.4.2 Válassza ki a készülékgombbal a kezelendőkészüléket (pl. TV). Sikeres
kiválasztásnál a LED egyszer felvillan, majd folyamatosan ég.
5.4.3 Nyomja meg a „SETUP” gombot. A LED egyszer felvillan, majd folyama-
tosan világít.
5.4.4 Az elsőszámjegy kereséséhez nyomja meg a 0 … 9 számjegygombok
egyikét. A LED egyet villan az ötjegyűkódszám elsőszámjegyénél.
5.4.5
Ismételje meg az 5.4.4 lépést a második, harmadik és negyedik számjegyre.

52
CODES
TV SAT
6. Speciális funkciók
6.1 Adó „Punch Through”
Az adó punch through funkcióval a CH+ vagy CH- parancsok kikerülhetik az
aktuálisan vezérelt eszközt, majd egy második készülékre válthatnak.
Az összes egyéb parancsot ez nem érinti.
Így aktiválja az adó punch through funkciót:
• Nyomja meg a kívánt készülékgombot (pl. TV).
• Tartsa a „CH+” gombot lenyomva.
• Nyomja meg a kívánt készülékgombot (pl. SAT).
• Engedje el a „CH+” gombot (a LED egyszer villan aklivált beállitásnál).
Így kapcsolja ki az adó punch through funkciót:
• Nyomja meg a kívánt készülékgombot (pl. TV).
• Tartsa a „CH-” gombot lenyomva.
• Nyomja meg a kívánt készülékgombot (pl. SAT).
• Engedje el a „CH-” gombot (a beállítás deaktiválásakor a LED kétszer
felvillan).
6.2 Hangerő„Punch Through”
A hangerőpunch through funkcióval a VOL+ vagy VOL- parancsok kikenülhetik
az aktuálisan vezérelt eszközt, majd egy második készülék hangerejét állíhatják
be. Az összes egyéb parancsot ez nem érinti.
Így aktiválja a hangerőpunch through funkciót:
• Nyomja meg a kívánt készülékgombot (pl. TV).
• Tartsa a „VOL+” gombot lenyomva.
• Nyomja meg a kívánt készülékgombot (pl. SAT).
• Engedje el a „VOL+” gombot (a LED egyszer villan aklivált beállitásnál).
Így kapcsolja ki a hangerőpunch through funkciót:
• Nyomja meg a kívánt készülékgombot (pl. TV).
• Tartsa a „VOL-” gombot lenyomva.
• Nyomja meg a kívánt készülékgombot (pl. SAT).
• Engedje el a „VOL-” gombot (a beállítás deaktiválásakor a LED kétszer
felvillan).
6.3 Macro Power
A Macro Power segítségével két AV-eszközt egyidejűleg tud be-/kikapcsolni.
Így aktiválja a Macro Power funkciót:
• Nyomja meg a kívánt készülékgombot (pl. TV).
• Tartsa a „POWER” gombot lenyomva.
• Nyomja meg a kívánt készülékgombot (pl. SAT).
• Engedje el a „POWER” gombot (a LED egyszer villan aklivált beállitásnál).
Így kapcsolja ki a Macro Power funkciót:
• Nyomja meg a kívánt készülékgombot (pl. TV).
• Tartsa a „POWER” gombot lenyomva.
• Nyomja meg a kívánt készülékgombot (pl. SAT).
• Engedje el a „POWER” gombot (beállítás deaktiválásakor a LED kétszer
felvillan).
7. BETANÍTÓ FUNKCIÓ
Ez a távirányító betanító funkcióval rendelkezik. Ezáltal az eredeti
távirányítójának funkcióit erre az univerzális távirányítóra átviheti.
7.1 Mielőtt a betanító funkciót elindítja
• Ügyeljen arra, hogy mindkét távirányítóban az összes elem kifogástalan
állapotban legyen. Adott esetben cserélje ki őket.

53
• Fektesse egymás mellé eredeti távirányítóját és az univerzális távirányítót
úgy, hogy a távirányítók infravörös diódái közvetlenül egymással szemben
helyezkedjenek el.
• Szükség esetén korrigálja mindkét távirányító magasságát annak érdekében,
hogy megfelelően legyenek pozicionálva.
• A két távirányító közötti távolság kb. 3 cm legyen.
ca. 3 cm
ROC1117GRU ORIGINAL
Hivatkozás
• A távirányítókat a betanulási folyamat közben ne mozgassa.
• Gondoskodjon arról, hogy a helyiség világítása ne fénycsövekkel vagy
energiatakarékos lámpákkal legyen megoldva, mivel zavart okozhatnak,
és ezáltal akadályozhatják a betanulási folyamatot.
• A két távirányító legközelebbi fényforráshoz képesti távolsága legalább
1 méter legyen.
• A betanulási folyamat mentés nélkül fejeződik be, ha az aktivált betanítási
mód során 30 másodpercig nem történik gombnyomás vagy jelfogadás.
• A betanítási módban minden gombhoz csak egy funkció rendelhető.
Egy új funkció felülírja az adott gombhoz tartozó, korábban betanított
funkciót.
• A TV, STB és Setup gombjait nem lehet további funkcióval kiegészíteni.
7.2 A betanítási mód aktiválása
1. Tartsa nyomva egyszerre a [MUTE] és a [VOL+] gombot kb.
3 mp-ig, amíg az állapotjelzőLED folyamatosan nem világít.
2. Adja meg a [9] [8] [0] kódot, az állapotjelzőLED kétszer villog, majd
folyamatosan világít.
3. Az univerzális távirányító most betanítási módban van.
7.3 Billentyűfunkciók átvitele
1. Nyomja meg az eredeti távirányítón azt a gombot, amelynek a funkcióját
át szeretné vinni. Annak megerősítéseképpen, hogy a parancs elfogadásra
került, a póttávirányító állapotjelzőLED-je villog.
2. Nyomja meg ekkor a póttávirányítónak azt a gombját, amelyhez az átvitt
funkciót rendelni szeretné.
3. A póttávirányító működésjelzőLED-je 3-szor villog megerősítésképpen,
végül újra folyamatosan világít. Az új funkció ekkor kerül mentésre.
4. További gombok funkciójának átviteléhez ismételje meg ezt a lépést.
5. Nyomja meg az [SETUP] gombot, hogy az összes betanított funkciót
mentse a rend-szer, és kilépjen a betanítási módból.
Hivatkozás
Elemcsere esetén az univerzális távirányító megőrzi a betanított gombok
funkcióját.
7.4 Betanított funkciók törlése
7.4.1 Betanított funkció törlése
1. Tartsa nyomva egyszerre a [MUTE] és a [VOL+] gombot kb. 3 mp-ig, amíg
az állapotjelzőLED folyamatosan nem világít.
BIG ZAPPER

54
2. Adja meg a [9] [8] [1] kódot, az állapotjelzőLED 2-szer villog, végül újra
folyamatosan világít.
3. Nyomja meg azt a gombot, amelynek a funkcióját törölni szeretné. Az
állapotjelzőLED 3-szor villog, és a kívánt funkció törlődik.
7.4.2 Az összes betanított funkció törlése
1. Tartsa nyomva egyszerre a [MUTE] és a [VOL+] gombot kb.
3 mp-ig, amíg az állapotjelzőLED folyamatosan nem világít.
2.
Adja meg a [9] [8] [2] kódot, az állapotjelzőLED 2-szer villog, végül újra
folyamatosan világít.
3. Nyomja meg az [SETUP] gombot, az állapotjelzőLED 3-szor villog, és az
összes betanított funkció törlésre kerül.
8. Karbantartás
• Ne tegyen egyidejűleg régi és új elemet
az univerzális távirányítóba, mivel a régi
elemek kifolyásra hajlamosak és teljesítmény
csökkenéshez vezethetnek.
• Az univerzális távirányító tisztításához ne használjon súrolószert vagy erős
tisztítószert.
• Az univerzális távirányítót száraz, puha törlőkendővel törölje le rendszere-
sen és így tartsa pormentesen.
9. HIBAELHÁRÍTÁS
K. Nem működik az univerzális távirányító!
V. Ellenőrizze az TV/STB-készüléket. Ha a készülék főkapcsolója ki van kapc-
solva, akkor az univerzális távirányító nem tudja kezelni a készüléket.
V. Ellenőrizze, hogy az elemek megfelelően,
helyes polaritással vannak-e betéve az elem-fészekbe.
V. Ellenőrizze, hogy a készüléknek megfelelőkészülékgombot nyomta-e meg.
V. Ha alacsony az elem feszültségszintje, cserélje
ki az elemeket.
K. Ha az TV/STB-készülékem márkájához több ké-
szülékkód van felsorolva, hogyan választom ki
a helyes készülékkódot?
V. Az TV/STB-készülék számára a helyes készülékkód megállapításához
tesztelje egymás után a kódokat, amíg a legtöbb gomb szabályosan nem
működik.
K. TV/STB-készülékem csak néhány gombparancsra reagál.
V. Próbáljon ki egyéb kódokat, amíg a legtöbb gomb helyesen nem működik.
10. Szerviz és terméktámogatási információk
Kérjük, hogy a termékkel kapcsolatos kérdéseivel forduljon a Hama termék-
tanácsadásához.
Közvetlen vonal Közvetlen vonal: +49 9091 502-0 (Deu/Eng)
További támogatási információt itt talál:
www.hama.com

55
OManual de instruções
Telecomando universal
Agradecemos que se tenha decidido por este produto Hama.
Antes de utilizar o produto, leia completamente estas instruções e
informações. Guarde estas instruções num local seguro para consultas
posteriores.
Botões de função
1.
LIGAR/DESLIGAR / indicador LED
2. Botões para selecção do aparelho
3. Vol+/Vol-: Regulação do volume
4. Botão mute
5. Botões numéricos 0 - 9
6. -/-- comutar para números de canal com dois dígitos
7. Setup – configurações do telecomando
8. Menu – aceder ao menu do aparelho
9. AV – selecionar fonte AV externa
10. Confirmar a selecção
11. Exit – deixar o menu do aparelho
12. CH +/- - selecção do canal
1. Explicação do símbolo „Nota”
Nota
•Este símbolo remete para informações adicionais ou informações impor-
tantes.
2. Itens fornecidos
- Telecomando universal
- Lista de códigos
- Estas instruções de utilização
3. Indicações de segurança
• Não utilize o telecomando universal em ambiente húmidos. Evite o
contacto com enguiços de água.
• Mantenha o telecomando universal afastado de fontes de calor e nunca o
exponha à luz solar directa.
• Não deixe cair o telecomando universal.
• Não abra o telecomando universal, pois este não possui componentes que
requerem manutenção pelo utilizador.
• O telecomando universal, tal como todos os aparelhos eléctricos, deve ser
mantido fora do alcance de crianças.
4. Primeiros passos - Colocar as pilhas
Nota
•Recomenda-se a utilização de pilhas alcalinas. Utilize duas pilhas do tipo
„AA” (LR 6/Mignon).
•Abra a tampa do compartimento das pilhas nas costas do telecomando
universal.
•Coloque as pilhas observando a polaridade correcta (marcas „+” e „-”).
•Feche o compartimento das pilhas.
Nota: Memória de código
•Este telecomando memoriza as denições mesmo durante a substituição
das pilhas.

56
Nota: Função de poupança de energia da pilha
•O controlo remoto desliga-se automaticamente quando pressiona o botão du-
rante mais de 15 segundos. Esta função permite conservar a energia da pilha,
caso o controlo remoto que preso, por exemplo, entre as almofadas do sofá
numa posição na qual os botões estão continuamente a ser pressionados.
5. Setup
Nota
•Para garantir uma transmissão por infravermelhos sem falhas, oriente
sempre o telecomando na direcção aproximada do aparelho a comandar.
•Se não for efectuada nenhuma introdução durante aprox. 30 segundos, o
modo de conguração termina automaticamente. O LED pisca seis vezes e
depois apaga-se.
•Não é possível comandar aparelhos com o telecomando universal se este
se encontrar no modo Setup. Deixe o modo Setup e seleccione, depois, o
aparelho desejado através dos botões de selecção de aparelhos.
5.1 Introdução directa de códigos
O telecomando é fornecido com uma lista de códigos para aparelhos. A lista
de códigos indica códigos de cinco dígitos da maior parte dos fabricantes de
aparelhos de TV/STB por ordem alfabética. Se o aparelho a comandar estiver
indicado na lista, a introdução directa via código do aparelho é o método de
introdução mais simples.
5.1.1 Ligue o aparelho a comandar.
5.1.2 Prima o botão SETUP e mantenha-o premido até o LED car perma-
nentemente aceso.
5.1.3 Seleccione, agora, o aparelho desejado através do botão de aparelho
(por ex., TV). Se a selecção foi aceite com sucesso, o LED pisca uma vez e
permanece, depois, aceso.
5.1.4 Procure a marca e o tipo do aparelho na lista de códigos.
5.1.5 Introduza o respetivo código de cinco dígitos com as teclas numéricas
0-9. O LED conrma sempre a introdução de cada dígito com um breve
piscar, e volta a apagar-se depois de o quinto dígito ser introduzido.
Nota
•Códigos válidos são automaticamente memorizados no telecomando.
•Se for introduzido um código inválido, o LED pisca seis vezes e, depois,
apaga-se. Repita os passos 5.1.1 até 5.1.5 ou utilize um outro método de
introdução.
5.2 Procura manual do código
O telecomando universal possui uma memória
interna na qual estão pré-memorizados até 350 códigos por tipo de aparelho
para os aparelhos
TV/STB comuns. É possível efectuar uma procura do código desejado nestes
códigos pré-memorizados até o aparelho reagir aos comandos. Por exemplo,
o aparelho a comandar desliga-se (Botão POWER) ou comuta para um outro
canal (botão CH+/CH-).
5.2.1 Ligue o aparelho a comandar.
5.2.2 Prima o botão SETUP e mantenha-o premido até o LED car perma-
nentemente aceso.
5.2.3 Seleccione, agora, o aparelho desejado através do botão de aparelho
(por ex., TV). Se a selecção foi aceite com sucesso, o LED pisca uma vez e
permanece, depois, aceso.
5.2.4 Prima o botão POWER ou
CH
+/
CH
- para iniciar uma procura nos códigos

57
pré-memorizados até o aparelho reagir ao comando.
5.2.5 Prima o botão MUTE para memorizar o código e deixar a função de
procura de códigos. O LED apaga-se.
Nota
•Na memória interna do telecomando é possível guardar até, no máx.,
350 códigos dos aparelhos mais comuns. Devido ao grande número de
aparelhos TV/STB disponíveis no mercado, é possível que apenas estejam
disponíveis as funções principais mais frequentes. Neste caso, repita os
passos 5.2.1 até 5.2.5 para encontrar um código mais adequado para o
aparelho. Para alguns modelos especiais é possível que não estejam
disponíveis códigos.
5.3 Procura automática do código
A procura automática do código utiliza os mesmos códigos pré-memorizados
utilizados pela procura manual (5.2). Neste tipo de procura, o telecomando
universal procura o código automaticamente até que o aparelho a comandar
reaja ao telecomando. Por exemplo, o aparelho a comandar desliga-se (Botão
POWER) ou comuta para um outro canal (botão PROG+/PROG-).sich das zu
bedienende Gerät aus (Taste „POWER”) oder wechselt den Sender (Tasten
„CH+/CH-”).
5.3.1 Ligue o aparelho a comandar.
5.3.2 Prima o botão SETUP e mantenha-o premido até o LED car perma-
nentemente aceso.
5.3.3 Seleccione, agora, o aparelho desejado através do botão de aparelho
(por ex., TV). Se a selecção foi aceite com sucesso, o LED pisca uma vez e
permanece, depois, aceso.
5.3.4 Prima o botão CH+/CH- ou o botão POWER para iniciar a procura
automática do código. O LED pisca uma vez e permanece, depois, aceso.
O telecomando universal requer
6 segundos para iniciar a primeira procura de códigos.
Nota: Ajuste da velocidade de procura
•A denição standard do tempo de procura por código é 1 segundo. Se
desejado, é possível seleccionar um tempo de procura de 3 segundos por
código. Para comutar entre os tempos de procura, prima o botão CH+ ou
CH- dentro dos 6 segundos antes da procura automática ser iniciada.
5.3.5 O LED conrma a respectiva procura de código piscando uma vez.
5.3.6 Prima o botão MUTE para memorizar o
código e deixar a função de procura de códigos. O LED apaga-se.
5.3.7 Para interromper a procura automática durante o processo de procura,
prima o botão EXIT.
Nota
•Se foram percorridos todos os códigos e não foi encontrado um código
válido, o telecomando universal deixa a procura automática e regressa ao
modo de operação normal. O código actualmente memorizado é mantido.
5.4 Identificação de códigos
A identicação do código oferece-lhe a opção de determinar um código já
introduzido no telecomando.
5.4.1 Prima o botão SETUP e mantenha-o premido até o LED car perma-
nentemente aceso.
5.4.2 Seleccione, agora, o aparelho desejado através do botão de aparelho
(por ex., TV). Se a selecção foi aceite com sucesso, o LED pisca uma vez
e permanece, depois, aceso.
5.4.3 Prima o botão SETUP. O LED pisca uma vez e permanece, depois, aceso.

58
5.4.4 Para procurar o primeiro dígito do código, prima um dos botões numé-
ricos 0-9. O LED pisca uma vez para o primeiro número do código de
cinco dígitos.
5.4.5 Repita o passo 5.4.4 para o segundo, terceiro e quarto algarismo.
CODES
TV SAT
6. Funções especiais
6.1 Função "Punch Through" de canal
Com a função „Punch Through” de canal, é possível fazer um bypass com os
comandos botões CH+/CH- do aparelho actualmente comandado e mudar de
canal de um segundo aparelho. Os restantes comandos não são afectados.
Para activar a função „Punch Through” de canal:
• Prima o botão de selecção de aparelho desejado (por ex., TV).
• Prima o botão „CH+” e mantenha-o premido.
• Prima o botão de selecção de aparelho desejado (por ex., SAT).
• Largue o botão „CH+” (o LED pisca uma vez se a função for activada).
Para desactivar a função „Punch Through” de canal:
• Prima o botão de selecção de aparelho desejado (por ex., TV).
• Prima o botão „CH-” e mantenha-o premido.
• Prima o botão de selecção de aparelho desejado (por ex., SAT).
• Largue o botão „CH-” (o LED pisca duas vezes se a função for desactivada).
6.2 Função "Punch Through" de volume do som
Com a função „Punch Through” de volume do som, é posslível fazer um bypass
com os comandos botões VOL+/VOL- do aparelho actualmente comandado e
regular o volume do som de um segundo aparelho. Os restantes comandos não
são afectados.
Para activar a função „Punch Through” de volume do som:
• Prima o botão de selecção de aparelho desejado (por ex., TV).
• Prima o botão „VOL+” e mantenha-o premido.
• Prima o botão de selecção de aparelho desejado (por ex., SAT).
• Largue o botão „VOL+” (o LED pisca uma vez se a função for activada).
Para desactivar a função „Punch Through” de volume do som:
• Prima o botão de selecção de aparelho desejado (por ex., TV).
• Prima o botão „VOL-” e mantenha-o premido.
• Prima o botão de selecção de aparelho desejado (por ex., SAT).
• Largue o botão „VOL-” (o LED pisca duas vezes se a função for desactivada).
6.3 Macro Power
Com MACRO POWER é possível ligar/desligar, simultaneamente, dois
aparelhos TV/STB.
Para activar a função „Macro Power”:
• Prima o botão de selecção de aparelho desejado (por ex., TV).
• Prima o botão „POWER” e mantenha-o premido.
• Prima o botão de selecção de aparelho desejado (por ex., SAT).
• Largue o botão „POWER” (o LED pisca uma vez se a função for activada).
Para desactivar a função „Macro Power”:
• Prima o botão de selecção de aparelho desejado (por ex., TV).
• Prima o botão „PWOER” e mantenha-o premido.
• Prima o botão de selecção de aparelho desejado (por ex., SAT).
• Largue o botão „POWER” (o LED pisca duas
vezes se a função for desactivada).
7. FUNÇÃO DE MEMORIZAÇÃO

59
Este telecomando está equipado com uma função de memorização. Assim,
pode transferir as funções do seu telecomando original para este telecomando
universal.
7.1 Antes de iniciar a função de memorização
• Preste atenção ao estado impecável de todas as pilhas utilizadas em ambos
os telecomandos. Se necessário, substitua-as.
• Coloque o telecomando original e o telecomando universal um ao lado
do outro para que os díodos de infravermelhos dos telecomandos estejam
diretamente um em frente ao outro.
• Se necessário, corrija a altura de ambos os telecomandos para obter um
alinhamento perfeito.
• A distância entre os telecomando deve ser de aprox. 3 cm.
ca. 3 cm
ROC1117GRU ORIGINAL
Nota
• Não movimente os telecomandos durante o processo de memorização.
• Certique-se de que a iluminação da sala não seja lâmpadas uorescentes
ou de poupança de energia, pois estas podem causar falhas e impedir o
processo de memorização.
• A distância dos dois telecomandos para a próxima fonte de iluminação
deve ser de, no mínimo, 1 metro.
• O processo de memorização é concluído sem gravação se, com o modo
de memorização ativado, não premir um botão durante 30 segundos ou
captar um sinal.
• No modo de memorização, cada botão só pode ser ocupado com uma
função. Uma nova função sobregrava a função anteriormente memorizada
nesse botão.
• As teclas TV, STB e Setup não podem ser ocupadas com funções novas.
7.2 Ativar o modo de memorização
1. Prima os botões [MUTE] e [VOL+] em simultâneo durante cerca
de 3 segundos até o LED de estado acender permanentemente.
2. Introduza o código [9] [8] [0], o LED de estado pisca 2 vezes e, em
seguida, volta
acar permanentemente aceso.
3. O telecomando universal encontra-se agora no modo de memorização.
7.3 Transferir a função do botão
1. Prima o botão no telecomando original cuja função pretende transferir.
Para conrmar que a função foi captada, o LED de estado do
telecomando
universal
pisca.
2. Agora, prima o botão do
telecomando universal
para o qual pretende
transferir a função.
3. O LED de função do
telecomando universal
pisca 3 vezes para conrmar
e, em seguida, volta a car permanentemente aceso. A nova função está
memorizada.
4. Para transferir as funções de outros botões, repita estes passos.
5. Prima o botão [SETUP] para gravar todas as funções memorizadas
e abandonar o modo de memorização.
BIG ZAPPER

60
Avvertenza
Durante a substituição das pilhas do telecomando universal, as funções dos
botões memorizados não são apagadas.
7.4 Apagar funções memorizadas
7.4.1 Apagar uma função memorizada
1. Prima os botões [MUTE] e [VOL+] em simultâneo durante cerca
de 3 segundos até o LED de estado acender permanentemente.
2. Introduza o código [9] [8] [1], o LED de estado pisca 2 vezes e, em
seguida, volta
acar permanentemente aceso.
3. Prima o botão cuja função pretende apagar. O LED de estado pisca
3 vezes e a função pretendida está apagada.
7.4.2 Apagar todas as funções memorizadas
1. Prima os botões [
MUTE
]e[
VOL
+] em simultâneo durante cerca de 3
segundos até o LED de estado acender permanentemente.
2. Introduza o código [9] [8] [2], o LED de estado pisca 2 vezes e, em segui-
da, volta a car permanentemente aceso.
3. Prima o botão [SETUP], o LED de estado pisca 3 vezes e todas as funções
memorizadas estão apagadas.
8. MANUTENÇÃO
•
Nunca utilize pilhas usadas juntamente com pilhas novas, pois pilhas usadas
tendem a derramar e poderão reduzir o desempenho do telecomando.
•
Nunca use detergentes abrasivos ou produtos de limpeza agressivos para limpar o
telecomando universal.
•
Mantenha o telecomando universal livre de pó limpando-o regularmente com
um pano seco suave.
9. PROCURA E ELIMINAÇÃO DE FALHAS
P. O telecomando universal não funciona!
R.
Verique o aparelho
TV/STB
. O telecomando universal não pode comandar o
aparelho se este estiver desligado com o botão LIG/DESL principal.
R.
Verique se as pilhas do telecomando estão correctamente inseridas e se a
polaridade está correcta.
R. Certique-se que foi premido o botão de selecção do aparelho correcto.
R. Substitua pilha com pouca carga.
P.
Se estiverem disponíveis vários códigos de aparelho para a marca do meu
aparelho
TV/STB
, qual é o código correcto?
R. Para determinar o código correcto, experimente sucessivamente os códigos
até a maioria das funções do aparelho funcionar correctamente.
P. O aparelho TV/STB não reage a alguns comandos de botões.
R. Teste outros códigos até a maiorias das funções funcionarem correcta-
mente.
10. Contactos e apoio técnico
Em caso de dúvidas sobre o produto, contacte o serviço de assistência ao
produto da Hama.
Linha de apoio ao cliente: +49 9091 502-0 (alemão/inglês)
Para mais informações sobre os serviços de apoio ao cliente, visite:
www.hama.com

61

179803_10.22
All listed brands are trademarks of the corresponding companies.
Errors and omissions excepted, and subject to technical changes.
Our general terms of delivery and payment are applied.
Hama GmbH & Co KG
86652 Monheim/Germany
www.hama.com
22
PAP
Raccolta Carta
-
 1
1
-
 2
2
-
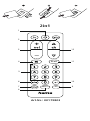 3
3
-
 4
4
-
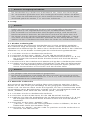 5
5
-
 6
6
-
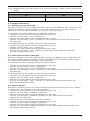 7
7
-
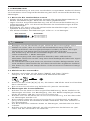 8
8
-
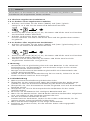 9
9
-
 10
10
-
 11
11
-
 12
12
-
 13
13
-
 14
14
-
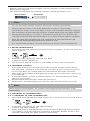 15
15
-
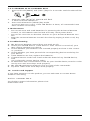 16
16
-
 17
17
-
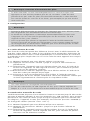 18
18
-
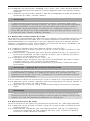 19
19
-
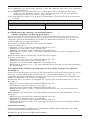 20
20
-
 21
21
-
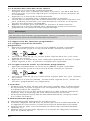 22
22
-
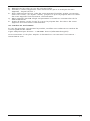 23
23
-
 24
24
-
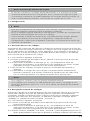 25
25
-
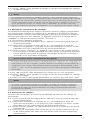 26
26
-
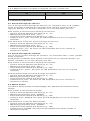 27
27
-
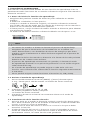 28
28
-
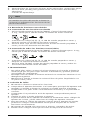 29
29
-
 30
30
-
 31
31
-
 32
32
-
 33
33
-
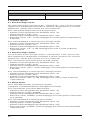 34
34
-
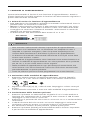 35
35
-
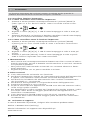 36
36
-
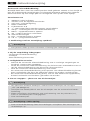 37
37
-
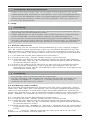 38
38
-
 39
39
-
 40
40
-
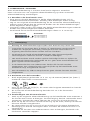 41
41
-
 42
42
-
 43
43
-
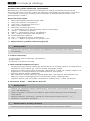 44
44
-
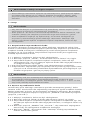 45
45
-
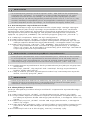 46
46
-
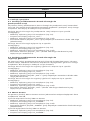 47
47
-
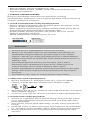 48
48
-
 49
49
-
 50
50
-
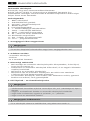 51
51
-
 52
52
-
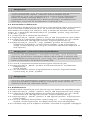 53
53
-
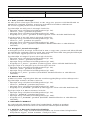 54
54
-
 55
55
-
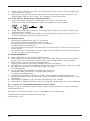 56
56
-
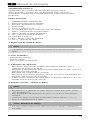 57
57
-
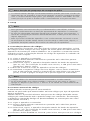 58
58
-
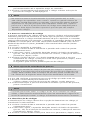 59
59
-
 60
60
-
 61
61
-
 62
62
-
 63
63
-
 64
64


in andere talen
- italiano: Hama 00179803 Manuale utente
- français: Hama 00179803 Manuel utilisateur
- español: Hama 00179803 Manual de usuario
- Deutsch: Hama 00179803 Benutzerhandbuch
- português: Hama 00179803 Manual do usuário
- polski: Hama 00179803 Instrukcja obsługi