Wolf Garten POWER WOLF 15/37 Handleiding
- Categorie
- Tuingereedschap
- Type
- Handleiding
Deze handleiding is ook geschikt voor

POWER WOLF 15/37
POWER WOLF 16/40
Gebrauchsanweisung 5
Instruction manual 11
Mode d’emploi 16
Istruzione d’uso 21
Gebruiksaanwijzing 26
POWER WOLF 15/37
POWER WOLF 16/40
0054659.book Seite 1 Mittwoch, 8. April 2009 12:00 12

2
0054659.book Seite 2 Mittwoch, 8. April 2009 12:00 12

3
0054659.book Seite 3 Mittwoch, 8. April 2009 12:00 12

4
POWER WOLF 15/37 - POWER WOLF 16/40
D
1 Kabelknickschutz
2 Ein-/ Ausschalter
3 Kabelzugentlastung
4 Griffhöheneinstellung
5 Grasfangsack
6 Schutzklappe
7 Schnitthöheneinstellung
8 Schnitthöhenanzeige
G
1 Cable anti-king protection
2 On-/Off-switch
3 Cable-kink protection
4 Handle height adjustment
5 Collector
6 Deflector plate
7 Height adjustment
8 Indicator to cutting
F
1 Protection antipliage du câble
2 Interrupteur
3 Cable-fixe
4 Réglage de la hauteur du guidon
5 Indicateur du niveau de remplissage
6 Clapet de sécurité
7 Reglage de la hauteur de coupe
8 Croquis de la hauteur de coupe
I
1 Regolazione profondit di lavoro
2 Interrutore per avviare
3 Portacavo
4 Regolazione altezza impugnatura
5 Raccoglierba
6 Deflettore
7 Regolazione dell‘altezza di taglio
8 Indicator dell‘ altezza
n
1 Kabel knikbeschermer
2 In- en uitschakelaar
3 Kabel trekontlaster
4 Duwboomhoogte instelling
5 Grasvangzak
6 Achterklep
7 Maaihoogte instelling
8 Maaihoogte aanwijzing
0054659.book Seite 4 Mittwoch, 8. April 2009 12:00 12

5
D
DHerzlichen Glückwunsch zum Kauf Ihres WOLF-Produkts
Inhalt
Technische Daten . . . . . . . . . . . . . . . . . . 5
Sicherheitshinweise . . . . . . . . . . . . . . . . . 6
Montage . . . . . . . . . . . . . . . . . . . . . . . 7
Betrieb . . . . . . . . . . . . . . . . . . . . . . . . 7
Wartung. . . . . . . . . . . . . . . . . . . . . . . . 8
Ersatzteile . . . . . . . . . . . . . . . . . . . . . . 9
Beseitigung von Störungen. . . . . . . . . . . . . . 9
Garantiebedingungen . . . . . . . . . . . . . . . .10
Konformitätserklärung . . . . . . . . . . . . . . . .33
Die Ausstattungsmerkmale im Überblick
–
zentrale Schnitthöheneinstellung 5-fach
– Klappgriff für platzsparende Aufbewahrung und einfachen
Transport
– Griffhöheneinstellung 2-fach
– leicht zu leerender, geräumiger Fangsack
– hochwertige Materialien, ausgezeichnete Verarbeitung und
attraktives Design
– Ready-to-use: von 0 auf Mähen in 30 Sekunden
Technische Daten
Lesen Sie die Gebrauchsanweisung sorgfältig, und
machen Sie sich mit den Bedienungselementen und
dem richtigen Gebrauch des Gerätes vertraut. Der Be-
nutzer ist verantwortlich für Unfälle mit anderen Per-
sonen oder deren Eigentum. Beachten Sie die
Hinweise, Erläuterungen und Vorschriften.
Lassen Sie nie Kinder oder andere Personen, die die
Gebrauchsanweisung nicht kennen, den Rasenmäher
benutzen. Jugendliche unter 16 Jahre dürfen das Ge-
rät nicht benutzen. Örtliche Bestimmungen können das
Mindestalter des Benutzers festlegen.
Änderungen aus technischen Gründen vorbehalten.
D Lärmmessung am Ohr der Bedienperson in Anlehnung an
EN 836.
E Schwingungen gemessen am Führungsholm, mit Bedien-
person nach EN 1033 und EN 836. Die bewertete Beschleu-
nigung beträgt typischerweise:
POWER WOLF 15/37 POWER WOLF 16/40
Typ 4927 ... 4969 ...
A 80 cm 80 cm
B 37 cm 55 cm
C 41 cm 47 cm
D LP 79 dB (A) LP 77 dB (A)
E a
hw
< 2,5 m/s
2
a
hw
< 2,5 m/s
2
Nennleistung 1.500 W 1.600 W
Stromstärke 7,0 A 7,3 A
Netzspannung 230 VAC 230 VAC
Fangsackvolumen 35 l 55 l
Schnittbreite 37 cm 40 cm
Schnitthöhe 20, 30, 40, 50, 60 mm 25, 35, 50, 65, 80 mm
Gewicht 16 kg 22 kg
Gebrauchsanweisung
0054659.book Seite 5 Mittwoch, 8. April 2009 12:00 12

6
D
Sicherheitshinweise
Bedeutung der Symbole
Allgemeine Hinweise
z Dieser Rasenmäher ist für die Pflege von Gras- und Rasen-
flächen im privaten Bereich vorgesehen. Wegen körperlicher
Gefährdung des Benutzers oder anderer Personen darf der
Rasenmäher nicht für andere Zwecke eingesetzt werden.
z Mähen Sie niemals, wenn Personen, besonders Kinder und
Tiere, in der Nähe sind.
z Mähen Sie nur bei entsprechenden Lichtverhältnissen.
Vor dem Mähen
z Mähen Sie nur in festem Schuhwerk und langer Hose.
z Mähen Sie nie barfuß oder in Sandalen.
z Überprüfen Sie das Gelände, auf dem der Mäher eingesetzt
wird, und entfernen Sie alle Gegenstände, die erfasst und
weggeschleudert werden können.
z Das Anschlusskabel und die am Gerät außen installierte Lei-
tung auf Beschädigung und Alterung (Brüchigkeit) untersu-
chen. Nur in einwandfreiem Zustand benutzen.
z Überprüfen Sie die Grasfangeinrichtung häufig auf Verschleiß
und Verformungen.
z Prüfen Sie vor Benutzung (Sichtprüfung), ob die Schneid-
werkzeuge und ihre Befestigungsmittel stumpf oder beschä-
digt sind.
z Ersetzen Sie stumpfe oder beschädigte Schneidwerkzeuge
im ganzen Satz, um keine Unwucht zu erzeugen (siehe „War-
tung“, Seite 8).
Kabel
1 Achtung! Stromschlag durch Kabelschaden
Wenn das Kabel durchtrennt oder beschädigt wird, löst
nicht immer die Sicherung aus.
z Kabel nicht berühren, bevor der Netzstecker aus der
Steckdose gezogen ist.
z Beschädigtes Kabel komplett austauschen. Es ist verbo-
ten, das Kabel mit Isolierband zu flicken.
z Lassen Sie Reparaturen am Kabel nur vom Fachmann durch-
führen (siehe „Beseitigung von Störungen“, Seite 9).
z Anschlusskabel an der Zugentlastung befestigen. Nicht an
Kanten, spitzen oder scharfen Gegenständen scheuern las-
sen.
z Kabel nicht durch Türritze oder Fensterspalten quetschen.
z Schalteinrichtungen dürfen nicht entfernt oder überbrückt
werden (z. B. Anbinden des Schalthebels am Führungsholm).
z Verwenden Sie ausschließlich Verlängerungskabel mit einem
Mindest-Querschnitt von 3 x 1,5 mm
2
und einer max. Länge
von 25 m:
– wenn Gummischlauchleitungen, dann nicht leichter als
Typ HO 7 RN-F
– wenn PVC-Leitungen, dann nicht leichter als Typ HO5 VV-
F (Leitungen diesen Typs sind für die ständige Verwendung
im Freien nicht geeignet, wie z. B.: unterirdische Verlegung
zum Anschluss einer Gartensteckdose, Anschluss einer
Teichpumpe oder Lagerung im Freien)
z Die Kabel müssen spritzwassergeschützt sein.
Beim Mähen
z Kippen Sie das Gerät nicht, wenn Sie den Motor einschalten,
es sei denn, das Gerät muss beim Anlassen gekippt werden.
Wenn dies der Fall ist, kippen Sie das Gerät nicht mehr als un-
bedingt notwendig ist und heben nur den Teil an, der vom Be-
nutzer entfernt ist. Überprüfen Sie immer, dass sich beide
Hände in Arbeitsstellung befinden, bevor das Gerät wieder auf
den Boden zurückgestellt wird.
z Halten Sie den durch das Griffgestänge gegebenen Sicher-
heitsabstand ein.
z Schalten Sie den Motor nur ein, wenn Ihre Füße in sicherem
Abstand von den Schneidwerkzeugen sind.
z Achten Sie auf sicheren Stand. Nie laufen, ruhig vorwärts ge-
hen.
z Mähen an Abhangstellen:
– Immer quer zum Gefälle mähen, nicht auf- und abwärts
– Besondere Vorsicht beim Richtungswechsel
– Mähen Sie nicht an steilen Abhängen
z Seien Sie besonders vorsichtig, wenn Sie rückwärts Mähen
und den Mäher zu sich ziehen.
z Schalten Sie den Mäher ab, wenn Sie ihn kippen oder trans-
portieren, z. B. von-/ zum Rasen oder über Wege.
z Vorsicht, nicht an laufende Schneiden greifen.
z Stellen Sie sich nicht vor die Grasauswurföffnung.
z Bevor Sie den Mäher aufheben oder wegtragen, schalten Sie
den Motor ab und warten Sie, bis die Schneidwerkzeuge zum
Stillstand gekommen sind.
z Verstellen Sie die Schnitthöhe nur bei abgeschaltetem Motor
und stillstehendem Schneidwerkzeug.
z Öffnen Sie die Schutzklappe nie, wenn der Motor noch läuft.
z Vor dem Abnehmen der Grasfangvorrichtung: Motor abstellen
und den Stillstand des Schneidwerkzeuges abwarten. Nach
der Entleerung Grasfangvorrichtung sorgfältig befestigen.
z Nie mit laufendem Motor über Kies fahren – Steinschlag!
z Wenn möglich, mähen Sie nicht in nassem Gras.
z Unter folgenden Umständen muss das Gerät abgeschaltet-,
der Netzstecker gezogen werden und das Gerät stehen:
– bei Verlassen des Mähers
– um ein blockiertes Messer frei zu machen
– um das Gerät zu überprüfen, zu reinigen oder daran zu ar-
beiten
Warnung!
Vor Inbetrieb-
nahme die
Gebrauchsan-
weisung lesen!
Dritte aus dem
Gefahren-
bereich
fernhalten!
Vorsicht! - Scharfe
Schneidmesser -
vor Wartungsar-
beiten und bei Be-
schädigung der
Leitung den
Stecker aus dem
Netz entfernen!
Anschluss-
kabel vom
Schneidwerk-
zeug fern-
halten!
0054659.book Seite 6 Mittwoch, 8. April 2009 12:00 12

7
D
– wenn ein Fremdkörper getroffen wurde (Überzeugen Sie
sich erst, ob Mäher oder Schneidwerkzeuge beschädigt
worden sind. Beseitigen Sie dann zunächst die Beschädi-
gung).
– wenn der Mäher durch Unwucht stark vibriert (sofort ab-
schalten und Ursache suchen).
– wenn die Anschlussleitung während des Gebrauchs be-
schädigt wird.
Wartung
1 Achtung! Rotierendes Messer
Vor allen Wartungs- und Reinigungsarbeiten:
z Netzstecker ziehen.
z Nicht an laufende Schneiden greifen.
z Alle sichtbaren Befestigungsschrauben und Muttern, beson-
ders die des Messerbalkens, regelmäßig auf festen Sitz prü-
fen und nachziehen.
z Stellen Sie den Mäher nicht in feuchten Räumen ab.
z Ersetzen Sie aus Sicherheitsgründen verschlissene oder be-
schädigte Teile.
z Nur WOLF Original-Ersatzteile verwenden, sonst haben Sie
keine Garantie, dass Ihr Mäher den Sicherheitsbestimmun-
gen entspricht.
Entsorgung
Montage
Griffgestänge befestigen
1 Vorsicht!
Beim Zusammenlegen oder Ausklappen des Griffgestän-
ges kann das Kabel beschädigt werden.
z Das Kabel in den Kabelknickschutz einlegen .
z Beim Anpassen der Griffhöhe darauf achten, dass
das Kabel nicht gequetscht wird.
1. Klappen Sie das Griffunterteil hoch, und schrauben Sie es mit
den beiden Handrädern fest .
2. Stellen Sie die gewünschte Griffhöhe ein .
3. Klappen Sie das Griffoberteil auf, und schrauben Sie es mit
den Flügelmuttern fest .
Fangsack montieren
1. Platzieren Sie die Schütte (1) an der Fangsackklappe (2)
.
2. Drücken Sie die Schütte von hinten an die Fangsackklappe.
Die Schütte ist fest, sobald sie einrastet .
Betrieb
Betriebszeiten
z Bitte regionale Vorschriften beachten.
z Erfragen Sie die Betriebszeiten bei Ihrer örtlichen Ordnungs-
behörde.
Kabel in die Zugentlastung führen
z Bitte führen Sie das Kabel in die Zugentlastung .
Fangsack einhängen
1 Achtung! Rotierendes Messer
Einstellungen am Gerät nur bei abgeschaltetem Motor und
stillstehendem Schneidwerkzeug vornehmen.
1. Heben Sie die Schutzklappe an.
2. Hängen Sie den Fangsack mit Haken in die Aussparungen im
Chassis (siehe Pfeile).
3. Legen Sie die Schutzklappe auf.
Schnitthöhe einstellen
1 Achtung! Rotierendes Messer
Arbeiten/Einstellungen am Gerät nur bei abgeschaltetem
Motor und stillstehendem Schneidwerkzeug vornehmen.
1. Ziehen Sie den Hebel nach außen.
2. Stellen Sie die gewünschte Schnitthöhe ein.
3. Drücken Sie Hebel wieder nach innen.
Schnitthöhe – Graszustand
z Mähen Sie möglichst trockenen Rasen, um die Grasnarbe zu
schonen. Bei feuchtem und hohem Rasen eventuell mit hö-
herer Schnitthöhe mähen.
z In der Regel stellt man eine Schnitthöhe von 40-50 mm ein.
Elektrogeräte gehören nicht in den Hausmüll. Ge-
rät, Zubehör und Verpackung einer umweltfreund-
lichen Wiederverwertung zuführen.
A
B
C
D
A
C
B
C
D
E
F
G
E
F
G
H
H
J
K
0054659.book Seite 7 Mittwoch, 8. April 2009 12:00 12

8
D
Anschluss an die Steckdose (230 Volt, 50 Hz)
z Das Gerät nur an Steckdosen anschließen, die mit einer
16 Amp. Sicherung träge (oder LS-Schalter Typ B) abgesi-
chert sind.
3 Hinweis: Fehlerstromschutzeinrichtung
Diese Schutzeinrichtungen schützen beim Berühren von
beschädigten Leitungen, Isolationsfehlern und in bestimm-
ten Fällen auch beim Beschädigen von unter Spannung ste-
henden Leitungen vor schweren Verletzungen.
z Wir empfehlen, das Gerät nur an Steckdosen anzu-
schließen, die mit einer Fehlerstromschutzeinrichtung
(RCD) mit einem Fehlerstrom von nicht mehr als 30 mA
abgesichert sind.
z Für Alt-Installationen gibt es Nachrüstsätze. Sprechen
Sie mit einer Elektro-Fachkraft.
Mäher ein-/ausschalten
z Mäher auf ebener Fläche einschalten.
z Nicht im hohen Gras – hier notfalls kippen .
Motor ein
1. Drücken Sie den Knopf (1) und halten diesen.
2. Ziehen Sie den Bügel (2) an.
3. Lassen Sie den Knopf (1) los.
Motor aus
z Geben Sie den Bügel (2) frei.
Fangsack entleeren
z Der Fangsack nimmt kein Gras mehr auf, wenn hinter dem
Gerät geschnittenes Gras liegenbleibt.
1 Achtung! Rotierendes Messer
Einstellungen am Gerät nur bei abgeschaltetem Motor und
stillstehendem Schneidwerkzeug vornehmen.
z Fangsack entleeren
.
z Vor dem Starten eventuelle Verstopfungen im Mähraum
beseitigen.
Tipps zum Mähen
z Damit keine Rasenstreifen entstehen, müssen sich die
Schneidbahnen immer um einige Zentimeter überdecken .
z Legen Sie das Kabel stets sicher auf Terrasse, Wege oder
das bereits geschnittene Gras.
Wartung
Allgemein
1 Achtung! Rotierendes Messer
Vor allen Wartungs- und Reinigungsarbeiten:
z Netzstecker ziehen.
z Nicht an laufende Schneiden greifen.
Reinigung
z Reinigen Sie nach jedem Mähen den Mäher mit einem Hand-
feger.
z Spritzen Sie den Mäher keinesfalls mit Wasser ab.
Lagerung im Winter
z Führen Sie nach jeder Mähsaison eine gründliche Reinigung
an Ihrem Mäher durch.
z Lassen Sie Ihren Mäher im Herbst von einer WOLF-Kunden-
dienstwerkstatt kontrollieren.
z Lagern Sie den Mäher im trockenen Raum.
Messerwechsel
z Bei allen Arbeiten an Messer, Kupplung und Messerbalken
zunächst den Netzstecker ziehen und Schutzhandschuhe tra-
gen.
1 Achtung!
Nach dem Nachschleifen des Messers kann eine Unwucht
entstehen.
z Lassen Sie die Messer immer von einer Fachwerkstatt
nachschleifen, da eine Unwuchtprüfung entsprechend
den Sicherheitsbestimmungen vorgenommen werden
muss.
z Lassen Sie einen Messerwechsel immer von einer Fachwerk-
statt durchführen. Ein Drehmomentschlüssel 10 mm ist zwin-
gend erforderlich. Anzugsmoment der Schrauben: 6-
7 Nm (37er).
z Lassen Sie einen Messerwechsel immer von einer Fachwerk-
statt durchführen. Ein Drehmomentschlüssel 13 mm ist zwin-
gend erforderlich. Anzugsmoment der Schrauben: 16-18 Nm
(40er).
z Nur WOLF Original-Ersatzteile verwenden.
L
M
M
O
N
P
0054659.book Seite 8 Mittwoch, 8. April 2009 12:00 12

9
D
Ersatzteile
Beseitigung von Störungen
Bestell-Nr. Artikel-Bezeichnung Artikel-Beschreibung
4917 031 Grasfangsack kpl. (37)
4968 030 Grasfangsack kpl. (40)
4907 096 Vi 37 FM Messerbalken 37cm
4970 096 Vi 40 FM Messerbalken 40cm
Abhilfe (X) durch
Problem Mögliche Ursache
WOLF
Service Werkstatt
Selbst
Unruhiger Lauf, starkes
Vibrieren des Gerätes
• Messer schadhaft
X ---
• Messer in der Befestigung gelöst
--- X
Motor läuft nicht
• Haus-Sicherung schadhaft
--- X
• Kabelschaden:
1 Achtung! Stromschlag durch Kabelschaden
Wenn das Kabel durchtrennt oder beschädigt wird,
löst nicht immer die Sicherung aus.
z Kabel nicht berühren, bevor der Netzstecker aus
der Steckdose gezogen ist.
z Beschädigtes Kabel komplett austauschen. Es
ist verboten, das Kabel mit Isolierband zu fli-
cken.
X---
Schlechte Mäh-/Fangleis-
tung
• Messer stumpf
X ---
• Fangsack verstopft
--- X
• Nicht angepasste Schnitthöhe
--- X
Im Zweifelsfall immer eine WOLF Service-Werkstatt aufsuchen.
Achtung: Mäher vor jeder Prüfung oder vor Arbeiten am Messer abstellen, und Netzstecker ziehen.
0054659.book Seite 9 Mittwoch, 8. April 2009 12:00 12

10
D
Garantiebedingungen
Die vom Verkäufer ausgefüllte Garantiekarte bzw. den Kaufbeleg
bitte sorgfältig aufbewahren.
Für die Dauer von 10 Jahren vom Kaufdatum an leistet die Firma
WOLF-Garten eine dem jeweiligen Stand der Technik und dem Ver-
wendungszweck/Anwendungsgebiet entsprechende Garantie. Die
gesetzlichen Rechte des Endverbrauchers werden durch die nachste-
henden Garantierichtlinien nicht beeinträchtigt.
Voraussetzungen für den 10-jährigen Garantieanspruch:
- Einsatz des Gerätes für den ausschließlichen privaten Gebrauch.
Im gewerblichen Bereich oder Verleihgeschäft reduziert sich die
Garantie auf 12 Monate.
- Sachgemäße Behandlung und Beachtung aller Hinweise in der Ge-
brauchsanweisung, die Bestandteil unserer Garantiebedingungen
ist.
- Beachtung der vorgeschriebenen Wartungsintervalle.
- Keine eigenmächtige Änderung der Konstruktion.
- Einbau von Original WOLF Ersatzteilen/Zubehör.
- Vorlage der ausgefüllten Garantiekarte und/oder des Kaufnach-
weises.
Die Garantie erstreckt sich nicht auf den normalen Verschleiß von Ak-
kus, Messern, Messerbefestigungsteilen wie Reibscheiben, Keil-
/Zahnriemen, Laufräder/Reifen, Luftfilter, Zündkerzen und Zündker-
zenstecker. Bei eigenmächtiger Reparatur erlischt automatisch sofort
jeglicher Garantieanspruch.
Auftretende Fehler und Mängel, deren Ursachen auf Material- oder
Fertigungsfehler zurückzuführen sind, werden ausschließlich durch
unsere Vertragswerkstätten (der Verkäufer hat das Recht zur Nach-
besserung) in Ihrer Nähe oder, falls er näher liegt, durch den Herstel-
ler beseitigt. Über die Garantieleistung hinausgehende Ansprüche
sind ausgeschlossen. Ein Anspruch auf Ersatzlieferung besteht nicht.
Etwaige Transportschäden sind nicht uns, sondern dem zuständigen
Transportträger zu melden, da sonst die Ersatzansprüche an diese
Unternehmen verloren gehen.
Die Garantieleistungen werden erfüllt durch unsere autorisierten
Kundendienstwerkstätten oder bei:
a
WOLF-Garten Austria Ges.m.b.H
Businesspark Wien Süd, Campus 21
Liebermannstraße F02-402
2345 Brunn am Gebirge
Tel.: ++ 43 (1) - 8 66 70 - 2 25 30
Fax: ++ 43 (1) - 8 66 70 - 2 25 40
E-mail: [email protected]
Z
WOLF-Garten Schweiz AG
Nordringstraße 16
4702 Oensingen
Tel.: ++ 41 (62) - 3 88 04 50
Fax: ++ 41 (62) - 3 88 04 60
D
WOLF-Garten GmbH & Co KG
Industriestraße 83-85
57518 Betzdorf
Tel.: ++ 49 (27 41) - 28 15 00
Fax: ++ 49 (27 41) - 28 12 99
E-mail: [email protected]
0054659.book Seite 10 Mittwoch, 8. April 2009 12:00 12

11
G
GCongratulations on your purchase of a WOLF lawn mower
Contents
Technical data . . . . . . . . . . . . . . . . . . . .11
Safety instructions . . . . . . . . . . . . . . . . . .12
Assembly . . . . . . . . . . . . . . . . . . . . . . .13
Operation . . . . . . . . . . . . . . . . . . . . . . .13
Maintenance . . . . . . . . . . . . . . . . . . . . .14
Spare parts . . . . . . . . . . . . . . . . . . . . . .15
Faults and how to remedy . . . . . . . . . . . . . .15
Guarantee terms . . . . . . . . . . . . . . . . . . .15
EC Declaration of Conformity . . . . . . . . . . . .33
A quick guide to features
–
Central cutting height setting
– Fold-down handle for space-saving storage and easy trans-
port
– dual-position height-adjustable handle
– Easily emptied, capacious catchment bag
– High-quality materials, excellent workmanship and attractive
design
– Ready-to-use: From 0 to mowing mode in 30 seconds
Technical data
It is important that you read, fully understand and ob-
serve the following safety precautions and warnings.
Careless or improper use of the machine may cause
serious or fatal injury. The user is responsible for any
accidents involving other people or other people‘s pro-
perty.
Never let children or other persons who are not familiar
with the operating instructions use the lawnmower. Ju-
veniles under l6 years may not use the equipment. Lo-
cal regulations may specify the minimum age of the
operator.
We reserve the right of technical changes
D Measurement of noise at the operator’s ear according to EN
836.
E Measurement of vibrations at the handlebar held by the ope-
rator according to EN 1033, EN 836. The typical weighted
acceleration is:
POWER WOLF 15/37 POWER WOLF 16/40
Typ 4927 ... 4969 ...
A 80 cm 80 cm
B 37 cm 55 cm
C 41 cm 47 cm
D LP 79 dB (A) LP 77 dB (A)
E a
hw
< 2,5 m/s
2
a
hw
< 2,5 m/s
2
Performanche 1.500 W 1.600 W
Amperage 7,0 A 7,3 A
Voltage 230 VAC 230 VAC
Grass catcher 35 l 55 l
Cutting width 37 cm 40 cm
Cutting height 20, 30, 40, 50, 60 mm 25, 35, 50, 65, 80 mm
Weight 16 kg 22 kg
Instruction manual
0054659.book Seite 11 Mittwoch, 8. April 2009 12:00 12

12
G
Safety instructions
Meaning of the symbols
General Notes
z This lawnmower is intended for the care of grass and lawn
areas in private grounds. Because of physical danger to the
operator or other persons, the lawnmower must not be used
for other purposes.
z Do not mow the grass if persons, especially children and ani-
mals, are in the vicinity.
z Only mow the grass if the light conditions are suitable.
Before mowing
z Only mow the grass wearing sturdy shoes and long trousers.
z Never mow the grass in bare feet or wearing sandals.
z Check the ground where the lawnmower is to be used, and re-
move any items which could be picked up and thrown out by
the lawnmower.
z Check the connection cable and the wire fitted to the outside
of the mower for damage and ageing (brittleness). Use only if
it is in perfect condition.
z Check the grass collection unit regularly for wear and defor-
mation.
z Before use check (visually), whether the cutting tools and their
fixings are blunt or damaged.
z Replace the cutting tools if they are blunt or damaged in comple-
te sets to avoid imbalance (see „Maintenance“, page 14).
Cable
1 Caution! Risk of electrocution from damaged cables
The fuse does not always respond if the cable is cut
or damaged.
z Do not touch the cable before the plug has been remo-
ved from the plug socket.
z Damaged cables should be replaced completelyIt is pro-
hibited to mend the cable using insulating tape.
z Repairs to the cable should only be undertaken by an expert
(see „Faults and how to remedy“, page 15).
z Attach the cable to the tension relief unit. Do not let it rub up
against edges, points or sharp items.
z Do not squash the cable by putting it through door gaps or
gaps in windows.
z Switching devices must not be removed or bridged out
(e.g.strapping the switching lever to the guide bar).
z Use only extension cables with a minimum cross-section of
3x1.5mm
2
and a length of max. 25 m:
– When using rubber-sheathed cables, they must be of
type HO 7 RN-F or heavier.
– When using PVC-sheathed cables, they must be of type
HO5 VV-F or heavier (cables of this type are not suitable for
continuous outdoor use -
e.g. underground installation for the
connection of an outdoor socket or pond pump, or outdoor storage).
z The cables must be water spray protected.
When mowing
z
Do not tilt the mower when starting the motor unless it has to be
tilted when starting. In this case, do not tilt it more than neces-
sary and only lift the section that is away from the opera-
tor.Check continuously that both hands are in the working
position before lowering the mower back to the ground.
z Keep the distance away provided by the handle linkage.
z Only switch the motor on if your feet are at a safe distance
from the cutting tools.
z Ensure that it is standing securely.Never run, move for-
wards smoothly.
z Mowing on inclines:
– Always mow at right angles to the incline, not up and down
– Take particular care when changing direction.
– Do not mow very steep ground
z Take particular care when mowing backwards and pulling the
mower towards you.
z Switch the mower off when tilting or transporting it, e.g. from/to
the lawn or over paths.
z Take care not to grab running cutters.
z Do not stand in front of the grass ejection opening.
z Before lifting or carrying the mower, switch the motor off and
wait until the cutting tools have come to a standstill.
z Only adjust the cutting height with the motor switched off and
with the cutting tools at a standstill.
z Never open the protective cover if the motor is still running.
z Before removing the grass collection device:Switch the motor
off and wait until the cutting tools come to a standstill.After
emptying, fix the grass collection device carefully.
z Never run the mower over gravel– Stones will fly up!
z If possible, do not mow if the grass is wet.
z Under the following conditions the mower must be switched
off, the mains plug must be removed and the mower must
be stationary:
– when leaving the mower
– when releasing blocked cutters
– in order to check the mower, to clean it and to work on it
– if foreign bodies are struck (check first whether the mower
or cutting tools have been damaged. Only then should you
remove the damage).
– if the mower is vibrating badly because of imbalance (switch
off and look for the cause).
– if the connection wire is damaged during use.
Attention!
Read instruction
manual before
use!
Keep bystan-
ders away!
Attention!
- Sharp knives -
before perfor-
ming a mainte-
nance work or if
the cable is da-
maged pull out
the plug!
Keep the sup-
ply flexible cord
away from the
cutting blade!
0054659.book Seite 12 Mittwoch, 8. April 2009 12:00 12

13
G
Maintenance
1 Caution! Rotating cutters
Before all maintenance and cleaning tasks:
z Pull the mains plug out.
z Take care not to grab running cutters.
z Check all the visible fixing bolts and nuts regularly for tight-
ness and retighten, particularly those of the cutter beam.
z Do not store the mower in damp rooms.
z For safety reasons, replace worn or damaged parts.
z Use only original WOLF spare parts, otherwise there is no gua-
rantee that your mower complies with the safety regulations.
Disposal
Assembly
Fasten handle bars
1 Caution!
The cable can be damaged while folding up or pulling out
the handle bar.
z Inlay the cable in the bend protection .
z When adjusting the handle height take care that the ca-
ble is not crimped
1. Fold the bottom part of the handle up and screw it tight with
the two hand wheels .
2. Set the handle to the desired height .
3. Fold the upper part of the handle out and screw it tight with the
wing nuts .
Mount the collecting bag
1. Place the chute (1) on the collecting bag flap (2) .
2. Press the chute from behind onto the collecting bag flap. The
chute is ready for use as soon as it locks into place .
Operation
Operating times
z Please check noise abatement regulations prevailing in your
country.
Feed cable through the strain relief
z Please feed cable through the strain relief .
Hang up collection bag
1 Attention! Rotary cutter blade
Undertake adjustments on the equipment only after the
motor is switched off and the cutting tool has come to a
standstill.
1. Lift the protective flap.
2. Hang the grass bag in the chassis with the hooks in the re-
cesses (see arrow).
3. Replace the protective flap.
Set cut height
1 Attention! Rotary cutter blade
Undertake work/adjustments on the equipment only after
the motor is switched off and the cutting tool has come to a
standstill.
1. Pull the lever out.
2. Set the desired cutting height.
3. Press the lever back in.
Selection of Cutting height
z If possible, mow when grass is dry in order to protect turf. Do
not se cutting position too low when mowing very hight or wet
grass.
z We recommend an average cutting height of 40-50 mm.
Connecting to the mains (230 Volts, A.C., 50 Hz)
z The mower operates from any normal household mains sup-
ply, provided with a 16 Amps. fuse.
3 Note: Residual current protection device
These protection devices safeguard while touching
damaged wires, from insulation flaws and in certain cases,
also while damaging live wires.
z We recommend that the equipment only be plugged into
a power socket, which is protected by a residual current
protection device (RCD) with a residual current of not
more than 30 mA.
z Retrofit kits are available for old installations. Consult an
electrician.
Electrical equipment must not be placed in the
household waste.The unit, accessories and pa-
cking material should be taken to an environment-
friendly recycling unit.
A
B
C
D
A
C
B
C
D
E
F
G
E
F
G
H
H
J
K
0054659.book Seite 13 Mittwoch, 8. April 2009 12:00 12

14
G
Starting and Stoping
z Switch on motor with mowerplaced on level and firm ground.
z not in high grass - alternatively tilt slightly .
Switch-on motor
1. Depress button and hold (1).
2. Lift up bar (2).
3. Release bar (1).
Switch-off motor
z Release bar (2).
Emptying of Grassbox
z The grassbox is full and should be emptied as soon as grass
clippings remain uncollected on the ground behind your
mower.
1 Attention! Rotary cutter blade
Undertake adjustments on the equipment only after the
motor is switched off and the cutting tool has come to a
standstill.
z Empty collection bag .
z Remove potential blockages in the cutting space before
starting.
Tips for mowing
z To prevent strips of grass from being left unmowed, the cutting
paths must always overlap a few centimeters .
z Always let cable trail on the cut side of the lawn.
Maintenance
General
1 Attention! Rotary cutter blade
Before all maintenance and cleaning work:
z pull out the power plug.
z Do not touch running blades.
Cleaning
z Clean mower thoroughly after each mowing with cloth or
brush.
z Do not spray with water.
Winter Storage
z Clean mower thoroughly before storing away.
z Have your mower thoroughly checked once a year by an ap-
proved Service Centre.
z Do not store it in a wet or humid place.
Changing blades
z For all works on blades, coupling and cutter bars, first of all,
pull out the power plug and wear protective gloves.
1 Attention!
An unbalance can develop after regrinding of the blade.
z Always regrind the blades in a specialist workshop,
because an unbalance check should be undertaken
according to the safety regulations.
z Always change blades in a specialist workshop. A torque
spanner of 10 mm is mandatorily required. Fastening torque
of the screws: 6-7 N-m (37).
z Always change blades in a specialist workshop. A torque
spanner of 13 mm is mandatorily required. Fastening torque
of the screws: 16-18 N-m (40).
L
M
M
O
N
P
0054659.book Seite 14 Mittwoch, 8. April 2009 12:00 12

15
G
Spare parts
Faults and how to remedy
Guarantee terms
Please carefully retain the guarantee card completed by the
seller, or the proof of purchase.
The company WOLF-Garten provides a guarantee for 10 years from
the date of purchase. This guarantee is in accordance with the rele-
vant state of technology and the utilisation purpose / area of applica-
tion. The consumer‘s statutory rights are not affected by the following
guarantee guidelines.
Pre-conditions for the 10-years guarantee entitlement:
- Deployment of the device solely for private use.
The guarantee is reduced to 12 months in the commercial sector
or leasing business.
- Proper handling and observance of all information given in the ope-
rating manual, which forms part of our guarantee terms.
- Observance of the prescribed maintenance intervals.
- No unauthorised alteration of the design.
- Installation of original WOLF replacement parts / accessories.
- Presentation of the completed guarantee card and/or proof of
purchase.
This guarantee does not extend to normal wear-and-tear on accu’s,
blades, blade mounting components or friction disks, V-belts/toothed
belts, running wheels/tyres, air filters, spark plugs and spark plug con-
nectors. Any guarantee claim shall be immediately void in the event of
unauthorised repairs. Faults and defects which can be traced to ma-
terial or manufacturing faults will be rectified exclusively by our con-
tracted workshops (the seller has the right to remedy a defect) in your
vicinity, or by the manufacturer if the latter is closer. Any claims going
beyond the provision of a guarantee are ruled out. There is no entitle-
ment to a replacement. Any transport damage should be reported not
to us but to the shipper in question since, otherwise, any compensati-
on claims vis-à-vis the shipper would be voided.
Item number Order description Product information
4917 031 Grass catcher (37)
4968 030 Grass catcher (40)
4907 096 Vi 37 FM Replacement blade 37 cm
4970 096 Vi 40 FM Replacement blade 40 cm
Remedy (X) by:
Problem Possible cause
WOLF service-
workshop
Yourself
Uneven running, heavy
vibrations in the mower
• Blades damaged
X ---
• Blades loose in the fastening parts
--- X
Motor will not run
• Fuse blown
--- X
• Cable damaged:
1 Attention! Electric shock through cable damage
When the cable is cut through or damaged, the
safety fuse doesn’t always trip.
z Do not touch cable, before pulling out the power
plug from the socket.
z Damaged cable has to be completely replaced.
Patching cable with insulating tape is forbidden.
X---
Poor mowing-/ catching
• Blunt blades
X ---
• Catcher bag blocked
--- X
• Incorrect cutting height
--- X
When in doubt, always consult a WOLF service workshop.
Important: switch off the mower and disconnect the mains plug before inspecting, cleaning or working on the blades.
The guarantee services will be performed by our authorized re-
pair shops or:
G
WOLFGarden Ltd.
Crown BusinessPark
Tredegar
Gwent, NP22 4EF
Tel. : ++ 44 / 14 95 30 66 00
Fax : ++ 44 / 14 95 30 33 44
E-mail: [email protected]
0054659.book Seite 15 Mittwoch, 8. April 2009 12:00 12

16
F
F Nous vous remercions d‘avoir acheté une tondeuse WOLF
Sommaire
Donnés Techniques . . . . . . . . . . . . . . . . .16
Consignes de sécurité . . . . . . . . . . . . . . . .17
Montage . . . . . . . . . . . . . . . . . . . . . . .18
Fonctionnement . . . . . . . . . . . . . . . . . . .18
Entretien . . . . . . . . . . . . . . . . . . . . . . .19
Pièces de rechange . . . . . . . . . . . . . . . . .20
Comment remédier aux pannes . . . . . . . . . . .20
Conditions de la garantie . . . . . . . . . . . . . . .20
CE Déclaration de conformité . . . . . . . . . . . 33
Récapitulatif des caractéristiques
–
Réglage central de la hauteur de coupe
– Poignée rabattable pour gagner de la place au rangement et
pour simplifi er le transport
– Réglage de la hauteur du guidon à 2 niveaux
– Grand sac de ramassage
– Matériaux de haute qualité, excellent travail de fabrication et
beau design
– Prêt à tondre en 30 secondes
Donnés Techniques
Lisez soigneusement la notice d‘utilisation et familiari-
sez-vous avec les commandes et l‘utilisation correcte
de la tondeuse. L‘utilisateur est responsabledes acci-
dents causés aux tiers ou à leur propriété. Observez
les indications, explications et prescriptions.
ne jamais laisser des enfants ou autres personnes
n'ayant pas lu la notice d'utilisation utiliser la tondeuse.
L'utilisation de cet appareil est interdit à tout adolescent
de moins de 16 ans. Respecter la réglementation loca-
le concernant l'âge minimum d'utilisation de cet ap-
pareil.
Droit de modifications techniques réservés.
D Mesurage du bruit au niveau de l'oreille de l'opérateur selon
EN 836.
E Mesurage des vibrations au guidon tenu par un opérateur
selon EN 1033, EN 836. L’accélération pondérée normale
est de:
POWER WOLF 15/37 POWER WOLF 16/40
Typ 4927 ... 4969 ...
A 80 cm 80 cm
B 37 cm 55 cm
C 41 cm 47 cm
D LP 79 dB (A) LP 77 dB (A)
E a
hw
< 2,5 m/s
2
a
hw
< 2,5 m/s
2
Puissance 1.500 W 1.600 W
Courant nominal 7,0 A 7,3 A
Tension 230 VAC 230 VAC
Sac de ramassage 35 l 55 l
Largeur de coupe 37 cm 40 cm
Hauteurs de coupe 20, 30, 40, 50, 60 mm 25, 35, 50, 65, 80 mm
Poids 16 kg 22 kg
Mode d’emploi
0054659.book Seite 16 Mittwoch, 8. April 2009 12:00 12

17
F
Consignes de sécurité
Signification des symboles
Conseils généraux
z Cette tondeuse est prévue pour l'entretien des surfaces d'her-
be et de pelouse de terrains privés. Pour prévenir tout risque
de danger corporel pour l'utilisateur ou un tiers, la tondeuse ne
doit pas être utilisée pour d'autres usages.
z Ne tondez jamais lorsque des personnes, en particulier des
enfants ou des animaux se trouvent à proximité.
z Ne tondez que lorsque la luminosité est suffisante.
Avant la tonte
z Tondez toujours avec des chaussures fermées et en panta-
lon.
z Ne tondez jamais pieds nus ou en sandales.
z Contrôlez le terrain sur lequel vous allez faire passer la ton-
deuse et retirez tous les objets que la tondeuse pourrait ra-
masser et projeter au loin.
z Inspecter le câble de branchement et l'installation de la ligne
reliée à l'appareil pour vous assurer qu'ils sont exempts de
toute détérioration ou altération (fragilité). N'utilisez la machi-
ne que si vous êtes sûr(e) qu'elle est en parfait état.
z Contrôlez fréquemment l'usure et les déformations du dispo-
sitif de ramassage de l'herbe.
z Avant l'utilisation, vérifiez (contrôle visuel) si les outils de cou-
pe et leurs serrages ne sont pas usés ou détériorés.
z Remplacez la totalité du kit-outils usé ou détérioré pour éviter
tout déséquilibrage (voir „Entretien“, page 19).
Câble
1 Attention! Risque d'électrocucion en raison d'une dété-
rioration du câble
Si le câble est sectionné ou endommagé, le fusible ne se
déclenche pas toujours.
z Ne touchez pas le câble avant qu'il soit débranché de la
prise secteur.
z Changer le câble en entier. Il est interdit d'utiliser du ru-
ban adhésif isolant (Chatterton) pour réparer le câble.
z Ne faîtes réaliser les réparations de câble que par un spécia-
liste (voir „Comment remédier aux pannes“, page 20).
z Fixez le câble de raccordement sur le guide-câble. Ne le
laissez pas frotter sur des arêtes ou des objets coupants
ou pointus.
z Ne coincez pas le câble dans des ouvertures de porte ou
de fenêtre.
z N'enlevez ou ne court-circuitez pas le dispositif d'allumage
(par ex. fixer le levier d'allumage à la poignée de direction).
z Employer comme rallonge électrique uniquement un câble
dont la section minimale est de 3 x 1,5 mm
2
et la longueur
maximale de 25 m:
– Si des câbles souples en caoutchouc sont employés, ils ne
doivent pas être plus légers que le type HO 7 RN-F
– Si des câbles en PVC sont employés, ils ne doivent pas être
plus légers que le type HO5 VV-F (ces câbles ne convi-
ennent pas pour une utilisation permanente à l'extérieur,
par exemple : pose enterrée pour branchement à une prise
électrique de jardin, branchement d’une pompe de bassin
ou entreposage à l’extérieur)
z Les câbles doivent être préservés de toute éclaboussure.
Lors de la tonte
z Ne basculez pas l'appareil lorsque vous mettez le moteur en
marche à moins que cette action soit vraiment nécessaire. Si
vous avez besoin de le faire, ne le basculez pas plus que né-
cessaire et ne soulevez que la partie qui est éloignée de l'uti-
lisateur. Replacez les mains en position de travail avant de
reposer l'appareil au sol.
z Respectez la distance de sécurité que représente la poignée
avec l'appareil
z N'allumez le moteur que lorsque vos pieds sont à une distan-
ce de sécurité suffisante des outils de coupe.
z Adopter une posture prudente. Ne courez jamais mais avan-
cez tranquillement.
z Tondre des terrains en pente :
– Tondez toujours perpendiculairement au dénivelé de la
pente et non pas de haut en bas et de bas en haut.
– Faites particulièrement attention lors des changements de
direction
– Ne tondez pas de pentes très raides
z Soyez particulièrement prudent lorsque vous tondez en arriè-
re et tirez la tondeuse vers vous.
z Eteignez la tondeuse lorsque vous la basculez ou la trans-
portez, par ex. de ou vers la pelouse ou sur des chemins.
z Prenez soin de ne pas toucher les outils de coupe.
z Tenez-vous à l'écart de la bouche d'éjection.
z Avant de soulever ou de transporter la tondeuse, éteignez le
moteur et attendez que les outils de coupe s'immobilisent.
z Ne modifiez la hauteur de coupe que lorsque le moteur est
éteint et que les outils de coupe sont à l'arrêt.
Attention!
Avant utilisation
lire la notice
d‘emploi!
Tenir les tiers à
l‘ecart de la
zone dangereu-
se!
Attention! -Cou-
teaux tranchants
- Avant d‘entrep-
rendre des tra-
vaux de
maintenance et
si le câble est en-
dommagé, retirer
la prise de cou-
rant.
Tenir le câble
de raccord éloi-
gné de l‘outil de
coupe!
0054659.book Seite 17 Mittwoch, 8. April 2009 12:00 12

18
F
z N'ouvrez jamais le carter si le moteur tourne encore.
z Avant le retrait du dispositif de ramassage de l'herbe : Arrêtez
le moteur et patientez jusqu'à l'immobilisation complète des
outils de coupe. Après avoir vidé le dispositif de ramassage
de l'herbe, replacez-le soigneusement.
z Ne roulez jamais sur des gravillons avec le moteur en marche
– Il y aurait des risque de projection de pierres !
z Si possible, ne tondez pas l'herbe mouillée.
z Dans les circonstances suivantes, l'appareil doit être éteint, la
prise de courant débranchée et l'appareil immobilisé :
– Si l'utilisateur de la tondeuse s'absente
– lors du déblocage de la lame
– si vous souhaitez contrôler l'appareil, le nettoyer ou effectu-
er un quelconque travail sur l'appareil
– Si vous trouvez un corps étranger (Vérifiez d'abord que la
tondeuse ou les outils de coupe n'ont pas été endomma-
gés. Enlevez ensuite ce qui a causé le dommage).
– Quand la tondeuse vibre fortement pour cause d'un
déséquilibrage (éteignez-la aussitôt et recherchez-en
la cause).
– si le câble d'alimentation subit une détérioration durant l'uti-
lisation.
Entretien
1 Attention ! Lame en rotation
Avant tous travaux d'entretien ou de nettoyage :
z Débranchez la prise.
z Ne touchez pas les outils de coupe.
z Vérifiez régulièrement la solidité des fixations et resserrer tous
les vis de fixation et écrous en particulier ceux de la barre des
outils de coupe.
z Ne rangez pas la tondeuse dans une pièce humide.
z Pour des raisons de sécurité, remplacez les pièces usées ou
endommagées.
z N'utilisez que des pièces de rechange WOLF d'origine, sinon
vous n'aurez aucune garantie que votre tondeuse réponde
aux normes de sécurité.
Elimination
Montage
Fixer le guidon
1 Attention !
Il est possible de détériorer le câble en pliant ou en sortant
la barre de guidage.
z Introduisez le câble dans la protection contre le pliage
.
z Alors que vous réglez la hauteur de la poignée veillez à
ce que le câble ne soit pas ondulé .
1. Dépliez la partie inférieure du guidon et fixez-la en serrant les
deux molettes .
2. Réglez la hauteur du guidon souhaitée .
3. Dépliez la partie supérieure du guidon et fixez-la à l‘aide des
écrous papillon .
Monter le sac de ramassage
1. Placez la goulotte (1) sur la trappe du sac de ramassage (2)
.
2. Depuis l‘arrière, pressez la goulotte contre la trappe du sac de
ramasssage. La goulotte est fixée dès qu‘elle s‘enclenche
.
Fonctionnement
Tranches horaires
z Observez les dispositions spécifiques de la lloi nationale.
Introduisez le câble dans le protecteur de cordon
z Veuillez introduire le câble dans le protecteur de cordon
Accrochez le sac de collecte
1 Attention! Couteau rotatif
Effectuez des réglages sur l’équipement seulement après
que le moteur a été éteint et l’outil de coupure s’est arrêté.
1. Soulever le capot.
2. Accrocher le bac de ramassage en insérant les crochets dans
les orifices du châssis (voir flcche).
3. Rabattre le capot.
Régler la hauteur de coupe
1 Attention! Couteau rotatif
Effectuez du travail/des réglages sur l’équipement
seulement après que le moteur a été éteint et l’outil de
coupure s’est arrêté.
1. Tirer le levier vers l‘extérieur.
2. Régler la hauteur de coupe souhaitée.
3. Repousser le levier vers l‘intérieur.
Hauteur de coupe – état de la pelouse
z Tondez de préférence lorsque l'herbe est sèche. Tondez l'her-
be humide ou mouillée à une hauteur plus élevée.
z En principe l'hauteur de coupe est de 40-50 mm.
Les appareils électriques sont pas des déchets
ménagers. L'appareil, les accessoires et l'emballa-
ge doivent être déposé dans un lieu de recyclage
approprié pour le respect de l'environnement.
A
B
C
D
A
C
B
C
D
E
F
G
E
F
G
H
H
J
K
0054659.book Seite 18 Mittwoch, 8. April 2009 12:00 12

19
F
Raccordement à la prise (courant alternatif 230
volts)
z La tondeuse peut être branchées sur n‘importe quelle prise de
courant protégée par un fusible de 16 Amp.
3 Remarque: Dispositif de protection contre le courant
résiduel
Ces dispositifs de protection vous protègent alors que vous
touchez des fils détériorés, contre les défauts d’isolation et
dans certains cas, aussi lorsque vous détériorez des fils
sous tension.
z Nous recommandons que l’équipement ne soit introduit
que dans une prise de courant qui est protégée par un
dispositif de protection contre le courant résiduel (RCD),
avec un courant résiduel qui ne dépasse pas 30 mA.
z Il y a des trousses d’adaptation disponibles pour les in-
stallations vieilles. Consultez un électricien.
Mise en route de la tondeuse
z Mettre le moteur en marche quand la tondeuse se trouve sur
une surface plane.
z Dans de l‘herbe haute, appuyer légèrement sur le manche
.
Mise en marche
1. Appuyez sur le bouton et maintenez le enfoncé (1).
2. Amenez la poignée (2) vers le guidon et lâchez le bouton (1).
Arrêt
z Lâchet la poignée (2).
Indication pour vider le bac récolteur
z Le bac récolteur est plein lorsque l‘herbe coupée se pose der-
rire la tondeuse.
1 Attention! Couteau rotatif
Effectuez des réglages sur l’équipement seulement après
que le moteur a été éteint et l’outil de coupure s’est arrêté.
z Videz le sac de collecte .
z Enlevez les possibles obstructions de l’espace de
coupure avant de commencer.
Conseils pour tondre
z Pour éviter que n’apparaisse un effet de rayures, il faut que
les passages successifs de la tondeuse se chevauchent de
quelques centimètres .
z Règle générale: Toujours poser le câble sur une terrasse,
dans un chemin ou sur une partie de la pelouse déjà tondue.
Entretien
Général
1 Attention! Couteau rotatif
Avant toute opération d’entretien et de nettoyage :
z sortez la fiche d’alimentation électrique.
z Ne touchez pas les aubes en état de fonctionnement.
Nettoyage
z Nettoyer la tondeuse avec une brosse ou un chiffon après
chaque tonte.
z Ne jamais nettoyer la tondeuse au jet d‘eau. Remiser la ton-
deuse dans un endroit sec.
Remiser la tondeuse pour l‘hiver
z Après la saison, nettoyer la tondeuse á fond.
z Faire réviser la tondeuse dès l‘automne par une station-ser-
vice WOLF agréée.
z Ne jamais nettoyer la tondeuse au jet d‘eau et ne la remiser
que dans un endroit sec.
Remplacement des couteaux
z Pour tout travail sur les aubes, les tirants et les barres de
coupe, sortez d’abord la fiche d’alimentation électrique et
portez des gants protecteurs.
1 Attention!
Il peut se développer un déséquilibre après le réaffûtage de
l’aube.
z Faites reaffûter toujours les aubes dans un atelier
spécilisé, parce qu’il faut effectuer une vérification de
l’équilibre conformément aux règlements de sécurité.
z Faites changer toujours les aubes dans un atelier spécialisé.
Un torquemètre de 10 mm est obligatoirement éxigé. Couple
de serrage pour les vis : 6-7 N-m (37).
z Faites changer toujours les aubes dans un atelier spécialisé.
Un torquemètre de 13 mm est obligatoirement éxigé. Couple
de serrage pour les vis : 16-18 N-m (40).
z N‘employez que des pièces de rechange d‘origine.
L
M
M
O
N
P
0054659.book Seite 19 Mittwoch, 8. April 2009 12:00 12

20
F
Pièces de rechange
Comment remédier aux pannes
Conditions de la garantie
La carte de garantie remplie par les vendeurs ou le justificatif
d‘achat doivent être conservés avec soin.
La société WOLF-Garten fournit une garantie selon l‘état actuel de la
technique et l‘objectif d‘utilisation / le domaine d‘application pour une
durée de 10
ans ŕ partir de la date d‘achat. Les droits légaux du consom-
mateur final ne sont pas entravés par les directives suivantes en ma-
tière de garantie.
Conditions préalables à l‘application de la garantie de 10 ans:
- Utilisation de l‘appareil exclusivement à usage privé.
Dans le secteur professionnel ou pour les sociétés de location,
la garantie est de 12 mois.
- Manipulation réglementaire et respect de toutes les consignes figu-
rant dans le mode d‘emploi, qui fait partie de nos conditions de ga-
rantie.
- Respect de la périodicité prescrite pour la maintenance.
- Pas de modification arbitraire de la construction.
- Montage de pièces détachées / accessoires WOLF originaux.
- Présentation de la carte de garantie remplie et/ou de la preuve
d‘achat.
La garantie ne couvre pas l‘usure normale des accus, lames, pièces
de fi xation des lames, rondelles de frottement, courroies et courroies
crantées, roues/pneumatiques, fi ltres à air, bougies et câbles con-
necteurs d‘allumage. En cas de réparation arbitraire, tout droit à la ga-
rantie est automatiquement supprimé. Les défauts et les
imperfections dont les causes sont attribuées à un défaut de matériau
ou de fabrication sont réparés exclusivement par nos ateliers parten-
aires (le vendeur a droit aux améliorations) situés près de chez vous
ou le fabricant s‘il est plus proche. Les droits dépassant les limites de
la garantie sont exclus. Un droit à une livraison compensatrice n‘existe
pas. Les dommages éventuels survenus pendant le transport ne doi-
vent pas être communiqués à notre société mais au transporteur con-
cerné pour conserver les droits à indemnité envers cette entreprise.
Numéro d‘article Désignation pour la commande Information produit
4917 031 Sac de ramassage (37)
4968 030 Sac de ramassage (40)
4907 096 Vi 37 FM Lame de rechange 37 cm
4970 096 Vi 40 FM Lame de rechange 40 cm
Mesures r prendre (X) par:
Dysfonctionnements Causes possibles
L‘atelier de service
après-vente WOLF
L‘utilisateur
L‘appareil fonctionne bruy-
amment et vibre fortement
• La lame est endommagée
X ---
• La lame s‘est desserrée de sa fixation
--- X
Le moteur ne démarre pas
• Le fusible a fondu
--- X
• Le câble est endommagé:
1 Attention! La déterioration du câble produit du
choc électrique
Quand le câble est coupé ou détérioré, le fusible de
sécurité ne se déclenche pas toujours.
z Ne touchez pas le câble avant de sortir la fiche
d’alimentation électrique de la prise de courant.
z Le câble détérioré doit être complètement remplacé.
Il est interdit de rapiécer le câble avec du chatterton.
X---
Mauvaise performance/ca-
pacité de tonte
• La lame est émoussée
X ---
• Hauteur de coupe non adaptée
--- X
• Le bac de ramassage est obstrué
--- X
IEn cas de doute, consulter toujours l‘atelier de service aprés-vente WOLF.
Attention, arrêter la tondeuse avant tout contrôle, tout nettoyage et tous travaux sur la lame et retirer la fiche secteur.
Les prestations de garantie seront exécutées par nos ateliers
agréés ou chez:
B
Graham NV-SA
Zoning Industriel21
1440 Wauthier-Braine
Tel.: ++ 32 (2) - 3 67 16 11
Fax: ++ 32 (2) - 3 67 16 12
E-mail: [email protected]
Z
WOLF-Garten Schweiz AG
Nordringstraße 16
4702 Oensingen
Tel.: ++ 41 (62) - 3 88 04 50
Fax: ++ 41 (62) - 3 88 04 60
l
WOLF-Garten GmbH & Co KG
Industriestraße 83-85
57518 Betzdorf
Tel.: ++ 49 (27 41) - 28 15 00
Fax: ++ 49 (27 41) - 28 12 99
E-mail: [email protected]
0054659.book Seite 20 Mittwoch, 8. April 2009 12:00 12

21
I
IComplimenti per aver scelto un tosaerba WOLF
Contenuto
Dati tecnici . . . . . . . . . . . . . . . . . . . . . .21
Indicazioni di sicurezza . . . . . . . . . . . . . . .22
Montaggio . . . . . . . . . . . . . . . . . . . . . .23
Messa in opera . . . . . . . . . . . . . . . . . . . .23
Manutenzione. . . . . . . . . . . . . . . . . . . . .24
Ricambi . . . . . . . . . . . . . . . . . . . . . . .25
Interventi di riparazione. . . . . . . . . . . . . . . .25
Condizioni di garanzia . . . . . . . . . . . . . . . .25
Dichiarazione CE di Conformità . . . . . . . . . . 33
Le caratteristiche della dotazione in sintesi
–
regolazione centralizzata dell’altezza di taglio
– impugnatura pieghevole per un deposito con minimo ingomb-
ro e trasporto semplificato
– Regolazione in altezza dell‘impugnatura in 2 posizioni
– sacco raccoglierba
– materiali di prima qualità, lavorazione eccellente e Design at-
traente
– Ready-to-use: da 0 alla rasatura in soli 30 secondi
Dati tecnici
Leggere attentamente le istruzioni per l‘uso e familia-
rizzare con gli elementi di comando e con il coretto uti-
lizzo dell‘apparecchio. L‘utente è responsabile degli
incidenti causati ad altre persone o alla loro proprietà.
Osservare le idicazioni, le spiegazioni e le prescrizioni.
Non lasciare mai bambini o altre persone che non co-
noscono le istruzioni per l'uso nei pressi della falciatri-
ce. Non è consentito a persone al di sotto dei 16 anni
di utilizzare questo apparecchio.
Ci riserviamo per tanto eventuali modifiche tecnici dovute
all' u l teriore sviluppo dei nostri prodotti.
D Misuratione della rumorositá all'altezza dell'orecchio
dell'utente eseguita in confomotà alla norma EN 836.
E Vibrazioni misurate sul manubrio di guida, con utente, in
conformitá a EN 1033, EN 836. L’accelerazione ponderata
tipica è di:
POWER WOLF 15/37 POWER WOLF 16/40
Typ 4927 ... 4969 ...
A 80 cm 80 cm
B 37 cm 55 cm
C 41 cm 47 cm
D LP 79 dB (A) LP 77 dB (A)
E a
hw
< 2,5 m/s
2
a
hw
< 2,5 m/s
2
Potenza 1.500 W 1.600 W
Corrente normale 7,0 A 7,3 A
Tensione 230 VAC 230 VAC
Sacco di raccolta 35 l 55 l
Larghezza di taglio 37 cm 40 cm
Altezza di taglio 20, 30, 40, 50, 60 mm 25, 35, 50, 65, 80 mm
Peso 16 kg 22 kg
Istruzione d’uso
0054659.book Seite 21 Mittwoch, 8. April 2009 12:00 12

22
I
Indicazioni di sicurezza
Legenda simboli
Indicazioni generali
z Questo tosaerba è stato progettato per la cura di superfici er-
bose e prati di aree private. Non è consentito utilizzare il tosa-
erba per altri scopi, poiché ciò comporterebbe rischi fisici per
l'operatore o per altre persone.
z Non utilizzare il tosaerba se nelle vicinanze vi sono altre per-
sone, soprattutto bambini o animali.
z Utilizzare il tosaerba solo se le condizioni di luce lo consentono.
Prima dell'uso
z Utilizzare il tosaerba solo se si indossano calzature robuste e
calzoni lunghi.
z Non utilizzare il tosaerba a piedi nudi o se si indossano san-
dali.
z Controllare il terreno su cui si intende utilizzare il tosaerba e
rimuovere tutti gli oggetti che possono rimanere impigliati
nell'apparecchio o essere scagliati in aria.
z Controllare la presenza di eventuali danni o segni di invecchi-
amento (fragilità) del cavo di allacciamento e della linea ester-
na dell'apparecchio. Utilizzare l'apparecchio solo se in
perfetto stato.
z Controllare frequentemente la presenza di eventuali segni di
usura o deformazioni del dispositivo di raccolta dell'erba.
z Prima dell'uso, verificare (tramite un controllo visivo) se gli
utensili di taglio ed i relativi mezzi di fissaggio sono smussati
o danneggiati.
z Per evitare sbilanciamenti, è necessario sostituire l'intero set
di utensili smussati o danneggiati (vedere „Manutenzione“,
pagina 24).
Cavi
1 Attenzione! Scosse elettriche a causa di cavi danneggiati
Se il cavo viene tagliato o danneggiato, non sempre scatta
il fusibile.
z Non toccare il cavo prima di aver staccato la spina dalla
presa.
z I cavi danneggiati vanno sostituiti completamente. Non
tentare di riparare il cavo con del nastro isolante.
z Le riparazioni del cavo vanno eseguite da un tecnico specia-
lizzato (vedere „Interventi di riparazione“, pagina 25).
z Fissare il cavo di allacciamento al dispositivo di scarico della
trazione del cavo. Evitare che il cavo sfreghi contro bordi, pun-
te o oggetti taglienti.
z Non schiacciare il cavo nelle fessure di porte o finestre.
z Non è consentito togliere né escludere i dispositivi di aziona-
mento (ad esempio, legando la leva di comando al manubrio
di guida).
z Utilizzare esclusivamente prolunghe con una sezione di
almeno 3 x 1,5 mm
2
e una lunghezza massima di 25 m:
– eventuali cavi in gomma flessibile devono essere del tipo
HO 7 RN-F o superiore
– eventuali cavi in PVC devono essere del tipo HO5 VV-F o
superiore (i cavi di questo tipo non sono adatti per l'impiego
continuo all'aperto - come p. es. posa sotto terra per il col-
legamento di una presa elettrica da giardino, collegamento
di una pompa per laghetti o conservazione all’aperto.)
z È necessario che i cavi siano protetti contro gli spruzzi d'ac-
qua.
Durante l'uso
z Non inclinare l'apparecchio quando si accende il motore, a
meno che ciò non sia necessario in fase d'avvio. In tal caso,
non inclinare l'apparecchio più di quanto strettamente neces-
sario e sollevare solo la parte lontana dall'utente. Prima di ri-
portare l'apparecchio al suolo, controllare sempre che
entrambe le mani si trovino in posizione di lavoro.
z Mantenere la distanza di sicurezza imposta dalla tiranteria.
z Accendere il motore solo quando i piedi si trovano a distanza
sicura dagli utensili di taglio.
z Controllare che l'appoggio sia sicuro. Non correre. Procedere
con calma.
z Taglio dell'erba su pendii:
– Tagliare l'erba trasversalmente rispetto al pendio, mai in sa-
lita o in discesa.
– Prestare un'attenzione particolare nel cambiare direzione.
– Non tagliare l'erba su pendii ripidi.
z Usare particolare cautela nel procedere all'indietro tirando il
tosaerba verso di sé.
z Spegnere il tosaerba quando lo si inclina o trasporta, ad
esempio da o verso il prato o lungo i vialetti.
z Attenzione, non toccare le lame in funzionamento.
z Non sostare davanti all'apertura di espulsione dell'erba.
z Prima di sollevare o portare via il tosaerba, spegnere il motore
e attendere fino al completo arresto degli utensili di taglio.
z L'altezza di taglio va regolata solo a motore spento e con gli
utensili di taglio fermi.
z Non aprire mai il coperchio di protezione se il motore è ancora
in funzionamento.
Attenzione!
Prima dell‘uso
leggere istruzio-
ni!
Allontanare le
per-sone dalla
zona di perico-
lo!
Attenzione! -
Lame da taglio
affilate - staccare
la spina prima di
qualsiasi inter-
vento di manu-
tenzione ed in
presenza di dan-
ni alla linea.
Tenere lontani i
cavi collega-
mento
dall‘utensile da
taglio!
0054659.book Seite 22 Mittwoch, 8. April 2009 12:00 12

23
I
z Prima di togliere il dispositivo di raccolta dell'erba: Spegnere il
motore e attendere fino al completo arresto dell'utensile di
taglio. Dopo aver svuotato il dispositivo di raccolta dell'erba,
fissarlo con cura.
z Non procedere sulla ghiaia se il motore è in funzionamento –
sussiste il rischio di essere colpiti da pietre.
z Se possibile, non tagliare erba bagnata.
z Nelle seguenti circostanze è necessario spegnere l'apparec-
chio, staccare la spina e arrestare l'apparecchio:
– quando ci si allontana dal tosaerba
– per sbloccare una lama bloccata
– per controllare l'apparecchio, per pulirlo o per svolgervi in-
terventi
– dopo aver colpito un corpo estraneo (verificare innanzitutto
la presenza di eventuali danni al tosaerba o agli utensili di
taglio. Quindi, riparare il danno)
– se il tosaerba vibra fortemente poiché sbilanciato (spegner-
lo subito e ricercare la causa)
– se il cavo di allacciamento subisce danni durante l'uso.
Manutenzione
1 Attenzione! Lame rotanti
Prima di ogni intervento di manutenzione e pulizia:
z Staccare la spina.
z Non toccare le lame in funzionamento.
z Controllare regolarmente che tutte le viti di fissaggio ed i dadi
visibili siano ben serrati, specialmente nella barra portalama;
serrarli se necessario.
z Non riporre il tosaerba in ambienti umidi.
z Per motivi di sicurezza, sostituire le parti usurate o danneggiate.
z Utilizzare solo ricambi originali WOLF; in caso contrario non è
possibile garantire che il tosaerba sia conforme alle disposizi-
oni in materia di sicurezza.
Smaltimento
Montaggio
Fissare l‘asta dell‘impugnatura
1 Cautela!
Il cavo può venire danneggiato quando viene piegata od
estratta l’impugnatura.
z Avvolgete il cavo nella protezione curva .
z Quando regolate l’altezza del’impugnatura abbiate cura
che il cavo non sia arricciato .
1. Sollevare la parte inferiore dell‘impugnatura ed avvitarla
saldamente ai due volantini .
2. Impostare l‘altezza desiderata dell‘impugnatura .
3. Sollevare la parte superiore dell‘impugnatura ed avvitarla
saldamente ai due dadi ad alette .
Montare il raccoglierba
1. Collocare il contenitore (1) sul raccoglierba (2) .
2. Premere il contenitore da dietro sul raccoglierba. Il contenitore
bloccato, quando si sente lo scatto .
Messa in opera
Tempo d’esercizio
z Si prega di osservare le prescrizioni vigenti nei singoli stati.
Fate passare il cavo attraverso il tensionatore
z Fate passare il cavo attraverso il tensionatore .
Appendete il sacco raccoglitore
1 Attenzione! Lama rotante
Iniziate regolazioni sull’attrezzo solo dopo aver spento il
motore e dopo che l’elemento da taglio si sia
completamente fermato.
1.
Sollevare la copertura di protezione.
2. Appendere il sacco per la raccolta al gancio che si trova nella
cavit dell‘intelaiatura (vedere freccia).
3. Collocare la copertura di protezione.
Impostate l’altezza del taglio
1 Attenzione! Lama rotante
Fate dei lavori/regolazioni sull’attrezzo solo dopo aver
spento il motore e dopo che l’elemento da taglio si sia com-
pletamente fermato.
1. Tirare la leva verso l‘esterno.
2. Impostare l‘altezza di taglio desiderata.
3. Premere di nuovo la leva all‘interno.
Altezza di taglio
z Tagliare possibilmente su prato asciutto per non danneggiare
la cotica erbosa. In caso di prato umido ed erba alta, tagliare
con una maggiore altezza di taglio.
z Di regola si tosa ad un'altezza di taglio di 40-50 mm.
Gli apparecchi elettrici non vanno smaltiti tra i rifiuti
domestici. Consegnare l'apparecchio, gli accessori
e l'imballaggio ad un centro di riciclaggio.
A
B
C
D
A
C
B
C
D
E
F
G
E
F
G
H
H
J
K
0054659.book Seite 23 Mittwoch, 8. April 2009 12:00 12

24
I
Inserire la spina della corrente (corrente alternata
230 Volt, 50 Hz)
z Si potr allacciare l‘attrezzo a qualsiasi presa, purch sia munita
di una valvola di protezione di 16 Ampre (oppure di un terrut-
tore-LS tipo B).
3 Nota: Dispositivo di protezione contro corrente residu-
ale
Questi dispositivi di protezione proteggono quando si tocca-
no fili danneggiati, da difetti di isolamento ed, in certi casi,
anche quando si danneggiano fili sotto tensione.
z Raccomandiamo che l’attrezzo sia collegato ad una pre-
sa di corrente che sia protetta da un dispositivo di prote-
zione contro la corrente residuale (RCD) con una
corrente residuale non superiore a 30 mA.
z Sono disponibili dei retrofit per i vecchi impianti. Consul-
tate un elettricista.
Avviare il tagliaerba
z Avviare la tosaerba su superficie piana.
z Possibilmente non nell‘erba alta. In questo caso inclinare leg-
germente come risulta dalla figura .
Per avviare il motore
1. Tener premuto il pulsante (1).
2. Tirare la leva (1) e lasciare il pilsante (2).
Per spegnere il motore
z Lasciare la leva (2).
Svuotate il sacco raccoglitore
z Il cesto da svuotare quando l‘erba non viene pi raccolte e res-
ta sul terreno.
1 Attenzione! Lama rotante
Iniziate delle regolazioni sull’attrezzo solo dopo aver spento
il motore e dopo che l’elemento da taglio si sia completa-
mente fermato.
z Svuotate il sacco raccoglitore
.
z Prima di iniziare rimuovete potenziali ostacoli nello spa-
zio dove volete tagliare.
Suggerimenti per la rasatura
z Per non creare strisce erbose, le vie di taglio devono sempre
sovrapporsi per alcuni centimetri .
z Mettete sempre il cavo in maniera sicura sul terrazzo, sul sen-
tiero o sull‘erba gi tosata.
Manutenzione
Generale
1 Attenzione! Lama rotante
Prima di qualsiasi lavoro di manutenzione e di pulitura:
z estraete la spina elettrica.
z Non toccate lame in movimento.
Pulizia
z Dopo ogni tosatura abbiate l‘avvertenza di pulire la tosaerba
con uno straccio oppure con uno scopino.
z In nessum caso usare acqua! Tenere il tosaerba in ambiente
asciutto.
Accantonamento durante l‘inverno
z Terminata la stagione si dorvr pulire accuratamente la tosaer-
ba.
z Mai spruzzare la tosaerbe con acqua, n collocarla in ambienti
umidi.
Sostituzione delle lame
z Per qualsiasi lavoro sulle lame, barre di accoppiamento e di
taglio, prima di tutto estraete la spina elettrica ed indossate
guanti di protezione.
1 Attenzione!
Dopo aver affilato la lama si può verificare uno sbilancia-
mento.
z Fate sempre riaffilare le lame da un’officina specializza-
ta, perchè un controllo del bilanciamento dovrebbe
sempre essere fatto secondo le norme di sicurezza.
z Fate sempre sostituire le lame da un’officina specializzata. E’
richiesta obbligatoriamente una chiave dinamometrica da
10 mm. Coppia di serraggio delle viti: 6-7 N-m (37).
z Fate sempre sostituire le lame da un’officina specializzata. E’
richiesta obbligatoriamente una chiave dinamometrica da
13 mm. Coppia di serraggio delle viti: 16-18 N-m (40).
L
M
M
O
N
P
0054659.book Seite 24 Mittwoch, 8. April 2009 12:00 12

25
I
Ricambi
Interventi di riparazione
Condizioni di garanzia
Custodite con cura il certificato di garanzia compilato dal vendi-
tore oppure il documento d‘acquisto.
Per la durata di 10 anni a partire dalla data d‘acquisto, la Ditta WOLF-
Garten presta garanzia in conformità al rispettivo stato della tecnica e
allo scopo/campo d‘applicazione. I diritti legali del consumatore finale
non vengono compromessi mediante i criteri di garanzia di seguito
elencati.
Premesse per il diritto alla garanzia di 10 anni:
- Impiego dell‘apparecchio esclusivamente per uso privato.
Nel campo industriale oppure negli esercizi di noleggio, la garan-
zia viene ridotta a 12 mesi.
- Uso conforme allo scopo e rispetto di tutte le avvertenze delle istru-
zioni sull‘uso che formano parte integrante delle nostre condizioni
di garanzia.
- Rispetto degli intervalli di manutenzione prescritti.
- Nessuna variazione della costruzione su propria iniziativa.
- Montaggio delle parti di ricambio originali/accessori della WOLF.
- Presentazione del documento di garanzia compilato e/o del certifi-
cato d‘acquisto.
La garanzia non copre la normale usura di batterie, lame, particolari di
fi ssaggio lama come dischi di attrito, cinghie trapezoidali/dentate,
ruote/gomme, fi ltri dell‘aria, candele di accensione e connettori per
candele di accensione. In caso di riparazioni effettuate in proprio, si
estingue automaticamente ogni diritto di garanzia. I difetti e le carenze
che si dovessero presentare le cui cause sono riconducibili a difetti di
materiale o di produzione, vengono rimossi esclusivamente dalle
nostre officine autorizzate (il venditore ha il diritto alla riparazione) op-
pure dal produttore stesso, se egli fosse pi vicino alla Vostra sede.
Sono escluse rivendicazioni non rientranti nella prestazione di garan-
zia. Non ammessa una rivendicazione per la fornitura di parti di ricam-
bio. Eventuali danni dovuti al trasporto non devono essere segnalati
a noi, ma alla ditta competente per il trasporto, poich in caso contrario
i diritti all‘indennizzo da parte di queste imprese decadono.
Articolo N° Denominazione articolo Informazione sul prodotto
4917 031 Sacco di raccolta (37)
4968 030 Sacco di raccolta (40)
4907 096 Vi 37 FM Lama di ricambio 37 cm
4970 096 Vi 40 FM Lama di ricambio 40 cm
Rimedio (X):
Problema Possibi causale
Officina Di
assistenza WOLF
In modo
autonomo
Funzionamento rumoroso, forte
vibrazione dell‘apparecchio
• Lama danneggiata
X ---
• Lama di fissaggio allentata
--- X
Il motore non funziona
• Fusibile danneggiato
--- X
• Cavo danneggiato:
1 Attenzione! Scarica elettrica da cavo danneggiato
Quanto il cavo è tagliato completamente o danneggiato, il
fusibile di sicurezza non sempre funziona.
z Non toccate il cavo prima di estrarre la spina dalla pre-
sa di corrente.
z Il cavo danneggiato deve essere completametne sosti-
tuito. E’ proibito rappezzare il cavo con nastro isolante.
X---
Pessime prestazioni di raccolta
/
Cattiva falciatura
• Lama smussata
X ---
• Cesto raccoglierba otturato
--- X
• Altezza di taglio non regolata
--- X
In caso dubbio rivolgersi sempre ad un‘officina di assistenza WOLF.
Attenzione, arrestare il tosaerba prima di ogni controllo, lavoro di pulitura o di lavori alla lama ed estrarre la chiave di accensione.
Le prestazioni in garanzia vengono rese dalle nostre officine au-
torizzata contrattualmente o nel caso di:
I
WOLF Italia S.r.l.
Via G. Galilei 5
20060 Ornago (Mi)
Tel.: ++ 39 (0 39) - 62 86 41
Fax: ++ 39 (0 39) - 6 01 02 57
E-mail: [email protected]
Z
WOLF-Garten Schweiz AG
Nordringstraße 16
4702 Oensingen
Tel.: ++ 41 (62) - 3 88 04 50
Fax: ++ 41 (62) - 3 88 04 60
0054659.book Seite 25 Mittwoch, 8. April 2009 12:00 12

26
n
n Hartelijk gefeliciteerd met de aanschaf van uw WOLF gazonmaaier
Inhoud
Technische gegevens . . . . . . . . . . . . . . . .26
Veiligheidsvoorschriften . . . . . . . . . . . . . . .27
Montage . . . . . . . . . . . . . . . . . . . . . . .28
Gebruik . . . . . . . . . . . . . . . . . . . . . . . .28
De verzorging. . . . . . . . . . . . . . . . . . . . .29
Reserveonderdelen . . . . . . . . . . . . . . . . .30
Opheffen van storingen. . . . . . . . . . . . . . . .30
Garantievoorwaarden. . . . . . . . . . . . . . . . .30
EG-Conformiteitsverklaring. . . . . . . . . . . . . 33
Typische kenmerken in het kort
–
Centrale instelling van de maaihoogte
– Inklapbare duwboom voor ruimtebesparend opbergen en
eenvoudig vervoeren
– Duwboom hoogte instelling 2-voudig
– Makkellijk te legen, ruime opvangzak
– Hoogwaardig materiaal, uitstekende verwerking en attractief
design
– Ready-to-use: van uitpakken tot maaien in 30 seconden
Technische gegevens
Lees het instructieboekje aandachtig door en stelt u
zich op de hoogte van de bedieningsorganen en het
correcte gebruik van het apparaat. De gebruiker is
aannsprakelijk voor ongevallen met andere personen
en voor schade aan hun eigendommen. Neem de aan-
wijzingen, voorschriften en de verklarende teksten in
acht.
Kinderen of andere personen die de gebruiksaanwij-
zing niet kennen, mogen de grasmaaier nooit gebru-
iken.
Veranderingen en technische aan-passingen voorbehou-
den
D Lawaaimeting aan het oor van de bedienende persoon wordt
uitgevoerd overeenkomstig EN 836.
E Trillingen gemeten aan de duwstang, met bedienende per-
soon, conform EN 1033, EN 836. De gemiddelde gewogen
versnelling is:
POWER WOLF 15/37 POWER WOLF 16/40
Typ 4927 ... 4969 ...
A 80 cm 80 cm
B 37 cm 55 cm
C 41 cm 47 cm
D LP 79 dB (A) LP 77 dB (A)
E a
hw
< 2,5 m/s
2
a
hw
< 2,5 m/s
2
Vermogen 1.500 W 1.600 W
Verbruik 7,0 A 7,3 A
Spanning 230 VAC 230 VAC
Opvangzack 35 l 55 l
Maaibreedte 37 cm 40 cm
Maaihoogte 20, 30, 40, 50, 60 mm 25, 35, 50, 65, 80 mm
Gewicht 16 kg 22 kg
Gebruiksaanwijzing
0054659.book Seite 26 Mittwoch, 8. April 2009 12:00 12

27
n
Veiligheidsvoorschriften
Betekenis van de symbolen
Algemene aanwijzingen
z Deze grasmaaier is bedoeld voor de verzorging van grasvel-
den en -perken voor privé-gebruik. Wegens lichamelijk gevaar
voor de gebruiker of andere personen mag de grasmaaier niet
voor andere doeleinden worden gebruikt.
z Maai nooit als er personen, vooral kinderen en dieren, in de
buurt zijn.
z Maai uitsluitend bij voldoende licht.
Voor het maaien
z Maai uitsluitend in vaste schoenen en lange broek.
z Maai nooit met blote voeten of in sandalen.
z Controleer het terrein waarop de maaier wordt ingezet,
en verwijder alle voorwerpen die kunnen worden gegre-
pen en weggeslingerd.
z Controleer of de aansluitkabel en de buiten op het appa-
raat geïnstalleerde leiding niet beschadigd en verouderd
(bros) is. De maaier mag uitsluitend in foutloze toestand
worden gebruikt.
z Controleer regelmatig of de grasvanginrichting niet is vers-
leten en vervormd.
z Controleer voor het gebruik (visuele controle) of de snijap-
paraten en hun bevestigingsmiddelen niet stomp of be-
schadigd zijn.
z Vervang stompe of beschadigde snijapparaten door een
volledige set om geen onbalans te krijgen (zie „De ver-
zorging“, pagina 29).
Kabel
1 Attentie! Elektrische schok door beschadigde kabel
Als de kabel wordt doorgesneden of beschadigd, wordt de
zekering niet altijd geactiveerd.
z Raak de kabel niet aan, voordat de netstekker uit het
stopcontact is getrokken.
z Een beschadigde kabel moet volledig worden ver-
vangen. Het is verboden de kabel met isolatieband
te herstellen.
z Laat reparaties aan de kabel uitsluitend door een vakman uit-
voeren (zie „Opheffen van storingen“, pagina 30).
z Bevestig de aansluitkabel op de kabelontlasting. Laat deze
niet schuren tegen randen en puntige of scherpe voorwerpen.
z De kabel mag niet door deur- of raamspleten worden
platgedrukt.
z Schakelinrichtingen mogen nooit worden verwijderd of
overbrugd (bijv. de schakelaarhendel op de geleidings-
steel binden).
z Maak uitsluitend gebruik van een verlengkabel met een
minimale diameter van 3 x 1,5 mm
2
en een max. lengte van
25 m:
– wanneer rubber slangleidingen, dan niet lichter dan
type HO 7 RN-F
– wanneer PVC slangleidingen, dan niet lichter dan type HO5
VV-F (leidingen van dit type zijn niet geschikt om constant
in de open lucht gebruikt te worden - zoals bijv.: als
onderaardse leiding voor de aansluiting van een
tuinstekkerdoos, een vijverpomp of voor opslag in de open
lucht)
z De kabels moeten spatwaterdicht zijn.
Bij het maaien
z Kantel het apparaat nooit als u de motor inschakelt, ten-
zij het apparaat bij het aanzetten moet worden gekan-
teld. Kantel in dat geval het apparaat niet meer dan
beslist noodzakelijk is en til alleen het deel op dat van
de gebruiker is verwijderd. Controleer altijd of uw beide
handen zich in de werkstand bevinden, alvorens het ap-
paraat weer op de grond terug te zetten.
z Houd de door het steelframe gegeven veiligheidsafstand aan.
z Zet de motor alleen aan als uw voeten zich op een veilige af-
stand van de snijapparaten bevinden.
z Let op een veilige stand. Loop nooit, ga rustig voorwaarts.
z Op hellende plaatsen maaien:
– Maai altijd dwars op de helling, niet op- en neerwaarts
– Wees zeer voorzichtig als u van richting verandert
– Maai niet op steile hellingen
z Wees zeer voorzichtig als u terugwaarts maait en de maaier
naar u toe trekt.
z Zet de maaier uit als u deze wilt kantelen of transporteren, bi-
jv. van/naar het grasveld of over de weg.
z Voorzichtig, grijp niet naar lopende snijkanten.
z Ga niet voor de grasuitwerpopening staan.
z Alvorens de maaier op te tillen of weg te dragen, moet u de
motor uitzetten en wachten tot de snijapparaten tot stilstand
zijn gekomen.
z Verstel de snijhoogte alleen als de motor is uitgeschakeld en
de snijapparaten stilstaan.
z Open de veiligheidsklep nooit als de motor nog loopt.
Opgelet!
Voor gebruik de
gebruiksaanwij-
zing lezen!
Anderen buiten
de gevarenzo-
ne houden!
Voorzichtig!
- Scherpe snij-
messen - vóór
onderhouds-
werk-zaamhe-
den en bij
beschadiging
van de leiding de
stekker uit het
stroomnet trek-
ken.
Aansluitkabels
mogen niet in
de buurt komen
van het sni-
jgereedschap!
0054659.book Seite 27 Mittwoch, 8. April 2009 12:00 12

28
n
z Voor het afnemen van de grasvangvoorziening: zet de
motor af en wacht tot de snijapparaten tot stilstand zijn ge-
komen. Na het legen moet de grasvangvoorziening zorg-
vuldig worden bevestigd.
z Rij nooit met een lopende motor over grind – steenslag!
z Maai zo mogelijk niet in nat gras.
z Onder de volgende omstandigheden moet het apparaat wor-
den uitgeschakeld, de netstekker worden losgetrokken en het
apparaat blijven staan:
– bij het verlaten van de maaier
– om een geblokkeerd mes vrij te maken
– om het apparaat te controleren, te reinigen of daaraan
te werken
– als een vreemd voorwerp is getroffen (controleer eerst of de
maaier of de snijapparaten niet zijn beschadigd. Verhelp
dan eerst de beschadiging).
– als de maaier sterk trilt door onbalans (direct uitzetten en
onbalans opsporen).
– als de aansluitkabel tijdens het gebruik wordt beschadigd.
Onderhoud
1 Attentie! Roterende messen
Voor alle onderhouds- en reinigingswerkzaamheden:
z Trek de netstekker los.
z Grijp niet naar lopende snijkanten.
z Controleer regelmatig of alle zichtbare bevestigingsschroeven
en moeren, vooral die van de messenbalk, vastzitten en draai
deze zo nodig aan.
z Berg de maaier niet in vochtige ruimten op.
z Vervang om veiligheidsredenen versleten of bescha-
digde onderdelen.
z Gebruik uitsluitende oorspronkelijke Wolf reserveonderdelen,
want anders hebt u geen garantie dat uw maaier aan de vei-
ligheidsvoorschriften voldoet.
Afvalverwijdering
Montage
Duwboom bevestigen
1 Opgelet!
De kabel kan beschadigen tijdens het opbergen of het
verwijderen van de vergrendeling.
z Plaats de kabel in de in de beschermhoes .
z Wanneer men de hoogte van de hendel instelt let erop
dat de kabel niet gevouwen is .
1. Klap het onderste gedeelte van de duwboom omhoog en
schroef het met de twee handwieltjes vast .
2. Stel de gewenste hoogte van de duwboom in .
3. Klap het bovenste gedeelte van de duwboom omhoog en
schroef het met de vleugelmoeren vast .
Vangzak monteren
1. Plaats de stortkoker (1) op de vangzak klep (2) .
2. Druk de stortkoker van achteren tegen de vangzak. De stort-
koker zit goed vast, zodra hij vastklikt .
Gebruik
Gebruikstijden
z Gelieve de specifieke nationale verordeningen in acht te ne-
men.
Voedt de kabel door de kabelontspanner
z Voedt alstublieft de kabel door de kabelonstpanner
Hang de verzamelzak op
1 Opgelet! Roterend snijmes
Verricht enkel aanpassingen aan de apparatuur nadat de
motor uitgezet is en het snij onderdeel tot stilstand is
gekomen.
1. Trek de veiligheidsklep omhoog.
2. Hang de haken van de vangzak in de openingen van het chas-
sis (zie pijl).
3. Plaats de veiligheidsklep weer terug.
Elektrische apparaten zijn geen huishoudelijk af-
val. Breng het apparaat, de accessoires en de ver-
pakking naar een milieuvriendelijke
recyclingvoorziening.
A
B
C
D
A
C
B
C
D
E
F
G
E
F
G
H
H
J
0054659.book Seite 28 Mittwoch, 8. April 2009 12:00 12

29
n
Stel snijhoogte in
1 Opgelet! Roterend snijmes
Verricht enkel werkzaamheden/aanpassingen aan de
apparatuur nadat de motor uitgezet is en het snij onderdeel
tot stilstand is gekomen.
1. Trek de hendel naar buiten.
2. Stel de gewenste maaihoogte in.
3. Druk de hendel weer naar binnen.
Maaihoogte - Grasconditie
z Maait u, indien mogelijk, bij droog weer. Daarmee wordt het
grassprietje gespaard.Bij een vochtige of hogere grasmat
wordt een hogere maaihoogte aanbevolen.
z Gemiddelde maaihoogte is 40-50 mm.
Aansluiting aan het stopcontact (wisselstroom 230
Volt, 50 Hz)
z De machine kan aan ieder stopcontact aangesloten worden,
dat met een 16 Ah. zekering (of LS-schakelaar type B) ge-
zekerd is.
3 Opmerking: Reststroomapparaat
Deze beveiligende apparatuur beschermd tijdens het
aanraken van bedrading met isolatie gebreken, tot in
sommige gevallen ook tijdens het beschadigen van onder
spanning staande draden.
z We adviseren de apparatuur enkel aangesloten wordt
aan een stopcontact dat beschermd is met een
reststroomapparaat (RCD) met een reststroom van niet
meer dan 30 mA.
z Vervangende onderdelen zijn verkrijgbaar voor oude in-
stallaties. Raadpleeg een elekticiën.
Maaier inschakelen
z Maaier op een glad oppervlak starten.
z Niet op hoog gras - hier desnoods licht kantelen .
Motor aanzetten
1. Knop (1) indrukken en vasthouden.
2. Hefboom (2) aantrekken.
3. Knop (1) loslatten.
Motor uitzetten
z Hefboom (2) loslaten.
Leeg verzamelzak
z De verzamelzak geen gras meer opneemt en wanneer het ge-
maaide gras blijft liggen.
1 Opgelet! Roterend snijmes
Verricht enkel aanpassingen aan de apparatuur nadat de
motor uitgezet is en het snij onderdeel tot stilstand is
gekomen.
z Leeg de verzamelzak .
z Verwijder potentiële blokkades bij het snijgedeelte
voordat men begint.
Tips voor het maaien
z Om strepen op uw gazon te voorkomen, moeten de maaivlak-
ken elkaar altijd een paar centimeter overlappen .
z Leg de kabel steeds veilig neer op terrassen, paden, of op het
reeds gemaaide gras.
De verzorging
Algemeen
1 Opgelet! Roterend snijmes
Voor al het onderhoud en schoonmaakwerk:
z Haal de stekker eruit.
z Raak de snijmessen niet aan.
Reinigen
z Na iedere maaibeurt moet de maaier met een handveger
schoongemaakt worden.
z In geen geval met water schoonspuiten.
Stalling tijdens de winter
z Na het maaiseizoen moet de maaimachine grondig schoon-
gemaakt worden.
z Laat uw maaier in de herfst nakijken bij een WOLF service
werkplaats.
z Nooit de maaier met water afspuiten of in vochtige ruimten op-
bergen.
Het verwisselen van de messen
z Voor alle werkzaamheden aan de messen, verbindings- en
snij onderdelen, ten eerste de stekker eruit halen en
beschermende handschoenen dragen.
1 Opgelet!
Er kan een onevenwichtigheid onstaan na het slijpen van
het mes.
z Laat de messen altijd slijpen bij een gespecialiseerde
werkplaats, daar er een onevenwichtigheids controle
moet plaatsvinden volgens de veiligheidsnormen.
z Verwissel de messen altijd bij een gespecialiseerde werk-
plaats. Een torque sleutel van 10 mm is verplicht vereist. Vast-
draaien torque van de schroeven: 6-7 N-m (37).
z Verwissel de messen altijd bij een gespecialiseerde werk-
plaats. Een torque sleutel van 13 mm is verplicht vereist. Vast-
draaien torque van de schroeven: 16-18 N-m (40).
z Alleen originele onderdelen gebruiken.
K
L
M
M
O
N
P
0054659.book Seite 29 Mittwoch, 8. April 2009 12:00 12

30
n
Reserveonderdelen
Opheffen van storingen
Garantievoorwaarden
Gelieve de door de verkoper ingevulde garantiekaart en het
aankoopbewijs zorgvuldig te bewaren.
Gedurende een periode van 10 jaar, te rekenen vanaf de aankoopda-
tum, verstrekt de firma WOLFGarten een garantie, die met de respec-
tievelijke stand van de techniek en met het gebruiksdoeleinde/
toepassingsgebied overeenstemt. Aan de wettelijke rechten van de
eindgebruiker doen de hierna volgende garantierichtlijnen geen af-
breuk.
Vereiste voorwaarden voor de garantieclaim gedurende 10 jaar:
- Gebruik van het toestel uitsluitend voor privé-doeleinden.
Voor industrieel gebruik of verhuur wordt de garantie tot 6 maan-
den beperkt.
- Deskundige behandeling en inachtneming van alle instructies in de
gebruiksaanwijzing, die een bestanddeel van onze garantie-voor-
waarden vormt.
- Inachtneming van de voorgeschreven tussentijden voor het onder-
houd.
- Geen eigenmachtige wijziging van de constructie.
- Inbouw van originele WOLF reserveonderdelen/toebehoren.
- Voorlegging van de ingevulde garantiekaart en/of van het aankoop-
bewijs.
De garantie is niet van toepassing voor de normale slijtage van accu‘s, mes-
sen, mesbevestigende onderdelen zoals frictieschijven, V-riemen, tandriemen,
loopwielen/banden, luchtfilters, ontstekingskaarsen en bougiestekkers. In geval
van een eigenmachtige reparatie komt iedere garantieclaim automatisch te ver-
vallen. Fouten en gebreken, die zich voordoen en waarvan de oorzaken aan
materiaal- of fabricagefouten te wijten zijn, worden uitsluitend door onze con-
tractueel gebonden werkplaatsen in uw buurt of, indien deze dichterbij gesitu-
eerd is, door de fabrikant verholpen. Buiten de verstrekte garantie
ressorterende claims zijn uitgesloten. Een aanspraak op levering van reserveo-
nderdelen bestaat niet. Eventueel door het transport resolterende beschadigin-
gen dienen niet aan onze firma, doch aan de bevoegde, met het transport
belaste firma te worden gerapporteerd. In het andere geval gaan de schade-
claims ten opzichte van dergelijke bedrijven immers verloren.
Artikelnummer Artikelnaam Productinformatie
4917 031 Opvangzack kpl. (37)
4968 030 Opvangzack kpl. (40)
4907 096 Vi 34 FM Vervangingsmes kpl. 37 cm
4970 096 Vi 37 FM Vervangingsmes kpl. 40 cm
Oplossing (X) door
Probleem Mogelijke oorzaak
WOLF
Service-dienst
Zelf
Draait slecht, het apparaat
trilt sterk
• Messen defect
X ---
• Messen uit bevestiging losgeraakt
--- X
De motor slaat niet aan
• Zekering defect
--- X
• Kabel beschadigd
1 Opgelet! Elektrische schok door kabelschade.
Wanneer de kabel doorgesneden of beschadigd is,
slaan de zekering niet altijd door.
z Raak de kabel niet aan voor men de stekker uit het
stopcontact haalt.
z Beschadigde kabel moet geheel worden vervangen.
De kabel afplakken met isolatietape is verboden.
X---
Maait/Vangt het gras slecht
op
• Messen zijn stomp
X ---
• Opvangbox verstopt
--- X
• niet aangepaste maaihoogte
--- X
INeem in geval van twijfel altijd contact op met de servicedienst van WOLF.
Attentie: schakel de maaier voor elke controle, reiniging of werkzaamheid aan de messen uit en verwijder de netsteker.
Werkzaamheden die onder de garantie vallen, worden uitgevo-
erd door onze geautoriseerde werkplaatsen of bij:
n
WOLF-Garten Nederland B. V.
Postbus 32
5240 AARosmalen
Tel.: ++ 31 (73) 5 23 58 50
Fax: ++ 31 (73) 5 21 76 14
E-mail: [email protected]
B
Graham NV-SA
Zoning Industriel21
1440 Wauthier-Braine
Tel.: ++ 32 (2) - 3 67 16 11
Fax: ++ 32 (2) - 3 67 16 12
E-mail: [email protected]
l
WOLF-Garten GmbH & Co KG
Industriestraße 83-85
57518 Betzdorf
Tel.: ++ 49 (27 41) - 28 15 00
Fax: ++ 49 (27 41) - 28 12 99
E-mail: [email protected]
0054659.book Seite 30 Mittwoch, 8. April 2009 12:00 12

31
Notes
0054659.book Seite 31 Mittwoch, 8. April 2009 12:00 12

32
Notes
0054659.book Seite 32 Mittwoch, 8. April 2009 12:00 12

33
D
EG-Konformitätserklärung
I
Dichiarazione CE di Conformità
G
EC Declaration of Conformity
n
EG-Conformiteitsverklaring
F
CE Déclaration de conformité
Wir / We / Nous / Noi / Wij
WOLF-Garten GmbH & Co KG
Industriestr. 83-85, D-57518 Betzdorf
erklären, dass die Maschine / declare that the machine / déclarons que la machine /
dichiariamo che la macchina / verklaren dat de machine
Rasenmäher, handgeführt und netzbetrieben
Lawnmower, walk behind and mains-operated
Tondeuse à conducteur à pied commandées à la main
falciatrice per prati, manuale e alimentata dalla rete
Grasmaaimachine, met de hand bediend en met netvoeding
Typ, type, type, tipo, type:
4927 ... - 4969 ...
mit folgenden EG-Richtlinien übereinstimmt - conforms to the specifications of the following EC directives - est conforme aux spécifications des
directives CE suivantes - è conforme alle seguenti direttive CE - met volgende EG-richtlijnen overeenstemt:
98/37/EG, 2006/95/EG, 2004/108/EG, 2000/14/EG, 2005/88/EG, 2002/95/EG
Angewandtes Konformitätsverfahren - Conformity assessment procedure followed - La procédure appliquée pour l‘évaluation de la conformité -
procedura di conformità applicata - toegepaste conformiteitmethode:
Anhang VI
Name und Anschrift der beteiligten benannten Stelle - name and address of the notified body involved - le nom et l‘organisme notifé
- nome ed indirizzo dell‘ufficio competente citato - naam en adres van de bevoegde, benoemde dienst:
VDE Prüf- und Zertifizierungsinstitut, Merianstr. 28, D-63069 Offenbach
4927 ... 4969 ...
Schnittbreite - Cutting width - Largeur de coup -
Larghezza di taglio - Maaibreedte
37 cm 40 cm
Drehzahl - R. P. M. - Régime - N. giri - Toerental 2.950 1/min 2.950 1/min
1. 88 dB 93 dB
2. 89 dB 94 dB
1. Repräsentativer gemessener Schallleistungspegel - representative measured sound power level - le niveau de puissance acoustique
mesuré représentatif - livello di potenza sonora approssimativo misurato - representatief gemeten geluidsoverdrachtniveau
2. Garantierter Schallleistungspegel - guaranteed sound power level - le niveau de puissance acoustique garanti - livello di potenza sonora
garantito - gewaarborgd geluidsoverdrachtniveau
Betzdorf, den 02.01.2009
J. Hörmann (Geschäftsführung)
Dr.-Ing. M. Simon (Entwicklungsleitung)
0054659.book Seite 33 Mittwoch, 8. April 2009 12:00 12

www.WOLF-Garten.com
Teil-Nr. 0054 659 / 0409 - TB
0054659.book Seite 34 Mittwoch, 8. April 2009 12:00 12
Documenttranscriptie
POWER WOLF 15/37 POWER WOLF 16/40 Gebrauchsanweisung 5 Instruction manual 11 Mode d’emploi 16 Istruzione d’uso 21 Gebruiksaanwijzing 26 2 3 POWER WOLF 15/37 - POWER WOLF 16/40 D 1 Kabelknickschutz 2 Ein-/ Ausschalter 3 Kabelzugentlastung 4 Griffhöheneinstellung 5 Grasfangsack 6 Schutzklappe 7 Schnitthöheneinstellung 8 Schnitthöhenanzeige F 1 Protection antipliage du câble 2 Interrupteur 3 Cable-fixe 4 Réglage de la hauteur du guidon 5 Indicateur du niveau de remplissage 6 Clapet de sécurité 7 Reglage de la hauteur de coupe 8 Croquis de la hauteur de coupe G 1 Cable anti-king protection 2 On-/Off-switch 3 Cable-kink protection 4 Handle height adjustment 5 Collector 6 Deflector plate 7 Height adjustment 8 Indicator to cutting I 1 Regolazione profondit di lavoro 2 Interrutore per avviare 3 Portacavo 4 Regolazione altezza impugnatura 5 Raccoglierba 6 Deflettore 7 Regolazione dell‘altezza di taglio 8 Indicator dell‘ altezza 4 n 1 Kabel knikbeschermer 2 In- en uitschakelaar 3 Kabel trekontlaster 4 Duwboomhoogte instelling 5 Grasvangzak 6 Achterklep 7 Maaihoogte instelling 8 Maaihoogte aanwijzing Gebrauchsanweisung D Herzlichen Glückwunsch zum Kauf Ihres WOLF-Produkts Lesen Sie die Gebrauchsanweisung sorgfältig, und machen Sie sich mit den Bedienungselementen und dem richtigen Gebrauch des Gerätes vertraut. Der Benutzer ist verantwortlich für Unfälle mit anderen Personen oder deren Eigentum. Beachten Sie die Hinweise, Erläuterungen und Vorschriften. Die Ausstattungsmerkmale im Überblick Lassen Sie nie Kinder oder andere Personen, die die Gebrauchsanweisung nicht kennen, den Rasenmäher benutzen. Jugendliche unter 16 Jahre dürfen das Gerät nicht benutzen. Örtliche Bestimmungen können das Mindestalter des Benutzers festlegen. – zentrale Schnitthöheneinstellung 5-fach – Klappgriff für platzsparende Aufbewahrung und einfachen Inhalt Technische Daten . . . . . Sicherheitshinweise . . . . Montage . . . . . . . . . . Betrieb . . . . . . . . . . . Wartung. . . . . . . . . . . Ersatzteile . . . . . . . . . Beseitigung von Störungen . Garantiebedingungen . . . Konformitätserklärung . . . . . . . . . . . . . . . . . . . . . . . . . . . . . . . . . . . . . . . . . . . . . . . . . . . . . . . . . . . . . . . . . . . . . . . . . . . . . . . . . . . . . . . . . . . . . . . . . . . . . . . . . . . . . . . . 5 . 6 . 7 . 7 . 8 . 9 . 9 .10 .33 Transport – Griffhöheneinstellung 2-fach – leicht zu leerender, geräumiger Fangsack – hochwertige Materialien, ausgezeichnete Verarbeitung und attraktives Design – Ready-to-use: von 0 auf Mähen in 30 Sekunden Technische Daten Änderungen aus technischen Gründen vorbehalten. POWER WOLF 15/37 D Lärmmessung am Ohr der Bedienperson in Anlehnung an EN 836. E Schwingungen gemessen am Führungsholm, mit Bedienperson nach EN 1033 und EN 836. Die bewertete Beschleunigung beträgt typischerweise: POWER WOLF 16/40 Typ 4927 ... 4969 ... A 80 cm 80 cm B 37 cm 55 cm C 41 cm 47 cm D LP 79 dB (A) LP 77 dB (A) E ahw < 2,5 m/s2 ahw < 2,5 m/s2 Nennleistung 1.500 W 1.600 W Stromstärke 7,0 A 7,3 A Netzspannung 230 VAC 230 VAC 55 l Fangsackvolumen 35 l Schnittbreite 37 cm 40 cm Schnitthöhe 20, 30, 40, 50, 60 mm 25, 35, 50, 65, 80 mm Gewicht 16 kg 22 kg D 5 Sicherheitshinweise Bedeutung der Symbole Warnung! Vor Inbetriebnahme die Gebrauchsanweisung lesen! Dritte aus dem Gefahrenbereich fernhalten! Vorsicht! - Scharfe Schneidmesser vor Wartungsarbeiten und bei Beschädigung der Leitung den Stecker aus dem Netz entfernen! Anschlusskabel vom Schneidwerkzeug fernhalten! Allgemeine Hinweise z Dieser Rasenmäher ist für die Pflege von Gras- und Rasenflächen im privaten Bereich vorgesehen. Wegen körperlicher Gefährdung des Benutzers oder anderer Personen darf der Rasenmäher nicht für andere Zwecke eingesetzt werden. z Mähen Sie niemals, wenn Personen, besonders Kinder und Tiere, in der Nähe sind. z Mähen Sie nur bei entsprechenden Lichtverhältnissen. Vor dem Mähen z Mähen Sie nur in festem Schuhwerk und langer Hose. z Mähen Sie nie barfuß oder in Sandalen. z Überprüfen Sie das Gelände, auf dem der Mäher eingesetzt wird, und entfernen Sie alle Gegenstände, die erfasst und weggeschleudert werden können. z Das Anschlusskabel und die am Gerät außen installierte Leitung auf Beschädigung und Alterung (Brüchigkeit) untersuchen. Nur in einwandfreiem Zustand benutzen. z Überprüfen Sie die Grasfangeinrichtung häufig auf Verschleiß und Verformungen. z Prüfen Sie vor Benutzung (Sichtprüfung), ob die Schneidwerkzeuge und ihre Befestigungsmittel stumpf oder beschädigt sind. z Ersetzen Sie stumpfe oder beschädigte Schneidwerkzeuge im ganzen Satz, um keine Unwucht zu erzeugen (siehe „Wartung“, Seite 8). Kabel 1 Achtung! Stromschlag durch Kabelschaden Wenn das Kabel durchtrennt oder beschädigt wird, löst nicht immer die Sicherung aus. z Kabel nicht berühren, bevor der Netzstecker aus der Steckdose gezogen ist. z Beschädigtes Kabel komplett austauschen. Es ist verboten, das Kabel mit Isolierband zu flicken. z Lassen Sie Reparaturen am Kabel nur vom Fachmann durchführen (siehe „Beseitigung von Störungen“, Seite 9). 6 z Anschlusskabel an der Zugentlastung befestigen. Nicht an Kanten, spitzen oder scharfen Gegenständen scheuern lassen. z Kabel nicht durch Türritze oder Fensterspalten quetschen. z Schalteinrichtungen dürfen nicht entfernt oder überbrückt werden (z. B. Anbinden des Schalthebels am Führungsholm). z Verwenden Sie ausschließlich Verlängerungskabel mit einem Mindest-Querschnitt von 3 x 1,5 mm2 und einer max. Länge von 25 m: – wenn Gummischlauchleitungen, dann nicht leichter als Typ HO 7 RN-F – wenn PVC-Leitungen, dann nicht leichter als Typ HO5 VVF (Leitungen diesen Typs sind für die ständige Verwendung im Freien nicht geeignet, wie z. B.: unterirdische Verlegung zum Anschluss einer Gartensteckdose, Anschluss einer Teichpumpe oder Lagerung im Freien) z Die Kabel müssen spritzwassergeschützt sein. Beim Mähen z Kippen Sie das Gerät nicht, wenn Sie den Motor einschalten, es sei denn, das Gerät muss beim Anlassen gekippt werden. Wenn dies der Fall ist, kippen Sie das Gerät nicht mehr als unbedingt notwendig ist und heben nur den Teil an, der vom Benutzer entfernt ist. Überprüfen Sie immer, dass sich beide Hände in Arbeitsstellung befinden, bevor das Gerät wieder auf den Boden zurückgestellt wird. z Halten Sie den durch das Griffgestänge gegebenen Sicherheitsabstand ein. z Schalten Sie den Motor nur ein, wenn Ihre Füße in sicherem Abstand von den Schneidwerkzeugen sind. z Achten Sie auf sicheren Stand. Nie laufen, ruhig vorwärts gehen. z Mähen an Abhangstellen: – Immer quer zum Gefälle mähen, nicht auf- und abwärts – Besondere Vorsicht beim Richtungswechsel – Mähen Sie nicht an steilen Abhängen z Seien Sie besonders vorsichtig, wenn Sie rückwärts Mähen und den Mäher zu sich ziehen. z Schalten Sie den Mäher ab, wenn Sie ihn kippen oder transportieren, z. B. von-/ zum Rasen oder über Wege. z Vorsicht, nicht an laufende Schneiden greifen. z Stellen Sie sich nicht vor die Grasauswurföffnung. z Bevor Sie den Mäher aufheben oder wegtragen, schalten Sie den Motor ab und warten Sie, bis die Schneidwerkzeuge zum Stillstand gekommen sind. z Verstellen Sie die Schnitthöhe nur bei abgeschaltetem Motor und stillstehendem Schneidwerkzeug. z Öffnen Sie die Schutzklappe nie, wenn der Motor noch läuft. z Vor dem Abnehmen der Grasfangvorrichtung: Motor abstellen und den Stillstand des Schneidwerkzeuges abwarten. Nach der Entleerung Grasfangvorrichtung sorgfältig befestigen. z Nie mit laufendem Motor über Kies fahren – Steinschlag! z Wenn möglich, mähen Sie nicht in nassem Gras. z Unter folgenden Umständen muss das Gerät abgeschaltet-, der Netzstecker gezogen werden und das Gerät stehen: – bei Verlassen des Mähers – um ein blockiertes Messer frei zu machen – um das Gerät zu überprüfen, zu reinigen oder daran zu arbeiten D – wenn ein Fremdkörper getroffen wurde (Überzeugen Sie sich erst, ob Mäher oder Schneidwerkzeuge beschädigt worden sind. Beseitigen Sie dann zunächst die Beschädigung). – wenn der Mäher durch Unwucht stark vibriert (sofort abschalten und Ursache suchen). – wenn die Anschlussleitung während des Gebrauchs beschädigt wird. z Stellen Sie den Mäher nicht in feuchten Räumen ab. z Ersetzen Sie aus Sicherheitsgründen verschlissene oder beschädigte Teile. z Nur WOLF Original-Ersatzteile verwenden, sonst haben Sie keine Garantie, dass Ihr Mäher den Sicherheitsbestimmungen entspricht. Entsorgung Elektrogeräte gehören nicht in den Hausmüll. Gerät, Zubehör und Verpackung einer umweltfreundlichen Wiederverwertung zuführen. Wartung 1 Achtung! Rotierendes Messer Vor allen Wartungs- und Reinigungsarbeiten: z Netzstecker ziehen. z Nicht an laufende Schneiden greifen. z Alle sichtbaren Befestigungsschrauben und Muttern, besonders die des Messerbalkens, regelmäßig auf festen Sitz prüfen und nachziehen. Montage Griffgestänge befestigen A B C D Fangsack montieren E Vorsicht! Beim Zusammenlegen oder Ausklappen des Griffgestänges kann das Kabel beschädigt werden. z Das Kabel in den Kabelknickschutz einlegen A . z Beim Anpassen der Griffhöhe C darauf achten, dass das Kabel nicht gequetscht wird. 1. Klappen Sie das Griffunterteil hoch, und schrauben Sie es mit den beiden Handrädern fest B . 2. Stellen Sie die gewünschte Griffhöhe ein C . 3. Klappen Sie das Griffoberteil auf, und schrauben Sie es mit den Flügelmuttern fest D . 1. Platzieren Sie die Schütte (1) an der Fangsackklappe (2) E F . 2. Drücken Sie die Schütte von hinten an die Fangsackklappe. Die Schütte ist fest, sobald sie einrastet G . 1 F G Betrieb Betriebszeiten Schnitthöhe einstellen K z Bitte regionale Vorschriften beachten. z Erfragen Sie die Betriebszeiten bei Ihrer örtlichen Ordnungsbehörde. Achtung! Rotierendes Messer Arbeiten/Einstellungen am Gerät nur bei abgeschaltetem Motor und stillstehendem Schneidwerkzeug vornehmen. 1. Ziehen Sie den Hebel nach außen. 2. Stellen Sie die gewünschte Schnitthöhe ein. 3. Drücken Sie Hebel wieder nach innen. Kabel in die Zugentlastung führen H z Bitte führen Sie das Kabel in die Zugentlastung H . Fangsack einhängen J 1 Achtung! Rotierendes Messer Einstellungen am Gerät nur bei abgeschaltetem Motor und stillstehendem Schneidwerkzeug vornehmen. 1. Heben Sie die Schutzklappe an. 2. Hängen Sie den Fangsack mit Haken in die Aussparungen im Chassis (siehe Pfeile). 3. Legen Sie die Schutzklappe auf. D 1 Schnitthöhe – Graszustand z Mähen Sie möglichst trockenen Rasen, um die Grasnarbe zu schonen. Bei feuchtem und hohem Rasen eventuell mit höherer Schnitthöhe mähen. z In der Regel stellt man eine Schnitthöhe von 40-50 mm ein. 7 Anschluss an die Steckdose (230 Volt, 50 Hz) Fangsack entleeren z Das Gerät nur an Steckdosen anschließen, die mit einer 16 Amp. Sicherung träge (oder LS-Schalter Typ B) abgesichert sind. z Der Fangsack nimmt kein Gras mehr auf, wenn hinter dem Gerät geschnittenes Gras liegenbleibt. 3 Hinweis: Fehlerstromschutzeinrichtung Diese Schutzeinrichtungen schützen beim Berühren von beschädigten Leitungen, Isolationsfehlern und in bestimmten Fällen auch beim Beschädigen von unter Spannung stehenden Leitungen vor schweren Verletzungen. z Wir empfehlen, das Gerät nur an Steckdosen anzuschließen, die mit einer Fehlerstromschutzeinrichtung (RCD) mit einem Fehlerstrom von nicht mehr als 30 mA abgesichert sind. z Für Alt-Installationen gibt es Nachrüstsätze. Sprechen Sie mit einer Elektro-Fachkraft. 1 Achtung! Rotierendes Messer Einstellungen am Gerät nur bei abgeschaltetem Motor und stillstehendem Schneidwerkzeug vornehmen. z Fangsack entleeren O . z Vor dem Starten eventuelle Verstopfungen im Mähraum beseitigen. Tipps zum Mähen z Damit keine Rasenstreifen entstehen, müssen sich die Schneidbahnen immer um einige Zentimeter überdecken N . z Legen Sie das Kabel stets sicher auf Terrasse, Wege oder das bereits geschnittene Gras. Mäher ein-/ausschalten z Mäher auf ebener Fläche einschalten. z Nicht im hohen Gras – hier notfalls kippen L . Motor ein M 1. Drücken Sie den Knopf (1) und halten diesen. 2. Ziehen Sie den Bügel (2) an. 3. Lassen Sie den Knopf (1) los. Motor aus M z Geben Sie den Bügel (2) frei. Wartung Allgemein 1 Achtung! Rotierendes Messer Vor allen Wartungs- und Reinigungsarbeiten: z Netzstecker ziehen. z Nicht an laufende Schneiden greifen. Reinigung z Reinigen Sie nach jedem Mähen den Mäher mit einem Handfeger. z Spritzen Sie den Mäher keinesfalls mit Wasser ab. Lagerung im Winter z Führen Sie nach jeder Mähsaison eine gründliche Reinigung an Ihrem Mäher durch. z Lassen Sie Ihren Mäher im Herbst von einer WOLF-Kundendienstwerkstatt kontrollieren. z Lagern Sie den Mäher im trockenen Raum. 8 Messerwechsel P z Bei allen Arbeiten an Messer, Kupplung und Messerbalken zunächst den Netzstecker ziehen und Schutzhandschuhe tragen. 1 Achtung! Nach dem Nachschleifen des Messers kann eine Unwucht entstehen. z Lassen Sie die Messer immer von einer Fachwerkstatt nachschleifen, da eine Unwuchtprüfung entsprechend den Sicherheitsbestimmungen vorgenommen werden muss. z Lassen Sie einen Messerwechsel immer von einer Fachwerkstatt durchführen. Ein Drehmomentschlüssel 10 mm ist zwingend erforderlich. Anzugsmoment der Schrauben: 67 Nm (37er). z Lassen Sie einen Messerwechsel immer von einer Fachwerkstatt durchführen. Ein Drehmomentschlüssel 13 mm ist zwingend erforderlich. Anzugsmoment der Schrauben: 16-18 Nm (40er). z Nur WOLF Original-Ersatzteile verwenden. D Ersatzteile Bestell-Nr. Artikel-Bezeichnung Artikel-Beschreibung 4917 031 Grasfangsack kpl. (37) 4968 030 Grasfangsack kpl. (40) 4907 096 Vi 37 FM Messerbalken 37cm 4970 096 Vi 40 FM Messerbalken 40cm Beseitigung von Störungen Abhilfe (X) durch WOLF Service Werkstatt Selbst • Messer schadhaft X --- • Messer in der Befestigung gelöst --- X • Haus-Sicherung schadhaft --- X X --- • Messer stumpf X --- • Fangsack verstopft --- X • Nicht angepasste Schnitthöhe --- X Problem Mögliche Ursache Unruhiger Lauf, starkes Vibrieren des Gerätes • Kabelschaden: 1 Motor läuft nicht Schlechte Mäh-/Fangleistung Achtung! Stromschlag durch Kabelschaden Wenn das Kabel durchtrennt oder beschädigt wird, löst nicht immer die Sicherung aus. z Kabel nicht berühren, bevor der Netzstecker aus der Steckdose gezogen ist. z Beschädigtes Kabel komplett austauschen. Es ist verboten, das Kabel mit Isolierband zu flicken. Im Zweifelsfall immer eine WOLF Service-Werkstatt aufsuchen. Achtung: Mäher vor jeder Prüfung oder vor Arbeiten am Messer abstellen, und Netzstecker ziehen. D 9 Garantiebedingungen Die vom Verkäufer ausgefüllte Garantiekarte bzw. den Kaufbeleg bitte sorgfältig aufbewahren. Für die Dauer von 10 Jahren vom Kaufdatum an leistet die Firma WOLF-Garten eine dem jeweiligen Stand der Technik und dem Verwendungszweck/Anwendungsgebiet entsprechende Garantie. Die gesetzlichen Rechte des Endverbrauchers werden durch die nachstehenden Garantierichtlinien nicht beeinträchtigt. Voraussetzungen für den 10-jährigen Garantieanspruch: - Einsatz des Gerätes für den ausschließlichen privaten Gebrauch. Im gewerblichen Bereich oder Verleihgeschäft reduziert sich die Garantie auf 12 Monate. - Sachgemäße Behandlung und Beachtung aller Hinweise in der Gebrauchsanweisung, die Bestandteil unserer Garantiebedingungen ist. - Beachtung der vorgeschriebenen Wartungsintervalle. - Keine eigenmächtige Änderung der Konstruktion. - Einbau von Original WOLF Ersatzteilen/Zubehör. - Vorlage der ausgefüllten Garantiekarte und/oder des Kaufnachweises. Die Garantie erstreckt sich nicht auf den normalen Verschleiß von Akkus, Messern, Messerbefestigungsteilen wie Reibscheiben, Keil/Zahnriemen, Laufräder/Reifen, Luftfilter, Zündkerzen und Zündkerzenstecker. Bei eigenmächtiger Reparatur erlischt automatisch sofort jeglicher Garantieanspruch. Auftretende Fehler und Mängel, deren Ursachen auf Material- oder Fertigungsfehler zurückzuführen sind, werden ausschließlich durch unsere Vertragswerkstätten (der Verkäufer hat das Recht zur Nachbesserung) in Ihrer Nähe oder, falls er näher liegt, durch den Hersteller beseitigt. Über die Garantieleistung hinausgehende Ansprüche sind ausgeschlossen. Ein Anspruch auf Ersatzlieferung besteht nicht. Etwaige Transportschäden sind nicht uns, sondern dem zuständigen Transportträger zu melden, da sonst die Ersatzansprüche an diese Unternehmen verloren gehen. Die Garantieleistungen werden erfüllt durch unsere autorisierten Kundendienstwerkstätten oder bei: a WOLF-Garten Austria Ges.m.b.H Businesspark Wien Süd, Campus 21 Liebermannstraße F02-402 2345 Brunn am Gebirge Tel.: ++ 43 (1) - 8 66 70 - 2 25 30 Fax: ++ 43 (1) - 8 66 70 - 2 25 40 E-mail: [email protected] 10 Z WOLF-Garten Schweiz AG Nordringstraße 16 4702 Oensingen Tel.: ++ 41 (62) - 3 88 04 50 Fax: ++ 41 (62) - 3 88 04 60 D WOLF-Garten GmbH & Co KG Industriestraße 83-85 57518 Betzdorf Tel.: ++ 49 (27 41) - 28 15 00 Fax: ++ 49 (27 41) - 28 12 99 E-mail: [email protected] D Instruction manual G Congratulations on your purchase of a WOLF lawn mower It is important that you read, fully understand and observe the following safety precautions and warnings. Careless or improper use of the machine may cause serious or fatal injury. The user is responsible for any accidents involving other people or other people‘s property. A quick guide to features Never let children or other persons who are not familiar with the operating instructions use the lawnmower. Juveniles under l6 years may not use the equipment. Local regulations may specify the minimum age of the operator. – Central cutting height setting – Fold-down handle for space-saving storage and easy trans- Contents Technical data . . . . . . . . Safety instructions . . . . . . Assembly . . . . . . . . . . . Operation . . . . . . . . . . . Maintenance . . . . . . . . . Spare parts . . . . . . . . . . Faults and how to remedy . . Guarantee terms . . . . . . . EC Declaration of Conformity . . . . . . . . . . . . . . . . . . . . . . . . . . . . . . . . . . . . . . . . . . . . . . . . . . . . . . . . . . . . . . . . . . . . . . . . . . . . . . . . . . . . . . . . . . . . . . . . . . . .11 .12 .13 .13 .14 .15 .15 .15 .33 port – dual-position height-adjustable handle – Easily emptied, capacious catchment bag – High-quality materials, excellent workmanship and attractive design – Ready-to-use: From 0 to mowing mode in 30 seconds Technical data We reserve the right of technical changes POWER WOLF 15/37 D Measurement of noise at the operator’s ear according to EN 836. E Measurement of vibrations at the handlebar held by the operator according to EN 1033, EN 836. The typical weighted acceleration is: POWER WOLF 16/40 Typ 4927 ... 4969 ... A 80 cm 80 cm B 37 cm 55 cm C 41 cm 47 cm D LP 79 dB (A) LP 77 dB (A) E ahw < 2,5 m/s2 ahw < 2,5 m/s2 Performanche 1.500 W 1.600 W Amperage 7,0 A 7,3 A Voltage 230 VAC 230 VAC 55 l Grass catcher 35 l Cutting width 37 cm 40 cm Cutting height 20, 30, 40, 50, 60 mm 25, 35, 50, 65, 80 mm Weight 16 kg 22 kg G 11 Safety instructions Meaning of the symbols Attention! Read instruction manual before use! Keep bystanders away! Attention! - Sharp knives before performing a maintenance work or if the cable is damaged pull out the plug! Keep the supply flexible cord away from the cutting blade! General Notes z This lawnmower is intended for the care of grass and lawn areas in private grounds. Because of physical danger to the operator or other persons, the lawnmower must not be used for other purposes. z Do not mow the grass if persons, especially children and animals, are in the vicinity. z Only mow the grass if the light conditions are suitable. Before mowing z Only mow the grass wearing sturdy shoes and long trousers. z Never mow the grass in bare feet or wearing sandals. z Check the ground where the lawnmower is to be used, and remove any items which could be picked up and thrown out by the lawnmower. z Check the connection cable and the wire fitted to the outside of the mower for damage and ageing (brittleness). Use only if it is in perfect condition. z Check the grass collection unit regularly for wear and deformation. z Before use check (visually), whether the cutting tools and their fixings are blunt or damaged. z Replace the cutting tools if they are blunt or damaged in complete sets to avoid imbalance (see „Maintenance“, page 14). Cable 1 Caution! Risk of electrocution from damaged cables The fuse does not always respond if the cable is cut or damaged. z Do not touch the cable before the plug has been removed from the plug socket. z Damaged cables should be replaced completelyIt is prohibited to mend the cable using insulating tape. z Repairs to the cable should only be undertaken by an expert (see „Faults and how to remedy“, page 15). z Attach the cable to the tension relief unit. Do not let it rub up against edges, points or sharp items. 12 z Do not squash the cable by putting it through door gaps or gaps in windows. z Switching devices must not be removed or bridged out (e.g.strapping the switching lever to the guide bar). z Use only extension cables with a minimum cross-section of 3 x 1.5 mm2 and a length of max. 25 m: – When using rubber-sheathed cables, they must be of type HO 7 RN-F or heavier. – When using PVC-sheathed cables, they must be of type HO5 VV-F or heavier (cables of this type are not suitable for continuous outdoor use - e.g. underground installation for the connection of an outdoor socket or pond pump, or outdoor storage). z The cables must be water spray protected. When mowing z Do not tilt the mower when starting the motor unless it has to be tilted when starting. In this case, do not tilt it more than necessary and only lift the section that is away from the operator.Check continuously that both hands are in the working position before lowering the mower back to the ground. z Keep the distance away provided by the handle linkage. z Only switch the motor on if your feet are at a safe distance from the cutting tools. z Ensure that it is standing securely.Never run, move forwards smoothly. z Mowing on inclines: – Always mow at right angles to the incline, not up and down – Take particular care when changing direction. – Do not mow very steep ground z Take particular care when mowing backwards and pulling the mower towards you. z Switch the mower off when tilting or transporting it, e.g. from/to the lawn or over paths. z Take care not to grab running cutters. z Do not stand in front of the grass ejection opening. z Before lifting or carrying the mower, switch the motor off and wait until the cutting tools have come to a standstill. z Only adjust the cutting height with the motor switched off and with the cutting tools at a standstill. z Never open the protective cover if the motor is still running. z Before removing the grass collection device:Switch the motor off and wait until the cutting tools come to a standstill.After emptying, fix the grass collection device carefully. z Never run the mower over gravel– Stones will fly up! z If possible, do not mow if the grass is wet. z Under the following conditions the mower must be switched off, the mains plug must be removed and the mower must be stationary: – when leaving the mower – when releasing blocked cutters – in order to check the mower, to clean it and to work on it – if foreign bodies are struck (check first whether the mower or cutting tools have been damaged. Only then should you remove the damage). – if the mower is vibrating badly because of imbalance (switch off and look for the cause). – if the connection wire is damaged during use. G Maintenance 1 Caution! Rotating cutters Before all maintenance and cleaning tasks: z Pull the mains plug out. z Take care not to grab running cutters. z Check all the visible fixing bolts and nuts regularly for tightness and retighten, particularly those of the cutter beam. z Do not store the mower in damp rooms. z For safety reasons, replace worn or damaged parts. z Use only original WOLF spare parts, otherwise there is no guarantee that your mower complies with the safety regulations. Disposal Electrical equipment must not be placed in the household waste.The unit, accessories and packing material should be taken to an environmentfriendly recycling unit. Assembly Fasten handle bars A B C D Mount the collecting bag E Caution! The cable can be damaged while folding up or pulling out the handle bar. z Inlay the cable in the bend protection A . z When adjusting the handle height take care that the cable is not crimped C 1. Fold the bottom part of the handle up and screw it tight with the two hand wheels B . 2. Set the handle to the desired height C . 3. Fold the upper part of the handle out and screw it tight with the wing nuts D . 1. Place the chute (1) on the collecting bag flap (2) E F . 2. Press the chute from behind onto the collecting bag flap. The chute is ready for use as soon as it locks into place G . 1 F G Operation Operating times z Please check noise abatement regulations prevailing in your country. Selection of Cutting height z If possible, mow when grass is dry in order to protect turf. Do not se cutting position too low when mowing very hight or wet grass. z We recommend an average cutting height of 40-50 mm. Feed cable through the strain relief H z Please feed cable through the strain relief H . Connecting to the mains (230 Volts, A.C., 50 Hz) Hang up collection bag J z The mower operates from any normal household mains supply, provided with a 16 Amps. fuse. 1 Attention! Rotary cutter blade Undertake adjustments on the equipment only after the motor is switched off and the cutting tool has come to a standstill. 1. Lift the protective flap. 2. Hang the grass bag in the chassis with the hooks in the recesses (see arrow). 3. Replace the protective flap. 3 Note: Residual current protection device These protection devices safeguard while touching damaged wires, from insulation flaws and in certain cases, also while damaging live wires. z We recommend that the equipment only be plugged into a power socket, which is protected by a residual current protection device (RCD) with a residual current of not more than 30 mA. z Retrofit kits are available for old installations. Consult an electrician. Set cut height K 1 Attention! Rotary cutter blade Undertake work/adjustments on the equipment only after the motor is switched off and the cutting tool has come to a standstill. 1. Pull the lever out. 2. Set the desired cutting height. 3. Press the lever back in. G 13 Starting and Stoping Emptying of Grassbox z Switch on motor with mowerplaced on level and firm ground. z not in high grass - alternatively tilt slightly L . z The grassbox is full and should be emptied as soon as grass clippings remain uncollected on the ground behind your mower. Switch-on motor M 1. Depress button and hold (1). 2. Lift up bar (2). 3. Release bar (1). Switch-off motor M z Release bar (2). 1 Attention! Rotary cutter blade Undertake adjustments on the equipment only after the motor is switched off and the cutting tool has come to a standstill. z Empty collection bag O . z Remove potential blockages in the cutting space before starting. Tips for mowing z To prevent strips of grass from being left unmowed, the cutting paths must always overlap a few centimeters N . z Always let cable trail on the cut side of the lawn. Maintenance General 1 Attention! Rotary cutter blade Before all maintenance and cleaning work: z pull out the power plug. z Do not touch running blades. Cleaning z Clean mower thoroughly after each mowing with cloth or brush. z Do not spray with water. Winter Storage z Clean mower thoroughly before storing away. z Have your mower thoroughly checked once a year by an approved Service Centre. z Do not store it in a wet or humid place. Changing blades P z For all works on blades, coupling and cutter bars, first of all, pull out the power plug and wear protective gloves. 1 Attention! An unbalance can develop after regrinding of the blade. z Always regrind the blades in a specialist workshop, because an unbalance check should be undertaken according to the safety regulations. z Always change blades in a specialist workshop. A torque spanner of 10 mm is mandatorily required. Fastening torque of the screws: 6-7 N-m (37). z Always change blades in a specialist workshop. A torque spanner of 13 mm is mandatorily required. Fastening torque of the screws: 16-18 N-m (40). 14 G Spare parts Item number Order description Product information 4917 031 Grass catcher (37) 4968 030 Grass catcher (40) 4907 096 Vi 37 FM Replacement blade 37 cm 4970 096 Vi 40 FM Replacement blade 40 cm Faults and how to remedy Remedy (X) by: WOLF serviceworkshop Yourself • Blades damaged X --- • Blades loose in the fastening parts --- X • Fuse blown --- X X --- • Blunt blades X --- • Catcher bag blocked --- X • Incorrect cutting height --- X Problem Possible cause Uneven running, heavy vibrations in the mower • Cable damaged: 1 Motor will not run Poor mowing-/ catching Attention! Electric shock through cable damage When the cable is cut through or damaged, the safety fuse doesn’t always trip. z Do not touch cable, before pulling out the power plug from the socket. z Damaged cable has to be completely replaced. Patching cable with insulating tape is forbidden. When in doubt, always consult a WOLF service workshop. Important: switch off the mower and disconnect the mains plug before inspecting, cleaning or working on the blades. Guarantee terms Please carefully retain the guarantee card completed by the seller, or the proof of purchase. The company WOLF-Garten provides a guarantee for 10 years from the date of purchase. This guarantee is in accordance with the relevant state of technology and the utilisation purpose / area of application. The consumer‘s statutory rights are not affected by the following guarantee guidelines. Pre-conditions for the 10-years guarantee entitlement: - Deployment of the device solely for private use. The guarantee is reduced to 12 months in the commercial sector or leasing business. - Proper handling and observance of all information given in the operating manual, which forms part of our guarantee terms. - Observance of the prescribed maintenance intervals. - No unauthorised alteration of the design. - Installation of original WOLF replacement parts / accessories. - Presentation of the completed guarantee card and/or proof of purchase. This guarantee does not extend to normal wear-and-tear on accu’s, blades, blade mounting components or friction disks, V-belts/toothed belts, running wheels/tyres, air filters, spark plugs and spark plug connectors. Any guarantee claim shall be immediately void in the event of unauthorised repairs. Faults and defects which can be traced to material or manufacturing faults will be rectified exclusively by our contracted workshops (the seller has the right to remedy a defect) in your vicinity, or by the manufacturer if the latter is closer. Any claims going beyond the provision of a guarantee are ruled out. There is no entitlement to a replacement. Any transport damage should be reported not to us but to the shipper in question since, otherwise, any compensation claims vis-à-vis the shipper would be voided. The guarantee services will be performed by our authorized repair shops or: G WOLFGarden Ltd. Crown BusinessPark Tredegar Gwent, NP22 4EF Tel. : ++ 44 / 14 95 30 66 00 Fax : ++ 44 / 14 95 30 33 44 E-mail: [email protected] G 15 Mode d’emploi F Nous vous remercions d‘avoir acheté une tondeuse WOLF Lisez soigneusement la notice d‘utilisation et familiarisez-vous avec les commandes et l‘utilisation correcte de la tondeuse. L‘utilisateur est responsabledes accidents causés aux tiers ou à leur propriété. Observez les indications, explications et prescriptions. Récapitulatif des caractéristiques ne jamais laisser des enfants ou autres personnes n'ayant pas lu la notice d'utilisation utiliser la tondeuse. L'utilisation de cet appareil est interdit à tout adolescent de moins de 16 ans. Respecter la réglementation locale concernant l'âge minimum d'utilisation de cet appareil. – Réglage central de la hauteur de coupe – Poignée rabattable pour gagner de la place au rangement et Sommaire Donnés Techniques . . . . . . Consignes de sécurité . . . . . Montage . . . . . . . . . . . . Fonctionnement . . . . . . . . Entretien . . . . . . . . . . . . Pièces de rechange . . . . . . Comment remédier aux pannes Conditions de la garantie . . . . CE Déclaration de conformité . . . . . . . . . . . . . . . . . . . . . . . . . . . . . . . . . . . . . . . . . . . . . . . . . . . . . . . . . . . . . . . . . . . . . . . . . . . . . . . . . . . . . . . . . . . .16 .17 .18 .18 .19 .20 .20 .20 33 pour simplifi er le transport – Réglage de la hauteur du guidon à 2 niveaux – Grand sac de ramassage – Matériaux de haute qualité, excellent travail de fabrication et beau design – Prêt à tondre en 30 secondes Donnés Techniques Droit de modifications techniques réservés. D Mesurage du bruit au niveau de l'oreille de l'opérateur selon EN 836. E POWER WOLF 15/37 Mesurage des vibrations au guidon tenu par un opérateur selon EN 1033, EN 836. L’accélération pondérée normale est de: POWER WOLF 16/40 Typ 4927 ... 4969 ... A 80 cm 80 cm B 37 cm 55 cm C 41 cm 47 cm D LP 79 dB (A) LP 77 dB (A) E ahw < 2,5 m/s2 ahw < 2,5 m/s2 1.600 W Puissance 1.500 W Courant nominal 7,0 A 7,3 A Tension 230 VAC 230 VAC Sac de ramassage 35 l 55 l Largeur de coupe 37 cm 40 cm Hauteurs de coupe 20, 30, 40, 50, 60 mm 25, 35, 50, 65, 80 mm Poids 16 kg 22 kg 16 F Consignes de sécurité Signification des symboles Câble Attention! Avant utilisation lire la notice d‘emploi! Tenir les tiers à l‘ecart de la zone dangereuse! Attention! -Couteaux tranchants - Avant d‘entreprendre des travaux de maintenance et si le câble est endommagé, retirer la prise de courant. Tenir le câble de raccord éloigné de l‘outil de coupe! 1 z z z z z Conseils généraux z Cette tondeuse est prévue pour l'entretien des surfaces d'herbe et de pelouse de terrains privés. Pour prévenir tout risque de danger corporel pour l'utilisateur ou un tiers, la tondeuse ne doit pas être utilisée pour d'autres usages. z Ne tondez jamais lorsque des personnes, en particulier des enfants ou des animaux se trouvent à proximité. z Ne tondez que lorsque la luminosité est suffisante. Avant la tonte z Tondez toujours avec des chaussures fermées et en pantalon. z Ne tondez jamais pieds nus ou en sandales. z Contrôlez le terrain sur lequel vous allez faire passer la tondeuse et retirez tous les objets que la tondeuse pourrait ramasser et projeter au loin. z Inspecter le câble de branchement et l'installation de la ligne reliée à l'appareil pour vous assurer qu'ils sont exempts de toute détérioration ou altération (fragilité). N'utilisez la machine que si vous êtes sûr(e) qu'elle est en parfait état. z Contrôlez fréquemment l'usure et les déformations du dispositif de ramassage de l'herbe. z Avant l'utilisation, vérifiez (contrôle visuel) si les outils de coupe et leurs serrages ne sont pas usés ou détériorés. z Remplacez la totalité du kit-outils usé ou détérioré pour éviter tout déséquilibrage (voir „Entretien“, page 19). F z Attention! Risque d'électrocucion en raison d'une détérioration du câble Si le câble est sectionné ou endommagé, le fusible ne se déclenche pas toujours. z Ne touchez pas le câble avant qu'il soit débranché de la prise secteur. z Changer le câble en entier. Il est interdit d'utiliser du ruban adhésif isolant (Chatterton) pour réparer le câble. Ne faîtes réaliser les réparations de câble que par un spécialiste (voir „Comment remédier aux pannes“, page 20). Fixez le câble de raccordement sur le guide-câble. Ne le laissez pas frotter sur des arêtes ou des objets coupants ou pointus. Ne coincez pas le câble dans des ouvertures de porte ou de fenêtre. N'enlevez ou ne court-circuitez pas le dispositif d'allumage (par ex. fixer le levier d'allumage à la poignée de direction). Employer comme rallonge électrique uniquement un câble dont la section minimale est de 3 x 1,5 mm2 et la longueur maximale de 25 m: – Si des câbles souples en caoutchouc sont employés, ils ne doivent pas être plus légers que le type HO 7 RN-F – Si des câbles en PVC sont employés, ils ne doivent pas être plus légers que le type HO5 VV-F (ces câbles ne conviennent pas pour une utilisation permanente à l'extérieur, par exemple : pose enterrée pour branchement à une prise électrique de jardin, branchement d’une pompe de bassin ou entreposage à l’extérieur) Les câbles doivent être préservés de toute éclaboussure. Lors de la tonte z Ne basculez pas l'appareil lorsque vous mettez le moteur en marche à moins que cette action soit vraiment nécessaire. Si vous avez besoin de le faire, ne le basculez pas plus que nécessaire et ne soulevez que la partie qui est éloignée de l'utilisateur. Replacez les mains en position de travail avant de reposer l'appareil au sol. z Respectez la distance de sécurité que représente la poignée avec l'appareil z N'allumez le moteur que lorsque vos pieds sont à une distance de sécurité suffisante des outils de coupe. z Adopter une posture prudente. Ne courez jamais mais avancez tranquillement. z Tondre des terrains en pente : – Tondez toujours perpendiculairement au dénivelé de la pente et non pas de haut en bas et de bas en haut. – Faites particulièrement attention lors des changements de direction – Ne tondez pas de pentes très raides z Soyez particulièrement prudent lorsque vous tondez en arrière et tirez la tondeuse vers vous. z Eteignez la tondeuse lorsque vous la basculez ou la transportez, par ex. de ou vers la pelouse ou sur des chemins. z Prenez soin de ne pas toucher les outils de coupe. z Tenez-vous à l'écart de la bouche d'éjection. z Avant de soulever ou de transporter la tondeuse, éteignez le moteur et attendez que les outils de coupe s'immobilisent. z Ne modifiez la hauteur de coupe que lorsque le moteur est éteint et que les outils de coupe sont à l'arrêt. 17 z N'ouvrez jamais le carter si le moteur tourne encore. z Avant le retrait du dispositif de ramassage de l'herbe : Arrêtez le moteur et patientez jusqu'à l'immobilisation complète des outils de coupe. Après avoir vidé le dispositif de ramassage de l'herbe, replacez-le soigneusement. z Ne roulez jamais sur des gravillons avec le moteur en marche – Il y aurait des risque de projection de pierres ! z Si possible, ne tondez pas l'herbe mouillée. z Dans les circonstances suivantes, l'appareil doit être éteint, la prise de courant débranchée et l'appareil immobilisé : – Si l'utilisateur de la tondeuse s'absente – lors du déblocage de la lame – si vous souhaitez contrôler l'appareil, le nettoyer ou effectuer un quelconque travail sur l'appareil – Si vous trouvez un corps étranger (Vérifiez d'abord que la tondeuse ou les outils de coupe n'ont pas été endommagés. Enlevez ensuite ce qui a causé le dommage). – Quand la tondeuse vibre fortement pour cause d'un déséquilibrage (éteignez-la aussitôt et recherchez-en la cause). – si le câble d'alimentation subit une détérioration durant l'utilisation. Entretien 1 z z z z Attention ! Lame en rotation Avant tous travaux d'entretien ou de nettoyage : z Débranchez la prise. z Ne touchez pas les outils de coupe. Vérifiez régulièrement la solidité des fixations et resserrer tous les vis de fixation et écrous en particulier ceux de la barre des outils de coupe. Ne rangez pas la tondeuse dans une pièce humide. Pour des raisons de sécurité, remplacez les pièces usées ou endommagées. N'utilisez que des pièces de rechange WOLF d'origine, sinon vous n'aurez aucune garantie que votre tondeuse réponde aux normes de sécurité. Elimination Les appareils électriques sont pas des déchets ménagers. L'appareil, les accessoires et l'emballage doivent être déposé dans un lieu de recyclage approprié pour le respect de l'environnement. Montage Fixer le guidon A B C D Monter le sac de ramassage E Attention ! Il est possible de détériorer le câble en pliant ou en sortant la barre de guidage. z Introduisez le câble dans la protection contre le pliage A. z Alors que vous réglez la hauteur de la poignée veillez à ce que le câble ne soit pas ondulé C . 1. Dépliez la partie inférieure du guidon et fixez-la en serrant les deux molettes B . 2. Réglez la hauteur du guidon souhaitée C . 3. Dépliez la partie supérieure du guidon et fixez-la à l‘aide des écrous papillon D . 1. Placez la goulotte (1) sur la trappe du sac de ramassage (2) E F . 2. Depuis l‘arrière, pressez la goulotte contre la trappe du sac de ramasssage. La goulotte est fixée dès qu‘elle s‘enclenche G. 1 F G Fonctionnement Tranches horaires Régler la hauteur de coupe K z Observez les dispositions spécifiques de la lloi nationale. Attention! Couteau rotatif Effectuez du travail/des réglages sur l’équipement seulement après que le moteur a été éteint et l’outil de coupure s’est arrêté. 1. Tirer le levier vers l‘extérieur. 2. Régler la hauteur de coupe souhaitée. 3. Repousser le levier vers l‘intérieur. Introduisez le câble dans le protecteur de cordon H z Veuillez introduire le câble dans le protecteur de cordon H Accrochez le sac de collecte J 1 Attention! Couteau rotatif Effectuez des réglages sur l’équipement seulement après que le moteur a été éteint et l’outil de coupure s’est arrêté. 1. Soulever le capot. 2. Accrocher le bac de ramassage en insérant les crochets dans les orifices du châssis (voir flcche). 3. Rabattre le capot. 18 1 Hauteur de coupe – état de la pelouse z Tondez de préférence lorsque l'herbe est sèche. Tondez l'herbe humide ou mouillée à une hauteur plus élevée. z En principe l'hauteur de coupe est de 40-50 mm. F Raccordement à la prise (courant alternatif 230 volts) z La tondeuse peut être branchées sur n‘importe quelle prise de courant protégée par un fusible de 16 Amp. 3 Remarque: Dispositif de protection contre le courant résiduel Ces dispositifs de protection vous protègent alors que vous touchez des fils détériorés, contre les défauts d’isolation et dans certains cas, aussi lorsque vous détériorez des fils sous tension. z Nous recommandons que l’équipement ne soit introduit que dans une prise de courant qui est protégée par un dispositif de protection contre le courant résiduel (RCD), avec un courant résiduel qui ne dépasse pas 30 mA. z Il y a des trousses d’adaptation disponibles pour les installations vieilles. Consultez un électricien. Mise en marche M 1. Appuyez sur le bouton et maintenez le enfoncé (1). 2. Amenez la poignée (2) vers le guidon et lâchez le bouton (1). Arrêt M z Lâchet la poignée (2). Indication pour vider le bac récolteur z Le bac récolteur est plein lorsque l‘herbe coupée se pose derrire la tondeuse. 1 Attention! Couteau rotatif Effectuez des réglages sur l’équipement seulement après que le moteur a été éteint et l’outil de coupure s’est arrêté. z Videz le sac de collecte O . z Enlevez les possibles obstructions de l’espace de coupure avant de commencer. Mise en route de la tondeuse Conseils pour tondre z Mettre le moteur en marche quand la tondeuse se trouve sur une surface plane. z Dans de l‘herbe haute, appuyer légèrement sur le manche L . z Pour éviter que n’apparaisse un effet de rayures, il faut que les passages successifs de la tondeuse se chevauchent de quelques centimètres N . z Règle générale: Toujours poser le câble sur une terrasse, dans un chemin ou sur une partie de la pelouse déjà tondue. Entretien Général 1 Attention! Couteau rotatif Avant toute opération d’entretien et de nettoyage : z sortez la fiche d’alimentation électrique. z Ne touchez pas les aubes en état de fonctionnement. Nettoyage z Nettoyer la tondeuse avec une brosse ou un chiffon après chaque tonte. z Ne jamais nettoyer la tondeuse au jet d‘eau. Remiser la tondeuse dans un endroit sec. 1 Attention! Il peut se développer un déséquilibre après le réaffûtage de l’aube. z Faites reaffûter toujours les aubes dans un atelier spécilisé, parce qu’il faut effectuer une vérification de l’équilibre conformément aux règlements de sécurité. z Faites changer toujours les aubes dans un atelier spécialisé. Un torquemètre de 10 mm est obligatoirement éxigé. Couple de serrage pour les vis : 6-7 N-m (37). z Faites changer toujours les aubes dans un atelier spécialisé. Un torquemètre de 13 mm est obligatoirement éxigé. Couple de serrage pour les vis : 16-18 N-m (40). z N‘employez que des pièces de rechange d‘origine. Remiser la tondeuse pour l‘hiver z Après la saison, nettoyer la tondeuse á fond. z Faire réviser la tondeuse dès l‘automne par une station-service WOLF agréée. z Ne jamais nettoyer la tondeuse au jet d‘eau et ne la remiser que dans un endroit sec. Remplacement des couteaux P z Pour tout travail sur les aubes, les tirants et les barres de coupe, sortez d’abord la fiche d’alimentation électrique et portez des gants protecteurs. F 19 Pièces de rechange Numéro d‘article Désignation pour la commande Information produit 4917 031 Sac de ramassage (37) 4968 030 Sac de ramassage (40) 4907 096 Vi 37 FM Lame de rechange 37 cm 4970 096 Vi 40 FM Lame de rechange 40 cm Comment remédier aux pannes Mesures r prendre (X) par: Dysfonctionnements Causes possibles L‘appareil fonctionne bruy- • La lame est endommagée amment et vibre fortement • La lame s‘est desserrée de sa fixation • Le fusible a fondu L‘atelier de service après-vente WOLF L‘utilisateur X --- --- X --- X X --- • Le câble est endommagé: 1 Le moteur ne démarre pas Attention! La déterioration du câble produit du choc électrique Quand le câble est coupé ou détérioré, le fusible de sécurité ne se déclenche pas toujours. z Ne touchez pas le câble avant de sortir la fiche d’alimentation électrique de la prise de courant. z Le câble détérioré doit être complètement remplacé. Il est interdit de rapiécer le câble avec du chatterton. • La lame est émoussée Mauvaise performance/ca• Hauteur de coupe non adaptée pacité de tonte • Le bac de ramassage est obstrué X --- --- X --- X IEn cas de doute, consulter toujours l‘atelier de service aprés-vente WOLF. Attention, arrêter la tondeuse avant tout contrôle, tout nettoyage et tous travaux sur la lame et retirer la fiche secteur. Conditions de la garantie La carte de garantie remplie par les vendeurs ou le justificatif d‘achat doivent être conservés avec soin. La société WOLF-Garten fournit une garantie selon l‘état actuel de la technique et l‘objectif d‘utilisation / le domaine d‘application pour une durée de 10 ans ŕ partir de la date d‘achat. Les droits légaux du consommateur final ne sont pas entravés par les directives suivantes en matière de garantie. Conditions préalables à l‘application de la garantie de 10 ans: - Utilisation de l‘appareil exclusivement à usage privé. Dans le secteur professionnel ou pour les sociétés de location, la garantie est de 12 mois. - Manipulation réglementaire et respect de toutes les consignes figurant dans le mode d‘emploi, qui fait partie de nos conditions de garantie. - Respect de la périodicité prescrite pour la maintenance. - Pas de modification arbitraire de la construction. - Montage de pièces détachées / accessoires WOLF originaux. - Présentation de la carte de garantie remplie et/ou de la preuve d‘achat. La garantie ne couvre pas l‘usure normale des accus, lames, pièces de fi xation des lames, rondelles de frottement, courroies et courroies crantées, roues/pneumatiques, fi ltres à air, bougies et câbles connecteurs d‘allumage. En cas de réparation arbitraire, tout droit à la garantie est automatiquement supprimé. Les défauts et les imperfections dont les causes sont attribuées à un défaut de matériau ou de fabrication sont réparés exclusivement par nos ateliers partenaires (le vendeur a droit aux améliorations) situés près de chez vous ou le fabricant s‘il est plus proche. Les droits dépassant les limites de la garantie sont exclus. Un droit à une livraison compensatrice n‘existe pas. Les dommages éventuels survenus pendant le transport ne doivent pas être communiqués à notre société mais au transporteur concerné pour conserver les droits à indemnité envers cette entreprise. Les prestations de garantie seront exécutées par nos ateliers agréés ou chez: B Graham NV-SA Zoning Industriel21 1440 Wauthier-Braine Tel.: ++ 32 (2) - 3 67 16 11 Fax: ++ 32 (2) - 3 67 16 12 E-mail: [email protected] 20 Z WOLF-Garten Schweiz AG Nordringstraße 16 4702 Oensingen Tel.: ++ 41 (62) - 3 88 04 50 Fax: ++ 41 (62) - 3 88 04 60 l WOLF-Garten GmbH & Co KG Industriestraße 83-85 57518 Betzdorf Tel.: ++ 49 (27 41) - 28 15 00 Fax: ++ 49 (27 41) - 28 12 99 E-mail: [email protected] F Istruzione d’uso I Complimenti per aver scelto un tosaerba WOLF Leggere attentamente le istruzioni per l‘uso e familiarizzare con gli elementi di comando e con il coretto utilizzo dell‘apparecchio. L‘utente è responsabile degli incidenti causati ad altre persone o alla loro proprietà. Osservare le idicazioni, le spiegazioni e le prescrizioni. Le caratteristiche della dotazione in sintesi Non lasciare mai bambini o altre persone che non conoscono le istruzioni per l'uso nei pressi della falciatrice. Non è consentito a persone al di sotto dei 16 anni di utilizzare questo apparecchio. Contenuto Dati tecnici . . . . . . . . . . . Indicazioni di sicurezza . . . . Montaggio . . . . . . . . . . . Messa in opera . . . . . . . . . Manutenzione. . . . . . . . . . Ricambi . . . . . . . . . . . . Interventi di riparazione. . . . . Condizioni di garanzia . . . . . Dichiarazione CE di Conformità . . . . . . . . . . . . . . . . . . . . . . . . . . . . . . . . . . . . . . . . . . . . . . . . . . . . . . . . . . . . . . . . . . . . . . . . . . . . . . . . . . . . . . . . . . .21 .22 .23 .23 .24 .25 .25 .25 33 – regolazione centralizzata dell’altezza di taglio – impugnatura pieghevole per un deposito con minimo ingombro e trasporto semplificato – Regolazione in altezza dell‘impugnatura in 2 posizioni – sacco raccoglierba – materiali di prima qualità, lavorazione eccellente e Design attraente – Ready-to-use: da 0 alla rasatura in soli 30 secondi Dati tecnici Ci riserviamo per tanto eventuali modifiche tecnici dovute all' u l teriore sviluppo dei nostri prodotti. POWER WOLF 15/37 D Misuratione della rumorositá all'altezza dell'orecchio dell'utente eseguita in confomotà alla norma EN 836. E Vibrazioni misurate sul manubrio di guida, con utente, in conformitá a EN 1033, EN 836. L’accelerazione ponderata tipica è di: POWER WOLF 16/40 Typ 4927 ... 4969 ... A 80 cm 80 cm B 37 cm 55 cm C 41 cm 47 cm D LP 79 dB (A) LP 77 dB (A) E ahw < 2,5 m/s2 ahw < 2,5 m/s2 Potenza 1.500 W 1.600 W Corrente normale 7,0 A 7,3 A Tensione 230 VAC 230 VAC Sacco di raccolta 35 l 55 l Larghezza di taglio 37 cm 40 cm Altezza di taglio 20, 30, 40, 50, 60 mm 25, 35, 50, 65, 80 mm Peso 16 kg 22 kg I 21 Indicazioni di sicurezza Legenda simboli Attenzione! Prima dell‘uso leggere istruzioni! Cavi Allontanare le per-sone dalla zona di pericolo! 1 z Attenzione! Lame da taglio affilate - staccare la spina prima di qualsiasi intervento di manutenzione ed in presenza di danni alla linea. Tenere lontani i cavi collegamento dall‘utensile da taglio! z z z z Indicazioni generali z Questo tosaerba è stato progettato per la cura di superfici erbose e prati di aree private. Non è consentito utilizzare il tosaerba per altri scopi, poiché ciò comporterebbe rischi fisici per l'operatore o per altre persone. z Non utilizzare il tosaerba se nelle vicinanze vi sono altre persone, soprattutto bambini o animali. z Utilizzare il tosaerba solo se le condizioni di luce lo consentono. z Attenzione! Scosse elettriche a causa di cavi danneggiati Se il cavo viene tagliato o danneggiato, non sempre scatta il fusibile. z Non toccare il cavo prima di aver staccato la spina dalla presa. z I cavi danneggiati vanno sostituiti completamente. Non tentare di riparare il cavo con del nastro isolante. Le riparazioni del cavo vanno eseguite da un tecnico specializzato (vedere „Interventi di riparazione“, pagina 25). Fissare il cavo di allacciamento al dispositivo di scarico della trazione del cavo. Evitare che il cavo sfreghi contro bordi, punte o oggetti taglienti. Non schiacciare il cavo nelle fessure di porte o finestre. Non è consentito togliere né escludere i dispositivi di azionamento (ad esempio, legando la leva di comando al manubrio di guida). Utilizzare esclusivamente prolunghe con una sezione di almeno 3 x 1,5 mm2 e una lunghezza massima di 25 m: – eventuali cavi in gomma flessibile devono essere del tipo HO 7 RN-F o superiore – eventuali cavi in PVC devono essere del tipo HO5 VV-F o superiore (i cavi di questo tipo non sono adatti per l'impiego continuo all'aperto - come p. es. posa sotto terra per il collegamento di una presa elettrica da giardino, collegamento di una pompa per laghetti o conservazione all’aperto.) È necessario che i cavi siano protetti contro gli spruzzi d'acqua. Durante l'uso Prima dell'uso z Utilizzare il tosaerba solo se si indossano calzature robuste e calzoni lunghi. z Non utilizzare il tosaerba a piedi nudi o se si indossano sandali. z Controllare il terreno su cui si intende utilizzare il tosaerba e rimuovere tutti gli oggetti che possono rimanere impigliati nell'apparecchio o essere scagliati in aria. z Controllare la presenza di eventuali danni o segni di invecchiamento (fragilità) del cavo di allacciamento e della linea esterna dell'apparecchio. Utilizzare l'apparecchio solo se in perfetto stato. z Controllare frequentemente la presenza di eventuali segni di usura o deformazioni del dispositivo di raccolta dell'erba. z Prima dell'uso, verificare (tramite un controllo visivo) se gli utensili di taglio ed i relativi mezzi di fissaggio sono smussati o danneggiati. z Per evitare sbilanciamenti, è necessario sostituire l'intero set di utensili smussati o danneggiati (vedere „Manutenzione“, pagina 24). 22 z Non inclinare l'apparecchio quando si accende il motore, a meno che ciò non sia necessario in fase d'avvio. In tal caso, non inclinare l'apparecchio più di quanto strettamente necessario e sollevare solo la parte lontana dall'utente. Prima di riportare l'apparecchio al suolo, controllare sempre che entrambe le mani si trovino in posizione di lavoro. z Mantenere la distanza di sicurezza imposta dalla tiranteria. z Accendere il motore solo quando i piedi si trovano a distanza sicura dagli utensili di taglio. z Controllare che l'appoggio sia sicuro. Non correre. Procedere con calma. z Taglio dell'erba su pendii: – Tagliare l'erba trasversalmente rispetto al pendio, mai in salita o in discesa. – Prestare un'attenzione particolare nel cambiare direzione. – Non tagliare l'erba su pendii ripidi. z Usare particolare cautela nel procedere all'indietro tirando il tosaerba verso di sé. z Spegnere il tosaerba quando lo si inclina o trasporta, ad esempio da o verso il prato o lungo i vialetti. z Attenzione, non toccare le lame in funzionamento. z Non sostare davanti all'apertura di espulsione dell'erba. z Prima di sollevare o portare via il tosaerba, spegnere il motore e attendere fino al completo arresto degli utensili di taglio. z L'altezza di taglio va regolata solo a motore spento e con gli utensili di taglio fermi. z Non aprire mai il coperchio di protezione se il motore è ancora in funzionamento. I z Prima di togliere il dispositivo di raccolta dell'erba: Spegnere il motore e attendere fino al completo arresto dell'utensile di taglio. Dopo aver svuotato il dispositivo di raccolta dell'erba, fissarlo con cura. z Non procedere sulla ghiaia se il motore è in funzionamento – sussiste il rischio di essere colpiti da pietre. z Se possibile, non tagliare erba bagnata. z Nelle seguenti circostanze è necessario spegnere l'apparecchio, staccare la spina e arrestare l'apparecchio: – quando ci si allontana dal tosaerba – per sbloccare una lama bloccata – per controllare l'apparecchio, per pulirlo o per svolgervi interventi – dopo aver colpito un corpo estraneo (verificare innanzitutto la presenza di eventuali danni al tosaerba o agli utensili di taglio. Quindi, riparare il danno) – se il tosaerba vibra fortemente poiché sbilanciato (spegnerlo subito e ricercare la causa) – se il cavo di allacciamento subisce danni durante l'uso. Manutenzione 1 z z z z Attenzione! Lame rotanti Prima di ogni intervento di manutenzione e pulizia: z Staccare la spina. z Non toccare le lame in funzionamento. Controllare regolarmente che tutte le viti di fissaggio ed i dadi visibili siano ben serrati, specialmente nella barra portalama; serrarli se necessario. Non riporre il tosaerba in ambienti umidi. Per motivi di sicurezza, sostituire le parti usurate o danneggiate. Utilizzare solo ricambi originali WOLF; in caso contrario non è possibile garantire che il tosaerba sia conforme alle disposizioni in materia di sicurezza. Smaltimento Gli apparecchi elettrici non vanno smaltiti tra i rifiuti domestici. Consegnare l'apparecchio, gli accessori e l'imballaggio ad un centro di riciclaggio. Montaggio Fissare l‘asta dell‘impugnatura A B C D Montare il raccoglierba E Cautela! Il cavo può venire danneggiato quando viene piegata od estratta l’impugnatura. z Avvolgete il cavo nella protezione curva A . z Quando regolate l’altezza del’impugnatura abbiate cura che il cavo non sia arricciato C . 1. Sollevare la parte inferiore dell‘impugnatura ed avvitarla saldamente ai due volantini B . 2. Impostare l‘altezza desiderata dell‘impugnatura C . 3. Sollevare la parte superiore dell‘impugnatura ed avvitarla saldamente ai due dadi ad alette D . 1. Collocare il contenitore (1) sul raccoglierba (2) E F . 2. Premere il contenitore da dietro sul raccoglierba. Il contenitore bloccato, quando si sente lo scatto G . 1 F G Messa in opera Tempo d’esercizio Impostate l’altezza del taglio K z Si prega di osservare le prescrizioni vigenti nei singoli stati. Attenzione! Lama rotante Fate dei lavori/regolazioni sull’attrezzo solo dopo aver spento il motore e dopo che l’elemento da taglio si sia completamente fermato. 1. Tirare la leva verso l‘esterno. 2. Impostare l‘altezza di taglio desiderata. 3. Premere di nuovo la leva all‘interno. Fate passare il cavo attraverso il tensionatore H z Fate passare il cavo attraverso il tensionatore H . 1 Appendete il sacco raccoglitore J 1 Attenzione! Lama rotante Iniziate regolazioni sull’attrezzo solo dopo aver spento il motore e dopo che l’elemento da taglio si sia completamente fermato. 1. Sollevare la copertura di protezione. 2. Appendere il sacco per la raccolta al gancio che si trova nella cavit dell‘intelaiatura (vedere freccia). 3. Collocare la copertura di protezione. I Altezza di taglio z Tagliare possibilmente su prato asciutto per non danneggiare la cotica erbosa. In caso di prato umido ed erba alta, tagliare con una maggiore altezza di taglio. z Di regola si tosa ad un'altezza di taglio di 40-50 mm. 23 Inserire la spina della corrente (corrente alternata 230 Volt, 50 Hz) z Si potr allacciare l‘attrezzo a qualsiasi presa, purch sia munita di una valvola di protezione di 16 Ampre (oppure di un terruttore-LS tipo B). 3 Nota: Dispositivo di protezione contro corrente residuale Questi dispositivi di protezione proteggono quando si toccano fili danneggiati, da difetti di isolamento ed, in certi casi, anche quando si danneggiano fili sotto tensione. z Raccomandiamo che l’attrezzo sia collegato ad una presa di corrente che sia protetta da un dispositivo di protezione contro la corrente residuale (RCD) con una corrente residuale non superiore a 30 mA. z Sono disponibili dei retrofit per i vecchi impianti. Consultate un elettricista. Per avviare il motore M 1. Tener premuto il pulsante (1). 2. Tirare la leva (1) e lasciare il pilsante (2). Per spegnere il motore M z Lasciare la leva (2). Svuotate il sacco raccoglitore z Il cesto da svuotare quando l‘erba non viene pi raccolte e resta sul terreno. 1 Attenzione! Lama rotante Iniziate delle regolazioni sull’attrezzo solo dopo aver spento il motore e dopo che l’elemento da taglio si sia completamente fermato. z Svuotate il sacco raccoglitore O . z Prima di iniziare rimuovete potenziali ostacoli nello spazio dove volete tagliare. Avviare il tagliaerba z Avviare la tosaerba su superficie piana. z Possibilmente non nell‘erba alta. In questo caso inclinare leggermente come risulta dalla figura L . Suggerimenti per la rasatura z Per non creare strisce erbose, le vie di taglio devono sempre sovrapporsi per alcuni centimetri N . z Mettete sempre il cavo in maniera sicura sul terrazzo, sul sentiero o sull‘erba gi tosata. Manutenzione Generale 1 Attenzione! Lama rotante Prima di qualsiasi lavoro di manutenzione e di pulitura: z estraete la spina elettrica. z Non toccate lame in movimento. Pulizia z Dopo ogni tosatura abbiate l‘avvertenza di pulire la tosaerba con uno straccio oppure con uno scopino. z In nessum caso usare acqua! Tenere il tosaerba in ambiente asciutto. 1 Attenzione! Dopo aver affilato la lama si può verificare uno sbilanciamento. z Fate sempre riaffilare le lame da un’officina specializzata, perchè un controllo del bilanciamento dovrebbe sempre essere fatto secondo le norme di sicurezza. z Fate sempre sostituire le lame da un’officina specializzata. E’ richiesta obbligatoriamente una chiave dinamometrica da 10 mm. Coppia di serraggio delle viti: 6-7 N-m (37). z Fate sempre sostituire le lame da un’officina specializzata. E’ richiesta obbligatoriamente una chiave dinamometrica da 13 mm. Coppia di serraggio delle viti: 16-18 N-m (40). Accantonamento durante l‘inverno z Terminata la stagione si dorvr pulire accuratamente la tosaerba. z Mai spruzzare la tosaerbe con acqua, n collocarla in ambienti umidi. Sostituzione delle lame P z Per qualsiasi lavoro sulle lame, barre di accoppiamento e di taglio, prima di tutto estraete la spina elettrica ed indossate guanti di protezione. 24 I Ricambi Articolo N° Denominazione articolo Informazione sul prodotto 4917 031 Sacco di raccolta (37) 4968 030 Sacco di raccolta (40) 4907 096 Vi 37 FM Lama di ricambio 37 cm 4970 096 Vi 40 FM Lama di ricambio 40 cm Interventi di riparazione Rimedio (X): Problema Possibi causale Funzionamento rumoroso, forte • Lama danneggiata vibrazione dell‘apparecchio • Lama di fissaggio allentata Officina Di assistenza WOLF In modo autonomo X --- --- X --- X X --- • Lama smussata X --- • Cesto raccoglierba otturato --- X • Altezza di taglio non regolata --- X • Fusibile danneggiato • Cavo danneggiato: 1 Il motore non funziona Pessime prestazioni di raccolta / Cattiva falciatura Attenzione! Scarica elettrica da cavo danneggiato Quanto il cavo è tagliato completamente o danneggiato, il fusibile di sicurezza non sempre funziona. z Non toccate il cavo prima di estrarre la spina dalla presa di corrente. z Il cavo danneggiato deve essere completametne sostituito. E’ proibito rappezzare il cavo con nastro isolante. In caso dubbio rivolgersi sempre ad un‘officina di assistenza WOLF. Attenzione, arrestare il tosaerba prima di ogni controllo, lavoro di pulitura o di lavori alla lama ed estrarre la chiave di accensione. Condizioni di garanzia Custodite con cura il certificato di garanzia compilato dal venditore oppure il documento d‘acquisto. Per la durata di 10 anni a partire dalla data d‘acquisto, la Ditta WOLFGarten presta garanzia in conformità al rispettivo stato della tecnica e allo scopo/campo d‘applicazione. I diritti legali del consumatore finale non vengono compromessi mediante i criteri di garanzia di seguito elencati. Premesse per il diritto alla garanzia di 10 anni: - Impiego dell‘apparecchio esclusivamente per uso privato. Nel campo industriale oppure negli esercizi di noleggio, la garanzia viene ridotta a 12 mesi. - Uso conforme allo scopo e rispetto di tutte le avvertenze delle istruzioni sull‘uso che formano parte integrante delle nostre condizioni di garanzia. - Rispetto degli intervalli di manutenzione prescritti. - Nessuna variazione della costruzione su propria iniziativa. - Montaggio delle parti di ricambio originali/accessori della WOLF. - Presentazione del documento di garanzia compilato e/o del certificato d‘acquisto. La garanzia non copre la normale usura di batterie, lame, particolari di fi ssaggio lama come dischi di attrito, cinghie trapezoidali/dentate, ruote/gomme, fi ltri dell‘aria, candele di accensione e connettori per candele di accensione. In caso di riparazioni effettuate in proprio, si estingue automaticamente ogni diritto di garanzia. I difetti e le carenze che si dovessero presentare le cui cause sono riconducibili a difetti di materiale o di produzione, vengono rimossi esclusivamente dalle nostre officine autorizzate (il venditore ha il diritto alla riparazione) oppure dal produttore stesso, se egli fosse pi vicino alla Vostra sede. Sono escluse rivendicazioni non rientranti nella prestazione di garanzia. Non ammessa una rivendicazione per la fornitura di parti di ricambio. Eventuali danni dovuti al trasporto non devono essere segnalati a noi, ma alla ditta competente per il trasporto, poich in caso contrario i diritti all‘indennizzo da parte di queste imprese decadono. Le prestazioni in garanzia vengono rese dalle nostre officine autorizzata contrattualmente o nel caso di: I WOLF Italia S.r.l. Via G. Galilei 5 20060 Ornago (Mi) Tel.: ++ 39 (0 39) - 62 86 41 Fax: ++ 39 (0 39) - 6 01 02 57 E-mail: [email protected] I Z WOLF-Garten Schweiz AG Nordringstraße 16 4702 Oensingen Tel.: ++ 41 (62) - 3 88 04 50 Fax: ++ 41 (62) - 3 88 04 60 25 Gebruiksaanwijzing n Hartelijk gefeliciteerd met de aanschaf van uw WOLF gazonmaaier Lees het instructieboekje aandachtig door en stelt u zich op de hoogte van de bedieningsorganen en het correcte gebruik van het apparaat. De gebruiker is aannsprakelijk voor ongevallen met andere personen en voor schade aan hun eigendommen. Neem de aanwijzingen, voorschriften en de verklarende teksten in acht. Typische kenmerken in het kort Kinderen of andere personen die de gebruiksaanwijzing niet kennen, mogen de grasmaaier nooit gebruiken. – Centrale instelling van de maaihoogte – Inklapbare duwboom voor ruimtebesparend opbergen en Inhoud Technische gegevens . . . Veiligheidsvoorschriften . . Montage . . . . . . . . . . Gebruik . . . . . . . . . . . De verzorging. . . . . . . . Reserveonderdelen . . . . Opheffen van storingen. . . Garantievoorwaarden. . . . EG-Conformiteitsverklaring . . . . . . . . . . . . . . . . . . . . . . . . . . . . . . . . . . . . . . . . . . . . . . . . . . . . . . . . . . . . . . . . . . . . . . . . . . . . . . . . . . . . . . . . . . . . . . . . . . . . . . . . . . . . . .26 .27 .28 .28 .29 .30 .30 .30 33 eenvoudig vervoeren – Duwboom hoogte instelling 2-voudig – Makkellijk te legen, ruime opvangzak – Hoogwaardig materiaal, uitstekende verwerking en attractief design – Ready-to-use: van uitpakken tot maaien in 30 seconden Technische gegevens Veranderingen en technische aan-passingen voorbehouden D Lawaaimeting aan het oor van de bedienende persoon wordt uitgevoerd overeenkomstig EN 836. E POWER WOLF 15/37 Trillingen gemeten aan de duwstang, met bedienende persoon, conform EN 1033, EN 836. De gemiddelde gewogen versnelling is: POWER WOLF 16/40 Typ 4927 ... 4969 ... A 80 cm 80 cm B 37 cm 55 cm C 41 cm 47 cm D LP 79 dB (A) LP 77 dB (A) E ahw < 2,5 m/s2 ahw < 2,5 m/s2 1.600 W Vermogen 1.500 W Verbruik 7,0 A 7,3 A Spanning 230 VAC 230 VAC Opvangzack 35 l 55 l Maaibreedte 37 cm 40 cm Maaihoogte 20, 30, 40, 50, 60 mm 25, 35, 50, 65, 80 mm Gewicht 16 kg 22 kg 26 n Veiligheidsvoorschriften Betekenis van de symbolen Kabel Opgelet! Voor gebruik de gebruiksaanwijzing lezen! Anderen buiten de gevarenzone houden! Voorzichtig! - Scherpe snijmessen - vóór onderhoudswerk-zaamheden en bij beschadiging van de leiding de stekker uit het stroomnet trekken. Aansluitkabels mogen niet in de buurt komen van het snijgereedschap! 1 z z z z z Algemene aanwijzingen z Deze grasmaaier is bedoeld voor de verzorging van grasvelden en -perken voor privé-gebruik. Wegens lichamelijk gevaar voor de gebruiker of andere personen mag de grasmaaier niet voor andere doeleinden worden gebruikt. z Maai nooit als er personen, vooral kinderen en dieren, in de buurt zijn. z Maai uitsluitend bij voldoende licht. z Attentie! Elektrische schok door beschadigde kabel Als de kabel wordt doorgesneden of beschadigd, wordt de zekering niet altijd geactiveerd. z Raak de kabel niet aan, voordat de netstekker uit het stopcontact is getrokken. z Een beschadigde kabel moet volledig worden vervangen. Het is verboden de kabel met isolatieband te herstellen. Laat reparaties aan de kabel uitsluitend door een vakman uitvoeren (zie „Opheffen van storingen“, pagina 30). Bevestig de aansluitkabel op de kabelontlasting. Laat deze niet schuren tegen randen en puntige of scherpe voorwerpen. De kabel mag niet door deur- of raamspleten worden platgedrukt. Schakelinrichtingen mogen nooit worden verwijderd of overbrugd (bijv. de schakelaarhendel op de geleidingssteel binden). Maak uitsluitend gebruik van een verlengkabel met een minimale diameter van 3 x 1,5 mm2 en een max. lengte van 25 m: – wanneer rubber slangleidingen, dan niet lichter dan type HO 7 RN-F – wanneer PVC slangleidingen, dan niet lichter dan type HO5 VV-F (leidingen van dit type zijn niet geschikt om constant in de open lucht gebruikt te worden - zoals bijv.: als onderaardse leiding voor de aansluiting van een tuinstekkerdoos, een vijverpomp of voor opslag in de open lucht) De kabels moeten spatwaterdicht zijn. Bij het maaien Voor het maaien z Maai uitsluitend in vaste schoenen en lange broek. z Maai nooit met blote voeten of in sandalen. z Controleer het terrein waarop de maaier wordt ingezet, en verwijder alle voorwerpen die kunnen worden gegrepen en weggeslingerd. z Controleer of de aansluitkabel en de buiten op het apparaat geïnstalleerde leiding niet beschadigd en verouderd (bros) is. De maaier mag uitsluitend in foutloze toestand worden gebruikt. z Controleer regelmatig of de grasvanginrichting niet is versleten en vervormd. z Controleer voor het gebruik (visuele controle) of de snijapparaten en hun bevestigingsmiddelen niet stomp of beschadigd zijn. z Vervang stompe of beschadigde snijapparaten door een volledige set om geen onbalans te krijgen (zie „De verzorging“, pagina 29). n z Kantel het apparaat nooit als u de motor inschakelt, tenzij het apparaat bij het aanzetten moet worden gekanteld. Kantel in dat geval het apparaat niet meer dan beslist noodzakelijk is en til alleen het deel op dat van de gebruiker is verwijderd. Controleer altijd of uw beide handen zich in de werkstand bevinden, alvorens het apparaat weer op de grond terug te zetten. z Houd de door het steelframe gegeven veiligheidsafstand aan. z Zet de motor alleen aan als uw voeten zich op een veilige afstand van de snijapparaten bevinden. z Let op een veilige stand. Loop nooit, ga rustig voorwaarts. z Op hellende plaatsen maaien: – Maai altijd dwars op de helling, niet op- en neerwaarts – Wees zeer voorzichtig als u van richting verandert – Maai niet op steile hellingen z Wees zeer voorzichtig als u terugwaarts maait en de maaier naar u toe trekt. z Zet de maaier uit als u deze wilt kantelen of transporteren, bijv. van/naar het grasveld of over de weg. z Voorzichtig, grijp niet naar lopende snijkanten. z Ga niet voor de grasuitwerpopening staan. z Alvorens de maaier op te tillen of weg te dragen, moet u de motor uitzetten en wachten tot de snijapparaten tot stilstand zijn gekomen. z Verstel de snijhoogte alleen als de motor is uitgeschakeld en de snijapparaten stilstaan. z Open de veiligheidsklep nooit als de motor nog loopt. 27 z Voor het afnemen van de grasvangvoorziening: zet de motor af en wacht tot de snijapparaten tot stilstand zijn gekomen. Na het legen moet de grasvangvoorziening zorgvuldig worden bevestigd. z Rij nooit met een lopende motor over grind – steenslag! z Maai zo mogelijk niet in nat gras. z Onder de volgende omstandigheden moet het apparaat worden uitgeschakeld, de netstekker worden losgetrokken en het apparaat blijven staan: – bij het verlaten van de maaier – om een geblokkeerd mes vrij te maken – om het apparaat te controleren, te reinigen of daaraan te werken – als een vreemd voorwerp is getroffen (controleer eerst of de maaier of de snijapparaten niet zijn beschadigd. Verhelp dan eerst de beschadiging). – als de maaier sterk trilt door onbalans (direct uitzetten en onbalans opsporen). – als de aansluitkabel tijdens het gebruik wordt beschadigd. Onderhoud 1 z z z z Attentie! Roterende messen Voor alle onderhouds- en reinigingswerkzaamheden: z Trek de netstekker los. z Grijp niet naar lopende snijkanten. Controleer regelmatig of alle zichtbare bevestigingsschroeven en moeren, vooral die van de messenbalk, vastzitten en draai deze zo nodig aan. Berg de maaier niet in vochtige ruimten op. Vervang om veiligheidsredenen versleten of beschadigde onderdelen. Gebruik uitsluitende oorspronkelijke Wolf reserveonderdelen, want anders hebt u geen garantie dat uw maaier aan de veiligheidsvoorschriften voldoet. Afvalverwijdering Elektrische apparaten zijn geen huishoudelijk afval. Breng het apparaat, de accessoires en de verpakking naar een milieuvriendelijke recyclingvoorziening. Montage Duwboom bevestigen A B C D Vangzak monteren E Opgelet! De kabel kan beschadigen tijdens het opbergen of het verwijderen van de vergrendeling. z Plaats de kabel in de in de beschermhoes A . z Wanneer men de hoogte van de hendel instelt let erop dat de kabel niet gevouwen is C . 1. Klap het onderste gedeelte van de duwboom omhoog en schroef het met de twee handwieltjes vast B . 2. Stel de gewenste hoogte van de duwboom in C . 3. Klap het bovenste gedeelte van de duwboom omhoog en schroef het met de vleugelmoeren vast D . 1. Plaats de stortkoker (1) op de vangzak klep (2) E F . 2. Druk de stortkoker van achteren tegen de vangzak. De stortkoker zit goed vast, zodra hij vastklikt G . 1 F G Gebruik Gebruikstijden Hang de verzamelzak op J z Gelieve de specifieke nationale verordeningen in acht te nemen. Opgelet! Roterend snijmes Verricht enkel aanpassingen aan de apparatuur nadat de motor uitgezet is en het snij onderdeel tot stilstand is gekomen. 1. Trek de veiligheidsklep omhoog. 2. Hang de haken van de vangzak in de openingen van het chassis (zie pijl). 3. Plaats de veiligheidsklep weer terug. Voedt de kabel door de kabelontspanner H z 28 Voedt alstublieft de kabel door de kabelonstpanner H 1 n Stel snijhoogte in K Maaier inschakelen Opgelet! Roterend snijmes Verricht enkel werkzaamheden/aanpassingen aan de apparatuur nadat de motor uitgezet is en het snij onderdeel tot stilstand is gekomen. 1. Trek de hendel naar buiten. 2. Stel de gewenste maaihoogte in. 3. Druk de hendel weer naar binnen. z Maaier op een glad oppervlak starten. z Niet op hoog gras - hier desnoods licht kantelen L . Maaihoogte - Grasconditie Motor uitzetten M 1 z Maait u, indien mogelijk, bij droog weer. Daarmee wordt het grassprietje gespaard.Bij een vochtige of hogere grasmat wordt een hogere maaihoogte aanbevolen. z Gemiddelde maaihoogte is 40-50 mm. Aansluiting aan het stopcontact (wisselstroom 230 Volt, 50 Hz) Motor aanzetten M 1. Knop (1) indrukken en vasthouden. 2. Hefboom (2) aantrekken. 3. Knop (1) loslatten. z Hefboom (2) loslaten. Leeg verzamelzak z De verzamelzak geen gras meer opneemt en wanneer het gemaaide gras blijft liggen. 1 z De machine kan aan ieder stopcontact aangesloten worden, dat met een 16 Ah. zekering (of LS-schakelaar type B) gezekerd is. 3 Opmerking: Reststroomapparaat Deze beveiligende apparatuur beschermd tijdens het aanraken van bedrading met isolatie gebreken, tot in sommige gevallen ook tijdens het beschadigen van onder spanning staande draden. z We adviseren de apparatuur enkel aangesloten wordt aan een stopcontact dat beschermd is met een reststroomapparaat (RCD) met een reststroom van niet meer dan 30 mA. z Vervangende onderdelen zijn verkrijgbaar voor oude installaties. Raadpleeg een elekticiën. Opgelet! Roterend snijmes Verricht enkel aanpassingen aan de apparatuur nadat de motor uitgezet is en het snij onderdeel tot stilstand is gekomen. z Leeg de verzamelzak O . z Verwijder potentiële blokkades bij het snijgedeelte voordat men begint. Tips voor het maaien z Om strepen op uw gazon te voorkomen, moeten de maaivlakken elkaar altijd een paar centimeter overlappen N . z Leg de kabel steeds veilig neer op terrassen, paden, of op het reeds gemaaide gras. De verzorging Algemeen 1 Opgelet! Roterend snijmes Voor al het onderhoud en schoonmaakwerk: z Haal de stekker eruit. z Raak de snijmessen niet aan. Reinigen z Na iedere maaibeurt moet de maaier met een handveger schoongemaakt worden. z In geen geval met water schoonspuiten. Stalling tijdens de winter z Na het maaiseizoen moet de maaimachine grondig schoongemaakt worden. z Laat uw maaier in de herfst nakijken bij een WOLF service werkplaats. z Nooit de maaier met water afspuiten of in vochtige ruimten opbergen. n Het verwisselen van de messen P z Voor alle werkzaamheden aan de messen, verbindings- en snij onderdelen, ten eerste de stekker eruit halen en beschermende handschoenen dragen. 1 Opgelet! Er kan een onevenwichtigheid onstaan na het slijpen van het mes. z Laat de messen altijd slijpen bij een gespecialiseerde werkplaats, daar er een onevenwichtigheids controle moet plaatsvinden volgens de veiligheidsnormen. z Verwissel de messen altijd bij een gespecialiseerde werkplaats. Een torque sleutel van 10 mm is verplicht vereist. Vastdraaien torque van de schroeven: 6-7 N-m (37). z Verwissel de messen altijd bij een gespecialiseerde werkplaats. Een torque sleutel van 13 mm is verplicht vereist. Vastdraaien torque van de schroeven: 16-18 N-m (40). z Alleen originele onderdelen gebruiken. 29 Reserveonderdelen Artikelnummer Artikelnaam Productinformatie 4917 031 Opvangzack kpl. (37) 4968 030 Opvangzack kpl. (40) 4907 096 Vi 34 FM Vervangingsmes kpl. 37 cm 4970 096 Vi 37 FM Vervangingsmes kpl. 40 cm Opheffen van storingen Oplossing (X) door WOLF Service-dienst Zelf • Messen defect X --- • Messen uit bevestiging losgeraakt --- X • Zekering defect --- X X --- Probleem Mogelijke oorzaak Draait slecht, het apparaat trilt sterk • Kabel beschadigd 1 De motor slaat niet aan Opgelet! Elektrische schok door kabelschade. Wanneer de kabel doorgesneden of beschadigd is, slaan de zekering niet altijd door. z Raak de kabel niet aan voor men de stekker uit het stopcontact haalt. z Beschadigde kabel moet geheel worden vervangen. De kabel afplakken met isolatietape is verboden. • Messen zijn stomp Maait/Vangt het gras slecht • Opvangbox verstopt op • niet aangepaste maaihoogte X --- --- X --- X INeem in geval van twijfel altijd contact op met de servicedienst van WOLF. Attentie: schakel de maaier voor elke controle, reiniging of werkzaamheid aan de messen uit en verwijder de netsteker. Garantievoorwaarden Gelieve de door de verkoper ingevulde garantiekaart en het aankoopbewijs zorgvuldig te bewaren. Gedurende een periode van 10 jaar, te rekenen vanaf de aankoopdatum, verstrekt de firma WOLFGarten een garantie, die met de respectievelijke stand van de techniek en met het gebruiksdoeleinde/ toepassingsgebied overeenstemt. Aan de wettelijke rechten van de eindgebruiker doen de hierna volgende garantierichtlijnen geen afbreuk. Vereiste voorwaarden voor de garantieclaim gedurende 10 jaar: - Gebruik van het toestel uitsluitend voor privé-doeleinden. Voor industrieel gebruik of verhuur wordt de garantie tot 6 maanden beperkt. - Deskundige behandeling en inachtneming van alle instructies in de gebruiksaanwijzing, die een bestanddeel van onze garantie-voorwaarden vormt. - Inachtneming van de voorgeschreven tussentijden voor het onderhoud. - Geen eigenmachtige wijziging van de constructie. - Inbouw van originele WOLF reserveonderdelen/toebehoren. - Voorlegging van de ingevulde garantiekaart en/of van het aankoopbewijs. De garantie is niet van toepassing voor de normale slijtage van accu‘s, messen, mesbevestigende onderdelen zoals frictieschijven, V-riemen, tandriemen, loopwielen/banden, luchtfilters, ontstekingskaarsen en bougiestekkers. In geval van een eigenmachtige reparatie komt iedere garantieclaim automatisch te vervallen. Fouten en gebreken, die zich voordoen en waarvan de oorzaken aan materiaal- of fabricagefouten te wijten zijn, worden uitsluitend door onze contractueel gebonden werkplaatsen in uw buurt of, indien deze dichterbij gesitueerd is, door de fabrikant verholpen. Buiten de verstrekte garantie ressorterende claims zijn uitgesloten. Een aanspraak op levering van reserveonderdelen bestaat niet. Eventueel door het transport resolterende beschadigingen dienen niet aan onze firma, doch aan de bevoegde, met het transport belaste firma te worden gerapporteerd. In het andere geval gaan de schadeclaims ten opzichte van dergelijke bedrijven immers verloren. Werkzaamheden die onder de garantie vallen, worden uitgevoerd door onze geautoriseerde werkplaatsen of bij: n WOLF-Garten Nederland B. V. Postbus 32 5240 AARosmalen Tel.: ++ 31 (73) 5 23 58 50 Fax: ++ 31 (73) 5 21 76 14 E-mail: [email protected] 30 B Graham NV-SA Zoning Industriel21 1440 Wauthier-Braine Tel.: ++ 32 (2) - 3 67 16 11 Fax: ++ 32 (2) - 3 67 16 12 E-mail: [email protected] l WOLF-Garten GmbH & Co KG Industriestraße 83-85 57518 Betzdorf Tel.: ++ 49 (27 41) - 28 15 00 Fax: ++ 49 (27 41) - 28 12 99 E-mail: [email protected] n Notes 31 Notes 32 D EG-Konformitätserklärung I Dichiarazione CE di Conformità G EC Declaration of Conformity n EG-Conformiteitsverklaring F CE Déclaration de conformité Wir / We / Nous / Noi / Wij WOLF-Garten GmbH & Co KG Industriestr. 83-85, D-57518 Betzdorf erklären, dass die Maschine / declare that the machine / déclarons que la machine / dichiariamo che la macchina / verklaren dat de machine Rasenmäher, handgeführt und netzbetrieben Lawnmower, walk behind and mains-operated Tondeuse à conducteur à pied commandées à la main falciatrice per prati, manuale e alimentata dalla rete Grasmaaimachine, met de hand bediend en met netvoeding Typ, type, type, tipo, type: 4927 ... - 4969 ... mit folgenden EG-Richtlinien übereinstimmt - conforms to the specifications of the following EC directives - est conforme aux spécifications des directives CE suivantes - è conforme alle seguenti direttive CE - met volgende EG-richtlijnen overeenstemt: 98/37/EG, 2006/95/EG, 2004/108/EG, 2000/14/EG, 2005/88/EG, 2002/95/EG Angewandtes Konformitätsverfahren - Conformity assessment procedure followed - La procédure appliquée pour l‘évaluation de la conformité procedura di conformità applicata - toegepaste conformiteitmethode: Anhang VI Name und Anschrift der beteiligten benannten Stelle - name and address of the notified body involved - le nom et l‘organisme notifé - nome ed indirizzo dell‘ufficio competente citato - naam en adres van de bevoegde, benoemde dienst: VDE Prüf- und Zertifizierungsinstitut, Merianstr. 28, D-63069 Offenbach 1. 2. 4927 ... 4969 ... Schnittbreite - Cutting width - Largeur de coup Larghezza di taglio - Maaibreedte 37 cm 40 cm Drehzahl - R. P. M. - Régime - N. giri - Toerental 2.950 1/min 2.950 1/min 1. 88 dB 93 dB 2. 89 dB 94 dB Repräsentativer gemessener Schallleistungspegel - representative measured sound power level - le niveau de puissance acoustique mesuré représentatif - livello di potenza sonora approssimativo misurato - representatief gemeten geluidsoverdrachtniveau Garantierter Schallleistungspegel - guaranteed sound power level - le niveau de puissance acoustique garanti - livello di potenza sonora garantito - gewaarborgd geluidsoverdrachtniveau Betzdorf, den 02.01.2009 J. Hörmann (Geschäftsführung) Dr.-Ing. M. Simon (Entwicklungsleitung) 33 www.WOLF-Garten.com Teil-Nr. 0054 659 / 0409 - TB-
 1
1
-
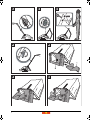 2
2
-
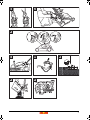 3
3
-
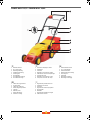 4
4
-
 5
5
-
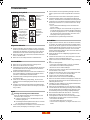 6
6
-
 7
7
-
 8
8
-
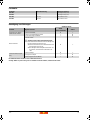 9
9
-
 10
10
-
 11
11
-
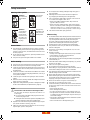 12
12
-
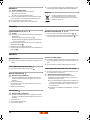 13
13
-
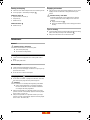 14
14
-
 15
15
-
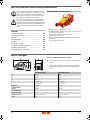 16
16
-
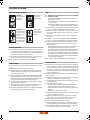 17
17
-
 18
18
-
 19
19
-
 20
20
-
 21
21
-
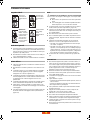 22
22
-
 23
23
-
 24
24
-
 25
25
-
 26
26
-
 27
27
-
 28
28
-
 29
29
-
 30
30
-
 31
31
-
 32
32
-
 33
33
-
 34
34


Wolf Garten POWER WOLF 15/37 Handleiding
- Categorie
- Tuingereedschap
- Type
- Handleiding
- Deze handleiding is ook geschikt voor
in andere talen
Gerelateerde artikelen
-
Wolf Garten Power 1500 Handleiding
-
-
-
-
-
Wolf Garten LI-ION Power 34 Handleiding
-
-
-
-