
BS 6058 CB
BS6058CB_IM_02.2023 16.02.23
Bedienungsanleitung
Instruction Manual • Gebruiksaanwijzing • Mode d’emploi
Manual de instrucciones • Istruzioni per l’uso • Instrukcja obsługi / Gwarancja
Használati utasítás • Руководство по эксплуатации •
NASS- / TROCKENSAUGER
Wet and Dry Vacuum Cleaner • Nat en droog stofzuiger • Aspirateur eau et poussière
Aspiradora para mojado y seco • Aspirapolvere e aspiraliquidi
Odkurzacz na sucho i na mokro • Nedves és szárazporszívó
Пылесос для сухой и влажной уборки •

BS6058CB_IM_02.2023 16.02.23
Bedienungsanleitung ....................................................................................Seite 4
Instruction Manual ........................................................................................ Page 9
Gebruiksaanwijzing ................................................................................... Pagina 14
Mode d’emploi............................................................................................... Page 19
Manual de instrucciones .......................................................................... Página 24
Istruzioni per l’uso .....................................................................................Pagina 29
Instrukcja obsługi .......................................................................................Strona 34
Használati utasítás .......................................................................................Oldal 40
Руководство по эксплуатации .................................................................. стр. 45
55 ....................................................................................................................
2

BS6058CB_IM_02.2023 16.02.23
3
Übersicht der Bedienelemente
Overview of the Components • Overzicht van de bedieningselementen
Liste des différents éléments de commande • Indicación de los elementos de manejo
Elementi di comando • Przegląd elementów obsługi • A kezelőelemek áttekintése
Обзор деталей прибора •

4
BS6058CB_IM_02.2023 16.02.23
WICHTIG:
Lesen Sie unbedingt zuerst die separat beiliegenden Sicherheits-
hinweise.
Bedienungsanleitung
Vielen Dank, dass Sie sich für unser Produkt entschieden
haben. Wir wünschen Ihnen viel Freude mit dem Gerät.
Lesen Sie vor Inbetriebnahme dieses Gerätes die Be-
dienungsanleitung und die separat beiliegenden Sicher-
heitshinweise sehr sorgfältig durch. Bewahren Sie diese
Unterlagen inkl. Garantieschein, Kassenbon und nach
Möglichkeit den Karton mit Innenverpackung gut auf. Falls
Sie das Gerät an Dritte weitergeben, geben Sie auch immer
alle dazugehörigen Unterlagen mit.
Symbole in dieser Bedienungsanleitung
Wichtige Hinweise für Ihre Sicherheit sind besonders ge-
kennzeichnet. Beachten Sie diese Hinweise unbedingt, um
Unfälle und Schäden am Gerät zu vermeiden:
WARNUNG:
Warnt vor Gefahren für Ihre Gesundheit und zeigt mög-
liche Verletzungsrisiken auf.
ACHTUNG:
Weist auf mögliche Gefährdungen für das Gerät oder
andere Gegenstände hin.
Inhalt
Übersicht der Bedienelemente ..........................................3
Bestimmungsgemäßer Gebrauch .....................................4
Auspacken des Gerätes ..................................................... 4
Übersicht der Bedienelemente / Lieferumfang ................5
Warnhinweise für die Benutzung des Gerätes ................ 5
Inbetriebnahme ...................................................................5
Montage des Tragegriffs ..................................................5
Montage der Rollen ..........................................................5
Filter einsetzen ................................................................. 6
Motorgehäuse aufsetzen .................................................6
Schlauch anschließen und lösen ..................................... 6
3-teiliges Saugrohr ........................................................... 6
Düsenaufsätze .................................................................6
Luftschieber ......................................................................6
Netzkabel .........................................................................6
Ein- / Ausschalten .............................................................7
Benutzung des Gerätes......................................................7
Vorbereitung ..................................................................... 7
Trocken saugen ...............................................................7
Nass saugen ....................................................................7
Permanentlter und Auffangbehälter entleeren ...............7
Betrieb beenden ...............................................................7
Reinigung .............................................................................7
Auffangbehälter ................................................................ 7
Zubehör ............................................................................ 7
Gehäuse ...........................................................................7
Aufbewahrung .....................................................................7
Störungsbehebung .............................................................8
Technische Daten ...............................................................8
Entsorgung .......................................................................... 8
Bedeutung des Symbols „Mülltonne“ ...............................8
Bestimmungsgemäßer Gebrauch
Dieses Gerät verfügt über folgende Funktionen:
• Nass- und Trockensaugen
• Gebläsefunktion
Es ist für den Gebrauch im Haushalt und ähnlichen Anwen-
dungsbereichen vorgesehen.
Es darf nur in der Art und Weise benutzt werden, wie es in
dieser Bedienungsanleitung beschrieben ist. Sie dürfen das
Gerät nicht für gewerbliche Zwecke einsetzen.
Jede andere Verwendung gilt als nicht bestimmungsgemäß
und kann zu Sachschäden oder sogar zu Personenschäden
führen.
Der Hersteller übernimmt keine Haftung für Schäden, die
durch nicht bestimmungsgemäßen Gebrauch entstehen.
Auspacken des Gerätes
1. Nehmen Sie das Gerät aus seiner Verpackung.
2. Entfernen Sie sämtliches Verpackungsmaterial, wie Fo-
lien, Füllmaterial, Kabelbinder und Kartonverpackung.
3. Prüfen Sie den Lieferumfang auf Vollständigkeit. Einige
Teile aus dem Lieferumfang nden Sie im Auffang-
behälter.
4. Sollte der Verpackungsinhalt unvollständig oder Beschä-
digungen feststellbar sein, nehmen Sie das Gerät nicht in
Betrieb. Bringen Sie es umgehend zum Händler zurück.

5
BS6058CB_IM_02.2023 16.02.23
Übersicht der Bedienelemente /
Lieferumfang
1 Saugrohr, 3-tlg.
2 Luftschieber
3 Saugschlauch
4 Ein- / Ausschalter ( I / O )
5 Ausblasöffnung
6 Aufsteckvorrichtung für die Bodendüse
7 Tragegriff
8 Motorgehäuse
9 Aufsteckvorrichtung für die Düsenaufsätze
10 Verriegelung
11 Ansaugöffnung
12 Schlauchanschluss
13 Auffangbehälter
14 Aufsteckvorrichtung für die Düsenaufsätze
15 Laufrollen
16 Fahrgestell
17 Hebel für das Ein- und Ausfahren der Bürste
18 Bodendüse
Zubehör
19 Fugendüse
20 Bürstendüse
Ohne Abbildung
Permanentlter (zum Trocken saugen)
Dichtungsring (zum Nass saugen)
Schutzlter aus Schaumstoff
Ersatzteile
Alle Service relevanten Themen, sowie Informationen
für die Bestellung von Ersatzteilen / Zubehören innerhalb
und außerhalb der Garantie, nden Sie auf unserer
Homepage: www.clatronic-germany.de / service
Warnhinweise für die
Benutzung des Gerätes
WARNUNG:
• Verwenden Sie das Gerät in feuchten Räumen nur,
wenn zu Ihrem Schutz ein FI-Schutzschalter im Strom-
kreis vorgeschaltet wurde. Ziehen Sie im Zweifelsfall
einen autorisierten Elektroinstallateur zurate.
• Sollte das wassergefüllte Gerät einmal unabsichtlich
umkippen, ziehen Sie immer erst den Stecker aus der
Steckdose, bevor Sie es wieder aufrichten.
WARNUNG:
• Saugen Sie niemals explosive Flüssigkeiten (wie
Heizöl, Benzin, Farbverdünner, Aceton) und Stäube
(wie Magnesium- und Aluminiumstäube), brennbare
Gase sowie unverdünnte Lösungsmittel und Säuren
damit auf, es besteht Explosionsgefahr! Es könnten
durch Verwirbelungen der Saugluft explosive Dämpfe
oder Gemische entstehen. Diese Stoffe könnten die
verwendeten Teile und Materialen angreifen.
ACHTUNG:
• Achten Sie auf die durch die Kabellänge begrenzte
Reichweite!
• Schalten Sie das Gerät in folgenden Situationen sofort
aus:
- Bei Schaumbildung.
- Bei Flüssigkeitsaustritt.
- Wenn der Behälter voll ist.
- Wenn das Gerät umgekippt ist.
• Saugen Sie mit dem Gerät keine schaumbildenden
Reinigungsmittel auf!
• Beim Saugen von Flüssigkeiten entfernen Sie immer
den Permanentlter. Setzen Sie stattdessen den
Dichtungsring ein.
• Prüfen Sie den richtigen Sitz des Schutzlters.
• Bevor Sie das nächste Mal wieder trocken saugen,
müssen alle Bauteile wieder getrocknet sein.
• Wenn Sie glatte Böden trocken mit der Bodendüse
saugen, verwenden Sie diese unbedingt mit ausge-
fahrenen Bürsten, um eine Beschädigung vom Boden
zu vermeiden.
Inbetriebnahme
Sofern noch nicht geschehen, entnehmen Sie die mitgelie-
ferten Teile aus dem Auffangbehälter.
Montage des Tragegriffs
Montieren Sie den Tragegriff mit den beiden beiliegenden
Schrauben. Ziehen Sie die Schrauben mit einem passen-
den Schraubenzieher handfest.
Montage der Rollen
Bevor Sie das Gerät benutzen, befestigen Sie die Rollen
am Fahrgestell des Auffangbehälters.
1. Lösen Sie das Motorgehäuse vom Auffangbehälter, in-
dem Sie die Verriegelungen nach innen drücken.
2. Nehmen Sie das Motorgehäuse vom Auffangbehälter ab.
3. Stellen Sie den Auffangbehälter auf den Kopf.
4. Stecken Sie die Rollen mit den Stiften in die dafür vor-
gesehenen Löcher bis zum Anschlag.
5. Drehen Sie den Behälter wieder um, so dass er auf den
Rollen steht.

6
BS6058CB_IM_02.2023 16.02.23
Filter einsetzen
1. Permanentlter einsetzen
(nur beim trocken Saugen)
Das Gerät verfügt über einen Per-
manentlter. Dieser ist leicht einzu-
setzen und lässt sich reinigen.
• Stülpen Sie den Gummirand
des Permanentlters über den
Rand des Auffangbehälters.
Er dient dem luftdichten Ver-
schluss des Motorgehäuses.
2. Schutzlter aus Schaumstoff
Unterhalb des Motors bendet sich ein Schutzlter aus
Schaumstoff. Er wird gleichermaßen zum nass und trocken
Saugen benötigt.
• Sofern noch nicht vorhanden, setzen Sie den Schutzlter
auf den Ansaugkorb.
• Kontrollieren Sie regelmäßig den richtigen Sitz und den
Zustand des Filters.
Motorgehäuse aufsetzen
• Wenn Sie den Permanentlter nicht verwenden,
bringen Sie immer den im Lieferumfang enthaltenden
Dichtungsring an. Stülpen Sie ihn über den Rand des
Auffangbehälters.
- Achten Sie darauf, dass diese Gummidichtung immer
korrekt auf dem Rand des Behälters sitzt. Ist dies nicht
der Fall, geht Saugleistung verloren.
• Richten Sie das Motorgehäuse so aus, dass der
Ein- / Ausschalter über der Ansaugöffnung sitzt.
• Die Verriegelungen am Gerät müssen in den Aussparun-
gen des Motorgehäuses liegen. Drücken Sie das Motor-
gehäuse auf den Auffangbehälter bis die Verriegelungen
einrasten.
Schlauch anschließen und lösen
Saugfunktion
Stecken Sie den Schlauchanschluss in die Ansaugöffnung
am Auffangbehälter. Achten Sie dabei auf die Aussparun-
gen. Drehen Sie den Schlauch im Uhrzeigersinn fest.
Blasfunktion
Stecken Sie den Schlauchanschluss in die Ausblasöffnung
am Motorgehäuse. Achten Sie dabei auf die Aussparungen.
Drehen Sie den Schlauch im Uhrzeigersinn fest.
Schlauch lösen
Lösen Sie den Schlauch, indem Sie diesen gegen den Uhr-
zeigersinn drehen und herausziehen.
3-teiliges Saugrohr
• Stecken Sie die beiden Saugrohre ohne Halterung in-
einander.
• Die zusammengesteckten Saugrohre stecken Sie mit
dem dünneren Ende auf das dickere Ende des Saug-
rohrs mit Halterung.
• Um die Saugrohre zu lösen, ziehen Sie diese unter
leichtem Drehen ab.
Düsenaufsätze
• Um die Düsenaufsätze zu lösen, ziehen Sie diese mit
einer leichten Drehung ab.
• Zur Aufbewahrung der Bürstendüse und der Fugendüse
haben Sie mehrere Möglichkeiten.
- Nutzen Sie die Halterungen über den Rollen oder die
Halterungen am Deckel.
Bodendüse
Sie können mit der Bodendüse glatte Flächen und Teppiche
trocken oder nass reinigen. Die Bodendüse ist zur leichte-
ren Führung mit Rollen ausgestattet.
• Mit dem Hebel stellen Sie die Bürsten nach außen oder
nach innen.
Die optimale Anwendung richtet sich nach der Beschaffen-
heit des Bodens. Wir empfehlen folgenden Einsatz:
• Einsatz ohne Bürsten ( ):
- Zum Saugen von trockenen Teppichböden (hoher
Flor).
- Zum Reinigen von nassen, glatten Böden.
Diese Einstellung eignet sich auch bestens, um Was-
ser von größeren Flächen aufzunehmen.
Beachten Sie, dass der Auffangbehälter nur eine
begrenzte Menge an Flüssigkeit aufnehmen kann!
Die maximale Füllmenge reduziert sich bei schaum-
bildenden Zusatzmittel entsprechend!
• Einsatz mit Bürsten ( ):
- Zum Saugen von trockenen, glatten Böden und
trockenen Teppichböden (niedriger Flor).
- Zum Reinigen (Schrubben) von nassen, glatten Bö-
den und nassen Teppichböden (niedriger Flor).
Fugendüse
Zum Saugen in Ecken und Schlitzen usw.
Bürstendüse
Zur Reinigung von Polstern oder Vorhängen.
Luftschieber
Öffnen Sie den Luftschieber am Schlauchgriff zur Luftregu-
lierung oder, um an der Düse haftende Teile zu lösen.
Netzkabel
• Zum Betrieb wickeln Sie das Netzkabel komplett ab.
• Nach dem Betrieb lassen Sie das Motorgehäuse zuerst
abkühlen. Anschließend können Sie das Netzkabel um
das Motorgehäuse wickeln.

7
BS6058CB_IM_02.2023 16.02.23
Ein- / Ausschalten
Mit dem Ein- / Ausschalter schalten Sie das Gerät ein (I)
und aus (O).
Benutzung des Gerätes
Vorbereitung
1. Wählen Sie das gewünschte Zubehör.
2. Wickeln Sie das Netzkabel vollständig ab.
3. Prüfen Sie, ob die Netzspannung, die Sie benutzen
wollen, mit den Angaben auf dem Typenschild überein-
stimmt.
Trocken saugen
1. Setzen Sie den Permanentlter in den Auffangbehälter.
2. Setzen Sie das Motorgehäuse mit den Aussparungen
auf die Verriegelungen, bis diese einrasten.
3. Montieren Sie das Zubehör.
4. Stecken Sie den Netzstecker in eine vorschriftsmäßig
installierte Schutzkontaktsteckdose.
5. Schalten Sie das Gerät ein.
6. Saugen Sie nun mit gleichmäßiger Geschwindigkeit.
Andrücken ist nicht nötig.
Nass saugen
1. Ziehen Sie den Netzstecker aus der Steckdose.
2. Entfernen Sie den Permanentlter. Setzen Sie stattdes-
sen den Dichtungsring ein.
3. Stülpen Sie den Dichtungsring über den Rand des Auf-
fangbehälters.
4. Setzen Sie das Motorgehäuse mit den Aussparungen
auf die Verriegelungen, bis diese einrasten.
5. Montieren Sie das Zubehör.
6. Stecken Sie den Netzstecker in eine vorschriftsmäßig
installierte Schutzkontaktsteckdose.
7. Schalten Sie das Gerät ein.
Der Auffangbehälter kann nur eine begrenzte Menge
Flüssigkeit aufnehmen! Bildet sich Schaum im Auffang-
behälter, reduziert sich das maximale Aufnahmevolumen
entsprechend! Ist der Behälter voll, schließt das
Schwimmerventil die Saugöffnung und der Motor läuft
mit erhöhter Drehzahl. Das Gerät sofort ausschalten und
entleeren.
Permanentlter und Auffangbehälter entleeren
1. Schalten Sie das Gerät mit dem Ein- / Ausschalter aus.
Ziehen Sie den Netzstecker aus der Steckdose.
2. Lösen Sie das Motorgehäuse vom Auffangbehälter,
indem Sie die Verriegelungen nach innen drücken. Neh-
men Sie das Motorgehäuse ab.
3. Entnehmen Sie gegebenenfalls den Permanentlter.
Schütteln Sie ihn aus.
4. Entfernen Sie den Saugschlauch.
5. Entleeren Sie den Auffangbehälter.
6. Setzen Sie gegebenenfalls den Permanentlter wieder in
den Auffangbehälter.
7. Montieren Sie den Schlauchanschluss und das Motor-
gehäuse wieder.
8. Nehmen Sie den Betrieb wieder auf.
Betrieb beenden
1. Schalten Sie das Gerät aus.
2. Ziehen Sie den Netzstecker aus der Steckdose.
Reinigung
WARNUNG:
• Ziehen Sie immer den Netzstecker aus der Steckdose,
bevor Sie das Gerät reinigen oder warten.
• Das Motorgehäuse auf keinen Fall zum Reinigen in
Wasser tauchen. Es könnte zu einem elektrischen
Schlag oder Brand führen.
ACHTUNG:
• Benutzen Sie keine Drahtbürste oder andere scheu-
ernde Gegenstände.
• Benutzen Sie keine scharfen oder scheuernden
Reinigungsmittel.
Auffangbehälter
• Spülen Sie den Auffangbehälter nach dem Gebrauch mit
klarem Wasser aus.
• Verunreinigungen in dem Behälter können Sie mit einem
Schwamm oder einer Nylonbürste entfernen.
Zubehör
• Sie können alle Zubehörteile in warmen Spülwasser mit
etwas Handspülmittel reinigen. Bei geringer Verschmut-
zung können Sie die Filter nur ausklopfen.
• Spülen Sie mit klarem Wasser nach und trocknen Sie die
Teile ab. Nehmen Sie das Gerät erst wieder in Betrieb,
wenn alle Filter vollständig trocken sind.
Gehäuse
Das Gehäuse kann mit einem leicht angefeuchteten Tuch
abgewischt werden.
Aufbewahrung
• Reinigen Sie das Gerät wie beschrieben und lassen Sie
es vollständig trocknen.
• Sie können das Netzkabel um das Motorgehäuse
wickeln.
• Die Aufsteckvorrichtung (6) ist ausschließlich für die
Bodendüse ohne Rohr und Schlauch vorgesehen.

8
BS6058CB_IM_02.2023 16.02.23
• Wir empfehlen, das Gerät in der Original-Verpackung
aufzubewahren, wenn Sie es über einen längeren Zeit-
raum nicht benutzen möchten.
• Lagern Sie das Gerät immer außerhalb der Reichweite
von Kindern an einem gut belüfteten und trockenen Ort.
Störungsbehebung
Problem Mögliche Ursache Abhilfe
Das Gerät ist ohne Funktion. Das Gerät hat keine Stromver-
sorgung.
Überprüfen Sie die Steckdose mit einem
anderen Gerät.
Setzen Sie den Netzstecker richtig ein.
Kontrollieren Sie die Haussicherung.
Gerät saugt nicht. Der Auffangbehälter ist voll. Entleeren Sie den Auffangbehälter.
Im Saugschlauch oder in der Düse
bendet sich ein Fremdkörper.
Kontrollieren Sie das Zubehör auf Fremd-
körper.
Das Gerät ist umgekippt. 1. Schalten Sie das Gerät aus.
2. Warten Sie den Stillstand des Motors ab.
3. Nehmen Sie den Betrieb wieder auf.
Der Dichtungsring zwischen Motor-
gehäuse und Auffangbehälter fehlt.
Kontrollieren Sie die Dichtung.
Staub oder Flüssigkeit läuft aus dem
Teleskoprohr, dem Saugschlauch
oder dem Sauganschluss.
Das Zubehör ist nicht korrekt
montiert.
Vergewissern Sie sich, dass das Zubehör
fest und richtig angeschlossen ist.
Das Gerät schaltet sich während
des Betriebs aus.
Das Gerät ist mit einer Temperatur-
sicherung ausgestattet, die bei
Überhitzung das Gerät automatisch
ausschaltet.
Lassen Sie das Gerät ca. 15 Minuten ab-
kühlen, bevor Sie es erneut benutzen.
Technische Daten
Modell: ................................................................. BS 6058 CB
Spannungsversorgung: ..................... 220 – 240 V~, 50 – 60 Hz
Leistungsaufnahme:....................................................1200 W
Schutzklasse: .......................................................................
Schutzart: ...................................................................... IPX4 *
Nettogewicht: ...........................................................ca. 4,9 kg
* Das Gerät entspricht der Schutzart IPX4. Das heißt, dass
das Gerät gegen allseitiges Spritzwasser geschützt ist.
Technische und gestalterische Änderungen im Zuge stetiger
Produktentwicklungen vorbehalten.
Dieses Gerät wurde nach allen zutreffenden, aktuellen
CE-Richtlinien geprüft und nach den neuesten sicherheits-
technischen Vorschriften gebaut.
Entsorgung
Bedeutung des Symbols „Mülltonne“
Schonen Sie unsere Umwelt, Elektrogeräte ge-
hören nicht in den Hausmüll.
Nutzen Sie die für die Entsorgung von Elektro-
geräten vorgesehenen Sammelstellen und
geben dort Ihre Elektrogeräte ab, die Sie nicht
mehr benutzen werden.
Sie helfen damit die potenziellen Auswirkungen, durch
falsche Entsorgung, auf die Umwelt und die menschliche
Gesundheit zu vermeiden.
Sie leisten damit Ihren Beitrag zur Wiederverwertung, zum
Recycling und zu anderen Formen der Verwertung von
Elektro- und Elektronik-Altgeräten.
Informationen, wo die Geräte zu entsorgen sind, erhalten
Sie über Ihre Kommunen oder die Gemeindeverwaltungen.
Ihr Händler und Vertragspartner ist ebenfalls zur kosten-
freien Rücknahme des Altgerätes verpichtet.

BS6058CB_IM_02.2023 16.02.23
9
IMPORTANT:
Be sure to read the separately enclosed safety instructions rst.
Instruction Manual
Thank you for choosing our product. We hope you will enjoy
using the appliance.
Read the instruction manual and the separately enclosed
safety instructions very carefully before using this appliance.
Keep these documents, including the warranty certicate,
receipt and, if possible, the box with the inner packaging in
a safe place. If you pass the appliance on to a third party,
always include all the relevant documents.
Symbols in this Instruction Manual
Important information for your safety is specially marked.
It is essential to comply with these instructions in order to
avoid accidents and prevent damage to the appliance:
WARNING:
This warns you of dangers to your health and indicates
possible injury risks.
CAUTION:
This refers to possible hazards to the appliance or other
objects.
Content
Overview of the Components ............................................3
Intended Use .......................................................................9
Unpacking the Appliance ...................................................9
Overview of the Components / Scope of Delivery ...........9
Warnings for the Use of the Appliance ..........................10
Putting Into Operation ...................................................... 10
Mounting the Carrying Handle .......................................10
Mounting the Rollers ......................................................10
Inserting the Filter ..........................................................10
Putting on the Motor Housing ........................................10
Connect and Disconnect the Hose ................................ 11
3-part Suction Tube ........................................................ 11
Nozzle Attachments ....................................................... 11
Air Slider ......................................................................... 11
Mains Cable ................................................................... 11
Switching On / Off ........................................................... 11
Using the Appliance ......................................................... 11
Preparation ..................................................................... 11
Vacuuming Dry ............................................................... 11
Wet Vacuuming .............................................................. 11
Emptying the Permanent Filter
and Collection Container ................................................12
End Operation ................................................................ 12
Cleaning ............................................................................. 12
Collection Container .......................................................12
Accessories .................................................................... 12
Housing ..........................................................................12
Storage ............................................................................... 12
Troubleshooting ................................................................12
Technical Data ...................................................................13
Disposal .............................................................................13
Meaning of the “Dustbin” Symbol ..................................13
Intended Use
This appliance has the following functions:
• Wet and dry vacuuming
• Fan function
It is intended for household and similar use.
It may only be used in the manner described in this instruc-
tion manual. You must not use the appliance for commercial
purposes.
Any other use is considered improper and may result in
damage to property or even personal injury.
The manufacturer is not liable for damage caused by
improper use.
Unpacking the Appliance
1. Remove the appliance from its packaging.
2. Remove all packaging material, such as foils, lling
material, cable ties and cardboard packaging.
3. Check the scope of delivery for completeness. Some
parts from the scope of delivery can be found in the
collection container.
4. If the contents of the packaging are incomplete or if
damage can be detected, do not operate the appliance.
Return it to the dealer immediately.
Overview of the Components /
Scope of Delivery
1 Suction pipe, 3-piece
2 Air slide
3 Suction hose
4 On / off switch ( I / O )
5 Air outlet
6 Attachment device for the oor nozzle
7 Carrying handle
8 Motor housing
9 Attachment device for the nozzle attachments
10 Locking device

BS6058CB_IM_02.2023 16.02.23
10
11 Suction opening
12 Hose connection
13 Collection container
14 Attachment device for the nozzle attachments
15 Rollers
16 Chassis frame
17 Lever for extending and retracting the brush
18 Floor nozzle
Accessories
19 Crevice nozzle
20 Brush nozzle
Without Illustration
Permanent lter (for dry vacuuming)
Sealing ring (for wet vacuuming)
Protective foam lter
Warnings for the Use of the Appliance
WARNING:
• Only use the appliance in damp rooms if a residual
current circuit breaker has been connected upstream
in the circuit for your protection. If in doubt, consult an
authorised electrician.
• If the appliance, which is lled with water, should acci-
dentally tip over, always unplug it from the wall socket
before standing it up again.
• Never use it to suck up explosive liquids (such as
heating oil, petrol, paint thinner, acetone) and dusts
(such as magnesium and aluminium dusts), ammable
gases as well as undiluted solvents and acids, there
is a risk of explosion! Explosive vapours or mixtures
could be created by swirling the suction air. These
substances could attack the parts and materials used.
CAUTION:
• Pay attention to the limited range due to the cable
length!
• Switch off the appliance immediately in the following
situations:
- In case of foam formation.
- In case of liquid leakage.
- When the container is full.
- If the appliance is tipped over.
• Do not vacuum foam-forming cleaning agents with
the appliance!
• When vacuuming liquids, always remove the perma-
nent lter. Insert the sealing ring instead.
• Check that the protective lter is correctly seated.
• Before you vacuum dry again the next time, all compo-
nents must be dry again.
CAUTION:
• When vacuuming smooth oors dry with the oor
nozzle, be sure to use it with the brushes extended to
avoid damaging the oor.
Putting Into Operation
If not already done, remove the supplied parts from the
collection container.
Mounting the Carrying Handle
Mount the carrying handle with the two enclosed screws.
Hand-tighten the screws with a suitable screwdriver.
Mounting the Rollers
Before you use the appliance, fasten the rollers to the chas-
sis frame of the collection container.
1. Detach the motor housing from the collection container
by pressing the latches inwards.
2. Remove the motor housing from the collection container.
3. Place the collection container upside down.
4. Insert the rollers with the pins into the provided holes as
far as they will go.
5. Turn the collection container back round so that it stands
on the rollers.
Inserting the Filter
1. Insert the Permanent Filter
(only when Vacuuming Dry)
The appliance has a permanent
lter. It is easy to insert and clean.
• Put the rubber rim of the perma-
nent lter over the edge of the
collection container. It serves
as an airtight seal for the motor
housing.
2. Protective Foam Filter
A protective foam lter is located underneath the motor. It is
needed for both wet and dry vacuuming.
• If not already tted, place the protective lter on the
suction strainer.
• Regularly check that the lter is correctly tted and in
good condition.
Putting on the Motor Housing
• If you do not use the permanent lter, always attach the
supplied sealing ring. Fit it over the edge of the collection
unit.
- Ensure that this rubber seal always sits correctly on
the edge of the container. If this is not the case the
suction power is lost.
• Align the motor housing so that the on / off switch sits
above the intake opening.

BS6058CB_IM_02.2023 16.02.23
11
• The latches on the appliance must be in the recesses
of the motor housing. Press the motor housing onto the
collection container until the latches engage.
Connect and Disconnect the Hose
Suction Function
Insert the hose connection into the suction opening on the
collection container. Pay attention to the recesses. Turn the
hose clockwise to tighten.
Fan Function
Insert the hose connection into the blow-out opening on the
motor housing. Pay attention to the recesses. Turn the hose
clockwise to tighten it.
Loosen the Hose
Loosen the hose by turning it anticlockwise and pulling it out.
3-part Suction Tube
• Insert the two suction pipes into each other without the
holder.
• Insert the thinner end of the assembled suction tubes
into the thicker end of the suction tube with holder.
• To detach the suction tubes, pull them off while turning
them slightly.
Nozzle Attachments
• To detach the nozzle attachments, pull them off with a
slight twist.
• There are several ways to store the brush nozzle and
crevice nozzle.
- Use the holders above the rollers or the holders on
the lid.
Floor Nozzle
You can clean smooth surfaces and carpets dry or wet with
the oor nozzle. The oor nozzle is equipped with rollers for
easier guidance.
• Use the lever to move the brushes outwards or inwards.
The optimal use depends on the condition of the oor. We
recommend the following use:
• Use without Brushes ( ):
- For vacuuming dry carpets (high pile).
- For cleaning wet, smooth oors.
This setting is also best suited for picking up water
from larger areas.
Note that the collection container can only hold a
limited amount of liquid! The maximum lling quantity
is reduced accordingly for foam-forming additives!
• Use with Brushes ( ):
- For vacuuming dry, smooth oors and dry carpets
(low pile).
- For cleaning (scrubbing) wet, smooth oors and wet
carpets (low pile).
Crevice Nozzle
For vacuuming in corners and slits, etc.
Brush Nozzle
For cleaning upholstery or curtains.
Air Slider
Open the air slider on the hose handle to regulate the air or
to loosen parts sticking to the nozzle.
Mains Cable
• For operation, unwind the mains cable completely.
• After operation, let the motor housing cool down rst. You
can then wrap the mains cable around the motor housing.
Switching On / Off
Use the on / off switch to turn the appliance on (I) and off (O).
Using the Appliance
Preparation
1. Select the desired accessory.
2. Unwind the mains cable completely.
3. Check that the mains voltage you want to use corre-
sponds to the information on the rating plate.
Vacuuming Dry
1. Place the permanent lter in the collection container.
2. Place the motor housing with the recesses on the latches
until they click into place.
3. Fit the accessories.
4. Insert the mains plug into a properly installed earthed
socket.
5. Switch on the appliance.
6. Now vacuum at a steady speed. It is not necessary to
press down.
Wet Vacuuming
1. Pull the mains plug out of the socket.
2. Remove the permanent lter. Insert the sealing ring
instead.
3. Fit the sealing ring over the edge of the collection unit.
4. Place the motor housing with the recesses on the latches
until they click into place.
5. Fit the accessories.
6. Insert the mains plug into a properly installed earthed
socket.
7. Switch on the appliance.
The collection container can only hold a limited amount
of liquid! If foam forms in the collection container, the
maximum collection volume is reduced accordingly!
When the container is full, the oat valve closes the
suction opening and the motor runs at increased speed.
Switch off and empty the appliance immediately.

BS6058CB_IM_02.2023 16.02.23
12
Emptying the Permanent Filter and Collection Container
1. Switch off the appliance with the on / off switch. Pull the
mains plug out of the socket.
2. Detach the motor housing from the collection container
by pressing the locks inwards. Remove the motor
housing.
3. If necessary, remove the permanent lter. Shake it out.
4. Remove the suction hose.
5. Empty the collection container.
6. If necessary, put the permanent lter back into the
collection container.
7. Reassemble the hose connection and the motor housing.
8. Resume operation.
End Operation
1. Switch off the appliance.
2. Unplug the mains plug from the socket.
Cleaning
WARNING:
• Pull the mains plug out of the socket before cleaning
or maintaining the appliance.
• Never immerse the motor housing in water for clean-
ing. It could cause an electric shock or re.
CAUTION:
• Do not use a wire brush or other abrasive objects.
• Do not use harsh or abrasive cleaners.
Collection Container
• Rinse the collection container with clean water after use.
• You can remove impurities in the container with a sponge
or a nylon brush.
Accessories
• You can clean all accessories in warm rinse water with
a little hand dishwashing liquid. If they are not very dirty,
you can just tap them out.
• Rinse with clean water and dry the parts. Do not put
the appliance back into operation until all lters are
completely dry.
Housing
The housing can be wiped clean with a slightly damp cloth.
Storage
• Clean the appliance as described and allow it to dry
completely.
• You can wrap the mains cable around the motor housing.
• The attachment device (6) is intended exclusively for the
oor nozzle without tube and hose.
• We recommend storing the appliance in its original
packaging if you do not intend to use it for a long period
of time.
• Always store the appliance out of the reach of children in
a well-ventilated and dry place.
Troubleshooting
Problem Possible Cause Remedy
The appliance has no function. The appliance has no power supply. Check the socket with another appliance.
Insert the mains plug correctly.
Check the house fuse.
The appliance does not suck. The collection container is full. Empty the collection container.
There is a foreign object in the suction
hose or nozzle.
Check the accessories for foreign objects.
The appliance has tipped over. 1. Switch off the appliance.
2. Maintain the standstill of the motor.
3. Resume operation.
The sealing ring between the motor hous-
ing and the collection unit is missing.
Check the seal.

BS6058CB_IM_02.2023 16.02.23
13
Problem Possible Cause Remedy
Dust or liquid leaks from the
telescopic tube, the suction hose
or the suction connection.
The accessories are not mounted
correctly.
Make sure that the accessories are rmly
and correctly connected.
The appliance switches off
during operation.
The appliance is equipped with a temper-
ature fuse that automatically switches off
the appliance if it overheats.
Let the appliance cool down for approx.
15 minutes before using it again.
Technical Data
Model:..................................................................BS 6058 CB
Power supply:.................................... 220 – 240 V~, 50 – 60 Hz
Power consumption: ...................................................1200 W
Protection class: ...................................................................
Protection type: ............................................................. IPX4 *
Net weight: ....................................................... approx. 4.9 kg
* The appliance complies with protection type IPX4. This
means that the appliance is protected against splashing
water from all sides.
The right to make technical and design modications in
the course of continuous product development remains
reserved.
This appliance has been tested according to all applicable,
current CE directives and built according to the latest safety
regulations.
Disposal
Meaning of the “Dustbin” Symbol
Protect our environment: do not dispose of elec-
trical equipment in the domestic waste.
Please return any electrical equipment that
you will no longer use to the collection points
provided for their disposal.
This helps avoid the potential effects of incorrect disposal
on the environment and human health.
This will contribute to the recycling and other forms of
re-utilisation of electrical and electronic equipment.
Information concerning where the equipment can be
disposed of can be obtained from your local authority. Your
dealer and contractual partner is also obliged to take back
the old appliance free of charge.

BS6058CB_IM_02.2023 16.02.23
14
BELANGRIJK:
Lees eerst de apart bijgevoegde veiligheidsinstructies.
Gebruiksaanwijzing
Dank u voor het kiezen van ons product. Wij hopen dat u
het gebruik van het apparaat zult genieten.
Lees de gebruiksaanwijzing en de apart bijgevoegde
veiligheidsinstructies zorgvuldig door voordat u dit apparaat
in gebruik neemt. Bewaar deze documenten, inclusief het
garantiebewijs, de kassabon en, indien mogelijk, de doos
met de binnenverpakking op een veilige plaats. Als u het
apparaat aan een derde doorgeeft, voeg dan altijd alle
relevante documenten bij.
Symbolen in deze gebruiksaanwijzing
Belangrijke aanwijzingen voor uw veiligheid zijn speciaal
gekenmerkt. Neem deze aanwijzingen strikt in acht om
ongevallen en schade aan het apparaat te vermijden:
WAARSCHUWING:
Waarschuwt voor gevaren voor uw gezondheid en toont
mogelijk letsel risico’s.
LET OP:
Wijst op mogelijke gevaren voor het apparaat of andere
voorwerpen.
Inhoud
Overzicht van de bedieningselementen ...........................3
Bedoeld gebruik ................................................................14
Het apparaat uitpakken ....................................................14
Overzicht van de bedieningselementen /
Omvang van de levering ..................................................14
Waarschuwingen voor het gebruik van het apparaat...15
Ingebruikname ..................................................................15
Montage van de draagbeugel ........................................ 15
Montage van de rollen en de opvangbak ......................15
Het lter plaatsen ...........................................................15
Het plaatsen van de motorbehuizing ............................. 15
Aansluiten en loskoppelen van de slang .......................16
3-delige aanzuigbuis ......................................................16
Mondstuk hulpstukken ...................................................16
Luchtschuif .....................................................................16
Netsnoer .........................................................................16
In- / uitschakelen ............................................................. 16
Gebruik van het apparaat.................................................16
Voorbereiding ................................................................. 16
Droog zuigen .................................................................. 16
Nat zuigen ......................................................................16
Leegmaken van het permanentlter en de opvangbak
..17
Einde bedrijf ...................................................................17
Reiniging ............................................................................ 17
Opvangbak ..................................................................... 17
Accessoires .................................................................... 17
Behuizing ........................................................................17
Opslag ................................................................................ 17
Problemen oplossen ........................................................17
Technische gegevens .......................................................18
Verwijdering .......................................................................18
Betekenis van het symbool “vuilnisemmer” ................... 18
Bedoeld gebruik
Dit apparaat heeft de volgende functies:
• Nat- en droogzuigen
• Ventilator functie
Het is bedoeld voor huishoudelijk en soortgelijk gebruik.
Het mag alleen worden gebruikt op de wijze zoals beschre-
ven in deze gebruiksaanwijzing. U mag het apparaat niet
voor commerciële doeleinden gebruiken.
Elk ander gebruik wordt beschouwd als oneigenlijk en kan
leiden tot materiële schade of zelfs tot persoonlijk letsel.
De fabrikant is niet aansprakelijk voor schade veroorzaakt
door oneigenlijk gebruik.
Het apparaat uitpakken
1. Neem het apparaat uit de verpakking.
2. Verwijder al het verpakkingsmateriaal, zoals folies, vul-
materiaal, kabelbinders en kartonnen verpakkingen.
3. Controleer de inhoud van de verpakking op volledigheid.
Sommige onderdelen uit de leveringsomvang kunnen
zich in de opvangbak bevinden.
4. Als de inhoud van de verpakking onvolledig is of als er
beschadigingen kunnen worden vastgesteld, mag u het
apparaat niet in gebruik nemen. Breng het onmiddellijk
terug naar de dealer.
Overzicht van de bedieningselementen /
Omvang van de levering
1 Zuigbuis, 3-delig
2 Luchtschuif
3 Zuigslang
4 Aan / uit schakelaar ( I / O )
5 Luchtuitlaat
6 Bevestigingsinrichting voor de vloerzuigmond
7 Draagbeugel
8 Motorhuis
9 Bevestigingsinrichting voor de sproeieropzetstukken

BS6058CB_IM_02.2023 16.02.23
15
10 Vergrendelingsinrichting
11 Zuigopening
12 Slangaansluiting
13 Opvangbak
14 Bevestigingsvoorziening voor de mondstukken
15 Rollen
16 Chassisframe
17 Hendel voor het uittrekken en intrekken van de borstel
18 Vloerzuigmond
Accessoires
19 Spleetmondstuk
20 Borstelmondstuk
Zonder afbeelding
Permanente lter (voor droogzuigen)
Dichtingsring (voor nat zuigen)
Beschermingsschuimlter
Waarschuwingen voor het
gebruik van het apparaat
WAARSCHUWING:
• Gebruik het apparaat alleen in vochtige ruimtes als er
stroomopwaarts in het circuit een aardlekschakelaar
is aangesloten voor uw bescherming. Raadpleeg in
geval van twijfel een erkend elektricien.
• Mocht het apparaat, gevuld met water, per ongeluk
omvallen, haal dan altijd eerst de stekker uit het stop-
contact voordat u het weer rechtop zet.
• Gebruik het apparaat nooit voor het opzuigen van
explosieve vloeistoffen (zoals stookolie, benzine,
verfverdunner, aceton) en stof (zoals magnesium- en
aluminiumstof), ontvlambare gassen en onverdunde
oplosmiddelen en zuren, er bestaat explosiegevaar!
Door het opdwarrelen van de aanzuiglucht kunnen
explosieve dampen of mengsels ontstaan. Deze
stoffen kunnen de gebruikte onderdelen en materialen
aantasten.
LET OP:
• Let op het beperkte bereik als gevolg van de kabel-
lengte!
• Schakel het apparaat in de volgende situaties onmid-
dellijk uit:
- In geval van schuimvorming.
- Bij vloeistoekkage.
- Als de container vol is.
- Als het apparaat is omgevallen.
• Zuig geen schuimvormende reinigingsmiddelen
op met het apparaat!
• Verwijder bij het opzuigen van vloeistoffen altijd het
permanentlter. Plaats in plaats daarvan de afdichtring.
• Controleer of het beschermlter goed zit.
LET OP:
• Voordat u de volgende keer weer gaat stofzuigen,
moeten alle onderdelen weer droog zijn.
• Bij het droogzuigen van gladde vloeren met het vloer-
mondstuk moet u erop letten dat u het mondstuk met
uitgeschoven borstels gebruikt om beschadiging van
de vloer te voorkomen.
Ingebruikname
Verwijder de meegeleverde onderdelen uit de opvangbak
als dat nog niet gebeurd is.
Montage van de draagbeugel
Monteer de draagbeugel met de twee bijgeleverde
schroeven. Draai de schroeven met de hand vast met een
geschikte schroevendraaier.
Montage van de rollen
Bevestig de rollen aan het chassisframe van de opvangbak
voordat u het apparaat in gebruik neemt.
1. Maak de motorbehuizing los van de opvangbak door de
vergrendelingen naar binnen te drukken.
2. Verwijder de motorbehuizing uit de opvangbak.
3. Plaats de opvangbak ondersteboven.
4. Steek de rollen met de pennen tot aan de aanslag in de
daarvoor bestemde gaten.
5. Draai de opvangbak weer om, zodat deze op de rollen
staat.
Het lter plaatsen
1. Plaats het permanent lter
(alleen bij droogzuigen)
Het apparaat heeft een permanent
lter. Het is gemakkelijk te plaatsen
en schoon te maken.
• Plaats de rubberen rand van
het permanent lter over de
rand van de opvangbak. Het
dient als luchtdichte afsluiting
van de motorbehuizing.
2. Beschermend schuimlter
Een beschermende schuimlter bevindt zich onder de mo-
tor. Het is nodig voor zowel nat als droog zuigen.
• Plaats het beschermlter op de zuigzeef als dat nog niet
gebeurd is.
• Controleer regelmatig of het lter goed gemonteerd is en
in goede staat verkeert.

BS6058CB_IM_02.2023 16.02.23
16
Het plaatsen van de motorbehuizing
• Als u het permanente lter niet gebruikt, altijd de mee-
geleverde afdichtring gebruiken. Leg deze over de rand
van de houder.
- Zorg ervoor dat deze rubberen ring goed op de rand
van de houder is aangebracht. Wanneer dit niet het
geval is, gaat zuigkracht verloren.
• Lijn de motorbehuizing zo uit dat de aan / uit schakelaar
boven de aanzuigopening zit.
• De vergrendelingen op het apparaat moeten in de
uitsparingen van de motorbehuizing zitten. Druk de mo-
torbehuizing op de opvangbak totdat de vergrendelingen
vastklikken.
Aansluiten en loskoppelen van de slang
Aanzuigfunctie
Steek de slangaansluiting in de aanzuigopening van de
opvangbak. Let op de uitsparingen. Draai de slang met de
klok mee om hem vast te draaien.
Uitblaasfunctie
Steek de slangaansluiting in de uitblaasopening op de
motorbehuizing. Let op de uitsparingen. Draai de slang
rechtsom om hem vast te draaien.
De slang losmaken
Maak de slang los door hem tegen de wijzers van de klok in
te draaien en eruit te trekken.
3-delige aanzuigbuis
• Steek de twee zuigbuizen in elkaar zonder de houder.
• Steek het dunnere uiteinde van de geassembleerde
zuigbuizen in het dikkere uiteinde van de zuigbuis met
houder.
• Om de zuigbuizen los te maken, trekt u ze los terwijl u ze
lichtjes draait.
Mondstuk hulpstukken
• Om de zuigmondhulpstukken los te maken, trekt u ze er
met een lichte draaibeweging af.
• Er zijn verschillende manieren om de borstelzuigmond
en de kierenzuigmond op te bergen.
- Gebruik de houders boven de rollers of de houders
op het deksel.
Vloerzuigmond
U kunt gladde oppervlakken en tapijten droog of nat reini-
gen met het vloermondstuk. Het vloermondstuk is uitgerust
met rollen voor een gemakkelijkere geleiding.
• Gebruik de hendel om de borstels naar buiten of naar
binnen te bewegen.
Het optimale gebruik is afhankelijk van de conditie van de
vloer. Wij bevelen het volgende gebruik aan:
• Gebruik zonder borstels ( ):
- Voor het stofzuigen van droge tapijten (hoogpolig).
- Voor het reinigen van natte, gladde vloeren.
Deze instelling is ook het meest geschikt voor het
opzuigen van water uit grotere oppervlakken.
Let erop dat de opvangbak slechts een beperkte
hoeveelheid vloeistof kan bevatten! Bij schuimvor-
mende additieven wordt de maximale vulhoeveelheid
overeenkomstig gereduceerd!
• Gebruik met borstels ( ):
- Voor het stofzuigen van droge, gladde vloeren en
droge tapijten (laagpolig).
- Voor het reinigen (schrobben) van natte, gladde vloe-
ren en natte tapijten (laagpolig).
Spleetzuigmond
Voor het stofzuigen in hoeken en spleten, enz.
Borstelmondstuk
Voor het reinigen van bekleding of gordijnen.
Luchtschuif
Open de luchtschuif op de handgreep van de slang om de
lucht te regelen of om onderdelen die aan het mondstuk
vastzitten los te maken.
Netsnoer
• Wikkel voor gebruik het netsnoer volledig af.
• Laat na gebruik de motorbehuizing eerst afkoelen.
Daarna kunt u het netsnoer om het motorhuis wikkelen.
In- / uitschakelen
Gebruik de aan / uit schakelaar om het apparaat in (I) en
uit (O) te schakelen.
Gebruik van het apparaat
Voorbereiding
1. Kies het gewenste accessoire.
2. Rol het netsnoer volledig af.
3. Controleer of de netspanning die u wilt gebruiken over-
eenkomt met de informatie op het typeplaatje.
Droog zuigen
1. Plaats het permanent lter in de opvangbak.
2. Plaats de motorbehuizing met de uitsparingen op de
vergrendelingen tot ze vastklikken.
3. Plaats de accessoires.
4. Steek de netstekker in een correct geïnstalleerd geaard
stopcontact.
5. Schakel het apparaat in.
6. Zuig nu met een gelijkmatige snelheid. Het is niet nodig
om te drukken.

BS6058CB_IM_02.2023 16.02.23
17
Nat zuigen
1. Trek de netstekker uit het stopcontact.
2. Verwijder het permanentlter. Inplaats daarvan de
afdichtring aanbrengen.
3. Leg de afdichtring over de rand van de houder.
4. Plaats de motorbehuizing met de uitsparingen op de
vergrendelingen tot ze vastklikken.
5. Plaats de accessoires.
6. Steek de netstekker in een correct geïnstalleerd geaard
stopcontact.
7. Schakel het apparaat in.
De opvangbak kan slechts een beperkte hoeveelheid
vloeistof bevatten! Als zich schuim vormt in het
opvangreservoir, wordt het maximale opvangvolume
dienovereenkomstig gereduceerd! Als het reservoir vol
is, sluit het vlotterventiel de aanzuigopening en draait de
motor met verhoogde snelheid. Schakel het apparaat
onmiddellijk uit en leeg het.
Leegmaken van het permanentlter en de opvangbak
1. Schakel het apparaat uit met de aan / uit schakelaar. Trek
de netstekker uit het stopcontact.
2. Maak de motorbehuizing los van de opvangbak door de
vergrendelingen naar binnen te drukken. Verwijder de
motorbehuizing.
3. Verwijder, indien nodig, het permanent lter. Schud het uit.
4. Verwijder de zuigslang.
5. Maak de opvangbak leeg.
6. Plaats, indien nodig, het permanent lter terug in de
opvangbak.
7. Monteer de slangverbinding en de motorbehuizing weer.
8. Hervat de werking.
Einde bedrijf
1. Schakel het apparaat uit.
2. Trek de netstekker uit het stopcontact.
Reiniging
WAARSCHUWING:
• Trek de netstekker uit het stopcontact voordat u het
apparaat reinigt of onderhoudt.
• Dompel het motorhuis nooit onder in water om het
te reinigen. Dit kan een elektrische schok of brand
veroorzaken.
LET OP:
• Gebruik geen staalborstel of andere schurende
voorwerpen.
• Gebruik geen agressieve of schurende reinigingsmid-
delen.
Opvangbak
• Spoel de opvangbak na gebruik met schoon water.
• U kunt onzuiverheden in de opvangbak verwijderen met
een spons of een nylon borstel.
Accessoires
• U kunt alle accessoires reinigen in warm spoelwater met
een beetje handafwasmiddel. Als ze niet erg vuil zijn,
kunt u ze gewoon uitkloppen.
• Spoel na met schoon water en droog de onderdelen.
Neem het apparaat pas weer in gebruik als alle lters
volledig droog zijn.
Behuizing
De behuizing kan met een licht vochtige doek worden
schoongeveegd.
Opslag
• Reinig het apparaat zoals beschreven en laat het volle-
dig drogen.
• U kunt het netsnoer om de motorbehuizing wikkelen.
• Het bevestigingsinrichting (6) is uitsluitend bedoeld voor
de vloerzuigmond zonder buis en slang.
• Wij raden u aan het apparaat in de originele verpakking
op te bergen als u het gedurende langere tijd niet zult
gebruiken.
• Bewaar het apparaat altijd buiten het bereik van kinderen
op een goed geventileerde en droge plaats.

BS6058CB_IM_02.2023 16.02.23
18
Problemen oplossen
Probleem Mogelijke oorzaak Oplossing
Het apparaat heeft geen
functie.
Het apparaat heeft geen stroom-
voorziening.
Controleer het stopcontact met een ander apparaat.
Steek de netstekker er goed in.
Controleer de huiszekering.
Het apparaat zuigt niet. De opvangbak is vol. Leeg de opvangbak.
Er zit een vreemd voorwerp in de
zuigslang of de zuigmond.
Controleer de accessoires op vreemde voorwerpen.
Het apparaat is gekanteld. 1. Schakel het apparaat uit.
2. Houd de motor stil.
3. Hervat de werking.
De afdichtring tussen het motor-
huis en de houder ontbreekt
Controleer de dichting.
Er lekt stof of vloeistof uit
de telescoopbuis, de zuigs-
lang of de zuigaansluiting.
De accessoires zijn niet correct
gemonteerd.
Controleer of de accessoires stevig en correct zijn
aangesloten.
Het apparaat schakelt uit
tijdens gebruik.
Het apparaat is uitgerust met
een temperatuurzekering die het
apparaat automatisch uitschakelt
als het oververhit raakt.
Laat het apparaat ong. 15 minuten afkoelen alvorens
het opnieuw te gebruiken.
Technische gegevens
Model:..................................................................BS 6058 CB
Stroomvoorziening: ........................... 220 – 240 V~, 50 – 60 Hz
Opgenomen vermogen: .............................................. 1200 W
Beschermingsklasse: ...........................................................
Beschermingsgraad: ..................................................... IPX4 *
Nettogewicht: ........................................................ ong. 4,9 kg
* Het apparaat voldoet aan beschermingsgraad IPX4. Dit
betekent dat het apparaat van alle kanten beschermd is
tegen opspattend water.
Het recht om technische en ontwerpaanpassingen te ma-
ken in de loop van voortdurende productontwikkeling blijft
voorbehouden.
Dit apparaat is getest volgens alle van toepassing zijnde,
huidige CE-richtlijnen en gebouwd volgens de meest
recente veiligheidsvoorschriften.
Verwijdering
Betekenis van het symbool “vuilnisemmer”
Bescherm ons milieu, elektrische apparaten ho-
ren niet in het huisafval.
Maak voor het afvoeren van elektrische appara-
ten gebruik van de voorgeschreven verzamel-
punten en geef daar de elektrische apparaten af
die u niet meer gebruikt.
Daardoor helpt u de potentiële effecten te voorkomen
die een verkeerde afvoer op het milieu en de menselijke
gezondheid kunnen hebben.
Op deze wijze levert u uw bijdrage aan het hergebruik, de
recycling en andere verwerkingsvormen voor oude elektro-
nische en elektrische apparaten.
Voor informatie over verzamelpunten voor uw apparaten
kunt u contact opnemen met uw gemeente of gemeen-
teadministratie. Uw dealer en contractpartner is bovendien
verplicht het oude apparaat gratis terug te nemen.

BS6058CB_IM_02.2023 16.02.23
19
IMPORTANT :
Veillez à lire d’abord les instructions de sécurité jointes séparé-
ment.
Mode d’emploi
Merci d’avoir choisi notre produit. Nous espérons que vous
saurez proter votre appareil.
Lisez très attentivement le mode d’emploi et les consignes
de sécurité jointes séparément avant d’utiliser cet appareil.
Conservez ces documents, y compris le certicat de garan-
tie, le reçu et, si possible, la boîte avec l’emballage intérieur
dans un endroit sûr. Si vous transmettez l’appareil à un
tiers, joignez toujours tous les documents pertinents.
Symboles de ce mode d’emploi
Les informations importantes pour votre sécurité sont
particulièrement indiquées. Veillez à bien respecter ces
indications an d’éviter tout risque d’accident ou d’endom-
magement de l’appareil :
AVERTISSEMENT :
Prévient des risques pour votre santé et des risques
éventuels de blessure.
ATTENTION :
Indique les risques pour l’appareil ou tout autre appareil.
Sommaire
Liste des différents éléments de commande ..................3
Utilisation prévue .............................................................. 19
Déballage de l’appareil ..................................................... 19
Liste des différents éléments de commande /
Contenu de la livraison ....................................................19
Avertissements pour l’utilisation de l’appareil..............20
Mise en service .................................................................20
Montage de la poignée de transport .............................. 20
Montage des rouleaux ...................................................20
Mise en place du ltre ....................................................20
Mise en place du boîtier du moteur ...............................21
Brancher et débrancher le tuyau ...................................21
Tube d’aspiration en 3 parties ........................................21
Embouts de buse ...........................................................21
Curseur d’air ...................................................................21
Câble d’alimentation.......................................................21
Mise en marche / arrêt ....................................................21
Utilisation de l’appareil.....................................................21
Préparation .....................................................................21
Aspiration à sec ..............................................................21
Aspiration humide ..........................................................22
Vidange du ltre permanent et du récipient de collecte
.. 22
Fin de l’opération ............................................................22
Nettoyage ...........................................................................22
Récipient de collecte ...................................................... 22
Accessoires .................................................................... 22
Boîtier .............................................................................22
Stockage ............................................................................22
Dépannage .........................................................................23
Données techniques .........................................................23
Élimination .........................................................................23
Signication du symbole « Poubelle » ........................... 23
Utilisation prévue
Cet appareil a les fonctions suivantes :
• Aspiration humide et sèche
• Fonction ventilateur
Il est destiné à un usage domestique et similaire.
Il ne doit être utilisé que de la manière décrite dans ce
manuel d’instructions. Vous ne devez pas utiliser l’appareil
à des ns commerciales.
Toute autre utilisation est considérée comme non conforme
et peut entraîner des dommages matériels, voire des bles-
sures corporelles.
Le fabricant n’est pas responsable des dommages causés
par une utilisation inappropriée.
Déballage de l’appareil
1. Sortez l’appareil de son emballage.
2. Retirez tous les matériaux d’emballage, tels que les
feuilles, les matériaux de remplissage, les attaches de
câbles et les emballages en carton.
3. Vériez que le contenu de la livraison est complet.
Certaines pièces de l’étendue de la livraison peuvent se
trouver dans le récipient de collecte.
4. Si le contenu de l’emballage est incomplet ou si des dom-
mages peuvent être détectés, n’utilisez pas l’appareil.
Retournez-le immédiatement au revendeur.
Liste des différents éléments de
commande / Contenu de la livraison
1 Tuyau d’aspiration, 3 pièces
2 Glissière d’air
3 Tuyau d’aspiration
4 Interrupteur marche / arrêt ( I / O )
5 Sortie d’air
6 Dispositif de xation pour le suceur pour sol

BS6058CB_IM_02.2023 16.02.23
20
7 Poignée de transport
8 Boîtier du moteur
9 Dispositif de xation des embouts de buse
10 Dispositif de verrouillage
11 Ouverture d’aspiration
12 Raccordement du tuyau
13 Récipient de collecte
14 Dispositif de xation des embouts de buse
15 Rouleaux
16 Cadre du châssis
17 Levier de sortie et de rentrée de la brosse
18 Suceur pour sol
Accessoires
19 Suceur plat
20 Suceur-brosse
Sans illustration
Filtre permanent (pour aspiration à sec)
Joint d’étanchéité (pour l’aspiration humide)
Filtre en mousse de protection
Avertissements pour
l’utilisation de l’appareil
AVERTISSEMENT :
• N’utilisez l’appareil dans les pièces humides que si un
disjoncteur différentiel a été connecté en amont du cir-
cuit pour votre protection. En cas de doute, consultez
un électricien agréé.
• Si l’appareil, rempli d’eau, se renverse accidentelle-
ment, débranchez-le toujours de la prise murale avant
de le remettre debout.
• N’utilisez jamais l’appareil pour aspirer des liquides
explosifs (comme le mazout, l’essence, le diluant pour
peinture, l’acétone) et des poussières (comme les
poussières de magnésium et d’aluminium), des gaz
inammables ainsi que des solvants et des acides non
dilués, car il y a un risque d’explosion ! Des vapeurs
ou des mélanges explosifs peuvent être créés par le
tourbillonnement de l’air d’aspiration. Ces substances
pourraient attaquer les pièces et les matériaux utilisés.
ATTENTION :
• Faites attention à la portée limitée due à la longueur
du câble !
• Éteignez immédiatement l’appareil dans les situations
suivantes :
- En cas de formation de mousse.
- En cas de fuite de liquide.
- Lorsque le récipient est plein.
- Si l’appareil est renversé.
• N’aspirez pas de produits de nettoyage moussants
avec l’appareil !
ATTENTION :
• Lorsque vous aspirez des liquides, retirez toujours le
ltre permanent. Insérez plutôt l’anneau d’étanchéité.
• Vériez que le ltre de protection est correctement mis
en place.
• Avant de passer l’aspirateur la fois suivante, tous les
composants doivent être à nouveau secs.
• Lorsque vous aspirez des sols lisses à sec avec le
suceur pour sol, veillez à l’utiliser avec les brosses
sorties pour ne pas endommager le sol.
Mise en service
Si ce n’est pas déjà fait, retirez les pièces fournies du
récipient de collecte.
Montage de la poignée de transport
Montez la poignée de transport à l’aide des deux vis fournies.
Serrez les vis à la main à l’aide d’un tournevis approprié.
Montage des rouleaux
Avant d’utiliser l’appareil, xez les rouleaux au cadre du
châssis du récipient de collecte.
1. Détachez le boîtier du moteur du récipient de collecte en
appuyant sur les loquets vers l’intérieur.
2. Retirez le boîtier du moteur du récipient de collecte.
3. Placez le récipient de collecte à l’envers.
4. Insérez les rouleaux avec les goupilles dans les trous
prévus à cet effet, jusqu’à la butée.
5. Retournez le récipient de collecte pour qu’il repose sur
les rouleaux.
Mise en place du ltre
1. Insertion du ltre permanent
(uniquement en cas d’aspiration
à sec)
L’appareil est équipé d’un ltre
permanent. Il est facile à insérer et
à nettoyer.
• Placez le rebord en caoutchouc
du ltre permanent sur le bord
du récipient de collecte. Il sert
de joint étanche à l’air pour le
boîtier du moteur.
2. Filtre en mousse de protection
Un ltre de protection en mousse est situé sous le moteur. Il
est nécessaire pour les aspirateurs à eau et à sec.
• Si ce n’est pas déjà fait, placez le ltre de protection sur
la crépine d’aspiration.
• Vériez régulièrement que le ltre est correctement
monté et en bon état.

BS6058CB_IM_02.2023 16.02.23
21
Mise en place du boîtier du moteur
• Si vous n’utilisez pas le ltre permanent, xez toujours
le joint d’étanchéité fourni. Fixez-le au bord du récipient
collecteur.
- Assurez-vous que le joint en caoutchouc s’adapte tou-
jours correctement au bord du récipient. sous peine
de perdre de la puissance d‘aspiration.
• Alignez le boîtier du moteur de manière à ce que l’inter-
rupteur marche / arrêt se trouve au-dessus de l’ouverture
d’aspiration.
• Les loquets de l’appareil doivent se trouver dans les
encoches du boîtier du moteur. Appuyez le boîtier du
moteur sur le récipient de collecte jusqu’à ce que les
loquets s’enclenchent.
Brancher et débrancher le tuyau
Fonction d’aspiration
Insérez le raccord du tuyau dans l’ouverture d’aspiration
du récipient de collecte. Faites attention aux évidements.
Tournez le tuyau dans le sens des aiguilles d’une montre
pour le serrer.
Fonction de soufage
Insérez le raccord du tuyau dans l’ouverture de soufage du
boîtier du moteur. Faites attention aux évidements. Tournez
le tuyau dans le sens des aiguilles d’une montre pour le
serrer.
Desserrer le tuyau
Desserrez le tuyau en le tournant dans le sens inverse des
aiguilles d’une montre et en le tirant vers l’extérieur.
Tube d’aspiration en 3 parties
• Insérez les deux tuyaux d’aspiration l’un dans l’autre
sans le support.
• Insérez l’extrémité la plus ne des tubes d’aspiration
assemblés dans l’extrémité la plus épaisse du tube
d’aspiration avec support.
• Pour détacher les tubes d’aspiration, tirez-les en les
tournant légèrement.
Embouts de buse
• Pour détacher les embouts de buse, tirez-les en les
tournant légèrement.
• Il existe plusieurs façons de ranger le suceur-brosse et
le suceur plat.
- Utilisez les supports au-dessus des rouleaux ou les
supports sur le couvercle.
Suceur pour sol
Le suceur pour sol permet de nettoyer les surfaces lisses et
les tapis à sec ou à l’eau. Le suceur pour sol est équipé de
rouleaux pour faciliter le guidage.
• Utilisez le levier pour déplacer les brosses vers l’exté-
rieur ou l’intérieur.
L’utilisation optimale dépend de l’état du sol. Nous recom-
mandons l’utilisation suivante :
• Utilisation sans brosses ( ) :
- Pour aspirer des moquettes sèches (poils hauts).
- Pour le nettoyage des sols humides et lisses.
Ce réglage est également le mieux adapté pour
ramasser l’eau sur des surfaces plus importantes.
Notez que le récipient de collecte ne peut contenir
qu’une quantité limitée de liquide ! La quantité maxi-
male de remplissage est réduite en conséquence pour
les additifs formant de la mousse !
• Utilisation avec les brosses ( ) :
- Pour aspirer les sols secs et lisses et les moquettes
sèches (à poils ras).
- Pour le nettoyage (brossage) des sols lisses et hu-
mides et des moquettes humides (à poils ras).
Suceur plat
Pour aspirer dans les coins et les fentes, etc.
Suceur-brosse
Pour le nettoyage des tissus d’ameublement ou des
rideaux.
Curseur d’air
Ouvrez le curseur d’air sur la poignée du tuyau pour réguler
l’air ou pour détacher les pièces collées à l’embout.
Câble d’alimentation
• Pour le fonctionnement, déroulez complètement le câble
d’alimentation.
• Après le fonctionnement, laissez d’abord refroidir le
boîtier du moteur. Vous pouvez ensuite enrouler le câble
d’alimentation autour du boîtier du moteur.
Mise en marche / arrêt
Utilisez l’interrupteur marche / arrêt pour allumer (I) et
éteindre (O) l’appareil.
Utilisation de l’appareil
Préparation
1. Sélectionnez l’accessoire souhaité.
2. Déroulez complètement le câble d’alimentation.
3. Vériez que la tension du réseau que vous souhaitez uti-
liser correspond aux informations gurant sur la plaque
signalétique.
Aspiration à sec
1. Placez le ltre permanent dans le récipient de collecte.
2. Placez le boîtier du moteur avec les évidements des
loquets jusqu’à ce qu’ils s’enclenchent.
3. Mettez les accessoires en place.
4. Insérez la che secteur dans une prise de courant cor-
rectement installée et reliée à la terre.

BS6058CB_IM_02.2023 16.02.23
22
5. Mettez l’appareil en marche.
6. Aspirez maintenant à une vitesse régulière. Il n’est pas
nécessaire d’appuyer sur l’appareil.
Aspiration humide
1. Retirez la che secteur de la prise.
2. Retirez le ltre permanent. Insérez plutôt le joint d’étan-
chéité.
3. Positionnez le joint d’étanchéité sur le bord du récipient
collecteur.
4. Placez le boîtier du moteur avec les évidements des
loquets jusqu’à ce qu’ils s’enclenchent.
5. Mettez les accessoires en place.
6. Insérez la che secteur dans une prise de courant cor-
rectement installée et reliée à la terre.
7. Mettez l’appareil en marche.
Le récipient de collecte ne peut contenir qu’une quantité
limitée de liquide ! Si de la mousse se forme dans le
récipient de collecte, le volume maximal de collecte est
réduit en conséquence ! Lorsque le récipient est plein, le
robinet à otteur ferme l’orice d’aspiration et le moteur
tourne à une vitesse accrue. Éteignez et videz immédia-
tement l’appareil.
Vidange du ltre permanent et du récipient de collecte
1. Éteignez l’appareil à l’aide de l’interrupteur marche / arrêt.
Retirez la che secteur de la prise de courant.
2. Détachez le boîtier du moteur du bac de récupération
en poussant les verrous vers l’intérieur. Retirez le boîtier
du moteur.
3. Si nécessaire, retirez le ltre permanent. Secouez-le.
4. Retirez le tuyau d’aspiration.
5. Videz le récipient de collecte.
6. Si nécessaire, remettez le ltre permanent dans le
récipient de collecte.
7. Remontez le raccord du tuyau et le boîtier du moteur.
8. Reprenez le fonctionnement.
Fin de l’opération
1. Éteignez l’appareil.
2. Débranchez la che secteur de la prise de courant.
Nettoyage
AVERTISSEMENT :
• Débranchez la che secteur de la prise avant de
nettoyer ou d’entretenir l’appareil.
• Ne plongez jamais le boîtier du moteur dans l’eau pour
le nettoyer. Cela pourrait provoquer un choc électrique
ou un incendie.
ATTENTION :
• N’utilisez pas de brosse métallique ou d’autres objets
abrasifs.
• N’utilisez pas de nettoyants agressifs ou abrasifs.
Récipient de collecte
• Rincez le récipient de collecte à l’eau claire après
utilisation.
• Vous pouvez éliminer les impuretés présentes dans le
récipient avec une éponge ou une brosse en nylon.
Accessoires
• Vous pouvez nettoyer tous les accessoires dans de l’eau
de rinçage chaude avec un peu de liquide vaisselle à la
main. S’ils ne sont pas très sales, vous pouvez simple-
ment les tapoter.
• Rincez-les à l’eau claire et séchez-les. Ne remettez
l’appareil en service que lorsque tous les ltres sont
complètement secs.
Boîtier
Le boîtier peut être nettoyé à l’aide d’un chiffon légèrement
humide.
Stockage
• Nettoyez l’appareil comme indiqué et laissez-le sécher
complètement.
• Vous pouvez enrouler le câble d’alimentation autour du
boîtier du moteur.
• Le dispositif de xation (6) est destiné exclusivement au
suceur pour sol sans tube et sans tuyau.
• Nous vous recommandons de ranger l’appareil dans
son emballage d’origine si vous n’avez pas l’intention de
l’utiliser pendant une longue période.
• Rangez toujours l’appareil hors de portée des enfants,
dans un endroit sec et bien ventilé.

BS6058CB_IM_02.2023 16.02.23
23
Dépannage
Problème Cause possible Remède
L’appareil ne fonctionne pas. L’appareil n’est pas alimenté en électricité. Vériez la prise avec un autre appareil.
Insérez la che secteur correctement.
Vériez le fusible domestique.
L’appareil n’aspire pas. Le récipient de collecte est plein. Videz le récipient de collecte.
Il y a un corps étranger dans le tuyau ou la
buse d’aspiration.
Vériez l’absence de corps étrangers dans
les accessoires.
L’appareil s’est renversé. 1. Éteignez l’appareil.
2. Maintenez l’arrêt du moteur.
3. Reprenez le fonctionnement.
Le joint d’étanchéité entre le boîtier du moteur
et le récipient collecteur n’est pas là.
Contrôlez le joint.
De la poussière ou du liquide
s’échappe du tube télesco-
pique, du tuyau d’aspiration
ou du raccord d’aspiration.
Les accessoires ne sont pas montés correc-
tement.
Assurez-vous que les accessoires sont
fermement et correctement connectés.
L’appareil s’éteint en cours
de fonctionnement.
L’appareil est équipé d’un fusible de tempéra-
ture qui éteint automatiquement l’appareil en
cas de surchauffe.
Laissez refroidir l’appareil pendant environ
15 minutes avant de l’utiliser à nouveau.
Données techniques
Modèle : ..............................................................BS 6058 CB
Alimentation électrique : .................... 220 – 240 V~, 50 – 60 Hz
Consommation électrique : .........................................1200 W
Classe de protection : ..........................................................
Type de protection : ...................................................... IPX4 *
Poids net : .........................................................environ 4,9 kg
* L’appareil est conforme au type de protection IPX4. Cela
signie que l’appareil est protégé contre les projections
d’eau de tous les côtés.
Nous nous réservons le droit d’apporter des modications
techniques ainsi que des modications de conception dans
le cadre du développement continu de nos produits.
Cet appareil a été testé conformément à toutes les direc-
tives CE applicables et actuelles et a été construit selon les
dernières réglementations en matière de sécurité.
Élimination
Signication du symbole « Poubelle »
Protégez votre environnement, ne jetez pas vos
appareils électriques avec les ordures ména-
gères.
Utilisez, pour l’élimination de vos appareils
électriques, les bornes de collecte prévues à
cet effet où vous pouvez vous débarrasser des
appareils que vous n’utilisez plus.
Vous contribuez ainsi à éviter les impacts potentiels dans
l’environnement et sur la santé de chacun, causés par une
mauvaise élimination de ces déchets.
Vous contribuez aussi au recyclage sous toutes ses formes
des appareils électriques et électroniques usagés.
Vous trouverez toutes les informations sur les bornes
d’élimination des appareils auprès de votre commune ou
de l’administration de votre communauté. Votre revendeur
et partenaire contractuel est également tenu de reprendre
gratuitement l’ancien appareil.

BS6058CB_IM_02.2023 16.02.23
24
IMPORTANTE:
Asegúrese de leer primero las instrucciones de seguridad adjun-
tas por separado.
Manual de instrucciones
Le agradecemos la conanza depositada en este producto
y esperamos que disfrute de su uso.
Lea atentamente el manual de instrucciones y las instruc-
ciones de seguridad adjuntas por separado antes de utilizar
este aparato. Guarde estos documentos, incluyendo el
certicado de garantía, el recibo y, si es posible, la caja
con el embalaje interior en un lugar seguro. Si entrega el
aparato a un tercero, incluya siempre todos los documentos
pertinentes.
Símbolos en este manual de instrucciones
Advertencias importantes para su seguridad están seña-
ladas en especial. Siga estas advertencias incondicional-
mente, para evitar accidentes y daños en el aparato:
AVISO:
Advierte ante los peligros para su salud y demuestra
posibles riesgos de herida.
ATENCIÓN:
Indica los posibles riesgos para el aparato u otros
objetos.
Índice
Indicación de los elementos de manejo ..........................3
Uso previsto ......................................................................24
Desembalaje del aparato..................................................24
Indicación de los elementos de manejo /
Volumen de entrega ..........................................................25
Advertencias para el uso del aparato .............................25
Puesta en funcionamiento ............................................... 25
Montaje del asa de transporte .......................................25
Montaje de los rodillos ...................................................25
Inserción del ltro ...........................................................25
Colocación de la carcasa del motor ..............................26
Conexión y desconexión de la manguera .....................26
Tubo de aspiración de 3 piezas ..................................... 26
Accesorios de las boquillas............................................26
Corredera de aire ........................................................... 26
Cable de alimentación ...................................................26
Encendido y apagado ....................................................26
Uso del aparato ................................................................. 27
Preparación .................................................................... 27
Aspirar en seco ..............................................................27
Aspiración en húmedo ...................................................27
Vaciar el ltro permanente y el recipiente de recogida ..27
Finalizar el funcionamiento ............................................27
Limpieza ............................................................................. 27
Recipiente de recogida ..................................................27
Accesorios ......................................................................27
Carcasa .......................................................................... 27
Almacenamiento ...............................................................27
Solución de problemas ....................................................28
Datos técnicos ..................................................................28
Eliminación ........................................................................ 28
Signicado del símbolo “Cubo de basura” ....................28
Uso previsto
Este aparato tiene las siguientes funciones:
• Aspiración en seco y en húmedo
• Función de ventilador
Está destinado a un uso doméstico y similar.
Sólo puede utilizarse de la manera descrita en este manual
de instrucciones. No debe utilizar el aparato para nes
comerciales.
Cualquier otro uso se considera inadecuado y puede provo-
car daños materiales o incluso personales.
El fabricante no se hace responsable de los daños causa-
dos por un uso inadecuado.
Desembalaje del aparato
1. Saque el aparato de su embalaje.
2. Retire todo el material de embalaje, como las láminas, el
material de relleno, las bridas para cables y el embalaje
de cartón.
3. Compruebe que el volumen de entrega está completo.
En el contenedor de recogida se encuentran algunas
piezas del volumen de suministro.
4. Si el contenido del embalaje está incompleto o si se
detectan daños, no utilice el aparato. Devuélvalo inme-
diatamente al distribuidor.

BS6058CB_IM_02.2023 16.02.23
25
Indicación de los elementos de manejo /
Volumen de entrega
1 Tubo de aspiración, 3 piezas
2 Corredera de aire
3 Manguera de aspiración
4 Interruptor de encendido / apagado ( I / O )
5 Salida de aire
6 Dispositivo de jación para la boquilla del suelo
7 Asa de transporte
8 Carcasa del motor
9 Dispositivo de jación de las boquillas
10 Dispositivo de bloqueo
11 Apertura de aspiración
12 Conexión de la manguera
13 Recipiente de recogida
14 Dispositivo de jación de las boquillas
15 Rodillos
16 Marco del chasis
17 Palanca para extender y retraer el cepillo
18 Boquilla para el suelo
Accesorios
19 Boquilla para hendiduras
20 Boquilla de cepillo
Sin ilustración
Filtro permanente (para la aspiración en seco)
Anillo de sellado (para la aspiración en húmedo)
Filtro protector de espuma
Advertencias para el uso del aparato
AVISO:
• Sólo utilice el aparato en espacios húmedos si se
ha conectado un interruptor diferencial en el circuito
para su protección. En caso de duda, consulte a un
electricista autorizado.
• Si el aparato, que está lleno de agua, se vuelca
accidentalmente, desenchúfelo siempre de la toma de
corriente antes de volver a ponerlo en pie.
• ¡No lo utilice nunca para aspirar líquidos explosivos
(como aceite de calefacción, gasolina, disolvente, ace-
tona) y polvos (como polvos de magnesio y aluminio),
gases inamables, así como disolventes y ácidos no
diluidos, ya que existe riesgo de explosión! Pueden
crearse vapores o mezclas explosivas al arremoli-
narse el aire de aspiración. Estas sustancias podrían
atacar las piezas y los materiales utilizados.
ATENCIÓN:
• ¡Preste atención al alcance limitado debido a la
longitud del cable!
ATENCIÓN:
• Apague el aparato inmediatamente en las siguientes
situaciones:
- En caso de formación de espuma.
- En caso de fuga de líquido.
- Cuando el recipiente esté lleno.
- Si el aparato se vuelca.
• ¡No aspire con el aparato productos de limpieza
que formen espuma!
• Cuando aspire líquidos, retire siempre el ltro perma-
nente. Coloque en su lugar el anillo de sellado.
• Compruebe que el ltro protector está correctamente
colocado.
• Antes de volver a aspirar en seco la próxima vez,
todos los componentes deben estar secos de nuevo.
• Cuando aspire en seco suelos lisos con la boquilla
para suelos, asegúrese de utilizarla con los cepillos
extendidos para evitar dañar el suelo.
Puesta en funcionamiento
Si aún no lo ha hecho, retire las piezas suministradas del
contenedor de recogida.
Montaje del asa de transporte
Monte el asa de transporte con los dos tornillos adjuntos.
Apriete los tornillos a mano con un destornillador adecuado.
Montaje de los rodillos
Antes de utilizar el aparato, je los rodillos al marco del
chasis del recipiente de recogida.
1. Separe la carcasa del motor del recipiente de recogida
presionando los pestillos hacia dentro.
2. Retire la carcasa del motor del recipiente de recogida.
3. Coloque el recipiente de recogida boca abajo.
4. Introduzca los rodillos con los pasadores en los oricios
previstos hasta el tope.
5. Vuelva a girar el recipiente de recogida para que se
apoye en los rodillos.
Inserción del ltro
1. Inserte el ltro permanente
(sólo cuando aspire en seco)
El aparato tiene un ltro perma-
nente. Es fácil de insertar y limpiar.
• Coloque el borde de goma del
ltro permanente sobre el borde
del recipiente de recogida. Sirve
de cierre hermético para la
carcasa del motor.

BS6058CB_IM_02.2023 16.02.23
26
2. Filtro de espuma de protección
Debajo del motor se encuentra un ltro de espuma de
protección. Es necesario tanto para la aspiración en seco
como en húmedo.
• Si no está montado, coloque el ltro protector en el
colador de aspiración.
• Compruebe regularmente que el ltro está correcta-
mente colocado y en buen estado.
Colocación de la carcasa del motor
• Si no utiliza el ltro permanente, conecte siempre el
anillo obturador suministrado. Ajústelo sobre el borde de
la unidad recolectora.
- Asegúrese de que esta junta de goma asiente
siempre correctamente sobre el borde del recipiente.
Si esto no fuera el caso, se pierde la potencia de
aspiración.
• Alinee la carcasa del motor de forma que el interruptor
de encendido / apagado quede por encima de la abertura
de aspiración.
• Los cierres del aparato deben estar en los huecos de la
carcasa del motor. Presione la carcasa del motor sobre
el recipiente de recogida hasta que los pestillos encajen.
Conexión y desconexión de la manguera
Función de aspiración
Introduzca la conexión de la manguera en la abertura de
aspiración del recipiente de recogida. Preste atención a las
hendiduras. Gire la manguera en el sentido de las agujas
del reloj para apretarla.
Función de soplado
Introduzca la conexión de la manguera en la abertura de
soplado de la carcasa del motor. Preste atención a las
ranuras. Gire la manguera en el sentido de las agujas del
reloj para apretarla.
Aojar la manguera
Aoje la manguera girándola en sentido contrario a las
agujas del reloj y tirando de ella.
Tubo de aspiración de 3 piezas
• Inserte los dos tubos de aspiración entre sí sin el
soporte.
• Introduzca el extremo más no de los tubos de aspira-
ción ensamblados en el extremo más grueso del tubo de
aspiración con soporte.
• Para separar los tubos de aspiración, tire de ellos mien-
tras los gira ligeramente.
Accesorios de las boquillas
• Para separar los accesorios de las boquillas, tire de ellos
con un ligero giro.
• Hay varias formas de guardar la boquilla de cepillado y
la boquilla para hendiduras.
- Utilice los soportes situados encima de los rodillos o
los soportes de la tapa.
Boquilla para suelos
Puede limpiar supercies lisas y alfombras en seco o en
húmedo con la boquilla para suelos. La boquilla para suelos
está equipada con rodillos para facilitar el guiado.
• Utilice la palanca para mover los cepillos hacia afuera o
hacia adentro.
El uso óptimo depende del estado del suelo. Recomenda-
mos el siguiente uso:
• Uso sin cepillos ( ):
- Para aspirar alfombras secas (de pelo alto).
- Para la limpieza de suelos húmedos y lisos.
Este ajuste también es el más adecuado para recoger
el agua de zonas grandes.
¡Tenga en cuenta que el recipiente colector sólo
puede contener una cantidad limitada de líquido! ¡La
cantidad máxima de llenado se reduce en consecuen-
cia para los aditivos que forman espuma!
• Uso con cepillos ( ):
- Para aspirar suelos secos y lisos y alfombras secas
(de pelo bajo).
- Para limpiar (fregar) suelos lisos y húmedos y alfom-
bras húmedas (de pelo bajo).
Boquilla para hendiduras
Para aspirar en esquinas y rendijas, etc.
Boquilla de cepillo
Para limpiar tapicerías o cortinas.
Corredera de aire
Abra el deslizador de aire en el mango de la manguera
para regular el aire o para aojar las piezas que se pegan
a la boquilla.
Cable de alimentación
• Para el funcionamiento, desenrolle completamente el
cable de alimentación.
• Después de la operación, deje que la carcasa del motor
se enfríe primero. A continuación, puede enrollar el cable
de alimentación alrededor de la carcasa del motor.
Encendido y apagado
Utilice el interruptor de encendido / apagado para encen-
der (I) y apagar (O) el aparato.

BS6058CB_IM_02.2023 16.02.23
27
Uso del aparato
Preparación
1. Seleccione el accesorio deseado.
2. Desenrolle completamente el cable de alimentación.
3. Compruebe que la tensión de red que desea utilizar se
corresponde con la información de la placa de caracte-
rísticas.
Aspirar en seco
1. Coloque el ltro permanente en el recipiente de reco-
gida.
2. Coloque la carcasa del motor con los huecos de los
cierres hasta que encajen.
3. Coloque los accesorios.
4. Inserte la clavija de red en una toma de corriente con
toma de tierra correctamente instalada.
5. Conecte el aparato.
6. Ahora aspire a una velocidad constante. No es necesa-
rio presionar.
Aspiración en húmedo
1. Saque el enchufe de la toma de corriente.
2. Retire el ltro permanente. En su lugar, introduzca el
anillo obturador.
3. Coloque el anillo obturador sobre el borde de la unidad
recolectora.
4. Coloque la carcasa del motor con los huecos de los
pestillos hasta que encajen.
5. Coloque los accesorios.
6. Inserte el enchufe de red en una toma de corriente con
toma de tierra debidamente instalada.
7. Conecte el aparato.
¡El recipiente colector sólo puede contener una cantidad
limitada de líquido! ¡Si se forma espuma en el recipiente
de recogida, el volumen máximo de recogida se reduce
en consecuencia! Cuando el recipiente está lleno, la vál-
vula de otador cierra el oricio de aspiración y el motor
funciona a mayor velocidad. Apague y vacíe el aparato
inmediatamente.
Vaciar el ltro permanente y el recipiente de recogida
1. Apague el aparato con el interruptor de encendido /
apagado. Saque el enchufe de la red eléctrica de la
toma de corriente.
2. Separe la carcasa del motor del recipiente de recogida
presionando los cierres hacia dentro. Retire la carcasa
del motor.
3. Si es necesario, retire el ltro permanente. Sacudirlo.
4. Retire la manguera de aspiración.
5. Vacíe el recipiente de recogida.
6. Si es necesario, vuelva a colocar el ltro permanente en
el recipiente de recogida.
7. Vuelva a montar la conexión de la manguera y la car-
casa del motor.
8. Reanudar el funcionamiento.
Finalizar el funcionamiento
1. Apague el aparato.
2. Desenchufe la clavija de red de la toma de corriente.
Limpieza
AVISO:
• Saque el enchufe de la toma de corriente antes de
limpiar o realizar el mantenimiento del aparato.
• No sumerja nunca la carcasa del motor en agua para
limpiarla. Podría provocar una descarga eléctrica o
un incendio.
ATENCIÓN:
• No utilice un cepillo de alambre u otros objetos
abrasivos.
• No utilice limpiadores fuertes o abrasivos.
Recipiente de recogida
• Enjuague el recipiente de recogida con agua limpia
después de utilizarlo.
• Puede eliminar las impurezas del recipiente con una
esponja o un cepillo de nailon.
Accesorios
• Puede limpiar todos los accesorios en agua tibia con
un poco de líquido lavavajillas a mano. Si no están muy
sucios, puedes sacarlos a golpecitos.
• Aclare con agua limpia y seque las piezas. No ponga
el aparato en funcionamiento hasta que todos los ltros
estén completamente secos.
Carcasa
La carcasa puede limpiarse con un paño ligeramente
húmedo.
Almacenamiento
• Limpie el aparato como se describe y déjelo secar
completamente.
• Puede enrollar el cable de alimentación alrededor de la
carcasa del motor.
• El dispositivo de jación (6) está previsto exclusivamente
para la boquilla de suelo sin tubo ni manguera.
• Le recomendamos que guarde el aparato en su emba-
laje original si no va a utilizarlo durante mucho tiempo.
• Guarde siempre el aparato fuera del alcance de los
niños en un lugar bien ventilado y seco.

BS6058CB_IM_02.2023 16.02.23
28
Solución de problemas
Problema Posible causa Solución
El aparato no funciona. El aparato no tiene alimentación
eléctrica.
Compruebe la toma de corriente con otro aparato.
Inserte el enchufe correctamente.
Compruebe el fusible de la casa.
El aparato no aspira. El recipiente de recogida está lleno. Vacíe el recipiente de recogida.
Hay un objeto extraño en la man-
guera de aspiración o en la boquilla.
Compruebe si hay objetos extraños en los acce-
sorios.
El aparato se ha volcado. 1. Apague el aparato.
2. Mantenga el motor parado.
3. Reanude el funcionamiento.
Falta el anillo obturador situado entre
la carcasa del motor y la unidad
recolectora.
Controle la junta.
Hay fugas de polvo o líquido
en el tubo telescópico, en la
manguera de aspiración o en
la conexión de aspiración.
Los accesorios no están montados
correctamente.
Asegúrese de que los accesorios están bien
conectados.
El aparato se apaga durante
el funcionamiento.
El aparato está equipado con un fu-
sible de temperatura que desconecta
automáticamente el aparato si se
sobrecalienta.
Deje que el aparato se enfríe durante unos 15 mi-
nutos antes de volver a utilizarlo.
Datos técnicos
Modelo: ...............................................................BS 6058 CB
Alimentación eléctrica: ...................... 220 – 240 V~, 50 – 60 Hz
Consumo de energía: .................................................1200 W
Clase de protección: ............................................................
Tipo de protección:........................................................ IPX4 *
Peso neto: .......................................................... aprox. 4,9 kg
* El aparato cumple con el tipo de protección IPX4. Esto
signica que el aparato está protegido contra las salpica-
duras de agua desde todos los lados.
El derecho de realizar modicaciones técnicas y de diseño
en el curso del desarrollo continuo del producto esta
reservado.
Este aparato ha sido probado de acuerdo con todas las
directivas CE vigentes y construido de acuerdo con las
últimas normas de seguridad.
Eliminación
Signicado del símbolo “Cubo de basura”
Proteja nuestro medio ambiente, aparatos eléc-
tricos no forman parte de la basura doméstica.
Haga uso de los centros de recogida previstos
para la eliminación de aparatos eléctricos y
entregue allí sus aparatos eléctricos que no
vaya a utilizar más.
Ayudará en evitar las potenciales consecuencias, a causa
de una errónea eliminación de desechos, para el medio
ambiente y la salud humana.
Con ello, contribuirá a la recuperación, al reciclado y a otras
formas de reutilización de los aparatos viejos eléctricos y
electrónicos.
La información cómo se debe eliminar los aparatos, se
obtiene en su ayuntamiento o su administración municipal.
Su distribuidor y socio contractual también está obligado a
recuperar el aparato antiguo sin coste alguno.

BS6058CB_IM_02.2023 16.02.23
29
IMPORTANTE:
Assicuratevi di leggere prima le istruzioni di sicurezza allegate
separatamente.
Istruzioni per l’uso
Grazie per aver scelto il nostro prodotto. Vi auguriamo un
buon utilizzo del dispositivo.
Prima di utilizzare l’apparecchio, leggere attentamente
le istruzioni per l’uso e le istruzioni di sicurezza allegate
separatamente. Conservare questi documenti, compreso il
certificato di garanzia, la ricevuta e, se possibile, la scatola
con l’imballaggio interno in un luogo sicuro. Se si cede
l’apparecchio a terzi, includere sempre tutti i documenti
pertinenti.
Simboli per questo manuale di istruzioni per l’uso
Le indicazioni importanti per la propria sicurezza sono
indicati appropriatamente. Osservare assolutamente queste
indicazioni, per evitare incidenti e danni all’apparecchio:
AVVISO:
Previene i rischi della propria salute ed indica possibili
rischi di ferite.
ATTENZIONE:
Indica possibili pericoli per l’apparecchio o altri oggetti.
Indice
Elementi di comando ..........................................................3
Uso previsto ......................................................................29
Disimballaggio dell’apparecchio ....................................29
Elementi di comando / Nella fornitura .............................29
Avvertenze per l’uso dell’apparecchio ........................... 30
Messa in funzione ............................................................. 30
Montaggio della maniglia di trasporto ............................ 30
Montaggio dei rulli ..........................................................30
Inserimento del filtro ....................................................... 30
Montaggio dell’alloggiamento del motore ...................... 31
Collegare e scollegare il tubo flessibile ..........................31
Tubo di aspirazione in 3 parti ......................................... 31
Attacchi dell’ugello .........................................................31
Cursore dell’aria .............................................................31
Cavo di rete .................................................................... 31
Accensione e spegnimento ............................................31
Uso dell’apparecchio ........................................................31
Preparazione .................................................................. 31
Aspirare a secco ............................................................31
Aspirazione a umido ......................................................32
Svuotare il filtro permanente e
il contenitore di raccolta .................................................32
Fine del funzionamento ..................................................32
Pulizia ................................................................................. 32
Contenitore di raccolta ...................................................32
Accessori ........................................................................32
Alloggiamento ................................................................32
Stoccaggio .........................................................................32
Risoluzione dei problemi .................................................33
Dati tecnici ......................................................................... 33
Smaltimento ......................................................................33
Significato del simbolo “Eliminazione” ...........................33
Uso previsto
Questo apparecchio ha le seguenti funzioni:
• Aspirazione a secco e a umido
• Funzione ventilatore
È destinato ad un uso domestico e simile.
Può essere usato solo nel modo descritto in queste istru-
zioni per l’uso. Non si deve usare l’apparecchio per scopi
commerciali.
Qualsiasi altro uso è considerato improprio e può provocare
danni alle cose o addirittura lesioni personali.
Il produttore non risponde dei danni causati da un uso
improprio.
Disimballaggio dell’apparecchio
1. Togliere l’apparecchio dal suo imballaggio.
2. Rimuovere tutto il materiale d’imballaggio, come pelli-
cole, materiale di riempimento, fascette e imballaggi di
cartone.
3. Controllare la completezza del contenuto dell’imballag-
gio. Alcune parti della fornitura si trovano nel contenitore
di raccolta.
4. Se il contenuto dell’imballaggio è incompleto o se si
rilevano danni, non mettere in funzione l’apparecchio.
Restituirlo immediatamente al rivenditore.
Elementi di comando / Nella fornitura
1 Tubo di aspirazione, 3 pezzi
2 Scivolo dell’aria
3 Tubo di aspirazione
4 Interruttore acceso / spento ( I / O )
5 Uscita dell’aria
6 Dispositivo di fissaggio per l’ugello del pavimento
7 Maniglia per il trasporto
8 Alloggiamento del motore

BS6058CB_IM_02.2023 16.02.23
30
9 Dispositivo di aggancio per gli attacchi degli ugelli
10 Dispositivo di bloccaggio
11 Apertura di aspirazione
12 Collegamento del tubo flessibile
13 Contenitore di raccolta
14 Dispositivo di fissaggio per gli attacchi degli ugelli
15 Rulli
16 Telaio
17 Leva per estendere e ritirare la spazzola
18 Ugello per il pavimento
Accessori
19 Bocchetta per fessure
20 Bocchetta a spazzola
Senza illustrazione
Filtro permanente (per aspirazione a secco)
Anello di tenuta (per aspirazione a umido)
Filtro di protezione in schiuma
Avvertenze per l’uso dell’apparecchio
AVVISO:
• Utilizzare l’apparecchio in ambienti umidi solo se nel
circuito è stato collegato a monte un interruttore dif-
ferenziale per la vostra protezione. In caso di dubbio,
consultare un elettricista autorizzato.
• Se l’apparecchio, riempito d’acqua, dovesse rove-
sciarsi accidentalmente, staccare sempre la spina
dalla presa di corrente prima di rialzarlo.
• Non usarlo mai per aspirare liquidi esplosivi (come
olio da riscaldamento, benzina, diluente per vernici,
acetone) e polveri (come polveri di magnesio e allu-
minio), gas infiammabili nonché solventi e acidi non
diluiti, c’è il rischio di esplosione! Vapori o miscele
esplosive potrebbero essere creati dal vortice dell’aria
di aspirazione. Queste sostanze potrebbero attaccare
le parti e i materiali utilizzati.
ATTENZIONE:
• Fare attenzione alla portata limitata a causa della
lunghezza del cavo!
• Spegnere immediatamente l’apparecchio nelle se-
guenti situazioni:
- In caso di formazione di schiuma.
- In caso di perdita di liquido.
- Quando il contenitore è pieno.
- Se l’apparecchio viene rovesciato.
• Non aspirare detergenti schiumogeni con l’appa-
recchio!
• Quando si aspirano liquidi, rimuovere sempre il filtro
permanente. Inserire invece l’anello di tenuta.
• Controllare che il filtro di protezione sia inserito
correttamente.
ATTENZIONE:
• Prima di passare l’aspirapolvere la volta successiva,
tutti i componenti devono essere nuovamente asciutti.
• Quando si aspirano i pavimenti lisci a secco con la
bocchetta per pavimenti, assicurarsi di usarla con
le spazzole estese per evitare di danneggiare il
pavimento.
Messa in funzione
Se non è già stato fatto, rimuovere le parti in dotazione dal
contenitore di raccolta.
Montaggio della maniglia di trasporto
Montare la maniglia di trasporto con le due viti in dotazione.
Stringere a mano le viti con un cacciavite adatto.
Montaggio dei rulli
Prima di usare l’apparecchio, fissare i rulli al telaio del
contenitore di raccolta.
1. Staccare l’alloggiamento del motore dal contenitore di
raccolta premendo i fermi verso l’interno.
2. Rimuovere l’alloggiamento del motore dal contenitore di
raccolta.
3. Posizionare il contenitore di raccolta a testa in giù.
4. Inserire i rulli con i perni nei fori previsti fino all’arresto.
5. Girare di nuovo il contenitore di raccolta in modo che
poggi sui rulli.
Inserimento del filtro
1. Inserire il filtro permanente
(solo quando si aspira a secco)
L’apparecchio ha un filtro perma-
nente. È facile da inserire e pulire.
• Mettere il bordo di gomma del
filtro permanente sopra il bordo
del contenitore di raccolta.
Serve come guarnizione
ermetica per l’alloggiamento del
motore.
2. Filtro di schiuma protettivo
Un filtro di protezione in schiuma si trova sotto il motore. È
necessario sia per l’aspirazione a umido che a secco.
• Se non è già montato, mettere il filtro di protezione sul
filtro di aspirazione.
• Controllare regolarmente che il filtro sia montato corretta-
mente e in buone condizioni.

BS6058CB_IM_02.2023 16.02.23
31
Montaggio dell’alloggiamento del motore
• Se non si utilizza il filtro prrmanente montare sempre l’a-
nello di tenuta in dotazione. Fissarlo sul bordo dell’unità
di raccolta.
- Controllare che la tenuta ingomma sia posizionata
correttamente sul bordo del contenitore. Se ciò non è
il caso, va persa potenza di aspirazione.
• Allineare l’alloggiamento del motore in modo che
l’interruttore acceso / spento si trovi sopra l’apertura di
aspirazione.
• I fermi dell’apparecchio devono trovarsi nelle rientranze
dell’alloggiamento del motore. Premere l’alloggiamento
del motore sul contenitore di raccolta fino a quando i
fermi non si innestano.
Collegare e scollegare il tubo flessibile
Funzione di aspirazione
Inserire il raccordo del tubo flessibile nell’apertura di aspira-
zione del contenitore di raccolta. Fare attenzione alle rien-
tranze. Girare il tubo flessibile in senso orario per stringerlo.
Funzione di ventilazione
Inserire il collegamento del tubo flessibile nell’apertura di
soffiaggio sull’alloggiamento del motore. Fare attenzione
alle rientranze. Ruotare il tubo flessibile in senso orario per
stringerlo.
Allentare il tubo flessibile
Allentare il tubo flessibile ruotandolo in senso antiorario e
tirandolo fuori.
Tubo di aspirazione in 3 parti
• Inserire i due tubi di aspirazione l’uno nell’altro senza il
supporto.
• Inserire l’estremità più sottile dei tubi di aspirazione as-
semblati nell’estremità più spessa del tubo di aspirazione
con supporto.
• Per staccare i tubi di aspirazione, tirarli fuori mentre li si
gira leggermente.
Attacchi dell’ugello
• Per staccare gli attacchi degli ugelli, tirarli via con una
leggera rotazione.
• Ci sono diversi modi per riporre la bocchetta della spaz-
zola e la bocchetta per le fessure.
- Usare i supporti sopra i rulli o i supporti sul coperchio.
Bocchetta per pavimenti
Con la bocchetta per pavimenti si possono pulire superfici
lisce e tappeti asciutti o bagnati. La bocchetta per pavimenti
è dotata di rulli per facilitare la guida.
• Usare la leva per spostare le spazzole verso l’esterno o
verso l’interno.
L’uso ottimale dipende dalle condizioni del pavimento. Si
raccomanda il seguente uso:
• Uso senza spazzole ( ):
- Per aspirare tappeti asciutti (a pelo alto).
- Per pulire pavimenti umidi e lisci.
Questa impostazione è anche la più adatta per racco-
gliere l’acqua da aree più grandi.
Si noti che il contenitore di raccolta può contenere
solo una quantità limitata di liquido! La quantità mas-
sima di riempimento è ridotta di conseguenza per gli
additivi che formano schiuma!
• Uso con le spazzole ( ):
- Per aspirare pavimenti asciutti e lisci e tappeti asciutti
(a pelo basso).
- Per pulire (strofinare) pavimenti lisci bagnati e tappeti
bagnati (a pelo basso).
Bocchetta per fessure
Per aspirare negli angoli e nelle fessure, ecc.
Bocchetta a spazzola
Per pulire tappezzeria o tende.
Cursore dell’aria
Aprire il cursore dell’aria sull’impugnatura del tubo per rego-
lare l’aria o per allentare le parti attaccate alla bocchetta.
Cavo di rete
• Per il funzionamento, srotolare completamente il cavo di
alimentazione.
• Dopo il funzionamento, lasciate prima raffreddare l’allog-
giamento del motore. Si può quindi avvolgere il cavo di
alimentazione intorno all’alloggiamento del motore.
Accensione e spegnimento
Usare l’interruttore acceso / spento per accendere (I) e
spegnere (O) l’apparecchio.
Uso dell’apparecchio
Preparazione
1. Selezionare l’accessorio desiderato.
2. Svolgere completamente il cavo di rete.
3. Controllare che la tensione di rete che si vuole usare
corrisponda alle indicazioni della targhetta.
Aspirare a secco
1. Mettere il filtro permanente nel contenitore di raccolta.
2. Posizionare l’alloggiamento del motore con le rientranze
delle chiusure finché non scattano in posizione.
3. Montare gli accessori.
4. Inserire la spina di rete in una presa con messa a terra
correttamente installata.
5. Accendere l’apparecchio.
6. Ora aspirare a velocità costante. Non è necessario
premere verso il basso.

BS6058CB_IM_02.2023 16.02.23
32
Aspirazione a umido
1. Estrarre la spina di rete dalla presa.
2. Togliere il filtro permanente. Inserire invece l’anello di
tenuta.
3. Montare l’anello di tenuta sul bordo dell’unità di raccolta.
4. Posizionare l’alloggiamento del motore con le rientranze
dei fermi finché non scattano in posizione.
5. Montare gli accessori.
6. Inserire la spina di rete in una presa con messa a terra
correttamente installata.
7. Accendere l’apparecchio.
Il contenitore di raccolta può contenere solo una quantità
limitata di liquido! Se si forma della schiuma nel conte-
nitore di raccolta, il volume massimo di raccolta viene
ridotto di conseguenza! Quando il contenitore è pieno,
la valvola galleggiante chiude l’apertura di aspirazione
e il motore funziona a velocità maggiore. Spegnere e
svuotare immediatamente l’apparecchio.
Svuotare il filtro permanente e il contenitore di raccolta
1. Spegnere l’apparecchio con l’interruttore acceso / spento.
Estrarre la spina di rete dalla presa.
2. Staccare l’alloggiamento del motore dal contenitore di
raccolta premendo le serrature verso l’interno. Rimuo-
vere l’alloggiamento del motore.
3. Se necessario, rimuovere il filtro permanente. Scuoterlo.
4. Rimuovere il tubo di aspirazione.
5. Svuotare il contenitore di raccolta.
6. Se necessario, rimettere il filtro permanente nel conteni-
tore di raccolta.
7. Rimontare il collegamento del tubo flessibile e l’alloggia-
mento del motore.
8. Riprendere il funzionamento.
Fine del funzionamento
1. Spegnere l’apparecchio.
2. Staccare la spina dalla presa di corrente.
Pulizia
AVVISO:
• Estrarre la spina dalla presa di corrente prima di pulire
o fare la manutenzione dell’apparecchio.
• Non immergere mai l’alloggiamento del motore in
acqua per la pulizia. Potrebbe causare una scossa
elettrica o un incendio.
ATTENZIONE:
• Non usare una spazzola metallica o altri oggetti
abrasivi.
• Non usare detergenti aggressivi o abrasivi.
Contenitore di raccolta
• Sciacquare il contenitore di raccolta con acqua pulita
dopo l’uso.
• È possibile rimuovere le impurità nel contenitore con una
spugna o una spazzola di nylon.
Accessori
• Si possono pulire tutti gli accessori in acqua calda con
un po’ di detersivo per piatti. Se non sono molto sporchi,
puoi semplicemente picchiettarli.
• Risciacquare con acqua pulita e asciugare le parti. Non
rimettere in funzione l’apparecchio finché tutti i filtri non
siano completamente asciutti.
Alloggiamento
L’alloggiamento può essere pulito con un panno legger-
mente umido.
Stoccaggio
• Pulire l’apparecchio come descritto e lasciarlo asciugare
completamente.
• Si può avvolgere il cavo di alimentazione intorno all’al-
loggiamento del motore.
• Il dispositivo di fissaggio (6) è previsto esclusivamente
per la bocchetta da terra senza tubo e flessibile.
• Si consiglia di conservare l’apparecchio nel suo imbal-
laggio originale se non si intende utilizzarlo per un lungo
periodo di tempo.
• Conservare sempre l’apparecchio fuori dalla portata dei
bambini in un luogo ben ventilato e asciutto.

BS6058CB_IM_02.2023 16.02.23
33
Risoluzione dei problemi
Problema Possibile causa Rimedio
L’apparecchio non
funziona.
L’apparecchio non è alimentato. Controllare la presa con un altro apparecchio.
Inserire correttamente la spina di rete.
Controllare il fusibile di casa.
L’apparecchio non aspira. Il contenitore di raccolta è pieno. Svuotare il contenitore di raccolta.
C’è un oggetto estraneo nel tubo di aspira-
zione o nell’ugello.
Controllare la presenza di corpi estranei negli
accessori.
L’apparecchio si è ribaltato. 1. Spegnere l’apparecchio.
2. Mantenere l’arresto del motore.
3. Riprendere il funzionamento.
Manca l’anello di tenuta tra alloggiamento
motore e unità di raccolta.
Controllate la guarnizione.
Dal tubo telescopico, dal
tubo di aspirazione o dal
raccordo di aspirazione
fuoriesce polvere o liquido.
Gli accessori non sono montati corretta-
mente.
Assicurarsi che gli accessori siano collegati
saldamente e correttamente.
L’apparecchio si spegne
durante il funzionamento.
L’apparecchio è dotato di un fusibile termico
che spegne automaticamente l’apparecchio
in caso di surriscaldamento.
Lasciare raffreddare l’apparecchio per circa
15 minuti prima di utilizzarlo di nuovo.
Dati tecnici
Modello: ............................................................... BS 6058 CB
Alimentazione elettrica: ..................... 220 – 240 V~, 50 – 60 Hz
Consumo di corrente:..................................................1200 W
Classe di protezione: ...........................................................
Tipo di protezione: ......................................................... IPX4 *
Peso netto: ...............................................................ca. 4,9 kg
* L’apparecchio è conforme al tipo di protezione IPX4. Ciò
significa che l’apparecchio è protetto dagli spruzzi d’acqua
da tutti i lati.
Si riserva il diritto di apportare modiche tecniche e di
design nel corso dello sviluppo del prodotto.
Questo apparecchio è stato testato secondo tutte le
direttive CE in vigore e costruito secondo le ultime norme
di sicurezza.
Smaltimento
Significato del simbolo “Eliminazione”
Salvaguardare l’ambiente, gli elettrodomestici
non vanno eliminati come riuti domestici.
Per l’eliminazione degli elettrodomestici, fare
uso dei posti di raccolta previsti per questo tipo
e porre quegli elettrodomestici che non sono
più in uso.
Si contribuisce così ad evitare un effetto potenziale sull’am-
biente e sulla salute, dovuto magari ad una eliminazione
sbagliata.
Questo signica un contributo personale alla riutilizzazione,
al riciclaggio e altre forme di utilizzazione di elettrodomestici
ed apparecchi elettronici usati.
Si possono trovare le corrispondenti informazioni sugli
appositi luoghi di raccolta, nelle amministrazioni dei comuni.
Il vostro rivenditore e partner contrattuale è anche obbligato
a riprendere gratuitamente il vecchio apparecchio.

BS6058CB_IM_02.2023 16.02.23
34
WAŻNE:
Najpierw należy zapoznać się z oddzielnie załączoną instrukcją
bezpieczeństwa.
Instrukcja obsługi
Dziękujemy za wybór naszego produktu. Mamy nadzieję, że
korzystanie z urządzenia sprawi państwu radość.
Przed rozpoczęciem użytkowania urządzenia przeczytaj
uważnie instrukcję obsługi oraz oddzielnie załączone
wskazówki bezpieczeństwa. Przechowuj te dokumenty
wraz z kartą gwarancyjną, paragonem i, jeśli to możliwe,
pudełkiem z opakowaniem wewnętrznym w bezpiecznym
miejscu. Jeżeli przekazujesz urządzenie osobom trzecim,
dołącz zawsze wszystkie istotne dokumenty.
Symbole użyte w tej instrukcji obsługi
Ważne informacje dotyczące bezpieczeństwa użytkownika
są specjalnie wyróżnione. Koniecznie stosuj się do tych
wskazówek, aby uniknąć wypadków i uszkodzenia urzą-
dzenia:
OSTRZEŻENIE:
Ostrzega przed zagrożeniami dla zdrowia i wskazuje na
potencjalne ryzyka obrażeń.
UWAGA:
Wskazuje na potencjalne zagrożenia dla urządzenia lub
innych przedmiotów.
Spis treści
Przegląd elementów obsługi .............................................3
Użytkowanie zgodne z przeznaczeniem ........................34
Rozpakowanie urządzenia ............................................... 34
Przegląd elementów obsługi / Zakres dostawy..............35
Ostrzeżenia dotyczące użytkowania urządzenia ..........35
Uruchomienie .................................................................... 35
Montowanie uchwytu do przenoszenia .........................35
Montaż rolek ...................................................................35
Wkładanie ltra ...............................................................35
Zakładanie obudowy silnika ........................................... 36
Podłączanie i odłączanie węża ...................................... 36
3-częściowa rura ssąca .................................................36
Przystawki dysz ..............................................................36
Suwak powietrza ............................................................ 36
Kabel sieciowy ...............................................................36
Włączanie / wyłączanie ...................................................36
Użytkowanie urządzenia ..................................................36
Przygotowanie ................................................................36
Odkurzanie na sucho .....................................................37
Odkurzanie na mokro .....................................................37
Opróżnianie ltra stałego
i pojemnika na zanieczyszczenia...................................37
Zakończenie pracy ......................................................... 37
Czyszczenie ....................................................................... 37
Pojemnik zbiorczy ..........................................................37
Akcesoria ........................................................................37
Obudowa ........................................................................ 37
Przechowywanie ...............................................................37
Rozwiązywanie problemów .............................................38
Dane techniczne ................................................................38
Warunki gwarancji ............................................................38
Usuwanie ...........................................................................39
Znaczenie symbolu „Pojemnik na śmieci” ..................... 39
Użytkowanie zgodne z przeznaczeniem
To urządzenie posiada następujące funkcje:
• Odkurzanie na mokro i na sucho
• Funkcja wentylatora
Przeznaczone jest do użytku domowego i podobnego.
Może być używane tylko w sposób opisany w niniejszej
instrukcji obsługi. Nie wolno używać urządzenia do celów
komercyjnych.
Każde inne zastosowanie uważane jest za niewłaściwe
i może spowodować szkody materialne lub nawet obrażenia
ciała.
Producent nie ponosi odpowiedzialności za szkody po-
wstałe w wyniku niewłaściwego użytkowania.
Rozpakowanie urządzenia
1. Wyjmij urządzenie z opakowania.
2. Usuń wszystkie materiały opakowaniowe, takie jak folie,
materiały wypełniające, opaski kablowe i opakowania
kartonowe.
3. Sprawdź, czy zawartość opakowania jest kompletna.
Niektóre części z zakresu dostawy znajdują się w pojem-
niku na odpady.
4. Jeżeli zawartość opakowania jest niekompletna lub
jeżeli widoczne są uszkodzenia, nie używaj urządzenia.
Natychmiast zwróć je do sprzedawcy.

BS6058CB_IM_02.2023 16.02.23
35
Przegląd elementów obsługi /
Zakres dostawy
1 Rura ssąca, 3-częściowa
2 Zasuwa powietrzna
3 Wąż ssący
4 Włącznik / wyłącznik ( I / O )
5 Wylot powietrza
6 Uchwyt do mocowania dyszy podłogowej
7 Uchwyt do przenoszenia
8 Obudowa silnika
9 Zaczepy do mocowania dysz
10 Blokada
11 Otwór ssący
12 Przyłącze węża
13 Pojemnik do zbierania odpadów
14 Uchwyt do mocowania końcówek dysz
15 Rolki
16 Rama podwozia
17 Dźwignia do wysuwania i chowania szczotki
18 Dysza podłogowa
Akcesoria
19 Dysza szczelinowa
20 Dysza szczotkowa
Bez ilustracji
Filtr stały (do odkurzania na sucho)
Pierścień uszczelniający (do odkurzania na mokro)
Ochronny ltr piankowy
Ostrzeżenia dotyczące
użytkowania urządzenia
OSTRZEŻENIE:
• Używaj urządzenia w wilgotnych pomieszczeniach tylko
wtedy, gdy dla twojej ochrony w obwodzie podłączono
wcześniej wyłącznik różnicowoprądowy. W razie wątpli-
wości, skonsultuj się z autoryzowanym elektrykiem.
• Jeżeli urządzenie, które jest wypełnione wodą, przypad-
kowo się przewróci, zawsze wyjmuj wtyczkę z gniazdka
ściennego przed ponownym postawieniem go.
• Nigdy nie zasysać cieczy wybuchowych (takich jak
olej opałowy, benzyna, rozcieńczalnik do farb, aceton)
i pyłów (takich jak pył magnezowy i aluminiowy),
gazów palnych oraz nierozcieńczonych rozpusz-
czalników i kwasów, istnieje niebezpieczeństwo
wybuchu! Wskutek zawirowań zasysanego powietrza
mogą powstawać wybuchowe opary lub mieszaniny.
Substancje te mogłyby zaatakować zastosowane
części i materiały.
UWAGA:
• Zwrócić uwagę na ograniczony zasięg ze względu na
długość kabla!
UWAGA:
• W następujących sytuacjach należy natychmiast
wyłączyć urządzenie:
- W przypadku tworzenia się piany.
- W przypadku wycieku cieczy.
- Gdy zbiornik jest pełny.
- Jeśli urządzenie zostanie przewrócone.
• Nie odkurzać przy pomocy urządzenia środków
czyszczących tworzących pianę!
• Podczas odkurzania cieczy należy zawsze zdejmować
ltr stały. Zamiast niego założyć pierścień uszczel-
niający.
• Sprawdzić, czy ltr ochronny jest prawidłowo osa-
dzony.
• Przed kolejnym odkurzaniem na sucho wszystkie
elementy muszą być ponownie suche.
• Przy odkurzaniu gładkich podłóg na sucho za pomocą
dyszy podłogowej należy pamiętać, aby używać jej
z wysuniętymi szczotkami, aby nie uszkodzić podłogi.
Uruchomienie
Jeśli nie zostało to jeszcze zrobione, wyjąć dostarczone
części z pojemnika na odpady.
Montowanie uchwytu do przenoszenia
Zamontuj uchwyt do przenoszenia za pomocą dwóch
załączonych śrub. Dokręć śruby ręcznie za pomocą odpo-
wiedniego śrubokręta.
Montaż rolek
Przed użyciem urządzenia należy przymocować rolki do
ramy podwozia pojemnika zbiorczego.
1. Zdjąć obudowę silnika z pojemnika zbiorczego, wciska-
jąc zatrzaski do wewnątrz.
2. Zdjąć obudowę silnika z pojemnika zbiorczego.
3. Ustawić pojemnik zbiorczy do góry dnem.
4. Włożyć rolki ze sworzniami do oporu w przewidziane
otwory.
5. Obrócić pojemnik zbiorczy z powrotem tak, aby stał na
rolkach.
Wkładanie ltra
1. Włóż ltr stały (tylko przy
odkurzaniu na sucho)
Urządzenie jest wyposażone w ltr
stały. Jest on łatwy do założenia
i czyszczenia.
• Załóż gumową obręcz ltra na
krawędź pojemnika na odpady.
Służy on jako szczelne za-
mknięcie obudowy silnika.

BS6058CB_IM_02.2023 16.02.23
36
2. Ochronny ltr piankowy
Ochronny ltr piankowy znajduje się pod silnikiem. Jest
on potrzebny zarówno przy odkurzaniu na mokro, jak i na
sucho.
• Jeżeli nie jest on jeszcze zamontowany, należy umieścić
ltr ochronny na sitku ssącym.
• Należy regularnie sprawdzać, czy ltr jest prawidłowo
zamontowany i w dobrym stanie.
Zakładanie obudowy silnika
• Jeśli nie używamy ltra permanentnego, zawsze należy
mocować pierścień uszczelniający. Dopasować krawędź
elementu zbierającego.
- Sprawdzić, czy gumowa uszczelka zawsze jest
prawidłowo usadowiona na krawędzi zbiornika. W
przeciwnym razie spadnie moc ssania.
• Ustawić obudowę silnika tak, aby włącznik / wyłącznik
znajdował się nad otworem wlotowym.
• Zatrzaski na urządzeniu muszą znajdować się we wgłę-
bieniach obudowy silnika. Docisnąć obudowę silnika do
pojemnika na odpady, aż zatrzaski się zatrzasną.
Podłączanie i odłączanie węża
Funkcja ssania
Włożyć króciec węża do otworu ssącego w pojemniku na
odpady. Zwrócić uwagę na wgłębienia. Przekręcić wąż
zgodnie z ruchem wskazówek zegara, aby go dokręcić.
Funkcja wentylatora
Włożyć złącze węża do otworu wydmuchowego na obu-
dowie silnika. Zwrócić uwagę na wgłębienia. Obrócić wąż
zgodnie z ruchem wskazówek zegara, aby go dokręcić.
Poluzować wąż
Poluzować wąż, obracając go w kierunku przeciwnym do
ruchu wskazówek zegara i wyciągając go.
3-częściowa rura ssąca
• Włóż obie rury ssące do siebie bez uchwytu.
• Włóż cieńszy koniec zmontowanych rur ssących do
grubszego końca rury ssącej z uchwytem.
• Aby odłączyć rurki ssące, należy je pociągnąć, lekko
obracając.
Przystawki dysz
• Aby odłączyć końcówki ssące, pociągnij je lekko prze-
kręcając.
• Istnieje kilka sposobów przechowywania ssawki szczot-
kowej i szczelinowej.
- Użyj uchwytów nad rolkami lub uchwytów na pokrywie.
Dysza podłogowa
Ssawką podłogową można czyścić gładkie powierzchnie
i dywany na sucho lub na mokro. Ssawka podłogowa jest
wyposażona w rolki ułatwiające prowadzenie.
• Użyj dźwigni, aby przesunąć szczotki na zewnątrz lub
do wewnątrz.
Optymalny sposób użycia zależy od stanu podłogi. Zale-
camy następujący sposób użycia:
• Użycie bez szczotkami ( ):
- Do odkurzania suchych dywanów (o wysokim runie).
- Do czyszczenia mokrych, gładkich podłóg.
To ustawienie najlepiej nadaje się również do zbiera-
nia wody z większych powierzchni.
Należy pamiętać, że pojemnik zbiorczy może pomie-
ścić tylko ograniczoną ilość cieczy! W przypadku do-
datków pianotwórczych maksymalna ilość napełnienia
jest odpowiednio zmniejszona!
• Użycie ze szczotkami ( ):
- Do odkurzania suchych, gładkich podłóg i suchych
dywanów (o niskim runie).
- Do czyszczenia (szorowania) mokrych, gładkich pod-
łóg i mokrych dywanów (o niskim runie).
Dysza szczelinowa
Do odkurzania w narożnikach, szczelinach itp.
Dysza szczotkowa
Do czyszczenia tapicerki lub zasłon.
Suwak powietrza
Otwórz suwak powietrza na uchwycie węża, aby regulować
przepływ powietrza lub poluzować części przyklejone do
dyszy.
Kabel sieciowy
• Do pracy należy całkowicie rozwinąć przewód zasilający.
• Po zakończeniu pracy należy najpierw odczekać, aż
obudowa silnika ostygnie. Następnie można owinąć
przewód sieciowy wokół obudowy silnika.
Włączanie / wyłączanie
Włącznik włączania / wyłączania służy do włączania (I)
i wyłączania (O) urządzenia.
Użytkowanie urządzenia
Przygotowanie
1. Wybierz żądane wyposażenie dodatkowe.
2. Rozwiń całkowicie przewód zasilający.
3. Sprawdź, czy napięcie sieciowe, z którego chcesz korzy-
stać, jest zgodne z danymi na tabliczce znamionowej.

BS6058CB_IM_02.2023 16.02.23
37
Odkurzanie na sucho
1. Umieść ltr stały w pojemniku na odpady.
2. Umieść obudowę silnika w zagłębieniach na zatrza-
skach, aż zaskoczą na swoje miejsce.
3. Zamontować wyposażenie dodatkowe.
4. Włożyć wtyczkę sieciową do prawidłowo zainstalowa-
nego gniazdka z uziemieniem.
5. Włączyć urządzenie.
6. Teraz odkurzać ze stałą prędkością. Nie jest konieczne
dociskanie.
Odkurzanie na mokro
1. Wyciągnąć wtyczkę sieciową z gniazdka.
2. Wyjąć ltr stały. Zamiast niego nałożyć pierścień uszczel-
niający.
3. Dopasować pierścień uszczelniający do krawędzi ele-
mentu zbierającego.
4. Umieść obudowę silnika w zagłębieniach na zatrza-
skach, aż zaskoczą na swoje miejsce.
5. Założyć akcesoria.
6. Włożyć wtyczkę sieciową do prawidłowo zainstalowa-
nego gniazdka z uziemieniem.
7. Włączyć urządzenie.
Pojemnik zbiorczy może pomieścić tylko ograniczoną
ilość cieczy! W przypadku tworzenia się piany w po-
jemniku zbiorczym, maksymalna pojemność zbiornika
zostanie odpowiednio zmniejszona! Gdy zbiornik jest
pełny, zawór pływakowy zamyka otwór ssący, a silnik
pracuje ze zwiększoną prędkością. Natychmiast wyłą-
czyć i opróżnić urządzenie.
Opróżnianie ltra stałego
i pojemnika na zanieczyszczenia
1. Wyłączyć urządzenie za pomocą włącznika / wyłącznika.
Wyciągnąć wtyczkę sieciową z gniazdka.
2. Odłączyć obudowę silnika od pojemnika na odpady,
wciskając blokady do środka. Zdjąć obudowę silnika.
3. W razie potrzeby wyjąć ltr stały. Wytrząsnąć go.
4. Wyjąć wąż ssący.
5. Opróżnić pojemnik na odpady.
6. W razie potrzeby włożyć ltr stały z powrotem do pojem-
nika na odpady.
7. Ponownie zamontować przyłącze węża i obudowę
silnika.
8. Wznowić pracę.
Zakończenie pracy
1. Wyłączyć urządzenie.
2. Wyciągnąć wtyczkę sieciową z gniazdka.
Czyszczenie
OSTRZEŻENIE:
• Przed czyszczeniem lub konserwacją urządzenia
należy wyjąć wtyczkę z gniazdka.
• Nigdy nie zanurzaj obudowy silnika w wodzie w celu
jej wyczyszczenia. Może to spowodować porażenie
prądem lub pożar.
UWAGA:
• Nie używać szczotki drucianej ani innych przedmiotów
ściernych.
• Nie używaj ostrych lub ściernych środków czyszczą-
cych.
Pojemnik zbiorczy
• Po użyciu wypłukać pojemnik zbiorczy czystą wodą.
• Zanieczyszczenia znajdujące się w pojemniku można
usunąć za pomocą gąbki lub nylonowej szczotki.
Akcesoria
• Wszystkie akcesoria można czyścić w ciepłej wodzie
z odrobiną płynu do ręcznego mycia naczyń. Jeśli nie są
bardzo zabrudzone, można je po prostu wytrzeć.
• Spłucz czystą wodą i wysusz części. Nie uruchamiaj
urządzenia, dopóki wszystkie ltry nie będą całkowicie
suche.
Obudowa
Obudowę można czyścić lekko zwilżoną ściereczką.
Przechowywanie
• Wyczyść urządzenie zgodnie z opisem i pozostaw do
całkowitego wyschnięcia.
• Przewód sieciowy można owinąć wokół obudowy silnika.
• Element mocujący (6) przeznaczony jest wyłącznie do
dyszy podłogowej bez rury i węża.
• Zalecamy przechowywanie urządzenia w oryginalnym
opakowaniu, jeżeli nie zamierzasz go używać przez
dłuższy czas.
• Zawsze przechowuj urządzenie poza zasięgiem dzieci
w dobrze wentylowanym i suchym miejscu.

BS6058CB_IM_02.2023 16.02.23
38
Rozwiązywanie problemów
Problem Możliwa przyczyna Środek zaradczy
Urządzenie nie działa. Urządzenie nie jest zasilane. Sprawdzić gniazdko przy pomocy innego urządzenia.
Prawidłowo włożyć wtyczkę sieciową.
Sprawdzić bezpiecznik domowy.
Urządzenie nie zasysa się. Zbiornik jest pełny. Opróżnić pojemnik na odpady.
W wężu ssącym lub dyszy ssącej
znajduje się ciało obce.
Sprawdzić, czy w akcesoriach nie ma obcych
przedmiotów.
Urządzenie przewróciło się. 1. Wyłączyć urządzenie.
2. Utrzymać silnik w stanie bezruchu.
3. Wznowić pracę.
Brakuje pierścienia uszczelniają-
cego między obudową silniczka a
elementem zbierającym.
Sprawdź uszczelkę.
Kurz lub płyn wycieka z rury
teleskopowej, węża ssącego
lub przyłącza ssącego.
Akcesoria nie są prawidłowo
zamontowane.
Upewnić się, że akcesoria są mocno i prawidłowo
podłączone.
Urządzenie wyłącza się
podczas pracy.
Urządzenie jest wyposażone
w bezpiecznik temperaturowy, który
automatycznie wyłącza urządzenie
w przypadku przegrzania.
Przed ponownym użyciem pozostawić urządzenie na
ok. 15 minut do ostygnięcia.
Dane techniczne
Model:..................................................................BS 6058 CB
Zasilanie: ........................................... 220 – 240 V~, 50 – 60 Hz
Pobór mocy: ................................................................1200 W
Klasa ochrony: .....................................................................
Typ ochrony: ..................................................................IPX4 *
Waga netto: ..............................................................ok. 4,9 kg
* Urządzenie spełnia wymagania klasy ochrony IPX4. Ozna-
cza to, że urządzenie jest zabezpieczone przed wodą
rozpryskową ze wszystkich stron.
Zastrzegamy sobie prawo wprowadzania zmian technicz-
nych i projektowych w trakcie ciągłego rozwoju produktu.
To urządzenie zostało przetestowane zgodnie z wszystkimi
obowiązującymi, aktualnymi dyrektywami CE i zbudowane
zgodnie z najnowszymi przepisami bezpieczeństwa.
Warunki gwarancji
Przyznajemy 24 miesiące gwarancji na produkt licząc od
daty zakupu.
W tym okresie będziemy bezpłatnie usuwać w terminie
14 dni od daty dostarczenia wadliwego sprzętu z kartą
gwarancyjną do miejsca zakupu wszystkie uszkodzenia
powstałe w tym urządzeniu na skutek wady materiałów
lub wadliwego wykonania, naprawiając oraz wymieniając
wadliwe części lub (jeśli uznamy za stosowne) wymieniając
całe urządzenie na nowe.
Sprzęt do naprawy powinien być dostarczony w komplecie
wraz z dowodem zakupu oraz z ważną kartą gwarancyjną
do sprzedawcy w miarę możliwości w oryginalnym opako-
waniu lub innym odpowiednim dla zabezpieczenia przed
uszkodzeniem. W razie braku kompletnego opakowania fa-
brycznego, ryzyko uszkodzenia sprzętu podczas transportu
do i z miejsca zakupu ponosi reklamujący.
Naprawa gwarancyjna nie dotyczy czynności przewidzianych
w instrukcji obsługi, do wykonania których zobowiązany jest
użytkownik we własnym zakresie i na własny koszt.
Gwarancja nie obejmuje:
• mechanicznych, termicznych, chemicznych uszkodzeń
sprzętu i wywołanych nimi wad,
• uszkodzeń powstałych w wyniku działania sił zewnętrz-
nych takich jak wyładowania atmosferyczne, zmiana
napięcia zasilania i innych zdarzeń losowych,
• nieprawidłowego ustawienia wartości napięcia elektrycz-
nego, zasilanie z nieodpowiedniego gniazda zasilania,
• sznurów połączeniowych, sieciowych, żarówek, baterii,
akumulatorów,
• uszkodzeń wyrobu powstałych w wyniku niewłaściwego
lub niezgodnego z instrukcją jego użytkowania, przecho-
wywania, konserwacji, samowolnego zrywania plomb
oraz wszelkich przeróbek i zmian konstrukcyjnych doko-
nanych przez użytkownika lub osoby niepowołane,
• roszczeń z tytułu parametrów technicznych wyrobu, o ile
są one zgodne z podanymi przez producenta,
• prawidłowego zużycia i uszkodzeń, które mają nieistotny
wpływ na wartość lub działanie tego urządzenia.

BS6058CB_IM_02.2023 16.02.23
39
Karta gwarancyjna bez pieczątki sklepu, daty sprzedaży, nie
wypełniona, źle wypełniona, ze śladami poprawek, nieczy-
telna wskutek zniszczenia, bez możliwości ustalenia miejsca
sprzedaży oraz dołączonego dowodu zakupu jest nieważna.
Korzystanie z usług gwarancyjnych nie jest możliwe po
upływie daty ważności gwarancji. Gwarancja na części lub
całe urządzenie, które są wymieniane kończy się, wraz
z końcem gwarancji na to urządzenie.
Wszystkie inne roszczenia, wliczając w to odszkodowania
są wykluczone chyba, że prawo przewiduje inaczej. Rosz-
czenia wykraczające poza tą umowę nie są uwzględniane
przez tą gwarancję.
Gwarancja na sprzedany towar konsumpcyjny nie wyłącza,
nie ogranicza ani nie zawiesza uprawnień kupującego
wynikających z niezgodności towaru z umową.
Gwarancja oraz zawarte w niej warunki obowiązują na
terenie Rzeczpospolitej Polskiej.
Dystrybutor:
CTC Clatronic Sp. z o.o
Ul. Brzeska 1
45-960 Opole
Usuwanie
Znaczenie symbolu „Pojemnik na śmieci”
Proszę oszczędzać nasze środowisko, sprzęt
elektryczny nie należy do śmieci domowych.
Proszę korzystać z punktów zbiorczych, prze-
widzianych do zdawania sprzętu elektrycznego,
i tam proszę oddawać sprzęt elektryczny,
którego już nie będą Państwo używać.
Tym sposobem pomagają Państwo unikać potencjalnych
następstw niewłaściwego usuwania odpadów, mających
wpływ na środowisko i zdrowie ludzi.
Tą drogą przyczyniają się Państwo do ponownego użycia,
do recyklingu i do innych form wykorzystania starego
sprzętu elektrycznego i elektronicznego.
Informacje, gdzie można zdać sprzęt, otrzymają Państwo
w swoich urzędach komunalnych lub w administracji gminy.
Twój sprzedawca i partner umowny jest również zobowią-
zany do bezpłatnego odbioru starego urządzenia.

BS6058CB_IM_02.2023 16.02.23
40
FONTOS:
Először feltétlenül olvassa el a külön mellékelt biztonsági utasítá-
sokat.
Használati utasítás
Köszönjük, hogy a termékünket választotta. Reméljük,
elégedetten használja majd a készüléket.
A készülék használata előtt nagyon gyelmesen olvassa
el a használati útmutatót és a külön mellékelt biztonsági
utasításokat. Tartsa ezeket a dokumentumokat, beleértve
a jótállási jegyet, a blokkot és lehetőség szerint a belső
csomagolással ellátott dobozt is, biztonságos helyen. Ha a
készüléket harmadik félnek adja tovább, mindig mellékelje
az összes vonatkozó dokumentumot.
A használati útmutatóban található szimbólumok
Az ön biztonságára vonatkozó utasítások kifejezetten meg
vannak különböztetve. Kérjük, mindenképpen ügyeljen
ezekre annak érdekében, hogy elkerülje a baleseteket és a
készülék károsodását:
FIGYELMEZTETÉS:
Egészségét károsító veszélyforrásokra gyelmeztet és
rámutat a lehetséges sérülési lehetőségekre.
VIGYÁZAT:
Lehetséges veszélyre utal, mely a készülékben vagy más
tárgyakban kárt tehet.
Tartalom
A kezelőelemek áttekintése ...............................................3
Rendeltetésszerű használat ............................................40
A készülék kicsomagolása ..............................................40
A kezelőelemek áttekintése / A csomag tartalma ..........41
A készülék használatára vonatkozó gyelmeztetések
.. 41
Üzembe helyezés ..............................................................41
A hordozófogantyú felszerelése .....................................41
A görgők felszerelése .....................................................41
A szűrő behelyezése ...................................................... 41
A motorház felhelyezése ................................................ 42
A tömlő csatlakoztatása és leválasztása .......................42
3-részes szívócső ..........................................................42
Fúvókák rögzítése ..........................................................42
Levegő csúszka .............................................................42
Hálózati kábel .................................................................42
Bekapcsolás / kikapcsolás .............................................. 42
A készülék használata ...................................................... 42
Előkészítés ..................................................................... 42
Porszívózás száraz ........................................................ 43
Nedves porszívózás .......................................................43
Az állandó szűrő és a gyűjtőtartály kiürítése .................43
Működés befejezése ...................................................... 43
Tisztítás .............................................................................. 43
Gyűjtőedény ................................................................... 43
Tartozékok ...................................................................... 43
Ház .................................................................................43
Tárolás ...............................................................................43
Hibaelhárítás......................................................................44
Műszaki adatok .................................................................44
Hulladékkezelés ................................................................44
A „kuka” piktogram jelentése..........................................44
Rendeltetésszerű használat
Ez a készülék a következő funkciókkal rendelkezik:
• Nedves és száraz porszívózás
• Ventilátor funkció
Háztartási és hasonló használatra szánták.
Kizárólag a jelen használati utasításban leírt módon szabad
használni. A készüléket nem szabad kereskedelmi célokra
használni.
Minden más használat nem megfelelőnek minősül, és
anyagi károkat vagy akár személyi sérülést is okozhat.
A gyártó nem vállal felelősséget a nem rendeltetésszerű
használatból eredő károkért.
A készülék kicsomagolása
1. Vegye ki a készüléket a csomagolásából.
2. Távolítson el minden csomagolóanyagot, például
fóliákat, töltőanyagot, kábelkötegelőket és kartoncso-
magolást.
3. Ellenőrizze a szállítási terjedelem teljességét. A gyűjtő-
tartályban a szállítási terjedelem egyes részei találhatók.
4. Ha a csomagolás tartalma hiányos, vagy ha sérülések
észlelhetők, ne működtesse a készüléket. Azonnal
juttassa vissza a kereskedőhöz.

BS6058CB_IM_02.2023 16.02.23
41
A kezelőelemek áttekintése /
A csomag tartalma
1 Szívócső, 3 darab
2 Levegőcsúszda
3 Szívócső
4 Be- / kikapcsoló ( I / O )
5 Levegő kimeneti nyílás
6 A padlófúvóka rögzítőszerkezete
7 Hordozófogantyú
8 Motorház
9 Fúvóka-felszerelések rögzítőszerkezete
10 Zárószerkezet
11 Szívónyílás
12 Tömlőcsatlakozás
13 Gyűjtőtartály
14 A fúvóka-felszerelések rögzítőszerkezete
15 Görgők
16 Alvázkeret
17 Kar a kefe ki- és behúzásához és visszahúzásához
18 Padlófúvóka
Tartozékok
19 Fugafúvóka
20 Kefés fúvóka
Ábra nélkül
Állandó szűrő (száraz porszívózáshoz)
Tömítőgyűrű (nedves porszívózáshoz)
Védő habszűrő
A készülék használatára
vonatkozó gyelmeztetések
FIGYELMEZTETÉS:
• A készüléket csak akkor használja nedves helyisé-
gekben, ha az áramkörbe az Ön védelme érdekében
előbbre egy hibásáramú megszakítót csatlakoztattak.
Kétség esetén forduljon egy erre felhatalmazott
villanyszerelőhöz.
• Ha a vízzel töltött készülék véletlenül felborulna, min-
dig húzza ki a konnektorból, mielőtt újra felállítaná.
• Soha ne használja a készüléket robbanásveszélyes
folyadékok (pl. fűtőolaj, benzin, festékhígító, aceton)
és porok (pl. magnézium- és alumíniumpor), gyúl-
ékony gázok, valamint hígítatlan oldószerek és savak
felszívására, robbanásveszély áll fenn! A szívóle-
vegő örvénylésével robbanásveszélyes gőzök vagy
keverékek keletkezhetnek. Ezek az anyagok megtá-
madhatják a felhasznált alkatrészeket és anyagokat.
VIGYÁZAT:
• Figyeljen a kábelhossz miatt korlátozott hatótávol-
ságra!
VIGYÁZAT:
• Az alábbi helyzetekben azonnal kapcsolja ki a
készüléket:
- Habképződés esetén.
- Folyadék szivárgása esetén.
- Ha a tartály megtelt.
- Ha a készülék felborul.
• Ne porszívózzon habképző tisztítószereket a
készülékkel!
• Folyadékok porszívózásakor mindig távolítsa el az
állandó szűrőt. Helyette helyezze be a tömítőgyűrűt.
• Ellenőrizze, hogy a védőszűrő helyesen van-e behe-
lyezve.
• Mielőtt a következő alkalommal újra porszívózik, min-
den alkatrésznek újra száraznak kell lennie.
• Ha sima padlót porszívózik szárazon a padlófúvóká-
val, akkor a padló sérülésének elkerülése érdekében
mindenképpen a kefék kihúzásával használja.
Üzembe helyezés
Ha még nem tette meg, vegye ki a szállított alkatrészeket a
gyűjtőtartályból.
A hordozófogantyú felszerelése
Szerelje fel a hordozófogantyút a mellékelt két csavarral.
Kézzel húzza meg a csavarokat egy megfelelő csavarhú-
zóval.
A görgők felszerelése
A készülék használata előtt rögzítse a görgőket a gyűjtőtar-
tály alvázához.
1. A reteszek befelé történő benyomásával vegye le a
motortartályt a gyűjtőtartályról.
2. Vegye ki a motorházat a gyűjtőtartályból.
3. Fordítsa a gyűjtőedényt fejjel lefelé.
4. Helyezze a görgőket a csapokkal együtt a megadott
lyukakba, ameddig csak lehet.
5. Fordítsa a gyűjtőtartályt ismét fejjel lefelé, hogy a görgő-
kön álljon.
A szűrő behelyezése
1. Helyezze be az állandó
szűrőt (csak száraz porszívózás
esetén)
A készülék állandó szűrővel
rendelkezik. Ez könnyen behelyez-
hető és tisztítható.
• Helyezze az állandó szűrő
gumiperemét a gyűjtőtartály
pereme fölé. Ez légmentes
lezárásként szolgál a motorház
számára.

BS6058CB_IM_02.2023 16.02.23
42
2. Védő habszűrő
A motor alatt egy védő habszűrő található. Nedves és szá-
raz porszívózásnál egyaránt szükség van rá.
• Ha még nincs felszerelve, helyezze a védőszűrőt a
szívószűrőre.
• Rendszeresen ellenőrizze, hogy a szűrő megfelelően
van-e felszerelve és jó állapotban van-e.
A motorház felhelyezése
• Ha nem használja az állandó szűrőt, mindig illessze fel a
mellékelt tömítőgyűrűt. Helyezze a felfogótartály szélére.
- Ügyeljen arra, hogy ez a gumitömítés mindig meg-
felelően felfeküdjön a tartály szélére. Máskülönben
csökken a szívóteljesítmény.
• Igazítsa a motorházat úgy, hogy a be- / kikapcsoló a
szívónyílás fölé kerüljön.
• A készüléken lévő reteszeknek a motorház mélyedése-
iben kell lenniük. Nyomja rá a motorházat a gyűjtőtar-
tályra, amíg a reteszek be nem reteszelődnek.
A tömlő csatlakoztatása és leválasztása
Szívási funkció
Helyezze a tömlőcsatlakozást a gyűjtőtartály szívónyílá-
sába. Figyeljen a mélyedésekre. A tömlő meghúzásához
forgassa el a tömlőt az óramutató járásával megegyező
irányba.
Ventilátor funkció
Helyezze a tömlőcsatlakozást a motorház kifúvónyílásába.
Figyeljen a mélyedésekre. A tömlő meghúzásához forgassa
el a tömlőt az óramutató járásával megegyező irányba.
Lazítsa meg a tömlőt
Lazítsa meg a tömlőt az óramutató járásával ellentétes
irányban elforgatva és kihúzva.
3-részes szívócső
• Illessze egymásba a két szívócsövet a tartó nélkül.
• Helyezze az összeszerelt szívócsövek vékonyabb végét
a tartóval ellátott szívócső vastagabb végébe.
• A szívócsövek leválasztásához húzza ki őket, miközben
kissé elforgatja őket.
Fúvókák rögzítése
• A fúvókatartozékok leválasztásához húzza le őket enyhe
csavarással.
• A kefefúvókát és a résfúvókát többféleképpen tárolhatja.
- Használja a hengerek feletti tartókat vagy a fedélen
lévő tartókat.
Padlófúvóka
A padlófúvókával szárazon vagy nedvesen tisztíthatja a
sima felületeket és a szőnyegeket. A padlófúvóka görgőkkel
van felszerelve a könnyebb vezetés érdekében.
• A kar segítségével a keféket kifelé vagy befelé mozgat-
hatja.
Az optimális használat a padló állapotától függ. A következő
használatot ajánljuk:
• Kefék nélküli használat ( ):
- Száraz szőnyegek (magas bolyhos) porszívózásához.
- Nedves, sima padlók tisztításához.
Ez a beállítás a legalkalmasabb a víz nagyobb terüle-
tekről történő felszedésére is.
Vegye gyelembe, hogy a gyűjtőtartály csak korlá-
tozott mennyiségű folyadékot képes befogadni! A
maximális töltési mennyiség habképző adalékanyagok
esetén ennek megfelelően csökken!
• Használja a kefékkel ( ):
- Száraz, sima padlók és száraz szőnyegek (alacsony
bolyhos) porszívózásához.
- Nedves, sima padlók és nedves szőnyegek (alacsony
bolyhos) tisztításához (súrolásához).
Résfúvóka
Sarkok és rések stb. porszívózásához.
Kefés fúvóka
Kárpitok vagy függönyök tisztításához.
Levegő csúszka
Nyissa ki a tömlő fogantyúján lévő levegőcsúszkát a levegő
szabályozásához vagy a fúvókához tapadó alkatrészek
fellazításához.
Hálózati kábel
• A működéshez tekerje ki teljesen a hálózati kábelt.
• Működés után először hagyja lehűlni a motorházat. Ezu-
tán a hálózati kábelt a motorház köré tekerheti.
Bekapcsolás / kikapcsolás
A készüléket a be- / kikapcsoló kapcsolóval kapcsolja be (I)
és ki (O).
A készülék használata
Előkészítés
1. Válassza ki a kívánt tartozékot.
2. Tekerje ki teljesen a hálózati kábelt.
3. Ellenőrizze, hogy a használni kívánt hálózati feszültség
megfelel-e a névtáblán szereplő adatoknak.

BS6058CB_IM_02.2023 16.02.23
43
Porszívózás száraz
1. Helyezze az állandó szűrőt a gyűjtőtartályba.
2. Helyezze a motortartó burkolatot a reteszek mélyedései-
vel a helyére, amíg azok be nem kattannak.
3. Szerelje fel a tartozékokat.
4. Helyezze be a hálózati dugót egy megfelelően felszerelt
földelt aljzatba.
5. Kapcsolja be a készüléket.
6. Most porszívózzon egyenletes sebességgel. Nem szük-
séges lenyomni.
Nedves porszívózás
1. Húzza ki a hálózati dugót a konnektorból.
2. Vegye ki az állandó szűrőt. Helyette illessze be a tömí-
tőgyűrűt.
3. Illessze a tömítőgyűrűt a felfogótartály szélére.
4. Helyezze a motortartó burkolatot a reteszek mélyedései-
vel a helyére, amíg azok be nem kattannak.
5. Szerelje fel a tartozékokat.
6. Helyezze a hálózati dugót egy megfelelően felszerelt
földelt aljzatba.
7. Kapcsolja be a készüléket.
A gyűjtőtartály csak korlátozott mennyiségű folyadékot
képes befogadni! Ha a gyűjtőtartályban hab képződik,
a maximális gyűjtési mennyiség ennek megfelelően
csökken! Amikor a tartály megtelt, az úszószelep lezárja
a szívónyílást, és a motor megnövelt fordulatszámon
működik. Azonnal kapcsolja ki és ürítse ki a készüléket.
Az állandó szűrő és a gyűjtőtartály kiürítése
1. Kapcsolja ki a készüléket a be- / kikapcsolóval. Húzza ki
a hálózati dugót a konnektorból.
2. A zárak befelé nyomásával vegye le a motortartályt a
gyűjtőtartályról. Vegye ki a motorházat.
3. Szükség esetén vegye ki az állandó szűrőt. Rázza ki.
4. Vegye ki a szívótömlőt.
5. Ürítse ki a gyűjtőtartályt.
6. Ha szükséges, tegye vissza az állandó szűrőt a gyűjtő-
tartályba.
7. Szerelje vissza a tömlőcsatlakozást és a motorházat.
8. Folytassa a működést.
Működés befejezése
1. Kapcsolja ki a készüléket.
2. Húzza ki a hálózati dugót a konnektorból.
Tisztítás
FIGYELMEZTETÉS:
• A készülék tisztítása vagy karbantartása előtt húzza ki
a hálózati dugót a konnektorból.
• Tisztítás céljából soha ne merítse a motorházát vízbe.
Ez áramütést vagy tüzet okozhat.
VIGYÁZAT:
• Ne használjon drótkefét vagy más csiszoló tárgyakat.
• Ne használjon durva vagy súroló hatású tisztítósze-
reket.
Gyűjtőedény
• Használat után öblítse ki a gyűjtőtartályt tiszta vízzel.
• A tartályban lévő szennyeződéseket szivaccsal vagy
nejlonkefével távolíthatja el.
Tartozékok
• Az összes tartozékot meleg öblítővízben, kevés kézi
mosogatószerrel tisztíthatja. Ha nem nagyon szennye-
zettek, akkor egyszerűen lecsapolhatja őket.
• Öblítse ki tiszta vízzel, és szárítsa meg az alkatrészeket.
Ne helyezze újra üzembe a készüléket, amíg az összes
szűrő teljesen meg nem száradt
Ház
A ház egy enyhén nedves ruhával tisztára törölhető.
Tárolás
• Tisztítsa meg a készüléket a leírtak szerint, és hagyja
teljesen megszáradni.
• A hálózati kábelt a motorház köré tekerheti.
• A rögzítőeszköz (6) kizárólag a cső és tömlő nélküli
padlófúvókához való.
• Javasoljuk, hogy a készüléket az eredeti csomagolásban
tárolja, ha hosszabb ideig nem kívánja használni.
• A készüléket mindig gyermekek elől elzárva, jól szellőző
és száraz helyen tárolja.

BS6058CB_IM_02.2023 16.02.23
44
Hibaelhárítás
Probléma Lehetséges ok Megoldás
A készülék nem működik. A készüléknek nincs áramellátása. Ellenőrizze az aljzatot egy másik készülékkel.
Helyesen dugja be a hálózati dugót.
Ellenőrizze a házi biztosítékot.
A készülék nem szív. A gyűjtőtartály megtelt. Ürítse ki a gyűjtőtartályt.
Idegen tárgy van a szívótömlőben
vagy a fúvókában.
Ellenőrizze a tartozékokat idegen tárgyakra.
A készülék felborult. 1. Kapcsolja ki a készüléket.
2. Tartsa fenn a motor leállását.
3. Folytassa a működést.
A motorburkolat és a felfogótartály
közötti tömítőgyűrű hiányzik.
Ellenőrizze a tömítést.
Por vagy folyadék szivárog a te-
leszkópos csőből, a szívótömlő-
ből vagy a szívócsatlakozásból.
A tartozékok nincsenek megfelelően
felszerelve.
Ellenőrizze, hogy a tartozékok szilárdan és
helyesen vannak-e csatlakoztatva.
A készülék működés közben
kikapcsol.
A készülék hőmérsékletbiztosítóval
van felszerelve, amely túlmelegedés
esetén automatikusan kikapcsolja a
készüléket.
Újbóli használat előtt hagyja a készüléket kb.
15 percig lehűlni.
Műszaki adatok
Modell: ................................................................. BS 6058 CB
Tápellátás: ......................................... 220 – 240 V~, 50 – 60 Hz
Energiafogyasztás: .....................................................1200 W
Védelmi osztály: ...................................................................
Védelem típusa: ............................................................ IPX4 *
Nettó súly: ................................................................kb. 4,9 kg
* A készülék megfelel az IPX4 védelmi típusnak. Ez azt
jelenti, hogy a készülék minden oldalról védett a fröccsenő
vízzel szemben.
A műszaki és kivitelezési módosítások jogát a folyamatos
termékfejlesztés miatt fenntartjuk.
Ezt a készüléket az összes vonatkozó, hatályos CE-irány-
elvnek megfelelően tesztelték, és a legújabb biztonsági
előírásoknak megfelelően gyártották.
Hulladékkezelés
A „kuka” piktogram jelentése
Kímélje környezetünket, az elektromos készülé-
kek nem a háztartási szemétbe valók!
Használja az elektromos készülékek ártalmat-
lanítására kijelölt gyűjtőhelyeket, ott adja le
azokat az elektromos készülékeit, amelyeket
többé már nem kíván használni!
Ezzel segítséget nyújt ahhoz, hogy elkerülhetők legyenek
azok a hatások, amelyeket a helytelen „szemétre dobás”
gyakorolhat a környezetre és az emberi egészségre.
Ezzel hozzájárul az újrahasznosításhoz, a recyclinghoz és a
kiöregedett elektromos és elektronikus készülékek értékesí-
tésének egyéb formáihoz.
Az önkormányzatoknál vagy a polgármesteri hivatalokban
tájékoztatást kaphat arról, hogy hova viheti a kiselejtezett
készülékeket. Az Ön kereskedője és szerződéses partnere
köteles a régi készüléket is ingyenesen visszavenni.

BS6058CB_IM_02.2023 16.02.23
45
ВАЖНО:
Обязательно сначала прочитайте отдельно прилагаемые
инструкции по технике безопасности.
Руководство по эксплуатации
Спасибо за выбор нашего продукта. Надеемся, он вам
понравится.
Перед использованием данного прибора внимательно
прочитайте инструкцию по эксплуатации и отдельно
прилагаемые инструкции по технике безопасности.
Храните эти документы, включая гарантийный талон,
чек и, по возможности, коробку с внутренней упаковкой
в надежном месте. Если вы передаете прибор третьему
лицу, всегда прикладывайте к нему все соответствую-
щие документы.
Символы применяемые в
данном руководстве пользователя
Важные рекомендации для обеспечения вашей без-
опасности обозначены по особенному. Обязательно
следуйте этим рекомендациям, чтобы предотвратить
несчастный случай или поломку изделия:
ПРЕДУПРЕЖДЕНИЕ:
Предупреждает об опасности для здоровья и возмож-
ном риске получения травмы.
ВНИМАНИЕ:
Указывает на возможную опасность для изделия и
других окружающих предметов.
Содержание
Обзор деталей прибора ...................................................3
Предполагаемое использование ................................45
Распаковка прибора ....................................................... 45
Обзор деталей прибора / Комплект поставки ...........46
Предупреждения по использованию прибора.........46
Ввод в эксплуатацию .....................................................46
Установка ручки для переноски .................................. 46
Монтаж роликов ...........................................................46
Установка фильтра ......................................................47
Установка корпуса двигателя .....................................47
Подключение и отключение шланга ..........................47
Всасывающая трубка из 3 частей ..............................47
Насадки .........................................................................47
Заслонка воздуха .........................................................47
Сетевой кабель ............................................................48
Включение / выключение .............................................48
Использование прибора ...............................................48
Подготовка ....................................................................48
Сухая уборка пылесосом ............................................48
Влажная уборка ............................................................ 48
Опорожнение постоянного
фильтра и контейнера для сбора мусора .................48
Окончание работы .......................................................48
Чистка ................................................................................ 48
Контейнер для сбора ...................................................48
Аксессуары ...................................................................48
Корпус ............................................................................48
Хранение ........................................................................... 49
Устранение неполадок ................................................... 49
Технические данные ......................................................49
Утилизация ....................................................................... 50
Значение символа «корзина» .....................................50
Предполагаемое использование
Этот прибор имеет следующие функции:
• Влажная и сухая уборка
• Функция вентилятора
Он предназначен для бытового и аналогичного исполь-
зования.
Его можно использовать только так, как описано в
данной инструкции. Запрещается использовать прибор
в коммерческих целях.
Любое другое использование считается ненадлежащим
и может привести к повреждению имущества или даже
к травмам.
Производитель не несет ответственности за ущерб,
причиненный в результате неправильного использо-
вания.
Распаковка прибора
1. Извлеките прибор из упаковки.
2. Удалите все упаковочные материалы, такие как
фольга, наполнитель, кабельные стяжки и картонная
упаковка.
3. Проверьте комплект поставки на комплектность. Не-
которые детали из комплекта поставки можно найти
в контейнере для сбора мусора.
4. Если содержимое упаковки неполное или если можно
обнаружить повреждения, не эксплуатируйте прибор.
Немедленно верните его дилеру.

BS6058CB_IM_02.2023 16.02.23
46
Обзор деталей прибора /
Комплект поставки
1 Всасывающая труба, 3-секционная
2 Воздушная заслонка
3 Всасывающий шланг
4 Переключатель включения / выключения ( I / O )
5 Выпуск воздуха
6 Навесное устройство для напольной насадки
7 Ручка для переноски
8 Корпус двигателя
9 Приспособление для крепления насадок
10 Запорное устройство
11 Всасывающее отверстие
12 Шланговое соединение
13 Контейнер для сбора мусора
14 Устройство для крепления насадок
15 Ролики
16 Шасси
17 Рычаг для выдвижения и втягивания щетки
18 Насадка для пола
Принадлежности
19 Насадка для щелей
20 Щеточная насадка
Без иллюстрации
Постоянный фильтр (для сухой уборки)
Уплотнительное кольцо (для влажной уборки)
Защитный поролоновый фильтр
Предупреждения по
использованию прибора
ПРЕДУПРЕЖДЕНИЕ:
• Используйте прибор во влажных помещениях
только в том случае, если для вашей защиты
перед ним в цепи подключен автоматический
выключатель остаточного тока. В случае сомнений
обратитесь к уполномоченному электрику.
• Если прибор, наполненный водой, случайно
опрокинется, всегда вынимайте вилку из розетки,
прежде чем снова ставить его на место.
• Никогда не используйте его для всасывания взры-
воопасных жидкостей (таких как печное топливо,
бензин, растворитель краски, ацетон) и пыли (такой
как магниевая и алюминиевая пыль), горючих газов,
а также неразбавленных растворителей и кислот,
существует опасность взрыва! Взрывоопасные
пары или смеси могут образоваться в результате
завихрения всасываемого воздуха. Эти вещества
могут поразить используемые детали и материалы.
ВНИМАНИЕ:
• Обратите внимание на ограниченный радиус дей-
ствия из-за длины кабеля!
• Немедленно выключите прибор в следующих
ситуациях:
- В случае образования пены.
- В случае утечки жидкости.
- Если контейнер переполнен.
- Если прибор опрокинут.
• Не всасывайте пылесосом пенообразующие
чистящие средства!
• При вакуумировании жидкостей всегда снимайте
постоянный фильтр. Вставьте вместо него уплот-
нительное кольцо.
• Проверьте, правильно ли установлен защитный
фильтр.
• Перед следующей сухой уборкой пылесосом все
компоненты должны быть снова сухими.
• При сухой уборке гладких полов пылесосом с
насадкой для пола обязательно используйте ее с
выдвинутыми щетками, чтобы не повредить пол.
Ввод в эксплуатацию
Если это еще не сделано, извлеките поставляемые
детали из контейнера для сбора мусора.
Установка ручки для переноски
Установите ручку для переноски с помощью двух при-
лагаемых винтов. Затяните винты вручную с помощью
подходящей отвертки.
Монтаж роликов
Перед использованием устройства прикрепите ролики к
шасси контейнера для сбора мусора.
1. Отсоедините корпус двигателя от контейнера для
сбора мусора, нажав на защелки внутрь.
2. Извлеките корпус двигателя из контейнера для сбора
мусора.
3. Переверните контейнер для сбора мусора вверх
дном.
4. Вставьте ролики со штифтами в предусмотренные
отверстия до упора.
5. Снова переверните контейнер для сбора мусора
вверх дном, чтобы он стоял на роликах.

BS6058CB_IM_02.2023 16.02.23
47
Установка фильтра
1. Вставьте постоянный
фильтр (только при сухой
уборке)
Прибор оснащен постоянным
фильтром. Его легко вставлять
и чистить.
• Наденьте резиновый обод
постоянного фильтра на край
контейнера для сбора му-
сора. Он служит герметичным
уплотнением для корпуса двигателя.
2. Защитный поролоновый фильтр
Защитный поролоновый фильтр расположен под
двигателем. Он необходим как для влажной, так и для
сухой уборки.
• Если он еще не установлен, установите защитный
фильтр на сетчатый фильтр всасывания.
• Регулярно проверяйте правильность установки и
состояние фильтра.
Установка корпуса двигателя
• Если вы не используете постоянный фильтр, всегда
закрепляйте уплотнительное кольцо. Подгоняйте его
по краю пылесборника.
- Всегда проверяйте, что резиновое уплотнение
правильно установлено по краю пылесборника. В
противном случае пылесос теряет мощность.
• Выровняйте корпус двигателя так, чтобы пере-
ключатель включения / выключения находился над
всасывающим отверстием.
• Защелки на приборе должны находиться в углубле-
ниях корпуса мотора. Прижмите корпус двигателя
к контейнеру для сбора мусора, пока защелки не
зафиксируются.
Подключение и отключение шланга
Функция всасывания
Вставьте штуцер шланга во всасывающее отверстие
на контейнере для сбора мусора. Обратите внимание
на углубления. Поверните шланг по часовой стрелке,
чтобы затянуть его.
Функция вентилятора
Вставьте штуцер шланга в выдувное отверстие на
корпусе двигателя. Обратите внимание на углубления.
Поверните шланг по часовой стрелке, чтобы затянуть
его.
Ослабление шланга
Ослабьте шланг, повернув его против часовой стрелки
и вытянув его.
Всасывающая трубка из 3 частей
• Вставьте две всасывающие трубки друг в друга без
держателя.
• Вставьте более тонкий конец собранных всасыва-
ющих трубок в более толстый конец всасывающей
трубки с держателем.
• Чтобы отсоединить всасывающие трубки, потяните
их, слегка поворачивая.
Насадки
• Чтобы отсоединить насадки, потяните их, слегка
повернув.
• Существует несколько способов хранения насад-
ки-щетки и щелевой насадки.
- Используйте держатели над роликами или держа-
тели на крышке.
Насадка для пола
С помощью насадки для пола можно производить сухую
или влажную уборку гладких поверхностей и ковров. На-
садка для пола оснащена роликами для более удобного
перемещения.
• Используйте рычаг для перемещения щеток наружу
или внутрь.
Оптимальное использование зависит от состояния
пола. Мы рекомендуем следующее использование:
• Использование без щеток ( ):
- Для уборки сухих ковров (с высоким ворсом).
- Для уборки влажных гладких полов.
Эта настройка также лучше всего подходит для
сбора воды с больших площадей.
Обратите внимание, что контейнер для сбора
может вмещать только ограниченное количество
жидкости! Для пенообразующих добавок макси-
мальное количество заполнения соответственно
уменьшается!
• Использование со щетками ( ):
- Для уборки сухих гладких полов и сухих ковров (с
низким ворсом).
- Для уборки (скребка) влажных гладких полов и
влажных ковров (с низким ворсом).
Насадка для щелей
Для пылесоса в углах, щелях и т.д.
Насадка-щетка
Для чистки обивки или штор.
Заслонка воздуха
Откройте воздушную заслонку на ручке шланга, чтобы
отрегулировать подачу воздуха или ослабить прилип-
шие к насадке детали.

BS6058CB_IM_02.2023 16.02.23
48
Сетевой кабель
• Для работы полностью размотайте сетевой кабель.
• После работы сначала дайте корпусу двигателя
остыть. Затем можно обернуть сетевой кабель вокруг
корпуса двигателя.
Включение / выключение
Для включения (I) и выключения (O) прибора исполь-
зуйте переключатель включения / выключения.
Использование прибора
Подготовка
1. Выберите нужную принадлежность.
2. Полностью размотайте сетевой кабель.
3. Убедитесь, что напряжение сети, которое вы хотите
использовать, соответствует информации на завод-
ской табличке.
Сухая уборка пылесосом
1. Поместите постоянный фильтр в контейнер для
сбора мусора.
2. Установите корпус двигателя с углублениями на
защелках до щелчка.
3. Установите принадлежности.
4. Вставьте сетевую вилку в правильно установленную
заземленную розетку.
5. Включите прибор.
6. Теперь пылесосьте с постоянной скоростью. Прижи-
мать пылесос не нужно.
Влажная уборка
1. Выньте сетевую вилку из розетки.
2. Снимите постоянный фильтр. Вместо фильтра
вставляйте уплотнительное кольцо.
3. Установите уплотнительное кольцо поверх края
пылесборника.
4. Установите корпус двигателя с углублениями на
защелках до щелчка.
5. Установите принадлежности.
6. Вставьте сетевую вилку в правильно установленную
заземленную розетку.
7. Включите прибор.
Контейнер для сбора может вмещать только огра-
ниченное количество жидкости! Если в контейнере
для сбора жидкости образуется пена, максимальный
объем сбора уменьшается соответственно! Когда
контейнер заполнен, поплавковый клапан закрывает
всасывающее отверстие, и двигатель работает с
повышенной скоростью. Выключите и немедленно
опорожните прибор.
Опорожнение постоянного фильтра и
контейнера для сбора мусора
1. Выключите прибор с помощью выключателя. Выньте
сетевую вилку из розетки.
2. Отсоедините корпус двигателя от контейнера для
сбора воды, нажав на фиксаторы внутрь. Снимите
корпус двигателя.
3. При необходимости снимите постоянный фильтр.
Вытряхните его.
4. Снимите всасывающий шланг.
5. Опорожните контейнер для сбора мусора.
6. При необходимости поместите постоянный фильтр
обратно в контейнер для сбора.
7. Соберите обратно соединение шланга и корпус
двигателя.
8. Возобновите работу.
Окончание работы
1. Выключите прибор.
2. Выньте вилку сетевого шнура из розетки.
Чистка
ПРЕДУПРЕЖДЕНИЕ:
• Перед чисткой или обслуживанием прибора
выньте сетевую вилку из розетки.
• Никогда не погружайте корпус двигателя в воду
для очистки. Это может привести к поражению
электрическим током или пожару.
ВНИМАНИЕ:
• Не используйте проволочную щетку или другие
абразивные предметы.
• Не используйте жесткие или абразивные чистящие
средства.
Контейнер для сбора
• После использования ополосните контейнер для
сбора чистой водой.
• Загрязнения в контейнере можно удалить губкой или
нейлоновой щеткой.
Аксессуары
• Все аксессуары можно мыть в теплой воде с не-
большим количеством жидкости для мытья посуды.
Если они не очень грязные, можно просто вымыть
их краном.
• Ополосните детали чистой водой и высушите. Не
вводите прибор в эксплуатацию, пока все фильтры
полностью не высохнут.
Корпус
Корпус можно протирать слегка влажной тряпкой.

BS6058CB_IM_02.2023 16.02.23
49
Хранение
• Очистите прибор, как описано, и дайте ему полно-
стью высохнуть.
• Сетевой кабель можно обернуть вокруг корпуса
двигателя.
• Крепежное устройство (6) предназначено исключи-
тельно для напольной насадки без трубки и шланга.
• Мы рекомендуем хранить прибор в оригинальной
упаковке, если вы не собираетесь использовать его в
течение длительного периода времени.
• Всегда храните прибор в недоступном для детей,
хорошо проветриваемом и сухом месте.
Устранение неполадок
Проблема Возможная причина Устранение
Прибор не работает. Прибор не имеет электропитания. Проверьте розетку с другим прибором.
Правильно вставьте сетевую вилку.
Проверьте предохранитель в доме.
Прибор не всасывает. Контейнер для сбора заполнен. Опорожните контейнер для сбора мусора.
Во всасывающем шланге или насадке
находится посторонний предмет.
Проверьте аксессуары на наличие посто-
ронних предметов.
Прибор опрокинулся. 1. Выключите прибор.
2. Обеспечьте остановку двигателя.
3. Возобновите работу.
Отсутствует уплотнительное кольцо
между корпусом электродвигателя и
пылесборником.
Проконтролируйте прокладку.
Пыль или жидкость вытекает
из телескопической трубки,
всасывающего шланга или
всасывающего патрубка.
Насадки установлены неправильно. Убедитесь, что принадлежности надежно и
правильно подсоединены.
Прибор выключается во
время работы.
Прибор оснащен температурным пре-
дохранителем, который автоматиче-
ски отключает прибор при перегреве.
Дайте прибору остыть в течение примерно
15 минут, прежде чем использовать его
снова.
Технические данные
Модель: ..............................................................BS 6058 CB
Электропитание: ..............................220 – 240 В~, 50 – 60 Гц
Потребляемая мощность: ....................................... 1200 Вт
Класс защиты: ....................................................................
Тип защиты: ................................................................. IPX4 *
Вес нетто: ..........................................................прибл. 4,9 кг
* Прибор соответствует типу защиты IPX4. Это озна-
чает, что прибор защищен от брызг воды со всех
сторон.
Сохранено право на технические и конструкционные
изменения в рамках продолжающейся разработки
продукта.
Данный прибор был протестирован в соответствии со
всеми применимыми действующими директивами CE
и изготовлен в соответствии с последними правилами
безопасности.

BS6058CB_IM_02.2023 16.02.23
50
Утилизация
Значение символа «корзина»
Защита окружающей среды: не допускается
утилизация электроприборов вместе с быто-
выми отходами.
Утилизация устаревшей техники и неис-
правных электроприборов производится в
городских приёмных пунктах.
Не допускайте неправильной утилизации отходов. Это
наносит вред окружающей среде и оказывает негатив-
ное воздействие на здоровье людей.
Оказывайте содействие программе утилизации и дру-
гим формам переработки электронной и электрической
техники.
Информацию о пунктах утилизации бытовой техники
можно получить в местных органах власти. Ваш дилер
и партнер по договору также обязан бесплатно принять
старый прибор.

BS6058CB_IM_02.2023 16.02.23
51
" "
:
.
.
.
.
.
.

BS6058CB_IM_02.2023 16.02.23
52
.
.
.
.
.
. . .
.
.
1 ..
2 .
.
3 ..
.
.
.
.
.
.
15
.
.
.
BS 6058 CB .......................................................................................:
60–50 ~ 240–220 .................................................:
1200 ..............................................................................:
II ................................................................................................ :
*IPX4 .......................................................................................::
4,9 ..........................................................................:
.IPX4 *
.
.
.
:
•
.
• .
.
:
•.
•.
•.
•.
•
. .
• .
.
.
•.
•.
•. (6)
•
.
•.

BS6058CB_IM_02.2023 16.02.23
53
.
•.
•
.
•.
•.
•.
-
.
. .
•.
: .
•:( )
- .( )
- .
.
! !
•:( )
- )
.(
- ) ()
.(
.
.
.
•.
• .
.
/
.( O) ( I) /
1 ..
2 ..
3 .
.
1 ..
2 ..
3 ..
4 ..
5 ..
6 . .
.
1 ..
2 .. .
3 ..
4 ..
5 ..
6 ..
7 . .
!
!
.
.
1 . ./
.
2 .
. .
3 .. .
4 ..
5 ..
6 ..
7 ..
8 ..
1 ..
2 ..

BS6058CB_IM_02.2023 16.02.23
54
.
.
.
.
1 .
.
2 ..
3 . .
4 ..
5 ..
.1
( )
.
.
•
.
.
.2
.
.
•.
•.
• .
.
- .
.
• /
.
• .
.
. .
.
. .
.
11
12
13
14
15
16
17
18
19
20
( )
( )
:
•
.
.
•
.
• )
) (
(
!
.
.
:
•!
•:
- .
- .
- .
- .
•!
• .
.
•.
•
.
•
.

BS6058CB_IM_02.2023 16.02.23
55
:
.
. .
. .
.
.
.
:
:
.
:
.
3 .......................................................................
55 .........................................................................
55 .......................................................................
55 ............................................... /
54 ..................................................................
54 ...........................................................
54 ...........................................................................
54 .......................................................................................
54 .......................................................................................
54 ..............................................................................
54 .......................................................................
53 ...................................................
53 ..................................................................................
53 ...................................................................
53 ......................................................................................
53 .................................................................... /
53 ..................................................................................
53 ...............................................................................................
53 ...................................................................................
53 ..................................................................................
53 ...................................................
53 ......................................................................................
52 ............................................................................................
52.....................................................................................
52..............................................................................................
52..................................................................................................
52 .............................................................................................
52 ...............................................................
52 ....................................................................................
51 .............................................................................
51 ................................................................ " "
:
•
•
.
.
.
.
.
1 ..
2 .
.
3 . .
.
4 .
. .
/
3 1
2
3
(O/I) / 4
5
6
7
8
9
10

BS6058CB_IM_02.2023 16.02.23

BS6058CB_IM_02.2023 16.02.23

C. Bomann GmbH
Internet: www.bomann-germany.de
Made in P.R.C.
BS 6058 CB
BS6058CB_IM_02.2023 16.02.23
Stand 02 / 2023
-
 1
1
-
 2
2
-
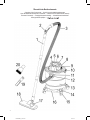 3
3
-
 4
4
-
 5
5
-
 6
6
-
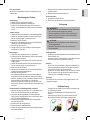 7
7
-
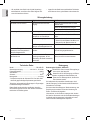 8
8
-
 9
9
-
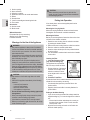 10
10
-
 11
11
-
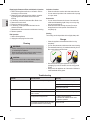 12
12
-
 13
13
-
 14
14
-
 15
15
-
 16
16
-
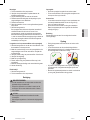 17
17
-
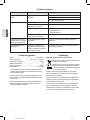 18
18
-
 19
19
-
 20
20
-
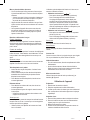 21
21
-
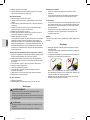 22
22
-
 23
23
-
 24
24
-
 25
25
-
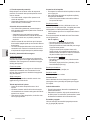 26
26
-
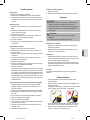 27
27
-
 28
28
-
 29
29
-
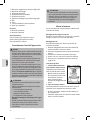 30
30
-
 31
31
-
 32
32
-
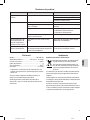 33
33
-
 34
34
-
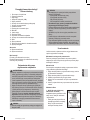 35
35
-
 36
36
-
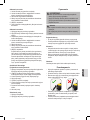 37
37
-
 38
38
-
 39
39
-
 40
40
-
 41
41
-
 42
42
-
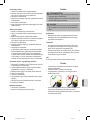 43
43
-
 44
44
-
 45
45
-
 46
46
-
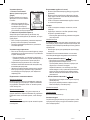 47
47
-
 48
48
-
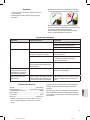 49
49
-
 50
50
-
 51
51
-
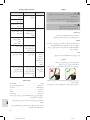 52
52
-
 53
53
-
 54
54
-
 55
55
-
 56
56
-
 57
57
-
 58
58


in andere talen
- italiano: BOMANN BS 6058 CB Manuale utente
- français: BOMANN BS 6058 CB Manuel utilisateur
- español: BOMANN BS 6058 CB Manual de usuario
- Deutsch: BOMANN BS 6058 CB Benutzerhandbuch
- polski: BOMANN BS 6058 CB Instrukcja obsługi