
USER’S MANUAL
MANUAL DEL USARIO
GEBRUIKERSHANDLEIDING
RB2
MULTIMEDIA SYSTEM
MULTIMEDIA SYSTEM
Chrysler Group LLC
Printed in Europe
13RB2-526-ENGSPADUT-AA
USER’S MANUAL
MANUAL DEL USARIO
GEBRUIKERSHANDLEIDING
First Edition
1183863 RB2 EN_SP_DU Radio Cover.indd 1 7/17/12 3:42 PM

1
MEDIA CENTER 431 (RB2)
• SAFETY GUIDELINES . . . . . . . . . . . . . . . . . . . . . . . . . 3
• INTRODUCTION . . . . . . . . . . . . . . . . . . . . . . . . . . . . . 4
• Warnings . . . . . . . . . . . . . . . . . . . . . . . . . . . . . . . 4
• Safety References . . . . . . . . . . . . . . . . . . . . . . . . . . 4
• Intended Use . . . . . . . . . . . . . . . . . . . . . . . . . . . . . 4
• System Care . . . . . . . . . . . . . . . . . . . . . . . . . . . . . 4
• GENERAL HANDLING . . . . . . . . . . . . . . . . . . . . . . . . . 6
• User Interface Elements . . . . . . . . . . . . . . . . . . . . . . 6
• Steering Wheel Audio Controls (If Equipped) . . . . . . . . . . 7
• Audio Settings . . . . . . . . . . . . . . . . . . . . . . . . . . . . 8
• GETTING STARTED . . . . . . . . . . . . . . . . . . . . . . . . . . . 9
• Change the Language . . . . . . . . . . . . . . . . . . . . . . . 9
• Set the Time . . . . . . . . . . . . . . . . . . . . . . . . . . . . . 9
• Store Radio Presets . . . . . . . . . . . . . . . . . . . . . . . 10
• Uconnect™ Multimedia (RADIO) . . . . . . . . . . . . . . . . . . 11
• Radio Mode . . . . . . . . . . . . . . . . . . . . . . . . . . . . 11
1

• Radio Settings . . . . . . . . . . . . . . . . . . . . . . . . . . . 12
• Uconnect™ Multimedia (MEDIA) . . . . . . . . . . . . . . . . . . 14
• Disc Mode . . . . . . . . . . . . . . . . . . . . . . . . . . . . . 14
• Hard Disk Drive Mode (HDD) . . . . . . . . . . . . . . . . . . 18
• Uconnect™ Multimedia (REMOTE DEVICES) . . . . . . . . . . . 29
• Video Entertainment System (VES)™ . . . . . . . . . . . . . 29
• License Agreements . . . . . . . . . . . . . . . . . . . . . . . 32
• USB Connector . . . . . . . . . . . . . . . . . . . . . . . . . . 33
• AUX Mode . . . . . . . . . . . . . . . . . . . . . . . . . . . . . 34
• iPodT Mode (If Equipped) . . . . . . . . . . . . . . . . . . . . 35
• Uconnect™ Phone (If Equipped) . . . . . . . . . . . . . . . . 38
• Voice Command (If Equipped) . . . . . . . . . . . . . . . . . 38
• SYSTEM INFORMATION . . . . . . . . . . . . . . . . . . . . . . . 39
• User Data Backup . . . . . . . . . . . . . . . . . . . . . . . . . 39
• Software and Database Updates . . . . . . . . . . . . . . . . 39
• TROUBLESHOOTING . . . . . . . . . . . . . . . . . . . . . . . . . 40
• Radio . . . . . . . . . . . . . . . . . . . . . . . . . . . . . . . . 40
• Disc . . . . . . . . . . . . . . . . . . . . . . . . . . . . . . . . . 40
• HDD . . . . . . . . . . . . . . . . . . . . . . . . . . . . . . . . . 40
• GLOSSARY OF TERMS . . . . . . . . . . . . . . . . . . . . . . . . 41
2

SAFETY GUIDELINES
Ensure that all persons read this manual care-
fully before using the radio system. It contains
instructions on how to use the system in a safe
and effective manner.
WARNING!
Please read and follow these safety precau-
tions. Failure to do so may result in injury or
property damage.
• Glance at the screen only when necessary
and safe to do so. If prolonged viewing of the
screen is necessary pull over at a safe
location.
• Stop use immediately if problem occurs.
Failure to do so may cause injury or damage
to the product. Return it to your authorized
dealer to repair.
• Make certain that the volume level of the
system is set to a level that still allows you to
hear outside traffic and emergency vehicles.
3

INTRODUCTION
Warnings
This manual contains WARNINGS against op-
erating procedures that could result in an acci-
dent or bodily injury. If you do not read the
entire manual you may miss important informa-
tion. Observe all WARNINGS!
The information given in this manual is subject
to change.
Safety References
Before operating this system for the first time,
please read this manual carefully. Note the
safety precautions described in this manual. If
you have any questions, please contact the
vehicle manufacturer or your authorized dealer.
Intended Use
Generally recognized rules of radio technology
were maintained during the development and
manufacture of the radio system. When using
this product, be aware of state-specific norms
and guidelines.
Visit www.DriveUconnect.com for updates, ad-
ditional information, compatible phones, etc.
System Care
Software Update
The GracenoteT data is software updatable.
Visit www.DriveUconnect.com or contact your
authorized dealer for the latest available soft-
ware.
Safe Usage of the Radio System
Read all instructions in this manual carefully
before using your radio system to ensure
proper usage!
Your radio is a sophisticated electronic device.
Do not let young children use your radio unsu-
pervised.
Permanent hearing loss may occur if you play
your music or the radio at the highest volumes.
Exercise caution when setting the volume on
your radio.
Driving is a complex activity that requires your
full attention. If you’re engaged in driving or any
activity that requires your full attention, we
recommend that you not use your radio.
NOTE:
Many features of this radio are speed depen-
dent. For your own safety it is not possible
to use the press screen keyboard while the
vehicle is in motion.
Keep drinks, rain, and other sources of mois-
ture away from your radio. Besides damage to
your radio, moisture can cause electric shocks
as with any electronic device.
NOTE:
In a convertible vehicle, the system perfor-
mance may be compromised with roof top
down.
Connections
Never force any connector into the ports of your
radio. Make sure your connectors are the cor-
rect shape and size before you connect.
Any attached cable should be routed so that it
will not apply any pressure to the connection.
Do not use a USB device which will interfere
with the operation of opening the display.
4

Touch Screen
Do not touch the screen with any hard or sharp
objects (pen, USB stick, jewelry, etc.) which
could scratch the touch screen surface!
NOTE:
It is possible to use a plastic stylus for press
screen enabled devices such as a PDA and
Pocket PCs.
Do not spray any liquid or caustic chemicals
directly on the screen! Use a clean and dry
micro fiber lens cleaning cloth in order to clean
the touch screen.
If necessary, use a lint-free cloth dampened
with a cleaning solution, such as isopropyl
alcohol, or an isopropyl alcohol and water
solution ratio of 50:50. Be sure to follow the
solvent manufacturer’s precautions and direc-
tions.
CD/DVD Drive
Do not insert any damaged, warped, scratched
or dirty CDs or DVDs into the CD/DVD player.
Discs that have been modified with an adhe-
sive label should not be used in the CD/DVD
player.
Do not insert more than one CD/DVD at a time
into the drive slot.
Do not insert anything other than the supported
CD/DVD formats. See Disc Mode section in
this manual for information on supported CD/
DVD formats.
5

GENERAL HANDLING
User Interface Elements
Power to operate the radio is supplied through
the ignition switch, which must be in the ON,
ACC or in ACC Delay mode in order to operate
the radio.
Soft-Keys
Soft-keys are accessible on the touch screen.
Hard-Keys
Hard-keys on the left and right side of the radio
faceplate.
(1) Voice Command (If Equipped)
Press the Voice Command
hard-key (1) and wait for the con-
firmation beep before you say a
voice command.
(2) Uconnect™ Phone (If Equipped)
Press the Uconnect™ Phone
hard-key (2) to either activate the
Uconnect™ system or to cancel an
active phone call.
(3) RADIO
Press the RADIO hard-key (3) to change to a
RADIO mode or to toggle between RADIO
modes.
(4) MEDIA
Press the MEDIA hard-key (4) to change to a
MEDIA mode or to toggle between MEDIA
modes.
(5) ON/OFF VOLUME
It is also possible to set the unit in standby
mode during driving by pressing the ON/OFF
VOLUME rotary knob (5).
NOTE:
If the ignition is switched OFF with the radio
in standby mode, the radio memorizes the
standby state when the ignition is switched
ON again. Press the (5) ON/OFF VOLUME
rotary knob to switch the radio ON. The
radio software is always working when the
ignition is switched ON, even if the radio is
in standby mode. It is still possible to eject
the CD and to display the time if the unit is
switched OFF.
(6) LOAD
To open or close the display, press the LOAD
hard key (6).
After opening the display, it takes a few sec-
onds to eject a CD/DVD, if one was in the slot.
When inserting a disc, make sure the label is
facing up.
The display will close automatically after insert-
ing the disc.
NOTE:
It may take several seconds to recognize the
type of inserted disc (CD, DVD, MP3, etc.).
6

(7) MENU
Press the MENU hard-key (7) to access the
system settings menu.
NOTE:
Press the MENU hard-key in an active mode
in order to change mode specific settings.
(8) AUDIO
Press the AUDIO hard-key (8) to switch to the
audio mode, which allows access to speaker
fade and tone controls.
(9) MY FILES
Press the MY FILES hard key (9) to manage
your music and picture files on the internal
storage drive.
(10) USB Connector
Connect a supported device into the USB
Connector (10) in order to copy files to the
internal hard disk drive.
NOTE:
See the USB Connector section of this
manual for information on supported de-
vices.
(11) AUX Connector
Connect an external audio device into the AUX
Input (11) (e.g., MP3 player, video-game) to
play the device audio through the car audio
system.
Electronic Vehicle Information Center
(EVIC)
Some vehicles feature an Electronic Vehicle
Information Center (EVIC) with driver-
interactive display. The EVIC is normally lo-
cated in the instrument cluster or overhead. It
can display radio station frequencies, CD disc
number, and satellite radio channel.
Steering Wheel Audio Controls (If
Equipped)
The steering wheel audio controls are located
on the rear surface of the steering wheel.
Please refer to the vehicle specific Owner’s
Manual for detailed information.
The following describes general steering wheel
functionality:
1. The VOLUME rocker switch, located on the
right, controls the volume of the sound system.
Pressing the top of the rocker switch will in-
crease the volume and pressing the bottom of
the rocker switch will decrease the volume.
2. The MODE ADVANCED button, located in
the center of the right rocker switch, changes
the mode of the radio between the various
modes available (LW, MW, FM, CD, DVD, etc.).
3. The FUNCTION SELECT button, located in
the center of the left rocker switch, advances
the radio to the next preset, changes the cur-
rent disc when in disc mode, etc. The function
is different depending upon which mode is in
use.
4. The SCROLL rocker switch, located on the
left, changes selections such as radio station
and CD track depending upon the current
mode.
The following describes the operation of the
SCROLL switch in each mode:
LW/MW/FM Operation
Pressing the top of the switch will seek up for
the next available station and pressing the
bottom of the switch will seek down for the next
available station.
7

HDD/Disc/iPod Operation
Pressing the top of the switch will go to the next
track on the disc, and pressing the bottom of
the switch will go to the beginning of the current
track, or to the beginning of the previous track,
if it is within eight seconds of the start of the
current track.
Video Entertainment System™ Operation
If equipped with a remote video player, this
control will function the same way as in disc
mode.
Audio Settings
Volume
Use the ON/OFF VOLUME rotary knob (5) to
adjust the volume of the currently playing audio
source. While you adjust the volume, the name
of the audio source and a volume indicator is
displayed in the lower left corner of the display.
Audio Control Menu
Press the AUDIO hard-key (8) on the right side
of the radio.
Use either the arrow soft-keys or the cross-hair
on the screen to change Balance and Fade.
The CENTER soft-key resets the settings.
Use either the arrow soft-keys or the sliders on
the screen to adjust BASS, MID, and/or
TREBLE.
8

GETTING STARTED
NOTE:
The ignition switch must be in the ON or
ACC position to operate the radio.
If the unit is OFF, switch it ON by pushing the
ON/OFF VOLUME rotary knob.
Change the Language
The radio will conform to the vehicle language
set in the Electronic Vehicle Information Center
(EVIC), if equipped.
If you change the language in the radio, the
vehicle will change the language for all display
information. Refer to the vehicles Owner’s
Manual.
To change the language with the radio:
1. Press the MENU hard-key on the right side
of the radio.
2. Then press the System Setup soft-key to get
to the System Setup menu.
3. Press the Language soft-key and select a
language.
Set the Time
1. Press the Time Display soft-key in the lower
left corner of the screen.
2. Adjust the hours and minutes using the up
and down soft-keys.
3. Press the Set Time Zone soft-key to change
to the desired time zone.
4. Press the Daylight Savings soft-key to switch
Daylight Savings on or off.
9

Store Radio Presets
1. Press the RADIO hard-key to display MW
LW FM.
2. Select the radio band by touching either the
MW, LW or FM soft-key.
3. Either press the SEEK up/down hard-keys,
or touch the SCAN soft-key, DIRECT TUNE
soft-key, or the left and right arrows to change
the currently playing station.
4. Touch and hold one of the PRESET soft-keys
in the list to the right, until you hear a confirma-
tion beep (approximately 2 seconds).
You can use the PAGE soft-key to
scroll through the list of presets.
NOTE:
If the preset list is not displayed. Press the
PRESETS soft-key located in the bottom line
of the screen.
You can use the FULLSCREEN soft-
key to toggle between full- and split
screen mode. Long preset names are
displayed in full screen mode.
You can use the BACK soft-key to
switch to the previous menu.
10

Uconnect™ Multimedia (RADIO)
Radio Mode
Overview
The radios are equipped with three different
tuners:
• FM 87.5 MHz - 108.0 MHz (RDS capable)
• MW 531 kHz - 1611 kHz
• LW 153 kHz - 282 kHz
Toggle between the different radio tuners by
pressing the RADIO hard-key. The different
tuner modes can be selected via the tabs in the
radio screen.
Station Presets
There are 12 station presets available for stor-
ing the radio stations in each tuner range.
In order to store the desired station, touch and
hold one of the station preset soft-keys for two
seconds and you will see the highlighted soft-
key change from green to beige. You will also
see the radio station stored in the highlighted
soft-key, and you will hear a confirmation beep
when the station is saved.
Change a Channel or Frequency
Press the seek/tune down arrow soft-key
to
quickly seek down to the next available station
or channel.
Press and hold the seek/tune down arrow soft-
key to tune down until the soft-key is
released.
Press the seek/tune up arrow soft-key to
quickly seek up to the next available station or
channel.
Press and hold the seek/tune up arrow soft-key
to tune up until the soft-key is released.
Select the DIRECT TUNE soft-key to enter a
frequency or a channel number, and confirm
your selection by pressing the GO soft-key.
Select SCAN for a five-second preview of each
listenable station in the frequency band. Touch
the SCAN soft-key again to stop the scan
function and to select a radio station.
Radio Data System (RDS)
This radio system is capable of receiving RDS
signals in the FM band. RDS is a technology
used for transmitting textual information about
the music type, song and artist for FM band
music. This information is shown on the display.
NOTE:
Not all radio stations support RDS.
The RDS information is displayed below the
frequency reading of the currently playing radio
station.
Radio Text Information
Select INFO to display additional radio text
information in the right half of the screen.
Select CLOSE INFO to hide additional radio
text information.
11

Music Type (Program Type Filter)
Program Type (PTY) is only available in FM
mode. Radio stations are grouped according to
their program (e.g., Soft Rock, Rhythm & Blues,
etc.).
Select MUSIC TYPE to enable and/or disable
desired program types. The SEEK and SCAN
function will then only display stations with
matching program types.
RDS (FM) Program Types
Adult Hits, Classic Rock, Classical, College,
Country, Information, Jazz, Language, News,
Nostalgia, Oldies, Personality, Public, Religious
Music, Religious Talk, Rhythm and Blues, Rock,
Soft, Soft Rhythm and Blues, Soft Rock, Sports,
Talk, Top 40, Weather.
Radio Settings
LW / MW / FM MENU
There are no specific settings for these modes.
Display Settings
Press the MENU hard-key and touch the Dis-
play Setting soft-key to access the Display
Settings menu.
Select the Daytime Colors soft-key to switch to
manual daytime mode and to adjust the bright-
ness of the display using daytime colors.
Select the Nighttime Colors soft-key to switch to
manual nighttime mode and to adjust the
brightness of the display using nighttime col-
ors.
Select the Auto Color soft-key to switch to
automatic daytime/nighttime mode and to con-
trol the brightness of the display using the light
dimmer switch of the vehicle.
Touch the DONE soft-key to save your settings.
Screen Off
To turn off the screen (so only the clock is
shown, and audio is still heard through the
vehicles speakers), press the MENU hard-key
and touch the Screen Off soft-key.
Once the Screen Off is active, press any hard-
key or touch the display to turn the screen on.
12

View Settings
Press the MENU hard-key and then touch the
Default View soft-key to enable the default view
mode, where the vehicle brand logo is dis-
played in the right half of the screen.
Touch the Picture View soft-key to enable the
picture view mode, where a pictures can be
displayed on the right half of the radio screen.
Refer to the Hard Disk Drive section for a
detailed example.
ParkviewT Rear Back Up Camera (if
equipped)
When equipped with ParkViewT, the radio dis-
play shows the rear view camera picture as
soon as the shifter is in the R position for
vehicles with automatic transmission. In ve-
hicles with manual transmission the reverse
gear must be engaged.
NOTE:
You may disable the ParkviewT in the Sys-
tem Setup menu.
13

Uconnect™ Multimedia (MEDIA)
Disc Mode
Overview
The radio is equipped with a CD/DVD player.
To activate DISC mode, press the MEDIA hard-
key and select the DISC tab soft-key.
Disc Requirements
CAUTION!
This disc playerswill accept 43/4 inch (12cm)
disc only. The use of other sized discs may
damage the disc player mechanism.
The radios are capable of playing compact
discs (CD), recordable compact discs (CD-R),
rewritable compact discs (CD-RW), recordable
DVD-R, DVD+R, DVD-RW, and DVD+RW com-
pact discs. The RB2 also supports AAC and
M4A.
Your radio will play the following formats:
MP3, WMA, CD Audio, DVD Audio, and DVD
Video.
Do not insert anything other than the supported
CD/DVD formats.
SACD (SACD layer), VCD DualDisc, SVCD,
VCD format on DVD MPEG-4 are not sup-
ported.
A complete list of supported CD/DVD formats is
available at www.DriveUconnect.com
Inserting a Disc
1. Press the LOAD hard-key once.
2. After the screen opens, with the printed side
upward, insert the disc into the disc slot of the
radio. The radio pulls the disc automatically
and closes the flip screen. The radio selects the
appropriate mode after the disc is recognized,
and starts playing the first track. The display
shows “Reading...” during this process.
NOTE:
A faulty CD is NOT automatically ejected.
Use only standard size discs. Discs that
have been modified with an adhesive label
should not be used in the CD/DVD player.
High definition content and media (e.g, HD-
DVD, Blue-Ray) is not supported.
If the user does not remove an ejected CD
within approximately 10 seconds, the CD will
reload.
NOTE:
On Data CDs with a large number of songs,
it may take several seconds to read, play,
and display information for all songs on the
disc.
NOTE:
Recording your own CD on a home com-
puter at a lower write speed will result in a
more consistent quality.
14

Removing a Disc
1. Press the LOAD hard-key.
2. The disc is ejected and can be removed.
NOTE:
If the disc is not removed within approxi-
mately 10 seconds, the unit pulls it back into
the slot (park position). The disc may be
ejected when the ignition is OFF.
3. Press the LOAD hard-key to close the dis-
play. The display will close within 30 seconds
after the disc is pulled from the mechanism.
Selecting Disc Mode
Toggle between the media and the radio
menus by pressing the MEDIA hard-key. The
disc mode can be selected by touching the
Disc tab soft-key.
NOTE:
When a disc is inserted, the appropriate
mode is automatically selected once the
disc is recognized.
Scan Search
Touch the SCAN soft-key.
The individual tracks of the disc will be played
in succession for eight seconds each.
Select STOP SCAN soft-key to stop the scan
function.
Change a Track
Press the forward arrows soft-key
to select
the next track on the disc.
Press and hold the forward arrows soft-key
to fast forward through the track.
Press the rearward arrows soft-key to
select the start of the current track (while the
track is playing) or the previous track (if the
current track has just started).
Press and hold the rearward arrows soft-key
to fast rewind through the track.
Press the pause soft-key to pause the playback
of the disc.
Press the play soft-key to resume playback of
the disc.
Displaying the Elapsed Title Time
The elapsed title time of the currently playing
track is displayed in the left center of the
screen.
Select Title from List
Select LIST to display a list of the titles of the
currently playing disc. Select the desired track
you wish to play.
Select HIDE LIST to hide the list.
Disc Info
Select INFO to display Title, Artist, Album,
Genre information in the right half of the screen.
Select CLOSE INFO to close the information.
GracenoteT Music Recognition Technology
This radio is equipped with the GracenoteT
Music Recognition Service, with an embedded
database to look up album, song title, genre
15

and artist information. Data will be found for
most Audio CDs (CDA discs). Data will not be
found for DVDs or data discs (those with MP3
or WMA files).
Music recognition technology and related data
are provided by GracenoteT. Gracenote is the
industry standard in music recognition technol-
ogy and related content delivery. For more
information visit www.gracenote.com.
NOTE:
Visit www.DriveUconnect.com for update in-
formation.
Copy Disc to Hard-Drive
Press the copy soft-key to copy the current
disc to the Hard Disc Drive.
Disc Menu
While in disc mode with inserted audio disc,
press the MENU hard-key to access the Disc
Menu.
Select Random to play the titles on the disc in
random order. Select Random again to turn
Random off.
Select Repeat to repeat all songs in the cur-
rently playing folder (MP3/WMA disc only).
Touch the Repeat Folder soft-key again to stop
the repeat mode.
Playing a MP3/WMA Disc
1. Press the LOAD hard-key once.
2. With the printed side upwards, insert the
disc into the disc slot of the radio. The radio
pulls the disc automatically and closes the flip
screen. The radio selects the appropriate mode
after the disc is recognized, and starts playing
the first track. The display shows “Reading...”
during this process.
A MP3/WMA disc may contain audio files in a
folder structure. The folder, if any, is shown in
the list view.
Touch the BROWSE soft-key if the list is not
displayed.
3. Touch a soft-key with a folder symbol to
open a folder.
4. Touch the Folder-Back Icon soft-key to close
a folder.
Playing a Video DVD
NOTE:
Viewing a DVD video on the radio screen is
not available in all states, and the vehicle
must be stopped, and the shifter must be in
position P for vehicles with an automatic
transmission. In vehicles with a manual
transmission, the parking brake must be
engaged.
16

First insert a video DVD.
The playback starts automatically after the DVD
video is recognized by the disc drive.
Touch the LIST soft-key to display a list of
available chapters or tracks. Touch a chapter
or track soft-key in the list to start playback from
the selected section.
Touch the VIEW VIDEO soft-key to view the
video on the screen.
DVD MENU Controls
If you insert a DVD video disc that contains a
top menu, a menu may appear.
Touch the cursor arrows soft-keys to select the
title you want to view, then touch the ENTER
soft-key to start playback.
Touch the DVD move soft-key to move the
controls to the right part of the screen.
Touch the close soft-key to close the DVD
MENU Controls.
DVD Playback Controls
In video playback mode touch anywhere on the
screen to show the DVD playback controls.
To pause playback touch the Pause soft-key.
To stop playback touch the Stop soft-key.
Touch the Fast Reverse soft-key during play-
back to fast reverse playback.
Touch the Fast Forward soft-key during play-
back to fast forward playback.
Touch the NEXT soft-key to locate succeeding
chapters or tracks.
17

Touch the PREV soft-key to start playback from
the beginning of the current chapter or track.
When you press twice in quick succession,
playback starts from the beginning of the pre-
ceding chapter or track.
DVD Video Menu
While in disc mode with inserted video DVD,
press the MENU hard-key to access the DISC
Menu.
Touch the DVD Setup soft-key to access the
DVD Setup menu.
In the DVD Setup menu, you may select Menu
Language, Audio Language, Subtitle, Camera
Angle, Aspect Ratio, and Brightness settings
by pressing the corresponding soft-key. Some
of the soft-keys are disabled if the inserted disc
does not support the functionality.
Disc Skipping
Skipping is typically caused by a damaged
(scratched) disc. This will result in a 10 second
jump forward until the damaged area is
passed.
Temperature Protection
If the temperature of the disc reader during
operation becomes too high, a popup mes-
sage will inform the user of an over temperature
situation. The unit switches to radio mode until
the disc reader temperature has dropped to a
normal level.
Hard Disk Drive Mode (HDD)
The HDD mode gives you access to the audio
files on the internal hard disk drive. It functions
similar to a CD player, with the exception that
the internal HDD can hold more tracks. It can
hold approximately 6,700 four-minute CD-
quality songs.
Before using the HDD mode, you will need to
copy tracks to the internal hard drive.
The files will be stored on the internal hard disk
drive and can be used in the HDD mode.
18

Copy Audio Disc to Hard-Drive
1. Insert a disc.
2. Touch the copy soft-key to copy music
tracks of the inserted disc to the Hard Disk
Drive.
After a short pause, the copy process begins
and the audio resumes playback from the start
of the track. The copy process continues in the
background while the audio plays. The prog-
ress is shown in the display. Even if you change
to another mode (radio, AUX, etc.) or turn the
radio OFF (ignition ON), the copy process will
continue in the background.
The copy progress is shown in the display.
It is also possible to listen to radio modes
during this process. Copying time is greater
than 4x the normal playback rate.
NOTE:
When copying CD-Audio to HDD, audio files
are converted from CD-Audio to AAC. DVD-
Audio cannot be copied to the HDD.
Copy WMA/MP3 Files to Hard-Drive
You can copy MP3 and WMA formatted com-
pressed audio files from a disc or via USB (e.g.,
USB stick).
It is recommended to sort music files into
folders.
Example:
Songs located in the root level (top level) of the
disc or USB device are saved in a playlist
named Root_Level_Songs.
Once the songs are copied, the playlist will be
named by the originating folder name.
For the example above the list on the HDD will
show the following:
Disc_Root_Level Songs (Playlist 1)
19

• Song 1.mp3 (First song in playlist 1)
• Song 2.mp3 (Second song in playlist 1)
• Song 3.wma (Third song in playlist 1)
My Playlist Folder 1 (Playlist 2)
• 01 Song.mp3 (First song in playlist 2)
• 02 Song.mp3 (Second song in playlist 2)
• 03 Song.mp3 (Third song in playlist 2)
Copying Complete Disc
1. Insert a disc with MP3, WMA files.
2. Touch the copy soft-key
to copy music
files of the inserted disc to the hard disk drive.
The copy progress is shown in the display.
During the copy process, the disc player can
play audio.
It is possible to listen to radio modes during this
process.
Selective Song Copying from Disc
You can select specific songs on a WMA/MP3
disc using the following procedure:
1. Touch the MY FILES hard-key.
2. Select My Music.
3. Touch the Import Music Files soft-key.
20

4. Touch the From DISC soft-key in the next
screen.
5. Select the folders or titles you would like to
copy.
A red check mark indicates the selected songs
and/or folders. Touch the ALL soft-key to select
all files and folders at once.
6. Touch the DONE soft-key to start the copy
process.
The copy process is shown on the display. It is
possible to listen to radio modes during this
process.
If you unplug or eject the media before the
copying process is finished, the process will be
interrupted. You may restart the copying pro-
cess by repeating the steps above.
Copying from USB
1. Insert a USB device.
2. Select My Music.
3. Touch the Import Music Files soft-key.
4. Touch the From USB soft-key in the next
screen.
21

5. Select the folders or titles you would like to
copy.
A red check mark indicates the selected songs
and/or folders. Touch the ALL soft-key to select
all files and folders at once.
6. Touch the DONE soft-key to start the copy
process.
Playing Audio Files from the Hard Disk
Drive
You can play songs directly from the internal
hard disk drive.
1. Touch the BROWSE soft-key to select an
available category.
The radio can sort the files by playlist, by song
name, by artist, by genre, or by album.
2. For this example, touch the Playlists soft-
key.
3. Touch a soft-key with the desired playlist
name to play a playlist.
Touch the PLAY ALL PLAYLISTS soft-key to
play all available playlists.
Change a Track
Press the forward arrows soft-key
to select
the next track on the disc.
Press and hold the forward arrows soft-key
to fast forward through the track.
Press the rearward arrows soft-key to
select the start of the current track (while the
track is playing) or the previous track (if the
current track has just started).
Press and hold the rearward arrows soft-key
to fast rewind through the track.
Press the pause soft-key to pause the playback
of the disc.
Press the play soft-key to resume playback of
the disc.
Displaying the Elapsed Title Time
The elapsed title time of the current playing
track is displayed in the left center of the
screen.
22

HDD Menu
While in HDD mode, press the MENU hard-key
to access the HDD Menu.
Random Playback
The random play function plays random tracks
from the hard disk drive. Touch the Random
soft-key to switch the random play function on
or off.
A red check mark indicates the random play
function is active.
Repeat Track
The repeat track function repeats the currently
played track. Touch the Rpt. TRK soft-key to
switch the repeat track function on or off.
A red check mark indicates the repeat track
function is active.
Favorite Playlists on the Hard Disk Drive
You may save links to favorite playlists in the
Favorite Playlists list.
1. While in the HDD mode touch the BROWSE
soft-key to access the Browse Categories
menu.
2. Touch the Favorites soft-key to display a list
of favorite playlists..
3. Touch one of the ADD FAVORITE soft-keys.
23

4. Select the desired playlist.
A link to the selected playlist is now saved in
the Favorite Playlists list.
NOTE:
The link to the favorite playlist will be re-
moved, after a playlist was removed from
the My Playlists menu. Refer to Editing Play-
lists in the Hard Disk Drive section of this
manual.
You may now edit the list by touching the EDIT
soft-key, or exit the list by touching the EXIT
soft-key.
Editing Playlists on the Hard Disk Drive
1. While in the HDD mode press the MY FILES
hard-key to access the Manage My Files Menu.
2. Select My Music
24

3. Touch the My Playlists soft-key.
4. Touch the EDIT soft-key (example: Donuts)
of the playlist you would like to edit.
NOTE:
You cannot edit a playlist during the copy
process
You can resume the selected playlist, delete
songs from the selected playlist, or delete the
selected playlist.
5. Touch the Rename This Playlist soft-key.
NOTE:
If you touch the Delete This Playlist soft-key,
the playlist and all songs contained in it, will
be permanently deleted. Neither song nor
playlist can be recovered.
6. Type in a new name for the playlist.
7. Touch the SAVE soft-key to confirm the
name.
25

The playlist now has the new name.
Deleting Songs from a Playlist
1. Press the MENU hard-key, then touch the
MY FILES soft-key, next touch the My Playlists
soft key and select the Delete Songs From This
Playlist soft-key.
NOTE:
If you touch the Delete This Playlist soft-key,
the playlist and all songs contained in it, will
be permanently deleted. Neither song nor
playlist can be recovered.
2. Select the titles you would like to delete
A red check-mark indicates the selected
songs.
3. Touch the DELETE soft-key to start the de-
lete process.
NOTE:
If you delete a song from the playlist, the
song cannot be recovered.
4. Touch the DONE soft-key, when you are
done editing the playlist.
Deleting All Playlists from the Hard Disk
Drive
1. Press the MENU hard-key on the right side
of the radio.
2. Touch the System Setup soft-key to access
the System Setup menu.
3. Touch the Manage Hard Drive soft-key to
access the Manage Hard Drive menu.
This menu displays the available space on the
hard disk drive, and allows you to delete pic-
tures and music files.
Importing Pictures
It is possible to import display pictures to the
internal hard disk drive. The pictures can be
displayed on the right half of the radio screen.
26

In the default mode, the vehicle brand logo is
displayed in the right half of the screen. Press
the MENU hard-key on the right side of the
radio to access one of the setting menus.
It is recommended to change the picture di-
mensions on a PC or Digital Camera to 240 by
158 pixels before the import.
NOTE:
USB devices (e.g., camera memory USB
adaptors, etc.) must comply with the MSD
(Mass Storage Device) standard. This USB
terminal can provide power to the inserted
device. The device’s current limitation must
be less or equal to 500mA.
1. Touch the MY FILES hard-key to go to the
Manage My Files screen.
2. Insert either a CD or a USB Stick containing
your pictures.
3. Touch the My Pictures soft-key to get an
overview of the currently stored images.
The radio can store 24 user pictures.
4. Press one of the Add Pictures soft-keys.
5. Select the type of media inserted.
27

6. Use the PAGE soft-keys to page through a
list of pictures and press the picture you would
like to import.
NOTE:
Files must be in the root directory (top level)
of the disc or USB device to be recognized.
7. Confirm your selection by touching the YES
soft-key.
The imported picture is now available in the
Manage My Pictures screen.
8.
In order to display the imported picture in the
radio screen, touch the desired picture soft-key.
9. Select this picture by pressing the Set as
Default soft-key. A check mark indicates the
currently used picture.
Use the PREV or NEXT soft-key to step through
the list of available pictures.
Touch the DELETE soft-key to delete the picture
from the hard disk drive.
10. Press the MENU hard-key twice and then
touch the Picture View soft-key to enable the
picture view.
The picture is now displayed on the right half of
the screen.
28

Uconnect™ Multimedia (REMOTE
DEVICES)
Video Entertainment System (VES)™
The radio can remotely control the VES™. Refer
to the VES™ user’s manual for more informa-
tion.
Receiving Audio/Video from the VES™
You can play audio from the VES™ through the
vehicle’s speaker system. If you have a VES™
with a video player, you can also see the video
on the radio’s display, if the vehicle is parked.
The VES tab becomes available after the VES™
system is turned on. Touch the VES MODES
soft-key to select the VES™ audio source.
Touch the soft-key of the desired source to play
the selection in the vehicle cabin.
Availability of the DVD Player soft-key, the Rear
AUX 1 soft-key, and the Rear AUX 2 is based on
the type of VES™ in the vehicle.
DVD Player is not available if there is no DVD
player in the VES™ or there is no DVD in the
player.
A device must be plugged into the AUX jack of
the VES™ to be available.
A disabled soft-key indicates an unavailable
source.
Sending Audio/Video and controlling the
VES
The radio can also control the VES™.
All sources are played through the VES™ head-
phones.
Refer to the VES™ user’s manual for more
information on controlling the rear VES™
through the remote control.
To access the rear VES™, press the MENU
hard-key on the right side of the radio.
29

Touch the Rear VES soft-key to display the Rear
VES Controls.
The Rear VES Controls are displayed in the
right half of the screen.
NOTE:
Press the HIDE LIST soft-key, and/or the
CLOSE INFO soft-key, if you cannot see the
Rear VES Controls.
The first column controls VES on/off and the
headset audio channels 1, or 2.
A VES™ headset can listen to either audio
Channel 1 or audio Channel 2.
Touch the soft-key tab 1 to select
Channel 1.
The left half of the screen displays the audio
source information, which, if FM was chosen for
example, a radio frequency would be dis-
played.
Touch the LIST soft-key to display the selected
source details.
In this case the FM preset list within the se-
lected tuner is displayed.
You may touch a preset soft-key to change the
station, or touch the DIRECT TUNE soft-key to
enter a frequency, or press the SEEK up or
SEEK down hard-keys to change the radio
station.
Touch the 2 soft-key tab to set the
desired audio source for the sec-
ond VES™ audio channel.
The left half of the screen displays the audio
source information, which is in this case track 1
of a playlist on the HDD of the radio.
30

Touch the LIST soft-key to display the selected
source details.
In this case the songs within the selected
playlist are displayed.
The RADIO column controls the MW / LW / FM
tuners of the radio.
NOTE:
The radio cannot play both MW or LW or FM
at the same time.
The MEDIA column controls the HDD, DISC,
and AUX audio source of the radio.
The VES column controls the DVD Player, Rear
AUX 1, and Rear AUX 2 of the VES™ system.
Touch the on/off soft-key tab to
show the VES ON/OFF display. You
may turn the VES™ system on or
off.
Touch the Turn Rear VES OFF soft-key to shut
the VES™ off.
Touch the Turn Rear VES ON soft-key to turn the
VES™ on.
VES™ LOCK
Press the LOCK soft-key to disable the controls
on the VES™ remote control unit. Once the
VES™ is locked, it is not possible to use the
VES™ controls or the VES™ remote control.
VES™ UNLOCK
Press the UNLOCK soft-key to enable the con-
trols on the VES™ remote control unit.
31

Playing a Video DVD for the Rear VES™
1. To view a DVD video on the rear VES™
screen, insert a video DVD.
The playback starts automatically after the DVD
video is recognized by the disc drive.
2. Press the MENU hard-key on the right side
of the radio.
3. Touch the Rear VES soft-key to display the
Rear VES Controls.
4. Touch the 1 soft-key tab to
select audio Channel 1.
5. Touch the DISC soft-key to select the media
mode.
6. Touch the PLAY VIDEO soft-key to start the
video playback.
License Agreements
Dolby Digital License Agreement
Manufactured under license from Dolby Labo-
ratories.
Dolby, MLP Lossless and the double-D are
trademarks of Dolby Laboratories.
Macrovision License Agreement
This product incorporates copyright protection
technology that is protected by U.S. patents
32

and other intellectual property rights. Use of
this copyright protection technology must be
authorized by Macrovision, and is intended for
home and other limited viewing uses only un-
less otherwise authorized by Macrovision. Re-
verse engineering or disassembly is prohibited.
USB Connector
It is possible to transfer audio files or pictures
files to the radio. Files can be on a disc or on a
USB device (e.g., USB stick). The USB connec-
tor is covered by a small cover, which protects
the connector from dust or damage.
NOTE:
USB devices (e.g., camera memory USB
adaptors, etc.) must comply with the MSD
(Mass Storage Device) standard. This USB
terminal can provide power to the inserted
device. The devices current limitation must
be less or equal to 500mA.
The transfer speed for this USB connector is
approximately two megabytes per second.
MP3 player devices cannot be controlled
through the USB connector. Some player de-
vices save music files in MP4 format, which
cannot be played in this radio. Some copy
protected music (e.g., downloads from the in-
ternet) cannot be played on this radio.
Compatible Devices
Please see your authorized dealer or visit ww-
w.DriveUconnect.com for supported devices.
NOTE:
Some MP3 Player do not allow songs to be
copied into other devices.
How to Open the Cover
1. Place finger under the pull arrow.
2. Pull forward.
NOTE:
The flap is attached and should not be
removed! Do not pull off of the frame. Do not
use a tool (e.g. screw driver, nail file, etc.) to
open the flap, as this could cause damage to
the face of the radio.
33

How to Close the Cover
1. Using your thumb and index finger, grasp
the flap. Notice the hooks (1), which must first
be inserted into the frame.
2. Hook the top hooks (1) into the frame first.
3. Then push on the bottom of the flap, to
secure in place.
CAUTION!
Never force any connector into the ports of
your radio. Make sure your connectors are the
identical shape and size before you connect.
AUX Mode
The AUX connector allows you to connect the
headset output of an audio device (e.g., MP3
player) to the radio. The audio of the connected
device will then be played through the radio
sound system.
34

Connect a 3.5 mm
stereo
mini-jack cable as
shown above (not provided with the radio) to
the AUX connector on the radio and to the
earphone connector of your audio device.
The display will switch automatically to the AUX
mode when a 3.5 mm
stereo
mini-jack cable
has been connected. The radio screen will
revert back to the last tuner mode when the
cable is unplugged.
To change radio modes while the cable is
connected to the unit, press the RADIO/MEDIA
hard-key until the AUX tab is displayed on the
top of the screen. Touch the AUX tab to return
to the AUX mode.
Adjust the volume with the ON/OFF VOLUME
rotary knob, or with the volume of the attached
device.
The control of the external device (e.g., select-
ing playlists, play, fast forward, etc.) cannot be
provided by the radio; use the device controls
instead.
NOTE:
Inserting of a
mono
jack will result in im-
proper audio playback.
iPodT Mode (If Equipped)
The iPodT mode gives you access to the audio
files on the external iPodT. It functions as a
remote control for the currently connected
iPodT mobile digital device, and you can play
audio from the iPodT device through the ve-
hicles speaker system.
Before using the iPodT mode, you will need to
connect your iPodT device to the iPodT con-
nector. (See UNIVERSAL CUSTOMER INTER-
FACE (UCI) section in your vehicle Owner’s
Manual for instructions.)
NOTE:
The files will not be stored on the internal
hard disk drive and cannot be used in the
HDD mode.
NOTE:
It is recommended to use the latest available
software for your iPod and iTunes.
See manufacturer website for updates http://
www.apple.com/support/ipod/.
Playing Audio Files from the iPodT Device
You can play songs directly from the iPodT
device.
Touch the LIST soft-key to display a list view.
Touch the soft-key with the desired list item to
select and play the item.
Touch the HIDE LIST soft-key to hide the list.
Touch the BROWSE soft-key to browse by
categories.
35

Select an iPodT Category
The radio can sort the files by playlists, by song
names, by artists, by composers, by genres, by
albums, by podcasts or by audio books.
Touch the Artists soft-key for this example.
Touch a soft-key with the desired artist’s name
to play songs from this artist.
Touch the PLAY ALL soft-key to play songs from
all available artists.
Touch the PAGE UP or PAGE DOWN soft-key to
navigate through the list of artists.
List Jump
If you encounter a very long list, it may be
helpful to touch the A<>Z soft-key to go to the
List Jump menu.
For this example we entered the first letter of
the desired artist.
Touch the GO soft-key to jump to the desired
artist.
36

Touch a soft-key with the desired artist’s name
to play songs from this artist.
Change a Track
Press the forward arrows soft-key
to select
the next track on the disc.
Press and hold the forward arrows soft-key
to fast forward through the track.
Press the rearward arrows soft-key to
select the start of the current track (while the
track is playing) or the previous track (if the
current track has just started).
Press and hold the rearward arrows soft-key
to fast rewind through the track.
Pause
Touch the PAUSE soft-key to pause the play-
back.
Play
Touch the PLAY soft-key to start the playback.
Displaying the Elapsed Title Time
The elapsed title time of the currently playing
track is displayed on the left side of the screen.
Scan Search
Touch the SCAN soft-key.
The individual tracks will be played in succes-
sion for eight seconds each.
Select STOP SCAN soft-key to stop the scan
function.
Track Info
Touch the INFO soft-key.
Information on the currently playing track, if
available, will be displayed on the right half of
the screen.
If additional information is available, the NEXT
soft-key will be displayed. Touch the NEXT
soft-key to show the additional information.
iPodT Menu
While in iPodT mode, press the MENU hard-key
to access the iPodT/AUX Menu.
37

Random Playback
The random playback function plays random
tracks from the iPodT device. Touch the Ran-
dom soft-key to switch the random play func-
tion on or off.
A red check mark indicates the random play
function is active.
Repeat Track
The repeat track function repeats the currently
played track. Touch the Rpt. TRK soft-key to
switch the repeat track function on or off.
A red check mark indicates the repeat track
function is active.
Uconnect™ Phone (If Equipped)
Uconnect™ Phone is a voice-
activated, hands-free, in-vehicle
communications system.
The Uconnect™ system is fully integrated with
the vehicle’s audio system. The radio display
will be used for visual prompts from the
Uconnect™ system such as phone battery
status, signal strength, caller ID, and call type.
NOTE:
Your phone may not support all available
Uconnect™ features.
Refer to your vehicle Owner’s Manual for
Uconnect™ Phone operating instructions.
Voice Command (If Equipped)
Refer to your vehicle Owner’s
Manual for Voice Command oper-
ating instructions.
38

SYSTEM INFORMATION
Press the MENU hard-key on the right side of
the radio, and touch the System Setup soft-key
to access the System Setup menu.
Touch the System Information soft-key to ac-
cess the system information.
User Data Backup
Visit http://www.chrysler.com/en/owners/mygig/
for information on how to backup or transfer
your user data, such as music files, etc., before
returning or changing to a vehicle with a com-
patible radio (e.g., end of lease).
Software and Database Updates
Visit www.DriveUconnect.com for information
on available software and database updates.
Updates are available for the radio software,
and the GracenoteT music recognition technol-
ogy database.
Please read the specific instructions on the
update discs before installing the updates.
Contact your local authorized dealership if you
need help or more information about the avail-
able updates.
39

TROUBLESHOOTING
Radio
Q.: I cannot find my favorite radio station that I
was always able to receive before. What can I
do?
A.: Select MUSIC TYPE while in radio mode.
Select CLEAR to disable all PTY filters, and try
to SEEK for your station.
Disc
Q.: The radio does not display the information
for the disc I inserted. How do I access this
information?
A.: The radio will search the internal
GracenoteT music recognition technology da-
tabase on the hard drive for the inserted disc. If
the database is out of date, or the database
does not contain the particular disc, the infor-
mation cannot be displayed. Contact your local
authorized dealership or website www.DriveU-
connect.com for available updates.
HDD
Q.: The radio is playing songs from the HDD, it
jumps to the first song in the list. Why does it do
that?
A.: After the radio is done copying or ripping
music to the HDD, it needs to rebuild the
current playlist. After the playlist was rebuild,
the radio starts to play the first song in the
current playlist.
40

GLOSSARY OF TERMS
AS Autostore
CD Compact Disc
CDC Compact Disc
Changer
CDDB A technology com-
pany founded in
1995 as CDDB, Inc.
The company has
been renamed to the
GracenoteT, Inc. The
technology has been
renamed to the
GracenoteT media
recognition service.
DVD Digital Versatile Disc
DVDC Digital Versatile Disc
Changer
GMD GracenoteT Media
Database,
GracenoteT Media
Recognition Service
(www.gracenote.com)
GMT Greenwich Mean
Time
HDD Hard-Disk Drive
MFB Multifunction soft-key
MFS Multi-Functional
Steering Wheel
MP3 MPEG-1 Audio
Layer-3.
Compression scheme
used to transfer au-
dio files via the Inter-
net and store in por-
table players and
digital audio servers.
M4A The .M4A format is
actually the audio
layer of (non-video)
MPEG 4 movies.
M4P The .M4P format is
an audio file pur-
chased from Apple’s
Music Store (iTunes)
and is protected by a
Digital Rights Man-
agement scheme.
POS Position
PTY Program type (radio)
RDS Radio Data System
UTC Universal Coordi-
nated Time
VES™ Video Entertainment
System™
WMA Windows Media Au-
dio Format
41

42

1
GESTOR MULTIMEDIA 431 (RB2)
• DIRECTRICES DE SEGURIDAD . . . . . . . . . . . . . . . . . . . . 3
• INTRODUCCIÓN . . . . . . . . . . . . . . . . . . . . . . . . . . . . . 4
• Advertencias . . . . . . . . . . . . . . . . . . . . . . . . . . . . . 4
• Referencias en materia de seguridad . . . . . . . . . . . . . . 4
• Uso previsto . . . . . . . . . . . . . . . . . . . . . . . . . . . . . 4
• Cuidados del sistema . . . . . . . . . . . . . . . . . . . . . . . 4
• USO GENERAL . . . . . . . . . . . . . . . . . . . . . . . . . . . . . 6
• Elementos de la interfaz de usuario . . . . . . . . . . . . . . . 6
• Controles de audio en el volante (si está equipado) . . . . . 7
• Ajustes de audio . . . . . . . . . . . . . . . . . . . . . . . . . . 8
• PRIMEROS PASOS . . . . . . . . . . . . . . . . . . . . . . . . . . . 9
• Cambio de idioma . . . . . . . . . . . . . . . . . . . . . . . . . . 9
• Ajuste de la hora . . . . . . . . . . . . . . . . . . . . . . . . . . 9
• Guardar preselecciones de radio . . . . . . . . . . . . . . . . 10
• Sistema multimedia Uconnect™ (RADIO) . . . . . . . . . . . . . 11
• Modo de radio . . . . . . . . . . . . . . . . . . . . . . . . . . . 11
1

• Ajustes de radio . . . . . . . . . . . . . . . . . . . . . . . . . . 12
• Sistema multimedia Uconnect™ (MEDIOS) . . . . . . . . . . . . 14
• Modo de disco . . . . . . . . . . . . . . . . . . . . . . . . . . . 14
• Modo de disco duro (HDD) . . . . . . . . . . . . . . . . . . . 19
• Sistema multimedia Uconnect™ (DISPOSITIVOS
REMOTOS) . . . . . . . . . . . . . . . . . . . . . . . . . . . . . . . 31
• Video Entertainment System (VES)™ . . . . . . . . . . . . . 31
• Acuerdos de licencia . . . . . . . . . . . . . . . . . . . . . . . 34
• Conector USB . . . . . . . . . . . . . . . . . . . . . . . . . . . 35
• Modo AUX . . . . . . . . . . . . . . . . . . . . . . . . . . . . . 37
• Modo iPodT (si está equipado) . . . . . . . . . . . . . . . . . 37
• Uconnect™ Phone (si está equipado) . . . . . . . . . . . . . 40
• Órdenes por voz (si está equipado) . . . . . . . . . . . . . . 41
• INFORMACIÓN DEL SISTEMA . . . . . . . . . . . . . . . . . . . . 42
• Copia de seguridad de datos del usuario . . . . . . . . . . . 42
• Actualizaciones de software y base de datos . . . . . . . . 42
• RESOLUCIÓN DE PROBLEMAS . . . . . . . . . . . . . . . . . . 43
• Radio . . . . . . . . . . . . . . . . . . . . . . . . . . . . . . . . 43
• Disco . . . . . . . . . . . . . . . . . . . . . . . . . . . . . . . . 43
• HDD . . . . . . . . . . . . . . . . . . . . . . . . . . . . . . . . . 43
• GLOSARIO DE TÉRMINOS . . . . . . . . . . . . . . . . . . . . . . 44
2

DIRECTRICES DE SEGURIDAD
Asegúrese de que todas las personas lean
este manual atentamente antes de utilizar el
sistema de radio. El manual contiene instruc-
ciones sobre el uso seguro y eficaz del sis-
tema.
ADVERTENCIA
Lea y siga las precauciones de seguridad. En
caso de no hacerlo, podrían producirse lesio-
nes personales o daños materiales.
• Mire a la pantalla únicamente cuando sea
necesario y resulte seguro hacerlo. Si nece-
sita observar la pantalla durante mucho
tiempo, apártese de la carretera a un lugar
seguro.
• Si se produce un problema, detenga el uso
inmediatamente. En caso de no hacerlo,
podrían producirse lesiones personales o
daños en el producto. Devuélvalo al conce-
sionario autorizado para su reparación.
• Asegúrese de establecer el volumen del
sistema de forma que pueda seguir oyendo
el sonido del tráfico exterior y los vehículos
de emergencia.
3

INTRODUCCIÓN
Advertencias
El presente manual contiene ADVERTENCIAS
sobre procedimientos de uso que pueden dar
lugar a accidentes o lesiones corporales. Si no
lee el presente manual en su totalidad, podría
pasar por alto información importante. Preste
atención a todas las ADVERTENCIAS.
La información que se proporciona en el pre-
sente manual está sujeta a cambios.
Referencias en materia de seguridad
Antes de utilizar este sistema por primera vez,
lea este manual cuidadosamente. Tenga pre-
sente las precauciones de seguridad que se
describen en el manual. Si tiene alguna duda o
pregunta, póngase en contacto con el fabri-
cante del vehículo o su concesionario autori-
zado.
Uso previsto
Durante el desarrollo y fabricación de este
sistema de radio se han mantenido las normas
de tecnología radiofónica reconocidas global-
mente. Tenga presente las normas y directrices
específicas de cada estado, cuando utilice el
producto.
Para obtener información sobre actualizacio-
nes, información adicional, teléfonos compati-
bles, etc., visite www.DriveUconnect.com.
Cuidados del sistema
Actualización de software
El software de datos de GracenoteT puede
actualizarse. Visite www.DriveUconnect.com o
póngase en contacto con su concesionario
autorizado para obtener el último software dis-
ponible.
Uso seguro del sistema de radio
Para garantizar un uso adecuado del sistema
de radio, lea atentamente todas las instruccio-
nes contenidas en el presente manual.
La radio es un sofisticado dispositivo electró-
nico. No permita que los niños utilicen la radio
sin supervisión.
Si se escucha música o la radio con un volu-
men muy alto, se puede producir una pérdida
permanente de audición. Tenga cuidado al
establecer el volumen de la radio.
La conducción es una actividad compleja que
requiere toda la atención. Si está concentrado
en la conducción o en cualquier actividad que
requiera toda su atención, le recomendamos
que no haga uso de la radio.
NOTA:
Muchas características de esta radio están
supeditadas a la velocidad. Para su propia
seguridad, no es posible utilizar el teclado
táctil de la pantalla con el vehículo en movi-
miento.
No permita que bebidas, lluvia u otras fuentes
de humedad entren en contacto con la radio.
Además de dañar la radio, la humedad puede
producir descargas eléctricas, como ocurre
con cualquier dispositivo electrónico.
NOTA:
En un vehículo descapotable, las prestacio-
nes del sistema pueden verse comprometi-
das con la capota bajada.
4

Conexiones
No fuerce nunca la entrada de un conector en
los puertos de la radio. Antes de realizar la
conexión, asegúrese de que los conectores
tienen la forma y medida correctas.
Todo cable conectado debe disponerse de
forma que no ejerza ninguna presión sobre la
conexión.
No utilice un dispositivo USB que pueda afec-
tar al movimiento de apertura de la pantalla.
Pantalla táctil
No toque la pantalla con objetos duros o afila-
dos (plumas, lápices de memoria USB, joyas,
etc.) que puedan arañar la superficie de la
pantalla táctil.
NOTA:
Pueden utilizarse estiletes de plástico para
dispositivos que permitan pulsar la pantalla,
como PDA o PC de bolsillo.
No aplique líquidos o productos químicos
cáusticos directamente sobre la pantalla. Para
limpiar la pantalla táctil, utilice un paño de
microfibras para lentes limpio y seco.
Si es necesario, utilice un paño que no deje
pelusas humedecido con una solución de lim-
pieza, como alcohol isopropílico, o una solu-
ción de alcohol isopropílico y agua a partes
iguales. Asegúrese de tomar las precauciones
y directrices del fabricante en materia de disol-
ventes.
Unidad de CD/DVD
No introduzca ningún CD o DVD deteriorado,
deformado, rayado o sucio en el reproductor
de CD/DVD.
Los discos que hayan sufrido modificaciones
por la utilización de una etiqueta adhesiva no
deben utilizarse en el reproductor de CD/DVD.
No introduzca más de un CD/DVD al mismo
tiempo en la ranura de la unidad.
No introduzca ningún soporte que no sean los
formatos de CD/DVD compatibles. Para obte-
ner información acerca de los formatos de
CD/DVD compatibles, consulte la sección
Modo de disco.
5

USO GENERAL
Elementos de la interfaz de usuario
La alimentación eléctrica para el funciona-
miento de la radio se proporciona a través del
interruptor de encendido, que debe estar en
las posiciones ON (Encendido) o ACC (Acce-
sorio) o en el modo de retardo de ACC para
permitir su funcionamiento.
Teclas variables
Las teclas variables se encuentran en la pan-
talla táctil.
Teclas fijas
Las teclas fijas se encuentran en los lados
izquierdo y derecho de la carátula de control
de la radio.
(1) Órdenes por voz (si está equipado)
Pulse la tecla fija de órdenes por
voz
(1) y espere al pitido de
confirmación antes de decir una
orden por voz.
(2) Uconnect™ Phone (si está equipado)
Pulse la tecla fija del teléfono
Uconnect™ Phone
(2) ya sea
para activar el sistema
Uconnect™ o para cancelar una
llamada telefónica activa.
(3) RADIO
Pulse la tecla fija RADIO (3) para cambiar a un
modo de RADIO o para cambiar entre los
modos de RADIO.
(4) MEDIA (MEDIOS)
Pulse la tecla fija MEDIA (MEDIOS) (4) para
cambiar a un modo de medio o para cambiar
entre los modos de medios.
(5) ON/OFF VOLUME (ENCENDER/APAGAR
VOLUMEN)
Durante la conducción, la unidad también
puede situarse en el modo de espera presio-
nando la perilla giratoria ON/OFF VOLUME
(ENCENDER/APAGAR VOLUMEN) (5).
NOTA:
Si se apaga el encendido con la radio en el
modo de espera, al colocarse el encendido
de nuevo en posición ON, la radio memoriza
el estado de espera. Para encender la radio,
presione la perilla giratoria ON/OFF VO-
LUME (ENCENDER/APAGAR VOLUMEN) (5).
Cuando el encendido se encuentra en posi-
ción ON, el software de la radio siempre está
funcionando, incluso si la radio está en el
modo de espera. Aunque la unidad esté
apagada, es posible extraer el CD y ver la
hora.
(6) LOAD (CARGAR)
Para abrir o cerrar la pantalla, pulse la tecla fija
LOAD (CARGAR) (6).
Tras abrir la pantalla, el dispositivo tarda unos
segundos en expulsar el CD/DVD, si hay uno
dentro.
6

Al insertar un disco, asegúrese de que la
etiqueta está orientada hacia arriba.
Tras insertar el disco, la pantalla se cerrará
automáticamente.
NOTA:
La unidad puede tardar varios segundos en
reconocer el tipo de disco insertado (CD,
DVD, MP3, etc.).
(7) MENU (MENÚ)
Pulse la tecla fija MENU (MENÚ) (7) para
acceder al menú de ajustes del sistema.
NOTA:
Pulse la tecla fija MENU (MENÚ) en un modo
activo para cambiar los ajustes específicos
de modo.
(8) AUDIO
Pulse la tecla fija AUDIO (8) para cambiar al
modo de audio, lo que permite acceder a la
atenuación de altavoces y a los controles de
tono.
(9) MY FILES (MIS ARCHIVOS)
Pulse la tecla fija MY FILES (MIS ARCHIVOS)
(9) para gestionar sus archivos de música e
imágenes en el disco de almacenamiento in-
terno.
(10) Conector USB
Conecte un dispositivo compatible al conector
de USB (10) para copiar archivos en el disco
duro interno.
NOTA:
Para obtener información acerca de los dis-
positivos compatibles, consulte la sección
Conector USB en este manual.
(11) Conector AUX
Conecte un dispositivo de audio externo (p. ej.,
reproductor de MP3, videojuego) a la entrada
AUX (11) para reproducir el audio del disposi-
tivo a través del sistema de audio del vehículo.
Centro de información electrónica del
vehículo (EVIC)
Algunos modelos incorporan un Centro de in-
formación electrónica del vehículo (EVIC) con
una pantalla con la que el conductor puede
interactuar. El EVIC normalmente se encuentra
en el grupo de instrumentos o en la parte
superior. Puede mostrar frecuencias de emiso-
ras de radio, número de disco CD y canal de
radio vía satélite.
Controles de audio en el volante (si
está equipado)
Los controles de audio del volante están situa-
dos en la superficie trasera del volante. Para
obtener información detallada, consulte el Ma-
nual del propietario específico del vehículo.
A continuación se describe la funcionalidad
general del volante:
1. El interruptor oscilante VOLUME (VOLU-
MEN), situado a la derecha, controla el volu-
men del sistema de sonido. Al pulsar la parte
superior del interruptor oscilante aumenta el
volumen y al pulsar la parte inferior disminuye.
2. El botón MODE ADVANCED (MODO AVAN-
ZADO), situado en el centro del interruptor
oscilante derecho, cambia el modo de la radio
entre los diversos modos disponibles (LW, MW,
FM, CD, DVD, etc.).
3. El botón FUNCTION SELECT (SELECCIÓN
DE FUNCIÓN), situado en el centro del in-
terruptor oscilante izquierdo, hace avanzar la
radio con navegador a la siguiente preselec-
ción, cambia el disco actual cuando se en-
cuentra en el modo de disco, etc. El funciona-
miento difiere en función del modo en uso.
7

4. El interruptor oscilante SCROLL (AVANCE),
situado a la izquierda, cambia las selecciones
tales como emisora de radio y pista de CD en
función del modo en uso.
A continuación se describe el funcionamiento del
interruptor SCROLL (AVANCE) en cada modo:
Funcionamiento de LW/MW/FM
Al pulsar la parte superior del interruptor la
unidad busca hacia adelante la siguiente emi-
sora disponible, y al pulsar la parte inferior del
interruptor busca hacia atrás la siguiente emi-
sora disponible.
Funcionamiento de HDD/Disco/iPodT
Presionando la parte superior del interruptor se
pasa a la siguiente pista del disco, mientras
que presionando la parte inferior del interruptor
se pasa al principio de la pista en curso, o al
principio de la pista anterior, si se encuentra
dentro de los primeros ocho segundos de la
pista en curso.
Funcionamiento del sistema Video
Entertainment System™
Si el vehículo está equipado con reproductor
de vídeo remoto, este control funcionará del
mismo modo que en el modo de disco.
Ajustes de audio
Volumen
Utilice la perilla giratoria ON/OFF VOLUME
(ENCENDER/APAGAR VOLUMEN) (5) para re-
gular el volumen de la fuente de audio que se
está reproduciendo. Mientras se regula el vo-
lumen, en la esquina inferior izquierda de la
pantalla se visualiza la fuente de audio y un
indicador de volumen.
Menú Audio Control (Control de Audio)
Pulse la tecla fija AUDIO (8) en el lado derecho
de la radio.
Utilice las teclas variables de flecha o la línea
de punto de mira de la pantalla para cambiar el
equilibrio y la atenuación. La tecla variable
CENTRE (CENTRAR) restablece los ajustes.
Utilice las teclas variables de flechas o los
cursores en la pantalla para ajustar los tonos
BASS (GRAVES), MID (MEDIOS) y/o TREBLE
(AGUDOS).
8

PRIMEROS PASOS
NOTA:
Para que funcione la radio, el interruptor de
encendido debe estar en la posición ON
(Encendido) o ACC (Accesorio).
Si la unidad está apagada, enciéndala presio-
nando la perilla giratoria ON/OFF VOLUME
(ENCENDER/APAGAR VOLUMEN).
Cambio de idioma
La radio se adaptará al idioma del vehículo
fijado en el Centro de información electrónica
del vehículo (EVIC), si está equipada.
Si se cambia el idioma para la radio, el vehículo
cambiará el idioma para toda la información
visualizada. Consulte el Manual del propietario
del vehículo.
Para cambiar el idioma con la radio:
1. Pulse la tecla fija MENU (MENÚ) en el lado
derecho de la radio.
2. A continuación, pulse la tecla variable Sys-
tem Setup (Config. sistema) para abrir el menú
System Setup (Config. del sistema).
3. Pulse la tecla variable Language (Idioma) y
seleccione un idioma.
Ajuste de la hora
1. Pulse la tecla variable Time Display (Visua-
lización de la hora), situada en la esquina
inferior izquierda de la pantalla.
2. Ajuste la hora y los minutos utilizando las
teclas variables ascendente y descendente.
3. Pulse la tecla variable Set Time Zone (Esta-
blecer zona horaria) para cambiar a la zona
horaria deseada.
4. Pulse la tecla variable Daylight Savings
(Ahorro luz día), para activar o desactivar el
ahorro de luz diurna.
9

Guardar preselecciones de radio
1. Pulse la tecla fija RADIO para que se mues-
tre MW LW FM.
2. Seleccione la banda de radio tocando la
tecla variable MW, LW o FM.
3. Pulse las teclas fijas SEEK (BÚSQUEDA)
ascendente/descendente, o toque la tecla va-
riable SCAN, la tecla variable DIRECT TUNE
(DIREC SINTON) o las flechas izquierda y
derecha para cambiar la emisora que se está
escuchando.
4. Toque y mantenga presionada una de las
teclas variables PRESET (PRESIN) en la lista a
la derecha, hasta oír un pitido de confirmación
(unos 2 segundos).
Puede usar la tecla variable PAGE
(PÁGINA) para recorrer la lista de
preselecciones.
NOTA:
Si la lista de preselecciones no se visualiza,
pulse la tecla variable PRESET (PRESIN)
situada en la línea inferior de la pantalla.
Puede utilizar la tecla variable PANTA-
LLA COMPLETA para cambiar entre el
modo de pantalla completa o dividida.
Los nombres largos de preselecciones se
muestran en el modo de pantalla completa.
Puede utilizar la tecla variable ATRÁS
para volver al menú anterior.
10

Sistema multimedia Uconnect™
(RADIO)
Modo de radio
Aspectos generales
Las radios están equipadas con tres sintoniza-
dores:
• FM 87.5 MHz - 108.0 MHz (capacidad de
RDS)
• MW 531 kHz - 1611 kHz
• LW 153 kHz - 282 kHz
Cambie entre los distintos sintonizadores de
radio pulsando la tecla fija RADIO. Los diferen-
tes modos de sintonizador pueden seleccio-
narse mediante las pestañas de la pantalla de
la radio.
Emisoras presintonizadas
Hay 12 preselecciones de emisoras disponi-
bles que se pueden guardar en cada rango del
sintonizador.
Para almacenar la emisora deseada, toque y
mantenga pulsada una de las teclas variables
de preselección de emisora durante dos se-
gundos. Verá cómo la tecla variable resaltada
cambia de color verde a beige. Además, la
emisora de radio se guardará en la tecla varia-
ble destacada y, una vez guardada, oirá un
pitido de confirmación.
Cambio de canal o frecuencia
Pulse la tecla variable de flecha descendente
de búsqueda/sintonización para buscar
rápidamente hacia abajo la siguiente emisora o
canal disponible.
Mantenga pulsada la tecla variable de flecha
descendente de búsqueda/sintonización
para sintonizar hacia abajo hasta que se suelte
la tecla variable.
Pulse la tecla variable de flecha ascendente de
búsqueda/sintonización para buscar rápi-
damente hacia arriba la siguiente emisora o
canal disponible.
Mantenga pulsada la tecla variable de flecha
ascendente de búsqueda/sintonización
para sintonizar hacia arriba hasta que se suelte
la tecla variable.
Seleccione la tecla variable DIRECT TUNE
(DIRECT SINTON) para introducir un número
de canal o frecuencia, y confirme su selección
pulsando la tecla variable GO (IR).
Seleccione SCAN (EXPLORACIÓN) para obte-
ner una vista previa de cinco segundos de
cada emisora sintonizable en la banda de
frecuencia. Toque nuevamente la tecla variable
SCAN para detener la función de exploración y
seleccionar una emisora de radio.
Sistema de datos de radio (RDS)
Este sistema de radio puede recibir señales de
RDS en la banda FM. RDS es una tecnología
utilizada para transmitir información en forma
de texto acerca del tipo de música, canción e
intérprete para la música de la banda FM. Esta
información se muestra en la pantalla.
NOTA:
No todas las emisoras de radio admiten
RDS.
La información de RDS se visualiza debajo de
la frecuencia de la emisora de radio que se
está escuchando.
11

Información de texto de radio
Seleccione INFO (INFORMACIÓN) para ver
más información de texto de la radio en la
mitad derecha de la pantalla.
Seleccione CLOSE INFO (CERRAR INFORMA-
CIÓN) para ocultar la información de texto
adicional de la radio.
Tipo de música (Filtro de tipo de
programa)
El tipo de programa (PTY) solo está disponible
en el modo FM. Las emisoras de radio están
agrupadas en función de sus programas
(p. ej., Rock suave, Rhythm & Blues, etc.).
Seleccione MUSIC TYPE (TIPO MÚSICA) para
habilitar e/o inhabilitar los tipos de programa
deseados. La función de SEEK (BÚSQUEDA) y
SCAN solo visualizará emisoras con tipos de
programa coincidentes.
Tipos de programa de RDS (FM)
Éxitos para adultos, rock clásico, música clá-
sica, música para adolescentes, country, infor-
mación, jazz, idioma, noticias, nostalgia, viejos
éxitos, personalidad, público, música religiosa,
charlas religiosas, rhythm and blues, rock, mú-
sica ligera, rhythm and blues ligero, rock ligero,
deportes, charla, 40 principales, meteorología.
Ajustes de radio
MENÚ LW/MW/FM
No existen reglajes específicos para estos mo-
dos.
Ajustes de visualización
Pulse la tecla fija MENU (MENÚ) y toque la
tecla variable Display Setting (Configuración
de pantalla) para acceder al menú de configu-
ración de pantalla.
Seleccione la tecla variable Daytime Colors
(Colores diurnos) para cambiar al modo de día
manual y ajustar el brillo de la pantalla con los
colores diurnos.
Seleccione la tecla variable Nighttime Colors
(Colores nocturnos) para cambiar al modo de
noche manual y ajustar el brillo de la pantalla
con los colores nocturnos.
Seleccione la tecla variable Auto Color (Modo
color auto) para cambiar al modo de día/noche
automático y controlar el brillo de la pantalla
empleando el interruptor atenuador de ilumina-
ción del vehículo.
Toque la tecla variable DONE (HECHO) para
guardar su configuración.
12

Apagado de la pantalla
Para apagar la pantalla (de manera que tan
solo se muestre el reloj y se siga oyendo el
audio por los altavoces del vehículo), pulse la
tecla fija MENU (MENÚ) y toque la tecla varia-
ble Screen Off (Apagado de pantalla).
Una vez activado el apagado de pantalla,
pulse cualquier tecla fija o toque la pantalla
para encenderla.
Ajustes de visualización
Pulse la tecla fija MENU (MENÚ) y toque la
tecla variable Default View (Vista Def.) para
habilitar el modo de visualización por omisión,
en el que el logotipo con la marca del vehículo
se muestra en la mitad derecha de la pantalla.
Toque la tecla variable Picture View (Imagen
Def.) para habilitar el modo de visualización de
imágenes, en el que las imágenes pueden
verse en la mitad derecha de la pantalla de la
radio. Para obtener un ejemplo detallado, con-
sulte la sección Disco duro.
Cámara trasera de marcha atrás ParkviewT
(si está equipado)
Cuando la pantalla de la radio está equipada
con ParkViewT, muestra la imagen de la cá-
mara trasera al colocar en posición R (marcha
atrás) el cambiador de los vehículos con caja
de cambios automática. En los vehículos con
caja de cambios manual debe acoplarse la
marcha atrás.
NOTA:
Puede inhabilitar ParkviewT en el menú de
configuración del sistema.
13

Sistema multimedia Uconnect™
(MEDIOS)
Modo de disco
Aspectos generales
La radio está equipada con un reproductor de
CD/DVD.
Para activar el modo DISC (DISCO), pulse la
tecla fija MEDIA (MEDIOS) y seleccione la tecla
variable de pestaña DISC (DISCO).
Requisitos de los discos
PRECAUCIÓN
Este reproductor de discos solo aceptadiscos
de 12 cm (4 3/4 pulgadas). El uso de discos
de otra medida puede dañar el mecanismo
del reproductor de discos.
Las radios pueden reproducir discos compac-
tos (CD), discos compactos grabables (CD-R),
discos compactos regrabables (CD-RW),
DVD-R, DVD+R, DVD-RW grabables y discos
compactos DVD+RW. RB2 también admite
AAC y M4A.
La radio puede reproducir los formatos si-
guientes:
MP3, WMA, CD de audio, DVD de audio y DVD
de vídeo.
No introduzca ningún soporte que no sean los
formatos de CD/DVD compatibles.
No se ofrece soporte para los formatos SACD
(estrato SACD), VCD de dos discos, SVCD,
VCD en DVD MPEG-4.
Puede encontrar una lista completa de los
formatos de CD/DVD compatibles en
www.DriveUconnect.com.
Introducción de discos
1. Pulse una vez la tecla fija LOAD (CARGAR).
2. Cuando se abra la pantalla, inserte el disco
en la ranura para discos de la radio con el lado
impreso hacia arriba. La radio introduce auto-
máticamente el disco y cierra la pantalla bas-
culante. Una vez reconocido el disco, la radio
selecciona el modo apropiado e inicia la repro-
ducción de la primera pista. Durante este pro-
ceso, la pantalla muestra 9Reading...9 (Le-
yendo).
NOTA:
Si un CD está defectuoso, NO se expulsa
automáticamente. Utilice únicamente discos
de la medida estándar. Los discos que ha-
yan sufrido modificaciones por la utilización
de una etiqueta adhesiva no deben utilizarse
en el reproductor de CD/DVD.
Los medios y contenidos de alta definición (p.
ej. HD-DVD, Blue-Ray) no son compatibles.
14

Si el usuario no retira un CD expulsado antes
de que transcurran 10 segundos aproxi-
madamente, el CD volverá a cargarse.
NOTA:
En los CD de datos con una gran cantidad
de canciones, la lectura, reproducción y
visualización de información de todas las
canciones del disco puede tardar varios
segundos.
NOTA:
La grabación de CD en un ordenador perso-
nal a una velocidad de escritura baja propor-
cionará una mejor calidad.
Extracción de discos
1. Pulse la tecla fija LOAD (CARGAR).
2. El disco será expulsado y podrá extraerse.
NOTA:
Si el disco no se retira antes de que trans-
curran 10 segundos aproximadamente, la
unidad vuelve a introducirlo en la ranura
(posición de estacionamiento). El disco
puede extraerse con el encendido apagado.
3. Pulse la tecla fija LOAD (CARGAR) para
cerrar la pantalla. La pantalla se cerrará dentro
de un plazo de 30 segundos después de
extraer el disco del mecanismo.
Selección del modo de disco
Cambie entre los menús de medios y radio
pulsando la tecla fija MEDIA (MEDIOS). El
modo de disco puede seleccionarse tocando
la tecla variable de la pestaña Disc (Disco).
NOTA:
Una vez introducido el disco, el sistema lo
reconoce y selecciona automáticamente el
modo apropiado.
Búsqueda de exploración
Toque la tecla variable SCAN.
Las pistas individuales del disco serán repro-
ducidas sucesivamente, durante ocho segun-
dos cada una.
Seleccione la tecla variable STOP SCAN (PA-
RAR SCAN) para detener la función de explo-
ración.
Cambio de pista
Pulse la tecla variable de flechas hacia ade-
lante
para seleccionar la siguiente pista
del disco.
Mantenga pulsada la tecla variable de flechas
hacia adelante
para que la pista avance
rápidamente.
Pulse la tecla variable de flechas hacia atrás
para seleccionar el comienzo de la pista
actual (mientras la pista se está reprodu-
ciendo) o la pista anterior (si la pista actual
acaba de comenzar).
Mantenga pulsada la tecla variable de flechas
hacia atrás
para que la pista retroceda
rápidamente.
Pulse la tecla variable de pausa para interrum-
pir la reproducción del disco.
Pulse la tecla variable de reproducción para
reanudar la reproducción del disco.
Visualización de tiempo de título
transcurrido
El tiempo de título transcurrido de la pista que
se está reproduciendo se muestra en la parte
central izquierda de la pantalla.
15

Selección de un título de la lista
Seleccione LIST (LISTA) para visualizar una
lista de los títulos del disco que se está repro-
duciendo. Seleccione la pista que desea repro-
ducir.
Seleccione HIDE LIST (OCULTAR LISTA) para
ocultar la lista.
Información del disco
Seleccione INFORMACIÓN para ver informa-
ción sobre el título, intérprete, álbum y género
del disco en la mitad derecha de la pantalla.
Seleccione CERRAR INFORMACIÓN para ce-
rrar la información.
Tecnología de reconocimiento de música
GracenoteT
Esta radio está equipada con el servicio de
reconocimiento de música de GracenoteT, una
base de datos incorporada destinada a propor-
cionar información relativa al álbum, título de
canción, género y artista. Se ofrecerán datos
para la mayor parte de CD de audio (discos
CDA). No se ofrecerán datos para discos DVD
o de datos (aquéllos que contienen archivos de
MP3 o WMA).
La tecnología de reconocimiento de música y
los datos relacionados son proporcionados por
GracenoteT. Gracenote es la norma industrial
en materia de tecnología de reconocimiento de
música y de suministro de contenidos relacio-
nados. Para obtener más información, visite el
sitio web www.gracenote.com.
NOTA:
Visite www.DriveUconnect.com para obte-
ner información sobre actualizaciones.
Copia de discos en el disco duro
Pulse la tecla variable de copia para
copiar el disco actual en el disco duro.
Menú de disco
En el modo de disco con un disco de audio
insertado, pulse la tecla fija MENU (MENÚ)
para acceder al menú Disc (Disco).
Seleccione Random (Aleatorio) para reproducir
los títulos del disco de forma aleatoria. Vuelva a
seleccionar Random (Aleatorio) para desacti-
var la reproducción aleatoria.
Seleccione Repeat (Repetir) para repetir todas
las canciones de la carpeta que se reproduce
actualmente (solo discos MP3/WMA). Toque de
nuevo la tecla variable Repeat Folder (Repetir
carpeta) para detener el modo de repetición.
Reproducción de un disco de MP3/WMA
1. Pulse una vez la tecla fija LOAD (CARGAR).
2. Inserte el disco en la ranura para discos de
la radio con el lado impreso hacia arriba. La
radio introduce automáticamente el disco y
cierra la pantalla basculante. Una vez recono-
cido el disco, la radio selecciona el modo
apropiado e inicia la reproducción de la pri-
mera pista. Durante este proceso, la pantalla
muestra 9Reading...9 (Leyendo).
Un disco MP3/WMA puede contener archivos
de audio en una estructura de carpetas. Las
carpetas, si existen, se muestran en la vista de
listas.
16

Si no se muestra la lista, toque la tecla variable
BROWSE (EXAMINAR).
3. Para abrir una carpeta, toque una tecla
variable con un símbolo de carpeta.
4. Para cerrar una carpeta, toque la tecla
variable con el icono que indica la carpeta
anterior.
Reproducción de DVD de vídeo
NOTA:
No todos los estados permiten ver un DVD
de vídeo en la pantalla de la radio, y el
vehículo debe estar detenido y con el cam-
biador en la posición P (Estacionamiento)
en el caso de vehículos con caja de cambios
automática. En los vehículos con caja de
cambios manual el freno de estaciona-
miento debe estar aplicado.
En primer lugar, inserte un DVD de vídeo.
La reproducción comienza automáticamente
una vez que el DVD de vídeo es reconocido
por la unidad de disco.
Toque la tecla variable LIST (LISTA) para ver
una lista de los capítulos o pistas disponibles.
Toque una tecla variable de capítulo o pista en
la lista para iniciar la reproducción desde la
sección seleccionada.
Toque la tecla variable VIEW VIDEO (VER VÍ-
DEO) para ver el vídeo en la pantalla.
Controles del menú de DVD
Si inserta un disco DVD de vídeo con un menú
superior, puede aparecer un menú.
Toque las teclas variables de flechas de cursor
para seleccionar el título que desea ver y, a
continuación, toque la tecla variable ENTER
(ENTR) para iniciar la reproducción.
Toque la tecla variable de desplaza-
miento de DVD para desplazar los con-
troles a la parte derecha de la pantalla.
Toque la tecla variable para cerrar los
controles en DVD MENU (MENÚ DE
DVD).
17

Controles de reproducción de DVD
En el modo de reproducción de vídeo, toque
cualquier parte de la pantalla para mostrar los
controles de reproducción de DVD.
Para realizar una pausa en la reproducción,
toque la tecla variable de pausa.
Para detener la reproducción toque la tecla
variable de parada.
Toque la tecla variable de retroceso rápido
durante la reproducción, para retroceder rápi-
damente.
Toque la tecla variable de avance rápido du-
rante la reproducción, para avanzar rápida-
mente.
Toque la tecla variable NEXT (SIGUIENTE)
para localizar capítulos o pistas sucesivas.
Toque la tecla variable PREV (ANTERIOR) para
iniciar la reproducción desde el principio del
capítulo o pista en curso. Si pulsa dos veces en
una sucesión rápida, la reproducción co-
mienza a partir del principio del capítulo o pista
precedente.
Menú DVD VIDEO (VÍDEO DE DVD)
Estando en el modo de disco con un DVD de
vídeo insertado, pulse la tecla fija MENU
(MENÚ) para acceder al menú DISC (DISCO).
Toque la tecla variable DVD Setup (Configura-
ción del DVD) para acceder al menú DVD
Setup (Configuración del DVD).
En el menú DVD Setup (Configuración del
DVD) puede seleccionar Menu Language
(Idioma del menú), Audio Language (Idioma
de audio), Subtitle (Subtítulo), Camera Angle
(Angulo de cámara), Aspect Ratio (Relación de
aspecto) y Brightness (Brillo) pulsando la tecla
variable correspondiente. Si el disco insertado
no admite la función, algunas de las teclas
variables aparecerán inhabilitadas.
18

Saltos en el disco
Por regla general, los saltos son producto de
un disco deteriorado (rayado). Esto provocará
un salto hacia adelante de 10 segundos hasta
superar la zona deteriorada.
Protección de temperatura
Si la temperatura del lector de discos es de-
masiado alta durante el funcionamiento, un
mensaje en pantalla informará al usuario al
respecto. La unidad cambiará al modo de
radio hasta que la temperatura del lector de
discos haya descendido hasta un nivel normal.
Modo de disco duro (HDD)
El modo de disco duro proporciona acceso a
los archivos de audio almacenados en el disco
duro interno. Funciona de forma similar a un
reproductor de CD, con la excepción de que el
disco duro interno puede almacenar más pis-
tas. Puede almacenar unas 6.700 canciones
de cuatro minutos con calidad de CD.
Antes de usar el modo de disco duro, debe
copiar las pistas en el disco duro interno.
Los archivos quedarán almacenados en el
disco duro interno y podrán usarse en el modo
de disco duro.
Copia de discos de audio en el disco duro
1. Inserte un disco.
2. Toque la tecla variable de copia
para
copiar pistas de música del disco insertado en
el disco duro.
Tras una breve pausa, el proceso de copiado
comienza y el audio reanuda la reproducción
desde el principio de la pista. El proceso de
copiado continúa en segundo plano mientras
se reproduce el audio. El avance se muestra en
la pantalla. Incluso si cambia a otro modo
(radio, AUX, etc.) o apaga la radio (encendido
en posición ON), el proceso de copiado conti-
nuará en segundo plano.
El avance de la copia se muestra en la pantalla.
Durante este proceso también pueden escu-
charse los modos de radio. El tiempo de co-
piado es 4 veces superior a la velocidad nor-
mal de reproducción.
NOTA:
Cuando se copia un CD de audio en el disco
duro, los archivos de audio se convierten de
CD de audio a AAC. Los DVD de audio no
pueden copiarse en el disco duro.
19

Copia de archivos WMA/MP3 en el disco
duro
Puede copiar archivos de audio comprimidos
con formato MP3 y WMA desde un disco o
mediante USB (p. ej., una memoria USB).
Se recomienda clasificar los archivos de mú-
sica en carpetas.
Ejemplo:
Las canciones situadas en el nivel raíz (nivel
superior) del disco o dispositivo USB se guar-
dan en una lista de reproducción denominada
Root_Level_Songs.
Una vez copiadas las canciones, la lista de
reproducción recibirá un nombre mediante el
nombre de carpeta originado.
En el ejemplo anterior, la lista del disco duro
mostrará lo siguiente:
Disc_Root_Level Songs (Lista de reproducción
1)
• Song 1.mp3 (Primera canción en lista de
reproducción 1)
• Song 2.mp3 (Segunda canción en lista de
reproducción 1)
• Song 3.wma (Tercera canción en lista de
reproducción 1)
My Playlist Folder 1 (Lista de reproducción 2)
• 01Song.mp3 (Primera canción en lista de
reproducción 2)
• 02 Song.mp3 (Segunda canción en lista de
reproducción 2)
• 03 Song.mp3 (Tercera canción en lista de
reproducción 2)
Copiado de disco completo
1. Inserte un disco con archivos de MP3,
WMA.
2. Toque la tecla variable de copia
para
copiar archivos de música del disco insertado
en el disco duro.
El avance de la copia se muestra en la pantalla.
Durante el proceso de copiado, el reproductor
de discos puede reproducir audio.
Durante el proceso pueden escucharse los
modos de radio.
20

Copia selectiva de canciones desde un
disco
Puede seleccionar canciones específicas de
un disco WMA/MP3 siguiendo el procedimiento
que se indica a continuación:
1. Toque la tecla fija MY FILES (MIS ARCHI-
VOS).
2. Seleccione My Music (Mi música).
3. Toque la tecla variable Import Music Files
(Importar archiv. música).
4. Toque la tecla variable From DISC (Desde el
disco) en la pantalla siguiente.
5. Seleccione las carpetas o títulos que desee
copiar.
Una marca de selección roja indica las cancio-
nes y/o carpetas seleccionadas. Toque la tecla
variable ALL (TODO) para seleccionar todos
los archivos y carpetas de una vez.
6. Toque la tecla variable DONE (HECHO)
para iniciar el proceso de copiado.
El proceso de copia se muestra en la pantalla.
Durante el proceso pueden escucharse los
modos de radio.
21

Si se desconecta o expulsa el medio antes de
finalizar la copia, se interrumpirá el proceso.
Puede reiniciar el proceso de copia repitiendo
los pasos anteriores.
Copia desde USB
1. Inserte un dispositivo USB.
2. Seleccione My Music (Mi música).
3. Toque la tecla variable Import Music Files
(Importar archiv. música).
4. Toque la tecla variable From USB (Desde
USB) en la pantalla siguiente.
5. Seleccione las carpetas o títulos que desee
copiar.
Una marca de selección roja indica las cancio-
nes y/o carpetas seleccionadas. Toque la tecla
variable ALL (TODO) para seleccionar todos
los archivos y carpetas de una vez.
6. Toque la tecla variable DONE (HECHO)
para iniciar el proceso de copiado.
Reproducción de archivos de audio desde
el disco duro
Puede reproducir canciones directamente
desde el disco duro interno.
22

1. Toque la tecla variable BROWSE (EXAMI-
NAR) para seleccionar una categoría disponi-
ble.
La radio puede clasificar los archivos por lista
de reproducción, por nombre de canción, por
artista, por género o por álbum.
2. Para este ejemplo, toque la tecla variable
Playlists (Listas de reproducción).
3. Toque una tecla variable con el nombre de
la lista de reproducción deseada para repro-
ducir una lista de reproducción.
Toque la tecla variable PLAY ALL PLAYLISTS
(REPR. TODAS LAS LISTAS) para reproducir
todas las listas de reproducción disponibles.
Cambio de pista
Pulse la tecla variable de flechas hacia ade-
lante para seleccionar la siguiente pista
del disco.
Mantenga pulsada la tecla variable de flechas
hacia adelante para que la pista avance
rápidamente.
Pulse la tecla variable de flechas hacia atrás
para seleccionar el comienzo de la pista
actual (mientras la pista se está reprodu-
ciendo) o la pista anterior (si la pista actual
acaba de comenzar).
Mantenga pulsada la tecla variable de flechas
hacia atrás para que la pista retroceda
rápidamente.
Pulse la tecla variable de pausa para interrum-
pir la reproducción del disco.
Pulse la tecla variable de reproducción para
reanudar la reproducción del disco.
Visualización de tiempo de título
transcurrido
El tiempo de título transcurrido de la pista que
se está reproduciendo se visualiza en la parte
central izquierda de la pantalla.
Menú del HDD
En el modo de disco duro, pulse la tecla fija
MENU (MENÚ) para acceder a la pantalla HDD
Menu (Menú del HDD).
23

Reproducción aleatoria
La función de reproducción al azar reproduce
pistas de forma aleatoria del disco duro. Toque
la tecla variable Random (Aleatorio) para acti-
var o desactivar la función de reproducción
aleatoria.
Una marca de selección roja indica que la
función de reproducción al azar está activa.
Repetición de pista
La función de repetición de pista repite la pista
que se está reproduciendo. Toque la tecla
variable Rpt. TRK para activar o desactivar la
función de repetición de pista.
Una marca de selección roja indica que la
función de repetición de pista está activa.
Listas de reproducción favoritas en el
disco duro
Puede guardar enlaces a las listas de repro-
ducción favoritas en la lista Favorite Playlists
(Listas de reproducción favoritas).
1. En el modo HDD, toque la tecla variable
BROWSE (EXAMINAR) para acceder al menú
Browse Categories (Examinar categorías).
2. Toque la tecla variable Favorites (Favoritos)
para ver las listas de reproducción favoritas.
3. Pulse una de las teclas variables ADD FA-
VORITE (AÑADIR FAVORITO).
4. Escoja la lista de reproducción que desee.
24

En la lista Favorite Playlists (Listas Reprod.
Fav.) se ha guardado un enlace a las listas de
reproducción seleccionadas.
NOTA:
Si una lista de reproducción se elimina del
menú My Playlists (Mis listas de reproduc-
ción), se eliminará también el enlace a la
lista de reproducción favorita. Consulte la
sección Edición de listas de reproducción
en el disco duro en este manual.
Ahora puede editar la lista si toca la tecla
variable EDIT (EDITAR) o salir de la lista si toca
la tecla variable EXIT (SALIR).
Edición de listas de reproducción en el
disco duro
1. En el modo de disco duro, pulse la tecla fija
MY FILES (MIS ARCHIVOS) para acceder al
menú Manage My Files (Administr. archivos).
2. Seleccione My Music (Mi música).
3. Toque la tecla variable My Playlists (Mis
listas de reproducción).
25

4. Toque la tecla variable EDIT (EDITAR) de la
lista de reproducción que desee editar.
NOTA:
No es posible editar una lista de reproduc-
ción durante el proceso de copia.
Puede continuar con la lista de reproducción
seleccionada, eliminar canciones de la lista de
reproducción seleccionada o eliminar la lista.
5. Toque la tecla variable Rename This Playlist
(Cambiar el nombre de esta lista de reproduc-
ción).
NOTA:
Si toca la tecla variable Delete This Playlist
(Eliminar esta lista de reproducción), la lista
de reproducción y todas las canciones que
contenga se eliminarán de forma perma-
nente. No se podrá recuperar ninguna can-
ción ni lista de reproducción.
6. Teclee un nuevo nombre para la lista de
reproducción.
7. Toque la tecla variable SAVE (GUARDAR)
para confirmar el nombre.
26

La lista de reproducción ahora tiene el nuevo
nombre.
Eliminación de canciones de una lista de
reproducción
1. Pulse la tecla fija MENU (MENÚ), toque la
tecla variable MY FILES (MIS ARCHIVOS), to-
que después la tecla variable My Playlists (Mis
listas de reproducción) y seleccione la tecla
variable Delete Songs From This Playlist (Elimi-
nar canciones de esta lista de reproducción).
NOTA:
Si toca la tecla variable Delete This Playlist
(Eliminar esta lista de reproducción), la lista
de reproducción y todas las canciones que
contenga se eliminarán de forma perma-
nente. No se podrá recuperar ninguna can-
ción ni lista de reproducción.
2. Seleccione los títulos que desee eliminar.
Una marca de selección roja indica las cancio-
nes seleccionadas.
3. Toque la tecla variable DELETE (ELIMIN)
para iniciar el proceso de eliminación.
NOTA:
Si elimina una canción de la lista de repro-
ducción, la canción no podrá recuperarse.
4. Cuando haya finalizado la edición de la lista
de reproducción, toque la tecla variable DONE
(HECHO).
Eliminación de todas las listas de
reproducción del disco duro
1. Pulse la tecla fija MENU (MENÚ) en el lado
derecho de la radio.
2. Toque la tecla variable System Setup (Con-
fig. sistema) para acceder al menú System
Setup (Config. sistema).
3. Toque la tecla variable Manage Hard Drive
(Gestionar unidad disco) para acceder al
menú del mismo nombre.
Este menú muestra el espacio disponible en el
disco duro y permite eliminar archivos de mú-
sica e imágenes.
27

Importación de imágenes
Es posible importar imágenes al disco interno.
Las imágenes pueden visualizarse en la mitad
derecha de la pantalla de la radio.
En el modo predeterminado, el logotipo con la
marca del vehículo se muestra en la mitad
derecha de la pantalla. Pulse la tecla fija MENU
(MENÚ) en el lado derecho de la radio para
acceder a uno de los menús de ajuste.
Antes de realizar la importación, se reco-
mienda cambiar las dimensiones de las imáge-
nes en un PC o una cámara digital a 240 por
158 píxeles.
NOTA:
Los dispositivos USB (p. ej., adaptadores
USB de memoria de cámara, etc.) deben
cumplir con la norma MSD (dispositivo de
almacenamiento masivo). Este terminal USB
puede proporcionar alimentación al disposi-
tivo insertado. La limitación de corriente del
dispositivo debe ser inferior o igual a
500 mA.
1. Toque la tecla fija MY FILES (MIS ARCHI-
VOS) para ir a la pantalla Manage My Files
(Administrar mis archivos).
2. Inserte un CD o una memoria USB que
contenga sus imágenes.
3. Toque la tecla variable My Pictures (Mis
imágenes) para ver las imágenes almacena-
das en conjunto.
La radio puede almacenar 24 imágenes del
usuario.
4. Pulse una de las teclas variables Add Pic-
tures (Añadir imágenes).
5. Seleccione el tipo de medio insertado.
28

6. Utilice las teclas variables PAGE (PÁGINA)
para recorrer las páginas a través de una lista
de imágenes y pulse la imagen que desee
importar.
NOTA:
Para que sean reconocidos, los archivos
deben estar en el directorio raíz (nivel supe-
rior) del disco o dispositivo USB.
7. Confirme su selección tocando la tecla va-
riable YES (SÍ).
La imagen importada aparece ahora en la
pantalla Manage My Pictures (Gestionar Mis
imágenes).
8. Para visualizar la imagen importada en la
pantalla de la radio, toque la tecla variable de
la imagen deseada.
9. Seleccione esta imagen pulsando la tecla
variable Set as Default (Establecer como pre-
determinada). Una marca de selección indica
la imagen que se está usando.
Utilice la tecla variable PREV (ANTE) o NEXT
(SIG.) para recorrer la lista de imágenes dispo-
nibles.
29

Toque la tecla variable DELETE (ELIMIN) para
eliminar la imagen del disco duro.
10. Pulse dos veces la tecla fija MENU (MENÚ)
y, a continuación, toque la tecla variable Pic-
ture View (Vista Imagen) para habilitar la visua-
lización de la imagen.
La imagen ahora se visualiza en la mitad
derecha de la pantalla.
30

Sistema multimedia Uconnect™
(DISPOSITIVOS REMOTOS)
Video Entertainment System (VES)™
La radio puede controlar a distancia el sistema
VES™. Para más información, consulte el ma-
nual del usuario de VES™.
Recepción de audio/vídeo desde VES™
Se puede reproducir audio desde VES™ me-
diante el sistema de altavoces del vehículo. Si
tiene un VES™ con reproductor de vídeo, tam-
bién podrá ver el vídeo en el visualizador de la
radio, si el vehículo está estacionado.
La pestaña VES aparece disponible después
de encender el sistema VES™. Toque la tecla
variable VES MODES (MODOS VES) para se-
leccionar la fuente de audio de VES™.
Toque la tecla variable de la fuente que desea
para reproducir la selección en la cabina del
vehículo.
La disponibilidad de las teclas variables DVD
Player (Reproductor DVD), Rear AUX 1 (AUX 1
trasero) y Rear AUX 2 (AUX 2 trasero) depende
del tipo de VES™ equipado en el vehículo.
El reproductor de DVD no estará disponible si
el VES™ no incorpora reproductor de DVD o si
no hay un DVD en el reproductor.
Para que un dispositivo esté disponible, de-
berá estar conectado a la toma AUX del VES™.
Una tecla variable inhabilitada indica una
fuente que no está disponible.
Envío de audio/vídeo y control del VES
La radio también puede controlar el VES™.
Todas las fuentes se reproducen a través de
los auriculares del VES™.
Para informarse sobre la forma de controlar el
VES™ trasero a través del mando a distancia,
consulte el manual del usuario de VES™.
Para acceder al VES™ trasero, pulse la tecla
fija MENU (MENÚ) en el lado derecho de la
radio.
31

Toque la tecla variable del VES trasero para
mostrar los controles del VES trasero.
Los controles del VES trasero se visualizan en
la mitad derecha de la pantalla.
NOTA:
Si no puede ver los controles del VES tra-
sero, pulse la tecla variable OCULTAR LIST
(LISTA) y/o la tecla variable CERRAR INFOR-
MACIÓN.
La primera columna controla la activación/
desactivación de VES y los canales de sonido
1 o 2 de los auriculares.
Con un auricular del VES™ puede escucharse
el canal 1 o 2 de audio.
Toque la pestaña de tecla variable
1 para seleccionar Canal 1.
La mitad izquierda de la pantalla muestra la
información de la fuente de audio de modo
que, si se elige por ejemplo FM, se muestra la
frecuencia de radio.
Toque la tecla variable LIST (LISTA) para visua-
lizar los detalles de la fuente seleccionada.
En este caso se visualiza la lista de la prese-
lección de FM en la sintonía seleccionada.
Puede tocar una tecla variable de preselección
para cambiar de emisora, tocar la tecla varia-
ble DIRECT TUNE (DIREC SINTON) para intro-
ducir una frecuencia o pulsar las teclas fijas
SEEK (BÚSQUEDA) ascendente o descen-
dente para cambiar de emisora de radio.
Toque la pestaña de tecla variable
2 para establecer la fuente de au-
dio deseada para el segundo canal
de audio del VES™.
La mitad izquierda de la pantalla muestra infor-
mación de la fuente de audio, que en este caso
es la pista 1 de una lista de reproducción del
disco duro de la radio.
Toque la tecla variable LIST (LISTA) para visua-
lizar los detalles de la fuente seleccionada.
32

En este caso se visualizan las canciones con-
tenidas en la lista de reproducción seleccio-
nada.
La columna RADIO controla los sintonizadores
de MW, LW y FM de la radio.
NOTA:
La radio no puede reproducir MW y LW o FM
al mismo tiempo.
La columna MEDIA (MEDIOS) controla la
fuente de audio de HDD, DISC (DISCO) y AUX
de la radio.
La columna VES controla el reproductor de
DVD, AUX 1 trasero y AUX 2 trasero del sis-
tema VES™.
Toque la pestaña de la tecla varia-
ble de encendido/apagado para
mostrar la visualización del VES
ENCENDIDO/APAGADO. Aquí puede activar o
desactivar el sistema VES™.
Toque la tecla variable Turn Rear VES OFF
(Apagar VES trasero) para apagar el VES™.
Toque la tecla variable Turn Rear VES ON
(Encender VES trasero) para encender el
VES™.
BLOQUEO DEL VES™
Pulse la tecla variable LOCK (BLOQ.) para
inhabilitar los controles en la unidad de mando
a distancia del VES™. Una vez bloqueado el
VES™, ya no es posible utilizar los controles ni
el mando a distancia del VES™.
DESBLOQUEO DEL VES™
Pulse la tecla variable UNLOCK (DESBLO-
QUEO) para habilitar los controles en la unidad
de mando a distancia del VES™.
33

Reproducción de un DVD de vídeo en el
VES™ trasero
1. Para ver un DVD de vídeo en la pantalla del
VES™ trasero, inserte un DVD de vídeo.
La reproducción comienza automáticamente
una vez que el DVD de vídeo es reconocido
por la unidad de disco.
2. Pulse la tecla fija MENU (MENÚ) en el lado
derecho de la radio.
3. Toque la tecla variable del VES trasero para
mostrar los controles del VES trasero.
4. Toque la pestaña de la tecla
variable 1 para seleccionar el canal
1 de audio.
5. Toque la tecla variable DISC (DISCO) para
seleccionar el modo de medio.
6. Toque la tecla variable PLAY VIDEO (RE-
PRODUCCIÓN DE VÍDEO) para iniciar la repro-
ducción del vídeo.
Acuerdos de licencia
Acuerdo de licencia de Dolby Digital
Fabricado bajo licencia de Dolby Laboratories.
Dolby, MLP Lossless y el símbolo de la doble D
son marcas comerciales de Dolby Laborato-
ries.
34

Acuerdo de licencia de Macrovision
Este producto incorpora tecnología con protec-
ción de copyright que está protegida por pa-
tentes de EE.UU. y otros derechos de propie-
dad intelectual. El uso de esta tecnología con
protección de copyright debe contar con la
autorización de Macrovision, y está destinada
para el hogar y otros usos de visualización
limitada únicamente, a menos que se cuente
con la autorización de Macrovision. Se prohíbe
el 9reverse engineering9 (reciclaje) o desmon-
taje.
Conector USB
Es posible transferir archivos de audio o archi-
vos de imágenes a la radio. Los archivos
pueden estar en un disco o en un dispositivo
USB (p. ej., memoria USB). El conector USB
está cubierto por una tapa pequeña que lo
protege del polvo y de deterioros.
NOTA:
Los dispositivos USB (p. ej., adaptadores
USB de memoria de cámara, etc.) deben
cumplir con la norma MSD (dispositivo de
almacenamiento masivo). Este terminal USB
puede proporcionar alimentación al disposi-
tivo insertado. La limitación de corriente del
dispositivo debe ser inferior o igual a
500 mA.
La velocidad de transferencia de este conector
USB es de unos dos megabytes por segundo.
Los dispositivos de reproducción de MP3 no se
pueden controlar a través del conector USB.
Algunos dispositivos de reproducción almace-
nan archivos de música en formato MP4, que
no se pueden reproducir en esta radio. Algu-
nos tipos de música protegidos frente a copias
(p. ej., descargas de Internet) no pueden re-
producirse en esta radio.
Dispositivos compatibles
Acuda a su concesionario autorizado o visite
www.DriveUconnect.com para obtener infor-
mación sobre los dispositivos compatibles.
NOTA:
Algunos reproductores de MP3 no permiten
la copia de canciones a otros dispositivos.
Cómo abrir la tapa
1. Coloque un dedo debajo de la flecha.
35

2. Tire hacia arriba.
NOTA:
La lengüeta está sujeta y no debe retirarse.
No tire del marco. No utilice una herramienta
(p. ej. destornillador, lima de uñas, etc.) para
abrir la lengüeta, ya que esto podría deterio-
rar la parte frontal de la radio.
Cómo cerrar la tapa
1. Con ayuda del dedo pulgar y del índice,
sujete la lengüeta. Las pestañas (1) deben
insertarse primero en el marco.
2. Introduzca primero las pestañas superiores
(1) dentro del marco.
36

3. A continuación, empuje la parte superior de
la lengüeta para asegurarla en su sitio.
PRECAUCIÓN
No fuerce nunca la entrada de un conector en
los puertos de la radio. Antes de realizar la
conexión, asegúrese de que los conectores
tienen la forma y medida correctas.
Modo AUX
El conector AUX le permite conectar la salida
de auriculares de un dispositivo de audio (p.
ej., reproductor de MP3) a la radio. El audio del
dispositivo conectado se reproducirá entonces
a través del sistema de sonido de la radio.
Conecte un cable de mini-enchufe hembra
estéreo
de 3,5 mm como se muestra antes (no
proporcionado con la radio) al conector AUX
de la radio y al conector de los auriculares de
su dispositivo de audio.
Cuando se conecta el cable de mini-enchufe
hembra
estéreo
de 3,5 mm, la pantalla cambia
automáticamente al modo AUX. Cuando se
desenchufa el cable, la pantalla de la radio
volverá al último modo de sintonizador.
Para cambiar los modos de radio mientras el
cable está conectado a la unidad, pulse la
tecla fija RADIO/MEDIA (RADIO/MEDIOS)
hasta que la pestaña AUX se visualice en la
parte superior de la pantalla. Toque la pestaña
AUX para volver al modo AUX.
Ajuste el volumen con la perilla giratoria ON/
OFF VOLUME (ENCENDIDO/APAGADO Y VO-
LUMEN) o con el volumen del dispositivo co-
nectado.
La radio no puede controlar el dispositivo ex-
terno (p. ej., selección de listas de reproduc-
ción, reproducción, avance rápido, etc.); en su
lugar, utilice los controles del dispositivo.
NOTA:
Si se inserta un conector
mono
, la reproduc-
ción del audio resultará inadecuada.
Modo iPodT (si está equipado)
El modo iPodT permite acceder a los archivos
de audio de un dispositivo iPodT externo. Fun-
ciona como un mando a distancia para el
dispositivo digital portátil iPodT que se encuen-
tra conectado y se puede reproducir el audio
del dispositivo iPodT mediante el sistema de
altavoces del vehículo.
Antes de utilizar el modo iPodT, deberá conec-
tar su dispositivo iPodT al conector del iPodT.
(Para obtener instrucciones, consulte la sec-
ción de INTERFAZ DEL CLIENTE UNIVERSAL
(UCI) en el manual del propietario del
vehículo.)
NOTA:
Los archivos no se almacenarán en el disco
duro interno y no podrán usarse en el modo
de disco duro.
NOTA:
Se recomienda utilizar el último software
disponible de iPodT e iTunes.
37

Consulte el sitio web del fabricante para
comprobar si existen actualizaciones
http://www.apple.com/support/ipod/.
Reproducción de archivos de audio de un
dispositivo iPodT
Se pueden reproducir canciones directamente
del dispositivo iPodT.
Toque la tecla variable LIST (LISTA) para visua-
lizar una lista.
Toque la tecla variable con el elemento de-
seado de la lista para seleccionar y reproducir
el elemento.
Toque la tecla variable OCULTAR LIST (LISTA)
para ocultar la lista.
Toque la tecla variable BROWSE (EXAMINAR)
para realizar una exploración por categorías.
Selección de una categoría del iPodT
La radio puede clasificar los archivos por lista
de reproducción, por nombres de canciones,
por intérpretes, por compositores, por géneros,
por álbumes, por podcasts o por audiolibros.
Para el ejemplo, toque la tecla variable Artists
(Intérpretes).
Toque una tecla variable con el nombre del
intérprete que desea para reproducir cancio-
nes de dicho intérprete.
Toque la tecla variable PLAY ALL (REPRODU-
CIR TODO) para reproducir las canciones de
todos los intérpretes disponibles.
Toque la tecla variable PÁGINA ANTERIOR o
PÁGINA SIGUIENTE para desplazarse por la
lista de intérpretes.
Salto a través de la lista
Si encuentra una lista muy larga, puede ser útil
tocar la tecla variable A<>Z para entrar en el
menú List Jump (Salto a través de la lista).
38

Para este ejemplo, hemos introducido la pri-
mera letra del intérprete deseado.
Toque la tecla variable GO (IR) para saltar al
intérprete deseado.
Toque una tecla variable con el nombre del
intérprete que desea para reproducir cancio-
nes de dicho intérprete.
Cambio de pista
Pulse la tecla variable de flechas hacia ade-
lante para seleccionar la siguiente pista
del disco.
Mantenga pulsada la tecla variable de flechas
hacia adelante para que la pista avance
rápidamente.
Pulse la tecla variable de flechas hacia atrás
para seleccionar el comienzo de la pista
actual (mientras la pista se está reprodu-
ciendo) o la pista anterior (si la pista actual
acaba de comenzar).
Mantenga pulsada la tecla variable de flechas
hacia atrás
para que la pista retroceda
rápidamente.
Pausa
Toque la tecla variable PAUSA para interrumpir
la reproducción.
Reproducción
Toque la tecla variable REPRODUCCIÓN para
iniciar la reproducción.
Visualización de tiempo de título
transcurrido
El tiempo de título transcurrido de la pista que
se está reproduciendo se muestra en el lado
izquierdo de la pantalla.
Búsqueda de exploración
Toque la tecla variable SCAN.
Las pistas individuales se reproducirán suce-
sivamente durante 8 segundos cada una.
Seleccione la tecla variable STOP SCAN (PA-
RAR SCAN) para detener la función de explo-
ración.
39

Información de pista
Toque la tecla variable INFORMACIÓN.
En la mitad derecha de la pantalla se visuali-
zará información relativa a la pista que se está
reproduciendo en ese momento, si está dispo-
nible.
Si existe más información, se visualizará la
tecla variable NEXT (SIGUIENTE). Toque la
tecla variable NEXT (SIGUIENTE) para ver la
información adicional.
Menú del iPodT
En el modo iPodT, pulse la tecla fija MENU
(MENÚ) para acceder al menú iPodT/AUX.
Reproducción aleatoria
La función de reproducción aleatoria repro-
duce pistas del dispositivo iPodT de forma
aleatoria. Toque la tecla variable Random (Ale-
atorio) para activar o desactivar la función de
reproducción aleatoria.
Una marca de selección roja indica que la
función de reproducción al azar está activa.
Repetición de pista
La función de repetición de pista repite la pista
que se está reproduciendo. Toque la tecla
variable Rpt. TRK para activar o desactivar la
función de repetición de pista.
Una marca de selección roja indica que la
función de repetición de pista está activa.
Uconnect™ Phone (si está
equipado)
Uconnect™ Phone es un sistema
de comunicaciones de a bordo de
manos libres activado por la voz.
El sistema Uconnect™ está completamente
integrado en el sistema de audio del vehículo.
La pantalla de la radio se utiliza para indica-
ciones visuales del sistema Uconnect™, tales
como el estado de la batería del teléfono, la
40

potencia de señal, la identificación de la per-
sona que llama y el tipo de llamada.
NOTA:
Es posible que su teléfono no admita todas
las características disponibles en
Uconnect™.
Consulte el manual del propietario de su
vehículo para obtener instrucciones de funcio-
namiento del teléfono Uconnect™ Phone.
Órdenes por voz (si está equipado)
Consulte el manual del propietario
de su vehículo para obtener ins-
trucciones de funcionamiento de
las órdenes por voz.
41

INFORMACIÓN DEL SISTEMA
Pulse la tecla fija MENU (MENÚ) en el lado
derecho de la radio y toque la tecla variable
System Setup (Config. sistema) para acceder
al menú System Setup (Config. sistema).
Toque la tecla variable System Information (In-
formación del sistema) para acceder a la infor-
mación del sistema.
Copia de seguridad de datos del
usuario
Visite http://www.chrysler.com/en/owners/mygig/
para obtener información sobre cómo realizar
copias de seguridad o transferir los datos de
usuario, como los archivos de música, etc. antes
de volver o cambiar a un vehículo con una radio
compatible (por ejemplo, finalización del alqui-
ler).
Actualizaciones de software y base
de datos
Visite www.DriveUconnect.com para obtener
información sobre las actualizaciones de soft-
ware y base de datos disponibles.
Hay disponibles actualizaciones para el soft-
ware de la radio y la base de datos de la
tecnología de reconocimiento de música
GracenoteT.
Antes de instalar las actualizaciones, lea las
instrucciones específicas relativas a los discos
de actualización.
Si necesita ayuda o más información acerca de
las actualizaciones disponibles, contacte con
su concesionario local autorizado.
42

RESOLUCIÓN DE PROBLEMAS
Radio
P.: No logro sintonizar mi emisora de radio
favorita que antes encontraba siempre. ¿Qué
puedo hacer?
R.: Seleccione MUSIC TYPE (TIPO DE MÚ-
SICA) desde el modo Radio. Seleccione
CLEAR (BORRAR) para inhabilitar todos los
filtros de PTY e intente buscar la emisora
deseada.
Disco
P.: La radio no muestra la información corres-
pondiente al disco que he insertado. ¿Cómo
puedo acceder a esta información?
R.: La radio buscará el disco insertado en la
base de datos de la tecnología de reconoci-
miento de música GracenoteT almacenada en
el disco duro. Si la base de datos no está
actualizada, o no contiene el disco en particu-
lar, la información no puede visualizarse. Pón-
gase en contacto con su concesionario autori-
zado o visite el sitio web
www.DriveUconnect.com para obtener infor-
mación sobre las actualizaciones disponibles.
HDD
P.: Cuando la radio reproduce canciones del
disco duro, salta a la primera canción de la
lista. ¿Por qué lo hace?
R.: Cuando la radio ha terminado de copiar o
grabar música en el disco duro, debe recons-
truir la lista de reproducción actual. Una vez
reconstituida la lista de reproducción, la radio
inicia la reproducción de la primera canción de
la lista de reproducción actual.
43

GLOSARIO DE TÉRMINOS
AS Almacenamiento au-
tomático
CD Disco compacto
CDC Cambiador de disco
compacto
CDDB Una compañía tecno-
lógica fundada en
1995 como CDDB,
Inc. La compañía ha
cambiado su nombre
por GracenoteT Inc.
La tecnología ahora
se llama servicio de
reconocimiento de
medios GracenoteT.
DVD Disco versátil digital
DVDC Cambiador de disco
versátil digital
GMD Base de datos de
medios GracenoteT,
Servicio de reconoci-
miento de medios
GracenoteT
(www.gracenote.com)
GMT Hora del meridiano
de Greenwich
HDD Unidad de disco duro
MFB Tecla variable multi-
función
MFS Volante multifunción
MP3 MPEG-1 Estrato
de audio 3.
Esquema de compre-
sión utilizado para
transferir archivos de
audio a través de
Internet y almacenar-
los en reproductores
portátiles y servido-
res de audio digital.
M4A El formato .M4A en
realidad es el estrato
de audio de películas
MPEG 4 (no vídeo).
M4P El formato .M4P es
un archivo de audio
comprado en una
tienda de música de
Apple (iTunes) que
está protegido por un
esquema de gestión
de derechos digita-
les.
POS Posición
PTY Tipo de programa
(radio)
RDS Sistema de datos de
la radio
UTC Hora universal coor-
dinada
VES™ Video Entertainment
System™ (Sistema
de entretenimiento
de vídeo)
WMA Formato de audio de
medios de Windows
44

1
MEDIA CENTER 431 (RB2)
• VEILIGHEIDSRICHTLIJNEN . . . . . . . . . . . . . . . . . . . . . . 3
• INLEIDING . . . . . . . . . . . . . . . . . . . . . . . . . . . . . . . . 4
• Waarschuwingen . . . . . . . . . . . . . . . . . . . . . . . . . . 4
• Veiligheidsinformatie . . . . . . . . . . . . . . . . . . . . . . . . 4
• Bedoeld gebruik . . . . . . . . . . . . . . . . . . . . . . . . . . . 4
• Systeemonderhoud . . . . . . . . . . . . . . . . . . . . . . . . . 4
• BEHANDELING ALGEMEEN . . . . . . . . . . . . . . . . . . . . . . 6
• ONDERDELEN VAN DE GEBRUIKERSINTERFACE . . . . . . 6
• Audiobedieningselementen op stuur (indien aanwezig) . . . 7
• Geluidsinstellingen . . . . . . . . . . . . . . . . . . . . . . . . . 8
• AAN DE SLAG . . . . . . . . . . . . . . . . . . . . . . . . . . . . . . 9
• De taal wijzigen . . . . . . . . . . . . . . . . . . . . . . . . . . . 9
• Tijd instellen . . . . . . . . . . . . . . . . . . . . . . . . . . . . . 9
• Voorkeurzenders opslaan . . . . . . . . . . . . . . . . . . . . 10
• Uconnect™ Multimedia (RADIO) . . . . . . . . . . . . . . . . . . 11
• Radiomodus . . . . . . . . . . . . . . . . . . . . . . . . . . . . 11
1

• Radio-instelingen . . . . . . . . . . . . . . . . . . . . . . . . . 12
• Uconnect™ Multimedia (MEDIA) . . . . . . . . . . . . . . . . . . 14
• Diskmodus . . . . . . . . . . . . . . . . . . . . . . . . . . . . . 14
• Modus harde schijf (HDD) . . . . . . . . . . . . . . . . . . . . 19
• Uconnect™ Multimedia (EXTERNE APPARATUUR) . . . . . . . 31
• Video Entertainment System (VES)™ . . . . . . . . . . . . . 31
• Licentieovereenkomsten . . . . . . . . . . . . . . . . . . . . . 35
• USB-aansluiting . . . . . . . . . . . . . . . . . . . . . . . . . . 35
• AUX-modus . . . . . . . . . . . . . . . . . . . . . . . . . . . . 38
• iPodT modus (indien aanwezig) . . . . . . . . . . . . . . . . . 38
• Uconnect™ Phone (indien aanwezig) . . . . . . . . . . . . . 42
• Spraakbediening (indien aanwezig) . . . . . . . . . . . . . . 42
• SYSTEEMINFORMATIE . . . . . . . . . . . . . . . . . . . . . . . . 43
• Back-up maken van gebruikersgegevens . . . . . . . . . . . 43
• Updates van software en databases . . . . . . . . . . . . . . 43
• PROBLEEMOPLOSSING . . . . . . . . . . . . . . . . . . . . . . . 44
• Radio . . . . . . . . . . . . . . . . . . . . . . . . . . . . . . . . 44
• Disk . . . . . . . . . . . . . . . . . . . . . . . . . . . . . . . . . 44
• HDD . . . . . . . . . . . . . . . . . . . . . . . . . . . . . . . . . 44
• WOORDENLIJST . . . . . . . . . . . . . . . . . . . . . . . . . . . 45
2

VEILIGHEIDSRICHTLIJNEN
Zorg ervoor dat alle gebruikers deze handlei-
ding zorgvuldig hebben gelezen alvorens zij het
audiosysteem gebruiken. De handleiding bevat
instructies voor veilige en effectief gebruik van
het systeem.
WAARSCHUWING!
Volg de onderstaande veiligheidsvoorschrif-
ten op. Anders bestaat er een risico op letsel
en schade aan eigendommen.
• Kijk alleen naar het scherm wanneer dat
noodzakelijk en veilig is. Als u een lange
periode naar het scherm wilt kijken, zet de
auto dan stil op een veilige plaats.
• Stop onmiddellijk met het gebruik van het
systeem wanneer zich een probleem voor-
doet. Anders bestaat er een risico op letsel
en schade aan het product. Laat het sys-
teem repareren door uw erkende dealer.
• Stel het geluidsvolume van het systeem
zodanig in, dat geluiden buiten de auto,
zoals van het verkeer of sirenes, goed hoor-
baar zijn.
3

INLEIDING
Waarschuwingen
Deze handleiding bevat WAARSCHUWINGEN
voor handelingen die kunnen leiden tot een
ongeval of lichamelijk letsel. Als u de handlei-
ding niet in zijn geheel leest, kan het zijn dat u
belangrijke informatie over het hoofd ziet.
Neem alle WAARSCHUWINGEN in acht!
Wijzigingen van de informatie in deze handlei-
ding zijn voorbehouden.
Veiligheidsinformatie
Lees de handleiding zorgvuldig door, voordat u
het systeem voor het eerst gaat gebruiken.
Neem de veiligheidsvoorschriften in acht die in
deze handleiding worden beschreven. Bij vra-
gen kunt u contact opnemen met de autofabri-
kant of uw erkende dealer.
Bedoeld gebruik
Bij de ontwikkeling en fabricage van het radio-
systeem heeft men zich gehouden aan de alge-
meen erkende regels inzake radiotechniek.
Houd u aan de landelijke normen en richtlijnen
bij gebruik van het product.
Bezoek www.DriveUconnect.com voor updates,
aanvullende informatie, compatibele telefoons,
etc.
Systeemonderhoud
Update van software
De GracenoteT software kan worden bijgewerkt.
Bezoek www.DriveUconnect.com of neem con-
tact op met uw erkende dealer voor de nieuwste
software.
Veilig gebruik van het radiosysteem
Lees alle aanwijzingen van deze handleiding
vóór gebruik zorgvuldig door om er zeker van
te zijn dat u het radiosysteem op de juiste wijze
bedient.
De radio is een geavanceerd elektronisch appa-
raat. Laat jonge kinderen niet zonder toezicht de
radio gebruiken.
U kunt blijvende gehoorschade oplopen als de
muziek of het geluid van de radio met maximaal
volume wordt weergegeven. Wees voorzichtig
bij het regelen van het volume van de radio.
Autorijden is een complexe bezigheid die uw
volledige aandacht vereist. Als u de auto be-
stuurt of iets anders doet dat uw volle aandacht
vereist, is het raadzaam de radio niet bedienen.
OPMERKING:
Veel functies van deze radio zijn snelheids-
gebonden. Voor uw eigen veiligheid is het
niet mogelijk om het toetsenpaneel op het
scherm tijdens het rijden te bedienen.
4

Houd dranken, regenwater en ander vocht uit
de buurt van de radio. Behalve schade aan de
radio kan vocht ook elektrische schokken ver-
oorzaken, zoals voor alle elektronische appa-
raten geldt.
OPMERKING:
Bij cabrioletmodellen kan de geluidskwali-
teit van het systeem te wensen overlaten
tijdens het rijden met open dak.
Aansluitingen
Probeer nooit met kracht een stekker in een
aansluiting van de radio te drukken. Controleer
of de vorm en het formaat van de stekkers juist
zijn, voordat u ze aansluit.
Aansluitkabels mogen geen druk uitoefenen op
de aansluiting.
Gebruik geen USB-apparaten die het openen
van het display belemmeren.
Aanraakscherm
Raak het scherm niet aan met een hard of
scherp voorwerp (pen, USB-stick, sieraden enz.)
dat krassen op het scherm kan veroorzaken!
OPMERKING:
Het gebruik van een plastic stift voor zak-
computers en andere aanraakschermen is
wel mogelijk.
Spuit geen vloeistoffen of bijtende stoffen op
het scherm! Gebruik een schoon, droog lens-
reinigingsdoekje van microvezel om het aan-
raakscherm schoon te maken.
Gebruik indien nodig een pluisvrij doek met
een reinigingsmiddel, zoals isopropylalcohol
of een 1:1-oplossing van isopropylalcohol en
water. Volg de aanwijzingen en voorschriften
van de oplosmiddelenfabrikant.
Cd/dvd-speler
Plaats geen beschadigde, vervormde, be-
kraste of vuile cd’s of dvd’s in de cd/dvd-
speler.
Gebruik geen disks met een zelf aangebracht
etiket in de cd/dvd-speler.
Plaats niet meer dan één cd/dvd tegelijk in de
speler.
Voer uitsluitend het ondersteunde formaat cd/
dvd in. Zie het hoofdstuk Diskmodus in deze
handleiding voor informatie over de onder-
steunde cd/dvd-formaten.
5

BEHANDELING ALGEMEEN
ONDERDELEN VAN DE
GEBRUIKERSINTERFACE
De voeding voor de radio wordt geleverd via de
contactschakelaar, die zich in de stand ON,
ACC of ACC Delay moet bevinden voordat de
radio kan worden gebruikt.
Schermtoetsen
Schermtoetsen bevinden zich op het aanraak-
scherm.
Toetsen
Toetsen links en rechts van het radiofront.
(1) Spraakbediening (indien aanwezig)
Druk op de Voice Command-toets
(1) en wacht tot u de beves-
tigingstoon hoort alvorens een op-
dracht in te spreken.
(2) Uconnect™ Phone (indien aanwezig)
Druk op de toets Uconnect™
Phone (6) om het Uconnect™
systeem te activeren of het huidige
telefoongesprek te beëindigen.
(3) RADIO
Druk op de toets RADIO (3) om naar een
RADIO-functie te schakelen of tussen RADIO-
functies te schakelen.
(4) MEDIA
Druk op de toets MEDIA (4) om naar een
MEDIA-functie te schakelen of tussen MEDIA-
functies te schakelen.
(5) ON/OFF VOLUME
Het systeem kan tevens tijdens het rijden in de
stand-bystand worden gezet door de draai-
knop ON/OFF VOLUME (5) in te drukken.
OPMERKING:
Als de contactschakelaar in de stand OFF
wordt gezet terwijl de radio in de stand-
bystand staat, dan onthoudt de radio de
stand-bystatus tot het de contactschakelaar
weer in de stand ON wordt gezet. Druk op
draaiknop (5) ON/OFF VOLUME om de radio
in te schakelen. De radiosoftware is voort-
durend werkzaam als het contact is inge-
schakeld, zelfs als de radio zich in de stand-
by-modus bevindt. Als het apparaat is
uitgeschakeld, kan nog steeds een cd wor-
den uitgeworpen en de tijd worden weerge-
geven.
(6) LOAD
Druk op de toets LOAD (6) om het display te
openen of te sluiten.
Na het openen van het display duurt het enkele
seconden voordat de cd/dvd wordt uitgewor-
pen, indien deze aanwezig is.
Let er bij het invoeren van een disk op dat het
label naar boven is gericht.
6

Het display wordt automatisch gesloten nadat
de disk is ingevoerd.
OPMERKING:
Het kan enkele seconden duren voordat het
type ingevoerde disk wordt herkend (cd, dvd,
MP3, enz.).
(7) MENU
Druk op de toets MENU (7) om het menu met
systeeminstellingen te openen.
OPMERKING:
Druk op de toets MENU in een actieve modus
om specifieke instellingen voor die modus te
wijzigen.
(8) AUDIO
Druk op de toets AUDIO (8) om te schakelen
naar de audiofunctie, zodat u toegang krijgt tot
de Fade-functie en de toonregeling.
(9) MY FILES (MIJN BESTANDEN)
Druk op de toets MY FILES (9) (MIJN BESTAN-
DEN) om uw muziek- en afbeeldingsbestanden
op de interne schijf te beheren.
(10) USB-aansluiting
Sluit een ondersteund apparaat aan op de
USB-aansluiting (10) om bestanden naar de
interne harde schijf te kopiëren.
OPMERKING:
Zie het hoofdstuk USB-aansluiting in deze
handleiding voor informatie over onder-
steunde apparaten.
(11) AUX-aansluiting
Sluit een extern audioapparaat aan op de AUX-
ingang (11) (bijv. MP3-speler, video game) om
het geluid van het apparaat via het audiosys-
teem van de auto af te spelen.
Elektronisch voertuiginformatiecentrum
(EVIC)
Sommige modellen zijn uitgerust met een elek-
tronisch voertuiginformatiecentrum (EVIC) met
interactief display voor de bestuurder. In de
meeste modellen bevindt het EVIC zich in
de instrumentengroep of in het plafondconsole.
De frequenties van de radiozenders, het
nummer van de cd en het satellietradiostation
kunnen worden weergegeven.
Audiobedieningselementen op stuur
(indien aanwezig)
De stuurbedieningselementen voor het audio-
systeem bevinden zich aan de achterzijde van
het stuur. Raadpleeg de handleiding van uw
auto voor meer informatie hierover.
Navolgend worden de verschillende bedie-
ningsfuncties van het stuur beschreven:
1. Met de tuimelschakelaar VOLUME aan de
rechterzijde regelt u het volume van het audio-
systeem. Als u de bovenzijde van de tuimel-
schakelaar indrukt, neemt het geluidsvolume
toe. Als u de onderzijde indrukt, wordt het
volume verlaagd.
2. Met de knop MODE ADVANCED in het mid-
den van de rechter tuimelschakelaar schakelt u
tussen de beschikbare functies van de radio
(LW, MW, FM, CD, DVD enz.).
3.
Met de knop FUNCTION SELECT in het mid-
den van de linker tuimelschakelaar schakelt de
radio naar de volgende voorkeurzender, of naar
een andere disk in de diskmodus, enz. De
functie is afhankelijk van welke modus actief is.
7

4. Met de tuimelschakelaar SCROLL aan de
linkerzijde schakelt u tussen selecties zoals
radiozender en cd-nummer, afhankelijk van de
actieve modus.
Hier volgt een beschrijving van het gebruik van
de schakelaar SCROLL in de verschillende modi:
Bediening LW/MW/FM
Als op de bovenzijde van de schakelaar wordt
gedrukt wordt vooruit gezocht naar de vol-
gende beschikbare zender. Als op de onder-
zijde wordt gedrukt, wordt achteruit gezocht
naar de vorige beschikbare zender.
Bediening HDD/Disk/iPod
Door op de bovenkant van de schakelaar te
drukken gaat u naar het volgende nummer op
de disk, en door op de onderkant van de
schakelaar te drukken krijgt u het begin van het
huidige nummer, of het begin van het voor-
gaande nummer, indien er nog niet acht secon-
den zijn verstreken sinds het begin van het
huidige nummer.
Bediening van Video Entertainment
System™
Als er een videospeler met afstandsbediening
aanwezig is, werkt dit bedieningselement op
dezelfde manier als in de diskmodus.
Geluidsinstellingen
Volume
Regel het volume van de huidige audiobron met
de draaiknop ON/OFF VOLUME (5). Tijdens de
volumeregeling worden de naam van de audio-
bron en het volume linksonder op het display
weergegeven.
Menu Audio Control (Audioregeling)
Druk op de toets AUDIO (8) rechts op de radio.
Gebruik de pijltoetsen of de aanwijzer op het
scherm om de instellingen Balance en Fade
te wijzigen. Met de schermtoets CENTER
(MIDDEN) worden de standaardinstellingen
hersteld.
Gebruik de pijltoetsen of de schuifregelaars op
het scherm om de instellingen BASS, MID en/of
TREBLE te wijzigen.
8

AAN DE SLAG
OPMERKING:
De contactschakelaar moet in de stand ON
of ACC staan om de radio te kunnen bedie-
nen.
Als het systeem is uitgeschakeld, kunt u het
inschakelen door op de draaiknop ON/OFF
VOLUME te drukken.
De taal wijzigen
De radio neemt de taal over die is ingesteld in
het elektronisch voertuiginformatiecentrum
(EVIC) (indien aanwezig).
Als u de taal van de radio wijzigt, verandert de
auto ook de taal van alle weergegeven informa-
tie. Raadpleeg de handleiding van de auto.
De taal wijzigen met de radio:
1. Druk op de toets MENU rechts op de radio.
2. Druk vervolgens op de schermtoets System
Setup (Systeem instellen) om het menu System
Setup te openen.
3. Druk op de schermtoets Language (Taal) en
kies de gewenste taal.
Tijd instellen
1. Druk op de schermtoets Time Display (Tijd-
weergave) linksonder op het scherm.
2. Met de schermtoetsen omhoog en omlaag
stelt u de uren en minuten in.
3. Druk op de schermtoets Set Time Zone
(Tijdzone instellen) om de gewenste tijdzone te
kiezen.
4. Druk op de schermtoets Daylight Savings
(Zomertijd) om zomertijd in of uit te schakelen.
9

Voorkeurzenders opslaan
1.
Druk op de toets RADIO om MW LW FM weer
te geven.
2. Selecteer de gewenste golf door de
schermtoets MW, LW of FM aan te raken.
3. Druk op de toetsen SEEK UP/DOWN of
kies de schermtoets SCAN, de schermtoets
DIRECT TUNE (DIRECT ZOEKEN) of de linker-
of rechterpijltoets om een andere zender te
kiezen.
4. Houd een willekeurige PRESET-schermtoets
in de lijst rechts op het scherm ingedrukt tot u
de bevestigingstoon hoort (ongeveer 2 secon-
den).
U kunt met de schermtoets PAGE door
de lijst met voorkeurzenders bladeren.
OPMERKING:
Als de lijst met voorkeurzenders niet wordt
weergegeven. Druk op de schermtoets PRE-
SETS op de onderste regel van het scherm.
Met de schermtoets FULLSCREEN
schakelt u tussen volledig scherm en
gedeeld scherm. Lange namen van
voorkeurzenders worden weergegeven op het
volledige scherm.
Met de schermtoets BACK (TERUG)
schakelt u naar het vorige menu.
10

Uconnect™ Multimedia (RADIO)
Radiomodus
Overzicht
De radio is uitgerust met drie verschillende
tuners:
•
FM 87.5 MHz - 108.0 MHz (geschikt voor RDS)
• MW 531 kHz - 1611 kHz
• LW 153 kHz - 282 kHz
Door op te toets RADIO te drukken kunt u
tussen verschillende radio-tuners schakelen.
De verschillende tunermodi kunnen worden
geselecteerd met behulp van de tabs op het
radioscherm.
Voorkeurzenders
U kunt 12 voorkeurzenders per band opslaan
in de radio.
Om de gewenste zender op te slaan, houdt u
een van de schermtoetsen voor de voorkeur-
zenders twee seconden lang ingedrukt. De
kleur van de schermtoets verandert dan van
groen in beige. Vervolgens verschijnt de radio-
zender op de gemarkeerde schermtoets en
hoort u een pieptoon ter bevestiging dat de
zender is opgeslagen.
Een ander kanaal of andere frequentie
kiezen
Druk op de schermtoets zoeken/afstemmen
met de pijl naar links om snel achteruit te
zoeken naar de vorige zender of kanaal.
Druk op de schermtoets zoeken/afstemmen met
de pijl naar links en houd deze ingedrukt om
op een lagere frequentie af te stemmen totdat de
schermtoets wordt losgelaten.
Druk op de schermtoets zoeken/afstemmen
met de pijl naar rechts om snel vooruit te
zoeken naar de volgende zender of kanaal.
Druk op de schermtoets zoeken/afstemmen met
de pijl naar rechts
en houd deze ingedrukt
om op een hogere frequentie af te stemmen
totdat de schermtoets wordt losgelaten.
Kies de schermtoets DIRECT TUNE (DIRECT
ZOEKEN) om een frequentie of kanaalnummer
in te voeren en bevestig uw keuze door op de
schermtoets GO (START) te drukken.
Kies SCAN om ieder ontvangen station op de
band vijf seconden te laten weergeven. Kies
nogmaals de schermtoets SCAN nogmaals om
de scanfunctie te stoppen en een radiozender
te selecteren.
Radio Data System (RDS)
Dit radiosysteem is geschikt voor de ontvangst
van RDS-signalen op de FM-band. RDS is een
technologie voor het verzenden van tekstinfor-
matie over de muzieksoort, het nummer en de
artiest voor muziek op de FM-band. Deze infor-
matie wordt weergegeven op het display.
OPMERKING:
Niet alle radiozenders ondersteunen RDS.
De RDS-informatie wordt weergegeven onder
de frequentie van de gekozen radiozender.
Radio-tekstinformatie
Als u INFO kiest, verschijnt er extra radio-
tekstinformatie op de rechterhelft van het
scherm.
Kies CLOSE INFO (info sluiten) om de extra
radio-tekstinformatie te verbergen.
11

Muzieksoort (programmasoort filteren)
Programmasoort (PTY) is uitsluitend beschik-
baar in de FM-modus. Radiozenders worden
ingedeeld volgens het soort programma (bijv.
soft rock, rhythm & blues, enz.).
Kies MUSIC TYPE (SOORT MUZIEK) om ge-
wenste programmasoorten in of uit te schake-
len. De functies SEEK (ZOEKEN) en SCAN
geven dan alleen zenders weer met de over-
eenkomstige programmasoorten.
RDS-programmasoorten (FM)
Adult Hits, Classic Rock, Classical, College,
Country, Information, Jazz, Language, News,
Nostalgia, Oldies, Personality, Public, Religious
Music, Religious Talk, Rhythm and Blues, Rock,
Soft, Soft Rhythm and Blues, Soft Rock, Sports,
Talk, Top 40, Weather.
Radio-instelingen
MENU LW / MW / FM
Er zijn geen specifieke instellingen voor deze
modi.
Beeldinstellingen
Druk op de toets MENU en kies de schermtoets
Display Settings (Weergave-instellingen) om het
menu Display Settings (Weergave-instellingen)
te openen.
Kies de schermtoets Daytime Colors (Dagkleu-
ren) om te schakelen naar de handbediende
modus en om de helderheid van het display af
te stellen met kleuren voor overdag.
Kies de schermtoets Nighttime Colors (Nacht-
kleuren) om te schakelen naar de handbe-
diende modus en om de helderheid van het
display af te stellen met kleuren voor ’s nachts.
12

Kies de schermtoets Auto Color (Autokleurmo-
dus) om te schakelen naar de automatische
dag-/nachtmodus en om de helderheid van het
display in te stellen met de dimschakelaar van
de auto.
Kies de schermtoets DONE (Gereed) om de
instellingen op te slaan.
Scherm uit
Om het scherm uit te schakelen (zodat alleen
de klok wordt weergegeven en geluid kan
worden gehoord door de auto-luidsprekers)
drukt u op de toets MENU en raakt u de
schermtoets Screen Off (Scherm uit) aan.
Als het scherm is uitgeschakeld, kunt u het
inschakelen door op een willekeurige toets te
drukken.
Weergave-instellingen
Druk op de toets MENU en raak vervolgens de
schermtoets Default View (Standaardbeeld) aan
om de standaard weergavemodus te activeren.
Hierbij wordt het embleem van het automerk op
de rechterhelft van het scherm getoond.
Kies de schermtoets Picture View (Fotobeeld)
om de afbeeldingsmodus te activeren, waarbij
afbeeldingen kunnen worden weergegeven op
de rechterhelft van het scherm. Raadpleeg het
hoofdstuk 9Harde schijf9 voor een gedetailleerd
voorbeeld.
ParkViewT achteruitrijcamera
(indien aanwezig)
Indien uitgerust met ParkViewT, toont het radio-
scherm het beeld van de achteruitkijkcamera
zodra de schakelhendel in de stand R staat bij
auto’s met een automatische versnellingsbak.
Bij auto’s met handgeschakelde versnellings-
bak moet de achteruitversnelling zijn gekozen.
OPMERKING:
U kunt ParkViewT uitschakelen in het menu
System Setup (Systeem instellen).
13

Uconnect™ Multimedia (MEDIA)
Diskmodus
Overzicht
De radio is uitgerust met een cd/dvd-speler.
Om diskmodus te activeren drukt u op de toets
MEDIA en kiest u de schermtoets DISK.
Diskvereisten
LET OP!
Deze cd-speler werkt uitsluitend met disks
met een diameter van 12 cm ( 4 3/4 inch). Het
gebruik van een andere maat disk kan het
mechanisme van de cd-speler beschadigen.
De radio kan de volgende soorten disks afspe-
len: compact disks (CD), recordable compact
disks (CD-R), herschrijfbare compact disks
(CD-RW), recordable compact disks DVD-R,
DVD+R, DVD-RW en DVD+RW. De RB2 onder-
steunt ook AAC en M4A.
De radio is geschikt voor de volgende formaten:
MP3, WMA, CD Audio, DVD Audio en DVD
Video.
Voer uitsluitend het ondersteunde formaat cd/
dvd in.
SACD (SACD-laag) VCD DualDisc, SVCD,
VCD-formaat op DVD MPEG-4 worden niet
ondersteund.
Een volledige lijst van alle CD/DVD-formaten is
beschikbaar op www.DriveUconnect.com
Een disk invoeren
1. Druk eenmaal op de toets LOAD.
2. Nadat het scherm is geopend voert u de
disk in de disksleuf van de radio met de
bedrukte kant naar boven. De radio trekt de
disk automatisch naar binnen en sluit het be-
schermklepje. De radio selecteert de juiste
modus na herkenning van de soort disk en
begint met het afspelen van het eerste nummer.
Op het scherm verschijnt “Reading...” (Bezig
met uitlezen ....) tijdens dit proces.
OPMERKING:
Een defecte cd wordt NIET automatisch uit-
geworpen. Gebruik uitsluitend disks met
een standaardformaat. Gebruik geen disks
met een zelf aangebracht etiket in de cd/dvd-
speler.
HD-inhoud en -media (bijv. HD-DVD, Blue-Ray)
worden niet ondersteund.
Als de gebruiker de uitgeworpen cd niet bin-
nen ongeveer 10 seconden verwijdert, wordt
de cd opnieuw geladen.
14

OPMERKING:
Op data-cd’s met een groot aantal nummers
kan het enkele seconden duren voordat de
informatie voor alle nummers op de disk is
uitgelezen, afgespeeld en weergegeven.
OPMERKING:
Als u thuis op uw computer een cd brandt,
kies dan een lagere schrijfsnelheid voor een
betere kwaliteit.
Een disk verwijderen
1. Druk op de toets LOAD.
2. De disk wordt uitgeworpen en kan worden
verwijderd.
OPMERKING:
Als de disk niet binnen ongeveer 10 secon-
den wordt verwijderd, trekt de speler hem
weer terug in de sleuf (parkeerstand). De
disk wordt mogelijk uitgeworpen wanneer
de contactschakelaar in de stand OFF staat.
3. Druk op de toets LOAD om het display te
sluiten. Het display wordt 30 seconden nadat
de disk uit het mechanisme is verwijderd ge-
sloten.
Diskmodus selecteren
U kunt schakelen tussen het radio- en het
mediamenu door op de toets MEDIA te druk-
ken. U kunt de diskmodus kiezen door de
schermtoets Disk tab (Disktab) aan te raken.
OPMERKING:
Als de disk wordt ingevoerd, wordt de juiste
modus na herkenning van de soort disk
automatisch geselecteerd.
Scannen
Kies de schermtoets SCAN.
De afzonderlijke nummers op de disk worden
achtereenvolgens elk acht seconden lang af-
gespeeld.
Kies de schermtoets STOP SCAN om de scan-
functie te stoppen.
Ander nummer kiezen
Druk op de schermtoets met dubbele pijlpunt
naar rechts
om het volgende nummer op
de disk te selecteren.
Druk op de schermtoets met dubbele pijlpunt
naar rechts
en houd deze ingedrukt om
vooruit te spoelen in het nummer.
Druk op de schermtoets met dubbele pijlpunt
naar links om het begin van het huidige
nummer (terwijl het nummer wordt afgespeeld)
of het vorige nummer (als het huidige nummer
net is begonnen) te selecteren.
Druk op de schermtoets met dubbele pijlpunt
naar links en houd deze ingedrukt om
terug te spoelen in het nummer.
Kies de schermtoets voor pauzeren om het
afspelen tijdelijk te onderbreken.
Kies de schermtoets voor pauzeren om het
afspelen te hervatten.
Verstreken speeltijd van het nummer
weergeven
De verstreken speeltijd van het huidige num-
mer wordt midden op het scherm links weerge-
geven.
Selecteer titel uit de lijst
Kies LIST (LIJST) om een lijst weer te geven
met de titels op de disk die nu wordt afge-
speeld. Selecteer het nummer dat u wilt horen.
Kies HIDE LIST (LIJST VERBERGEN) om de lijst
te verbergen.
15

Diskinformatie
Kies INFO voor weergave van informatie over
de titel, artiest, album, genre in de rechterhelft
van het scherm.
Kies CLOSE INFO (INFO SLUITEN) om de infor-
matie te verbergen.
GracenoteT technologie voor
muziekherkenning
Deze radio wordt geleverd met de muziekher-
kenningsservice GracenoteT, met een geïnte-
greerde database met informatie over album,
titel, genre en artiest. Er zijn gegevens beschik-
baar voor de meeste audio-cd’s (CDA-disks).
Er zijn geen gegevens beschikbaar voor dvd’s
of data-disks (met mp3- of wma-bestanden).
Muziekherkenningstechnologie en gerelateerde
gegevens worden geleverd door GracenoteT.
Gracenote is de norm in de branche voor muziek-
herkenningstechnologie en de levering van ge-
lijkaardige inhoud. Bezoek www.gracenote.com
voor meer informatie.
OPMERKING:
Bezoek www.DriveUconnect.com voor infor-
matie over updates.
Een disk kopiëren naar de harde schijf
Druk op de schermtoets voor kopiëren om
de huidige disk naar de harde schijf te kopiëren.
Menu voor disks
Druk, terwijl de diskmodus actief is en een
audiodisk is ingevoerd, op de toets MENU om
het diskmenu te openen.
Kies Random (Willekeurig) om de nummers op
de disk in willekeurige volgorde af te spelen.
Kies nogmaals Random (Willekeurig) om deze
functie uit te schakelen.
Kies Repeat (Herhalen) om alle nummers uit de
huidige map (alleen MP3/WMA-disks) te herha-
len. Kies de schermtoets Repeat Folder (Map
herhalen) opnieuw om de herhaalmodus uit te
schakelen.
Afspelen van een MP3/WMA-disk
1. Druk eenmaal op de toets LOAD.
2. Plaats de disk in de disksleuf van de radio
met de gedrukte kant naar boven. De radio
trekt de disk automatisch naar binnen en sluit
het beschermklepje. De radio selecteert de
juiste modus na herkenning van de soort disk
en begint met het afspelen van het eerste
nummer. Op het scherm verschijnt “Reading...”
(Bezig met uitlezen ....) tijdens dit proces.
MP3/WMA-disks kunnen audiobestanden in
mappen bevatten. De map, indien aanwezig,
wordt weergegeven in de lijst.
16

Kies de schermtoets BROWSE als de lijst niet
wordt weergegeven.
3. Kies de schermtoets met het mappictogram
om de map te openen.
4. Kies de schermtoets Folder-Back Icon om
de map te sluiten.
Een video-dvd afspelen
OPMERKING:
De mogelijkheid om een dvd op het radio-
scherm te bekijken is niet beschikbaar in alle
landen. Bovendien moet de auto stilstaan
en de schakelhendel in de stand P staan bij
auto’s met automatische versnellingsbak. Bij
auto’s met een handgeschakelde versnel-
lingsbak moet de handrem zijn aangetrokken.
Voer eerst een video-dvd in.
Het afspelen begint zodra de speler de video-
dvd heeft herkend.
Kies de schermtoets LIST (LIJST) om de lijst van
beschikbare hoofdstukken of nummers weer te
geven. Kies de schermtoets voor het hoofdstuk
of nummer in de lijst om het gewenste fragment
af te spelen.
Kies de schermtoets VIEW VIDEO (BEKIJK
VIDEO) om de video op het scherm te weer te
geven.
Bedieningselementen voor dvd-menu
Als u een dvd-videodisk invoert die een menu
bevat, is het mogelijk dat dit menu wordt weer-
gegeven.
17

Kies de schermtoetsen met de pijltjes om de
titel te selecteren die u wilt bekijken. Kies
daarna de schermtoets ENTER om te beginnen
met afspelen.
Kies de schermtoets DVD move om de
bedieningselementen naar de rechter-
kant van het scherm te verplaatsen.
Kies de schermtoets voor sluiten om de
bedieningselementen voor dvd-menu te
verbergen.
Bedieningselementen voor afspelen dvd
Wanneer de video wordt afgespeeld, kunt u het
scherm op een willekeurige plaats aanraken
om de bedieningselementen voor het afspelen
van de dvd weer te geven.
Raak de schermtoets Pause aan om het afspe-
len tijdelijk te onderbreken.
Kies de schermtoets Stop om het afspelen te
stoppen.
Kies de schermtoets Fast Reverse tijdens het
afspelen om snel terug te spoelen.
Kies tijdens het afspelen de schermtoets Fast
Forward om snel vooruit te spoelen.
Kies de schermtoets NEXT (VOLGENDE) om
volgende hoofdstukken of nummers te zoeken.
Kies de schermtoets PREV (VORIGE) om de
dvd af te spelen vanaf het begin van het
huidige hoofdstuk of nummer. Als u twee keer
snel achter elkaar drukt, wordt de dvd afge-
speeld vanaf het begin van het vorige hoofd-
stuk of nummer.
Dvd-videomenu
Druk, terwijl de diskmodus actief is en een
video-dvd is ingevoerd, op de toets MENU om
het menu DISK te openen.
Kies de schermtoets DVD Setup (Dvd-
instellingen) om het menu DVD Setup (Dvd-
instellingen) te openen.
18

In het menu DVD Setup (DVD-instellingen) kunt
u de instellingen bepalen voor de taal van het
menu, het geluid en de ondertitels, voor de
camerahoek, beeldverhouding en de helder-
heid als u op de overeenkomstige schermtoets
drukt. Een aantal schermtoetsen zijn niet be-
schikbaar wanneer de ingevoerde disk de
functionaliteit niet ondersteunt.
Verspringen van de disk
Als de disk verspringt, is er meestal sprake van
een beschadigde (gekraste) disk. Dit geeft
aanleiding tot een sprong voorwaarts van
10 seconden tot het beschadigde deel is over-
geslagen.
Temperatuurbescherming
Als de temperatuur van de disklezer te hoog
oploopt, verschijnt er een waarschuwing. Het
apparaat schakelt naar de radiomodus tot de
temperatuur van de disklezer tot het normale
peil is gezakt.
Modus harde schijf (HDD)
De HDD-modus geeft u toegang tot de audio-
bestanden op de ingebouwde harde schijf.
Deze werkt op dezelfde manier als een cd-
speler behalve dat de ingebouwde HDD meer
nummers kan bevatten. De schijf kan ongeveer
6.700 nummers van vier minuten van cd-
kwaliteit bevatten.
Vóór gebruik van de HDD-modus moet u de
nummers naar de ingebouwde harde schijf
kopiëren.
De bestanden worden op de ingebouwde
harde schijf opgeslagen en kunnen in de HDD-
modus worden afgespeeld.
Een audiodisk kopiëren naar de harde schijf
1. Voer een disk in.
2. Druk op de schermtoets voor kopiëren
om nummers van de geplaatste disk naar de
harde schijf te kopiëren.
Na een korte pauze begint het kopiëren en
wordt het afspelen vanaf het begin van het
nummer hervat. Het kopieerproces wordt op de
achtergrond uitgevoerd terwijl de audiodisk
wordt afgespeeld. Het kopieerproces wordt
weergegeven op het display. Ook als u naar
een andere modus schakelt (radio, AUX, enz.)
19

of de radio uitschakelt (contact in de stand
ON), blijft het kopiëren op de achtergrond
doorgaan.
De voortgang van het kopieerproces wordt
weergegeven op het display.
U kunt ook naar de radio luisteren tijdens het
kopiëren. Het duurt 4 keer langer om te kopië-
ren dan de normale afspeeltijd.
OPMERKING:
Als een audio-cd naar de harde schijf wordt
gekopieerd, worden de muziekbestanden
geconverteerd van cd-audio naarAAC. DVD-
audio kan niet naar de harde schijf worden
gekopieerd.
Kopiëren van WMA/MP3-bestanden naar de
harde schijf
U kunt gecomprimeerde audiobestanden in
MP3- en WMA-formaat van een disk of via USB
(bijv. USB-geheugenstick) kopiëren.
Het wordt aanbevolen de muziekbestanden in
mappen in te delen.
Voorbeeld:
Nummers die zich op het root-niveau van de
disk of de USB-geheugenstick bevinden, wor-
den opgeslagen in een afspeellijst met de
naam Root_Level_Songs.
Zodra de nummers zijn gekopieerd, krijgt de
afspeellijst de oorspronkelijke naam van de
map.
Wat betreft het voorbeeld hierboven, wordt de
lijst op de harde schijf als volgt weergegeven:
Disc_Root_Level Songs (afspeellijst 1)
• Song 1.mp3 (eerste nummer in afspeellijst 1)
•
Song 2.mp3 (tweede nummer in afspeellijst 1)
• Song 3.wma (derde nummer in afspeellijst 1)
My Playlist Folder 1 (afspeellijst 2)
•
01 Song.mp3 (eerste nummer in afspeellijst 2)
•
02 Song.mp3 (tweede nummer in afspeellijst 2)
•
03 Song.mp3 (derde nummer in afspeellijst 2)
20

Volledige disk kopiëren
1. Plaats een disk met MP3/WMA-bestanden.
2. Druk op de schermtoets voor kopiëren
om muziekbestanden van de geplaatste disk
naar de harde schijf te kopiëren.
De voortgang van het kopieerproces wordt
weergegeven op het display.
Tijdens het kopieerproces kan de cd-speler
audio weergeven.
U kunt naar de radio luisteren tijdens het kopiëren.
Bepaalde nummers van een disk kopiëren
U kunt op de volgende manier bepaalde num-
mers op een disk met WMA/MP3-bestanden
selecteren:
1. Kies de schermtoets MY FILES (MIJN BE-
STANDEN).
2. Kies My Music (Mijn muziek).
3. Kies de schermtoets Import Music Files
(Muziekbestanden importeren).
21

4. Kies de schermtoets From DISC (Van disk)
op het volgende scherm.
5. Selecteer de mappen of titels die u wilt
kopiëren.
Een rood vinkje geeft de geselecteerde num-
mers en/of mappen aan. Kies de schermtoets
ALL (ALLE) om alle bestanden en mappen
tegelijk te selecteren.
6. Kies de schermtoets DONE (GEREED) om
met het kopiëren te beginnen.
De voortgang van het kopieerproces wordt
weergegeven op het display. U kunt naar de
radio luisteren tijdens het kopiëren.
Als u de media loskoppelt of uitwerpt voordat
het kopieerproces is voltooid, wordt het kopië-
ren afgebroken. U kunt het kopieerproces op-
nieuw starten door de bovenstaande stappen
te herhalen.
Kopiëren van USB
1. Sluit het USB-apparaat aan.
2. Kies My Music (Mijn muziek).
3. Kies de schermtoets Import Music Files
(Muziekbestanden importeren).
4. Kies de schermtoets From USB (Van USB)
op het volgende scherm.
22

5. Selecteer de mappen of titels die u wilt
kopiëren.
Een rood vinkje geeft de geselecteerde num-
mers en/of mappen aan. Kies de schermtoets
ALL (ALLE) om alle bestanden en mappen
tegelijk te selecteren.
6. Kies de schermtoets DONE (DONE) om met
het kopiëren te beginnen.
Audiobestanden afspelen van de harde
schijf.
U kunt de nummers direct vanaf de inge-
bouwde harde schijf afspelen.
1.
Kies de schermtoets BROWSE (BLADEREN)
om een beschikbare categorie te selecteren.
De radio kan de bestanden sorteren op afspeel-
lijst, op titel, op artiest op genre of op album.
2. Kies in dit voorbeeld de schermtoets Play-
lists (Afspeellijsten).
3. Kies de schermtoets met de naam van de
gewenste afspeellijst om deze afspeellijst af te
spelen.
Kies de schermtoets PLAY ALL PLAYLISTS
(ALLE LIJSTEN AFSPELEM) om alle beschik-
bare albums af te spelen.
Ander nummer kiezen
Druk op de schermtoets met dubbele pijlpunt
naar rechts om het volgende nummer op
de disk te selecteren.
Druk op de schermtoets met dubbele pijlpunt
naar rechts
en houd deze ingedrukt om
vooruit te spoelen in het nummer.
Druk op de schermtoets met dubbele pijlpunt
naar links om het begin van het huidige
nummer (terwijl het nummer wordt afgespeeld)
of het vorige nummer (als het huidige nummer
net is begonnen) te selecteren.
Druk op de schermtoets met dubbele pijlpunt
naar links
en houd deze ingedrukt om
terug te spoelen in het nummer.
23

Kies de schermtoets voor pauzeren om het
afspelen tijdelijk te onderbreken.
Kies de schermtoets voor pauzeren om het
afspelen te hervatten.
Verstreken speeltijd van het nummer
weergeven
De verstreken speeltijd van het huidige num-
mer wordt midden op het scherm links weerge-
geven.
Menu HDD (Harde schijf)
Druk, terwijl de modus HDD actief is, op de
toets MENU om het menu HDD (Harde schijf) te
openen.
Willekeurige nummers afspelen
Deze functie speelt willekeurige nummers op
de harde schijf af. Kies de schermtoets Ran-
dom (Willekeurig) om het afspelen van wille-
keurige nummers in of uit te schakelen.
Een rood vinkje geeft aan dat het afspelen van
willekeurige nummers actief is.
Nummer herhalen
Met de functie voor nummer herhalen wordt het
huidige nummer opnieuw afgespeeld. Kies de
schermtoets Rpt. TRK (Nummer herhalen) om
de herhaalfunctie in of uit te schakelen.
Een rood vinkje geeft aan dat de functie voor
nummer herhalen actief is.
Favoriete afspeellijsten op de harde schijf
U kunt koppelingen opslaan naar favoriete af-
speellijsten in de lijst met favoriete afspeellijsten.
1. Kies in de HDD-modus de schermtoets
BROWSE (BLADEREN) om toegang te krijgen
tot het menu Browse Categories (Categorieën
doorbladeren).
2. Kies de schermtoets Favorites (Favorieten)
om de favoriete afspeellijsten weer te geven.
3. Kies een van de schermtoetsen ADD FA-
VOURITE (FAVORIET TOEVOEGEN).
24

4. Selecteer de gewenste afspeellijst.
Een koppeling naar de geselecteerde afspeel-
lijst wordt nu in de lijst met favoriete afspeellijs-
ten opgeslagen.
OPMERKING:
De koppeling naar de favoriete afspeellijst
wordt verwijderd nadat een afspeellijst uit
het menu My Playlists (Mijn afspeellijsten) is
verwijderd. Zie (Afspeellijsten bewerken( in
het hoofdstuk (Harde schijf( van deze hand-
leiding.
U kunt nu de lijst bewerken door de schermtoets
EDIT (BEWERK) te kiezen, of de lijst afsluiten
door de schermtoets EXIT (SLUITEN) te kiezen.
Afspeellijsten op de harde schijf bewerken.
1.
In de HDD-modus drukt u op de toets MY
FILES (MIJN BESTANDEN) om het menu
Manage My Files (Mijn files beheren) te openen.
2. Kies My Music (Mijn muziek)
25

3. Kies de schermtoets My Playlists (Mijn af-
speellijsten).
4. Kies de schermtoets EDIT (BEWERK) (voor-
beeld: Donuts) van de afspeellijst die u wilt
bewerken.
OPMERKING:
U kunt geen afspeellijst bewerken tijdens
het kopiëren.
U kunt de geselecteerde lijst opnieuw afspelen,
nummers uit de gekozen afspeellijst verwijderen
of de gekozen afspeellijst in zijn geheel wissen.
5. Kies de schermtoets Rename This Playlist
(Naam van deze afspeellijst weergeven).
OPMERKING:
Als u de schermtoets Delete This Playlist
(Deze afspeellijst verwijderen) kiest, wordt
de afspeellijst en daarmee ook alle nummers
in deze lijst permanent gewist. Nummers en
afspeellijsten kunnen niet worden hersteld.
6.
Voer een nieuwe naam voor de afspeellijst in.
7. Kies de schermtoets SAVE (OPSLAAN) om
de naam te bevestigen.
26

De afspeellijst heeft nu een nieuwe naam.
Nummers verwijderen uit een afspeellijst
1. Druk op de toets MENU, kies vervolgens de
schermtoets MY FILES (MIJN BESTANDEN),
kies dan de schermtoets My Playlists (Mijn
afspeellijsten) en kies de schermtoets Delete
Songs From This Playlist (Nummers verwijde-
ren uit deze afspeellijst).
OPMERKING:
Als u de schermtoets Delete This Playlist
(Deze afspeellijst verwijderen) kiest, wordt
de afspeellijst en daarmee ook alle nummers
in deze lijst permanent gewist. Nummers en
afspeellijsten kunnen niet worden hersteld.
2. Selecteer de titels die u wilt verwijderen.
Een rood vinkje geeft de geselecteerde num-
mers aan.
3. Kies de schermtoets DELETE (Verwijderen)
om met het verwijderen te beginnen.
OPMERKING:
Als u een nummer uit de afspeellijst verwij-
dert, kan het nummer niet worden hersteld.
4.
Kies de schermtoets DONE (Gereed) als u
klaar bent met het bewerken van de afspeellijst.
Alle afspeellijsten verwijderen van de
harde schijf
1. Druk op de toets MENU rechts op de radio.
2. Kies de schermtoets System Setup (Sys-
teem instellen) om het menu System Setup
(Systeem instellen) te openen.
3. Kies de schermtoets Manage Hard Drive
(HDD beheren) om toegang te krijgen tot het
menu Manage Hard Drive (HDD beheren).
Dit menu geeft de beschikbare schijfruimte
weer en stelt u in staat om afbeeldingen en
muziekbestanden te verwijderen.
27

Afbeeldingen importeren
Het is mogelijk om schermafbeeldingen naar
de ingebouwde harde schijf te importeren. De
afbeeldingen kunnen worden weergegeven in
de rechterhelft van het radioscherm.
In de standaardmodus wordt het embleem van
het automerk weergegeven in de rechterhelft
van het scherm. Druk op de toets MENU rechts
op radio om toegang te krijgen tot een van de
instelmenu’s.
Het wordt aanbevolen de afmetingen van de
afbeelding op een pc of digitale camera te
veranderen in 240 x 158 pixels voordat de
afbeelding wordt geïmporteerd.
OPMERKING:
USB-apparaten (bijv. USB-adapters voor ca-
merageheugens, enz.) moeten voldoen aan
de norm voor MSD (Mass Storage Device).
Deze USB-aansluiting kan voeding leveren
aan het aangesloten apparaat. De stroomli-
miet van het apparaat moet lager dan of
gelijk zijn aan 500 mA.
1. Kies de schermtoets MY FILES (MIJN BE-
STANDEN) om naar het scherm Manage My
Files (Mijn files beheren) te gaan.
2. Voer een cd of een USB-geheugenstick met
uw afbeeldingen in.
3. Kies de schermtoets My Pictures (Mijn af-
beeldingen) om een overzicht weer te geven
van de opgeslagen afbeeldingen.
28

In de radio kunnen 24 gebruikersafbeeldingen
worden opgeslagen.
4.
Kies een van de schermtoetsen Add Pictures
(Afbeeldingen toevoegen).
5. Selecteer het soort medium dat is geplaatst.
6. Met de schermtoets PAGE (PAGINA) kunt u
door een lijst met afbeeldingen bladeren en de
afbeelding aanraken die u wilt importeren.
OPMERKING:
De bestanden moeten zich in de root-map
(bovenste niveau) van de disk of het USB-
geheugen bevinden om herkend te kunnen
worden.
7. Bevestig uw keuze door de schermtoets
YES (JA) te kiezen.
De geïmporteerde afbeelding is nu beschik-
baar op het scherm Manage My Pictures (Mijn
afbeeldingen beheren).
29

8. Om de geïmporteerde afbeelding op het
radioscherm weer te geven, kiest u de scherm-
toets voor de gewenste afbeelding.
9. Selecteer deze afbeelding door de scherm-
toets Set as Default (Instellen als standaard) te
kiezen. Een vinkje geeft aan welke afbeelding
momenteel wordt gebruikt.
Met de schermtoets PREV (VORIGE) of NEXT
(VOLGENDE) kunt u door de lijst van beschik-
bare afbeeldingen bladeren.
Kies de schermtoets DELETE (VERWIJDEREN)
om de afbeelding van de harde schijf te verwij-
deren.
10. Druk tweemaal op de toets MENU en
kies vervolgens de schermtoets Picture View
(Afbeelding weergeven) om de weergave van
de afbeelding te activeren.
De afbeelding wordt nu weergegeven in de
rechterhelft van het scherm.
30

Uconnect™ Multimedia
(EXTERNE APPARATUUR)
Video Entertainment System (VES)™
Via de radio kan VES™ op afstand worden
bediend. Raadpleeg de gebruikershandleiding
van VES™ voor meer informatie.
Audio/Video ontvangen uit VES™
U kunt audio uit VES™ weergeven via de luid-
sprekers van de auto. Als VES™ voorzien is van
een videospeler, kunt u de video ook op het
radioscherm bekijken als de auto is geparkeerd.
Het tabblad VES is beschikbaar zodra het
VES™ systeem is ingeschakeld. Kies de
schermtoets VES MODES (VES MODI) om de
audiobron van VES™ te selecteren.
Kies de schermtoets met de gewenste bron
aan om de selectie af te spelen in de auto.
De beschikbaarheid van de schermtoetsen
DVD Player (Dvd-speler), Rear AUX 1 (Achter
AUX 1) en Rear AUX 2 (Achter AUX 2) hangt af
van het type VES™ in het voertuig.
De dvd-speler is niet beschikbaar als er geen
dvd-speler in VES™ aanwezig is of als er geen
dvd in de speler is ingevoerd.
Een apparaat moet aangesloten zijn op de
AUX-aansluiting van VES™; anders is het niet
beschikbaar.
Als de schermtoets niet beschikbaar is, duidt
dit op een niet beschikbare bron.
Overbrengen van Audio/Video en
bediening van VES™
VES™ kan ook via de radio worden bediend.
Alle bronnen worden afgespeeld via de hoofd-
telefoon van VES™.
Raadpleeg de gebruikershandleiding van
VES™ voor meer informatie over de bediening
van VES™ achterin met de afstandsbediening.
31

Om naar VES™ achterin te gaan, drukt u op de
toets MENU rechts op de radio.
Kies de schermtoets Rear VES (VES achterin)
om de bedieningselementen van VES™ ach-
terin weer te geven.
De bedieningselementen van VES achterin
worden in de rechterhelft van het scherm weer-
gegeven.
OPMERKING:
Kies de schermtoets HIDE LIST (LIJST VER-
BERGEN) en/of de schermtoets CLOSE
INFO (INFO SLUITEN) als de bedieningsele-
menten van VES achterin niet zichtbaar zijn.
Via de eerste kolom wordt VES™ in- en uitge-
schakeld en worden de audiokanalen 1 of 2 van
de headset bediend.
Met de headset van VES™ kan men audioka-
naal 1 of 2 beluisteren.
Kies de schermtoets voor tab 1 om
kanaal 1 te selecteren.
De linkerhelft van het scherm geeft informatie
over de audiobron weer. Als bijv. FM is gekozen,
wordt er een radiofrequentie weergegeven.
Kies de schermtoets LIST (LIJST) voor informa-
tie over de geselecteeerde bron.
In dit geval wordt de lijst met voorkeurzenders
van de FM-band op de geselecteerde tuner
weergegeven.
32

U kunt een schermtoets van een voorkeurzen-
der aanraken om een andere zender te kiezen,
of de schermtoets DIRECT TUNE (DIRECT
AFSTEMMEN) kiezen om een frequentie in te
voeren of op de toetsen SEEK UP of SEEK
DOWN drukken om af te stemmen op een
andere radiozender.
Kies de schermtoets voor tab 2
om de gewenste audiobron in te
stellen voor het tweede audio-
kanaal van VES™.
In de linkerhelft van het scherm verschijnt infor-
matie over de audiobron, in dit geval nummer 1
uit een afspeellijst op de HDD van de radio.
Kies de schermtoets LIST (LIJST) voor informa-
tie over de geselecteeerde bron.
In dit geval worden de nummers in de geselec-
teerde afspeellijst weergegeven.
Via de kolom RADIO worden de MW-/LW-/
FM-tuners van de radio bediend.
OPMERKING:
De radio kan niet tegelijkertijd afgestemd
zijn op MW of LW of FM.
Via de kolom MEDIA worden de HDD-, DISK-,
en AUX-audiobron van de radio bediend.
33

Via de kolom VES worden de dvd-speler, AUX 1
achter en AUX 2 achter van het VES™ systeem
bediend.
Kies de schermtoets On/Off (Aan/
uit) om het scherm VES ON/OFF
(VES aan/uit) weer te geven. U kunt
het VES™ systeem in- of uitschakelen.
Kies de schermtoets Turn Rear VES OFF (VES
achterin uitschakelen) om VES™ uit te schakelen.
Kies de schermtoets Turn Rear VES ON (VES
achterin inschakelen) om VES™ in te schakelen.
VES™ BLOKKEREN
Kies de schermtoets LOCK (VERGRENDELEN)
om de bedieningselementen op de afstands-
bediening van VES™ te blokkeren. Wanneer
VES™ is geblokkeerd, zijn de bedieningsele-
menten van VES™ en de afstandsbediening
van VES™ geblokkeerd.
VES™ DEBLOKKEREN
Kies de schermtoets UNLOCK (ONTRENDE-
LEN) om de bedieningselementen op de af-
standsbediening van VES™ te deblokkeren.
Een video-dvd afspelen voor VES™ achterin
1. Plaats een video-dvd om op het scherm van
VES™ achterin een dvd-video weer te geven.
Het afspelen begint zodra de speler de video-
dvd heeft herkend.
2. Druk op de toets MENU rechts op de radio.
3. Kies de schermtoets Rear VES (VES ach-
terin) om de bedieningselementen van VES™
achterin weer te geven.
4. Kies de schermtoets voor tab 1
om audiokanaal 1 te selecteren.
34

5. Kies de schermtoets DISK om de media-
functie te selecteren.
6. Kies de schermtoets PLAY VIDEO (Video
afspelen) om te beginnen met het afspelen van
de video.
Licentieovereenkomsten
Dolby Digital licentieovereenkomst
Gemaakt onder een licentie van Dolby Labora-
tories.
Dolby, MLP Lossless en het dubbele D-symbool
zijn handelsmerken van Dolby Laboratories.
Macrovision licentieovereenkomst
Dit product bevat technologie ter bescherming
van auteursrechten die beschermd worden
door Amerikaanse patenten en rechten op in-
tellectueel bezit. Gebruik van deze technologie
ter bescherming van de auteursrechten moet
geautoriseerd worden door Macrovision en is
bedoeld voor het bekijken thuis of bij andere
beperkte gelegenheden, tenzij Macrovision
een andere autorisatie heeft gegeven. Probe-
ren deze apparatuur na te maken of uit elkaar
te halen is verboden.
USB-aansluiting
Het is mogelijk om muziek- of afbeeldingsbe-
standen naar de radio over te brengen. Dit
kunnen bestanden zijn die op een disk of op
een USB-geheugen (bijv. USB-geheugenstick)
zijn opgeslagen. De USB-aansluiting is voor-
zien van een kapje dat de aansluiting be-
schermt tegen stof of schade.
OPMERKING:
USB-apparaten (bijv. USB-adapters voor ca-
merageheugens, enz.) moeten voldoen aan
de norm voor MSD (Mass Storage Device).
Deze USB-aansluiting kan voeding leveren
aan het aangesloten apparaat. De stroomli-
miet van het apparaat moet lager dan of gelijk
zijn aan 500 mA.
De overdrachtssnelheid voor deze USB-
aansluiting bedraagt ongeveer 2 megabytes
(MB) per seconde.
35

MP3-spelers kunnen niet via de USB-aansluiting
worden bediend. Sommige spelers slaan mu-
ziekbestanden op in het formaat MP4, dat echter
niet op deze radio kan worden weergegeven.
Sommige auteursrechterlijk beschermde muziek
(bijv. gedownload van internet) kan niet op de
radio worden afgespeeld.
Compatibele apparatuur
Raadpleeg uw erkende dealer of bezoek
www.DriveUconnect.com voor informatie over
ondersteunde apparaten.
OPMERKING:
Sommige MP3-spelers staan het kopiëren van
nummers naar andere apparatuur niet toe.
Het deksel openen
1. Plaats uw vinger onder het pijltje.
2. Trek naar voren.
OPMERKING:
Het klepje zit vast en mag niet verwijderd
worden! Trek het niet van het frame af. Niet
met een schroevendraaier, nagelvijl, enz.
proberen het klepje te openen, omdat an-
ders het front van de radio beschadigd kan
raken.
36

Het deksel sluiten
1. Met duim en wijsvinger het klepje vastpak-
ken. De haakjes (1) moeten eerst in het front
worden aangebracht.
2. Breng de bovenste haakjes (1) eerst aan in
het front.
3. Druk daarna op de onderkant van het klepje
om het op zijn plaats te bevestigen.
LET OP!
Probeer nooit met kracht een stekker in een
aansluiting van de radio te drukken. Controleer
of de vorm en het formaat van de stekkers juist
zijn, voordat u ze aansluit.
37

AUX-modus
Met de AUX-aansluiting is het mogelijk de
hoofdtelefoon van een audioapparaat (bijv.
mp3-speler) op de radio aan te sluiten. Het
geluid van het aangesloten apparaat wordt dan
via het audiosysteem weergeven.
Sluit een
stereokabel
van 3,5 mm (niet meege-
leverd) op bovenstaande wijze aan op de AUX-
aansluiting van de radio en op de hoofdtele-
foonaansluiting van uw audioapparaat.
Het display schakelt automatisch naar de AUX-
modus als een
stereo
mini-jack-kabel (3,5 mm)
wordt aangesloten. Het radioscherm keert te-
rug naar de laatste modus van de tuner als de
kabel wordt losgekoppeld.
Om van radiomodus te veranderen als de kabel
op het systeem is aangesloten, drukt u op de
toets RADIO/MEDIA totdat de AUX-tab boven-
aan het scherm verschijnt. Kies de AUX-tab om
terug te keren naar de AUX-modus.
Stel het volume in met de draaiknop ON/OFF
VOLUME of met de volumeregelaar van het
aangesloten apparaat.
Het externe apparaat kan niet worden bediend
(bijv. afspeellijsten kiezen, afspelen, vooruit-
spoelen, enz.) met de radio. Gebruik de bedie-
ningselementen van het apparaat.
OPMERKING:
Als u een
mono
connector aansluit, neemt
de geluidskwaliteit af.
iPodT modus (indien aanwezig)
Met de iPodT modus heeft u toegang tot de
muziekbestanden op een externe iPodT. Deze
werkt als afstandsbediening voor de aangeslo-
ten iPodT, en u kunt de muziek van de iPodT via
de luidsprekers van de auto afspelen.
Voordat u de iPodT modus gebruikt, moet u uw
iPodT op de iPodT aansluiting aansluiten.
(Raadpleeg het hoofdstuk 9UNIVERSAL CUS-
TOMER INTERFACE (UCI)9 in de gebruikers-
handleiding van uw auto voor instructies.)
OPMERKING:
De bestanden worden niet op de inge-
bouwde harde schijf opgeslagen en kunnen
niet in de HDD-modus worden afgespeeld.
OPMERKING:
Het is raadzaam de meest recente software
voor uw iPod en iTunes te gebruiken.
Bezoek de website van de fabrikant voor up-
dates: http://www.apple.com/support/ipod/.
38

Muziekbestanden afspelen vanaf een iPodT
U kunt nummers rechtstreeks vanaf de iPodT
afspelen.
Kies de schermtoets LIST (LIJST) om een lijst
weer te geven.
Kies de schermtoets met het gewenste num-
mer in de lijst om het nummer te selecteren en
af te spelen.
Kies de schermtoets HIDE LIST (LIJST VERBER-
GEN) om de lijst met nummers te verbergen.
Kies de schermtoets BROWSE (BLADEREN)
om door de categorieën te bladeren.
Een iPodT categorie selecteren
De radio kan de bestanden op afspeellijst, titel,
artiest, componist, genre, album, podcast of
luisterboek sorteren.
Kies de schermtoets Artists (Artiesten) in dit
voorbeeld.
Kies een schermtoets met de naam van de
gewenste artiest om nummers van die artiest af
te spelen.
Kies de schermtoets PLAY ALL (ALLE AFSPE-
LEN) om muziek van alle beschikbare artiesten
af te spelen.
Kies de schermtoets PAGE UP (VORIGE PA-
GINA) of PAGE DOWN (VOLGENDE PAGINA)
om door de artiestenlijst te navigeren.
39

Springen in lijsten
Als u een zeer lange lijst aantreft, is het moge-
lijk handig als u met behulp van de scherm-
toets A <> Z het menu List Jump (Sprong in
lijst) opent.
In dit voorbeeld hebben we de beginletter van
de gewenste artiest ingevoerd.
Kies de schermtoets GO (START) om naar de
gewenste artiest te springen.
Kies een schermtoets met de naam van de
gewenste artiest om nummers van die artiest af
te spelen.
Ander nummer kiezen
Druk op de schermtoets met dubbele pijlpunt
naar rechts om het volgende nummer op
de disk te selecteren.
Druk op de schermtoets met dubbele pijlpunt
naar rechts
en houd deze ingedrukt om
vooruit te spoelen in het nummer.
Druk op de schermtoets met dubbele pijlpunt
naar links om het begin van het huidige
nummer (terwijl het nummer wordt afgespeeld)
of het vorige nummer (als het huidige nummer
net is begonnen) te selecteren.
Druk op de schermtoets met dubbele pijlpunt
naar links
en houd deze ingedrukt om
terug te spoelen in het nummer.
Pauzeren
Kies de schermtoets PAUSE (PAUZE) om het
afspelen tijdelijk te onderbreken.
Afspelen
Kies de schermtoets PLAY (AFSPELEN) om het
afspelen te starten.
Verstreken speeltijd van het nummer
weergeven
De verstreken speeltijd van het huidige num-
mer wordt links op het scherm weergegeven.
Scannen
Kies de schermtoets SCAN.
De afzonderlijke nummers worden achtereen-
volgens elk acht seconden lang afgespeeld.
Kies de schermtoets STOP SCAN om de scan-
functie te stoppen.
40

Informatie over nummer
Kies de schermtoets INFO.
Als er informatie beschikbaar is over het hui-
dige nummer, wordt deze weergegeven in de
rechterhelft van het scherm.
Als er nog meer informatie beschikbaar is,
verschijnt de schermtoets NEXT (VOLGENDE).
Kies de schermtoets NEXT (VOLGENDE) voor
meer informatie.
Menu iPodT
Druk, terwijl de modus iPodT actief is, op de
toets MENU om het menu iPodT/AUX te openen.
Willekeurige nummers afspelen
Deze functie speelt willekeurige nummers op
de iPodT af. Kies de schermtoets Random
(Willekeurig) om het afspelen van willekeurige
nummers in of uit te schakelen.
Een rood vinkje geeft aan dat het afspelen van
willekeurige nummers actief is.
Nummer herhalen
Met de functie voor nummer herhalen wordt het
huidige nummer opnieuw afgespeeld. Kies de
schermtoets Rpt. TRK (Nummer herhalen) om
de herhaalfunctie in of uit te schakelen.
Een rood vinkje geeft aan dat de functie voor
nummer herhalen actief is.
41

Uconnect™ Phone (indien aanwezig)
Uconnect™ Phone is een via
spraak te activeren, handsfree
communicatiesysteem voor in de
auto.
Het UConnect™ systeem is volledig geïnte-
greerd in het audiosysteem van de auto. Op het
radioscherm worden de visuele meldingen van
het Uconnect™ systeem weergegeven, zoals
batterijstatus van telefoon, signaalsterkte, num-
merherkenning en soort gesprek.
OPMERKING:
Het is mogelijk dat uw telefoon niet alle
functies van Uconnect™ ondersteunt.
Raadpleeg de gebruikershandleiding van uw
auto voor aanwijzingen over de bediening van
Uconnect™ Phone.
Spraakbediening (indien aanwezig)
Raadpleeg de gebruikershandlei-
ding van uw auto voor aanwijzin-
gen over de bediening van het
spraakbedieningssysteem.
42

SYSTEEMINFORMATIE
Druk op de toets MENU rechts van de radio en
kies de schermtoets System Setup (Systeem
instellen) om het menu System Setup (Systeem
instellen) te openen.
Kies de schermtoets System Information (Sys-
teeminformatie) om toegang te krijgen tot de
systeeminformatie.
Back-up maken van
gebruikersgegevens
Bezoek http://www.chrysler.com/en/owners/
mygig/ voor informatie over het maken van een
back-up van uw gebruikersgegevens, zoals
bijvoorbeeld muziekbestanden, voordat u over-
stapt op een ander voertuig met een compati-
bele radio (bijv, einde van lease).
Updates van software en databases
Bezoek www.DriveUconnect.com voor informa-
tie over beschikbare updates van sofware en
databases.
Updates zijn verkrijgbaar voor de software van
de radio en de database voor muziekherken-
ning van GracenoteT.
Lees de specifieke aanwijzingen op de update-
disks voordat u de updates installeert.
Neem contact op met uw plaatselijke erkende
dealer als u hulp nodig heeft of meer informatie
over de beschikbare updates wenst te ontvan-
gen.
43

PROBLEEMOPLOSSING
Radio
V.: Ik kan favoriete radiozender niet vinden,
terwijl ik deze altijd kon ontvangen. Hoe los ik
dit op?
A.: Selecteer MUSIC TYPE (Muziektype) in de
radiomodus. Selecteer CLEAR (Wissen) om
alle PTY-filters uit te schakelen en probeer uw
zender te vinden met SEEK.
Disk
V.:
De radio geeft geen informatie over de inge-
voerde disk. Hoe verkrijg ik deze informatie?
A.: De radio zoekt op de harde schijf naar de
geplaatste disk in de ingebouwde database op
basis van de muziekherkenningstechnologie
van GracenoteT. Als de database verouderd is
of de desbetreffende disk niet bevat, kan de
informatie niet worden weergegeven. Neem
contact op met uw erkende dealer of de web-
site www.DriveUconnect.com voor beschik-
bare updates.
HDD
V.: De radio speelt nummers van de harde
schijf af en springt naar het eerste nummer in
de lijst. Hoe komt dat?
A.: Nadat de radio klaar is met het kopiëren
of rippen van muziek naar de harde schijf,
moet de huidige afspeellijst opnieuw worden
samengesteld. Nadat de afspeellijst opnieuw is
samengesteld, begint de radio het eerste num-
mer in de huidige afspeellijst af te spelen.
44

WOORDENLIJST
AS Automatisch opslaan
CD Compact Disc
CDC Compact Disc Changer
CDDB
Een technologiebedrijf
opgericht onder de naam
CDDB, Inc. in 1995.
Het bedrijf is later omge-
doopt in GracenoteT Inc.
De technologie heet
nu GracenoteT media
recognition service
(mediaherkenningsservice).
DVD Digital Versatile Disc
DVDC Digital Versatile Disc
Changer
GMD GracenoteT Media Data-
base, GracenoteT Media
Recognition Service
(www.gracenote.com)
GMT Greenwich Mean Time
HDD Hard-Disk Drive
MFB Multifunctionele
schermtoets
MFS Multifunctioneel stuur
MP3 MPEG-1
Audio Layer-3.
Compressiesysteem waar-
mee muziekbestanden
via het internet kunnen
worden verzonden en
opgeslagen in draagbare
spelers en digitale audio-
servers.
M4A Het M4A-formaat is in
wezen de geluidslaag
(zonder video) van MPEG
4-films.
M4P
Het .M4P-formaat is een
geluidsbestand uit de
Apple Music Store (iTunes)
en valt onder de regeling
inzake beheer van digitale
auteursrechten.
POS Positie
PTY Soort programma (radio)
RDS Radio Data System
UTC Universal Coordinated
Time
VES™ Video Entertainment
System™
WMA Windows Media
Audio Format
45

USER’S MANUAL
MANUAL DEL USARIO
GEBRUIKERSHANDLEIDING
RB2
MULTIMEDIA SYSTEM
MULTIMEDIA SYSTEM
Chrysler Group LLC
Printed in Europe
13RB2-526-ENGSPADUT-AA
USER’S MANUAL
MANUAL DEL USARIO
GEBRUIKERSHANDLEIDING
First Edition
1183863 RB2 EN_SP_DU Radio Cover.indd 1 7/17/12 3:42 PM
Documenttranscriptie
MULTIMEDIA SYSTEM USER’S MANUAL MANUAL DEL USARIO GEBRUIKERSHANDLEIDING RB2 7/17/12 3:42 PM 1 MEDIA CENTER 431 (RB2) • SAFETY GUIDELINES . . . . . . . . • INTRODUCTION . . . . . . . . . . . . • Warnings . . . . . . . . . . . . . . • Safety References . . . . . . . . . • Intended Use . . . . . . . . . . . . • System Care . . . . . . . . . . . . • GENERAL HANDLING . . . . . . . . • User Interface Elements . . . . . • Steering Wheel Audio Controls (If • Audio Settings . . . . . . . . . . . • GETTING STARTED . . . . . . . . . . • Change the Language . . . . . . • Set the Time . . . . . . . . . . . . • Store Radio Presets . . . . . . . • Uconnect™ Multimedia (RADIO) . . • Radio Mode . . . . . . . . . . . . . . . . . . . . . . . . . . . . . . . . . . . . . . . . . . . . . . . . . . . . . . . . . . . . . . . . . . . . Equipped) . . . . . . . . . . . . . . . . . . . . . . . . . . . . . . . . . . . . . . . . . . . . . . . . . . . . . . . . . . . . . . . . . . . . . . . . . . . . . . . . . . . . . . . . . . . . . . . . . . . . . . . . . . . . . . . . . . . . . . . . . . . . . . . . . . . . . . . . . . . . . . . . . . . . . . . . . . . . . . . . . . . . . . . . . . . . . . . . . . . . . . . . . . . . . . . . . . 3 . 4 . 4 . 4 . 4 . 4 . 6 . 6 . 7 . 8 . 9 . 9 . 9 10 11 11 1 • Radio Settings . . . . . . . . . . . . . . . . • Uconnect™ Multimedia (MEDIA) . . . . . . . • Disc Mode . . . . . . . . . . . . . . . . . . • Hard Disk Drive Mode (HDD) . . . . . . . • Uconnect™ Multimedia (REMOTE DEVICES) • Video Entertainment System (VES)™ . . • License Agreements . . . . . . . . . . . . • USB Connector . . . . . . . . . . . . . . . • AUX Mode . . . . . . . . . . . . . . . . . . • iPodT Mode (If Equipped) . . . . . . . . . • Uconnect™ Phone (If Equipped) . . . . . • Voice Command (If Equipped) . . . . . . • SYSTEM INFORMATION . . . . . . . . . . . . • User Data Backup . . . . . . . . . . . . . . • Software and Database Updates . . . . . • TROUBLESHOOTING . . . . . . . . . . . . . . • Radio . . . . . . . . . . . . . . . . . . . . . • Disc . . . . . . . . . . . . . . . . . . . . . . • HDD . . . . . . . . . . . . . . . . . . . . . . • GLOSSARY OF TERMS . . . . . . . . . . . . . 2 . . . . . . . . . . . . . . . . . . . . . . . . . . . . . . . . . . . . . . . . . . . . . . . . . . . . . . . . . . . . . . . . . . . . . . . . . . . . . . . . . . . . . . . . . . . . . . . . . . . . . . . . . . . . . . . . . . . . . . . . . . . . . . . . . . . . . . . . . . . . . . . . . . . . . . . . . . . . . . . . . . . . . . . . . . . . . . . . . . . . . . . . . . . . . . . . . . . . . . . . . . . . . . . . . . . . . . . . . . . . 12 14 14 18 29 29 32 33 34 35 38 38 39 39 39 40 40 40 40 41 SAFETY GUIDELINES Ensure that all persons read this manual carefully before using the radio system. It contains instructions on how to use the system in a safe and effective manner. WARNING! Please read and follow these safety precautions. Failure to do so may result in injury or property damage. • Glance at the screen only when necessary and safe to do so. If prolonged viewing of the screen is necessary pull over at a safe location. • Stop use immediately if problem occurs. Failure to do so may cause injury or damage to the product. Return it to your authorized dealer to repair. • Make certain that the volume level of the system is set to a level that still allows you to hear outside traffic and emergency vehicles. 3 INTRODUCTION System Care Warnings Software Update The GracenoteT data is software updatable. Visit www.DriveUconnect.com or contact your authorized dealer for the latest available software. This manual contains WARNINGS against operating procedures that could result in an accident or bodily injury. If you do not read the entire manual you may miss important information. Observe all WARNINGS! The information given in this manual is subject to change. Safety References Before operating this system for the first time, please read this manual carefully. Note the safety precautions described in this manual. If you have any questions, please contact the vehicle manufacturer or your authorized dealer. Intended Use Generally recognized rules of radio technology were maintained during the development and manufacture of the radio system. When using this product, be aware of state-specific norms and guidelines. Visit www.DriveUconnect.com for updates, additional information, compatible phones, etc. 4 Safe Usage of the Radio System Read all instructions in this manual carefully before using your radio system to ensure proper usage! NOTE: Many features of this radio are speed dependent. For your own safety it is not possible to use the press screen keyboard while the vehicle is in motion. Keep drinks, rain, and other sources of moisture away from your radio. Besides damage to your radio, moisture can cause electric shocks as with any electronic device. Your radio is a sophisticated electronic device. Do not let young children use your radio unsupervised. NOTE: In a convertible vehicle, the system performance may be compromised with roof top down. Permanent hearing loss may occur if you play your music or the radio at the highest volumes. Exercise caution when setting the volume on your radio. Connections Never force any connector into the ports of your radio. Make sure your connectors are the correct shape and size before you connect. Driving is a complex activity that requires your full attention. If you’re engaged in driving or any activity that requires your full attention, we recommend that you not use your radio. Any attached cable should be routed so that it will not apply any pressure to the connection. Do not use a USB device which will interfere with the operation of opening the display. Touch Screen Do not touch the screen with any hard or sharp objects (pen, USB stick, jewelry, etc.) which could scratch the touch screen surface! NOTE: It is possible to use a plastic stylus for press screen enabled devices such as a PDA and Pocket PCs. Do not spray any liquid or caustic chemicals directly on the screen! Use a clean and dry micro fiber lens cleaning cloth in order to clean the touch screen. If necessary, use a lint-free cloth dampened with a cleaning solution, such as isopropyl alcohol, or an isopropyl alcohol and water solution ratio of 50:50. Be sure to follow the solvent manufacturer’s precautions and directions. Do not insert more than one CD/DVD at a time into the drive slot. Do not insert anything other than the supported CD/DVD formats. See Disc Mode section in this manual for information on supported CD/ DVD formats. CD/DVD Drive Do not insert any damaged, warped, scratched or dirty CDs or DVDs into the CD/DVD player. Discs that have been modified with an adhesive label should not be used in the CD/DVD player. 5 GENERAL HANDLING User Interface Elements (1) Voice Command (If Equipped) Press the Voice Command hard-key (1) and wait for the confirmation beep before you say a voice command. (2) Uconnect™ Phone (If Equipped) Press the Uconnect™ Phone hard-key (2) to either activate the Uconnect™ system or to cancel an active phone call. Power to operate the radio is supplied through the ignition switch, which must be in the ON, ACC or in ACC Delay mode in order to operate the radio. (3) RADIO Press the RADIO hard-key (3) to change to a RADIO mode or to toggle between RADIO modes. Soft-Keys Soft-keys are accessible on the touch screen. (4) MEDIA Press the MEDIA hard-key (4) to change to a MEDIA mode or to toggle between MEDIA modes. Hard-Keys Hard-keys on the left and right side of the radio faceplate. 6 (5) ON/OFF VOLUME It is also possible to set the unit in standby mode during driving by pressing the ON/OFF VOLUME rotary knob (5). NOTE: If the ignition is switched OFF with the radio in standby mode, the radio memorizes the standby state when the ignition is switched ON again. Press the (5) ON/OFF VOLUME rotary knob to switch the radio ON. The radio software is always working when the ignition is switched ON, even if the radio is in standby mode. It is still possible to eject the CD and to display the time if the unit is switched OFF. (6) LOAD To open or close the display, press the LOAD hard key (6). After opening the display, it takes a few seconds to eject a CD/DVD, if one was in the slot. When inserting a disc, make sure the label is facing up. The display will close automatically after inserting the disc. NOTE: It may take several seconds to recognize the type of inserted disc (CD, DVD, MP3, etc.). (7) MENU Press the MENU hard-key (7) to access the system settings menu. NOTE: Press the MENU hard-key in an active mode in order to change mode specific settings. (8) AUDIO Press the AUDIO hard-key (8) to switch to the audio mode, which allows access to speaker fade and tone controls. (9) MY FILES Press the MY FILES hard key (9) to manage your music and picture files on the internal storage drive. (11) AUX Connector Connect an external audio device into the AUX Input (11) (e.g., MP3 player, video-game) to play the device audio through the car audio system. Electronic Vehicle Information Center (EVIC) Some vehicles feature an Electronic Vehicle Information Center (EVIC) with driverinteractive display. The EVIC is normally located in the instrument cluster or overhead. It can display radio station frequencies, CD disc number, and satellite radio channel. Steering Wheel Audio Controls (If Equipped) (10) USB Connector Connect a supported device into the USB Connector (10) in order to copy files to the internal hard disk drive. The steering wheel audio controls are located on the rear surface of the steering wheel. Please refer to the vehicle specific Owner’s Manual for detailed information. NOTE: See the USB Connector section of this manual for information on supported devices. The following describes general steering wheel functionality: 1. The VOLUME rocker switch, located on the right, controls the volume of the sound system. Pressing the top of the rocker switch will in- crease the volume and pressing the bottom of the rocker switch will decrease the volume. 2. The MODE ADVANCED button, located in the center of the right rocker switch, changes the mode of the radio between the various modes available (LW, MW, FM, CD, DVD, etc.). 3. The FUNCTION SELECT button, located in the center of the left rocker switch, advances the radio to the next preset, changes the current disc when in disc mode, etc. The function is different depending upon which mode is in use. 4. The SCROLL rocker switch, located on the left, changes selections such as radio station and CD track depending upon the current mode. The following describes the operation of the SCROLL switch in each mode: LW/MW/FM Operation Pressing the top of the switch will seek up for the next available station and pressing the bottom of the switch will seek down for the next available station. 7 HDD/Disc/iPod Operation Pressing the top of the switch will go to the next track on the disc, and pressing the bottom of the switch will go to the beginning of the current track, or to the beginning of the previous track, if it is within eight seconds of the start of the current track. Audio Control Menu Press the AUDIO hard-key (8) on the right side of the radio. Video Entertainment System™ Operation If equipped with a remote video player, this control will function the same way as in disc mode. Use either the arrow soft-keys or the sliders on the screen to adjust BASS, MID, and/or TREBLE. Audio Settings Volume Use the ON/OFF VOLUME rotary knob (5) to adjust the volume of the currently playing audio source. While you adjust the volume, the name of the audio source and a volume indicator is displayed in the lower left corner of the display. 8 Use either the arrow soft-keys or the cross-hair on the screen to change Balance and Fade. The CENTER soft-key resets the settings. GETTING STARTED NOTE: The ignition switch must be in the ON or ACC position to operate the radio. If the unit is OFF, switch it ON by pushing the ON/OFF VOLUME rotary knob. Change the Language The radio will conform to the vehicle language set in the Electronic Vehicle Information Center (EVIC), if equipped. If you change the language in the radio, the vehicle will change the language for all display information. Refer to the vehicles Owner’s Manual. To change the language with the radio: 3. Press the Language soft-key and select a language. 2. Adjust the hours and minutes using the up and down soft-keys. Set the Time 3. Press the Set Time Zone soft-key to change to the desired time zone. 1. Press the Time Display soft-key in the lower left corner of the screen. 4. Press the Daylight Savings soft-key to switch Daylight Savings on or off. 1. Press the MENU hard-key on the right side of the radio. 2. Then press the System Setup soft-key to get to the System Setup menu. 9 Store Radio Presets 1. Press the RADIO hard-key to display MW LW FM. 3. Either press the SEEK up/down hard-keys, or touch the SCAN soft-key, DIRECT TUNE soft-key, or the left and right arrows to change the currently playing station. You can use the FULLSCREEN softkey to toggle between full- and split screen mode. Long preset names are displayed in full screen mode. 4. Touch and hold one of the PRESET soft-keys in the list to the right, until you hear a confirmation beep (approximately 2 seconds). You can use the BACK soft-key to switch to the previous menu. You can use the PAGE soft-key to scroll through the list of presets. 2. Select the radio band by touching either the MW, LW or FM soft-key. 10 NOTE: If the preset list is not displayed. Press the PRESETS soft-key located in the bottom line of the screen. Uconnect™ Multimedia (RADIO) Radio Mode Overview The radios are equipped with three different tuners: • FM 87.5 MHz - 108.0 MHz (RDS capable) • MW 531 kHz - 1611 kHz • LW 153 kHz - 282 kHz Toggle between the different radio tuners by pressing the RADIO hard-key. The different tuner modes can be selected via the tabs in the radio screen. Station Presets There are 12 station presets available for storing the radio stations in each tuner range. In order to store the desired station, touch and hold one of the station preset soft-keys for two seconds and you will see the highlighted softkey change from green to beige. You will also see the radio station stored in the highlighted soft-key, and you will hear a confirmation beep when the station is saved. Change a Channel or Frequency to Press the seek/tune down arrow soft-key quickly seek down to the next available station or channel. Press and hold the seek/tune down arrow softto tune down until the soft-key is key released. Press the seek/tune up arrow soft-key to quickly seek up to the next available station or channel. Press and hold the seek/tune up arrow soft-key to tune up until the soft-key is released. Select the DIRECT TUNE soft-key to enter a frequency or a channel number, and confirm your selection by pressing the GO soft-key. the music type, song and artist for FM band music. This information is shown on the display. NOTE: Not all radio stations support RDS. The RDS information is displayed below the frequency reading of the currently playing radio station. Radio Text Information Select INFO to display additional radio text information in the right half of the screen. Select CLOSE INFO to hide additional radio text information. Select SCAN for a five-second preview of each listenable station in the frequency band. Touch the SCAN soft-key again to stop the scan function and to select a radio station. Radio Data System (RDS) This radio system is capable of receiving RDS signals in the FM band. RDS is a technology used for transmitting textual information about 11 Music Type (Program Type Filter) Program Type (PTY) is only available in FM mode. Radio stations are grouped according to their program (e.g., Soft Rock, Rhythm & Blues, etc.). Select MUSIC TYPE to enable and/or disable desired program types. The SEEK and SCAN function will then only display stations with matching program types. RDS (FM) Program Types Adult Hits, Classic Rock, Classical, College, Country, Information, Jazz, Language, News, Nostalgia, Oldies, Personality, Public, Religious 12 Music, Religious Talk, Rhythm and Blues, Rock, Soft, Soft Rhythm and Blues, Soft Rock, Sports, Talk, Top 40, Weather. Select the Daytime Colors soft-key to switch to manual daytime mode and to adjust the brightness of the display using daytime colors. Radio Settings LW / MW / FM MENU There are no specific settings for these modes. Select the Nighttime Colors soft-key to switch to manual nighttime mode and to adjust the brightness of the display using nighttime colors. Display Settings Press the MENU hard-key and touch the Display Setting soft-key to access the Display Settings menu. Select the Auto Color soft-key to switch to automatic daytime/nighttime mode and to control the brightness of the display using the light dimmer switch of the vehicle. Touch the DONE soft-key to save your settings. Screen Off To turn off the screen (so only the clock is shown, and audio is still heard through the vehicles speakers), press the MENU hard-key and touch the Screen Off soft-key. Once the Screen Off is active, press any hardkey or touch the display to turn the screen on. View Settings Press the MENU hard-key and then touch the Default View soft-key to enable the default view mode, where the vehicle brand logo is displayed in the right half of the screen. ParkviewT Rear Back Up Camera (if equipped) NOTE: You may disable the ParkviewT in the System Setup menu. Touch the Picture View soft-key to enable the picture view mode, where a pictures can be displayed on the right half of the radio screen. Refer to the Hard Disk Drive section for a detailed example. When equipped with ParkViewT, the radio display shows the rear view camera picture as soon as the shifter is in the R position for vehicles with automatic transmission. In vehicles with manual transmission the reverse gear must be engaged. 13 Uconnect™ Multimedia (MEDIA) Disc Mode Overview The radio is equipped with a CD/DVD player. The radios are capable of playing compact discs (CD), recordable compact discs (CD-R), rewritable compact discs (CD-RW), recordable DVD-R, DVD+R, DVD-RW, and DVD+RW compact discs. The RB2 also supports AAC and M4A. Your radio will play the following formats: NOTE: A faulty CD is NOT automatically ejected. Use only standard size discs. Discs that have been modified with an adhesive label should not be used in the CD/DVD player. MP3, WMA, CD Audio, DVD Audio, and DVD Video. High definition content and media (e.g, HDDVD, Blue-Ray) is not supported. Do not insert anything other than the supported CD/DVD formats. If the user does not remove an ejected CD within approximately 10 seconds, the CD will reload. SACD (SACD layer), VCD DualDisc, SVCD, VCD format on DVD MPEG-4 are not supported. To activate DISC mode, press the MEDIA hardkey and select the DISC tab soft-key. A complete list of supported CD/DVD formats is available at www.DriveUconnect.com Disc Requirements Inserting a Disc 1. Press the LOAD hard-key once. CAUTION! This disc players will accept 4 3/4 inch (12 cm) disc only. The use of other sized discs may damage the disc player mechanism. 14 and starts playing the first track. The display shows “Reading...” during this process. 2. After the screen opens, with the printed side upward, insert the disc into the disc slot of the radio. The radio pulls the disc automatically and closes the flip screen. The radio selects the appropriate mode after the disc is recognized, NOTE: On Data CDs with a large number of songs, it may take several seconds to read, play, and display information for all songs on the disc. NOTE: Recording your own CD on a home computer at a lower write speed will result in a more consistent quality. Removing a Disc 1. Press the LOAD hard-key. 2. The disc is ejected and can be removed. NOTE: If the disc is not removed within approximately 10 seconds, the unit pulls it back into the slot (park position). The disc may be ejected when the ignition is OFF. 3. Press the LOAD hard-key to close the display. The display will close within 30 seconds after the disc is pulled from the mechanism. Selecting Disc Mode Toggle between the media and the radio menus by pressing the MEDIA hard-key. The disc mode can be selected by touching the Disc tab soft-key. NOTE: When a disc is inserted, the appropriate mode is automatically selected once the disc is recognized. Scan Search Touch the SCAN soft-key. The individual tracks of the disc will be played in succession for eight seconds each. Select STOP SCAN soft-key to stop the scan function. Change a Track Press the forward arrows soft-key the next track on the disc. to select Press and hold the forward arrows soft-key to fast forward through the track. Press the rearward arrows soft-key to select the start of the current track (while the track is playing) or the previous track (if the current track has just started). Displaying the Elapsed Title Time The elapsed title time of the currently playing track is displayed in the left center of the screen. Select Title from List Select LIST to display a list of the titles of the currently playing disc. Select the desired track you wish to play. Select HIDE LIST to hide the list. Disc Info Select INFO to display Title, Artist, Album, Genre information in the right half of the screen. Select CLOSE INFO to close the information. GracenoteT Music Recognition Technology Press and hold the rearward arrows soft-key to fast rewind through the track. Press the pause soft-key to pause the playback of the disc. Press the play soft-key to resume playback of the disc. This radio is equipped with the GracenoteT Music Recognition Service, with an embedded database to look up album, song title, genre 15 and artist information. Data will be found for most Audio CDs (CDA discs). Data will not be found for DVDs or data discs (those with MP3 or WMA files). Select Repeat to repeat all songs in the currently playing folder (MP3/WMA disc only). Touch the Repeat Folder soft-key again to stop the repeat mode. Music recognition technology and related data are provided by GracenoteT. Gracenote is the industry standard in music recognition technology and related content delivery. For more information visit www.gracenote.com. Playing a MP3/WMA Disc NOTE: Visit www.DriveUconnect.com for update information. Copy Disc to Hard-Drive to copy the current Press the copy soft-key disc to the Hard Disc Drive. Disc Menu While in disc mode with inserted audio disc, press the MENU hard-key to access the Disc Menu. Select Random to play the titles on the disc in random order. Select Random again to turn Random off. 16 1. Press the LOAD hard-key once. 2. With the printed side upwards, insert the disc into the disc slot of the radio. The radio pulls the disc automatically and closes the flip screen. The radio selects the appropriate mode after the disc is recognized, and starts playing the first track. The display shows “Reading...” during this process. A MP3/WMA disc may contain audio files in a folder structure. The folder, if any, is shown in the list view. Touch the BROWSE soft-key if the list is not displayed. 3. Touch a soft-key with a folder symbol to open a folder. 4. Touch the Folder-Back Icon soft-key to close a folder. Playing a Video DVD NOTE: Viewing a DVD video on the radio screen is not available in all states, and the vehicle must be stopped, and the shifter must be in position P for vehicles with an automatic transmission. In vehicles with a manual transmission, the parking brake must be engaged. First insert a video DVD. DVD MENU Controls If you insert a DVD video disc that contains a top menu, a menu may appear. DVD Playback Controls In video playback mode touch anywhere on the screen to show the DVD playback controls. Touch the cursor arrows soft-keys to select the title you want to view, then touch the ENTER soft-key to start playback. To pause playback touch the Pause soft-key. The playback starts automatically after the DVD video is recognized by the disc drive. Touch the LIST soft-key to display a list of available chapters or tracks. Touch a chapter or track soft-key in the list to start playback from the selected section. Touch the VIEW VIDEO soft-key to view the video on the screen. Touch the DVD move soft-key to move the controls to the right part of the screen. Touch the close soft-key to close the DVD MENU Controls. To stop playback touch the Stop soft-key. Touch the Fast Reverse soft-key during playback to fast reverse playback. Touch the Fast Forward soft-key during playback to fast forward playback. Touch the NEXT soft-key to locate succeeding chapters or tracks. 17 Touch the PREV soft-key to start playback from the beginning of the current chapter or track. When you press twice in quick succession, playback starts from the beginning of the preceding chapter or track. Touch the DVD Setup soft-key to access the DVD Setup menu. DVD Video Menu While in disc mode with inserted video DVD, press the MENU hard-key to access the DISC Menu. Hard Disk Drive Mode (HDD) In the DVD Setup menu, you may select Menu Language, Audio Language, Subtitle, Camera Angle, Aspect Ratio, and Brightness settings by pressing the corresponding soft-key. Some of the soft-keys are disabled if the inserted disc does not support the functionality. Disc Skipping Skipping is typically caused by a damaged (scratched) disc. This will result in a 10 second jump forward until the damaged area is passed. 18 Temperature Protection If the temperature of the disc reader during operation becomes too high, a popup message will inform the user of an over temperature situation. The unit switches to radio mode until the disc reader temperature has dropped to a normal level. The HDD mode gives you access to the audio files on the internal hard disk drive. It functions similar to a CD player, with the exception that the internal HDD can hold more tracks. It can hold approximately 6,700 four-minute CDquality songs. Before using the HDD mode, you will need to copy tracks to the internal hard drive. The files will be stored on the internal hard disk drive and can be used in the HDD mode. It is recommended to sort music files into folders. Copy Audio Disc to Hard-Drive 1. Insert a disc. Example: The copy progress is shown in the display. to copy music 2. Touch the copy soft-key tracks of the inserted disc to the Hard Disk Drive. After a short pause, the copy process begins and the audio resumes playback from the start of the track. The copy process continues in the background while the audio plays. The progress is shown in the display. Even if you change to another mode (radio, AUX, etc.) or turn the radio OFF (ignition ON), the copy process will continue in the background. It is also possible to listen to radio modes during this process. Copying time is greater than 4x the normal playback rate. NOTE: When copying CD-Audio to HDD, audio files are converted from CD-Audio to AAC. DVDAudio cannot be copied to the HDD. Copy WMA/MP3 Files to Hard-Drive You can copy MP3 and WMA formatted compressed audio files from a disc or via USB (e.g., USB stick). Songs located in the root level (top level) of the disc or USB device are saved in a playlist named Root_Level_Songs. Once the songs are copied, the playlist will be named by the originating folder name. For the example above the list on the HDD will show the following: Disc_Root_Level Songs (Playlist 1) 19 • Song 1.mp3 (First song in playlist 1) The copy progress is shown in the display. • Song 2.mp3 (Second song in playlist 1) During the copy process, the disc player can play audio. • Song 3.wma (Third song in playlist 1) My Playlist Folder 1 (Playlist 2) • 01 Song.mp3 (First song in playlist 2) • 02 Song.mp3 (Second song in playlist 2) • 03 Song.mp3 (Third song in playlist 2) It is possible to listen to radio modes during this process. Selective Song Copying from Disc You can select specific songs on a WMA/MP3 disc using the following procedure: Copying Complete Disc 2. Select My Music. 1. Insert a disc with MP3, WMA files. 1. Touch the MY FILES hard-key. to copy music 2. Touch the copy soft-key files of the inserted disc to the hard disk drive. 20 3. Touch the Import Music Files soft-key. 4. Touch the From DISC soft-key in the next screen. If you unplug or eject the media before the copying process is finished, the process will be interrupted. You may restart the copying process by repeating the steps above. Copying from USB 1. Insert a USB device. 3. Touch the Import Music Files soft-key. 4. Touch the From USB soft-key in the next screen. 5. Select the folders or titles you would like to copy. A red check mark indicates the selected songs and/or folders. Touch the ALL soft-key to select all files and folders at once. 2. Select My Music. 6. Touch the DONE soft-key to start the copy process. The copy process is shown on the display. It is possible to listen to radio modes during this process. 21 5. Select the folders or titles you would like to copy. The radio can sort the files by playlist, by song name, by artist, by genre, or by album. 3. Touch a soft-key with the desired playlist name to play a playlist. A red check mark indicates the selected songs and/or folders. Touch the ALL soft-key to select all files and folders at once. Touch the PLAY ALL PLAYLISTS soft-key to play all available playlists. 6. Touch the DONE soft-key to start the copy process. to select Change a Track Press the forward arrows soft-key the next track on the disc. Press and hold the forward arrows soft-key to fast forward through the track. Playing Audio Files from the Hard Disk Drive You can play songs directly from the internal hard disk drive. 2. For this example, touch the Playlists softkey. Press the rearward arrows soft-key to select the start of the current track (while the track is playing) or the previous track (if the current track has just started). Press and hold the rearward arrows soft-key to fast rewind through the track. Press the pause soft-key to pause the playback of the disc. Press the play soft-key to resume playback of the disc. 1. Touch the BROWSE soft-key to select an available category. 22 Displaying the Elapsed Title Time The elapsed title time of the current playing track is displayed in the left center of the screen. 2. Touch the Favorites soft-key to display a list of favorite playlists.. HDD Menu While in HDD mode, press the MENU hard-key to access the HDD Menu. Random Playback The random play function plays random tracks from the hard disk drive. Touch the Random soft-key to switch the random play function on or off. A red check mark indicates the random play function is active. Repeat Track The repeat track function repeats the currently played track. Touch the Rpt. TRK soft-key to switch the repeat track function on or off. 1. While in the HDD mode touch the BROWSE soft-key to access the Browse Categories menu. 3. Touch one of the ADD FAVORITE soft-keys. A red check mark indicates the repeat track function is active. Favorite Playlists on the Hard Disk Drive You may save links to favorite playlists in the Favorite Playlists list. 23 4. Select the desired playlist. Editing Playlists on the Hard Disk Drive A link to the selected playlist is now saved in the Favorite Playlists list. 1. While in the HDD mode press the MY FILES hard-key to access the Manage My Files Menu. 2. Select My Music NOTE: The link to the favorite playlist will be removed, after a playlist was removed from the My Playlists menu. Refer to Editing Playlists in the Hard Disk Drive section of this manual. You may now edit the list by touching the EDIT soft-key, or exit the list by touching the EXIT soft-key. 24 3. Touch the My Playlists soft-key. 4. Touch the EDIT soft-key (example: Donuts) of the playlist you would like to edit. NOTE: You cannot edit a playlist during the copy process 5. Touch the Rename This Playlist soft-key. 6. Type in a new name for the playlist. NOTE: If you touch the Delete This Playlist soft-key, the playlist and all songs contained in it, will be permanently deleted. Neither song nor playlist can be recovered. 7. Touch the SAVE soft-key to confirm the name. You can resume the selected playlist, delete songs from the selected playlist, or delete the selected playlist. 25 The playlist now has the new name. Deleting Songs from a Playlist 1. Press the MENU hard-key, then touch the MY FILES soft-key, next touch the My Playlists soft key and select the Delete Songs From This Playlist soft-key. NOTE: If you touch the Delete This Playlist soft-key, the playlist and all songs contained in it, will be permanently deleted. Neither song nor playlist can be recovered. A red check-mark indicates the selected songs. 3. Touch the DELETE soft-key to start the delete process. NOTE: If you delete a song from the playlist, the song cannot be recovered. 4. Touch the DONE soft-key, when you are done editing the playlist. Deleting All Playlists from the Hard Disk Drive 1. Press the MENU hard-key on the right side of the radio. 2. Touch the System Setup soft-key to access the System Setup menu. 3. Touch the Manage Hard Drive soft-key to access the Manage Hard Drive menu. 2. Select the titles you would like to delete 26 This menu displays the available space on the hard disk drive, and allows you to delete pictures and music files. Importing Pictures It is possible to import display pictures to the internal hard disk drive. The pictures can be displayed on the right half of the radio screen. 1. Touch the MY FILES hard-key to go to the Manage My Files screen. In the default mode, the vehicle brand logo is displayed in the right half of the screen. Press the MENU hard-key on the right side of the radio to access one of the setting menus. It is recommended to change the picture dimensions on a PC or Digital Camera to 240 by 158 pixels before the import. The radio can store 24 user pictures. 4. Press one of the Add Pictures soft-keys. 2. Insert either a CD or a USB Stick containing your pictures. 5. Select the type of media inserted. 3. Touch the My Pictures soft-key to get an overview of the currently stored images. NOTE: USB devices (e.g., camera memory USB adaptors, etc.) must comply with the MSD (Mass Storage Device) standard. This USB terminal can provide power to the inserted device. The device’s current limitation must be less or equal to 500mA. 27 6. Use the PAGE soft-keys to page through a list of pictures and press the picture you would like to import. 9. Select this picture by pressing the Set as Default soft-key. A check mark indicates the currently used picture. NOTE: Files must be in the root directory (top level) of the disc or USB device to be recognized. Use the PREV or NEXT soft-key to step through the list of available pictures. Touch the DELETE soft-key to delete the picture from the hard disk drive. The imported picture is now available in the Manage My Pictures screen. 10. Press the MENU hard-key twice and then touch the Picture View soft-key to enable the picture view. 8. In order to display the imported picture in the radio screen, touch the desired picture soft-key. 7. Confirm your selection by touching the YES soft-key. The picture is now displayed on the right half of the screen. 28 Sending Audio/Video and controlling the VES The radio can also control the VES™. Uconnect™ Multimedia (REMOTE DEVICES) Video Entertainment System (VES)™ All sources are played through the VES™ headphones. The radio can remotely control the VES™. Refer to the VES™ user’s manual for more information. Receiving Audio/Video from the VES™ You can play audio from the VES™ through the vehicle’s speaker system. If you have a VES™ with a video player, you can also see the video on the radio’s display, if the vehicle is parked. Refer to the VES™ user’s manual for more information on controlling the rear VES™ through the remote control. Touch the soft-key of the desired source to play the selection in the vehicle cabin. To access the rear VES™, press the MENU hard-key on the right side of the radio. Availability of the DVD Player soft-key, the Rear AUX 1 soft-key, and the Rear AUX 2 is based on the type of VES™ in the vehicle. DVD Player is not available if there is no DVD player in the VES™ or there is no DVD in the player. A device must be plugged into the AUX jack of the VES™ to be available. The VES tab becomes available after the VES™ system is turned on. Touch the VES MODES soft-key to select the VES™ audio source. A disabled soft-key indicates an unavailable source. 29 Touch the Rear VES soft-key to display the Rear VES Controls. Touch the soft-key tab 1 to select Channel 1. enter a frequency, or press the SEEK up or SEEK down hard-keys to change the radio station. The left half of the screen displays the audio source information, which, if FM was chosen for example, a radio frequency would be displayed. Touch the 2 soft-key tab to set the desired audio source for the second VES™ audio channel. Touch the LIST soft-key to display the selected source details. The Rear VES Controls are displayed in the right half of the screen. NOTE: Press the HIDE LIST soft-key, and/or the CLOSE INFO soft-key, if you cannot see the Rear VES Controls. The first column controls VES on/off and the headset audio channels 1, or 2. A VES™ headset can listen to either audio Channel 1 or audio Channel 2. 30 The left half of the screen displays the audio source information, which is in this case track 1 of a playlist on the HDD of the radio. In this case the FM preset list within the selected tuner is displayed. You may touch a preset soft-key to change the station, or touch the DIRECT TUNE soft-key to Touch the LIST soft-key to display the selected source details. The RADIO column controls the MW / LW / FM tuners of the radio. Touch the Turn Rear VES OFF soft-key to shut the VES™ off. NOTE: The radio cannot play both MW or LW or FM at the same time. Touch the Turn Rear VES ON soft-key to turn the VES™ on. The MEDIA column controls the HDD, DISC, and AUX audio source of the radio. The VES column controls the DVD Player, Rear AUX 1, and Rear AUX 2 of the VES™ system. In this case the songs within the selected playlist are displayed. Touch the on/off soft-key tab to show the VES ON/OFF display. You may turn the VES™ system on or VES™ LOCK Press the LOCK soft-key to disable the controls on the VES™ remote control unit. Once the VES™ is locked, it is not possible to use the VES™ controls or the VES™ remote control. VES™ UNLOCK Press the UNLOCK soft-key to enable the controls on the VES™ remote control unit. off. 31 Playing a Video DVD for the Rear VES™ 1. To view a DVD video on the rear VES™ screen, insert a video DVD. 2. Press the MENU hard-key on the right side of the radio. 5. Touch the DISC soft-key to select the media mode. The playback starts automatically after the DVD video is recognized by the disc drive. 3. Touch the Rear VES soft-key to display the Rear VES Controls. 4. Touch the 1 soft-key tab to select audio Channel 1. 6. Touch the PLAY VIDEO soft-key to start the video playback. License Agreements Dolby Digital License Agreement Manufactured under license from Dolby Laboratories. Dolby, MLP Lossless and the double-D are trademarks of Dolby Laboratories. Macrovision License Agreement This product incorporates copyright protection technology that is protected by U.S. patents 32 and other intellectual property rights. Use of this copyright protection technology must be authorized by Macrovision, and is intended for home and other limited viewing uses only unless otherwise authorized by Macrovision. Reverse engineering or disassembly is prohibited. cannot be played in this radio. Some copy protected music (e.g., downloads from the internet) cannot be played on this radio. USB Connector NOTE: Some MP3 Player do not allow songs to be copied into other devices. It is possible to transfer audio files or pictures files to the radio. Files can be on a disc or on a USB device (e.g., USB stick). The USB connector is covered by a small cover, which protects the connector from dust or damage. Compatible Devices Please see your authorized dealer or visit www.DriveUconnect.com for supported devices. How to Open the Cover 2. Pull forward. NOTE: USB devices (e.g., camera memory USB adaptors, etc.) must comply with the MSD (Mass Storage Device) standard. This USB terminal can provide power to the inserted device. The devices current limitation must be less or equal to 500mA. NOTE: The flap is attached and should not be removed! Do not pull off of the frame. Do not use a tool (e.g. screw driver, nail file, etc.) to open the flap, as this could cause damage to the face of the radio. The transfer speed for this USB connector is approximately two megabytes per second. MP3 player devices cannot be controlled through the USB connector. Some player devices save music files in MP4 format, which 1. Place finger under the pull arrow. 33 How to Close the Cover CAUTION! Never force any connector into the ports of your radio. Make sure your connectors are the identical shape and size before you connect. AUX Mode 2. Hook the top hooks (1) into the frame first. 1. Using your thumb and index finger, grasp the flap. Notice the hooks (1), which must first be inserted into the frame. 3. Then push on the bottom of the flap, to secure in place. 34 The AUX connector allows you to connect the headset output of an audio device (e.g., MP3 player) to the radio. The audio of the connected device will then be played through the radio sound system. Connect a 3.5 mm stereo mini-jack cable as shown above (not provided with the radio) to the AUX connector on the radio and to the earphone connector of your audio device. The display will switch automatically to the AUX mode when a 3.5 mm stereo mini-jack cable has been connected. The radio screen will revert back to the last tuner mode when the cable is unplugged. To change radio modes while the cable is connected to the unit, press the RADIO/MEDIA hard-key until the AUX tab is displayed on the top of the screen. Touch the AUX tab to return to the AUX mode. Adjust the volume with the ON/OFF VOLUME rotary knob, or with the volume of the attached device. The control of the external device (e.g., selecting playlists, play, fast forward, etc.) cannot be provided by the radio; use the device controls instead. iPodT Mode (If Equipped) The iPodT mode gives you access to the audio files on the external iPodT. It functions as a remote control for the currently connected iPodT mobile digital device, and you can play audio from the iPodT device through the vehicles speaker system. Playing Audio Files from the iPodT Device You can play songs directly from the iPodT device. Before using the iPodT mode, you will need to connect your iPodT device to the iPodT connector. (See UNIVERSAL CUSTOMER INTERFACE (UCI) section in your vehicle Owner’s Manual for instructions.) NOTE: The files will not be stored on the internal hard disk drive and cannot be used in the HDD mode. NOTE: It is recommended to use the latest available software for your iPod and iTunes. See manufacturer website for updates http:// www.apple.com/support/ipod/. Touch the LIST soft-key to display a list view. Touch the soft-key with the desired list item to select and play the item. Touch the HIDE LIST soft-key to hide the list. Touch the BROWSE soft-key to browse by categories. NOTE: Inserting of a mono jack will result in improper audio playback. 35 Select an iPodT Category The radio can sort the files by playlists, by song names, by artists, by composers, by genres, by albums, by podcasts or by audio books. Touch the Artists soft-key for this example. Touch a soft-key with the desired artist’s name to play songs from this artist. For this example we entered the first letter of the desired artist. Touch the PLAY ALL soft-key to play songs from all available artists. Touch the GO soft-key to jump to the desired artist. Touch the PAGE UP or PAGE DOWN soft-key to navigate through the list of artists. List Jump If you encounter a very long list, it may be helpful to touch the A<>Z soft-key to go to the List Jump menu. 36 Touch a soft-key with the desired artist’s name to play songs from this artist. Scan Search Touch the SCAN soft-key. Change a Track Press the forward arrows soft-key the next track on the disc. The individual tracks will be played in succession for eight seconds each. to select Press and hold the forward arrows soft-key to fast forward through the track. Press the rearward arrows soft-key to select the start of the current track (while the track is playing) or the previous track (if the current track has just started). Select STOP SCAN soft-key to stop the scan function. If additional information is available, the NEXT soft-key will be displayed. Touch the NEXT soft-key to show the additional information. iPodT Menu While in iPodT mode, press the MENU hard-key to access the iPodT/AUX Menu. Track Info Touch the INFO soft-key. Information on the currently playing track, if available, will be displayed on the right half of the screen. Press and hold the rearward arrows soft-key to fast rewind through the track. Pause Touch the PAUSE soft-key to pause the playback. Play Touch the PLAY soft-key to start the playback. Displaying the Elapsed Title Time The elapsed title time of the currently playing track is displayed on the left side of the screen. 37 Random Playback The random playback function plays random tracks from the iPodT device. Touch the Random soft-key to switch the random play function on or off. A red check mark indicates the random play function is active. Repeat Track The repeat track function repeats the currently played track. Touch the Rpt. TRK soft-key to switch the repeat track function on or off. A red check mark indicates the repeat track function is active. 38 Uconnect™ Phone (If Equipped) Uconnect™ Phone is a voiceactivated, hands-free, in-vehicle communications system. The Uconnect™ system is fully integrated with the vehicle’s audio system. The radio display will be used for visual prompts from the Uconnect™ system such as phone battery status, signal strength, caller ID, and call type. NOTE: Your phone may not support all available Uconnect™ features. Refer to your vehicle Owner’s Manual for Uconnect™ Phone operating instructions. Voice Command (If Equipped) Refer to your vehicle Owner’s Manual for Voice Command operating instructions. SYSTEM INFORMATION User Data Backup Press the MENU hard-key on the right side of the radio, and touch the System Setup soft-key to access the System Setup menu. Visit http://www.chrysler.com/en/owners/mygig/ for information on how to backup or transfer your user data, such as music files, etc., before returning or changing to a vehicle with a compatible radio (e.g., end of lease). Touch the System Information soft-key to access the system information. Contact your local authorized dealership if you need help or more information about the available updates. Software and Database Updates Visit www.DriveUconnect.com for information on available software and database updates. Updates are available for the radio software, and the GracenoteT music recognition technology database. Please read the specific instructions on the update discs before installing the updates. 39 TROUBLESHOOTING Radio Q.: I cannot find my favorite radio station that I was always able to receive before. What can I do? A.: Select MUSIC TYPE while in radio mode. Select CLEAR to disable all PTY filters, and try to SEEK for your station. Disc Q.: The radio does not display the information for the disc I inserted. How do I access this information? 40 A.: The radio will search the internal GracenoteT music recognition technology database on the hard drive for the inserted disc. If the database is out of date, or the database does not contain the particular disc, the information cannot be displayed. Contact your local authorized dealership or website www.DriveUconnect.com for available updates. HDD Q.: The radio is playing songs from the HDD, it jumps to the first song in the list. Why does it do that? A.: After the radio is done copying or ripping music to the HDD, it needs to rebuild the current playlist. After the playlist was rebuild, the radio starts to play the first song in the current playlist. GLOSSARY OF TERMS AS CD CDC CDDB DVD DVDC GMD GMT Autostore Compact Disc Compact Disc Changer A technology company founded in 1995 as CDDB, Inc. The company has been renamed to the GracenoteT, Inc. The technology has been renamed to the GracenoteT media recognition service. Digital Versatile Disc Digital Versatile Disc Changer GracenoteT Media Database, GracenoteT Media Recognition Service (www.gracenote.com) Greenwich Mean Time HDD MFB MFS MP3 MPEG-1 Audio Layer-3. M4A M4P POS PTY RDS Hard-Disk Drive Multifunction soft-key Multi-Functional Steering Wheel Compression scheme used to transfer audio files via the Internet and store in portable players and digital audio servers. The .M4A format is actually the audio layer of (non-video) MPEG 4 movies. The .M4P format is an audio file purchased from Apple’s Music Store (iTunes) and is protected by a Digital Rights Management scheme. Position Program type (radio) Radio Data System UTC VES™ WMA Universal Coordinated Time Video Entertainment System™ Windows Media Audio Format 41 42 1 GESTOR MULTIMEDIA 431 (RB2) • DIRECTRICES DE SEGURIDAD . . . . . . . . . . . . . . • INTRODUCCIÓN . . . . . . . . . . . . . . . . . . . . . . . • Advertencias . . . . . . . . . . . . . . . . . . . . . . . • Referencias en materia de seguridad . . . . . . . . • Uso previsto . . . . . . . . . . . . . . . . . . . . . . . • Cuidados del sistema . . . . . . . . . . . . . . . . . • USO GENERAL . . . . . . . . . . . . . . . . . . . . . . . • Elementos de la interfaz de usuario . . . . . . . . . • Controles de audio en el volante (si está equipado) • Ajustes de audio . . . . . . . . . . . . . . . . . . . . • PRIMEROS PASOS . . . . . . . . . . . . . . . . . . . . . • Cambio de idioma . . . . . . . . . . . . . . . . . . . . • Ajuste de la hora . . . . . . . . . . . . . . . . . . . . • Guardar preselecciones de radio . . . . . . . . . . . • Sistema multimedia Uconnect™ (RADIO) . . . . . . . . • Modo de radio . . . . . . . . . . . . . . . . . . . . . . . . . . . . . . . . . . . . . . . . . . . . . . . . . . . . . . . . . . . . . . . . . . . . . . . . . . . . . . . . . . . . . . . . . . . . . . . . . . . . . . 3 . 4 . 4 . 4 . 4 . 4 . 6 . 6 . 7 . 8 . 9 . 9 . 9 10 11 11 1 • Ajustes de radio . . . . . . . . . . . . . . . . . • Sistema multimedia Uconnect™ (MEDIOS) . . . • Modo de disco . . . . . . . . . . . . . . . . . . • Modo de disco duro (HDD) . . . . . . . . . . • Sistema multimedia Uconnect™ (DISPOSITIVOS REMOTOS) . . . . . . . . . . . . . . . . . . . . . . • Video Entertainment System (VES)™ . . . . • Acuerdos de licencia . . . . . . . . . . . . . . • Conector USB . . . . . . . . . . . . . . . . . . • Modo AUX . . . . . . . . . . . . . . . . . . . . • Modo iPodT (si está equipado) . . . . . . . . • Uconnect™ Phone (si está equipado) . . . . • Órdenes por voz (si está equipado) . . . . . • INFORMACIÓN DEL SISTEMA . . . . . . . . . . . • Copia de seguridad de datos del usuario . . • Actualizaciones de software y base de datos • RESOLUCIÓN DE PROBLEMAS . . . . . . . . . • Radio . . . . . . . . . . . . . . . . . . . . . . . • Disco . . . . . . . . . . . . . . . . . . . . . . . • HDD . . . . . . . . . . . . . . . . . . . . . . . . • GLOSARIO DE TÉRMINOS . . . . . . . . . . . . . 2 . . . . . . . . . . . . . . . . . . . . . . . . . . . . . . . . . . . . 12 14 14 19 . . . . . . . . . . . . . . . . . . . . . . . . . . . . . . . . . . . . . . . . . . . . . . . . . . . . . . . . . . . . . . . . . . . . . . . . . . . . . . . . . . . . . . . . . . . . . . . . . . . . . . . . . . . . . . . . . . . . . . . . . . . . . . . . . . . . . . . . . . 31 31 34 35 37 37 40 41 42 42 42 43 43 43 43 44 . . . . . DIRECTRICES DE SEGURIDAD Asegúrese de que todas las personas lean este manual atentamente antes de utilizar el sistema de radio. El manual contiene instrucciones sobre el uso seguro y eficaz del sistema. ADVERTENCIA Lea y siga las precauciones de seguridad. En caso de no hacerlo, podrían producirse lesiones personales o daños materiales. • Mire a la pantalla únicamente cuando sea necesario y resulte seguro hacerlo. Si necesita observar la pantalla durante mucho tiempo, apártese de la carretera a un lugar seguro. • Si se produce un problema, detenga el uso inmediatamente. En caso de no hacerlo, podrían producirse lesiones personales o daños en el producto. Devuélvalo al concesionario autorizado para su reparación. • Asegúrese de establecer el volumen del sistema de forma que pueda seguir oyendo el sonido del tráfico exterior y los vehículos de emergencia. 3 INTRODUCCIÓN Advertencias El presente manual contiene ADVERTENCIAS sobre procedimientos de uso que pueden dar lugar a accidentes o lesiones corporales. Si no lee el presente manual en su totalidad, podría pasar por alto información importante. Preste atención a todas las ADVERTENCIAS. La información que se proporciona en el presente manual está sujeta a cambios. Referencias en materia de seguridad Antes de utilizar este sistema por primera vez, lea este manual cuidadosamente. Tenga presente las precauciones de seguridad que se describen en el manual. Si tiene alguna duda o pregunta, póngase en contacto con el fabricante del vehículo o su concesionario autorizado. Uso previsto Durante el desarrollo y fabricación de este sistema de radio se han mantenido las normas de tecnología radiofónica reconocidas globalmente. Tenga presente las normas y directrices específicas de cada estado, cuando utilice el producto. Para obtener información sobre actualizaciones, información adicional, teléfonos compatibles, etc., visite www.DriveUconnect.com. Cuidados del sistema Actualización de software El software de datos de GracenoteT puede actualizarse. Visite www.DriveUconnect.com o póngase en contacto con su concesionario autorizado para obtener el último software disponible. Uso seguro del sistema de radio Para garantizar un uso adecuado del sistema de radio, lea atentamente todas las instrucciones contenidas en el presente manual. La radio es un sofisticado dispositivo electrónico. No permita que los niños utilicen la radio sin supervisión. 4 Si se escucha música o la radio con un volumen muy alto, se puede producir una pérdida permanente de audición. Tenga cuidado al establecer el volumen de la radio. La conducción es una actividad compleja que requiere toda la atención. Si está concentrado en la conducción o en cualquier actividad que requiera toda su atención, le recomendamos que no haga uso de la radio. NOTA: Muchas características de esta radio están supeditadas a la velocidad. Para su propia seguridad, no es posible utilizar el teclado táctil de la pantalla con el vehículo en movimiento. No permita que bebidas, lluvia u otras fuentes de humedad entren en contacto con la radio. Además de dañar la radio, la humedad puede producir descargas eléctricas, como ocurre con cualquier dispositivo electrónico. NOTA: En un vehículo descapotable, las prestaciones del sistema pueden verse comprometidas con la capota bajada. Conexiones No fuerce nunca la entrada de un conector en los puertos de la radio. Antes de realizar la conexión, asegúrese de que los conectores tienen la forma y medida correctas. Todo cable conectado debe disponerse de forma que no ejerza ninguna presión sobre la conexión. No utilice un dispositivo USB que pueda afectar al movimiento de apertura de la pantalla. Pantalla táctil No toque la pantalla con objetos duros o afilados (plumas, lápices de memoria USB, joyas, etc.) que puedan arañar la superficie de la pantalla táctil. NOTA: Pueden utilizarse estiletes de plástico para dispositivos que permitan pulsar la pantalla, como PDA o PC de bolsillo. No aplique líquidos o productos químicos cáusticos directamente sobre la pantalla. Para limpiar la pantalla táctil, utilice un paño de microfibras para lentes limpio y seco. Si es necesario, utilice un paño que no deje pelusas humedecido con una solución de limpieza, como alcohol isopropílico, o una solución de alcohol isopropílico y agua a partes iguales. Asegúrese de tomar las precauciones y directrices del fabricante en materia de disolventes. No introduzca más de un CD/DVD al mismo tiempo en la ranura de la unidad. No introduzca ningún soporte que no sean los formatos de CD/DVD compatibles. Para obtener información acerca de los formatos de CD/DVD compatibles, consulte la sección Modo de disco. Unidad de CD/DVD No introduzca ningún CD o DVD deteriorado, deformado, rayado o sucio en el reproductor de CD/DVD. Los discos que hayan sufrido modificaciones por la utilización de una etiqueta adhesiva no deben utilizarse en el reproductor de CD/DVD. 5 USO GENERAL Elementos de la interfaz de usuario Teclas fijas Las teclas fijas se encuentran en los lados izquierdo y derecho de la carátula de control de la radio. (1) Órdenes por voz (si está equipado) Pulse la tecla fija de órdenes por voz (1) y espere al pitido de confirmación antes de decir una orden por voz. (2) Uconnect™ Phone (si está equipado) La alimentación eléctrica para el funcionamiento de la radio se proporciona a través del interruptor de encendido, que debe estar en las posiciones ON (Encendido) o ACC (Accesorio) o en el modo de retardo de ACC para permitir su funcionamiento. Teclas variables Las teclas variables se encuentran en la pantalla táctil. 6 Pulse la tecla fija del teléfono (2) ya sea Uconnect™ Phone para activar el sistema Uconnect™ o para cancelar una llamada telefónica activa. (3) RADIO Pulse la tecla fija RADIO (3) para cambiar a un modo de RADIO o para cambiar entre los modos de RADIO. (4) MEDIA (MEDIOS) Pulse la tecla fija MEDIA (MEDIOS) (4) para cambiar a un modo de medio o para cambiar entre los modos de medios. (5) ON/OFF VOLUME (ENCENDER/APAGAR VOLUMEN) Durante la conducción, la unidad también puede situarse en el modo de espera presionando la perilla giratoria ON/OFF VOLUME (ENCENDER/APAGAR VOLUMEN) (5). NOTA: Si se apaga el encendido con la radio en el modo de espera, al colocarse el encendido de nuevo en posición ON, la radio memoriza el estado de espera. Para encender la radio, presione la perilla giratoria ON/OFF VOLUME (ENCENDER/APAGAR VOLUMEN) (5). Cuando el encendido se encuentra en posición ON, el software de la radio siempre está funcionando, incluso si la radio está en el modo de espera. Aunque la unidad esté apagada, es posible extraer el CD y ver la hora. (6) LOAD (CARGAR) Para abrir o cerrar la pantalla, pulse la tecla fija LOAD (CARGAR) (6). Tras abrir la pantalla, el dispositivo tarda unos segundos en expulsar el CD/DVD, si hay uno dentro. Al insertar un disco, asegúrese de que la etiqueta está orientada hacia arriba. imágenes en el disco de almacenamiento interno. Controles de audio en el volante (si está equipado) Tras insertar el disco, la pantalla se cerrará automáticamente. (10) Conector USB Conecte un dispositivo compatible al conector de USB (10) para copiar archivos en el disco duro interno. Los controles de audio del volante están situados en la superficie trasera del volante. Para obtener información detallada, consulte el Manual del propietario específico del vehículo. NOTA: Para obtener información acerca de los dispositivos compatibles, consulte la sección Conector USB en este manual. A continuación se describe la funcionalidad general del volante: NOTA: La unidad puede tardar varios segundos en reconocer el tipo de disco insertado (CD, DVD, MP3, etc.). (7) MENU (MENÚ) Pulse la tecla fija MENU (MENÚ) (7) para acceder al menú de ajustes del sistema. NOTA: Pulse la tecla fija MENU (MENÚ) en un modo activo para cambiar los ajustes específicos de modo. (8) AUDIO Pulse la tecla fija AUDIO (8) para cambiar al modo de audio, lo que permite acceder a la atenuación de altavoces y a los controles de tono. (9) MY FILES (MIS ARCHIVOS) Pulse la tecla fija MY FILES (MIS ARCHIVOS) (9) para gestionar sus archivos de música e (11) Conector AUX Conecte un dispositivo de audio externo (p. ej., reproductor de MP3, videojuego) a la entrada AUX (11) para reproducir el audio del dispositivo a través del sistema de audio del vehículo. Centro de información electrónica del vehículo (EVIC) Algunos modelos incorporan un Centro de información electrónica del vehículo (EVIC) con una pantalla con la que el conductor puede interactuar. El EVIC normalmente se encuentra en el grupo de instrumentos o en la parte superior. Puede mostrar frecuencias de emisoras de radio, número de disco CD y canal de radio vía satélite. 1. El interruptor oscilante VOLUME (VOLUMEN), situado a la derecha, controla el volumen del sistema de sonido. Al pulsar la parte superior del interruptor oscilante aumenta el volumen y al pulsar la parte inferior disminuye. 2. El botón MODE ADVANCED (MODO AVANZADO), situado en el centro del interruptor oscilante derecho, cambia el modo de la radio entre los diversos modos disponibles (LW, MW, FM, CD, DVD, etc.). 3. El botón FUNCTION SELECT (SELECCIÓN DE FUNCIÓN), situado en el centro del interruptor oscilante izquierdo, hace avanzar la radio con navegador a la siguiente preselección, cambia el disco actual cuando se encuentra en el modo de disco, etc. El funcionamiento difiere en función del modo en uso. 7 4. El interruptor oscilante SCROLL (AVANCE), situado a la izquierda, cambia las selecciones tales como emisora de radio y pista de CD en función del modo en uso. A continuación se describe el funcionamiento del interruptor SCROLL (AVANCE) en cada modo: Funcionamiento de LW/MW/FM Al pulsar la parte superior del interruptor la unidad busca hacia adelante la siguiente emisora disponible, y al pulsar la parte inferior del interruptor busca hacia atrás la siguiente emisora disponible. Ajustes de audio Volumen Utilice la perilla giratoria ON/OFF VOLUME (ENCENDER/APAGAR VOLUMEN) (5) para regular el volumen de la fuente de audio que se está reproduciendo. Mientras se regula el volumen, en la esquina inferior izquierda de la pantalla se visualiza la fuente de audio y un indicador de volumen. Menú Audio Control (Control de Audio) Pulse la tecla fija AUDIO (8) en el lado derecho de la radio. Funcionamiento de HDD/Disco/iPodT Presionando la parte superior del interruptor se pasa a la siguiente pista del disco, mientras que presionando la parte inferior del interruptor se pasa al principio de la pista en curso, o al principio de la pista anterior, si se encuentra dentro de los primeros ocho segundos de la pista en curso. Funcionamiento del sistema Video Entertainment System™ Si el vehículo está equipado con reproductor de vídeo remoto, este control funcionará del mismo modo que en el modo de disco. 8 Utilice las teclas variables de flecha o la línea de punto de mira de la pantalla para cambiar el equilibrio y la atenuación. La tecla variable CENTRE (CENTRAR) restablece los ajustes. Utilice las teclas variables de flechas o los cursores en la pantalla para ajustar los tonos BASS (GRAVES), MID (MEDIOS) y/o TREBLE (AGUDOS). PRIMEROS PASOS NOTA: Para que funcione la radio, el interruptor de encendido debe estar en la posición ON (Encendido) o ACC (Accesorio). 2. A continuación, pulse la tecla variable System Setup (Config. sistema) para abrir el menú System Setup (Config. del sistema). Si la unidad está apagada, enciéndala presionando la perilla giratoria ON/OFF VOLUME (ENCENDER/APAGAR VOLUMEN). Cambio de idioma 2. Ajuste la hora y los minutos utilizando las teclas variables ascendente y descendente. La radio se adaptará al idioma del vehículo fijado en el Centro de información electrónica del vehículo (EVIC), si está equipada. Si se cambia el idioma para la radio, el vehículo cambiará el idioma para toda la información visualizada. Consulte el Manual del propietario del vehículo. Para cambiar el idioma con la radio: 1. Pulse la tecla fija MENU (MENÚ) en el lado derecho de la radio. 3. Pulse la tecla variable Language (Idioma) y seleccione un idioma. Ajuste de la hora 1. Pulse la tecla variable Time Display (Visualización de la hora), situada en la esquina inferior izquierda de la pantalla. 3. Pulse la tecla variable Set Time Zone (Establecer zona horaria) para cambiar a la zona horaria deseada. 4. Pulse la tecla variable Daylight Savings (Ahorro luz día), para activar o desactivar el ahorro de luz diurna. 9 Guardar preselecciones de radio 1. Pulse la tecla fija RADIO para que se muestre MW LW FM. 3. Pulse las teclas fijas SEEK (BÚSQUEDA) ascendente/descendente, o toque la tecla variable SCAN, la tecla variable DIRECT TUNE (DIREC SINTON) o las flechas izquierda y derecha para cambiar la emisora que se está escuchando. 4. Toque y mantenga presionada una de las teclas variables PRESET (PRESIN) en la lista a la derecha, hasta oír un pitido de confirmación (unos 2 segundos). Puede usar la tecla variable PAGE (PÁGINA) para recorrer la lista de preselecciones. 2. Seleccione la banda de radio tocando la tecla variable MW, LW o FM. 10 NOTA: Si la lista de preselecciones no se visualiza, pulse la tecla variable PRESET (PRESIN) situada en la línea inferior de la pantalla. Puede utilizar la tecla variable PANTALLA COMPLETA para cambiar entre el modo de pantalla completa o dividida. Los nombres largos de preselecciones se muestran en el modo de pantalla completa. Puede utilizar la tecla variable ATRÁS para volver al menú anterior. Sistema multimedia Uconnect™ (RADIO) Modo de radio Aspectos generales Las radios están equipadas con tres sintonizadores: • FM 87.5 MHz - 108.0 MHz (capacidad de RDS) • MW 531 kHz - 1611 kHz • LW 153 kHz - 282 kHz Cambie entre los distintos sintonizadores de radio pulsando la tecla fija RADIO. Los diferentes modos de sintonizador pueden seleccionarse mediante las pestañas de la pantalla de la radio. cambia de color verde a beige. Además, la emisora de radio se guardará en la tecla variable destacada y, una vez guardada, oirá un pitido de confirmación. Cambio de canal o frecuencia Pulse la tecla variable de flecha descendente de búsqueda/sintonización para buscar rápidamente hacia abajo la siguiente emisora o canal disponible. Mantenga pulsada la tecla variable de flecha descendente de búsqueda/sintonización para sintonizar hacia abajo hasta que se suelte la tecla variable. Pulse la tecla variable de flecha ascendente de búsqueda/sintonización para buscar rápidamente hacia arriba la siguiente emisora o canal disponible. Emisoras presintonizadas Hay 12 preselecciones de emisoras disponibles que se pueden guardar en cada rango del sintonizador. Mantenga pulsada la tecla variable de flecha ascendente de búsqueda/sintonización para sintonizar hacia arriba hasta que se suelte la tecla variable. Para almacenar la emisora deseada, toque y mantenga pulsada una de las teclas variables de preselección de emisora durante dos segundos. Verá cómo la tecla variable resaltada Seleccione la tecla variable DIRECT TUNE (DIRECT SINTON) para introducir un número de canal o frecuencia, y confirme su selección pulsando la tecla variable GO (IR). Seleccione SCAN (EXPLORACIÓN) para obtener una vista previa de cinco segundos de cada emisora sintonizable en la banda de frecuencia. Toque nuevamente la tecla variable SCAN para detener la función de exploración y seleccionar una emisora de radio. Sistema de datos de radio (RDS) Este sistema de radio puede recibir señales de RDS en la banda FM. RDS es una tecnología utilizada para transmitir información en forma de texto acerca del tipo de música, canción e intérprete para la música de la banda FM. Esta información se muestra en la pantalla. NOTA: No todas las emisoras de radio admiten RDS. La información de RDS se visualiza debajo de la frecuencia de la emisora de radio que se está escuchando. 11 Información de texto de radio Seleccione INFO (INFORMACIÓN) para ver más información de texto de la radio en la mitad derecha de la pantalla. Seleccione CLOSE INFO (CERRAR INFORMACIÓN) para ocultar la información de texto adicional de la radio. Tipo de música (Filtro de tipo de programa) Seleccione MUSIC TYPE (TIPO MÚSICA) para habilitar e/o inhabilitar los tipos de programa deseados. La función de SEEK (BÚSQUEDA) y SCAN solo visualizará emisoras con tipos de programa coincidentes. Tipos de programa de RDS (FM) Éxitos para adultos, rock clásico, música clásica, música para adolescentes, country, información, jazz, idioma, noticias, nostalgia, viejos éxitos, personalidad, público, música religiosa, charlas religiosas, rhythm and blues, rock, música ligera, rhythm and blues ligero, rock ligero, deportes, charla, 40 principales, meteorología. Ajustes de radio MENÚ LW/MW/FM No existen reglajes específicos para estos modos. El tipo de programa (PTY) solo está disponible en el modo FM. Las emisoras de radio están agrupadas en función de sus programas (p. ej., Rock suave, Rhythm & Blues, etc.). Ajustes de visualización Pulse la tecla fija MENU (MENÚ) y toque la tecla variable Display Setting (Configuración de pantalla) para acceder al menú de configuración de pantalla. Seleccione la tecla variable Daytime Colors (Colores diurnos) para cambiar al modo de día manual y ajustar el brillo de la pantalla con los colores diurnos. Seleccione la tecla variable Nighttime Colors (Colores nocturnos) para cambiar al modo de noche manual y ajustar el brillo de la pantalla con los colores nocturnos. Seleccione la tecla variable Auto Color (Modo color auto) para cambiar al modo de día/noche automático y controlar el brillo de la pantalla empleando el interruptor atenuador de iluminación del vehículo. Toque la tecla variable DONE (HECHO) para guardar su configuración. 12 Cuando la pantalla de la radio está equipada con ParkViewT, muestra la imagen de la cámara trasera al colocar en posición R (marcha atrás) el cambiador de los vehículos con caja de cambios automática. En los vehículos con caja de cambios manual debe acoplarse la marcha atrás. Apagado de la pantalla Para apagar la pantalla (de manera que tan solo se muestre el reloj y se siga oyendo el audio por los altavoces del vehículo), pulse la tecla fija MENU (MENÚ) y toque la tecla variable Screen Off (Apagado de pantalla). Una vez activado el apagado de pantalla, pulse cualquier tecla fija o toque la pantalla para encenderla. Ajustes de visualización Pulse la tecla fija MENU (MENÚ) y toque la tecla variable Default View (Vista Def.) para habilitar el modo de visualización por omisión, en el que el logotipo con la marca del vehículo se muestra en la mitad derecha de la pantalla. NOTA: Puede inhabilitar ParkviewT en el menú de configuración del sistema. Cámara trasera de marcha atrás ParkviewT (si está equipado) Toque la tecla variable Picture View (Imagen Def.) para habilitar el modo de visualización de imágenes, en el que las imágenes pueden verse en la mitad derecha de la pantalla de la radio. Para obtener un ejemplo detallado, consulte la sección Disco duro. 13 Sistema multimedia Uconnect™ (MEDIOS) Modo de disco Aspectos generales La radio está equipada con un reproductor de CD/DVD. Requisitos de los discos PRECAUCIÓN Este reproductor de discos solo acepta discos de 12 cm (4 3/4 pulgadas). El uso de discos de otra medida puede dañar el mecanismo del reproductor de discos. Las radios pueden reproducir discos compactos (CD), discos compactos grabables (CD-R), discos compactos regrabables (CD-RW), DVD-R, DVD+R, DVD-RW grabables y discos compactos DVD+RW. RB2 también admite AAC y M4A. La radio puede reproducir los formatos siguientes: Para activar el modo DISC (DISCO), pulse la tecla fija MEDIA (MEDIOS) y seleccione la tecla variable de pestaña DISC (DISCO). MP3, WMA, CD de audio, DVD de audio y DVD de vídeo. No introduzca ningún soporte que no sean los formatos de CD/DVD compatibles. No se ofrece soporte para los formatos SACD (estrato SACD), VCD de dos discos, SVCD, VCD en DVD MPEG-4. 14 Puede encontrar una lista completa de los formatos de CD/DVD compatibles en www.DriveUconnect.com. Introducción de discos 1. Pulse una vez la tecla fija LOAD (CARGAR). 2. Cuando se abra la pantalla, inserte el disco en la ranura para discos de la radio con el lado impreso hacia arriba. La radio introduce automáticamente el disco y cierra la pantalla basculante. Una vez reconocido el disco, la radio selecciona el modo apropiado e inicia la reproducción de la primera pista. Durante este proceso, la pantalla muestra 9Reading...9 (Leyendo). NOTA: Si un CD está defectuoso, NO se expulsa automáticamente. Utilice únicamente discos de la medida estándar. Los discos que hayan sufrido modificaciones por la utilización de una etiqueta adhesiva no deben utilizarse en el reproductor de CD/DVD. Los medios y contenidos de alta definición (p. ej. HD-DVD, Blue-Ray) no son compatibles. Si el usuario no retira un CD expulsado antes de que transcurran 10 segundos aproximadamente, el CD volverá a cargarse. NOTA: En los CD de datos con una gran cantidad de canciones, la lectura, reproducción y visualización de información de todas las canciones del disco puede tardar varios segundos. 3. Pulse la tecla fija LOAD (CARGAR) para cerrar la pantalla. La pantalla se cerrará dentro de un plazo de 30 segundos después de extraer el disco del mecanismo. Cambio de pista Pulse la tecla variable de flechas hacia adepara seleccionar la siguiente pista lante del disco. Selección del modo de disco Cambie entre los menús de medios y radio pulsando la tecla fija MEDIA (MEDIOS). El modo de disco puede seleccionarse tocando la tecla variable de la pestaña Disc (Disco). Mantenga pulsada la tecla variable de flechas para que la pista avance hacia adelante rápidamente. NOTA: La grabación de CD en un ordenador personal a una velocidad de escritura baja proporcionará una mejor calidad. NOTA: Una vez introducido el disco, el sistema lo reconoce y selecciona automáticamente el modo apropiado. Extracción de discos Búsqueda de exploración Toque la tecla variable SCAN. 1. Pulse la tecla fija LOAD (CARGAR). 2. El disco será expulsado y podrá extraerse. NOTA: Si el disco no se retira antes de que transcurran 10 segundos aproximadamente, la unidad vuelve a introducirlo en la ranura (posición de estacionamiento). El disco puede extraerse con el encendido apagado. Las pistas individuales del disco serán reproducidas sucesivamente, durante ocho segundos cada una. Seleccione la tecla variable STOP SCAN (PARAR SCAN) para detener la función de exploración. Pulse la tecla variable de flechas hacia atrás para seleccionar el comienzo de la pista actual (mientras la pista se está reproduciendo) o la pista anterior (si la pista actual acaba de comenzar). Mantenga pulsada la tecla variable de flechas hacia atrás para que la pista retroceda rápidamente. Pulse la tecla variable de pausa para interrumpir la reproducción del disco. Pulse la tecla variable de reproducción para reanudar la reproducción del disco. Visualización de tiempo de título transcurrido El tiempo de título transcurrido de la pista que se está reproduciendo se muestra en la parte central izquierda de la pantalla. 15 Selección de un título de la lista Seleccione LIST (LISTA) para visualizar una lista de los títulos del disco que se está reproduciendo. Seleccione la pista que desea reproducir. Seleccione HIDE LIST (OCULTAR LISTA) para ocultar la lista. Información del disco Seleccione INFORMACIÓN para ver información sobre el título, intérprete, álbum y género del disco en la mitad derecha de la pantalla. Seleccione CERRAR INFORMACIÓN para cerrar la información. Tecnología de reconocimiento de música GracenoteT cionar información relativa al álbum, título de canción, género y artista. Se ofrecerán datos para la mayor parte de CD de audio (discos CDA). No se ofrecerán datos para discos DVD o de datos (aquéllos que contienen archivos de MP3 o WMA). La tecnología de reconocimiento de música y los datos relacionados son proporcionados por GracenoteT. Gracenote es la norma industrial en materia de tecnología de reconocimiento de música y de suministro de contenidos relacionados. Para obtener más información, visite el sitio web www.gracenote.com. NOTA: Visite www.DriveUconnect.com para obtener información sobre actualizaciones. Copia de discos en el disco duro Pulse la tecla variable de copia copiar el disco actual en el disco duro. Esta radio está equipada con el servicio de reconocimiento de música de GracenoteT, una base de datos incorporada destinada a propor16 para Menú de disco En el modo de disco con un disco de audio insertado, pulse la tecla fija MENU (MENÚ) para acceder al menú Disc (Disco). Seleccione Random (Aleatorio) para reproducir los títulos del disco de forma aleatoria. Vuelva a seleccionar Random (Aleatorio) para desactivar la reproducción aleatoria. Seleccione Repeat (Repetir) para repetir todas las canciones de la carpeta que se reproduce actualmente (solo discos MP3/WMA). Toque de nuevo la tecla variable Repeat Folder (Repetir carpeta) para detener el modo de repetición. Reproducción de un disco de MP3/WMA 1. Pulse una vez la tecla fija LOAD (CARGAR). 2. Inserte el disco en la ranura para discos de la radio con el lado impreso hacia arriba. La radio introduce automáticamente el disco y cierra la pantalla basculante. Una vez reconocido el disco, la radio selecciona el modo apropiado e inicia la reproducción de la primera pista. Durante este proceso, la pantalla muestra 9Reading...9 (Leyendo). Un disco MP3/WMA puede contener archivos de audio en una estructura de carpetas. Las carpetas, si existen, se muestran en la vista de listas. Si no se muestra la lista, toque la tecla variable BROWSE (EXAMINAR). 3. Para abrir una carpeta, toque una tecla variable con un símbolo de carpeta. en el caso de vehículos con caja de cambios automática. En los vehículos con caja de cambios manual el freno de estacionamiento debe estar aplicado. En primer lugar, inserte un DVD de vídeo. 4. Para cerrar una carpeta, toque la tecla variable con el icono que indica la carpeta anterior. Reproducción de DVD de vídeo NOTA: No todos los estados permiten ver un DVD de vídeo en la pantalla de la radio, y el vehículo debe estar detenido y con el cambiador en la posición P (Estacionamiento) La reproducción comienza automáticamente una vez que el DVD de vídeo es reconocido por la unidad de disco. Toque la tecla variable LIST (LISTA) para ver una lista de los capítulos o pistas disponibles. Toque una tecla variable de capítulo o pista en la lista para iniciar la reproducción desde la sección seleccionada. Toque la tecla variable VIEW VIDEO (VER VÍDEO) para ver el vídeo en la pantalla. Controles del menú de DVD Si inserta un disco DVD de vídeo con un menú superior, puede aparecer un menú. Toque las teclas variables de flechas de cursor para seleccionar el título que desea ver y, a continuación, toque la tecla variable ENTER (ENTR) para iniciar la reproducción. Toque la tecla variable de desplazamiento de DVD para desplazar los controles a la parte derecha de la pantalla. Toque la tecla variable para cerrar los controles en DVD MENU (MENÚ DE DVD). 17 Controles de reproducción de DVD En el modo de reproducción de vídeo, toque cualquier parte de la pantalla para mostrar los controles de reproducción de DVD. Toque la tecla variable NEXT (SIGUIENTE) para localizar capítulos o pistas sucesivas. Toque la tecla variable PREV (ANTERIOR) para iniciar la reproducción desde el principio del capítulo o pista en curso. Si pulsa dos veces en una sucesión rápida, la reproducción comienza a partir del principio del capítulo o pista precedente. Toque la tecla variable DVD Setup (Configuración del DVD) para acceder al menú DVD Setup (Configuración del DVD). Menú DVD VIDEO (VÍDEO DE DVD) Estando en el modo de disco con un DVD de vídeo insertado, pulse la tecla fija MENU (MENÚ) para acceder al menú DISC (DISCO). Para realizar una pausa en la reproducción, toque la tecla variable de pausa. Para detener la reproducción toque la tecla variable de parada. Toque la tecla variable de retroceso rápido durante la reproducción, para retroceder rápidamente. Toque la tecla variable de avance rápido durante la reproducción, para avanzar rápidamente. 18 En el menú DVD Setup (Configuración del DVD) puede seleccionar Menu Language (Idioma del menú), Audio Language (Idioma de audio), Subtitle (Subtítulo), Camera Angle (Angulo de cámara), Aspect Ratio (Relación de aspecto) y Brightness (Brillo) pulsando la tecla variable correspondiente. Si el disco insertado no admite la función, algunas de las teclas variables aparecerán inhabilitadas. Saltos en el disco Por regla general, los saltos son producto de un disco deteriorado (rayado). Esto provocará un salto hacia adelante de 10 segundos hasta superar la zona deteriorada. Copia de discos de audio en el disco duro 1. Inserte un disco. Protección de temperatura Si la temperatura del lector de discos es demasiado alta durante el funcionamiento, un mensaje en pantalla informará al usuario al respecto. La unidad cambiará al modo de radio hasta que la temperatura del lector de discos haya descendido hasta un nivel normal. El avance de la copia se muestra en la pantalla. Modo de disco duro (HDD) El modo de disco duro proporciona acceso a los archivos de audio almacenados en el disco duro interno. Funciona de forma similar a un reproductor de CD, con la excepción de que el disco duro interno puede almacenar más pistas. Puede almacenar unas 6.700 canciones de cuatro minutos con calidad de CD. Antes de usar el modo de disco duro, debe copiar las pistas en el disco duro interno. Los archivos quedarán almacenados en el disco duro interno y podrán usarse en el modo de disco duro. 2. Toque la tecla variable de copia para copiar pistas de música del disco insertado en el disco duro. Tras una breve pausa, el proceso de copiado comienza y el audio reanuda la reproducción desde el principio de la pista. El proceso de copiado continúa en segundo plano mientras se reproduce el audio. El avance se muestra en la pantalla. Incluso si cambia a otro modo (radio, AUX, etc.) o apaga la radio (encendido en posición ON), el proceso de copiado continuará en segundo plano. Durante este proceso también pueden escucharse los modos de radio. El tiempo de copiado es 4 veces superior a la velocidad normal de reproducción. NOTA: Cuando se copia un CD de audio en el disco duro, los archivos de audio se convierten de CD de audio a AAC. Los DVD de audio no pueden copiarse en el disco duro. 19 Copia de archivos WMA/MP3 en el disco duro Puede copiar archivos de audio comprimidos con formato MP3 y WMA desde un disco o mediante USB (p. ej., una memoria USB). Una vez copiadas las canciones, la lista de reproducción recibirá un nombre mediante el nombre de carpeta originado. Se recomienda clasificar los archivos de música en carpetas. Disc_Root_Level Songs (Lista de reproducción 1) Ejemplo: • Song 1.mp3 (Primera canción en lista de reproducción 1) Copiado de disco completo 1. Inserte un disco con archivos de MP3, WMA. En el ejemplo anterior, la lista del disco duro mostrará lo siguiente: • Song 2.mp3 (Segunda canción en lista de reproducción 1) • Song 3.wma (Tercera canción en lista de reproducción 1) My Playlist Folder 1 (Lista de reproducción 2) • 01Song.mp3 (Primera canción en lista de reproducción 2) • 02 Song.mp3 (Segunda canción en lista de reproducción 2) Las canciones situadas en el nivel raíz (nivel superior) del disco o dispositivo USB se guardan en una lista de reproducción denominada Root_Level_Songs. 20 • 03 Song.mp3 (Tercera canción en lista de reproducción 2) 2. Toque la tecla variable de copia para copiar archivos de música del disco insertado en el disco duro. El avance de la copia se muestra en la pantalla. Durante el proceso de copiado, el reproductor de discos puede reproducir audio. Durante el proceso pueden escucharse los modos de radio. 4. Toque la tecla variable From DISC (Desde el disco) en la pantalla siguiente. Copia selectiva de canciones desde un disco Puede seleccionar canciones específicas de un disco WMA/MP3 siguiendo el procedimiento que se indica a continuación: 2. Seleccione My Music (Mi música). 5. Seleccione las carpetas o títulos que desee copiar. Una marca de selección roja indica las canciones y/o carpetas seleccionadas. Toque la tecla variable ALL (TODO) para seleccionar todos los archivos y carpetas de una vez. 1. Toque la tecla fija MY FILES (MIS ARCHIVOS). 6. Toque la tecla variable DONE (HECHO) para iniciar el proceso de copiado. 3. Toque la tecla variable Import Music Files (Importar archiv. música). El proceso de copia se muestra en la pantalla. Durante el proceso pueden escucharse los modos de radio. 21 Si se desconecta o expulsa el medio antes de finalizar la copia, se interrumpirá el proceso. Puede reiniciar el proceso de copia repitiendo los pasos anteriores. 5. Seleccione las carpetas o títulos que desee copiar. Una marca de selección roja indica las canciones y/o carpetas seleccionadas. Toque la tecla variable ALL (TODO) para seleccionar todos los archivos y carpetas de una vez. Copia desde USB 1. Inserte un dispositivo USB. 6. Toque la tecla variable DONE (HECHO) para iniciar el proceso de copiado. 3. Toque la tecla variable Import Music Files (Importar archiv. música). 4. Toque la tecla variable From USB (Desde USB) en la pantalla siguiente. 2. Seleccione My Music (Mi música). 22 Reproducción de archivos de audio desde el disco duro Puede reproducir canciones directamente desde el disco duro interno. 1. Toque la tecla variable BROWSE (EXAMINAR) para seleccionar una categoría disponible. Pulse la tecla variable de flechas hacia atrás para seleccionar el comienzo de la pista actual (mientras la pista se está reproduciendo) o la pista anterior (si la pista actual acaba de comenzar). La radio puede clasificar los archivos por lista de reproducción, por nombre de canción, por artista, por género o por álbum. Mantenga pulsada la tecla variable de flechas para que la pista retroceda hacia atrás rápidamente. 3. Toque una tecla variable con el nombre de la lista de reproducción deseada para reproducir una lista de reproducción. Toque la tecla variable PLAY ALL PLAYLISTS (REPR. TODAS LAS LISTAS) para reproducir todas las listas de reproducción disponibles. 2. Para este ejemplo, toque la tecla variable Playlists (Listas de reproducción). Cambio de pista Pulse la tecla variable de flechas hacia adepara seleccionar la siguiente pista lante del disco. Mantenga pulsada la tecla variable de flechas hacia adelante para que la pista avance rápidamente. Pulse la tecla variable de pausa para interrumpir la reproducción del disco. Pulse la tecla variable de reproducción para reanudar la reproducción del disco. Visualización de tiempo de título transcurrido El tiempo de título transcurrido de la pista que se está reproduciendo se visualiza en la parte central izquierda de la pantalla. Menú del HDD En el modo de disco duro, pulse la tecla fija MENU (MENÚ) para acceder a la pantalla HDD Menu (Menú del HDD). 23 Reproducción aleatoria La función de reproducción al azar reproduce pistas de forma aleatoria del disco duro. Toque la tecla variable Random (Aleatorio) para activar o desactivar la función de reproducción aleatoria. Una marca de selección roja indica que la función de reproducción al azar está activa. Repetición de pista La función de repetición de pista repite la pista que se está reproduciendo. Toque la tecla variable Rpt. TRK para activar o desactivar la función de repetición de pista. 1. En el modo HDD, toque la tecla variable BROWSE (EXAMINAR) para acceder al menú Browse Categories (Examinar categorías). 3. Pulse una de las teclas variables ADD FAVORITE (AÑADIR FAVORITO). Una marca de selección roja indica que la función de repetición de pista está activa. Listas de reproducción favoritas en el disco duro Puede guardar enlaces a las listas de reproducción favoritas en la lista Favorite Playlists (Listas de reproducción favoritas). 4. Escoja la lista de reproducción que desee. 2. Toque la tecla variable Favorites (Favoritos) para ver las listas de reproducción favoritas. 24 Edición de listas de reproducción en el disco duro En la lista Favorite Playlists (Listas Reprod. Fav.) se ha guardado un enlace a las listas de reproducción seleccionadas. NOTA: Si una lista de reproducción se elimina del menú My Playlists (Mis listas de reproducción), se eliminará también el enlace a la lista de reproducción favorita. Consulte la sección Edición de listas de reproducción en el disco duro en este manual. Ahora puede editar la lista si toca la tecla variable EDIT (EDITAR) o salir de la lista si toca la tecla variable EXIT (SALIR). 2. Seleccione My Music (Mi música). 1. En el modo de disco duro, pulse la tecla fija MY FILES (MIS ARCHIVOS) para acceder al menú Manage My Files (Administr. archivos). 3. Toque la tecla variable My Playlists (Mis listas de reproducción). 25 4. Toque la tecla variable EDIT (EDITAR) de la lista de reproducción que desee editar. NOTA: No es posible editar una lista de reproducción durante el proceso de copia. Puede continuar con la lista de reproducción seleccionada, eliminar canciones de la lista de reproducción seleccionada o eliminar la lista. 26 5. Toque la tecla variable Rename This Playlist (Cambiar el nombre de esta lista de reproducción). NOTA: Si toca la tecla variable Delete This Playlist (Eliminar esta lista de reproducción), la lista de reproducción y todas las canciones que contenga se eliminarán de forma permanente. No se podrá recuperar ninguna canción ni lista de reproducción. 6. Teclee un nuevo nombre para la lista de reproducción. 7. Toque la tecla variable SAVE (GUARDAR) para confirmar el nombre. La lista de reproducción ahora tiene el nuevo nombre. Eliminación de todas las listas de reproducción del disco duro Eliminación de canciones de una lista de reproducción 1. Pulse la tecla fija MENU (MENÚ) en el lado derecho de la radio. 1. Pulse la tecla fija MENU (MENÚ), toque la tecla variable MY FILES (MIS ARCHIVOS), toque después la tecla variable My Playlists (Mis listas de reproducción) y seleccione la tecla variable Delete Songs From This Playlist (Eliminar canciones de esta lista de reproducción). 2. Toque la tecla variable System Setup (Config. sistema) para acceder al menú System Setup (Config. sistema). NOTA: Si toca la tecla variable Delete This Playlist (Eliminar esta lista de reproducción), la lista de reproducción y todas las canciones que contenga se eliminarán de forma permanente. No se podrá recuperar ninguna canción ni lista de reproducción. 2. Seleccione los títulos que desee eliminar. 3. Toque la tecla variable Manage Hard Drive (Gestionar unidad disco) para acceder al menú del mismo nombre. Una marca de selección roja indica las canciones seleccionadas. 3. Toque la tecla variable DELETE (ELIMIN) para iniciar el proceso de eliminación. NOTA: Si elimina una canción de la lista de reproducción, la canción no podrá recuperarse. 4. Cuando haya finalizado la edición de la lista de reproducción, toque la tecla variable DONE (HECHO). Este menú muestra el espacio disponible en el disco duro y permite eliminar archivos de música e imágenes. 27 Importación de imágenes Es posible importar imágenes al disco interno. Las imágenes pueden visualizarse en la mitad derecha de la pantalla de la radio. NOTA: Los dispositivos USB (p. ej., adaptadores USB de memoria de cámara, etc.) deben cumplir con la norma MSD (dispositivo de almacenamiento masivo). Este terminal USB puede proporcionar alimentación al dispositivo insertado. La limitación de corriente del dispositivo debe ser inferior o igual a 500 mA. 3. Toque la tecla variable My Pictures (Mis imágenes) para ver las imágenes almacenadas en conjunto. 1. Toque la tecla fija MY FILES (MIS ARCHIVOS) para ir a la pantalla Manage My Files (Administrar mis archivos). La radio puede almacenar 24 imágenes del usuario. En el modo predeterminado, el logotipo con la marca del vehículo se muestra en la mitad derecha de la pantalla. Pulse la tecla fija MENU (MENÚ) en el lado derecho de la radio para acceder a uno de los menús de ajuste. Antes de realizar la importación, se recomienda cambiar las dimensiones de las imágenes en un PC o una cámara digital a 240 por 158 píxeles. 28 4. Pulse una de las teclas variables Add Pictures (Añadir imágenes). 5. Seleccione el tipo de medio insertado. 2. Inserte un CD o una memoria USB que contenga sus imágenes. La imagen importada aparece ahora en la pantalla Manage My Pictures (Gestionar Mis imágenes). 8. Para visualizar la imagen importada en la pantalla de la radio, toque la tecla variable de la imagen deseada. 6. Utilice las teclas variables PAGE (PÁGINA) para recorrer las páginas a través de una lista de imágenes y pulse la imagen que desee importar. NOTA: Para que sean reconocidos, los archivos deben estar en el directorio raíz (nivel superior) del disco o dispositivo USB. 7. Confirme su selección tocando la tecla variable YES (SÍ). 9. Seleccione esta imagen pulsando la tecla variable Set as Default (Establecer como predeterminada). Una marca de selección indica la imagen que se está usando. Utilice la tecla variable PREV (ANTE) o NEXT (SIG.) para recorrer la lista de imágenes disponibles. 29 Toque la tecla variable DELETE (ELIMIN) para eliminar la imagen del disco duro. 10. Pulse dos veces la tecla fija MENU (MENÚ) y, a continuación, toque la tecla variable Picture View (Vista Imagen) para habilitar la visualización de la imagen. La imagen ahora se visualiza en la mitad derecha de la pantalla. 30 Sistema multimedia Uconnect™ (DISPOSITIVOS REMOTOS) variable VES MODES (MODOS VES) para seleccionar la fuente de audio de VES™. Envío de audio/vídeo y control del VES La radio también puede controlar el VES™. Video Entertainment System (VES)™ La radio puede controlar a distancia el sistema VES™. Para más información, consulte el manual del usuario de VES™. Recepción de audio/vídeo desde VES™ Se puede reproducir audio desde VES™ mediante el sistema de altavoces del vehículo. Si tiene un VES™ con reproductor de vídeo, también podrá ver el vídeo en el visualizador de la radio, si el vehículo está estacionado. Una tecla variable inhabilitada indica una fuente que no está disponible. Todas las fuentes se reproducen a través de los auriculares del VES™. Para informarse sobre la forma de controlar el VES™ trasero a través del mando a distancia, consulte el manual del usuario de VES™. Toque la tecla variable de la fuente que desea para reproducir la selección en la cabina del vehículo. Para acceder al VES™ trasero, pulse la tecla fija MENU (MENÚ) en el lado derecho de la radio. La disponibilidad de las teclas variables DVD Player (Reproductor DVD), Rear AUX 1 (AUX 1 trasero) y Rear AUX 2 (AUX 2 trasero) depende del tipo de VES™ equipado en el vehículo. El reproductor de DVD no estará disponible si el VES™ no incorpora reproductor de DVD o si no hay un DVD en el reproductor. La pestaña VES aparece disponible después de encender el sistema VES™. Toque la tecla Para que un dispositivo esté disponible, deberá estar conectado a la toma AUX del VES™. 31 Toque la tecla variable del VES trasero para mostrar los controles del VES trasero. Toque la pestaña de tecla variable 1 para seleccionar Canal 1. La mitad izquierda de la pantalla muestra la información de la fuente de audio de modo que, si se elige por ejemplo FM, se muestra la frecuencia de radio. SEEK (BÚSQUEDA) ascendente o descendente para cambiar de emisora de radio. Toque la pestaña de tecla variable 2 para establecer la fuente de audio deseada para el segundo canal de audio del VES™. Toque la tecla variable LIST (LISTA) para visualizar los detalles de la fuente seleccionada. Los controles del VES trasero se visualizan en la mitad derecha de la pantalla. NOTA: Si no puede ver los controles del VES trasero, pulse la tecla variable OCULTAR LIST (LISTA) y/o la tecla variable CERRAR INFORMACIÓN. La primera columna controla la activación/ desactivación de VES y los canales de sonido 1 o 2 de los auriculares. Con un auricular del VES™ puede escucharse el canal 1 o 2 de audio. 32 En este caso se visualiza la lista de la preselección de FM en la sintonía seleccionada. Puede tocar una tecla variable de preselección para cambiar de emisora, tocar la tecla variable DIRECT TUNE (DIREC SINTON) para introducir una frecuencia o pulsar las teclas fijas La mitad izquierda de la pantalla muestra información de la fuente de audio, que en este caso es la pista 1 de una lista de reproducción del disco duro de la radio. Toque la tecla variable LIST (LISTA) para visualizar los detalles de la fuente seleccionada. NOTA: La radio no puede reproducir MW y LW o FM al mismo tiempo. La columna MEDIA (MEDIOS) controla la fuente de audio de HDD, DISC (DISCO) y AUX de la radio. La columna VES controla el reproductor de DVD, AUX 1 trasero y AUX 2 trasero del sistema VES™. En este caso se visualizan las canciones contenidas en la lista de reproducción seleccionada. Toque la pestaña de la tecla variable de encendido/apagado para mostrar la visualización del VES ENCENDIDO/APAGADO. Aquí puede activar o desactivar el sistema VES™. Toque la tecla variable Turn Rear VES OFF (Apagar VES trasero) para apagar el VES™. Toque la tecla variable Turn Rear VES ON (Encender VES trasero) para encender el VES™. BLOQUEO DEL VES™ Pulse la tecla variable LOCK (BLOQ.) para inhabilitar los controles en la unidad de mando a distancia del VES™. Una vez bloqueado el VES™, ya no es posible utilizar los controles ni el mando a distancia del VES™. DESBLOQUEO DEL VES™ Pulse la tecla variable UNLOCK (DESBLOQUEO) para habilitar los controles en la unidad de mando a distancia del VES™. La columna RADIO controla los sintonizadores de MW, LW y FM de la radio. 33 Reproducción de un DVD de vídeo en el VES™ trasero 2. Pulse la tecla fija MENU (MENÚ) en el lado derecho de la radio. 1. Para ver un DVD de vídeo en la pantalla del VES™ trasero, inserte un DVD de vídeo. 5. Toque la tecla variable DISC (DISCO) para seleccionar el modo de medio. La reproducción comienza automáticamente una vez que el DVD de vídeo es reconocido por la unidad de disco. 3. Toque la tecla variable del VES trasero para mostrar los controles del VES trasero. 4. Toque la pestaña de la tecla variable 1 para seleccionar el canal 1 de audio. 6. Toque la tecla variable PLAY VIDEO (REPRODUCCIÓN DE VÍDEO) para iniciar la reproducción del vídeo. Acuerdos de licencia Acuerdo de licencia de Dolby Digital Fabricado bajo licencia de Dolby Laboratories. Dolby, MLP Lossless y el símbolo de la doble D son marcas comerciales de Dolby Laboratories. 34 Acuerdo de licencia de Macrovision Este producto incorpora tecnología con protección de copyright que está protegida por patentes de EE.UU. y otros derechos de propiedad intelectual. El uso de esta tecnología con protección de copyright debe contar con la autorización de Macrovision, y está destinada para el hogar y otros usos de visualización limitada únicamente, a menos que se cuente con la autorización de Macrovision. Se prohíbe el 9reverse engineering9 (reciclaje) o desmontaje. NOTA: Los dispositivos USB (p. ej., adaptadores USB de memoria de cámara, etc.) deben cumplir con la norma MSD (dispositivo de almacenamiento masivo). Este terminal USB puede proporcionar alimentación al dispositivo insertado. La limitación de corriente del dispositivo debe ser inferior o igual a 500 mA. Conector USB Los dispositivos de reproducción de MP3 no se pueden controlar a través del conector USB. Algunos dispositivos de reproducción almacenan archivos de música en formato MP4, que no se pueden reproducir en esta radio. Algunos tipos de música protegidos frente a copias (p. ej., descargas de Internet) no pueden reproducirse en esta radio. Es posible transferir archivos de audio o archivos de imágenes a la radio. Los archivos pueden estar en un disco o en un dispositivo USB (p. ej., memoria USB). El conector USB está cubierto por una tapa pequeña que lo protege del polvo y de deterioros. NOTA: Algunos reproductores de MP3 no permiten la copia de canciones a otros dispositivos. Cómo abrir la tapa La velocidad de transferencia de este conector USB es de unos dos megabytes por segundo. 1. Coloque un dedo debajo de la flecha. Dispositivos compatibles Acuda a su concesionario autorizado o visite www.DriveUconnect.com para obtener información sobre los dispositivos compatibles. 35 Cómo cerrar la tapa 2. Tire hacia arriba. NOTA: La lengüeta está sujeta y no debe retirarse. No tire del marco. No utilice una herramienta (p. ej. destornillador, lima de uñas, etc.) para abrir la lengüeta, ya que esto podría deteriorar la parte frontal de la radio. 36 1. Con ayuda del dedo pulgar y del índice, sujete la lengüeta. Las pestañas (1) deben insertarse primero en el marco. 2. Introduzca primero las pestañas superiores (1) dentro del marco. 3. A continuación, empuje la parte superior de la lengüeta para asegurarla en su sitio. PRECAUCIÓN No fuerce nunca la entrada de un conector en los puertos de la radio. Antes de realizar la conexión, asegúrese de que los conectores tienen la forma y medida correctas. Modo AUX El conector AUX le permite conectar la salida de auriculares de un dispositivo de audio (p. ej., reproductor de MP3) a la radio. El audio del dispositivo conectado se reproducirá entonces a través del sistema de sonido de la radio. Conecte un cable de mini-enchufe hembra estéreo de 3,5 mm como se muestra antes (no proporcionado con la radio) al conector AUX de la radio y al conector de los auriculares de su dispositivo de audio. Cuando se conecta el cable de mini-enchufe hembra estéreo de 3,5 mm, la pantalla cambia automáticamente al modo AUX. Cuando se desenchufa el cable, la pantalla de la radio volverá al último modo de sintonizador. Para cambiar los modos de radio mientras el cable está conectado a la unidad, pulse la tecla fija RADIO/MEDIA (RADIO/MEDIOS) hasta que la pestaña AUX se visualice en la parte superior de la pantalla. Toque la pestaña AUX para volver al modo AUX. Ajuste el volumen con la perilla giratoria ON/ OFF VOLUME (ENCENDIDO/APAGADO Y VOLUMEN) o con el volumen del dispositivo conectado. La radio no puede controlar el dispositivo externo (p. ej., selección de listas de reproducción, reproducción, avance rápido, etc.); en su lugar, utilice los controles del dispositivo. NOTA: Si se inserta un conector mono, la reproducción del audio resultará inadecuada. Modo iPodT (si está equipado) El modo iPodT permite acceder a los archivos de audio de un dispositivo iPodT externo. Funciona como un mando a distancia para el dispositivo digital portátil iPodT que se encuentra conectado y se puede reproducir el audio del dispositivo iPodT mediante el sistema de altavoces del vehículo. Antes de utilizar el modo iPodT, deberá conectar su dispositivo iPodT al conector del iPodT. (Para obtener instrucciones, consulte la sección de INTERFAZ DEL CLIENTE UNIVERSAL (UCI) en el manual del propietario del vehículo.) NOTA: Los archivos no se almacenarán en el disco duro interno y no podrán usarse en el modo de disco duro. NOTA: Se recomienda utilizar el último software disponible de iPodT e iTunes. 37 Consulte el sitio web del fabricante para comprobar si existen actualizaciones http://www.apple.com/support/ipod/. Reproducción de archivos de audio de un dispositivo iPodT Se pueden reproducir canciones directamente del dispositivo iPodT. Toque la tecla variable BROWSE (EXAMINAR) para realizar una exploración por categorías. Selección de una categoría del iPodT La radio puede clasificar los archivos por lista de reproducción, por nombres de canciones, por intérpretes, por compositores, por géneros, por álbumes, por podcasts o por audiolibros. Toque una tecla variable con el nombre del intérprete que desea para reproducir canciones de dicho intérprete. Toque la tecla variable PLAY ALL (REPRODUCIR TODO) para reproducir las canciones de todos los intérpretes disponibles. Toque la tecla variable LIST (LISTA) para visualizar una lista. Toque la tecla variable con el elemento deseado de la lista para seleccionar y reproducir el elemento. Toque la tecla variable OCULTAR LIST (LISTA) para ocultar la lista. 38 Para el ejemplo, toque la tecla variable Artists (Intérpretes). Toque la tecla variable PÁGINA ANTERIOR o PÁGINA SIGUIENTE para desplazarse por la lista de intérpretes. Salto a través de la lista Si encuentra una lista muy larga, puede ser útil tocar la tecla variable A<>Z para entrar en el menú List Jump (Salto a través de la lista). Para este ejemplo, hemos introducido la primera letra del intérprete deseado. Toque la tecla variable GO (IR) para saltar al intérprete deseado. Toque una tecla variable con el nombre del intérprete que desea para reproducir canciones de dicho intérprete. Reproducción Toque la tecla variable REPRODUCCIÓN para iniciar la reproducción. Cambio de pista Pulse la tecla variable de flechas hacia adelante para seleccionar la siguiente pista del disco. Visualización de tiempo de título transcurrido El tiempo de título transcurrido de la pista que se está reproduciendo se muestra en el lado izquierdo de la pantalla. Mantenga pulsada la tecla variable de flechas hacia adelante para que la pista avance rápidamente. Pulse la tecla variable de flechas hacia atrás para seleccionar el comienzo de la pista actual (mientras la pista se está reproduciendo) o la pista anterior (si la pista actual acaba de comenzar). Búsqueda de exploración Toque la tecla variable SCAN. Las pistas individuales se reproducirán sucesivamente durante 8 segundos cada una. Seleccione la tecla variable STOP SCAN (PARAR SCAN) para detener la función de exploración. Mantenga pulsada la tecla variable de flechas hacia atrás para que la pista retroceda rápidamente. Pausa Toque la tecla variable PAUSA para interrumpir la reproducción. 39 Información de pista Toque la tecla variable INFORMACIÓN. Una marca de selección roja indica que la función de repetición de pista está activa. En la mitad derecha de la pantalla se visualizará información relativa a la pista que se está reproduciendo en ese momento, si está disponible. Uconnect™ Phone (si está equipado) Si existe más información, se visualizará la tecla variable NEXT (SIGUIENTE). Toque la tecla variable NEXT (SIGUIENTE) para ver la información adicional. Menú del iPodT En el modo iPodT, pulse la tecla fija MENU (MENÚ) para acceder al menú iPodT/AUX. 40 Uconnect™ Phone es un sistema de comunicaciones de a bordo de manos libres activado por la voz. Reproducción aleatoria La función de reproducción aleatoria reproduce pistas del dispositivo iPodT de forma aleatoria. Toque la tecla variable Random (Aleatorio) para activar o desactivar la función de reproducción aleatoria. Una marca de selección roja indica que la función de reproducción al azar está activa. Repetición de pista La función de repetición de pista repite la pista que se está reproduciendo. Toque la tecla variable Rpt. TRK para activar o desactivar la función de repetición de pista. El sistema Uconnect™ está completamente integrado en el sistema de audio del vehículo. La pantalla de la radio se utiliza para indicaciones visuales del sistema Uconnect™, tales como el estado de la batería del teléfono, la potencia de señal, la identificación de la persona que llama y el tipo de llamada. NOTA: Es posible que su teléfono no admita todas las características disponibles en Uconnect™. Consulte el manual del propietario de su vehículo para obtener instrucciones de funcionamiento del teléfono Uconnect™ Phone. Órdenes por voz (si está equipado) Consulte el manual del propietario de su vehículo para obtener instrucciones de funcionamiento de las órdenes por voz. 41 INFORMACIÓN DEL SISTEMA Pulse la tecla fija MENU (MENÚ) en el lado derecho de la radio y toque la tecla variable System Setup (Config. sistema) para acceder al menú System Setup (Config. sistema). Toque la tecla variable System Information (Información del sistema) para acceder a la información del sistema. Copia de seguridad de datos del usuario Visite http://www.chrysler.com/en/owners/mygig/ para obtener información sobre cómo realizar copias de seguridad o transferir los datos de usuario, como los archivos de música, etc. antes de volver o cambiar a un vehículo con una radio compatible (por ejemplo, finalización del alquiler). Actualizaciones de software y base de datos Visite www.DriveUconnect.com para obtener información sobre las actualizaciones de software y base de datos disponibles. Hay disponibles actualizaciones para el software de la radio y la base de datos de la tecnología de reconocimiento de música GracenoteT. 42 Antes de instalar las actualizaciones, lea las instrucciones específicas relativas a los discos de actualización. Si necesita ayuda o más información acerca de las actualizaciones disponibles, contacte con su concesionario local autorizado. RESOLUCIÓN DE PROBLEMAS Radio P.: No logro sintonizar mi emisora de radio favorita que antes encontraba siempre. ¿Qué puedo hacer? R.: Seleccione MUSIC TYPE (TIPO DE MÚSICA) desde el modo Radio. Seleccione CLEAR (BORRAR) para inhabilitar todos los filtros de PTY e intente buscar la emisora deseada. Disco P.: La radio no muestra la información correspondiente al disco que he insertado. ¿Cómo puedo acceder a esta información? R.: La radio buscará el disco insertado en la base de datos de la tecnología de reconocimiento de música GracenoteT almacenada en el disco duro. Si la base de datos no está actualizada, o no contiene el disco en particular, la información no puede visualizarse. Póngase en contacto con su concesionario autorizado o visite el sitio web www.DriveUconnect.com para obtener información sobre las actualizaciones disponibles. R.: Cuando la radio ha terminado de copiar o grabar música en el disco duro, debe reconstruir la lista de reproducción actual. Una vez reconstituida la lista de reproducción, la radio inicia la reproducción de la primera canción de la lista de reproducción actual. HDD P.: Cuando la radio reproduce canciones del disco duro, salta a la primera canción de la lista. ¿Por qué lo hace? 43 GLOSARIO DE TÉRMINOS AS CD CDC CDDB DVD DVDC GMD 44 Almacenamiento automático Disco compacto Cambiador de disco compacto Una compañía tecnológica fundada en 1995 como CDDB, Inc. La compañía ha cambiado su nombre por GracenoteT Inc. La tecnología ahora se llama servicio de reconocimiento de medios GracenoteT. Disco versátil digital Cambiador de disco versátil digital Base de datos de medios GracenoteT, Servicio de reconocimiento de medios GracenoteT (www.gracenote.com) GMT Hora del meridiano de Greenwich HDD Unidad de disco duro MFB Tecla variable multifunción MFS Volante multifunción MP3 MPEG-1 Estrato Esquema de comprede audio 3. sión utilizado para transferir archivos de audio a través de Internet y almacenarlos en reproductores portátiles y servidores de audio digital. M4A El formato .M4A en realidad es el estrato de audio de películas MPEG 4 (no vídeo). M4P POS PTY RDS UTC VES™ WMA El formato .M4P es un archivo de audio comprado en una tienda de música de Apple (iTunes) que está protegido por un esquema de gestión de derechos digitales. Posición Tipo de programa (radio) Sistema de datos de la radio Hora universal coordinada Video Entertainment System™ (Sistema de entretenimiento de vídeo) Formato de audio de medios de Windows 1 MEDIA CENTER 431 (RB2) • VEILIGHEIDSRICHTLIJNEN . . . . . . . . . . . . . . . . . . • INLEIDING . . . . . . . . . . . . . . . . . . . . . . . . . . . . • Waarschuwingen . . . . . . . . . . . . . . . . . . . . . . • Veiligheidsinformatie . . . . . . . . . . . . . . . . . . . . • Bedoeld gebruik . . . . . . . . . . . . . . . . . . . . . . . • Systeemonderhoud . . . . . . . . . . . . . . . . . . . . . • BEHANDELING ALGEMEEN . . . . . . . . . . . . . . . . . . • ONDERDELEN VAN DE GEBRUIKERSINTERFACE . . • Audiobedieningselementen op stuur (indien aanwezig) • Geluidsinstellingen . . . . . . . . . . . . . . . . . . . . . • AAN DE SLAG . . . . . . . . . . . . . . . . . . . . . . . . . . • De taal wijzigen . . . . . . . . . . . . . . . . . . . . . . . • Tijd instellen . . . . . . . . . . . . . . . . . . . . . . . . . • Voorkeurzenders opslaan . . . . . . . . . . . . . . . . . • Uconnect™ Multimedia (RADIO) . . . . . . . . . . . . . . . • Radiomodus . . . . . . . . . . . . . . . . . . . . . . . . . . . . . . . . . . . . . . . . . . . . . . . . . . . . . . . . . . . . . . . . . . . . . . . . . 3 . 4 . 4 . 4 . 4 . 4 . 6 . 6 . 7 . 8 . 9 . 9 . 9 10 11 11 1 • Radio-instelingen . . . . . . . . . . . . . . . . . • Uconnect™ Multimedia (MEDIA) . . . . . . . . . . • Diskmodus . . . . . . . . . . . . . . . . . . . . . • Modus harde schijf (HDD) . . . . . . . . . . . . • Uconnect™ Multimedia (EXTERNE APPARATUUR) • Video Entertainment System (VES)™ . . . . . • Licentieovereenkomsten . . . . . . . . . . . . . • USB-aansluiting . . . . . . . . . . . . . . . . . . • AUX-modus . . . . . . . . . . . . . . . . . . . . • iPodT modus (indien aanwezig) . . . . . . . . . • Uconnect™ Phone (indien aanwezig) . . . . . • Spraakbediening (indien aanwezig) . . . . . . • SYSTEEMINFORMATIE . . . . . . . . . . . . . . . . • Back-up maken van gebruikersgegevens . . . • Updates van software en databases . . . . . . • PROBLEEMOPLOSSING . . . . . . . . . . . . . . . • Radio . . . . . . . . . . . . . . . . . . . . . . . . • Disk . . . . . . . . . . . . . . . . . . . . . . . . . • HDD . . . . . . . . . . . . . . . . . . . . . . . . . • WOORDENLIJST . . . . . . . . . . . . . . . . . . . 2 . . . . . . . . . . . . . . . . . . . . . . . . . . . . . . . . . . . . . . . . . . . . . . . . . . . . . . . . . . . . . . . . . . . . . . . . . . . . . . . . . . . . . . . . . . . . . . . . . . . . . . . . . . . . . . . . . . . . . . . . . . . . . . . . . . . . . . . . . . . . . . . . . . . . . . . . . . . . . . . 12 14 14 19 31 31 35 35 38 38 42 42 43 43 43 44 44 44 44 45 VEILIGHEIDSRICHTLIJNEN Zorg ervoor dat alle gebruikers deze handleiding zorgvuldig hebben gelezen alvorens zij het audiosysteem gebruiken. De handleiding bevat instructies voor veilige en effectief gebruik van het systeem. WAARSCHUWING! Volg de onderstaande veiligheidsvoorschriften op. Anders bestaat er een risico op letsel en schade aan eigendommen. • Stop onmiddellijk met het gebruik van het systeem wanneer zich een probleem voordoet. Anders bestaat er een risico op letsel en schade aan het product. Laat het systeem repareren door uw erkende dealer. • Kijk alleen naar het scherm wanneer dat noodzakelijk en veilig is. Als u een lange periode naar het scherm wilt kijken, zet de auto dan stil op een veilige plaats. • Stel het geluidsvolume van het systeem zodanig in, dat geluiden buiten de auto, zoals van het verkeer of sirenes, goed hoorbaar zijn. 3 INLEIDING Waarschuwingen Deze handleiding bevat WAARSCHUWINGEN voor handelingen die kunnen leiden tot een ongeval of lichamelijk letsel. Als u de handleiding niet in zijn geheel leest, kan het zijn dat u belangrijke informatie over het hoofd ziet. Neem alle WAARSCHUWINGEN in acht! Wijzigingen van de informatie in deze handleiding zijn voorbehouden. Veiligheidsinformatie Lees de handleiding zorgvuldig door, voordat u het systeem voor het eerst gaat gebruiken. Neem de veiligheidsvoorschriften in acht die in deze handleiding worden beschreven. Bij vragen kunt u contact opnemen met de autofabrikant of uw erkende dealer. 4 Bedoeld gebruik Bij de ontwikkeling en fabricage van het radiosysteem heeft men zich gehouden aan de algemeen erkende regels inzake radiotechniek. Houd u aan de landelijke normen en richtlijnen bij gebruik van het product. Bezoek www.DriveUconnect.com voor updates, aanvullende informatie, compatibele telefoons, etc. Systeemonderhoud Update van software De GracenoteT software kan worden bijgewerkt. Bezoek www.DriveUconnect.com of neem contact op met uw erkende dealer voor de nieuwste software. Veilig gebruik van het radiosysteem Lees alle aanwijzingen van deze handleiding vóór gebruik zorgvuldig door om er zeker van te zijn dat u het radiosysteem op de juiste wijze bedient. De radio is een geavanceerd elektronisch apparaat. Laat jonge kinderen niet zonder toezicht de radio gebruiken. U kunt blijvende gehoorschade oplopen als de muziek of het geluid van de radio met maximaal volume wordt weergegeven. Wees voorzichtig bij het regelen van het volume van de radio. Autorijden is een complexe bezigheid die uw volledige aandacht vereist. Als u de auto bestuurt of iets anders doet dat uw volle aandacht vereist, is het raadzaam de radio niet bedienen. OPMERKING: Veel functies van deze radio zijn snelheidsgebonden. Voor uw eigen veiligheid is het niet mogelijk om het toetsenpaneel op het scherm tijdens het rijden te bedienen. Houd dranken, regenwater en ander vocht uit de buurt van de radio. Behalve schade aan de radio kan vocht ook elektrische schokken veroorzaken, zoals voor alle elektronische apparaten geldt. OPMERKING: Bij cabrioletmodellen kan de geluidskwaliteit van het systeem te wensen overlaten tijdens het rijden met open dak. Aansluitingen Probeer nooit met kracht een stekker in een aansluiting van de radio te drukken. Controleer of de vorm en het formaat van de stekkers juist zijn, voordat u ze aansluit. Aansluitkabels mogen geen druk uitoefenen op de aansluiting. Gebruik geen USB-apparaten die het openen van het display belemmeren. Aanraakscherm Raak het scherm niet aan met een hard of scherp voorwerp (pen, USB-stick, sieraden enz.) dat krassen op het scherm kan veroorzaken! Cd/dvd-speler Plaats geen beschadigde, vervormde, bekraste of vuile cd’s of dvd’s in de cd/dvdspeler. OPMERKING: Het gebruik van een plastic stift voor zakcomputers en andere aanraakschermen is wel mogelijk. Gebruik geen disks met een zelf aangebracht etiket in de cd/dvd-speler. Spuit geen vloeistoffen of bijtende stoffen op het scherm! Gebruik een schoon, droog lensreinigingsdoekje van microvezel om het aanraakscherm schoon te maken. Voer uitsluitend het ondersteunde formaat cd/ dvd in. Zie het hoofdstuk Diskmodus in deze handleiding voor informatie over de ondersteunde cd/dvd-formaten. Plaats niet meer dan één cd/dvd tegelijk in de speler. Gebruik indien nodig een pluisvrij doek met een reinigingsmiddel, zoals isopropylalcohol of een 1:1-oplossing van isopropylalcohol en water. Volg de aanwijzingen en voorschriften van de oplosmiddelenfabrikant. 5 BEHANDELING ALGEMEEN ONDERDELEN VAN DE GEBRUIKERSINTERFACE (1) Spraakbediening (indien aanwezig) Druk op de Voice Command-toets (1) en wacht tot u de bevestigingstoon hoort alvorens een opdracht in te spreken. (2) Uconnect™ Phone (indien aanwezig) Druk op de toets Uconnect™ Phone (6) om het Uconnect™ systeem te activeren of het huidige telefoongesprek te beëindigen. De voeding voor de radio wordt geleverd via de contactschakelaar, die zich in de stand ON, ACC of ACC Delay moet bevinden voordat de radio kan worden gebruikt. Schermtoetsen Schermtoetsen bevinden zich op het aanraakscherm. Toetsen Toetsen links en rechts van het radiofront. 6 (3) RADIO Druk op de toets RADIO (3) om naar een RADIO-functie te schakelen of tussen RADIOfuncties te schakelen. (4) MEDIA Druk op de toets MEDIA (4) om naar een MEDIA-functie te schakelen of tussen MEDIAfuncties te schakelen. (5) ON/OFF VOLUME Het systeem kan tevens tijdens het rijden in de stand-bystand worden gezet door de draaiknop ON/OFF VOLUME (5) in te drukken. OPMERKING: Als de contactschakelaar in de stand OFF wordt gezet terwijl de radio in de standbystand staat, dan onthoudt de radio de stand-bystatus tot het de contactschakelaar weer in de stand ON wordt gezet. Druk op draaiknop (5) ON/OFF VOLUME om de radio in te schakelen. De radiosoftware is voortdurend werkzaam als het contact is ingeschakeld, zelfs als de radio zich in de standby-modus bevindt. Als het apparaat is uitgeschakeld, kan nog steeds een cd worden uitgeworpen en de tijd worden weergegeven. (6) LOAD Druk op de toets LOAD (6) om het display te openen of te sluiten. Na het openen van het display duurt het enkele seconden voordat de cd/dvd wordt uitgeworpen, indien deze aanwezig is. Let er bij het invoeren van een disk op dat het label naar boven is gericht. Het display wordt automatisch gesloten nadat de disk is ingevoerd. OPMERKING: Het kan enkele seconden duren voordat het type ingevoerde disk wordt herkend (cd, dvd, MP3, enz.). (7) MENU Druk op de toets MENU (7) om het menu met systeeminstellingen te openen. OPMERKING: Druk op de toets MENU in een actieve modus om specifieke instellingen voor die modus te wijzigen. (8) AUDIO Druk op de toets AUDIO (8) om te schakelen naar de audiofunctie, zodat u toegang krijgt tot de Fade-functie en de toonregeling. (9) MY FILES (MIJN BESTANDEN) Druk op de toets MY FILES (9) (MIJN BESTANDEN) om uw muziek- en afbeeldingsbestanden op de interne schijf te beheren. (10) USB-aansluiting Sluit een ondersteund apparaat aan op de USB-aansluiting (10) om bestanden naar de interne harde schijf te kopiëren. OPMERKING: Zie het hoofdstuk USB-aansluiting in deze handleiding voor informatie over ondersteunde apparaten. (11) AUX-aansluiting Sluit een extern audioapparaat aan op de AUXingang (11) (bijv. MP3-speler, video game) om het geluid van het apparaat via het audiosysteem van de auto af te spelen. Elektronisch voertuiginformatiecentrum (EVIC) Sommige modellen zijn uitgerust met een elektronisch voertuiginformatiecentrum (EVIC) met interactief display voor de bestuurder. In de meeste modellen bevindt het EVIC zich in de instrumentengroep of in het plafondconsole. De frequenties van de radiozenders, het nummer van de cd en het satellietradiostation kunnen worden weergegeven. Audiobedieningselementen op stuur (indien aanwezig) De stuurbedieningselementen voor het audiosysteem bevinden zich aan de achterzijde van het stuur. Raadpleeg de handleiding van uw auto voor meer informatie hierover. Navolgend worden de verschillende bedieningsfuncties van het stuur beschreven: 1. Met de tuimelschakelaar VOLUME aan de rechterzijde regelt u het volume van het audiosysteem. Als u de bovenzijde van de tuimelschakelaar indrukt, neemt het geluidsvolume toe. Als u de onderzijde indrukt, wordt het volume verlaagd. 2. Met de knop MODE ADVANCED in het midden van de rechter tuimelschakelaar schakelt u tussen de beschikbare functies van de radio (LW, MW, FM, CD, DVD enz.). 3. Met de knop FUNCTION SELECT in het midden van de linker tuimelschakelaar schakelt de radio naar de volgende voorkeurzender, of naar een andere disk in de diskmodus, enz. De functie is afhankelijk van welke modus actief is. 7 4. Met de tuimelschakelaar SCROLL aan de linkerzijde schakelt u tussen selecties zoals radiozender en cd-nummer, afhankelijk van de actieve modus. Hier volgt een beschrijving van het gebruik van de schakelaar SCROLL in de verschillende modi: Bediening van Video Entertainment System™ Als er een videospeler met afstandsbediening aanwezig is, werkt dit bedieningselement op dezelfde manier als in de diskmodus. Geluidsinstellingen Bediening LW/MW/FM Als op de bovenzijde van de schakelaar wordt gedrukt wordt vooruit gezocht naar de volgende beschikbare zender. Als op de onderzijde wordt gedrukt, wordt achteruit gezocht naar de vorige beschikbare zender. Volume Regel het volume van de huidige audiobron met de draaiknop ON/OFF VOLUME (5). Tijdens de volumeregeling worden de naam van de audiobron en het volume linksonder op het display weergegeven. Bediening HDD/Disk/iPod Door op de bovenkant van de schakelaar te drukken gaat u naar het volgende nummer op de disk, en door op de onderkant van de schakelaar te drukken krijgt u het begin van het huidige nummer, of het begin van het voorgaande nummer, indien er nog niet acht seconden zijn verstreken sinds het begin van het huidige nummer. Menu Audio Control (Audioregeling) Druk op de toets AUDIO (8) rechts op de radio. 8 Gebruik de pijltoetsen of de aanwijzer op het scherm om de instellingen Balance en Fade te wijzigen. Met de schermtoets CENTER (MIDDEN) worden de standaardinstellingen hersteld. Gebruik de pijltoetsen of de schuifregelaars op het scherm om de instellingen BASS, MID en/of TREBLE te wijzigen. AAN DE SLAG De taal wijzigen met de radio: Tijd instellen OPMERKING: De contactschakelaar moet in de stand ON of ACC staan om de radio te kunnen bedienen. 1. Druk op de toets MENU rechts op de radio. 1. Druk op de schermtoets Time Display (Tijdweergave) linksonder op het scherm. 2. Druk vervolgens op de schermtoets System Setup (Systeem instellen) om het menu System Setup te openen. Als het systeem is uitgeschakeld, kunt u het inschakelen door op de draaiknop ON/OFF VOLUME te drukken. De taal wijzigen De radio neemt de taal over die is ingesteld in het elektronisch voertuiginformatiecentrum (EVIC) (indien aanwezig). Als u de taal van de radio wijzigt, verandert de auto ook de taal van alle weergegeven informatie. Raadpleeg de handleiding van de auto. 2. Met de schermtoetsen omhoog en omlaag stelt u de uren en minuten in. 3. Druk op de schermtoets Language (Taal) en kies de gewenste taal. 3. Druk op de schermtoets Set Time Zone (Tijdzone instellen) om de gewenste tijdzone te kiezen. 4. Druk op de schermtoets Daylight Savings (Zomertijd) om zomertijd in of uit te schakelen. 9 Voorkeurzenders opslaan 1. Druk op de toets RADIO om MW LW FM weer te geven. 3. Druk op de toetsen SEEK UP/DOWN of kies de schermtoets SCAN, de schermtoets DIRECT TUNE (DIRECT ZOEKEN) of de linkerof rechterpijltoets om een andere zender te kiezen. Met de schermtoets FULLSCREEN schakelt u tussen volledig scherm en gedeeld scherm. Lange namen van voorkeurzenders worden weergegeven op het volledige scherm. 4. Houd een willekeurige PRESET-schermtoets in de lijst rechts op het scherm ingedrukt tot u de bevestigingstoon hoort (ongeveer 2 seconden). Met de schermtoets BACK (TERUG) schakelt u naar het vorige menu. U kunt met de schermtoets PAGE door de lijst met voorkeurzenders bladeren. 2. Selecteer de gewenste golf door de schermtoets MW, LW of FM aan te raken. 10 OPMERKING: Als de lijst met voorkeurzenders niet wordt weergegeven. Druk op de schermtoets PRESETS op de onderste regel van het scherm. Uconnect™ Multimedia (RADIO) Radiomodus Overzicht De radio is uitgerust met drie verschillende tuners: • FM 87.5 MHz - 108.0 MHz (geschikt voor RDS) • MW 531 kHz - 1611 kHz • LW 153 kHz - 282 kHz Door op te toets RADIO te drukken kunt u tussen verschillende radio-tuners schakelen. De verschillende tunermodi kunnen worden geselecteerd met behulp van de tabs op het radioscherm. Voorkeurzenders U kunt 12 voorkeurzenders per band opslaan in de radio. Om de gewenste zender op te slaan, houdt u een van de schermtoetsen voor de voorkeurzenders twee seconden lang ingedrukt. De kleur van de schermtoets verandert dan van groen in beige. Vervolgens verschijnt de radio- zender op de gemarkeerde schermtoets en hoort u een pieptoon ter bevestiging dat de zender is opgeslagen. Een ander kanaal of andere frequentie kiezen Druk op de schermtoets zoeken/afstemmen om snel achteruit te met de pijl naar links zoeken naar de vorige zender of kanaal. Druk op de schermtoets zoeken/afstemmen met en houd deze ingedrukt om de pijl naar links op een lagere frequentie af te stemmen totdat de schermtoets wordt losgelaten. Druk op de schermtoets zoeken/afstemmen met de pijl naar rechts om snel vooruit te zoeken naar de volgende zender of kanaal. Druk op de schermtoets zoeken/afstemmen met de pijl naar rechts en houd deze ingedrukt om op een hogere frequentie af te stemmen totdat de schermtoets wordt losgelaten. Kies de schermtoets DIRECT TUNE (DIRECT ZOEKEN) om een frequentie of kanaalnummer in te voeren en bevestig uw keuze door op de schermtoets GO (START) te drukken. Kies SCAN om ieder ontvangen station op de band vijf seconden te laten weergeven. Kies nogmaals de schermtoets SCAN nogmaals om de scanfunctie te stoppen en een radiozender te selecteren. Radio Data System (RDS) Dit radiosysteem is geschikt voor de ontvangst van RDS-signalen op de FM-band. RDS is een technologie voor het verzenden van tekstinformatie over de muzieksoort, het nummer en de artiest voor muziek op de FM-band. Deze informatie wordt weergegeven op het display. OPMERKING: Niet alle radiozenders ondersteunen RDS. De RDS-informatie wordt weergegeven onder de frequentie van de gekozen radiozender. Radio-tekstinformatie Als u INFO kiest, verschijnt er extra radiotekstinformatie op de rechterhelft van het scherm. Kies CLOSE INFO (info sluiten) om de extra radio-tekstinformatie te verbergen. 11 Muzieksoort (programmasoort filteren) RDS-programmasoorten (FM) Adult Hits, Classic Rock, Classical, College, Country, Information, Jazz, Language, News, Nostalgia, Oldies, Personality, Public, Religious Music, Religious Talk, Rhythm and Blues, Rock, Soft, Soft Rhythm and Blues, Soft Rock, Sports, Talk, Top 40, Weather. Radio-instelingen Programmasoort (PTY) is uitsluitend beschikbaar in de FM-modus. Radiozenders worden ingedeeld volgens het soort programma (bijv. soft rock, rhythm & blues, enz.). Kies MUSIC TYPE (SOORT MUZIEK) om gewenste programmasoorten in of uit te schakelen. De functies SEEK (ZOEKEN) en SCAN geven dan alleen zenders weer met de overeenkomstige programmasoorten. 12 MENU LW / MW / FM Er zijn geen specifieke instellingen voor deze modi. Beeldinstellingen Druk op de toets MENU en kies de schermtoets Display Settings (Weergave-instellingen) om het menu Display Settings (Weergave-instellingen) te openen. Kies de schermtoets Daytime Colors (Dagkleuren) om te schakelen naar de handbediende modus en om de helderheid van het display af te stellen met kleuren voor overdag. Kies de schermtoets Nighttime Colors (Nachtkleuren) om te schakelen naar de handbediende modus en om de helderheid van het display af te stellen met kleuren voor ’s nachts. Kies de schermtoets Auto Color (Autokleurmodus) om te schakelen naar de automatische dag-/nachtmodus en om de helderheid van het display in te stellen met de dimschakelaar van de auto. Kies de schermtoets DONE (Gereed) om de instellingen op te slaan. Scherm uit Om het scherm uit te schakelen (zodat alleen de klok wordt weergegeven en geluid kan worden gehoord door de auto-luidsprekers) drukt u op de toets MENU en raakt u de schermtoets Screen Off (Scherm uit) aan. Als het scherm is uitgeschakeld, kunt u het inschakelen door op een willekeurige toets te drukken. Weergave-instellingen Druk op de toets MENU en raak vervolgens de schermtoets Default View (Standaardbeeld) aan om de standaard weergavemodus te activeren. Hierbij wordt het embleem van het automerk op de rechterhelft van het scherm getoond. ParkViewT achteruitrijcamera (indien aanwezig) Kies de schermtoets Picture View (Fotobeeld) om de afbeeldingsmodus te activeren, waarbij afbeeldingen kunnen worden weergegeven op de rechterhelft van het scherm. Raadpleeg het hoofdstuk 9Harde schijf9 voor een gedetailleerd voorbeeld. Indien uitgerust met ParkViewT, toont het radioscherm het beeld van de achteruitkijkcamera zodra de schakelhendel in de stand R staat bij auto’s met een automatische versnellingsbak. Bij auto’s met handgeschakelde versnellingsbak moet de achteruitversnelling zijn gekozen. OPMERKING: U kunt ParkViewT uitschakelen in het menu System Setup (Systeem instellen). 13 Uconnect™ Multimedia (MEDIA) Diskmodus Overzicht De radio is uitgerust met een cd/dvd-speler. Diskvereisten LET OP! Deze cd-speler werkt uitsluitend met disks met een diameter van 12 cm ( 4 3/4 inch). Het gebruik van een andere maat disk kan het mechanisme van de cd-speler beschadigen. De radio kan de volgende soorten disks afspelen: compact disks (CD), recordable compact disks (CD-R), herschrijfbare compact disks (CD-RW), recordable compact disks DVD-R, DVD+R, DVD-RW en DVD+RW. De RB2 ondersteunt ook AAC en M4A. 2. Nadat het scherm is geopend voert u de disk in de disksleuf van de radio met de bedrukte kant naar boven. De radio trekt de disk automatisch naar binnen en sluit het beschermklepje. De radio selecteert de juiste modus na herkenning van de soort disk en begint met het afspelen van het eerste nummer. Op het scherm verschijnt “Reading...” (Bezig met uitlezen ....) tijdens dit proces. MP3, WMA, CD Audio, DVD Audio en DVD Video. Voer uitsluitend het ondersteunde formaat cd/ dvd in. HD-inhoud en -media (bijv. HD-DVD, Blue-Ray) worden niet ondersteund. SACD (SACD-laag) VCD DualDisc, SVCD, VCD-formaat op DVD MPEG-4 worden niet ondersteund. Als de gebruiker de uitgeworpen cd niet binnen ongeveer 10 seconden verwijdert, wordt de cd opnieuw geladen. Een volledige lijst van alle CD/DVD-formaten is beschikbaar op www.DriveUconnect.com 14 1. Druk eenmaal op de toets LOAD. OPMERKING: Een defecte cd wordt NIET automatisch uitgeworpen. Gebruik uitsluitend disks met een standaardformaat. Gebruik geen disks met een zelf aangebracht etiket in de cd/dvdspeler. De radio is geschikt voor de volgende formaten: Om diskmodus te activeren drukt u op de toets MEDIA en kiest u de schermtoets DISK. Een disk invoeren OPMERKING: Op data-cd’s met een groot aantal nummers kan het enkele seconden duren voordat de informatie voor alle nummers op de disk is uitgelezen, afgespeeld en weergegeven. Diskmodus selecteren U kunt schakelen tussen het radio- en het mediamenu door op de toets MEDIA te drukken. U kunt de diskmodus kiezen door de schermtoets Disk tab (Disktab) aan te raken. Druk op de schermtoets met dubbele pijlpunt naar links om het begin van het huidige nummer (terwijl het nummer wordt afgespeeld) of het vorige nummer (als het huidige nummer net is begonnen) te selecteren. OPMERKING: Als u thuis op uw computer een cd brandt, kies dan een lagere schrijfsnelheid voor een betere kwaliteit. OPMERKING: Als de disk wordt ingevoerd, wordt de juiste modus na herkenning van de soort disk automatisch geselecteerd. Druk op de schermtoets met dubbele pijlpunt en houd deze ingedrukt om naar links terug te spoelen in het nummer. Een disk verwijderen Scannen Kies de schermtoets SCAN. 1. Druk op de toets LOAD. 2. De disk wordt uitgeworpen en kan worden verwijderd. OPMERKING: Als de disk niet binnen ongeveer 10 seconden wordt verwijderd, trekt de speler hem weer terug in de sleuf (parkeerstand). De disk wordt mogelijk uitgeworpen wanneer de contactschakelaar in de stand OFF staat. 3. Druk op de toets LOAD om het display te sluiten. Het display wordt 30 seconden nadat de disk uit het mechanisme is verwijderd gesloten. De afzonderlijke nummers op de disk worden achtereenvolgens elk acht seconden lang afgespeeld. Kies de schermtoets STOP SCAN om de scanfunctie te stoppen. Ander nummer kiezen Druk op de schermtoets met dubbele pijlpunt om het volgende nummer op naar rechts de disk te selecteren. Druk op de schermtoets met dubbele pijlpunt en houd deze ingedrukt om naar rechts vooruit te spoelen in het nummer. Kies de schermtoets voor pauzeren om het afspelen tijdelijk te onderbreken. Kies de schermtoets voor pauzeren om het afspelen te hervatten. Verstreken speeltijd van het nummer weergeven De verstreken speeltijd van het huidige nummer wordt midden op het scherm links weergegeven. Selecteer titel uit de lijst Kies LIST (LIJST) om een lijst weer te geven met de titels op de disk die nu wordt afgespeeld. Selecteer het nummer dat u wilt horen. Kies HIDE LIST (LIJST VERBERGEN) om de lijst te verbergen. 15 Diskinformatie Kies INFO voor weergave van informatie over de titel, artiest, album, genre in de rechterhelft van het scherm. Kies CLOSE INFO (INFO SLUITEN) om de informatie te verbergen. GracenoteT technologie voor muziekherkenning Muziekherkenningstechnologie en gerelateerde gegevens worden geleverd door GracenoteT. Gracenote is de norm in de branche voor muziekherkenningstechnologie en de levering van gelijkaardige inhoud. Bezoek www.gracenote.com voor meer informatie. Kies Repeat (Herhalen) om alle nummers uit de huidige map (alleen MP3/WMA-disks) te herhalen. Kies de schermtoets Repeat Folder (Map herhalen) opnieuw om de herhaalmodus uit te schakelen. OPMERKING: Bezoek www.DriveUconnect.com voor informatie over updates. 1. Druk eenmaal op de toets LOAD. Een disk kopiëren naar de harde schijf Druk op de schermtoets voor kopiëren om de huidige disk naar de harde schijf te kopiëren. Deze radio wordt geleverd met de muziekherkenningsservice GracenoteT, met een geïntegreerde database met informatie over album, titel, genre en artiest. Er zijn gegevens beschikbaar voor de meeste audio-cd’s (CDA-disks). Er zijn geen gegevens beschikbaar voor dvd’s of data-disks (met mp3- of wma-bestanden). 16 Menu voor disks Druk, terwijl de diskmodus actief is en een audiodisk is ingevoerd, op de toets MENU om het diskmenu te openen. Kies Random (Willekeurig) om de nummers op de disk in willekeurige volgorde af te spelen. Kies nogmaals Random (Willekeurig) om deze functie uit te schakelen. Afspelen van een MP3/WMA-disk 2. Plaats de disk in de disksleuf van de radio met de gedrukte kant naar boven. De radio trekt de disk automatisch naar binnen en sluit het beschermklepje. De radio selecteert de juiste modus na herkenning van de soort disk en begint met het afspelen van het eerste nummer. Op het scherm verschijnt “Reading...” (Bezig met uitlezen ....) tijdens dit proces. MP3/WMA-disks kunnen audiobestanden in mappen bevatten. De map, indien aanwezig, wordt weergegeven in de lijst. Kies de schermtoets BROWSE als de lijst niet wordt weergegeven. 3. Kies de schermtoets met het mappictogram om de map te openen. Een video-dvd afspelen OPMERKING: De mogelijkheid om een dvd op het radioscherm te bekijken is niet beschikbaar in alle landen. Bovendien moet de auto stilstaan en de schakelhendel in de stand P staan bij auto’s met automatische versnellingsbak. Bij auto’s met een handgeschakelde versnellingsbak moet de handrem zijn aangetrokken. Voer eerst een video-dvd in. Kies de schermtoets LIST (LIJST) om de lijst van beschikbare hoofdstukken of nummers weer te geven. Kies de schermtoets voor het hoofdstuk of nummer in de lijst om het gewenste fragment af te spelen. Kies de schermtoets VIEW VIDEO (BEKIJK VIDEO) om de video op het scherm te weer te geven. Bedieningselementen voor dvd-menu Als u een dvd-videodisk invoert die een menu bevat, is het mogelijk dat dit menu wordt weergegeven. 4. Kies de schermtoets Folder-Back Icon om de map te sluiten. Het afspelen begint zodra de speler de videodvd heeft herkend. 17 Kies de schermtoetsen met de pijltjes om de titel te selecteren die u wilt bekijken. Kies daarna de schermtoets ENTER om te beginnen met afspelen. Raak de schermtoets Pause aan om het afspelen tijdelijk te onderbreken. Kies de schermtoets DVD move om de bedieningselementen naar de rechterkant van het scherm te verplaatsen. Kies de schermtoets Fast Reverse tijdens het afspelen om snel terug te spoelen. Kies de schermtoets voor sluiten om de bedieningselementen voor dvd-menu te verbergen. Bedieningselementen voor afspelen dvd Wanneer de video wordt afgespeeld, kunt u het scherm op een willekeurige plaats aanraken om de bedieningselementen voor het afspelen van de dvd weer te geven. Kies de schermtoets Stop om het afspelen te stoppen. Kies tijdens het afspelen de schermtoets Fast Forward om snel vooruit te spoelen. Kies de schermtoets NEXT (VOLGENDE) om volgende hoofdstukken of nummers te zoeken. Kies de schermtoets PREV (VORIGE) om de dvd af te spelen vanaf het begin van het huidige hoofdstuk of nummer. Als u twee keer snel achter elkaar drukt, wordt de dvd afgespeeld vanaf het begin van het vorige hoofdstuk of nummer. Dvd-videomenu Druk, terwijl de diskmodus actief is en een video-dvd is ingevoerd, op de toets MENU om het menu DISK te openen. 18 Kies de schermtoets DVD Setup (Dvdinstellingen) om het menu DVD Setup (Dvdinstellingen) te openen. In het menu DVD Setup (DVD-instellingen) kunt u de instellingen bepalen voor de taal van het menu, het geluid en de ondertitels, voor de camerahoek, beeldverhouding en de helderheid als u op de overeenkomstige schermtoets drukt. Een aantal schermtoetsen zijn niet beschikbaar wanneer de ingevoerde disk de functionaliteit niet ondersteunt. Modus harde schijf (HDD) Een audiodisk kopiëren naar de harde schijf De HDD-modus geeft u toegang tot de audiobestanden op de ingebouwde harde schijf. Deze werkt op dezelfde manier als een cdspeler behalve dat de ingebouwde HDD meer nummers kan bevatten. De schijf kan ongeveer 6.700 nummers van vier minuten van cdkwaliteit bevatten. 1. Voer een disk in. Verspringen van de disk Als de disk verspringt, is er meestal sprake van een beschadigde (gekraste) disk. Dit geeft aanleiding tot een sprong voorwaarts van 10 seconden tot het beschadigde deel is overgeslagen. Vóór gebruik van de HDD-modus moet u de nummers naar de ingebouwde harde schijf kopiëren. Temperatuurbescherming Als de temperatuur van de disklezer te hoog oploopt, verschijnt er een waarschuwing. Het apparaat schakelt naar de radiomodus tot de temperatuur van de disklezer tot het normale peil is gezakt. De bestanden worden op de ingebouwde harde schijf opgeslagen en kunnen in de HDDmodus worden afgespeeld. 2. Druk op de schermtoets voor kopiëren om nummers van de geplaatste disk naar de harde schijf te kopiëren. Na een korte pauze begint het kopiëren en wordt het afspelen vanaf het begin van het nummer hervat. Het kopieerproces wordt op de achtergrond uitgevoerd terwijl de audiodisk wordt afgespeeld. Het kopieerproces wordt weergegeven op het display. Ook als u naar een andere modus schakelt (radio, AUX, enz.) 19 of de radio uitschakelt (contact in de stand ON), blijft het kopiëren op de achtergrond doorgaan. Kopiëren van WMA/MP3-bestanden naar de harde schijf U kunt gecomprimeerde audiobestanden in MP3- en WMA-formaat van een disk of via USB (bijv. USB-geheugenstick) kopiëren. Zodra de nummers zijn gekopieerd, krijgt de afspeellijst de oorspronkelijke naam van de map. Het wordt aanbevolen de muziekbestanden in mappen in te delen. Disc_Root_Level Songs (afspeellijst 1) Voorbeeld: Wat betreft het voorbeeld hierboven, wordt de lijst op de harde schijf als volgt weergegeven: • Song 1.mp3 (eerste nummer in afspeellijst 1) • Song 2.mp3 (tweede nummer in afspeellijst 1) • Song 3.wma (derde nummer in afspeellijst 1) My Playlist Folder 1 (afspeellijst 2) • 01 Song.mp3 (eerste nummer in afspeellijst 2) • 02 Song.mp3 (tweede nummer in afspeellijst 2) De voortgang van het kopieerproces wordt weergegeven op het display. • 03 Song.mp3 (derde nummer in afspeellijst 2) U kunt ook naar de radio luisteren tijdens het kopiëren. Het duurt 4 keer langer om te kopiëren dan de normale afspeeltijd. OPMERKING: Als een audio-cd naar de harde schijf wordt gekopieerd, worden de muziekbestanden geconverteerd van cd-audio naar AAC. DVDaudio kan niet naar de harde schijf worden gekopieerd. 20 Nummers die zich op het root-niveau van de disk of de USB-geheugenstick bevinden, worden opgeslagen in een afspeellijst met de naam Root_Level_Songs. Volledige disk kopiëren 1. Plaats een disk met MP3/WMA-bestanden. Bepaalde nummers van een disk kopiëren U kunt op de volgende manier bepaalde nummers op een disk met WMA/MP3-bestanden selecteren: 2. Kies My Music (Mijn muziek). 2. Druk op de schermtoets voor kopiëren om muziekbestanden van de geplaatste disk naar de harde schijf te kopiëren. 1. Kies de schermtoets MY FILES (MIJN BESTANDEN). De voortgang van het kopieerproces wordt weergegeven op het display. Tijdens het kopieerproces kan de cd-speler audio weergeven. U kunt naar de radio luisteren tijdens het kopiëren. 3. Kies de schermtoets Import Music Files (Muziekbestanden importeren). 21 4. Kies de schermtoets From DISC (Van disk) op het volgende scherm. Als u de media loskoppelt of uitwerpt voordat het kopieerproces is voltooid, wordt het kopiëren afgebroken. U kunt het kopieerproces opnieuw starten door de bovenstaande stappen te herhalen. Kopiëren van USB 1. Sluit het USB-apparaat aan. 3. Kies de schermtoets Import Music Files (Muziekbestanden importeren). 5. Selecteer de mappen of titels die u wilt kopiëren. 4. Kies de schermtoets From USB (Van USB) op het volgende scherm. Een rood vinkje geeft de geselecteerde nummers en/of mappen aan. Kies de schermtoets ALL (ALLE) om alle bestanden en mappen tegelijk te selecteren. 6. Kies de schermtoets DONE (GEREED) om met het kopiëren te beginnen. De voortgang van het kopieerproces wordt weergegeven op het display. U kunt naar de radio luisteren tijdens het kopiëren. 22 2. Kies My Music (Mijn muziek). 5. Selecteer de mappen of titels die u wilt kopiëren. De radio kan de bestanden sorteren op afspeellijst, op titel, op artiest op genre of op album. Een rood vinkje geeft de geselecteerde nummers en/of mappen aan. Kies de schermtoets ALL (ALLE) om alle bestanden en mappen tegelijk te selecteren. Kies de schermtoets PLAY ALL PLAYLISTS (ALLE LIJSTEN AFSPELEM) om alle beschikbare albums af te spelen. 6. Kies de schermtoets DONE (DONE) om met het kopiëren te beginnen. Audiobestanden afspelen van de harde schijf. U kunt de nummers direct vanaf de ingebouwde harde schijf afspelen. 3. Kies de schermtoets met de naam van de gewenste afspeellijst om deze afspeellijst af te spelen. Ander nummer kiezen Druk op de schermtoets met dubbele pijlpunt om het volgende nummer op naar rechts de disk te selecteren. 2. Kies in dit voorbeeld de schermtoets Playlists (Afspeellijsten). Druk op de schermtoets met dubbele pijlpunt en houd deze ingedrukt om naar rechts vooruit te spoelen in het nummer. Druk op de schermtoets met dubbele pijlpunt naar links om het begin van het huidige nummer (terwijl het nummer wordt afgespeeld) of het vorige nummer (als het huidige nummer net is begonnen) te selecteren. Druk op de schermtoets met dubbele pijlpunt naar links en houd deze ingedrukt om terug te spoelen in het nummer. 1. Kies de schermtoets BROWSE (BLADEREN) om een beschikbare categorie te selecteren. 23 Kies de schermtoets voor pauzeren om het afspelen tijdelijk te onderbreken. Kies de schermtoets voor pauzeren om het afspelen te hervatten. Verstreken speeltijd van het nummer weergeven De verstreken speeltijd van het huidige nummer wordt midden op het scherm links weergegeven. Menu HDD (Harde schijf) Druk, terwijl de modus HDD actief is, op de toets MENU om het menu HDD (Harde schijf) te openen. Nummer herhalen Met de functie voor nummer herhalen wordt het huidige nummer opnieuw afgespeeld. Kies de schermtoets Rpt. TRK (Nummer herhalen) om de herhaalfunctie in of uit te schakelen. Een rood vinkje geeft aan dat de functie voor nummer herhalen actief is. Favoriete afspeellijsten op de harde schijf U kunt koppelingen opslaan naar favoriete afspeellijsten in de lijst met favoriete afspeellijsten. 2. Kies de schermtoets Favorites (Favorieten) om de favoriete afspeellijsten weer te geven. Willekeurige nummers afspelen Deze functie speelt willekeurige nummers op de harde schijf af. Kies de schermtoets Random (Willekeurig) om het afspelen van willekeurige nummers in of uit te schakelen. Een rood vinkje geeft aan dat het afspelen van willekeurige nummers actief is. 24 1. Kies in de HDD-modus de schermtoets BROWSE (BLADEREN) om toegang te krijgen tot het menu Browse Categories (Categorieën doorbladeren). 3. Kies een van de schermtoetsen ADD FAVOURITE (FAVORIET TOEVOEGEN). OPMERKING: De koppeling naar de favoriete afspeellijst wordt verwijderd nadat een afspeellijst uit het menu My Playlists (Mijn afspeellijsten) is verwijderd. Zie (Afspeellijsten bewerken( in het hoofdstuk (Harde schijf( van deze handleiding. 4. Selecteer de gewenste afspeellijst. Een koppeling naar de geselecteerde afspeellijst wordt nu in de lijst met favoriete afspeellijsten opgeslagen. U kunt nu de lijst bewerken door de schermtoets EDIT (BEWERK) te kiezen, of de lijst afsluiten door de schermtoets EXIT (SLUITEN) te kiezen. Afspeellijsten op de harde schijf bewerken. 1. In de HDD-modus drukt u op de toets MY FILES (MIJN BESTANDEN) om het menu Manage My Files (Mijn files beheren) te openen. 2. Kies My Music (Mijn muziek) 25 OPMERKING: U kunt geen afspeellijst bewerken tijdens het kopiëren. U kunt de geselecteerde lijst opnieuw afspelen, nummers uit de gekozen afspeellijst verwijderen of de gekozen afspeellijst in zijn geheel wissen. OPMERKING: Als u de schermtoets Delete This Playlist (Deze afspeellijst verwijderen) kiest, wordt de afspeellijst en daarmee ook alle nummers in deze lijst permanent gewist. Nummers en afspeellijsten kunnen niet worden hersteld. 3. Kies de schermtoets My Playlists (Mijn afspeellijsten). 5. Kies de schermtoets Rename This Playlist (Naam van deze afspeellijst weergeven). 4. Kies de schermtoets EDIT (BEWERK) (voorbeeld: Donuts) van de afspeellijst die u wilt bewerken. 26 6. Voer een nieuwe naam voor de afspeellijst in. 7. Kies de schermtoets SAVE (OPSLAAN) om de naam te bevestigen. Alle afspeellijsten verwijderen van de harde schijf 1. Druk op de toets MENU rechts op de radio. 2. Kies de schermtoets System Setup (Systeem instellen) om het menu System Setup (Systeem instellen) te openen. 3. Kies de schermtoets Manage Hard Drive (HDD beheren) om toegang te krijgen tot het menu Manage Hard Drive (HDD beheren). De afspeellijst heeft nu een nieuwe naam. 2. Selecteer de titels die u wilt verwijderen. Nummers verwijderen uit een afspeellijst Een rood vinkje geeft de geselecteerde nummers aan. 1. Druk op de toets MENU, kies vervolgens de schermtoets MY FILES (MIJN BESTANDEN), kies dan de schermtoets My Playlists (Mijn afspeellijsten) en kies de schermtoets Delete Songs From This Playlist (Nummers verwijderen uit deze afspeellijst). OPMERKING: Als u de schermtoets Delete This Playlist (Deze afspeellijst verwijderen) kiest, wordt de afspeellijst en daarmee ook alle nummers in deze lijst permanent gewist. Nummers en afspeellijsten kunnen niet worden hersteld. 3. Kies de schermtoets DELETE (Verwijderen) om met het verwijderen te beginnen. OPMERKING: Als u een nummer uit de afspeellijst verwijdert, kan het nummer niet worden hersteld. 4. Kies de schermtoets DONE (Gereed) als u klaar bent met het bewerken van de afspeellijst. Dit menu geeft de beschikbare schijfruimte weer en stelt u in staat om afbeeldingen en muziekbestanden te verwijderen. 27 Afbeeldingen importeren Het is mogelijk om schermafbeeldingen naar de ingebouwde harde schijf te importeren. De afbeeldingen kunnen worden weergegeven in de rechterhelft van het radioscherm. Het wordt aanbevolen de afmetingen van de afbeelding op een pc of digitale camera te veranderen in 240 x 158 pixels voordat de afbeelding wordt geïmporteerd. OPMERKING: USB-apparaten (bijv. USB-adapters voor camerageheugens, enz.) moeten voldoen aan de norm voor MSD (Mass Storage Device). Deze USB-aansluiting kan voeding leveren aan het aangesloten apparaat. De stroomlimiet van het apparaat moet lager dan of gelijk zijn aan 500 mA. 1. Kies de schermtoets MY FILES (MIJN BESTANDEN) om naar het scherm Manage My Files (Mijn files beheren) te gaan. In de standaardmodus wordt het embleem van het automerk weergegeven in de rechterhelft van het scherm. Druk op de toets MENU rechts op radio om toegang te krijgen tot een van de instelmenu’s. 28 2. Voer een cd of een USB-geheugenstick met uw afbeeldingen in. 3. Kies de schermtoets My Pictures (Mijn afbeeldingen) om een overzicht weer te geven van de opgeslagen afbeeldingen. 5. Selecteer het soort medium dat is geplaatst. In de radio kunnen 24 gebruikersafbeeldingen worden opgeslagen. 4. Kies een van de schermtoetsen Add Pictures (Afbeeldingen toevoegen). 6. Met de schermtoets PAGE (PAGINA) kunt u door een lijst met afbeeldingen bladeren en de afbeelding aanraken die u wilt importeren. 7. Bevestig uw keuze door de schermtoets YES (JA) te kiezen. OPMERKING: De bestanden moeten zich in de root-map (bovenste niveau) van de disk of het USBgeheugen bevinden om herkend te kunnen worden. De geïmporteerde afbeelding is nu beschikbaar op het scherm Manage My Pictures (Mijn afbeeldingen beheren). 29 8. Om de geïmporteerde afbeelding op het radioscherm weer te geven, kiest u de schermtoets voor de gewenste afbeelding. 9. Selecteer deze afbeelding door de schermtoets Set as Default (Instellen als standaard) te kiezen. Een vinkje geeft aan welke afbeelding momenteel wordt gebruikt. Met de schermtoets PREV (VORIGE) of NEXT (VOLGENDE) kunt u door de lijst van beschikbare afbeeldingen bladeren. Kies de schermtoets DELETE (VERWIJDEREN) om de afbeelding van de harde schijf te verwijderen. 10. Druk tweemaal op de toets MENU en kies vervolgens de schermtoets Picture View (Afbeelding weergeven) om de weergave van de afbeelding te activeren. 30 De afbeelding wordt nu weergegeven in de rechterhelft van het scherm. Uconnect™ Multimedia (EXTERNE APPARATUUR) Video Entertainment System (VES)™ Het tabblad VES is beschikbaar zodra het VES™ systeem is ingeschakeld. Kies de schermtoets VES MODES (VES MODI) om de audiobron van VES™ te selecteren. De dvd-speler is niet beschikbaar als er geen dvd-speler in VES™ aanwezig is of als er geen dvd in de speler is ingevoerd. Via de radio kan VES™ op afstand worden bediend. Raadpleeg de gebruikershandleiding van VES™ voor meer informatie. Een apparaat moet aangesloten zijn op de AUX-aansluiting van VES™; anders is het niet beschikbaar. Audio/Video ontvangen uit VES™ U kunt audio uit VES™ weergeven via de luidsprekers van de auto. Als VES™ voorzien is van een videospeler, kunt u de video ook op het radioscherm bekijken als de auto is geparkeerd. Als de schermtoets niet beschikbaar is, duidt dit op een niet beschikbare bron. Overbrengen van Audio/Video en bediening van VES™ VES™ kan ook via de radio worden bediend. Alle bronnen worden afgespeeld via de hoofdtelefoon van VES™. Kies de schermtoets met de gewenste bron aan om de selectie af te spelen in de auto. De beschikbaarheid van de schermtoetsen DVD Player (Dvd-speler), Rear AUX 1 (Achter AUX 1) en Rear AUX 2 (Achter AUX 2) hangt af van het type VES™ in het voertuig. Raadpleeg de gebruikershandleiding van VES™ voor meer informatie over de bediening van VES™ achterin met de afstandsbediening. 31 Om naar VES™ achterin te gaan, drukt u op de toets MENU rechts op de radio. Met de headset van VES™ kan men audiokanaal 1 of 2 beluisteren. Kies de schermtoets voor tab 1 om kanaal 1 te selecteren. De linkerhelft van het scherm geeft informatie over de audiobron weer. Als bijv. FM is gekozen, wordt er een radiofrequentie weergegeven. De bedieningselementen van VES achterin worden in de rechterhelft van het scherm weergegeven. Kies de schermtoets Rear VES (VES achterin) om de bedieningselementen van VES™ achterin weer te geven. OPMERKING: Kies de schermtoets HIDE LIST (LIJST VERBERGEN) en/of de schermtoets CLOSE INFO (INFO SLUITEN) als de bedieningselementen van VES achterin niet zichtbaar zijn. Via de eerste kolom wordt VES™ in- en uitgeschakeld en worden de audiokanalen 1 of 2 van de headset bediend. 32 Kies de schermtoets LIST (LIJST) voor informatie over de geselecteeerde bron. In dit geval wordt de lijst met voorkeurzenders van de FM-band op de geselecteerde tuner weergegeven. U kunt een schermtoets van een voorkeurzender aanraken om een andere zender te kiezen, of de schermtoets DIRECT TUNE (DIRECT AFSTEMMEN) kiezen om een frequentie in te voeren of op de toetsen SEEK UP of SEEK DOWN drukken om af te stemmen op een andere radiozender. In de linkerhelft van het scherm verschijnt informatie over de audiobron, in dit geval nummer 1 uit een afspeellijst op de HDD van de radio. Kies de schermtoets LIST (LIJST) voor informatie over de geselecteeerde bron. Kies de schermtoets voor tab 2 om de gewenste audiobron in te stellen voor het tweede audiokanaal van VES™. Via de kolom RADIO worden de MW-/LW-/ FM-tuners van de radio bediend. OPMERKING: De radio kan niet tegelijkertijd afgestemd zijn op MW of LW of FM. In dit geval worden de nummers in de geselecteerde afspeellijst weergegeven. Via de kolom MEDIA worden de HDD-, DISK-, en AUX-audiobron van de radio bediend. 33 Via de kolom VES worden de dvd-speler, AUX 1 achter en AUX 2 achter van het VES™ systeem bediend. Kies de schermtoets On/Off (Aan/ uit) om het scherm VES ON/OFF (VES aan/uit) weer te geven. U kunt het VES™ systeem in- of uitschakelen. VES™ BLOKKEREN Kies de schermtoets LOCK (VERGRENDELEN) om de bedieningselementen op de afstandsbediening van VES™ te blokkeren. Wanneer VES™ is geblokkeerd, zijn de bedieningselementen van VES™ en de afstandsbediening van VES™ geblokkeerd. Het afspelen begint zodra de speler de videodvd heeft herkend. 2. Druk op de toets MENU rechts op de radio. VES™ DEBLOKKEREN Kies de schermtoets UNLOCK (ONTRENDELEN) om de bedieningselementen op de afstandsbediening van VES™ te deblokkeren. Een video-dvd afspelen voor VES™ achterin 1. Plaats een video-dvd om op het scherm van VES™ achterin een dvd-video weer te geven. 3. Kies de schermtoets Rear VES (VES achterin) om de bedieningselementen van VES™ achterin weer te geven. Kies de schermtoets Turn Rear VES OFF (VES achterin uitschakelen) om VES™ uit te schakelen. Kies de schermtoets Turn Rear VES ON (VES achterin inschakelen) om VES™ in te schakelen. 34 4. Kies de schermtoets voor tab 1 om audiokanaal 1 te selecteren. Licentieovereenkomsten Dolby Digital licentieovereenkomst Gemaakt onder een licentie van Dolby Laboratories. Dolby, MLP Lossless en het dubbele D-symbool zijn handelsmerken van Dolby Laboratories. 5. Kies de schermtoets DISK om de mediafunctie te selecteren. 6. Kies de schermtoets PLAY VIDEO (Video afspelen) om te beginnen met het afspelen van de video. Macrovision licentieovereenkomst Dit product bevat technologie ter bescherming van auteursrechten die beschermd worden door Amerikaanse patenten en rechten op intellectueel bezit. Gebruik van deze technologie ter bescherming van de auteursrechten moet geautoriseerd worden door Macrovision en is bedoeld voor het bekijken thuis of bij andere beperkte gelegenheden, tenzij Macrovision een andere autorisatie heeft gegeven. Proberen deze apparatuur na te maken of uit elkaar te halen is verboden. USB-aansluiting Het is mogelijk om muziek- of afbeeldingsbestanden naar de radio over te brengen. Dit kunnen bestanden zijn die op een disk of op een USB-geheugen (bijv. USB-geheugenstick) zijn opgeslagen. De USB-aansluiting is voorzien van een kapje dat de aansluiting beschermt tegen stof of schade. OPMERKING: USB-apparaten (bijv. USB-adapters voor camerageheugens, enz.) moeten voldoen aan de norm voor MSD (Mass Storage Device). Deze USB-aansluiting kan voeding leveren aan het aangesloten apparaat. De stroomlimiet van het apparaat moet lager dan of gelijk zijn aan 500 mA. De overdrachtssnelheid voor deze USBaansluiting bedraagt ongeveer 2 megabytes (MB) per seconde. 35 MP3-spelers kunnen niet via de USB-aansluiting worden bediend. Sommige spelers slaan muziekbestanden op in het formaat MP4, dat echter niet op deze radio kan worden weergegeven. Sommige auteursrechterlijk beschermde muziek (bijv. gedownload van internet) kan niet op de radio worden afgespeeld. Het deksel openen Compatibele apparatuur Raadpleeg uw erkende dealer of bezoek www.DriveUconnect.com voor informatie over ondersteunde apparaten. OPMERKING: Sommige MP3-spelers staan het kopiëren van nummers naar andere apparatuur niet toe. 36 2. Trek naar voren. 1. Plaats uw vinger onder het pijltje. OPMERKING: Het klepje zit vast en mag niet verwijderd worden! Trek het niet van het frame af. Niet met een schroevendraaier, nagelvijl, enz. proberen het klepje te openen, omdat anders het front van de radio beschadigd kan raken. Het deksel sluiten 1. Met duim en wijsvinger het klepje vastpakken. De haakjes (1) moeten eerst in het front worden aangebracht. 2. Breng de bovenste haakjes (1) eerst aan in het front. 3. Druk daarna op de onderkant van het klepje om het op zijn plaats te bevestigen. LET OP! Probeer nooit met kracht een stekker in een aansluiting van de radio te drukken. Controleer of de vorm en het formaat van de stekkers juist zijn, voordat u ze aansluit. 37 AUX-modus Met de AUX-aansluiting is het mogelijk de hoofdtelefoon van een audioapparaat (bijv. mp3-speler) op de radio aan te sluiten. Het geluid van het aangesloten apparaat wordt dan via het audiosysteem weergeven. Het display schakelt automatisch naar de AUXmodus als een stereo mini-jack-kabel (3,5 mm) wordt aangesloten. Het radioscherm keert terug naar de laatste modus van de tuner als de kabel wordt losgekoppeld. Om van radiomodus te veranderen als de kabel op het systeem is aangesloten, drukt u op de toets RADIO/MEDIA totdat de AUX-tab bovenaan het scherm verschijnt. Kies de AUX-tab om terug te keren naar de AUX-modus. Stel het volume in met de draaiknop ON/OFF VOLUME of met de volumeregelaar van het aangesloten apparaat. Sluit een stereokabel van 3,5 mm (niet meegeleverd) op bovenstaande wijze aan op de AUXaansluiting van de radio en op de hoofdtelefoonaansluiting van uw audioapparaat. 38 Het externe apparaat kan niet worden bediend (bijv. afspeellijsten kiezen, afspelen, vooruitspoelen, enz.) met de radio. Gebruik de bedieningselementen van het apparaat. OPMERKING: Als u een mono connector aansluit, neemt de geluidskwaliteit af. iPodT modus (indien aanwezig) Met de iPodT modus heeft u toegang tot de muziekbestanden op een externe iPodT. Deze werkt als afstandsbediening voor de aangesloten iPodT, en u kunt de muziek van de iPodT via de luidsprekers van de auto afspelen. Voordat u de iPodT modus gebruikt, moet u uw iPodT op de iPodT aansluiting aansluiten. (Raadpleeg het hoofdstuk 9UNIVERSAL CUSTOMER INTERFACE (UCI)9 in de gebruikershandleiding van uw auto voor instructies.) OPMERKING: De bestanden worden niet op de ingebouwde harde schijf opgeslagen en kunnen niet in de HDD-modus worden afgespeeld. OPMERKING: Het is raadzaam de meest recente software voor uw iPod en iTunes te gebruiken. Bezoek de website van de fabrikant voor updates: http://www.apple.com/support/ipod/. Muziekbestanden afspelen vanaf een iPodT U kunt nummers rechtstreeks vanaf de iPodT afspelen. Een iPodT categorie selecteren De radio kan de bestanden op afspeellijst, titel, artiest, componist, genre, album, podcast of luisterboek sorteren. Kies een schermtoets met de naam van de gewenste artiest om nummers van die artiest af te spelen. Kies de schermtoets LIST (LIJST) om een lijst weer te geven. Kies de schermtoets met het gewenste nummer in de lijst om het nummer te selecteren en af te spelen. Kies de schermtoets HIDE LIST (LIJST VERBERGEN) om de lijst met nummers te verbergen. Kies de schermtoets Artists (Artiesten) in dit voorbeeld. Kies de schermtoets PLAY ALL (ALLE AFSPELEN) om muziek van alle beschikbare artiesten af te spelen. Kies de schermtoets PAGE UP (VORIGE PAGINA) of PAGE DOWN (VOLGENDE PAGINA) om door de artiestenlijst te navigeren. Kies de schermtoets BROWSE (BLADEREN) om door de categorieën te bladeren. 39 Druk op de schermtoets met dubbele pijlpunt naar links en houd deze ingedrukt om terug te spoelen in het nummer. Springen in lijsten Als u een zeer lange lijst aantreft, is het mogelijk handig als u met behulp van de schermtoets A <> Z het menu List Jump (Sprong in lijst) opent. Pauzeren Kies de schermtoets PAUSE (PAUZE) om het afspelen tijdelijk te onderbreken. Afspelen Kies de schermtoets PLAY (AFSPELEN) om het afspelen te starten. Kies een schermtoets met de naam van de gewenste artiest om nummers van die artiest af te spelen. In dit voorbeeld hebben we de beginletter van de gewenste artiest ingevoerd. Kies de schermtoets GO (START) om naar de gewenste artiest te springen. Ander nummer kiezen Druk op de schermtoets met dubbele pijlpunt om het volgende nummer op naar rechts de disk te selecteren. Druk op de schermtoets met dubbele pijlpunt naar rechts en houd deze ingedrukt om vooruit te spoelen in het nummer. Druk op de schermtoets met dubbele pijlpunt naar links om het begin van het huidige nummer (terwijl het nummer wordt afgespeeld) of het vorige nummer (als het huidige nummer net is begonnen) te selecteren. 40 Verstreken speeltijd van het nummer weergeven De verstreken speeltijd van het huidige nummer wordt links op het scherm weergegeven. Scannen Kies de schermtoets SCAN. De afzonderlijke nummers worden achtereenvolgens elk acht seconden lang afgespeeld. Kies de schermtoets STOP SCAN om de scanfunctie te stoppen. Informatie over nummer Kies de schermtoets INFO. Als er informatie beschikbaar is over het huidige nummer, wordt deze weergegeven in de rechterhelft van het scherm. Menu iPodT Druk, terwijl de modus iPodT actief is, op de toets MENU om het menu iPodT/AUX te openen. Nummer herhalen Met de functie voor nummer herhalen wordt het huidige nummer opnieuw afgespeeld. Kies de schermtoets Rpt. TRK (Nummer herhalen) om de herhaalfunctie in of uit te schakelen. Een rood vinkje geeft aan dat de functie voor nummer herhalen actief is. Als er nog meer informatie beschikbaar is, verschijnt de schermtoets NEXT (VOLGENDE). Kies de schermtoets NEXT (VOLGENDE) voor meer informatie. Willekeurige nummers afspelen Deze functie speelt willekeurige nummers op de iPodT af. Kies de schermtoets Random (Willekeurig) om het afspelen van willekeurige nummers in of uit te schakelen. Een rood vinkje geeft aan dat het afspelen van willekeurige nummers actief is. 41 Uconnect™ Phone (indien aanwezig) Uconnect™ Phone is een via spraak te activeren, handsfree communicatiesysteem voor in de auto. Het UConnect™ systeem is volledig geïntegreerd in het audiosysteem van de auto. Op het radioscherm worden de visuele meldingen van het Uconnect™ systeem weergegeven, zoals batterijstatus van telefoon, signaalsterkte, nummerherkenning en soort gesprek. OPMERKING: Het is mogelijk dat uw telefoon niet alle functies van Uconnect™ ondersteunt. 42 Raadpleeg de gebruikershandleiding van uw auto voor aanwijzingen over de bediening van Uconnect™ Phone. Spraakbediening (indien aanwezig) Raadpleeg de gebruikershandleiding van uw auto voor aanwijzingen over de bediening van het spraakbedieningssysteem. SYSTEEMINFORMATIE Druk op de toets MENU rechts van de radio en kies de schermtoets System Setup (Systeem instellen) om het menu System Setup (Systeem instellen) te openen. Kies de schermtoets System Information (Systeeminformatie) om toegang te krijgen tot de systeeminformatie. Back-up maken van gebruikersgegevens Lees de specifieke aanwijzingen op de updatedisks voordat u de updates installeert. Bezoek http://www.chrysler.com/en/owners/ mygig/ voor informatie over het maken van een back-up van uw gebruikersgegevens, zoals bijvoorbeeld muziekbestanden, voordat u overstapt op een ander voertuig met een compatibele radio (bijv, einde van lease). Neem contact op met uw plaatselijke erkende dealer als u hulp nodig heeft of meer informatie over de beschikbare updates wenst te ontvangen. Updates van software en databases Bezoek www.DriveUconnect.com voor informatie over beschikbare updates van sofware en databases. Updates zijn verkrijgbaar voor de software van de radio en de database voor muziekherkenning van GracenoteT. 43 PROBLEEMOPLOSSING Disk HDD Radio V.: De radio geeft geen informatie over de ingevoerde disk. Hoe verkrijg ik deze informatie? V.: De radio speelt nummers van de harde schijf af en springt naar het eerste nummer in de lijst. Hoe komt dat? V.: Ik kan favoriete radiozender niet vinden, terwijl ik deze altijd kon ontvangen. Hoe los ik dit op? A.: Selecteer MUSIC TYPE (Muziektype) in de radiomodus. Selecteer CLEAR (Wissen) om alle PTY-filters uit te schakelen en probeer uw zender te vinden met SEEK. 44 A.: De radio zoekt op de harde schijf naar de geplaatste disk in de ingebouwde database op basis van de muziekherkenningstechnologie van GracenoteT. Als de database verouderd is of de desbetreffende disk niet bevat, kan de informatie niet worden weergegeven. Neem contact op met uw erkende dealer of de website www.DriveUconnect.com voor beschikbare updates. A.: Nadat de radio klaar is met het kopiëren of rippen van muziek naar de harde schijf, moet de huidige afspeellijst opnieuw worden samengesteld. Nadat de afspeellijst opnieuw is samengesteld, begint de radio het eerste nummer in de huidige afspeellijst af te spelen. WOORDENLIJST AS CD CDC CDDB DVD DVDC GMD Automatisch opslaan Compact Disc Compact Disc Changer Een technologiebedrijf opgericht onder de naam CDDB, Inc. in 1995. Het bedrijf is later omgedoopt in GracenoteT Inc. De technologie heet nu GracenoteT media recognition service (mediaherkenningsservice). Digital Versatile Disc Digital Versatile Disc Changer GracenoteT Media Database, GracenoteT Media Recognition Service (www.gracenote.com) GMT HDD MFB MFS MP3 MPEG-1 Audio Layer-3. M4A M4P Greenwich Mean Time Hard-Disk Drive Multifunctionele schermtoets Multifunctioneel stuur Compressiesysteem waarmee muziekbestanden via het internet kunnen worden verzonden en opgeslagen in draagbare spelers en digitale audioservers. Het M4A-formaat is in wezen de geluidslaag (zonder video) van MPEG 4-films. Het .M4P-formaat is een geluidsbestand uit de Apple Music Store (iTunes) en valt onder de regeling inzake beheer van digitale auteursrechten. POS PTY RDS UTC VES™ WMA Positie Soort programma (radio) Radio Data System Universal Coordinated Time Video Entertainment System™ Windows Media Audio Format 45 Chrysler Group LLC 13RB2-526-ENGSPADUT-AA 1183863 RB2 EN_SP_DU Radio Cover.indd 1 First Edition Printed in Europe-
 1
1
-
 2
2
-
 3
3
-
 4
4
-
 5
5
-
 6
6
-
 7
7
-
 8
8
-
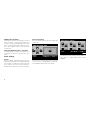 9
9
-
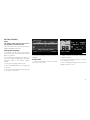 10
10
-
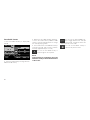 11
11
-
 12
12
-
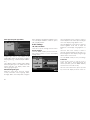 13
13
-
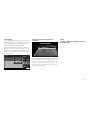 14
14
-
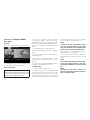 15
15
-
 16
16
-
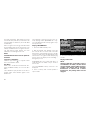 17
17
-
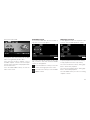 18
18
-
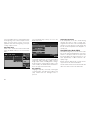 19
19
-
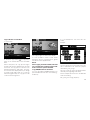 20
20
-
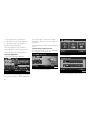 21
21
-
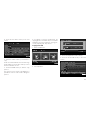 22
22
-
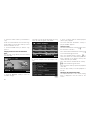 23
23
-
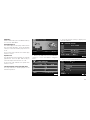 24
24
-
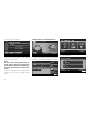 25
25
-
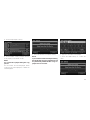 26
26
-
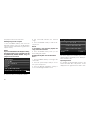 27
27
-
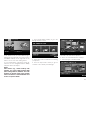 28
28
-
 29
29
-
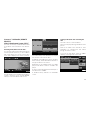 30
30
-
 31
31
-
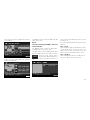 32
32
-
 33
33
-
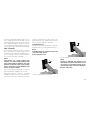 34
34
-
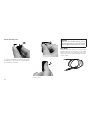 35
35
-
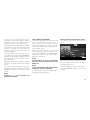 36
36
-
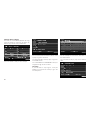 37
37
-
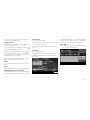 38
38
-
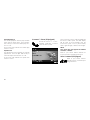 39
39
-
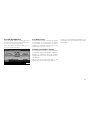 40
40
-
 41
41
-
 42
42
-
 43
43
-
 44
44
-
 45
45
-
 46
46
-
 47
47
-
 48
48
-
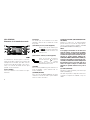 49
49
-
 50
50
-
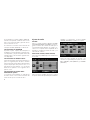 51
51
-
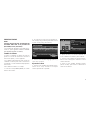 52
52
-
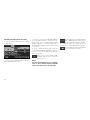 53
53
-
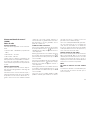 54
54
-
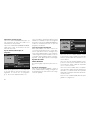 55
55
-
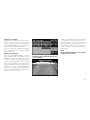 56
56
-
 57
57
-
 58
58
-
 59
59
-
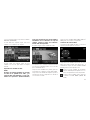 60
60
-
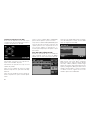 61
61
-
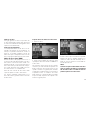 62
62
-
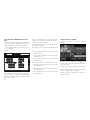 63
63
-
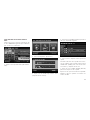 64
64
-
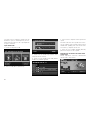 65
65
-
 66
66
-
 67
67
-
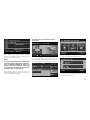 68
68
-
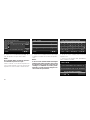 69
69
-
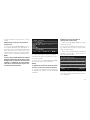 70
70
-
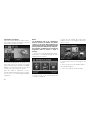 71
71
-
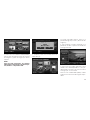 72
72
-
 73
73
-
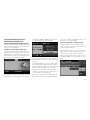 74
74
-
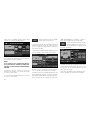 75
75
-
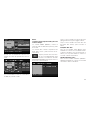 76
76
-
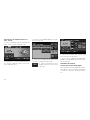 77
77
-
 78
78
-
 79
79
-
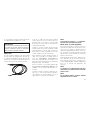 80
80
-
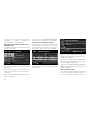 81
81
-
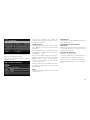 82
82
-
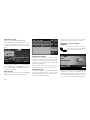 83
83
-
 84
84
-
 85
85
-
 86
86
-
 87
87
-
 88
88
-
 89
89
-
 90
90
-
 91
91
-
 92
92
-
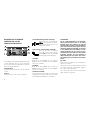 93
93
-
 94
94
-
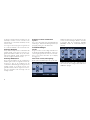 95
95
-
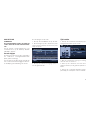 96
96
-
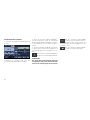 97
97
-
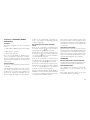 98
98
-
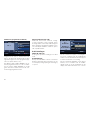 99
99
-
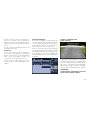 100
100
-
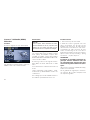 101
101
-
 102
102
-
 103
103
-
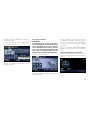 104
104
-
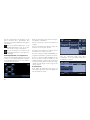 105
105
-
 106
106
-
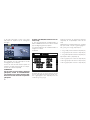 107
107
-
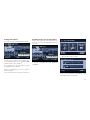 108
108
-
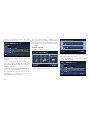 109
109
-
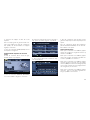 110
110
-
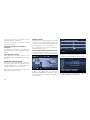 111
111
-
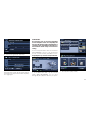 112
112
-
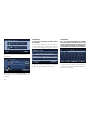 113
113
-
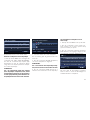 114
114
-
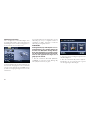 115
115
-
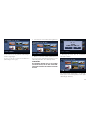 116
116
-
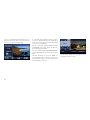 117
117
-
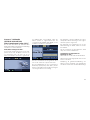 118
118
-
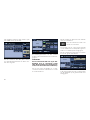 119
119
-
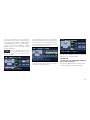 120
120
-
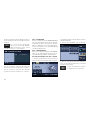 121
121
-
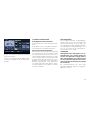 122
122
-
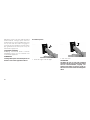 123
123
-
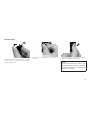 124
124
-
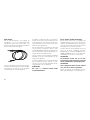 125
125
-
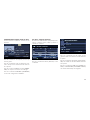 126
126
-
 127
127
-
 128
128
-
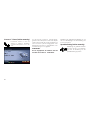 129
129
-
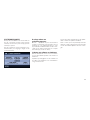 130
130
-
 131
131
-
 132
132
-
 133
133


in andere talen
- English: Chrysler 431 User manual
- español: Chrysler 431 Manual de usuario
Andere documenten
-
Soundstream VIR-8310NRB de handleiding
-
Power Acoustik PTID-8310NRB de handleiding
-
-
-
Soundstream VIR-7022 Handleiding
-
Panasonic CQC8803N de handleiding
-
Yamaha DVX-700 Handleiding
-
-
Pioneer DCS-424K de handleiding
-
JVC KW-AVX720 de handleiding