
R
AKS 825
Bedienungsanleitung/Garantie
Gebruiksaanwijzing/Garantie • Mode d’emploi/Garantie
Instrucciones de servicio/Garantía • Manual de instruções/Garantia
Istruzioni per l’uso/Garanzia • Instruction Manual/Guarantee
Instrukcja obsługi/Gwarancja • Návod k použití/Záruka
A használati utasítás/garancia • Mod de întrebuinflare/Garanflie
Руководство по эксплуатации/Гарантия
Akkusauger
Accu-stofzuiger • Aspirateur à accus
Aspirador de baterías • Aspirador de acumuladores
Aspirator ricaricabile • Battery Vacuum
Odkurzacz z akumulatorem • Akumulátorový vysavač
Akkumulátoros porszívó • Aspirator cu acumulator
Аккумуляторный пылесос
4....-05-AKS 825 22.02.2002 15:29 Uhr Seite 1

Inhalt
Inhoud • Sommaire • Indice • Índice • Indice
Contents • Spis treści • Obsah • Tartalom • Conflinut • Содержание
D
Übersicht Bedienelemente . . . . . . . . . . . . . . . . . . . . . . . . . .Seite 3
Bedienungsanleitung . . . . . . . . . . . . . . . . . . . . . . . . . . . . . . .Seite 4
Garantie . . . . . . . . . . . . . . . . . . . . . . . . . . . . . . . . . . . . . . . .Seite 5
NL
Overzicht bedieningselementen . . . . . . . . . . . . . . . . . . . . . .Pagina 3
Gebruiksaanwijzing . . . . . . . . . . . . . . . . . . . . . . . . . . . . . . . .Pagina 7
Garantie . . . . . . . . . . . . . . . . . . . . . . . . . . . . . . . . . . . . . . . .Pagina 9
F
Aperçu des éléments de commande . . . . . . . . . . . . . . . . . . .Page 3
Mode d’emploi . . . . . . . . . . . . . . . . . . . . . . . . . . . . . . . . . . .Page 10
Garantie . . . . . . . . . . . . . . . . . . . . . . . . . . . . . . . . . . . . . . . .Page 12
E
Vista de conjunto Elementos de mando . . . . . . . . . . . . . . . .Página 3
Instrucciones de servicio . . . . . . . . . . . . . . . . . . . . . . . . . . . .Página 13
Garantia . . . . . . . . . . . . . . . . . . . . . . . . . . . . . . . . . . . . . . . .Página 15
P
Vista geral dos elemntos de comando . . . . . . . . . . . . . . . . .Página 3
Manual de instruções . . . . . . . . . . . . . . . . . . . . . . . . . . . . . .Página 16
Garantía . . . . . . . . . . . . . . . . . . . . . . . . . . . . . . . . . . . . . . . .Página 18
I Descrizione dei singoli pezzi . . . . . . . . . . . . . . . . . . . . . . . .Pagina 3
Istruzioni per l’uso . . . . . . . . . . . . . . . . . . . . . . . . . . . . . . . . .Pagina 19
Garanzia . . . . . . . . . . . . . . . . . . . . . . . . . . . . . . . . . . . .Pagina 21
GB
Control element overview . . . . . . . . . . . . . . . . . . . . . . . . . . .Page 3
Instruction Manual . . . . . . . . . . . . . . . . . . . . . . . . . . . . . . . . .Page 22
Guarantee . . . . . . . . . . . . . . . . . . . . . . . . . . . . . . . . . . . . . .Page 24
PL
Przegląd elemetów obsługi . . . . . . . . . . . . . . . . . . . . . . . . .Strona 3
Instrukcja obsługi . . . . . . . . . . . . . . . . . . . . . . . . . . . . . . . .Strona 25
Gwarancja . . . . . . . . . . . . . . . . . . . . . . . . . . . . . . . . . . .Strona 27
CZ
Přehled obsluhovací prvky . . . . . . . . . . . . . . . . . . . . . . . . . .Strana 3
Návod k použití . . . . . . . . . . . . . . . . . . . . . . . . . . . . . . . . . .Strana 29
Záruka . . . . . . . . . . . . . . . . . . . . . . . . . . . . . . . . . . . . .Strana 31
H
A hasznalt elemek megtekintése . . . . . . . . . . . . . . . . . . . . .Oldal 3
A hasznalati utasítás . . . . . . . . . . . . . . . . . . . . . . . . . . . . . .Oldal 32
Garancia . . . . . . . . . . . . . . . . . . . . . . . . . . . . . . . . . . . . . . . .Oldal 34
RO
Privire de ansamblu al modului de întrebuinflare . . . . . . . .Paginæ 3
Mod de întrebuinflare . . . . . . . . . . . . . . . . . . . . . . . . . . . . . .Paginæ 35
Garanflie
. . . . . . . . . . . . . . . . . . . . . . . . . . . . . . . . . . . . . .
Paginæ 37
RUS
Обзор управляющих элементов . . . . . . . . . . . . . . . . . . . .стр. 3
Руководство по эксплуатации . . . . . . . . . . . . . . . . . . . . . .стр. 38
Гарантия . . . . . . . . . . . . . . . . . . . . . . . . . . . . . . . . . . . . . . . . .стр. 40
4....-05-AKS 825 22.02.2002 15:29 Uhr Seite 2

Übersicht der Bedienelemente
1 Staubbehälter 7 Ladestecker
2 Löseknopf Staubbehälter 8 Wandhalterung
3 Anzeige 9 Netzadapter
4 EIN/AUS Schalter 10 Filter
5 Griff 11 Aufsatz für das Nasssaugen
6 Motorgehäuse 12 Fugendüse
3
1 2 3 4 5
6
12
7
9
8
10
11
4....-05-AKS 825 22.02.2002 15:29 Uhr Seite 3

Allgemeine Sicherheitshinweise
• Lesen Sie vor Inbetriebnahme dieses Gerätes die Bedienungsanleitung sehr
sorgfältig durch und bewahren Sie diese inkl. Garantieschein, Kassenbon und
nach Möglichkeit den Karton mit Innenverpackung gut auf.
• Benutzen Sie das Gerät ausschließlich für den privaten und den dafür
vorgesehenen Zweck. Dieses Gerät ist nicht für den gewerblichen Gebrauch
bestimmt. Benutzen Sie es nicht im Freien (außer es ist für den bedingten
Einsatz im Freien vorgesehen). Halten Sie es vor Hitze, direkter
Sonneneinstrahlung, Feuchtigkeit (auf keinen Fall in Flüssigkeiten tauchen) und
scharfen Kanten fern. Benutzen Sie das Gerät nicht mit feuchten Händen. Bei
feucht oder nass gewordenem Gerät sofort den Netzstecker ziehen. Nicht ins
Wasser greifen.
• Schalten Sie das Gerät aus und ziehen Sie immer den Stecker aus der
Steckdose (ziehen Sie am Stecker, nicht am Kabel) wenn Sie das Gerät nicht
benutzen, Zubehörteile anbringen, zur Reinigung oder bei Störung.
• Lassen Sie das Gerät niemals unbeaufsichtigt. Um Kinder vor Gefahren
elektrischer Geräte zu schützen, sorgen Sie bitte dafür, dass das Kabel nicht
herunter hängt und Kinder keinen Zugriff auf das Gerät haben.
• Prüfen Sie Gerät und Kabel regelmäßig auf Schäden. Ein beschädigtes Gerät
bitte nicht in Betrieb nehmen.
• Reparieren Sie das Gerät nicht selbst, sondern suchen Sie bitte einen autori-
sierten Fachmann auf. Um Gefährdungen zu vermeiden, ein defektes Netzkabel
bitte nur vom Hersteller, unserem Kundendienst oder einer ähnlich qualifizierten
Person durch ein gleichwertiges Kabel ersetzen lassen.
• Verwenden Sie nur Original-Zubehör.
• Beachten Sie bitte die nachfolgenden ”Speziellen Sicherheitshinweise...”.
Spezielle Sicherheitshinweise für dieses Gerät
• Saugen Sie nur Staub und kleine Krümel, keine spitzen Gegenstände oder
heiße Asche.
• Benutzen Sie zum Nasssaugen bitte immer den Aufsatz (11).
Inbetriebnahme des Gerätes
Wandhalterung
Bringen Sie ggf. die Wandhalterung mittels beiliegenden Schrauben und Dübel an.
Laden der Akku’s
Nach Montage der Wandhalterung:
• Stecken Sie das Netzgerät in eine vorschriftsmäßig installierte
Schutzkontaktsteckdose 230 V, 50 Hz. Die Lade-Kontrollleuchte leuchtet.
• Zum Aufladen der Akkus nehmen Sie bitte ggf. die Düsenaufsätze ab und
stecken das Gerät zuerst in die obere Lasche der Wandhalterung.
4
D
4....-05-AKS 825 22.02.2002 15:29 Uhr Seite 4

• Drücken Sie dann leicht am Griff, bis das Gerät einrastet.
• Die Ladezeit beträgt beim ersten Mal ca. 16 Stunden, danach ca. 8 Stunden.
Das Netzteil dann bitte aus der Steckdose ziehen.
Benutzung des Gerätes
Lösen Sie ggf. das Gerät vom Netz und setzen Sie die gewünschten Düsen auf.
Um mit dem Saugen zu beginnen, müssen Sie den EIN/AUS Schalter (4) drücken
und gedrückt halten. Nach Beendigung oder bei leerem Akku, schließen Sie den
Sauger, wie unter „Laden der Akkus“ beschrieben, bitte an die Ladestecker an.
Achten Sie darauf, dass auch der Netzstecker eingesteckt ist.
Düsenaufsätze
Fugendüse: Ideal zum Saugen von z.B. Ecken und Schlitzen.
Einsatz zum Nasssaugen: Bitte achten Sie darauf, dass Sie diesen Aufsatz
immer zum Aufsaugen von Flüssigkeiten auf-
stecken (Schieben Sie die Verlängerung des
Aufsatzes in das Gerät, bis die Düse bündig
abschließt.
Reinigung
• Ziehen Sie vor der Reinigung immer den Netzstecker!
• Reinigen Sie das Gehäuse mit einem trockenen Tuch.
• Den Staubbehälter können Sie mit dem Löseknopf (2) lösen und dann von
oben nach unten abziehen.
• Entnehmen Sie den Staubfilter (10) indem Sie den Einsatz gegen den
Uhrzeigersinn (OPEN) drehen und klopfen Sie ihn aus. Nach mehrmaligem
Leeren können Sie den Staubbeutel auch in Wasser reinigen. Anschließend
bitte trocknen lassen.
• Das Gerät bitte wieder in umgekehrter Reihenfolge zusammenfügen.
Garantie
Wir übernehmen für das von uns vertriebene Gerät eine Garantie von 24 Monaten
ab Kaufdatum (Kassenbon).
Innerhalb der Garantiezeit beseitigen wir unentgeltlich die Mängel des Gerätes oder
des Zubehörs*), die auf Material- oder Herstellungsfehler beruhen, durch Reparatur
oder, nach unserem Ermessen, durch Umtausch. Garantieleistungen bewirken
weder eine Verlängerung der Garantiefrist, noch beginnt dadurch ein Anspruch auf
eine neue Garantie!
Als Garantienachweis gilt der Kaufbeleg. Ohne diesen Nachweis kann ein kosten-
loser Austausch oder eine kostenlose Reparatur nicht erfolgen.
5
D
4....-05-AKS 825 22.02.2002 15:29 Uhr Seite 5

Im Garantiefall geben Sie bitte komplette Gerät in der Originalverpackung zusammen
mit dem Kassenbon an Ihren Händler.
*) Schäden an Zubehörteilen führen nicht automatisch zum kostenlosen Umtausch
des kompletten Gerätes. Wenden Sie sich in desem Fall bitte an unsere Hotline!
Glasbruchschäden bzw. Brüche von Kunststoffteilen sind grundsätzlich kosten-
pflichtig!
Sowohl Defekte an Verbrauchszubehör bzw. Verschleißteilen (z.B. Motorkohlen,
Knethaken, Antriebsriemen, Ersatzfernbedienung, Ersatzzahnbürsten, Sägeblättern
usw.), als auch Reinigung, Wartung oder der Austausch von Verschleißteilen, fallen
nicht unter die Garantie und sind deshalb kostenpflichtig!
Die Garantie erlischt bei Fremdeingriff.
Nach der Garantie
Nach Ablauf der Garantiezeit können Reparaturen kostenpflichtig vom entsprechen-
den Fachhandel oder Reparaturservice ausgeführt werden.
6
D
Service für unsere
Haushaltsartikel
Verschleißteile für Haushaltsartikel
(soweit diese nicht vom Fachmann
ausgewechselt werden müssen),
Ersatzkannen, Staubsaugerfilterbeutel
usw. können Sie mit Angabe des
Gerätetyps unter folgender Telefon-
Hotline bestellen:
0 21 52 / 20 06 – 888
Service für unsere
Unterhaltungselektronik
Verschleißteile und Ersatzteile für
unsere Unterhaltungselektronik (soweit
diese nicht vom Fachmann ausge-
wechselt werden müssen) wie z. B.
Fernbedienungen, Bedienteilklappen,
Lautsprecherblenden usw. können Sie
mit Angabe des Gerätetyps unter fol-
gender Telefon-Hotline bestellen:
0 21 52 / 20 06 – 666
Für technische Fragen haben wir für Sie folgende e-mail-Adresse eingerichtet:
Interessieren Sie sich für weitere Clatronic-Produkte?
Besuchen Sie doch einmal unsere Homepage unter
www.clatronic.de oder www.clatronic.com
4....-05-AKS 825 22.02.2002 15:29 Uhr Seite 6

Algemene veiligheidsinstructies
• Lees vóór de ingebruikname van dit apparaat de handleiding uiterst zorgvuldig
door en bewaar deze goed, samen met het garantiebewijs, de kassabon en zo
mogelijk de doos met de binnenverpakking.
• Gebruik het apparaat uitsluitend privé en uitsluitend voor de voorgeschreven
toepassing. Dit apparaat is niet geschikt voor commercieel gebruik (tenzij het
bedoeld is voor beperkt gebruik in de buitenlucht). Bescherm het tegen hitte,
directe zonnestralen, vocht (i geen geval in vloeistoffen dompelen) en scherpe
kanten. Gebruik het apparaat niet met vochtige handen. Bij vochtig of nat gewor-
den apparaat onmiddellijk de stroomtoevoer onderbreken. Niet in het water grij-
pen.
• Schakel het apparaat uit en onderbreek altijd de stroomtoevoer (trek aan de
steker, nooit aan de kabel) wanneer u het apparaat niet gebruikt, hulpstukken
aanbrengt, reinigt of wanneer storingen optreden.
• Laat het apparaat nooit ingeschakeld zonder toezicht. Bescherm kinderen tegen
gevaren en zorg ervoor dat kabels nooit los omlaag hangen en dat het apparaat
buiten het bereik van kinderen blijft.
• Controleer regelmatig of het apparaat beschadigingen vertoont. Een bescha-
digd apparaat mag niet in gebruik worden genomen.
• Repareer het apparaat nooit zelf, maar breng het naar een geautoriseerde vak-
man. Voorkom gevaren en laat een defecte kabel altijd alleen door de fabrikant,
onze technische dienst of een eender gekwalificeerde persoon vervangen door
een soortgelijke kabel.
• Gebruik alleen originele reserveonderdelen.
• Neem de onderstaande “Speciale veiligheidsinstructies“ in acht.
Speciale veiligheidsinstructies voor dit apparaat
• Zuig alleen stof en kruimels op, geen spitse voorwerpen of hete as.
• Gebruik altijd het hulpstuk (11) om nat te zuigen.
Ingebruikname van het apparaat
Overzicht van de bedieningselementen
1 Stofvak 7 Laadsteker
2 Toets stofvak 8 WandhalterungWandhouder
3 LED 9 Netadapter
4 AAN/UIT-schakelaar 10 Filter
5 Handgreep 11 Hulpstuk voor nat zuigen
6 Motorkast 12 Voegenmondstuk
Wandhouder
Bevestig de wandhouder met de bijgevoegde schroeven en pluggen aan de wand.
7
NL
4....-05-AKS 825 22.02.2002 15:29 Uhr Seite 7

Accu’s laden
Na montage van de wandhouder:
• Sluit het nettoestel aan op een correct geïnstalleerde en geaarde contactdoos,
230 V - 50 Hz. Het laadlampje brandt.
• Voor het opladen van de accu moet u eventueel eerst de mondstukken verwij-
deren en het apparaat in de bovenste clip van de wandhouder steken.
• Druk vervolgens tegen de handgreep totdat het apparaat inklikt.
• De eerste laadperiode duurt ca. 16 uur, daarna duurt het opladen ca. 8 uur. Trek
daarna het nettoestel uit de contactdoos.
Bediening van het apparaat
Neem het apparaat uit de houder en breng de gewenste hulpstukken aan. Om met
zuigen te kunnen beginnen, moet u de AAN-/UIT-schakelaar (4) indrukken en inge-
drukt houden. Na het zuigen of bij lege accu sluit u de stofzuiger weer aan zoals
beschreven onder “Laden van de accu’s“. Let erop dat ook de netsteker moet zijn
aangesloten.
Hulpstukken
Voegenmondstuk: ideaal voor het zuigen in hoeken en sleuven.
Hulpstuk voor het nat zuigen: Gebruik dit hulpstuk altijd voor het opzuigen van
vloeistoffen (schuif de verlenging van het hulpstuk
in het apparaat totdat het mondstuk in één lijn
afsluit).
Reiniging
• Onderbeek vóór elke reiniging altijd eerst de stroomtoevoer!
• Reinig de kast met een droge doek.
• U kunt de stofzak met de vrijgaveknop (2) ontgrendelen en dan van bovenaf
omlaag trekken.
• Verwijder de stoffilter (10) door de inzet tegen de wijzers van de klok in (OPEN)
te draaien en klop hem vervolgens goed uit. Na meerdere malen legen kunt u
de stofzak ook in water reinigen. Vervolgens goed laten drogen.
• Zet het apparaat in omgekeerde volgorde weer in elkaar.
Dit apparaat is gekeurd conform de op dit moment van toepassing zijnde CE-
richtlijnen zoals bijvoorbeeld elektromagnetische compatibiliteit en laagspannings-
voorschriften en is geconstrueerd volgens de nieuwste veiligheidstechnische voor-
schriften.
Technische wijzigingen voorbehouden!
8
NL
4....-05-AKS 825 22.02.2002 15:29 Uhr Seite 8

Garantie
Voor het door ons geleverde apparaat verlenen wij een garantie van 24 maanden
vanaf koopdatum (kassabon).
Eventuele gebreken aan het apparaat of aan het toebehoren*) die zijn ontstaan
door productie- of materiaalfouten verhelpen wij binnen deze periode kosteloos
door middel van reparatie of, naar ons oordeel, door vervanging. Eventuele garan-
tiegevallen verlengen noch de geldigheidsduur van de garantie, noch begint daar-
door een nieuwe garantieperiode!
Het koopbewijs geldt als garantiebewijs. Zonder dit bewijs kan geen kosteloze
reparatie of vervanging plaatsvinden.
Geef in garantiegevallen het complete apparaat in de originele verpakking samen
met de kassabon af bij uw handelaar.
*) Schade aan onderdelen leidt niet automatisch tot kosteloze vervanging van het
complete apparaat. Neem in dit geval contact op met onze hotline! De reparatie van
glasbreuk of breuk van kunststofonderdelen wordt altijd berekend!
Niet defecten aan de hulpstukken of aan de slijtende onderdelen (bijv. koolborstels,
deeghaken, drijfriemen, reserveafstandsbediening, reservetandenborstels, zaag-
bladen enz.), maar ook reiniging, onderhoud of de vervanging van slijtende delen
vallen niet onder de garantie en geschieden altijd tegen berekening!
Bij ingrepen door derden komt de garantieverlening te vervallen.
Na de garantieperiode
Na afloop van de garantieperiode kunnen reparaties tegen berekening worden uit-
gevoerd door de betreffende vakhandelaar of de technische dienst.
9
NL
4....-05-AKS 825 22.02.2002 15:29 Uhr Seite 9

Conseils généraux de sécurité
• Lisez attentivement ce mode d’emploi avant de mettre l’appareil en marche
pour la première fois. Conservez le mode d’emploi ainsi que le bon de garantie,
votre ticket de caisse et si possible, le carton avec l’emballage se trouvant à
l’intérieur.
• N’utilisez cet appareil que pour un usage privé et pour les taches auxquelles il
est destiné. Cet appareil n’est pas prévu pour une utilisation professionnelle. Ne
l’utilisez pas en plein air (sauf s’il est indiqué que vous pouvez le faire).
Protégez-le de la chaleur, des rayons directs du soleil, de l’humidité (ne le plon-
gez en aucun cas dans l’eau) et des objets tranchants. N’utilisez pas cet
appareil avec des mains humides. S’il arrive que de l’humidité ou de l’eau att-
eignent l’appareil, débranchez aussitôt le câble d’alimentation. Ne touchez pas
les parties mouillées.
• Arrêtez l’appareil et débranchez toujours le câble d’alimentation de la prise de
courant (tirez sur la fiche, pas sur le câble) si vous n’utilisez pas l’appareil, si
vous installez les accessoires, pour le nettoyage ou en cas de panne.
• Ne laissez en aucun cas l’appareil fonctionner sans surveillance. Pour protéger
les enfants des risques engendrés par les appareils électriques , veillez à ce
que le câble ne pende pas de l’appareil et que l’appareil ne soit pas à portée
des enfants.
• Contrôlez régulièrement l’appareil et le câble. Ne mettez pas l’appareil en mar-
che s’il est endommagé.
• Ne réparez pas l’appareil vous-même. Contactez plutôt un technicien qualifié.
Pour éviter toute mise en danger, ne faites remplacer le câble défectueux que
par un câble équivalent et que par le fabricant, notre service après-vente ou
toute personne de qualification similaire.
• N’utilisez que les accessoires d’origine.
• Respectez les „conseils de sécurité spécifiques à cet appareil“ ci-dessous ...
Conseils de sécurité spécifiques à cet appareil
• N’aspirez que de la poussière et de petites miettes, en aucun cas d’objets poin-
tus ou de cendres chaudes.
• Utilisez toujours l’accessoire prévu à cet effet (11) pour aspirer du liquide
Avant la première utilisation
Liste des différents éléments de commande
1 Bac à poussière 7 Prise de chargement
2 Bouton de déverrouillage 8 Support mural
du bac à poussière 9 Adaptateur réseau
3 Affichage 10 Filtre
4 Bouton Marche / Arrêt 11 Accessoire aspiration eau
5 Poignée 12 Embout suceur
6 Bloc moteur
10
F
4....-05-AKS 825 22.02.2002 15:29 Uhr Seite 10

Fixation murale
Fixez le support mural, si nécessaire, à l’aide des vis et des chevilles livrées.
Chargement de l’accu
Après avoir fixé le support mura:
• Branchez le câble d’alimentation dans une prise de courant en bon état de fon-
ctionnement de 230 V, 50 Hz. La lampe témoin s’allume.
• Pour charger l’accu, retirez l’embout, s’il est installé sur l’appareil, et introduisez
ensuite l’appareil dans l’attache supérieure de la fixation murale.
• Appuyez légèrement sur la poignée jusqu’à ce que l’appareil soit fermement
installé.
• Le chargement dure la première fois env. 16 heures puis les fois suivantes env.
8 heures. Retirez ensuite la fiche de la prise de courant.
Utilisation de l’appareil
Débranchez éventuellement le câble d’alimentation et montez l’accessoire désiré.
Pour pouvoir commencer à aspirer, enfoncez la touche Marche / Arrêt (4) et main-
tenez-la enfoncée. Lorsque l’accu est déchargé, connectez l’aspirateur à la prise de
chargement, comme indiqué dans „Chargement de l’accu“. Veillez à ce que l’unité
d’alimentation soit également branchée.
Accessoires d’aspiration
Embout suceur: idéal pour aspirer par ex. dans les coins
et les fentes.
Accessoire pour aspiration eau: Veillez à toujours installer cet accessoire
avant d’aspirer un liquide (introduisez
l’extrémité de l’accessoire dans l’appareil
jusqu’à ce que l’embout soit correctement
installé).
Nettoyage
• Débranchez toujours l’appareil avant de le nettoyer!
• Nettoyez les parois de l’appareil avec un torchon sec.
• Vous pouvez retirer le compartiment à poussière à l’aide du bouton de déver-
rouillage (2) puis sortez-le du haut vers le bas.
• Retirez le filtre à poussière (10), en le tournant dans le sens inverse des aiguil-
les d’une montre (OPEN) puis secouez-le pour le dépoussiérer. Après avoir
vidé plusieurs fois le sac à poussière, vous pouvez le laver à l’eau. N’oubliez
pas de le laisser ensuite sécher.
• Assemblez à nouveau l’appareil en procédant de façon opposée.
11
F
4....-05-AKS 825 22.02.2002 15:29 Uhr Seite 11

Cet appareil a été contrôlé d’après toutes les directives européennes actuelles
applicables, comme par exemple concernant la compatibilité électromagnétique et
la basse tension. Cet appareil a été fabriqué en respect des réglementations tech-
niques de sécurité les plus récentes.
Sous réserve de modifications techniques.
Garantie
Nous accordons une garantie de 24 mois à dater de la date d’achat (ticket de
caisse) pour l’appareil que nous vendons.
Pendant la durée de la garantie, nous éliminons gratuitement les défauts de l’appa-
reil ou des accessoires *) découlant d’un vice de matériau ou de fabrication au
moyen d’une réparation ou, selon notre estimation, au moyen d’un remplacement.
Les prestations dans le cadre de la garantie n’entraînent aucune prorogation de la
durée de garantie et ne donnent pas droit à une nouvelle garantie !
Le justificatif de garantie est le reçu. Sans ce justificatif, aucun remplacement
gratuit ni aucune réparation gratuite ne peuvent être effectués.
En cas de recours à la garantie, ramenez votre appareil complet, dans son
emballage d'origine, accompagné de votre preuve d'achat, à votre revendeur.
*) Les endommagements de pièces d’accessoires ne justifient pas automatique-
ment l’échange gratuit de l’appareil complet. Contactez alors notre centrale télépho-
nique! La casse de pièces en verre ou en plastique est dans tous les cas à votre
charge!
Les défauts sur les accessoires ou les pièces d’usure (p.ex. les charbons de
moteurs, crochets, courroies d’entraînement, télécommande de rechange, brosses
à dents de rechange, lames de scies etc.) ainsi que le nettoyage, l’entretien ou le
remplacement de pièces d’usure ne sont pas garantis et sont donc payants !
En cas d’intervention étrangère, la garantie devient caduque.
Après la garantie
Après écoulement de la durée de garantie, les réparations peuvent être effectuées,
contre paiement, par le commerce spécialisé ou le service de réparation.
12
F
4....-05-AKS 825 22.02.2002 15:29 Uhr Seite 12

Indicaciones generales de seguridad
• Antes de la puesta en servicio de este aparato lea detenidamente el manual de
instrucciones y guarde este bien incluido la garantía, el recibo de pago y si es
posible también el cartón de embalaje con el embalaje interior.
• Solamente utilice el aparato para el uso privado y para el fin previsto. Este
aparato no está destinado para el uso profesional. No lo utilice al aire libre
(en excepto que esté destinado para el uso limitado al aire libre). No lo expon-
ga al calor, a la entrada directa de rayos de sol, a la humedad ( en ningún caso
sumerja el aparato en agua) y a los cantos agudos. No utilice el aparato con las
manos húmedas. En caso de que el aparato esté húmedo o mojado retire de
momento la clavija de la caja de enchufe. No tocar el agua.
• Desconecte el aparato y siempre retire la clavija de la caja de enchufe (tire de
la clavija no del cable), cuando no quiera utilizar el aparato, montar piezas o en
caso de limpieza o defectos.
• Nunca deje el aparato sin supervisión de una persona. Para evitar que los
niños se hagan daños eléctricos, siempre tenga atención, que el cable no cuel-
gue hacia abajo y que los niños no tengan acceso al aparato.
• Controle regularmente si el aparato o el cable tiene defectos. No ponga en ser-
vicio un aparato defecto.
• No repare el aparato por su cuenta, sino vaya a un establecimiento autorizado.
Para evitar peligros, deje sustituir un cable defecto por uno de la misma calidad
solamente por el fabricante, nuestro servicio al cliente o una similar persona
cualificada.
• Solamente utilice accesorios originales.
• Por favor tenga atención a las “Indicaciones especiales de seguridad…“
indicadas a continuación.
Indicaciones especiales de seguridad
• Solamente aspire polvo o migas pequeñas, ningún objeto agudo o ceniza
caliente.
• Para la aspiración en húmedo, utilice por favor siempre la pieza sobrepuesta
(11).
Puesta en servicio del aparato
Representación de los elementos de mando
1 Recipiente para el polvo 7 Clavija de carga
2 Botón de soltura 8 Soporte para la pared
3 Indicación 9 Adaptador de red
4 Conectador / desconectador 10 Filtro
5 Empuñadura 11 Pieza sobrepuesta para la aspiración
6 Carcasa en húmedo
12 Boquilla para las juntas
13
E
4....-05-AKS 825 22.02.2002 15:29 Uhr Seite 13

Soporte para la pared
En caso de que sea necesario, coloque el soporte para la pared con ayuda de los
tornillos y las clavijas adjuntas.
Carga de los acumuladores
Después del montaje del soporte para la pared:
• Introduzca el aparato alimentado por la red en una caja de enchufe de contacto
de protección e instalada por la norma 230 V, 50 Hz. La lámpara de control de
carga está iluminada.
• Para cargar los acumuladores, aparte, si es necesario, las toberas en pieza
sobrepuesta e introduzca primero el aparato en la oreja superior del soporte
para la pared.
• Ahora presione leve en la empuñadura, hasta que el aparato encaje.
• El tiempo de carga es en la primera vez de unas 16 horas, después de unas 8
horas. Después retire por favor el aparato alimentado por la red de la caja de
enchufe.
Utilización del aparato
En caso de que sea necesario retire el aparato de la red y coloque la boquilla
deseada sobre el aspirador. Para comenzar con la aspiración, tiene que presionar y
mantener presionado el interruptor de conexión / desconexión (4). Después de la
finalización o al estar vacíos los acumuladores, conecte el aspirador como indicado
bajo "carga de los acumuladores" a la clavija de carga. Tenga atención que la clavi-
ja de red también esté conectada a la red.
Boquillas para sobreponer
Boquilla para las juntas: Para la aspiración perfecta de p.ej. esquinas
o ranuras.
Pieza sobrepuesta para
la aspiración: Por favor tenga atención de colocar siempre esta
pieza para la aspiración de líquidos (Introduzca el
alargamiento de la pieza sobrepuesta en el apara
to, hasta que la tobera se cierre de forma exacta.
Limpieza
• ¡Antes de la limpieza retire siempre la clavija de la caja de enchufe!
• Limpie la carcasa con un paño seco.
• El recipiente para el polvo, lo puede soltar con el botón de liberación (2) y retir-
arlo de arriba hacia abajo.
• Aparte el filtro de polvo (10), girando la pieza insertada en el sentido contrario
de las agujas del reloj (OPEN) y sacúdala bien. Después de haber vacíado la
14
E
4....-05-AKS 825 22.02.2002 15:29 Uhr Seite 14

bolsa varias veces, puede lavarla en agua. Después por favor deje secar la
bolsa.
• Por favor monte el aparato de nuevo, pero en orden inverso.
Este aparato se ha examinado según las normativas actuales y vigentes de la
Comunidad Europea, como p.ej. compatibilidad electromagnética y directiva de
baja tensión y se ha construido según las más nuevas especificaciones en razón
de la seguridad.
No reservamos el derecho de efectuar modificaciones técnicas.
Garantía
Para el aparato comercializado por nosotros nos responsabilizamos con una
garantía de 24 meses a partir de la fecha de compra (factura de compra).
Durante el período de garantía nos encargamos gratuítamente de los defectos del
aparato y de los accesorios*), que se hayan originado por defectos del material o
de la fabricación. Dependiendo de nuestra estimación se realizará una reparación
o un cambio. ¡Los servicios de garantía no prolangan la garantía, ni se incia por
ello un período nuevo de garantía!
Como comprobante para la garantía es válido la factura de compra. Sin este com-
probante no se podrá realizar un cambio o una reparación gratuíta.
En caso de garantía entregue el aparato completo en su embalaje original
junto con la factura a su agente comerciante.
*) Defectos en las piezas de accesorio, no significan automáticamente el recambio
gratuito del aparato completo. ¡En este caso dirijase por favor a nuestra linea de
atención al cliente! ¡Rotos de vidrio o roturas en las piezas de plástico deben
pagarse siempre por el cliente !
Defectos en los accesorios de uso o en las piezas de desgaste (p.ej. escobillas de
carbón del motor, varillas amasadoras, correas de transmisión, mando a distancia
de repuesto, cepillos de dientes de repuesto, hojas de sierra etc.), como también la
limpieza, mantenimiento o el recambio de piezas de desgaste no recaen en la
garantía e irán al cargo del cliente!
En caso de intervención ajena se expira la garantía.
Después de la garantía
Después de haber expirado la garantía se pueden realizar las reparaciones por el
concesionario o por el servicio de reparaciones. Los gastos irán al cargo del cliente.
15
E
4....-05-AKS 825 22.02.2002 15:29 Uhr Seite 15

Instruções gerais de segurança
• Antes de pôr este aparelho a funcionar, leia muito atentamente as instruções
de emprego e guarde-as muito bem, juntamente com o talão de garantia, o
talão de compra e, tanto quanto possível, a embalagem com os elementos inte-
riores.
• Utilize o aparelho exclusivamente para fins privados e para a finalidade para a
qual o mesmo foi concebido. Este aparelho não se destina a fins comerciais.
Não o utilize ao ar livre (a não ser que o mesmo possa ser usado ao ar livre
sob determinadas condições). Mantenha-o protegido do calor, de irradiação
solar directa, da humidade (não o imergir de forma alguma em quaisquer líqui-
dos) e de arestas aguçadas. Não utilize o aparelho com as mãos molhadas. No
caso de o aparelho ficar húmido ou molhado, retire imediatamente a ficha da
tomada. Não tocar na água.
• Sempre que não utilizar o aparelho, ou desejar montar acessórios, ou queira
limpá-lo, ou ainda em caso de avarias, deverá desligá-lo e retirar a ficha da
tomada (puxe pela ficha e não pelo fio).
• Nunca deixe o aparelho sem vigilância. Para proteger as crianças dos perigos
relacionados com aparelhos eléctricos, nunca deixe os fios pendurados e aten-
te em que as crianças não possam chegar a tais aparelhos.
• Verifique regularmente se o aparelho ou o fio têm alguns danos. Nunca ponha
a funcionar um aparelho com quaisquer danos.
• Não tente reparar o aparelho, dirija-se a um técnico da especialidade, devida-
mente autorizado. Para evitar quaisquer perigos, é favor substituir um fio danifi-
cado por um fio da mesma qualidade. Tal deverá ser efectuado pelo fabricante,
pelos nossos serviços de assistência ou por outra pessoa com as mesmas
qualificações.
• Utilize apenas acessórios de origem.
• É favor observar as seguintes „Instruções especiais de segurança...“.
Instruções especiais de segurança
• Aspirar apenas pó e migalhas; não aspirar objectos aguçados nem cinzas
quentes.
• Utilize sempre a peça (11) quando aspirar superfícies molhadas
Primeira utilização
Elementos do aparelho
1 Recipiente do lixo 7 Ficha para recarga
2 Botão para soltar o recipiente 8 Suporte de parede
do lixo 9 Adaptador de corrente
3 Indicador 10 Filtro
4 Interruptor 11 Peça para aspirar superfícies
5 Pega molhadas
6 Caixa do motor 12 Bocal para frestas
16
P
4....-05-AKS 825 22.02.2002 15:29 Uhr Seite 16

Suporte de parede
Se desejar, montar o suporte de parede, usando as buchas e os parafusos juntos.
Recarga dos acumuladores
Após a montagem do suporte de parede:
• Introduzir a o adaptador de corrente numa tomada com protecção de contactos
de 230 V/50 Hz, convenientemente instalada. A lâmpada de controle de recar-
ga iluminar-se-á.
• Para recarregar o acumulador, remova os bocais e coloque em primeiro lugar o
aparelho na parte superior do suporte de parede.
• Carregue então ligeiramente na pega, até o aparelho ficar fixo.
• A primeira recarga levará 16 horas; as seguintes aprox. 8 horas. Retirar em
seguida o adaptador da tomada.
Utilização do aparelho
Se necessário, desligar o aparelho da corrente e montar os bocais pretendidos.
Para começar a aspirar, carregue no interruptor (4) e mantenha-o pressionado. No
final, ou no caso de o acumulador ficar descarregado, ligar o aspirador à ficha de
recarga, da forma descrita na rubrica „Recarga dos acumuladores„. Assegure-se
de que a ficha da corrente está introduzida na tomada.
Bocais
Bocal para frestas: ideal para aspirar cantos e reentrâncias.
Peça para aspirar
superfícies molhadas: Utilize sempre esta peça quando aspirar líquidos
(Introduza o prolongamento da peça no aparelho,
até o bocal ficar hermeticamente fechado).
Limpeza
• Antes da limpeza, retirar sempre a ficha da tomada!
• Limpar a caixa com um pano seco.
• Para retirar o saco, pressionar o botão (2) e puxar de cima para baixo.
• Retire o filtro do pó (10), girando a peça no sentido contrário ao dos ponteiros
do relógio (OPEN) e sacuda-o. Após ter sido utilizado várias vezes, o saco do
lixo pode ser lavado em água. Deixá-lo secar bem.
• Tornar a montar as peças em sequência inversa
17
P
4....-05-AKS 825 22.02.2002 15:29 Uhr Seite 17

Este aparelho foi controlado nos termos das actuais directivas da CEE
aplicáveis, tais como inocuidade electromagnética e directiva sobre baixa
tensão, e fabricado de acordo com as mais novas prescrições da segurança
técnica.
Reserva-se o direito de alterações!
Garantia
O aparelho vendido pela nossa empresa tem uma garantia de 24 meses a partir
da data da compra (talão).
Durante o período de garantia, procederemos à remoção grátis - por reparação,
ou, segundo a nossa decisão, por substituição - das deficiências do aparelho ou
dos acessórios*) que provenham de erros de material ou de fabricação. A pre-
stação de serviços relacionados com a garantia não prolongarão a mesma, nem
iniciarão um novo prazo de garantia!
O talão de compra consistirá prova desta garantia. Sem o mesmo, não será pos-
sível proceder-se a qualquer troca ou reparação grátis.
Em caso de garantia, entregue o aparelho completo, juntamente com o talão de
compra, na loja onde o mesmo foi comprado.
*) No caso de danos em quaisquer acessórios, não será efectuada automática-
mente uma substituição completa do aparelho. Contacte neste caso a nossa hotli-
ne! Danos causados por quebras de peças de vidro ou de plástico terão de ser
pagos pelo cliente!
Não estão incluídos na garantia quaisquer defeitos de acessórios ou de peças que
se desgastem (como, por exemplo, carvões do motor, varinhas, correias do motor,
telecomandos, escovas de dentes, folhas de serra, etc.), nem a limpeza, a manu-
tenção ou a substituição de peças que se desgastem, devendo tais despesas ser
reembolsadas!
A garantia terminará sempre que tenha havido intervenção alheia nos aparelhos.
Após a garantia
Após a expiração do prazo de garantia, poderão ser efectuados arranjos por pes-
soal especializado, ou pelos nossos serviços de reparações, contra reembolso.
18
P
4....-05-AKS 825 22.02.2002 15:29 Uhr Seite 18

Norme di sicurezza generali
• Prima di mettere in funzione questo apparecchio, leggere molto attentamente le
istruzioni per l’uso e conservarle con cura unitamente al certificato di garanzia,
allo scontrino e, se possibile, alla scatola di cartone con la confezione interna.
• Utilizzare l’apparecchio esclusivamente per scopi privati e conformemente al
tipo di applicazione previsto. Questo prodotto non è stato concepito ai fini di un
impiego in ambito industriale. Non utilizzarlo all’aperto (a meno che non sia
contemplato un particolare tipo di uso all’aperto nel rispetto di specifiche
condizioni). Proteggerlo dal calore, nonché dall’esposizione diretta ai raggi sola-
ri e dall’umidità (non immergerlo mai in sostanze liquide) e tenerlo a distanza
da oggetti con spigoli affilati. Non utilizzare l’apparecchio con le mani umide.
Nel caso in cui si bagni o si inumidisca l’apparecchio, staccare immediatamente
la spina. Evitare il contatto con l’acqua.
• Disattivare l’apparecchio e staccare sempre la spina dalla relativa presa
(si raccomanda di afferrare il connettore e non il cavo quando si effettua questa
operazione) allorché non si utilizza l’apparecchio, quando si applicano degli
accessori oppure nel caso in cui lo si debba pulire o si siano manifestate
anomalie.
• Non lasciare mai l’apparecchio incustodito. Allo scopo di proteggere i bambini
contro i pericoli che possono derivare dagli apparecchi elettrici, accertarsi che
non vi siano cavi pendenti e che i bambini non possano accedere in alcun
modo all’apparecchio stesso.
• Controllare periodicamente l’apparecchio per verificare che non vi siano danni.
Non mettere in funzione l’apparecchio nel caso in cui sia guasto.
• Non tentare di riparare l’apparecchio, bensì rivolgersi a un tecnico autorizzato.
Al fine di evitare l’insorgere di situazioni di pericolo, si raccomanda di contattare
il costruttore, il nostro servizio di assistenza tecnica o un tecnico ugualmente
qualificato per la sostituzione del cavo di alimentazione difettoso con un cavo
equivalente.
• Utilizzare esclusivamente accessori originali.
• Rispettare le seguenti “Speciali norme di sicurezza...“.
Speciali norme di sicurezza
• Aspirare esclusivamente polvere e briciole di piccole dimensioni. Non è consen-
tito usare l’apparecchio per l’aspirazione di oggetti acuminati o di cenere calda.
• Per l’aspirazione a umido, si raccomanda di utilizzare sempre l’apposito disposi-
tivo (11).
Messa in funzione dell’apparecchio
Elementi di comando
1 Contenitore raccoglisporco 3 Display
2 Pulsante di sbloccaggio 4 Interruttore ON/OFF
del contenitore raccoglisporco 5 Impugnatura
19
I
4....-05-AKS 825 22.02.2002 15:29 Uhr Seite 19

6 Vano motore 10 Filtro
7 Spina di ricarica 11 Dispositivo per l’aspirazione
8 Supporto da parete a umido
9 Adattatore di rete 12 Bocchetta a giunto
Supporto da parete
Se necessario, applicare il supporto da parete fissandolo mediante le viti e i tasselli
forniti in dotazione.
Ricarica degli accumulatori
In seguito al montaggio del supporto da parete,
effettuare le seguenti operazioni:
• Collegare l’alimentatore di rete a una presa con messa a terra da 230 V, 50 Hz
installata correttamente. La spia luminosa di ricarica si accende.
• Per poter ricaricare le batterie, rimuovere le bocchette e inserire l’apparecchio
dapprima nella linguetta superiore del supporto a parete.
• Successivamente, premere leggermente sull’impugnatura finché l’apparecchio
non si innesti in posizione.
• La prima volta che si effettua la ricarica delle batterie, il tempo di carica dura ca.
16 ore. Successivamente, sono sufficienti 8 ore. Una volta terminata la fase di
ricarica, staccare l’alimentatore dalla presa di rete.
Utilizzo dell’apparecchio
Staccare eventualmente l’apparecchio dall’alimentazione di rete e applicare le
bocchette desiderate. Per poter iniziare a usare l’aspiratore, è necessario premere
e tenere premuto l’interruttore ON/OFF (4). Una volta conclusa l’operazione oppure
nel caso in cui l’accumulatore sia scarico, collegare l’aspiratore all’apposita spina di
ricarica conformemente a quanto descritto alla sezione „Ricarica degli accumulato-
ri„. Accertarsi che anche la spina sia inserita.
Bocchette
Bocchetta a giunto: ideale, per esempio, per la pulizia di angoli e
fessure.
Dispositivo per l’aspirazione
in umido: Si raccomanda di utilizzare sempre questo
dispositivo per aspirare liquidi (inserire la prolunga
nell’apparecchio, finché la bocchetta non sia
perfettamente allineata.
Pulizia
• Prima di procedere alla pulizia, staccare la spina dalla rete!
• Per la pulizia del corpo dell’apparecchio, utilizzare un panno asciutto.
20
I
4....-05-AKS 825 22.02.2002 15:29 Uhr Seite 20

• Il contenitore raccoglisporco può essere staccato premendo il pulsante di sbloc-
caggio (2) e può poi essere estratto spingendolo verso il basso.
• Rimuovere il filtro della polvere (10) facendo ruotare il dispositivo in oggetto in
senso antiorario (OPEN). Pulirlo, battendo con le dita la sua superficie. Dopo
averlo svuotato più volte, è possibile lavare il sacchetto di spolvero in acqua. A
lavaggio ultimato, farlo asciugare.
• Montare nuovamente l’apparecchio, effettuando nella sequenza inversa le ope-
razioni descritte.
Questo apparecchio è stato controllato sulla base di tutte le direttive CE attuali in
vigore in questo settore, quali per esempio la normativa in materia di compatibilità
elettromagnetica e la direttiva in materia di bassa tensione, ed è stato costruito
conformemente alle norme di sicurezza più moderne.
Con riserva di apportare modifiche tecniche.
Garanzia
Per l’apparecchio da noi messo in commercio ci assumiamo una garanzia di
24 mesi dalla data di acquisto (scontrino).
Durante la garanzia noi ci impegniamo ad eliminare gratuitamente i guasti dell’ap-
parecchio o degli accessori*), dovuti a difetti di materiale o di fabbricazione, riparan-
doli o, a nostra discrezione, sostituendoli. Le prestazioni in garanzia danno luogo a
una proroga della garanzia né danno diritto ad una nuova garanzia!
Per la garanzia è sufficiente lo scontrino di acquisto. Senza questo scontrino non
sussiste il diritto né ad una sostituzione né ad una riparazione gratuita.
Nel caso si ricorra alla garanzia, restituire al rivenditore l’apparecchio completo in
ogni sua parte, nell’imballaggio originale unitamente allo scontrino.
*) Danni agli accessori non giustificano automaticamente lo scambio gratuito dell’-
apparecchio completo. Si prega di mettersi in contatto con la nostra centrale telefo-
nica. Danni alle parti di vetro oppure fratture ai pezzi di materia plastica sono obbli-
gatoriamente a spese del cliente.
La riparazione di pezzi d’uso ovvero soggetti a logoramento (cursori, ganci impa-
statori, cinghie di trasmissione, telecomandi di ricambio, spazzolini di ricambio,
lame di seghe ecc.) come anche operazioni di pulizia e manutenzione o la sostitu-
zione di pezzi soggetti a logoramento non rientrano nella garanzia e quindi sono a
pagamento!
La garanzia si annulla nel caso di intervento da parte di terzi.
Dopo la garanzia
Al termine della garanzia le riparazioni possono essere eseguite dietro pagamento
dal corrispettivo negozio specializzato o servizio riparazioni.
21
I
4....-05-AKS 825 22.02.2002 15:29 Uhr Seite 21

General Safety Instructions
• Read the operating instructions carefully before putting the appliance into ope-
ration and keep the instructions including the warranty, the receipt and, if possi-
ble, the box with the internal packing.
• The appliance is designed exclusively for private use and for the envisaged pur-
pose. This appliance is not fit for commercial use. Do not use it outdoors (except
if it is designed to be used outdoors). Keep it away from sources of heat, direct
sunlight, humidity (never dip it into any liquid) and sharp edges. Do not use the
appliance with wet hands. If the appliance is humid or wet, unplug it immediate-
ly. Do not put it in water.
• When cleaning or putting it away, switch off the appliance and always pull out
the plug from the socket (pull on the plug, not the cable) if the appliance is not
being used and remove the attached accessories.
• Never leave the appliance unsupervised. To protect children from the dangers
posed by electrical appliances, make sure that the cable is hanging low and that
children do not have access to the appliance.
• Check the appliance and the cable for damage on a regular basis. Do not use
the appliance if it is damaged.
• Do not try to repair the appliance on your own. Always contact an authorized
technician. To avoid the exposure to danger, always have a faulty cable be
replaced only by the manufacturer, by our customer service or by a qualified
person and with a cable of the same type.
• Use only original spare parts.
• Pay careful attention to the following “Special Safety Instructions“.
Special safety information for this unit
• Vacuum only dust and small crumbs. Do not vacuum sharp objects or hot
ashes.
• Please always use the attachment (11) for wet vacuuming.
Device start-up
Overview of the Components
1 Dust container 7 Charger
2 Dust container release button 8 Wall holder
3 Display 9 AC adapter
4 ON/OFF switch 10 Filter
5 Handle 11 Attachment for wet vacuuming
6 Motor casing 12 Crevice nozzle
Wall holder
Mount the wall holder with the supplied screws and dowels.
22
GB
4....-05-AKS 825 22.02.2002 15:29 Uhr Seite 22

Charging the Batteries
After mounting the wall holder:
• Insert the AC adapter in a duly installed 230V/50Hz protective contact socket.
The charging LED lights up.
• If you want to charge the batteries, first remove the nozzle attachments and
then insert the device first into the upper bracket of the wall mounting.
• Then press the handle lightly until the device locks in place.
• The charging time is approximately 16 hours the first time, and then approxima-
tely 8 hours. Once the charging is over, unplug the AC adapter.
Using the Device
Unplug the device and fit on the desired nozzle. In order to start vacuuming you
have to press the ON/OFF switch (4) and keep it pressed. Once you have finished
or when the batteries are down, connect the vacuum to the charger as described in
„Charging the Batteries“. Make sure that the plug is inserted.
Nozzles
Crevice nozzle: ideal for vacuuming corners and crevices, etc.
Use for wet vacuuming: Please ensure that you always use the attachment
when vacuuming up liquids (insert the extension of
the attachment into the device until the nozzle is
flush).
Cleaning
• Always unplug the device before cleaning!
• Clean the casing with a dry cloth.
• The dust container can be released with the release knob (2) and then pulled
off from the top downwards.
• Remove the dust filter (10) by turning the insert anticlockwise (OPEN) and
tapping it out. After emptying the
container several times, it can also be cleaned in water. Dry well once you have
finished.
• Please reassemble the device in the reverse order.
This device has been tested according to all relevant current CE guidelines,
such as electromagnetic compatibility and low voltage directives, and has been
constructed in accordance with the latest safety regulations.
Subject to technical changes without prior notice!
23
GB
4....-05-AKS 825 22.02.2002 15:29 Uhr Seite 23

Guarantee
The device supplied by our Company is covered by a 24 month guarantee starting
on the date of purchase (receipt).
During the life of the guarantee any fault of the device or its accessories *) ascriba-
ble to material or manufacturing defects will be eliminated free of charge by repai-
ring or, at our discretion, by replacing it. The guarantee services do not entail an
extension of the life of the guarantee nor do they give rise to any right to a new
guarantee!
Proof of the guarantee is provided by the proof of purchase. Without proof of
purchase no free replacement or repair will be carried out.
If you wish to make a claim under the guarantee please return the entire machine
in the original packaging to your dealer together with the receipt.
*) Damage to accessories does not mean automatic free replacement of the whole
machine. In such cases please contact our hotline. Broken glass or breakage of
plastic parts are always subject to a charge.
Defects to consumables or parts subject to wearing (e.g. motor pistons, kneading
blades, drive shafts, spare remote control, spare toothbrushes, saw blades, etc.) as
well as cleaning, maintenance or the replacement of said parts are not covered by
the guarantee and hence are to be paid!
The guarantee lapses in case of unauthorized tampering.
After the expiry of the guarantee
After the expiry of the guarantee repairs can be carried by the competent dealer or
repair service against the payment of the ensuing costs.
24
GB
4....-05-AKS 825 22.02.2002 15:29 Uhr Seite 24

Ogólne wskazówki bezpieczeństwa
• Przed uruchomieniem urządzenia proszę bardzo dokładnie przeczytać
instrukcję obsługi. Proszę zachować ją wraz z kartą gwarancyjną,
paragonem i w miarę możliwości również kartonem z opakowaniem
wewnętrznym.
• Proszę wykorzystywać urządzenie jedynie dla prywatnego celu, jaki został
przewidziany dla urządzenia. Urządzenie to nie zostało przewidziane do
użytku w ramach działalności gospodarczej. Proszę nie korzystać z
urządzenia na zewnątrz (chyba że w określonych warunkach). Proszę
trzymać urządzenie z daleka od ciepła, bezpośredniego promieniowania
słonecznego, wilgoci (w żadnym wypadku nie zanurzać w substancjach
płynnych) oraz ostrych krawędzi. Proszę nie obsługiwać urządzenia
wilgotnymi dłońmi. Jeżeli urządzenie jest wilgotne lub mokre, proszę
natychmiast wyciągnąć wtyczkę. Nie sięgać do wody.
• Jeżeli nie korzystacie Państwo z urządzenia, jeżeli chcecie Państwo
zamontować jakieś akcesoria, w celu wyczyszczenia lub w przypadku
jakichkolwiek zakłóceń, proszę zawsze wyłączyć urządzenie i wyjąć wtyczkę
z gniazdka (proszę pociągnąć za wtyczkę, nie zaś za przewód zasilający).
• Proszę nigdy nie pozostawiać urządzenia bez nadzoru. Aby uchronić dzieci
przed niebezpieczeństwem związanym z elektrycznymi urządzeniami, proszę
zadbać o to, aby przewód zasilający nigdy nie wisiał luźno, oraz aby dzieci
nie miały dostępu do urządzenia.
• Proszę regularnie kontrolować urządzenie pod kątem uszkodzeń. Proszę nie
uruchamiać uszkodzonego urządzenia.
• W razie awarii proszę nie naprawiać urządzenia samemu lecz skorzystać z
pomocy autoryzowanego specjalisty.Jeżeli przewód zasilający nieodłączalny
ulegnie uszkodzeniu, to powinien on być wymieniony u wytwórcy lub w
specjalnym zakładzie naprawczym albo przez wykwalifikowaną osobę w celu
uniknięcia zagrożenia.
• Proszę stosować tylko oryginalne akcesoria.
• Prosimy pamiętać o podanych dalej „Specjalnych wskazówkach
bezpieczeństwa...“.
Specjalne zalecenia bezpieczeństwa
• Odkurzać tylko kurz i niewielkie okruchy, nie zbierać żadnych ostrych
przedmiotów, czy gorącego popiołu.
• Podczas odkurzania na mokro proszę zawsze korzystać z nasadki (11).
Specjalne zalecenia bezpieczeństwa
Schemat elementów obsługi
1 Pojemnik na kurz 3 Wskaźnik
2 Przycisk odblokowujący 4 Włącznik/wyłącznik
pojemnik na kurz 5 Uchwyt
25
PL
4....-05-AKS 825 22.02.2002 15:29 Uhr Seite 25

6 Obudowa silnika 10 Filtr
7 Wtyczka ładowarki 11 Nasadka do odkurzania na mokro
8 Mocowanie naścienne 12 Końcówka do szczelin
9 Zasilacz sieciowy
Zawieszenie na ścianie
W razie potrzeby mocowanie naścienne można zamontować za pomocą
dołączonych śrub i kołków.
Ładowanie akumulatora
Po zamontowaniu mocowania na ścianie:
• Zasilacz należy podłączyć do prawidłowo zainstalowanego gniazda z zesty-
kiem ochronnym 230 V, 50 Hz. Świeci się lampka kontrolna ładowania.
• W celu naładowania akumulatora proszę zdjąć nasadki dysz i umieścić
urządzenie w górnej części zawieszenia ściennego.
• Następnie proszę delikatnie nacisnąć uchwyt, aby urządzenie stabilnie
osiadło.
• Czas pierwszego ładowania wynosi ok. 16 godzin, następnie ok. 8 godzin.
Po upływie tego czasu prosimy o odłączenie zasilacza od gniazda.
Korzystanie z urządzenia
Odłączyć urządzenie od sieci i nałożyć wybraną ssawkę. Aby rozpocząć
odkurzanie, należy wcisnąć przycisk WŁĄCZONY/ WYŁĄCZONY (4) i pozosta-
wić go w tej pozycji. Po zakończeniu odkurzania lub w przypadku wyczerpania
się akumulatora, odkurzacz należy podłączyć do wtyczki ładowarki w sposób
opisany w ustępie „Ładowanie akumulatora ". Należy również sprawdzić, czy
zasilacz jest podłączony do sieci.
Nakładki
Ssawka do szczelin: idealna do odkurzania np. naroży i szczelin.
Element do odkurzania
na mokro: Proszę uważać, aby przy zbieraniu cieczy
zawsze stosować tę nakładkę (proszę wsunąć
przedłużenie nasadki do urządzenia na taką
głębokość, aby umożliwić prawidłowe
zamknięcie dyszy.
Czyszczenie
• Przed czyszczeniem należy zawsze odłączyć wtyczkę od gniazda!
• Obudowę należy oczyścić za pomocą miękkiej ściereczki.
• Pojemnik kurzowy mogą Państwo zwolnić naciskając przycisk zwalniający (2)
a następnie wyjąć ciągnąc z góry na dół.
26
PL
4....-05-AKS 825 22.02.2002 15:29 Uhr Seite 26

• Proszę wyjąć filtr kurzowy (10) przekręcając element w kierunku przeciwnym
do ruchu wskazówek zegara (OPEN) i wytrzepać go. Po kilkukrotnym
opróżnieniu worek na kurz można również oczyścić w wodzie. Następnie
pozostawić go do wyschnięcia.
• Urządzenie proszę ponownie złożyć wykonując odpowiednio wszystkie czyn-
ności w odwrotnej kolejności.
Urządzenie to skontrolowano zgodnie ze wszystkimi dotyczącymi go aktualnymi
wytycznymi CE, takimi jak np. odpowiedniość elektromagnetyczna i dyrektywa
na temat niskiego napięcia; urządzenie wykonane zostało z uwzględnieniem
wszystkich najnowszych przepisów techniki bezpieczeństwa pracy.
Zastrzega się prawo do zmian technicznych!
WARUNKI GWARANCJI
Przyznajemy 24 miesięcy gwarancji na produkt licząc od daty zakupu.
W tym okresie będziemy bezpłatnie usuwać w terminie 14 dni od daty dostarcze-
nia wadliwego sprzętu z kartą gwarancyjną do miejsca zakupu wszystkie uszko-
dzenia powstałe w tym urządzeniu na skutek wady materiałów lub wadliwego
wykonania, naprawiając oraz wymieniając wadliwe części lub (jeśli uznamy za sto-
sowne) wymieniając całe urządzenie na nowe.
Sprzęt do naprawy powinien być dostarczony w komplecie wraz z dowodem
zakupu oraz z ważną kartą gwarancyjną do sprzedawcy w miarę możliwości w
oryginalnym opakowaniu lub innym odpowiednim dla zabezpieczenia przed uszko-
dzeniem. W razie braku kompletnego opakowania fabrycznego, ryzyko uszkodze-
nia sprzętu podczas transportu do i z miejsca zakupu ponosi reklamujący.
Naprawa gwarancyjna nie dotyczy czynności przewidzianych w instrukcji obsługi,
do wykonania których zobowiązany jest użytkownik we własnym zakresie i na
własny koszt.
Gwarancja nie obejmuje:
• mechanicznych, termicznych, chemicznych uszkodzeń sprzętu i wywołanych
nimi wad,
• uszkodzeń powstałych w wyniku działania sił zewnętrznych takich jak wyłado-
wania atmosferyczne, zmiana napięcia zasilania i innych zdarzeń losowych,
• nieprawidłowego ustawienia wartości napięcia elektrycznego, zasilanie z nie-
odpowiedniego gniazda zasilania,
• sznurów połączeniowych, sieciowych, żarówek, baterii, akumulatorów,
• uszkodzeń wyrobu powstałych w wyniku niewłaściwego lub niezgodnego z
instrukcją jego użytkowania, przechowywania, konserwacji, samowolnego
zrywania plomb oraz wszelkich przeróbek i zmian konstrukcyjnych dokonanych
przez użytkownika lub osoby niepowołane,
• roszczeń z tytułu parametrów technicznych wyrobu, o ile są one zgodne z
podanymi przez producenta,
27
PL
4....-05-AKS 825 22.02.2002 15:29 Uhr Seite 27

• prawidłowego zużycia i uszkodzeń, które mają nieistotny wpływ na wartość
lub działanie tego urządzenia.
Karta gwarancyjna bez pieczątki sklepu, daty sprzedaży, nie wypełniona, źle
wypełniona, ze śladami poprawek, nieczytelna wskutek zniszczenia, bez
możliwości ustalenia miejsca sprzedaży oraz dołączonego dowodu zakupu jest
nieważna.
Korzystanie z usług gwarancyjnych nie jest możliwe po upływie daty ważności
gwarancji. Gwarancja na części lub całe urządzenie, które są wymieniane kończy
się, wraz z końcem gwarancji na to urządzenie.
Wszystkie inne roszczenia, wliczając w to odszkodowania są wykluczone chyba, że
prawo przewiduje inaczej. Roszczenia wykraczające poza tą umowę nie są
uwzględniane przez tą gwarancję.
Gwarancja oraz zawarte w niej warunki obowiązują na terenie Rzeczpospolitej
Polskiej.
28
PL
4....-05-AKS 825 22.02.2002 15:29 Uhr Seite 28

Všeobecné bezpečnostní pokyny
• Před uvedením tohoto přístroje do provozu si velmi pozorně přečtěte návod
k obsluze a tento návod spolu se záručním listem, pokladním blokem a
podle možností i s obalem a vnitřním vybavením obalu dobře uschovejte.
• Používejte tento přístroj výlučně pro soukromou potřebu a pro stanovené
účely. Tento přístroj není určen pro komerční použití. Nepoužívejte jej v
otevřeném prostoru (s výjimkou přístrojů, které jsou podmíněné používání
venku určeny). Chraňte jej před horkem, přímým slunečním zářením, vlhko-
stí (v žádném případě jej neponořujte do kapalin) a stykem s ostrými hrana-
mi. Nepoužívejte přístroj v případě, že máte vlhké ruce. Jestliže dojde k navl-
hčení nebo namočení přístroje, okamžitě vytáhněte zástrčku ze zásuvky.
Vyvarujte se styku s vodou.
• Přístroj vypněte a vždy vytáhněte zástrčku ze zásuvky (tahejte jen za zástrč-
ku, nikdy ne za kabel), jestliže nebudete přístroj používat, chcete-li
namontovat příslušenství, přístroj vyčistit nebo v případě poruchy.
• Nikdy nenechávejte přístroj bez dozoru, jestliže je v provozu. Abyste ochrá-
nili děti před riziky spojenými s elektrickými přístroji, postarejte se o to, aby
kabel nevisel dolů a děti na přístroj nedosáhly.
• Pravidelně kontrolujte přístroj a přívodní kabel z hlediska poškození. Jestliže
přístroj vykazuje nějakou závadu, neuvádějte jej do provozu.
• Neopravujte přístroj vlastními silami, nýbrž vyhledejte autorizovaného
opraváře. Abyste eliminovali rizika, nechejte poškozený přívodní kabel
nahradit kabelem se stejnými hodnotami a to jen výrobcem, naším servisem
pro zákazníky nebo jinou kvalifikovanou osobou.
• Používejte jen originální příslušenství.
• Respektujte, prosím, následující „Speciální bezpečnostní pokyny ...“.
Zvláštní bezpečnostní pokyny
• Vysávejte pouze prach a malé drobty, nevysávejte ostré předměty nebo
horký popel.
• K mokrému vysávání používejte vždy nástavec (11).
Uvedení přístroje do provozu
Vyobrazení ovládacích prvků
1 Jímka na prach 7 Nabíjecí zástrčka
2 Tlačítko pro uvolnění jímky 8 Stěnový držák
na prach 9 Sít’ový adaptér
3 Indikace 10 Filtr
4 Vypínač ZAP/VYP 11 Nástavec pro mokré vysávání
5 Úchyt 12 Štěrbinová hubice
6 Kryt motoru
29
CZ
4....-05-AKS 825 22.02.2002 15:29 Uhr Seite 29

Stěnový držák
Pomocí přiložených šroubů a hmoždinek popř. upevněte stěnový držák.
Nabíjení akumulátorů
Po provedené montáži stěnového držáku:
• Zastrčte sít’ový napáječ do zásuvky s ochranným kolíkem 230 V, 50 Hz
instalované podle předpisu. Rozsvítí se kontrolka nabíjení.
• Chcete-li akumulátory nabít, demontujte eventuálně nástavce a zastrčte
přístroj nejprve do horního závěsu nástěnného držáku.
• Poté lehce zatlačte na rukojeť, až přístroj zaklapne.
• Doba nabíjení činí při prvním nabíjení zhruba 16 hodin, poté přibližně 8
hodin. Poté, prosím, napáječ vyjměte ze zásuvky.
Použití přístroje
Přístroj popř. odpojte od sítě a nasad’te požadované hubice. Chcete-li zahájit
vysávání, musíte stlačit vypínač Zapnuto/Vypnuto (4) a držet jej stlačený.
Jakmile skončíte s vysáváním anebo jestliže je prázdný akumulátor, napojte,
prosím, vysavač jak je popsáno v bodě „Nabíjení akumulátorů“ na nabíjecí
zástrčku. Dbejte na to, aby také zástrčka byla napojena na sít‘.
Hubicové násady
Štěrbinová hubice: Ideální k vysávání např. rohů a štěrbin
Nástavec pro mokré
vysávání: Dbejte, prosím, na to, aby při vysávání kapalin
byl vždy používán tento nástavec (zasuňte
prodloužení nástavce do přístroje tak, až je
nástavec rovinně uzavřen.
Čištění
• Před čištěním vždy vytáhněte zástrčku ze sítě!
• Kryt čistěte suchým hadříkem.
• Jímku na prach můžete uvolnit pomocí uvolňovacího tlačítka (2) a pak stáh-
nout shora dolů.
• Vyjměte prachový filtr (10) tak, že vložkou otočíte proti směru pohybu hodi-
nových ručiček (OPEN) a vyklepnete ji. Po několikerém vyprázdnění můžete
sáček na prach rovněž vyčistit vodou. Poté, prosím, nechejte vyschnout.
• Přístroj opět sestavte v opačném pořadí jednotlivých kroků.
30
CZ
4....-05-AKS 825 22.02.2002 15:29 Uhr Seite 30

Tento přístroj byl testován podle všech příslušných, v současné době platných
směrnic CE, jako je např. elektromagnetická kompatibilita a direktiva o nízko-
napěťové bezpečnosti, a byl zkonstruován podle nejnovějších bezpečnostně-
technických předpisů.
Vyhrazujeme si technické změny!
Záruka
Na námi prodaný přístroj poskytujeme záruku v trvání 24 měsíců od data prode-
je (pokladní doklad).
Během záruční lhůty odstraníme bezplatně všechny vady přístroje nebo
příslušenství*), které vzniknou v důsledku vad materiálu nebo výrobních vad, a to
opravou nebo, podle našeho uvážení, formou výměny. Záruční plnění nemají za
následek ani prodloužení záruční doby ani tím nevzniká nárok na novou záruku!
Jako záruční doklad slouží doklad o koupi. Bez tohoto dokladu nelze uskutečnit
bezplatnou výměnu nebo bezplatnou opravu.
V případě uplatnění záruky předejte, prosím, kompletní přístroj v originálním
obalu spolu s pokladním dokladem Vašemu obchodníkovi.
*) Poškození příslušenství není automaticky důvodem pro bezplatnou výměnu
kompletního přístroje. V takovém případě se obraťte na naši Hotline! Prasklé
skleněné resp. plastové díly zásadně podléhají povinnosti úhrady!
Jak na vady na spotřebním příslušenství, resp. dílech podléhajících rychlému
opotřebení (např. uhlíky motoru, hnětací háky, hnací řemeny, náhradní dálkové
ovládání, náhradní zubní kartáčky, pilové listy atd.), tak i na čištění, údržbu nebo
výměnu dílů podléhajících rychlému opotřebení se záruka nevztahuje a je proto
nutno je uhradit!
Záruka zaniká v případě, že dojde k zásahu neautorizovanou osobou.
Po uplynutí záruky
Po uplynutí záruční doby je možno za úplatu provést opravy v příslušném
odborném obchodě nebo opravně.
31
CZ
4....-05-AKS 825 22.02.2002 15:29 Uhr Seite 31

Általános biztonsági rendszabályok
• A készülék használatba vétele előtt gondosan olvassa végig a használati
utasítást, és őrizze meg a garancialevéllel, a pénztári nyugtával és lehetőleg
a csomagolókartonnal, ill. az abban lévő bélésanyaggal együtt!
• Kizárólag személyi célra használja a készüléket, és csupán arra, amire való!
A készülék nem ipari jellegű használatra készült. Ne használja a szabadban
(hacsak nem a szabadban való, meghatározott korlátok közötti használatra
van szánva)! Ne tegye ki erős hőhatásnak, közvetlen napsugárzásnak és
nedvességnek (semmi esetre se mártsa folyadékba), és óvja az éles
szélektől! Ne használja a készüléket vizes kézzel! Ha a készülék vizes vagy
nedves lett, azonnal húzza ki a konnektorból! Ne nyúljon bele a vízbe!
• Kapcsolja ki a készüléket, és amikor nem használja, tartozékokat helyez rá,
tisztítja, vagy ha zavart észlel, mindig húzza ki a csatlakozó dugaszt a
konnektorból!
• Soha ne hagyja a készüléket felügyelet nélkül! Annak érdekében, hogy a
gyermekeket megvédje az elektromos készülékek okozta veszélyektől, soha
ne hagyja a kábeleket szabadon lógva, és olyan helyre tegye a készüléket,
ahol gyermekek nem férhetnek hozzá!
• Rendszeresen ellenőrizze, hogy nincs-e a készüléken vagy a kábelen
sérülés! Sérült készüléket soha ne helyezzen üzembe!
• A kockázatok elkerülése végett ne maga javítsa a készüléket, hanem
keressen fel egy erre kiképzett szakembert! Ha hibás a csatlakozó kábel,
csak a gyártótól, a vevőszolgálatunktól vagy hasonló képzettségű személytől
kérjen helyette azonos értékű másik kábelt!
• Csak eredeti tartozékokat használjon!
• Tartsa be az itt következő "Speciális biztonsági rendszabályokat" ...
Speciális biztonsági rendszabályok
• Csak port és apró morzsát szívjon fel a készülékkel, hegyes tárgyakat vagy
forró hamut ne!
• Nedvesség felszívásához használja mindig a toldalékfejet (11)!
A készülék használatba vétele
A kezelő elemek bemutatása
1 Portartály 7 Feltöltő dugasz
2 A portartály kioldó gombja 8 Fali tartó
3 Kijelző 9 Hálózati adapter
4 Be-/kikapcsológomb 10 Szűrő
5 Nyél 11 Nedvességszívó fej
6 Motorház 12 Résszívó fej
32
H
4....-05-AKS 825 22.02.2002 15:29 Uhr Seite 32

Fali tartó
Ha szükség van rá, szerelje fel a fali tartót a hozzá adott csavarok és tiplik
segítségével!
Az akku feltöltése
A fali tartó felszerelése után:
• Dugja a hálózati adaptert előírásszerűen szerelt, földelt, 230 V, 50 Hz-es
konnektorba! A feltöltés-ellenőrző lámpa kigyullad.
• Az akku feltöltéséhez szükség esetén vegye le a szívófejeket, és dugja a
készüléket először a falitartó felső rekeszébe.
• Utána finoman nyomja meg a nyelet úgy, hogy a készülék bekattanjon!
• A feltöltési idő első alkalommal kb. 16 óra, a későbbiekben kb. 8 óra. Utána
húzza ki kérem az adaptert a konnektorból!
A készülék használata
Mielőtt a kívánt szívófejet feltenné a készülékre, húzza ki a csatlakozó dugót a
konnektorból! A porszívózás megkezdéséhez meg kell nyomni, és a működ-
tetéshez lenyomva kell tartani a ki-/bekapcsológombot (EIN/AUS - 4). A munka
befejeztével, vagy ha az akku lemerült, csatlakoztassa a készüléket "Az akku fel-
töltése" címszó alatt leírtak szerint a feltöltő dugaszra! Ügyeljen rá, hogy az
adapter is be legyen dugva a konnektorba!
Szívófejek
Résszívófej: Ideális pl. sarkok vagy rések porszívózására
Nedvességszívás: Ügyeljen rá, hogy folyadék felszívásához mindig
be kell helyezni ezt a szívófejet (tolja be a
toldalék nyakát a készülékbe úgy, hogy a
szívófej körkörösen zárjon!)
Tisztítás
• Tisztítás előtt mindig húzza ki a hálózati csatlakozó dugót a konnektorból!
• A motorházat száraz ruhával törölje le!
• A portartályt a kioldógombbal (2) lehet kioldani, utána pedig felülről lefelé
húzva kivenni.
• A betétet az óramutató járásával ellentétes irányba (OPEN) forgatva, vegye
ki a porszűrőt (10), és porolja ki! Többszöri ürítés után a porzsákot vízben ki
is moshatja. Utána szárítsa meg!
• A készüléket fordított sorrendben illessze ismét össze!
33
H
4....-05-AKS 825 22.02.2002 15:29 Uhr Seite 33

Ezt a készüléket az Európa Tanács minden vonatkozó aktuális irányelve szerint
(pl. elektromágnesesség-elviselő képesség vagy kisfeszültség-elviselő képes-
ség) ellenőriztük, és a legújabb biztonságtechnikai előírások szerint készült.
Megjegyezzük az esetleges müszaki változásokat!
Garancia
Az általunk forgalmazott készülékre a vétel időpontjától (pénztári nyugta)
számított 24 havi garanciát vállalunk.
A garanciális időn belül saját mérlegelésünk szerint javítással vagy cserével
díjtalanul megszüntetjük a készülék vagy a tartozék *) olyan hiányosságait, ame-
lyek anyaghibára vagy gyártási hibára vezethetők vissza. A garanciális szolgál-
tatások sem a garanciális idő meghosszabbítását nem eredményezik, sem nem
alapoznak meg újabb garanciára való igényt!
A garancia igazolására a pénztári nyugta szolgál. E nélkül az igazolás nélkül sem
díjmentes csere, sem díjtalan javítás nem végezhető.
Garanciális esetben eredeti csomagolásban a pénztári nyugtával együtt vigye
vissza az egész készüléket az üzletbe, ahol vásárolta.
*) A tartozékok hibái nem eredményezik automatikusan az egész készülék
díjtalan cseréjét. Ilyen esetekben forduljon „forró vonalunkhoz”! Az üvegtörésből,
ill. a műanyag alkatrészek töréséből eredő hibák megszüntetése mindenkor
térítésköteles.
Sem az elhasználódó tartozékokban, ill. kopó alkatrészekben (pl. szénkefe,
dagasztóhorog, hajtószíj, póttávvezérlő, pótfogkefe, fűrészlap stb.) bekövetkező
hibák, sem a tisztítás, karbantartás vagy a kopó alkatrészek cseréje nem esik a
garancia hatálya alá, következésképp térítésköteles.
Illetéktelen beavatkozás a garancia megszűnését eredményezi.
A garanciális idő után
A garanciális idő eltelte után a megfelelő szakkereskedésben vagy javítószol-
gálatnál végeztethet térítésköteles javításokat.
34
H
4....-05-AKS 825 22.02.2002 15:29 Uhr Seite 34

Indicaflii generale de siguranflæ
• Înainte de punerea în funcfliune a acestui aparat citifli cu atenflie instrucfliunile de
utilizare øi pæstrafli inclusiv certificatul de garanflie, bonul de casæ øi dupæ posibi-
litæfli ambalajul.
• Folosifli acest aparat exclusiv în scop privat øi în cel pentru care a fost conce-
put. Acest aparat nu este conceput pentru utilizarea industrialæ. Nu-l folosifli în
exterior (doar dacæ este conceput pentru a fi folosit în exterior). Evitafli
expunerea aparatului la cælduræ, la influenfla directæ a razelor solare, umezealæ
(este interzisæ scufundarea acestuia în lichide) øi nu folosifli obiecte ascuflite în
timpul utilizærii. Evitafli folosirea aparatului cu mâinile ude. În cazul în care apa-
ratul este umed sau ud, deconectafli imediat de la reflea. Nu bægafli mâna în
apæ.
• Oprifli aparatul øi deconectafli întotdeuna de la reflea (tragefli de øtecher øi nu de
cablu) atunci când nu folosifli aparatul, când montafli accesorii, în timpul curæflærii
sau în cazul unor defecfliuni de funcflionare.
• Nu læsafli aparatul niciciodatæ nesupravegheat. Pentru a proteja copiii faflæ de
pericolele aparatelor electrice, asigurafli-væ cæ aceøtia nu au acces la ele øi nu
læsafli cablurile sæ atârne.
• Verificafli regulat aparatul øi cablurile în vederea detectærii defecfliunilor. Nu
folosifli aparate defecte.
• Pentru repararea aparatului contactafli un specialist autorizat. Pentru înlocuirea
unuiui cablu defect de reflea contactafli, în vederea evitærii riscurilor, pro-
ducætorul, serviciul nostru de clienfli sau o persoanæ calificatæ.
• Folosifli doar accesorii originale.
• Væ rugæm sæ citifli cu atenflie øi urmætoarele „Indicaflii speciale de siguranflæ…“
Instrucfliuni speziale de securitatae
• Aspirafli numai praf øi færâmituri mici, nici un obiect ascuflit sau scrum fierbinte.
• Pentru aspirarea lichidelor folosifli întotdeauna setul corespunzætor (11).
Punerea în funcfliune a aparatului
Descrierea elementelor de deservire
1 Recipient pentru praf 6 Corpul motorului
2 Buton de decuplare a 7 Fiøæ de încærcare
recipientului pentru praf 8 Stativ de perete
3 Indicaflie 9 Adaptor de reflea
4 Comutator EIN/AUS 10 Filtru
(CONECTAT/DECONECTAT) 11 Set pentru aspirarea lichidelor
5 Mâner 12 Duzæ pentru rosturi
35
RO
4....-05-AKS 825 22.02.2002 15:29 Uhr Seite 35

Suportul de perete
Dacæ este cazul, fixafli suportul de perete cu ajutorul øuruburilor øi al diblului
anexate.
Încærcarea acumulatorului
Dupæ montajul suportului ce perete:
• Introducefli aparatul de alimentare într-o prizæ 230V, 50 Hz cu protecflie, instalatæ
conform prescripfliilor. Becul de control al încærcærii se va aprinde.
• Pentru încærcarea acumulatorului demontafli, dacæ este nevoie, seturile de duze
øi introducefli aparatul în primul rând în eclisa superioaræ a suportului pentru
perete.
• Apæsafli apoi uøor pe mâner pânæ se blocheazæ.
• Durata de încærcare este, la prima încærcare, de cca. 16 ore, iar ulterior de cca.
8 ore. Apoi scoatefli din prizæ aparatul de alimentare.
Folosirea aparatului
La nevoie separafli aparatul de reflea øi montafli duza doritæ. Pentru a putea începe
aspirarea, comutatorul PORNIT/OPRIT (4) trebuie apæsat øi flinut apæsat. La termi-
narea lucrului, sau dacæ acumulatorul este descærcat, racordafli aspiratorul la fiøa
de încærcare, aøa cum a fost descris la capitolul îmcærcarea acumulatorului. Atenflie,
ca øi fiøa de reflea sæ fie introdusæ.
Stul de duze
Duza petru rosturi: idealæ pentru aspirarea de ex. a colflurilor sau
a rosturilor.
Set pentru aspirarea lichidelor: Acest set de aspirare trebuie montat doar în cazul
aspirærii lichidelor (împingefli prelungirea setului în
aparat pânæ când duza se fixeazæ coliniar.
Curæflirea
• Scoatefli totdeauna fiøa de reflea înaintea curæflirii!
• Curæflaflî corpul cu o cârpæ uscatæ.
• Aspiratorul poate fi desprins de la butonul de desprindere (2) øi apoi tras în jos.
• Scoatefli filtrul de praf (10) învârtind setul în sens contrar acelor de ceas
(OPEN) øi scuturafli-l. Dupæ goliri repetate putefli curæfla punga de praf øi în apæ.
Apoi læsafli sæ se usuce.
• Montafli aparatul la loc în ordine inversæ.
36
RO
4....-05-AKS 825 22.02.2002 15:29 Uhr Seite 36

Acest aparat a fost verificat în conformitate cu toate directivele actuale ale CE,
cum ar fi de ex. compatibilitatea magneticæ øi directiva de tensiune joasæ, øi a fost
construit în conformitate cu cele mai noi prevederi de siguranflæ tehnicæ.
Schimbæri technice sînt rezervate!
Garanflie
Acordæm pentru aparatul nostru o garanflie de 24 de luni începând cu data
achiziflionærii (bon de casæ).
Pe durata perioadei de garanflie remediem gratuit defecfliunile aparatului sau ale
accesoriilor*) rezultate ca urmare a unor defecfliuni din fabricaflie, reparând sau, în
funcflie de aprecierea noastræ, înlocuind aparatul. Reparafliile în garanflie nu duc la
prelungirea teremenului de garanflie øi nici la obflinerea unei noi garanflii!
Pentru a beneficia de garanflie, cumpærætorul este obligat sæ prezinte chitanfla/factu-
ra originalæ de cumpærare a aparatului. Færæ aceastæ dovadæ nu se poate efectua
înlocuirea sau reparaflia gratuitæ a aparatului.
În cazul remedierilor în garanflie predafli aparatul integral în ambalajul original
împreunæ cu bonul de casæ la service-ul autorizat.
*) Defecfliunile accesoriilor nu includ în mod automat schimbarea întregului aparat.
În acest caz væ rugæm sæ sunafli la unul din numerele noastre de telefon!
Deteriorærile componentelor din sticlæ respectiv ale celor din material plastic trebuie
plætite!
Atât defectele de la accesoriile funcflionale resp. componetele care se uzeazæ (de
ex. paleta de fræmântat, curea de distribuflie, telecomandæ de rezervæ, periufle de
dinfli de rezervæ, pânza de fieræstræu) cât øi curæflarea, întreflinerea sau înlocuirea
componentelor care se uzeazæ, nu untræ sub incidenfla garanfliei øi de aceea trebuie
plætite!
Garanflia dispare în cazul intervenfliei stræine.
Post-garanflie
Dupæ scurgerea teremenului de garanflie reparafliile pot fi efectuate gratuit de cætre
service-ul autorizat.
37
RO
4....-05-AKS 825 22.02.2002 15:29 Uhr Seite 37

Общие указания по технике безопасности
• Перед началом эксплуатации прибора внимательно прочитайте
прилагаемую инструкцию по эксплуатации и сохраните ее в надежном
месте, вместе с гарантийным талоном, кассовым чеком и, по
возможности, картонной коробкой с упаковочным материалом.
• Пользуйтесь прибором только частным образом и по назначению.
Прибор не предназначен для коммерческого использования. Не
пользуйтесь прибором под открытым небом (исключая приборы,
эксплуатация которых под открытым небом допустима). Предохраняйте
прибор от жары, прямых солнечных лучей, влажности (ни в коем случае
не погружайте его в воду) и ударов об острые углы. Не прикасайтесь к
прибору влажными руками. Если прибор увлажнился или намок, тут же
выньте вилку из розетки. Не прикасайтесь к мокрым местам.
• После эксплуатации, монтаже принадлежностей, чистке или поломке
прибора всегда вынимайте вилку из розетки (тяните за вилку, а не за
кабель).
• Никогда не оставляйте прибор без присмотра. Для защиты детей от
поражений электротоком, следите за тем, чтобы кабель не висел где
попало и дети не имели доступа к прибору.
• Регулярно осматривайте прибор и кабель на предмет возможных
повреждений. Ни в коем случае не включайте прибор, имеющий
повреждения.
• Ни в коем случае не ремонтируйте прибор самостоятельно, а
обращайтесь в таком случае за помощью к специалисту, имеющему
соответствующий допуск. Из соображений безопасности, замена
сетевого шнура на равнозначный допускается только через завод-
изготовитель, нашу сервисную мастерскую или соответствующего
квалифицированного специалиста.
• Используйте только оригинальные запчасти.
• Пожалуйста, соблюдайте нижеследующие "Специальные указания по
технике безопасности ...".
Специальные указания по технике безопасности
• Пылесосьте только пыль и мелкие крошки и ни в коем случае острые
предметы или горячий пепел.
• Пожалуйста, используйте для влажной уборки насадку (11).
Подготовка прибора к эксплуатации
Изображение конрольных деталей
1 Пылесборник 4 Выключатель ВКЛ/ВЫКЛ
2 Кнопка разблокировки 5 Ручка
пылесборника 6 Корпус мотора
3 Индикатор 7 Вилка подзарядного устройства
38
RUS
4....-05-AKS 825 22.02.2002 15:29 Uhr Seite 38

8 Настенный держатель 10 Фильтр
9 Сетевой адаптер/ 11 Насадка для влажной уборки
подзарядное устройство 12 Узкое сопло
Настенный держатель
При необходимости, прикрепите настенный держатель к стене при помощи
прилагаемых винтов и дюбелей.
Подзарядка аккумуляторов
После монтажа настенного держателя:
• Вставьте вилку в заземленную розетку с напряжением сети 230 В, 50 Гц,
установленную в соответствии с предписаниями. Загорается
светоиндикатор контроля подзарядки.
• Для подзарядки аккумуляторов снимите все насадки и вставьте прибор
для начала в верхнее гнездо настенного держателя.
- Затем слегка нажмите на ручку, чтобы прибор зафиксировался.
- Время подзарядки аккумуляторов составляет: в первый раз прим. 16
часов, потом прим. по 8 часов. После этого выньте сетевой адаптер из
розетки.
Порядок работы с прибором
Отключите прибор от сети и наденьте на сопло необходимую насадку. Для
начала работы необходимо нажать на выключатель "ВКЛ/ВЫКЛ" (4)
("EIN/AUS") и держать его нажатым. По окончании эксплуатации или
разрядке аккумуляторов, поставьте пылесос на подзарядку, как это описано
в главе "Подзарядка аккумуляторов". Проследите за тем, чтобы вилка
сетевого адаптера была вставлена в розетку.
Насадки
Узкое сопло: идеально подходит для удаления пыли из
углов или щелей.
Насадка для
влажной уборки: Пожалуйста не забывайте надевать насадку
для влажной уборки (вставьте удлинитель
насадки в прибор и задвиньте его, до
надежной фиксации сопла).
Чистка прибора
• Перед чисткой прибора выньте вилку из розетки!
• Протрите корпус прибора сухой тряпкой.
• Разблокируйте контейнер пылесборника, нажав кнопку (2), и потяните
его сверху вниз.
39
RUS
4....-05-AKS 825 22.02.2002 15:29 Uhr Seite 39

• Выньте пылефильтр (10), для чего поверните насадку против часовой
стрелки (крутить в направлении "OPEN"), и выколотите его. После
многократной чистки его можно промыть в воде. Не забудьте его хорошо
просушить.
• Соберите, пожалуйста, прибор в обратной последовательности
Это изделение прошло все необходимые и актуальные проверки,
предписанные директивой СЕ, к прим. на электромагнитную
совместимость и соответствие требованиям к низковольтной технике, оно
было также сконструировано и построено с учетом последних требований
по технике безопасности.
Мы оставляем за собой право на технические изменения!
Гарантийное обязательство
Во время гарантии мы бесплатно устраняем все недостатки изделий и
принадлежностей к ним, возникшие по причине дефектных материалов или
по вине завода-изготовителя, путем ремонта или, на наше усмотрение,
путем замены изделия. Гарантийный ремонт не удлиняет срок гарантии и не
возобновляет ее!
Кассовый чек является гарантийным талоном. Без него невозможен
бесплатный ремонт или замена изделия.
В случае возникновжния притензий по гарантии, предъявите изделие в
полнойкомплектации, с оригинальной упаковкой и кассовым чеком
торговой точке, продавшей это изделие.
*) Дефекты принадлежностей не служат причиной для автоматической
замены всего изделия. В этом случае позвоните нам, пожалуйста, по
горячей линии! Разбитые стеклянные и поломаные пластмассовые детали
возмещаются только за дополнительную оплату!
Дефекты изнашиваемых принадлежностей или трущихся деталей (например
контактные щетки моторов, смесительные крюки, приводные ремни,
запасные пульты управления, запасные зубные щетки, пильные полотна и
т.д.), а также чистка, техобслуживание или замена трущихся деталей не
попадают под гарантию, и поэтому проводятся за отдельную оплату!
Гарантия теряется при вскрытии изделия посторонними лицами.
После гарантии
После окончания срока гарантии, ремонт изделий производится за оплату,
соответствующими мастерскими или пунктами сервисного обслуживания.
40
RUS
4....-05-AKS 825 22.02.2002 15:29 Uhr Seite 40

D-47906 Kempen/Germany · Industriering Ost 40
Internet: http://www.clatronic.de · email: [email protected]
Technische Daten
Modell: AKS 825
Spannungsversorgung: 230 V, 50 Hz
Netzteil: 6 V, ≈ 200 mA, 1,2 VA
Schutzklasse:
ΙΙ
Dieses Gerät wurde nach allen zutreffenden,
aktuellen CE-Richtlinien geprüft, wie z.B.
elektromagnetische Verträglichkeit und
Niederspannungsdirektive und wurde nach den
neuesten sicherheitstechnischen Vorschriften
gebaut.
Technische Änderungen vorbehalten!
Bitte führen Sie das ausgediente Gerät
einer umweltgerechten Entsorgung zu.
Stünings, Krefeld • 02/02
NiCd:
4....-05-AKS 825 22.02.2002 15:29 Uhr Seite 41
Documenttranscriptie
4....-05-AKS 825 22.02.2002 15:29 Uhr Seite 1 R Bedienungsanleitung/Garantie Gebruiksaanwijzing/Garantie • Mode d’emploi/Garantie Instrucciones de servicio/Garantía • Manual de instruções/Garantia Istruzioni per l’uso/Garanzia • Instruction Manual/Guarantee Instrukcja obsługi/Gwarancja • Návod k použití/Záruka A használati utasítás/garancia • Mod de întrebuinflare/Garanflie Руководство по эксплуатации/Гарантия Akkusauger Accu-stofzuiger • Aspirateur à accus Aspirador de baterías • Aspirador de acumuladores Aspirator ricaricabile • Battery Vacuum Odkurzacz z akumulatorem • Akumulátorový vysavač Akkumulátoros porszívó • Aspirator cu acumulator Аккумуляторный пылесос AKS 825 4....-05-AKS 825 22.02.2002 15:29 Uhr Seite 2 Inhalt D NL F E P I GB PL CZ H RO RUS Inhoud • Sommaire • Indice • Índice • Indice Contents • Spis treści • Obsah • Tartalom • Conflinut • Содержание Übersicht Bedienelemente . . . . . . . . . . . . . . . . . . . . . . . . . .Seite Bedienungsanleitung . . . . . . . . . . . . . . . . . . . . . . . . . . . . . . .Seite Garantie . . . . . . . . . . . . . . . . . . . . . . . . . . . . . . . . . . . . . . . .Seite Overzicht bedieningselementen . . . . . . . . . . . . . . . . . . . . . .Pagina Gebruiksaanwijzing . . . . . . . . . . . . . . . . . . . . . . . . . . . . . . . .Pagina Garantie . . . . . . . . . . . . . . . . . . . . . . . . . . . . . . . . . . . . . . . .Pagina Aperçu des éléments de commande . . . . . . . . . . . . . . . . . . .Page Mode d’emploi . . . . . . . . . . . . . . . . . . . . . . . . . . . . . . . . . . .Page Garantie . . . . . . . . . . . . . . . . . . . . . . . . . . . . . . . . . . . . . . . .Page Vista de conjunto Elementos de mando . . . . . . . . . . . . . . . .Página Instrucciones de servicio . . . . . . . . . . . . . . . . . . . . . . . . . . . .Página Garantia . . . . . . . . . . . . . . . . . . . . . . . . . . . . . . . . . . . . . . . .Página Vista geral dos elemntos de comando . . . . . . . . . . . . . . . . .Página Manual de instruções . . . . . . . . . . . . . . . . . . . . . . . . . . . . . .Página Garantía . . . . . . . . . . . . . . . . . . . . . . . . . . . . . . . . . . . . . . . .Página Descrizione dei singoli pezzi . . . . . . . . . . . . . . . . . . . . . . . .Pagina Istruzioni per l’uso . . . . . . . . . . . . . . . . . . . . . . . . . . . . . . . . .Pagina Garanzia . . . . . . . . . . . . . . . . . . . . . . . . . . . . . . . . . . . .Pagina Control element overview . . . . . . . . . . . . . . . . . . . . . . . . . . .Page Instruction Manual . . . . . . . . . . . . . . . . . . . . . . . . . . . . . . . . .Page Guarantee . . . . . . . . . . . . . . . . . . . . . . . . . . . . . . . . . . . . . .Page Przegląd elemetów obsługi . . . . . . . . . . . . . . . . . . . . . . . . .Strona Instrukcja obsługi . . . . . . . . . . . . . . . . . . . . . . . . . . . . . . . .Strona Gwarancja . . . . . . . . . . . . . . . . . . . . . . . . . . . . . . . . . . .Strona Přehled obsluhovací prvky . . . . . . . . . . . . . . . . . . . . . . . . . .Strana Návod k použití . . . . . . . . . . . . . . . . . . . . . . . . . . . . . . . . . .Strana Záruka . . . . . . . . . . . . . . . . . . . . . . . . . . . . . . . . . . . . .Strana A hasznalt elemek megtekintése . . . . . . . . . . . . . . . . . . . . .Oldal A hasznalati utasítás . . . . . . . . . . . . . . . . . . . . . . . . . . . . . .Oldal Garancia . . . . . . . . . . . . . . . . . . . . . . . . . . . . . . . . . . . . . . . .Oldal Privire de ansamblu al modului de întrebuinflare . . . . . . . .Paginæ Mod de întrebuinflare . . . . . . . . . . . . . . . . . . . . . . . . . . . . . .Paginæ Garanflie . . . . . . . . . . . . . . . . . . . . . . . . . . . . . . . . . . . . . .Paginæ Обзор управляющих элементов . . . . . . . . . . . . . . . . . . . .стр. Руководство по эксплуатации . . . . . . . . . . . . . . . . . . . . . .стр. Гарантия . . . . . . . . . . . . . . . . . . . . . . . . . . . . . . . . . . . . . . . . .стр. 3 4 5 3 7 9 3 10 12 3 13 15 3 16 18 3 19 21 3 22 24 3 25 27 3 29 31 3 32 34 3 35 37 3 38 40 4....-05-AKS 825 22.02.2002 15:29 Uhr 1 2 3 Seite 3 4 5 6 10 12 11 7 9 8 Übersicht der Bedienelemente 1 2 3 4 5 6 Staubbehälter Löseknopf Staubbehälter Anzeige EIN/AUS Schalter Griff Motorgehäuse 7 8 9 10 11 12 Ladestecker Wandhalterung Netzadapter Filter Aufsatz für das Nasssaugen Fugendüse 3 4....-05-AKS 825 22.02.2002 15:29 Uhr Seite 4 Allgemeine Sicherheitshinweise D • • • • • • • • Lesen Sie vor Inbetriebnahme dieses Gerätes die Bedienungsanleitung sehr sorgfältig durch und bewahren Sie diese inkl. Garantieschein, Kassenbon und nach Möglichkeit den Karton mit Innenverpackung gut auf. Benutzen Sie das Gerät ausschließlich für den privaten und den dafür vorgesehenen Zweck. Dieses Gerät ist nicht für den gewerblichen Gebrauch bestimmt. Benutzen Sie es nicht im Freien (außer es ist für den bedingten Einsatz im Freien vorgesehen). Halten Sie es vor Hitze, direkter Sonneneinstrahlung, Feuchtigkeit (auf keinen Fall in Flüssigkeiten tauchen) und scharfen Kanten fern. Benutzen Sie das Gerät nicht mit feuchten Händen. Bei feucht oder nass gewordenem Gerät sofort den Netzstecker ziehen. Nicht ins Wasser greifen. Schalten Sie das Gerät aus und ziehen Sie immer den Stecker aus der Steckdose (ziehen Sie am Stecker, nicht am Kabel) wenn Sie das Gerät nicht benutzen, Zubehörteile anbringen, zur Reinigung oder bei Störung. Lassen Sie das Gerät niemals unbeaufsichtigt. Um Kinder vor Gefahren elektrischer Geräte zu schützen, sorgen Sie bitte dafür, dass das Kabel nicht herunter hängt und Kinder keinen Zugriff auf das Gerät haben. Prüfen Sie Gerät und Kabel regelmäßig auf Schäden. Ein beschädigtes Gerät bitte nicht in Betrieb nehmen. Reparieren Sie das Gerät nicht selbst, sondern suchen Sie bitte einen autorisierten Fachmann auf. Um Gefährdungen zu vermeiden, ein defektes Netzkabel bitte nur vom Hersteller, unserem Kundendienst oder einer ähnlich qualifizierten Person durch ein gleichwertiges Kabel ersetzen lassen. Verwenden Sie nur Original-Zubehör. Beachten Sie bitte die nachfolgenden ”Speziellen Sicherheitshinweise...”. Spezielle Sicherheitshinweise für dieses Gerät • • Saugen Sie nur Staub und kleine Krümel, keine spitzen Gegenstände oder heiße Asche. Benutzen Sie zum Nasssaugen bitte immer den Aufsatz (11). Inbetriebnahme des Gerätes Wandhalterung Bringen Sie ggf. die Wandhalterung mittels beiliegenden Schrauben und Dübel an. Laden der Akku’s Nach Montage der Wandhalterung: • • 4 Stecken Sie das Netzgerät in eine vorschriftsmäßig installierte Schutzkontaktsteckdose 230 V, 50 Hz. Die Lade-Kontrollleuchte leuchtet. Zum Aufladen der Akkus nehmen Sie bitte ggf. die Düsenaufsätze ab und stecken das Gerät zuerst in die obere Lasche der Wandhalterung. 4....-05-AKS 825 • • 22.02.2002 15:29 Uhr Seite 5 Drücken Sie dann leicht am Griff, bis das Gerät einrastet. Die Ladezeit beträgt beim ersten Mal ca. 16 Stunden, danach ca. 8 Stunden. Das Netzteil dann bitte aus der Steckdose ziehen. D Benutzung des Gerätes Lösen Sie ggf. das Gerät vom Netz und setzen Sie die gewünschten Düsen auf. Um mit dem Saugen zu beginnen, müssen Sie den EIN/AUS Schalter (4) drücken und gedrückt halten. Nach Beendigung oder bei leerem Akku, schließen Sie den Sauger, wie unter „Laden der Akkus“ beschrieben, bitte an die Ladestecker an. Achten Sie darauf, dass auch der Netzstecker eingesteckt ist. Düsenaufsätze Fugendüse: Ideal zum Saugen von z.B. Ecken und Schlitzen. Einsatz zum Nasssaugen: Bitte achten Sie darauf, dass Sie diesen Aufsatz immer zum Aufsaugen von Flüssigkeiten aufstecken (Schieben Sie die Verlängerung des Aufsatzes in das Gerät, bis die Düse bündig abschließt. Reinigung • • • • • Ziehen Sie vor der Reinigung immer den Netzstecker! Reinigen Sie das Gehäuse mit einem trockenen Tuch. Den Staubbehälter können Sie mit dem Löseknopf (2) lösen und dann von oben nach unten abziehen. Entnehmen Sie den Staubfilter (10) indem Sie den Einsatz gegen den Uhrzeigersinn (OPEN) drehen und klopfen Sie ihn aus. Nach mehrmaligem Leeren können Sie den Staubbeutel auch in Wasser reinigen. Anschließend bitte trocknen lassen. Das Gerät bitte wieder in umgekehrter Reihenfolge zusammenfügen. Garantie Wir übernehmen für das von uns vertriebene Gerät eine Garantie von 24 Monaten ab Kaufdatum (Kassenbon). Innerhalb der Garantiezeit beseitigen wir unentgeltlich die Mängel des Gerätes oder des Zubehörs*), die auf Material- oder Herstellungsfehler beruhen, durch Reparatur oder, nach unserem Ermessen, durch Umtausch. Garantieleistungen bewirken weder eine Verlängerung der Garantiefrist, noch beginnt dadurch ein Anspruch auf eine neue Garantie! Als Garantienachweis gilt der Kaufbeleg. Ohne diesen Nachweis kann ein kostenloser Austausch oder eine kostenlose Reparatur nicht erfolgen. 5 4....-05-AKS 825 D 22.02.2002 15:29 Uhr Seite 6 Im Garantiefall geben Sie bitte komplette Gerät in der Originalverpackung zusammen mit dem Kassenbon an Ihren Händler. *) Schäden an Zubehörteilen führen nicht automatisch zum kostenlosen Umtausch des kompletten Gerätes. Wenden Sie sich in desem Fall bitte an unsere Hotline! Glasbruchschäden bzw. Brüche von Kunststoffteilen sind grundsätzlich kostenpflichtig! Sowohl Defekte an Verbrauchszubehör bzw. Verschleißteilen (z.B. Motorkohlen, Knethaken, Antriebsriemen, Ersatzfernbedienung, Ersatzzahnbürsten, Sägeblättern usw.), als auch Reinigung, Wartung oder der Austausch von Verschleißteilen, fallen nicht unter die Garantie und sind deshalb kostenpflichtig! Die Garantie erlischt bei Fremdeingriff. Nach der Garantie Nach Ablauf der Garantiezeit können Reparaturen kostenpflichtig vom entsprechenden Fachhandel oder Reparaturservice ausgeführt werden. Service für unsere Haushaltsartikel Verschleißteile für Haushaltsartikel (soweit diese nicht vom Fachmann ausgewechselt werden müssen), Ersatzkannen, Staubsaugerfilterbeutel usw. können Sie mit Angabe des Gerätetyps unter folgender TelefonHotline bestellen: Service für unsere Unterhaltungselektronik Verschleißteile und Ersatzteile für unsere Unterhaltungselektronik (soweit diese nicht vom Fachmann ausgewechselt werden müssen) wie z. B. Fernbedienungen, Bedienteilklappen, Lautsprecherblenden usw. können Sie mit Angabe des Gerätetyps unter folgender Telefon-Hotline bestellen: 0 21 52 / 20 06 – 888 0 21 52 / 20 06 – 666 Für technische Fragen haben wir für Sie folgende e-mail-Adresse eingerichtet: [email protected] Interessieren Sie sich für weitere Clatronic-Produkte? Besuchen Sie doch einmal unsere Homepage unter www.clatronic.de oder www.clatronic.com 6 4....-05-AKS 825 22.02.2002 15:29 Uhr Seite 7 Algemene veiligheidsinstructies • • • • • • • • NL Lees vóór de ingebruikname van dit apparaat de handleiding uiterst zorgvuldig door en bewaar deze goed, samen met het garantiebewijs, de kassabon en zo mogelijk de doos met de binnenverpakking. Gebruik het apparaat uitsluitend privé en uitsluitend voor de voorgeschreven toepassing. Dit apparaat is niet geschikt voor commercieel gebruik (tenzij het bedoeld is voor beperkt gebruik in de buitenlucht). Bescherm het tegen hitte, directe zonnestralen, vocht (i geen geval in vloeistoffen dompelen) en scherpe kanten. Gebruik het apparaat niet met vochtige handen. Bij vochtig of nat geworden apparaat onmiddellijk de stroomtoevoer onderbreken. Niet in het water grijpen. Schakel het apparaat uit en onderbreek altijd de stroomtoevoer (trek aan de steker, nooit aan de kabel) wanneer u het apparaat niet gebruikt, hulpstukken aanbrengt, reinigt of wanneer storingen optreden. Laat het apparaat nooit ingeschakeld zonder toezicht. Bescherm kinderen tegen gevaren en zorg ervoor dat kabels nooit los omlaag hangen en dat het apparaat buiten het bereik van kinderen blijft. Controleer regelmatig of het apparaat beschadigingen vertoont. Een beschadigd apparaat mag niet in gebruik worden genomen. Repareer het apparaat nooit zelf, maar breng het naar een geautoriseerde vakman. Voorkom gevaren en laat een defecte kabel altijd alleen door de fabrikant, onze technische dienst of een eender gekwalificeerde persoon vervangen door een soortgelijke kabel. Gebruik alleen originele reserveonderdelen. Neem de onderstaande “Speciale veiligheidsinstructies“ in acht. Speciale veiligheidsinstructies voor dit apparaat • • Zuig alleen stof en kruimels op, geen spitse voorwerpen of hete as. Gebruik altijd het hulpstuk (11) om nat te zuigen. Ingebruikname van het apparaat Overzicht van de bedieningselementen 1 2 3 4 5 6 Stofvak Toets stofvak LED AAN/UIT-schakelaar Handgreep Motorkast 7 8 9 10 11 12 Laadsteker WandhalterungWandhouder Netadapter Filter Hulpstuk voor nat zuigen Voegenmondstuk Wandhouder Bevestig de wandhouder met de bijgevoegde schroeven en pluggen aan de wand. 7 4....-05-AKS 825 22.02.2002 15:29 Uhr Seite 8 Accu’s laden NL Na montage van de wandhouder: • • • • Sluit het nettoestel aan op een correct geïnstalleerde en geaarde contactdoos, 230 V - 50 Hz. Het laadlampje brandt. Voor het opladen van de accu moet u eventueel eerst de mondstukken verwijderen en het apparaat in de bovenste clip van de wandhouder steken. Druk vervolgens tegen de handgreep totdat het apparaat inklikt. De eerste laadperiode duurt ca. 16 uur, daarna duurt het opladen ca. 8 uur. Trek daarna het nettoestel uit de contactdoos. Bediening van het apparaat Neem het apparaat uit de houder en breng de gewenste hulpstukken aan. Om met zuigen te kunnen beginnen, moet u de AAN-/UIT-schakelaar (4) indrukken en ingedrukt houden. Na het zuigen of bij lege accu sluit u de stofzuiger weer aan zoals beschreven onder “Laden van de accu’s“. Let erop dat ook de netsteker moet zijn aangesloten. Hulpstukken Voegenmondstuk: ideaal voor het zuigen in hoeken en sleuven. Hulpstuk voor het nat zuigen: Gebruik dit hulpstuk altijd voor het opzuigen van vloeistoffen (schuif de verlenging van het hulpstuk in het apparaat totdat het mondstuk in één lijn afsluit). Reiniging • • • • • Onderbeek vóór elke reiniging altijd eerst de stroomtoevoer! Reinig de kast met een droge doek. U kunt de stofzak met de vrijgaveknop (2) ontgrendelen en dan van bovenaf omlaag trekken. Verwijder de stoffilter (10) door de inzet tegen de wijzers van de klok in (OPEN) te draaien en klop hem vervolgens goed uit. Na meerdere malen legen kunt u de stofzak ook in water reinigen. Vervolgens goed laten drogen. Zet het apparaat in omgekeerde volgorde weer in elkaar. Dit apparaat is gekeurd conform de op dit moment van toepassing zijnde CErichtlijnen zoals bijvoorbeeld elektromagnetische compatibiliteit en laagspanningsvoorschriften en is geconstrueerd volgens de nieuwste veiligheidstechnische voorschriften. Technische wijzigingen voorbehouden! 8 4....-05-AKS 825 22.02.2002 15:29 Uhr Seite 9 Garantie NL Voor het door ons geleverde apparaat verlenen wij een garantie van 24 maanden vanaf koopdatum (kassabon). Eventuele gebreken aan het apparaat of aan het toebehoren*) die zijn ontstaan door productie- of materiaalfouten verhelpen wij binnen deze periode kosteloos door middel van reparatie of, naar ons oordeel, door vervanging. Eventuele garantiegevallen verlengen noch de geldigheidsduur van de garantie, noch begint daardoor een nieuwe garantieperiode! Het koopbewijs geldt als garantiebewijs. Zonder dit bewijs kan geen kosteloze reparatie of vervanging plaatsvinden. Geef in garantiegevallen het complete apparaat in de originele verpakking samen met de kassabon af bij uw handelaar. *) Schade aan onderdelen leidt niet automatisch tot kosteloze vervanging van het complete apparaat. Neem in dit geval contact op met onze hotline! De reparatie van glasbreuk of breuk van kunststofonderdelen wordt altijd berekend! Niet defecten aan de hulpstukken of aan de slijtende onderdelen (bijv. koolborstels, deeghaken, drijfriemen, reserveafstandsbediening, reservetandenborstels, zaagbladen enz.), maar ook reiniging, onderhoud of de vervanging van slijtende delen vallen niet onder de garantie en geschieden altijd tegen berekening! Bij ingrepen door derden komt de garantieverlening te vervallen. Na de garantieperiode Na afloop van de garantieperiode kunnen reparaties tegen berekening worden uitgevoerd door de betreffende vakhandelaar of de technische dienst. 9 4....-05-AKS 825 22.02.2002 15:29 Uhr Seite 10 Conseils généraux de sécurité F • • • • • • • • Lisez attentivement ce mode d’emploi avant de mettre l’appareil en marche pour la première fois. Conservez le mode d’emploi ainsi que le bon de garantie, votre ticket de caisse et si possible, le carton avec l’emballage se trouvant à l’intérieur. N’utilisez cet appareil que pour un usage privé et pour les taches auxquelles il est destiné. Cet appareil n’est pas prévu pour une utilisation professionnelle. Ne l’utilisez pas en plein air (sauf s’il est indiqué que vous pouvez le faire). Protégez-le de la chaleur, des rayons directs du soleil, de l’humidité (ne le plongez en aucun cas dans l’eau) et des objets tranchants. N’utilisez pas cet appareil avec des mains humides. S’il arrive que de l’humidité ou de l’eau atteignent l’appareil, débranchez aussitôt le câble d’alimentation. Ne touchez pas les parties mouillées. Arrêtez l’appareil et débranchez toujours le câble d’alimentation de la prise de courant (tirez sur la fiche, pas sur le câble) si vous n’utilisez pas l’appareil, si vous installez les accessoires, pour le nettoyage ou en cas de panne. Ne laissez en aucun cas l’appareil fonctionner sans surveillance. Pour protéger les enfants des risques engendrés par les appareils électriques , veillez à ce que le câble ne pende pas de l’appareil et que l’appareil ne soit pas à portée des enfants. Contrôlez régulièrement l’appareil et le câble. Ne mettez pas l’appareil en marche s’il est endommagé. Ne réparez pas l’appareil vous-même. Contactez plutôt un technicien qualifié. Pour éviter toute mise en danger, ne faites remplacer le câble défectueux que par un câble équivalent et que par le fabricant, notre service après-vente ou toute personne de qualification similaire. N’utilisez que les accessoires d’origine. Respectez les „conseils de sécurité spécifiques à cet appareil“ ci-dessous ... Conseils de sécurité spécifiques à cet appareil • • N’aspirez que de la poussière et de petites miettes, en aucun cas d’objets pointus ou de cendres chaudes. Utilisez toujours l’accessoire prévu à cet effet (11) pour aspirer du liquide Avant la première utilisation Liste des différents éléments de commande 1 2 3 4 5 6 10 Bac à poussière Bouton de déverrouillage du bac à poussière Affichage Bouton Marche / Arrêt Poignée Bloc moteur 7 8 9 10 11 12 Prise de chargement Support mural Adaptateur réseau Filtre Accessoire aspiration eau Embout suceur 4....-05-AKS 825 22.02.2002 15:29 Uhr Seite 11 Fixation murale F Fixez le support mural, si nécessaire, à l’aide des vis et des chevilles livrées. Chargement de l’accu Après avoir fixé le support mura: • • • • Branchez le câble d’alimentation dans une prise de courant en bon état de fonctionnement de 230 V, 50 Hz. La lampe témoin s’allume. Pour charger l’accu, retirez l’embout, s’il est installé sur l’appareil, et introduisez ensuite l’appareil dans l’attache supérieure de la fixation murale. Appuyez légèrement sur la poignée jusqu’à ce que l’appareil soit fermement installé. Le chargement dure la première fois env. 16 heures puis les fois suivantes env. 8 heures. Retirez ensuite la fiche de la prise de courant. Utilisation de l’appareil Débranchez éventuellement le câble d’alimentation et montez l’accessoire désiré. Pour pouvoir commencer à aspirer, enfoncez la touche Marche / Arrêt (4) et maintenez-la enfoncée. Lorsque l’accu est déchargé, connectez l’aspirateur à la prise de chargement, comme indiqué dans „Chargement de l’accu“. Veillez à ce que l’unité d’alimentation soit également branchée. Accessoires d’aspiration Embout suceur: idéal pour aspirer par ex. dans les coins et les fentes. Accessoire pour aspiration eau: Veillez à toujours installer cet accessoire avant d’aspirer un liquide (introduisez l’extrémité de l’accessoire dans l’appareil jusqu’à ce que l’embout soit correctement installé). Nettoyage • • • • • Débranchez toujours l’appareil avant de le nettoyer! Nettoyez les parois de l’appareil avec un torchon sec. Vous pouvez retirer le compartiment à poussière à l’aide du bouton de déverrouillage (2) puis sortez-le du haut vers le bas. Retirez le filtre à poussière (10), en le tournant dans le sens inverse des aiguilles d’une montre (OPEN) puis secouez-le pour le dépoussiérer. Après avoir vidé plusieurs fois le sac à poussière, vous pouvez le laver à l’eau. N’oubliez pas de le laisser ensuite sécher. Assemblez à nouveau l’appareil en procédant de façon opposée. 11 4....-05-AKS 825 F 22.02.2002 15:29 Uhr Seite 12 Cet appareil a été contrôlé d’après toutes les directives européennes actuelles applicables, comme par exemple concernant la compatibilité électromagnétique et la basse tension. Cet appareil a été fabriqué en respect des réglementations techniques de sécurité les plus récentes. Sous réserve de modifications techniques. Garantie Nous accordons une garantie de 24 mois à dater de la date d’achat (ticket de caisse) pour l’appareil que nous vendons. Pendant la durée de la garantie, nous éliminons gratuitement les défauts de l’appareil ou des accessoires *) découlant d’un vice de matériau ou de fabrication au moyen d’une réparation ou, selon notre estimation, au moyen d’un remplacement. Les prestations dans le cadre de la garantie n’entraînent aucune prorogation de la durée de garantie et ne donnent pas droit à une nouvelle garantie ! Le justificatif de garantie est le reçu. Sans ce justificatif, aucun remplacement gratuit ni aucune réparation gratuite ne peuvent être effectués. En cas de recours à la garantie, ramenez votre appareil complet, dans son emballage d'origine, accompagné de votre preuve d'achat, à votre revendeur. *) Les endommagements de pièces d’accessoires ne justifient pas automatiquement l’échange gratuit de l’appareil complet. Contactez alors notre centrale téléphonique! La casse de pièces en verre ou en plastique est dans tous les cas à votre charge! Les défauts sur les accessoires ou les pièces d’usure (p.ex. les charbons de moteurs, crochets, courroies d’entraînement, télécommande de rechange, brosses à dents de rechange, lames de scies etc.) ainsi que le nettoyage, l’entretien ou le remplacement de pièces d’usure ne sont pas garantis et sont donc payants ! En cas d’intervention étrangère, la garantie devient caduque. Après la garantie Après écoulement de la durée de garantie, les réparations peuvent être effectuées, contre paiement, par le commerce spécialisé ou le service de réparation. 12 4....-05-AKS 825 22.02.2002 15:29 Uhr Seite 13 Indicaciones generales de seguridad • • • • • • • • E Antes de la puesta en servicio de este aparato lea detenidamente el manual de instrucciones y guarde este bien incluido la garantía, el recibo de pago y si es posible también el cartón de embalaje con el embalaje interior. Solamente utilice el aparato para el uso privado y para el fin previsto. Este aparato no está destinado para el uso profesional. No lo utilice al aire libre (en excepto que esté destinado para el uso limitado al aire libre). No lo exponga al calor, a la entrada directa de rayos de sol, a la humedad ( en ningún caso sumerja el aparato en agua) y a los cantos agudos. No utilice el aparato con las manos húmedas. En caso de que el aparato esté húmedo o mojado retire de momento la clavija de la caja de enchufe. No tocar el agua. Desconecte el aparato y siempre retire la clavija de la caja de enchufe (tire de la clavija no del cable), cuando no quiera utilizar el aparato, montar piezas o en caso de limpieza o defectos. Nunca deje el aparato sin supervisión de una persona. Para evitar que los niños se hagan daños eléctricos, siempre tenga atención, que el cable no cuelgue hacia abajo y que los niños no tengan acceso al aparato. Controle regularmente si el aparato o el cable tiene defectos. No ponga en servicio un aparato defecto. No repare el aparato por su cuenta, sino vaya a un establecimiento autorizado. Para evitar peligros, deje sustituir un cable defecto por uno de la misma calidad solamente por el fabricante, nuestro servicio al cliente o una similar persona cualificada. Solamente utilice accesorios originales. Por favor tenga atención a las “Indicaciones especiales de seguridad…“ indicadas a continuación. Indicaciones especiales de seguridad • • Solamente aspire polvo o migas pequeñas, ningún objeto agudo o ceniza caliente. Para la aspiración en húmedo, utilice por favor siempre la pieza sobrepuesta (11). Puesta en servicio del aparato Representación de los elementos de mando 1 2 3 4 5 6 Recipiente para el polvo Botón de soltura Indicación Conectador / desconectador Empuñadura Carcasa 7 8 9 10 11 Clavija de carga Soporte para la pared Adaptador de red Filtro Pieza sobrepuesta para la aspiración en húmedo 12 Boquilla para las juntas 13 4....-05-AKS 825 E 22.02.2002 15:29 Uhr Seite 14 Soporte para la pared En caso de que sea necesario, coloque el soporte para la pared con ayuda de los tornillos y las clavijas adjuntas. Carga de los acumuladores Después del montaje del soporte para la pared: • • • • Introduzca el aparato alimentado por la red en una caja de enchufe de contacto de protección e instalada por la norma 230 V, 50 Hz. La lámpara de control de carga está iluminada. Para cargar los acumuladores, aparte, si es necesario, las toberas en pieza sobrepuesta e introduzca primero el aparato en la oreja superior del soporte para la pared. Ahora presione leve en la empuñadura, hasta que el aparato encaje. El tiempo de carga es en la primera vez de unas 16 horas, después de unas 8 horas. Después retire por favor el aparato alimentado por la red de la caja de enchufe. Utilización del aparato En caso de que sea necesario retire el aparato de la red y coloque la boquilla deseada sobre el aspirador. Para comenzar con la aspiración, tiene que presionar y mantener presionado el interruptor de conexión / desconexión (4). Después de la finalización o al estar vacíos los acumuladores, conecte el aspirador como indicado bajo "carga de los acumuladores" a la clavija de carga. Tenga atención que la clavija de red también esté conectada a la red. Boquillas para sobreponer Boquilla para las juntas: Pieza sobrepuesta para la aspiración: Para la aspiración perfecta de p.ej. esquinas o ranuras. Por favor tenga atención de colocar siempre esta pieza para la aspiración de líquidos (Introduzca el alargamiento de la pieza sobrepuesta en el apara to, hasta que la tobera se cierre de forma exacta. Limpieza • • • • 14 ¡Antes de la limpieza retire siempre la clavija de la caja de enchufe! Limpie la carcasa con un paño seco. El recipiente para el polvo, lo puede soltar con el botón de liberación (2) y retirarlo de arriba hacia abajo. Aparte el filtro de polvo (10), girando la pieza insertada en el sentido contrario de las agujas del reloj (OPEN) y sacúdala bien. Después de haber vacíado la 4....-05-AKS 825 • 22.02.2002 15:29 Uhr Seite 15 bolsa varias veces, puede lavarla en agua. Después por favor deje secar la bolsa. Por favor monte el aparato de nuevo, pero en orden inverso. E Este aparato se ha examinado según las normativas actuales y vigentes de la Comunidad Europea, como p.ej. compatibilidad electromagnética y directiva de baja tensión y se ha construido según las más nuevas especificaciones en razón de la seguridad. No reservamos el derecho de efectuar modificaciones técnicas. Garantía Para el aparato comercializado por nosotros nos responsabilizamos con una garantía de 24 meses a partir de la fecha de compra (factura de compra). Durante el período de garantía nos encargamos gratuítamente de los defectos del aparato y de los accesorios*), que se hayan originado por defectos del material o de la fabricación. Dependiendo de nuestra estimación se realizará una reparación o un cambio. ¡Los servicios de garantía no prolangan la garantía, ni se incia por ello un período nuevo de garantía! Como comprobante para la garantía es válido la factura de compra. Sin este comprobante no se podrá realizar un cambio o una reparación gratuíta. En caso de garantía entregue el aparato completo en su embalaje original junto con la factura a su agente comerciante. *) Defectos en las piezas de accesorio, no significan automáticamente el recambio gratuito del aparato completo. ¡En este caso dirijase por favor a nuestra linea de atención al cliente! ¡Rotos de vidrio o roturas en las piezas de plástico deben pagarse siempre por el cliente ! Defectos en los accesorios de uso o en las piezas de desgaste (p.ej. escobillas de carbón del motor, varillas amasadoras, correas de transmisión, mando a distancia de repuesto, cepillos de dientes de repuesto, hojas de sierra etc.), como también la limpieza, mantenimiento o el recambio de piezas de desgaste no recaen en la garantía e irán al cargo del cliente! En caso de intervención ajena se expira la garantía. Después de la garantía Después de haber expirado la garantía se pueden realizar las reparaciones por el concesionario o por el servicio de reparaciones. Los gastos irán al cargo del cliente. 15 4....-05-AKS 825 22.02.2002 15:29 Uhr Seite 16 Instruções gerais de segurança P • • • • • • • • Antes de pôr este aparelho a funcionar, leia muito atentamente as instruções de emprego e guarde-as muito bem, juntamente com o talão de garantia, o talão de compra e, tanto quanto possível, a embalagem com os elementos interiores. Utilize o aparelho exclusivamente para fins privados e para a finalidade para a qual o mesmo foi concebido. Este aparelho não se destina a fins comerciais. Não o utilize ao ar livre (a não ser que o mesmo possa ser usado ao ar livre sob determinadas condições). Mantenha-o protegido do calor, de irradiação solar directa, da humidade (não o imergir de forma alguma em quaisquer líquidos) e de arestas aguçadas. Não utilize o aparelho com as mãos molhadas. No caso de o aparelho ficar húmido ou molhado, retire imediatamente a ficha da tomada. Não tocar na água. Sempre que não utilizar o aparelho, ou desejar montar acessórios, ou queira limpá-lo, ou ainda em caso de avarias, deverá desligá-lo e retirar a ficha da tomada (puxe pela ficha e não pelo fio). Nunca deixe o aparelho sem vigilância. Para proteger as crianças dos perigos relacionados com aparelhos eléctricos, nunca deixe os fios pendurados e atente em que as crianças não possam chegar a tais aparelhos. Verifique regularmente se o aparelho ou o fio têm alguns danos. Nunca ponha a funcionar um aparelho com quaisquer danos. Não tente reparar o aparelho, dirija-se a um técnico da especialidade, devidamente autorizado. Para evitar quaisquer perigos, é favor substituir um fio danificado por um fio da mesma qualidade. Tal deverá ser efectuado pelo fabricante, pelos nossos serviços de assistência ou por outra pessoa com as mesmas qualificações. Utilize apenas acessórios de origem. É favor observar as seguintes „Instruções especiais de segurança...“. Instruções especiais de segurança • • Aspirar apenas pó e migalhas; não aspirar objectos aguçados nem cinzas quentes. Utilize sempre a peça (11) quando aspirar superfícies molhadas Primeira utilização Elementos do aparelho 1 2 3 4 5 6 16 Recipiente do lixo Botão para soltar o recipiente do lixo Indicador Interruptor Pega Caixa do motor 7 8 9 10 11 Ficha para recarga Suporte de parede Adaptador de corrente Filtro Peça para aspirar superfícies molhadas 12 Bocal para frestas 4....-05-AKS 825 22.02.2002 15:29 Uhr Seite 17 Suporte de parede Se desejar, montar o suporte de parede, usando as buchas e os parafusos juntos. Recarga dos acumuladores Após a montagem do suporte de parede: • • • • Introduzir a o adaptador de corrente numa tomada com protecção de contactos de 230 V/50 Hz, convenientemente instalada. A lâmpada de controle de recarga iluminar-se-á. Para recarregar o acumulador, remova os bocais e coloque em primeiro lugar o aparelho na parte superior do suporte de parede. Carregue então ligeiramente na pega, até o aparelho ficar fixo. A primeira recarga levará 16 horas; as seguintes aprox. 8 horas. Retirar em seguida o adaptador da tomada. Utilização do aparelho Se necessário, desligar o aparelho da corrente e montar os bocais pretendidos. Para começar a aspirar, carregue no interruptor (4) e mantenha-o pressionado. No final, ou no caso de o acumulador ficar descarregado, ligar o aspirador à ficha de recarga, da forma descrita na rubrica „Recarga dos acumuladores„. Assegure-se de que a ficha da corrente está introduzida na tomada. Bocais Bocal para frestas: Peça para aspirar superfícies molhadas: ideal para aspirar cantos e reentrâncias. Utilize sempre esta peça quando aspirar líquidos (Introduza o prolongamento da peça no aparelho, até o bocal ficar hermeticamente fechado). Limpeza • • • • • Antes da limpeza, retirar sempre a ficha da tomada! Limpar a caixa com um pano seco. Para retirar o saco, pressionar o botão (2) e puxar de cima para baixo. Retire o filtro do pó (10), girando a peça no sentido contrário ao dos ponteiros do relógio (OPEN) e sacuda-o. Após ter sido utilizado várias vezes, o saco do lixo pode ser lavado em água. Deixá-lo secar bem. Tornar a montar as peças em sequência inversa 17 P 4....-05-AKS 825 P 22.02.2002 15:29 Uhr Seite 18 Este aparelho foi controlado nos termos das actuais directivas da CEE aplicáveis, tais como inocuidade electromagnética e directiva sobre baixa tensão, e fabricado de acordo com as mais novas prescrições da segurança técnica. Reserva-se o direito de alterações! Garantia O aparelho vendido pela nossa empresa tem uma garantia de 24 meses a partir da data da compra (talão). Durante o período de garantia, procederemos à remoção grátis - por reparação, ou, segundo a nossa decisão, por substituição - das deficiências do aparelho ou dos acessórios*) que provenham de erros de material ou de fabricação. A prestação de serviços relacionados com a garantia não prolongarão a mesma, nem iniciarão um novo prazo de garantia! O talão de compra consistirá prova desta garantia. Sem o mesmo, não será possível proceder-se a qualquer troca ou reparação grátis. Em caso de garantia, entregue o aparelho completo, juntamente com o talão de compra, na loja onde o mesmo foi comprado. *) No caso de danos em quaisquer acessórios, não será efectuada automáticamente uma substituição completa do aparelho. Contacte neste caso a nossa hotline! Danos causados por quebras de peças de vidro ou de plástico terão de ser pagos pelo cliente! Não estão incluídos na garantia quaisquer defeitos de acessórios ou de peças que se desgastem (como, por exemplo, carvões do motor, varinhas, correias do motor, telecomandos, escovas de dentes, folhas de serra, etc.), nem a limpeza, a manutenção ou a substituição de peças que se desgastem, devendo tais despesas ser reembolsadas! A garantia terminará sempre que tenha havido intervenção alheia nos aparelhos. Após a garantia Após a expiração do prazo de garantia, poderão ser efectuados arranjos por pessoal especializado, ou pelos nossos serviços de reparações, contra reembolso. 18 4....-05-AKS 825 22.02.2002 15:29 Uhr Seite 19 Norme di sicurezza generali • • • • • • • • I Prima di mettere in funzione questo apparecchio, leggere molto attentamente le istruzioni per l’uso e conservarle con cura unitamente al certificato di garanzia, allo scontrino e, se possibile, alla scatola di cartone con la confezione interna. Utilizzare l’apparecchio esclusivamente per scopi privati e conformemente al tipo di applicazione previsto. Questo prodotto non è stato concepito ai fini di un impiego in ambito industriale. Non utilizzarlo all’aperto (a meno che non sia contemplato un particolare tipo di uso all’aperto nel rispetto di specifiche condizioni). Proteggerlo dal calore, nonché dall’esposizione diretta ai raggi solari e dall’umidità (non immergerlo mai in sostanze liquide) e tenerlo a distanza da oggetti con spigoli affilati. Non utilizzare l’apparecchio con le mani umide. Nel caso in cui si bagni o si inumidisca l’apparecchio, staccare immediatamente la spina. Evitare il contatto con l’acqua. Disattivare l’apparecchio e staccare sempre la spina dalla relativa presa (si raccomanda di afferrare il connettore e non il cavo quando si effettua questa operazione) allorché non si utilizza l’apparecchio, quando si applicano degli accessori oppure nel caso in cui lo si debba pulire o si siano manifestate anomalie. Non lasciare mai l’apparecchio incustodito. Allo scopo di proteggere i bambini contro i pericoli che possono derivare dagli apparecchi elettrici, accertarsi che non vi siano cavi pendenti e che i bambini non possano accedere in alcun modo all’apparecchio stesso. Controllare periodicamente l’apparecchio per verificare che non vi siano danni. Non mettere in funzione l’apparecchio nel caso in cui sia guasto. Non tentare di riparare l’apparecchio, bensì rivolgersi a un tecnico autorizzato. Al fine di evitare l’insorgere di situazioni di pericolo, si raccomanda di contattare il costruttore, il nostro servizio di assistenza tecnica o un tecnico ugualmente qualificato per la sostituzione del cavo di alimentazione difettoso con un cavo equivalente. Utilizzare esclusivamente accessori originali. Rispettare le seguenti “Speciali norme di sicurezza...“. Speciali norme di sicurezza • • Aspirare esclusivamente polvere e briciole di piccole dimensioni. Non è consentito usare l’apparecchio per l’aspirazione di oggetti acuminati o di cenere calda. Per l’aspirazione a umido, si raccomanda di utilizzare sempre l’apposito dispositivo (11). Messa in funzione dell’apparecchio Elementi di comando 1 2 Contenitore raccoglisporco Pulsante di sbloccaggio del contenitore raccoglisporco 3 4 5 Display Interruttore ON/OFF Impugnatura 19 4....-05-AKS 825 I 6 7 8 9 22.02.2002 15:29 Uhr Vano motore Spina di ricarica Supporto da parete Adattatore di rete Seite 20 10 Filtro 11 Dispositivo per l’aspirazione a umido 12 Bocchetta a giunto Supporto da parete Se necessario, applicare il supporto da parete fissandolo mediante le viti e i tasselli forniti in dotazione. Ricarica degli accumulatori In seguito al montaggio del supporto da parete, effettuare le seguenti operazioni: • • • • Collegare l’alimentatore di rete a una presa con messa a terra da 230 V, 50 Hz installata correttamente. La spia luminosa di ricarica si accende. Per poter ricaricare le batterie, rimuovere le bocchette e inserire l’apparecchio dapprima nella linguetta superiore del supporto a parete. Successivamente, premere leggermente sull’impugnatura finché l’apparecchio non si innesti in posizione. La prima volta che si effettua la ricarica delle batterie, il tempo di carica dura ca. 16 ore. Successivamente, sono sufficienti 8 ore. Una volta terminata la fase di ricarica, staccare l’alimentatore dalla presa di rete. Utilizzo dell’apparecchio Staccare eventualmente l’apparecchio dall’alimentazione di rete e applicare le bocchette desiderate. Per poter iniziare a usare l’aspiratore, è necessario premere e tenere premuto l’interruttore ON/OFF (4). Una volta conclusa l’operazione oppure nel caso in cui l’accumulatore sia scarico, collegare l’aspiratore all’apposita spina di ricarica conformemente a quanto descritto alla sezione „Ricarica degli accumulatori„. Accertarsi che anche la spina sia inserita. Bocchette Bocchetta a giunto: ideale, per esempio, per la pulizia di angoli e fessure. Dispositivo per l’aspirazione in umido: Si raccomanda di utilizzare sempre questo dispositivo per aspirare liquidi (inserire la prolunga nell’apparecchio, finché la bocchetta non sia perfettamente allineata. Pulizia • • 20 Prima di procedere alla pulizia, staccare la spina dalla rete! Per la pulizia del corpo dell’apparecchio, utilizzare un panno asciutto. 4....-05-AKS 825 • • • 22.02.2002 15:29 Uhr Seite 21 Il contenitore raccoglisporco può essere staccato premendo il pulsante di sbloccaggio (2) e può poi essere estratto spingendolo verso il basso. Rimuovere il filtro della polvere (10) facendo ruotare il dispositivo in oggetto in senso antiorario (OPEN). Pulirlo, battendo con le dita la sua superficie. Dopo averlo svuotato più volte, è possibile lavare il sacchetto di spolvero in acqua. A lavaggio ultimato, farlo asciugare. Montare nuovamente l’apparecchio, effettuando nella sequenza inversa le operazioni descritte. Questo apparecchio è stato controllato sulla base di tutte le direttive CE attuali in vigore in questo settore, quali per esempio la normativa in materia di compatibilità elettromagnetica e la direttiva in materia di bassa tensione, ed è stato costruito conformemente alle norme di sicurezza più moderne. Con riserva di apportare modifiche tecniche. Garanzia Per l’apparecchio da noi messo in commercio ci assumiamo una garanzia di 24 mesi dalla data di acquisto (scontrino). Durante la garanzia noi ci impegniamo ad eliminare gratuitamente i guasti dell’apparecchio o degli accessori*), dovuti a difetti di materiale o di fabbricazione, riparandoli o, a nostra discrezione, sostituendoli. Le prestazioni in garanzia danno luogo a una proroga della garanzia né danno diritto ad una nuova garanzia! Per la garanzia è sufficiente lo scontrino di acquisto. Senza questo scontrino non sussiste il diritto né ad una sostituzione né ad una riparazione gratuita. Nel caso si ricorra alla garanzia, restituire al rivenditore l’apparecchio completo in ogni sua parte, nell’imballaggio originale unitamente allo scontrino. *) Danni agli accessori non giustificano automaticamente lo scambio gratuito dell’apparecchio completo. Si prega di mettersi in contatto con la nostra centrale telefonica. Danni alle parti di vetro oppure fratture ai pezzi di materia plastica sono obbligatoriamente a spese del cliente. La riparazione di pezzi d’uso ovvero soggetti a logoramento (cursori, ganci impastatori, cinghie di trasmissione, telecomandi di ricambio, spazzolini di ricambio, lame di seghe ecc.) come anche operazioni di pulizia e manutenzione o la sostituzione di pezzi soggetti a logoramento non rientrano nella garanzia e quindi sono a pagamento! La garanzia si annulla nel caso di intervento da parte di terzi. Dopo la garanzia Al termine della garanzia le riparazioni possono essere eseguite dietro pagamento dal corrispettivo negozio specializzato o servizio riparazioni. 21 I 4....-05-AKS 825 22.02.2002 15:29 Uhr Seite 22 General Safety Instructions GB • • • • • • • • Read the operating instructions carefully before putting the appliance into operation and keep the instructions including the warranty, the receipt and, if possible, the box with the internal packing. The appliance is designed exclusively for private use and for the envisaged purpose. This appliance is not fit for commercial use. Do not use it outdoors (except if it is designed to be used outdoors). Keep it away from sources of heat, direct sunlight, humidity (never dip it into any liquid) and sharp edges. Do not use the appliance with wet hands. If the appliance is humid or wet, unplug it immediately. Do not put it in water. When cleaning or putting it away, switch off the appliance and always pull out the plug from the socket (pull on the plug, not the cable) if the appliance is not being used and remove the attached accessories. Never leave the appliance unsupervised. To protect children from the dangers posed by electrical appliances, make sure that the cable is hanging low and that children do not have access to the appliance. Check the appliance and the cable for damage on a regular basis. Do not use the appliance if it is damaged. Do not try to repair the appliance on your own. Always contact an authorized technician. To avoid the exposure to danger, always have a faulty cable be replaced only by the manufacturer, by our customer service or by a qualified person and with a cable of the same type. Use only original spare parts. Pay careful attention to the following “Special Safety Instructions“. Special safety information for this unit • • Vacuum only dust and small crumbs. Do not vacuum sharp objects or hot ashes. Please always use the attachment (11) for wet vacuuming. Device start-up Overview of the Components 1 2 3 4 5 6 Dust container Dust container release button Display ON/OFF switch Handle Motor casing 7 8 9 10 11 12 Charger Wall holder AC adapter Filter Attachment for wet vacuuming Crevice nozzle Wall holder Mount the wall holder with the supplied screws and dowels. 22 4....-05-AKS 825 22.02.2002 15:29 Uhr Seite 23 Charging the Batteries GB After mounting the wall holder: • • • • Insert the AC adapter in a duly installed 230V/50Hz protective contact socket. The charging LED lights up. If you want to charge the batteries, first remove the nozzle attachments and then insert the device first into the upper bracket of the wall mounting. Then press the handle lightly until the device locks in place. The charging time is approximately 16 hours the first time, and then approximately 8 hours. Once the charging is over, unplug the AC adapter. Using the Device Unplug the device and fit on the desired nozzle. In order to start vacuuming you have to press the ON/OFF switch (4) and keep it pressed. Once you have finished or when the batteries are down, connect the vacuum to the charger as described in „Charging the Batteries“. Make sure that the plug is inserted. Nozzles Crevice nozzle: ideal for vacuuming corners and crevices, etc. Use for wet vacuuming: Please ensure that you always use the attachment when vacuuming up liquids (insert the extension of the attachment into the device until the nozzle is flush). Cleaning • • • • • Always unplug the device before cleaning! Clean the casing with a dry cloth. The dust container can be released with the release knob (2) and then pulled off from the top downwards. Remove the dust filter (10) by turning the insert anticlockwise (OPEN) and tapping it out. After emptying the container several times, it can also be cleaned in water. Dry well once you have finished. Please reassemble the device in the reverse order. This device has been tested according to all relevant current CE guidelines, such as electromagnetic compatibility and low voltage directives, and has been constructed in accordance with the latest safety regulations. Subject to technical changes without prior notice! 23 4....-05-AKS 825 22.02.2002 15:29 Uhr Seite 24 Guarantee GB The device supplied by our Company is covered by a 24 month guarantee starting on the date of purchase (receipt). During the life of the guarantee any fault of the device or its accessories *) ascribable to material or manufacturing defects will be eliminated free of charge by repairing or, at our discretion, by replacing it. The guarantee services do not entail an extension of the life of the guarantee nor do they give rise to any right to a new guarantee! Proof of the guarantee is provided by the proof of purchase. Without proof of purchase no free replacement or repair will be carried out. If you wish to make a claim under the guarantee please return the entire machine in the original packaging to your dealer together with the receipt. *) Damage to accessories does not mean automatic free replacement of the whole machine. In such cases please contact our hotline. Broken glass or breakage of plastic parts are always subject to a charge. Defects to consumables or parts subject to wearing (e.g. motor pistons, kneading blades, drive shafts, spare remote control, spare toothbrushes, saw blades, etc.) as well as cleaning, maintenance or the replacement of said parts are not covered by the guarantee and hence are to be paid! The guarantee lapses in case of unauthorized tampering. After the expiry of the guarantee After the expiry of the guarantee repairs can be carried by the competent dealer or repair service against the payment of the ensuing costs. 24 4....-05-AKS 825 22.02.2002 15:29 Uhr Seite 25 Ogólne wskazówki bezpieczeństwa • • • • • • • • PL Przed uruchomieniem urządzenia proszę bardzo dokładnie przeczytać instrukcję obsługi. Proszę zachować ją wraz z kartą gwarancyjną, paragonem i w miarę możliwości również kartonem z opakowaniem wewnętrznym. Proszę wykorzystywać urządzenie jedynie dla prywatnego celu, jaki został przewidziany dla urządzenia. Urządzenie to nie zostało przewidziane do użytku w ramach działalności gospodarczej. Proszę nie korzystać z urządzenia na zewnątrz (chyba że w określonych warunkach). Proszę trzymać urządzenie z daleka od ciepła, bezpośredniego promieniowania słonecznego, wilgoci (w żadnym wypadku nie zanurzać w substancjach płynnych) oraz ostrych krawędzi. Proszę nie obsługiwać urządzenia wilgotnymi dłońmi. Jeżeli urządzenie jest wilgotne lub mokre, proszę natychmiast wyciągnąć wtyczkę. Nie sięgać do wody. Jeżeli nie korzystacie Państwo z urządzenia, jeżeli chcecie Państwo zamontować jakieś akcesoria, w celu wyczyszczenia lub w przypadku jakichkolwiek zakłóceń, proszę zawsze wyłączyć urządzenie i wyjąć wtyczkę z gniazdka (proszę pociągnąć za wtyczkę, nie zaś za przewód zasilający). Proszę nigdy nie pozostawiać urządzenia bez nadzoru. Aby uchronić dzieci przed niebezpieczeństwem związanym z elektrycznymi urządzeniami, proszę zadbać o to, aby przewód zasilający nigdy nie wisiał luźno, oraz aby dzieci nie miały dostępu do urządzenia. Proszę regularnie kontrolować urządzenie pod kątem uszkodzeń. Proszę nie uruchamiać uszkodzonego urządzenia. W razie awarii proszę nie naprawiać urządzenia samemu lecz skorzystać z pomocy autoryzowanego specjalisty.Jeżeli przewód zasilający nieodłączalny ulegnie uszkodzeniu, to powinien on być wymieniony u wytwórcy lub w specjalnym zakładzie naprawczym albo przez wykwalifikowaną osobę w celu uniknięcia zagrożenia. Proszę stosować tylko oryginalne akcesoria. Prosimy pamiętać o podanych dalej „Specjalnych wskazówkach bezpieczeństwa...“. Specjalne zalecenia bezpieczeństwa • • Odkurzać tylko kurz i niewielkie okruchy, nie zbierać żadnych ostrych przedmiotów, czy gorącego popiołu. Podczas odkurzania na mokro proszę zawsze korzystać z nasadki (11). Specjalne zalecenia bezpieczeństwa Schemat elementów obsługi 1 2 Pojemnik na kurz Przycisk odblokowujący pojemnik na kurz 3 4 5 Wskaźnik Włącznik/wyłącznik Uchwyt 25 4....-05-AKS 825 PL 6 7 8 9 22.02.2002 15:29 Uhr Obudowa silnika Wtyczka ładowarki Mocowanie naścienne Zasilacz sieciowy Seite 26 10 Filtr 11 Nasadka do odkurzania na mokro 12 Końcówka do szczelin Zawieszenie na ścianie W razie potrzeby mocowanie naścienne można zamontować za pomocą dołączonych śrub i kołków. Ładowanie akumulatora Po zamontowaniu mocowania na ścianie: • • • • Zasilacz należy podłączyć do prawidłowo zainstalowanego gniazda z zestykiem ochronnym 230 V, 50 Hz. Świeci się lampka kontrolna ładowania. W celu naładowania akumulatora proszę zdjąć nasadki dysz i umieścić urządzenie w górnej części zawieszenia ściennego. Następnie proszę delikatnie nacisnąć uchwyt, aby urządzenie stabilnie osiadło. Czas pierwszego ładowania wynosi ok. 16 godzin, następnie ok. 8 godzin. Po upływie tego czasu prosimy o odłączenie zasilacza od gniazda. Korzystanie z urządzenia Odłączyć urządzenie od sieci i nałożyć wybraną ssawkę. Aby rozpocząć odkurzanie, należy wcisnąć przycisk WŁĄCZONY/ WYŁĄCZONY (4) i pozostawić go w tej pozycji. Po zakończeniu odkurzania lub w przypadku wyczerpania się akumulatora, odkurzacz należy podłączyć do wtyczki ładowarki w sposób opisany w ustępie „Ładowanie akumulatora ". Należy również sprawdzić, czy zasilacz jest podłączony do sieci. Nakładki Ssawka do szczelin: Element do odkurzania na mokro: idealna do odkurzania np. naroży i szczelin. Proszę uważać, aby przy zbieraniu cieczy zawsze stosować tę nakładkę (proszę wsunąć przedłużenie nasadki do urządzenia na taką głębokość, aby umożliwić prawidłowe zamknięcie dyszy. Czyszczenie • • • 26 Przed czyszczeniem należy zawsze odłączyć wtyczkę od gniazda! Obudowę należy oczyścić za pomocą miękkiej ściereczki. Pojemnik kurzowy mogą Państwo zwolnić naciskając przycisk zwalniający (2) a następnie wyjąć ciągnąc z góry na dół. 4....-05-AKS 825 • • 22.02.2002 15:29 Uhr Seite 27 Proszę wyjąć filtr kurzowy (10) przekręcając element w kierunku przeciwnym do ruchu wskazówek zegara (OPEN) i wytrzepać go. Po kilkukrotnym opróżnieniu worek na kurz można również oczyścić w wodzie. Następnie pozostawić go do wyschnięcia. Urządzenie proszę ponownie złożyć wykonując odpowiednio wszystkie czynności w odwrotnej kolejności. Urządzenie to skontrolowano zgodnie ze wszystkimi dotyczącymi go aktualnymi wytycznymi CE, takimi jak np. odpowiedniość elektromagnetyczna i dyrektywa na temat niskiego napięcia; urządzenie wykonane zostało z uwzględnieniem wszystkich najnowszych przepisów techniki bezpieczeństwa pracy. Zastrzega się prawo do zmian technicznych! WARUNKI GWARANCJI Przyznajemy 24 miesięcy gwarancji na produkt licząc od daty zakupu. W tym okresie będziemy bezpłatnie usuwać w terminie 14 dni od daty dostarczenia wadliwego sprzętu z kartą gwarancyjną do miejsca zakupu wszystkie uszkodzenia powstałe w tym urządzeniu na skutek wady materiałów lub wadliwego wykonania, naprawiając oraz wymieniając wadliwe części lub (jeśli uznamy za stosowne) wymieniając całe urządzenie na nowe. Sprzęt do naprawy powinien być dostarczony w komplecie wraz z dowodem zakupu oraz z ważną kartą gwarancyjną do sprzedawcy w miarę możliwości w oryginalnym opakowaniu lub innym odpowiednim dla zabezpieczenia przed uszkodzeniem. W razie braku kompletnego opakowania fabrycznego, ryzyko uszkodzenia sprzętu podczas transportu do i z miejsca zakupu ponosi reklamujący. Naprawa gwarancyjna nie dotyczy czynności przewidzianych w instrukcji obsługi, do wykonania których zobowiązany jest użytkownik we własnym zakresie i na własny koszt. Gwarancja nie obejmuje: • mechanicznych, termicznych, chemicznych uszkodzeń sprzętu i wywołanych nimi wad, • uszkodzeń powstałych w wyniku działania sił zewnętrznych takich jak wyładowania atmosferyczne, zmiana napięcia zasilania i innych zdarzeń losowych, • nieprawidłowego ustawienia wartości napięcia elektrycznego, zasilanie z nieodpowiedniego gniazda zasilania, • sznurów połączeniowych, sieciowych, żarówek, baterii, akumulatorów, • uszkodzeń wyrobu powstałych w wyniku niewłaściwego lub niezgodnego z instrukcją jego użytkowania, przechowywania, konserwacji, samowolnego zrywania plomb oraz wszelkich przeróbek i zmian konstrukcyjnych dokonanych przez użytkownika lub osoby niepowołane, • roszczeń z tytułu parametrów technicznych wyrobu, o ile są one zgodne z podanymi przez producenta, 27 PL 4....-05-AKS 825 PL • 22.02.2002 15:29 Uhr Seite 28 prawidłowego zużycia i uszkodzeń, które mają nieistotny wpływ na wartość lub działanie tego urządzenia. Karta gwarancyjna bez pieczątki sklepu, daty sprzedaży, nie wypełniona, źle wypełniona, ze śladami poprawek, nieczytelna wskutek zniszczenia, bez możliwości ustalenia miejsca sprzedaży oraz dołączonego dowodu zakupu jest nieważna. Korzystanie z usług gwarancyjnych nie jest możliwe po upływie daty ważności gwarancji. Gwarancja na części lub całe urządzenie, które są wymieniane kończy się, wraz z końcem gwarancji na to urządzenie. Wszystkie inne roszczenia, wliczając w to odszkodowania są wykluczone chyba, że prawo przewiduje inaczej. Roszczenia wykraczające poza tą umowę nie są uwzględniane przez tą gwarancję. Gwarancja oraz zawarte w niej warunki obowiązują na terenie Rzeczpospolitej Polskiej. 28 4....-05-AKS 825 22.02.2002 15:29 Uhr Seite 29 Všeobecné bezpečnostní pokyny • • • • • • • • CZ Před uvedením tohoto přístroje do provozu si velmi pozorně přečtěte návod k obsluze a tento návod spolu se záručním listem, pokladním blokem a podle možností i s obalem a vnitřním vybavením obalu dobře uschovejte. Používejte tento přístroj výlučně pro soukromou potřebu a pro stanovené účely. Tento přístroj není určen pro komerční použití. Nepoužívejte jej v otevřeném prostoru (s výjimkou přístrojů, které jsou podmíněné používání venku určeny). Chraňte jej před horkem, přímým slunečním zářením, vlhkostí (v žádném případě jej neponořujte do kapalin) a stykem s ostrými hranami. Nepoužívejte přístroj v případě, že máte vlhké ruce. Jestliže dojde k navlhčení nebo namočení přístroje, okamžitě vytáhněte zástrčku ze zásuvky. Vyvarujte se styku s vodou. Přístroj vypněte a vždy vytáhněte zástrčku ze zásuvky (tahejte jen za zástrčku, nikdy ne za kabel), jestliže nebudete přístroj používat, chcete-li namontovat příslušenství, přístroj vyčistit nebo v případě poruchy. Nikdy nenechávejte přístroj bez dozoru, jestliže je v provozu. Abyste ochránili děti před riziky spojenými s elektrickými přístroji, postarejte se o to, aby kabel nevisel dolů a děti na přístroj nedosáhly. Pravidelně kontrolujte přístroj a přívodní kabel z hlediska poškození. Jestliže přístroj vykazuje nějakou závadu, neuvádějte jej do provozu. Neopravujte přístroj vlastními silami, nýbrž vyhledejte autorizovaného opraváře. Abyste eliminovali rizika, nechejte poškozený přívodní kabel nahradit kabelem se stejnými hodnotami a to jen výrobcem, naším servisem pro zákazníky nebo jinou kvalifikovanou osobou. Používejte jen originální příslušenství. Respektujte, prosím, následující „Speciální bezpečnostní pokyny ...“. Zvláštní bezpečnostní pokyny • • Vysávejte pouze prach a malé drobty, nevysávejte ostré předměty nebo horký popel. K mokrému vysávání používejte vždy nástavec (11). Uvedení přístroje do provozu Vyobrazení ovládacích prvků 1 2 3 4 5 6 Jímka na prach Tlačítko pro uvolnění jímky na prach Indikace Vypínač ZAP/VYP Úchyt Kryt motoru 7 8 9 10 11 12 Nabíjecí zástrčka Stěnový držák Sít’ový adaptér Filtr Nástavec pro mokré vysávání Štěrbinová hubice 29 4....-05-AKS 825 CZ 22.02.2002 15:29 Uhr Seite 30 Stěnový držák Pomocí přiložených šroubů a hmoždinek popř. upevněte stěnový držák. Nabíjení akumulátorů Po provedené montáži stěnového držáku: • • • • Zastrčte sít’ový napáječ do zásuvky s ochranným kolíkem 230 V, 50 Hz instalované podle předpisu. Rozsvítí se kontrolka nabíjení. Chcete-li akumulátory nabít, demontujte eventuálně nástavce a zastrčte přístroj nejprve do horního závěsu nástěnného držáku. Poté lehce zatlačte na rukojeť, až přístroj zaklapne. Doba nabíjení činí při prvním nabíjení zhruba 16 hodin, poté přibližně 8 hodin. Poté, prosím, napáječ vyjměte ze zásuvky. Použití přístroje Přístroj popř. odpojte od sítě a nasad’te požadované hubice. Chcete-li zahájit vysávání, musíte stlačit vypínač Zapnuto/Vypnuto (4) a držet jej stlačený. Jakmile skončíte s vysáváním anebo jestliže je prázdný akumulátor, napojte, prosím, vysavač jak je popsáno v bodě „Nabíjení akumulátorů“ na nabíjecí zástrčku. Dbejte na to, aby také zástrčka byla napojena na sít‘. Hubicové násady Štěrbinová hubice: Nástavec pro mokré vysávání: Ideální k vysávání např. rohů a štěrbin Dbejte, prosím, na to, aby při vysávání kapalin byl vždy používán tento nástavec (zasuňte prodloužení nástavce do přístroje tak, až je nástavec rovinně uzavřen. Čištění • • • • • 30 Před čištěním vždy vytáhněte zástrčku ze sítě! Kryt čistěte suchým hadříkem. Jímku na prach můžete uvolnit pomocí uvolňovacího tlačítka (2) a pak stáhnout shora dolů. Vyjměte prachový filtr (10) tak, že vložkou otočíte proti směru pohybu hodinových ručiček (OPEN) a vyklepnete ji. Po několikerém vyprázdnění můžete sáček na prach rovněž vyčistit vodou. Poté, prosím, nechejte vyschnout. Přístroj opět sestavte v opačném pořadí jednotlivých kroků. 4....-05-AKS 825 22.02.2002 15:29 Uhr Seite 31 Tento přístroj byl testován podle všech příslušných, v současné době platných směrnic CE, jako je např. elektromagnetická kompatibilita a direktiva o nízkonapěťové bezpečnosti, a byl zkonstruován podle nejnovějších bezpečnostnětechnických předpisů. Vyhrazujeme si technické změny! Záruka Na námi prodaný přístroj poskytujeme záruku v trvání 24 měsíců od data prodeje (pokladní doklad). Během záruční lhůty odstraníme bezplatně všechny vady přístroje nebo příslušenství*), které vzniknou v důsledku vad materiálu nebo výrobních vad, a to opravou nebo, podle našeho uvážení, formou výměny. Záruční plnění nemají za následek ani prodloužení záruční doby ani tím nevzniká nárok na novou záruku! Jako záruční doklad slouží doklad o koupi. Bez tohoto dokladu nelze uskutečnit bezplatnou výměnu nebo bezplatnou opravu. V případě uplatnění záruky předejte, prosím, kompletní přístroj v originálním obalu spolu s pokladním dokladem Vašemu obchodníkovi. *) Poškození příslušenství není automaticky důvodem pro bezplatnou výměnu kompletního přístroje. V takovém případě se obraťte na naši Hotline! Prasklé skleněné resp. plastové díly zásadně podléhají povinnosti úhrady! Jak na vady na spotřebním příslušenství, resp. dílech podléhajících rychlému opotřebení (např. uhlíky motoru, hnětací háky, hnací řemeny, náhradní dálkové ovládání, náhradní zubní kartáčky, pilové listy atd.), tak i na čištění, údržbu nebo výměnu dílů podléhajících rychlému opotřebení se záruka nevztahuje a je proto nutno je uhradit! Záruka zaniká v případě, že dojde k zásahu neautorizovanou osobou. Po uplynutí záruky Po uplynutí záruční doby je možno za úplatu provést opravy v příslušném odborném obchodě nebo opravně. 31 CZ 4....-05-AKS 825 22.02.2002 15:29 Uhr Seite 32 Általános biztonsági rendszabályok H • • • • • • • • A készülék használatba vétele előtt gondosan olvassa végig a használati utasítást, és őrizze meg a garancialevéllel, a pénztári nyugtával és lehetőleg a csomagolókartonnal, ill. az abban lévő bélésanyaggal együtt! Kizárólag személyi célra használja a készüléket, és csupán arra, amire való! A készülék nem ipari jellegű használatra készült. Ne használja a szabadban (hacsak nem a szabadban való, meghatározott korlátok közötti használatra van szánva)! Ne tegye ki erős hőhatásnak, közvetlen napsugárzásnak és nedvességnek (semmi esetre se mártsa folyadékba), és óvja az éles szélektől! Ne használja a készüléket vizes kézzel! Ha a készülék vizes vagy nedves lett, azonnal húzza ki a konnektorból! Ne nyúljon bele a vízbe! Kapcsolja ki a készüléket, és amikor nem használja, tartozékokat helyez rá, tisztítja, vagy ha zavart észlel, mindig húzza ki a csatlakozó dugaszt a konnektorból! Soha ne hagyja a készüléket felügyelet nélkül! Annak érdekében, hogy a gyermekeket megvédje az elektromos készülékek okozta veszélyektől, soha ne hagyja a kábeleket szabadon lógva, és olyan helyre tegye a készüléket, ahol gyermekek nem férhetnek hozzá! Rendszeresen ellenőrizze, hogy nincs-e a készüléken vagy a kábelen sérülés! Sérült készüléket soha ne helyezzen üzembe! A kockázatok elkerülése végett ne maga javítsa a készüléket, hanem keressen fel egy erre kiképzett szakembert! Ha hibás a csatlakozó kábel, csak a gyártótól, a vevőszolgálatunktól vagy hasonló képzettségű személytől kérjen helyette azonos értékű másik kábelt! Csak eredeti tartozékokat használjon! Tartsa be az itt következő "Speciális biztonsági rendszabályokat" ... Speciális biztonsági rendszabályok • • Csak port és apró morzsát szívjon fel a készülékkel, hegyes tárgyakat vagy forró hamut ne! Nedvesség felszívásához használja mindig a toldalékfejet (11)! A készülék használatba vétele A kezelő elemek bemutatása 1 2 3 4 5 6 32 Portartály A portartály kioldó gombja Kijelző Be-/kikapcsológomb Nyél Motorház 7 8 9 10 11 12 Feltöltő dugasz Fali tartó Hálózati adapter Szűrő Nedvességszívó fej Résszívó fej 4....-05-AKS 825 22.02.2002 15:29 Uhr Seite 33 Fali tartó H Ha szükség van rá, szerelje fel a fali tartót a hozzá adott csavarok és tiplik segítségével! Az akku feltöltése A fali tartó felszerelése után: • • • • Dugja a hálózati adaptert előírásszerűen szerelt, földelt, 230 V, 50 Hz-es konnektorba! A feltöltés-ellenőrző lámpa kigyullad. Az akku feltöltéséhez szükség esetén vegye le a szívófejeket, és dugja a készüléket először a falitartó felső rekeszébe. Utána finoman nyomja meg a nyelet úgy, hogy a készülék bekattanjon! A feltöltési idő első alkalommal kb. 16 óra, a későbbiekben kb. 8 óra. Utána húzza ki kérem az adaptert a konnektorból! A készülék használata Mielőtt a kívánt szívófejet feltenné a készülékre, húzza ki a csatlakozó dugót a konnektorból! A porszívózás megkezdéséhez meg kell nyomni, és a működtetéshez lenyomva kell tartani a ki-/bekapcsológombot (EIN/AUS - 4). A munka befejeztével, vagy ha az akku lemerült, csatlakoztassa a készüléket "Az akku feltöltése" címszó alatt leírtak szerint a feltöltő dugaszra! Ügyeljen rá, hogy az adapter is be legyen dugva a konnektorba! Szívófejek Résszívófej: Ideális pl. sarkok vagy rések porszívózására Nedvességszívás: Ügyeljen rá, hogy folyadék felszívásához mindig be kell helyezni ezt a szívófejet (tolja be a toldalék nyakát a készülékbe úgy, hogy a szívófej körkörösen zárjon!) Tisztítás • • • • • Tisztítás előtt mindig húzza ki a hálózati csatlakozó dugót a konnektorból! A motorházat száraz ruhával törölje le! A portartályt a kioldógombbal (2) lehet kioldani, utána pedig felülről lefelé húzva kivenni. A betétet az óramutató járásával ellentétes irányba (OPEN) forgatva, vegye ki a porszűrőt (10), és porolja ki! Többszöri ürítés után a porzsákot vízben ki is moshatja. Utána szárítsa meg! A készüléket fordított sorrendben illessze ismét össze! 33 4....-05-AKS 825 H 22.02.2002 15:29 Uhr Seite 34 Ezt a készüléket az Európa Tanács minden vonatkozó aktuális irányelve szerint (pl. elektromágnesesség-elviselő képesség vagy kisfeszültség-elviselő képesség) ellenőriztük, és a legújabb biztonságtechnikai előírások szerint készült. Megjegyezzük az esetleges müszaki változásokat! Garancia Az általunk forgalmazott készülékre a vétel időpontjától (pénztári nyugta) számított 24 havi garanciát vállalunk. A garanciális időn belül saját mérlegelésünk szerint javítással vagy cserével díjtalanul megszüntetjük a készülék vagy a tartozék *) olyan hiányosságait, amelyek anyaghibára vagy gyártási hibára vezethetők vissza. A garanciális szolgáltatások sem a garanciális idő meghosszabbítását nem eredményezik, sem nem alapoznak meg újabb garanciára való igényt! A garancia igazolására a pénztári nyugta szolgál. E nélkül az igazolás nélkül sem díjmentes csere, sem díjtalan javítás nem végezhető. Garanciális esetben eredeti csomagolásban a pénztári nyugtával együtt vigye vissza az egész készüléket az üzletbe, ahol vásárolta. *) A tartozékok hibái nem eredményezik automatikusan az egész készülék díjtalan cseréjét. Ilyen esetekben forduljon „forró vonalunkhoz”! Az üvegtörésből, ill. a műanyag alkatrészek töréséből eredő hibák megszüntetése mindenkor térítésköteles. Sem az elhasználódó tartozékokban, ill. kopó alkatrészekben (pl. szénkefe, dagasztóhorog, hajtószíj, póttávvezérlő, pótfogkefe, fűrészlap stb.) bekövetkező hibák, sem a tisztítás, karbantartás vagy a kopó alkatrészek cseréje nem esik a garancia hatálya alá, következésképp térítésköteles. Illetéktelen beavatkozás a garancia megszűnését eredményezi. A garanciális idő után A garanciális idő eltelte után a megfelelő szakkereskedésben vagy javítószolgálatnál végeztethet térítésköteles javításokat. 34 4....-05-AKS 825 22.02.2002 15:29 Uhr Seite 35 Indicaflii generale de siguranflæ • RO • • Înainte de punerea în funcfliune a acestui aparat citifli cu atenflie instrucfliunile de utilizare øi pæstrafli inclusiv certificatul de garanflie, bonul de casæ øi dupæ posibilitæfli ambalajul. Folosifli acest aparat exclusiv în scop privat øi în cel pentru care a fost conceput. Acest aparat nu este conceput pentru utilizarea industrialæ. Nu-l folosifli în exterior (doar dacæ este conceput pentru a fi folosit în exterior). Evitafli expunerea aparatului la cælduræ, la influenfla directæ a razelor solare, umezealæ (este interzisæ scufundarea acestuia în lichide) øi nu folosifli obiecte ascuflite în timpul utilizærii. Evitafli folosirea aparatului cu mâinile ude. În cazul în care aparatul este umed sau ud, deconectafli imediat de la reflea. Nu bægafli mâna în apæ. Oprifli aparatul øi deconectafli întotdeuna de la reflea (tragefli de øtecher øi nu de cablu) atunci când nu folosifli aparatul, când montafli accesorii, în timpul curæflærii sau în cazul unor defecfliuni de funcflionare. Nu læsafli aparatul niciciodatæ nesupravegheat. Pentru a proteja copiii faflæ de pericolele aparatelor electrice, asigurafli-væ cæ aceøtia nu au acces la ele øi nu læsafli cablurile sæ atârne. Verificafli regulat aparatul øi cablurile în vederea detectærii defecfliunilor. Nu folosifli aparate defecte. Pentru repararea aparatului contactafli un specialist autorizat. Pentru înlocuirea unuiui cablu defect de reflea contactafli, în vederea evitærii riscurilor, producætorul, serviciul nostru de clienfli sau o persoanæ calificatæ. Folosifli doar accesorii originale. Væ rugæm sæ citifli cu atenflie øi urmætoarele „Indicaflii speciale de siguranflæ…“ • • Aspirafli numai praf øi færâmituri mici, nici un obiect ascuflit sau scrum fierbinte. Pentru aspirarea lichidelor folosifli întotdeauna setul corespunzætor (11). • • • • • Instrucfliuni speziale de securitatae Punerea în funcfliune a aparatului Descrierea elementelor de deservire 1 2 3 4 5 Recipient pentru praf Buton de decuplare a recipientului pentru praf Indicaflie Comutator EIN/AUS (CONECTAT/DECONECTAT) Mâner 6 7 8 9 10 11 12 Corpul motorului Fiøæ de încærcare Stativ de perete Adaptor de reflea Filtru Set pentru aspirarea lichidelor Duzæ pentru rosturi 35 4....-05-AKS 825 RO 22.02.2002 15:29 Uhr Seite 36 Suportul de perete Dacæ este cazul, fixafli suportul de perete cu ajutorul øuruburilor øi al diblului anexate. Încærcarea acumulatorului Dupæ montajul suportului ce perete: • • • • Introducefli aparatul de alimentare într-o prizæ 230V, 50 Hz cu protecflie, instalatæ conform prescripfliilor. Becul de control al încærcærii se va aprinde. Pentru încærcarea acumulatorului demontafli, dacæ este nevoie, seturile de duze øi introducefli aparatul în primul rând în eclisa superioaræ a suportului pentru perete. Apæsafli apoi uøor pe mâner pânæ se blocheazæ. Durata de încærcare este, la prima încærcare, de cca. 16 ore, iar ulterior de cca. 8 ore. Apoi scoatefli din prizæ aparatul de alimentare. Folosirea aparatului La nevoie separafli aparatul de reflea øi montafli duza doritæ. Pentru a putea începe aspirarea, comutatorul PORNIT/OPRIT (4) trebuie apæsat øi flinut apæsat. La terminarea lucrului, sau dacæ acumulatorul este descærcat, racordafli aspiratorul la fiøa de încærcare, aøa cum a fost descris la capitolul îmcærcarea acumulatorului. Atenflie, ca øi fiøa de reflea sæ fie introdusæ. Stul de duze idealæ pentru aspirarea de ex. a colflurilor sau a rosturilor. Set pentru aspirarea lichidelor: Acest set de aspirare trebuie montat doar în cazul aspirærii lichidelor (împingefli prelungirea setului în aparat pânæ când duza se fixeazæ coliniar. Duza petru rosturi: Curæflirea • • • • • 36 Scoatefli totdeauna fiøa de reflea înaintea curæflirii! Curæflaflî corpul cu o cârpæ uscatæ. Aspiratorul poate fi desprins de la butonul de desprindere (2) øi apoi tras în jos. Scoatefli filtrul de praf (10) învârtind setul în sens contrar acelor de ceas (OPEN) øi scuturafli-l. Dupæ goliri repetate putefli curæfla punga de praf øi în apæ. Apoi læsafli sæ se usuce. Montafli aparatul la loc în ordine inversæ. 4....-05-AKS 825 22.02.2002 15:29 Uhr Seite 37 Acest aparat a fost verificat în conformitate cu toate directivele actuale ale CE, cum ar fi de ex. compatibilitatea magneticæ øi directiva de tensiune joasæ, øi a fost construit în conformitate cu cele mai noi prevederi de siguranflæ tehnicæ. Schimbæri technice sînt rezervate! Garanflie Acordæm pentru aparatul nostru o garanflie de 24 de luni începând cu data achiziflionærii (bon de casæ). Pe durata perioadei de garanflie remediem gratuit defecfliunile aparatului sau ale accesoriilor*) rezultate ca urmare a unor defecfliuni din fabricaflie, reparând sau, în funcflie de aprecierea noastræ, înlocuind aparatul. Reparafliile în garanflie nu duc la prelungirea teremenului de garanflie øi nici la obflinerea unei noi garanflii! Pentru a beneficia de garanflie, cumpærætorul este obligat sæ prezinte chitanfla/factura originalæ de cumpærare a aparatului. Færæ aceastæ dovadæ nu se poate efectua înlocuirea sau reparaflia gratuitæ a aparatului. În cazul remedierilor în garanflie predafli aparatul integral în ambalajul original împreunæ cu bonul de casæ la service-ul autorizat. *) Defecfliunile accesoriilor nu includ în mod automat schimbarea întregului aparat. În acest caz væ rugæm sæ sunafli la unul din numerele noastre de telefon! Deteriorærile componentelor din sticlæ respectiv ale celor din material plastic trebuie plætite! Atât defectele de la accesoriile funcflionale resp. componetele care se uzeazæ (de ex. paleta de fræmântat, curea de distribuflie, telecomandæ de rezervæ, periufle de dinfli de rezervæ, pânza de fieræstræu) cât øi curæflarea, întreflinerea sau înlocuirea componentelor care se uzeazæ, nu untræ sub incidenfla garanfliei øi de aceea trebuie plætite! Garanflia dispare în cazul intervenfliei stræine. Post-garanflie Dupæ scurgerea teremenului de garanflie reparafliile pot fi efectuate gratuit de cætre service-ul autorizat. 37 RO 4....-05-AKS 825 22.02.2002 15:29 Uhr Seite 38 Общие указания по технике безопасности RUS • • • • • • • • Перед началом эксплуатации прибора внимательно прочитайте прилагаемую инструкцию по эксплуатации и сохраните ее в надежном месте, вместе с гарантийным талоном, кассовым чеком и, по возможности, картонной коробкой с упаковочным материалом. Пользуйтесь прибором только частным образом и по назначению. Прибор не предназначен для коммерческого использования. Не пользуйтесь прибором под открытым небом (исключая приборы, эксплуатация которых под открытым небом допустима). Предохраняйте прибор от жары, прямых солнечных лучей, влажности (ни в коем случае не погружайте его в воду) и ударов об острые углы. Не прикасайтесь к прибору влажными руками. Если прибор увлажнился или намок, тут же выньте вилку из розетки. Не прикасайтесь к мокрым местам. После эксплуатации, монтаже принадлежностей, чистке или поломке прибора всегда вынимайте вилку из розетки (тяните за вилку, а не за кабель). Никогда не оставляйте прибор без присмотра. Для защиты детей от поражений электротоком, следите за тем, чтобы кабель не висел где попало и дети не имели доступа к прибору. Регулярно осматривайте прибор и кабель на предмет возможных повреждений. Ни в коем случае не включайте прибор, имеющий повреждения. Ни в коем случае не ремонтируйте прибор самостоятельно, а обращайтесь в таком случае за помощью к специалисту, имеющему соответствующий допуск. Из соображений безопасности, замена сетевого шнура на равнозначный допускается только через заводизготовитель, нашу сервисную мастерскую или соответствующего квалифицированного специалиста. Используйте только оригинальные запчасти. Пожалуйста, соблюдайте нижеследующие "Специальные указания по технике безопасности ...". Специальные указания по технике безопасности • • Пылесосьте только пыль и мелкие крошки и ни в коем случае острые предметы или горячий пепел. Пожалуйста, используйте для влажной уборки насадку (11). Подготовка прибора к эксплуатации Изображение конрольных деталей 1 2 3 38 Пылесборник Кнопка разблокировки пылесборника Индикатор 4 5 6 7 Выключатель ВКЛ/ВЫКЛ Ручка Корпус мотора Вилка подзарядного устройства 4....-05-AKS 825 8 9 22.02.2002 15:29 Uhr Настенный держатель Сетевой адаптер/ подзарядное устройство Seite 39 10 Фильтр 11 Насадка для влажной уборки 12 Узкое сопло RUS Настенный держатель При необходимости, прикрепите настенный держатель к стене при помощи прилагаемых винтов и дюбелей. Подзарядка аккумуляторов После монтажа настенного держателя: • Вставьте вилку в заземленную розетку с напряжением сети 230 В, 50 Гц, установленную в соответствии с предписаниями. Загорается светоиндикатор контроля подзарядки. • Для подзарядки аккумуляторов снимите все насадки и вставьте прибор для начала в верхнее гнездо настенного держателя. - Затем слегка нажмите на ручку, чтобы прибор зафиксировался. - Время подзарядки аккумуляторов составляет: в первый раз прим. 16 часов, потом прим. по 8 часов. После этого выньте сетевой адаптер из розетки. Порядок работы с прибором Отключите прибор от сети и наденьте на сопло необходимую насадку. Для начала работы необходимо нажать на выключатель "ВКЛ/ВЫКЛ" (4) ("EIN/AUS") и держать его нажатым. По окончании эксплуатации или разрядке аккумуляторов, поставьте пылесос на подзарядку, как это описано в главе "Подзарядка аккумуляторов". Проследите за тем, чтобы вилка сетевого адаптера была вставлена в розетку. Насадки Узкое сопло: Насадка для влажной уборки: идеально подходит для удаления пыли из углов или щелей. Пожалуйста не забывайте надевать насадку для влажной уборки (вставьте удлинитель насадки в прибор и задвиньте его, до надежной фиксации сопла). Чистка прибора • • • Перед чисткой прибора выньте вилку из розетки! Протрите корпус прибора сухой тряпкой. Разблокируйте контейнер пылесборника, нажав кнопку (2), и потяните его сверху вниз. 39 4....-05-AKS 825 RUS • • 22.02.2002 15:29 Uhr Seite 40 Выньте пылефильтр (10), для чего поверните насадку против часовой стрелки (крутить в направлении "OPEN"), и выколотите его. После многократной чистки его можно промыть в воде. Не забудьте его хорошо просушить. Соберите, пожалуйста, прибор в обратной последовательности Это изделение прошло все необходимые и актуальные проверки, предписанные директивой СЕ, к прим. на электромагнитную совместимость и соответствие требованиям к низковольтной технике, оно было также сконструировано и построено с учетом последних требований по технике безопасности. Мы оставляем за собой право на технические изменения! Гарантийное обязательство Во время гарантии мы бесплатно устраняем все недостатки изделий и принадлежностей к ним, возникшие по причине дефектных материалов или по вине завода-изготовителя, путем ремонта или, на наше усмотрение, путем замены изделия. Гарантийный ремонт не удлиняет срок гарантии и не возобновляет ее! Кассовый чек является гарантийным талоном. Без него невозможен бесплатный ремонт или замена изделия. В случае возникновжния притензий по гарантии, предъявите изделие в полнойкомплектации, с оригинальной упаковкой и кассовым чеком торговой точке, продавшей это изделие. *) Дефекты принадлежностей не служат причиной для автоматической замены всего изделия. В этом случае позвоните нам, пожалуйста, по горячей линии! Разбитые стеклянные и поломаные пластмассовые детали возмещаются только за дополнительную оплату! Дефекты изнашиваемых принадлежностей или трущихся деталей (например контактные щетки моторов, смесительные крюки, приводные ремни, запасные пульты управления, запасные зубные щетки, пильные полотна и т.д.), а также чистка, техобслуживание или замена трущихся деталей не попадают под гарантию, и поэтому проводятся за отдельную оплату! Гарантия теряется при вскрытии изделия посторонними лицами. После гарантии После окончания срока гарантии, ремонт изделий производится за оплату, соответствующими мастерскими или пунктами сервисного обслуживания. 40 4....-05-AKS 825 22.02.2002 15:29 Uhr Seite 41 Technische Daten Modell: AKS 825 Spannungsversorgung: 230 V, 50 Hz Netzteil: 6 V, ≈ 200 mA, 1,2 VA Schutzklasse: ΙΙ Dieses Gerät wurde nach allen zutreffenden, aktuellen CE-Richtlinien geprüft, wie z.B. elektromagnetische Verträglichkeit und Niederspannungsdirektive und wurde nach den neuesten sicherheitstechnischen Vorschriften gebaut. Technische Änderungen vorbehalten! Bitte führen Sie das ausgediente Gerät einer umweltgerechten Entsorgung zu. D-47906 Kempen/Germany · Industriering Ost 40 Internet: http://www.clatronic.de · email: [email protected] Stünings, Krefeld • 02/02 NiCd:-
 1
1
-
 2
2
-
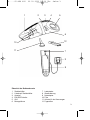 3
3
-
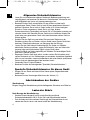 4
4
-
 5
5
-
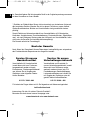 6
6
-
 7
7
-
 8
8
-
 9
9
-
 10
10
-
 11
11
-
 12
12
-
 13
13
-
 14
14
-
 15
15
-
 16
16
-
 17
17
-
 18
18
-
 19
19
-
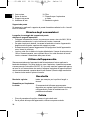 20
20
-
 21
21
-
 22
22
-
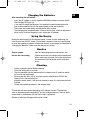 23
23
-
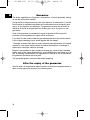 24
24
-
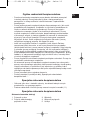 25
25
-
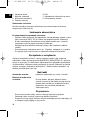 26
26
-
 27
27
-
 28
28
-
 29
29
-
 30
30
-
 31
31
-
 32
32
-
 33
33
-
 34
34
-
 35
35
-
 36
36
-
 37
37
-
 38
38
-
 39
39
-
 40
40
-
 41
41


in andere talen
- English: Clatronic AKS 825 Owner's manual
- italiano: Clatronic AKS 825 Manuale del proprietario
- русский: Clatronic AKS 825 Инструкция по применению
- français: Clatronic AKS 825 Le manuel du propriétaire
- español: Clatronic AKS 825 El manual del propietario
- Deutsch: Clatronic AKS 825 Bedienungsanleitung
- português: Clatronic AKS 825 Manual do proprietário
- čeština: Clatronic AKS 825 Návod k obsluze
- polski: Clatronic AKS 825 Instrukcja obsługi
- română: Clatronic AKS 825 Manualul proprietarului
Gerelateerde papieren
-
Clatronic CB 801 de handleiding
-
-
Clatronic aks 826 de handleiding
-
-
CTC Union aks 828 wet dry de handleiding
-
-
-
Clatronic AKS 828 Handleiding
-
-