47
EnglishDeutschFrançaisItalianoEspañolPortuguêsNederlands
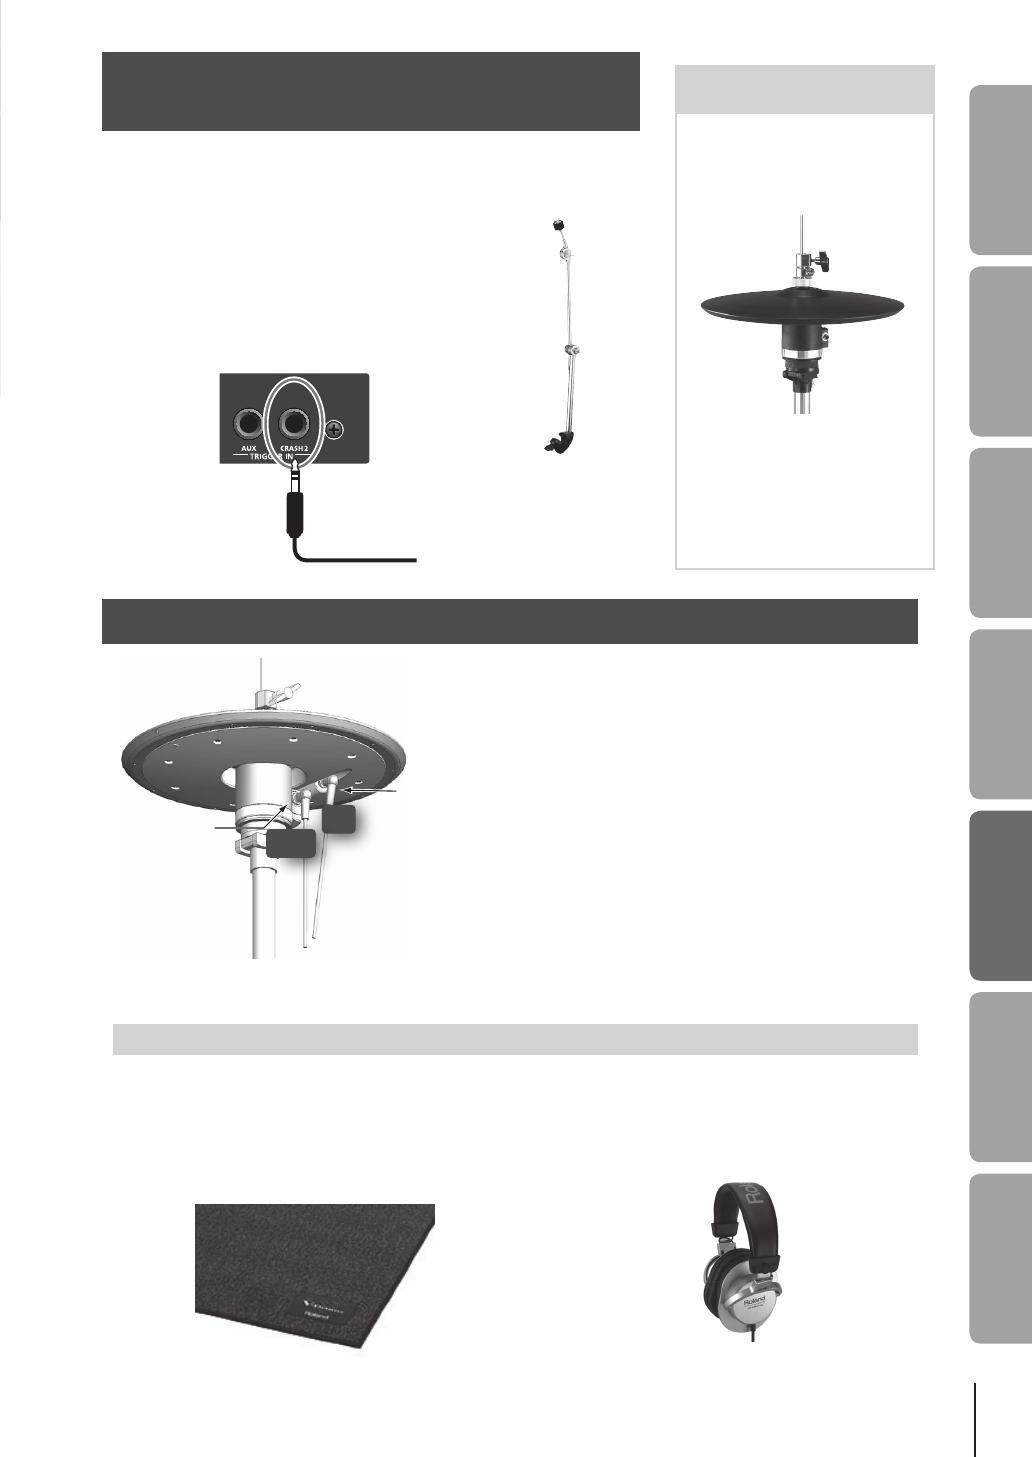
Conectar un plato crash
(CY-8: debe adquirirlo por separado)
Utilice un cable estéreo para conectar el CY-8 al TD-9, como se
muestra en la ilustración.
1.
Instale el soporte de plato
a la base .
2. Conecte el cable incluido con el pad
al jack CRASH2 del TD-9 .
El V hi-hat es un perfecto ejemplo
de la tecnología V-Drums de Roland
La principal característica del V hi-
hat (VH-11) es el diseño que crea el
movimiento, el peso y la sensación de
interpretación de un charles acústico.
El VH-11 puede instalarse en práctica-
mente cualquier soporte de charles,
lo cual permite una técnica de inter-
pretación normal de arco/borde, una
transición suave entre la posición
abierta y cerrada, e incluso la técnica
de “foot splash”.
Conectar un V hi-hat (VH-11: debe adquirirlo por separado)
Utilice los cables existentes para conectar el
VH-11 al TD-9, como se muestra en la ilustración.
1. Conecte el cable HH (disparo
de charles) al jack TRIGGER OUT.
2. Conecte el cable HHC (control
de charles) al jack CONTROL OUT.
* El soporte de charles debe adquirirse por separado.
* El pad de plato original (CY-5) utilizado para el
charles, puede utilizarse como un plato splash
o crash. Instálelo utilizando un soporte de plato
(MDY-12: debe adquirirlo por separado) o el con-
junto de piezas del plato (CYM-10: debe adquirirlo
por separado).
Jack
TRIGGER OUT
Jack
CONTROL OUT
HH
HHC
MDY-10U (debe
adquirirse por separado)
Soporte de plato
del CY-8
Otras opciones
Además de los elementos propuestos aquí, puede ampliar el sistema con otras opciones. Para
más información, consulte a su distribuidor local Roland o visite el sitio web de Roland.
http://www.roland.com/V-Drums/
Alfombrilla especíca para el conjunto V-Drums
TDM-20/10
Auriculares monitores estéreo
RH series
Soporte de plato
serie MDY (debeadquirirse
por separado)


