
FRANÇAIS
ESPAÑOL
ES
FR
EN
Owner’s Manual
Mode d'emploi
Manual de instrucciones
Thank you for purchasing this Yamaha Hybrid Piano! This
instrument provides touch and sound that are closer than ever to
an actual acoustic grand piano for your playing enjoyment.
We recommend that you read this manual carefully so that you
can fully take advantage of the advanced and convenient
functions of the instrument. We also recommend that you keep
this manual in a safe and handy place for future reference.
Before using this instrument, be sure to read “PRECAUTIONS”
on pages 5–6.
When assembling the unit, consult a qualified AvantGrand
dealer. (Refer to the assembly instructions at the end of this
manual.)
Nous vous remercions d'avoir acheté ce piano hybride Yamaha.
Pour votre plus grand plaisir, cet instrument offre un toucher et
un son qui n'ont jamais été aussi proches de ceux d'un véritable
piano à queue acoustique. Nous vous conseillons de lire
attentivement ce mode d'emploi afin de tirer pleinement profit
des fonctions avancées et très pratiques de votre instrument.
Nous vous recommandons également de garder ce manuel à
portée de main pour toute référence ultérieure.
Avant d'utiliser cet instrument, lisez attentivement la section
« PRÉCAUTIONS D'USAGE » aux pages 5-6.
Lors du montage de l'unité, contactez un revendeur AvantGrand
agréé. (Reportez-vous aux instructions de montage figurant à la
fin de ce manuel.)
Gracias por comprar este piano híbrido de Yamaha. Este
instrumento ofrece pulsación y sonido que se acercan más que
nunca a un piano de cola acústico real para que disfrute
tocando. Le recomendamos que lea este manual detenidamente
para poder aprovechar al máximo las funciones avanzadas y
prácticas del instrumento. También le recomendamos que lo
guarde en un lugar seguro y fácilmente accesible para futuras
consultas.
Antes de utilizar el instrumento, lea la sección
“PRECAUCIONES”, en las páginas 5-6.
Al montar la unidad, consulte con un concesionario cualificado
de AvantGrand (consulte las instrucciones de montaje al final de
este manual).
ENGLISH
N1X

2•N1X
PRODUCT SAFETY MARKINGS: Yamaha electronic
products may have either labels similar to the graphics
shown below or molded/stamped facsimiles of these
graphics on the enclosure. The explanation of these graph-
ics appears on this page. Please observe all cautions indi-
cated on this page and those indicated in the safety
instruction section.
See bottom of Keyboard enclosure for graphic symbol
markings.
The exclamation point within the equi-
lateral triangle is intended to alert the
user to the presence of important operat-
ing and maintenance (servicing) instruc-
tions in the literature accompanying the
product.
The lightning flash with arrowhead
symbol, within the equilateral triangle,
is intended to alert the user to the pres-
ence of uninsulated “dangerous volt-
age” within the product’s enclosure that
may be of sufficient magnitude to con-
stitute a risk of electrical shock.
IMPORTANT NOTICE: All Yamaha electronic products
are tested and approved by an independent safety testing
laboratory in order that you may be sure that when it is
properly installed and used in its normal and customary
manner, all foreseeable risks have been eliminated. DO
NOT modify this unit or commission others to do so unless
specifically authorized by Yamaha. Product performance
and/or safety standards may be diminished. Claims filed
under the expressed warranty may be denied if the unit is/
has been modified. Implied warranties may also be
affected.
SPECIFICATIONS SUBJECT TO CHANGE: The
information contained in this manual is believed to be cor-
rect at the time of printing. However, Yamaha reserves the
right to change or modify any of the specifications without
notice or obligation to update existing units.
ENVIRONMENTAL ISSUES: Yamaha strives to pro-
duce products that are both user safe and environmentally
friendly. We sincerely believe that our products and the
production methods used to produce them, meet these
goals. In keeping with both the letter and the spirit of the
law, we want you to be aware of the following:
Battery Notice: This product MAY contain a small non-
rechargeable battery which (if applicable) is soldered in
place. The average life span of this type of battery is
approximately five years. When replacement becomes nec-
essary, contact a qualified service representative to per-
form the replacement.
Warning: Do not attempt to recharge, disassemble, or
incinerate this type of battery. Keep all batteries away from
children. Dispose of used batteries promptly and as regu-
lated by applicable laws. Note: In some areas, the servicer
is required by law to return the defective parts. However,
you do have the option of having the servicer dispose of
these parts for you.
Disposal Notice: Should this product become damaged
beyond repair, or for some reason its useful life is consid-
ered to be at an end, please observe all local, state, and fed-
eral regulations that relate to the disposal of products that
contain lead, batteries, plastics, etc.
NOTICE: Service charges incurred due to lack of knowl-
edge relating to how a function or effect works (when the
unit is operating as designed) are not covered by the manu-
facturer’s warranty, and are therefore the owners responsi-
bility. Please study this manual carefully and consult your
dealer before requesting service.
NAME PLATE LOCATION: The graphic below indi-
cates the location of the name plate. The model number,
serial number, power requirements, etc., are located on this
plate. You should record the model number, serial number,
and the date of purchase in the spaces provided below and
retain this manual as a permanent record of your purchase.
Model
Serial No.
Purchase Date
SPECIAL MESSAGE SECTION
CAUTION
RISK OF ELECTRIC SHOCK
DO NOT OPEN
CAUTION: TO REDUCE THE RISK OF ELECTRIC SHOCK.
DO NOT REMOVE COVER (OR BACK).
NO USER-SERVICEABLE PARTS INSIDE.
REFER SERVICING TO QUALIFIED SERVICE PERSONNEL.
92-469-q (bottom)
n1x_en_om.book Page 2 Friday, October 19, 2018 6:01 PM

N1X •3
1. IMPORTANT NOTICE: DO NOT MODIFY THIS UNIT!
This product, when installed as indicated in the instructions
contained in this manual, meets FCC requirements. Modifica-
tions not expressly approved by Yamaha may void your author-
ity, granted by the FCC, to use the product.
2. IMPORTANT: When connecting this product to accessories
and/or another product use only high quality shielded cables.
Cable/s supplied with this product MUST be used. Follow all
installation instructions. Failure to follow instructions could void
your FCC authorization to use this product in the USA.
3. NOTE: This product has been tested and found to comply with
the requirements listed in FCC Regulations, Part 15 for Class
“B” digital devices. Compliance with these requirements pro-
vides a reasonable level of assurance that your use of this
product in a residential environment will not result in harmful
interference with other electronic devices. This equipment gen-
erates/uses radio frequencies and, if not installed and used
according to the instructions found in the users manual, may
cause interference harmful to the operation of other electronic
devices. Compliance with FCC regulations does not guarantee
that interference will not occur in all installations. If this product
is found to be the source of interference, which can be deter-
mined by turning the unit “OFF” and “ON”, please try to elimi-
nate the problem by using one of the following measures:
Relocate either this product or the device that is being affected
by the interference.
Utilize power outlets that are on different branch (circuit breaker
or fuse) circuits or install AC line filter/s.
In the case of radio or TV interference, relocate/reorient the
antenna. If the antenna lead-in is 300 ohm ribbon lead, change
the lead-in to co-axial type cable.
If these corrective measures do not produce satisfactory
results, please contact the local retailer authorized to distribute
this type of product. If you can not locate the appropriate
retailer, please contact Yamaha Corporation of America, Elec-
tronic Service Division, 6600 Orangethorpe Ave, Buena Park,
CA90620
The above statements apply ONLY to those products distrib-
uted by Yamaha Corporation of America or its subsidiaries.
* This applies only to products distributed by Yamaha Corporation of America. (class B)
FCC INFORMATION (U.S.A.)
COMPLIANCE INFORMATION STATEMENT
(Supplier’s declaration of conformity procedure)
Responsible Party : Yamaha Corporation of America
Address : 6600 Orangethorpe Ave., Buena Park, Calif. 90620
Telephone : 714-522-9011
Type of Equipment : Hybrid Piano
Model Name : N1X
This device complies with Part 15 of the FCC Rules.
Operation is subject to the following two conditions:
1) this device may not cause harmful interference, and
2) this device must accept any interference received including interference
that may cause undesired operation.
* This applies only to products distributed by
Yamaha Corporation of America.
(FCC SDoC)
n1x_en_om.book Page 3 Friday, October 19, 2018 6:01 PM

4•N1X Owner’s Manual
The above warning is located on the bottom of the unit.
Explanation of Graphical Symbols
The lightning flash with arrowhead symbol
within an equilateral triangle is intended to
alert the user to the presence of uninsulated
“dangerous voltage” within the product’s
enclosure that may be of sufficient
magnitude to constitute a risk of electric
shock to persons.
The exclamation point within an equilateral
triangle is intended to alert the user to the
presence of important operating and
maintenance (servicing) instructions in the
literature accompanying the product.
1 Read these instructions.
2 Keep these instructions.
3 Heed all warnings.
4 Follow all instructions.
5 Do not use this apparatus near water.
6 Clean only with dry cloth.
7 Do not block any ventilation openings. Install in
accordance with the manufacturer’s instructions.
8 Do not install near any heat sources such as radiators,
heat registers, stoves, or other apparatus (including
amplifiers) that produce heat.
9 Do not defeat the safety purpose of the polarized or
grounding-type plug. A polarized plug has two blades
with one wider than the other. A grounding type plug
has two blades and a third grounding prong. The wide
blade or the third prong are provided for your safety. If
the provided plug does not fit into your outlet, consult
an electrician for replacement of the obsolete outlet.
10 Protect the power cord from being walked on or
pinched particularly at plugs, convenience receptacles,
and the point where they exit from the apparatus.
11 Only use attachments/accessories specified by the
manufacturer.
12 Use only with the cart, stand,
tripod, bracket, or table specified
by the manufacturer, or sold with
the apparatus. When a cart is
used, use caution when moving
the cart/apparatus combination to
avoid injury from tip-over.
13 Unplug this apparatus during
lightning storms or when unused for long periods of
time.
14 Refer all servicing to qualified service personnel.
Servicing is required when the apparatus has been
damaged in any way, such as power-supply cord or
plug is damaged, liquid has been spilled or objects
have fallen into the apparatus, the apparatus has been
exposed to rain or moisture, does not operate normally,
or has been dropped.
(UL60065_03)
CAUTION: TO REDUCE THE RISK OF
ELECTRIC SHOCK, DO NOT REMOVE
COVER (OR BACK). NO USER-SERVICEABLE
PARTS INSIDE. REFER SERVICING TO
QUALIFIED SERVICE PERSONNEL.
CAUTION
RISK OF ELECTRIC SHOCK
DO NOT OPEN
IMPORTANT SAFETY INSTRUCTIONS
WARNING
TO REDUCE THE RISK OF FIRE OR ELECTRIC SHOCK, DO NOT EXPOSE THIS APPARATUS TO RAIN OR MOISTURE.
The model number, serial number, power requirements, etc., may be found
on or near the name plate, which is at the bottom of the unit. You should
note this serial number in the space provided below and retain this manual
as a permanent record of your purchase to aid identification in the event of
theft.
Model No.
Serial No.
(bottom_en_01)
The name plate is located
on the bottom of the unit.
n1x_en_om.book Page 4 Friday, October 19, 2018 6:01 PM

N1X Owner’s Manual •5
PRECAUTIONS
PLEASE READ CAREFULLY BEFORE PROCEEDING
Please keep this manual in a safe and handy place for future reference.
WARNING
Always follow the basic precautions listed below to avoid the possibility of serious injury or even death from electrical
shock, short-circuiting, damages, fire or other hazards. These precautions include, but are not limited to, the
following:
• Do not place the power cord near heat sources such as heaters or radiators. Also,
do not excessively bend or otherwise damage the cord, or place heavy objects on
it.
• Only use the voltage specified as correct for the instrument. The required voltage
is printed on the name plate of the instrument.
• Use only the supplied power cord/plug.
• Check the electric plug periodically and remove any dirt or dust which may have
accumulated on it.
• This instrument contains no user-serviceable parts. Do not open the instrument
or attempt to disassemble or modify the internal components in any way. If it
should appear to be malfunctioning, discontinue use immediately and have it
inspected by qualified Yamaha service personnel.
(For information on whether
Bluetooth
functionality is included or not, refer to page 50.)
• Do not use this instrument near medical devices or inside medical facilities.
Radio waves from this instrument may affect electro-medical devices.
• Do not use this instrument within 15 cm (6 in) of persons with a heart pacemaker
implant or a defibrillator implant. Radio waves from this instrument may affect
electro-medical devices, such as a heart pacemaker implant or defibrillator
implant.
• Do not expose the instrument to rain, use it near water or in damp or wet
conditions, or place on it any containers (such as vases, bottles or glasses)
containing liquids which might spill into any openings. If any liquid such as water
seeps into the instrument, turn off the power immediately and unplug the power
cord from the AC outlet. Then have the instrument inspected by qualified Yamaha
service personnel.
• Never insert or remove an electric plug with wet hands.
• Do not put burning items, such as candles, on the unit. A burning item may fall
over and cause a fire.
• When one of the following problems occur, immediately turn off the power switch
and disconnect the electric plug from the outlet. Then have the device inspected
by Yamaha service personnel.
- The power cord or plug becomes frayed or damaged.
- It emits unusual smells or smoke.
- Some object has been dropped into the instrument.
- There is a sudden loss of sound during use of the instrument.
CAUTION
Always follow the basic precautions listed below to avoid the possibility of physical injury to you or others, or damage
to the instrument or other property. These precautions include, but are not limited to, the following:
• Do not connect the instrument to an electrical outlet using a multiple-connector.
Doing so can result in lower sound quality, or possibly cause overheating in the
outlet.
• When removing the electric plug from the instrument or an outlet, always hold the
plug itself and not the cord. Pulling by the cord can damage it.
• Remove the electric plug from the outlet when the instrument is not to be used for
extended periods of time, or during electrical storms.
• Read carefully the attached documentation explaining the assembly process.
Failure to assemble the instrument in the proper sequence might result in damage
to the instrument or even injury.
• Do not place the instrument in an unstable position where it might accidentally
fall over.
• Since this product is very heavy, make sure that a sufficient number of people are
on hand to help, so you can lift and move it safely and easily. Attempting to lift or
move the instrument by force may damage your back, result in other injury, or
cause damage to the instrument itself.
• Before moving the instrument, remove all connected cables, to prevent damage to
the cables or injury to anyone who might trip over them.
• When setting up the product, make sure that the AC outlet you are using is easily
accessible. If some trouble or malfunction occurs, immediately turn off the power
switch and disconnect the plug from the outlet. Even when the power switch is
turned off, electricity is still flowing to the product at the minimum level. When
you are not using the product for a long time, make sure to unplug the power cord
from the wall AC outlet.
Power supply/Power cord
Do not open
Location (if
Bluetooth
functionality is included)
Water warning
Fire warning
If you notice any abnormality
Power supply/Power cord
Assembly
Location
DMI-5 1/2
n1x_en_om.book Page 5 Friday, October 19, 2018 6:01 PM

6•N1X Owner’s Manual
• Though the wooden parts of this instrument have been designed and produced
with care concerning the environment and human health, in some rare instances
customers may sense an unusual odor or develop irritation in the eyes, due to the
coating material and adhesive.
To avoid this, we recommend that you observe the following:
1. Specially ventilate the room for several days after unpacking and installing this
instrument, since it has been packed in airtight conditions in order to maintain
quality during transportation.
2. If the room housing the instrument is small, continue to ventilate it normally,
either daily or periodically.
3. If you have left the instrument in a closed room for a long time under high
temperature, ventilate the room, then lower the temperature if possible, before
using the instrument.
• Before connecting the instrument to other electronic components, turn off the
power for all components. Before turning the power on or off for all components,
set all volume levels to minimum.
• Be sure to set the volumes of all components at their minimum levels and
gradually raise the volume controls while playing the instrument to set the desired
listening level.
• Do not insert a finger or hand in any gaps on the fallboard or instrument. Also
take care that the fallboard does not pinch your finger.
• Do not apply excessive force when closing the fallboard.
A fallboard equipped with the SOFT-CLOSE™ mechanism closes the cover
slowly. Applying excessive force to the fallboard when closing it could damage
the SOFT-CLOSE™ mechanism, and possibly result in injury to your hands and
fingers caught under the closing the fallboard.
• Never insert or drop paper, metallic, or other objects into the gaps on the
fallboard, panel or keyboard. This could cause physical injury to you or others,
damage to the instrument or other property, or operational failure.
• Do not rest your weight on, or place heavy objects on the instrument, and do not
use excessive force on the buttons, switches or connectors.
• Do not use the instrument/device or headphones for a long period of time at a
high or uncomfortable volume level, since this can cause permanent hearing loss.
If you experience any hearing loss or ringing in the ears, consult a physician.
• Do not go near the instrument during an earthquake. Strong shaking during an
earthquake could cause the instrument to move or tip over, resulting in damage to
the instrument or its parts, and possibly causing injury.
• Do not place the bench in an unstable position where it might accidentally fall
over.
• Do not play carelessly with or stand on the bench. Using it as a tool or stepladder
or for any other purpose might result in accident or injury.
• Only one person should sit on the bench at a time, in order to prevent the
possibility of accident or injury.
• For benches that can be adjusted, do not adjust the bench height while sitting on
the bench, since this can cause excessive force to be imposed on the adjustment
mechanism, possibly resulting in damage to the mechanism or even injury.
• If the bench screws become loose due to extensive long-term use, tighten them
periodically using the specified tool in order to prevent the possibility of accident
or injury.
• Keep special watch over any small children so that they don’t fall off the rear of the
bench. Since the bench does not have a backrest, unsupervised use may result in
accident or injury.
Always turn the power off when the instrument is not in use.
Even when the [ ] (Standby/On) switch is in standby status (power lamp is off), electricity is still flowing to the instrument at the minimum level.
When you are not using the instrument for a long time, make sure you unplug the power cord from the wall AC outlet.
DMI-5 2/2
NOTICE
To avoid the possibility of malfunction/ damage to the product, damage to data, or damage to other property, follow the notices below.
Handling
• Do not use the instrument in the vicinity of a TV, radio, stereo equipment, mobile phone, or other electric devices. Otherwise, the instrument, TV, or radio
may generate noise. When you use the instrument along with a smart device, such as an iPhone, iPad, etc., we recommend that you set that device’s
“Airplane Mode” to on and then the Wi-Fi/Bluetooth setting to on in order to avoid noise caused by communication.
• Do not expose the instrument to excessive dust or vibrations, or extreme cold or heat (such as in direct sunlight, near a heater, or in a car during the day)
to prevent the possibility of panel disfiguration, damage to the internal components or unstable operation. (Verified operating temperature range: 5° –
40°C, or 41° – 104°F.)
• Do not place vinyl, plastic or rubber objects on the instrument, since this might discolor the panel or keyboard.
• Bumping the surface of the instrument with metal, porcelain, or other hard objects can cause the finish to crack or peel. Use caution.
Maintenance
• When cleaning the instrument, use a soft and dry/slightly damp cloth. Do not use paint thinners, solvents, alcohol, cleaning fluids, or chemical-
impregnated wiping cloths.
• Gently remove dust and dirt with a soft cloth. Do not wipe too hard since small particles of dirt can scratch the instrument’s finish.
• During extreme changes in temperature or humidity, condensation may occur and water may collect on the surface of the instrument. If water is left, the
wooden parts may absorb the water and be damaged. Make sure to wipe any water off immediately with a soft cloth.
Connections
Handling caution
Using the bench (If included)
Yamaha cannot be held responsible for damage caused by improper use or modifications to the instrument, or data that is lost or destroyed.
n1x_en_om.book Page 6 Friday, October 19, 2018 6:01 PM

N1X Owner’s Manual •7
Saving data
• Some of the data of this instrument (page 34) and the Song data saved to the internal memory of this instrument (page 28) are retained when the power is
turned off. However, the saved data may be lost due to some failure, an operation mistake, etc. Save the Song data onto USB flash drive/an external device
such as a computer (pages 33, 38).
Before using a USB flash drive, make sure to refer to page 31.
• To protect against data loss through USB flash drive damage, we recommend that you save your important data onto spare USB flash drive or an external
device such as a computer as backup data.
Information
About copyrights
• Copying of the commercially available musical data including but not limited to MIDI data and/or audio data is strictly prohibited except for your personal
use.
• This product incorporates and bundles contents in which Yamaha owns copyrights or with respect to which Yamaha has license to use others’ copyrights.
Due to copyright laws and other relevant laws, you are NOT allowed to distribute media in which these contents are saved or recorded and remain virtually
the same or very similar to those in the product.
* The contents described above include a computer program, Accompaniment Style data, MIDI data, WAVE data, voice recording data, a score, score
data, etc.
* You are allowed to distribute medium in which your performance or music production using these contents is recorded, and the permission of Yamaha
Corporation is not required in such cases.
About functions/data bundled with the instrument
• Some of the preset songs have been edited for length or arrangement, and may not be exactly the same as the original.
About this manual
• The illustrations and displays as shown in this manual are for instructional purposes only, and may appear somewhat different from those on your
instrument.
• Windows is a registered trademark of Microsoft
®
Corporation in the United States and other countries.
• iPhone, iPad, iPod touch are trademarks of Apple Inc., registered in the U.S. and other countries.
• Android™ is a trademark of Google LLC.
• IOS is a trademark or registered trademark of Cisco in the U.S. and other countries and is used under license.
• The Bluetooth
®
word mark and logos are registered trademarks owned by Bluetooth SIG, Inc. and any use of such marks by Yamaha Corporation is under
license.
• The company names and product names in this manual are the trademarks or registered trademarks of their respective companies.
About Bluetooth
• For information on handling Bluetooth communications, refer to “About Bluetooth” on page 50.
Tuning
• Unlike an acoustic piano, this instrument does not need to be tuned by an expert (although the pitch can be user-adjusted to match other instruments).
However, since the keyboard mechanism of this instrument is the same as that of an actual piano, the mechanism may change over years of use. However,
if you feel there is something abnormal concerning the keyboard touch, contact your Yamaha dealer.
Transporting / Placing
If you move to another location, transport the
instrument horizontally. Do not lean it up against a
wall or stand it up side down. Do not subject the
instrument to excessive vibration or shock.
CAUTION
• Since this product is very heavy, make sure that a
sufficient number of people are on hand to help,
so you can lift and move it safely and easily.
• When moving the instrument, always hold the bot-
tom of the main unit.
Be sure not to hold the headphone jack box or the
speaker net. Improper handling can result in dam-
age to the instrument or personal injury.
Place the instrument away from the wall by at least
15 cm to optimize and enhance the sound effect.
If you find the instrument shaky or unstable after
installing, insert the included felt strips. For
details, refer to the instructions supplied with the
felt strips.
Do not
hold here.
Do not hold here.
Do not
hold here.
n1x_en_om.book Page 7 Friday, October 19, 2018 6:01 PM

8•N1X Owner’s Manual
Hybrid Piano
N1X
Combining over a century of experience in crafting world-class pianos with the latest in advanced
technology, Yamaha proudly introduces an instrument that is closer than ever to an actual acoustic
piano—equipped with every essential element pianists demand.
Authentic acoustic piano touch with special grand piano action and piano keyboard
An actual acoustic grand piano has an unmistakable rich expressive quality, thanks to its finely nuanced touch and
exceptional response. The remarkable AvantGrand N1X is the culmination of our many decades of expertise in
crafting grand pianos, and offers the discerning player a specially-developed grand piano action featuring a
configuration identical to the action of a real grand. The keyboard also features real-wood keys, just as on a real
grand piano, letting you enjoy an authentic touch and feel that goes far beyond any existing digital piano. In addition
to a hammer sensor, this instrument employs a non-contact key sensor that has no effect on the movement of the keys,
yet accurately recognizes the player's pressure on the keyboard, timing, and the other delicate nuances that affect
musical expression.
Enjoy performing and practicing with the sound of famous grand pianos
This instrument puts the sound of several different renowned grand pianos at your fingertips, including the CFX,
Yamaha’s flagship concert grand piano—which delivers dynamic sound, from a brilliant high-range to powerful
bass—and the Bösendorfer
*
Imperial, a flagship grand piano known for its subtle and warm sound.
* Bösendorfer is a subsidiary company of Yamaha.
Natural sound distance sensation for headphone play Page 15
This instrument features a binaural sampling sound designed especially for use with headphones. Binaural sampling
is a method which uses two microphones placed where the ears of a performer would be and records that piano
sound. Listening to the sound created through this method with headphones gives the impression of being immersed
in the sound, as if it was actually emanating from the piano.
Always in optimum condition, no need for tuning
Unlike acoustic pianos, this instrument does not need to be tuned. It always stays perfectly in tune even after long-
time use.
Playback and Recording functions to support your lessons and practice
Page 26, 28, 40
You can record your performance to this instrument and a USB flash drive, and improve your performance by
listening to the recording. Furthermore, this instrument has a Bluetooth* audio function, letting you play back audio
data on this instrument by connecting with a Bluetooth-equipped device via Bluetooth.
* Depending on the country in which you purchased the product, the instrument may not have Bluetooth capability. For details, refer to page 50.
Smart Device App “Smart Pianist”
The smart device app “Smart Pianist” (available as a free download; Page 38) enables you to use the functions such as
selecting Voices, controlling the metronome intuitively with the visualized interface, or display the score (depending on
the selected data) on your smart device.
n1x_en_om.book Page 8 Friday, October 19, 2018 6:01 PM

N1X Owner’s Manual •9
Table of Contents
About Manuals
This instrument has the following documents and instructional materials.
Included Documents
Owner’s Manual (this book)
This manual describes how to use this instrument.
Online Materials (from Yamaha Downloads)
Smart Device Connection Manual
Explains how to connect the instrument to a smart-
phone or tablet, etc. You can choose from two versions
(for iOS and Android) depending on your device.
Computer-related Operations
Includes instructions on connecting this instrument to a
computer, and operations related to transferring files
and MIDI data.
MIDI Reference
Contains MIDI related information such as MIDI Data
Format and the MIDI Implementation Chart.
MIDI Basics
Contains basic explanations about MIDI.
To obtain these manuals, access the Yamaha Downloads, enter the
model name for searching the desired files.
Included Accessories
Owner’s Manual (this book) ×1
Online Member Product Registration ×1
Warranty* ×1
Felt key cover ×1
Power cord ×1
Bench* ×1
Felt strip set ×1
Use this if you find the instrument shaky or unstable after installing. For details,
refer to the instructions supplied with the felt strips.
* May not be included depending on your area. Check with your Yamaha dealer.
Yamaha Downloads https://download.yamaha.com/
PRECAUTIONS ....................................................... 5
Setting Up
Panel Controls and Terminals .................................. 10
Playing the Keyboard ................................................ 11
Opening/Closing the Fallboard....................................11
Music Rest...................................................................11
Turning the Power On/Off............................................12
Confirming the Firmware Version................................13
Adjusting the Master Volume.......................................14
Using Headphones......................................................15
Using the Pedals .........................................................16
Main Operations
Basic Operations and More ...................................... 17
Selecting a Voice.........................................................17
Listening to the Voice Demo Songs ............................18
Using the Metronome ..................................................19
Adjusting the Tempo....................................................20
Changing the Touch Sensitivity ...................................20
Playing the Realistic Resonance-enhanced VRM Voices
....21
Enhancing the Sound with Reverb ..............................22
Adjusting the Brightness of the Sound (Brilliance) ......22
Transposing the Pitch in Semitones ............................23
Fine-tuning the Pitch....................................................23
Setting the Scale Tuning .............................................24
Playing Back Songs .................................................. 25
Compatible Songs .......................................................25
Playing Back Songs.....................................................26
Recording Your Performance ................................... 28
Deleting Song Files..................................................... 30
Using a USB Flash Drive ........................................... 31
About USB Devices .................................................... 31
Formatting a USB Flash Drive .................................... 32
Managing Files on a USB Flash Drive ........................ 32
Copying User Songs in the Instrument to USB Flash Drive
.... 33
Backup Data and Initialization .................................. 34
Backup Data in Internal Memory................................. 34
Initializing the Backup Data......................................... 34
Connections ............................................................... 35
Jacks and Terminals ................................................... 35
Connecting Audio Devices ([AUX IN] jack, AUX OUT
[R] [L/L+R] jacks) ........................................................ 35
Connecting External MIDI Devices (MIDI [OUT] [IN] terminals)
... 36
Connecting to a Computer ([USB TO HOST] terminal)
... 38
Connecting to a Smart Device and Using Apps.......... 38
Transmitting/Receiving Audio Data (USB Audio
Interface function) ....................................................... 40
Listening to Audio Data from a
Bluetooth
-equipped
Device on this Instrument (
Bluetooth
Audio Function)
... 40
Appendix
Message List .............................................................. 42
Troubleshooting......................................................... 43
Preset Song List.........................................................44
Assembling the Unit .................................................. 45
Specifications.............................................................48
Index............................................................................49
About Bluetooth* .......................................................50
Quick Operation Guide** ...........................................51
* For information on whether Bluetooth functionality is included or not, refer to page 50.
** This is a quick reference for operation of the functions assigned to the buttons and
keyboard.
Getting started playing your new AvantGrand!
This section explains how to make detailed settings for the
instrument’s various functions.
This section includes a list of display messages, Quick
Operation Guide and other information.
n1x_en_om.book Page 9 Friday, October 19, 2018 6:01 PM

10 • N1X Owner’s Manual
Setting Up
Panel Controls and Terminals
Overview
Control Panel
q Display ................................................................See below.
w [PIANO/VOICE] button .................. pages 15, 16, 17, 20, 21
e [REVERB] button .................................................... page 22
r [METRONOME] button ....................................pages 19, 20
t [+]/[-] button
y [DEMO/SONG] button ...............................pages 18, 26, 28
u [REC] button............................................................ page 29
i [FUNCTION] button..............................pages 13, 22, 23, 51
o [>/o] (PLAY/PAUSE) button.............................pages 26, 29
!0 (Bluetooth lamp) ........................................pages 40, 50
For information on whether Bluetooth functionality is included or not,
refer to page 50.
Display
Indicates various values such as Song number and Parameter value. Note that the display turns dark after the value is
set.
This display also indicates various messages with alphanumeric characters. For details, refer to page 42.
Square brackets [ ]
The names of panel buttons, jacks, connectors, and so on are enclosed in square brackets. Also, the word “button” is
omitted throughout this manual (for example, the PIANO/VOICE button is expressed as [PIANO/VOICE]).
Music Rest (page 11)
Fallboard
(page 11)
(Bottom surface)
[AC IN] connector
(page 12)
[ ] (Standby/On)
switch (page 12)
Pedals (page 16)
Control panel
(see below)
(Bottom surface)
Jacks and Terminals
(page 35)
[MASTER VOLUME]
control (page 14)
[USB TO DEVICE]
terminal (page 31)
[PHONES] jacks
(page 15)
Headphone hanger
(page 15)
Music braces (page 11)
q
w
e
r
t
!0
y
uo
i
d.01
Song number
5
Parameter value
n1x_en_om.book Page 10 Friday, October 19, 2018 6:01 PM

N1X Owner’s Manual •11
Playing the Keyboard
To open the fallboard, hold the hand grip with both hands, then lift the fallboard slightly, and push it up
until it is fully upright. To close the fallboard, lower the fallboard back in place gently with both hands.
The fallboard is equipped with the special SOFT-CLOSE™ mechanism which closes the cover slowly.
CAUTION
• Hold the fallboard with both hands when opening or closing it. Do not release it until it is fully opened or closed. Be careful to
avoid catching fingers (yours or others, especially children’s) between the fallboard and the unit.
• Do not apply excessive force when closing the fallboard. Applying excessive force to the fallboard when closing it could dam-
age the SOFT-CLOSE™ mechanism, and possibly result in injury to your hands and fingers caught under the closing fall-
board.
• Do not place anything (such as metal objects or pieces of paper) on top of the fallboard. Small objects placed on the fallboard
may fall inside the unit when the fallboard is opened and may be nearly impossible to remove. Once inside, they could cause
electric shock, short circuit, fire or other serious damage to the instrument.
To raise the music rest:
1 Pull the music rest up and toward yourself as far as it
will go.
2 Flip down the two metal supports at the left and right
on the rear of the music rest.
3 Lower the music rest so that it rests on the metal
supports.
Music braces allow you to hold the pages of music books in place.
To lower the music rest:
Close the music braces if they are open, and then lower the music rest
by following the instructions below.
1 Pull the music rest toward yourself as far as it will go.
2 Raise the two metal supports (at the rear of the
music rest).
3 Gently lower the music rest backward until it is all
the way down.
CAUTION
Do not try to use the music rest in a half-raised position. When raising or low-
ering the music rest, do not release your hands from the music rest until it is
all the way up or down.
Opening/Closing the Fallboard
Music Rest
CAUTION
Be careful to avoid catching your fingers
when opening/closing the fallboard.
Music braces
Music braces
n1x_en_om.book Page 11 Friday, October 19, 2018 6:01 PM

Playing the Keyboard
12 • N1X Owner’s Manual
1 Connect the power cord in the order shown in the illustration.
Refer to the “Panel Controls and Terminals” on page 10 for information on the location of the [AC IN] connector.
NOTE
When disconnecting the power cord, first turn off the power, then follow this procedure in reverse order.
WARNING
• Use only the AC power cord supplied with the instrument. If the supplied power cord is lost or damaged and needs to be
replaced, contact your Yamaha dealer. The use of an inappropriate replacement can pose a fire and shock hazard!
• The type of AC power cord provided with the instrument may be different depending on the country in which the instru-
ment was purchased. (In some areas a plug adaptor may be provided to match the pin configuration of the AC wall out-
lets in your area.) Do NOT modify the plug provided with the instrument. If the plug will not fit the outlet, have a proper
outlet installed by a qualified electrician.
CAUTION
When setting up the product, make sure that the AC outlet you are using is easily accessible. If some trouble or malfunc-
tion occurs, immediately turn off the power switch and disconnect the plug from the outlet.
2 Turn down the [MASTER VOLUME] control to “MIN.”
3 Press the [ ] (Standby/On) switch on the right of the keyboard to turn the power on.
The power indicator located on the right of the [MASTER VOLUME] control lights up. The display indicators
flash in a pattern, indicating the instrument is currently starting up, and stop flashing when startup is completed.
NOTICE
Do not press any keys, buttons or pedals until the instrument has completely started up (roughly ten seconds after turning
on the switch). Doing so may cause some keys to not play normally or some other malfunction to occur.
4 Play the keyboard.
While playing the keyboard, adjust the volume level by using the [MASTER VOLUME] control located at the
left of the panel.
Turning the Power On/Off
q
w
[AC IN] connector
(page 10)
AC outlet
The shape of the plug and
outlet differ depending on
your area.
MAXMIN
MASTER VOLUME
3
2
Power indicator
[ ] (Standby/On) switch
MAX
USB TO
MIN
MASTER VOLUME
Level
increases.
Level
decreases.
n1x_en_om.book Page 12 Friday, October 19, 2018 6:01 PM

Playing the Keyboard
N1X Owner’s Manual •13
5 Turn off the power by pressing the [ ] (Standby/On) switch for about a second.
The power gradually turns off.
CAUTION
Even after the power switch is turned off, electricity is still flowing to the instrument at the minimum level. Remove the
electric plug from the outlet when the instrument is not to be used for extended periods of time, or during electrical
storms.
Auto Power Off function
To prevent unnecessary power consumption, this instrument features an Auto Power Off function that automatically
turns the power off if the instrument is not operated for approximately 30 minutes.
Default setting: On (enabled)
Disabling Auto Power Off (simple method)
Turn the power on while holding down the lowest key on the keyboard.
The indication “
PoF
” appears on the display briefly and Auto Power Off is disabled.
Disabling or enabling the Auto Power Off setting
While the power is on, simultaneously hold down [FUNCTION] and press the A5 key. Pressing the A5 key repeat-
edly in this condition toggles between “
OFF
” (disabled) and “
On
” (enabled), and the setting appears on the display.
NOTE
The Auto Power Off setting is retained even when the power is turned off.
You can confirm the firmware version of your instrument.
While holding down [FUNCTION], press the B5 key. The current version appears briefly on the display.
Yamaha may from time to time update firmware of the product without notice for improvement.
Make sure to check our website for information of the latest release and upgrade the firmware for your instrument.
Confirming the Firmware Version
Lowest key (A-1)
A5
Highest key (C7)
B5
Highest key (C7)
n1x_en_om.book Page 13 Friday, October 19, 2018 6:01 PM

Playing the Keyboard
14 • N1X Owner’s Manual
To adjust the volume level by using the [MASTER VOLUME] control located at the front left, just below
the keyboard while playing the keyboard.
CAUTION
Do not use this instrument at a high volume level for a long period of time, to avoid hearing damage.
Intelligent Acoustic Control (IAC)
This function automatically adjusts and controls the sound quality according to the overall volume of the instrument.
Even when the volume is low, it permits both low sounds and high sounds to be clearly heard. Note that the IAC is
effective only from the sound output of the instrument speakers.
To turn on/off the IAC:
While holding down [FUNCTION], press the C0 key repeatedly (if necessary). The setting (“
On
” or “
OFF
”)
appears on the display.
Default setting: On
To adjust the IAC Depth:
While holding down [FUNCTION], press one of the keys between A0–D#1.
Setting range: -3 – 0 – 3
Default setting: 0
The higher the value, the more clearly that low and high sounds are heard at lower volume levels.
Adjusting the Master Volume
MAX
USB T
O
MIN
MASTER VOLUME
Level
increases.
Level
decreases.
C0 C1
(0)
A0
(-3)
D#1 (3)
Lowest
key (
A-1)
n1x_en_om.book Page 14 Friday, October 19, 2018 6:01 PM

Playing the Keyboard
N1X Owner’s Manual •15
Since this instrument is equipped with two [PHONES] jacks,
you can connect two sets of standard stereo headphones. If
you are using only one set of headphones, insert a plug into
either jack; this automatically shuts off the speakers. You can
conveniently hang the headphones on the headphone hanger.
CAUTION
Avoid listening to the instrument at a high volume level through head-
phones for a long period of time, to prevent hearing damage.
NOTICE
Do not hang anything other than the headphones on the hanger. Other-
wise, the instrument or the hanger may be damaged.
Reproducing the Natural Sound Distance Sensation
(when using Headphones)—Binaural Sampling and Ste-
reophonic Optimizer
This instrument features two advanced technologies that allow you to enjoy exceptionally realistic, natural sound,
even though listening on headphones.
Binaural Sampling (“CFX Grand” Voice only)
Binaural sampling is a method that uses two special microphones set at the ear position of a performer and records
the sound from a piano as it is. Listening to the sound with this effect through headphones gives the impression of
being immersed in the sound, as if it was actually emanating from the piano. Moreover, you can enjoy the sound
naturally for a long time without ear strain. When the default Voice, “CFX Grand” (page 17) is selected, connect-
ing the headphones automatically enables the binaural sampling sound.
Stereophonic Optimizer (Piano Voices other than “CFX Grand”)
The Stereophonic Optimizer is an effect which reproduces natural sound distance like the sound of binaural sam-
pling even though you hear it on headphones. When one of the Piano Voices other than “CFX Grand” (Display
numbers 2–5; page 17) is selected, connecting headphones enable the Stereophonic Optimizer.
Turning the Binaural Sampling and Stereophonic Optimizer functions on/off
When headphones are connected, the sound from this instrument changed to the sound of Binaural Sampling or the
sound enhanced with the Stereophonic Optimizer. Since these sounds are optimized for listening with headphones,
we recommend that you set this function to “OFF” (as described below).
While holding down [PIANO/VOICE], press the C6 key repeatedly (if necessary) to turn this function on/off. The
setting (“
On
” or “
OFF
”) appears on the display.
Default setting: On
Using Headphones
You should turn these functions off when:
• Playing the sound of this instrument with an external powered speaker system or a mixer, while monitoring the sound
output from this instrument on connected headphones.
• Making an audio recording (page 28) and then playing that recorded audio Song through speakers.
(Make sure to turn off these functions before using audio recording.)
NOTE
Before connecting an external powered speaker system, be sure to read “Using an External Stereo System for Playback—AUX OUT [R] [L/L+R] jacks” (page 36).
MAX
PHONES USB TO DEVICE
MIN
MASTER VOLUME
Standard stereo phone plug
Headphone
hanger
C6
Highest key (C7)
n1x_en_om.book Page 15 Friday, October 19, 2018 6:01 PM

Playing the Keyboard
16 • N1X Owner’s Manual
The instrument has three pedals that produce a range of
expressive effects similar to those produced by the pedals on
an acoustic piano.
Damper Pedal (Right)
Pressing this pedal will sustain notes longer. Releasing this pedal immediately stops
(damps) any sustained notes. The damper pedal features a half-pedal function.
Half-pedal function
This function allows the sustain length to vary depending on how far the pedal is
pressed. The farther you press the pedal, the more the sound sustains. For example, if
you press the damper pedal and all notes you are playing sound a bit murky and loud
with too much sustain, you can release the pedal half way to subdue the sustain (murk-
iness).
To set the Half Pedal Point:
While holding down [PIANO/VOICE], press one of the A#4–E5 keys. This operation
sets the degree to which pressing the damper pedal applies the half-pedal effect. The
smaller the value, the shallower the half-pedal point. The larger the value, the deeper
the half-pedal point.
Sostenuto Pedal (Center)
Pressing this pedal while holding the notes will sustain the pressed notes (as if the
damper pedal had been pressed), but all subsequently played notes will not be sus-
tained. This makes it possible to sustain a chord, for example, while the other notes are
played “staccato.”
Soft Pedal (Left)
Pressing this pedal will reduce the volume and slightly change the timbre of the notes.
The notes played before this pedal is pressed are not affected.
Using the Pedals
If you press and hold the damper pedal here,
all the notes shown will be sustained.
Setting range: -2 – 4
Default setting: 0
GP Responsive Damper Pedal
This special pedal has been designed to provide enhanced tactile response and, when
pressed, is much closer in feel to the pedal of an actual grand piano. It makes it easier
to physically experience the half-pedal point and more easily apply the half-pedal
effect than other pedals.
E5
(4)
C5
(0)
A#4 (-2)
Highest key (C7)
NOTE
While the sostenuto pedal is held, the
Organ Voices (Display numbers 12–15;
page 17) sound continuously without decay
after the notes have been released.
If you press and hold the sostenuto pedal here, only
the notes held at this timing will be sustained.
n1x_en_om.book Page 16 Friday, October 19, 2018 6:01 PM

N1X Owner’s Manual •17
Basic Operations and More
To select the “CFX Grand” Voice:
Simply press [PIANO/VOICE]. “1” will appear on the display.
To select a different Voice:
While holding down [PIANO/VOICE], press [+] or [-]. Pressing the buttons switches
through the 15 Voices in numerical order, as indicated in the Voice List below.
Voice List
*VRM: Simulated string resonance sound with physical modeling when the damper pedal is pressed or keys
are pressed. Refer to page 21 for details.
Selecting a Voice
NOTE
To understand the characteristics of various
Voices, listen to Demo Songs for each
Voice (page 18).
Display Voice name Description VRM*
1
CFX Grand
Four-channel Voice featuring multi sampling of Yamaha’s CFX
flagship concert grand piano sound, with wide dynamic range for
maximum expressive control. It is suitable for playing in any
music genre and style. When headphones are connected, this
Voice is automatically changed to “Binaural CFX Grand” (below).
Binaural CFX
Grand
Yamaha’s CFX flagship concert grand piano sound sampled by
Binaural Sampling, the method optimized for headphone use.
Listening this through headphones gives the impression of being
immersed in the sound, as if it was actually emanating from the
piano. This Voice is selected automatically when headphones are
connected. Refer to page 15 for details. (This Voice cannot be
selected following the procedure of “Selecting a Voice” instruc-
tions above.)
2
Bösendorfer
Imperial
The sound of the famed Vienna-made Bösendorfer flagship
grand piano, utilizing four-channel sampling. This Voice has a rich
and captivating sound, ideal for expressing the most delicate and
tender musical passages.
3
Bright Grand
Bright piano sound. Good for clear expression and “cutting
through” other instruments in an ensemble.
4
Bösendorfer
Grand
The Bösendorfer grand piano sound with a lively attack and bril-
liant presence.
5
Pop Grand
A bright, richly metallic sound ideal for pop music styles and for
playing in ensembles.
6
Stage E.Piano
The sound of an electric piano using hammer-struck metallic
“tines.” Soft tone when played lightly, and an aggressive tone
when played hard.
-
7
DX E.Piano
An electronic piano sound produced by an FM synthesizer. The
tone will change as you vary your playing touch. Ideal for popular
music.
-
8
Vintage E.Piano
A different type of electric piano sound than Stage E.piano.
Widely used in rock and popular music.
-
9
Harpsichord 8’
The sound of the instrument frequently used in baroque music.
Variations in playing touch will not affect the volume, and a char-
acteristic sound will be heard when you release the key.
-
10
Harpsichord
8’+4’
A harpsichord with an added upper octave. Produces a more bril-
liant sound. Variations in playing touch will not affect the volume.
-
11
Celesta
The sound of a celesta (a percussion instrument in which ham-
mers strike metallic bars to produce sound). This instrument is
well-known for its appearance in “Dance of the Sugarplum Fair-
ies” from Tchaikovsky’s “Nutcracker Suite.”
-
12
Organ Principal
This Voice features the combination of pipes (8’+4’+2’) of a prin-
cipal (brass instrument) organ. It is suitable for Baroque church
music.
-
13
Organ Tutti
This Voice features a full coupler of a pipe organ, famous for the
sound used in “Toccata and Fugue” by Bach.
-
14
Jazz Organ
The sound of a “tonewheel” type electric organ. Sampled with
Rotary SP effect, its rotation speed is slow. Often heard in jazz
and rock idioms.
-
15
Organ Flute
A pipe organ sound that combines flute-type (woodwind type)
stops of different pitches (8’+4’). This is a gentle sound that is
ideal for accompanying hymns.
-
Main Operations
n1x_en_om.book Page 17 Friday, October 19, 2018 6:01 PM

Basic Operations and More
18 • N1X Owner’s Manual
Demo Songs effectively demonstrate each of this instrument’s Voices.
1 Select the Voice (page 17) for the Demo Song that you want to lis-
ten to.
2 Press [DEMO/SONG].
The Demo Song for the Voice selected in Step 1 starts.
To change the Demo Song during playback:
Press [+] or [-].
To adjust the playback tempo:
While holding down [METRONOME], press [+] or [-].
To pause playback:
During playback, press [
>/o] (Play/Pause) to pause playback. Pressing it again
resumes Demo Song playback from the current position.
3 Press [DEMO/SONG] again to stop playback.
Demo Song List
The Songs
d.04
–
d.08
and
d.13
–
d.15
are Yamaha’s original pieces (©2018 Yamaha Corporation).
Listening to the Voice Demo Songs
NOTE
You can play the keyboard along with the
Demo Song.
NOTE
No MIDI data will be output during Voice
Demo playback.
NOTE
The “Binaural CFX Grand” Voice is auto-
matically selected when you select the
“CFX Grand” Voice while headphones are
connected. Refer to the “Voice List” on
page 17 for details.
Display Voice Name Song Name Composer
d.01
CFX Grand
Prelude, Suite bergamasque C. A. Debussy
Binaural CFX Grand
d.02
Bösendorfer Imperial Consolation No.3 F. Liszt
d.03
Bright Grand Italienisches Konzert, BWV 971-1 1st mov. J. S. Bach
d.04
Bösendorfer Grand Original -
d.05
Pop Grand Original -
d.06
Stage E.Piano Original -
d.07
DX E.Piano Original -
d.08
Vintage E.Piano Original -
d.09
Harpsichord 8’
Concerto a cembalo obbligato, 2 violini, viola e
continuo No.7, BWV 1058
J. S. Bach
d.10
Harpsichord 8’+4’ Gigue, Französische Suiten No.5, BWV 816 J. S. Bach
d.11
Celesta Danse de la Fée Dragée P. I. Tchaikovsky
d.12
Organ Principal Herr Christ, der ein’ge Gottes-Sohn, BWV 601 J. S. Bach
d.13
Organ Tutti Original -
d.14
Jazz Organ Original -
d.15
Organ Flute Original -
n1x_en_om.book Page 18 Friday, October 19, 2018 6:01 PM

Basic Operations and More
N1X Owner’s Manual •19
The metronome feature is convenient for practicing with an accurate tempo.
1 Press [METRONOME] to start the metronome.
While the metronome sounds, a dot at the right side of the LED display and the
lamp of the metronome button flash on and off to the tempo.
2 Press [METRONOME] again to stop the metronome.
Selecting the Beat
While holding down [METRONOME], press one of the C3–F3
keys. The selected value is shown on the display while both
controls are held.
Only the first beat is accented with a bell sound when set to a value other than 0.
Adjusting the Metronome volume
While holding down [METRONOME], press one of the C1–G2 keys to set the vol-
ume. The specified value is shown on the display while both controls are held.
Using the Metronome
NOTE
The tempo value on the display will disap-
pear shortly after the operation.
120.
The beat lamp
flashes at the current
tempo
Default setting: 0 (No 1st beat accent)
NOTE
The Beat of the metronome is restored to
the default setting when the power is turned
off.
Display Key Beat Display Key Beat
0
C3
0
(no 1st beat accent)
4
D#34
2
C#3 2
5
E3 5
3
D3 3
6
F3 6
0
Beat
C3 F3
Highest key (C7)
Setting range: 1–20
Default setting: 15
NOTE
You can adjust the metronome volume
when it is stopped or while it is playing.
C1 (1) G2 (20)D2 (15)
max.min.
Lowest
key (A-1)
The volume level increases as you press higher keys.
n1x_en_om.book Page 19 Friday, October 19, 2018 6:01 PM

Basic Operations and More
20 • N1X Owner’s Manual
The tempo of Metronome can be adjusted. You can also adjust the playback tempo of a MIDI Song (page
25) as well as the playback speed of an Audio Song (page 25) as they are playing.
To increase or decrease the value by 1:
While holding down [METRONOME], press [+] (or the C#5 key) to increase or [-] (or
the B4 key) to decrease. While only the Metronome is playing, simply press [+] or [-]
to change the tempo of the Metronome.
To increase or decrease the value by 10:
While holding down [METRONOME], press the D5 key to increase or the A#4 key to
decrease.
To reset the value to the default:
While holding down [METRONOME], press the C5 key or press [+] and [-] simulta-
neously. While only the Metronome is playing, simply press both [+] and [-] simulta-
neously to reset the Metronome to its default tempo.
You can specify the Touch Sensitivity (how the sound responds to the way you play the keys).
While holding down [PIANO/VOICE], press one of the A6–C7 keys. The selected
Touch Sensitivity is shown on the display while both controls are held.
Adjusting the Tempo
NOTE
Adjusting the tempo of Metronome cannot
be done during the playback of Audio
Songs (page 25).
Metronome
Setting range: 5 to 500 beats per minute
Default setting: 120
MIDI Song
Setting range: 5 to 500 beats per minute
Normal setting: Depends on the selected
Song
Audio Song
Setting range: 75% to 125%
Normal setting: 100%
NOTE
The metronome tempo is restored to the
default setting when the power is turned off.
D5 (+10)B4 (-1)
A#4 (-10) C#5 (+1)
Highest key (C7)
C5 (Default)
Changing the Touch Sensitivity
A6
Highest key (C7)
Default setting: 2 (Medium)
NOTE
The touch type is restored to the default
setting when the power is turned off.
NOTE
This setting does not change the weight of
the keyboard, but only the response.
Display Key Touch Sensitivity Description
OFF
A6 Fixed
The volume level does not change at all regardless of
whether you play the keyboard soft or hard.
1
A#6 Soft
The volume level does not change much when you play the
keyboard soft or hard.
2
B6 Medium This is the standard piano touch response.
3
C7 Hard
The volume level changes very widely from pianissimo to
fortissimo to facilitate dynamic and dramatic expression. You
have to hit the keys hard to produce a loud sound.
n1x_en_om.book Page 20 Friday, October 19, 2018 6:01 PM

Basic Operations and More
N1X Owner’s Manual •21
On an actual acoustic piano, if you press the damper pedal and play a key, not only does the string of the
pressed key vibrate, it also causes other strings and the soundboard to vibrate, with each influencing the
rest, creating a rich and brilliant resonance that sustains and spreads. The VRM (Virtual Resonance Mod-
eling) technology featured in the N1X reproduces the complicated interaction of both string and sound-
board resonance faithfully using a virtual musical instrument (physical modeling), and makes the sound
more like a real acoustic piano. Since instantaneous resonance is made at the moment according to the
state of the keyboard or pedal, you can vary the sound expressively by changing the timing of your press-
ing the keys, and the timing and depth of your pressing the pedal.
The default setting of this function is on. Simply by selecting a VRM Voice (page 17), you can enjoy the
VRM effect. You can turn the VRM function on or off, and adjust the depth.
Turning the VRM function on or off
While holding down [PIANO/VOICE], press the C0 key repeatedly (if necessary).
Adjusting the depth of the VRM effect
While holding down [PIANO/VOICE], press one of the keys in the ranges of G0–F1
and G1–F2. During the operation, the specified value is shown on the display.
Playing the Realistic Resonance-enhanced VRM Voices
C0 G0 F1 G1 F2
54
3681
207910 54
3681
207910
String Resonance
Depth
Damper Resonance
Depth
On/Off
Lowest key (
A-1)
Default setting: 5
Default setting: 5
NOTE
The depth of the VRM effect is restored to
the default setting when the power is turned
off.
Display Key Value Description
0
–
10
G0–F1
Damper Reso-
nance Depth
Adjusts the depth of the VRM effect heard when pressing
the damper pedal.
0
–
10
G1–F2
String Resonance
Depth
Adjusts the depth of the VRM effect heard when playing the
keyboard.
n1x_en_om.book Page 21 Friday, October 19, 2018 6:01 PM

Basic Operations and More
22 • N1X Owner’s Manual
The Reverb effect simulates the natural reverberation of a concert hall.
Turning the Reverb on or off
Press [REVERB] repeatedly (if necessary).
Adjusting the Reverb Depth
While holding down [REVERB], press [+] or [-]. The current value is shown on the
display while both controls are held.
To restore the default value, press [+] and [-] simultaneously while holding
[REVERB].
To adjust the brightness of the sound, simultaneously hold down [FUNCTION] and press one of the
A#1–D2 keys. During the operation, the specified value is shown on the display.
Enhancing the Sound with Reverb
Lights up when REVERB is on.
Setting range: 1–20
Default setting: 5
NOTE
The Reverb Depth is restored to the default
setting when the power is turned off.
NOTE
Holding [REVERB] shows the Reverb Depth
value on the display.
Adjusting the Brightness of the Sound (Brilliance)
D2
A#1
Lowest key (A-1)
Default setting: 3 (Normal)
Display Key Brilliance Description
1
A#1 Mellow 2
Soft and mellow tone.
The sound becomes more mellow and rounder.
2
B1 Mellow 1 A mellow tone between Normal and Mellow 2.
3
C2 Normal Standard tone.
4
C#2 Bright 1 A bright tone between Normal and Bright 1.
5
D2 Bright 2 Bright tone. The sound becomes brighter.
n1x_en_om.book Page 22 Friday, October 19, 2018 6:01 PM

Basic Operations and More
N1X Owner’s Manual •23
You can shift the pitch of the entire keyboard up or down in semitones to facilitate playing in difficult key
signatures and match the pitch of the keyboard to the range of a singer or other instruments. For example,
if “+5” is selected, playing the key C produces a pitch of F, letting you play a song of F major as though it
were in C major.
To transpose the pitch down:
While holding down [FUNCTION], press a key between F#2 (-6) and B2 (-1).
To transpose the pitch up:
While holding down [FUNCTION], press a key between C#3 (+1) and F#3 (+6).
To restore the original pitch:
While holding down [FUNCTION], press the C3 key.
The specified value is shown on the display.
You can fine-tune the pitch of the entire instrument. This function is useful when you play this instrument
along with other instruments or recorded music.
During the operation described below, you can check the Pitch
value shown on the display. (The hundreds place value has been
omitted.)
To tune up (in roughly 0.2Hz steps):
While holding down [FUNCTION], press [+]. Holding down both buttons shows the
current pitch setting (Hz).
To tune down (in roughly 0.2Hz steps):
While holding down [FUNCTION], press [-]. Holding down both buttons shows the
current pitch setting (Hz).
To restore standard pitch:
While holding down [FUNCTION], press [+] and [-] simultaneously. Holding down
all three buttons shows the current pitch setting (Hz).
Transposing the Pitch in Semitones
Default setting: 0 (Normal pitch)
Setting range: -6 – +6
NOTE
The Transpose value is restored to the
default setting when the power is turned off.
C3
F#3F#2
0-1
-2 +1 +3-4
-3-5 +2 +4+5
-6 +6
Lowest key (A-1)
Transpose up
Transpose down
Normal pitch
Fine-tuning the Pitch
NOTE
The pitch value on the display will disap-
pear shortly after the operation.
NOTE
The tuning value is retained even when the
power is turned off.
Hz (Hertz):
This unit of measurement refers to the fre-
quency of a sound and represents the num-
ber of times a sound wave vibrates in a
second.
Setting range: 414.8–466.8Hz (=A3)
Default setting: 440.0Hz (=A3)
42.0
Example: 442.0Hz
n1x_en_om.book Page 23 Friday, October 19, 2018 6:01 PM

Basic Operations and More
24 • N1X Owner’s Manual
You can select various scales for the instrument. Equal Temperament is the most common contemporary
piano tuning scale. However, history has known numerous other scales, many of which serve as the basis
for certain genres of music. This feature lets you experience the tunings of these genres.
Selecting a Scale
While holding down [FUNCTION], press one of the C5–F#5 keys. Holding down
both controls shows the current value on the display.
Selecting the Base Note
For scales 2 and 3 in particular, you should specify the key you intend to play (Base
Note). While holding down [FUNCTION], press one of the C4–B4 keys. Holding
down both controls shows the current value on the display.
Setting the Scale Tuning
Default setting: 1 (Equal)
NOTE
The scale is restored to the default setting
when the power is turned off.
C5
F#5
Highest key (C7)
Display Key Scale Description
1
C5 Equal
The pitch range of each octave is divided equally into twelve parts, with each half-step evenly spaced in
pitch. This is the most commonly used tuning in music today.
2
C#5 Pure Major
These tunings preserve the pure mathematical intervals of each scale, especially for triad chords (root,
third, fifth). You can hear this best in actual vocal harmonies—such as choirs and a cappella singing.
3
D5 Pure Minor
4
D#5 Pythagorean
This scale was devised by the famous Greek philosopher and is created from a series of perfect fifths,
which are collapsed into a single octave. The 3rd in this tuning are slightly unstable, but the 4th and 5th
are beautiful and suitable for some leads.
5
E5 Mean-Tone
This scale was created as an improvement on the Pythagorean scale, by making the major third interval
more “in tune.” It was especially popular from the 16th century to the 18th century. Handel, among oth-
ers, used this scale.
6
F5 Werckmeister
This composite scale combines the Werckmeister and Kirnberger systems, which were themselves
improvements on the mean-tone and Pythagorean scales. The main feature of this scale is that each
key has its own unique character. The scale was used extensively during the time of Bach and
Beethoven, and even now it is often used when performing period music on the harpsichord.
7
F#5 Kirnberger
Default setting: C
NOTE
The base note is restored to the default set-
ting when the power is turned off.
Key Base Note Key Base Note Key Base Note Key Base Note
C4 C D#4Eb F#4F# A4 A
C#4 C# E4 E G4 G A#4 Bb
D4 D F4 F G#4Ab B4 B
B4C4
Highest key (C7)
F~ G A_
Example:
F#
(Followed by a high bar if sharp)
GAb
(Followed by a low bar if flat)
n1x_en_om.book Page 24 Friday, October 19, 2018 6:01 PM

N1X Owner’s Manual •25
Playing Back Songs
This instrument can play back Songs contained in internal memory or USB flash drive connected to the
[USB TO DEVICE] terminal. There are two kinds of Songs that can be played back: MIDI Songs and
Audio Songs.
Song data formats that can be played
NOTE
When playing back MIDI Songs containing Voices that are incompatible with this instrument such as XG and GM Songs, the Voices may not sound as intended on the original. In addition,
Song data of MIDI channels 3–16 cannot be played back, since this instrument can recognize only MIDI channels 1 and 2. This is why you should only play back Songs which have data of
only MIDI channels 1–2, to which the piano performance is assigned.
Song Category List (XX indicates numerals.)
* Shown only when USB flash drive is connected.
** When data does not exist, the Song number is not displayed.
User Songs and External Songs
Songs recorded by this instrument are called “User Songs” while Songs created in other ways or on other instruments
are called “External Songs.” In USB flash drive, Songs in the USER FILES folder are handled as User Songs while
Songs in a location other than the USER FILES folder are handled as External Songs. When you record a Song to
USB flash drive, a USER FILES folder is created automatically and the resulting User Song will be saved in this
folder.
Songs
MIDI Songs
A MIDI Song contains data of your keyboard performance
(such as which keys you played and how hard you played
them), and is not a recording of the actual sound itself. The
performance information refers to which keys are played, at
what timing, and at what strength—just as in a musical score.
Based on the recorded performance information, the tone
generator (of the digital piano, etc.) outputs the corresponding
sound. A MIDI Song uses a small amount of data capacity in
comparison to audio recording.
Audio Songs
An Audio Song is a recording of the performed sound itself.
This data is recorded in the same way as that used in record-
ing cassette tapes, or with voice recorders, etc. This data can
be played with a portable music player, etc., allowing you to
easily let other people hear your performance.
Data formats
SMF (Standard MIDI File) Formats 0 and 1
One of the most common and widely compatible MIDI formats
used for storing sequence data. MIDI Songs recorded in this
instrument are saved as SMF Format 0.
WAV format (.wav)
Audio file format commonly used by computers. This instru-
ment can play 44.1kHz/16bit stereo WAV files. Audio Songs
recorded on this instrument are saved in this format.
Extension .MID .WAV
Compatible Songs
Song Category
Song
Number
Description
d.
XX
Voice Demo Song
(MIDI Song)
d.01
–
d.15
Each Song effectively demonstrates each of this instrument’s Voices (page 18).
P.
XX
Preset Song
(MIDI Song)
P.01
–
P.10
10 Preset Songs in the instrument. Refer to the Preset Song List on page 44.
A.
XX*
Audio Song in USB
flash drive
A.00
–
A.99
User Songs which have been recorded with this instrument (page 28)
C.
XX**
C.00
–
C.99
** External Songs, commercially available or which have been recorded on a computer, etc.
S.
XX*
MIDI Song in USB
flash drive
S.00
–
S.99
User Songs which have been recorded with this instrument (page 28)
F.
XX**
F.00
–
F.99
** External Songs, commercially available or which have been recorded on a computer, etc.
U.
XX
MIDI Song in inter-
nal memory of this
instrument
U.01
–
U.10
User Songs which have been recorded to internal memory of the instrument (page 28)
L.00
–
L.99
**
External Songs (commercially available or which have been recorded on a computer, etc.)
transferred from a computer to this instrument. For information on connecting this instru-
ment to a computer, refer to page 38.
n1x_en_om.book Page 25 Friday, October 19, 2018 6:01 PM

Playing Back Songs
26 • N1X Owner’s Manual
1 While holding down [DEMO/SONG], press [+] to select the
desired Song Category (page 25).
2 Press [+] or [-] to select the specific Song number (see “Song
Category List” on page 25), or “*.
rd
” (random) or “*.
AL
”(all).
Song number ............Plays back only the selected Song.
*.
rd
...........................Plays back the Songs of this type continuously
in random order.
*.
AL
...........................Plays back all the Songs of this type continu-
ously in sequential order.
The asterisk (*) indicates “
P
”, “
A
”, “
C
”, “
S
”, “
F
” or “
U
” designation in the dis-
play.
3 Press [>/o] (Play/Pause) to start playback.
During playback, the current measure number (for MIDI Songs) or playing time
(for Audio Songs) is shown on the display.
For information on operations such as Pause, Rewind, Fast Forward, etc., refer to
“Playback-related Operations” on page 27.
4 Press [DEMO/SONG] to stop playback.
If a specific Song number is selected in Step 2, playback stops automatically
when the end of the Song is reached.
Playing Back Songs
To play back a Song on a USB flash drive:
Read “About USB Devices” (page 31), then connect the USB flash drive to the [USB TO DEVICE] terminal, and fol-
low the instructions below.
NOTE
The Song Categories will appear on the
display in the following order:
d
.XX
P
.XX (
A
.XX) (
C
.XX)
(
S
.XX) (
F
.XX)
U
.XX
d
.XX etc.
“
A
.XX”, “
C
.XX”, “
S
.XX” and “
F
.XX” are
shown only when a USB flash drive is con-
nected.
C
.XX and
F
.XX are not displayed
when data does not exist.
NOTE
During playback of a Demo Song, “*.
rd
”
or “*.
AL
” cannot be selected.
NOTE
Song indications such as “
F
.
00
” and
“
C
.
00
” may not appear immediately
depending on the amount of the folders in
the USB flash drive.
NOTE
This instrument can select or play Songs
saved to only the first, second, or third
hierarchical folder level. For details, refer to
page 32.
NOTE
• During Demo Song playback, the current
measure number is not shown on the
display.
• During playback of a MIDI Song, the
Voice of the keyboard performance is
automatically set to the Voice of the MIDI
Song. When you stop playback, the
Voice of the keyboard performance will
be restored to the Voice last selected.
• If you select the Voice “Celesta” (page
17) and then start playback of a MIDI
Song, your keyboard performance will
sound one octave higher than usual dur-
ing playback of the MIDI Song.
• The metronome can be used during play-
back. It will automatically stop when
playback is stopped.
• When playing back External Songs on a
USB flash drive, actual playback is done
in numerical or alphabetical order,
according to the Song titles.
1. 2. 0.01. 0.02.
MIDI Song
Current measure
number
Audio Song
Playing time
Indicates minutes. In
case of 10 minutes or
more, only the lowest
digit is shown.
Indicates
seconds.
n1x_en_om.book Page 26 Friday, October 19, 2018 6:01 PM

Playing Back Songs
N1X Owner’s Manual •27
Playback-related Operations
Adjusting the tempo (MIDI Song) or playback speed (Audio Song)
You can change the playback tempo of a MIDI Song. You can also adjust the
playback speed of an Audio Song during its playback.
While holding down [METRONOME], press [+] / [-] or C#5/B4 key to increase
or decrease the value. To reset the value to default, press [+] and [-] simultane-
ously while holding down [METRONOME]. For details, refer to page 20.
Adjusting the volume (only for Audio Song)
The volume level of this instrument may be markedly different from that of com-
mercially available Audio Song or one recorded on another device. To adjust the
volume of the Audio Song, press one of the C1–G2 keys while holding down
[DEMO/SONG].
Pause
During playback, press [
>/o] to pause playback. The display will also pause and
the [>/o] lamp will flash. Pressing it again resumes Song playback from the cur-
rent position.
Rewind/Fast forward
During playback, press [-] or [+] to move back or forth through the measures.
Pressing one of these buttons once moves one measure back/forward for MIDI
Songs, or one second for Audio Songs.
Returning to the Song Top
During playback, press [-] and [+] simultaneously to jump to the top of the Song.
MIDI Song
Setting range: 5 to 500 beats per minute
Default setting: Depends on the selected
Song
Audio Song
Setting range: 75% to 125%
Default setting: 100%
Setting range: 1–20
Default setting: 16
C1(1) G2(20)A1(10)
max. min.
Lowest
key (A-1)
The higher the key, the greater the volume.
D#2 (Default)
NOTE
During playback of a Demo Song, Rewind/
Fast Forward operations or returning to the
Song top cannot be done.
Setting range: JA (Japanese) / Int (Interna-
tional)
Default setting: Int
Setting the Character Code
If the Song cannot be called up, you may need to select the appropriate Character
Code from the following two settings.
International
For playing back Songs with names using western European characters (including
umlaut or diacritic marks). To select this, turn on the power while holding down the
A-1 and A#-1 keys.
Japanese
For playing back Songs with names using Japanese characters. To select this, turn on
the power while holding down the A-1 and B-1 keys.
A#-1
Lowest key (A-1)
B-1
Lowest key (A-1)
n1x_en_om.book Page 27 Friday, October 19, 2018 6:01 PM

28 • N1X Owner’s Manual
Recording Your Performance
This instrument allows you to record your performance by using one of the following two methods. The
recorded performance can be played back as a User Song.
MIDI recording
With this method, your keyboard performances are recorded and saved to internal memory of this instrument or USB
flash drive as a MIDI Song (via the SMF format 0). Up to 10 Songs can be recorded to the instrument, although more
can be recorded to USB flash drive (See below).
Audio recording
With this method, your keyboard performances are saved to USB flash drive as an Audio Song in stereo WAV format
of normal CD-quality resolution. The saved Audio Song can be transmitted to then played on portable music players.
The recordable time differs depending on the capacity of the USB flash drive.
1 Connect a USB flash drive to the [USB TO DEVICE] terminal.
2 Select the Recording method.
To make a MIDI Recording:
While holding down [DEMO/SONG], press [+] or [-] until “
U.
**” (for saving
data to the instrument) or “
S.
**” (for saving data to the USB flash drive) is shown
on the display.
To make an Audio Recording:
While holding down [DEMO/SONG], press [+] or [-] until “
A.
**” (for saving
data to the USB flash drive) is shown on the display.
3 Press [+] or [-] to select a Song number.
•
U.01
–
U.10
......User Song in this instrument (MIDI Song)
•
S.00
–
S.99
......User Song in USB flash drive (MIDI Song)
•
A.00
–
A.99
......User Song in USB flash drive (Audio Song)
When the selected Song contains already-recorded data:
You can confirm it by checking the display.
NOTICE
When the selected Song contains data, keep in mind that recording new data will erase
the existing data.
NOTE
If you intend to play back your recording
only on the instrument itself, we recom-
mend using MIDI recording for optimum
sound. When using Audio recording, Piano
Voices created by four-channel sampling
will be recorded in stereo (two-channel).
NOTE
If a coded message appears on the display
when connecting the USB flash drive to the
instrument, refer to the “Message List” on
page 42.
NOTE
If you make an audio recording while using
headphones and then play that recorded
audio Song through speakers, you should
set “Binaural sampling/Stereophonic Opti-
mizer” to “OFF.” Refer to page 15 for
details.
NOTE
Songs recorded with the MIDI recording
cannot be converted to Audio Songs.
NOTE
Record mode cannot be called up in the fol-
lowing situations.
• During Song playback (page 26)
• During file management operations
such as Copy (page 33), Delete (page
30) and Format(page 32)
When is USB flash drive necessary?
MIDI Songs can be saved to internal memory of this instrument or to USB flash
drive, while Audio Songs can only be saved to the USB flash drive.
As necessary, prepare a USB flash drive referring to “About USB Devices” (page
31).
U.01U.0.1.
When Song contains data: When Song does not contain data:
Only the left-most dot lights up.
Three dots light up.
n1x_en_om.book Page 28 Friday, October 19, 2018 6:01 PM

Recording Your Performance
N1X Owner’s Manual •29
4 Select a Voice (page 17) and other parameters such as Beat
(page 19) for recording.
5 Press [REC] to engage the Record mode.
The [REC] lamp lights up, and the [>/o] (Play/Pause) lamp flashes according to
the current tempo.
To exit from the Record mode, press [REC] again.
6 Start recording.
Play a note on the keyboard or press [>/o] to start recording.
With MIDI Recording:
While recording, the current measure number is shown on the display.
With Audio Recording:
While recording, the elapsed time is shown on the display.
7 Press [REC] or [>/o] to stop recording.
Dashes appear on the display in succession, indicating that the recorded data is
being saved. After the data is saved, an “
End
” message appears for three sec-
onds, indicating that the Record mode is disengaged.
NOTICE
While dashes appear on the display in succession, never turn off the power or discon-
nect the USB flash drive. Doing so may delete all Song data in the instrument, including
external Songs (page 25).
8 Press [>/o] to play the recorded Song.
To stop playback, press [DEMO/SONG].
Regarding the operations such as Pause or Rewind/Fast forward etc., refer to
“Playback-related Operations” on page 27.
Using the Metronome
You can use the metronome while record-
ing, although the metronome sound will not
be recorded.
If memory space is running low:
An “
EnP
” or “
FUL
” message will
appear on the display after pressing [REC].
If “
EnP
” appears, you can start recording.
However, keep in mind that your perfor-
mance data may not have been correctly
saved or recording may stop automatically.
If “
FUL
” appears, you cannot start
recording. We recommend that you first
remove any unnecessary files (page 30) to
ensure sufficient memory capacity.
FlashesLights up
1. 2.
Measure number
NOTE
When using audio recording, any audio
signals from the [AUX IN] jack (page 35),
USB Audio Interface function (page 40) and
Bluetooth Audio function (page 40) are also
recorded.
0.01. 0.02.
Indicates minutes. In
case of 10 minutes
or more, only the
lowest digit is
shown.
Indicates seconds.
Elapsed time
NOTE
The recorded User Song data on this
instrument can be copied to a USB flash
drive. Refer to page 33.
When engaging the Record Mode (pressing [REC]) without selecting a Song number
Your performance will be recorded to the selected Song when you press [REC].
NOTICE
When the selected Song contains data, keep in mind that recording new data will erase the existing data.
If one of the following Songs (page 25) is selected, your performance will be recorded to a User Song (page 25) as indi-
cated.
• External audio Song “
C
.XX” .............................................................................Recorded to “
A
.XX”.
• External MIDI Song on USB flash drive “
F
.XX”.............................................. Recorded to “
S
.XX”.
• External MIDI Song in internal memory of the instrument “
L
.XX” ................. Recorded to “
U
.XX”.
• Voice Demo Song “
d
.XX”, Preset Song “
P
.XX” .............................................. Recorded to “
U
.XX”.
Then, the Song number as the Recording target will be the lowest Song number (of those containing no data) in each
Song category, “
A
”, “
S
” and “
U
”.
If there are no empty User Songs, “
A.0.0.
”, “
S.0.0.
”, or “
U.0.1.
” will be used as the Recording target.
n1x_en_om.book Page 29 Friday, October 19, 2018 6:01 PM

Recording Your Performance
30 • N1X Owner’s Manual
A User Song can be deleted.
1 If necessary, connect the USB flash drive to the [USB TO
DEVICE] terminal.
2 Select the Song to be deleted.
For details on how to select a Song file, refer to page 26.
3 While holding down [FUNCTION], press [REC].
“
dEL
” appears on the display for a while, then “
n Y
” appears on the display. If
you wish to cancel this operation, press [-].
4 Press [+] to execute the Delete operation.
Dashes appear in succession on the display, indicating that the Delete operation is
in process. When the operation is completed, “
End
” appears on the display.
NOTICE
While dashes appear in succession on the display, never turn off the power or discon-
nect the USB flash drive. Doing so may not only corrupt the Song data to be deleted but
also other data in the internal memory or the USB flash drive.
Deleting Song Files
NOTE
In case a message appears on the display
when connecting a USB flash drive to the
instrument, refer to the “Message List” on
page 42.
NOTE
Song Playback is not available after execut-
ing Step 3. Make sure to confirm the to-be-
deleted Song before executing Step 3.
NOTE
The operation here does not apply to Songs
transferred from the computer to this
instrument’s internal memory. If you want to
delete such a Song, use a computer.
n1x_en_om.book Page 30 Friday, October 19, 2018 6:01 PM

N1X Owner’s Manual •31
Using a USB Flash Drive
With a USB flash drive plugged in, you can use this instrument to perform the following tasks.
Formatting a USB flash drive ......................................................... page 32
Listening to songs stored on the USB flash drive ....................... page 25
Recording your performances on the USB flash drive................ page 28
Copying User Songs recorded on the instrument to
the USB flash drive ......................................................................... page 33
NOTE
• When deleting Songs on the USB flash
drive, refer to page 30.
• The Format, Copy and Delete operations
cannot be done in the following situa-
tions.
• During Song playback (page 26)
• Record mode (page 29)
About USB Devices
Precautions when using the [USB TO
DEVICE] terminal
This instrument features a built-in [USB TO DEVICE]
terminal. When connecting a USB device to the termi-
nal, be sure to handle the USB device with care. Follow
the important precautions below.
NOTE
For more information about the handling of USB devices, refer to the owner’s man-
ual of the USB device.
Compatible USB devices
• USB flash drive
• USB wireless LAN adaptor (UD-WL01) (sold sepa-
rately; may not be available in some areas)
Other USB devices such as a USB hub, computer key-
board or mouse cannot be used.
The instrument does not necessarily support all com-
mercially available USB devices. Yamaha cannot guar-
antee operation of USB devices that you purchase.
Before purchasing a USB device for use with this
instrument, please visit the following web page:
https://download.yamaha.com/
After selecting your country and clicking on “Docu-
ments and Data” from the “Support” page, select the
desired Language and Product Category, and then enter
the model name into the search box.
Although USB devices 1.1 to 2.0 can be used on this
instrument, the amount of time for saving to or loading
from the USB device may differ depending on the type
of data or the status of the instrument.
NOTICE
The rating of the [USB TO DEVICE] terminal is a maxi-
mum of 5V/500mA. Do not connect USB devices having a
rating above this, since this can cause damage to the
instrument itself.
Connecting a USB device
When connecting a USB device to the [USB TO
DEVICE] terminal, make sure that the connector on the
device is appropriate and that it is connected in the
proper direction.
NOTICE
• Avoid connecting or disconnecting the USB device
during playback/recording and file management opera-
tions (such as Save, Copy, Delete and Format), or when
accessing the USB device. Failure to observe this may
result in “freezing” of the operation of the instrument
or corruption of the USB device and the data.
• When connecting then disconnecting the USB device
(and vice versa), make sure to wait a few seconds
between the two operations.
• Do not use an extension cable when connecting a USB
device.
Using a USB flash drive
By connecting the instrument to a USB flash drive, you
can save data you’ve created to the connected USB
flash drive, as well as read data from the connected
USB flash drive.
Number of USB flash drives that can be used
Only one USB flash drive can be connected to the
[USB TO DEVICE] terminal.
Formatting a USB flash drive
You should format the USB flash drive only with this
instrument (page 32). A USB flash drive formatted on
another device may not operate properly.
NOTICE
The format operation overwrites any previously existing
data. Make sure that the USB flash drive you are format-
ting does not contain important data.
To protect your data (write-protect)
To prevent important data from being inadvertently
erased, apply the write-protect provided with each USB
flash drive. If you are saving data to the USB flash
drive, make sure to disable write-protect.
Turning off the instrument
When turning off the instrument, make sure that the
instrument is NOT accessing the USB flash drive by
playback/recording or file management (such as during
Save, Copy, Delete and Format operations). Failure to
do so may corrupt the USB flash drive and the data.
MAX
PHONES USB TO DEVICE
MIN
MASTER VOLUME
n1x_en_om.book Page 31 Friday, October 19, 2018 6:01 PM

Using a USB Flash Drive
32 • N1X Owner’s Manual
NOTICE
Executing the Format operation will delete all data in the USB flash drive. Before formatting, save important data to a computer
or another storage device.
1 Connect the USB flash drive to the [USB TO DEVICE] terminal.
2 While holding [FUNCTION] and [>/o] (Play/Pause), press [REC].
“
For
” appears on the display for a while, then “
n Y
” appears. If you wish to
cancel this operation, press [-] here.
3 Press [+] to execute the Format operation.
Dashes appear in succession on the display, indicating that Formatting is in pro-
cess. When the operation is completed, “
End
” appears on the display.
NOTICE
While dashes appear in succession on the display, never turn off the power or discon-
nect the USB flash drive. Doing so may corrupt the data on the USB flash drive, and the
Format operation will not be executed properly.
When organizing files on a USB flash drive using a computer, etc., make sure to place External Songs
only in the first, second, or third hierarchical folder level. This instrument will not be able to select or
play songs from any level lower than that. This instrument can recognize up to 100 MIDI Songs and 100
Audio Songs on a USB flash drive as External Songs.
Formatting a USB Flash Drive
NOTE
When you execute a Song Recording (page
29), Copy (page 33) or Delete (page 30)
operation, a “
UnF
” prompt may appear
on the display, indicating that the USB flash
drive has not been formatted yet. In this
case, execute the Format operation by pro-
ceeding from Step 2 as described at left.
Managing Files on a USB Flash Drive
USB flash
drive
First level Second level Third level Fourth level
Song file
Song file
Song file
Song file
USER
FILES
folder
Song folder
User Song
(MIDI)
USERSONG
XX.mid
User Song
(audio)
USERAUDIO
XX.wav
Song folder
Song folder
Song folder
These Songs
are playable.
These Songs
are not playable.
n1x_en_om.book Page 32 Friday, October 19, 2018 6:01 PM

Using a USB Flash Drive
N1X Owner’s Manual •33
You can copy the User Song in the instrument to the USB flash drive. The copied Song is saved as SMF
format 0 to the “USER FILES” folder in the USB flash drive, and the file is automatically named as
“USERSONG**.MID” (**: numerals).
1 Connect the USB flash drive to the [USB TO DEVICE] terminal.
2 For the Copy source, select a User Song in this instrument.
For detailed instructions, refer to page 25.
3 While holding [FUNCTION], press [>/o] (Play/Pause).
On the display, “
SAu
” appears for a while then the Song number (for example
“
S.00
”) appears as Copy destination.
To cancel the Copy operation before it begins, press any button other than [
>/o]
here.
4 Press [>/o] to execute the Copy operation.
Dashes appears in succession on the display, indicating that the Copy operation is
in process. When the Copy is completed, “
End
” appears on the display.
NOTICE
When dashes appear in succession on the display, never turn off the power or discon-
nect the USB flash drive. Doing so may corrupt the data on the USB flash drive.
Copying User Songs in the Instrument to USB Flash Drive
NOTE
If any Song other than one of the User
Songs is selected in Step 2, “
Pro
”
appears in Step 3. In this case, return back
to Step 2.
NOTE
When there is insufficient free memory
capacity in the USB flash drive, the copied
Song cannot be saved. To ensure sufficient
memory, try erasing unnecessary files
(page 30).
SAu S.00
Song number
(Example: “S.00”)
n1x_en_om.book Page 33 Friday, October 19, 2018 6:01 PM

34 • N1X Owner’s Manual
Backup Data and Initialization
The following data, referred to as Backup data, as well as User Song data and External Song data will be
maintained even if the power is turned off.
• Auto Power Off on/off......................................................page 13
• IAC on/off ........................................................................page 14
• IAC Depth ........................................................................page 14
• Binaural Sampling / Stereophonic Optimizer on/off........page 15
• Half Pedal Point................................................................page 16
• Metronome volume ..........................................................page 19
• VRM function on/off........................................................page 21
• Tuning...............................................................................page 23
• Audio Song volume..........................................................page 27
• Character Code.................................................................page 27
• AUX IN Noise Gate on/off...............................................page 36
• Wireless LAN connection information ............................page 39
• Audio Loop Back .............................................................page 40
• Bluetooth Pairing information ..........................................page 41
• Bluetooth on/off................................................................page 41
While holding down the C7 key, turn on the power. The Backup data (with the exception of “Character
Code” and “Bluetooth Paring information”) will be initialized. Note that User Songs and External Songs
are not erased.
“
CLr
” appears on the display, and the initialization starts. When the initialization fin-
ishes, the display turns dark.
NOTICE
While the display indicators flash in a pattern (i.e., data is being initialized), never turn off the
power. Doing so may delete all Song data in the instrument, including external Songs (page
25), or corrupt the Backup data and cause the Format operation not to be executed properly.
Backup Data in Internal Memory
Initializing the Backup Data
Highest key (C7)
NOTE
If this instrument somehow becomes dis-
abled or malfunctions, turn off the power to
the instrument, then perform the initializa-
tion procedure.
n1x_en_om.book Page 34 Friday, October 19, 2018 6:01 PM

N1X Owner’s Manual •35
Connections
CAUTION
Before connecting the instrument to other electronic components, turn off the power to all the components. Before turning the
power on or off to all components, set all volume levels to minimum (0). Otherwise, damage to the components, electrical
shock, or even permanent hearing loss may occur.
Refer to the “Panel Controls and Terminals” on page 10 for information on the location of the jacks and
terminals.
q
AUX OUT [R] [L/L+R] jacks .........................................page 36
w [AUX IN] jack ...........................................................See below.
e MIDI [OUT] [IN] terminals ............................................page 36
r [USB TO HOST] terminal .............................................page 38
t [USB TO DEVICE] terminal..................................pages 31, 39
Playing a Portable Audio Player with the Built-in Speakers—[AUX IN] jack
You can connect the headphone jack of a portable audio player to the instrument’s [AUX IN] jack, letting you hear
the sound of that audio player through the built-in speakers of the instrument.
NOTICE
To avoid damage to the devices, first turn on the power to the external device, then to the
instrument. When turning off the power, first turn off the power to the instrument, then to the
external device.
Jacks and Terminals
eq w r
USB TO DEVICE
t
RearFront (keyboard side)
(Left side of the front surface
below the keyboard)
Connecting Audio Devices ([AUX IN] jack, AUX OUT [R] [L/L+R] jacks)
NOTE
Use audio cables and adaptor plugs having
no (zero) resistance.
Instrument
Portable
audio player
Phone plug
(stereo mini)
Headphone jack
Phone plug
(stereo mini)
Audio cable
Audio signal
n1x_en_om.book Page 35 Friday, October 19, 2018 6:01 PM

Connections
36 • N1X Owner’s Manual
Minimizing noise of the input sound via Noise Gate
By default, this instrument cuts unwanted noise from the input sound. However, this
may result in necessary sounds also being cut, such as the soft decay sound of a piano
or guitar. To avoid this, set the Noise Gate to off via the following operation.
While holding down [FUNCTION], press the C#6 key repeatedly to toggle Noise
Gate on and off as needed.
Using an External Stereo System for Playback—AUX OUT [R] [L/L+R] jacks
These jacks let you connect the instrument to external powered speaker systems, for
playing in larger venues at higher volumes.
NOTICE
• To avoid possible damage to the devices, first turn on the power to the instrument, then to the external device. When turning
off the power, first turn off the power to the external device, then to the instrument. Since this instrument’s power may auto-
matically be turned off due to the Auto Power Off function (page 13), turn off the power to the external device, or disable Auto
Power Off when you do not intend to operate the instrument.
• When the AUX OUT jacks are connected to an external device, never connect the [AUX IN] jacks to the output jacks of the
external device. Doing so could result in feedback (oscillation) that may damage both the devices.
MIDI (Musical Instrument Digital Interface) is a global format standard for
performance data transmission and reception between electronic musical
instruments. Connecting musical instruments that support MIDI via MIDI
cables enables you to transfer performance and setting data between multiple
musical instruments. Using MIDI, you can create and arrange more complex
and dynamic performances than would be possible with the use of only a sin-
gle musical instrument.
Default setting: On
C#6
Highest key (C7)
NOTE
Use audio cables and adaptor plugs with no
resistance.
NOTE
Use only the AUX OUT [L/L+R] jack for
connection with a mono device.
NOTE
If you are monitoring the sound output via
the AUX OUT [R] [L/L+R] jacks from head-
phones connected to the instrument, you
should set “Binaural sampling/Stereo-
phonic Optimizer” to “OFF.” Refer to page
15 for details.
AUX INAUX OUT
Audio cable
Audio signal
Instrument Powered speaker
Phone plug
(standard)
Phone plug
(standard)
Connecting External MIDI Devices (MIDI [OUT] [IN] terminals)
NOTE
You need a dedicated MIDI cable to make a
MIDI connection.
NOTE
The handled MIDI messages differ depend-
ing on the MIDI instrument. In other words,
some MIDI messages transmitted from this
instrument may not be recognized on a dif-
ferent MIDI instrument. For details, you
should check the MIDI Implementation
Chart of each MIDI instrument. The MIDI
Implementation Chart of this instrument is
described in the “MIDI Reference” on the
website (page 9).
NOTE
During Song playback, data of only MIDI
channels 3–16 will be output via MIDI.
NOTE
Voice Demo Song and Preset Song data are
not transmitted via MIDI.
Receives
MIDI data.
Transmits
MIDI data.
n1x_en_om.book Page 36 Friday, October 19, 2018 6:01 PM

Connections
N1X Owner’s Manual •37
MIDI Connection Examples
Example 1:
The connection below allows you to play the sounds of an external MIDI tone generator from the keyboard of this
instrument.
Set the MIDI Receive Channel of the external MIDI tone generator to “1,” since the MIDI Transmit Channel of this
instrument is set to “1.”
Example 2:
The connection below allows you to play the sounds of this instrument by playing back a Song on an external MIDI
keyboard or sequencer.
The MIDI Receive Channels of this instrument can only be set to 1 and 2. This is why the data for the piano part
should be assigned to MIDI Channels 1 and 2 of the Song.
Local Control on/off
Normally, playing the keyboard will control the internal tone generator. This situation is called “Local Control ON.”
If you want to use the keyboard only for controlling an external MIDI instrument, turn off Local Control. With this
setting, this instrument will produce no sound even if you play the keyboard.
To turn the Local Control ON or OFF:
While holding down [FUNCTION], press the C6 key repeatedly (if necessary).
MIDI OUT MIDI IN
Performance data
MIDI
tone generator
N1X
MIDI IN MIDI OUT
Song data
MIDI keyboard or sequencer
N1X
Default setting: On
C6
Highest key (C7)
n1x_en_om.book Page 37 Friday, October 19, 2018 6:01 PM

Connections
38 • N1X Owner’s Manual
By connecting a computer to the [USB TO HOST] terminal, you can transfer Song data between the
instrument and the computer via MIDI, and take advantage of sophisticated computer music software.
For details, refer to the “Computer-related Operations” on the website (page 9).
You can set whether the Audio sound input to the instrument from a computer is output or not to a com-
puter or smart device along with the performance played on the instrument. For details, refer to “Audio
Loop Back On/Off” on page 40.
NOTICE
• Use an AB type USB cable of less than 3 meters. USB 3.0 cables cannot be used.
• If you are using a DAW (digital audio workstation) application with this instrument, set the
Audio Loop Back function (page 40) to off. Otherwise, a loud sound may occur, depending
on the settings of the computer or the application software.
By connecting this instrument to a smart device, such as an iPhone, iPad, etc., and using a compatible
app, you can get more enjoyment out of this instrument.
For information about compatible apps and smart devices, access the web page of the respective apps on
the following page:
https://www.yamaha.com/kbdapps/
For information on connecting without using the “Smart Pianist” app, and using the
wireless LAN adaptor (UD-WL01, sold separately), refer to the instructions on page
39. For information on connecting in other ways, refer to the “Smart Device Connec-
tion Manual” on the website (page 9).
NOTICE
• Do not place your smart device in an unstable position. Doing so may cause the device to
fall and result in damage.
• If you are using a DAW (digital audio workstation) application with this instrument, set the
Audio Loop Back function (page 40) to off. Otherwise, a loud sound may occur, depending
on the settings of the computer or the application software.
Connecting to a Computer ([USB TO HOST] terminal)
NOTE
When transmitting or receiving audio sig-
nals by using a computer running Win-
dows, the Yamaha Steinberg USB Driver
should be installed to the computer.
For details, refer to the “Computer-related
Operations” on the website (page 9).
Files that can be transferred from a computer to this instrument (and vice versa).
• Song file: .mid (SMF format 0, 1)
Connecting to a Smart Device and Using Apps
NOTE
When you use the instrument along with a
smart device, we recommend that you set
that device’s “Airplane Mode” to on and
then the Wi-Fi/Bluetooth setting to on in
order to avoid noise caused by communi-
cation.
NOTE
When using the “Smart Pianist” app, you
cannot use any buttons on the instrument.
Control the instrument by using “Smart
Pianist.” Pressing the [>/o] (Play/Pause)
button on the instrument disconnects the
instrument from the “Smart Pianist” app,
and enables you to control the instrument
by using its buttons.
Smart device app “Smart Pianist”
The smart device app “Smart Pianist” (available as a free download) lets you select the
Voice and make Metronome settings intuitively, and allows you to display the nota-
tion, depending on the selected data. For details, access the “Smart Pianist” page on
the website above.
For instructions on connecting the instrument to a smart device, the connection wizard
of the “Smart Pianist” will guide you according to the operating condition and envi-
ronment. To start the connection wizard, tap “ ” (Menu) located at the upper left on
the “Smart Pianist” screen to open the Menu, and then tap “Instrument” “Start Con-
nection Wizard.”
NOTICE
Activating the “Smart Pianist” app while the instrument is connected to the smart device
overwrites the settings on the instrument by that of “Smart Pianist.”
n1x_en_om.book Page 38 Friday, October 19, 2018 6:01 PM

Connections
N1X Owner’s Manual •39
Connection with the USB Wireless LAN Adaptor (UD-WL01*)
*UD-WL01 (sold separately) may not be available depending on your area.
There are two types of connections with the USB wireless adaptor (UD-WL01) described below.
Connecting by the Infrastructure Mode (Automatic Setup by WPS)
The Infrastructure mode uses an access point for data communication between a USB
wireless LAN adaptor and a network. You can use this mode when you connect to the
internet while connecting the wireless LAN adaptor to the instrument.
1 Connect the UD-WL01 (sold separately) to the [USB TO DEVICE]
terminal.
2 Hold down [WPS] on the UD-WL01 for three seconds.
“
§PS
” appears on the display.
3 Press the WPS button on your access point within two minutes
after step 2.
After connection to the access point is completed, the message will disappear.
4 Make sure your smart device is connected to the network to
which you connected the instrument.
If not, turn on the Wi-Fi on the Wi-Fi setting display on your smart device, and
then tap and connect to the network to which you connected the instrument.
Connecting by Access Point Mode
The Access Point mode allows you to directly connect UD-WL01 (sold separately)
and a smart device, without the need for using an access point. You can use this mode
when there is not any access point available for connection to the instrument, or when
it is unnecessary to connect to another network while a smart device is connected to
the instrument.
1 Initialize the instrument (page 34) if the last wireless LAN con-
nection was made by Infrastructure Mode.
NOTICE
The initialization procedure initializes all Backup data (page 34), with the exception of
the Character Code and Bluetooth Paring information.
2 Connect the UD-WL01 (sold separately) to the [USB TO DEVICE]
terminal.
3 On your smart device, turn on the Wi-Fi on the Wi-Fi setting dis-
play and tap “ap-N1X-xxxxxx” (“xxxxxx” represents 6 alphanu-
meric characters) to connect the instrument.
NOTE
Before using the [USB TO DEVICE] termi-
nal, be sure to read “Precautions when
using the [USB TO DEVICE] terminal” on
page 31.
Access point
An “access point” refers to a device which
acts as a base station when data is trans-
mitted/received via a USB wireless LAN
adaptor.
Some access points are combined with
router or modem functions.
NOTE
If the last wireless LAN connection was
made by Infrastructure mode, you can con-
nect to a network automatically without
executing steps 2 and 3.
n1x_en_om.book Page 39 Friday, October 19, 2018 6:01 PM

Connections
40 • N1X Owner’s Manual
By connecting a computer or a smart device to the USB [TO HOST] terminal via a USB cable, digital
audio data can be transmitted/received. This USB Audio Interface function provides the following advan-
tages:
Playing back audio data with high sound quality
This gives you direct, clear sound in which the sound quality has less noise and deteri-
oration than that from the [AUX IN] jack.
Recording performance on the instrument as audio data by using
recording/music production software
The recorded audio data can be played back on the computer or smart device.
NOTICE
If you are using a DAW (digital audio workstation) application with this instrument, set the
Audio Loop Back function to “Off” (see below). Otherwise, a loud sound may occur, depend-
ing on the settings of the computer or the application software.
Audio Loop Back On/Off
This allows you to set whether audio sound input from the connected computer or
smart device is output to a computer or a smart device or not along with the perfor-
mance played on the instrument. To output the audio input sound, set the Audio Loop
Back to “On.”
For example, if you want to record the audio input sound as well as the sound played
on the instrument by using the computer or the smart device, set this to “On.” If you
intend to record only the sound played on the instrument by using the computer or the
smart device, set this to “Off.”
While holding down [FUNCTION], press the G6 key repeatedly (if necessary) to set
this to on or off.
You can input the sound of the audio data saved in a Bluetooth-equipped device, such as a smart phone or
digital audio player, to this instrument and listen to it through the built-in speaker of the instrument. Also,
you can record the input audio data as an Audio Song (page 28).
You can set whether the Audio sound input to the instrument by using this function is output or not to a
computer or smart device connected to [USB TO HOST] terminal via USB cable. For details, refer to
“Audio Loop Back On/Off” (see above).
* Bluetooth-equipped device
In this manual, “Bluetooth-equipped device” means a device that can transmit the audio data saved in it to the instrument using the Bluetooth function
via wireless communication; for example, smart phone, digital audio player, etc. For proper operation, the device must be compatible with A2DP
(Advanced Audio Distribution Profile).
Transmitting/Receiving Audio Data (USB Audio Interface function)
NOTE
• For details on connections, refer to the
“Computer-related Operations” or the
“Smart Device Connection Manual” on
the website (page 9).
• The volume of the audio sound input can
be adjusted from a computer or smart
device.
Default setting: On
NOTE
• The Audio Loop Back function also
affects the audio input sound when using
the Bluetooth Audio function (see below)
or the wireless LAN connection (page
39).
• The playback sound of an Audio Song
(page 25) is also output to a computer or
smart device connected to the [USB TO
HOST] terminal via USB cable when this
is set to “On.” The sound is not output
when this is set to “Off.”
• With Audio Recording (page 28), the
audio input sound from the connected
computer, smart device or Bluetooth-
equipped device is recorded when this is
set to “On,” while the sound is not
recorded when this is set to “Off.”
G6
Highest key (C7)
Listening to Audio Data from a
Bluetooth
-equipped Device on this Instrument
(
Bluetooth
Audio Function)
Before using the Bluet ooth function, be sure to read “About Bluetooth” on page 50.
Depending on the country in which you purchased the product, the instrument may not have Bluetooth capability. For
details, refer to page 50.
n1x_en_om.book Page 40 Friday, October 19, 2018 6:01 PM

Connections
N1X Owner’s Manual •41
Pairing with
Bluetooth
-equipped Devices
If you wish to connect your Bluetooth-equipped device to the instrument via Blue-
tooth, the device needs to be paired with the instrument first.
Once the Bluetooth-equipped device has been paired with this instrument, there is no
need to perform pairing again.
1 Hold down [FUNCTION] for 3 seconds.
The instrument will enter into Pairing mode. At the same time the (Bluetooth)
lamp will flash and “
bt
” message will appear on the display. To cancel the pair-
ing, press [
>/o] (Play/Pause).
2 On your Bluetooth-equipped device, set the Bluetooth function
to on and select “N1X” from the connection list.
For details, refer to the Bluetooth-equipped device owner’s manual.
After pairing is completed, the (Bluetooth) lamp will light up and the message
will disappear and the display will turn dark.
3
Play back audio data on your
Bluetooth
-equipped device to confirm that
the built-in speakers of the instrument can output the audio sound.
When you turn on the instrument the next time, the last connected
Bluetooth
-
equipped device will be connected to this instrument automatically, if the
Bluetooth
function of the device and the instrument is set to on. If it is not connected automati-
cally, select the model name of the instrument from the connections list on the device.
Switching the
Bluetooth
Function On/Off
By default, the Bluetooth function will be set to on right after turning the instrument’s power on. However, you can
set the function to off when you want to disconnect the connection between the instrument and the Bluetooth-
equipped device, or when you want to try to connect the device to the instrument again, etc.
While holding down [FUNCTION], press the F6 key repeatedly (if necessary).
Pairing
“Pairing” means to register Bluetooth-
equipped devices on this instrument, and
establish the mutual recognition for wire-
less communication between the two.
NOTE
Only one Bluetooth-equipped device can be
connected to this instrument at a time
(although up to 8 devices can be paired to
this instrument). When pairing with the 9th
Bluetooth-equipped device has succeeded,
pairing data for the device with the oldest
connection date will be deleted.
NOTE
When the Bluetooth function of this instru-
ment is set to “Off,” standby for pairing with
the instrument is not enabled when holding
[FUNCTION] for 3 seconds. In this case, set
Bluetooth to “On” (See below.), and then
start pairing.
bt
Flashes.
Appears on the display.
NOTE
• Make sure to complete the settings on
the Bluetooth-equipped device within 5
minutes. After 5 minutes passed, the
Pairing mode ends automatically and the
(Bluetooth) lamp turns off.
• If you are required to enter a passkey,
enter the numerals “0000.”
NOTE
You can adjust the volume of the sound
input via Bluetooth by the [MASTER VOL-
UME] control. To adjust the volume balance
between your keyboard performance and
the input sound via Bluetooth, adjust the
volume on the Bluetooth-equipped device.
F6
Highest key (C7)
n1x_en_om.book Page 41 Friday, October 19, 2018 6:01 PM

42 • N1X Owner’s Manual
Message List
* When an operation (such as saving or data transfer) is in process, the display shows a sequence of flashing dashes.
* Press any button to exit from these message displays.
Message Description
bt
The instrument is standing by for Bluetooth pairing. While this message appears, you cannot operate the
instrument. To cancel the pairing, press [
>/o] (Play/Pause).
CLr
Displayed when the initialization (page 34) is completed.
con
Displayed when “Musicsoft Downloader” is used on the connected computer, or when the app “Music Soft
Manager” or “Smart Pianist” (page 38) is used on the connected smart device such as an iPhone and
iPad. While this message appears, you cannot operate the instrument.
E01
Displayed when the character code (page 27) is not appropriate for the file name of the Song which you
are selecting. Switch the character code.
Displayed when the data format is not compatible with this instrument, or the data has some other prob-
lems. This Song cannot be selected.
Displayed when no USB flash drive can be found, or a problem has occurred in the USB flash drive. Dis-
connect and connect the device again, then execute the operation. If this message appears repeatedly
even when there aren’t any other likely problems, the USB flash drive may be damaged.
The Song you have selected cannot be copied or deleted on this instrument. Copy or delete these types
of Songs on a computer.
The memory or the number of the files in the copy destination USB flash drive is full. Remove any unnec-
essary files in the USB flash drive.
E02
Indicates that the USB flash drive is protected.
E03
Displayed when the memory of the USB flash drive becomes full, or the number of files and folders
exceeds the system limit.
E04
Displayed when Audio Song playback or recording has failed. If you are using a USB flash drive to which
data has already been stored or deleted a number of times, first make sure that the device does not con-
tain important data, then format it (page 32) and connect to the instrument again.
EE1
A malfunction has occurred in the instrument. Contact your nearest Yamaha dealer or authorized distributor.
EEE
A malfunction has occurred in the instrument. Contact your nearest Yamaha dealer or authorized distributor.
End
Displayed when the current operation is completed.
EnP
The memory of the instrument or the USB flash drive is running out. We recommend that you remove any
unnecessary files (page 30) to ensure sufficient memory capacity before start recording.
FUL
The operation could not be completed because the instrument’s internal memory or the USB flash drive is
nearly full. If this message is shown while recording, your performance data may not be correctly saved.
n Y
Confirms whether each operation is executed or not.
Pro
Displayed when you try to overwrite or delete a protected Song or read-only file.
UnF
Displayed when an unformatted USB flash drive is connected. First make sure that the device does not
contain important data, then format it (page 32).
Uoc
Communication with the USB flash drive has been shut down because of overcurrent to the USB flash
drive. Disconnect the USB flash drive from the [USB TO DEVICE] terminal, then turn on the power of the
instrument again.
UU1
Communication with the USB flash drive has failed. Remove the USB flash drive and make the connec-
tion again. If the message appears even when the USB flash drive is connected properly, the USB flash
drive may be damaged.
UU2
This USB flash drive is not supported on this instrument, or too many USB flash drives may have been
connected. Refer to “About USB Devices” (page 31) for information on the USB flash drive connection.
§PS
The instrument is in Access Point mode and standing by for connection to an access point by WPS (page
39). While this message appears, you cannot operate the instrument.
§.P.S.
A malfunction occurred in the instrument while it was standing by for connection to an access point by
WPS (page 39). Reconnect the UD-WL01 (sold separately) to the instrument and try to connect to the
access point by WPS again.
Appendix
n1x_en_om.book Page 42 Friday, October 19, 2018 6:01 PM

N1X Owner’s Manual •43
Troubleshooting
* For information on other specific problems and explanations of display messages, see the Message List (page 42).
Problem Possible Cause and Solution
The instrument does not turn on.
The instrument has not been plugged in properly. Securely insert the female plug into
the socket on the instrument, and the male plug into a proper AC outlet (page 12).
A click or pop is heard when the power is
turned on or off.
Electrical current is being applied to the instrument. This is normal.
The power is automatically turned off.
This is normal and due to the Auto Power Off function. If necessary, set the parameter
of the Auto Power Off function (page 13).
Noise is heard from the instrument’s
speakers or headphones.
The noise may be due to interference caused by the use of a mobile phone in close
proximity to the instrument. Turn off the mobile phone, or use it further away from the
instrument.
Noise is heard from the instrument’s
speakers or headphones when using the
instrument with your smart device, such as
an iPhone/iPad.
When you use the instrument along with your smart device, we recommend that you
set that device’s “Airplane Mode” to on and then the Wi-Fi/Bluetooth setting to on on
your smart device, in order to avoid noise caused by communication.
The overall volume is low, or no sound is
heard.
The volume is set too low: set it to an appropriate level using the [MASTER VOLUME]
control (page 14).
Make sure a pair of headphones or an adapter plug is not connected to the [PHONES]
jack (page 15).
Make sure that Local Control (page 37) is on.
The pitch and/or tone of the Piano Voices in
certain ranges do not sound right.
The Piano Voices attempt to precisely simulate actual piano sounds. However, as a
result of sampling algorithms, overtones in some ranges may sound exaggerated,
producing a somewhat different pitch or tone. This is normal, and no cause for concern.
Sound is not heard on a particular key.
Keyboard may not function normally if the key was pressed when the power was turned
on. Turn off the power and turn it on again to reset the function. Do not touch any keys
when turning the power on (page 12).
Mechanical noise is heard during
performance.
This is normal. The keyboard mechanism of this instrument is the same as that of an
actual piano, which also has mechanical noise.
The key you pressed does not return to the
original position smoothly.
Since the keyboard mechanism of this instrument is the same as that of an actual
piano, the mechanism may change over years of use. If this occurs or causes problems
in performance, contact your Yamaha dealer.
Some keys sound louder or quieter than
other keys.
Sound input to the [AUX IN] jacks is
interrupted.
The output volume of the external device connected to this instrument is too low,
resulting in the sound being cut off via the Noise Gate after it is input to this instrument.
• Increase the output volume of the external device. The volume level reproduced via
this instrument’s speakers can be adjusted by using the [MASTER VOLUME] control.
• Set the Noise Gate to off (page 36).
The damper pedal has no effect.
The pedal cord may not be securely connected to the [PEDAL] jack. Turn off the power
to the instrument first, and then insert the pedal cord to the [PEDAL] jack all the way
until the metal part of the cord plug disappears from view (page 46).
The damper pedal was pressed when the power was turned on. This is not a
malfunction; press the pedal again to reset the function.
The USB flash drive has hung up (stopped).
Disconnect the USB flash drive and connect it to the instrument again.
The USB flash drive is not compatible with the instrument. Only use the USB flash drive
whose compatibility has been confirmed by Yamaha (page 31).
Higher or lower notes do not sound correctly
when the transpose setting is made.
The instrument can cover a range of C-2–G8 when you set the transposition. If notes
lower than C-2 are played, the actual resulting sound is one octave higher. If notes
higher than G8 are played, the resulting sound is one octave lower.
The Bluetooth-equipped device cannot be
paired with nor connected to this instrument.
The Bluetooth function of the instrument is off; make sure that it is turned on (page 41).
The Bluetooth-equipped device is not paired with this instrument. The device and this
instrument need to be paired to each other via Bluetooth (page 41).
The Bluetooth function of the Bluetooth-equipped device is not activated. Make sure
that the function is activated.
This instrument and the Bluetooth-equipped device are too far apart. Use the device in
close proximity to this instrument.
There is a device (microwave oven, wireless LAN device, etc.) that outputs signals in
the 2.4 GHz frequency band nearby. Move the instrument away from any devices that
might be emitting radio-frequency signals.
Sound input via Bluetooth is interrupted.
The output volume of the Bluetooth-equipped device connected to this instrument is
too low, resulting in the sound being cut off via the Noise Gate after it is input to this
instrument. Increase the output volume of the device. The volume level reproduced via
this instrument’s speakers can be adjusted by using the [MASTER VOLUME] control.
n1x_en_om.book Page 43 Friday, October 19, 2018 6:01 PM

44 • N1X Owner’s Manual
Preset Song List
Display Song Name Composer
P.01
Prelude op.3-2, Morceaux de fantaisie S. Rakhmaninov
P.02
Mädchens Wünsch, 6 Chants polonaise F. L i s z t
P.03
Sonate für Klavier Nr.14 “Mondschein”, op.27-2 L. v. Beethoven
P.04
Sonate für Klavier Nr.5, K.283 W. A. Mozar t
P.05
Nocturne, op.9-1 F. F. Chopin
P.06
Sonate, K.380, L.23 D. Scarlatti
P.07
Valse, op.69-2 F. F. Chopin
P.08
Aria, Goldberg-Variationen, BWV 988 J. S. Bach
P.09
Fantaisie-Impromptu F. F. Chopin
P.10
Clair de lune C. A. Debussy
n1x_en_om.book Page 44 Friday, October 19, 2018 6:01 PM

N1X Owner’s Manual •45
Assembling the Unit
When assembling the unit, consult a qualified AvantGrand dealer.
CAUTION
• Be careful not to confuse parts, and be sure to install all
parts in the correct direction. Please assemble the unit in
the appropriate sequence.
• Since this product is very heavy, make sure that a suffi-
cient number of people are on hand to help, so you can
assemble it safely and easily.
• Be sure to use only the included screws. Do not use any
other screws. Inappropriate screws may cause damage or
malfunction of the product. Be sure to insert screws of the
proper size in the correct hole locations.
• Be sure to tighten all screws upon completing assembly of
each unit.
• To disassemble, reverse the assembly sequence.
Remove all parts other than the main unit from the box.
Confirm that all parts shown in the illustration are pro-
vided. Do not remove the main unit from the box prior
to step 3.
1 Attach the legs to the speaker box.
1-1 Attach the leg (L) to the side of the speaker
box using three short screws (6 x 20 mm).
1-2 While pressing the bracket on the leg against
the speaker box, securely tighten the screws
that were attached.
1-3 Follow the same steps to attach the leg (R).
1-4 Raise the speaker box.
2 Detach the speaker net.
2-1 Remove the two screws. These screws are used
in step 6.
2-2 Detach the speaker net.
Have a Phillips-head (+) screwdriver of the appropriate
size ready.
Main Unit
Leg (L) Leg (R)
Speaker box
Be sure to lay the packaging sheet
or other protective sheet on the
floor and under the instrument.
6 × 30 mm
long screws × 10
6 × 20 mm
short screws × 6
AC power cord × 1
Headphone
hanger
4 × 10 mm
thin screws × 2
1-1
1-2
Do not hold here.
2-2
2-1
n1x_en_om.book Page 45 Friday, October 19, 2018 6:01 PM

Assembling the Unit
46 • N1X Owner’s Manual
3 Mount the main unit.
3-1 Mount the main unit on the speaker box while
aligning the rear of the main unit with the rear
of the speaker box, and each lateral side of the
main unit with the lateral side of the legs.
3-2 Move the main unit slightly toward the rear
side, then adjust its position so that the project-
ing pin on the metal brackets on the bottom of
the main unit will lock into the notch on the
metal brackets of the legs (L/R).
4 Secure the main unit.
Secure the main unit using ten long screws (6 x 30
mm).
5 Connect the speaker cord and pedal
cord.
5-1 Remove the vinyl tie attaching the speaker
cord and pedal cord.
5-2 Insert the speaker cord plug into the connector
so that the tab extends toward the front when
viewed from the rear.
5-3 Insert the pedal cord plug into the pedal con-
nector in the correct orientation.
5-4 Use vinyl ties to bundle the speaker cord and
pedal cord.
6 Attach the speaker net.
6-1 Attach the speaker net.
CAUTION
Be careful not to pinch your fingers when mounting the
main unit.
Hold here.
Connecting the pedal cord
Insert the pedal cord securely until
the metal part of the cord plug disap-
pears from view. Otherwise, the
pedal may not function properly.
5-1
5-4
5-1
5-4
5-2
5-3
n1x_en_om.book Page 46 Friday, October 19, 2018 6:01 PM

Assembling the Unit
N1X Owner’s Manual •47
6-2 Affix the speaker net with the screws unloosed
at step 2.
7 Insert the AC power cord plug into the
[AC IN] connector.
8 Rotate the adjuster until it comes in firm
contact with the floor surface.
9 Attach the headphone hanger.
Use the two thin screws (4 x 10 mm) to attach the
hanger as shown in the illustration.
CAUTION
If the main unit creaks or is otherwise unsteady when you
play on the keyboard, refer to the assembly diagrams and
retighten all screws.
[AC IN]
connector
After completing the assembly, please
check the following.
• Are there any parts left over?
Review the assembly procedure and correct any
errors.
•
Is the instrument clear of doors and other movable fix-
tures?
Move the instrument to an appropriate location.
• Does the instrument make a rattling noise when you
shake it?
Tighten all screws.
• Is the power cord inserted securely into the sockets?
Check the connection.
n1x_en_om.book Page 47 Friday, October 19, 2018 6:01 PM

48 • N1X Owner’s Manual
Specifications
* The contents of this manual apply to the latest specifications as of the publishing date. To obtain the latest manual, access the Yamaha website then download
the manual file. Since specifications, equipment or separately sold accessories may not be the same in every locale, please check with your Yamaha dealer.
Product Name Hybrid Piano
Size/Weight
Width 1,465 mm (57-11/16”)
Height
With music rest closed 1,001 mm (39-7/16”)
With music rest raised 1,167 mm (45-15/16”)
Depth 618 mm (24-5/16”)
Weight 117 kg (257 lbs., 15 oz)
Control
Interface
Keyboard
Number of Keys 88 (A-1 – C7)
Type Specialized Grand Piano Action
Key Surfaces - White Acrylic resin
Touch Sensitivity Hard/Medium/Soft/Fixed
Sensor System
Hammer Sensors Non-contact optical fiber
Key Sensors Non-contact optical fiber
Pedal
Number of Pedals 3
Functions Damper with half pedal effect, Sostenuto and Soft
Type GP Responsive Damper Pedal
Cabinet
Fallboard Soft-Close Fallboard Yes
Music Rest Ye s
Music Braces Yes
Voices
Tone
Generation
Piano Sound Spatial Acoustic Sampling
Binaural Sampling Yes (“CFX Grand” Voice only)
Piano Effect
VRM Yes
Key-off Samples Yes
Smooth Release Yes
Polyphony (max.) 256
Preset Number of Voices 15
Effects Typ es
Reverb Yes
Brilliance 5
Intelligent Acoustic Control (IAC) Yes
Stereophonic Optimizer Yes
Songs (MIDI)
Preset Number of Preset Songs 10 preset songs, 15 voice demo songs
Recording
Number of Songs 10
Number of Tracks 1
Data Capacity approx. 500 KB/Song
Format
Playback SMF (Format 0, 1)
Recording SMF (Format 0)
Recording/
Playback
(Audio)
Recording Time (max.) 80 minutes/Song
Format
Playback WAV (44.1 kHz, 16 bit, stereo)
Recording WAV (44.1 kHz, 16 bit, stereo)
Functions
Overall
Controls
Metronome Yes
Tempo Range 5 – 500
Transpose -6 – 0 – +6
Tuning 414.8 – 440.0 – 466.8 Hz
Scale Type 7 types
USB audio interface 44.1 kHz, 16 bit, stereo
Bluetooth
(May not have this
functionality
depending on the
country in which
you purchased
the product.)
Bluetooth version 4.1
Supported profile A2DP
Compatible codec SBC
Wireless output Bluetooth Class 2
Maximum communication distance Approx. 10 m (33 ft)
Range of transmit frequency 2,402 – 2,480 MHz
Maximum output power (E.I.R.P) 4 dBm
Storage and
Connectivity
Storage
Internal Memory approx. 1.3 MB
External Drives USB Flash Drive
Connectivity
Headphones Standard stereo phone jack (x 2)
MIDI IN/OUT
AUX IN Stereo Mini
AUX OUT [L/L+R] [R] (Standard phone jack)
USB TO DEVICE Yes
USB TO HOST Yes
Sound System
Amplifiers 30 W x 6
Speakers 16 cm x 1 + 13 cm x 2 + 8 cm x 3
Power Supply Auto Power Off Yes
Included Accessories
Owner’s Manual (this book), Power cord, Warranty*,
Felt Key Cover, Bench*, Online Member Product
Registration, Felt strip set
* May not be included depending on your area.
Check with your Yamaha dealer.
Separately Sold Accessories
(May not be available depending on your area.)
Headphones (HPH-50/HPH-100/HPH-150),
USB wireless LAN adaptor (UD-WL01),
Wireless MIDI Adaptor (UD-BT01/MD-BT01)
n1x_en_om.book Page 48 Friday, October 19, 2018 6:01 PM

N1X Owner’s Manual •49
A
AC IN ....................................... 12
Access point ............................. 39
Access Point Mode .................. 39
Accessories ................................ 9
Assembly ................................. 45
Audio Loop Back ..................... 40
Audio recording ....................... 28
Audio Song .............................. 25
Auto Power Off ........................ 13
AUX IN .................................... 35
AUX OUT ................................ 36
B
Backup Data ............................ 34
Base Note ................................. 24
Beat .......................................... 19
Binaural Sampling ................... 15
Bluetooth .................................. 40
Brilliance ................................. 22
C
Character Code ........................ 27
Computer ................................. 38
Computer-related Operations ..... 9
Connections ............................. 35
Control Panel ........................... 10
Copy ......................................... 33
D
Damper Resonance .................. 21
Data format .............................. 25
Delete ....................................... 30
Demo Song .............................. 18
Demo Song List ....................... 18
Display ..................................... 10
E
External Song .......................... 25
F
Fallboard .................................. 11
Fast forward ............................. 27
File Management ..................... 32
Format (USB flash drive) ........ 32
H
Half Pedal Point .......................16
Half-pedal .................................16
Headphone ...............................15
Headphone hanger ..............15, 47
Hz (Hertz) ................................23
I
Infrastructure Mode ..................39
Initialization .............................34
Intelligent Acoustic Control (IAC)
..14
L
Local Control ...........................37
M
Maintenance ...............................6
Master Volume .........................14
Message List ............................42
Metronome ...............................19
MIDI .........................................36
MIDI Basics ...............................9
MIDI recording ........................28
MIDI Reference .........................9
MIDI Song ...............................25
Music braces ............................11
Music rest .................................11
N
Noise Gate ................................36
P
Pairing ......................................41
Pause ........................................27
Pedal .........................................16
PHONES ..................................15
Placing ........................................7
Playback
all ......................................26
Audio Song .......................26
MIDI Song ........................26
Preset Song .......................26
random ..............................26
Playback speed (Audio Song) ..27
Power ........................................12
Precautions .................................5
Preset Song List .......................44
Q
Quick Operation Guide ............51
R
Recording ................................ 28
Reverb ...................................... 22
Rewind ..................................... 27
S
Scale ........................................ 24
Smart device ............................ 38
Smart Device Connection Manual
.. 9
Smart Pianist ............................ 38
Song ......................................... 25
Song Category List .................. 25
Specifications ........................... 48
Stereophonic Optimizer ........... 15
String Resonance ..................... 21
T
Tempo ...................................... 20
Tempo (MIDI Song) ................ 27
Touch Sensitivity ..................... 20
Transporting ............................... 7
Transpose ................................. 23
Troubleshooting ....................... 43
Tuning .................................. 7, 23
U
USB Audio Interface function . 40
USB Device ............................. 31
USB flash drive ........................ 31
USB TO DEVICE ................... 31
USB TO HOST ........................ 38
USB wireless LAN adaptor ..... 39
User Song ................................ 25
V
Version ..................................... 13
Virtual Resonance Modeling ... 21
Voice ........................................ 17
Voice Demo Song .................... 18
Voice List ................................. 17
Volume (Audio Song) .............. 27
Volume (Master Volume) ......... 14
Volume (Metronome volume) .. 19
VRM ........................................ 21
W
Wireless LAN .......................... 39
Index
n1x_en_om.book Page 49 Friday, October 19, 2018 6:01 PM

50 • N1X Owner’s Manual
About Bluetooth
• Bluetooth is a technology for wireless communication between devices within an area of about 10 meters (33 ft.)
employing the 2.4 GHz frequency band.
• The Bluetooth
®
word mark and logos are registered trademarks owned by Bluetooth SIG, Inc. and any use of such
marks by Yamaha is under license.
Handling Bluetooth communications
• The 2.4 GHz band used by Bluetooth compatible devices is a radio band shared by many types of equipment.
While Bluetooth compatible devices use a technology minimizing the influence of other components using the
same radio band, such influence may reduce the speed or distance of communications and in some cases interrupt
communications.
• The speed of signal transfer and the distance at which communication is possible differs according to the distance
between the communicating devices, the presence of obstacles, radio wave conditions and the type of equipment.
• Yamaha does not guarantee all wireless connections between this unit and devices compatible with Bluetooth func-
tion.
Bluetooth capability
Depending on the country in which you purchased the product, the
instrument may not have Bluetooth capability.
If the Bluetooth logo is printed on the control panel, this means that
the product is equipped with Bluetooth functionality.
Bluetooth logo, lamp
n1x_en_om.book Page 50 Friday, October 19, 2018 6:01 PM

Quick Operation Guide
While holding down the button on the control panel, press one of the corresponding keys shown below to set parameters.
C1C0 C2 C4 C5 C6 C7
D1 E1 F1 G1 A1 B1 D2 E2 F2 G2
C#1D#1F#1G#1A#1C#2
B4 D5
A#4C#5D#2F#2
F#2
D3 E3 F3
C#3D#3
C1C0 C2 C4 C5 C6 C7
D1 D2A0 B0 B1
C#1C#2D#1A#0A#1F#3
D3 E3 F3G2 A2 B2
C#3D#3G#2A#2F#4
D4 E4 F4
C#4D#4F#5
D5 F6 G6E6E5 F5G4 A4 A5 B5B4
C#5D#5G#4A#4
C3
C3
C1C0 C2
D1 E1 F1 G1 A1 B1 D2 E2 F2 G2
C#1D#1F#1G#1A#1C#2D#2F#2
C1C0 C2 C4 C5 C6 C7
D1 E1 F1 D2 E2 F2G0 A0 B0 G1 A1 B1
C#1C#2D#1D#2G#0G#1A#0A#1
A6 B6B4 D5 E5
A#6A#4C#5D#5
C3
C3
+6+3+1 2 4 7-2-4-6
0+2+4+5
F# Ab BbEbC#
CD 13 5 6EFGAB-5 -3 -1
+3 1 4+1-2
0+2 2 3 5-3 -1
0
24
531
79
10
11
1286
14 16
171513
19
2018 +10
+1
-10
-1
24
653
24
531
79
10
11
1286
14 16
171513
19
2018
32-1 0 +2 +409102457 0 9102457
1-213 366881 +1 +3
C#6
On/OFF
On/OFF
OFF
Default
On/OFF
On/OFF
On/OFF
On/OFF
On/OFF
On/OFF
Audio Song Volume (page 27)
VRM
(page 21)
Damper Resonance Depth
(page 21)
String Resonance Depth
(page 21)
Half Pedal
Point
(page 16)
Binaural
Sampling /
Stereophonic
Optimizer
(page 15)
Touch
Sensitivity
(page 20)
Metronome Volume (page 19)
Metronome Beat
(page 19)
Tempo
(page 20)
IAC
(page 14)
IAC Depth
(page 14)
Brightness of the
Sound (Brilliance)
(page 22)
Transpose (page 23) Base Note (page 24)
Scale
(page 24)
Auto Power Off
function
(page 13)
Local
Control
(page 37)
Bluetooth
Pairing
(page 41)
Version
(page 13)
AUX IN
Noise Gate
(page 36)
Bluetooth
Function
(page 41)
Audio
Loop Back
(page 40)
n1x_en_om.book Page 51 Friday, October 19, 2018 6:01 PM

Information for users on collection and disposal of old equipment:
This symbol on the products, packaging, and/or accompanying documents means that used electrical and electronic products
should not be mixed with general household waste.
For proper treatment, recovery and recycling of old products, please take them to applicable collection points, in accordance with
your national legislation.
By disposing of these products correctly, you will help to save valuable resources and prevent any potential negative effects on
human health and the environment which could otherwise arise from inappropriate waste handling.
For more information about collection and recycling of old products, please contact your local municipality, your waste disposal
service or the point of sale where you purchased the items.
For business users in the European Union:
If you wish to discard electrical and electronic equipment, please contact your dealer or supplier for further information.
Information on Disposal in other Countries outside the European Union:
This symbol is only valid in the European Union. If you wish to discard these items, please contact your local authorities or dealer
and ask for the correct method of disposal.
(weee_eu_en_02)
Informations concernant la collecte et le traitement des déchets d’équipements électriques et électroniques
Le symbole sur les produits, l'emballage et/ou les documents joints signifie que les produits électriques ou électroniques usagés
ne doivent pas être mélangés avec les déchets domestiques habituels.
Pour un traitement, une récupération et un recyclage appropriés des déchets d’équipements électriques et électroniques, veuillez
les déposer aux points de collecte prévus à cet effet, conformément à la réglementation nationale.
En vous débarrassant correctement des déchets d’équipements électriques et électroniques, vous contribuerez à la sauvegarde
de précieuses ressources et à la prévention de potentiels effets négatifs sur la santé humaine qui pourraient advenir lors d'un
traitement inapproprié des déchets.
Pour plus d'informations à propos de la collecte et du recyclage des déchets d’équipements électriques et électroniques, veuillez
contacter votre municipalité, votre service de traitement des déchets ou le point de vente où vous avez acheté les produits.
Pour les professionnels dans l'Union européenne :
Si vous souhaitez vous débarrasser des déchets d’équipements électriques et électroniques, veuillez contacter votre vendeur ou
fournisseur pour plus d'informations.
Informations sur la mise au rebut dans d'autres pays en dehors de l'Union européenne :
Ce symbole est seulement valable dans l'Union européenne. Si vous souhaitez vous débarrasser de déchets d’équipements
électriques et électroniques, veuillez contacter les autorités locales ou votre fournisseur et demander la méthode de traitement
appropriée.
(weee_eu_fr_02)
Información para usuarios sobre la recogida y eliminación de los equipos antiguos
Este símbolo en los productos, embalajes y documentos anexos significa que los productos eléctricos y electrónicos no deben
mezclarse con los desperdicios domésticos normales.
Para el tratamiento, recuperación y reciclaje apropiados de los productos antiguos, llévelos a puntos de reciclaje
correspondientes, de acuerdo con la legislación nacional.
Al deshacerse de estos productos de forma correcta, ayudará a ahorrar recursos valiosos y a impedir los posibles efectos
desfavorables en la salud humana y en el entorno que de otro modo se producirían si se trataran los desperdicios de modo
inapropiado.
Para obtener más información acerca de la recogida y el reciclaje de los productos antiguos, póngase en contacto con las
autoridades locales, con el servicio de eliminación de basuras o con el punto de venta donde adquirió los artículos.
Para los usuarios empresariales de la Unión Europea:
Si desea desechar equipos eléctricos y electrónicos, póngase en contacto con su vendedor o proveedor para obtener más
información.
Información sobre la eliminación en otros países fuera de la Unión Europea:
Este símbolo solo es válido en la Unión Europea. Si desea desechar estos artículos, póngase en contacto con las autoridades
locales o con el vendedor y pregúnteles el método correcto.
(weee_eu_es_02)
n1x_en_om.book Page 52 Friday, October 19, 2018 6:01 PM

For U.S.A.
For CANADA
For U.S.A. and CANADA
This transmitter must not be co-located or operated in conjunction with any other antenna or transmitter.
This device complies with Industry Canada licence-exempt RSS standard(s). Operation is subject to the following two
conditions: (1) this device may not cause interference, and (2) this device must accept any interference, including
interference that may cause undesired operation of the device.
Le présent appareil est conforme aux CNR d’Industrie Canada applicables aux appareils radio exempts de licence.
L’exploitation est autorisée aux deux conditions suivantes : (1) l’appareil ne doit pas produire de brouillage, et (2)
l’utilisateur de l’appareil doit accepter tout brouillage radioélectrique subi, même si le brouillage est susceptible d’en
compromettre le fonctionnement.
This equipment complies with FCC/IC radiation exposure limits set forth for an uncontrolled environment and meets the
FCC radio frequency (RF) Exposure Guidelines and RSS-102 of the IC radio frequency (RF) Exposure rules. This
equipment has very low levels of RF energy that are deemed to comply without testing of specific absorption rate (SAR).
Cet équipement est conforme aux limites d’exposition aux rayonnements énoncées pour un environnement non contrôlé et
respecte les règles les radioélectriques (RF) de la FCC lignes directrices d’exposition et d’exposition aux fréquences
radioélectriques (RF) CNR-102 de l’IC. Cet équipement émet une énergie RF très faible qui est considérée conforme sans
évaluation du débit d’absorption spécifique (DAS).
n1x_en_om.book Page 53 Friday, October 19, 2018 6:01 PM

BG Bulgarian
ОПРОСТЕНА ЕС ДЕКЛАРАЦИЯ ЗА СЪОТВЕТСТВИЕ
С настоящото Yamaha Music Europe GmbH декларира, че този тип радиосъоръжение
[N1X] е в съответствие с Директива 2014/53/ЕС. Цялостният текст на ЕС
декларацията за съответствие може да се намери на следния интернет адрес:
https://europe.yamaha.com/en/support/compliance/doc.html
ES Spanish
DECLARACIÓN UE DE CONFORMIDAD SIMPLIFICADA
Por la presente, Yamaha Music Europe GmbH declara que el tipo de equipo radio-
eléctrico [N1X] es conforme con la Directiva 2014/53/UE. El texto completo de la
declaración UE de conformidad está disponible en la dirección Internet siguiente:
https://europe.yamaha.com/en/support/compliance/doc.html
CS Czech
ZJEDNODUŠENÉ EU PROHLÁŠENÍ O SHODĚ
Tímto Yamaha Music Europe GmbH prohlašuje, že typ rádiového
zařízení [N1X] je v souladu se směrnicí 2014/53/EU. Úplné znění EU
prohlášení o shodě je k dispozici na této internetové adrese:
https://europe.yamaha.com/en/support/compliance/doc.html
DA Danish
FORENKLET EU-OVERENSSTEMMELSESERKLÆRING
Hermed erklærer Yamaha Music Europe GmbH, at radioudstyrstypen [N1X]
er i overensstemmelse med direktiv 2014/53/EU. EU-overensstemmelseser-
klæringens fulde tekst kan findes på følgende internetadresse:
https://europe.yamaha.com/en/support/compliance/doc.html
DE German
VEREINFACHTE EU-KONFORMITÄTSERKLÄRUNG
Hiermit erklärt Yamaha Music Europe GmbH, dass der Funkanlagentyp
[N1X] der Richtlinie 2014/53/EU entspricht. Der vollständige Text der EU-
Konformitätserklärung ist unter der folgenden Internetadresse verfügbar:
https://europe.yamaha.com/en/support/compliance/doc.html
ET Estonian
LIHTSUSTATUD ELI VASTAVUSDEKLARATSIOON
Käesolevaga deklareerib Yamaha Music Europe GmbH, et käesolev raadio-
seadme tüüp [N1X] vastab direktiivi 2014/53/EL nõuetele. ELi vastavusdek-
laratsiooni täielik tekst on kättesaadav järgmisel internetiaadressil:
https://europe.yamaha.com/en/support/compliance/doc.html
EL Greek
ΑΠΛΟΥΣΤΕΥΜΕΝΗ ∆ΗΛΩΣΗ ΣΥΜΜΟΡΦΩΣΗΣ ΕΕ
Με την παρούσα ο/η Yamaha Music Europe GmbH, δηλώνει ότι ο ραδιοεξο-
πλισμός [N1X] πληροί την οδηγία 2014/53/ΕΕ. Το πλήρες κείμενο της δήλω-
σης συμμόρφωσης ΕΕ διατίθεται στην ακόλουθη ιστοσελίδα στο διαδίκτυο:
https://europe.yamaha.com/en/support/compliance/doc.html
EN English
SIMPLIFIED EU DECLARATION OF CONFORMITY
Hereby, Yamaha Music Europe GmbH declares that the radio equipment
type [N1X] is in compliance with Directive 2014/53/EU. The full text of the
EU declaration of conformity is available at the following internet address:
https://europe.yamaha.com/en/support/compliance/doc.html
FR French
DECLARATION UE DE CONFORMITE SIMPLIFIEE
Le soussigné, Yamaha Music Europe GmbH, déclare que l'équipement radioélec-
trique du type [N1X] est conforme à la directive 2014/53/UE. Le texte complet de
la déclaration UE de conformité est disponible à l'adresse internet suivante:
https://europe.yamaha.com/en/support/compliance/doc.html
HR Croatian
POJEDNOSTAVLJENA EU IZJAVA O SUKLADNOSTI
Yamaha Music Europe GmbH ovime izjavljuje da je radijska oprema
tipa [N1X] u skladu s Direktivom 2014/53/EU. Cjeloviti tekst EU izjave o
sukladnosti dostupan je na sljedećoj internetskoj adresi:
https://europe.yamaha.com/en/support/compliance/doc.html
IT Italian
DICHIARAZIONE DI CONFORMITÀ UE SEMPLIFICATA
Il fabbricante, Yamaha Music Europe GmbH, dichiara che il tipo di apparecchia-
tura radio [N1X] è conforme alla direttiva 2014/53/UE. Il testo completo della
dichiarazione di conformità UE è disponibile al seguente indirizzo Internet:
https://europe.yamaha.com/en/support/compliance/doc.html
LV Latvian
VIENKĀRŠOTA ES ATBILSTĪBAS DEKLARĀCIJA
Ar šo Yamaha Music Europe GmbH deklarē, ka radioiekārta [N1X] atbilst Direktīvai
2014/53/ES. Pilns ES atbilstības deklarācijas teksts ir pieejams šādā interneta vietnē:
https://europe.yamaha.com/en/support/compliance/doc.html
LT Lithuanian
SUPAPRASTINTA ES ATITIKTIES DEKLARACIJA
Aš, Yamaha Music Europe GmbH, patvirtinu, kad radijo įrenginių tipas
[N1X] atitinka Direktyvą 2014/53/ES. Visas ES atitikties deklaracijos
tekstas prieinamas šiuo interneto adresu:
https://europe.yamaha.com/en/support/compliance/doc.html
HU Hungarian
EGYSZERŰSÍTETT EU-MEGFELELŐSÉGI NYILATKOZAT
Yamaha Music Europe GmbH igazolja, hogy a [N1X] típusú rádióberen-
dezés megfelel a 2014/53/EU irányelvnek. Az EU-megfelelőségi nyilat-
kozat teljes szövege elérhető a következő internetes címen:
https://europe.yamaha.com/en/support/compliance/doc.html
NL Dutch
VEREENVOUDIGDE EU-CONFORMITEITSVERKLARING
Hierbij verklaar ik, Yamaha Music Europe GmbH, dat het type radioapparatuur
[N1X] conform is met Richtlijn 2014/53/EU. De volledige tekst van de EU-confor-
miteitsverklaring kan worden geraadpleegd op het volgende internetadres:
https://europe.yamaha.com/en/support/compliance/doc.html
PL Polish
UPROSZCZONA DEKLARACJA ZGODNOŚCI UE
Yamaha Music Europe GmbH niniejszym oświadcza, że typ urządzenia
radiowego [N1X] jest zgodny z dyrektywą 2014/53/UE. Pełny tekst deklaracji
zgodności UE jest dostępny pod następującym adresem internetowym:
https://europe.yamaha.com/en/support/compliance/doc.html
PT Portuguese
DECLARAÇÃO UE DE CONFORMIDADE SIMPLIFICADA
O(a) abaixo assinado(a) Yamaha Music Europe GmbH declara que o presente tipo de
equipamento de rádio [N1X] está em conformidade com a Diretiva 2014/53/UE. O texto
integral da declaração de conformidade está disponível no seguinte endereço de Internet:
https://europe.yamaha.com/en/support/compliance/doc.html
RO Romanian
DECLARAȚIA UE DE CONFORMITATE SIMPLIFICATĂ
Prin prezenta, Yamaha Music Europe GmbH declară că tipul de echipamente
radio [N1X] este în conformitate cu Directiva 2014/53/UE. Textul integral al
declarației UE de conformitate este disponibil la următoarea adresă internet:
https://europe.yamaha.com/en/support/compliance/doc.html
SK Slovak
ZJEDNODUŠENÉ EÚ VYHLÁSENIE O ZHODE
Yamaha Music Europe GmbH týmto vyhlasuje, že rádiové zariadenie
typu [N1X] je v súlade so smernicou 2014/53/EÚ. Úplné EÚ vyhlásenie
o zhode je k dispozícii na tejto internetovej adrese:
https://europe.yamaha.com/en/support/compliance/doc.html
SL Slovenian
POENOSTAVLJENA IZJAVA EU O SKLADNOSTI
Yamaha Music Europe GmbH potrjuje, da je tip radijske opreme [N1X]
skladen z Direktivo 2014/53/EU. Celotno besedilo izjave EU o
skladnosti je na voljo na naslednjem spletnem naslovu:
https://europe.yamaha.com/en/support/compliance/doc.html
FI Finnish
YKSINKERTAISTETTU EU-VAATIMUSTENMUKAISUUSVAKUUTUS
Yamaha Music Europe GmbH vakuuttaa, että radiolaitetyyppi [N1X] on
direktiivin 2014/53/EU mukainen. EU-vaatimustenmukaisuusvakuutuksen
täysimittainen teksti on saatavilla seuraavassa internetosoitteessa:
https://europe.yamaha.com/en/support/compliance/doc.html
SV Swedish
FÖRENKLAD EU-FÖRSÄKRAN OM ÖVERENSSTÄMMELSE
Härmed försäkrar Yamaha Music Europe GmbH att denna typ av radioutrust-
ning [N1X] överensstämmer med direktiv 2014/53/EU. Den fullständiga tex-
ten till EU-försäkran om överensstämmelse finns på följande webbadress:
https://europe.yamaha.com/en/support/compliance/doc.html
TR Turkey
BASİTLEŞTİRİLMİŞ AVRUPA BİRLİĞİ UYGUNLUK BİLDİRİMİ
İşbu belge ile, Yamaha Music Europe GmbH, radyo cihaz tipinin [N1X],
Direktif 2014/53/AB'ye uygunluğunu beyan eder. AB uyumu beyanının
tam metni aşağıdaki internet adresinden edinilebilir:
https://europe.yamaha.com/en/support/compliance/doc.html
For EU countries
n1x_en_om.book Page 54 Friday, October 19, 2018 6:01 PM

n1x_en_om.book Page 55 Friday, October 19, 2018 6:01 PM

Manual Development Group
© 2018 Yamaha Corporation
Published 11/2018 POMA*.*- **W-B0
ZZ29880
Yamaha Global Site https://www.yamaha.com/ Yamaha Downloads https://download.yamaha.com/
For details of products, please contact your nearest Yamaha
representative or the authorized distributor listed below.
Pour plus de détails sur les produits, veuillez-vous adresser à Yamaha
ou au distributeur le plus proche de vous figurant dans la liste suivante.
Para detalles sobre productos, contacte su tienda Yamaha más
cercana o el distribuidor autorizado que se lista debajo.
CANADA
Yamaha Canada Music Ltd.
135 Milner Avenue, Toronto, Ontario M1S 3R1,
Canada
Tel: +1-416-298-1311
U.S.A.
Yamaha Corporation of America
6600 Orangethorpe Avenue, Buena Park, CA 90620,
U.S.A.
Tel: +1-714-522-9011
MEXICO
Yamaha de México, S.A. de C.V.
Av. Insurgentes Sur 1647 Piso 9, Col. San José
Insurgentes, Delegación Benito Juárez, México,
D.F., C.P. 03900, México
Tel: +52-55-5804-0600
BRAZIL
Yamaha Musical do Brasil Ltda.
Rua Fidêncio Ramos, 302 – Cj 52 e 54 – Torre B –
Vila Olímpia – CEP 04551-010 – São Paulo/SP,
Brazil
Tel: +55-11-3704-1377
ARGENTINA
Yamaha Music Latin America, S.A.,
Sucursal Argentina
Olga Cossettini 1553, Piso 4 Norte,
Madero Este-C1107CEK,
Buenos Aires, Argentina
Tel: +54-11-4119-7000
PANAMA AND OTHER LATIN
AMERICAN COUNTRIES/
CARIBBEAN COUNTRIES
Yamaha Music Latin America, S.A.
Edificio Torre Davivienda, Piso: 20
Avenida Balboa, Marbella, Corregimiento de Bella
Vista, Ciudad de Panamá, Rep. de Panamá
Tel: +507-269-5311
THE UNITED KINGDOM/IRELAND
Yamaha Music Europe GmbH (UK)
Sherbourne Drive, Tilbrook, Milton Keynes,
MK7 8BL, U.K.
Tel: +44-1908-366700
GERMANY
Yamaha Music Europe GmbH
Siemensstrasse 22-34, 25462 Rellingen, Germany
Tel: +49-4101-303-0
SWITZERLAND/LIECHTENSTEIN
Yamaha Music Europe GmbH, Branch
Switzerland in Thalwil
Seestrasse 18a, 8800 Thalwil, Switzerland
Tel: +41-44-3878080
AUSTRIA/CROATIA/
CZECH REPUBLIC
/
HUNGARY/ROMANIA/SLOVAKIA/
SLOVENIA
Yamaha Music Europe GmbH, Branch Austria
Schleiergasse 20, 1100 Wien, Austria
Tel: +43-1-60203900
POLAND
Yamaha Music Europe GmbH
Sp.z o.o. Oddział w Polsce
ul. Wielicka 52, 02-657 Warszawa, Poland
Tel: +48-22-880-08-88
BULGARIA
Dinacord Bulgaria LTD.
Bul.Iskarsko Schose 7 Targowski Zentar Ewropa
1528 Sofia, Bulgaria
Tel: +359-2-978-20-25
MALTA
Olimpus Music Ltd.
Valletta Road, Mosta MST9010, Malta
Tel: +356-2133-2093
NETHERLANDS/BELGIUM/
LUXEMBOURG
Yamaha Music Europe, Branch Benelux
Clarissenhof 5b, 4133 AB Vianen, The Netherlands
Tel: +31-347-358040
FRANCE
Yamaha Music Europe
7 rue Ambroise Croizat, Zone d'activités de Pariest,
77183 Croissy-Beaubourg, France
Tel: +33-1-6461-4000
ITALY
Yamaha Music Europe GmbH, Branch Italy
Via Tinelli N.67/69 20855 Gerno di Lesmo (MB),
Italy
Tel: +39-039-9065-1
SPAIN/PORTUGAL
Yamaha Music Europe GmbH Ibérica, Sucursal
en España
Ctra. de la Coruña km. 17,200, 28231
Las Rozas de Madrid, Spain
Tel: +34-91-639-88-88
GREECE
Philippos Nakas S.A. The Music House
19th klm. Leof. Lavriou 190 02 Peania – Attiki,
Greece
Tel: +30-210-6686260
SWEDEN
Yamaha Music Europe GmbH Germany filial
Scandinavia
JA Wettergrensgata 1, 400 43 Göteborg, Sweden
Tel: +46-31-89-34-00
DENMARK
Yamaha Music Denmark,
Fillial of Yamaha Music Europe GmbH, Tyskland
Generatorvej 8C, ST. TH., 2860 Søborg, Denmark
Tel: +45-44-92-49-00
FINLAND
F-Musiikki Oy
Antaksentie 4
FI-01510 Vantaa, Finland
Tel: +358 (0)96185111
NORWAY
Yamaha Music Europe GmbH Germany -
Norwegian Branch
Grini Næringspark 1, 1332 Østerås, Norway
Tel: +47-6716-7800
ICELAND
Hljodfaerahusid Ehf.
Sidumula 20
IS-108 Reykjavik, Iceland
Tel: +354-525-5050
CYPRUS
Nakas Music Cyprus Ltd.
Nikis Ave 2k
1086 Nicosia
Tel: + 357-22-511080
Major Music Center
21 Ali Riza Ave. Ortakoy
P.O.Box 475 Lefkoşa, Cyprus
Tel: (392) 227 9213
RUSSIA
Yamaha Music (Russia) LLC.
Room 37, entrance 7, bld. 7, Kievskaya street,
Moscow, 121059, Russia
Tel: +7-495-626-5005
OTHER EUROPEAN COUNTRIES
Yamaha Music Europe GmbH
Siemensstrasse 22-34, 25462 Rellingen, Germany
Tel: +49-4101-303-0
Yamaha Music Gulf FZE
JAFZA-16, Office 512, P.O.Box 17328,
Jebel Ali FZE, Dubai, UAE
Tel: +971-4-801-1500
TURKEY
Yamaha Music Europe GmbH
Merkezi Almanya Türkiye İstanbul Şubesi
Mor Sumbul Sokak Varyap Meridian Business
1.Blok No:1 113-114-115
Bati Atasehir Istanbul, Turkey
Tel: +90-216-275-7960
ISRAEL
RBX International Co., Ltd.
P.O Box 10245, Petach-Tikva, 49002
Tel: (972) 3-925-6900
OTHER COUNTRIES
Yamaha Music Gulf FZE
JAFZA-16, Office 512, P.O.Box 17328,
Jebel Ali FZE, Dubai, UAE
Tel: +971-4-801-1500
THE PEOPLE’S REPUBLIC OF CHINA
Yamaha Music & Electronics (China) Co., Ltd.
2F, Yunhedasha, 1818 Xinzha-lu, Jingan-qu,
Shanghai, China
Tel: +86-400-051-7700
HONG KONG
Tom Lee Music Co., Ltd.
11/F., Silvercord Tower 1, 30 Canton Road,
Tsimshatsui, Kowloon, Hong Kong
Tel: +852-2737-7688
INDIA
Yamaha Music India Private Limited
P-401, JMD Megapolis, Sector-48, Sohna Road,
Gurgaon-122018, Haryana, India
Tel: +91-124-485-3300
INDONESIA
PT. Yamaha Musik Indonesia (Distributor)
Yamaha Music Center Bldg. Jalan Jend. Gatot
Subroto Kav. 4, Jakarta 12930, Indonesia
Tel: +62-21-520-2577
KOREA
Yamaha Music Korea Ltd.
11F, Prudential Tower, 298, Gangnam-daero,
Gangnam-gu, Seoul, 06253, Korea
Tel: +82-2-3467-3300
MALAYSIA
Yamaha Music (Malaysia) Sdn. Bhd.
No.8, Jalan Perbandaran, Kelana Jaya, 47301
Petaling Jaya, Selangor, Malaysia
Tel: +60-3-78030900
SINGAPORE
Yamaha Music (Asia) Private Limited
Block 202 Hougang Street 21, #02-00,
Singapore 530202, Singapore
Tel: +65-6740-9200
TAIWAN
Yamaha Music & Electronics Taiwan Co., Ltd.
2F., No.1, Yuandong Rd., Banqiao Dist.,
New Taipei City 22063, Taiwan (R.O.C.)
Tel: +886-2-7741-8888
THAILAND
Siam Music Yamaha Co., Ltd.
3, 4, 15, 16th Fl., Siam Motors Building,
891/1 Rama 1 Road, Wangmai,
Pathumwan, Bangkok 10330, Thailand
Tel: +66-2215-2622
VIETNAM
Yamaha Music Vietnam Company Limited
15th Floor, Nam A Bank Tower, 201-203 Cach
Mang Thang Tam St., Ward 4, Dist.3,
Ho Chi Minh City, Vietnam
Tel: +84-28-3818-1122
OTHER ASIAN COUNTRIES
https://asia-latinamerica-mea.yamaha.com/
index.html
AUSTRALIA
Yamaha Music Australia Pty. Ltd.
Level 1, 80 Market Street, South Melbourne,
VIC 3205 Australia
Tel: +61-3-9693-5111
NEW ZEALAND
Music Works LTD
P.O.BOX 6246 Wellesley, Auckland 4680,
New Zealand
Tel: +64-9-634-0099
COUNTRIES AND TRUST
TERRITORIES IN PACIFIC OCEAN
https://asia-latinamerica-mea.yamaha.com/
index.html
NORTH AMERICA
CENTRAL & SOUTH AMERICA
EUROPE
AFRICA
MIDDLE EAST
ASIA
OCEANIA
DMI26
Head Office/Manufacturer: Yamaha Corporation 10-1, Nakazawa-cho, Naka-ku, Hamamatsu, 430-8650, Japan
(For European Countries) Importer: Yamaha Music Europe GmbH Siemensstrasse 22-34, 25462 Rellingen, Germany
-
 1
1
-
 2
2
-
 3
3
-
 4
4
-
 5
5
-
 6
6
-
 7
7
-
 8
8
-
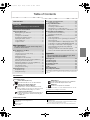 9
9
-
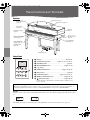 10
10
-
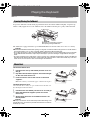 11
11
-
 12
12
-
 13
13
-
 14
14
-
 15
15
-
 16
16
-
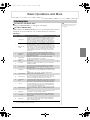 17
17
-
 18
18
-
 19
19
-
 20
20
-
 21
21
-
 22
22
-
 23
23
-
 24
24
-
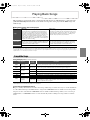 25
25
-
 26
26
-
 27
27
-
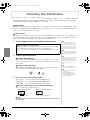 28
28
-
 29
29
-
 30
30
-
 31
31
-
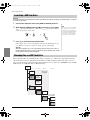 32
32
-
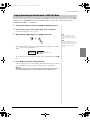 33
33
-
 34
34
-
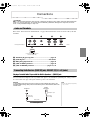 35
35
-
 36
36
-
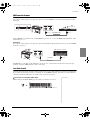 37
37
-
 38
38
-
 39
39
-
 40
40
-
 41
41
-
 42
42
-
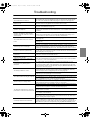 43
43
-
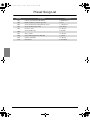 44
44
-
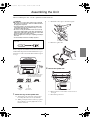 45
45
-
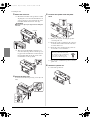 46
46
-
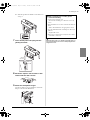 47
47
-
 48
48
-
 49
49
-
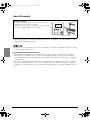 50
50
-
 51
51
-
 52
52
-
 53
53
-
 54
54
-
 55
55
-
 56
56


in andere talen
- English: Yamaha N1X Owner's manual
- italiano: Yamaha N1X Manuale del proprietario
- русский: Yamaha N1X Инструкция по применению
- français: Yamaha N1X Le manuel du propriétaire
- español: Yamaha N1X El manual del propietario
- Deutsch: Yamaha N1X Bedienungsanleitung
- português: Yamaha N1X Manual do proprietário
- dansk: Yamaha N1X Brugervejledning
- suomi: Yamaha N1X Omistajan opas
- čeština: Yamaha N1X Návod k obsluze
- svenska: Yamaha N1X Bruksanvisning
- Türkçe: Yamaha N1X El kitabı
- polski: Yamaha N1X Instrukcja obsługi
- română: Yamaha N1X Manualul proprietarului