Beamz HZ3000 Handleiding
- Categorie
- Schijnwerpers
- Type
- Handleiding
Deze handleiding is ook geschikt voor

HZ3000 Haze MACHINE
160.770 V1.0

ENGLISH
SAFETY INSTRUCTIONS ....................................................................................................................................................................................................................................................................................... 3
UNPACKING INSTRUCTION ................................................................................................................................................................................................................................................................................. 4
POWERSUPPLY ........................................................................................................................................................................................................................................................................................................ 4
INSTALLATION ........................................................................................................................................................................................................................................................................................................... 4
OPERATION ................................................................................................................................................................................................................................................................................................................. 4
DMX512 CONTROL .................................................................................................................................................................................................................................................................................................... 5
CLEANING .................................................................................................................................................................................................................................................................................................................... 5
REPLACING THE FUSE .......................................................................................................................................................................................................................................................................................... 5
NEDERLANDS
VEILIGHEIDSINSTRUCTIES ................................................................................................................................................................................................................................................................................. 6
UITPAKKEN ................................................................................................................................................................................................................................................................................................................. 7
AANSLUITSPANNING ............................................................................................................................................................................................................................................................................................. 7
INSTALLATIE .............................................................................................................................................................................................................................................................................................................. 7
BEDIENING ................................................................................................................................................................................................................................................................................................................... 7
DMX512 BEDIENING ................................................................................................................................................................................................................................................................................................ 8
REINIGEN ...................................................................................................................................................................................................................................................................................................................... 8
VERVANGEN ZEKERING ....................................................................................................................................................................................................................................................................................... 8
DEUTSCH
SICHERHEITSHINWEISE....................................................................................................................................................................................................................................................................................... 9
AUSPACKEN ............................................................................................................................................................................................................................................................................................................. 10
NETZANSCHLUSS .................................................................................................................................................................................................................................................................................................. 10
INSTALLATION ......................................................................................................................................................................................................................................................................................................... 10
BEDIENUNG ............................................................................................................................................................................................................................................................................................................... 10
DMX512 BEDIENUNG .............................................................................................................................................................................................................................................................................................. 11
REINIGUNG .................................................................................................................................................................................................................................................................................................................. 11
SICHERUNGWECHSEL .......................................................................................................................................................................................................................................................................................... 11
ESPAÑOL
INSTRUCCIONES DE SEGURIDAD ...................................................................................................................................................................................................................................................................12
INSTRUCCIONES DE DESEMBALAJE .......................................................................................................................................................................................................................................................... 13
FUENTE DE ALIMENTACIÓN ............................................................................................................................................................................................................................................................................ 13
INSTALACIÓN ........................................................................................................................................................................................................................................................................................................... 13
OPERACIÓN ............................................................................................................................................................................................................................................................................................................... 13
DMX512 CONTROL ................................................................................................................................................................................................................................................................................................... 14
LIMPIEZA ..................................................................................................................................................................................................................................................................................................................... 14
CAMBIANDO EL FUSIBLE .................................................................................................................................................................................................................................................................................... 14

FRANÇAIS
INSTRUCTIONS DE SECURITE ..........................................................................................................................................................................................................................................................................15
INSTRUCTIONS DE DEBALLAGE .................................................................................................................................................................................................................................................................... 16
ALIMENTATION ....................................................................................................................................................................................................................................................................................................... 16
INSTALLATION ......................................................................................................................................................................................................................................................................................................... 16
FONCTIONNEMENT ............................................................................................................................................................................................................................................................................................... 16
GESTION DMX512 .................................................................................................................................................................................................................................................................................................... 17
NETTOYAGE ............................................................................................................................................................................................................................................................................................................... 17
REMPLACEMENT DU FUSIBLE ........................................................................................................................................................................................................................................................................ 17
TECHNICAL DETAILS
TECHNICAL SPECIFICATIONS ......................................................................................................................................................................................................................................................................... 18

WARNING! Before carrying out any operations with the unit, carefully read this instruction manual and keep it with cure for future reference. It
contains important information about the installation, usage and maintenance of the unit.
• Unpack and check carefully that there is no transportation damage before using the unit.
• Please read these instructions carefully and follow the instructions.
• Observe all safety warnings. Never remove safety warnings or other information from the equipment.
• Be sure that no ventilation slots are blocked; otherwise the unit will overheated.
CAUTION: Before connecting the equipment to the power outlet, first verify that the mains voltage and frequency match the values specified on
the equipment. If the equipment has a voltage selection switch, connect the equipment to the power outlet only if the equipment values and the
mains power values match. If the included power cord or power adapter does not fit in your wall outlet, contact your electrician.
• After connecting the unit, check all cables in order to prevent damage or accidents, e.g., due to tripping hazards.
• Make sure that the power cord is never crimped or damaged. Check the unit and the power cord from time to time.
• Always disconnect power from the mains, when unit is not used or before cleaning! Only handle the power cord by the plug. Never pull out
the plug by tugging the power cord.
• Unplug the power cord and power adapter from the power outlet if there is a risk of a lightning strike or before extended periods of disuse.
• Do not switch the unit on and off in short intervals.
• Do not connect the unit to a dimmerpack.
• Always allow free air space of at least 50 cm around the unit for ventilation.
• This unit is not designed for permanent operation. Consistent operation breaks will ensure that the unit will serve you for a long time without
defects.
CAUTION: The nozzle will be very hot, danger of burns and injury!
• Very hot steam escapes from the nozzle. Danger of getting burnt!
• Occasionally very hot droplets of fluid may escape when in operation. Thus never aim at persons or animals directly and keep a minimum
distance of 3 m (9.8 ft) to the nozzle.
• Never touch the nozzle when in operation. Danger of getting burnt!
• The location for the unit must be non-flammable, non-combustible and not sensitive to heat.
• Keep a minimum distance of 1 meter (3.28 ft) to all flammable, combustible objects and objects sensitive to heat.
• Never point the fog at strong sources of ignition like fire or pyrotechnic effects.
• Do not swallow the fog fluid. In case of eye contact, rinse with a lot of water. Consult a doctor should you have accidentally swallowed some
fluid.
• Spilled fluid or splashed fluid droplets can cause slip hazard. Mop up the fluid and dispose of it according to regulations.
• Fog may activate smoke detectors!
CAUTION: If the power cord of the unit is equipped with an earthing contact, then it must be connected to an outlet with a protective ground.
Never deactivate the protective ground of a power cord.
• Make sure that the unit is not exposed to extreme heat, moisture or dust.
• Clean the unit using a dry cloth.
• Do not touch the unit bare-handed during its operation (housing becomes very hot). After switching off, the unit can remain warm for a few
hours.
• This unit is designed exclusively for indoor use, do not use this equipment in the immediate vicinity of fluid (does not apply to special outdoor
equipment - in this case, observe the special instructions noted below). Do not expose this unit to flammable materials, fluids or gases.
• If the unit has been exposed to drastic temperature fluctuation (e.g. after transportation), do not switch it on immediately. The arising
condensation water might damage your unit. Leave the unit switched off until it has reached room temperature.
• Never attempt to bypass the thermostatic switch or fuses.
• Do not dismantle or modify the unit.
• For replacement use fuses/bulb of same type and rating only.
• Repairs, servicing and electric connection must be carried out by a qualified technician.
• The ambient temperature must always be between -5° C and +45° C.
• If this unit is operated in any other way, than the one described in this manual, the product may suffer damages and the warranty becomes
void.
• Plastic bags must be kept out of reach of children.
• Unit must be installed out of the reach of children. Never leave the unit running unattended when connected to a power supply.
This symbol on the product or on its packaging indicates that this product shall not be treated as household waste. Instead it shall be
handed over to the applicable collection point for the recycling of electrical and electronic equipment.
By ensuring this product is disposed of correctly, you will help prevent potential negative consequences for the environment and human health,
which could otherwise be caused by inappropriate waste handling of this product. The recycling of materials will help to conserve natural
resources. For more detailed information about recycling of this product, please contact your local Civic Office, your household waste disposal
service or the shop where you purchased the product.

CAUTION! Immediately upon receiving the product, carefully unpack the carton, check the contents to ensure that all parts are present, and have been
received in good condition. Notify the shipper immediately and retain packing material for inspection if any parts appear damage from shipping or the
package itself shows signs of mishandling. Save the package and all packing materials. In the event that the product must be returned to the factory, it
is important that the product be returned in the original factory box and packing.
If the unit has been exposed to drastic temperature fluctuation (e.g. after transportation), do not switch it on immediately. The arising condensation
water might damage your unit. Leave the unit switched off until it has reached room temperature.
On the label on the backside of the unit is indicated on this type of power supply must be connected. Check that the mains voltage corresponds to this,
all other voltages than specified, the light effect can be irreparably damaged. The product must also be directly connected to the mains and may be
used. No dimmer or adjustable power supply.
Always connect the unit to a protected circuit (circuit breaker or fuse). Make sure the unit has an appropriate electrical ground to avoid the
risk of electrocution or fire.
Step 1: Place the unit on a flat surface and in a suitably large area with at least 50 cm of open space around the unit.
Step 2: Fill the fluid tank with Beamz oil based haze fluid.
Step 3: Connect the machine to a suitably rated power supply. To determine the power requirement for the unit refer
to the label on the back of the unit.
Step 4: Turn on the unit, put the power switch to the “ON” position.. The LCD display will show “WARMING UP”. After
few seconds the LCD display will shows “READY”.
Step 5: To start producing haze, press “LOCK” on screen then select output level “UP” or “DOWN”. To stop producing haze
press again “LOCK”.
Step 6: Turn off the unit, put the power switch to the “OFF” position.
Step 7: Before transporting the unit, empty the fluid tank by connecting a tube to the valve.
Use only original Beamz oil based haze fluid! (Beamz reference 160.674, 160.669, 160.668 and 160.673). Warranty will
be voided if any other type of liquid is used, improper use of liquid may lead to machine failure and malfunction.
When display shows “READY”, you can start producing haze and adjust the settings via LCD display panel.
Menu
Description
DMX512
Set DMX start address
Interval
00 min 01 sec - 59 min 59 sec
Duration
00 min 01 sec - 59 min 59 sec
Timer
Setting timer function, press up and down
Volume
Setting haze volume, press up and down
Fan
Fan speed 20 - 100%
DMX
001-253
Manual
Manual test button
Remote
Switch remote control function ON - OFF
WIRELESS REMOTE
A: ON / OFF
B: ON / OFF
C: Output volume up
D: Output volume down

The unit provides 3 pin XLR connectors for DMX connection. The diagram below indicates pin assignment information.
Caution: At the last fixture, you must close the DMX line with a terminating resistor. Take an XLR connector and solder a 120 Ohm resistor
between signal (-) and signal (+) and connect it to the DMX output of the last fixture in the line.
DMX CHANNELS
Channel
Function
Value
Description
1
Haze
000-005
Haze off
006-127
Haze output low
128-255
Haze output high
2
Fan
000-005
Fan speed 20%
006-255
Fan speed 21 - 100%
We recommend a frequent cleaning of the unit.
Noted: There are no serviceable parts inside the unit except for the fuse. Repairs and service operations are only to be carried out by authorized
dealers.
CAUTION! Disconnect the mains plug from the wall socket before starting any maintenance work!
• Ensure the fluid do not become contaminated.
• Ensure the air vents are not clogged by dust. If necessary remove the dust.
• Ensure that the unit can not get overheated.
• Do not run the unit without any fluid, as the pump will run dry.
• Wipe up spilled fluid immediately. Moisture and fluid can permanently damage the electrical components of the unit.
• For cleaning the surface of the unit use a suitable, solvent-free cleaner.
• It is recommended to run the unit on a monthly basis in order to achieve best performance and output condition.
If the fuse is defective, replace the fuse with a fuse of the same type and value. Before replacing the fuse, unplug mains lead.
Procedure:
Step 1: Open the fuse holder on the rear panel with a fitting screwdriver.
Step 2: Remove the old fuse from the fuse holder.
Step 3: Install the new fuse in the fuse holder.
Step 4: Replace the fuse holder in the housing.

WAARSCHUWING! Lees deze gebruiksaanwijzing zorgvuldig door voordat u met het apparaat gaat werken en bewaar deze handleiding voor
toekomstig gebruik. Het bevat belangrijke informatie over de installatie, het gebruik en het onderhoud van het apparaat.
• Uitpakken en zorgvuldig controleren of er geen transportschade is voordat u het apparaat gebruikt.
• Lees deze instructies aandachtig door en volg de instructies op.
• Neem alle veiligheidswaarschuwingen in acht. Verwijder nooit veiligheidswaarschuwingen of andere informatie van het apparaat.
• Zorg ervoor dat er geen ventilatiesleuven geblokkeerd zijn, anders zal het apparaat oververhit raken.
WAARSCHUWING: Voordat u het apparaat verbind met een contactdoos, moet u eerst controleren of de netspanning en -frequentie
overeenkomen met de op de apparatuur aangegeven waarden. Als de apparatuur een spanningsselectieschakelaar heeft, sluit het apparaat alleen
aan op het stopcontact als de waarden van het apparaat en de waarden van de netspanning overeenkomen. Als het bijgeleverde netsnoer of de
voedingsadapter niet in uw stopcontact past, neem dan contact op met uw elektricien.
• Controleer na het aansluiten van het apparaat alle kabels om schade of ongevallen, bijv. door struikelgevaar, te voorkomen.
• Zorg ervoor dat het netsnoer nooit gekrompen of beschadigd raakt. Controleer het apparaat en het netsnoer van tijd tot tijd.
• Trek altijd de stekker uit het stopcontact wanneer het apparaat niet wordt gebruikt of voordat u het apparaat schoonmaakt! Pak het
netsnoer alleen bij de stekker vast en trek nooit aan het netsnoer.
• Haal de stekker van het netsnoer en de voedingsadapter uit het stopcontact als er gevaar bestaat voor blikseminslag of voor langere
perioden van buitengebruikstelling.
• Schakel het apparaat niet snel achter elkaar in en uit.
• Sluit het apparaat niet aan op een dimmerpack.
• Zorg altijd voor een vrije luchtruimte van minstens 50 cm rondom het apparaat voor ventilatie.
• Dit apparaat is niet ontworpen voor permanent gebruik. Consistente bedieningspauzes zullen ervoor zorgen dat het apparaat lang zonder
defecten van dienst zal zijn.
WAARSCHUWING: Het mondstuk wordt zeer heet, gevaar voor verbranding en verwondingen!
• Uit het mondstuk ontsnapt zeer hete stoom. Let op voor verbrandingsgevaar!
• Af en toe kan er tijdens het gebruik, zeer hete vloeistofdruppels ontsnappen. Richt het apparaat nooit op personen of dieren en houd een
minimale afstand van 3 meter tot het mondstuk aan.
• Raak het mondstuk tijdens het gebruik nooit aan. Let op voor verbrandingsgevaar!
• De locatie van het apparaat moet onbrandbaar en niet gevoelig voor warmte zijn.
• Houd een minimumafstand van 1 meter tot alle ontvlambare, brandbare voorwerpen en voorwerpen die gevoelig zijn voor hitte.
• Richt de nevel/rook nooit op sterke ontstekingsbronnen zoals vuur of pyrotechnische effecten.
• Slik de vloeistof niet in. Houd het apparaat uit de buurt van kinderen. In geval van oogcontact, de ogen spoelen met veel water. Raadpleeg
een arts als u per ongeluk vloeistof heeft ingeslikt.
• Gemorste vloeistof of spattende vloeistofdruppels kunnen slipgevaar veroorzaken. Dweil de vloeistof op en voer deze af volgens de
voorschriften.
• Mist kan rookmelders activeren!
WAARSCHUWING: Als het netsnoer van het apparaat is voorzien van een aardingscontact, moet het worden aangesloten op een stopcontact met
een beschermende aarding. Deactiveer nooit de beschermende aarding van een netsnoer.
• Zorg ervoor dat het apparaat niet wordt blootgesteld aan extreme hitte, vocht of stof.
• Reinig het apparaat met een droge doek.
• Raak het apparaat tijdens de werking ervan niet met blote handen aan (de behuizing kan zeer heet worden). Na het uitschakelen kan het
apparaat enkele uren warm blijven.
• Dit apparaat is uitsluitend ontworpen voor gebruik binnenshuis, gebruik deze apparatuur niet in de onmiddellijke nabijheid van vloeistof (niet
van toepassing op speciale buitenapparatuur - in dit geval, neem de speciale instructies hieronder in acht). Stel dit apparaat niet bloot aan
brandbare materialen, vloeistoffen of gassen.
• Als het apparaat is blootgesteld aan drastische temperatuurschommelingen (bijv. na transport), schakel het dan niet onmiddellijk in. Het
ontstane condenswater kan uw apparaat beschadigen. Laat het apparaat uitgeschakeld tot het op kamertemperatuur is.
• Probeer nooit de thermostaatschakelaar of zekeringen te omzeilen.
• Demonteer of wijzig het apparaat niet.
• Gebruik voor vervanging alleen zekeringen/lampen van hetzelfde type en vermogen.
• Reparaties, onderhoud en elektrische aansluiting moeten worden uitgevoerd door een gekwalificeerde technicus.
• De omgevingstemperatuur moet altijd tussen -5° C en +45° C liggen.
• Als dit apparaat op een andere manier wordt gebruikt dan beschreven in deze handleiding, kan het product beschadigd raken en vervalt de
garantie.
• Plastic zakken moeten buiten het bereik van kinderen worden gehouden.
• Het apparaat moet buiten het bereik van kinderen worden geïnstalleerd en laat het apparaat nooit onbeheerd achter wanneer het op een
stroomvoorziening is aangesloten.
Dit symbool op het product of op de verpakking geeft aan dat dit product niet als huishoudelijk afval mag worden behandeld. I n plaats daarvan moet het worden overhandigd aan
het toepasselijke inzamelpunt voor de recycling van elektrische en elektronische apparatuur.
Door ervoor te zorgen dat dit product op de juiste wijze wordt afgevoerd, helpt u mogelijke negatieve gevolgen voor het milieu en de menselijke gezondheid te voorkomen, die anders
zouden kunnen worden veroorzaakt door ongepaste afvalverwerking van dit product. Het recyclen van materialen draagt bij tot het behoud van natuurlijke hulpbronnen. Voor meer
gedetailleerde informatie over het recyclen van dit product kunt u contact opnemen met uw plaatselijke gemeente, uw huisvuildienst of de winkel waar u het product hebt gekocht.

LET OP! Onmiddellijk na ontvangst, zorgvuldig uitpakken van de doos, controleer de inhoud om ervoor te zorgen dat alle onderdelen aanwezig zijn en
zijn in goede staat zijn ontvangen. Bij transportschade of ontbreken van onderdelen onmiddellijk de verkopende partij inlichten. Bewaar de verpakking
en het verpakkingsmateriaal. Indien het product moet worden teruggestuurd, is het belangrijk dat het product in originele verpakking wordt
geretourneerd.
Als het apparaat is blootgesteld aan drastische temperatuurverschillen (bv. na het transport), schakel het apparaat niet onmiddellijk in. De ontstane
condensatie kan het apparaat beschadigen. Zorg ervoor dat het apparaat op kamertemperatuur komt en steek vervolgens de voeding stekker in het
stopcontact.
Op achterzijde van het apparaat staat aangegeven op welke netspanning deze moet worden aangesloten. Controleer of de netspanning hiermee
overeenkomt, bij alle andere netspanningen dan aangegeven kan het apparaat onherstelbaar worden beschadigd. Tevens moet het apparaat direct op
de netspanning worden aangesloten en mag géén dimmer of regelbare voeding worden gebruikt.
Sluit het apparaat altijd aan op een beschermd circuit (aardlekschakelaar of zekering). Zorg ervoor dat het apparaat voldoende elektrisch is
geaard om het risico op elektrocutie of brand te vermijden.
Stap 1: Plaats het apparaat op een vlakke ondergrond en op een geschikt groot oppervlak met ten minste 50 cm open
ruimte rondom het apparaat.
Stap 2: Vul de vloeistoftank met op Beamz olie gebaseerde haze vloeistof.
Stap 3: Sluit de machine aan op een geschikte stroomvoorziening. Om het benodigde vermogen voor het apparaat te
bepalen, raadpleeg het etiket op de achterkant van het apparaat.
Stap 4: Schakel het apparaat in, zet de stroomschakelaar in de stand “ON”. Op het LCD-display verschijnt "WARMING
UP". Na enkele seconden toont het LCD-display "READY".
Stap 5: Om te beginnen met het produceren van nevel, drukt u op toets "LOCK" en selecteer vervolgens het nevelvolume met de
toesten "UP" of "DOWN". Om te stoppen met het produceren van nevel drukt u nogmaals op "LOCK".
Stap 6: Schakel het apparaat uit, zet de stroomschakelaar in de stand “OFF”.
Stap 7: Voordat u het apparaat gaat vervoeren, moet u de vloeistoftank legen doormiddel van een slang op het ventiel aan te
sluiten.
Gebruik alleen originele Beamz olie gebaseerde Haze vloeistof! (Beamz referentie 160.674, 160.669, 160.668 en
160.673). Bij gebruik van een ander type vloeistof vervalt de garantie, onjuist gebruik van vloeistof kan leiden tot
defecten en storingen aan de machine.
Wanneer het display "READY" weergeeft, kunt u starten met het produceren van nevel en de instellingen aanpassen via het LCD-display.
Menu
Omschrijving
DMX512
Instellen van DMX startadres
Interval
00 min 01 sec - 59 min 59 sec
Duration
00 min 01 sec - 59 min 59 sec
Timer
Instellen van timer functie d.m.v. toesten
omhoog en omlaag
Volume
Instellen van haze volume d.m.v. toesten
omhoog en omlaag
Fan
Ventilator snelheid 20 - 100%
DMX
001-253
Manual
Handmatige test toets
Remote
Schakel functie afstandsbediending AAN- UIT
DRAADLOZE AFSTANDSBEDIENING
A: AAN / UIT
B: AAN / UIT
C: Uitstoot volume omhoog
D: Uitstoot volume omlaag

Het apparaat is voorzien van 3 pin XLR-connectoren voor DMX-aansluiting. Het onderstaande diagram geeft informatie over de pinbezetting.
Let op: Bij het laatste apparaat, dient u de DMX-lijn af te sluiten met een eindweerstand. Neem een XLR connector en soldeer een 120 Ohm
weerstand tussen signaal (-) en signaal (+)en steek deze in de DMX uitgang van het laatste apparaat in de lijn.
DMX KANALEN
Kanaal
Functie
Waarde
Omschrijving
1
Haze
000-005
Haze uit
006-127
Haze lage uitstoot
128-255
Haze hoge uitstoot
2
Ventilator
000-005
Ventilator snelheid 20%
006-255
Ventilator snelheid 21 - 100%
Wij raden aan om het apparaat regelmatig te reinigen.
LET OP: Er bevinden zich geen onderdelen in het apparaat, behalve de zekering. Reparaties en servicewerkzaamheden mogen alleen worden
uitgevoerd door geautoriseerde dealers.
WAARSCHUWING! Haal de netstekker uit het wandcontactdoos voordat u met onderhoudswerkzaamheden begint!
• Zorg ervoor dat de vloeistof niet verontreinigd raakt.
• Zorg ervoor dat de ventilatieroosters niet verstopt raken door stof. Verwijder waar nodig het stof.
• Zorg ervoor dat het apparaat niet oververhit kan raken.
• Laat het apparaat niet zonder vloeistof draaien, omdat de pomp dan droogloopt.
• Veeg gemorste vloeistof onmiddellijk af. Vocht en vloeistof, kan de elektrische onderdelen van het apparaat permanent beschadigen.
• Gebruik voor het reinigen van het oppervlak van het apparaat een geschikte, oplosmiddelvrije reiniger.
Indien de zekering defect is, dient u de zekering te vervangen door een zekering van hetzelfde type en waarde. Voor het vervangen van de zekering,
schakel eerst de stroom uit en volg de onderstaande stappen.
Procedure:
Stap 1: Open de zekeringhouder op het achterpaneel met een passende platte schroevendraaier.
Stap 2: Verwijder de oude zekering uit de zekeringhouder.
Stap 3: Installeer de nieuwe zekering in de zekeringhouder.
Stap 4: Plaats de zekeringhouder in de behuizing.

WARNUNG! Lesen Sie diese Anleitung sorgfältig durch, bevor Sie das Gerät in Betrieb nehmen, und bewahren Sie sie zum späteren Gebrauch auf.
Sie enthält wichtige Informationen über die Installation, den Gebrauch und die Wartung des Gerätes.
• Vor der Inbetriebnahme des Gerätes auspacken und sorgfältig auf Transportschäden prüfen.
• Lesen Sie diese Anleitung sorgfältig durch und befolgen Sie sie.
• Beachten Sie alle Sicherheitshinweise. Entfernen Sie niemals Sicherheitshinweise oder andere Informationen vom Gerät.
• Achten Sie darauf, dass keine Lüftungsschlitze blockiert sind, da das Gerät sonst überhitzt.
WARNUNG: Bevor Sie das Gerät an eine Steckdose anschließen, überprüfen Sie, ob die Netzspannung und -frequenz mit den auf dem Gerät
angegebenen Werten übereinstimmen. Wenn das Gerät über einen Spannungswahlschalter verfügt, schließen Sie das Gerät nur dann an das Netz
an, wenn die Gerätewerte und die Netzspannungswerte übereinstimmen. Wenn das mitgelieferte Netzkabel oder -adapter nicht in Ihre Steckdose
passt, wenden Sie sich an Ihren Elektriker.
• Überprüfen Sie nach dem Anschluss des Gerätes alle Kabel, um Schäden oder Unfälle, z.B. durch Stolperfallen, zu vermeiden.
• Das Netzkabel darf niemals geschrumpft oder beschädigt werden. Überprüfen Sie das Gerät und das Netzkabel von Zeit zu Zeit.
• Ziehen Sie immer den Netzstecker, wenn Sie das Gerät nicht benutzen oder vor der Reinigung! Fassen Sie das Netzkabel nur am Stecker und
ziehen Sie niemals am Netzkabel.
• Ziehen Sie das Netzkabel und das Netzteil aus der Steckdose, wenn die Gefahr von Blitzschlag oder längerer Inaktivität besteht.
• Schalten Sie die Maschine nicht in schneller Folge ein und aus.
• Schließen Sie das Gerät nicht an ein Dimmerpack an.
• Achten Sie immer auf einen Freiraum von mindestens 50 cm um das Gerät, um eine Belüftung zu gewährleisten.
• Dieses Gerät ist nicht für den Dauerbetrieb ausgelegt. Durch konsequente Betriebspausen wird sichergestellt, dass das Gerät lange Zeit
störungsfrei arbeitet.
WARNUNG: Die Nebelaustrittsöffnung ist sehr heiß, Verbrennungs- und Verletzungsgefahr!
• Aus der Nebelaustrittsöffnung tritt sehr heißer Dampf aus. Verbrennungsgefahr!
• Während des Betriebes können vereinzelt sehr heiße Fluid-Tröpfchen aus der Nebelaustrittsöffnung austreten. Deshalb nie auf Personen
oder Tiere nebeln und einen Sicherheitsabstand von 3 m zur Nebelaustrittsöffnung einhalten.
• Während des Betriebes niemals an der Nebelaustrittsöffnung hantieren. Verbrennungsgefahr!
• Der Standort muß eine nicht entflammbare, nicht brennbar und wärmeunempfindlich sein.
• Einen Mindestabstand von 1 meter zu entflammbaren, brennbaren und wärmeempflindlichen Gegenständen einhalten.
• Richten Sie den Nebel niemals auf starke Zündquellen wie Feuer oder pyrotechnische Effekte.
• Fluid nicht einnehmen. Bei Augenkontakt mit viel Wasser ausspülen. Bei versehentlicher Einnahme Arzt aufsuchen
• Verschüttetes Fluid oder verspritzte Fluid-Tröpfchen können Rutschgefahr auslösen. Fluid aufnehmen und vorschriftsmäßig entsorgen.
• Nebel kann Rauchmelder auslösen!
WARNUNG: Wenn das Netzkabel des Geräts mit einer Erdungsklemme ausgestattet ist, schließen Sie es an eine Steckdose mit einer
Schutzerdungsklemme an. Deaktivieren Sie niemals die Schutzerdung eines Netzkabels.
• Achten Sie darauf, dass das Gerät keiner extremen Hitze, Feuchtigkeit oder Staub ausgesetzt ist.
• Reinigen Sie das Gerät mit einem trockenen Tuch.
• Berühren Sie das Gerät während des Betriebs nicht mit bloßen Händen (das Gehäuse kann sehr heiß werden). Nach dem Ausschalten kann
das Gerät einige Stunden lang warm bleiben.
• Dieses Gerät ist nur für den Innenbereich bestimmt, verwenden Sie es nicht in unmittelbarer Nähe von Flüssigkeiten (gilt nicht für spezielle
Außengeräte - in diesem Fall befolgen Sie die folgenden besonderen Anweisungen). Setzen Sie dieses Gerät keinen brennbaren Stoffen,
Flüssigkeiten oder Gasen aus.
• Wenn das Gerät starken Temperaturschwankungen ausgesetzt war (z.B. nach dem Transport), schalten Sie es nicht sofort ein. Die dabei
entstehende Kondensation kann Ihr Gerät beschädigen. Lassen Sie das Gerät ausgeschaltet, bis es Raumtemperatur erreicht hat.
• Versuchen Sie niemals, den Thermostatschalter oder die Sicherungen zu umgehen.
• Demontieren oder modifizieren Sie das Gerät nicht.
• Verwenden Sie für den Austausch nur Sicherungen/Leuchten gleichen Typs und gleicher Leistung.
• Reparaturen, Wartungen und der elektrische Anschluss dürfen nur von einem qualifizierten Techniker durchgeführt werden.
• Die Umgebungstemperatur muss immer zwischen -5°C und +45°C liegen.
• Wenn dieses Gerät auf eine andere Weise als in dieser Anleitung beschrieben verwendet wird, kann das Produkt beschädigt werden und die
Garantie erlischt.
• Plastiktüten sollten außerhalb der Reichweite von Kindern aufbewahrt werden.
• Das Gerät muss außerhalb der Reichweite von Kindern installiert werden. Betreiben Sie das Gerät niemals unbeaufsichtigt, wenn es an ein
Stromnetz angeschlossen ist.
Dieses Symbol auf dem Produkt oder der Verpackung weist darauf hin, dass dieses Produkt nicht als normaler Haushaltsabfall behandelt werden darf. Es muss stattdessen an die
entsprechende Sammelstelle für das Recycling von elektrischen und elektronischen Geräten abgegeben werden.
Indem Sie sicherstellen, dass dieses Gerät ordnungsgemäß entsorgt wird, tragen Sie dazu bei, mögliche negative Auswirkungen auf die Umwelt und die menschliche Gesundheit zu
vermeiden, die sonst durch eine unsachgemäße Entsorgung dieses Produkts verursacht werden könnten. Recycling-Materialien tragen zur Schonung der natürlichen Ressourcen bei. Für
weitere Informationen zur Wiederverwertung dieses Produkts wenden Sie sich bitte an Ihre Gemeinde, Ihren Hausmüllentsorger oder an den Laden, in dem Sie das Produkt gekauft haben.
Tronios BV Registrierungsnummer : DE51181017 (ElektroG) / 21003000 (BatterieG)

ACHTUNG! Packen Sie den Karton sofort nach Erhalt sorgfältig aus, überprüfen Sie seinen Inhalt, um sicherzustellen, dass alle Teile vorhanden sind
und in gutem Zustand erhalten wurden. Bei Transportschäden oder fehlenden Teilen ist der Verkäufer unverzüglich zu informieren. Lagern Sie die
Verpackung und das Verpackungsmaterial. Wenn das Produkt zurückgegeben werden muss, ist es wichtig, dass das Produkt in der Originalverpackung
zurückgegeben wird.
Wenn das Gerät drastischen Temperaturunterschieden ausgesetzt war (z.B. nach dem Transport), schalten Sie es nicht sofort ein. Die dabei
entstehende Kondensation kann das Gerät beschädigen. Vergewissern Sie sich, dass das Gerät Raumtemperatur hat, und stecken Sie dann den
Netzstecker in die Steckdose.
Auf der Rückseite von das Gerät wird angezeigt, an welche Netzspannung es angeschlossen werden muss. Prüfen Sie, ob die Netzspannung mit dieser
übereinstimmt. Wenn die Netzspannung von der angegebenen abweicht, kann das Gerät irreparabel beschädigt werden. Das Gerät muss auch direkt an
die Netzspannung angeschlossen werden. Es darf kein Dimmer oder eine einstellbare Stromversorgung verwendet werden.
Schließen Sie das Gerät immer an einen geschützten Stromkreis an (Fehlerstromschutzschalter oder Sicherung). Vergewissern Sie sich, dass
das Gerät ausreichend elektrisch geerdet ist, um die Gefahr eines Stromschlags oder Brandes zu vermeiden.
Schritt 1: Stellen Sie das Gerät auf eine ebene Fläche und in eine entsprechend große Fläche mit mindestens 50 cm
freier Fläche um das Gerät herum.
Schritt 2: Füllen Sie den Flüssigkeitstank mit Beamz Öl basierter Dunstflüssigkeit.
Schritt 3: Schließen Sie die Maschine an ein geeignetes Netzteil an. Um den Leistungsbedarf für das Gerät zu ermitteln,
lesen Sie bitte das Etikett auf der Rückseite des Gerätes.
Schritt 4: Schalten Sie das Gerät ein, stellen Sie den Netzschalter auf die Position "ON". Auf der LCD-Anzeige erscheint
"WARMING UP". Nach einigen Sekunden zeigt das LCD-Display "READY" an.
Schritt 5: Um mit der Nebelproduktion zu beginnen, drücken Sie "LOCK" auf dem Bildschirm und wählen Sie die Ausgangsstufe
"UP" oder "DOWN". Um Um mit der Nebelproduktion zu stoppen, drücken Sie erneut "LOCK".
Schritt 6: Schalten Sie das Gerät aus, stellen Sie den Netzschalter auf die Position "OFF".
Schritt 7: Entleeren Sie vor dem Transport des Gerätes den Flüssigkeitstank, indem Sie einen Schlauch an das Ventil
anschließen.
Verwenden Sie nur Original Beamz Öl basierte Dunstflüssigkeit! (Beamz Referenz 160.674, 160.669, 160.668 und
160.673). Die Garantie erlischt, wenn eine andere Art von Flüssigkeit verwendet wird. Eine unsachgemäße Verwendung
von Flüssigkeit kann zu Maschinenausfällen und Fehlfunktionen führen.
Wenn auf dem Display "READY" angezeigt wird, können Sie mit der Erzeugung von Dunst beginnen und die Einstellungen über das LCD-Display
vornehmen
Menu
Beschreibung
DMX512
DMX-Startadresse einstellen
Interval
00 min 01 sec - 59 min 59 sec
Duration
00 min 01 sec - 59 min 59 sec
Timer
Timerfunktion einstellen, nach oben und unten
drücken
Volume
Trübungsvolumen einstellen, auf und ab
drücken
Fan
Lüftergeschwindigkeit 20 - 100%
DMX
001-253
Manual
Taste Manueller Test
Remote
Fernsteuerungsfunktion EIN - AUS schalten
DRAHTLOSE FERNBEDIENUNG
A: EIN / AUS
B: EIN / AUS
C: Leistungsvolumen steigt
D: Leistungsvolumen abfall

Das Gerät verfügt über 3-polige XLR-Anschlüsse für den DMX-Anschluss. Das folgende Diagramm zeigt die Informationen zur Pinbelegung.
Hinweis: Bei der letzten Gerät müssen Sie die DMX-Leitung mit einem Abschlusswiderstand schließen. Nehmen Sie einen XLR-Stecker und
löten Sie einen 120-Ohm-Widerstand zwischen Signal (-) und Signal (+) und stecken Sie diesen in den DMX-Ausgang der letzten Gerät in der
Leitung.
DMX-KANÄLE
Kanäle
Funktion
Wert
Beschreibung
1
Haze
000-005
Nebel aus
006-127
Nebelausstoß niedrig
128-255
Nebelausstoß hoch
2
Lüfter
000-005
Lüftergeschwindigkeit 20%
006-255
Lüftergeschwindigkeit 21 - 100%
Wir empfehlen eine regelmäßige Reinigung des Gerätes.
Achtung: Es befinden sich keine Teile im Inneren des Gerätes, außer der Sicherung. Reparaturen und Servicearbeiten dürfen nur von autorisierten
Fachhändlern durchgeführt werden.
WARNUNG! Ziehen Sie vor Beginn der Wartungsarbeiten den Netzstecker aus der Steckdose!
• Stellen Sie sicher, dass die Flüssigkeit nicht verunreinigt wird.
• Stellen Sie sicher, dass die Lüftungsöffnungen nicht durch Staub verstopft sind. Bei Bedarf den Staub entfernen.
• Stellen Sie sicher, dass das Gerät nicht überhitzt werden kann.
• Betreiben Sie das Gerät nicht ohne Flüssigkeit, da die Pumpe sonst trocken läuft.
• Wischen Sie alle Verschüttungen sofort ab. Feuchtigkeit und Flüssigkeit können die elektrischen Komponenten des Gerätes dauerhaft
beschädigen.
• Verwenden Sie einen geeigneten, lösungsmittelfreien Reiniger, um die Oberfläche des Gerätes zu reinigen.
• Es wird empfohlen, das Gerät monatlich zu betreiben, um die beste Leistung und Ausgangsbedingung zu erreichen.
Wenn die Sicherung defekt ist, ersetzen Sie sie durch eine Sicherung gleichen Typs und gleicher Leistung. Um die Sicherung auszutauschen, schalten
Sie zuerst die Stromversorgung aus und führen Sie die folgenden Schritte aus.
Vorgehensweise:
Schritt 1: Öffnen Sie den Sicherungshalter auf der Rückseite mit einem geeigneten flachen Schraubendreher.
Schritt 2: Entfernen Sie die alte Sicherung aus dem Sicherungshalter.
Schritt 3: Setzen Sie die neue Sicherung in den Sicherungshalter ein.
Schritt 4: Setzen Sie den Sicherungshalter in das Gehäuse ein.

ATENCIÓN! Antes de realizar cualquier operación con la unidad, lea atentamente este manual de instrucciones y guárdelo con cura para futuras
consultas. Contiene información importante sobre la instalación, uso y mantenimiento de la unidad.
• Desembale y compruebe cuidadosamente que no haya daños de transporte antes de usar la unidad
• Lea atentamente estas instrucciones y siga las instrucciones.
• Observe todas las advertencias de seguridad. Nunca elimine las advertencias de seguridad u otra información del equipo.
• Asegúrese de que no haya ranuras de ventilación bloqueadas; de lo contrario la unidad se sobrecalentará.
PRECAUCIÓN: Antes de conectar el equipo a la toma de corriente, primero verifique que la tensión y la frecuencia de la red coincidan con los
valores especificados en el equipo. Si el equipo tiene un interruptor de selección de voltaje, conecte el equipo a la toma de corriente solo si los
valores del equipo y los valores de la red eléctrica coinciden. Si el cable de alimentación incluido o el adaptador de corriente no encaja en el
tomacorriente de pared, comuníquese con su electricista.
• Después de conectar la unidad, verifique todos los cables para evitar daños o accidentes debido a peligros de tropiezos.
• Asegúrese de que el cable de alimentación nunca esté rizado o dañado. Compruebe el dispositivo y el cable de alimentación de vez en
cuando.
• ¡Desconecte siempre la alimentación de la red eléctrica, cuando no se utilice el dispositivo o antes de limpiarlo! Sólo manipule el cable de
alimentación por el enchufe. Nunca desenchufe el cable tirando del cable de alimentación.
• Desenchufe el cable de alimentación y el adaptador de alimentación de la toma de corriente si existe riesgo de que se caiga un rayo o antes
de períodos prolongados de desuso.
• No encienda y apague la unidad en intervalos cortos.
• No conecte la unidad a un dimmerpack.
• Instale la unidad en un lugar bien ventilado.
• Esta unidad no está diseñada para una operación permanente. Las interrupciones constantes de la operación garantizarán que el dispositivo
le servirá durante mucho tiempo sin defectos.
PRECAUCION: La boquilla está muy caliente, hay peligro de quemaduras y daños!
• Vapor muy caliente se escapa de la boquilla. ¡Peligro de quemaduras!
• Ocasionalmente pueden salir gotas de fluido durante la operativa. Nunca coloque a personas o animals a menos de 3 metro de la boquilla.
• Nunca toque la boquilla durante la operativa. ¡Peligro de quemaduras!
• La unidad debe colocarse en una zona no inflamable, no combustible y no sensible al calor.
• Mantenga una distancia de seguridad de 1 metro a cualquier objeto inflamable, combustible o sensibles al calor.
• Nunca apunte la niebla hacia fuentes de ignición como fuegos artificiales.
• Nunca abra la unidad o la deje desatendida mientras esté conectada a la alimentación.
• No ingeste el líquido de humo. En caso de contacto con los ojos, lávelos abundantemente con agua. Consulte a su medico en caso de ingesta
accidental.
• Las salpicaduras de líquido pueden provocar corta circuitos. Limpie y seque la unidad siguiendo las instrucciones.
• El humo o niebla pueden activar los detectores de humo!
PRECAUCIÓN: Si el cable de alimentación del dispositivo está equipado con un contacto de conexión a tierra, debe conectarse a una toma de
corriente con una conexión a tierra de protección. Nunca desactive la conexión a tierra protectora de un cable de alimentación.
• Asegúrese de que la unidad no esté expuesta a calor extremo, humedad o polvo.
• Limpie la unidad con un paño seco.
• No toque el aparato con las manos descubiertas durante su funcionamiento (la carcasa se calienta mucho). Después de la desconexión, la
unidad puede permanecer caliente durante unas horas.
• Esta unidad está diseñada exclusivamente para uso en interiores, no use este equipo en las inmediaciones del fluido (no se aplica a equipos
especiales para exteriores, en este caso, siga las instrucciones especiales que se indican a continuación). No exponga esta unidad a
materiales, líquidos o gases inflamables.
• Si la unidad ha estado expuesta a una fluctuación drástica de la temperatura (por ejemplo, después del transporte), no la encienda de
inmediato. El agua de condensación que surge puede dañar su unidad. Deje la unidad apagada hasta que alcance la temperatura ambiente.
• Nunca intente pasar por alto el interruptor termostático o los fusibles.
• No desmonte ni modifique la unidad.
• Para reemplazo, use fusibles / bombilla del mismo tipo y clasificación solamente.
• Las reparaciones, el servicio y la conexión eléctrica deben ser llevados a cabo por un técnico calificado.
• La temperatura ambiente siempre debe estar entre -5 ° C y + 45 ° C.
• Si esta unidad se opera de una manera diferente a la descrita en este manual, el producto podría sufrir daños y la garantía quedará anulada.
• Las bolsas de plástico deben mantenerse fuera del alcance de los niños.
• La unidad debe instalarse fuera del alcance de los niños. Nunca deje la unidad funcionando sin supervisión cuando esté conectada a una
fuente de alimentación.
Este símbolo en el producto o en su empaque indica que este producto no debe ser tratado como basura doméstica. En su lugar, se entregará al punto de recolección
correspondiente para el reciclaje de equipos eléctricos y electrónicos.
Al garantizar que este producto se elimine correctamente, ayudará a evitar posibles consecuencias negativas para el medio ambiente y la salud humana, que de otro modo podrían ser causadas
por el manejo inadecuado de los desechos de este producto. El reciclaje de materiales ayudará a conservar los recursos naturales. Para obtener información más detallada sobre el reciclaje de
este producto, comuníquese con su Oficina Cívica local, el servicio de eliminación de desechos domésticos o la tienda donde adquirió el producto.

PRECAUCIÓN! Inmediatamente después de recibir el producto, desembale la caja con cuidado, verifique el contenido para asegurarse de que todas las
partes estén presentes y se hayan recibido en buenas condiciones. Notifique al remitente de inmediato y guarde el material de empaque para
inspeccionarlo si aparecen piezas dañadas por el envío o si el propio paquete muestra signos de mal manejo. Guarde el paquete y todos los materiales
de embalaje. En el caso de que el producto deba devolverse a la fábrica, es importante que el producto se devuelva en la caja y empaque originales de
fábrica.
Si el dispositivo ha estado expuesto a una drástica fluctuación de la temperatura (por ejemplo, después del transporte), no lo encienda de inmediato. El
agua de condensación que surge podría dañar su dispositivo. Deje el dispositivo apagado hasta que alcance la temperatura ambiente.
En la etiqueta que se encuentra en la parte posterior del producto, se indica que este tipo de fuente de alimentación debe estar conectada. Verifique
que la tensión de la red corresponda a esto, todos los demás voltajes que los especificados, el efecto de la luz puede dañarse irreparablemente. El
producto también debe estar conectado directamente a la red eléctrica y se puede utilizar.
Siempre conecte el dispositivo a un circuito protegido (disyuntor o fusible). Asegúrese de que el dispositivo tenga una toma de tierra eléctrica
adecuada para evitar el riesgo de electrocución o incendio.
Paso 1: Coloque la unidad en una superficie plana y en un área adecuadamente grande con al menos 50 cm de espacio
abierto alrededor de la unidad.
Paso 2: Llene el tanque de fluido con líquido de neblina a base de aceite Beamz.
Paso 3: Conecte la máquina a una fuente de alimentación adecuada. Para determinar el requerimiento de energía
para la unidad, consulte la etiqueta en la parte posterior de la unidad.
Paso 4: Encienda la unidad, coloque el interruptor de encendido en la posición "ON". La pantalla LCD mostrará
"WARMING UP". Después de unos segundos, la pantalla LCD mostrará "READY”.
Paso 5: Para comenzar a producir niebla, presione "LOCK" en la pantalla y luego seleccione el nivel de salida "ARRIBA" o
"ABAJO". Para detener la producción de neblina presiona nuevamente “LOCK”.
Paso 6: Apague la unidad, coloque el interruptor de encendido en la posición "OFF".
Paso 7: Antes de transportar la unidad, vacíe el tanque de fluido conectando un tubo a la válvula.
¡Utilice únicamente fluido de neblina a base de aceite original de Beamz! (Referencia de Beamz 160.674, 160.669,
160.668 y 160.673). La garantía se anulará si se utiliza cualquier otro tipo de líquido, el uso incorrecto del líquido
puede ocasionar la falla de la máquina y su mal funcionamiento
Cuando la pantalla muestra "READY", puede comenzar a producir niebla y ajustar la configuración a través del panel de pantalla LCD.
Menu
Descripción
DMX512
Seleccionar la dirección DMX inicio
Interval
00 min 01 seg - 59 min 59 seg
Duration
00 min 01 seg - 59 min 59 seg
Timer
Configuración de la función del temporizador, pulse arriba y abajo.
Volume
Ajuste de volumen de neblina, presione up y down
Fan
Velocidad ventilador 20 - 100%
DMX
001-253
Manual
Botón Manual
Remote
Cambiar la función de control remoto ON - OFF
MANDO A DISTANCIA
A: ON / OFF
B: ON / OFF
C: Volúmen de salida +
D: Volúmen de salida -

La unidad proporciona conectores XLR de 3 pines para la conexión DMX. El siguiente diagrama indica la información de asignación de pin.
Precaución: En el último aparato, debe cerrar la línea DMX con una resistencia de terminación. Tome un conector XLR y suelde una
resistencia de 120 Ohm entre la señal (-) y la señal (+) y conéctela a la salida DMX del último dispositivo en la línea.
CANALES DMX
Canal
Función
Valor
Descripción
1
Haze
000-005
Niebla off
006-127
Niebla salida baja
128-255
Niebla salida alta
2
Fan
000-005
Velocidad ventilador 20%
006-255
Velocidad ventilador 21 - 100%
Recomendamos una limpieza frecuente de la unidad.
Nota: No hay piezas reparables dentro de la unidad, excepto el fusible. Las reparaciones y las operaciones de servicio solo deben ser realizadas por
distribuidores autorizados.
PRECAUCIÓN! Desconecte de la red eléctrica antes de iniciar la operación de mantenimiento!
• Asegúrese de que el fluido no se contamine.
• Asegúrese de que las rejillas de ventilación no estén obstruidas por el polvo. Si es necesario quitar el polvo.
• Asegúrese de que la unidad no pueda sobrecalentarse.
• No haga funcionar la unidad sin ningún líquido, ya que la bomba funcionará en seco.
• Limpie el líquido derramado inmediatamente. La humedad y el fluido pueden dañar permanentemente los componentes eléctricos de la
unidad.
• Para limpiar la superficie de la unidad, use un limpiador adecuado y sin disolventes.
• Se recomienda utilizar la unidad mensualmente para lograr el mejor rendimiento y condición de salida.
Si el fusible está defectuoso, sustitúyalo por un fusible del mismo tipo y valor. Antes de cambiar el fusible, desenchufe el cable de alimentación.
Procedimiento:
Paso 1: Abra el portafusibles en el panel trasero con un destornillador adecuado.
Paso 2: Retire el fusible viejo del portafusibles.
Paso 3: Instale el nuevo fusible en el portafusibles.
Paso 4: Reemplace el portafusibles en la carcasa.

AVERTISSEMENT ! Avant d'effectuer toute manipulation sur l'appareil, lisez avec attention la présente notice et conservez-la pour pouvoir vous y
reporter ultérieurement. Elle contient des informations importantes sur l’installation, l’utilisation et l’entretien de l’appareil.
• Déballez l'appareil, vérifiez soigneusement qu'il n'y a pas de dommages dus au transport avant de l'utiliser.
• Veuillez lire attentivement ces instructions et les suivre.
• Respectez tous les avertissements de sécurité. Ne retirez jamais les avertissements de sécurité ou autres informations figurant sur l’appareil.
• Assurez-vous qu'aucune ouïe d'aération n'est obstruée, sinon il y a risque de surchauffe de l’appareil.
ATTENTION : Avant de brancher l’appareil à une prise d’alimentation, assurez-vous tout d’abord que la tension et la fréquence du secteur
correspondent aux valeurs spécifiées sur l’appareil. S’il est équipé d'un sélecteur de tension, ne branchez l'appareil à la prise de courant que si les
valeurs de l'appareil et celles de l'alimentation secteur correspondent. Si le cordon d'alimentation ou l'adaptateur secteur fourni ne s'adapte pas à
votre prise murale, contactez votre électricien.
• Après avoir branché l'appareil, vérifiez tous les câbles afin d'éviter tout dommage ou accident, par exemple pour ne pas trébucher.
• Assurez-vous que le cordon d'alimentation n'est jamais serti ou endommagé. Vérifiez régulièrement l'appareil et le cordon d'alimentation.
• Débranchez toujours le cordon d'alimentation du secteur lorsque l'appareil n'est pas utilisé ou avant de le nettoyer ! Ne manipulez le cordon
d'alimentation que par la fiche. Ne débranchez jamais la fiche en tirant sur le cordon d'alimentation.
• Débranchez le cordon d'alimentation et l'adaptateur secteur de la prise de courant s'il y a un risque de foudre ou avant une longue période
d'inutilisation.
• N'allumez et n'éteignez pas l'appareil à intervalles rapprochés.
• Ne connectez pas l'appareil à un gradateur.
• Installez l'appareil dans un endroit bien ventilé.
• Cet appareil n'est pas conçu pour fonctionner en permanence. Des pauses d'utilisation régulières assureront un fonctionnement sans
problème sur le long terme.
ATTENTION : La buse sera très chaude, risque de brûlures et de blessures !
• De la vapeur très chaude s'échappe de la buse. Risque de brûlure !
• Occasionnellement, des gouttelettes de liquide très chaudes peuvent s'échapper pendant le fonctionnement. Ne visez donc jamais
directement des personnes ou des animaux et gardez une distance minimale de 3 m avec la buse.
• Ne touchez jamais la buse en fonctionnement. Risque de brûlure !
• L’appareil doit être placé dans un endroit non inflammable, non combustible et insensible à la chaleur.
• Maintenez une distance minimale d'un mètre de tous les objets inflammables, combustibles et sensibles à la chaleur.
• Ne dirigez jamais le brouillard vers des sources inflammables importantes telle un feu ou des effets pyrotechniques.
• N'avalez pas le liquide de brouillard. En cas de contact avec les yeux, rincez abondamment à l'eau. Consultez un médecin si vous avez avalé
accidentellement du liquide.
• Le produit déversé ou les gouttelettes de produit éclaboussé peuvent provoquer un risque de glissade. Épongez le liquide et jetez-le
conformément à la réglementation.
• brouillard peut activer les détecteurs de fumée !
ATTENTION : Si le cordon d'alimentation de l'appareil est équipé d'un contact de mise à la terre, il doit être connecté à une prise de courant avec
une terre de protection. Ne jamais désactiver la terre de protection d'un cordon d'alimentation.
• Assurez-vous que l'appareil n'est pas exposé à une chaleur extrême, à l'humidité ou à la poussière.
• Nettoyez l'appareil à l'aide d'un chiffon sec.
• Ne touchez pas le projecteur à mains nues pendant son fonctionnement (le boîtier devient très chaud). Après la mise hors tension, l'appareil
peut rester au chaud pendant quelques heures.
• Cet appareil est conçu exclusivement pour une utilisation à l'intérieur, n'utilisez pas cet appareil à proximité immédiate d'un liquide (ne
s'applique pas aux équipements extérieurs spéciaux - dans ce cas, respectez les instructions spéciales indiquées ci-dessous). N'exposez pas
cet appareil à des matériaux, liquides ou gaz inflammables.
• Si l'appareil a été exposé à des variations de température importantes (par ex. après un transport), ne l’allumez pas immédiatement. La
condensation pourrait endommager votre appareil. Laissez l'appareil éteint jusqu'à ce qu'il atteigne la température ambiante.
• N'essayez jamais de bridger l'interrupteur thermostatique ou les fusibles.
• Ne démontez pas ou ne modifiez pas l'appareil.
• Pour le remplacement, utilisez uniquement des fusibles/ampoules de même type et de même puissance.
• Les réparations, l'entretien et le raccordement électrique ne doivent être effectués que par un technicien qualifié.
• La température ambiante doit toujours être comprise entre -5° C et +45° C.
• Si cet appareil est utilisé dans un but autre que celui décrit dans ce manuel, il peut subir des dommages, dans ce cas, la garantie est caduque.
• Les sacs en plastique doivent être gardés hors de portée des enfants.
• L'appareil doit être installé hors de portée des enfants. Ne laissez jamais l'appareil en marche sans surveillance lorsqu'il est connecté à une
alimentation électrique.
Ce symbole sur le produit ou sur son emballage indique que ce produit ne doit pas être traité comme un déchet ménager. Il doi t être déposé au point de collecte approprié pour le
recyclage des équipements électriques et électroniques.
En vous assurant que ce produit est éliminé correctement, vous contribuerez à prévenir les conséquences négatives potentielle s pour l'environnement et la santé humaine, qui pourraient
autrement être causées par une manipulation inappropriée des déchets de ce produit. Le recyclage des matériaux contribuera à préserver les ressources naturelles. Pour de plus amples
informations sur le recyclage de ce produit, veuillez contacter votre bureau municipal local, votre service d'élimination des déchets ménagers ou le magasin où vous avez acheté le produit.

ATTENTION ! Dès réception du produit, déballez soigneusement le carton, vérifiez son contenu pour vous assurer que toutes les pièces sont présentes
et qu'elles ont été reçues en bon état. Avisez immédiatement l'expéditeur et conservez le matériel d'emballage ; contrôlez si des pièces semblent
endommagées lors de l'expédition ou si le colis lui-même montre des signes de mauvaise manipulation. Conservez l'emballage et tout le matériel
d'emballage. Dans le cas où le produit doit être retourné à l'usine, il est important que le produit soit retourné dans son emballage d'origine.
Si l'appareil a été exposé à des variations de température importantes (par ex. après un transport), ne l’allumez pas immédiatement. La condensation
pourrait endommager votre appareil. Laissez l'appareil éteint jusqu'à ce qu'il atteigne la température ambiante.
Le type d'alimentation auquel le produit doit être connecté est indiqué sur l'étiquette à l'arrière du produit. Vérifiez que la tension secteur corresponde
à cette tension, toutes les autres tensions que celles spécifiées peuvent endommager l’appareil. Le produit doit également être branché directement
sur le secteur et peut être utilisé. Pas de gradateur ni d'alimentation réglable.
Reliez toujours l'appareil à un circuit protégé (disjoncteur ou fusible). Assurez-vous que l'appareil dispose d'une mise à la terre électrique
appropriée pour éviter tout risque d'électrocution ou d'incendie.
Etape 1: Placez l’appareil sur une surface plane et dans une zone suffisamment large avec 50 cm d’espace au moins
autour de l’appareil.
Etape 2: Remplissez le réservoir avec du liquide base huile Beamz.
Etape 3: Reliez l’appareil au secteur en vous assurant de la conformité de la tension d’alimentation ; pour définir le
type d’alimentation requise, reportez-vous à la plaque à l’arrière de l’appareil.
Etape 4: Allumez l’appareil, mettez l’interrupteur sur la position “ON“. L’affichage LCD indique “WARMING UP”. Après
quelques secondes, l’affichage indique “READY”.
Etape 5: Pour démarrer la production de fumée, appuyez sur “LOCK” sur l’écran puis sélectionnez le niveau de sortie “UP” ou
“DOWN”. Pour arrêter, appuyez à nouveau sur “LOCK”.
Etape 6: Eteignez l’appareil en mettant l’interrupteur secteur sur la position “OFF”.
Etape 7: Avant de déplacer l’appareil, videz le réservoir en reliant un tube à la valve.
Utilisez uniquement du liquide original base huile BeamZ (référence Beamz 160.674, 160.669, 160.668 et 160.673). La
garantie devient caduque si un autre type de liquide est utilisé, une utilisation inadéquate du liquide peut engendrer
un défaut de l’appareil et un dysfonctionnement.
Lorsque l’affichage indique “READY”, vous pouvez commencer à produire de la fumée et ajuster les réglages via l’affichage LCD.
Menu
Description
DMX512
Réglage de l’adresse de démarrage DMX
Interval
00 min 01 sec - 59 min 59 sec
Duration
00 min 01 sec - 59 min 59 sec
Timer
Réglage fonction Timer, enclencher / désenclencher
Volume
Réglage volume fumée, enclencher / désenclencher
Fan
Vitesse ventilateur 20 - 100%
DMX
001-253
Manual
Touche test manuel
Remote
Activation gestion télécommande ON - OFF
TELECOMMANDE SANS FIL
A : ON / OFF
B : ON / OFF
C : Augmentation du volume de sortie
D : Diminution du volume de sortie

Cet appareil dispose de connecteurs XLR 3 pôles pour la connexion DMX. Le schéma ci-dessous présente la configuration de branchement.
Attention : Sur le dernier appareil, vous devez terminer la liaison DMX par un bouchon. Utilisez un connecteur XLR, soudez une résistance 120
ohms entre signal (-) et signal (+) et branchez ce connecteur sur la sortie DMX du dernier appareil de la ligne.
CANAUX DMX
Canel
Fonction
Valeur
Description
1
Fumée
000-005
Emission fumée désactivée
006-127
Emission fumée faible
128-255
Emission fumée élevée
2
Ventilateur
000-005
Vitesse ventilateur 20%
006-255
Vitesse ventilateur 21 - 100%
Nous recommandons un nettoyage fréquent de l’appareil.
Noté : Il n'y a aucune pièce réparable à l'intérieur de l'appareil, sauf le fusible. Les réparations et les opérations d'entretien ne doivent être effectuées
que par des revendeurs agréés.
REMARQUE : Débranchez la fiche secteur de la prise murale avant de commencer les travaux d'entretien !
• Assurez-vous que le liquide ne soit pas contaminé.
• Assurez-vous que les ouïes de ventilation ne soient pas obturées par de la poussière. Au besoin, nettoyez-les.
• Assurez-vous que l’appareil n’est pas en surchauffe.
• N’utilisez pas l’appareil sans liquide sinon la pompe fonctionnera à vide et à sec.
• Essuyez immédiatement tout liquide qui serait tombé. De l’humidité ou du liquide peut endommager durablement les composants
électriques de l’appareil.
• Pour nettoyer l’appareil, utilisez un produit nettoyant adapté et sans solvant.
• Il est recommandé de faire fonctionner l’appareil une fois par mois pour garantir un fonctionnement optimal de l’appareil.
Si le fusible est défectueux, remplacez-le par un fusible de même type et valeur. Avant de remplacer le fusible, débranchez le cordon secteur.
Procédure :
Etape 1 : Ouvrez le porte-fusible sur la face arrière avec un tournevis.
Etape 2 : Retirez l’ancien fusible du porte-fusible.
Etape 3 : Installez le nouveau fusible dans le porte-fusible.
Etape 4 : Replacez le porte-fusible dans le boîtier.

Rated voltage : 100-240VAC, 50-60Hz, 4-1.6A
DMX Channels : 2
Functions : Manual, DMX and wireless remote.
Dimensions per unit : 490 x 370 x 460mm
Weight (per unit) : 26,0kg
Design and product specifications are subject to change without prior notice.
The products referred to in this manual conform to the European Community Directives to which they are subject:
• Low Voltage (LVD) 2014/35/EU
• Electromagnetic Compatibility (EMC) 2014/30/EU
• Restriction of Hazardous Substances (RoHS) 2011/65/EU

. . . . . . . . . . . . . . . . . . . . . . . . . . . . . . . . . . . . . . . . . . . . . . . . . . . . . . . . . . . . . . . . . . . . . . . . . . . . . . . . . . . . . . . . . . . . . . . . . . . . . . . . . . . . . . . . . . . . . . . . . . . . . . . . . . . . . . . . . . . . . . . . . . . . . . . . . . .
. . . . . . . . . . . . . . . . . . . . . . . . . . . . . . . . . . . . . . . . . . . . . . . . . . . . . . . . . . . . . . . . . . . . . . . . . . . . . . . . . . . . . . . . . . . . . . . . . . . . . . . . . . . . . . . . . . . . . . . . . . . . . . . . . . . . . . . . . . . . . . . . . . . . . . . . . . .
. . . . . . . . . . . . . . . . . . . . . . . . . . . . . . . . . . . . . . . . . . . . . . . . . . . . . . . . . . . . . . . . . . . . . . . . . . . . . . . . . . . . . . . . . . . . . . . . . . . . . . . . . . . . . . . . . . . . . . . . . . . . . . . . . . . . . . . . . . . . . . . . . . . . . . . . . . .
. . . . . . . . . . . . . . . . . . . . . . . . . . . . . . . . . . . . . . . . . . . . . . . . . . . . . . . . . . . . . . . . . . . . . . . . . . . . . . . . . . . . . . . . . . . . . . . . . . . . . . . . . . . . . . . . . . . . . . . . . . . . . . . . . . . . . . . . . . . . . . . . . . . . . . . . . . .
. . . . . . . . . . . . . . . . . . . . . . . . . . . . . . . . . . . . . . . . . . . . . . . . . . . . . . . . . . . . . . . . . . . . . . . . . . . . . . . . . . . . . . . . . . . . . . . . . . . . . . . . . . . . . . . . . . . . . . . . . . . . . . . . . . . . . . . . . . . . . . . . . . . . . . . . . . .
. . . . . . . . . . . . . . . . . . . . . . . . . . . . . . . . . . . . . . . . . . . . . . . . . . . . . . . . . . . . . . . . . . . . . . . . . . . . . . . . . . . . . . . . . . . . . . . . . . . . . . . . . . . . . . . . . . . . . . . . . . . . . . . . . . . . . . . . . . . . . . . . . . . . . . . . . . .
. . . . . . . . . . . . . . . . . . . . . . . . . . . . . . . . . . . . . . . . . . . . . . . . . . . . . . . . . . . . . . . . . . . . . . . . . . . . . . . . . . . . . . . . . . . . . . . . . . . . . . . . . . . . . . . . . . . . . . . . . . . . . . . . . . . . . . . . . . . . . . . . . . . . . . . . . . .
. . . . . . . . . . . . . . . . . . . . . . . . . . . . . . . . . . . . . . . . . . . . . . . . . . . . . . . . . . . . . . . . . . . . . . . . . . . . . . . . . . . . . . . . . . . . . . . . . . . . . . . . . . . . . . . . . . . . . . . . . . . . . . . . . . . . . . . . . . . . . . . . . . . . . . . . . . .
. . . . . . . . . . . . . . . . . . . . . . . . . . . . . . . . . . . . . . . . . . . . . . . . . . . . . . . . . . . . . . . . . . . . . . . . . . . . . . . . . . . . . . . . . . . . . . . . . . . . . . . . . . . . . . . . . . . . . . . . . . . . . . . . . . . . . . . . . . . . . . . . . . . . . . . . . . .
. . . . . . . . . . . . . . . . . . . . . . . . . . . . . . . . . . . . . . . . . . . . . . . . . . . . . . . . . . . . . . . . . . . . . . . . . . . . . . . . . . . . . . . . . . . . . . . . . . . . . . . . . . . . . . . . . . . . . . . . . . . . . . . . . . . . . . . . . . . . . . . . . . . . . . . . . . .
. . . . . . . . . . . . . . . . . . . . . . . . . . . . . . . . . . . . . . . . . . . . . . . . . . . . . . . . . . . . . . . . . . . . . . . . . . . . . . . . . . . . . . . . . . . . . . . . . . . . . . . . . . . . . . . . . . . . . . . . . . . . . . . . . . . . . . . . . . . . . . . . . . . . . . . . . . .
. . . . . . . . . . . . . . . . . . . . . . . . . . . . . . . . . . . . . . . . . . . . . . . . . . . . . . . . . . . . . . . . . . . . . . . . . . . . . . . . . . . . . . . . . . . . . . . . . . . . . . . . . . . . . . . . . . . . . . . . . . . . . . . . . . . . . . . . . . . . . . . . . . . . . . . . . . .
. . . . . . . . . . . . . . . . . . . . . . . . . . . . . . . . . . . . . . . . . . . . . . . . . . . . . . . . . . . . . . . . . . . . . . . . . . . . . . . . . . . . . . . . . . . . . . . . . . . . . . . . . . . . . . . . . . . . . . . . . . . . . . . . . . . . . . . . . . . . . . . . . . . . . . . . . . .
. . . . . . . . . . . . . . . . . . . . . . . . . . . . . . . . . . . . . . . . . . . . . . . . . . . . . . . . . . . . . . . . . . . . . . . . . . . . . . . . . . . . . . . . . . . . . . . . . . . . . . . . . . . . . . . . . . . . . . . . . . . . . . . . . . . . . . . . . . . . . . . . . . . . . . . . . . .
. . . . . . . . . . . . . . . . . . . . . . . . . . . . . . . . . . . . . . . . . . . . . . . . . . . . . . . . . . . . . . . . . . . . . . . . . . . . . . . . . . . . . . . . . . . . . . . . . . . . . . . . . . . . . . . . . . . . . . . . . . . . . . . . . . . . . . . . . . . . . . . . . . . . . . . . . . .
. . . . . . . . . . . . . . . . . . . . . . . . . . . . . . . . . . . . . . . . . . . . . . . . . . . . . . . . . . . . . . . . . . . . . . . . . . . . . . . . . . . . . . . . . . . . . . . . . . . . . . . . . . . . . . . . . . . . . . . . . . . . . . . . . . . . . . . . . . . . . . . . . . . . . . . . . . .
. . . . . . . . . . . . . . . . . . . . . . . . . . . . . . . . . . . . . . . . . . . . . . . . . . . . . . . . . . . . . . . . . . . . . . . . . . . . . . . . . . . . . . . . . . . . . . . . . . . . . . . . . . . . . . . . . . . . . . . . . . . . . . . . . . . . . . . . . . . . . . . . . . . . . . . . . . .
. . . . . . . . . . . . . . . . . . . . . . . . . . . . . . . . . . . . . . . . . . . . . . . . . . . . . . . . . . . . . . . . . . . . . . . . . . . . . . . . . . . . . . . . . . . . . . . . . . . . . . . . . . . . . . . . . . . . . . . . . . . . . . . . . . . . . . . . . . . . . . . . . . . . . . . . . . .
. . . . . . . . . . . . . . . . . . . . . . . . . . . . . . . . . . . . . . . . . . . . . . . . . . . . . . . . . . . . . . . . . . . . . . . . . . . . . . . . . . . . . . . . . . . . . . . . . . . . . . . . . . . . . . . . . . . . . . . . . . . . . . . . . . . . . . . . . . . . . . . . . . . . . . . . . . .
. . . . . . . . . . . . . . . . . . . . . . . . . . . . . . . . . . . . . . . . . . . . . . . . . . . . . . . . . . . . . . . . . . . . . . . . . . . . . . . . . . . . . . . . . . . . . . . . . . . . . . . . . . . . . . . . . . . . . . . . . . . . . . . . . . . . . . . . . . . . . . . . . . . . . . . . . . .
. . . . . . . . . . . . . . . . . . . . . . . . . . . . . . . . . . . . . . . . . . . . . . . . . . . . . . . . . . . . . . . . . . . . . . . . . . . . . . . . . . . . . . . . . . . . . . . . . . . . . . . . . . . . . . . . . . . . . . . . . . . . . . . . . . . . . . . . . . . . . . . . . . . . . . . . . . .
. . . . . . . . . . . . . . . . . . . . . . . . . . . . . . . . . . . . . . . . . . . . . . . . . . . . . . . . . . . . . . . . . . . . . . . . . . . . . . . . . . . . . . . . . . . . . . . . . . . . . . . . . . . . . . . . . . . . . . . . . . . . . . . . . . . . . . . . . . . . . . . . . . . . . . . . . . .
. . . . . . . . . . . . . . . . . . . . . . . . . . . . . . . . . . . . . . . . . . . . . . . . . . . . . . . . . . . . . . . . . . . . . . . . . . . . . . . . . . . . . . . . . . . . . . . . . . . . . . . . . . . . . . . . . . . . . . . . . . . . . . . . . . . . . . . . . . . . . . . . . . . . . . . . . . .
. . . . . . . . . . . . . . . . . . . . . . . . . . . . . . . . . . . . . . . . . . . . . . . . . . . . . . . . . . . . . . . . . . . . . . . . . . . . . . . . . . . . . . . . . . . . . . . . . . . . . . . . . . . . . . . . . . . . . . . . . . . . . . . . . . . . . . . . . . . . . . . . . . . . . . . . . . .
. . . . . . . . . . . . . . . . . . . . . . . . . . . . . . . . . . . . . . . . . . . . . . . . . . . . . . . . . . . . . . . . . . . . . . . . . . . . . . . . . . . . . . . . . . . . . . . . . . . . . . . . . . . . . . . . . . . . . . . . . . . . . . . . . . . . . . . . . . . . . . . . . . . . . . . . . . .
. . . . . . . . . . . . . . . . . . . . . . . . . . . . . . . . . . . . . . . . . . . . . . . . . . . . . . . . . . . . . . . . . . . . . . . . . . . . . . . . . . . . . . . . . . . . . . . . . . . . . . . . . . . . . . . . . . . . . . . . . . . . . . . . . . . . . . . . . . . . . . . . . . . . . . . . . . .
. . . . . . . . . . . . . . . . . . . . . . . . . . . . . . . . . . . . . . . . . . . . . . . . . . . . . . . . . . . . . . . . . . . . . . . . . . . . . . . . . . . . . . . . . . . . . . . . . . . . . . . . . . . . . . . . . . . . . . . . . . . . . . . . . . . . . . . . . . . . . . . . . . . . . . . . . . .
. . . . . . . . . . . . . . . . . . . . . . . . . . . . . . . . . . . . . . . . . . . . . . . . . . . . . . . . . . . . . . . . . . . . . . . . . . . . . . . . . . . . . . . . . . . . . . . . . . . . . . . . . . . . . . . . . . . . . . . . . . . . . . . . . . . . . . . . . . . . . . . . . . . . . . . . . . .
. . . . . . . . . . . . . . . . . . . . . . . . . . . . . . . . . . . . . . . . . . . . . . . . . . . . . . . . . . . . . . . . . . . . . . . . . . . . . . . . . . . . . . . . . . . . . . . . . . . . . . . . . . . . . . . . . . . . . . . . . . . . . . . . . . . . . . . . . . . . . . . . . . . . . . . . . . .
. . . . . . . . . . . . . . . . . . . . . . . . . . . . . . . . . . . . . . . . . . . . . . . . . . . . . . . . . . . . . . . . . . . . . . . . . . . . . . . . . . . . . . . . . . . . . . . . . . . . . . . . . . . . . . . . . . . . . . . . . . . . . . . . . . . . . . . . . . . . . . . . . . . . . . . . . . .
. . . . . . . . . . . . . . . . . . . . . . . . . . . . . . . . . . . . . . . . . . . . . . . . . . . . . . . . . . . . . . . . . . . . . . . . . . . . . . . . . . . . . . . . . . . . . . . . . . . . . . . . . . . . . . . . . . . . . . . . . . . . . . . . . . . . . . . . . . . . . . . . . . . . . . . . . . .
. . . . . . . . . . . . . . . . . . . . . . . . . . . . . . . . . . . . . . . . . . . . . . . . . . . . . . . . . . . . . . . . . . . . . . . . . . . . . . . . . . . . . . . . . . . . . . . . . . . . . . . . . . . . . . . . . . . . . . . . . . . . . . . . . . . . . . . . . . . . . . . . . . . . . . . . . . .
. . . . . . . . . . . . . . . . . . . . . . . . . . . . . . . . . . . . . . . . . . . . . . . . . . . . . . . . . . . . . . . . . . . . . . . . . . . . . . . . . . . . . . . . . . . . . . . . . . . . . . . . . . . . . . . . . . . . . . . . . . . . . . . . . . . . . . . . . . . . . . . . . . . . . . . . . . .

. . . . . . . . . . . . . . . . . . . . . . . . . . . . . . . . . . . . . . . . . . . . . . . . . . . . . . . . . . . . . . . . . . . . . . . . . . . . . . . . . . . . . . . . . . . . . . . . . . . . . . . . . . . . . . . . . . . . . . . . . . . . . . . . . . . . . . . . . . . . . . . . . . . . . . . . . . .
. . . . . . . . . . . . . . . . . . . . . . . . . . . . . . . . . . . . . . . . . . . . . . . . . . . . . . . . . . . . . . . . . . . . . . . . . . . . . . . . . . . . . . . . . . . . . . . . . . . . . . . . . . . . . . . . . . . . . . . . . . . . . . . . . . . . . . . . . . . . . . . . . . . . . . . . . . .
. . . . . . . . . . . . . . . . . . . . . . . . . . . . . . . . . . . . . . . . . . . . . . . . . . . . . . . . . . . . . . . . . . . . . . . . . . . . . . . . . . . . . . . . . . . . . . . . . . . . . . . . . . . . . . . . . . . . . . . . . . . . . . . . . . . . . . . . . . . . . . . . . . . . . . . . . . .
. . . . . . . . . . . . . . . . . . . . . . . . . . . . . . . . . . . . . . . . . . . . . . . . . . . . . . . . . . . . . . . . . . . . . . . . . . . . . . . . . . . . . . . . . . . . . . . . . . . . . . . . . . . . . . . . . . . . . . . . . . . . . . . . . . . . . . . . . . . . . . . . . . . . . . . . . . .
. . . . . . . . . . . . . . . . . . . . . . . . . . . . . . . . . . . . . . . . . . . . . . . . . . . . . . . . . . . . . . . . . . . . . . . . . . . . . . . . . . . . . . . . . . . . . . . . . . . . . . . . . . . . . . . . . . . . . . . . . . . . . . . . . . . . . . . . . . . . . . . . . . . . . . . . . . .
. . . . . . . . . . . . . . . . . . . . . . . . . . . . . . . . . . . . . . . . . . . . . . . . . . . . . . . . . . . . . . . . . . . . . . . . . . . . . . . . . . . . . . . . . . . . . . . . . . . . . . . . . . . . . . . . . . . . . . . . . . . . . . . . . . . . . . . . . . . . . . . . . . . . . . . . . . .
. . . . . . . . . . . . . . . . . . . . . . . . . . . . . . . . . . . . . . . . . . . . . . . . . . . . . . . . . . . . . . . . . . . . . . . . . . . . . . . . . . . . . . . . . . . . . . . . . . . . . . . . . . . . . . . . . . . . . . . . . . . . . . . . . . . . . . . . . . . . . . . . . . . . . . . . . . .
. . . . . . . . . . . . . . . . . . . . . . . . . . . . . . . . . . . . . . . . . . . . . . . . . . . . . . . . . . . . . . . . . . . . . . . . . . . . . . . . . . . . . . . . . . . . . . . . . . . . . . . . . . . . . . . . . . . . . . . . . . . . . . . . . . . . . . . . . . . . . . . . . . . . . . . . . . .
. . . . . . . . . . . . . . . . . . . . . . . . . . . . . . . . . . . . . . . . . . . . . . . . . . . . . . . . . . . . . . . . . . . . . . . . . . . . . . . . . . . . . . . . . . . . . . . . . . . . . . . . . . . . . . . . . . . . . . . . . . . . . . . . . . . . . . . . . . . . . . . . . . . . . . . . . . .
. . . . . . . . . . . . . . . . . . . . . . . . . . . . . . . . . . . . . . . . . . . . . . . . . . . . . . . . . . . . . . . . . . . . . . . . . . . . . . . . . . . . . . . . . . . . . . . . . . . . . . . . . . . . . . . . . . . . . . . . . . . . . . . . . . . . . . . . . . . . . . . . . . . . . . . . . . .
. . . . . . . . . . . . . . . . . . . . . . . . . . . . . . . . . . . . . . . . . . . . . . . . . . . . . . . . . . . . . . . . . . . . . . . . . . . . . . . . . . . . . . . . . . . . . . . . . . . . . . . . . . . . . . . . . . . . . . . . . . . . . . . . . . . . . . . . . . . . . . . . . . . . . . . . . . .
. . . . . . . . . . . . . . . . . . . . . . . . . . . . . . . . . . . . . . . . . . . . . . . . . . . . . . . . . . . . . . . . . . . . . . . . . . . . . . . . . . . . . . . . . . . . . . . . . . . . . . . . . . . . . . . . . . . . . . . . . . . . . . . . . . . . . . . . . . . . . . . . . . . . . . . . . . .
. . . . . . . . . . . . . . . . . . . . . . . . . . . . . . . . . . . . . . . . . . . . . . . . . . . . . . . . . . . . . . . . . . . . . . . . . . . . . . . . . . . . . . . . . . . . . . . . . . . . . . . . . . . . . . . . . . . . . . . . . . . . . . . . . . . . . . . . . . . . . . . . . . . . . . . . . . .
. . . . . . . . . . . . . . . . . . . . . . . . . . . . . . . . . . . . . . . . . . . . . . . . . . . . . . . . . . . . . . . . . . . . . . . . . . . . . . . . . . . . . . . . . . . . . . . . . . . . . . . . . . . . . . . . . . . . . . . . . . . . . . . . . . . . . . . . . . . . . . . . . . . . . . . . . . .
. . . . . . . . . . . . . . . . . . . . . . . . . . . . . . . . . . . . . . . . . . . . . . . . . . . . . . . . . . . . . . . . . . . . . . . . . . . . . . . . . . . . . . . . . . . . . . . . . . . . . . . . . . . . . . . . . . . . . . . . . . . . . . . . . . . . . . . . . . . . . . . . . . . . . . . . . . .
. . . . . . . . . . . . . . . . . . . . . . . . . . . . . . . . . . . . . . . . . . . . . . . . . . . . . . . . . . . . . . . . . . . . . . . . . . . . . . . . . . . . . . . . . . . . . . . . . . . . . . . . . . . . . . . . . . . . . . . . . . . . . . . . . . . . . . . . . . . . . . . . . . . . . . . . . . .
. . . . . . . . . . . . . . . . . . . . . . . . . . . . . . . . . . . . . . . . . . . . . . . . . . . . . . . . . . . . . . . . . . . . . . . . . . . . . . . . . . . . . . . . . . . . . . . . . . . . . . . . . . . . . . . . . . . . . . . . . . . . . . . . . . . . . . . . . . . . . . . . . . . . . . . . . . .
. . . . . . . . . . . . . . . . . . . . . . . . . . . . . . . . . . . . . . . . . . . . . . . . . . . . . . . . . . . . . . . . . . . . . . . . . . . . . . . . . . . . . . . . . . . . . . . . . . . . . . . . . . . . . . . . . . . . . . . . . . . . . . . . . . . . . . . . . . . . . . . . . . . . . . . . . . .
. . . . . . . . . . . . . . . . . . . . . . . . . . . . . . . . . . . . . . . . . . . . . . . . . . . . . . . . . . . . . . . . . . . . . . . . . . . . . . . . . . . . . . . . . . . . . . . . . . . . . . . . . . . . . . . . . . . . . . . . . . . . . . . . . . . . . . . . . . . . . . . . . . . . . . . . . . .
. . . . . . . . . . . . . . . . . . . . . . . . . . . . . . . . . . . . . . . . . . . . . . . . . . . . . . . . . . . . . . . . . . . . . . . . . . . . . . . . . . . . . . . . . . . . . . . . . . . . . . . . . . . . . . . . . . . . . . . . . . . . . . . . . . . . . . . . . . . . . . . . . . . . . . . . . . .
. . . . . . . . . . . . . . . . . . . . . . . . . . . . . . . . . . . . . . . . . . . . . . . . . . . . . . . . . . . . . . . . . . . . . . . . . . . . . . . . . . . . . . . . . . . . . . . . . . . . . . . . . . . . . . . . . . . . . . . . . . . . . . . . . . . . . . . . . . . . . . . . . . . . . . . . . . .
. . . . . . . . . . . . . . . . . . . . . . . . . . . . . . . . . . . . . . . . . . . . . . . . . . . . . . . . . . . . . . . . . . . . . . . . . . . . . . . . . . . . . . . . . . . . . . . . . . . . . . . . . . . . . . . . . . . . . . . . . . . . . . . . . . . . . . . . . . . . . . . . . . . . . . . . . . .
. . . . . . . . . . . . . . . . . . . . . . . . . . . . . . . . . . . . . . . . . . . . . . . . . . . . . . . . . . . . . . . . . . . . . . . . . . . . . . . . . . . . . . . . . . . . . . . . . . . . . . . . . . . . . . . . . . . . . . . . . . . . . . . . . . . . . . . . . . . . . . . . . . . . . . . . . . .
. . . . . . . . . . . . . . . . . . . . . . . . . . . . . . . . . . . . . . . . . . . . . . . . . . . . . . . . . . . . . . . . . . . . . . . . . . . . . . . . . . . . . . . . . . . . . . . . . . . . . . . . . . . . . . . . . . . . . . . . . . . . . . . . . . . . . . . . . . . . . . . . . . . . . . . . . . .
. . . . . . . . . . . . . . . . . . . . . . . . . . . . . . . . . . . . . . . . . . . . . . . . . . . . . . . . . . . . . . . . . . . . . . . . . . . . . . . . . . . . . . . . . . . . . . . . . . . . . . . . . . . . . . . . . . . . . . . . . . . . . . . . . . . . . . . . . . . . . . . . . . . . . . . . . . .
. . . . . . . . . . . . . . . . . . . . . . . . . . . . . . . . . . . . . . . . . . . . . . . . . . . . . . . . . . . . . . . . . . . . . . . . . . . . . . . . . . . . . . . . . . . . . . . . . . . . . . . . . . . . . . . . . . . . . . . . . . . . . . . . . . . . . . . . . . . . . . . . . . . . . . . . . . .
. . . . . . . . . . . . . . . . . . . . . . . . . . . . . . . . . . . . . . . . . . . . . . . . . . . . . . . . . . . . . . . . . . . . . . . . . . . . . . . . . . . . . . . . . . . . . . . . . . . . . . . . . . . . . . . . . . . . . . . . . . . . . . . . . . . . . . . . . . . . . . . . . . . . . . . . . . .
. . . . . . . . . . . . . . . . . . . . . . . . . . . . . . . . . . . . . . . . . . . . . . . . . . . . . . . . . . . . . . . . . . . . . . . . . . . . . . . . . . . . . . . . . . . . . . . . . . . . . . . . . . . . . . . . . . . . . . . . . . . . . . . . . . . . . . . . . . . . . . . . . . . . . . . . . . .
. . . . . . . . . . . . . . . . . . . . . . . . . . . . . . . . . . . . . . . . . . . . . . . . . . . . . . . . . . . . . . . . . . . . . . . . . . . . . . . . . . . . . . . . . . . . . . . . . . . . . . . . . . . . . . . . . . . . . . . . . . . . . . . . . . . . . . . . . . . . . . . . . . . . . . . . . . .
. . . . . . . . . . . . . . . . . . . . . . . . . . . . . . . . . . . . . . . . . . . . . . . . . . . . . . . . . . . . . . . . . . . . . . . . . . . . . . . . . . . . . . . . . . . . . . . . . . . . . . . . . . . . . . . . . . . . . . . . . . . . . . . . . . . . . . . . . . . . . . . . . . . . . . . . . . .
. . . . . . . . . . . . . . . . . . . . . . . . . . . . . . . . . . . . . . . . . . . . . . . . . . . . . . . . . . . . . . . . . . . . . . . . . . . . . . . . . . . . . . . . . . . . . . . . . . . . . . . . . . . . . . . . . . . . . . . . . . . . . . . . . . . . . . . . . . . . . . . . . . . . . . . . . . .
. . . . . . . . . . . . . . . . . . . . . . . . . . . . . . . . . . . . . . . . . . . . . . . . . . . . . . . . . . . . . . . . . . . . . . . . . . . . . . . . . . . . . . . . . . . . . . . . . . . . . . . . . . . . . . . . . . . . . . . . . . . . . . . . . . . . . . . . . . . . . . . . . . . . . . . . . . .

offers a wide range of high performance lighting
equipment and related accessories for the rental, entertainment
and architectural lighting markets. BeamZ Pro stands for performance,
innovation and value pricing!
Documenttranscriptie
160.770 V1.0 HZ3000 Haze MACHINE ENGLISH SAFETY INSTRUCTIONS ....................................................................................................................................................................................................................................................................................... 3 UNPACKING INSTRUCTION ................................................................................................................................................................................................................................................................................. 4 POWERSUPPLY ........................................................................................................................................................................................................................................................................................................ 4 INSTALLATION........................................................................................................................................................................................................................................................................................................... 4 OPERATION ................................................................................................................................................................................................................................................................................................................. 4 DMX512 CONTROL .................................................................................................................................................................................................................................................................................................... 5 CLEANING .................................................................................................................................................................................................................................................................................................................... 5 REPLACING THE FUSE .......................................................................................................................................................................................................................................................................................... 5 NEDERLANDS VEILIGHEIDSINSTRUCTIES ................................................................................................................................................................................................................................................................................. 6 UITPAKKEN ................................................................................................................................................................................................................................................................................................................. 7 AANSLUITSPANNING ............................................................................................................................................................................................................................................................................................. 7 INSTALLATIE .............................................................................................................................................................................................................................................................................................................. 7 BEDIENING................................................................................................................................................................................................................................................................................................................... 7 DMX512 BEDIENING ................................................................................................................................................................................................................................................................................................ 8 REINIGEN ...................................................................................................................................................................................................................................................................................................................... 8 VERVANGEN ZEKERING ....................................................................................................................................................................................................................................................................................... 8 DEUTSCH SICHERHEITSHINWEISE....................................................................................................................................................................................................................................................................................... 9 AUSPACKEN ............................................................................................................................................................................................................................................................................................................. 10 NETZANSCHLUSS .................................................................................................................................................................................................................................................................................................. 10 INSTALLATION......................................................................................................................................................................................................................................................................................................... 10 BEDIENUNG............................................................................................................................................................................................................................................................................................................... 10 DMX512 BEDIENUNG .............................................................................................................................................................................................................................................................................................. 11 REINIGUNG .................................................................................................................................................................................................................................................................................................................. 11 SICHERUNGWECHSEL .......................................................................................................................................................................................................................................................................................... 11 ESPAÑOL INSTRUCCIONES DE SEGURIDAD ...................................................................................................................................................................................................................................................................12 INSTRUCCIONES DE DESEMBALAJE .......................................................................................................................................................................................................................................................... 13 FUENTE DE ALIMENTACIÓN ............................................................................................................................................................................................................................................................................ 13 INSTALACIÓN ........................................................................................................................................................................................................................................................................................................... 13 OPERACIÓN ............................................................................................................................................................................................................................................................................................................... 13 DMX512 CONTROL ...................................................................................................................................................................................................................................................................................................14 LIMPIEZA .....................................................................................................................................................................................................................................................................................................................14 CAMBIANDO EL FUSIBLE ....................................................................................................................................................................................................................................................................................14 FRANÇAIS INSTRUCTIONS DE SECURITE ..........................................................................................................................................................................................................................................................................15 INSTRUCTIONS DE DEBALLAGE .................................................................................................................................................................................................................................................................... 16 ALIMENTATION ....................................................................................................................................................................................................................................................................................................... 16 INSTALLATION......................................................................................................................................................................................................................................................................................................... 16 FONCTIONNEMENT ............................................................................................................................................................................................................................................................................................... 16 GESTION DMX512 ....................................................................................................................................................................................................................................................................................................17 NETTOYAGE ...............................................................................................................................................................................................................................................................................................................17 REMPLACEMENT DU FUSIBLE ........................................................................................................................................................................................................................................................................17 TECHNICAL DETAILS TECHNICAL SPECIFICATIONS ......................................................................................................................................................................................................................................................................... 18 W ARNING! Before carrying out any operations with the unit, carefully read this instruction manual and keep it with cure for future ref erence. It contains important information about the installation, usage and maintenance of the unit. • • • • Unpack and check carefully that there is no transportation damage before using the unit. Please read these instructions carefully and follow the instructions. Observe all safety warnings. Never remove safety warnings or other information from the equipment. Be sure that no ventilation slots are blocked; otherwise the unit will overheated. CAUTION: Before connecting the equipment to the power outlet, first verify that the mains voltage and frequency match the values speci fied on the equipment. If the equipment has a voltage selection switch, connect the equipment to the power outlet only if the equipment values and the mains power values match. If the included power cord or power adapter does not fit in your wall outlet, contact your electrician. • • • • • • • • After connecting the unit, check all cables in order to prevent damage or accidents, e.g., due to tripping hazards. Make sure that the power cord is never crimped or damaged. Check the unit and the power cord from time to time. Always disconnect power from the mains, when unit is not used or before cleaning! Only handle the power cord by the plug. Never pull out the plug by tugging the power cord. Unplug the power cord and power adapter from the power outlet if there is a risk of a lightning strike or before extended per iods of disuse. Do not switch the unit on and off in short intervals. Do not connect the unit to a dimmerpack. Always allow free air space of at least 50 cm around the unit for ventilation. This unit is not designed for permanent operation. Consistent operation breaks will ensure that the unit will serve you for a long time without defects. CAUTION: The nozzle will be very hot, danger of burns and injury! • • • • • • • • • Very hot steam escapes from the nozzle. Danger of getting burnt! Occasionally very hot droplets of fluid may escape when in operation. Thus never aim at persons or animals directly and keep a minimum distance of 3 m (9.8 ft) to the nozzle. Never touch the nozzle when in operation. Danger of getting burnt! The location for the unit must be non-flammable, non-combustible and not sensitive to heat. Keep a minimum distance of 1 meter (3.28 ft) to all flammable, combustible objects and objects sensitive to heat. Never point the fog at strong sources of ignition like fire or pyrotechnic effects. Do not swallow the fog fluid. In case of eye contact, rinse with a lot of water. Consult a doctor should you have accidentally swallowed some fluid. Spilled fluid or splashed fluid droplets can cause slip hazard. Mop up the fluid and dispose of it according to regulations. Fog may activate smoke detectors! CAUTION: If the power cord of the unit is equipped with an earthing contact, then it must be connected to an outlet with a protective ground. Never deactivate the protective ground of a power cord. • • • • • • • • • • • • • Make sure that the unit is not exposed to extreme heat, moisture or dust. Clean the unit using a dry cloth. Do not touch the unit bare-handed during its operation (housing becomes very hot). After switching off, the unit can remain warm for a few hours. This unit is designed exclusively for indoor use, do not use this equipment in the immediate vicinity of fluid (does not apply to special outdoor equipment - in this case, observe the special instructions noted below). Do not expose this unit to flammable materials, fluids or gases. If the unit has been exposed to drastic temperature fluctuation (e.g. after transportation), do not switch it on immediately. The arising condensation water might damage your unit. Leave the unit switched off until it has reached room temperature. Never attempt to bypass the thermostatic switch or fuses. Do not dismantle or modify the unit. For replacement use fuses/bulb of same type and rating only. Repairs, servicing and electric connection must be carried out by a qualified technician. The ambient temperature must always be between -5° C and +45° C. If this unit is operated in any other way, than the one described in this manual, the product may suffer damages and the warranty becomes void. Plastic bags must be kept out of reach of children. Unit must be installed out of the reach of children. Never leave the unit running unattended when connected to a power supply. This symbol on the product or on its packaging indicates that this product shall not be treated as household waste. Instead i t shall be handed over to the applicable collection point for the recycling of electrical and electronic equipment. By ensuring this product is disposed of correctly, you will help prevent potential negative consequences for the environment and human health, which could otherwise be caused by inappropriate waste handling of this product. The recycling of materials will help to conserve natural resources. For more detailed information about recycling of this product, please contact your local Civic Office, your househ old waste disposal service or the shop where you purchased the product. CAUTION! Immediately upon receiving the product, carefully unpack the carton, check the contents to ensure that all parts are present, and have been received in good condition. Notify the shipper immediately and retain packing material for inspection if any parts appear damage from shipping or the package itself shows signs of mishandling. Save the package and all packing materials. In the event that the product must be returned to the factory, it is important that the product be returned in the original factory box and packing. If the unit has been exposed to drastic temperature fluctuation (e.g. after transportation), do not switch it on immediately. The arising condensation water might damage your unit. Leave the unit switched off until it has reached room temperature. On the label on the backside of the unit is indicated on this type of power supply must be connected. Check that the mains voltage corresponds to this, all other voltages than specified, the light effect can be irreparably damaged. The product must also be directly connected to the mains and may be used. No dimmer or adjustable power supply. Always connect the unit to a protected circuit (circuit breaker or fuse). Make sure the unit has an appropriate electrical ground to avoid the risk of electrocution or fire. Step 1: Place the unit on a flat surface and in a suitably large area with at least 50 cm of open space around the unit. Step 2: Fill the fluid tank with Beamz oil based haze fluid. Step 3: Connect the machine to a suitably rated power supply. To determine the power requirement for the unit refer to the label on the back of the unit. Step 4: Turn on the unit, put the power switch to the “ON” position.. The LCD display will show “WARMING UP”. After few seconds the LCD display will shows “READY”. Step 5: To start producing haze, press “LOCK” on screen then select output level “UP” or “DOWN”. To stop producing haze press again “LOCK”. Step 6: Turn off the unit, put the power switch to the “OFF” position. Step 7: Before transporting the unit, empty the fluid tank by connecting a tube to the valve. Use only original Beamz oil based haze fluid! (Beamz reference 160.674, 160.669, 160.668 and 160.673). Warranty will be voided if any other type of liquid is used, improper use of liquid may lead to machine failure and malfunction. When display shows “READY”, you can start producing haze and adjust the settings via LCD display panel. Menu DMX512 Interval Duration Timer Volume Fan DMX Manual Remote Description Set DMX start address 00 min 01 sec - 59 min 59 sec 00 min 01 sec - 59 min 59 sec Setting timer function, press up and down Setting haze volume, press up and down Fan speed 20 - 100% 001-253 Manual test button Switch remote control function ON - OFF W IRELESS REMOTE A: ON / OFF B: ON / OFF C: Output volume up D: Output volume down The unit provides 3 pin XLR connectors for DMX connection. The diagram below indicates pin assignment information. Caution: At the last fixture, you must close the DMX line with a terminating resistor. Take an XLR connector and solder a 120 Ohm resistor between signal (-) and signal (+) and connect it to the DMX output of the last fixture in the line. DMX CHANNELS Channel 1 2 Function Value Description Haze 000-005 Haze off 006-127 Haze output low 128-255 Haze output high 000-005 Fan speed 20% 006-255 Fan speed 21 - 100% Fan We recommend a frequent cleaning of the unit. Noted: There are no serviceable parts inside the unit except for the fuse. Repairs and service operations are only to be carried out by authorized dealers. CAUTION! Disconnect the mains plug from the wall socket before starting any maintenance work! • • • • • • • Ensure the fluid do not become contaminated. Ensure the air vents are not clogged by dust. If necessary remove the dust. Ensure that the unit can not get overheated. Do not run the unit without any fluid, as the pump will run dry. Wipe up spilled fluid immediately. Moisture and fluid can permanently damage the electrical components of the unit. For cleaning the surface of the unit use a suitable, solvent-free cleaner. It is recommended to run the unit on a monthly basis in order to achieve best performance and output condition. If the fuse is defective, replace the fuse with a fuse of the same type and value. Before replacing the fuse, unplug mains lead. Procedure: Step 1: Open the fuse holder on the rear panel with a fitting screwdriver. Step 2: Remove the old fuse from the fuse holder. Step 3: Install the new fuse in the fuse holder. Step 4: Replace the fuse holder in the housing. W AARSCHUW ING! Lees deze gebruiksaanwijzing zorgvuldig door voordat u met het apparaat gaat werken en bewaar deze handleiding voor toekomstig gebruik. Het bevat belangrijke informatie over de installatie, het gebruik en het onderhoud van het apparaat. • • • • Uitpakken en zorgvuldig controleren of er geen transportschade is voordat u het apparaat gebruikt. Lees deze instructies aandachtig door en volg de instructies op. Neem alle veiligheidswaarschuwingen in acht. Verwijder nooit veiligheidswaarschuwingen of andere informatie van het apparaat. Zorg ervoor dat er geen ventilatiesleuven geblokkeerd zijn, anders zal het apparaat oververhit raken. W AARSCHUW ING: Voordat u het apparaat verbind met een contactdoos, moet u eerst controleren of de netspanning en -frequentie overeenkomen met de op de apparatuur aangegeven waarden. Als de apparatuur een spanningsselectieschakelaar heeft, sluit het apparaat alleen aan op het stopcontact als de waarden van het apparaat en de waarden van de netspanning overeenkomen. Als het bijgeleverde netsnoer of de voedingsadapter niet in uw stopcontact past, neem dan contact op met uw elektricien. • • • • • • • • Controleer na het aansluiten van het apparaat alle kabels om schade of ongevallen, bijv. door struikelgevaar, te voorkomen. Zorg ervoor dat het netsnoer nooit gekrompen of beschadigd raakt. Controleer het apparaat en het netsnoer van tijd tot tijd. Trek altijd de stekker uit het stopcontact wanneer het apparaat niet wordt gebruikt of voordat u het apparaat schoonmaakt! Pa k het netsnoer alleen bij de stekker vast en trek nooit aan het netsnoer. Haal de stekker van het netsnoer en de voedingsadapter uit het stopcontact als er gevaar bestaat voor blikseminslag of voor langere perioden van buitengebruikstelling. Schakel het apparaat niet snel achter elkaar in en uit. Sluit het apparaat niet aan op een dimmerpack. Zorg altijd voor een vrije luchtruimte van minstens 50 cm rondom het apparaat voor ventilatie. Dit apparaat is niet ontworpen voor permanent gebruik. Consistente bedieningspauzes zullen ervoor zorgen dat het apparaat lang zonder defecten van dienst zal zijn. W AARSCHUW ING: Het mondstuk wordt zeer heet, gevaar voor verbranding en verwondingen! • • • • • • • • • Uit het mondstuk ontsnapt zeer hete stoom. Let op voor verbrandingsgevaar! Af en toe kan er tijdens het gebruik, zeer hete vloeistofdruppels ontsnappen. Richt het apparaat nooit op personen of dieren en houd een minimale afstand van 3 meter tot het mondstuk aan. Raak het mondstuk tijdens het gebruik nooit aan. Let op voor verbrandingsgevaar! De locatie van het apparaat moet onbrandbaar en niet gevoelig voor warmte zijn. Houd een minimumafstand van 1 meter tot alle ontvlambare, brandbare voorwerpen en voorwerpen die gevoelig zijn voor hitte. Richt de nevel/rook nooit op sterke ontstekingsbronnen zoals vuur of pyrotechnische effecten. Slik de vloeistof niet in. Houd het apparaat uit de buurt van kinderen. In geval van oogcontact, de ogen spoelen met veel water. Raadpleeg een arts als u per ongeluk vloeistof heeft ingeslikt. Gemorste vloeistof of spattende vloeistofdruppels kunnen slipgevaar veroorzaken. Dweil de vloeistof op en voer deze af volgen s de voorschriften. Mist kan rookmelders activeren! W AARSCHUW ING: Als het netsnoer van het apparaat is voorzien van een aardingscontact, moet het worden aangesloten op een stopcontact met een beschermende aarding. Deactiveer nooit de beschermende aarding van een netsnoer. • • • • • • • • • • • • • Zorg ervoor dat het apparaat niet wordt blootgesteld aan extreme hitte, vocht of stof. Reinig het apparaat met een droge doek. Raak het apparaat tijdens de werking ervan niet met blote handen aan (de behuizing kan zeer heet worden). Na het uitschakelen kan het apparaat enkele uren warm blijven. Dit apparaat is uitsluitend ontworpen voor gebruik binnenshuis, gebruik deze apparatuur niet in de onmiddellijke nabijheid van vloeistof ( niet van toepassing op speciale buitenapparatuur - in dit geval, neem de speciale instructies hieronder in acht). Stel dit apparaat niet bloot aan brandbare materialen, vloeistoffen of gassen. Als het apparaat is blootgesteld aan drastische temperatuurschommelingen (bijv. na transport), schakel het dan niet onmiddell ijk in. Het ontstane condenswater kan uw apparaat beschadigen. Laat het apparaat uitgeschakeld tot het op kamertemperatuur is. Probeer nooit de thermostaatschakelaar of zekeringen te omzeilen. Demonteer of wijzig het apparaat niet. Gebruik voor vervanging alleen zekeringen/lampen van hetzelfde type en vermogen. Reparaties, onderhoud en elektrische aansluiting moeten worden uitgevoerd door een gekwalificeerde technicus. De omgevingstemperatuur moet altijd tussen -5° C en +45° C liggen. Als dit apparaat op een andere manier wordt gebruikt dan beschreven in deze handleiding, kan het product beschadigd raken en vervalt de garantie. Plastic zakken moeten buiten het bereik van kinderen worden gehouden. Het apparaat moet buiten het bereik van kinderen worden geïnstalleerd en laat het apparaat nooit onbeheerd achter wanneer het op een stroomvoorziening is aangesloten. Dit symbool op het product of op de verpakking geeft aan dat dit product niet als huishoudelijk afval mag worden behandeld. I n plaats daarvan moet het worden overhandigd aan het toepasselijke inzamelpunt voor de recycling van elektrische en elektronische apparatuur. Door ervoor te zorgen dat dit product op de juiste wijze wordt afgevoerd, helpt u mogelijke negatieve gevolgen voor het milie u en de menselijke gezondheid te voorkomen, die anders zouden kunnen worden veroorzaakt door ongepaste afvalverwerking van dit product. Het recyclen van materialen draagt bij tot het behoud van natuurlijke hulpbronnen. Voor meer gedetailleerde informatie over het recyclen van dit product kunt u contact opnemen met uw plaatselijke gemeente, uw huisvuildienst of de winkel waar u het product hebt gekocht. LET OP! Onmiddellijk na ontvangst, zorgvuldig uitpakken van de doos, controleer de inhoud om ervoor te zorgen dat alle onderdelen aanwezig zijn en zijn in goede staat zijn ontvangen. Bij transportschade of ontbreken van onderdelen onmiddellijk de verkopende partij inlichten. Bewa ar de verpakking en het verpakkingsmateriaal. Indien het product moet worden teruggestuurd, is het belangrijk dat het product in originele verpakking wordt geretourneerd. Als het apparaat is blootgesteld aan drastische temperatuurverschillen (bv. na het transport), schakel het apparaat niet onmi ddellijk in. De ontstane condensatie kan het apparaat beschadigen. Zorg ervoor dat het apparaat op kamertemperatuur komt en steek vervolgens de voeding stekker in het stopcontact. Op achterzijde van het apparaat staat aangegeven op welke netspanning deze moet worden aangesloten. Controleer of de netspanning hiermee overeenkomt, bij alle andere netspanningen dan aangegeven kan het apparaat onherstelbaar worden beschadigd. Tevens moet het appara at direct op de netspanning worden aangesloten en mag géén dimmer of regelbare voeding worden gebruikt. Sluit het apparaat altijd aan op een beschermd circuit (aardlekschakelaar of zekering). Zorg ervoor dat het apparaat voldoende elektrisch is geaard om het risico op elektrocutie of brand te vermijden. Stap 1: Plaats het apparaat op een vlakke ondergrond en op een geschikt groot oppervlak met ten minste 50 cm open ruimte rondom het apparaat. Stap 2: Vul de vloeistoftank met op Beamz olie gebaseerde haze vloeistof. Stap 3: Sluit de machine aan op een geschikte stroomvoorziening. Om het benodigde vermogen voor het apparaat te bepalen, raadpleeg het etiket op de achterkant van het apparaat. Stap 4: Schakel het apparaat in, zet de stroomschakelaar in de stand “ON”. Op het LCD-display verschijnt "WARMING UP". Na enkele seconden toont het LCD-display "READY". Stap 5: Om te beginnen met het produceren van nevel, drukt u op toets "LOCK" en selecteer vervolgens het nevelvolume met de toesten "UP" of "DOWN". Om te stoppen met het produceren van nevel drukt u nogmaals op "LOCK". Stap 6: Schakel het apparaat uit, zet de stroomschakelaar in de stand “OFF”. Stap 7: Voordat u het apparaat gaat vervoeren, moet u de vloeistoftank legen doormiddel van een slang op het ventiel aan te sluiten. Gebruik alleen originele Beamz olie gebaseerde Haze vloeistof! (Beamz referentie 160.674, 160.669, 160.668 en 160.673). Bij gebruik van een ander type vloeistof vervalt de garantie, onjuist gebruik van vloeistof kan leiden tot defecten en storingen aan de machine. Wanneer het display "READY" weergeeft, kunt u starten met het produceren van nevel en de instellingen aanpassen via het LCD-display. Menu DMX512 Interval Duration Timer Volume Fan DMX Manual Remote Omschrijving Instellen van DMX startadres 00 min 01 sec - 59 min 59 sec 00 min 01 sec - 59 min 59 sec Instellen van timer functie d.m.v. toesten omhoog en omlaag Instellen van haze volume d.m.v. toesten omhoog en omlaag Ventilator snelheid 20 - 100% 001-253 Handmatige test toets Schakel functie afstandsbediending AAN- UIT DRAADLOZE AFSTANDSBEDIENING A: AAN / UIT B: AAN / UIT C: Uitstoot volume omhoog D: Uitstoot volume omlaag Het apparaat is voorzien van 3 pin XLR-connectoren voor DMX-aansluiting. Het onderstaande diagram geeft informatie over de pinbezetting. Let op: Bij het laatste apparaat, dient u de DMX-lijn af te sluiten met een eindweerstand. Neem een XLR connector en soldeer een 120 Ohm weerstand tussen signaal (-) en signaal (+)en steek deze in de DMX uitgang van het laatste apparaat in de lijn. DMX KANALEN Kanaal 1 2 Functie W aarde Omschrijving Haze 000-005 Haze uit 006-127 Haze lage uitstoot 128-255 Haze hoge uitstoot 000-005 Ventilator snelheid 20% 006-255 Ventilator snelheid 21 - 100% Ventilator Wij raden aan om het apparaat regelmatig te reinigen. LET OP: Er bevinden zich geen onderdelen in het apparaat, behalve de zekering. Reparaties en servicewerkzaamheden mogen alleen worden uitgevoerd door geautoriseerde dealers. W AARSCHUW ING! Haal de netstekker uit het wandcontactdoos voordat u met onderhoudswerkzaamheden begint! • • • • • • Zorg ervoor dat de vloeistof niet verontreinigd raakt. Zorg ervoor dat de ventilatieroosters niet verstopt raken door stof. Verwijder waar nodig het stof. Zorg ervoor dat het apparaat niet oververhit kan raken. Laat het apparaat niet zonder vloeistof draaien, omdat de pomp dan droogloopt. Veeg gemorste vloeistof onmiddellijk af. Vocht en vloeistof, kan de elektrische onderdelen van het apparaat permanent beschad igen. Gebruik voor het reinigen van het oppervlak van het apparaat een geschikte, oplosmiddelvrije reiniger. Indien de zekering defect is, dient u de zekering te vervangen door een zekering van hetzelfde type en waarde. Voor het verva ngen van de zekering, schakel eerst de stroom uit en volg de onderstaande stappen. Procedure: Stap 1: Open de zekeringhouder op het achterpaneel met een passende platte schroevendraaier. Stap 2: Verwijder de oude zekering uit de zekeringhouder. Stap 3: Installeer de nieuwe zekering in de zekeringhouder. Stap 4: Plaats de zekeringhouder in de behuizing. W ARNUNG! Lesen Sie diese Anleitung sorgfältig durch, bevor Sie das Gerät in Betrieb nehmen, und bewahren Sie sie zum späteren Gebrauch auf. Sie enthält wichtige Informationen über die Installation, den Gebrauch und die Wartung des Gerätes. • • • • Vor der Inbetriebnahme des Gerätes auspacken und sorgfältig auf Transportschäden prüfen. Lesen Sie diese Anleitung sorgfältig durch und befolgen Sie sie. Beachten Sie alle Sicherheitshinweise. Entfernen Sie niemals Sicherheitshinweise oder andere Informationen vom Gerät. Achten Sie darauf, dass keine Lüftungsschlitze blockiert sind, da das Gerät sonst überhitzt. W ARNUNG: Bevor Sie das Gerät an eine Steckdose anschließen, überprüfen Sie, ob die Netzspannung und -frequenz mit den auf dem Gerät angegebenen Werten übereinstimmen. Wenn das Gerät über einen Spannungswahlschalter verfügt, schließen Sie das Gerät nur dann an das Netz an, wenn die Gerätewerte und die Netzspannungswerte übereinstimmen. Wenn das mitgelieferte Netzkabel oder -adapter nicht in Ihre Steckdose passt, wenden Sie sich an Ihren Elektriker. • • • • • • • • Überprüfen Sie nach dem Anschluss des Gerätes alle Kabel, um Schäden oder Unfälle, z.B. durch Stolperfallen, zu vermeiden. Das Netzkabel darf niemals geschrumpft oder beschädigt werden. Überprüfen Sie das Gerät und das Netzkabel von Zeit zu Zeit. Ziehen Sie immer den Netzstecker, wenn Sie das Gerät nicht benutzen oder vor der Reinigung! Fassen Sie das Netzkabel nur am Stecker und ziehen Sie niemals am Netzkabel. Ziehen Sie das Netzkabel und das Netzteil aus der Steckdose, wenn die Gefahr von Blitzschlag oder längerer Inaktivität besteht. Schalten Sie die Maschine nicht in schneller Folge ein und aus. Schließen Sie das Gerät nicht an ein Dimmerpack an. Achten Sie immer auf einen Freiraum von mindestens 50 cm um das Gerät, um eine Belüftung zu gewährleisten. Dieses Gerät ist nicht für den Dauerbetrieb ausgelegt. Durch konsequente Betriebspausen wird sichergestellt, dass das Gerät lange Zeit störungsfrei arbeitet. W ARNUNG: Die Nebelaustrittsöffnung ist sehr heiß, Verbrennungs- und Verletzungsgefahr! • • • • • • • • • Aus der Nebelaustrittsöffnung tritt sehr heißer Dampf aus. Verbrennungsgefahr! Während des Betriebes können vereinzelt sehr heiße Fluid-Tröpfchen aus der Nebelaustrittsöffnung austreten. Deshalb nie auf Personen oder Tiere nebeln und einen Sicherheitsabstand von 3 m zur Nebelaustrittsöffnung einhalten. Während des Betriebes niemals an der Nebelaustrittsöffnung hantieren. Verbrennungsgefahr! Der Standort muß eine nicht entflammbare, nicht brennbar und wärmeunempfindlich sein. Einen Mindestabstand von 1 meter zu entflammbaren, brennbaren und wärmeempflindlichen Gegenständen einhalten. Richten Sie den Nebel niemals auf starke Zündquellen wie Feuer oder pyrotechnische Effekte. Fluid nicht einnehmen. Bei Augenkontakt mit viel Wasser ausspülen. Bei versehentlicher Einnahme Arzt aufsuchen Verschüttetes Fluid oder verspritzte Fluid-Tröpfchen können Rutschgefahr auslösen. Fluid aufnehmen und vorschriftsmäßig entsorgen. Nebel kann Rauchmelder auslösen! W ARNUNG: Wenn das Netzkabel des Geräts mit einer Erdungsklemme ausgestattet ist, schließen Sie es an eine Steckdose mit einer Schutzerdungsklemme an. Deaktivieren Sie niemals die Schutzerdung eines Netzkabels. • • • • • • • • • • • • • Achten Sie darauf, dass das Gerät keiner extremen Hitze, Feuchtigkeit oder Staub ausgesetzt ist. Reinigen Sie das Gerät mit einem trockenen Tuch. Berühren Sie das Gerät während des Betriebs nicht mit bloßen Händen (das Gehäuse kann sehr heiß werden). Nach dem Ausschalten kann das Gerät einige Stunden lang warm bleiben. Dieses Gerät ist nur für den Innenbereich bestimmt, verwenden Sie es nicht in unmittelbarer Nähe von Flüssigkeiten (gilt nicht für spezielle Außengeräte - in diesem Fall befolgen Sie die folgenden besonderen Anweisungen). Setzen Sie dieses Gerät keinen brennbaren Stoffen, Flüssigkeiten oder Gasen aus. Wenn das Gerät starken Temperaturschwankungen ausgesetzt war (z.B. nach dem Transport), schalten Sie es nicht sofort ein. Die dabei entstehende Kondensation kann Ihr Gerät beschädigen. Lassen Sie das Gerät ausgeschaltet, bis es Raumtemperatur erreicht hat. Versuchen Sie niemals, den Thermostatschalter oder die Sicherungen zu umgehen. Demontieren oder modifizieren Sie das Gerät nicht. Verwenden Sie für den Austausch nur Sicherungen/Leuchten gleichen Typs und gleicher Leistung. Reparaturen, Wartungen und der elektrische Anschluss dürfen nur von einem qualifizierten Techniker durchgeführt werden. Die Umgebungstemperatur muss immer zwischen -5°C und +45°C liegen. Wenn dieses Gerät auf eine andere Weise als in dieser Anleitung beschrieben verwendet wird, kann das Produkt beschädigt werden und die Garantie erlischt. Plastiktüten sollten außerhalb der Reichweite von Kindern aufbewahrt werden. Das Gerät muss außerhalb der Reichweite von Kindern installiert werden. Betreiben Sie das Gerät niemals unbeaufsichtigt , wenn es an ein Stromnetz angeschlossen ist. Dieses Symbol auf dem Produkt oder der Verpackung weist darauf hin, dass dieses Produkt nicht als normaler Haushaltsabfall be handelt werden darf. Es muss stattdessen an die entsprechende Sammelstelle für das Recycling von elektrischen und elektronischen Geräten abgegeben werden. Indem Sie sicherstellen, dass dieses Gerät ordnungsgemäß entsorgt wird, tragen Sie dazu bei, mögliche negative Auswirkungen a uf die Umwelt und die menschliche Gesundheit zu vermeiden, die sonst durch eine unsachgemäße Entsorgung dieses Produkts verursacht werden könnten. Recycling-Materialien tragen zur Schonung der natürlichen Ressourcen bei. Für weitere Informationen zur Wiederverwertung dieses Produkts wenden Sie sich bitte an Ihre Gemeinde, Ihren Hausmü llentsorger oder an den Laden, in dem Sie das Produkt gekauft haben. Tronios BV Registrierungsnummer : DE51181017 (ElektroG) / 21003000 (BatterieG) ACHTUNG! Packen Sie den Karton sofort nach Erhalt sorgfältig aus, überprüfen Sie seinen Inhalt, um sicherzustellen, dass alle Teile vorhanden sind und in gutem Zustand erhalten wurden. Bei Transportschäden oder fehlenden Teilen ist der Verkäufer unverzüglich zu informiere n. Lagern Sie die Verpackung und das Verpackungsmaterial. Wenn das Produkt zurückgegeben werden muss, ist es wichtig, dass das Produkt in der Originalverpackung zurückgegeben wird. Wenn das Gerät drastischen Temperaturunterschieden ausgesetzt war (z.B. nach dem Transport), schalten Sie es nicht sofort ein . Die dabei entstehende Kondensation kann das Gerät beschädigen. Vergewissern Sie sich, dass das Gerät Raumtemperatur hat, und stecken Sie dann den Netzstecker in die Steckdose. Auf der Rückseite von das Gerät wird angezeigt, an welche Netzspannung es angeschlossen werden muss. Prüfen Sie, ob die Netzspannung mit dieser übereinstimmt. Wenn die Netzspannung von der angegebenen abweicht, kann das Gerät irreparabel beschädigt werden. Das Gerät mu ss auch direkt an die Netzspannung angeschlossen werden. Es darf kein Dimmer oder eine einstellbare Stromversorgung verwendet werden. Schließen Sie das Gerät immer an einen geschützten Stromkreis an (Fehlerstromschutzschalter oder Sicherung). Vergewissern Sie sich, dass das Gerät ausreichend elektrisch geerdet ist, um die Gefahr eines Stromschlags oder Brandes zu vermeiden. Schritt 1: Stellen Sie das Gerät auf eine ebene Fläche und in eine entsprechend große Fläche mit mindestens 50 cm freier Fläche um das Gerät herum. Schritt 2: Füllen Sie den Flüssigkeitstank mit Beamz Öl basierter Dunstflüssigkeit. Schritt 3: Schließen Sie die Maschine an ein geeignetes Netzteil an. Um den Leistungsbedarf für das Gerät zu ermitteln, lesen Sie bitte das Etikett auf der Rückseite des Gerätes. Schritt 4: Schalten Sie das Gerät ein, stellen Sie den Netzschalter auf die Position "ON". Auf der LCD-Anzeige erscheint "WARMING UP". Nach einigen Sekunden zeigt das LCD-Display "READY" an. Schritt 5: Um mit der Nebelproduktion zu beginnen, drücken Sie "LOCK" auf dem Bildschirm und wählen Sie die Ausgangsstufe "UP" oder "DOWN". Um Um mit der Nebelproduktion zu stoppen, drücken Sie erneut "LOCK". Schritt 6: Schalten Sie das Gerät aus, stellen Sie den Netzschalter auf die Position "OFF". Schritt 7: Entleeren Sie vor dem Transport des Gerätes den Flüssigkeitstank, indem Sie einen Schlauch an das Ventil anschließen. Verwenden Sie nur Original Beamz Öl basierte Dunstflüssigkeit! (Beamz Referenz 160.674, 160.669, 160.668 und 160.673). Die Garantie erlischt, wenn eine andere Art von Flüssigkeit verwendet wird. Eine unsachgemäße Verwendung von Flüssigkeit kann zu Maschinenausfällen und Fehlfunktionen führen. Wenn auf dem Display "READY" angezeigt wird, können Sie mit der Erzeugung von Dunst beginnen und die Einstellungen über das LCD-Display vornehmen Menu DMX512 Interval Duration Timer Volume Fan DMX Manual Remote Beschreibung DMX-Startadresse einstellen 00 min 01 sec - 59 min 59 sec 00 min 01 sec - 59 min 59 sec Timerfunktion einstellen, nach oben und unten drücken Trübungsvolumen einstellen, auf und ab drücken Lüftergeschwindigkeit 20 - 100% 001-253 Taste Manueller Test Fernsteuerungsfunktion EIN - AUS schalten DRAHTLOSE FERNBEDIENUNG A: EIN / AUS B: EIN / AUS C: Leistungsvolumen steigt D: Leistungsvolumen abfall Das Gerät verfügt über 3-polige XLR-Anschlüsse für den DMX-Anschluss. Das folgende Diagramm zeigt die Informationen zur Pinbelegung. Hinweis: Bei der letzten Gerät müssen Sie die DMX-Leitung mit einem Abschlusswiderstand schließen. Nehmen Sie einen XLR-Stecker und löten Sie einen 120-Ohm-Widerstand zwischen Signal (-) und Signal (+) und stecken Sie diesen in den DMX-Ausgang der letzten Gerät in der Leitung. DMX -KANÄLE Kanäle 1 2 Funktion W ert Beschreibung Haze 000-005 006-127 Nebel aus Nebelausstoß niedrig 128-255 Nebelausstoß hoch 000-005 Lüftergeschwindigkeit 20% 006-255 Lüftergeschwindigkeit 21 - 100% Lüfter Wir empfehlen eine regelmäßige Reinigung des Gerätes. Achtung: Es befinden sich keine Teile im Inneren des Gerätes, außer der Sicherung. Reparaturen und Servicearbeiten dürfen nur von autorisierten Fachhändlern durchgeführt werden. W ARNUNG! Ziehen Sie vor Beginn der Wartungsarbeiten den Netzstecker aus der Steckdose! • • • • • • • Stellen Sie sicher, dass die Flüssigkeit nicht verunreinigt wird. Stellen Sie sicher, dass die Lüftungsöffnungen nicht durch Staub verstopft sind. Bei Bedarf den Staub entfernen. Stellen Sie sicher, dass das Gerät nicht überhitzt werden kann. Betreiben Sie das Gerät nicht ohne Flüssigkeit, da die Pumpe sonst trocken läuft. Wischen Sie alle Verschüttungen sofort ab. Feuchtigkeit und Flüssigkeit können die elektrischen Komponenten des Gerätes da uerhaft beschädigen. Verwenden Sie einen geeigneten, lösungsmittelfreien Reiniger, um die Oberfläche des Gerätes zu reinigen. Es wird empfohlen, das Gerät monatlich zu betreiben, um die beste Leistung und Ausgangsbedingung zu erreichen. Wenn die Sicherung defekt ist, ersetzen Sie sie durch eine Sicherung gleichen Typs und gleicher Leistung. Um die Sicherung auszutauschen, schalten Sie zuerst die Stromversorgung aus und führen Sie die folgenden Schritte aus. Vorgehensweise: Schritt 1: Öffnen Sie den Sicherungshalter auf der Rückseite mit einem geeigneten flachen Schraubendreher. Schritt 2: Entfernen Sie die alte Sicherung aus dem Sicherungshalter. Schritt 3: Setzen Sie die neue Sicherung in den Sicherungshalter ein. Schritt 4: Setzen Sie den Sicherungshalter in das Gehäuse ein. ATENCIÓN! Antes de realizar cualquier operación con la unidad, lea atentamente este manual de instrucciones y guárdelo con cura para fu turas consultas. Contiene información importante sobre la instalación, uso y mantenimiento de la unidad. • • • • Desembale y compruebe cuidadosamente que no haya daños de transporte antes de usar la unidad Lea atentamente estas instrucciones y siga las instrucciones. Observe todas las advertencias de seguridad. Nunca elimine las advertencias de seguridad u otra información del equipo. Asegúrese de que no haya ranuras de ventilación bloqueadas; de lo contrario la unidad se sobrecalentará. PRECAUCIÓN: Antes de conectar el equipo a la toma de corriente, primero verifique que la tensión y la frecuencia de la red coincidan con los valores especificados en el equipo. Si el equipo tiene un interruptor de selección de voltaje, conecte el equipo a la toma de corriente solo si los valores del equipo y los valores de la red eléctrica coinciden. Si el cable de alimentación incluido o el adaptador de corriente no encaja en el tomacorriente de pared, comuníquese con su electricista. • • • • • • • • Después de conectar la unidad, verifique todos los cables para evitar daños o accidentes debido a peligros de tropiezos. Asegúrese de que el cable de alimentación nunca esté rizado o dañado. Compruebe el dispositivo y el cable de alimentación de vez en cuando. ¡Desconecte siempre la alimentación de la red eléctrica, cuando no se utilice el dispositivo o antes de limpiarlo! Sólo manipule el cable de alimentación por el enchufe. Nunca desenchufe el cable tirando del cable de alimentación. Desenchufe el cable de alimentación y el adaptador de alimentación de la toma de corriente si existe riesgo de que se caiga un rayo o antes de períodos prolongados de desuso. No encienda y apague la unidad en intervalos cortos. No conecte la unidad a un dimmerpack. Instale la unidad en un lugar bien ventilado. Esta unidad no está diseñada para una operación permanente. Las interrupciones constantes de la operación garantizarán que el dispositivo le servirá durante mucho tiempo sin defectos. PRECAUCION: La boquilla está muy caliente, hay peligro de quemaduras y daños! • • • • • • • • • • Vapor muy caliente se escapa de la boquilla. ¡Peligro de quemaduras! Ocasionalmente pueden salir gotas de fluido durante la operativa. Nunca coloque a personas o animals a menos de 3 metro de la boquilla. Nunca toque la boquilla durante la operativa. ¡Peligro de quemaduras! La unidad debe colocarse en una zona no inflamable, no combustible y no sensible al calor. Mantenga una distancia de seguridad de 1 metro a cualquier objeto inflamable, combustible o sensibles al calor. Nunca apunte la niebla hacia fuentes de ignición como fuegos artificiales. Nunca abra la unidad o la deje desatendida mientras esté conectada a la alimentación. No ingeste el líquido de humo. En caso de contacto con los ojos, lávelos abundantemente con agua. Consulte a su medico en caso de ingesta accidental. Las salpicaduras de líquido pueden provocar corta circuitos. Limpie y seque la unidad siguiendo las instrucciones. El humo o niebla pueden activar los detectores de humo! PRECAUCIÓN: Si el cable de alimentación del dispositivo está equipado con un contacto de conexión a tierra, debe conectarse a una toma de corriente con una conexión a tierra de protección. Nunca desactive la conexión a tierra protectora de un cable de alimentació n. • • • • • • • • • • • • • Asegúrese de que la unidad no esté expuesta a calor extremo, humedad o polvo. Limpie la unidad con un paño seco. No toque el aparato con las manos descubiertas durante su funcionamiento (la carcasa se calienta mucho). Después de la desconexión, la unidad puede permanecer caliente durante unas horas. Esta unidad está diseñada exclusivamente para uso en interiores, no use este equipo en las inmediaciones del fluido (no se aplica a equipos especiales para exteriores, en este caso, siga las instrucciones especiales que se indican a continuación). No exponga esta unidad a materiales, líquidos o gases inflamables. Si la unidad ha estado expuesta a una fluctuación drástica de la temperatura (por ejemplo, después del transporte), no la encienda de inmediato. El agua de condensación que surge puede dañar su unidad. Deje la unidad apagada hasta que alcance la temperatura ambiente. Nunca intente pasar por alto el interruptor termostático o los fusibles. No desmonte ni modifique la unidad. Para reemplazo, use fusibles / bombilla del mismo tipo y clasificación solamente. Las reparaciones, el servicio y la conexión eléctrica deben ser llevados a cabo por un técnico calificado. La temperatura ambiente siempre debe estar entre -5 ° C y + 45 ° C. Si esta unidad se opera de una manera diferente a la descrita en este manual, el producto podría sufrir daños y la garantía quedará anulada. Las bolsas de plástico deben mantenerse fuera del alcance de los niños. La unidad debe instalarse fuera del alcance de los niños. Nunca deje la unidad funcionando sin supervisión cuando esté conectada a una fuente de alimentación. Este símbolo en el producto o en su empaque indica que este producto no debe ser tratado como basura doméstica. En su lugar, se entregará al punto de recolección correspondiente para el reciclaje de equipos eléctricos y electrónicos. Al garantizar que este producto se elimine correctamente, ayudará a evitar posibles consecuencias negativas para el medio amb iente y la salud humana, que de otro modo podrían ser causadas por el manejo inadecuado de los desechos de este producto. El reciclaje de materiales ayudará a conservar los recursos naturales. Para obtener información más detallada sobre el rec iclaje de este producto, comuníquese con su Oficina Cívica local, el servicio de eliminación de desechos domésticos o la tienda don de adquirió el producto. PRECAUCIÓN! Inmediatamente después de recibir el producto, desembale la caja con cuidado, verifique el contenido para asegurarse de que t odas las partes estén presentes y se hayan recibido en buenas condiciones. Notifique al remitente de inmediato y guarde el materia l de empaque para inspeccionarlo si aparecen piezas dañadas por el envío o si el propio paquete muestra signos de mal manejo. Guarde el paquete y todos los materiales de embalaje. En el caso de que el producto deba devolverse a la fábrica, es importante que el producto se devuelva en la caja y empaque originales de fábrica. Si el dispositivo ha estado expuesto a una drástica fluctuación de la temperatura (por ejemplo, después del transporte), no lo encienda de inmediato. El agua de condensación que surge podría dañar su dispositivo. Deje el dispositivo apagado hasta que alcance la temperatura ambiente. En la etiqueta que se encuentra en la parte posterior del producto, se indica que este tipo de fuente de alimentación debe estar conectada. Verifique que la tensión de la red corresponda a esto, todos los demás voltajes que los especificados, el efecto de la luz puede dañarse irreparablemente. El producto también debe estar conectado directamente a la red eléctrica y se puede utilizar. Siempre conecte el dispositivo a un circuito protegido (disyuntor o fusible). Asegúrese de que el dispositivo tenga una toma de tierra eléctrica adecuada para evitar el riesgo de electrocución o incendio. Paso 1: Coloque la unidad en una superficie plana y en un área adecuadamente grande con al menos 50 cm de espacio abierto alrededor de la unidad. Paso 2: Llene el tanque de fluido con líquido de neblina a base de aceite Beamz. Paso 3: Conecte la máquina a una fuente de alimentación adecuada. Para determinar el requerimiento de energía para la unidad, consulte la etiqueta en la parte posterior de la unidad. Paso 4: Encienda la unidad, coloque el interruptor de encendido en la posición "ON". La pantalla LCD mostrará "WARMING UP". Después de unos segundos, la pantalla LCD mostrará "READY”. Paso 5: Para comenzar a producir niebla, presione "LOCK" en la pantalla y luego seleccione el nivel de salida "ARRIBA" o "ABAJO". Para detener la producción de neblina presiona nuevamente “LOCK”. Paso 6: Apague la unidad, coloque el interruptor de encendido en la posición "OFF". Paso 7: Antes de transportar la unidad, vacíe el tanque de fluido conectando un tubo a la válvula. ¡Utilice únicamente fluido de neblina a base de aceite original de Beamz! (Referencia de Beamz 160.674, 160.669, 160.668 y 160.673). La garantía se anulará si se utiliza cualquier otro tipo de líquido, el uso incorrecto del líquido puede ocasionar la falla de la máquina y su mal funcionamiento Cuando la pantalla muestra "READY", puede comenzar a producir niebla y ajustar la configuración a través del panel de pantalla LCD. Menu DMX512 Interval Duration Timer Volume Fan DMX Manual Remote Descripción Seleccionar la dirección DMX inicio 00 min 01 seg - 59 min 59 seg 00 min 01 seg - 59 min 59 seg Configuración de la función del temporizador, pulse arriba y abajo. Ajuste de volumen de neblina, presione up y down Velocidad ventilador 20 - 100% 001-253 Botón Manual Cambiar la función de control remoto ON - OFF MANDO A DISTANCIA A: ON / OFF B: ON / OFF C: Volúmen de salida + D: Volúmen de salida - La unidad proporciona conectores XLR de 3 pines para la conexión DMX. El siguiente diagrama indica la información de asignación de pin. Precaución: En el último aparato, debe cerrar la línea DMX con una resistencia de terminación. Tome un conector XLR y suelde una resistencia de 120 Ohm entre la señal (-) y la señal (+) y conéctela a la salida DMX del último dispositivo en la línea. CANALES DMX Canal 1 2 Función Valor Descripción Haze 000-005 Niebla off 006-127 Niebla salida baja 128-255 Niebla salida alta 000-005 Velocidad ventilador 20% 006-255 Velocidad ventilador 21 - 100% Fan Recomendamos una limpieza frecuente de la unidad. Nota: No hay piezas reparables dentro de la unidad, excepto el fusible. Las reparaciones y las operaciones de servicio solo deben s er realizadas por distribuidores autorizados. PRECAUCIÓN! Desconecte de la red eléctrica antes de iniciar la operación de mantenimiento! • • • • • • • Asegúrese de que el fluido no se contamine. Asegúrese de que las rejillas de ventilación no estén obstruidas por el polvo. Si es necesario quitar el polvo. Asegúrese de que la unidad no pueda sobrecalentarse. No haga funcionar la unidad sin ningún líquido, ya que la bomba funcionará en seco. Limpie el líquido derramado inmediatamente. La humedad y el fluido pueden dañar permanentemente los componentes eléctricos de la unidad. Para limpiar la superficie de la unidad, use un limpiador adecuado y sin disolventes. Se recomienda utilizar la unidad mensualmente para lograr el mejor rendimiento y condición de salida. Si el fusible está defectuoso, sustitúyalo por un fusible del mismo tipo y valor. Antes de cambiar el fusible, desenchufe el cable de alimentación. Procedimiento: Paso 1: Abra el portafusibles en el panel trasero con un destornillador adecuado. Paso 2: Retire el fusible viejo del portafusibles. Paso 3: Instale el nuevo fusible en el portafusibles. Paso 4: Reemplace el portafusibles en la carcasa. AVERTISSEMENT ! Avant d'effectuer toute manipulation sur l'appareil, lisez avec attention la présente notice et conservez-la pour pouvoir vous y reporter ultérieurement. Elle contient des informations importantes sur l’installation, l’utilisation et l’entretien de l’appareil. • • • • Déballez l'appareil, vérifiez soigneusement qu'il n'y a pas de dommages dus au transport avant de l'utiliser. Veuillez lire attentivement ces instructions et les suivre. Respectez tous les avertissements de sécurité. Ne retirez jamais les avertissements de sécurité ou autres informations figura nt sur l’appareil. Assurez-vous qu'aucune ouïe d'aération n'est obstruée, sinon il y a risque de surchauffe de l’appareil. ATTENTION : Avant de brancher l’appareil à une prise d’alimentation, assurez-vous tout d’abord que la tension et la fréquence du secteur correspondent aux valeurs spécifiées sur l’appareil. S’il est équipé d'un sélecteur de tension, ne branchez l'appareil à la prise de courant que si les valeurs de l'appareil et celles de l'alimentation secteur correspondent. Si le cordon d'alimentation ou l'adaptateur secteur fourni ne s'adapte pas à votre prise murale, contactez votre électricien. • • • • • • • • Après avoir branché l'appareil, vérifiez tous les câbles afin d'éviter tout dommage ou accident, par exemple pour ne pas tréb ucher. Assurez-vous que le cordon d'alimentation n'est jamais serti ou endommagé. Vérifiez régulièrement l'appareil et le cordon d'alimentation. Débranchez toujours le cordon d'alimentation du secteur lorsque l'appareil n'est pas utilisé ou avant de le nettoyer ! Ne man ipulez le cordon d'alimentation que par la fiche. Ne débranchez jamais la fiche en tirant sur le cordon d'alimentation. Débranchez le cordon d'alimentation et l'adaptateur secteur de la prise de courant s'il y a un risque de foudre ou avant une longue période d'inutilisation. N'allumez et n'éteignez pas l'appareil à intervalles rapprochés. Ne connectez pas l'appareil à un gradateur. Installez l'appareil dans un endroit bien ventilé. Cet appareil n'est pas conçu pour fonctionner en permanence. Des pauses d'utilisation régulières assureront un fonctionnement sans problème sur le long terme. ATTENTION : La buse sera très chaude, risque de brûlures et de blessures ! • • • • • • • • • De la vapeur très chaude s'échappe de la buse. Risque de brûlure ! Occasionnellement, des gouttelettes de liquide très chaudes peuvent s'échapper pendant le fonctionnement. Ne visez donc jama is directement des personnes ou des animaux et gardez une distance minimale de 3 m avec la buse. Ne touchez jamais la buse en fonctionnement. Risque de brûlure ! L’appareil doit être placé dans un endroit non inflammable, non combustible et insensible à la chaleur. Maintenez une distance minimale d'un mètre de tous les objets inflammables, combustibles et sensibles à la chaleur. Ne dirigez jamais le brouillard vers des sources inflammables importantes telle un feu ou des effets pyrotechniques. N'avalez pas le liquide de brouillard. En cas de contact avec les yeux, rincez abondamment à l'eau. Consultez un médecin si vous avez avalé accidentellement du liquide. Le produit déversé ou les gouttelettes de produit éclaboussé peuvent provoquer un risque de glissade. Épongez le liquide et jetez-le conformément à la réglementation. brouillard peut activer les détecteurs de fumée ! ATTENTION : Si le cordon d'alimentation de l'appareil est équipé d'un contact de mise à la terre, il doit être connecté à une prise de courant avec une terre de protection. Ne jamais désactiver la terre de protection d'un cordon d'alimentation. • • • • • • • • • • • • • Assurez-vous que l'appareil n'est pas exposé à une chaleur extrême, à l'humidité ou à la poussière. Nettoyez l'appareil à l'aide d'un chiffon sec. Ne touchez pas le projecteur à mains nues pendant son fonctionnement (le boîtier devient très chaud). Après la mise hors tension, l'appareil peut rester au chaud pendant quelques heures. Cet appareil est conçu exclusivement pour une utilisation à l'intérieur, n'utilisez pas cet appareil à proximité immédiate d'un liquide (ne s'applique pas aux équipements extérieurs spéciaux - dans ce cas, respectez les instructions spéciales indiquées ci-dessous). N'exposez pas cet appareil à des matériaux, liquides ou gaz inflammables. Si l'appareil a été exposé à des variations de température importantes (par ex. après un transport), ne l’allumez pas immédia tement. La condensation pourrait endommager votre appareil. Laissez l'appareil éteint jusqu'à ce qu'il atteigne la température ambiante. N'essayez jamais de bridger l'interrupteur thermostatique ou les fusibles. Ne démontez pas ou ne modifiez pas l'appareil. Pour le remplacement, utilisez uniquement des fusibles/ampoules de même type et de même puissance. Les réparations, l'entretien et le raccordement électrique ne doivent être effectués que par un technicien qualifié. La température ambiante doit toujours être comprise entre -5° C et +45° C. Si cet appareil est utilisé dans un but autre que celui décrit dans ce manuel, il peut subir des dommages, dans ce cas, la garantie est caduque. Les sacs en plastique doivent être gardés hors de portée des enfants. L'appareil doit être installé hors de portée des enfants. Ne laissez jamais l'appareil en marche sans surveillance lorsqu'il est connecté à une alimentation électrique. Ce symbole sur le produit ou sur son emballage indique que ce produit ne doit pas être traité comme un déchet ménager. Il doi t être déposé au point de collecte approprié pour le recyclage des équipements électriques et électroniques. En vous assurant que ce produit est éliminé correctement, vous contribuerez à prévenir les conséquences négatives potentielle s pour l'environnement et la santé humaine, qui pourraient autrement être causées par une manipulation inappropriée des déchets de ce produit. Le recyclage des matériaux contribuera à préserver les ressources naturelles. Pour de plus amples informations sur le recyclage de ce produit, veuillez contacter votre bureau municipal local, votre service d'élimination des déchets ménagers ou le magasin où vous avez acheté le produi t. ATTENTION ! Dès réception du produit, déballez soigneusement le carton, vérifiez son contenu pour vous assurer que toutes les pièces sont présentes et qu'elles ont été reçues en bon état. Avisez immédiatement l'expéditeur et conservez le matériel d'emballage ; contrôlez si des pièces semblent endommagées lors de l'expédition ou si le colis lui-même montre des signes de mauvaise manipulation. Conservez l'emballage et tout le matériel d'emballage. Dans le cas où le produit doit être retourné à l'usine, il est important que le produit soit retourné dans son emballage d'origine. Si l'appareil a été exposé à des variations de température importantes (par ex. après un transport), ne l’allumez pas immédiatement. La condensatio n pourrait endommager votre appareil. Laissez l'appareil éteint jusqu'à ce qu'il atteigne la température ambiante. Le type d'alimentation auquel le produit doit être connecté est indiqué sur l'étiquette à l'arrière du produit. Vérifiez que la tension secteur corresponde à cette tension, toutes les autres tensions que celles spécifiées peuvent endommager l’appareil. Le produit doit également être branché directement sur le secteur et peut être utilisé. Pas de gradateur ni d'alimentation réglable. Reliez toujours l'appareil à un circuit protégé (disjoncteur ou fusible). Assurez-vous que l'appareil dispose d'une mise à la terre électrique appropriée pour éviter tout risque d'électrocution ou d'incendie. Etape 1: Placez l’appareil sur une surface plane et dans une zone suffisamment large avec 50 cm d’espace au moins autour de l’appareil. Etape 2: Remplissez le réservoir avec du liquide base huile Beamz. Etape 3: Reliez l’appareil au secteur en vous assurant de la conformité de la tension d’alimentation ; pour définir le type d’alimentation requise, reportez-vous à la plaque à l’arrière de l’appareil. Etape 4: Allumez l’appareil, mettez l’interrupteur sur la position “ON“. L’affichage LCD indique “WARMING UP”. Après quelques secondes, l’affichage indique “READY”. Etape 5: Pour démarrer la production de fumée, appuyez sur “LOCK” sur l’écran puis sélectionnez le niveau de sortie “UP” ou “DOWN”. Pour arrêter, appuyez à nouveau sur “LOCK”. Etape 6: Eteignez l’appareil en mettant l’interrupteur secteur sur la position “OFF”. Etape 7: Avant de déplacer l’appareil, videz le réservoir en reliant un tube à la valve. Utilisez uniquement du liquide original base huile BeamZ (référence Beamz 160.674, 160.669, 160.668 et 160.673). La garantie devient caduque si un autre type de liquide est utilisé, une utilisation inadéquate du liquide peut engendrer un défaut de l’appareil et un dysfonctionnement. Lorsque l’affichage indique “READY”, vous pouvez commencer à produire de la fumée et ajuster les réglages via l’affichage LCD. Menu DMX512 Interval Duration Timer Volume Fan DMX Manual Remote Description Réglage de l’adresse de démarrage DMX 00 min 01 sec - 59 min 59 sec 00 min 01 sec - 59 min 59 sec Réglage fonction Timer, enclencher / désenclencher Réglage volume fumée, enclencher / désenclencher Vitesse ventilateur 20 - 100% 001-253 Touche test manuel Activation gestion télécommande ON - OFF TELECOMMANDE SANS FIL A : ON / OFF B : ON / OFF C : Augmentation du volume de sortie D : Diminution du volume de sortie Cet appareil dispose de connecteurs XLR 3 pôles pour la connexion DMX. Le schéma ci-dessous présente la configuration de branchement. Attention : Sur le dernier appareil, vous devez terminer la liaison DMX par un bouchon. Utilisez un connecteur XLR, soudez une résistance 120 ohms entre signal (-) et signal (+) et branchez ce connecteur sur la sortie DMX du dernier appareil de la ligne. CANAUX DMX Canel 1 2 Fonction Valeur Description Fumée 000-005 Emission fumée désactivée 006-127 Emission fumée faible 128-255 Emission fumée élevée 000-005 Vitesse ventilateur 20% 006-255 Vitesse ventilateur 21 - 100% Ventilateur Nous recommandons un nettoyage fréquent de l’appareil. Noté : Il n'y a aucune pièce réparable à l'intérieur de l'appareil, sauf le fusible. Les réparations et les opérations d'entretien ne doivent être effectuées que par des revendeurs agréés. REMARQUE : Débranchez la fiche secteur de la prise murale avant de commencer les travaux d'entretien ! • • • • • • • Assurez-vous que le liquide ne soit pas contaminé. Assurez-vous que les ouïes de ventilation ne soient pas obturées par de la poussière. Au besoin, nettoyez-les. Assurez-vous que l’appareil n’est pas en surchauffe. N’utilisez pas l’appareil sans liquide sinon la pompe fonctionnera à vide et à sec. Essuyez immédiatement tout liquide qui serait tombé. De l’humidité ou du liquide peut endommager durablement les composants électriques de l’appareil. Pour nettoyer l’appareil, utilisez un produit nettoyant adapté et sans solvant. Il est recommandé de faire fonctionner l’appareil une fois par mois pour garantir un fonctionnement optimal de l’appareil. Si le fusible est défectueux, remplacez-le par un fusible de même type et valeur. Avant de remplacer le fusible, débranchez le cordon secteur. Procédure : Etape 1 : Ouvrez le porte-fusible sur la face arrière avec un tournevis. Etape 2 : Retirez l’ancien fusible du porte-fusible. Etape 3 : Installez le nouveau fusible dans le porte-fusible. Etape 4 : Replacez le porte-fusible dans le boîtier. Rated voltage DMX Channels Functions Dimensions per unit Weight (per unit) : 100-240VAC, 50-60Hz, 4-1.6A :2 : Manual, DMX and wireless remote. : 490 x 370 x 460mm : 26,0kg Design and product specifications are subject to change without prior notice. The products referred to in this manual conform to the European Community Directives to which they are subject: • Low Voltage (LVD) 2014/35/EU • Electromagnetic Compatibility (EMC) 2014/30/EU • Restriction of Hazardous Substances (RoHS) 2011/65/EU ........................................................................................................................................................... ........................................................................................................................................................... ........................................................................................................................................................... ........................................................................................................................................................... ........................................................................................................................................................... ........................................................................................................................................................... ........................................................................................................................................................... ........................................................................................................................................................... ........................................................................................................................................................... ........................................................................................................................................................... ........................................................................................................................................................... ........................................................................................................................................................... ........................................................................................................................................................... ........................................................................................................................................................... ........................................................................................................................................................... ........................................................................................................................................................... ........................................................................................................................................................... ........................................................................................................................................................... ........................................................................................................................................................... ........................................................................................................................................................... ........................................................................................................................................................... ........................................................................................................................................................... ........................................................................................................................................................... ........................................................................................................................................................... ........................................................................................................................................................... ........................................................................................................................................................... ........................................................................................................................................................... ........................................................................................................................................................... ........................................................................................................................................................... ........................................................................................................................................................... ........................................................................................................................................................... ........................................................................................................................................................... ........................................................................................................................................................... ........................................................................................................................................................... ........................................................................................................................................................... ........................................................................................................................................................... ........................................................................................................................................................... ........................................................................................................................................................... ........................................................................................................................................................... ........................................................................................................................................................... ........................................................................................................................................................... ........................................................................................................................................................... ........................................................................................................................................................... ........................................................................................................................................................... ........................................................................................................................................................... ........................................................................................................................................................... ........................................................................................................................................................... ........................................................................................................................................................... ........................................................................................................................................................... ........................................................................................................................................................... ........................................................................................................................................................... ........................................................................................................................................................... ........................................................................................................................................................... ........................................................................................................................................................... ........................................................................................................................................................... ........................................................................................................................................................... ........................................................................................................................................................... ........................................................................................................................................................... ........................................................................................................................................................... ........................................................................................................................................................... ........................................................................................................................................................... ........................................................................................................................................................... ........................................................................................................................................................... ........................................................................................................................................................... ........................................................................................................................................................... offers a wide range of high performance lighting equipment and related accessories for the rental, entertainment and architectural lighting markets. BeamZ Pro stands for performance, innovation and value pricing!-
 1
1
-
 2
2
-
 3
3
-
 4
4
-
 5
5
-
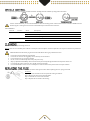 6
6
-
 7
7
-
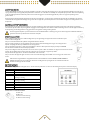 8
8
-
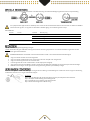 9
9
-
 10
10
-
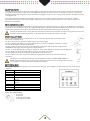 11
11
-
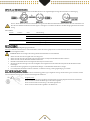 12
12
-
 13
13
-
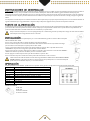 14
14
-
 15
15
-
 16
16
-
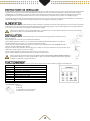 17
17
-
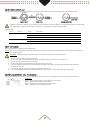 18
18
-
 19
19
-
 20
20
-
 21
21
-
 22
22


Beamz HZ3000 Handleiding
- Categorie
- Schijnwerpers
- Type
- Handleiding
- Deze handleiding is ook geschikt voor
in andere talen
- English: Beamz HZ3000 User manual
- français: Beamz HZ3000 Manuel utilisateur
- español: Beamz HZ3000 Manual de usuario
- Deutsch: Beamz HZ3000 Benutzerhandbuch
Gerelateerde papieren
-
Beamz F900 Handleiding
-
-
Beamz Fuze712 Wash Moving Head de handleiding
-
-
Beamz PRO Handleiding
-
Beamz MHL75 de handleiding
-
Beamz F1600 de handleiding
-
-
-
Andere documenten
-
Beamz Pro SNOW5000 de handleiding
-
-
-
 MaxxHome 20779 Handleiding
-
HQ Power VDP600HZ Handleiding
-
HQ Power VDP900HZ2 Handleiding
-
Velleman VDP600HZ Handleiding
-
Chauvet Professional Cloud 9 Referentie gids
-
Chauvet Hurricane Haze 2D Referentie gids
-
Chauvet Professional Amhaze Whisper Referentie gids
