Patton Kamado 13 Operating And Assembly Instructions Manual
- Categorie
- Barbecues
- Type
- Operating And Assembly Instructions Manual
Deze handleiding is ook geschikt voor

GEBRUIKS- EN INSTALLATIEHANDLEIDING
PATTON B.V.
Postbus 2044 NL 5300 CA Zaltbommel Holland
Website: www.patton.eu
Kamado 13”

2
NL, BE, LU
NL, BE, LU
FR, CH
GB, IE
DE, CH, AT
PL
IT, CH
Gebruiksaanwijzing - 3
Notice d’emploi - 10
Operating instructions - 18
Gebrauchsanweisung - 34
Instrukcja Obsługi - 45
Uso e istruzioni di montaggio - 56

3
NL, BE, LU
Benodigd gereedschap (NIET inbegrepen)
Instructies voor de gebruiker – bewaar deze goed, zodat u deze later kunt raadplegen
BELANGRIJK: verwijder voor gebruik alle verpakkingen, maar bewaar de veiligheidsinstructies.
Deze instructies zijn onderdeel van het product.
Let goed op alle veiligheidswaarschuwingen in deze instructies.
Lees deze instructies volledig door en bewaar ze voor toekomstig gebruik. Bewaar de instructies samen met het product.
Dit product is alleen geschikt voor thuisgebruik en mag niet voor commerciële of contractuele doeleinden worden ge-
bruikt.
DIT PRODUCT MOET IN DE WINTER BINNEN WORDEN BEWAARD.
HET UITERLIJK VAN DE KERAMIEK BEVAT SCHEUREN; DIT IS NORMAAL.
Onderhoud en richtlijnen voor veilig gebruik
OVER UW KAMADO
Archeologen hebben 4.000 jaar oud aardewerk gevonden, waarvan men denkt dat het vroege versies zijn van de kera-
mische koker Kamado. Sindsdien is deze op allerlei manieren geëvolueerd: het deksel kan worden verwijderd, er is een
extra tochtdeur voor betere warmtecontrole en in plaats van hout gebruikt men nu als belangrijkste brandstof houtskool.
In Japan was de Mushikamado een ronde pot van klei met een verwijderbaar bol deksel. Deze was bedoeld voor het sto-
men van rijst. De naam ‘Kamado’ is dan ook het Japanse woord voor ‘fornuis’ of ‘kookplaat’. Deze naam is overgenomen
door de Amerikanen en is nu een algemene term voor dit type keramische kookplaat.
Kamado-kookplaten zijn enorm veelzijdig. Ze kunnen niet alleen worden gebruikt om te grillen of te roken, maar er kun-
nen ook zonder problemen pizza’s, brood, taarten en koekjes mee worden gebakken. De Kamado kan uitstekend warmte
binnenhouden en haalt en behoudt hoge temperaturen dankzij de nauwkeurig instelbare luchtinstroom via de luchtgaten
aan de boven- en onderkant. Hoge temperaturen zijn ideaal om hamburgers en worst te bakken, terwijl lage temperaturen
beter geschikt zijn om grotere stukken vlees langere tijd te bakken. Probeer ook eens wat houtsnippers aan de houtskool
toe te voegen of combineer houtsnippers met verschillende aroma’s om het vlees een unieke smaak te geven.
WAARSCHUWINGEN – LET OP!
Verwijder de grijze viltpakking niet van de rand van het onderstel of het deksel. Deze vilten pakking zorgt namelijk voor
afdichting en zorgt ervoor dat “valse” lucht, wat de circulatie binnen de Kamado zou kunnen verstoren, geen kans krijgt.
Zorg ervoor dat u de bouten en scharnieren van de metalen banden regelmatig met een lichte machineolie (of WD40)
olied. De bouten moeten regelmatig gecontroleerd en indien nodig aangedraaid te worden.
• Dit product is ALLEEN GESCHIKT VOOR BUITENGEBRUIK.
• Laat NOOIT een brandend vuur onbeheerd achter.
• RISICO op koolmonoxidevergiftiging – dit product NOOIT gebruiken of laten afkoelen in kleine ruimten.
• Laad het apparaat NIET te vol met brandstof.
• BRANDGEVAAR: er kunnen hete kooltjes ontsnappen tijdens het gebruik.
• WAARSCHUWING: gebruik GEEN benzine, terpentine, wasbenzine, alcohol of andere vergelijkbare
chemische stoffen om het apparaat (opnieuw) aan te steken. Gebruik alleen aanstekers conform EN1860-3!
• Het wordt sterk aanbevolen om klompjes houtskool te gebruiken in uw Kamado. Deze branden langer en
produceren minder as die de luchtstroom kan beperken.
• BELANGRIJK: bij het openen van het deksel op hoge temperaturen is het belangrijk dat u het deksel slechts

4
NL, BE, LU
licht omhoog tilt, zodat de lucht langzaam en veilig kan binnenkomen en er geen backdrafts of steekvlammen
kunnen ontstaan die kunnen leiden tot letsel.
• Houd u ALTIJD aan de KOOKINSTRUCTIES op pagina 5 van deze handleiding.
• Gebruik de Kamado NIET op een terras of op andere brandbare oppervlakken, zoals droog gras,
houtsnippers, bladeren of decoratieschors.
• Zorg ervoor dat de Kamado op minimaal 2 meter afstand staat van brandbare voorwerpen.
• Gebruik de Kamado NIET als kachel.
• Zorg ervoor dat u de Kamado NIET aanraakt of verplaatst wanneer deze aan staat; hij is heet.
• GEBRUIK ALTIJD warmtebestendige handschoenen bij het gebruik van hete keramische of kookoppervlakken.
• Laat het apparaat volledig afkoelen voor verplaatsing of opslag.
• Houd kinderen en huisdieren ALTIJD op veilige afstand van de oven wanneer deze in gebruik is.
• Controleer het apparaat voor gebruik altijd op slijtage en schade en repareer deze waar nodig.
DE KAMADO PREPAREREN
• Maak een vuurtje door een opgerolde krant met een aantal aanmaakblokjes of solide vuurblokjes op de
houtskoolplaat (7) onderin de Kamado te leggen. Plaats vervolgens 2 of 3 handen houtskool bovenop de krant.
• Gebruik GEEN benzine, terpentine, wasbenzine, alcohol of andere vergelijkbare chemische stoffen om het
apparaat (opnieuw) aan te steken.
• Open het onderste luchtgat en steek de krant aan met een lange aansteker of veiligheidslucifers.
• Laad het apparaat NIET te vol met brandstof; als het vuur te krachtig is kan de Kamado schade oplopen.
• Laat het vuur branden tot alle brandstof op is en het vuur is gedoofd.
• Als de eerste vlammen te hoog zijn, kan dit de vilten afdichting beschadigen voor deze de kans heeft gehad
om goed te hechten.
• Controleer na het eerste gebruik of alle sluitingen goed vast zitten. De metalen ring die het deksel verbindt
met het onderstel zal bij hitte uitzetten en kan los komen te zitten. Het wordt aanbevolen om de ring te
controleren en waar nodig met een sleutel weer vast te zetten.
• U kunt uw Kamado nu normaal gebruiken.
DOVEN
• Om het vuur te doven stopt u de brandstoftoevoer en sluit u alle gaten en het deksel, zodat het vuur op
natuurlijke wijze uitgaat.
• Gebruik GEEN water om de houtskool te blussen; de keramische Kamado kan hierdoor beschadigd raken.
OPSLAG
• Wanneer u het apparaat niet gebruikt en buiten laat staan, moet u de Kamado eerst volledig laten afkoelen en
vervolgens bedekken met een geschikte bescherming tegen regen.
• De grill van chroomplaat is NIET vaatwasserbestendig; gebruik een mild schoonmaakmiddel en warm water.
• Druk bij gebruik van de Kamado de beide wielklemmen naar beneden, zodat deze niet kan verschuiven.
• Het wordt aangeraden om de Kamado ‘s winters overdekt op te slaan voor volledige bescherming,
bijvoorbeeld in een garage of in een schuur.
• Op een vorstvrije plaats bewaren.
REINIGING
• De Kamado is zelfreinigend. Verwarm hem 30 minuten lang op 260ºC en hij verschroeit al het eten en vuil.
• Gebruik GEEN water of andere soorten schoonmaakproducten om de binnenkant van uw Kamado schoon te
maken. De wanden zijn poreus en absorberen alle vloeistof, waardoor de Kamado kan scheuren. Als er heel
veel roet is ontstaan, kunt u een borstel of het bijgeleverde gereedschap gebruiken om de koolrestanten weg
te schrapen voor het volgende gebruik.
• Gebruik voor het schoonmaken van de grills en roosters schoonmaakmiddel zonder schuurmiddel, zodra het
apparaat volledig is afgekoeld.
• Wacht bij het schoonmaken van de buitenkant tot de Kamado volledig is afgekoeld en gebruik een vochtige
doek met een mild schoonmaakmiddel.

5
NL, BE, LU
ONDERHOUD
• Twee keer per jaar (vaker indien nodig) de ringen vastschroeven en de scharnieren oliën.
AANSTEKEN, GEBRUIK EN VEILIGHEID
• Zorg dat de Kamado op een vaste, vlakke, horizontale, warmtebestendige en niet-brandbare ondergrond staat,
uit de buurt van brandbare voorwerpen.
• Zorg dat de Kamado minimaal 2 meter bovenruimte heeft en minimaal 2 meter van andere voorwerpen af
staat.
• Maak een vuurtje door een opgerolde krant met een aantal aanmaakblokjes of solide vuurblokjes op de
houtskoolplaat (7) onderin de Kamado te leggen. Plaats vervolgens 2 of 3 handen houtskool bovenop de krant.
• Gebruik GEEN benzine, terpentine, wasbenzine, alcohol of andere vergelijkbare chemische stoffen om het
apparaat (opnieuw) aan te steken.
• Open het luchtgat aan de onderkant en steek de krant aan met een lange aansteker of veiligheidslucifers.
Laat, zodra het vuur aan is, het onderste luchtgat en het deksel ongeveer 10 minuten open staan om een
kleine basis van hete kooltjes te krijgen.
• Laat de houtskool opwarmen en minimaal 30 minuten gloeien voordat u op de Kamado gaat bakken. NIET
bakken voordat er op de brandstof een laagje as ligt.
• Het wordt geadviseerd om de kolen niet op te stoken of om te draaien zodra ze heet zijn. Op die manier
kunnen de kolen uniformer en efciënter branden.
• Gebruik zodra het vuur aan staat ALLEEN warmtebestendige handschoenen bij het gebruik van hete keramiek
of bakoppervlakken.
• Hieronder vindt u bakinstructies per temperatuur en duur.
INSTRUCTIES VOOR BAKKEN OP LAGE TEMPERATUUR
• Stook de houtskool op volgens de instructies hierboven. Gloeiende houtskool NIET verplaatsen of opstoken.
• Open het luchtgat aan de onderkant volledig en laat het deksel ongeveer 10 minuten open om een kleine
basis van hete kooltjes te krijgen.
• Houd de Kamado in de gaten tot deze de gewenste temperatuur heeft. Zie pagina 5 voor temperatuur-
instructies.
• Sluit het onderste luchtgat volledig om de Kamado op temperatuur te houden.
• U kunt nu bakken op de Kamado.
• BELANGRIJK: bij het openen van het deksel op hoge temperaturen is het belangrijk dat u het deksel slechts
licht omhoog tilt, zodat de lucht langzaam en veilig kan binnenkomen en er geen backdrafts of steekvlammen
kunnen ontstaan die kunnen leiden tot letsel.
• Lees ALTIJD de INFORMATIE OVER HET BEREIDEN VAN ETEN op pagina 6 van deze instructiehandleiding.
• Gebruik ALTIJD warmtebestendige handschoenen bij het gebruik van hete keramiek of bakoppervlakken.
INSTRUCTIES VOOR ROKEN
• Ga hetzelfde te werk als bij bakken op lage temperatuur.
• Houd de Kamado in de gaten tot deze de gewenste temperatuur heeft. Zie pagina 5 voor temperatuur-
instructies.
• Laat het onderste luchtgat een beetje open.
• Doe het bovenste luchtgat dicht en controleer de temperatuur nog een paar minuten.
• Strooi met warmtebestendige handschoenen de houtsnippers over de hete houtskool heen.
• U kunt nu roken op de Kamado.
• TIP: dompel de houtsnippers of rookplanken 15 minuten onder in water om het rookproces te verlengen.
• BELANGRIJK: bij het openen van het deksel op hoge temperaturen is het belangrijk dat u het deksel slechts
licht omhoog tilt, zodat de lucht langzaam en veilig kan binnenkomen en er geen backdrafts of steekvlammen
kunnen ontstaan die kunnen leiden tot letsel.
• Lees ALTIJD de INFORMATIE OVER HET BEREIDEN VAN ETEN op pagina 6 van deze instructiehandleiding.
• Gebruik ALTIJD warmtebestendige handschoenen bij het gebruik van hete keramiek of bakoppervlakken.
INSTRUCTIES VOOR BAKKEN OP HOGE TEMPERATUUR
• Stook de houtskool op volgens de instructies op pagina 4.

6
NL, BE, LU
• Sluit het deksel en zet de luchtgaten aan de boven- en onderkant helemaal open.
• Houd de Kamado in de gaten tot deze de gewenste temperatuur heeft. Zie pagina 5 voor temperatuur-
instructies.
• Sluit het bovenste luchtgat voor de helft en controleer de temperatuur nog een paar minuten.
• U kunt nu bakken op de Kamado.
• BELANGRIJK: bij het openen van het deksel op hoge temperaturen is het belangrijk dat u het deksel slechts
licht omhoog tilt, zodat de lucht langzaam en veilig kan binnenkomen en er geen backdrafts of steekvlammen
kunnen ontstaan die kunnen leiden tot letsel.
• Lees ALTIJD de INFORMATIE OVER HET BEREIDEN VAN ETEN op pagina 6 van deze instructiehandleiding.
• Gebruik ALTIJD warmtebestendige handschoenen bij het gebruik van hete keramiek of bakoppervlakken.
INFORMATIE OVER HET BEREIDEN VAN ETEN
• Lees deze instructies goed door en volg ze op bij het bakken op de Kamado.
• Was altijd uw handen voor en na het bereiden van rauw vlees en voor het eten.
• Houd rauw vlees altijd uit de buurt van gebakken vlees en ander eten.
• Zorg vóór het bakken dat het grilloppervlak en het keukengerei schoon zijn en vrij zijn van etensresten.
• Gebruik NIET dezelfde keukengerei voor rauw en gekookt eten.
• Zorg dat al het vlees goed gaar is voor het eten.
• LET OP: het eten van rauw of onvoldoende gaar vlees kan leiden tot voedselvergiftiging
(bijv. door bacteriën als E.coli).
• Om het risico op onvoldoende gaar vlees te verkleinen, kunt u het opensnijden om te controleren of het
binnenin gaar genoeg is.
• LET OP: als het vlees voldoende is gebakken, moet het sap doorzichtig zijn en moet er geen roze/rood sap of
verkleuring van het vlees zichtbaar zijn.
• Het is aan te raden om grotere stukken vlees voor te bakken voordat u ze afbakt op de grill.
• Maak na gebruik van de Kamado het bakoppervlak van de grill en het keukengerei altijd schoon.
BRANDSTOF BIJVULLEN
• Met gesloten luchtgaten kan de Kamado een paar uur op hoge temperatuur blijven. Als u meer baktijd nodig
heeft (bijvoorbeeld bij het roosteren van een groot stuk vlees of bij langzaam roken) kan het nodig zijn om
meer houtskool toe te voegen. Voeg deze houtskool toe en ga verder zoals hierboven aangegeven.
HET VERVANGEN VAN HET VILT VAN DE KAMADO GRILL
Afhankelijk van hoe vaak u uw Kamado Grill gebruikt dient u het vilt van het deksel en de basis van de Kamado Grill af en
toe te vervangen. Hiermee voorkomt u de eerder genoemde “valse” lucht. Ga zorgvuldig en als volgt te werk:
Benodigdheden:
- Zelfklevend vilt
- Steeksleutel
- Verfkrabber en/of Stanleymes
- Schuursponsje of doekje
- Aceton
- Schilderstape
1. Verwijder de de regelbare afsluiter of keramische afdekdop. Draai de moeren van de bovenste spanband met
de steeksleutel los, til vervolgens het deksel er voorzichtig uit en zet deze ondersteboven op een beschermen
de ondergrond. Zorg ervoor dat het deksel niet kan vallen!
2. Draai de onderste spanband los en laat de keramieken basis in het nest of de tafel staan.
3. Snijd met een stanleymes en/of verfkrabber zoveel mogelijk van het oude vilt weg.
Verwijder de restjes vilt en lijm met een doekje of schuurspons met aceton.
4. Wacht minstens een uur zodat de aceton is vervlogen.
5. Plak het nieuwe (zelfklevende) vilt zorgvuldig op de rand van de basis en het deksel. Zorg ervoor dat de naden
niet exact op dezelfde plaats komen en laat het vilt aan de buitenkant iets overhangen, dat is beter dan aan de
binnenkant (dit zal anders namelijk verbranden bij ingebruikname). Zorg bij het plakken van het vilt voor wat
speling (dus niet zo strak mogelijk), bij verwarming kan het vilt namelijk mogelijk nog iets krimpen. Snijd het vilt
bij de naad netjes af. Gebruikt u niet zelfklevend vilt in combinatie met lijm dan gaat u als volgt te werk:

7
NL, BE, LU
Plak aan de buitenzijde van het deksel en de basis direct onder de rand het schilderstape om te voorkomen
dat er lijm op de Kamado Grill komt. Bescherm de binnenzijde met een stuk karton en spuit de randen met de
lijm in. Laat volgens de aanwijzingen op de verpakking van de lijm drogen en plak het vilt vervolgens op de
randen. Laat de lijm goed uitharden.
6. Zet de Kamado Grill weer in elkaar. Houd de spanband om de basis en draai de moeren vrijwel helemaal aan.
Zet het deksel voorzichtig in de bovenste spanband en draai de moeren vrijwel helemaal aan. Controleer of
het deksel en de spanbanden mooi recht zitten en draai alle moeren stevig aan.
VOORWAARDEN EN BEPALINGEN VAN DE BEPERKTE GARANTIE VAN PATTON KAMADO GRILL
Iedere Patton Kamado Grill keramisch kooktoestel heeft een beperkte garantie op materiaal en constructie van alle
keramische onderdelen (zoals koepel, onderstel, schoorsteen met afsluiter, vuurkorf en binnenring). Deze garantie geldt
zolang de oorspronkelijke koper de Patton Kamado Grill of het gedekte onderdeel in eigendom heeft.
De Patton Kamado Grill heeft een beperkte fabrieksgarantie van 2 jaar voor de oorspronkelijke koper. De keramische
onderdelen worden niet gedekt tegen breuk door vallen of misbruik. De onderdelen van metaal, roestvrij staal en gietijzer
van de Patton Kamado Grill (zoals de metalen banden, het scharniermechanisme, metalen deksel met twee functies,
rooster, vuurkorf en regelschuif) hebben een beperkte fabrieksgarantie van 1 jaar voor de oorspronkelijke koper.
Patton stelt alles in het werk om roestbestendige materialen en lak die tegen hoge temperaturen bestand is op metalen
oppervlakken te gebruiken. Metalen materialen en beschermende deklagen kunnen echter worden aangetast door di-
verse oppervlaktekrassen of blootstelling aan stoffen en omstandigheden waarover Patton geen controle heeft.
Chloor, industriële dampen, chemicaliën, kunstmest, extreme vochtigheid, pesticiden voor het gazon en zout zijn enkele
van de stoffen die lak en nish op metalen deklagen kunnen aantasten. Om deze redenen worden door de garantie op
metalen, roestvrij stalen en gietijzeren onderdelen GEEN ROEST, OXIDATIE, VERVAGING of andere ONVOLKOMEN-
HEDEN GEDEKT tenzij deze ook leiden tot verlies van structurele integriteit of defecten van deze onderdelen van de
Patton Kamado Grill. Dit product moet tijdens de winterperiode binnen gezet worden. Het uiterlijk van craquelé van het
keramiek maakt onderdeel uit van het productieproces.
Houten artikelen, zoals de bamboe zijtafels, hebben een beperkte fabrieksgarantie 1 jaar voor de oorspronkelijke koper.
Houten producten zijn niet gedekt tegen normale verwering of scheuren tenzij de structurele integriteit ook verloren gaat.
De thermometer heeft ook een beperkte fabrieksgarantie van 1 jaar.
Deze garanties zijn gebaseerd op normaal en redelijk huishoudelijk gebruik en onderhoud van de Patton Kamado Grill.
Commercieel gebruik en dergelijke toepassingen zijn uitgesloten van de garantie. De garantie is niet van toepassing op
bijkomende of onvoorziene schade of breuk, of voor schade veroorzaakt door: vervoer; laten vallen; verkeerde montage;
onjuiste ondersteuning; pogingen om de Patton Kamado Grill te ondersteunen door andere middelen dan een solide,
onbrandbaar oppervlak onder de basis; commercieel gebruik; wijzigingen; veranderingen; nalatigheid; misbruik; onjuiste
verzorging; gevaren op de weg; normale en redelijke slijtage; of natuurrampen.
De garantie is niet van toepassing op krassen, deuken, scherfjes, haarscheurtjes, het ontstaan van kleine cosmetische
scheuren in de buitenste glazuurlaag die de werking van de Patton Kamado Grill niet beïnvloeden.
Alle niet-toegestane wijzigingen of veranderingen aan een Patton Kamado Grill doen de garantie teniet. Dit omvat het bo-
ren van gaten of het knoeien aan onderdelen; gebruik van andere onderdelen in de Patton Kamado Grill dan authentieke
Patton Kamado Grill -onderdelen; of gebruik van inwendige onderdelen op een andere manier dan zoals bedoeld door de
fabrikant. Wijzigen of vervangen van inwendige onderdelen, zoals de vuurkorf en de binnenring, doet de garantie teniet,
en Patton wijst uitdrukkelijk iedere aansprakelijkheid af voor directe, indirecte, bijkomende of gevolgschade die hieruit
voorkomt. Aanstekervloeistof of welk ontvlambaar mengsel dan ook in een Patton Kamado Grill gieten doet de garantie
teniet. Dit is een gevaarlijke praktijk en kan tot schade of letsel leiden.
VOOR ZOVER MAXIMAAL TOEGESTAAN DOOR DE WET REIKEN ALLE WETTELIJK VOORGESCHREVEN, UIT-
DRUKKELIJKE OF STILZWIJGENDE GARANTIES, MET INBEGRIP VAN DE STILZWIJGENDE GARANTIES VAN
VER- KOOPBAARHEID EN GESCHIKTHEID VOOR EEN BEPAALD DOEL, NIET VERDER DAN DEZE GARANTIE.
AANSPRAKELIJKHEID VOOR BIJKOMENDE, SPECIALE EN GEVOLGSCHADE IS UITGESLOTEN.

8
NL, BE, LU
TEMPERATUURINSTRUCTIES
Langzaam bakken / roken (110ºC-135ºC) Luchtgat boven Luchtgat beneden
Grillen / roosteren (160ºC-180ºC) Luchtgat boven Luchtgat beneden
Aanbraden / dichtschroeien (260ºC-370ºC) Luchtgat boven Luchtgat beneden
Runderborst 2 uur per pond
Draadjesvlees 2 uur per pond
Hele kip 3 - 4 uur
Ribben 3 - 5 uur
Braadstukken 9+ uur
Vis 15-20 min.
Fricandeau 15-30 min.
Kipstukken 30-45 min.
Hele kip 1-1,5 uur
Lamsbout 3-4 uur
Kalkoen 2-4 uur
Ham 2-5 uur
Steak 5-8 min.
Karbonades 6-10 min.
Hamburgers 6-10 min.
Worsten 6-10 min.
Open Dicht

9
NL, BE, LU
Klem
Voor het optillen van pizzastenen of grills wanneer deze te heet
zijn om met de handen aan te pakken.
Asschraper
Wanneer de Kamado alle brandstof heeft verbruikt en is afgekoeld,
kunt u hiermee de as van de bodem verwijderen.
OPTIONEEL

MODE D’EMPLOI
Cuiseur Kamado, modèle 13”

11
FR, CH
Outils requis (non inclus)
Instructions pour l’utilisateur, à conserver pour toute référence ultérieure
IMPORTANT : Retirez avec précaution tout emballage avant l’utilisation, mais prenez soin de conserver les in-
structions de sécurité.
Ces instructions font partie du produit.
Veuillez prendre connaissance de l’ensemble des avertissements de sécurité gurant dans ces instructions.
Veuillez lire ces instructions dans leur intégralité et les conserver pour toute référence ultérieure. Ces instructions doivent
être conservées à proximité du produit.
Ce produit est à usage domestique uniquement, de sorte qu’il ne doit pas être utilisé à des ns commerciales ou contrac-
tuelles. CE PRODUIT DOIT ÊTRE CONSERVÉ EN INTÉRIEUR EN HIVER.
LES CRAQUEMENTS QUI APPARAISSENT SUR LA CÉRAMIQUE SONT NORMAUX.
Consignes préventives et d’utilisation en toute sécurité
PRÉSENTATION DU CUISEUR KAMADO
Il y a 4 000 ans, des archéologues découvrent de grands récipients d’argile que l’on considère aujourd’hui comme les
premières incarnations du cuiseur en céramique Kamado. Depuis lors, le produit a évolué à bien des égards. Il a été
équipé d’un couvercle amovible, d’une trappe de tirage offrant un meilleur contrôle thermique, et d’un bouton permettant
de sélectionner le bois ou le charbon comme combustible principal. Au Japon, le Mushikamado était un pot en argile de
forme arrondie surmonté d’un dôme amovible conçu pour la cuisson du riz. Le nom « Kamado » signie en effet en japo-
nais « poêle » ou « cuisinière ». Ce nom a été rapidement adopté par les Américains jusqu’à devenir un terme générique
pour ce style de cuiseur en céramique.
Les cuiseurs Kamado sont extrêmement polyvalents. Ils peuvent non seulement être utilisés comme gril ou fumoir, mais
également pour cuire sans effort les pizzas, le pain, les tartes et les cookies. Grâce à leurs excellentes propriétés de
rétention thermique, il est possible d’obtenir et de maintenir des températures élevées, avec un contrôle précis du débit
d’air, par le biais des évents inférieurs et supérieurs. Les températures élevées sont idéales pour la cuisson rapide des
hamburgers et des saucisses, tandis que les températures basses permettent une cuisson lente parfaitement adaptée
aux morceaux de viande plus volumineux. Par ailleurs, il est possible d’ajouter quelques copeaux de bois au charbon ou
d’associer différents types de copeaux de bois pour rendre vos viandes encore plus savoureuses.
AVERTISSEMENTS - DANGER !
Ne retirez pas le joint en feutre gris xé sur le bord du cadre du couvercle. Ce joint en feutre assure l’étanchéité et ne
permet aucune entrée d’air, ce qui pourrait perturber la circulation à l’intérieur du gril Kamado.
Veillez à lubrier régulièrement la boulonnerie et les charnières des bandes métalliques avec de l’huile d’usinage uide
(ou WD40). Il convient de contrôler régulièrement le serrage des boulons et de les resserrer le cas échéant.
• Ce produit est conçu POUR UNE UTILISATION EN EXTÉRIEUR UNIQUEMENT.
• NE JAMAIS laisser un feu sans surveillance.
• DANGER d’intoxication au monoxyde de carbone. NE JAMAIS allumer ce cuiseur, ou encore le laisser se
consumer ou refroidir, dans des espaces connés.
• NE PAS surcharger le cuiseur en combustible.
• RISQUE D’INCENDIE : des braises peuvent jaillir du cuiseur pendant l’utilisation.
• DANGER : NE PAS utiliser d’essence, de white-spirit, d’essence à briquet, d’alcool ou d’autres substances
chimiques similaires pour allumer ou rallumer ce cuiseur. Utilisez uniquement des allume-feu conformes à la

12
FR, CH
norme EN1860-3 !
• Il est vivement recommandé d’utiliser des briquettes ou morceaux de charbon de bois comme combustibles
pour votre cuiseur Kamado. Ces combustibles brûlent plus longtemps et produisent moins de cendres à même
d’entraver la circulation de l’air.
• IMPORTANT : Lors de l’ouverture du couvercle à des températures élevées, il est essentiel de ne soulever
le couvercle que très légèrement, ce qui permet à l’air de pénétrer lentement et en toute sécurité, empêchant
ainsi tout refoulement ou toute ambée soudaine susceptible de provoquer des brûlures.
• Suivre toujours les INFORMATIONS RELATIVES À LA CUISSON DES ALIMENTS de la page 13 de cette
notice d’emploi.
• NE PAS utiliser le cuiseur Kamado sur un plancher ou sur d’autres surfaces inammables comme de l’herbe
sèche, des copeaux de bois, des feuilles ou de l’écorce décorative.
• Veiller à ce que le cuiseur Kamado soit placé à au moins 2 mètres des éventuels objets inammables.
• NE PAS se servir de ce cuiseur Kamado en tant que fourneau.
• NE PAS manipuler ou déplacer le cuiseur Kamado lorsqu’il est allumé et chaud.
• UTILISER TOUJOURS des gants antichaleur lors de la manipulation de plaques céramiques ou de surfaces
de cuisson chaudes.
• Laisser le cuiseur refroidir complètement avant de le déplacer ou de le ranger.
• Tenir TOUJOURS les enfants et les animaux à une distance de sécurité du four lors de l’utilisation.
• Inspecter toujours l’appareil avant de l’utiliser, vérier notamment l’usure des pièces, vérier qu’elles ne sont
pas endommagées, et les remplacer le cas échéant.
ENTRETIEN DU CUISEUR KAMADO
• Pour allumer le foyer, placer du papier journal enroulé et quelques cubes d’allume-feu solides sur la plaque à
charbon de bois (7) suitée à la base du cuiseur Kamado. Placer ensuite 2 ou 3 poignées de charbon de bois
au-dessus du papier journal.
• NE PAS utiliser d’essence, de white-spirit, d’essence à briquet, d’alcool ou d’autres substances chimiques
similaires pour allumer ou rallumer ce cuiseur.
• Ouvrir l’évent inférieur et allumer le papier journal en utilisant un briquet à long bec ou des allumettes de
sûreté.
• NE PAS surcharger l’appareil en combustible, un foyer trop intense pourrait endommager le cuiseur Kamado.
• Attendre que tout le combustible soit épuisé et que le feu s’éteigne naturellement.
• Lorsque les premières ambées sont trop fortes, le joint d’étanchéité en feutre peut être endommagé avant
même d’arriver à maturation.
• À l’issue de la première utilisation, vérier que toutes les xations sont bien serrées. La bande en métal rac
cordant le couvercle à la base se dilatera sous l’effet de la chaleur et pourrait se desserrer. Il vous est
recommandé de vérier et, le cas échéant, de resserrer la bande à l’aide d’une clé.
• Votre cuiseur Kamado est à présent prêt à l’emploi.
EXTINCTION
• Pour éteindre l’appareil, cesser d’ajouter du combustible et fermer les évents et le couvercle an de permettre
au feu de s’éteindre naturellement.
• NE PAS utiliser d’eau pour éteindre les braises de charbon, cela pourrait endommager le cuiseur céramique
Kamado.
RANGEMENT
• Lorsqu’il n’est pas utilisé, et s’il est remisé en extérieur, couvrir le cuiseur Kamado, à l’état totalement refroidi,
au moyen d’une housse de protection antipluie.
• La grille de cuisson chromée n’est pas lavable au lave-vaisselle. Pour la nettoyer, utiliser un détergent doux et
de l’eau chaude.
• Lors de l’utilisation du cuiseur Kamado, appuyer vers le bas sur les deux roues de verrouillage an d’empêcher
tout déplacement de l’appareil au cours de l’utilisation.
• Pour une protection complète et adéquate en hiver, il est recommandé de remiser le cuiseur Kamado sous une
housse dans un garage ou un abri de jardin.
• Ranger l’appareil dans un endroit à l’abri du gel.

13
FR, CH
NETTOYAGE
• Le cuiseur Kamado est autonettoyant. Le laisser chauffer jusqu’à 260 °C pendant 30 minutes an qu’il brûle
tous les résidus d’aliments et débris.
• NE PAS utiliser d’eau ou tout autre type de produit de nettoyage pour nettoyer l’intérieur du cuiseur Kamado.
Les parois du cuiseur Kamado sont poreuses et absorberont tous les uides utilisés, ce qui pourrait provoquer
des craquements et ssures. Lorsqu’un excès de suie est constaté, utiliser une brosse métallique ou l’outil
fourni an de gratter les résidus de carbone avant l’utilisation successive.
• Pour nettoyer les différentes grilles de l’appareil une fois celui-ci totalement refroidi, utiliser un produit de net
toyage non abrasif.
• Pour nettoyer la surface extérieure, attendre que le cuiseur Kamado soit totalement refroidi et utiliser un chif
fon humidié et un détergent doux.
ENTRETIEN
• Serrer les bandes et graisser la charnière deux fois par an, voire plus si nécessaire.
INFORMATIONS SUR L’UTILISATION, L’ALLUMAGE ET LA PRÉVENTION
• Veiller à ce que le cuiseur Kamado soit positionné sur une surface permanente, plane, mise à niveau,
résistante à la chaleur et non inammable, à distance d’objets inammables.
• Veiller à ce que le cuiseur Kamado présente au moins un dégagement de deux mètres en hauteur, et un
dégagement de deux mètres relativement à d’autres éléments environnants.
• Pour allumer le foyer, placer du papier journal enroulé et quelques cubes d’allume-feu solides sur la plaque à
charbon de bois (7) suitée à la base du cuiseur Kamado. Placer ensuite 2 ou 3 poignées de charbon de bois
au-dessus du papier journal.
• NE PAS utiliser d’essence, de white-spirit, d’essence à briquet, d’alcool ou d’autres substances chimiques
similaires pour allumer ou rallumer ce cuiseur.
• Ouvrir l’évent inférieur et allumer le papier journal en utilisant un briquet à long bec ou des allumettes de
sûreté. Lorsque le papier est allumé, laissez l’évent inférieur et le couvercle ouverts pendant environ dix
minutes an d’obtenir une petite quantité de braises.
• Laisser le charbon de bois chauffer et le conserver ardent pendant au moins 30 minutes avant toute première
cuisson dans le cuiseur Kamado. NE RIEN faire cuire avant que le combustible ne soit recouvert d’une ne
couche de cendres.
• Il est recommandé de ne pas attiser et de ne pas retourner les braises de charbon. Ceci permet au charbon de
bois de brûler le minerai de manière homogène et efcace.
• Lorsque le cuiseur est allumé, utiliser TOUJOURS des gants antichaleur pour manipuler les plaques
céramiques ou les surfaces de cuisson chaudes.
• Consulter la section ci-dessous pour connaître les instructions de cuisson selon la température, et la durée.
GUIDE DE CUISSON À BASSE TEMPÉRATURE
• Allumer le charbon de bois en suivant les instructions afférentes données précédemment. NE PAS remuer ou
attiser les braises de charbon.
• Ouvrir l’évent inférieur totalement et laisser le couvercle ouvert pendant environ dix minutes an d’obtenir une
petite quantité de braises.
• Surveiller le cuiseur Kamado jusqu’à ce qu’il ait atteint la température souhaitée. Reportez-vous à la page 13
pour consulter le guide des températures de cuisson.
• Fermer complètement l’évent inférieur pour maintenir la température adaptée.
• Le cuiseur Kamado est maintenant prêt à être utilisé pour la cuisson.
• IMPORTANT : Lors de l’ouverture du couvercle à des températures élevées, il est essentiel de ne soulever
le couvercle que très légèrement, ce qui permet à l’air de pénétrer lentement et en toute sécurité, empêchant
ainsi tout refoulement ou toute ambée soudaine à même de provoquer des brûlures.
• Suivre toujours les INFORMATIONS RELATIVES À LA CUISSON DES ALIMENTS de la page 14 de cette
notice d’emploi.
• UTILISER TOUJOURS des gants antichaleur lors de la manipulation de plaques céramiques ou de surfaces
de cuisson chaudes.

14
FR, CH
GUIDE DE FUMAISON
• Suivre les instructions ci-dessus, comme si vous lanciez une cuisson lente.
• Surveiller le cuiseur Kamado jusqu’à ce qu’il ait atteint la température souhaitée. Reportez-vous à la page 13
pour consulter le guide des températures de cuisson.
• Laisser l’évent inférieur légèrement ouvert.
• Fermer l’évent supérieur et continuer à vérier la température pendant encore quelques minutes.
• À l’aide de gants antichaleur, éparpiller les copeaux de bois en formant un cercle au-dessus des braises de
charbon de bois.
• Le cuiseur Kamado est maintenant prêt à être utilisé pour la fumaison.
• ASTUCE : Tremper les copeaux de bois ou les planches de cuisson dans l’eau pendant 15 minutes pour pro
longer la fumaison.
• IMPORTANT : Lors de l’ouverture du couvercle à des températures élevées, il est essentiel de ne soulever
le couvercle que très légèrement, ce qui permet à l’air de pénétrer lentement et en toute sécurité, empêchant
ainsi tout refoulement ou toute ambée soudaine à même de provoquer des brûlures.
• Suivez toujours les INFORMATIONS RELATIVES À LA CUISSON DES ALIMENTS de la page 14 de cette
notice d’emploi.
• UTILISER TOUJOURS des gants antichaleur lors de la manipulation de plaques céramiques ou de surfaces
de cuisson chaudes.
GUIDE DE CUISSON À HAUTE TEMPÉRATURE
• Allumer le charbon de bois en suivant les instructions données en page 12.
• Fermer le couvercle et ouvrir complètement les évents supérieurs et inférieurs.
• Surveiller le cuiseur Kamado jusqu’à ce qu’il ait atteint la température souhaitée. Reportez-vous à la page 13
pour consulter le guide des températures de cuisson.
• Fermer l’évent supérieur à mi-hauteur et continuer à vérier la température pendant encore quelques minutes.
• Le cuiseur Kamado est maintenant prêt à être utilisé pour la cuisson.
• IMPORTANT : Lors de l’ouverture du couvercle à des températures élevées, il est essentiel de ne soulever
le couvercle que très légèrement, ce qui permet à l’air de pénétrer lentement et en toute sécurité, empêchant
ainsi tout refoulement ou toute ambée soudaine à même de provoquer des brûlures.
• Suivre toujours les INFORMATIONS RELATIVES À LA CUISSON DES ALIMENTS de la page 13 de cette
notice d’emploi.
• UTILISER TOUJOURS des gants antichaleur lors de la manipulation de plaques céramiques ou de surfaces
de cuisson chaudes.
INFORMATIONS RELATIVES À LA CUISSON DES ALIMENTS
• Veuillez lire et suivre les conseils ci-dessous pour la cuisson des aliments dans le cuiseur Kamado.
• Se laver toujours les mains avant et après avoir manipulé de la viande crue, et avant de manger.
• Conserver toujours la viande crue séparément des viandes cuisinées et autres aliments.
• Avant la cuisson, veiller à ce que les surfaces du grill et les outils soient propres et exempts de résidus
alimentaires.
• NE PAS utiliser les mêmes ustensiles pour manipuler les aliments cuits et les aliments crus.
• Veiller à ce que les viandes soient bien cuites avant de manger.
• ATTENTION : L’ingestion de viandes crues ou de viandes en sous-cuisson peut engendrer un
empoisonnement alimentaire (par des souches de bactéries, par exemple Escherichia coli).
• Pour réduire le risque de sous-cuisson de la viande, couper la pièce de viande à cœur an de vérier qu’elle
est bien cuite à l’intérieur.
• ATTENTION : Si la viande a été cuite sufsamment, le jus de la viande doit être clair et il ne doit y avoir
aucune trace de jus rose/rouge ou coloration de la viande.
• Une précuisson des gros morceaux de viande est recommandée avant toute cuisson sur le grill.
• Après une cuisson dans le cuiseur Kamado, toujours nettoyer les surfaces de cuisson du grill et les ustensiles
de cuisine.
AJOUT DE COMBUSTIBLE
• Lorsque les évents sont fermés, le cuiseur Kamado conserve une température élevée pendant plusieurs
heures. Pour un temps de cuisson plus long (pour griller un rôti ou effectuer une fumaison lente par exemple),

15
FR, CH
il peut être nécessaire d’ajouter du charbon de bois. Dans ce cas, il suft d’ajouter du charbon de bois et de
continuer comme indiqué précédemment.
REMPLACEMENT DU FEUTRE DU GRIL KAMADO
En fonction de la fréquence d’utilisation du gril Kamado, il est recommandé de remplacer de temps en temps le feutre
du couvercle et la base du gril. Ceci permettra d’empêcher les entrées d’air précitées. Procédez minutieusement de la
manière suivante :
Matériel nécessaire :
– Feutre autocollant
– Clé plate
– Grattoir à peinture et / ou lame Stanley
– Éponge métallique ou toile abrasive
– Acétone
– Ruban adhésif de masquage
1. Retirez l’évent réglable ou le capuchon en céramique. Dévissez les écrous de la bande de tension à l’aide de la
clé plate, puis soulevez précautionneusement le couvercle et déposez-le à l’envers sur une surface protégée.
Veillez à ce que le couvercle ne puisse tomber !
2. Desserrez la bande de tension inférieure tout en laissant la base en céramique dans son logement ou en la
posant sur la table.
3. Retirez au maximum l’ancien feutre à l’aide d’une lame Stanley et / ou un grattoir à peinture. Éliminez les restes
de feutre et de colle avec une éponge métallique ou de la toile abrasive imbibée d’acétone.
4. Attendez au moins une heure pour permettre à l’acétone de s’évaporer.
5. Collez soigneusement le nouveau feutre (autocollant) sur le bord de la base et du couvercle. Veillez à ce que les
jointures ne se trouvent pas au même endroit et laissez dépasser un peu de feutre à l’extérieur plutôt qu’à
l’intérieur (pour empêcher sa combustion lors de la mise en service). Lors de l’encollage, laissez un peu de jeu
au feutre (sans le tendre à l’excès). Il est en effet possible que le feutre se rétracte quelque peu au contact de la
chaleur. Coupez le feutre proprement au niveau des jointures. Si vous utilisez de la colle pour xer le feutre et
non pas du feutre autocollant, vous devez procéder de la manière suivante :
Collez du ruban adhésif de masquage directement sous le bord de la face extérieure du couvercle et de la base
pour éviter toute trace de colle sur le gril Kamado. Protégez la face intérieure avec un morceau de carton et
appliquez de la colle sur les bords. Laissez sécher la colle suivant les indications mentionnées sur l’emballage et
appliquez ensuite le feutre sur les bords. Permettez à la colle de bien durcir.
6. Remontez le gril Kamado. Maintenez la bande de tension autour de la base, placez les écrous et resserrez-
les sans forcer. Déposez précautionneusement le couvercle dans la bande de tension supérieure, placez les
écrous et resserrez-les sans forcer. Assurez-vous que le couvercle et les bandes de tension sont bien droits
avant de resserrer solidement tous les écrous.
CONDITIONS ET DISPOSITIONS DE LA GARANTIE LIMITÉE DU GRIL PATTON KAMADO
Le foyer en céramique de tout gril Patton Kamado est couvert par une garantie limitée sur les matériaux et la fabrica-
tion de tous les éléments en céramique (le dôme, le cadre, la cheminée et sa vanne, la braisière et l’anneau de feu). La
présente garantie reste en vigueur tant que l’acheteur initial reste le propriétaire du gril Patton Kamado ou de la pièce
couverte.
Le fabricant offre une garantie limitée de deux (2) ans à l’acheteur initial du gril Patton Kamado. Les éléments en cérami-
que ne sont pas couverts contre les brisures consécutives à une chute ou à un mauvais usage. Cependant, le fabricant
ne donne qu’une garantie limitée d’un (1) an à l’acheteur initial du gril Patton Kamado sur les pièces en métal, en acier
inoxydable et en fonte (les bandes métalliques, le mécanisme à charnière, le couvercle métallique à double fonction, la
grille, la braisière et la vanne de réglage).
Patton met tout en œuvre pour n’utiliser que des matériaux résistant à la corrosion et des peintures laquées résistant à
des températures élevées sur les surfaces métalliques. Il arrive néanmoins que des matériaux métalliques et des cou-
ches protectrices soient détériorés par des rayures à la surface ou suite à une exposition à des substances et des conditi-
ons sur lesquelles Patton n’a aucun contrôle.
Le chlore, les fumées industrielles, les produits chimiques, les engrais chimiques, l’humidité extrême, les pesticides
pour la pelouse et le sel ne sont que quelques-unes des substances pouvant ronger la peinture laquée et la nition des
couches métalliques. C’est la raison pour laquelle la garantie sur les pièces métalliques, en acier inoxydable et en fonte
NE COUVRE PAS LA ROUILLE, L’OXYDATION, LA DÉCOLORATION et / ou toute autre DÉFECTUOSITÉ, à moins que

16
FR, CH
celles-ci n’entraînent la perte de l’intégrité structurelle ou tout vice desdites pièces du gril Patton Kamado. En période
hivernale, le gril doit être remisé à l’intérieur. L’aspect craquelé de la céramique est une réaction normale du processus
de production.
Le fabricant offre à l’acheteur initial une garantie limitée d’un (1) an sur les éléments en bois, tels que les tablettes laté-
rales en bambou. Les éléments en bois ne sont pas couverts contre l’altération ni les ssures normales, à moins d’une
perte de l’intégrité structurelle. Le thermomètre est couvert par une garantie limitée d’un (1) an du fabricant.
Les présentes garanties reposent sur l’hypothèse d’une utilisation domestique et d’un entretien normaux et raisonnables
du gril Patton Kamado. L’utilisation commerciale et toute autre application de même nature sont exclues de la présente
garantie. La présente garantie n’est applicable à aucun dommage ni aucune cassure collatéral ou imprévisible, ni à aucun
dommage occasionné dans les situations suivantes : son transport, toute chute, un montage erroné, tout support inappro-
prié, toute tentative d’installation du gril Patton Kamado sur une base autre qu’une surface solide et ininammable sous le
piètement, toute utilisation commerciale, toute modication, tout changement, toute négligence, tout mauvais usage, tout
entretien inadéquat, tout danger sur la chaussée, toute usure normale et raisonnable, et / ou toute catastrophe naturelle.
La présente garantie n’est pas davantage applicable aux rayures, bosses, éclats et craquelures ni à l’apparition de petites
ssures esthétiques dans la couche d’émail extérieure n’affectant en rien le fonctionnement du gril Patton Kamado.
Toutes les modications ou altérations non autorisées apportées au gril Patton Kamado rendent la présente garantie
caduque. Elles comprennent notamment le perçage de trous ou le bricolage de pièces, l’utilisation de pièces dans le gril
Patton Kamado autres que celles d’origine ou l’utilisation de pièces internes à d’autres ns que celles visées par le fa-
bricant. Toute modication ou altération de pièces internes, telles que la braisière ou l’anneau de feu, annule la présente
garantie et Patton décline expressément toute responsabilité pour tout dommage direct, indirect, collatéral ou consécutif
pouvant en découler. Le déversement de tout liquide allume-feu ou de tout autre mélange inammable dans le gril Patton
Kamado rend la garantie caduque. Il s’agit là d’une pratique dangereuse pouvant entraîner des dommages matériels et /
ou corporels.
POUR AUTANT QUE LA LOI EN VIGUEUR L’AUTORISE DANS LE SENS LE PLUS LARGE, TOUTE GARANTIE LÉGA-
LE, EXPRESSE OU TACITE, Y COMPRIS LA GARANTIE CLASSIQUE DE QUALITÉ MARCHANDE ET D’ADÉQUATION
À UN USAGE PARTICULIER, EST LIMITÉE AU CADRE DE LA PRÉSENTE GARANTIE. TOUTE RESPONSABILITÉ
POUR TOUT DOMMAGE COLLATÉRAL, SPÉCIAL ET CONSÉCUTIF EST EXCLUE.
GUIDE DES TEMPÉRATURES DE CUISSON
Cuisson lente / fumaison (110 °C - 135 °C) Évent supérieur Évent inférieur
Griller / rôtir (160 °C - 180 °C) Évent supérieur Évent inférieur
Saisir (260 °C - 370 °C) Évent supérieur Évent inférieur
Poitrine de bœuf 2 h par livre.
Efloché de porc 2 h par livre.
Poulet entier 3-4 h.
Côtes levées 3-5 h.
Rôtis plus de 9 h.
Poisson 15-20 min.
Filet de porc 15-30 min.
Morceaux de poulet 30-45 min.
Poulet entier 1-1,5 h.
Gigot d’agneau 3-4 h.
Dinde 2-4 h.
Jambon 2-5 h.
Steak 5-8 min.
Côtelettes de porc 6-10 min.
Hamburgers 6-10 min.
Saucisses 6-10 min.
Ouvrir Fermé

17
FR, CH
Pince
Cette pince vous permet de soulever la pierre à pizza ou les grilles
de cuisson lorsqu’elles sont trop chaudes pour être manipulées.
Outil de collecte des cendres
Lorsque le cuiseur Kamado a brûlé tous les éléments combusti-
bles et a refroidi, utiliser cet outil pour collecter les cendres dans la
partie inférieure prévue à cet effet.
EN OPTION

OPERATING AND ASSEMBLY INSTRUCTIONS
Kamado 13”

GB, IE
19
Tools required (NOT included)
User Instructions - Please keep for future reference
IMPORTANT – Carefully remove any packaging before use, but retain the safety instructions.
These instructions form part of the product.
Please take note of all of the safety warnings listed in these instructions.
Please read these instructions in their entirety and retain them for future reference.
These instructions should be stored with the product.
This product is for domestic use ONLY and should not be used commercially or for contract purposes.
THIS PRODUCT SHOULD BE PUT INSIDE DURING THE WINTER.
THE LOOK OF CRACKLE OF THE CERAMIC IS NORMAL.
Care and safe use guidelines
ABOUT YOUR KAMADO
Dating back 4000 years ago archaeologists have discovered large clay vessles thought to be early incarnations of
the Kamado ceramic cooker. Since then it has evolved in many ways; removable lid, added draft door for better
heat control and the switch from wood to charcoal as the primary fuel. In Japan the Mushikamado was a round
clay pot with a removable domed lid designed for steaming rice. The name ‘Kamado’ is, in fact, the Japanese
word for ’stove’ or ‘cooking range’. This name was adopted by the Americans and has now become a generic term
for this style of ceramic cooker.
Kamado cookers are extremely versatile. Not only can they be used for grilling or smoking but also pizzas, bread,
pies and cookies can be baked effortlessly inside them. Due to their excellent heat retention properties, high
temperatures can be achieved and maintained by precise contol of airow via the top and bottom vents. High
temperatures are ideal for fast cooking burgers and sausages whilst low heats will cook larger joints over a longer
period of time. Why not try adding some wood chips to the charcoal or try combining different avour wood chips
to make your meats even more avoursome.
WARNINGS – CAUTION!
Do not remove the grey felt packing from the base or the lid. This grey packing is used for sealing purposes and ensures
that “false air” does not occur, which could interfere with the air circulation inside the Kamado Grill.
Make sure that you regularly lubricate the bolts and hinges on the metal bands with a light machine oil, or
WD40. The bolts must be checked regularly and tightened when necessary.
• This product is intended FOR OUTDOOR USE ONLY.
• NEVER leave a burning re unattended.
• DANGER of carbon monoxide poisoning – NEVER light this product or let it smoulder or cool down in conned
spaces.
• DO NOT overload the unit with fuel.
• FIRE HAZARD – Hot embers may emit while in use.
• CAUTION - DO NOT use petrol, white spirit, lighter uid, alcohol or other similar chemicals for lighting or
relighting. Use only relighters complying to EN1860-3!
• It is highly recommened that you use lump charcoal in your Kamado. It burns for longer and produces less ash
which can restrict the airow.
• IMPORTANT: When opening the lid at high temperatures it is essential to lift the lid only slightly, allowing air to
enter slowly and safely, preventing any backdraft or are-ups that may cause injury.

GB, IE
20
• ALWAYS follow the FOOD COOKING INFORMATION stated on page 21 of this instruction manual.
• DO NOT use the Kamado on decking or any other ammable surfaces such as dry grass, wood chips,
leaves or decorative bark.
• Ensure that the Kamado is positioned at least 2 metres away from ammable items.
• DO NOT use this Kamado as a furnace.
• DO NOT handle or move the Kamado whilst alight as it will be hot.
• ALWAYS USE heat resistant gloves when handling hot ceramics or cooking surfaces.
• Allow the unit to cool down completely before moving or storing.
• ALWAYS keep children and pets at a safe distance from the oven when in use.
• Always inspect the unit prior to use for fatigue and damage and replace as and when necessary.
CURING THE KAMADO
• To start a re place rolled up newspaper with some lighter cubes or solid relighters on the charcoal plate (7)
in the base of the Kamado. Then place 2 or 3 handfuls of lump charcoal over the top of the newspaper.
• DO NOT use petrol, white spirit, lighter uid, alcohol or other similar chemicals for lighting or relighting.
• Open the bottom vent and light the newpaper using a long nosed lighter or safety matches.
• DO NOT overload the unit with fuel – if the re is too intense this could damage the Kamado.
• Leave until all the fuel is used and extinguished.
• If the rst burns are too high it could damage the felt gasket seal before it has had the chance to mature
properly.
• After rst use inspect all fasteners for tightness. The metal band connecting your lid to the base will expand
from the heat and this could become loose. It is recommended you check and if neccessary tighten the band
with a spanner.
• You can now use your Kamado as normal.
EXTINGUISHING
• To extinguish unit – stop adding fuel and close all the vents and the lid to allow the re to die natuarally.
• DO NOT use water to extinguish the charcoals as this could damage the ceramic Kamado.
STORAGE
• When not in use, and if stored outside, cover the Kamado once completely cooled with suitable rain cover
• The chrome plated cooking grill is NOT dishwasher safe; use a mild detergent with warm water.
• When using the Kamado push down on both of the locking wheels to stop the unit moving about during use.
• It is recommended the Kamado be stored under cover in a garage or shed over winter for complete protection.
CLEANING
• The Kamado is self cleaning. Heat it up to 260ºC for 30 minutes and it will scorch off all of the food and debris.
• DO NOT use water or any other types of cleaning product to clean the inside of your Kamado. The walls are
porous and will absorb any uids used, this could cause the Kamado to crack. If the soot becomes excessive
then use a wire brush or the supplied tool to scrape off the carbon remnants before the next use.
• To clean the grills and grates use a non-abrasive cleaner once the unit has fully cooled.
• To clean the outer surface wait until the Kamado is cool and use a damp cloth with a mild detergent.
MAINTENANCE
• Tighten the bands and oil the hinge 2 times a year or more if needed.
LIGHTING, USAGE AND CARE INFORMATION
• Ensure the Kamado is positioned on a permanent, at, level, heat resistant non-ammable surface away
from ammable items.
• Ensure the Kamado has a minimum of 2m overhead clearance and has a minimum 2m clearance from
other surrounding items.
• To start a re place rolled up newspaper with some lighter cubes or solid relighters on the charcoal plate (7)
in the base of the Kamado. Then place 2 or 3 handfuls of lump charcoal over the top of the newspaper.

GB, IE
21
• DO NOT use petrol, white spirit, lighter uid, alcohol or other similar chemicals for lighting or relighting.
• Open the bottom vent and light the newpaper using a long nosed lihter or safety matches. Once it has caught,
leave the bottom vent and lid open for about 10 minutes to build a small bed of hot embers.
• Allow the charcoal to heat up and be kept red hot for at least 30 minutes prior to the rst cooking on the
Kamado. DO NOT cook before the fuel has a coating of ash.
• It is recommended you don’t stoke or turn the coals once they are alight. This allows the charcoals to burn
ore uniformly and efcient.
• Once alight ONLY use heat resistant gloves when handling hot ceramics or cooking surfaces.
• See below for cooking instuctions depending on temperature and duration.
LOW TEMPERATURE COOKING GUIDE
• Light the lump charcoal according to the the instructions above. DO NOT move or stoke the coals once lit.
• Open the bottom vent fully and leave the lid open for about 10 minutes to build a small bed of hot embers.
• Monitor the Kamado until it has risen to the desired temperature. See page 21 for a temperature cooking guide.
• Fully close the bottom vent to maintain the temperature.
• You are now ready to use the Kamado for cooking on.
• IMPORTANT: When opening the lid at high temperatures it is essential to lift the lid only slightly, allowing air
to enter slowly and safely, preventing any backdraft or are-ups that may cause injury.
• ALWAYS follow the FOOD COOKING INFORMATION stated on page 21 of this instruction manual.
• ALWAYS use heat resistant gloves when handling hot ceramics or cooking surfaces.
SMOKING GUIDE
• Follow the instructions above as if you were starting a slow cook.
• Monitor the Kamado until it has risen to the desired temperature. See page 21 for a temperature cooking guide.
• Leave the bottom vent slightly open.
• Close the top vent and continue to check the tempertaute for a few more minutes.
• Using heat resistant gloves sprinkle the wood chips in a circle over the hot charcoal.
• You are now ready to use the Kamado to smoke on.
• TIP: Soak your wood chips or cooking planks in water for 15 minutes to prolong the smoking process.
• IMPORTANT: When opening the lid at high temperatures it is essential to lift the lid only slightly, allowing air
to enter slowly and safely, preventing any backdraft or are-ups that may cause injury.
• ALWAYS follow the FOOD COOKING INFORMATION stated on page 21 of this instruction manual.
• ALWAYS use heat resistant gloves when handling hot ceramics or cooking surfaces.
HIGH TEMPERATURE COOKING GUIDE
• Light the lump charcoal according to the the instructions on page 20.
• Close the lid and fully open the top and bottom vents.
• Monitor the Kamado until it has risen to the desired temperature. See page 21 for a temperature cooking guide.
• Close the top vent half way and continue to check the temperature for a few more minutes.
• You are now ready to use the Kamado for cooking on.
• IMPORTANT: When opening the lid at high temperatures it is essential to lift the lid only slightly, allowing air to
enter slowly and safely, preventing any backdraft or are-ups that may cause injury.
• ALWAYS follow the FOOD COOKING INFORMATION stated on page 21 of this instruction manual.
• ALWAYS use heat resistant gloves when handling hot ceramics or cooking surfaces.
FOOD COOKING INFORMATION
• Please read and follow this advice when cooking on your Kamado.
• Always wash your hands before and after handling uncooked meat and before eating.
• Always keep raw meat away from cooked meat and other foods.
• Before cooking ensure grill surfaces and tools are clean and free of old food residues.
• DO NOT use the same utensils to handle cooked and uncooked foods.
• Ensure all meat is cooked thoroughly before eating.
• CAUTION – eating raw or under cooked meat can cause food poisoning (e.g. bacteria strains such as E.coli).
• To reduce the risk of under cooked meat cut open to ensure it is cooked all the way through internally.
• CAUTION – if the meat has been cooked sufciently the meat juices should be clear and there should be no

GB, IE
22
traces of pink/red juice or meat colouring.
• Pre-cooking larger pieces of meat and joints is recommended before nally cooking on your grill.
• After cooking on your Kamado always clean the grill cooking surfaces and utensils.
REFUELING
• With the vents closed, the Kamado stay at a high temperature for several hours. If you require a longer
cooking time (e.g when roasting a whole joint or slow smoking), it may be necessary to add more charcoal.
Just add some additional charcoal and continue as above.
REPLACING THE FELT PACKING ON THE KAMADO GRILL
Depending on how you use the Kamado Grill, the felt packing around the lid and the base should be replaced from time to
time. This prevents “false air” from occurring. Carefully carry out the following:
Requirements:
- self adhesive felt packing
- open-ended spanner
- scraper and/or Stanley Knife
- pot scourer of abrasive pad
- acetone
- masking tape
1. Remove the adjustable cut-off or ceramic lid cap. Unscrew the nuts on the top tensioning band with the
spanner, then next, carefully lift off the lid and lay it upside down onto a protective layer on the oor.
Make sure that you do not drop the lid!
2. Unscrew the bottom tensioning band and leave the ceramic base standing in the housing or on the table.
3. Using the Stanley Knife or scraper, cut or scrape off as much of the existing felt packing as possible.
Remove the remaining bits of felt and glue with the acetone an the action of an abrasive pad or pot scourer
4. Now you must wait for about one hour until the acetone has evaporated.
5. Carefully stick the new (self adhesive) felt packing to the edge of the base and the lid. Make sure that the
seams are not at exactly the same place again and allow the felt to overlap slightly on the outside, which is
better than on the inside (because it will burn when the grill is lit once again). Allow a little play when sticking
down the felt packing (therefore not too tight or stretched), so when warming up the felt packing is able to
shrink a little. Neatly cut the felt packing at the seam. It you are using adhesive in place of self adhesive tape,
please do as follows:
Apply the masking tape immediately under the edge of the base and the outside of the lid so that the adhesive
does not stick to the Kamado Grill itself. Protect the inside of the grill with a piece of cardboard and then spray
the edges with the adhesive. Follow the instruction for the adhesive and allow it to dry and then stick the felt
packing onto the edges. Allow the glue to completely harden.
6. Reassemble the Kamado Grill. Place the tensioning band against the base and tighten the nuts. Carefully put
the lid into the top tensioning band and tighten the nuts. Check whether the lid and the tensioning bands are
straight and then give the nuts a nal tighten.
TERMS & CONDITIONS OF THE LIMITED GUARANTEE FOR THE PATTON KAMADO GRILL
Every Patton Kamado Grill ceramic cooker has a limited guarantee covering the materials and construction of all tyhe
ceramic components (e.g. canopy, frame, u with cut-off, re basket and inner ring). This guarantee is effective for as long
as the original purchaser remains in possession of the Patton Kamado Grill or the covered component.
The Patton Kamado Grill has a limited manufacturer’s guarantee of 2 years for the original purchaser. The ceramic com-
ponents are not covered for breakages caused by dropping or misuse. The components made from metal, stainless steel
or cast iron on the Patton Kamado Grill (e.g. metal bands, hinging mechanism, metal covers with double function, grill, re
basket and regulating slide) have a limited manufacturer’s guarantee of 1 year for the original purchaser.
Patton endeavours to use only rustproof materials and paint that can resist high temperatures and is used on the metal
surfaces. However, metal materials and protective nishing coats can be affected by surface cracking or exposure to vari-
ous substances and circumstances over which Patton has no control.
Bleach, industrial vapours, chemicals, articial fertiliser, extreme humidity, pesticides for the lawn and salt are but a few
of the substances that can adversely affect paint and nishing materials on metal coverings. For this reason, the guaran-
tee DOES NOT COVER RUST, OXIDISATION, FADING or any other DEFECTS to the metal, stainless steel and cast
iron components, unless this also leads to the loss of the structural integrity or defects to the components on the Patton

GB, IE
23
Kamado Grill. This product must be kept indoors during the winter period. The crackleware nish of the ceramics is part of
the production process.
Wooden articles, such as bamboo side tables, have a limited manufacturer’s guarantee of 1 year for the original purcha-
ser. Wooden products are not covered against normal weathering or cracking unless this affects the structural integrity.
The thermometer also has a limited manufacturer’s guarantee of 1 year.
These guaranteed are based or the normal, reasonable domestic use and maintenance of the Patton Kamado Grill.
Commercial use and similar applications are not covered by this guarantee. The guarantee does not apply to incidental
or unforeseen damage or breakage, or damage caused by the following: transportation, dropping, incorrect assembly,
incorrect support, attempts to support the Patton Kamado Grill using anything other than having a solid, inammable base
underneath, commercial use, making modications or changes, negligence, incorrect maintenance, hazards on pathways/
roads, normal wear & tear or natural disasters.
The guarantee does not cover scratches, dents, splinters, hair cracks or small cosmetic cracks appearing on the outer
glazing that do not inuence the normal operation of the Patton Kamado Grill.
Any modications or changes made to the Patton Kamado Grill without receiving prior written consent from the manu-
facturer, render the guarantee null and void. This includes boring holes or altering components, or using spare parts not
authorised for use on the Patton Kamado Grill, or using internal components in manner for which they were not designed
by the manufacturer. Modications or changes to internal components, such as the re basket and the inner ring will
render the guarantee null and void and Patton expressly rejects any liability for direct, indirect, incidental or consequential
damages or losses that may result. Using re lighter uid or any other type of ammable mixture in a Patton Kamado Grill
renders the guarantee null and void. This is a dangerous practice and can lead to damage and physical injury.
UP TO THE MAXIMUM EXTENT PERMITTED BY LAW, ALL STATUTORY PROVISIONS, EXPRESSLY OR IMPLIED
GUARANTEES, INCLUDING IMPLIED GUARANTEES REGARDING THE SALEABILITY AND SUITABILITY FOR A
SPECIFIC PURPOSE, WILL NOT EXCEED THIS GUARANTEE. LIABILITY FOR INCIDENTAL, SPECIFIC AND CONSE-
QUENTIAL DAMAGE IS EXCLUDED.
COOKING TEMPERATURE GUIDE
Slow cook / Smoke (110ºC-135ºC) Top vent Bottom vent
Grill / Roast (160ºC-180ºC) Top vent Bottom vent
Sear (260ºC-370ºC) Top vent Bottom vent
Beef Brisket 2 Hrs per lb.
Pulled Pork 2 Hrs per lb.
Whole Chicken 3 - 4 Hrs.
Ribs 3 - 5 Hrs.
Roasts 9+ Hrs.
Fish 15-20 Min.
Pork Tenderloin 15-30 Min.
Chicken Pieces 30-45 Min.
Whole Chicken 1-1.5 Hrs.
Leg of lamb 3-4 Hrs.
Turkey 2-4 Hrs.
Ham 2-5 Hrs.
Steak 5-8 Min.
Pork Chops 6-10 Min.
Burgers 6-10 Min.
Sausages 6-10 Min.
Open Closed

GB, IE
24
Clip Tool
Allows you to lift the pizza stone or cooking grills when
they are too hot to handle.
Ash Tool
Once your Kamado has burnt all its fuel and cooled down
use this tool for removing the ash from the bottom.
OPTIONAL

BEDIENUNGS-UND MONTAGEANLEITUNG
Kamado 13”

26
DE, CH, AT
Benötigte Werkzeuge (NICHT enthalten)
Bedienungsanleitung - Für zukünftige Zwecke aufbewahren
WICHTIG – Entfernen Sie vor der Verwendung sorgfältig sämtliche Verpackungen, heben Sie jedoch die Sicher-
heitshinweise auf.
Diese Hinweise gehören zum Produkt.
Bitte beachten Sie alle in dieser Gebrauchsanweisung aufgeführten Sicherheitshinweise.
Bitte lesen Sie diese Gebrauchsanweisung vollständig durch und heben Sie sie für zukünftige Zwecke auf. Diese Gebrau-
chsanweisung sollte zusammen mit dem Produkt aufbewahrt werden.
Das Produkt ist NUR für den Hausgebrauch bestimmt und darf nicht kommerziell oder zu vertraglichen Zwecken verwen-
det werden. DIESES PRODUKT MUSS IM WINTER IM INNENBEREICH AUFBEWAHRT WERDEN.
DAS SCHRUNDIGE AUSSEHEN DER KERAMIK IST NORMAL.
Hinweise zur Pege und sicheren Bedienung
INFORMATIONEN ÜBER IHREN KAMADO
Vor 4000 Jahren haben Archäologen große Tongefäße gefunden, die als frühe Formen des Kamado Keramikkochers
angesehen werden. Seitdem hat er sich auf vielseitige Weise entwickelt: abnehmbarer Deckel, zusätzlicher Windschutz
für eine bessere Wärmeregelung und der Wechsel von Holz zu Kohle als primären Brennstoff. In Japan war der
Mushikamado ein runder Tontopf mit abnehmbarem, kuppelförmigem Deckel, mit dem Reis gedämpft wurde. Der Name
„Kamado“ ist tatsächlich das japanische Wort für „Ofen“ oder „Herd“. Dieser Name wurde von den Amerikanern
übernommen und ist nun der Oberbegriff für diese Art von Keramikkochern.
Kamado-Kocher sind extrem vielseitig. Nicht nur können sie zum Grillen oder Räuchern verwendet werden, sondern auch
um Pizzas, Brot, Kuchen und Kekse mühelos darin zu backen. Aufgrund seines hervorragenden Wärmeschutzes können
hohe Temperaturen erreicht und durch eine präzise Luftstromkontrolle über die oberen und unteren Belüftungen
aufrechterhalten werden. Hohe Temperaturen sind ideal für das schnelle Zubereiten von Burgern und Würstchen,
während niedrige Temperaturen besser für das Braten größerer Braten über einen längeren Zeitraum geeignet sind.
Warum geben Sie nicht einfach ein paar Holzschnitzel zur Kohle hinzu oder probieren unterschiedliche Sorgen
Holzschnitzel aus, damit Ihr Fleisch noch aromatischer wird.
WARNHINWEISE – ACHTUNG!
Entfernen Sie nicht die graue Filzdichtung vom Rand des Untersatzes oder Deckels. Diese Filzdichtung sorgt nämlich für
die Abdichtung und dafür, dass „falsche“ Luft, die die Zirkulation im Kamado beeinträchtigen könnte, keine Chance erhält.
Sorgen Sie dafür, dass Sie die Schrauben und Scharniere der Metallreifen regelmäßig mit einem leichten Maschinenöl
(oder WD40) einölen. Die Schrauben müssen regelmäßig kontrolliert und bei Bedarf nachgezogen werden.
• Dieses Produkt darf NUR IM AUSSENBEREICH VERWENDET WERDEN.
• Lassen Sie ein brennendes Feuer NIEMALS unbeaufsichtigt.
• GEFAHR der Kohlenmonoxidvergiftung – Das Produkt NIEMALS in engen Räumen anzünden oder glühen
oder abkühlen lassen.
• Das Gerät NICHT mit Brennstoff überfüllen.
• BRANDGEFAHR – Heiße Glut kann während der Verwendung ausströmen.
• ACHTUNG - KEIN Benzin, Testbenzin, Feuerzeugfüllmittel, Alkohol oder ähnliche Chemikalien zum Anzünden
oder Neuanzünden verwenden. Verwenden Sie ausschließlich Feuerlöscher, die die Richtlinie EN1860-3
erfüllen!
• Es wird dringend empfohlen, für Ihren Kamado Grillkohle zu verwenden. Sie brennt länger und produziert

27
DE, CH, AT
weniger Asche, die den Luftstrom blockieren könnte.
• WICHTIG: Wenn Sie den Deckel bei hohen Temperaturen öffnen, sollten Sie ihn nur leicht anheben, damit
die Luft langsam und sicher einströmen kann und eine Windentwicklung oder ein Auodern, das zu
Verletzungen führen könnte, verhindert wird.
• Folgen Sie IMMER den HINWEISEN ZUR LEBENSMITTELZUBEREITUNG auf Seite 28 dieser
Gebrauchsanweisung.
• Verwenden Sie den Kamado NICHT auf Terrassendielen oder anderen brennbaren Oberächen wie trockenes
Gras, Holzspänen, Blättern oder dekorativer Baumrinde.
• Achten Sie darauf, dass der Kamado mindestens 2 Meter entfernt von brennbaren Elementen steht.
• Verwenden Sie den Kamado NICHT als Ofen.
• Transportieren oder bewegen Sie den Kamado NICHT, nachdem Sie ihn angezündet haben, da er sehr heiß
wird.
• Tragen Sie IMMER hitzebeständige Handschuhe, wenn Sie die heißen Keramik- oder Kochoberächen
berühren.
• Lassen Sie das Gerät vollständig abkühlen, bevor Sie es verschieben oder verstauen.
• Halten Sie Kinder und Tiere IMMER auf sicheren Abstand zu dem Kocher, wenn er in Verwendung ist.
• Inspizieren Sie das Gerät immer vor der Verwendung auf Verschleiß und Schäden und ersetzen Sie
verschlissene oder beschädigte Teile bei Bedarf.
HÄRTUNG DES KAMADO
• Um ein Feuer zu machen, legen Sie zusammengerollte Zeitung mit einigen Anzünderwürfeln oder festen
Feueranzündern auf die Kohlenplatte (7) im Sockel des Kamado. Legen Sie dann 2 oder 3 Handvoll Grillkohle
über das Zeitungspapier.
• KEIN Benzin, Testbenzin, Feuerzeugfüllmittel, Alkohol oder ähnliche Chemikalien zum Anzünden oder
Neuanzünden verwenden.
• Öffnen Sie die untere Belüftungsklappe und zünden Sie das Zeitungspapier mit einem langen Feuerzeug oder
mit Sicherheitsstreichhölzern an.
• Überfüllen Sie das Gerät NICHT mit Brennstoff – Wenn das Feuer zu stark ist, könnte dies den Kamado
beschädigen.
• Warten Sie, bis der Brennstoff vollständig verbraucht und erloschen ist.
• Wenn die ersten Flammen zu hoch sind, könnte dies die Filzdichtung beschädigen, bevor sie richtig aushärten
kann.
• Inspizieren Sie nach dem ersten Gebrauch alle Verbindungselemente auf Festigkeit. Das Metallband, das
Ihren Deckel mit dem Sockels verbindet, dehnt sich bei Hitze aus und könnte sich dadurch lockern. Sie sollten
das Band prüfen und bei Bedarf mit einem Spanner festziehen.
• Sie können Ihren Kamado nun ganz normal benutzen.
LÖSCHEN
• Löschen des Geräts – Setzen Sie keinen weiteren Brennstoff zu und schließen Sie alle Belüftungsklappen und
den Deckel, damit das Feuer von allein ausglühen kann.
• Verwenden Sie KEIN Wasser, um die Kohlen zu löschen, da dies die Keramik des Kamado beschädigen
könnte.
AUFBEWAHRUNG
• Wenn Sie den Kamado nicht verwenden und im Außenbereich aufbewahren, decken Sie das komplett
abgekühlte Gerät mit einem geeigneten Regenschutz ab.
• Das chrombeschichtete Kochgitter ist NICHT spülmaschinenfest; verwenden Sie ein mildes Reinigungsmittel
mit warmem Wasser.
• Wenn Sie den Kamado benutzen, drücken Sie beide Radbremsen hinunter, damit sich das Gerät während des
Gebrauchs nicht bewegen kann.
• Es wird empfohlen, den Kamado im Winter abgedeckt in einer Garage oder in einem Schuppen zu verstauen,
damit er vollständig geschützt it.
• Bewahren Sie ihn an einem frostgeschützten Ort auf.
REINIGUNG
• Der Kamado reinigt sich selbst. Erhitzen Sie ihn 30 Minuten lang auf 260°C. Dabei werden alle

28
DE, CH, AT
Lebensmittelreste und Rückstände entfernt.
• Verwenden Sie KEIN Wasser oder andere Reinigungsprodukte, um das Innere Ihres Kamado zu reinigen.
Die Wände sind porös und absorbieren alle verwendeten Flüssigkeiten. Dies könnte zu Rissen in Ihrem
Kamado führen. Wenn sich zu viel Ruß angesammelt hat, verwenden Sie eine Drahtbürste oder das
mitgelieferte Werkzeug, um die Kohlenrückstände vor der nächsten Verwendung zu entfernen.
• Um den Rost und die Gitter zu reinigen, verwenden Sie ein nicht scheuerndes Reinigungsmittel, nachdem
sich das Gerät vollständig abgekühlt hat.
• Um die Außenächen zu reinigen, warten Sie, bis sich der Kamada abgekühlt hat, und verwenden Sie ein
feuchtes Tuch mit einem milden Reinigungsmittel.
WARTUNG
• Ziehen Sie zweimal im Jahr oder bei Bedarf öfter die Bänder fest und schmieren Sie das Gelenk.
HINWEISE ZUM ANZÜNDEN, GEBRAUCH UND REINIGEN
• Stellen Sie sicher, dass der Kamado fern von brennbaren Gegenständen auf einer festen, achen, ebenen,
hitzebeständigen, nicht brennbaren Oberäche steht.
• Sorgen Sie dafür, dass über dem Kamado ein Abstand von mindestens 2 Metern vorhanden ist und dass sich
alle umliegenden Gegenstände in einem Abstand von mindestens 2 Metern benden.
• Um ein Feuer zu machen, legen Sie zusammengerollte Zeitung mit einigen Anzünderwürfeln oder festen
Feueranzündern auf die Kohlenplatte (7) im Sockel des Kamado. Legen Sie dann 2 oder 3 Handvoll Grillkohle
über das Zeitungspapier.
• KEIN Benzin, Testbenzin, Feuerzeugfüllmittel, Alkohol oder ähnliche Chemikalien zum Anzünden oder
Neuanzünden verwenden.
• Öffnen Sie die untere Belüftungsklappe und zünden Sie das Zeitungspapier mit einem langen Feuerzeug oder
mit Sicherheitsstreichhölzern an. Sobald das Feuer brennt, lassen Sie die untere Belüftungsklappe und den
Deckel 10 Minuten lang offen, damit sich ein heißes Glutbett bilden kann.
• Lassen Sie die Kohlen mindestens 30 Minuten lang durchglühen, bevor Sie das erste Mal mit dem
Kamado Lebensmittel zubereiten. Kochen Sie NICHT, bevor der Brennstoff mit Asche bedeckt ist.
• Sie dürfen die Kohlen, sobald sie entzündet nicht, nicht schüren oder drehen. So können die Kohlen einheitlich
und efzient brennen.
• Tragen Sie nach dem Anzünden IMMER hitzebeständige Handschuhe, wenn Sie die heißen Keramik- oder
Kochoberächen berühren.
• Die Zubereitungshinweise abhängig von Temperatur und Dauer nden Sie im Folgenden.
HINWEISE ZUM KOCHEN BEI NIEDRIGEN TEMPERATUREN
• Zünden Sie die Grillkohle gemäß den oben genannten Anweisungen an. Bewegen oder schüren Sie die
Kohlen NICHT, sobald sie angezündet sind.
• Öffnen Sie die untere Belüftungsklappe vollständig und lassen Sie den Deckel ungefähr 10 Minuten lang
geöffnet, damit sich ein heißes Glutbett bilden kann.
• Überwachen Sie den Kamado, bis er die gewünschte Temperatur erreicht hat. Siehe Seite 28 für Hinweise zu
den Gartemperaturen.
• Schließen Sie die untere Belüftungsklappe, um die Temperatur aufrechtzuerhalten.
• Sie können nun mit dem Kamado kochen.
• WICHTIG: Wenn Sie den Deckel bei hohen Temperaturen öffnen, sollten Sie ihn nur leicht anheben, damit
die Luft langsam und sicher einströmen kann und eine Windentwicklung oder ein Auodern, das zu
Verletzungen führen könnte, verhindert wird.
• Folgen Sie IMMER den HINWEISEN ZUR LEBENSMITTELZUBEREITUNG auf Seite 29 dieser
Gebrauchsanweisung.
• Tragen Sie IMMER hitzebeständige Handschuhe, wenn Sie die heißen Keramik- oder Kochoberächen
berühren.
HINWEISE ZUM RÄUCHERN
• Folgen Sie den oben beschriebenen Anweisungen, als würden Sie langsam garen.
• Überwachen Sie den Kamado, bis er die gewünschte Temperatur erreicht hat. Siehe Seite 28 für Hinweise zu
den Gartemperaturen.
• Lassen Sie die untere Belüftungsklappe leicht geöffnet.

29
DE, CH, AT
• Schließen Sie die obere Belüftungsklappe und prüfen Sie einige Minuten lang weiterhin die Temperatur.
• Verstreuen Sie mit hitzebeständigen Handschuhen die Holzschnitzel kreisförmig über der heißen Kohle.
• Sie können nun mit dem Kamado räuchern.
• TIPP: Weichen Sie die Holzschnitzel oder Kochplanken 15 Minuten in Wasser ein, um den Räuchervorgang zu
verlängern.
• WICHTIG: Wenn Sie den Deckel bei hohen Temperaturen öffnen, sollten Sie ihn nur leicht anheben, damit
die Luft langsam und sicher einströmen kann und eine Windentwicklung oder ein Auodern, das zu
Verletzungen führen könnte, verhindert wird.
• Folgen Sie IMMER den HINWEISEN ZUR LEBENSMITTELZUBEREITUNG auf Seite 29 dieser
Gebrauchsanweisung.
• Tragen Sie IMMER hitzebeständige Handschuhe, wenn Sie die heißen Keramik- oder Kochoberächen
berühren.
HINWEISE ZUM KOCHEN BEI HOHEN TEMPERATUREN
• Zünden Sie die Grillkohle gemäß den Anweisungen auf Seite 27 an.
• Schließen Sie den Deckel und öffnen Sie die oberen und unteren Belüftungsklappen vollständig.
• Überwachen Sie den Kamado, bis er die gewünschte Temperatur erreicht hat. Siehe Seite 28 für Hinweise zu
den Gartemperaturen.
• Schließen Sie die obere Belüftungsklappe halb und prüfen Sie einige Minuten lang weiterhin die Temperatur.
• Sie können nun mit dem Kamado kochen.
• WICHTIG: Wenn Sie den Deckel bei hohen Temperaturen öffnen, sollten Sie ihn nur leicht anheben, damit
die Luft langsam und sicher einströmen kann und eine Windentwicklung oder ein Auodern, das zu
Verletzungen führen könnte, verhindert wird.
• Folgen Sie IMMER den HINWEISEN ZUR LEBENSMITTELZUBEREITUNG auf Seite 29 dieser
Gebrauchsanweisung.
• Tragen Sie IMMER hitzebeständige Handschuhe, wenn Sie die heißen Keramik- oder Kochoberächen
berühren.
HINWEISE ZUR LEBENSMITTELZUBEREITUNG
• Bitte lesen und befolgen Sie diese Hinweise, wenn Sie mit Ihrem Kamado kochen.
• Waschen Sie stets Ihre Hände, bevor und nachdem Sie rohes Fleisch anfassen, und bevor Sie essen.
• Bewahren Sie rohes Fleisch immer getrennt von zubereitetem Fleisch und anderen Lebensmitteln auf.
• Stellen Sie vor dem Kochen sicher, dass die Grillächen und Grillwerkzeuge sauber und frei von
Lebensmittelresten sind.
• Verwenden Sie NICHT die gleichen Utensilien für gekochte und für rohe Lebensmittel.
• Braten Sie Fleisch immer gut durch, bevor Sie es essen.
• ACHTUNG – Das Essen von rohem oder nicht garem Fleisch kann zu einer Lebensmittelvergiftung führen (z.
B. Bakterienstämme wie E.coli).
• Um das Risiko von nicht garem Fleisch zu reduzieren, schneiden Sie es auf, um sicherzustellen,
dass es innen gut durchgebraten ist.
• ACHTUNG – Wenn das Fleisch ausreichend durchgebraten ist, sollte sein Saft klar sein und es dürfen keine
Spuren von rosafarbenem/rotem Saft oder Verfärbungen vorhanden sein.
• Das Vorgaren von größeren Fleischstücken und Braten wird empfohlen, bevor Sie es auf dem Grill zu Ende
braten.
• Nach dem Kochen auf Ihrem Kamado reinigen Sie stets die Kochächen und Kochutensilien.
AUFFÜLLEN
• Wenn die Belüftungsklappen geschlossen sind, bleibt der Kamado mehrere Stunden lang sehr warm.
Wenn Sie eine längere Garzeit benötigen (z. B. bei einem ganzen Braten oder beim langsamen Räuchern),
müssen Sie ggf. mehr Kohle hinzufügen. Fügen Sie einfach weitere Kohle hinzu und fahren Sie wie oben fort.
DEN FILZ AM KAMADO GRILL AUSTAUSCHEN
Je nachdem, wie oft Sie Ihren Kamado Grill benutzen, müssen Sie den Filz am Deckel und der Basis des Kamado Grills
austauschen. Hiermit verhindern Sie die oben erwähnte „falsche“ Luft. Gehen Sie sorgfältig und wie folgt vor:

30
DE, CH, AT
Sie benötigen:
- Selbstklebenden Filz
- Steckschlüssel
- Farbkratzer und/oder Stanley-Messer (Teppichmesser)
- Scheuerschwamm oder Tuch
- Aceton
- Malertape
1. Entfernen Sie das regelbare Absperrventil oder keramische Abdeckkappe. Lösen Sie die Muttern des oberen
Spannbands mit dem Steckschlüssel, heben Sie danach den Deckel vorsichtig heraus und legen Sie diesen
mit der Unterseite nach oben auf einen schützenden Untergrund. Sorgen Sie dafür, dass der Deckel nicht
fallen kann!
2. Schrauben Sie das unterste Spannband ab und lassen Sie die Keramikbasis im Nest oder auf dem Tisch stehen.
3. Schneiden Sie mit dem Stanley-Messer und/oder dem Farbkratzer so viel wie möglich vom alten Filz weg.
Entfernen Sie die Filz- und Leimreste mit einem Tuch oder Scheuerschwamm mit Aceton.
4. Warten Sie mindestens eine Stunde, bis sich das Aceton verüchtigt hat.
5. Kleben Sie den neuen (selbstklebenden) Filz auf den Rand der Basis und des Deckels. Sorgen Sie dafür,
dass die Nähte auf exakt die gleiche Stelle kommen, und lassen Sie den Filz an der Außenseite etwas
überhängen, das ist besser als an der Innenseite (sonst verbrennt er nämlich bei Inbetriebnahme). Sorgen Sie
beim Verkleben des Filzes dafür, dass etwas Spiel vorhanden ist (also nicht so straff wie möglich). Bei
Erwärmung kann der Filz nämlich möglicherweise noch etwas schrumpfen. Schneiden Sie den Filz sauber an
der Naht ab. Wenn Sie selbstklebenden Filz in Kombination mit Leim verwenden, gehen Sie folgendermaßen
vor: Kleben Sie an der Außenseite des Deckels und der Basis direkt unter dem Rand das Malertape, um zu
vermeiden, dass Leim auf den Kamado Grill gelangt. Schützen Sie die Innenseite mit einem Stück Karton
und spritzen Sie die Ränder mit dem Leim ein. Lassen Sie den Leim entsprechend den Anweisungen auf der
Verpackung trocknen und kleben Sie danach den Filz auf die Ränder. Lassen Sie den Leim gut aushärten.
6. Bauen Sie den Kamado Grill wieder zusammen. Halten Sie das Spannband um die Basis und ziehen Sie die
Muttern fast vollständig fest. Setzen Sie den Deckel vorsichtig in das obere Spannband und ziehen Sie die
Muttern fast vollständig fest. Überprüfen Sie, ob Deckel und Spannbänder schön gerade sitzen und ziehen Sie
alle Muttern fest an.
BEDINGUNGEN UND BESTIMMUNGEN DER EINGESCHRÄNKTEN GARANTIE VON PATTON KAMADO GRILL
Für alle keramischen Kochgeräte von Patton Kamado Grill gilt eine eingeschränkte Garantie bezüglich des Materials und
der Bauweise aller keramischen Komponenten (wie Kuppel, Untergestell, Schornstein mit Absperrschieber, Kochtopf und
Innenring). Diese Garantie gilt nur solange der Erstkäufer im Besitz des Patton Kamado Grill oder des gedeckten Unter-
gestells ist.
Für den Patton Kamado Grill gilt eine eingeschränkte Herstellergarantie von 2 Jahren, sofern der Grill Eigentum des
Erstkäufers ist. Die keramischen Komponenten sind bei Bruch durch Fallen oder unsachgemäße Behandlung nicht durch
diese Garantie gedeckt. Für die aus Metall, Edelstahl und/oder Gusseisen bestehenden Komponenten des Patton Ka-
mado Grill (wie die Metallbänder, der Scharniermechanismus, Metalldeckel mit Doppelfunktion, Grillrost, Kochtopf und der
Absperrschieber) gilt eine eingeschränkte Herstellergarantie von 1 Jahr, sofern der Erstkäufer im Besitz des Grills ist.
Patton ist bestrebt, nach Möglichkeit rost- und hitzebeständige Materialien und Lackbeschichtungen auf den Metal-
loberächen zu verwenden. Materialien aus Metall und Schutzbeschichtungen können jedoch durch Kratzer auf der
Oberäche angegriffen werden oder beschädigt werden, wenn sie mit bestimmten Materialien in Berührung kommen oder
bestimmten Bedingungen ausgesetzt werden, die Patton nicht beeinussen kann.
Chlor, industrielle Dämpfe, Chemikalien, Kunstdünger, extrem hohe Feuchtigkeit, im Garten bzw. auf dem Rasen ein-
gesetzte Pestizide und Salze sind nur einige Beispiele für Stoffe und Materialien, die Lackbeschichtungen und Lack-
schichten auf Metalloberächen angreifen können. Aus diesen Gründen werden durch diese Garantie KEINE SCHÄDEN,
FEHLER oder ABWEICHUNGEN durch bzw. in Form von ROST, OXIDATION, STUMPFEN STELLEN oder sonstigen
MÄNGELN auf/an den Komponenten aus Metall, Edelstahl und/oder Gusseisen GEDECKT, es sei denn, dass diese
Schäden, Fehler, Abweichungen und/oder Mängel auch zu Beeinträchtigungen der strukturellen Funktionsweise dieser
Komponenten führen oder funktionelle Störungen oder Mängel an diesen Komponenten des Patton Kamado Grill her-
vorrufen würden. Dieses Produkt muss in der Wintersaison im Haus verstaut werden. Der Krakelee-Effekt des äußeren
Erscheinungsbildes des Keramikmaterials entsteht infolge des Herstellungsverfahrens.
Für Holzprodukte wie die Bambus-Tischchen gilt eine eingeschränkte Herstellergarantie von 1 Jahr, sofern der Erstkäufer
der Eigentümer ist. Holzprodukte sind durch die Garantie nicht gedeckt, sofern die üblichen Verwitterungs- und Abnut-
zungserscheinungen oder Rissbildungen betroffen sind, es sei denn, dass die strukturelle Funktionsweise der Komponen-
ten verloren geht. Auch für das Thermometer gilt eine eingeschränkte Herstellergarantie von 1 Jahr.

31
DE, CH, AT
Diese Garantien basieren auf normalem Hausgebrauch in angemessener Weise und sachgerechter Pege /Wartung des
Patton Kamado Grill. Die Garantien gelten nicht bei gewerblicher Benutzung oder ähnlich gearteter Verwendungsweise.
Die Garantien gelten nicht für andere als die genannten Fälle oder für unerwartet eingetretene Schäden oder Bruch oder
für Schäden, die verursacht wurden durch: Transport; Fallen lassen; unsachgerechte Montage; unsachgemäße Unter-
bauten zur Abstützung oder Auage des Grillgeräts; Versuche, den Patton Kamado Grill abzustützen durch ungeeignete
Mittel wie etwa unstabile, brennbare Unterlagen /Flächen, auf denen das Untergestell des Grills ruht; gewerblichen
Gebrauch; Änderungen; Nach- und/oder Fahrlässigkeit; unsachgerechte Benutzung; unsachgemäße Pege /Wartung;
Risiken beim Transport; normalen und zumutbaren Verschleiß oder Naturkatastrophen.
Die Garantie gilt nicht bei Kratzern, Beulen, Beschädigungen durch Scherben, Haarrissen, bei der Bildung kleiner, kosme-
tischer Risse in der oberen Lasurschicht, sofern diese die Funktionsweise des Patton Kamado Grill nicht beeinträchtigen.
Alle unzulässigen bzw. unerlaubten Änderungen am Patton Kamado Grill führen zu einer Aufhebung der Garantie. Hierzu
zählen u.a.: das Bohren von Löchern oder das Herumwerkeln an Gerätekomponenten; die Verwendung fremder Kompo-
nenten im Patton Kamado Grill, die keine Originalteile des Patton Kamado Grill sind; oder der Gebrauch innerer Teile /
Komponenten in einer anderen als der vorgesehenen bzw. vom Hersteller vorgeschriebenen Weise. Änderungen oder
der Austausch innerer Gerätekomponenten, wie etwa des Kochtopfes und/oder Innenringes, heben die Garantie auf und
Patton übernimmt ausdrücklich keine Haftung für direkte, indirekte, zusätzliche oder Folgeschäden, die aus dieser Hand-
lungsweise entstehen. Wird Feuerzeugüssigkeit oder ein anderes entammbares Gemisch in einen Patton Kamado
Grill gegossen, so erlischt hierdurch ebenfalls die Garantie. Diese Handlungsweise ist gefährlich und kann Schäden oder
Personenverletzungen verursachen.
SOFERN GESETZLICH ZULÄSSIG, ÜBERSTEIGT DIE GÜLTIGKEIT ALLER GESETZLICH VORGESCHRIEBENEN,
AUSDRÜCKLICH FORMULIERTEN ODER STILLSCHWEIGENDEN GARANTIEN EINSCHLIEßLICH DER STILLSCH-
WEIGENDEN GARANTIEN BEZÜGLICH DES WEITERVERKAUFS UND DER EIGNUNG FÜR BESTIMMTE ZWECKE
NICHT DEN GÜLTIGKEITSBEREICH DIESER GARANTIE. EINE HAFTUNG FÜR ZUSÄTZLICHE, BESONDERE UND/
ODER FOLGESCHÄDEN IST AUSGESCHLOSSEN.
HINWEISE ZU DEN GARTEMPERATUREN
Langsames Garen / Räuchern (110ºC-135ºC) Obere Belüftung Untere Belüftung
Grillen / Braten (160ºC-180ºC) Obere Belüftung Untere Belüftung
Anbraten (260ºC-370ºC) Obere Belüftung Untere Belüftung
Rinderbrust 2 Std. pro
Pfund. Schweineeisch 2 Std. pro
Pfund Ganzes Huhn 3 - 4 Std.
Rippchen 3 - 5 Std.
Braten 9+ Std.
Fisch 15-20 Min.
Schweinelet 15-30 Min.
Hühnchenteile 30-45 Min.
Ganzes Huhn 1-1,5 Std.
Lammkeule 3-4 Std.
Truthahn 2-4 Std.
Schinken 2-5 Std.
Steak 5-8 Min.
Schweinskotelett 6-10 Min.
Burger 6-10 Min.
Würstchen 6-10 Min.
Öffnen Geschlossen

32
DE, CH, AT
Greifzange
Zum Anheben des Pizzasteins oder der Kochgitter, wenn diese zu
heiß zum Anfassen sind.
Asche-werkzeug
Nachdem Ihr Kamado sämtlichen Brennstoff verbrannt und sich
abgekühlt hat, können Sie die Asche mit diesem Werkzeug aus
dem Boden entfernen.
OPTIONAL

INSTRUKCJA OBSŁUGI i MONTAŻU
Grill Kamado 13”

34
PL
Potrzebne narzędzia (NIE są dostarczane wraz z produktem)
Instrukcja obsługi – prosimy zachować ją do późniejszego użytku
UWAGA – Przed użyciem grilla starannie usunąć opakowanie, lecz pozostawić instrukcje bezpieczeństwa.
Niniejsza instrukcja stanowi nieodłączną część produktu.
Prosimy zapoznać się ze wszystkimi ostrzeżeniami dotyczącymi bezpieczeństwa podanymi w instrukcji.
Prosimy przeczytać całą instrukcję i zachować ją do późniejszego użytku.
Instrukcję przechowywać razem z produktem.
Niniejszy produkt przeznaczony jest TYLKO do użytku domowego i nie może być używany w celach komercyjnych.
PODCZAS ZIMY PRODUKT TEN MUSI BYĆ PRZECHOWYWANY WEWNĄTRZ POMIESZCZENIA.
POJAWIENIE SIĘ SIATKI PĘKNIĘĆ NA CERAMICE JEST ZJAWISKIEM NORMALNYM
Wskazówki dotyczące bezpiecznego użytkowania i dbania o produkt
CO TO JEST KAMADO
Archeolodzy odkryli duże naczynia gliniane pochodzące sprzed 4000 lat, uważane za prawzór kuchni ceramicznych Ka-
mado. Od tego czasu Kamado zmieniało się w różny sposób — pojawiły się: zdejmowana pokrywa, drzwiczki do regul-
acji ciągu w celu lepszej kontroli grzania oraz przełącznik paliwa podstawowego: drewno lub węgiel drzewny. W Japonii
Mushikamado oznacza okrągłe naczynie z gliny ze zdejmowaną pokrywą w kształcie kopuły przeznaczone do parowania
ryżu. „Kamado” jest słowem japońskim oznaczającym „piec” lub „kuchnię”. Nazwa ta została przejęta przez amerykanów i
obecnie stała się nazwą pospolitą dla tego rodzaju kuchenek ceramicznych.
Kuchenki Kamado są niezwykle uniwersalne. Można ich używać nie tylko do grillowania lub wędzenia, lecz również do
łatwego pieczenia pizzy, chleba, ciast i ciasteczek. Dzięki doskonałej zdolności do utrzymywania ciepła, można osiągnąć
i utrzymywać wysoką temperaturę poprzez precyzyjne sterowanie przepływem powietrza przez górny i dolny wlot powie-
trza. Wysoka temperatura nadaje się idealnie do szybkiego pieczenia burgerów i kiełbasek, podczas, gdy niższa tempera-
tura służy do pieczenia większych kawałków mięsa przez dłuższy czas. Można również spróbować dodać wióry z drewna
do węgla drzewnego lub wymieszać wióry z drewna różnych gatunków, aby mięso stało się bardziej smakowite i aromaty-
czne.
UWAGA: OSTRZEŻENIA
Nie usuwać uszczelnienia z szarego lcu z krawędzi podstawy ani z pokrywy. Zapewnia ono bowiem szczelność i chroni
przed tzw. fałszywym powietrzem, które mogłoby zakłócić cyrkulację wewnątrz grilla.
Należy zadbać o to, aby śruby i zawiasy obręczy metalowych były regularnie smarowane przy użyciu lekkiego smaru do
maszyn (lub preparatu WD40). Śruby muszą być regularnie kontrolowane i w razie konieczności dokręcane.
• Produkt ten przeznaczony jest TYLKO DO UŻYTKU NA ZEWNĄTRZ POMIESZCZEŃ.
• NIGDY nie pozostawiać ognia bez nadzoru.
• NIEBEZPIECZEŃSTWO zatrucia się tlenkiem węgla – NIGDY nie rozpalać ognia lub wygaszać go lub chłodzić
to urządzenie w pomieszczeniach.
• NIE ŁADOWAĆ zbyt dużo paliwa do grilla.
• ZAGROŻENIE POŻAREM – podczas użytkowania mogą wypadać rozżarzone węgle.
• UWAGA: NIE UŻYWAĆ do rozpalania ognia benzyny, nafty, benzyny do zapalniczek, alkoholu lub podobnych
chemikaliów. Używać tylko podpałek spełniających wymagania normy EN1860-3!
• Do grilla Kamado zalecamy używać grubego węgla drzewnego. Węgiel taki pali się dłużej i wytwarza mniej
popiołu, który może ograniczać przepływ powietrza.

35
PL
• UWAGA: Podczas otwierania pokrywy w stanie wysokiej temperatury należy ją lekko podnieść, zapewniając
powolny i bezpieczny dopływ powietrza, co zapobiegnie odwróceniu ciągu lub buchnięciu płomieni, które mogą
spowodować oparzenie.
• ZAWSZE postępować według INFORMACJI DOTYCZĄCYCH SMAŻENIA ŻYWNOŚCI podanych na stronie
36 niniejszej instrukcji obsługi.
• NIE UŻYWAĆ grilla Kamado na podłożu drewnianym lub na innych łatwopalnych powierzchniach jak sucha
trawa, wióry drewniane, liście lub kora.
• Grill Kamado powinien znajdować się w odległości przynajmniej 2 metrów od palnych materiałów
i przedmiotów.
• NIE używać grilla Kamado jako pieca do ogrzewania.
• NIE przenosić grilla Kamado, gdy znajduje się w nim żar lub jest gorący.
• ZAWSZE UŻYWAĆ termoodpornych rękawic podczas posługiwania się gorącą ceramiką lub rusztami do
grillowania.
• Przed przemieszczaniem lub przechowywaniem odczekać, aż grill Kamado ostygnie całkowicie.
• ZAWSZE trzymać dzieci i zwierzęta w bezpiecznej odległości od grilla Kamado, gdy jest używany.
• Przed użyciem zawsze sprawdzić, czy grill Kamado nie jest zużyty lub uszkodzony i, jeśli trzeba, wymienić.
WYŻARZANIE GRILLA KAMADO
• Aby rozpalić ogień, umieścić zmiętą gazetę z kilkoma kostkami paliwa stałego lub podpałki na ruszcie do
palenia (7) w podstawie grilla Kamado. Następnie na wierzchu gazety położyć 2 lub 3 garści węgla drzewnego.
• NIE UŻYWAĆ do rozpalania benzyny, nafty, benzyny do zapalniczek, alkoholu lub podobnych
chemikaliów.
• Otworzyć dolny wlot powietrza i podpalić gazetę specjalną zapalniczką lub zapałkami.
• NIE nakładać za dużo paliwa – zbyt intensywny ogień może uszkodzić grill Kamado.
• Pozostawić grill Kamado, aż paliwo się wypali i zgaśnie ogień.
• Zbyt intensywny ogień podczas pierwszego palenia może uszkodzić lcową uszczelkę, zanim zdąży się
prawidłowo utwardzić.
• Po pierwszym użyciu sprawdzić wszystkie elementy mocujące, czy są dobrze dociśnięte. Taśma metalowa
łącząca pokrywę z podstawą rozszerza się pod wpływem ciepła i może się poluzować. Zalecamy sprawdzić
i w razie potrzeby dokręcić taśmę kluczem.
• Od tej chwili można normalnie używać grilla Kamado.
WYGASZANIE OGNIA
• W celu wygaszenia ognia przestać dodawać paliwa i zamknąć wloty powietrza oraz pokrywę, aby
umożliwić naturalne zgaśnięcie ognia.
• NIE używać wody do gaszenia węgla drzewnego, ponieważ może to uszkodzić ceramikę grilla Kamado.
PRZECHOWYWANIE
• Jeżeli grill Kamado jest nieużywany i przechowywany na zewnątrz, przykryć go po wystygnięciu
nieprzemakalnym pokrowcem
• Chromowana kratka do smażenia NIE nadaje się do mycia w zmywarce do naczyń – używać łagodnego
detergentu z ciepłą wodą.
• Podczas używania grilla Kamado nacisnąć do dołu hamulce dwóch kółek, aby uniemożliwić przemieszczanie
się urządzenia.
• Aby zapewnić całkowitą ochronę podczas zimy, zalecamy przechowywać grill Kamado pod pokrowcem
w garażu lub szopie.
• Przechowywać w temperaturze powyżej zera.
CZYSZCZENIE
• Grill Kamado jest urządzeniem samoczyszczącym się. Wystarczy rozgrzać go do temperatury 260ºC i po
30 minutach wszystkie zanieczyszczenia i pozostałości żywności wypalą się same.
• NIE używać wody lub innych środków czyszczących do czyszczenia wnętrza grilla Kamado. Ścianki są
porowate i wchłaniają używane płyny, co może spowodować pęknięcie grilla Kamado. Jeżeli na ściankach
osadziło się dużo sadzy, użyć szczotki drucianej lub dostarczonego narzędzia i zdrapać pozostałości węgla

36
PL
przed następnym użyciem.
• Do czyszczenia kratek i rusztów używać środka czyszczącego bez dodatków ściernych po całkowitym
ostygnięciu urządzenia.
• Aby oczyścić zewnętrzną powierzchnię, poczekać, aż grill Kamado ostygnie i użyć wilgotnej ścierki i łagodnego
detergentu.
KONSERWACJA
• Dokręcać taśmy i smarować zawiasy 2 razy w roku lub częściej, jeśli trzeba.
INFORMACJE DOTYCZĄCE ROZPALANIA, UŻYWANIA I PIELĘGNOWANIA
• Grill Kamado powinien być ustawiany na stałej, płaskiej, poziomej, odpornej na temperaturę i niepalnej
powierzchni z dala od palnych materiałów i przedmiotów.
• Nad grillem Kamado zapewnić przynajmniej 2 m wolnej przestrzeni i 2 m odstępu od innych otaczających
przedmiotów.
• Aby rozpalić ogień, umieścić zmiętą gazetę z kilkoma kostkami paliwa stałego lub podpałki na ruszcie do
palenia (7) w podstawie grilla Kamado. Następnie na wierzchu gazety położyć 2 lub 3 garści węgla drzewnego.
• NIE UŻYWAĆ do rozpalania benzyny, nafty, benzyny do zapalniczek, alkoholu lub podobnych
chemikaliów.
• Otworzyć dolny wlot powietrza i podpalić gazetę specjalną zapalniczką lub zapałkami. Gdy ogień rozpali się,
pozostawić dolny wlot powietrza i pokrywę otwarte przez około 10 minut, aby utworzyć odpowiednią warstwę żaru.
• Przed pierwszym grillowaniem w grillu Kamado poczekać, aż węgiel drzewny rozpali się do czerwoności
i utrzymywać go w tym stanie przez przynajmniej 30 minut. NIE grillować, zanim na paliwie nie wytworzy się
warstwa popiołu.
• Zalecamy nie poruszać i nie przewracać węgla, gdy się rozpali. Zapewni to równomierne, skuteczne spalanie
węgla drzewnego.
• Po rozpaleniu podczas manipulowania gorącą ceramiką lub rusztami do grillowania używać TYLKO rękawic
termoodpornych.
• Korzystać z podanych niżej instrukcji grillowania w zależności od temperatury i czasu trwania.
GRILLOWANIE W NISKIEJ TEMPERATURZE
• Rozpalić węgiel drzewny według instrukcji podanych wyżej. NIE poruszać i nie przewracać węgla, gdy się rozpali.
• Pozostawić dolny wlot powietrza i pokrywę otwarte przez około 10 minut, aby utworzyć odpowiednią warstwę żaru.
• Nadzorować grill Kamado, aż osiągnie wymaganą temperaturę. Patrz strona 36, wskazówki dotyczące
grillowania.
• Zamknąć całkowicie dolny wlot powietrza, aby utrzymywać temperaturę.
• Od tego momentu można używać grilla Kamado do grillowania.
• UWAGA: Otwieranie pokrywy przy wysokiej temperaturze: należy ją lekko podnieść, zapewniając powolny
i bezpieczny dopływ powietrza, co zapobiegnie odwróceniu ciągu lub buchnięciu płomieni, które mogą
spowodować oparzenie.
• ZAWSZE postępować według INFORMACJI DOTYCZĄCYCH GRILLOWANIA podanych na stronie
37 niniejszej instrukcji obsługi.
• ZAWSZE używać rękawic żaroodpornych podczas manipulowania gorącą ceramiką lub rusztami do grillowania.
WĘDZENIE
• Postępować według instrukcji jak do grillowania powolnego podanych wyżej.
• Nadzorować grill Kamado, aż osiągnie wymaganą temperaturę. Patrz strona 36, wskazówki dotyczące
grillowania.
• Pozostawić dolny wlot powietrza lekko otwarty.
• Zamknąć górny wlot powietrza i sprawdzać temperaturę przez kilka minut.
• Używając termoodpornych rękawic, rozsypać wióry drewna na gorącym węglu drzewnym.
• Od tego momentu można używać grilla Kamado do wędzenia.
• WSKAZÓWKA: Namoczyć w wodzie wióry drewniane lub deskę do grillowania przez 15 minut, aby przedłużyć
proces wędzenia.
• UWAGA: Otwieranie pokrywy przy wysokiej temperaturze: należy ją lekko podnieść, zapewniając powolny
i bezpieczny dopływ powietrza, co zapobiegnie odwróceniu ciągu lub buchnięciu płomieni, które mogą
spowodować oparzenie.

37
PL
• ZAWSZE postępować według INFORMACJI DOTYCZĄCYCH GRILLOWANIA podanych na stronie
37 niniejszej instrukcji obsługi.
• ZAWSZE używać rękawic termoodpornych podczas manipulowania gorącą ceramiką lub rusztami do grillowania.
GRILLOWANIE W WYSOKIEJ TEMPERATURZE
• Rozpalić węgiel drzewny według instrukcji podanych na stronie 35.
• Zakryć pokrywę i całkowicie otworzyć górny i dolny wlot powietrza.
• Nadzorować grill Kamado, aż osiągnie wymaganą temperaturę. Patrz strona 36, wskazówki dotyczące
grillowania.
• Zamknąć do połowy górny wlot powietrza i sprawdzać temperaturę przez kilka minut.
• Od tego momentu można używać Kamado do grillowania.
• UWAGA: Otwieranie pokrywy przy wysokiej temperaturze: należy ją lekko podnieść, zapewniając powolny
i bezpieczny dopływ powietrza, co zapobiegnie odwróceniu ciągu lub buchnięciu płomieni, które mogą
spowodować oparzenie.
• ZAWSZE postępować według INFORMACJI DOTYCZĄCYCH GRILLOWANIA podanych na stronie
37 niniejszej instrukcji obsługi.
• ZAWSZE używać rękawic termoodpornych podczas manipulowania gorącą ceramiką lub rusztami do grillowania.
INFORMACJE DOTYCZĄCE PRZYGOTOWYWANIA POŻYWIENIA
• Prosimy przeczytać i stosować poniższe rady podczas grillowania na grillu Kamado.
• Zawsze myć ręce przed i po manipulowaniu surowym mięsem oraz przed jedzeniem.
• Surowe mięso zawsze przechowywać z dala od mięsa usmażonego i innej żywności.
• Przed rozpoczęciem grillowania upewnić się, że powierzchnie grilla i narzędzia są czyste i wolne od resztek
starej żywności.
• NIE używać tych samych naczyń do żywności surowej i grillowanej.
• Przed jedzeniem upewnić się, że całe mięso jest należycie usmażone.
• UWAGA: spożywanie surowego lub niedosmażonego mięsa może być przyczyną zatrucia
(np. bakteriami z rodziny E. coli).
• Aby zredukować ryzyko niedosmażenia mięsa, rozciąć je i upewnić się, że jest należycie usmażone wewnątrz.
• UWAGA: jeżeli mięso jest prawidłowo usmażone, to sos własny mięsa jest przezroczysty, bez śladów
różowego/czerwonego koloru lub zabarwienia od mięsa.
• Większe kawałki mięsa zalecamy podgotować przed ostatecznym grillowaniem na grillu.
• Po skończeniu grillowania w grillu Kamado zawsze oczyścić naczynia i ruszty grilla.
DOKŁADANIE PALIWA
• Przy zamkniętych wlotach powietrza grill Kamado utrzymuje wysoką temperaturę przez kilka godzin. Jeżeli
wymagany jest dłuższy czas działania grilla (np podczas pieczenia dużych kawałków lub powolnego
wędzenia), trzeba dołożyć więcej węgla drzewnego. Należy wtedy po prostu dołożyć węgla drzewnego i
postępować, jak opisano powyżej.
WYMIANA FILCOWEGO USZCZELNIENIA GRILLA KAMADO
W zależności od częstotliwości korzystania z grilla Kamado należy od czasu do czasu wymieniać lcowe uszczelnienie
pokrywy i podstawy grilla. W ten sposób zapobiegamy powstawaniu wspomnianego wcześniej tzw. fałszywego powietrza.
Należy przy tym w staranny sposób wykonać następujące czynności:
Potrzebne materiały:
• lc samoprzylepny
• klucz płaski
• skrobak do farby i/lub nóż z ostrzem łamanym
• gąbka lub ściereczka
• aceton
• taśma malarska.
1. Zdemontować regulowany zawór lub zatyczkę ceramiczną. Odkręcić nakrętki górnej obręczy napinającej przy
pomocy klucza płaskiego, następnie ostrożnie zdjąć pokrywę i położyć ją w odwróconej pozycji na

38
PL
bezpiecznym podłożu. Zadbać o to, aby pokrywa była chroniona przed upadkiem.
2. Odkręcić dolną obręcz napinającą i pozostawić podstawę ceramiczną w ramie lub postawić na stole.
3. Możliwie jak najdokładniej usunąć stary lc przy pomocy noża z łamanym ostrzem i/lub skrobaka do farby.
Usunąć resztki lcu i kleju przy pomocy ściereczki lub gąbki nasączonej acetonem.
4. Odczekać co najmniej godzinę, aż aceton się ulotni.
5. Starannie nakleić nowy (samoprzylepny) lc na krawędź podstawy i pokrywę. Zadbać o to, aby szwy nie
zostały umieszczone dokładnie w tym samym miejscu i zostawić po zewnętrznej stronie odrobinę zwisającego
lcu. Gdyby nadmiar lcu znajdował się wewnątrz, mógłby się spalić podczas użytkowania. Podczas
naklejania lcu należy pozostawić odrobinę luzu (a więc nie przyklejać go możliwie jak najciaśniej), gdyż może
on się nieco skurczyć pod wpływem temperatury. Starannie przyciąć lc przy szwie. W przypadku stosowania
lcu bezklejowego w połączeniu z klejem należy postąpić w następujący sposób:
Nakleić taśmę malarską na zewnętrznej stronie pokrywy i podstawy tuż pod krawędzią, aby zapobiec dostaniu
się kleju do grilla Kamado. Osłonić część wewnętrzną kawałkiem kartonu i rozprowadzić klej na krawędziach.
Pozostawić klej do wyschnięcia zgodnie z instrukcjami znajdującymi się na jego opakowaniu, po czym nakleić
lc na krawędzie. Pozwolić, aby klej dobrze stwardniał.
6. Ponownie złożyć grill Kamado. Przytrzymać obręcz napinającą wokół podstawy i przykręcić nakrętki niemal do
samego końca. Ostrożnie ustawić pokrywę na górnej obręczy napinającej i przykręcić nakrętki niemal do
samego końca. Sprawdzić, czy pokrywa i obręcze napinające są prosto ustawione i dokładnie dokręcić
wszystkie nakrętki.
WARUNKI I POSTANOWIENIA OGRANICZONEJ GWARANCJI DLA URZĄDZENIA PATTON KAMADO GRILL
Każde urządzenie ceramiczne Patton Kamado Grill objęte jest ograniczoną gwarancją obejmującą materiały oraz
konstrukcję wszystkich elementów ceramicznych (takich jak pokrywa, podstawa, kominek z zaworem, pojemnik na węgiel
oraz obręcz wewnętrzna). Gwarancja obowiązuje, dopóki pierwotny nabywca posiada urządzenie Patton Kamado Grill lub
jego część objętą gwarancją.
Pierwotnemu nabywcy przysługuje ograniczona gwarancja fabryczna na urządzenie Patton Kamado Grill, która wynosi 2
lata. Gwarancja obowiązująca w przypadku elementów ceramicznych nie ma zastosowania w odniesieniu do uszkodzeń
spowodowanych upadkiem lub niewłaściwym użytkowaniem urządzenia. W przypadku elementów urządzenia Patton
Kamado Grill wykonanych z metalu, stali nierdzewnej oraz żeliwa (takich jak metalowe obręcze, mechanizm zawiasowy,
metalowa pokrywa dwufunkcyjna, grill, pojemnik na węgiel oraz szyber) ograniczona gwarancja fabryczna udzielana
pierwotnemu nabywcy wynosi 1 rok.
Firma Patton dokłada wszelkich starań, aby stosować materiały nierdzewne oraz lakiery odporne na działanie wysokich
temperatur na powierzchniach wykonanych z metalu. Materiały metalowe oraz kryjące warstwy ochronne mogą zresztą
zostać uszkodzone na skutek różnego rodzaju zarysowań powierzchni lub też narażenia na działanie substancji i warun-
ków, na które rma Patton nie ma żadnego wpływu.
Chlor, opary przemysłowe, chemikalia, nawozy sztuczne, ekstremalna wilgoć, pestycydy stosowane na trawnikach oraz
sól to tylko niektóre z czynników, które mogą negatywnie wpływać na lakier i wykończenie metalowych warstw wier-
zchnich. Z tego powodu gwarancja na elementy wykonane z metalu, stali nierdzewnej oraz żeliwa NIE OBOWIĄZUJE
W PRZYPADKU POJAWIENIA SIĘ RDZY, OKSYDACJI, PŁOWIENIA lub innych NIEPRAWIDŁOWOŚCI, chyba
że powodują one utratę integralności strukturalnej lub uszkodzenie danej części urządzenia Patton Kamado Grill.
Urządzenie musi być w okresie zimowym przechowywane wewnątrz budynku. Zewnętrzna krakelura elementów cera-
micznych stanowi część procesu produkcji.
W przypadku elementów wykonanych z drewna, jak na przykład bambusowe blaty boczne, pierwotnemu nabywcy
urządzenia przysługuje roczna gwarancja fabryczna w ograniczonym zakresie. W przypadku elementów drewnianych
gwarancja nie obejmuje normalnego procesu starzenia się ani pęknięć, chyba że powodują one utratę integralności struk-
turalnej. Termometr również objęty jest roczną gwarancją fabryczną w ograniczonym zakresie.
Udzielona gwarancja obowiązuje w odniesieniu do normalnego i rozsądnego użytkowania urządzenia Patton Kamado
Grill w gospodarstwie domowym oraz jego konserwacji. Gwarancja nie obowiązuje w przypadku wykorzystywania
urządzenia do celów komercyjnych oraz temu podobnych. Gwarancja nie obejmuje dodatkowych lub nieprzewidzianych
szkód lub pęknięć, ani też szkód powstałych na skutek transportu, upadku, nieprawidłowego montażu, niewłaściwego
ustawienia, prób ustawienia urządzenia Patton Kamado Gril na innym podłożu niż solidna, niepalna powierzchnia, na
której zostanie umieszczona jego podstawa, wykorzystywania urządzenia do celów komercyjnych, wprowadzenia zmian
lub modykacji, zaniedbań, nieprawidłowego użytkowania, niewłaściwej konserwacji, zagrożeń występujących na drodze,
normalnego i zasadnego zużycia lub katastrof naturalnych.

39
PL
Gwarancja nie obowiązuje w odniesieniu do zarysowań, wgnieceń, odprysków, pęknięć oraz drobnych pęknięć
zewnętrznej warstwy lakieru, które nie wpływają na sposób działania urządzenia Patton Kamado Grill.
Wprowadzanie wszelkich niedozwolonych zmian lub modykacji urządzenia Patton Kamado Grill powoduje
unieważnienie gwarancji. Dotyczy to nawiercania otworów lub podmieniania elementów, stosowania innych części niż
oryginalne elementy do urządzenia Patton Kamado Grill lub też stosowanie części wewnętrznych w sposób inny niż prze-
widziany przez producenta. Dokonanie modykacji lub wymiany części wewnętrznych, takich jak pojemnik na węgiel oraz
obręcz wewnętrzna, powoduje utratę gwarancji. Firma Patton wyraźnie zrzeka się wszelkiej odpowiedzialności za szkody
bezpośrednie, pośrednie, dodatkowe lub następcze, jakie wynikną z tego faktu. Stosowanie podpałek w formie płynnej
lub jakichkolwiek mieszanin łatwopalnych w urządzeniu Patton Kamado Grill powoduje unieważnienie gwarancji. Są to
niebezpieczne praktyki mogące prowadzić do powstania szkód lub obrażeń.
WSZELKIE PRZEWIDZIANE PRAWEM WYRAŹNE LUB DOROZUMIANE GWARANCJE, ŁĄCZNIE Z DOROZUMIANĄ
GWARANCJĄ MOŻLIWOŚCI SPRZEDAŻY ORAZ ODPOWIEDNIOŚCI DO DANEGO CELU, O ILE SĄ ONE DOPUSZC-
ZALNE W MAKSYMALNYM WYMIARZE W OPARCIU O PRAWO, NIE GWARANTUJĄ WIĘKSZYCH PRZYWILEJÓW
NIŻ WYNIKAJĄCE Z NINIEJSZEJ GWARANCJI. PRODUCENT NIE PONOSI ODPOWIEDZIALNOŚCI ZA SZKODY
DODATKOWE, SZCZEGÓLNE ORAZ NASTĘPCZE.
INFORMACJE NA TEMAT TEMPERATURY GRILLOWANIA
Powolne grillowanie / wędzenie (110ºC-135ºC) Górny wlot powietrza Dolny wlot powietrza
Grillowanie / pieczenie (160ºC-180ºC) Górny wlot powietrza Dolny wlot powietrza
Obsmażanie (260ºC-370ºC) Górny wlot powietrza Dolny wlot powietrza
Mostek wołowy 2 godz./ ½ kg
Wieprzowina 2 godz./ ½ kg
Kurczak cały 3-4 godz.
Żeberka 3-5 godz.
Pieczeń ponad 9 godz.
Ryba 15-20 min
Polędwica 15-30 min
Kawałki kurczaka 30-45 min
Kurczak cały 1-1,5 godz.
Udziec jagnięcy 3-4 godz.
Indyk 2-4 godz.
Szynka 2-5 godz.
Stek 5-8 min
Kotlety wieprzowe 6-10 min
Hamburgery 6-10 min
Kiełbaski 6-10 min
Otwarte Zamknięte

40
PL
Chwytak
Służy do podnoszenia płyty do pizzy lub kratek do grillowania, gdy
są zbyt gorące.
Pogrzebacz
Służy do usuwania popiołu z dna grilla Kamado po wypaleniu pa-
liwa i ostygnięciu.
WYPOSAŻENIE OPCJONALNE

ISTRUZIONI D’USO E DI MONTAGGIO
Kamado 13”

42
IT, CH
Attrezzi richiesti (NON inclusi)
Istruzioni di montaggio – Da conservare per uso futuro
IMPORTANTE – Rimuovere con cura tutti gli imballaggi prima dell’uso econservare le informazioni sulla sicurezza.
Queste istruzioni fanno parte del prodotto.
Prendere nota di tutte le avvertenze sulla sicurezza elencate in queste istruzioni.
Leggere attentamente le istruzioni e conservarle per uso futuro. Le presenti istruzioni sono da conservare insieme
all’apparecchio.
Questo prodotto è da intendersi SOLAMENTE per uso domestico e non per uso commerciale o per scopi contrattuali.
QUESTO PRODOTTO DEVE ESSERE TENUTO AL COPERTO DURANTE L’INVERNO.
L’ASPETTO “CREPATO” DELLA CERAMICA È NORMALE.
Linee guida sulla manutenzione e la sicurezza nell’uso dell’apparecchio
A PROPOSITO DEL VOSTRO KAMADO
Datati di 4.000 anni fa, gli archeologi hanno scoperto ampi recipienti di cottura in argilla ritenuti essere i predecessori del
fornello da cottura in ceramica Kamado. Da allora, il prodotto si è evoluto nel corso degli anni in diversi modi; coperchio
amovibile, sportello aggiuntivo aspirante per un miglior controllo del calore e passaggio dal legno al carbone come com-
bustibile primario. In Giappone, il Mushikamado era un recipiente rotondo in argilla con un coperchio a cupola amovibile
studiato per la cottura a vapore del riso. Il nome ‘Kamado’ deriva, infatti, dal termine giapponese ’fornello’ o ‘cucina per
varie cotture’. Questo termine è stato poi adottato dagli americani ed è oggi diventato di uso comune per questo stile di
fornello da cucina in ceramica.
I fornelli Kamado sono molto versatili. Non solo possono essere utilizzati per grigliare o affumicare, ma anche per cuo-
cere con facilità pizze, pane, torte e biscotti. Grazie alle loro eccellenti proprietà di conservazione del calore, si possono
raggiungere e mantenere temperature elevate grazie a un controllo preciso del usso dell’aria attraverso le bocchette di
ventilazione superiori e inferiori. Le temperature elevate sono ideali per la cottura veloce di hamburger e salsicce mentre
quelle più basse sono più adatte per cuocere pezzi di carne più grossi in tempi più lunghi. Provate ad aggiungere qualche
pezzetto di legno al carbone o ad associare legni di varietà diverse per rendere le vostre carni ancora più saporite.
AVVERTENZE – ATTENZIONE!
Non rimuovere la guarnizione in feltro nero dal bordo della base o dal coperchio. Questa guarnizione in feltro infatti assi-
cura una chiusura ermetica e fa in modo che non penetri dell’aria “cattiva” che potrebbe disturbare la circolazione dell’aria
all’interno del Kamado.
Assicuratevi che i bulloni e le cerniere delle ruote metalliche siano lubricate regolarmente con un olio per macchine leg-
gero (o WD40). I bulloni devono essere controllati regolarmente e serrati nel caso in cui ciò dovesse essere necessario.
• Questo prodotto è destinato al SOLO USO ESTERNO.
• Non lasciare MAI un fuoco acceso incustodito.
• PERICOLO di intossicazione da monossido di carbonio – Non accendere MAI questo apparecchio o lasciarlo
bruciare senza amma o raffreddare in ambienti ristretti.
• NON sovraccaricare l’unità di carburante.
• PERICOLO D’INCENDIO – In fase di utilizzo, l’apparecchio contiene braci ardenti che possono
inavvertitamente schizzare fuori dal braciere.
• AVVERTENZA – NON utilizzare benzina, acquaragia, liquido inammabile per accendini, alcool o altri prodotti
chimici simili per l’accensione o la riaccensione. Utilizzare solo prodotti accendi-fuoco conformi alla normativa
EN1860-3!

43
IT, CH
• È fortemente consigliato l’uso di carbone in pezzi nel vostro Kamado perché brucia più a lungo e produce
meno ceneri che possono limitare il usso d’aria.
• IMPORTANTE: Quanto aprite il coperchio a temperature elevate è essenziale sollevarlo lentamente per
permettere all’aria di entrare piano e in maniera sicura, evitando eventuali schizzi o scintille che possono
provocare danni.
• Seguire SEMPRE le INFORMAZIONI SULLA COTTURA DEGLI ALIMENTI evidenziate a pagina 44 di questo
manuale di istruzioni.
• NON usare il Kamado su rivestimenti in legno o altre superci inammabili quali erba secca, trucioli di legno,
foglie o corteccia decorativa.
• Assicurarsi che il Kamado si trovi almeno a 2 metri di distanza da elementi inammabili.
• NON UTILIZZARE il Kamado come fornace.
• NON maneggiare o spostare il Kamado quando è acceso perché potrebbe essere rovente.
• UTILIZZARE SEMPRE dei guanti termoresistenti quando si maneggiano oggetti in ceramica o superci da
cottura roventi.
• Lasciare sempre raffreddare l’unità completamente prima di spostarla o di riporla.
• Tenere SEMPRE i bambini e gli animali domestici a distanza di sicurezza dal dispositivo in uso.
• Controllare sempre l’unità prima di utilizzarla per eventuale usura e danni e sostituire eventuali pezzi se e
quando necessario.
PREPARAZIONE DEL KAMADO
• Per accendere il fuoco, porre un giornale arrotolato con qualche cubetto accendi-fuoco o esca solida per il
fuoco sul braciere (7) posto sulla base del Kamado. Quindi mettere 2 o 3 manciate di carbone sopra al giornale.
• NON utilizzare benzina, acquaragia, liquido inammabile per accendini, alcool o altri prodotti chimici simili per
l’accensione o la riaccensione.
• Aprire la bocchetta di ventilazione inferiore e accendere il giornale con l’aiuto di un accendino lungo o di
ammiferi di sicurezza.
• NON sovraccaricare l’unità di carburante – se il fuoco è troppo forte il Kamado potrebbe rovinarsi.
• Attendere sino a quando tutto il combustibile è utilizzato e consumato.
• Se le prime amme sono troppo alte, la guarnizione in feltro potrebbe rovinarsi ancora prima di essere
utilizzata correttamente.
• Dopo il primo utilizzo, controllare tutte le chiusure per la tenuta. La banda in metallo che collega il coperchio
alla base si dilaterà in seguito al calore e si potrebbe quindi allentare. Si consiglia quindi un controllo e, se
necessario, un restringimento dei dadi con un’apposita chiave.
• Ora si può utilizzare il Kamado normalmente.
SPEGNIMENTO
• Per spegnere l’unità – non aggiungere più combustibile e chiudere tutti gli sati e il coperchio per far sì che il
fuoco si spenga naturalmente.
• NON utilizzare acqua per spegnere le braci poiché ciò potrebbe rovinare la ceramica del Kamado.
STOCCAGGIO
• Quando non in uso, e se riposto all’esterno, coprire il Kamado, una volta completamente raffreddato, con
l’apposita protezione anti-pioggia
• La griglia di cottura cromata NON può essere lavata in lavastoviglie; pulirla quindi con un detergente neutro
e acqua tiepida.
• Quando si usa il Kamado spingere verso il basso le leve di blocco sulle ruote per impedire all’unità di spostarsi
in fase di utilizzo.
• Si consiglia di riporre il Kamado al coperto in un garage o al riparo durante l’inverno per una protezione totale.
• Riporre in un luogo che non teme il gelo.
PULIZIA
• Il Kamado è auto-pulente. Scaldarlo no a 260ºC per 30 minuti per permettergli di bruciare tutti gli eventuali
avanzi di cibo e i detriti.
• NON utilizzare acqua o altri prodotti detergenti per pulire l’interno del Kamado. Le pareti sono porose e
assorbirebbero qualsiasi tipo di liquido utilizzato, arrecando danni al Kamado. In caso di eccessiva fuliggine,

44
IT, CH
utilizzare una spazzola con setole in ferro o l’apposito strumento fornito per raschiare i residui di carbone prima
dell’utilizzo successivo.
• Per pulire le griglie e le graticole utilizzare un detergente non-abrasivo quando l’unità è completamente raffreddata.
• Per pulire la supercie esterna attendere il raffreddamento del Kamado e utilizzare uno straccio umido con del
detergente neutro.
MANUTENZIONE
• Stringere le fasce in metallo e oliare il cardine 2 volte l’anno o più se necessario.
INFORMAZIONI SU ACCENSIONE, UTILIZZO E CURA
• Assicurarsi che il Kamado sia collocato su una supercie stabile, piana, orizzontale, resistente al calore e
non-inammabile lontano da oggetti inammabili.
• Assicurarsi il Kamado sia in un ambiente con almeno 2 m di spazio libero sopra e intorno.
• Per accendere il fuoco, disporre un giornale arrotolato con qualche cubetto accendi-fuoco o esca solida per il
fuoco sul braciere (7) posto sulla base del Kamado. Quindi porre 2 o 3 manciate di carbone sopra al giornale.
• NON utilizzare benzina, acquaragia, liquido inammabile per accendini, alcool o altri prodotti chimici simili per
l’accensione o la riaccensione.
• Aprire la bocchetta di ventilazione inferiore e accendere il giornale con l’aiuto di un accendino lungo o di
ammiferi di sicurezza. Quando il fuoco inizia a prendere, lasciare la bocchetta di ventilazione inferiore e il
coperchio aperti per circa 10 minuti per creare un giaciglio per le braci.
• Permettere al carbone di surriscaldarsi e tenerlo rovente per almeno 30 minuti prima di iniziare a cucinare sul
Kamado. NON iniziare a cuocere prima che il combustile non sia ricoperto da uno strato di cenere.
• Si consiglia di non alimentare o girare il carbone una volta acceso per permettergli di bruciare in maniera
uniforme ed efcace.
• Una volta acceso il fuoco, utilizzare SOLO guanti termo-resistenti per maneggiare le parti calde in ceramica o
le superci di cottura.
• Vedere le istruzioni di cottura sottostanti e far riferimento alle temperature e ai tempi di cottura indicati.
GUIDA ALLA COTTURA A BASSA TEMPERATURA
• Accendere il carbone rispettando le istruzioni sopra indicate. NON spostare o attizzare il carbone una volta acceso.
• Lasciare la bocchetta di ventilazione inferiore e il coperchio aperti per circa 10 minuti per creare un giaciglio
per le braci.
• Monitorare il Kamado no al raggiungimento della temperatura desiderata. Fare riferimento alla guida delle
temperature di cottura di pagina 44.
• Chiudere completamente la bocchetta di ventilazione inferiore per mantenere la temperatura.
• Il Kamado è ora pronto per essere utilizzato.
• IMPORTANTE: Quando aprite il coperchio a temperature elevate è essenziale sollevarlo lentamente per
permettere all’aria di entrare piano e in maniera sicura, evitando eventuali schizzi o scintille che possono
provocare danni.
• Seguire SEMPRE LE INFORMAZIONI SULLA COTTURA DEI CIBI presenti a pagina 45 del presente manuale
di istruzioni.
• Utilizzare SEMPRE guanti termo-resistenti per maneggiare le parti calde in ceramica o le superci di cottura.
GUIDA ALLA PREPARAZIONE DI CIBI AFFUMICATI
• Seguire le istruzioni sopra indicate come per il procedimento di cottura lenta.
• Monitorare il Kamado no al raggiungimento della temperatura desiderata. Fare riferimento alla guida delle
temperature di cottura di pagina 44.
• Lasciare la bocchetta di ventilazione inferiore leggermente aperta.
• Chiudere la bocchetta di ventilazione superiore e tenere controllata la temperatura per qualche minuto.
• Con l’aiuto di guanti termoresistenti, porre dei pezzetti di legno intorno ai carboni ardenti.
• A questo punto il Kamado è pronto per la preparazione di cibo affumicato.
• CONSIGLIO: Immergere in acqua i pezzetti di legno o i ripiani di cottura per 15 minuti per prolungare il
processo di affumicatura.
• IMPORTANTE: Quando aprite il coperchio a temperature elevate è essenziale sollevarlo lentamente per
permettere all’aria di entrare piano e in maniera sicura, evitando eventuali schizzi o scintille che possono

45
IT, CH
provocare danni.
• Seguire SEMPRE LE INFORMAZIONI SULLA COTTURA DEI CIBI presenti a pagina 45 del presente manuale
di istruzioni.
• Utilizzare SEMPRE guanti termo-resistenti per maneggiare le parti calde in ceramica o le superci di cottura.
GUIDA ALLA COTTURA AD ALTA TEMPERATURA
• Accendere il carbone rispettando le istruzioni indicate a pagina 43.
• Chiudere il coperchio e aprire completamente la bocchetta di ventilazione superiore e quella inferiore.
• Monitorare il Kamado no al raggiungimento della temperatura desiderata. Fare riferimento alla guida delle
temperature di cottura di pagina 44.
• Chiudere a metà la bocchetta di ventilazione superiore e continuare a controllare la temperatura per ancora
qualche minuto.
• Il Kamado è ora pronto per essere utilizzato.
• IMPORTANTE: Quando aprite il coperchio a temperature elevate è essenziale sollevarlo lentamente per
permettere all’aria di entrare piano e in maniera sicura, evitando eventuali schizzi o scintille che possono
provocare danni.
• Seguire SEMPRE LE INFORMAZIONI SULLA COTTURA DEI CIBI presenti a pagina 45 del presente manuale
di istruzioni.
• Utilizzare SEMPRE guanti termo-resistenti per maneggiare le parti calde in ceramica o le superci di cottura.
INFORMAZIONI SULLA COTTURA DEI CIBI
• Si prega di leggere e di seguire attentamente queste avvertenze quando si cucina con il Kamado.
• Lavarsi sempre le mani prima e dopo aver toccato la carne cruda e prima di mangiare.
• Tenere sempre la carne cruda lontana dalla carne cotta e da altri alimenti.
• Prima di cucinare assicurarsi che le griglie e gli utensili siano puliti e senza residui alimentari precedenti.
• NON utilizzare gli stessi utensili per toccare alimenti cotti e non cotti.
• Accertarsi che tutta la carne sia cotta bene prima di mangiarla.
• AVVERTENZA – mangiare carne cruda o cotta male può dar luogo a intossicazione alimentare
(ad esempio, ceppi di batteri quali l’E-coli).
• Per ridurre il rischio di ottenere carne cotta male tagliarla per essere certi che sia cotta bene all’interno.
• AVVERTENZA – se la carne è sufcientemente cotta rilascerà un sugo chiaro e senza tracce rosee o rosse o
del colore della carne.
• Si consiglia di precuocere i grossi pezzi o parti di carne prima della cottura nale alla griglia.
• Al termine della cottura con il Kamado pulire sempre le griglie e le superci di cottura insieme agli utensili utilizzati.
AGGIUNTA DI COMBUSTILE
• Con le bocchette di ventilazione chiuse, il Kamado mantiene una temperatura elevata per diverse ore. Nel
caso fosse necessario un tempo di cottura più lungo (ad esempio se si vuole arrostire un intero pezzo di
carne o si vuole affumicare un alimento lentamente), può rivelarsi necessario aggiungere più combustibile.
È sufciente quindi aggiungere del carbone e procedere come indicato sopra.
SOSTITUZIONE DEL FELTRO DEL KAMADO GRILL
A seconda della frequenza dell’utilizzo del vostro Kamado Grill è necessario sostituire di tanto in tanto il feltro del coper-
chio e della base del Kamado Grill. In questo modo prevenite l’introduzione della soprannominata aria “cattiva”. Proce-
dete con cura e nel seguente modo:
Occorrente:
- Feltro autoadesivo
- Chiave inglese
- Raschietto e/o coltello Stanley
- Spugnetta abrasiva o panno
- Acetone
- Nastro protettivo

46
IT, CH
1. Rimuovere la valvola regolabile o il tappo di chiusura in ceramica. Svitare i bulloni della fascia di
tensionamento superiore con la chiave inglese, in seguito sollevare il coperchio con cautela e riporlo
sottosopra su una base protettiva. Assicurarsi che il coperchio non possa cadere!
2. Svitare la fascia di tensionamento inferiore e lasciare la base in ceramica nel supporto o sul tavolo.
3. Tagliare con il coltello Stanley e/o il raschietto il più possibile del vecchio feltro. Rimuovere i residui di feltro e
colla con un panno o una spugnetta abrasiva imbevuta di acetone.
4. Attendere almeno un ora in modo che l’acetone sia evaporato completamente.
5. Incollare il feltro nuovo (autoadesivo) con cura sul bordo della base e del coperchio. Assicurarsi che i punti
di congiunzione non si vengano a trovare esattamente nella stessa posizione e lasciate pendere il feltro un
po’ verso l’esterno, il che è preferibile rispetto all’interno (perché verrebbe bruciato durante l’utilizzo). Durante
l’incollaggio assicurarsi che il feltro abbia un po’ di gioco (quindi non il più stretto possibile). In presenza di
calore infatti il feltro potrebbe restringersi ulteriormente. Tagliare il feltro in maniera ordinata sul giunto. Nel
caso in cui non doveste utilizzare del feltro autoadesivo, allora potrete procedere nel seguente modo
utilizzando della colla:
Incollare sulla parte esterna del coperchio e della base direttamente sotto al bordo il nastro adesivo
protettivo per prevenire che la colla nisca sul Kamado Grill. Proteggete la parte interna con un pezzo di
cartone e spruzzare i bordi con la colla. Lasciate asciugare la colla in accordo alle indicazione riportate sulla
confezione e incollate successivamente il feltro sui bordi. Lasciate che la colla si indurisca completamente.
6. Rimontare il Kamado Grill. Rimettere la fascia di tensionamento intorno alla base e avvitare i bulloni quasi
completamente. Riporre il coperchio con cautela nella fascia di tensionamento intorno alla base e avvitare i
bulloni quasi completamente. Controllare che il coperchio e le fasce di tensionamento siano posizionate
correttamente e serrare tutti i bulloni.
CONDIZIONI GENERALI DI GARANZIA LIMITATA PER IL PATTON KAMADO GRILL
Ogni apparecchio di cottura in materiale ceramico Patton Kamado Grill ha una garanzia limitata sul materiale e la costru-
zione di tutti i componenti in ceramica (come la cupola, il corpo, il camino con valvola di chiusura, il focolaio e l’anello
interno). Questa garanzia è valida per tutto il periodo in cui l’acquirente originario del Patton Kamado Grill rimane il pro-
prietario del componente coperto da garanzia.
Il Patton Kamado Grill è coperto da una garanzia limitata di 2 anni per difetti di fabbricazione in favore dell’acquirente
originario. La garanzia non copre la rottura dei componenti in ceramica derivante da cadute o da un uso inappropriato.
I componenti in metallo, acciaio inox e ghisa del Patton Kamado Grill (come per esempio le ruote in metallo, il mecca-
nismo della cerniera, il coperchio in metallo con le due funzioni, la griglia, il focolaio e il pannello scorrevole di areazione)
sono coperti da una garanzia limitata per difetti di fabbricazione di un anno in favore dell’acquirente originario.
Patton si impegna a utilizzare sulle superci in metallo materiali antiruggine e vernici che siano in grado di sopportare le
temperature elevate. I materiali in metallo e gli strati protettivi tuttavia possono essere danneggiati da possibili graf sulla
supercie o dall’esposizione degli stessi a sostanze e condizioni ambientali non sotto il controllo della Patton.
Cloro, vapori industriali, sostanze chimiche, fertilizzante chimico, umidità estrema, pesticidi per il prato e sale sono sol-
tanto alcune delle sostanze che possono danneggiare la lacca e la nitura degli strati protettivi applicati sui metalli. Per
questo motivo la garanzia NON COPRE LA RUGGINE, OSSIDAZIONI, SOSTITUZIONE e altri tipi di DIFETTI relativi ai
componenti in metallo, acciaio inox e ghisa tranne nel caso in cui questi difetti siano causa di perdita dell’integrità strut-
turale o che questi componenti del Patton Kamado Grill siano difettosi. Durante il periodo invernale questo prodotto deve
essere riposto all’interno. La crettatura esterna della ceramica fa parte del processo di produzione.
Gli articoli in legno, come i tavoli laterali in bambù, sono coperti da una garanzia limitata di 1 anno in favore dell’acqui-
rente originario. I prodotti in legno non sono coperti per quanto riguarda il normale invecchiamento o le crepe a meno che
non ci sia anche una perdita dell’integrità strutturale. Anche il termometro ha una garanzia limitata di 1 anno contro difetti
di fabbricazione.
Queste garanzie sono basate su un utilizzo, non commerciale e una manutenzione normale del Patton Kamado Grill.
L’utilizzo commerciale o similare non è coperto dalla garanzia. La garanzia non copre danni aggiuntivi o imprevisti o
rotture, o danni derivanti dal: trasporto; cadute; montaggio errato; supporto inadeguato; tentativo di supportare il Patton
Kamado Grill tramite mezzi diversi rispetto ad una supercie solida, non inammabile sotto la base; l’utilizzo commerci-
ale; modiche; variazioni; negligenza; uso improprio; cura impropria; pericoli sulla strada; usura normale e ragionevole; o
calamità naturali.

47
IT, CH
La garanzia non copre i graf, ammaccature, scheggiature, piccole crepe, l’apparizione di piccole crepe cosmetiche nella
laccatura esterna che non inuenzano la funzionalità del Patton Kamado Grill.
Qualsiasi modica o variazione del Patton Kamado Grill non autorizzata causerà il decadimento della garanzia. Queste
comprendono la creazione di fori o la manomissione dei componenti; l’utilizzo nel Patton Kamado Grill di componenti non
originali della Patton Kamado Grill; o l’utilizzo dei componenti interni in maniera diversa dalla destinazione d’uso prevista
dal produttore. La modica o la sostituzione dei componenti interni, come il focolaio e l’anello interno, causa la decadenza
della garanzia, e la Patton declina espressamente ogni responsabilità per qualsiasi danno diretto o indiretto accessorio
che ne deriva. L’utilizzo nel Patton Kamado Grill di liquido accendifuoco o di qualsiasi altra miscela inammabile fa deca-
dere la garanzia. Questa è un’operazione pericolosa e può causare danni o ferite.
NEI LIMITI MASSIMI AMMESSI DALLA LEGGE, LA PRESENTE È L’UNICA GARANZIA ASSOCIATA AL PRODOTTO.
NON SONO PREVISTE ULTERIORI GARANZIE, ESPRESSE O TACITE, INCLUSE GARANZIE TACITE DI COMMER-
CIABILITÀ E IDONEITÀ PER SCOPI PARTICOLARI. È ESCLUSA QUALSIASI RESPOSABILITÀ PER DANNI AGGIUN-
TIVI, SPECIALI O ACCESSORI.
GUIDA ALLE TEMPERATURE DI COTTURA
Cuocere lentamente / Affumicare (110ºC-135ºC) Bocchetta superiore Bocchetta inferiore
Grigliare / Arrostire (160ºC-180ºC) Bocchetta superiore Bocchetta inferiore
Scottare (260ºC-370ºC) Bocchetta superiore Bocchetta inferiore
Petto di manzo 2 ore x 450 gr
Maiale arrosto 2 ore x 450 gr
Pollo intero 3 - 4 ore
Costolette 3 - 5 ore
Arrosti 9+ ore
Pesce 15-20 min.
Filetto di maiale 15-30 min.
Parti di pollo 30-45 min.
Pollo intero 1-1.5 ore
Cosciotto di agnello 3-4 ore
Tacchino 2-4 ore
Coscia di maiale 2-5 ore
Bistecca 5-8 min.
Braciola di maiale 6-10 min.
Hamburger 6-10 min.
Salsicce 6-10 min.
Aprire Chiuso

48
IT, CH
Pinza
Permette di sollevare la pieta per la cottura della pizza o le griglie
di cottura quando sono troppo calde da maneggiare.
Paletta per la cenere
Una volta bruciato tutto il combustibile e il Kamado è raffreddato,
utilizzare questo utensile per rimuovere le ceneri depositate.
ACCESSORI OPZIONALI

NL, BE, LU
FR, CH
GB, IE
DE, CH, AT
PL
IT, CH
Attentie: Deze informatie is alleen bedoeld
als gids. Specieke onderdelen in uw BBQ
en omschrijving kunnen per regio of dealer
verschillen.
Note: Ces renseignements sont donnés à
titre indicatif. Il est possible que les articles
inclus dans les spécications de votre bar-
becue diffèrent selon la région ou les carac-
téristiques stipulées par le concessionaire.
Note: This information is a guide only.
Items included in your BBQ specication
may differ depending on region or specic
dealer specication.
Anmerkung: Diese Anleitung dient lediglich
der Information. Teile der Grillspezikation
können je nach Vertriebsregion oder
Händleranforderung unterschiedlich sein.
Uwaga: Niniejsza informacja jest
wskazówką. Specyczne części zamienne
grilla w opisie mogą różnić się w zależności
od regionu lub sprzedawcy.
Nota: Questa informazione è solo una
guida. Gli elementi inclusi nella vostra
specica barbecue possono essere diversi
a seconda della regione o specicazione
rivenditore specico.
Alle specicaties kunnen zonder vooraf-
gaande kennisgeving worden gewijzigd.
Toutes les caractéristiques sont susceb-
tibles d’être modiées sans préavis.
All specications are subject to change
without prior notice.
Änderungen ohne vorherige Bekannt-
gabe vorbehalten.
Wszystkie specykacje mogą być zmie-
niane bez uprzedniego zawiadomienia.
Tutte le speciche sono soggette a mo-
diche senza preavviso.
www.patton.eu
Documenttranscriptie
GEBRUIKS- EN INSTALLATIEHANDLEIDING Kamado 13” PATTON B.V. Postbus 2044 NL 5300 CA Zaltbommel Holland Website: www.patton.eu NL, BE, LU NL, BE, LU Gebruiksaanwijzing - 3 FR, CH Notice d’emploi - 10 GB, IE Operating instructions - 18 DE, CH, AT Gebrauchsanweisung - 34 PL Instrukcja Obsługi - 45 IT, CH Uso e istruzioni di montaggio - 56 2 NL, BE, LU Benodigd gereedschap (NIET inbegrepen) Instructies voor de gebruiker – bewaar deze goed, zodat u deze later kunt raadplegen BELANGRIJK: verwijder voor gebruik alle verpakkingen, maar bewaar de veiligheidsinstructies. Deze instructies zijn onderdeel van het product. Let goed op alle veiligheidswaarschuwingen in deze instructies. Lees deze instructies volledig door en bewaar ze voor toekomstig gebruik. Bewaar de instructies samen met het product. Dit product is alleen geschikt voor thuisgebruik en mag niet voor commerciële of contractuele doeleinden worden gebruikt. DIT PRODUCT MOET IN DE WINTER BINNEN WORDEN BEWAARD. HET UITERLIJK VAN DE KERAMIEK BEVAT SCHEUREN; DIT IS NORMAAL. Onderhoud en richtlijnen voor veilig gebruik OVER UW KAMADO Archeologen hebben 4.000 jaar oud aardewerk gevonden, waarvan men denkt dat het vroege versies zijn van de keramische koker Kamado. Sindsdien is deze op allerlei manieren geëvolueerd: het deksel kan worden verwijderd, er is een extra tochtdeur voor betere warmtecontrole en in plaats van hout gebruikt men nu als belangrijkste brandstof houtskool. In Japan was de Mushikamado een ronde pot van klei met een verwijderbaar bol deksel. Deze was bedoeld voor het stomen van rijst. De naam ‘Kamado’ is dan ook het Japanse woord voor ‘fornuis’ of ‘kookplaat’. Deze naam is overgenomen door de Amerikanen en is nu een algemene term voor dit type keramische kookplaat. Kamado-kookplaten zijn enorm veelzijdig. Ze kunnen niet alleen worden gebruikt om te grillen of te roken, maar er kunnen ook zonder problemen pizza’s, brood, taarten en koekjes mee worden gebakken. De Kamado kan uitstekend warmte binnenhouden en haalt en behoudt hoge temperaturen dankzij de nauwkeurig instelbare luchtinstroom via de luchtgaten aan de boven- en onderkant. Hoge temperaturen zijn ideaal om hamburgers en worst te bakken, terwijl lage temperaturen beter geschikt zijn om grotere stukken vlees langere tijd te bakken. Probeer ook eens wat houtsnippers aan de houtskool toe te voegen of combineer houtsnippers met verschillende aroma’s om het vlees een unieke smaak te geven. WAARSCHUWINGEN – LET OP! Verwijder de grijze viltpakking niet van de rand van het onderstel of het deksel. Deze vilten pakking zorgt namelijk voor afdichting en zorgt ervoor dat “valse” lucht, wat de circulatie binnen de Kamado zou kunnen verstoren, geen kans krijgt. Zorg ervoor dat u de bouten en scharnieren van de metalen banden regelmatig met een lichte machineolie (of WD40) olied. De bouten moeten regelmatig gecontroleerd en indien nodig aangedraaid te worden. • • • • • • • • Dit product is ALLEEN GESCHIKT VOOR BUITENGEBRUIK. Laat NOOIT een brandend vuur onbeheerd achter. RISICO op koolmonoxidevergiftiging – dit product NOOIT gebruiken of laten afkoelen in kleine ruimten. Laad het apparaat NIET te vol met brandstof. BRANDGEVAAR: er kunnen hete kooltjes ontsnappen tijdens het gebruik. WAARSCHUWING: gebruik GEEN benzine, terpentine, wasbenzine, alcohol of andere vergelijkbare chemische stoffen om het apparaat (opnieuw) aan te steken. Gebruik alleen aanstekers conform EN1860-3! Het wordt sterk aanbevolen om klompjes houtskool te gebruiken in uw Kamado. Deze branden langer en produceren minder as die de luchtstroom kan beperken. BELANGRIJK: bij het openen van het deksel op hoge temperaturen is het belangrijk dat u het deksel slechts 3 NL, BE, LU • • • • • • • • • licht omhoog tilt, zodat de lucht langzaam en veilig kan binnenkomen en er geen backdrafts of steekvlammen kunnen ontstaan die kunnen leiden tot letsel. Houd u ALTIJD aan de KOOKINSTRUCTIES op pagina 5 van deze handleiding. Gebruik de Kamado NIET op een terras of op andere brandbare oppervlakken, zoals droog gras, houtsnippers, bladeren of decoratieschors. Zorg ervoor dat de Kamado op minimaal 2 meter afstand staat van brandbare voorwerpen. Gebruik de Kamado NIET als kachel. Zorg ervoor dat u de Kamado NIET aanraakt of verplaatst wanneer deze aan staat; hij is heet. GEBRUIK ALTIJD warmtebestendige handschoenen bij het gebruik van hete keramische of kookoppervlakken. Laat het apparaat volledig afkoelen voor verplaatsing of opslag. Houd kinderen en huisdieren ALTIJD op veilige afstand van de oven wanneer deze in gebruik is. Controleer het apparaat voor gebruik altijd op slijtage en schade en repareer deze waar nodig. DE KAMADO PREPAREREN • • • • • • • • Maak een vuurtje door een opgerolde krant met een aantal aanmaakblokjes of solide vuurblokjes op de houtskoolplaat (7) onderin de Kamado te leggen. Plaats vervolgens 2 of 3 handen houtskool bovenop de krant. Gebruik GEEN benzine, terpentine, wasbenzine, alcohol of andere vergelijkbare chemische stoffen om het apparaat (opnieuw) aan te steken. Open het onderste luchtgat en steek de krant aan met een lange aansteker of veiligheidslucifers. Laad het apparaat NIET te vol met brandstof; als het vuur te krachtig is kan de Kamado schade oplopen. Laat het vuur branden tot alle brandstof op is en het vuur is gedoofd. Als de eerste vlammen te hoog zijn, kan dit de vilten afdichting beschadigen voor deze de kans heeft gehad om goed te hechten. Controleer na het eerste gebruik of alle sluitingen goed vast zitten. De metalen ring die het deksel verbindt met het onderstel zal bij hitte uitzetten en kan los komen te zitten. Het wordt aanbevolen om de ring te controleren en waar nodig met een sleutel weer vast te zetten. U kunt uw Kamado nu normaal gebruiken. DOVEN • • Om het vuur te doven stopt u de brandstoftoevoer en sluit u alle gaten en het deksel, zodat het vuur op natuurlijke wijze uitgaat. Gebruik GEEN water om de houtskool te blussen; de keramische Kamado kan hierdoor beschadigd raken. OPSLAG • • • • • Wanneer u het apparaat niet gebruikt en buiten laat staan, moet u de Kamado eerst volledig laten afkoelen en vervolgens bedekken met een geschikte bescherming tegen regen. De grill van chroomplaat is NIET vaatwasserbestendig; gebruik een mild schoonmaakmiddel en warm water. Druk bij gebruik van de Kamado de beide wielklemmen naar beneden, zodat deze niet kan verschuiven. Het wordt aangeraden om de Kamado ‘s winters overdekt op te slaan voor volledige bescherming, bijvoorbeeld in een garage of in een schuur. Op een vorstvrije plaats bewaren. REINIGING • • • • De Kamado is zelfreinigend. Verwarm hem 30 minuten lang op 260ºC en hij verschroeit al het eten en vuil. Gebruik GEEN water of andere soorten schoonmaakproducten om de binnenkant van uw Kamado schoon te maken. De wanden zijn poreus en absorberen alle vloeistof, waardoor de Kamado kan scheuren. Als er heel veel roet is ontstaan, kunt u een borstel of het bijgeleverde gereedschap gebruiken om de koolrestanten weg te schrapen voor het volgende gebruik. Gebruik voor het schoonmaken van de grills en roosters schoonmaakmiddel zonder schuurmiddel, zodra het apparaat volledig is afgekoeld. Wacht bij het schoonmaken van de buitenkant tot de Kamado volledig is afgekoeld en gebruik een vochtige doek met een mild schoonmaakmiddel. 4 NL, BE, LU ONDERHOUD • Twee keer per jaar (vaker indien nodig) de ringen vastschroeven en de scharnieren oliën. AANSTEKEN, GEBRUIK EN VEILIGHEID • • • • • • • • • Zorg dat de Kamado op een vaste, vlakke, horizontale, warmtebestendige en niet-brandbare ondergrond staat, uit de buurt van brandbare voorwerpen. Zorg dat de Kamado minimaal 2 meter bovenruimte heeft en minimaal 2 meter van andere voorwerpen af staat. Maak een vuurtje door een opgerolde krant met een aantal aanmaakblokjes of solide vuurblokjes op de houtskoolplaat (7) onderin de Kamado te leggen. Plaats vervolgens 2 of 3 handen houtskool bovenop de krant. Gebruik GEEN benzine, terpentine, wasbenzine, alcohol of andere vergelijkbare chemische stoffen om het apparaat (opnieuw) aan te steken. Open het luchtgat aan de onderkant en steek de krant aan met een lange aansteker of veiligheidslucifers. Laat, zodra het vuur aan is, het onderste luchtgat en het deksel ongeveer 10 minuten open staan om een kleine basis van hete kooltjes te krijgen. Laat de houtskool opwarmen en minimaal 30 minuten gloeien voordat u op de Kamado gaat bakken. NIET bakken voordat er op de brandstof een laagje as ligt. Het wordt geadviseerd om de kolen niet op te stoken of om te draaien zodra ze heet zijn. Op die manier kunnen de kolen uniformer en efficiënter branden. Gebruik zodra het vuur aan staat ALLEEN warmtebestendige handschoenen bij het gebruik van hete keramiek of bakoppervlakken. Hieronder vindt u bakinstructies per temperatuur en duur. INSTRUCTIES VOOR BAKKEN OP LAGE TEMPERATUUR • • • • • • • • Stook de houtskool op volgens de instructies hierboven. Gloeiende houtskool NIET verplaatsen of opstoken. Open het luchtgat aan de onderkant volledig en laat het deksel ongeveer 10 minuten open om een kleine basis van hete kooltjes te krijgen. Houd de Kamado in de gaten tot deze de gewenste temperatuur heeft. Zie pagina 5 voor temperatuurinstructies. Sluit het onderste luchtgat volledig om de Kamado op temperatuur te houden. U kunt nu bakken op de Kamado. BELANGRIJK: bij het openen van het deksel op hoge temperaturen is het belangrijk dat u het deksel slechts licht omhoog tilt, zodat de lucht langzaam en veilig kan binnenkomen en er geen backdrafts of steekvlammen kunnen ontstaan die kunnen leiden tot letsel. Lees ALTIJD de INFORMATIE OVER HET BEREIDEN VAN ETEN op pagina 6 van deze instructiehandleiding. Gebruik ALTIJD warmtebestendige handschoenen bij het gebruik van hete keramiek of bakoppervlakken. INSTRUCTIES VOOR ROKEN • • • • • • • • • • Ga hetzelfde te werk als bij bakken op lage temperatuur. Houd de Kamado in de gaten tot deze de gewenste temperatuur heeft. Zie pagina 5 voor temperatuurinstructies. Laat het onderste luchtgat een beetje open. Doe het bovenste luchtgat dicht en controleer de temperatuur nog een paar minuten. Strooi met warmtebestendige handschoenen de houtsnippers over de hete houtskool heen. U kunt nu roken op de Kamado. TIP: dompel de houtsnippers of rookplanken 15 minuten onder in water om het rookproces te verlengen. BELANGRIJK: bij het openen van het deksel op hoge temperaturen is het belangrijk dat u het deksel slechts licht omhoog tilt, zodat de lucht langzaam en veilig kan binnenkomen en er geen backdrafts of steekvlammen kunnen ontstaan die kunnen leiden tot letsel. Lees ALTIJD de INFORMATIE OVER HET BEREIDEN VAN ETEN op pagina 6 van deze instructiehandleiding. Gebruik ALTIJD warmtebestendige handschoenen bij het gebruik van hete keramiek of bakoppervlakken. INSTRUCTIES VOOR BAKKEN OP HOGE TEMPERATUUR • Stook de houtskool op volgens de instructies op pagina 4. 5 NL, BE, LU • • • • • • • Sluit het deksel en zet de luchtgaten aan de boven- en onderkant helemaal open. Houd de Kamado in de gaten tot deze de gewenste temperatuur heeft. Zie pagina 5 voor temperatuurinstructies. Sluit het bovenste luchtgat voor de helft en controleer de temperatuur nog een paar minuten. U kunt nu bakken op de Kamado. BELANGRIJK: bij het openen van het deksel op hoge temperaturen is het belangrijk dat u het deksel slechts licht omhoog tilt, zodat de lucht langzaam en veilig kan binnenkomen en er geen backdrafts of steekvlammen kunnen ontstaan die kunnen leiden tot letsel. Lees ALTIJD de INFORMATIE OVER HET BEREIDEN VAN ETEN op pagina 6 van deze instructiehandleiding. Gebruik ALTIJD warmtebestendige handschoenen bij het gebruik van hete keramiek of bakoppervlakken. INFORMATIE OVER HET BEREIDEN VAN ETEN • • • • • • • • • • • Lees deze instructies goed door en volg ze op bij het bakken op de Kamado. Was altijd uw handen voor en na het bereiden van rauw vlees en voor het eten. Houd rauw vlees altijd uit de buurt van gebakken vlees en ander eten. Zorg vóór het bakken dat het grilloppervlak en het keukengerei schoon zijn en vrij zijn van etensresten. Gebruik NIET dezelfde keukengerei voor rauw en gekookt eten. Zorg dat al het vlees goed gaar is voor het eten. LET OP: het eten van rauw of onvoldoende gaar vlees kan leiden tot voedselvergiftiging (bijv. door bacteriën als E.coli). Om het risico op onvoldoende gaar vlees te verkleinen, kunt u het opensnijden om te controleren of het binnenin gaar genoeg is. LET OP: als het vlees voldoende is gebakken, moet het sap doorzichtig zijn en moet er geen roze/rood sap of verkleuring van het vlees zichtbaar zijn. Het is aan te raden om grotere stukken vlees voor te bakken voordat u ze afbakt op de grill. Maak na gebruik van de Kamado het bakoppervlak van de grill en het keukengerei altijd schoon. BRANDSTOF BIJVULLEN • Met gesloten luchtgaten kan de Kamado een paar uur op hoge temperatuur blijven. Als u meer baktijd nodig heeft (bijvoorbeeld bij het roosteren van een groot stuk vlees of bij langzaam roken) kan het nodig zijn om meer houtskool toe te voegen. Voeg deze houtskool toe en ga verder zoals hierboven aangegeven. HET VERVANGEN VAN HET VILT VAN DE KAMADO GRILL Afhankelijk van hoe vaak u uw Kamado Grill gebruikt dient u het vilt van het deksel en de basis van de Kamado Grill af en toe te vervangen. Hiermee voorkomt u de eerder genoemde “valse” lucht. Ga zorgvuldig en als volgt te werk: Benodigdheden: - Zelfklevend vilt - Steeksleutel - Verfkrabber en/of Stanleymes - Schuursponsje of doekje - Aceton - Schilderstape 1. 2. 3. 4. 5. Verwijder de de regelbare afsluiter of keramische afdekdop. Draai de moeren van de bovenste spanband met de steeksleutel los, til vervolgens het deksel er voorzichtig uit en zet deze ondersteboven op een beschermen de ondergrond. Zorg ervoor dat het deksel niet kan vallen! Draai de onderste spanband los en laat de keramieken basis in het nest of de tafel staan. Snijd met een stanleymes en/of verfkrabber zoveel mogelijk van het oude vilt weg. Verwijder de restjes vilt en lijm met een doekje of schuurspons met aceton. Wacht minstens een uur zodat de aceton is vervlogen. Plak het nieuwe (zelfklevende) vilt zorgvuldig op de rand van de basis en het deksel. Zorg ervoor dat de naden niet exact op dezelfde plaats komen en laat het vilt aan de buitenkant iets overhangen, dat is beter dan aan de binnenkant (dit zal anders namelijk verbranden bij ingebruikname). Zorg bij het plakken van het vilt voor wat speling (dus niet zo strak mogelijk), bij verwarming kan het vilt namelijk mogelijk nog iets krimpen. Snijd het vilt bij de naad netjes af. Gebruikt u niet zelfklevend vilt in combinatie met lijm dan gaat u als volgt te werk: 6 NL, BE, LU 6. Plak aan de buitenzijde van het deksel en de basis direct onder de rand het schilderstape om te voorkomen dat er lijm op de Kamado Grill komt. Bescherm de binnenzijde met een stuk karton en spuit de randen met de lijm in. Laat volgens de aanwijzingen op de verpakking van de lijm drogen en plak het vilt vervolgens op de randen. Laat de lijm goed uitharden. Zet de Kamado Grill weer in elkaar. Houd de spanband om de basis en draai de moeren vrijwel helemaal aan. Zet het deksel voorzichtig in de bovenste spanband en draai de moeren vrijwel helemaal aan. Controleer of het deksel en de spanbanden mooi recht zitten en draai alle moeren stevig aan. VOORWAARDEN EN BEPALINGEN VAN DE BEPERKTE GARANTIE VAN PATTON KAMADO GRILL Iedere Patton Kamado Grill keramisch kooktoestel heeft een beperkte garantie op materiaal en constructie van alle keramische onderdelen (zoals koepel, onderstel, schoorsteen met afsluiter, vuurkorf en binnenring). Deze garantie geldt zolang de oorspronkelijke koper de Patton Kamado Grill of het gedekte onderdeel in eigendom heeft. De Patton Kamado Grill heeft een beperkte fabrieksgarantie van 2 jaar voor de oorspronkelijke koper. De keramische onderdelen worden niet gedekt tegen breuk door vallen of misbruik. De onderdelen van metaal, roestvrij staal en gietijzer van de Patton Kamado Grill (zoals de metalen banden, het scharniermechanisme, metalen deksel met twee functies, rooster, vuurkorf en regelschuif) hebben een beperkte fabrieksgarantie van 1 jaar voor de oorspronkelijke koper. Patton stelt alles in het werk om roestbestendige materialen en lak die tegen hoge temperaturen bestand is op metalen oppervlakken te gebruiken. Metalen materialen en beschermende deklagen kunnen echter worden aangetast door diverse oppervlaktekrassen of blootstelling aan stoffen en omstandigheden waarover Patton geen controle heeft. Chloor, industriële dampen, chemicaliën, kunstmest, extreme vochtigheid, pesticiden voor het gazon en zout zijn enkele van de stoffen die lak en finish op metalen deklagen kunnen aantasten. Om deze redenen worden door de garantie op metalen, roestvrij stalen en gietijzeren onderdelen GEEN ROEST, OXIDATIE, VERVAGING of andere ONVOLKOMENHEDEN GEDEKT tenzij deze ook leiden tot verlies van structurele integriteit of defecten van deze onderdelen van de Patton Kamado Grill. Dit product moet tijdens de winterperiode binnen gezet worden. Het uiterlijk van craquelé van het keramiek maakt onderdeel uit van het productieproces. Houten artikelen, zoals de bamboe zijtafels, hebben een beperkte fabrieksgarantie 1 jaar voor de oorspronkelijke koper. Houten producten zijn niet gedekt tegen normale verwering of scheuren tenzij de structurele integriteit ook verloren gaat. De thermometer heeft ook een beperkte fabrieksgarantie van 1 jaar. Deze garanties zijn gebaseerd op normaal en redelijk huishoudelijk gebruik en onderhoud van de Patton Kamado Grill. Commercieel gebruik en dergelijke toepassingen zijn uitgesloten van de garantie. De garantie is niet van toepassing op bijkomende of onvoorziene schade of breuk, of voor schade veroorzaakt door: vervoer; laten vallen; verkeerde montage; onjuiste ondersteuning; pogingen om de Patton Kamado Grill te ondersteunen door andere middelen dan een solide, onbrandbaar oppervlak onder de basis; commercieel gebruik; wijzigingen; veranderingen; nalatigheid; misbruik; onjuiste verzorging; gevaren op de weg; normale en redelijke slijtage; of natuurrampen. De garantie is niet van toepassing op krassen, deuken, scherfjes, haarscheurtjes, het ontstaan van kleine cosmetische scheuren in de buitenste glazuurlaag die de werking van de Patton Kamado Grill niet beïnvloeden. Alle niet-toegestane wijzigingen of veranderingen aan een Patton Kamado Grill doen de garantie teniet. Dit omvat het boren van gaten of het knoeien aan onderdelen; gebruik van andere onderdelen in de Patton Kamado Grill dan authentieke Patton Kamado Grill -onderdelen; of gebruik van inwendige onderdelen op een andere manier dan zoals bedoeld door de fabrikant. Wijzigen of vervangen van inwendige onderdelen, zoals de vuurkorf en de binnenring, doet de garantie teniet, en Patton wijst uitdrukkelijk iedere aansprakelijkheid af voor directe, indirecte, bijkomende of gevolgschade die hieruit voorkomt. Aanstekervloeistof of welk ontvlambaar mengsel dan ook in een Patton Kamado Grill gieten doet de garantie teniet. Dit is een gevaarlijke praktijk en kan tot schade of letsel leiden. VOOR ZOVER MAXIMAAL TOEGESTAAN DOOR DE WET REIKEN ALLE WETTELIJK VOORGESCHREVEN, UITDRUKKELIJKE OF STILZWIJGENDE GARANTIES, MET INBEGRIP VAN DE STILZWIJGENDE GARANTIES VAN VER- KOOPBAARHEID EN GESCHIKTHEID VOOR EEN BEPAALD DOEL, NIET VERDER DAN DEZE GARANTIE. AANSPRAKELIJKHEID VOOR BIJKOMENDE, SPECIALE EN GEVOLGSCHADE IS UITGESLOTEN. 7 NL, BE, LU TEMPERATUURINSTRUCTIES Langzaam bakken / roken (110ºC-135ºC) Runderborst Draadjesvlees Hele kip Ribben Braadstukken Luchtgat boven Luchtgat beneden Luchtgat boven Luchtgat beneden 15-20 min. 15-30 min. 30-45 min. 1-1,5 uur 3-4 uur 2-4 uur 2-5 uur Aanbraden / dichtschroeien (260ºC-370ºC) Steak Karbonades Hamburgers Worsten Luchtgat beneden 2 uur per pond 2 uur per pond 3 - 4 uur 3 - 5 uur 9+ uur Grillen / roosteren (160ºC-180ºC) Vis Fricandeau Kipstukken Hele kip Lamsbout Kalkoen Ham Luchtgat boven 5-8 min. 6-10 min. 6-10 min. 6-10 min. Open 8 Dicht NL, BE, LU OPTIONEEL Klem Voor het optillen van pizzastenen of grills wanneer deze te heet zijn om met de handen aan te pakken. Asschraper Wanneer de Kamado alle brandstof heeft verbruikt en is afgekoeld, kunt u hiermee de as van de bodem verwijderen. 9 MODE D’EMPLOI Cuiseur Kamado, modèle 13” FR, CH Outils requis (non inclus) Instructions pour l’utilisateur, à conserver pour toute référence ultérieure IMPORTANT : Retirez avec précaution tout emballage avant l’utilisation, mais prenez soin de conserver les instructions de sécurité. Ces instructions font partie du produit. Veuillez prendre connaissance de l’ensemble des avertissements de sécurité figurant dans ces instructions. Veuillez lire ces instructions dans leur intégralité et les conserver pour toute référence ultérieure. Ces instructions doivent être conservées à proximité du produit. Ce produit est à usage domestique uniquement, de sorte qu’il ne doit pas être utilisé à des fins commerciales ou contractuelles. CE PRODUIT DOIT ÊTRE CONSERVÉ EN INTÉRIEUR EN HIVER. LES CRAQUEMENTS QUI APPARAISSENT SUR LA CÉRAMIQUE SONT NORMAUX. Consignes préventives et d’utilisation en toute sécurité PRÉSENTATION DU CUISEUR KAMADO Il y a 4 000 ans, des archéologues découvrent de grands récipients d’argile que l’on considère aujourd’hui comme les premières incarnations du cuiseur en céramique Kamado. Depuis lors, le produit a évolué à bien des égards. Il a été équipé d’un couvercle amovible, d’une trappe de tirage offrant un meilleur contrôle thermique, et d’un bouton permettant de sélectionner le bois ou le charbon comme combustible principal. Au Japon, le Mushikamado était un pot en argile de forme arrondie surmonté d’un dôme amovible conçu pour la cuisson du riz. Le nom « Kamado » signifie en effet en japonais « poêle » ou « cuisinière ». Ce nom a été rapidement adopté par les Américains jusqu’à devenir un terme générique pour ce style de cuiseur en céramique. Les cuiseurs Kamado sont extrêmement polyvalents. Ils peuvent non seulement être utilisés comme gril ou fumoir, mais également pour cuire sans effort les pizzas, le pain, les tartes et les cookies. Grâce à leurs excellentes propriétés de rétention thermique, il est possible d’obtenir et de maintenir des températures élevées, avec un contrôle précis du débit d’air, par le biais des évents inférieurs et supérieurs. Les températures élevées sont idéales pour la cuisson rapide des hamburgers et des saucisses, tandis que les températures basses permettent une cuisson lente parfaitement adaptée aux morceaux de viande plus volumineux. Par ailleurs, il est possible d’ajouter quelques copeaux de bois au charbon ou d’associer différents types de copeaux de bois pour rendre vos viandes encore plus savoureuses. AVERTISSEMENTS - DANGER ! Ne retirez pas le joint en feutre gris fixé sur le bord du cadre du couvercle. Ce joint en feutre assure l’étanchéité et ne permet aucune entrée d’air, ce qui pourrait perturber la circulation à l’intérieur du gril Kamado. Veillez à lubrifier régulièrement la boulonnerie et les charnières des bandes métalliques avec de l’huile d’usinage fluide (ou WD40). Il convient de contrôler régulièrement le serrage des boulons et de les resserrer le cas échéant. • • • • • • Ce produit est conçu POUR UNE UTILISATION EN EXTÉRIEUR UNIQUEMENT. NE JAMAIS laisser un feu sans surveillance. DANGER d’intoxication au monoxyde de carbone. NE JAMAIS allumer ce cuiseur, ou encore le laisser se consumer ou refroidir, dans des espaces confinés. NE PAS surcharger le cuiseur en combustible. RISQUE D’INCENDIE : des braises peuvent jaillir du cuiseur pendant l’utilisation. DANGER : NE PAS utiliser d’essence, de white-spirit, d’essence à briquet, d’alcool ou d’autres substances chimiques similaires pour allumer ou rallumer ce cuiseur. Utilisez uniquement des allume-feu conformes à la 11 FR, CH • • • • • • • • • • • norme EN1860-3 ! Il est vivement recommandé d’utiliser des briquettes ou morceaux de charbon de bois comme combustibles pour votre cuiseur Kamado. Ces combustibles brûlent plus longtemps et produisent moins de cendres à même d’entraver la circulation de l’air. IMPORTANT : Lors de l’ouverture du couvercle à des températures élevées, il est essentiel de ne soulever le couvercle que très légèrement, ce qui permet à l’air de pénétrer lentement et en toute sécurité, empêchant ainsi tout refoulement ou toute flambée soudaine susceptible de provoquer des brûlures. Suivre toujours les INFORMATIONS RELATIVES À LA CUISSON DES ALIMENTS de la page 13 de cette notice d’emploi. NE PAS utiliser le cuiseur Kamado sur un plancher ou sur d’autres surfaces inflammables comme de l’herbe sèche, des copeaux de bois, des feuilles ou de l’écorce décorative. Veiller à ce que le cuiseur Kamado soit placé à au moins 2 mètres des éventuels objets inflammables. NE PAS se servir de ce cuiseur Kamado en tant que fourneau. NE PAS manipuler ou déplacer le cuiseur Kamado lorsqu’il est allumé et chaud. UTILISER TOUJOURS des gants antichaleur lors de la manipulation de plaques céramiques ou de surfaces de cuisson chaudes. Laisser le cuiseur refroidir complètement avant de le déplacer ou de le ranger. Tenir TOUJOURS les enfants et les animaux à une distance de sécurité du four lors de l’utilisation. Inspecter toujours l’appareil avant de l’utiliser, vérifier notamment l’usure des pièces, vérifier qu’elles ne sont pas endommagées, et les remplacer le cas échéant. ENTRETIEN DU CUISEUR KAMADO • • • • • • • • Pour allumer le foyer, placer du papier journal enroulé et quelques cubes d’allume-feu solides sur la plaque à charbon de bois (7) suitée à la base du cuiseur Kamado. Placer ensuite 2 ou 3 poignées de charbon de bois au-dessus du papier journal. NE PAS utiliser d’essence, de white-spirit, d’essence à briquet, d’alcool ou d’autres substances chimiques similaires pour allumer ou rallumer ce cuiseur. Ouvrir l’évent inférieur et allumer le papier journal en utilisant un briquet à long bec ou des allumettes de sûreté. NE PAS surcharger l’appareil en combustible, un foyer trop intense pourrait endommager le cuiseur Kamado. Attendre que tout le combustible soit épuisé et que le feu s’éteigne naturellement. Lorsque les premières flambées sont trop fortes, le joint d’étanchéité en feutre peut être endommagé avant même d’arriver à maturation. À l’issue de la première utilisation, vérifier que toutes les fixations sont bien serrées. La bande en métal rac cordant le couvercle à la base se dilatera sous l’effet de la chaleur et pourrait se desserrer. Il vous est recommandé de vérifier et, le cas échéant, de resserrer la bande à l’aide d’une clé. Votre cuiseur Kamado est à présent prêt à l’emploi. EXTINCTION • • Pour éteindre l’appareil, cesser d’ajouter du combustible et fermer les évents et le couvercle afin de permettre au feu de s’éteindre naturellement. NE PAS utiliser d’eau pour éteindre les braises de charbon, cela pourrait endommager le cuiseur céramique Kamado. RANGEMENT • • • • • Lorsqu’il n’est pas utilisé, et s’il est remisé en extérieur, couvrir le cuiseur Kamado, à l’état totalement refroidi, au moyen d’une housse de protection antipluie. La grille de cuisson chromée n’est pas lavable au lave-vaisselle. Pour la nettoyer, utiliser un détergent doux et de l’eau chaude. Lors de l’utilisation du cuiseur Kamado, appuyer vers le bas sur les deux roues de verrouillage afin d’empêcher tout déplacement de l’appareil au cours de l’utilisation. Pour une protection complète et adéquate en hiver, il est recommandé de remiser le cuiseur Kamado sous une housse dans un garage ou un abri de jardin. Ranger l’appareil dans un endroit à l’abri du gel. 12 FR, CH NETTOYAGE • • • • Le cuiseur Kamado est autonettoyant. Le laisser chauffer jusqu’à 260 °C pendant 30 minutes afin qu’il brûle tous les résidus d’aliments et débris. NE PAS utiliser d’eau ou tout autre type de produit de nettoyage pour nettoyer l’intérieur du cuiseur Kamado. Les parois du cuiseur Kamado sont poreuses et absorberont tous les fluides utilisés, ce qui pourrait provoquer des craquements et fissures. Lorsqu’un excès de suie est constaté, utiliser une brosse métallique ou l’outil fourni afin de gratter les résidus de carbone avant l’utilisation successive. Pour nettoyer les différentes grilles de l’appareil une fois celui-ci totalement refroidi, utiliser un produit de net toyage non abrasif. Pour nettoyer la surface extérieure, attendre que le cuiseur Kamado soit totalement refroidi et utiliser un chif fon humidifié et un détergent doux. ENTRETIEN • Serrer les bandes et graisser la charnière deux fois par an, voire plus si nécessaire. INFORMATIONS SUR L’UTILISATION, L’ALLUMAGE ET LA PRÉVENTION • • • • • • • • • Veiller à ce que le cuiseur Kamado soit positionné sur une surface permanente, plane, mise à niveau, résistante à la chaleur et non inflammable, à distance d’objets inflammables. Veiller à ce que le cuiseur Kamado présente au moins un dégagement de deux mètres en hauteur, et un dégagement de deux mètres relativement à d’autres éléments environnants. Pour allumer le foyer, placer du papier journal enroulé et quelques cubes d’allume-feu solides sur la plaque à charbon de bois (7) suitée à la base du cuiseur Kamado. Placer ensuite 2 ou 3 poignées de charbon de bois au-dessus du papier journal. NE PAS utiliser d’essence, de white-spirit, d’essence à briquet, d’alcool ou d’autres substances chimiques similaires pour allumer ou rallumer ce cuiseur. Ouvrir l’évent inférieur et allumer le papier journal en utilisant un briquet à long bec ou des allumettes de sûreté. Lorsque le papier est allumé, laissez l’évent inférieur et le couvercle ouverts pendant environ dix minutes afin d’obtenir une petite quantité de braises. Laisser le charbon de bois chauffer et le conserver ardent pendant au moins 30 minutes avant toute première cuisson dans le cuiseur Kamado. NE RIEN faire cuire avant que le combustible ne soit recouvert d’une fine couche de cendres. Il est recommandé de ne pas attiser et de ne pas retourner les braises de charbon. Ceci permet au charbon de bois de brûler le minerai de manière homogène et efficace. Lorsque le cuiseur est allumé, utiliser TOUJOURS des gants antichaleur pour manipuler les plaques céramiques ou les surfaces de cuisson chaudes. Consulter la section ci-dessous pour connaître les instructions de cuisson selon la température, et la durée. GUIDE DE CUISSON À BASSE TEMPÉRATURE • • • • • • • • Allumer le charbon de bois en suivant les instructions afférentes données précédemment. NE PAS remuer ou attiser les braises de charbon. Ouvrir l’évent inférieur totalement et laisser le couvercle ouvert pendant environ dix minutes afin d’obtenir une petite quantité de braises. Surveiller le cuiseur Kamado jusqu’à ce qu’il ait atteint la température souhaitée. Reportez-vous à la page 13 pour consulter le guide des températures de cuisson. Fermer complètement l’évent inférieur pour maintenir la température adaptée. Le cuiseur Kamado est maintenant prêt à être utilisé pour la cuisson. IMPORTANT : Lors de l’ouverture du couvercle à des températures élevées, il est essentiel de ne soulever le couvercle que très légèrement, ce qui permet à l’air de pénétrer lentement et en toute sécurité, empêchant ainsi tout refoulement ou toute flambée soudaine à même de provoquer des brûlures. Suivre toujours les INFORMATIONS RELATIVES À LA CUISSON DES ALIMENTS de la page 14 de cette notice d’emploi. UTILISER TOUJOURS des gants antichaleur lors de la manipulation de plaques céramiques ou de surfaces de cuisson chaudes. 13 FR, CH GUIDE DE FUMAISON • • • • • • • • • • Suivre les instructions ci-dessus, comme si vous lanciez une cuisson lente. Surveiller le cuiseur Kamado jusqu’à ce qu’il ait atteint la température souhaitée. Reportez-vous à la page 13 pour consulter le guide des températures de cuisson. Laisser l’évent inférieur légèrement ouvert. Fermer l’évent supérieur et continuer à vérifier la température pendant encore quelques minutes. À l’aide de gants antichaleur, éparpiller les copeaux de bois en formant un cercle au-dessus des braises de charbon de bois. Le cuiseur Kamado est maintenant prêt à être utilisé pour la fumaison. ASTUCE : Tremper les copeaux de bois ou les planches de cuisson dans l’eau pendant 15 minutes pour pro longer la fumaison. IMPORTANT : Lors de l’ouverture du couvercle à des températures élevées, il est essentiel de ne soulever le couvercle que très légèrement, ce qui permet à l’air de pénétrer lentement et en toute sécurité, empêchant ainsi tout refoulement ou toute flambée soudaine à même de provoquer des brûlures. Suivez toujours les INFORMATIONS RELATIVES À LA CUISSON DES ALIMENTS de la page 14 de cette notice d’emploi. UTILISER TOUJOURS des gants antichaleur lors de la manipulation de plaques céramiques ou de surfaces de cuisson chaudes. GUIDE DE CUISSON À HAUTE TEMPÉRATURE • • • • • • • • Allumer le charbon de bois en suivant les instructions données en page 12. Fermer le couvercle et ouvrir complètement les évents supérieurs et inférieurs. Surveiller le cuiseur Kamado jusqu’à ce qu’il ait atteint la température souhaitée. Reportez-vous à la page 13 pour consulter le guide des températures de cuisson. Fermer l’évent supérieur à mi-hauteur et continuer à vérifier la température pendant encore quelques minutes. Le cuiseur Kamado est maintenant prêt à être utilisé pour la cuisson. IMPORTANT : Lors de l’ouverture du couvercle à des températures élevées, il est essentiel de ne soulever le couvercle que très légèrement, ce qui permet à l’air de pénétrer lentement et en toute sécurité, empêchant ainsi tout refoulement ou toute flambée soudaine à même de provoquer des brûlures. Suivre toujours les INFORMATIONS RELATIVES À LA CUISSON DES ALIMENTS de la page 13 de cette notice d’emploi. UTILISER TOUJOURS des gants antichaleur lors de la manipulation de plaques céramiques ou de surfaces de cuisson chaudes. INFORMATIONS RELATIVES À LA CUISSON DES ALIMENTS • • • • • • • • • • • Veuillez lire et suivre les conseils ci-dessous pour la cuisson des aliments dans le cuiseur Kamado. Se laver toujours les mains avant et après avoir manipulé de la viande crue, et avant de manger. Conserver toujours la viande crue séparément des viandes cuisinées et autres aliments. Avant la cuisson, veiller à ce que les surfaces du grill et les outils soient propres et exempts de résidus alimentaires. NE PAS utiliser les mêmes ustensiles pour manipuler les aliments cuits et les aliments crus. Veiller à ce que les viandes soient bien cuites avant de manger. ATTENTION : L’ingestion de viandes crues ou de viandes en sous-cuisson peut engendrer un empoisonnement alimentaire (par des souches de bactéries, par exemple Escherichia coli). Pour réduire le risque de sous-cuisson de la viande, couper la pièce de viande à cœur afin de vérifier qu’elle est bien cuite à l’intérieur. ATTENTION : Si la viande a été cuite suffisamment, le jus de la viande doit être clair et il ne doit y avoir aucune trace de jus rose/rouge ou coloration de la viande. Une précuisson des gros morceaux de viande est recommandée avant toute cuisson sur le grill. Après une cuisson dans le cuiseur Kamado, toujours nettoyer les surfaces de cuisson du grill et les ustensiles de cuisine. AJOUT DE COMBUSTIBLE • Lorsque les évents sont fermés, le cuiseur Kamado conserve une température élevée pendant plusieurs heures. Pour un temps de cuisson plus long (pour griller un rôti ou effectuer une fumaison lente par exemple), 14 FR, CH il peut être nécessaire d’ajouter du charbon de bois. Dans ce cas, il suffit d’ajouter du charbon de bois et de continuer comme indiqué précédemment. REMPLACEMENT DU FEUTRE DU GRIL KAMADO En fonction de la fréquence d’utilisation du gril Kamado, il est recommandé de remplacer de temps en temps le feutre du couvercle et la base du gril. Ceci permettra d’empêcher les entrées d’air précitées. Procédez minutieusement de la manière suivante : Matériel nécessaire : – Feutre autocollant – Clé plate – Grattoir à peinture et / ou lame Stanley – Éponge métallique ou toile abrasive – Acétone – Ruban adhésif de masquage 1. 2. 3. 4. 5. 6. Retirez l’évent réglable ou le capuchon en céramique. Dévissez les écrous de la bande de tension à l’aide de la clé plate, puis soulevez précautionneusement le couvercle et déposez-le à l’envers sur une surface protégée. Veillez à ce que le couvercle ne puisse tomber ! Desserrez la bande de tension inférieure tout en laissant la base en céramique dans son logement ou en la posant sur la table. Retirez au maximum l’ancien feutre à l’aide d’une lame Stanley et / ou un grattoir à peinture. Éliminez les restes de feutre et de colle avec une éponge métallique ou de la toile abrasive imbibée d’acétone. Attendez au moins une heure pour permettre à l’acétone de s’évaporer. Collez soigneusement le nouveau feutre (autocollant) sur le bord de la base et du couvercle. Veillez à ce que les jointures ne se trouvent pas au même endroit et laissez dépasser un peu de feutre à l’extérieur plutôt qu’à l’intérieur (pour empêcher sa combustion lors de la mise en service). Lors de l’encollage, laissez un peu de jeu au feutre (sans le tendre à l’excès). Il est en effet possible que le feutre se rétracte quelque peu au contact de la chaleur. Coupez le feutre proprement au niveau des jointures. Si vous utilisez de la colle pour fixer le feutre et non pas du feutre autocollant, vous devez procéder de la manière suivante : Collez du ruban adhésif de masquage directement sous le bord de la face extérieure du couvercle et de la base pour éviter toute trace de colle sur le gril Kamado. Protégez la face intérieure avec un morceau de carton et appliquez de la colle sur les bords. Laissez sécher la colle suivant les indications mentionnées sur l’emballage et appliquez ensuite le feutre sur les bords. Permettez à la colle de bien durcir. Remontez le gril Kamado. Maintenez la bande de tension autour de la base, placez les écrous et resserrezles sans forcer. Déposez précautionneusement le couvercle dans la bande de tension supérieure, placez les écrous et resserrez-les sans forcer. Assurez-vous que le couvercle et les bandes de tension sont bien droits avant de resserrer solidement tous les écrous. CONDITIONS ET DISPOSITIONS DE LA GARANTIE LIMITÉE DU GRIL PATTON KAMADO Le foyer en céramique de tout gril Patton Kamado est couvert par une garantie limitée sur les matériaux et la fabrication de tous les éléments en céramique (le dôme, le cadre, la cheminée et sa vanne, la braisière et l’anneau de feu). La présente garantie reste en vigueur tant que l’acheteur initial reste le propriétaire du gril Patton Kamado ou de la pièce couverte. Le fabricant offre une garantie limitée de deux (2) ans à l’acheteur initial du gril Patton Kamado. Les éléments en céramique ne sont pas couverts contre les brisures consécutives à une chute ou à un mauvais usage. Cependant, le fabricant ne donne qu’une garantie limitée d’un (1) an à l’acheteur initial du gril Patton Kamado sur les pièces en métal, en acier inoxydable et en fonte (les bandes métalliques, le mécanisme à charnière, le couvercle métallique à double fonction, la grille, la braisière et la vanne de réglage). Patton met tout en œuvre pour n’utiliser que des matériaux résistant à la corrosion et des peintures laquées résistant à des températures élevées sur les surfaces métalliques. Il arrive néanmoins que des matériaux métalliques et des couches protectrices soient détériorés par des rayures à la surface ou suite à une exposition à des substances et des conditions sur lesquelles Patton n’a aucun contrôle. Le chlore, les fumées industrielles, les produits chimiques, les engrais chimiques, l’humidité extrême, les pesticides pour la pelouse et le sel ne sont que quelques-unes des substances pouvant ronger la peinture laquée et la finition des couches métalliques. C’est la raison pour laquelle la garantie sur les pièces métalliques, en acier inoxydable et en fonte NE COUVRE PAS LA ROUILLE, L’OXYDATION, LA DÉCOLORATION et / ou toute autre DÉFECTUOSITÉ, à moins que 15 FR, CH celles-ci n’entraînent la perte de l’intégrité structurelle ou tout vice desdites pièces du gril Patton Kamado. En période hivernale, le gril doit être remisé à l’intérieur. L’aspect craquelé de la céramique est une réaction normale du processus de production. Le fabricant offre à l’acheteur initial une garantie limitée d’un (1) an sur les éléments en bois, tels que les tablettes latérales en bambou. Les éléments en bois ne sont pas couverts contre l’altération ni les fissures normales, à moins d’une perte de l’intégrité structurelle. Le thermomètre est couvert par une garantie limitée d’un (1) an du fabricant. Les présentes garanties reposent sur l’hypothèse d’une utilisation domestique et d’un entretien normaux et raisonnables du gril Patton Kamado. L’utilisation commerciale et toute autre application de même nature sont exclues de la présente garantie. La présente garantie n’est applicable à aucun dommage ni aucune cassure collatéral ou imprévisible, ni à aucun dommage occasionné dans les situations suivantes : son transport, toute chute, un montage erroné, tout support inapproprié, toute tentative d’installation du gril Patton Kamado sur une base autre qu’une surface solide et ininflammable sous le piètement, toute utilisation commerciale, toute modification, tout changement, toute négligence, tout mauvais usage, tout entretien inadéquat, tout danger sur la chaussée, toute usure normale et raisonnable, et / ou toute catastrophe naturelle. La présente garantie n’est pas davantage applicable aux rayures, bosses, éclats et craquelures ni à l’apparition de petites fissures esthétiques dans la couche d’émail extérieure n’affectant en rien le fonctionnement du gril Patton Kamado. Toutes les modifications ou altérations non autorisées apportées au gril Patton Kamado rendent la présente garantie caduque. Elles comprennent notamment le perçage de trous ou le bricolage de pièces, l’utilisation de pièces dans le gril Patton Kamado autres que celles d’origine ou l’utilisation de pièces internes à d’autres fins que celles visées par le fabricant. Toute modification ou altération de pièces internes, telles que la braisière ou l’anneau de feu, annule la présente garantie et Patton décline expressément toute responsabilité pour tout dommage direct, indirect, collatéral ou consécutif pouvant en découler. Le déversement de tout liquide allume-feu ou de tout autre mélange inflammable dans le gril Patton Kamado rend la garantie caduque. Il s’agit là d’une pratique dangereuse pouvant entraîner des dommages matériels et / ou corporels. POUR AUTANT QUE LA LOI EN VIGUEUR L’AUTORISE DANS LE SENS LE PLUS LARGE, TOUTE GARANTIE LÉGALE, EXPRESSE OU TACITE, Y COMPRIS LA GARANTIE CLASSIQUE DE QUALITÉ MARCHANDE ET D’ADÉQUATION À UN USAGE PARTICULIER, EST LIMITÉE AU CADRE DE LA PRÉSENTE GARANTIE. TOUTE RESPONSABILITÉ POUR TOUT DOMMAGE COLLATÉRAL, SPÉCIAL ET CONSÉCUTIF EST EXCLUE. GUIDE DES TEMPÉRATURES DE CUISSON Cuisson lente / fumaison (110 °C - 135 °C) Poitrine de bœuf Effiloché de porc Poulet entier Côtes levées Rôtis Évent supérieur Évent inférieur Évent supérieur Évent inférieur 15-20 min. 15-30 min. 30-45 min. 1-1,5 h. 3-4 h. 2-4 h. 2-5 h. Saisir (260 °C - 370 °C) Steak Côtelettes de porc Hamburgers Saucisses Évent inférieur 2 h par livre. 2 h par livre. 3-4 h. 3-5 h. plus de 9 h. Griller / rôtir (160 °C - 180 °C) Poisson Filet de porc Morceaux de poulet Poulet entier Gigot d’agneau Dinde Jambon Évent supérieur 5-8 min. 6-10 min. 6-10 min. 6-10 min. Ouvrir 16 Fermé FR, CH EN OPTION Pince Cette pince vous permet de soulever la pierre à pizza ou les grilles de cuisson lorsqu’elles sont trop chaudes pour être manipulées. Outil de collecte des cendres Lorsque le cuiseur Kamado a brûlé tous les éléments combustibles et a refroidi, utiliser cet outil pour collecter les cendres dans la partie inférieure prévue à cet effet. 17 OPERATING AND ASSEMBLY INSTRUCTIONS Kamado 13” GB, IE Tools required (NOT included) User Instructions - Please keep for future reference IMPORTANT – Carefully remove any packaging before use, but retain the safety instructions. These instructions form part of the product. Please take note of all of the safety warnings listed in these instructions. Please read these instructions in their entirety and retain them for future reference. These instructions should be stored with the product. This product is for domestic use ONLY and should not be used commercially or for contract purposes. THIS PRODUCT SHOULD BE PUT INSIDE DURING THE WINTER. THE LOOK OF CRACKLE OF THE CERAMIC IS NORMAL. Care and safe use guidelines ABOUT YOUR KAMADO Dating back 4000 years ago archaeologists have discovered large clay vessles thought to be early incarnations of the Kamado ceramic cooker. Since then it has evolved in many ways; removable lid, added draft door for better heat control and the switch from wood to charcoal as the primary fuel. In Japan the Mushikamado was a round clay pot with a removable domed lid designed for steaming rice. The name ‘Kamado’ is, in fact, the Japanese word for ’stove’ or ‘cooking range’. This name was adopted by the Americans and has now become a generic term for this style of ceramic cooker. Kamado cookers are extremely versatile. Not only can they be used for grilling or smoking but also pizzas, bread, pies and cookies can be baked effortlessly inside them. Due to their excellent heat retention properties, high temperatures can be achieved and maintained by precise contol of airflow via the top and bottom vents. High temperatures are ideal for fast cooking burgers and sausages whilst low heats will cook larger joints over a longer period of time. Why not try adding some wood chips to the charcoal or try combining different flavour wood chips to make your meats even more flavoursome. WARNINGS – CAUTION! Do not remove the grey felt packing from the base or the lid. This grey packing is used for sealing purposes and ensures that “false air” does not occur, which could interfere with the air circulation inside the Kamado Grill. Make sure that you regularly lubricate the bolts and hinges on the metal bands with a light machine oil, or WD40. The bolts must be checked regularly and tightened when necessary. • • • • • • • • This product is intended FOR OUTDOOR USE ONLY. NEVER leave a burning fire unattended. DANGER of carbon monoxide poisoning – NEVER light this product or let it smoulder or cool down in confined spaces. DO NOT overload the unit with fuel. FIRE HAZARD – Hot embers may emit while in use. CAUTION - DO NOT use petrol, white spirit, lighter fluid, alcohol or other similar chemicals for lighting or relighting. Use only firelighters complying to EN1860-3! It is highly recommened that you use lump charcoal in your Kamado. It burns for longer and produces less ash which can restrict the airflow. IMPORTANT: When opening the lid at high temperatures it is essential to lift the lid only slightly, allowing air to enter slowly and safely, preventing any backdraft or flare-ups that may cause injury. 19 GB, IE • • • • • • • • • ALWAYS follow the FOOD COOKING INFORMATION stated on page 21 of this instruction manual. DO NOT use the Kamado on decking or any other flammable surfaces such as dry grass, wood chips, leaves or decorative bark. Ensure that the Kamado is positioned at least 2 metres away from flammable items. DO NOT use this Kamado as a furnace. DO NOT handle or move the Kamado whilst alight as it will be hot. ALWAYS USE heat resistant gloves when handling hot ceramics or cooking surfaces. Allow the unit to cool down completely before moving or storing. ALWAYS keep children and pets at a safe distance from the oven when in use. Always inspect the unit prior to use for fatigue and damage and replace as and when necessary. CURING THE KAMADO • • • • • • • • To start a fire place rolled up newspaper with some lighter cubes or solid firelighters on the charcoal plate (7) in the base of the Kamado. Then place 2 or 3 handfuls of lump charcoal over the top of the newspaper. DO NOT use petrol, white spirit, lighter fluid, alcohol or other similar chemicals for lighting or relighting. Open the bottom vent and light the newpaper using a long nosed lighter or safety matches. DO NOT overload the unit with fuel – if the fire is too intense this could damage the Kamado. Leave until all the fuel is used and extinguished. If the first burns are too high it could damage the felt gasket seal before it has had the chance to mature properly. After first use inspect all fasteners for tightness. The metal band connecting your lid to the base will expand from the heat and this could become loose. It is recommended you check and if neccessary tighten the band with a spanner. You can now use your Kamado as normal. EXTINGUISHING • • To extinguish unit – stop adding fuel and close all the vents and the lid to allow the fire to die natuarally. DO NOT use water to extinguish the charcoals as this could damage the ceramic Kamado. STORAGE • • • • When not in use, and if stored outside, cover the Kamado once completely cooled with suitable rain cover The chrome plated cooking grill is NOT dishwasher safe; use a mild detergent with warm water. When using the Kamado push down on both of the locking wheels to stop the unit moving about during use. It is recommended the Kamado be stored under cover in a garage or shed over winter for complete protection. CLEANING • • • • The Kamado is self cleaning. Heat it up to 260ºC for 30 minutes and it will scorch off all of the food and debris. DO NOT use water or any other types of cleaning product to clean the inside of your Kamado. The walls are porous and will absorb any fluids used, this could cause the Kamado to crack. If the soot becomes excessive then use a wire brush or the supplied tool to scrape off the carbon remnants before the next use. To clean the grills and grates use a non-abrasive cleaner once the unit has fully cooled. To clean the outer surface wait until the Kamado is cool and use a damp cloth with a mild detergent. MAINTENANCE • Tighten the bands and oil the hinge 2 times a year or more if needed. LIGHTING, USAGE AND CARE INFORMATION • • • Ensure the Kamado is positioned on a permanent, flat, level, heat resistant non-flammable surface away from flammable items. Ensure the Kamado has a minimum of 2m overhead clearance and has a minimum 2m clearance from other surrounding items. To start a fire place rolled up newspaper with some lighter cubes or solid firelighters on the charcoal plate (7) in the base of the Kamado. Then place 2 or 3 handfuls of lump charcoal over the top of the newspaper. 20 GB, IE • • • • • • DO NOT use petrol, white spirit, lighter fluid, alcohol or other similar chemicals for lighting or relighting. Open the bottom vent and light the newpaper using a long nosed lihter or safety matches. Once it has caught, leave the bottom vent and lid open for about 10 minutes to build a small bed of hot embers. Allow the charcoal to heat up and be kept red hot for at least 30 minutes prior to the first cooking on the Kamado. DO NOT cook before the fuel has a coating of ash. It is recommended you don’t stoke or turn the coals once they are alight. This allows the charcoals to burn ore uniformly and efficient. Once alight ONLY use heat resistant gloves when handling hot ceramics or cooking surfaces. See below for cooking instuctions depending on temperature and duration. LOW TEMPERATURE COOKING GUIDE • • • • • • • • Light the lump charcoal according to the the instructions above. DO NOT move or stoke the coals once lit. Open the bottom vent fully and leave the lid open for about 10 minutes to build a small bed of hot embers. Monitor the Kamado until it has risen to the desired temperature. See page 21 for a temperature cooking guide. Fully close the bottom vent to maintain the temperature. You are now ready to use the Kamado for cooking on. IMPORTANT: When opening the lid at high temperatures it is essential to lift the lid only slightly, allowing air to enter slowly and safely, preventing any backdraft or flare-ups that may cause injury. ALWAYS follow the FOOD COOKING INFORMATION stated on page 21 of this instruction manual. ALWAYS use heat resistant gloves when handling hot ceramics or cooking surfaces. SMOKING GUIDE • • • • • • • • • • Follow the instructions above as if you were starting a slow cook. Monitor the Kamado until it has risen to the desired temperature. See page 21 for a temperature cooking guide. Leave the bottom vent slightly open. Close the top vent and continue to check the tempertaute for a few more minutes. Using heat resistant gloves sprinkle the wood chips in a circle over the hot charcoal. You are now ready to use the Kamado to smoke on. TIP: Soak your wood chips or cooking planks in water for 15 minutes to prolong the smoking process. IMPORTANT: When opening the lid at high temperatures it is essential to lift the lid only slightly, allowing air to enter slowly and safely, preventing any backdraft or flare-ups that may cause injury. ALWAYS follow the FOOD COOKING INFORMATION stated on page 21 of this instruction manual. ALWAYS use heat resistant gloves when handling hot ceramics or cooking surfaces. HIGH TEMPERATURE COOKING GUIDE • • • • • • • • Light the lump charcoal according to the the instructions on page 20. Close the lid and fully open the top and bottom vents. Monitor the Kamado until it has risen to the desired temperature. See page 21 for a temperature cooking guide. Close the top vent half way and continue to check the temperature for a few more minutes. You are now ready to use the Kamado for cooking on. IMPORTANT: When opening the lid at high temperatures it is essential to lift the lid only slightly, allowing air to enter slowly and safely, preventing any backdraft or flare-ups that may cause injury. ALWAYS follow the FOOD COOKING INFORMATION stated on page 21 of this instruction manual. ALWAYS use heat resistant gloves when handling hot ceramics or cooking surfaces. FOOD COOKING INFORMATION • • • • • • • • • Please read and follow this advice when cooking on your Kamado. Always wash your hands before and after handling uncooked meat and before eating. Always keep raw meat away from cooked meat and other foods. Before cooking ensure grill surfaces and tools are clean and free of old food residues. DO NOT use the same utensils to handle cooked and uncooked foods. Ensure all meat is cooked thoroughly before eating. CAUTION – eating raw or under cooked meat can cause food poisoning (e.g. bacteria strains such as E.coli). To reduce the risk of under cooked meat cut open to ensure it is cooked all the way through internally. CAUTION – if the meat has been cooked sufficiently the meat juices should be clear and there should be no 21 GB, IE • • traces of pink/red juice or meat colouring. Pre-cooking larger pieces of meat and joints is recommended before finally cooking on your grill. After cooking on your Kamado always clean the grill cooking surfaces and utensils. REFUELING • With the vents closed, the Kamado stay at a high temperature for several hours. If you require a longer cooking time (e.g when roasting a whole joint or slow smoking), it may be necessary to add more charcoal. Just add some additional charcoal and continue as above. REPLACING THE FELT PACKING ON THE KAMADO GRILL Depending on how you use the Kamado Grill, the felt packing around the lid and the base should be replaced from time to time. This prevents “false air” from occurring. Carefully carry out the following: Requirements: - self adhesive felt packing - open-ended spanner - scraper and/or Stanley Knife - pot scourer of abrasive pad - acetone - masking tape 1. 2. 3. 4. 5. 6. Remove the adjustable cut-off or ceramic lid cap. Unscrew the nuts on the top tensioning band with the spanner, then next, carefully lift off the lid and lay it upside down onto a protective layer on the floor. Make sure that you do not drop the lid! Unscrew the bottom tensioning band and leave the ceramic base standing in the housing or on the table. Using the Stanley Knife or scraper, cut or scrape off as much of the existing felt packing as possible. Remove the remaining bits of felt and glue with the acetone an the action of an abrasive pad or pot scourer Now you must wait for about one hour until the acetone has evaporated. Carefully stick the new (self adhesive) felt packing to the edge of the base and the lid. Make sure that the seams are not at exactly the same place again and allow the felt to overlap slightly on the outside, which is better than on the inside (because it will burn when the grill is lit once again). Allow a little play when sticking down the felt packing (therefore not too tight or stretched), so when warming up the felt packing is able to shrink a little. Neatly cut the felt packing at the seam. It you are using adhesive in place of self adhesive tape, please do as follows: Apply the masking tape immediately under the edge of the base and the outside of the lid so that the adhesive does not stick to the Kamado Grill itself. Protect the inside of the grill with a piece of cardboard and then spray the edges with the adhesive. Follow the instruction for the adhesive and allow it to dry and then stick the felt packing onto the edges. Allow the glue to completely harden. Reassemble the Kamado Grill. Place the tensioning band against the base and tighten the nuts. Carefully put the lid into the top tensioning band and tighten the nuts. Check whether the lid and the tensioning bands are straight and then give the nuts a final tighten. TERMS & CONDITIONS OF THE LIMITED GUARANTEE FOR THE PATTON KAMADO GRILL Every Patton Kamado Grill ceramic cooker has a limited guarantee covering the materials and construction of all tyhe ceramic components (e.g. canopy, frame, flu with cut-off, fire basket and inner ring). This guarantee is effective for as long as the original purchaser remains in possession of the Patton Kamado Grill or the covered component. The Patton Kamado Grill has a limited manufacturer’s guarantee of 2 years for the original purchaser. The ceramic components are not covered for breakages caused by dropping or misuse. The components made from metal, stainless steel or cast iron on the Patton Kamado Grill (e.g. metal bands, hinging mechanism, metal covers with double function, grill, fire basket and regulating slide) have a limited manufacturer’s guarantee of 1 year for the original purchaser. Patton endeavours to use only rustproof materials and paint that can resist high temperatures and is used on the metal surfaces. However, metal materials and protective finishing coats can be affected by surface cracking or exposure to various substances and circumstances over which Patton has no control. Bleach, industrial vapours, chemicals, artificial fertiliser, extreme humidity, pesticides for the lawn and salt are but a few of the substances that can adversely affect paint and finishing materials on metal coverings. For this reason, the guarantee DOES NOT COVER RUST, OXIDISATION, FADING or any other DEFECTS to the metal, stainless steel and cast iron components, unless this also leads to the loss of the structural integrity or defects to the components on the Patton 22 GB, IE Kamado Grill. This product must be kept indoors during the winter period. The crackleware finish of the ceramics is part of the production process. Wooden articles, such as bamboo side tables, have a limited manufacturer’s guarantee of 1 year for the original purchaser. Wooden products are not covered against normal weathering or cracking unless this affects the structural integrity. The thermometer also has a limited manufacturer’s guarantee of 1 year. These guaranteed are based or the normal, reasonable domestic use and maintenance of the Patton Kamado Grill. Commercial use and similar applications are not covered by this guarantee. The guarantee does not apply to incidental or unforeseen damage or breakage, or damage caused by the following: transportation, dropping, incorrect assembly, incorrect support, attempts to support the Patton Kamado Grill using anything other than having a solid, inflammable base underneath, commercial use, making modifications or changes, negligence, incorrect maintenance, hazards on pathways/ roads, normal wear & tear or natural disasters. The guarantee does not cover scratches, dents, splinters, hair cracks or small cosmetic cracks appearing on the outer glazing that do not influence the normal operation of the Patton Kamado Grill. Any modifications or changes made to the Patton Kamado Grill without receiving prior written consent from the manufacturer, render the guarantee null and void. This includes boring holes or altering components, or using spare parts not authorised for use on the Patton Kamado Grill, or using internal components in manner for which they were not designed by the manufacturer. Modifications or changes to internal components, such as the fire basket and the inner ring will render the guarantee null and void and Patton expressly rejects any liability for direct, indirect, incidental or consequential damages or losses that may result. Using fire lighter fluid or any other type of flammable mixture in a Patton Kamado Grill renders the guarantee null and void. This is a dangerous practice and can lead to damage and physical injury. UP TO THE MAXIMUM EXTENT PERMITTED BY LAW, ALL STATUTORY PROVISIONS, EXPRESSLY OR IMPLIED GUARANTEES, INCLUDING IMPLIED GUARANTEES REGARDING THE SALEABILITY AND SUITABILITY FOR A SPECIFIC PURPOSE, WILL NOT EXCEED THIS GUARANTEE. LIABILITY FOR INCIDENTAL, SPECIFIC AND CONSEQUENTIAL DAMAGE IS EXCLUDED. COOKING TEMPERATURE GUIDE Slow cook / Smoke (110ºC-135ºC) Beef Brisket Pulled Pork Whole Chicken Ribs Roasts Top vent Bottom vent Top vent Bottom vent 15-20 Min. 15-30 Min. 30-45 Min. 1-1.5 Hrs. 3-4 Hrs. 2-4 Hrs. 2-5 Hrs. Sear (260ºC-370ºC) Steak Pork Chops Burgers Sausages Bottom vent 2 Hrs per lb. 2 Hrs per lb. 3 - 4 Hrs. 3 - 5 Hrs. 9+ Hrs. Grill / Roast (160ºC-180ºC) Fish Pork Tenderloin Chicken Pieces Whole Chicken Leg of lamb Turkey Ham Top vent 5-8 Min. 6-10 Min. 6-10 Min. 6-10 Min. Open 23 Closed GB, IE OPTIONAL Clip Tool Allows you to lift the pizza stone or cooking grills when they are too hot to handle. Ash Tool Once your Kamado has burnt all its fuel and cooled down use this tool for removing the ash from the bottom. 24 BEDIENUNGS-UND MONTAGEANLEITUNG Kamado 13” DE, CH, AT Benötigte Werkzeuge (NICHT enthalten) Bedienungsanleitung - Für zukünftige Zwecke aufbewahren WICHTIG – Entfernen Sie vor der Verwendung sorgfältig sämtliche Verpackungen, heben Sie jedoch die Sicherheitshinweise auf. Diese Hinweise gehören zum Produkt. Bitte beachten Sie alle in dieser Gebrauchsanweisung aufgeführten Sicherheitshinweise. Bitte lesen Sie diese Gebrauchsanweisung vollständig durch und heben Sie sie für zukünftige Zwecke auf. Diese Gebrauchsanweisung sollte zusammen mit dem Produkt aufbewahrt werden. Das Produkt ist NUR für den Hausgebrauch bestimmt und darf nicht kommerziell oder zu vertraglichen Zwecken verwendet werden. DIESES PRODUKT MUSS IM WINTER IM INNENBEREICH AUFBEWAHRT WERDEN. DAS SCHRUNDIGE AUSSEHEN DER KERAMIK IST NORMAL. Hinweise zur Pflege und sicheren Bedienung INFORMATIONEN ÜBER IHREN KAMADO Vor 4000 Jahren haben Archäologen große Tongefäße gefunden, die als frühe Formen des Kamado Keramikkochers angesehen werden. Seitdem hat er sich auf vielseitige Weise entwickelt: abnehmbarer Deckel, zusätzlicher Windschutz für eine bessere Wärmeregelung und der Wechsel von Holz zu Kohle als primären Brennstoff. In Japan war der Mushikamado ein runder Tontopf mit abnehmbarem, kuppelförmigem Deckel, mit dem Reis gedämpft wurde. Der Name „Kamado“ ist tatsächlich das japanische Wort für „Ofen“ oder „Herd“. Dieser Name wurde von den Amerikanern übernommen und ist nun der Oberbegriff für diese Art von Keramikkochern. Kamado-Kocher sind extrem vielseitig. Nicht nur können sie zum Grillen oder Räuchern verwendet werden, sondern auch um Pizzas, Brot, Kuchen und Kekse mühelos darin zu backen. Aufgrund seines hervorragenden Wärmeschutzes können hohe Temperaturen erreicht und durch eine präzise Luftstromkontrolle über die oberen und unteren Belüftungen aufrechterhalten werden. Hohe Temperaturen sind ideal für das schnelle Zubereiten von Burgern und Würstchen, während niedrige Temperaturen besser für das Braten größerer Braten über einen längeren Zeitraum geeignet sind. Warum geben Sie nicht einfach ein paar Holzschnitzel zur Kohle hinzu oder probieren unterschiedliche Sorgen Holzschnitzel aus, damit Ihr Fleisch noch aromatischer wird. WARNHINWEISE – ACHTUNG! Entfernen Sie nicht die graue Filzdichtung vom Rand des Untersatzes oder Deckels. Diese Filzdichtung sorgt nämlich für die Abdichtung und dafür, dass „falsche“ Luft, die die Zirkulation im Kamado beeinträchtigen könnte, keine Chance erhält. Sorgen Sie dafür, dass Sie die Schrauben und Scharniere der Metallreifen regelmäßig mit einem leichten Maschinenöl (oder WD40) einölen. Die Schrauben müssen regelmäßig kontrolliert und bei Bedarf nachgezogen werden. • • • • • • • Dieses Produkt darf NUR IM AUSSENBEREICH VERWENDET WERDEN. Lassen Sie ein brennendes Feuer NIEMALS unbeaufsichtigt. GEFAHR der Kohlenmonoxidvergiftung – Das Produkt NIEMALS in engen Räumen anzünden oder glühen oder abkühlen lassen. Das Gerät NICHT mit Brennstoff überfüllen. BRANDGEFAHR – Heiße Glut kann während der Verwendung ausströmen. ACHTUNG - KEIN Benzin, Testbenzin, Feuerzeugfüllmittel, Alkohol oder ähnliche Chemikalien zum Anzünden oder Neuanzünden verwenden. Verwenden Sie ausschließlich Feuerlöscher, die die Richtlinie EN1860-3 erfüllen! Es wird dringend empfohlen, für Ihren Kamado Grillkohle zu verwenden. Sie brennt länger und produziert 26 DE, CH, AT • • • • • • • • • • weniger Asche, die den Luftstrom blockieren könnte. WICHTIG: Wenn Sie den Deckel bei hohen Temperaturen öffnen, sollten Sie ihn nur leicht anheben, damit die Luft langsam und sicher einströmen kann und eine Windentwicklung oder ein Auflodern, das zu Verletzungen führen könnte, verhindert wird. Folgen Sie IMMER den HINWEISEN ZUR LEBENSMITTELZUBEREITUNG auf Seite 28 dieser Gebrauchsanweisung. Verwenden Sie den Kamado NICHT auf Terrassendielen oder anderen brennbaren Oberflächen wie trockenes Gras, Holzspänen, Blättern oder dekorativer Baumrinde. Achten Sie darauf, dass der Kamado mindestens 2 Meter entfernt von brennbaren Elementen steht. Verwenden Sie den Kamado NICHT als Ofen. Transportieren oder bewegen Sie den Kamado NICHT, nachdem Sie ihn angezündet haben, da er sehr heiß wird. Tragen Sie IMMER hitzebeständige Handschuhe, wenn Sie die heißen Keramik- oder Kochoberflächen berühren. Lassen Sie das Gerät vollständig abkühlen, bevor Sie es verschieben oder verstauen. Halten Sie Kinder und Tiere IMMER auf sicheren Abstand zu dem Kocher, wenn er in Verwendung ist. Inspizieren Sie das Gerät immer vor der Verwendung auf Verschleiß und Schäden und ersetzen Sie verschlissene oder beschädigte Teile bei Bedarf. HÄRTUNG DES KAMADO • • • • • • • • Um ein Feuer zu machen, legen Sie zusammengerollte Zeitung mit einigen Anzünderwürfeln oder festen Feueranzündern auf die Kohlenplatte (7) im Sockel des Kamado. Legen Sie dann 2 oder 3 Handvoll Grillkohle über das Zeitungspapier. KEIN Benzin, Testbenzin, Feuerzeugfüllmittel, Alkohol oder ähnliche Chemikalien zum Anzünden oder Neuanzünden verwenden. Öffnen Sie die untere Belüftungsklappe und zünden Sie das Zeitungspapier mit einem langen Feuerzeug oder mit Sicherheitsstreichhölzern an. Überfüllen Sie das Gerät NICHT mit Brennstoff – Wenn das Feuer zu stark ist, könnte dies den Kamado beschädigen. Warten Sie, bis der Brennstoff vollständig verbraucht und erloschen ist. Wenn die ersten Flammen zu hoch sind, könnte dies die Filzdichtung beschädigen, bevor sie richtig aushärten kann. Inspizieren Sie nach dem ersten Gebrauch alle Verbindungselemente auf Festigkeit. Das Metallband, das Ihren Deckel mit dem Sockels verbindet, dehnt sich bei Hitze aus und könnte sich dadurch lockern. Sie sollten das Band prüfen und bei Bedarf mit einem Spanner festziehen. Sie können Ihren Kamado nun ganz normal benutzen. LÖSCHEN • • Löschen des Geräts – Setzen Sie keinen weiteren Brennstoff zu und schließen Sie alle Belüftungsklappen und den Deckel, damit das Feuer von allein ausglühen kann. Verwenden Sie KEIN Wasser, um die Kohlen zu löschen, da dies die Keramik des Kamado beschädigen könnte. AUFBEWAHRUNG • • • • • Wenn Sie den Kamado nicht verwenden und im Außenbereich aufbewahren, decken Sie das komplett abgekühlte Gerät mit einem geeigneten Regenschutz ab. Das chrombeschichtete Kochgitter ist NICHT spülmaschinenfest; verwenden Sie ein mildes Reinigungsmittel mit warmem Wasser. Wenn Sie den Kamado benutzen, drücken Sie beide Radbremsen hinunter, damit sich das Gerät während des Gebrauchs nicht bewegen kann. Es wird empfohlen, den Kamado im Winter abgedeckt in einer Garage oder in einem Schuppen zu verstauen, damit er vollständig geschützt it. Bewahren Sie ihn an einem frostgeschützten Ort auf. REINIGUNG • Der Kamado reinigt sich selbst. Erhitzen Sie ihn 30 Minuten lang auf 260°C. Dabei werden alle 27 DE, CH, AT • • • Lebensmittelreste und Rückstände entfernt. Verwenden Sie KEIN Wasser oder andere Reinigungsprodukte, um das Innere Ihres Kamado zu reinigen. Die Wände sind porös und absorbieren alle verwendeten Flüssigkeiten. Dies könnte zu Rissen in Ihrem Kamado führen. Wenn sich zu viel Ruß angesammelt hat, verwenden Sie eine Drahtbürste oder das mitgelieferte Werkzeug, um die Kohlenrückstände vor der nächsten Verwendung zu entfernen. Um den Rost und die Gitter zu reinigen, verwenden Sie ein nicht scheuerndes Reinigungsmittel, nachdem sich das Gerät vollständig abgekühlt hat. Um die Außenflächen zu reinigen, warten Sie, bis sich der Kamada abgekühlt hat, und verwenden Sie ein feuchtes Tuch mit einem milden Reinigungsmittel. WARTUNG • Ziehen Sie zweimal im Jahr oder bei Bedarf öfter die Bänder fest und schmieren Sie das Gelenk. HINWEISE ZUM ANZÜNDEN, GEBRAUCH UND REINIGEN • • • • • • • • • Stellen Sie sicher, dass der Kamado fern von brennbaren Gegenständen auf einer festen, flachen, ebenen, hitzebeständigen, nicht brennbaren Oberfläche steht. Sorgen Sie dafür, dass über dem Kamado ein Abstand von mindestens 2 Metern vorhanden ist und dass sich alle umliegenden Gegenstände in einem Abstand von mindestens 2 Metern befinden. Um ein Feuer zu machen, legen Sie zusammengerollte Zeitung mit einigen Anzünderwürfeln oder festen Feueranzündern auf die Kohlenplatte (7) im Sockel des Kamado. Legen Sie dann 2 oder 3 Handvoll Grillkohle über das Zeitungspapier. KEIN Benzin, Testbenzin, Feuerzeugfüllmittel, Alkohol oder ähnliche Chemikalien zum Anzünden oder Neuanzünden verwenden. Öffnen Sie die untere Belüftungsklappe und zünden Sie das Zeitungspapier mit einem langen Feuerzeug oder mit Sicherheitsstreichhölzern an. Sobald das Feuer brennt, lassen Sie die untere Belüftungsklappe und den Deckel 10 Minuten lang offen, damit sich ein heißes Glutbett bilden kann. Lassen Sie die Kohlen mindestens 30 Minuten lang durchglühen, bevor Sie das erste Mal mit dem Kamado Lebensmittel zubereiten. Kochen Sie NICHT, bevor der Brennstoff mit Asche bedeckt ist. Sie dürfen die Kohlen, sobald sie entzündet nicht, nicht schüren oder drehen. So können die Kohlen einheitlich und effizient brennen. Tragen Sie nach dem Anzünden IMMER hitzebeständige Handschuhe, wenn Sie die heißen Keramik- oder Kochoberflächen berühren. Die Zubereitungshinweise abhängig von Temperatur und Dauer finden Sie im Folgenden. HINWEISE ZUM KOCHEN BEI NIEDRIGEN TEMPERATUREN • • • • • • • • Zünden Sie die Grillkohle gemäß den oben genannten Anweisungen an. Bewegen oder schüren Sie die Kohlen NICHT, sobald sie angezündet sind. Öffnen Sie die untere Belüftungsklappe vollständig und lassen Sie den Deckel ungefähr 10 Minuten lang geöffnet, damit sich ein heißes Glutbett bilden kann. Überwachen Sie den Kamado, bis er die gewünschte Temperatur erreicht hat. Siehe Seite 28 für Hinweise zu den Gartemperaturen. Schließen Sie die untere Belüftungsklappe, um die Temperatur aufrechtzuerhalten. Sie können nun mit dem Kamado kochen. WICHTIG: Wenn Sie den Deckel bei hohen Temperaturen öffnen, sollten Sie ihn nur leicht anheben, damit die Luft langsam und sicher einströmen kann und eine Windentwicklung oder ein Auflodern, das zu Verletzungen führen könnte, verhindert wird. Folgen Sie IMMER den HINWEISEN ZUR LEBENSMITTELZUBEREITUNG auf Seite 29 dieser Gebrauchsanweisung. Tragen Sie IMMER hitzebeständige Handschuhe, wenn Sie die heißen Keramik- oder Kochoberflächen berühren. HINWEISE ZUM RÄUCHERN • • • Folgen Sie den oben beschriebenen Anweisungen, als würden Sie langsam garen. Überwachen Sie den Kamado, bis er die gewünschte Temperatur erreicht hat. Siehe Seite 28 für Hinweise zu den Gartemperaturen. Lassen Sie die untere Belüftungsklappe leicht geöffnet. 28 DE, CH, AT • • • • • • • Schließen Sie die obere Belüftungsklappe und prüfen Sie einige Minuten lang weiterhin die Temperatur. Verstreuen Sie mit hitzebeständigen Handschuhen die Holzschnitzel kreisförmig über der heißen Kohle. Sie können nun mit dem Kamado räuchern. TIPP: Weichen Sie die Holzschnitzel oder Kochplanken 15 Minuten in Wasser ein, um den Räuchervorgang zu verlängern. WICHTIG: Wenn Sie den Deckel bei hohen Temperaturen öffnen, sollten Sie ihn nur leicht anheben, damit die Luft langsam und sicher einströmen kann und eine Windentwicklung oder ein Auflodern, das zu Verletzungen führen könnte, verhindert wird. Folgen Sie IMMER den HINWEISEN ZUR LEBENSMITTELZUBEREITUNG auf Seite 29 dieser Gebrauchsanweisung. Tragen Sie IMMER hitzebeständige Handschuhe, wenn Sie die heißen Keramik- oder Kochoberflächen berühren. HINWEISE ZUM KOCHEN BEI HOHEN TEMPERATUREN • • • • • • • • Zünden Sie die Grillkohle gemäß den Anweisungen auf Seite 27 an. Schließen Sie den Deckel und öffnen Sie die oberen und unteren Belüftungsklappen vollständig. Überwachen Sie den Kamado, bis er die gewünschte Temperatur erreicht hat. Siehe Seite 28 für Hinweise zu den Gartemperaturen. Schließen Sie die obere Belüftungsklappe halb und prüfen Sie einige Minuten lang weiterhin die Temperatur. Sie können nun mit dem Kamado kochen. WICHTIG: Wenn Sie den Deckel bei hohen Temperaturen öffnen, sollten Sie ihn nur leicht anheben, damit die Luft langsam und sicher einströmen kann und eine Windentwicklung oder ein Auflodern, das zu Verletzungen führen könnte, verhindert wird. Folgen Sie IMMER den HINWEISEN ZUR LEBENSMITTELZUBEREITUNG auf Seite 29 dieser Gebrauchsanweisung. Tragen Sie IMMER hitzebeständige Handschuhe, wenn Sie die heißen Keramik- oder Kochoberflächen berühren. HINWEISE ZUR LEBENSMITTELZUBEREITUNG • • • • • • • • • • • Bitte lesen und befolgen Sie diese Hinweise, wenn Sie mit Ihrem Kamado kochen. Waschen Sie stets Ihre Hände, bevor und nachdem Sie rohes Fleisch anfassen, und bevor Sie essen. Bewahren Sie rohes Fleisch immer getrennt von zubereitetem Fleisch und anderen Lebensmitteln auf. Stellen Sie vor dem Kochen sicher, dass die Grillflächen und Grillwerkzeuge sauber und frei von Lebensmittelresten sind. Verwenden Sie NICHT die gleichen Utensilien für gekochte und für rohe Lebensmittel. Braten Sie Fleisch immer gut durch, bevor Sie es essen. ACHTUNG – Das Essen von rohem oder nicht garem Fleisch kann zu einer Lebensmittelvergiftung führen (z. B. Bakterienstämme wie E.coli). Um das Risiko von nicht garem Fleisch zu reduzieren, schneiden Sie es auf, um sicherzustellen, dass es innen gut durchgebraten ist. ACHTUNG – Wenn das Fleisch ausreichend durchgebraten ist, sollte sein Saft klar sein und es dürfen keine Spuren von rosafarbenem/rotem Saft oder Verfärbungen vorhanden sein. Das Vorgaren von größeren Fleischstücken und Braten wird empfohlen, bevor Sie es auf dem Grill zu Ende braten. Nach dem Kochen auf Ihrem Kamado reinigen Sie stets die Kochflächen und Kochutensilien. AUFFÜLLEN • Wenn die Belüftungsklappen geschlossen sind, bleibt der Kamado mehrere Stunden lang sehr warm. Wenn Sie eine längere Garzeit benötigen (z. B. bei einem ganzen Braten oder beim langsamen Räuchern), müssen Sie ggf. mehr Kohle hinzufügen. Fügen Sie einfach weitere Kohle hinzu und fahren Sie wie oben fort. DEN FILZ AM KAMADO GRILL AUSTAUSCHEN Je nachdem, wie oft Sie Ihren Kamado Grill benutzen, müssen Sie den Filz am Deckel und der Basis des Kamado Grills austauschen. Hiermit verhindern Sie die oben erwähnte „falsche“ Luft. Gehen Sie sorgfältig und wie folgt vor: 29 DE, CH, AT Sie benötigen: - Selbstklebenden Filz - Steckschlüssel - Farbkratzer und/oder Stanley-Messer (Teppichmesser) - Scheuerschwamm oder Tuch - Aceton - Malertape 1. 2. 3. 4. 5. 6. Entfernen Sie das regelbare Absperrventil oder keramische Abdeckkappe. Lösen Sie die Muttern des oberen Spannbands mit dem Steckschlüssel, heben Sie danach den Deckel vorsichtig heraus und legen Sie diesen mit der Unterseite nach oben auf einen schützenden Untergrund. Sorgen Sie dafür, dass der Deckel nicht fallen kann! Schrauben Sie das unterste Spannband ab und lassen Sie die Keramikbasis im Nest oder auf dem Tisch stehen. Schneiden Sie mit dem Stanley-Messer und/oder dem Farbkratzer so viel wie möglich vom alten Filz weg. Entfernen Sie die Filz- und Leimreste mit einem Tuch oder Scheuerschwamm mit Aceton. Warten Sie mindestens eine Stunde, bis sich das Aceton verflüchtigt hat. Kleben Sie den neuen (selbstklebenden) Filz auf den Rand der Basis und des Deckels. Sorgen Sie dafür, dass die Nähte auf exakt die gleiche Stelle kommen, und lassen Sie den Filz an der Außenseite etwas überhängen, das ist besser als an der Innenseite (sonst verbrennt er nämlich bei Inbetriebnahme). Sorgen Sie beim Verkleben des Filzes dafür, dass etwas Spiel vorhanden ist (also nicht so straff wie möglich). Bei Erwärmung kann der Filz nämlich möglicherweise noch etwas schrumpfen. Schneiden Sie den Filz sauber an der Naht ab. Wenn Sie selbstklebenden Filz in Kombination mit Leim verwenden, gehen Sie folgendermaßen vor: Kleben Sie an der Außenseite des Deckels und der Basis direkt unter dem Rand das Malertape, um zu vermeiden, dass Leim auf den Kamado Grill gelangt. Schützen Sie die Innenseite mit einem Stück Karton und spritzen Sie die Ränder mit dem Leim ein. Lassen Sie den Leim entsprechend den Anweisungen auf der Verpackung trocknen und kleben Sie danach den Filz auf die Ränder. Lassen Sie den Leim gut aushärten. Bauen Sie den Kamado Grill wieder zusammen. Halten Sie das Spannband um die Basis und ziehen Sie die Muttern fast vollständig fest. Setzen Sie den Deckel vorsichtig in das obere Spannband und ziehen Sie die Muttern fast vollständig fest. Überprüfen Sie, ob Deckel und Spannbänder schön gerade sitzen und ziehen Sie alle Muttern fest an. BEDINGUNGEN UND BESTIMMUNGEN DER EINGESCHRÄNKTEN GARANTIE VON PATTON KAMADO GRILL Für alle keramischen Kochgeräte von Patton Kamado Grill gilt eine eingeschränkte Garantie bezüglich des Materials und der Bauweise aller keramischen Komponenten (wie Kuppel, Untergestell, Schornstein mit Absperrschieber, Kochtopf und Innenring). Diese Garantie gilt nur solange der Erstkäufer im Besitz des Patton Kamado Grill oder des gedeckten Untergestells ist. Für den Patton Kamado Grill gilt eine eingeschränkte Herstellergarantie von 2 Jahren, sofern der Grill Eigentum des Erstkäufers ist. Die keramischen Komponenten sind bei Bruch durch Fallen oder unsachgemäße Behandlung nicht durch diese Garantie gedeckt. Für die aus Metall, Edelstahl und/oder Gusseisen bestehenden Komponenten des Patton Kamado Grill (wie die Metallbänder, der Scharniermechanismus, Metalldeckel mit Doppelfunktion, Grillrost, Kochtopf und der Absperrschieber) gilt eine eingeschränkte Herstellergarantie von 1 Jahr, sofern der Erstkäufer im Besitz des Grills ist. Patton ist bestrebt, nach Möglichkeit rost- und hitzebeständige Materialien und Lackbeschichtungen auf den Metalloberflächen zu verwenden. Materialien aus Metall und Schutzbeschichtungen können jedoch durch Kratzer auf der Oberfläche angegriffen werden oder beschädigt werden, wenn sie mit bestimmten Materialien in Berührung kommen oder bestimmten Bedingungen ausgesetzt werden, die Patton nicht beeinflussen kann. Chlor, industrielle Dämpfe, Chemikalien, Kunstdünger, extrem hohe Feuchtigkeit, im Garten bzw. auf dem Rasen eingesetzte Pestizide und Salze sind nur einige Beispiele für Stoffe und Materialien, die Lackbeschichtungen und Lackschichten auf Metalloberflächen angreifen können. Aus diesen Gründen werden durch diese Garantie KEINE SCHÄDEN, FEHLER oder ABWEICHUNGEN durch bzw. in Form von ROST, OXIDATION, STUMPFEN STELLEN oder sonstigen MÄNGELN auf/an den Komponenten aus Metall, Edelstahl und/oder Gusseisen GEDECKT, es sei denn, dass diese Schäden, Fehler, Abweichungen und/oder Mängel auch zu Beeinträchtigungen der strukturellen Funktionsweise dieser Komponenten führen oder funktionelle Störungen oder Mängel an diesen Komponenten des Patton Kamado Grill hervorrufen würden. Dieses Produkt muss in der Wintersaison im Haus verstaut werden. Der Krakelee-Effekt des äußeren Erscheinungsbildes des Keramikmaterials entsteht infolge des Herstellungsverfahrens. Für Holzprodukte wie die Bambus-Tischchen gilt eine eingeschränkte Herstellergarantie von 1 Jahr, sofern der Erstkäufer der Eigentümer ist. Holzprodukte sind durch die Garantie nicht gedeckt, sofern die üblichen Verwitterungs- und Abnutzungserscheinungen oder Rissbildungen betroffen sind, es sei denn, dass die strukturelle Funktionsweise der Komponenten verloren geht. Auch für das Thermometer gilt eine eingeschränkte Herstellergarantie von 1 Jahr. 30 DE, CH, AT Diese Garantien basieren auf normalem Hausgebrauch in angemessener Weise und sachgerechter Pflege /Wartung des Patton Kamado Grill. Die Garantien gelten nicht bei gewerblicher Benutzung oder ähnlich gearteter Verwendungsweise. Die Garantien gelten nicht für andere als die genannten Fälle oder für unerwartet eingetretene Schäden oder Bruch oder für Schäden, die verursacht wurden durch: Transport; Fallen lassen; unsachgerechte Montage; unsachgemäße Unterbauten zur Abstützung oder Auflage des Grillgeräts; Versuche, den Patton Kamado Grill abzustützen durch ungeeignete Mittel wie etwa unstabile, brennbare Unterlagen /Flächen, auf denen das Untergestell des Grills ruht; gewerblichen Gebrauch; Änderungen; Nach- und/oder Fahrlässigkeit; unsachgerechte Benutzung; unsachgemäße Pflege /Wartung; Risiken beim Transport; normalen und zumutbaren Verschleiß oder Naturkatastrophen. Die Garantie gilt nicht bei Kratzern, Beulen, Beschädigungen durch Scherben, Haarrissen, bei der Bildung kleiner, kosmetischer Risse in der oberen Lasurschicht, sofern diese die Funktionsweise des Patton Kamado Grill nicht beeinträchtigen. Alle unzulässigen bzw. unerlaubten Änderungen am Patton Kamado Grill führen zu einer Aufhebung der Garantie. Hierzu zählen u.a.: das Bohren von Löchern oder das Herumwerkeln an Gerätekomponenten; die Verwendung fremder Komponenten im Patton Kamado Grill, die keine Originalteile des Patton Kamado Grill sind; oder der Gebrauch innerer Teile / Komponenten in einer anderen als der vorgesehenen bzw. vom Hersteller vorgeschriebenen Weise. Änderungen oder der Austausch innerer Gerätekomponenten, wie etwa des Kochtopfes und/oder Innenringes, heben die Garantie auf und Patton übernimmt ausdrücklich keine Haftung für direkte, indirekte, zusätzliche oder Folgeschäden, die aus dieser Handlungsweise entstehen. Wird Feuerzeugflüssigkeit oder ein anderes entflammbares Gemisch in einen Patton Kamado Grill gegossen, so erlischt hierdurch ebenfalls die Garantie. Diese Handlungsweise ist gefährlich und kann Schäden oder Personenverletzungen verursachen. SOFERN GESETZLICH ZULÄSSIG, ÜBERSTEIGT DIE GÜLTIGKEIT ALLER GESETZLICH VORGESCHRIEBENEN, AUSDRÜCKLICH FORMULIERTEN ODER STILLSCHWEIGENDEN GARANTIEN EINSCHLIEßLICH DER STILLSCHWEIGENDEN GARANTIEN BEZÜGLICH DES WEITERVERKAUFS UND DER EIGNUNG FÜR BESTIMMTE ZWECKE NICHT DEN GÜLTIGKEITSBEREICH DIESER GARANTIE. EINE HAFTUNG FÜR ZUSÄTZLICHE, BESONDERE UND/ ODER FOLGESCHÄDEN IST AUSGESCHLOSSEN. HINWEISE ZU DEN GARTEMPERATUREN Langsames Garen / Räuchern (110ºC-135ºC) Rinderbrust Pfund. Schweinefleisch Pfund Ganzes Huhn Rippchen Braten Obere Belüftung Untere Belüftung Obere Belüftung Untere Belüftung 15-20 Min. 15-30 Min. 30-45 Min. 1-1,5 Std. 3-4 Std. 2-4 Std. 2-5 Std. Anbraten (260ºC-370ºC) Steak Schweinskotelett Burger Würstchen Untere Belüftung 2 Std. pro 2 Std. pro 3 - 4 Std. 3 - 5 Std. 9+ Std. Grillen / Braten (160ºC-180ºC) Fisch Schweinefilet Hühnchenteile Ganzes Huhn Lammkeule Truthahn Schinken Obere Belüftung 5-8 Min. 6-10 Min. 6-10 Min. 6-10 Min. Öffnen 31 Geschlossen DE, CH, AT OPTIONAL Greifzange Zum Anheben des Pizzasteins oder der Kochgitter, wenn diese zu heiß zum Anfassen sind. Asche-werkzeug Nachdem Ihr Kamado sämtlichen Brennstoff verbrannt und sich abgekühlt hat, können Sie die Asche mit diesem Werkzeug aus dem Boden entfernen. 32 INSTRUKCJA OBSŁUGI i MONTAŻU Grill Kamado 13” PL Potrzebne narzędzia (NIE są dostarczane wraz z produktem) Instrukcja obsługi – prosimy zachować ją do późniejszego użytku UWAGA – Przed użyciem grilla starannie usunąć opakowanie, lecz pozostawić instrukcje bezpieczeństwa. Niniejsza instrukcja stanowi nieodłączną część produktu. Prosimy zapoznać się ze wszystkimi ostrzeżeniami dotyczącymi bezpieczeństwa podanymi w instrukcji. Prosimy przeczytać całą instrukcję i zachować ją do późniejszego użytku. Instrukcję przechowywać razem z produktem. Niniejszy produkt przeznaczony jest TYLKO do użytku domowego i nie może być używany w celach komercyjnych. PODCZAS ZIMY PRODUKT TEN MUSI BYĆ PRZECHOWYWANY WEWNĄTRZ POMIESZCZENIA. POJAWIENIE SIĘ SIATKI PĘKNIĘĆ NA CERAMICE JEST ZJAWISKIEM NORMALNYM Wskazówki dotyczące bezpiecznego użytkowania i dbania o produkt CO TO JEST KAMADO Archeolodzy odkryli duże naczynia gliniane pochodzące sprzed 4000 lat, uważane za prawzór kuchni ceramicznych Kamado. Od tego czasu Kamado zmieniało się w różny sposób — pojawiły się: zdejmowana pokrywa, drzwiczki do regulacji ciągu w celu lepszej kontroli grzania oraz przełącznik paliwa podstawowego: drewno lub węgiel drzewny. W Japonii Mushikamado oznacza okrągłe naczynie z gliny ze zdejmowaną pokrywą w kształcie kopuły przeznaczone do parowania ryżu. „Kamado” jest słowem japońskim oznaczającym „piec” lub „kuchnię”. Nazwa ta została przejęta przez amerykanów i obecnie stała się nazwą pospolitą dla tego rodzaju kuchenek ceramicznych. Kuchenki Kamado są niezwykle uniwersalne. Można ich używać nie tylko do grillowania lub wędzenia, lecz również do łatwego pieczenia pizzy, chleba, ciast i ciasteczek. Dzięki doskonałej zdolności do utrzymywania ciepła, można osiągnąć i utrzymywać wysoką temperaturę poprzez precyzyjne sterowanie przepływem powietrza przez górny i dolny wlot powietrza. Wysoka temperatura nadaje się idealnie do szybkiego pieczenia burgerów i kiełbasek, podczas, gdy niższa temperatura służy do pieczenia większych kawałków mięsa przez dłuższy czas. Można również spróbować dodać wióry z drewna do węgla drzewnego lub wymieszać wióry z drewna różnych gatunków, aby mięso stało się bardziej smakowite i aromatyczne. UWAGA: OSTRZEŻENIA Nie usuwać uszczelnienia z szarego filcu z krawędzi podstawy ani z pokrywy. Zapewnia ono bowiem szczelność i chroni przed tzw. fałszywym powietrzem, które mogłoby zakłócić cyrkulację wewnątrz grilla. Należy zadbać o to, aby śruby i zawiasy obręczy metalowych były regularnie smarowane przy użyciu lekkiego smaru do maszyn (lub preparatu WD40). Śruby muszą być regularnie kontrolowane i w razie konieczności dokręcane. • • • • • • • Produkt ten przeznaczony jest TYLKO DO UŻYTKU NA ZEWNĄTRZ POMIESZCZEŃ. NIGDY nie pozostawiać ognia bez nadzoru. NIEBEZPIECZEŃSTWO zatrucia się tlenkiem węgla – NIGDY nie rozpalać ognia lub wygaszać go lub chłodzić to urządzenie w pomieszczeniach. NIE ŁADOWAĆ zbyt dużo paliwa do grilla. ZAGROŻENIE POŻAREM – podczas użytkowania mogą wypadać rozżarzone węgle. UWAGA: NIE UŻYWAĆ do rozpalania ognia benzyny, nafty, benzyny do zapalniczek, alkoholu lub podobnych chemikaliów. Używać tylko podpałek spełniających wymagania normy EN1860-3! Do grilla Kamado zalecamy używać grubego węgla drzewnego. Węgiel taki pali się dłużej i wytwarza mniej popiołu, który może ograniczać przepływ powietrza. 34 PL • • • • • • • • • • UWAGA: Podczas otwierania pokrywy w stanie wysokiej temperatury należy ją lekko podnieść, zapewniając powolny i bezpieczny dopływ powietrza, co zapobiegnie odwróceniu ciągu lub buchnięciu płomieni, które mogą spowodować oparzenie. ZAWSZE postępować według INFORMACJI DOTYCZĄCYCH SMAŻENIA ŻYWNOŚCI podanych na stronie 36 niniejszej instrukcji obsługi. NIE UŻYWAĆ grilla Kamado na podłożu drewnianym lub na innych łatwopalnych powierzchniach jak sucha trawa, wióry drewniane, liście lub kora. Grill Kamado powinien znajdować się w odległości przynajmniej 2 metrów od palnych materiałów i przedmiotów. NIE używać grilla Kamado jako pieca do ogrzewania. NIE przenosić grilla Kamado, gdy znajduje się w nim żar lub jest gorący. ZAWSZE UŻYWAĆ termoodpornych rękawic podczas posługiwania się gorącą ceramiką lub rusztami do grillowania. Przed przemieszczaniem lub przechowywaniem odczekać, aż grill Kamado ostygnie całkowicie. ZAWSZE trzymać dzieci i zwierzęta w bezpiecznej odległości od grilla Kamado, gdy jest używany. Przed użyciem zawsze sprawdzić, czy grill Kamado nie jest zużyty lub uszkodzony i, jeśli trzeba, wymienić. WYŻARZANIE GRILLA KAMADO • • • • • • • • Aby rozpalić ogień, umieścić zmiętą gazetę z kilkoma kostkami paliwa stałego lub podpałki na ruszcie do palenia (7) w podstawie grilla Kamado. Następnie na wierzchu gazety położyć 2 lub 3 garści węgla drzewnego. NIE UŻYWAĆ do rozpalania benzyny, nafty, benzyny do zapalniczek, alkoholu lub podobnych chemikaliów. Otworzyć dolny wlot powietrza i podpalić gazetę specjalną zapalniczką lub zapałkami. NIE nakładać za dużo paliwa – zbyt intensywny ogień może uszkodzić grill Kamado. Pozostawić grill Kamado, aż paliwo się wypali i zgaśnie ogień. Zbyt intensywny ogień podczas pierwszego palenia może uszkodzić filcową uszczelkę, zanim zdąży się prawidłowo utwardzić. Po pierwszym użyciu sprawdzić wszystkie elementy mocujące, czy są dobrze dociśnięte. Taśma metalowa łącząca pokrywę z podstawą rozszerza się pod wpływem ciepła i może się poluzować. Zalecamy sprawdzić i w razie potrzeby dokręcić taśmę kluczem. Od tej chwili można normalnie używać grilla Kamado. WYGASZANIE OGNIA • • W celu wygaszenia ognia przestać dodawać paliwa i zamknąć wloty powietrza oraz pokrywę, aby umożliwić naturalne zgaśnięcie ognia. NIE używać wody do gaszenia węgla drzewnego, ponieważ może to uszkodzić ceramikę grilla Kamado. PRZECHOWYWANIE • • • • • Jeżeli grill Kamado jest nieużywany i przechowywany na zewnątrz, przykryć go po wystygnięciu nieprzemakalnym pokrowcem Chromowana kratka do smażenia NIE nadaje się do mycia w zmywarce do naczyń – używać łagodnego detergentu z ciepłą wodą. Podczas używania grilla Kamado nacisnąć do dołu hamulce dwóch kółek, aby uniemożliwić przemieszczanie się urządzenia. Aby zapewnić całkowitą ochronę podczas zimy, zalecamy przechowywać grill Kamado pod pokrowcem w garażu lub szopie. Przechowywać w temperaturze powyżej zera. CZYSZCZENIE • • Grill Kamado jest urządzeniem samoczyszczącym się. Wystarczy rozgrzać go do temperatury 260ºC i po 30 minutach wszystkie zanieczyszczenia i pozostałości żywności wypalą się same. NIE używać wody lub innych środków czyszczących do czyszczenia wnętrza grilla Kamado. Ścianki są porowate i wchłaniają używane płyny, co może spowodować pęknięcie grilla Kamado. Jeżeli na ściankach osadziło się dużo sadzy, użyć szczotki drucianej lub dostarczonego narzędzia i zdrapać pozostałości węgla 35 PL • • przed następnym użyciem. Do czyszczenia kratek i rusztów używać środka czyszczącego bez dodatków ściernych po całkowitym ostygnięciu urządzenia. Aby oczyścić zewnętrzną powierzchnię, poczekać, aż grill Kamado ostygnie i użyć wilgotnej ścierki i łagodnego detergentu. KONSERWACJA • Dokręcać taśmy i smarować zawiasy 2 razy w roku lub częściej, jeśli trzeba. INFORMACJE DOTYCZĄCE ROZPALANIA, UŻYWANIA I PIELĘGNOWANIA • • • • • • • • • Grill Kamado powinien być ustawiany na stałej, płaskiej, poziomej, odpornej na temperaturę i niepalnej powierzchni z dala od palnych materiałów i przedmiotów. Nad grillem Kamado zapewnić przynajmniej 2 m wolnej przestrzeni i 2 m odstępu od innych otaczających przedmiotów. Aby rozpalić ogień, umieścić zmiętą gazetę z kilkoma kostkami paliwa stałego lub podpałki na ruszcie do palenia (7) w podstawie grilla Kamado. Następnie na wierzchu gazety położyć 2 lub 3 garści węgla drzewnego. NIE UŻYWAĆ do rozpalania benzyny, nafty, benzyny do zapalniczek, alkoholu lub podobnych chemikaliów. Otworzyć dolny wlot powietrza i podpalić gazetę specjalną zapalniczką lub zapałkami. Gdy ogień rozpali się, pozostawić dolny wlot powietrza i pokrywę otwarte przez około 10 minut, aby utworzyć odpowiednią warstwę żaru. Przed pierwszym grillowaniem w grillu Kamado poczekać, aż węgiel drzewny rozpali się do czerwoności i utrzymywać go w tym stanie przez przynajmniej 30 minut. NIE grillować, zanim na paliwie nie wytworzy się warstwa popiołu. Zalecamy nie poruszać i nie przewracać węgla, gdy się rozpali. Zapewni to równomierne, skuteczne spalanie węgla drzewnego. Po rozpaleniu podczas manipulowania gorącą ceramiką lub rusztami do grillowania używać TYLKO rękawic termoodpornych. Korzystać z podanych niżej instrukcji grillowania w zależności od temperatury i czasu trwania. GRILLOWANIE W NISKIEJ TEMPERATURZE • • • • • • • • Rozpalić węgiel drzewny według instrukcji podanych wyżej. NIE poruszać i nie przewracać węgla, gdy się rozpali. Pozostawić dolny wlot powietrza i pokrywę otwarte przez około 10 minut, aby utworzyć odpowiednią warstwę żaru. Nadzorować grill Kamado, aż osiągnie wymaganą temperaturę. Patrz strona 36, wskazówki dotyczące grillowania. Zamknąć całkowicie dolny wlot powietrza, aby utrzymywać temperaturę. Od tego momentu można używać grilla Kamado do grillowania. UWAGA: Otwieranie pokrywy przy wysokiej temperaturze: należy ją lekko podnieść, zapewniając powolny i bezpieczny dopływ powietrza, co zapobiegnie odwróceniu ciągu lub buchnięciu płomieni, które mogą spowodować oparzenie. ZAWSZE postępować według INFORMACJI DOTYCZĄCYCH GRILLOWANIA podanych na stronie 37 niniejszej instrukcji obsługi. ZAWSZE używać rękawic żaroodpornych podczas manipulowania gorącą ceramiką lub rusztami do grillowania. WĘDZENIE • • • • • • • • Postępować według instrukcji jak do grillowania powolnego podanych wyżej. Nadzorować grill Kamado, aż osiągnie wymaganą temperaturę. Patrz strona 36, wskazówki dotyczące grillowania. Pozostawić dolny wlot powietrza lekko otwarty. Zamknąć górny wlot powietrza i sprawdzać temperaturę przez kilka minut. Używając termoodpornych rękawic, rozsypać wióry drewna na gorącym węglu drzewnym. Od tego momentu można używać grilla Kamado do wędzenia. WSKAZÓWKA: Namoczyć w wodzie wióry drewniane lub deskę do grillowania przez 15 minut, aby przedłużyć proces wędzenia. UWAGA: Otwieranie pokrywy przy wysokiej temperaturze: należy ją lekko podnieść, zapewniając powolny i bezpieczny dopływ powietrza, co zapobiegnie odwróceniu ciągu lub buchnięciu płomieni, które mogą spowodować oparzenie. 36 PL • • ZAWSZE postępować według INFORMACJI DOTYCZĄCYCH GRILLOWANIA podanych na stronie 37 niniejszej instrukcji obsługi. ZAWSZE używać rękawic termoodpornych podczas manipulowania gorącą ceramiką lub rusztami do grillowania. GRILLOWANIE W WYSOKIEJ TEMPERATURZE • • • • • • • • Rozpalić węgiel drzewny według instrukcji podanych na stronie 35. Zakryć pokrywę i całkowicie otworzyć górny i dolny wlot powietrza. Nadzorować grill Kamado, aż osiągnie wymaganą temperaturę. Patrz strona 36, wskazówki dotyczące grillowania. Zamknąć do połowy górny wlot powietrza i sprawdzać temperaturę przez kilka minut. Od tego momentu można używać Kamado do grillowania. UWAGA: Otwieranie pokrywy przy wysokiej temperaturze: należy ją lekko podnieść, zapewniając powolny i bezpieczny dopływ powietrza, co zapobiegnie odwróceniu ciągu lub buchnięciu płomieni, które mogą spowodować oparzenie. ZAWSZE postępować według INFORMACJI DOTYCZĄCYCH GRILLOWANIA podanych na stronie 37 niniejszej instrukcji obsługi. ZAWSZE używać rękawic termoodpornych podczas manipulowania gorącą ceramiką lub rusztami do grillowania. INFORMACJE DOTYCZĄCE PRZYGOTOWYWANIA POŻYWIENIA • • • • • • • • • • • Prosimy przeczytać i stosować poniższe rady podczas grillowania na grillu Kamado. Zawsze myć ręce przed i po manipulowaniu surowym mięsem oraz przed jedzeniem. Surowe mięso zawsze przechowywać z dala od mięsa usmażonego i innej żywności. Przed rozpoczęciem grillowania upewnić się, że powierzchnie grilla i narzędzia są czyste i wolne od resztek starej żywności. NIE używać tych samych naczyń do żywności surowej i grillowanej. Przed jedzeniem upewnić się, że całe mięso jest należycie usmażone. UWAGA: spożywanie surowego lub niedosmażonego mięsa może być przyczyną zatrucia (np. bakteriami z rodziny E. coli). Aby zredukować ryzyko niedosmażenia mięsa, rozciąć je i upewnić się, że jest należycie usmażone wewnątrz. UWAGA: jeżeli mięso jest prawidłowo usmażone, to sos własny mięsa jest przezroczysty, bez śladów różowego/czerwonego koloru lub zabarwienia od mięsa. Większe kawałki mięsa zalecamy podgotować przed ostatecznym grillowaniem na grillu. Po skończeniu grillowania w grillu Kamado zawsze oczyścić naczynia i ruszty grilla. DOKŁADANIE PALIWA • Przy zamkniętych wlotach powietrza grill Kamado utrzymuje wysoką temperaturę przez kilka godzin. Jeżeli wymagany jest dłuższy czas działania grilla (np podczas pieczenia dużych kawałków lub powolnego wędzenia), trzeba dołożyć więcej węgla drzewnego. Należy wtedy po prostu dołożyć węgla drzewnego i postępować, jak opisano powyżej. WYMIANA FILCOWEGO USZCZELNIENIA GRILLA KAMADO W zależności od częstotliwości korzystania z grilla Kamado należy od czasu do czasu wymieniać filcowe uszczelnienie pokrywy i podstawy grilla. W ten sposób zapobiegamy powstawaniu wspomnianego wcześniej tzw. fałszywego powietrza. Należy przy tym w staranny sposób wykonać następujące czynności: Potrzebne materiały: • filc samoprzylepny • klucz płaski • skrobak do farby i/lub nóż z ostrzem łamanym • gąbka lub ściereczka • aceton • taśma malarska. 1. Zdemontować regulowany zawór lub zatyczkę ceramiczną. Odkręcić nakrętki górnej obręczy napinającej przy pomocy klucza płaskiego, następnie ostrożnie zdjąć pokrywę i położyć ją w odwróconej pozycji na 37 PL 2. 3. 4. 5. 6. bezpiecznym podłożu. Zadbać o to, aby pokrywa była chroniona przed upadkiem. Odkręcić dolną obręcz napinającą i pozostawić podstawę ceramiczną w ramie lub postawić na stole. Możliwie jak najdokładniej usunąć stary filc przy pomocy noża z łamanym ostrzem i/lub skrobaka do farby. Usunąć resztki filcu i kleju przy pomocy ściereczki lub gąbki nasączonej acetonem. Odczekać co najmniej godzinę, aż aceton się ulotni. Starannie nakleić nowy (samoprzylepny) filc na krawędź podstawy i pokrywę. Zadbać o to, aby szwy nie zostały umieszczone dokładnie w tym samym miejscu i zostawić po zewnętrznej stronie odrobinę zwisającego filcu. Gdyby nadmiar filcu znajdował się wewnątrz, mógłby się spalić podczas użytkowania. Podczas naklejania filcu należy pozostawić odrobinę luzu (a więc nie przyklejać go możliwie jak najciaśniej), gdyż może on się nieco skurczyć pod wpływem temperatury. Starannie przyciąć filc przy szwie. W przypadku stosowania filcu bezklejowego w połączeniu z klejem należy postąpić w następujący sposób: Nakleić taśmę malarską na zewnętrznej stronie pokrywy i podstawy tuż pod krawędzią, aby zapobiec dostaniu się kleju do grilla Kamado. Osłonić część wewnętrzną kawałkiem kartonu i rozprowadzić klej na krawędziach. Pozostawić klej do wyschnięcia zgodnie z instrukcjami znajdującymi się na jego opakowaniu, po czym nakleić filc na krawędzie. Pozwolić, aby klej dobrze stwardniał. Ponownie złożyć grill Kamado. Przytrzymać obręcz napinającą wokół podstawy i przykręcić nakrętki niemal do samego końca. Ostrożnie ustawić pokrywę na górnej obręczy napinającej i przykręcić nakrętki niemal do samego końca. Sprawdzić, czy pokrywa i obręcze napinające są prosto ustawione i dokładnie dokręcić wszystkie nakrętki. WARUNKI I POSTANOWIENIA OGRANICZONEJ GWARANCJI DLA URZĄDZENIA PATTON KAMADO GRILL Każde urządzenie ceramiczne Patton Kamado Grill objęte jest ograniczoną gwarancją obejmującą materiały oraz konstrukcję wszystkich elementów ceramicznych (takich jak pokrywa, podstawa, kominek z zaworem, pojemnik na węgiel oraz obręcz wewnętrzna). Gwarancja obowiązuje, dopóki pierwotny nabywca posiada urządzenie Patton Kamado Grill lub jego część objętą gwarancją. Pierwotnemu nabywcy przysługuje ograniczona gwarancja fabryczna na urządzenie Patton Kamado Grill, która wynosi 2 lata. Gwarancja obowiązująca w przypadku elementów ceramicznych nie ma zastosowania w odniesieniu do uszkodzeń spowodowanych upadkiem lub niewłaściwym użytkowaniem urządzenia. W przypadku elementów urządzenia Patton Kamado Grill wykonanych z metalu, stali nierdzewnej oraz żeliwa (takich jak metalowe obręcze, mechanizm zawiasowy, metalowa pokrywa dwufunkcyjna, grill, pojemnik na węgiel oraz szyber) ograniczona gwarancja fabryczna udzielana pierwotnemu nabywcy wynosi 1 rok. Firma Patton dokłada wszelkich starań, aby stosować materiały nierdzewne oraz lakiery odporne na działanie wysokich temperatur na powierzchniach wykonanych z metalu. Materiały metalowe oraz kryjące warstwy ochronne mogą zresztą zostać uszkodzone na skutek różnego rodzaju zarysowań powierzchni lub też narażenia na działanie substancji i warunków, na które firma Patton nie ma żadnego wpływu. Chlor, opary przemysłowe, chemikalia, nawozy sztuczne, ekstremalna wilgoć, pestycydy stosowane na trawnikach oraz sól to tylko niektóre z czynników, które mogą negatywnie wpływać na lakier i wykończenie metalowych warstw wierzchnich. Z tego powodu gwarancja na elementy wykonane z metalu, stali nierdzewnej oraz żeliwa NIE OBOWIĄZUJE W PRZYPADKU POJAWIENIA SIĘ RDZY, OKSYDACJI, PŁOWIENIA lub innych NIEPRAWIDŁOWOŚCI, chyba że powodują one utratę integralności strukturalnej lub uszkodzenie danej części urządzenia Patton Kamado Grill. Urządzenie musi być w okresie zimowym przechowywane wewnątrz budynku. Zewnętrzna krakelura elementów ceramicznych stanowi część procesu produkcji. W przypadku elementów wykonanych z drewna, jak na przykład bambusowe blaty boczne, pierwotnemu nabywcy urządzenia przysługuje roczna gwarancja fabryczna w ograniczonym zakresie. W przypadku elementów drewnianych gwarancja nie obejmuje normalnego procesu starzenia się ani pęknięć, chyba że powodują one utratę integralności strukturalnej. Termometr również objęty jest roczną gwarancją fabryczną w ograniczonym zakresie. Udzielona gwarancja obowiązuje w odniesieniu do normalnego i rozsądnego użytkowania urządzenia Patton Kamado Grill w gospodarstwie domowym oraz jego konserwacji. Gwarancja nie obowiązuje w przypadku wykorzystywania urządzenia do celów komercyjnych oraz temu podobnych. Gwarancja nie obejmuje dodatkowych lub nieprzewidzianych szkód lub pęknięć, ani też szkód powstałych na skutek transportu, upadku, nieprawidłowego montażu, niewłaściwego ustawienia, prób ustawienia urządzenia Patton Kamado Gril na innym podłożu niż solidna, niepalna powierzchnia, na której zostanie umieszczona jego podstawa, wykorzystywania urządzenia do celów komercyjnych, wprowadzenia zmian lub modyfikacji, zaniedbań, nieprawidłowego użytkowania, niewłaściwej konserwacji, zagrożeń występujących na drodze, normalnego i zasadnego zużycia lub katastrof naturalnych. 38 PL Gwarancja nie obowiązuje w odniesieniu do zarysowań, wgnieceń, odprysków, pęknięć oraz drobnych pęknięć zewnętrznej warstwy lakieru, które nie wpływają na sposób działania urządzenia Patton Kamado Grill. Wprowadzanie wszelkich niedozwolonych zmian lub modyfikacji urządzenia Patton Kamado Grill powoduje unieważnienie gwarancji. Dotyczy to nawiercania otworów lub podmieniania elementów, stosowania innych części niż oryginalne elementy do urządzenia Patton Kamado Grill lub też stosowanie części wewnętrznych w sposób inny niż przewidziany przez producenta. Dokonanie modyfikacji lub wymiany części wewnętrznych, takich jak pojemnik na węgiel oraz obręcz wewnętrzna, powoduje utratę gwarancji. Firma Patton wyraźnie zrzeka się wszelkiej odpowiedzialności za szkody bezpośrednie, pośrednie, dodatkowe lub następcze, jakie wynikną z tego faktu. Stosowanie podpałek w formie płynnej lub jakichkolwiek mieszanin łatwopalnych w urządzeniu Patton Kamado Grill powoduje unieważnienie gwarancji. Są to niebezpieczne praktyki mogące prowadzić do powstania szkód lub obrażeń. WSZELKIE PRZEWIDZIANE PRAWEM WYRAŹNE LUB DOROZUMIANE GWARANCJE, ŁĄCZNIE Z DOROZUMIANĄ GWARANCJĄ MOŻLIWOŚCI SPRZEDAŻY ORAZ ODPOWIEDNIOŚCI DO DANEGO CELU, O ILE SĄ ONE DOPUSZCZALNE W MAKSYMALNYM WYMIARZE W OPARCIU O PRAWO, NIE GWARANTUJĄ WIĘKSZYCH PRZYWILEJÓW NIŻ WYNIKAJĄCE Z NINIEJSZEJ GWARANCJI. PRODUCENT NIE PONOSI ODPOWIEDZIALNOŚCI ZA SZKODY DODATKOWE, SZCZEGÓLNE ORAZ NASTĘPCZE. INFORMACJE NA TEMAT TEMPERATURY GRILLOWANIA Powolne grillowanie / wędzenie (110ºC-135ºC) Mostek wołowy Wieprzowina Kurczak cały Żeberka Pieczeń Górny wlot powietrza Dolny wlot powietrza Górny wlot powietrza Dolny wlot powietrza 15-20 min 15-30 min 30-45 min 1-1,5 godz. 3-4 godz. 2-4 godz. 2-5 godz. Obsmażanie (260ºC-370ºC) Stek Kotlety wieprzowe Hamburgery Kiełbaski Dolny wlot powietrza 2 godz./ ½ kg 2 godz./ ½ kg 3-4 godz. 3-5 godz. ponad 9 godz. Grillowanie / pieczenie (160ºC-180ºC) Ryba Polędwica Kawałki kurczaka Kurczak cały Udziec jagnięcy Indyk Szynka Górny wlot powietrza 5-8 min 6-10 min 6-10 min 6-10 min Otwarte 39 Zamknięte PL WYPOSAŻENIE OPCJONALNE Chwytak Służy do podnoszenia płyty do pizzy lub kratek do grillowania, gdy są zbyt gorące. Pogrzebacz Służy do usuwania popiołu z dna grilla Kamado po wypaleniu paliwa i ostygnięciu. 40 ISTRUZIONI D’USO E DI MONTAGGIO Kamado 13” IT, CH Attrezzi richiesti (NON inclusi) Istruzioni di montaggio – Da conservare per uso futuro IMPORTANTE – Rimuovere con cura tutti gli imballaggi prima dell’uso econservare le informazioni sulla sicurezza. Queste istruzioni fanno parte del prodotto. Prendere nota di tutte le avvertenze sulla sicurezza elencate in queste istruzioni. Leggere attentamente le istruzioni e conservarle per uso futuro. Le presenti istruzioni sono da conservare insieme all’apparecchio. Questo prodotto è da intendersi SOLAMENTE per uso domestico e non per uso commerciale o per scopi contrattuali. QUESTO PRODOTTO DEVE ESSERE TENUTO AL COPERTO DURANTE L’INVERNO. L’ASPETTO “CREPATO” DELLA CERAMICA È NORMALE. Linee guida sulla manutenzione e la sicurezza nell’uso dell’apparecchio A PROPOSITO DEL VOSTRO KAMADO Datati di 4.000 anni fa, gli archeologi hanno scoperto ampi recipienti di cottura in argilla ritenuti essere i predecessori del fornello da cottura in ceramica Kamado. Da allora, il prodotto si è evoluto nel corso degli anni in diversi modi; coperchio amovibile, sportello aggiuntivo aspirante per un miglior controllo del calore e passaggio dal legno al carbone come combustibile primario. In Giappone, il Mushikamado era un recipiente rotondo in argilla con un coperchio a cupola amovibile studiato per la cottura a vapore del riso. Il nome ‘Kamado’ deriva, infatti, dal termine giapponese ’fornello’ o ‘cucina per varie cotture’. Questo termine è stato poi adottato dagli americani ed è oggi diventato di uso comune per questo stile di fornello da cucina in ceramica. I fornelli Kamado sono molto versatili. Non solo possono essere utilizzati per grigliare o affumicare, ma anche per cuocere con facilità pizze, pane, torte e biscotti. Grazie alle loro eccellenti proprietà di conservazione del calore, si possono raggiungere e mantenere temperature elevate grazie a un controllo preciso del flusso dell’aria attraverso le bocchette di ventilazione superiori e inferiori. Le temperature elevate sono ideali per la cottura veloce di hamburger e salsicce mentre quelle più basse sono più adatte per cuocere pezzi di carne più grossi in tempi più lunghi. Provate ad aggiungere qualche pezzetto di legno al carbone o ad associare legni di varietà diverse per rendere le vostre carni ancora più saporite. AVVERTENZE – ATTENZIONE! Non rimuovere la guarnizione in feltro nero dal bordo della base o dal coperchio. Questa guarnizione in feltro infatti assicura una chiusura ermetica e fa in modo che non penetri dell’aria “cattiva” che potrebbe disturbare la circolazione dell’aria all’interno del Kamado. Assicuratevi che i bulloni e le cerniere delle ruote metalliche siano lubrificate regolarmente con un olio per macchine leggero (o WD40). I bulloni devono essere controllati regolarmente e serrati nel caso in cui ciò dovesse essere necessario. • • • • • • Questo prodotto è destinato al SOLO USO ESTERNO. Non lasciare MAI un fuoco acceso incustodito. PERICOLO di intossicazione da monossido di carbonio – Non accendere MAI questo apparecchio o lasciarlo bruciare senza fiamma o raffreddare in ambienti ristretti. NON sovraccaricare l’unità di carburante. PERICOLO D’INCENDIO – In fase di utilizzo, l’apparecchio contiene braci ardenti che possono inavvertitamente schizzare fuori dal braciere. AVVERTENZA – NON utilizzare benzina, acquaragia, liquido infiammabile per accendini, alcool o altri prodotti chimici simili per l’accensione o la riaccensione. Utilizzare solo prodotti accendi-fuoco conformi alla normativa EN1860-3! 42 IT, CH • • • • • • • • • • • È fortemente consigliato l’uso di carbone in pezzi nel vostro Kamado perché brucia più a lungo e produce meno ceneri che possono limitare il flusso d’aria. IMPORTANTE: Quanto aprite il coperchio a temperature elevate è essenziale sollevarlo lentamente per permettere all’aria di entrare piano e in maniera sicura, evitando eventuali schizzi o scintille che possono provocare danni. Seguire SEMPRE le INFORMAZIONI SULLA COTTURA DEGLI ALIMENTI evidenziate a pagina 44 di questo manuale di istruzioni. NON usare il Kamado su rivestimenti in legno o altre superfici infiammabili quali erba secca, trucioli di legno, foglie o corteccia decorativa. Assicurarsi che il Kamado si trovi almeno a 2 metri di distanza da elementi infiammabili. NON UTILIZZARE il Kamado come fornace. NON maneggiare o spostare il Kamado quando è acceso perché potrebbe essere rovente. UTILIZZARE SEMPRE dei guanti termoresistenti quando si maneggiano oggetti in ceramica o superfici da cottura roventi. Lasciare sempre raffreddare l’unità completamente prima di spostarla o di riporla. Tenere SEMPRE i bambini e gli animali domestici a distanza di sicurezza dal dispositivo in uso. Controllare sempre l’unità prima di utilizzarla per eventuale usura e danni e sostituire eventuali pezzi se e quando necessario. PREPARAZIONE DEL KAMADO • • • • • • • • Per accendere il fuoco, porre un giornale arrotolato con qualche cubetto accendi-fuoco o esca solida per il fuoco sul braciere (7) posto sulla base del Kamado. Quindi mettere 2 o 3 manciate di carbone sopra al giornale. NON utilizzare benzina, acquaragia, liquido infiammabile per accendini, alcool o altri prodotti chimici simili per l’accensione o la riaccensione. Aprire la bocchetta di ventilazione inferiore e accendere il giornale con l’aiuto di un accendino lungo o di fiammiferi di sicurezza. NON sovraccaricare l’unità di carburante – se il fuoco è troppo forte il Kamado potrebbe rovinarsi. Attendere sino a quando tutto il combustibile è utilizzato e consumato. Se le prime fiamme sono troppo alte, la guarnizione in feltro potrebbe rovinarsi ancora prima di essere utilizzata correttamente. Dopo il primo utilizzo, controllare tutte le chiusure per la tenuta. La banda in metallo che collega il coperchio alla base si dilaterà in seguito al calore e si potrebbe quindi allentare. Si consiglia quindi un controllo e, se necessario, un restringimento dei dadi con un’apposita chiave. Ora si può utilizzare il Kamado normalmente. SPEGNIMENTO • • Per spegnere l’unità – non aggiungere più combustibile e chiudere tutti gli sfiati e il coperchio per far sì che il fuoco si spenga naturalmente. NON utilizzare acqua per spegnere le braci poiché ciò potrebbe rovinare la ceramica del Kamado. STOCCAGGIO • • • • • Quando non in uso, e se riposto all’esterno, coprire il Kamado, una volta completamente raffreddato, con l’apposita protezione anti-pioggia La griglia di cottura cromata NON può essere lavata in lavastoviglie; pulirla quindi con un detergente neutro e acqua tiepida. Quando si usa il Kamado spingere verso il basso le leve di blocco sulle ruote per impedire all’unità di spostarsi in fase di utilizzo. Si consiglia di riporre il Kamado al coperto in un garage o al riparo durante l’inverno per una protezione totale. Riporre in un luogo che non teme il gelo. PULIZIA • • Il Kamado è auto-pulente. Scaldarlo fino a 260ºC per 30 minuti per permettergli di bruciare tutti gli eventuali avanzi di cibo e i detriti. NON utilizzare acqua o altri prodotti detergenti per pulire l’interno del Kamado. Le pareti sono porose e assorbirebbero qualsiasi tipo di liquido utilizzato, arrecando danni al Kamado. In caso di eccessiva fuliggine, 43 IT, CH • • utilizzare una spazzola con setole in ferro o l’apposito strumento fornito per raschiare i residui di carbone prima dell’utilizzo successivo. Per pulire le griglie e le graticole utilizzare un detergente non-abrasivo quando l’unità è completamente raffreddata. Per pulire la superficie esterna attendere il raffreddamento del Kamado e utilizzare uno straccio umido con del detergente neutro. MANUTENZIONE • Stringere le fasce in metallo e oliare il cardine 2 volte l’anno o più se necessario. INFORMAZIONI SU ACCENSIONE, UTILIZZO E CURA • • • • • • • • • Assicurarsi che il Kamado sia collocato su una superficie stabile, piana, orizzontale, resistente al calore e non-infiammabile lontano da oggetti infiammabili. Assicurarsi il Kamado sia in un ambiente con almeno 2 m di spazio libero sopra e intorno. Per accendere il fuoco, disporre un giornale arrotolato con qualche cubetto accendi-fuoco o esca solida per il fuoco sul braciere (7) posto sulla base del Kamado. Quindi porre 2 o 3 manciate di carbone sopra al giornale. NON utilizzare benzina, acquaragia, liquido infiammabile per accendini, alcool o altri prodotti chimici simili per l’accensione o la riaccensione. Aprire la bocchetta di ventilazione inferiore e accendere il giornale con l’aiuto di un accendino lungo o di fiammiferi di sicurezza. Quando il fuoco inizia a prendere, lasciare la bocchetta di ventilazione inferiore e il coperchio aperti per circa 10 minuti per creare un giaciglio per le braci. Permettere al carbone di surriscaldarsi e tenerlo rovente per almeno 30 minuti prima di iniziare a cucinare sul Kamado. NON iniziare a cuocere prima che il combustile non sia ricoperto da uno strato di cenere. Si consiglia di non alimentare o girare il carbone una volta acceso per permettergli di bruciare in maniera uniforme ed efficace. Una volta acceso il fuoco, utilizzare SOLO guanti termo-resistenti per maneggiare le parti calde in ceramica o le superfici di cottura. Vedere le istruzioni di cottura sottostanti e far riferimento alle temperature e ai tempi di cottura indicati. GUIDA ALLA COTTURA A BASSA TEMPERATURA • • • • • • • • Accendere il carbone rispettando le istruzioni sopra indicate. NON spostare o attizzare il carbone una volta acceso. Lasciare la bocchetta di ventilazione inferiore e il coperchio aperti per circa 10 minuti per creare un giaciglio per le braci. Monitorare il Kamado fino al raggiungimento della temperatura desiderata. Fare riferimento alla guida delle temperature di cottura di pagina 44. Chiudere completamente la bocchetta di ventilazione inferiore per mantenere la temperatura. Il Kamado è ora pronto per essere utilizzato. IMPORTANTE: Quando aprite il coperchio a temperature elevate è essenziale sollevarlo lentamente per permettere all’aria di entrare piano e in maniera sicura, evitando eventuali schizzi o scintille che possono provocare danni. Seguire SEMPRE LE INFORMAZIONI SULLA COTTURA DEI CIBI presenti a pagina 45 del presente manuale di istruzioni. Utilizzare SEMPRE guanti termo-resistenti per maneggiare le parti calde in ceramica o le superfici di cottura. GUIDA ALLA PREPARAZIONE DI CIBI AFFUMICATI • • • • • • • • Seguire le istruzioni sopra indicate come per il procedimento di cottura lenta. Monitorare il Kamado fino al raggiungimento della temperatura desiderata. Fare riferimento alla guida delle temperature di cottura di pagina 44. Lasciare la bocchetta di ventilazione inferiore leggermente aperta. Chiudere la bocchetta di ventilazione superiore e tenere controllata la temperatura per qualche minuto. Con l’aiuto di guanti termoresistenti, porre dei pezzetti di legno intorno ai carboni ardenti. A questo punto il Kamado è pronto per la preparazione di cibo affumicato. CONSIGLIO: Immergere in acqua i pezzetti di legno o i ripiani di cottura per 15 minuti per prolungare il processo di affumicatura. IMPORTANTE: Quando aprite il coperchio a temperature elevate è essenziale sollevarlo lentamente per permettere all’aria di entrare piano e in maniera sicura, evitando eventuali schizzi o scintille che possono 44 IT, CH • • provocare danni. Seguire SEMPRE LE INFORMAZIONI SULLA COTTURA DEI CIBI presenti a pagina 45 del presente manuale di istruzioni. Utilizzare SEMPRE guanti termo-resistenti per maneggiare le parti calde in ceramica o le superfici di cottura. GUIDA ALLA COTTURA AD ALTA TEMPERATURA • • • • • • • • Accendere il carbone rispettando le istruzioni indicate a pagina 43. Chiudere il coperchio e aprire completamente la bocchetta di ventilazione superiore e quella inferiore. Monitorare il Kamado fino al raggiungimento della temperatura desiderata. Fare riferimento alla guida delle temperature di cottura di pagina 44. Chiudere a metà la bocchetta di ventilazione superiore e continuare a controllare la temperatura per ancora qualche minuto. Il Kamado è ora pronto per essere utilizzato. IMPORTANTE: Quando aprite il coperchio a temperature elevate è essenziale sollevarlo lentamente per permettere all’aria di entrare piano e in maniera sicura, evitando eventuali schizzi o scintille che possono provocare danni. Seguire SEMPRE LE INFORMAZIONI SULLA COTTURA DEI CIBI presenti a pagina 45 del presente manuale di istruzioni. Utilizzare SEMPRE guanti termo-resistenti per maneggiare le parti calde in ceramica o le superfici di cottura. INFORMAZIONI SULLA COTTURA DEI CIBI • • • • • • • • • • • Si prega di leggere e di seguire attentamente queste avvertenze quando si cucina con il Kamado. Lavarsi sempre le mani prima e dopo aver toccato la carne cruda e prima di mangiare. Tenere sempre la carne cruda lontana dalla carne cotta e da altri alimenti. Prima di cucinare assicurarsi che le griglie e gli utensili siano puliti e senza residui alimentari precedenti. NON utilizzare gli stessi utensili per toccare alimenti cotti e non cotti. Accertarsi che tutta la carne sia cotta bene prima di mangiarla. AVVERTENZA – mangiare carne cruda o cotta male può dar luogo a intossicazione alimentare (ad esempio, ceppi di batteri quali l’E-coli). Per ridurre il rischio di ottenere carne cotta male tagliarla per essere certi che sia cotta bene all’interno. AVVERTENZA – se la carne è sufficientemente cotta rilascerà un sugo chiaro e senza tracce rosee o rosse o del colore della carne. Si consiglia di precuocere i grossi pezzi o parti di carne prima della cottura finale alla griglia. Al termine della cottura con il Kamado pulire sempre le griglie e le superfici di cottura insieme agli utensili utilizzati. AGGIUNTA DI COMBUSTILE • Con le bocchette di ventilazione chiuse, il Kamado mantiene una temperatura elevata per diverse ore. Nel caso fosse necessario un tempo di cottura più lungo (ad esempio se si vuole arrostire un intero pezzo di carne o si vuole affumicare un alimento lentamente), può rivelarsi necessario aggiungere più combustibile. È sufficiente quindi aggiungere del carbone e procedere come indicato sopra. SOSTITUZIONE DEL FELTRO DEL KAMADO GRILL A seconda della frequenza dell’utilizzo del vostro Kamado Grill è necessario sostituire di tanto in tanto il feltro del coperchio e della base del Kamado Grill. In questo modo prevenite l’introduzione della soprannominata aria “cattiva”. Procedete con cura e nel seguente modo: Occorrente: - Feltro autoadesivo - Chiave inglese - Raschietto e/o coltello Stanley - Spugnetta abrasiva o panno - Acetone - Nastro protettivo 45 IT, CH 1. 2. 3. 4. 5. 6. Rimuovere la valvola regolabile o il tappo di chiusura in ceramica. Svitare i bulloni della fascia di tensionamento superiore con la chiave inglese, in seguito sollevare il coperchio con cautela e riporlo sottosopra su una base protettiva. Assicurarsi che il coperchio non possa cadere! Svitare la fascia di tensionamento inferiore e lasciare la base in ceramica nel supporto o sul tavolo. Tagliare con il coltello Stanley e/o il raschietto il più possibile del vecchio feltro. Rimuovere i residui di feltro e colla con un panno o una spugnetta abrasiva imbevuta di acetone. Attendere almeno un ora in modo che l’acetone sia evaporato completamente. Incollare il feltro nuovo (autoadesivo) con cura sul bordo della base e del coperchio. Assicurarsi che i punti di congiunzione non si vengano a trovare esattamente nella stessa posizione e lasciate pendere il feltro un po’ verso l’esterno, il che è preferibile rispetto all’interno (perché verrebbe bruciato durante l’utilizzo). Durante l’incollaggio assicurarsi che il feltro abbia un po’ di gioco (quindi non il più stretto possibile). In presenza di calore infatti il feltro potrebbe restringersi ulteriormente. Tagliare il feltro in maniera ordinata sul giunto. Nel caso in cui non doveste utilizzare del feltro autoadesivo, allora potrete procedere nel seguente modo utilizzando della colla: Incollare sulla parte esterna del coperchio e della base direttamente sotto al bordo il nastro adesivo protettivo per prevenire che la colla finisca sul Kamado Grill. Proteggete la parte interna con un pezzo di cartone e spruzzare i bordi con la colla. Lasciate asciugare la colla in accordo alle indicazione riportate sulla confezione e incollate successivamente il feltro sui bordi. Lasciate che la colla si indurisca completamente. Rimontare il Kamado Grill. Rimettere la fascia di tensionamento intorno alla base e avvitare i bulloni quasi completamente. Riporre il coperchio con cautela nella fascia di tensionamento intorno alla base e avvitare i bulloni quasi completamente. Controllare che il coperchio e le fasce di tensionamento siano posizionate correttamente e serrare tutti i bulloni. CONDIZIONI GENERALI DI GARANZIA LIMITATA PER IL PATTON KAMADO GRILL Ogni apparecchio di cottura in materiale ceramico Patton Kamado Grill ha una garanzia limitata sul materiale e la costruzione di tutti i componenti in ceramica (come la cupola, il corpo, il camino con valvola di chiusura, il focolaio e l’anello interno). Questa garanzia è valida per tutto il periodo in cui l’acquirente originario del Patton Kamado Grill rimane il proprietario del componente coperto da garanzia. Il Patton Kamado Grill è coperto da una garanzia limitata di 2 anni per difetti di fabbricazione in favore dell’acquirente originario. La garanzia non copre la rottura dei componenti in ceramica derivante da cadute o da un uso inappropriato. I componenti in metallo, acciaio inox e ghisa del Patton Kamado Grill (come per esempio le ruote in metallo, il meccanismo della cerniera, il coperchio in metallo con le due funzioni, la griglia, il focolaio e il pannello scorrevole di areazione) sono coperti da una garanzia limitata per difetti di fabbricazione di un anno in favore dell’acquirente originario. Patton si impegna a utilizzare sulle superfici in metallo materiali antiruggine e vernici che siano in grado di sopportare le temperature elevate. I materiali in metallo e gli strati protettivi tuttavia possono essere danneggiati da possibili graffi sulla superficie o dall’esposizione degli stessi a sostanze e condizioni ambientali non sotto il controllo della Patton. Cloro, vapori industriali, sostanze chimiche, fertilizzante chimico, umidità estrema, pesticidi per il prato e sale sono soltanto alcune delle sostanze che possono danneggiare la lacca e la finitura degli strati protettivi applicati sui metalli. Per questo motivo la garanzia NON COPRE LA RUGGINE, OSSIDAZIONI, SOSTITUZIONE e altri tipi di DIFETTI relativi ai componenti in metallo, acciaio inox e ghisa tranne nel caso in cui questi difetti siano causa di perdita dell’integrità strutturale o che questi componenti del Patton Kamado Grill siano difettosi. Durante il periodo invernale questo prodotto deve essere riposto all’interno. La crettatura esterna della ceramica fa parte del processo di produzione. Gli articoli in legno, come i tavoli laterali in bambù, sono coperti da una garanzia limitata di 1 anno in favore dell’acquirente originario. I prodotti in legno non sono coperti per quanto riguarda il normale invecchiamento o le crepe a meno che non ci sia anche una perdita dell’integrità strutturale. Anche il termometro ha una garanzia limitata di 1 anno contro difetti di fabbricazione. Queste garanzie sono basate su un utilizzo, non commerciale e una manutenzione normale del Patton Kamado Grill. L’utilizzo commerciale o similare non è coperto dalla garanzia. La garanzia non copre danni aggiuntivi o imprevisti o rotture, o danni derivanti dal: trasporto; cadute; montaggio errato; supporto inadeguato; tentativo di supportare il Patton Kamado Grill tramite mezzi diversi rispetto ad una superficie solida, non infiammabile sotto la base; l’utilizzo commerciale; modifiche; variazioni; negligenza; uso improprio; cura impropria; pericoli sulla strada; usura normale e ragionevole; o calamità naturali. 46 IT, CH La garanzia non copre i graffi, ammaccature, scheggiature, piccole crepe, l’apparizione di piccole crepe cosmetiche nella laccatura esterna che non influenzano la funzionalità del Patton Kamado Grill. Qualsiasi modifica o variazione del Patton Kamado Grill non autorizzata causerà il decadimento della garanzia. Queste comprendono la creazione di fori o la manomissione dei componenti; l’utilizzo nel Patton Kamado Grill di componenti non originali della Patton Kamado Grill; o l’utilizzo dei componenti interni in maniera diversa dalla destinazione d’uso prevista dal produttore. La modifica o la sostituzione dei componenti interni, come il focolaio e l’anello interno, causa la decadenza della garanzia, e la Patton declina espressamente ogni responsabilità per qualsiasi danno diretto o indiretto accessorio che ne deriva. L’utilizzo nel Patton Kamado Grill di liquido accendifuoco o di qualsiasi altra miscela infiammabile fa decadere la garanzia. Questa è un’operazione pericolosa e può causare danni o ferite. NEI LIMITI MASSIMI AMMESSI DALLA LEGGE, LA PRESENTE È L’UNICA GARANZIA ASSOCIATA AL PRODOTTO. NON SONO PREVISTE ULTERIORI GARANZIE, ESPRESSE O TACITE, INCLUSE GARANZIE TACITE DI COMMERCIABILITÀ E IDONEITÀ PER SCOPI PARTICOLARI. È ESCLUSA QUALSIASI RESPOSABILITÀ PER DANNI AGGIUNTIVI, SPECIALI O ACCESSORI. GUIDA ALLE TEMPERATURE DI COTTURA Cuocere lentamente / Affumicare (110ºC-135ºC) Petto di manzo Maiale arrosto Pollo intero Costolette Arrosti Bocchetta superiore Bocchetta inferiore 15-20 min. 15-30 min. 30-45 min. 1-1.5 ore 3-4 ore 2-4 ore 2-5 ore Scottare (260ºC-370ºC) Bistecca Braciola di maiale Hamburger Salsicce Bocchetta inferiore 2 ore x 450 gr 2 ore x 450 gr 3 - 4 ore 3 - 5 ore 9+ ore Grigliare / Arrostire (160ºC-180ºC) Pesce Filetto di maiale Parti di pollo Pollo intero Cosciotto di agnello Tacchino Coscia di maiale Bocchetta superiore Bocchetta superiore Bocchetta inferiore 5-8 min. 6-10 min. 6-10 min. 6-10 min. Aprire 47 Chiuso IT, CH ACCESSORI OPZIONALI Pinza Permette di sollevare la pieta per la cottura della pizza o le griglie di cottura quando sono troppo calde da maneggiare. Paletta per la cenere Una volta bruciato tutto il combustibile e il Kamado è raffreddato, utilizzare questo utensile per rimuovere le ceneri depositate. 48 NL, BE, LU Attentie: Deze informatie is alleen bedoeld Alle specificaties kunnen zonder voorafals gids. Specifieke onderdelen in uw BBQ gaande kennisgeving worden gewijzigd. en omschrijving kunnen per regio of dealer verschillen. FR, CH Note: Ces renseignements sont donnés à Toutes les caractéristiques sont susceb- titre indicatif. Il est possible que les articles tibles d’être modifiées sans préavis. inclus dans les spécifications de votre barbecue diffèrent selon la région ou les caractéristiques stipulées par le concessionaire. GB, IE Note: This information is a guide only. All specifications are subject to change Items included in your BBQ specification without prior notice. may differ depending on region or specific dealer specification. DE, CH, AT Anmerkung: Diese Anleitung dient lediglich Änderungen ohne vorherige Bekanntder Information. Teile der Grillspezifikation gabe vorbehalten. können je nach Vertriebsregion oder Händleranforderung unterschiedlich sein. PL Uwaga: Niniejsza informacja jest Wszystkie specyfikacje mogą być zmie- wskazówką. Specyficzne części zamienne niane bez uprzedniego zawiadomienia. grilla w opisie mogą różnić się w zależności od regionu lub sprzedawcy. IT, CH Nota: Questa informazione è solo una guida. Gli elementi inclusi nella vostra specifica barbecue possono essere diversi a seconda della regione o specificazione rivenditore specifico. Tutte le specifiche sono soggette a modifiche senza preavviso. www.patton.eu-
 1
1
-
 2
2
-
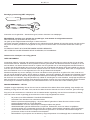 3
3
-
 4
4
-
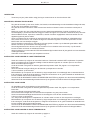 5
5
-
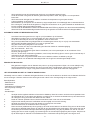 6
6
-
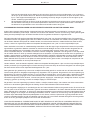 7
7
-
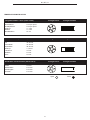 8
8
-
 9
9
-
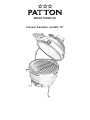 10
10
-
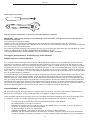 11
11
-
 12
12
-
 13
13
-
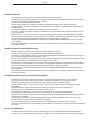 14
14
-
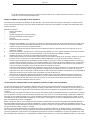 15
15
-
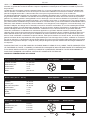 16
16
-
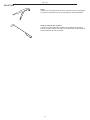 17
17
-
 18
18
-
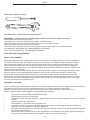 19
19
-
 20
20
-
 21
21
-
 22
22
-
 23
23
-
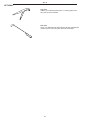 24
24
-
 25
25
-
 26
26
-
 27
27
-
 28
28
-
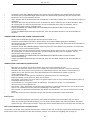 29
29
-
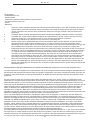 30
30
-
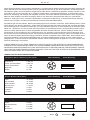 31
31
-
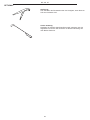 32
32
-
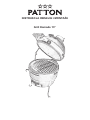 33
33
-
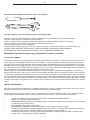 34
34
-
 35
35
-
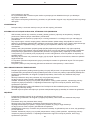 36
36
-
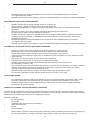 37
37
-
 38
38
-
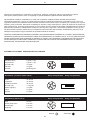 39
39
-
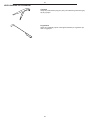 40
40
-
 41
41
-
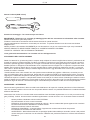 42
42
-
 43
43
-
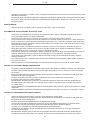 44
44
-
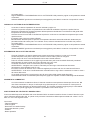 45
45
-
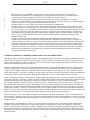 46
46
-
 47
47
-
 48
48
-
 49
49


Patton Kamado 13 Operating And Assembly Instructions Manual
- Categorie
- Barbecues
- Type
- Operating And Assembly Instructions Manual
- Deze handleiding is ook geschikt voor
in andere talen
- English: Patton Kamado 13
- italiano: Patton Kamado 13
- français: Patton Kamado 13
- Deutsch: Patton Kamado 13
- polski: Patton Kamado 13
Gerelateerde papieren
Andere documenten
-
Vonroc BQ501XX Handleiding
-
-
Kamado Joe KJ23NRHC de handleiding
-
Maxima 09378005 Handleiding
-
-
Maxima Premium Kamado BBQ Ø 56 cm Handleiding
-
-
bluMill 8720246428513 Handleiding
-
-