Yamaha P-140 de handleiding
- Categorie
- Synthesizer
- Type
- de handleiding
Deze handleiding is ook geschikt voor

ENGLISH
DEUTSCH
FRANÇAIS
ESPAÑOL
ES
FR
DE
EN
P-140/P-140S
Electronic Piano
lectroni
c
ian
o
Owner’s Manual
Bedienungsanleitung
Mode d’emploi
Manual de instrucciones

P-140 Owner’s Manual
2
PLEASE KEEP THIS MANUAL
This product utilizes batteries or an external power supply (adapter). DO
NOT connect this product to any power supply or adapter other than one
described in the manual, on the name plate, or specifically recom-
mended by Yamaha.
WARNING: Do not place this product in a position where anyone could
walk on, trip over, or roll anything over power or connecting cords of any
kind. The use of an extension cord is not recommended! If you must use
an extension cord, the minimum wire size for a 25’ cord (or less) is 18
AWG. NOTE: The smaller the AWG number, the larger the current han-
dling capacity. For longer extension cords, consult a local electrician.
This product should be used only with the components supplied or; a
cart, rack, or stand that is recommended by Yamaha. If a cart, etc., is
used, please observe all safety markings and instructions that accom-
pany the accessory product.
SPECIFICATIONS SUBJECT TO CHANGE:
The information contained in this manual is believed to be correct at the
time of printing. However, Yamaha reserves the right to change or modify
any of the specifications without notice or obligation to update existing
units.
This product, either alone or in combination with an amplifier and head-
phones or speaker/s, may be capable of producing sound levels that
could cause permanent hearing loss. DO NOT operate for long periods
of time at a high volume level or at a level that is uncomfortable. If you
experience any hearing loss or ringing in the ears, you should consult an
audiologist.
IMPORTANT: The louder the sound, the shorter the time period before
damage occurs.
Some Yamaha products may have benches and / or accessory mounting
fixtures that are either supplied with the product or as optional accesso-
ries. Some of these items are designed to be dealer assembled or
installed. Please make sure that benches are stable and any optional fix-
tures (where applicable) are well secured BEFORE using.
Benches supplied by Yamaha are designed for seating only. No other
uses are recommended.
NOTICE:
Service charges incurred due to a lack of knowledge relating to how a
function or effect works (when the unit is operating as designed) are not
covered by the manufacturer’s warranty, and are therefore the owners
responsibility. Please study this manual carefully and consult your dealer
before requesting service.
ENVIRONMENTAL ISSUES:
Yamaha strives to produce products that are both user safe and environ-
mentally friendly. We sincerely believe that our products and the produc-
tion methods used to produce them, meet these goals. In keeping with
both the letter and the spirit of the law, we want you to be aware of the
following:
Battery Notice:
This product MAY contain a small non-rechargeable battery which (if
applicable) is soldered in place. The average life span of this type of bat-
tery is approximately five years. When replacement becomes necessary,
contact a qualified service representative to perform the replacement.
This product may also use “household” type batteries. Some of these
may be rechargeable. Make sure that the battery being charged is a
rechargeable type and that the charger is intended for the battery being
charged.
When installing batteries, do not mix batteries with new, or with batteries
of a different type. Batteries MUST be installed correctly. Mismatches or
incorrect installation may result in overheating and battery case rupture.
Warning:
Do not attempt to disassemble, or incinerate any battery. Keep all batter-
ies away from children. Dispose of used batteries promptly and as regu-
lated by the laws in your area. Note: Check with any retailer of
household type batteries in your area for battery disposal information.
Disposal Notice:
Should this product become damaged beyond repair, or for some reason
its useful life is considered to be at an end, please observe all local,
state, and federal regulations that relate to the disposal of products that
contain lead, batteries, plastics, etc. If your dealer is unable to assist
you, please contact Yamaha directly.
NAME PLATE LOCATION:
The name plate is located on the bottom of the product. The model num-
ber, serial number, power requirements, etc., are located on this plate.
You should record the model number, serial number, and the date of pur-
chase in the spaces provided below and retain this manual as a perma-
nent record of your purchase.
Model
Serial No.
Purchase Date
SPECIAL MESSAGE SECTION
92-BP (bottom)

P-140 Owner’s Manual
3
IMPORTANT SAFETY INSTRUCTIONS
INFORMATION RELATING TO PERSONAL INJURY, ELECTRICAL SHOCK,
AND FIRE HAZARD POSSIBILITIES HAS BEEN INCLUDED IN THIS LIST.
WARNING- When using any electrical or electronic product,
basic precautions should always be followed. These precautions
include, but are not limited to, the following:
1. Read all Safety Instructions, Installation Instructions, Spe-
cial Message Section items, and any Assembly Instructions
found in this manual BEFORE making any connections, includ-
ing connection to the main supply.
2. Main Power Supply Verification: Yamaha products are
manufactured specifically for the supply voltage in the area
where they are to be sold. If you should move, or if any doubt
exists about the supply voltage in your area, please contact your
dealer for supply voltage verification and (if applicable) instruc-
tions. The required supply voltage is printed on the name plate.
For name plate location, please refer to the graphic found in the
Special Message Section of this manual.
3. This product may be equipped with a polarized plug (one
blade wider than the other). If you are unable to insert the plug
into the outlet, turn the plug over and try again. If the problem
persists, contact an electrician to have the obsolete outlet
replaced. Do NOT defeat the safety purpose of the plug.
4. Some electronic products utilize external power supplies
or adapters. Do NOT connect this type of product to any power
supply or adapter other than one described in the owners manual,
on the name plate, or specifically recommended by Yamaha.
5. WARNING: Do not place this product or any other
objects on the power cord or place it in a position where anyone
could walk on, trip over, or roll anything over power or connect-
ing cords of any kind. The use of an extension cord is not recom-
mended! If you must use an extension cord, the minimum wire
size for a 25’ cord (or less) is 18 AWG. NOTE: The smaller the
AWG number, the larger the current handling capacity. For
longer extension cords, consult a local electrician.
6. Ventilation: Electronic products, unless specifically
designed for enclosed installations, should be placed in locations
that do not interfere with proper ventilation. If instructions for
enclosed installations are not provided, it must be assumed that
unobstructed ventilation is required.
7. Temperature considerations: Electronic products should
be installed in locations that do not significantly contribute to
their operating temperature. Placement of this product close to
heat sources such as; radiators, heat registers and other devices
that produce heat should be avoided.
8. This product was NOT designed for use in wet/damp loca-
tions and should not be used near water or exposed to rain.
Examples of wet/damp locations are; near a swimming pool,
spa, tub, sink, or wet basement.
9. This product should be used only with the components
supplied or; a cart, rack, or stand that is recommended by the
manufacturer. If a cart, rack, or stand is used, please observe all
safety markings and instructions that accompany the accessory
product.
10. The power supply cord (plug) should be disconnected
from the outlet when electronic products are to be left unused for
extended periods of time. Cords should also be disconnected
when there is a high probability of lightning and/or electrical
storm activity.
11. Care should be taken that objects do not fall and liquids are
not spilled into the enclosure through any openings that may exist.
12. Electrical/electronic products should be serviced by a
qualified service person when:
a. The power supply cord has been damaged; or
b. Objects have fallen, been inserted, or liquids have been
spilled into the enclosure through openings; or
c. The product has been exposed to rain: or
d. The product dose not operate, exhibits a marked change
in performance; or
e. The product has been dropped, or the enclosure of the
product has been damaged.
13. Do not attempt to service this product beyond that
described in the user-maintenance instructions. All other servic-
ing should be referred to qualified service personnel.
14. This product, either alone or in combination with an
amplifier and headphones or speaker/s, may be capable of pro-
ducing sound levels that could cause permanent hearing loss.
DO NOT operate for a long period of time at a high volume level
or at a level that is uncomfortable. If you experience any hearing
loss or ringing in the ears, you should consult an audiologist.
IMPORTANT: The louder the sound, the shorter the time period
before damage occurs.
15. Some Yamaha products may have benches and/or accessory
mounting fixtures that are either supplied as a part of the product
or as optional accessories. Some of these items are designed to be
dealer assembled or installed. Please make sure that benches are
stable and any optional fixtures (where applicable) are well
secured BEFORE using. Benches supplied by Yamaha are
designed for seating only. No other uses are recommended.
PLEASE KEEP THIS MANUAL
92-469-2

P-140 Owner’s Manual
ENGLISH
4
(3)-9
1/2
PRECAUTIONS
PLEASE READ CAREFULLY BEFORE PROCEEDING
* Please keep this manual in a safe place for future reference.
WARNING
Always follow the basic precautions listed below to avoid the possibility of serious injury or even death from electrical
shock, short-circuiting, damages, fire or other hazards. These precautions include, but are not limited to, the following:
• Only use the voltage specified as correct for the instrument. The required
voltage is printed on the name plate of the instrument.
• Use the specified adaptor (PA-5D, PA-150, or an equivalent recommended by
Yamaha) only. Using the wrong adaptor can result in damage to the instrument
or overheating.
• Check the electric plug periodically and remove any dirt or dust which may have
accumulated on it.
• Do not place the AC adaptor cord near heat sources such as heaters or radiators,
and do not excessively bend or otherwise damage the cord, place heavy objects
on it, or place it in a position where anyone could walk on, trip over, or roll
anything over it.
• Do not open the instrument or attempt to disassemble the internal parts or
modify them in any way. The instrument contains no user-serviceable parts. If it
should appear to be malfunctioning, discontinue use immediately and have it
inspected by qualified Yamaha service personnel.
• Do not expose the instrument to rain, use it near water or in damp or wet
conditions, or place containers on it containing liquids which might spill into
any openings.
• Never insert or remove an electric plug with wet hands.
• Do not put burning items, such as candles, on the unit.
A burning item may fall over and cause a fire.
• If the AC adaptor cord or plug becomes frayed or damaged, or if there is a
sudden loss of sound during use of the instrument, or if any unusual smells or
smoke should appear to be caused by it, immediately turn off the power switch,
disconnect the adaptor plug from the outlet, and have the instrument inspected
by qualified Yamaha service personnel.
CAUTION
Always follow the basic precautions listed below to avoid the possibility of physical injury to you or others, or damage
to the instrument or other property. These precautions include, but are not limited to, the following:
• When removing the electric plug from the instrument or an outlet, always hold
the plug itself and not the cord.
• Unplug the AC power adaptor when not using the instrument, or during
electrical storms.
• Do not connect the instrument to an electrical outlet using a multiple-connector.
Doing so can result in lower sound quality, or possibly cause overheating in the
outlet.
• Do not expose the instrument to excessive dust or vibrations, or extreme cold or
heat (such as in direct sunlight, near a heater, or in a car during the day) to
prevent the possibility of panel disfiguration or damage to the internal
components.
• Do not use the instrument in the vicinity of a TV, radio, stereo equipment,
mobile phone, or other electric devices. Otherwise, the instrument, TV, or radio
may generate noise.
• Do not place the instrument in an unstable position where it might accidentally
fall over.
• Before moving the instrument, remove all connected adaptor and other cables.
• When setting up the instrument, make sure that the AC outlet you are using is
easily accessible. If some trouble or malfunction occurs, immediately turn off
the power switch and disconnect the plug from the outlet.
• Use only the stand specified for the instrument. When attaching the stand or
rack, use the provided screws only. Failure to do so could cause damage to the
internal components or result in the instrument falling over.
Power supply/AC power adaptor
Do not open
Water warning
Fire warning
If you notice any abnormality
Power supply/AC power adaptor
Location

P-140 Owner’s Manual
ENGLISH
5
• Before connecting the instrument to other electronic components, turn off the
power for all components. Before turning the power on or off for all
components, set all volume levels to minimum. Also, be sure to set the volumes
of all components at their minimum levels and gradually raise the volume
controls while playing the instrument to set the desired listening level.
• When cleaning the instrument, use a soft, dry cloth. Do not use paint thinners,
solvents, cleaning fluids, or chemical-impregnated wiping cloths.
• Do not insert a finger or hand in any gaps on the instrument.
• Never insert or drop paper, metallic, or other objects into the gaps on the panel
or keyboard. If this happens, turn off the power immediately and unplug the
power cord from the AC outlet. Then have the instrument inspected by qualified
Yamaha service personnel.
• Do not place vinyl, plastic or rubber objects on the instrument, since this might
discolor the panel or keyboard.
• Do not rest your weight on, or place heavy objects on the instrument, and do not
use excessive force on the buttons, switches or connectors.
• Do not operate the instrument for a long period of time at a high or
uncomfortable volume level, since this can cause permanent hearing loss. If you
experience any hearing loss or ringing in the ears, consult a physician.
Saving and backing up your data
• Data in the instrument’s internal memory can be lost due to operational errors or
malfunction. Be sure to save any important data to external media via a
computer connection. (page 50)
Yamaha cannot be held responsible for damage caused by improper use or modifications to the instrument, or data that is lost or destroyed.
Always turn the power off when the instrument is not in use.
Even when the instrument turns the power off, electricity is still flowing to the instrument at the minimum level. When you are not using the instrument for a long time, make
sure you unplug the AC power adaptor from the wall AC outlet.
Connections
Maintenance
Handling caution
Saving data
(3)-9
2/2

P-140 Owner’s Manual
ENGLISH
6
Introduction
Thank you for purchasing the Yamaha Electronic Piano P-140/P-140S!
We recommend that you read this manual carefully
so that you can fully take advantage of the advanced and
convenient functions of the P-140/P-140S.
We also recommend that you keep this manual in a safe and
handy place for future reference.
Main Features
Graded Hammer Effect Keyboard
Thanks to our experience as the world’s leading manufacturer of acoustic pianos, we’ve developed a keyboard with
action that’s virtually indistinguishable from the real thing. Just as on a traditional acoustic piano, the keys of the lower
notes have a heavier touch, while the higher ones are more responsive to lighter playing. The keyboard’s sensitivity can
even be adjusted to match your playing style.
AWM Dynamic Stereo Sampling
The Yamaha P-140 Electronic piano offers unmatched sonic realism and natural grand-piano type playability as well as
Ya maha’s original AWM Dynamic Stereo Sampling tone generation technology for rich, musical voices.
The Grand Piano 1, 2 and 3 voices feature totally new samples painstakingly recorded from a full concert grand piano.
The Grand Piano 1 and 3 voices feature three velocity-switched samples (Dynamic Sampling), special Sustain Sam-
pling (page 43) that samples the unique resonance of an acoustic grand piano’s soundboard and strings when the sus-
tain pedal is pressed, and Keyoff Samples that add the subtle sound produced when the keys are released. The P-140
comes much closer to the sound of a true acoustic piano.

P-140 Owner’s Manual
ENGLISH
7
About this Owner’s Manual
This manual consists of three main sections: Introduction, Reference and Appendix.
Introduction (page 6):
Please read this section first.
Reference (page 14):
This section explains how to make detailed settings for the P-140’s various functions.
Appendix (page 58):
This section introduces reference material.
*The illustrations and displays as shown in this owner’s manual are for instructional purposes only, and may appear somewhat dif-
ferent from those on your instrument.
*Copying of the commercially available musical data including but not limited to MIDI data and/or audio data is strictly prohibited
except for your personal use.
*The models P-140/P-140S will be referred to as the P-140 in this Owner’s Manual.
•The company names and product names in this Owner’s Manual are the trademarks or registered trademarks of their respective
companies.
Accessories
• Owner’s Manual
This manual contains complete instructions for operating your P-140.
•AC Power Adaptor (Yamaha PA-5D, PA-150 or an equivalent)*
• Pedal (FC3)
•Music Rest
* May not be included depending on your particular area. Please check with your Yamaha dealer.
This product incorporates and bundles computer programs and contents in which Yamaha owns copyrights or with respect to
which it has license to use others’ copyrights. Such copyrighted materials include, without limitation, all computer software, style
files, MIDI files, WAVE data, musical scores and sound recordings. Any unauthorized use of such programs and contents outside of
personal use is not permitted under relevant laws. Any violation of copyright has legal consequences. DON’T MAKE, DISTRIBUTE
OR USE ILLEGAL COPIES.

P-140 Owner’s Manual
ENGLISH
8
Table of Contents
Introduction
Main Features..................................................... 6
About this Owner’s Manual ............................... 7
Accessories ......................................................... 7
Application Index............................................... 9
Panel Controls and Terminals.......................... 10
Before Using the P-140 .................................... 12
Turning the Power On ...............................................12
Setting the Volume.....................................................12
Using the Pedals..........................................................13
Using Headphones .....................................................13
Music Rest...................................................................13
Reference
Listening to the Demo Songs .......................... 14
Using the 50 Piano Preset Songs..................... 15
Listening to the 50 Piano Preset Songs......................15
Practicing a One-Hand Part Using the 50 Preset
Songs (Part Cancel Function)....................................16
A-B Repeat for the 50 Preset Songs ...........................18
Selecting & Playing Voices............................... 19
Selecting Voices ..........................................................19
Combining Voices (Dual)..........................................20
Splitting the Keyboard Range and Playing Two
Different Voices (Split) ..............................................21
Adding Variations to the Sound – [VARIATION]...23
Selecting a Reverb/Effect type – [REVERB]/
[EFFECT]....................................................................24
Touch Sensitivity – [TOUCH] ..................................25
Transposition – [TRANSPOSE] ................................26
Using the Metronome ................................................27
Recording Your Performance .......................... 28
Recording a performance quickly..............................28
Re-recording a previously recorded song..................30
Recording to RIGHT/LEFT .......................................31
Changing the Initial Settings (data recorded
at the beginning of a song).........................................33
Playing Back Songs .......................................... 34
Playing Back User Songs/External Songs
on the P-140................................................................34
Detailed Settings – [FUNCTION]...................... 36
Basic Procedure in Function......................................37
About Each Function .................................................39
F1. Fine Tuning of the Pitch ...............................39
F2. Selecting a Scale .............................................40
F3. Dual Functions ..............................................41
F4. Split Functions...............................................42
F5. Other Functions ............................................43
F6. Metronome Volume ..................................... 44
F7. Song Part Cancel Volume............................. 44
F8. MIDI Functions ............................................44
F9. Backup Functions..........................................46
Connections ..................................................... 47
Connectors .................................................................47
Connecting a Personal Computer.............................49
Data Backup Using a Computer....................... 50
Message List ..................................................... 51
Troubleshooting............................................... 52
Optional Equipment......................................... 52
Preset Voice List ............................................... 53
Index................................................................. 55
Appendix
Preset Song List................................................ 58
Factory Setting List .......................................... 59
MIDI Data Format ............................................ 60
MIDI Implementation Chart ............................ 64
Specifications ................................................... 65

P-140 Owner’s Manual
ENGLISH
9
Application Index
Use this index to find reference pages that may be helpful for your particular application and situation.
Listening
Listening to demo songs with different voices.....................................................................Listening to the Demo Songs on page 14
Listening to my recorded performance................................................................................................Playing Back Songs on page 34
Listening to commercially available Music Data .................................................................................Playing Back Songs on page 34
Playing
Using the pedals .........................................................................................................................................Using the Pedals on page 13
Playing an accompaniment that matches pitch.............................................................. Transposition – [TRANSPOSE] on page 26
Selecting a touch sensitivity type........................................................................................Touch Sensitivity – [TOUCH] on page 25
Fine tuning the pitch of the entire instrument when you play the P-140 along with other instruments or CD music
........................................................................................................................................................Fine Tuning of the Pitch on page 39
Changing voices
Viewing the list of voices ...........................................................................................................................Preset Voice List on page 53
Combining two voices ............................................................................................................... Combining Voices (Dual) on page 20
Playing different sounds with left and right hands
............................................................................Splitting the Keyboard Range and Playing Two Different Voices (Split) on page 21
Making the sound more brilliant or more mellow......................................................................................[VARIATION] on page 23
Simulating a concert hall ....................................................................................................................................[REVERB] on page 24
Adding spread or swell to the sound...................................................................................................................[EFFECT] on page 24
Practicing
Muting the right- or left-hand part
...............................................................Practicing a One-Hand Part Using the 50 Preset Songs (Part Cancel Function) on page 16
Practicing a specified phrase repeatedly .................................................................... A-B Repeat for the 50 Preset Songs on page 18
Practicing with an accurate and steady tempo ............................................................................... Using the Metronome on page 27
Practicing using your recorded song....................................................................................Recording Your Performance on page 28
.........................................................................................................................................Turning part playback on and off on page 35
Recording
Recording your performance................................................................................................Recording Your Performance on page 28
Settings
Adjusting the P-140 settings .........................................................................................Detailed Settings – [FUNCTION] on page 36
Resetting to the default setting ...........................................................................................................Factory Preset Recall on page 46
Connecting the P-140 to other devices
What is MIDI?..................................................................................................................................................About MIDI on page 47
Making detailed settings for MIDI ...........................................................................................................MIDI Functions on page 44
Recording your performance............................................................................AUX OUT [L] [R] (LEVEL FIXED) jacks on page 48
Raising the volume............................................................................................AUX OUT [L] [R] (LEVEL FIXED) jacks on page 48
Connecting a computer ................................................................................................ Connecting a Personal Computer on page 49
Saving the data to a computer.........................................................................................Data Backup Using a Computer on page 50
Loading the data from a computer ......................................................................................................Playing Back Songs on page 34

Panel Controls and Terminals
P-140 Owner’s Manual
ENGLISH
10
Panel Controls and Terminals
1 2 3 4 5 7 96 8 )
& * ( ¡º
™
Rear panel
Front
panel

Panel Controls and Terminals
P-140 Owner’s Manual
ENGLISH
11
1 [STANDBY/ON] switch ................ page 12
For turning the power on or off.
2 [MASTER VOLUME] slider ........... page 12
For adjusting the volume level of the entire sound.
3 [DEMO] button............................ page 14
For playing the demo songs.
4 [TRANSPOSE] button................... page 26
For shifting the pitch of the entire keyboard up or
down.
5 [REC] button ................................ page 28
For recording your keyboard performance.
6 [PLAY/PAUSE], [STOP] buttons
..............................................pages 15, 34
For playing back the preset songs, your recorded
material or commercially available music data, etc.
7 [SONG SELECT] button ........pages 15, 34
For selecting a song to play back or edit.
8 [RIGHT], [LEFT] buttons .......pages 16, 35
For turning the left- and right-hand parts on or off as
required so you can practice the corresponding part
(the part that is turned off) on the keyboard.
9 [METRONOME] button.........pages 27, 44
For starting/stopping the metronome function.
)
[TEMPO/FUNCTION
–
,
+
] button
..............................................pages 27, 37
For changing the song tempo (speed) and selecting
other useful functions (pages 36-46).
! Display ......................................... page 12
For showing information on certain settings and val-
ues of the instrument.
CAUTION
Never attempt to turn off the power while flashing
dashes appear in the display, indicating data is being
written to internal memory. Doing so may result in
loss of all user data.
@ [–/NO], [+/YES] buttons
For setting values or performing file operations.
Pressing both buttons simultaneously for certain
value settings (Transpose, Tempo, etc.) restores the
default value.
# Voice group buttons ....................page 19
For selecting voices from 14 internal sounds includ-
ing Grand Piano 1, 2 and 3.
$ [VARIATION] button ....................page 23
For adjusting the brightness of the selected voice for
your keyboard performance.
% [REVERB], [EFFECT] buttons.........page 24
For adding reverb and chorus effects to the selected
voice for your keyboard performance.
^ [TOUCH] button ..........................page 25
For selecting the touch response.
& MIDI [IN] [OUT] terminals...........page 47
For connecting external MIDI devices, allowing the
use of various MIDI functions.
* [SUSTAIN PEDAL] jack.......... pages 13, 47
For connecting an included pedal (FC3) or an
optional FC4/5 foot switch.
( [AUX PEDAL] jack................. pages 13, 48
For connecting an included pedal (FC3), an optional
FC4/5 foot switch or an FC7 foot controller.
º AUX OUT [L] [R] (LEVEL FIXED) jacks
.....................................................page 48
For outputting the sound of the P-140 to an external
audio system, or connecting it to another device (MD
recorder, etc.) to record your performance.
¡ [DC IN 12V] jack...........................page 12
For connecting the included power adaptor.
™ [PHONES] jack..............................page 13
For connecting a set of standard stereo headphones,
allowing private practice.
! ^$@ # %

Before Using the P-140
P-140 Owner’s Manual
ENGLISH
12
Before Using the P-140
Tur ning the Power On
1. Connect the power adaptor’s DC cable to
the [DC IN 12V] jack.
2. Plug the AC adaptor into an AC outlet.
WARNING
Use the specified adaptor (PA-5D, PA-150, or an equivalent recom-
mended by Yamaha) only. The use of other adaptors may result in
irreparable damage to both the adaptor and the P-140.
CAUTION
Unplug the AC Power Adaptor when not using the P-140, or during
electrical storms.
3. Press the [STANDBY/ON] switch to turn
the power on.
The display located in the center of the front panel lights up.
When you’re ready to turn off the power, press the [STANDBY/
ON]
switch again.
CAUTION
Even when the instrument is turned off, electricity is still flowing to
the instrument at the minimum level. When you are not using the P-
140 for a long time, make sure you unplug the AC power adaptor
from the wall AC outlet.
When turning off the power, press and hold down the
[STANDBY/ON] switch for a short time until the power turns
off. The P-140 uses this power-off procedure as a “safety” device
to prevent the power from being inadvertently turned off during
performance.
Setting the Volume
Initially set the [MASTER VOLUME] slider about halfway between the “MIN” and “MAX” settings. Then, when you start
playing, re-adjust the [MASTER VOLUME] slider to the most comfortable listening level.
TERMINOLOGY
MASTER VOLUME:
The volume level of the entire keyboard sound
(The shape of plug differs
depending on locale.)
Display
Normally indicates tempo.
The level increases.The level decreases.

Before Using the P-140
P-140 Owner’s Manual
ENGLISH
13
Using the Pedals
Sustain Pedal (Sustain Pedal jack)
This jack is for connecting the included pedal (FC3).
The pedal functions in the same way as a damper pedal on an acoustic piano. Connect the included pedal (FC3) to this
jack and press the pedal to sustain the sound. The further down the pedal is pressed, the longer the sound will be sus-
tained (can be used like a half pedal effect).
When the GRAND PIANO 1 and 3 voices are selected, pressing the FC3 pedal activates the instrument’s special Sustain
Samples to accurately recreate the unique resonance of an acoustic grand piano’s soundboard and strings.
An optional FC4/FC5 foot switch can also be connected to this jack. However, these foot switches cannot be used to con-
trol the half pedal effect.
AUX Pedal (AUX Pedal jack)
This jack is for connecting an optional FC4/FC5 foot switch or an optional FC7 foot controller. A wide range of functions,
including the Soft Pedal function can be assigned to this jack. For instructions on assigning the pedal, refer to pages 37,
43.
Using Headphones
Connect a set of headphones to one of the [PHONES] jacks.
Two [PHONES] jacks are provided.
You can connect two sets of standard stereo headphones. (If you are
using only one set of headphones, you can plug them into either
jack.)
CAUTION
Do not use the P-140 at a high volume level for a long period of time,
or your hearing may be damaged.
Music Rest
The P-140 includes a music rest that can be attached to the instrument by inserting it into the holes at the top of the con-
trol panel.
The depth of the effect produced by the Sustain Samples can be adjusted via the Pedal Functions (pages 37, 43) in
Function.
The FC7 Foot Controller can be used to control Expression (pages 37, 43).
FC3
NOTE
NOTE
On front panel
Standard
stereo mini
plug

Listening to the Demo Songs
P-140 Owner’s Manual
ENGLISH
14
Listening to the Demo Songs
Demo songs are provided that effectively demonstrate each of the P-140’s voices.
1. Press the [STANDBY/ON] switch to turn the power
on.
When the power is turned ON, one of the voice button
indicators will light.
2. Adjust the volume.
Initially set the [MASTER VOLUME] slider about half
way between the “MIN” and “MAX” settings. Then,
when you start playing, re-adjust the [MASTER VOL-
UME]
slider to the most comfortable listening level.
3. Press the [DEMO] button to listen
to the Demo songs.
The VOICE button indicators will flash in sequence,
then the GRAND PIANO 1 demo song will start. Demo songs provided for each
voice will play back in sequence until you press the [DEMO] or [STOP] button.
Changing a demo song
You can change to another Demo song during playback by pressing the desired
VOICE button.
Demo Song List
• The demonstration pieces listed above are short rearranged excerpts of the original
compositions.
• All other songs are original (© 2005 Yamaha Corporation).
4. Press the [DEMO] or [STOP] button
to stop the Voice demo.
3
4
1 2
34
Demo song data is not transmit-
ted via the MIDI terminals.
Demo songs cannot be played
during User song recording
(page 28).
You cannot adjust the tempo of
demo songs.
You cannot use the Part Cancel
function (page 16) or the Song
A-B Repeat function (page 18) in
Demo.
Seven voices (page 19) are
assigned to the [OTHERS] but-
ton. The demo songs for these
voices are called up in sequence
each time the [OTHERS] button is
pressed during playback.
NOTE
NOTE
NOTE
NOTE
Voice Name Title Composer
GRAND PIANO 3 “Eintritt” Waldszenen Op.82 R. Schumann
HARPSICHORD ([OTHERS] o 4)Gavotte J.S. Bach
or
Reference

Using the 50 Piano Preset Songs
P-140 Owner’s Manual
ENGLISH
15
Using the 50 Piano Preset Songs
Listening to the 50 Piano Preset Songs
The P-140 provides performance data of 50 piano songs. You can simply listen to these songs
(page 58) or use them for practice (page 16).
1. Press the [SONG SELECT] button a
few times until the “PRESET” indica-
tor lights.
2. Press the [–/NO], [+/YES] buttons to
select the number of the tune you
want to play.
The number will appear on the display.
1 – 50: Select a preset song number and play only the song.
ALL: Play all preset songs in sequence.
rnd: Play all preset songs continuously in random order.
3. Press the [PLAY/PAUSE] button to
start playback.
Adjust the tempo
You can use the [TEMPO/FUNCTION –, +] but-
tons to adjust the playback tempo as required.
This produces a relative tempo variation, with
a range from “–50” through “0” to “50” at max-
imum; the range will differ depending on the
selected song.
The default tempo can be recalled by simulta-
neously pressing the [–] and [+] buttons.
4. Stop playback.
Playback will stop automatically when the selected preset
song has finished. To stop the song during playback (or
continuous playback), press the [STOP] button. You can
also pause playback by pressing the [PLAY/PAUSE] button.
To play back another song continuously, see step 2 above.
5.
Press the [SONG SELECT] button to exit Preset Song
playback.
The indicator turns off, and the instrument returns to normal play.
52
34
1
TERMINOLOGY
Song:
On the P-140, performance data
is called a “Song.” This includes
demonstration tunes and piano
preset tunes.
Preset:
Preset Data supplied with the
internal memory of the P-140
shipped from the factory.
The default tempo “0” is automati-
cally selected whenever a new
preset song is selected, or when
playback of a new preset song
begins during “ALL” or “rnd”
playback.
When you select a different song
(or a different song is selected
during chained playback), appro-
priate reverb and effect types will
be selected accordingly.
You can adjust the Variation type
(page 23) and Reverb type
(page 24) that is applied to the
voice you play on the keyboard
and for the preset song playback.
NOTE
NOTE
NOTE

Using the 50 Piano Preset Songs
P-140 Owner’s Manual
ENGLISH
16
Practicing a One-Hand Part Using the 50 Preset Songs
(Part Cancel Function)
The 50 preset songs have separate left- and right-hand parts on individual parts. You can turn the
left- and right-hand parts on or off as required so you can practice the corresponding part (the part
that is turned off) on the keyboard. The right-hand part is played by [RIGHT] and the left-hand part
is played by [LEFT].
1. Turn off the playback part you wish
to practice.
After you select a song to practice, press the [RIGHT] or
[LEFT] button to turn off the corresponding part.
When you first select a song, both [RIGHT] and [LEFT] indicators light up, indi-
cating that you can play back both parts. When you press one of the buttons to
turn off playback, the corresponding button indicator turns off and the corre-
sponding part playback is muted.
Pressing the buttons repeatedly toggles playback between on and off. The parts
can be turned on or off even during playback.
2. Press the [PLAY/PAUSE] button to
start playback and playing.
Play the part you just turned off.
3. Stop playback.
When playback is complete, it automatically stops and
the P-140 locates the top of the song. If you wish to stop
playback in the middle of a song, press the
[STOP] but-
ton. You can also pause playback by pressing the [PLAY/
PAUSE]
button.
1
23
The Preset Song Part Cancel
function cannot be used during
“ALL” or “rnd” (page 15) play-
back.
The “Song Part Cancel Volume”
function described on pages 37,
44 can be used to set the can-
celed part so that it plays at a vol-
ume from “0” (no sound) to “20.”
The default setting is “5.”
NOTE
NOTE

Using the 50 Piano Preset Songs
P-140 Owner’s Manual
ENGLISH
17
Starting playback automatically as you start playing
the keyboard (Sync Start)
When the Sync Start function is engaged, playback of the selected preset song
will begin automatically as soon as you start playing on the keyboard.
To engage the Sync Start function, simultaneously hold down the
[STOP] and
press the [PLAY/PAUSE] button. Repeat the previous operation to disengage the
Sync Start function.
Playback will then start as soon as you begin playing the keyboard.
Pedal Play/Pause
A pedal connected to the [AUX PEDAL] connector can be assigned to play and
pause preset song playback via the AUX Pedal function described on pages 37,
43.
TERMINOLOGY
Sync:
Synchronized; occurring at the
same time.
Sync Start
standby
Sync Start

Using the 50 Piano Preset Songs
P-140 Owner’s Manual
ENGLISH
18
A-B Repeat for the 50 Preset Songs
The A-B Repeat function can be used to continuously repeat a specified phrase within a preset song.
Combined with the Part Cancel function described below, this provides an excellent way to practice
difficult phrases.
1. Select and play a preset song.
2. Press the [TEMPO/FUNCTION] button at the begin-
ning of the phrase you want to repeat.
This sets the “A” point ( will appear on the display).
3. Press the [TEMPO/FUNCTION] button a second
time at the end of the phrase.
This sets the “B” point ( will appear on the display).
At this point, repeat playback will begin between the specified A and B points.
4. Press the [STOP] button to stop play-
back.
A-B repeat playback will resume if you press the [PLAY/
PAUSE]
button.
To cancel the A and B points, press the [TEMPO/FUNCTION] button once.
3
2
4
The A-B Repeat function cannot
be used during “ALL” or “rnd”
(page 15) playback.
NOTE
•To set the “A” point at the very
beginning of the song, press
the [TEMPO/FUNCTION] but-
ton before starting playback.
•You can have the B point auto-
matically be set to the song’s
end, by setting the A point and
letting the song play to the end.
An automatic lead-in (to help
guide you into the phrase) starts
at the A point of the song.
NOTE
NOTE
AB
Repeat A through B
The A and B points are automati-
cally canceled when a new song
is selected.
NOTE

Selecting & Playing Voices
P-140 Owner’s Manual
ENGLISH
19
Selecting & Playing Voices
Selecting Voices
1. Select the desired voice by pressing one of the Voice
buttons.
[OTHERS] button
Pressing the [OTHERS] button switches among the fol-
lowing seven voices.
For details about “o 7 SPLIT,” refer to page 21.
Then, when you start playing, re-adjust the [MASTER VOLUME] slider for the most
comfortable listening level.
1
[OTHERS] button
To familiarize yourself with the
characteristics of the voices, lis-
ten to the demo songs for each
voice (page 14). Refer to “Preset
Voice List” on page 53 for more
information on the characteristics
of each preset voice.
TERMINOLOGY
Voice:
On the P-140, the term “voice”
means “instrument sound.”
You can control the loudness of a
voice by adjusting the force with
which you strike the keys,
although different playing styles
(touch sensitivities) have little or
no effect with certain musical
instruments.
Refer to “Preset Voice List” on
page 53.
If you select the voice via the
[OTHERS] button then press
another VOICE button, the voice
last selected via the [OTHERS]
button will be maintained. In other
words, pressing the [OTHERS]
button again calls up the last
selected voice.
NOTE
NOTE
NOTE
o 1
CHURCH ORGAN
o 2
JAZZ ORGAN
o 3
STRINGS
o 4
HARPSI CHORD
o 5
E. CLAVI CHORD
o 6
VIBRAPHONE
o 7
SPLIT

Selecting & Playing Voices
P-140 Owner’s Manual
ENGLISH
20
Combining Voices (Dual)
You can play voices simultaneously across the entire range of the keyboard. In this way, you can
combine similar voices to create a thicker sound.
1. Press two voice buttons at the same time (or press
one voice button while holding another) to engage
Dual.
The voice indicators of both selected voices will light when Dual is active.
Play the keyboard.
If you want to use a voice selected via the [OTHERS] button, press the [OTHERS]
button several times to call up the desired voice (other than “SPLIT”) while
holding any other VOICE button.
According to the voice numbering priority shown in the diagram below, the
lower value voice number will be designated as Voice 1 (the other voice will be
designated as Voice 2).
The P-140 Function provides access to a number of other Dual functions, such
as volume balance setting and octave setting (pages 37, 41). (If you do not set
the Dual functions, the appropriate setting will be set in each voice by default.)
2. Press any single voice button to return to the nor-
mal single-voice play.
2
1
Two voices in the [OTHERS] but-
ton cannot be engaged at the
same time.
Dual is not available when
“SPLIT” is selected via the
[OTHER] button.
The PIANO & STRINGS voice
combines the sounds of piano
and strings. Pressing the
[PIANO&STRINGS] button will
produce the same result as Dual.
You can combine other voices
with this voice; however, keep in
mind that the sound may cut off
unnaturally.
NOTE
NOTE
NOTE
Press at the same time
1 2 3 4 5 6 7 8
Voice numbering priority

Selecting & Playing Voices
P-140 Owner’s Manual
ENGLISH
21
Splitting the Keyboard Range and Playing Two Different
Vo ices (Split)
Split enables you to play two different voices on the keyboard — one with the left hand and
another with the right hand. For example, you can play a bass part using the Wood Bass or Electric
Bass voice with the left hand, and a melody with the right hand.
1. Press the [OTHERS] button several times until “o 7”
is called up in the display.
The [OTHERS] button lights.
As a default setting, GRAND PIANO 1 will be selected
for the right-hand part and WOOD BASS will be selected
for the left-hand part.
The Function provides access to a number of other Split
functions (pages 37, 42). (If you make no settings for the
Split functions, the appropriate setting will be set in each
voice by default.)
2. Specify the split point (the border between the
right- and left-hand range).
The Split Point can be specified from the FUNCTION display. For details, refer
to pages 37, 42.
(The split point is initially set at the F#2 key by default.
If you do not need to change the split point, skip this step.)
Split point (default setting: F#2)
Bass voice Melody
2
43
15

Selecting & Playing Voices
P-140 Owner’s Manual
ENGLISH
22
3. Select a voice for the right hand.
A voice for the right hand can be selected from the following 13 voices in the
FUNCTION display. For details, refer to pages 37, 42.
4. Select a voice for the left hand.
A voice for the left hand can be selected from the following four voices in the
FUNCTION display. For details, refer to pages 37, 42.
5. Press any single voice button to exit Split and return
to normal play.
[REVERB] in Split
The reverb type assigned to the
right voice will take priority over
the other. (If the reverb is set to
OFF, the left voice’s reverb type
will be in effect.) Reverb depth
settings made via the panel con-
trols (i.e., pressing the [–/NO] or
[+/YES] buttons while holding the
[REVERB] button; see page 24)
will be applied to the right voice
only.
[EFFECT] in Split
Depending on the conditions, one
effect type will take priority over
the other. The depth will be
decided according to the default
depth value of the voice combina-
tion. However, using Function F4
(pages 37, 42) you can change
the depth value for each voice as
you like. Effect depth settings
made via the panel controls (i.e.,
pressing the [–/NO] or [+/YES]
buttons while holding the
[EFFECT] button; see page 24)
will be applied to the right voice
only.
NOTE
NOTE
1 GRAND PIANO 1
2 GRAND PIANO 2
3 GRAND PIANO 3
4 PIANO & STRINGS
5 ELECTRIC PIANO 1
6 ELECTRIC PIANO 2
7 ELECTRIC PIANO 3
8 CHURCH ORGAN
9JAZZ ORGAN
10 STRINGS
11 HARPSICHORD
12 E.CLAVICHORD
13 VIBRAPHONE
1WOOD BASS
2 BASS & CYMBAL
3 E.BASS 1
4 E.BASS 2

Selecting & Playing Voices
P-140 Owner’s Manual
ENGLISH
23
Adding Variations to the Sound – [VARIATION]
[VARIATION]
This button enables you to select the brightness of the selected
voice for your keyboard performance. The following three types
are available.
BRIGHT: Bright tone
NORMAL: Standard tone
MELLOW: Soft and mellow tone
To select a variation type, press the [VARIATION] button a few times until the indicator
corresponding to the desired type lights (the indicator lights in sequence each time you
press the [VARIATION] button). Variation can be selected among three types.
[VARIATION] button
TERMINOLOGY
Default setting:
The “Default setting” refers to the
factory setting obtained when you
first turn on the power to the P-
140.
Default setting = NORMAL
When the VARIATION is set to
BRIGHT, the overall sound will be
slightly louder. If the MASTER
VOLUME is set at a high level the
sound may become distorted. If
so, lower the MASTER VOLUME
level.
NOTE
NOTE

Selecting & Playing Voices
P-140 Owner’s Manual
ENGLISH
24
Selecting a Reverb/Effect type – [REVERB]/[EFFECT]
[REVERB]
This control enables you to select various digital reverb effects
for adding extra depth and expression to the sound and creating
a realistic acoustic ambience.
OFF: When no reverb effect is selected, no REVERB indi-
cator is lit.
ROOM: This setting adds a continuous reverb effect to the sound, similar to the
acoustic reverberation you would hear in a room.
HALL 1: For a “bigger” reverb sound, use the HALL 1 setting. This effect simulates
the natural reverberation of a small-size concert hall.
HALL 2: For a truly spacious reverb sound, use the HALL 2 setting. This effect simu-
lates the natural reverberation of a large concert hall.
STAGE: Simulates the reverb of a stage environment.
Pressing the [REVERB] button repeatedly toggles the reverb on and off.
The indicators light in sequence each time the [REVERB] button is pressed. When all
indicators are off, no effect is produced.
Adjusting Reverb Depth
Adjust the reverb depth for the selected voice by using the [–/NO] [+/YES] buttons
while holding the [REVERB] button. Default depth settings are different for each voice.
The depth range is from 0 (no effect) through 20 (maximum reverb depth). The cur-
rent depth setting appears on the display while the [REVERB] button is held.
[EFFECT]
The [EFFECT] button allows you to select an effect to give your
sound greater depth and animation.
OFF: When no effect is selected, no EFFECT indicator
is lit.
CHORUS: Adds depth and richness to the sound.
PHASER: Adds a sweeping effect to the sound.
TREMOLO: Adds an animated, vibrating effect to the sound.
ROTARY SP:Adds the vibrato effect of a rotary speaker.
To select an effect type, press the [EFFECT] button a few times until the indicator corre-
sponding to the desired type lights (the indicators light in sequence each time you press
the [EFFECT] button). No effect is produced when all indicators are off.
Adjusting Effect Depth
You can adjust the effect depth for the selected voice by using the [–/NO] and [+/YES]
buttons while holding the [EFFECT] button.
Default depth settings are different for each voice. The depth range is from 0 (no effect)
through 20 (maximum effect depth). The current depth setting appears on the display
while the [EFFECT] button is held.
[–/NO][+/YES] buttons [REVERB] button
[EFFECT] button
The default reverb type (including
OFF) and depth settings are dif-
ferent for each voice.
NOTE
Releasing the [REVERB] button
changes the reverb type.
If you are changing the reverb
depth by holding the [REVERB]
button, releasing the [REVERB]
button will not change the reverb
type.
NOTE
The default effect type (including
OFF) and depth settings are dif-
ferent for each voice.
NOTE
Releasing the [EFFECT] button
changes the effect type.
If you are changing the depth set-
tings by holding the [EFFECT]
button, releasing the [EFFECT]
button will not change the effect
type.
NOTE

Selecting & Playing Voices
P-140 Owner’s Manual
ENGLISH
25
Touch Sensitivity – [TOUCH]
[TOUCH]
You can select four different types of keyboard touch sensitivity — HARD, MEDIUM,
SOFT or FIXED — to match different playing styles and preferences.
HARD: Requires that the keys be played quite hard to produce maximum loud-
ness.
MEDIUM: Produces a fairly “standard” keyboard response.
SOFT: Allows maximum loudness to be produced with relatively light key pres-
sure.
FIXED: All notes are produced at the same volume no matter how hard the key-
board is played. (No indicators are lit.) The fixed volume can be changed.
To select a touch sensitivity type press the [TOUCH] button a
few times until the indicator corresponding to the desired type
lights (the indicators light in sequence each time the [TOUCH]
button is pressed). No indicator is lit when “FIXED” is
selected.
Changing the volume when FIXED is selected
When you select FIXED, you can set the volume for notes
played in FIXED by using the [–/NO] and [+/YES] buttons
while you hold the [TOUCH] button. The current volume
level appears on the display. The volume range is from 1
(minimum volume) through 127 (maximum volume). The
default setting is 64.
[–/NO] [+/YES] buttons [TOUCH] button
This setting does not change the
weight of the keyboard.
Default setting = MEDIUM
The touch sensitivity type will
become the common setting for
all voices. However, the touch
sensitivity settings may have little
or no effect with certain voices
that are not normally responsive
to keyboard dynamics. (Refer to
the “Preset Voice List” on
page 53.)
NOTE
NOTE
NOTE
The touch volume set in FIXED
will become the common setting
for all voices.
Releasing the [TOUCH] button
changes the touch type.
If you are changing the volume by
holding the [TOUCH] button,
releasing the [TOUCH] button will
not change the touch sensitivity
type. (FIXED will remain
selected.)
NOTE
NOTE
Volume range

Selecting & Playing Voices
P-140 Owner’s Manual
ENGLISH
26
Transposition – [TRANSPOSE]
The P-140’s Transpose function makes it possible to shift the pitch of the entire keyboard up or
down in semitone intervals to facilitate playing in difficult key signatures, and to let you easily
match the pitch of the keyboard to the range of a singer or other instruments. For example, if you
set the transposition amount to “5,” playing key C produces pitch F. In this way, you can play a
song as though it were in C major, and the P-140 will transpose it to the key of F.
Use the [–/NO] and [+/YES] button while holding the
[TRANSPOSE]
button to transpose down or up as required.
The amount of transposition appears on the display while the
[TRANSPOSE] button is held. The default transpose setting is
“0.”
The [TRANSPOSE] button indicator remains lit when a
transpose setting other than “0” is selected. Every time the
[TRANSPOSE]
button is pressed after that switches the trans-
pose function ON or OFF.
[–/NO] [+/YES] buttons[TRANSPOSE] button
TERMINOLOGY
Transpose:
Changing the key signature of a
song. On the P-140, transposing
shifts the pitch of the entire key-
board.
The transposition range:
–12: –12 semitones (down one
octave)
0: normal pitch
12: 12 semitones (up one octave)
NOTE
Transposition

Selecting & Playing Voices
P-140 Owner’s Manual
ENGLISH
27
Using the Metronome
The P-140 features a built-in metronome for convenience in practicing and use with the Recording
features.
1. Press the [METRONOME] button to start the metro-
nome.
The metronome sound is turned on.
Adjusting the tempo
The tempo of the metronome and user song recorder playback (the recorder is
described in the next section) can be set from 32 to 280 beats per minute by
using the [TEMPO/FUNCTION –, +] buttons (when the [TEMPO/FUNCTION –,
+]
button’s [TEMPO] indicator is lit).
Adjusting the time signature
The time signature (beat) of the metronome can be set by using the [–/NO] and
[+/YES] buttons while holding the [METRONOME] button. You can set the beat
from 0 to 15. The current setting appears on the display while you are holding
the [METRONOME] button.
2. Press the [METRONOME] button to stop the metro-
nome.
1
2
[–/NO] [+/YES] buttons
[TEMPO/FUNCTION –, +] buttons
The beat indicator flashes
at the current tempo.
If the [TEMPO/FUNCTION] but-
ton’s [FUNCTION] indicator is lit,
press the [TEMPO/FUNCTION]
button to light the [TEMPO] indi-
cator.
NOTE
The volume of the metronome can
be adjusted via the Metronome
Volume function in Function
(pages 37, 44).
NOTE
Holding the
[METRONOME]
button.
Beat

Recording Your Performance
P-140 Owner’s Manual
ENGLISH
28
Recording Your Performance
The ability to record and play back what you’ve played on the P-140 keyboard can be an effective
practice aid. You can, for example, record just the left-hand part, and then practice the right-hand
part while playing back the recorded left-hand part. Or, since you can record up to two parts sepa-
rately, you could record the left- and right-hand parts separately, or record both parts of a duet and
hear how they sound when played back. The two-part Song Recorder on the P-140 allows the
recording of up to three User songs (U01-U03) to the instrument.
Recording a performance quickly
This convenient and simple recording method lets you quickly record your performance without
specifying the recording parts — useful, for example, in recording solo piano pieces.
In this way, the performance is automatically recorded to right part.
CAUTION
To avoid erasing previously recorded song(s):
If the song contains data, the part indicator lights up green when you select a song.
Note that recording new data on this part will erase the existing data.
1. Select the voice you want to record (or voices if you
will be using Dual or Split), before you begin to
record.
Make any other desired settings (reverb, effect, etc.) as well. You might also want
to set the volume.
You can also adjust the playback volume using the [MASTER VOLUME] slider.
You can record your performance
(audio data) to an MD recorder or
other recording device via the
AUX OUT jack (page 48).
NOTE
TERMINOLOGY
Recording vs. Saving:
The format of performance data recorded on an MD differs from that of data recorded on the P-140. An
MD records audio signals. The P-140 “saves” information regarding note timing, voices, and a tempo
value, but not audio signals. When you play back recorded songs, the P-140 produces sound based on
the saved information. Therefore, recording on the P-140 may be more accurately called “saving infor-
mation.” However, this book often uses the word “recording” because it seems to make more sense.
2 4
43 5
1
Record mode cannot be engaged
during Demo Song playback.
NOTE

Recording Your Performance
P-140 Owner’s Manual
ENGLISH
29
2. Press the [REC] button to engage Record Ready
mode.
This automatically selects an empty number (U01-U03)
for recording and makes the RIGHT part active. If all
song numbers contain recorded data, Song U01 will be
selected. This simply enables recording; to start record-
ing, go on to step 3.
The amount of memory available for recording is shown on the display in
approximate kilobytes. You can record up to a maximum of about 11,000 notes
on the P-140 depending on pedal usage and other factors. The [PLAY/PAUSE]
indicator will flash at the current METRONOME tempo setting.
You can turn on the metronome in this step, and adjust the tempo by using the
[TEMPO/FUNCTION –, +] buttons. (Range: 32-280)
Record Ready mode can be disengaged before recording by pressing the
[REC]
button again.
3. Start recording.
Recording will begin automatically as soon as you
play a note on the keyboard or press the [PLAY/
PAUSE]
button. The current measure’s number will
appear on the display while recording.
4. Press either [REC] or [STOP] button to stop record-
ing.
When recording is stopped, dashes appear in the dis-
play in succession to indicate that the recorded data is
being saved to the instrument automatically. After the
data is saved, the song name (U01-U03) appears in
the display. The recorded part’s indicator will light in
green to indicate that it now contains data. (Record
mode is disengaged automatically.)
CAUTION
Never attempt to turn the [STANDBY/ON] switch OFF
while flashing dashes appear in the display (these indi-
cate data is being written to internal memory). Turning
the power off in this state results in loss of all user data.
5. Play back the recorded performance.
Press the [PLAY/PAUSE] button to play back the recorded performance. To stop
playback in the middle of a song, press the [STOP] button.
If you have selected the LEFT
part previously in the same song,
the LEFT part will automatically
be made active when pressing
the [REC] button in step 2.
If the metronome was on when
you started recording, you’ll be
able to keep time with the metro-
nome while recording, but the
metronome sound will not be
recorded.
For more recording information,
see page 32.
The function of the [PLAY/
PAUSE] button can be assigned
to the AUX pedal (pages 37, 43).
This allows you to start recording
by pressing the Footswitch con-
nected to the AUX jack.
Song recording can not be
paused, even by pressing the
[PLAY/PAUSE] button.
The record part indicator will
begin to flash when the recorder
memory is almost full. If the mem-
ory becomes full during record-
ing, “Fu£” will appear on the
display and recording will stop
automatically. (All recorded data
up to that point will be retained.)
Pressing the [PLAY/PAUSE] but-
ton to start recording, then press-
ing the [STOP] button to stop
recording will erase all previously
recorded data on the selected
part.
NOTE
NOTE
NOTE
NOTE
NOTE
NOTE
NOTE
The song name
(U01 to U03)

Recording Your Performance
P-140 Owner’s Manual
ENGLISH
30
Re-recording a previously recorded song
If you are not satisfied with the recording, you can record it again. Using the following operation.
1. Select a voice or voices (and other settings) for
recording, if necessary.
Repeat step 1 on page 28 if you wish to change the previous settings.
2. Press the [REC] button again to re-engage Record
Ready mode.
The selected part’s indicator lights in red.
Follow the procedure from step 3 in “Recording a perfor-
mance quickly” on page 29 to re-record.
If you want to change the tempo,
time signature, reverb type, or
effect type when re-recording a
part or when recording to another
part, do so after engaging the
Record Ready mode.
You cannot re-record in the mid-
dle of a song.
NOTE
NOTE

Recording Your Performance
P-140 Owner’s Manual
ENGLISH
31
Recording to RIGHT/LEFT
This lets you record the right and left parts separately. Since you can record the left part while play-
ing back the right, this is useful for independently recording both parts of a duet.
1. Make all the initial settings.
Same as step 1 in “Recording a performance quickly” on page 28.
2. Select a song to record.
Press the [SONG SELECT] button so that the “USER”
indicator lights then press the [–/NO][+/YES] buttons to
select a song for recording.
CAUTION
To avoid erasing previously recorded song(s):
If the song contains data, the part indicator lights up green
when you select a song. Note that recording new data on this
part will erase the existing data.
3. Engage the Record Ready mode.
Press the [REC] button and press the [RIGHT]/[LEFT]
button to engage the Record Ready mode. Recording
does not actually start yet.
The amount of memory available for recording will be
shown on the display in approximate kilobytes. This
value is expressed in kilobytes and indicates how much
space remains available for recording on the P-140. You
can record up to a maximum of about 11,000 notes on
the P-140 depending on pedal usage and other factors.
The
[PLAY/PAUSE] indicator will flash at the current
METRONOME tempo setting.
Record Ready mode can be disengaged before recording by pressing the
[REC]
button again.
4. Start and stop recording.
Same as steps 3-5 in “Recording a performance quickly” on page 29.
23
23
1
Part button indications
Off: Contains no data
On (green): Contains data
On (red): Part is enabled for
recording
If the metronome was on when
you started recording, you’ll be
able to keep time with the metro-
nome while recording, but the
metronome sound will not be
recorded.
If you want to change the tempo,
time signature, reverb type, or
effect type when rerecording a
part or when recording to another
part, do so after entering the
Record Ready mode.
If you don’t want to hear the previ-
ously recorded part while you
record (for example, when you
want to record a song different
from what you recorded on the
previous part), press the play-
back part button before pressing
the [REC] button so that its indi-
cator is turned off.
For more information on record-
ing, see page 32.
NOTE
NOTE
NOTE
NOTE
NOTE

Recording Your Performance
P-140 Owner’s Manual
ENGLISH
32
The user song recorder records the following data:
Data in addition to the notes and voices you play is recorded.
This data includes “Individual Parts” and “Entire Song.” See below.
Individual Parts
•Notes played
•Voice selection
•Pedal (Sustain/Soft/Sostenuto/Expression)
• [REVERB] depth
• [EFFECT] depth
•Dual voices
•Dual balance (F3)
•Dual detune (F3)
•Dual octave shift (F3)
• Split voices (F4)
• Split balance (F4)
• Split octave shift (F4)
Entire Song
•Tempo
•Time signature (beat)
• [REVERB] type (including OFF)
• [EFFECT] type (including OFF)

Recording Your Performance
P-140 Owner’s Manual
ENGLISH
33
Changing the Initial Settings (data recorded at the
beginning of a song)
The initial settings (data recorded at the beginning of a song) can be changed after the recording.
For example, after recording, you can change the voice to create a different ambience or adjust the
song tempo to your taste.
You can change the following initial settings.
Individual Parts
•Voice selection
• [REVERB] depth
• [EFFECT] depth
•Dual voices
• Split voices
Entire Song
•Tempo
• [REVERB] type (including OFF)
• [EFFECT] type (including OFF)
1. Press the [REC] button to engage
Record mode and select a part to
change the initial settings.
The indicator lights in red. (Data shared by two parts can
be changed via either part.)
2. Change the settings via the panel
controls.
For example, if you wish to change the recorded voice
from [ELECTRIC PIANO 1] to [ELECTRIC PIANO 2], press the [ELECTRIC
PIANO 2]
button. When you wish to change the sustain/soft pedal depth, press
and hold the pedal.
3. Press the [REC] button to exit the Record mode.
CAUTION
Be careful not to press the [PLAY/PAUSE] button or a key on the keyboard after step 2
or 3, either of which will start recording and erase all previously-recorded data on the
selected part.
1
1 3
You can cancel changes made to
the initial settings by selecting a
different part after step 2, then
exiting Record mode by pressing
the [REC] button. (Changes
made to the data shared by two
parts are also canceled.)
NOTE

Playing Back Songs
P-140 Owner’s Manual
ENGLISH
34
Playing Back Songs
The following three types of songs are available.
• 50 Piano Preset Songs
50 Piano Preset Songs in the instrument. (page 15)
•User songs in the instrument
User songs which you recorded to the instrument by using the record function
(page 28).
• External songs in the instrument
Songs transferred from a computer (including commercially available songs and
songs which have been edited on a computer). Songs can be transferred (saved) to
the instrument by using the included Musicsoft Downloader software. The songs are
saved to an area of the internal memory separate from the area for recorded User
songs. Up to 255 songs can be played back on this instrument (numbers 001-255).
You can download the Musicsoft Downloader (MSD). Please check the following
URL for the latest version.
http://music.yamaha.com/download/msd
If the song cannot be transferred from a computer, you may need to rename the file.
Sequence formats that can be played on the P-140
•SMF (Standard MIDI File) Formats 0 and 1
The SMF format is one of the most common and widely compatible sequence for-
mats used for storing sequence data. There are two variations: Format 0 and Format
1. A large number of MIDI devices are compatible with SMF Format 0, and most
commercially available MIDI sequence data is provided in SMF Format 0. The SMF
format for sequence files allows you to exchange song data between different
sequencers.
Playing Back User Songs/External Songs on the P-140
1. Press the [SONG SELECT] button
(the USER indicator lights).
2. Press the [–/NO] [+/YES] buttons to
select a song.
The User songs are displayed as “Uxx*” and External
songs in the instrument are displayed as “xxx*.”
*The “U” indication in the User song name means
“User.” The letters “xx” represent the song number.
You cannot select songs during
Demo Song playback (page 14).
When playing back songs con-
taining various voices or parts
(such as XG or GM songs), the
voices may not sound correct or
as intended on the original. You
may be able to remedy this and
make the playback sound more
natural or appropriate by chang-
ing the Song Channel Selection
setting (page 43) to “1&2,” so that
only channels 1 and 2 will play
back.
If the metronome is being used
during playback, the metronome
will automatically stop when play-
back is stopped.
If the REVERB type is changed
via the panel controls during play-
back, both the playback and key-
board reverb effects will be
changed.
If the EFFECT type is changed via
the panel controls during playback,
the playback effect may be
switched off in some cases.
NOTE
NOTE
NOTE
NOTE
NOTE
2
134

Playing Back Songs
P-140 Owner’s Manual
ENGLISH
35
3. Press the [PLAY/PAUSE] button to start playback.
The current measure number appears on the display during playback.
•You can play the keyboard while the P-140 is playing back a song. You can
also play the notes with a voice different from the playback voice by selecting
a voice from the panel.
Adjust the tempo
You can use the [TEMPO/FUNCTION –, +] buttons to adjust the playback
tempo as required before or during playback. The default tempo (the song’s
original tempo) is set when you press the [–] and [+] buttons simultaneously.
4. Press the [STOP] button or [PLAY/PAUSE] button to
stop playback.
When playback is complete, the P-140 automatically
stops and locates the top of the song. To stop playback in
the middle of a song, press the [STOP] button. You can
also pause playback by pressing the [PLAY/PAUSE] but-
ton.
Turning part playback on and off
When you select a song on the P-140, the indicators for
parts that contain data (one of [RIGHT] [LEFT] or both)
are lit in green. While the P-140 is playing or stopped,
pressing these part buttons turns off the indicators, and
the data on those parts is not played. Pressing the part
buttons toggles part playback on and off.
User song playback cannot be
started when the recorder contains
no data.
You can also enjoy playing duets
with yourself by recording one
part of a duet or a song for two
pianos, then playing the other
part while the recorded part plays
back.
If you have External songs in the
instrument, you can use the
repeat function.
ALL: Play all External songs in
sequence.
rnd: Play all External songs con-
tinuously in random order.
NOTE
NOTE
NOTE
Parts can be turned on or off
before or during playback.
You can adjust the volume of a
part of a song for which playback
is turned off (page 44).
NOTE
NOTE
Part button indication
On: Contains data
Off: Contains no data

Detailed Settings – [FUNCTION]
P-140 Owner’s Manual
ENGLISH
36
Detailed Settings – [FUNCTION]
You can set various parameters to make the best use of P-140 functions, such as fine tuning the pitch or selecting a scale,
etc.
The following parameters are available.
The P-140 has nine main functions.
Some of these main functions consist of a set of sub-functions.
Functions List
Function Sub-function Display Reference page
Fine tuning of the pitch
— F1. 39
Selecting a scale
Scale F2.1 40
Base Note F2.2 40
Dual functions
Dual Balance F3.1 41
Dual Detune F3.2 41
Voice 1 Octave Shift F3.3 41
Voice 2 Octave Shift F3.4 41
Voice 1 Effect Depth F3.5 41
Voice 2 Effect Depth F3.6 41
Reset F3.7 41
Split functions
Split Point F4.1 42
Split Balance F4.2 42
Right Voice Selection F4.3 42
Left Voice Selection F4.4 42
Right Voice Octave Shift F4.5 42
Left Voice Octave Shift F4.6 42
Right Voice Effect Depth F4.7 42
Left Voice Effect Depth F4.8 42
Sustain Pedal Range F4.9 42
Reset F4.A 42
Other Functions
AUX Pedal F5.1 43
Soft Pedal Effect Depth F5.2 43
Sustain Sample Depth F5.3 43
Keyoff Sample Volume F5.4 43
Song Channel Selection F5.5 43
Sustain Pedal Type F5.6 43
AUX Pedal Type F5.7 43
Metronome volume
— F6. 44
Song Part Cancel Volume
— F7. 44
MIDI Functions
MIDI Transmit Channel Selection F8.1 44
MIDI Receive Channel Selection F8.2 44
Local Control ON/OFF F8.3 44
Program Change ON/OFF F8.4 45
Control Change ON/OFF F8.5 45
Panel/Status Transmit F8.6 45
Initial Setup Send F8.7 45
Backup Functions
Voice F9.1 46
MIDI F9.2 46
Tuning F9.3 46
Others F9.4 46

Detailed Settings – [FUNCTION]
P-140 Owner’s Manual
ENGLISH
37
Basic Procedure in Function
Follow the steps below to use the functions.
If you become lost while using a function, return to this page and read the basic procedure.
1. Press the [TEMPO/FUNCTION] but-
ton to enter the Function.
The [FUNCTION] indicator lights.
When you call up the FUNCTION display after turning
the power on, appears on the display. When you
call up the FUNCTION display again (without turning
the power off), the previous selected appears on
the display.
2. Use the [TEMPO/FUNCTION –, +] buttons to select
the desired function from F1–F9.
When (that include the sub-functions) is selected, go on to step 3.
When F1, F6 or F7 is selected (these have no sub-functions), go on to step 5.
3. Press the [+/YES] button to enter the
sub-function.
4. Use the [TEMPO/FUNCTION –, +] buttons to select
the desired sub-function.
In the example below, the sub-functions of F4 (Split) are shown.
5
1246
3
Functions cannot be selected
during Demo/Song Select or
when the user song recorder is in
operation.
To cancel the function in step 2, 3,
or 4, press the [TEMPO/FUNC-
TION –, +] button any time to exit
Function.
NOTE
NOTE
Desired
function
Sub-
function
Desired
function
Sub-function

Detailed Settings – [FUNCTION]
P-140 Owner’s Manual
ENGLISH
38
5.
Use the [–/NO] and [+/YES] buttons
to change the ON/OFF setting, select
the type, or change the value.
The default setting (which is used when you first turn on
the power to the P-140) is recalled by pressing the
[–/NO] and [+/YES] buttons simultaneously.
6.
Press the [TEMPO/FUNCTION] to exit
the Function.
The [TEMPO] indicator lights.
After you select the function, the
current setting will be displayed
when the [–/NO] or [+/YES] but-
ton is pressed for the first time.
NOTE
Operation Example 1 (F1. Fine tuning of the pitch)
Operation Example 2 (F3.1 “Dual Balance”)
Select a desired function.Engage the Function. Change the value.
Display Display
Engage the Function. Select a desired function. Engage the respective
sub-function.
Select a desired
sub-function.
Display
Display
Display
Change the value.

Detailed Settings – [FUNCTION]
P-140 Owner’s Manual
ENGLISH
39
About Each Function
The explanations here apply when entering the Function in step 5 on page 38.
You can fine tune the pitch of the entire instru-
ment. This function is useful when you play
the P-140 along with other instruments or CD
music.
Use the [–/NO] and [+/YES] buttons to lower
or raise the pitch of the A3 key in approxi-
mately 0.2 Hz increments.
..... .....
Te nths of a hertz are indicated on the display by the
appearance and position of one or two dots, as in the
following example:
F1. Fine Tuning of the Pitch
Display Value
440.0
Setting range:
440.2
427.0–453.0 (Hz)
440.4
Default setting:
440.6
440.0 (Hz)
440.8
TERMINOLOGY
Hz (Hertz):
This unit of measurement refers to the frequency of a sound and
represents the number of times a sound wave vibrates in a sec-
ond.
Using the keyboard to set the pitch
You can fine tune the pitch by pressing a key on the
keyboard, without having to call up the FUNCTION
display.
To tune up (in roughly 0.2Hz steps): Hold the A-1
and B-1 keys (two white keys at the left end) simulta-
neously and press any key between C3 and B3.
To tune down (in roughly 0.2Hz steps): Hold the A-
1 and A#-1 keys (a white and a black key at the left
end) simultaneously and press any key between C3
and B3.
To restore standard pitch: Hold the A-1, A#-1 and
B-1 keys (two white keys and one black key at the left
end) simultaneously and press any key between C3
and B3.
•Each key has a note name; for example, the lowest
(farthest left) key on the keyboard corresponds to
A-1, and the highest (farthest right) key to C7.
During the procedure described above, the display
indicates a value in Hz ( … ). After the
procedure, the display returns to the previous indica-
tion.
To tune down or up, respectively, in approximately
1 Hz increments: Hold the A-1 and A#-1 keys (a
white and a black key at the left end) or A-1 and B-1
keys (two white keys at the left end) simultaneously
and press the [–/NO] or [+/YES] button.
To restore standard pitch: Hold the A-1 and A#-1
keys (a white and a black key at the left end) or A-1
and B-1 keys (two white keys at the left end) simulta-
neously and press the [–/NO] [+/YES] buttons
simultaneously.
During the procedure described above, the display
indicates a value in Hz ( … ). After the
procedure, the display returns to the previous indica-
tion.

Detailed Settings – [FUNCTION]
P-140 Owner’s Manual
ENGLISH
40
You can select various scales.
Equal Temperament is the most common con-
temporary piano tuning scale. However, his-
tory has known numerous other scales, many
of which serve as the basis for certain genres of
music. You can experience these tunings with
the P-140.
F2.1: Scale
Setting range: 1: Equal Temperament
2: Pure Major
3: Pure Minor
4: Pythagorean
5: Mean Tone
6: Werckmeister
7: Kirnberger
Default setting: 1: Equal Temperament
EQUAL TEMPERAMENT
The pitch range of each octave is divided equally into
twelve parts, with each half-step evenly spaced in pitch.
This is the most commonly used tuning in music today.
PURE MAJOR/PURE MINOR
These tunings preserve the pure mathematical intervals of
each scale, especially for triad chords (root, third, fifth).
You can hear this best in actual vocal harmonies - such as
choirs and a cappella singing.
PYTHAGOREAN
This scale was devised by the famous Greek philosopher
and is created from a series of perfect fifths, which are col-
lapsed into a single octave.
The 3rd in this tuning are slightly unstable, but the 4th and
5th are beautiful and suitable for some leads.
MEAN-TONE
This scale was created as an improvement on the
Pythagorean scale, by making the major third interval more
“in tune.” It was especially popular from the 16th century
to the 18th century. Handel, among others, used this scale.
WERCKMEISTER/KIRNBERGER
This composite scale combines the Werckmeister and Kirn-
berger systems, which were themselves improvements on
the mean-tone and Pythagorean scales. The main feature of
this scale is that each key has its own unique character. The
scale was used extensively during the time of Bach and
Beethoven, and even now it is often used when performing
period music on the harpsichord.
F2.2: Base Note
If you select a scale other than Equal Temperament, you
need to specify the root. (You can also specify the root
note with Equal Temperament selected, but it will have
no effect. The base note setting is effective for tunings
other than the Equal Temperament tuning.)
Setting range: C, C#, D, Eb, E, F, F#, G, Ab, A, Bb, B
Default setting: C
•Root indication example
F2. Selecting a Scale
(F#) (G)
(Ab)
Followed by
a high bar if sharp
Followed by
a low bar if flat

Detailed Settings – [FUNCTION]
P-140 Owner’s Manual
ENGLISH
41
You can set various parameters for Dual
(page 20) to optimize the settings for the
songs you play, such as adjusting the volume
balance between two voices.
Dual function settings are set individually for
each voice combination.
If Dual is not engaged, will appear
instead of and you will be unable to
select the Dual functions. If this happens, press
two voice buttons at the same time to engage
Dual.
F3.1: Dual Balance
Setting range: 0 – 20 (A setting of “10” produces an
equal balance between the two Dual
voices. Settings below “10” increase
the volume of Voice 2 in relation to
Vo ice 1, and settings above “10”
increase the volume of Voice 1 in
relation to Voice 2.)
Default setting: Different for each voice combina-
tion.
You can set one voice as the main voice, and another
voice as a softer, mixed voice.
F3.2: Dual Detune
Setting range: -10 – 0 – 10 (With positive values,
the pitch of Voice 1 is raised and the
pitch of Voice 2 is lowered. With neg-
ative values, the pitch of Voice 1 is
lowered and the pitch of Voice 2 is
raised.)
Default setting: Different for each voice combina-
tion.
Detune Voice 1 and Voice 2 for Dual to create a thicker
sound.
F3.3: Voice 1 Octave Shift
F3.4: Voice 2 Octave Shift
Setting range: –1, 0, 1
Default setting: Different for each voice combina-
tion.
You can shift the pitch up and down in octave steps for
Vo ice 1 and Voice 2 independently. Depending on which
voices you combine in Dual, the combination may sound
better if one of the voices is shifted up or down an octave.
F3.5: Voice 1 Effect Depth
F3.6: Voice 2 Effect Depth
Setting range: 0 – 20
Default setting: Different for each voice combina-
tion.
These functions make it possible to individually set the
depth of the effect for Voices 1 and 2 for Dual. (The effect
depth settings cannot be changed unless the
[EFFECT] is
ON. Function must be exited before the [EFFECT] can be
turned ON.)
•“Vo ice 1” and “Voice 2” are explained on page 20.
F3.7: Reset
This function resets all Dual functions to their default
values. Press the [+/YES] button to reset the values.
F3. Dual Functions
The available setting range is wider in the lower range (± 60
cents for A-1), and narrower in the higher range (± 5 cents for
C7). (100 cents equal one semitone.)
NOTE
SHORTCUT:
You can jump directly to the Dual functions by pressing
the [TEMPO/FUNCTION] button while holding the two Dual
voice buttons.
NOTE

Detailed Settings – [FUNCTION]
P-140 Owner’s Manual
ENGLISH
42
This menu enables you to make various
detailed settings for Split.
By selecting the right/left voices, changing the
split point or other setting, you can optimize
the settings for the songs you play.
Be sure to select the Split by pressing the
[OTHERS] button before engaging Function.
If Split is not engaged, will appear
instead of and you will be unable to
select the Split functions. Also note that you
must exit Function before you can engage
Split.
F4.1: Split Point
Setting range: The entire keyboard
Default setting: F#2
Set the point on the keyboard that separates the right and
left-hand sections (split point). The pressed key is
included in the left-hand range.
•Instead of pressing the [–/NO] [+/YES] buttons, you
can engage the split point by pressing the appropriate
key on the keyboard.
•Example key name indications for Split Point:
F4.2: Split Balance
Setting range: 0 – 20 (A setting of “10” produces an
equal balance between the two Split
voices. Settings below “10” increase
the volume of the left voice in rela-
tion to the right voice, and settings
above “10” increase the volume of
the right voice in relation to the left
voice.)
Default setting: Different for each voice combina-
tion.
The volume level of the two voices combined in Split can
be adjusted as required. You can make this setting for
each combination of voices individually.
F4.3: Right Voice Selection
Setting range: 1 – 13
Default setting: 1
Set the right voice.
You can select the voices from 1 to 13. Refer to “Preset
Vo ice List” on page 53.
F4.4: Left Voice Selection
Setting range: 1 – 4
Default setting: 1
Set the left voice.
You can select the voices from 1 to 4. Refer to “Preset
Vo ice List” on page 53.
F4.5: Right Voice Octave Shift
F4.6: Left Voice Octave Shift
Setting range: –1, 0, 1
Default setting: Different for each voice combination
You can shift the pitch up and down in octave steps for
the Right Voice and Left Voice independently. Make a set-
ting depending on the note range of the songs you play.
You can make this setting for each combination of voices
individually.
F4.7: Right Voice Effect Depth
F4.8: Left Voice Effect Depth
Setting range: 0 – 20
Default setting: Different for each voice combination
These functions make it possible to individually set the
depth of the effect for the left and right Split voices.
The effect depth settings cannot be changed unless the
[EFFECT] is ON. You must exit Function before you can
turn on an [EFFECT].
You can make this setting for each combination of voices
individually.
F4.9: Sustain Pedal Range
Setting range: ALL (for both voices)
1 (for the right Voice)
2 (for the left Voice)
Default setting: ALL
The Sustain Pedal Range function determines whether
the sustain pedal affects the right voice, the left voice, or
both the left and right voices in Split.
F4.A: Reset
This function resets all Split functions to their default
values. Press the [+/YES] button to reset the values.
F4. Split Functions
(F#2) (G2)
(Ab2)
Followed by
a high bar if sharp
Followed by
a low bar if flat

Detailed Settings – [FUNCTION]
P-140 Owner’s Manual
ENGLISH
43
This section provides a variety of other func-
tions, including letting you assign the opera-
tion of the AUX pedal to one of several
settings, and allowing you to select specific
song channels for playback.
F5.1 AUX Pedal
Setting range:
1. Soft Pedal
The soft pedal reduces the volume and slightly
changes the timbre of notes played while the pedal is
pressed. The soft pedal will not affect notes that are
already playing.
2. Sostenuto pedal
If you play a note or chord on the keyboard and press
the pedal while the note(s) are held, those notes will
be sustained for as long as the pedal is held (as if the
sustain pedal had been pressed) but all notes played
thereafter will not be sustained. This makes it possible
to sustain a chord, for example, while other notes are
played “staccato.”
3. Expression
This setting allows control of dynamics during perfor-
mance.
4. Song Play/Pause
This setting allows you to start or pause song play-
back. In this setting, the AUX Pedal functions in the
same manner as the [PLAY/PAUSE] button on the
panel.
Default setting: 1(Soft Pedal)
F5.2 Soft Pedal Effect Depth
Setting range: 1 – 5
Default setting: 3
This function sets the depth of the soft pedal effect.
F5.3 Sustain Sample Depth
Setting range: 0 – 20
Default setting: 12
The GRAND PIANO 1, 3 voice features special “Sustain
Samples” that recreate the unique resonance of an acous-
tic grand piano’s soundboard and strings when the sus-
tain pedal is pressed. This function lets you adjust the
depth of this effect.
F5.4 Keyoff Sample Volume
Setting range: 0 – 20
Default setting: 10
You can adjust the volume of the keyoff sound (the sub-
tle sound produced when the keys are released) for voices
[GRAND PIANO1, 3], [HARPSICHORD], [E.CLAVI-
CHORD]
.
F5.5 Song Channel Selection
Setting range: ALL, 1&2
Default setting: ALL
The setting here only affects External songs. You can
specify which song channels will play back on this instru-
ment. When “ALL” is selected, channels 1-16 will be
played back. When “1&2” is selected, only channels 1 and
2 will be played back, while channels 3-16 will be trans-
mitted via MIDI.
F5.6 SUSTAIN PEDAL Type
F5.7 AUX PEDAL Type
Setting range: 1, 2
Default setting: 1
Depending upon the pedal that is connected to the SUS-
TAIN PEDAL jack or AUX PEDAL jack, the effect pro-
duced by operating the pedal (ON/OFF, dynamics, etc.)
might be reversed.
If this happens, you can use this setting to correct the
pedal operation. The setting range is from 1 to 2.
Press the [–/NO] and [+/YES] buttons simultaneously to
recall the default setting of “1.”
F5. Other Functions
Organ, string and choir voices will continue to sound for as long
as the sostenuto pedal is depressed.
NOTE
• Make sure that the power is switched OFF when connecting or
disconnecting the pedal.
• If the SUSTAIN PEDAL type is set to “2”, disconnecting the
sustain pedal while the power is switched on may leave the
sustain active, causing notes to sustain indefinitely. In this
case, switch the power off, then back on.
NOTE

Detailed Settings – [FUNCTION]
P-140 Owner’s Manual
ENGLISH
44
Use this function to adjust the metronome vol-
ume.
Setting range: 1 – 20
Default setting: 10
This function sets the volume at which a “can-
celed” part is played during song playback.
Adjust the part volume to a comfortable level
and use the “canceled” part as a guide with
which to play along.
Setting range: 0 – 20
Default setting: 5
You can make detailed adjustments to the
MIDI settings.
For more information about MIDI, see the
“About MIDI” section (page 47).
F8.1: MIDI Transmit Channel Selection
In any MIDI control setup, the MIDI channels of the
transmitting and receiving devices must be matched for
proper data transfer.
This parameter enables you to specify the channel on
which the P-140 transmits MIDI data.
Setting range: 1 – 16, OFF (not transmitted)
Default setting: 1
F8.2: MIDI Receive Channel Selection
In any MIDI control setup, the MIDI channels of the
transmitting and receiving devices must be matched for
proper data transfer. This parameter enables you to spec-
ify the channel on which the P-140 receives MIDI data.
Setting range: ALL, 1&2, 1 – 16
Default setting: ALL
F8.3: Local Control ON/OFF
“Local Control” refers to the fact that, normally, the P-
140 keyboard controls its internal tone generator, allow-
ing the internal voices to be played directly from the key-
board. This situation is “Local Control On,” since the
internal tone generator is controlled locally by its own
keyboard.
Local control can be turned OFF, however, so that the P-
140 keyboard does not play the internal voices, but the
appropriate MIDI information is still transmitted via the
MIDI OUT terminal when notes are played on the key-
board. At the same time, the internal tone generator
responds to MIDI information received via the MIDI IN
terminal.
Setting range: ON/OFF
Default setting: ON
F6. Metronome Volume
SHORTCUT:
You can jump directly to the metronome functions by
pressing the [TEMPO/FUNCTION] button while holding the
[METRONOME] button.
F7. Song Part Cancel Volume
This function cannot be used for Demo songs.
F8. MIDI Functions
NOTE
NOTE
• In Dual, Voice 1 data is transmitted on its specified channel. In
Split, right voice data is transmitted on its specified channel. In
Dual, Voice 2 data is transmitted on the next greater channel
number relative to the specified channel. In Split, left voice
data is transmitted on the next greater channel number relative
to the specified channel. In either case, no data is transmitted
if the transmit channel is set to “OFF.”
• Song data is not transmitted via the MIDI connections. How-
ever, channels 3-16 of External songs will be transmitted via
the MIDI connections depending on the Song Channel Selec-
tion setting (page 43).
• ALL:
“Multi-timbre” Receive. This allows simultaneous reception of
different parts on all 16 MIDI channels, enabling the P-140 to
play multi-channel song data received from a music computer
or sequencer.
1&2:
“1&2” Receive. This allows simultaneous reception on chan-
nels 1 and 2 only, enabling the P-140 to play 1 and 2 channel
song data received from a music computer or sequencer.
•Program change and other like channel messages received
will not affect the P-140’s panel settings or the notes you play
on the keyboard.
NOTE
NOTE

Detailed Settings – [FUNCTION]
P-140 Owner’s Manual
ENGLISH
45
F8.4: Program Change ON/OFF
Normally the P-140 will respond to MIDI program
change numbers received from an external keyboard or
other MIDI device, causing the correspondingly num-
bered voice to be selected on the corresponding channel
(the keyboard voice does not change). The P-140 will
normally also send a MIDI program change number
whenever one of its voices is selected, causing the corre-
spondingly numbered voice or program to be selected on
the external MIDI device if the device is set up to receive
and respond to MIDI program change numbers.
This function makes it possible to cancel program
change number reception and transmission so that
voices can be selected on the P-140 without affecting the
external MIDI device.
Setting range: ON/OFF
Default setting: ON
F8.5: Control Change ON/OFF
Normally the P-140 will respond to MIDI control change
data received from an external MIDI device or keyboard,
causing the voice on the corresponding channel to be
affected by pedal and other “control” settings received
from the controlling device (the keyboard voice is not
affected).
The P-140 also transmits MIDI control change informa-
tion when the pedal or other appropriate controls are
operated.
This function makes it possible to cancel control change
data reception and transmission so that, for example, the
P-140’s pedal and other controls can be operated without
affecting an external MIDI device.
Setting range: ON/OFF
Default setting: ON
F8.6:
Panel/Status Transmit
This function causes all the current P-140 panel settings
(selected voice, etc.) to be transmitted via the MIDI OUT
terminal.
1. Set up the panel controls as desired.
2. Connect the P-140 to a sequencer via MIDI, and set
up the sequencer so it can receive the setup data.
3. Engage the Function and select .
4. Press the [+/YES] button to transmit the panel/status
data.
will appear on the display when the data has been
successfully transmitted.
F8.7:
Initial Setup Send
This function lets you send the data of the panel settings
to a computer. By transmitting the panel settings and
recording them on the MIDI sequence recorder prior to
the actual performance data, the instrument will be
automatically restored to the same settings when the per-
formance is played back. You can also use this function to
change the settings of a connected tone generator to the
same settings as the instrument.
1. Set up the panel controls as desired.
2. Connect the P-140 to a sequencer via MIDI, and set
up the sequencer so it can receive the setup data.
3. Engage the Function and select .
4. Press the [+/YES] button to transmit the panel/status
data.
will appear on the display when the data has been
successfully transmitted.
The following data can be sent.
•Voice selection
• [REVERB] type
• [REVERB] depth
• [EFFECT] type
• [EFFECT] depth
• Split point
•Tuning (F1)
•Dual detune (F3.2)
For information on program change numbers for each of the P-
140’s voices, refer to MIDI Data Format page 60.
For information on control changes that can be used with the P-
140, refer to MIDI Data Format on page 60.
NOTE
NOTE
• See page 61 for a list of the Panel Data Contents transmitted
by this function.
• Receiving the transmitted data:
1. Connect the P-140 via MIDI to the device to which the setup
data was transmitted previously.
2. Start sending the setup data from the device.
The P-140 automatically receives the setup data, which will be
reflected in the panel settings.
(For the data to be accepted, the P-140 that receives the setup
data should be the same model as the one that transmitted the
setup data to the sequencer.)
• For more information on transmitting and receiving setup data
via MIDI, refer to the owner’s manual for the connected MIDI
device.
NOTE

Detailed Settings – [FUNCTION]
P-140 Owner’s Manual
ENGLISH
46
You can back up some settings, such as voice
selection and reverb type, so that they will not
be lost when you turn off the power to the P-
140. If the backup function is turned on, the
settings at power off are effective. If the
backup function is turned off, the settings in
memory are erased when you turn off the
power. In this case, when you turn on the
power to the unit, the default settings (the ini-
tial settings) will be used. (The factory setting
default list is found on page 59.)
However, the backup settings themselves, the
contents of the user song recorder memory,
and character code setting are always backed
up. Refer to “Data Backup Using a Computer”
on page 50.
You can turn the backup function on or off for
each function group. Different Backup Groups
are provided for the different function catego-
ries of the instrument: Voice, MIDI, Tuning and
Others.
F9.1: Voice
Setting range: ON/OFF
Default setting: OFF
•Voice (Keyboard, Dual, and Split)
•Dual (ON/OFF, Voice, and Dual Functions for each
voice combination)
• Split (ON/OFF, Voice, and Split Functions for each
voice combination)
•Reverb (ON/OFF, Type, and Depth for each voice)
• Effect (ON/OFF, Type, and Depth for each voice)
•Touch Sensitivity (including the FIXED volume)
•Metronome Beat, Volume ( settings)
•Song Part Cancel Volume ( settings)
F9.2: MIDI
Setting range: ON/OFF
Default setting: ON
The MIDI functions ( settings)
(expect for )
F9.3: Tuning
Setting range: ON/OFF
Default setting: ON
•Transpose
•Tuning ( settings)
• Scale (including base note) ( settings)
F9.4: Others
Setting range: ON/OFF
Default setting: ON
•Other functions ( settings)
•VARIATION setting
F9. Backup Functions
Factory Preset Recall
All settings affected by the Functions (F1 – F9) can be
restored to their original factory preset values by
turning the [STANDBY/ON] switch ON while hold-
ing the C7 key (right-most-key on the keyboard).
This operation also erases all user song data. The fac-
tory preset values are listed on page 59.
CAUTION
After turning the [STANDBY/ON] switch ON while
holding the C7 key (right-most-key on the key-
board), “CLr” appears in the display. Never attempt
to turn off the power while “CLr” appears in the dis-
play. Turning the power off in this state may cause
the system to freeze.

Connections
P-140 Owner’s Manual
ENGLISH
47
Connections
Connectors
CAUTION
Before connecting the P-140 to other electronic components, turn off the power to all the components. Before turning
the power on or off to all components, set all volume levels to minimum (0). Otherwise, electrical shock or damage to the
components may result.
1 MIDI [IN] [OUT] terminals
Use MIDI cables to connect external MIDI devices to these connectors.
MIDI [IN]: Receives MIDI data.
MIDI [OUT]: Transmits MIDI data.
Refer to the “Connecting a Personal Computer” on page 49.
2 SUSTAIN PEDAL Jack
This jack is for connecting an included foot pedal FC3 here.
CAUTION
Make sure that power is OFF when connecting or disconnecting the pedal.
Do not turn on the power to the unit while pressing the foot switch or foot pedal. Otherwise, the
switch or pedal type (on/off) will be reversed.
1 2 3 4
Since MIDI data that can be
transmitted or received varies
depending on the type of MIDI
device, check the “MIDI Imple-
mentation Chart” to find out what
MIDI data and commands your
devices can transmit or receive.
The P-140’s MIDI Implementation
Chart appears on page 64.
NOTE
About MIDI
MIDI (Musical Instrument Digital Interface) is a standard format for data transmission/
reception. It enables the transfer of performance data and commands between MIDI devices
and personal computers. Using MIDI, you can control a connected MIDI device from the P-
140, or control the P-140 from a connected MIDI device or computer.
Depending upon the pedal that is
connected to the SUSTAIN
PEDAL jack, the effect produced
by operating the pedal (ON/OFF,
dynamics, etc.) might be
reversed. If this happens, refer to
the “SUSTAIN PEDAL Type” sec-
tion (page 43).
NOTE
FC3

Connections
P-140 Owner’s Manual
ENGLISH
48
3 AUX PEDAL Jack
This jack is for connecting an optional FC4/FC5 foot switch or FC7 foot controller.
A wide range of functions such as the Soft Pedal function, etc. can be assigned to
this jack. Use the Function settings to assign the function. (page 43)
4 AUX OUT [R] [L] Pin jacks (LEVEL FIXED)
You can connect these jacks to a stereo system to amplify the P-140 or to a cassette
tape recorder to record your performance. Refer to the diagram below and use
audio cables to make the connections.
CAUTION
When the P-140’s AUX OUT jacks are connected to an external audio system, first turn on the
power to the P-140, then to the external audio system. Reverse this order when you turn the
power off.
Depending upon the pedal that is
connected to the AUX PEDAL
jack, the effect produced by oper-
ating the pedal (ON/OFF, dynam-
ics, etc.) might be reversed. If this
happens, refer to the “AUX
PEDAL Type” section (page 43).
NOTE
FC5
Use audio cables and adaptor
plugs with zero resistance.
The P-140’s [MASTER VOLUME]
slider setting does not affect the
signal output from the AUX OUT
(LEVEL FIXED) jacks.
NOTE
NOTE
When these are connected (with RCA pin plug; LEVEL FIXED), the sound
is output to the external device at a fixed level, regardless of the [MASTER
VOLUME] slider setting.
P-140 Stereo
AUX OUT
RCA pin plug
AUX IN
RCA pin plug
audio cable

Connections
P-140 Owner’s Manual
ENGLISH
49
Connecting a Personal Computer
By connecting a computer to the USB [TO HOST] or MIDI terminals, you can transfer data between
the instrument and the computer via MIDI. To do this, install the USB MIDI interface (such as the
UX16, UX96, or UX256) driver and Musicsoft Downloader software.
There are two ways you can connect the P-140 to a computer:
1. Connecting the USB port on the computer to the P-140 via a USB MIDI inter-
face.
2. Using a MIDI interface and the P-140’s MIDI terminals.
For more information, see below.
CAUTION
When connecting the P-140 to a computer, first turn off the power to both the P-140 and the
computer before connecting any cables. After making connections, turn on the power to the
computer first, then to the P-140.
Connecting the USB port on the computer to the
P-140 via a USB MIDI interface (such as the UX16,
UX96, or UX256)
Use a USB MIDI interface device to connect the USB port on your computer to the P-
140’s MIDI terminals.
Using a MIDI interface and the P-140’s MIDI
terminals
Use a MIDI interface device to connect a computer to the P-140 using MIDI cables.
You can download the USB MIDI
interface driver and Musicsoft
Downloader (MSD). Please check
the following URL for the latest
version.
http://music.yamaha.com/
download/msd
NOTE
Computer
USB MIDI
interface
MIDI [IN]
terminal
Instrument
MIDI [OUT]
terminal
USB terminal
USB port or serial port
(modem or printer terminal)
Computer
MIDI
interface
MIDI cable
MIDI [IN] terminal
MIDI [OUT]
terminal
Instrument

Data Backup Using a Computer
P-140 Owner’s Manual
ENGLISH
50
Data Backup Using a Computer
For maximum data security Yamaha recommends that you save your important data to your com-
puter by using the Musicsoft Downloader (MSD) software. This provides a convenient backup if the
internal memory is damaged.
Data that can be saved
● Panel settings and recorded User songs
Panel settings are the same data that can be backed up using the Backup Functions
(page 46). You can save the panel settings and recorded User songs as one file.
● External songs received via computer.
1. Install the USB MIDI driver and MSD to your com-
puter (Windows), then connect the computer and
the instrument.
For connection, see page 49.
2. Save the data to the computer.
Using MSD, save the “P-140.BUP” file from “System Drive” under “Electronic
Musical Instruments” to the computer.
The “P-140.BUP” file contains the panel settings and recorded User songs. Also,
if you store the external songs in the instrument from the computer, save the
songs from “Flash Memory” under “Electronic Musical Instruments” to the
computer via the MSD.
For instructions on using MSD, see the Help in the MSD.
To recall the settings and load songs to the instrument, save the
“P-140.BUP” file and the External songs under the folders to which you saved
the files.
You can download the USB MIDI
interface driver and Musicsoft
Downloader (MSD). Please check
the following URL for the latest
version.
http://music.yamaha.com/
download/msd
NOTE
When MSD is started on a com-
puter connected to the instru-
ment, “con (computer
connection)” appears in the dis-
play. When this indication
appears, you cannot operate the
instrument.
The Musicsoft Downloader can-
not be used when the instrument
is in the following state:
• During Demo playback.
• During song playback.
• During Record mode.
The panel settings and User
songs (P-140.BUP file) remain in
the instrument after being saved
to the computer.
NOTE
NOTE
NOTE

Message List
P-140 Owner’s Manual
ENGLISH
51
Message List
CAUTION
Never attempt to turn off the power while “CLr” or “FCL” appears in the display. Turning the power off
in this state may cause the system to freeze.
Message Comment
CLr*
Displayed after factory presets are recalled.
con
Displayed when Musicsoft Downloader is started on a computer connected to the instrument.
When this message appears, you cannot operate the instrument.
E02
Displayed when the song data is damaged.
E04
Indicates that the song data is too large to be loaded.
End
Displayed when the current operation is completed.
Err
Displayed when the MIDI/USB cable is disconnected while starting Musicsoft Downloader on a computer con-
nected to the instrument.
FCL*
Indicates that internal memory has been cleaned. Recorded songs and external songs which have been
loaded from a computer are deleted, because the power has been turned off before the song save or load
operations were completed.
Fu£
Displayed when internal memory becomes full during song recording.
n Y
Confirms whether each operation is executed or not.

Troubleshooting
P-140 Owner’s Manual
ENGLISH
52
Troubleshooting
Optional Equipment
Foot Pedal (FC3/FC4/FC5/FC7)
Keyboard Stand (L-140/L-140S)
Problem Possible Cause and Solution
The P-140 does not turn on. The P-140 has not been plugged in properly. Securely insert the female plug into the
socket on the P-140, and the male plug into a proper AC outlet (page 12).
A click or pop is heard when the power is
turned on or off.
This is normal when electrical current is being applied to the instrument.
Noise is heard from the speakers or head-
phones.
The noise may be due to interference caused by the use of a mobile phone in close
proximity to the P-140. Turn off the mobile phone, or use it further away from the P-
140.
The overall volume is low, or no sound is
heard.
• The Master Volume is set too low; set it to an appropriate level using the [MASTER
VOLUME] control.
• Make sure a pair of headphones is not connected to the headphones jack
(page 13).
• Make sure that Local Control (page 44) is ON.
The sustain pedal has no effect. The pedal cable/plug may not be properly connected. Make sure to securely insert
the pedal plug into the proper jack (page 47).
The foot pedal seems to produce the oppo-
site effect. For example, pressing the foot
pedal cuts off the sound and releasing it sus-
tains the sounds.
The type of the foot pedal is reversed.
If this happens, use F5.6 or F5.7 to correct the pedal type (pages 37, 43).
If you press the [VARIATION] button during
performance, Sound is cut off.
This is normal, and is no cause for concern.

Preset Voice List
P-140 Owner’s Manual
ENGLISH
53
Preset Voice List
*1. Dynamic Sampling provides multiple velocity-switched samples to accurately simulate the timbral response
of an acoustic instrument.
*2. Contains a very subtle sample that is produced when the keys are released.
*3. Depends on the assigned voice.
Voice Name
Stereo
Sampling
Touch
Response
Dynamic
Sampling
*1
Key-Off
Sampling
*2
Voice Descriptions
1 GRAND PIANO 1
Recorded samples from a full concert grand piano. Also
includes three levels of dynamic sampling, sustain sam-
ples, and key-off samples for exceptionally realistic
acoustic grand piano sound. Perfect for classical compo-
sitions as well as any other style that requires acoustic
piano.
2 GRAND PIANO 2
Spacious and clear piano with bright reverb. Good for
popular music.
3 GRAND PIANO 3
Warm and mellow piano. Good for classical composi-
tions.
4
PIANO &
STRINGS
A Dual voice combining grand piano and strings – per-
fect for slow, orchestral piano music.
5
ELECTRIC
PIANO 1
An electronic piano sound created by FM synthesis.
Exceptional musical response with varying timbre
according to keyboard dynamics. Good for standard
popular music.
6
ELECTRIC
PIANO 2
The sound of an electric piano using hammer-struck
metallic tines. Soft tone when played lightly, and an
aggressive tone when played hard.
7
ELECTRIC
PIANO 3
A slightly different electric piano sound often heard in
rock and popular music.
8 CHURCH ORGAN
This is a typical pipe organ sound (8 feet + 4 feet + 2
feet).
Good for sacred music from the Baroque period.
9JAZZ ORGAN
The sound of a tonewheel type electric organ. Often
heard in jazz and rock idioms.
10 STRINGS
Stereo-sampled, large-scale strings ensemble with real-
istic reverb. Try combining this voice with piano in the
DUAL.
11 HARPSICHORD
The definitive instrument for baroque music. Since harp-
sichord uses plucked strings, there is no touch
response.
There is, however, a characteristic additional sound
when the keys are released.
12 E. CLAVICHORD
A hammer-struck keyboard instrument that utilizes an
electric pickup that is often heard in funk and soul music.
Its tone is noted for the unique sound produced when
the keys are released.
13 VIBRAPHONE
Vibraphone played with relatively soft mallets. The tone
becomes more metallic the harder you play.
14 SPLIT
*3 *3 *3 *3
Split lets you play two parts at the same time a bass part
with the left hand, and a melody with the right hand.
: Yes
: No

Preset Voice List
P-140 Owner’s Manual
ENGLISH
54
Split Left Voice List
*1. Dynamic Sampling provides multiple velocity-switched samples to accurately simulate the timbral response
of an acoustic instrument.
*2. Contains a very subtle sample that is produced when the keys are released.
Voice Name
Stereo
Sampling
Touch
Response
Dynamic
Sampling
*1
Key-Off
Sampling
*2
Voice Descriptions
1WOOD BASS
An upright bass played fingerstyle. Ideal for jazz and
Latin music.
2BASS & CYMBAL
Adds a soft ride cymbal to the bass sound. Ideal for
walking bass lines in jazz tunes.
3E. BASS 1
Electric bass for a wide range of music styles, jazz,
rock, popular, and more.
4E. BASS 2
A fretless bass. Ideal for styles such as jazz, fusion, etc.
: Yes
: No

Index
P-140 Owner’s Manual
ENGLISH
55
Index
Numerics
50 Piano Preset Songs .....................................................15
A
A-B Repeat.......................................................................18
Adjust
Tempo (50 Piano Preset Songs) ...............................15
Tempo (Recorded Songs) .........................................35
Volume (Metronome) ..............................................44
ALL (display) ...................................................................15
AUX OUT [L] [R] (LEVEL FIXED) jacks .....................48
AUX Pedal .......................................................................43
[AUX PEDAL] jack ...................................................13, 48
B
Backup (data) ..................................................................50
Backup Functions............................................................46
C
CLr (display)....................................................................51
Combining Voices (Dual)...............................................20
con (display)....................................................................51
Connecting a Personal Computer..................................49
Connections.....................................................................47
Computer...................................................................49
MIDI interface...........................................................49
Connectors ......................................................................47
D
Default setting .................................................................23
[DEMO] button ..............................................................14
Detailed Settings (FUNCTION).....................................36
Display .............................................................................12
Dual............................................................................20, 41
E
E02 (display)....................................................................51
E04 (display)....................................................................51
[EFFECT] button ............................................................24
Effects...............................................................................24
End (display) ...................................................................51
Err (display).....................................................................51
F
Factory Setting List .........................................................59
FCL (display)................................................................... 51
Fine Tuning of the Pitch.................................................39
Full (display) ...................................................................51
FUNCTION ..............................................................39–46
Basic Procedure.........................................................37
H
Hz (Hertz) .......................................................................39
L
[LEFT] button...........................................................16, 31
List
Factory Setting........................................................... 59
Functions...................................................................36
Preset Song ................................................................58
Preset Voice .........................................................53–54
M
[MASTER VOLUME] slider ..........................................12
Message List.....................................................................51
[METRONOME] button................................................27
Metronome Volume .......................................................44
MIDI [IN] [OUT]...........................................................47
MIDI Data Format..........................................................60
MIDI Functions ..............................................................44
MIDI Implementation Chart .........................................64
Music Rest .......................................................................13
N
n y (display)..................................................................... 51
O
Other Functions ..............................................................43
[OTHERS] button ..........................................................19
P
Part Cancel ......................................................................16
Part Playback On and Off...............................................35
Pedal Type .......................................................................43

Index
P-140 Owner’s Manual
ENGLISH
56
Pedals ...............................................................................13
[PHONES] jack ...............................................................13
Pitch ➝ Fine Tuning of the Pitch...................................39
[PLAY/PAUSE] button .............................................15, 35
Play/Pause playback
Demo Songs...............................................................14
Recorded Songs .........................................................34
Playing Back Songs..........................................................34
Practicing a One-Hand Part Using the 50 Preset
Songs..............................................................................16
Preset................................................................................15
Preset Song List ...............................................................58
Preset songs ➝ 50 Piano Preset Songs ...........................15
Preset Voice List ........................................................53–54
R
[REC] button...................................................................28
Recording.........................................................................28
Initial Settings............................................................33
Repeat ........................................................................15, 18
Re-recording....................................................................30
[REVERB] button ...........................................................24
[RIGHT] button........................................................16, 31
RIGHT/LEFT (50 Piano Preset Songs) ..........................16
rnd (display) ....................................................................15
S
Scale..................................................................................40
Soft Pedal .........................................................................43
Song..................................................................................15
Song Part Cancel Volume...............................................44
Song playback..................................................................34
[SONG SELECT] button ..........................................15, 34
Sostenuto pedal ...............................................................43
Specifications...................................................................65
SPLIT (Function) ............................................................42
[STANDBY/ON] switch .................................................12
[STOP] button...........................................................15, 35
Sustain Pedal..............................................................42, 43
[SUSTAIN PEDAL] jack...........................................13, 47
Sync ..................................................................................17
Sync Start .........................................................................17
T
TEMPO......................................................................15, 35
TEMPO (METRONOME) .............................................27
[TEMPO/FUNCTION] button................................ 27, 37
[TOUCH] button............................................................25
Touch Sensitivity.............................................................25
[TRANSPOSE] button....................................................26
Troubleshooting.............................................................. 52
Tuning ➝ Fine Tuning of the Pitch...............................39
V
[VARIATION] button....................................................23
VOICE ............................................................................. 19
Voice group buttons .......................................................19

P-140 Owner’s Manual
ENGLISH
57
MEMO

P-140 Owner’s Manual / Bedienungsanleitung / Mode d’emploi / Manual de instrucciones
58
Preset Song List / Liste der voreingestellten Songs /
Liste des morceaux prédéfinis /
Lista de canciones preseleccionadas
No. Title Composer
1Invention No. 1 J.S.Bach
2Invention No. 8 J.S.Bach
3Gavotte J.S.Bach
4
Prelude (Wohltemperierte Klavier
I No.1)
J.S.Bach
5 Menuett G dur BWV.Anh.114 J.S.Bach
6 Le Coucou L-C.Daquin
7 Piano Sonate No.15 K.545 1st mov. W.A.Mozart
8Turkish March W.A.Mozart
9 Menuett G dur W.A.Mozart
10 Little Serenade J.Haydn
11 Perpetuum mobile C.M.v.Weber
12 Ecossaise L.v.Beethoven
13 Für Elise L.v.Beethoven
14 Marcia alla Turca L.v.Beethoven
15 Piano Sonate op.13 “Pathétique” 2nd mov. L.v.Beethoven
16 Piano Sonate op.27-2 “Mondschein” 1st mov. L.v.Beethoven
17 Piano Sonate op.49-2 1st mov. L.v.Beethoven
18 Impromptu op.90-2 F.P.Schubert
19 Moments Musicaux op.94-3 F.P.Schubert
20 Frühlingslied op.62-2 J.L.F.Mendelssohn
21 Jägerlied op.19b-3 J.L.F.Mendelssohn
22 Fantaisie-Impromptu F.F.Chopin
23 Prelude op.28-15 “Raindrop” F.F.Chopin
24 Etude op.10-5 “Black keys” F.F.Chopin
25 Etude op.10-3 “Chanson de l’adieu” F.F.Chopin
26 Etude op.10-12 “Revolutionary” F.F.Chopin
27 Valse op.64-1 “Petit chien” F.F.Chopin
28 Valse op.64-2 F.F.Chopin
29 Valse op.69-1 “L’adieu” F.F.Chopin
30 Nocturne op.9-2 F.F.Chopin
31 Träumerei R.Schumann
32 Fröhlicher Landmann R.Schumann
33 La prière d’une Vierge T.Badarzewska
34 Dolly’s Dreaming and Awakening T.Oesten
35 Arabesque J.F.Burgmüller
36 Pastorale J.F.Burgmüller
37 La chevaleresque J.F.Burgmüller
38 Liebesträume Nr.3 F.Liszt
39 Blumenlied G.Lange
40 Barcarolle P.I.Tchaikovsky
41 Melody in F A.Rubinstein
42 Humoresque A.Dvorák
43 Tango (España) I.Albéniz
44 The Entertainer S.Joplin
45 Maple Leaf Rag S.Joplin
46 La Fille aux Cheveux de Lin C.A.Debussy
47 Arabesque 1 C.A.Debussy
48 Clair de lune C.A.Debussy
49 Rêverie C.A.Debussy
50 Golliwog’s Cakewalk C.A.Debussy
ˇ
Appendix

P-140 Owner’s Manual / Bedienungsanleitung / Mode d’emploi / Manual de instrucciones
59
Factory Setting List / Liste der Vorgabeeinstellungen /
Liste des réglages / Lista de ajustes de fábrica
Function
Default Backup Group
Voice GRAND PIANO 1
F9.1
Dual OFF
Split OFF
Split Right Voice GRAND PIANO 1
Split Left Voice WOOD BASS
Variation NORMAL F9.4
Reverb Type Preset for each voice
F9.1
Reverb Depth Preset for each voice
Effect Type Preset for each voice
Effect Depth Preset for each voice
Touch Sensitivity MEDIUM
Volume in the FIXED 64
Metronome OFF —
Metronome Time Signature 0 (no accent) F9.1
Tempo 120 —
Transpose 0 F9.3
Display Function Default Backup Group
F1. Tuning A3=440Hz
F9.3F2.1 Scale 1 (Equal Temperament)
F2.2 Base Note C
F3.1 Dual Balance Preset for each voice combination
F9.1
F3.2 Dual Detune Preset for each voice combination
F3.3, F3.4 Dual Octave Shift Preset for each voice combination
F3.5, F.3.6 Dual Effect Depth Preset for each voice combination
F4.1 Split Point F#2
F4.2 Split Balance Preset for each voice combination
F4.3 Right Voice Selection 1
F4.4 Left Voice Selection 1
F4.5, F4.6 Split Octave Shift Preset for each voice combination
F4.7, F4.8 Split Effect Depth Preset for each voice combination
F4.9 Sustain Pedal Range ALL
F5.1 AUX Pedal 1 (Soft Pedal)
F9.4
F5.2 Soft Pedal Effect Depth 3
F5.3 Sustain Sample Depth 12
F5.4 Keyoff Sample Volume 10
F5.5 Song Channel Selection ALL
F5.6 Sustain Pedal Type 1
F5.7 AUX Pedal Type 1
F6. Metronome Volume 10
F9.1
F7. Song Part Cancel Volume 5
F8.1 MIDI Transmit Channel 1
F9.2
F8.2 MIDI Receive Channel ALL
F8.3 Local Control ON
F8.4 Program Change Send & Receive ON
F8.5 Control Change Send & Receive ON
F9. Backup Voice: OFF
MIDI, Tuning, Others: ON
Always backed up

P-140 Owner’s Manual / Bedienungsanleitung / Mode d’emploi / Manual de instrucciones
60
MIDI Data Format / MIDI-Datenformat /
Format des données MIDI / Formato de datos MIDI
If you’re already very familiar with MIDI, or are using a computer to control your music hardware with computer-generated MIDI
messages, the data provided in this section can help you to control the P-140.
Falls Sie bereits mit MIDI vertraut sind oder einen Computer zur Erzeugung von MIDI-Steuermeldungen für die Instrumente verwenden,
können Sie sich zur Steuerung des P-140 nach den im folgenden Abschnitt aufgeführten Spezifikationen richten.
Si vous êtes très familier avec l’interface MIDI ou si vous utilisez un ordinateur pour commander votre matériel de musique au moyen de
messages MIDI générés par ordinateur, les données suivantes vous seront utiles et vous aideront à commander le P-140.
SI usted está ya familiarizado con MIDI, o si emplea una computadora para controlar sus aparatos musicales con mensajes MIDI
generados por computadora, los datos proporcionados en esta sección le ayudarán a controlar la P-140.
1. NOTE ON/OFF
Data format: [9nH] -> [kk] -> [vv]
9nH = Note ON/OFF event (n = channel number)
kk = Note number (Transmit: 09H ~ 78H = A-2 ~ C8 /
Receive: 00H ~ 7FH = C-2 ~ G8)
vv = Velocity (Key ON = 01H ~ 7FH, Key OFF = 00H)
Data format: [8nH] -> [kk] -> [vv] (reception only)
8nH = Note OFF event (n = channel number)
kk = Note number: 00H ~ 7FH = C-2 ~ G8)
vv = Velocity
2. CONTROL CHANGE
Data format: [BnH] -> [cc] -> [vv]
BnH = Control change (n = channel number)
cc = Control number
vv = Data Range
(1) Bank Select
ccH Parameter Data Range (vvH)
00H Bank Select MSB 00H:Normal
20H Bank Select LSB 00H...7FH
Bank selection processing does not occur until receipt of next
Program Change message.
(2) Main Volume
ccH Parameter Data Range (vvH)
07H Volume MSB 00H...7FH
(3) Expression
ccH Parameter Data Range (vvH)
0BH Expression MSB 00H...7FH
(4) Sustain
ccH Parameter Data Range (vvH)
40H Sustain MSB 00H...7FH
(5) Sostenuto
ccH Parameter Data Range (vvH)
42H Sostenuto 00H-3FH:off, 40H-7FH:on
(6) Soft Pedal
ccH Parameter Data Range (vvH)
43H Soft Pedal 00H-3FH:off, 40H-7FH:on
(7) Effect1 Depth (Reverb Send Level)
ccH Parameter Data Range (vvH)
5BH Effect1 Depth 00H...7FH
Adjusts the reverb send level.
(8) Effect4 Depth (Variation Effect Send Level)
ccH Parameter Data Range (vvH)
5EH Effect4 Depth 00H...7FH
(9) RPN
65H RPN MSB
64H RPN LSB
06H Data Entry MSB
26H Data Entry LSB
60H Data Increment
61H Data Decrement
* Parameters that are controllable with RPN
• Coarse Tune
• Fine Tune
• Pitch Bend Range
3. MODE MESSAGES
Data format: [BnH] -> [cc] -> [vv]
BnH = Control event (n = channel number)
cc = Control number
vv = Data Range
(1) All Sound Off
ccH Parameter Data Range (vvH)
78H All Sound Off 00H
(2) Reset All Controllers
ccH Parameter Data Range (vvH)
79H Reset All Controllers 00H
Resets controllers as follows.
Controller Value
Expression 127 (max)
Sustain Pedal 0 (off)
Sostenuto 0 (off)
Soft Pedal 0 (off)
(3) Local Control (reception only)
ccH Parameter Data Range (vvH)
7AH Local Control 00H (off), 7FH (on)
(4) All Notes Off
ccH Parameter Data Range (vvH)
7BH All Notes Off 00H
Switches OFF all the notes that are currently ON on the spec-
ified channel. Any notes being held by the sustain or soste-
nuto pedal will continue to sound until the pedal is released.
(5) Omni Off (reception only)
ccH Parameter Data Range (vvH)
7CH Omni Off 00H
Same processing as for All Notes Off.
(6) Omni On (reception only)
ccH Parameter Data Range (vvH)
7DH Omni On 00H
Same processing as for All Notes Off.
(7) Mono (reception only)
ccH Parameter Data Range (vvH)
7EH Mono 00H
Same processing as for All Sound Off.
(8) Poly (reception only)
ccH Parameter Data Range (vvH)
7FH Poly 00H
Same processing as for All Sound Off.
• When Control Change is turned OFF, Control Change mes-
sages will not be transmitted or received.
• Local on/off, OMNI on/off are not transmitted. (The appropriate
note off number is supplied with “All Note Off” transmission).
• When a voice bank MSB/LSB is received, the number is
stored in the internal buffer regardless of the received order,
then the stored value is used to select the appropriate voice
when a program change message is received.
•Poly mode is always active. This mode will not change when
the instrument receives MONO/POLY mode message.

P-140 Owner’s Manual / Bedienungsanleitung / Mode d’emploi / Manual de instrucciones
61
4. PROGRAM CHANGE
Data format: [CnH] -> [ppH]
CnH = Program event (n = channel number)
ppH = Program change number
P. C .#=Program Change number
SPLIT VOICE
• Some devices use a “0 to 127” numbering system for program
change messages. Since the P-140 uses a “1 to 128” number-
ing system, you will need to subtract 1 from the transmitted
program change numbers to select the appropriate sound:
e.g. to select P.C.#1 in the list above, transmit program
change number 0.
5. PITCH BEND CHANGE
[EnH] -> [ccH] -> [ddH]
ccH = LSB
ddH = MSB
6. SYSTEM REALTIME MESSAGES
[rrH]
F8H: Timing clock
FAH: Start
FCH: Stop
FEH: Active sensing
• Caution: If an error occurs during MIDI reception, the Sustain,
Sostenuto, and Soft effects for all channels are turned off and
an All Note Off message occurs.
7. SYSTEM EXCLUSIVE MESSAGES
(Yamaha MIDI Format)
Panel Data Transmit
Data format: [F0H] -> [43H] -> [0nH] -> [7CH] -> ... -> [F7H]
F0H, 43H, 0nH, 7CH (n: channel number)
00H, LLH (data length)
43H, 4CH, 20H, 20H (CL)
43H, 4CH, 50H, 27H, 30H, 35H (CLP05)
3xH, 3yH (version x.y)
[PANEL DATA]
[CHECK SUM (1byte)] = 0-(43H+4CH+20H+......+Data end)
F7H (End of Exclusive)
• Panel Data Contents
•Panel data send requests cannot be received.
8. SYSTEM EXCLUSIVE MESSAGES
(Universal System Exclusive)
(1) Universal Realtime Message
Data format: [F0H] -> [7FH] -> [XnH] -> [04H] -> [01H] ->
[llH] -> [mmH] -> [F7H]
MIDI Master Volume
• Simultaneously changes the volume of all channels.
• When a MIDI master volume message is received, the volume
only has affect on the MIDI receive channel, not the panel
master volume.
F0H = Exclusive status
7FH = Universal Realtime
7FH = ID of target device
04H = Sub-ID #1=Device Control Message
01H = Sub-ID #2=Master Volume
llH = Volume LSB
mmH =
Volume MSB
F7H = End of Exclusive
or
F0H = Exclusive status
7FH = Universal Realtime
XnH = When n is received n=0~F, whichever is received.
X = irrelevant
04H = Sub-ID #1=Device Control Message
01H = Sub-ID #2=Master Volume
llH = Volume LSB
mmH =
Volume MSB
F7H = End of Exclusive
Voice Name MSB LSB
P.C.#
GRAND PIANO 1 0 122 1
GRAND PIANO 2 0 112 1
GRAND PIANO 3 0 123 1
PIANO & STRINGS 0 125 1
ELECTRIC PIANO 1 0 122 6
ELECTRIC PIANO 2 0 122 5
ELECTRIC PIANO 3 0 123 5
CHURCH ORGAN 0 123 20
JAZZ ORGAN 0 122 17
STRINGS 0 122 49
HARPSICHORD 0 122 7
E.CLAVICHORD 0 122 8
VIBRAPHONE 0 122 12
Voice Name MSB LSB
P.C.#
WOOD BASS 0 122 33
BASS & CYMBAL 0 124 33
E.BASS 1 0 122 34
E.BASS 2 0 122 36
Data Transmission Reception
F8H
Transmitted every
96 clocks
Received as 96-clock tempo timing
when MIDI clock is set to External.
FAH Song start
Song start
Not received when the MIDI clock is
set to Internal.
FCH Song stop
Song stop
Not received when the MIDI clock is
set to Internal.
FEH
Transmitted every
200 milliseconds
If a signal is not received via MIDI for
more than 400 milliseconds, the same
processing will take place for All
Sound Off, All Notes Off and Reset All
Controllers as when those signals are
received.
(1) 1’st Voice
(2) Dual On/Off
(3) Dual Voice
(4) Dual Balance
(5) Dual Detune
(6) Dual Voice1 Octave
(7) Dual Voice2 Octave
(8) Dual Voice1 Effect Depth
(9) Dual Voice2 Effect Depth
(10) Split On/Off
(11) Split Voice
(12) Split Point
(13) Split Balance
(14) Split Voice1 Octave
(15) Split Voice2 Octave
(16) Split Voice1 Effect Depth
(17) Split Voice2 Effect Depth
(18) Split Sustain Mode
(19) Reverb Type 1
(20) Reverb Type 2
(21) Reverb Depth 1
(22) Reverb Depth 2
(23) Effect Type 1
(24) Effect Type 2
(25) Effect Depth
(26) —
(27) Touch Sensitivity
(28) Fixed Data
(29) AUX Pedal
(30) Soft Pedal Depth
(31) Absolute tempo low byte
(32) Absolute tempo high byte
(33) Key-Off Sampling Depth
(34) —
(35) —
(36) Variation

P-140 Owner’s Manual / Bedienungsanleitung / Mode d’emploi / Manual de instrucciones
62
(2) Universal Non-Realtime Message (GM On)
General MIDI Mode On
Data format: [F0H] -> [7EH] -> [XnH] -> [09H] -> [01H] ->
[F7H]
F0H = Exclusive status
7EH = Universal Non-Realtime
7FH = ID of target device
09H = Sub-ID #1=General MIDI Message
01H = Sub-ID #2=General MIDI On
F7H = End of Exclusive
or
F0H = Exclusive status
7EH = Universal Non-Realtime
XnH = When received, n=0~F.
X = irrelevant
09H = Sub-ID #1=General MIDI Message
01H = Sub-ID #2=General MIDI On
F7H = End of Exclusive
When a General MIDI mode ON message is received, the
MIDI system will be reset to its default settings.
This message requires approximately 50ms to execute, so
sufficient time should be allowed before the next message is
sent.
9. SYSTEM EXCLUSIVE MESSAGES (XG Standard)
(1) XG Native Parameter Change
Data format: [F0H] -> [43H] -> [1nH] -> [4CH] -> [hhH] ->
[mmH] -> [llH] -> [ddH] ->...-> [F7H]
F0H = Exclusive status
43H = YAMAHA ID
1nH = When received, n=0~F.
When transmitted, n=0.
4CH = Model ID of XG
hhH = Address High
mmH =
Address Mid
llH = Address Low
ddH = Data
|
F7H = End of Exclusive
Data size must match parameter size (2 or 4 bytes).
When an XG System On message is received, the MIDI sys-
tem will be reset to its default settings.
The message requires approximately 50ms to execute, so
sufficient time should be allowed before the next message is
sent.
(2) XG Native Bulk Data (reception only)
Data format: [F0H] -> [43H] -> [0nH] -> [4CH] -> [aaH] ->
[bbH] -> [hhH] -> [mmH] -> [llH] ->[ddH] ->...->
[ccH] -> [F7H]
F0H = Exclusive status
43H = YAMAHA ID
0nH = When received, n=0~F.
When transmitted, n=0.
4CH = Model ID of XG
aaH = Byte Count
bbH = Byte Count
hhH = Address High
mmH =
Address Mid
llH = Address Low
ddH = Data
| |
| |
ccH = Check sum
F7H = End of Exclusive
• Receipt of the XG SYSTEM ON message causes reinitializa-
tion of relevant parameters and Control Change values. Allow
sufficient time for processing to execute (about 50 msec)
before sending the P-140 another message.
• XG Native Parameter Change message may contain two or
four bytes of parameter data (depending on the parameter
size).
•For information about the Address and Byte Count values,
refer to Table 1 below. Note that the table’s Total Size value
gives the size of a bulk block. Only the top address of the
block (00H, 00H, 00H) is valid as a bulk data address.
10. SYSTEM EXCLUSIVE MESSAGES
(P-140 MIDI Format)
Data format:
[F0H] -> [43H] -> [73H] -> [01H] -> [nnH] -> [F7H]
F0H = Exclusive status
43H = Yamaha ID
73H = P-140 ID
01H = Product ID (CLP common)
nnH = Substatus
nn Control
02H Internal MIDI clock
03H External MIDI clock
F7H = End of Exclusive
11.
SYSTEM EXCLUSIVE MESSAGES (Special Control)
Data format: [F0H] -> [43H] -> [73H] -> [xxH] -> [11H] ->
[0nH] -> [ccH] -> [vvH] -> [F7H]
F0H = Exclusive status
43H = Yamaha ID
73H = P-140 ID
7FH = Extended Product ID
xxH = Product ID 4CH
11H = Special control
0nH = Control MIDI change (n=channel number)
cc = Control number
vv = Value
F7H = End of Exclusive
Control On ccH vvH
Split Point Always 00H 14H
14H:
Split Key Number
Metronome Always 00H 1BH 00H: No accent
01H-0FH: 1/4-15/4
7FH: off
Sustain Level
ch: 00H-0FH 3DH (Sets the Sustain Level
for each channel)
00H-7FH
Channel Detune
ch: 00H-0FH 43H (Sets the Detune value
for each channel)
00H-7FH
Voice Reserve
ch: 00H-0FH 45H 00H : Reserve off
7FH : on*
*
When Volume or Expression is received for Reserve On,
they will be effective from the next Key On. Reserve Off is
normal.
12. SYSTEM EXCLUSIVE MESSAGES (Others)
Data format:
[F0H] -> [43H] -> [1nH] -> [27H] -> [30H] -> [00H]
-> [00H] -> [mmH] -> [
ll
H] -> [ccH] -> [F7H]
Master Tuning (XG and last message priority) simultaneously
changes the pitch of all channels.
F0H = Exclusive Status
43H = Yamaha ID
1nH = When received, n=0~F.
When transmitted, n=0.
27H = Model ID of TG100
30H = Sub ID
00H =
00H =
mmH = Master Tune MSB
llH = Master Tune LSB
ccH = irrelevant (under 7FH)
F7H = End of Exclusive

P-140 Owner’s Manual / Bedienungsanleitung / Mode d’emploi / Manual de instrucciones
63
<Table 1>
MIDI Parameter Change table (SYSTEM)
Address (H) Size (H) Data (H) Parameter Description Default value (H)
00 00 00 4 020C - 05F4* MASTER TUNE -50 - +50[cent] 00 04 00 00
01 1st bit 3 - 0 ➝ bit 15 - 12 400
02 2nd bit 3 - 0 ➝ bit 11 - 8
03 3rd bit 3 - 0 ➝ bit 7 - 4
4th bit 3 - 0 ➝ bit 3 - 0
04 1 00 - 7F MASTER VOLUME 0 - 127 7F
7E 00 XG SYSTEM ON 00=XG system ON
7F 00 RESET ALL PARAMETERS 00=ON (receive only)
TOTAL SIZE 07
*Values lower than 020CH select -50 cents. Values higher than 05F4H select +50 cents.
<Table 2>
MIDI Parameter Change table (EFFECT 1)
Refer to the “Effect MIDI Map” for a complete list of Reverb, Chorus and Variation type numbers.
Address (H) Size (H) Data (H) Parameter Description Default value (H)
02 01 00 2 00-7F REVERB TYPE MSB Refer to Effect MIDI Map 01 (=HALL1)
00-7F REVERB TYPE LSB 00 : basic type 00
02 01 40 2 00-7F VARIATION TYPE MSB Refer to Effect MIDI Map 00(=Effect off)
00-7F VARIATION TYPE LSB 00 : basic type 00
• “VARIATION” refers to the EFFECT on the panel.
<Table 3>
MIDI Parameter Change table (MULTI PART)
Address (H) Size (H) Data (H) Parameter Description Default value (H)
08 nn 11 1 00 - 7F DRY LEVEL 0 - 127 7F
nn = Part Number
• Effect MIDI Map
REVERB
MSB LSB
ROOM 02H 10H
HALL 1 01H 10H
HALL 2 01H 11H
STAGE 03H 10H
OFF 00H 00H
EFFECT
MSB LSB
CHORUS 42H 10H
PHASER 48H 10H
TREMOLO 46H 10H
ROTARY SP 47H 10H
OFF 00H 00H

P-140 Owner’s Manual / Bedienungsanleitung / Mode d’emploi / Manual de instrucciones
64
MIDI Implementation Chart
TransmittedFunction Recognized Remarks
Basic
Channel
Note
Number : True voice
Velocity
After
Touch
Pitch Bend
Control
Change
Prog
Change : True #
System Exclusive
Common : Song Pos.
: Song Sel.
: Tune
System : Clock
Real Time : Commands
: All Sound Off
Aux :
Reset
All
Cntrls
: Local ON/OFF
Mes- : All Notes OFF
sages: Active Sense
: Reset
Notes:
Mode
Default
Changed
Note ON
Note OFF
Key's
Ch's
0,32
1
7
10
11
6,38
64,66,67
84
91,94
96-97
100-101
1
1 - 16
Ø 9nH,v=1-127
˛
˛
˛
Ø
˛
Ø
˛
Ø
˛
Ø
˛
Ø
˛
˛
Ø
Ø
Ø
Ø
Ø
Ø
Ø
Ø
Ø
Ø
Ø
Ø
0 - 127
**************
˛
˛
˛
Ø
Ø
Ø
Ø
˛
Ø
Ø
˛
3
˛
**************
0 - 127
**************
Ø
Mode 1 : OMNI ON , POLY Mode 2 : OMNI ON ,MONO
Mode 3 : OMNI OFF, POLY Mode 4 : OMNI OFF,MONO
˛ Ø 0 - 24 semi
1 - 16
1 - 16
Ø 9nH,v=1-127
˛
˛
˛
˛
˛
˛
Ø
Ø
Ø (120,126,127)
Ø (121)
Ø (122)
Ø (123-125)
Ø
˛
3
˛
˛
0 - 127
0 - 127
Ø
Ø : Yes
˛ : No
Default
Messages
Altered
YAMAHA [ Electronic Piano ] Date : 08-APR-2005
Model P-140 MIDI Implementation Chart
Version : 1.0
Bank Select
Modulation
Main Volume
Panpot
Expression
Data Entry
Portamento Control
Effect Depth
RPN Inc,Dec
RPN LSB,MSB
Ø 0 - 127

P-140 Owner’s Manual / Bedienungsanleitung / Mode d’emploi / Manual de instrucciones
65
Specifications / Technische Daten /
Caractéristiques techniques / Especificaciones
*Specifications and descriptions in this owner’s manual are for information purposes only. Yamaha Corp. reserves the right to change or modify
products or specifications at any time without prior notice. Since specifications, equipment or options may not be the same in every locale, please
check with your Yamaha dealer.
*Die technischen Daten und Beschreibungen in dieser Bedienungsanleitung dienen nur der Information. Yamaha Corp. behält sich das Recht vor,
Produkte oder deren technische Daten jederzeit ohne vorherige Ankündigung zu verändern oder zu modifizieren. Da die technischen Daten, das
Gerät selbst oder Sonderzubehör nicht in jedem Land gleich sind, setzen Sie sich im Zweifel bitte mit Ihrem Yamaha-Händler in Verbindung.
*Les caractéristiques techniques et les descriptions du mode d’emploi ne sont données que pour information. Yamaha Corp. se réserve le droit de
changer ou modifier les produits et leurs caractéristiques techniques à tout moment sans aucun avis. Du fait que les caractéristiques techniques, les
équipements et les options peuvent différer d’un pays à l’autre, adressez-vous au distributeur Yamaha le plus proche.
* Las especificaciones y descripciones de este manual del propietario tienen sólo el propósito de servir como información. Yamaha Corp. se reserva el
derecho a efectuar cambios o modificaciones en los productos o especificaciones en cualquier momento sin previo aviso. Puesto que las especifica-
ciones, equipos u opciones pueden no ser las mismas en todos los mercados, solicite información a su distribuidor Yamaha.
Keyboard GH keyboard 88 keys (A-1 – C7)
Sound Source AWM Dynamic Stereo Sampling
Polyphony (Max.) 64
Voice Selection 14
Effect Reverb, Effect
Volume Master Volume
Controls Dual, Split, Metronome, Transpose, Touch (Hard/Medium/Soft/Fixed), Functions
Recording/Playback 2-part recording/playback (three User songs), Tempo Adjustment, Sync Start
Pedal
SUSTAIN PEDAL (Can be used with half pedal effect),
AUX PEDAL (Assignable to various functions)
Demo Songs 14 voice Demo Songs, 50 preset Songs
Jacks/Connectors
MIDI (IN/OUT), PHONES × 2, AUX OUT (LEVEL FIXED) (L, R),
DC IN 12V, SUSTAIN PEDAL, AUX PEDAL
Memory Device
(for saving User songs): 65 KB
(for saving External songs): 352 KB
Main Amplifiers 6W × 2
Speakers (12 cm × 6 cm) × 2
Dimensions (W × D × H)
(with music rest)
1,334 mm × 351 mm × 140 mm [52-1/2" x 13-13/16" x 5-1/2"]
(1,334 mm × 357 mm × 332 mm) [52-1/2" x 14-1/16" x 13-1/16"]
Weight 17.8 kg (39lbs., 4oz)
Accessories
Owner’s Manual, AC Power Adaptor (Yamaha PA-5D, PA-150 or an equivalent),
Pedal (FC3), Music Rest

* This applies only to products distributed by YAMAHA CORPORATION OF AMERICA. (class B)
(standby)
FCC INFORMATION (U.S.A.)
1. IMPORTANT NOTICE: DO NOT MODIFY THIS UNIT!
This product, when installed as indicated in the instruc-
tions contained in this manual, meets FCC require-
ments. Modifications not expressly approved by
Yamaha may void your authority, granted by the FCC, to
use the product.
2. IMPORTANT: When connecting this product to acces-
sories and/or another product use only high quality
shielded cables. Cable/s supplied with this product
MUST be used. Follow all installation instructions. Fail-
ure to follow instructions could void your FCC authori-
zation to use this product in the USA.
3. NOTE: This product has been tested and found to com-
ply with the requirements listed in FCC Regulations,
Part 15 for Class “B” digital devices. Compliance with
these requirements provides a reasonable level of
assurance that your use of this product in a residential
environment will not result in harmful interference with
other electronic devices. This equipment generates/
uses radio frequencies and, if not installed and used
according to the instructions found in the users manual,
may cause interference harmful to the operation of
other electronic devices. Compliance with FCC regula-
tions does not guarantee that interference will not occur
in all installations. If this product is found to be the
source of interference, which can be determined by
turning the unit “OFF” and “ON”, please try to eliminate
the problem by using one of the following measures:
Relocate either this product or the device that is being
affected by the interference.
Utilize power outlets that are on different branch (circuit
breaker or fuse) circuits or install AC line filter/s.
In the case of radio or TV interference, relocate/reorient
the antenna. If the antenna lead-in is 300 ohm ribbon
lead, change the lead-in to co-axial type cable.
If these corrective measures do not produce satisfac-
tory results, please contact the local retailer authorized
to distribute this type of product. If you can not locate
the appropriate retailer, please contact Yamaha Corpo-
ration of America, Electronic Service Division, 6600
Orangethorpe Ave, Buena Park, CA90620
The above statements apply ONLY to those products
distributed by Yamaha Corporation of America or its
subsidiaries.
OBSERVERA!
Apparaten kopplas inte ur växelströmskällan (nätet) så länge som den
ar ansluten till vägguttaget, även om själva apparaten har stängts av.
ADVARSEL:Netspæendingen til dette apparat er IKKE afbrudt,
sålæenge netledningen siddr i en stikkontakt, som er t endt — også
selvom der or slukket på apparatets afbryder.
VAROITUS:Laitteen toisiopiiriin kytketty käyttökytkin ei irroita koko
laitetta verkosta.

For details of products, please contact your nearest Yamaha
representative or the authorized distributor listed below.
Pour plus de détails sur les produits, veuillez-vous adresser à Yamaha ou
au distributeur le plus proche de vous figurant dans la liste suivante.
Die Einzelheiten zu Produkten sind bei Ihrer unten aufgeführten
Niederlassung und bei Yamaha Vertragshändlern in den jeweiligen
Bestimmungsländern erhältlich.
Para detalles sobre productos, contacte su tienda Yamaha más cercana
o el distribuidor autorizado que se lista debajo.
CANADA
Yamaha Canada Music Ltd.
135 Milner Avenue, Scarborough, Ontario,
M1S 3R1, Canada
Tel: 416-298-1311
U.S.A.
Yamaha Corporation of America
6600 Orangethorpe Ave., Buena Park, Calif. 90620,
U.S.A.
Tel: 714-522-9011
MEXICO
Yamaha de México S.A. de C.V.
Calz. Javier Rojo Gómez #1149,
Col. Guadalupe del Moral
C.P. 09300, México, D.F., México
Tel: 55-5804-0600
BRAZIL
Yamaha Musical do Brasil Ltda.
Rua Joaquim Floriano, 913 - 4' andar, Itaim Bibi,
CEP 04534-013 Sao Paulo, SP. BRAZIL
Tel: 011-3704-1377
ARGENTINA
Yamaha Music Latin America, S.A.
Sucursal de Argentina
Viamonte 1145 Piso2-B 1053,
Buenos Aires, Argentina
Tel: 1-4371-7021
PANAMA AND OTHER LATIN
AMERICAN COUNTRIES/
CARIBBEAN COUNTRIES
Yamaha Music Latin America, S.A.
Torre Banco General, Piso 7, Urbanización Marbella,
Calle 47 y Aquilino de la Guardia,
Ciudad de Panamá, Panamá
Tel: +507-269-5311
THE UNITED KINGDOM
Yamaha-Kemble Music (U.K.) Ltd.
Sherbourne Drive, Tilbrook, Milton Keynes,
MK7 8BL, England
Tel: 01908-366700
IRELAND
Danfay Ltd.
61D, Sallynoggin Road, Dun Laoghaire, Co. Dublin
Tel: 01-2859177
GERMANY
Yamaha Music Central Europe GmbH
Siemensstraße 22-34, 25462 Rellingen, Germany
Tel: 04101-3030
SWITZERLAND/LIECHTENSTEIN
Yamaha Music Central Europe GmbH,
Branch Switzerland
Seefeldstrasse 94, 8008 Zürich, Switzerland
Tel: 01-383 3990
AUSTRIA
Yamaha Music Central Europe GmbH,
Branch Austria
Schleiergasse 20, A-1100 Wien, Austria
Tel: 01-60203900
CZECH REPUBLIC/SLOVAKIA/
HUNGARY/SLOVENIA
Yamaha Music Central Europe GmbH,
Branch Austria, CEE Department
Schleiergasse 20, A-1100 Wien, Austria
Tel: 01-602039025
POLAND
Yamaha Music Central Europe GmbH
Sp.z. o.o. Oddzial w Polsce
ul. 17 Stycznia 56, PL-02-146 Warszawa, Poland
Tel: 022-868-07-57
THE NETHERLANDS/
BELGIUM/LUXEMBOURG
Yamaha Music Central Europe GmbH,
Branch Benelux
Clarissenhof 5-b, 4133 AB Vianen, The Netherlands
Tel: 0347-358 040
FRANCE
Yamaha Musique France
BP 70-77312 Marne-la-Vallée Cedex 2, France
Tel: 01-64-61-4000
ITALY
Yamaha Musica Italia S.P.A.
Viale Italia 88, 20020 Lainate (Milano), Italy
Tel: 02-935-771
SPAIN/PORTUGAL
Yamaha-Hazen Música, S.A.
Ctra. de la Coruna km. 17, 200, 28230
Las Rozas (Madrid), Spain
Tel: 91-639-8888
GREECE
Philippos Nakas S.A. The Music House
147 Skiathou Street, 112-55 Athens, Greece
Tel: 01-228 2160
SWEDEN
Yamaha Scandinavia AB
J. A. Wettergrens Gata 1
Box 30053
S-400 43 Göteborg, Sweden
Tel: 031 89 34 00
DENMARK
YS Copenhagen Liaison Office
Generatorvej 6A
DK-2730 Herlev, Denmark
Tel: 44 92 49 00
FINLAND
F-Musiikki Oy
Kluuvikatu 6, P.O. Box 260,
SF-00101 Helsinki, Finland
Tel: 09 618511
NORWAY
Norsk filial av Yamaha Scandinavia AB
Grini Næringspark 1
N-1345 Østerås, Norway
Tel: 67 16 77 70
ICELAND
Skifan HF
Skeifan 17 P.O. Box 8120
IS-128 Reykjavik, Iceland
Tel: 525 5000
OTHER EUROPEAN COUNTRIES
Yamaha Music Central Europe GmbH
Siemensstraße 22-34, 25462 Rellingen, Germany
Tel: +49-4101-3030
Yamaha Corporation,
Asia-Pacific Music Marketing Group
Nakazawa-cho 10-1, Hamamatsu, Japan 430-8650
Tel: +81-53-460-2312
TURKEY/CYPRUS
Yamaha Music Central Europe GmbH
Siemensstraße 22-34, 25462 Rellingen, Germany
Tel: 04101-3030
OTHER COUNTRIES
Yamaha Music Gulf FZE
LOB 16-513, P.O.Box 17328, Jubel Ali,
Dubai, United Arab Emirates
Tel: +971-4-881-5868
THE PEOPLE’S REPUBLIC OF CHINA
Yamaha Music & Electronics (China) Co.,Ltd.
25/F., United Plaza, 1468 Nanjing Road (West),
Jingan, Shanghai, China
Tel: 021-6247-2211
HONG KONG
Tom Lee Music Co., Ltd.
11/F., Silvercord Tower 1, 30 Canton Road,
Tsimshatsui, Kowloon, Hong Kong
Tel: 2737-7688
INDONESIA
PT. Yamaha Music Indonesia (Distributor)
PT. Nusantik
Gedung Yamaha Music Center, Jalan Jend. Gatot
Subroto Kav. 4, Jakarta 12930, Indonesia
Tel: 21-520-2577
KOREA
Yamaha Music Korea Ltd.
8F, 9F, Dongsung Bldg. 158-9 Samsung-Dong,
Kangnam-Gu, Seoul, Korea
Tel: 02-3467-3300
MALAYSIA
Yamaha Music Malaysia, Sdn., Bhd.
Lot 8, Jalan Perbandaran, 47301 Kelana Jaya,
Petaling Jaya, Selangor, Malaysia
Tel: 3-78030900
PHILIPPINES
Yupangco Music Corporation
339 Gil J. Puyat Avenue, P.O. Box 885 MCPO,
Makati, Metro Manila, Philippines
Tel: 819-7551
SINGAPORE
Yamaha Music Asia Pte., Ltd.
#03-11 A-Z Building
140 Paya Lebor Road, Singapore 409015
Tel: 747-4374
TAIWAN
Yamaha KHS Music Co., Ltd.
3F, #6, Sec.2, Nan Jing E. Rd. Taipei.
Taiwan 104, R.O.C.
Tel: 02-2511-8688
THAILAND
Siam Music Yamaha Co., Ltd.
891/1 Siam Motors Building, 15-16 floor
Rama 1 road, Wangmai, Pathumwan
Bangkok 10330, Thailand
Tel: 02-215-2626
OTHER ASIAN COUNTRIES
Yamaha Corporation,
Asia-Pacific Music Marketing Group
Nakazawa-cho 10-1, Hamamatsu, Japan 430-8650
Tel: +81-53-460-2317
AUSTRALIA
Yamaha Music Australia Pty. Ltd.
Level 1, 99 Queensbridge Street, Southbank,
Victoria 3006, Australia
Tel: 3-9693-5111
NEW ZEALAND
Music Houses of N.Z. Ltd.
146/148 Captain Springs Road, Te Papapa,
Auckland, New Zealand
Tel: 9-634-0099
COUNTRIES AND TRUST
TERRITORIES IN PACIFIC OCEAN
Yamaha Corporation,
Asia-Pacific Music Marketing Group
Nakazawa-cho 10-1, Hamamatsu, Japan 430-8650
Tel: +81-53-460-2312
NORTH AMERICA
CENTRAL & SOUTH AMERICA
EUROPE
AFRICA
MIDDLE EAST
ASIA
OCEANIA
HEAD OFFICE Yamaha Corporation, Pro Audio & Digital Musical Instrument Division
Nakazawa-cho 10-1, Hamamatsu, Japan 430-8650
Tel: +81-53-460-3273
[PK] 38

This document is printed on chlorine free (ECF) paper with soy ink.
Auf Umweltpapier mit Sojatinte gedruckt.
Ce document a été imprimé sur du papier non blanchi au chlore avec de l'encre d'huile de soja.
Este documento se ha impreso en papel sin cloro alguno, con tinta de soja.
U.R.G., Pro Audio & Digital Musical Instrument Division, Yamaha Corporation
© 2005 Yamaha Corporation
WE98590
612
POCP
5
.3-0
3C0
Printed in Japan
Yamaha Home Keyboards Home Page (English Only)
http://music.yamaha.com/homekeyboard
Yamaha Manual Library
http://www.yamaha.co.jp/manual/
Documenttranscriptie
ENGLISH Electronic Piano P-140/P-140S lectronic iano ESPAÑOL FRANÇAIS DEUTSCH Owner’s Manual Bedienungsanleitung Mode d’emploi Manual de instrucciones EN DE FR ES SPECIAL MESSAGE SECTION This product utilizes batteries or an external power supply (adapter). DO NOT connect this product to any power supply or adapter other than one described in the manual, on the name plate, or specifically recommended by Yamaha. WARNING: Do not place this product in a position where anyone could walk on, trip over, or roll anything over power or connecting cords of any kind. The use of an extension cord is not recommended! If you must use an extension cord, the minimum wire size for a 25’ cord (or less) is 18 AWG. NOTE: The smaller the AWG number, the larger the current handling capacity. For longer extension cords, consult a local electrician. This product should be used only with the components supplied or; a cart, rack, or stand that is recommended by Yamaha. If a cart, etc., is used, please observe all safety markings and instructions that accompany the accessory product. SPECIFICATIONS SUBJECT TO CHANGE: The information contained in this manual is believed to be correct at the time of printing. However, Yamaha reserves the right to change or modify any of the specifications without notice or obligation to update existing units. This product, either alone or in combination with an amplifier and headphones or speaker/s, may be capable of producing sound levels that could cause permanent hearing loss. DO NOT operate for long periods of time at a high volume level or at a level that is uncomfortable. If you experience any hearing loss or ringing in the ears, you should consult an audiologist. IMPORTANT: The louder the sound, the shorter the time period before damage occurs. Some Yamaha products may have benches and / or accessory mounting fixtures that are either supplied with the product or as optional accessories. Some of these items are designed to be dealer assembled or installed. Please make sure that benches are stable and any optional fixtures (where applicable) are well secured BEFORE using. Benches supplied by Yamaha are designed for seating only. No other uses are recommended. NOTICE: Battery Notice: This product MAY contain a small non-rechargeable battery which (if applicable) is soldered in place. The average life span of this type of battery is approximately five years. When replacement becomes necessary, contact a qualified service representative to perform the replacement. This product may also use “household” type batteries. Some of these may be rechargeable. Make sure that the battery being charged is a rechargeable type and that the charger is intended for the battery being charged. When installing batteries, do not mix batteries with new, or with batteries of a different type. Batteries MUST be installed correctly. Mismatches or incorrect installation may result in overheating and battery case rupture. Warning: Do not attempt to disassemble, or incinerate any battery. Keep all batteries away from children. Dispose of used batteries promptly and as regulated by the laws in your area. Note: Check with any retailer of household type batteries in your area for battery disposal information. Disposal Notice: Should this product become damaged beyond repair, or for some reason its useful life is considered to be at an end, please observe all local, state, and federal regulations that relate to the disposal of products that contain lead, batteries, plastics, etc. If your dealer is unable to assist you, please contact Yamaha directly. NAME PLATE LOCATION: The name plate is located on the bottom of the product. The model number, serial number, power requirements, etc., are located on this plate. You should record the model number, serial number, and the date of purchase in the spaces provided below and retain this manual as a permanent record of your purchase. Service charges incurred due to a lack of knowledge relating to how a function or effect works (when the unit is operating as designed) are not covered by the manufacturer’s warranty, and are therefore the owners responsibility. Please study this manual carefully and consult your dealer before requesting service. Model ENVIRONMENTAL ISSUES: Purchase Date Serial No. Yamaha strives to produce products that are both user safe and environmentally friendly. We sincerely believe that our products and the production methods used to produce them, meet these goals. In keeping with both the letter and the spirit of the law, we want you to be aware of the following: 92-BP (bottom) 2 P-140 Owner’s Manual PLEASE KEEP THIS MANUAL IMPORTANT SAFETY INSTRUCTIONS INFORMATION RELATING TO PERSONAL INJURY, ELECTRICAL SHOCK, AND FIRE HAZARD POSSIBILITIES HAS BEEN INCLUDED IN THIS LIST. WARNING- When using any electrical or electronic product, basic precautions should always be followed. These precautions include, but are not limited to, the following: 1. Read all Safety Instructions, Installation Instructions, Special Message Section items, and any Assembly Instructions found in this manual BEFORE making any connections, including connection to the main supply. 2. Main Power Supply Verification: Yamaha products are manufactured specifically for the supply voltage in the area where they are to be sold. If you should move, or if any doubt exists about the supply voltage in your area, please contact your dealer for supply voltage verification and (if applicable) instructions. The required supply voltage is printed on the name plate. For name plate location, please refer to the graphic found in the Special Message Section of this manual. 3. This product may be equipped with a polarized plug (one blade wider than the other). If you are unable to insert the plug into the outlet, turn the plug over and try again. If the problem persists, contact an electrician to have the obsolete outlet replaced. Do NOT defeat the safety purpose of the plug. 4. Some electronic products utilize external power supplies or adapters. Do NOT connect this type of product to any power supply or adapter other than one described in the owners manual, on the name plate, or specifically recommended by Yamaha. 5. WARNING: Do not place this product or any other objects on the power cord or place it in a position where anyone could walk on, trip over, or roll anything over power or connecting cords of any kind. The use of an extension cord is not recommended! If you must use an extension cord, the minimum wire size for a 25’ cord (or less) is 18 AWG. NOTE: The smaller the AWG number, the larger the current handling capacity. For longer extension cords, consult a local electrician. 6. Ventilation: Electronic products, unless specifically designed for enclosed installations, should be placed in locations that do not interfere with proper ventilation. If instructions for enclosed installations are not provided, it must be assumed that unobstructed ventilation is required. 7. Temperature considerations: Electronic products should be installed in locations that do not significantly contribute to their operating temperature. Placement of this product close to heat sources such as; radiators, heat registers and other devices that produce heat should be avoided. 8. This product was NOT designed for use in wet/damp locations and should not be used near water or exposed to rain. Examples of wet/damp locations are; near a swimming pool, spa, tub, sink, or wet basement. 9. This product should be used only with the components supplied or; a cart, rack, or stand that is recommended by the manufacturer. If a cart, rack, or stand is used, please observe all safety markings and instructions that accompany the accessory product. 10. The power supply cord (plug) should be disconnected from the outlet when electronic products are to be left unused for extended periods of time. Cords should also be disconnected when there is a high probability of lightning and/or electrical storm activity. 11. Care should be taken that objects do not fall and liquids are not spilled into the enclosure through any openings that may exist. 12. Electrical/electronic products should be serviced by a qualified service person when: a. The power supply cord has been damaged; or b. Objects have fallen, been inserted, or liquids have been spilled into the enclosure through openings; or c. The product has been exposed to rain: or d. The product dose not operate, exhibits a marked change in performance; or e. The product has been dropped, or the enclosure of the product has been damaged. 13. Do not attempt to service this product beyond that described in the user-maintenance instructions. All other servicing should be referred to qualified service personnel. 14. This product, either alone or in combination with an amplifier and headphones or speaker/s, may be capable of producing sound levels that could cause permanent hearing loss. DO NOT operate for a long period of time at a high volume level or at a level that is uncomfortable. If you experience any hearing loss or ringing in the ears, you should consult an audiologist. IMPORTANT: The louder the sound, the shorter the time period before damage occurs. 15. Some Yamaha products may have benches and/or accessory mounting fixtures that are either supplied as a part of the product or as optional accessories. Some of these items are designed to be dealer assembled or installed. Please make sure that benches are stable and any optional fixtures (where applicable) are well secured BEFORE using. Benches supplied by Yamaha are designed for seating only. No other uses are recommended. PLEASE KEEP THIS MANUAL 92-469-2 P-140 Owner’s Manual 3 PRECAUTIONS PLEASE READ CAREFULLY BEFORE PROCEEDING * Please keep this manual in a safe place for future reference. WARNING Always follow the basic precautions listed below to avoid the possibility of serious injury or even death from electrical shock, short-circuiting, damages, fire or other hazards. These precautions include, but are not limited to, the following: ENGLISH Power supply/AC power adaptor Water warning • Only use the voltage specified as correct for the instrument. The required voltage is printed on the name plate of the instrument. • Use the specified adaptor (PA-5D, PA-150, or an equivalent recommended by Yamaha) only. Using the wrong adaptor can result in damage to the instrument or overheating. • Check the electric plug periodically and remove any dirt or dust which may have accumulated on it. • Do not place the AC adaptor cord near heat sources such as heaters or radiators, and do not excessively bend or otherwise damage the cord, place heavy objects on it, or place it in a position where anyone could walk on, trip over, or roll anything over it. Do not open • Do not open the instrument or attempt to disassemble the internal parts or modify them in any way. The instrument contains no user-serviceable parts. If it should appear to be malfunctioning, discontinue use immediately and have it inspected by qualified Yamaha service personnel. • Do not expose the instrument to rain, use it near water or in damp or wet conditions, or place containers on it containing liquids which might spill into any openings. • Never insert or remove an electric plug with wet hands. Fire warning • Do not put burning items, such as candles, on the unit. A burning item may fall over and cause a fire. If you notice any abnormality • If the AC adaptor cord or plug becomes frayed or damaged, or if there is a sudden loss of sound during use of the instrument, or if any unusual smells or smoke should appear to be caused by it, immediately turn off the power switch, disconnect the adaptor plug from the outlet, and have the instrument inspected by qualified Yamaha service personnel. CAUTION Always follow the basic precautions listed below to avoid the possibility of physical injury to you or others, or damage to the instrument or other property. These precautions include, but are not limited to, the following: Power supply/AC power adaptor • When removing the electric plug from the instrument or an outlet, always hold the plug itself and not the cord. • Unplug the AC power adaptor when not using the instrument, or during electrical storms. • Do not connect the instrument to an electrical outlet using a multiple-connector. Doing so can result in lower sound quality, or possibly cause overheating in the outlet. • Do not place the instrument in an unstable position where it might accidentally fall over. • Before moving the instrument, remove all connected adaptor and other cables. • When setting up the instrument, make sure that the AC outlet you are using is easily accessible. If some trouble or malfunction occurs, immediately turn off the power switch and disconnect the plug from the outlet. • Use only the stand specified for the instrument. When attaching the stand or rack, use the provided screws only. Failure to do so could cause damage to the internal components or result in the instrument falling over. Location • Do not expose the instrument to excessive dust or vibrations, or extreme cold or heat (such as in direct sunlight, near a heater, or in a car during the day) to prevent the possibility of panel disfiguration or damage to the internal components. • Do not use the instrument in the vicinity of a TV, radio, stereo equipment, mobile phone, or other electric devices. Otherwise, the instrument, TV, or radio may generate noise. (3)-9 4 P-140 Owner’s Manual 1/2 Connections Handling caution • Before connecting the instrument to other electronic components, turn off the power for all components. Before turning the power on or off for all components, set all volume levels to minimum. Also, be sure to set the volumes of all components at their minimum levels and gradually raise the volume controls while playing the instrument to set the desired listening level. • Do not insert a finger or hand in any gaps on the instrument. • Never insert or drop paper, metallic, or other objects into the gaps on the panel or keyboard. If this happens, turn off the power immediately and unplug the power cord from the AC outlet. Then have the instrument inspected by qualified Yamaha service personnel. • Do not place vinyl, plastic or rubber objects on the instrument, since this might discolor the panel or keyboard. Maintenance • When cleaning the instrument, use a soft, dry cloth. Do not use paint thinners, solvents, cleaning fluids, or chemical-impregnated wiping cloths. • Do not rest your weight on, or place heavy objects on the instrument, and do not use excessive force on the buttons, switches or connectors. • Do not operate the instrument for a long period of time at a high or uncomfortable volume level, since this can cause permanent hearing loss. If you experience any hearing loss or ringing in the ears, consult a physician. Saving and backing up your data • Data in the instrument’s internal memory can be lost due to operational errors or malfunction. Be sure to save any important data to external media via a computer connection. (page 50) ENGLISH Saving data Yamaha cannot be held responsible for damage caused by improper use or modifications to the instrument, or data that is lost or destroyed. Always turn the power off when the instrument is not in use. Even when the instrument turns the power off, electricity is still flowing to the instrument at the minimum level. When you are not using the instrument for a long time, make sure you unplug the AC power adaptor from the wall AC outlet. (3)-9 2/2 P-140 Owner’s Manual 5 ENGLISH Introduction Thank you for purchasing the Yamaha Electronic Piano P-140/P-140S! We recommend that you read this manual carefully so that you can fully take advantage of the advanced and convenient functions of the P-140/P-140S. We also recommend that you keep this manual in a safe and handy place for future reference. Main Features Graded Hammer Effect Keyboard Thanks to our experience as the world’s leading manufacturer of acoustic pianos, we’ve developed a keyboard with action that’s virtually indistinguishable from the real thing. Just as on a traditional acoustic piano, the keys of the lower notes have a heavier touch, while the higher ones are more responsive to lighter playing. The keyboard’s sensitivity can even be adjusted to match your playing style. AWM Dynamic Stereo Sampling The Yamaha P-140 Electronic piano offers unmatched sonic realism and natural grand-piano type playability as well as Yamaha’s original AWM Dynamic Stereo Sampling tone generation technology for rich, musical voices. The Grand Piano 1, 2 and 3 voices feature totally new samples painstakingly recorded from a full concert grand piano. The Grand Piano 1 and 3 voices feature three velocity-switched samples (Dynamic Sampling), special Sustain Sampling (page 43) that samples the unique resonance of an acoustic grand piano’s soundboard and strings when the sustain pedal is pressed, and Keyoff Samples that add the subtle sound produced when the keys are released. The P-140 comes much closer to the sound of a true acoustic piano. 6 P-140 Owner’s Manual About this Owner’s Manual This manual consists of three main sections: Introduction, Reference and Appendix. Introduction (page 6): Please read this section first. Reference (page 14): This section explains how to make detailed settings for the P-140’s various functions. * The illustrations and displays as shown in this owner’s manual are for instructional purposes only, and may appear somewhat different from those on your instrument. * Copying of the commercially available musical data including but not limited to MIDI data and/or audio data is strictly prohibited except for your personal use. * The models P-140/P-140S will be referred to as the P-140 in this Owner’s Manual. ENGLISH Appendix (page 58): This section introduces reference material. This product incorporates and bundles computer programs and contents in which Yamaha owns copyrights or with respect to which it has license to use others’ copyrights. Such copyrighted materials include, without limitation, all computer software, style files, MIDI files, WAVE data, musical scores and sound recordings. Any unauthorized use of such programs and contents outside of personal use is not permitted under relevant laws. Any violation of copyright has legal consequences. DON’T MAKE, DISTRIBUTE OR USE ILLEGAL COPIES. • The company names and product names in this Owner’s Manual are the trademarks or registered trademarks of their respective companies. Accessories • Owner’s Manual This manual contains complete instructions for operating your P-140. • AC Power Adaptor (Yamaha PA-5D, PA-150 or an equivalent)* • Pedal (FC3) • Music Rest * May not be included depending on your particular area. Please check with your Yamaha dealer. P-140 Owner’s Manual 7 Table of Contents ENGLISH Introduction Main Features..................................................... 6 About this Owner’s Manual ............................... 7 Accessories ......................................................... 7 Application Index ............................................... 9 Panel Controls and Terminals.......................... 10 Before Using the P-140 .................................... 12 Turning the Power On ...............................................12 Setting the Volume .....................................................12 Using the Pedals..........................................................13 Using Headphones .....................................................13 Music Rest...................................................................13 F5. Other Functions ............................................ 43 F6. Metronome Volume ..................................... 44 F7. Song Part Cancel Volume............................. 44 F8. MIDI Functions ............................................ 44 F9. Backup Functions.......................................... 46 Connections ..................................................... 47 Connectors ................................................................. 47 Connecting a Personal Computer ............................. 49 Data Backup Using a Computer....................... 50 Message List ..................................................... 51 Troubleshooting............................................... 52 Optional Equipment......................................... 52 Preset Voice List ............................................... 53 Index................................................................. 55 Reference Listening to the Demo Songs .......................... 14 Using the 50 Piano Preset Songs ..................... 15 Listening to the 50 Piano Preset Songs......................15 Practicing a One-Hand Part Using the 50 Preset Songs (Part Cancel Function)....................................16 A-B Repeat for the 50 Preset Songs ...........................18 Selecting & Playing Voices............................... 19 Selecting Voices ..........................................................19 Combining Voices (Dual)..........................................20 Splitting the Keyboard Range and Playing Two Different Voices (Split) ..............................................21 Adding Variations to the Sound – [VARIATION]...23 Selecting a Reverb/Effect type – [REVERB]/ [EFFECT]....................................................................24 Touch Sensitivity – [TOUCH] ..................................25 Transposition – [TRANSPOSE] ................................26 Using the Metronome ................................................27 Recording Your Performance .......................... 28 Recording a performance quickly..............................28 Re-recording a previously recorded song..................30 Recording to RIGHT/LEFT .......................................31 Changing the Initial Settings (data recorded at the beginning of a song).........................................33 Playing Back Songs .......................................... 34 Playing Back User Songs/External Songs on the P-140................................................................34 Detailed Settings – [FUNCTION]...................... 36 Basic Procedure in Function......................................37 About Each Function .................................................39 F1. Fine Tuning of the Pitch ...............................39 F2. Selecting a Scale .............................................40 F3. Dual Functions ..............................................41 F4. Split Functions...............................................42 8 P-140 Owner’s Manual Appendix Preset Song List................................................ 58 Factory Setting List .......................................... 59 MIDI Data Format ............................................ 60 MIDI Implementation Chart ............................ 64 Specifications ................................................... 65 Application Index Use this index to find reference pages that may be helpful for your particular application and situation. Listening Listening to demo songs with different voices.....................................................................Listening to the Demo Songs on page 14 Listening to my recorded performance................................................................................................Playing Back Songs on page 34 Listening to commercially available Music Data .................................................................................Playing Back Songs on page 34 Using the pedals .........................................................................................................................................Using the Pedals on page 13 Playing an accompaniment that matches pitch.............................................................. Transposition – [TRANSPOSE] on page 26 Selecting a touch sensitivity type........................................................................................Touch Sensitivity – [TOUCH] on page 25 Fine tuning the pitch of the entire instrument when you play the P-140 along with other instruments or CD music ........................................................................................................................................................Fine Tuning of the Pitch on page 39 Changing voices ENGLISH Playing Viewing the list of voices ........................................................................................................................... Preset Voice List on page 53 Combining two voices ............................................................................................................... Combining Voices (Dual) on page 20 Playing different sounds with left and right hands ............................................................................Splitting the Keyboard Range and Playing Two Different Voices (Split) on page 21 Making the sound more brilliant or more mellow......................................................................................[VARIATION] on page 23 Simulating a concert hall ....................................................................................................................................[REVERB] on page 24 Adding spread or swell to the sound...................................................................................................................[EFFECT] on page 24 Practicing Muting the right- or left-hand part ...............................................................Practicing a One-Hand Part Using the 50 Preset Songs (Part Cancel Function) on page 16 Practicing a specified phrase repeatedly .................................................................... A-B Repeat for the 50 Preset Songs on page 18 Practicing with an accurate and steady tempo ............................................................................... Using the Metronome on page 27 Practicing using your recorded song....................................................................................Recording Your Performance on page 28 .........................................................................................................................................Turning part playback on and off on page 35 Recording Recording your performance................................................................................................Recording Your Performance on page 28 Settings Adjusting the P-140 settings .........................................................................................Detailed Settings – [FUNCTION] on page 36 Resetting to the default setting ...........................................................................................................Factory Preset Recall on page 46 Connecting the P-140 to other devices What is MIDI? ..................................................................................................................................................About MIDI on page 47 Making detailed settings for MIDI ...........................................................................................................MIDI Functions on page 44 Recording your performance............................................................................AUX OUT [L] [R] (LEVEL FIXED) jacks on page 48 Raising the volume............................................................................................AUX OUT [L] [R] (LEVEL FIXED) jacks on page 48 Connecting a computer ................................................................................................ Connecting a Personal Computer on page 49 Saving the data to a computer ......................................................................................... Data Backup Using a Computer on page 50 Loading the data from a computer ......................................................................................................Playing Back Songs on page 34 P-140 Owner’s Manual 9 Panel Controls and Terminals Panel Controls and Terminals 2 3 4 5 6 7 8 9 ENGLISH 1 Rear panel ™ & Front panel 10 P-140 Owner’s Manual * ( º ¡ ) Panel Controls and Terminals @ # 1 [STANDBY/ON] switch ................ page 12 For turning the power on or off. $ % ^ @ [–/NO], [+/YES] buttons For adjusting the volume level of the entire sound. For setting values or performing file operations. Pressing both buttons simultaneously for certain value settings (Transpose, Tempo, etc.) restores the default value. 3 [DEMO] button............................ page 14 # Voice group buttons ....................page 19 2 [MASTER VOLUME] slider ........... page 12 For playing the demo songs. 4 [TRANSPOSE] button................... page 26 For shifting the pitch of the entire keyboard up or down. 5 [REC] button ................................ page 28 For recording your keyboard performance. 6 [PLAY/PAUSE], [STOP] buttons ..............................................pages 15, 34 For playing back the preset songs, your recorded material or commercially available music data, etc. 7 [SONG SELECT] button ........pages 15, 34 For selecting a song to play back or edit. 8 [RIGHT], [LEFT] buttons .......pages 16, 35 For selecting voices from 14 internal sounds including Grand Piano 1, 2 and 3. $ [VARIATION] button ....................page 23 For adjusting the brightness of the selected voice for your keyboard performance. % [REVERB], [EFFECT] buttons.........page 24 For adding reverb and chorus effects to the selected voice for your keyboard performance. ^ [TOUCH] button ..........................page 25 For selecting the touch response. & MIDI [IN] [OUT] terminals ...........page 47 For connecting external MIDI devices, allowing the use of various MIDI functions. For turning the left- and right-hand parts on or off as required so you can practice the corresponding part (the part that is turned off) on the keyboard. * [SUSTAIN PEDAL] jack.......... pages 13, 47 9 [METRONOME] button.........pages 27, 44 ( [AUX PEDAL] jack................. pages 13, 48 For starting/stopping the metronome function. ) [TEMPO/FUNCTION –, +] button ..............................................pages 27, 37 For changing the song tempo (speed) and selecting other useful functions (pages 36-46). ! Display ......................................... page 12 For showing information on certain settings and values of the instrument. CAUTION Never attempt to turn off the power while flashing dashes appear in the display, indicating data is being written to internal memory. Doing so may result in loss of all user data. ENGLISH ! For connecting an included pedal (FC3) or an optional FC4/5 foot switch. For connecting an included pedal (FC3), an optional FC4/5 foot switch or an FC7 foot controller. º AUX OUT [L] [R] (LEVEL FIXED) jacks .....................................................page 48 For outputting the sound of the P-140 to an external audio system, or connecting it to another device (MD recorder, etc.) to record your performance. ¡ [DC IN 12V] jack...........................page 12 For connecting the included power adaptor. ™ [PHONES] jack..............................page 13 For connecting a set of standard stereo headphones, allowing private practice. P-140 Owner’s Manual 11 Before Using the P-140 Before Using the P-140 Turning the Power On 1. Connect the power adaptor’s DC cable to the [DC IN 12V] jack. ENGLISH 2. Plug the AC adaptor into an AC outlet. WARNING Use the specified adaptor (PA-5D, PA-150, or an equivalent recommended by Yamaha) only. The use of other adaptors may result in irreparable damage to both the adaptor and the P-140. CAUTION Unplug the AC Power Adaptor when not using the P-140, or during electrical storms. (The shape of plug differs depending on locale.) 3. Press the [STANDBY/ON] switch to turn the power on. Display The display located in the center of the front panel lights up. When you’re ready to turn off the power, press the [STANDBY/ ON] switch again. Normally indicates tempo. CAUTION Even when the instrument is turned off, electricity is still flowing to the instrument at the minimum level. When you are not using the P140 for a long time, make sure you unplug the AC power adaptor from the wall AC outlet. When turning off the power, press and hold down the [STANDBY/ON] switch for a short time until the power turns off. The P-140 uses this power-off procedure as a “safety” device to prevent the power from being inadvertently turned off during performance. Setting the Volume Initially set the [MASTER VOLUME] slider about halfway between the “MIN” and “MAX” settings. Then, when you start playing, re-adjust the [MASTER VOLUME] slider to the most comfortable listening level. The level decreases. TERMINOLOGY MASTER VOLUME: The volume level of the entire keyboard sound 12 P-140 Owner’s Manual The level increases. Before Using the P-140 Using the Pedals Sustain Pedal (Sustain Pedal jack) This jack is for connecting the included pedal (FC3). The pedal functions in the same way as a damper pedal on an acoustic piano. Connect the included pedal (FC3) to this jack and press the pedal to sustain the sound. The further down the pedal is pressed, the longer the sound will be sustained (can be used like a half pedal effect). When the GRAND PIANO 1 and 3 voices are selected, pressing the FC3 pedal activates the instrument’s special Sustain Samples to accurately recreate the unique resonance of an acoustic grand piano’s soundboard and strings. An optional FC4/FC5 foot switch can also be connected to this jack. However, these foot switches cannot be used to control the half pedal effect. NOTE ENGLISH FC3 The depth of the effect produced by the Sustain Samples can be adjusted via the Pedal Functions (pages 37, 43) in Function. AUX Pedal (AUX Pedal jack) This jack is for connecting an optional FC4/FC5 foot switch or an optional FC7 foot controller. A wide range of functions, including the Soft Pedal function can be assigned to this jack. For instructions on assigning the pedal, refer to pages 37, 43. NOTE The FC7 Foot Controller can be used to control Expression (pages 37, 43). Using Headphones Connect a set of headphones to one of the [PHONES] jacks. Two [PHONES] jacks are provided. You can connect two sets of standard stereo headphones. (If you are using only one set of headphones, you can plug them into either jack.) On front panel Standard stereo mini plug CAUTION Do not use the P-140 at a high volume level for a long period of time, or your hearing may be damaged. Music Rest The P-140 includes a music rest that can be attached to the instrument by inserting it into the holes at the top of the control panel. P-140 Owner’s Manual 13 Listening to the Demo Songs Reference Listening to the Demo Songs Demo songs are provided that effectively demonstrate each of the P-140’s voices. ENGLISH 1 2 3 4 4 3 1. Press the [STANDBY/ON] switch to turn the power on. When the power is turned ON, one of the voice button indicators will light. NOTE Demo song data is not transmitted via the MIDI terminals. 2. Adjust the volume. Initially set the [MASTER VOLUME] slider about half way between the “MIN” and “MAX” settings. Then, when you start playing, re-adjust the [MASTER VOLUME] slider to the most comfortable listening level. NOTE Demo songs cannot be played during User song recording (page 28). 3. Press the [DEMO] button to listen NOTE to the Demo songs. The VOICE button indicators will flash in sequence, then the GRAND PIANO 1 demo song will start. Demo songs provided for each voice will play back in sequence until you press the [DEMO] or [STOP] button. Changing a demo song NOTE You can change to another Demo song during playback by pressing the desired VOICE button. Demo Song List Voice Name Title Composer GRAND PIANO 3 “Eintritt” Waldszenen Op.82 R. Schumann HARPSICHORD ([OTHERS] o 4) Gavotte J.S. Bach • The demonstration pieces listed above are short rearranged excerpts of the original compositions. • All other songs are original (© 2005 Yamaha Corporation). 4. Press the [DEMO] or [STOP] button to stop the Voice demo. or 14 P-140 Owner’s Manual You cannot adjust the tempo of demo songs. You cannot use the Part Cancel function (page 16) or the Song A-B Repeat function (page 18) in Demo. Seven voices (page 19) are assigned to the [OTHERS] button. The demo songs for these voices are called up in sequence each time the [OTHERS] button is pressed during playback. Using the 50 Piano Preset Songs Using the 50 Piano Preset Songs Listening to the 50 Piano Preset Songs The P-140 provides performance data of 50 piano songs. You can simply listen to these songs (page 58) or use them for practice (page 16). 15 2 ENGLISH 4 3 1. Press the [SONG SELECT] button a few times until the “PRESET” indicator lights. 2. Press the [–/NO], [+/YES] buttons to select the number of the tune you want to play. The number will appear on the display. 1 – 50: Select a preset song number and play only the song. ALL: Play all preset songs in sequence. rnd: Play all preset songs continuously in random order. 3. Press the [PLAY/PAUSE] button to start playback. Adjust the tempo You can use the [TEMPO/FUNCTION –, +] buttons to adjust the playback tempo as required. This produces a relative tempo variation, with a range from “–50” through “0” to “50” at maximum; the range will differ depending on the selected song. The default tempo can be recalled by simultaneously pressing the [–] and [+] buttons. 4. Stop playback. Playback will stop automatically when the selected preset song has finished. To stop the song during playback (or continuous playback), press the [STOP] button. You can also pause playback by pressing the [PLAY/PAUSE] button. To play back another song continuously, see step 2 above. TERMINOLOGY Song: On the P-140, performance data is called a “Song.” This includes demonstration tunes and piano preset tunes. Preset: Preset Data supplied with the internal memory of the P-140 shipped from the factory. NOTE The default tempo “0” is automatically selected whenever a new preset song is selected, or when playback of a new preset song begins during “ALL” or “rnd” playback. NOTE When you select a different song (or a different song is selected during chained playback), appropriate reverb and effect types will be selected accordingly. NOTE You can adjust the Variation type (page 23) and Reverb type (page 24) that is applied to the voice you play on the keyboard and for the preset song playback. 5. Press the [SONG SELECT] button to exit Preset Song playback. The indicator turns off, and the instrument returns to normal play. P-140 Owner’s Manual 15 Using the 50 Piano Preset Songs Practicing a One-Hand Part Using the 50 Preset Songs (Part Cancel Function) The 50 preset songs have separate left- and right-hand parts on individual parts. You can turn the left- and right-hand parts on or off as required so you can practice the corresponding part (the part that is turned off) on the keyboard. The right-hand part is played by [RIGHT] and the left-hand part is played by [LEFT]. ENGLISH 3 2 1 1. Turn off the playback part you wish to practice. After you select a song to practice, press the [RIGHT] or [LEFT] button to turn off the corresponding part. When you first select a song, both [RIGHT] and [LEFT] indicators light up, indicating that you can play back both parts. When you press one of the buttons to turn off playback, the corresponding button indicator turns off and the corresponding part playback is muted. Pressing the buttons repeatedly toggles playback between on and off. The parts can be turned on or off even during playback. 2. Press the [PLAY/PAUSE] button to start playback and playing. Play the part you just turned off. 3. Stop playback. When playback is complete, it automatically stops and the P-140 locates the top of the song. If you wish to stop playback in the middle of a song, press the [STOP] button. You can also pause playback by pressing the [PLAY/ PAUSE] button. 16 P-140 Owner’s Manual NOTE The Preset Song Part Cancel function cannot be used during “ALL” or “rnd” (page 15) playback. NOTE The “Song Part Cancel Volume” function described on pages 37, 44 can be used to set the canceled part so that it plays at a volume from “0” (no sound) to “20.” The default setting is “5.” Using the 50 Piano Preset Songs Starting playback automatically as you start playing the keyboard (Sync Start) When the Sync Start function is engaged, playback of the selected preset song will begin automatically as soon as you start playing on the keyboard. To engage the Sync Start function, simultaneously hold down the [STOP] and press the [PLAY/PAUSE] button. Repeat the previous operation to disengage the Sync Start function. Playback will then start as soon as you begin playing the keyboard. Sync Start standby ENGLISH Sync Start TERMINOLOGY Sync: Synchronized; occurring at the same time. Pedal Play/Pause A pedal connected to the [AUX PEDAL] connector can be assigned to play and pause preset song playback via the AUX Pedal function described on pages 37, 43. P-140 Owner’s Manual 17 Using the 50 Piano Preset Songs A-B Repeat for the 50 Preset Songs The A-B Repeat function can be used to continuously repeat a specified phrase within a preset song. Combined with the Part Cancel function described below, this provides an excellent way to practice difficult phrases. ENGLISH 4 23 1. Select and play a preset song. 2. Press the [TEMPO/FUNCTION] button at the beginning of the phrase you want to repeat. This sets the “A” point ( will appear on the display). 3. Press the [TEMPO/FUNCTION] button a second time at the end of the phrase. This sets the “B” point ( will appear on the display). At this point, repeat playback will begin between the specified A and B points. NOTE The A-B Repeat function cannot be used during “ALL” or “rnd” (page 15) playback. NOTE • To set the “A” point at the very beginning of the song, press the [TEMPO/FUNCTION] button before starting playback. • You can have the B point automatically be set to the song’s end, by setting the A point and letting the song play to the end. NOTE A B An automatic lead-in (to help guide you into the phrase) starts at the A point of the song. Repeat A through B 4. Press the [STOP] button to stop playback. A-B repeat playback will resume if you press the [PLAY/ PAUSE] button. To cancel the A and B points, press the [TEMPO/FUNCTION] button once. NOTE The A and B points are automatically canceled when a new song is selected. 18 P-140 Owner’s Manual Selecting & Playing Voices Selecting & Playing Voices Selecting Voices 1 ENGLISH 1. Select the desired voice by pressing one of the Voice buttons. [OTHERS] button [OTHERS] button Pressing the [OTHERS] button switches among the following seven voices. o 1 CHURCH ORGAN o 2 JAZZ ORGAN o 3 STRINGS o 4 HARPSI CHORD o 5 E. CLAVI CHORD o 6 VIBRAPHONE o 7 SPLIT For details about “o 7 SPLIT,” refer to page 21. Then, when you start playing, re-adjust the [MASTER VOLUME] slider for the most comfortable listening level. NOTE To familiarize yourself with the characteristics of the voices, listen to the demo songs for each voice (page 14). Refer to “Preset Voice List” on page 53 for more information on the characteristics of each preset voice. TERMINOLOGY Voice: On the P-140, the term “voice” means “instrument sound.” NOTE You can control the loudness of a voice by adjusting the force with which you strike the keys, although different playing styles (touch sensitivities) have little or no effect with certain musical instruments. Refer to “Preset Voice List” on page 53. NOTE If you select the voice via the [OTHERS] button then press another VOICE button, the voice last selected via the [OTHERS] button will be maintained. In other words, pressing the [OTHERS] button again calls up the last selected voice. P-140 Owner’s Manual 19 Selecting & Playing Voices Combining Voices (Dual) You can play voices simultaneously across the entire range of the keyboard. In this way, you can combine similar voices to create a thicker sound. ENGLISH 12 1. Press two voice buttons at the same time (or press one voice button while holding another) to engage Dual. The voice indicators of both selected voices will light when Dual is active. Play the keyboard. NOTE Two voices in the [OTHERS] button cannot be engaged at the same time. NOTE Dual is not available when “SPLIT” is selected via the [OTHER] button. NOTE Press at the same time If you want to use a voice selected via the [OTHERS] button, press the [OTHERS] button several times to call up the desired voice (other than “SPLIT”) while holding any other VOICE button. According to the voice numbering priority shown in the diagram below, the lower value voice number will be designated as Voice 1 (the other voice will be designated as Voice 2). Voice numbering priority 1 2 3 4 5 6 7 8 The P-140 Function provides access to a number of other Dual functions, such as volume balance setting and octave setting (pages 37, 41). (If you do not set the Dual functions, the appropriate setting will be set in each voice by default.) 2. Press any single voice button to return to the normal single-voice play. 20 P-140 Owner’s Manual The PIANO & STRINGS voice combines the sounds of piano and strings. Pressing the [PIANO&STRINGS] button will produce the same result as Dual. You can combine other voices with this voice; however, keep in mind that the sound may cut off unnaturally. Selecting & Playing Voices Splitting the Keyboard Range and Playing Two Different Voices (Split) Split enables you to play two different voices on the keyboard — one with the left hand and another with the right hand. For example, you can play a bass part using the Wood Bass or Electric Bass voice with the left hand, and a melody with the right hand. Bass voice ENGLISH Split point (default setting: F#2) Melody 234 5 1 1. Press the [OTHERS] button several times until “o 7” is called up in the display. The [OTHERS] button lights. As a default setting, GRAND PIANO 1 will be selected for the right-hand part and WOOD BASS will be selected for the left-hand part. The Function provides access to a number of other Split functions (pages 37, 42). (If you make no settings for the Split functions, the appropriate setting will be set in each voice by default.) 2. Specify the split point (the border between the right- and left-hand range). The Split Point can be specified from the FUNCTION display. For details, refer to pages 37, 42. (The split point is initially set at the F#2 key by default. If you do not need to change the split point, skip this step.) P-140 Owner’s Manual 21 Selecting & Playing Voices 3. Select a voice for the right hand. ENGLISH A voice for the right hand can be selected from the following 13 voices in the FUNCTION display. For details, refer to pages 37, 42. 1 GRAND PIANO 1 2 GRAND PIANO 2 3 GRAND PIANO 3 4 PIANO & STRINGS 5 ELECTRIC PIANO 1 6 ELECTRIC PIANO 2 7 ELECTRIC PIANO 3 8 CHURCH ORGAN 9 JAZZ ORGAN 10 STRINGS 11 HARPSICHORD 12 E.CLAVICHORD 13 VIBRAPHONE [REVERB] in Split The reverb type assigned to the right voice will take priority over the other. (If the reverb is set to OFF, the left voice’s reverb type will be in effect.) Reverb depth settings made via the panel controls (i.e., pressing the [–/NO] or [+/YES] buttons while holding the [REVERB] button; see page 24) will be applied to the right voice only. NOTE 4. Select a voice for the left hand. A voice for the left hand can be selected from the following four voices in the FUNCTION display. For details, refer to pages 37, 42. 1 WOOD BASS 2 BASS & CYMBAL 3 E.BASS 1 4 E.BASS 2 5. Press any single voice button to exit Split and return to normal play. 22 NOTE P-140 Owner’s Manual [EFFECT] in Split Depending on the conditions, one effect type will take priority over the other. The depth will be decided according to the default depth value of the voice combination. However, using Function F4 (pages 37, 42) you can change the depth value for each voice as you like. Effect depth settings made via the panel controls (i.e., pressing the [–/NO] or [+/YES] buttons while holding the [EFFECT] button; see page 24) will be applied to the right voice only. Selecting & Playing Voices Adding Variations to the Sound – [VARIATION] [VARIATION] button [VARIATION] BRIGHT: NORMAL: MELLOW: Bright tone Standard tone Soft and mellow tone To select a variation type, press the [VARIATION] button a few times until the indicator corresponding to the desired type lights (the indicator lights in sequence each time you press the [VARIATION] button). Variation can be selected among three types. TERMINOLOGY Default setting: The “Default setting” refers to the factory setting obtained when you first turn on the power to the P140. ENGLISH This button enables you to select the brightness of the selected voice for your keyboard performance. The following three types are available. NOTE Default setting = NORMAL NOTE When the VARIATION is set to BRIGHT, the overall sound will be slightly louder. If the MASTER VOLUME is set at a high level the sound may become distorted. If so, lower the MASTER VOLUME level. P-140 Owner’s Manual 23 Selecting & Playing Voices Selecting a Reverb/Effect type – [REVERB]/[EFFECT] [–/NO][+/YES] buttons [REVERB] button [EFFECT] button ENGLISH [REVERB] This control enables you to select various digital reverb effects for adding extra depth and expression to the sound and creating a realistic acoustic ambience. OFF: ROOM: HALL 1: HALL 2: STAGE: NOTE The default reverb type (including OFF) and depth settings are different for each voice. When no reverb effect is selected, no REVERB indicator is lit. This setting adds a continuous reverb effect to the sound, similar to the acoustic reverberation you would hear in a room. For a “bigger” reverb sound, use the HALL 1 setting. This effect simulates the natural reverberation of a small-size concert hall. For a truly spacious reverb sound, use the HALL 2 setting. This effect simulates the natural reverberation of a large concert hall. Simulates the reverb of a stage environment. Pressing the [REVERB] button repeatedly toggles the reverb on and off. The indicators light in sequence each time the [REVERB] button is pressed. When all indicators are off, no effect is produced. Adjusting Reverb Depth Adjust the reverb depth for the selected voice by using the [–/NO] [+/YES] buttons while holding the [REVERB] button. Default depth settings are different for each voice. The depth range is from 0 (no effect) through 20 (maximum reverb depth). The current depth setting appears on the display while the [REVERB] button is held. NOTE Releasing the [REVERB] button changes the reverb type. If you are changing the reverb depth by holding the [REVERB] button, releasing the [REVERB] button will not change the reverb type. [EFFECT] The [EFFECT] button allows you to select an effect to give your sound greater depth and animation. OFF: When no effect is selected, no EFFECT indicator is lit. CHORUS: Adds depth and richness to the sound. PHASER: Adds a sweeping effect to the sound. TREMOLO: Adds an animated, vibrating effect to the sound. ROTARY SP: Adds the vibrato effect of a rotary speaker. To select an effect type, press the [EFFECT] button a few times until the indicator corresponding to the desired type lights (the indicators light in sequence each time you press the [EFFECT] button). No effect is produced when all indicators are off. Adjusting Effect Depth You can adjust the effect depth for the selected voice by using the [–/NO] and [+/YES] buttons while holding the [EFFECT] button. Default depth settings are different for each voice. The depth range is from 0 (no effect) through 20 (maximum effect depth). The current depth setting appears on the display while the [EFFECT] button is held. 24 P-140 Owner’s Manual NOTE The default effect type (including OFF) and depth settings are different for each voice. NOTE Releasing the [EFFECT] button changes the effect type. If you are changing the depth settings by holding the [EFFECT] button, releasing the [EFFECT] button will not change the effect type. Selecting & Playing Voices Touch Sensitivity – [TOUCH] [–/NO] [+/YES] buttons [TOUCH] [TOUCH] button NOTE HARD: Requires that the keys be played quite hard to produce maximum loudness. MEDIUM: Produces a fairly “standard” keyboard response. SOFT: Allows maximum loudness to be produced with relatively light key pressure. FIXED: All notes are produced at the same volume no matter how hard the keyboard is played. (No indicators are lit.) The fixed volume can be changed. This setting does not change the weight of the keyboard. NOTE Default setting = MEDIUM NOTE ENGLISH You can select four different types of keyboard touch sensitivity — HARD, MEDIUM, SOFT or FIXED — to match different playing styles and preferences. The touch sensitivity type will become the common setting for all voices. However, the touch sensitivity settings may have little or no effect with certain voices that are not normally responsive to keyboard dynamics. (Refer to the “Preset Voice List” on page 53.) To select a touch sensitivity type press the [TOUCH] button a few times until the indicator corresponding to the desired type lights (the indicators light in sequence each time the [TOUCH] button is pressed). No indicator is lit when “FIXED” is selected. Changing the volume when FIXED is selected When you select FIXED, you can set the volume for notes played in FIXED by using the [–/NO] and [+/YES] buttons while you hold the [TOUCH] button. The current volume level appears on the display. The volume range is from 1 (minimum volume) through 127 (maximum volume). The default setting is 64. NOTE Volume range The touch volume set in FIXED will become the common setting for all voices. NOTE Releasing the [TOUCH] button changes the touch type. If you are changing the volume by holding the [TOUCH] button, releasing the [TOUCH] button will not change the touch sensitivity type. (FIXED will remain selected.) P-140 Owner’s Manual 25 Selecting & Playing Voices Transposition – [TRANSPOSE] The P-140’s Transpose function makes it possible to shift the pitch of the entire keyboard up or down in semitone intervals to facilitate playing in difficult key signatures, and to let you easily match the pitch of the keyboard to the range of a singer or other instruments. For example, if you set the transposition amount to “5,” playing key C produces pitch F. In this way, you can play a song as though it were in C major, and the P-140 will transpose it to the key of F. ENGLISH [TRANSPOSE] button [–/NO] [+/YES] buttons Use the [–/NO] and [+/YES] button while holding the [TRANSPOSE] button to transpose down or up as required. The amount of transposition appears on the display while the [TRANSPOSE] button is held. The default transpose setting is “0.” The [TRANSPOSE] button indicator remains lit when a transpose setting other than “0” is selected. Every time the [TRANSPOSE] button is pressed after that switches the transpose function ON or OFF. 26 P-140 Owner’s Manual TERMINOLOGY Transpose: Changing the key signature of a song. On the P-140, transposing shifts the pitch of the entire keyboard. NOTE Transposition The transposition range: –12: –12 semitones (down one octave) 0: normal pitch 12: 12 semitones (up one octave) Selecting & Playing Voices Using the Metronome The P-140 features a built-in metronome for convenience in practicing and use with the Recording features. 12 [–/NO] [+/YES] buttons ENGLISH [TEMPO/FUNCTION –, +] buttons 1. Press the [METRONOME] button to start the metronome. The metronome sound is turned on. The beat indicator flashes at the current tempo. Adjusting the tempo The tempo of the metronome and user song recorder playback (the recorder is described in the next section) can be set from 32 to 280 beats per minute by using the [TEMPO/FUNCTION –, +] buttons (when the [TEMPO/FUNCTION –, +] button’s [TEMPO] indicator is lit). Adjusting the time signature The time signature (beat) of the metronome can be set by using the [–/NO] and [+/YES] buttons while holding the [METRONOME] button. You can set the beat from 0 to 15. The current setting appears on the display while you are holding the [METRONOME] button. Holding the [METRONOME] button. NOTE If the [TEMPO/FUNCTION] button’s [FUNCTION] indicator is lit, press the [TEMPO/FUNCTION] button to light the [TEMPO] indicator. NOTE The volume of the metronome can be adjusted via the Metronome Volume function in Function (pages 37, 44). Beat 2. Press the [METRONOME] button to stop the metronome. P-140 Owner’s Manual 27 Recording Your Performance Recording Your Performance The ability to record and play back what you’ve played on the P-140 keyboard can be an effective practice aid. You can, for example, record just the left-hand part, and then practice the right-hand part while playing back the recorded left-hand part. Or, since you can record up to two parts separately, you could record the left- and right-hand parts separately, or record both parts of a duet and hear how they sound when played back. The two-part Song Recorder on the P-140 allows the recording of up to three User songs (U01-U03) to the instrument. ENGLISH TERMINOLOGY NOTE Recording vs. Saving: The format of performance data recorded on an MD differs from that of data recorded on the P-140. An MD records audio signals. The P-140 “saves” information regarding note timing, voices, and a tempo value, but not audio signals. When you play back recorded songs, the P-140 produces sound based on the saved information. Therefore, recording on the P-140 may be more accurately called “saving information.” However, this book often uses the word “recording” because it seems to make more sense. You can record your performance (audio data) to an MD recorder or other recording device via the AUX OUT jack (page 48). Recording a performance quickly This convenient and simple recording method lets you quickly record your performance without specifying the recording parts — useful, for example, in recording solo piano pieces. In this way, the performance is automatically recorded to right part. 2 4 4 3 5 CAUTION To avoid erasing previously recorded song(s): If the song contains data, the part indicator lights up green when you select a song. Note that recording new data on this part will erase the existing data. 1. Select the voice you want to record (or voices if you will be using Dual or Split), before you begin to record. Make any other desired settings (reverb, effect, etc.) as well. You might also want to set the volume. You can also adjust the playback volume using the [MASTER VOLUME] slider. 28 P-140 Owner’s Manual 1 NOTE Record mode cannot be engaged during Demo Song playback. Recording Your Performance mode. This automatically selects an empty number (U01-U03) for recording and makes the RIGHT part active. If all song numbers contain recorded data, Song U01 will be selected. This simply enables recording; to start recording, go on to step 3. The amount of memory available for recording is shown on the display in approximate kilobytes. You can record up to a maximum of about 11,000 notes on the P-140 depending on pedal usage and other factors. The [PLAY/PAUSE] indicator will flash at the current METRONOME tempo setting. You can turn on the metronome in this step, and adjust the tempo by using the [TEMPO/FUNCTION –, +] buttons. (Range: 32-280) Record Ready mode can be disengaged before recording by pressing the [REC] button again. NOTE If you have selected the LEFT part previously in the same song, the LEFT part will automatically be made active when pressing the [REC] button in step 2. NOTE If the metronome was on when you started recording, you’ll be able to keep time with the metronome while recording, but the metronome sound will not be recorded. NOTE For more recording information, see page 32. ENGLISH 2. Press the [REC] button to engage Record Ready NOTE 3. Start recording. The function of the [PLAY/ PAUSE] button can be assigned to the AUX pedal (pages 37, 43). This allows you to start recording by pressing the Footswitch connected to the AUX jack. Recording will begin automatically as soon as you play a note on the keyboard or press the [PLAY/ PAUSE] button. The current measure’s number will appear on the display while recording. NOTE Song recording can not be paused, even by pressing the [PLAY/PAUSE] button. 4. Press either [REC] or [STOP] button to stop recording. The record part indicator will begin to flash when the recorder memory is almost full. If the memory becomes full during recording, “Fu£” will appear on the display and recording will stop automatically. (All recorded data up to that point will be retained.) When recording is stopped, dashes appear in the display in succession to indicate that the recorded data is being saved to the instrument automatically. After the data is saved, the song name (U01-U03) appears in the display. The recorded part’s indicator will light in green to indicate that it now contains data. (Record mode is disengaged automatically.) NOTE CAUTION Never attempt to turn the [STANDBY/ON] switch OFF while flashing dashes appear in the display (these indicate data is being written to internal memory). Turning the power off in this state results in loss of all user data. NOTE The song name (U01 to U03) Pressing the [PLAY/PAUSE] button to start recording, then pressing the [STOP] button to stop recording will erase all previously recorded data on the selected part. 5. Play back the recorded performance. Press the [PLAY/PAUSE] button to play back the recorded performance. To stop playback in the middle of a song, press the [STOP] button. P-140 Owner’s Manual 29 Recording Your Performance Re-recording a previously recorded song If you are not satisfied with the recording, you can record it again. Using the following operation. 1. Select a voice or voices (and other settings) for recording, if necessary. Repeat step 1 on page 28 if you wish to change the previous settings. 2. Press the [REC] button again to re-engage Record ENGLISH Ready mode. The selected part’s indicator lights in red. Follow the procedure from step 3 in “Recording a performance quickly” on page 29 to re-record. NOTE If you want to change the tempo, time signature, reverb type, or effect type when re-recording a part or when recording to another part, do so after engaging the Record Ready mode. NOTE You cannot re-record in the middle of a song. 30 P-140 Owner’s Manual Recording Your Performance Recording to RIGHT/LEFT This lets you record the right and left parts separately. Since you can record the left part while playing back the right, this is useful for independently recording both parts of a duet. 2 3 2 1. Make all the initial settings. Same as step 1 in “Recording a performance quickly” on page 28. 2. Select a song to record. Press the [SONG SELECT] button so that the “USER” indicator lights then press the [–/NO][+/YES] buttons to select a song for recording. CAUTION To avoid erasing previously recorded song(s): If the song contains data, the part indicator lights up green when you select a song. Note that recording new data on this part will erase the existing data. 3. Engage the Record Ready mode. Press the [REC] button and press the [RIGHT]/[LEFT] button to engage the Record Ready mode. Recording does not actually start yet. The amount of memory available for recording will be shown on the display in approximate kilobytes. This value is expressed in kilobytes and indicates how much space remains available for recording on the P-140. You can record up to a maximum of about 11,000 notes on the P-140 depending on pedal usage and other factors. The [PLAY/PAUSE] indicator will flash at the current METRONOME tempo setting. Record Ready mode can be disengaged before recording by pressing the [REC] button again. 1 NOTE Part button indications Off: Contains no data On (green): Contains data On (red): Part is enabled for recording ENGLISH 3 NOTE If the metronome was on when you started recording, you’ll be able to keep time with the metronome while recording, but the metronome sound will not be recorded. NOTE If you want to change the tempo, time signature, reverb type, or effect type when rerecording a part or when recording to another part, do so after entering the Record Ready mode. NOTE If you don’t want to hear the previously recorded part while you record (for example, when you want to record a song different from what you recorded on the previous part), press the playback part button before pressing the [REC] button so that its indicator is turned off. NOTE For more information on recording, see page 32. 4. Start and stop recording. Same as steps 3-5 in “Recording a performance quickly” on page 29. P-140 Owner’s Manual 31 Recording Your Performance The user song recorder records the following data: ENGLISH Data in addition to the notes and voices you play is recorded. This data includes “Individual Parts” and “Entire Song.” See below. Individual Parts • Notes played • Voice selection • Pedal (Sustain/Soft/Sostenuto/Expression) • [REVERB] depth • [EFFECT] depth • Dual voices • Dual balance (F3) • Dual detune (F3) • Dual octave shift (F3) • Split voices (F4) • Split balance (F4) • Split octave shift (F4) Entire Song • Tempo • Time signature (beat) • [REVERB] type (including OFF) • [EFFECT] type (including OFF) 32 P-140 Owner’s Manual Recording Your Performance Changing the Initial Settings (data recorded at the beginning of a song) The initial settings (data recorded at the beginning of a song) can be changed after the recording. For example, after recording, you can change the voice to create a different ambience or adjust the song tempo to your taste. You can change the following initial settings. ENGLISH Individual Parts • Voice selection • [REVERB] depth • [EFFECT] depth • Dual voices • Split voices Entire Song • Tempo • [REVERB] type (including OFF) • [EFFECT] type (including OFF) 1 3 1 1. Press the [REC] button to engage Record mode and select a part to change the initial settings. The indicator lights in red. (Data shared by two parts can be changed via either part.) NOTE You can cancel changes made to the initial settings by selecting a different part after step 2, then exiting Record mode by pressing the [REC] button. (Changes made to the data shared by two parts are also canceled.) 2. Change the settings via the panel controls. For example, if you wish to change the recorded voice from [ELECTRIC PIANO 1] to [ELECTRIC PIANO 2], press the [ELECTRIC PIANO 2] button. When you wish to change the sustain/soft pedal depth, press and hold the pedal. 3. Press the [REC] button to exit the Record mode. CAUTION Be careful not to press the [PLAY/PAUSE] button or a key on the keyboard after step 2 or 3, either of which will start recording and erase all previously-recorded data on the selected part. P-140 Owner’s Manual 33 Playing Back Songs Playing Back Songs The following three types of songs are available. • 50 Piano Preset Songs NOTE 50 Piano Preset Songs in the instrument. (page 15) You cannot select songs during Demo Song playback (page 14). • User songs in the instrument User songs which you recorded to the instrument by using the record function (page 28). ENGLISH • External songs in the instrument Songs transferred from a computer (including commercially available songs and songs which have been edited on a computer). Songs can be transferred (saved) to the instrument by using the included Musicsoft Downloader software. The songs are saved to an area of the internal memory separate from the area for recorded User songs. Up to 255 songs can be played back on this instrument (numbers 001-255). You can download the Musicsoft Downloader (MSD). Please check the following URL for the latest version. http://music.yamaha.com/download/msd If the song cannot be transferred from a computer, you may need to rename the file. Sequence formats that can be played on the P-140 NOTE When playing back songs containing various voices or parts (such as XG or GM songs), the voices may not sound correct or as intended on the original. You may be able to remedy this and make the playback sound more natural or appropriate by changing the Song Channel Selection setting (page 43) to “1&2,” so that only channels 1 and 2 will play back. NOTE If the metronome is being used during playback, the metronome will automatically stop when playback is stopped. NOTE • SMF (Standard MIDI File) Formats 0 and 1 The SMF format is one of the most common and widely compatible sequence formats used for storing sequence data. There are two variations: Format 0 and Format 1. A large number of MIDI devices are compatible with SMF Format 0, and most commercially available MIDI sequence data is provided in SMF Format 0. The SMF format for sequence files allows you to exchange song data between different sequencers. If the REVERB type is changed via the panel controls during playback, both the playback and keyboard reverb effects will be changed. NOTE If the EFFECT type is changed via the panel controls during playback, the playback effect may be switched off in some cases. Playing Back User Songs/External Songs on the P-140 43 1 1. Press the [SONG SELECT] button (the USER indicator lights). 2. Press the [–/NO] [+/YES] buttons to select a song. The User songs are displayed as “Uxx*” and External songs in the instrument are displayed as “xxx*.” * The “U” indication in the User song name means “User.” The letters “xx” represent the song number. 34 P-140 Owner’s Manual 2 Playing Back Songs 3. Press the [PLAY/PAUSE] button to start playback. The current measure number appears on the display during playback. NOTE User song playback cannot be started when the recorder contains no data. NOTE Adjust the tempo You can use the [TEMPO/FUNCTION –, +] buttons to adjust the playback tempo as required before or during playback. The default tempo (the song’s original tempo) is set when you press the [–] and [+] buttons simultaneously. 4. Press the [STOP] button or [PLAY/PAUSE] button to stop playback. You can also enjoy playing duets with yourself by recording one part of a duet or a song for two pianos, then playing the other part while the recorded part plays back. NOTE If you have External songs in the instrument, you can use the repeat function. ALL: Play all External songs in sequence. rnd: Play all External songs continuously in random order. ENGLISH • You can play the keyboard while the P-140 is playing back a song. You can also play the notes with a voice different from the playback voice by selecting a voice from the panel. When playback is complete, the P-140 automatically stops and locates the top of the song. To stop playback in the middle of a song, press the [STOP] button. You can also pause playback by pressing the [PLAY/PAUSE] button. Turning part playback on and off When you select a song on the P-140, the indicators for parts that contain data (one of [RIGHT] [LEFT] or both) are lit in green. While the P-140 is playing or stopped, pressing these part buttons turns off the indicators, and the data on those parts is not played. Pressing the part buttons toggles part playback on and off. NOTE Part button indication Off: Contains no data On: Contains data Parts can be turned on or off before or during playback. NOTE You can adjust the volume of a part of a song for which playback is turned off (page 44). P-140 Owner’s Manual 35 Detailed Settings – [FUNCTION] Detailed Settings – [FUNCTION] You can set various parameters to make the best use of P-140 functions, such as fine tuning the pitch or selecting a scale, etc. The following parameters are available. The P-140 has nine main functions. Some of these main functions consist of a set of sub-functions. Functions List Function ENGLISH Display Reference page Fine tuning of the pitch — F1. 39 Selecting a scale Scale F2.1 40 Base Note F2.2 40 Dual Balance F3.1 41 Dual Detune F3.2 41 Voice 1 Octave Shift F3.3 41 Voice 2 Octave Shift F3.4 41 Voice 1 Effect Depth F3.5 41 Voice 2 Effect Depth F3.6 41 Reset F3.7 41 Split Point F4.1 42 Split Balance F4.2 42 Right Voice Selection F4.3 42 Left Voice Selection F4.4 42 Right Voice Octave Shift F4.5 42 Left Voice Octave Shift F4.6 42 Right Voice Effect Depth F4.7 42 Left Voice Effect Depth F4.8 42 Sustain Pedal Range F4.9 42 Reset F4.A 42 AUX Pedal F5.1 43 Soft Pedal Effect Depth F5.2 43 Sustain Sample Depth F5.3 43 Dual functions Split functions Other Functions Keyoff Sample Volume F5.4 43 Song Channel Selection F5.5 43 Sustain Pedal Type F5.6 43 AUX Pedal Type F5.7 43 Metronome volume — F6. 44 Song Part Cancel Volume — F7. 44 MIDI Functions MIDI Transmit Channel Selection F8.1 44 MIDI Receive Channel Selection F8.2 44 Local Control ON/OFF F8.3 44 Program Change ON/OFF F8.4 45 Control Change ON/OFF F8.5 45 Panel/Status Transmit F8.6 45 Initial Setup Send F8.7 45 Voice F9.1 46 MIDI F9.2 46 Tuning F9.3 46 Others F9.4 46 Backup Functions 36 Sub-function P-140 Owner’s Manual Detailed Settings – [FUNCTION] Basic Procedure in Function Follow the steps below to use the functions. If you become lost while using a function, return to this page and read the basic procedure. 5 3 1. Press the [TEMPO/FUNCTION] but- NOTE ton to enter the Function. Functions cannot be selected during Demo/Song Select or when the user song recorder is in operation. The [FUNCTION] indicator lights. When you call up the FUNCTION display after turning the power on, appears on the display. When you call up the FUNCTION display again (without turning the power off), the previous selected the display. appears on ENGLISH 1 6 24 NOTE Desired Subfunction function To cancel the function in step 2, 3, or 4, press the [TEMPO/FUNCTION –, +] button any time to exit Function. 2. Use the [TEMPO/FUNCTION –, +] buttons to select the desired function from F1–F9. When (that include the sub-functions) is selected, go on to step 3. When F1, F6 or F7 is selected (these have no sub-functions), go on to step 5. Desired function 3. Press the [+/YES] button to enter the sub-function. 4. Use the [TEMPO/FUNCTION –, +] buttons to select the desired sub-function. In the example below, the sub-functions of F4 (Split) are shown. Sub-function P-140 Owner’s Manual 37 Detailed Settings – [FUNCTION] 5. Use the [–/NO] and [+/YES] buttons NOTE to change the ON/OFF setting, select the type, or change the value. After you select the function, the current setting will be displayed when the [–/NO] or [+/YES] button is pressed for the first time. The default setting (which is used when you first turn on the power to the P-140) is recalled by pressing the [–/NO] and [+/YES] buttons simultaneously. 6. Press the [TEMPO/FUNCTION] to exit the Function. ENGLISH The [TEMPO] indicator lights. Operation Example 1 (F1. Fine tuning of the pitch) Display Engage the Function. Select a desired function. Display Change the value. Operation Example 2 (F3.1 “Dual Balance”) Display Engage the Function. Select a desired function. Display Change the value. 38 P-140 Owner’s Manual Display Engage the respective sub-function. Select a desired sub-function. Detailed Settings – [FUNCTION] About Each Function The explanations here apply when entering the Function in step 5 on page 38. You can fine tune the pitch of the entire instrument. This function is useful when you play the P-140 along with other instruments or CD music. Use the [–/NO] and [+/YES] buttons to lower or raise the pitch of the A3 key in approximately 0.2 Hz increments. ..... ..... Tenths of a hertz are indicated on the display by the appearance and position of one or two dots, as in the following example: Display Value 440.0 Setting range: 440.2 427.0–453.0 (Hz) 440.4 Default setting: 440.6 440.0 (Hz) 440.8 TERMINOLOGY Hz (Hertz): This unit of measurement refers to the frequency of a sound and represents the number of times a sound wave vibrates in a second. Using the keyboard to set the pitch You can fine tune the pitch by pressing a key on the keyboard, without having to call up the FUNCTION display. To tune up (in roughly 0.2Hz steps): Hold the A-1 and B-1 keys (two white keys at the left end) simultaneously and press any key between C3 and B3. To tune down (in roughly 0.2Hz steps): Hold the A1 and A#-1 keys (a white and a black key at the left end) simultaneously and press any key between C3 and B3. ENGLISH F1. Fine Tuning of the Pitch To restore standard pitch: Hold the A-1, A#-1 and B-1 keys (two white keys and one black key at the left end) simultaneously and press any key between C3 and B3. • Each key has a note name; for example, the lowest (farthest left) key on the keyboard corresponds to A-1, and the highest (farthest right) key to C7. During the procedure described above, the display indicates a value in Hz ( … ). After the procedure, the display returns to the previous indication. To tune down or up, respectively, in approximately 1 Hz increments: Hold the A-1 and A#-1 keys (a white and a black key at the left end) or A-1 and B-1 keys (two white keys at the left end) simultaneously and press the [–/NO] or [+/YES] button. To restore standard pitch: Hold the A-1 and A#-1 keys (a white and a black key at the left end) or A-1 and B-1 keys (two white keys at the left end) simultaneously and press the [–/NO] [+/YES] buttons simultaneously. During the procedure described above, the display indicates a value in Hz ( … ). After the procedure, the display returns to the previous indication. P-140 Owner’s Manual 39 Detailed Settings – [FUNCTION] F2. Selecting a Scale You can select various scales. Equal Temperament is the most common contemporary piano tuning scale. However, history has known numerous other scales, many of which serve as the basis for certain genres of music. You can experience these tunings with the P-140. ENGLISH F2.1: Scale Setting range: EQUAL TEMPERAMENT The pitch range of each octave is divided equally into twelve parts, with each half-step evenly spaced in pitch. This is the most commonly used tuning in music today. PURE MAJOR/PURE MINOR These tunings preserve the pure mathematical intervals of each scale, especially for triad chords (root, third, fifth). You can hear this best in actual vocal harmonies - such as choirs and a cappella singing. PYTHAGOREAN This scale was devised by the famous Greek philosopher and is created from a series of perfect fifths, which are collapsed into a single octave. The 3rd in this tuning are slightly unstable, but the 4th and 5th are beautiful and suitable for some leads. MEAN-TONE This scale was created as an improvement on the Pythagorean scale, by making the major third interval more “in tune.” It was especially popular from the 16th century to the 18th century. Handel, among others, used this scale. WERCKMEISTER/KIRNBERGER This composite scale combines the Werckmeister and Kirnberger systems, which were themselves improvements on the mean-tone and Pythagorean scales. The main feature of this scale is that each key has its own unique character. The scale was used extensively during the time of Bach and Beethoven, and even now it is often used when performing period music on the harpsichord. P-140 Owner’s Manual If you select a scale other than Equal Temperament, you need to specify the root. (You can also specify the root note with Equal Temperament selected, but it will have no effect. The base note setting is effective for tunings other than the Equal Temperament tuning.) Setting range: C, C#, D, Eb, E, F, F#, G, Ab, A, Bb, B Default setting: C • Root indication example (F#) 1: Equal Temperament 2: Pure Major 3: Pure Minor 4: Pythagorean 5: Mean Tone 6: Werckmeister 7: Kirnberger Default setting: 1: Equal Temperament 40 F2.2: Base Note (G) Followed by a high bar if sharp (Ab) Followed by a low bar if flat Detailed Settings – [FUNCTION] You can set various parameters for Dual (page 20) to optimize the settings for the songs you play, such as adjusting the volume balance between two voices. Dual function settings are set individually for each voice combination. If Dual is not engaged, will appear instead of and you will be unable to select the Dual functions. If this happens, press two voice buttons at the same time to engage Dual. F3.1: Dual Balance Setting range: 0 – 20 (A setting of “10” produces an equal balance between the two Dual voices. Settings below “10” increase the volume of Voice 2 in relation to Voice 1, and settings above “10” increase the volume of Voice 1 in relation to Voice 2.) Default setting: Different for each voice combination. You can set one voice as the main voice, and another voice as a softer, mixed voice. F3.3: Voice 1 Octave Shift F3.4: Voice 2 Octave Shift Setting range: –1, 0, 1 Default setting: Different for each voice combination. You can shift the pitch up and down in octave steps for Voice 1 and Voice 2 independently. Depending on which voices you combine in Dual, the combination may sound better if one of the voices is shifted up or down an octave. F3.5: Voice 1 Effect Depth F3.6: Voice 2 Effect Depth Setting range: 0 – 20 Default setting: Different for each voice combination. These functions make it possible to individually set the depth of the effect for Voices 1 and 2 for Dual. (The effect depth settings cannot be changed unless the [EFFECT] is ON. Function must be exited before the [EFFECT] can be turned ON.) ENGLISH F3. Dual Functions • “Voice 1” and “Voice 2” are explained on page 20. F3.7: Reset This function resets all Dual functions to their default values. Press the [+/YES] button to reset the values. F3.2: Dual Detune Setting range: -10 – 0 – 10 (With positive values, the pitch of Voice 1 is raised and the pitch of Voice 2 is lowered. With negative values, the pitch of Voice 1 is lowered and the pitch of Voice 2 is raised.) NOTE SHORTCUT: You can jump directly to the Dual functions by pressing the [TEMPO/FUNCTION] button while holding the two Dual voice buttons. NOTE The available setting range is wider in the lower range (± 60 cents for A-1), and narrower in the higher range (± 5 cents for C7). (100 cents equal one semitone.) Default setting: Different for each voice combination. Detune Voice 1 and Voice 2 for Dual to create a thicker sound. P-140 Owner’s Manual 41 Detailed Settings – [FUNCTION] F4.3: Right Voice Selection F4. Split Functions ENGLISH This menu enables you to make various detailed settings for Split. By selecting the right/left voices, changing the split point or other setting, you can optimize the settings for the songs you play. Be sure to select the Split by pressing the [OTHERS] button before engaging Function. If Split is not engaged, will appear instead of and you will be unable to select the Split functions. Also note that you must exit Function before you can engage Split. F4.1: Split Point Setting range: The entire keyboard Default setting: F#2 Set the point on the keyboard that separates the right and left-hand sections (split point). The pressed key is included in the left-hand range. • Instead of pressing the [–/NO] [+/YES] buttons, you can engage the split point by pressing the appropriate key on the keyboard. • Example key name indications for Split Point: (F#2) (G2) Followed by a high bar if sharp (Ab2) Followed by a low bar if flat F4.2: Split Balance Setting range: 0 – 20 (A setting of “10” produces an equal balance between the two Split voices. Settings below “10” increase the volume of the left voice in relation to the right voice, and settings above “10” increase the volume of the right voice in relation to the left voice.) Default setting: Different for each voice combination. The volume level of the two voices combined in Split can be adjusted as required. You can make this setting for each combination of voices individually. 42 P-140 Owner’s Manual Setting range: 1 – 13 Default setting: 1 Set the right voice. You can select the voices from 1 to 13. Refer to “Preset Voice List” on page 53. F4.4: Left Voice Selection Setting range: 1 – 4 Default setting: 1 Set the left voice. You can select the voices from 1 to 4. Refer to “Preset Voice List” on page 53. F4.5: Right Voice Octave Shift F4.6: Left Voice Octave Shift Setting range: –1, 0, 1 Default setting: Different for each voice combination You can shift the pitch up and down in octave steps for the Right Voice and Left Voice independently. Make a setting depending on the note range of the songs you play. You can make this setting for each combination of voices individually. F4.7: Right Voice Effect Depth F4.8: Left Voice Effect Depth Setting range: 0 – 20 Default setting: Different for each voice combination These functions make it possible to individually set the depth of the effect for the left and right Split voices. The effect depth settings cannot be changed unless the [EFFECT] is ON. You must exit Function before you can turn on an [EFFECT]. You can make this setting for each combination of voices individually. F4.9: Sustain Pedal Range Setting range: ALL (for both voices) 1 (for the right Voice) 2 (for the left Voice) Default setting: ALL The Sustain Pedal Range function determines whether the sustain pedal affects the right voice, the left voice, or both the left and right voices in Split. F4.A: Reset This function resets all Split functions to their default values. Press the [+/YES] button to reset the values. Detailed Settings – [FUNCTION] F5.3 Sustain Sample Depth This section provides a variety of other functions, including letting you assign the operation of the AUX pedal to one of several settings, and allowing you to select specific song channels for playback. Setting range: 0 – 20 Default setting: 12 The GRAND PIANO 1, 3 voice features special “Sustain Samples” that recreate the unique resonance of an acoustic grand piano’s soundboard and strings when the sustain pedal is pressed. This function lets you adjust the depth of this effect. F5.1 AUX Pedal F5.4 Keyoff Sample Volume Setting range: 1. Soft Pedal The soft pedal reduces the volume and slightly changes the timbre of notes played while the pedal is pressed. The soft pedal will not affect notes that are already playing. 2. Sostenuto pedal If you play a note or chord on the keyboard and press the pedal while the note(s) are held, those notes will be sustained for as long as the pedal is held (as if the sustain pedal had been pressed) but all notes played thereafter will not be sustained. This makes it possible to sustain a chord, for example, while other notes are played “staccato.” Setting range: 0 – 20 Default setting: 10 You can adjust the volume of the keyoff sound (the subtle sound produced when the keys are released) for voices [GRAND PIANO1, 3], [HARPSICHORD], [E.CLAVICHORD]. NOTE Organ, string and choir voices will continue to sound for as long as the sostenuto pedal is depressed. 3. Expression This setting allows control of dynamics during performance. 4. Song Play/Pause This setting allows you to start or pause song playback. In this setting, the AUX Pedal functions in the same manner as the [PLAY/PAUSE] button on the panel. Default setting: 1(Soft Pedal) F5.2 Soft Pedal Effect Depth Setting range: 1 – 5 Default setting: 3 This function sets the depth of the soft pedal effect. ENGLISH F5. Other Functions F5.5 Song Channel Selection Setting range: ALL, 1&2 Default setting: ALL The setting here only affects External songs. You can specify which song channels will play back on this instrument. When “ALL” is selected, channels 1-16 will be played back. When “1&2” is selected, only channels 1 and 2 will be played back, while channels 3-16 will be transmitted via MIDI. F5.6 SUSTAIN PEDAL Type F5.7 AUX PEDAL Type Setting range: 1, 2 Default setting: 1 Depending upon the pedal that is connected to the SUSTAIN PEDAL jack or AUX PEDAL jack, the effect produced by operating the pedal (ON/OFF, dynamics, etc.) might be reversed. If this happens, you can use this setting to correct the pedal operation. The setting range is from 1 to 2. Press the [–/NO] and [+/YES] buttons simultaneously to recall the default setting of “1.” NOTE • Make sure that the power is switched OFF when connecting or disconnecting the pedal. • If the SUSTAIN PEDAL type is set to “2”, disconnecting the sustain pedal while the power is switched on may leave the sustain active, causing notes to sustain indefinitely. In this case, switch the power off, then back on. P-140 Owner’s Manual 43 Detailed Settings – [FUNCTION] F6. Metronome Volume Use this function to adjust the metronome volume. Setting range: 1 – 20 Default setting: 10 NOTE ENGLISH SHORTCUT: You can jump directly to the metronome functions by pressing the [TEMPO/FUNCTION] button while holding the [METRONOME] button. F7. Song Part Cancel Volume This function sets the volume at which a “canceled” part is played during song playback. Adjust the part volume to a comfortable level and use the “canceled” part as a guide with which to play along. Setting range: 0 – 20 Default setting: 5 NOTE This function cannot be used for Demo songs. F8. MIDI Functions You can make detailed adjustments to the MIDI settings. For more information about MIDI, see the “About MIDI” section (page 47). F8.1: MIDI Transmit Channel Selection In any MIDI control setup, the MIDI channels of the transmitting and receiving devices must be matched for proper data transfer. This parameter enables you to specify the channel on which the P-140 transmits MIDI data. Setting range: 1 – 16, OFF (not transmitted) Default setting: 1 44 P-140 Owner’s Manual NOTE • In Dual, Voice 1 data is transmitted on its specified channel. In Split, right voice data is transmitted on its specified channel. In Dual, Voice 2 data is transmitted on the next greater channel number relative to the specified channel. In Split, left voice data is transmitted on the next greater channel number relative to the specified channel. In either case, no data is transmitted if the transmit channel is set to “OFF.” • Song data is not transmitted via the MIDI connections. However, channels 3-16 of External songs will be transmitted via the MIDI connections depending on the Song Channel Selection setting (page 43). F8.2: MIDI Receive Channel Selection In any MIDI control setup, the MIDI channels of the transmitting and receiving devices must be matched for proper data transfer. This parameter enables you to specify the channel on which the P-140 receives MIDI data. Setting range: ALL, 1&2, 1 – 16 Default setting: ALL NOTE • ALL: “Multi-timbre” Receive. This allows simultaneous reception of different parts on all 16 MIDI channels, enabling the P-140 to play multi-channel song data received from a music computer or sequencer. 1&2: “1&2” Receive. This allows simultaneous reception on channels 1 and 2 only, enabling the P-140 to play 1 and 2 channel song data received from a music computer or sequencer. • Program change and other like channel messages received will not affect the P-140’s panel settings or the notes you play on the keyboard. F8.3: Local Control ON/OFF “Local Control” refers to the fact that, normally, the P140 keyboard controls its internal tone generator, allowing the internal voices to be played directly from the keyboard. This situation is “Local Control On,” since the internal tone generator is controlled locally by its own keyboard. Local control can be turned OFF, however, so that the P140 keyboard does not play the internal voices, but the appropriate MIDI information is still transmitted via the MIDI OUT terminal when notes are played on the keyboard. At the same time, the internal tone generator responds to MIDI information received via the MIDI IN terminal. Setting range: ON/OFF Default setting: ON Detailed Settings – [FUNCTION] F8.4: Program Change ON/OFF F8.6: Panel/Status Transmit Normally the P-140 will respond to MIDI program change numbers received from an external keyboard or other MIDI device, causing the correspondingly numbered voice to be selected on the corresponding channel (the keyboard voice does not change). The P-140 will normally also send a MIDI program change number whenever one of its voices is selected, causing the correspondingly numbered voice or program to be selected on the external MIDI device if the device is set up to receive and respond to MIDI program change numbers. This function makes it possible to cancel program change number reception and transmission so that voices can be selected on the P-140 without affecting the external MIDI device. This function causes all the current P-140 panel settings (selected voice, etc.) to be transmitted via the MIDI OUT terminal. For information on program change numbers for each of the P140’s voices, refer to MIDI Data Format page 60. Setting range: ON/OFF Default setting: ON F8.5: Control Change ON/OFF Normally the P-140 will respond to MIDI control change data received from an external MIDI device or keyboard, causing the voice on the corresponding channel to be affected by pedal and other “control” settings received from the controlling device (the keyboard voice is not affected). The P-140 also transmits MIDI control change information when the pedal or other appropriate controls are operated. This function makes it possible to cancel control change data reception and transmission so that, for example, the P-140’s pedal and other controls can be operated without affecting an external MIDI device. NOTE For information on control changes that can be used with the P140, refer to MIDI Data Format on page 60. Setting range: ON/OFF Default setting: ON 3. Engage the Function and select . 4. Press the [+/YES] button to transmit the panel/status data. will appear on the display when the data has been successfully transmitted. NOTE • See page 61 for a list of the Panel Data Contents transmitted by this function. • Receiving the transmitted data: 1. Connect the P-140 via MIDI to the device to which the setup data was transmitted previously. 2. Start sending the setup data from the device. The P-140 automatically receives the setup data, which will be reflected in the panel settings. (For the data to be accepted, the P-140 that receives the setup data should be the same model as the one that transmitted the setup data to the sequencer.) • For more information on transmitting and receiving setup data via MIDI, refer to the owner’s manual for the connected MIDI device. ENGLISH NOTE 1. Set up the panel controls as desired. 2. Connect the P-140 to a sequencer via MIDI, and set up the sequencer so it can receive the setup data. F8.7: Initial Setup Send This function lets you send the data of the panel settings to a computer. By transmitting the panel settings and recording them on the MIDI sequence recorder prior to the actual performance data, the instrument will be automatically restored to the same settings when the performance is played back. You can also use this function to change the settings of a connected tone generator to the same settings as the instrument. 1. Set up the panel controls as desired. 2. Connect the P-140 to a sequencer via MIDI, and set up the sequencer so it can receive the setup data. 3. Engage the Function and select . 4. Press the [+/YES] button to transmit the panel/status data. will appear on the display when the data has been successfully transmitted. The following data can be sent. • Voice selection • [REVERB] type • [REVERB] depth • [EFFECT] type • [EFFECT] depth • Split point • Tuning (F1) • Dual detune (F3.2) P-140 Owner’s Manual 45 Detailed Settings – [FUNCTION] ENGLISH F9. Backup Functions You can back up some settings, such as voice selection and reverb type, so that they will not be lost when you turn off the power to the P140. If the backup function is turned on, the settings at power off are effective. If the backup function is turned off, the settings in memory are erased when you turn off the power. In this case, when you turn on the power to the unit, the default settings (the initial settings) will be used. (The factory setting default list is found on page 59.) However, the backup settings themselves, the contents of the user song recorder memory, and character code setting are always backed up. Refer to “Data Backup Using a Computer” on page 50. You can turn the backup function on or off for each function group. Different Backup Groups are provided for the different function categories of the instrument: Voice, MIDI, Tuning and Others. F9.3: Tuning Setting range: ON/OFF Default setting: ON • Transpose • Tuning ( settings) • Scale (including base note) ( settings) F9.4: Others Setting range: ON/OFF Default setting: ON • Other functions ( • VARIATION setting settings) Factory Preset Recall All settings affected by the Functions (F1 – F9) can be restored to their original factory preset values by turning the [STANDBY/ON] switch ON while holding the C7 key (right-most-key on the keyboard). This operation also erases all user song data. The factory preset values are listed on page 59. F9.1: Voice Setting range: ON/OFF Default setting: OFF • Voice (Keyboard, Dual, and Split) • Dual (ON/OFF, Voice, and Dual Functions for each voice combination) • Split (ON/OFF, Voice, and Split Functions for each voice combination) • Reverb (ON/OFF, Type, and Depth for each voice) • Effect (ON/OFF, Type, and Depth for each voice) • Touch Sensitivity (including the FIXED volume) • Metronome Beat, Volume ( settings) • Song Part Cancel Volume ( settings) F9.2: MIDI Setting range: ON/OFF Default setting: ON The MIDI functions ( (expect for 46 P-140 Owner’s Manual settings) ) CAUTION After turning the [STANDBY/ON] switch ON while holding the C7 key (right-most-key on the keyboard), “CLr” appears in the display. Never attempt to turn off the power while “CLr” appears in the display. Turning the power off in this state may cause the system to freeze. Connections Connections Connectors CAUTION Before connecting the P-140 to other electronic components, turn off the power to all the components. Before turning the power on or off to all components, set all volume levels to minimum (0). Otherwise, electrical shock or damage to the components may result. 2 3 4 ENGLISH 1 1 MIDI [IN] [OUT] terminals Use MIDI cables to connect external MIDI devices to these connectors. MIDI [IN]: Receives MIDI data. MIDI [OUT]: Transmits MIDI data. Refer to the “Connecting a Personal Computer” on page 49. About MIDI MIDI (Musical Instrument Digital Interface) is a standard format for data transmission/ reception. It enables the transfer of performance data and commands between MIDI devices and personal computers. Using MIDI, you can control a connected MIDI device from the P140, or control the P-140 from a connected MIDI device or computer. NOTE Since MIDI data that can be transmitted or received varies depending on the type of MIDI device, check the “MIDI Implementation Chart” to find out what MIDI data and commands your devices can transmit or receive. The P-140’s MIDI Implementation Chart appears on page 64. 2 SUSTAIN PEDAL Jack This jack is for connecting an included foot pedal FC3 here. NOTE FC3 CAUTION Depending upon the pedal that is connected to the SUSTAIN PEDAL jack, the effect produced by operating the pedal (ON/OFF, dynamics, etc.) might be reversed. If this happens, refer to the “SUSTAIN PEDAL Type” section (page 43). Make sure that power is OFF when connecting or disconnecting the pedal. Do not turn on the power to the unit while pressing the foot switch or foot pedal. Otherwise, the switch or pedal type (on/off) will be reversed. P-140 Owner’s Manual 47 Connections 3 AUX PEDAL Jack This jack is for connecting an optional FC4/FC5 foot switch or FC7 foot controller. A wide range of functions such as the Soft Pedal function, etc. can be assigned to this jack. Use the Function settings to assign the function. (page 43) NOTE Depending upon the pedal that is connected to the AUX PEDAL jack, the effect produced by operating the pedal (ON/OFF, dynamics, etc.) might be reversed. If this happens, refer to the “AUX PEDAL Type” section (page 43). FC5 ENGLISH 4 AUX OUT [R] [L] Pin jacks (LEVEL FIXED) You can connect these jacks to a stereo system to amplify the P-140 or to a cassette tape recorder to record your performance. Refer to the diagram below and use audio cables to make the connections. Use audio cables and adaptor plugs with zero resistance. CAUTION When the P-140’s AUX OUT jacks are connected to an external audio system, first turn on the power to the P-140, then to the external audio system. Reverse this order when you turn the power off. P-140 Stereo AUX OUT AUX IN RCA pin plug RCA pin plug audio cable When these are connected (with RCA pin plug; LEVEL FIXED), the sound is output to the external device at a fixed level, regardless of the [MASTER VOLUME] slider setting. 48 NOTE P-140 Owner’s Manual NOTE The P-140’s [MASTER VOLUME] slider setting does not affect the signal output from the AUX OUT (LEVEL FIXED) jacks. Connections Connecting a Personal Computer By connecting a computer to the USB [TO HOST] or MIDI terminals, you can transfer data between the instrument and the computer via MIDI. To do this, install the USB MIDI interface (such as the UX16, UX96, or UX256) driver and Musicsoft Downloader software. There are two ways you can connect the P-140 to a computer: 1. Connecting the USB port on the computer to the P-140 via a USB MIDI interface. 2. Using a MIDI interface and the P-140’s MIDI terminals. For more information, see below. You can download the USB MIDI interface driver and Musicsoft Downloader (MSD). Please check the following URL for the latest version. http://music.yamaha.com/ download/msd CAUTION When connecting the P-140 to a computer, first turn off the power to both the P-140 and the computer before connecting any cables. After making connections, turn on the power to the computer first, then to the P-140. ENGLISH NOTE Connecting the USB port on the computer to the P-140 via a USB MIDI interface (such as the UX16, UX96, or UX256) Use a USB MIDI interface device to connect the USB port on your computer to the P140’s MIDI terminals. MIDI [IN] terminal MIDI [OUT] terminal USB terminal Instrument Computer USB MIDI interface Using a MIDI interface and the P-140’s MIDI terminals Use a MIDI interface device to connect a computer to the P-140 using MIDI cables. MIDI cable Instrument USB port or serial port (modem or printer terminal) MIDI [IN] terminal MIDI [OUT] terminal MIDI interface Computer P-140 Owner’s Manual 49 Data Backup Using a Computer Data Backup Using a Computer For maximum data security Yamaha recommends that you save your important data to your computer by using the Musicsoft Downloader (MSD) software. This provides a convenient backup if the internal memory is damaged. Data that can be saved ENGLISH ● Panel settings and recorded User songs Panel settings are the same data that can be backed up using the Backup Functions (page 46). You can save the panel settings and recorded User songs as one file. ● External songs received via computer. 1. Install the USB MIDI driver and MSD to your computer (Windows), then connect the computer and the instrument. For connection, see page 49. 2. Save the data to the computer. Using MSD, save the “P-140.BUP” file from “System Drive” under “Electronic Musical Instruments” to the computer. The “P-140.BUP” file contains the panel settings and recorded User songs. Also, if you store the external songs in the instrument from the computer, save the songs from “Flash Memory” under “Electronic Musical Instruments” to the computer via the MSD. For instructions on using MSD, see the Help in the MSD. To recall the settings and load songs to the instrument, save the “P-140.BUP” file and the External songs under the folders to which you saved the files. NOTE You can download the USB MIDI interface driver and Musicsoft Downloader (MSD). Please check the following URL for the latest version. http://music.yamaha.com/ download/msd NOTE When MSD is started on a computer connected to the instrument, “con (computer connection)” appears in the display. When this indication appears, you cannot operate the instrument. NOTE The Musicsoft Downloader cannot be used when the instrument is in the following state: • During Demo playback. • During song playback. • During Record mode. NOTE The panel settings and User songs (P-140.BUP file) remain in the instrument after being saved to the computer. 50 P-140 Owner’s Manual Message List Message List Comment CLr* Displayed after factory presets are recalled. con Displayed when Musicsoft Downloader is started on a computer connected to the instrument. When this message appears, you cannot operate the instrument. E02 Displayed when the song data is damaged. E04 Indicates that the song data is too large to be loaded. End Displayed when the current operation is completed. Err Displayed when the MIDI/USB cable is disconnected while starting Musicsoft Downloader on a computer connected to the instrument. FCL* Indicates that internal memory has been cleaned. Recorded songs and external songs which have been loaded from a computer are deleted, because the power has been turned off before the song save or load operations were completed. Fu£ Displayed when internal memory becomes full during song recording. n Y Confirms whether each operation is executed or not. ENGLISH Message CAUTION Never attempt to turn off the power while “CLr” or “FCL” appears in the display. Turning the power off in this state may cause the system to freeze. P-140 Owner’s Manual 51 Troubleshooting Troubleshooting ENGLISH Problem Possible Cause and Solution The P-140 does not turn on. The P-140 has not been plugged in properly. Securely insert the female plug into the socket on the P-140, and the male plug into a proper AC outlet (page 12). A click or pop is heard when the power is turned on or off. This is normal when electrical current is being applied to the instrument. Noise is heard from the speakers or headphones. The noise may be due to interference caused by the use of a mobile phone in close proximity to the P-140. Turn off the mobile phone, or use it further away from the P140. The overall volume is low, or no sound is heard. • The Master Volume is set too low; set it to an appropriate level using the [MASTER VOLUME] control. • Make sure a pair of headphones is not connected to the headphones jack (page 13). • Make sure that Local Control (page 44) is ON. The sustain pedal has no effect. The pedal cable/plug may not be properly connected. Make sure to securely insert the pedal plug into the proper jack (page 47). The foot pedal seems to produce the opposite effect. For example, pressing the foot pedal cuts off the sound and releasing it sustains the sounds. The type of the foot pedal is reversed. If this happens, use F5.6 or F5.7 to correct the pedal type (pages 37, 43). If you press the [VARIATION] button during performance, Sound is cut off. This is normal, and is no cause for concern. Optional Equipment Foot Pedal (FC3/FC4/FC5/FC7) Keyboard Stand (L-140/L-140S) 52 P-140 Owner’s Manual Preset Voice List Preset Voice List : Yes : No Stereo Sampling Touch Response Dynamic Sampling*1 Key-Off Sampling*2 Voice Descriptions 1 GRAND PIANO 1 Recorded samples from a full concert grand piano. Also includes three levels of dynamic sampling, sustain samples, and key-off samples for exceptionally realistic acoustic grand piano sound. Perfect for classical compositions as well as any other style that requires acoustic piano. 2 GRAND PIANO 2 Spacious and clear piano with bright reverb. Good for popular music. 3 GRAND PIANO 3 Warm and mellow piano. Good for classical compositions. 4 PIANO & STRINGS A Dual voice combining grand piano and strings – perfect for slow, orchestral piano music. 5 ELECTRIC PIANO 1 An electronic piano sound created by FM synthesis. Exceptional musical response with varying timbre according to keyboard dynamics. Good for standard popular music. 6 ELECTRIC PIANO 2 The sound of an electric piano using hammer-struck metallic tines. Soft tone when played lightly, and an aggressive tone when played hard. 7 ELECTRIC PIANO 3 A slightly different electric piano sound often heard in rock and popular music. 8 CHURCH ORGAN This is a typical pipe organ sound (8 feet + 4 feet + 2 feet). Good for sacred music from the Baroque period. 9 JAZZ ORGAN The sound of a tonewheel type electric organ. Often heard in jazz and rock idioms. 10 STRINGS Stereo-sampled, large-scale strings ensemble with realistic reverb. Try combining this voice with piano in the DUAL. 11 HARPSICHORD The definitive instrument for baroque music. Since harpsichord uses plucked strings, there is no touch response. There is, however, a characteristic additional sound when the keys are released. 12 E. CLAVICHORD A hammer-struck keyboard instrument that utilizes an electric pickup that is often heard in funk and soul music. Its tone is noted for the unique sound produced when the keys are released. 13 VIBRAPHONE Vibraphone played with relatively soft mallets. The tone becomes more metallic the harder you play. 14 SPLIT *3 *3 *3 *3 ENGLISH Voice Name Split lets you play two parts at the same time a bass part with the left hand, and a melody with the right hand. *1. Dynamic Sampling provides multiple velocity-switched samples to accurately simulate the timbral response of an acoustic instrument. *2. Contains a very subtle sample that is produced when the keys are released. *3. Depends on the assigned voice. P-140 Owner’s Manual 53 Preset Voice List : Yes : No Split Left Voice List ENGLISH Voice Name 54 Stereo Sampling Touch Response Dynamic Sampling*1 Key-Off Sampling*2 Voice Descriptions 1 WOOD BASS An upright bass played fingerstyle. Ideal for jazz and Latin music. 2 BASS & CYMBAL Adds a soft ride cymbal to the bass sound. Ideal for walking bass lines in jazz tunes. 3 E. BASS 1 Electric bass for a wide range of music styles, jazz, rock, popular, and more. 4 E. BASS 2 A fretless bass. Ideal for styles such as jazz, fusion, etc. *1. Dynamic Sampling provides multiple velocity-switched samples to accurately simulate the timbral response of an acoustic instrument. *2. Contains a very subtle sample that is produced when the keys are released. P-140 Owner’s Manual Index Index Numerics F 50 Piano Preset Songs .....................................................15 Factory Setting List ......................................................... 59 FCL (display)................................................................... 51 A-B Repeat.......................................................................18 Adjust Tempo (50 Piano Preset Songs) ...............................15 Tempo (Recorded Songs) .........................................35 Volume (Metronome) ..............................................44 ALL (display) ...................................................................15 Fine Tuning of the Pitch................................................. 39 Full (display) ................................................................... 51 FUNCTION ..............................................................39–46 Basic Procedure......................................................... 37 H Hz (Hertz) ....................................................................... 39 AUX OUT [L] [R] (LEVEL FIXED) jacks .....................48 AUX Pedal .......................................................................43 [AUX PEDAL] jack ...................................................13, 48 ENGLISH A L [LEFT] button ........................................................... 16, 31 B Backup (data) ..................................................................50 Backup Functions............................................................46 C List Factory Setting........................................................... 59 Functions ................................................................... 36 Preset Song ................................................................ 58 Preset Voice .........................................................53–54 M CLr (display)....................................................................51 Combining Voices (Dual)...............................................20 con (display) ....................................................................51 Connecting a Personal Computer ..................................49 Connections.....................................................................47 Computer...................................................................49 MIDI interface ...........................................................49 Connectors ......................................................................47 [MASTER VOLUME] slider .......................................... 12 Message List..................................................................... 51 [METRONOME] button................................................ 27 Metronome Volume ....................................................... 44 MIDI [IN] [OUT]........................................................... 47 MIDI Data Format.......................................................... 60 MIDI Functions .............................................................. 44 MIDI Implementation Chart ......................................... 64 D Default setting .................................................................23 Music Rest ....................................................................... 13 [DEMO] button ..............................................................14 N Detailed Settings (FUNCTION).....................................36 n y (display)..................................................................... 51 Display .............................................................................12 Dual............................................................................20, 41 E O Other Functions .............................................................. 43 [OTHERS] button .......................................................... 19 E02 (display)....................................................................51 E04 (display)....................................................................51 [EFFECT] button ............................................................24 Effects...............................................................................24 End (display) ...................................................................51 P Part Cancel ...................................................................... 16 Part Playback On and Off............................................... 35 Pedal Type ....................................................................... 43 Err (display).....................................................................51 P-140 Owner’s Manual 55 Index Pedals ...............................................................................13 [TEMPO/FUNCTION] button................................ 27, 37 [PHONES] jack ...............................................................13 [TOUCH] button............................................................ 25 Pitch ➝ Fine Tuning of the Pitch...................................39 Touch Sensitivity............................................................. 25 [PLAY/PAUSE] button .............................................15, 35 [TRANSPOSE] button.................................................... 26 Play/Pause playback Demo Songs...............................................................14 Recorded Songs .........................................................34 Troubleshooting.............................................................. 52 Playing Back Songs..........................................................34 ENGLISH Practicing a One-Hand Part Using the 50 Preset Songs..............................................................................16 V [VARIATION] button.................................................... 23 Preset................................................................................15 VOICE ............................................................................. 19 Preset Song List ...............................................................58 Voice group buttons ....................................................... 19 Preset songs ➝ 50 Piano Preset Songs ...........................15 Preset Voice List ........................................................53–54 R [REC] button...................................................................28 Recording.........................................................................28 Initial Settings............................................................33 Repeat ........................................................................15, 18 Re-recording....................................................................30 [REVERB] button ...........................................................24 [RIGHT] button........................................................16, 31 RIGHT/LEFT (50 Piano Preset Songs) ..........................16 rnd (display) ....................................................................15 S Scale..................................................................................40 Soft Pedal .........................................................................43 Song..................................................................................15 Song Part Cancel Volume ...............................................44 Song playback ..................................................................34 [SONG SELECT] button ..........................................15, 34 Sostenuto pedal ...............................................................43 Specifications...................................................................65 SPLIT (Function) ............................................................42 [STANDBY/ON] switch .................................................12 [STOP] button...........................................................15, 35 Sustain Pedal..............................................................42, 43 [SUSTAIN PEDAL] jack ...........................................13, 47 Sync ..................................................................................17 Sync Start .........................................................................17 T TEMPO......................................................................15, 35 TEMPO (METRONOME) .............................................27 56 Tuning ➝ Fine Tuning of the Pitch............................... 39 P-140 Owner’s Manual ENGLISH MEMO P-140 Owner’s Manual 57 Appendix Preset Song List / Liste der voreingestellten Songs / Liste des morceaux prédéfinis / Lista de canciones preseleccionadas No. 58 Title Composer 1 Invention No. 1 J.S.Bach 2 Invention No. 8 J.S.Bach 3 Gavotte J.S.Bach 4 Prelude (Wohltemperierte Klavier I No.1) J.S.Bach 5 Menuett G dur BWV.Anh.114 J.S.Bach 6 Le Coucou L-C.Daquin 7 Piano Sonate No.15 K.545 1st mov. W.A.Mozart 8 Turkish March W.A.Mozart 9 Menuett G dur W.A.Mozart 10 Little Serenade J.Haydn 11 Perpetuum mobile C.M.v.Weber 12 Ecossaise L.v.Beethoven 13 Für Elise L.v.Beethoven 14 Marcia alla Turca L.v.Beethoven 15 Piano Sonate op.13 “Pathétique” 2nd mov. L.v.Beethoven 16 Piano Sonate op.27-2 “Mondschein” 1st mov. L.v.Beethoven 17 Piano Sonate op.49-2 1st mov. L.v.Beethoven 18 Impromptu op.90-2 F.P.Schubert 19 Moments Musicaux op.94-3 F.P.Schubert 20 Frühlingslied op.62-2 J.L.F.Mendelssohn 21 Jägerlied op.19b-3 J.L.F.Mendelssohn 22 Fantaisie-Impromptu F.F.Chopin 23 Prelude op.28-15 “Raindrop” F.F.Chopin 24 Etude op.10-5 “Black keys” F.F.Chopin 25 Etude op.10-3 “Chanson de l’adieu” F.F.Chopin 26 Etude op.10-12 “Revolutionary” F.F.Chopin 27 Valse op.64-1 “Petit chien” F.F.Chopin 28 Valse op.64-2 F.F.Chopin 29 Valse op.69-1 “L’adieu” F.F.Chopin 30 Nocturne op.9-2 F.F.Chopin 31 Träumerei R.Schumann 32 Fröhlicher Landmann R.Schumann 33 La prière d’une Vierge T.Badarzewska 34 Dolly’s Dreaming and Awakening T.Oesten 35 Arabesque J.F.Burgmüller 36 Pastorale J.F.Burgmüller 37 La chevaleresque J.F.Burgmüller 38 Liebesträume Nr.3 F.Liszt 39 Blumenlied G.Lange 40 Barcarolle P.I.Tchaikovsky 41 Melody in F A.Rubinstein 42 Humoresque A.Dvorák ˇ 43 Tango (España) I.Albéniz 44 The Entertainer S.Joplin 45 Maple Leaf Rag S.Joplin 46 La Fille aux Cheveux de Lin C.A.Debussy 47 Arabesque 1 C.A.Debussy 48 Clair de lune C.A.Debussy 49 Rêverie C.A.Debussy 50 Golliwog’s Cakewalk C.A.Debussy P-140 Owner’s Manual / Bedienungsanleitung / Mode d’emploi / Manual de instrucciones Factory Setting List / Liste der Vorgabeeinstellungen / Liste des réglages / Lista de ajustes de fábrica Default Voice GRAND PIANO 1 Dual OFF Split OFF Split Right Voice Backup Group F9.1 GRAND PIANO 1 Split Left Voice WOOD BASS Variation NORMAL Reverb Type Preset for each voice Reverb Depth Preset for each voice Effect Type Preset for each voice Effect Depth Preset for each voice Touch Sensitivity F9.4 F9.1 MEDIUM Volume in the FIXED 64 Metronome Metronome Time Signature Tempo OFF — 0 (no accent) F9.1 120 — 0 F9.3 Default Backup Group Transpose Function Display Function F1. Tuning A3=440Hz F2.1 Scale 1 (Equal Temperament) F2.2 Base Note C F3.1 Dual Balance Preset for each voice combination F3.2 Dual Detune Preset for each voice combination F3.3, F3.4 Dual Octave Shift Preset for each voice combination F3.5, F.3.6 Dual Effect Depth Preset for each voice combination F4.1 Split Point F#2 F4.2 Split Balance Preset for each voice combination F4.3 Right Voice Selection 1 F4.4 Left Voice Selection 1 F4.5, F4.6 Split Octave Shift Preset for each voice combination F4.7, F4.8 Split Effect Depth Preset for each voice combination F4.9 Sustain Pedal Range ALL F5.1 AUX Pedal 1 (Soft Pedal) F5.2 Soft Pedal Effect Depth 3 F5.3 Sustain Sample Depth 12 F5.4 Keyoff Sample Volume 10 F5.5 Song Channel Selection ALL F5.6 Sustain Pedal Type 1 F5.7 AUX Pedal Type 1 F6. Metronome Volume 10 F7. Song Part Cancel Volume 5 F8.1 MIDI Transmit Channel 1 F8.2 MIDI Receive Channel ALL F8.3 Local Control ON F8.4 Program Change Send & Receive ON F8.5 Control Change Send & Receive ON F9. Backup Voice: OFF MIDI, Tuning, Others: ON F9.3 F9.1 F9.4 F9.1 F9.2 Always backed up P-140 Owner’s Manual / Bedienungsanleitung / Mode d’emploi / Manual de instrucciones 59 MIDI Data Format / MIDI-Datenformat / Format des données MIDI / Formato de datos MIDI If you’re already very familiar with MIDI, or are using a computer to control your music hardware with computer-generated MIDI messages, the data provided in this section can help you to control the P-140. Falls Sie bereits mit MIDI vertraut sind oder einen Computer zur Erzeugung von MIDI-Steuermeldungen für die Instrumente verwenden, können Sie sich zur Steuerung des P-140 nach den im folgenden Abschnitt aufgeführten Spezifikationen richten. Si vous êtes très familier avec l’interface MIDI ou si vous utilisez un ordinateur pour commander votre matériel de musique au moyen de messages MIDI générés par ordinateur, les données suivantes vous seront utiles et vous aideront à commander le P-140. SI usted está ya familiarizado con MIDI, o si emplea una computadora para controlar sus aparatos musicales con mensajes MIDI generados por computadora, los datos proporcionados en esta sección le ayudarán a controlar la P-140. 1. NOTE ON/OFF 3. MODE MESSAGES Data format: [9nH] -> [kk] -> [vv] Data format: [BnH] -> [cc] -> [vv] 9nH = Note ON/OFF event (n = channel number) kk = Note number (Transmit: 09H ~ 78H = A-2 ~ C8 / Receive: 00H ~ 7FH = C-2 ~ G8) vv = Velocity (Key ON = 01H ~ 7FH, Key OFF = 00H) Data format: [8nH] -> [kk] -> [vv] (reception only) 8nH = Note OFF event (n = channel number) kk = Note number: 00H ~ 7FH = C-2 ~ G8) vv = Velocity 2. CONTROL CHANGE Data format: [BnH] -> [cc] -> [vv] BnH = Control change (n = channel number) cc = Control number vv = Data Range (1) Bank Select ccH Parameter Data Range (vvH) 00H Bank Select MSB 00H:Normal 20H Bank Select LSB 00H...7FH Bank selection processing does not occur until receipt of next Program Change message. (2) Main Volume ccH Parameter 07H Volume MSB Data Range (vvH) 00H...7FH (3) Expression ccH Parameter 0BH Expression MSB Data Range (vvH) 00H...7FH (4) Sustain ccH Parameter 40H Sustain MSB Data Range (vvH) 00H...7FH (5) Sostenuto ccH Parameter 42H Sostenuto Data Range (vvH) 00H-3FH:off, 40H-7FH:on (6) Soft Pedal ccH Parameter 43H Soft Pedal Data Range (vvH) 00H-3FH:off, 40H-7FH:on (7) Effect1 Depth (Reverb Send Level) ccH Parameter Data Range (vvH) 5BH Effect1 Depth 00H...7FH Adjusts the reverb send level. (8) Effect4 Depth (Variation Effect Send Level) ccH Parameter Data Range (vvH) 5EH Effect4 Depth 00H...7FH (9) RPN 65H RPN MSB 64H RPN LSB 06H Data Entry MSB 26H Data Entry LSB 60H Data Increment 61H Data Decrement * Parameters that are controllable with RPN • Coarse Tune • Fine Tune • Pitch Bend Range 60 BnH = Control event (n = channel number) cc = Control number vv = Data Range (1) All Sound Off ccH Parameter 78H All Sound Off (2) Reset All Controllers ccH Parameter 79H Reset All Controllers Resets controllers as follows. Controller Expression Sustain Pedal Sostenuto Soft Pedal Data Range (vvH) 00H Data Range (vvH) 00H Value 127 (max) 0 (off) 0 (off) 0 (off) (3) Local Control (reception only) ccH Parameter Data Range (vvH) 7AH Local Control 00H (off), 7FH (on) (4) All Notes Off ccH Parameter Data Range (vvH) 7BH All Notes Off 00H Switches OFF all the notes that are currently ON on the specified channel. Any notes being held by the sustain or sostenuto pedal will continue to sound until the pedal is released. (5) Omni Off (reception only) ccH Parameter Data Range (vvH) 7CH Omni Off 00H Same processing as for All Notes Off. (6) Omni On (reception only) ccH Parameter Data Range (vvH) 7DH Omni On 00H Same processing as for All Notes Off. (7) Mono (reception only) ccH Parameter Data Range (vvH) 7EH Mono 00H Same processing as for All Sound Off. (8) Poly (reception only) ccH Parameter Data Range (vvH) 7FH Poly 00H Same processing as for All Sound Off. • When Control Change is turned OFF, Control Change messages will not be transmitted or received. • Local on/off, OMNI on/off are not transmitted. (The appropriate note off number is supplied with “All Note Off” transmission). • When a voice bank MSB/LSB is received, the number is stored in the internal buffer regardless of the received order, then the stored value is used to select the appropriate voice when a program change message is received. • Poly mode is always active. This mode will not change when the instrument receives MONO/POLY mode message. P-140 Owner’s Manual / Bedienungsanleitung / Mode d’emploi / Manual de instrucciones 4. PROGRAM CHANGE 7. SYSTEM EXCLUSIVE MESSAGES (Yamaha MIDI Format) Data format: [CnH] -> [ppH] CnH = Program event (n = channel number) ppH = Program change number P.C.#=Program Change number Voice Name GRAND PIANO 1 GRAND PIANO 2 GRAND PIANO 3 PIANO & STRINGS ELECTRIC PIANO 1 ELECTRIC PIANO 2 ELECTRIC PIANO 3 CHURCH ORGAN JAZZ ORGAN STRINGS HARPSICHORD E.CLAVICHORD VIBRAPHONE MSB 0 0 0 0 0 0 0 0 0 0 0 0 0 LSB 122 112 123 125 122 122 123 123 122 122 122 122 122 P.C.# 1 1 1 1 6 5 5 20 17 49 7 8 12 MSB LSB 0 0 0 0 122 124 122 122 P.C.# 33 33 34 36 SPLIT VOICE Voice Name WOOD BASS BASS & CYMBAL E.BASS 1 E.BASS 2 • Some devices use a “0 to 127” numbering system for program change messages. Since the P-140 uses a “1 to 128” numbering system, you will need to subtract 1 from the transmitted program change numbers to select the appropriate sound: e.g. to select P.C.#1 in the list above, transmit program change number 0. [EnH] -> [ccH] -> [ddH] ccH = LSB ddH = MSB 6. SYSTEM REALTIME MESSAGES [rrH] F8H: Timing clock FAH: Start FCH: Stop FEH: Active sensing F8H Transmission Transmitted every 96 clocks FAH Song start FCH Song stop FEH Transmitted every 200 milliseconds F0H, 43H, 0nH, 7CH (n: channel number) 00H, LLH (data length) 43H, 4CH, 20H, 20H (CL) 43H, 4CH, 50H, 27H, 30H, 35H (CLP05) 3xH, 3yH (version x.y) [PANEL DATA] [CHECK SUM (1byte)] = 0-(43H+4CH+20H+......+Data end) F7H (End of Exclusive) • Panel Data Contents (1) 1’st Voice (2) Dual On/Off (3) Dual Voice (4) Dual Balance (5) Dual Detune (6) Dual Voice1 Octave (7) Dual Voice2 Octave (8) Dual Voice1 Effect Depth (9) Dual Voice2 Effect Depth (10) Split On/Off (11) Split Voice (12) Split Point (13) Split Balance (14) Split Voice1 Octave (15) Split Voice2 Octave (16) Split Voice1 Effect Depth (17) Split Voice2 Effect Depth (18) Split Sustain Mode (19) Reverb Type 1 (20) Reverb Type 2 (21) Reverb Depth 1 (22) Reverb Depth 2 (23) Effect Type 1 (24) Effect Type 2 (25) Effect Depth (26) — (27) Touch Sensitivity (28) Fixed Data (29) AUX Pedal (30) Soft Pedal Depth (31) Absolute tempo low byte (32) Absolute tempo high byte (33) Key-Off Sampling Depth (34) — (35) — (36) Variation • Panel data send requests cannot be received. 8. SYSTEM EXCLUSIVE MESSAGES (Universal System Exclusive) (1) Universal Realtime Message Data format: [F0H] -> [7FH] -> [XnH] -> [04H] -> [01H] -> [llH] -> [mmH] -> [F7H] MIDI Master Volume 5. PITCH BEND CHANGE Data Panel Data Transmit Data format: [F0H] -> [43H] -> [0nH] -> [7CH] -> ... -> [F7H] Reception Received as 96-clock tempo timing when MIDI clock is set to External. Song start Not received when the MIDI clock is set to Internal. Song stop Not received when the MIDI clock is set to Internal. If a signal is not received via MIDI for more than 400 milliseconds, the same processing will take place for All Sound Off, All Notes Off and Reset All Controllers as when those signals are received. • Simultaneously changes the volume of all channels. • When a MIDI master volume message is received, the volume only has affect on the MIDI receive channel, not the panel master volume. F0H = Exclusive status 7FH = Universal Realtime 7FH = ID of target device 04H = Sub-ID #1=Device Control Message 01H = Sub-ID #2=Master Volume llH = Volume LSB mmH = Volume MSB F7H = End of Exclusive or F0H = Exclusive status 7FH = Universal Realtime XnH = When n is received n=0~F, whichever is received. X = irrelevant 04H = Sub-ID #1=Device Control Message 01H = Sub-ID #2=Master Volume llH = Volume LSB mmH = Volume MSB F7H = End of Exclusive • Caution: If an error occurs during MIDI reception, the Sustain, Sostenuto, and Soft effects for all channels are turned off and an All Note Off message occurs. P-140 Owner’s Manual / Bedienungsanleitung / Mode d’emploi / Manual de instrucciones 61 (2) Universal Non-Realtime Message (GM On) General MIDI Mode On Data format: [F0H] -> [7EH] -> [XnH] -> [09H] -> [01H] -> [F7H] F0H = 7EH = 7FH = 09H = 01H = F7H = or F0H = 7EH = XnH = Exclusive status Universal Non-Realtime ID of target device Sub-ID #1=General MIDI Message Sub-ID #2=General MIDI On End of Exclusive Exclusive status Universal Non-Realtime When received, n=0~F. X = irrelevant 09H = Sub-ID #1=General MIDI Message 01H = Sub-ID #2=General MIDI On F7H = End of Exclusive When a General MIDI mode ON message is received, the MIDI system will be reset to its default settings. This message requires approximately 50ms to execute, so sufficient time should be allowed before the next message is sent. 9. SYSTEM EXCLUSIVE MESSAGES (XG Standard) (1) XG Native Parameter Change Data format: [F0H] -> [43H] -> [1nH] -> [4CH] -> [hhH] -> [mmH] -> [llH] -> [ddH] ->...-> [F7H] F0H = Exclusive status 43H = YAMAHA ID 1nH = When received, n=0~F. When transmitted, n=0. 4CH = Model ID of XG hhH = Address High mmH = Address Mid llH = Address Low ddH = Data | F7H = End of Exclusive Data size must match parameter size (2 or 4 bytes). When an XG System On message is received, the MIDI system will be reset to its default settings. The message requires approximately 50ms to execute, so sufficient time should be allowed before the next message is sent. (2) XG Native Bulk Data (reception only) Data format: [F0H] -> [43H] -> [0nH] -> [4CH] -> [aaH] -> [bbH] -> [hhH] -> [mmH] -> [llH] ->[ddH] ->...-> [ccH] -> [F7H] F0H = Exclusive status 43H = YAMAHA ID 0nH = When received, n=0~F. When transmitted, n=0. 4CH = Model ID of XG aaH = Byte Count bbH = Byte Count hhH = Address High mmH = Address Mid llH = Address Low ddH = Data | | | | ccH = Check sum F7H = End of Exclusive 10. SYSTEM EXCLUSIVE MESSAGES (P-140 MIDI Format) Data format: [F0H] -> [43H] -> [73H] -> [01H] -> [nnH] -> [F7H] F0H = 43H = 73H = 01H = nnH = nn 02H 03H F7H = Exclusive status Yamaha ID P-140 ID Product ID (CLP common) Substatus Control Internal MIDI clock External MIDI clock End of Exclusive 11. SYSTEM EXCLUSIVE MESSAGES (Special Control) Data format: [F0H] -> [43H] -> [73H] -> [xxH] -> [11H] -> [0nH] -> [ccH] -> [vvH] -> [F7H] F0H = Exclusive status 43H = Yamaha ID 73H = P-140 ID 7FH = Extended Product ID xxH = Product ID 4CH 11H = Special control 0nH = Control MIDI change (n=channel number) cc = Control number vv = Value F7H = End of Exclusive Control On ccH vvH 14H: Split Key Number Split Point Always 00H 14H Metronome Always 00H 1BH 00H: No accent 01H-0FH: 1/4-15/4 7FH: off Sustain Level ch: 00H-0FH 3DH (Sets the Sustain Level for each channel) 00H-7FH Channel Detune ch: 00H-0FH 43H (Sets the Detune value for each channel) 00H-7FH Voice Reserve ch: 00H-0FH 45H 00H : Reserve off 7FH : on* * When Volume or Expression is received for Reserve On, they will be effective from the next Key On. Reserve Off is normal. 12. SYSTEM EXCLUSIVE MESSAGES (Others) Data format: [F0H] -> [43H] -> [1nH] -> [27H] -> [30H] -> [00H] -> [00H] -> [mmH] -> [llH] -> [ccH] -> [F7H] Master Tuning (XG and last message priority) simultaneously changes the pitch of all channels. F0H = Exclusive Status 43H = Yamaha ID 1nH = When received, n=0~F. When transmitted, n=0. 27H = Model ID of TG100 30H = Sub ID 00H = 00H = mmH = Master Tune MSB llH = Master Tune LSB ccH = irrelevant (under 7FH) F7H = End of Exclusive • Receipt of the XG SYSTEM ON message causes reinitialization of relevant parameters and Control Change values. Allow sufficient time for processing to execute (about 50 msec) before sending the P-140 another message. • XG Native Parameter Change message may contain two or four bytes of parameter data (depending on the parameter size). • For information about the Address and Byte Count values, refer to Table 1 below. Note that the table’s Total Size value gives the size of a bulk block. Only the top address of the block (00H, 00H, 00H) is valid as a bulk data address. 62 P-140 Owner’s Manual / Bedienungsanleitung / Mode d’emploi / Manual de instrucciones <Table 1> MIDI Parameter Change table (SYSTEM) Address (H) Size (H) Data (H) 00 00 00 4 020C - 05F4* 01 02 03 04 7E 7F TOTAL SIZE 1 00 - 7F 00 00 Parameter MASTER TUNE MASTER VOLUME XG SYSTEM ON RESET ALL PARAMETERS Description -50 - +50[cent] 1st bit 3 - 0 ➝ bit 15 - 12 2nd bit 3 - 0 ➝ bit 11 - 8 3rd bit 3 - 0 ➝ bit 7 - 4 4th bit 3 - 0 ➝ bit 3 - 0 0 - 127 00=XG system ON 00=ON (receive only) Default value (H) 00 04 00 00 400 7F 07 *Values lower than 020CH select -50 cents. Values higher than 05F4H select +50 cents. <Table 2> MIDI Parameter Change table (EFFECT 1) Refer to the “Effect MIDI Map” for a complete list of Reverb, Chorus and Variation type numbers. Address (H) 02 01 00 Size (H) 2 02 01 40 2 Data (H) 00-7F 00-7F Parameter REVERB TYPE MSB REVERB TYPE LSB 00-7F VARIATION TYPE MSB 00-7F VARIATION TYPE LSB • “VARIATION” refers to the EFFECT on the panel. Description Refer to Effect MIDI Map 00 : basic type Default value (H) 01 (=HALL1) 00 Refer to Effect MIDI Map 00 : basic type 00(=Effect off) 00 Description 0 - 127 Default value (H) 7F <Table 3> MIDI Parameter Change table (MULTI PART) Address (H) Size (H) 08 nn 11 1 nn = Part Number Data (H) 00 - 7F Parameter DRY LEVEL • Effect MIDI Map REVERB ROOM HALL 1 HALL 2 STAGE OFF MSB 02H 01H 01H 03H 00H LSB 10H 10H 11H 10H 00H MSB 42H 48H 46H 47H 00H LSB 10H 10H 10H 10H 00H EFFECT CHORUS PHASER TREMOLO ROTARY SP OFF P-140 Owner’s Manual / Bedienungsanleitung / Mode d’emploi / Manual de instrucciones 63 YAMAHA Implementation [ Electronic Piano ]Chart MIDI Model P-140 MIDI Implementation Function Date : 08-APR-2005 Version : 1.0 Chart Transmitted Recognized Basic Channel Default Changed 1 1 - 16 1 - 16 1 - 16 Mode Default Messages Altered 3 3 ˛ ************** ˛ ˛ 0 - 127 ************** 0 - 127 0 - 127 Note Number : True voice Velocity Note ON Ø 9nH,v=1-127 Note OFF ˛ Ø ˛ After Touch Key's Ch's ˛ ˛ ˛ ˛ ˛ Ø Ø ˛ Ø ˛ Ø ˛ Ø ˛ Ø ˛ ˛ Ø Ø Ø Ø Ø Ø Ø Ø Ø Ø Ø Ø 0 - 127 ************** Ø Ø Ø : Song Pos. ˛ : Song Sel. ˛ : Tune ˛ ˛ ˛ ˛ Pitch Bend Control Change Prog Change 0,32 1 7 10 11 6,38 64,66,67 84 91,94 96-97 100-101 : True # System Exclusive Common System : Clock Real Time : Commands Ø Ø Ø Ø : : : Mes- : sages: : Ø Ø ˛ Ø Ø ˛ Ø Ø Ø Ø Ø ˛ Aux All Sound Off Reset All Cntrls Local ON/OFF All Notes OFF Active Sense Reset Remarks 9nH,v=1-127 0 - 24 semi Bank Select Modulation Main Volume Panpot Expression Data Entry Portamento Control Effect Depth RPN Inc,Dec RPN LSB,MSB 0 - 127 (120,126,127) (121) (122) (123-125) Notes: Mode 1 : OMNI ON , POLY Mode 3 : OMNI OFF, POLY 64 Mode 2 : OMNI ON ,MONO Mode 4 : OMNI OFF,MONO P-140 Owner’s Manual / Bedienungsanleitung / Mode d’emploi / Manual de instrucciones Ø ˛ : Yes : No Specifications / Technische Daten / Caractéristiques techniques / Especificaciones Keyboard GH keyboard 88 keys (A-1 – C7) Sound Source AWM Dynamic Stereo Sampling Polyphony (Max.) 64 Voice Selection 14 Effect Reverb, Effect Volume Master Volume Controls Dual, Split, Metronome, Transpose, Touch (Hard/Medium/Soft/Fixed), Functions Recording/Playback Pedal Demo Songs Jacks/Connectors 2-part recording/playback (three User songs), Tempo Adjustment, Sync Start SUSTAIN PEDAL (Can be used with half pedal effect), AUX PEDAL (Assignable to various functions) 14 voice Demo Songs, 50 preset Songs MIDI (IN/OUT), PHONES × 2, AUX OUT (LEVEL FIXED) (L, R), DC IN 12V, SUSTAIN PEDAL, AUX PEDAL Memory Device (for saving User songs): 65 KB (for saving External songs): 352 KB Main Amplifiers 6W × 2 Speakers Dimensions (W × D × H) (with music rest) Weight Accessories (12 cm × 6 cm) × 2 1,334 mm × 351 mm × 140 mm [52-1/2" x 13-13/16" x 5-1/2"] (1,334 mm × 357 mm × 332 mm) [52-1/2" x 14-1/16" x 13-1/16"] 17.8 kg (39lbs., 4oz) Owner’s Manual, AC Power Adaptor (Yamaha PA-5D, PA-150 or an equivalent), Pedal (FC3), Music Rest * Specifications and descriptions in this owner’s manual are for information purposes only. Yamaha Corp. reserves the right to change or modify products or specifications at any time without prior notice. Since specifications, equipment or options may not be the same in every locale, please check with your Yamaha dealer. * Die technischen Daten und Beschreibungen in dieser Bedienungsanleitung dienen nur der Information. Yamaha Corp. behält sich das Recht vor, Produkte oder deren technische Daten jederzeit ohne vorherige Ankündigung zu verändern oder zu modifizieren. Da die technischen Daten, das Gerät selbst oder Sonderzubehör nicht in jedem Land gleich sind, setzen Sie sich im Zweifel bitte mit Ihrem Yamaha-Händler in Verbindung. * Les caractéristiques techniques et les descriptions du mode d’emploi ne sont données que pour information. Yamaha Corp. se réserve le droit de changer ou modifier les produits et leurs caractéristiques techniques à tout moment sans aucun avis. Du fait que les caractéristiques techniques, les équipements et les options peuvent différer d’un pays à l’autre, adressez-vous au distributeur Yamaha le plus proche. * Las especificaciones y descripciones de este manual del propietario tienen sólo el propósito de servir como información. Yamaha Corp. se reserva el derecho a efectuar cambios o modificaciones en los productos o especificaciones en cualquier momento sin previo aviso. Puesto que las especificaciones, equipos u opciones pueden no ser las mismas en todos los mercados, solicite información a su distribuidor Yamaha. P-140 Owner’s Manual / Bedienungsanleitung / Mode d’emploi / Manual de instrucciones 65 FCC INFORMATION (U.S.A.) 1. IMPORTANT NOTICE: DO NOT MODIFY THIS UNIT! This product, when installed as indicated in the instructions contained in this manual, meets FCC requirements. Modifications not expressly approved by Yamaha may void your authority, granted by the FCC, to use the product. 2. IMPORTANT: When connecting this product to accessories and/or another product use only high quality shielded cables. Cable/s supplied with this product MUST be used. Follow all installation instructions. Failure to follow instructions could void your FCC authorization to use this product in the USA. 3. NOTE: This product has been tested and found to comply with the requirements listed in FCC Regulations, Part 15 for Class “B” digital devices. Compliance with these requirements provides a reasonable level of assurance that your use of this product in a residential environment will not result in harmful interference with other electronic devices. This equipment generates/ uses radio frequencies and, if not installed and used according to the instructions found in the users manual, may cause interference harmful to the operation of other electronic devices. Compliance with FCC regulations does not guarantee that interference will not occur in all installations. If this product is found to be the source of interference, which can be determined by turning the unit “OFF” and “ON”, please try to eliminate the problem by using one of the following measures: Relocate either this product or the device that is being affected by the interference. Utilize power outlets that are on different branch (circuit breaker or fuse) circuits or install AC line filter/s. In the case of radio or TV interference, relocate/reorient the antenna. If the antenna lead-in is 300 ohm ribbon lead, change the lead-in to co-axial type cable. If these corrective measures do not produce satisfactory results, please contact the local retailer authorized to distribute this type of product. If you can not locate the appropriate retailer, please contact Yamaha Corporation of America, Electronic Service Division, 6600 Orangethorpe Ave, Buena Park, CA90620 The above statements apply ONLY to those products distributed by Yamaha Corporation of America or its subsidiaries. * This applies only to products distributed by YAMAHA CORPORATION OF AMERICA. OBSERVERA! Apparaten kopplas inte ur växelströmskällan (nätet) så länge som den ar ansluten till vägguttaget, även om själva apparaten har stängts av. ADVARSEL:Netspæendingen til dette apparat er IKKE afbrudt, sålæenge netledningen siddr i en stikkontakt, som er t endt — også selvom der or slukket på apparatets afbryder. VAROITUS:Laitteen toisiopiiriin kytketty käyttökytkin ei irroita koko laitetta verkosta. (standby) (class B) For details of products, please contact your nearest Yamaha representative or the authorized distributor listed below. Pour plus de détails sur les produits, veuillez-vous adresser à Yamaha ou au distributeur le plus proche de vous figurant dans la liste suivante. NORTH AMERICA CANADA Yamaha Canada Music Ltd. 135 Milner Avenue, Scarborough, Ontario, M1S 3R1, Canada Tel: 416-298-1311 Die Einzelheiten zu Produkten sind bei Ihrer unten aufgeführten Niederlassung und bei Yamaha Vertragshändlern in den jeweiligen Bestimmungsländern erhältlich. Para detalles sobre productos, contacte su tienda Yamaha más cercana o el distribuidor autorizado que se lista debajo. THE NETHERLANDS/ BELGIUM/LUXEMBOURG Yamaha Music Central Europe GmbH, Branch Benelux Clarissenhof 5-b, 4133 AB Vianen, The Netherlands Tel: 0347-358 040 FRANCE U.S.A. Yamaha Corporation of America 6600 Orangethorpe Ave., Buena Park, Calif. 90620, U.S.A. Tel: 714-522-9011 CENTRAL & SOUTH AMERICA MEXICO Yamaha de México S.A. de C.V. Calz. Javier Rojo Gómez #1149, Col. Guadalupe del Moral C.P. 09300, México, D.F., México Tel: 55-5804-0600 Yamaha Musique France BP 70-77312 Marne-la-Vallée Cedex 2, France Tel: 01-64-61-4000 ITALY Yamaha Musica Italia S.P.A. Viale Italia 88, 20020 Lainate (Milano), Italy Tel: 02-935-771 SPAIN/PORTUGAL Yamaha-Hazen Música, S.A. Ctra. de la Coruna km. 17, 200, 28230 Las Rozas (Madrid), Spain Tel: 91-639-8888 GREECE BRAZIL Yamaha Musical do Brasil Ltda. Rua Joaquim Floriano, 913 - 4' andar, Itaim Bibi, CEP 04534-013 Sao Paulo, SP. BRAZIL Tel: 011-3704-1377 ARGENTINA Yamaha Music Latin America, S.A. Sucursal de Argentina Viamonte 1145 Piso2-B 1053, Buenos Aires, Argentina Tel: 1-4371-7021 PANAMA AND OTHER LATIN AMERICAN COUNTRIES/ CARIBBEAN COUNTRIES Yamaha Music Latin America, S.A. Torre Banco General, Piso 7, Urbanización Marbella, Calle 47 y Aquilino de la Guardia, Ciudad de Panamá, Panamá Tel: +507-269-5311 EUROPE THE UNITED KINGDOM Yamaha-Kemble Music (U.K.) Ltd. Sherbourne Drive, Tilbrook, Milton Keynes, MK7 8BL, England Tel: 01908-366700 IRELAND Danfay Ltd. 61D, Sallynoggin Road, Dun Laoghaire, Co. Dublin Tel: 01-2859177 GERMANY Yamaha Music Central Europe GmbH Siemensstraße 22-34, 25462 Rellingen, Germany Tel: 04101-3030 SWITZERLAND/LIECHTENSTEIN Yamaha Music Central Europe GmbH, Branch Switzerland Seefeldstrasse 94, 8008 Zürich, Switzerland Tel: 01-383 3990 AUSTRIA Yamaha Music Central Europe GmbH, Branch Austria Schleiergasse 20, A-1100 Wien, Austria Tel: 01-60203900 CZECH REPUBLIC/SLOVAKIA/ HUNGARY/SLOVENIA Yamaha Music Central Europe GmbH, Branch Austria, CEE Department Schleiergasse 20, A-1100 Wien, Austria Tel: 01-602039025 POLAND Philippos Nakas S.A. The Music House 147 Skiathou Street, 112-55 Athens, Greece Tel: 01-228 2160 ASIA THE PEOPLE’S REPUBLIC OF CHINA Yamaha Music & Electronics (China) Co.,Ltd. 25/F., United Plaza, 1468 Nanjing Road (West), Jingan, Shanghai, China Tel: 021-6247-2211 HONG KONG Tom Lee Music Co., Ltd. 11/F., Silvercord Tower 1, 30 Canton Road, Tsimshatsui, Kowloon, Hong Kong Tel: 2737-7688 INDONESIA PT. Yamaha Music Indonesia (Distributor) PT. Nusantik Gedung Yamaha Music Center, Jalan Jend. Gatot Subroto Kav. 4, Jakarta 12930, Indonesia Tel: 21-520-2577 KOREA Yamaha Music Korea Ltd. 8F, 9F, Dongsung Bldg. 158-9 Samsung-Dong, Kangnam-Gu, Seoul, Korea Tel: 02-3467-3300 MALAYSIA Yamaha Music Malaysia, Sdn., Bhd. Lot 8, Jalan Perbandaran, 47301 Kelana Jaya, Petaling Jaya, Selangor, Malaysia Tel: 3-78030900 SWEDEN Yamaha Scandinavia AB J. A. Wettergrens Gata 1 Box 30053 S-400 43 Göteborg, Sweden Tel: 031 89 34 00 PHILIPPINES DENMARK YS Copenhagen Liaison Office Generatorvej 6A DK-2730 Herlev, Denmark Tel: 44 92 49 00 FINLAND F-Musiikki Oy Kluuvikatu 6, P.O. Box 260, SF-00101 Helsinki, Finland Tel: 09 618511 Yupangco Music Corporation 339 Gil J. Puyat Avenue, P.O. Box 885 MCPO, Makati, Metro Manila, Philippines Tel: 819-7551 SINGAPORE Yamaha Music Asia Pte., Ltd. #03-11 A-Z Building 140 Paya Lebor Road, Singapore 409015 Tel: 747-4374 TAIWAN NORWAY Norsk filial av Yamaha Scandinavia AB Grini Næringspark 1 N-1345 Østerås, Norway Tel: 67 16 77 70 ICELAND Skifan HF Skeifan 17 P.O. Box 8120 IS-128 Reykjavik, Iceland Tel: 525 5000 Yamaha KHS Music Co., Ltd. 3F, #6, Sec.2, Nan Jing E. Rd. Taipei. Taiwan 104, R.O.C. Tel: 02-2511-8688 THAILAND Siam Music Yamaha Co., Ltd. 891/1 Siam Motors Building, 15-16 floor Rama 1 road, Wangmai, Pathumwan Bangkok 10330, Thailand Tel: 02-215-2626 OTHER ASIAN COUNTRIES OTHER EUROPEAN COUNTRIES Yamaha Music Central Europe GmbH Siemensstraße 22-34, 25462 Rellingen, Germany Tel: +49-4101-3030 Yamaha Corporation, Asia-Pacific Music Marketing Group Nakazawa-cho 10-1, Hamamatsu, Japan 430-8650 Tel: +81-53-460-2317 OCEANIA AFRICA Yamaha Corporation, Asia-Pacific Music Marketing Group Nakazawa-cho 10-1, Hamamatsu, Japan 430-8650 Tel: +81-53-460-2312 MIDDLE EAST TURKEY/CYPRUS Yamaha Music Central Europe GmbH Siemensstraße 22-34, 25462 Rellingen, Germany Tel: 04101-3030 OTHER COUNTRIES Yamaha Music Gulf FZE LOB 16-513, P.O.Box 17328, Jubel Ali, Dubai, United Arab Emirates Tel: +971-4-881-5868 AUSTRALIA Yamaha Music Australia Pty. Ltd. Level 1, 99 Queensbridge Street, Southbank, Victoria 3006, Australia Tel: 3-9693-5111 NEW ZEALAND Music Houses of N.Z. Ltd. 146/148 Captain Springs Road, Te Papapa, Auckland, New Zealand Tel: 9-634-0099 COUNTRIES AND TRUST TERRITORIES IN PACIFIC OCEAN Yamaha Corporation, Asia-Pacific Music Marketing Group Nakazawa-cho 10-1, Hamamatsu, Japan 430-8650 Tel: +81-53-460-2312 Yamaha Music Central Europe GmbH Sp.z. o.o. Oddzial w Polsce ul. 17 Stycznia 56, PL-02-146 Warszawa, Poland Tel: 022-868-07-57 HEAD OFFICE Yamaha Corporation, Pro Audio & Digital Musical Instrument Division Nakazawa-cho 10-1, Hamamatsu, Japan 430-8650 Tel: +81-53-460-3273 [PK] 38 Yamaha Home Keyboards Home Page (English Only) http://music.yamaha.com/homekeyboard Yamaha Manual Library http://www.yamaha.co.jp/manual/ This document is printed on chlorine free (ECF) paper with soy ink. Auf Umweltpapier mit Sojatinte gedruckt. Ce document a été imprimé sur du papier non blanchi au chlore avec de l'encre d'huile de soja. Este documento se ha impreso en papel sin cloro alguno, con tinta de soja. U.R.G., Pro Audio & Digital Musical Instrument Division, Yamaha Corporation © 2005 Yamaha Corporation WE98590 612POCP5.3-03C0 Printed in Japan-
 1
1
-
 2
2
-
 3
3
-
 4
4
-
 5
5
-
 6
6
-
 7
7
-
 8
8
-
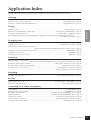 9
9
-
 10
10
-
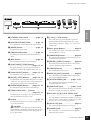 11
11
-
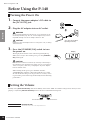 12
12
-
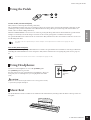 13
13
-
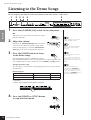 14
14
-
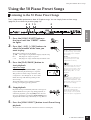 15
15
-
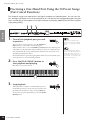 16
16
-
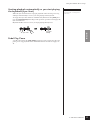 17
17
-
 18
18
-
 19
19
-
 20
20
-
 21
21
-
 22
22
-
 23
23
-
 24
24
-
 25
25
-
 26
26
-
 27
27
-
 28
28
-
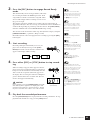 29
29
-
 30
30
-
 31
31
-
 32
32
-
 33
33
-
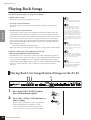 34
34
-
 35
35
-
 36
36
-
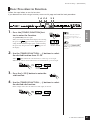 37
37
-
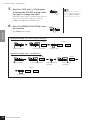 38
38
-
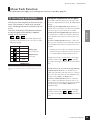 39
39
-
 40
40
-
 41
41
-
 42
42
-
 43
43
-
 44
44
-
 45
45
-
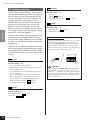 46
46
-
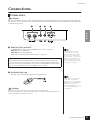 47
47
-
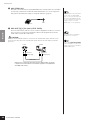 48
48
-
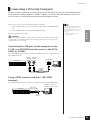 49
49
-
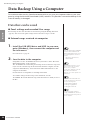 50
50
-
 51
51
-
 52
52
-
 53
53
-
 54
54
-
 55
55
-
 56
56
-
 57
57
-
 58
58
-
 59
59
-
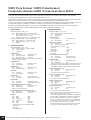 60
60
-
 61
61
-
 62
62
-
 63
63
-
 64
64
-
 65
65
-
 66
66
-
 67
67
-
 68
68


Yamaha P-140 de handleiding
- Categorie
- Synthesizer
- Type
- de handleiding
- Deze handleiding is ook geschikt voor
in andere talen
- English: Yamaha P-140 Owner's manual
- italiano: Yamaha P-140 Manuale del proprietario
- русский: Yamaha P-140 Инструкция по применению
- français: Yamaha P-140 Le manuel du propriétaire
- español: Yamaha P-140 El manual del propietario
- Deutsch: Yamaha P-140 Bedienungsanleitung
- português: Yamaha P-140 Manual do proprietário
- dansk: Yamaha P-140 Brugervejledning
- suomi: Yamaha P-140 Omistajan opas
- čeština: Yamaha P-140 Návod k obsluze
- svenska: Yamaha P-140 Bruksanvisning
- Türkçe: Yamaha P-140 El kitabı
- polski: Yamaha P-140 Instrukcja obsługi
- română: Yamaha P-140 Manualul proprietarului