
X-Micro Digital Photo Frame 100
Quick Start Guide
V2.0

1
INFORMATION TO USER
Product Name: X-Micro Digital Photo Frame 100
Model Name: XPFA-STD, XPFA-128, XPFA-256, XPFA-512
This device complies with Part 15 of the FCC
Rules. Operation is subject to the following two
conditions:(1)this device may not cause
harmful interference,and (2) this device must
accpt any interference received, including interference that
may cause undesired operation. Conforms to the following
EMC Product Testing Specifications FCC part 15.109, Class
B-Residential Emissions at 3 meters. Testing was performed
in a FCC Listed 3 meter semi-anechoic chamber. FCC Part
15.107, Class B-Residential Emissions at shield Room.
Testing was performed in a FCC Listed shield Room.
The referred test report(s) show that the
product complies with standard(s) recognized
as giving presumption of compliance with the
essential requirement in the above listed EU
Directive(s). Other relevant Directives have to be observed.

2
Copyright
Copyright 2006 by X-Micro Technology Corp., All rights
reserved. No part of this publication may be reproduced,
transmitted, transcribed, stored in a retrieval system, or
translated into any language or computer language, in any
form or by any means, electronic, mechanical, magnetic,
optical, chemical, manual or otherwise, without the prior
written permission of X-Micro Technology Corp.
Disclaimer
X-Micro Technology Corp. makes no representations or
warranties, either expressed or implied, with respect to the
contents hereof and specifically disclaims any warranties,
merchantability or fitness for any particular purpose. Any
software described in this manual is sold or licensed "as is".
Should the programs prove defective following their purchase,
the buyer (and not this company, its distributor, or its dealer)
assumes the entire cost of all necessary servicing, repair,
and any incidental or consequential damages resulting from
any defect in the software. Further, X-Micro Technology Corp.,
reserves the right to revise this publication and to make
changes from time to time in the contents hereof without
obligation to notify any person of such revision or change.
All brand and product names mentioned in this manual are
trademarks and/or registered trademarks of their respective
holders.

3
Index
English…………………...………………………..P.4
German…………………......……………………P.8
French……………………..……………………..P.13
Dutch…………………………..…………………P.18
Italian………………………………............….…P.23
Spanish…………………………….....………….P.28
Portuguese……...……………………….………..P.33
Russian………………………………….……….P.38

4
Power
on/off
Rotate
image
Enter
Select
image
Brightness Menu Slideshow
Zoom
image
Press
button to activate power, the Language menu
will show up; press
button to select your language and
press
to save the setting and exit. After selecting a
language the screen will pause for 3 seconds to complete
saving and automatically start to play image.
After activating the power, “Digital Photo Frame” will play in
slideshow mode directly; to stop slideshow, just press
button.
Notice: You must select a language every time the power is
re-initiated.
Button definition
Power On
English

5
To enter into Menu screen, you need to stop the Slideshow
mode first; press
to stop Slideshow.
(1) Press
once to enter into Menu screen.
(2) On the Menu screen, there are four function menus for
your selection; press
button to scroll the cursor
up and down.
(3) Scroll the cursor onto the desired function Menu and
press
button to save the setting and exit.
Menu 1. Hide image
This function allows you to hide a specific image in the
Slideshow mode, so it will not be played.
Press
button to move the cursor onto “Show or hide
image in slideshow”, then press
button to save and exit.
A subsequent pressing of one of the following buttons will
activate the respective function:
Manual selection of image
Hide/Display of image
Rotate image (0/90/180/270 degrees)
Adjust image brightness
Activate Slideshow (3/6/15/60 second)
Zoom image (Max. 0~35%)
Menu 2. Copy image
This function allows you to copy the image from a removable
device into the built-in memory.
Press
button to move the cursor onto “Copy photo from
removable device to the digital photo frame” and then press
Menu introduction

6
button to save and exit. A subsequent pressing of one
of the following buttons will activate the respective function:
Manual selection of image
Copy photo from removable device to the
digital photo frame
Rotate image (0/90/180/270 degrees)
Adjust image brightness
Activate Slideshow (3/6/15/60 second)
Zoom image (Max. 0~35%)
Menu 3. Delete image
This function allows you to directly delete the image in the
removable device or the built-in memory.
Press
button to move the cursor onto “Delete image
from media” and press
button to save the selection and
exit. A subsequent pressing of one of the following buttons
will activate the respective function:
Manual selection of image
Delete photo of removable device or built-in
memory
Rotate image (0/90/180/270 degrees)
Adjust image brightness
Activate Slideshow (3/6/15/60 second)
Zoom image (Max. 0~35%)
Menu 4. Zoom mode
This function allows you to Zoom the viewing image.
Press
button to move the cursor onto “Enter Zoom
Mode” and press
button to save and exit; pressing
button one more time will enter into “Zoom pan” menu.

7
(1) To Zoom image out
Press
button to scroll the cursor to select a desired
zoom factor (2x/3x/4x), press
button to save setting,
press
to pre-view the desired image for zooming, (at
this moment, pressing
buttons in the
preview mode may move the image), press
button to
confirm selection and return to Menu; finally press
button to move cursor to “Return to image view” and press
button to exit.
Note: When in Preview mode, press
button to cancel
the setting and return to menu screen.
(2) To cancel a zoom setting of a zoomed image
Follow the above mentioned steps to enter into Zoom pan
menu, then select “Reset image display setting to 1x” and
press
button to save setting, then move the cursor to
“Return to image view” and press
button to exit; this
allows return to the original size of the image.
(3) Return to Browse Image mode
Press
button to select “Show or hide image in
slideshow” and press
button to exit; then press
button to activate slideshow.

8
Ein-/
Ausschalten
Bild
drehen
Eingabe Bild wählen
Helligkeit Menü Diashow
Bild
zoomen
Drücken Sie die Taste
, um das Gerät einzuschalten.
Das Sprachmenü wird angezeigt. Drücken Sie die Taste
um die gewünschte Sprache auszuwählen. Drücken Sie
anschließend auf
, um Ihre Einstellung zu speichern und
das Menü zu schließen. Wenn Sie nach dem Auswählen der
Sprache für 3 Sekunden warten, dann wird Ihre Auswahl
gespeichert und es wird automatisch begonnen, die Bilder
anzuzeigen.
Nach dem Einschalten des Gerätes werden die Bilder
automatisch im Diashowmodus angezeigt. Drücken Sie bitte
die Taste
, um die Diashow zu beenden.
Hinweis: Sie müssen immer eine Sprache auswählen, wann
immer das Gerät erneut eingeschaltet wird.
Tastenfunktion
Einschalten
German

9
Um das Menü zu öffnen, müssen Sie zuerst die Diashow
beenden. Drücken Sie bitte auf
, um die Diashow zu
beenden.
(1) Drücken Sie einmal auf
, um das Menü
anzuzeigen.
(2) In dem Menü stehen vier Funktionen zur Auswahl.
Drücken Sie bitte immer wieder auf
, um den
Cursor nach oben oder unten zu bewegen.
(3) Bringen Sie den Cursor zu der gewünschten Funktion
und drücken anschließend die Taste
, um Ihre
Auswahl zu bestätigen.
Menü 1. Bild ausblenden
Diese Funktion erlaubt Ihnen ein bestimmtes Bild im
Diashowmodus auszublenden; d.h. das Bild wird nicht
angezeigt.
Drücken Sie die Taste
, um den Cursor zu der Option
"Show or hide image in slideshow"(Bild in Diashow
ein-/ausblenden) zu bringen. Drücken Sie anschließend auf
, um Ihre Auswahl zu bestätigen. Wenn Sie anschließend
eine der folgenden Tasten drücken, dann wird die
entsprechende Funktion aktiviert:
Manuell Bild auswählen
Bild ein-/ausblenden
Bild drehen (um 0/90/180/270 Grad)
Bildhelligkeit einstellen
Diashow (mit einem Zeitintervall von 3/6/15/60
Sekunden) aktivieren
Bild zoomen (Max. 0~35%)
Einführun
g
ins Menü

10
Menü 2. Bild kopieren
Diese Funktion erlaubt Ihnen ein Bild von einem
Wechseldatenträger in den integrierten Speicher des
Digitalfotorahmens zu kopieren.
Drücken Sie die Taste
, um den Cursor zu der Option
"Copy photo from removable device to the digital photo
frame"(Bild vom Wechseldatenträger in den Digitalfotorahmen
kopieren) zu bringen. Drücken Sie anschließend auf
, um
Ihre Auswahl zu bestätigen. Wenn Sie anschließend eine der
folgenden Tasten drücken, dann wird die entsprechende
Funktion aktiviert:
Manuell Bild auswählen
Bild vom Wechseldatenträger in den
Digitalfotorahmen kopieren
Bild drehen (um 0/90/180/270 Grad)
Bildhelligkeit einstellen
Diashow (mit einem Zeitintervall von 3/6/15/60
Sekunden) aktivieren
Bild zoomen (Max. 0~35%)
Menü 3. Bild löschen
Diese Funktion erlaubt Ihnen ein Bild direkt von einem
Wechseldatenträger oder dem integrierten Speicher zu
entfernen.
Drücken Sie die Taste
, um den Cursor zu der Option
"Delete image from media"(Bild vom Medium entfernen) zu
bringen. Drücken Sie anschließend auf
, um Ihre
Auswahl zu bestätigen. Wenn Sie anschließend eine der
folgenden Tasten drücken, dann wird die entsprechende
Funktion aktiviert:
Manuell Bild auswählen
Bild vom Wechseldatenträger oder integrierten

11
Speicher entfernen
Bild drehen (um 0/90/180/270 Grad)
Bildhelligkeit einstellen
Diashow (mit einem Zeitintervall von 3/6/15/60
Sekunden) aktivieren
Bild zoomen (Max. 0~35%)
Menü 4. Zoommodus
Diese Funktion erlaubt Ihnen das angezeigte Bild zu zoomen.
Drücken Sie die Taste
, um den Cursor zu der Option
"Enter Zoom Mode"(Zoommodus aktivieren) zu bringen.
Drücken Sie anschließend auf
, um Ihre Auswahl zu
bestätigen. Drücken Sie noch einmal auf
, um das "Zoom
pan"(Zoom/Schwenken)-Menü zu öffnen.
(1) So zoomen Sie ein Bild aus
Drücken Sie die Taste
, um einen gewünschten
Zoomfaktor (2x/3x/4x) auszuwählen. Drücken Sie auf
,
um Ihre Einstellung zu speichern. Drücken Sie anschließend
auf
, um eine Vorschau des gezoomten Bildes zu
erhalten. (In dem Vorschaumodus können Sie mit Hilfe der
Tasten
das Bild schwenken.) Drücken Sie
die Taste
, um Ihre Auswahl zu bestätigen und zum Menü
zurückzukehren. Wählen Sie mit Hilfe der
-Taste die
Option "Return to image view(Zur Bildansicht)" aus und
drücken anschließend auf
.
Hinweis: Im Vorschaumodus können Sie durch Drücken auf
die Einstellung abbrechen und zum Menü zurückkehren.
(2) So brechen Sie eine Zoomeinstellung eines

12
gezoomten Bildes ab
Folgen Sie den obigen Schritten, um das
"Zoom/Schwenken"-Menü zu öffnen. Wählen Sie
anschließend die Option "Reset image display setting to
1x"(Bildanzeige auf 1x zurücksetzen). Drücken Sie zum
Schluss die Taste
, um die Einstellung zu speichern.
Wählen Sie die Option "Return to image view"(Zur
Bildansicht). Drücken Sie anschließend die Taste
, um
Ihre Auswahl zu bestätigen. Daraufhin wird das Bild in der
Originalgröße angezeigt.
(3) So wechseln Sie in den Bildsuchmodus
Verwenden Sie die Taste
, um die Option "Show or hide
image in slideshow"(Bild in Diashow ein-/ausblenden) zu
wählen. Drücken Sie anschließend auf
, um Ihre Auswahl
zu bestätigen. Drücken Sie anschließend die Taste
, um
die Diashow zu aktivieren.

13
Allumé /
Éteint
Faire
pivoter
l'image
Entrée
Sélectionn
er l'image
Luminosité Menu Diaporama
Zoom
image
Appuyez sur le bouton
pour activer l'alimentation, le
menu Langue apparaît ; appuyez sur le bouton
pour
sélectionner votre langue et appuyez sur
pour
enregistrer le réglage et quitter. Ou après avoir sélectionné
une langue, l'écran se met en pause pendant 3 secondes
pour terminer l'enregistrement et démarre automatiquement
la lecture des images.
Après mise sous tension, le cadre photo numérique lit les
images directement en mode diaporama ; pour arrêter le
diaporama, appuyez juste sur le bouton
.
Avertissement : Vous devez choisir une langue à chaque fois
que l'alimentation est réinitialisée.
French
Définition du bouton
Mise sous tension

14
Pour entrer dans l'écran de menu, il vous faut d'abord arrêter
le mode Diaporama ; appuyez sur
pour arrêter le
Diaporama.
(1) Appuyez une fois sur
pour entrer dans l'écran du
Menu.
(2) Sur l'écran de Menu, il y a quatre menus de fonctions
que vous pouvez sélectionner ; veuillez appuyer en
continu sur le bouton
pour faire défiler le curseur
vers le haut ou vers le bas.
(3) Faites défiler le curseur sur le Menu de fonction
souhaité et appuyez sur le bouton
pour
enregistrer et quitter.
Menu 1. Cacher l'image
Cette fonction vous permet de cacher une image spécifique
en mode Diaporama, de sorte qu'elle ne soit pas lue.
Appuyez sur le bouton
pour déplacer le curseur sur
"Show or hide image in slideshow"(Montrer ou cacher l'image
dans le diaporama), puis appuyez sur le bouton
pour
enregistrer et quitter. Une pression, en suite, sur l'un des
boutons suivants permet d'activer la fonction
correspondante :
Sélection manuelle de l'image
Cacher/Afficher l'image
Faire pivoter l'image (0/90/180/270 degrés)
Régler la luminosité de l'image
Activer le diaporama (3/6/15/60 secondes)
Zoomer l'image (Maxi. 0~35%)
Présentation du menu

15
Menu 2. Copier l'image
Cette fonction vous permet de copier l'image à partir d'un
périphérique amovible vers la mémoire intégrée du cadre
photo numérique.
Appuyez sur le bouton
pour déplacer le curseur sur
"Copy photo from removable device to the digital photo
frame"(Copier une photo depuis le dispositif amovible vers le
cadre photo numérique), puis appuyez sur le bouton
pour enregistrer et quitter. Une pression, en suite, sur l'un des
boutons suivants permet d'activer la fonction
correspondante :
Sélection manuelle de l'image
Copier une photo depuis le dispositif amovible
vers le cadre photo numérique
Faire pivoter l'image (0/90/180/270 degrés)
Régler la luminosité de l'image
Activer le diaporama (3/6/15/60 secondes)
Zoomer l'image (Maxi. 0~35%)
Menu 3. Supprimer l'image
Cette fonction vous permet de supprimer directement l'image
du périphérique amovible ou de la mémoire intégrée.
Appuyez sur le bouton
pour déplacer le curseur sur
"Delete image from media"(Supprimer l'image du support),
puis appuyez sur le bouton
pour enregistrer et quitter.
Une pression, en suite, sur l'un des boutons suivants permet
d'activer la fonction correspondante :
Sélection manuelle de l'image
Supprimer la photo du périphérique amovible
ou de la mémoire intégrée

16
Faire pivoter l'image (0/90/180/270 degrés)
Régler la luminosité de l'image
Activer le diaporama (3/6/15/60 secondes)
Zoomer l'image (Maxi. 0~35%)
Menu 4. Mode zoom
Cette fonction vous permet de zoomer l'image
visualisée.
Appuyez sur le bouton
pour déplacer le curseur
sur "Enter Zoom Mode"(Entrer en mode zoom) et
appuyez puis appuyez sur le bouton
pour
enregistrer et quitter ; appuyez une fois de plus sur le
bouton
pour entrer dans l'écran du menu "Zoom
pan".
(1) Pour zoomer arrière sur l'image
Appuyez sur le bouton
pour faire défiler le
curseur et sélectionner le facteur de zoom souhaité
(2x/3x/4x), appuyez sur le bouton
pour
enregistrer le réglage, appuyez sur
pour
prévisualiser l'image souhaitée pour le zoom, (à ce
moment, l'appui sur les boutons
en
mode prévisualisation peut déplacer l'image),
appuyez sur le bouton
pour confirmer la
sélection et retourner au Menu; enfin appuyez sur le
bouton
pour déplacer le curseur vers "Return to
image view"(Retourner à la visualisation image) et
appuyez sur le bouton
pour quitter.

17
Remarque : En mode Prévisualisation, vous pouvez
appuyer sur le bouton
pour annuler le réglage et
retourner à l'écran de menu.
(2) Pour annuler un réglage de zoom d'une
image zoomée
Suivez les étapes mentionnées ci-dessus pour entrer
en mode Zoom pan, puis sélectionnez "Reset image
display setting to 1x"(Réinitialiser le réglage
d'affichage de l'image sur 1x) et appuyez sur le
bouton
pour enregistrer le réglage, puis
déplacez le curseur vers "Return to image
view"(Retourner à la visualisation image)et appuyez
sur le bouton
pour quitter ; ceci permet de
retourner à la taille initiale de l'image.
(3) Retourner au mode Parcourir les images
Appuyez sur le bouton
pour sélectionner "Show
or hide image in slideshow(Montrer ou cacher l'image
dans le diaporama)", puis appuyez sur le bouton
pour quitter ; appuyez ensuite sur le bouton
pour activer le diaporama.

18
In-/uitsch
akelen
Foto
draaien
Enter
Foto
selecteren
Helderheid Menu
Diavoorstelli
ng
Foto
zoomen
Druk op de knop
om de voeding in te schakelen. Het
menu Language (Taal) wordt weergegeven. Druk op de knop
om uw taal te selecteren en druk op om de
instelling op te slaan en af te sluiten. Of na het selecteren van
een taal zal het scherm gedurende 3 seconden pauzeren om
het opslaan te voltooien. Daarna worden de foto's
automatisch afgespeeld.
Nadat u de digitale fotolijst hebt ingeschakeld, worden de
foto's onmiddellijk in de diavoorstellingsmodus afgespeeld.
Druk op de knop
om de diavoorstelling te stoppen.
Opmerking: telkens wanneer u de lijst opnieuw inschakelt,
moet u een taal selecteren.
Inschakelen
Definitie kno
pp
en
Dutch

19
Om het menuscherm te openen, moet u eerst de
diavoorstellingsmodus stoppen. Druk hiervoor op
.
(1) Druk eenmaal op
om het menuscherm te
openen.
(2) In het menuscherm hebt u de keuze tussen vier
functiemenu's. Druk herhaaldelijk op de knop
om
de cursor omhoog of omlaag te schuiven.
(3) Schuif de cursor naar het gewenste functiemenu en
druk op de knop
om op te slaan en af te sluiten.
Menu 1 Foto verbergen
Met deze functie kunt u een specifieke foto in de
diavoorstellingsmodus verbergen, zodat deze niet wordt
afgespeeld.
Druk op de knop
om de cursor naar "Show or hide
image in slideshow" (Foto weergeven of verbergen in
diavoorstelling) te verplaatsen en druk vervolgens op de knop
om op te slaan en af te sluiten. Wanneer u daarna op
een van de volgende knoppen drukt, wordt de respectievelijke
functie geactiveerd.
Handmatige selectie van foto
Foto verbergen/weergeven
Foto draaien (0/90/180/270 graden)
Helderheid foto aanpassen
Diavoorstelling activeren (3/6/15/60 seconden)
Foto zoomen (Max. 0~35%)
Kennismaken met het menu

20
Menu 2. Foto kopiëren
Met deze functie kunt u de foto kopiëren van een
verwisselbaar apparaat naar het interne geheugen van de
digitale fotolijst.
Druk op de knop
om de cursor naar "Copy photo from
removable device to the digital photo frame" (Foto van
verwisselbaar apparaat kopiëren naar digitale fotolijst) te
verplaatsen en druk vervolgens op de knop
om op te
slaan en af te sluiten. Wanneer u daarna op een van de
volgende knoppen drukt, wordt de respectievelijke functie
geactiveerd.
Handmatige selectie van foto
Foto van verwisselbaar apparaat kopiëren
naar digitale fotolijst
Foto draaien (0/90/180/270 graden)
Helderheid foto aanpassen
Diavoorstelling activeren (3/6/15/60 seconden)
Foto zoomen (Max. 0~35%)
Menu 3. Foto verwijderen
Met deze functie kunt u foto's op het verwisselbare apparaat
of in het interne geheugen rechtstreeks verwijderen.
Druk op de knop
om de cursor naar "Delete image
from media" (Foto van media verwijderen) te verplaatsen en
druk op de knop
om de selectie op te slaan en af te
sluiten. Wanneer u daarna op een van de volgende knoppen
drukt, wordt de respectievelijke functie geactiveerd.
Handmatige selectie van foto
Foto van verwisselbaar apparaat of intern
geheugen verwijderen

21
Foto draaien (0/90/180/270 graden)
Helderheid foto aanpassen
Diavoorstelling activeren (3/6/15/60 seconden)
Foto zoomen (Max. 0~35%)
Menu 4. Zoommodus
Met deze functie kunt u zoomen op de weergegeven foto.
Druk op de knop
om de cursor naar "Enter Zoom
Mode" (Zoommodus openen) te verplaatsen en druk op de
knop
om op te slaan en af te sluiten. Wanneer u een
tweede keer op de knop
drukt, wordt het menuscherm
"Zoom pan"(Zoomen pannen) geopend.
(1) Uitzoomen op de foto
Druk op de knop
om de cursor te verplaatsen naar een
gewenste zoomfactor (2x/3x/4x). Druk op de knop
om
de instelling op te slaan, druk op
om een voorbeeld
weer te geven van de foto die u wilt zoomen (wanneer u op dit
ogenblik in de voorbeeldmodus op de knoppen
drukt, kan de foto worden verplaatst). Druk
op de knop
om de selectie te bevestigen en terug te
keren naar het menu. Druk tot slot op de knop
om de
cursor naar "Return to image view" (Terug naar fotoweergave)
te verplaatsen en druk op de knop
om af te sluiten.
Opmerking: Wanneer u in de voorbeeldmodus bent, kunt u op
de knop
drukken om de instelling te annuleren en terug
te keren naar het menuscherm.
(2) Een zoominstelling van een ingezoomde foto
annuleren
Volg de bovenstaande stappen om het menu Zoom pan te

22
openen en selecteer vervolgens "Reset image display setting
to 1x" (fotoweergave opnieuw instellen naar 1x). Druk op de
knop
om de instelling op te slaan, verplaats daarna de
cursor naar "Return to image view" (Terug naar fotoweergave)
en druk op de knop
om af te sluiten. Hiermee keert u
terug naar het originele formaat van de foto.
(3) Terug naar de modus Bladeren door foto's
Druk op de knop
om "Show or hide image in
slideshow" (Foto weergeven of verbergen in diavoorstelling)
te selecteren en druk op de knop
om af te sluiten. Druk
vervolgens op de knop
om de diavoorstelling te
activeren.

23
Accensione/
Spegnimento
Rotazione
immagine
Invio
Selezione
immagine
Luminosità Menu Presentazione
Zoom
immagine
Premere il tasto
per accendere, apparirà il menu
Language (Lingua); premere il tasto
per selezionare la
lingua e premere
per salvare l’impostazione ed uscire.
Oppure, dopo avere selezionato la lingua, lo schermo si
bloccherà per 3 secondi durante i quali sarà eseguito il
salvataggio dell’impostazione; dopodiché sarà avviata
automaticamente la visualizzazione delle immagini.
Dopo l’accensione, la cornice digitale visualizzerà le immagini
direttamente in modalità di presentazione; per terminare la
presentazione premere il tasto
.
Avviso: è necessario selezionare le lingua ad ogni
accensione.
Definizione dei tasti
A
ccensione
Italian

24
Per accedere alla schermata del menu è necessario, prima,
terminare la modalità Slideshow (Presentazione); premere
per terminare la presentazione.
(1) Premere una volta
per accedere alla schermata
del Menu.
(2) Nella schermata del Menu ci sono a scelta quattro
funzioni, premere in modo continuato il tasto
per
spostare il cursore verso l’alto e il basso.
(3) Portare il cursore sulla funzione desiderata e premere il
tasto
per salvare ed uscire.
Menu 1. Nascondi immagine
Questa funzione consente di nascondere un’immagine
specifica in modalità Slideshow (Presentazione), così che
non sarà visualizzata.
Premere il tasto
per spostare il cursore su "Show or
hide image in slideshow" (Mostra o nascondi immagini della
presentazione), poi premere il tasto
per salvare ed
uscire. La successiva pressione di uno dei tasti che seguono
attiverà la funzione relativa:
Selezione manuale dell'immagine
Nascondi/Visualizza immagine
Ruota immagine (0/90/180/270 gradi)
Regola luminosità dell’immagine
Attiva presentazione (3/6/15/60 secondi)
Zoom immagine (massimo 0-35%)
Introduzione al menu

25
Menu 2. Copia immagine
Questa funzione consente di copiare le immagini da un
dispositivo mobile alla memoria integrata della cornice
digitale.
Premere il tasto
per spostare il cursore su "Copy
photo from removable device to the digital photo frame"
(Copia foto dal dispositivo mobile alla cornice digitale), poi
premere il tasto
per salvare ed uscire. La successiva
pressione di uno dei tasti che seguono attiverà la funzione
relativa:
Selezione manuale dell'immagine
Copia foto dal dispositivo mobile alla cornice
digitale
Ruota immagine (0/90/180/270 gradi)
Regola luminosità dell'immagine
Attiva presentazione (3/6/15/60 secondi)
Zoom immagine (massimo 0~35%)
Menu 3. Elimina immagine
Questa funzione consente di eliminare direttamente le
immagini del dispositivo mobile o della memoria integrata.
Premere il tasto
per spostare il cursore su "Delete
image from media" (Elimina immagini da supporto) e premere
il tasto
per salvare ed uscire. La successiva pressione
di uno dei tasti che seguono attiverà la funzione relativa:
Selezione manuale dell'immagine
Elimina foto da dispositivo rimovibile o
memoria integrata
Ruota immagine (0/90/180/270 gradi)
Regola luminosità dell'immagine

26
Attiva presentazione (3/6/15/60 secondi)
Zoom immagine (massimo 0~35%)
Menu 4. Modalità Zoom
Questa funzione consente zoomare l’immagine visualizzata.
Premere il tasto
per spostare il cursore su "Enter
Zoom Mode" (Accesso a modalità Zoom) e premere il tasto
per salvare ed uscire; premendo di nuovo il tasto
si accederà alla schermata del menu "Zoom pan"
(Panoramica zoom).
(1) Per ingrandire un’immagine
Premere il tasto
per spostare il cursore su sul fatto
zoom desiderato (2x/3x/4x), premere il tasto
per
salvare l’impostazione, premere
per vedere l’anteprima
dell’immagine da zoomare, (a questo punto, la pressione dei
tasti
e in modalità d’anteprima permette
di spostare l’immagine), premere il tasto
per
confermare la selezione tornare al Menu; infine, premere il
tasto
per spostare il cursore su "Return to image view"
(Torna a visualizzazione immagine) e premere il tasto
per uscire.
Nota: in modalità d’anteprima, si può premere il tasto
per annullare l’impostazione tornare alla schermata del menu.
(2) Per annullare l’impostazione zoom di un'immagine
ingrandita
Attenersi alle fasi precedenti per accedere al menu Zoom pan

27
(Panoramica zoom), poi selezionare "Reset image display
setting to 1x" (Ripristina impostazione visualizzazione
immagine su 1x) e premere il tasto
per salvare
l’impostazione, poi spostare il cursore su "Return to image
view" (Torna a visualizzazione immagini) e premere il tasto
per uscire; in questo modo si torna alle dimensioni
originali dell’immagine.
(3) Tornare alla modalità Browse Image (Esplorazione
immagini)
Premere il tasto
per selezionare "Show or hide image
in slideshow" (Mostra o nascondi immagini della
presentazione) e premere il tasto
per uscire; poi
premere il tasto
per attivare la presentazione.

28
Encender
y apagar
Girar
imagen
Aceptar
Selecciona
r imagen
Brillo Menú
Presentación de
diapositivas
Aplicar
zoom a
imagen
Presione el botón
para activar la alimentación.
Aparecerá el menú Idioma. Presione el botón
para
seleccionar el idioma y, a continuación, presione
para
guardar la configuración y salir. También es posible que
después de seleccionar un idioma la pantalla entre en pausa
durante 3 segundos para completar el almacenamiento y
comience a reproducir automáticamente las imágenes.
Después de activar la alimentación, el marco digital para
fotografías reproducirá las imágenes en el modo
Presentación de diapositivas directamente. Para detener
dicha presentación, solamente tiene que presionar el botón
.
Aviso: debe seleccionar un idioma cada vez que la
alimentación se reinicia.
Definición de los botones
Encendido
Spanish

29
Para entrar en la pantalla de menús, es necesario detener
antes el modo Presentación de diapositivas; presione
para detener la presentación de diapositivas.
(1) Presione
una vez para entrar en la pantalla
Menú.
(2) En esta pantalla, hay cuatro menús de función; siga
presionando
para mover el cursor hacia arriba y
hacia abajo.
(3) Desplace el cursor hasta el menú de función que desee
y presione el botón
para guardar y salir.
Menú 1. Ocultar imagen
Esta función permite ocultar una imagen determinada en el
modo Presentación de diapositivas, lo que impide su
reproducción.
Presione el botón
para desplazar el cursor hasta la
opción "Show or hide image in slideshow”(Mostrar u ocultar la
imagen en la presentación de diapositivas) y, a continuación,
presione el botón
para guardar y salir. Si vuelve a
presionar uno de los siguientes botones se activará la función
correspondiente:
Selección manual de imagen
Ocultar o mostrar imagen
Girar imagen (0, 90, 180 ó 270 grados)
Ajustar el brillo de la imagen
Activar presentación de diapositivas (3, 6, 15 ó
60 segundos)
Aplicar zoom a imagen (0~35% como
máximo)
Introducción a los menús

30
Menú 2. Copiar imagen
Esta función permite copiar la imagen desde un dispositivo
extraíble en la memoria integrada del marco digital para
fotografías.
Presione el botón
para desplazar el cursor hasta la
opción "Copy photo from removable device to the digital
photo frame"(Copiar fotografía del dispositivo extraíble en el
marco digital para fotografías) y, a continuación, presione el
botón
para guardar y salir. Si vuelve a presionar uno de
los siguientes botones se activará la función correspondiente:
Selección manual de imagen
Copiar fotografía del dispositivo extraíble en el
marco digital para fotografías
Girar imagen (0, 90, 180 ó 270 grados)
Ajustar el brillo de la imagen
Activar presentación de diapositivas (3, 6, 15 ó
60 segundos)
Aplicar zoom a imagen (0~35% como
máximo)
Menú 3. Eliminar imagen
Esta función permite eliminar la imagen del dispositivo
extraíble o de la memoria integrada directamente.
Presione el botón
para desplazar el cursor hasta la
opción "Delete image from media"(Eliminar imagen del medio)
y, a continuación, presione el botón
para guardar y salir.
Si vuelve a presionar uno de los siguientes botones se
activará la función correspondiente:
Selección manual de imagen

31
Eliminar fotografía del dispositivo extraíble o
de la memoria integrada
Girar imagen (0, 90, 180 ó 270 grados)
Ajustar el brillo de la imagen
Activar presentación de diapositivas (3, 6, 15 ó
60 segundos)
Aplicar zoom a imagen (0~35% como
máximo)
Menú 4. Modo Zoom
Esta función permite aplicar zoom a la imagen que se está
visualizando.
Presione el botón
para desplazar el cursor hasta la
opción "Enter Zoom Mode”(Entrar en el modo Zoom) y
presione el botón
para guardar y salir; presione el
botón
una vez más para entrar en la pantalla de menú
"Zoom pan”(Panorámica).
(1) Para reducir la imagen
Presione el botón para desplazar el cursor y
seleccionar el factor de zoom que desea (2x, 3x o 4x).
Presione el botón
para guardar la configuración.
Presione el botón
para realizar una vista previa de la
imagen a la que desea aplicar zoom (en este momento, si
presiona los botones
en el modo Vista
previa la imagen se puede mover). Presione el botón
para confirmar la selección y volver al menú; por último,
presione el botón
para desplazar el cursor hasta la
opción "Return to image view”(Volver a la vista de imagen) y,
a continuación, presione el botón
para salir.

32
Nota: en el modo Vista previa, puede presionar el botón
para cancelar la configuración y volver a la pantalla de
menús.
(2) Para cancelar una configuración de zoom de una
imagen con zoom
Siga los pasos mencionados anteriormente para entrar en el
menú Panorámica. A continuación, seleccione "Reset image
display setting to 1x”(Restablecer la configuración de
visualización de la imagen a 1x) y presione el botón
para guardar la configuración. A continuación, desplace el
cursor hasta la opción "Return to image view”(Volver a la
vista de imagen) y presione el botón
para salir. De esta
forma devolverá la imagen a su tamaño original.
(3) Volver al modo Explorar imágenes
Presione el botón para seleccionar la opción "Show or
hide image in slideshow”(Mostrar u ocultar imagen en la
presentación de diapositivas) y, a continuación, presione el
botón
para salir. Seguidamente, presione el botón
para activar la presentación de diapositivas.

33
Botão de
alimentaç
ão
Rodar
imagem
Confirmar
Selecciona
r imagem
Brilho Menu
Apresentação
de diapositivos
Zoom
Prima o botão
para ligar a moldura digital, o menu
Language (Idioma) é apresentado; prima o botão
para
seleccionar o idioma pretendido e depois prima o botão
para guardar a definição e sair. Alternativamente, após a
selecção do idioma, aguarde durante 3 segundos. A moldura
digital guarda a definição automaticamente e inicia a
reprodução das imagens.
Após ligar a moldura digital, as imagens são reproduzidas sob
a forma de uma apresentação de diapositivos; para parar a
reprodução das imagens basta premir o botão
.
Aviso: Tem de seleccionar o idioma sempre que desligar
e voltar a ligar a moldura digital.
Funções dos botões
Li
g
ar
Portuguese

34
Para aceder ao ecrã de menu, tem de parar primeiro a
reprodução das imagens sob a forma de uma apresentação
de diapositivos; para tal prima o botão
.
(1) Prima uma vez o botão
para aceder ao ecrã de
menu.
(2) No ecrã de menu existem quatro menus à sua escolha;
prima continuamente o botão
para deslocar o
cursor para cima e para baixo.
(3) Desloque o cursor até à função pretendida no menu e
prima o botão
para guardar e sair.
Menu 1. Ocultar imagem
Esta função permite-lhe ocultar uma imagem específica no
modo Slideshow (Apresentação de diapositivos) de forma a
que a imagem definida não seja reproduzida.
Prima o botão
para deslocar o cursor para a opção
"Show or hide image in slideshow" (Mostrar ou ocultar
imagem na apresentação de diapositivos), de seguida prima o
botão
para guardar e sair. O premir de qualquer um dos
seguintes botões irá activar a função correspondente:
Seleccionar imagens manualmente
Ocultar/Mostrar imagens
Rodar imagens (0/90/180/270 graus)
Ajustar o brilho.
Activar apresentação de diapositivos
(3/6/15/60 segundos)
Aplicar zoom às imagens (máx. 0~35%)
Ap
resenta
ç
ão do menu

35
Menu 2. Copiar imagem
Esta função permite-lhe copiar a imagem de um dispositivo
amovível para a memória interna da moldura digital.
Prima o botão
para deslocar o cursor para a opção
"Copy photo from removable device to the digital photo frame"
(Copiar foto do dispositivo amovível para a moldura digital),
de seguida prima o botão
para guardar e sair. O premir
de qualquer um dos seguintes botões irá activar a função
correspondente:
Seleccionar imagens manualmente
Copiar foto do dispositivo amovível para a
moldura digital
Rodar imagens (0/90/180/270 graus)
Ajustar o brilho.
Activar apresentação de diapositivos
(3/6/15/60 segundos)
Aplicar zoom às imagens (máx. 0~35%)
Menu 3. Eliminar imagem
Esta função permite-lhe eliminar directamente as imagens no
dispositivo amovível ou na memória interna.
Prima o botão
para deslocar o cursor para a opção
"Delete image from media" (Eliminar imagem), de seguida
prima o botão
para guardar a definição e sair. O premir
de qualquer um dos seguintes botões irá activar a função
correspondente:
Seleccionar imagens manualmente
Seleccionar fotos a partir de um dispositivo
amovível ou da memória interna
Rodar imagens (0/90/180/270 graus)

36
Ajustar o brilho.
Activar apresentação de diapositivos
(3/6/15/60 segundos)
Aplicar zoom às imagens (máx. 0~35%)
Menu 4. Modo de zoom
Esta função permite-lhe aplicar zoom à imagem que pretende
ver.
Prima o botão
para deslocar o cursor para a opção
"Enter Zoom Mode" (Aceder ao modo de zoom) e depois
prima o botão
para guardar e sair; se premir o botão
mais uma vez acederá ao ecrã do menu "Zoom pan"
(Zoom panorâmico).
(1) Para reduzir a imagem
Prima o botão
para deslocar o cursor para o factor de
zoom pretendido (2x/3x/4x), de seguida prima o botão
para guardar a definição. Prima o botão
para
pré-visualizar a imagem à qual pretende aplicar o zoom
(nesta etapa, se premir os botões
no
modo de pré-visualização poderá deslocar a imagem), prima
o botão
para confirmar a selecção e voltar ao menu;
por último, prima o botão
para deslocar o cursor para a
opção "Return to image view" (Voltar à imagem) e prima o
botão
para sair.
Nota: No modo Preview (Pré-visualizar), pode premir o botão
para cancelar a definição e voltar ao ecrã de menu.
(2) Para cancelar a definição de zoom escolhida para a

37
imagem
Siga as etapas acima descritas para aceder ao menu Zoom
pan (Zoom panorâmico), depois seleccione a opção "Reset
image display setting to 1x" (Repor imagem para 1x) e prima o
botão
para guardar a definição, de seguida desloque o
cursor para a opção "Return to image view" (Voltar à imagem)
e prima o botão
para sair. Isto permite-lhe voltar a ver a
imagem no seu tamanho original.
(3) Voltar ao modo Browse Image (Procura imagem)
Prima o botão
para seleccionar a opção "Show or hide
image in slideshow" (Mostrar ou ocultar imagem na
apresentação de diapositivos) e prima o botão
para sair;
depois prima o botão
para activar a apresentação de
imagens sob a forma de diapositivos.

Вкл.
(выкл.)
питания
Поворот
изображе
ния
Ввод
Выбор
изображения
Яркость Меню Слайд-шоу
Увеличение
изображения
Нажмите кнопку
для включения питания,
отобразится меню «Language» (Язык); нажмите кнопку
для выбора языка, затем нажмите кнопку для
подтверждения и выхода из меню. В противном случае
после выбора языка изображение на экране не будет
изменяться в течение 3 секунд во время сохранения,
затем начнется автоматическое воспроизведение
изображений.
После включения питания цифровая фоторамка будет
воспроизводить изображения в режиме слайд-шоу; для
прерывания слайд-шоу нажмите кнопку
.
Примечание. Язык необходимо выбирать при каждом
включении питания.
Russian
Назначение кнопо
к
Включение питания

39
Для перехода к главному меню сначала следует
остановить слайд-шоу; для прерывания слайд-шоу
нажмите кнопку
.
(1) Нажмите кнопку
один раз для перехода к
главному меню.
(2) В главном меню отображаются четыре
функциональных меню; для перемещения курсора
вверх и вниз непрерывно нажимайте кнопку
.
(3) Переместите курсор на необходимое
функциональное меню и нажмите кнопку
для
подтверждения и выхода из меню.
Меню 1. Скрыть изображение
Даная функция позволяет скрыть определенное
изображение в режиме слайд-шоу, такое изображение
воспроизводиться не будет.
Нажимайте кнопку
для перемещения курсора на
пункт «Show or hide image in slideshow» (Показать или
скрыть изображение в слайд-шоу), затем нажмите кнопку
для подтверждения и выхода из меню.
Последующее нажатие указанных ниже кнопок вызовет
соответствующую функцию.
Ручной выбор изображения
Скрыть (показать) изображение
Поворот изображения (0, 90, 180, 270
градусов)
Описание меню

40
Настройка яркости изображения
Запуск слайд-шоу (3, 6, 15, 60 секунд)
Увеличение изображения (макс. 0 – 35%)
Меню 2. Копировать изображение
Данная функция позволяет скопировать изображение со
съемного устройства во встроенную память фоторамки.
Нажимайте кнопку
для перемещения курсора на
пункт «Copy photo from removable device to the digital photo
frame» (Копировать фотографию со съемного устройства
на цифровую фоторамку), затем нажмите кнопку
для
подтверждения и выхода из меню. Последующее нажатие
указанных ниже кнопок вызовет соответствующую
функцию.
Ручной выбор изображения
Копировать фотографию со съемного
устройства на цифровую фоторамку
Поворот изображения (0, 90, 180, 270
градусов)
Настройка яркости изображения
Запуск слайд-шоу (3, 6, 15, 60 секунд)
Увеличение изображения (макс. 0 – 35%)
Меню 3. Удалить изображение
Данная функция позволяет удалить изображение со
съемного устройства или из встроенной памяти.
Нажимайте кнопку
для перемещения курсора на
пункт «Delete image from media» (Удалить изображение с
носителя), затем нажмите кнопку
для
подтверждения выбора и выхода из меню. Последующее

41
нажатие указанных ниже кнопок вызовет
соответствующую функцию.
Ручной выбор изображения
Удаление изображения со съемного
устройства или встроенной памяти
фоторамки.
Поворот изображения (0, 90, 180, 270
градусов)
Настройка яркости изображения
Запуск слайд-шоу (3, 6, 15, 60 секунд)
Увеличение изображения (макс. 0 – 35%)
Меню 4. Режим увеличения
Данная функция позволяет увеличить просматриваемое
изображение.
Нажимайте кнопку
для перемещения курсора на
пункт «Enter Zoom Mode» (Перейти в режим увеличения),
затем нажмите кнопку
для подтверждения и выхода
из меню; при повторном нажатии кнопки
фоторамка
переключится в меню «Zoom pan» (Увеличение с
панорамированием).
(1) Уменьшение изображения
Нажимайте кнопку
для перемещения курсора к
необходимому коэффициенту увеличения (2x, 3x, 4x),
затем нажмите кнопку
для подтверждения, нажмите
кнопку
для предварительного просмотра
подлежащего увеличению изображения (в это время
нажимайте кнопки
для перемещения

42
изображения), нажмите кнопку для подтверждения
и возврата к меню; после этого нажмите кнопку
для
перемещения курсора на пункт «Return to image view» и
нажмите кнопку
для выхода из меню.
Примечание. В режиме предварительного просмотра
можно нажать кнопку
для отмены настройки и
перехода к главному меню.
(2) Отмена увеличения изображения
Выполните приведенные выше шаги для перехода к меню
«Zoom pan» (Увеличение с панорамированием), затем
выберите пункт «Reset image display setting to 1x»
(Сбросить масштаб изображения на 1х) и нажмите кнопку
для подтверждения, затем переместите курсор на
пункт «Return to image view» (Вернуться к просмотру
изображения) и нажмите кнопку
для выхода из меню;
это позволит вернуть изображение к исходному размеру.
(3) Возвращение к режиму обзора изображений
Нажимайте кнопку
для выбора пункта «Show or hide
image in slideshow» (Показать или скрыть изображение в
слайд-шоу) и нажмите кнопку
для выхода из меню,
затем нажмите кнопку
для запуска слайд-шоу.

www.x-micro.com
Documenttranscriptie
X-Micro Digital Photo Frame 100 Quick Start Guide V2.0 INFORMATION TO USER Product Name: X-Micro Digital Photo Frame 100 Model Name: XPFA-STD, XPFA-128, XPFA-256, XPFA-512 This device complies with Part 15 of the FCC Rules. Operation is subject to the following two conditions:(1)this device may not cause harmful interference,and (2) this device must accpt any interference received, including interference that may cause undesired operation. Conforms to the following EMC Product Testing Specifications FCC part 15.109, Class B-Residential Emissions at 3 meters. Testing was performed in a FCC Listed 3 meter semi-anechoic chamber. FCC Part 15.107, Class B-Residential Emissions at shield Room. Testing was performed in a FCC Listed shield Room. The referred test report(s) show that the product complies with standard(s) recognized as giving presumption of compliance with the essential requirement in the above listed EU Directive(s). Other relevant Directives have to be observed. 1 Copyright Copyright 2006 by X-Micro Technology Corp., All rights reserved. No part of this publication may be reproduced, transmitted, transcribed, stored in a retrieval system, or translated into any language or computer language, in any form or by any means, electronic, mechanical, magnetic, optical, chemical, manual or otherwise, without the prior written permission of X-Micro Technology Corp. Disclaimer X-Micro Technology Corp. makes no representations or warranties, either expressed or implied, with respect to the contents hereof and specifically disclaims any warranties, merchantability or fitness for any particular purpose. Any software described in this manual is sold or licensed "as is". Should the programs prove defective following their purchase, the buyer (and not this company, its distributor, or its dealer) assumes the entire cost of all necessary servicing, repair, and any incidental or consequential damages resulting from any defect in the software. Further, X-Micro Technology Corp., reserves the right to revise this publication and to make changes from time to time in the contents hereof without obligation to notify any person of such revision or change. All brand and product names mentioned in this manual are trademarks and/or registered trademarks of their respective holders. 2 Index English…………………...………………………..P.4 German…………………......……………………P.8 French……………………..……………………..P.13 Dutch…………………………..…………………P.18 Italian………………………………............….…P.23 Spanish…………………………….....………….P.28 Portuguese……...……………………….………..P.33 Russian………………………………….……….P.38 3 English Button definition Power on/off Rotate image Enter Select image Brightness Menu Slideshow Zoom image Power On button to activate power, the Language menu Press will show up; press button to select your language and to save the setting and exit. After selecting a press language the screen will pause for 3 seconds to complete saving and automatically start to play image. After activating the power, “Digital Photo Frame” will play in slideshow mode directly; to stop slideshow, just press button. Notice: You must select a language every time the power is re-initiated. 4 Menu introduction To enter into Menu screen, you need to stop the Slideshow mode first; press to stop Slideshow. (1) (2) (3) Press once to enter into Menu screen. On the Menu screen, there are four function menus for your selection; press button to scroll the cursor up and down. Scroll the cursor onto the desired function Menu and press button to save the setting and exit. Menu 1. Hide image This function allows you to hide a specific image in the Slideshow mode, so it will not be played. Press button to move the cursor onto “Show or hide button to save and exit. image in slideshow”, then press A subsequent pressing of one of the following buttons will activate the respective function: Manual selection of image Hide/Display of image Rotate image (0/90/180/270 degrees) Adjust image brightness Activate Slideshow (3/6/15/60 second) Zoom image (Max. 0~35%) Menu 2. Copy image This function allows you to copy the image from a removable device into the built-in memory. Press button to move the cursor onto “Copy photo from removable device to the digital photo frame” and then press 5 button to save and exit. A subsequent pressing of one of the following buttons will activate the respective function: Manual selection of image Copy photo from removable device to the digital photo frame Rotate image (0/90/180/270 degrees) Adjust image brightness Activate Slideshow (3/6/15/60 second) Zoom image (Max. 0~35%) Menu 3. Delete image This function allows you to directly delete the image in the removable device or the built-in memory. Press button to move the cursor onto “Delete image button to save the selection and from media” and press exit. A subsequent pressing of one of the following buttons will activate the respective function: Manual selection of image Delete photo of removable device or built-in memory Rotate image (0/90/180/270 degrees) Adjust image brightness Activate Slideshow (3/6/15/60 second) Zoom image (Max. 0~35%) Menu 4. Zoom mode This function allows you to Zoom the viewing image. Press button to move the cursor onto “Enter Zoom button to save and exit; pressing Mode” and press button one more time will enter into “Zoom pan” menu. 6 (1) To Zoom image out Press button to scroll the cursor to select a desired button to save setting, zoom factor (2x/3x/4x), press to pre-view the desired image for zooming, (at press buttons in the this moment, pressing preview mode may move the image), press button to confirm selection and return to Menu; finally press button to move cursor to “Return to image view” and press button to exit. button to cancel Note: When in Preview mode, press the setting and return to menu screen. (2) To cancel a zoom setting of a zoomed image Follow the above mentioned steps to enter into Zoom pan menu, then select “Reset image display setting to 1x” and press button to save setting, then move the cursor to button to exit; this “Return to image view” and press allows return to the original size of the image. (3) Return to Browse Image mode Press button to select “Show or hide image in button to exit; then press slideshow” and press button to activate slideshow. 7 German Tastenfunktion Ein-/ Ausschalten Bild drehen Helligkeit Menü Eingabe Diashow Bild wählen Bild zoomen Einschalten , um das Gerät einzuschalten. Drücken Sie die Taste Das Sprachmenü wird angezeigt. Drücken Sie die Taste um die gewünschte Sprache auszuwählen. Drücken Sie anschließend auf , um Ihre Einstellung zu speichern und das Menü zu schließen. Wenn Sie nach dem Auswählen der Sprache für 3 Sekunden warten, dann wird Ihre Auswahl gespeichert und es wird automatisch begonnen, die Bilder anzuzeigen. Nach dem Einschalten des Gerätes werden die Bilder automatisch im Diashowmodus angezeigt. Drücken Sie bitte die Taste , um die Diashow zu beenden. Hinweis: Sie müssen immer eine Sprache auswählen, wann immer das Gerät erneut eingeschaltet wird. 8 Einführung ins Menü Um das Menü zu öffnen, müssen Sie zuerst die Diashow beenden. Drücken Sie bitte auf , um die Diashow zu beenden. (1) Drücken Sie einmal auf , um das Menü anzuzeigen. (2) In dem Menü stehen vier Funktionen zur Auswahl. Drücken Sie bitte immer wieder auf , um den Cursor nach oben oder unten zu bewegen. (3) Bringen Sie den Cursor zu der gewünschten Funktion und drücken anschließend die Taste , um Ihre Auswahl zu bestätigen. Menü 1. Bild ausblenden Diese Funktion erlaubt Ihnen ein bestimmtes Bild im Diashowmodus auszublenden; d.h. das Bild wird nicht angezeigt. Drücken Sie die Taste , um den Cursor zu der Option "Show or hide image in slideshow"(Bild in Diashow ein-/ausblenden) zu bringen. Drücken Sie anschließend auf , um Ihre Auswahl zu bestätigen. Wenn Sie anschließend eine der folgenden Tasten drücken, dann wird die entsprechende Funktion aktiviert: Manuell Bild auswählen Bild ein-/ausblenden Bild drehen (um 0/90/180/270 Grad) Bildhelligkeit einstellen Diashow (mit einem Zeitintervall von 3/6/15/60 Sekunden) aktivieren Bild zoomen (Max. 0~35%) 9 Menü 2. Bild kopieren Diese Funktion erlaubt Ihnen ein Bild von einem Wechseldatenträger in den integrierten Speicher des Digitalfotorahmens zu kopieren. Drücken Sie die Taste , um den Cursor zu der Option "Copy photo from removable device to the digital photo frame"(Bild vom Wechseldatenträger in den Digitalfotorahmen kopieren) zu bringen. Drücken Sie anschließend auf , um Ihre Auswahl zu bestätigen. Wenn Sie anschließend eine der folgenden Tasten drücken, dann wird die entsprechende Funktion aktiviert: Manuell Bild auswählen Bild vom Wechseldatenträger in den Digitalfotorahmen kopieren Bild drehen (um 0/90/180/270 Grad) Bildhelligkeit einstellen Diashow (mit einem Zeitintervall von 3/6/15/60 Sekunden) aktivieren Bild zoomen (Max. 0~35%) Menü 3. Bild löschen Diese Funktion erlaubt Ihnen ein Bild direkt von einem Wechseldatenträger oder dem integrierten Speicher zu entfernen. Drücken Sie die Taste , um den Cursor zu der Option "Delete image from media"(Bild vom Medium entfernen) zu , um Ihre bringen. Drücken Sie anschließend auf Auswahl zu bestätigen. Wenn Sie anschließend eine der folgenden Tasten drücken, dann wird die entsprechende Funktion aktiviert: Manuell Bild auswählen Bild vom Wechseldatenträger oder integrierten 10 Speicher entfernen Bild drehen (um 0/90/180/270 Grad) Bildhelligkeit einstellen Diashow (mit einem Zeitintervall von 3/6/15/60 Sekunden) aktivieren Bild zoomen (Max. 0~35%) Menü 4. Zoommodus Diese Funktion erlaubt Ihnen das angezeigte Bild zu zoomen. Drücken Sie die Taste , um den Cursor zu der Option "Enter Zoom Mode"(Zoommodus aktivieren) zu bringen. Drücken Sie anschließend auf , um Ihre Auswahl zu , um das "Zoom bestätigen. Drücken Sie noch einmal auf pan"(Zoom/Schwenken)-Menü zu öffnen. (1) So zoomen Sie ein Bild aus Drücken Sie die Taste , um einen gewünschten , Zoomfaktor (2x/3x/4x) auszuwählen. Drücken Sie auf um Ihre Einstellung zu speichern. Drücken Sie anschließend auf , um eine Vorschau des gezoomten Bildes zu erhalten. (In dem Vorschaumodus können Sie mit Hilfe der Tasten das Bild schwenken.) Drücken Sie , um Ihre Auswahl zu bestätigen und zum Menü die Taste -Taste die zurückzukehren. Wählen Sie mit Hilfe der Option "Return to image view(Zur Bildansicht)" aus und drücken anschließend auf . Hinweis: Im Vorschaumodus können Sie durch Drücken auf die Einstellung abbrechen und zum Menü zurückkehren. (2) So brechen Sie eine Zoomeinstellung eines 11 gezoomten Bildes ab Folgen Sie den obigen Schritten, um das "Zoom/Schwenken"-Menü zu öffnen. Wählen Sie anschließend die Option "Reset image display setting to 1x"(Bildanzeige auf 1x zurücksetzen). Drücken Sie zum Schluss die Taste , um die Einstellung zu speichern. Wählen Sie die Option "Return to image view"(Zur Bildansicht). Drücken Sie anschließend die Taste , um Ihre Auswahl zu bestätigen. Daraufhin wird das Bild in der Originalgröße angezeigt. (3) So wechseln Sie in den Bildsuchmodus Verwenden Sie die Taste , um die Option "Show or hide image in slideshow"(Bild in Diashow ein-/ausblenden) zu wählen. Drücken Sie anschließend auf , um Ihre Auswahl , um zu bestätigen. Drücken Sie anschließend die Taste die Diashow zu aktivieren. 12 French Définition du bouton Allumé / Éteint Faire pivoter l'image Entrée Sélectionn er l'image Luminosité Menu Diaporama Zoom image Mise sous tension Appuyez sur le bouton pour activer l'alimentation, le pour menu Langue apparaît ; appuyez sur le bouton sélectionner votre langue et appuyez sur pour enregistrer le réglage et quitter. Ou après avoir sélectionné une langue, l'écran se met en pause pendant 3 secondes pour terminer l'enregistrement et démarre automatiquement la lecture des images. Après mise sous tension, le cadre photo numérique lit les images directement en mode diaporama ; pour arrêter le diaporama, appuyez juste sur le bouton . Avertissement : Vous devez choisir une langue à chaque fois que l'alimentation est réinitialisée. 13 Présentation du menu Pour entrer dans l'écran de menu, il vous faut d'abord arrêter le mode Diaporama ; appuyez sur pour arrêter le Diaporama. (1) (2) (3) Appuyez une fois sur pour entrer dans l'écran du Menu. Sur l'écran de Menu, il y a quatre menus de fonctions que vous pouvez sélectionner ; veuillez appuyer en continu sur le bouton pour faire défiler le curseur vers le haut ou vers le bas. Faites défiler le curseur sur le Menu de fonction souhaité et appuyez sur le bouton pour enregistrer et quitter. Menu 1. Cacher l'image Cette fonction vous permet de cacher une image spécifique en mode Diaporama, de sorte qu'elle ne soit pas lue. pour déplacer le curseur sur Appuyez sur le bouton "Show or hide image in slideshow"(Montrer ou cacher l'image dans le diaporama), puis appuyez sur le bouton pour enregistrer et quitter. Une pression, en suite, sur l'un des boutons suivants permet d'activer la fonction correspondante : Sélection manuelle de l'image Cacher/Afficher l'image Faire pivoter l'image (0/90/180/270 degrés) Régler la luminosité de l'image Activer le diaporama (3/6/15/60 secondes) Zoomer l'image (Maxi. 0~35%) 14 Menu 2. Copier l'image Cette fonction vous permet de copier l'image à partir d'un périphérique amovible vers la mémoire intégrée du cadre photo numérique. Appuyez sur le bouton pour déplacer le curseur sur "Copy photo from removable device to the digital photo frame"(Copier une photo depuis le dispositif amovible vers le cadre photo numérique), puis appuyez sur le bouton pour enregistrer et quitter. Une pression, en suite, sur l'un des boutons suivants permet d'activer la fonction correspondante : Sélection manuelle de l'image Copier une photo depuis le dispositif amovible vers le cadre photo numérique Faire pivoter l'image (0/90/180/270 degrés) Régler la luminosité de l'image Activer le diaporama (3/6/15/60 secondes) Zoomer l'image (Maxi. 0~35%) Menu 3. Supprimer l'image Cette fonction vous permet de supprimer directement l'image du périphérique amovible ou de la mémoire intégrée. Appuyez sur le bouton pour déplacer le curseur sur "Delete image from media"(Supprimer l'image du support), puis appuyez sur le bouton pour enregistrer et quitter. Une pression, en suite, sur l'un des boutons suivants permet d'activer la fonction correspondante : Sélection manuelle de l'image Supprimer la photo du périphérique amovible ou de la mémoire intégrée 15 Faire pivoter l'image (0/90/180/270 degrés) Régler la luminosité de l'image Activer le diaporama (3/6/15/60 secondes) Zoomer l'image (Maxi. 0~35%) Menu 4. Mode zoom Cette fonction vous permet de zoomer l'image visualisée. pour déplacer le curseur Appuyez sur le bouton sur "Enter Zoom Mode"(Entrer en mode zoom) et pour appuyez puis appuyez sur le bouton enregistrer et quitter ; appuyez une fois de plus sur le pour entrer dans l'écran du menu "Zoom bouton pan". (1) Pour zoomer arrière sur l'image pour faire défiler le Appuyez sur le bouton curseur et sélectionner le facteur de zoom souhaité pour (2x/3x/4x), appuyez sur le bouton pour enregistrer le réglage, appuyez sur prévisualiser l'image souhaitée pour le zoom, (à ce en moment, l'appui sur les boutons mode prévisualisation peut déplacer l'image), pour confirmer la appuyez sur le bouton sélection et retourner au Menu; enfin appuyez sur le pour déplacer le curseur vers "Return to bouton image view"(Retourner à la visualisation image) et pour quitter. appuyez sur le bouton 16 Remarque : En mode Prévisualisation, vous pouvez pour annuler le réglage et appuyer sur le bouton retourner à l'écran de menu. (2) Pour annuler un réglage de zoom d'une image zoomée Suivez les étapes mentionnées ci-dessus pour entrer en mode Zoom pan, puis sélectionnez "Reset image display setting to 1x"(Réinitialiser le réglage d'affichage de l'image sur 1x) et appuyez sur le pour enregistrer le réglage, puis bouton déplacez le curseur vers "Return to image view"(Retourner à la visualisation image)et appuyez pour quitter ; ceci permet de sur le bouton retourner à la taille initiale de l'image. (3) Retourner au mode Parcourir les images pour sélectionner "Show Appuyez sur le bouton or hide image in slideshow(Montrer ou cacher l'image dans le diaporama)", puis appuyez sur le bouton pour quitter ; appuyez ensuite sur le bouton pour activer le diaporama. 17 Dutch Definitie knoppen In-/uitsch akelen Helderheid Foto draaien Menu Enter Diavoorstelli ng Foto selecteren Foto zoomen Inschakelen Druk op de knop om de voeding in te schakelen. Het menu Language (Taal) wordt weergegeven. Druk op de knop om uw taal te selecteren en druk op om de instelling op te slaan en af te sluiten. Of na het selecteren van een taal zal het scherm gedurende 3 seconden pauzeren om het opslaan te voltooien. Daarna worden de foto's automatisch afgespeeld. Nadat u de digitale fotolijst hebt ingeschakeld, worden de foto's onmiddellijk in de diavoorstellingsmodus afgespeeld. Druk op de knop om de diavoorstelling te stoppen. Opmerking: telkens wanneer u de lijst opnieuw inschakelt, moet u een taal selecteren. 18 Kennismaken met het menu Om het menuscherm te openen, moet u eerst de diavoorstellingsmodus stoppen. Druk hiervoor op . om het menuscherm te (1) Druk eenmaal op openen. (2) In het menuscherm hebt u de keuze tussen vier om functiemenu's. Druk herhaaldelijk op de knop de cursor omhoog of omlaag te schuiven. (3) Schuif de cursor naar het gewenste functiemenu en om op te slaan en af te sluiten. druk op de knop Menu 1 Foto verbergen Met deze functie kunt u een specifieke foto in de diavoorstellingsmodus verbergen, zodat deze niet wordt afgespeeld. Druk op de knop om de cursor naar "Show or hide image in slideshow" (Foto weergeven of verbergen in diavoorstelling) te verplaatsen en druk vervolgens op de knop om op te slaan en af te sluiten. Wanneer u daarna op een van de volgende knoppen drukt, wordt de respectievelijke functie geactiveerd. Handmatige selectie van foto Foto verbergen/weergeven Foto draaien (0/90/180/270 graden) Helderheid foto aanpassen Diavoorstelling activeren (3/6/15/60 seconden) Foto zoomen (Max. 0~35%) 19 Menu 2. Foto kopiëren Met deze functie kunt u de foto kopiëren van een verwisselbaar apparaat naar het interne geheugen van de digitale fotolijst. Druk op de knop om de cursor naar "Copy photo from removable device to the digital photo frame" (Foto van verwisselbaar apparaat kopiëren naar digitale fotolijst) te verplaatsen en druk vervolgens op de knop om op te slaan en af te sluiten. Wanneer u daarna op een van de volgende knoppen drukt, wordt de respectievelijke functie geactiveerd. Handmatige selectie van foto Foto van verwisselbaar apparaat kopiëren naar digitale fotolijst Foto draaien (0/90/180/270 graden) Helderheid foto aanpassen Diavoorstelling activeren (3/6/15/60 seconden) Foto zoomen (Max. 0~35%) Menu 3. Foto verwijderen Met deze functie kunt u foto's op het verwisselbare apparaat of in het interne geheugen rechtstreeks verwijderen. Druk op de knop om de cursor naar "Delete image from media" (Foto van media verwijderen) te verplaatsen en druk op de knop om de selectie op te slaan en af te sluiten. Wanneer u daarna op een van de volgende knoppen drukt, wordt de respectievelijke functie geactiveerd. Handmatige selectie van foto Foto van verwisselbaar apparaat of intern geheugen verwijderen 20 Foto draaien (0/90/180/270 graden) Helderheid foto aanpassen Diavoorstelling activeren (3/6/15/60 seconden) Foto zoomen (Max. 0~35%) Menu 4. Zoommodus Met deze functie kunt u zoomen op de weergegeven foto. Druk op de knop om de cursor naar "Enter Zoom Mode" (Zoommodus openen) te verplaatsen en druk op de knop om op te slaan en af te sluiten. Wanneer u een drukt, wordt het menuscherm tweede keer op de knop "Zoom pan"(Zoomen pannen) geopend. (1) Uitzoomen op de foto Druk op de knop om de cursor te verplaatsen naar een om gewenste zoomfactor (2x/3x/4x). Druk op de knop om een voorbeeld de instelling op te slaan, druk op weer te geven van de foto die u wilt zoomen (wanneer u op dit ogenblik in de voorbeeldmodus op de knoppen drukt, kan de foto worden verplaatst). Druk op de knop om de selectie te bevestigen en terug te om de keren naar het menu. Druk tot slot op de knop cursor naar "Return to image view" (Terug naar fotoweergave) te verplaatsen en druk op de knop om af te sluiten. Opmerking: Wanneer u in de voorbeeldmodus bent, kunt u op de knop drukken om de instelling te annuleren en terug te keren naar het menuscherm. (2) Een zoominstelling van een ingezoomde foto annuleren Volg de bovenstaande stappen om het menu Zoom pan te 21 openen en selecteer vervolgens "Reset image display setting to 1x" (fotoweergave opnieuw instellen naar 1x). Druk op de knop om de instelling op te slaan, verplaats daarna de cursor naar "Return to image view" (Terug naar fotoweergave) om af te sluiten. Hiermee keert u en druk op de knop terug naar het originele formaat van de foto. (3) Terug naar de modus Bladeren door foto's Druk op de knop om "Show or hide image in slideshow" (Foto weergeven of verbergen in diavoorstelling) om af te sluiten. Druk te selecteren en druk op de knop vervolgens op de knop om de diavoorstelling te activeren. 22 Italian Definizione dei tasti Accensione/ Spegnimento Rotazione immagine Luminosità Menu Invio Selezione immagine Presentazione Zoom immagine Accensione per accendere, apparirà il menu Premere il tasto Language (Lingua); premere il tasto per selezionare la per salvare l’impostazione ed uscire. lingua e premere Oppure, dopo avere selezionato la lingua, lo schermo si bloccherà per 3 secondi durante i quali sarà eseguito il salvataggio dell’impostazione; dopodiché sarà avviata automaticamente la visualizzazione delle immagini. Dopo l’accensione, la cornice digitale visualizzerà le immagini direttamente in modalità di presentazione; per terminare la presentazione premere il tasto . Avviso: è necessario selezionare le lingua ad ogni accensione. 23 Introduzione al menu Per accedere alla schermata del menu è necessario, prima, terminare la modalità Slideshow (Presentazione); premere per terminare la presentazione. per accedere alla schermata (1) Premere una volta del Menu. (2) Nella schermata del Menu ci sono a scelta quattro funzioni, premere in modo continuato il tasto per spostare il cursore verso l’alto e il basso. (3) Portare il cursore sulla funzione desiderata e premere il tasto per salvare ed uscire. Menu 1. Nascondi immagine Questa funzione consente di nascondere un’immagine specifica in modalità Slideshow (Presentazione), così che non sarà visualizzata. Premere il tasto per spostare il cursore su "Show or hide image in slideshow" (Mostra o nascondi immagini della presentazione), poi premere il tasto per salvare ed uscire. La successiva pressione di uno dei tasti che seguono attiverà la funzione relativa: Selezione manuale dell'immagine Nascondi/Visualizza immagine Ruota immagine (0/90/180/270 gradi) Regola luminosità dell’immagine Attiva presentazione (3/6/15/60 secondi) Zoom immagine (massimo 0-35%) 24 Menu 2. Copia immagine Questa funzione consente di copiare le immagini da un dispositivo mobile alla memoria integrata della cornice digitale. Premere il tasto per spostare il cursore su "Copy photo from removable device to the digital photo frame" (Copia foto dal dispositivo mobile alla cornice digitale), poi premere il tasto per salvare ed uscire. La successiva pressione di uno dei tasti che seguono attiverà la funzione relativa: Selezione manuale dell'immagine Copia foto dal dispositivo mobile alla cornice digitale Ruota immagine (0/90/180/270 gradi) Regola luminosità dell'immagine Attiva presentazione (3/6/15/60 secondi) Zoom immagine (massimo 0~35%) Menu 3. Elimina immagine Questa funzione consente di eliminare direttamente le immagini del dispositivo mobile o della memoria integrata. Premere il tasto per spostare il cursore su "Delete image from media" (Elimina immagini da supporto) e premere il tasto per salvare ed uscire. La successiva pressione di uno dei tasti che seguono attiverà la funzione relativa: Selezione manuale dell'immagine Elimina foto da dispositivo rimovibile o memoria integrata Ruota immagine (0/90/180/270 gradi) Regola luminosità dell'immagine 25 Attiva presentazione (3/6/15/60 secondi) Zoom immagine (massimo 0~35%) Menu 4. Modalità Zoom Questa funzione consente zoomare l’immagine visualizzata. per spostare il cursore su "Enter Premere il tasto Zoom Mode" (Accesso a modalità Zoom) e premere il tasto per salvare ed uscire; premendo di nuovo il tasto si accederà alla schermata del menu "Zoom pan" (Panoramica zoom). (1) Per ingrandire un’immagine Premere il tasto per spostare il cursore su sul fatto per zoom desiderato (2x/3x/4x), premere il tasto salvare l’impostazione, premere per vedere l’anteprima dell’immagine da zoomare, (a questo punto, la pressione dei tasti e in modalità d’anteprima permette per di spostare l’immagine), premere il tasto confermare la selezione tornare al Menu; infine, premere il tasto per spostare il cursore su "Return to image view" (Torna a visualizzazione immagine) e premere il tasto per uscire. Nota: in modalità d’anteprima, si può premere il tasto per annullare l’impostazione tornare alla schermata del menu. (2) Per annullare l’impostazione zoom di un'immagine ingrandita Attenersi alle fasi precedenti per accedere al menu Zoom pan 26 (Panoramica zoom), poi selezionare "Reset image display setting to 1x" (Ripristina impostazione visualizzazione per salvare immagine su 1x) e premere il tasto l’impostazione, poi spostare il cursore su "Return to image view" (Torna a visualizzazione immagini) e premere il tasto per uscire; in questo modo si torna alle dimensioni originali dell’immagine. (3) Tornare alla modalità Browse Image (Esplorazione immagini) Premere il tasto per selezionare "Show or hide image in slideshow" (Mostra o nascondi immagini della presentazione) e premere il tasto per uscire; poi per attivare la presentazione. premere il tasto 27 Spanish Definición de los botones Encender y apagar Brillo Girar imagen Menú Aceptar Presentación de diapositivas Selecciona r imagen Aplicar zoom a imagen Encendido para activar la alimentación. Presione el botón Aparecerá el menú Idioma. Presione el botón para para seleccionar el idioma y, a continuación, presione guardar la configuración y salir. También es posible que después de seleccionar un idioma la pantalla entre en pausa durante 3 segundos para completar el almacenamiento y comience a reproducir automáticamente las imágenes. Después de activar la alimentación, el marco digital para fotografías reproducirá las imágenes en el modo Presentación de diapositivas directamente. Para detener dicha presentación, solamente tiene que presionar el botón . Aviso: debe seleccionar un idioma cada vez que la alimentación se reinicia. 28 Introducción a los menús Para entrar en la pantalla de menús, es necesario detener antes el modo Presentación de diapositivas; presione para detener la presentación de diapositivas. (1) Presione una vez para entrar en la pantalla Menú. (2) En esta pantalla, hay cuatro menús de función; siga presionando para mover el cursor hacia arriba y hacia abajo. (3) Desplace el cursor hasta el menú de función que desee y presione el botón para guardar y salir. Menú 1. Ocultar imagen Esta función permite ocultar una imagen determinada en el modo Presentación de diapositivas, lo que impide su reproducción. Presione el botón para desplazar el cursor hasta la opción "Show or hide image in slideshow”(Mostrar u ocultar la imagen en la presentación de diapositivas) y, a continuación, presione el botón para guardar y salir. Si vuelve a presionar uno de los siguientes botones se activará la función correspondiente: Selección manual de imagen Ocultar o mostrar imagen Girar imagen (0, 90, 180 ó 270 grados) Ajustar el brillo de la imagen Activar presentación de diapositivas (3, 6, 15 ó 60 segundos) Aplicar zoom a imagen (0~35% como máximo) 29 Menú 2. Copiar imagen Esta función permite copiar la imagen desde un dispositivo extraíble en la memoria integrada del marco digital para fotografías. Presione el botón para desplazar el cursor hasta la opción "Copy photo from removable device to the digital photo frame"(Copiar fotografía del dispositivo extraíble en el marco digital para fotografías) y, a continuación, presione el botón para guardar y salir. Si vuelve a presionar uno de los siguientes botones se activará la función correspondiente: Selección manual de imagen Copiar fotografía del dispositivo extraíble en el marco digital para fotografías Girar imagen (0, 90, 180 ó 270 grados) Ajustar el brillo de la imagen Activar presentación de diapositivas (3, 6, 15 ó 60 segundos) Aplicar zoom a imagen (0~35% como máximo) Menú 3. Eliminar imagen Esta función permite eliminar la imagen del dispositivo extraíble o de la memoria integrada directamente. Presione el botón para desplazar el cursor hasta la opción "Delete image from media"(Eliminar imagen del medio) y, a continuación, presione el botón para guardar y salir. Si vuelve a presionar uno de los siguientes botones se activará la función correspondiente: Selección manual de imagen 30 Eliminar fotografía del dispositivo extraíble o de la memoria integrada Girar imagen (0, 90, 180 ó 270 grados) Ajustar el brillo de la imagen Activar presentación de diapositivas (3, 6, 15 ó 60 segundos) Aplicar zoom a imagen (0~35% como máximo) Menú 4. Modo Zoom Esta función permite aplicar zoom a la imagen que se está visualizando. Presione el botón para desplazar el cursor hasta la opción "Enter Zoom Mode”(Entrar en el modo Zoom) y para guardar y salir; presione el presione el botón botón una vez más para entrar en la pantalla de menú "Zoom pan”(Panorámica). (1) Para reducir la imagen Presione el botón para desplazar el cursor y seleccionar el factor de zoom que desea (2x, 3x o 4x). Presione el botón para guardar la configuración. para realizar una vista previa de la Presione el botón imagen a la que desea aplicar zoom (en este momento, si presiona los botones en el modo Vista previa la imagen se puede mover). Presione el botón para confirmar la selección y volver al menú; por último, para desplazar el cursor hasta la presione el botón opción "Return to image view”(Volver a la vista de imagen) y, a continuación, presione el botón para salir. 31 Nota: en el modo Vista previa, puede presionar el botón para cancelar la configuración y volver a la pantalla de menús. (2) Para cancelar una configuración de zoom de una imagen con zoom Siga los pasos mencionados anteriormente para entrar en el menú Panorámica. A continuación, seleccione "Reset image display setting to 1x”(Restablecer la configuración de visualización de la imagen a 1x) y presione el botón para guardar la configuración. A continuación, desplace el cursor hasta la opción "Return to image view”(Volver a la vista de imagen) y presione el botón para salir. De esta forma devolverá la imagen a su tamaño original. (3) Volver al modo Explorar imágenes Presione el botón para seleccionar la opción "Show or hide image in slideshow”(Mostrar u ocultar imagen en la presentación de diapositivas) y, a continuación, presione el para salir. Seguidamente, presione el botón botón para activar la presentación de diapositivas. 32 Portuguese Funções dos botões Botão de alimentaç ão Brilho Rodar imagem Menu Confirmar Apresentação de diapositivos Selecciona r imagem Zoom Ligar Prima o botão para ligar a moldura digital, o menu para Language (Idioma) é apresentado; prima o botão seleccionar o idioma pretendido e depois prima o botão para guardar a definição e sair. Alternativamente, após a selecção do idioma, aguarde durante 3 segundos. A moldura digital guarda a definição automaticamente e inicia a reprodução das imagens. Após ligar a moldura digital, as imagens são reproduzidas sob a forma de uma apresentação de diapositivos; para parar a reprodução das imagens basta premir o botão . Aviso: Tem de seleccionar o idioma sempre que desligar e voltar a ligar a moldura digital. 33 Apresentação do menu Para aceder ao ecrã de menu, tem de parar primeiro a reprodução das imagens sob a forma de uma apresentação de diapositivos; para tal prima o botão . para aceder ao ecrã de (1) Prima uma vez o botão menu. (2) No ecrã de menu existem quatro menus à sua escolha; prima continuamente o botão para deslocar o cursor para cima e para baixo. (3) Desloque o cursor até à função pretendida no menu e prima o botão para guardar e sair. Menu 1. Ocultar imagem Esta função permite-lhe ocultar uma imagem específica no modo Slideshow (Apresentação de diapositivos) de forma a que a imagem definida não seja reproduzida. Prima o botão para deslocar o cursor para a opção "Show or hide image in slideshow" (Mostrar ou ocultar imagem na apresentação de diapositivos), de seguida prima o botão para guardar e sair. O premir de qualquer um dos seguintes botões irá activar a função correspondente: Seleccionar imagens manualmente Ocultar/Mostrar imagens Rodar imagens (0/90/180/270 graus) Ajustar o brilho. Activar apresentação de diapositivos (3/6/15/60 segundos) Aplicar zoom às imagens (máx. 0~35%) 34 Menu 2. Copiar imagem Esta função permite-lhe copiar a imagem de um dispositivo amovível para a memória interna da moldura digital. Prima o botão para deslocar o cursor para a opção "Copy photo from removable device to the digital photo frame" (Copiar foto do dispositivo amovível para a moldura digital), de seguida prima o botão para guardar e sair. O premir de qualquer um dos seguintes botões irá activar a função correspondente: Seleccionar imagens manualmente Copiar foto do dispositivo amovível para a moldura digital Rodar imagens (0/90/180/270 graus) Ajustar o brilho. Activar apresentação de diapositivos (3/6/15/60 segundos) Aplicar zoom às imagens (máx. 0~35%) Menu 3. Eliminar imagem Esta função permite-lhe eliminar directamente as imagens no dispositivo amovível ou na memória interna. Prima o botão para deslocar o cursor para a opção "Delete image from media" (Eliminar imagem), de seguida prima o botão para guardar a definição e sair. O premir de qualquer um dos seguintes botões irá activar a função correspondente: Seleccionar imagens manualmente Seleccionar fotos a partir de um dispositivo amovível ou da memória interna Rodar imagens (0/90/180/270 graus) 35 Ajustar o brilho. Activar apresentação de diapositivos (3/6/15/60 segundos) Aplicar zoom às imagens (máx. 0~35%) Menu 4. Modo de zoom Esta função permite-lhe aplicar zoom à imagem que pretende ver. Prima o botão para deslocar o cursor para a opção "Enter Zoom Mode" (Aceder ao modo de zoom) e depois prima o botão para guardar e sair; se premir o botão mais uma vez acederá ao ecrã do menu "Zoom pan" (Zoom panorâmico). (1) Para reduzir a imagem Prima o botão para deslocar o cursor para o factor de zoom pretendido (2x/3x/4x), de seguida prima o botão para para guardar a definição. Prima o botão pré-visualizar a imagem à qual pretende aplicar o zoom no (nesta etapa, se premir os botões modo de pré-visualização poderá deslocar a imagem), prima o botão para confirmar a selecção e voltar ao menu; para deslocar o cursor para a por último, prima o botão opção "Return to image view" (Voltar à imagem) e prima o botão para sair. Nota: No modo Preview (Pré-visualizar), pode premir o botão para cancelar a definição e voltar ao ecrã de menu. (2) Para cancelar a definição de zoom escolhida para a 36 imagem Siga as etapas acima descritas para aceder ao menu Zoom pan (Zoom panorâmico), depois seleccione a opção "Reset image display setting to 1x" (Repor imagem para 1x) e prima o botão para guardar a definição, de seguida desloque o cursor para a opção "Return to image view" (Voltar à imagem) e prima o botão para sair. Isto permite-lhe voltar a ver a imagem no seu tamanho original. (3) Voltar ao modo Browse Image (Procura imagem) Prima o botão para seleccionar a opção "Show or hide image in slideshow" (Mostrar ou ocultar imagem na apresentação de diapositivos) e prima o botão para sair; para activar a apresentação de depois prima o botão imagens sob a forma de diapositivos. 37 Russian Назначение кнопок Вкл. (выкл.) питания Поворот изображе ния Яркость Меню Ввод Слайд-шоу Выбор изображения Увеличение изображения Включение питания Нажмите кнопку для включения питания, отобразится меню «Language» (Язык); нажмите кнопку для выбора языка, затем нажмите кнопку для подтверждения и выхода из меню. В противном случае после выбора языка изображение на экране не будет изменяться в течение 3 секунд во время сохранения, затем начнется автоматическое воспроизведение изображений. После включения питания цифровая фоторамка будет воспроизводить изображения в режиме слайд-шоу; для прерывания слайд-шоу нажмите кнопку . Примечание. Язык необходимо выбирать при каждом включении питания. Описание меню Для перехода к главному меню сначала следует остановить слайд-шоу; для прерывания слайд-шоу нажмите кнопку . один раз для перехода к (1) Нажмите кнопку главному меню. (2) В главном меню отображаются четыре функциональных меню; для перемещения курсора вверх и вниз непрерывно нажимайте кнопку . (3) Переместите курсор на необходимое функциональное меню и нажмите кнопку подтверждения и выхода из меню. для Меню 1. Скрыть изображение Даная функция позволяет скрыть определенное изображение в режиме слайд-шоу, такое изображение воспроизводиться не будет. Нажимайте кнопку для перемещения курсора на пункт «Show or hide image in slideshow» (Показать или скрыть изображение в слайд-шоу), затем нажмите кнопку для подтверждения и выхода из меню. Последующее нажатие указанных ниже кнопок вызовет соответствующую функцию. Ручной выбор изображения Скрыть (показать) изображение Поворот изображения (0, 90, 180, 270 градусов) 39 Настройка яркости изображения Запуск слайд-шоу (3, 6, 15, 60 секунд) Увеличение изображения (макс. 0 – 35%) Меню 2. Копировать изображение Данная функция позволяет скопировать изображение со съемного устройства во встроенную память фоторамки. Нажимайте кнопку для перемещения курсора на пункт «Copy photo from removable device to the digital photo frame» (Копировать фотографию со съемного устройства на цифровую фоторамку), затем нажмите кнопку для подтверждения и выхода из меню. Последующее нажатие указанных ниже кнопок вызовет соответствующую функцию. Ручной выбор изображения Копировать фотографию со съемного устройства на цифровую фоторамку Поворот изображения (0, 90, 180, 270 градусов) Настройка яркости изображения Запуск слайд-шоу (3, 6, 15, 60 секунд) Увеличение изображения (макс. 0 – 35%) Меню 3. Удалить изображение Данная функция позволяет удалить изображение со съемного устройства или из встроенной памяти. Нажимайте кнопку для перемещения курсора на пункт «Delete image from media» (Удалить изображение с носителя), затем нажмите кнопку для подтверждения выбора и выхода из меню. Последующее 40 нажатие указанных ниже кнопок вызовет соответствующую функцию. Ручной выбор изображения Удаление изображения со съемного устройства или встроенной памяти фоторамки. Поворот изображения (0, 90, 180, 270 градусов) Настройка яркости изображения Запуск слайд-шоу (3, 6, 15, 60 секунд) Увеличение изображения (макс. 0 – 35%) Меню 4. Режим увеличения Данная функция позволяет увеличить просматриваемое изображение. Нажимайте кнопку для перемещения курсора на пункт «Enter Zoom Mode» (Перейти в режим увеличения), затем нажмите кнопку для подтверждения и выхода фоторамка из меню; при повторном нажатии кнопки переключится в меню «Zoom pan» (Увеличение с панорамированием). (1) Уменьшение изображения Нажимайте кнопку для перемещения курсора к необходимому коэффициенту увеличения (2x, 3x, 4x), затем нажмите кнопку для подтверждения, нажмите для предварительного просмотра кнопку подлежащего увеличению изображения (в это время нажимайте кнопки для перемещения 41 изображения), нажмите кнопку для подтверждения для и возврата к меню; после этого нажмите кнопку перемещения курсора на пункт «Return to image view» и для выхода из меню. нажмите кнопку Примечание. В режиме предварительного просмотра можно нажать кнопку для отмены настройки и перехода к главному меню. (2) Отмена увеличения изображения Выполните приведенные выше шаги для перехода к меню «Zoom pan» (Увеличение с панорамированием), затем выберите пункт «Reset image display setting to 1x» (Сбросить масштаб изображения на 1х) и нажмите кнопку для подтверждения, затем переместите курсор на пункт «Return to image view» (Вернуться к просмотру для выхода из меню; изображения) и нажмите кнопку это позволит вернуть изображение к исходному размеру. (3) Возвращение к режиму обзора изображений Нажимайте кнопку для выбора пункта «Show or hide image in slideshow» (Показать или скрыть изображение в слайд-шоу) и нажмите кнопку для выхода из меню, затем нажмите кнопку для запуска слайд-шоу. 42 www.x-micro.com-
 1
1
-
 2
2
-
 3
3
-
 4
4
-
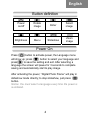 5
5
-
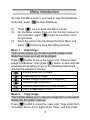 6
6
-
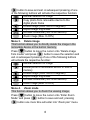 7
7
-
 8
8
-
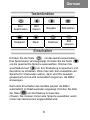 9
9
-
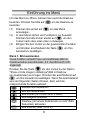 10
10
-
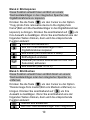 11
11
-
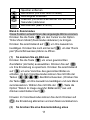 12
12
-
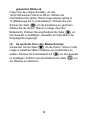 13
13
-
 14
14
-
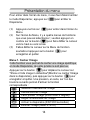 15
15
-
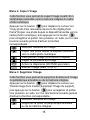 16
16
-
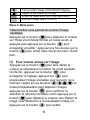 17
17
-
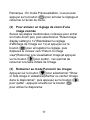 18
18
-
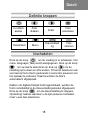 19
19
-
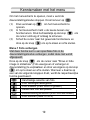 20
20
-
 21
21
-
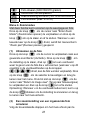 22
22
-
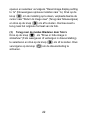 23
23
-
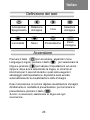 24
24
-
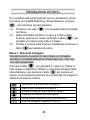 25
25
-
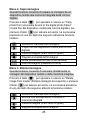 26
26
-
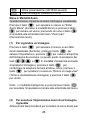 27
27
-
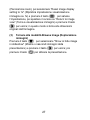 28
28
-
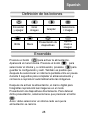 29
29
-
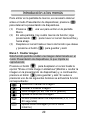 30
30
-
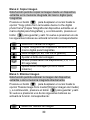 31
31
-
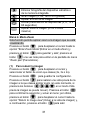 32
32
-
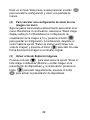 33
33
-
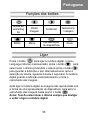 34
34
-
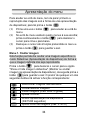 35
35
-
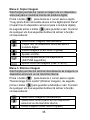 36
36
-
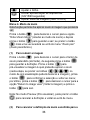 37
37
-
 38
38
-
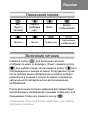 39
39
-
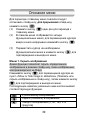 40
40
-
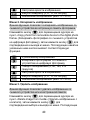 41
41
-
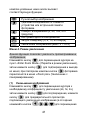 42
42
-
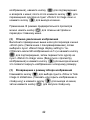 43
43
-
 44
44


X-Micro XPFA-256 Snelstartgids
- Type
- Snelstartgids
in andere talen
- English: X-Micro XPFA-256 Quick start guide
- italiano: X-Micro XPFA-256 Guida Rapida
- русский: X-Micro XPFA-256 Инструкция по началу работы
- français: X-Micro XPFA-256 Guide de démarrage rapide
- español: X-Micro XPFA-256 Guía de inicio rápido
- Deutsch: X-Micro XPFA-256 Schnellstartanleitung
- português: X-Micro XPFA-256 Guia rápido
