
WARMWACHS-SET / HOT WAX KIT
CHAUFFE-CIRE ET ACCESSOIRES SWWS 240 C1
WARMWACHS-SET
Bedienungsanleitung
HOT WAX KIT
Operating instructions
CHAUFFE-CIRE ET ACCESSOIRES
Mode d’emploi
WARME WAX-SET
Gebruiksaanwijzing
IAN 339566_1910
ELEKTRICKÁ DEPILAČNÍ SADA
Návod k obsluze
PRÍSTROJ NA OHRIEVANIE
DEPILAČNÉHO VOSKU
Návod na obsluhu
ZESTAW DO DEPILACJI
CIEPŁYM WOSKIEM
Instrukcja obsługi

DE / AT / CH Bedienungsanleitung Seite 1
GB/IE Operating instructions Page 25
FR / BE Mode d’emploi Page 47
NL / BE Gebruiksaanwijzing Pagina 75
PL Instrukcja obsługi Strona 97
CZ Návod k obsluze Strana 119
SK Návod na obsluhu Strana 141
Klappen Sie vor dem Lesen die Seite mit den Abbildungen aus und machen
Sie sich anschließend mit allen Funktionen des Gerätes vertraut.
Before reading, unfold the page containing the illustrations and familiarise
yourself with all functions of the device.
Avant de lire le mode d‘emploi, ouvrez la page contenant les illustrations et
familiarisez-vous ensuite avec toutes les fonctions de l‘appareil.
Vouw vóór het lezen de pagina met de afbeeldingen open en maak u ver-
trouwd met alle functies van het apparaat.
Przed przeczytaniem proszę rozłożyć stronę z ilustracjami, a następnie
proszę zapoznać się z wszystkimi funkcjami urządzenia.
Před čtením si otevřete stranu s obrázky a potom se seznamte se všemi
funkcemi přístroje.
Pred čítaním si odklopte stranu s obrázkami a potom sa oboznámte so
všetkými funkciami prístroja.

B
A

DE
│
AT
│
CH
│
1 ■
SWWS 240 C1
Inhaltsverzeichnis
Einführung ....................................2
Bestimmungsgemäßer Gebrauch .................2
Lieferumfang ..................................2
Gerätebeschreibung ............................3
Technische Daten ...............................3
Sicherheitshinweise .............................4
Vor dem ersten Gebrauch .......................9
Abschaltautomatik .............................9
Gerät vorbereiten ..............................9
Enthaaren. . . . . . . . . . . . . . . . . . . . . . . . . . . . . . . . . . . . 11
Beine ...............................................12
Achseln ..............................................13
Bikinizone ............................................14
Nach dem Enthaaren ..........................15
Reinigung ....................................15
Aufbewahrung ...............................17
Entsorgung ...................................18
Ersatzteile bestellen ...........................19
Garantie der Kompernaß Handels GmbH .........20
Service ..............................................22
Importeur ............................................23
IB_339566_SWWS240C1_LB8.indb 1 05.02.2020 14:43:01

■ 2
│
DE
│
AT
│
CH
SWWS 240 C1
Einführung
Herzlichen Glückwunsch zum Kauf Ihres neuen Gerätes.
Sie haben sich damit für ein hochwertiges Produkt
entschieden. Die Bedienungsanleitung ist Bestandteil
dieses Produkts. Sie enthält wichtige Hinweise für
Sicherheit, Gebrauch und Entsorgung. Machen Sie sich
vor der Benutzung des Produkts mit allen Bedien- und Sicherheitshin-
weisen vertraut. Benutzen Sie das Produkt nur wie beschrieben und
für die angegebenen Einsatzbereiche. Bewahren Sie die Bedienungs-
anleitung immer als Nachschlagewerk in der Nähe des Produkts auf.
Händigen Sie alle Unterlagen bei Weitergabe des Produkts an Dritte
mit aus.
Bestimmungsgemäßer Gebrauch
Dieses Gerät dient ausschließlich dem Enthaaren von Beinen,
Achseln und der Bikinizone am menschlichen Körper. Dieses Gerät
ist ausschließlich für die Benutzung in privaten Haushalten bestimmt.
Benutzen Sie es nicht gewerblich.
Lieferumfang
Warmwachs-Set
18 Wachsscheiben
Spatel
Bedienungsanleitung
IB_339566_SWWS240C1_LB8.indb 2 05.02.2020 14:43:01

DE
│
AT
│
CH
│
3 ■
SWWS 240 C1
Gerätebeschreibung
1 Innenschale
2 Kontrollleuchte
3 Stecker
4 Buchse
5 Schiene (zur Verriegelung des Deckels)
6 Ablage (für den Spatel)
7 Deckel
8 Spatel
9 Wachsscheiben
Technische Daten
Spannung
220 - 240 V ∼ (Wechselstrom),
50 Hz
Leistungsaufnahme 20 W
Fassungsvermögen ca. 530 ml
Schutzklasse
II /
(Doppelisolierung)
IB_339566_SWWS240C1_LB8.indb 3 05.02.2020 14:43:04

■ 4
│
DE
│
AT
│
CH
SWWS 240 C1
Sicherheitshinweise
WARNUNG!
STROMSCHLAGGEFAHR!
► Wenn die Netzanschlussleitung dieses
Gerätes beschädigt ist, muss sie durch den
Hersteller oder seinen Kundendienst oder
eine ähnlich qualifizierte Person ersetzt
werden, um Gefährdungen zu vermeiden.
► Verwenden Sie das Gerät nur in trockenen
Räumen, nicht im Freien.
► Öffnen Sie nie das Gehäuse des Gerätes.
► Benutzen Sie das Gerät nicht in der Nähe
von Wasser, wie Waschbecken, Duschwan-
nen oder Badewannen.
► Benutzen Sie das Gerät niemals während
Sie baden, duschen oder schlafen.
► Fassen Sie den Netzstecker oder das Netz-
kabel niemals mit nassen Händen an.
► Kontrollieren Sie das Gerät vor der Ver-
wendung auf äußere, sichtbare Schäden.
Nehmen Sie ein beschädigtes oder herunter-
gefallenes Gerät nicht in Betrieb.
IB_339566_SWWS240C1_LB8.indb 4 05.02.2020 14:43:07

DE
│
AT
│
CH
│
5 ■
SWWS 240 C1
WARNUNG!
STROMSCHLAGGEFAHR!
Dieses Gerät nicht in der Nähe von Ba-
dewannen, Duschwannen oder anderen
Gefäßen benutzen, die Wasser enthalten.
► Es darf keine Flüssigkeit auf die Gerätesteck-
verbindung überlaufen.
WARNUNG!
VERLETZUNGSGEFAHR!
► Dieses Gerät kann von Kindern ab 8 Jahren
und darüber sowie von Personen mit ver-
ringerten physischen, sensorischen oder
mentalen Fähigkeiten oder Mangel an
Erfahrung und Wissen benutzt werden,
wenn sie beaufsichtigt oder bezüglich des
sicheren Gebrauchs des Gerätes unterwie-
sen wurden und die daraus resultierenden
Gefahren verstehen.
► Kinder dürfen nicht mit dem Gerät spielen.
IB_339566_SWWS240C1_LB8.indb 5 05.02.2020 14:43:10

■ 6
│
DE
│
AT
│
CH
SWWS 240 C1
WARNUNG!
VERLETZUNGSGEFAHR!
► Reinigung und eine Wartung durch den Be-
nutzer dürfen nicht durch Kinder vorgenom-
men werden, es sei denn, sie sind 8 Jahre
und älter und werden beaufsichtigt.
► Das Gerät und seine Anschlussleitung sind
von Kindern jünger als 8 Jahre fernzuhalten.
► Hitzeunempfindliche Menschen dürfen
dieses Gerät nicht benutzen!
► Wenn Sie, aufgrund von Vorerkrankungen,
sich nicht sicher sind, ob Sie das Gerät ver-
wenden dürfen, konsultieren Sie einen Arzt
vor der Verwendung.
► Nach der Anwendung verfügt die Oberfläche
des Heiz elements noch über Restwärme.
► Bei Missbrauch des Gerätes besteht Ver-
letzungsgefahr. Verwenden Sie das Gerät
immer bestimmungsgemäß!
IB_339566_SWWS240C1_LB8.indb 6 05.02.2020 14:43:10

DE
│
AT
│
CH
│
7 ■
SWWS 240 C1
WARNUNG!
VERLETZUNGSGEFAHR!
► Verwenden Sie das Gerät nicht unter De-
cken oder Handtüchern.
► Stellen Sie das Gerät möglichst in der Nähe
einer Steckdose auf. Sorgen Sie dafür, dass
der Netzstecker bei Gefahr schnell erreichbar
ist und die Netzleitung nicht zur Stolperfalle
werden kann.
► Sorgen Sie für einen sicheren Stand des
Gerätes.
► Tauchen Sie das Gerät niemals in Wasser
oder andere Flüssigkeiten!
► Verwenden Sie das Gerät nicht bei Herz-
erkrankungen, Hautrötungen, Entzündungen,
Schwellungen, empfindlichen Stellen, Dia-
betes, offenen Wunden, Verbrennungen,
Ekzemen oder Schuppenflechte.
IB_339566_SWWS240C1_LB8.indb 7 05.02.2020 14:43:10

■ 8
│
DE
│
AT
│
CH
SWWS 240 C1
ACHTUNG! SACHSCHADEN!
► Betreiben Sie das Gerät niemals im Leerzu-
stand, ohne Wachs.
► Füllen Sie nur Wachs in das Gerät, keine
aggressiven oder lösungsmittelhaltigen
Substanzen!
► Stellen Sie das Gerät ausschließlich auf
hitzeunempfindliche, ebene Oberflächen.
► Erhitzen Sie das Wachs niemals in der
Plastikverpackung.
► Erhitzen Sie das Wachs niemals in der
Mikrowelle, über offenen Flammen oder
einem Herd.
► Benutzen Sie keine externe Zeitschaltuhr
oder ein separates Fernwirksystem, um das
Gerät zu betreiben.
► Benutzen Sie keine spitzen oder scharfen
Gegenstände, um das erkaltete Wachs aus
dem Gerät zu entfernen.
IB_339566_SWWS240C1_LB8.indb 8 05.02.2020 14:43:10

DE
│
AT
│
CH
│
9 ■
SWWS 240 C1
Vor dem ersten Gebrauch
1) Wischen Sie das Gerät mit einem feuchten Tuch von innen und
außen ab, um Transportstaub zu entfernen. Trocknen Sie es gut
ab, so dass sich keine Feuchtigkeit mehr im Gerät befindet.
2) Stellen Sie das Gerät auf einen ebenen und hitzeunempfindlichen
Untergrund. Bedenken Sie auch, dass eventuell Wachsspritzer
auf den Untergrund tropfen können. Dieser sollte daher gut zu
reinigen sein.
Abschaltautomatik
Nach 60 Minuten schaltet sich das Gerät automatisch aus. Nach
55 Minuten beginnt die Kontrollleuchte 2 zu blinken, um an das
automatische Abschalten zu erinnern.
Die automatische Abschaltung ersetzt nicht das Ziehen des Netzste-
ckers nach Beenden der Anwendung. Sie dient nur der Sicherheit!
Ziehen Sie immer den Netzstecker, wenn Sie das Gerät nicht benut-
zen!
Gerät vorbereiten
Wenn das Gerät auf einem geeigneten Untergrund aufgestellt ist:
1) Entnehmen Sie die Wachsscheiben 9 aus der Verpackung.
2) Geben Sie die benötigte Anzahl Wachsscheiben 9 in die Innen-
schale 1. Orientieren Sie sich nach folgenden Richtwerten, die
jedoch etwas variieren können:
IB_339566_SWWS240C1_LB8.indb 9 05.02.2020 14:43:10

■ 10
│
DE
│
AT
│
CH
SWWS 240 C1
Körper-Region
Anzahl der
Wachsscheiben 9
Unterschenkel
ca. 2 Stück je
Unterschenkel
Achseln 1 Stück
Bikinizone 1 Stück
ganzer Körper
(Unterschenkel, Achseln,
Bikinizone)
6 Stück
Dieses Symbol, zusammen mit einer Datumsangabe, auf
der Verpackung der Wachsscheiben 9 gibt an, wie lange
das Produkt haltbar ist.
3) Setzen Sie den Deckel 7 auf das Gerät, indem Sie den kleinen
Plastikvorsprung in die Schiene 5 setzen und dann den Deckel 7
ein wenig im Uhrzeigersinn drehen (siehe Ausklappseite):
4) Stecken Sie den Stecker 3 des Netzkabels in die Buchse 4 am
Gerät.
5) Stecken Sie den Netzstecker in eine Netzsteckdose.
Das Gerät heizt auf, die Kontrolleuchte 2 im Sockel des Gerä-
tes leuchtet.
6) Rühren Sie das Wachs während des Schmelzens gelegentlich um.
Sobald die Wachsscheiben 9 geschmolzen sind (bei 6 Wachsschei-
ben ca. 25 - 30 Minuten), können Sie mit der Enthaarung beginnen.
IB_339566_SWWS240C1_LB8.indb 10 05.02.2020 14:43:10

DE
│
AT
│
CH
│
11 ■
SWWS 240 C1
HINWEIS
► Falls Sie merken, dass Sie mehr Wachs benötigen, als Sie
geschmolzen haben, können Sie jederzeit weitere Wachs-
scheiben 9 in die Innenschale 1 geben. Warten Sie, bis
das Wachs geschmolzen ist, bevor Sie mit dem Enthaaren
fortfahren.
► Schmelzen Sie maximal 6 Wachsscheiben 9 auf einmal.
Enthaaren
Die Hautpartien, auf welchen Sie Haare entfernen wollen, müssen
trocken, sauber und frei von Pflegeprodukten, Ölen oder Fetten sein.
HINWEISE
► Führen Sie vor der ersten Benutzung unbedingt einen Hauttest
durch, um zu kontrollieren, ob Ihre Haut diese Art der Anwen-
dung verträgt. Geben Sie ein wenig geschmolzenen Wachs
auf eine versteckte Hautstelle und kontrollieren Sie nach dem
Abziehen, ob Hautveränderungen innerhalb der nächsten
24 Stunden auftreten. Sollten Hautveränderungen aufteten,
benutzen Sie dieses Gerät nicht weiter. Ziehen Sie ggf. einen
Arzt zu Rate.
► Wenn Sie zu eingewachsenen Haaren neigen, benutzen
Sie regelmäßig Peelings. Diese können das Einwachsen von
Haaren vermeiden.
► Ziehen Sie die Wachsstreifen immer so nah wie möglich an
der Hautoberfläche ab.
► Achten Sie darauf, dass kein Wachs auf Ihre Kleidung
gelangt. Wachsreste können nur schwer entfernt werden und
führen eventuell zu Verfärbungen auf der Kleidung.
IB_339566_SWWS240C1_LB8.indb 11 05.02.2020 14:43:10

■ 12
│
DE
│
AT
│
CH
SWWS 240 C1
Beine
Wenn die Wachsscheiben 9 vollständig geschmolzen sind:
1) Öffnen Sie den Deckel 7, indem Sie diesen ein wenig gegen
den Uhrzeigersinn drehen und nach oben abheben.
2) Nehmen Sie etwas Wachs mit der abgeflachten Seite des
Spatels 8 auf. Überschüssiges Wachs können Sie am Rand des
Gerätes abstreifen.
3) Tragen Sie das Wachs sofort in Haarwuchsrichtug (vom Knie
in Richtung Knöchel) auf die Haut auf. Der Wachsstreifen sollte
die Dicke einer Orangenschale und die Fläche von 2 nebenein-
ander liegenden Spateln 8 haben. Eventuell müssen Sie dabei
mehrmals Wachs aufnehmen. Versuchen Sie, das Ende des
aufgetragenen Wachsstreifens (welches näher am Knöchel liegt)
etwas dicker aufzutragen, da Sie dieses Ende zum Abziehen
greifen müssen.
4) Nach dem Auftragen können Sie den Spatel 8 in die Ablage
6 am Rand des Gerätes legen, so dass der Spatel 8 über der
Innenschale 1 liegt.
5) Warten Sie 30 - 60 Sekunden, bis das Wachs trocken ist.
6) Straffen Sie mit einer Hand die Haut, greifen Sie den Wachsstrei-
fen am dicken Ende und ziehen Sie diesen mit einer schnellen
Bewegung gegen die Haarwuchsrichtung (vom Knöchel in
Richtung Knie) ab.
Gehen Sie bei weiteren Hautpartien genauso vor.
7) Wenn Sie mit der Anwendung fertig sind, ziehen Sie den Netz-
stecker aus der Netzsteckdose, um das Gerät auszuschalten. Die
Kontrollleuchte 2 erlischt.
IB_339566_SWWS240C1_LB8.indb 12 05.02.2020 14:43:10

DE
│
AT
│
CH
│
13 ■
SWWS 240 C1
Achseln
Wenn die Wachsscheibe 9 vollständig geschmolzen ist:
1) Öffnen Sie den Deckel 7, indem Sie diesen ein wenig gegen
den Uhrzeigersinn drehen und nach oben abheben.
HINWEIS
►
Da Achselhaare dazu neigen, in verschiedene Richtungen
zu wachsen, müssen diese in mindestens 2 Schritten entfernt
werden.
2) Halten Sie den Ellenbogen nach oben und hinten. So wird die
Haut in der Achselhöhle gestrafft.
3) Nehmen Sie etwas Wachs mit der abgeflachten Seite des
Spatels 8 auf. Überschüssiges Wachs können Sie am Rand des
Gerätes abstreifen.
4) Tragen Sie diesen sofort von der Mitte der Achselhöhle nach
oben Richtung Ellenbogen auf. Der Wachsstreifen sollte etwa so
dick sein wie eine Orangenschale. Versuchen Sie das Ende des
aufgetragenen Wachsstreifens (welches näher am Ellenbogen
liegt) etwas dicker aufzutragen, da Sie dieses Ende zum Abzie-
hen greifen müssen.
5) Nach dem Auftragen können Sie den Spatel 8 in die Ablage
6 am Rand des Gerätes legen, so dass der Spatel 8 über der
Innenschale 1 liegt.
6) Warten Sie 30 - 60 Sekunden, bis das Wachs trocken ist.
7) Greifen Sie den Wachsstreifen am oberen Ende (welches näher
am Ellenbogen liegt) und ziehen Sie diesen mit einer schnellen
Bewegung gegen die Haarwuchsrichtung nach unten hin ab.
8) Um den unteren Teil der Achselhöhle zu enthaaren, tragen Sie
das Wachs von der Mitte der Achselhöhle nach unten hin auf.
9) Warten Sie 30 - 60 Sekunden, bis das Wachs trocken ist.
IB_339566_SWWS240C1_LB8.indb 13 05.02.2020 14:43:10

■ 14
│
DE
│
AT
│
CH
SWWS 240 C1
10) Greifen Sie den Wachsstreifen am unteren Ende und ziehen Sie
diesen mit einer schnellen Bewegung gegen die Haarwuchsrich-
tung nach oben hin ab.
11) Wenn Sie mit der Anwendung fertig sind, ziehen Sie den Netz-
stecker aus der Netzsteckdose, um das Gerät auszuschalten. Die
Kontrollleuchte 2 erlischt.
Bikinizone
Wenn die Wachsscheibe 9 vollständig geschmolzen ist:
1) Öffnen Sie den Deckel 7, indem Sie diesen ein wenig gegen
den Uhrzeigersinn drehen und nach oben abheben.
2) Nehmen Sie etwas Wachs mit der abgeflachten Seite des
Spatels 8 auf. Überschüssiges Wachs können Sie am Rand des
Gerätes abstreifen.
3) Nach dem Auftragen können Sie den Spatel 8 in die Ablage
6 am Rand des Gerätes legen, so dass der Spatel 8 über der
Innenschale 1 liegt.
HINWEIS
► Enthaaren Sie in der Bikinizone immer nur kleine Bereiche auf
einmal. Die Haut ist sehr empfindlich.
4) Straffen Sie die Haut mit einer Hand und tragen Sie das Wachs
in Haarwuchsrichtung (Richtung innerer Oberschenkel) auf.
5) Warten Sie 30 - 60 Sekunden, bis das Wachs trocken ist.
6) Greifen Sie den Wachsstreifen am Ende (welches näher am
inneren Oberschenkel liegt) und ziehen Sie diesen mit einer
schnellen Bewegung gegen die Haarwuchsrichtung ab.
Gehen Sie bei weiteren Hautpartien genauso vor.
7) Wenn Sie mit der Anwendung fertig sind, ziehen Sie den Netz-
stecker aus der Netzsteckdose, um das Gerät auszuschalten. Die
Kontrollleuchte 2 erlischt.
IB_339566_SWWS240C1_LB8.indb 14 05.02.2020 14:43:10

DE
│
AT
│
CH
│
15 ■
SWWS 240 C1
Nach dem Enthaaren
■ Reinigen Sie den Spatel 8 (siehe Kapitel „Reinigung“).
■ Kleine Wachsreste auf der Haut können Sie mit etwas Babyöl
entfernen. Sollten Sie kein Babyöl zur Hand haben, können Sie
auch Ölivenöl oder anderes Speiseöl benutzen.
■ Nach dem Enthaaren kann Ihre Haut leicht gerötet sein. Dies
ist normal. Lassen Sie etwas kaltes Wasser über die betroffenen
Stellen fließen. Das beruhigt die Haut.
Sollte sich die Haut nicht beruhigen und stark brennen, suchen
Sie einen Arzt auf.
Reinigung
WARNUNG! STROMSCHLAGGEFAHR!
► Ziehen Sie vor jeder Reinigung den Netzstecker aus der
Netzsteckdose!
► Tauchen Sie das Gerät niemals in Wasser oder andere
Flüssigkeiten!
WARNUNG! VERLETZUNGSGEFAHR!
► Lassen Sie das Gerät etwas abkühlen, bevor Sie es reinigen.
ACHTUNG! SACHSCHADEN!
► Benutzen Sie keine spitzen und scharfen Gegenstände, um
erkaltetes Wachs aus dem Gerät zu entfernen!
► Benutzen Sie keine chemischen, scheuernden oder aggressiven
Reinigungsmittel, um das Gerät zu reinigen!
IB_339566_SWWS240C1_LB8.indb 15 05.02.2020 14:43:10

■ 16
│
DE
│
AT
│
CH
SWWS 240 C1
HINWEIS
► Sie müssen die Innenschale 1 nicht nach jeder Benutzung
reinigen und alle Wachsreste entfernen. Das im Gerät ver-
bliebene Wachs kann bei der nächsten Anwendung wieder
geschmolzen und erneut verwendet werden!
► Um Wachsscheiben 9 nachzubestellen, wenden Sie sich an
unseren Kundenservice (siehe Kapitel „Ersatzteile bestellen“).
■ Streichen Sie überflüssiges Wachs vom Spatel 8 direkt nach
dem Gebrauch am Rand des Gerätes ab.
■ Wischen Sie den Spatel 8 sowie den Rand des Gerätes direkt
nach dem Gebrauch mit einem mit Babyöl befeuchteten Tuch ab.
So lassen sich noch weiche Wachsreste entfernen. Benutzen Sie
am besten ein altes Stofftuch, da sich Wachsreste nur schwer aus
Textilien entfernen lassen.
Sollten Sie kein Babyöl im Haus haben, können Sie auch Olivenöl
oder anderes Speiseöl für die Reinigung benutzen.
Achten Sie besonders darauf, dass sich keine Wachsreste in
den Schienen 5 für die Verriegelung des Deckels 7 befinden!
Wischen Sie danach den Spatel 8 und den Rand mit einem
trockenen Papiertuch nach, um Öl-Reste zu entfernen.
■ Wenn an der Außenseite des Gehäuses Wachs haftet, entfernen
Sie dieses folgendermaßen:
– Stellen Sie sicher, dass das Gerät zwar vom Stromnetz getrennt
ist, jedoch noch warm ist.
– Wischen Sie die Außenseiten mit einem mit Öl befeuchteten
Tuch ab.
– Achten Sie besonders darauf, dass sich keine Wachsreste in
den Schienen 5 für die Verriegelung des Deckels 7 befinden!
– Entfernen Sie Ölreste mit einem sauberen, trockenen Papiertuch.
IB_339566_SWWS240C1_LB8.indb 16 05.02.2020 14:43:10

DE
│
AT
│
CH
│
17 ■
SWWS 240 C1
Aufbewahrung
HINWEIS
► Sie müssen die Innenschale 1 nicht nach jeder Benutzung
reinigen und alle Wachsreste entfernen. Das im Gerät ver-
bliebene Wachs kann bei der nächsten Anwendung wieder
geschmolzen und erneut verwendet werden!
■ Wenn Gerät und Spatel 8 wie im Kapitel „Reinigung“ gesäubert
sind:
– Legen Sie den Spatel 8 in die Ablage 6 am Rand des
Gerätes, so dass der Spatel 8 über der Innenschale 1 liegt.
– Setzen Sie den Deckel 7 auf.
– Bewahren Sie das abgekühlte Gerät an einem sauberen und
trockenen Ort auf.
HINWEIS
► Sollten Sie nach dem Aufbewahren den Deckel 7 nicht mehr
öffnen/drehen können, befinden sich wahrscheinlich erkaltete
Wachsreste zwischen Deckel 7 und Gerät.
Lassen Sie in diesem Fall das Gerät mit geschlossenem Deckel 7
ca. 10 Minuten (je nach Wachsmenge) aufheizen. Das Wachs
wird weich und der Deckel 7 lässt sich öffnen.
IB_339566_SWWS240C1_LB8.indb 17 05.02.2020 14:43:10

■ 18
│
DE
│
AT
│
CH
SWWS 240 C1
Entsorgung
Sie können das benutzte Wachs im normalen Restmüll entsorgen.
Werfen Sie das Gerät keinesfalls in den nor-
malen Hausmüll. Dieses Produkt unterliegt
der europäischen Richtlinie 2012/19/EU.
Entsorgen Sie das Gerät über einen zugelassenen Entsorgungsbe-
trieb oder über Ihre kommunale Entsorgungseinrichtung. Beachten
Sie die aktuell geltenden Vorschriften. Setzen Sie sich im Zweifelsfall
mit Ihrer Entsorgungseinrichtung in Verbindung.
Das Produkt ist recycelbar, unterliegt einer erweiterten
Herstellerverantwortung und wird getrennt gesammelt.
Die Verpackung besteht aus umweltfreundlichen Materia-
lien, die Sie über die örtlichen Recyclingstellen entsorgen
können.
Entsorgen Sie die Verpackung umweltgerecht. Beachten
Sie die Kennzeichnung auf den verschiedenen Verpack-
ungsmaterialien und trennen Sie diese gegebenenfalls
gesondert. Die Verpackungsmaterialien sind gekenn-
zeichnet mit Abkürzungen (a) und Ziffern (b) mit
folgender Bedeutung: 1–7: Kunststoffe, 20–22: Papier
und Pappe, 80–98: Verbundstoffe
Möglichkeiten zur Entsorgung des ausgedienten
Produkts erfahren Sie bei Ihrer Gemeinde- oder
Stadtverwaltung
IB_339566_SWWS240C1_LB8.indb 18 05.02.2020 14:43:16

DE
│
AT
│
CH
│
19 ■
SWWS 240 C1
Ersatzteile bestellen
Folgende Ersatzteile können Sie zum Produkt SWWS 240 C1 bestellen:
► Wachsscheiben (18 Stück)
Bestellen Sie die Ersatzteile über unsere Service-Hotline (siehe
Kapitel „Service″) oder bequem auf unserer Webseite unter
www.kompernass.com.
Mit diesem QR-Code gelangen Sie direkt auf unsere Website und
können die verfügbaren Ersatzteile bestellen:
HINWEIS
► Halten Sie die IAN-Nummer, die Sie auf dem Umschlag
dieser Bedienungsanleitung fi nden, für Ihre Bestellung bereit.
IB_339566_SWWS240C1_LB8.indb 19 05.02.2020 14:43:17

■ 20
│
DE
│
AT
│
CH
SWWS 240 C1
Garantie der Kompernaß Handels GmbH
Sehr geehrte Kundin, sehr geehrter Kunde,
Sie erhalten auf dieses Gerät 3 Jahre Garantie ab Kaufdatum. Im
Falle von Mängeln dieses Produkts stehen Ihnen gegen den Verkäu-
fer des Produkts gesetzliche Rechte zu. Diese gesetzlichen Rechte
werden durch unsere im Folgenden dargestellte Garantie nicht einge-
schränkt.
Garantiebedingungen
Die Garantiefrist beginnt mit dem Kaufdatum. Bitte bewahren Sie den
Kassenbon gut auf. Dieser wird als Nachweis für den Kauf benötigt.
Tritt innerhalb von drei Jahren ab dem Kaufdatum dieses Produkts
ein Material- oder Fabrikationsfehler auf, wird das Produkt von
uns – nach unserer Wahl – für Sie kostenlos repariert, ersetzt oder
der Kaufpreis erstattet. Diese Garantieleistung setzt voraus, dass
innerhalb der Dreijahresfrist das defekte Gerät und der Kaufbeleg
(Kassenbon) vorgelegt und schriftlich kurz beschrieben wird, worin
der Mangel besteht und wann er aufgetreten ist.
Wenn der Defekt von unserer Garantie gedeckt ist, erhalten Sie
das reparierte oder ein neues Produkt zurück. Mit Reparatur oder
Austausch des Produkts beginnt kein neuer Garantiezeitraum.
Garantiezeit und gesetzliche Mängelansprüche
Die Garantiezeit wird durch die Gewährleistung nicht verlängert.
Dies gilt auch für ersetzte und reparierte Teile. Eventuell schon beim
Kauf vorhandene Schäden und Mängel müssen sofort nach dem Aus-
packen gemeldet werden. Nach Ablauf der Garantiezeit anfallende
Reparaturen sind kostenpflichtig.
IB_339566_SWWS240C1_LB8.indb 20 05.02.2020 14:43:17

DE
│
AT
│
CH
│
21 ■
SWWS 240 C1
Garantieumfang
Das Gerät wurde nach strengen Qualitätsrichtlinien sorgfältig produ-
ziert und vor Auslieferung gewissenhaft geprüft.
Die Garantieleistung gilt für Material- oder Fabrikationsfehler. Diese
Garantie erstreckt sich nicht auf Produktteile, die normaler Abnutzung
ausgesetzt sind und daher als Verschleißteile angesehen werden kön-
nen oder für Beschädigungen an zerbrechlichen Teilen, z. B. Schalter,
Akkus oder Teile, die aus Glas gefertigt sind.
Diese Garantie verfällt, wenn das Produkt beschädigt, nicht sachge-
mäß benutzt oder gewartet wurde. Für eine sachgemäße Benutzung
des Produkts sind alle in der Bedienungsanleitung aufgeführten
Anweisungen genau einzuhalten. Verwendungszwecke und Hand-
lungen, von denen in der Bedienungsanleitung abgeraten oder vor
denen gewarnt wird, sind unbedingt zu vermeiden.
Das Produkt ist nur für den privaten und nicht für den gewerblichen
Gebrauch bestimmt. Bei missbräuchlicher und unsachgemäßer
Behandlung, Gewaltanwendung und bei Eingriffen, die nicht von
unserer autorisierten Serviceniederlassung vorgenommen wurden,
erlischt die Garantie.
Abwicklung im Garantiefall
Um eine schnelle Bearbeitung Ihres Anliegens zu gewährleisten,
folgen Sie bitte den folgenden Hinweisen:
■ Bitte halten Sie für alle Anfragen den Kassenbon und die Artikel-
nummer (z.B.IAN123456) als Nachweis für den Kauf bereit.
■ Die Artikelnummer entnehmen Sie bitte dem Typenschild am
Produkt, einer Gravur am Produkt, dem Titelblatt der Bedienungs-
anleitung (unten links) oder dem Aufkleber auf der Rück- oder
Unterseite des Produktes.
IB_339566_SWWS240C1_LB8.indb 21 05.02.2020 14:43:17

■ 22
│
DE
│
AT
│
CH
SWWS 240 C1
■ Sollten Funktionsfehler oder sonstige Mängel auftreten, kontak-
tieren Sie zunächst die nachfolgend benannte Serviceabteilung
telefonisch oder per E-Mail.
■ Ein als defekt erfasstes Produkt können Sie dann unter Beifügung
des Kaufbelegs (Kassenbon) und der Angabe, worin der Mangel
besteht und wann er aufgetreten ist, für Sie portofrei an die Ihnen
mitgeteilte Serviceanschrift übersenden.
Auf www.lidl-service.com können Sie diese und
viele weitere Handbücher, Produktvideos und
Installationssoftware herunterladen.
Mit diesem QR-Code gelangen Sie direkt auf die
Lidl-Service-Seite (www.lidl-service.com) und kön-
nen mittels der Eingabe der Artikelnummer (IAN)
123456 Ihre Bedienungsanleitung öffnen.
Service
Service Deutschland
Tel.: 0800 5435 111
(kostenfrei aus dem dt. Festnetz/Mobilfunknetz)
E-Mail: [email protected]
Service Österreich
Tel.: 0820 201 222 (0,15 EUR/Min.)
E-Mail: [email protected]
Service Schweiz
Tel.: 0842 665566 (0,08 CHF/Min.,
Mobilfunk max. 0,40 CHF/Min.)
E-Mail: [email protected]
IAN 339566_1910
IB_339566_SWWS240C1_LB8.indb 22 05.02.2020 14:43:17

DE
│
AT
│
CH
│
23 ■
SWWS 240 C1
Importeur
Bitte beachten Sie, dass die folgende Anschrift keine Serviceanschrift
ist. Kontaktieren Sie zunächst die benannte Servicestelle.
KOMPERNASS HANDELS GMBH
BURGSTRASSE 21
44867 BOCHUM
DEUTSCHLAND
www.kompernass.com
IB_339566_SWWS240C1_LB8.indb 23 05.02.2020 14:43:17

■ 24
│
DE
│
AT
│
CH
SWWS 240 C1
IB_339566_SWWS240C1_LB8.indb 24 05.02.2020 14:43:18

GB
│
IE
│
25 ■
SWWS 240 C1
Contents
Introduction ..................................26
Intended use .................................26
Package contents .............................26
Appliance description ..........................27
Technical details ..............................27
Safety information ............................28
Before first use ...............................33
Automatic switch-off ...........................33
Preparing the appliance ........................33
Epilation .....................................35
Legs ................................................36
Armpits ..............................................37
Bikini zone ...........................................38
After epilation ................................39
Cleaning .....................................39
Storage .....................................41
Disposal .....................................42
Ordering spare parts ..........................43
Kompernass Handels GmbH warranty ............44
Service ..............................................46
Importer .............................................46
IB_339566_SWWS240C1_LB8.indb 25 05.02.2020 14:43:18

■ 26
│
GB
│
IE
SWWS 240 C1
Introduction
Congratulations on the purchase of your new appliance.
You have selected a high-quality product. The operating
instructions are part of this product. They contain
important information about safety, usage and
disposal. Before using the product, please familiarise
yourself with all operating and safety instructions. Use the product
only as described and for the range of applications specified. Keep
these operating instructions as a reference and store them near the
product. Please also pass these operating instructions on to any
future owner.
Intended use
This appliance has been designed exclusively for the epilation of
legs, armpits and the bikini zone on the human body. This appliance
is intended solely for use in private households. Do not use it for
commercial purposes.
Package contents
Hot Wax Kit
18 wax discs
Spatula
Operating instructions
IB_339566_SWWS240C1_LB8.indb 26 05.02.2020 14:43:18

GB
│
IE
│
27 ■
SWWS 240 C1
Appliance description
1 Inner bowl
2 Control lamp
3 Power plug
4 Socket
5 Groove (for locking the lid)
6 Tray (for the spatula)
7 Lid
8 Spatula
9 Wax disc
Technical details
Voltage
220 - 240 V
~
(AC),
50 Hz
Power consumption 20 W
Capacity approx. 530 ml
Protection class
II /
(Double insulation)
IB_339566_SWWS240C1_LB8.indb 27 05.02.2020 14:43:21

■ 28
│
GB
│
IE
SWWS 240 C1
Safety information
WARNING!
RISK OF ELECTRIC SHOCK!
► To avoid potential risks, damaged mains
cables should be replaced by the manufac-
turer or the manufacturer’s customer service
department or a similarly qualified person.
► Use the appliance only in dry indoor areas,
not outdoors.
► NEVER open the housing of the appliance.
► Do not use the appliance in the vicinity of
water, such as wash basins, showers or bath
tubs.
► Do not use the appliance while bathing,
showering or sleeping.
► Never touch the mains plug or the mains
cable with wet hands.
► Check the appliance for visible external
damage before use. Do not operate a appli-
ance that has been damaged or dropped!
IB_339566_SWWS240C1_LB8.indb 28 05.02.2020 14:43:23

GB
│
IE
│
29 ■
SWWS 240 C1
WARNING!
RISK OF ELECTRIC SHOCK!
Do not use this appliance near a bath
tub, shower or any other container
filled with water.
► Do not allow any liquid to run over the ap-
pliance’s plug connections.
WARNING! RISK OF INJURY!
► This appliance may be used by children
aged 8 years and above and by persons
with limited physical, sensory or mental capa-
bilities or lack of experience and knowledge,
provided that they are under supervision or
have been told how to use the appliance
safely and are aware of the potential risks.
► Do not allow children to play with the
appliance.
IB_339566_SWWS240C1_LB8.indb 29 05.02.2020 14:43:26

■ 30
│
GB
│
IE
SWWS 240 C1
WARNING! RISK OF INJURY!
► Cleaning and user maintenance tasks may
not be carried out by children unless they
are aged 8 or older and are supervised.
► The appliance and its connecting cable
must be kept away from children younger
than 8 years old.
► People who are insensitive to heat may not
use this appliance.
► If you are unsure whether you can safely use
the appliance due to pre-existing conditions,
consult a doctor before use.
► After use, the surfaces of the heating ele-
ments will still have some residual heat.
► There is a risk of injury if the appliance is
misused. Use the appliance only as de-
scribed in the instructions!
IB_339566_SWWS240C1_LB8.indb 30 05.02.2020 14:43:26

GB
│
IE
│
31 ■
SWWS 240 C1
WARNING! RISK OF INJURY!
► Do not use the appliance beneath blankets
or towels.
► If possible, set up the appliance close to a
power socket. Ensure that the power plug
is quickly reachable in case of danger, and
that the cable poses no risk of tripping.
► Provide a stable location for the appliance.
► Never immerse the appliance in water or
other liquids!
► Do not use the appliance if you have heart
disease, skin redness, inflammation, swelling,
sensitive areas, diabetes, open wounds,
burns, eczema or psoriasis.
IB_339566_SWWS240C1_LB8.indb 31 05.02.2020 14:43:26

■ 32
│
GB
│
IE
SWWS 240 C1
ATTENTION! PROPERTY DAMAGE!
► Never operate this appliance when it is
empty (without wax).
► Fill the appliance with wax only. Do not
add any aggressive substances or substances
containing solvents!
► Always place the appliance on a heat-
resistant, level surface.
► Never heat the wax in the plastic packaging.
► Never heat the wax in a microwave oven,
over an open flame or on a stove.
► Do not use an external timer switch or a
separate remote control system to operate
the appliance.
► Never use pointed or sharp objects to re-
move solidified wax from the appliance.
IB_339566_SWWS240C1_LB8.indb 32 05.02.2020 14:43:26

GB
│
IE
│
33 ■
SWWS 240 C1
Before first use
1) Wipe the appliance with a damp cloth both inside and outside
to remove any residual dust left over from transport. Dry it well
so that there is no moisture left in the appliance.
2) Place the appliance on a level and heat-resistant surface. Also
keep in mind that wax splashes may drip onto the surface. The
surface should therefore be easy to clean.
Automatic switch-off
After 60 minutes, the appliance will switch off automatically. After
55 minutes, the control lamp 2 will start flashing to notify you that
the appliance is about to switch off automatically.
The automatic switch-off is not intended as a substitute for removing
the plug from the mains power after use! It is merely a safety feature!
Always remove the plug from the mains power socket when the ap-
pliance is not in use!
Preparing the appliance
Once the appliance is set up on a suitable surface:
1) Remove the wax discs 9 from its packaging.
2) Add the required number of wax discs 9 to the inner bowl 1.
Use the following standard values as an orientation aid. The values
may vary.
IB_339566_SWWS240C1_LB8.indb 33 05.02.2020 14:43:26

■ 34
│
GB
│
IE
SWWS 240 C1
Body region
Number of
wax discs 9
Lower leg approx. 2 pcs. lower leg
Armpits 1 pc.
Bikini zone 1 pc.
Entire body
(lower leg, armpits,
bikini zone)
6 pcs.
This symbol, together with a date, on the packaging of the
wax discs 9 indicates how long the product will last.
3) Put the lid 7 on the appliance by placing the plastic tab in the
groove 5 and then turning the lid 7 clockwise slightly (see
fold-out page):
4) Insert the plug 3 of the power cable into the socket 4 on the
appliance.
5) Insert the plug into a mains power socket. The control lamp 2 in
the base of the appliance comes on and the appliance heats up.
6) Stir the wax occasionally while it is melting.
As soon as the wax discs 9 have melted (this takes about
25–30 minutes for 6 discs), you can start epilating.
IB_339566_SWWS240C1_LB8.indb 34 05.02.2020 14:43:27

GB
│
IE
│
35 ■
SWWS 240 C1
NOTE
► If you realise that you need more wax than you have melted,
you can add additional wax discs 9 to the inner bowl 1.
Wait until the wax has melted before you start epilating.
► Melt a maximum of 6 wax discs 9
at once.
Epilation
The skin regions that you want to epilate should be dry, clean and
free of care products, oils or fats.
NOTES
► Before first use, carry out a skin test to find out whether your
skin reacts to the treatment. Apply a small amount of melted
wax to an inconspicuous area of skin. After removing the
wax, check to see whether the skin reacts in any way over
the course of the next 24 hours. If you notice any skin reac-
tions, stop using this appliance. If in any doubt, seek medical
advice.
► If you have a tendency towards ingrowing hairs, carry out
regular peelings. These can prevent the hairs from growing
inwards.
► Always pull off the wax strips as close as possible to the skin
surface.
► Make sure that you don’t get any wax on your clothes. Wax
residue can be very difficult to remove and may discolour
clothing.
IB_339566_SWWS240C1_LB8.indb 35 05.02.2020 14:43:27

■ 36
│
GB
│
IE
SWWS 240 C1
Legs
Once the wax discs 9 are completely melted:
1) Open the lid 7 by turning it anticlockwise slightly and lifting it
upwards.
2) Pick up a little wax using the flattened edge of the spatula 8.
You can wipe off excess wax on the rim of the appliance.
3) Apply the wax to the skin in the direction of hair growth (from the
knee towards the heel). The wax strips should have the approxi-
mate thickness of an orange peel and the area of two spatulas 8
laid side by side. You may have to add wax. Try to make sure that
one end of the applied wax strip (the end nearer to your heel) is a
little thicker as you will need to be able to grip this end for removal.
4) After application, you can place the spatula 8 into the tray 6
on the edge of the appliance so that the spatula 8 projects over
the inner bowl 1.
5) Wait about 30 - 60 seconds until the wax is dry.
6) Pull the skin taut with one hand. Grip the wax strip by the thicker
end and pull it off with a rapid movement against the direction of
hair growth (from your ankle towards your knee).
Repeat the process for the remaining areas of skin.
7) When you are finished with the treatment, pull the plug from
the mains power socket to turn off the appliance. The control
lamp 2 goes out.
IB_339566_SWWS240C1_LB8.indb 36 05.02.2020 14:43:27

GB
│
IE
│
37 ■
SWWS 240 C1
Armpits
Once the wax disc 9 is completely melted:
1) Open the lid 7 by turning it anticlockwise slightly and lifting it
upwards.
NOTE
►
As armpit hairs tend to grow in different directions, they need
to be removed in at least two steps.
2) Raise your elbow upwards and hold it out behind you.
This tightens the skin in the armpit.
3) Pick up a little wax using the flattened edge of the spatula 8.
You can wipe off excess wax on the rim of the appliance.
4) Apply this immediately from the middle of the armpit upwards in
the direction of the elbow. The wax strips should be roughly the
thickness of orange peel. Try to make sure that one end of the
applied wax strip (the end nearer to your elbow) is a little thicker
as you will need to be able to grip this end for removal.
5) After application, you can place the spatula 8 into the tray 6
on the edge of the appliance so that the spatula 8 projects over
the inner bowl 1.
6) Wait about 30–60 seconds until the wax is dry.
7) Grip the wax strip by the thicker end (the end nearer to your
elbow) and pull it off downwards with a rapid movement against
the direction of hair growth.
8) To depilate the lower part of the armpit, apply the wax from the
middle of the armpit towards the bottom.
9) Wait about 30–60 seconds until the wax is dry.
IB_339566_SWWS240C1_LB8.indb 37 05.02.2020 14:43:27

■ 38
│
GB
│
IE
SWWS 240 C1
10) Grip the wax strip at the lower end and pull it off upwards with
a rapid movement against the direction of hair growth.
11) When you are finished with the treatment, pull the plug from
the mains power socket to turn off the appliance. The control
lamp 2 goes out.
Bikini zone
Once the wax disc 9 is completely melted:
1) Open the lid 7 by turning it anticlockwise slightly and lifting it
upwards.
2) Pick up a little wax using the flattened edge of the spatula 8.
You can wipe off excess wax on the rim of the appliance.
3) After application, you can place the spatula 8 into the tray 6
on the edge of the appliance so that the spatula 8 projects over
the inner bowl 1.
NOTE
► When epilating the bikini zone, treat only small areas at
once. The skin is very sensitive.
4) Tighten the skin with one hand and apply the wax in the direc-
tion of hair growth (towards your inner thigh).
5) Wait about 30 - 60 seconds until the wax is dry.
6) Grip the wax strip by the thicker end (the end nearer to your
inner thigh) and pull it off downwards with a rapid movement
against the direction of hair growth.
Repeat the process for the remaining areas of skin.
7) When you are finished with the treatment, pull the plug from
the mains power socket to turn off the appliance. The control
lamp 2 goes out.
IB_339566_SWWS240C1_LB8.indb 38 05.02.2020 14:43:27

GB
│
IE
│
39 ■
SWWS 240 C1
After epilation
■ Clean the spatula 8 (see section “Cleaning”).
■ You can remove small quantities of residual wax from your skin
using baby oil. If you do not have any baby oil, you can also use
olive oil or some other edible oil.
■ You skin may be slightly reddened after epilation. This is normal.
Run cold water over affected areas. This soothes the skin. If your
skin does not recover and/or you experience a burning sensation,
contact a doctor.
Cleaning
WARNING! RISK OF ELECTRIC SHOCK!
► Before cleaning the appliance, disconnect the power plug from
the mains power socket!
► NEVER immerse the appliance in water or other liquids!
WARNING! RISK OF INJURY!
► Allow the appliance to cool down before cleaning it.
ATTENTION! PROPERTY DAMAGE!
► Never use pointed or sharp objects to remove solidified wax
from the appliance!
► Do not use any chemical, abrasive or aggressive cleaning
agents to clean the appliance!
IB_339566_SWWS240C1_LB8.indb 39 05.02.2020 14:43:27

■ 40
│
GB
│
IE
SWWS 240 C1
NOTE
► You do not need to clean the inner bowl 1 and remove the
wax residues after every use. The wax remaining in the appli-
ance can be melted and reused for the next application!
► To reorder wax discs 9, contact our Customer Service (see
section “Ordering spare parts”).
■ Scrape the surplus wax off the spatula 8 on the inside of the rim
of the appliance immediately after use.
■ Wipe the spatula 8 as well as the rim of the appliance immedi-
ately after use with a cloth moistened with a little baby oil. This
will allow you to remove any still-soft wax residue. Preferably use
an old cloth as wax residue is extremely difficult to remove from
textiles. If you do not have any baby oil in the house, you can also
use olive oil or some other edible oil for cleaning. Make sure that
no wax residue remains in the grooves 5 for locking the lid 7!
Wipe the spatula 8 and the rim afterwards with a paper cloth to
remove any remaining oil.
■ If there is any wax left on the outside of the appliance, proceed
as follows:
– Ensure that the appliance is unplugged but still warm.
– Wipe the surface with a cloth moistened with a little oil.
– Make sure that no wax residue remains in the grooves 5 for
locking the lid 7!
– Remove any oil residue with a clean paper towel.
IB_339566_SWWS240C1_LB8.indb 40 05.02.2020 14:43:27

GB
│
IE
│
41 ■
SWWS 240 C1
Storage
NOTE
► You do not need to clean the inner bowl 1 and remove the
wax residues after every use. The wax remaining in the appli-
ance can be melted and reused for the next application!
■ Once the appliance and the spatula 8 have been cleaned as
described in the “Cleaning” section:
– Lay the spatula 8 in the tray 6 on the edge of the appliance
so that the spatula 8 protrudes over the inner bowl 1.
– Put the lid 7 on.
– Store the cooled-down appliance in a clean, dry location.
NOTE
► If you are unable to remove/turn the lid 7 when you remove it
from storage, there is probably solidified wax between the lid 7
and the appliance. In this case, heat up the appliance for about
10 minutes (depending on the amount of wax) with the lid 7
closed. The wax will soften and the lid 7 can now be removed.
IB_339566_SWWS240C1_LB8.indb 41 05.02.2020 14:43:27

■ 42
│
GB
│
IE
SWWS 240 C1
Disposal
You can dispose of used wax in the normal waste.
Never dispose of the appliance in your
normal domestic waste. This product is
subject to the provisions of European
Directive 2012/19/EU.
Dispose of the appliance through an approved disposal centre or at
your community waste facility. Please comply with all applicable regula-
tions. Please contact your waste disposal centre if you are in any doubt.
The product is recyclable, subject to extended producer
responsibility and is collected separately.
The packaging is made from environmentally friendly material
and can be disposed of at your local recycling plant.
Dispose of the packaging in an environmentally-friendly
manner. Note the labelling on the packaging and
separate the packaging material components for
disposal if necessary. The packaging material is labelled
with abbreviations (a) and numbers (b) with the
following meanings: 1–7: Plastics, 20–22: Paper and
cardboard, 80–98: Composites
Your local community or municipal authorities can provide
information on how to dispose of the worn-out product.
IB_339566_SWWS240C1_LB8.indb 42 05.02.2020 14:43:33

GB
│
IE
│
43 ■
SWWS 240 C1
Ordering spare parts
You can order the following spare parts for the product SWWS 240 C1:
► Wax discs (18 pc.)
Order the spare parts via the Service Hotline (see section „Service“)
or simply visit our website at www.kompernass.com.
With this QR code you can go directly to our website and order the
available spare parts:
HINWEIS
► Have the IAN number of the appliance ready (can be found
on the cover of these operating instructions) when you place
your order.
IB_339566_SWWS240C1_LB8.indb 43 05.02.2020 14:43:34

■ 44
│
GB
│
IE
SWWS 240 C1
Kompernass Handels GmbH warranty
Dear Customer,
This appliance has a 3-year warranty valid from the date of purchase.
If this product has any faults, you, the buyer, have certain statutory
rights. Your statutory rights are not restricted in any way by the war-
ranty described below.
Warranty conditions
The warranty period starts on the date of purchase. Please keep your
receipt in a safe place. This will be required as proof of purchase.
If any material or manufacturing fault occurs within three years of the
date of purchase of the product, we will either repair or replace the
product for you or refund the purchase price (at our discretion). This
warranty service requires that you present the defective appliance
and the proof of purchase (receipt) within the three-year warranty
period, along with a brief written description of the fault and of
when it occurred.
If the defect is covered by the warranty, your product will either be
repaired or replaced by us. The repair or replacement of a product
does not signify the beginning of a new warranty period.
Warranty period and statutory claims for defects
The warranty period is not prolonged by repairs effected under the
warranty. This also applies to replaced and repaired components.
Any damage and defects present at the time of purchase must be re-
ported immediately after unpacking. Repairs carried out after expiry
of the warranty period shall be subject to a fee.
Scope of the warranty
This appliance has been manufactured in accordance with strict
quality guidelines and inspected meticulously prior to delivery.
IB_339566_SWWS240C1_LB8.indb 44 05.02.2020 14:43:34

GB
│
IE
│
45 ■
SWWS 240 C1
The warranty covers material faults or production faults. The war-
ranty does not extend to product parts subject to normal wear and
tear or to fragile parts which could be considered as consumable
parts such as switches, batteries or parts made of glass.
The warranty does not apply if the product has been damaged,
improperly used or improperly maintained. The directions in the
operating instructions for the product regarding proper use of the
product are to be strictly followed. Uses and actions that are discour-
aged in the operating instructions or which are warned against must
be avoided.
This product is intended solely for private use and not for commercial
purposes. The warranty shall be deemed void in cases of misuse or
improper handling, use of force and modifications / repairs which
have not been carried out by one of our authorised Service centres.
Warranty claim procedure
To ensure quick processing of your case, please observe the follow-
ing instructions:
■ Please have the till receipt and the item number
(e.g.IAN12345) available as proof of purchase.
■ You will find the item number on the type plate on the product,
an engraving on the product, on the front page of the operating
instructions (below left) or on the sticker on the rear or bottom of
the product.
■ If functional or other defects occur, please contact the service
department listed either by telephone or by e-mail.
■ You can return a defective product to us free of charge to the ser-
vice address that will be provided to you. Ensure that you enclose
the proof of purchase (till receipt) and information about what the
defect is and when it occurred.
IB_339566_SWWS240C1_LB8.indb 45 05.02.2020 14:43:34

■ 46
│
GB
│
IE
SWWS 240 C1
You can download these instructions along with
many other manuals, product videos and installa-
tion software at www.lidl-service.com.
This QR code will take you directly to the Lidl ser-
vice page (www.lidl-service.com) where you can
open your operating instructions
by entering the item number (IAN) 123456.
Service
Service Great Britain
Tel.: 0800 404 7657
E-Mail: [email protected]
Service Ireland
Tel.: 1890 930 034
(0,08 EUR/Min., (peak))
(0,06 EUR/Min., (off peak))
E-Mail: [email protected]
IAN 339566_1910
Importer
Please note that the following address is not the service address.
Please use the service address provided in the operating instructions.
KOMPERNASS HANDELS GMBH
BURGSTRASSE 21 • 44867 BOCHUM
GERMANY
www.kompernass.com
IB_339566_SWWS240C1_LB8.indb 46 05.02.2020 14:43:35

FR
│
BE
│
47 ■
SWWS 240 C1
Table des matières
Introduction ..................................48
Utilisation conforme à l’usage prévu .............48
Matériel livré .................................48
Description de l’appareil .......................49
Caractéristiques techniques .....................49
Consignes de sécurité ..........................50
Avant la première utilisation ....................55
Coupure automatique ..........................55
Préparation de l’appareil .......................55
Épilation .....................................57
Jambes ..............................................58
Aisselles .............................................59
Zone du maillot .......................................60
Suite à l’épilation .............................61
Nettoyage ...................................61
Rangement. . . . . . . . . . . . . . . . . . . . . . . . . . . . . . . . . . .63
Mise au rebut .................................64
Commander des pièces de rechange ..............65
Garantie pour Kompernass Handels GmbH pour la
Belgique .....................................66
Garantie pour Kompernass Handels GmbH pour la
France .......................................68
Service après-vente ............................73
Importateur ..................................73
IB_339566_SWWS240C1_LB8.indb 47 05.02.2020 14:43:35

■ 48
│
FR
│
BE
SWWS 240 C1
Introduction
Toutes nos félicitations pour l’achat de votre nouvel appareil.
Vous venez ainsi d’opter pour un produit de grande
qualité. Le mode d’emploi fait partie intégrante de ce
produit. Il contient des remarques importantes
concernant la sécurité, l’usage et la mise au rebut.
Avant d’utiliser le produit, veuillez vous familiariser avec toutes les
consignes d’utilisation et de sécurité. N’utilisez le produit que
conformément aux consignes et pour les domaines d’utilisation
prévus. Conservez toujours le mode d’emploi comme ouvrage de
référence à proximité du produit. Si vous cédez le produit à un tiers,
remettez-lui également tous les documents.
Utilisation conforme à l’usage prévu
Cet appareil sert exclusivement à épiler les jambes, aisselles et la
zone du maillot du corps humain. Cet appareil est exclusivement
réservé à un usage domestique. Veuillez ne pas l’utiliser à des fins
professionnelles.
Matériel livré
Chauffe-cire et accessoires
18 disques de cire
Spatule
Mode d’emploi
IB_339566_SWWS240C1_LB8.indb 48 05.02.2020 14:43:35

FR
│
BE
│
49 ■
SWWS 240 C1
Description de l’appareil
1 Bac intérieur
2 Voyant de contrôle
3 Fiche secteur
4 Douille
5 Rail (pour verrouiller le couvercle)
6 Desserte (pour la spatule)
7 Couvercle
8 Spatule
9 Disque de cire
Caractéristiques techniques
Tension
220 - 240 V ∼ (Courant alternatif),
50 Hz
Puissance absorbée 20 W
Capacité env. 530 ml
Classe de protection
II /
(Double isolation)
IB_339566_SWWS240C1_LB8.indb 49 05.02.2020 14:43:38

■ 50
│
FR
│
BE
SWWS 240 C1
Consignes de sécurité
AVERTISSEMENT !
RISQUE D'ÉLECTROCUTION!
► Si le cordon d'alimentation de cet appareil
est endommagé, il doit être remplacé par
le fabricant, son service après-vente ou
une personne de qualification similaire afin
d'éviter tout risque.
► Utilisez l'appareil exclusivement dans des
locaux secs, surtout pas en extérieur.
► N'ouvrez jamais le boîtier de l'appareil.
► N'utilisez pas l'appareil à proximité d'eau,
comme des lavabos, receveurs de douche
ou baignoires.
► Ne jamais utiliser cet appareil dans le bain
ou la douche, ou pendant que vous dormez.
► Ne saisissez jamais la fiche secteur ou
le cordon d'alimentation avec les mains
mouillées.
► Avant d'utiliser l'appareil, vérifiez que
celui-ci ne présente aucun dégât extérieur
visible. Ne mettez pas en service un appa-
reil endommagé ou qui a chuté.
IB_339566_SWWS240C1_LB8.indb 50 05.02.2020 14:43:41

FR
│
BE
│
51 ■
SWWS 240 C1
AVERTISSEMENT !
RISQUE D’ÉLECTROCUTION!
N’utilisez pas l’appareil à proximité
de baignoires, de bacs à douche ou
d’autres récipients contenant de l’eau.
► Aucun liquide ne doit couler sur la fiche de
raccordement de l’appareil.
AVERTISSEMENT !
RISQUE DE BLESSURES!
► Cet appareil peut être utilisé par des enfants
à partir de 8 ans et par des personnes
ayant des capacités physiques, sensorielles
ou mentales réduites ou disposant de peu
d'expérience et/ou de connaissances, à
condition qu'ils soient surveillés ou qu'ils
aient été initiés à l'utilisation sécurisée de
l'appareil et qu'ils aient compris les dangers
en résultant.
► Les enfants ne doivent pas jouer avec
l'appareil.
IB_339566_SWWS240C1_LB8.indb 51 05.02.2020 14:43:43

■ 52
│
FR
│
BE
SWWS 240 C1
AVERTISSEMENT !
RISQUE DE BLESSURES!
► Le nettoyage et une maintenance par l'uti-
lisateur ne doivent pas être confiés à des
enfants, sauf s'ils sont âgés de 8 ans et plus
et s'ils effectuent ces opérations sous surveil-
lance.
► Éloignez l'appareil et son cordon d'alimen-
tation des enfants âgés de moins de 8 ans.
► Les personnes insensibles à la chaleur ne
doivent pas utiliser cet appareil !
► Si suite à des antécédents médicaux, vous
n’êtes pas sûr de pouvoir utiliser l’appareil,
consultez un médecin avant toute utilisation.
► Suite à l’utilisation, la surface de l’élément
chauffant présente encore une chaleur
résiduelle.
► En cas d’usage abusif, il existe un risque
de blessures. Utilisez l’appareil toujours de
manière conforme à sa destination!
IB_339566_SWWS240C1_LB8.indb 52 05.02.2020 14:43:43

FR
│
BE
│
53 ■
SWWS 240 C1
AVERTISSEMENT !
RISQUE DE BLESSURES!
► N'utilisez pas l'appareil sous des couvertures
ou des serviettes éponge.
► Dans la mesure du possible, placez l'appareil
à proximité immédiate d'une prise secteur.
Veillez à ce que la fiche secteur soit rapide-
ment accessible en cas de danger et à ce
que le cordon d'alimentation ne provoque
pas la chute d'une personne.
► Veillez à ce que l'appareil soit posé sur une
surface stable.
► N'immergez jamais l'appareil dans de l'eau
ni dans d'autres liquides !
► N'utilisez pas l'appareil en cas de maladies
cardiaques, de rougeurs cutanées, d'inflam-
mations, d'enflures, d'endroits sensibles, de
diabète, de plaies ouvertes, de brûlures,
d'eczéma ou de psoriasis.
IB_339566_SWWS240C1_LB8.indb 53 05.02.2020 14:43:44

■ 54
│
FR
│
BE
SWWS 240 C1
ATTENTION!
RISQUE DE DÉGÂTS MATÉRIELS!
► Ne faites jamais fonctionner l'appareil à
videsans cire.
► Ne remplissez l'appareil qu'avec de la
cire, pas avec des substances corrosives ou
contenant du solvant!
► Posez l'appareil uniquement sur une surface
plane et non sensible à la chaleur.
► Ne faites jamais chauffer la cire dans
l'emballage plastique.
► Ne faites jamais chauffer la cire au micro-
ondes, au-dessus d'une flamme ouverte ou
de plaques électriques.
► N'utilisez pas de minuterie externe ni de
dispositif de commande à distance séparé
pour opérer l'appareil.
► N'utilisez pas d'objets pointus ou tranchants
pour retirer la cire refroidie de l'appareil.
IB_339566_SWWS240C1_LB8.indb 54 05.02.2020 14:43:44

FR
│
BE
│
55 ■
SWWS 240 C1
Avant la première utilisation
1) Essuyez l’intérieur et l’extérieur de l’appareil avec un chiffon
humide pour éliminer la poussière due au transport. Séchez-le
bien, de manière à ce que toute humidité soit retirée de l’appareil.
2) Placez l’appareil sur une surface plate et résistante à la chaleur.
Pensez également que d’éventuelles projections de cire risquent
de goutter sur la surface. Cette dernière doit de ce fait être facile
à nettoyer.
Coupure automatique
L’appareil s’arrête automatiquement après 60 minutes. Au bout de
55 minutes, le voyant de contrôle 2 se met à clignoter pour vous
rappeler la coupure automatique.
La coupure automatique ne se substitue pas au retrait de la fiche
secteur une fois l’utilisation terminée ! Elle constitue uniquement une
sécurité ! Débranchez toujours la fiche secteur lorsque vous n’utilisez
plus l’appareil !
Préparation de l’appareil
Une fois l’appareil mis en place sur une surface adaptée :
1) retirez les disques de cire 9 de l’emballage.
2) Placez le nombre de disques de cire 9 nécessaires dans le bac
intérieur 1. Orientez-vous aux valeurs indicatives suivantes, qui
peuvent cependant varier un peu :
IB_339566_SWWS240C1_LB8.indb 55 05.02.2020 14:43:44

■ 56
│
FR
│
BE
SWWS 240 C1
Région du corps
Nombre de disques
de cire 9
Bas des jambes
env. 2 pièces pour chaque
bas de jambe
Aisselles 1 pièce
Zone du maillot 1 pièce
corps entier (bas des
jambes, aisselles, zone du
maillot)
6 pièces
Ce symbole, avec une date, présent sur l’emballage des
disques de cire 9 indique la durée de conservation du
produit.
3) Placez le couvercle 7 sur l’appareil en plaçant la petite
pièce plastique dans le rail 5 puis en tournant légèrement le
couvercle 7 dans le sens des aiguilles d’une montre (voir volet
dépliant) :
4) Enfichez la fiche secteur 3 du cordon d’alimentation dans la
douille 4 de l’appareil.
5) Branchez la fiche secteur dans une prise secteur. L’appareil
chauffe, le voyant de contrôle 2 dans le socle de l’appareil
s’allume.
6) Mélangez de temps en temps la cire pendant qu’elle fond.
Une fois les disques de cire 9 fondus, (env. 25 à 30 minutes pour
6 disques en cire), vous pouvez démarrer l’épilation.
IB_339566_SWWS240C1_LB8.indb 56 05.02.2020 14:43:44

FR
│
BE
│
57 ■
SWWS 240 C1
REMARQUE
► Si vous remarquez que vous avez besoin de plus de cire que
ce que vous avez fait fondre, vous pouvez rajouter à tout
moment d'autres disques de cire 9 dans le bac intérieur 1.
Attendez que la cire ait fondu avant de poursuivre l'épilation.
► Faites fondes 6 disques de cire 9 au maximum à la fois.
Épilation
Les parties cutanées que vous souhaitez épiler doivent être sèches,
propres et exemptes de produits de soin, huiles ou graisses.
REMARQUES
► Avant la première utilisation, réalisez obligatoirement un test
cutané pour contrôler si votre peau supporte ce genre d'appli-
cation. Mettez un peu de cire fondue sur une partie de peau
cachée et contrôlez, une fois la bande de cire arrachée, si
des altérations cutanées apparaissent au cours des 24 heures
suivantes. N'utilisez jamais cet appareil si des altérations
cutanées apparaissent. Demandez conseil à un médecin si
nécessaire.
► Si vous avez tendance aux poils incarnés, procédez réguliè-
rement à des exfoliations. Ils peuvent empêcher l'incarnation
des poils.
► Arrachez toujours les bandes de cire le plus près possible de
la surface de la peau.
► Veillez à ce que la cire ne soit pas projetée sur vos vêtements.
Les restes de cire ne peuvent être éliminés que difficilement
et peuvent éventuellement entraîner des colorations des
vêtements.
IB_339566_SWWS240C1_LB8.indb 57 05.02.2020 14:43:44

■ 58
│
FR
│
BE
SWWS 240 C1
Jambes
Une fois les disques de cire 9 entièrement fondus :
1) Ouvrez le couvercle 7 en tournant légèrement dans le sens
inverse aux aiguilles d’une montre et en soulevant vers le haut.
2) Prélevez un peu de cire à l’aide du côté plat de la spatule 8.
Vous pouvez racler l’excédent de cire sur le bord de l’appareil.
3) Appliquez immédiatement la cire sur la peau dans le sens de
pousse des poils (du genou en direction de la cheville). Les
bandes de cire doivent présenter l’épaisseur d’une écorce
d’orange et la surface de 2 spatules 8 placées côte à côte.
Vous devez éventuellement prendre plus de cire. Essayer d’appli-
quer la cire de manière un peu plus épaisse à la fin de la bande
de cire appliquée (qui se trouve près de la cheville), puisque
vous devez saisir cette extrémité pour tirer la bande.
4) Suite à l’application, vous pouvez poser la spatule 8 sur la
desserte 6 sur le bord de l’appareil, de manière à ce que la
spatule 8 repose sur le bac intérieur 1.
5) Patientez 30-60 secondes jusqu’à ce que la cire soit sèche.
6) Tendez la peau d’une main, saisissez la bande de cire à
l’extrémité épaisse et tirez d’un mouvement rapide dans le sens
contraire de la pousse des poils (de la cheville en direction du
genou).
Procédez de la même manière pour les autres parties cutanées.
7) Lorsque vous avez fini, retirez la fiche secteur de la prise secteur
pour éteindre l’appareil. Le voyant de contrôle 2 s’éteint.
IB_339566_SWWS240C1_LB8.indb 58 05.02.2020 14:43:44

FR
│
BE
│
59 ■
SWWS 240 C1
Aisselles
Une fois le disque de cire 9 entièrement fondu :
1) Ouvrez le couvercle 7 en tournant légèrement dans le sens
inverse aux aiguilles d’une montre et en soulevant vers le haut.
REMARQUE
►
Les poils des aisselles ont tendance à pousser dans différentes
directions et doivent être éliminés en 2 étapes au minimum.
2) Levez le coude vers le haut et en arrière. La peau des aisselles
est ainsi tendue.
3) Prélevez un peu de cire à l’aide du côté plat de la spatule 8.
Vous pouvez racler l’excédent de cire sur le bord de l’appareil.
4) Appliquez immédiatement la cire du milieu du creux de l’aisselle
vers le haut en direction du coude. La bande de cire doit être
aussi épaisse que l’écorce d’une orange. Essayer d’appliquer la
cire de manière un peu plus épaisse à la fin de la bande de cire
appliquée (qui se trouve près du coude), puisque vous devez
saisir cette extrémité pour tirer la bande.
5) Suite à l’application, vous pouvez poser la spatule 8 sur la
desserte 6 sur le bord de l’appareil, de manière à ce que la
spatule 8 repose sur le bac intérieur 1.
6) Patientez 30-60 secondes jusqu’à ce que la cire soit sèche.
7) Saisissez la bande de cire à l’extrémité supérieure (qui se trouve
plus près du coude) et tirez d’un mouvement rapide vers le bas
dans le sens contraire de la pousse des poils.
8) Pour épiler la partie inférieure du creux des aisselles, appliquez
la cire du milieu du creux de l’aisselle vers le bas.
9) Patientez 30-60 secondes jusqu’à ce que la cire soit sèche.
IB_339566_SWWS240C1_LB8.indb 59 05.02.2020 14:43:44

■ 60
│
FR
│
BE
SWWS 240 C1
10) Saisissez la bande de cire à l’extrémité inférieure et tirez d’un
mouvement rapide vers le haut dans le sens contraire de la
pousse des poils.
11) Lorsque vous avez fini, retirez la fiche secteur de la prise secteur
pour éteindre l’appareil. Le voyant de contrôle 2 s’éteint.
Zone du maillot
Une fois le disque de cire 9 entièrement fondu :
1) ouvrez le couvercle 7 en tournant légèrement dans le sens
inverse aux aiguilles d’une montre et en soulevant vers le haut.
2) Prélevez un peu de cire à l’aide du côté plat de la spatule 8.
Vous pouvez racler l’excédent de cire sur le bord de l’appareil.
3) Suite à l’application, vous pouvez poser la spatule 8 sur la
desserte 6 sur le bord de l’appareil, de manière à ce que la
spatule 8 repose sur le bac intérieur 1.
REMARQUE
► Au niveau de la zone du maillot, n'épilez toujours que de
petites zones à la fois. La peau est très sensible.
4) Tendez la peau d’une main et appliquez la cire dans le sens de
la pousse des poils (en direction de l’intérieur de la cuisse).
5) Patientez 30-60 secondes jusqu’à ce que la cire soit sèche.
6) Saisissez la bande de cire à l’extrémité (la plus proche de l’inté-
rieur de la cuisse) et tirez d’un mouvement rapide dans le sens
contraire de la pousse des poils.
Procédez de la même manière pour les autres parties cutanées.
7) Lorsque vous avez fini, retirez la fiche secteur de la prise secteur
pour éteindre l’appareil. Le voyant de contrôle 2 s’éteint.
IB_339566_SWWS240C1_LB8.indb 60 05.02.2020 14:43:44

FR
│
BE
│
61 ■
SWWS 240 C1
Suite à l’épilation
■ Nettoyez la spatule 8 (voir le chapitre «Nettoyage»).
■ Les petits restes de cire s’éliminent facilement avec de l’huile pour
bébé. Si vous n’avez pas d’huile pour bébé sous la main, vous
pouvez également utiliser de l’huile d’olive ou une autre huile
alimentaire.
■ Après l’épilation, votre peau peut présenter une légère rougeur.
C’est tout à fait normal. Faites couler un peu d’eau froide sur les
parties concernées. Cela apaise la peau.
Si votre peau ne s’apaise pas et brûle fortement, consultez un
médecin.
Nettoyage
AVERTISSEMENT ! RISQUE D'ÉLECTROCUTION!
► Avant chaque nettoyage, retirez la fiche secteur de la prise
secteur !
► N'immergez jamais l'appareil dans de l'eau ou dans d'autres
liquides !
AVERTISSEMENT ! RISQUE DE BLESSURES!
► Laissez l'appareil refroidir légèrement avant de le nettoyer.
ATTENTION! RISQUE DE DÉGÂTS MATÉRIELS!
► N'utilisez pas d'objets pointus et tranchants pour retirer la cire
refroidie de l'appareil.
► N'utilisez pas de produits de nettoyage agressifs, abrasifs ou
chimiques pour nettoyer l'appareil !
IB_339566_SWWS240C1_LB8.indb 61 05.02.2020 14:43:44

■ 62
│
FR
│
BE
SWWS 240 C1
REMARQUE
► Vous ne devez pas nettoyer le bac intérieur 1 après chaque
utilisation pour éliminer tous les restes de cire. La cire qui reste
dans l'appareil peut être refondue pour la prochaine utilisation
et être réutilisée !
► Pour commander des disques de cire 9, veuillez vous adresser
à notre service après-vente (cf. le chapitre «Commander des
pièces de rechange»).
■ Raclez l’excédent de cire de la spatule 8 directement après
l’utilisation sur le bord de l’appareil.
■ Essuyez la spatule 8, ainsi que le bord de l’appareil directement
après utilisation avec un chiffon imbibé d’huile pour bébé. Cela
permet d’éliminer les restes de cire encore mous. Utilisez idéale-
ment un vieux chiffon, les restes de cire ne pouvant être éliminés
que difficilement. Si vous n’avez pas d’huile pour bébé sous la
main, vous pouvez également utiliser de l’huile d’olive ou une
autre huile alimentaire pour le nettoyage. Veillez en particulier à
ce qu’aucun reste de cire ne se trouve dans les rails 5 pour le ver-
rouillage du couvercle 7 ! Essuyez ensuite la spatule 8 et le bord
avec un mouchoir en papier sec pour éliminer les restes d’huile.
■ Si de la cire colle à la face extérieure du boîtier, éliminez-la
comme suit :
– assurez-vous que l’appareil soit débranché du réseau élec-
trique, mais qu’il soit encore chaud.
– Essuyez les faces extérieures avec un chiffon imbibé d’huile.
– Veillez en particulier à ce qu’aucun reste de cire ne se trouve
dans les rails 5 pour le verrouillage du couvercle 7 !
– Éliminez les restes d’huile avec un mouchoir en papier propre
et sec.
IB_339566_SWWS240C1_LB8.indb 62 05.02.2020 14:43:44

FR
│
BE
│
63 ■
SWWS 240 C1
Rangement
REMARQUE
► Vous ne devez pas nettoyer le bac intérieur 1 après chaque
utilisation pour éliminer tous les restes de cire. La cire qui reste
dans l'appareil peut être refondue pour la prochaine utilisation
et être réutilisée !
■ Une fois l’appareil et la spatule 8 nettoyés comme exposé dans
le chapitre «Nettoyage» :
– posez la spatule 8 sur la desserte 6 sur le bord de l’appa-
reil, de manière à ce que la spatule 8 repose sur le bac
intérieur 1.
– Mettez le couvercle 7 en place.
– Rangez l’appareil refroidi dans un endroit sec et propre.
REMARQUE
► Si vous ne pouvez plus ouvrir/tourner le couvercle 7 après
l'entreposage, des restes de cire froids se trouvent vraisembla-
blement entre le couvercle 7 et l'appareil. Faites dans ce cas
chauffer l'appareil avec le couvercle 7 fermé pendant env.
10 minutes (en fonction de la quantité de cire). La cire ramollit
et le couvercle 7 peut être ouvert.
IB_339566_SWWS240C1_LB8.indb 63 05.02.2020 14:43:44

■ 64
│
FR
│
BE
SWWS 240 C1
Mise au rebut
Vous pouvez jeter la cire utilisée avec les déchets normaux.
Ne jetez en aucun cas l’appareil avec les
ordures ménagères. Ce produit est assujetti
à la directive européenne 2012/19/EU-DEEE
(déchets d’équipements électriques et élec-
troniques).
Éliminez l’appareil par l’intermédiaire d’une entreprise de traite-
ment des déchets autorisée ou via le service de recyclage de votre
commune. Respectez la réglementation en vigueur. En cas de doute,
veuillez contacter votre centre de recyclage.
L’emballage est constitué de matériaux écologiques que
vous pouvez recycler par le biais des postes de recyclage
locaux.
Éliminez l’emballage d’une manière respectueuse de
l’environnement. Observez le marquage sur les différents
matériaux d’emballage et triez-les séparément si
nécessaire. Les matériaux d’emballage sont repérés par
des abréviations (a) et des chiffres (b) qui ont la
signification suivante :1–7 : Plastiques, 20–22 : Papier
et carton, 80–98 : Matériaux composites
Renseignez-vous auprès de votre commune pour
connaître les possibilités de mise au rebut de votre
appareil usagé.
Le produit récyclable doit être trié ou rapporté dans un
point de collecte pour être recycle.
IB_339566_SWWS240C1_LB8.indb 64 05.02.2020 14:43:50

FR
│
BE
│
65 ■
SWWS 240 C1
Commander des pièces de rechange
Les pièces de rechange suivantes peuvent être commandées pour le
produit SWWS 240 C1.
► Disques de cire (18 pièces)
Commandez les pièces de rechange via la hotline de notre service
après-vente (Voir chapitre «Service après-vente») ou tout simplement
sur notre site web www.kompernass.com.
Ce code QR vous donne un accès direct à notre site Web sur lequel
vous pouvez commander les pièces de rechange disponibles:
REMARQUE
► Tenez le numéro IAN que vous trouverez sur la couverture
de ce manuel d’utilisation, prêt pour passer votre com-
mande.
IB_339566_SWWS240C1_LB8.indb 65 05.02.2020 14:43:51

■ 66
│
FR
│
BE
SWWS 240 C1
Garantie pour Kompernass Handels GmbH
pour la Belgique
Chère cliente, cher client,
Cet appareil est garanti 3 ans à partir de la date d’achat. Si ce pro-
duit venait à présenter des vices, vous disposez de droits légaux face
au vendeur de ce produit. Vos droits légaux ne sont pas restreints
par notre garantie présentée ci-dessous.
Conditions de garantie
La période de garantie débute à la date d’achat. Veuillez bien
conserver le ticket de caisse. Celui-ci servira de preuve d’achat.
Si dans un délai de trois ans suivant la date d’achat de ce pro-
duit, un vice de matériel ou de fabrication venait à apparaître, le
produit sera réparé, remplacé gratuitement par nos soins ou le prix
d’achat remboursé, selon notre choix. Cette prestation sous garantie
nécessite, dans le délai de trois ans, la présentation de l’appareil
défectueux et du justificatif d’achat (ticket de caisse) ainsi que la
description brève du vice et du moment de son apparition.
Si le vice est couvert par notre garantie, vous recevrez le produit
réparé ou un nouveau produit en retour. Aucune nouvelle période de
garantie ne débute avec la réparation ou l’échange du produit.
Période de garantie et réclamation légale pour vices
cachés
L’exercice de la garantie ne prolonge pas la période de garantie.
Cette disposition s’applique également aux pièces remplacées ou
réparées. Les dommages et vices éventuellement déjà présents à
l’achat doivent être signalés immédiatement après le déballage.
Toute réparation survenant après la période sous garantie fera
l’objet d’une facturation.
IB_339566_SWWS240C1_LB8.indb 66 05.02.2020 14:43:51

FR
│
BE
│
67 ■
SWWS 240 C1
Étendue de la garantie
L’appareil a été fabriqué avec soin conformément à des directives de
qualité strictes et consciencieusement contrôlé avant sa livraison.
La prestation de la garantie s’applique aux vices de matériel et de
fabrication. Cette garantie ne s’étend pas aux pièces du produit qui
sont exposées à une usure normale et peuvent de ce fait être considé-
rées comme pièces d’usure, ni aux détériorations de pièces fragiles,
par ex. interrupteurs, batteries ou pièces en verre.
Cette garantie devient caduque si le produit est détérioré, utilisé ou
entretenu de manière non conforme. Toutes les instructions listées
dans le manuel d’utilisation doivent être exactement respectées pour
une utilisation conforme du produit. Des buts d’utilisation et actions
qui sont déconseillés dans le manuel d’utilisation, ou dont vous êtes
avertis doivent également être évités.
Le produit est uniquement destiné à un usage privé et ne convient
pas à un usage professionnel. La garantie est annulée en cas
d’entretien incorrect et inapproprié, d’usage de la force et en cas
d’intervention non réalisée par notre centre de service après-vente
agréé.
Procédure en cas de garantie
Afin de garantir un traitement rapide de votre demande, veuillez
suivre les indications suivantes :
■ Veuillez avoir à portée de main pour toutes questions le ticket de
caisse et la référence article (par ex.IAN12345) en tant que
justificatif de votre achat.
■ Vous trouverez la référence sur la plaque signalétique sur le pro-
duit, une gravure sur le produit, sur la page de garde du mode
d’emploi (en bas à gauche) ou sur l’autocollant au dos ou sur le
dessous du produit.
IB_339566_SWWS240C1_LB8.indb 67 05.02.2020 14:43:51

■ 68
│
FR
│
BE
SWWS 240 C1
■ Si des erreurs de fonctionnement ou d’autres vices venaient à
apparaître, veuillez d’abord contacter le département service
clientèle cité ci-dessous par téléphone ou par e-mail.
■ Vous pouvez ensuite retourner un produit enregistré comme étant
défectueux en joignant le ticket de caisse et en indiquant en quoi
consiste le vice et quand il est survenu, sans devoir l’affranchir à
l’adresse de service après-vente communiquée.
Sur www.lidl-service.com, vous pourrez télécharger
ce mode d’emploi et de nombreux autres manuels,
vidéos produit et logiciels d’installation.
Grâce à ce code QR, vous arriverez directement
sur le site Lidl service après-vente
(www.lidl-service.com) et vous pourrez ouvrir votre
mode d’emploi en saisissant votre référence (IAN)
123456.
Garantie pour Kompernass Handels GmbH
pour la France
Chère cliente, cher client,
Cet appareil est garanti 3 ans à partir de la date d’achat. Si ce pro-
duit venait à présenter des vices, vous disposez de droits légaux face
au vendeur de ce produit. Vos droits légaux ne sont pas restreints
par notre garantie présentée ci-dessous.
Conditions de garantie
La période de garantie débute à la date d’achat. Veuillez bien
conserver le ticket de caisse. Celui-ci servira de preuve d’achat.
Si dans un délai de trois ans suivant la date d’achat de ce produit,
un vice de matériel ou de fabrication venait à apparaître, le produit
sera réparé, remplacé gratuitement par nos soins ou le prix d’achat
remboursé, selon notre choix.
IB_339566_SWWS240C1_LB8.indb 68 05.02.2020 14:43:51

FR
│
BE
│
69 ■
SWWS 240 C1
Cette prestation sous garantie nécessite, dans le délai de trois ans, la
présentation de l’appareil défectueux et du justificatif d’achat (ticket
de caisse) ainsi que la description brève du vice et du moment de
son apparition.
Si le vice est couvert par notre garantie, vous recevrez le produit
réparé ou un nouveau produit en retour. Aucune nouvelle période de
garantie ne débute avec la réparation ou l’échange du produit.
Période de garantie et réclamation légale pour vices
cachés
L’exercice de la garantie ne prolonge pas la période de garantie.
Cette disposition s’applique également aux pièces remplacées ou
réparées. Les dommages et vices éventuellement déjà présents à
l’achat doivent être signalés immédiatement après le déballage.
Toute réparation survenant après la période sous garantie fera
l’objet d’une facturation.
Étendue de la garantie
L’appareil a été fabriqué avec soin conformément à des directives de
qualité strictes et consciencieusement contrôlé avant sa livraison.
La prestation de la garantie s’applique aux vices de matériel et de
fabrication. Cette garantie ne s’étend pas aux pièces du produit qui
sont exposées à une usure normale et peuvent de ce fait être considé-
rées comme pièces d’usure, ni aux détériorations de pièces fragiles,
par ex. interrupteurs, batteries ou pièces en verre.
Cette garantie devient caduque si le produit est détérioré, utilisé ou
entretenu de manière non conforme. Toutes les instructions listées
dans le manuel d’utilisation doivent être exactement respectées pour
une utilisation conforme du produit. Des buts d’utilisation et actions
qui sont déconseillés dans le manuel d’utilisation, ou dont vous êtes
avertis doivent également être évités.
IB_339566_SWWS240C1_LB8.indb 69 05.02.2020 14:43:51

■ 70
│
FR
│
BE
SWWS 240 C1
Le produit est uniquement destiné à un usage privé et ne convient
pas à un usage professionnel. La garantie est annulée en cas
d’entretien incorrect et inapproprié, d’usage de la force et en cas
d’intervention non réalisée par notre centre de service après-vente
agréé.
Article L217-16 du Code de la consommation
Lorsque l‘acheteur demande au vendeur, pendant le cours de la
garantie commerciale qui lui a été consentie lors de l‘acquisition ou
de la réparation d‘un bien meuble, une remise en état couverte par
la garantie, toute période d‘immobilisation d‘au moins sept jours
vient s‘ajouter à la durée de la garantie qui restait à courir. Cette
période court à compter de la demande d‘intervention de l‘acheteur
ou de la mise à disposition pour réparation du bien en cause, si cette
mise à disposition est postérieure à la demande d‘intervention.
Indépendamment de la garantie commerciale souscrite, le vendeur
reste tenu des défauts de conformité du bien et des vices rédhibi-
toires dans les conditions prévues aux articles L217-4 à L217-13 du
Code de la consommation et aux articles 1641 à 1648 et 2232 du
Code Civil.
Article L217-4 du Code de la consommation
Le vendeur livre un bien conforme au contrat et répond des défauts
de conformité existant lors de la délivrance. Il répond également des
défauts de conformité résultant de l‘emballage, des instructions de
montage ou de l‘installation lorsque celle-ci a été mise à sa charge
par le contrat ou a été réalisée sous sa responsabilité.
Article L217-5 du Code de la consommation
Le bien est conforme au contrat :
1° S´il est propre à l‘usage habituellement attendu d‘un bien sem-
blable et, le cas échéant :
IB_339566_SWWS240C1_LB8.indb 70 05.02.2020 14:43:51

FR
│
BE
│
71 ■
SWWS 240 C1
– s‘il correspond à la description donnée par le vendeur et pos-
séder les qualités que celui-ci a présentées à l‘acheteur sous
forme d‘échantillon ou de modèle ;
– s‘il présente les qualités qu‘un acheteur peut légitimement
attendre eu égard aux déclarations publiques faites par le ven-
deur, par le producteur ou par son représentant, notamment
dans la publicité ou l‘étiquetage ;
2° Ou s‘il présente les caractéristiques définies d‘un commun accord
par les parties ou être propre à tout usage spécial recherché par
l‘acheteur, porté à la connaissance du vendeur et que ce dernier
a accepté.
Article L217-12 du Code de la consommation
L‘action résultant du défaut de conformité se prescrit par deux ans à
compter de la délivrance du bien.
Article 1641 du Code civil
Le vendeur est tenu de la garantie à raison des défauts cachés de
la chose vendue qui la rendent impropre à l‘usage auquel on la
destine, ou qui diminuent tellement cet usage que l‘acheteur ne
l‘aurait pas acquise, ou n‘en aurait donné qu‘un moindre prix, s‘il les
avait connus.
Article 1648 1er alinéa du Code civil
L‘action résultant des vices rédhibitoires doit être intentée par
l‘acquéreur dans un délai de deux ans à compter de la découverte
du vice.
Les pièces détachées indispensables à l’utilisation du produit sont
disponibles pendant la durée de la garantie du produit.
IB_339566_SWWS240C1_LB8.indb 71 05.02.2020 14:43:51

■ 72
│
FR
│
BE
SWWS 240 C1
Procédure en cas de garantie
Afin de garantir un traitement rapide de votre demande, veuillez
suivre les indications suivantes :
■ Veuillez avoir à portée de main pour toutes questions le ticket de
caisse et la référence article (par ex. IAN 12345) en tant que
justificatif de votre achat.
■ Vous trouverez la référence sur la plaque signalétique sur le pro-
duit, une gravure sur le produit, sur la page de garde du mode
d’emploi (en bas à gauche) ou sur l’autocollant au dos ou sur le
dessous du produit.
■ Si des erreurs de fonctionnement ou d’autres vices venaient à
apparaître, veuillez d’abord contacter le département service
clientèle cité ci-dessous par téléphone ou par e-mail.
■ Vous pouvez ensuite retourner un produit enregistré comme étant
défectueux en joignant le ticket de caisse et en indiquant en quoi
consiste le vice et quand il est survenu, sans devoir l’affranchir à
l’adresse de service après-vente communiquée.
Sur www.lidl-service.com, vous pourrez télécharger
ce mode d’emploi et de nombreux autres manuels,
vidéos produit et logiciels d’installation.
Grâce à ce code QR, vous arriverez directement
sur le site Lidl service après-vente
(www.lidl-service.com) et vous pourrez ouvrir votre
mode d’emploi en saisissant votre référence (IAN)
123456.
IB_339566_SWWS240C1_LB8.indb 72 05.02.2020 14:43:51

FR
│
BE
│
73 ■
SWWS 240 C1
Service après-vente
Service France
Tel.: 0800 919270
E-Mail: [email protected]
Service Belgique
Tel.: 070 270 171 (0,15 EUR/Min.)
E-Mail: [email protected]
IAN 339566_1910
Importateur
Veuillez tenir compte du fait que l’adresse suivante n’est pas une
adresse de service après-vente. Veuillez d’abord contacter le service
mentionné.
KOMPERNASS HANDELS GMBH
BURGSTRASSE 21
44867 BOCHUM
ALLEMAGNE
www.kompernass.com
IB_339566_SWWS240C1_LB8.indb 73 05.02.2020 14:43:52

■ 74
│
FR
│
BE
SWWS 240 C1
IB_339566_SWWS240C1_LB8.indb 74 05.02.2020 14:43:52

NL
│
BE
│
75 ■
SWWS 240 C1
Inhoud
Inleiding .....................................76
Gebruik in overeenstemming met bestemming .....76
Inhoud van het pakket .........................76
Apparaatbeschrijving ..........................77
Technische gegevens ...........................77
Veiligheidsvoorschriften ........................78
Vóór het eerste gebruik ........................83
Automatische uitschakeling .....................83
Apparaat voorbereiden ........................83
Ontharen ....................................85
Benen ...............................................86
Oksels ...............................................87
Bikinizone ............................................88
Na het ontharen ..............................89
Reinigen .....................................89
Opbergen. . . . . . . . . . . . . . . . . . . . . . . . . . . . . . . . . . . . 91
Afvoeren ....................................92
Vervangingsonderdelen bestellen ...............93
Garantie van Kompernaß Handels GmbH .........94
Service ..............................................96
Importeur ............................................96
IB_339566_SWWS240C1_LB8.indb 75 05.02.2020 14:43:52

■ 76
│
NL
│
BE
SWWS 240 C1
Inleiding
Hartelijk gefeliciteerd met de aankoop van uw nieuwe apparaat.
U hebt hiermee gekozen voor een hoogwaardig product.
De gebruiksaanwijzing maakt deel uit van dit product.
Deze bevat belangrijke aanwijzingen voor veiligheid,
gebruik en afvoer. Lees alle bedienings- en veiligheidsaan-
wijzingen voordat u het product in gebruik neemt. Gebruik het
product uitsluitend op de voorgeschreven wijze en voor de
aangegeven doeleinden. Bewaar de gebruiksaanwijzing altijd als
naslagwerk in de buurt van het product. Geef alle documenten mee als
u het product doorgeeft aan een derde.
Gebruik in overeenstemming met
bestemming
Dit apparaat dient uitsluitend voor het ontharen van benen, oksels
en bikinizone van het menselijk lichaam. Dit apparaat is uitsluitend
bestemd voor gebruik in privéhuishoudens. Gebruik het apparaat
niet bedrijfsmatig.
Inhoud van het pakket
Warme wax-set
18 wax-schijven
Spatel
Gebruiksaanwijzing
IB_339566_SWWS240C1_LB8.indb 76 05.02.2020 14:43:52

NL
│
BE
│
77 ■
SWWS 240 C1
Apparaatbeschrijving
1 Binnenschaal
2 Indicatielampje
3 Stekker
4 Stekkeraansluiting
5 Geleiding (voor vergrendeling van het deksel)
6 Aflegvlak (voor de spatel)
7 Deksel
8 Spatel
9 Wax-schijf
Technische gegevens
Spanning
220 - 240 V ∼ (wisselstroom),
50 Hz
Opgenomen vermogen 20 W
Capaciteit ca. 530 ml
Beschermingsklasse
II /
(dubbel geïsoleerd)
IB_339566_SWWS240C1_LB8.indb 77 05.02.2020 14:43:55

■ 78
│
NL
│
BE
SWWS 240 C1
Veiligheidsvoorschriften
WAARSCHUWING! GEVAAR
VOOR EEN ELEKTRISCHE SCHOK!
► Wanneer het netsnoer van dit apparaat
beschadigd is, moet het worden vervangen
door de fabrikant of de klantendienst van
de fabrikant of een persoon met vergelijkbare
kwalificaties, om risico's te vermijden.
► Gebruik het apparaat alleen in droge ruimtes,
niet in de openlucht.
► Open nooit de behuizing van het apparaat.
► Gebruik het apparaat niet in de buurt van
water, zoals bij een wasbak, douchebak of
badkuip.
► Gebruik het apparaat nooit tijdens het
baden, douchen of slapen.
► Pak de stekker of het snoer nooit met natte
handen vast.
► Controleer het apparaat vóór gebruik op
zichtbare schade aan de buitenzijde.
Gebruik geen apparaat dat beschadigd of
gevallen is.
IB_339566_SWWS240C1_LB8.indb 78 05.02.2020 14:43:58

NL
│
BE
│
79 ■
SWWS 240 C1
WAARSCHUWING! GEVAAR
VOOR EEN ELEKTRISCHE SCHOK!
Gebruik dit apparaat in geen geval in
de buurt van badkuipen, wasbakken
of andere water bevattende objecten.
► Er mag geen vloeistof op de stekkerverbin-
ding van het apparaat komen.
WAARSCHUWING!
LETSELGEVAAR!
► Dit apparaat mag worden gebruikt door
kinderen vanaf 8jaar en door personen
met cbeperkte fysieke, zintuiglijke of gees-
telijke vermogens of gebrek aan ervaring
of kennis, mits ze onder toezicht staan of
over het veilige gebruik van het apparaat
zijn geïnstrueerd en de daaruit resulterende
gevaren hebben begrepen.
► Kinderen mogen niet met het apparaat
spelen.
IB_339566_SWWS240C1_LB8.indb 79 05.02.2020 14:44:01

■ 80
│
NL
│
BE
SWWS 240 C1
WAARSCHUWING!
LETSELGEVAAR!
► Reiniging en onderhoud door de gebruiker
mogen niet worden uitgevoerd door kinderen,
tenzij ze 8 jaar of ouder zijn en onder
toezicht staan.
► Houd het apparaat en het bijbehorende
snoer buiten bereik van kinderen jonger
dan 8 jaar.
► Mensen die ongevoelig zijn voor warmte,
mogen dit apparaat niet gebruiken!
► Raadpleeg eerst een arts als u vanwege
bestaande aandoeningen niet zeker weet
of u het apparaat mag gebruiken.
► Na gebruik kan het oppervlak van het ver-
warmingselement nog warm zijn.
► Bij verkeerd gebruik van het apparaat
bestaat er kans op letsel. Gebruik het ap-
paraat altijd in overeenstemming met de
bestemming!
IB_339566_SWWS240C1_LB8.indb 80 05.02.2020 14:44:01

NL
│
BE
│
81 ■
SWWS 240 C1
WAARSCHUWING!
LETSELGEVAAR!
► Gebruik het apparaat niet onder dekens of
handdoeken.
► Plaats het apparaat bij voorkeur dicht bij
een stopcontact. Zorg ervoor dat de stekker
bij gevaar goed bereikbaar is en dat u niet
kunt struikelen over het snoer.
► Zorg voor een veilige stand van het apparaat.
► Dompel het apparaat nooit onder in water
of in andere vloeistoffen!
► Gebruik het apparaat niet bij hartaandoe-
ningen, rode huid, ontstekingen, zwellingen,
gevoelige plekken, diabetes, open wonden,
verbrandingen, eczeem of psoriasis.
IB_339566_SWWS240C1_LB8.indb 81 05.02.2020 14:44:01

■ 82
│
NL
│
BE
SWWS 240 C1
LET OP! MATERIËLE SCHADE!
► Gebruik het apparaat niet als het leeg is,
zonder wax.
► Doe alleen wax in het apparaat, geen agres-
sieve of oplosmiddelhoudende substanties!
► Zet het apparaat uitsluitend op egale
oppervlakken die bestand zijn tegen hitte.
► Verhit de wax nooit in de plasticverpakking.
► Verhit de wax nooit in de magnetron,
boven open vuur of boven een kachel.
► Gebruik geen externe timer of een aparte
afstandsbediening om het apparaat te
bedienen.
► Gebruik geen puntige of scherpe voorwer-
pen om de koud geworden wax uit het
apparaat te verwijderen.
IB_339566_SWWS240C1_LB8.indb 82 05.02.2020 14:44:01

NL
│
BE
│
83 ■
SWWS 240 C1
Vóór het eerste gebruik
1) Veeg het apparaat van binnen en buiten af met een vochtige
doek om transportstof te verwijderen. Droog het apparaat goed
af, zodat er zich geen vocht meer in bevindt.
2) Plaats het apparaat op een egale ondergrond die bestand
is tegen hitte. Bedenk ook dat er mogelijk wax-spatten op de
ondergrond kunnen druppelen. De ondergrond moet daarom
goed reinigbaar zijn.
Automatische uitschakeling
Na 60 minuten gaat het apparaat automatisch uit. Na 55 minuten
begint het indicatielampje 2 te knipperen om u te herinneren aan
de automatische uitschakeling.
De automatische uitschakeling is geen vervanging voor het uit het
stopcontact trekken van de stekker na het gebruik! Deze dient alleen
voor de veiligheid! Haal altijd de stekker uit het stopcontact wanneer
u het apparaat niet gebruikt!
Apparaat voorbereiden
Wanneer het apparaat op een geschikte ondergrond is geplaatst:
1) Haal de wax-schijven 9 uit de verpakking.
2) Doe het benodigde aantal wax-schijven 9 in de binnenschaal 1.
Ga uit van de volgende richtwaarden, die echter enigszins kunnen
variëren:
IB_339566_SWWS240C1_LB8.indb 83 05.02.2020 14:44:01

■ 84
│
NL
│
BE
SWWS 240 C1
Lichaamsgedeelte
Aantal
wax-schijven 9
Onderbeen ca. 2 stuks per onderbeen
Oksels 1 stuks
Bikinizone 1 stuks
Hele lichaam (onderbe-
nen, oksels, bikinizone)
6 stuks
De combinatie van dit pictogram en een datum op de
verpakking van de wax-schijven 9 geeft aan hoe lang het
product houdbaar is.
3) Plaats het deksel 7 op het apparaat door de kleine plastic nok
in de geleiding 5 te plaatsen en dan het deksel 7 een beetje
met de wijzers van de klok mee te draaien (zie uitvouwpagina):
4) Steek de stekker 3 van het snoer in de stekkeraansluiting 4 op
het apparaat.
5) Steek de stekker in een stopcontact. Het apparaat wordt heet,
het indicatielampje 2 in de voet van het apparaat brandt.
6) Roer de wax tijdens het smelten zo nu en dan om.
Zodra de wax-schijven 9 zijn gesmolten (bij 6 wax-schijven ca. 25 -
30 minuten), kunt u beginnen met het ontharen.
IB_339566_SWWS240C1_LB8.indb 84 05.02.2020 14:44:01

NL
│
BE
│
85 ■
SWWS 240 C1
OPMERKING
► Als u merkt dat u meer wax nodig hebt dan u hebt gesmol-
ten, kunt u op elk gewenst moment meer wax-schijven 9 in
de binnenschaal 1 doen. Wacht tot de wax gesmolten is
voordat u doorgaat met ontharen.
► Smelt maximaal 6 wax-schijven 9 per keer.
Ontharen
De huidgedeeltes waarvan u haar wilt verwijderen, moeten droog,
schoon en vrij van verzorgingsproducten, olie of vet zijn.
OPMERKINGEN
► Test het apparaat vóór het eerste gebruik beslist op de
huid, om te controleren of uw huid dit type behandeling
verdraagt. Doe een beetje gesmolten wax op een niet-zicht-
baar gedeelte van de huid en controleer na het ontharen
of er binnen de volgende 24 uur veranderingen op de huid
zijn. Mocht dit het geval zijn, gebruik het apparaat dan niet
verder. Raadpleeg zo nodig een arts.
► Hebt u vaak last van ingegroeide haren, gebruik dan re-
gelmatig peelings. Deze kunnen het ingroeien van haren
voorkomen.
► Trek de wax-stroken altijd zo dicht mogelijk bij het huidop-
pervlak af.
► Let erop dat er geen wax op uw kleding komt. Wax-resten
laten zich moeilijk verwijderen en kunnen verkleuringen op
de kleding veroorzaken.
IB_339566_SWWS240C1_LB8.indb 85 05.02.2020 14:44:01

■ 86
│
NL
│
BE
SWWS 240 C1
Benen
Wanneer de wax-schijven 9 volledig zijn gesmolten:
1) Open het deksel 7 door het een beetje tegen de wijzers van de
klok in te draaien en naar boven toe op te tillen.
2) Neem wat wax op met de schuine zijkant van de spatel 8.
Overtollige wax kunt u aan de rand van het apparaat afstrijken.
3) Breng de wax meteen in de haargroeirichting (vanaf de knie in
de richting van de enkel) op de huid aan. De wax-strook moet
de dikte van een sinaasappelschil en de breedte van 2 naast
elkaar liggende spatels 8 hebben. Zo nodig brengt u daarvoor
meermaals wax aan. Probeer het uiteinde van de aangebrachte
wax-strook (dat dichter bij de enkel ligt) iets dikker aan te bren-
gen, omdat u dit uiteinde moet vastpakken om de wax-strook
weg te trekken.
4) Na het opbrengen kunt u de spatel 8 in het aflegvlak 6 op
de rand van het apparaat leggen, zodat de spatel 8 boven de
binnenschaal 1 ligt.
5) Wacht 30 - 60 seconden tot de wax droog is.
6) Trek met de ene hand de huid strak, pak met de andere hand de
wax-strook aan het dikke uiteinde en trek deze met een snelle
beweging tegen de haargroeirichting in (vanuit de enkel richting
knie) van het been af.
Doe hetzelfde voor de overige delen van de huid.
7) Wanneer u klaar bent met de behandeling, haalt u de stekker uit
het stopcontact om het apparaat uit te schakelen. Het indicatie-
lampje 2 dooft.
IB_339566_SWWS240C1_LB8.indb 86 05.02.2020 14:44:01

NL
│
BE
│
87 ■
SWWS 240 C1
Oksels
Wanneer de wax-schijf 9 volledig is gesmolten:
1) Open het deksel 7 door het een beetje tegen de wijzers van de
klok in te draaien en naar boven toe op te tillen.
OPMERKING
►
Omdat okselharen de neiging hebben in verschillende
richtingen te groeien, moeten deze in minstens 2 stappen
worden verwijderd.
2) Houd de ellebogen omhoog en naar achteren. Zo wordt de
huid in de okselholte strakgetrokken.
3) Neem wat wax op met de schuine zijkant van de spatel 8.
Overtollige wax kunt u aan de rand van het apparaat afstrijken.
4) Breng de wax meteen vanuit het midden van de okselholte
omhoog in de richting van de elleboog aan. De wax-strook
moet ongeveer zo dik zijn als een sinaasappelschil. Probeer het
uiteinde van de aangebrachte wax-strook (dat dichter bij de
elleboog ligt) iets dikker aan te brengen, omdat u dit uiteinde
moet vastpakken om de wax-strook weg te trekken.
5) Na het opbrengen kunt u de spatel 8 in het aflegvlak 6 op
de rand van het apparaat leggen, zodat de spatel 8 boven
de binnenschaal 1 ligt.
6) Wacht 30 - 60 seconden tot de wax droog is.
7) Pak de wax-strook aan het dikke uiteinde (dat dichter bij de el-
leboog ligt) vast en trek deze met een snelle beweging tegen de
haargroeirichting in omlaag van de oksel af.
8) Om het onderste deel van de okselholte te ontharen, brengt u de
wax vanuit het midden van de okselholte naar onderen op.
9) Wacht 30 - 60 seconden tot de wax droog is.
IB_339566_SWWS240C1_LB8.indb 87 05.02.2020 14:44:01

■ 88
│
NL
│
BE
SWWS 240 C1
10) Pak de wax-strook aan het onderste uiteinde vast en trek deze
met een snelle beweging tegen de haargroeirichting in naar
boven af.
11) Wanneer u klaar bent met de behandeling, haalt u de stekker uit
het stopcontact om het apparaat uit te schakelen. Het indicatie-
lampje 2 dooft.
Bikinizone
Wanneer de wax-schijf 9 volledig is gesmolten:
1) Open het deksel 7 door het een beetje tegen de wijzers van de
klok in te draaien en naar boven toe op te tillen.
2) Neem wat wax op met de schuine zijkant van de spatel 8.
Overtollige wax kunt u aan de rand van het apparaat afstrijken.
3) Na het opbrengen kunt u de spatel 8 in het aflegvlak 6 op
de rand van het apparaat leggen, zodat de spatel 8 boven de
binnenschaal 1 ligt.
OPMERKING
►
Onthaar in de bikinizone steeds kleine stukjes huid tegelijk.
De huid is in deze zone zeer gevoelig.
4) Trek de huid met de ene hand strak en breng met de andere
hand de wax aan in de haargroeirichting (in de richting van de
binnenkant van het bovenbeen).
5) Wacht 30 - 60 seconden tot de wax droog is.
6) Pak de wax-strook aan het uiteinde (dat dichter bij de binnenkant
van het bovenbeen ligt) vast en trek deze met een snelle beweging
tegen de haargroeirichting in van het been af.
Doe hetzelfde voor de overige delen van de huid.
7) Wanneer u klaar bent met de behandeling, haalt u de stekker uit
het stopcontact om het apparaat uit te schakelen. Het indicatie-
lampje 2 dooft.
IB_339566_SWWS240C1_LB8.indb 88 05.02.2020 14:44:01

NL
│
BE
│
89 ■
SWWS 240 C1
Na het ontharen
■ Reinig de spatel 8 (zie het hoofdstuk “Reinigen”).
■ Kleine wax-resten op de huid kunt u verwijderen met een beetje
babyolie. Mocht u geen babyolie in huis hebben, dan kunt u ook
olijfolie of andere spijsolie gebruiken.
■ Na het ontharen kan de huid een beetje rood zijn geworden. Dat
is normaal. Laat een beetje koud water over de betroffen plekken
stromen. Dat kalmeert de huid. Mocht de huid niet kalmeren en
hevig branden, raadpleeg dan een arts.
Reinigen
WAARSCHUWING!
GEVAAR VOOR EEN ELEKTRISCHE SCHOK!
► Haal voor het schoonmaken altijd eerst de stekker uit het
stopcontact!
► Dompel het apparaat nooit onder in water of in andere
vloeistoffen!
WAARSCHUWING! LETSELGEVAAR!
► Laat het apparaat iets afkoelen voordat u het schoonmaakt.
LET OP! MATERIËLE SCHADE!
► Gebruik geen puntige of scherpe voorwerpen om koud gewor-
den wax uit het apparaat te verwijderen.
► Gebruik geen chemische, schurende, of agressieve schoon-
maakmiddelen om het apparaat te reinigen.
IB_339566_SWWS240C1_LB8.indb 89 05.02.2020 14:44:01

■ 90
│
NL
│
BE
SWWS 240 C1
OPMERKING
► U hoeft de binnenschaal 1 niet na elk gebruik te reinigen en
alle wax-resten te verwijderen. De in het apparaat achterge-
bleven wax kan bij de volgende behandeling weer worden
gesmolten en opnieuw worden gebruikt!
► Neem voor het nabestellen van wax-schijven 9 contact op
met onze klantenservice (zie het hoofdstuk “Vervangingsonder-
delen bestellen”).
■ Strijk overtollige wax op de spatel 8 meteen na gebruik aan de
rand van het apparaat naar binnen toe af.
■ Veeg de spatel 8 en de rand van het apparaat meteen na ge-
bruik af met een met babyolie bevochtigde doek. Zo kunnen nog
zachte wax-resten worden verwijderd. Hiervoor kunt u het beste
een oude lap gebruiken, omdat wax-resten zich moeilijk uit textiel
laten verwijderen. Mocht u geen babyolie in huis hebben, dan
kunt u ook olijfolie of andere spijsolie gebruiken voor het schoon-
maken. Let er vooral op dat er geen wax-resten achterblijven in
de geleidingen 5 voor de vergrendeling van het deksel 7!
Veeg daarna de spatel 8 en de rand nogmaals af met een
droog stuk keukenpapier om olieresten te verwijderen.
■ Wanneer zich wax aan de buitenkant van de behuizing heeft
gehecht, verwijdert u die als volgt:
– Vergewis u ervan dat het apparaat is losgekoppeld van het
lichtnet, maar nog wel warm is.
– Veeg de buitenkanten af met een doek die is bevochtigd met olie.
– Let er vooral op dat er geen wax-resten achterblijven in de
geleidingen 5 voor de vergrendeling van het deksel 7!
– Verwijder olieresten met een schoon, droog stuk keukenpapier.
IB_339566_SWWS240C1_LB8.indb 90 05.02.2020 14:44:01

NL
│
BE
│
91 ■
SWWS 240 C1
Opbergen
OPMERKING
► U hoeft de binnenschaal 1 niet na elk gebruik te reinigen en
alle wax-resten te verwijderen. De in het apparaat achterge-
bleven wax kan bij de volgende behandeling weer worden
gesmolten en opnieuw worden gebruikt!
■ Wanneer het apparaat en de spatel 8 zijn schoongemaakt
zoals beschreven in het hoofdstuk “Reinigen”:
– Leg de spatel 8 in het aflegvlak 6 op de rand van het
apparaat, zodat de spatel 8 boven de binnenschaal 1 ligt.
– Plaats het deksel 7 op het apparaat.
– Berg het afgekoelde apparaat op een schone en droge plaats
op.
OPMERKING
► As na het opbergen het deksel 7 niet meer kan worden
geopend/gedraaid, zitten er waarschijnlijk koud geworden wax-
resten tussen het deksel 7 en het apparaat. Laat in dat geval het
apparaat met gesloten deksel 7 ca. 10 minuten (al naar gelang
de hoeveelheid wax) heet worden. De wax wordt zacht en het
deksel 7 kan weer worden geopend.
IB_339566_SWWS240C1_LB8.indb 91 05.02.2020 14:44:01

■ 92
│
NL
│
BE
SWWS 240 C1
Afvoeren
U kunt de gebruikte wax bij het gewone huisvuil deponeren.
Deponeer het apparaat in geen geval bij het
gewone huisvuil. Dit product voldoet aan de
Europese richtlijn 2012/19/EU.
Voer het apparaat af via een erkend afvalverwerkingsbedrijf of via uw
gemeentereiniging. Neem de momenteel geldende voorschriften in
acht. Neem bij twijfel contact op met de verantwoordelijke instantie.
Het product is recycleerbaar; er is een uitgebreide
producentenverantwoordelijkheid op van toepassing en
het afval wordt gescheiden ingezameld.
De verpakking bestaat uit milieuvriendelijke materialen,
die u via de plaatselijke recyclepunten kunt afvoeren.
Voer de verpakking af conform de milieuvoorschriften.
Let op de aanduiding op de verschillende verpakkings-
materialen en voer ze zo nodig gescheiden af. De
verpakkingsmaterialen zijn voorzien van afkortingen (a)
en cijfers (b) met de volgende betekenis: 1 - 7:
kunststoffen, 20 - 22: papier en karton, 80-98:
composietmaterialen
Informatie over mogelijkheden voor het afvoeren van het
afgedankte product krijgt u bij uw gemeentereiniging.
IB_339566_SWWS240C1_LB8.indb 92 05.02.2020 14:44:07

NL
│
BE
│
93 ■
SWWS 240 C1
Vervangingsonderdelen bestellen
Voor product SWWS 240 C1 kunt u de volgende vervangingsonder-
delen bestellen:
► Wax-schijven (18 stuks)
Bestel de reserveonderdelen via onze service-hotline (zie het
hoofdstuk “Service”) of op onze website: www.kompernass.com.
Met deze QR-code gaat u rechtstreeks naar onze website en kunt u
de beschikbare vervangings onderdelen bestellen:
OPMERKING
► Houd het IAN-nummer, dat op het omslag van deze gebruiks-
aanwijzing staat, bij de hand bij het bestellen.
IB_339566_SWWS240C1_LB8.indb 93 05.02.2020 14:44:08

■ 94
│
NL
│
BE
SWWS 240 C1
Garantie van Kompernaß Handels GmbH
Geachte klant,
U hebt op dit apparaat 3 jaar garantie vanaf de aankoopdatum. In
geval van ge breken in dit product hebt u wettelijke rechten tegenover
de verkoper van het product. Deze wettelijke rechten worden door
onze hierna beschreven garantie niet beperkt.
Garantievoorwaarden
De garantieperiode geldt vanaf de datum van aankoop. Bewaar de
kassabon zorgvuldig. U hebt hem nodig als bewijs van aankoop.
Als er binnen drie jaar vanaf de aankoopdatum van dit product een
materiaal- of fabricagefout optreedt, wordt - naar onze keuze - het
product door ons kosteloos gerepareerd of vervangen of wordt
de koopprijs terugbetaald. Voorwaarde voor deze garantie is dat
het defecte apparaat en het aankoopbewijs (kassabon) binnen de
termijn van drie jaar worden overlegd en dat kort wordt omschreven
waaruit het gebrek bestaat en wanneer het is opgetreden.
Wanneer het defect door onze garantie wordt gedekt, krijgt u het
gerepareerde product of een nieuw product retour. Met de reparatie
of vervanging van het product begint er geen nieuwe garantieperi-
ode.
Garantieperiode en wettelijke aanspraken bij gebre-
ken
De garantieperiode wordt door deze waarborg niet verlengd. Dat
geldt ook voor vervangen en gerepareerde onderdelen. Eventueel
al bij aankoop aanwezige schade en gebreken moeten meteen na
het uitpakken worden gemeld. Voor reparaties na afloop van de
garantieperiode worden kosten in rekening gebracht.
IB_339566_SWWS240C1_LB8.indb 94 05.02.2020 14:44:08

NL
│
BE
│
95 ■
SWWS 240 C1
Garantieomvang
Het apparaat is op basis van strenge kwaliteitsnormen met de
grootst mogelijke zorg vervaardigd en voorafgaand aan de levering
nauwkeurig gecontroleerd.
De garantie geldt voor materiaal- of fabricagefouten. Deze garantie
geldt niet voor productonderdelen die onderhevig zijn aan normale
slijtage en die daarom als slijtonderdelen worden beschouwd, of
voor schade aan breekbare onderdelen zoals schakelaars, accu‘s of
onderdelen die van glas zijn gemaakt.
Deze garantie vervalt wanneer het product is beschadigd, ondes-
kundig is gebruikt of is gerepareerd. Voor deskundig gebruik van het
product moeten alle in de gebruiksaanwijzing beschreven aanwijzin-
gen precies worden opgevolgd. Gebruiksdoeleinden en handelin-
gen die in de gebruiksaanwijzing worden afgeraden of waarvoor
wordt gewaarschuwd, moeten beslist worden vermeden.
Het product is uitsluitend bestemd voor privégebruik en niet voor
bedrijfsmatige doeleinden. Bij verkeerd gebruik en ondeskundige
behandeling, bij gebruik van geweld en bij reparaties die niet door
ons erkend servicefiliaal zijn uitgevoerd, vervalt de garantie.
Afhandeling bij een garantiekwestie
Voor een snelle afhandeling van uw aanvraag neemt u de volgende
aanwijzingen in acht:
■ Houd voor alle aanvragen de kassabon en het artikelnummer
(bijv.IAN12345) als aankoopbewijs bij de hand.
■ Het artikelnummer vindt u op het typeplaatje van het product, op
het product gegraveerd, op de titelpagina van de gebruiksaan-
wijzing (linksonder) of op de sticker op de achter- of onderkant
van het product.
■ Als er fouten in de werking of andere gebreken optreden, neemt
u eerst contract op met de hierna genoemde serviceafdeling,
telefonisch of viae-mail.
IB_339566_SWWS240C1_LB8.indb 95 05.02.2020 14:44:08

■ 96
│
NL
│
BE
SWWS 240 C1
■ Een als defect geregistreerd product kunt u dan zonder porto-
kosten naar het aan u doorgegeven serviceadres sturen. Voeg
het aankoopbewijs (kassabon) bij en vermeld waaruit het gebrek
bestaat en wanneer het is opgetreden.
Op www.lidl-service.com kunt u deze en vele andere
handleidingen, productvideo‘s en installatiesoftware
downloaden.
Met deze QR-code gaat u direct naar de website van
Lidl Service (www.lidl-service.com) en kunt u met het
invoeren van het artikelnummer (IAN) 123456 de
gebruiksaanwijzing openen.
Service
Service Nederland
Tel.: 0900 0400223 (0,10 EUR/Min.)
E-Mail: [email protected]
Service België
Tel.: 070 270 171 (0,15 EUR/Min.)
E-Mail: [email protected]
IAN 339566_1910
Importeur
Let op: het volgende adres is geen serviceadres. Neem eerst contact
op met het opgegeven serviceadres.
KOMPERNASS HANDELS GMBH
BURGSTRASSE 21
44867 BOCHUM
DUITSLAND
www.kompernass.com
IB_339566_SWWS240C1_LB8.indb 96 05.02.2020 14:44:08

PL
│
97 ■
SWWS 240 C1
Spis treści
Wstęp .......................................98
Użytkowanie zgodne z przeznaczeniem ..........98
Zakres dostawy ..............................98
Opis urządzenia ..............................99
Dane techniczne ..............................99
Wskazówki bezpieczeństwa ...................100
Przed pierwszym użyciem .....................105
Wyłącznik automatyczny ......................105
Przygotowanie urządzenia ....................105
Depilacja ...................................107
Nogi .............................................. 108
Pachy .............................................109
Okolice bikini ....................................... 110
Po depilacji .................................111
Czyszczenie .................................111
Przechowywanie ............................113
Utylizacja ...................................113
Zamawianie części zamiennych ................115
Gwarancja Kompernaß Handels GmbH ..........116
Serwis ............................................. 118
Importer ...........................................118
IB_339566_SWWS240C1_LB8.indb 97 05.02.2020 14:44:09

■ 98
│
PL
SWWS 240 C1
Wstęp
Serdecznie gratulujemy zakupu nowego urządzenia.
Wybrany produkt charakteryzuje się wysoką jakością.
Instrukcja obsługi jest częścią składową produktu.
Zawiera ona ważne informacje na temat bezpieczeń-
stwa, użytkowania i usuwania urządzenia.
Przed rozpoczęciem użytkowania produktu należy zapoznać się ze
wszystkimi informacjami dotyczącymi obsługi i bezpieczeństwa.
Produkt należy użytkować wyłącznie zgodnie z zamieszczonym tu
opisem oraz w podanym zakresie zastosowań. Instrukcję obsługi
należy zawsze przechowywać w pobliżu urządzenia, by móc z niej
skorzystać w razie potrzeby. W przypadku przekazania urządzenia
osobie trzeciej należy dołączyć do niego również całą dokumentację.
Użytkowanie zgodne z przeznaczeniem
To urządzenie służy wyłącznie depilacji nóg, pach i okolic bikini
u ludzi. Urządzenie przeznaczone jest wyłącznie do stosowania
w gospodarstwie domowym. Nie należy go używać do celów
komercyjnych.
Zakres dostawy
Zestaw do depilacji ciepłym woskiem
18 krążków wosku
Szpatułka
Instrukcja obsługi
IB_339566_SWWS240C1_LB8.indb 98 05.02.2020 14:44:09

PL
│
99 ■
SWWS 240 C1
Opis urządzenia
1 Miska wewnętrzna
2 Lampka kontrolna
3 Wtyk
4 Gniazdo
5 Szyna (do zablokowania pokrywki)
6 Półeczka (na szpatułkę)
7 Pokrywka
8 Szpatułka
9 Krążek wosku
Dane techniczne
Napięcie
220 - 240 V ∼ (prąd przemienny),
50 Hz
Pobór mocy 20 W
Pojemność ok. 530 ml
Klasa ochrony
II /
(podwójna izolacja)
IB_339566_SWWS240C1_LB8.indb 99 05.02.2020 14:44:12

■ 100
│
PL
SWWS 240 C1
Wskazówki bezpieczeństwa
OSTRZEŻENIE!
NIEBEZPIECZEŃSTWO PORAŻENIA
PRĄDEM ELEKTRYCZNYM!
► W przypadku uszkodzenia kabla zasilają-
cego należy zlecić jego wymianę produ-
centowi, w punkcie serwisowym lub osobie
posiadającej odpowiednie kwalifikacje.
Dzięki temu zapobiega się poważnym
zagrożeniom.
► Urządzenia wolno używać wyłącznie
w suchych pomieszczeniach. Nie wolno
go używać na otwartej przestrzeni.
► Nigdy nie otwierać obudowy urządzenia.
► Nie używać urządzenia w pobliżu wody,
na przykład umywalek, brodzików i wanien.
► Nigdy nie używać urządzenia w trakcie
kąpieli, prysznica ani snu.
► Nigdy nie chwytać wtyku sieciowego ani
kabla zasilającego wilgotnymi rękoma.
► Przed przystąpieniem do użytkowania należy
sprawdzić, czy urządzenie nie ma widocz-
nych uszkodzeń. Nie wolno uruchamiać
urządzenia, gdy jest uszkodzone lub upa-
dło na ziemię.
IB_339566_SWWS240C1_LB8.indb 100 05.02.2020 14:44:14

PL
│
101 ■
SWWS 240 C1
OSTRZEŻENIE!
NIEBEZPIECZEŃSTWO PORAŻENIA
PRĄDEM ELEKTRYCZNYM!
Nigdy nie używać urządzenia w
pobliżu wody, szczególnie w pobliżu
umywalki, wanny lub innych zbiorni-
ków na wodę.
► Na połączenie wtykowe urzą dzenia nie
może wylać się żadna ciecz.
OSTRZEŻENIE!
NIEBEZPIECZEŃSTWO OBRAŻEŃ!
► To urządzenie może być używane przez
dzieci od 8.roku życia oraz przez osoby
oograniczonych zdolnościach fizycznych,
sensorycznych lub umysłowych lub też
osoby nieposiadające odpowiedniego do-
świadczenia i/lub wiedzy wyłącznie pod
nadzorem lub po przeszkoleniu w zakresie
bezpiecznego użytkowania urządzenia
oraz potencjalnych zagrożeń.
► Dzieciom nie wolno bawić się urządzeniem.
IB_339566_SWWS240C1_LB8.indb 101 05.02.2020 14:44:17

■ 102
│
PL
SWWS 240 C1
OSTRZEŻENIE!
NIEBEZPIECZEŃSTWO OBRAŻEŃ!
► Czyszczenia ani konserwacji przez użyt-
kownika nie mogą wykonywać dzieci,
chyba że mają 8 lat lub więcej i są pod
nadzorem.
► Urządzenie oraz jego kabel zasilający
należy trzymać poza zasięgiem dzieci
w wieku poniżej 8 lat.
► Osoby wrażliwe na wysoką temperaturę
nie powinny używać tego urządzenia!
► Jeśli ze względu na wcześniejsze swoje
schorzenia nie masz pewności, czy możesz
korzystać z urządzenia, przed użyciem
skonsultuj się z lekarzem.
► Po użyciu powierzchnia elementu grzejne-
go pozostaje jeszcze ciepła.
► Nieprawidłowe użycie urzą dzenia grozi
obrażeniami. Urządzenie należy zawsze
stosować zgodnie z jego przeznaczeniem!
IB_339566_SWWS240C1_LB8.indb 102 05.02.2020 14:44:17

PL
│
103 ■
SWWS 240 C1
OSTRZEŻENIE!
NIEBEZPIECZEŃSTWO OBRAŻEŃ!
► Nie korzystaj z urządzenia pod kołdrami
lub ręcznikami.
► Postaw urządzenie jak najbliżej gniazda
sieciowego. Pamiętaj, by wtyk był łatwo
dostępny w celu wyjęcia go z gniazda w
przypadku zagrożenia, a także, by kabel
sieciowy nie był przyczyną potknięcia.
► Ustaw urządzenie na stabilnym podłożu.
► W żadnym razie nie zanurzaj urządzenia w
wodzie ani w innych cieczach!
► Nie używaj urządzenia w przypadku
występowania schorzeń serca, zaczerwie-
niani skóry, zapaleń, opuchlizn, wrażliwych
miejsc, cukrzycy, otwartych ran, poparzeń,
egzemy lub łuszczycy.
IB_339566_SWWS240C1_LB8.indb 103 05.02.2020 14:44:17

■ 104
│
PL
SWWS 240 C1
UWAGA! SZKODY MATERIALNE!
► Nigdy nie używaj pustego urządzenia, bez
wosku.
► Urządzenie napełniać wyłącznie woskiem,
nie stosować żadnych żrących lub zawiera-
jących rozpuszczalniki substancji!
► Stawiaj urządzenie wyłącznie na odpornych
na wysoką temperaturę, równych płaszczy-
znach.
► Nigdy nie rozgrzewaj wosku w opakowaniu
foliowym.
► Nigdy nie rozgrzewaj wosku w kuchence
mikrofalowej, nad otwartym płomieniem
lub na kuchence.
► Do sterowania pracą urządzenia nie używaj
żadnych zewnętrznych zegarów sterujących
ani innego systemu zdalnego sterowania.
► Nie używaj spiczastych ani ostrych przed-
miotów do usuwania zastygłego wosku z
urządzenia.
IB_339566_SWWS240C1_LB8.indb 104 05.02.2020 14:44:17

PL
│
105 ■
SWWS 240 C1
Przed pierwszym użyciem
1) Wytrzyj urządzenie wilgotną szmatką od wewnątrz i od zewnątrz,
aby usunąć z niego pył, który osadził się w trakcie transportu.
Dobrze je osusz, aby w urządzeniu nie było wilgoci.
2) Postaw urządzenie na równym, odpornym na działanie wysokiej
temperatury podłożu. Pamiętaj, że na podłoże mogą kapać
krople rozgrzanego wosku. Dlatego powinno być ono łatwe do
czyszczenia.
Wyłącznik automatyczny
Po upływie 60 minut urządzenie wyłączy się automatycznie.
Po 55 minutach, lampka kontrolna 2 zacznie migać, aby przypo-
mnieć o zbliżającym się automatycznym wyłączeniu.
Automatyczne wyłączenie nie zastępuje wyjęcia wtyczki sieciowej z
gniazda po zakończeniu korzystania z urządzenia! Służy ono tylko
do zapewnienia bezpieczeństwa! Zawsze wyciągaj wtyk z gniazda
sieciowego, gdy nie używasz urządzenia!
Przygotowanie urządzenia
Gdy urządzenie jest umieszczone na odpowiednim podłożu:
1) Wyjmij krążki wosku 9 z opakowania.
2) Włóż wymaganą liczbę krążków wosku 9 do miski wewnętrz-
nej 1. Korzystaj z następujących wytycznych, ale mogą się one
nieco różnić:
IB_339566_SWWS240C1_LB8.indb 105 05.02.2020 14:44:17

■ 106
│
PL
SWWS 240 C1
Region ciała
Liczba krążków
woskowych 9
Podudzie około 2 na każde podudzie
Pachy 1 sztuka
Okolice bikini 1 sztuka
Całe ciało (podudzia,
pachy, okolice bikini)
6 sztuk
Symbol ten, wraz z datą, na opakowaniu krążków
woskowych 9 wskazuje, jak długo produkt jest przydatny
do użycia.
3) Załóż pokrywkę 7 na urządzenie, wsuwając małą plastikową
wypustkę w szynę 5, a następnie obróć pokrywkę 7 nieco
w prawo (patrz rozkładana strona):
4) Włóż wtyk 3 kabla zasilającego do gniazda 4 w urządzeniu.
5) Włóż wtyk sieciowy do gniazda sieciowego. Urządzenie
nagrzewa się, lampka kontrolna 2 w podstawie urządzenia
świeci się.
6) Podczas topienia wosku mieszaj go od czasu do czasu.
Gdy tylko krążki woskowe 9 sie stopią (przy 6 krążkach woskowych
ok. 25 - 30 minut), można zacząć depilację.
IB_339566_SWWS240C1_LB8.indb 106 05.02.2020 14:44:18

PL
│
107 ■
SWWS 240 C1
WSKAZÓWKA
► Jeśli zauważysz, że potrzebujesz więcej wosku, niż się
stopiło, możesz w każdym momencie dodać kolejne krążki
wosku 9 do wewnętrznej miski 1. Przed przystąpieniem
do depilacji poczekaj, aż wosk się roztopi.
► Rozpuszczaj maksymalnie 6 krążków woskowych 9
na
jeden raz.
Depilacja
Skóra z której chcesz usunąć włosy musi być sucha, czysta i nie
może być posmarowana żadnymi produktami pielęgnacyjnymi,
olejkami lub kremami.
WSKAZÓWKI
► Przed pierwszym użyciem należy koniecznie przeprowadzić
test na skórze, aby sprawdzić, czy Twoja skóra toleruje tego
typu zabiegi. Nanieś trochę roztopionego wosku na ukrytą
powierzchnię skóry i sprawdź po zerwaniu, czy nie wystę-
pują zmiany na skórze. Jeśli pojawią się zmiany skórne, nie
korzystaj dalej z urządzenia. Jeśli to konieczne, skonsultuj
się z lekarzem.
► Jeśli masz skłonność do wrastania włosków, regularnie
używaj peelingu. Może to zapobiegać wrastaniu włosków.
► Paski woskowe zrywaj zawsze możliwie jak najbliżej
powierzchni skóry.
► Uważaj na to, aby na ubranie nie dostał się wosk.
Pozostałości wosku mogą być trudne do usunięcia i mogą
powodować odbarwienie ubrania.
IB_339566_SWWS240C1_LB8.indb 107 05.02.2020 14:44:18

■ 108
│
PL
SWWS 240 C1
Nogi
Gdy krążki wosku 9 roztopią się całkowicie:
1) Otwórz pokrywkę 7, obracając ją nieco w lewo i unosząc do
góry.
2) Pobierz trochę wosku szpatułką 8. Nadmiar wosku można
wytrzeć o krawędź urządzenia.
3) Wosk nanoś od razu na skórę w kierunku wzrostu włosów (od
kolana w kierunku kostki). Pasek wosku powinien mieć grubość
skórki pomarańczy oraz powierzchnię 2 ułożonych obok siebie
szpatułek 8. Ewentualnie może być konieczne pobieranie
wosku kilka razy. Postaraj się, aby koniec naniesionego paska
wosku (ten bliżej kostki) był nieco grubszy, ponieważ za ten
koniec trzeba będzie chwycić w celu oderwania wosku.
4) Po aplikacji wosku możesz odłożyć szpatułkę 8 na półeczkę 6
na krawędzi urządzenia, aby szpatułka 8 była ułożona nieco
ponad miską wewnętrzną 1.
5) Odczekaj 30 - 60 sekund, aż wosk wyschnie.
6) Jedną ręką napręż skórę, chwyć pasek wosku za grubszy koniec
i pociągnij go szybkim ruchem pod włos (od kostki w kierunku
kolana).
W pozostałych miejscach postępuj tak samo.
7) Po zakończeniu korzystania z urządzenia wyciągnij wtyk sieciowy
z gniazda sieciowego, aby wyłączyć urządzenie.
Lampka kontrolna 2 zgaśnie.
IB_339566_SWWS240C1_LB8.indb 108 05.02.2020 14:44:18

PL
│
109 ■
SWWS 240 C1
Pachy
Po całkowitym stopieniu krążka wosku 9:
1) Otwórz pokrywkę 7, obracając ją nieco w lewo i unosząc do
góry.
WSKAZÓWKA
►
Ponieważ włosy pod pachami często rosną w różnych
kierunkach, należy je usuwać w co najmniej 2 etapach.
2) Trzymaj łokieć skierowany do góry i w tył. W ten sposób skóra
pod pachą się napręża.
3) Pobierz trochę wosku szpatułką 8. Nadmiar wosku można
wytrzeć o krawędź urządzenia.
4) Nanoś wosk od razu od środka pachy do góry w kierunku
łokcia. Pasek wosku powinien mię mniej więcej grubość skórki
pomarańczy. Postaraj się, by koniec naniesionego paska wosku
(ten bliżej łokcia) był nieco grubszy, ponieważ za ten koniec
trzeba będzie chwycić w celu oderwania wosku.
5) Po aplikacji wosku możesz odłożyć szpatułkę 8 na półeczkę 6
na krawędzi urządzenia, aby szpatułka 8 była ułożona nieco
ponad miską wewnętrzną 1.
6) Odczekaj 30 - 60 sekund, aż wosk wyschnie.
7) Chwyć pasek wosku za górny koniec (znajdujący się bliżej
łokcia) i pociągnij go szybkim ruchem pod włos do dołu.
8) Aby wykonać depilację dolnej części pachy, nanoś wosk od
środka pachy kierując się do dołu.
9) Odczekaj 30 - 60 sekund, aż wosk wyschnie.
IB_339566_SWWS240C1_LB8.indb 109 05.02.2020 14:44:18

■ 110
│
PL
SWWS 240 C1
10) Chwyć pasek wosku za górny koniec (ten bliżej łokcia) i pociągnij
go szybkim ruchem pod włos do dołu.
11) Po zakończeniu korzystania z urządzenia wyciągnij wtyk sieciowy
z gniazda sieciowego, aby wyłączyć urządzenie. Lampka
kontrolna 2 zgaśnie.
Okolice bikini
Po całkowitym stopieniu krążka wosku 9:
1) Otwórz pokrywkę 7, obracając ją nieco w lewo i unosząc do
góry.
2) Pobierz trochę wosku szpatułką 8. Nadmiar wosku można
wytrzeć o krawędź urządzenia.
3) Po aplikacji wosku możesz odłożyć szpatułkę 8 na półeczkę 6
na krawędzi urządzenia, aby szpatułka 8 była ułożona nieco
ponad miską wewnętrzną 1.
WSKAZÓWKA
► W okolicach bikini wykonuj depilację tylko na małych
obszarach jednocześnie. Skóra jest tam bardzo wrażliwa.
4) Napręż skórę jedną ręką i nanoś wosk w kierunku wzrostu
włosów (kierunek wewnętrznej strony ud).
5) Odczekaj 30 - 60 sekund, aż wosk wyschnie.
6) Chwyć pasek wosku za górny koniec (ten bliżej wewnętrznej
strony uda) i pociągnij go szybkim ruchem pod włos do dołu.
W pozostałych miejscach postępuj tak samo.
7) Po zakończeniu korzystania z urządzenia wyciągnij wtyk sieciowy
z gniazda sieciowego, aby wyłączyć urządzenie.
Lampka kontrolna 2 zgaśnie.
IB_339566_SWWS240C1_LB8.indb 110 05.02.2020 14:44:18

PL
│
111 ■
SWWS 240 C1
Po depilacji
■ Wyczyść szpatułkę 8 (patrz rozdział „Czyszczenie“).
■ Niewielkie pozostałości wosku na skórze można usuwać oliwką
dla dzieci. Jeśli nie masz pod ręką oliwki dla dzieci, możesz
również użyć oliwy lub innego oleju spożywczego.
■ Po depilacji skóra może być lekko zaczerwieniona.
Jest to normalne. Spłucz dane miejsca niewielką ilością zimnej
wody. To złagodzi skórę. Jeśli to nie pomoże i skóra będzie piec,
skonsultuj się z lekarzem.
Czyszczenie
OSTRZEŻENIE! NIEBEZPIECZEŃSTWO PORAŻENIA
PRĄDEM ELEKTRYCZNYM!
► Przed każdym czyszczeniem należy wyciągnąć wtyczkę
z gniazda zasilania!
► Nigdy nie wolno zanurzać urządzenia w wodzie ani w innych
cieczach.
OSTRZEŻENIE! NIEBEZPIECZEŃSTWO OBRAŻEŃ!
► Przed przystąpieniem do czyszczenia urządzenia odczekaj
do jego ostygnięcia.
UWAGA! SZKODY MATERIALNE!
► Nie używaj spiczastych ani ostrych przedmiotów do usuwania
zastygłego wosku z urządzenia!
► Do czyszczenia urządzenia nie stosuj żadnych chemicznych,
szorujących ani żrących środków czyszczących!
IB_339566_SWWS240C1_LB8.indb 111 05.02.2020 14:44:18

■ 112
│
PL
SWWS 240 C1
WSKAZÓWKA
► Miski wewnętrznej 1 po każdym użyciu nie trzeba czyścić
i usuwać wszystkich resztek wosku. Pozostały w urządzeniu
wosk można przy następnym użyciu stopić i ponownie użyć!
► Aby zamówić nowe krążki wosku 9, prosimy o kontakt z
naszym działem obsługi klienta (patrz rozdział „Gwarancja i
serwis”).
■ Zbierz nadmiar wosku ze szpatułki 8 bezpośrednio po użyciu,
zbierając go wzdłuż krawędzi urządzenia do środka.
■ Zmyj szpatułkę 8 oraz krawędź urządzenia bezpośrednio po
zastosowaniu, używając do tego szmatki zwilżonej oliwką dla
dzieci. Tak można usunąć pozostałości jeszcze miękkiego wosku.
Najlepiej użyć starego kawałka materiału, ponieważ pozostało-
ści wosku są trudne do usunięcia. Jeśli nie masz w domu oliwki
dla dzieci, możesz do czyszczenia również użyć oliwy lub
innego oleju spożywczego.
Szczególnie uważaj na to, aby w szynach 5 blokady pokrywki 7
nie pozostały żadne zanieczyszczenia! Następnie wytrzyj szpa-
tułkę 8 i krawędź suchym ręcznikiem papierowym, aby usunąć
pozostałości oleju.
■ Jeśli do zewnętrznej powierzchni obudowy przylega wosk, usuń
go w następujący sposób:
– Upewnij się, że urządzenie jest odłączone od zasilania
sieciowego, ale wciąż jest ciepłe.
– Przetrzyj powierzchnię zewnętrzną szmatką zwilżoną oliwą.
– Szczególnie uważaj na to, aby w szynach 5 blokady
pokrywki 7 nie pozostały żadne zanieczyszczenia!
– Usuń pozostałości oleju suchym i czystym ręcznikiem
papierowym.
IB_339566_SWWS240C1_LB8.indb 112 05.02.2020 14:44:18

PL
│
113 ■
SWWS 240 C1
Przechowywanie
WSKAZÓWKA
► Miski wewnętrznej 1 po każdym użyciu nie trzeba czyścić
i usuwać wszystkich resztek wosku. Pozostały w urządzeniu
wosk można przy następnym użyciu stopić i ponownie użyć!
■ Gdy urządzenie i szpatułka 8 zostały wyczyszczone w sposób
opisany w rozdziale „Czyszczenie“:
– Odłóż szpatułkę 8 na półeczkę 6 na krawędzi urządzenia,
aby szpatułka 8 była ułożona nieco ponad miską wewnętrz-
ną 1.
– Załóż pokrywkę 7.
– Schłodzone urządzenie należy przechowywać w czystym
i suchym miejscu.
WSKAZÓWKA
► Jeśli po zakończeniu przechowywania nie można otworzyć/
obrócić pokrywki 7, pomiędzy pokrywką 7 a urządzeniem
znajdują się prawdopodobnie zastygnięte resztki wosku.
W takim przypadku rozgrzej urządzenie z zamkniętą pokrywką 7
przez ok. 10 minut (w zależności od ilości wosku).
Wosk stanie się miękki i będzie można otworzyć pokrywkę 7.
Utylizacja
Zużyty wosk można wyrzucać razem z normalnymi odpadami
komunalnymi.
W żadnym przypadku nie wyrzucaj urzą-
dzenia do zwykłych śmieci domowych. Ten
produkt podlega dyrektywie europejskiej
2012/19/EU.
IB_339566_SWWS240C1_LB8.indb 113 05.02.2020 14:44:21

■ 114
│
PL
SWWS 240 C1
Zużyte urządzenie należy oddać do certyfikowanego zakładu
utylizacji odpadów lub do komunalnego zakładu oczyszczania.
Należy przestrzegać aktualnie obowiązujących przepisów. W razie
pytań i wątpliwości odnośnie do zasad utylizacji należy zwrócić się
do miejscowego zakładu utylizacji odpadów.
Produkt można poddać recyklingowi, podlega
rozszerzonej odpowiedzialności producenta i jest
zbierany w ramach systemu segregacji odpadów.
Opakowanie urządzenia jest wykonane z materiałów
przyjaznych dla środowiska naturalnego, które można
zutylizować w lokalnych punktach recyklingu.
Opakowania należy utylizować w sposób przyjazny
dla środowiska.
Przestrzegać oznaczeń na różnych materiałach
opakowaniowych i w razie potrzeby utylizuj je zgodnie
z zasadami segregacji odpadów. Materiały opakowa-
niowe są oznaczone skrótami (a) i cyframi (b) w
następujący sposób:
1–7: tworzywa sztuczne,
20–22: papier i tektura,
80–98: kompozyty.
Informacji na temat możliwości utylizacji wyeksploato-
wanego produktu udziela urząd gminy lub miasta.
IB_339566_SWWS240C1_LB8.indb 114 05.02.2020 14:44:24

PL
│
115 ■
SWWS 240 C1
Zamawianie części zamiennych
Do produktu SWWS 240 C1 można zamówić następujące części
zamienne:
► woskowych (18 sztuka)
Zamawiaj części zamienne przez naszą infolinię serwisową (patrz
rozdział „Serwis″) lub wygodnie na naszej stronie internetowej pod
adresem www.kompernass.com..
Za pomocą tego kodu QR możesz przejść bezpośrednio do naszej
strony internetowej i zamówić dostępne części zamienne:
WSKAZÓWKA
► Zamawiając części zamienne, miej pod ręką numer IAN, który
można znaleźć na okładce tej instrukcji obsługi.
IB_339566_SWWS240C1_LB8.indb 115 05.02.2020 14:44:25

■ 116
│
PL
SWWS 240 C1
Gwarancja Kompernaß Handels GmbH
Szanowny Kliencie,
To urządzenie objęte jest 3-letnią gwarancją, licząc od daty zakupu. W
przypadku wad tego produktu, masz gwarantowane ustawowo prawa
w stosunku sprzedawcy. Te ustawowe prawa nie są ograniczone
przez nasze opisane poniżej warunki gwarancji.
Warunki gwarancji
Okres gwarancji rozpoczyna się od daty zakupu. Należy zachować
paragon. Jest on wymagany jako dowód zakupu.
Jeżeli w ciągu trzech lat od daty zakupu produktu ujawni się w nim
wada materiałowa lub produkcyjna, produkt zostanie wedle na-
szego uznania nieodpłatnie naprawiony, wymieniony na nowy lub
zostanie zwrócona jego cena. Warunkiem spełnienia tego świad-
czenia gwarancyjnego jest dostarczenie w trakcie tego trzyletniego
okresu uszkodzonego urządzenia wraz z dowodem zakupu (para-
gonem) oraz krótkim opisem wady i daty jej wystąpienia.
Jeżeli wada jest objęta naszą gwarancją, otrzymasz z powrotem
naprawiony lub nowy produkt.
Okres gwarancji i ustawowe roszczenia gwarancyjne
Wykonanie usługi gwarancyjnej nie przedłuża okresu gwarancji.
Dotyczy to również wymienionych i naprawionych części. Wszelkie
szkody i wady wykryte w chwili zakupu należy zgłosić bezpośred-
nio po rozpakowaniu urządzenia. Po upływie okresu gwarancji
wszelkie naprawy są wykonywane odpłatnie.
Zakres gwarancji
Urządzenie zostało starannie wyprodukowane i poddane przed
wysyłką skrupulatnej kontroli jakości.
Gwarancja obejmuje wady materiałowe lub produkcyjne. Niniejsza
gwarancja nie obejmuje części produktu, podlegających normalne-
IB_339566_SWWS240C1_LB8.indb 116 05.02.2020 14:44:25

PL
│
117 ■
SWWS 240 C1
mu zużyciu, ani uszkodzeń części łatwo łamliwych, np. przełączni-
ków, akumulatorów, lub części wykonanych ze szkła.
Niniejsza gwarancja traci swoją ważność, jeśli produkt został uszko-
dzony, nie używano go prawidłowo lub nie serwisowano należycie.
W celu zapewnienia prawidłowego stosowania produktu należy
ściśle przestrzegać wszystkich instrukcji wymienionych w instrukcjach
obsługi. Należy bezwzględnie unikać zastosowania oraz postępo-
wania, których odradza się w instrukcji obsługi lub przed którymi się
w niej ostrzega.
Produkt przeznaczony jest wyłącznie do użytku domowego, a nie do
zastosowań komercyjnych. Niewłaściwe użytkowanie urządzenia, uży-
wanie go w sposób niezgodny z jego przeznaczeniem, użycie siły lub
ingerencja w urządzenie, dokonywana poza naszymi autoryzowany-
mi punktami serwisowymi, powodują utratę gwarancji.
Realizacja zobowiązań gwarancyjnych
W celu zapewnienia szybkiego załatwienia sprawy, postępuj zgod-
nie z poniższymi wskazówkami:
■ W przypadku wszelkich pytań przygotuj paragon fiskalny oraz
numer artykułu (np. IAN12345) jako dowód zakupu.
■ Numer artykułu można znaleźć na tabliczce znamionowej na
produkcie, wygrawerowany na urządzeniu, zapisany na stronie
tytułowej instrukcji obsługi (w dolnym lewym rogu) lub na naklej-
ce ztyłu bądź na spodzie urządzenia.
■ W przypadku wystąpienia błędów działania lub innych wad,
prosimy o kontakt z odpowiednim działem serwisu telefonicz-
nie lub przez e-mail.
■ Zarejestrowany jako wadliwy produkt możesz wtedy wraz z
dołączonym dowodem zakupu (paragonem) oraz opisem i datą
wystąpienia usterki wysłać nieodpłatnie na przekazany wcześniej
adres serwisu.
IB_339566_SWWS240C1_LB8.indb 117 05.02.2020 14:44:25

■ 118
│
PL
SWWS 240 C1
Na stronie www.lidl-service.com możesz pobrać te
i wiele innych instrukcji, filmów o produktach oraz
oprogramowanie instalacyjne.
Za pomocą tego kodu QR możesz przejść
bezpośrednio na stronę serwisu Lidl
(www.lidl-service.com), gdzie możesz otworzyć
instrukcję obsługi, wpisując numer artykułu (IAN)
123456.
Serwis
Serwis Polska
Tel.: 22 397 4996
E-Mail: [email protected]
IAN 339566_1910
Importer
Pamiętaj, że poniższy adres nie jest adresem serwisu. Skontaktuj się
najpierw z odpowiednim punktem serwisowym.
KOMPERNASS HANDELS GMBH
BURGSTRASSE 21
44867 BOCHUM
NIEMCY
www.kompernass.com
IB_339566_SWWS240C1_LB8.indb 118 05.02.2020 14:44:25

CZ
│
119 ■
SWWS 240 C1
Obsah
Úvod .......................................120
Použití vsouladu s určením ....................120
Rozsah dodávky .............................120
Popis přístroje ...............................121
Technické údaje ..............................121
Bezpečnostní pokyny .........................122
Před prvním použitím .........................127
Vypínací automatika .........................127
Příprava přístroje ............................127
Depilace ....................................129
Nohy .............................................130
Podpaží ...........................................131
Oblast linie bikin. . . . . . . . . . . . . . . . . . . . . . . . . . . . . . . . . . . . . 132
Po depilaci ..................................133
Čištění ......................................133
Skladování ..................................135
Likvidace ...................................136
Objednávání náhradních dílů ..................137
Záruka společnosti Kompernass Handels GmbH . . .138
Servis ............................................. 140
Dovozce ...........................................140
IB_339566_SWWS240C1_LB8.indb 119 05.02.2020 14:44:25

■ 120
│
CZ
SWWS 240 C1
Úvod
Blahopřejeme vám kzakoupení nového přístroje.
Rozhodli jste se pro vysoce kvalitní výrobek. Návod
kobsluze je součástí tohoto výrobku. Obsahuje důležité
informace obezpečnosti, použití a likvidaci. Před
použitím výrobku se prosím dobře seznamte se všemi
provozními a bezpečnostními pokyny. Výrobek používejte pouze
předepsaným způsobem a pro uvedené oblasti použití. Návod k
obsluze uchovejte vždy jako referenční příručku v blízkosti výrobku.
Při předávání výrobku třetím osobám předejte spolu sním ityto
podklady.
Použití vsouladu s určením
Tento přístroj slouží výhradně pro depilaci nohou, podpaží a oblasti
linie bikin na lidském těle. Tento přístroj je určen výhradně kpoužití
vdomácnostech pro soukromé účely. Není určen ke komerčnímu
použití.
Rozsah dodávky
Elektrická depilační sada
18 voskových disků
Špachtle
Návod kobsluze
IB_339566_SWWS240C1_LB8.indb 120 05.02.2020 14:44:25

CZ
│
121 ■
SWWS 240 C1
Popis přístroje
1 vnitřní miska
2 kontrolka
3 zástrčka
4 zdířka
5 obruč (pro zajištění víka)
6 odkládání (pro špachtli)
7 víko
8 špachtle
9 voskový disk
Technické údaje
Napětí 220 - 240 V ∼ (střídavý proud), 50 Hz
Příkon 20 W
Kapacita nádoby cca 530 ml
Třída ochrany
II /
(dvojitá izolace)
IB_339566_SWWS240C1_LB8.indb 121 05.02.2020 14:44:28

■ 122
│
CZ
SWWS 240 C1
Bezpečnostní pokyny
VÝSTRAHA! NEBEZPEČÍ ÚRAZU
ELEKTRICKÝM PROUDEM!
► Pokud je napájecí kabel tohoto přístroje
poškozen, musí jej vyměnit výrobce, jeho
zákaznický servis nebo obdobně kvalifikova-
ná osoba, aby se tak zabránilo nebezpečí.
► Přístroj používejte jen v suchých prostorách,
ne venku.
► Kryt přístroje nikdy neotevírejte.
► Nepoužívejte přístroj v blízkosti vody, např.
umyvadel, sprchových vaniček nebo van.
► Přístroj nikdy nepoužívejte při koupání,
sprchování nebo při spaní.
► Nedotýkejte se síťové zástrčky nebo síťové-
ho kabelu nikdy mokrýma rukama.
► Před použitím zkontrolujte, zda přístroj není
zvenčí viditelně poškozený. Poškozený
nebo na zem spadlý přístroj neuvádějte do
provozu.
IB_339566_SWWS240C1_LB8.indb 122 05.02.2020 14:44:31

CZ
│
123 ■
SWWS 240 C1
VÝSTRAHA! NEBEZPEČÍ ÚRAZU
ELEKTRICKÝM PROUDEM!
Tento přístroj se v žádném případě
nesmí používat v blízkosti vany, sprch
nebo jiných nádrží, obsahujících vodu.
► Na konektor přístroje nesmí vytéct žádná
kapalina.
VÝSTRAHA!
NEBEZPEČÍ ZRANĚNÍ!
► Děti starší 8 let a osoby somezenými fyzický-
mi, smyslovými nebo mentálními schopnostmi
či nedostatkem zkušeností a znalostí mohou
používat tento přístroj, avšak pouze tehdy,
pokud jsou pod dohledem nebo pokud byly
poučeny obezpečném používání přístroje
a pokud porozuměly ztoho vyplývajícímu
nebezpečí.
► Děti si nesmí spřístrojem hrát.
IB_339566_SWWS240C1_LB8.indb 123 05.02.2020 14:44:34

■ 124
│
CZ
SWWS 240 C1
VÝSTRAHA!
NEBEZPEČÍ ZRANĚNÍ!
► Děti nesmí provádět uživatelské čištění ani
údržbu, ledaže jsou starší než 8 let a jsou
pod dohledem.
► Děti mladší 8let nesmí mít přístup kpřístroji
a jeho připojovacímu kabelu.
► Lidé citliví na teplo nesmí tento přístroj
používat!
► Pokud si z důvodu již předchozích onemoc-
nění nejste jisti, zda přístroj můžete používat,
poraďte se před použitím s lékařem.
► Po použití je na povrchu topného prvku
ještě zbytkové teplo.
► Při nesprávném použití přístroje hrozí ne-
bezpečí zranění. Přístroj používejte výlučně
vsouladu surčením!
IB_339566_SWWS240C1_LB8.indb 124 05.02.2020 14:44:34

CZ
│
125 ■
SWWS 240 C1
VÝSTRAHA! NEBEZPEČÍ ZRANĚNÍ!
► Přístroj nikdy nepoužívejte pod dekami
nebo ručníky.
► Přístroj umístěte pokud možno do blízkosti
zásuvky. Zajistěte, aby síťová zástrčka byla
vpřípadě nebezpečí rychle dosažitelná
a aby nebylo možné zakopnout osíťový
kabel.
► Zajistěte, aby byl přístroj postavený ve
stabilní poloze.
► Přístroj nikdy neponořujte do vody či jiných
tekutin!
► Přístroj nepoužívejte při srdečních onemoc-
něních, zarudnutí kůže, zánětech, otocích,
na citlivých místech, v případě cukrovky,
otevřených ran, popálenin, ekzémech nebo
lupénky.
IB_339566_SWWS240C1_LB8.indb 125 05.02.2020 14:44:34

■ 126
│
CZ
SWWS 240 C1
POZOR! VĚCNÉ ŠKODY!
► Nikdy neprovozujte přístroj naprázdno,
bez vosku.
► Přístroj plňte pouze voskem, nikoliv agre-
sivními látkami nebo přípravky sobsahem
rozpouštědel!
► Postavte přístroj výhradně na tepelně odol-
né, rovné povrchy.
► Vosk nikdy nerozehřívejte v plastovém
obalu.
► Vosk nikdy nerozehřívejte v mikrovlnné troubě,
nad otevřeným ohněm nebo sporákem.
► Kprovozu přístroje nepoužívejte externí
spínací hodiny ani samostatné dálkové
ovládání.
► Pro vyjmutí vosku z přístroje nepoužívejte
špičaté ani ostré předměty.
IB_339566_SWWS240C1_LB8.indb 126 05.02.2020 14:44:34

CZ
│
127 ■
SWWS 240 C1
Před prvním použitím
1) Otřete přístroj vlhkým hadříkem zevnitř a zvenčí k odstranění
prachu usazeného při přepravě. Dobře ho vysušte, aby v přístroji
nebyla žádná vlhkost.
2) Přístroj postavte vždy na rovný a tepelně odolný podklad. Také
mějte na paměti, že na podklad mohou odkapávat kapky vosku.
Proto by měl být snadno čistitelný.
Vypínací automatika
Po 60 minutách se přístroj automaticky vypne. Po 55 minutách začne
blikat kontrolka 2 za účelem připomenutí automatického vypnutí.
Automatické vypínání nenahrazuje vytažení síťové zástrčky po ukončení
použití! Slouží pouze pro bezpečnost! Vždy vytáhněte síťovou zástrčku
ze zásuvky, když přístroj nepoužíváte!
Příprava přístroje
Když je přístroj umístěn na vhodném podkladu:
1) Vyjměte voskové disky 9 z balení.
2) Dejte potřebný počet voskových disků 9 do vnitřní misky 1.
Orientujte se podle následujících směrných hodnot, které se však
mohou poněkud lišit:
IB_339566_SWWS240C1_LB8.indb 127 05.02.2020 14:44:34

■ 128
│
CZ
SWWS 240 C1
Oblast těla
Počet voskových
disků 9
Holeň cca 2 kusy na holeň
Podpaží 1kus
Oblast linie bikin 1kus
Celé tělo
(holeň, podpaží,
oblast linie bikin)
6kusů
Tento symbol společně s údajem data na obalu voskových
disků 9 udává, jakou trvanlivost výrobek má.
3) Nasaďte víko 7 na přístroj nasazením malého plastového
výběžku do obruče 5 a mírným otočením víka 7 ve směru
hodinových ručiček (viz výklopnou stranu):
4) Zastrčte zástrčku 3 síťového kabelu do zdířky 4 na přístroji.
5) Zastrčte zástrčku do síťové zásuvky. Přístroj se zahřívá, kontrolka 2
v podstavci přístroje svítí.
6) Během rozpouštění vosk příležitostně zamíchejte.
Jakmile se voskové disky 9 rozpustily (u 6 voskových disků cca
25 - 30 minut), můžete začít s depilací.
IB_339566_SWWS240C1_LB8.indb 128 05.02.2020 14:44:34

CZ
│
129 ■
SWWS 240 C1
UPOZORNĚNÍ
► Když zjistíte, že potřebujete více vosku, než jste rozpustili, můžete
kdykoliv přidat další voskové disky 9 do vnitřní misky 1.
Než budete pokračovat v depilaci, vyčkejte, dokud se vosk
nerozpustí.
► Rozpusťte najednou maximálně 6 voskových disků 9.
Depilace
Oblasti pokožky, na kterých chcete odstranit chloupky, musí být
suché, čisté a zbavené výrobků pro péči, olejů nebo tuků.
UPOZORNĚNÍ
► Před prvním použitím nezbytně proveďte kožní test pro
kontrolu, zda vaše pokožka toleruje tento způsob aplikace.
Dejte trochu rozpuštěného vosku na skryté oblasti pokožky a
po stáhnutí zkontrolujte, zda se vyskytnou během následujících
24 hodin kožní změny. Vyskytnou-li se kožní změny, tento
přístroj dál nepoužívejte. Příp. se poraďte s lékařem.
► Pokud jste náchylní k zarůstání chloupků, používejte pravidel-
ně peelingy. Ty mohou zabránit zarůstání chloupků.
► Strhávejte voskové pásky vždy co nejblíže k povrchu pokožky.
► Dbejte na to, aby se vosk nedostal na váš oděv. Zbytky vosku
lze obtížně odstranit a může způsobit zbarvení na oblečení.
IB_339566_SWWS240C1_LB8.indb 129 05.02.2020 14:44:34

■ 130
│
CZ
SWWS 240 C1
Nohy
Když jsou voskové disky 9 zcela rozpuštěny:
1) Otevřete víko 7 tak, že ho opatrně proti směru hodinových
ručiček vyšroubujete a sejmete ho.
2) Naberte trochu vosku plochou stranou špachtle 8. Přebytečný
vosk můžete na okraji přístroje setřít.
3) Naneste vosk ihned na kůži ve směru růstu chloupků (od kolen
směrem ke kotníku). Voskové pásy by měly mít tloušťku pome-
rančové kůry a plochu 2 vedle sebe ležících špachtlí 8. Možná
budete muset vícekrát nabrat vosk. Zkuste konec naneseného
voskového pásu (který je blíže ke kotníku) nanést o něco silnější,
protože tento konec musíte uchopit ke stažení.
4) Po nanesení můžete špachtli 8 odložit na plochu odkládání 6 na
okraji přístroje tak, aby špachtle 8 ležela nad vnitřní miskou 1.
5) Vyčkejte 30 - 60 sekund, dokud vosk neuschne.
6) Jednou rukou natáhněte kůži, uchopte voskový pás na silném
konci a stáhněte ho rychlým pohybem proti směru růstu chloupků
(od kotníku směrem ke kolenu).
U dalších oblastí pokožky postupujte stejně.
7) Když jste s aplikací hotovi, vytáhněte síťovou zástrčku ze zásuvky
k vypnutí přístroje. Kontrolka 2 zhasne.
IB_339566_SWWS240C1_LB8.indb 130 05.02.2020 14:44:34

CZ
│
131 ■
SWWS 240 C1
Podpaží
Když je voskový disk 9 zcela rozpuštěn:
1) Otevřete víko 7 tak, že ho opatrně proti směru hodinových
ručiček vyšroubujete a sejmete ho.
UPOZORNĚNÍ
►
Protože chloupky v podpaží mají tendenci růst v různých
směrech, musíte je odstraňovat minimálně ve 2 krocích.
2) Držte loket nahoru a dozadu. Tím se natáhne kůže v podpaží.
3) Naberte trochu vosku plochou stranou špachtle 8. Přebytečný
vosk můžete na okraji přístroje setřít.
4) Naneste jej ihned od středu podpaží nahoru směrem k lokti.
Voskový pás by měl být silný asi jako pomerančová kůra. Zkuste
konec naneseného voskového pásu (který je blíže k lokti) nanést
trochu silnější, protože tento konec musíte uchopit ke stažení.
5) Po nanesení můžete špachtli 8 odložit na plochu odkládání 6 na
okraji přístroje tak, aby špachtle 8 ležela nad vnitřní miskou 1.
6) Vyčkejte 30 - 60 sekund, dokud vosk neuschne.
7) Uchopte voskový pás na silném konci (který doléhá blíže k lokti)
a stáhněte ho rychlým pohybem proti směru růstu chloupků dolů.
8) K depilaci spodní části podpaží naneste vosk od středu podpaží
až dolů.
9) Vyčkejte 30 - 60 sekund, dokud vosk neuschne.
IB_339566_SWWS240C1_LB8.indb 131 05.02.2020 14:44:34

■ 132
│
CZ
SWWS 240 C1
10) Uchopte voskový pás na silném konci a stáhněte ho rychlým
pohybem proti směru růstu chloupků dolů.
11) Když jste s aplikací hotovi, vytáhněte síťovou zástrčku ze zásuvky
k vypnutí přístroje. Kontrolka 2 zhasne.
Oblast linie bikin
Když je voskový disk 9 zcela rozpuštěn:
1) Otevřete víko 7 tak, že ho opatrně proti směru hodinových
ručiček vyšroubujete a sejmete ho.
2) Naberte trochu vosku plochou stranou špachtle 8. Přebytečný
vosk můžete na okraji přístroje setřít.
3) Po nanesení můžete špachtli 8 odložit na plochu odkládání 6 na
okraji přístroje tak, aby špachtle 8 ležela nad vnitřní miskou 1.
UPOZORNĚNÍ
► Depilujte v oblasti linie bikin vždy jen malé oblasti najednou.
Zde je pokožka velmi citlivá.
4) Jednou rukou napněte kůži a naneste vosk ve směru růstu
chloupků (směrem od vnitřního stehna).
5) Vyčkejte 30 - 60 sekund, dokud vosk neuschne.
6) Uchopte voskový pás na silném konci (který doléhá blíže k
vnitřnímu stehnu) a stáhněte ho rychlým pohybem proti směru
růstu chloupků dolů.
U dalších oblastí pokožky postupujte stejně.
7) Když jste s aplikací hotovi, vytáhněte síťovou zástrčku ze zásuvky
k vypnutí přístroje. Kontrolka 2 zhasne.
IB_339566_SWWS240C1_LB8.indb 132 05.02.2020 14:44:34

CZ
│
133 ■
SWWS 240 C1
Po depilaci
■ Očistěte špachtli 8 (viz kapitola „Čištění“).
■ Malé zbytky vosku na kůži můžete odstranit dětským olejem.
Pokud nemáte žádný dětský olej po ruce, můžete také použít
olivový olej nebo jiné stolní oleje.
■ Po depilaci může být kůže lehce zarudlá. To je normální. Postiženou
oblast ochlazujte pod tekoucí studenou vodou. To kůži zklidní.
Pokud se kůže nezklidní a silně pálí, pak vyhledejte lékaře.
Čištění
VÝSTRAHA!
NEBEZPEČÍ ÚRAZU ELEKTRICKÝM PROUDEM!
► Před každým čištěním vytáhněte zástrčku ze zásuvky!
► Přístroj nikdy neponořujte do vody či jiných tekutin!
VÝSTRAHA! NEBEZPEČÍ ZRANĚNÍ!
► Před čištěním nechte přístroj trochu vychladnout.
POZOR! VĚCNÉ ŠKODY!
► Pro vyjmutí potravin z přístroje nepoužívejte kovové, špičaté ani
ostré předměty.
► K čištění přístroje nepoužívejte chemické, abrazivní nebo agre-
sivní čisticí prostředky.
IB_339566_SWWS240C1_LB8.indb 133 05.02.2020 14:44:34

■ 134
│
CZ
SWWS 240 C1
UPOZORNĚNÍ
► Vnitřní misku 1 nemusíte vymýt po každém použití ani odstra-
ňovat veškeré zbytky vosku. V přístroji zbývající vosk se může
znovu roztavit při další aplikaci a znovu použít!
► K doobjednání voskových disků 9 kontaktujte náš servis pro
zákazníky (viz kapitola „Objednání náhradních dílů“).
■ Setřete přebytečný vosk špachtlí 8 přímo po použití na okraji
přístroje směrem dovnitř.
■ Otřete špachtli 8, jakož i okraj přístroje přímo po použití hadříkem
navlhčeným dětským olejem. Tak lze odstranit ještě měkké zbytky
vosku. Nejlépe použijte starou tkaninu, protože zbytky vosku lze
z textilií obtížně odstranit. Pokud doma nemáte žádný dětský olej,
můžete také použít na čištění olivový olej nebo jiné stolní oleje.
Dbejte zejména na to, aby se zbytky vosku nenacházely v obru-
čích 5 pro zajištění víka 7 ! Poté otřete špachtli 8 a okraj suchou
papírovou utěrkou k odstranění zbytků oleje.
■ Pokud je na vnější straně pláště přilepen vosk, odstraňte jej násle-
dujícím způsobem:
– Ujistěte se, že je přístroj odpojen od sítě, avšak je ještě teplý.
– Vnější strany otřete hadříkem, navlhčeným olejem.
– Dbejte zejména na to, aby se zbytky vosku nenacházely
v obručích 5 pro zajištění víka 7 !
– Odstraňte zbytky oleje čistou, suchou papírovou utěrkou.
IB_339566_SWWS240C1_LB8.indb 134 05.02.2020 14:44:34

CZ
│
135 ■
SWWS 240 C1
Skladování
UPOZORNĚNÍ
► Vnitřní misku 1 nemusíte vymýt po každém použití ani odstra-
ňovat veškeré zbytky vosku. V přístroji zbývající vosk se může
znovu roztavit při další aplikaci a znovu použít!
■ Když jsou přístroj a špachtle 8 očištěny tak, jak je popsáno
v kapitole „Čištění“:
– Odložte špachtli 8 do odkládání 6 na okraji přístroje tak,
aby špachtle 8 ležela nad vnitřní miskou 1.
– Víko 7 opět nasaďte.
– Vychladlý přístroj uchovávejte na čistém a suchém místě.
UPOZORNĚNÍ
► Pokud po uložení nemůžete víko 7 otevřít/odšroubovat, na-
chází se pravděpodobně ochlazené zbytky vosku mezi víkem
7 a přístrojem. V tomto případě nechte přístroj s uzavřeným
víkem 7 cca 10 minut (podle množství vosku) zahřát. Vos
změkne a víko 7 lze otevřít.
IB_339566_SWWS240C1_LB8.indb 135 05.02.2020 14:44:34

■ 136
│
CZ
SWWS 240 C1
Likvidace
Použitý vosk můžete zlikvidovat spolu s běžným odpadem.
Vžádném případě nevyhazujte přístroj
do normálního domovního odpadu.
Tento výrobek podléhá evropské směrnici
č.2012/19/EU.
Nechte přístroj zlikvidovat v autorizované provozovněnebo ve vašem
místním likvidačním zařízení. Dodržujte aktuálně platné předpisy.
Vpřípadě pochybností se informujte ve sběrném dvoře.
Výrobek je recyklovatelný, podléhá rozšířené odpověd-
nosti výrobce a je shromažďován odděleně.
Obal se skládá zekologických materiálů, které lze zlikvi-
dovat v komunálních sběrných dvorech.
Balení zlikvidujte ekologicky. Dbejte na označení na
různých obalových materiálech a v případě potřeby tyto
obaly roztřiďte. Obalové materiály jsou označeny
zkratkami (a) a číslicemi (b) s následujícím významem:
1-7: plasty, 20-22: papír a lepenka, 80–98: kompozitní
materiály
Informace o možnostech likvidace vysloužilého výrobku
Vám podá správa Vašeho obecního nebo městského
úřadu.
IB_339566_SWWS240C1_LB8.indb 136 05.02.2020 14:44:40

CZ
│
137 ■
SWWS 240 C1
Objednávání náhradních dílů
K produktu SWWS 240 C1 můžete objednat následující náhradní díly:
► Voskové disky (18 ks)
Objednejte náhradní díly prostřednictvím naší servisní poradenské
linky (viz kapitola „Servis″) nebo pohodlně na našich webových
stránkách www.kompernass.com.
Pomocí tohoto kódu QR se dostanete přímo na naši webovou stránku
a můžete si objednat dostupné náhradní díly:
UPOZORNĚNÍ
► Pro Vaši objednávku mějte připravené číslo IAN, které najde-
te na obalu tohoto návodu k obsluze.
IB_339566_SWWS240C1_LB8.indb 137 05.02.2020 14:44:41

■ 138
│
CZ
SWWS 240 C1
Záruka společnosti
Kompernass Handels GmbH
Vážená zákaznice, vážený zákazníku,
na tento přístroj získáváte záruku v trvání 3let od data zakoupení.
V případě závad tohoto výrobku máte zákonná práva vůči prodejci
výrobku. Tato zákonná práva nejsou omezena naší níže uvedenou
zárukou.
Záruční podmínky
Záruční doba začíná plynout dnem nákupu. Dobře uschovejte po-
kladní doklad. Tento doklad je potřebný jako důkaz okoupi.
Pokud se do tří let od data zakoupení tohoto výrobku vyskytne vada
materiálu nebo výrobní závada, pak Vám podle našeho uvážení
výrobek zdarma opravíme, vyměníme nebo uhradíme kupní cenu.
Předpokladem této záruky je, že bude během tříleté lhůty předložen
vadný přístroj a doklad okoupi (pokladní doklad) a stručně se popí-
še, včem závada spočívá a kdy se vyskytla.
Vztahuje-li se na závadu naše záruka, obdržíte zpět buď opravený
nebo nový produkt. Opravou nebo výměnou výrobku nezačne
plynout nová záruční doba.
Záruční doba a zákonné nároky vyplývající ze závad
Záručním plněním se záruční doba neprodlužuje. To platí ipro
vyměněné a opravené součásti. Poškození nebo vady vyskytující
se případně již při nákupu se musí oznámit ihned po vybalení. Po
uplynutí záruční doby podléhají veškeré opravy zpoplatnění.
Rozsah záruky
Přístroj byl vyroben pečlivě podle přísných směrnic kvality a před
expedicí byl svědomitě vyzkoušen.
IB_339566_SWWS240C1_LB8.indb 138 05.02.2020 14:44:41

CZ
│
139 ■
SWWS 240 C1
Záruka se vztahuje na materiálové nebo výrobní vady. Tato záruka
se nevztahuje na součásti výrobku, které jsou vystaveny běžnému
opotřebení, a proto je lze považovat za spotřební díly, nebo na
poškození křehkých součástí, jako jsou např. spínače, akumulátory
nebo díly, které jsou vyrobeny ze skla.
Tato záruka zaniká, pokud je výrobek poškozen, nebyl řádně pou-
žíván nebo udržován. Pro zajištění správného používání výrobku se
musí přesně dodržovat všechny pokyny uvedené v návodu kobsluze.
Účelům použití a úkonům, které se v návodu kobsluze nedoporučují
nebo se před nimi varuje, je třeba se bezpodmínečně vyhnout.
Výrobek je určen pouze pro soukromé účely a ne pro komerční pou-
žití. Při nesprávném a neodborném používání, při použití násilí a při
zásazích, které nebyly provedeny našimi autorizovanými servisními
provozovnami, záruční nároky zanikají.
Vyřízení v případě záruky
Pro zajištění rychlého Vaší žádosti postupujte podle následujících
pokynů:
■ Pro všechny dotazy mějte připraven pokladní lístek a číslo výrob-
ku (např.IAN12345) jako doklad o koupi.
■ Číslo výrobku naleznete na typovém štítku na výrobku, rytině na
výrobku, na titulní straně návodu k obsluze (vlevo dole) nebo na
nálepce na zadní nebo spodní straně výrobku.
■ Pokud by se měly vyskytovat funkční vady nebo jiné závady,
kontaktujte nejprve níže uvedené servisní oddělení telefonicky
nebo e-mailem.
■ Výrobek, zaevidovaný jako vadný výrobek pak můžete při při-
ložení dokladu o nákupu (pokladní lístek) a při uvedení, v čem
spočívá vada a kdy k ní došlo, poslat výrobek pro Vás bez poštov-
ného na adresu, kterou Vám oznámí servis.
IB_339566_SWWS240C1_LB8.indb 139 05.02.2020 14:44:41

■ 140
│
CZ
SWWS 240 C1
Na webových stránkách www.lidl-service.com si
můžete stáhnout tyto a mnoho dalších příruček, videí o
výrobku a instalační software.
Pomocí kódu QR se dostanete přímo na stránku servisu
Lidl (www.lidl-service.com) a můžete pomocí zadání
čísla výrobku (IAN) 123456 otevřít svůj návod k
obsluze.
Servis
Servis Česko
Tel.: 800143873
E-Mail: [email protected]
IAN 339566_1910
Dovozce
Dbejte prosím na to, že následující adresa není adresou servisu.
Kontaktujte nejprve uvedený servis.
KOMPERNASS HANDELS GMBH
BURGSTRASSE 21
44867 BOCHUM
NĚMECKO
www.kompernass.com
IB_339566_SWWS240C1_LB8.indb 140 05.02.2020 14:44:42

SK
│
141 ■
SWWS 240 C1
Obsah
Úvod .......................................142
Používanie vsúlade surčením ..................142
Rozsah dodávky .............................142
Opis prístroja ................................143
Technické údaje ..............................143
Bezpečnostné pokyny ........................144
Pred prvým použitím .........................149
Automatika vypnutia .........................149
Príprava prístroja ............................149
Depilácia ...................................151
Nohy .............................................152
Pazuchy ........................................... 153
Oblasť bikín ........................................ 154
Po depilácii .................................155
Čistenie .....................................155
Uskladnenie .................................157
Likvidácia ...................................158
Objednávanie náhradných dielov ...............159
Záruka spoločnosti Kompernass Handels GmbH . . .160
Servis ............................................. 162
Dovozca ...........................................162
IB_339566_SWWS240C1_LB8.indb 141 05.02.2020 14:44:42

■ 142
│
SK
SWWS 240 C1
Úvod
Srdečne vám gratulujeme ku kúpe vášho nového prístroja.
Touto kúpou ste sa rozhodli pre výrobok vysokej kvality.
Návod naobsluhu je súčasťou tohto výrobku. Obsahuje
dôležité upozornenia týkajúce sa bezpečnosti, používa-
nia a likvidácie. Pred použitím výrobku sa oboznámte
sovšetkými pokynmi na obsluhu a bezpečnostnými pokynmi. Výro-
bok používajte iba podľa opisu a vuvedených oblastiach použitia.
Návod na obsluhu si uschovajte vždy ako referenčnú príručku v
blízkosti výrobku. Pri postúpení výrobku tretej osobe odovzdajte
spolu sním aj všetky dokumenty.
Používanie vsúlade surčením
Tento prístroj slúži výlučne na depilovanie nôh, pazúch a oblasti
bikín na ľudskom tele. Tento prístroj je určený výlučne na používanie
vsúkromných domácnostiach. Nepoužívajte ho komerčne.
Rozsah dodávky
Prístroj na ohrievanie depilačného vosku
18 voskových krúžkov
Špachtľa
Návod na obsluhu
IB_339566_SWWS240C1_LB8.indb 142 05.02.2020 14:44:42

SK
│
143 ■
SWWS 240 C1
Opis prístroja
1 Vnútorná miska
2 Kontrolka
3 Zástrčka
4 Zásuvka
5 Lišta (na zablokovanie veka)
6 Odkladacia plocha (na špachtľu)
7 Veko
8 Špachtľa
9 Voskové krúžky
Technické údaje
Napätie
220 – 240 V ∼ (striedavý prúd),
50 Hz
Príkon 20 W
Kapacita cca 530 ml
Trieda ochrany
II /
(dvojitá izolácia)
IB_339566_SWWS240C1_LB8.indb 143 05.02.2020 14:44:45

■ 144
│
SK
SWWS 240 C1
Bezpečnostné pokyny
VÝSTRAHA!
NEBEZPEČENSTVO ZÁSAHU
ELEKTRICKÝM PRÚDOM!
► Ak je pripojovací sieťový kábel prístroja
poškodený, musí sa dať vymeniť výrobcovi
alebo jeho zákazníckemu servisu alebo
podobne kvalifikovanej osobe, aby sa
zabránilo ohrozeniam.
► Prístroj používajte len vsuchých auzavre-
tých priestoroch, nie vonku.
► Otvorte veko prístroja.
► Nepoužívajte prístroj vblízkosti vody, ako
umývadlá, sprchovacie vaničky alebo vane.
► Prístroj nikdy nepoužívajte počas kúpania,
sprchovania ani spania.
► Nikdy nechytajte sieťovú zástrčku ani sieťový
kábel mokrými rukami.
► Pred použitím skontrolujte prípadné viditeľné
poškodenia prístroja. Neuvádzajte dopre-
vádzky poškodený prístroj ani prístroj, ktorý
predtým spadol nazem.
IB_339566_SWWS240C1_LB8.indb 144 05.02.2020 14:44:47

SK
│
145 ■
SWWS 240 C1
VÝSTRAHA!
NEBEZPEČENSTVO ZÁSAHU
ELEKTRICKÝM PRÚDOM!
Tento prístroj sa nesmie používať v blíz-
kostí vaní, sprchovacích vaničiek a iných
nádob, ktoré obsahujú vodu.
► Na zásuvné spojenie prístroja nesmie pretie-
cť žiadna tekutina.
VÝSTRAHA!
NEBEZPEČENSTVO PORANENIA!
► Tento prístroj môžu používať deti staršie ako
8 rokov, ako aj osoby sozníženými fyzic-
kými, zmyslovými alebo mentálnymi schop-
nosťami alebo s nedostatkom skúseností
avedomostí, ak sú pod dohľadom alebo
ak boli o bezpečnom používaní prístroja
poučené apochopili z toho vyplývajúce
nebezpečenstvá.
► Deti sa s prístrojom nesmú hrať.
IB_339566_SWWS240C1_LB8.indb 145 05.02.2020 14:44:50

■ 146
│
SK
SWWS 240 C1
VÝSTRAHA!
NEBEZPEČENSTVO PORANENIA!
► Čistenie aužívateľskú údržbu nesmú vy-
konávať deti, iba ak sú staršie než 8rokov
asú pod dohľadom.
► Prístroj a jeho pripojovací kábel sa musia
uchovávať mimo dosahu detí mladších než
8rokov.
► Ľudia, ktorí nie sú citliví na teplo, nesmú
tento prístroj používať!
► Ak pre svoje ochorenia nemáte istotu, či
smiete prístroj používať, poraďte sa najprv
s lekárom.
► Po použití je na povrchu vyhrievacieho
prvku ešte zvyškové teplo.
► Pri nesprávnom používaní prí stroja hrozí
riziko poranenia. Prístroj používajte vždy na
určený účel!
IB_339566_SWWS240C1_LB8.indb 146 05.02.2020 14:44:50

SK
│
147 ■
SWWS 240 C1
VÝSTRAHA!
NEBEZPEČENSTVO PORANENIA!
► Nepoužívajte prístroj pod prikrývkami ani
uterákmi.
► Podľa možnosti postavte prístroj doblízkosti
zásuvky. Zabezpečte, aby sieťová zástrčka
bola v prípade nebezpečenstva ľahko a
rýchlo dostupná a aby sieťový kábel ne-
predstavoval riziko potknutia.
► Postarajte sa o bezpečné umiestnenie
prístroja.
► Nikdy neponárajte prístroj do vody ani
do iných tekutín!
► Prístroj nepoužívajte pri ochoreniach srdca,
sčervenaniach kože, zápaloch, opuchoch,
citlivých miestach, cukrovke, otvorených
ranách, popáleninách, ekzémoch alebo
psoriáze.
IB_339566_SWWS240C1_LB8.indb 147 05.02.2020 14:44:50

■ 148
│
SK
SWWS 240 C1
POZOR! VECNÉ ŠKODY!
► Prístroj nikdy neprevádzkujte vprázdnom
stave, bez vosku.
► Ako náplň dávajte do prístroja len vosk,
žiadne agresívne látky alebo látky s obsa-
hom rozpúšťadiel!
► Prístroj postavte výlučne na rovné povrchy
odolné proti teplu.
► Vosk nikdy nezohrievajte v plastovom obale.
► Vosk nikdy nezohrievajte v mikrovlnnej rúre,
nad otvoreným ohňom ani na sporáku.
► Na prevádzkovanie prístroja nepoužívajte
externý časový spínač ani samostatný
systém diaľkového ovládania.
► Na vyberanie vychladnutého vosku z prí-
stroja nepoužívajte žiadne špicaté ani ostré
predmety.
IB_339566_SWWS240C1_LB8.indb 148 05.02.2020 14:44:50

SK
│
149 ■
SWWS 240 C1
Pred prvým použitím
1) Prístroj zvnútra a zvonku otrite vlhkou handrou, aby ste odstránili
prach, ktorý sa tam dostal pri preprave. Prístroj dobre vysušte,
aby sa v ňom nenachádzala žiadna vlhkosť.
2) Prístroj postavte na rovný podklad odolný proti teplu. Myslite
na to, že na podklad môžu kvapnúť kúsky vosku. Podklad by
sa preto mal dať dobre vyčistiť.
Automatika vypnutia
Po 60 minútach sa prístroj automaticky vypne. Asi po 55 minútach
začína kontrolka 2 blikať, čím vás upozorní na automatické vypnutie.
Automatické vypnutie nenahrádza vytiahnutie sieťovej zástrčky po
ukončení aplikácie. Je to iba bezpečnostný prvok!
Vždy, keď prístroj nepoužívate, vytiahnite sieťovú zástrčku!
Príprava prístroja
Ak je prístroj postavený na vhodnom podklade:
1) Vyberte voskové krúžky 9 z obalu.
2) Dajte potrebný počet voskových krúžkov 9 do vnútornej misky 1.
Riaďte sa nasledujúcimi hodnotami, ktoré sa však môžu trochu
líšiť:
IB_339566_SWWS240C1_LB8.indb 149 05.02.2020 14:44:50

■ 150
│
SK
SWWS 240 C1
Časť tela
Počet voskových
krúžkov 9
predkolenie
cca 2 kusy na každé
predkolenie
pazuchy 1 kus
oblasť bikín 1 kus
celé telo
(predkolenie, pazuchy,
oblasť bikín)
6 kusov
Tento symbol a dátum na obale voskových krúžkov 9
udáva, akú má produkt trvanlivosť.
3) Nasaďte veko 7 na prístroj tak, že umiestnite malý plastový
výstupok do lišty 5 a potom veko 7 trochu otočíte v smere
hodinových ručičiek (pozri vyklápaciu stranu):
4) Zastrčte zástrčku 3 sieťového kábla do zásuvky 4 na prístroji.
5) Zastrčte sieťovú zástrčku do sieťovej zásuvky.
Prístroj sa zohrieva, kontrolka 2 na podstavci prístroja svieti.
6) Vosk počas roztápania príležitostne premiešajte.
Hneď ako sú voskové krúžky 9 roztopené (pri 6 voskových krúžkoch
cca 25 – 30 minút), môžete začať s depiláciou.
IB_339566_SWWS240C1_LB8.indb 150 05.02.2020 14:44:50

SK
│
151 ■
SWWS 240 C1
UPOZORNENIE
► Ak zistíte, že potrebujete viac vosku, ako ste roztopili, môžete
kedykoľvek pridať do vnútornej misky 1 ďalšie voskové krúžky
9. Skôr ako budete pokračovať s depiláciou, počkajte, kým
sa vosk roztopí.
► Naraz roztopte maximálne 6 voskových krúžkov 9.
Depilácia
Časti pokožky, z ktorých chcete odstrániť chĺpky, musia byť suché,
čisté a bez ošetrovacích produktov, olejov alebo tukov.
UPOZORNENIA
► Pred prvým použitím bezpodmienečne vykonajte test pokožky,
aby ste si overili, či vaša pokožka znáša tento druh aplikácie.
Na skryté miesto pokožky dajte malé množstvo vosku a po
stiahnutí skontrolujte, či sa počas nasledujúcich 24 hodín ne-
vyskytnú žiadne začervenania. Ak by sa takéto začervenania
pokožky vyskytli, prístroj nepoužívajte. Prípadne sa poraďte
s lekárom.
► Keď sa u vás objavujú zarastené chĺpky, pravidelne používajte
peeling. Ten môže zabrániť zarastaniu chĺpkov.
► Voskové pásiky sťahujte vždy tak blízko pri povrchu pokožky,
ako je to možné.
► Dávajte pozor na to, aby sa vosk nedostal na vaše obleče-
nie. Zvyšky vosku sa dajú ťažko odstrániť, prípadne sfarbia
oblečenie.
IB_339566_SWWS240C1_LB8.indb 151 05.02.2020 14:44:50

■ 152
│
SK
SWWS 240 C1
Nohy
Keď sú voskové krúžky 9 úplne roztopené:
1) Otvorte veko 7 tak, že ho trochu otočíte proti smeru hodinových
ručičiek a zdvihnete nahor.
2) Sploštenou stranou špachtle 8 naneste trochu vosku.
Nadbytočný vosk môžete zotrieť na okraji prístroja.
3) Vosk ihneď nanášajte na pokožku v smere rastu chĺpkov (od ko-
lena k členku). Voskový pásik by mal mať hrúbku pomarančovej
šupky a zaberať plochu 2 vedľa seba ležiacich špachtlí 8.
Preto možno budete musieť vosk nanášať viackrát. Pokúste sa
naniesť na koniec voskového pásika (ktorý leží bližšie k členku)
trochu hrubšiu vrstvu vosku, pretože sa tento koniec musí pri
sťahovaní uchopiť.
4) Po nanesení môžete špachtľu 8 položiť na odkladaciu plochu
6 na okraji prístroja tak, aby špachtľa 8 ležala nad vnútornou
miskou 1.
5) Počkajte 30–60 sekúnd, kým bude vosk suchý.
6) Napnite jednou rukou pokožku, uchopte voskový pásik na
hrubom konci a stiahnite ho rýchlym pohybom proti smeru rastu
chĺpkov (od členku ku kolenu).
Rovnako postupujte pri ďalších častiach pokožky.
7) Po ukončení aplikácie vypnite prístroj tak, že vytiahnete sieťovú
zástrčku zo sieťovej zásuvky. Kontrolka 2 zhasne.
IB_339566_SWWS240C1_LB8.indb 152 05.02.2020 14:44:51

SK
│
153 ■
SWWS 240 C1
Pazuchy
Keď je voskový krúžok 9 úplne roztopený:
1) Otvorte veko 7 tak, že ho trochu otočíte proti smeru hodinových
ručičiek a zdvihnete nahor.
UPOZORNENIE
►
Pretože chĺpky pazúch rastú v rozličných smeroch, musíte ich
odstrániť v minimálne 2 krokoch.
2) Držte lakeť smerom nahor a dozadu. Tak sa pokožka v podpa-
zuší trochu napne.
3) Sploštenou stranou špachtle 8 naneste trochu vosku.
Nadbytočný vosk môžete zotrieť na okraji prístroja.
4) Naneste ho ihneď od stredu podpazušia smerom hore k lakťu.
Voskový pásik by mal byť taký hrubý ako pomarančová šupka.
Pokúste sa naniesť na koniec voskového pásika (ktorý leží bližšie
k lakťu) trochu hrubšiu vrstvu vosku, pretože sa tento koniec musí
pri sťahovaní uchopiť.
5) Po nanesení môžete špachtľu 8 položiť na odkladaciu plochu
6 na okraji prístroja tak, aby špachtľa 8 ležala nad vnútornou
miskou 1.
6) Počkajte 30–60 sekúnd, kým bude vosk suchý.
7) Uchopte voskový pásik na hornom konci (ktorý leží bližšie k lakťu)
a stiahnite ho rýchlym pohybom proti smeru rastu chĺpkov smerom
dole.
8) Na depilovanie dolnej časti podpazušia naneste vosk od stredu
podpazušia smerom dole.
9) Počkajte 30–60 sekúnd, kým bude vosk suchý.
IB_339566_SWWS240C1_LB8.indb 153 05.02.2020 14:44:51

■ 154
│
SK
SWWS 240 C1
10) Uchopte voskový pásik na dolnom konci a stiahnite ho rýchlym
pohybom proti smeru rastu chĺpkov smerom hore.
11) Po ukončení aplikácie vypnite prístroj tak, že vytiahnete sieťovú
zástrčku zo sieťovej zásuvky. Kontrolka 2 zhasne.
Oblasť bikín
Keď je voskový krúžok 9 úplne roztopený:
1) Otvorte veko 7 tak, že ho trochu otočíte proti smeru hodinových
ručičiek a zdvihnete nahor.
2) Sploštenou stranou špachtle 8 naneste trochu vosku.
Nadbytočný vosk môžete zotrieť na okraji prístroja.
3) Po nanesení môžete špachtľu 8 položiť na odkladaciu plochu
6 na okraji prístroja tak, aby špachtľa 8 ležala nad vnútornou
miskou 1.
UPOZORNENIE
► V oblasti bikín depilujte naraz iba malé úseky. Pokožka je
veľmi citlivá.
4) Napnite pokožku jednou rukou a naneste vosk v smere rastu
chĺpkov (smer vnútorného stehna).
5) Počkajte 30–60 sekúnd, kým bude vosk suchý.
6) Uchopte voskový pásik na konci (ktorý leží bližšie k vnútornému
stehnu) a stiahnite ho rýchlym pohybom proti smeru rastu chĺpkov.
Rovnako postupujte pri ďalších častiach pokožky.
7) Po ukončení aplikácie vypnite prístroj tak, že vytiahnete sieťovú
zástrčku zo sieťovej zásuvky. Kontrolka 2 zhasne.
IB_339566_SWWS240C1_LB8.indb 154 05.02.2020 14:44:51

SK
│
155 ■
SWWS 240 C1
Po depilácii
■ Vyčistite špachtľu 8 (pozri kapitolu „Čistenie“).
■ Malé zvyšky vosku na pokožke môžete odstrániť troškou detského
oleja. Ak nemáte poruke detský olej, môžete použiť tiež olivový
olej alebo iný jedlý olej.
■ Po depilácii môže byť vaša pokožka trochu začervenená. To je
normálne. Na postihnuté miesta nechajte tiecť trochu studenej
vody. To pokožku upokojí.
Ak sa pokožka neupokojí a intenzívne páli, vyhľadajte lekára.
Čistenie
VÝSTRAHA! NEBEZPEČENSTVO ZÁSAHU ELEK-
TRICKÝM PRÚDOM!
► Pred každým čistením vytiahnite sieťovú zástrčku zo sieťovej
zásuvky!
► Nikdy neponárajte prístroj do vody ani do iných tekutín!
VÝSTRAHA! NEBEZPEČENSTVO PORANENIA!
► Pred čistením nechajte prístroj trochu vychladnúť.
POZOR! VECNÉ ŠKODY!
► Nepoužívajte žiadne špicaté ani ostré predmety na odstráne-
nie vychladnutého vosku z prístroja!
► Na vyčistenie prístroja nepoužívajte žiadne chemické, drsné
ani agresívne čistiace prostriedky!
IB_339566_SWWS240C1_LB8.indb 155 05.02.2020 14:44:51

■ 156
│
SK
SWWS 240 C1
UPOZORNENIE
► Vnútornú misku 1 nemusíte čistiť po každom použití ani
odstraňovať všetky zvyšky vosku. Vosk, ktorý ostane v prístroji,
sa môže pri nasledujúcej aplikácii znova roztopiť a opätovne
použiť!
► Na dodatočné objednanie voskových krúžkov 9 sa obráťte
na náš zákaznícky servis (pozri kapitolu „Objednávanie
náhradných dielov“).
■ Nadbytočný vosk zotrite zo špachtle 8 priamo po použití na
okraji prístroja.
■ Špachtľu 8, ako aj okraj prístroja utrite ihneď po použití handrič-
kou navlhčenou v detskom oleji. Tak sa dajú odstrániť nestuhnuté
zvyšky vosku. Najlepšie bude, ak použijete starú látkovú handrič-
ku, pretože zvyšky vosku sa dajú z textílií odstrániť iba ťažko.
Ak nemáte doma detský olej, môžete použiť na čistenie aj olivový
olej alebo iný jedlý olej.
Dávajte zvlášť pozor na to, aby sa v lištách 5 na zablokovanie
veka 7 nenachádzali žiadne zvyšky vosku! Potom otrite špachtľu
8 a okraj suchou papierovou vreckovkou, aby ste odstránili
zvyšky oleja.
■ Keď sa na vonkajšej strane telesa drží vosk, odstráňte ho nasle-
dovne:
– Zabezpečte, aby bol prístroj odpojený od elektrickej siete,
ale aby bol ešte stále teplý.
– Olej utrite na vonkajších stranách utierkou navlhčenou olejom.
– Dávajte zvlášť pozor na to, aby sa v lištách 5 na zabloko-
vanie veka 7 nenachádzali žiadne zvyšky vosku!
– Zvyšky oleja odstráňte čistou, suchou papierovou utierkou.
IB_339566_SWWS240C1_LB8.indb 156 05.02.2020 14:44:51

SK
│
157 ■
SWWS 240 C1
Uskladnenie
UPOZORNENIE
► Vnútornú misku 1 nemusíte čistiť po každom použití ani
odstraňovať všetky zvyšky vosku. Vosk, ktorý ostane v prístroji,
sa môže pri nasledujúcej aplikácii znova roztopiť a opätovne
použiť!
■ Keď sú prístroj a špachtľa 8 vyčistené ako v kapitole „Čistenie“:
– Položte špachtľu 8 na odkladaciu plochu 6 na okraji prístro-
ja tak, aby špachtľa 8 ležala nad vnútornou miskou 1.
– Nasaďte veko 7.
– Vychladnutý prístroj uložte na čisté asuché miesto.
UPOZORNENIE
► Ak po uskladnení nie je možné veko 7 ďalej otvárať/otáčať,
pravdepodobne sa medzi vekom 7 a prístrojom nachádzajú
vychladnuté zvyšky vosku.
V takomto prípade nechajte prístroj ohriať so zatvoreným
vekom 7 cca 10 minút (podľa množstva vosku). Vosk zmäkne
a veko 7 sa bude dať otvoriť.
IB_339566_SWWS240C1_LB8.indb 157 05.02.2020 14:44:51

■ 158
│
SK
SWWS 240 C1
Likvidácia
Vosk môžete zlikvidovať v bežnom odpade.
Prístroj vžiadnom prípade nevyhadzujte do
bežného komunálneho odpadu. Na tento
výrobok sa vzťahuje európska smernica
2012/19/EU.
Zlikvidujte ho v oprávnenej firme na likvidáciu odpadu alebo vo
vašom obecnom zariadení na likvidáciu odpadu. Dodržiavajte ak-
tuálne platné predpisy. Vprípade pochybností kontaktujte miestny
zberný dvor.
Produkt je recyklovateľný, podlieha rozšírenej
zodpovednosti výrobcu a zbiera sa oddelene.
Obal sa skladá zekologických materiálov, ktoré môžete
zlikvidovať vmiestnych recyklačných strediskách.
Obal zlikvidujte ekologicky. Dbajte na označenie na
rôznych obalových materiáloch a trieďte ich osobitne.
Obalové materiály sú označené skratkami (a) a číslicami
(b) s nasledujúcim významom: 1 – 7: plasty, 20 – 22:
papier a lepenka, 80 – 98: kompozitné materiály
Informácie o možnostiach likvidácie výrobku, ktorý
doslúžil, získate od svojej miestnej alebo mestskej
samosprávy
IB_339566_SWWS240C1_LB8.indb 158 05.02.2020 14:44:57

SK
│
159 ■
SWWS 240 C1
Objednávanie náhradných dielov
Pre produkt SWWS 240 C1 môžete objednať tieto náhradné diely:
► Voskové krúžky (18 kusov)
Náhradné diely objednávajte cez našu servisnú telefonickú linku
(pozri kapitolu „Servis″) alebo pohodlne na našej webovej stránke
www.kompernass.com.
Pomocou tohto QR kódu sa dostanete priamo na našu webovú
stránku a môžete objednať dostupné náhradné diely:
UPOZORNENIE
► Pri svojej objednávke majte pripravené číslo IAN, ktoré nájdete
na obale tohto návodu na obsluhu.
IB_339566_SWWS240C1_LB8.indb 159 05.02.2020 14:44:58

■ 160
│
SK
SWWS 240 C1
Záruka spoločnosti
Kompernass Handels GmbH
Vážená zákazníčka, vážený zákazník,
natento prístroj máte záruku 3roky od dátumu zakúpenia. V prípa-
de nedostatkov tohto výrobku máte práva vyplývajúce zo zákona
voči predajcovi tohto výrobku. Tieto Vaše práva vyplývajúce zo
zákona nie sú obmedzené našou zárukou, uvedenou nižšie.
Záručné podmienky
Záručná doba začína plynúť dátumom zakúpenia. Prosím, uschovaj-
te si pokladničný blok. Tento bude potrebný ako dôkaz ozakúpení.
Ak v priebehu troch rokov od dátumu zakúpenia tohto výrobku dôj-
de k chybe materiálu alebo výrobnej chybe, výrobok vám – podľa
nášho uváženia – bezplatne opravíme, vymeníme alebo uhradíme
kúpnu cenu. Podmienkou tohto záručného plnenia je, že počas
trojročnej lehoty sa poškodený prístroj a doklad o zakúpení (poklad-
ničný blok) predloží so stručným opisom, v čom spočíva nedostatok
prístroja a kedy sa vyskytol.
Ak je chyba pokrytá našou zárukou, zašleme Vám späť opravený
alebo nový výrobok. Opravou alebo výmenou výrobku nezačína
plynúť žiadna nová záručná doba.
Záručná doba a zákonné nároky na odstránenie chýb
Záručná doba sa záručným plnením nepredĺži. To platí aj pre vy-
menené aopravené diely. Poškodenia a chyby zistené prípadne už
pri kúpe, sa musia hlásiť okamžite po vybalení. Po uplynutí záručnej
doby podliehajú prípadné opravy poplatku.
Rozsah záruky
Prístroj bol starostlivo vyrobený v súlade s prísnymi smernicami kvali-
ty a pred dodaním bol svedomito preskúšaný.
IB_339566_SWWS240C1_LB8.indb 160 05.02.2020 14:44:58

SK
│
161 ■
SWWS 240 C1
Záručné plnenie sa vzťahuje na chyby materiálu alebo výrobné chyby.
Táto záruka sa nevzťahuje na časti výrobku, ktoré sú vystavené bežné-
mu opotrebovaniu a preto ich možno pokladať za rýchlo opotrebiteľ-
né diely, ani na poškodenia krehkých dielov, ako sú napríklad spínače,
akumulátory alebo diely vyrobené zo skla.
Táto záruka zaniká v prípade poškodenia výrobku neodborným
používaním alebo neodbornou údržbou. Na správne používanie
výrobku sa musia presne dodržiavať všetky pokyny, uvedené v ná-
vode na obsluhu. Bezpodmienečne sa musí zabrániť použitiu alebo
úkonom, ktoré sa v návode na obsluhu neodporúčajú alebo pred
ktorými sa varuje.
Výrobok je určený len na súkromné použitie a nie na priemyselné
používanie. Zárukazaniká pri nesprávnom aneodbornom zaob-
chádzaní, pri použití násilia apri zásahoch, ktoré neboli vykonané
naším autorizovaným servisom.
Vybavenie v prípade záruky
Na zaručenie rýchleho vybavenia Vašej žiadosti postupujte podľa
nasledujúcich pokynov:
■ Na všetky otázky majte pripravený pokladničný doklad a číslo
výrobku (napr.IAN12345) ako doklad o nákupe.
■ Číslo výrobku nájdete na typovom štítku na výrobku, na gravúre
na výrobku, na titulnej stránke návodu na obsluhu (dole vľavo)
alebo ako nálepku na zadnej alebo spodnej strane výrobku.
■ Ak dôjde k funkčným poruchám alebo iným nedostatkom, kon-
taktujte najprv nižšie uvedené servisné oddelenie telefonicky
alebo e-mailom.
■ Výrobok, zaevidovaný ako poruchový, môžete potom spolu
s dokladom o nákupe (pokladničný blok) a uvedením popisu
chyby a dátumu, kedy k nej došlo, bezplatne odoslať na adresu
servisného strediska, ktorá Vám bude oznámená.
IB_339566_SWWS240C1_LB8.indb 161 05.02.2020 14:44:58

■ 162
│
SK
SWWS 240 C1
Na webovej stránke www.lidl-service.com si môžete
stiahnuť tieto a mnoho ďalších príručiek, videá o výrob-
koch a inštalačný softvér.
Pomocou tohto QR-kódu sa dostanete priamo na
stránku servisu Lidl (www.lidl-service.com) a pomocou
zadania čísla výrobku (IAN) 123456 otvoríte váš
návod na obsluhu.
Servis
Servis Slovensko
Tel. 0850 232001
E-Mail: [email protected]
IAN 339566_1910
Dovozca
Majte na pamäti, že nižšie uvedená adresa nie je adresou servisné-
ho strediska. Najprv kontaktujte uvedené servisné stredisko.
KOMPERNASS HANDELS GMBH
BURGSTRASSE 21
44867 BOCHUM
NEMECKO
www.kompernass.com
IB_339566_SWWS240C1_LB8.indb 162 05.02.2020 14:44:58

8
KOMPERNASS HANDELS GMBH
BURGSTRASSE 21
44867 BOCHUM
GERMANY
www.kompernass.com
Stand der Informationen · Last Information Update · Version des informations
Stand van de informatie · Stan informacji · Stav informací · Stav informácií:
12 / 2019 · Ident.-No.: SWWS240C1-122019-1
IAN 339566_1910
Documenttranscriptie
WARMWACHS-SET / HOT WAX KIT CHAUFFE-CIRE ET ACCESSOIRES SWWS 240 C1 WARMWACHS-SET HOT WAX KIT CHAUFFE-CIRE ET ACCESSOIRES WARME WAX-SET ZESTAW DO DEPILACJI CIEPŁYM WOSKIEM ELEKTRICKÁ DEPILAČNÍ SADA Bedienungsanleitung Mode d’emploi Operating instructions Gebruiksaanwijzing Návod k obsluze Instrukcja obsługi PRÍSTROJ NA OHRIEVANIE DEPILAČNÉHO VOSKU Návod na obsluhu IAN 339566_1910 Klappen Sie vor dem Lesen die Seite mit den Abbildungen aus und machen Sie sich anschließend mit allen Funktionen des Gerätes vertraut. Before reading, unfold the page containing the illustrations and familiarise yourself with all functions of the device. Avant de lire le mode d‘emploi, ouvrez la page contenant les illustrations et familiarisez-vous ensuite avec toutes les fonctions de l‘appareil. Vouw vóór het lezen de pagina met de afbeeldingen open en maak u vertrouwd met alle functies van het apparaat. Przed przeczytaniem proszę rozłożyć stronę z ilustracjami, a następnie proszę zapoznać się z wszystkimi funkcjami urządzenia. Před čtením si otevřete stranu s obrázky a potom se seznamte se všemi funkcemi přístroje. Pred čítaním si odklopte stranu s obrázkami a potom sa oboznámte so všetkými funkciami prístroja. DE / AT / CH GB/IE FR / BE NL / BE PL CZ SK Bedienungsanleitung Operating instructions Mode d’emploi Gebruiksaanwijzing Instrukcja obsługi Návod k obsluze Návod na obsluhu Seite Page Page Pagina Strona Strana Strana 1 25 47 75 97 119 141 A B Inhaltsverzeichnis Einführung . . . . . . . . . . . . . . . . . . . . . . . . . . . . . . . . . . . . 2 Bestimmungsgemäßer Gebrauch . . . . . . . . . . . . . . . . . 2 Lieferumfang . . . . . . . . . . . . . . . . . . . . . . . . . . . . . . . . . . 2 Gerätebeschreibung . . . . . . . . . . . . . . . . . . . . . . . . . . . . 3 Technische Daten . . . . . . . . . . . . . . . . . . . . . . . . . . . . . . . 3 Sicherheitshinweise. . . . . . . . . . . . . . . . . . . . . . . . . . . . . 4 Vor dem ersten Gebrauch . . . . . . . . . . . . . . . . . . . . . . . 9 Abschaltautomatik . . . . . . . . . . . . . . . . . . . . . . . . . . . . . 9 Gerät vorbereiten . . . . . . . . . . . . . . . . . . . . . . . . . . . . . . 9 Enthaaren. . . . . . . . . . . . . . . . . . . . . . . . . . . . . . . . . . . . 11 Beine . . . . . . . . . . . . . . . . . . . . . . . . . . . . . . . . . . . . . . . . . . . . . . .12 Achseln . . . . . . . . . . . . . . . . . . . . . . . . . . . . . . . . . . . . . . . . . . . . . .13 Bikinizone . . . . . . . . . . . . . . . . . . . . . . . . . . . . . . . . . . . . . . . . . . . .14 Nach dem Enthaaren . . . . . . . . . . . . . . . . . . . . . . . . . . 15 Reinigung . . . . . . . . . . . . . . . . . . . . . . . . . . . . . . . . . . . . 15 Aufbewahrung . . . . . . . . . . . . . . . . . . . . . . . . . . . . . . . 17 Entsorgung . . . . . . . . . . . . . . . . . . . . . . . . . . . . . . . . . . . 18 Ersatzteile bestellen . . . . . . . . . . . . . . . . . . . . . . . . . . . 19 Garantie der Kompernaß Handels GmbH . . . . . . . . . 20 Service . . . . . . . . . . . . . . . . . . . . . . . . . . . . . . . . . . . . . . . . . . . . . .22 Importeur . . . . . . . . . . . . . . . . . . . . . . . . . . . . . . . . . . . . . . . . . . . .23 SWWS 240 C1 DE│AT│CH │ 1 ■ Einführung Herzlichen Glückwunsch zum Kauf Ihres neuen Gerätes. Sie haben sich damit für ein hochwertiges Produkt entschieden. Die Bedienungsanleitung ist Bestandteil dieses Produkts. Sie enthält wichtige Hinweise für Sicherheit, Gebrauch und Entsorgung. Machen Sie sich vor der Benutzung des Produkts mit allen Bedien- und Sicherheitshinweisen vertraut. Benutzen Sie das Produkt nur wie beschrieben und für die angegebenen Einsatzbereiche. Bewahren Sie die Bedienungsanleitung immer als Nachschlagewerk in der Nähe des Produkts auf. Händigen Sie alle Unterlagen bei Weitergabe des Produkts an Dritte mit aus. Bestimmungsgemäßer Gebrauch Dieses Gerät dient ausschließlich dem Enthaaren von Beinen, Achseln und der Bikinizone am menschlichen Körper. Dieses Gerät ist ausschließlich für die Benutzung in privaten Haushalten bestimmt. Benutzen Sie es nicht gewerblich. Lieferumfang Warmwachs-Set 18 Wachsscheiben Spatel Bedienungsanleitung ■ 2 │ DE│AT│CH SWWS 240 C1 Gerätebeschreibung 1 Innenschale 2 Kontrollleuchte 3 Stecker 4 Buchse 5 Schiene (zur Verriegelung des Deckels) 6 Ablage (für den Spatel) 7 Deckel 8 Spatel 9 Wachsscheiben Technische Daten Spannung 220 - 240 V ∼ (Wechselstrom), 50 Hz Leistungsaufnahme 20 W Fassungsvermögen ca. 530 ml Schutzklasse II / SWWS 240 C1 (Doppelisolierung) DE│AT│CH │ 3 ■ Sicherheitshinweise ► ► ► ► ► ► ► WARNUNG! STROMSCHLAGGEFAHR! Wenn die Netzanschlussleitung dieses Gerätes beschädigt ist, muss sie durch den Hersteller oder seinen Kundendienst oder eine ähnlich qualifizierte Person ersetzt werden, um Gefährdungen zu vermeiden. Verwenden Sie das Gerät nur in trockenen Räumen, nicht im Freien. Öffnen Sie nie das Gehäuse des Gerätes. Benutzen Sie das Gerät nicht in der Nähe von Wasser, wie Waschbecken, Duschwannen oder Badewannen. Benutzen Sie das Gerät niemals während Sie baden, duschen oder schlafen. Fassen Sie den Netzstecker oder das Netzkabel niemals mit nassen Händen an. Kontrollieren Sie das Gerät vor der Verwendung auf äußere, sichtbare Schäden. Nehmen Sie ein beschädigtes oder heruntergefallenes Gerät nicht in Betrieb. ■ 4 │ DE│AT│CH SWWS 240 C1 ► ► ► WARNUNG! STROMSCHLAGGEFAHR! Dieses Gerät nicht in der Nähe von Badewannen, Duschwannen oder anderen Gefäßen benutzen, die Wasser enthalten. Es darf keine Flüssigkeit auf die Gerätesteckverbindung überlaufen. WARNUNG! VERLETZUNGSGEFAHR! Dieses Gerät kann von Kindern ab 8 Jahren und darüber sowie von Personen mit verringerten physischen, sensorischen oder mentalen Fähigkeiten oder Mangel an Erfahrung und Wissen benutzt werden, wenn sie beaufsichtigt oder bezüglich des sicheren Gebrauchs des Gerätes unterwiesen wurden und die daraus resultierenden Gefahren verstehen. Kinder dürfen nicht mit dem Gerät spielen. SWWS 240 C1 DE│AT│CH │ 5 ■ ► ► ► ► ► ► WARNUNG! VERLETZUNGSGEFAHR! Reinigung und eine Wartung durch den Benutzer dürfen nicht durch Kinder vorgenommen werden, es sei denn, sie sind 8 Jahre und älter und werden beaufsichtigt. Das Gerät und seine Anschlussleitung sind von Kindern jünger als 8 Jahre fernzuhalten. Hitzeunempfindliche Menschen dürfen dieses Gerät nicht benutzen! Wenn Sie, aufgrund von Vorerkrankungen, sich nicht sicher sind, ob Sie das Gerät verwenden dürfen, konsultieren Sie einen Arzt vor der Verwendung. Nach der Anwendung verfügt die Oberfläche des Heizelements noch über Restwärme. Bei Missbrauch des Gerätes besteht Verletzungsgefahr. Verwenden Sie das Gerät immer bestimmungsgemäß! ■ 6 │ DE│AT│CH SWWS 240 C1 ► ► ► ► ► WARNUNG! VERLETZUNGSGEFAHR! Verwenden Sie das Gerät nicht unter Decken oder Handtüchern. Stellen Sie das Gerät möglichst in der Nähe einer Steckdose auf. Sorgen Sie dafür, dass der Netzstecker bei Gefahr schnell erreichbar ist und die Netzleitung nicht zur Stolperfalle werden kann. Sorgen Sie für einen sicheren Stand des Gerätes. Tauchen Sie das Gerät niemals in Wasser oder andere Flüssigkeiten! Verwenden Sie das Gerät nicht bei Herzerkrankungen, Hautrötungen, Entzündungen, Schwellungen, empfindlichen Stellen, Diabetes, offenen Wunden, Verbrennungen, Ekzemen oder Schuppenflechte. SWWS 240 C1 DE│AT│CH │ 7 ■ ACHTUNG! SACHSCHADEN! ► Betreiben Sie das Gerät niemals im Leerzustand, ohne Wachs. ► Füllen Sie nur Wachs in das Gerät, keine aggressiven oder lösungsmittelhaltigen Substanzen! ► Stellen Sie das Gerät ausschließlich auf hitzeunempfindliche, ebene Oberflächen. ► Erhitzen Sie das Wachs niemals in der Plastikverpackung. ► Erhitzen Sie das Wachs niemals in der Mikrowelle, über offenen Flammen oder einem Herd. ► Benutzen Sie keine externe Zeitschaltuhr oder ein separates Fernwirksystem, um das Gerät zu betreiben. ► Benutzen Sie keine spitzen oder scharfen Gegenstände, um das erkaltete Wachs aus dem Gerät zu entfernen. ■ 8 │ DE│AT│CH SWWS 240 C1 Vor dem ersten Gebrauch 1) Wischen Sie das Gerät mit einem feuchten Tuch von innen und außen ab, um Transportstaub zu entfernen. Trocknen Sie es gut ab, so dass sich keine Feuchtigkeit mehr im Gerät befindet. 2) Stellen Sie das Gerät auf einen ebenen und hitzeunempfindlichen Untergrund. Bedenken Sie auch, dass eventuell Wachsspritzer auf den Untergrund tropfen können. Dieser sollte daher gut zu reinigen sein. Abschaltautomatik Nach 60 Minuten schaltet sich das Gerät automatisch aus. Nach 55 Minuten beginnt die Kontrollleuchte 2 zu blinken, um an das automatische Abschalten zu erinnern. Die automatische Abschaltung ersetzt nicht das Ziehen des Netzsteckers nach Beenden der Anwendung. Sie dient nur der Sicherheit! Ziehen Sie immer den Netzstecker, wenn Sie das Gerät nicht benutzen! Gerät vorbereiten Wenn das Gerät auf einem geeigneten Untergrund aufgestellt ist: 1) Entnehmen Sie die Wachsscheiben 9 aus der Verpackung. 2) Geben Sie die benötigte Anzahl Wachsscheiben 9 in die Innenschale 1. Orientieren Sie sich nach folgenden Richtwerten, die jedoch etwas variieren können: SWWS 240 C1 DE│AT│CH │ 9 ■ Körper-Region Anzahl der Wachsscheiben 9 Unterschenkel ca. 2 Stück je Unterschenkel Achseln 1 Stück Bikinizone 1 Stück ganzer Körper (Unterschenkel, Achseln, Bikinizone) 6 Stück Dieses Symbol, zusammen mit einer Datumsangabe, auf der Verpackung der Wachsscheiben 9 gibt an, wie lange das Produkt haltbar ist. 3) Setzen Sie den Deckel 7 auf das Gerät, indem Sie den kleinen Plastikvorsprung in die Schiene 5 setzen und dann den Deckel 7 ein wenig im Uhrzeigersinn drehen (siehe Ausklappseite): 4) Stecken Sie den Stecker 3 des Netzkabels in die Buchse 4 am Gerät. 5) Stecken Sie den Netzstecker in eine Netzsteckdose. Das Gerät heizt auf, die Kontrolleuchte 2 im Sockel des Gerätes leuchtet. 6) Rühren Sie das Wachs während des Schmelzens gelegentlich um. Sobald die Wachsscheiben 9 geschmolzen sind (bei 6 Wachsscheiben ca. 25 - 30 Minuten), können Sie mit der Enthaarung beginnen. ■ 10 │ DE│AT│CH SWWS 240 C1 HINWEIS ► Falls Sie merken, dass Sie mehr Wachs benötigen, als Sie geschmolzen haben, können Sie jederzeit weitere Wachsscheiben 9 in die Innenschale 1 geben. Warten Sie, bis das Wachs geschmolzen ist, bevor Sie mit dem Enthaaren fortfahren. ► Schmelzen Sie maximal 6 Wachsscheiben 9 auf einmal. Enthaaren Die Hautpartien, auf welchen Sie Haare entfernen wollen, müssen trocken, sauber und frei von Pflegeprodukten, Ölen oder Fetten sein. HINWEISE ► Führen Sie vor der ersten Benutzung unbedingt einen Hauttest durch, um zu kontrollieren, ob Ihre Haut diese Art der Anwendung verträgt. Geben Sie ein wenig geschmolzenen Wachs auf eine versteckte Hautstelle und kontrollieren Sie nach dem Abziehen, ob Hautveränderungen innerhalb der nächsten 24 Stunden auftreten. Sollten Hautveränderungen aufteten, benutzen Sie dieses Gerät nicht weiter. Ziehen Sie ggf. einen Arzt zu Rate. ► Wenn Sie zu eingewachsenen Haaren neigen, benutzen Sie regelmäßig Peelings. Diese können das Einwachsen von Haaren vermeiden. ► Ziehen Sie die Wachsstreifen immer so nah wie möglich an der Hautoberfläche ab. ► Achten Sie darauf, dass kein Wachs auf Ihre Kleidung gelangt. Wachsreste können nur schwer entfernt werden und führen eventuell zu Verfärbungen auf der Kleidung. SWWS 240 C1 DE│AT│CH │ 11 ■ Beine Wenn die Wachsscheiben 9 vollständig geschmolzen sind: 1) Öffnen Sie den Deckel 7, indem Sie diesen ein wenig gegen den Uhrzeigersinn drehen und nach oben abheben. 2) Nehmen Sie etwas Wachs mit der abgeflachten Seite des Spatels 8 auf. Überschüssiges Wachs können Sie am Rand des Gerätes abstreifen. 3) Tragen Sie das Wachs sofort in Haarwuchsrichtug (vom Knie in Richtung Knöchel) auf die Haut auf. Der Wachsstreifen sollte die Dicke einer Orangenschale und die Fläche von 2 nebeneinander liegenden Spateln 8 haben. Eventuell müssen Sie dabei mehrmals Wachs aufnehmen. Versuchen Sie, das Ende des aufgetragenen Wachsstreifens (welches näher am Knöchel liegt) etwas dicker aufzutragen, da Sie dieses Ende zum Abziehen greifen müssen. 4) Nach dem Auftragen können Sie den Spatel 8 in die Ablage 6 am Rand des Gerätes legen, so dass der Spatel 8 über der Innenschale 1 liegt. 5) Warten Sie 30 - 60 Sekunden, bis das Wachs trocken ist. 6) Straffen Sie mit einer Hand die Haut, greifen Sie den Wachsstreifen am dicken Ende und ziehen Sie diesen mit einer schnellen Bewegung gegen die Haarwuchsrichtung (vom Knöchel in Richtung Knie) ab. Gehen Sie bei weiteren Hautpartien genauso vor. 7) Wenn Sie mit der Anwendung fertig sind, ziehen Sie den Netzstecker aus der Netzsteckdose, um das Gerät auszuschalten. Die Kontrollleuchte 2 erlischt. ■ 12 │ DE│AT│CH SWWS 240 C1 Achseln Wenn die Wachsscheibe 9 vollständig geschmolzen ist: 1) Öffnen Sie den Deckel 7, indem Sie diesen ein wenig gegen den Uhrzeigersinn drehen und nach oben abheben. HINWEIS ► Da Achselhaare dazu neigen, in verschiedene Richtungen zu wachsen, müssen diese in mindestens 2 Schritten entfernt werden. 2) Halten Sie den Ellenbogen nach oben und hinten. So wird die Haut in der Achselhöhle gestrafft. 3) Nehmen Sie etwas Wachs mit der abgeflachten Seite des Spatels 8 auf. Überschüssiges Wachs können Sie am Rand des Gerätes abstreifen. 4) Tragen Sie diesen sofort von der Mitte der Achselhöhle nach oben Richtung Ellenbogen auf. Der Wachsstreifen sollte etwa so dick sein wie eine Orangenschale. Versuchen Sie das Ende des aufgetragenen Wachsstreifens (welches näher am Ellenbogen liegt) etwas dicker aufzutragen, da Sie dieses Ende zum Abziehen greifen müssen. 5) Nach dem Auftragen können Sie den Spatel 8 in die Ablage 6 am Rand des Gerätes legen, so dass der Spatel 8 über der Innenschale 1 liegt. 6) Warten Sie 30 - 60 Sekunden, bis das Wachs trocken ist. 7) Greifen Sie den Wachsstreifen am oberen Ende (welches näher am Ellenbogen liegt) und ziehen Sie diesen mit einer schnellen Bewegung gegen die Haarwuchsrichtung nach unten hin ab. 8) Um den unteren Teil der Achselhöhle zu enthaaren, tragen Sie das Wachs von der Mitte der Achselhöhle nach unten hin auf. 9) Warten Sie 30 - 60 Sekunden, bis das Wachs trocken ist. SWWS 240 C1 DE│AT│CH │ 13 ■ 10) Greifen Sie den Wachsstreifen am unteren Ende und ziehen Sie diesen mit einer schnellen Bewegung gegen die Haarwuchsrichtung nach oben hin ab. 11) Wenn Sie mit der Anwendung fertig sind, ziehen Sie den Netzstecker aus der Netzsteckdose, um das Gerät auszuschalten. Die Kontrollleuchte 2 erlischt. Bikinizone Wenn die Wachsscheibe 9 vollständig geschmolzen ist: 1) Öffnen Sie den Deckel 7, indem Sie diesen ein wenig gegen den Uhrzeigersinn drehen und nach oben abheben. 2) Nehmen Sie etwas Wachs mit der abgeflachten Seite des Spatels 8 auf. Überschüssiges Wachs können Sie am Rand des Gerätes abstreifen. 3) Nach dem Auftragen können Sie den Spatel 8 in die Ablage 6 am Rand des Gerätes legen, so dass der Spatel 8 über der Innenschale 1 liegt. HINWEIS ► Enthaaren Sie in der Bikinizone immer nur kleine Bereiche auf einmal. Die Haut ist sehr empfindlich. 4) Straffen Sie die Haut mit einer Hand und tragen Sie das Wachs in Haarwuchsrichtung (Richtung innerer Oberschenkel) auf. 5) Warten Sie 30 - 60 Sekunden, bis das Wachs trocken ist. 6) Greifen Sie den Wachsstreifen am Ende (welches näher am inneren Oberschenkel liegt) und ziehen Sie diesen mit einer schnellen Bewegung gegen die Haarwuchsrichtung ab. Gehen Sie bei weiteren Hautpartien genauso vor. 7) Wenn Sie mit der Anwendung fertig sind, ziehen Sie den Netzstecker aus der Netzsteckdose, um das Gerät auszuschalten. Die Kontrollleuchte 2 erlischt. ■ 14 │ DE│AT│CH SWWS 240 C1 Nach dem Enthaaren ■ Reinigen Sie den Spatel 8 (siehe Kapitel „Reinigung“). ■ Kleine Wachsreste auf der Haut können Sie mit etwas Babyöl entfernen. Sollten Sie kein Babyöl zur Hand haben, können Sie auch Ölivenöl oder anderes Speiseöl benutzen. ■ Nach dem Enthaaren kann Ihre Haut leicht gerötet sein. Dies ist normal. Lassen Sie etwas kaltes Wasser über die betroffenen Stellen fließen. Das beruhigt die Haut. Sollte sich die Haut nicht beruhigen und stark brennen, suchen Sie einen Arzt auf. Reinigung WARNUNG! STROMSCHLAGGEFAHR! ► Ziehen Sie vor jeder Reinigung den Netzstecker aus der Netzsteckdose! ► Tauchen Sie das Gerät niemals in Wasser oder andere Flüssigkeiten! WARNUNG! VERLETZUNGSGEFAHR! ► Lassen Sie das Gerät etwas abkühlen, bevor Sie es reinigen. ACHTUNG! SACHSCHADEN! ► Benutzen Sie keine spitzen und scharfen Gegenstände, um erkaltetes Wachs aus dem Gerät zu entfernen! ► Benutzen Sie keine chemischen, scheuernden oder aggressiven Reinigungsmittel, um das Gerät zu reinigen! SWWS 240 C1 DE│AT│CH │ 15 ■ HINWEIS ► Sie müssen die Innenschale 1 nicht nach jeder Benutzung reinigen und alle Wachsreste entfernen. Das im Gerät verbliebene Wachs kann bei der nächsten Anwendung wieder geschmolzen und erneut verwendet werden! ► Um Wachsscheiben 9 nachzubestellen, wenden Sie sich an unseren Kundenservice (siehe Kapitel „Ersatzteile bestellen“). ■ Streichen Sie überflüssiges Wachs vom Spatel 8 direkt nach dem Gebrauch am Rand des Gerätes ab. ■ Wischen Sie den Spatel 8 sowie den Rand des Gerätes direkt nach dem Gebrauch mit einem mit Babyöl befeuchteten Tuch ab. So lassen sich noch weiche Wachsreste entfernen. Benutzen Sie am besten ein altes Stofftuch, da sich Wachsreste nur schwer aus Textilien entfernen lassen. Sollten Sie kein Babyöl im Haus haben, können Sie auch Olivenöl oder anderes Speiseöl für die Reinigung benutzen. Achten Sie besonders darauf, dass sich keine Wachsreste in den Schienen 5 für die Verriegelung des Deckels 7 befinden! Wischen Sie danach den Spatel 8 und den Rand mit einem trockenen Papiertuch nach, um Öl-Reste zu entfernen. ■ Wenn an der Außenseite des Gehäuses Wachs haftet, entfernen Sie dieses folgendermaßen: – Stellen Sie sicher, dass das Gerät zwar vom Stromnetz getrennt ist, jedoch noch warm ist. – Wischen Sie die Außenseiten mit einem mit Öl befeuchteten Tuch ab. – Achten Sie besonders darauf, dass sich keine Wachsreste in den Schienen 5 für die Verriegelung des Deckels 7 befinden! – Entfernen Sie Ölreste mit einem sauberen, trockenen Papiertuch. ■ 16 │ DE│AT│CH SWWS 240 C1 Aufbewahrung HINWEIS ► Sie müssen die Innenschale 1 nicht nach jeder Benutzung reinigen und alle Wachsreste entfernen. Das im Gerät verbliebene Wachs kann bei der nächsten Anwendung wieder geschmolzen und erneut verwendet werden! ■ Wenn Gerät und Spatel 8 wie im Kapitel „Reinigung“ gesäubert sind: – Legen Sie den Spatel 8 in die Ablage 6 am Rand des Gerätes, so dass der Spatel 8 über der Innenschale 1 liegt. – Setzen Sie den Deckel 7 auf. – Bewahren Sie das abgekühlte Gerät an einem sauberen und trockenen Ort auf. HINWEIS ► Sollten Sie nach dem Aufbewahren den Deckel 7 nicht mehr öffnen/drehen können, befinden sich wahrscheinlich erkaltete Wachsreste zwischen Deckel 7 und Gerät. Lassen Sie in diesem Fall das Gerät mit geschlossenem Deckel 7 ca. 10 Minuten (je nach Wachsmenge) aufheizen. Das Wachs wird weich und der Deckel 7 lässt sich öffnen. SWWS 240 C1 DE│AT│CH │ 17 ■ Entsorgung Sie können das benutzte Wachs im normalen Restmüll entsorgen. Werfen Sie das Gerät keinesfalls in den normalen Hausmüll. Dieses Produkt unterliegt der europäischen Richtlinie 2012/19/EU. Entsorgen Sie das Gerät über einen zugelassenen Entsorgungsbetrieb oder über Ihre kommunale Entsorgungseinrichtung. Beachten Sie die aktuell geltenden Vorschriften. Setzen Sie sich im Zweifelsfall mit Ihrer Entsorgungseinrichtung in Verbindung. Das Produkt ist recycelbar, unterliegt einer erweiterten Herstellerverantwortung und wird getrennt gesammelt. Die Verpackung besteht aus umweltfreundlichen Materialien, die Sie über die örtlichen Recyclingstellen entsorgen können. Entsorgen Sie die Verpackung umweltgerecht. Beachten Sie die Kennzeichnung auf den verschiedenen Verpackungsmaterialien und trennen Sie diese gegebenenfalls gesondert. Die Verpackungsmaterialien sind gekennzeichnet mit Abkürzungen (a) und Ziffern (b) mit folgender Bedeutung: 1–7: Kunststoffe, 20–22: Papier und Pappe, 80–98: Verbundstoffe Möglichkeiten zur Entsorgung des ausgedienten Produkts erfahren Sie bei Ihrer Gemeinde- oder Stadtverwaltung ■ 18 │ DE│AT│CH SWWS 240 C1 Ersatzteile bestellen Folgende Ersatzteile können Sie zum Produkt SWWS 240 C1 bestellen: ► Wachsscheiben (18 Stück) Bestellen Sie die Ersatzteile über unsere Service-Hotline (siehe Kapitel „Service″) oder bequem auf unserer Webseite unter www.kompernass.com. Mit diesem QR-Code gelangen Sie direkt auf unsere Website und können die verfügbaren Ersatzteile bestellen: HINWEIS ► Halten Sie die IAN-Nummer, die Sie auf dem Umschlag dieser Bedienungsanleitung finden, für Ihre Bestellung bereit. SWWS 240 C1 DE│AT│CH │ 19 ■ Garantie der Kompernaß Handels GmbH Sehr geehrte Kundin, sehr geehrter Kunde, Sie erhalten auf dieses Gerät 3 Jahre Garantie ab Kaufdatum. Im Falle von Mängeln dieses Produkts stehen Ihnen gegen den Verkäufer des Produkts gesetzliche Rechte zu. Diese gesetzlichen Rechte werden durch unsere im Folgenden dargestellte Garantie nicht eingeschränkt. Garantiebedingungen Die Garantiefrist beginnt mit dem Kaufdatum. Bitte bewahren Sie den Kassenbon gut auf. Dieser wird als Nachweis für den Kauf benötigt. Tritt innerhalb von drei Jahren ab dem Kaufdatum dieses Produkts ein Material- oder Fabrikationsfehler auf, wird das Produkt von uns – nach unserer Wahl – für Sie kostenlos repariert, ersetzt oder der Kaufpreis erstattet. Diese Garantieleistung setzt voraus, dass innerhalb der Dreijahresfrist das defekte Gerät und der Kaufbeleg (Kassenbon) vorgelegt und schriftlich kurz beschrieben wird, worin der Mangel besteht und wann er aufgetreten ist. Wenn der Defekt von unserer Garantie gedeckt ist, erhalten Sie das reparierte oder ein neues Produkt zurück. Mit Reparatur oder Austausch des Produkts beginnt kein neuer Garantiezeitraum. Garantiezeit und gesetzliche Mängelansprüche Die Garantiezeit wird durch die Gewährleistung nicht verlängert. Dies gilt auch für ersetzte und reparierte Teile. Eventuell schon beim Kauf vorhandene Schäden und Mängel müssen sofort nach dem Auspacken gemeldet werden. Nach Ablauf der Garantiezeit anfallende Reparaturen sind kostenpflichtig. ■ 20 │ DE│AT│CH SWWS 240 C1 Garantieumfang Das Gerät wurde nach strengen Qualitätsrichtlinien sorgfältig produziert und vor Auslieferung gewissenhaft geprüft. Die Garantieleistung gilt für Material- oder Fabrikationsfehler. Diese Garantie erstreckt sich nicht auf Produktteile, die normaler Abnutzung ausgesetzt sind und daher als Verschleißteile angesehen werden können oder für Beschädigungen an zerbrechlichen Teilen, z. B. Schalter, Akkus oder Teile, die aus Glas gefertigt sind. Diese Garantie verfällt, wenn das Produkt beschädigt, nicht sachgemäß benutzt oder gewartet wurde. Für eine sachgemäße Benutzung des Produkts sind alle in der Bedienungsanleitung aufgeführten Anweisungen genau einzuhalten. Verwendungszwecke und Handlungen, von denen in der Bedienungsanleitung abgeraten oder vor denen gewarnt wird, sind unbedingt zu vermeiden. Das Produkt ist nur für den privaten und nicht für den gewerblichen Gebrauch bestimmt. Bei missbräuchlicher und unsachgemäßer Behandlung, Gewaltanwendung und bei Eingriffen, die nicht von unserer autorisierten Serviceniederlassung vorgenommen wurden, erlischt die Garantie. Abwicklung im Garantiefall Um eine schnelle Bearbeitung Ihres Anliegens zu gewährleisten, folgen Sie bitte den folgenden Hinweisen: ■ Bitte halten Sie für alle Anfragen den Kassenbon und die Artikelnummer (z. B. IAN 123456) als Nachweis für den Kauf bereit. ■ Die Artikelnummer entnehmen Sie bitte dem Typenschild am Produkt, einer Gravur am Produkt, dem Titelblatt der Bedienungsanleitung (unten links) oder dem Aufkleber auf der Rück- oder Unterseite des Produktes. SWWS 240 C1 DE│AT│CH │ 21 ■ ■ Sollten Funktionsfehler oder sonstige Mängel auftreten, kontaktieren Sie zunächst die nachfolgend benannte Serviceabteilung telefonisch oder per E-Mail. ■ Ein als defekt erfasstes Produkt können Sie dann unter Beifügung des Kaufbelegs (Kassenbon) und der Angabe, worin der Mangel besteht und wann er aufgetreten ist, für Sie portofrei an die Ihnen mitgeteilte Serviceanschrift übersenden. Auf www.lidl-service.com können Sie diese und viele weitere Handbücher, Produktvideos und Installationssoftware herunterladen. Mit diesem QR-Code gelangen Sie direkt auf die Lidl-Service-Seite (www.lidl-service.com) und können mittels der Eingabe der Artikelnummer (IAN) 123456 Ihre Bedienungsanleitung öffnen. Service Service Deutschland Tel.: 0800 5435 111 (kostenfrei aus dem dt. Festnetz/Mobilfunknetz) E-Mail: [email protected] Service Österreich Tel.: 0820 201 222 (0,15 EUR/Min.) E-Mail: [email protected] Service Schweiz Tel.: 0842 665566 (0,08 CHF/Min., Mobilfunk max. 0,40 CHF/Min.) E-Mail: [email protected] IAN 339566_1910 ■ 22 │ DE│AT│CH SWWS 240 C1 Importeur Bitte beachten Sie, dass die folgende Anschrift keine Serviceanschrift ist. Kontaktieren Sie zunächst die benannte Servicestelle. KOMPERNASS HANDELS GMBH BURGSTRASSE 21 44867 BOCHUM DEUTSCHLAND www.kompernass.com SWWS 240 C1 DE│AT│CH │ 23 ■ ■ 24 │ DE│AT│CH SWWS 240 C1 Contents Introduction . . . . . . . . . . . . . . . . . . . . . . . . . . . . . . . . . . 26 Intended use . . . . . . . . . . . . . . . . . . . . . . . . . . . . . . . . . 26 Package contents . . . . . . . . . . . . . . . . . . . . . . . . . . . . . 26 Appliance description . . . . . . . . . . . . . . . . . . . . . . . . . . 27 Technical details . . . . . . . . . . . . . . . . . . . . . . . . . . . . . . 27 Safety information . . . . . . . . . . . . . . . . . . . . . . . . . . . . 28 Before first use . . . . . . . . . . . . . . . . . . . . . . . . . . . . . . . 33 Automatic switch-off . . . . . . . . . . . . . . . . . . . . . . . . . . . 33 Preparing the appliance . . . . . . . . . . . . . . . . . . . . . . . . 33 Epilation . . . . . . . . . . . . . . . . . . . . . . . . . . . . . . . . . . . . . 35 Legs . . . . . . . . . . . . . . . . . . . . . . . . . . . . . . . . . . . . . . . . . . . . . . . .36 Armpits . . . . . . . . . . . . . . . . . . . . . . . . . . . . . . . . . . . . . . . . . . . . . .37 Bikini zone . . . . . . . . . . . . . . . . . . . . . . . . . . . . . . . . . . . . . . . . . . .38 After epilation . . . . . . . . . . . . . . . . . . . . . . . . . . . . . . . . 39 Cleaning . . . . . . . . . . . . . . . . . . . . . . . . . . . . . . . . . . . . . 39 Storage . . . . . . . . . . . . . . . . . . . . . . . . . . . . . . . . . . . . . 41 Disposal . . . . . . . . . . . . . . . . . . . . . . . . . . . . . . . . . . . . . 42 Ordering spare parts . . . . . . . . . . . . . . . . . . . . . . . . . . 43 Kompernass Handels GmbH warranty . . . . . . . . . . . . 44 Service . . . . . . . . . . . . . . . . . . . . . . . . . . . . . . . . . . . . . . . . . . . . . .46 Importer . . . . . . . . . . . . . . . . . . . . . . . . . . . . . . . . . . . . . . . . . . . . .46 SWWS 240 C1 GB│IE │ 25 ■ Introduction Congratulations on the purchase of your new appliance. You have selected a high-quality product. The operating instructions are part of this product. They contain important information about safety, usage and disposal. Before using the product, please familiarise yourself with all operating and safety instructions. Use the product only as described and for the range of applications specified. Keep these operating instructions as a reference and store them near the product. Please also pass these operating instructions on to any future owner. Intended use This appliance has been designed exclusively for the epilation of legs, armpits and the bikini zone on the human body. This appliance is intended solely for use in private households. Do not use it for commercial purposes. Package contents Hot Wax Kit 18 wax discs Spatula Operating instructions ■ 26 │ GB│IE SWWS 240 C1 Appliance description 1 Inner bowl 2 Control lamp 3 Power plug 4 Socket 5 Groove (for locking the lid) 6 Tray (for the spatula) 7 Lid 8 Spatula 9 Wax disc Technical details Voltage 220 - 240 V ~ (AC), 50 Hz Power consumption 20 W Capacity approx. 530 ml Protection class II / SWWS 240 C1 (Double insulation) GB│IE │ 27 ■ Safety information ► ► ► ► ► ► ► WARNING! RISK OF ELECTRIC SHOCK! To avoid potential risks, damaged mains cables should be replaced by the manufacturer or the manufacturer’s customer service department or a similarly qualified person. Use the appliance only in dry indoor areas, not outdoors. NEVER open the housing of the appliance. Do not use the appliance in the vicinity of water, such as wash basins, showers or bath tubs. Do not use the appliance while bathing, showering or sleeping. Never touch the mains plug or the mains cable with wet hands. Check the appliance for visible external damage before use. Do not operate a appliance that has been damaged or dropped! ■ 28 │ GB│IE SWWS 240 C1 WARNING! RISK OF ELECTRIC SHOCK! ► ► ► Do not use this appliance near a bath tub, shower or any other container filled with water. Do not allow any liquid to run over the appliance’s plug connections. WARNING! RISK OF INJURY! This appliance may be used by children aged 8 years and above and by persons with limited physical, sensory or mental capabilities or lack of experience and knowledge, provided that they are under supervision or have been told how to use the appliance safely and are aware of the potential risks. Do not allow children to play with the appliance. SWWS 240 C1 GB│IE │ 29 ■ ► ► ► ► ► ► WARNING! RISK OF INJURY! Cleaning and user maintenance tasks may not be carried out by children unless they are aged 8 or older and are supervised. The appliance and its connecting cable must be kept away from children younger than 8 years old. People who are insensitive to heat may not use this appliance. If you are unsure whether you can safely use the appliance due to pre-existing conditions, consult a doctor before use. After use, the surfaces of the heating elements will still have some residual heat. There is a risk of injury if the appliance is misused. Use the appliance only as described in the instructions! ■ 30 │ GB│IE SWWS 240 C1 ► ► ► ► ► WARNING! RISK OF INJURY! Do not use the appliance beneath blankets or towels. If possible, set up the appliance close to a power socket. Ensure that the power plug is quickly reachable in case of danger, and that the cable poses no risk of tripping. Provide a stable location for the appliance. Never immerse the appliance in water or other liquids! Do not use the appliance if you have heart disease, skin redness, inflammation, swelling, sensitive areas, diabetes, open wounds, burns, eczema or psoriasis. SWWS 240 C1 GB│IE │ 31 ■ ATTENTION! PROPERTY DAMAGE! ► Never operate this appliance when it is empty (without wax). ► Fill the appliance with wax only. Do not add any aggressive substances or substances containing solvents! ► Always place the appliance on a heatresistant, level surface. ► Never heat the wax in the plastic packaging. ► Never heat the wax in a microwave oven, over an open flame or on a stove. ► Do not use an external timer switch or a separate remote control system to operate the appliance. ► Never use pointed or sharp objects to remove solidified wax from the appliance. ■ 32 │ GB│IE SWWS 240 C1 Before first use 1) Wipe the appliance with a damp cloth both inside and outside to remove any residual dust left over from transport. Dry it well so that there is no moisture left in the appliance. 2) Place the appliance on a level and heat-resistant surface. Also keep in mind that wax splashes may drip onto the surface. The surface should therefore be easy to clean. Automatic switch-off After 60 minutes, the appliance will switch off automatically. After 55 minutes, the control lamp 2 will start flashing to notify you that the appliance is about to switch off automatically. The automatic switch-off is not intended as a substitute for removing the plug from the mains power after use! It is merely a safety feature! Always remove the plug from the mains power socket when the appliance is not in use! Preparing the appliance Once the appliance is set up on a suitable surface: 1) Remove the wax discs 9 from its packaging. 2) Add the required number of wax discs 9 to the inner bowl 1. Use the following standard values as an orientation aid. The values may vary. SWWS 240 C1 GB│IE │ 33 ■ Body region Number of wax discs 9 Lower leg approx. 2 pcs. lower leg Armpits 1 pc. Bikini zone 1 pc. Entire body (lower leg, armpits, bikini zone) 6 pcs. This symbol, together with a date, on the packaging of the wax discs 9 indicates how long the product will last. 3) Put the lid 7 on the appliance by placing the plastic tab in the groove 5 and then turning the lid 7 clockwise slightly (see fold-out page): 4) Insert the plug 3 of the power cable into the socket 4 on the appliance. 5) Insert the plug into a mains power socket. The control lamp 2 in the base of the appliance comes on and the appliance heats up. 6) Stir the wax occasionally while it is melting. As soon as the wax discs 9 have melted (this takes about 25–30 minutes for 6 discs), you can start epilating. ■ 34 │ GB│IE SWWS 240 C1 NOTE ► If you realise that you need more wax than you have melted, you can add additional wax discs 9 to the inner bowl 1. Wait until the wax has melted before you start epilating. ► Melt a maximum of 6 wax discs 9 at once. Epilation The skin regions that you want to epilate should be dry, clean and free of care products, oils or fats. NOTES ► Before first use, carry out a skin test to find out whether your skin reacts to the treatment. Apply a small amount of melted wax to an inconspicuous area of skin. After removing the wax, check to see whether the skin reacts in any way over the course of the next 24 hours. If you notice any skin reactions, stop using this appliance. If in any doubt, seek medical advice. ► If you have a tendency towards ingrowing hairs, carry out regular peelings. These can prevent the hairs from growing inwards. ► Always pull off the wax strips as close as possible to the skin surface. ► Make sure that you don’t get any wax on your clothes. Wax residue can be very difficult to remove and may discolour clothing. SWWS 240 C1 GB│IE │ 35 ■ Legs Once the wax discs 9 are completely melted: 1) Open the lid 7 by turning it anticlockwise slightly and lifting it upwards. 2) Pick up a little wax using the flattened edge of the spatula 8. You can wipe off excess wax on the rim of the appliance. 3) Apply the wax to the skin in the direction of hair growth (from the knee towards the heel). The wax strips should have the approximate thickness of an orange peel and the area of two spatulas 8 laid side by side. You may have to add wax. Try to make sure that one end of the applied wax strip (the end nearer to your heel) is a little thicker as you will need to be able to grip this end for removal. 4) After application, you can place the spatula 8 into the tray 6 on the edge of the appliance so that the spatula 8 projects over the inner bowl 1. 5) Wait about 30 - 60 seconds until the wax is dry. 6) Pull the skin taut with one hand. Grip the wax strip by the thicker end and pull it off with a rapid movement against the direction of hair growth (from your ankle towards your knee). Repeat the process for the remaining areas of skin. 7) When you are finished with the treatment, pull the plug from the mains power socket to turn off the appliance. The control lamp 2 goes out. ■ 36 │ GB│IE SWWS 240 C1 Armpits Once the wax disc 9 is completely melted: 1) Open the lid 7 by turning it anticlockwise slightly and lifting it upwards. NOTE ► As armpit hairs tend to grow in different directions, they need to be removed in at least two steps. 2) Raise your elbow upwards and hold it out behind you. This tightens the skin in the armpit. 3) Pick up a little wax using the flattened edge of the spatula 8. You can wipe off excess wax on the rim of the appliance. 4) Apply this immediately from the middle of the armpit upwards in the direction of the elbow. The wax strips should be roughly the thickness of orange peel. Try to make sure that one end of the applied wax strip (the end nearer to your elbow) is a little thicker as you will need to be able to grip this end for removal. 5) After application, you can place the spatula 8 into the tray 6 on the edge of the appliance so that the spatula 8 projects over the inner bowl 1. 6) Wait about 30–60 seconds until the wax is dry. 7) Grip the wax strip by the thicker end (the end nearer to your elbow) and pull it off downwards with a rapid movement against the direction of hair growth. 8) To depilate the lower part of the armpit, apply the wax from the middle of the armpit towards the bottom. 9) Wait about 30–60 seconds until the wax is dry. SWWS 240 C1 GB│IE │ 37 ■ 10) Grip the wax strip at the lower end and pull it off upwards with a rapid movement against the direction of hair growth. 11) When you are finished with the treatment, pull the plug from the mains power socket to turn off the appliance. The control lamp 2 goes out. Bikini zone Once the wax disc 9 is completely melted: 1) Open the lid 7 by turning it anticlockwise slightly and lifting it upwards. 2) Pick up a little wax using the flattened edge of the spatula 8. You can wipe off excess wax on the rim of the appliance. 3) After application, you can place the spatula 8 into the tray 6 on the edge of the appliance so that the spatula 8 projects over the inner bowl 1. NOTE ► When epilating the bikini zone, treat only small areas at once. The skin is very sensitive. 4) Tighten the skin with one hand and apply the wax in the direction of hair growth (towards your inner thigh). 5) Wait about 30 - 60 seconds until the wax is dry. 6) Grip the wax strip by the thicker end (the end nearer to your inner thigh) and pull it off downwards with a rapid movement against the direction of hair growth. Repeat the process for the remaining areas of skin. 7) When you are finished with the treatment, pull the plug from the mains power socket to turn off the appliance. The control lamp 2 goes out. ■ 38 │ GB│IE SWWS 240 C1 After epilation ■ Clean the spatula 8 (see section “Cleaning”). ■ You can remove small quantities of residual wax from your skin using baby oil. If you do not have any baby oil, you can also use olive oil or some other edible oil. ■ You skin may be slightly reddened after epilation. This is normal. Run cold water over affected areas. This soothes the skin. If your skin does not recover and/or you experience a burning sensation, contact a doctor. Cleaning WARNING! RISK OF ELECTRIC SHOCK! ► Before cleaning the appliance, disconnect the power plug from the mains power socket! ► NEVER immerse the appliance in water or other liquids! WARNING! RISK OF INJURY! ► Allow the appliance to cool down before cleaning it. ATTENTION! PROPERTY DAMAGE! ► Never use pointed or sharp objects to remove solidified wax from the appliance! ► Do not use any chemical, abrasive or aggressive cleaning agents to clean the appliance! SWWS 240 C1 GB│IE │ 39 ■ NOTE ► You do not need to clean the inner bowl 1 and remove the wax residues after every use. The wax remaining in the appliance can be melted and reused for the next application! ► To reorder wax discs 9, contact our Customer Service (see section “Ordering spare parts”). ■ Scrape the surplus wax off the spatula 8 on the inside of the rim of the appliance immediately after use. ■ Wipe the spatula 8 as well as the rim of the appliance immediately after use with a cloth moistened with a little baby oil. This will allow you to remove any still-soft wax residue. Preferably use an old cloth as wax residue is extremely difficult to remove from textiles. If you do not have any baby oil in the house, you can also use olive oil or some other edible oil for cleaning. Make sure that no wax residue remains in the grooves 5 for locking the lid 7! Wipe the spatula 8 and the rim afterwards with a paper cloth to remove any remaining oil. ■ If there is any wax left on the outside of the appliance, proceed as follows: – Ensure that the appliance is unplugged but still warm. – Wipe the surface with a cloth moistened with a little oil. – Make sure that no wax residue remains in the grooves 5 for locking the lid 7! – Remove any oil residue with a clean paper towel. ■ 40 │ GB│IE SWWS 240 C1 Storage NOTE ► You do not need to clean the inner bowl 1 and remove the wax residues after every use. The wax remaining in the appliance can be melted and reused for the next application! ■ Once the appliance and the spatula 8 have been cleaned as described in the “Cleaning” section: – Lay the spatula 8 in the tray 6 on the edge of the appliance so that the spatula 8 protrudes over the inner bowl 1. – Put the lid 7 on. – Store the cooled-down appliance in a clean, dry location. NOTE ► If you are unable to remove/turn the lid 7 when you remove it from storage, there is probably solidified wax between the lid 7 and the appliance. In this case, heat up the appliance for about 10 minutes (depending on the amount of wax) with the lid 7 closed. The wax will soften and the lid 7 can now be removed. SWWS 240 C1 GB│IE │ 41 ■ Disposal You can dispose of used wax in the normal waste. Never dispose of the appliance in your normal domestic waste. This product is subject to the provisions of European Directive 2012/19/EU. Dispose of the appliance through an approved disposal centre or at your community waste facility. Please comply with all applicable regulations. Please contact your waste disposal centre if you are in any doubt. The product is recyclable, subject to extended producer responsibility and is collected separately. The packaging is made from environmentally friendly material and can be disposed of at your local recycling plant. Dispose of the packaging in an environmentally-friendly manner. Note the labelling on the packaging and separate the packaging material components for disposal if necessary. The packaging material is labelled with abbreviations (a) and numbers (b) with the following meanings: 1–7: Plastics, 20–22: Paper and cardboard, 80–98: Composites Your local community or municipal authorities can provide information on how to dispose of the worn-out product. ■ 42 │ GB│IE SWWS 240 C1 Ordering spare parts You can order the following spare parts for the product SWWS 240 C1: ► Wax discs (18 pc.) Order the spare parts via the Service Hotline (see section „Service“) or simply visit our website at www.kompernass.com. With this QR code you can go directly to our website and order the available spare parts: HINWEIS ► Have the IAN number of the appliance ready (can be found on the cover of these operating instructions) when you place your order. SWWS 240 C1 GB│IE │ 43 ■ Kompernass Handels GmbH warranty Dear Customer, This appliance has a 3-year warranty valid from the date of purchase. If this product has any faults, you, the buyer, have certain statutory rights. Your statutory rights are not restricted in any way by the warranty described below. Warranty conditions The warranty period starts on the date of purchase. Please keep your receipt in a safe place. This will be required as proof of purchase. If any material or manufacturing fault occurs within three years of the date of purchase of the product, we will either repair or replace the product for you or refund the purchase price (at our discretion). This warranty service requires that you present the defective appliance and the proof of purchase (receipt) within the three-year warranty period, along with a brief written description of the fault and of when it occurred. If the defect is covered by the warranty, your product will either be repaired or replaced by us. The repair or replacement of a product does not signify the beginning of a new warranty period. Warranty period and statutory claims for defects The warranty period is not prolonged by repairs effected under the warranty. This also applies to replaced and repaired components. Any damage and defects present at the time of purchase must be reported immediately after unpacking. Repairs carried out after expiry of the warranty period shall be subject to a fee. Scope of the warranty This appliance has been manufactured in accordance with strict quality guidelines and inspected meticulously prior to delivery. ■ 44 │ GB│IE SWWS 240 C1 The warranty covers material faults or production faults. The warranty does not extend to product parts subject to normal wear and tear or to fragile parts which could be considered as consumable parts such as switches, batteries or parts made of glass. The warranty does not apply if the product has been damaged, improperly used or improperly maintained. The directions in the operating instructions for the product regarding proper use of the product are to be strictly followed. Uses and actions that are discouraged in the operating instructions or which are warned against must be avoided. This product is intended solely for private use and not for commercial purposes. The warranty shall be deemed void in cases of misuse or improper handling, use of force and modifications / repairs which have not been carried out by one of our authorised Service centres. Warranty claim procedure To ensure quick processing of your case, please observe the following instructions: ■ Please have the till receipt and the item number (e.g. IAN 12345) available as proof of purchase. ■ You will find the item number on the type plate on the product, an engraving on the product, on the front page of the operating instructions (below left) or on the sticker on the rear or bottom of the product. ■ If functional or other defects occur, please contact the service department listed either by telephone or by e-mail. ■ You can return a defective product to us free of charge to the service address that will be provided to you. Ensure that you enclose the proof of purchase (till receipt) and information about what the defect is and when it occurred. SWWS 240 C1 GB│IE │ 45 ■ You can download these instructions along with many other manuals, product videos and installation software at www.lidl-service.com. This QR code will take you directly to the Lidl service page (www.lidl-service.com) where you can open your operating instructions by entering the item number (IAN) 123456. Service Service Great Britain Tel.: 0800 404 7657 E-Mail: [email protected] Service Ireland Tel.: 1890 930 034 (0,08 EUR/Min., (peak)) (0,06 EUR/Min., (off peak)) E-Mail: [email protected] IAN 339566_1910 Importer Please note that the following address is not the service address. Please use the service address provided in the operating instructions. KOMPERNASS HANDELS GMBH BURGSTRASSE 21 • 44867 BOCHUM GERMANY www.kompernass.com ■ 46 │ GB│IE SWWS 240 C1 Table des matières Introduction . . . . . . . . . . . . . . . . . . . . . . . . . . . . . . . . . . 48 Utilisation conforme à l’usage prévu . . . . . . . . . . . . . 48 Matériel livré . . . . . . . . . . . . . . . . . . . . . . . . . . . . . . . . . 48 Description de l’appareil . . . . . . . . . . . . . . . . . . . . . . . 49 Caractéristiques techniques . . . . . . . . . . . . . . . . . . . . . 49 Consignes de sécurité . . . . . . . . . . . . . . . . . . . . . . . . . . 50 Avant la première utilisation . . . . . . . . . . . . . . . . . . . . 55 Coupure automatique . . . . . . . . . . . . . . . . . . . . . . . . . . 55 Préparation de l’appareil. . . . . . . . . . . . . . . . . . . . . . . 55 Épilation . . . . . . . . . . . . . . . . . . . . . . . . . . . . . . . . . . . . . 57 Jambes . . . . . . . . . . . . . . . . . . . . . . . . . . . . . . . . . . . . . . . . . . . . . .58 Aisselles . . . . . . . . . . . . . . . . . . . . . . . . . . . . . . . . . . . . . . . . . . . . .59 Zone du maillot . . . . . . . . . . . . . . . . . . . . . . . . . . . . . . . . . . . . . . .60 Suite à l’épilation . . . . . . . . . . . . . . . . . . . . . . . . . . . . . 61 Nettoyage . . . . . . . . . . . . . . . . . . . . . . . . . . . . . . . . . . . 61 Rangement. . . . . . . . . . . . . . . . . . . . . . . . . . . . . . . . . . . 63 Mise au rebut . . . . . . . . . . . . . . . . . . . . . . . . . . . . . . . . . 64 Commander des pièces de rechange . . . . . . . . . . . . . . 65 Garantie pour Kompernass Handels GmbH pour la Belgique . . . . . . . . . . . . . . . . . . . . . . . . . . . . . . . . . . . . . 66 Garantie pour Kompernass Handels GmbH pour la France . . . . . . . . . . . . . . . . . . . . . . . . . . . . . . . . . . . . . . . 68 Service après-vente. . . . . . . . . . . . . . . . . . . . . . . . . . . . 73 Importateur . . . . . . . . . . . . . . . . . . . . . . . . . . . . . . . . . . 73 SWWS 240 C1 FR│BE │ 47 ■ Introduction Toutes nos félicitations pour l’achat de votre nouvel appareil. Vous venez ainsi d’opter pour un produit de grande qualité. Le mode d’emploi fait partie intégrante de ce produit. Il contient des remarques importantes concernant la sécurité, l’usage et la mise au rebut. Avant d’utiliser le produit, veuillez vous familiariser avec toutes les consignes d’utilisation et de sécurité. N’utilisez le produit que conformément aux consignes et pour les domaines d’utilisation prévus. Conservez toujours le mode d’emploi comme ouvrage de référence à proximité du produit. Si vous cédez le produit à un tiers, remettez-lui également tous les documents. Utilisation conforme à l’usage prévu Cet appareil sert exclusivement à épiler les jambes, aisselles et la zone du maillot du corps humain. Cet appareil est exclusivement réservé à un usage domestique. Veuillez ne pas l’utiliser à des fins professionnelles. Matériel livré Chauffe-cire et accessoires 18 disques de cire Spatule Mode d’emploi ■ 48 │ FR│BE SWWS 240 C1 Description de l’appareil 1 Bac intérieur 2 Voyant de contrôle 3 Fiche secteur 4 Douille 5 Rail (pour verrouiller le couvercle) 6 Desserte (pour la spatule) 7 Couvercle 8 Spatule 9 Disque de cire Caractéristiques techniques Tension 220 - 240 V ∼ (Courant alternatif), 50 Hz Puissance absorbée 20 W Capacité env. 530 ml Classe de protection II / SWWS 240 C1 (Double isolation) FR│BE │ 49 ■ Consignes de sécurité ► ► ► ► ► ► ► AVERTISSEMENT ! RISQUE D'ÉLECTROCUTION ! Si le cordon d'alimentation de cet appareil est endommagé, il doit être remplacé par le fabricant, son service après-vente ou une personne de qualification similaire afin d'éviter tout risque. Utilisez l'appareil exclusivement dans des locaux secs, surtout pas en extérieur. N'ouvrez jamais le boîtier de l'appareil. N'utilisez pas l'appareil à proximité d'eau, comme des lavabos, receveurs de douche ou baignoires. Ne jamais utiliser cet appareil dans le bain ou la douche, ou pendant que vous dormez. Ne saisissez jamais la fiche secteur ou le cordon d'alimentation avec les mains mouillées. Avant d'utiliser l'appareil, vérifiez que celui-ci ne présente aucun dégât extérieur visible. Ne mettez pas en service un appareil endommagé ou qui a chuté. ■ 50 │ FR│BE SWWS 240 C1 AVERTISSEMENT ! RISQUE D’ÉLECTROCUTION ! ► ► ► N’utilisez pas l’appareil à proximité de baignoires, de bacs à douche ou d’autres récipients contenant de l’eau. Aucun liquide ne doit couler sur la fiche de raccordement de l’appareil. AVERTISSEMENT ! RISQUE DE BLESSURES ! Cet appareil peut être utilisé par des enfants à partir de 8 ans et par des personnes ayant des capacités physiques, sensorielles ou mentales réduites ou disposant de peu d'expérience et/ou de connaissances, à condition qu'ils soient surveillés ou qu'ils aient été initiés à l'utilisation sécurisée de l'appareil et qu'ils aient compris les dangers en résultant. Les enfants ne doivent pas jouer avec l'appareil. SWWS 240 C1 FR│BE │ 51 ■ ► ► ► ► ► ► AVERTISSEMENT ! RISQUE DE BLESSURES ! Le nettoyage et une maintenance par l'utilisateur ne doivent pas être confiés à des enfants, sauf s'ils sont âgés de 8 ans et plus et s'ils effectuent ces opérations sous surveillance. Éloignez l'appareil et son cordon d'alimentation des enfants âgés de moins de 8 ans. Les personnes insensibles à la chaleur ne doivent pas utiliser cet appareil ! Si suite à des antécédents médicaux, vous n’êtes pas sûr de pouvoir utiliser l’appareil, consultez un médecin avant toute utilisation. Suite à l’utilisation, la surface de l’élément chauffant présente encore une chaleur résiduelle. En cas d’usage abusif, il existe un risque de blessures. Utilisez l’appareil toujours de manière conforme à sa destination ! ■ 52 │ FR│BE SWWS 240 C1 ► ► ► ► ► AVERTISSEMENT ! RISQUE DE BLESSURES ! N'utilisez pas l'appareil sous des couvertures ou des serviettes éponge. Dans la mesure du possible, placez l'appareil à proximité immédiate d'une prise secteur. Veillez à ce que la fiche secteur soit rapidement accessible en cas de danger et à ce que le cordon d'alimentation ne provoque pas la chute d'une personne. Veillez à ce que l'appareil soit posé sur une surface stable. N'immergez jamais l'appareil dans de l'eau ni dans d'autres liquides ! N'utilisez pas l'appareil en cas de maladies cardiaques, de rougeurs cutanées, d'inflammations, d'enflures, d'endroits sensibles, de diabète, de plaies ouvertes, de brûlures, d'eczéma ou de psoriasis. SWWS 240 C1 FR│BE │ 53 ■ ATTENTION ! RISQUE DE DÉGÂTS MATÉRIELS ! ► Ne faites jamais fonctionner l'appareil à vide sans cire. ► Ne remplissez l'appareil qu'avec de la cire, pas avec des substances corrosives ou contenant du solvant ! ► Posez l'appareil uniquement sur une surface plane et non sensible à la chaleur. ► Ne faites jamais chauffer la cire dans l'emballage plastique. ► Ne faites jamais chauffer la cire au microondes, au-dessus d'une flamme ouverte ou de plaques électriques. ► N'utilisez pas de minuterie externe ni de dispositif de commande à distance séparé pour opérer l'appareil. ► N'utilisez pas d'objets pointus ou tranchants pour retirer la cire refroidie de l'appareil. ■ 54 │ FR│BE SWWS 240 C1 Avant la première utilisation 1) Essuyez l’intérieur et l’extérieur de l’appareil avec un chiffon humide pour éliminer la poussière due au transport. Séchez-le bien, de manière à ce que toute humidité soit retirée de l’appareil. 2) Placez l’appareil sur une surface plate et résistante à la chaleur. Pensez également que d’éventuelles projections de cire risquent de goutter sur la surface. Cette dernière doit de ce fait être facile à nettoyer. Coupure automatique L’appareil s’arrête automatiquement après 60 minutes. Au bout de 55 minutes, le voyant de contrôle 2 se met à clignoter pour vous rappeler la coupure automatique. La coupure automatique ne se substitue pas au retrait de la fiche secteur une fois l’utilisation terminée ! Elle constitue uniquement une sécurité ! Débranchez toujours la fiche secteur lorsque vous n’utilisez plus l’appareil ! Préparation de l’appareil Une fois l’appareil mis en place sur une surface adaptée : 1) retirez les disques de cire 9 de l’emballage. 2) Placez le nombre de disques de cire 9 nécessaires dans le bac intérieur 1. Orientez-vous aux valeurs indicatives suivantes, qui peuvent cependant varier un peu : SWWS 240 C1 FR│BE │ 55 ■ Région du corps Nombre de disques de cire 9 Bas des jambes env. 2 pièces pour chaque bas de jambe Aisselles 1 pièce Zone du maillot 1 pièce corps entier (bas des jambes, aisselles, zone du maillot) 6 pièces Ce symbole, avec une date, présent sur l’emballage des disques de cire 9 indique la durée de conservation du produit. 3) Placez le couvercle 7 sur l’appareil en plaçant la petite pièce plastique dans le rail 5 puis en tournant légèrement le couvercle 7 dans le sens des aiguilles d’une montre (voir volet dépliant) : 4) Enfichez la fiche secteur 3 du cordon d’alimentation dans la douille 4 de l’appareil. 5) Branchez la fiche secteur dans une prise secteur. L’appareil chauffe, le voyant de contrôle 2 dans le socle de l’appareil s’allume. 6) Mélangez de temps en temps la cire pendant qu’elle fond. Une fois les disques de cire 9 fondus, (env. 25 à 30 minutes pour 6 disques en cire), vous pouvez démarrer l’épilation. ■ 56 │ FR│BE SWWS 240 C1 REMARQUE ► Si vous remarquez que vous avez besoin de plus de cire que ce que vous avez fait fondre, vous pouvez rajouter à tout moment d'autres disques de cire 9 dans le bac intérieur 1. Attendez que la cire ait fondu avant de poursuivre l'épilation. ► Faites fondes 6 disques de cire 9 au maximum à la fois. Épilation Les parties cutanées que vous souhaitez épiler doivent être sèches, propres et exemptes de produits de soin, huiles ou graisses. REMARQUES ► Avant la première utilisation, réalisez obligatoirement un test cutané pour contrôler si votre peau supporte ce genre d'application. Mettez un peu de cire fondue sur une partie de peau cachée et contrôlez, une fois la bande de cire arrachée, si des altérations cutanées apparaissent au cours des 24 heures suivantes. N'utilisez jamais cet appareil si des altérations cutanées apparaissent. Demandez conseil à un médecin si nécessaire. ► Si vous avez tendance aux poils incarnés, procédez régulièrement à des exfoliations. Ils peuvent empêcher l'incarnation des poils. ► Arrachez toujours les bandes de cire le plus près possible de la surface de la peau. ► Veillez à ce que la cire ne soit pas projetée sur vos vêtements. Les restes de cire ne peuvent être éliminés que difficilement et peuvent éventuellement entraîner des colorations des vêtements. SWWS 240 C1 FR│BE │ 57 ■ Jambes Une fois les disques de cire 9 entièrement fondus : 1) Ouvrez le couvercle 7 en tournant légèrement dans le sens inverse aux aiguilles d’une montre et en soulevant vers le haut. 2) Prélevez un peu de cire à l’aide du côté plat de la spatule 8. Vous pouvez racler l’excédent de cire sur le bord de l’appareil. 3) Appliquez immédiatement la cire sur la peau dans le sens de pousse des poils (du genou en direction de la cheville). Les bandes de cire doivent présenter l’épaisseur d’une écorce d’orange et la surface de 2 spatules 8 placées côte à côte. Vous devez éventuellement prendre plus de cire. Essayer d’appliquer la cire de manière un peu plus épaisse à la fin de la bande de cire appliquée (qui se trouve près de la cheville), puisque vous devez saisir cette extrémité pour tirer la bande. 4) Suite à l’application, vous pouvez poser la spatule 8 sur la desserte 6 sur le bord de l’appareil, de manière à ce que la spatule 8 repose sur le bac intérieur 1. 5) Patientez 30-60 secondes jusqu’à ce que la cire soit sèche. 6) Tendez la peau d’une main, saisissez la bande de cire à l’extrémité épaisse et tirez d’un mouvement rapide dans le sens contraire de la pousse des poils (de la cheville en direction du genou). Procédez de la même manière pour les autres parties cutanées. 7) Lorsque vous avez fini, retirez la fiche secteur de la prise secteur pour éteindre l’appareil. Le voyant de contrôle 2 s’éteint. ■ 58 │ FR│BE SWWS 240 C1 Aisselles Une fois le disque de cire 9 entièrement fondu : 1) Ouvrez le couvercle 7 en tournant légèrement dans le sens inverse aux aiguilles d’une montre et en soulevant vers le haut. REMARQUE ► Les poils des aisselles ont tendance à pousser dans différentes directions et doivent être éliminés en 2 étapes au minimum. 2) Levez le coude vers le haut et en arrière. La peau des aisselles est ainsi tendue. 3) Prélevez un peu de cire à l’aide du côté plat de la spatule 8. Vous pouvez racler l’excédent de cire sur le bord de l’appareil. 4) Appliquez immédiatement la cire du milieu du creux de l’aisselle vers le haut en direction du coude. La bande de cire doit être aussi épaisse que l’écorce d’une orange. Essayer d’appliquer la cire de manière un peu plus épaisse à la fin de la bande de cire appliquée (qui se trouve près du coude), puisque vous devez saisir cette extrémité pour tirer la bande. 5) Suite à l’application, vous pouvez poser la spatule 8 sur la desserte 6 sur le bord de l’appareil, de manière à ce que la spatule 8 repose sur le bac intérieur 1. 6) Patientez 30-60 secondes jusqu’à ce que la cire soit sèche. 7) Saisissez la bande de cire à l’extrémité supérieure (qui se trouve plus près du coude) et tirez d’un mouvement rapide vers le bas dans le sens contraire de la pousse des poils. 8) Pour épiler la partie inférieure du creux des aisselles, appliquez la cire du milieu du creux de l’aisselle vers le bas. 9) Patientez 30-60 secondes jusqu’à ce que la cire soit sèche. SWWS 240 C1 FR│BE │ 59 ■ 10) Saisissez la bande de cire à l’extrémité inférieure et tirez d’un mouvement rapide vers le haut dans le sens contraire de la pousse des poils. 11) Lorsque vous avez fini, retirez la fiche secteur de la prise secteur pour éteindre l’appareil. Le voyant de contrôle 2 s’éteint. Zone du maillot Une fois le disque de cire 9 entièrement fondu : 1) ouvrez le couvercle 7 en tournant légèrement dans le sens inverse aux aiguilles d’une montre et en soulevant vers le haut. 2) Prélevez un peu de cire à l’aide du côté plat de la spatule 8. Vous pouvez racler l’excédent de cire sur le bord de l’appareil. 3) Suite à l’application, vous pouvez poser la spatule 8 sur la desserte 6 sur le bord de l’appareil, de manière à ce que la spatule 8 repose sur le bac intérieur 1. REMARQUE ► Au niveau de la zone du maillot, n'épilez toujours que de petites zones à la fois. La peau est très sensible. 4) Tendez la peau d’une main et appliquez la cire dans le sens de la pousse des poils (en direction de l’intérieur de la cuisse). 5) Patientez 30-60 secondes jusqu’à ce que la cire soit sèche. 6) Saisissez la bande de cire à l’extrémité (la plus proche de l’intérieur de la cuisse) et tirez d’un mouvement rapide dans le sens contraire de la pousse des poils. Procédez de la même manière pour les autres parties cutanées. 7) Lorsque vous avez fini, retirez la fiche secteur de la prise secteur pour éteindre l’appareil. Le voyant de contrôle 2 s’éteint. ■ 60 │ FR│BE SWWS 240 C1 Suite à l’épilation ■ Nettoyez la spatule 8 (voir le chapitre «Nettoyage»). ■ Les petits restes de cire s’éliminent facilement avec de l’huile pour bébé. Si vous n’avez pas d’huile pour bébé sous la main, vous pouvez également utiliser de l’huile d’olive ou une autre huile alimentaire. ■ Après l’épilation, votre peau peut présenter une légère rougeur. C’est tout à fait normal. Faites couler un peu d’eau froide sur les parties concernées. Cela apaise la peau. Si votre peau ne s’apaise pas et brûle fortement, consultez un médecin. Nettoyage AVERTISSEMENT ! RISQUE D'ÉLECTROCUTION ! ► Avant chaque nettoyage, retirez la fiche secteur de la prise secteur ! ► N'immergez jamais l'appareil dans de l'eau ou dans d'autres liquides ! AVERTISSEMENT ! RISQUE DE BLESSURES ! ► Laissez l'appareil refroidir légèrement avant de le nettoyer. ATTENTION ! RISQUE DE DÉGÂTS MATÉRIELS ! ► N'utilisez pas d'objets pointus et tranchants pour retirer la cire refroidie de l'appareil. ► N'utilisez pas de produits de nettoyage agressifs, abrasifs ou chimiques pour nettoyer l'appareil ! SWWS 240 C1 FR│BE │ 61 ■ REMARQUE ► Vous ne devez pas nettoyer le bac intérieur 1 après chaque utilisation pour éliminer tous les restes de cire. La cire qui reste dans l'appareil peut être refondue pour la prochaine utilisation et être réutilisée ! ► Pour commander des disques de cire 9, veuillez vous adresser à notre service après-vente (cf. le chapitre «Commander des pièces de rechange»). ■ Raclez l’excédent de cire de la spatule 8 directement après l’utilisation sur le bord de l’appareil. ■ Essuyez la spatule 8, ainsi que le bord de l’appareil directement après utilisation avec un chiffon imbibé d’huile pour bébé. Cela permet d’éliminer les restes de cire encore mous. Utilisez idéalement un vieux chiffon, les restes de cire ne pouvant être éliminés que difficilement. Si vous n’avez pas d’huile pour bébé sous la main, vous pouvez également utiliser de l’huile d’olive ou une autre huile alimentaire pour le nettoyage. Veillez en particulier à ce qu’aucun reste de cire ne se trouve dans les rails 5 pour le verrouillage du couvercle 7 ! Essuyez ensuite la spatule 8 et le bord avec un mouchoir en papier sec pour éliminer les restes d’huile. ■ Si de la cire colle à la face extérieure du boîtier, éliminez-la comme suit : – assurez-vous que l’appareil soit débranché du réseau électrique, mais qu’il soit encore chaud. – Essuyez les faces extérieures avec un chiffon imbibé d’huile. – Veillez en particulier à ce qu’aucun reste de cire ne se trouve dans les rails 5 pour le verrouillage du couvercle 7 ! – Éliminez les restes d’huile avec un mouchoir en papier propre et sec. ■ 62 │ FR│BE SWWS 240 C1 Rangement REMARQUE ► Vous ne devez pas nettoyer le bac intérieur 1 après chaque utilisation pour éliminer tous les restes de cire. La cire qui reste dans l'appareil peut être refondue pour la prochaine utilisation et être réutilisée ! ■ Une fois l’appareil et la spatule 8 nettoyés comme exposé dans le chapitre «Nettoyage» : – posez la spatule 8 sur la desserte 6 sur le bord de l’appareil, de manière à ce que la spatule 8 repose sur le bac intérieur 1. – Mettez le couvercle 7 en place. – Rangez l’appareil refroidi dans un endroit sec et propre. REMARQUE ► Si vous ne pouvez plus ouvrir/tourner le couvercle 7 après l'entreposage, des restes de cire froids se trouvent vraisemblablement entre le couvercle 7 et l'appareil. Faites dans ce cas chauffer l'appareil avec le couvercle 7 fermé pendant env. 10 minutes (en fonction de la quantité de cire). La cire ramollit et le couvercle 7 peut être ouvert. SWWS 240 C1 FR│BE │ 63 ■ Mise au rebut Vous pouvez jeter la cire utilisée avec les déchets normaux. Ne jetez en aucun cas l’appareil avec les ordures ménagères. Ce produit est assujetti à la directive européenne 2012/19/EU-DEEE (déchets d’équipements électriques et électroniques). Éliminez l’appareil par l’intermédiaire d’une entreprise de traitement des déchets autorisée ou via le service de recyclage de votre commune. Respectez la réglementation en vigueur. En cas de doute, veuillez contacter votre centre de recyclage. L’emballage est constitué de matériaux écologiques que vous pouvez recycler par le biais des postes de recyclage locaux. Éliminez l’emballage d’une manière respectueuse de l’environnement. Observez le marquage sur les différents matériaux d’emballage et triez-les séparément si nécessaire. Les matériaux d’emballage sont repérés par des abréviations (a) et des chiffres (b) qui ont la signification suivante :1–7 : Plastiques, 20–22 : Papier et carton, 80–98 : Matériaux composites Renseignez-vous auprès de votre commune pour connaître les possibilités de mise au rebut de votre appareil usagé. Le produit récyclable doit être trié ou rapporté dans un point de collecte pour être recycle. ■ 64 │ FR│BE SWWS 240 C1 Commander des pièces de rechange Les pièces de rechange suivantes peuvent être commandées pour le produit SWWS 240 C1. ► Disques de cire (18 pièces) Commandez les pièces de rechange via la hotline de notre service après-vente (Voir chapitre «Service après-vente») ou tout simplement sur notre site web www.kompernass.com. Ce code QR vous donne un accès direct à notre site Web sur lequel vous pouvez commander les pièces de rechange disponibles : REMARQUE ► Tenez le numéro IAN que vous trouverez sur la couverture de ce manuel d’utilisation, prêt pour passer votre commande. SWWS 240 C1 FR│BE │ 65 ■ Garantie pour Kompernass Handels GmbH pour la Belgique Chère cliente, cher client, Cet appareil est garanti 3 ans à partir de la date d’achat. Si ce produit venait à présenter des vices, vous disposez de droits légaux face au vendeur de ce produit. Vos droits légaux ne sont pas restreints par notre garantie présentée ci-dessous. Conditions de garantie La période de garantie débute à la date d’achat. Veuillez bien conserver le ticket de caisse. Celui-ci servira de preuve d’achat. Si dans un délai de trois ans suivant la date d’achat de ce produit, un vice de matériel ou de fabrication venait à apparaître, le produit sera réparé, remplacé gratuitement par nos soins ou le prix d’achat remboursé, selon notre choix. Cette prestation sous garantie nécessite, dans le délai de trois ans, la présentation de l’appareil défectueux et du justificatif d’achat (ticket de caisse) ainsi que la description brève du vice et du moment de son apparition. Si le vice est couvert par notre garantie, vous recevrez le produit réparé ou un nouveau produit en retour. Aucune nouvelle période de garantie ne débute avec la réparation ou l’échange du produit. Période de garantie et réclamation légale pour vices cachés L’exercice de la garantie ne prolonge pas la période de garantie. Cette disposition s’applique également aux pièces remplacées ou réparées. Les dommages et vices éventuellement déjà présents à l’achat doivent être signalés immédiatement après le déballage. Toute réparation survenant après la période sous garantie fera l’objet d’une facturation. ■ 66 │ FR│BE SWWS 240 C1 Étendue de la garantie L’appareil a été fabriqué avec soin conformément à des directives de qualité strictes et consciencieusement contrôlé avant sa livraison. La prestation de la garantie s’applique aux vices de matériel et de fabrication. Cette garantie ne s’étend pas aux pièces du produit qui sont exposées à une usure normale et peuvent de ce fait être considérées comme pièces d’usure, ni aux détériorations de pièces fragiles, par ex. interrupteurs, batteries ou pièces en verre. Cette garantie devient caduque si le produit est détérioré, utilisé ou entretenu de manière non conforme. Toutes les instructions listées dans le manuel d’utilisation doivent être exactement respectées pour une utilisation conforme du produit. Des buts d’utilisation et actions qui sont déconseillés dans le manuel d’utilisation, ou dont vous êtes avertis doivent également être évités. Le produit est uniquement destiné à un usage privé et ne convient pas à un usage professionnel. La garantie est annulée en cas d’entretien incorrect et inapproprié, d’usage de la force et en cas d’intervention non réalisée par notre centre de service après-vente agréé. Procédure en cas de garantie Afin de garantir un traitement rapide de votre demande, veuillez suivre les indications suivantes : ■ Veuillez avoir à portée de main pour toutes questions le ticket de caisse et la référence article (par ex. IAN 12345) en tant que justificatif de votre achat. ■ Vous trouverez la référence sur la plaque signalétique sur le produit, une gravure sur le produit, sur la page de garde du mode d’emploi (en bas à gauche) ou sur l’autocollant au dos ou sur le dessous du produit. SWWS 240 C1 FR│BE │ 67 ■ ■ Si des erreurs de fonctionnement ou d’autres vices venaient à apparaître, veuillez d’abord contacter le département service clientèle cité ci-dessous par téléphone ou par e-mail. ■ Vous pouvez ensuite retourner un produit enregistré comme étant défectueux en joignant le ticket de caisse et en indiquant en quoi consiste le vice et quand il est survenu, sans devoir l’affranchir à l’adresse de service après-vente communiquée. Sur www.lidl-service.com, vous pourrez télécharger ce mode d’emploi et de nombreux autres manuels, vidéos produit et logiciels d’installation. Grâce à ce code QR, vous arriverez directement sur le site Lidl service après-vente (www.lidl-service.com) et vous pourrez ouvrir votre mode d’emploi en saisissant votre référence (IAN) 123456. Garantie pour Kompernass Handels GmbH pour la France Chère cliente, cher client, Cet appareil est garanti 3 ans à partir de la date d’achat. Si ce produit venait à présenter des vices, vous disposez de droits légaux face au vendeur de ce produit. Vos droits légaux ne sont pas restreints par notre garantie présentée ci-dessous. Conditions de garantie La période de garantie débute à la date d’achat. Veuillez bien conserver le ticket de caisse. Celui-ci servira de preuve d’achat. Si dans un délai de trois ans suivant la date d’achat de ce produit, un vice de matériel ou de fabrication venait à apparaître, le produit sera réparé, remplacé gratuitement par nos soins ou le prix d’achat remboursé, selon notre choix. ■ 68 │ FR│BE SWWS 240 C1 Cette prestation sous garantie nécessite, dans le délai de trois ans, la présentation de l’appareil défectueux et du justificatif d’achat (ticket de caisse) ainsi que la description brève du vice et du moment de son apparition. Si le vice est couvert par notre garantie, vous recevrez le produit réparé ou un nouveau produit en retour. Aucune nouvelle période de garantie ne débute avec la réparation ou l’échange du produit. Période de garantie et réclamation légale pour vices cachés L’exercice de la garantie ne prolonge pas la période de garantie. Cette disposition s’applique également aux pièces remplacées ou réparées. Les dommages et vices éventuellement déjà présents à l’achat doivent être signalés immédiatement après le déballage. Toute réparation survenant après la période sous garantie fera l’objet d’une facturation. Étendue de la garantie L’appareil a été fabriqué avec soin conformément à des directives de qualité strictes et consciencieusement contrôlé avant sa livraison. La prestation de la garantie s’applique aux vices de matériel et de fabrication. Cette garantie ne s’étend pas aux pièces du produit qui sont exposées à une usure normale et peuvent de ce fait être considérées comme pièces d’usure, ni aux détériorations de pièces fragiles, par ex. interrupteurs, batteries ou pièces en verre. Cette garantie devient caduque si le produit est détérioré, utilisé ou entretenu de manière non conforme. Toutes les instructions listées dans le manuel d’utilisation doivent être exactement respectées pour une utilisation conforme du produit. Des buts d’utilisation et actions qui sont déconseillés dans le manuel d’utilisation, ou dont vous êtes avertis doivent également être évités. SWWS 240 C1 FR│BE │ 69 ■ Le produit est uniquement destiné à un usage privé et ne convient pas à un usage professionnel. La garantie est annulée en cas d’entretien incorrect et inapproprié, d’usage de la force et en cas d’intervention non réalisée par notre centre de service après-vente agréé. Article L217-16 du Code de la consommation Lorsque l‘acheteur demande au vendeur, pendant le cours de la garantie commerciale qui lui a été consentie lors de l‘acquisition ou de la réparation d‘un bien meuble, une remise en état couverte par la garantie, toute période d‘immobilisation d‘au moins sept jours vient s‘ajouter à la durée de la garantie qui restait à courir. Cette période court à compter de la demande d‘intervention de l‘acheteur ou de la mise à disposition pour réparation du bien en cause, si cette mise à disposition est postérieure à la demande d‘intervention. Indépendamment de la garantie commerciale souscrite, le vendeur reste tenu des défauts de conformité du bien et des vices rédhibitoires dans les conditions prévues aux articles L217-4 à L217-13 du Code de la consommation et aux articles 1641 à 1648 et 2232 du Code Civil. Article L217-4 du Code de la consommation Le vendeur livre un bien conforme au contrat et répond des défauts de conformité existant lors de la délivrance. Il répond également des défauts de conformité résultant de l‘emballage, des instructions de montage ou de l‘installation lorsque celle-ci a été mise à sa charge par le contrat ou a été réalisée sous sa responsabilité. Article L217-5 du Code de la consommation Le bien est conforme au contrat : 1° S´il est propre à l‘usage habituellement attendu d‘un bien semblable et, le cas échéant : ■ 70 │ FR│BE SWWS 240 C1 – s‘il correspond à la description donnée par le vendeur et posséder les qualités que celui-ci a présentées à l‘acheteur sous forme d‘échantillon ou de modèle ; – s‘il présente les qualités qu‘un acheteur peut légitimement attendre eu égard aux déclarations publiques faites par le vendeur, par le producteur ou par son représentant, notamment dans la publicité ou l‘étiquetage ; 2° Ou s‘il présente les caractéristiques définies d‘un commun accord par les parties ou être propre à tout usage spécial recherché par l‘acheteur, porté à la connaissance du vendeur et que ce dernier a accepté. Article L217-12 du Code de la consommation L‘action résultant du défaut de conformité se prescrit par deux ans à compter de la délivrance du bien. Article 1641 du Code civil Le vendeur est tenu de la garantie à raison des défauts cachés de la chose vendue qui la rendent impropre à l‘usage auquel on la destine, ou qui diminuent tellement cet usage que l‘acheteur ne l‘aurait pas acquise, ou n‘en aurait donné qu‘un moindre prix, s‘il les avait connus. Article 1648 1er alinéa du Code civil L‘action résultant des vices rédhibitoires doit être intentée par l‘acquéreur dans un délai de deux ans à compter de la découverte du vice. Les pièces détachées indispensables à l’utilisation du produit sont disponibles pendant la durée de la garantie du produit. SWWS 240 C1 FR│BE │ 71 ■ Procédure en cas de garantie Afin de garantir un traitement rapide de votre demande, veuillez suivre les indications suivantes : ■ Veuillez avoir à portée de main pour toutes questions le ticket de caisse et la référence article (par ex. IAN 12345) en tant que justificatif de votre achat. ■ Vous trouverez la référence sur la plaque signalétique sur le produit, une gravure sur le produit, sur la page de garde du mode d’emploi (en bas à gauche) ou sur l’autocollant au dos ou sur le dessous du produit. ■ Si des erreurs de fonctionnement ou d’autres vices venaient à apparaître, veuillez d’abord contacter le département service clientèle cité ci-dessous par téléphone ou par e-mail. ■ Vous pouvez ensuite retourner un produit enregistré comme étant défectueux en joignant le ticket de caisse et en indiquant en quoi consiste le vice et quand il est survenu, sans devoir l’affranchir à l’adresse de service après-vente communiquée. Sur www.lidl-service.com, vous pourrez télécharger ce mode d’emploi et de nombreux autres manuels, vidéos produit et logiciels d’installation. Grâce à ce code QR, vous arriverez directement sur le site Lidl service après-vente (www.lidl-service.com) et vous pourrez ouvrir votre mode d’emploi en saisissant votre référence (IAN) 123456. ■ 72 │ FR│BE SWWS 240 C1 Service après-vente Service France Tel.: 0800 919270 E-Mail: [email protected] Service Belgique Tel.: 070 270 171 (0,15 EUR/Min.) E-Mail: [email protected] IAN 339566_1910 Importateur Veuillez tenir compte du fait que l’adresse suivante n’est pas une adresse de service après-vente. Veuillez d’abord contacter le service mentionné. KOMPERNASS HANDELS GMBH BURGSTRASSE 21 44867 BOCHUM ALLEMAGNE www.kompernass.com SWWS 240 C1 FR│BE │ 73 ■ ■ 74 │ FR│BE SWWS 240 C1 Inhoud Inleiding . . . . . . . . . . . . . . . . . . . . . . . . . . . . . . . . . . . . . 76 Gebruik in overeenstemming met bestemming . . . . . 76 Inhoud van het pakket . . . . . . . . . . . . . . . . . . . . . . . . . 76 Apparaatbeschrijving . . . . . . . . . . . . . . . . . . . . . . . . . . 77 Technische gegevens . . . . . . . . . . . . . . . . . . . . . . . . . . . 77 Veiligheidsvoorschriften . . . . . . . . . . . . . . . . . . . . . . . . 78 Vóór het eerste gebruik . . . . . . . . . . . . . . . . . . . . . . . . 83 Automatische uitschakeling . . . . . . . . . . . . . . . . . . . . . 83 Apparaat voorbereiden . . . . . . . . . . . . . . . . . . . . . . . . 83 Ontharen . . . . . . . . . . . . . . . . . . . . . . . . . . . . . . . . . . . . 85 Benen . . . . . . . . . . . . . . . . . . . . . . . . . . . . . . . . . . . . . . . . . . . . . . .86 Oksels. . . . . . . . . . . . . . . . . . . . . . . . . . . . . . . . . . . . . . . . . . . . . . .87 Bikinizone . . . . . . . . . . . . . . . . . . . . . . . . . . . . . . . . . . . . . . . . . . . .88 Na het ontharen . . . . . . . . . . . . . . . . . . . . . . . . . . . . . . 89 Reinigen . . . . . . . . . . . . . . . . . . . . . . . . . . . . . . . . . . . . . 89 Opbergen. . . . . . . . . . . . . . . . . . . . . . . . . . . . . . . . . . . . 91 Afvoeren . . . . . . . . . . . . . . . . . . . . . . . . . . . . . . . . . . . . 92 Vervangingsonderdelen bestellen . . . . . . . . . . . . . . . 93 Garantie van Kompernaß Handels GmbH . . . . . . . . . 94 Service . . . . . . . . . . . . . . . . . . . . . . . . . . . . . . . . . . . . . . . . . . . . . .96 Importeur . . . . . . . . . . . . . . . . . . . . . . . . . . . . . . . . . . . . . . . . . . . .96 SWWS 240 C1 NL│BE │ 75 ■ Inleiding Hartelijk gefeliciteerd met de aankoop van uw nieuwe apparaat. U hebt hiermee gekozen voor een hoogwaardig product. De gebruiksaanwijzing maakt deel uit van dit product. Deze bevat belangrijke aanwijzingen voor veiligheid, gebruik en afvoer. Lees alle bedienings- en veiligheidsaanwijzingen voordat u het product in gebruik neemt. Gebruik het product uitsluitend op de voorgeschreven wijze en voor de aangegeven doeleinden. Bewaar de gebruiksaanwijzing altijd als naslagwerk in de buurt van het product. Geef alle documenten mee als u het product doorgeeft aan een derde. Gebruik in overeenstemming met bestemming Dit apparaat dient uitsluitend voor het ontharen van benen, oksels en bikinizone van het menselijk lichaam. Dit apparaat is uitsluitend bestemd voor gebruik in privéhuishoudens. Gebruik het apparaat niet bedrijfsmatig. Inhoud van het pakket Warme wax-set 18 wax-schijven Spatel Gebruiksaanwijzing ■ 76 │ NL│BE SWWS 240 C1 Apparaatbeschrijving 1 Binnenschaal 2 Indicatielampje 3 Stekker 4 Stekkeraansluiting 5 Geleiding (voor vergrendeling van het deksel) 6 Aflegvlak (voor de spatel) 7 Deksel 8 Spatel 9 Wax-schijf Technische gegevens Spanning 220 - 240 V ∼ (wisselstroom), 50 Hz Opgenomen vermogen 20 W Capaciteit ca. 530 ml Beschermingsklasse II / SWWS 240 C1 (dubbel geïsoleerd) NL│BE │ 77 ■ Veiligheidsvoorschriften ► ► ► ► ► ► ► WAARSCHUWING! GEVAAR VOOR EEN ELEKTRISCHE SCHOK! Wanneer het netsnoer van dit apparaat beschadigd is, moet het worden vervangen door de fabrikant of de klantendienst van de fabrikant of een persoon met vergelijkbare kwalificaties, om risico's te vermijden. Gebruik het apparaat alleen in droge ruimtes, niet in de openlucht. Open nooit de behuizing van het apparaat. Gebruik het apparaat niet in de buurt van water, zoals bij een wasbak, douchebak of badkuip. Gebruik het apparaat nooit tijdens het baden, douchen of slapen. Pak de stekker of het snoer nooit met natte handen vast. Controleer het apparaat vóór gebruik op zichtbare schade aan de buitenzijde. Gebruik geen apparaat dat beschadigd of gevallen is. ■ 78 │ NL│BE SWWS 240 C1 ► ► ► WAARSCHUWING! GEVAAR VOOR EEN ELEKTRISCHE SCHOK! Gebruik dit apparaat in geen geval in de buurt van badkuipen, wasbakken of andere water bevattende objecten. Er mag geen vloeistof op de stekkerverbinding van het apparaat komen. WAARSCHUWING! LETSELGEVAAR! Dit apparaat mag worden gebruikt door kinderen vanaf 8 jaar en door personen met cbeperkte fysieke, zintuiglijke of geestelijke vermogens of gebrek aan ervaring of kennis, mits ze onder toezicht staan of over het veilige gebruik van het apparaat zijn geïnstrueerd en de daaruit resulterende gevaren hebben begrepen. Kinderen mogen niet met het apparaat spelen. SWWS 240 C1 NL│BE │ 79 ■ ► ► ► ► ► ► WAARSCHUWING! LETSELGEVAAR! Reiniging en onderhoud door de gebruiker mogen niet worden uitgevoerd door kinderen, tenzij ze 8 jaar of ouder zijn en onder toezicht staan. Houd het apparaat en het bijbehorende snoer buiten bereik van kinderen jonger dan 8 jaar. Mensen die ongevoelig zijn voor warmte, mogen dit apparaat niet gebruiken! Raadpleeg eerst een arts als u vanwege bestaande aandoeningen niet zeker weet of u het apparaat mag gebruiken. Na gebruik kan het oppervlak van het verwarmingselement nog warm zijn. Bij verkeerd gebruik van het apparaat bestaat er kans op letsel. Gebruik het apparaat altijd in overeenstemming met de bestemming! ■ 80 │ NL│BE SWWS 240 C1 ► ► ► ► ► WAARSCHUWING! LETSELGEVAAR! Gebruik het apparaat niet onder dekens of handdoeken. Plaats het apparaat bij voorkeur dicht bij een stopcontact. Zorg ervoor dat de stekker bij gevaar goed bereikbaar is en dat u niet kunt struikelen over het snoer. Zorg voor een veilige stand van het apparaat. Dompel het apparaat nooit onder in water of in andere vloeistoffen! Gebruik het apparaat niet bij hartaandoeningen, rode huid, ontstekingen, zwellingen, gevoelige plekken, diabetes, open wonden, verbrandingen, eczeem of psoriasis. SWWS 240 C1 NL│BE │ 81 ■ LET OP! MATERIËLE SCHADE! ► Gebruik het apparaat niet als het leeg is, zonder wax. ► Doe alleen wax in het apparaat, geen agressieve of oplosmiddelhoudende substanties! ► Zet het apparaat uitsluitend op egale oppervlakken die bestand zijn tegen hitte. ► Verhit de wax nooit in de plasticverpakking. ► Verhit de wax nooit in de magnetron, boven open vuur of boven een kachel. ► Gebruik geen externe timer of een aparte afstandsbediening om het apparaat te bedienen. ► Gebruik geen puntige of scherpe voorwerpen om de koud geworden wax uit het apparaat te verwijderen. ■ 82 │ NL│BE SWWS 240 C1 Vóór het eerste gebruik 1) Veeg het apparaat van binnen en buiten af met een vochtige doek om transportstof te verwijderen. Droog het apparaat goed af, zodat er zich geen vocht meer in bevindt. 2) Plaats het apparaat op een egale ondergrond die bestand is tegen hitte. Bedenk ook dat er mogelijk wax-spatten op de ondergrond kunnen druppelen. De ondergrond moet daarom goed reinigbaar zijn. Automatische uitschakeling Na 60 minuten gaat het apparaat automatisch uit. Na 55 minuten begint het indicatielampje 2 te knipperen om u te herinneren aan de automatische uitschakeling. De automatische uitschakeling is geen vervanging voor het uit het stopcontact trekken van de stekker na het gebruik! Deze dient alleen voor de veiligheid! Haal altijd de stekker uit het stopcontact wanneer u het apparaat niet gebruikt! Apparaat voorbereiden Wanneer het apparaat op een geschikte ondergrond is geplaatst: 1) Haal de wax-schijven 9 uit de verpakking. 2) Doe het benodigde aantal wax-schijven 9 in de binnenschaal 1. Ga uit van de volgende richtwaarden, die echter enigszins kunnen variëren: SWWS 240 C1 NL│BE │ 83 ■ Lichaamsgedeelte Aantal wax-schijven 9 Onderbeen ca. 2 stuks per onderbeen Oksels 1 stuks Bikinizone 1 stuks Hele lichaam (onderbenen, oksels, bikinizone) 6 stuks De combinatie van dit pictogram en een datum op de verpakking van de wax-schijven 9 geeft aan hoe lang het product houdbaar is. 3) Plaats het deksel 7 op het apparaat door de kleine plastic nok in de geleiding 5 te plaatsen en dan het deksel 7 een beetje met de wijzers van de klok mee te draaien (zie uitvouwpagina): 4) Steek de stekker 3 van het snoer in de stekkeraansluiting 4 op het apparaat. 5) Steek de stekker in een stopcontact. Het apparaat wordt heet, het indicatielampje 2 in de voet van het apparaat brandt. 6) Roer de wax tijdens het smelten zo nu en dan om. Zodra de wax-schijven 9 zijn gesmolten (bij 6 wax-schijven ca. 25 30 minuten), kunt u beginnen met het ontharen. ■ 84 │ NL│BE SWWS 240 C1 OPMERKING ► Als u merkt dat u meer wax nodig hebt dan u hebt gesmolten, kunt u op elk gewenst moment meer wax-schijven 9 in de binnenschaal 1 doen. Wacht tot de wax gesmolten is voordat u doorgaat met ontharen. ► Smelt maximaal 6 wax-schijven 9 per keer. Ontharen De huidgedeeltes waarvan u haar wilt verwijderen, moeten droog, schoon en vrij van verzorgingsproducten, olie of vet zijn. OPMERKINGEN ► Test het apparaat vóór het eerste gebruik beslist op de huid, om te controleren of uw huid dit type behandeling verdraagt. Doe een beetje gesmolten wax op een niet-zichtbaar gedeelte van de huid en controleer na het ontharen of er binnen de volgende 24 uur veranderingen op de huid zijn. Mocht dit het geval zijn, gebruik het apparaat dan niet verder. Raadpleeg zo nodig een arts. ► Hebt u vaak last van ingegroeide haren, gebruik dan regelmatig peelings. Deze kunnen het ingroeien van haren voorkomen. ► Trek de wax-stroken altijd zo dicht mogelijk bij het huidoppervlak af. ► Let erop dat er geen wax op uw kleding komt. Wax-resten laten zich moeilijk verwijderen en kunnen verkleuringen op de kleding veroorzaken. SWWS 240 C1 NL│BE │ 85 ■ Benen Wanneer de wax-schijven 9 volledig zijn gesmolten: 1) Open het deksel 7 door het een beetje tegen de wijzers van de klok in te draaien en naar boven toe op te tillen. 2) Neem wat wax op met de schuine zijkant van de spatel 8. Overtollige wax kunt u aan de rand van het apparaat afstrijken. 3) Breng de wax meteen in de haargroeirichting (vanaf de knie in de richting van de enkel) op de huid aan. De wax-strook moet de dikte van een sinaasappelschil en de breedte van 2 naast elkaar liggende spatels 8 hebben. Zo nodig brengt u daarvoor meermaals wax aan. Probeer het uiteinde van de aangebrachte wax-strook (dat dichter bij de enkel ligt) iets dikker aan te brengen, omdat u dit uiteinde moet vastpakken om de wax-strook weg te trekken. 4) Na het opbrengen kunt u de spatel 8 in het aflegvlak 6 op de rand van het apparaat leggen, zodat de spatel 8 boven de binnenschaal 1 ligt. 5) Wacht 30 - 60 seconden tot de wax droog is. 6) Trek met de ene hand de huid strak, pak met de andere hand de wax-strook aan het dikke uiteinde en trek deze met een snelle beweging tegen de haargroeirichting in (vanuit de enkel richting knie) van het been af. Doe hetzelfde voor de overige delen van de huid. 7) Wanneer u klaar bent met de behandeling, haalt u de stekker uit het stopcontact om het apparaat uit te schakelen. Het indicatielampje 2 dooft. ■ 86 │ NL│BE SWWS 240 C1 Oksels Wanneer de wax-schijf 9 volledig is gesmolten: 1) Open het deksel 7 door het een beetje tegen de wijzers van de klok in te draaien en naar boven toe op te tillen. OPMERKING ► Omdat okselharen de neiging hebben in verschillende richtingen te groeien, moeten deze in minstens 2 stappen worden verwijderd. 2) Houd de ellebogen omhoog en naar achteren. Zo wordt de huid in de okselholte strakgetrokken. 3) Neem wat wax op met de schuine zijkant van de spatel 8. Overtollige wax kunt u aan de rand van het apparaat afstrijken. 4) Breng de wax meteen vanuit het midden van de okselholte omhoog in de richting van de elleboog aan. De wax-strook moet ongeveer zo dik zijn als een sinaasappelschil. Probeer het uiteinde van de aangebrachte wax-strook (dat dichter bij de elleboog ligt) iets dikker aan te brengen, omdat u dit uiteinde moet vastpakken om de wax-strook weg te trekken. 5) Na het opbrengen kunt u de spatel 8 in het aflegvlak 6 op de rand van het apparaat leggen, zodat de spatel 8 boven de binnenschaal 1 ligt. 6) Wacht 30 - 60 seconden tot de wax droog is. 7) Pak de wax-strook aan het dikke uiteinde (dat dichter bij de elleboog ligt) vast en trek deze met een snelle beweging tegen de haargroeirichting in omlaag van de oksel af. 8) Om het onderste deel van de okselholte te ontharen, brengt u de wax vanuit het midden van de okselholte naar onderen op. 9) Wacht 30 - 60 seconden tot de wax droog is. SWWS 240 C1 NL│BE │ 87 ■ 10) Pak de wax-strook aan het onderste uiteinde vast en trek deze met een snelle beweging tegen de haargroeirichting in naar boven af. 11) Wanneer u klaar bent met de behandeling, haalt u de stekker uit het stopcontact om het apparaat uit te schakelen. Het indicatielampje 2 dooft. Bikinizone Wanneer de wax-schijf 9 volledig is gesmolten: 1) Open het deksel 7 door het een beetje tegen de wijzers van de klok in te draaien en naar boven toe op te tillen. 2) Neem wat wax op met de schuine zijkant van de spatel 8. Overtollige wax kunt u aan de rand van het apparaat afstrijken. 3) Na het opbrengen kunt u de spatel 8 in het aflegvlak 6 op de rand van het apparaat leggen, zodat de spatel 8 boven de binnenschaal 1 ligt. OPMERKING ► Onthaar in de bikinizone steeds kleine stukjes huid tegelijk. De huid is in deze zone zeer gevoelig. 4) Trek de huid met de ene hand strak en breng met de andere hand de wax aan in de haargroeirichting (in de richting van de binnenkant van het bovenbeen). 5) Wacht 30 - 60 seconden tot de wax droog is. 6) Pak de wax-strook aan het uiteinde (dat dichter bij de binnenkant van het bovenbeen ligt) vast en trek deze met een snelle beweging tegen de haargroeirichting in van het been af. Doe hetzelfde voor de overige delen van de huid. 7) Wanneer u klaar bent met de behandeling, haalt u de stekker uit het stopcontact om het apparaat uit te schakelen. Het indicatielampje 2 dooft. ■ 88 │ NL│BE SWWS 240 C1 Na het ontharen ■ Reinig de spatel 8 (zie het hoofdstuk “Reinigen”). ■ Kleine wax-resten op de huid kunt u verwijderen met een beetje babyolie. Mocht u geen babyolie in huis hebben, dan kunt u ook olijfolie of andere spijsolie gebruiken. ■ Na het ontharen kan de huid een beetje rood zijn geworden. Dat is normaal. Laat een beetje koud water over de betroffen plekken stromen. Dat kalmeert de huid. Mocht de huid niet kalmeren en hevig branden, raadpleeg dan een arts. Reinigen WAARSCHUWING! GEVAAR VOOR EEN ELEKTRISCHE SCHOK! ► Haal voor het schoonmaken altijd eerst de stekker uit het stopcontact! ► Dompel het apparaat nooit onder in water of in andere vloeistoffen! WAARSCHUWING! LETSELGEVAAR! ► Laat het apparaat iets afkoelen voordat u het schoonmaakt. LET OP! MATERIËLE SCHADE! ► Gebruik geen puntige of scherpe voorwerpen om koud geworden wax uit het apparaat te verwijderen. ► Gebruik geen chemische, schurende, of agressieve schoonmaakmiddelen om het apparaat te reinigen. SWWS 240 C1 NL│BE │ 89 ■ OPMERKING ► U hoeft de binnenschaal 1 niet na elk gebruik te reinigen en alle wax-resten te verwijderen. De in het apparaat achtergebleven wax kan bij de volgende behandeling weer worden gesmolten en opnieuw worden gebruikt! ► Neem voor het nabestellen van wax-schijven 9 contact op met onze klantenservice (zie het hoofdstuk “Vervangingsonderdelen bestellen”). ■ Strijk overtollige wax op de spatel 8 meteen na gebruik aan de rand van het apparaat naar binnen toe af. ■ Veeg de spatel 8 en de rand van het apparaat meteen na gebruik af met een met babyolie bevochtigde doek. Zo kunnen nog zachte wax-resten worden verwijderd. Hiervoor kunt u het beste een oude lap gebruiken, omdat wax-resten zich moeilijk uit textiel laten verwijderen. Mocht u geen babyolie in huis hebben, dan kunt u ook olijfolie of andere spijsolie gebruiken voor het schoonmaken. Let er vooral op dat er geen wax-resten achterblijven in de geleidingen 5 voor de vergrendeling van het deksel 7! Veeg daarna de spatel 8 en de rand nogmaals af met een droog stuk keukenpapier om olieresten te verwijderen. ■ Wanneer zich wax aan de buitenkant van de behuizing heeft gehecht, verwijdert u die als volgt: – Vergewis u ervan dat het apparaat is losgekoppeld van het lichtnet, maar nog wel warm is. – Veeg de buitenkanten af met een doek die is bevochtigd met olie. – Let er vooral op dat er geen wax-resten achterblijven in de geleidingen 5 voor de vergrendeling van het deksel 7! – Verwijder olieresten met een schoon, droog stuk keukenpapier. ■ 90 │ NL│BE SWWS 240 C1 Opbergen OPMERKING ► U hoeft de binnenschaal 1 niet na elk gebruik te reinigen en alle wax-resten te verwijderen. De in het apparaat achtergebleven wax kan bij de volgende behandeling weer worden gesmolten en opnieuw worden gebruikt! ■ Wanneer het apparaat en de spatel 8 zijn schoongemaakt zoals beschreven in het hoofdstuk “Reinigen”: – Leg de spatel 8 in het aflegvlak 6 op de rand van het apparaat, zodat de spatel 8 boven de binnenschaal 1 ligt. – Plaats het deksel 7 op het apparaat. – Berg het afgekoelde apparaat op een schone en droge plaats op. OPMERKING ► As na het opbergen het deksel 7 niet meer kan worden geopend/gedraaid, zitten er waarschijnlijk koud geworden waxresten tussen het deksel 7 en het apparaat. Laat in dat geval het apparaat met gesloten deksel 7 ca. 10 minuten (al naar gelang de hoeveelheid wax) heet worden. De wax wordt zacht en het deksel 7 kan weer worden geopend. SWWS 240 C1 NL│BE │ 91 ■ Afvoeren U kunt de gebruikte wax bij het gewone huisvuil deponeren. Deponeer het apparaat in geen geval bij het gewone huisvuil. Dit product voldoet aan de Europese richtlijn 2012/19/EU. Voer het apparaat af via een erkend afvalverwerkingsbedrijf of via uw gemeentereiniging. Neem de momenteel geldende voorschriften in acht. Neem bij twijfel contact op met de verantwoordelijke instantie. Het product is recycleerbaar; er is een uitgebreide producentenverantwoordelijkheid op van toepassing en het afval wordt gescheiden ingezameld. De verpakking bestaat uit milieuvriendelijke materialen, die u via de plaatselijke recyclepunten kunt afvoeren. Voer de verpakking af conform de milieuvoorschriften. Let op de aanduiding op de verschillende verpakkingsmaterialen en voer ze zo nodig gescheiden af. De verpakkingsmaterialen zijn voorzien van afkortingen (a) en cijfers (b) met de volgende betekenis: 1 - 7: kunststoffen, 20 - 22: papier en karton, 80-98: composietmaterialen Informatie over mogelijkheden voor het afvoeren van het afgedankte product krijgt u bij uw gemeentereiniging. ■ 92 │ NL│BE SWWS 240 C1 Vervangingsonderdelen bestellen Voor product SWWS 240 C1 kunt u de volgende vervangingsonderdelen bestellen: ► Wax-schijven (18 stuks) Bestel de reserveonderdelen via onze service-hotline (zie het hoofdstuk “Service”) of op onze website: www.kompernass.com. Met deze QR-code gaat u rechtstreeks naar onze website en kunt u de beschikbare vervangingsonderdelen bestellen: OPMERKING ► Houd het IAN-nummer, dat op het omslag van deze gebruiksaanwijzing staat, bij de hand bij het bestellen. SWWS 240 C1 NL│BE │ 93 ■ Garantie van Kompernaß Handels GmbH Geachte klant, U hebt op dit apparaat 3 jaar garantie vanaf de aankoopdatum. In geval van gebreken in dit product hebt u wettelijke rechten tegenover de verkoper van het product. Deze wettelijke rechten worden door onze hierna beschreven garantie niet beperkt. Garantievoorwaarden De garantieperiode geldt vanaf de datum van aankoop. Bewaar de kassabon zorgvuldig. U hebt hem nodig als bewijs van aankoop. Als er binnen drie jaar vanaf de aankoopdatum van dit product een materiaal- of fabricagefout optreedt, wordt - naar onze keuze - het product door ons kosteloos gerepareerd of vervangen of wordt de koopprijs terugbetaald. Voorwaarde voor deze garantie is dat het defecte apparaat en het aankoopbewijs (kassabon) binnen de termijn van drie jaar worden overlegd en dat kort wordt omschreven waaruit het gebrek bestaat en wanneer het is opgetreden. Wanneer het defect door onze garantie wordt gedekt, krijgt u het gerepareerde product of een nieuw product retour. Met de reparatie of vervanging van het product begint er geen nieuwe garantieperiode. Garantieperiode en wettelijke aanspraken bij gebreken De garantieperiode wordt door deze waarborg niet verlengd. Dat geldt ook voor vervangen en gerepareerde onderdelen. Eventueel al bij aankoop aanwezige schade en gebreken moeten meteen na het uitpakken worden gemeld. Voor reparaties na afloop van de garantieperiode worden kosten in rekening gebracht. ■ 94 │ NL│BE SWWS 240 C1 Garantieomvang Het apparaat is op basis van strenge kwaliteitsnormen met de grootst mogelijke zorg vervaardigd en voorafgaand aan de levering nauwkeurig gecontroleerd. De garantie geldt voor materiaal- of fabricagefouten. Deze garantie geldt niet voor productonderdelen die onderhevig zijn aan normale slijtage en die daarom als slijtonderdelen worden beschouwd, of voor schade aan breekbare onderdelen zoals schakelaars, accu‘s of onderdelen die van glas zijn gemaakt. Deze garantie vervalt wanneer het product is beschadigd, ondeskundig is gebruikt of is gerepareerd. Voor deskundig gebruik van het product moeten alle in de gebruiksaanwijzing beschreven aanwijzingen precies worden opgevolgd. Gebruiksdoeleinden en handelingen die in de gebruiksaanwijzing worden afgeraden of waarvoor wordt gewaarschuwd, moeten beslist worden vermeden. Het product is uitsluitend bestemd voor privégebruik en niet voor bedrijfsmatige doeleinden. Bij verkeerd gebruik en ondeskundige behandeling, bij gebruik van geweld en bij reparaties die niet door ons erkend servicefiliaal zijn uitgevoerd, vervalt de garantie. Afhandeling bij een garantiekwestie Voor een snelle afhandeling van uw aanvraag neemt u de volgende aanwijzingen in acht: ■ Houd voor alle aanvragen de kassabon en het artikelnummer (bijv. IAN 12345) als aankoopbewijs bij de hand. ■ Het artikelnummer vindt u op het typeplaatje van het product, op het product gegraveerd, op de titelpagina van de gebruiksaanwijzing (linksonder) of op de sticker op de achter- of onderkant van het product. ■ Als er fouten in de werking of andere gebreken optreden, neemt u eerst contract op met de hierna genoemde serviceafdeling, telefonisch of via e-mail. NL│BE │ 95 ■ SWWS 240 C1 ■ Een als defect geregistreerd product kunt u dan zonder portokosten naar het aan u doorgegeven serviceadres sturen. Voeg het aankoopbewijs (kassabon) bij en vermeld waaruit het gebrek bestaat en wanneer het is opgetreden. Op www.lidl-service.com kunt u deze en vele andere handleidingen, productvideo‘s en installatiesoftware downloaden. Met deze QR-code gaat u direct naar de website van Lidl Service (www.lidl-service.com) en kunt u met het invoeren van het artikelnummer (IAN) 123456 de gebruiksaanwijzing openen. Service Service Nederland Tel.: 0900 0400223 (0,10 EUR/Min.) E-Mail: [email protected] Service België Tel.: 070 270 171 (0,15 EUR/Min.) E-Mail: [email protected] IAN 339566_1910 Importeur Let op: het volgende adres is geen serviceadres. Neem eerst contact op met het opgegeven serviceadres. KOMPERNASS HANDELS GMBH BURGSTRASSE 21 44867 BOCHUM DUITSLAND www.kompernass.com ■ 96 │ NL│BE SWWS 240 C1 Spis treści Wstęp . . . . . . . . . . . . . . . . . . . . . . . . . . . . . . . . . . . . . . . 98 Użytkowanie zgodne z przeznaczeniem . . . . . . . . . . 98 Zakres dostawy . . . . . . . . . . . . . . . . . . . . . . . . . . . . . . 98 Opis urządzenia . . . . . . . . . . . . . . . . . . . . . . . . . . . . . . 99 Dane techniczne . . . . . . . . . . . . . . . . . . . . . . . . . . . . . . 99 Wskazówki bezpieczeństwa . . . . . . . . . . . . . . . . . . .100 Przed pierwszym użyciem . . . . . . . . . . . . . . . . . . . . .105 Wyłącznik automatyczny. . . . . . . . . . . . . . . . . . . . . .105 Przygotowanie urządzenia . . . . . . . . . . . . . . . . . . . .105 Depilacja . . . . . . . . . . . . . . . . . . . . . . . . . . . . . . . . . . .107 Nogi . . . . . . . . . . . . . . . . . . . . . . . . . . . . . . . . . . . . . . . . . . . . . . 108 Pachy . . . . . . . . . . . . . . . . . . . . . . . . . . . . . . . . . . . . . . . . . . . . . 109 Okolice bikini . . . . . . . . . . . . . . . . . . . . . . . . . . . . . . . . . . . . . . . 110 Po depilacji . . . . . . . . . . . . . . . . . . . . . . . . . . . . . . . . .111 Czyszczenie . . . . . . . . . . . . . . . . . . . . . . . . . . . . . . . . .111 Przechowywanie . . . . . . . . . . . . . . . . . . . . . . . . . . . .113 Utylizacja . . . . . . . . . . . . . . . . . . . . . . . . . . . . . . . . . . .113 Zamawianie części zamiennych . . . . . . . . . . . . . . . .115 Gwarancja Kompernaß Handels GmbH . . . . . . . . . .116 Serwis . . . . . . . . . . . . . . . . . . . . . . . . . . . . . . . . . . . . . . . . . . . . . 118 Importer . . . . . . . . . . . . . . . . . . . . . . . . . . . . . . . . . . . . . . . . . . . 118 SWWS 240 C1 PL │ 97 ■ Wstęp Serdecznie gratulujemy zakupu nowego urządzenia. Wybrany produkt charakteryzuje się wysoką jakością. Instrukcja obsługi jest częścią składową produktu. Zawiera ona ważne informacje na temat bezpieczeństwa, użytkowania i usuwania urządzenia. Przed rozpoczęciem użytkowania produktu należy zapoznać się ze wszystkimi informacjami dotyczącymi obsługi i bezpieczeństwa. Produkt należy użytkować wyłącznie zgodnie z zamieszczonym tu opisem oraz w podanym zakresie zastosowań. Instrukcję obsługi należy zawsze przechowywać w pobliżu urządzenia, by móc z niej skorzystać w razie potrzeby. W przypadku przekazania urządzenia osobie trzeciej należy dołączyć do niego również całą dokumentację. Użytkowanie zgodne z przeznaczeniem To urządzenie służy wyłącznie depilacji nóg, pach i okolic bikini u ludzi. Urządzenie przeznaczone jest wyłącznie do stosowania w gospodarstwie domowym. Nie należy go używać do celów komercyjnych. Zakres dostawy Zestaw do depilacji ciepłym woskiem 18 krążków wosku Szpatułka Instrukcja obsługi ■ 98 │ PL SWWS 240 C1 Opis urządzenia 1 Miska wewnętrzna 2 Lampka kontrolna 3 Wtyk 4 Gniazdo 5 Szyna (do zablokowania pokrywki) 6 Półeczka (na szpatułkę) 7 Pokrywka 8 Szpatułka 9 Krążek wosku Dane techniczne Napięcie 220 - 240 V ∼ (prąd przemienny), 50 Hz Pobór mocy 20 W Pojemność ok. 530 ml Klasa ochrony II / SWWS 240 C1 (podwójna izolacja) PL │ 99 ■ Wskazówki bezpieczeństwa ► ► ► ► ► ► ► OSTRZEŻENIE! NIEBEZPIECZEŃSTWO PORAŻENIA PRĄDEM ELEKTRYCZNYM! W przypadku uszkodzenia kabla zasilającego należy zlecić jego wymianę producentowi, w punkcie serwisowym lub osobie posiadającej odpowiednie kwalifikacje. Dzięki temu zapobiega się poważnym zagrożeniom. Urządzenia wolno używać wyłącznie w suchych pomieszczeniach. Nie wolno go używać na otwartej przestrzeni. Nigdy nie otwierać obudowy urządzenia. Nie używać urządzenia w pobliżu wody, na przykład umywalek, brodzików i wanien. Nigdy nie używać urządzenia w trakcie kąpieli, prysznica ani snu. Nigdy nie chwytać wtyku sieciowego ani kabla zasilającego wilgotnymi rękoma. Przed przystąpieniem do użytkowania należy sprawdzić, czy urządzenie nie ma widocznych uszkodzeń. Nie wolno uruchamiać urządzenia, gdy jest uszkodzone lub upadło na ziemię. ■ 100 │ PL SWWS 240 C1 OSTRZEŻENIE! NIEBEZPIECZEŃSTWO PORAŻENIA PRĄDEM ELEKTRYCZNYM! ► ► ► Nigdy nie używać urządzenia w pobliżu wody, szczególnie w pobliżu umywalki, wanny lub innych zbiorników na wodę. Na połączenie wtykowe urządzenia nie może wylać się żadna ciecz. OSTRZEŻENIE! NIEBEZPIECZEŃSTWO OBRAŻEŃ! To urządzenie może być używane przez dzieci od 8. roku życia oraz przez osoby o ograniczonych zdolnościach fizycznych, sensorycznych lub umysłowych lub też osoby nieposiadające odpowiedniego doświadczenia i/lub wiedzy wyłącznie pod nadzorem lub po przeszkoleniu w zakresie bezpiecznego użytkowania urządzenia oraz potencjalnych zagrożeń. Dzieciom nie wolno bawić się urządzeniem. SWWS 240 C1 PL │ 101 ■ ► ► ► ► ► ► OSTRZEŻENIE! NIEBEZPIECZEŃSTWO OBRAŻEŃ! Czyszczenia ani konserwacji przez użytkownika nie mogą wykonywać dzieci, chyba że mają 8 lat lub więcej i są pod nadzorem. Urządzenie oraz jego kabel zasilający należy trzymać poza zasięgiem dzieci w wieku poniżej 8 lat. Osoby wrażliwe na wysoką temperaturę nie powinny używać tego urządzenia! Jeśli ze względu na wcześniejsze swoje schorzenia nie masz pewności, czy możesz korzystać z urządzenia, przed użyciem skonsultuj się z lekarzem. Po użyciu powierzchnia elementu grzejnego pozostaje jeszcze ciepła. Nieprawidłowe użycie urządzenia grozi obrażeniami. Urządzenie należy zawsze stosować zgodnie z jego przeznaczeniem! ■ 102 │ PL SWWS 240 C1 ► ► ► ► ► OSTRZEŻENIE! NIEBEZPIECZEŃSTWO OBRAŻEŃ! Nie korzystaj z urządzenia pod kołdrami lub ręcznikami. Postaw urządzenie jak najbliżej gniazda sieciowego. Pamiętaj, by wtyk był łatwo dostępny w celu wyjęcia go z gniazda w przypadku zagrożenia, a także, by kabel sieciowy nie był przyczyną potknięcia. Ustaw urządzenie na stabilnym podłożu. W żadnym razie nie zanurzaj urządzenia w wodzie ani w innych cieczach! Nie używaj urządzenia w przypadku występowania schorzeń serca, zaczerwieniani skóry, zapaleń, opuchlizn, wrażliwych miejsc, cukrzycy, otwartych ran, poparzeń, egzemy lub łuszczycy. SWWS 240 C1 PL │ 103 ■ UWAGA! SZKODY MATERIALNE! ► Nigdy nie używaj pustego urządzenia, bez wosku. ► Urządzenie napełniać wyłącznie woskiem, nie stosować żadnych żrących lub zawierających rozpuszczalniki substancji! ► Stawiaj urządzenie wyłącznie na odpornych na wysoką temperaturę, równych płaszczyznach. ► Nigdy nie rozgrzewaj wosku w opakowaniu foliowym. ► Nigdy nie rozgrzewaj wosku w kuchence mikrofalowej, nad otwartym płomieniem lub na kuchence. ► Do sterowania pracą urządzenia nie używaj żadnych zewnętrznych zegarów sterujących ani innego systemu zdalnego sterowania. ► Nie używaj spiczastych ani ostrych przedmiotów do usuwania zastygłego wosku z urządzenia. ■ 104 │ PL SWWS 240 C1 Przed pierwszym użyciem 1) Wytrzyj urządzenie wilgotną szmatką od wewnątrz i od zewnątrz, aby usunąć z niego pył, który osadził się w trakcie transportu. Dobrze je osusz, aby w urządzeniu nie było wilgoci. 2) Postaw urządzenie na równym, odpornym na działanie wysokiej temperatury podłożu. Pamiętaj, że na podłoże mogą kapać krople rozgrzanego wosku. Dlatego powinno być ono łatwe do czyszczenia. Wyłącznik automatyczny Po upływie 60 minut urządzenie wyłączy się automatycznie. Po 55 minutach, lampka kontrolna 2 zacznie migać, aby przypomnieć o zbliżającym się automatycznym wyłączeniu. Automatyczne wyłączenie nie zastępuje wyjęcia wtyczki sieciowej z gniazda po zakończeniu korzystania z urządzenia! Służy ono tylko do zapewnienia bezpieczeństwa! Zawsze wyciągaj wtyk z gniazda sieciowego, gdy nie używasz urządzenia! Przygotowanie urządzenia Gdy urządzenie jest umieszczone na odpowiednim podłożu: 1) Wyjmij krążki wosku 9 z opakowania. 2) Włóż wymaganą liczbę krążków wosku 9 do miski wewnętrznej 1. Korzystaj z następujących wytycznych, ale mogą się one nieco różnić: SWWS 240 C1 PL │ 105 ■ Region ciała Liczba krążków woskowych 9 Podudzie około 2 na każde podudzie Pachy 1 sztuka Okolice bikini 1 sztuka Całe ciało (podudzia, pachy, okolice bikini) 6 sztuk Symbol ten, wraz z datą, na opakowaniu krążków woskowych 9 wskazuje, jak długo produkt jest przydatny do użycia. 3) Załóż pokrywkę 7 na urządzenie, wsuwając małą plastikową wypustkę w szynę 5, a następnie obróć pokrywkę 7 nieco w prawo (patrz rozkładana strona): 4) Włóż wtyk 3 kabla zasilającego do gniazda 4 w urządzeniu. 5) Włóż wtyk sieciowy do gniazda sieciowego. Urządzenie nagrzewa się, lampka kontrolna 2 w podstawie urządzenia świeci się. 6) Podczas topienia wosku mieszaj go od czasu do czasu. Gdy tylko krążki woskowe 9 sie stopią (przy 6 krążkach woskowych ok. 25 - 30 minut), można zacząć depilację. ■ 106 │ PL SWWS 240 C1 WSKAZÓWKA ► Jeśli zauważysz, że potrzebujesz więcej wosku, niż się stopiło, możesz w każdym momencie dodać kolejne krążki wosku 9 do wewnętrznej miski 1. Przed przystąpieniem do depilacji poczekaj, aż wosk się roztopi. ► Rozpuszczaj maksymalnie 6 krążków woskowych 9 na jeden raz. Depilacja Skóra z której chcesz usunąć włosy musi być sucha, czysta i nie może być posmarowana żadnymi produktami pielęgnacyjnymi, olejkami lub kremami. WSKAZÓWKI ► Przed pierwszym użyciem należy koniecznie przeprowadzić test na skórze, aby sprawdzić, czy Twoja skóra toleruje tego typu zabiegi. Nanieś trochę roztopionego wosku na ukrytą powierzchnię skóry i sprawdź po zerwaniu, czy nie występują zmiany na skórze. Jeśli pojawią się zmiany skórne, nie korzystaj dalej z urządzenia. Jeśli to konieczne, skonsultuj się z lekarzem. ► Jeśli masz skłonność do wrastania włosków, regularnie używaj peelingu. Może to zapobiegać wrastaniu włosków. ► Paski woskowe zrywaj zawsze możliwie jak najbliżej powierzchni skóry. ► Uważaj na to, aby na ubranie nie dostał się wosk. Pozostałości wosku mogą być trudne do usunięcia i mogą powodować odbarwienie ubrania. SWWS 240 C1 PL │ 107 ■ Nogi Gdy krążki wosku 9 roztopią się całkowicie: 1) Otwórz pokrywkę 7, obracając ją nieco w lewo i unosząc do góry. 2) Pobierz trochę wosku szpatułką 8. Nadmiar wosku można wytrzeć o krawędź urządzenia. 3) Wosk nanoś od razu na skórę w kierunku wzrostu włosów (od kolana w kierunku kostki). Pasek wosku powinien mieć grubość skórki pomarańczy oraz powierzchnię 2 ułożonych obok siebie szpatułek 8. Ewentualnie może być konieczne pobieranie wosku kilka razy. Postaraj się, aby koniec naniesionego paska wosku (ten bliżej kostki) był nieco grubszy, ponieważ za ten koniec trzeba będzie chwycić w celu oderwania wosku. 4) Po aplikacji wosku możesz odłożyć szpatułkę 8 na półeczkę 6 na krawędzi urządzenia, aby szpatułka 8 była ułożona nieco ponad miską wewnętrzną 1. 5) Odczekaj 30 - 60 sekund, aż wosk wyschnie. 6) Jedną ręką napręż skórę, chwyć pasek wosku za grubszy koniec i pociągnij go szybkim ruchem pod włos (od kostki w kierunku kolana). W pozostałych miejscach postępuj tak samo. 7) Po zakończeniu korzystania z urządzenia wyciągnij wtyk sieciowy z gniazda sieciowego, aby wyłączyć urządzenie. Lampka kontrolna 2 zgaśnie. ■ 108 │ PL SWWS 240 C1 Pachy Po całkowitym stopieniu krążka wosku 9: 1) Otwórz pokrywkę 7, obracając ją nieco w lewo i unosząc do góry. WSKAZÓWKA ► Ponieważ włosy pod pachami często rosną w różnych kierunkach, należy je usuwać w co najmniej 2 etapach. 2) Trzymaj łokieć skierowany do góry i w tył. W ten sposób skóra pod pachą się napręża. 3) Pobierz trochę wosku szpatułką 8. Nadmiar wosku można wytrzeć o krawędź urządzenia. 4) Nanoś wosk od razu od środka pachy do góry w kierunku łokcia. Pasek wosku powinien mię mniej więcej grubość skórki pomarańczy. Postaraj się, by koniec naniesionego paska wosku (ten bliżej łokcia) był nieco grubszy, ponieważ za ten koniec trzeba będzie chwycić w celu oderwania wosku. 5) Po aplikacji wosku możesz odłożyć szpatułkę 8 na półeczkę 6 na krawędzi urządzenia, aby szpatułka 8 była ułożona nieco ponad miską wewnętrzną 1. 6) Odczekaj 30 - 60 sekund, aż wosk wyschnie. 7) Chwyć pasek wosku za górny koniec (znajdujący się bliżej łokcia) i pociągnij go szybkim ruchem pod włos do dołu. 8) Aby wykonać depilację dolnej części pachy, nanoś wosk od środka pachy kierując się do dołu. 9) Odczekaj 30 - 60 sekund, aż wosk wyschnie. SWWS 240 C1 PL │ 109 ■ 10) Chwyć pasek wosku za górny koniec (ten bliżej łokcia) i pociągnij go szybkim ruchem pod włos do dołu. 11) Po zakończeniu korzystania z urządzenia wyciągnij wtyk sieciowy z gniazda sieciowego, aby wyłączyć urządzenie. Lampka kontrolna 2 zgaśnie. Okolice bikini Po całkowitym stopieniu krążka wosku 9: 1) Otwórz pokrywkę 7, obracając ją nieco w lewo i unosząc do góry. 2) Pobierz trochę wosku szpatułką 8. Nadmiar wosku można wytrzeć o krawędź urządzenia. 3) Po aplikacji wosku możesz odłożyć szpatułkę 8 na półeczkę 6 na krawędzi urządzenia, aby szpatułka 8 była ułożona nieco ponad miską wewnętrzną 1. WSKAZÓWKA ► W okolicach bikini wykonuj depilację tylko na małych obszarach jednocześnie. Skóra jest tam bardzo wrażliwa. 4) Napręż skórę jedną ręką i nanoś wosk w kierunku wzrostu włosów (kierunek wewnętrznej strony ud). 5) Odczekaj 30 - 60 sekund, aż wosk wyschnie. 6) Chwyć pasek wosku za górny koniec (ten bliżej wewnętrznej strony uda) i pociągnij go szybkim ruchem pod włos do dołu. W pozostałych miejscach postępuj tak samo. 7) Po zakończeniu korzystania z urządzenia wyciągnij wtyk sieciowy z gniazda sieciowego, aby wyłączyć urządzenie. Lampka kontrolna 2 zgaśnie. ■ 110 │ PL SWWS 240 C1 Po depilacji ■ Wyczyść szpatułkę 8 (patrz rozdział „Czyszczenie“). ■ Niewielkie pozostałości wosku na skórze można usuwać oliwką dla dzieci. Jeśli nie masz pod ręką oliwki dla dzieci, możesz również użyć oliwy lub innego oleju spożywczego. ■ Po depilacji skóra może być lekko zaczerwieniona. Jest to normalne. Spłucz dane miejsca niewielką ilością zimnej wody. To złagodzi skórę. Jeśli to nie pomoże i skóra będzie piec, skonsultuj się z lekarzem. Czyszczenie OSTRZEŻENIE! NIEBEZPIECZEŃSTWO PORAŻENIA PRĄDEM ELEKTRYCZNYM! ► Przed każdym czyszczeniem należy wyciągnąć wtyczkę z gniazda zasilania! ► Nigdy nie wolno zanurzać urządzenia w wodzie ani w innych cieczach. OSTRZEŻENIE! NIEBEZPIECZEŃSTWO OBRAŻEŃ! ► Przed przystąpieniem do czyszczenia urządzenia odczekaj do jego ostygnięcia. UWAGA! SZKODY MATERIALNE! ► Nie używaj spiczastych ani ostrych przedmiotów do usuwania zastygłego wosku z urządzenia! ► Do czyszczenia urządzenia nie stosuj żadnych chemicznych, szorujących ani żrących środków czyszczących! SWWS 240 C1 PL │ 111 ■ WSKAZÓWKA ► Miski wewnętrznej 1 po każdym użyciu nie trzeba czyścić i usuwać wszystkich resztek wosku. Pozostały w urządzeniu wosk można przy następnym użyciu stopić i ponownie użyć! ► Aby zamówić nowe krążki wosku 9, prosimy o kontakt z naszym działem obsługi klienta (patrz rozdział „Gwarancja i serwis”). ■ Zbierz nadmiar wosku ze szpatułki 8 bezpośrednio po użyciu, zbierając go wzdłuż krawędzi urządzenia do środka. ■ Zmyj szpatułkę 8 oraz krawędź urządzenia bezpośrednio po zastosowaniu, używając do tego szmatki zwilżonej oliwką dla dzieci. Tak można usunąć pozostałości jeszcze miękkiego wosku. Najlepiej użyć starego kawałka materiału, ponieważ pozostałości wosku są trudne do usunięcia. Jeśli nie masz w domu oliwki dla dzieci, możesz do czyszczenia również użyć oliwy lub innego oleju spożywczego. Szczególnie uważaj na to, aby w szynach 5 blokady pokrywki 7 nie pozostały żadne zanieczyszczenia! Następnie wytrzyj szpatułkę 8 i krawędź suchym ręcznikiem papierowym, aby usunąć pozostałości oleju. ■ Jeśli do zewnętrznej powierzchni obudowy przylega wosk, usuń go w następujący sposób: – Upewnij się, że urządzenie jest odłączone od zasilania sieciowego, ale wciąż jest ciepłe. – Przetrzyj powierzchnię zewnętrzną szmatką zwilżoną oliwą. – Szczególnie uważaj na to, aby w szynach 5 blokady pokrywki 7 nie pozostały żadne zanieczyszczenia! – Usuń pozostałości oleju suchym i czystym ręcznikiem papierowym. ■ 112 │ PL SWWS 240 C1 Przechowywanie WSKAZÓWKA ► Miski wewnętrznej 1 po każdym użyciu nie trzeba czyścić i usuwać wszystkich resztek wosku. Pozostały w urządzeniu wosk można przy następnym użyciu stopić i ponownie użyć! ■ Gdy urządzenie i szpatułka 8 zostały wyczyszczone w sposób opisany w rozdziale „Czyszczenie“: – Odłóż szpatułkę 8 na półeczkę 6 na krawędzi urządzenia, aby szpatułka 8 była ułożona nieco ponad miską wewnętrzną 1. – Załóż pokrywkę 7. – Schłodzone urządzenie należy przechowywać w czystym i suchym miejscu. WSKAZÓWKA ► Jeśli po zakończeniu przechowywania nie można otworzyć/ obrócić pokrywki 7, pomiędzy pokrywką 7 a urządzeniem znajdują się prawdopodobnie zastygnięte resztki wosku. W takim przypadku rozgrzej urządzenie z zamkniętą pokrywką 7 przez ok. 10 minut (w zależności od ilości wosku). Wosk stanie się miękki i będzie można otworzyć pokrywkę 7. Utylizacja Zużyty wosk można wyrzucać razem z normalnymi odpadami komunalnymi. W żadnym przypadku nie wyrzucaj urządzenia do zwykłych śmieci domowych. Ten produkt podlega dyrektywie europejskiej 2012/19/EU. SWWS 240 C1 PL │ 113 ■ Zużyte urządzenie należy oddać do certyfikowanego zakładu utylizacji odpadów lub do komunalnego zakładu oczyszczania. Należy przestrzegać aktualnie obowiązujących przepisów. W razie pytań i wątpliwości odnośnie do zasad utylizacji należy zwrócić się do miejscowego zakładu utylizacji odpadów. Produkt można poddać recyklingowi, podlega rozszerzonej odpowiedzialności producenta i jest zbierany w ramach systemu segregacji odpadów. Opakowanie urządzenia jest wykonane z materiałów przyjaznych dla środowiska naturalnego, które można zutylizować w lokalnych punktach recyklingu. Opakowania należy utylizować w sposób przyjazny dla środowiska. Przestrzegać oznaczeń na różnych materiałach opakowaniowych i w razie potrzeby utylizuj je zgodnie z zasadami segregacji odpadów. Materiały opakowaniowe są oznaczone skrótami (a) i cyframi (b) w następujący sposób: 1–7: tworzywa sztuczne, 20–22: papier i tektura, 80–98: kompozyty. Informacji na temat możliwości utylizacji wyeksploatowanego produktu udziela urząd gminy lub miasta. ■ 114 │ PL SWWS 240 C1 Zamawianie części zamiennych Do produktu SWWS 240 C1 można zamówić następujące części zamienne: ► woskowych (18 sztuka) Zamawiaj części zamienne przez naszą infolinię serwisową (patrz rozdział „Serwis″) lub wygodnie na naszej stronie internetowej pod adresem www.kompernass.com.. Za pomocą tego kodu QR możesz przejść bezpośrednio do naszej strony internetowej i zamówić dostępne części zamienne: WSKAZÓWKA ► Zamawiając części zamienne, miej pod ręką numer IAN, który można znaleźć na okładce tej instrukcji obsługi. SWWS 240 C1 PL │ 115 ■ Gwarancja Kompernaß Handels GmbH Szanowny Kliencie, To urządzenie objęte jest 3-letnią gwarancją, licząc od daty zakupu. W przypadku wad tego produktu, masz gwarantowane ustawowo prawa w stosunku sprzedawcy. Te ustawowe prawa nie są ograniczone przez nasze opisane poniżej warunki gwarancji. Warunki gwarancji Okres gwarancji rozpoczyna się od daty zakupu. Należy zachować paragon. Jest on wymagany jako dowód zakupu. Jeżeli w ciągu trzech lat od daty zakupu produktu ujawni się w nim wada materiałowa lub produkcyjna, produkt zostanie wedle naszego uznania nieodpłatnie naprawiony, wymieniony na nowy lub zostanie zwrócona jego cena. Warunkiem spełnienia tego świadczenia gwarancyjnego jest dostarczenie w trakcie tego trzyletniego okresu uszkodzonego urządzenia wraz z dowodem zakupu (paragonem) oraz krótkim opisem wady i daty jej wystąpienia. Jeżeli wada jest objęta naszą gwarancją, otrzymasz z powrotem naprawiony lub nowy produkt. Okres gwarancji i ustawowe roszczenia gwarancyjne Wykonanie usługi gwarancyjnej nie przedłuża okresu gwarancji. Dotyczy to również wymienionych i naprawionych części. Wszelkie szkody i wady wykryte w chwili zakupu należy zgłosić bezpośrednio po rozpakowaniu urządzenia. Po upływie okresu gwarancji wszelkie naprawy są wykonywane odpłatnie. Zakres gwarancji Urządzenie zostało starannie wyprodukowane i poddane przed wysyłką skrupulatnej kontroli jakości. Gwarancja obejmuje wady materiałowe lub produkcyjne. Niniejsza gwarancja nie obejmuje części produktu, podlegających normalne- ■ 116 │ PL SWWS 240 C1 mu zużyciu, ani uszkodzeń części łatwo łamliwych, np. przełączników, akumulatorów, lub części wykonanych ze szkła. Niniejsza gwarancja traci swoją ważność, jeśli produkt został uszkodzony, nie używano go prawidłowo lub nie serwisowano należycie. W celu zapewnienia prawidłowego stosowania produktu należy ściśle przestrzegać wszystkich instrukcji wymienionych w instrukcjach obsługi. Należy bezwzględnie unikać zastosowania oraz postępowania, których odradza się w instrukcji obsługi lub przed którymi się w niej ostrzega. Produkt przeznaczony jest wyłącznie do użytku domowego, a nie do zastosowań komercyjnych. Niewłaściwe użytkowanie urządzenia, używanie go w sposób niezgodny z jego przeznaczeniem, użycie siły lub ingerencja w urządzenie, dokonywana poza naszymi autoryzowanymi punktami serwisowymi, powodują utratę gwarancji. Realizacja zobowiązań gwarancyjnych W celu zapewnienia szybkiego załatwienia sprawy, postępuj zgodnie z poniższymi wskazówkami: ■ W przypadku wszelkich pytań przygotuj paragon fiskalny oraz numer artykułu (np. IAN 12345) jako dowód zakupu. ■ Numer artykułu można znaleźć na tabliczce znamionowej na produkcie, wygrawerowany na urządzeniu, zapisany na stronie tytułowej instrukcji obsługi (w dolnym lewym rogu) lub na naklejce z tyłu bądź na spodzie urządzenia. ■ W przypadku wystąpienia błędów działania lub innych wad, prosimy o kontakt z odpowiednim działem serwisu telefonicznie lub przez e-mail. ■ Zarejestrowany jako wadliwy produkt możesz wtedy wraz z dołączonym dowodem zakupu (paragonem) oraz opisem i datą wystąpienia usterki wysłać nieodpłatnie na przekazany wcześniej adres serwisu. SWWS 240 C1 PL │ 117 ■ Na stronie www.lidl-service.com możesz pobrać te i wiele innych instrukcji, filmów o produktach oraz oprogramowanie instalacyjne. Za pomocą tego kodu QR możesz przejść bezpośrednio na stronę serwisu Lidl (www.lidl-service.com), gdzie możesz otworzyć instrukcję obsługi, wpisując numer artykułu (IAN) 123456. Serwis Serwis Polska Tel.: 22 397 4996 E-Mail: [email protected] IAN 339566_1910 Importer Pamiętaj, że poniższy adres nie jest adresem serwisu. Skontaktuj się najpierw z odpowiednim punktem serwisowym. KOMPERNASS HANDELS GMBH BURGSTRASSE 21 44867 BOCHUM NIEMCY www.kompernass.com ■ 118 │ PL SWWS 240 C1 Obsah Úvod . . . . . . . . . . . . . . . . . . . . . . . . . . . . . . . . . . . . . . .120 Použití v souladu s určením . . . . . . . . . . . . . . . . . . . .120 Rozsah dodávky . . . . . . . . . . . . . . . . . . . . . . . . . . . . .120 Popis přístroje . . . . . . . . . . . . . . . . . . . . . . . . . . . . . . .121 Technické údaje . . . . . . . . . . . . . . . . . . . . . . . . . . . . . .121 Bezpečnostní pokyny . . . . . . . . . . . . . . . . . . . . . . . . .122 Před prvním použitím . . . . . . . . . . . . . . . . . . . . . . . . .127 Vypínací automatika . . . . . . . . . . . . . . . . . . . . . . . . .127 Příprava přístroje . . . . . . . . . . . . . . . . . . . . . . . . . . . .127 Depilace . . . . . . . . . . . . . . . . . . . . . . . . . . . . . . . . . . . .129 Nohy . . . . . . . . . . . . . . . . . . . . . . . . . . . . . . . . . . . . . . . . . . . . . 130 Podpaží . . . . . . . . . . . . . . . . . . . . . . . . . . . . . . . . . . . . . . . . . . . 131 Oblast linie bikin. . . . . . . . . . . . . . . . . . . . . . . . . . . . . . . . . . . . . 132 Po depilaci . . . . . . . . . . . . . . . . . . . . . . . . . . . . . . . . . .133 Čištění . . . . . . . . . . . . . . . . . . . . . . . . . . . . . . . . . . . . . .133 Skladování . . . . . . . . . . . . . . . . . . . . . . . . . . . . . . . . . .135 Likvidace . . . . . . . . . . . . . . . . . . . . . . . . . . . . . . . . . . .136 Objednávání náhradních dílů . . . . . . . . . . . . . . . . . .137 Záruka společnosti Kompernass Handels GmbH . . .138 Servis . . . . . . . . . . . . . . . . . . . . . . . . . . . . . . . . . . . . . . . . . . . . . 140 Dovozce . . . . . . . . . . . . . . . . . . . . . . . . . . . . . . . . . . . . . . . . . . . 140 SWWS 240 C1 CZ │ 119 ■ Úvod Blahopřejeme vám k zakoupení nového přístroje. Rozhodli jste se pro vysoce kvalitní výrobek. Návod k obsluze je součástí tohoto výrobku. Obsahuje důležité informace o bezpečnosti, použití a likvidaci. Před použitím výrobku se prosím dobře seznamte se všemi provozními a bezpečnostními pokyny. Výrobek používejte pouze předepsaným způsobem a pro uvedené oblasti použití. Návod k obsluze uchovejte vždy jako referenční příručku v blízkosti výrobku. Při předávání výrobku třetím osobám předejte spolu s ním i tyto podklady. Použití v souladu s určením Tento přístroj slouží výhradně pro depilaci nohou, podpaží a oblasti linie bikin na lidském těle. Tento přístroj je určen výhradně k použití v domácnostech pro soukromé účely. Není určen ke komerčnímu použití. Rozsah dodávky Elektrická depilační sada 18 voskových disků Špachtle Návod k obsluze ■ 120 │ CZ SWWS 240 C1 Popis přístroje 1 vnitřní miska 2 kontrolka 3 zástrčka 4 zdířka 5 obruč (pro zajištění víka) 6 odkládání (pro špachtli) 7 víko 8 špachtle 9 voskový disk Technické údaje Napětí 220 - 240 V ∼ (střídavý proud), 50 Hz Příkon 20 W Kapacita nádoby cca 530 ml Třída ochrany II / SWWS 240 C1 (dvojitá izolace) CZ │ 121 ■ Bezpečnostní pokyny ► ► ► ► ► ► ► VÝSTRAHA! NEBEZPEČÍ ÚRAZU ELEKTRICKÝM PROUDEM! Pokud je napájecí kabel tohoto přístroje poškozen, musí jej vyměnit výrobce, jeho zákaznický servis nebo obdobně kvalifikovaná osoba, aby se tak zabránilo nebezpečí. Přístroj používejte jen v suchých prostorách, ne venku. Kryt přístroje nikdy neotevírejte. Nepoužívejte přístroj v blízkosti vody, např. umyvadel, sprchových vaniček nebo van. Přístroj nikdy nepoužívejte při koupání, sprchování nebo při spaní. Nedotýkejte se síťové zástrčky nebo síťového kabelu nikdy mokrýma rukama. Před použitím zkontrolujte, zda přístroj není zvenčí viditelně poškozený. Poškozený nebo na zem spadlý přístroj neuvádějte do provozu. ■ 122 │ CZ SWWS 240 C1 VÝSTRAHA! NEBEZPEČÍ ÚRAZU ELEKTRICKÝM PROUDEM! ► ► ► Tento přístroj se v žádném případě nesmí používat v blízkosti vany, sprch nebo jiných nádrží, obsahujících vodu. Na konektor přístroje nesmí vytéct žádná kapalina. VÝSTRAHA! NEBEZPEČÍ ZRANĚNÍ! Děti starší 8 let a osoby s omezenými fyzickými, smyslovými nebo mentálními schopnostmi či nedostatkem zkušeností a znalostí mohou používat tento přístroj, avšak pouze tehdy, pokud jsou pod dohledem nebo pokud byly poučeny o bezpečném používání přístroje a pokud porozuměly z toho vyplývajícímu nebezpečí. Děti si nesmí s přístrojem hrát. SWWS 240 C1 CZ │ 123 ■ ► ► ► ► ► ► VÝSTRAHA! NEBEZPEČÍ ZRANĚNÍ! Děti nesmí provádět uživatelské čištění ani údržbu, ledaže jsou starší než 8 let a jsou pod dohledem. Děti mladší 8 let nesmí mít přístup k přístroji a jeho připojovacímu kabelu. Lidé citliví na teplo nesmí tento přístroj používat! Pokud si z důvodu již předchozích onemocnění nejste jisti, zda přístroj můžete používat, poraďte se před použitím s lékařem. Po použití je na povrchu topného prvku ještě zbytkové teplo. Při nesprávném použití přístroje hrozí nebezpečí zranění. Přístroj používejte výlučně v souladu s určením! ■ 124 │ CZ SWWS 240 C1 ► ► ► ► ► VÝSTRAHA! NEBEZPEČÍ ZRANĚNÍ! Přístroj nikdy nepoužívejte pod dekami nebo ručníky. Přístroj umístěte pokud možno do blízkosti zásuvky. Zajistěte, aby síťová zástrčka byla v případě nebezpečí rychle dosažitelná a aby nebylo možné zakopnout o síťový kabel. Zajistěte, aby byl přístroj postavený ve stabilní poloze. Přístroj nikdy neponořujte do vody či jiných tekutin! Přístroj nepoužívejte při srdečních onemocněních, zarudnutí kůže, zánětech, otocích, na citlivých místech, v případě cukrovky, otevřených ran, popálenin, ekzémech nebo lupénky. SWWS 240 C1 CZ │ 125 ■ POZOR! VĚCNÉ ŠKODY! ► Nikdy neprovozujte přístroj naprázdno, bez vosku. ► Přístroj plňte pouze voskem, nikoliv agresivními látkami nebo přípravky s obsahem rozpouštědel! ► Postavte přístroj výhradně na tepelně odolné, rovné povrchy. ► Vosk nikdy nerozehřívejte v plastovém obalu. ► Vosk nikdy nerozehřívejte v mikrovlnné troubě, nad otevřeným ohněm nebo sporákem. ► K provozu přístroje nepoužívejte externí spínací hodiny ani samostatné dálkové ovládání. ► Pro vyjmutí vosku z přístroje nepoužívejte špičaté ani ostré předměty. ■ 126 │ CZ SWWS 240 C1 Před prvním použitím 1) Otřete přístroj vlhkým hadříkem zevnitř a zvenčí k odstranění prachu usazeného při přepravě. Dobře ho vysušte, aby v přístroji nebyla žádná vlhkost. 2) Přístroj postavte vždy na rovný a tepelně odolný podklad. Také mějte na paměti, že na podklad mohou odkapávat kapky vosku. Proto by měl být snadno čistitelný. Vypínací automatika Po 60 minutách se přístroj automaticky vypne. Po 55 minutách začne blikat kontrolka 2 za účelem připomenutí automatického vypnutí. Automatické vypínání nenahrazuje vytažení síťové zástrčky po ukončení použití! Slouží pouze pro bezpečnost! Vždy vytáhněte síťovou zástrčku ze zásuvky, když přístroj nepoužíváte! Příprava přístroje Když je přístroj umístěn na vhodném podkladu: 1) Vyjměte voskové disky 9 z balení. 2) Dejte potřebný počet voskových disků 9 do vnitřní misky 1. Orientujte se podle následujících směrných hodnot, které se však mohou poněkud lišit: SWWS 240 C1 CZ │ 127 ■ Oblast těla Počet voskových disků 9 Holeň cca 2 kusy na holeň Podpaží 1 kus Oblast linie bikin 1 kus Celé tělo (holeň, podpaží, oblast linie bikin) 6 kusů Tento symbol společně s údajem data na obalu voskových disků 9 udává, jakou trvanlivost výrobek má. 3) Nasaďte víko 7 na přístroj nasazením malého plastového výběžku do obruče 5 a mírným otočením víka 7 ve směru hodinových ručiček (viz výklopnou stranu): 4) Zastrčte zástrčku 3 síťového kabelu do zdířky 4 na přístroji. 5) Zastrčte zástrčku do síťové zásuvky. Přístroj se zahřívá, kontrolka 2 v podstavci přístroje svítí. 6) Během rozpouštění vosk příležitostně zamíchejte. Jakmile se voskové disky 9 rozpustily (u 6 voskových disků cca 25 - 30 minut), můžete začít s depilací. ■ 128 │ CZ SWWS 240 C1 UPOZORNĚNÍ ► Když zjistíte, že potřebujete více vosku, než jste rozpustili, můžete kdykoliv přidat další voskové disky 9 do vnitřní misky 1. Než budete pokračovat v depilaci, vyčkejte, dokud se vosk nerozpustí. ► Rozpusťte najednou maximálně 6 voskových disků 9. Depilace Oblasti pokožky, na kterých chcete odstranit chloupky, musí být suché, čisté a zbavené výrobků pro péči, olejů nebo tuků. UPOZORNĚNÍ ► Před prvním použitím nezbytně proveďte kožní test pro kontrolu, zda vaše pokožka toleruje tento způsob aplikace. Dejte trochu rozpuštěného vosku na skryté oblasti pokožky a po stáhnutí zkontrolujte, zda se vyskytnou během následujících 24 hodin kožní změny. Vyskytnou-li se kožní změny, tento přístroj dál nepoužívejte. Příp. se poraďte s lékařem. ► Pokud jste náchylní k zarůstání chloupků, používejte pravidelně peelingy. Ty mohou zabránit zarůstání chloupků. ► Strhávejte voskové pásky vždy co nejblíže k povrchu pokožky. ► Dbejte na to, aby se vosk nedostal na váš oděv. Zbytky vosku lze obtížně odstranit a může způsobit zbarvení na oblečení. SWWS 240 C1 CZ │ 129 ■ Nohy Když jsou voskové disky 9 zcela rozpuštěny: 1) Otevřete víko 7 tak, že ho opatrně proti směru hodinových ručiček vyšroubujete a sejmete ho. 2) Naberte trochu vosku plochou stranou špachtle 8. Přebytečný vosk můžete na okraji přístroje setřít. 3) Naneste vosk ihned na kůži ve směru růstu chloupků (od kolen směrem ke kotníku). Voskové pásy by měly mít tloušťku pomerančové kůry a plochu 2 vedle sebe ležících špachtlí 8. Možná budete muset vícekrát nabrat vosk. Zkuste konec naneseného voskového pásu (který je blíže ke kotníku) nanést o něco silnější, protože tento konec musíte uchopit ke stažení. 4) Po nanesení můžete špachtli 8 odložit na plochu odkládání 6 na okraji přístroje tak, aby špachtle 8 ležela nad vnitřní miskou 1. 5) Vyčkejte 30 - 60 sekund, dokud vosk neuschne. 6) Jednou rukou natáhněte kůži, uchopte voskový pás na silném konci a stáhněte ho rychlým pohybem proti směru růstu chloupků (od kotníku směrem ke kolenu). U dalších oblastí pokožky postupujte stejně. 7) Když jste s aplikací hotovi, vytáhněte síťovou zástrčku ze zásuvky k vypnutí přístroje. Kontrolka 2 zhasne. ■ 130 │ CZ SWWS 240 C1 Podpaží Když je voskový disk 9 zcela rozpuštěn: 1) Otevřete víko 7 tak, že ho opatrně proti směru hodinových ručiček vyšroubujete a sejmete ho. UPOZORNĚNÍ ► Protože chloupky v podpaží mají tendenci růst v různých směrech, musíte je odstraňovat minimálně ve 2 krocích. 2) Držte loket nahoru a dozadu. Tím se natáhne kůže v podpaží. 3) Naberte trochu vosku plochou stranou špachtle 8. Přebytečný vosk můžete na okraji přístroje setřít. 4) Naneste jej ihned od středu podpaží nahoru směrem k lokti. Voskový pás by měl být silný asi jako pomerančová kůra. Zkuste konec naneseného voskového pásu (který je blíže k lokti) nanést trochu silnější, protože tento konec musíte uchopit ke stažení. 5) Po nanesení můžete špachtli 8 odložit na plochu odkládání 6 na okraji přístroje tak, aby špachtle 8 ležela nad vnitřní miskou 1. 6) Vyčkejte 30 - 60 sekund, dokud vosk neuschne. 7) Uchopte voskový pás na silném konci (který doléhá blíže k lokti) a stáhněte ho rychlým pohybem proti směru růstu chloupků dolů. 8) K depilaci spodní části podpaží naneste vosk od středu podpaží až dolů. 9) Vyčkejte 30 - 60 sekund, dokud vosk neuschne. SWWS 240 C1 CZ │ 131 ■ 10) Uchopte voskový pás na silném konci a stáhněte ho rychlým pohybem proti směru růstu chloupků dolů. 11) Když jste s aplikací hotovi, vytáhněte síťovou zástrčku ze zásuvky k vypnutí přístroje. Kontrolka 2 zhasne. Oblast linie bikin Když je voskový disk 9 zcela rozpuštěn: 1) Otevřete víko 7 tak, že ho opatrně proti směru hodinových ručiček vyšroubujete a sejmete ho. 2) Naberte trochu vosku plochou stranou špachtle 8. Přebytečný vosk můžete na okraji přístroje setřít. 3) Po nanesení můžete špachtli 8 odložit na plochu odkládání 6 na okraji přístroje tak, aby špachtle 8 ležela nad vnitřní miskou 1. UPOZORNĚNÍ ► Depilujte v oblasti linie bikin vždy jen malé oblasti najednou. Zde je pokožka velmi citlivá. 4) Jednou rukou napněte kůži a naneste vosk ve směru růstu chloupků (směrem od vnitřního stehna). 5) Vyčkejte 30 - 60 sekund, dokud vosk neuschne. 6) Uchopte voskový pás na silném konci (který doléhá blíže k vnitřnímu stehnu) a stáhněte ho rychlým pohybem proti směru růstu chloupků dolů. U dalších oblastí pokožky postupujte stejně. 7) Když jste s aplikací hotovi, vytáhněte síťovou zástrčku ze zásuvky k vypnutí přístroje. Kontrolka 2 zhasne. ■ 132 │ CZ SWWS 240 C1 Po depilaci ■ Očistěte špachtli 8 (viz kapitola „Čištění“). ■ Malé zbytky vosku na kůži můžete odstranit dětským olejem. Pokud nemáte žádný dětský olej po ruce, můžete také použít olivový olej nebo jiné stolní oleje. ■ Po depilaci může být kůže lehce zarudlá. To je normální. Postiženou oblast ochlazujte pod tekoucí studenou vodou. To kůži zklidní. Pokud se kůže nezklidní a silně pálí, pak vyhledejte lékaře. Čištění VÝSTRAHA! NEBEZPEČÍ ÚRAZU ELEKTRICKÝM PROUDEM! ► Před každým čištěním vytáhněte zástrčku ze zásuvky! ► Přístroj nikdy neponořujte do vody či jiných tekutin! VÝSTRAHA! NEBEZPEČÍ ZRANĚNÍ! ► Před čištěním nechte přístroj trochu vychladnout. POZOR! VĚCNÉ ŠKODY! ► Pro vyjmutí potravin z přístroje nepoužívejte kovové, špičaté ani ostré předměty. ► K čištění přístroje nepoužívejte chemické, abrazivní nebo agresivní čisticí prostředky. SWWS 240 C1 CZ │ 133 ■ UPOZORNĚNÍ ► Vnitřní misku 1 nemusíte vymýt po každém použití ani odstraňovat veškeré zbytky vosku. V přístroji zbývající vosk se může znovu roztavit při další aplikaci a znovu použít! ► K doobjednání voskových disků 9 kontaktujte náš servis pro zákazníky (viz kapitola „Objednání náhradních dílů“). ■ Setřete přebytečný vosk špachtlí 8 přímo po použití na okraji přístroje směrem dovnitř. ■ Otřete špachtli 8, jakož i okraj přístroje přímo po použití hadříkem navlhčeným dětským olejem. Tak lze odstranit ještě měkké zbytky vosku. Nejlépe použijte starou tkaninu, protože zbytky vosku lze z textilií obtížně odstranit. Pokud doma nemáte žádný dětský olej, můžete také použít na čištění olivový olej nebo jiné stolní oleje. Dbejte zejména na to, aby se zbytky vosku nenacházely v obručích 5 pro zajištění víka 7 ! Poté otřete špachtli 8 a okraj suchou papírovou utěrkou k odstranění zbytků oleje. ■ Pokud je na vnější straně pláště přilepen vosk, odstraňte jej následujícím způsobem: – Ujistěte se, že je přístroj odpojen od sítě, avšak je ještě teplý. – Vnější strany otřete hadříkem, navlhčeným olejem. – Dbejte zejména na to, aby se zbytky vosku nenacházely v obručích 5 pro zajištění víka 7 ! – Odstraňte zbytky oleje čistou, suchou papírovou utěrkou. ■ 134 │ CZ SWWS 240 C1 Skladování UPOZORNĚNÍ ► Vnitřní misku 1 nemusíte vymýt po každém použití ani odstraňovat veškeré zbytky vosku. V přístroji zbývající vosk se může znovu roztavit při další aplikaci a znovu použít! ■ Když jsou přístroj a špachtle 8 očištěny tak, jak je popsáno v kapitole „Čištění“: – Odložte špachtli 8 do odkládání 6 na okraji přístroje tak, aby špachtle 8 ležela nad vnitřní miskou 1. – Víko 7 opět nasaďte. – Vychladlý přístroj uchovávejte na čistém a suchém místě. UPOZORNĚNÍ ► Pokud po uložení nemůžete víko 7 otevřít/odšroubovat, nachází se pravděpodobně ochlazené zbytky vosku mezi víkem 7 a přístrojem. V tomto případě nechte přístroj s uzavřeným víkem 7 cca 10 minut (podle množství vosku) zahřát. Vos změkne a víko 7 lze otevřít. SWWS 240 C1 CZ │ 135 ■ Likvidace Použitý vosk můžete zlikvidovat spolu s běžným odpadem. V žádném případě nevyhazujte přístroj do normálního domovního odpadu. Tento výrobek podléhá evropské směrnici č. 2012/19/EU. Nechte přístroj zlikvidovat v autorizované provozovněnebo ve vašem místním likvidačním zařízení. Dodržujte aktuálně platné předpisy. V případě pochybností se informujte ve sběrném dvoře. Výrobek je recyklovatelný, podléhá rozšířené odpovědnosti výrobce a je shromažďován odděleně. Obal se skládá z ekologických materiálů, které lze zlikvidovat v komunálních sběrných dvorech. Balení zlikvidujte ekologicky. Dbejte na označení na různých obalových materiálech a v případě potřeby tyto obaly roztřiďte. Obalové materiály jsou označeny zkratkami (a) a číslicemi (b) s následujícím významem: 1-7: plasty, 20-22: papír a lepenka, 80–98: kompozitní materiály Informace o možnostech likvidace vysloužilého výrobku Vám podá správa Vašeho obecního nebo městského úřadu. ■ 136 │ CZ SWWS 240 C1 Objednávání náhradních dílů K produktu SWWS 240 C1 můžete objednat následující náhradní díly: ► Voskové disky (18 ks) Objednejte náhradní díly prostřednictvím naší servisní poradenské linky (viz kapitola „Servis″) nebo pohodlně na našich webových stránkách www.kompernass.com. Pomocí tohoto kódu QR se dostanete přímo na naši webovou stránku a můžete si objednat dostupné náhradní díly: UPOZORNĚNÍ ► Pro Vaši objednávku mějte připravené číslo IAN, které najdete na obalu tohoto návodu k obsluze. SWWS 240 C1 CZ │ 137 ■ Záruka společnosti Kompernass Handels GmbH Vážená zákaznice, vážený zákazníku, na tento přístroj získáváte záruku v trvání 3 let od data zakoupení. V případě závad tohoto výrobku máte zákonná práva vůči prodejci výrobku. Tato zákonná práva nejsou omezena naší níže uvedenou zárukou. Záruční podmínky Záruční doba začíná plynout dnem nákupu. Dobře uschovejte pokladní doklad. Tento doklad je potřebný jako důkaz o koupi. Pokud se do tří let od data zakoupení tohoto výrobku vyskytne vada materiálu nebo výrobní závada, pak Vám podle našeho uvážení výrobek zdarma opravíme, vyměníme nebo uhradíme kupní cenu. Předpokladem této záruky je, že bude během tříleté lhůty předložen vadný přístroj a doklad o koupi (pokladní doklad) a stručně se popíše, v čem závada spočívá a kdy se vyskytla. Vztahuje-li se na závadu naše záruka, obdržíte zpět buď opravený nebo nový produkt. Opravou nebo výměnou výrobku nezačne plynout nová záruční doba. Záruční doba a zákonné nároky vyplývající ze závad Záručním plněním se záruční doba neprodlužuje. To platí i pro vyměněné a opravené součásti. Poškození nebo vady vyskytující se případně již při nákupu se musí oznámit ihned po vybalení. Po uplynutí záruční doby podléhají veškeré opravy zpoplatnění. Rozsah záruky Přístroj byl vyroben pečlivě podle přísných směrnic kvality a před expedicí byl svědomitě vyzkoušen. ■ 138 │ CZ SWWS 240 C1 Záruka se vztahuje na materiálové nebo výrobní vady. Tato záruka se nevztahuje na součásti výrobku, které jsou vystaveny běžnému opotřebení, a proto je lze považovat za spotřební díly, nebo na poškození křehkých součástí, jako jsou např. spínače, akumulátory nebo díly, které jsou vyrobeny ze skla. Tato záruka zaniká, pokud je výrobek poškozen, nebyl řádně používán nebo udržován. Pro zajištění správného používání výrobku se musí přesně dodržovat všechny pokyny uvedené v návodu k obsluze. Účelům použití a úkonům, které se v návodu k obsluze nedoporučují nebo se před nimi varuje, je třeba se bezpodmínečně vyhnout. Výrobek je určen pouze pro soukromé účely a ne pro komerční použití. Při nesprávném a neodborném používání, při použití násilí a při zásazích, které nebyly provedeny našimi autorizovanými servisními provozovnami, záruční nároky zanikají. Vyřízení v případě záruky Pro zajištění rychlého Vaší žádosti postupujte podle následujících pokynů: ■ Pro všechny dotazy mějte připraven pokladní lístek a číslo výrobku (např. IAN 12345) jako doklad o koupi. ■ Číslo výrobku naleznete na typovém štítku na výrobku, rytině na výrobku, na titulní straně návodu k obsluze (vlevo dole) nebo na nálepce na zadní nebo spodní straně výrobku. ■ Pokud by se měly vyskytovat funkční vady nebo jiné závady, kontaktujte nejprve níže uvedené servisní oddělení telefonicky nebo e-mailem. ■ Výrobek, zaevidovaný jako vadný výrobek pak můžete při přiložení dokladu o nákupu (pokladní lístek) a při uvedení, v čem spočívá vada a kdy k ní došlo, poslat výrobek pro Vás bez poštovného na adresu, kterou Vám oznámí servis. SWWS 240 C1 CZ │ 139 ■ Na webových stránkách www.lidl-service.com si můžete stáhnout tyto a mnoho dalších příruček, videí o výrobku a instalační software. Pomocí kódu QR se dostanete přímo na stránku servisu Lidl (www.lidl-service.com) a můžete pomocí zadání čísla výrobku (IAN) 123456 otevřít svůj návod k obsluze. Servis Servis Česko Tel.: 800143873 E-Mail: [email protected] IAN 339566_1910 Dovozce Dbejte prosím na to, že následující adresa není adresou servisu. Kontaktujte nejprve uvedený servis. KOMPERNASS HANDELS GMBH BURGSTRASSE 21 44867 BOCHUM NĚMECKO www.kompernass.com ■ 140 │ CZ SWWS 240 C1 Obsah Úvod . . . . . . . . . . . . . . . . . . . . . . . . . . . . . . . . . . . . . . .142 Používanie v súlade s určením . . . . . . . . . . . . . . . . . .142 Rozsah dodávky . . . . . . . . . . . . . . . . . . . . . . . . . . . . .142 Opis prístroja . . . . . . . . . . . . . . . . . . . . . . . . . . . . . . . .143 Technické údaje . . . . . . . . . . . . . . . . . . . . . . . . . . . . . .143 Bezpečnostné pokyny . . . . . . . . . . . . . . . . . . . . . . . .144 Pred prvým použitím . . . . . . . . . . . . . . . . . . . . . . . . .149 Automatika vypnutia . . . . . . . . . . . . . . . . . . . . . . . . .149 Príprava prístroja . . . . . . . . . . . . . . . . . . . . . . . . . . . .149 Depilácia . . . . . . . . . . . . . . . . . . . . . . . . . . . . . . . . . . .151 Nohy . . . . . . . . . . . . . . . . . . . . . . . . . . . . . . . . . . . . . . . . . . . . . 152 Pazuchy . . . . . . . . . . . . . . . . . . . . . . . . . . . . . . . . . . . . . . . . . . . 153 Oblasť bikín . . . . . . . . . . . . . . . . . . . . . . . . . . . . . . . . . . . . . . . . 154 Po depilácii . . . . . . . . . . . . . . . . . . . . . . . . . . . . . . . . .155 Čistenie . . . . . . . . . . . . . . . . . . . . . . . . . . . . . . . . . . . . .155 Uskladnenie . . . . . . . . . . . . . . . . . . . . . . . . . . . . . . . . .157 Likvidácia . . . . . . . . . . . . . . . . . . . . . . . . . . . . . . . . . . .158 Objednávanie náhradných dielov . . . . . . . . . . . . . . .159 Záruka spoločnosti Kompernass Handels GmbH. . .160 Servis . . . . . . . . . . . . . . . . . . . . . . . . . . . . . . . . . . . . . . . . . . . . . 162 Dovozca . . . . . . . . . . . . . . . . . . . . . . . . . . . . . . . . . . . . . . . . . . . 162 SWWS 240 C1 SK │ 141 ■ Úvod Srdečne vám gratulujeme ku kúpe vášho nového prístroja. Touto kúpou ste sa rozhodli pre výrobok vysokej kvality. Návod na obsluhu je súčasťou tohto výrobku. Obsahuje dôležité upozornenia týkajúce sa bezpečnosti, používania a likvidácie. Pred použitím výrobku sa oboznámte so všetkými pokynmi na obsluhu a bezpečnostnými pokynmi. Výrobok používajte iba podľa opisu a v uvedených oblastiach použitia. Návod na obsluhu si uschovajte vždy ako referenčnú príručku v blízkosti výrobku. Pri postúpení výrobku tretej osobe odovzdajte spolu s ním aj všetky dokumenty. Používanie v súlade s určením Tento prístroj slúži výlučne na depilovanie nôh, pazúch a oblasti bikín na ľudskom tele. Tento prístroj je určený výlučne na používanie v súkromných domácnostiach. Nepoužívajte ho komerčne. Rozsah dodávky Prístroj na ohrievanie depilačného vosku 18 voskových krúžkov Špachtľa Návod na obsluhu ■ 142 │ SK SWWS 240 C1 Opis prístroja 1 Vnútorná miska 2 Kontrolka 3 Zástrčka 4 Zásuvka 5 Lišta (na zablokovanie veka) 6 Odkladacia plocha (na špachtľu) 7 Veko 8 Špachtľa 9 Voskové krúžky Technické údaje Napätie 220 – 240 V ∼ (striedavý prúd), 50 Hz Príkon 20 W Kapacita cca 530 ml Trieda ochrany II / SWWS 240 C1 (dvojitá izolácia) SK │ 143 ■ Bezpečnostné pokyny ► ► ► ► ► ► ► VÝSTRAHA! NEBEZPEČENSTVO ZÁSAHU ELEKTRICKÝM PRÚDOM! Ak je pripojovací sieťový kábel prístroja poškodený, musí sa dať vymeniť výrobcovi alebo jeho zákazníckemu servisu alebo podobne kvalifikovanej osobe, aby sa zabránilo ohrozeniam. Prístroj používajte len v suchých a uzavretých priestoroch, nie vonku. Otvorte veko prístroja. Nepoužívajte prístroj v blízkosti vody, ako umývadlá, sprchovacie vaničky alebo vane. Prístroj nikdy nepoužívajte počas kúpania, sprchovania ani spania. Nikdy nechytajte sieťovú zástrčku ani sieťový kábel mokrými rukami. Pred použitím skontrolujte prípadné viditeľné poškodenia prístroja. Neuvádzajte do prevádzky poškodený prístroj ani prístroj, ktorý predtým spadol na zem. ■ 144 │ SK SWWS 240 C1 ► ► ► VÝSTRAHA! NEBEZPEČENSTVO ZÁSAHU ELEKTRICKÝM PRÚDOM! Tento prístroj sa nesmie používať v blízkostí vaní, sprchovacích vaničiek a iných nádob, ktoré obsahujú vodu. Na zásuvné spojenie prístroja nesmie pretiecť žiadna tekutina. VÝSTRAHA! NEBEZPEČENSTVO PORANENIA! Tento prístroj môžu používať deti staršie ako 8 rokov, ako aj osoby so zníženými fyzickými, zmyslovými alebo mentálnymi schopnosťami alebo s nedostatkom skúseností a vedomostí, ak sú pod dohľadom alebo ak boli o bezpečnom používaní prístroja poučené a pochopili z toho vyplývajúce nebezpečenstvá. Deti sa s prístrojom nesmú hrať. SWWS 240 C1 SK │ 145 ■ ► ► ► ► ► ► VÝSTRAHA! NEBEZPEČENSTVO PORANENIA! Čistenie a užívateľskú údržbu nesmú vykonávať deti, iba ak sú staršie než 8 rokov a sú pod dohľadom. Prístroj a jeho pripojovací kábel sa musia uchovávať mimo dosahu detí mladších než 8 rokov. Ľudia, ktorí nie sú citliví na teplo, nesmú tento prístroj používať! Ak pre svoje ochorenia nemáte istotu, či smiete prístroj používať, poraďte sa najprv s lekárom. Po použití je na povrchu vyhrievacieho prvku ešte zvyškové teplo. Pri nesprávnom používaní prístroja hrozí riziko poranenia. Prístroj používajte vždy na určený účel! ■ 146 │ SK SWWS 240 C1 ► ► ► ► ► VÝSTRAHA! NEBEZPEČENSTVO PORANENIA! Nepoužívajte prístroj pod prikrývkami ani uterákmi. Podľa možnosti postavte prístroj do blízkosti zásuvky. Zabezpečte, aby sieťová zástrčka bola v prípade nebezpečenstva ľahko a rýchlo dostupná a aby sieťový kábel nepredstavoval riziko potknutia. Postarajte sa o bezpečné umiestnenie prístroja. Nikdy neponárajte prístroj do vody ani do iných tekutín! Prístroj nepoužívajte pri ochoreniach srdca, sčervenaniach kože, zápaloch, opuchoch, citlivých miestach, cukrovke, otvorených ranách, popáleninách, ekzémoch alebo psoriáze. SWWS 240 C1 SK │ 147 ■ POZOR! VECNÉ ŠKODY! ► Prístroj nikdy neprevádzkujte v prázdnom stave, bez vosku. ► Ako náplň dávajte do prístroja len vosk, žiadne agresívne látky alebo látky s obsahom rozpúšťadiel! ► Prístroj postavte výlučne na rovné povrchy odolné proti teplu. ► Vosk nikdy nezohrievajte v plastovom obale. ► Vosk nikdy nezohrievajte v mikrovlnnej rúre, nad otvoreným ohňom ani na sporáku. ► Na prevádzkovanie prístroja nepoužívajte externý časový spínač ani samostatný systém diaľkového ovládania. ► Na vyberanie vychladnutého vosku z prístroja nepoužívajte žiadne špicaté ani ostré predmety. ■ 148 │ SK SWWS 240 C1 Pred prvým použitím 1) Prístroj zvnútra a zvonku otrite vlhkou handrou, aby ste odstránili prach, ktorý sa tam dostal pri preprave. Prístroj dobre vysušte, aby sa v ňom nenachádzala žiadna vlhkosť. 2) Prístroj postavte na rovný podklad odolný proti teplu. Myslite na to, že na podklad môžu kvapnúť kúsky vosku. Podklad by sa preto mal dať dobre vyčistiť. Automatika vypnutia Po 60 minútach sa prístroj automaticky vypne. Asi po 55 minútach začína kontrolka 2 blikať, čím vás upozorní na automatické vypnutie. Automatické vypnutie nenahrádza vytiahnutie sieťovej zástrčky po ukončení aplikácie. Je to iba bezpečnostný prvok! Vždy, keď prístroj nepoužívate, vytiahnite sieťovú zástrčku! Príprava prístroja Ak je prístroj postavený na vhodnom podklade: 1) Vyberte voskové krúžky 9 z obalu. 2) Dajte potrebný počet voskových krúžkov 9 do vnútornej misky 1. Riaďte sa nasledujúcimi hodnotami, ktoré sa však môžu trochu líšiť: SWWS 240 C1 SK │ 149 ■ Časť tela Počet voskových krúžkov 9 predkolenie cca 2 kusy na každé predkolenie pazuchy 1 kus oblasť bikín 1 kus celé telo (predkolenie, pazuchy, oblasť bikín) 6 kusov Tento symbol a dátum na obale voskových krúžkov 9 udáva, akú má produkt trvanlivosť. 3) Nasaďte veko 7 na prístroj tak, že umiestnite malý plastový výstupok do lišty 5 a potom veko 7 trochu otočíte v smere hodinových ručičiek (pozri vyklápaciu stranu): 4) Zastrčte zástrčku 3 sieťového kábla do zásuvky 4 na prístroji. 5) Zastrčte sieťovú zástrčku do sieťovej zásuvky. Prístroj sa zohrieva, kontrolka 2 na podstavci prístroja svieti. 6) Vosk počas roztápania príležitostne premiešajte. Hneď ako sú voskové krúžky 9 roztopené (pri 6 voskových krúžkoch cca 25 – 30 minút), môžete začať s depiláciou. ■ 150 │ SK SWWS 240 C1 UPOZORNENIE ► Ak zistíte, že potrebujete viac vosku, ako ste roztopili, môžete kedykoľvek pridať do vnútornej misky 1 ďalšie voskové krúžky 9. Skôr ako budete pokračovať s depiláciou, počkajte, kým sa vosk roztopí. ► Naraz roztopte maximálne 6 voskových krúžkov 9. Depilácia Časti pokožky, z ktorých chcete odstrániť chĺpky, musia byť suché, čisté a bez ošetrovacích produktov, olejov alebo tukov. UPOZORNENIA ► Pred prvým použitím bezpodmienečne vykonajte test pokožky, aby ste si overili, či vaša pokožka znáša tento druh aplikácie. Na skryté miesto pokožky dajte malé množstvo vosku a po stiahnutí skontrolujte, či sa počas nasledujúcich 24 hodín nevyskytnú žiadne začervenania. Ak by sa takéto začervenania pokožky vyskytli, prístroj nepoužívajte. Prípadne sa poraďte s lekárom. ► Keď sa u vás objavujú zarastené chĺpky, pravidelne používajte peeling. Ten môže zabrániť zarastaniu chĺpkov. ► Voskové pásiky sťahujte vždy tak blízko pri povrchu pokožky, ako je to možné. ► Dávajte pozor na to, aby sa vosk nedostal na vaše oblečenie. Zvyšky vosku sa dajú ťažko odstrániť, prípadne sfarbia oblečenie. SWWS 240 C1 SK │ 151 ■ Nohy Keď sú voskové krúžky 9 úplne roztopené: 1) Otvorte veko 7 tak, že ho trochu otočíte proti smeru hodinových ručičiek a zdvihnete nahor. 2) Sploštenou stranou špachtle 8 naneste trochu vosku. Nadbytočný vosk môžete zotrieť na okraji prístroja. 3) Vosk ihneď nanášajte na pokožku v smere rastu chĺpkov (od kolena k členku). Voskový pásik by mal mať hrúbku pomarančovej šupky a zaberať plochu 2 vedľa seba ležiacich špachtlí 8. Preto možno budete musieť vosk nanášať viackrát. Pokúste sa naniesť na koniec voskového pásika (ktorý leží bližšie k členku) trochu hrubšiu vrstvu vosku, pretože sa tento koniec musí pri sťahovaní uchopiť. 4) Po nanesení môžete špachtľu 8 položiť na odkladaciu plochu 6 na okraji prístroja tak, aby špachtľa 8 ležala nad vnútornou miskou 1. 5) Počkajte 30 – 60 sekúnd, kým bude vosk suchý. 6) Napnite jednou rukou pokožku, uchopte voskový pásik na hrubom konci a stiahnite ho rýchlym pohybom proti smeru rastu chĺpkov (od členku ku kolenu). Rovnako postupujte pri ďalších častiach pokožky. 7) Po ukončení aplikácie vypnite prístroj tak, že vytiahnete sieťovú zástrčku zo sieťovej zásuvky. Kontrolka 2 zhasne. ■ 152 │ SK SWWS 240 C1 Pazuchy Keď je voskový krúžok 9 úplne roztopený: 1) Otvorte veko 7 tak, že ho trochu otočíte proti smeru hodinových ručičiek a zdvihnete nahor. UPOZORNENIE ► Pretože chĺpky pazúch rastú v rozličných smeroch, musíte ich odstrániť v minimálne 2 krokoch. 2) Držte lakeť smerom nahor a dozadu. Tak sa pokožka v podpazuší trochu napne. 3) Sploštenou stranou špachtle 8 naneste trochu vosku. Nadbytočný vosk môžete zotrieť na okraji prístroja. 4) Naneste ho ihneď od stredu podpazušia smerom hore k lakťu. Voskový pásik by mal byť taký hrubý ako pomarančová šupka. Pokúste sa naniesť na koniec voskového pásika (ktorý leží bližšie k lakťu) trochu hrubšiu vrstvu vosku, pretože sa tento koniec musí pri sťahovaní uchopiť. 5) Po nanesení môžete špachtľu 8 položiť na odkladaciu plochu 6 na okraji prístroja tak, aby špachtľa 8 ležala nad vnútornou miskou 1. 6) Počkajte 30 – 60 sekúnd, kým bude vosk suchý. 7) Uchopte voskový pásik na hornom konci (ktorý leží bližšie k lakťu) a stiahnite ho rýchlym pohybom proti smeru rastu chĺpkov smerom dole. 8) Na depilovanie dolnej časti podpazušia naneste vosk od stredu podpazušia smerom dole. 9) Počkajte 30 – 60 sekúnd, kým bude vosk suchý. SWWS 240 C1 SK │ 153 ■ 10) Uchopte voskový pásik na dolnom konci a stiahnite ho rýchlym pohybom proti smeru rastu chĺpkov smerom hore. 11) Po ukončení aplikácie vypnite prístroj tak, že vytiahnete sieťovú zástrčku zo sieťovej zásuvky. Kontrolka 2 zhasne. Oblasť bikín Keď je voskový krúžok 9 úplne roztopený: 1) Otvorte veko 7 tak, že ho trochu otočíte proti smeru hodinových ručičiek a zdvihnete nahor. 2) Sploštenou stranou špachtle 8 naneste trochu vosku. Nadbytočný vosk môžete zotrieť na okraji prístroja. 3) Po nanesení môžete špachtľu 8 položiť na odkladaciu plochu 6 na okraji prístroja tak, aby špachtľa 8 ležala nad vnútornou miskou 1. UPOZORNENIE ► V oblasti bikín depilujte naraz iba malé úseky. Pokožka je veľmi citlivá. 4) Napnite pokožku jednou rukou a naneste vosk v smere rastu chĺpkov (smer vnútorného stehna). 5) Počkajte 30 – 60 sekúnd, kým bude vosk suchý. 6) Uchopte voskový pásik na konci (ktorý leží bližšie k vnútornému stehnu) a stiahnite ho rýchlym pohybom proti smeru rastu chĺpkov. Rovnako postupujte pri ďalších častiach pokožky. 7) Po ukončení aplikácie vypnite prístroj tak, že vytiahnete sieťovú zástrčku zo sieťovej zásuvky. Kontrolka 2 zhasne. ■ 154 │ SK SWWS 240 C1 Po depilácii ■ Vyčistite špachtľu 8 (pozri kapitolu „Čistenie“). ■ Malé zvyšky vosku na pokožke môžete odstrániť troškou detského oleja. Ak nemáte poruke detský olej, môžete použiť tiež olivový olej alebo iný jedlý olej. ■ Po depilácii môže byť vaša pokožka trochu začervenená. To je normálne. Na postihnuté miesta nechajte tiecť trochu studenej vody. To pokožku upokojí. Ak sa pokožka neupokojí a intenzívne páli, vyhľadajte lekára. Čistenie VÝSTRAHA! NEBEZPEČENSTVO ZÁSAHU ELEKTRICKÝM PRÚDOM! ► Pred každým čistením vytiahnite sieťovú zástrčku zo sieťovej zásuvky! ► Nikdy neponárajte prístroj do vody ani do iných tekutín! VÝSTRAHA! NEBEZPEČENSTVO PORANENIA! ► Pred čistením nechajte prístroj trochu vychladnúť. POZOR! VECNÉ ŠKODY! ► Nepoužívajte žiadne špicaté ani ostré predmety na odstránenie vychladnutého vosku z prístroja! ► Na vyčistenie prístroja nepoužívajte žiadne chemické, drsné ani agresívne čistiace prostriedky! SWWS 240 C1 SK │ 155 ■ UPOZORNENIE ► Vnútornú misku 1 nemusíte čistiť po každom použití ani odstraňovať všetky zvyšky vosku. Vosk, ktorý ostane v prístroji, sa môže pri nasledujúcej aplikácii znova roztopiť a opätovne použiť! ► Na dodatočné objednanie voskových krúžkov 9 sa obráťte na náš zákaznícky servis (pozri kapitolu „Objednávanie náhradných dielov“). ■ Nadbytočný vosk zotrite zo špachtle 8 priamo po použití na okraji prístroja. ■ Špachtľu 8, ako aj okraj prístroja utrite ihneď po použití handričkou navlhčenou v detskom oleji. Tak sa dajú odstrániť nestuhnuté zvyšky vosku. Najlepšie bude, ak použijete starú látkovú handričku, pretože zvyšky vosku sa dajú z textílií odstrániť iba ťažko. Ak nemáte doma detský olej, môžete použiť na čistenie aj olivový olej alebo iný jedlý olej. Dávajte zvlášť pozor na to, aby sa v lištách 5 na zablokovanie veka 7 nenachádzali žiadne zvyšky vosku! Potom otrite špachtľu 8 a okraj suchou papierovou vreckovkou, aby ste odstránili zvyšky oleja. ■ Keď sa na vonkajšej strane telesa drží vosk, odstráňte ho nasledovne: – Zabezpečte, aby bol prístroj odpojený od elektrickej siete, ale aby bol ešte stále teplý. – Olej utrite na vonkajších stranách utierkou navlhčenou olejom. – Dávajte zvlášť pozor na to, aby sa v lištách 5 na zablokovanie veka 7 nenachádzali žiadne zvyšky vosku! – Zvyšky oleja odstráňte čistou, suchou papierovou utierkou. ■ 156 │ SK SWWS 240 C1 Uskladnenie UPOZORNENIE ► Vnútornú misku 1 nemusíte čistiť po každom použití ani odstraňovať všetky zvyšky vosku. Vosk, ktorý ostane v prístroji, sa môže pri nasledujúcej aplikácii znova roztopiť a opätovne použiť! ■ Keď sú prístroj a špachtľa 8 vyčistené ako v kapitole „Čistenie“: – Položte špachtľu 8 na odkladaciu plochu 6 na okraji prístroja tak, aby špachtľa 8 ležala nad vnútornou miskou 1. – Nasaďte veko 7. – Vychladnutý prístroj uložte na čisté a suché miesto. UPOZORNENIE ► Ak po uskladnení nie je možné veko 7 ďalej otvárať/otáčať, pravdepodobne sa medzi vekom 7 a prístrojom nachádzajú vychladnuté zvyšky vosku. V takomto prípade nechajte prístroj ohriať so zatvoreným vekom 7 cca 10 minút (podľa množstva vosku). Vosk zmäkne a veko 7 sa bude dať otvoriť. SWWS 240 C1 SK │ 157 ■ Likvidácia Vosk môžete zlikvidovať v bežnom odpade. Prístroj v žiadnom prípade nevyhadzujte do bežného komunálneho odpadu. Na tento výrobok sa vzťahuje európska smernica 2012/19/EU. Zlikvidujte ho v oprávnenej firme na likvidáciu odpadu alebo vo vašom obecnom zariadení na likvidáciu odpadu. Dodržiavajte aktuálne platné predpisy. V prípade pochybností kontaktujte miestny zberný dvor. Produkt je recyklovateľný, podlieha rozšírenej zodpovednosti výrobcu a zbiera sa oddelene. Obal sa skladá z ekologických materiálov, ktoré môžete zlikvidovať v miestnych recyklačných strediskách. Obal zlikvidujte ekologicky. Dbajte na označenie na rôznych obalových materiáloch a trieďte ich osobitne. Obalové materiály sú označené skratkami (a) a číslicami (b) s nasledujúcim významom: 1 – 7: plasty, 20 – 22: papier a lepenka, 80 – 98: kompozitné materiály Informácie o možnostiach likvidácie výrobku, ktorý doslúžil, získate od svojej miestnej alebo mestskej samosprávy ■ 158 │ SK SWWS 240 C1 Objednávanie náhradných dielov Pre produkt SWWS 240 C1 môžete objednať tieto náhradné diely: ► Voskové krúžky (18 kusov) Náhradné diely objednávajte cez našu servisnú telefonickú linku (pozri kapitolu „Servis″) alebo pohodlne na našej webovej stránke www.kompernass.com. Pomocou tohto QR kódu sa dostanete priamo na našu webovú stránku a môžete objednať dostupné náhradné diely: UPOZORNENIE ► Pri svojej objednávke majte pripravené číslo IAN, ktoré nájdete na obale tohto návodu na obsluhu. SWWS 240 C1 SK │ 159 ■ Záruka spoločnosti Kompernass Handels GmbH Vážená zákazníčka, vážený zákazník, na tento prístroj máte záruku 3 roky od dátumu zakúpenia. V prípade nedostatkov tohto výrobku máte práva vyplývajúce zo zákona voči predajcovi tohto výrobku. Tieto Vaše práva vyplývajúce zo zákona nie sú obmedzené našou zárukou, uvedenou nižšie. Záručné podmienky Záručná doba začína plynúť dátumom zakúpenia. Prosím, uschovajte si pokladničný blok. Tento bude potrebný ako dôkaz o zakúpení. Ak v priebehu troch rokov od dátumu zakúpenia tohto výrobku dôjde k chybe materiálu alebo výrobnej chybe, výrobok vám – podľa nášho uváženia – bezplatne opravíme, vymeníme alebo uhradíme kúpnu cenu. Podmienkou tohto záručného plnenia je, že počas trojročnej lehoty sa poškodený prístroj a doklad o zakúpení (pokladničný blok) predloží so stručným opisom, v čom spočíva nedostatok prístroja a kedy sa vyskytol. Ak je chyba pokrytá našou zárukou, zašleme Vám späť opravený alebo nový výrobok. Opravou alebo výmenou výrobku nezačína plynúť žiadna nová záručná doba. Záručná doba a zákonné nároky na odstránenie chýb Záručná doba sa záručným plnením nepredĺži. To platí aj pre vymenené a opravené diely. Poškodenia a chyby zistené prípadne už pri kúpe, sa musia hlásiť okamžite po vybalení. Po uplynutí záručnej doby podliehajú prípadné opravy poplatku. Rozsah záruky Prístroj bol starostlivo vyrobený v súlade s prísnymi smernicami kvality a pred dodaním bol svedomito preskúšaný. ■ 160 │ SK SWWS 240 C1 Záručné plnenie sa vzťahuje na chyby materiálu alebo výrobné chyby. Táto záruka sa nevzťahuje na časti výrobku, ktoré sú vystavené bežnému opotrebovaniu a preto ich možno pokladať za rýchlo opotrebiteľné diely, ani na poškodenia krehkých dielov, ako sú napríklad spínače, akumulátory alebo diely vyrobené zo skla. Táto záruka zaniká v prípade poškodenia výrobku neodborným používaním alebo neodbornou údržbou. Na správne používanie výrobku sa musia presne dodržiavať všetky pokyny, uvedené v návode na obsluhu. Bezpodmienečne sa musí zabrániť použitiu alebo úkonom, ktoré sa v návode na obsluhu neodporúčajú alebo pred ktorými sa varuje. Výrobok je určený len na súkromné použitie a nie na priemyselné používanie. Záruka zaniká pri nesprávnom a neodbornom zaobchádzaní, pri použití násilia a pri zásahoch, ktoré neboli vykonané naším autorizovaným servisom. Vybavenie v prípade záruky Na zaručenie rýchleho vybavenia Vašej žiadosti postupujte podľa nasledujúcich pokynov: ■ Na všetky otázky majte pripravený pokladničný doklad a číslo výrobku (napr. IAN 12345) ako doklad o nákupe. ■ Číslo výrobku nájdete na typovom štítku na výrobku, na gravúre na výrobku, na titulnej stránke návodu na obsluhu (dole vľavo) alebo ako nálepku na zadnej alebo spodnej strane výrobku. ■ Ak dôjde k funkčným poruchám alebo iným nedostatkom, kontaktujte najprv nižšie uvedené servisné oddelenie telefonicky alebo e-mailom. ■ Výrobok, zaevidovaný ako poruchový, môžete potom spolu s dokladom o nákupe (pokladničný blok) a uvedením popisu chyby a dátumu, kedy k nej došlo, bezplatne odoslať na adresu servisného strediska, ktorá Vám bude oznámená. SWWS 240 C1 SK │ 161 ■ Na webovej stránke www.lidl-service.com si môžete stiahnuť tieto a mnoho ďalších príručiek, videá o výrobkoch a inštalačný softvér. Pomocou tohto QR-kódu sa dostanete priamo na stránku servisu Lidl (www.lidl-service.com) a pomocou zadania čísla výrobku (IAN) 123456 otvoríte váš návod na obsluhu. Servis Servis Slovensko Tel. 0850 232001 E-Mail: [email protected] IAN 339566_1910 Dovozca Majte na pamäti, že nižšie uvedená adresa nie je adresou servisného strediska. Najprv kontaktujte uvedené servisné stredisko. KOMPERNASS HANDELS GMBH BURGSTRASSE 21 44867 BOCHUM NEMECKO www.kompernass.com ■ 162 │ SK SWWS 240 C1 KOMPERNASS HANDELS GMBH BURGSTRASSE 21 44867 BOCHUM GERMANY www.kompernass.com Stand der Informationen · Last Information Update · Version des informations Stand van de informatie · Stan informacji · Stav informací · Stav informácií: 12 / 2019 · Ident.-No.: SWWS240C1-122019-1 IAN 339566_1910 8-
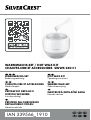 1
1
-
 2
2
-
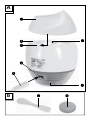 3
3
-
 4
4
-
 5
5
-
 6
6
-
 7
7
-
 8
8
-
 9
9
-
 10
10
-
 11
11
-
 12
12
-
 13
13
-
 14
14
-
 15
15
-
 16
16
-
 17
17
-
 18
18
-
 19
19
-
 20
20
-
 21
21
-
 22
22
-
 23
23
-
 24
24
-
 25
25
-
 26
26
-
 27
27
-
 28
28
-
 29
29
-
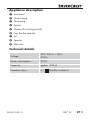 30
30
-
 31
31
-
 32
32
-
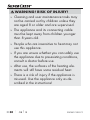 33
33
-
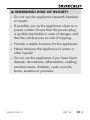 34
34
-
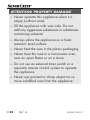 35
35
-
 36
36
-
 37
37
-
 38
38
-
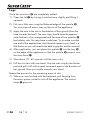 39
39
-
 40
40
-
 41
41
-
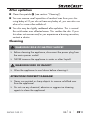 42
42
-
 43
43
-
 44
44
-
 45
45
-
 46
46
-
 47
47
-
 48
48
-
 49
49
-
 50
50
-
 51
51
-
 52
52
-
 53
53
-
 54
54
-
 55
55
-
 56
56
-
 57
57
-
 58
58
-
 59
59
-
 60
60
-
 61
61
-
 62
62
-
 63
63
-
 64
64
-
 65
65
-
 66
66
-
 67
67
-
 68
68
-
 69
69
-
 70
70
-
 71
71
-
 72
72
-
 73
73
-
 74
74
-
 75
75
-
 76
76
-
 77
77
-
 78
78
-
 79
79
-
 80
80
-
 81
81
-
 82
82
-
 83
83
-
 84
84
-
 85
85
-
 86
86
-
 87
87
-
 88
88
-
 89
89
-
 90
90
-
 91
91
-
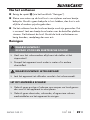 92
92
-
 93
93
-
 94
94
-
 95
95
-
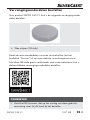 96
96
-
 97
97
-
 98
98
-
 99
99
-
 100
100
-
 101
101
-
 102
102
-
 103
103
-
 104
104
-
 105
105
-
 106
106
-
 107
107
-
 108
108
-
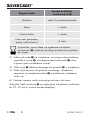 109
109
-
 110
110
-
 111
111
-
 112
112
-
 113
113
-
 114
114
-
 115
115
-
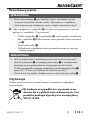 116
116
-
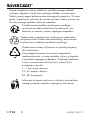 117
117
-
 118
118
-
 119
119
-
 120
120
-
 121
121
-
 122
122
-
 123
123
-
 124
124
-
 125
125
-
 126
126
-
 127
127
-
 128
128
-
 129
129
-
 130
130
-
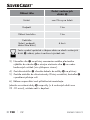 131
131
-
 132
132
-
 133
133
-
 134
134
-
 135
135
-
 136
136
-
 137
137
-
 138
138
-
 139
139
-
 140
140
-
 141
141
-
 142
142
-
 143
143
-
 144
144
-
 145
145
-
 146
146
-
 147
147
-
 148
148
-
 149
149
-
 150
150
-
 151
151
-
 152
152
-
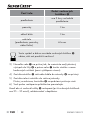 153
153
-
 154
154
-
 155
155
-
 156
156
-
 157
157
-
 158
158
-
 159
159
-
 160
160
-
 161
161
-
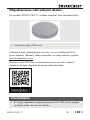 162
162
-
 163
163
-
 164
164
-
 165
165
-
 166
166


Silvercrest SWWS 240 C1 Handleiding
- Type
- Handleiding
- Deze handleiding is ook geschikt voor
in andere talen
- English: Silvercrest SWWS 240 C1 Operating instructions
- français: Silvercrest SWWS 240 C1 Mode d'emploi
- Deutsch: Silvercrest SWWS 240 C1 Bedienungsanleitung
- slovenčina: Silvercrest SWWS 240 C1 Návod na používanie
- čeština: Silvercrest SWWS 240 C1 Operativní instrukce
- polski: Silvercrest SWWS 240 C1 Instrukcja obsługi
Gerelateerde artikelen
Andere documenten
-
Alpha innotec WWS SWWS de handleiding
-
-
-
-
Buki Professional Studio Bougies de handleiding
-
LIVARNO 382877 de handleiding
-
Beurer HL 40 harsapparaat de handleiding
-
Solac DEPIL CENTER Mod DC7500 de handleiding