HQ Power VDPLDJBAR2 Handleiding
- Categorie
- Stroboscopen
- Type
- Handleiding

VD
P
LED P
A
LEDP
A
HERS
E
JUEG
O
LEDP
A
USER
M
GEBRU
NOTIC
E
MANU
A
BEDIE
N
P
LDJB
A
A
R BATTE
N
A
R BOVENL
I
E
À
PAR LE
D
O
DE ILUMI
A
R-LICHTE
F
M
ANUAL
IKERSHAN
D
E
D’EMPLOI
A
L DEL USU
A
N
UNGSANLE
A
R2
N
- 28x3W
R
I
CHT - 28
x
D
- 28 LED
NACI
Ó
N P
A
F
FEKT-SET
D
LEIDING
A
RIO
ITUNG
R
GB LEDs
x
3 W RGB-
RVB DE 3
W
A
R LED - 2
8
- 28 x 3W
R
1
1
1
LEDS
W
8
LEDs DE
3
R
GB LEDs
3
7
1
5
9
3
W RGB

15.09.201
2
How to t
Controll
e
Modifier
Modifica
r
Die Cont
0
urn the contro
l
e
r line van 3-pi
n
la ligne du co
n
r
la línea del c
o
roller-Linie vo
n
l
ler line from 3
-
n
naar 5-pin a
a
n
trôleur de 3 br
o
ntrolador de 3
n
3-Pin nach 5-
VDPLDJ
2
-
pins into 5-pi
n
a
npassen (stek
k
oches en 5 bro
c
polos y 5 polo
s
Pin anzupasse
n
BAR2
e
i
n
s (plug and so
c
k
er en contact
)
c
hes (fiche et
c
s
(conector y c
o
n
(Stecker und
terminator
i
ndweerstand
résistance de
terminaison
terminación
Terminierung
c
ket).
)
.
c
ontact).
o
ntacto).
Kontakt).
©Vellem
a
a
n nv

15.09.201
1. In
t
To all re
s
Importa
n
T
h
b
a
I
Thank yo
u
the devic
e
2. Sa
f
• This
d
pers
o
• Make
• Do n
o
nece
s
• Resp
e
• Use
a
• Do n
o
3. Ge
n
Refer to t
• Fami
l
unqu
a
devic
• All m
devic
• Only
lamp
• Dam
a
deal
e
• A qu
a
• Do n
o
devic
• This
d
indo
o
• Light
i
0
t
roduction
s
idents of the
E
n
t environmen
t
T
his symbol on t
h
h
arm the enviro
n
b
e taken to a sp
e
a
local recycling
I
f in doubt, co
n
u
for choosing H
Q
e
was damaged i
n
f
ety Instru
c
Be very carefu
Always discon
n
are performed
.
Keep this devi
c
Caution: devi
c
There are no u
spare parts.
d
evice falls unde
o
n carry out the
e
sure that the a
v
o
t crimp the po
w
s
sary.
e
ct a minimum
d
a
n appropriate s
a
o
t stare directly
a
n
eral Guid
e
he Velleman
®
S
Indoor
Keep thi
clear at
opening
s
Protect
t
l
iarise yourself
w
a
lified people. A
n
e.
odifications of th
e is not covered
use the device f
o
explosion, cras
h
a
ge caused by di
e
r will not accept
a
lified technician
o
t switch the de
v
e against dama
g
d
evice is design
e
o
r (< 35°C, < 7
5
i
ng effects are n
o
E
uropean Unio
n
t
al information
h
e device or the
n
ment. Do not di
e
cialized compa
n
se
r
vice. Respect
n
tact your local
Q
Power™! Please
n
transit, don't in
s
c
tions
l during the inst
a
n
ect mains powe
r
.
Handle the po
w
c
e away from chi
c
e heats up duri
n
se
r
-serviceable
p
r protection clas
s
e
lectric connecti
o
v
ailable voltage
d
w
er cord and prot
d
istance of 0.5 m
a
fety cable to fix
a
t the light sour
c
e
lines
S
ervice and Qu
a
use only. Keep
s device away fr
o
all times. For su
f
s
.
t
his device from
w
ith the functions
n
y damage that
m
e device are for
b
by the warranty
o
r its intended p
u
h
, etc. Using the
d
sregard of certai
responsibility fo
r
should install a
n
v
ice on immediat
e
g
e by leaving it s
w
e
d for profession
a
5
%RH) with an
a
o
t designed for
p
VDPLDJ
3
USER M
A
n
about this pro
d
package indicat
e
spose of the uni
t
n
y for recycling.
T
the local enviro
n
waste disposa
read the manual
s
tall or use it and
a
llation: touchin
g
r
when device n
o
w
er cord by the p
l
ldren and unaut
h
n
g use.
p
arts inside the
d
s
I. It is therefor
e
o
n.
d
oes not exceed
t
ect it against da
m
between the de
v
the device (e.g.
c
e, as this may c
a
a
lity Warranty
o
this device awa
y
o
m dust and ext
f
ficient air circul
a
shocks and abus
of the device b
e
m
ay occur will m
b
idden for safety
.
u
rpose. All other
d
evice in an una
u
n guidelines in t
h
r
any ensuing de
n
d service this d
e
e
ly after it has b
e
w
itched off until
a
l use on stage, i
a
lternating curre
n
p
ermanent opera
t
BAR2
A
NUAL
d
uct
e
s that disposal
o
t
(or batteries) a
s
T
his device shoul
n
mental rules.
l authorities.
thoroughly befo
r
contact your de
a
g
live wires can c
a
o
t in use or whe
n
l
ug only.
h
orized users.
d
evice. Refer to
a
e
essential that
t
t
he voltage stat
e
m
age. Have an a
v
ice’s light outp
u
VDLSC7 or VD
L
a
use epileptic se
i
o
n the last page
s
y
form rain, mois
t
reme heat. Mak
e
a
tion, leave at le
a
e. Avoid brute f
o
e
fore actually usi
n
ost probably be
d
reasons. Dama
g
uses may lead t
o
u
thorised way w
i
h
is manual is no
t
fects or problem
e
vice.
e
en exposed to
c
it has reached r
o
n discos, theatr
e
n
t of 90-250 VA
C
t
ion: regular op
e
o
f the device aft
e
s
unsorted muni
c
d be returned to
r
e bringing this d
e
a
ler.
a
use life-threate
n
servicing or ma
a
n authorized de
a
t
he device be ea
r
e
d in the specific
a
uthorised dealer
u
t and any illumi
n
L
SC8).
i
zure in sensitiv
e
s
of this manual.
t
ure, splashing
a
e
sure the ventil
a
a
st 1” (± 2.5 cm
o
rce when opera
t
n
g it. Do not allo
d
ue to unprofes
s
g
e caused by use
o
short circuits,
b
i
ll void the warra
t
covered by the
s.
c
hanges in temp
e
o
om temperatur
e
e
s, etc. The VDP
C
~50-60 Hz.
e
ration breaks wi
l
©Vellem
a
e
r its lifecycle co
u
c
ipal waste; it sh
your distributor
e
vice into service
.
ning electroshoc
k
intenance activit
a
ler for service a
r
thed. Have a qu
a
a
tions of this ma
n
replace it if
n
ated surface.
e
people.
a
nd dripping liqui
a
tion openings ar
)
in front of the
t
ing the device.
w operation by
s
ional use of the
r modifications t
o
b
urns, electrosh
o
nty.
warranty and th
e
e
rature. Protect
t
e
.
LDJBAR2 can b
e
l
l prolong their li
v
a
n nv
u
ld
ould
or to
.
If
k
s.
ies
nd/or
a
lified
n
ual.
ds.
e
o
the
o
cks,
e
t
he
e
used
v
es.

VDPLDJBAR2
15.09.2010 ©Velleman nv
4
• Use the original packaging if the device is to be transported.
• Keep this manual for future reference.
4. Features
• comes with tripod, each light can be positioned separately
• protection case for transporting
• DMX-controlled via 15 channels
• built-in stand-alone programs, master/slave mode or sound activation via built-in microphone
• footswitch for easy control of the built-in programs
• optional lighting stand: VDL3SS
5. Overview
Refer to the illustrations on page 2 of this manual.
1 microphone 3 DMX input
2 display with control buttons 4 DMX output
A MODE button 5 sound sensitivity knob
B DOWN button 6 foot controller jack
C UP button 7 power input
6. Getting started
Choosing a Mounting Location
The VDPLDJBAR2 batten has been designed for indoor environments at temperatures up to 35°C. For
proper operation, the unit must be operated with an unobstructed air convection to its metal housing.
Do not:
• Operate the batten in environments with an ambient temperature higher than 35°C and a relative humidity
higher than 75%.
• Operate the batten in a closed environment smaller than 10 m³ unless forced air convection is provided.
Secure Mounting
Risk of injury. Overhead mounting requires extensive experience: calculating workload limits,
determining the installation material to be used… Have the material and the device itself checked
regularly. Do not attempt to install the device yourself if you lack these qualifications as improper
installation may result in injuries.
• The VDPLDJBAR2 batten is designed to be mounted on a tripod with a 35 mm tube diameter. Make sure
that the diameter of the inserted tripod tube is not less than 35 mm as otherwise secure mounting cannot be
guaranteed. Slide a tripod adaptor over the tripod tube and secure the unit with the provided screw handle.
• Have the batten installed by a qualified person, respecting EN 60598-2-17 and all other applicable norms.
• The carrying construction must be able to support 10 times the weight of the batten for 1 hour without
deforming.
• The installation must always be secured with a secondary attachment e.g. a safety cable.
• Never stand directly below the batten when it is being mounted, removed or serviced. Have a qualified
technician check the batten once a year and once before you bring it into service.
• Install the batten in a location with few passers-by that is inaccessible to unauthorised persons.
• Adjust the desired inclination angle via the mounting bracket and tighten the bracket screws.
• Make sure there is no flammable material within a 0.5 m radius of the batten.
• Have a qualified electrician carry out the electric connection.
• Connect the batten to the mains with the power plug. Make sure the used mains circuit is protected by a
30mA Residual Current Device (RCD). Do not connect it to a dimming pack.
• The installation has to be approved by an expert before the device is taken into service.
DMX-512 connection
Refer to the illustrations on page 2 of this manual.
• When applicable, connect an XLR cable to the female 3-pin XLR output of a controller (not incl.) and the
other side to the male 3-pin XLR input [3] of the VDPLDJBAR2. Multiple VDPLDJBAR2’s can be linked
through serial linking. The linking cable should be a dual core, screened cable with XLR input and output
connectors.
• A DMX terminator is recommended for installations where the DMX cable has to run a long distance or is in
an electrically noisy environment (e.g. discos). The terminator prevents corruption of the digital control
signal by electrical noise. The DMX terminator is simply an XLR plug with a 120Ω resistor between pins 2 and
3, which is then plugged into the XLR output socket [4] of the last device in the chain.

15.09.201
Connect
i
• Simply
wall ou
t
7. Op
7.1 Sta
• The
m
devic
• Choo
the n
VDP
L
• Conn
• Plug
i
• Set t
h
• Whe
n
• On al
follo
w
butt
o
• To c
h
(defa
7.2 DM
• Pres
s
displ
a
• All D
M
This
d
contr
be s
e
• Whe
n
chan
n
set i
n
chan
n
• In ca
s
(CH1
• Pres
s
• Use t
pres
s
• It ta
k
(e.g.
Channel
Channel
Channel
Channel
0
i
on to the AC P
o
The AC
earthe
d
authori
insert the suppli
e
t
let.
eration
nd alone or
m
aster/slave op
e
e.
se one VDPLDJ
B
ext VDPLDJBA
R
L
DJBAR2 (refer
ect the foot cont
i
n the power cab
h
e master VDPL
n
mode is
l slave units, se
t
w
ed by a digit (e.
o
ns. Wait for ±2
0
h
ange the speed
ult speed is 51).
X controlled
s
the MODE butt
o
a
y now shows
M
X-controlled de
d
igital start addr
e
oller. The same
s
e
t for every devi
c
n
all devices hav
e
n
el. In other wo
r
n
dividual addres
s
n
el will only affe
c
s
e of the 15-cha
n
~15), the secon
d
s
the mode butto
he UP- [C] or D
O
s
the MODE butt
o
k
es ±20s before
t
)
1 internal
auto m
o
sound c
o
2 Master
D
3 Strobe
4 Spot 1:
o
wer Supply
socket providin
g
d
. Do not use an
y
zed by the man
u
e
d AC power cor
d
master/sla
v
e
ration enables t
h
B
AR2 that will a
c
R
2 and so on. M
a
to §6 DMX-51
2
roller to the foot
les [7] and plug
DJBAR2 to
selected, control
t
the address to
1
g. : add
r
0
s until the displ
a
of the internal p
r
Use the UP [C]
o
n [A] until the
d
.
vices need a dig
i
e
ss is the chann
e
s
tarting address
c
e.
e
the same addr
e
r
ds: changing th
e
s
es, each device
w
c
t the device in
q
n
nel VDPLDJBA
d
unit to 16 (1 +
n [A] until the d
O
WN-button [D]
o
n [A] until the
d
t
he address bec
o
programs
o
de
o
ntrolled mode
D
immer
red
VDPLDJ
5
g
power to the V
y
other AC cords
u
facturer.
d
into the power
v
e (no DMX)
h
at several devic
e
c
t as a master e
n
a
ke sure to plug
a
2
connection)
controller jack
[
the other ends i
(auto) or
the sounds sen
s
1
. Select the add
r
ess = 16). Set
t
a
y shows
r
ogram, press th
or DOWN [B] b
u
d
isplay [2] show
s
i
tal start addres
s
e
l number from
w
can be used for
a
e
ss, all the units
e
settings of one
w
ill “listen” to a
s
q
uestion.
R2, you will hav
e
15) (CH16~30)
,
isplay shows A f
o
to select a DMX
d
isplay shows
o
mes active and
t
000 – 0
0
010 – 0
3
033 – 0
5
053 – 0
7
074 – 0
9
096 – 1
1
117 – 1
3
138 – 1
5
159 – 1
8
181 – 2
0
202 – 2
2
223 – 2
4
244 – 2
5
250 – 2
5
000 – 0
0
010 - 25
000 – 0
0
010 - 25
000 – 2
5
BAR2
DPLDJBA
R
2 ba
t
than the one pr
o
input [7] and i
n
e
s can be synch
r
n
connect its DM
X
a
terminator int
o
[
6] of the maste
r
nto a suitable m
(sound cont
r
s
itivity with the
s
ress setting with
t
he address to 1
.
e MODE button
[
u
ttons to set the
s
or
s
so that the corr
w
hich the device
a
whole group o
f
will “listen” to t
h
channel will affe
s
eparate channe
l
e
to set the star
t
,
the third to 31
o
llowed by a digi
starting addres
s
.
t
he display show
0
9 Of
f
3
2 Program
1
5
2 Program
2
7
3 Program
3
9
5 Program
4
1
6 Program
5
3
7 Program
6
5
8 Program
7
8
0 Program
8
0
1 Program
9
2
2 Program
1
4
3 Program
1
5
5 Auto Mod
e
5
5 Sound Co
n
0
9 Of
f
5 Dimming
f
0
9 Of
f
5 Flash, wit
h
5
5 Dimming
f
t
ten must be pr
o
o
vided or any ot
h
n
sert the power
p
r
onized and cont
r
X
output [4] to
t
o
the DMX outpu
t
r
.
ains outlet.
r
olled) using the
s
ound sensitivity
the mode butto
using the UP [C
]
[
A] until the dis
p
desired speed.
R
, then press t
h
ect device respo
n
starts to “listen
”
f
devices or an i
n
h
e control signal
o
ct all devices si
m
l
number. Chang
t
address of the
f
(16 + 15) (CH3
1
t (e.g. :
s
. After selecting
s “d” followed b
y
1
2
3
4
5
6
7
8
9
1
0
1
1
e
: internal progr
a
n
trolled Mode
f
rom 0 – 100%
h
increasing spe
e
f
rom 0 – 100%
©Vellem
a
o
perly and separ
a
h
er AC cord not
p
lug into a suita
b
r
olled by one ma
t
he DMX input [
3
t
[4] of the last
DOWN button [
B
knob [5].
n [A]. The show
]
or DOWN [B]
p
lay shows
R
ange 1 – 100.
h
e UP button [C]
n
ds to the signal
”
to the DMX
n
dividual address
o
n one particula
r
m
ultaneously. If
y
ing the settings
o
f
irst unit to 1
1
~45), and so o
n
address = 16).
the desired add
r
y
the selected ad
a
ms
e
d
a
n nv
a
tely
b
le
ster
3
] of
B
].
s A
. The
s.
can
r
y
ou
o
f one
n
.
r
ess,
dress

15.09.201
Channel
Channel
Channel
Channel
Channel
Channel
Channel
Channel
Channel
Channel
Channel
7.3 foo
Note: th
e
(
• Unpl
u
[6].
• Foot
pedal 1
pedal 2
pedal 3
pedal 4
8. Ma
• This
u
fuse.
• Wipe
• Ther
e
9. Te
c
power su
p
power co
n
LEDs
DMX cha
n
beam an
g
dimensio
n
weight
Use this
damage
and the
l
this ma
n
© COPYR
I
The copyr
i
No part of
t
written con
0
5 Spot 1:
6 Spot 1:
7 Spot 2:
8 Spot 2:
9 Spot 2:
10 Spot 3:
11 Spot 3:
12 Spot 3:
13 Spot 4:
14 Spot 4:
15 Spot 4:
t controller
e
foot controller
w
) mode.
u
g the power cor
controller functi
o
presets
sound on
hold
black out
intenance
u
nit does not ne
e
Replace a faulty
the batten regul
e
are no user-se
r
c
hnical Sp
e
p
ply
n
sumption
n
nels
g
le
n
s
device with or
i
or injury resul
t
l
atest version
o
n
ual is subject
t
I
GHT NOTICE
i
ght to this manu
a
t
his manual or may
sent of the copyrig
h
green
blue
red
green
blue
red
green
blue
red
green
blue
w
ill only work w
h
d from the VDP
L
o
ns:
Press #
e
1
w
2
r
3
g
4
b
5
y
6
p
7
c
8
c
9
c
Press at any ti
m
e
d regular maint
e
fuse by a fuse
o
arly with a mois
t
r
viceable parts.
C
e
cifications
i
ginal accessor
i
t
ed from (incor
o
f this manual,
t
o change with
o
a
l is owned by Ve
l
be copied, reprodu
c
h
t holder.
VDPLDJ
6
000 – 2
5
000 – 2
5
000 – 2
5
000 – 2
5
000 – 2
5
000 – 2
5
000 – 2
5
000 – 2
5
000 – 2
5
000 – 2
5
000 – 2
5
h
en the VDPLDJ
B
L
DJBAR2 and c
o
e
ffect
w
hite
r
ed
g
reen
b
lue
y
ellow
p
ink
c
yan
c
olour changes e
v
c
olour fade ever
y
m
e to switch off a
e
nance. The inte
o
f the exact spec
i
t
, lint-free cloth.
C
ontact your dea
l
230VAC ~ 50Hz
160W
28 x 3W RGB
15
30°
1200 x 65 x 31
5
15kg
i
es only. Velle
m
rect) use of th
i
please visit ou
r
o
ut prior notic
e
l
leman nv. All wo
r
c
ed, translated or r
e
BAR2
5
5 Dimming
f
5
5 Dimming
f
5
5 Dimming
f
5
5 Dimming
f
5
5 Dimming
f
5
5 Dimming
f
5
5 Dimming
f
5
5 Dimming
f
5
5 Dimming
f
5
5 Dimming
f
5
5 Dimming
f
B
AR2 is set to a
u
o
nnect the foot c
o
v
ery second in c
o
y
3 seconds in co
ll LEDs. Press ag
rnal circuit is pr
o
i
fications.
Do not use alco
h
l
er for spare par
t
5
mm
m
an nv cannot
b
i
s device. For
m
r
website ww
w
e
.
r
ldwide rights res
e
e
duced to any elect
r
f
rom 0 – 100%
f
rom 0 – 100%
f
rom 0 – 100%
f
rom 0 – 100%
f
rom 0 – 100%
f
rom 0 – 100%
f
rom 0 – 100%
f
rom 0 – 100%
f
rom 0 – 100%
f
rom 0 – 100%
f
rom 0 – 100%
u
tomatic (
o
ntroller to the f
o
o
ntinuous loop (
1
ntinuous loop (1
ain to return to
p
o
tected by a 250
h
ol or solvents.
t
s if necessary.
b
e held respon
s
m
ore info conce
w
.hqpower.eu.
T
e
rved.
r
onic medium or ot
h
©Vellem
a
) or sound con
t
o
ot controller ja
c
1
through 7)
through 7)
p
revious setting.
V/2 A, 5 x 20 m
s
ible in the eve
rning this prod
T
he informatio
n
h
erwise without the
a
n nv
t
rolled
c
k
m
nt of
uct
n
in
prior

15.09.201
1. Inl
Aan alle
Belangri
j
D
w
b
t
b
Hebt u v
r
Dank u v
o
beschadi
g
2. Ve
i
• Dit t
o
tech
n
• De b
e
hand
l
• De v
o
plaat
s
• Zorg
• Maa
k
• Kijk
n
epile
p
3. Al
g
Raadplee
g
• Leer
e
toest
e
• Om
v
aang
e
• Gebr
u
bran
d
• De g
a
deal
e
houd
e
• Laat
d
• Om
b
temp
• Dit t
o
binn
e
0
eiding
ingezetenen v
a
j
ke milieu-info
r
D
it symbool op
h
w
eggeworpen, d
i
b
atterijen) niet
b
t
erechtkomen v
o
b
rengen. Respec
r
agen, contact
e
o
or uw aankoop!
g
d tijdens het tra
i
ligheidsin
s
Wees voorzich
t
elektroshocks
t
Trek de stekk
e
niet gebruikt.
Houd dit toest
e
Let op: dit to
e
Er zijn geen d
o
reserveonderd
e
o
estel valt onder
n
icus moet de el
e
e
schikbare netsp
l
eiding.
o
edingskabel ma
g
s
en.
voor een minim
u
k
het toestel vast
n
iet rechtstreeks
p
sie.
g
emene ric
h
g
de Velleman
®
Gebruik
vloeisto
f
Bescher
m
geraken
Bescher
m
e
erst de functie
s
e
l niet gebruike
n
v
eiligheidsredene
e
bracht valt niet
u
ik het toestel e
n
d
wonden, elektri
s
a
rantie geldt nie
t
e
r zal de verantw
e
n.
d
it toestel install
b
eschadiging te
v
eratuurschomm
e
o
estel is ontworp
e
e
nshuis gebruike
n
GEBR
U
a
n de Europes
e
r
matie betreff
e
h
et toestel of de
v
i
t toestel schade
b
ij het gewone h
u
o
or recyclage. U
m
teer de plaatseli
j
e
er dan de pla
a
Lees deze handl
nsport, installee
r
s
tructies
t
ig bij de installa
t
t
e vermijden.
e
r uit het stopco
n
e
l uit de buurt v
a
e
stel wordt zeer
w
o
or de gebruiker
e
len, contacteer
beschermingskl
a
e
ktrische aanslui
t
anning mag niet
g
niet beschadig
d
u
mafstand van 0
met een geschi
k
in de lichtbron.
D
h
tlijnen
service- en k
w
het toestel enk
e
f
fen.
m
tegen stof en
e
. Voorzie een rui
m
tegen schokk
e
s
van het toestel
n
. Meestal is bes
c
n mag u geen w
i
onder de garant
n
kel waarvoor h
e
s
che schokken,
e
t
voor schade do
o
oordelijkheid af
w
eren en onderho
v
ermijden, zet u
h
e
lingen. Wacht t
o
e
n voor professi
o
n
(<35°C, <75
%
VDPLDJ
7
U
IKERSH
A
e
Unie
e
nde dit produc
t
v
erpakking geeft
kan toebrengen
u
ishoudelijke afv
a
m
oet dit toestel
n
j
ke milieuwetge
v
a
tselijke autori
t
eiding grondig v
o
r
het dan niet en
t
ie: raak geen k
a
n
tact (trek niet a
a
a
n kinderen en o
n
w
arm tijdens het
vervangbare on
d
uw dealer.
a
sse I, wat wil z
e
t
ing verzorgen.
hoger zijn dan
d
d
zijn of ingekor
t
,5 m tussen de l
i
k
te veiligheidska
b
D
e lichtbron kan
w
aliteitsgaranti
e
e
l binnenshuis.
e
xtreme hitte. Z
o
mte van minste
n
e
n en vermijd br
u
kennen voor u h
c
hadiging het ge
v
i
jzigingen aanbr
e
ie.
e
t gemaakt is. A
n
e
nz. Bij onoorde
e
o
r het negeren v
w
ijzen voor defe
c
uden door een g
h
et toestel best
n
o
t het toestel op
o
neel gebruik op
%
RH). Sluit aan o
BAR2
A
NDLEI
D
t
aan dat, als het
aan het milieu.
G
a
l; het moet bij
e
n
aar uw verdele
r
v
ing.
t
eiten betreffe
n
o
or u het toestel
raadpleeg uw d
e
a
bels aan die on
d
a
n de kabel!) vo
o
n
bevoegden.
gebruik.
d
erdelen in dit to
e
ggen dat het to
e
d
e spanning in d
e
t
worden. Laat u
w
i
chtuitgang van
h
b
el (bv. VDLSC
7
bij gevoelige m
e
e
achteraan dez
e
Bescherm tege
n
o
rg dat de verlu
c
n
s 2,5 cm tussen
u
te kracht tijden
s
et gaat gebruike
v
olg van onprofe
s
e
ngen. Schade d
o
n
dere toepassing
e
e
lkundig gebruik
an bepaalde rich
c
ten of probleme
n
eschoolde techn
i
n
iet aan onmidd
e
kamertemperat
u
podia, in disco's
p 90-250 VAC~
5
D
ING
na zijn levensc
y
G
ooi dit toestel (
e
en gespecialise
e
r
of naar een lok
a
n
d de verwijde
r
in gebruik nee
m
e
aler.
d
er stroom staan
o
rdat u het toest
e
estel. Voor onde
e
stel geaard mo
e
e
specificaties ac
h
w
dealer zo nodi
g
h
et toestel en he
t
7
of VDLSC8).
e
nsen leiden tot
e
e
handleiding.
n
regen, vochtigh
c
htingsopeninge
n
het toestel en e
s
de bediening.
n. Ongeschoold
e
s
sioneel gebruik
.
o
or wijzigingen
d
e
n kunnen leide
n
vervalt de garan
tlijnen in deze h
a
n
die hier rechts
t
i
cus.
e
llijk nadat het
w
u
ur gekomen is.
, enz. U mag dit
5
0-60 Hz.
©Vellem
a
y
clus wordt
en eventuele
e
rd bedrijf
a
al recyclagepun
t
r
ing.
m
t. Werd het toe
s
om dodelijke
e
l reinigt en als
u
rhoud of
e
t zijn. Een gesc
h
h
teraan de
g
een nieuwe ka
b
t
belichte opper
v
e
en aanval van
eid en opspatte
n
n
niet verstopt
lk ander object.
e
personen moge
ie de gebruiker
h
n
tot kortsluiting
e
tie.
a
ndleiding en u
w
t
reeks verband
m
w
erd blootgesteld
toestel enkel
a
n nv
t
s
tel
u
het
h
oolde
b
el
v
lak
n
de
n dit
h
eeft
e
n,
w
m
ee
aan

VDPLDJBAR2
15.09.2010 ©Velleman nv
8
• Lichteffecten zijn niet ontworpen voor continue werking: regelmatige onderbrekingen doen ze langer
meegaan.
• Gebruik de oorspronkelijke verpakking wanneer u het toestel vervoert.
• Bewaar deze handleiding voor verdere raadpleging.
4. Eigenschappen
• geleverd met statief, elke spot is afzonderlijk instelbaar
• beschermende transporthoes
• DMX-sturing via 15 kanalen
• ingebouwde programma's, master-slavesturing of muzieksturing dankzij de ingebouwde microfoon
• gemakkelijk te bedienen dankzij het voetpedaal
• optioneel statief: VDL3SS
5. Omschrijving
Raadpleeg de afbeelding op pagina 2 van deze handleiding.
1 microfoon 3 DMX-ingang
2 display met bedieningsknoppen 4 DMX-uitgang
A MODE-knop 5 instelknop gevoeligheid
B UP-knop 6 ingang voetpedaal
C DOWN-knop 7 voedingsingang
6. Voorbereiding
Keuze van de montageplaats
De VDPLDJBAR2 werd ontworpen voor gebruik binnenshuis aan temperaturen lager dan 35°C.
Voorzie een aangepaste ventilatie en richt deze naar de metalen behuizing van de spots.
Het is niet aan te raden om:
• De spots te gebruiken in een omgeving met een omgevingstemperatuur hoger dan 35°C en een relatieve
vochtigheid hoger dan 75%.
• De spots te gebruiken in een ruimte kleiner dan 10 m³ tenzij er ventilatie is voorzien.
Montage
Gevaar voor verwondingen. Een degelijke praktijkervaring is vereist voor de plaatsing van dit
toestel. U moet de maximumbelasting van de draagconstructie kunnen berekenen, weten welk
constructiemateriaal u kunt gebruiken en u moet het gebruikte materiaal en het toestel af en toe
laten nakijken. Monteer het toestel niet zelf indien u er geen ervaring mee heeft. Een slechte montage
kan leiden tot verwondingen.
• Monteer de VDPLDJBAR2 op een statief met buizen van 35 mm om een goede bevestiging te garanderen.
Schuif een koppelstuk over de buis van het statief en bevestig met de meegeleverde vleugelmoer.
• Laat een geschoolde technicus dit toestel installeren conform EN 60598-2-17 en andere toepasselijke
normen.
• De constructie waaraan het toestel wordt bevestigd, moet gedurende 1 uur 10 x het gewicht van dit toestel
kunnen dragen zonder te vervormen.
• Maak het toestel ook vast met een veiligheidskabel.
• Sta nooit recht onder het toestel wanneer u het monteert, verwijdert of schoonveegt. Laat het toestel
controleren door een geschoolde technicus voor u het in gebruik neemt en laat het 1 x per jaar volledig
nakijken.
• Installeer dit toestel op een plaats waar niemand langs moet lopen, kan neerzitten of het toestel kan
aanraken.
• Regel de gewenste invalshoek door middel van de montagebeugel en draai de regelschroeven stevig aan.
• Verwijder alle brandbaar materiaal in een straal van 0,5 m rond het toestel.
• Een geschoolde elektricien moet het toestel aansluiten.
• Sluit het toestel via de stekker aan op het lichtnet. Zorg dat het gebruikte voedingscircuit beveiligd is met
een aardlekschakelaar van 30 mA. Sluit het niet aan op een dimmerpack.
• De installatie moet voor het eerste gebruik gekeurd worden door een expert.
DMX512-aansluiting
Raadpleeg de figuren op pagina 2 van deze handleiding.
• Indien van toepassing, sluit een XLR-kabel aan de vrouwelijke 3-pin XLR-uitgang van een controller (niet
meegelev.) en de andere kant van de mannelijke 3-pin XLR-ingang [3] van de VDPLDJBAR2. U kunt
verscheidene VDPLDJBAR2’s aan elkaar koppelen met behulp van een seriële koppeling. Gebruik daarvoor
een 2-aderige afgeschermde kabel met XLR ingang- en uitgangsaansluitingen.
• Een DMX eindweerstand is aanbevolen als de DMX-kabel vrij lang is of wordt gebruikt in een omgeving met
veel elektrische ruis (bv. een discotheek). De eindweerstand voorkomt corruptie van het digitale

15.09.201
contr
weer
s
het l
a
Aansluit
i
• Steek
d
7. Ge
b
7.1 Sta
• Met
d
• Kies
e
volg
e
eind
w
• Kopp
• Sluit
• Plaat
s
• Indie
• Sele
c
cijfer
de di
s
• Om
d
(stan
7.2 DM
• Druk
geeft
• Alle
D
signa
DMX
nieu
w
• Wan
n
woor
d
Wan
n
woor
d
• In he
moet
(CH3
• Druk
• Sele
c
weer
g
• Het
a
adre
s
kanaal 1
kanaal 2
0
olesignaal door
e
s
tand van 120 Ω
a
atste toestel in
d
i
ng op het voe
d
Koppel
d
dan dez
e
goedge
k
d
e voedingskabe
b
ruik
nd-alone of
d
e master-slaves
t
e
en VDPLDJBA
R
e
nde VDPLDJBA
w
eerstand (raad
p
el het voetpeda
a
alle voedingska
b
s
het mastertoe
s
n geselec
t
c
teer op elk slav
e
(bv. : a
d
s
play
w
d
e snelheid van
h
daard snelheid i
s
X-sturing
op MODE [A] t
o
nu weer.
D
MX-gestuurde t
o
len. Dit digitale
s
controller. U ku
n
w
startadres inge
n
eer u een enkel
d
en: wanneer u
d
n
eer u verschille
n
d
en: wanneer u
d
t geval van de 1
en instellen, van
1~45), enz.
op MODE [A] t
o
c
teer het startad
r
g
eeft.
a
dres wordt actie
f
s
(bv. ).
interne
p
automa
t
muzieks
masterd
e
lektrische ruis.
D
van pin 2 naar
3
d
e reeks.
d
ingsnet
d
e spot aan een
a
e
meegeleverd
m
k
eurd.
l in de voedingsi
master-sla
v
t
uring kunt u m
e
R
2 als masterto
e
R2, enz. Voorzi
e
p
leeg §6 DMX51
a
l aan het maste
r
b
els [7] aan.
s
tel op (
a
t
eerd is, kunt u
d
e
toestel het adre
s
d
res = 16). Plaa
t
w
eergeeft.
h
et interne progr
a
s
51). Stel de ge
w
o
t de display [2]
o
estellen hebbe
n
s
tartadres is het
n
t één enkel star
t
ven.
startadres instel
d
e instellingen v
o
n
de adressen ins
t
d
e instellingen v
a
5-kanaals VDPL
D
het tweede toe
s
o
t de display “A”
r
es met UP [C]
o
f
na ± 20 secon
d
p
rogramma
’
s
t
ische sturing
turing
immer
VDPLDJ
9
D
e DMX eindwee
3
. Deze XLR-ste
k
a
fzonderlijk gea
a
m
et de spot of ee
ngang [7] en st
e
v
e (geen DM
X
e
erdere toestelle
n
e
stel. Koppel de
D
e
de DMX-uitgan
g
2-aansluiting).
r
toestel [6].
a
uto) of (
m
d
e gevoeligheid
v
s
menu met MOD
t
s het adres op 1
a
mma te wijzige
n
w
enste snelheid
of
n
een digitaal sta
kanaalnummer
v
t
adres gebruiken
t, zullen alle toe
s
o
or 1 kanaal ver
a
t
elt, dan luistert
a
n een kanaal v
e
D
JBAR2, zult u
s
tel op 16 (1 + 1
en de digit weer
g
o
f DOWN [D]. D
r
d
en. De display
g
000 – 0
0
010 – 0
3
033 – 0
5
053 – 0
7
074 – 0
9
096 – 1
1
117 – 1
3
138 – 1
5
159 – 1
8
181 – 2
0
202 – 2
2
223 – 2
4
244 – 2
5
250 – 2
5
000 – 0
0
010 - 25
BAR2
rstand is niets
m
k
ker wordt dan a
a
a
rd stopcontact.
G
n voedingskabel
e
ek de stekker i
n
X
)
n
synchroon late
n
D
MX-uitgang [4]
g
[4] van de laa
t
m
uzieksturing)
m
v
ia de instelknop
E [A]. Op de dis
met UP [C] of
D
n
, druk op MOD
E
(1~100) in met
weergeeft en d
rtadres nodig, z
o
v
an waarop het
t
voor een groep
s
tellen ‘luisteren
’
a
ndert, zullen all
elk toestel naar
e
e
randert, zal enk
e
het startadres v
a
5) (CH16~30),
v
g
eeft (bv.
r
uk daarna op M
O
g
eeft daarna “d”
w
0
9 uit
3
2 program
m
5
2 program
m
7
3 program
m
9
5 program
m
1
6 program
m
3
7 program
m
5
8 program
m
8
0 program
m
0
1 program
m
2
2 program
m
4
3 program
m
5
5 automati
s
5
5 muziekst
u
0
9 uit
5 dimmen
v
m
eer dan een XL
R
a
ngesloten op d
e
G
ebruik geen an
d
dat niet door de
n
het stopcontac
t
n
lopen met het
aan de DMX-in
g
t
ste VDPLDJBA
R
m
et DOWN [B].
[5] bijregelen.
play verschijnt “
A
D
OWN [B]. Wac
h
E
[A] tot de displ
UP [C] of DOW
N
ruk daarna op U
o
dat het juiste to
t
oestel ‘luistert’
n
toestellen of u k
’
naar hetzelfde
k
e toestellen er t
e
e
en ander kana
a
e
l het toestel op
a
n het eerste toe
v
an het derde op
: adres = 16).
O
DE [A] tot de d
w
eer gevolgd do
o
m
a 1
m
a 2
m
a 3
m
a 4
m
a 5
m
a 6
m
a 7
m
a 8
m
a 9
m
a 10
m
a 11
s
che sturing: int
e
u
ring
v
an 0 – 100%
©Vellem
a
R
-stekker met ee
e
XLR-uitgang [4
d
ere voedingska
b
fabrikant werd
t
.
mastertoestel.
g
ang [3] van de
R
2 van een
A
” gevolgd door
h
t ± 20 seconde
n
ay wee
r
N
[B].
P [C]. De displa
y
estel reageert o
p
n
aar het signaal
v
unt per toestel
e
k
anaal. Met and
e
e
gelijk op reager
e
l. Met andere
dat kanaal reag
e
stel op 1 (CH1~
1
31 (16 + 15)
isplay
o
r het geselecte
e
e
rne programma’
a
n nv
n
] van
b
el
een
n
tot
r
geeft
y
p
de
v
an de
e
en
e
re
e
n.
e
ren.
1
5)
e
rde
s

15.09.201
kanaal 3
kanaal 4
kanaal 5
kanaal 6
kanaal 7
kanaal 8
kanaal 9
kanaal 1
kanaal 1
kanaal 1
kanaal 1
kanaal 1
kanaal 1
7.3 Vo
e
Opmerki
• Ontk
o
• Func
t
pedaal 1
pedaal 2
pedaal 3
pedaal 4
8. On
• Dit t
o
250
V
• Maa
k
• De g
e
9. Te
c
voeding
verbrui
k
leds
DMX-kan
a
stralingsh
afmeting
e
gewicht
Gebruik
kwetsur
e
versie v
a
tijde wo
r
© AUTE
U
Vellema
n
Het is nie
t
bewerke
n
rechtheb
b
0
strobos
c
spot 1:
r
spot 1:
g
spot 1:
b
spot 2:
r
spot 2:
g
spot 2:
b
0 spot 3:
r
1 spot 3:
g
2 spot 3:
b
3 spot 4:
r
4 spot 4:
g
5 spot 4:
b
e
tpedaal
ng: Het voetped
geselecteer
d
o
ppel de voedin
g
t
ies:
presets
geluid aan
hold
black-out
derhoud
o
estel hoeft geen
V
/2 A, 5 x 20 m
m
k
de spot regelm
a
e
bruiker mag ge
e
c
hnische s
p
a
len
oe
k
e
n
dit toestel enk
e
e
n bij (verkeer
d
a
n deze handle
i
r
den gewijzigd
U
RSRECHT
n
nv heeft het
a
t
toegestaan om
n
en op te slaan
o
b
ende.
c
oop
r
ood
gr
oen
b
lauw
r
ood
gr
oen
b
lauw
r
ood
gr
oen
b
lauw
r
ood
gr
oen
b
lauw
aal functioneert
d
is.
g
sstekker en kop
p
druk #
e
1
w
2
r
3
g
4
b
5
g
6
r
7
c
8
k
9
k
druk om alle le
d
keren
regelmatig ond
e
m
. Vervang een
d
a
tig schoon met
e
e
n onderdelen v
e
p
ecificaties
e
l met originel
e
d
) gebruik van
i
ding, zie www
zonder vooraf
g
a
uteursrecht v
o
deze handleidin
g
o
p een elektroni
s
VDPLDJ
10
000 – 0
0
010 - 25
000 – 2
5
000 – 2
5
000 – 2
5
000 – 2
5
000 – 2
5
000 – 2
5
000 – 2
5
000 – 2
5
000 – 2
5
000 – 2
5
000 – 2
5
000 – 2
5
enkel indien de
a
p
el het voetpeda
e
ffect
w
it
r
ood
gr
oen
b
lauw
g
eel
r
oze
c
yaan
k
leurverandering
,
k
leurenfade, elk
e
d
s uit te schakel
e
e
rhoud. Het inte
r
d
efecte zekering
d
e
en vochtige, ni
e
e
rvangen. Bestel
230 VAC ~ 50 H
160 W
28 x 3 W RGB
15
30°
1200 x 65 x 31
5
15 kg
e
accessoires.
V
dit toestel. Vo
o
.hqpower.eu.
D
g
aande kennis
g
o
or deze handl
e
g
of gedeelten e
r
s
ch medium zon
d
BAR2
0
9 uit
5 strobosco
o
5
5 dimmen
v
5
5 dimmen
v
5
5 dimmen
v
5
5 dimmen
v
5
5 dimmen
v
5
5 dimmen
v
5
5 dimmen
v
5
5 dimmen
v
5
5 dimmen
v
5
5 dimmen
v
5
5 dimmen
v
5
5 dimmen
v
a
utomatische (
al aan de ingan
g
,
elke seconde,
c
e
3 seconden, co
n
e
n, druk opnieuw
r
ne circuit is bev
e
d
oor een exempl
e
t-pluizende doe
k
eventuele reser
v
z
5
mm
V
elleman nv is
n
o
r meer inform
D
e informatie i
n
g
eving.
e
iding. Alle we
r
r
van over te ne
m
d
er voorafgaand
e
o
p van traag na
a
v
an 0 – 100%
v
an 0 – 100%
v
an 0 – 100%
v
an 0 – 100%
v
an 0 – 100%
v
an 0 – 100%
v
an 0 – 100%
v
an 0 – 100%
v
an 0 – 100%
v
an 0 – 100%
v
an 0 – 100%
v
an 0 – 100%
) of muzie
k
g
[6].
c
ontinue lus (1 t
o
n
tinue lus (1 tot
7
om naar vorige
e
iligd door een i
n
aar met dezelfd
e
k
. Gebruik geen
a
v
eonderdelen bij
n
iet aansprake
atie over dit p
r
n
deze handlei
d
r
eldwijde recht
e
m
en, te kopiëren,
e
schriftelijke toe
s
©Vellem
a
a
r snel
k
sturing ( )
o
t 7)
7
)
instelling terug t
n
terne zekering
v
e
eigenschappen
.
a
lcohol of solven
t
uw dealer
lijk voor schad
e
r
oduct en de la
a
d
ing kan te alle
n
e
n voorbehoud
te vertalen, te
s
temming van d
e
a
n nv
e
v
an
.
t
en.
e
of
a
tste
n
en.
e

15.09.201
1. In
t
Aux rési
d
Des info
r
C
l
d
l
l
En cas d
e
Nous vou
s
l’appareil
.
2. Co
n
• Cet a
tech
n
• La te
n
• Le câ
le câ
b
• Resp
e
• Fixer
• Ne p
a
certa
3. Di
r
Se référe
r
• Se fa
non
q
• Tout
e
modi
f
• N’util
élect
r
• La g
a
votre
• Confi
• Ne p
a
atten
• Cet a
appa
r
0
t
roduction
d
ents de l'Unio
r
mations envir
o
C
e symbole sur l
'
'environnement.
d
échets municip
a
es équipements
a réglementatio
n
e
questions, co
s
remercions de
.
Si l’appareil a é
n
signes de
Être prudent l
o
mortels.
Débrancher l’a
l'appareil ; no
n
Garder hors d
e
Attention : le
Il n’y a aucun
e
chez votre rev
e
ppareil ressort à
n
icien qualifié doi
n
sion réseau ne
ble d’alimentati
o
b
le d’alimentatio
n
e
cter une distan
c
l’appareil à l’aid
e
a
s regarder dire
c
ins gens.
r
ectives gé
n
r
à la garantie
d
Utiliser
c
projecti
o
Protége
r
ventilati
o
et tout
a
Protége
r
miliariser avec l
e
q
ualifiées d’opér
e
e
modification es
t
f
ications par le c
l
iser le spot qu’à
r
ochocs, etc. Un
a
rantie ne s’appli
q
revendeur décli
n
er l’installation
e
a
s brancher l’app
a
dre jusqu’à ce q
u
ppareil a été dé
v
r
eil qu’à l’intérie
u
N
O
n européenne
o
nnementales
i
'
appareil ou l'em
Ne pas jeter un
a
ux non sujets a
u
usagés à votre f
o
n
locale relative
à
ntacter les aut
o
votre achat ! Lir
e
té endommagé
p
sécurité
o
rs de l’installati
o
ppareil s’il n’est
p
n
pas le câble.
e
la portée de pe
r
boîtier du spot
c
e
pièce maintena
b
e
ndeur.
la classe de pro
t
t établir la conn
e
peut pas dépass
e
o
n ne peut pas ê
t
n
si nécessaire.
c
e minimum de
0
e
d’un câble de
s
c
tement la sourc
e
n
érales
d
e service et d
e
c
et appareil uni
q
o
ns d’eau.
r
contre la pouss
i
o
n ne soient pas
a
utre objet.
r
contre les choc
s
e
fonctionnemen
t
e
r cet appareil. L
a
t
interdite pour
d
l
ient ne tombent
sa fonction prév
u
usage impropre
q
ue pas aux do
m
n
era toute respo
e
t l’entretien à u
n
a
reil après expos
i
u
e l’appareil ait a
t
v
eloppé pour usa
u
r (<35°C, <75°
VDPLDJ
11
O
TICE D
i
mportantes co
ballage indique
q
appareil électriq
u
tri sélecti
f
; un
e
o
urnisseur ou à
u
à
la protection d
e
o
rités locales
p
e
la présente no
t
p
endant le trans
p
o
n : toucher un c
p
as utilisé ou po
u
r
sonnes non qua
c
hauffe pendant l
b
le par l’utilisate
u
t
ection I, ce qui
i
e
xion électrique.
e
r la tension me
n
t
re replissé ou e
n
0
,5 m entre la so
s
écurité adéquat
e
lumineuse com
m
e
qualité Velle
m
q
uement à l'int
é
i
ère. Protéger co
bloquées. Laiss
e
s
et le traiter av
e
t
de l’appareil av
a
a
plupart des dé
g
d
es raisons de s
é
pas sous la gar
a
u
e. Tout autre u
s
annule d'office l
a
m
mages survenu
s
nsabilité pour le
s
n
personnel quali
f
i
tion à des variati
t
teint la températ
ge professionnel
RH). Le raccord
e
BAR2
’EMPLO
I
ncernant ce pr
o
q
ue l’élimination
ue ou électroniq
u
e
déchèterie trai
t
u
n service de re
c
e
l’environneme
n
p
our éliminatio
n
t
ice attentiveme
n
p
ort, ne pas l’ins
t
âble sous tensio
n
u
r le nettoyer. Ti
lifiées et de jeun
’usage.
u
r. Commander
d
i
mplique que l’a
p
n
tionnée dans le
s
n
dommagé. Dem
rtie lumière de l’
(p.ex. VDLSC7
o
m
e ceci peut en
t
m
an
®
en fin de n
o
é
rieur. Protéger
ntre la chaleur e
e
r une distance
d
e
c circonspection
a
nt de l’utiliser.
N
g
âts sont causés
é
curité. Les dom
m
a
ntie.
s
age peut cause
r
a
garantie.
s
en négligeant
c
s
problèmes et l
e
f
ié.
ons de températ
u
ure ambiante av
a
dans des discot
h
e
r à une source
d
I
o
duit
d’un appareil en
u
e (et des piles
é
t
era l’appareil en
c
yclage local. Il c
n
t.
n
.
n
t avant la mise
e
t
aller et consulte
n
peut causer de
rer la fiche pour
es enfants.
d
es pièces de re
c
p
pareil doit être
m
s
spécifications à
ander à votre re
v
appareil et la su
r
o
u VDLSC8).
t
raîner des crises
o
tice.
de la pluie, de l’
h
xtrême. Veiller à
d
e minimum 2,5
c
pendant l’opéra
t
N
e pas permettr
e
par un usage n
o
m
ages occasionn
é
r
des courts-circ
u
c
ertaines directiv
e
e
s défauts qui en
u
re. Afin d’éviter
a
nt de l’utiliser.
h
èques, des thé
â
d
e courant de 90
-
©Vellem
a
fin de vie peut
p
é
ventuelles) par
m
question. Renv
o
onvient de resp
e
e
n service de
r votre revendeu
s électrochocs
débrancher
c
hange éventuell
m
is à la terre. U
n
la fin de cette n
v
endeur de reno
u
r
face illuminée.
d’épilepsie chez
h
umidité et des
ce que les fent
e
c
m entre le proj
e
t
ion.
e
pas aux perso
n
o
n professionnel.
é
s par des
u
its, des brûlure
s
e
s de cette notic
e
résultent.
des dommages,
â
tres, etc. N’utili
s
-
250 VCA~50-6
0
a
n nv
p
olluer
m
i les
o
yer
e
cter
r.
es
n
otice.
u
veler
e
s de
e
cteur
n
nes
s
, des
e
et
s
er cet
0
Hz.

VDPLDJBAR2
15.09.2010 ©Velleman nv
12
• Un effet lumineux n’est pas conçu pour une opération continue. Des pauses régulières prolongeront sa vie.
• Transporter l’appareil dans son emballage originel.
• Garder cette notice pour toute référence ultérieure.
4. Caractéristiques
• livrée avec pied, chaque spot est séparément réglable
• housse de protection pour le transport
• pilotage DMX depuis 15 canaux
• programmes intégrés, pilotage maître/esclave ou pilotage par le son grâce au microphone intégré
• facile à utiliser grâce au pédalier
• pied optionnel : VDL3SS
5. Description
Se référer aux illustrations en page 2 de cette notice.
1 microphone 3 entrée DMX
2 afficheur avec boutons de configuration 4 sortie DMX
A bouton de sélection MODE 5 réglage de sensibilité
B bouton UP 6 entrée pour pédalier
C bouton DOWN 7 entrée d’alimentation
6. Préparation
Choix d’un emplacement de montage
Les spots ont été conçus pour une utilisation dans un environnement à l’intérieur et avec des
t
empératures jusqu’à 35°C. Prévoir une ventilation suffisante dirigée vers le boîtier métallique des
spots.
Ne pas :
• utiliser les spots lors d’une température ambiante supérieure à 35°C et un taux d’humidité supérieur à 75%
• utiliser les spots dans un environnement d’un volume inférieur à 10 m³ à moins de prévoir une ventilation
directe vers les spots.
Montage
Risque de blessures. L’installation de cet appareil exige une solide expérience pratique : le calcul de
la charge max. de la construction, les matériaux d’installation requis etc. De temps en temps, un
t
echnicien qualifié doit vérifier la construction portante et l’appareil même. Ne pas essayer d’installer
cet appareil vous-même si vous n’avez pas les qualifications requises ; une installation incorrecte peut
entraîner des blessures.
• Monter la VDPLDJBAR2 sur un trépied ayant un diamètre de 35 mm pour une fixation en toute sécurité.
Glisser une pièce de jonction sur le tube du trépied et fixer la herse à l’aide de l’écrou fourni.
• Un technicien qualifié doit installer l’appareil en respectant EN 60598-2-17 et toute autre norme applicable.
• La construction portante de l’appareil doit être capable de supporter 10 x le poids de l’appareil pendant une
heure, sans qu’une déformation de la construction en résulte.
• Fixer les spots à l’aide d’un câble de sécurité (sécurité supplémentaire).
• Éviter de vous positionner en dessous de l’appareil pour l’enlever ou lors du montage ou du nettoyage. Un
technicien qualifié doit réviser l’appareil avant la mise en service. Organiser une révision minutieuse
annuelle.
• Installer l’appareil à un endroit où personne ne peut passer ou s’asseoir et où personne ne peut le toucher.
• Déterminer l’angle d’inclinaison au moyen de l’étrier de montage et serrer les vis de montage.
• Enlever tout matériau inflammable dans un rayon de 0,5 m autour de l’appareil.
• Un électricien qualifié doit établir la connexion électrique.
• Brancher l’appareil sur le réseau électrique par la fiche d’alimentation. Veiller à ne brancher la VDPLDJBAR2
que sur un circuit protégé par un disjoncteur différentiel de 30 mA. Ne pas le brancher sur un bloc de
puissance.
• Un expert doit approuver l’installation avant qu’elle puisse être prise en service.
Connexion DMX512
• Si nécessaire, connecter un câble à fiche XLR à la sortie XLR femelle à 3 broches de votre contrôleur (non
incl.) et l’autre fiche XLR mâle à 3 broches à l’entrée [3] de la VDPLDJBAR2. Il est possible de relier
plusieurs VDPLDJBAR2 à partir d’une connexion sérielle. Utiliser un câble de connexion blindé à 2
conducteurs avec des connecteurs d’entrée et de sortie XLR.
• Une résistance de terminaison DMX est à recommander si le câble DMX doit couvrir une grande distance ou
s’il est utilisé dans un environnement avec beaucoup de bruit électrique (p.ex. une discothèque). La
résistance de terminaison prévient la corruption du signal de contrôle numérique par le bruit électrique. La
résistance de terminaison DMX n’est rien d’autre qu’une fiche XLR avec une résistance de 120 Ω de broche 2
vers broche 3 (voir illustration à gauche). Cette fiche XLR est connectée à la sortie XLR [4] du dernier
appareil de la série.

15.09.201
Connexi
o
• Conne
c
7. E
m
7.1 Po
s
• Le pil
l’app
a
• Choi
s
etc.
P
(voir
• Conn
• Conn
• Place
• En m
• Séle
c
indiq
u
ou D
O
• Pour
indiq
u
1~1
0
7.2 Pil
o
• Enfo
n
bout
o
• Tous
appa
r
num
é
de d
é
• Dans
Tous
adre
s
ajust
e
• Pour
16 (
1
• Enfo
n
adre
s
• Séle
c
MOD
E
• L’adr
e
sélec
t
canal 1
canal 2
canal 3
0
o
n au réseau
Veill
e
mise
spot
s
c
ter le cordon d’
a
m
ploi
s
e libre ou
m
otage maître/es
c
a
reil maître.
s
ir l’appareil maî
t
P
révoir une résis
t
§6 Connexion
D
ecter le pédalier
ecter les câbles
d
r l’appareil maît
r
ode , régl
e
c
tionner le menu
u
e « A » suivi d’
u
O
WN [B]. Patien
régler la vitesse
u
e (vite
0
0).
o
tage DMX
n
cer le bouton M
O
o
n UP [C]. L’affi
c
les appareils pil
o
r
eils corrects réa
é
ro de canal sur
l
é
part pour toute
le cas d’une seu
les appareils se
r
s
ses de départ in
e
ment des régla
g
la VDPLDJBAR
2
1
+ 15) (CH16~
3
n
cer le bouton M
O
s
se = 16).
c
tionner l’adress
e
E
[A] jusqu’à ce
e
sse sélectionné
e
t
ionnée (p.ex.
progra
m
pilotage
pilotage
variateu
strobos
c
e
r à ce que la pri
à la terre. Ne p
a
s
ou un cordon a
a
limentation fou
r
m
aître/escla
v
c
lave permet de
t
re et connecter
s
t
ance de termin
a
D
MX512).
à l’entrée [6] d
e
d
’alimentation [
7
r
e en mode
e
r la sensibilité a
v
d’adressage sur
u
n digit (p.ex.
ter ± 20 second
e
d’exécution du
p
sse par défaut =
O
DE [A] jusqu’à
c
heur indiquera
o
tés par un sign
a
gissent sur les s
i
l
equel l’appareil
é
une série d’appa
le adresse, tous
r
ont donc influen
c
dividuelles, cha
q
g
es d’un canal n
’
2
à 15 canaux, l’
a
3
1), du troisième
O
DE [A] jusqu’à
e
DMX de départ
que l’afficheur i
n
e
s’activera aprè
s
).
m
mes internes
automatique
par le son
r maître
c
ope
VDPLDJ
13
se de courant à
l
a
s utiliser un cor
d
utorisé par le fa
b
r
ni à l’entrée [7]
v
e (sans DM
X
synchroniser les
s
a sortie DMX [
4
a
ison sur la sorti
e
e
l’appareil maît
r
7
].
(auto) ou
v
ec le bouton de
tous les apparei
l
: adresse
=
e
s jusqu’à ce qu
e
p
rogramme, enfo
51). Régler la v
ce que l’affiche
u
.
a
l DMX demande
n
i
gnaux de contrô
é
coute le contrôl
reils ou une adr
e
les appareils «
é
c
és lorsque vous
q
ue appareil « éc
o
’
influence que l'a
a
dresse de dépa
r
31 (16 + 15) (
C
ce que l’affiche
u
avec le bouton
U
n
dique .
s
± 20 secondes
000 – 0
0
010 – 0
3
033 – 0
5
053 – 0
7
074 – 0
9
096 – 1
1
117 – 1
3
138 – 1
5
159 – 1
8
181 – 2
0
202 – 2
2
223 – 2
4
244 – 2
5
250 – 2
5
000 – 0
0
010 - 25
000 – 0
0
010 - 25
BAR2
l
aquelle les spot
s
d
on d’alimentati
o
b
ricant.
et insérer la fic
h
X
)
mouvements de
4
] à l’entrée DM
X
e
DMX [4] de la
d
r
e.
(pilotage pa
r
réglage [5].
l
s esclaves avec
=
16). Sélection
n
e
l’afficheur indi
q
ncer le bouton
M
itesse avec le bo
u
r [2] indique
n
t une adresse d
le. Cette adress
e
eur DMX. Vous
a
e
sse de départ p
a
é
couteront » les
m
changez les rég
o
utera » son pro
ppareil su
r
ce ca
r
t du premier ap
p
C
H16~30), etc.
u
r [2] indique «
A
U
P [C] ou DOWN
. L’afficheur indi
q
0
9 éteint
3
2 program
m
5
2 program
m
7
3 program
m
9
5 program
m
1
6 program
m
3
7 program
m
5
8 program
m
8
0 program
m
0
1 program
m
2
2 program
m
4
3 program
m
5
5 pilotage a
5
5 pilotage p
0
9 éteint
5 variation
d
0
9 éteint
5 éclats de
l
s
sont connectés
o
n autre que cel
u
h
e dans une pris
e
s appareils escla
X
[3] de la VDP
L
d
ernière VDPLD
J
r
le son) avec le
b
le bouton MODE
n
er l’adresse 1 a
v
q
ue .
M
ODE [A] jusqu’
à
uton UP [C] ou
D
ou .
e départ DMX p
o
e
de départ num
é
a
vez le choix ent
r
a
r appareil.
m
êmes signaux,
lages d’un seul
c
pre canal. Par c
o
nal.
p
areil est 1 (CH1
A
» et le digit (p
.
[D]. Ensuite, e
n
q
uera « d » suivi
m
e 1
m
e 2
m
e 3
m
e 4
m
e 5
m
e 6
m
e 7
m
e 8
m
e 9
m
e 10
m
e 11
utomatique : pr
o
ar le son
d
e 0 – 100%
l
ent à rapide
©Vellem
a
soit séparément
u
i fourni avec les
e
de courant.
ves à ceux de
L
DJBAR2 suivan
t
J
BAR2 de la sér
i
b
outon DOWN [
B
[A]. L’afficheur
v
ec le bouton UP
à
ce que l’affiche
D
OWN [B] (plag
Ensuite, enfonc
e
o
ur assurer que l
e
é
rique indique le
r
e une seule adr
e
sur un seul cana
c
anal. Avec des
o
nséquent, un
~15), du deuxiè
ex. :
n
foncer le bouto
n
de l’adresse
o
grammes intern
a
n nv
t
e,
i
e
B
].
[C]
ur
e
e
r le
e
s
e
sse
l.
me
n
es

15.09.201
canal 4
canal 5
canal 6
canal 7
canal 8
canal 9
canal 10
canal 11
canal 12
canal 13
canal 14
canal 15
7.3 Le
p
Remarq
u
• Déco
n
• Fonc
t
pédale 1
pédale 2
pédale 3
pédale 4
8. En
t
• Cett
e
5 x 2
• Nett
o
• Il n’y
votre
9. Sp
é
alimentat
i
consomm
a
LED
canaux D
M
angle de
r
dimensio
n
poids
N’emplo
y
respons
a
d’inform
www.hq
notificat
i
© DROI
T
SA Velle
m
Toute re
p
procédé
o
0
spot 1 :
spot 1 :
spot 1 :
spot 2 :
spot 2 :
spot 2 :
spot 3 :
spot 3 :
spot 3 :
spot 4 :
spot 4 :
spot 4 :
p
édalier
u
e : Le pédalier
f
le son (
n
necter le câble
t
ions :
effets
internes
son activé
hold
black-out
t
retien
e
unité ne nécess
0 mm. Remplac
e
o
yer le spot régu
l
a aucune pièce
m
revendeur.
é
cification
s
i
on
a
tion
M
X
r
ayonnement
n
s
y
er cet apparei
a
ble de domma
ation concerna
power.eu. Tou
t
i
on préalable.
T
S D’AUTEU
R
m
an est l’ayan
t
p
roduction, tradu
c
o
u sur tout supp
o
r
ouge
vert
bleu
r
ouge
vert
bleu
r
ouge
vert
bleu
r
ouge
vert
bleu
f
onctionne uniqu
e
).
d’alimentation d
e
enfoncer #
e
1
b
2
r
3
v
4
b
5 j
6
r
7
c
8
t
9
f
enfoncer pour é
t
précédemment
a
ite aucun entreti
e
r un fusible déf
e
l
ièrement avec u
m
aintenable par
s
technique
s
l qu’avec des a
ges ou lésions
nt cet article e
t
t
es les informa
t
t
droit des droi
t
c
tion, copie ou d
o
rt électronique
q
VDPLDJ
14
000 – 2
5
000 – 2
5
000 – 2
5
000 – 2
5
000 – 2
5
000 – 2
5
000 – 2
5
000 – 2
5
000 – 2
5
000 – 2
5
000 – 2
5
000 – 2
5
e
ment en modes
e
la VDPLDJBA
R
e
ffet
b
lanc
r
ouge
v
ert
b
leu
aune
r
ose
c
yan
t
ransition couleu
r
f
ade couleur, tou
t
t
eindre toutes le
s
a
ctivé
en régulier. Le c
e
ctueux par un f
u
n chiffon humid
e
l’utilisateur. Co
m
s
230 V
CA
~ 50 H
z
160 W
28 x 3 W RVB
15
30°
1200 x 65 x 31
5
15 kg
ccessoires d’o
r
survenus à un
t
la dernière v
e
t
ions présenté
e
t
s d’auteur po
u
iffusion, intégral
e
q
ue se soit est in
t
BAR2
5
5 variation
d
5
5 variation
d
5
5 variation
d
5
5 variation
d
5
5 variation
d
5
5 variation
d
5
5 variation
d
5
5 variation
d
5
5 variation
d
5
5 variation
d
5
5 variation
d
5
5 variation
d
de pilotage aut
o
R
2 et connecter l
r
, chaque second
t
es les 3 second
e
s
LED, renfoncer
ircuit interne est
u
sible ayant les
m
e
non pelucheux.
m
mander des piè
z
5
mm
r
igine. SA Velle
usage (incorre
c
e
rsion de cette
e
s dans cette n
o
u
r cette notice.
e
ou partielle, d
u
t
erdite sans l’ac
c
d
e 0 – 100%
d
e 0 – 100%
d
e 0 – 100%
d
e 0 – 100%
d
e 0 – 100%
d
e 0 – 100%
d
e 0 – 100%
d
e 0 – 100%
d
e 0 – 100%
d
e 0 – 100%
d
e 0 – 100%
d
e 0 – 100%
o
matique (
e pédalier à l’en
t
e en boucle con
t
e
s en boucle con
t
pour revenir au
protégé par un
f
m
êmes spécificat
i
Éviter l’usage d
’
ces de rechange
man ne sera a
u
c
t) de cet app
a
notice, visiter
n
o
tice peuvent
ê
Tous droits m
o
u
contenu de cet
t
c
ord préalable éc
©Vellem
a
) et par
t
rée [6].
t
inue (1 à 7)
t
inue (1 à 7)
programme
f
usible de 250 V
/
i
ons.
’
alcools et de sol
v
éventuelles che
z
u
cunement
a
reil. Pour plus
n
otre site web
ê
tre modifiées
s
o
ndiaux réserv
é
t
e notice par que
rit de l’ayant dr
o
a
n nv
/
2 A,
v
ants.
z
s
ans
é
s.
lque
o
it.

15.09.201
1. In
t
A los ciu
d
Importa
n
E
m
N
e
R
Si tiene
d
¡Gracias
p
el aparat
o
2. In
s
• Este a
p
La con
e
• Asegú
r
• No apl
a
afilada
• Respe
t
• Fije el
• No mi
r
3. No
Véase la
G
• Fami
l
may
o
• Por r
a
caus
a
• Utilic
e
que
m
com
p
• Los d
su di
s
• La in
s
• No c
o
llegu
e
• Este
a
sólo
e
• No h
a
vida
d
0
t
roducción
d
adanos de la
U
n
tes informaci
o
E
ste símbolo en
e
m
edio ambiente.
N
o tire este apa
r
e
specializada en
R
espete las leye
s
d
udas, contact
e
p
or haber compr
a
o
ha sufrido algú
n
s
truccione
s
Cuidado duran
t
conectado a la
Desconecte si
e
limpiarlo. Tire
s
Mantenga el a
p
¡Ojo!: la caja
d
El usuario no
h
necesita pieza
s
p
arato pertenece
e
xión eléctrica d
e
r
ese de que la te
n
a
ste el cable de
a
. Si es necesario
t
e una distancia
d
aparato con un
c
r
e directamente
a
rmas gene
r
G
arantía de se
r
Utilice el a
de salpica
d
No expon
g
que los ori
aparato y
No agite e
l
iarícese con el f
u
o
ría de los daños
a
zones de seguri
a
dos por modific
a
e
sólo el VDPLD
J
m
aduras, descarg
p
letamente.
años causados
p
s
tribuidor no ser
á
s
talación y el ma
o
necte el aparat
o
e
a la temperatu
r
a
parato ha sido
d
e
n interiores (<
3
a
sido diseñado
p
d
el aparato.
MA
N
U
nión Europea
o
nes sobre el
m
e
ste aparato o e
l
r
ato (ni las pilas,
reciclaje. Devue
s
locales en rela
c
e
con las autor
i
a
do el VDPLDJ
B
n
daño en el tra
n
s
de seguri
d
t
e la instalación:
red eléctrica.
e
mpre el aparato
s
iempre del enc
h
p
arato lejos del
a
d
el proyector se
h
abrá de efectua
r
s
de recambio.
a la clase de pr
o
e
be llevarse a ca
n
sión de red no
s
a
limentación y p
r
, pida a su distri
b
d
e mín. 0.5m en
t
c
able de segurid
a
a
la fuente de lu
z
r
ales
r
vicio y calidad
parato sólo en
i
d
ura o goteo.
g
a este equipo a
ficios de ventila
c
cualquier otro o
b
l aparato. Evite
u
u
ncionamiento d
e
son causados p
o
dad, las modific
a
a
ciones no autor
i
J
BAR2 para apli
c
as eléctricas, et
c
p
or descuido de l
a
á
responsable d
e
ntenimiento deb
o
si ha estado ex
p
r
a ambiente.
d
iseñado para u
s
3
5°C, <75%RH).
p
ara un uso inint
e
VDPLDJ
15
N
UAL DE
L
m
edio ambiente
l
embalaje indica
si las hubiera) e
lva este aparato
c
ión con el medi
o
i
dades locales
p
B
AR2! Lea atent
a
n
sporte no lo ins
t
d
ad
puede sufrir un
a
si no va a usarl
o
h
ufe para descon
a
lcance de perso
n
calienta durante
r
el mantenimien
o
tección I. Por lo
bo por un técnic
o
s
ea mayor que l
a
r
otéjalo contra p
o
b
uidor reemplaz
a
t
re la salida de l
u
a
d adecuado (p.
e
z
. Esto puede cau
Velleman
®
al f
i
i
nteriores. No e
x
polvo. No expon
g
c
ión no estén blo
b
jeto.
u
sar excesiva fu
e
e
l aparato. Sólo
p
o
r un uso inadec
u
a
ciones no autori
i
zadas, no están
c
aciones descrit
a
c
. Un uso desaut
o
a
s instrucciones
d
e
ningún daño u
o
en ser realizado
s
p
uesto a grande
s
s
o profesional en
Conéctelo a una
e
rrumpido. Intro
BAR2
L
USUA
R
concerniente
a
que, si tira las
m
n la basura dom
é
a su distribuido
r
o
ambiente.
p
ara residuos.
a
mente las instru
t
ale y póngase e
n
a
peligrosa desc
a
o
durante un lar
g
ectar el cable de
n
as no capacitad
a
su operación.
to de ninguna pi
tanto, es esenci
o
cualificado.
a
tensión indicad
a
o
sibles daños ca
u
a
r el cable de ali
m
u
z y el área ilumi
e
j. VDLSC7 o V
D
sar un ataque epi
i
nal de este man
x
ponga este equ
g
a este equipo a
queados. Deje u
n
e
rza durante el
m
p
ersonas cualific
a
u
ado.
zadas del apara
t
cubiertos por la
a
s en este manu
a
o
rizado puede ca
d
e seguridad de
o
tros problemas
s
por personal e
s
s
cambios de te
m
una discoteca,
u
fuente de corri
e
duzca frecuente
m
R
IO
a
este product
o
m
uestras inservi
b
é
stica; debe ir a
r
o a la unidad d
e
cciones del man
u
n
contacto con s
u
a
rga eléctrica al
t
g
o periodo de tie
m
red, nunca del
p
a
s y niños.
eza. Contacte co
al que el aparat
o
a
en las especifi
c
u
sados por algú
n
m
entación.
nada.
D
LSC8).
léptico.
ual del usuario.
ipo a lluvia, hu
m
temperaturas e
x
n
a distancia de
m
m
anejo y la instal
a
das pueden ma
t
o están prohibid
garantía.
a
l a fin de evitar
usar daños y an
u
este manual inv
a
resultantes.
s
pecializado.
m
peratura. Esper
e
u
n teatro, etc. y
e
e
nte CA de máx.
m
ente una paus
a
©Vellem
a
o
b
les, podrían da
ñ
una empresa
e
reciclaje local.
u
al antes de usa
r
u
distribuidor.
t
ocar un cable
m
po o antes de
p
ropio cable.
n su distribuidor
o
esté puesto a t
i
c
aciones.
n
tipo de superfi
c
m
edad ni a ningú
n
x
tremas. Asegúr
e
m
ín. 2,5cm entre
ación.
n
ejar este apara
t
a
s. Los daños
p.ej. cortocircuit
u
la la garantía
a
lidarán su gara
n
e
hasta que el a
p
e
s apto para un
u
240VCA / 50Hz.
a
para prolongar
a
n nv
ñ
ar el
r
lo. Si
si
i
erra.
c
ie
n
tipo
e
se de
el
t
o. La
os,
n
tía y
p
arato
u
so
la

VDPLDJBAR2
15.09.2010 ©Velleman nv
16
• Transporte el aparato en su embalaje original.
• Guarde este manual del usuario para cuando necesite consultarlo.
4. Características
• se entrega con pie, es posible ajustar cada foco por separado
• funda de protección para el transporte
• control DMX por 15 canales
• programas autónomos incorporados, control maestro/esclavo o control por la música gracias al micrófono
incorporado
• fácil de utilizar gracias al interruptor de pie
• pie opcional: VDL3SS
5. Descripción
Véase las figuras en la página 2 de este manual del usuario.
1 micrófono 3 entrada DMX
2 pantalla con botones de ajuste 4 salida DMX
A botón de selección MODE 5 ajuste de sensibilidad
B botón UP 6 entrada para interruptor de pie
C botón DOWN 7 entrada de alimentación
6. Preparación
Seleccionar un lugar de montaje
El foco ha sido diseñado para un uso en interiores y con temperaturas hasta 35°C. Prevea una
ventilación suficiente dirigida hacia la caja metálica del foco.
NO :
• Utilice el foco le con una temperatura ambiente superior a 35°C y una humedad superior al 75%.
• Utilice el foco en un lugar inferior a 10 m³ salvo al prever una ventilación directa hacia el foco.
Montaje
Riesgo de lesiones. La instalación de este aparato exige una sólida experiencia práctica: el cálculo
de la carga máx. de la construcción, los materiales de instalación requeridos, etc. De vez en cuando,
un técnico cualificado debe controlar la construcción portante y el aparato mismo. No intente instalar
este aparato usted mismo si no tiene las cualificaciones requeridas; una instalación incorrecta puede
causar lesiones.
• Respete la directiva EN 60598-2-17 y toda norma nacional antes de instalar el aparato. La instalación debe
ser realizada por un técnico especializado.
• El soporte donde irá el aparato, debe ser capaz de sostener 10 veces el peso de éste durante una hora, sin
que se produzca una deformación de dicho soporte.
• Fije siempre el VDPLDJBAR2 con un cable de seguridad (seguridad adicional).
• Evite ponerse debajo del aparato durante el montaje, la limpieza, etc. Un técnico especializado debe revisar
el aparato antes de la puesta en marcha. Después, debe revisarlo una vez al año.
• Instale el aparato fuera del alcance de personas no autorizadas y en un lugar con poca gente.
• La instalación de este aparato exige una sólida experiencia práctica: debe poder calcular la carga máx. del
soporte, debe conocer los materiales necesarios para la instalación, etc. De vez en cuando, una verificación
de la estructura y del aparato mismo debe ser llevada a cabo por un técnico especializado. No intente
instalar este aparato si no tiene las cualificaciones requeridas; una instalación incorrecta puede causar
lesiones.
• Ajuste el ángulo de inclinación a su gusto mediante un soporte de montaje y fije los tornillos del soporte.
• Quite todo material inflamable en un radio de 0.5m alrededor del aparato.
• Pregunte a un electricista cómo hacer la conexión eléctrica.
• Conecte el aparato a la red eléctrica con la conexión de alimentación. Asegúrese de que sólo conecte el
VDPLDJBAR2 a un circuito protegido por un disyuntor de corriente residual (RCD) de 30 mA. Normalmente,
no se conectan efectos luminosos a dimmer packs (reguladores).
• Un experto debe probar la instalación antes de la puesta en marcha.
Conexión DMX512
Véase las figuras en la página 2 de este manual del usuario.
• Si fuera necesario, conecte un cable con conector XLR (no incl.) a la salida XLR hembra de 3 polos del
controlador y el otro conector XLR macho de 3 polos a la entrada [3] del VDPLDJBAR2. Es posible conectar
varios VDPLDJBAR2 en serie. Use un cable blindado de doble hilo conductor con conectores XLR de entrada
y de salida VDPLDJBAR2.
• Se recomienda una terminación si el cable DMX debe cubrir una gran distancia o si se usa en un medio
ambiente con mucho ruido eléctrico (ej. una discoteca). La terminación impide que el ruido eléctrico
corrompa la señal de control numérico. La terminación DMX no es más que un conector XLR con una

15.09.201
resis
t
apar
a
Conexió
n
• Conec
t
7. Us
o
7.1 Mo
d
• El m
o
mae
s
• Sele
c
VDP
L
(véa
s
• Cone
c
• Cone
c
• Pong
a
músi
c
• En el
• Sele
c
pant
a
botó
n
• Para
7.2 Co
n
• Pulse
La p
a
• Si se
reac
c
apar
a
para
• Con
u
a la
m
Con
v
ajust
e
• En el
segu
n
• Pulse
• Sele
c
que l
a
• La di
r
direc
c
canal 1
canal 2
0
t
encia de 120Ω
d
a
to de la serie.
n
a la red
Aseg
sepa
por
e
t
e el cable de ali
m
o
d
o autónom
o
o
do maestro/escl
s
tro.
c
cione el aparato
L
DJBAR2, etc.
P
s
e §6 Conexión
c
te el interrupto
r
c
te los cables de
a
el aparato ma
e
c
a).
modo , aj
u
c
cione el menú d
e
a
lla indica « A »
s
n
UP [C] o DOW
N
ajustar la veloci
d
(velocidad p
o
n
trol DMX
el botón MODE
a
ntalla indica
usa una señal D
c
ionen a las seña
a
to reaccionará
a
toda una serie d
e
u
na sola direcció
n
m
isma señal. Por
v
arias direccione
s
e
s de un solo ca
n
caso del VDPL
D
n
do aparato 16 (
el botón MODE
c
cione la direcció
n
a
pantalla indiqu
r
ección seleccion
c
ión seleccionad
a
progra
m
control
a
control
p
dimmer
d
e polo 2 a polo
3
úrese de que el
e
rado. Utilice sól
o
e
l fabricante.
m
entación (incl.)
o
(stand alo
n
avo permite sin
c
maestro y cone
c
P
revea una termi
n
DMX512).
r
de pie a la entr
a
alimentación [7
e
stro con el botó
n
u
ste la sensibilid
a
e
ajuste de la di
r
s
eguido de un dí
g
N
[B]. Espere ±
d
ad de ejecución
o
r defecto = 51)
.
[A] hasta que la
.
MX, cada aparat
o
les de control co
a
las señales DM
X
e
aparatos o un
a
n
inicial para un
a
lo tanto, cambi
a
s
iniciales, cada
a
n
al sólo afecta al
D
JBAR2 de 15 c
a
16 + 5) (CH16~
[A] hasta que la
n
DMX inicial co
n
e .
ada se activa de
s
a
(p.ej. )
m
as internos
a
utomático
p
or la música
maestro
VDPLDJ
17
3
. Este conector
X
e
nchufe al que e
s
o
el cable de alim
a la entrada [7
]
n
e) o modo
c
ronizar los movi
m
c
te la salida DM
X
n
ación en la sali
d
a
da [6] del apa
r
].
n
DOWN [B] en
e
a
d con el botón
d
r
ección para tod
o
g
ito (p.ej.
20 segundos ha
s
del programa, p
.
Ajuste la veloci
d
pantalla [2] in
d
o
tiene su propi
a
rrectas. Esta dir
e
X
del controlador
a
dirección inicial
a
serie de aparat
o
a
r los ajustes de
a
parato reaccion
canal en cuesti
ó
a
nales, la direcci
ó
30), del tercer a
p
pantalla [2] in
d
n
el botón UP [C
]
s
pués de ± 20 s
e
000 – 0
0
010 – 0
3
033 – 0
5
053 – 0
7
074 – 0
9
096 – 1
1
117 – 1
3
138 – 1
5
159 – 1
8
181 – 2
0
202 – 2
2
223 – 2
4
244 – 2
5
250 – 2
5
000 – 0
0
010 - 25
BAR2
X
LR está conect
a
s
tá conectado el
entación entreg
a
]
y conéctelo a l
a
maestro/es
c
m
ientos de los a
p
X
[4] a la entrad
a
d
a DMX [4] del
ú
r
ato maestro.
e
l modo
d
e ajuste [5].
o
s los aparatos e
s
: dirección =
1
s
ta que la pantal
l
ulse el botón M
O
d
ad con el botón
d
ique o
a
dirección inicial
e
cción inicial digi
t
DMX. Es posibl
e
por aparato.
o
s, todos los ap
a
un solo canal af
e
ará independien
t
ó
n.
ó
n inicial del pri
m
p
arato 31 (16 +
d
ique « A » y el
d
]
o DOWN [D].
L
e
gundos. La pan
t
0
9 desactiva
d
3
2 programa
5
2 programa
7
3 programa
9
5 programa
1
6 programa
3
7 programa
5
8 programa
8
0 programa
0
1 programa
2
2 programa
4
3 programa
5
5 pilotage a
5
5 pilotage p
0
9 desactiva
d
5 ajustar la
a
do a la salida X
L
foco esté puest
o
a
do con el foco o
a
red eléctrica.
c
lavo (sin D
M
p
aratos esclavos
a
DMX [3] del si
g
ú
ltimo VDPLDJB
A
(auto) o
(
s
clavos con el b
o
1
6). Seleccione l
a
l
a indique
O
DE [A] hasta q
u
UP [C] o DOW
N
. Luego, pu
DMX para aseg
u
t
al es el primer
c
e
elegir entre un
a
a
ratos reaccionar
e
cta a los ajuste
s
t
emente. Por lo t
m
er aparato es 1
15) (CH31~45),
d
ígito (p.ej.
L
uego, pulse el b
o
t
alla indica « d »
d
o
1
2
3
4
5
6
7
8
9
10
11
utomatique : pr
o
ar le son
d
o
intensidad lumi
n
©Vellem
a
L
R [4] del últim
o
o
a tierra por
un cable autori
z
M
X)
con los del apar
g
uiente
A
R2 de la serie
(
control por la
o
tón MODE [A].
L
a
dirección 1 con
.
u
e la pantalla ind
N
[B] (rango 1~
1
lse el botón UP
[
u
rar que los apar
a
c
anal en el cual
e
a
sola dirección i
n
án sincronizada
m
s
de todos los ca
n
anto, cambiar lo
s
(CH1~15), del
etc.
: dirección =
o
tón MODE [A]
h
seguido de la
o
gramas interne
s
n
osa de de 0 – 1
0
a
n nv
o
z
ado
ato
L
a
el
ique
1
00).
[
C].
a
tos
e
l
n
icial
m
ente
n
ales.
s
16).
h
asta
s
0
0%

15.09.201
canal 3
canal 4
canal 5
canal 6
canal 7
canal 8
canal 9
canal 10
canal 11
canal 12
canal 13
canal 14
canal 15
7.3 Int
Nota: el
i
• Desc
o
• Funci
pedal 1
pedal 2
pedal 3
pedal 4
8. Ma
Este apar
250 V/2
A
Limpie el
El usuari
o
piezas de
9. Es
p
alimentac
consumo
LED
canales D
ángulo de
dimensio
n
peso
Utilice e
s
lesiones
visite nu
este ma
n
© DERE
C
Vellema
n
mundiale
s
del usuar
i
0
estrobo
s
foco 1 :
foco 1 :
foco 1 :
foco 2 :
foco 2 :
foco 2 :
foco 3 :
foco 3 :
foco 3 :
foco 4 :
foco 4 :
foco 4 :
erruptor de
i
nterruptor de pi
e
música (
o
necte el cable d
ones:
ajustes
preprogramad
o
sonido activad
o
hold
black-out
ntenimien
t
ato no necesita
n
A
, 5 x 20 mm. R
e
aparato regular
m
o
no habrá de ef
e
recambio.
p
ecificacio
n
ión
MX
l haz
n
es
s
te aparato sól
o
causados por
u
estra página
w
n
ual sin previo
C
HOS DE AUTO
R
n
NV dispone d
e
s
reservados. Es
t
i
o o partes de ell
s
copio
rojo
verde
azul
rojo
verde
azul
rojo
verde
azul
rojo
verde
azul
pie
e
funciona sólo
e
).
e alimentación
d
o
s
pulse #
1
2
3
4
5
6
7
8
9
o
pulse para de
s
anteriorment
e
t
o
n
ingún manteni
m
e
emplace un fusi
b
m
ente con un pa
ñ
e
ctuar el manten
i
n
es
o
con los acces
u
n uso (indebi
d
w
ww.hqpower.
e
aviso.
R
e
los derechos
t
á estrictamente
o sin previo per
m
VDPLDJ
18
000 – 0
0
010 - 25
000 – 2
5
000 – 2
5
000 – 2
5
000 – 2
5
000 – 2
5
000 – 2
5
000 – 2
5
000 – 2
5
000 – 2
5
000 – 2
5
000 – 2
5
000 – 2
5
e
n el modo de co
n
d
el VDPLDJBAR
2
efecto
blanco
rojo
ve
r
de
azul
amarillo
rosa
cyan
cambio de colo
r
fade de colo
r
, c
s
activar todos lo
s
e
activado
m
iento regular. El
b
le defectuoso p
o
ñ
o húmedo y sin
i
miento de ning
u
230VAC ~ 50Hz
160W
28 x 3W RGB
15
30°
1200 x 65 x 31
5
15kg
orios originale
s
d
o) de este apa
e
u. Se pueden
m
de autor para
e
prohibido repro
d
m
iso escrito del
d
BAR2
0
9 desactiva
d
5 destellos
d
5
5 ajustar la
5
5 ajustar la
5
5 ajustar la
5
5 ajustar la
5
5 ajustar la
5
5 ajustar la
5
5 ajustar la
5
5 ajustar la
5
5 ajustar la
5
5 ajustar la
5
5 ajustar la
5
5 ajustar la
n
trol automático
2
y conecte el in
t
r
, cada segundo,
ada 3 segundos,
s
LEDs, vuelva a
circuito interno
o
r un fusible con
pelusas. Evite e
u
na pieza. Conta
c
5
mm
s
. Velleman N
V
rato. Para más
m
odificar las e
s
e
ste manual de
d
ucir, traducir, c
o
d
erecho habiente
d
o
d
e lenot a rápid
o
intensidad lumi
n
intensidad lumi
n
intensidad lumi
n
intensidad lumi
n
intensidad lumi
n
intensidad lumi
n
intensidad lumi
n
intensidad lumi
n
intensidad lumi
n
intensidad lumi
n
intensidad lumi
n
intensidad lumi
n
() y el
m
t
erruptor de pie
a
bucle continuo
(
bucle continuo
(
pulsar para vol
v
está protegido p
las mismas esp
e
l uso de alcohol
y
c
te con su distrib
V
no será respo
n
información s
o
s
pecificaciones
l usuario.
T
odo
s
o
piar, editar y g
u
.
©Vellem
a
o
n
osa de de 0 – 1
0
n
osa de de 0 – 1
0
n
osa de de 0 – 1
0
n
osa de de 0 – 1
0
n
osa de de 0 – 1
0
n
osa de de 0 – 1
0
n
osa de de 0 – 1
0
n
osa de de 0 – 1
0
n
osa de de 0 – 1
0
n
osa de de 0 – 1
0
n
osa de de 0 – 1
0
n
osa de de 0 – 1
0
m
odo de control
p
a
la entrada [6].
(
de 1 a 7)
(
de 1 a 7)
er al programa
or un fusible de
e
cificaciones.
y
de disolventes.
uidor si necesita
n
sable de daño
o
bre este prod
u
y el contenido
d
s
los derechos
u
ardar este man
u
a
n nv
0
0%
0
0%
0
0%
0
0%
0
0%
0
0%
0
0%
0
0%
0
0%
0
0%
0
0%
0
0%
p
or la
s ni
u
cto,
d
e
u
al

15.09.201
1. Ei
n
An alle
E
Wichtig
e
D
n
v
v
o
U
Falls Zw
e
Wir beda
n
sorgfältig
Gerät nic
h
2. Si
c
• Der Au
Der el
e
• Verge
w
beschr
• Achten
Bei Be
s
• Beacht
e
• Mache
n
• Blicke
n
werde
n
3. All
g
Siehe Ve
l
• Nehm
e
Sie da
s
des Ge
• Eigen
m
eigen
m
• Verwe
n
Schäd
e
Kurzsc
• Bei Sc
h
Garan
t
• Lassen
• Das G
e
indem
0
n
führung
E
inwohner der
E
e
Umweltinfor
m
D
ieses Symbol a
u
n
ach seinem Leb
e
v
erwendeten Bat
t
v
on einer speziali
o
der ein örtliches
U
mweltvorschrift
e
e
ifel bestehen,
n
ken uns für den
durch. Überprüf
h
t und wenden
S
c
herheitshi
n
Seien Sie wäh
r
stehenden Leit
Trennen Sie d
a
Netzstecker a
n
Halten Sie Kin
d
Achtung: Ber
ü
Es gibt keine z
fbau des Geräte
s
e
ktrische Anschl
u
w
issern Sie sich,
ieben in dieser
B
Sie darauf, das
s
s
chädigungen so
e
n Sie eine mini
m
n
Sie das Gerät
m
n
Sie niemals dir
e
n
können.
g
emeine Ri
l
leman® Servi
c
Verwende
n
Setzen Si
e
Schützen
S
Sie, dass
d
2.5cm zwi
s
Vermeide
n
Bedienun
g
e
n Sie das Gerät
e
s
Gerät nicht von
rätes das Ergebn
m
ächtige Veränd
e
m
ächtige Änderu
n
n
den Sie das Ge
r
e
n am Produkt f
ü
hluss, B
r
andwun
h
äden, die durch
t
ieanspruch. Für
d
Sie dieses Gerä
t
e
rät bei Tempera
Sie es ausgesch
a
BEDI
E
E
uropäischen
U
m
ationen über
d
u
f dem Produkt o
e
nszyklus der U
m
t
erien) nicht als
u
sierten Firma z
w
Recycling-Unte
r
e
n.
wenden Sie si
c
Kauf des VDPL
D
en Sie, ob Trans
S
ie sich an Ihren
n
weise
r
end der Installa
t
ungen könnte z
u
a
s Gerät bei Nich
n
der Grifffläche
a
d
er und Unbefug
t
ü
hren Sie das G
e
u wartenden Tei
l
s
entspricht der
S
u
ss darf nur von
e
dass die anzusc
h
B
edienungsanleit
u
s
die Netzleitung
ll eine Fachkraft
m
ale Entfernung v
o
m
it einem geeig
n
e
kt in die Lichtq
u
chtlinien
c
e- und Qualitä
t
n
Sie das Gerät
n
e
das Gerät kein
e
S
ie das Gerät vo
r
d
ie Lüftungsschli
t
s
chen dem Gerä
t
n
Sie Erschütteru
g
des Gerätes.
e
rst in Betrieb, n
a
Personen bedien
e
is von unfachmä
n
e
rungen sind aus
n
gen erlischt der
r
ät nur für Anwe
n
ü
hren und erlisch
den, elektrische
m
Nichtbeachtung
d
araus resultier
e
t
von einem Fac
h
turschwankunge
a
ltet lassen bis e
VDPLDJ
19
E
NUNGS
U
nion
d
ieses Produkt
der der Verpack
u
m
welt Schaden z
u
u
nsortiertes
Haus
w
ecks Recycling
e
r
nehmen retourn
i
c
h für Entsorg
u
D
JBAR2! Lesen
S
portschäden vorl
Händler.
t
ion des Gerätes
u
lebensgefährlic
h
tbenutzung und
a
n und ziehen Si
e
t
e vom Gerät fer
e
häuse während
d
l
e. Bestellen Sie
S
chutzklasse I.
G
e
iner Fachkraft
d
h
ließende Netzsp
a
u
ng.
nicht gequetsch
t
das Kabel erset
z
o
n 0.5m zwischen
n
eten Sicherheits
u
elle da bei empf
t
sgarantie am
E
n
ur im Innenb
e
e
r Flüssigkeit wie
r
Staub. Schütze
t
ze nicht blockie
r
t
und jedem and
e
ngen. Vermeide
n
a
chdem Sie sich
m
e
n, die sich nicht
n
nischer Bedienu
n
Sicherheitsgrün
Garantieanspru
c
n
dungen beschri
e
t der Garantiean
m
Schlag, usw.
v
der Bedienungs
a
e
nde Folgeschäd
e
h
mann installier
e
n nicht sofort ei
n
s akklimatisiert i
BAR2
ANLEIT
U
u
ng zeigt an, da
s
u
fügen kann. En
t
müll; die Einheit
e
ntsorgt werden.
i
ert werden. Res
p
u
ngsrichtlinien
a
S
ie diese Bedien
u
iegen. Sollte die
s
sehr vorsichtig:
h
en elektrischen
vor jeder Reinig
u
e
nie an der Net
z
n.
d
es Betriebs nic
h
eventuelle Ersat
z
G
emäß den Vors
c
d
urchgeführt wer
d
a
nnung nicht hö
h
t
oder durch sch
a
z
en.
der Lichtausbeut
e
kabel fest (z.B.
V
indlichen Mensc
h
E
nde dieser Bedi
e
e
reich. Schützen
z.B. Trop
f
- ode
r
n Sie das Gerät
v
r
t werden. Beach
e
ren Gegenstan
d
n
Sie rohe Gewal
m
it seinen Funkti
o
mit dem Gerät a
n
g.
den verboten. B
e
c
h.
e
ben in dieser B
e
spruch. Jede an
d
v
erbunden.
a
nleitung verurs
a
e
n übernimmt d
e
e
n und warten.
n
schalten. Schüt
z
st (Zimmertemp
U
NG
s
s die Entsorgun
g
t
sorgen Sie die E
oder verwendet
e
Diese Einheit m
u
p
ektieren Sie di
e
a
n Ihre örtlich
e
u
ngsanleitung v
o
s
der Fall sein, v
e
das Berühren v
o
Schlägen führen
u
ng vom Netz. F
a
z
leitung.
h
t, denn das Geh
z
teile bei Ihrem
F
c
hriften muss da
s
d
en.
h
er ist als die Ne
a
rfe Kanten bes
c
e
und irgendeine
r
V
DLSC7 oder V
D
h
en epileptische
A
e
nungsanleitung.
Sie das Gerät v
o
r
Spritzwasser, a
u
v
or extremen Te
ten Sie eine min
d
.
t während der I
n
o
nen vertraut ge
m
uskennen. Meist
e
i Schäden veru
r
e
dienungsanleitu
n
d
ere Verwendun
g
a
cht werden, erli
s
e
r Hersteller kein
e
z
en Sie das Gerä
eratur erreicht h
©Vellem
a
g
dieses Produkt
e
inheit (oder
e
n Batterien mü
s
u
ss an den Händ
l
e
örtlichen
e
Behörde.
o
r Inbetriebnah
m
e
rwenden Sie da
n unter Spannu
n
.
a
ssen Sie dazu d
äuse heizt auf.
F
achhändler.
s
Gerät geerdet
s
tzspannung
c
hädigt werden k
a
r
beleuchteten Flä
c
D
LSC8)
A
nfälle ausgelös
t
o
r Regen und Fe
u
u
s.
mperaturen. Be
a
imale Entfernun
g
n
stallation und
m
acht haben. La
s
ist die Beschädig
r
sacht durch
n
g sonst kann di
e
g
ist mit Gefahre
n
s
cht der
e
Haftung.
t vor Beschädig
u
at).
a
n nv
e
s
s
sen
l
er
m
e
s
n
g
en
s
ein.
a
nn.
c
he.
t
u
chte.
a
chten
g
von
s
sen
ung
e
s zu
n
wie
u
ng,

VDPLDJBAR2
15.09.2010 ©Velleman nv
20
• Dieses Gerät wurde für den professionellen Einsatz auf Bühnen, in Discotheken, Theatern, usw. entworfen und
eignet sich nur für die Anwendung im Innenbereich (<35°C, <75%RH). Verwenden Sie das Gerät mit einer
Wechselspannung von max. 240VAC / 50Hz.
• Das Gerät eignet sich nicht für permanenten Betrieb: eine regelmäßige Pause verlängert die Lebensdauer.
• Verwenden Sie die Originalverpackung, wenn das Gerät transportiert werden soll.
• Bewahren Sie diese Bedienungsanleitung für künftige Einsichtnahme auf.
4. Eigenschaften
• Lieferung mit Stativ, jeder Scheinwerfer kann separat eingestellt werden
• Schutztasche für Transport
• DMX-Steuerung über 15 Kanäle
• eingebaute Stand-Alone-Programa, Master/Slave-Steuerung oder Musiksteuerung dank des eingebauten
Mikrofons
• einfach über Fußschalter zu bedienen
• optionales Stativ: VDL3SS
5. Umschreibung
Siehe Abbildungen, Seite 2 dieser Bedienungsanleitung.
1 Mikrofon 3 DMX-Eingang
2 Display mit Einstellknöpfen 4 DMX-Ausgang
A MODE-Taste 5 Einstellknopf Empfindlichkeit
B UP-Taste 6 Eingang Fußschalter
C DOWN-Taste 7 Netzeingang
6. Vorbereitung
Den Montageort auswählen
Der VDPLDJBAR2 wurde für die Anwendung im Innenbereich bei Temperaturen niedriger als 35°C
entworfen. Sorgen Sie für eine geeignete Ventilation und richten Sie diese auf das Metallgehäuse des
Scheinwerfers.
Verwenden Sie den Scheinwerfer nicht:
• in einer Umgebung mit einer Umgebungstemperatur höher als 35°C und eine relative Feuchte höher als
75%.
• in einem Raum kleiner als 10 m³ wenn es keine Ventilation gibt.
Montage
Gefahr vor Verletzungen. Für die Installation des Gerätes ist eine solide praktische Erfahrung
notwendig. Sie müssen die Höchstlast einer Tragkonstruktion berechnen können, wissen welches
Baumaterial Sie verwenden können und Sie müssen das verwendete Material und das Gerät af und zu
kontrollieren lassen. Montieren Sie das Gerät nie selber wenn Sie keine Erfahrung damit haben. Eine
schlechte Montage kann zu Verletzungen führen.
• Eignet sich als Bodenscheinwerfer oder befestigen Sie das Gerät an einer Halterung.
• Lassen Sie das Gerät von einem Fachmann und gemäß den EN 60598-2-17 und allen anderen zutreffenden
Normen installieren.
• Die Konstruktion muss während einer Stunde eine Punktlast von maximal 10 x dem Gewicht des Geräts tragen
können, ohne dass Verformung verursacht wird.
• Das Gerät muss immer mit einer zweiten Befestigung z.B. mit einem Sicherheitskabel gesichert werden.
• Stehen Sie während der Montage, Entfernung oder Wartung nie direkt unter dem Gerät. Lassen Sie das Gerät
jährlich und vor der Inbetriebnahme von einem Fachmann prüfen.
• Montieren Sie das Gerät an einem Ort, an dem es wenig Vorübergehende gibt und der unzugänglich ist für
Unbefugte.
• Oberirdische Montage erfordert erhebliche Sachkenntnis in Bezug auf das Berechnen der maximalen Lasten,
das geeignete Montagematerial…Lassen Sie das Material und das Gerät regelmäßig kontrollieren. Versuchen
Sie das Gerät nicht selber zu installieren, denn wenn Sie nicht über diese Qualifikationen verfügen, könnte es
zu Verletzungen führen.
• Regeln Sie den Neigungswinkel über den Montagebügel und drehen Sie die Schrauben fest an.
• Achten Sie darauf, dass sich kein entflammbares Material in einem Umkreis von 50 cm befindet.
• Lassen Sie das Gerät von einem qualifizierten Elektriker anschließen.
• Schließen Sie das Gerät an das Hauptnetz und nicht an einen Dimmer an. Beachten Sie, dass der verwendete
Kreis mit einem mit einem
Fehlerstrom-Schutzschalter (RCD) von 30 mA geschützt ist.
• Die Installation muss vor Inbetriebnahme von einem Experten genehmigt werden.
DMX512-Anschluss
Siehe Abbildungen, Seite 2 dieser Bedienungsanleitung.
• Wenn nötig, so verbinden Sie ein XLR-Kabel mit dem 3-Pin XLR-Ausgang der Steuerung (nicht mitgeliefert)
und die andere Seite mit dem 3-Pin XLR-Eingang [3] des VDPLDJBAR2. Sie können verschiedene

15.09.201
VDP
L
Ausg
a
• Ein
D
in ei
n
Stör
u
XLR-
B
der
K
Anschlu
s
• Stecke
7. An
w
7.1 Sta
• Mit d
e
lasse
• Wähl
e
Eing
a
VDP
L
• Verbi
• Schli
e
• Stell
e
• Habe
• Wähl
e
einer
Sie
±
• Um d
anzei
oder
7.2 DM
• Drüc
k
Das
D
• Alle
D
reagi
e
Steu
e
verw
e
• Wen
n
empf
gleic
h
Kana
• Im F
a
zweit
müs
s
• Drüc
k
• Wähl
e
• Die
A
Adre
s
Kanal 1
0
L
DJBAR2in Seri
e
a
ngsanschlüssen
D
MX-Abschlusswi
d
n
er Umgebung m
u
ng des digitalen
B
uchse mit eine
m
K
ette angeschlos
s
s
s an das Netz
Verb
das
m
gen
e
n Sie das Netzk
a
w
endung
nd alone od
e
e
m Master/Slav
e
n.
e
n Sie einen VD
P
a
ng [3] des näc
h
L
DJBAR2 mit ei
n
nden Sie den Fu
ß
e
ßen Sie alle Ne
t
e
n Sie das Maste
r
n Sie aus
g
e
n Sie für jedes
S
Ziffe
r
(z.B.
±
20 Sekunden bi
ie Geschwindigk
e
gt (Standard-Ge
DOWN [B] ein.
X-Steuerun
g
k
en Sie MODE [
A
D
isplay zeigt nun
D
MX-gesteuerten
e
ren kann. Dies
e
e
rung empfängt
u
e
nden oder eine
n
alle Geräte die
s
angen. Mit ande
r
h
en Zeit beeinflu
s
l Signale empfa
n
a
lle des 15-Kana
l
en Einheit auf 1
6
s
en.
k
en Sie MODE [
A
e
n Sie die Starta
anzeigt.
A
dresse wird nac
h
s
se (z.B.
interne
P
automa
t
musikg
e
e
schalten. Verw
e
.
d
erstand ist emp
it vielem elektri
s
Steuersignals d
u
m
120Ω Widerst
a
s
en wird.
inden Sie den S
c
m
it dem Schein
w
e
hmigt worden is
t
a
bel in den Netz
e
e
r Master/S
e
-Steuerung kön
n
P
LDJBAR2 als
M
h
sten VDPLDJB
A
n
em Abschlusswi
ß
schalter mit de
m
t
zkabel [7] an.
r
gerät mit DOW
N
g
ewählt, so könn
S
lave-Gerät das
: Adresse =
1
s das Display
e
it des internen
P
schwindigkeit is
t
g
A
] bis das Displa
y
an.
Geräte brauche
e
digitale Startad
u
nd ausführt. Si
e
separate Starta
d
s
elbe Startadres
s
r
en Worten, wen
s
st. Wenn Sie v
e
n
gen. Wenn Sie
d
l
VDPLDJBAR2,
6
(1 + 15) (CH1
6
A
] bis das Displa
y
dresse mit UP [
C
h
± 20 Sekunde
n
).
P
rogramme
t
ische Steuerung
e
steuert
VDPLDJ
21
e
nden Sie ein z
w
fehlenswert für
I
s
chem Rauschen
u
rch elektrisches
a
nd zwischen 2 u
c
heinwerfer mit
e
w
erfer mitgeliefer
t
.
e
ingang [7] und
s
lave (ohne
D
n
en Sie mehrere
M
astergerät. Ver
b
A
R2, usw. Verse
h
derstand (siehe
m
Mastergerät [
6
N
[B] auf
en Sie die Empfi
Adressenmenü
m
1
6). Stellen Sie
d
anzeigt.
P
rogramms zu ä
n
t
51). Stellen Sie
y
[2] o
d
n eine digitale S
t
resse ist die Kan
e
können dieselb
e
d
resse für jedes
G
s
e haben, werde
n
n Sie die Einstell
e
rschiedene Adre
s
d
ie Einstellungen
werden Sie die
S
6
~30), der dritte
y
“A” und die Zif
f
C
] oder DOWN [
D
n
aktiv. Das Disp
l
000 – 0
0
010 – 0
3
033 – 0
5
053 – 0
7
074 – 0
9
096 – 1
1
117 – 1
3
138 – 1
5
159 – 1
8
181 – 2
0
202 – 2
2
223 – 2
4
BAR2
w
eipoliges abges
c
I
nstallationen, b
e
(z.B. Discos). D
e
Rauschen. Der
D
nd 3, die den XL
e
iner separat gee
ten Netzkabel o
d
s
tecken Sie den
D
MX)
Geräte synchro
n
b
inden Sie den D
h
en Sie den DM
X
§6 DMX512-A
n
6
].
(auto) oder
ndlichkeit über
d
m
it MODE [A]. I
m
d
ie Adresse mit
U
n
dern, drücken
S
die gewünschte
d
e
r
anzeig
t
t
artadresse, sod
a
alnummer, von
d
e
Startadresse f
ü
G
erät eingeben.
n
sie auf einem s
ungen von eine
m
s
sen einstellen,
w
ändern, wird nu
r
S
tartadresse de
s
n Einheit auf 31
f
e
r
anzeigt (z.B.
D
]. Drücken Sie
l
ay zeigt danach
0
9 ausgesch
a
3
2 Program
m
5
2 Program
m
7
3 Program
m
9
5 Program
m
1
6 Program
m
3
7 Program
m
5
8 Program
m
8
0 Program
m
0
1 Program
m
2
2 Program
m
4
3 Program
m
c
hirmtes Kabel m
e
i denen das DM
X
e
r Abschlusswid
e
D
MX-Abschlussw
R-Ausgang [4]
d
rdeten Steckdos
e
d
er ein Netzkabe
l
Stecker in die S
t
n
mit dem Maste
r
MX-Ausgang [4]
X
-Ausgang [4] d
e
n
schluss).
(musikgeste
u
d
en Einstellknopf
m
Display ersch
e
U
P [C] oder DO
W
S
ie MODE [A] bi
s
Geschwindigkei
t
t
und drücken Si
e
a
ss das richtige
G
d
er das Gerät di
e
ü
r eine ganze Gr
u
pezifischen Kan
a
m
Kanal ändern,
w
w
ird jedes Gerät
r
das besagte G
e
s
ersten Gerätes
a
(16 + 15) (CH3
1
: Adress
danach auf MO
D
“d” gefolgt von
d
a
ltet
m
1
m
2
m
3
m
4
m
5
m
6
m
7
m
8
m
9
m
10
m
11
©Vellem
a
it XLR Ein- und
X
-Kabel lang ist
o
e
rstand verhinde
r
iderstand ist nur
d
es letzten Gerät
e
. Verwenden Si
e
l
, das vom Herst
e
t
eckdose.
r
gerät funktionie
r
mit dem DMX-
e
s letzten
u
ert).
[5] regeln.
e
int “A” gefolgt v
o
W
N [B] auf 1. W
a
s
das Display
t
(1~100) mit U
P
e
danach au
f
UP
G
erät auf die Sig
n
e
Befehle der DM
u
ppe von Geräte
a
l das Steuersign
w
erden alle Ger
ä
auf einem ande
r
e
rät beeinflusst.
a
uf 1 (CH1~15),
1
~45) usw. einst
e = 16).
E [A] bis das Di
s
d
er ausgewählte
n
a
n nv
o
der
r
t
eine
s in
e
nur
e
ller
r
en
o
n
a
rten
P
[C]
[C].
n
ale
X-
n
al
ä
te zur
r
en
der
ellen
s
play
n

15.09.201
Kanal 2
Kanal 3
Kanal 4
Kanal 5
Kanal 6
Kanal 7
Kanal 8
Kanal 9
Kanal 1
0
Kanal 1
1
Kanal 1
2
Kanal 1
3
Kanal 1
4
Kanal 1
5
7.3 Fu
ß
Bemerk
u
• Tren
n
• Funk
t
Pedal 1
Pedal 2
Pedal 3
Pedal 4
8. W
a
• Das
G
250
V
Eige
n
• Verw
e
Lösu
n
• Es gi
b
9. Te
c
Stromver
s
Stromver
b
LEDs
DMX-Kan
ä
Abstrahl
w
Abmessu
n
Gewicht
Verwend
e
Schaden
o
Produkt,
© URHEB
E
Velleman
ohne vorhe
reproduzie
r
0
Masterd
i
Strobos
k
Spot 1:
Spot 1:
Spot 1:
Spot 2:
Spot 2:
Spot 2:
0
Spot 3:
1
Spot 3:
2
Spot 3:
3
Spot 4:
4
Spot 4:
5
Spot 4:
ß
schalter
u
ng: Der Fußsch
a
musiksteue
r
n
en Sie den Netz
t
ionen:
vorprogrammi
e
Einstellungen
Ton eingeschal
Hold
Black-out
a
rtung Vor
b
G
erät braucht ke
i
V
/2 A, 5 x 20 m
m
n
schaften.
e
nden Sie zur R
e
n
gsmittel.
b
t keine wartbar
e
c
hnische D
a
s
orgung
b
rauch
ä
le
w
inkel
n
gen
e
n Sie dieses Ge
o
der Verletzung
siehe www.hqp
o
E
RRECHT
NV besitzt das Ur
h
rige schriftliche Ge
n
r
en, zu kopieren, zu
i
mmer
k
op
rot
grün
blau
rot
grün
blau
rot
grün
blau
rot
grün
blau
a
lter funktioniert
r
ung ( ) au
s
stecker und ver
b
e
rte
drücken Si
#
1
2
3
4
5
6
7
8
9
tet
drücken Sie
,
Einstellung
z
b
ereitung
i
ne regelmäßige
m
geschützt. Ers
e
e
inigung ein feuc
e
n Teile. Bestell
e
a
ten
rät nur mit origi
en bei (falscher
)
o
wer.eu. Alle Än
h
eberrecht für di
e
n
ehmigung des Urh
e
übersetzen, zu be
a
VDPLDJ
22
244 – 2
5
250 – 2
5
000 – 0
0
010 - 25
000 – 0
0
010 - 25
000 – 2
5
000 – 2
5
000 – 2
5
000 – 2
5
000 – 2
5
000 – 2
5
000 – 2
5
000 – 2
5
000 – 2
5
000 – 2
5
000 – 2
5
000 – 2
5
nur wenn Sie d
e
s
gewählt haben.
b
inden Sie den F
u
e Effekt
Weiß
Rot
Grün
Blau
Gelb
Rosa
Cyan
Farbwechsel,
j
Farbfade, alle
,
um alle LEDs a
u
z
urückzukehren
Wartung. Der in
t
e
tzen Sie eine de
htes Tuch. Verw
e
e
n Sie eventuelle
230VAC ~ 50Hz
160W
28 x 3W RGB
15
30°
1200 x 65 x 31
5
15kg
nellen Zubehört
)
Anwendung di
e
derungen ohne
v
e
se Bedienungsan
e
bers ist es nicht g
e
a
rbeiten oder zu sp
e
BAR2
5
5 automati
s
5
5 musikges
t
0
9 ausgesch
a
5 Dimmen
v
0
9 ausgesch
a
5 Strobosk
o
5
5 Dimmen
v
5
5 Dimmen
v
5
5 Dimmen
v
5
5 Dimmen
v
5
5 Dimmen
v
5
5 Dimmen
v
5
5 Dimmen
v
5
5 Dimmen
v
5
5 Dimmen
v
5
5 Dimmen
v
5
5 Dimmen
v
5
5 Dimmen
v
e
n automatische
n
u
ßschalter mit d
e
j
ede Sekunde, e
n
3 Sekunden, en
d
u
szuschalten, d
r
ü
t
erne Kreis ist m
fekte Sicherung
e
nden Sie auf ke
Ersatzteile bei I
h
5
mm
eilen. Velleman
e
ses Gerätes. Fü
v
orherige Ankü
n
leitung. Alle welt
w
e
stattet, diese Bedi
e
e
ichern.
s
che Steue
r
ung:
t
euert
a
ltet
v
on 0 – 100%
a
ltet
o
p von langsam
a
v
on 0 – 100%
v
on 0 – 100%
v
on 0 – 100%
v
on 0 – 100%
v
on 0 – 100%
v
on 0 – 100%
v
on 0 – 100%
v
on 0 – 100%
v
on 0 – 100%
v
on 0 – 100%
v
on 0 – 100%
v
on 0 – 100%
n
Modus (
e
m Eingang [6].
n
dlose Schleife (
d
lose Schleife (1
ü
cken Sie wieder
it einer internen
durch eine mit d
inen Fall Alkohol
h
rem Fachhändl
e
NV übernimmt
k
r mehr Informa
t
n
digung vorbeha
w
eiten Rechte vo
r
e
nungsanleitung ga
n
©Vellem
a
interne Program
m
a
uf schnell
) oder
1 bis 7)
bis 7)
, um zur vorigen
Sicherung von
enselben
oder irgendwel
c
e
r.
k
eine Haftung fü
t
ionen zu diese
m
lten.
r
behalten.
n
z oder in Teilen zu
a
n nv
m
e
c
he
r
m

Velleman® Service and Quality Warranty
Velleman® has over 35 years of experience in the electronics world
and distributes its products in more than 85 countries.
All our products fulfil strict quality requirements and legal
stipulations in the EU. In order to ensure the quality, our products
regularly go through an extra quality check, both by an internal
quality department and by specialized external organisations. If, all
precautionary measures notwithstanding, problems should occur,
please make appeal to our warranty (see guarantee conditions).
General Warranty Conditions Concerning Consumer Products
(for EU):
• All consumer products are subject to a 24-month warranty on
production flaws and defective material as from the original date of
purchase.
• Velleman® can decide to replace an article with an equivalent
article, or to refund the retail value totally or partially when the
complaint is valid and a free repair or replacement of the article is
impossible, or if the expenses are out of proportion.
You will be delivered a replacing article or a refund at the value of
100% of the purchase price in case of a flaw occurred in the first
year after the date of purchase and delivery, or a replacing article at
50% of the purchase price or a refund at the value of 50% of the
retail value in case of a flaw occurred in the second year after the
date of purchase and delivery.
• Not covered by warranty:
- all direct or indirect damage caused after delivery to the article
(e.g. by oxidation, shocks, falls, dust, dirt, humidity...), and by the
article, as well as its contents (e.g. data loss), compensation for loss
of profits;
- frequently replaced consumable goods, parts or accessories such as
batteries, lamps, rubber parts, drive belts... (unlimited list);
- flaws resulting from fire, water damage, lightning, accident, natural
disaster, etc. …;
- flaws caused deliberately, negligently or resulting from improper
handling, negligent maintenance, abusive use or use contrary to the
manufacturer’s instructions;
- damage caused by a commercial, professional or collective use of
the article (the warranty validity will be reduced to six (6) months
when the article is used professionally);
- damage resulting from an inappropriate packing and shipping of
the article;
- all damage caused by modification, repair or alteration performed
by a third party without written permission by Velleman®.
• Articles to be repaired must be delivered to your Velleman®
dealer, solidly packed (preferably in the original packaging), and be
completed with the original receipt of purchase and a clear flaw
description.
• Hint: In order to save on cost and time, please reread the manual
and check if the flaw is caused by obvious causes prior to presenting
the article for repair. Note that returning a non-defective article can
also involve handling costs.
• Repairs occurring after warranty expiration are subject to shipping
costs.
• The above conditions are without prejudice to all commercial
warranties.
The above enumeration is subject to modification according
to the article (see article’s manual).
Velleman® service- en kwaliteitsgarantie
Velleman® heeft ruim 35 jaar ervaring in de elektronicawereld en
verdeelt in meer dan 85 landen.
Al onze producten beantwoorden aan strikte kwaliteitseisen en aan
de wettelijke bepalingen geldig in de EU. Om de kwaliteit te
waarborgen,
ondergaan onze producten op regelmatige tijdstippen een extra
kwaliteitscontrole, zowel door onze eigen kwaliteitsafdeling als door
externe gespecialiseerde organisaties. Mocht er ondanks deze
voorzorgen toch een probleem optreden, dan kunt u steeds een
beroep doen op onze waarborg (zie waarborgvoorwaarden).
Algemene waarborgvoorwaarden consumentengoederen
(voor Europese Unie):
• Op alle consumentengoederen geldt een garantieperiode van 24
maanden op productie- en materiaalfouten en dit vanaf de
oorspronkelijke aankoopdatum.
• Indien de klacht gegrond is en een gratis reparatie of vervanging
van een artikel onmogelijk is of indien de kosten hiervoor buiten
verhouding zijn, kan Velleman® beslissen het desbetreffende artikel
te vervangen door een gelijkwaardig artikel of de aankoopsom van
het artikel gedeeltelijk of volledig terug te betalen. In dat geval krijgt
u een vervangend product of terugbetaling ter waarde van 100% van
de aankoopsom bij ontdekking van een gebrek tot één jaar na
aankoop en levering, of een vervangend product tegen 50% van de
kostprijs of terugbetaling van 50 % bij ontdekking na één jaar tot 2
jaar.
• Valt niet onder waarborg:
- alle rechtstreekse of onrechtstreekse schade na de levering
veroorzaakt aan het toestel (bv. door oxidatie, schokken, val, stof,
vuil, vocht...), en door het toestel, alsook zijn inhoud (bv. verlies van
data), vergoeding voor eventuele winstderving.
- verbruiksgoederen, onderdelen of hulpstukken die regelmatig
dienen te worden vervangen, zoals bv. batterijen, lampen, rubberen
onderdelen, aandrijfriemen... (onbeperkte lijst).
- defecten ten gevolge van brand, waterschade, bliksem, ongevallen,
natuurrampen, enz.
- defecten veroorzaakt door opzet, nalatigheid of door een
onoordeelkundige behandeling, slecht onderhoud of abnormaal
gebruik of gebruik van het toestel strijdig met de voorschriften van
de fabrikant.
- schade ten gevolge van een commercieel, professioneel of collectief
gebruik van het apparaat (bij professioneel gebruik wordt de
garantieperiode herleid tot 6 maand).
- schade veroorzaakt door onvoldoende bescherming bij transport
van het apparaat.
- alle schade door wijzigingen, reparaties of modificaties uitgevoerd
door derden zonder toestemming van Velleman®.
• Toestellen dienen ter reparatie aangeboden te worden bij uw
Velleman®-verdeler. Het toestel dient vergezeld te zijn van het
oorspronkelijke aankoopbewijs. Zorg voor een degelijke verpakking
(bij voorkeur de originele verpakking) en voeg een duidelijke
foutomschrijving bij.
• Tip: alvorens het toestel voor reparatie aan te bieden, kijk nog
eens na of er geen voor de hand liggende reden is waarom het
toestel niet naar behoren werkt (zie handleiding). Op deze wijze kunt
u kosten en tijd besparen. Denk eraan dat er ook voor niet-defecte
toestellen een kost voor controle aangerekend kan worden.
• Bij reparaties buiten de waarborgperiode zullen transportkosten
aangerekend worden.
• Elke commerciële garantie laat deze rechten onverminderd.
Bovenstaande opsomming kan eventueel aangepast worden
naargelang de aard van het product (zie handleiding van het
betreffende product).
Garantie de service et de qualité Velleman®
Velleman® jouit d’une expérience de plus de 35 ans dans le monde
de l’électronique avec une distribution dans plus de 85 pays.
Tous nos produits répondent à des exigences de qualité rigoureuses
et à des dispositions légales en vigueur dans l’UE. Afin de garantir la
qualité, nous soumettons régulièrement nos produits à des contrôles
de qualité supplémentaires, tant par notre propre service qualité que
par un service qualité externe. Dans le cas improbable d’un défaut
malgré toutes les précautions, il est possible d’invoquer notre
garantie (voir les conditions de garantie).
Conditions générales concernant la garantie sur les produits
grand public (pour l’UE) :
• tout produit grand public est garanti 24 mois contre tout vice de
production ou de matériaux à dater du jour d’acquisition effective ;
• si la plainte est justifiée et que la réparation ou le remplacement
d’un article est jugé impossible, ou lorsque les coûts s’avèrent
disproportionnés, Velleman® s’autorise à remplacer ledit article par
un article équivalent ou à rembourser la totalité ou une partie du prix
d’achat. Le cas échéant, il vous sera consenti un article de
remplacement ou le remboursement complet du prix d’achat lors
d’un défaut dans un délai de 1 an après l’achat et la livraison, ou un
article de remplacement moyennant 50% du prix d’achat ou le
remboursement de 50% du prix d’achat lors d’un défaut après 1 à 2
ans.
• sont par conséquent exclus :
- tout dommage direct ou indirect survenu à l’article après livraison
(p.ex. dommage lié à l’oxydation, choc, chute, poussière, sable,
impureté…) et provoqué par l’appareil, ainsi que son contenu (p.ex.
perte de données) et une indemnisation éventuelle pour perte de
revenus ;
- tout bien de consommation ou accessoire, ou pièce qui nécessite un
remplacement régulier comme p.ex. piles, ampoules, pièces en
caoutchouc, courroies… (liste illimitée) ;
- tout dommage qui résulte d’un incendie, de la foudre, d’un
accident, d’une catastrophe naturelle, etc. ;
- out dommage provoqué par une négligence, volontaire ou non, une
utilisation ou un entretien incorrects, ou une utilisation de l’appareil
contraire aux prescriptions du fabricant ;
- tout dommage à cause d’une utilisation commerciale,
professionnelle ou collective de l’appareil (la période de garantie sera
réduite à 6 mois lors d’une utilisation professionnelle) ;

- tout dommage à l’appareil qui résulte d’une utilisation incorrecte ou
différente que celle pour laquelle il a été initialement prévu comme
décrit dans la notice ;
- tout dommage engendré par un retour de l’appareil emballé dans
un conditionnement non ou insuffisamment protégé.
- toute réparation ou modification effectuée par une tierce personne
sans l’autorisation explicite de SA Velleman® ; - frais de transport
de et vers Velleman® si l’appareil n’est plus couvert sous la garantie.
• toute réparation sera fournie par l’endroit de l’achat. L’appareil doit
nécessairement être accompagné du bon d’achat d’origine et être
dûment conditionné (de préférence dans l’emballage d’origine avec
mention du défaut) ;
• tuyau : il est conseillé de consulter la notice et de contrôler câbles,
piles, etc. avant de retourner l’appareil. Un appareil retourné jugé
défectueux qui s’avère en bon état de marche pourra faire l’objet
d’une note de frais à charge du consommateur ;
• une réparation effectuée en-dehors de la période de garantie fera
l’objet de frais de transport ;
• toute garantie commerciale ne porte pas atteinte aux conditions
susmentionnées.
La liste susmentionnée peut être sujette à une
complémentation selon le type de l’article et être mentionnée
dans la notice d’emploi.
Velleman® Service- und Qualitätsgarantie
Velleman® hat gut 35 Jahre Erfahrung in der Elektronikwelt und
vertreibt seine Produkte in über 85 Ländern.
Alle Produkte entsprechen den strengen Qualitätsforderungen und
gesetzlichen Anforderungen in der EU. Um die Qualität zu
gewährleisten werden unsere Produkte regelmäßig einer zusätzlichen
Qualitätskontrolle unterworfen, sowohl von unserer eigenen
Qualitätsabteilung als auch von externen spezialisierten
Organisationen. Sollten, trotz aller Vorsichtsmaßnahmen, Probleme
auftreten, nehmen Sie bitte die Garantie in Anspruch (siehe
Garantiebedingungen).
Allgemeine Garantiebedingungen in Bezug auf Konsumgüter
(für die Europäische Union):
• Alle Produkte haben für Material- oder Herstellungsfehler eine
Garantieperiode von 24 Monaten ab Verkaufsdatum.
• Wenn die Klage berechtigt ist und falls eine kostenlose Reparatur
oder ein Austausch des Gerätes unmöglicht ist, oder wenn die Kosten
dafür unverhältnismäßig sind, kann Velleman® sich darüber
entscheiden, dieses Produkt durch ein gleiches Produkt zu ersetzen
oder die Kaufsumme ganz oder teilweise zurückzuzahlen. In diesem
Fall erhalten Sie ein Ersatzprodukt oder eine Rückzahlung im Werte
von 100% der Kaufsumme im Falle eines Defektes bis zu 1 Jahr nach
Kauf oder Lieferung, oder Sie bekommen ein Ersatzprodukt im Werte
von 50% der Kaufsumme oder eine Rückzahlung im Werte von 50 %
im Falle eines Defektes im zweiten Jahr.
• Von der Garantie ausgeschlossen sind:
- alle direkten oder indirekten Schäden, die nach Lieferung am Gerät
und durch das Gerät verursacht werden (z.B. Oxidation, Stöße, Fall,
Staub, Schmutz, Feuchtigkeit, ...), sowie auch der Inhalt (z.B.
Datenverlust), Entschädigung für eventuellen Gewinnausfall.
- Verbrauchsgüter, Teile oder Zubehörteile, die regelmäßig
ausgewechselt werden, wie z.B. Batterien, Lampen, Gummiteile,
Treibriemen, usw. (unbeschränkte Liste).
- Schäden verursacht durch Brandschaden, Wasserschaden, Blitz,
Unfälle, Naturkatastrophen, usw.
- Schäden verursacht durch absichtliche, nachlässige oder
unsachgemäße Anwendung, schlechte Wartung, zweckentfremdete
Anwendung oder Nichtbeachtung von Benutzerhinweisen in der
Bedienungsanleitung.
- Schäden infolge einer kommerziellen, professionellen oder
kollektiven Anwendung des Gerätes (bei gewerblicher Anwendung
wird die Garantieperiode auf 6 Monate zurückgeführt).
- Schäden verursacht durch eine unsachgemäße Verpackung und
unsachgemäßen Transport des Gerätes.
- alle Schäden verursacht durch unautorisierte Änderungen,
Reparaturen oder Modifikationen, die von einem Dritten ohne
Erlaubnis von Velleman® vorgenommen werden.
• Im Fall einer Reparatur, wenden Sie sich an Ihren Velleman®-
Verteiler. Legen Sie das Produkt ordnungsgemäß verpackt
(vorzugsweise die Originalverpackung) und mit dem Original-
Kaufbeleg vor. Fügen Sie eine deutliche Fehlerumschreibung hinzu.
• Hinweis: Um Kosten und Zeit zu sparen, lesen Sie die
Bedienungsanleitung nochmals und überprüfen Sie, ob es keinen auf
de Hand liegenden Grund gibt, ehe Sie das Gerät zur Reparatur
zurückschicken. Stellt sich bei der Überprüfung des Geräts heraus,
dass kein Geräteschaden vorliegt, könnte dem Kunden eine
Untersuchungspauschale berechnet.
• Für Reparaturen nach Ablauf der Garantiefrist werden
Transportkosten berechnet.
• Jede kommerzielle Garantie lässt diese Rechte unberührt.
Die oben stehende Aufzählung kann eventuell angepasst
werden gemäß der Art des Produktes (siehe
Bedienungsanleitung des Gerätes).
Garantía de servicio y calidad Velleman®
Velleman® disfruta de una experiencia de más de 35 años en el
mundo de la electrónica con una distribución en más de 85 países.
Todos nuestros productos responden a normas de calidad rigurosas y
disposiciones legales vigentes en la UE. Para garantizar la calidad,
sometimos nuestros productos regularmente a controles de calidad
adicionales, tanto por nuestro propio servicio de calidad como por un
servicio de calidad externo. En el caso improbable de que surgieran
problemas a pesar de todas las precauciones, es posible apelar a
nuestra garantía (véase las condiciones de garantía).
Condiciones generales referentes a la garantía sobre
productos de venta al público (para la Unión Europea):
• Todos los productos de venta al público tienen un período de
garantía de 24 meses contra errores de producción o errores en
materiales desde la adquisición original;
• Si la queja está fundada y si la reparación o la sustitución de un
artículo es imposible, o si los gastos son desproporcionados,
Velleman® autoriza reemplazar el artículo por un artículo
equivalente o reembolsar la totalidad o una parte del precio de
compra. En este caso, recibirá un artículo de recambio o el
reembolso completo del precio de compra al descubrir un defecto
hasta un año después de la compra y la entrega, o un artículo de
recambio al 50% del precio de compra o la sustitución de un 50% del
precio de compra al descubrir un defecto después de 1 a 2 años.
• Por consiguiente, están excluidos entre otras cosas:
- todos los daños causados directamente o indirectamente al aparato
y su contenido después de la entrega (p.ej. por oxidación, choques,
caída,...) y causados por el aparato, al igual que el contenido (p.ej.
pérdida de datos) y una indemnización eventual para falta de
ganancias;
- partes o accesorios que deban ser reemplazados regularmente,
como por ejemplo baterías, lámparas, partes de goma, ... (lista
ilimitada)
- defectos causados por un incendio, daños causados por el agua,
rayos, accidentes, catástrofes naturales, etc. ;
- defectos causados a conciencia , descuido o por malos tratos, un
mantenimiento inapropiado o un uso anormal del aparato contrario a
las instrucciones del fabricante;
- daños causados por un uso comercial, profesional o colectivo del
aparato (el período de garantía se reducirá a 6 meses con uso
profesional) ;
- daños causados por un uso incorrecto o un uso ajeno al que est
está previsto el producto inicialmente como está descrito en el
manual del usuario ;
- daños causados por una protección insuficiente al transportar el
aparato.
- daños causados por reparaciones o modificaciones efectuadas por
una tercera persona sin la autorización explicita de SA Velleman® ;
- se calcula gastos de transporte de y a Velleman® si el aparato ya
no está cubierto por la garantía.
• Cualquier reparación se efectuará por el lugar de compra. Devuelva
el aparato con la factura de compra original y transpórtelo en un
embalaje sólido (preferentemente el embalaje original). Incluya
también una buena descripción del defecto ;
• Consejo: Lea el manual del usuario y controle los cables, las pilas,
etc. antes de devolver el aparato. Si no se encuentra un defecto en
el artículo los gastos podrían correr a cargo del cliente;
• Los gastos de transporte correrán a carga del cliente para una
reparación efectuada fuera del periode de garantía.
• Cualquier gesto comercial no disminuye estos derechos.
La lista previamente mencionada puede ser adaptada según el
tipo de artículo (véase el manual del usuario del artículo en
cuestión)
Documenttranscriptie
VDP PLDJBA AR2 LED PA AR BATTEN N - 28x3W RGB R LEDs LEDPA AR BOVENLI ICHT - 28 x 3 W RGB-LEDS HERSE E À PAR LED D - 28 LED RVB DE 3 W JUEGO O DE ILUMINACIÓN PA AR LED - 28 8 LEDs DE 3W 3 RGB LEDPA AR-LICHTEF FFEKT-SET - 28 x 3W RGB R LEDs USER MANUAL M GEBRUIKERSHAND DLEIDING NOTICE E D’EMPLOI MANUA AL DEL USUA ARIO BEDIEN NUNGSANLEITUNG 3 7 11 15 19 VDPLDJBAR2 2 terminator eiindweerstand résistance de terminaison terminación Terminierung How to turn the controlller line from 3--pins into 5-pin ns (plug and soc cket). Controlle er line van 3-pin n naar 5-pin aa anpassen (stekk ker en contact) ). Modifier la ligne du con ntrôleur de 3 broches en 5 broc ches (fiche et contact). c Modificarr la línea del co ontrolador de 3 polos y 5 polos s (conector y co ontacto). Die Controller-Linie von n 3-Pin nach 5-Pin anzupassen n (Stecker und Kontakt). 15.09.2010 2 ©Vellema an nv VDPLDJBAR2 USER MA ANUAL 1. Inttroduction To all res sidents of the European E Union n Importan nt environmenttal information about this prod duct T This symbol on th he device or the package indicate es that disposal of o the device afte er its lifecycle cou uld h harm the environ nment. Do not dispose of the unitt (or batteries) as s unsorted munic cipal waste; it should b taken to a spe be ecialized compan ny for recycling. This T device should be returned to your distributor or to a local recycling service. Respect the local environ nmental rules. I in doubt, con If ntact your local waste disposal authorities. Thank you u for choosing HQ QPower™! Please read the manual thoroughly beforre bringing this de evice into service.. If the device e was damaged in n transit, don't ins stall or use it and contact your dea aler. 2. Saffety Instruc ctions Be very careful during the insta allation: touching g live wires can ca ause life-threatening electroshock ks. Always disconn nect mains powerr when device no ot in use or when n servicing or maintenance activities are performed.. Handle the pow wer cord by the pllug only. Keep this devic ce away from children and unauth horized users. Caution: devic ce heats up durin ng use. There are no user-serviceable parts p inside the device. d Refer to an a authorized dea aler for service and/or spare parts. • • • • • • This device d falls under protection class s I. It is therefore e essential that the t device be earrthed. Have a qua alified perso on carry out the electric e connectio on. Make sure that the av vailable voltage does d not exceed the t voltage state ed in the specifica ations of this man nual. Do no ot crimp the pow wer cord and protect it against dam mage. Have an authorised dealer replace it if neces ssary. Respe ect a minimum distance d of 0.5 m between the dev vice’s light outpu ut and any illumin nated surface. Use an a appropriate sa afety cable to fix the device (e.g. VDLSC7 or VDL LSC8). Do no ot stare directly at a the light sourc ce, as this may ca ause epileptic seiizure in sensitive e people. 3. Gen neral Guide elines Refer to the Velleman® Service S and Qua ality Warranty on o the last pages s of this manual. Indoor use only. Keep this device away y form rain, moistture, splashing and a dripping liquids. Keep this device away fro om dust and extreme heat. Make e sure the ventila ation openings are clear at all times. For suffficient air circula ation, leave at lea ast 1” (± 2.5 cm) in front of the openings s. Protect this t device from shocks and abuse. Avoid brute fo orce when operatting the device. • • • • • • • • Familliarise yourself with w the functions of the device be efore actually usin ng it. Do not allow operation by unqua alified people. An ny damage that may m occur will most probably be due d to unprofess sional use of the device. All modifications of the device are forb bidden for safety reasons. Damag ge caused by user modifications to o the device is not covered by the warranty. Only use the device fo or its intended pu urpose. All other uses may lead to o short circuits, burns, b electrosho ocks, lamp explosion, crash h, etc. Using the device d in an unau uthorised way wiill void the warranty. Dama age caused by disregard of certain guidelines in th his manual is nott covered by the warranty and the e deale er will not accept responsibility forr any ensuing defects or problems. A qua alified technician should install an nd service this de evice. Do no ot switch the dev vice on immediate ely after it has be een exposed to changes c in tempe erature. Protect the t device against damag ge by leaving it sw witched off until it has reached ro oom temperature e. This device d is designe ed for professiona al use on stage, in discos, theatre es, etc. The VDPLDJBAR2 can be e used indoo or (< 35°C, < 75 5%RH) with an alternating a curren nt of 90-250 VAC C~50-60 Hz. Lightiing effects are no ot designed for permanent p operattion: regular ope eration breaks willl prolong their liv ves. 15.09.2010 3 ©Vellema an nv VDPLDJBAR2 • • Use the original packaging if the device is to be transported. Keep this manual for future reference. 4. Features • • • • • • comes with tripod, each light can be positioned separately protection case for transporting DMX-controlled via 15 channels built-in stand-alone programs, master/slave mode or sound activation via built-in microphone footswitch for easy control of the built-in programs optional lighting stand: VDL3SS 5. Overview Refer to the illustrations on page 2 of this manual. 1 2 microphone display with control buttons A MODE button B DOWN button C UP button 3 4 5 6 7 DMX input DMX output sound sensitivity knob foot controller jack power input 6. Getting started Choosing a Mounting Location The VDPLDJBAR2 batten has been designed for indoor environments at temperatures up to 35°C. For proper operation, the unit must be operated with an unobstructed air convection to its metal housing. Do not: • Operate the batten in environments with an ambient temperature higher than 35°C and a relative humidity higher than 75%. • Operate the batten in a closed environment smaller than 10 m³ unless forced air convection is provided. Secure Mounting Risk of injury. Overhead mounting requires extensive experience: calculating workload limits, determining the installation material to be used… Have the material and the device itself checked regularly. Do not attempt to install the device yourself if you lack these qualifications as improper installation may result in injuries. • • • • • • • • • • • The VDPLDJBAR2 batten is designed to be mounted on a tripod with a 35 mm tube diameter. Make sure that the diameter of the inserted tripod tube is not less than 35 mm as otherwise secure mounting cannot be guaranteed. Slide a tripod adaptor over the tripod tube and secure the unit with the provided screw handle. Have the batten installed by a qualified person, respecting EN 60598-2-17 and all other applicable norms. The carrying construction must be able to support 10 times the weight of the batten for 1 hour without deforming. The installation must always be secured with a secondary attachment e.g. a safety cable. Never stand directly below the batten when it is being mounted, removed or serviced. Have a qualified technician check the batten once a year and once before you bring it into service. Install the batten in a location with few passers-by that is inaccessible to unauthorised persons. Adjust the desired inclination angle via the mounting bracket and tighten the bracket screws. Make sure there is no flammable material within a 0.5 m radius of the batten. Have a qualified electrician carry out the electric connection. Connect the batten to the mains with the power plug. Make sure the used mains circuit is protected by a 30mA Residual Current Device (RCD). Do not connect it to a dimming pack. The installation has to be approved by an expert before the device is taken into service. DMX-512 connection Refer to the illustrations on page 2 of this manual. • • When applicable, connect an XLR cable to the female 3-pin XLR output of a controller (not incl.) and the other side to the male 3-pin XLR input [3] of the VDPLDJBAR2. Multiple VDPLDJBAR2’s can be linked through serial linking. The linking cable should be a dual core, screened cable with XLR input and output connectors. A DMX terminator is recommended for installations where the DMX cable has to run a long distance or is in an electrically noisy environment (e.g. discos). The terminator prevents corruption of the digital control signal by electrical noise. The DMX terminator is simply an XLR plug with a 120Ω resistor between pins 2 and 3, which is then plugged into the XLR output socket [4] of the last device in the chain. 15.09.2010 4 ©Velleman nv VDPLDJBAR2 Connectiion to the AC Po ower Supply g power to the VDPLDJBAR2 battten must be pro operly and separa ately The AC socket providing earthed d. Do not use any y other AC cords than the one pro ovided or any oth her AC cord not authorized by the manu ufacturer. • Simply insert the supplie ed AC power cord d into the power input [7] and in nsert the power plug p into a suitab ble wall outtlet. 7. Operation 7.1 Stand alone or master/slav ve (no DMX) • • • The master/slave m ope eration enables th hat several device es can be synchrronized and contrrolled by one master device. Choose one VDPLDJB BAR2 that will ac ct as a master en n connect its DMX X output [4] to the t DMX input [3 3] of R2 and so on. Ma ake sure to plug a terminator into o the DMX outputt [4] of the last the next VDPLDJBAR VDPL LDJBAR2 (refer to §6 DMX-512 2 connection) Connect the foot controller to the foot controller jack [6] [ of the masterr. i the power cables [7] and plug the other ends into a suitable mains outlet. Plug in • Set th he master VDPLDJBAR2 to • • When n mode is selected, control the sounds sens sitivity with the sound s sensitivity knob [5]. On all slave units, sett the address to 1. 1 Select the address setting with the mode button [A]. The shows A • wed by a digit (e.g. follow : addrress = 16). Set the t address to 1 using the UP [C] ] or DOWN [B] . butto ons. Wait for ±20 0s until the displa ay shows • B]. (sound contrrolled) using the DOWN button [B (auto) or To ch hange the speed of the internal prrogram, press the MODE button [A] [ until the disp play shows (default speed is 51). Use the UP [C] or DOWN [B] bu uttons to set the desired speed. Range R 1 – 100. 7.2 DMX controlled • • • • Press s the MODE butto on [A] until the display d [2] shows s or , then press th he UP button [C]. The displa ay now shows . All DM MX-controlled devices need a digiital start address s so that the correct device respon nds to the signals. This digital d start addre ess is the channe el number from which w the device starts to “listen”” to the DMX controller. The same starting s address can be used for a whole group off devices or an in ndividual address can be se et for every devic ce. When n all devices have e the same addre ess, all the units will “listen” to th he control signal on o one particularr chann nel. In other worrds: changing the e settings of one channel will affect all devices sim multaneously. If you y set in ndividual address ses, each device will w “listen” to a separate s channell number. Changing the settings of o one chann nel will only affec ct the device in question. q In cas se of the 15-chan nnel VDPLDJBAR2, you will have e to set the startt address of the first f unit to 1 (CH1~15), the second d unit to 16 (1 + 15) (CH16~30),, the third to 31 (16 + 15) (CH31 1~45), and so on n. • • Press s the mode button [A] until the display shows A fo ollowed by a digit (e.g. : address = 16). Use the UP- [C] or DO OWN-button [D] to select a DMX starting address s. After selecting the desired addrress, • s the MODE butto on [A] until the display d shows . press It tak kes ±20s before the t address beco omes active and tthe display shows “d” followed by y the selected address (e.g. ) Channel 1 internal programs auto mo ode sound co ontrolled mode Channel 2 Master Dimmer D Channel 3 Strobe Channel 4 Spot 1: red 15.09.2010 000 – 00 09 010 – 03 32 033 – 05 52 053 – 07 73 074 – 09 95 096 – 11 16 117 – 13 37 138 – 15 58 159 – 18 80 181 – 20 01 202 – 22 22 223 – 24 43 244 – 25 55 250 – 25 55 000 – 00 09 010 - 255 000 – 00 09 010 - 255 000 – 25 55 5 Off Program 1 Program 2 Program 3 Program 4 Program 5 Program 6 Program 7 Program 8 Program 9 Program 10 1 Program 11 1 Auto Mode e: internal progra ams Sound Con ntrolled Mode Off Dimming from f 0 – 100% Off Flash, with h increasing spee ed Dimming from f 0 – 100% ©Vellema an nv VDPLDJBAR2 Channel Channel Channel Channel Channel Channel Channel Channel Channel Channel Channel 5 6 7 8 9 10 11 12 13 14 15 Spot Spot Spot Spot Spot Spot Spot Spot Spot Spot Spot 1: 1: 2: 2: 2: 3: 3: 3: 4: 4: 4: green blue red green blue red green blue red green blue 000 000 000 000 000 000 000 000 000 000 000 – – – – – – – – – – – 25 55 25 55 25 55 25 55 25 55 25 55 25 55 25 55 25 55 25 55 25 55 Dimming Dimming Dimming Dimming Dimming Dimming Dimming Dimming Dimming Dimming Dimming ffrom f from f from f from f from f from f from f from f from f from f from 0 0 0 0 0 0 0 0 0 0 0 – – – – – – – – – – – 100% 100% 100% 100% 100% 100% 100% 100% 100% 100% 100% 7.3 foot controller Note: the e foot controller will w only work wh hen the VDPLDJB BAR2 is set to au utomatic ( ) or sound conttrolled ( ) mode. • Unplu ug the power cord from the VDPL LDJBAR2 and co onnect the foot co ontroller to the fo oot controller jac ck [6]. • Foot controller functio ons: pedal 1 presets e effect Press # 1 w white 2 r red 3 g green 4 b blue 5 y yellow 6 p pink 7 c cyan 8 c colour changes ev very second in co ontinuous loop (1 1 through 7) 9 c colour fade every y 3 seconds in continuous loop (1 through 7) pedal 2 sound on pedal 3 hold pedal 4 black out Press at any tim me to switch off all LEDs. Press again to return to previous p setting. 8. Maintenance • • • This unit u does not nee ed regular mainte enance. The internal circuit is pro otected by a 250 V/2 A, 5 x 20 mm fuse. Replace a faulty fuse by a fuse of o the exact speciifications. Wipe the batten regularly with a moistt, lint-free cloth. Do not use alcoh hol or solvents. e are no user-serrviceable parts. Contact C your dealler for spare partts if necessary. There 9. Tec chnical Spe ecifications power sup pply power con nsumption LEDs DMX chan nnels beam ang gle dimension ns weight 230VAC ~ 50Hz 160W 28 x 3W RGB 15 30° 1200 x 65 x 315 5mm 15kg Use this device with oriiginal accessoriies only. Vellem man nv cannot be b held respons sible in the event of damage or injury resultted from (incorrect) use of thiis device. For more m info concerning this product and the latest l version of o this manual, please visit ourr website www w.hqpower.eu. The T information n in this man nual is subject to t change witho out prior notice e. © COPYRI IGHT NOTICE The copyriight to this manua al is owned by Vellleman nv. All worrldwide rights rese erved. No part of this t manual or may be copied, reproduc ced, translated or re educed to any electrronic medium or oth herwise without the prior written consent of the copyrigh ht holder. 15.09.2010 6 ©Vellema an nv VDPLDJBAR2 GEBRU UIKERSHA ANDLEID DING 1. Inleiding Aan alle ingezetenen va an de Europese e Unie Belangrijjke milieu-inforrmatie betreffe ende dit productt D symbool op het Dit h toestel of de verpakking v geeft aan dat, als het na zijn levenscy yclus wordt w weggeworpen, diit toestel schade kan toebrengen aan het milieu. Gooi G dit toestel (en eventuele b batterijen) niet bij b het gewone hu uishoudelijke afva al; het moet bij een e gespecialisee erd bedrijf t terechtkomen vo oor recyclage. U moet m dit toestel naar n uw verdelerr of naar een loka aal recyclagepuntt b brengen. Respecteer de plaatselijjke milieuwetgev ving. Hebt u vrragen, contacte eer dan de plaa atselijke autoritteiten betreffen nd de verwijder ring. Dank u vo oor uw aankoop! Lees deze handleiding grondig vo oor u het toestel in gebruik neem mt. Werd het toes stel beschadig gd tijdens het transport, installeerr het dan niet en raadpleeg uw de ealer. 2. Veiiligheidsins structies Wees voorzichttig bij de installattie: raak geen ka abels aan die ond der stroom staan om dodelijke elektroshocks te t vermijden. Trek de stekke er uit het stopcon ntact (trek niet aa an de kabel!) voo ordat u het toeste el reinigt en als u het niet gebruikt. Houd dit toeste el uit de buurt va an kinderen en on nbevoegden. Let op: dit toe estel wordt zeer warm w tijdens het gebruik. Er zijn geen do oor de gebruiker vervangbare ond derdelen in dit toestel. Voor onderhoud of reserveonderde elen, contacteer uw dealer. • • • • • • Dit to oestel valt onder beschermingskla asse I, wat wil ze eggen dat het toe estel geaard moe et zijn. Een gesch hoolde techn nicus moet de ele ektrische aansluitting verzorgen. De be eschikbare netspanning mag niet hoger zijn dan de d spanning in de e specificaties ach hteraan de handlleiding. De vo oedingskabel mag g niet beschadigd d zijn of ingekortt worden. Laat uw w dealer zo nodig g een nieuwe kab bel plaats sen. Zorg voor een minimu umafstand van 0,5 m tussen de liichtuitgang van het h toestel en hett belichte opperv vlak Maak k het toestel vast met een geschik kte veiligheidskab bel (bv. VDLSC7 7 of VDLSC8). Kijk niet n rechtstreeks in de lichtbron. De D lichtbron kan bij gevoelige me ensen leiden tot een e aanval van epilep psie. 3. Alg gemene rich htlijnen Raadpleeg g de Velleman® service- en kw waliteitsgarantie e achteraan deze e handleiding. Gebruik het toestel enke el binnenshuis. Bescherm tegen n regen, vochtigheid en opspatten nde vloeistofffen. m tegen stof en extreme e hitte. Zo org dat de verluc chtingsopeningen n niet verstopt Bescherm geraken. Voorzie een ruimte van minsten ns 2,5 cm tussen het toestel en elk ander object. Bescherm m tegen schokke en en vermijd bru ute kracht tijdens s de bediening. • • • • • • • Leer eerst e de functies s van het toestel kennen voor u het gaat gebruiken. Ongeschoolde e personen mogen dit toeste el niet gebruiken n. Meestal is besc chadiging het gev volg van onprofes ssioneel gebruik. Om veiligheidsredene v n mag u geen wiijzigingen aanbre engen. Schade do oor wijzigingen die de gebruiker heeft h aange ebracht valt niet onder de garantie. Gebru uik het toestel en nkel waarvoor he et gemaakt is. An ndere toepassinge en kunnen leiden n tot kortsluitinge en, brand dwonden, elektris sche schokken, enz. e Bij onoordee elkundig gebruik vervalt de garantie. De ga arantie geldt niett voor schade doo or het negeren van bepaalde richtlijnen in deze ha andleiding en uw w deale er zal de verantwoordelijkheid afw wijzen voor defec cten of problemen n die hier rechtsttreeks verband mee m houde en. Laat dit d toestel installeren en onderhouden door een geschoolde techniicus. Om beschadiging b te vermijden, v zet u het h toestel best niet n aan onmidde ellijk nadat het werd w blootgesteld aan temperatuurschomme elingen. Wacht to ot het toestel op kamertemperatu uur gekomen is. oestel is ontworpe en voor professio oneel gebruik op podia, in disco's, enz. U mag dit toestel enkel Dit to binne enshuis gebruiken n (<35°C, <75% %RH). Sluit aan op 90-250 VAC~5 50-60 Hz. 15.09.2010 7 ©Vellema an nv VDPLDJBAR2 • Lichteffecten zijn niet ontworpen voor continue werking: regelmatige onderbrekingen doen ze langer meegaan. Gebruik de oorspronkelijke verpakking wanneer u het toestel vervoert. Bewaar deze handleiding voor verdere raadpleging. • • 4. Eigenschappen • • • • • • geleverd met statief, elke spot is afzonderlijk instelbaar beschermende transporthoes DMX-sturing via 15 kanalen ingebouwde programma's, master-slavesturing of muzieksturing dankzij de ingebouwde microfoon gemakkelijk te bedienen dankzij het voetpedaal optioneel statief: VDL3SS 5. Omschrijving Raadpleeg de afbeelding op pagina 2 van deze handleiding. 1 2 microfoon display met bedieningsknoppen A MODE-knop B UP-knop C DOWN-knop 3 4 5 6 7 DMX-ingang DMX-uitgang instelknop gevoeligheid ingang voetpedaal voedingsingang 6. Voorbereiding Keuze van de montageplaats De VDPLDJBAR2 werd ontworpen voor gebruik binnenshuis aan temperaturen lager dan 35°C. Voorzie een aangepaste ventilatie en richt deze naar de metalen behuizing van de spots. Het is niet aan te raden om: • De spots te gebruiken in een omgeving met een omgevingstemperatuur hoger dan 35°C en een relatieve vochtigheid hoger dan 75%. • De spots te gebruiken in een ruimte kleiner dan 10 m³ tenzij er ventilatie is voorzien. Montage Gevaar voor verwondingen. Een degelijke praktijkervaring is vereist voor de plaatsing van dit toestel. U moet de maximumbelasting van de draagconstructie kunnen berekenen, weten welk constructiemateriaal u kunt gebruiken en u moet het gebruikte materiaal en het toestel af en toe laten nakijken. Monteer het toestel niet zelf indien u er geen ervaring mee heeft. Een slechte montage kan leiden tot verwondingen. • • • • • • • • • • • Monteer de VDPLDJBAR2 op een statief met buizen van 35 mm om een goede bevestiging te garanderen. Schuif een koppelstuk over de buis van het statief en bevestig met de meegeleverde vleugelmoer. Laat een geschoolde technicus dit toestel installeren conform EN 60598-2-17 en andere toepasselijke normen. De constructie waaraan het toestel wordt bevestigd, moet gedurende 1 uur 10 x het gewicht van dit toestel kunnen dragen zonder te vervormen. Maak het toestel ook vast met een veiligheidskabel. Sta nooit recht onder het toestel wanneer u het monteert, verwijdert of schoonveegt. Laat het toestel controleren door een geschoolde technicus voor u het in gebruik neemt en laat het 1 x per jaar volledig nakijken. Installeer dit toestel op een plaats waar niemand langs moet lopen, kan neerzitten of het toestel kan aanraken. Regel de gewenste invalshoek door middel van de montagebeugel en draai de regelschroeven stevig aan. Verwijder alle brandbaar materiaal in een straal van 0,5 m rond het toestel. Een geschoolde elektricien moet het toestel aansluiten. Sluit het toestel via de stekker aan op het lichtnet. Zorg dat het gebruikte voedingscircuit beveiligd is met een aardlekschakelaar van 30 mA. Sluit het niet aan op een dimmerpack. De installatie moet voor het eerste gebruik gekeurd worden door een expert. DMX512-aansluiting Raadpleeg de figuren op pagina 2 van deze handleiding. • • Indien van toepassing, sluit een XLR-kabel aan de vrouwelijke 3-pin XLR-uitgang van een controller (niet meegelev.) en de andere kant van de mannelijke 3-pin XLR-ingang [3] van de VDPLDJBAR2. U kunt verscheidene VDPLDJBAR2’s aan elkaar koppelen met behulp van een seriële koppeling. Gebruik daarvoor een 2-aderige afgeschermde kabel met XLR ingang- en uitgangsaansluitingen. Een DMX eindweerstand is aanbevolen als de DMX-kabel vrij lang is of wordt gebruikt in een omgeving met veel elektrische ruis (bv. een discotheek). De eindweerstand voorkomt corruptie van het digitale 15.09.2010 8 ©Velleman nv VDPLDJBAR2 controlesignaal door elektrische e ruis. De D DMX eindweerstand is niets meer m dan een XLR R-stekker met een weers stand van 120 Ω van pin 2 naar 3. 3 Deze XLR-stek kker wordt dan aa angesloten op de e XLR-uitgang [4] van het la aatste toestel in de d reeks. Aansluitiing op het voed dingsnet d spot aan een afzonderlijk a geaa ard stopcontact. Gebruik G geen and dere voedingskab bel Koppel de dan deze e meegeleverd met m de spot of een voedingskabel dat niet door de fabrikant werd goedgek keurd. • Steek de d voedingskabel in de voedingsingang [7] en ste eek de stekker in n het stopcontactt. 7. Geb bruik 7.1 Stand-alone of master-slav ve (geen DMX X) • • • • Met de d master-slavestturing kunt u me eerdere toestellen n synchroon laten n lopen met het mastertoestel. Kies een e VDPLDJBAR R2 als mastertoe estel. Koppel de DMX-uitgang D [4] aan de DMX-ing gang [3] van de volge ende VDPLDJBAR2, enz. Voorzie e de DMX-uitgang g [4] van de laattste VDPLDJBAR R2 van een eindw weerstand (raadp pleeg §6 DMX512-aansluiting). Koppel het voetpedaa al aan het masterrtoestel [6]. bels [7] aan. Sluit alle voedingskab • s het mastertoes stel op Plaats • • Indien geselectteerd is, kunt u de d gevoeligheid via v de instelknop [5] bijregelen. cteer op elk slave etoestel het adres smenu met MODE [A]. Op de display verschijnt “A A” gevolgd door een Selec cijfer (bv. (m muzieksturing) met m DOWN [B]. : ad dres = 16). Plaatts het adres op 1 met UP [C] of DOWN D [B]. Wach ht ± 20 seconden n tot de dis splay • (a auto) of w weergeeft. Om de d snelheid van het h interne progra amma te wijzigen n, druk op MODE E [A] tot de display (standaard snelheid is s 51). Stel de gew wenste snelheid (1~100) in met UP [C] of DOWN N [B]. weerrgeeft 7.2 DMX-sturing • • • • Druk op MODE [A] to ot de display [2] weergeeft en druk daarna op UP [C]. De display y of geeft nu weer. Alle DMX-gestuurde D to oestellen hebben n een digitaal startadres nodig, zo odat het juiste toestel reageert op p de signalen. Dit digitale startadres s is het kanaalnummer van v waarop het toestel t ‘luistert’ naar n het signaal van v de DMX controller. U kun nt één enkel starttadres gebruiken voor een groep toestellen of u kunt per toestel een e nieuw w startadres ingeven. Wann neer u een enkel startadres instelt, zullen alle toes stellen ‘luisteren’’ naar hetzelfde kanaal. k Met ande ere woord den: wanneer u de d instellingen vo oor 1 kanaal vera andert, zullen alle toestellen er te egelijk op reagere en. Wann neer u verschillen nde adressen insttelt, dan luistert elk toestel naar een e ander kanaal. Met andere woord den: wanneer u de d instellingen va an een kanaal ve erandert, zal enke el het toestel op dat kanaal reage eren. In het geval van de 15-kanaals VDPLD DJBAR2, zult u het startadres va an het eerste toestel op 1 (CH1~1 15) moeten instellen, van het tweede toes stel op 16 (1 + 15) (CH16~30), van v het derde op 31 (16 + 15) (CH31~45), enz. • ot de display “A” en de digit weerg geeft (bv. Druk op MODE [A] to • Selec cteer het startadrres met UP [C] of o DOWN [D]. Drruk daarna op MO ODE [A] tot de display weerg geeft. Het adres a wordt actieff na ± 20 second den. De display geeft g daarna “d” weer w gevolgd doo or het geselectee erde • adres s (bv. ). kanaal 1 p interne programma’s automattische sturing muzieksturing kanaal 2 masterdimmer 15.09.2010 : adres = 16). 000 – 00 09 010 – 03 32 033 – 05 52 053 – 07 73 074 – 09 95 096 – 11 16 117 – 13 37 138 – 15 58 159 – 18 80 181 – 20 01 202 – 22 22 223 – 24 43 244 – 25 55 250 – 25 55 000 – 00 09 010 - 255 9 uit programm ma 1 programm ma 2 programm ma 3 programm ma 4 programm ma 5 programm ma 6 programm ma 7 programm ma 8 programm ma 9 programm ma 10 programm ma 11 automatis sche sturing: inte erne programma’s muziekstu uring uit dimmen van v 0 – 100% ©Vellema an nv VDPLDJBAR2 kanaal 3 strobosc coop kanaal kanaal kanaal kanaal kanaal kanaal kanaal kanaal kanaal kanaal kanaal kanaal spot spot spot spot spot spot spot spot spot spot spot spot 4 5 6 7 8 9 10 11 12 13 14 15 1: 1: 1: 2: 2: 2: 3: 3: 3: 4: 4: 4: 000 – 00 09 010 - 255 000 – 25 55 000 – 25 55 000 – 25 55 000 – 25 55 000 – 25 55 000 – 25 55 000 – 25 55 000 – 25 55 000 – 25 55 000 – 25 55 000 – 25 55 000 – 25 55 rrood g groen b blauw r rood g groen b blauw r rood g groen b blauw r rood g groen b blauw uit stroboscoo op van dimmen van v 0– dimmen van v 0– dimmen van v 0– dimmen van v 0– dimmen van v 0– dimmen van v 0– dimmen van v 0– dimmen van v 0– dimmen van v 0– dimmen van v 0– dimmen van v 0– dimmen van v 0– traag naa ar snel 100% 100% 100% 100% 100% 100% 100% 100% 100% 100% 100% 100% 7.3 Voe etpedaal Opmerking: Het voetpedaal functioneert enkel indien de automatische a ( ) of muziek ksturing ( ) d is. geselecteerd oppel de voeding gsstekker en kopp pel het voetpedaal aan de ingang g [6]. • Ontko • Functties: pedaal 1 presets druk # e effect 1 w wit 2 r rood 3 g groen 4 b blauw 5 g geel 6 r roze 7 c cyaan 8 k kleurverandering, , elke seconde, continue c lus (1 to ot 7) 9 k kleurenfade, elke e 3 seconden, con ntinue lus (1 tot 7) 7 pedaal 2 geluid aan pedaal 3 hold pedaal 4 black-out druk om alle led ds uit te schakele en, druk opnieuw om naar vorige instelling terug te keren 8. Onderhoud • • • Dit to oestel hoeft geen regelmatig onde erhoud. Het interrne circuit is beve eiligd door een in nterne zekering van v 250 V/2 V A, 5 x 20 mm m. Vervang een defecte d zekering door d een exemplaar met dezelfde e eigenschappen.. Maak k de spot regelma atig schoon met een e vochtige, nie et-pluizende doek k. Gebruik geen alcohol a of solventten. De ge ebruiker mag gee en onderdelen ve ervangen. Bestel eventuele reserv veonderdelen bij uw dealer 9. Tec chnische sp pecificaties voeding 230 VAC ~ 50 Hz verbruik 160 W leds 28 x 3 W RGB DMX-kana alen 15 stralingshoek 30° afmetinge en 1200 x 65 x 315 5 mm gewicht 15 kg Gebruik dit toestel enke el met originele e accessoires. Velleman V nv is niet n aansprakelijk voor schade e of kwetsure en bij (verkeerd d) gebruik van dit toestel. Voo or meer informatie over dit pr roduct en de laa atste versie va an deze handleiiding, zie www.hqpower.eu. De D informatie in n deze handleid ding kan te allen n tijde worrden gewijzigd zonder voorafg gaande kennisg geving. © AUTEU URSRECHT Velleman n nv heeft het auteursrecht a vo oor deze handle eiding. Alle werreldwijde rechte en voorbehouden. Het is niett toegestaan om deze handleiding g of gedeelten errvan over te nem men, te kopiëren, te vertalen, te bewerken n en op te slaan op o een elektronis sch medium zond der voorafgaande e schriftelijke toes stemming van de e rechthebb bende. 15.09.2010 10 ©Vellema an nv VDPLDJBAR2 NO OTICE D’EMPLOI I 1. Inttroduction Aux résid dents de l'Union européenne Des inforrmations enviro onnementales importantes i concernant ce pro oduit C symbole sur l''appareil ou l'emballage indique que Ce q l’élimination d’un appareil en fin de vie peut polluer p l'environnement. Ne pas jeter un appareil électrique ou électroniqu ue (et des piles éventuelles) é parm mi les d déchets municipa aux non sujets au u tri sélectif ; une e déchèterie traittera l’appareil en question. Renvo oyer les équipements usagés à votre fo ournisseur ou à un u service de rec cyclage local. Il convient de respe ecter la réglementation n locale relative à la protection de e l’environnemen nt. e questions, contacter les auto orités locales pour p élimination n. En cas de Nous vous s remercions de votre achat ! Lire e la présente nottice attentivemen nt avant la mise en e service de l’appareil.. Si l’appareil a été endommagé pendant p le transp port, ne pas l’insttaller et consulter votre revendeur. 2. Con nsignes de sécurité Être prudent lo ors de l’installatio on : toucher un câble sous tension n peut causer des électrochocs mortels. Débrancher l’appareil s’il n’est pas p utilisé ou pou ur le nettoyer. Tirer la fiche pour débrancher n pas le câble. l'appareil ; non Garder hors de e la portée de perrsonnes non qualifiées et de jeunes enfants. Attention : le boîtier du spot chauffe c pendant l’usage. Il n’y a aucune e pièce maintenab ble par l’utilisateu ur. Commander des d pièces de rec change éventuelles chez votre reve endeur. • • • • • • Cet appareil ressort à la classe de prottection I, ce qui implique i que l’ap ppareil doit être mis m à la terre. Un n techn nicien qualifié doit établir la conne exion électrique. La ten nsion réseau ne peut pas dépasse er la tension men ntionnée dans les s spécifications à la fin de cette notice. Le câble d’alimentatio on ne peut pas êttre replissé ou en ndommagé. Demander à votre rev vendeur de renou uveler le câb ble d’alimentation n si nécessaire. Respe ecter une distanc ce minimum de 0,5 0 m entre la sortie lumière de l’appareil et la surrface illuminée. Fixer l’appareil à l’aide e d’un câble de sécurité s adéquat (p.ex. VDLSC7 ou o VDLSC8). Ne pa as regarder direc ctement la source e lumineuse comm me ceci peut enttraîner des crises d’épilepsie chez certains gens. 3. Dirrectives gén nérales Se référerr à la garantie de d service et de e qualité Vellem man® en fin de no otice. c appareil uniq quement à l'inté érieur. Protéger de la pluie, de l’h humidité et des Utiliser cet projectio ons d’eau. es de Protégerr contre la poussiière. Protéger contre la chaleur extrême. Veiller à ce que les fente ventilatio on ne soient pas bloquées. Laisse er une distance de d minimum 2,5 cm c entre le proje ecteur et tout autre a objet. Protégerr contre les chocs s et le traiter ave ec circonspection pendant l’opérattion. • • • • • • • Se familiariser avec le e fonctionnementt de l’appareil ava ant de l’utiliser. Ne N pas permettre e pas aux person nnes non qualifiées q d’opére er cet appareil. La a plupart des dég gâts sont causés par un usage no on professionnel. Toute e modification estt interdite pour des d raisons de sé écurité. Les domm mages occasionné és par des modiffications par le cllient ne tombent pas sous la gara antie. N’utiliser le spot qu’à sa fonction prévu ue. Tout autre us sage peut causerr des courts-circu uits, des brûlures s, des a garantie. électrrochocs, etc. Un usage impropre annule d'office la La ga arantie ne s’appliq que pas aux dom mmages survenus s en négligeant certaines c directive es de cette notice e et votre revendeur déclin nera toute responsabilité pour les s problèmes et le es défauts qui en résultent. e l’entretien à un n personnel qualiffié. Confier l’installation et as brancher l’appa areil après exposiition à des variations de températu ure. Afin d’éviter des dommages, Ne pa attendre jusqu’à ce qu ue l’appareil ait attteint la température ambiante ava ant de l’utiliser. veloppé pour usage professionnel dans des discoth hèques, des théâ âtres, etc. N’utilis ser cet Cet appareil a été dév apparreil qu’à l’intérieu ur (<35°C, <75°RH). Le raccorde er à une source de d courant de 90--250 VCA~50-60 0 Hz. 15.09.2010 11 ©Vellema an nv VDPLDJBAR2 • • • Un effet lumineux n’est pas conçu pour une opération continue. Des pauses régulières prolongeront sa vie. Transporter l’appareil dans son emballage originel. Garder cette notice pour toute référence ultérieure. 4. Caractéristiques • • • • • • livrée avec pied, chaque spot est séparément réglable housse de protection pour le transport pilotage DMX depuis 15 canaux programmes intégrés, pilotage maître/esclave ou pilotage par le son grâce au microphone intégré facile à utiliser grâce au pédalier pied optionnel : VDL3SS 5. Description Se référer aux illustrations en page 2 de cette notice. 1 2 microphone afficheur avec boutons de configuration A bouton de sélection MODE B bouton UP C bouton DOWN 3 4 5 6 7 entrée DMX sortie DMX réglage de sensibilité entrée pour pédalier entrée d’alimentation 6. Préparation Choix d’un emplacement de montage Les spots ont été conçus pour une utilisation dans un environnement à l’intérieur et avec des températures jusqu’à 35°C. Prévoir une ventilation suffisante dirigée vers le boîtier métallique des spots. Ne pas : • utiliser les spots lors d’une température ambiante supérieure à 35°C et un taux d’humidité supérieur à 75% • utiliser les spots dans un environnement d’un volume inférieur à 10 m³ à moins de prévoir une ventilation directe vers les spots. Montage Risque de blessures. L’installation de cet appareil exige une solide expérience pratique : le calcul de la charge max. de la construction, les matériaux d’installation requis etc. De temps en temps, un technicien qualifié doit vérifier la construction portante et l’appareil même. Ne pas essayer d’installer cet appareil vous-même si vous n’avez pas les qualifications requises ; une installation incorrecte peut entraîner des blessures. • • • • • • • • • • • Monter la VDPLDJBAR2 sur un trépied ayant un diamètre de 35 mm pour une fixation en toute sécurité. Glisser une pièce de jonction sur le tube du trépied et fixer la herse à l’aide de l’écrou fourni. Un technicien qualifié doit installer l’appareil en respectant EN 60598-2-17 et toute autre norme applicable. La construction portante de l’appareil doit être capable de supporter 10 x le poids de l’appareil pendant une heure, sans qu’une déformation de la construction en résulte. Fixer les spots à l’aide d’un câble de sécurité (sécurité supplémentaire). Éviter de vous positionner en dessous de l’appareil pour l’enlever ou lors du montage ou du nettoyage. Un technicien qualifié doit réviser l’appareil avant la mise en service. Organiser une révision minutieuse annuelle. Installer l’appareil à un endroit où personne ne peut passer ou s’asseoir et où personne ne peut le toucher. Déterminer l’angle d’inclinaison au moyen de l’étrier de montage et serrer les vis de montage. Enlever tout matériau inflammable dans un rayon de 0,5 m autour de l’appareil. Un électricien qualifié doit établir la connexion électrique. Brancher l’appareil sur le réseau électrique par la fiche d’alimentation. Veiller à ne brancher la VDPLDJBAR2 que sur un circuit protégé par un disjoncteur différentiel de 30 mA. Ne pas le brancher sur un bloc de puissance. Un expert doit approuver l’installation avant qu’elle puisse être prise en service. Connexion DMX512 • • Si nécessaire, connecter un câble à fiche XLR à la sortie XLR femelle à 3 broches de votre contrôleur (non incl.) et l’autre fiche XLR mâle à 3 broches à l’entrée [3] de la VDPLDJBAR2. Il est possible de relier plusieurs VDPLDJBAR2 à partir d’une connexion sérielle. Utiliser un câble de connexion blindé à 2 conducteurs avec des connecteurs d’entrée et de sortie XLR. Une résistance de terminaison DMX est à recommander si le câble DMX doit couvrir une grande distance ou s’il est utilisé dans un environnement avec beaucoup de bruit électrique (p.ex. une discothèque). La résistance de terminaison prévient la corruption du signal de contrôle numérique par le bruit électrique. La résistance de terminaison DMX n’est rien d’autre qu’une fiche XLR avec une résistance de 120 Ω de broche 2 vers broche 3 (voir illustration à gauche). Cette fiche XLR est connectée à la sortie XLR [4] du dernier appareil de la série. 15.09.2010 12 ©Velleman nv VDPLDJBAR2 Connexio on au réseau er à ce que la prise de courant à laquelle l les spots s sont connectés soit séparément Veille mise à la terre. Ne pa as utiliser un cord don d’alimentatio on autre que celu ui fourni avec les spots s ou un cordon autorisé par le fab bricant. • Connec cter le cordon d’a alimentation fourrni à l’entrée [7] et insérer la fich he dans une prise e de courant. 7. Em mploi 7.1 Pos se libre ou maître/esclav m ve (sans DMX X) • • • Le pilotage maître/esc clave permet de synchroniser les mouvements des appareils esclaves à ceux de l’appa areil maître. Chois sir l’appareil maîttre et connecter sa s sortie DMX [4 4] à l’entrée DMX X [3] de la VDPL LDJBAR2 suivantte, etc. Prévoir P une résisttance de termina aison sur la sortie e DMX [4] de la dernière d VDPLDJ JBAR2 de la sériie (voir §6 Connexion DMX512). D Connecter le pédalier à l’entrée [6] de e l’appareil maîtrre. Connecter les câbles d’alimentation d [7 7]. • Placer l’appareil maîtrre en mode • • En mode , régle er la sensibilité av vec le bouton de réglage [5]. Sélec ctionner le menu d’adressage sur tous les appareills esclaves avec le bouton MODE [A]. L’afficheur • indiqu ue « A » suivi d’u un digit (p.ex. • (auto) ou (pilotage parr le son) avec le bouton b DOWN [B B]. : adresse = 16). Sélectionn ner l’adresse 1 av vec le bouton UP [C] ou DO OWN [B]. Patienter ± 20 seconde es jusqu’à ce que e l’afficheur indiq que . Pour régler la vitesse d’exécution du programme, p enfoncer le bouton MODE M [A] jusqu’à à ce que l’afficheur ue indiqu 1~10 00). (vitesse par défaut = 51). Régler la vitesse avec le bouton UP [C] ou DOWN D [B] (plage 7.2 Pilo otage DMX • • • • • Enfon ncer le bouton MO ODE [A] jusqu’à ce que l’afficheu ur [2] indique ou . Ensuite, enfonce er le bouto on UP [C]. L’affic cheur indiquera . Tous les appareils pilo otés par un signa al DMX demanden nt une adresse de départ DMX po our assurer que le es apparreils corrects réagissent sur les siignaux de contrôle. Cette adresse e de départ numé érique indique le numé éro de canal sur lequel l l’appareil écoute é le contrôleur DMX. Vous avez a le choix entrre une seule adre esse de dé épart pour toute une série d’appareils ou une adre esse de départ pa ar appareil. Dans le cas d’une seule adresse, tous les appareils « écouteront é » les mêmes m signaux, sur un seul canal. cés lorsque vous changez les réglages d’un seul canal. c Avec des Tous les appareils serront donc influenc adres sses de départ individuelles, chaq que appareil « éco outera » son propre canal. Par co onséquent, un ajuste ement des réglag ges d’un canal n’’influence que l'appareil sur ce canal. Pour la VDPLDJBAR2 2 à 15 canaux, l’a adresse de déparrt du premier app pareil est 1 (CH1~15), du deuxième 16 (1 1 + 15) (CH16~3 31), du troisième 31 (16 + 15) (C CH16~30), etc. • Enfon ncer le bouton MO ODE [A] jusqu’à ce que l’afficheu ur [2] indique « A » et le digit (p.ex. : adres sse = 16). Sélec ctionner l’adresse e DMX de départ avec le bouton UP U [C] ou DOWN [D]. Ensuite, en nfoncer le bouton n • MODE E [A] jusqu’à ce que l’afficheur in ndique . L’adre esse sélectionnée e s’activera après s ± 20 secondes. L’afficheur indiq quera « d » suivi de l’adresse sélecttionnée (p.ex. ). canal 1 program mmes internes pilotage automatique pilotage par le son canal 2 variateur maître canal 3 strobosc cope 15.09.2010 09 000 – 00 010 – 03 32 033 – 05 52 053 – 07 73 074 – 09 95 096 – 11 16 117 – 13 37 138 – 15 58 159 – 18 80 181 – 20 01 202 – 22 22 223 – 24 43 244 – 25 55 250 – 25 55 000 – 00 09 010 - 255 000 – 00 09 010 - 255 13 éteint programm me 1 programm me 2 programm me 3 programm me 4 programm me 5 programm me 6 programm me 7 programm me 8 programm me 9 programm me 10 programm me 11 pilotage automatique : pro ogrammes internes pilotage par le son éteint variation de d 0 – 100% éteint éclats de lent l à rapide ©Vellema an nv VDPLDJBAR2 canal canal canal canal canal canal canal canal canal canal canal canal 4 5 6 7 8 9 10 11 12 13 14 15 spot spot spot spot spot spot spot spot spot spot spot spot 1 1 1 2 2 2 3 3 3 4 4 4 : : : : : : : : : : : : rouge vert bleu rouge vert bleu rouge vert bleu rouge vert bleu 000 000 000 000 000 000 000 000 000 000 000 000 – – – – – – – – – – – – 25 55 25 55 25 55 25 55 25 55 25 55 25 55 25 55 25 55 25 55 25 55 25 55 variation variation variation variation variation variation variation variation variation variation variation variation de d d de d de d de d de d de d de d de d de d de d de d de 0 0 0 0 0 0 0 0 0 0 0 0 – – – – – – – – – – – – 100% 100% 100% 100% 100% 100% 100% 100% 100% 100% 100% 100% 7.3 Le pédalier p Remarqu ue : Le pédalier fonctionne f unique ement en modes de pilotage auto omatique ( ) et par le son ( ). • Décon nnecter le câble d’alimentation de e la VDPLDJBAR R2 et connecter le pédalier à l’enttrée [6]. • Foncttions : pédale 1 effets enfoncer # e effet internes 1 b blanc 2 r rouge 3 v vert 4 b bleu 5 jaune 6 r rose 7 c cyan 8 t transition couleurr, chaque seconde en boucle conttinue (1 à 7) 9 f fade couleur, touttes les 3 seconde es en boucle conttinue (1 à 7) pédale 2 son activé pédale 3 hold pédale 4 black-out enfoncer pour étteindre toutes les s LED, renfoncer pour revenir au programme précédemment activé a 8. Enttretien • • • Cette e unité ne nécessite aucun entretien régulier. Le circuit interne est protégé par un fusible f de 250 V//2 A, 5 x 20 mm. Remplace er un fusible défe ectueux par un fu usible ayant les mêmes m spécificatiions. Netto oyer le spot régullièrement avec un chiffon humide e non pelucheux. Éviter l’usage d’’alcools et de solv vants. Il n’y a aucune pièce maintenable m par l’utilisateur. Com mmander des pièces de rechange éventuelles chez z votre revendeur. 9. Spé écifications s techniques s alimentatiion 230 VCA ~ 50 Hz z consomma ation 160 W LED 28 x 3 W RVB canaux DM MX 15 angle de rayonnement r 30° dimension ns 1200 x 65 x 315 5 mm poids 15 kg N’employ yer cet appareil qu’avec des accessoires d’orrigine. SA Velleman ne sera au ucunement responsa able de dommages ou lésions survenus à un usage (incorrec ct) de cet appa areil. Pour plus d’information concernant cet article ett la dernière ve ersion de cette notice, visiter notre n site web www.hqpower.eu. Touttes les informattions présentée es dans cette no otice peuvent être ê modifiées sans s notificatiion préalable. © DROIT TS D’AUTEUR SA Vellem man est l’ayantt droit des droitts d’auteur pou ur cette notice. Tous droits mo ondiaux réservé és. Toute rep production, traduc ction, copie ou diffusion, intégrale e ou partielle, du u contenu de cettte notice par quelque procédé ou o sur tout suppo ort électronique que q se soit est intterdite sans l’acc cord préalable écrit de l’ayant dro oit. 15.09.2010 14 ©Vellema an nv VDPLDJBAR2 MAN NUAL DEL L USUAR RIO 1. Inttroducción A los ciud dadanos de la Unión U Europea Importan ntes informacio ones sobre el medio m ambiente concerniente a este producto o E Este símbolo en este e aparato o ell embalaje indica que, si tira las muestras m inservib bles, podrían dañ ñar el m medio ambiente. N tire este aparrato (ni las pilas, si las hubiera) en la basura domé No éstica; debe ir a una empresa e especializada en reciclaje. Devuelva este aparato a su distribuidorr o a la unidad de e reciclaje local. R Respete las leyes s locales en relac ción con el medio o ambiente. Si tiene dudas, d contacte e con las autoriidades locales para p residuos. ¡Gracias por p haber compra ado el VDPLDJB BAR2! Lea atenta amente las instrucciones del manu ual antes de usarrlo. Si el aparato o ha sufrido algún n daño en el tran nsporte no lo insttale y póngase en n contacto con su u distribuidor. 2. Ins strucciones s de segurid dad Cuidado durantte la instalación: puede sufrir una a peligrosa desca arga eléctrica al tocar t un cable conectado a la red eléctrica. Desconecte sie empre el aparato si no va a usarlo o durante un larg go periodo de tiem mpo o antes de limpiarlo. Tire siempre s del ench hufe para desconectar el cable de red, nunca del propio p cable. Mantenga el ap parato lejos del alcance a de person nas no capacitada as y niños. ¡Ojo!: la caja del d proyector se calienta durante su operación. El usuario no habrá h de efectuarr el mantenimiento de ninguna pieza. Contacte con su distribuidor si necesita piezas s de recambio. • Este ap parato pertenece a la clase de pro otección I. Por lo tanto, es esencial que el aparato o esté puesto a tiierra. La cone exión eléctrica de ebe llevarse a cabo por un técnico o cualificado. • Asegúrrese de que la ten nsión de red no sea s mayor que la a tensión indicada a en las especific caciones. • No apla aste el cable de alimentación a y prrotéjalo contra po osibles daños cau usados por algún n tipo de superfic cie afilada. Si es necesario, pida a su distrib buidor reemplaza ar el cable de alim mentación. d mín. 0.5m enttre la salida de lu uz y el área iluminada. • Respette una distancia de • Fije el aparato con un cable c de segurida ad adecuado (p.e ej. VDLSC7 o VD DLSC8). • No mirre directamente a la fuente de luz z. Esto puede causar un ataque epiléptico. 3. Normas generrales Véase la Garantía G de serrvicio y calidad Velleman ® al fiinal de este manual del usuario. i No ex xponga este equipo a lluvia, hum medad ni a ningún n tipo Utilice el aparato sólo en interiores. de salpicad dura o goteo. ga este equipo a polvo. No expong ga este equipo a temperaturas ex xtremas. Asegúre ese de No expong que los orificios de ventilac ción no estén bloqueados. Deje un na distancia de mín. m 2,5cm entre el aparato y cualquier otro ob bjeto. No agite el aparato. Evite usar u excesiva fue erza durante el manejo m y la instalación. • • • • • • • • Familliarícese con el fu uncionamiento de el aparato. Sólo personas p cualifica adas pueden manejar este aparatto. La mayo oría de los daños son causados po or un uso inadecu uado. Por ra azones de seguridad, las modifica aciones no autorizadas del aparatto están prohibidas. Los daños causa ados por modifica aciones no autoriizadas, no están cubiertos por la garantía. Utilice e sólo el VDPLDJ JBAR2 para aplic caciones descrita as en este manua al a fin de evitar p.ej. cortocircuitos, quem maduras, descargas eléctricas, etc c. Un uso desauto orizado puede causar daños y anu ula la garantía comp pletamente. Los daños causados por p descuido de la as instrucciones de d seguridad de este manual inva alidarán su garan ntía y stribuidor no será á responsable de e ningún daño u otros o problemas resultantes. su dis La ins stalación y el mantenimiento deben ser realizados s por personal es specializado. No co onecte el aparato o si ha estado exp puesto a grandes s cambios de tem mperatura. Espere e hasta que el ap parato llegue e a la temperaturra ambiente. Este aparato a ha sido diseñado d para us so profesional en una discoteca, un u teatro, etc. y es e apto para un uso u sólo en e interiores (<3 35°C, <75%RH). Conéctelo a una fuente de corrie ente CA de máx. 240VCA / 50Hz. No ha a sido diseñado para p un uso ininte errumpido. Introduzca frecuentem mente una pausa a para prolongar la vida del d aparato. 15.09.2010 15 ©Vellema an nv VDPLDJBAR2 • • Transporte el aparato en su embalaje original. Guarde este manual del usuario para cuando necesite consultarlo. 4. Características • • • • se entrega con pie, es posible ajustar cada foco por separado funda de protección para el transporte control DMX por 15 canales programas autónomos incorporados, control maestro/esclavo o control por la música gracias al micrófono incorporado fácil de utilizar gracias al interruptor de pie pie opcional: VDL3SS • • 5. Descripción Véase las figuras en la página 2 de este manual del usuario. 1 2 micrófono pantalla con botones de ajuste A botón de selección MODE B botón UP C botón DOWN 3 4 5 6 7 entrada DMX salida DMX ajuste de sensibilidad entrada para interruptor de pie entrada de alimentación 6. Preparación Seleccionar un lugar de montaje El foco ha sido diseñado para un uso en interiores y con temperaturas hasta 35°C. Prevea una ventilación suficiente dirigida hacia la caja metálica del foco. NO : • Utilice el foco le con una temperatura ambiente superior a 35°C y una humedad superior al 75%. • Utilice el foco en un lugar inferior a 10 m³ salvo al prever una ventilación directa hacia el foco. Montaje • • • • • • • • • • • Riesgo de lesiones. La instalación de este aparato exige una sólida experiencia práctica: el cálculo de la carga máx. de la construcción, los materiales de instalación requeridos, etc. De vez en cuando, un técnico cualificado debe controlar la construcción portante y el aparato mismo. No intente instalar este aparato usted mismo si no tiene las cualificaciones requeridas; una instalación incorrecta puede causar lesiones. Respete la directiva EN 60598-2-17 y toda norma nacional antes de instalar el aparato. La instalación debe ser realizada por un técnico especializado. El soporte donde irá el aparato, debe ser capaz de sostener 10 veces el peso de éste durante una hora, sin que se produzca una deformación de dicho soporte. Fije siempre el VDPLDJBAR2 con un cable de seguridad (seguridad adicional). Evite ponerse debajo del aparato durante el montaje, la limpieza, etc. Un técnico especializado debe revisar el aparato antes de la puesta en marcha. Después, debe revisarlo una vez al año. Instale el aparato fuera del alcance de personas no autorizadas y en un lugar con poca gente. La instalación de este aparato exige una sólida experiencia práctica: debe poder calcular la carga máx. del soporte, debe conocer los materiales necesarios para la instalación, etc. De vez en cuando, una verificación de la estructura y del aparato mismo debe ser llevada a cabo por un técnico especializado. No intente instalar este aparato si no tiene las cualificaciones requeridas; una instalación incorrecta puede causar lesiones. Ajuste el ángulo de inclinación a su gusto mediante un soporte de montaje y fije los tornillos del soporte. Quite todo material inflamable en un radio de 0.5m alrededor del aparato. Pregunte a un electricista cómo hacer la conexión eléctrica. Conecte el aparato a la red eléctrica con la conexión de alimentación. Asegúrese de que sólo conecte el VDPLDJBAR2 a un circuito protegido por un disyuntor de corriente residual (RCD) de 30 mA. Normalmente, no se conectan efectos luminosos a dimmer packs (reguladores). Un experto debe probar la instalación antes de la puesta en marcha. Conexión DMX512 Véase las figuras en la página 2 de este manual del usuario. • • Si fuera necesario, conecte un cable con conector XLR (no incl.) a la salida XLR hembra de 3 polos del controlador y el otro conector XLR macho de 3 polos a la entrada [3] del VDPLDJBAR2. Es posible conectar varios VDPLDJBAR2 en serie. Use un cable blindado de doble hilo conductor con conectores XLR de entrada y de salida VDPLDJBAR2. Se recomienda una terminación si el cable DMX debe cubrir una gran distancia o si se usa en un medio ambiente con mucho ruido eléctrico (ej. una discoteca). La terminación impide que el ruido eléctrico corrompa la señal de control numérico. La terminación DMX no es más que un conector XLR con una 15.09.2010 16 ©Velleman nv VDPLDJBAR2 resisttencia de 120Ω de d polo 2 a polo 3. 3 Este conector XLR X está conecta ado a la salida XL LR [4] del último o apara ato de la serie. Conexión n a la red e al que es stá conectado el foco esté puesto o a tierra por Asegúrese de que el enchufe o el cable de alimentación entrega ado con el foco o un cable autoriz zado separado. Utilice sólo e fabricante. por el • Conectte el cable de alim mentación (incl.) a la entrada [7] ] y conéctelo a la a red eléctrica. 7. Uso o 7.1 Mod do autónomo o (stand alon ne) o modo maestro/esc clavo (sin DM MX) • • • • El mo odo maestro/esclavo permite sinc cronizar los movim mientos de los ap paratos esclavos con los del aparato maes stro. Selec ccione el aparato maestro y conec cte la salida DMX X [4] a la entrada a DMX [3] del sig guiente VDPL LDJBAR2, etc. Prevea P una termin nación en la salid da DMX [4] del último ú VDPLDJBA AR2 de la serie (véas se §6 Conexión DMX512). Conec cte el interruptorr de pie a la entra ada [6] del aparrato maestro. Conec cte los cables de alimentación [7]. • Ponga a el aparato mae estro con el botón n DOWN [B] en el e modo músic ca). • • En el modo uste la sensibilida ad con el botón de d ajuste [5]. , aju ccione el menú de e ajuste de la dirrección para todo os los aparatos es sclavos con el bo otón MODE [A]. La L Selec panta alla indica « A » seguido s de un díg gito (p.ej. • (auto) o (control ( por la : dirección = 16). 1 Seleccione la a dirección 1 con el botón n UP [C] o DOWN N [B]. Espere ± 20 segundos has sta que la pantallla indique . Para ajustar la velocid dad de ejecución del programa, pulse el botón MO ODE [A] hasta qu ue la pantalla indique (velocidad po or defecto = 51).. Ajuste la velocid dad con el botón UP [C] o DOWN N [B] (rango 1~1 100). 7.2 Con ntrol DMX • • • • Pulse el botón MODE [A] hasta que la pantalla [2] ind dique o . Luego, pulse el botón UP [C]. [ antalla indica La pa . Si se usa una señal DMX, cada aparato o tiene su propia a dirección inicial DMX para asegu urar que los apara atos reacc cionen a las señales de control correctas. Esta dire ección inicial digittal es el primer canal c en el cual el e apara ato reaccionará a las señales DMX X del controlador DMX. Es posible e elegir entre una a sola dirección in nicial para toda una serie de e aparatos o una a dirección inicial por aparato. Con una u sola dirección n inicial para una a serie de aparato os, todos los apa aratos reaccionarán sincronizadam mente a la misma m señal. Por lo tanto, cambia ar los ajustes de un solo canal afe ecta a los ajustes s de todos los can nales. Con varias v direcciones s iniciales, cada aparato a reaccionará independienttemente. Por lo tanto, cambiar los s ajuste es de un solo can nal sólo afecta al canal en cuestió ón. En el caso del VDPLD DJBAR2 de 15 ca anales, la direcció ón inicial del prim mer aparato es 1 (CH1~15), del segun ndo aparato 16 (16 + 5) (CH16~30), del tercer ap parato 31 (16 + 15) (CH31~45), etc. • • Pulse el botón MODE [A] hasta que la pantalla [2] ind dique « A » y el d dígito (p.ej. : dirección = 16). ccione la dirección n DMX inicial con n el botón UP [C] ] o DOWN [D]. Luego, L pulse el bo otón MODE [A] hasta h Selec • que la a pantalla indique . La dirrección seleccionada se activa des spués de ± 20 se egundos. La panttalla indica « d » seguido de la direcc ción seleccionada a (p.ej. canal 1 program mas internos control automático a control por p la música canal 2 dimmer maestro 15.09.2010 ) 09 000 – 00 010 – 03 32 033 – 05 52 053 – 07 73 074 – 09 95 096 – 11 16 117 – 13 37 138 – 15 58 159 – 18 80 181 – 20 01 202 – 22 22 223 – 24 43 244 – 25 55 250 – 25 55 000 – 00 09 010 - 255 17 desactivad do programa 1 programa 2 programa 3 programa 4 programa 5 programa 6 programa 7 programa 8 programa 9 programa 10 programa 11 pilotage automatique : pro ogramas internes s pilotage par le son desactivad do ajustar la intensidad lumin nosa de de 0 – 10 00% ©Vellema an nv VDPLDJBAR2 canal 3 estrobos scopio canal canal canal canal canal canal canal canal canal canal canal canal foco foco foco foco foco foco foco foco foco foco foco foco 4 5 6 7 8 9 10 11 12 13 14 15 1 1 1 2 2 2 3 3 3 4 4 4 : : : : : : : : : : : : 000 – 00 09 010 - 255 000 – 25 55 000 – 25 55 000 – 25 55 000 – 25 55 000 – 25 55 000 – 25 55 000 – 25 55 000 – 25 55 000 – 25 55 000 – 25 55 000 – 25 55 000 – 25 55 rojo verde azul rojo verde azul rojo verde azul rojo verde azul desactivad do destellos de d lenot a rápido o ajustar la intensidad lumin nosa ajustar la intensidad lumin nosa ajustar la intensidad lumin nosa ajustar la intensidad lumin nosa ajustar la intensidad lumin nosa ajustar la intensidad lumin nosa ajustar la intensidad lumin nosa ajustar la intensidad lumin nosa ajustar la intensidad lumin nosa ajustar la intensidad lumin nosa ajustar la intensidad lumin nosa ajustar la intensidad lumin nosa de de de de de de de de de de de de de de de de de de de de de de de de 0 0 0 0 0 0 0 0 0 0 0 0 – – – – – – – – – – – – 10 00% 10 00% 10 00% 10 00% 10 00% 10 00% 10 00% 10 00% 10 00% 10 00% 10 00% 10 00% 7.3 Interruptor de pie Nota: el interruptor i de pie e funciona sólo en e el modo de con ntrol automático ( ) y el modo m de control por p la música ( ). • Desco onecte el cable de alimentación del d VDPLDJBAR2 2 y conecte el intterruptor de pie a la entrada [6]. • Funciones: pulse # efecto pedal 1 ajustes os preprogramado 1 blanco 2 rojo 3 verde 4 azul 5 amarillo 6 rosa 7 cyan 8 cambio de colorr, cada segundo, bucle continuo (de ( 1 a 7) 9 fade de color, cada 3 segundos, bucle continuo (de ( 1 a 7) pedal 2 sonido activado o pedal 3 hold pedal 4 black-out pulse para des sactivar todos los s LEDs, vuelva a pulsar para volver al programa anteriormente e activado 8. Mantenimientto Este aparato no necesita ningún n mantenim miento regular. El circuito interno está protegido por un fusible de 250 V/2 A, A 5 x 20 mm. Re eemplace un fusib ble defectuoso po or un fusible con las mismas espe ecificaciones. Limpie el aparato regularm mente con un pañ ño húmedo y sin pelusas. Evite el uso de alcohol y de disolventes. o no habrá de efe ectuar el manteniimiento de ningu una pieza. Contac cte con su distribuidor si necesita El usuario piezas de recambio. 9. Esp pecificacion nes alimentación 230VAC ~ 50Hz consumo 160W LED 28 x 3W RGB canales DMX 15 ángulo del haz 30° dimension nes 1200 x 65 x 315 5mm peso 15kg Utilice es ste aparato sólo o con los accesorios originales s. Velleman NV V no será respon nsable de daños ni lesiones causados por un u uso (indebid do) de este aparato. Para más información so obre este produ ucto, visite nuestra página www.hqpower.e w eu. Se pueden modificar m las es specificaciones y el contenido de d este man nual sin previo aviso. © DEREC CHOS DE AUTOR R Velleman n NV dispone de e los derechos de autor para este e manual del usuario. Todos s los derechos mundiales s reservados. Esttá estrictamente prohibido reprod ducir, traducir, co opiar, editar y gu uardar este manu ual del usuariio o partes de ello sin previo perm miso escrito del derecho d habiente. 15.09.2010 18 ©Vellema an nv VDPLDJBAR2 BEDIE ENUNGSANLEITU UNG 1. Ein nführung An alle Einwohner E der Europäischen E U Union Wichtige e Umweltinform mationen über dieses d Produkt D Dieses Symbol au uf dem Produkt oder der Verpacku ung zeigt an, das ss die Entsorgung g dieses Produkte es n nach seinem Lebe enszyklus der Um mwelt Schaden zu ufügen kann. Enttsorgen Sie die Einheit (oder v verwendeten Battterien) nicht als unsortiertes u Hausmüll; die Einheit oder verwendete en Batterien müs ssen v von einer spezialisierten Firma zw wecks Recycling entsorgt e werden. Diese Einheit mu uss an den Händller o oder ein örtliches Recycling-Unterrnehmen retourniiert werden. Resp pektieren Sie die e örtlichen U Umweltvorschrifte en. Falls Zwe eifel bestehen, wenden Sie sic ch für Entsorgu ungsrichtlinien an a Ihre örtliche e Behörde. Wir bedan nken uns für den Kauf des VDPLD DJBAR2! Lesen Sie S diese Bedienu ungsanleitung vo or Inbetriebnahm me sorgfältig durch. Überprüfen Sie, ob Transportschäden vorliegen. Sollte dies s der Fall sein, ve erwenden Sie das Gerät nich ht und wenden Sie S sich an Ihren Händler. 2. Sic cherheitshin nweise Seien Sie währrend der Installattion des Gerätes sehr vorsichtig: das Berühren von unter Spannun ng stehenden Leitungen könnte zu u lebensgefährlich hen elektrischen Schlägen führen. Trennen Sie da as Gerät bei Nichtbenutzung und vor jeder Reinigu ung vom Netz. Fa assen Sie dazu den Netzstecker an n der Grifffläche an a und ziehen Sie e nie an der Netz zleitung. Halten Sie Kind der und Unbefugtte vom Gerät fern. Achtung: Berü ühren Sie das Ge ehäuse während des d Betriebs nich ht, denn das Gehäuse heizt auf. Es gibt keine zu wartenden Teille. Bestellen Sie eventuelle Ersatz zteile bei Ihrem Fachhändler. F • Der Aufbau des Gerätes s entspricht der Schutzklasse S I. Gemäß G den Vorsc chriften muss das s Gerät geerdet sein. s Der ele ektrische Anschlu uss darf nur von einer e Fachkraft durchgeführt d werd den. • Vergew wissern Sie sich, dass die anzusch hließende Netzspa annung nicht höh her ist als die Netzspannung beschrieben in dieser Bedienungsanleitu B ung. s die Netzleitung nicht gequetschtt oder durch scha arfe Kanten besc chädigt werden ka ann. • Achten Sie darauf, dass schädigungen soll eine Fachkraft das Kabel ersetz zen. Bei Bes • Beachte en Sie eine minim male Entfernung vo on 0.5m zwischen der Lichtausbeute e und irgendeinerr beleuchteten Fläc che. • Machen n Sie das Gerät mit m einem geeign neten Sicherheitskabel fest (z.B. VDLSC7 V oder VD DLSC8) • Blicken n Sie niemals dire ekt in die Lichtqu uelle da bei empfindlichen Mensch hen epileptische Anfälle A ausgelöstt werden n können. 3. Allg gemeine Richtlinien Siehe Vellleman® Servic ce- und Qualitättsgarantie am Ende E dieser Bedie enungsanleitung. n Sie das Gerät nur n im Innenbe ereich. Schützen Sie das Gerät vo or Regen und Feu uchte. Verwenden Setzen Sie e das Gerät keine er Flüssigkeit wie z.B. Tropf- oderr Spritzwasser, au us. S das Gerät vorr Staub. Schützen Sie das Gerät vor v extremen Temperaturen. Bea achten Schützen Sie Sie, dass die d Lüftungsschlittze nicht blockierrt werden. Beachten Sie eine minimale Entfernung g von 2.5cm zwis schen dem Gerätt und jedem ande eren Gegenstand d. n Sie Erschütterungen. Vermeiden n Sie rohe Gewalt während der In nstallation und Vermeiden Bedienung g des Gerätes. • Nehme en Sie das Gerät erst e in Betrieb, na achdem Sie sich mit m seinen Funktio onen vertraut gem macht haben. Las ssen Sie das s Gerät nicht von Personen bediene en, die sich nicht mit dem Gerät auskennen. Meist ist die Beschädigung des Gerätes das Ergebnis von unfachmän nnischer Bedienun ng. • Eigenm mächtige Verände erungen sind aus Sicherheitsgründen verboten. Be ei Schäden verurrsacht durch eigenm mächtige Änderun ngen erlischt der Garantieanspruc ch. • Verwen nden Sie das Gerrät nur für Anwen ndungen beschrie eben in dieser Be edienungsanleitun ng sonst kann die es zu Schäde en am Produkt fü ühren und erlischt der Garantieanspruch. Jede and dere Verwendung g ist mit Gefahren n wie Kurzschluss, Brandwunden, elektrischem m Schlag, usw. verbunden. v • Bei Sch häden, die durch Nichtbeachtung der Bedienungsa anleitung verursa acht werden, erlis scht der Garanttieanspruch. Für daraus d resultiere ende Folgeschäde en übernimmt de er Hersteller keine e Haftung. • Lassen Sie dieses Gerätt von einem Fach hmann installiere en und warten. • Das Ge erät bei Temperaturschwankungen nicht sofort ein nschalten. Schütz zen Sie das Gerät vor Beschädigu ung, indem Sie es ausgescha altet lassen bis es akklimatisiert ist (Zimmertemperatur erreicht hat). 15.09.2010 19 ©Vellema an nv VDPLDJBAR2 • Dieses Gerät wurde für den professionellen Einsatz auf Bühnen, in Discotheken, Theatern, usw. entworfen und eignet sich nur für die Anwendung im Innenbereich (<35°C, <75%RH). Verwenden Sie das Gerät mit einer Wechselspannung von max. 240VAC / 50Hz. • Das Gerät eignet sich nicht für permanenten Betrieb: eine regelmäßige Pause verlängert die Lebensdauer. • Verwenden Sie die Originalverpackung, wenn das Gerät transportiert werden soll. • Bewahren Sie diese Bedienungsanleitung für künftige Einsichtnahme auf. 4. Eigenschaften • • • • Lieferung mit Stativ, jeder Scheinwerfer kann separat eingestellt werden Schutztasche für Transport DMX-Steuerung über 15 Kanäle eingebaute Stand-Alone-Programa, Master/Slave-Steuerung oder Musiksteuerung dank des eingebauten Mikrofons • einfach über Fußschalter zu bedienen • optionales Stativ: VDL3SS 5. Umschreibung Siehe Abbildungen, Seite 2 dieser Bedienungsanleitung. 1 2 Mikrofon Display mit Einstellknöpfen A MODE-Taste B UP-Taste C DOWN-Taste 3 4 5 6 7 DMX-Eingang DMX-Ausgang Einstellknopf Empfindlichkeit Eingang Fußschalter Netzeingang 6. Vorbereitung Den Montageort auswählen Der VDPLDJBAR2 wurde für die Anwendung im Innenbereich bei Temperaturen niedriger als 35°C entworfen. Sorgen Sie für eine geeignete Ventilation und richten Sie diese auf das Metallgehäuse des Scheinwerfers. Verwenden Sie den Scheinwerfer nicht: • in einer Umgebung mit einer Umgebungstemperatur höher als 35°C und eine relative Feuchte höher als 75%. • in einem Raum kleiner als 10 m³ wenn es keine Ventilation gibt. Montage Gefahr vor Verletzungen. Für die Installation des Gerätes ist eine solide praktische Erfahrung notwendig. Sie müssen die Höchstlast einer Tragkonstruktion berechnen können, wissen welches Baumaterial Sie verwenden können und Sie müssen das verwendete Material und das Gerät af und zu kontrollieren lassen. Montieren Sie das Gerät nie selber wenn Sie keine Erfahrung damit haben. Eine schlechte Montage kann zu Verletzungen führen. • Eignet sich als Bodenscheinwerfer oder befestigen Sie das Gerät an einer Halterung. • Lassen Sie das Gerät von einem Fachmann und gemäß den EN 60598-2-17 und allen anderen zutreffenden Normen installieren. • Die Konstruktion muss während einer Stunde eine Punktlast von maximal 10 x dem Gewicht des Geräts tragen können, ohne dass Verformung verursacht wird. • Das Gerät muss immer mit einer zweiten Befestigung z.B. mit einem Sicherheitskabel gesichert werden. • Stehen Sie während der Montage, Entfernung oder Wartung nie direkt unter dem Gerät. Lassen Sie das Gerät jährlich und vor der Inbetriebnahme von einem Fachmann prüfen. • Montieren Sie das Gerät an einem Ort, an dem es wenig Vorübergehende gibt und der unzugänglich ist für Unbefugte. • Oberirdische Montage erfordert erhebliche Sachkenntnis in Bezug auf das Berechnen der maximalen Lasten, das geeignete Montagematerial…Lassen Sie das Material und das Gerät regelmäßig kontrollieren. Versuchen Sie das Gerät nicht selber zu installieren, denn wenn Sie nicht über diese Qualifikationen verfügen, könnte es zu Verletzungen führen. • Regeln Sie den Neigungswinkel über den Montagebügel und drehen Sie die Schrauben fest an. • Achten Sie darauf, dass sich kein entflammbares Material in einem Umkreis von 50 cm befindet. • Lassen Sie das Gerät von einem qualifizierten Elektriker anschließen. • Schließen Sie das Gerät an das Hauptnetz und nicht an einen Dimmer an. Beachten Sie, dass der verwendete Kreis mit einem mit einem Fehlerstrom-Schutzschalter (RCD) von 30 mA geschützt ist. • Die Installation muss vor Inbetriebnahme von einem Experten genehmigt werden. DMX512-Anschluss Siehe Abbildungen, Seite 2 dieser Bedienungsanleitung. • Wenn nötig, so verbinden Sie ein XLR-Kabel mit dem 3-Pin XLR-Ausgang der Steuerung (nicht mitgeliefert) und die andere Seite mit dem 3-Pin XLR-Eingang [3] des VDPLDJBAR2. Sie können verschiedene 15.09.2010 20 ©Velleman nv VDPLDJBAR2 • VDPL LDJBAR2in Serie e schalten. Verwe enden Sie ein zw weipoliges abgesc chirmtes Kabel mit XLR Ein- und Ausga angsanschlüssen. Ein DMX-Abschlusswid D derstand ist empfehlenswert für Installationen, I be ei denen das DMX X-Kabel lang ist oder o in ein ner Umgebung mit vielem elektris schem Rauschen (z.B. Discos). De er Abschlusswide erstand verhinderrt Störu ung des digitalen Steuersignals du urch elektrisches Rauschen. Der DMX-Abschlussw D iderstand ist nur eine XLR-B Buchse mit einem m 120Ω Widersta and zwischen 2 und 3, die den XLR-Ausgang [4] des d letzten Geräts in der Kette K angeschloss sen wird. Anschlus ss an das Netz Verbinden Sie den Sc cheinwerfer mit einer e separat geerdeten Steckdose e. Verwenden Sie e nur das mit m dem Scheinw werfer mitgelieferten Netzkabel od der ein Netzkabell, das vom Herste eller gene ehmigt worden istt. • Stecken Sie das Netzka abel in den Netze eingang [7] und stecken s Sie den Stecker in die Stteckdose. 7. Anw wendung 7.1 Stand alone ode er Master/Slave (ohne DMX) D • • • Mit de em Master/Slave e-Steuerung könn nen Sie mehrere Geräte synchron n mit dem Masterrgerät funktionierren lassen. en Sie einen VDP PLDJBAR2 als Mastergerät. M Verb binden Sie den DMX-Ausgang [4] mit dem DMXWähle Einga ang [3] des näch hsten VDPLDJBA AR2, usw. Verseh hen Sie den DMX X-Ausgang [4] de es letzten VDPL LDJBAR2 mit ein nem Abschlusswiderstand (siehe §6 DMX512-An nschluss). Verbinden Sie den Fuß ßschalter mit dem m Mastergerät [6 6]. Schlie eßen Sie alle Nettzkabel [7] an. • Stelle en Sie das Masterrgerät mit DOWN N [B] auf • • Haben Sie ausg gewählt, so können Sie die Empfindlichkeit über den d Einstellknopf [5] regeln. Wähle en Sie für jedes Slave-Gerät S das Adressenmenü mit m MODE [A]. Im m Display ersche eint “A” gefolgt vo on • uert). (musikgesteu : Adresse = 16). 1 Stellen Sie die d Adresse mit UP U [C] oder DOW WN [B] auf 1. Wa arten einer Ziffer (z.B. • (auto) oder anzeigt. Sie ± 20 Sekunden bis das Display Um die Geschwindigke eit des internen Programms P zu än ndern, drücken Sie S MODE [A] bis s das Display P [C] anzeigt (Standard-Geschwindigkeit istt 51). Stellen Sie die gewünschte Geschwindigkeitt (1~100) mit UP oder DOWN [B] ein. 7.2 DMX-Steuerung g • • • • Drück ken Sie MODE [A A] bis das Display y [2] od der anzeigtt und drücken Sie e danach auf UP [C]. Das Display D zeigt nun an. Alle DMX-gesteuerten D ass das richtige Gerät G auf die Sign nale Geräte brauchen eine digitale Sttartadresse, soda reagie eren kann. Diese e digitale Startadresse ist die Kanalnummer, von der d das Gerät die e Befehle der DMXSteue erung empfängt und u ausführt. Sie e können dieselbe e Startadresse fü ür eine ganze Gru uppe von Geräten verwe enden oder eine separate Startad dresse für jedes Gerät G eingeben. Wenn n alle Geräte dies selbe Startadress se haben, werden n sie auf einem spezifischen Kana al das Steuersignal empfangen. Mit anderren Worten, wenn Sie die Einstellungen von einem m Kanal ändern, werden w alle Gerä äte zur gleich hen Zeit beeinflus sst. Wenn Sie ve erschiedene Adres ssen einstellen, wird w jedes Gerät auf einem anderren Kanal Signale empfan ngen. Wenn Sie die d Einstellungen ändern, wird nurr das besagte Ge erät beeinflusst. alle des 15-Kanall VDPLDJBAR2, werden Sie die Startadresse S des s ersten Gerätes auf a 1 (CH1~15), der Im Fa zweiten Einheit auf 16 6 (1 + 15) (CH16 6~30), der dritten Einheit auf 31 (16 + 15) (CH31 1~45) usw. einstellen müss sen. • • Drück ken Sie MODE [A A] bis das Display y “A” und die Zifffer anzeigt (z.B. : Adresse = 16). Wähle en Sie die Startadresse mit UP [C C] oder DOWN [D D]. Drücken Sie danach auf MODE [A] bis das Dis splay • anzeigt. Die A Adresse wird nach h ± 20 Sekunden n aktiv. Das Displlay zeigt danach “d” gefolgt von der d ausgewählten n Adres sse (z.B. Kanal 1 15.09.2010 ). P interne Programme automattische Steuerung musikge esteuert 000 010 033 053 074 096 117 138 159 181 202 223 – – – – – – – – – – – – 09 00 03 32 05 52 07 73 09 95 11 16 13 37 15 58 18 80 20 01 22 22 24 43 21 ausgescha altet Programm m1 Programm m2 Programm m3 Programm m4 Programm m5 Programm m6 Programm m7 Programm m8 Programm m9 Programm m 10 Programm m 11 ©Vellema an nv VDPLDJBAR2 Kanal 2 Masterdiimmer Kanal 3 Strobosk kop Kanal Kanal Kanal Kanal Kanal Kanal Kanal Kanal Kanal Kanal Kanal Kanal Spot Spot Spot Spot Spot Spot Spot Spot Spot Spot Spot Spot 4 5 6 7 8 9 10 0 11 1 12 2 13 3 14 4 15 5 1: 1: 1: 2: 2: 2: 3: 3: 3: 4: 4: 4: rot grün blau rot grün blau rot grün blau rot grün blau 244 – 25 55 250 – 25 55 000 – 00 09 010 - 255 000 – 00 09 010 - 255 000 – 25 55 000 – 25 55 000 – 25 55 000 – 25 55 000 – 25 55 000 – 25 55 000 – 25 55 000 – 25 55 000 – 25 55 000 – 25 55 000 – 25 55 000 – 25 55 automatis sche Steuerung: interne Programm me musikgestteuert ausgescha altet Dimmen von v 0 – 100% ausgescha altet Strobosko op von langsam auf a schnell Dimmen von v 0 – 100% Dimmen von v 0 – 100% Dimmen von v 0 – 100% Dimmen von v 0 – 100% Dimmen von v 0 – 100% Dimmen von v 0 – 100% Dimmen von v 0 – 100% Dimmen von v 0 – 100% Dimmen von v 0 – 100% Dimmen von v 0 – 100% Dimmen von v 0 – 100% Dimmen von v 0 – 100% 7.3 Fuß ßschalter Bemerku ung: Der Fußscha alter funktioniert nur wenn Sie de en automatischen n Modus ( ) oder musiksteuerrung ( ) aus sgewählt haben. • Trenn nen Sie den Netzstecker und verb binden Sie den Fu ußschalter mit de em Eingang [6]. • Funkttionen: Pedal 1 vorprogrammie erte drücken Sie Effekt # Einstellungen 1 Weiß 2 Rot 3 Grün 4 Blau 5 Gelb 6 Rosa 7 Cyan 8 Farbwechsel, jede j Sekunde, en ndlose Schleife (1 bis 7) 9 Farbfade, alle 3 Sekunden, end dlose Schleife (1 bis 7) Pedal 2 Ton eingeschaltet Pedal 3 Hold Pedal 4 Black-out drücken Sie,, um alle LEDs au uszuschalten, drü ücken Sie wieder, um zur vorigen Einstellung zurückzukehren z 8. Wa artung Vorb bereitung • • • Das Gerät G braucht keiine regelmäßige Wartung. Der intterne Kreis ist mit einer internen Sicherung von 250 V/2 V A, 5 x 20 mm m geschützt. Erse etzen Sie eine defekte Sicherung durch eine mit denselben Eigen nschaften. Verwe enden Sie zur Re einigung ein feuchtes Tuch. Verwe enden Sie auf keinen Fall Alkohol oder irgendwelc che Lösun ngsmittel. Es gib bt keine wartbare en Teile. Bestelle en Sie eventuelle Ersatzteile bei Ih hrem Fachhändle er. 9. Tec chnische Da aten Stromvers sorgung Stromverb brauch LEDs DMX-Kanä äle Abstrahlw winkel Abmessun ngen Gewicht 230VAC ~ 50Hz 160W 28 x 3W RGB 15 30° 1200 x 65 x 315 5mm 15kg Verwende en Sie dieses Gerät nur mit originellen Zubehörteilen. Velleman NV übernimmt keine k Haftung für Schaden oder o Verletzungen bei (falscher) ) Anwendung die eses Gerätes. Für mehr Informattionen zu diesem m Produkt, siehe www.hqpo ower.eu. Alle Änderungen ohne vorherige v Ankün ndigung vorbehalten. © URHEBE ERRECHT Velleman NV besitzt das Urh heberrecht für die ese Bedienungsanleitung. Alle weltw weiten Rechte vor rbehalten. ohne vorherige schriftliche Gen nehmigung des Urhe ebers ist es nicht ge estattet, diese Bedie enungsanleitung gan nz oder in Teilen zu reproduzierren, zu kopieren, zu übersetzen, zu bea arbeiten oder zu spe eichern. 15.09.2010 22 ©Vellema an nv Velleman® Service and Quality Warranty Velleman® has over 35 years of experience in the electronics world and distributes its products in more than 85 countries. All our products fulfil strict quality requirements and legal stipulations in the EU. In order to ensure the quality, our products regularly go through an extra quality check, both by an internal quality department and by specialized external organisations. If, all precautionary measures notwithstanding, problems should occur, please make appeal to our warranty (see guarantee conditions). General Warranty Conditions Concerning Consumer Products (for EU): • All consumer products are subject to a 24-month warranty on production flaws and defective material as from the original date of purchase. • Velleman® can decide to replace an article with an equivalent article, or to refund the retail value totally or partially when the complaint is valid and a free repair or replacement of the article is impossible, or if the expenses are out of proportion. You will be delivered a replacing article or a refund at the value of 100% of the purchase price in case of a flaw occurred in the first year after the date of purchase and delivery, or a replacing article at 50% of the purchase price or a refund at the value of 50% of the retail value in case of a flaw occurred in the second year after the date of purchase and delivery. • Not covered by warranty: - all direct or indirect damage caused after delivery to the article (e.g. by oxidation, shocks, falls, dust, dirt, humidity...), and by the article, as well as its contents (e.g. data loss), compensation for loss of profits; - frequently replaced consumable goods, parts or accessories such as batteries, lamps, rubber parts, drive belts... (unlimited list); - flaws resulting from fire, water damage, lightning, accident, natural disaster, etc. …; - flaws caused deliberately, negligently or resulting from improper handling, negligent maintenance, abusive use or use contrary to the manufacturer’s instructions; - damage caused by a commercial, professional or collective use of the article (the warranty validity will be reduced to six (6) months when the article is used professionally); - damage resulting from an inappropriate packing and shipping of the article; - all damage caused by modification, repair or alteration performed by a third party without written permission by Velleman®. • Articles to be repaired must be delivered to your Velleman® dealer, solidly packed (preferably in the original packaging), and be completed with the original receipt of purchase and a clear flaw description. • Hint: In order to save on cost and time, please reread the manual and check if the flaw is caused by obvious causes prior to presenting the article for repair. Note that returning a non-defective article can also involve handling costs. • Repairs occurring after warranty expiration are subject to shipping costs. • The above conditions are without prejudice to all commercial warranties. The above enumeration is subject to modification according to the article (see article’s manual). Velleman® service- en kwaliteitsgarantie Velleman® heeft ruim 35 jaar ervaring in de elektronicawereld en verdeelt in meer dan 85 landen. Al onze producten beantwoorden aan strikte kwaliteitseisen en aan de wettelijke bepalingen geldig in de EU. Om de kwaliteit te waarborgen, ondergaan onze producten op regelmatige tijdstippen een extra kwaliteitscontrole, zowel door onze eigen kwaliteitsafdeling als door externe gespecialiseerde organisaties. Mocht er ondanks deze voorzorgen toch een probleem optreden, dan kunt u steeds een beroep doen op onze waarborg (zie waarborgvoorwaarden). Algemene waarborgvoorwaarden consumentengoederen (voor Europese Unie): • Op alle consumentengoederen geldt een garantieperiode van 24 maanden op productie- en materiaalfouten en dit vanaf de oorspronkelijke aankoopdatum. • Indien de klacht gegrond is en een gratis reparatie of vervanging van een artikel onmogelijk is of indien de kosten hiervoor buiten verhouding zijn, kan Velleman® beslissen het desbetreffende artikel te vervangen door een gelijkwaardig artikel of de aankoopsom van het artikel gedeeltelijk of volledig terug te betalen. In dat geval krijgt u een vervangend product of terugbetaling ter waarde van 100% van de aankoopsom bij ontdekking van een gebrek tot één jaar na aankoop en levering, of een vervangend product tegen 50% van de kostprijs of terugbetaling van 50 % bij ontdekking na één jaar tot 2 jaar. • Valt niet onder waarborg: - alle rechtstreekse of onrechtstreekse schade na de levering veroorzaakt aan het toestel (bv. door oxidatie, schokken, val, stof, vuil, vocht...), en door het toestel, alsook zijn inhoud (bv. verlies van data), vergoeding voor eventuele winstderving. - verbruiksgoederen, onderdelen of hulpstukken die regelmatig dienen te worden vervangen, zoals bv. batterijen, lampen, rubberen onderdelen, aandrijfriemen... (onbeperkte lijst). - defecten ten gevolge van brand, waterschade, bliksem, ongevallen, natuurrampen, enz. - defecten veroorzaakt door opzet, nalatigheid of door een onoordeelkundige behandeling, slecht onderhoud of abnormaal gebruik of gebruik van het toestel strijdig met de voorschriften van de fabrikant. - schade ten gevolge van een commercieel, professioneel of collectief gebruik van het apparaat (bij professioneel gebruik wordt de garantieperiode herleid tot 6 maand). - schade veroorzaakt door onvoldoende bescherming bij transport van het apparaat. - alle schade door wijzigingen, reparaties of modificaties uitgevoerd door derden zonder toestemming van Velleman®. • Toestellen dienen ter reparatie aangeboden te worden bij uw Velleman®-verdeler. Het toestel dient vergezeld te zijn van het oorspronkelijke aankoopbewijs. Zorg voor een degelijke verpakking (bij voorkeur de originele verpakking) en voeg een duidelijke foutomschrijving bij. • Tip: alvorens het toestel voor reparatie aan te bieden, kijk nog eens na of er geen voor de hand liggende reden is waarom het toestel niet naar behoren werkt (zie handleiding). Op deze wijze kunt u kosten en tijd besparen. Denk eraan dat er ook voor niet-defecte toestellen een kost voor controle aangerekend kan worden. • Bij reparaties buiten de waarborgperiode zullen transportkosten aangerekend worden. • Elke commerciële garantie laat deze rechten onverminderd. Bovenstaande opsomming kan eventueel aangepast worden naargelang de aard van het product (zie handleiding van het betreffende product). Garantie de service et de qualité Velleman® Velleman® jouit d’une expérience de plus de 35 ans dans le monde de l’électronique avec une distribution dans plus de 85 pays. Tous nos produits répondent à des exigences de qualité rigoureuses et à des dispositions légales en vigueur dans l’UE. Afin de garantir la qualité, nous soumettons régulièrement nos produits à des contrôles de qualité supplémentaires, tant par notre propre service qualité que par un service qualité externe. Dans le cas improbable d’un défaut malgré toutes les précautions, il est possible d’invoquer notre garantie (voir les conditions de garantie). Conditions générales concernant la garantie sur les produits grand public (pour l’UE) : • tout produit grand public est garanti 24 mois contre tout vice de production ou de matériaux à dater du jour d’acquisition effective ; • si la plainte est justifiée et que la réparation ou le remplacement d’un article est jugé impossible, ou lorsque les coûts s’avèrent disproportionnés, Velleman® s’autorise à remplacer ledit article par un article équivalent ou à rembourser la totalité ou une partie du prix d’achat. Le cas échéant, il vous sera consenti un article de remplacement ou le remboursement complet du prix d’achat lors d’un défaut dans un délai de 1 an après l’achat et la livraison, ou un article de remplacement moyennant 50% du prix d’achat ou le remboursement de 50% du prix d’achat lors d’un défaut après 1 à 2 ans. • sont par conséquent exclus : - tout dommage direct ou indirect survenu à l’article après livraison (p.ex. dommage lié à l’oxydation, choc, chute, poussière, sable, impureté…) et provoqué par l’appareil, ainsi que son contenu (p.ex. perte de données) et une indemnisation éventuelle pour perte de revenus ; - tout bien de consommation ou accessoire, ou pièce qui nécessite un remplacement régulier comme p.ex. piles, ampoules, pièces en caoutchouc, courroies… (liste illimitée) ; - tout dommage qui résulte d’un incendie, de la foudre, d’un accident, d’une catastrophe naturelle, etc. ; - out dommage provoqué par une négligence, volontaire ou non, une utilisation ou un entretien incorrects, ou une utilisation de l’appareil contraire aux prescriptions du fabricant ; - tout dommage à cause d’une utilisation commerciale, professionnelle ou collective de l’appareil (la période de garantie sera réduite à 6 mois lors d’une utilisation professionnelle) ; - tout dommage à l’appareil qui résulte d’une utilisation incorrecte ou différente que celle pour laquelle il a été initialement prévu comme décrit dans la notice ; - tout dommage engendré par un retour de l’appareil emballé dans un conditionnement non ou insuffisamment protégé. - toute réparation ou modification effectuée par une tierce personne sans l’autorisation explicite de SA Velleman® ; - frais de transport de et vers Velleman® si l’appareil n’est plus couvert sous la garantie. • toute réparation sera fournie par l’endroit de l’achat. L’appareil doit nécessairement être accompagné du bon d’achat d’origine et être dûment conditionné (de préférence dans l’emballage d’origine avec mention du défaut) ; • tuyau : il est conseillé de consulter la notice et de contrôler câbles, piles, etc. avant de retourner l’appareil. Un appareil retourné jugé défectueux qui s’avère en bon état de marche pourra faire l’objet d’une note de frais à charge du consommateur ; • une réparation effectuée en-dehors de la période de garantie fera l’objet de frais de transport ; • toute garantie commerciale ne porte pas atteinte aux conditions susmentionnées. La liste susmentionnée peut être sujette à une complémentation selon le type de l’article et être mentionnée dans la notice d’emploi. Velleman® Service- und Qualitätsgarantie Velleman® hat gut 35 Jahre Erfahrung in der Elektronikwelt und vertreibt seine Produkte in über 85 Ländern. Alle Produkte entsprechen den strengen Qualitätsforderungen und gesetzlichen Anforderungen in der EU. Um die Qualität zu gewährleisten werden unsere Produkte regelmäßig einer zusätzlichen Qualitätskontrolle unterworfen, sowohl von unserer eigenen Qualitätsabteilung als auch von externen spezialisierten Organisationen. Sollten, trotz aller Vorsichtsmaßnahmen, Probleme auftreten, nehmen Sie bitte die Garantie in Anspruch (siehe Garantiebedingungen). Allgemeine Garantiebedingungen in Bezug auf Konsumgüter (für die Europäische Union): • Alle Produkte haben für Material- oder Herstellungsfehler eine Garantieperiode von 24 Monaten ab Verkaufsdatum. • Wenn die Klage berechtigt ist und falls eine kostenlose Reparatur oder ein Austausch des Gerätes unmöglicht ist, oder wenn die Kosten dafür unverhältnismäßig sind, kann Velleman® sich darüber entscheiden, dieses Produkt durch ein gleiches Produkt zu ersetzen oder die Kaufsumme ganz oder teilweise zurückzuzahlen. In diesem Fall erhalten Sie ein Ersatzprodukt oder eine Rückzahlung im Werte von 100% der Kaufsumme im Falle eines Defektes bis zu 1 Jahr nach Kauf oder Lieferung, oder Sie bekommen ein Ersatzprodukt im Werte von 50% der Kaufsumme oder eine Rückzahlung im Werte von 50 % im Falle eines Defektes im zweiten Jahr. • Von der Garantie ausgeschlossen sind: - alle direkten oder indirekten Schäden, die nach Lieferung am Gerät und durch das Gerät verursacht werden (z.B. Oxidation, Stöße, Fall, Staub, Schmutz, Feuchtigkeit, ...), sowie auch der Inhalt (z.B. Datenverlust), Entschädigung für eventuellen Gewinnausfall. - Verbrauchsgüter, Teile oder Zubehörteile, die regelmäßig ausgewechselt werden, wie z.B. Batterien, Lampen, Gummiteile, Treibriemen, usw. (unbeschränkte Liste). - Schäden verursacht durch Brandschaden, Wasserschaden, Blitz, Unfälle, Naturkatastrophen, usw. - Schäden verursacht durch absichtliche, nachlässige oder unsachgemäße Anwendung, schlechte Wartung, zweckentfremdete Anwendung oder Nichtbeachtung von Benutzerhinweisen in der Bedienungsanleitung. - Schäden infolge einer kommerziellen, professionellen oder kollektiven Anwendung des Gerätes (bei gewerblicher Anwendung wird die Garantieperiode auf 6 Monate zurückgeführt). - Schäden verursacht durch eine unsachgemäße Verpackung und unsachgemäßen Transport des Gerätes. - alle Schäden verursacht durch unautorisierte Änderungen, Reparaturen oder Modifikationen, die von einem Dritten ohne Erlaubnis von Velleman® vorgenommen werden. • Im Fall einer Reparatur, wenden Sie sich an Ihren Velleman®Verteiler. Legen Sie das Produkt ordnungsgemäß verpackt (vorzugsweise die Originalverpackung) und mit dem OriginalKaufbeleg vor. Fügen Sie eine deutliche Fehlerumschreibung hinzu. • Hinweis: Um Kosten und Zeit zu sparen, lesen Sie die Bedienungsanleitung nochmals und überprüfen Sie, ob es keinen auf de Hand liegenden Grund gibt, ehe Sie das Gerät zur Reparatur zurückschicken. Stellt sich bei der Überprüfung des Geräts heraus, dass kein Geräteschaden vorliegt, könnte dem Kunden eine Untersuchungspauschale berechnet. • Für Reparaturen nach Ablauf der Garantiefrist werden Transportkosten berechnet. • Jede kommerzielle Garantie lässt diese Rechte unberührt. Die oben stehende Aufzählung kann eventuell angepasst werden gemäß der Art des Produktes (siehe Bedienungsanleitung des Gerätes). Garantía de servicio y calidad Velleman® Velleman® disfruta de una experiencia de más de 35 años en el mundo de la electrónica con una distribución en más de 85 países. Todos nuestros productos responden a normas de calidad rigurosas y disposiciones legales vigentes en la UE. Para garantizar la calidad, sometimos nuestros productos regularmente a controles de calidad adicionales, tanto por nuestro propio servicio de calidad como por un servicio de calidad externo. En el caso improbable de que surgieran problemas a pesar de todas las precauciones, es posible apelar a nuestra garantía (véase las condiciones de garantía). Condiciones generales referentes a la garantía sobre productos de venta al público (para la Unión Europea): • Todos los productos de venta al público tienen un período de garantía de 24 meses contra errores de producción o errores en materiales desde la adquisición original; • Si la queja está fundada y si la reparación o la sustitución de un artículo es imposible, o si los gastos son desproporcionados, Velleman® autoriza reemplazar el artículo por un artículo equivalente o reembolsar la totalidad o una parte del precio de compra. En este caso, recibirá un artículo de recambio o el reembolso completo del precio de compra al descubrir un defecto hasta un año después de la compra y la entrega, o un artículo de recambio al 50% del precio de compra o la sustitución de un 50% del precio de compra al descubrir un defecto después de 1 a 2 años. • Por consiguiente, están excluidos entre otras cosas: - todos los daños causados directamente o indirectamente al aparato y su contenido después de la entrega (p.ej. por oxidación, choques, caída,...) y causados por el aparato, al igual que el contenido (p.ej. pérdida de datos) y una indemnización eventual para falta de ganancias; - partes o accesorios que deban ser reemplazados regularmente, como por ejemplo baterías, lámparas, partes de goma, ... (lista ilimitada) - defectos causados por un incendio, daños causados por el agua, rayos, accidentes, catástrofes naturales, etc. ; - defectos causados a conciencia , descuido o por malos tratos, un mantenimiento inapropiado o un uso anormal del aparato contrario a las instrucciones del fabricante; - daños causados por un uso comercial, profesional o colectivo del aparato (el período de garantía se reducirá a 6 meses con uso profesional) ; - daños causados por un uso incorrecto o un uso ajeno al que est está previsto el producto inicialmente como está descrito en el manual del usuario ; - daños causados por una protección insuficiente al transportar el aparato. - daños causados por reparaciones o modificaciones efectuadas por una tercera persona sin la autorización explicita de SA Velleman® ; - se calcula gastos de transporte de y a Velleman® si el aparato ya no está cubierto por la garantía. • Cualquier reparación se efectuará por el lugar de compra. Devuelva el aparato con la factura de compra original y transpórtelo en un embalaje sólido (preferentemente el embalaje original). Incluya también una buena descripción del defecto ; • Consejo: Lea el manual del usuario y controle los cables, las pilas, etc. antes de devolver el aparato. Si no se encuentra un defecto en el artículo los gastos podrían correr a cargo del cliente; • Los gastos de transporte correrán a carga del cliente para una reparación efectuada fuera del periode de garantía. • Cualquier gesto comercial no disminuye estos derechos. La lista previamente mencionada puede ser adaptada según el tipo de artículo (véase el manual del usuario del artículo en cuestión)-
 1
1
-
 2
2
-
 3
3
-
 4
4
-
 5
5
-
 6
6
-
 7
7
-
 8
8
-
 9
9
-
 10
10
-
 11
11
-
 12
12
-
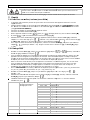 13
13
-
 14
14
-
 15
15
-
 16
16
-
 17
17
-
 18
18
-
 19
19
-
 20
20
-
 21
21
-
 22
22
-
 23
23
-
 24
24


HQ Power VDPLDJBAR2 Handleiding
- Categorie
- Stroboscopen
- Type
- Handleiding
in andere talen
- English: HQ Power VDPLDJBAR2 User manual
- français: HQ Power VDPLDJBAR2 Manuel utilisateur
- español: HQ Power VDPLDJBAR2 Manual de usuario
- Deutsch: HQ Power VDPLDJBAR2 Benutzerhandbuch
Gerelateerde papieren
-
HQ-Power HQ-POWER LEDA03C DMX Controller Output LED Power and Control Unit Handleiding
-
HQ Power LED FLOWER BATTEN Handleiding
-
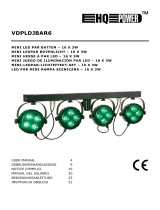 HQ Power PAR BATTEN Specificatie
-
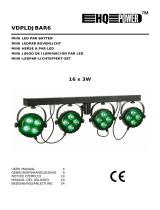 HQ Power VDPLDJBAR6 Handleiding
-
HQ-Power QUAD DANCER Handleiding
-
-
 HQ Power HQ-Power VDPL1003WW Handleiding
-
HQ Power ARAS 45W Handleiding
-
 HQ Power VDL360LO3 Handleiding
-


