Pagina wordt geladen...

Installationguide
Installatiegids
Guide d’installation
Montageanleitung
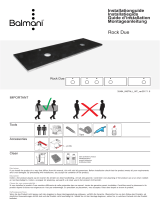
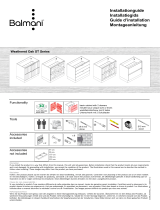
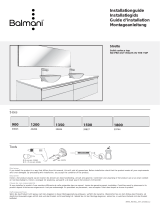
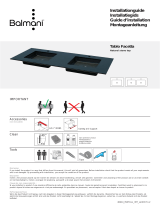
StoneFix stainless steel wallbrackets
30285_INSTALL_INT_ver2020.1.4
This set is developed for use in strong thick brick and concrete walls. For other applica-
tions; thin walls, aerated concrete building blocks and dry wall systems should additional
measures be taken. Therefore, refer to the installation instructions of the manufacturer of
the wall.
Deze set is ontwikkeld voor gebruik in draagkrachtige en voldoende dikke muren. Voor
andere toepassingen; dunne wanden, gasbeton, snelbouwsteen en holle wandsystemen
dienen bijkomende maatregelen genomen te worden. Raadpleeg daarom de voorschriften
van de fabrikant van het betreffende muursysteem.
Cet ensemble est développé pour utilisation dans murs portants et sufsamment épais.
Pour autres applications, parois nes, béton-gaz, bloc treillis et systèmes de mur creux, il
convient d’envisager des mesures complémentaires. Consultez à cet effet les consignes
du fabricant du système de mur.
Dieses Set ist für den Einsatz in starken Dicke Ziegel und Beton Wände entwickelt. Für
andere Anwendungen; dünne Wände, Porenbeton und Trockenmauer-Systeme sollten
zusätzliche Maßnahmen getroffen werden. Daher nden Sie in der Installationsanleitung
des Herstellers von der Wand.
!
30285
option Boption A

·
·
·
Ø 10 mm
·
I. PREPARATION
Fixation of the basin cabinet to the wall - detailed specications are noted in the manual of the basin
cabinet.
E
NL
F
D
·
·
·
Ø 10 mm
·
·
·
·
Ø 10 mm
·
1 2
Do not x the brackets now, this should be done
in step 11.
xeer de beugels nog niet, dit dient te gebeuren
in stap 11.
Ne xez pas les supports maintenant, cela
devrait être fait à
l’étape 11.
Befestigen Sie die Klammern nicht jetzt, sollte
dies im Schritt 11.
PRESS TO
UNLOCK
PRESS TO
UNLOCK
·
PRESS TO
UNLOCK
·
PRESS TO
UNLOCK
PRESS TO
UNLOCK
PRESS TO
UNLOCK
·
PRESS TO
UNLOCK
·
PRESS TO
UNLOCK
PRESS TO
UNLOCK
PRESS TO
UNLOCK
·
PRESS TO
UNLOCK
·
PRESS TO
UNLOCK
45
3
x 2
x 2
x 28 x 2
x 2
x 2
x 2
Disclaimer
If you install the product in a way that differs from this manual, this
will void all guarantees. Before installation check that the product
meets all your requirements and is not damaged. By proceeding with
installation, you accept the condition of the product.
Disclaimer
Indien u het product plaatst op een manier die afwijkt van deze
handleiding, vervalt alle garantie. Controleer voor plaatsing of het
product aan al uw eisen voldoet en niet beschadigd is. Indien u
overgaat tot plaatsing, aanvaardt u de staat waarin het product zich
bevindt.
Clause de non-responsabilité
Si vous installez le produit d’une manière différente de celle présen-
tée dans ce manuel, toutes les garanties seront invalidées. Contrôlez
avant le placement si le produit répond à toutes vos exigences et n’est
pas endommagé. En procédant au placement, vous acceptez l’état
dans lequel se trouve le produit.
Haftungsausschluss
Wenn Sie das Produkt nicht genau nach den Angaben in dieser Monta-
geanleitung einbauen, verfällt die Garantie. Überprüfen Sie vor dem
Einbau des Produkts, ob sämtliche Voraussetzungen erfüllt sind und
das Produkt nicht beschädigt ist. Sobald Sie mit der Montage beginnen,
sehen Sie, in welchem Zustand sich das Produkt bendet.
PARTLIST

PRESS TO
UNLOCK
·
PRESS TO
UNLOCK
·
PRESS TO
UNLOCK
PRESS TO
UNLOCK
PRESS TO
UNLOCK
PRESS TO
UNLOCK
PRESS TO
UNLOCK
PRESS TO
UNLOCK
PRESS TO
UNLOCK
PRESS TO
UNLOCK
PRESS TO
UNLOCK
PRESS TO
UNLOCK
PRESS TO
UNLOCK
PRESS TO
UNLOCK
PRESS TO
UNLOCK
PRESS TO
UNLOCK
PRESS TO
UNLOCK
PRESS TO
UNLOCK
PRESS TO
UNLOCK
PRESS TO
UNLOCK
PRESS TO
UNLOCK
PRESS TO
UNLOCK
PRESS TO
UNLOCK
PRESS TO
UNLOCK
PRESS TO
UNLOCK
PRESS TO
UNLOCK
·
PRESS TO
UNLOCK
PRESS TO
UNLOCK
PRESS TO
UNLOCK
PRESS TO
UNLOCK
·
·
·
PRESS TO
UNLOCK
PRESS TO
UNLOCK
PRESS TO
UNLOCK
PRESS TO
UNLOCK
PRESS TO
UNLOCK
PRESS TO
UNLOCK
PRESS TO
UNLOCK
PRESS TO
UNLOCK
·
PRESS TO
UNLOCK
PRESS TO
UNLOCK
PRESS TO
UNLOCK
PRESS TO
UNLOCK
·
·
·
II. Aditional bottom support (L-prole) installation
PRESS TO
UNLOCK
PRESS TO
UNLOCK
PRESS TO
UNLOCK
PRESS TO
UNLOCK
PRESS TO
UNLOCK
PRESS TO
UNLOCK
PRESS TO
UNLOCK
PRESS TO
UNLOCK
·
PRESS TO
UNLOCK
PRESS TO
UNLOCK
PRESS TO
UNLOCK
PRESS TO
UNLOCK
·
·
·
8
9
E
NL
F
D
Use suited screws and wallplugs to provide sufcient
xture.
Gebruik aangepaste schroeven en pluggen voor
voldoende bevestiging.
Utilisez des vis et chevilles adaptés pour un xation
sufsante.
Verwenden Sie benutzerdenierte Schrauben und
Dübel geeignet dafür ausreichende Bestätigung.
E
NL
F
D
Set the screw against the wall. It prevents the
upper support of the cabinet to be damaged while
tightening the wall xation.
Stel de schroef tegen de muur. Deze voorkomt dat
de bovenste steun van de onderkast wordt bescha-
digd tijdens het aandraaien van de muurbout.
Mettre la vis contre le mur. Cela permet d’éviter
que la support arriére du cabinet sera endomma-
gée pendant le serrage dénitive du xation mural.
Legen Sie die Schraube an der Wand. Dies ver-
hindert, dass die obere Unterstützung der Kabinett
während der endgültig festziehen der Schraube
beschädigt ist.
III. Adjustable screw
PRESS TO
UNLOCK
·
PRESS TO
UNLOCK
·
PRESS TO
UNLOCK
PRESS TO
UNLOCK
PRESS TO
UNLOCK
PRESS TO
UNLOCK
PRESS TO
UNLOCK
PRESS TO
UNLOCK
PRESS TO
UNLOCK
PRESS TO
UNLOCK
PRESS TO
UNLOCK
PRESS TO
UNLOCK
PRESS TO
UNLOCK
PRESS TO
UNLOCK
PRESS TO
UNLOCK
PRESS TO
UNLOCK
PRESS TO
UNLOCK
PRESS TO
UNLOCK
PRESS TO
UNLOCK
·
PRESS TO
UNLOCK
·
PRESS TO
UNLOCK
PRESS TO
UNLOCK
PRESS TO
UNLOCK
PRESS TO
UNLOCK
PRESS TO
UNLOCK
PRESS TO
UNLOCK
PRESS TO
UNLOCK
PRESS TO
UNLOCK
PRESS TO
UNLOCK
PRESS TO
UNLOCK
PRESS TO
UNLOCK
PRESS TO
UNLOCK
PRESS TO
UNLOCK
PRESS TO
UNLOCK
PRESS TO
UNLOCK
PRESS TO
UNLOCK
67
option B
option A

PRESS TO
UNLOCK
PRESS TO
UNLOCK
PRESS TO
UNLOCK
PRESS TO
UNLOCK
PRESS TO
UNLOCK
PRESS TO
UNLOCK
PRESS TO
UNLOCK
PRESS TO
UNLOCK
·
PRESS TO
UNLOCK
PRESS TO
UNLOCK
PRESS TO
UNLOCK
PRESS TO
UNLOCK
·
PRESS TO
UNLOCK
PRESS TO
UNLOCK
PRESS TO
UNLOCK
PRESS TO
UNLOCK
PRESS TO
UNLOCK
PRESS TO
UNLOCK
PRESS TO
UNLOCK
PRESS TO
UNLOCK
·
PRESS TO
UNLOCK
PRESS TO
UNLOCK
PRESS TO
UNLOCK
PRESS TO
UNLOCK
·
PRESS TO
UNLOCK
PRESS TO
UNLOCK
PRESS TO
UNLOCK
PRESS TO
UNLOCK
PRESS TO
UNLOCK
PRESS TO
UNLOCK
PRESS TO
UNLOCK
PRESS TO
UNLOCK
·
PRESS TO
UNLOCK
PRESS TO
UNLOCK
PRESS TO
UNLOCK
PRESS TO
UNLOCK
·
PRESS TO
UNLOCK
PRESS TO
UNLOCK
PRESS TO
UNLOCK
PRESS TO
UNLOCK
PRESS TO
UNLOCK
PRESS TO
UNLOCK
PRESS TO
UNLOCK
PRESS TO
UNLOCK
·
PRESS TO
UNLOCK
PRESS TO
UNLOCK
PRESS TO
UNLOCK
PRESS TO
UNLOCK
·
PRESS TO
UNLOCK
PRESS TO
UNLOCK
PRESS TO
UNLOCK
PRESS TO
UNLOCK
PRESS TO
UNLOCK
PRESS TO
UNLOCK
PRESS TO
UNLOCK
PRESS TO
UNLOCK
·
PRESS TO
UNLOCK
PRESS TO
UNLOCK
PRESS TO
UNLOCK
PRESS TO
UNLOCK
·
PRESS TO
UNLOCK
PRESS TO
UNLOCK
PRESS TO
UNLOCK
PRESS TO
UNLOCK
PRESS TO
UNLOCK
PRESS TO
UNLOCK
PRESS TO
UNLOCK
PRESS TO
UNLOCK
·
PRESS TO
UNLOCK
PRESS TO
UNLOCK
PRESS TO
UNLOCK
PRESS TO
UNLOCK
·
PRESS TO
UNLOCK
PRESS TO
UNLOCK
PRESS TO
UNLOCK
PRESS TO
UNLOCK
PRESS TO
UNLOCK
PRESS TO
UNLOCK
PRESS TO
UNLOCK
PRESS TO
UNLOCK
·
PRESS TO
UNLOCK
PRESS TO
UNLOCK
PRESS TO
UNLOCK
PRESS TO
UNLOCK
·
PRESS TO
UNLOCK
PRESS TO
UNLOCK
PRESS TO
UNLOCK
PRESS TO
UNLOCK
PRESS TO
UNLOCK
PRESS TO
UNLOCK
PRESS TO
UNLOCK
PRESS TO
UNLOCK
·
PRESS TO
UNLOCK
PRESS TO
UNLOCK
PRESS TO
UNLOCK
PRESS TO
UNLOCK
·
Tighten the bolt ,reset, if nescessary the adjustable screw.
Draai de muurbout aan, stel eventueel de afstandsschroef bij.
Serrez le boulon à visser au mur, ajuster eventuellement la vis distance.
Ziehen Sie die Schraube an der Wand, passen Sie gegebenenfalls die Entfernung an.
E
NL
F
D
V. Fix wall bracket into the wall
VI. Fix wall bracket to the body structure of the inside of the basin cabinet
VII. Continue installation for basin cabinet and top, see manuals for detailed information
11
12
PRESS TO
UNLOCK
PRESS TO
UNLOCK
PRESS TO
UNLOCK
PRESS TO
UNLOCK
PRESS TO
UNLOCK
PRESS TO
UNLOCK
PRESS TO
UNLOCK
PRESS TO
UNLOCK
·
PRESS TO
UNLOCK
PRESS TO
UNLOCK
PRESS TO
UNLOCK
PRESS TO
UNLOCK
·
·
·
10
PRESS TO
UNLOCK
2 mm
=X
PRESS TO
UNLOCK
PRESS TO
UNLOCK
1
Click
2
E
NL
F
D
Place the base cabinets in their Wallbrackets.
Plaats de onderkasten in hun muurbevestiging.
Placez les armoires dans les équerres.
Setzen Sie die Unterschränke in ihre
Wandhalterung
IV. Fix basin cabinet onto the wall, verify connections
1/4