Pioneer DEH-X2900UI Handleiding
- Categorie
- Auto media-ontvangers
- Type
- Handleiding

English Français Italiano Español Deutsch Nederlands Русский
CD RDS RECEIVER
AUTORADIO CD RDS
SINTOLETTORE CD RDS
REPRODUCTOR DE CD CON RECEPTOR RDS
CD RDS-EMPFÄNGER
CD RDS-ONTVANGER
CD RDS ПРИЕМНИК
DEH-X2900UI
Owner’s Manual
Mode d’emploi
Manuale d’istruzioni
Manual de instrucciones
Bedienungsanleitung
Handleiding
Руководство пользователя

2En
Before You Start....................................................................................... 2
Getting Started........................................................................................ 3
Radio.......................................................................................................... 4
CD/USB/iPod/AUX................................................................................... 5
App Mode................................................................................................. 7
Spotify®..................................................................................................... 7
Using Pioneer ARC APP.......................................................................... 8
Settings ..................................................................................................... 9
FUNCTION settings ................................................................................. 9
AUDIO settings...................................................................................... 10
SYSTEM settings ................................................................................... 10
ILLUMINATION settings....................................................................... 11
MIXTRAX settings................................................................................. 12
Connections/Installation ..................................................................... 12
Additional Information ........................................................................ 14
About this manual:
• In the following instructions, a USB memory or USB audio player are referred to as
“USB device”.
• In this manual, iPod and iPhone are referred to as “iPod”.
Table of Contents
Thank you for purchasing this PIONEER product
To ensure proper use, please read through this manual before using this product. It is especially
important that you read and observe WARNINGs and CAUTIONs in this manual. Please keep the
manual in a safe and accessible place for future reference.
Private households in the member states of the EU, in Switzerland and Norway may return their used
electronic products free of charge to designated collection facilities or to a retailer (if you purchase a
similar new one).
For countries not mentioned above, please contact your local authorities for the correct method of
disposal.
By doing so you will ensure that your disposed product undergoes the necessary treatment, recovery
and recycling and thus prevent potential negative effects on the environment and human health.
WARNING
• Do not attempt to install or service this product by yourself. Installation or servicing of this
product by persons without training and experience in electronic equipment and automotive
accessories may be dangerous and could expose you to the risk of electric shock, injury or other
hazards.
• Do not attempt to operate the unit while driving. Make sure to pull off the road and park your vehicle
in a safe location before attempting to use the controls on the device.
CAUTION
• Do not allow this unit to come into contact with moisture and/or liquids. Electrical shock could result.
Also, damage to this unit, smoke, and overheating could result from contact with liquids.
• Always keep the volume low enough to hear outside sounds.
• The Pioneer CarStereo-Pass is for use only in Germany.
• This product is evaluated in moderate and tropical climate condition under the Audio, video and
similar electronic apparatus - Safety requirements, IEC 60065.
Before You Start
If you want to dispose this product, do not mix it with general household waste. There is a separate
collection system for used electronic products in accordance with legislation that requires proper
treatment, recovery and recycling.
CAUTION
This product is a class 1 laser product classified under the Safety of laser products, IEC 60825-1:2007.

3En
English
If you experience problems
Should this unit fail to work properly, please contact your dealer or nearest authorized PIONEER Service
Station.
DEH-X2900UI
Optional remote control
The remote control CD-R320 is sold separately.
Frequently used operations
Getting Started
Basic operation
Purpose Operation
Turn on the power* Press SRC
/OFF to turn on the power.
Press and hold SR
C/OFF to turn off the
power.
Adjust the volume Turn the M.
C. dial.
Select a source Press SRC
/OFF repeatedly.
Change the display information Press DISP re
peatedly.
Detach button
Display window
M.C. (multi-control) dial
BAND/
DISP (display)
SRC (source)/OFF
USB port
(eject)
AUX input jack (3.5 mm stereo jack)
Disc loading slot
* When this unit’s blue/white lead is connected to the vehicle’s auto-antenna relay control terminal,
the vehicle’s antenna extends when this unit’s source is turned on. To retract the antenna, turn the
source off.
Display indication
Detach the front panel to prevent theft. Remove any cables and devices attached to the
front panel and turn off the unit before detaching it.
Important
• Avoid subjecting the front panel to excessive shock.
• Keep the front panel out of direct sunlight and high temperatures.
• Always store the detached front panel in a protective case or bag.
Return to the previous display/list Press BAND/ .
Return to the normal display from the menu Press and hold BAND/ .
Indication Description
Appears when a lower tier of the menu or folder exists.
Appears when the button is pressed.
Appears when the local seek tuning function is set (page 9).
Appears when a traffic program is received.
Appears when the TA (traffic announcements) function is set (page 9).
Appears when the sound retriever function is set (page 10).
Appears when random/shuffle play is set.
Appears when repeat play is set.
Appears when the iPod control function is set (page 6).
Detaching the front panel
Purpose Operation
Detach Attach

4En
When you turn the ignition switch to ON after installation, [SET UP :YES] appears in the
di
splay.
1 Press the M.C. dial.
The setup menu disappears after 30 seconds of no operation. If you prefer not to set
at
this time, turn the M.C. dial to select [NO], then press to confirm.
2 Turn the M.C. dial to select the options, then press to confirm.
To proceed to the next menu option, you need to confirm your selection.
3 [QUIT :YES] appears when all the settings have been made.
To return to the first item of the setup menu, turn the M.C
. dial to select [QUIT :NO],
then press to confirm.
4 Press the M.C. dial to confirm the settings.
NOTES
• You can cancel the menu setting by pressing SRC/OFF.
• These settings can be made at any time from the SYSTEM settings (page 10) and INITIAL settings
(page 4).
1 Press the M.C. dial to display the main menu.
2 Turn the M.C. dial to select [SYSTEM], then press to confirm.
3 Turn the M.C. dial to select [DEMO OFF], then press to confirm.
4 Turn the M.C. dial to select [YES], then press to confirm.
Setup menu
Menu Item Description
LANGUAGE Select the language to display the text information from a
c
ompressed audio file.
[ENG](English),
[РУС
](Russian),
[TUR](Turkish)
CLOCK SET Set the clock.
FM STEP Select the FM tuning step from 100 kHz or 50 kHz.
[100], [50]
Canceling the demonstration display (DEMO OFF)
1 Press and hold SRC/OFF until the unit turns off.
2 Press and hold SRC/OFF to display the main menu.
3 Turn the M.C. dial to select [INITIAL], then press to confirm.
4 Turn the M.C. dial to select an option, then press to confirm.
The tuner frequencies on this unit are allocated for use in Western Europe, Asia, the
M
iddle East, Africa and Oceania. Use in other areas may result in poor reception. The RDS
(radio data system) function only works in areas that broadcast RDS signals for FM
stations.
INITIAL settings
Menu Item Description
FM STEP Select the FM tuning step from 100 kHz or 50 kHz.
[100], [50]
SP-P/O MODE Select when there is a full-range speaker connected to the rear
s
peaker output leads and there is a subwoofer connected to the
RCA output.
[REAR/SUB.W]
[SUB.W/SUB.W] Select when there is a passive subwoofer connected directly to
the rear speaker output leads and there is a subwoofer
connected to the RCA output.
[REAR/REAR] Select when there are full-range speakers connected to the rear
s
peaker output leads and RCA output. If there is a full-range
speaker connected to the rear speaker output leads, and the
RCA output is not used, you may select either [REAR/SUB.W] or
[REAR/REAR].
S/W UPDATE Select to confirm the latest system information on the unit.
[SYSTEM INFO]
[SYSTEM UPDATE] Select to update the unit to the latest software and initialize the
u
nit settings. For details on the latest software and updating,
visit our website.
SYSTEM RESET Select [YES] to initialize the unit settings. The unit will be
restarted automatically.
(Some of the settings may be retained even after resetting the
uni
t.)
[YES], [NO]
Radio

5En
English
1 Press SRC/OFF to select [RADIO].
2 Press BAND/ to select the band from [FM1], [FM2], [FM3], [MW] or [LW].
3 Press a number button (1/ to 6/ ).
TIP
The / buttons can be also used to select a preset station when [SEEK] is set to [PCH] in the
FUNCTION settings (page 9).
The six strongest stations are stored on the number buttons (1/ to 6/ ).
1 After selecting the band, press the M.C. dial to display the main menu.
2 Turn the M.C. dial to select [FUNCTION], then press to confirm.
3 Turn the M.C. dial to select [BSM], then press to confirm.
To seek a station manually
1 After selecting the band, press / to select a station.
Press and hold / then release to seek an available station. Scanning stops
when the unit receives a station. To cancel seek tuning, press / .
NOTE
[SEEK] needs to be set to [MAN] in the FUNCTION settings (page 9).
To store stations manually
1 While receiving the station you want to store, press and hold one of the number
buttons (1/ to 6/ ) until it stops flashing.
The unit searches for a station by PTY (program type) information.
1 Press during FM reception.
2 Turn the M.C. dial to select a program type from [NEWS/INFO], [POPULAR],
[CLASSICS] or [OTHERS].
3 Press the M.C. dial.
Receiving preset stations
Best stations memory (BSM)
Using PTY functions
The unit begins to search for a station. When it is found, its program service name is
displayed.
NOTES
• To cancel the search, press the M.C. dial.
• The program of some stations may differ from that indicated by the transmitted PTY.
• If no station is broadcasting the type of program you searched for, [NOT FOUND] is displayed for
about two seconds and then the tuner returns to the original station.
Disconnect headphones from the device before connecting it to the unit.
CD
1 Insert a disc into the disc loading slot with the label side up.
To eject a disc, stop playback first then press .
USB devices (including Android™)/iPod
1 Open the USB port cover.
2 Plug in the USB device/iPod using an appropriate cable.
NOTE
To automatically switch to [USB] source when a USB device/iPod is connected to the unit, set [USB
AUTO] to [ON] in the SYSTEM settings (page 11).
CAUTION
Use an optional Pioneer USB cable (CD-U50E) to connect the USB device as any device connected
directly to the unit will protrude out from the unit, which could be dangerous.
Before removing the device, stop playback.
AOA connections
For details on AOA connection, see page 8.
MTP connection
A device installed with Android OS 4.0 or later can be connected to the unit via MTP, using the cable
supplied with the device. However, depending on the connected device and the numbers of the files in
the device, audio files/songs may not be able to be played back via MTP. Note that MTP connection is
not compatible with WAV file formats, and cannot be used with the MIXTRAX function.
CD/USB/iPod/AUX
Playing back

6En
NOTE
If you use an MTP connection, [ANDROID WIRED] needs to be set to [MEMORY] in the SYSTEM settings
(page 11).
AUX
1 Insert the stereo mini plug into the AUX input jack.
2 Press SRC/OFF to select [AUX] as the source.
NOTE
If [AUX] is set to [OFF] in the SYSTEM settings, [AUX] cannot be selected as a source (page 11).
You can make various adjustments in the FUNCTION settings (page 9).
Note that the following operations do not w
ork for an AUX device. To operate an AUX
device, use the device itself.
Operations
Purpose Operation
Select a folder/album*1 Press 1/ or 2/ .
Select a track/song (chapter) Press or .
Fast forward or reverse*3 Press and hold or .
Search for a file from a list 1 Press to display the list.
2 Tu
rn the M.C. dial to select the desired
file (folder) name or category, then press
to confirm.
3 Tu
rn the M.C. dial to select the desired
file, then press to confirm.
Playback starts.
View a list of the files in the selected folder/
category*1
Press the M.C. dial when a folder/category
is selected.
Play a song in the selected folder/
cat
egory*1
Press and hold the M.C. dial when a folder/
category is selected.
Alphabetical search (iPod only) 1 P
ress to display the list.
2 Tu
rn the M.C. dial to select the desired
category list, then press to enter the
alphabetical search mode.
(Turning the M.
C. dial twice also enters
the alphabetical search mode.)
3 Tu
rn the M.C. dial to select a letter, then
press to display the alphabetical list.
To cancel alphabetical search, press BA
ND/
.
*1 Compressed audio files only
*2 This function is disabled when USB is selected as a source and the MIXTRAX function is on.
*3 When you use the fast forward or reverse function while playing a VBR file, the playback time may
be not correct.
Link play mode
You can access songs based on the artist, album, or genre currently playing.
1 While listening to a song, press and hold to enter the link play mode.
2 Turn the M.C. dial to select the mode ([ARTIST], [ALBUM], [GENRE]), then press to
confirm.
The selected song/album will be played after the currently playing song.
NOTE
The selected song/album may be canceled if you use functions other than those from the link play
mode (e.g. fast forward and reverse).
iPod control
You can control the unit via a connected iPod.
The following iPod models are not compatible with this function.
–iPod nano 1st generation, iPod with video
1 Press BAND/ during playback, then select the control mode.
[CO
NTROL iPod]: The unit’s iPod function can be operated from the connected iPod.
Repeat play Press 6/ .
Random/shuffle play Press 5/ .
Shuffle all play (iPod only) Press and hold 5/ .
Pause/resume playback Press 4/PA
USE.
Sound retriever*1*2 Press 3/S.
Rtrv.
[1]: Effective for low compression rates
[2]: Effective for high compression rates
Return to root folder (CD/USB only)*1 Press and hold .
Switch between compressed audio and CD-
DA (
CD only)
Press BAND/ .
Change drives in USB device
(Devices that support the USB mass storage
device class protocol only)
Press BAND/ .
Useful functions for iPod
Purpose Operation

7En
English
[CONTROL AUDIO]: The unit’s iPod function can only be operated by the buttons on
the unit. In this mode, the connected iPod cannot be turned on or off.
NOTES
• Switching the control mode to [CONTROL iPod] pauses song playback. Use the connected iPod to
resume playback.
• The following operations are still accessible from the unit, even if the control mode is set to
[CONTROL iPod].
– Pause, fast forward/reverse, song/chapter selection
• The volume can only be adjusted from the unit.
The MIXTRAX function creates a non-stop mix of your music library, accompanied by
illumination effects. For details on MIXTRAX settings, see page 12.
NOTES
• This function is not compatible with an Android device connected via MTP.
• When USB is selected as a source and the MIXTRAX function is in use, the sound retriever function is
disabled.
• Depending on the file/song, sound effects may not be available.
• Turn the MIXTRAX function off if the illumination effects it produces interfere with driving.
1 Press MIX to turn MIXTRAX on/off.
You can enjoy listening to an application on an iPhone via the unit. In some cases, you
c
an control an application by using the unit.
For details on compatible devices, visit our website.
Important
Use of third party apps may involve or require the provision of personally identifiable information,
whether through the creation of a user account or otherwise, and for certain applications, the provision
of geolocation data.
ALL THIRD PARTY APPS ARE THE SOLE RESPONSIBILITY OF THE PROVIDERS, INCLUDING WITHOUT
LIMITATION COLLECTION AND SECURITY OF USER DATA AND PRIVACY PRACTICES. BY ACCESSING
THIRD PARTY APPS, YOU AGREE TO REVIEW THE TERMS OF SERVICE AND PRIVACY POLICIES OF THE
PROVIDERS. IF YOU DO NOT AGREE WITH THE TERMS OR POLICIES OF ANY PROVIDER OR DO NOT
CONSENT TO THE USE OF GEOLOCATION DATA WHERE APPLICABLE, DO NOT USE THAT THIRD PARTY
APP.
For iPhone users
This function is compatible with iPhones and iPod touches installed with iOS 5.0 or later.
About MIXTRAX (USB/iPod only)
App Mode
NOTE
PIONEER IS NOT LIABLE FOR ANY THIRD PARTY APPS OR CONTENT, INCLUDING WITHOUT LIMITATION
THEIR ACCURACY OR COMPLETENESS. THE CONTENT AND FUNCTIONALITY OF SUCH APPS ARE THE
SOLE RESPONSIBILITY OF THE APP PROVIDER.
1 Connect this unit with the mobile device.
• i
Phone via USB (page 5)
2 Press SRC/OFF to select [APP].
3 Operate the mobile device to start up the application.
Basic operations
You can make various adjustments in the FUNCTION settings (page 9).
(DEH-X2900UI is only compatible with Spotify installed on iPhone.)
Spotify is a music streaming distribution service not affiliated with Pioneer. More
i
nformation is available at http://www.spotify.com.
The Spotify application is available for compatible smartphones, please visit https://
sup
port.spotify.com/ for the latest compatibility information.
To enjoy Spotify as you drive, first download the Spotify app to your iPhone. You can
d
ownload it on the iTunes App Store. Choose a free account or a paid Premium account,
either in the app or at spotify.com. A Premium account gives you more features, like
offline listening.
Important
• This product incorporates Spotify software which is subject to 3rd party licenses found here:
www.spotify.com/connect/third-party-licenses.
• For information on the countries and regions where Spotify can be used, take a look at https://
www.spotify.com/us/select-your-country/.
Playback of an application via the unit
Purpose Operation
Select a track Press or .
Fast forward or reverse Press and hold or .
Pause/resume playback Press BA
ND/ .
Spotify®

8En
Update the firmware of the Spotify application to the latest version before use.
1 Connect this unit with the mobile device.
• iP
hone via USB (page 5)
2 Press SRC/OFF to select [SPOTIFY].
3 Launch the Spotify application on the mobile device and start playback.
Basic operations
You can make various adjustments in the FUNCTION settings (page 9).
NOTE
The available operations may vary according to the type of contents (track/album/artist/playlist/radio)
you want to play.
NOTE
Some functions of Spotify may not be operated from the unit.
Listening to Spotify
Purpose Operation
Skip a track Press or .
Search for a track from a list 1 Press (list) to display the list.
2 Tu
rn the M.C. dial to select the desired
category, then press to confirm.
3 Tu
rn the M.C. dial to select the desired
file, then press to confirm.
Playback starts.
Pause/resume playback Press 4/
PAUSE.
Thumbs Up (Only for radio) Press 1/ .
Thumbs Down (Only for radio) Press 2/ .
Random play (Only for track/album/artist/
pl
aylist)
Press 5/ .
Repeat play (Only for track/album/artist/
pl
aylist)
Press 6/ .
Start a radio channel based on the song
cur
rently being played.
1 Press and hold (list) to start a radio.
2 P
ress the M.C. dial.
• T
his function may not be available
depending on the selected song.
Store the information about the song
cur
rently being played.
Remove the song information stored.
1 Press and hold 3/S.Rtrv.
[SAVE]/[UNSAVE] appears.
2 P
ress the M.C. dial.
You can operate the unit from Pioneer ARC APP installed on an iPhone/Android device.
In some cases, you can control aspects of the application, such as source selection,
pause, etc., by using the unit.
For details on what operations are available on the application, see the application’s help
section.
WARNING
Do not attempt to operate the application while driving. Make sure to pull off the road and park your
vehicle in a safe location before attempting to use the controls on the application.
For iPhone users
This function is compatible with iPhones (iPhone 5 or later) and iPod touches installed
wit
h iOS 8.0 or later.
You can download Pioneer ARC APP on iTunes App Store.
For Android device users
This function is compatible with devices that have Android OS 4.1 or later installed and
also sup
port AOA (Android Open Accessory) 2.0.
You can download Pioneer ARC APP on Google Play™.
NOTE
Some Android devices connected via AOA 2.0 may not work properly or emit sounds due to their own
software design, regardless of the OS version.
1 Connect this unit with the mobile device.
• i
Phone/Android device via USB (page 5)
Proceed to step 6 if you select the USB connection for iPhone.
2 Press the M.C. dial to display the main menu.
3 Turn the M.C. dial to select [SYSTEM], then press to confirm.
4 Turn the M.C. dial to select [ANDROID WIRED], then press to confirm.
5 Turn the M.C. dial to select [APP CONTROL] for an Android device connected via
USB.
If [ON] is selected in [P.APP AUTO ON] (page 11), Pioneer ARC APP on the Android
device starts automatically, and all the steps are finished.
Using Pioneer ARC APP
Making a connection with Pioneer ARC APP

9En
English
NOTE
If Pioneer ARC APP has not been installed on your Android device yet, a message that prompts you
to install the application will appear on your Android device. Select [OFF] in [P.APP AUTO ON] to
clear the message (page 11).
6 Press SRC/OFF to select any source.
7 Launch Pioneer ARC APP on the mobile device.
NOTE
You can also launch the application by pressing and holding the M.C. dial for iPhone.
1 Press SRC/OFF to select [ANDROID].
Basic operations
You can adjust various settings in the main menu.
1 Press the M.C. dial to display the main menu.
2 Turn the M.C. dial to select one of the categories below, then press to confirm.
• FUNCTION settings (page 9)
• AUDIO settings (page 10)
• SYSTEM settings (page 10)
• ILLUMINATION settings (page 11)
• MIXTRAX settings (page 12)
3 Turn the M.C. dial to select the options, then press to confirm.
Listening to music on Android
Purpose Operation
Select a track Press or .
Fast forward or reverse Press and hold or .
Pause/resume playback Press 4/PA
USE.
Sound retriever Press 3/S.
Rtrv.
[1]: Effective for low compression rates
[2]: Effective for high compression rates
Settings
The menu items vary according to the source.
FUNCTION settings
Menu Item Description
FM SETTING
[TALK], [STANDARD], [MUSIC] Match the sound quality level with the broadcast
s
ignal conditions of the FM band signal.
(Available only when FM band is selected.)
BSM
Store the six strongest stations on the number
but
tons (1/ to 6/ ) automatically.
REGIONAL
[ON], [OFF] Limit the reception to the specific regional
programs when AF (alternative frequencies
search) is selected. (Available only when FM
band is selected.)
LOCAL
FM: [
OFF], [LV1], [LV2], [LV3], [LV4]
MW/LW: [O
FF], [LV1], [LV2]
Restrict the tuning station according to the
si
gnal strength.
TA
[ON], [OFF] Receive current traffic information if available.
(
Available only when FM band is selected.)
AF
[ON], [OFF] Allow the unit to retune to a different frequency
pro
viding the same station. (Available only when
FM band is selected.)
NEWS
[ON], [OFF] Interrupt the currently selected source with
n
ews programs. (Available only when FM band is
selected.)
SEEK
[MAN], [PCH] Assign or buttons to seek the stations
one by one (manual tuning) or select a station
f
rom the preset channels.
SAVE
Store the information about the song currently
bei
ng played to your music list on Spotify.

10En
UNSAVE
Remove the song information stored in [SAVE].
S.RTRV
[1] (effective for low compression
ra
tes),
[2] (effective for high
co
mpression rates),
[OFF]
Enhance compressed audio and restore rich
so
und.
Not available when:
• U
SB is selected as a source and the MIXTRAX
function is set to on.
• C
D-DA/CD-TEXT is played back.
AUDIO BOOK
[FASTER], [NORMAL], [SLOWER] Change the playback speed. (Not available when
[C
ONTROL iPod] is selected in the control mode.)
PAUSE
Pause or resume playback.
AUDIO settings
Menu Item Description
FADER*1
Adjust the front and rear speaker balance.
BALANCE
Adjust the left and right speaker balance.
EQ SETTING
[SUPER BASS], [POWERFUL],
[NATURAL], [VOCAL], [CUSTOM1],
[CUSTOM2], [FLAT]
Select an equalizer band and
level fo
r further customising.
Equalizer band: [80H
Z], [250HZ],
[800HZ], [2.5KHZ], [8KHZ]
Equalizer level: [+
6] to [–6]
Select or customise the equalizer curve.
[CUSTOM1] can be set separately for each source.
H
owever, each of the below combinations are set
to the same setting automatically.
• U
SB, iPod, ANDROID, SPOTIFY, and APP
(iPhone)
[CUSTOM2] is a shared setting used for all
so
urces.
LOUDNESS
[OFF], [LOW], [MID], [HI] Compensate for clear sound at low volume.
Menu Item Description
USB
iPod
iPod
*1 Not available when [SUB.W/SUB.W] is selected in [SP-P/O MODE] in the INITIAL settings (page 4).
*2 Not available when [REAR/REAR] is selected in [SP-P/O MODE] in the INITIAL settings (page 4).
*3 Not available when [OFF] is selected in [SUB.W].
You can also access to these menus when the unit is turned off.
SUB.W*2
[NOR], [REV], [OFF] Select the subwoofer phase.
SUB.W CTRL*2
*3
Cut-off frequency: [50H
Z],
[63HZ], [80HZ], [100HZ], [125HZ],
[160HZ], [200HZ]
Output level:
[–24] to [+6]
Slope level: [–12
], [–24]
Only frequencies lower than those in the
sel
ected range are output from the subwoofer.
BASS BOOST
[0] to [+6] Select the bass boost level.
HPF SETTING
Cut-off frequency: [
OFF], [50HZ],
[63HZ], [80HZ], [100HZ], [125HZ],
[160HZ], [200HZ]
Slope level: [–12
], [–24]
Only frequencies higher than the high-pass filter
(
HPF) cutoff are output from the speakers.
SLA
[+4] to [–4] Adjust the volume level for each source except
FM
.
Each of the below combinations are set to the
s
ame setting automatically.
• U
SB, iPod, ANDROID, SPOTIFY, and APP
(iPhone)
SYSTEM settings
Menu Item Description
LANGUAGE
[ENG](English), [РУС](Russian),
[TUR](Turkish)
Select the language to display the text
information from a compressed audio file.
CLOCK SET
Set the clock (page 4).
12H/24H
[12H], [24H] Select the time notation.
Menu Item Description

11En
English
* [PW SAVE] is canceled if the vehicle battery is disconnected and will need to be turned back on once
the battery is reconnected. When [PW SAVE] is off, depending on connection methods, the unit may
continue to draw power from the battery if your vehicle’s ignition does not have an ACC (accessory)
position.
AUTO PI
[ON], [OFF] Search for a different station with the same
pro
gramming, even if using a preset station.
AUX
[ON], [OFF] Set to [ON] when using an auxiliary device
c
onnected to the unit.
SPOTIFY
[ON], [OFF] Set to [ON] when using the Spotify function.
PW SAVE*
[ON], [OFF] Reduce the battery power consumption.
Turning on the source is the only operation
al
lowed when this function is on.
ANDROID WIRED
[MEMORY], [APP CONTROL] Select the appropriate connection method for an
A
ndroid device.
P.A P P AUTO O N
[ON], [OFF]
Select [ON] to automatically launch Pioneer ARC
APP when an Android device is connected to the
unit via AOA. (Not available when [MEMORY] is
selected in [ANDROID WIRED].)
USB AUTO
[ON], [OFF] Select [ON] to automatically switch to [USB]
so
urce when a USB device/iPod is connected to
the unit.
Select [OFF] when a USB device/iPod is being
connected to the unit just for charging.
Menu Item Description
ILLUMINATION settings
Menu Item Description
COLOUR
[KEY COLOUR], [DISP COLOUR],
[BOTH COLOUR]
Select colour for the keys/display of the unit from
12 preset colours, [SCAN] or [CUSTOM]*.
• [
SCAN]: Cycle through a variety of colours
automatically.
• [C
USTOM]*:
1 P
ress and hold the M.C. dial until the colour
setting display appears.
2 S
et the primary colour (R (red)/G (green)/B
(blue)) and brightness level ([0] to [60]).
You cannot select a level below 10 for all three
of
R (red), G (green), B (blue) at the same time.
You can also customise the preset colours. Select
o
ne of the preset colours, then press and hold
the M.C. dial until the colour setting display
appears.
* The CUSTOM setting is only available for [KEY
COLOUR] and [DISP COLOUR].
DIM SETTING
[SYNC ILLUMI], [SYNC CLOCK],
[MA
NUAL]
Change the display brightness.
BRIGHTNESS
[KEY], [DISP] Select the brightness for the keys/display of the
uni
t from [1] to [10].
The available setting ranges differ depending on
[D
IM SETTING].
ILLUMI FX
[ON], [OFF] The illumination effect can be seen when a CD is
in
serted/ejected.
The illumination effect will activate when the
A
CC power is turned on/off regardless of this
setting.

12En
MIXTRAX settings
Menu Item Description
SHORT PLAYBCK
[1.0 MIN], [1.5 MIN], [2.0 MIN],
[2.5 MIN], [3.0 MIN], [OFF]
Select the length of the playback time.
FLASH AREA
[KEY/DISPLAY], [KEY], [OFF] Select the area for the illumination effect.
When [OFF] is selected, the colour set under
th
e ILLUMINATION settings (page 11) is used as
the display colour.
FLASH PATTERN
[SOUND LEVEL 1] to [SOUND LEVEL
6]
Change the illumination effect according to
t
he sound and bass level.
The flash pattern changes according to the
so
und level.
[LOW PASS 1] to [LOW PASS 6] The flash pattern changes according to the
bas
s level.
[RANDOM1] The flash pattern changes randomly according
t
o the sound level mode and low pass mode.
[RANDOM2] The flash pattern changes randomly according
t
o the sound level mode.
[RANDOM3] The flash pattern changes randomly according
t
o the low pass mode.
DISPLAY FX
[ON], [OFF] Set the MIXTRAX special effects on/off.
CUT IN FX
[ON], [OFF] Turn the MIXTRAX sound effects on/off while
m
anually changing the tracks.
Important
• When installing this unit in a vehicle
without an ACC (accessory) position on
the ignition switch, failure to connect the
red cable to the terminal that detects
operation of the ignition key may result
in battery drain.
• Use of this unit in conditions other than
the following could result in fire or
malfunction.
–Vehicles with a 12-volt battery and
neg
ative grounding.
–When speaker output is used by 4
chan
nels, use speakers over 50 W
(maximum input power) and between 4
Ω to 8 Ω (impedance value). Do not use
1 Ω to 3 Ω speakers for this unit.
–When rear speaker output is used by 2
Ω
of subwoofer, use speakers over 70 W
(maximum input power).
* Please refer to connections for a
co
nnection method.
• T
o prevent a short-circuit, overheating or
malfunction, be sure to follow the
directions below.
–Disconnect the negative terminal of the
bat
tery before installation.
–Secure the wiring with cable clamps or
a
dhesive tape. Wrap adhesive tape
around wiring that comes into contact
with metal parts to protect the wiring.
– Place all cables away from moving parts,
su
ch as the shift lever and seat rails.
–Place all cables away
from hot places,
such as near the heater outlet.
–Do not connect the yellow cable to the
bat
tery by passing it through the hole
to the engine compartment.
–Cover any disconnected cable
co
nnectors with insulating tape.
–Do not shorten any cables.
–Never cut the insulation of the power
cabl
e of this unit in order to share the
power with other devices. The current
capacity of the cable is limited.
–Use a fuse of the rating prescribed.
–Never wire the negative speaker cable
di
rectly to ground.
–Never band together negative cables of
m
ultiple speakers.
• When t
his unit is on, control signals are
sent through the blue/white cable.
Connect this cable to the system remote
control of an external power amp or the
vehicle’s auto-antenna relay control
terminal (max. 300mA 12 V DC). If the
vehicle is equipped with a glass antenna,
connect it to the antenna booster power
supply terminal.
• Nev
er connect the blue/white cable to
the power terminal of an external power
amp. Also, never connect it to the power
terminal of the auto antenna. Doing so
may result in battery drain or a
malfunction.
• T
he black cable is ground. Ground cables
for this unit and other equipment
(especially, high-current products such as
power amps) must be wired separately. If
they are not, an accidental detachment
may result in a fire or malfunction.
• Th
e graphical symbol placed on
the product means direct current.
Connections/Installation
Connections
ACC position No ACC position

13En
English
This unit
Power cord input
Rear AUX IN | [Tel In] (3.5mm stereo jack)
A dedicated rear input that is only
com
patible with external Bluetooth
hands-free telephone kits. The audio
signal is muted during a phone call
when the yellow/black wire is
connected/activated.
Rear output or subwoofer output
Front output
Antenna input
Fuse (10 A)
Wired remote input
Hard-wired remote control adapter can
be connec
ted (sold separately).
Power cord
To power cord input
Depending on the kind of vehicle, the
function of and may be different.
In this case, be sure to connect to
and to .
Yel low
Back-up (or accessory)
Yel low
Connect to the constant 12 V supply
te
rminal.
Red
Accessory (or back-up)
Red
Connect to terminal controlled by the
ign
ition switch (12 V DC).
Connect leads of the same colour to
each other.
Black (chassis ground)
Blue/white
The pin position of the ISO connector
w
ill differ depending on the type of
vehicle. Connect and when Pin 5
is an antenna control type. In another
t
ype of vehicle, never connect and
.
Blue/white
Connect to the system control terminal
of
the power amp (max. 300 mA 12 V
DC).
Blue/white
Connect to the auto-antenna relay
c
ontrol terminal (max. 300 mA 12 V DC).
Speaker leads
White: Front left
White/black: Front left
Gray: Front right
Gray/black: Front right
Green: Rear left or subwoofer
Green/black: Rear left or subwoofer
Violet: Rear right or subwoofer
Violet/black: Rear right or subwoofer
Orange/white
Connect to a car’s illumination signal.
ISO connector
In some vehicles, the ISO connector
may be divided into two. In this case, be
sure to connect to both connectors.
NOTES
• Change the initial menu of this unit. Refer
to [SP-P/O MODE]
(page 4). The
subwoofer output of this unit is
mo
naural.
• W
hen using a subwoofer of 2 Ω, be sure
to connect the subwoofer to the violet
and violet/black leads of this unit. Do not
connect anything to the green and
green/black leads.
Power amp (sold separately)
Perform these connections when using the
optional amplifier.
System remote control
Connect to blue/white cable.
Power amp (sold separately)
Connect with RCA cables (sold
separately)
To front output
Front speaker
To rear output or subwoofer output
Rear speaker or subwoofer
Important
• Check all connections and systems before
final installation.
• Do not use unauthorized parts as this
may cause malfunctions.
• Consult your dealer if installation requires
drilling of holes or other modifications to
the vehicle.
• Do
not install this unit where:
– it may interfere with operation of the
vehicl
e.
– it may cause injury to a passenger as a
r
esult of a sudden stop.
• T
he semiconductor laser will be damaged
if it overheats. Install this unit away from
hot places such as near the heater outlet.
• Opt
imum performance is
obtained when the unit is
installed at an angle of less
than 60°.
• W
hen installing, to ensure proper heat
dispersal when using this unit, make sure
you leave ample space behind the rear
panel and wrap any loose cables so they
are not blocking the vents.
DIN mount installation
1 Insert the supplied mounting sleeve
into the dashboard.
2 Secure the mounting sleeve by using a
screwdriver to bend the metal tabs
(90°) into place.
Dashboard
Mounting sleeve
Installation
Leave ample
space
5 cm
5 cm

14En
• Make sure that the unit is installed
securely in place. An unstable
installation may cause skipping or
other malfunctions.
When not using the supplied
mounting sleeve
1 Determine the appropriate position
where the holes on the bracket and
the side of the unit match.
2 Tighten two screws on each side.
Tapping screw (5 mm × 9 mm, not
supplied with product)
Mounting bracket
Dashboard or console
Removing the unit (installed with
the supplied mounting sleeve)
1 Remove the trim ring.
Trim ring
Notched tab
• R
eleasing the front panel allows easier
access to the trim ring.
• Wh
en reattaching the trim ring, point
the side with the notched tab down.
2 Insert the supplied extraction keys
into both sides of the unit until they
click into place.
3 Pull the unit out of the dashboard.
The display automatically returns to the
normal display.
→ No operations have been made for
about 30 seconds.
– Perform an operation.
The repeat play range changes
unexpectedly.
→ Depending on the repeat play range,
the selected range may change when
another folder or track is being selected
or during fast forwarding/reversing.
– Select the repeat play range again.
A subfolder is not played back.
→ Subfolders cannot be played when
[FLD] (folder repeat) is selected.
– Select another repeat play range.
The sound is intermittent.
→ You are using a device, such as a cellular
phone, that may cause audible
interference.
– Move electrical devices that may be
c
ausing the interference away from
the unit.
Common
AMP ERROR
→ This unit fails to operate or the speaker
connection is incorrect.
→ T
he protective circuit is activated.
– Check the speaker connection.
– Turn the ignition switch OFF and back
t
o ON again. If the message remains,
contact your dealer or an authorized
Pioneer Service Station for assistance.
NO XXXX (NO TITLE, for example)
→ There is no embedded text information.
– Switch the display or play another
tr
ack/file.
CD player
ERROR-07, 11, 12, 17, 30
→ The disc is dirty.
–Clean the disc.
→ T
he disc is scratched.
– Replace the disc.
ERROR-07, 10, 11, 12, 15, 17, 30, A0
→ There is an electrical or mechanical
error.
– Turn the ignition switch OFF and back
to
ON, or switch to a different source,
then back to the CD player.
ERROR-15
→ The inserted disc is blank.
– Replace the disc.
ERROR-23
→ Unsupported CD format.
– Replace the disc.
FORMAT READ
→ Sometimes there is a delay between the
start of playback and when you start to
hear any sound.
– Wait until the message disappears and
y
ou hear sound.
NO AUDIO
→ The inserted disc does not contain any
playable files.
– Replace the disc.
SKIPPED
→ The inserted disc contains DRM
protected files.
– The protected files are skipped.
Additional Information
Troubleshooting
Error messages

15En
English
PROTECT
→ All the files on the inserted disc are
embedded with DRM.
– Replace the disc.
USB device/iPod
FORMAT READ
→ Sometimes there is a delay between the
start of playback and when you start to
hear any sound.
– Wait until the message disappears and
y
ou hear sound.
NO AUDIO
→ There are no songs.
–Transfer the audio files to the USB
de
vice and connect.
→ The co
nnected USB device has security
enabled.
– Follow the USB device instructions to
d
isable the security.
SKIPPED
→ The connected USB device contains
DRM protected files.
– The protected files are skipped.
PROTECT
→ All the files on the connected USB
device are embedded with DRM.
– Replace the USB device.
N/A USB
→ The connected USB device is not
supported by this unit.
– Disconnect your device and replace it
wit
h a compatible USB device.
HUB ERROR
→ The USB device connected via a USB
hub is not supported by this unit.
– Connect the USB device directly to this
u
nit using a USB cable.
CHECK USB
→ The USB connector or USB cable has
short-circuited.
–Check that the USB connector or USB
cable is
not caught in something or
damaged.
→ The co
nnected USB device consumes
more than maximum allowable current.
–Disconnect the USB device and do not
use it
. Turn the ignition switch OFF
and back to ACC or ON. Connect only
compliant USB devices.
→ The
iPod operates correctly but does
not charge.
–Make sure the connection cable for
t
he iPod has not shorted out (e.g., not
caught in metal objects). After
checking, turn the ignition switch OFF
and back to ON, or disconnect the
iPod and reconnect.
ERROR-19
→ Communication failed.
–Perform one of the following
op
erations, then return to the USB
source.
• T
urn the ignition switch OFF and
back to ON.
• Di
sconnect the USB device.
• C
hange to a different source.
→ iP
od failure.
–Disconnect the cable from the iPod.
O
nce the iPod’s main menu is
displayed, reconnect the iPod and
reset it.
ERROR-23
→ USB device was not formatted properly.
–Format the USB device with FAT12,
FAT
16 or FAT32.
ERROR-16
→ The iPod firmware version is old.
–Update the iPod version.
→ iP
od failure.
–Disconnect the cable from the iPod.
O
nce the iPod’s main menu is
displayed, reconnect the iPod and
reset it.
STOP
→ There are no songs in the current list.
– Select a list that contains songs.
NOT FOUND
→ No related songs.
– Transfer songs to the iPod.
Apps
START UP APP
→ The application has not started running
yet.
– Operate the mobile device to start up
t
he application.
Spotify
CHECK APP
→ Connection to the Spotify application
failed.
– Follow the instructions that appear on
t
he screen.
Discs and player
• Use only discs that feature either of the
following two logos.
• Use 12-cm discs.
• U
se only conventional, fully circular discs.
• T
he following types of discs cannot be
used with this unit:
–DualDiscs
–8-cm discs: Attempts to use such discs
w
ith an adaptor may cause the unit to
malfunction.
–Oddly shaped discs
–Discs other than CDs
–Damaged discs, including discs that are
cra
cked, chipped or warped
–CD-R/RW discs that have not been
fi
nalized
• D
o not write on or apply chemicals to the
surface of the discs.
• T
o clean a CD, wipe the disc with a soft
cloth outward from the center.
• C
ondensation may temporarily impair
the player’s performance. Let it rest for
about one hour to adjust to a warmer
temperature. Also, wipe any damp discs
off with a soft cloth.
• W
hen using discs that can be printed on
label surfaces, check the instructions and
the warnings of the discs. Depending on
the discs, inserting and ejecting may not
be possible. Using such discs may result
in damage to this equipment.
• D
o not attach commercially available
labels or other materials to the discs.
– The discs may warp making the disc
unpl
ayable.
– The labels may come off during
play
back and prevent ejection of the
discs, which may result in damage to
the equipment.
USB storage device
• Connections via USB hubs are not
supported.
• F
irmly secure the USB storage device
before driving. Do not let the USB storage
device fall onto the floor, where it may
become jammed under the brake or
accelerator pedal.
• D
epending on the USB storage device,
the following problems may occur.
–Operations may vary.
– The storage device may not be
reco
gnized.
– Files may not be played back properly.
– The device may cause audible
int
erference when you are listening to
the radio.
Handling guidelines

16En
iPod
• Do not leave the iPod in places with high
temperatures.
• F
irmly secure the iPod when driving. Do
not let the iPod fall onto the floor, where
it may become jammed under the brake
or accelerator pedal.
• The se
ttings of the iPod such as the
equalizer and repeat play are changed
automatically when the iPod is
connected to the unit. Once the iPod is
disconnected, those settings will return
to the original settings.
• I
ncompatible text saved on the iPod will
not be displayed by the unit.
• Only the first 32 characters can be
displayed as a file name (including the file
extension) or a folder name.
• The uni
t may not work properly
depending on the application used to
encode WMA files.
• There m
ay be a slight delay at the start of
the playback of audio files embedded
with image data, or audio files stored on a
USB device with numerous folder
hierarchies.
• R
ussian text to be displayed on this unit
should be encoded in one of the
following character sets:
–Unicode (UTF-8, UTF-16)
–A character set other than Unicode that
is use
d in a Windows environment and
is set to Russian in the multi-language
setting
CAUTION
• Pioneer cannot guarantee compatibility
with all USB mass storage devices, and
assumes no responsibility for any loss of
data on media players, smartphones, or
other devices while using this product.
• Do not leave discs or a USB storage
device in any place that is subject to high
temperatures.
WMA files
MP3 files
WAV files
• WAV file formats cannot be connected via
MTP.
Compressed audio
compatibility
File extension .wma
Bit rate 48 kbps to 320 kbps
(CBR), 48 kbps to 384
kbps (VBR)
Sampling frequency 32 kHz, 44.1 kHz, 48
kHz
Windows Media™
Audio Professional,
Lossless, Voice/DRM
Stream/Stream with
video
Not compatible
File extension .mp3
Bit rate 8 kbps to 320 kbps
(CBR), VBR
Sampling frequency 8 kHz to 48 kHz (32
kHz, 44.1 kHz, 48 kHz
for emphasis)
Compatible ID3 tag
version
1.0, 1.1, 2.2, 2.3, 2.4
(ID3 tag Version 2.x is
given priority over
Version 1.x.)
M3u playlist Not compatible
MP3i (MP3
interactive), mp3 PRO
Not compatible
File extension .wav
Quantization bits 8 and 16 (LPCM), 4
(MSADPCM)
Sampling frequency 16 kHz to 48 kHz
(LPCM), 22.05 kHz and
44.1 kHz (MS ADPCM)
Disc
• Regardless of the length of the blank
section between the songs from the
original recording, compressed audio
discs play with a short pause between
songs.
USB device
• There may be a slight delay when starting
playback of audio files on a USB storage
device with numerous folder hierarchies.
This unit supports only the following iPod
models. Supported iPod software versions are
shown below. Older versions may not be
supported.
Made for
–iPod touch (1st through 6th generation)
–iPod classic
–iPod with video
–iPod nano (1st through 7th generation)
–iPhone 6s
– iPhone 6s Plus
–iPhone 6
–iPhone 6 Plus
–iPhone 5s
–iPhone 5c
–iPhone 5
–iPhone 4s
–iPhone 4
–iPhone 3GS
–iPhone 3G
–iPhone
• O
perations may vary depending on the
generation and/or software version of
the iPod.
• U
sers of iPod with the Lightning
Connector should use the Lightning to
USB Cable (supplied with iPod).
• U
sers of iPod with the Dock Connector
should use the CD-IU51. For details,
consult your dealer.
• Refer t
o the iPod manuals for information
about the file/format compatibility.
• A
udiobook, Podcast: Compatible
CAUTION
Pioneer accepts no responsibility for data
lost on the iPod, even if that data is lost
while this unit is used.
The user cannot assign folder numbers and
specify playback sequences with this unit.
Sequence of audio file depends on the
connected device.
Note that the hidden files in a USB device
can
not be played back.
Playable folder
hierarchy
Up to eight tiers (A
practical hierarchy is
less than two tiers.)
Playable folders Up to 99
Playable files Up to 999
File system ISO 9660 Level 1 and
2, Romeo, Joliet
Multi-session
playback
Compatible
Packet write data
transfer
Not compatible
Playable folder
hierarchy
Up to eight tiers (A
practical hierarchy is
less than two tiers.)
Playable folders Up to 500
Playable files Up to 15 000
Playback of copyright-
protected files
Not compatible
Partitioned USB
device
Only the first partition
can be played.
iPod compatibility
Sequence of audio files

17En
English
Example of a hierarchy
iTunes
Apple and iTunes are trademarks of Apple
I
nc., registered in the U.S. and other
countries.
WMA
Windows Media is either a registered
tr
ademark or trademark of Microsoft
Corporation in the United States and/or
other countries.
This product includes technology owned
by
Microsoft Corporation and cannot be
used or distributed without a license from
Microsoft Licensing, Inc.
iPod & iPhone
iPhone, iPod, iPod classic, iPod nano, and
iP
od touch are trademarks of Apple Inc.,
regi
stered in the U.S. and other countries.
Lightning is a trademark of Apple Inc.
“Made for iPod” and “Made for iPhone”
m
ean that an electronic accessory has
been designed to connect specifically to
iPod or iPhone, respectively, and has been
certified by the developer to meet Apple
performance standards. Apple is not
responsible for the operation of this device
or its compliance with safety and
regulatory standards. Please note that the
use of this accessory with iPod or iPhone
may affect wireless performance.
Android & Google Play
Android, Google Play, and the Google Play
l
ogo are trademarks of Google Inc.
MIXTRAX
MIXTRAX is a trademark of the PIONEER
COR
PORATION.
Spotify®
SPOTIFY and the Spotify logo are among
t
he registered trademarks of Spotify AB.
Compatible mobile digital devices and
premium subscription required, where
available, see https://www.spotify.com.
Russian character chart
Folder
Compressed
audio file
to : Playback sequence
01 to 05: Folder number
D: Display C: Character
Copyright and trademark
General
Power source: 14.4 V DC (10.8 V to 15.1 V
allowable)
Grounding system: Negative type
Maximum current consumption: 10.0 A
Dimensions (W × H × D):
DIN
Chassis: 178 mm × 50 mm × 165 mm
Nose: 188 mm × 58 mm × 17 mm
D
Chassis: 178 mm × 50 mm × 165 mm
Nose: 170 mm × 46 mm × 17 mm
Weight: 1 kg
Audio
Maximum power output:
• 50 W × 4 ch/4 Ω (for no subwoofer)
•
50 W × 2 ch/4 Ω + 70 W × 1 ch/2 Ω
(for subwoofer)
Continuous power output:
22 W × 4 (50 Hz to 15 000 Hz, 5 %
TH
D, 4 Ω load, both channels driven)
Load impedance: 4 Ω (4 Ω to 8 Ω allowable)
Preout maximum output level: 2.0 V
Loudness contour: +10 dB (100 Hz), +6.5
dB
(10 kHz) (volume: –30 dB)
Equalizer (5-Band Graphic Equalizer):
Frequency: 80 Hz/250 Hz/800 Hz/2.5
kHz
/8 kHz
Equalization range: ±12 dB (2 dB step)
Subwoofer (mono):
Frequency: 50 Hz/63 Hz/80 Hz/100
H
z/125 Hz/160 Hz/200 Hz
Slope: –12 dB/oct, –24 dB/oct
Gain: +6 dB to –24 dB
Phase: Normal/Reverse
CD player
System: Compact disc audio system
Usable discs: Compact disc
Signal-to-noise ratio: 94 dB (1 kHz) (IEC-A
ne
twork)
Number of channels: 2 (stereo)
MP3 decoding format: MPEG-1 & 2 Audio
La
yer 3
WMA decoding format: Ver. 7, 7.1, 8, 9, 10,
11, 12
(2 ch audio) (Windows Media
Player)
WAV signal format: Linear PCM & MS
A
DPCM (Non-compressed)
USB
USB standard specification: USB 2.0 full
speed
Maximum current supply: 1.5 A
USB Protocol:
MSC (Mass Storage Class)
MTP (Media Transfer Protocol)
AOA (Android Open Accessory) 2.0
File system: FAT12, FAT16, FAT32
MP3 decoding format: MPEG-1 & 2 Audio
La
yer 3
WMA decoding format: Ver. 7, 7.1, 8, 9, 10,
11, 12
(2 ch audio) (Windows Media
Player)
WAV signal format: Linear PCM & MS
A
DPCM (Non-compressed)
FM tuner
Frequency range: 87.5 MHz to 108.0 MHz
Usable sensitivity: 11 dBf (1.0 μV/75 Ω,
mon
o, S/N: 30 dB)
Signal-to-noise ratio: 72 dB (IEC-A network)
MW tuner
Frequency range: 531 kHz to 1 602 kHz
Usable sensitivity: 25 μV (S/N: 20 dB)
Signal-to-noise ratio: 62 dB (IEC-A network)
LW tuner
Frequency range: 153 kHz to 281 kHz
Usable sensitivity: 28 μV (S/N: 20 dB)
Signal-to-noise ratio: 62 dB (IEC-A network)
NOTE
Specifications and the design are subject
to modifications without notice.
Specifications

2Fr
Avant de commencer ............................................................................. 2
Mise en route ........................................................................................... 3
Radio.......................................................................................................... 5
CD/USB/iPod/AUX................................................................................... 6
Mode d’application................................................................................. 8
Spotify®..................................................................................................... 8
Utilisation de Pioneer ARC APP............................................................ 9
Réglages ................................................................................................. 10
Réglages FUNCTION ............................................................................ 10
Réglages AUDIO.................................................................................... 11
Réglages SYSTEM ................................................................................. 12
Réglages ILLUMINATION..................................................................... 13
Réglages MIXTRAX............................................................................... 13
Raccordements/Installation................................................................ 14
Informations complémentaires.......................................................... 16
À propos de ce mode d’emploi :
• Parmi les instructions suivantes, les clés USB ou les lecteurs audio USB sont
collectivement désignés sous le nom de « périphérique USB ».
• Dans ce mode d’emploi, les iPod et les iPhone sont collectivement désignés sous le
nom d’« iPod ».
Table des matières
Nous vous remercions d’avoir acheté cet appareil PIONEER
Pour garantir une utilisation correcte, lisez bien ce mode d’emploi avant d’utiliser cet appareil. Il est
particulièrement important que vous lisiez et respectiez les indications AT T E N T IO N et PRÉCAUTION
de ce mode d’emploi. Conservez-le dans un endroit sûr et facilement accessible pour toute
consultation ultérieure.
Dans les états membres de l’UE, en Suisse et en Norvège, les foyers domestiques peuvent rapporter
leurs produits électroniques usagés gratuitement à des points de collecte spécifiés ou à un revendeur
(sous réserve d’achat d’un produit similaire).
Dans les pays qui ne sont pas mentionnés ci-dessus, veuillez contacter les autorités locales pour vous
informer de la méthode correcte de mise au rebut.
En agissant ainsi vous assurerez que le produit que vous mettez au rebut est soumis au processus de
traitement, de récupération et de recyclage nécessaire et éviterez ainsi les effets négatifs potentiels sur
l’environnement et la santé publique.
ATTENTION
• N’essayez pas d’installer cet appareil ou d’en faire l’entretien vous-même. L’installation ou
l’entretien de cet appareil par des personnes sans formation et sans expérience en équipement
électronique et en accessoires automobiles peut être dangereux et vous exposer à des risques
d’électrocution ou à d’autres dangers.
• N’essayez pas de démonter ou de modifier cet appareil. Veillez à quitter la route et garer votre véhicule
en lieu sûr avant d’essayer d’utiliser les commandes de l’appareil.
PRÉCAUTION
• Ne laissez pas cet appareil entrer en contact avec de l’humidité et/ou des liquides. Cela pourrait
provoquer une décharge électrique. Tout contact avec des liquides pourrait également provoquer des
dommages, de la fumée et une surchauffe de l’appareil.
• Maintenez le niveau d’écoute à une valeur telle que vous puissiez entendre les sons provenant de
l’extérieur.
• Le Pioneer CarStereo-Pass est utilisable seulement en Allemagne.
• Ce produit est évalué sous des conditions climatiques modérées et tropicales conformément à la
norme CEI 60065 sur les Appareils audio, vidéo et appareils électroniques analogues - Exigences de
sécurité.
Avant de commencer
Si vous souhaitez vous débarrasser de cet appareil, ne le mettez pas à la poubelle avec vos ordures
ménagères. Il existe un système de collecte séparé pour les appareils électroniques usagés, qui
doivent être récupérés, traités et recyclés conformément à la législation.

3Fr
Français
Si vous rencontrez des problèmes
En cas d’anomalie, veuillez contacter votre revendeur ou le centre d’entretien agréé par PIONEER le plus
proche.
DEH-X2900UI
Télécommande en option
La télécommande CD-R320 est vendue séparément.
PRÉCAUTION
Cet appareil est un produit laser de Classe 1, classé selon l’article IEC 60825-1:2007 relatif à la Sécurité
des produits laser.
Mise en route
Fonctionnement de base
Touche de retrait
Fenêtre d’affichage
Molette M.C. (multi-contrôle)
BAND/
DISP (affichage)
SRC (source)/OFF
Port USB
(éjection)
Prise d’entrée AUX (prise stéréo 3,5 mm)
Fente de chargement des disques
Opérations fréquemment utilisées
* Si le fil bleu/blanc de l’appareil est relié à la borne de commande du relais d’antenne automatique du
véhicule, l’antenne se déploie lorsque la source de cet appareil est mise en service. Pour rétracter
l’antenne, mettez la source hors service.
Indication de l’affichage
Retirez la face avant pour empêcher tout vol. Débranchez tous les câbles et les
périphériques branchés à la face avant et mettez l’appareil hors tension avant de le
retirer.
Objectif Opération
Mettre l’appareil sous tension* Appuyez sur SR
C/OFF pour mettre
l’appareil sous tension.
Appuyez longuement sur SRC
/OFF pour
mettre l’appareil hors tension.
Régler le volume Tournez la molette M.
C..
Sélectionner une source Appuyez plusieurs fois sur SR
C/OFF.
Modifier les informations d’affichage Appuyez plusieurs fois sur DI
SP.
Revenir à l’affichage/la liste précédent(e) Appuyez sur BAND/ .
Revenir à l’affichage normal à partir du
menu
Appuyez longuement sur BAND/ .
Indication Description
Apparaît lorsqu’il existe un niveau inférieur de menu ou de dossier.
Apparaît lorsque vous appuyez sur la touche .
Apparaît lorsque la fonction d’accord sur une station locale est en service
(page 10).
Apparaît lorsqu’un programme d’informations routières est capté.
Apparaît lorsque la fonction TA (informations routières) est activée
(page 10).
Apparaît lorsque le sound retriever (correcteur de son compressé) est en
ser
vice (page 11).
Apparaît lorsque la lecture aléatoire est en service.
Apparaît lorsque la lecture répétée est en service.
Apparaît lorsque la fonction de commande d’iPod est en service (page 7).
Retrait de la face avant

4Fr
Important
• Évitez de soumettre la face avant à des chocs excessifs.
• Tenez la face avant à l’abri du soleil et des températures élevées.
• Stockez toujours la face avant détachée, dans un étui de protection ou un sac.
Lorsque vous mettez le contact sur ON après avoir installé l’appareil, [SET UP :YES]
s’affiche.
1 Appuyez sur la molette M.C..
Si vous n’utilisez pas l’appareil dans les 30 secondes qui suivent, le menu de
con
figuration disparaît. Si vous préférez ne pas effectuer la configuration pour
l’instant, tournez la molette M.C. pour sélectionner [NO], puis appuyez pour valider.
2 Tournez la molette M.C. pour sélectionner les options, puis appuyez pour valider.
Pour passer à l’option de menu suivante, vous devez valider votre sélection.
3 [QUIT :YES] apparaît lorsque tous les réglages sont terminés.
Pour revenir au premier élément du menu de configuration, tournez la molette M.
C.
pour sélectionner [QUIT :NO], puis appuyez pour valider.
4 Appuyez sur la molette M.C. pour valider les réglages.
Menu de configuration
Élément de menu Description
LANGUAGE Sélectionnez la langue d’affichage des informations textuelles à
par
tir d’un fichier audio compressé.
[ENG] (anglais),
[РУС
] (russe),
[TU
R] (turc)
CLOCK SET Réglez l’horloge.
FM STEP Sélectionnez l’incrément d’accord FM à partir de 100 kHz ou de
50 kHz.
[100], [50]
Retirer Fixer
REMARQUES
• Vous pouvez annuler le réglage du menu en appuyant sur SRC/OFF.
• Ces paramètres peuvent être ajustés à tout moment à partir des réglages SYSTEM (page 12) et des
réglages INITIAL (page 4).
1 Appuyez sur la molette M.C. pour afficher le menu principal.
2 Tournez la molette M.C. pour sélectionner [SYSTEM], puis appuyez pour valider.
3 Tournez la molette M.C. pour sélectionner [DEMO OFF], puis appuyez pour
valider.
4 Tournez la molette M.C. pour sélectionner [YES], puis appuyez pour valider.
1 Appuyez longuement sur SRC/OFF jusqu’à ce que l’appareil se mette hors
tension.
2 Appuyez longuement sur SRC/OFF pour afficher le menu principal.
3 Tournez la molette M.C. pour sélectionner [INITIAL], puis appuyez pour valider.
4 Tournez la molette M.C. pour sélectionner une option, puis appuyez pour valider.
Annulation de l’affichage de démonstration (DEMO
OFF)
Réglages INITIAL
Élément de menu Description
FM STEP Sélectionnez l’incrément d’accord FM à partir de 100 kHz ou de
50 kHz.
[100], [50]
SP-P/O MODE À sélectionner lorsqu’un haut-parleur à gamme étendue est
r
elié aux fils de sortie du haut-parleur arrière et qu’un haut-
parleur d’extrêmes graves est branché à la sortie RCA.
[REAR/SUB.W]
[SUB.W/SUB.W] À sélectionner lorsqu’un haut-parleur d’extrêmes graves passif
es
t directement relié aux fils de sortie du haut-parleur arrière et
qu’un haut-parleur d’extrêmes graves est branché à la sortie
RCA.
[REAR/REAR] À sélectionner lorsque des haut-parleurs à gamme étendue sont
rel
iés aux fils de sortie du haut-parleur arrière et à la sortie RCA.
Si un haut-parleur à gamme étendue est relié aux fils de sortie
du haut-parleur arrière et que la sortie RCA n’est pas utilisée,
vous pouvez sélectionner [REAR/SUB.W] ou [REAR/REAR].

5Fr
Français
Les fréquences du syntoniseur de cet appareil sont destinées à une utilisation en Europe
de l’Ouest, Asie, Moyen-Orient, Afrique et Océanie. Son utilisation dans d’autres régions
peut se traduire par une réception de mauvaise qualité. La fonction RDS (Radio Data
System) n’est opérationnelle que dans les régions où des signaux RDS sont diffusés pour
les stations FM.
1 Appuyez sur SRC/OFF pour sélectionner [RADIO].
2 Appuyez sur BAND/ pour sélectionner la bande [FM1], [FM2], [FM3], [MW] ou
[LW].
3 Appuyez sur l’une des touches numériques (1/ à 6/ ).
CONSEIL
Les touches / peuvent également servir à sélectionner une station préréglée lorsque [SEEK]
est réglé sur [PCH] dans les réglages FUNCTION (page 11).
Les six stations les plus puissantes sont mémorisées sur les touches numériques (1/ à
6/ ).
1 Après avoir sélectionné la bande, appuyez sur la molette M.C. pour afficher le
menu principal.
S/W UPDATE À sélectionner pour valider les dernières informations relatives
au système de l’appareil.
[SYSTEM INFO]
[SYSTEM UPDATE] À sélectionner pour effectuer la dernière mise à jour des
logiciels de l’appareil et réinitialiser ses réglages. Pour obtenir de
plus amples informations sur les derniers logiciels et mises à
jour, veuillez vous rendre sur notre site Web.
SYSTEM RESET Sélectionnez [YES] pour réinitialiser les réglages de l’appareil.
L
’appareil redémarre automatiquement.
(Certains réglages sont conservés même après la réinitialisation
d
e l’appareil.)
[YES], [NO]
Radio
Réception des stations présélectionnées
Mémoire des meilleures stations (BSM)
Élément de menu Description
2 Tournez la molette M.C. pour sélectionner [FUNCTION], puis appuyez pour
valider.
3 Tournez la molette M.C. pour sélectionner [BSM], puis appuyez pour valider.
Pour rechercher une station manuellement
1 Après avoir sélectionné la bande, appuyez sur / pour sélectionner une
station.
Appuyez longuement sur / , puis relâchez pour rechercher une station
disponible. Le balayage s’arrête lorsque l’a
ppareil capte une station. Pour annuler
l’accord par recherche, appuyez sur / .
REMARQUE
[SEEK] doit être réglé sur [MAN] dans les réglages FUNCTION (page 11).
Pour mémoriser des stations manuellement
1 Lorsque vous captez la station que vous souhaitez mémoriser, appuyez
longuement sur l’une des touches numériques (1/ à 6/ ) jusqu’à ce qu’elle
cesse de clignoter.
L’appareil recherche une station diffusant des informations PTY (type de programme).
1 Appuyez sur pendant la réception FM.
2 Tournez la molette M.C. pour sélectionner le type de programme [NEWS/INFO],
[POPULAR], [CLASSICS] ou [OTHERS].
3 Appuyez sur la molette M.C..
L’appareil continue à rechercher une station. Lorsqu’il en trouve une, son nom de
s
ervice de programme s’affiche.
REMARQUES
• Pour annuler la recherche, appuyez sur la molette M.C..
• Le programme de certaines stations peut différer de celui qu’indique le PTY transmis.
• Si aucune station ne diffuse le type de programme que vous recherchez, [NOT FOUND] s’affiche
pendant environ deux secondes, puis le syntoniseur revient à la station de départ.
Utilisation des fonctions PTY

6Fr
Débranchez le casque ou les écouteurs du périphérique avant de raccorder ce dernier à
l
’appareil.
CD
1 Insérez un disque dans la fente de chargement des disques en orientant l’étiquette
vers le haut.
Pour éjecter un disque, arrêtez d’abord la lecture avant d’appuyer sur .
Périphériques USB (y compris Android™)/iPod
1 Ouvrez le cache du port USB.
2 Raccordez le périphérique USB/l’iPod à l’aide d’un câble approprié.
REMARQUE
Pour basculer automatiquement sur une source [USB] lorsqu’un périphérique USB/iPod est connecté à
l’appareil, réglez [USB AUTO] sur [ON] dans les paramètres SYSTEM (page 12).
PRÉCAUTION
Utilisez un câble USB Pioneer en option (CD-U50E) pour raccorder le périphérique USB, car tout
périphérique raccordé directement à l’appareil dépasse de ce dernier, ce qui peut être dangereux.
Avant de retirer le périphérique, arrêtez la lecture.
Connexions AOA
Pour plus de détails sur la connexion AOA, voir page 9.
Connexion MTP
Il est possible de connecter un périphérique Android (utilisant le système d’exploitation Android 4.0 ou
une version supérieure) via une connexion MTP à l’aide du câble fourni avec le périphérique. Toutefois,
selon le périphérique connecté et les numéros des fichiers qu’il contient, il se peut que la lecture de
fichiers audio/morceaux soit impossible via MTP. Notez que la connexion MTP n’est pas compatible
avec les formats de fichier WAV et ne peut pas être utilisée avec la fonction MIXTRAX.
REMARQUE
Si vous utilisez une connexion MTP, vous devez régler [ANDROID WIRED] sur [MEMORY] dans les
paramètres SYSTEM (page 12).
AUX
1 Insérez la mini-fiche stéréo dans la prise d’entrée AUX.
CD/USB/iPod/AUX
Lecture
2 Appuyez sur SRC/OFF pour sélectionner la source [AUX].
REMARQUE
Si [AUX] est réglé sur [OFF] dans les réglages SYSTEM, il est impossible de sélectionner [AUX] en tant
que source (page 12).
Vous pouvez procéder à différents ajustements dans les réglages FUNCTION (page 10).
Notez que les opérations suivantes ne fonctionnent pas pour un périphérique AUX. Pour
uti
liser un périphérique AUX, utilisez le périphérique proprement dit.
Opérations
Objectif Opération
Sélectionner un dossier/album*1 Appuyez sur 1/ ou 2/ .
Sélectionner une piste/un morceau
(chapitre)
Appuyez sur ou .
Avance ou retour rapide*3 Appuyez longuement sur ou .
Rechercher un fichier dans une liste 1 Ap
puyez sur pour afficher la liste.
2 T
ournez la molette M.C. pour
sélectionner la catégorie ou le nom de
fichier (dossier) de votre choix, puis
appuyez pour valider.
3 T
ournez la molette M.C. pour
sélectionner le fichier de votre choix, puis
appuyez pour valider.
La lecture démarre.
Afficher une liste de fichiers dans la
cat
égorie/le dossier sélectionné(e)*1
Appuyez sur la molette M.C. lorsqu’une
catégorie/un dossier est sélectionné(e).
Lire un morceau de la catégorie/du dossier
sél
ectionné(e)*1
Appuyez longuement sur la molette M.C.
lorsqu’une catégorie/un dossier est
sélectionné(e).

7Fr
Français
*1 Fichiers d’audio compressé uniquement
*2 Cette fonction est désactivée lorsque USB est sélectionné en tant que source et que la fonction
MIXTRAX est activée.
*3 Si vous utilisez la fonction avance ou retour rapide au moment de la lecture d’un fichier VBR, la
durée de lecture peut ne pas être correcte.
Recherche alphabétique (iPod uniquement) 1 Appuyez sur pour afficher la liste.
2 T
ournez la molette M.C. pour
sélectionner la liste de catégories de
votre choix, puis appuyez sur pour
accéder au mode de recherche
al
phabétique.
(Pour accéder au mode de recherche
al
phabétique, vous pouvez également
tourner deux fois la molette M.C
..)
3 T
ournez la molette M.C. pour
sélectionner une lettre, puis appuyez
pour afficher la liste alphabétique.
Pour annuler la recherche alphabétique,
ap
puyez sur BAND/ .
Lecture répétée Appuyez sur 6/ .
Lecture aléatoire Appuyez sur 5/ .
Lecture aléatoire de toutes les pistes (iPod
uniq
uement)
Appuyez longuement sur 5/ .
Pause/Reprise de la lecture Appuyez sur 4/PA
USE.
Sound retriever (correcteur de son
co
mpressé)*1*2
Appuyez sur 3/S.Rtrv.
[1] : efficace pour les taux de compression
fa
ibles
[2] : efficace pour les taux de compression
él
evés
Retour au dossier racine (CD/USB
uniq
uement)*1
Appuyez longuement sur .
Commutation entre les modes audio
compr
essé et CD-DA (CD uniquement)
Appuyez sur BAND/ .
Changer de lecteur sur le périphérique USB
(périphériques prenant en charge le
protocole de classe de périphérique de
stockage de masse USB uniquement)
Appuyez sur BAND/
.
Objectif Opération
Mode de lecture en lien
Vous pouvez accéder à des morceaux en vous basant sur l’artiste, l’album ou le genre en
cours de lecture.
1 Pendant l’écoute d’un morceau, appuyez longuement sur pour entrer en mode
de lecture en lien.
2 Tournez la molette M.C. pour sélectionner le mode ([ARTIST], [ALBUM], [GENRE]),
puis appuyez pour valider.
Le morceau/l’album sélectionné est lu après le morceau en cours de lecture.
REMARQUE
Le morceau/l’album sélectionné peut être annulé si vous utilisez d’autres fonctions que le mode de
lecture en lien (ex. : avance et retour rapides).
Commande d’un iPod
Vous pouvez commander l’appareil via un iPod raccordé.
Les modèles d’iPod suivants ne sont pas compatibles avec cette fonction.
–iPod nano 1e génération, iPod avec vidéo
1 Appuyez sur BAND/ en cours de lecture, puis sélectionnez le mode de
commande.
[CO
NTROL iPod] : la fonction iPod de l’appareil peut être activée à partir de l’iPod
raccordé.
[CO
NTROL AUDIO] : la fonction iPod de l’appareil ne peut être activée que par les
touches situées sur l’appareil. Dans ce mode, il est impossible de mettre l’iPod
raccordé sous ou hors tension.
REMARQUES
• La commutation du mode de commande sur [CONTROL iPod] met en pause la lecture d’un morceau.
Utilisez l’iPod raccordé pour reprendre la lecture.
• Les opérations suivantes sont toujours accessibles à partir de l’appareil, même si le mode de
commande est réglé sur [CONTROL iPod].
– Pause, avance/retour rapide, sélection d’un morceau/chapitre
• Le volume ne peut être réglé qu’à partir de cet appareil.
La fonction MIXTRAX crée un mélange ininterrompu de pistes de votre bibliothèque
musicale, agrémenté d’effets d’éclairage. Pour plus de détails sur les réglages de
MIXTRAX, voir page 13.
Fonctions utiles pour iPod
À propos de MIXTRAX (USB/iPod uniquement)

8Fr
REMARQUES
• Cette fonction n’est pas compatible avec un périphérique Android connecté via MTP.
• Lorsque USB est sélectionné en tant que source et que la fonction MIXTRAX est en cours d’utilisation,
la fonction de sound retriever (correcteur de son compressé) est désactivée.
• Selon le fichier/morceau, il se peut que les effets sonores soient indisponibles.
• Désactivez la fonction MIXTRAX si les effets d’éclairage qu’elle produit vous gênent dans votre
conduite.
1 Appuyez sur MIX pour activer/désactiver MIXTRAX.
Vous pouvez écouter une application sur un iPhone via cet appareil. Dans certains cas,
v
ous pouvez commander une application en utilisant cet appareil.
Pour plus de détails sur les périphériques compatibles, visitez notre site Web.
Important
L’utilisation d’applications tierces peut impliquer ou nécessiter la fourniture d’informations
personnelles, que ce soit en créant un compte d’utilisateur ou une autre méthode ainsi que, pour
certaines applications, la fourniture de données de géolocalisation.
TOUTES LES APPLICATIONS TIERCES RELÈVENT DE L’ENTIÈRE RESPONSABILITÉ DES FOURNISSEURS,
NOTAMMENT MAIS SANS S’Y LIMITER, LA COLLECTE ET LA PROTECTION DES DONNÉES UTILISATEUR ET
LES BONNES PRATIQUES DE CONFIDENTIALITÉ. EN ACCÉDANT À UNE APPLICATION TIERCE, VOUS
ACCEPTEZ DE PRENDRE CONNAISSANCE DES CONDITIONS DE SERVICE ET DES RÈGLES DE
CONFIDENTIALITÉ DES FOURNISSEURS. SI VOUS N’ACCEPTEZ PAS LES CONDITIONS OU RÈGLES D’UN
FOURNISSEUR OU SI VOUS N’ACCEPTEZ PAS L’UTILISATION DES DONNÉES DE GÉOLOCALISATION, LE
CAS ÉCHÉANT, N’UTILISEZ PAS CETTE APPLICATION TIERCE.
Pour les utilisateurs d’iPhone
Cette fonction est compatible avec les iPhone et les iPod touch installés avec iOS 5.0 ou une version
ultérieure.
REMARQUE
PIONEER DÉCLINE TOUTE RESPONSABILITÉ QUANT AUX APPLICATIONS OU AUX CONTENUS TIERS, Y
COMPRIS, SANS S’Y LIMITER, QUANT À LEUR EXACTITUDE OU À LEUR EXHAUSTIVITÉ. LE CONTENU ET
LA FONCTIONNALITÉ DE CES APPLICATIONS RELÈVENT DE LA SEULE RESPONSABILITÉ DU
FOURNISSEUR DE L’APPLICATION.
1 Connectez cet appareil au périphérique mobile.
• iP
hone via USB (page 6)
2 Appuyez sur SRC/OFF pour sélectionner [APP].
3 Activez le périphérique mobile pour lancer l’application.
Mode d’application
Lecture d’une application via cet appareil
Opérations de base
Vous pouvez procéder à différents ajustements dans les réglages FUNCTION (page 10).
(DEH-X2900UI est compatible uniquement avec les iPhone sur lesquels Spotify est
in
stallé.)
Spotify est un service de diffusion de musique en continu non affilié à Pioneer. Des
i
nformations complémentaires sont disponibles sur http://www.spotify.com.
L’application Spotify est disponible pour les smartphones compatibles ; veuillez
consulter h
ttps://support.spotify.com/ afin d’obtenir les dernières informations sur la
compatibilité.
Pour profiter de Spotify pendant que vous condui
sez, téléchargez d’abord l’application
Spotify sur votre iPhone. Vous pouvez la télécharger sur iTunes App Store. Optez pour un
compte gratuit ou payant Premium, sur l’application ou sur spotify.com. Un compte
Premium vous permet d’accéder à davantage de fonctionnalités, comme l’écoute hors-
ligne.
Important
• Ce produit contient le logiciel Spotify qui fait l’objet de licences tierces que vous trouverez ici :
www.spotify.com/connect/third-party-licenses.
• Pour obtenir de plus amples informations sur les pays et les régions où Spotify peut être utilisé,
consultez https://www.spotify.com/us/select-your-country/.
Mettez à jour le microprogramme de l’application Spotify à sa dernière version avant de
l’utiliser.
1 Connectez cet appareil au périphérique mobile.
• iP
hone via USB (page 6)
2 Appuyez sur SRC/OFF pour sélectionner [SPOTIFY].
3 Lancez l’application Spotify sur le périphérique mobile, puis lancez la lecture.
Objectif Opération
Sélectionner une piste Appuyez sur ou .
Avance ou retour rapide Appuyez longuement sur ou .
Pause/Reprise de la lecture Appuyez sur BAN
D/ .
Spotify®
Écoute de Spotify

9Fr
Français
Opérations de base
Vous pouvez procéder à différents ajustements dans les réglages FUNCTION (page 10).
REMARQUE
Les opérations disponibles peuvent varier selon le type de contenus (titres/albums/artistes/listes de
lecture/radios) que vous souhaitez lire.
REMARQUE
Certaines fonctions de Spotify ne peuvent pas être activées à partir de cet appareil.
Objectif Opération
Sauter une piste Appuyez sur ou .
Rechercher un titre dans une liste 1 Appuyez sur (liste) pour afficher la
liste.
2 T
ournez la molette M.C. pour
sélectionner la catégorie de votre choix,
puis appuyez pour valider.
3 T
ournez la molette M.C. pour
sélectionner le fichier de votre choix, puis
appuyez pour valider.
La lecture commence.
Pause/Reprise de la lecture Appuyez sur 4/
PAUSE.
Pouces levés (uniquement pour la radio) Appuyez sur 1/ .
Pouces baissés (uniquement pour la radio) Appuyez sur 2/ .
Lecture aléatoire (uniquement pour les
t
itres/albums/artistes/listes de lecture)
Appuyez sur 5/ .
Lecture répétée (uniquement pour les
t
itres/albums/artistes/listes de lecture)
Appuyez sur 6/ .
Lancez une station de radio en fonction de
la c
hanson en cours de lecture.
1 Appuyez longuement sur (liste) pour
lancer une radio.
2 Ap
puyez sur la molette M.C..
• Ce
tte fonction peut ne pas être disponible
selon la chanson sélectionnée.
Enregistrez les informations concernant la
cha
nson en cours de lecture.
Supprimez les informations relatives à la
cha
nson enregistrées.
1 Ap
puyez longuement sur 3/S.Rtrv.
[SAVE]/[UNSAVE] apparaît.
2 Ap
puyez sur la molette M.C..
Vous pouvez faire fonctionner l’appareil à partir de Pioneer ARC APP installé sur un
périphérique iPhone/Android. Dans certains cas, vous pouvez commander des aspects
de l’application, par exemple, la sélection de la source, la mise en pause, etc. à l’aide de
l’appareil.
Pour plus de détails sur les opérations disponibles sur l’application, consultez la section
d’aide de l’application.
ATTENTION
N’essayez pas d’utiliser l’application tout en conduisant. Veillez à quitter la route et à garer votre
véhicule en lieu sûr avant d’essayer d’utiliser les commandes de l’application.
Pour les utilisateurs d’iPhone
Cette fonction est compatible avec les iPhone (iPhone 5 ou ultérieur) et les iPod touch
sur lesq
uels iOS 8.0 ou ultérieur est installé.
Vous pouvez télécharger Pioneer ARC APP sur iTunes App Store.
Pour les utilisateurs de périphérique Android
Cette fonction est compatible avec les périphériques sur lesquels est installé Android
OS 4.1 ou une version ultérieure et qui prennent également en charge les profils AOA
(
Android Open Accessory) 2.0.
Vous pouvez télécharger Pioneer ARC APP sur Google Play™.
REMARQUE
Certains périphériques Android connectés via AOA 2.0 risquent de ne pas fonctionner correctement ou
d’émettre des sons en raison de leur conception logicielle propre, indépendamment de la version du
système d’exploitation.
1 Connectez cet appareil au périphérique mobile.
• i
Phone/périphérique Android via USB (page 6)
Passez à l’étape 6 si vous sélectionnez la connexion USB pour iPhone.
2 Appuyez sur la molette M.C. pour afficher le menu principal.
3 Tournez la molette M.C. pour sélectionner [SYSTEM], puis appuyez pour valider.
4 Tournez la molette M.C. pour sélectionner [ANDROID WIRED], puis appuyez pour
valider.
5 Tournez la molette M.C. pour sélectionner [APP CONTROL] pour un périphérique
Android connecté via USB.
Utilisation de Pioneer ARC APP
Connectez-vous à Pioneer ARC APP

10Fr
Si [ON] est sélectionné dans [P.APP AUTO ON] (page 12), Pioneer ARC APP sur le
périphérique Android démarrera automatiquement et toutes les étapes se
te
rmineront.
REMARQUE
Si Pioneer ARC APP n’a pas encore été installé sur votre périphérique Android, un message vous
invitant à installer l’application apparaîtra sur votre appareil Android. Sélectionnez [OFF] dans
[P.APP AUTO ON] pour effacer le message (page 12).
6 Appuyez sur SRC/OFF pour sélectionner une source.
7 Lancer Pioneer ARC APP sur le périphérique mobile.
REMARQUE
Vous pouvez également lancer l’application en maintenant enfoncé la commande M.C. pour
l’iPhone.
1 Appuyez sur SRC/OFF pour sélectionner [ANDROID].
Opérations de base
Vous pouvez régler divers paramètres dans le menu principal.
1 Appuyez sur la molette M.C. pour afficher le menu principal.
2 Tournez la molette M.C. pour sélectionner l’une des catégories suivantes, puis
appuyez pour valider.
• Réglages FUNCTION (page 10)
Écoute de musique sur Android
Objectif Opération
Sélectionner une piste Appuyez sur ou .
Avance ou retour rapide Appuyez longuement sur ou .
Pause/Reprise de la lecture Appuyez sur 4/PA
USE.
Sound retriever (correcteur de son
co
mpressé)
Appuyez sur 3/S.Rtrv.
[1] : efficace pour les taux de compression
fa
ibles
[2] : efficace pour les taux de compression
élevés
Réglages
• Réglages AUDIO (page 11)
• Réglages SYSTEM (page 12)
• Réglages ILLUMINATION (page 13)
• Réglages MIXTRAX (page 13)
3 Tournez la molette M.C. pour sélectionner les options, puis appuyez pour valider.
Les éléments de menu varient selon la source.
Réglages FUNCTION
Élément de menu Description
FM SETTING
[TALK], [STANDARD], [MUSIC] Adaptez le niveau de qualité sonore aux
c
onditions de signal de radiodiffusion du signal
de la bande FM. (Disponible uniquement lorsque
la bande FM est sélectionnée.)
BSM
Mémorisez automatiquement les six stations les
plus
puissantes sur les touches numériques (1/
à 6/ ).
REGIONAL
[ON], [OFF] Limitez la réception des programmes régionaux
spéc
ifiques lorsque AF (recherche des autres
fréquences) est sélectionné. (Disponible
uniquement lorsque la bande FM est
sélectionnée.)
LOCAL
FM : [O
FF], [LV1], [LV2], [LV3],
[LV4]
MW/LW : [O
FF], [LV1], [LV2]
Restreignez la station d’accord suivant la
p
uissance du signal.
TA
[ON], [OFF] Recevez des programmes d’informations
ro
utières, le cas échéant. (Disponible
uniquement lorsque la bande FM est
sélectionnée.)

11Fr
Français
AF
[ON], [OFF] Laissez l’appareil s’accorder sur une autre
fréquence fournissant la même station.
(Disponible uniquement lorsque la bande FM est
sélectionnée.)
NEWS
[ON], [OFF] Interrompez la source actuellement sélectionnée
av
ec des bulletins d’informations. (Disponible
uniquement lorsque la bande FM est
sélectionnée.)
SEEK
[MAN], [PCH] Attribuez aux touches ou la
recherche de stations une par une (accord
m
anuel) ou sélectionnez une station à partir des
canaux préréglés.
SAVE
Enregistrez les informations concernant la
ch
anson en cours de lecture sur votre liste de
lecture sur Spotify.
UNSAVE
Supprimez les informations relatives à la
ch
anson enregistrées dans [SAVE].
S.RTRV
[1] (efficace pour les taux de
co
mpression faibles),
[2] (efficace pour les taux de
c
ompression élevés),
[OFF]
Améliorez l’audio compressé et restaurez un son
ri
che.
Indisponible lorsque :
• US
B est sélectionné en tant que source et que
la fonction MIXTRAX est activée ;
• C
D-DA/CD-TEXT est en cours de lecture.
AUDIO BOOK
[FASTER], [NORMAL], [SLOWER] Modifiez la vitesse de lecture. (Indisponible
l
orsque [CONTROL iPod] est sélectionné en
mode de commande.)
PAU SE
Mettez sur pause ou reprenez la lecture.
Élément de menu Description
USB
iPod
iPod
Réglages AUDIO
Élément de menu Description
FADER*1
Réglez l’équilibre sonore entre les haut-parleurs
avant et arrière.
BALANCE
Réglez l’équilibre sonore entre les haut-parleurs
ga
uche et droite.
EQ SETTING
[SUPER BASS], [POWERFUL],
[NA
TURAL], [VOCAL], [CUSTOM1],
[CUSTOM2], [FLAT]
Sélectionnez la bande et le
niveau de l’égaliseur pour une
personnalisation approfondie.
Bande de l’égaliseur : [80HZ
],
[250HZ], [800HZ], [2.5KHZ],
[8KHZ]
Niveau de l’égaliseur : [+
6] à [–6]
Sélectionnez ou personnalisez la courbe de
l’
égaliseur.
[CUSTOM1] peut être défini séparément pour
ch
aque source. Cependant, chacune des
combinaisons ci-dessous est définie
automatiquement sur le même réglage.
• U
SB, iPod, ANDROID, SPOTIFY et APP (iPhone)
[CUSTOM2] est un réglage partagé et commun à
t
outes les sources.
LOUDNESS
[OFF], [LOW], [MID], [HI] Compensez pour obtenir un son net à faible
volume
.
SUB.W*2
[NOR], [REV], [OFF] Sélectionnez la phase du haut-parleur
d
’extrêmes graves.
SUB.W CTRL*2
*3
Fréquence de coupure : [50HZ
],
[63HZ], [80HZ], [100HZ], [125HZ],
[160HZ], [200HZ]
Niveau de sortie : [–2
4] à [+6]
Niveau de la pente : [–12],
[–24]
Seules les fréquences inférieures à celles de la
g
amme sélectionnée sont émises par le haut-
parleur d’extrêmes graves.
BASS BOOST
[0] à [+6] Sélectionnez le niveau d’accentuation des
gra
ves.

12Fr
*1 Indisponible lorsque [SUB.W/SUB.W] est sélectionné sous [SP-P/O MODE] dans les réglages INITIAL
(page 4).
*2 Indisponible lorsque [REAR/REAR] est sélectionné sous [SP-P/O MODE] dans les réglages INITIAL
(page 4).
*3 Indisponible lorsque [OFF] est sélectionné sous [SUB.W].
Vous pouvez également accéder à ces menus lorsque l’appareil est hors tension.
HPF SETTING
Fréquence de coupure : [O
FF],
[50HZ], [63HZ], [80HZ], [100HZ],
[125HZ], [160HZ], [200HZ]
Niveau de la pente : [–12]
, [–24]
Seules les fréquences supérieures à la coupure
d
u filtre passe-haut (HPF) sont émises en sortie
via les haut-parleurs.
SLA
[+4] à [–4] Réglez le niveau de volume de chaque source,
sau
f celui de la FM.
Chacune des combinaisons ci-dessous est
d
éfinie automatiquement sur le même réglage.
• US
B, iPod, ANDROID, SPOTIFY et APP (iPhone)
Réglages SYSTEM
Élément de menu Description
LANGUAGE
[ENG] (anglais), [РУС] (russe),
[TUR] (turc)
Sélectionnez la langue d’affichage des
informations textuelles à partir d’un fichier audio
compressé.
CLOCK SET
Réglez l’horloge (page 4).
12H/24H
[12H], [24H] Sélectionnez la notation de l’heure.
AUTO PI
[ON], [OFF] Recherchez une autre station avec la même
pr
ogrammation, même si vous utilisez une
station présélectionnée.
AUX
[ON], [OFF] Sélectionnez [ON] lors de l’utilisation d’un
pér
iphérique auxiliaire connecté à l’appareil.
Élément de menu Description
* [PW SAVE] s’annule si la batterie du véhicule est débranchée, et il doit être réactivé une fois la batterie
rebranchée. Lorsque [PW SAVE] est désactivé, selon les méthodes de connexion, l’appareil peut
continuer à consommer l’énergie de la batterie s’il n’y a pas de position ACC (accessoire) sur le
contact de votre véhicule.
SPOTIFY
[ON], [OFF] Sélectionnez [ON] lorsque vous utilisez la
f
onction Spotify.
PW SAVE*
[ON], [OFF] Réduisez la consommation d’énergie de la
bat
terie.
L’activation de la source est la seule opération
aut
orisée lorsque cette fonction est activée.
ANDROID WIRED
[MEMORY], [APP CONTROL] Sélectionnez la méthode de connexion adaptée
à un pér
iphérique Android.
P. A P P AU TO O N
[ON], [OFF]
Sélectionnez [ON] pour lancer automatiquement
Pioneer ARC APP lorsqu’un périphérique Android
est connecté à l’appareil via AOA. (Indisponible
lorsque [MEMORY] est sélectionné sous [ANDROID
WIRED].)
USB AUTO
[ON], [OFF] Sélectionnez [ON] pour basculer
aut
omatiquement sur la source [USB] lorsqu’un
périphérique USB/iPod est connecté à l’appareil.
Sélectionnez [OFF] lorsqu’un périphérique USB/
iPod est connecté à l’appareil uniquement à des
fins de charge.
Élément de menu Description

13Fr
Français
Réglages ILLUMINATION
Élément de menu Description
COLOUR
[KEY COLOUR], [DISP COLOUR],
[BOTH COLOUR]
Sélectionnez la couleur des touches ou de
l’affichage de l’appareil parmi 12 couleurs
présé
lectionnées, [SCAN] ou [CUSTOM]*.
• [S
CAN] : parcourez automatiquement une
variété de couleurs.
• [C
USTOM]* :
1 Ap
puyez longuement sur la molette M.C.
jusqu’à ce que l’affichage de réglage des
couleurs apparaisse.
2 R
églez la couleur primaire (R (rouge)/G (vert)/
B (bleu)) et le niveau de luminosité ([0] à [60]).
Vous ne pouvez pas sélectionner un niveau
i
nférieur à 10 pour les trois couleurs R (rouge),
G (ver
t), B (bleu) à la fois.
Vous pouvez également personnaliser les
co
uleurs présélectionnées. Sélectionnez l’une
des couleurs présélectionnées, puis appuyez
longuement sur la molette M.C. jusqu’à ce que
l’affichage de réglage des couleurs apparaisse.
* Le réglage CUSTOM est uniquement disponible pour
[KEY COLOUR] et [DISP COLOUR].
DIM SETTING
[SYNC ILLUMI], [SYNC CLOCK],
[MA
NUAL]
Changez la luminosité de l’affichage.
BRIGHTNESS
[KEY], [DISP] Sélectionnez la luminosité des touches ou de
l
’affichage de l’appareil de [1] à [10].
Les plages de réglage disponibles varient selon
le
paramètre [DIM SETTING].
ILLUMI FX
[ON], [OFF] L’effet d’éclairage peut être visible lors de
l
’insertion/éjection d’un CD.
L’effet d’éclairage s’active lorsque l’alimentation
AC
C est activée/désactivée, indépendamment
de ce réglage.
Réglages MIXTRAX
Élément de menu Description
SHORT PLAYBCK
[1.0 MIN], [1.5 MIN], [2.0 MIN],
[2.5 MIN], [3.0 MIN], [OFF]
Sélectionnez la durée de lecture.
FLASH AREA
[KEY/DISPLAY], [KEY], [OFF] Sélectionnez la zone de l’effet d’éclairage.
Lorsque [OFF] est sélectionné, la couleur
dé
finie dans les réglages ILLUMINATION
(page 13) sert de couleur d’affichage.
FLASH PATTERN
[SOUND LEVEL 1] à [SOUND LEVEL
6]
Modifiez l’effet d’éclairage suivant le niveau
so
nore et le niveau des graves.
Le modèle de clignotement change suivant le
ni
veau sonore.
[LOW PASS 1] à [LOW PASS 6] Le modèle de clignotement change suivant le
ni
veau des graves.
[RANDOM1] Le modèle de clignotement change de
m
anière aléatoire suivant le mode de niveau
sonore et le mode passe-bas.
[RANDOM2] Le modèle de clignotement change de
m
anière aléatoire suivant le mode de niveau
sonore.
[RANDOM3] Le modèle de clignotement change de
m
anière aléatoire suivant le mode passe-bas.
DISPLAY FX
[ON], [OFF] Activez/désactivez les effets spéciaux de
MI
XTRAX.
CUT IN FX
[ON], [OFF] Activez/désactivez les effets sonores de
M
IXTRAX tout en changeant manuellement de
piste.

14Fr
Important
• Lorsque vous installez cet appareil dans
un véhicule sans position ACC
(accessoire) sur le contact, si vous
omettez de brancher le câble rouge à la
borne qui détecte le fonctionnement de
la clé de contact, vous risquez d’entraîner
une fuite de la batterie.
• L’utilisation de cet appareil dans des
conditions autres que ce qui suit peut
provoquer un incendie ou un
dysfonctionnement.
–Véhicules équipés d’une batterie de
12 volts et d’une mise à la terre
nég
ative.
–Lorsque la sortie de l’enceinte est
ut
ilisée par 4 stations, utilisez les haut-
parleurs de plus de 50 W (puissance
d
’entrée maximale) et entre 4 Ω et 8 Ω
(valeur d
’impédance). N’utilisez pas de
haut-parleurs de 1 Ω à 3 Ω pour cet
appar
eil.
–Si la sortie du haut-parleur arrière est
u
tilisée par un caisson de graves de 2 Ω,
utilisez les haut-parleurs de plus de
70 W (puissance d’entrée maximale).
* Veuillez voir les branchements pour la
mé
thode de connexion.
• P
our éviter un court-circuit, une
surchauffe ou un dysfonctionnement,
assurez-vous de suivre les instructions ci-
dessous.
–Débranchez la borne négative de la
b
atterie avant l’installation.
–Fixez les câbles au moyen de serre-
c
âbles ou de ruban adhésif. Enroulez du
ruban adhésif autour du câblage qui
entre en contact avec des pièces
métalliques afin de protéger le câblage.
–Placez tous les câbles à l’écart des
pièces m
obiles, comme le levier de
vitesse et les rails des sièges.
–Placez tous les câbles à l’écart des
e
ndroits chauds (ex. : la sortie du
chauf
fage).
–Ne raccordez pas le câble jaune à la
bat
terie en le faisant passer par le trou
du compartiment moteur.
–Recouvrez de ruban isolant tous les
câble
s non raccordés.
–Ne raccourcissez pas les câbles.
–Ne coupez jamais l’isolation du câble
d’
alimentation de cet appareil dans le
but de partager l’alimentation avec
d’autres périphériques. La capacité
actuelle du câble est limitée.
–Utilisez un fusible de la valeur indiquée.
–Ne raccordez jamais le câble de haut-
par
leur négatif directement à la masse.
–N’attachez jamais ensemble les câbles
nég
atifs de plusieurs haut-parleurs.
• L
orsque cet appareil est sous tension, les
signaux de commande sont transmis via
le câble bleu/blanc. Branchez ce câble à la
télécommande de système d’un
amplificateur de puissance externe ou à
la borne de commande du relais
d’antenne automatique du véhicule
(max. 300 mA 12 V CC). Si le véhicule est
éq
uipé d’une antenne de vitre, raccordez
cette dernière à la borne d’alimentation
de l’amplificateur d’antenne.
• N
e raccordez jamais le câble bleu/blanc à
la borne d’alimentation d’un
amplificateur de puissance externe. De
même, ne le raccordez jamais à la borne
d’alimentation de l’antenne automatique.
Raccordements/Installation
Raccordements
Avec position ACC Sans position ACC
Cela pourrait entraîner la fuite de la
batterie ou un dysfonctionnement de
l’appareil.
• Le câble noir est la masse. Les câbles de
masse de cet appareil et d’autres
équipements (notamment les produits à
haute intensité tels que les amplificateurs
de puissance) doivent être câblés
séparément. Dans le cas contraire, un
détachement accidentel peut provoquer
un incendie ou un dysfonctionnement.
• L
e symbole graphique situé sur le
produit représente le courant continu.
Cet appareil
Entrée du cordon d’alimentation
AUX IN arrière | [Tel In] (prise stéréo
3,5 mm)
Entrée arrière dédiée, uniquement
co
mpatible avec les kits téléphoniques
mains libres Bluetooth externes. Le
signal audio est coupé durant un appel
téléphonique lorsque le fil jaune/noir
est raccordé/activé.
Sortie arrière ou sortie du haut-parleur
d’extrêmes graves
Sortie avant
Entrée de l’antenne
Fusible (10 A)
Entrée de la télécommande filaire
Il est possible de raccorder un
a
daptateur de télécommande câblé
(vendu séparément).
Cordon d’alimentation
Vers l’entrée du cordon d’alimentation
La fonction du et du peut varier
selon le type de véhicule. Dans ce cas,
v
eillez à brancher le au et le
au .
Jaune
Secours (ou accessoire)
Jaune
À raccorder à la borne d’alimentation
co
nstante de 12 V.
Rouge
Accessoire (ou secours)
Rouge
À raccorder à la borne commandée par
la cl
é de contact (12 V CC).
Raccordez les fils de même couleur les
uns aux autres.
Noir (masse du châssis)
Bleu/blanc
La position des broches du connecteur
IS
O varie selon le type de véhicule.
Raccordez le et le lorsque la
broche 5 est un type de commande
d
’antenne. Dans un autre type de

15Fr
Français
véhicule, ne branchez jamais le et
le .
Bleu/blanc
À raccorder à la borne de commande de
sy
stème de l’amplificateur de puissance
(max. 300 mA 12 V CC).
Bleu/blanc
À raccorder à la borne de commande du
r
elais d’antenne automatique (max.
300 mA 12 V CC).
Fils de haut-parleur
Blanc : avant gauche
Blanc/noir : avant gauche
Gris : avant droite
Gris/noir : avant droite
Vert : arrière gauche ou haut-parleur
d’extrêmes graves
Vert/noir : arrière gauche ou haut-
parleur d’extrêmes graves
Violet : arrière droite ou haut-parleur
d’extrêmes graves
Violet/noir : arrière droite ou haut-
parleur d’extrêmes graves
Orange/blanc
À raccorder à un signal d’éclairage du
véhicule.
Connecteur ISO
Dans certains véhicules, le connecteur
IS
O peut être divisé en deux. Dans ce
cas, veillez à raccorder les
deux connecteurs.
REMARQUES
• Modifiez le menu initial de cet appareil.
Reportez-vous à la section [SP-P/O
MODE]
(page 4). La sortie du haut-parleur
d’extrêmes graves de cet appareil est
mo
nophonique.
• L
orsque vous utilisez un caisson de
graves de 2 Ω, assurez-vous de le
racco
rder aux fils violet et violet/noir de
cet appareil. Ne raccordez rien aux fils
vert et vert/noir.
Amplificateur de puissance
(vendu séparément)
Effectuez ces raccordements si vous
utilisez l’amplificateur optionnel.
Télécommande de système
À raccorder au câble bleu/blanc.
Amplificateur de puissance (vendu
séparément)
À raccorder aux câbles RCA (vendus
séparément)
Vers la sortie avant
Haut-parleur avant
Vers la sortie arrière ou la sortie du haut-
parleur d’extrêmes graves
Haut-parleur arrière ou haut-parleur
d’extrêmes graves
Important
• Vérifiez tous les raccordements et les
systèmes avant l’installation finale.
• N’utilisez pas de pièces non autorisées,
car cela pourrait provoquer des
dysfonctionnements.
• C
onsultez votre revendeur si l’installation
nécessite de percer des trous ou
d’apporter d’autres modifications au
véhicule.
• N
’installez pas cet appareil aux endroits
où :
–il peut interférer avec le
fo
nctionnement du véhicule.
– il peut causer des blessures à un
pas
sager à la suite d’un arrêt brusque.
Installation
• S’il surchauffe, le laser à semiconducteur
risque d’être endommagé. Installez cet
appareil à l’écart des endroits chauds
(ex.
: la sortie du chauffage).
• Une per
formance optimale
est obtenue lorsque
l’appareil est installé à un
angle inférieur à 60°.
• P
our l’installation, afin d’assurer une
dispersion de chaleur adéquate lors de
l’utilisation de cet appareil, veillez à
laisser suffisamment d’espace derrière la
face arrière et à enrouler tout câble
gênant de façon à ne pas obstruer les
ouvertures d’aération.
Installation pour montage DIN
1 Insérez le manchon de montage fourni
dans le tableau de bord.
2 Fixez le manchon de montage à l’aide
d’un tournevis pour plier les
languettes métalliques (90°) et les
mettre en place.
Tableau de bord
Manchon de montage
• V
érifiez que l’appareil est bien en
place. Une installation instable peut
entraîner des tremblements et
d’autres dysfonctionnements.
Si vous n’utilisez pas le manchon de
montage fourni
1 Déterminez la position appropriée
dans laquelle les orifices du support et
le côté de l’appareil se font face.
2 Serrez deux vis de chaque côté.
Vis taraudeuse (5 mm × 9 mm, non
fournie avec le produit)
Support de montage
Tableau de bord ou console
Retrait de l’appareil (installé avec le
manchon de montage fourni)
1 Retirez l’anneau de garniture.
Anneau de garniture
Languette crantée
• L
e détachement de la face avant
permet d’accéder plus facilement à
l’anneau de garniture.
• P
our remettre l’anneau de garniture,
orientez le côté de l’appareil avec la
languette crantée vers le bas.
2 Insérez les clés d’extraction fournies
dans les deux côtés de l’appareil
jus
qu’à leur enclenchement.
3 Retirez l’appareil du tableau de bord.
Laissez
suffisamment
d’espace
5 cm
5 cm

16Fr
L’affichage redevient automatiquement
ordinaire.
→ Vous n’avez exécuté aucune opération
pendant environ 30 secondes.
– Exécutez une opération.
L’étendue de lecture répétée change de
manière inattendue.
→ En fonction de l’étendue de lecture
répétée, l’étendue sélectionnée peut
changer lors de la sélection d’un autre
dossier ou d’une autre piste ou pendant
l’avance ou le retour rapide.
– Sélectionnez à nouveau l’étendue de
le
cture répétée.
Un sous-dossier n’est pas lu.
→ Il est impossible de lire les sous-dossiers
lorsque [FLD] (répétition du dossier) est
sélectionné.
– Sélectionnez une autre étendue de
le
cture répétée.
Le son est intermittent.
→ Vous utilisez un périphérique, un
téléphone portable par exemple, qui
peut générer des interférences sonores.
– Éloignez de l’appareil tous les
p
ériphériques électriques susceptibles
de provoquer des interférences.
Commun
AMP ERROR
→ Un dysfonctionnement de l’appareil
s’est produit ou le raccordement des
haut-parleurs est incorrect.
→ L
e circuit de protection est activé.
– Vérifiez le raccordement des haut-
p
arleurs.
– Tournez la clé de contact sur OFF, puis
d
e nouveau sur ON. Si le message ne
disparaît pas, demandez de l’aide à
votre revendeur ou à un centre
d’entretien agréé par Pioneer.
NO XXXX (ex. : NO TITLE)
→ Aucune info
rmation textuelle n’est
intégrée.
– Commutez l’affichage ou la lecture sur
un
e autre piste ou un autre fichier.
Lecteur de CD
ERROR-07, 11, 12, 17, 30
→ Le disque est sale.
– Nettoyez le disque.
→ Le
disque est rayé.
– Utilisez un autre disque.
ERROR-07, 10, 11, 12, 15, 17, 30, A0
→ Une erreur mécanique ou électrique est
survenue.
– Tournez la clé de contact sur OFF, puis
de nouveau s
ur ON ou choisissez une
autre source, puis revenez au lecteur
de CD.
ERROR-15
→ Le disque inséré est vierge.
– Utilisez un autre disque.
ERROR-23
→ Format de CD non pris en charge.
– Utilisez un autre disque.
FORMAT READ
→ Le début de la lecture et le début de
l’émission des sons sont parfois décalés.
– Attendez que le message disparaisse
p
our entendre les sons.
Informations complémentaires
Dépannage
Messages d’erreur

17Fr
Français
NO AUDIO
→ Le disque inséré ne contient pas de
fichiers lisibles.
– Utilisez un autre disque.
SKIPPED
→ Le disque inséré contient des fichiers
protégés par DRM.
– Les fichiers protégés sont sautés.
PROTECT
→ Tous les fichiers sur le disque inséré
intègrent la protection par DRM.
– Utilisez un autre disque.
Périphérique USB/iPod
FORMAT READ
→ Le début de la lecture et le début de
l’émission des sons sont parfois décalés.
– Attendez que le message disparaisse
po
ur entendre les sons.
NO AUDIO
→ Il n’y a aucun morceau.
– Transférez les fichiers audio vers le
périph
érique USB et procédez à la
connexion.
→ L
a sécurité est activée sur le
périphérique USB connecté.
– Suivez les instructions du
pér
iphérique USB pour désactiver la
sécurité.
SKIPPED
→ Le périphérique USB connecté contient
des fichiers protégés par DRM.
– Les fichiers protégés sont sautés.
PROTECT
→ Tous les fichiers sur le périphérique USB
connecté intègrent la protection par
DRM.
– Utilisez un autre périphérique USB.
N/A USB
→ Le périphérique USB connecté n’est pas
pris en charge par cet appareil.
–Déconnectez votre périphérique et
r
emplacez-le par un périphérique USB
compatible.
HUB ERROR
→ Le périphérique USB connecté via un
concentrateur USB n’est pas pris en
charge par cet appareil.
–Connectez le périphérique USB
d
irectement à cet appareil à l’aide
d’un câble USB.
CHECK USB
→ Le connecteur USB ou le câble USB est
en court-circuit.
–Vérifiez que le connecteur USB ou le
câble
USB n’est pas coincé ou
endommagé.
→ L
e périphérique USB connecté
consomme plus que le courant maximal
autorisé.
–Déconnectez le périphérique USB et
ne l’
utilisez pas. Mettez le contact sur
OFF, puis de nouveau sur ACC ou ON.
Ne connectez que des périphériques
USB conformes.
→ L
’iPod fonctionne correctement mais
n’est pas chargé.
–Assurez-vous que le câble de
c
onnexion de l’iPod n’est pas en court-
circuit (ex. : qu’il n’est pas coincé dans
d
es objets métalliques). Après avoir
procédé à cette vérification, mettez le
contact sur OFF puis de nouveau sur
ON, ou déconnectez l’iPod et
reconnectez-le.
ERROR-19
→ Panne de communication.
–Effectuez l’une des opérations
su
ivantes, puis revenez à la source
USB.
• T
ournez la clé de contact sur OFF,
puis de nouveau sur ON.
• D
éconnectez le périphérique USB.
• Ch
angez de source.
→ P
anne de l’iPod.
– Débranchez le câble de l’iPod. Une fois
l
e menu principal de l’iPod affiché,
reconnectez et réinitialisez l’iPod.
ERROR-23
→ Le périphérique USB n’a pas été formaté
correctement.
– Formatez le périphérique USB avec
FAT
12, FAT16 ou FAT32.
ERROR-16
→ La version du microprogramme de
l’iPod est désuète.
– Mettez à jour la version de l’iPod.
→ P
anne de l’iPod.
– Débranchez le câble de l’iPod. Une fois
l
e menu principal de l’iPod affiché,
reconnectez et réinitialisez l’iPod.
STOP
→ La liste en cours ne comporte aucun
morceau.
–Sélectionnez une liste contenant des
mo
rceaux.
NOT FOUND
→ Aucun morceau connexe.
– Transférez des morceaux sur l’iPod.
Applications
START UP APP
→ L’application n’a pas encore commencé
à s’exécuter.
– Activez le périphérique mobile pour
lancer
l’application.
Spotify
CHECK APP
→ Échec de la connexion à l’application
Spotify.
–Suivez les instructions qui s’affichent à
l’
écran.
Disques et lecteur
• Utilisez uniquement des disques
affichant l’un des deux logos suivants.
• Utilisez des disques de 12 cm.
• Ut
ilisez seulement des disques
conventionnels de forme circulaire.
• Les t
ypes de disque suivants ne peuvent
pas être utilisés avec cet appareil :
–DualDisc
–Disques de 8 cm : les tentatives
d’ut
ilisation de tels disques avec un
adaptateur peuvent entraîner un
dysfonctionnement de l’appareil.
– Disques de forme bizarre
– Disques autres que les CD
– Disques endommagés, y compris les
d
isques fendillés, ébréchés ou voilés
– Disques CD-R/RW non finalisés
• N’
écrivez pas et n’appliquez aucun agent
chimique sur la surface d’un disque.
• P
our nettoyer un CD, essuyez le disque
avec un chiffon doux en partant du
centre vers l’extérieur.
• L
a condensation peut perturber
temporairement le fonctionnement du
lecteur. Laissez celui-ci s’adapter à une
température plus élevée pendant
une heure environ. Essuyez également
l
es disques humides avec un chiffon
doux.
• L
ors de l’utilisation de disques dont la
surface de l’étiquette est imprimable,
vérifiez les instructions et les
avertissements des disques. L’insertion et
l’éjection peuvent ne pas être possibles
selon les disques. L’utilisation de tels
Conseils sur la
manipulation

18Fr
disques risque d’endommager cet
appareil.
• Ne
posez aucune étiquette disponible
dans le commerce ou tout autre matériau
sur la surface des disques.
–Les disques pourraient se déformer et
de
venir injouables.
–Les étiquettes pourraient se décoller
pend
ant la lecture et empêcher
l’éjection des disques, ce qui pourrait
endommager l’appareil.
Périphérique de stockage USB
• Les connexions via un concentrateur USB
ne sont pas prises en charge.
• A
ttachez fermement le périphérique de
stockage USB avant de conduire. Ne
laissez pas le périphérique de stockage
USB tomber au sol, où il pourrait rester
coincé sous la pédale de frein ou
d’accélérateur.
• S
elon le périphérique de stockage USB,
les problèmes suivants peuvent survenir.
–Le fonctionnement peut varier.
–Le périphérique de stockage peut ne
p
as être reconnu.
–Les fichiers peuvent ne pas être lus
co
rrectement.
–Le périphérique peut générer des
int
erférences sonores lorsque vous
écoutez la radio.
iPod
• Ne laissez pas l’iPod dans un endroit
soumis à une température élevée.
• At
tachez fermement l’iPod pendant que
vous conduisez. Ne laissez pas l’iPod
tomber au sol, où il pourrait gêner le bon
fonctionnement de la pédale de frein ou
d’accélérateur.
• L
es réglages de l’iPod, comme l’égaliseur
et la lecture répétée, changent
automatiquement lorsque l’iPod est
connecté à l’appareil. Une fois l’iPod
déconnecté, les réglages d’origine sont
rétablis.
• A
ucun texte incompatible enregistré sur
l’iPod ne sera affiché par cet appareil.
• Seuls les 32 premiers caractères peuvent
s’afficher en tant que nom de fichier
(extension de fichier comprise) ou nom
de dossier.
• L
’appareil risque de ne pas fonctionner
correctement selon l’application utilisée
pour encoder les fichiers WMA.
• I
l peut se produire un léger retard au
début de la lecture de fichiers audio
intégrés avec des données d’image, ou de
fichiers audio stockés sur un périphérique
USB avec de nombreuses hiérarchies de
dossiers.
• L
es textes russes à afficher sur cet
appareil doivent être codés avec l’un des
jeux de caractères suivants :
–Unicode (UTF-8, UTF-16)
–Jeu de caractères autre que l’Unicode
q
ui est utilisé dans un environnement
Windows et est paramétré sur Russe
dans le réglage multilingue
PRÉCAUTION
• Pioneer ne garantit pas la compatibilité
avec tous les périphériques de stockage
de masse USB et décline toute
responsabilité en cas de perte de
données sur des lecteurs multimédia,
smartphones ou autres périphériques
lors de l’utilisation de ce produit.
• Ne laissez pas de disques ou un
périphérique de stockage USB dans un
lieu où les températures sont élevées.
Fichiers WMA
Compatibilité avec
l’audio compressé
Extension de fichier .wma
Fichiers MP3
Fichiers WAV
• Il est impossible de connecter les formats
de fichier WAV via MTP.
Disque
• Quelle que soit la durée du silence entre
les morceaux de l’enregistrement
original, la lecture des disques d’audio
compressé s’effectue avec une courte
pause entre les morceaux.
Périphérique USB
• Il peut se produire un léger retard au
début de la lecture de fichiers audio
stockés sur un périphérique de stockage
USB avec de nombreuses hiérarchies de
dossiers.
Cet appareil prend en charge uniquement les
modèles d’iPod suivants. Les versions du logiciel
iPod prises en charge sont indiquées ci-dessous.
Les versions antérieures ne sont pas prises en
charge.
Made for (Conçu pour)
–iPod touch (de la 1e à la 6e génération)
–iPod classic
– iPod avec vidéo
Débit binaire 48 kbps à 320 kbps
(CBR), 48 kbps à
384 kbps (VBR)
Fréquence
d’échantillonnage
32 kHz, 44,1 kHz,
48 kHz
Windows Media™
Audio Professional,
Lossless, Voice/DRM
Stream/Stream avec
vidéo
Incompatible
Extension de fichier .mp3
Débit binaire 8 kbps à 320 kbps
(CBR), VBR
Fréquence
d’échantillonnage
8 kHz à 48 kHz
(32 kHz, 44,1 kHz,
48 kHz pour
accentuation)
Version étiquette ID3
compatible
1.0, 1.1, 2.2, 2.3, 2.4 (la
version 2.x de
l’étiquette ID3 a
priorité sur la
version 1.x.)
Liste de lecture M3u Incompatible
MP3i (MP3 interactif),
mp3 PRO
Incompatible
Extension de fichier .wav
Bits de quantification 8 et 16 (LPCM), 4 (MS
ADPCM)
Fréquence
d’échantillonnage
16 kHz à 48 kHz
(LPCM), 22,05 kHz et
44,1 kHz (MS ADPCM)
Hiérarchie des
dossiers lisibles
Jusqu’à huit niveaux
(dans la pratique, la
hiérarchie compte
moins de
deux niveaux)
Dossiers lisibles Jusqu’à 99
Fichiers lisibles Jusqu’à 999
Système de fichiers ISO 9660 Niveaux 1 et
2, Romeo, Joliet
Lecture multi-session Compatible
Transfert des données
en écriture par paquet
Incompatible
Hiérarchie des
dossiers lisibles
Jusqu’à huit niveaux
(dans la pratique, la
hiérarchie compte
moins de
deux niveaux)
Dossiers lisibles Jusqu’à 500
Fichiers lisibles Jusqu’à 15 000
Lecture des fichiers
protégés par des
droits d’auteur
Incompatible
Périphérique USB
partitionné
Seule la première
partition est lisible.
Compatibilité avec un
iPod

19Fr
Français
–iPod nano (de la 1e à la 7e génération)
–iPhone 6s
– iPhone 6s Plus
–iPhone 6
– iPhone 6 Plus
–iPhone 5s
–iPhone 5c
–iPhone 5
–iPhone 4s
–iPhone 4
–iPhone 3GS
–iPhone 3G
–iPhone
• L
es opérations peuvent varier selon la
génération et/ou la version de l’iPod.
• L
es utilisateurs d’un iPod avec
connecteur Lightning doivent utiliser le
câble Lightning vers USB (fourni avec
l’iPod).
• L
es utilisateurs d’un iPod avec
connecteur pour station d’accueil
doivent utiliser le câble CD-IU51. Pour
plus de détails, consultez votre
revendeur.
• P
our en savoir plus sur la compatibilité
fichier/format, reportez-vous aux
manuels de l’iPod.
• L
ivre audio, podcast : compatible
PRÉCAUTION
Pioneer n’accepte aucune responsabilité
en cas de perte de données sur l’iPod,
même si la perte de données se produit
pendant l’utilisation de cet appareil.
Sur cet appareil, l’utilisateur ne peut pas
affecter de numéros de dossier ni spécifier
les séquences de lecture. La séquence de
fichier audio dépend du périphérique
raccordé.
Notez que la lecture des fichiers masqués
d’un pér
iphérique USB est impossible.
Exemple de hiérarchie
Séquence des fichiers
audio
Tableau des caractères
cyrilliques
Dossier
Fichier d’audio
compressé
à : séquence de lecture
01 à 05 : numéro de dossier
D : Affichage C : Caractère
iTunes
Apple et iTunes sont des marques
commerciales d’Apple Inc., enregistrées
aux États-Unis et dans d’autres pays.
WMA
Windows Media est une marque déposée
ou un
e marque commerciale de Microsoft
Corporation aux États-Unis et/ou dans
d’autres pays.
Ce produit intègre une technologie
dé
tenue par Microsoft Corporation, qui ne
peut être utilisée et distribuée que sous
licence de Microsoft Licensing, Inc.
iPod & iPhone
iPhone, iPod, iPod classic, iPod nano et
iP
od touch sont des marques
commerciales d’Apple Inc., déposées aux
États-Unis et dans d’autres pays.
Lightning est une marque commerciale
d’
Apple Inc.
Les accessoires électroniques portant la
m
ention « Made for iPod » et « Made for
iPhone » ont été conçus pour fonctionner
respectivement avec un iPod ou un iPhone
et sont certifiés conformes aux exigences
d’Apple par le fabricant. Apple n’est pas
responsable du fonctionnement de cet
appareil ou de sa compatibilité avec les
normes réglementaires et de sécurité.
Veuillez noter que l’emploi de cet
accessoire avec un iPod ou un iPhone peut
affecter les performances sans fil.
Android & Google Play
Android, Google Play et le logo Google
P
lay sont des marques commerciales de
Google Inc.
MIXTRAX
MIXTRAX est une marque commerciale de
PIO
NEER CORPORATION.
Spotify®
SPOTIFY et le logo Spotify font partie des
m
arques déposées de Spotify AB. Des
appareils numériques mobiles compatibles
et un abonnement premium sont
nécessaires, le cas échéant, consultez le
site https://www.spotify.com.
Généralités
Tension d’alimentation : 14,4 V CC (10,8 V à
15,1 V admissible)
Mise à la masse : pôle négatif
Consommation maximale : 10,0 A
Dimensions (L × H × P) :
DIN
Châssis : 178 mm × 50 mm × 165 mm
Panneau avant : 188 mm × 58 mm ×
17 mm
D
Châssis : 178 mm × 50 mm × 165 mm
Panneau avant : 170 mm × 46 mm ×
17 mm
Poids : 1 kg
Audio
Puissance de sortie maximale :
• 50 W × 4 canaux/4 Ω (sans haut-
par
leur d’extrêmes graves)
• 50 W × 2 canaux/4 Ω + 70 W ×
1 canal/2 Ω (pour haut-parleur
d’extrêmes graves)
Puissance de sortie continue :
22 W × 4 (50 Hz à 15 000 Hz, THD 5 %,
i
mpédance de charge 4 Ω, avec les
de
ux canaux entraînés)
Impédance de charge : 4 Ω (4 Ω à 8 Ω
ad
missible)
Niveau de sortie maximum de la sortie
pr
éamp. : 2,0 V
Correction physiologique : +10 dB
(100 Hz), +6,5 dB (10 kHz)
(volume : –30 dB)
Droits d’auteur et
marques commerciales
Caractéristiques
techniques

20Fr
Égaliseur (égaliseur graphique à
5 bandes) :
Fréquence : 80 Hz/250 Hz/800 Hz/
2,5 kHz/8 kHz
Plage d’égalisation : ±12 dB (par pas
de
2 dB)
Haut-parleur d’extrêmes graves (mono) :
Fréquence : 50 Hz/63 Hz/80 Hz/
100 Hz/125 Hz/160 Hz/200 Hz
Pente : –12 dB/oct, –24 dB/oct
Gain : +6 dB à –24 dB
Phase : normale/inverse
Lecteur de CD
Système : Compact Disc Audio
Disques utilisables : disques compacts
Rapport signal/bruit : 94 dB (1 kHz) (réseau
IE
C-A)
Nombre de canaux : 2 (stéréo)
Format de décodage MP3 : MPEG-1 et 2
Co
uche Audio 3
Format de décodage WMA : Ver. 7, 7.1, 8, 9,
10,
11, 12 (2 canaux audio) (Windows
Me
dia Player)
Format de signal WAV : Linear PCM et MS
AD
PCM (non compressé)
USB
Spécification standard USB : USB 2.0 vitesse
pleine
Alimentation maximale : 1,5 A
Protocole USB :
MSC (Mass Storage Class)
MTP (Media Transfer Protocol)
AOA (Android Open Accessory) 2.0
Système de fichiers : FAT12, FAT16, FAT32
Format de décodage MP3 : MPEG-1 et 2
Co
uche Audio 3
Format de décodage WMA : Ver. 7, 7.1, 8, 9,
10,
11, 12 (2 canaux audio) (Windows
Me
dia Player)
Format de signal WAV : Linear PCM et MS
AD
PCM (non compressé)
Syntoniseur FM
Gamme de fréquences : 87,5 MHz à
108,0 MHz
Sensibilité utile : 11 dBf (1,0 μV/75 Ω,
mon
o, S/B : 30 dB)
Rapport signal/bruit : 72 dB (réseau IEC-A)
Syntoniseur MW
Gamme de fréquences : 531 kHz à
1 602 kHz
Sensibilité utile : 25 μV (S/B : 20 dB)
Rapport signal/bruit : 62 dB (réseau IEC-A)
Syntoniseur LW
Gamme de fréquences : 153 kHz à 281 kHz
Sensibilité utile : 28 μV (S/B : 20 dB)
Rapport signal/bruit : 62 dB (réseau IEC-A)
REMARQUE
Les caractéristiques et la présentation
peuvent être modifiées sans avis préalable.

21Fr
Français

2It
Prima di iniziare....................................................................................... 2
Operazioni preliminari........................................................................... 3
Radio.......................................................................................................... 5
CD/USB/iPod/AUX................................................................................... 6
Modalità app............................................................................................ 7
Spotify®..................................................................................................... 8
Utilizzare Pioneer ARC APP ................................................................... 9
Impostazioni .......................................................................................... 10
Impostazioni FUNCTION..................................................................... 10
Impostazioni AUDIO ............................................................................ 11
Impostazioni SYSTEM .......................................................................... 11
Impostazioni ILLUMINATION.............................................................. 12
Impostazioni MIXTRAX........................................................................ 13
Connessioni/Installazione................................................................... 13
Informazioni aggiuntive ...................................................................... 16
Informazioni sul manuale:
• Nelle seguenti istruzioni, una memoria USB o un lettore audio USB viene denominato
“dispositivo USB”.
• In questo manuale, iPod e iPhone vengono denominati “iPod”.
Sommario
Grazie per avere acquistato questo prodotto PIONEER
Per garantire un uso corretto, leggere attentamente questo manuale prima di utilizzare il prodotto. È
fondamentale leggere e osservare le indicazioni di AVVERTENZA e AT T E N Z I ON E del manuale. Tenere
il manuale in un luogo sicuro e accessibile per future consultazioni.
Gli utenti privati dei Paesi membri dell’Unione Europea, della Svizzera e della Norvegia possono portare
i propri prodotti elettronici gratuitamente presso i centri di raccolta specificati o presso il rivenditore al
dettaglio (se l’acquisto è stato eseguito presso un rivenditore di questo tipo).
Per i Paesi non specificati in precedenza, contattare le autorità locali per informazioni sul corretto
metodo di smaltimento.
In questo modo si garantirà che il prodotto smaltito subisca i processi di trattamento, recupero e
riciclaggio necessari per prevenire i potenziali effetti negativi per l’ambiente e la salute umana.
AVVERTENZA
• Non cercare di installare o effettuare interventi di manutenzione sul prodotto. L’installazione o
l’esecuzione di interventi di manutenzione sul prodotto da parte di persone sprovviste delle
qualifiche o dell’esperienza richiesta per apparecchi elettronici e accessori automobilistici
potrebbe risultare pericolosa ed esporre a rischi di scosse elettriche e di altre situazioni
pericolose.
• Non cercare di utilizzare i comandi dell’unità durante la guida. Prima di utilizzare i comandi dell’unità,
parcheggiare il veicolo in un luogo sicuro.
ATTENZIONE
• Non lasciare che l’unità entri in contatto con umidità e/o liquidi. Possono verificarsi scosse elettriche.
Inoltre, in seguito al contatto con i liquidi possono verificarsi danni all’unità, fumo e surriscaldamento.
• Mantenere sempre il volume basso abbastanza da poter udire i suoni provenienti dall’esterno.
• Il CarStereo-Pass Pioneer può essere usato solo in Germania.
• Questo prodotto è stato sottoposto a valutazione in condizioni climatiche temperate e tropicali in
conformità alla norma IEC 60065: Apparecchi audio, video ed apparecchi elettronici similari - Requisiti
di sicurezza.
Prima di iniziare
Se si vuole eliminare questo prodotto, non gettarlo insieme ai rifiuti domestici. Esiste un sistema di
raccolta differenziata in conformità alle leggi che richiedono appositi trattamenti, recupero e riciclo.

3It
Italiano
In caso di problemi
Nel caso che questa unità non funzioni correttamente, contattare il rivenditore o il Centro di assistenza
autorizzato PIONEER più vicino.
DEH-X2900UI
Telecomando opzionale
Il telecomando CD-R320 viene venduto separatamente.
ATTENZIONE
Questo apparecchio è un prodotto al laser di Classe 1 secondo le norme di sicurezza dei prodotti al
laser IEC 60825-1:2007.
Operazioni preliminari
Funzionamento di base
Pulsante di sgancio
Finestra di visualizzazione
Ghiera M.C. (multi-controllo)
BAND/
DISP (display)
SRC (sorgente)/OFF
Porta USB
(espulsione)
Jack di ingresso AUX (jack stereo da 3,5 mm)
Fessura di caricamento del disco
Operazioni frequenti
* Quando l’interlinea blu/bianca dell’unità è collegata al terminale di controllo relè dell’antenna
automatica del veicolo, l’antenna del veicolo si estende quando la sorgente dell’unità è attivata. Per
ritirare l’antenna, disattivare la sorgente.
Indicazione del display
Scopo Operazione
Accendere l’alimentazione* Premere SR
C/OFF per accendere
l’alimentazione.
Tenere premuto SR
C/OFF per spegnere
l’alimentazione.
Regolare il volume Ruotare la ghiera M.
C..
Selezionare una sorgente Premere ripetutamente SRC
/OFF.
Cambiare la visualizzazione delle
info
rmazioni
Premere ripetutamente DISP.
Tornare alla precedente visualizzazione/
el
enco
Premere BAND/ .
Tornare alla visualizzazione normale dal
me
nu
Tenere premuto BAND/ .
Indicazione
Descrizione
Viene visualizzata quando esiste un livello inferiore del menu o della
car
tella.
Viene visualizzato quando si preme il pulsante .
Viene visualizzata quando è impostata la funzione di sintonizzazione
a
utomatica locale (pagina 10).
Viene visualizzata quando viene ricevuto un programma sul traffico.
Viene visualizzata quando è impostata la funzione TA (annunci sul traffico)
(pagina 10).
Viene visualizzata quando è impostata la funzione sound retriever
(pagina 11).
Viene visualizzata quando è impostata la riproduzione casuale/shuffle.
Viene visualizzata quando è impostata la ripetizione della riproduzione.
Viene visualizzata quando è impostata la f
unzione di controllo dell’iPod
(pagina 7).

4It
Staccare il frontalino per evitarne il furto. Rimuovere tutti i cavi e i dispositivi collegati al
fr
ontalino e spegnere l’unità prima di staccarla.
Importante
• Evitare di sottoporre il frontalino a forti urti.
• Mantenere il frontalino lontano da luce diretta del sole e alte temperature.
• Conservare sempre il frontalino staccato in una custodia protettiva o in borsa.
Quando, dopo l’installazione, si imposta l’interruttore di accensione su ON, sul display
viene visualizzato [SET UP :YES].
1 Premere la ghiera M.C..
Il menu di configurazione scompare dopo 30 secondi di attività. Se si desidera
e
ffettuare l’impostazione in seguito, ruotare la ghiera M.C. per selezionare [NO],
quindi premere per confermare.
2 Ruotare la ghiera M.C. per selezionare le opzioni, quindi premere per confermare.
Per passare all’opzione di menu successiva, confermare la selezione.
3 [QUIT :YES] viene visualizzato quando sono state effettuate tutte le impostazioni.
Rimozione del frontalino
Menu di configurazione
Voce del menu Descrizione
LANGUAGE Selezionare la lingua per visualizzare le informazioni di testo di
un f
ile audio compresso.
[ENG](Inglese),
[РУС
](Russo),
[TUR](Turco)
CLOCK SET Impostare l’orologio.
FM STEP Selezionare il passo di frequenza FM tra 100 kHz o 50 kHz.
[100], [50]
Stacca Attacca
Per tornare alla prima voce del menu di configurazione, ruotare la ghiera M.C. per
selezionare [QUIT :NO], quindi premere per confermare.
4 Premere la ghiera M.C. per confermare le impostazioni.
NOTE
• È possibile annullare l’impostazione del menu premendo SRC/OFF.
• Tali impostazioni possono essere effettuate in qualsiasi momento dalle impostazioni SYSTEM
(pagina 11) e dalle impostazioni INITIAL (pagina 4).
1 Premere la ghiera M.C. per visualizzare il menu principale.
2 Ruotare la ghiera M.C. per selezionare [SYSTEM], quindi premere per confermare.
3 Ruotare la ghiera M.C. per selezionare [DEMO OFF], quindi premere per
confermare.
4 Ruotare la ghiera M.C. per selezionare [YES], quindi premere per confermare.
1 Tenere premuto SRC/OFF finché l’unità si spegne.
2 Tenere premuto SRC/OFF per visualizzare il menu principale.
3 Ruotare la ghiera M.C. per selezionare [INITIAL], quindi premere per confermare.
4 Ruotare la ghiera M.C. per selezionare un’opzione, quindi premere per
confermare.
Annullamento della visualizzazione di
dimostrazione (DEMO OFF)
Impostazioni INITIAL
Voce del menu Descrizione
FM STEP Selezionare il passo di frequenza FM tra 100 kHz o 50 kHz.
[100], [50]

5It
Italiano
Le frequenze del tuner sull’unità sono distribuite per l’utilizzo in Europa occidentale,
Asia, Medio oriente, Africa e Oceania. L’utilizzo in altre aree può provocare una scarsa
ricezione. La funzione RDS (radio data system) funziona solo nelle aree di trasmissione
dei segnali RDS per le stazioni FM.
1 Premere SRC/OFF per selezionare [RADIO].
2 Premere BAND/ per selezionare la banda [FM1], [FM2], [FM3], [MW] o [LW].
3 Premere un pulsante numerico (da 1/ a 6/ ).
TIP
I pulsanti / possono anche essere utilizzati per selezionare una stazione preimpostata
quando [SEEK] è impostato su [PCH] nelle impostazioni FUNCTION (pagina 10).
SP-P/O MODE Selezionare in presenza di un altoparlante full-range collegato
alle interlinee di uscita dell’altoparlante posteriore e di un
subwoofer collegato a un’uscita RCA.
[REAR/SUB.W]
[SUB.W/SUB.W] Selezionare in presenza di un subwoofer passivo collegato
d
irettamente alle interlinee di uscita dell’altoparlante posteriore
e di un subwoofer collegato all’uscita RCA.
[REAR/REAR] Selezionare in presenza di altoparlanti full-range collegati alle
int
erlinee di uscita dell’altoparlante posteriore e all’uscita RCA.
In presenza di un altoparlante full-range collegato alle interlinee
di uscita dell’altoparlante posteriore e l’uscita RCA non viene
utilizzata, è possibile selezionare [REAR/SUB.W] o [REAR/REAR].
S/W UPDATE Selezionare per confermare le più recenti informazioni di
sist
ema sull’unità.
[SYSTEM INFO]
[SYSTEM UPDATE] Selezionare per aggiornare l’unità al software più recente e
avviare le impostazioni dell’unità. Per dettagli sul software più
recente e sull’aggiornamento, visitare il nostro sito Web.
SYSTEM RESET Selezionare [YES] per avviare le impostazioni dell’unità. L'unità
verrà riavviata automaticamente.
(Alcune impostazioni possono essere mantenute anche dopo la
r
eimpostazione dell’unità.)
[YES], [NO]
Radio
Ricezione delle stazioni preimpostate
Voce del menu Descrizione
Le sei stazioni più forti vengono memorizzate sui pulsanti numerici (da 1/ a 6/ ).
1 Una volta selezionata la banda, premere la ghiera M.C. per visualizzare il menu
principale.
2 Ruotare la ghiera M.C. per selezionare [FUNCTION], quindi premere per
confermare.
3 Ruotare la ghiera M.C. per selezionare [BSM], quindi premere per confermare.
Per cercare manualmente una stazione
1 Una volta selezionata la banda, premere / per selezionare una stazione.
Tenere premuto / , quindi rilasciarlo per cercare una stazione disponibile. La
scansione termina quando l’unità riceve una stazione. Per annullare la
sin
tonizzazione, premere / .
NOTA
[SEEK] deve essere impostato su [MAN] nelle impostazioni FUNCTION (pagina 10).
Per memorizzare manualmente le stazioni
1 Durante la ricezione della stazione che si desidera memorizzare, tenere premuto
uno dei pulsanti numerici (da 1/ a 6/ ) fino a quando non smette di
lampeggiare.
L’unità cerca una stazione per informazione PTY (tipo di programma).
1 Premere durante la ricezione FM.
2 Ruotare la ghiera M.C. per selezionare un tipo di programma da [NEWS/INFO],
[POPULAR], [CLASSICS] o [OTHERS].
3 Premere la ghiera M.C..
L’unità inizia a cercare una stazione. Una volta trovata, viene visualizzato il relativo
n
ome di servizio del programma.
NOTE
• Per annullare la ricerca, premere la ghiera M.C..
• Il programma di alcune stazioni può differire da quanto indicato dal PTY trasmesso.
• Se non viene trasmessa alcuna stazione per il tipo di programma che si sta cercando, viene
visualizzato [NOT FOUND] per circa due secondi, quindi il tuner torna alla stazione originale.
Best stations memory (BSM)
Utilizzo delle funzioni PTY

6It
Scollegare le cuffie dal dispositiv
o prima di collegarlo all’unità.
CD
1 Inserire un disco nella fessura di caricamento con l’etichetta rivolta verso l’alto.
Per espellere un disco, per prima cosa interrompere la riproduzione, quindi premere .
Dispositivi USB (incluso Android™)/iPod
1 Aprire il coperchio della porta USB.
2 Collegare il dispositivo USB/iPod utilizzando un cavo idoneo.
NOTA
Per passare automaticamente alla sorgente [USB] quando un dispositivo USB/iPod è collegato all’unità,
impostare [USB AUTO] su [ON] nelle impostazioni SYSTEM (pagina 12).
ATTENZIONE
Utilizzare un cavo Pioneer USB opzionale (CD-U50E) per collegare il dispositivo USB in quanto ogni
dispositivo collegato direttamente all’unità sporge e può risultare pericoloso.
Prima di rimuovere il dispositivo, interrompere la riproduzione.
Connessioni AOA
Per dettagli sulla connessione AOA, consultare pagina 9.
Connessione MTP
Un dispositivo installato con Android OS 4.0 o versioni successive, può essere collegato all’unità via
MTP, utilizzando il cavo in dotazione con il dispositivo. Tuttavia, in base al dispositivo connesso e al
numero di file nel dispositivo, i brani/file audio potrebbero non essere riprodotti via MTP. Si prega di
notare che la connessione MTP non è compatibile con i formati file WAV e non può essere utilizzata con
la funzione MIXTRAX.
NOTA
Se si utilizza una connessione MTP, impostare [ANDROID WIRED] su [MEMORY] nelle impostazioni
SYSTEM (pagina 12).
AUX
1 Inserire la spina mini stereo nel jack di ingresso AUX.
2 Premere SRC/OFF per selezionare [AUX] come sorgente.
CD/USB/iPod/AUX
Riproduzione
NOTA
Se [AUX] è impostato su [OFF] nelle impostazioni SYSTEM, non è possibile selezionare [AUX] come
sorgente (pagina 12).
È possibile effettuare diverse regolazioni nelle impostazioni FUNCTION (pagina 10).
Si prega di notare che le seguenti operazioni non funzionano su un dispositivo AUX. Per
u
tilizzare un dispositivo AUX, utilizzare il dispositivo stesso.
Operazioni
Scopo Operazione
Selezionare una cartella/album*1 Premere 1/ o 2/ .
Selezionare una traccia/brano (capitolo) Premere o .
Avanzamento o avvolgimento rapido*3 Tenere premuto o .
Cercare un file da un elenco 1 Premere per visualizzare l’elenco.
2 Ruo
tare la ghiera M.C. per selezionare il
nome file desiderato (cartella) o la
categoria, quindi premere per
confermare.
3 Ruo
tare la ghiera M.C. per selezionare il
file desiderato, quindi premere per
confermare.
Viene avviata la riproduzione.
Visualizzare un elenco di file nella cartella/
cat
egoria selezionata*1
Premere la ghiera M.C. quando viene
selezionata una cartella/categoria.
Riprodurre un brano nella cartella/categoria
sel
ezionata*1
Tenere premuto la ghiera M.C. quando
viene selezionata una cartella/categoria.
Ricerca alfabetica (solo iPod) 1 P
remere per visualizzare l’elenco.
2 Ruo
tare la ghiera M.C. per selezionare
l’elenco di categoria desiderato, quindi
premere per inserire la modalità di
ricerca alfabetica.
(È possibile inserire la modalità di ricerca
alf
abetica M.C. anche ruotando la ghiera
due volte).
3 Ruo
tare la ghiera M.C. per selezionare
una lettera, quindi premere per
visualizzare l’elenco alfabetico.
Per annullare la ricerca alfabetica, premere
BA
ND/ .
Ripetere la riproduzione Premere 6/ .
Riproduzione casuale/shuffle Premere 5/ .

7It
Italiano
*1 Solo file audio compressi
*2 Questa funzione è disabilitata quando USB è selezionato come sorgente e la funzione MIXTRAX è
attiva.
*3 Quando si utilizza la funzione di avanzamento o avvolgimento rapido durante la riproduzione di un
file VBR, la durata della riproduzione indicata potrebbe non essere corretta.
Modalità di riproduzione collegamento
È possibile accedere ai brani in base ad artista, album o genere attualmente in
riproduzione.
1 Mentre si ascolta un brano, tenere premuto per inserire la modalità di
riproduzione collegamento.
2 Ruotare la ghiera M.C. per selezionare la modalità ([ARTIST], [ALBUM], [GENRE]),
quindi premere per confermare.
Il brano/album selezionato verrà riprodot
to dopo il brano attualmente in
riproduzione.
NOTA
È possibile annullare il brano/album selezionato se si utilizzano funzioni diverse dalla modalità di
ricerca collegamento (ad esempio avanzamento e riavvolgimento rapidi).
Riproduzione shuffle di tutti i brani (solo
iPod)
Tenere premuto 5/ .
Sospendere/riprendere la riproduzione Premere 4/PA
USE.
Sound retriever*1*2 Premere 3/S.
Rtrv.
[1]: efficace per velocità di compressione
bas
se
[2]: efficace per velocità di compressione
alt
e
Tornare alla cartella principale (solo CD/
US
B)*1
Tenere premuto .
Passare da audio compresso a CD-DA (solo
CD
)
Premere BAND/ .
Cambiare le unità nel dispositivo USB
(dispositivi che supportano solo il
protocollo di classe dispositivo di
archiviazione di massa USB)
Premere BAN
D/ .
Funzioni utili per iPod
Scopo Operazione
Controllo iPod
È possibile controllare l’unità mediante un iPod connesso.
I seguenti modelli di iPod non sono compatibili con questa funzione.
–iPod nano 1° generazione, iPod con video
1 Premere BAND/ durante la riproduzione, quindi selezionare la modalità di
controllo.
[CO
NTROL iPod]: la funzione iPod dell’unità può essere utilizzata dall’iPod collegato.
[CO
NTROL AUDIO]: la funzione iPod dell’unità può essere utilizzata solo mediante i
pulsanti dell’unità. In questa modalità, l’iPod collegato non può essere acceso o
spento.
NOTE
• Il passaggio dalla modalità di controllo a [CONTROL iPod] sospende la riproduzione del brano.
Utilizzare l’iPod collegato per riprendere la riproduzione.
• Le seguenti operazioni continuano a essere accessibili dall’unità anche se la modalità di controllo è
impostata su [CONTROL iPod].
– Pausa, avanzamento/riavvolgimento rapido, selezione brano/capitolo
• Il volume può essere regolato solo dall’unità.
La funzione MIXTRAX crea un mix ininterrotto della vostra libreria musicale,
accompagnato da effetti luminosi. Per dettagli sulle impostazioni di MIXTRAX,
consultare pagina 13.
NOTE
• Questa funzione non è compatibile con un dispositivo Android collegato via MTP.
• Quando si seleziona USB come sorgente e la funzione MIXTRAX è in uso, la funzione sound retriever è
disattivata.
• In base al file/brano, gli effetti sonori potrebbero non essere disponibili.
• Disattivare la funzione MIXTRAX nel caso in cui gli effetti luminosi interferiscano con la guida.
1 Premere MIX per attivare/disattivare MIXTRAX.
È possibile ascoltare un’applicazione su un iPhone attrav
erso l’unità. In alcuni casi, è
possibile controllare un’applicazione utilizzando l’unità.
Per dettagli sui dispositivi compatibili, visitare il nostro sito Web.
Informazioni su MIXTRAX (solo USB/iPod)
Modalità app

8It
Importante
L’utilizzo di applicazioni di terze parti potrebbe comportare o richiedere di fornire informazioni
personali di identificazione attraverso la creazione di un account utente o in altro modo e, per alcune
applicazioni, attraverso l’invio di dati di geolocalizzazione.
TUTTE LE APPLICAZIONI DI TERZE PARTI SONO DI RESPONSABILITÀ ESCLUSIVA DEI RISPETTIVI
FORNITORI, INCLUSI MA NON LIMITATAMENTE ALLA GESTIONE E SICUREZZA DEI DATI UTENTE E ALLE
PROCEDURE DI TUTELA DELLA PRIVACY. ACCEDENDO AD APPLICAZIONI DI TERZE PARTI, SI ACCETTA DI
ESAMINARE I TERMINI DEL SERVIZIO E I CRITERI SULLA PRIVACY DEI FORNITORI. SE NON SI ACCETTANO
I TERMINI O I CRITERI DI QUALSIASI FORNITORE O NON SI ACCONSENTE, DOVE SIA APPLICABILE,
ALL’USO DEI DATI DI GEOLOCALIZZAZIONE, NON UTILIZZARE TALI APPLICAZIONI DI TERZE PARTI.
Per gli utenti iPhone
Questa funzione è compatibile con iPhone e iPod touch installati con iOS 5.0 o versioni successive.
NOTA
PIONEER NON È RESPONSABILE DELLE APP DI TERZE PARTI O DEI RELATIVI CONTENUTI, SENZA ALCUNA
LIMITAZIONE ALL’ACCURATEZZA O ALLA COMPLETEZZA. IL CONTENUTO E LA FUNZIONALITÀ DI TALI
APPLICAZIONI SONO DI SOLA RESPONSABILITÀ DEL FORNITORE DELLA APP.
1 Connettere l’unità con un dispositivo mobile.
• iP
hone via USB (pagina 6)
2 Premere SRC/OFF per selezionare [APP].
3 Utilizzare il dispositivo mobile per avviare l’applicazione.
Operazioni di base
È possibile effettuare diverse regolazioni nelle impostazioni FUNCTION (pagina 10).
(DEH-X2900UI è compatibile solo con Spotify installato su iPhone.)
Spotify è un servizio di distribuzione musicale in streaming non affiliato con Pioneer.
M
aggiori informazioni sono disponibili alla pagina http://www.spotify.com.
L’applicazione Spotify è disponibile per gli smartphone compatibili. Per informazioni
ag
giornate sulla compatibilità, visitare la pagina https://support.spotify.com/.
Riproduzione di un’applicazione attraverso l’unità
Scopo Operazione
Selezionare una traccia Premere o .
Avanzamento o avvolgimento rapido Tenere premuto o .
Sospendere/riprendere la riproduzione Premere BA
ND/ .
Spotify®
Per utilizzare Spotify durante la guida, per prima cosa scaricare la app Spotify
sull’iPhone. È possibile effettuare il download da iTunes App Store. Scegliere un account
gratuito o Premium a pagamento, all’interno della app o su spotify.com. Un account
Premium offre molte più funzioni, come ad esempio l’ascolto offline.
Importante
• Questo prodotto include il software Spotify soggetto a licenze di terze parti consultabili qui:
www.spotify.com/connect/third-party-licenses.
• Per informazioni sui Paesi e sulle regioni in cui è possibile utilizzare Spotify, dare un’occhiata a https://
www.spotify.com/us/select-your-country/.
Prima dell’uso, aggiornare il firmware dell’applicazione Spotify alla versione più recente.
1 Connettere l’unità con un dispositivo mobile.
• iP
hone via USB (pagina 6)
2 Premere SRC/OFF per selezionare [SPOTIFY].
3 Avviare l’applicazione Spotify sul dispositivo mobile e avviare la riproduzione.
Operazioni di base
È possibile effettuare diverse regolazioni nelle impostazioni FUNCTION (pagina 10).
NOTA
Le operazioni disponibili variano in base al tipo di contenuti (brano/album/artista/playlist/radio) che si
desidera riprodurre.
Ascoltare Spotify
Scopo Operazione
Saltare una traccia Premere o .
Cercare un brano da un elenco 1 Premere (elenco) per visualizzare
l’elenco.
2 Ruo
tare la ghiera M.C. per selezionare la
categoria desiderata, quindi premere per
confermare.
3 Ruo
tare la ghiera M.C. per selezionare il
file desiderato, quindi premere per
confermare.
La riproduzione si avvia.
Sospendere/riprendere la riproduzione Premere 4/
PAUSE.
Pollice in su (solo per la radio) Premere 1/ .
Pollice in giù (solo per la radio) Premere 2/ .
Riproduzione casuale (solo per brano/
album
/artista/playlist)
Premere 5/ .

9It
Italiano
NOTA
Alcune funzioni di Spotify potrebbero non funzionare dall’unità.
È possibile utilizzare l’unità dall’applicazione Pioneer ARC APP installata su un
dispositivo iPhone/Android. In alcuni casi, è possibile controllare aspetti
dell’applicazione utilizzando l’unità, quali selezione della sorgente, pausa e così via.
Per dettagli sulle operazioni disponibili nell’applicazione, consultare la sezione di
sup
porto dell’applicazione.
AVVERTENZA
Non tentare di utilizzare l’applicazione durante la guida. Assicurarsi di uscire dalla strada e
parcheggiare il veicolo in un luogo sicuro prima di tentare di utilizzare i comandi sull’applicazione.
Per gli utenti iPhone
Questa funzione è compatibile con iPhone (iPhone 5 o successivo) e iPod touch installati
con i
OS 8.0 o versioni successive.
È possibile scaricare Pioneer ARC APP da iTunes App Store.
Per gli utenti di dispositivi Android
Questa funzione è compatibile con i dispositivi con Android OS 4.1 o versioni successive
i
nstallate e inoltre supportano AOA (Android Open Accessory) 2.0.
È possibile scaricare Pioneer ARC APP su Google Play™.
NOTA
Alcuni dispositivi Android collegati via AOA 2.0 potrebbero non funzionare correttamente o emettere
suoni a causa del proprio software, indipendentemente dalla versione del sistema operativo.
Riproduzione ripetuta (solo per brano/
album/artista/playlist)
Premere 6/ .
Avviare un canale radio in base al brano
at
tualmente riprodotto.
1 Tenere premuto (elenco) per avviare
una radio.
2 P
remere la ghiera M.C..
• Q
uesta funzione potrebbe non essere
disponibile in base al brano selezionato.
Memorizzare le informazioni sul brano
at
tualmente riprodotto.
Rimuovere le informazioni memorizzate.
1 Tenere premuto 3/S.Rtrv.
Viene visualizzato [SAVE]/[UNSAVE].
2 P
remere la ghiera M.C..
Utilizzare Pioneer ARC APP
Scopo Operazione
1 Connettere l’unità con un dispositivo mobile.
• D
ispositivo iPhone/Android via USB (pagina 6)
Se si seleziona la connessione USB per iPhone, passare al punto 6.
2 Premere la ghiera M.C. per visualizzare il menu principale.
3 Ruotare la ghiera M.C. per selezionare [SYSTEM], quindi premere per confermare.
4 Ruotare la ghiera M.C. per selezionare [ANDROID WIRED], quindi premere per
confermare.
5 Ruotare la ghiera M.C. per selezionare [APP CONTROL] per un dispositivo Android
connesso via USB.
Se si seleziona [ON] in [P.APP AUTO ON] (pagina 12), Pioneer ARC APP sul dispositivo
Android si avvia automaticamente e tutti i passaggi sono stati completati.
NOTA
Se Pioneer ARC APP non è ancora stato installato sul dispositivo Android, viene visualizzato un
messaggio che richiede di installare l’applicazione sul dispositivo Android. Selezionare [OFF] in
[P.APP AUTO ON] per annullare il messaggio (pagina 12).
6 Premere SRC/OFF per selezionare qualsiasi sorgente.
7 Avviare Pioneer ARC APP sul dispositivo mobile.
NOTA
Per l’iPhone, è anche possibile avviare l’applicazione tenendo premuta la ghiera M.C..
1 Premere SRC/OFF per selezionare [ANDROID].
Operazioni di base
Effettuare una connessione con Pioneer ARC APP
Ascoltare musica su Android
Scopo Operazione
Selezionare una traccia Premere o .
Avanzamento o avvolgimento rapido Tenere premuto o .
Sospendere/riprendere la riproduzione Premere 4/PA
USE.

10It
È possibile regolare diverse impostazioni nel menu principale.
1 Premere la ghiera M.C. per visualizzare il menu principale.
2 Ruotare la ghiera M.C. per selezionare una delle seguenti categorie, quindi
premere per confermare.
• Impostazioni FUNCTION (pagina 10)
• Impostazioni AUDIO (pagina 11)
• Impostazioni SYSTEM (pagina 11)
• Impostazioni ILLUMINATION (pagina 12)
• Impostazioni MIXTRAX (pagina 13)
3 Ruotare la ghiera M.C. per selezionare le opzioni, quindi premere per confermare.
Le voci del menu variano a seconda della sorgente.
Sound retriever Premere 3/S.Rtrv.
[1]: efficace per velocità di compressione
b
asse
[2]: efficace per velocità di compressione
alt
e
Impostazioni
Impostazioni FUNCTION
Voce del menu Descrizione
FM SETTING
[TALK], [STANDARD], [MUSIC] Corrispondenza del livello della qualità audio
co
n le condizioni del segnale di trasmissione del
segnale di banda FM. (Disponibile solo con
banda FM selezionata.)
BSM
Memorizzare automaticamente le sei stazioni più
fo
rti sui pulsanti numerici (da 1/ a 6/ ).
Scopo Operazione
REGIONAL
[ON], [OFF] Limitare la ricezione ai programmi regionali
specifici quando è selezionato AF (ricerca
frequenze alternative). (Disponibile solo con
banda FM selezionata.)
LOCAL
FM: [O
FF], [LV1], [LV2], [LV3], [LV4]
MW/LW: [O
FF], [LV1], [LV2]
Limitare la stazione di sintonizzazione in base
all
a potenza del segnale.
TA
[ON], [OFF] Ricevere le informazioni correnti sul traffico, se
d
isponibili. (Disponibile solo con banda FM
selezionata.)
AF
[ON], [OFF] Consentire all’unità di risintonizzarsi su una
f
requenza differente fornendo la medesima
stazione. (Disponibile solo con banda FM
selezionata.)
NEWS
[ON], [OFF] Interrompere la sorgente attualmente
s
elezionata con nuovi programmi. (Disponibile
solo con banda FM selezionata.)
SEEK
[MAN], [PCH] Assegnare i pulsanti o per cercare le
stazioni una a una (sintonizzazione manuale) o
sel
ezionare una stazione dai canali preimpostati.
SAVE
Memorizzare le informazioni sul brano
at
tualmente riprodotto nell’elenco musicale in
Spotify.
UNSAVE
Rimuovere le informazioni memorizzate in
[SAVE].
Voce del menu Descrizione

11It
Italiano
S.RTRV
[1] (efficace per velocità di
compressione basse),
[2] (efficace per velocità di
co
mpressione alte),
[OFF]
Potenziare l’audio compresso e ripristinare il
su
ono completo.
Non disponibile quando:
• U
SB è selezionato come sorgente e la funzione
MIXTRAX è impostata su On.
• V
iene riprodotto CD-DA/CD-TEXT.
AUDIO BOOK
[FASTER], [NORMAL], [SLOWER] Modificare la velocità di riproduzione. (Non
di
sponibile quando [CONTROL iPod] è
selezionato nella modalità di controllo.)
PAU SE
Sospendere o riprendere la riproduzione.
Impostazioni AUDIO
Voce del menu Descrizione
FADER*1
Regolare il bilanciamento dell’altoparlante
anteriore e posteriore.
BALANCE
Regolare il bilanciamento dell’altoparlante
d
estro e sinistro.
EQ SETTING
[SUPER BASS], [POWERFUL],
[NA
TURAL], [VOCAL], [CUSTOM1],
[CUSTOM2], [FLAT]
Selezionare una banda
eq
ualizzatore e il livello per
un’ulteriore personalizzazione.
Banda equalizzatore: [80
HZ],
[250HZ], [800HZ], [2.5KHZ],
[8KHZ]
Livello equalizzatore: d
a [+6] a
[–6]
Selezionare o personalizzare la curva di
eq
ualizzazione.
[CUSTOM1] può essere importato
se
paratamente per ogni sorgente. Tuttavia,
ognuna delle seguenti combinazioni viene
impostata automaticamente sulla stessa
impostazione.
• U
SB, iPod, ANDROID, SPOTIFY e APP (iPhone)
[CUSTOM2] è un’impostazione condivisa
ut
ilizzata per tutte le origini.
Voce del menu Descrizione
USB
iPod
iPod
*1 Non disponibile quando [SUB.W/SUB.W] è selezionato in [SP-P/O MODE] nelle impostazioni INITIAL
(pagina 5).
*2 Non disponibile quando [REAR/REAR] è selezionato in [SP-P/O MODE] nelle impostazioni INITIAL
(pagina 5).
*3 Non disponibile quando [OFF] è selezionato in [SUB.W].
È anche possibile accedere a questi menu quando l’unità è spenta.
LOUDNESS
[OFF], [LOW], [MID], [HI] Compensare il suono chiaro a basso volume.
SUB.W*2
[NOR], [REV], [OFF] Selezionare la fase del subwoofer.
SUB.W CTRL*2
*3
Frequenza di cutoff: [
50HZ],
[63HZ], [80HZ], [100HZ], [125HZ],
[160HZ], [200HZ]
Livello di output: da [
–24] a [+6]
Livello di pendenza: [
–12], [–24]
Il subwoofer emette solo le frequenze inferiori a
q
uelle presenti nell’intervallo selezionato.
BASS BOOST
Da [0] a [+6] Selezionare il livello di incremento dei bassi.
HPF SETTING
Frequenza di cutoff: [O
FF],
[50HZ], [63HZ], [80HZ], [100HZ],
[125HZ], [160HZ], [200HZ]
Livello di pendenza: [
–12], [–24]
Dagli altoparlanti vengono emesse solo le
f
requenze superiori al cutoff del filtro passa alto
(HPF).
SLA
Da [+4] a [–4] Regolare il volume del livello per ogni sorgente,
f
atta eccezione per FM.
Ognuna delle seguenti combinazioni viene
i
mpostata automaticamente sulla stessa
impostazione.
• U
SB, iPod, ANDROID, SPOTIFY e APP (iPhone)
Impostazioni SYSTEM
Voce del menu Descrizione
LANGUAGE
[ENG](Inglese), [РУС](Russo),
[TUR](Turco)
Selezionare la lingua per visualizzare le
informazioni di testo di un file audio compresso.
Voce del menu Descrizione

12It
* [PW SAVE] è annullato se la batteria del veicolo è scollegata e dovrà essere riattivato una volta
ricollegata la batteria. Quando [PW SAVE] è disattivato, in base ai metodi di connessione, l’unità può
continuare a ricavare energia dalla batteria se l’interruttore di accensione del veicolo non dispone di
una posizione ACC (accessorio).
CLOCK SET
Impostare l’orologio (pagina 4).
12H/24H
[12H], [24H] Selezionare la notazione temporale.
AUTO PI
[ON], [OFF] Cercare una stazione differente con la medesima
pr
ogrammazione, anche se si utilizza una
stazione preimpostata.
AUX
[ON], [OFF] Impostare su [ON] quando si utilizza un
d
ispositivo ausiliario connesso all’unità.
SPOTIFY
[ON], [OFF] Impostare su [ON] quando si utilizza la funzione
Spo
tify.
PW SAVE*
[ON], [OFF] Ridurre il consumo della batteria.
L’attivazione della sorgente è consentita solo se
qu
esta funzione è attiva.
ANDROID WIRED
[MEMORY], [APP CONTROL] Selezionare il metodo di connessione idoneo in
bas
e al dispositivo Android.
P. A P P AU TO O N
[ON], [OFF]
Selezionare [ON] per avviare automaticamente
Pioneer ARC APP quando all’unità è collegato un
dispositivo Android mediante AOA. (Non
disponibile quando [MEMORY] è selezionato in
[ANDROID WIRED].)
USB AUTO
[ON], [OFF] Selezionare [ON] per passare automaticamente
all
a sorgente [USB] quando un dispositivo USB/
iPod è collegato all’unità.
Selezionare [OFF] quando un dispositivo USB/
iPod è stato collegato all’unità solo per essere
caricato.
Voce del menu Descrizione
Impostazioni ILLUMINATION
Voce del menu Descrizione
COLOUR
[KEY COLOUR], [DISP COLOUR],
[BOTH COLOUR]
Selezionare il colore per i tasti/display dell’unità
tra i 12 colori preimpostati, [SCAN] o [CUSTOM]*.
• [
SCAN]: consente di percorrere
automaticamente una vasta gamma di colori.
• [C
USTOM]*:
1 T
enere premuta la ghiera M.C. finché non
viene visualizzata l’impostazione del colore.
2 I
mpostare il colore primario (R (rosso)/G
(verde)/B (blu)) e il livello di luminosità (da [0]
a [60]).
Non è possibile selezionare un livello inferiore
a 10 per
tutti e tre R (rosso), G (verde), B (blu)
contemporaneamente.
È inoltre possibile personalizzare i colori
pr
eimpostati. Selezionare uno dei colori
preimpostati, quindi tenere premuta la ghiera
M.C. finché non viene visualizzato il display di
impostazione del colore.
* L’impostazione CUSTOM è disponibile solo per [KEY
COLOUR] e [DISP COLOUR].
DIM SETTING
[SYNC ILLUMI], [SYNC CLOCK],
[MA
NUAL]
Cambiare la luminosità del display.
BRIGHTNESS
[KEY], [DISP] Selezionare la luminosità per i tasti/display
d
ell’unità da [1] a [10].
La gamma di impostazioni disponibili varia in
b
ase a [DIM SETTING].
ILLUMI FX
[ON], [OFF] È possibile visualizzare l’effetto di illuminazione
q
uando viene inserito/espulso un CD.
L’effetto di illuminazione si attiva quando
l
’alimentazione ACC viene accesa/spenta,
indipendentemente dall’impostazione.

13It
Italiano
Impostazioni MIXTRAX
Voce del menu Descrizione
SHORT PLAYBCK
[1.0 MIN], [1.5 MIN], [2.0 MIN],
[2.5 MIN], [3.0 MIN], [OFF]
Selezionare la lunghezza del tempo di
riproduzione.
FLASH AREA
[KEY/DISPLAY], [KEY], [OFF] Selezionare l’area per l’effetto luminoso.
Quando è selezionato [OFF], il colore
im
postato nelle impostazioni ILLUMINATION
(pagina 12) viene utilizzato come colore del
display.
FLASH PATTERN
Da [SOUND LEVEL 1] a [SOUND
LEV
EL 6]
Cambiare l’effetto luminoso in base al livello
audio e dei bassi.
L’effetto lampeggiante cambia in base al livello
aud
io.
Da [LOW PASS 1] a [LOW PASS 6] L’effetto lampeggiante cambia in base al livello
d
ei bassi.
[RANDOM1] L’effetto lampeggiante cambia casualmente in
b
ase alla modalità di livello audio e alla
modalità di passa basso.
[RANDOM2] L’effetto lampeggiante cambia casualmente in
b
ase alla modalità del livello audio.
[RANDOM3] L’effetto lampeggiante cambia casualmente in
bas
e alla modalità di passa basso.
DISPLAY FX
[ON], [OFF] Impostare gli effetti speciali MIXTRAX su on/
of
f.
CUT IN FX
[ON], [OFF] Attivare/disattivare gli effetti audio MIXTRAX
me
ntre si cambiano manualmente le tracce.
Importante
• Durante l’installazione dell’unità su un
veicolo privo di posizione ACC
(accessorio) sull’interruttore di
accensione, il mancato collegamento del
cavo rosso al terminale che rileva il
funzionamento del tasto di accensione
può provocare il consumo della batteria.
• Se questa unità venisse, utilizzata in
condizioni diverse dalle seguenti,
potrebbero verificarsi incendi o
malfunzionamenti.
–Veicoli con batteria da 12 volt e messa a
te
rra negativa.
–Quando l’uscita dell’altoparlante viene
ut
ilizzata da 4 canali, usare altoparlanti
oltre 50 W (potenza in entrata massima)
e tra 4 Ω e 8 Ω (valore di impedenza).
Per questa unità, non utilizzare
altoparlanti con valore di impedenza
compreso tra 1 Ω e 3 Ω.
–Quando l’uscita dell’altoparlante
po
steriore viene utilizzata da un
subwoofer da 2 Ω, usare altoparlanti
oltre 70 W (potenza in entrata massima).
* Fare riferimento alle connessioni per
un
metodo di connessione.
• P
er evitare cortocircuiti, surriscaldamento
e malfunzionamenti, assicurarsi di
attenersi alla seguente procedura.
–Scollegare il terminale negativo della
bat
teria prima dell’installazione.
–Fissare il cablaggio con fascette o nastro
ad
esivo. Avvolgere nastro adesivo
intorno cablaggio che entra in contatto
con le parti metalliche per proteggere i
cavi.
– Posizionare tutti i cavi lontano dalle
par
ti in movimento, come ad esempio
la leva del cambio e le guide dei sedili.
– Posizionare tutti i cavi lontano da luoghi
ca
ldi, come ad esempio vicino alle
bocchette del riscaldamento.
– Non collegare il cavo giallo alla batteria
f
acendolo passare attraverso il foro del
vano motore.
–Coprire tutti i connettori per cavi
sco
llegati con nastro isolante.
– Non accorciare i cavi.
– Non tagliare mai l’isolamento del cavo
d
i alimentazione dell’unità al fine di
condividere la potenza con altri
dispositivi. La capacità corrente del cavo
è limitata.
– Utilizzare un fusibile dal valore
pr
escritto.
– Non collegare il cavo negativo
d
ell’altoparlante direttamente alla
messa a terra.
–Non unire mai i cavi negativi di diversi
al
toparlanti.
• Q
uando l’unità è accesa, i segnali di
controllo vengono inviati attraverso il
cavo blu/bianco. Collegare il cavo al
telecomando di sistema di un
amplificatore di potenza esterno o al
terminale di controllo relè dell’antenna
automatica del veicolo (max. 300 mA 12 V
CC). Se il veicolo è dotato di un’antenna
da vetro, collegarla al terminale di
alimentazione del booster.
• No
n collegare il cavo blu/bianco al
terminale di alimentazione di un
amplificatore di potenza esterno. Inoltre,
non collegarlo al terminale di
alimentazione dell’antenna automatica.
Questa operazione può provocare
Connessioni/Installazione
Connessioni
Posizione ACC
Senza posizione ACC

14It
l’esaurimento della batteria o un
malfunzionamento.
• I
l cavo nero è la messa a terra. I cavi di
messa a terra per l’unità e per altre
apparecchiature (in particolare prodotti
ad alta corrente, come ad esempio
amplificatori di potenza) devono essere
collegati separatamente. In caso
contrario, un distacco accidentale può
provocare incendi o malfunzionamenti.
• I
l simbolo grafico situato sul
prodotto significa corrente continua.
L’ u n i t à
Ingresso cavo di alimentazione
AUX IN posteriore | [Tel In] (jack stereo
da 3,5 mm)
Ingresso posteriore dedicato
co
mpatibile solo con i kit telefonici
Bluetooth hands-free esterni. Il segnale
audio viene disattivato durante una
telefonata quando il filo giallo/nero è
collegato/attivato.
Uscita posteriore o uscita subwoofer
Uscita anteriore
Ingresso antenna
Fusibile (10 A)
Ingresso remoto cablato
È possibile collegare un adattatore per il
t
elecomando cablato (venduto
separatamente).
Cavo di alimentazione
All’ingresso del cavo di alimentazione
In base al veicolo, la funzione di e
può variare. In questo caso, assicurarsi
di
collegare a e a .
Giallo
Backup (o accessorio)
Giallo
Effettuare la connessione a un terminale
d
i alimentazione costante pari a 12 V.
Rosso
Accessorio (o backup)
Rosso
Effettuare la connessione a un terminale
co
ntrollato dall’interruttore di
accensione (12 V CC).
Collegare tra loro le interlinee del
medesimo colore.
Nero (messa a terra telaio)
Blu/bianco
La posizione del pin del connettore ISO
var
ia in base al tipo di veicolo. Collegare
e quando il Pin 5 è di tipo
controllo antenna. In un altro tipo di
v
eicolo, non collegare mai e .
Blu/bianco
Effettuare il collegamento al terminale
di controllo del sistema
dell’amplificatore di potenza (max. 300
mA 12 V CC).
Blu/bianco
Effettuare il collegamento al terminale
d
i controllo relè dell’antenna
automatica (max. 300 mA 12 V CC).
Interlinee altoparlante
Bianco: anteriore sinistra
Bianco/nero: anteriore sinistra
Grigio: anteriore destra
Grigio/nero: anteriore destra
Verde: posteriore sinistra o
subwoofer
Verde/nero: posteriore sinistra o
subwoofer
Viola: posteriore destra o subwoofer
Viola/nero: posteriore destra o
subwoofer
Arancione/bianco
Effettuare il collegamento al segnale di
ill
uminazione del veicolo.
Connettore ISO
In alcuni veicoli, il connettore ISO può
es
sere diviso in due. In questo caso,
assicurarsi di collegare entrambi i
connettori.
NOTE
• Cambiare il menu iniziale dell’unità. Fare
riferimento a [SP-P/O MODE]
(pagina 5).
L’uscita subwoofer dell’unità è
m
onofonica.
• Q
uando si utilizza un subwoofer da 2 Ω,
assicurarsi di collegare il subwoofer alle
interlinee viola e viola/nero dell’unità.
Non collegare nulla alle interlinee verde e
verde/nero.
Amplificatore di potenza
(venduto separatamente)
Eseguire questi collegamenti quando si
utilizza un amplificatore opzionale.
Telecomando di sistema
Effettuare la connessione al cavo blu/
bianco
.
Amplificatore di potenza (venduto
separatamente)
Effettuare la connessione con cavi RCA
(venduti separatamente)
All’uscita anteriore
Altoparlante anteriore
All’uscita posteriore o all’uscita
subwoofer
Altoparlante posteriore o subwoofer
Importante
• Verificare tutti i collegamenti e i sistemi
prima dell’installazione finale.
• Non utilizzare parti non autorizzate, in
quanto possono provocare
malfunzionamenti.
• S
e l’installazione richiede la foratura o
altre modifiche del veicolo, consultare il
rivenditore.
• No
n installare l’unità se:
–può interferire con il funzionamento dei
ve
icolo.
–può causare lesioni ai passeggeri in
cas
o di arresto improvviso.
• I
n caso di surriscaldamento, il laser
semiconduttore può subire danni.
Installare l’unità lontano da luoghi caldi,
come ad esempio vicino alle bocchette
del riscaldamento.
Installazione

15It
Italiano
• È possibile ottenere
prestazioni ottimali quando
l’unità viene installata con
un’angolazione inferiore ai
60°.
• Durante l’installazione, per garantire la
corretta dispersione del calore quando si
utilizza l’unità, accertarsi di lasciare
ampio spazio dietro il pannello posteriore
e avvolgere i cavi allentati in modo che
non blocchino le aperture.
Installazione a montaggio DIN
1 Inserire il riduttore di montaggio in
dotazione nel cruscotto.
2 Fissare il riduttore di montaggio
utilizzando un cacciavite per piegare
le linguette metalliche (90°) in
posizione.
Cruscotto
Riduttore di montaggio
• Assicu
rarsi che l’unità sia installata
saldamente in posizione.
Un’installazione instabile può
provocare salti o malfunzionamenti.
Quando non si utilizza il riduttore di
montaggio in dotazione
1 Determinare la posizione corretta in
cui i fori della forcella e il lato
dell’unità corrispondono.
2 Serrare le due viti su ogni lato.
Vite filettata (5 mm × 9 mm, non in
dotazione con il prodotto)
Forcella montante
Cruscotto o console
Rimozione dell’unità (installata con
il riduttore di montaggio in
dotazione)
1 Rimuovere l’anello di rivestimento.
Anello di rivestimento
Linguetta a tacche
• I
l rilascio del pannello anteriore
consente un più facile accesso
all’anello di rivestimento.
• Q
uando l’anello di rivestimento viene
nuovamente collegato, puntare il lato
con la linguetta a tacche rivolta verso il
basso.
2 Inserire le chiavi di estrazione in
dotazione in entrambi i lati dell’unità
finché non scattano in posizione.
3 Estrarre l’unità dal cruscotto.
Lasciare
ampio spazio
5 cm
5 cm

16It
Il display torna automaticamente alla
visualizzazione normale.
→ Non è stata effettuata alcuna
operazione per circa 30 secondi.
–Eseguire un’operazione.
Il range della riproduzione ripetuta
cambia in maniera inattesa.
→ In base al range di riproduzione
ripetuta, il range selezionato può
cambiare quando viene selezionata
un’altra cartella o traccia o durante
l’avanzamento/riavvolgimento rapido.
– Selezionare nuovamente il range di
r
iproduzione ripetuta.
Una cartella secondaria non viene
riprodotta.
→ Non è possibile riprodurre le cartelle
secondarie quando è selezionato [FLD]
(ripetizione cartella).
– Selezionare un altro range di
r
iproduzione ripetuta.
Il suono è intermittente.
→ Si sta utilizzando un dispositivo, come
ad esempio un cellulare, che può
provocare interferenze audio.
– Allontanare dall’unità i dispositivi
el
ettronici che possono causare
interferenze.
Comuni
AMP ERROR
→ Unità non funzionante o collegamento
altoparlante errato.
→ Il
circuito protettivo è attivato.
– Verificare il collegamento degli
al
toparlanti.
– Posizionare l’interruttore di
accen
sione su OFF e nuovamente su
ON. Se il messaggio rimane, contattare
il rivenditore o una Stazione di servizio
Pioneer per ottenere assistenza.
NO XXXX (NO TITLE, a esempio)
→ Non sono presenti informazioni di testo
incorporate.
– Accendere il display o riprodurre un
al
tro file o traccia.
Lettore CD
ERROR-07, 11, 12, 17, 30
→ Il disco è sporco.
– Pulire il disco.
→ I
l disco è graffiato.
– Sostituire il disco.
ERROR-07, 10, 11, 12, 15, 17, 30, A0
→ Si è verificato un errore elettrico e
meccanico.
– Posizionare l’interruttore di
accen
sione su OFF e nuovamente su
ON, oppure passare a una sorgente
differente, quindi tornare la lettore CD.
ERROR-15
→ Il disco inserito è vuoto.
– Sostituire il disco.
ERROR-23
→ Formato CD non supportato.
– Sostituire il disco.
FORMAT READ
→ Può verificarsi un ritardo tra l’inizio della
riproduzione e il momento in cui si
inizia a udire il suono.
– Attendere che il messaggio scompaia
e as
coltare l’audio.
Informazioni aggiuntive
Risoluzione dei problemi
Messaggi di errore
NO AUDIO
→ Il disco inserito non contiene file
riproducibili.
– Sostituire il disco.
SKIPPED
→ Il dico inserito contiene file protetti da
DRM.
– I file protetti vengono ignorati.
PROTECT
→ Tutti i file del disco inserito hanno il
DRM incorporato.
– Sostituire il disco.
Dispositivo USB/iPod
FORMAT READ
→ Può verificarsi un ritardo tra l’inizio della
riproduzione e il momento in cui si
inizia a udire il suono.
– Attendere che il messaggio scompaia
e as
coltare l’audio.
NO AUDIO
→ Non sono presenti brani.
– Trasferire i file audio al dispositivo USB
ed
effettuare la connessione.
→ I
l dispositivo USB connesso ha la
sicurezza abilitata.
– Attenersi alle istruzioni del dispositivo
U
SB per disattivare la sicurezza.
SKIPPED
→ Il dispositivo USB connesso contiene file
protetti da DRM.
– I file protetti vengono ignorati.
PROTECT
→ Tutti i file sul dispositivo USB connesso
hanno il DRM incorporato.
– Sostituire il dispositivo USB.
N/A USB
→ Il dispositivo USB connesso non è
supportato dall’unità.
– Scollegare il dispositivo e sostituirlo
co
n un dispositivo USB compatibile.
HUB ERROR
→ Il dispositivo USB connesso mediante
un hub USB non è supportato dall’unità.
– Collegare il dispositivo USB
dir
ettamente all’unità utilizzando un
cavo USB.
CHECK USB
→ Il connettore USB o il cavo USB ha
subito un corto circuito.
– Verificare che il connettore USB o il
c
avo USB non siano impigliati in
qualcosa o danneggiati.
→ I
l dispositivo USB collegato consuma
più della quantità di energia massima
consentita.
– Scollegare il dispositivo USB e non
ut
ilizzarlo. Posizionare l’interruttore di
accensione su OFF e nuovamente su
ACC o ON. Collegare solo dispositivi
USB conformi.
→ L
’iPod funziona correttamente ma non è
in carica.
– Assicurarsi che il cavo di collegamento
de
ll’iPod non sia accorciato (ad
esempio, non sia impigliato in oggetti
metallici). Una volta verificato,
posizionare l’interruttore di
accensione su OFF e nuovamente su
ON, oppure scollegare e ricollegare
l’iPod.
ERROR-19
→ Comunicazione non riuscita.
– Effettuare una delle seguenti
oper
azioni, quindi tornare alla
sorgente USB.
• P
osizionare l’interruttore di
accensione su OFF e nuovamente su
ON.
• S
collegare il dispositivo USB.
• P
assare a una sorgente diversa.
→ E
rrore iPod.
– Scollegare il cavo dall’iPod. Una volta
v
isualizzato il menu principale

17It
Italiano
dell’iPod, ricollegare e reimpostare
l’iPod.
ERROR-23
→ Il dispositivo USB non è formattato
correttamente.
– Formattare il dispositivo USB con
FAT
12, FAT16 o FAT32.
ERROR-16
→ La versione firmware dell’iPod è
obsoleta.
– Aggiornare la versione iPod.
→ E
rrore iPod.
– Scollegare il cavo dall’iPod. Una volta
v
isualizzato il menu principale
dell’iPod, ricollegare e reimpostare
l’iPod.
STOP
→ Nell’elenco corrente non sono presenti
brani.
– Selezionare un elenco che contenga
de
i brani.
NOT FOUND
→ Nessun brano correlato.
– Trasferire i brani all’iPod.
App
START UP APP
→ L’applicazione non è ancora in
esecuzione.
– Utilizzare il dispositivo mobile per
a
vviare l’applicazione.
Spotify
CHECK APP
→ Connessione all’applicazione Spotify
non riuscita.
– Attenersi alle istruzioni visualizzate
su
llo schermo.
Dischi e lettori
• Utilizzare solo dischi che riportano uno
dei due loghi riportati di seguito.
• Utilizzare dischi da 12 cm.
• Ut
ilizzare solo dischi circolari
convenzionali.
• C
on questa unità non è possibile
utilizzare i seguenti tipi di disco:
–DualDiscs
– Dischi da 8 cm: il tentativo di utilizzare
ta
li dischi con un adattatore può
provocare il malfunzionamento
dell’unità.
– Dischi dalla forma non convenzionale
– Dischi diversi da CD
– Dischi danneggiati, inclusi dischi rotti,
sc
heggiati o deformati
– Dischi CD-R/RW non finalizzati
• No
n scrivere o non applicare prodotti
chimici sulla superficie dei dischi.
• P
er pulire un CD, utilizzare un panno
morbido dal centro verso l’esterno.
• L
a condensa può compromettere
temporaneamente le prestazioni del
lettore. Lasciare riposare per circa un’ora a
una temperatura più calda. Inoltre, pulire
tutti i dischi umidi con un panno
morbido.
• Qua
ndo si utilizzano dischi che possono
essere stampati su superfici adesive,
controllare le istruzioni e le avvertenze
dei dischi. In base al disco, l’inserimento e
l’espulsione potrebbe non essere
possibile. L’utilizzo di simili dischi può
danneggiare l’apparecchiatura.
• N
on attaccare sul disco etichette
disponibili in commercio o altri materiali.
Linee guida di gestione
–I dischi possono deformarsi rendendo il
disco non riproducibile.
–Le etichette possono staccarsi durante
la riproduzione e impedire l’espulsione
dei dischi, provocando danni
all’apparecchiatura.
Dispositivo di archiviazione
USB
• Le connessioni via hub USB non sono
supportate.
• F
issare saldamente il dispositivo di
archiviazione USB prima di guidare. Non
lasciar cadere il dispositivo di
archiviazione USB sul pavimento, in
quanto potrebbe incastrarsi sotto il
pedale del freno o dell’acceleratore.
• I
n base al dispositivo di archiviazione
USB, potrebbero verificarsi i seguenti
problemi.
–Le operazioni possono variare.
–Il dispositivo di archiviazione potrebbe
no
n essere riconosciuto.
–I file potrebbero non essere riprodotti
co
rrettamente.
–Il dispositivo può causare interferenze
a
udio durante l’ascolto della radio.
iPod
• Non lasciare l’iPod in luoghi con
temperature elevate.
• F
issare saldamente l’iPod durante la
guida. Non lasciar cadere l’iPod sul
pavimento, in quanto potrebbe
incastrarsi sotto il pedale del freno o
dell’acceleratore.
• L
e impostazioni dell’iPod, come ad
esempio equalizzatore e ripetizione della
riproduzione, cambiano
automaticamente quando l’iPod è
collegato all’unità. Una volta scollegato
l’iPod, tali impostazioni tornano alle
impostazioni originali.
• I
l testo incompatibile salvato sull’iPod
non verrà visualizzato dall’unità.
• P
er il nome cartella o per il nome file, è
possibile visualizzare solo i primi 32
caratteri (inclusa l’estensione del file).
• L
’unità potrebbe non funzionare
correttamente in base all’applicazione
utilizzata per decodificare i file WMA.
• P
otrebbe verificarsi un leggero ritardo
all’avvio della riproduzione dei file audio
incorporati con i dati immagine o dei file
audio memorizzati su un dispositivo USB
con numerose gerarchie di cartelle.
• I
l testo con caratteri russi da visualizzare
sull’unità deve essere codificato con uno
dei seguenti gruppi di caratteri:
–Unicode (UTF-8, UTF-16)
– Un gruppo di caratteri diverso da
U
nicode utilizzato in un ambiente
Windows e impostato su Russo
nell’impostazione multilingue
ATTENZIONE
• Pioneer non può garantire la
compatibilità con tutti i dispositivi di
archiviazione di massa USB e non si
assume alcuna responsabilità per
eventuali perdite di dati su lettori
multimediali, smartphone o altri
dispositivi durante l’utilizzo del prodotto.
• Non lasciare i dischi o un dispositivo di
archiviazione USB in luoghi soggetti a
temperature elevate.
File WMA
Compatibilità audio
compresso
Estensione file .wma
Velocità di
trasmissione
Da 48 kbps a 320 kbps
(CBR), da 48 kbps a
384 kbps (VBR)
Frequenza di
campionamento
32 kHz, 44,1 kHz, 48
kHz

18It
File MP3
File WAV
• I formati file WAV non possono essere
collegati via MTP.
Disco
• Indipendentemente dalla lunghezza
della sezione vuota tra i brani della
registrazione originale, i dischi con audio
compresso vengono riprodotti con una
breve pausa tra i brani.
Dispositivo USB
• Potrebbe verificarsi un leggero ritardo
all’avvio della riproduzione dei file audio
su un dispositivo di archiviazione USB
con numerose gerarchie di cartelle.
L’unità supporta solo i seguenti modelli di iPod.
Di seguito vengono indicate le versioni
supportate del software iPod. Le versioni
precedenti potrebbero non essere supportate.
Realizzato per
–iPod touch (dalla 1° alla 6° generazione)
–iPod classic
–iPod con video
–iPod nano (dalla 1° alla 7° generazione)
–iPhone 6s
– iPhone 6s Plus
–iPhone 6
–iPhone 6 Plus
–iPhone 5s
–iPhone 5c
–iPhone 5
–iPhone 4s
–iPhone 4
Windows Media™
Audio Professional,
Compressione dati
senza perdita, Voce/
Streaming DRM/
Streaming con video
Non compatibile
Estensione file .mp3
Velocità di
trasmissione
Da 8 kbps a 320 kbps
(CBR), VBR
Frequenza di
campionamento
Da 8 kHz a 48 kHz (32
kHz, 44,1 kHz, 48 kHz
per enfasi)
Versione tag ID3
compatibile
1.0, 1.1, 2.2, 2.3, 2.4 (la
versione tag ID3 2.x ha
la priorità sulla
versione 1.x.)
Playlist M3u Non compatibile
MP3i (MP3
interattivo), mp3 PRO
Non compatibile
Estensione file .wav
Bit di quantizzazione 8 e 16 (LPCM), 4
(MSADPCM)
Frequenza di
campionamento
Da 16 kHz a 48 kHz
(LPCM), 22,05 kHz e
44,1 kHz (MS ADPCM)
Gerarchia cartella
riproducibile
Fino a otto livelli (una
gerarchia pratica
presenta meno di due
livelli).
Cartelle riproducibili Fino a 99
File riproducibili Fino a 999
File system ISO 9660 livello 1 e 2,
Romeo, Joliet
Riproduzione a
sessione multipla
Compatibile
Trasferimento dati
scrittura a pacchetti
Non compatibile
Gerarchia cartella
riproducibile
Fino a otto livelli (una
gerarchia pratica
presenta meno di due
livelli).
Cartelle riproducibili Fino a 500
File riproducibili Fino a 15 000
Riproduzione di file
protetti da copyright
Non compatibile
Dispositivo USB
partizionato
È possibile riprodurre
solo la prima
partizione.
Compatibilità iPod
–iPhone 3GS
–iPhone 3G
–iPhone
• L
e operazioni possono variare in base alla
generazione e/o alla versione del
software dell’iPod.
• G
li utenti dell’iPod con Lightning
Connector devono utilizzare il cavo da
Lightning a USB (in dotazione con iPod).
• G
li utenti dell’iPod con Dock Connector
devono utilizzare CD-IU51. Per dettagli,
consultare il rivenditore.
• F
are riferimento ai manuali dell’iPod per
ottenere informazioni sulla compatibilità
di file/formato.
• A
udiolibri, Podcast: compatibile
ATTENZIONE
Pioneer declina ogni responsabilità per la
perdita di dati sull’iPod, anche se i dati
vengono persi durante l’utilizzo dell’unità.
Con questa unità, l’utente non può
assegnare numeri di cartella e specificare le
sequenze di riproduzione. La sequenza di
file audio dipende dal dispositivo
collegato.
Notare che i file nascosti in un dispositivo
U
SB non possono essere riprodotti.
Esempio di gerarchia
Sequenza di file audio
Grafico caratteri russi
Cartella
File audio
compresso
a : sequenza di riproduzione
Da 01 a 05: numero cartella
D: visualizzazione C: carattere

19It
Italiano
iTunes
Apple ed iTunes sono marchi di fabbrica di
Apple Inc., registrati negli Stati Uniti ed in
altri Paesi.
WMA
Windows Media è un marchio di fabbrica o
ma
rchio di fabbrica depositato della
Microsoft Corporation negli Stati Uniti ed
in altri paesi.
Questo prodotto include tecnologie di
pr
oprietà della Microsoft Corporation e
non è utilizzabile senza licenza della
Microsoft Licensing, Inc.
iPod & iPhone
iPhone, iPod, iPod classic, iPod nano, e iPod
t
ouch sono marchi di Apple Inc., registrati
negli Stati Uniti e in altri Paesi.
Lightning è un marchio di fabbrica di
Ap
ple Inc.
“Fatto per l'iPod” e “Fatto per l'iPhone”
s
ignificano che un accessorio elettronico è
stato progettato specificamente
rispettivamente per il collegamento con
l'iPod o l'iPhone ed è stato certificato dal
suo sviluppatore corrispondere agli
standard operativi stabiliti da Apple. Apple
non può essere considerata responsabile di
questo dispositivo o della sua osservanza
delle norme di sicurezza e dei vari
regolamenti. Tenere presente che l'uso di
questo accessorio con l'iPod o l'iPhone può
peggiorare le prestazioni wireless.
Android & Google Play
Android, Google Play e il logo Google Play
s
ono marchi di Google Inc.
MIXTRAX
MIXTRAX è un marchio registrato di
PIO
NEER CORPORATION.
Spotify®
SPOTIFY e il logo Spotify sono marchi
regis
trati di Spotify AB. Sono necessari
dispositivi digitali mobili compatibili e
abbonamento premium, ove disponibili,
vedere https://www.spotify.com.
Generali
Alimentazione: 14,4 V CC (da 10,8 V a 15,1 V
consentiti)
Sistema di messa a terra: tipo negativo
Consumo di corrente massimo: 10,0 A
Dimensioni (L × A × P):
DIN
Telaio: 178 mm × 50 mm × 165 mm
Testata: 188 mm × 58 mm × 17 mm
D
Telaio: 178 mm × 50 mm × 165 mm
Testata: 170 mm × 46 mm × 17 mm
Peso: 1 kg
Audio
Potenza massima:
• 50 W × 4 canali/4 Ω (senza
s
ubwoofer)
• 50 W × 2 canali/4 Ω + 70 W × 1
canale/2 Ω (per il subwoofer)
Potenza continua:
22 W × 4 (da 50 Hz a 15 000 Hz, 5 %
TH
D, 4 Ω di carico, entrambi i canali
pi
lotati)
Impedenza di carico: 4 Ω (da 4 Ω a 8 Ω
co
nsentiti)
Livello di output massimo tensione preout:
2,0 V
Profilo loudness: +10 dB (100 Hz), +6,5 dB
(10 k
Hz) (volume: –30 dB)
Equalizzatore (equalizzatore grafico a
5 bande):
Frequenza: 80 Hz/250 Hz/800 Hz/
2,5 kHz/8 kHz
Campo di equalizzazione: ±12 dB
(pas
so 2 dB)
Subwoofer (mono):
Frequenza: 50 Hz/63 Hz/80 Hz/
100 Hz/125 Hz/160 Hz/200 Hz
Pendenza: –12 dB/oct, –24 dB/oct
Copyright e marchio
Specifiche
Guadagno: da +6 dB a –24 dB
Fase: normale/inversa
Lettore CD
Sistema: sistema audio compact disc
Dischi utilizzabili: compact disc
Rapporto segnale-rumore: 94 dB (1 kHz)
(ret
e IEC-A)
Numero di canali: 2 (stereo)
Formato di decodifica MP3: MPEG-1 e 2
Au
dio Layer 3
Formato di decodifica WMA: ver. 7, 7.1, 8, 9,
10, 1
1, 12 (audio a 2 canali) (Windows
Media Player)
Formato segnale WAV: Linear PCM & MS
A
DPCM (non compresso)
USB
Specifica standard USB: USB 2.0 full speed
Alimentazione massima: 1,5 A
USB Protocollo:
MSC (Mass Storage Class)
MTP (Media Transfer Protocol)
AOA (Android Open Accessory) 2.0
File system: FAT12, FAT16, FAT32
Formato di decodifica MP3: MPEG-1 e 2
Au
dio Layer 3
Formato di decodifica WMA: ver. 7, 7.1, 8, 9,
10, 1
1, 12 (audio a 2 canali) (Windows
Media Player)
Formato segnale WAV: Linear PCM & MS
A
DPCM (non compresso)
Tuner FM
Intervallo di frequenza: da 87,5 MHz a
108,0 MHz
Sensibilità utilizzabile: 11 dBf (1,0 μV/75 Ω,
mon
o, S/N: 30 dB)
Rapporto segnale-rumore: 72 dB (rete
IEC-A)
Tuner MW
Intervallo di frequenza: da 531 kHz a
1 602 kHz
Sensibilità utilizzabile: 25 μV (S/N: 20 dB)
Rapporto segnale-rumore: 62 dB (rete
IEC-A)
Tuner LW
Intervallo di frequenza: da 153 kHz a
281 kHz
Sensibilità utilizzabile: 28 μV (S/N: 20 dB)
Rapporto segnale-rumore: 62 dB (rete
IEC-A)
NOTA
Caratteristiche tecniche e design sono
soggetti a eventuali modifiche senza
preavviso.

2Es
Antes de empezar ................................................................................... 2
Procedimientos iniciales........................................................................ 3
Radio.......................................................................................................... 5
CD/USB/iPod/AUX................................................................................... 6
Modo app ................................................................................................. 8
Spotify®..................................................................................................... 8
Uso de Pioneer ARC APP........................................................................ 9
Ajustes..................................................................................................... 10
Ajustes de FUNCTION.......................................................................... 10
Ajustes de AUDIO ................................................................................. 11
Ajustes de SYSTEM............................................................................... 12
Ajustes de ILLUMINATION................................................................... 12
Ajustes de MIXTRAX............................................................................. 13
Conexiones/instalación ....................................................................... 14
Información complementaria............................................................. 16
Acerca de este manual:
• En las siguientes instrucciones, la designación “dispositivo USB” hace referencia tanto
a dispositivos de memoria USB como a reproductores de audio USB.
• En este manual, la designación “iPod” hace referencia tanto a un iPod como a un
iPhone.
Índice
Muchas gracias por adquirir este producto PIONEER
Lea este manual con atención antes de usar este producto para garantizar un uso correcto. Es muy
importante que lea y respete los mensajes de ADVERTENCIA y PRECAUCIÓN de este manual. Guarde
el manual en un lugar seguro y de fácil acceso para poder consultarlo en el futuro.
Las viviendas privadas en los estados miembros de la UE, en Suiza y Noruega pueden devolver
gratuitamente sus productos electrónicos usados en los centros de recolección previstos o bien en una
tienda minorista (si adquieren un producto similar nuevo).
En el caso de los países que no se han mencionado en el párrafo anterior, póngase en contacto con las
autoridades locales a fin de conocer el método de eliminación correcto.
Al actuar siguiendo estas instrucciones, se asegurará de que el producto eliminado se someta a los
procesos de tratamiento, recuperación y reciclaje necesarios, evitando de este modo efectos
potencialmente negativos en el entorno y la salud humana.
ADVERTENCIA
• No trate de instalar o reparar este producto usted mismo. La instalación o la reparación de este
producto por parte de personas sin cualificación ni experiencia en equipos electrónicos y
accesorios para automóviles puede ser peligrosa y puede exponerle al riesgo de sufrir una
descarga eléctrica u otros peligros.
• No intente utilizar la unidad mientras esté conduciendo. Asegúrese de salir de la carretera y aparcar su
vehículo en un lugar seguro antes de intentar utilizar los controles del dispositivo.
PRECAUCIÓN
• No permita que la unidad entre en contacto con líquidos y/o humedad. De lo contrario, podría
producirse una descarga eléctrica. Asimismo, el contacto de esta unidad con líquidos podría provocar
averías, humo y sobrecalentamientos.
• Mantenga siempre el volumen lo suficientemente bajo como para poder escuchar los sonidos que
provienen del exterior.
• El CarStereo-Pass de Pioneer solo debe usarse en Alemania.
• Este producto se ha evaluado bajo condiciones moderadas y tropicales de acuerdo con los Requisitos
de seguridad , IEC 60065, para dispositivos de audio, vídeo y dispositivos electrónicos similares.
Antes de empezar
Si desea deshacerse de este producto, no lo mezcle con los residuos generales de su hogar. De
conformidad con la legislación vigente, existe un sistema de recogida distinto para los productos
electrónicos que requieren un procedimiento adecuado de tratamiento, recuperación y reciclado.

3Es
Español
En caso de problemas con el dispositivo
Si esta unidad no funcionase correctamente, póngase en contacto con su concesionario o con el centro
de servicio PIONEER autorizado más cercano.
DEH-X2900UI
Mando a distancia opcional
El mando a distancia CD-R320 se vende por separado.
PRECAUCIÓN
Este aparato es un producto de láser de clase 1 clasificado como tal en Seguridad de productos de
láser, IEC 60825-1:2007.
Procedimientos iniciales
Funcionamiento básico
PRODUCTO LASER CLASE 1
Botón de extracción
Visor
Selector M.C. (control múltiple)
BAND/
DISP (visualización)
SRC (fuente)/OFF
Puerto USB
(expulsar)
Toma de entrada AUX (toma estéreo de 3,5 mm)
Ranura de carga de discos
Operaciones más frecuentes
* Si el cable azul/blanco de esta unidad está conectado al terminal de control de relé de antena de
automóvil, la antena del vehículo se extiende cuando se activa la fuente de esta unidad. Para
replegar la antena, apague la fuente.
Indicaciones en pantalla
Extraiga el frontal para evitar robos. Desconecte todos los cables y dispositivos
conectados al frontal y apague la unidad antes de extraerlo.
Función Operación
Encendido* Pulse SRC
/OFF para encender la unidad.
Mantenga pulsado SRC
/OFF para apagar la
unidad.
Ajustar el volumen Gire el selector M.
C..
Seleccionar una fuente Pulse SRC
/OFF varias veces.
Cambiar la información mostrada Pulse DISP var
ias veces.
Volver a la visualización/lista anterior Pulse BA
ND/ .
Volver a la visualización normal desde el
menú pr
incipal
Mantenga pulsado BAND/ .
Indicación Descripción
Aparece si existe un nivel inferior para un menú o una carpeta.
Aparece al pulsar el botón .
Aparece si se ha ajustado la función de exploración local (página 10).
Aparece si se está recibiendo un programa de tráfico.
Aparece si se ha ajustado la función TA (anuncios de tráfico) (página 10).
Aparece si se ha ajustado la función de recuperación del sonido
(página 11).
Aparece si se ha seleccionado la reproducción aleatoria.
Aparece si se ha seleccionado la reproducción repetida.
Aparece si se ha ajustado la función de control de iPod (página 7).
Extracción del frontal

4Es
Importante
• Evite la exposición del frontal a impactos violentos.
• Guarde el frontal protegido de la luz solar directa y de las temperaturas elevadas.
• Guarde siempre el frontal desmontado en un estuche de protección o una bolsa.
Al situar el contacto en ON después de la instalación, aparece [SET UP :YES] en el visor.
1 Presione el selector M.C..
El menú de configuración desaparece después de 30 segundos sin realizar
op
eraciones. Si prefiere realizar la configuración en otro momento, gire el selector
M.C. para seleccionar [NO] y presione para confirmar.
2 Gire el selector M.C. para seleccionar las opciones y, a continuación, presione
para confirmar.
Para pasar a la siguiente opción del menú, tiene que confirmar la selección.
3 [QUIT :YES] aparece una vez realizados todos los ajustes.
Para volver a la primera opción del menú de configuración, gire el selector M.
C. para
seleccionar [QUIT :NO] y, a continuación, presione para confirmar.
4 Presione el selector M.C. para confirmar los ajustes.
Menú de configuración
Opción del menú Descripción
LANGUAGE Seleccione el idioma en el que debe aparecer la información de
te
xto de un archivo de audio comprimido.
[ENG](inglés),
[РУС
](ruso),
[TUR](turco)
CLOCK SET Ajuste el reloj.
FM STEP Seleccione los pasos de la sintonización FM entre 100 kHz y 50
kHz
.
[100], [50]
Extracción Colocación
NOTAS
• Puede cancelar la configuración de los menús pulsando SRC/OFF.
• La configuración puede realizarse en cualquier momento desde los ajustes de SYSTEM (página 12) y
los ajustes de INITIAL (página 4).
1 Presione el selector M.C. para que aparezca el menú principal.
2 Gire el selector M.C. para seleccionar [SYSTEM] y, a continuación, presione para
confirmar.
3 Gire el selector M.C. para seleccionar [DEMO OFF] y, a continuación, presione para
confirmar.
4 Gire el selector M.C. para seleccionar [YES] y, a continuación, presione para
confirmar.
1 Mantenga pulsado SRC/OFF hasta que se apague la unidad.
2 Mantenga pulsado SRC/OFF para mostrar el menú principal.
3 Gire el selector M.C. para seleccionar [INITIAL] y, a continuación, presione para
confirmar.
4 Gire el selector M.C. para seleccionar una opción y, a continuación, presione para
confirmar.
Cancelación de la pantalla de demostración (DEMO
OFF)
Ajustes de INITIAL
Opción del menú Descripción
FM STEP Seleccione los pasos de la sintonización FM entre 100 kHz y
50 kHz.
[100], [50]

5Es
Español
Las frecuencias del sintonizador de esta unidad están pensadas para su utilización en
Europa Occidental, Asia, Oriente Medio, África y Oceanía. Si se utiliza en otras áreas es
posible que la recepción no sea correcta. La función RDS (Radio Data System) solo
funciona en áreas en las que se emiten señales RDS correspondientes a emisoras FM.
1 Pulse SRC/OFF para seleccionar [RADIO].
2 Pulse BAND/ para seleccionar la banda entre las opciones [FM1], [FM2], [FM3],
[MW] o [LW].
3 Pulse un botón numérico (de 1/ a 6/ ).
SP-P/O MODE Seleccione esta opción si hay un altavoz de gama completa
conectado a los cables de salida de los altavoces traseros y un
subwoofer conectado a la salida RCA.
[REAR/SUB.W]
[SUB.W/SUB.W] Seleccione esta opción si hay un subwoofer pasivo conectado
d
irectamente a los cables de salida de los altavoces traseros y un
subwoofer conectado a la salida RCA.
[REAR/REAR] Seleccione esta opción si hay altavoces de gama completa
c
onectados a los cables de salida de los altavoces traseros y a la
salida RCA. Si hay un altavoz de gama completa conectado a los
cables de salida de los altavoces traseros y no se utiliza la salida
RCA, puede seleccionar [REAR/SUB.W] o [REAR/REAR].
S/W UPDATE Seleccione para confirmar la información más reciente del
sist
ema en la unidad.
[SYSTEM INFO]
[SYSTEM UPDATE] Seleccione esta opción para actualizar la unidad con el software
más reciente e inicializar los ajustes de la unidad. Para obtener
más información sobre el software y las actualizaciones más
recientes, visite nuestro sitio web.
SYSTEM RESET Seleccione [YES] para inicializar los ajustes de la unidad. La
u
nidad se reiniciará automáticamente.
(Algunos de los ajustes se mantendrán incluso después de
r
einiciar la unidad.)
[YES], [NO]
Radio
Recepción de emisoras memorizadas
Opción del menú Descripción
SUGERENCIA
Los botones / también pueden utilizarse para seleccionar una emisora memorizada cuando
[SEEK] está ajustado en [PCH] en los ajustes de FUNCTION (página 10).
Las seis emisoras con mejor señal se guardan en los botones numéricos (de 1/ a 6/
).
1 Después de seleccionar la banda, presione el selector M.C. para que aparezca el
menú principal.
2 Gire el selector M.C. para seleccionar [FUNCTION] y, a continuación, presione para
confirmar.
3 Gire el selector M.C. para seleccionar [BSM] y, a continuación, presione para
confirmar.
Para buscar una emisora manualmente
1 Después de seleccionar la banda, pulse / para seleccionar una emisora.
Mantenga pulsado / y suéltelo para buscar una emisora disponible. La
exploración se detiene cuando la unidad recibe una emisora. Para cancelar la
búsq
ueda local, pulse / .
NOTA
[SEEK] debe estar ajustado en [MAN] en los ajustes de FUNCTION (página 10).
Para almacenar las emisoras manualmente
1 Mientras recibe la emisora que desea guardar, mantenga pulsado uno de los
botones numéricos (de 1/ a 6/ ) hasta que deje de parpadear.
La unidad busca una emisora según la información de PTY (tipo de programa).
1 Pulse durante la recepción FM.
2 Gire el selector M.C. para seleccionar un tipo de programa entre las opciones
[NEWS/INFO], [POPULAR], [CLASSICS] y [OTHERS].
3 Presione el selector M.C..
La unidad empieza a buscar una emisora. Cuando la encuentra, muestra el nombre
de su
servicio de programas.
Memoria de mejores emisoras (BSM)
Utilización de las funciones de PTY

6Es
NOTAS
• Para cancelar la búsqueda, presione el selector M.C..
• El programa de algunas emisoras puede no coincidir con la indicación del PTY transmitido.
• Si ninguna emisora emite el tipo de programa que ha buscado, aparecerá [NOT FOUND] durante
aproximadamente dos segundos y el sintonizador volverá a la emisora original.
Desconecte los auriculares del dispositivo antes de conectarlo a la unidad.
CD
1 Inserte un disco en la ranura de carga de discos con la cara de la etiqueta hacia
arriba.
Para expulsar un disco, interrumpa la reproducción y pulse a continuación .
USB dispositivos (incluyendo Android™)/iPod
1 Abra la tapa del puerto USB.
2 Conecte el dispositivo USB/iPod utilizando un cable adecuado.
NOTA
Para cambiar automáticamente a la fuente [USB] cuando el dispositivo USB/iPod está conectado a la
unidad, ajuste [USB AUTO] en [ON] en los ajustes SYSTEM (página 12).
PRECAUCIÓN
Utilice un cable Pioneer USB opcional (CD-U50E) para conectar el dispositivo USB, ya que cualquier
dispositivo conectado directamente a la unidad sobresaldrá y podría resultar peligroso.
Antes de extraer el dispositivo, detenga la reproducción.
Conexiones AOA
Para obtener más información sobre la conexión AOA, consulte la página 9.
Conexión MTP
Puede conectar a la unidad un dispositivo con Android OS 4.0 o una versión posterior a través de MTP,
utilizando el cable suministrado con el dispositivo. Sin embargo, en función del dispositivo conectado y
del número de archivos en el dispositivo, es posible que no puedan reproducirse archivos de audio/
canciones a través de MTP. Tenga en cuenta que la conexión MTP no es compatible con los formatos de
archivo WAV y no puede utilizarse con la función MIXTRAX.
CD/USB/iPod/AUX
Reproducción
NOTA
Si utiliza una conexión MTP, [ANDROID WIRED] debe estar ajustado en [MEMORY] en los ajustes de
SYSTEM (página 12).
AUX
1 Inserte el miniconector estéreo en la toma de entrada AUX.
2 Pulse SRC/OFF para seleccionar [AUX] como fuente.
NOTA
Si [AUX] está ajustado en [OFF] en los ajustes de SYSTEM, [AUX] no puede seleccionarse como fuente
(página 12).
Puede realizar varios ajustes en los ajustes de FUNCTION (página 10).
Tenga en cuenta que las siguientes operaciones no pueden realizarse en un dispositivo
A
UX. Para controlar un dispositivo AUX, utilice el propio dispositivo.
Operaciones
Función Operación
Seleccionar una carpeta/álbum*1 Pulse 1/ o 2/ .
Seleccionar una pista/canción (capítulo) Pulse o .
Avanzar o retroceder rápidamente*3 Mantenga pulsado o .
Buscar un archivo en una lista 1 Pulse para mostrar la lista.
2 Gire el
selector M.C. para seleccionar el
nombre del archivo (o carpeta) o la
categoría que busca y, a continuación,
presione para confirmar.
3 Gire el
selector M.C. para seleccionar el
archivo que desee y, a continuación,
presione para confirmar.
Empieza la reproducción.
Ver una lista de los archivos de la carpeta/
cat
egoría seleccionada*1
Presione el selector M.C. después de
seleccionar una carpeta/categoría.
Reproducir una canción de la carpeta/
cat
egoría seleccionada*1
Mantenga presionado el selector M.C.
después de seleccionar una carpeta/
categoría.

7Es
Español
*1 Solo archivos de audio comprimido
*2 Esta función está desactivada cuando se ha seleccionado USB como fuente y la función MIXTRAX
está activada.
*3 Cuando utilice la función de avance/retroceso rápido durante la reproducción de un archivo VBR, es
posible que el tiempo de reproducción no sea correcto.
Búsqueda alfabética (solo iPod) 1 Pulse para mostrar la lista.
2 Gi
re el selector M.C. para seleccionar la
lista de categorías deseadas y, a
continuación, pulse para pasar al
modo de búsqueda alfabética.
(Girar el selector M.
C. dos veces también
permite acceder al modo de búsqueda
alfabética.)
3 Gi
re el selector M.C. para elegir una letra
y, a continuación, presione para ver la
lista alfabética.
Para cancelar la búsqueda alfabética, pulse
BAN
D/ .
Reproducción repetida Pulse 6/ .
Reproducción aleatoria Pulse 5/ .
Reproducción aleatoria de todo (solo iPod) Mantenga pulsado 5/ .
Poner en pausa/reanudar la reproducción Pulse 4/PA
USE.
Recuperación de sonido*1*2 Pulse 3/S.
Rtrv.
[1]: funciona con índices de compresión
bajos
[2]: funciona con índices de compresión
alt
os
Volver a la carpeta raíz (solo CD/USB)*1 Mantenga pulsado .
Cambiar entre audio comprimido y CD-DA
(s
olo CD)
Pulse BAND/ .
Cambiar de unidades en el dispositivo USB
(Solo dispositivos compatibles con el
pr
otocolo de la clase de dispositivo de
almacenamiento masivo USB)
Pulse BA
ND/ .
Función Operación
Modo de reproducción por asociación
Puede acceder a canciones a partir del artista, el álbum o el género que se está
reproduciendo en cada momento.
1 Mientras escucha una canción, mantenga pulsado para pasar al modo de
reproducción por asociación.
2 Gire el selector M.C. para seleccionar el modo ([ARTIST], [ALBUM], [GENRE]) y, a
continuación, presione para confirmar.
La canción o álbum seleccionado se reproduci
rá después de la canción que está
sonando.
NOTA
Puede cancelar la reproducción de la canción o el álbum seleccionado si utiliza funciones no
relacionadas con el modo de reproducción por asociación (como el avance o retroceso rápido).
Control de iPod
Puede controlar la unidad a través de un iPod conectado.
Los siguientes modelos de iPod no son compatibles con esta función.
–iPod nano 1.ª generación, iPod con vídeo
1 Pulse BAND/ durante la reproducción y, a continuación, seleccione el modo de
control.
[CO
NTROL iPod]: la función de iPod de la unidad puede controlarse desde el iPod
conectado.
[CO
NTROL AUDIO]: la función de iPod de la unidad solo puede controlarse desde los
botones de la unidad. En este modo, no es posible encender ni apagar el iPod
conectado.
NOTAS
• Si selecciona [CONTROL iPod] como modo de control la reproducción de las canciones se pone en
pausa. Utilice el iPod conectado para reanudar la reproducción.
• Es posible acceder a las siguientes operaciones desde la unidad, aunque el modo de control esté
ajustado en [CONTROL iPod].
– Pausa, avance/retroceso rápido, selección de canción/capítulo
• El volumen solo puede ajustarse desde la unidad.
La función MIXTRAX genera una mezcla ininterrumpida a partir de su biblioteca musical,
acompañada de efectos de iluminación. Para obtener más información sobre los ajustes
de MIXTRAX, consulte la página 13.
Funciones útiles para iPod
Acerca de MIXTRAX (solo USB/iPod)

8Es
NOTAS
• Esta función no es compatible con un dispositivo Android conectado a través de MTP.
• Mientras USB está seleccionado como fuente y se esté utilizando la función MIXTRAX, la función de
recuperación de sonido está desactivada.
• En función del archivo o la canción, es posible que los efectos de sonido no estén disponibles.
• Desactive la función MIXTRAX si los efectos de iluminación generados interfieren con la conducción.
1 Pulse MIX para activar o desactivar MIXTRAX.
Puede escuchar el audio de una aplicación de un iPhone a través de la unidad. En
alg
unos casos, puede incluso controlar la aplicación utilizando la unidad.
Para obtener más información sobre los dispositivos compatibles, visite nuestro sitio
we
b.
Importante
El uso de aplicaciones de terceros puede implicar o necesitar la puesta a disposición de información de
identificación personal, bien mediante la creación de una cuenta de usuario o de algún otro modo, y,
para ciertas aplicaciones, la puesta a disposición de datos de geoubicación.
TODAS LAS APLICACIONES DE TERCEROS SON RESPONSABILIDAD EXCLUSIVA DE LOS PROVEEDORES,
INCLUIDAS SIN LIMITACIÓN LA RECOPILACIÓN Y LA SEGURIDAD DE LOS DATOS DE USUARIO Y LAS
PRÁCTICAS DE PRIVACIDAD. AL ACCEDER A APLICACIONES DE TERCEROS, USTED SE MANIFIESTA DE
ACUERDO EN REVISAR LOS TÉRMINOS DE SERVICIO Y LAS POLÍTICAS DE PRIVACIDAD DE LOS
PROVEEDORES. SI NO ESTÁ DE ACUERDO CON LOS TÉRMINOS O LAS POLÍTICAS DE ALGÚN PROVEEDOR
O NO CONSIENTE EL USO DE DATOS DE GEOUBICACIÓN DONDE SEA APLICABLE, NO UTILICE ESTAS
APLICACIONES DE TERCEROS.
Para usuarios de iPhone
Esta función es compatible con dispositivos iPhone y iPod touch con iOS 5.0 o una versión posterior.
NOTA
PIONEER NO SE HACE RESPONSABLE DE APPS O CONTENIDOS DE OTROS PROVEEDORES, EN RELACIÓN
CON ASPECTOS COMO SU PRECISIÓN, SU EXACTITUD Y OTROS ASPECTOS. EL CONTENIDO Y LAS
FUNCIONALIDADES DE DICHAS APPS SON RESPONSABILIDAD EXCLUSIVA DEL PROVEEDOR DE CADA
APP.
1 Conecte el dispositivo móvil a esta unidad.
• iP
hone a través de USB (página 6)
2 Pulse SRC/OFF para seleccionar [APP].
Modo app
Reproducción de una aplicación a través de la
unidad
3 Utilice el dispositivo móvil para iniciar la aplicación.
Funcionamiento básico
Puede realizar varios ajustes en los ajustes de FUNCTION (página 10).
(DEH-X2900UI solo es compatible con Spotify instalado en iPhone.)
Spotify es un servicio de distribución de música en streaming que no está afiliado a
P
ioneer. Más información disponible en http://www.spotify.com.
La aplicación de Spotify está disponible para teléfonos compatibles. Visite https://
s
upport.spotify.com/ para consultar la información sobre compatibilidad más reciente.
Para disfrutar de Spotify durante la conducción, primero descargue la aplicación Spotify
en
su iPhone. Puede descargarla en iTunes App Store. Seleccione una cuenta gratis o una
cuenta Premium de pago, tanto en la aplicación como en spotify.com. Una cuenta
Premium le ofrece más funciones, como escuchar música offline.
Importante
• Este producto incorpora el software Spotify, que está sujeto a licencias de terceros que puede
consultar aquí: www.spotify.com/connect/third-party-licenses.
• Para obtener información acerca de los países y regiones donde se puede utilizar Spotify, consulte
https://www.spotify.com/us/select-your-country/.
Actualice el firmware de la aplicación Spotify a la última versión antes de utilizarla.
1 Conecte el dispositivo móvil a esta unidad.
• i
Phone a través de USB (página 6)
2 Pulse SRC/OFF para seleccionar [SPOTIFY].
3 Abra la aplicación Spotify en el dispositivo móvil e inicie la reproducción.
Funcionamiento básico
Puede realizar varios ajustes en los ajustes de FUNCTION (página 10).
Función Operación
Seleccionar una pista Pulse o .
Avanzar o retroceder rápidamente Mantenga pulsado o .
Poner en pausa/reanudar la reproducción Pulse BA
ND/ .
Spotify®
Escuchar Spotify

9Es
Español
NOTA
Las operaciones disponibles pueden variar en función del tipo de contenidos (pista/álbum/artista/lista
de reproducción/radio) que desee reproducir.
NOTA
Algunas funciones de Spotify no pueden controlarse desde esta unidad.
Puede utilizar la unidad desde la Pioneer ARC APP instalada en un dispositivo iPhone/
Android. En algunos casos, puede controlar aspectos de la aplicación, como por ejemplo
selección de fuente, pausa, etc., al utilizar la unidad.
Función Operación
Saltar una pista Pulse o .
Buscar una pista en una lista 1 Pulse (lista) para mostrar la lista.
2 Gi
re el selector M.C. para seleccionar la
categoría que desee y, a continuación,
presione para confirmar.
3 Gi
re el selector M.C. para seleccionar el
archivo que desee y, a continuación,
presione para confirmar.
Empieza la reproducción.
Poner en pausa/reanudar la reproducción Pulse 4/
PAUSE.
Pulgar arriba (solo para radio) Pulse 1/ .
Pulgar abajo (solo para radio) Pulse 2/ .
Reproducción aleatoria (solo para pista/
álbum
/artista/lista de reproducción)
Pulse 5/ .
Reproducción repetida (solo para pista/
álbum
/artista/lista de reproducción)
Pulse 6/ .
Iniciar un canal de radio en función de la
can
ción que se reproduce en ese momento.
1 Mantenga pulsado (lista) para iniciar
la radio.
2 P
resione el selector M.C..
• E
s posible que esta función no esté
disponible en función de la canción
seleccionada.
Almacenar la información sobre la canción
q
ue se está reproduciendo en ese
momento.
Borrar la información de la canción
alm
acenada.
1 Ma
ntenga pulsado 3/S.Rtrv.
Aparece [SAVE]/[UNSAVE].
2 P
resione el selector M.C..
Uso de Pioneer ARC APP
Para obtener más información sobre las operaciones que están disponibles en la
aplicación, consulte la sección de ayuda de la aplicación.
ADVERTENCIA
No trate de controlar la aplicación mientras conduce. Detenga y aparque el vehículo en un lugar seguro
antes de intentar usar los controles de la aplicación.
Para usuarios de iPhone
Esta función es compatible con dispositivos iPhone (iPhone 5 o una versión posterior) y
iP
od touch con iOS 8.0 o una versión posterior.
Puede descargar Pioneer ARC APP en iTunes App Store.
Para usuarios de dispositivos Android
Esta función es compatible con dispositivos con Android OS 4.1 o posterior instalado y
q
ue sean compatibles con los perfiles de AOA (Android Open Accessory) 2.0.
Puede descargar Pioneer ARC APP en Google Play™.
NOTA
Es posible que algunos dispositivos Android conectados vía AOA 2.0 no funcionen correctamente o
emitan sonidos debido a su propio diseño de software, independientemente de la versión del SO.
1 Conecte el dispositivo móvil a esta unidad.
• D
ispositivos iPhone/Android a través de USB (página 6)
Continúe con el paso 6 si selecciona la conexión USB para iPhone.
2 Presione el selector M.C. para que aparezca el menú principal.
3 Gire el selector M.C. para seleccionar [SYSTEM] y, a continuación, presione para
confirmar.
4 Gire el selector M.C. para seleccionar [ANDROID WIRED] y, a continuación,
presione para confirmar.
5 Gire el selector M.C. para seleccionar [APP CONTROL] para un dispositivo Android
conectado a través de USB.
Si se ha seleccionado [ON] en [P.APP AUTO ON] (página 12), Pioneer ARC APP en el
dispositivo Android se inicia automáticamente y el proceso habrá finalizado.
NOTA
Si Pioneer ARC APP no está aún instalada en su dispositivo Android, aparece un mensaje que le
pide que instale la aplicación en su dispositivo Android. Seleccione [OFF] en [P.APP AUTO ON] para
borrar el mensaje (página 12).
6 Pulse SRC/OFF para seleccionar una fuente.
7 Inicie la Pioneer ARC APP en el dispositivo móvil.
Cómo realizar una conexión con Pioneer ARC APP

10Es
NOTA
También puede iniciar la aplicación manteniendo pulsada la tecla M.C. en el iPhone.
1 Pulse SRC/OFF para seleccionar [ANDROID].
Funcionamiento básico
Puede ajustar diferentes valores en el menú principal.
1 Presione el selector M.C. para que aparezca el menú principal.
2 Gire el selector M.C. para seleccionar una de las categorías siguientes y, a
continuación, presione para confirmar.
• Ajustes de FUNCTION (página 10)
• Ajustes de AUDIO (página 11)
• Ajustes de SYSTEM (página 12)
• Ajustes de ILLUMINATION (página 12)
• Ajustes de MIXTRAX (página 13)
3 Gire el selector M.C. para seleccionar las opciones y, a continuación, presione
para confirmar.
Los elementos de los menús varían en función de la fuente.
Cómo escuchar música en Android
Función Operación
Seleccionar una pista Pulse o .
Avanzar o retroceder rápidamente Mantenga pulsado o .
Poner en pausa/reanudar la reproducción Pulse 4/PA
USE.
Recuperación de sonido Pulse 3/S.
Rtrv.
[1]: funciona con índices de compresión
bajo
s
[2]: funciona con índices de compresión
alt
os
Ajustes
Ajustes de FUNCTION
Opción del menú Descripción
FM SETTING
[TALK], [STANDARD], [MUSIC] Ajusta el nivel de calidad del sonido a las
co
ndiciones de señal de la emisión de la banda
FM. (Disponible solo si se selecciona la banda
FM.)
BSM
Las seis emisoras con mejor señal se guardan en
lo
s botones numéricos (de 1/ a 6/ )
automáticamente.
REGIONAL
[ON], [OFF] Limita la recepción a los programas regionales
espe
cíficos cuando se selecciona AF (búsqueda
de frecuencias alternativas). (Disponible solo si
se selecciona la banda FM.)
LOCAL
FM: [O
FF], [LV1], [LV2], [LV3], [LV4]
MW/LW: [O
FF], [LV1], [LV2]
Limita las emisoras sintonizadas en función de la
int
ensidad de la señal.
TA
[ON], [OFF] Recibe la información de tráfico actual, si está
d
isponible. (Disponible solo si se selecciona la
banda FM.)
AF
[ON], [OFF] Permite a la unidad volver a sintonizar una
f
recuencia diferente que ofrezca la misma
emisora. (Disponible solo si se selecciona la
banda FM.)
NEWS
[ON], [OFF] Interrumpe la fuente activa con programas de
no
ticias. (Disponible solo si se selecciona la
banda FM.)
SEEK
[MAN], [PCH] Permite utilizar los botones o para
buscar emisoras una a una (sintonización
m
anual) o seleccionar una emisora a partir de los
canales memorizados.

11Es
Español
SAVE
Almacena la información sobre la canción que se
está reproduciendo en su lista de música en
Spotify.
UNSAVE
Borra la información de la canción almacenada
en
[SAVE].
S.RTRV
[1] (funciona con índices de
co
mpresión bajos),
[2] (funciona con índices de
co
mpresión altos),
[OFF]
Mejora el audio comprimido y recupera un
s
onido de calidad.
No disponible si:
• US
B está seleccionado como fuente y la
función MIXTRAX está activada.
• Se r
eproduce un CD-DA/CD-TEXT.
AUDIO BOOK
[FASTER], [NORMAL], [SLOWER] Cambia la velocidad de reproducción. (No está
di
sponible si [CONTROL iPod] está seleccionado
en el modo de control.)
PAU SE
Pone en pausa o reanuda la reproducción.
Ajustes de AUDIO
Opción del menú Descripción
FADER*1
Ajuste el balance de los altavoces delanteros y
traseros.
BALANCE
Ajuste el balance de los altavoces derechos e
izq
uierdos.
Opción del menú Descripción
USB
iPod
iPod
*1 No está disponible si [SUB.W/SUB.W] está seleccionado en [SP-P/O MODE], en los ajustes de INITIAL
(página 5).
EQ SETTING
[SUPER BASS], [POWERFUL],
[NA
TURAL], [VOCAL], [CUSTOM1],
[CUSTOM2], [FLAT]
Seleccione la banda y el nivel del
ecualizador para personalizar
todavía más la configuración.
Banda del ecualizador: [80HZ
],
[250HZ], [800HZ], [2.5KHZ],
[8KHZ]
Nivel del ecualizador: d
e [+6] a
[–6]
Seleccione o personalice la curva del ecualizador.
[CUSTOM1] puede ajustarse por separado para
cad
a fuente. Sin embargo, cada una de las
siguientes combinaciones presenta
automáticamente el mismo ajuste.
• U
SB, iPod, ANDROID, SPOTIFY y APP (iPhone)
[CUSTOM2] es un ajuste compartido utilizado
par
a todas las fuentes.
LOUDNESS
[OFF], [LOW], [MID], [HI] Permite aplicar compensación para disfrutar de
un s
onido nítido con el volumen más bajo.
SUB.W*2
[NOR], [REV], [OFF] Seleccione la fase del subwoofer.
SUB.W CTRL*2
*3
Frecuencia de corte: [5
0HZ],
[63HZ], [80HZ], [100HZ], [125HZ],
[160HZ], [200HZ]
Nivel de salida: de
[–24] a [+6]
Nivel de curva: [–12], [
–24]
El subwoofer solo emite las frecuencias por
debajo del intervalo seleccionado.
BASS BOOST
De [0] a [+6] Seleccione el nivel de intensificación de graves.
HPF SETTING
Frecuencia de corte: [O
FF],
[50HZ], [63HZ], [80HZ], [100HZ],
[125HZ], [160HZ], [200HZ]
Nivel de curva: [–12], [
–24]
Los altavoces solo emiten frecuencias por
en
cima del punto de corte del filtro de paso alto
(HPF).
SLA
De [+4] a [–4] Ajusta el nivel de volumen de cada fuente
ex
cepto FM.
Cada una de las siguientes combinaciones
p
resenta automáticamente el mismo ajuste.
• USB, iPod, ANDROID, SPOTIFY y APP (iPhone)
Opción del menú Descripción

12Es
*2 No está disponible si [REAR/REAR] está seleccionado en [SP-P/O MODE], en los ajustes de INITIAL
(página 5).
*3 No está disponible si [OFF] está seleccionado en [SUB.W].
También puede acceder a estos menús cuando la unidad está apagada.
Ajustes de SYSTEM
Opción del menú Descripción
LANGUAGE
[ENG](inglés), [РУС](ruso),
[TUR](turco)
Seleccione el idioma en el que debe aparecer la
información de texto de un archivo de audio
comprimido.
CLOCK SET
Ajuste el reloj (página 4).
12H/24H
[12H], [24H] Seleccione el formato de la hora.
AUTO PI
[ON], [OFF] Busca una emisora diferente con la misma
pro
gramación, aunque se haya seleccionado una
emisora memorizada.
AUX
[ON], [OFF] Ajuste esta opción en [ON] si utiliza un
d
ispositivo auxiliar conectado a la unidad.
SPOTIFY
[ON], [OFF] Seleccione [ON] cuando utilice la función Spotify.
PW SAVE*
[ON], [OFF] Reduce el consumo de la batería.
La activación de la fuente es la única operación
per
mitida cuando esta función está activada.
ANDROID WIRED
[MEMORY], [APP CONTROL] Seleccione el método de conexión adecuado en
fun
ción de su dispositivo Android.
P. A P P AU TO O N
[ON], [OFF]
Seleccione [ON] para iniciar Pioneer ARC APP
automáticamente si se conecta un dispositivo
Android a la unidad a través de AOA. (No está
disponible si [MEMORY] está seleccionado en
[ANDROID WIRED].)
* [PW SAVE] se cancela y se desconecta la batería del vehículo, por lo que tendrá que volver a
encenderse una vez conectada de nuevo la batería. Si [PW SAVE] está desactivado, en función de los
métodos de conexión, es posible que la unidad continúe consumiendo energía de la batería si el
contacto del vehículo no incorpora una posición ACC (accesorio).
USB AUTO
[ON], [OFF] Seleccione [ON] para cambiar automáticamente
a la
fuente [USB] cuando un dispositivo USB/iPod
está conectado a la unidad.
Seleccione [OFF] cuando se está conectando un
d
ispositivoUSB/iPod a la unidad solo para carga.
Ajustes de ILLUMINATION
Opción del menú Descripción
COLOUR
[KEY COLOUR], [DISP COLOUR],
[BOTH COLOUR]
Selecciona el color de las teclas/visor de la
unidad a partir de 12 colores predefinidos,
[SCAN] o [CUSTOM]*.
• [S
CAN]: acceda a una secuencia automática de
diferentes colores.
• [C
USTOM]*:
1 M
antenga presionado el selector M.C. hasta
que aparezca la pantalla de ajuste del color.
2 Aj
uste el color principal (R (rojo)/G (verde)/B
(azul)) y el nivel de brillo ([0] a [60]).
No puede seleccionar un nivel inferior a 10
par
a los tres colores R (rojo), G (verde), B (azul)
al mismo tiempo.
También puede personalizar los colores
pred
efinidos. Seleccione uno de los colores
predefinidos y mantenga presionado el selector
M.C. hasta que aparezca la pantalla de ajuste de
colores.
* El ajuste CUSTOM solo está disponible para [KEY
COLOUR] y [DISP COLOUR].
DIM SETTING
[SYNC ILLUMI], [SYNC CLOCK],
[MA
NUAL]
Modifica el brillo del visor.
Opción del menú Descripción

13Es
Español
BRIGHTNESS
[KEY], [DISP] Seleccione el brillo de las teclas/visor de la
unidad, de [1] a [10].
Los intervalos de ajuste disponibles varían en
f
unción de [DIM SETTING].
ILLUMI FX
[ON], [OFF] El efecto de iluminación puede observarse
cuan
do se inserta o se expulsa un CD.
El efecto de iluminación se activa cuando se
ac
tiva/desactiva ACC, independientemente de
este ajuste.
Ajustes de MIXTRAX
Opción del menú Descripción
SHORT PLAYBCK
[1.0 MIN], [1.5 MIN], [2.0 MIN],
[2.5 MIN], [3.0 MIN], [OFF]
Seleccione la duración del tiempo de
reproducción.
FLASH AREA
[KEY/DISPLAY], [KEY], [OFF] Seleccione la zona del efecto de iluminación.
Si se ha seleccionado [OFF], el color definido
e
n los ajustes de ILLUMINATION (página 12) se
utiliza como color del visor.
FLASH PATTERN
De [SOUND LEVEL 1] a [SOUND
LEV
EL 6]
Modifique el efecto de iluminación con arreglo
al nivel de sonido y de graves.
El patrón de parpadeo cambia en función del
ni
vel de sonido.
De [LOW PASS 1] a [LOW PASS 6] El patrón de parpadeo cambia en función del
ni
vel de graves.
[RANDOM1] El patrón de parpadeo cambia de forma
al
eatoria en función del modo de nivel de
sonido y el modo de paso bajo.
[RANDOM2] El patrón de parpadeo cambia aleatoriamente
en función del modo de nivel de sonido.
[RANDOM3] El patrón de parpadeo cambia aleatoriamente
e
n función del modo de paso bajo.
Opción del menú Descripción
DISPLAY FX
[ON], [OFF] Activa o desactiva los efectos especiales
MI
XTRAX.
CUT IN FX
[ON], [OFF]
Activa o desactiva los efectos de sonido
MIXTRAX durante el cambio manual de pistas.
Opción del menú Descripción

14Es
Importante
• Si instala esta unidad en un vehículo sin
posición ACC (accesorio) en el contacto, si
no conecta el cable rojo al terminal que
detecta el funcionamiento de la llave de
contacto la batería podría agotarse.
• Si utiliza esta unidad en condiciones
diferentes de las descritas, podría
producirse un incendio o una avería.
–Vehículos con una batería de 12 V y una
co
nexión a tierra negativa.
–Cuando los 4 canales utilizan la salida
de
l altavoz, use altavoces de más de
50 W (alimentación de entrada máxima)
y
de entre 4 Ω y 8 Ω (valor de
impedancia). No utilice altavoces de
entre 1 Ω y 3 Ω con esta unidad.
–Cuando la salida del altavoz trasero la
ut
ilice un subwoofer de 2 Ω, use
altavoces de más de 70 W (alimentación
de
entrada máxima).
* Consulte las conexiones para obtener
inf
ormación sobre el método de
conexión.
• P
ara impedir un cortocircuito, un
sobrecalentamiento o una avería, siga las
indicaciones descritas a continuación.
–Desconecte el terminal negativo de la
bat
ería antes de la instalación.
–Fije el cable con abrazaderas de cable o
cint
a adhesiva. Envuelva con cinta
adhesiva los cables que estén en
contacto con piezas metálicas, para
protegerlos.
–Aleje los cables de piezas en
mo
vimiento, como la palanca de
cambios o las guías de los asientos.
–Aleje los cables de lugares calientes,
como
por ejemplo las salidas de la
calefacción.
–No conecte el cable amarillo a la batería
pas
ándolo a través del orificio del
compartimento del motor.
–Cubra los conectores de cables
d
esconectados con cinta aislante.
–No acorte ningún cable.
–Nunca corte el aislamiento del cable de
alim
entación de esta unidad para
compartir la potencia con otros
dispositivos. La capacidad de corriente
del cable es limitada.
–Utilice un fusible del nivel especificado.
–Nunca conecte el cable negativo del
alt
avoz directamente a tierra.
–Nunca agrupe diferentes cables
n
egativos de varios altavoces.
• C
uando esta unidad está encendida, las
señales de control se envían a través del
cable azul/blanco. Conecte este cable al
terminal de control remoto del sistema
de un amplificador externo o al terminal
de control de relé de antena de
automóvil (máx. 300 mA 12 V CC). Si el
vehículo incorpora una antena en el
cristal, conéctela al terminal de
alimentación de intensificación de la
antena.
• N
unca conecte el cable azul/blanco al
terminal de alimentación de un
amplificador externo ni al terminal de
alimentación de la antena para
automóvil. De lo contrario, la batería
podría agotarse o podría producirse una
avería.
• E
l cable negro es el cable de tierra. Los
cables de tierra de esta unidad y de otros
equipos (especialmente productos de
Conexiones/instalación
Conexiones
Posición ACC Sin posición ACC
alto voltaje como amplificadores) deben
conectarse por separado. De lo contrario,
podrían desprenderse por accidente y
provocar un incendio o una avería.
• El símbolo gráfico colocado en el
producto significa corriente continua.
Esta unidad
Entrada de cable de alimentación
AUX IN trasera | [Tel In] (toma estéreo
de 3,5 mm)
Una entrada trasera dedicada
co
mpatible únicamente con kits
telefónicos de manos libres Bluetooth.
La señal de audio se silencia durante
una llamada telefónica si el cable
amarillo/negro está conectado/
activado.
Salida trasera o salida de subwoofer
Salida frontal
Entrada de antena
Fusible (10 A)
Entrada de mando a distancia con cable
Puede conectarse un adaptador de
m
ando a distancia con cable (vendido
por separado).
Cable de alimentación
A entrada de cable de alimentación
En función del tipo de vehículo, la
función de y puede ser diferente.
En este caso, asegúrese de conectar
a y a .
Amarillo
Reserva (o adicional)
Amarillo
Conectar al terminal de alimentación
co
nstante de 12 V.
Rojo
Adicional (o reserva)
Rojo
Conectar al terminal controlado por el
inte
rruptor de encendido (12 V CC).
Conecte cada cable con el cable del
mismo color.
Negro (tierra del chasis)
Azul/blanco
La posición de las clavijas del conector
I
SO será diferente en función del tipo de
vehículo. Conecte y cuando la
clavija 5 sea de control de antena. En
o
tro tipo de vehículo, nunca conecte
y .

15Es
Español
Azul/blanco
Conectar al terminal de control del
sistema del amplificador (máx. 300 mA
12 V CC).
Azul/blanco
Conectar al terminal de control de relé
d
e antena de automóvil (máx. 300 mA
12 V CC).
Cables de los altavoces
Blanco: frontal izquierdo
Blanco/negro: frontal izquierdo
Gris: frontal derecho
Gris/negro: frontal derecho
Verde: izquierdo trasero o subwoofer
Verde/negro: izquierdo trasero o
subwoofer
Violeta: derecho trasero o subwoofer
Violeta/negro: derecho trasero o
subwoofer
Naranja/blanco
Conectar a la señal de iluminación de
un co
che.
Conector ISO
En algunos vehículos, es posible que el
c
onector ISO esté dividido en dos. En
este caso, asegúrese de realizar la
conexión a los dos conectores.
NOTAS
• Cambie el menú inicial de esta unidad.
Consulte [SP-P/O MODE]
(página 5). La
salida de subwoofer de esta unidad es
mo
noaural.
• S
i utiliza un subwoofer de 2 Ω, asegúrese
de conectar el subwoofer a los cables
violeta y violeta/negro de esta unidad. No
conecte nada a los cables verde y verde/
negro.
Amplificador (vendido por
separado)
Realice estas conexiones cuando utilice el
amplificador opcional.
Control remoto del sistema
Conectar al cable azul/blanco.
Amplificador (vendido por separado)
Conectar con cables RCA (vendidos por
separado)
A la salida frontal
Altavoz frontal
A salida trasera o salida de subwoofer
Altavoz trasero o subwoofer
Importante
• Compruebe todas las conexiones y
sistemas antes de la instalación definitiva.
• No utilice piezas no homologadas, ya que
podrían producirse averías.
• C
onsulte con su distribuidor si la
instalación requiere el taladrado de
orificios u otras modificaciones en el
vehículo.
• No
instale esta unidad en los siguientes
lugares:
– donde pueda interferir con el control
de
l vehículo.
– donde pueda lesionar a un pasajero en
cas
o de parada brusca.
• E
l láser semiconductor puede resultar
dañado en caso de recalentamiento.
Instale esta unidad lejos de lugares
calientes, como por ejemplo las salidas
de la calefacción.
• L
a unidad funciona en su
nivel óptimo cuando se
instala en ángulos
inferiores a 60°.
Instalación
• Al realizar la instalación, asegúrese de
que la dispersión del calor es correcta
durante la utilización de la unidad, deje
espacio suficiente detrás del panel
posterior y recoja los cables sueltos para
que no obstruyan las salidas de
ventilación.
Instalación en soporte DIN
1 Introduzca la carcasa de montaje en el
salpicadero.
2 Fije la carcasa de montaje utilizando
un destornillador para doblar las
lengüetas metálicas (90°) y encajarlas
en sus posiciones.
Salpicadero
Carcasa de montaje
• Asegúres
e de que la unidad está
instalada de forma segura. Una
instalación inestable podría provocar
saltos u otros errores.
Cuando no utilice la carcasa de
montaje suministrada
1 Determine la posición exacta para
encajar los orificios del soporte con los
orificios del lateral de la unidad.
2 Apriete dos tornillos en cada lado.
Tornillo de rosca cortante (5 mm × 9
mm, no suministrado con el
pr
oducto)
Soporte de montaje
Salpicadero o consola
Extraiga la unidad (instalada con la
carcasa de montaje suministrada)
1 Extraiga el marco decorativo.
Marco decorativo
Lengüeta con muesca
• E
l desmontaje del frontal facilita el
acceso al marco decorativo.
• A
l volver a colocar el marco
decorativo, hágalo con la parte de la
lengüeta con muesca hacia abajo.
2 Introduzca las llaves de extracción
suministradas en ambos lados de la
unidad hasta que escuche un clic.
3 Tire de la unidad.
Deje espacio
suficiente
5 cm
5 cm

16Es
El visor vuelve automáticamente a la
visualización normal.
→ No se han realizado operaciones en
aproximadamente 30 segundos.
– Realice una operación.
El intervalo de la reproducción repetida
cambia de forma imprevista.
→ En función del intervalo de la
reproducción repetida, es posible que el
intervalo seleccionado se modifique
cuando se selecciona otra carpeta o
pista o durante el avance o retroceso
rápido.
– Seleccione de nuevo el intervalo de la
r
eproducción repetida.
No se reproduce una subcarpeta.
→ Las subcarpetas no pueden
reproducirse si se ha seleccionado la
opción [FLD] (repetición de carpeta).
– Seleccione otro intervalo de la
r
eproducción repetida.
El sonido es intermitente.
→ Utiliza un dispositivo, como un teléfono
móvil, que puede provocar
interferencias audibles.
– Aleje de la unidad los dispositivos que
pued
an provocar las interferencias.
Generales
AMP ERROR
→ La unidad no funciona o la conexión del
altavoz es incorrecta.
→ E
l circuito de protección está activado.
– Compruebe la conexión del altavoz.
– Sitúe la llave de contacto en la
pos
ición OFF y de nuevo en la
posición ON. Si el mensaje continúa
apareciendo, póngase en contacto
con su distribuidor o con un centro de
asistencia Pioneer autorizado para
obtener ayuda.
NO XXXX (NO TITLE, por ejemplo)
→ No hay información de texto asociada.
– Cambie de pantalla o reproduzca otra
pi
sta o archivo.
Reproductor de CD
ERROR-07, 11, 12, 17, 30
→ El disco está sucio.
– Limpie el disco.
→ E
l disco está arañado.
– Cambie el disco.
ERROR-07, 10, 11, 12, 15, 17, 30, A0
→ Se ha producido un error eléctrico o
mecánico.
– Sitúe la llave de contacto en la
pos
ición OFF y de nuevo en la
posición ON o seleccione una fuente
diferente y luego vuelva a seleccionar
el reproductor de CD.
ERROR-15
→ El disco introducido está en blanco.
– Cambie el disco.
ERROR-23
→ Formato de CD no compatible.
– Cambie el disco.
FORMAT READ
→ A veces transcurre un tiempo entre el
inicio de la reproducción y el instante
en que empieza a escuchar sonido.
Información complementaria
Solución de problemas
Mensajes de error
– Espere hasta que el mensaje
desaparezca y empiece a escuchar
sonido.
NO AUDIO
→ El disco introducido no contiene
archivos reproducibles.
– Cambie el disco.
SKIPPED
→ El disco introducido contiene archivos
con protección DRM.
– Se saltarán los archivos protegidos.
PROTECT
→ Todos los archivos del disco introducido
incorporan información DRM.
– Cambie el disco.
Dispositivo USB/iPod
FORMAT READ
→ A veces transcurre un tiempo entre el
inicio de la reproducción y el instante
en que empieza a escuchar sonido.
– Espere hasta que el mensaje
d
esaparezca y empiece a escuchar
sonido.
NO AUDIO
→ No hay canciones.
– Transfiera archivos de audio al
d
ispositivo USB y conéctelo.
→ El
dispositivo USB conectado tiene la
protección activada.
– Siga las instrucciones de seguridad del
d
ispositivo USB para desactivar la
protección.
SKIPPED
→ El dispositivo USB conectado contiene
archivos con protección DRM.
– Se saltarán los archivos protegidos.
PROTECT
→ Todos los archivos del dispositivo USB
conectado tienen incorporada
información DRM.
– Cambie el dispositivo USB.
N/A USB
→ El dispositivo USB conectado no es
compatible con esta unidad.
– Desconecte el dispositivo y cámbielo
po
r un dispositivo USB compatible.
HUB ERROR
→ Esta unidad no permite utilizar el
dispositivo USB conectado a través de
un concentrador USB.
– Conecte el dispositivo USB
d
irectamente a esta unidad utilizando
un cable USB.
CHECK USB
→ El conector USB o el cable USB presenta
un cortocircuito.
– Compruebe si el conector USB o el
c
able USB está atrapado o dañado.
→ El
dispositivo USB conectado consume
una cantidad de corriente superior al
máximo permitido.
– Desconecte el dispositivo USB y no
vu
elva a utilizarlo. Sitúe la llave de
contacto en la posición OFF y de
nuevo en la posición ACC u ON.
Conecte solo dispositivos USB
compatibles.
→ E
l iPod funciona correctamente pero no
se carga.
– Asegúrese de que el cable de
co
nexión del iPod no haya quedado
cortocircuitado (por ejemplo, por
quedar atrapado en objetos
metálicos). Después de la
comprobación, sitúe la llave de
contacto en OFF y de nuevo en ON o
desconecte el iPod y vuelva a
conectarlo.
ERROR-19
→ Error en la comunicación.
– Realice una de las operaciones
s
iguientes y, a continuación, vuelva a
la fuente USB.

17Es
Español
• Sitúe la llave de contacto en la
posición OFF y seguidamente en la
posición ON.
• Desconecte el dispositivo USB.
• S
eleccione una fuente diferente.
→ E
rror del iPod.
– Desconecte el cable del iPod. Cuando
apar
ezca el menú principal del iPod,
vuelva a conectar el iPod y reinícielo.
ERROR-23
→ El dispositivo USB no se ha formateado
correctamente.
– Formatee el dispositivo USB con los
f
ormatos FAT12, FAT16 o FAT32.
ERROR-16
→ La versión del firmware del iPod es
antigua.
– Actualice la versión del iPod.
→ E
rror del iPod.
– Desconecte el cable del iPod. Cuando
apar
ezca el menú principal del iPod,
vuelva a conectar el iPod y reinícielo.
STOP
→ No hay canciones en la lista actual.
– Seleccione una lista que contenga
cancio
nes.
NOT FOUND
→ No hay canciones asociadas.
– Transfiera canciones al iPod.
Apps
START UP APP
→ La aplicación todavía no se ha iniciado.
– Utilice el dispositivo móvil para iniciar
la ap
licación.
Spotify
CHECK APP
→ Error en la conexión con la aplicación
Spotify.
– Siga las instrucciones que aparecen en
pant
alla.
Discos y reproductor
• Utilice únicamente discos que incorporen
alguno de los dos logotipos siguientes.
• Utilice discos de 12 cm.
• Ut
ilice únicamente discos convencionales
y totalmente circulares.
• L
os tipos de discos siguientes no pueden
utilizarse con esta unidad:
–Discos DualDisc
– Discos de 8 cm: si intenta utilizar estos
d
iscos sin ningún adaptador la unidad
podría dejar de funcionar
correctamente.
– Discos de formas no convencionales
– Discos que no sean CD
– Discos estropeados, como por ejemplo
di
scos con grietas, deformados o
desconchados
– Discos CD-R/RW sin finalizar
• No
escriba en la superficie de los discos ni
aplique productos químicos encima.
• P
ara limpiar un CD, utilice un paño suave
realizando movimientos desde el centro
hacia fuera.
• L
a condensación puede impedir
temporalmente el funcionamiento
correcto del reproductor. Espere
aproximadamente una hora, hasta que el
reproductor se adapte a la temperatura
más cálida. Asimismo, seque los discos
húmedos con un paño suave.
• S
i utiliza discos en los que es posible
imprimir en las superficies de las
etiquetas, revise las instrucciones y los
avisos de los discos. En función de los
discos, es posible que las operaciones de
inserción y expulsión no puedan
Instrucciones de
manipulación
realizarse. Si utiliza este tipo de discos
pueden producirse daños en el equipo.
• No pegue en los discos etiquetas ni otros
materiales disponibles en el mercado.
–Los discos podrían deformarse y
po
drían no reproducirse.
–Las etiquetas pueden desprenderse
dur
ante la reproducción e impedir la
extracción de los discos, lo que puede
provocar daños en el equipo.
Dispositivo de almacenamiento
USB
• No están permitidas las conexiones a
través de concentradores USB.
• Aseg
ure correctamente el dispositivo de
almacenamiento USB antes de arrancar.
No permita que el dispositivo de
almacenamiento USB se caiga al suelo, ya
que podría interferir con el
funcionamiento del pedal de freno o de
aceleración.
• E
n función del dispositivo de
almacenamiento USB, pueden producirse
los siguientes problemas.
–Las operaciones pueden variar.
–Es posible que no se reconozca el
di
spositivo de almacenamiento.
–Es posible que los archivos no se
repro
duzcan correctamente.
–El dispositivo puede provocar
int
erferencias audibles mientras
escucha la radio.
iPod
• No deje el iPod en lugares expuestos a
temperaturas elevadas.
• Aseg
ure correctamente el iPod mientras
conduce. No permita que el iPod se caiga
al suelo, ya que podría interferir con el
funcionamiento del pedal de freno o de
aceleración.
• D
eterminados ajustes del iPod, como el
ecualizador y la reproducción repetida,
cambian automáticamente cuando se
conecta el iPod a la unidad. Una vez
desconectado el iPod, estos ajustes
recuperan los parámetros normales.
• E
l texto no compatible guardado en el
iPod no se visualizará tampoco en la
unidad.
• S
olo se mostrarán los primeros
32 caracteres de un nombre de archivo
(incl
uyendo la extensión del archivo) o un
nombre de carpeta.
• E
s posible que la unidad no funcione
correctamente, en función de la
aplicación utilizada para codificar los
archivos WMA.
• L
a reproducción de archivos de audio con
datos de imagen asociados o archivos de
audio almacenados en un dispositivo USB
con una jerarquía de carpetas compleja
podría tardar un poco en empezar.
• P
ara poder visualizar texto en ruso en
esta unidad, debe estar codificado en
alguno de los conjuntos de caracteres
siguientes:
–Unicode (UTF-8, UTF-16)
– Un conjunto de caracteres diferente de
U
nicode utilizado en un entorno
Windows y definido como ruso en la
configuración de múltiples idiomas
PRECAUCIÓN
• Pioneer no garantiza la compatibilidad
con todos los dispositivos de
almacenamiento masivo USB y no asume
responsabilidad alguna en caso de
pérdida de datos en reproductores
multimedia, smartphones u otros
dispositivos al utilizar este producto.
• No deje discos ni dispositivos de
almacenamiento USB en lugares
expuestos a temperaturas elevadas.
Compatibilidad con
formatos de audio
comprimido

18Es
Archivos WMA
Archivos MP3
Archivos WAV
• Los formatos de archivo WAV no pueden
conectarse a través de MTP.
Disco
• Independientemente de la longitud de la
secciones en blanco que haya entre las
canciones de la grabación original, los
discos de audio comprimidos se
reproducirán con una breve pausa entre
cada canción.
Dispositivo USB
• La reproducción de archivos de audio
almacenados en un dispositivo USB con
una jerarquía de carpetas compleja
podría tardar un poco en empezar.
Esta unidad es compatible únicamente con los
siguientes modelos de iPod. Las versiones de
Extensión del archivo .wma
Tasa de bits De 48 kbps a 320 kbps
(CBR), de 48 kbps a
384 kbps (VBR)
Frecuencia de
muestreo
32 kHz, 44,1 kHz,
48 kHz
Windows Media™
Audio Professional,
Lossless, Voice/DRM
Stream/Stream con
vídeo
No compatible
Extensión del archivo .mp3
Tasa de bits De 8 kbps a 320 kbps
(CBR), VBR
Frecuencia de
muestreo
De 8 kHz a 48 kHz
(32 kHz, 44,1 kHz,
48 kHz para énfasis)
Versión de etiqueta
ID3 compatible
1.0, 1.1, 2.2, 2.3, 2.4 (la
versión de etiqueta
ID3 2.x tiene prioridad
sobre la versión 1.x.)
Lista de reproducción
M3u
No compatible
MP3i (MP3
interactivo), mp3 PRO
No compatible
Extensión del archivo .wav
Bits de cuantificación 8 y 16 (LPCM), 4 (MS
ADPCM)
Frecuencia de
muestreo
De 16 kHz a 48 kHz
(LPCM), 22,05 kHz y
44,1 kHz (MS ADPCM)
Jerarquía de carpetas
reproducibles
Hasta ocho niveles
(una jerarquía práctica
debe tener menos de
dos niveles)
Carpetas
reproducibles
Hasta 99
Archivos
reproducibles
Hasta 999
Sistema de archivos ISO 9660 Nivel 1 y 2,
Romeo, Joliet
Reproducción
multisesión
Compatible
Transferencia de datos
en formato Packet
Write
No compatible
Jerarquía de carpetas
reproducibles
Hasta ocho niveles
(una jerarquía práctica
debe tener menos de
dos niveles)
Carpetas
reproducibles
Hasta 500
Archivos
reproducibles
Hasta 15 000
Reproducción de
archivos protegidos
por derechos de autor
No compatible
Dispositivo USB con
particiones
Solo es posible
reproducir la primera
partición.
Compatibilidad de
modelos de iPod
software de iPod compatibles se indican a
continuación. Es posible que la unidad no sea
compatible con versiones anteriores.
Diseñado para
–iPod touch (generaciones de 1.ª a 6.ª)
–iPod classic
– iPod con vídeo
–iPod nano (generaciones de 1.ª a 7.ª)
–iPhone 6s
– iPhone 6s Plus
–iPhone 6
–iPhone 6 Plus
–iPhone 5s
–iPhone 5c
–iPhone 5
–iPhone 4s
–iPhone 4
–iPhone 3GS
–iPhone 3G
–iPhone
• L
as operaciones pueden variar en función
de la generación y/o la versión del
software del iPod.
• L
os usuarios de un iPod con conector
Lightning deben utilizar el cable de
Lightning a USB (suministrado con el
iPod).
• L
os usuarios de un iPod con conector
Dock deben utilizar el CD-IU51. Para
obtener más información, consulte a su
distribuidor.
• C
onsulte los manuales del iPod para
obtener información sobre la
compatibilidad de archivos y formatos.
• A
udiolibro, podcast: compatible
PRECAUCIÓN
Pioneer declina toda responsabilidad por
la pérdida de datos del iPod, aunque la
pérdida se produzca durante la utilización
de esta unidad.
El usuario no puede asignar números de
carpeta ni especificar secuencias de
reproducción con esta unidad. La
secuencia de los archivos de audio
depende del dispositivo conectado.
Tenga en cuenta que los archivos ocultos
de
un dispositivo USB no podrán
reproducirse.
Ejemplo de una jerarquía
Secuencia de archivos de
audio
Carpeta
Archivo de audio
comprimido
a : secuencia de reproducción
De 01 a 05: número de carpeta

19Es
Español
iTunes
Apple e iTunes son marcas comerciales de
Apple Inc., registradas en los EE.UU. y en
otros países.
WMA
Windows Media es una marca registrada o
una m
arca de fábrica de Microsoft
Corporation en los Estados Unidos y/u
otros países.
Este producto incluye tecnología
pr
opiedad de Microsoft Corporation, y no
se puede usar ni distribuir sin una licencia
de Microsoft Licensing, Inc.
iPod & iPhone
iPhone, iPod, iPod classic, iPod nano y iPod
t
ouch son marcas comerciales de Apple
Inc., registradas en los EE. UU. y en otros
países.
Lightning es una marca comercial de Apple
In
c.
“Made for iPod” y “Made for iPhone”
s
ignifican que un accesorio electrónico ha
sido diseñado para ser conectado
específicamente a un iPod o a un iPhone,
respectivamente, y ha sido homologado
por quien lo desarrolló para cumplir con las
normas de funcionamiento de Apple.
Apple no es responsable del
funcionamiento de este aparato ni de que
cumpla con las normas de seguridad y
reguladoras. Tenga presente que el empleo
de este accesorio con un iPod o iPhone
puede afectar el funcionamiento
inalámbrico.
Android & Google Play
Android, Google Play y el logotipo de
G
oogle Play son marcas comerciales de
Google Inc.
MIXTRAX
MIXTRAX es una marca comercial de
PIO
NEER CORPORATION.
Spotify®
SPOTIFY y el logotipo de Spotify se
en
cuentran entre las marcas registradas de
Spotify AB. Se requieren dispositivos
digitales móviles y una suscripción
Premium, si está disponible; consulte
https://www.spotify.com.
General
Fuente de alimentación: 14,4 V CC (de
10,8 V a 15,1 V permisible)
Sistema de conexión a tierra: tipo negativo
Consumo máximo de corriente: 10,0 A
Dimensiones (An × Al × Pr):
Tabla de caracteres de
ruso
Copyright y marcas
registradas
D: visor C: carácter
Especificaciones
DIN
Bastidor: 178 mm × 50 mm × 165 mm
Cara anterior: 188 mm × 58 mm ×
17 mm
D
Bastidor: 178 mm × 50 mm × 165 mm
Cara anterior: 170 mm × 46 mm ×
17 mm
Peso: 1 kg
Audio
Salida de potencia máxima:
• 50 W × 4 canales/4 Ω (sin
s
ubwoofer)
• 50 W × 2 canales/4 Ω + 70 W × 1
canal/2 Ω (con subwoofer)
Salida de potencia continua:
22 W × 4 (de 50 Hz a 15 000 Hz, 5%
TH
D, 4 Ω carga, ambos canales
ac
tivados)
Impedancia de carga: 4 Ω (de 4 Ω a 8 Ω
pe
rmisible)
Nivel de salida máxima del
pr
eamplificador: 2,0 V
Contorno de sonoridad: +10 dB (100 Hz),
+6,
5 dB (10 kHz) (volumen: –30 dB)
Ecualizador (ecualizador gráfico de
5 bandas):
Frecuencia: 80 Hz/250 Hz/800 Hz/2,5
kHz
/8 kHz
Intervalo de ecualización: ±12 dB
(pas
os de 2 dB)
Subwoofer (mono):
Frecuencia: 50 Hz/63 Hz/80 Hz/
100 Hz/125 Hz/160 Hz/200 Hz
Curva: –12 dB/oct, –24 dB/oct
Ganancia: +6 dB a –24 dB
Fase: normal/inversa
Reproductor de CD
Sistema: sistema de audio de discos
compactos
Discos utilizables: discos compactos
Relación señal/ruido: 94 dB (1 kHz) (red
IE
C-A)
Número de canales: 2 (estéreo)
Formato de decodificación MP3: MPEG-1 &
2 A
udio Layer 3
Formato de decodificación WMA: ver. 7,
7.1,
8, 9, 10, 11, 12 (audio 2 canales)
(Windows Media Player)
Formato de señal WAV: PCM lineal y MS
A
DPCM (sin comprimir)
USB
Especificación estándar USB: USB 2.0 de
alta velocidad
Corriente máxima: 1,5 A
USB Protocolo:
MSC (Clase de almacenamiento
ma
sivo)
MTP (Protocolo de transferencia
m
ultimedia)
AOA (Open Accessory de Android) 2.0
Sistema de archivos: FAT12, FAT16, FAT32
Formato de decodificación MP3: MPEG-1 &
2 A
udio Layer 3
Formato de decodificación WMA: ver. 7,
7.1,
8, 9, 10, 11, 12 (audio 2 canales)
(Windows Media Player)
Formato de señal WAV: PCM lineal y MS
A
DPCM (sin comprimir)
Sintonizador FM
Intervalo de frecuencias: de 87,5 MHz a
108,0 MHz
Sensibilidad utilizable: 11 dBf (1,0 μV/75 Ω,
m
ono, señal/ruido: 30 dB)
Relación señal/ruido: 72 dB (red IEC-A)
Sintonizador MW
Intervalo de frecuencias: de 531 kHz a
1 602 kHz
Sensibilidad utilizable: 25 μV (señal/ruido:
20 dB
)
Relación señal/ruido: 62 dB (red IEC-A)
Sintonizador LW
Intervalo de frecuencias: de 153 kHz a
281 kHz
Sensibilidad utilizable: 28 μV (señal/ruido:
20 dB
)

20Es
Relación señal/ruido: 62 dB (red IEC-A)
NOTA
Las especificaciones y el diseño están
sujetos a modificaciones sin previo aviso.

21Es
Español

2De
Bevor Sie beginnen................................................................................. 2
Erste Schritte............................................................................................ 3
Radio.......................................................................................................... 5
CD/USB/iPod/AUX................................................................................... 6
App-Modus............................................................................................... 8
Spotify®..................................................................................................... 8
Verwenden von Pioneer ARC APP........................................................ 9
Einstellungen......................................................................................... 10
FUNCTION-Einstellungen ................................................................... 10
AUDIO-Einstellungen........................................................................... 11
SYSTEM-Einstellungen ........................................................................ 12
ILLUMINATION-Einstellungen............................................................ 13
MIXTRAX-Einstellungen...................................................................... 13
Anschlüsse/Einbau................................................................................ 14
Zusätzliche Informationen.................................................................. 16
Über dieses Handbuch:
• In den folgenden Anweisungen werden ein USB-Stick oder USB-Audioplayer als „USB-
Gerät” bezeichnet.
• iPod und iPhone werden in diesem Handbuch als „iPod” bezeichnet.
Inhaltsverzeichnis
Vielen Dank für den Kauf dieses PIONEER-Produkts
Um eine ordnungsgemäße Verwendung sicherzustellen, lesen Sie sich bitte dieses Handbuch durch,
bevor Sie dieses Produkt verwenden. Besonders wichtig ist, dass Sie die Hinweise WARNUNG und
VORSICHT in diesem Handbuch lesen. Bitte bewahren Sie das Handbuch an einem sicheren und gut
zugänglichen Ort auf, um später darin nachschlagen zu können.
Privathaushalte in den Mitgliedstaaten der EU, in der Schweiz und in Norwegen können ihre
gebrauchten elektronischen Produkte kostenfrei bei speziell dafür eingerichteten Sammelstellen
abgeben oder zu einem Fachhändler zurückbringen (sofern sie ein vergleichbares neues Produkt
kaufen).
In den Ländern, die hier nicht aufgeführt sind, wenden Sie sich hinsichtlich der zu beachtenden
Entsorgungsweise bitte an die zuständige Gemeindeverwaltung.
Auf diese Weise stellen Sie sicher, dass das zu entsorgende Produkt der erforderlichen Verarbeitung,
Rückgewinnung und Wiederverwertung zugeführt wird, und verhindern damit potenziell negative
Auswirkungen auf die Umwelt sowie Gesundheitsschäden.
WARNUNG
•Versuchen Sie nicht, dieses Produkt selbst zu montieren oder zu warten. Werden Montage-
oder Wartungsarbeiten des Produkts von Personen ohne Ausbildung und Erfahrung
hinsichtlich elektronischer Geräte und Fahrzeugzubehör vorgenommen, kann dies gefährlich
sein und möglicherweise zu elektrischen Schlägen, Verletzungen oder anderen Gefahren
führen.
• Bedienen Sie das Gerät niemals während der Fahrt. Fahren Sie an den Straßenrand und parken Sie Ihr
Fahrzeug zuerst an einem sicheren Ort, bevor Sie die Bedienelemente des Geräts bedienen.
Bevor Sie beginnen
Mischen Sie dieses Produkt, wenn Sie es entsorgen wollen, nicht mit gewöhnlichen
Haushaltsabfällen. Es gibt ein getrenntes Sammelsystem für gebrauchte elektronische Produkte,
über das die richtige Behandlung, Rückgewinnung und Wiederverwertung gemäß der bestehenden
Gesetzgebung gewährleistet wird.
Wichtig
Bitte tragen Sie die folgenden Informationen in das dafür vorgesehene Formular in der
„Schnellstartanleitung“ ein.
— 14-stellige Seriennummer (an der Unterseite des Geräts angegeben)
— Kaufdatum (Datum der Quittung)
— Stempel des Händlers
Diese Informationen dienen als Eigentumsnachweis.
Im Fall eines Diebstahls teilen Sie der Polizei die 14-stellige Seriennummer und das Kaufdatum des
Geräts mit.
Bewahren Sie die „Schnellstartanleitung“ an einem sicheren Ort auf.

3De
Deutsch
VORSICHT
•Lassen Sie dieses Gerät nicht in Kontakt mit Feuchtigkeit und/oder Flüssigkeiten kommen. Dies
könnte zu einem elektrischen Schlag führen. Außerdem könnte es bei Kontakt mit Flüssigkeiten zu
Beschädigungen des Geräts, Rauchentwicklung und Überhitzung kommen.
•Wählen Sie stets eine Lautstärke, bei der Sie Umgebungsgeräusche noch deutlich wahrnehmen
können.
•Dieses Produkt wurde unter moderaten und tropischen Klimabedingungen entsprechend der
Sicherheitsbestimmungen, IEC 60065, für Audio-, Video- und ähnliche Elektrogeräte getestet.
Im Problemfall
Sollte dieses Gerät nicht ordnungsgemäß funktionieren, dann wenden Sie sich an Ihren Händler oder
an die nächstgelegene PIONEER-Kundendienststelle.
DEH-X2900UI
VORSICHT
Bei diesem Gerät handelt es sich um ein Laserprodukt der Klasse 1, das entsprechend dem Standard
Sicherheit für Laserprodukte IEC 60825-1:2007 klassifiziert ist.
Erste Schritte
Grundlagen der Bedienung
Entriegelungstaste
Anzeigefenster
M.C.-(Mehrfunktions-)Regler
BAND/
DISP (Display)
SRC (Quelle)/OFF
USB-Anschluss
(auswerfen)
AUX-Eingangsbuchse (3,5-mm-Stereobuchse)
CD-Fach
Optionale Fernbedienung
Die Fernbedienung CD-R320 ist separat erhältlich.
Häufig verwendete Bedienvorgänge
* Wenn das blauweiße Kabel dieses Geräts an der Steuerklemme des Automatikantennenrelais des
Fahrzeugs angeschlossen ist, fährt die Fahrzeugantenne aus, wenn die Quelle dieses Geräts
eingeschaltet wird. Um die Antenne einzuziehen, schalten Sie die Quelle aus.
Anzeige im Display
Zweck Bedienung
Gerät einschalten* Drücken Sie SRC
/OFF, um das Gerät
einzuschalten.
Halten Sie SRC
/OFF gedrückt, um das Gerät
auszuschalten.
Lautstärke einstellen Drehen Sie den M.
C.-Regler.
Quelle auswählen Drücken Sie mehrmals SRC
/OFF.
Anzeigeinformationen umschalten Drücken Sie mehrmals DISP.
Zur vorhergehenden Anzeige/Liste
zurückkehren
Drücken Sie BAND/ .
Vom Menü zur normalen Anzeige
zur
ückkehren
Halten Sie BAND/ gedrückt.
Anzeige Beschreibung
Erscheint, wenn eine untere Ebene des Menüs oder Ordners existiert.
Erscheint, wenn die -Taste gedrückt wird.
Erscheint, wenn der Lokalsender-Suchlauf eingeschaltet ist (Seite 10).
Erscheint, wenn ein Verkehrsfunkprogramm empfangen wird.
Erscheint, wenn die TA-Funktion (Verkehrsdurchsagen) eingeschaltet ist
(Seite 10).
Erscheint, wenn die Sound Retriever-Funktion eingeschaltet ist (Seite 11).
Erscheint, wenn die Zufalls-/Shuffle-Wiedergabe eingeschaltet ist.
Erscheint, wenn die Wiedergabewiederholung eingeschaltet ist.
Erscheint, wenn die iPod-Steuerung eingeschaltet ist (Seite 7).

4De
Nehmen Sie das Bedienfeld ab, um einen Diebstahl zu verhindern. Ziehen Sie am
B
edienfeld befestigte Kabel und Geräte ab und schalten Sie das Gerät aus, bevor Sie das
Bedienfeld abnehmen.
Wichtig
• Setzen Sie das Bedienfeld keinen starken Erschütterungen aus.
• Halten Sie das Bedienfeld von direktem Sonnenlicht und hohen Temperaturen fern.
• Bewahren Sie das abgenommene Bedienfeld immer in einer Schutzhülle oder Tasche auf.
Wenn Sie nach dem Einbau die Zündung einschalten, erscheint [SET UP :YES] im Display.
1 Drücken Sie den M.C.-Regler.
Das Einrichtungsmenü verschwindet, wenn 30 Sekunden lang kein Bedienvorgang
a
usgeführt wird. Wenn Sie die Einrichtung im Moment nicht durchführen möchten,
drehen Sie den M.C.-Regler, um [NO] auszuwählen, und drücken Sie ihn dann, um
den Vorgang zu bestätigen.
2 Drehen Sie den M.C.-Regler, um die Optionen auszuwählen, und drücken Sie ihn
dann, um den Vorgang zu bestätigen.
Um mit der nächsten Menüoption fortzufahren, müssen Sie Ihre Auswahl
be
stätigen.
Abnehmen des Bedienfelds
Einrichtungsmenü
Menüpunkt Beschreibung
LANGUAGE Auswahl der Sprache, in der die Textinformationen
k
omprimierter Audiodateien angezeigt werden sollen.
[ENG] (Englisch),
[РУС
] (Russisch),
[TUR] (Türkisch)
CLOCK SET Einstellung der Uhr.
Abnehmen Anbringen
3 [QUIT :YES] erscheint, wenn sämtliche Einstellungen vorgenommen wurden.
Um zum ersten Eintrag des Einrichtungsmenüs zurückzukehren, drehen Sie den
M.C
.-Regler, um [QUIT :NO] auszuwählen, und drücken Sie ihn dann, um den
Vorgang zu bestätigen.
4 Drehen Sie den M.C.-Regler, um die Einstellungen zu bestätigen.
HINWEISE
• Sie können die Menüeinstellung durch Drücken von SRC/OFF abbrechen.
• Diese Einstellungen können jederzeit über die SYSTEM- (Seite 12) und INITIAL-Einstellungen (Seite 4)
vorgenommen werden.
1 Drehen Sie den M.C.-Regler, um das Hauptmenü anzuzeigen.
2 Drehen Sie den M.C.-Regler, um [SYSTEM] auszuwählen, und drücken Sie ihn
dann, um den Vorgang zu bestätigen.
3 Drehen Sie den M.C.-Regler, um [DEMO OFF] auszuwählen, und drücken Sie ihn
dann, um den Vorgang zu bestätigen.
4 Drehen Sie den M.C.-Regler, um [YES] auszuwählen, und drücken Sie ihn dann,
um den Vorgang zu bestätigen.
1 Halten Sie SRC/OFF gedrückt, bis sich das Gerät ausschaltet.
2 Halten Sie SRC/OFF gedrückt, um das Hauptmenü anzuzeigen.
3 Drehen Sie den M.C.-Regler, um [INITIAL] auszuwählen, und drücken Sie ihn
dann, um den Vorgang zu bestätigen.
4 Drehen Sie den M.C.-Regler, um eine Option auszuwählen, und drücken Sie ihn
dann, um den Vorgang zu bestätigen.
FM STEP Auswahl der FM-Schrittweite: 100 kHz oder 50 kHz.
[100], [50]
Abbrechen der Demoanzeige (DEMO OFF)
INITIAL-Einstellungen
Menüpunkt Beschreibung
FM STEP Auswahl der FM-Schrittweite: 100 kHz oder 50 kHz.
[100], [50]
Menüpunkt Beschreibung

5De
Deutsch
Die Empfangsfrequenzen dieses Geräts sind für die Nutzung in Westeuropa, Asien, dem
Nahen Osten, Afrika und Ozeanien vorgesehen. Eine Nutzung in anderen Regionen kann
zu schlechtem Empfang führen. Die RDS-Funktion (Radio Data System:
Datenfunksystem) funktioniert nur in Regionen, die RDS-Signale für FM-Sender
übertragen.
1 Drücken Sie SRC/OFF, um [RADIO] auszuwählen.
2 Drücken Sie BAND/ , um das Band auszuwählen: [FM1], [FM2], [FM3], [MW]
oder [LW].
3 Drücke Sie eine Zifferntaste (1/ bis 6/ ).
SP-P/O MODE Wählen Sie diese Option, wenn an den Ausgangsdrähten für die
Hecklautsprecher ein Breitbandlautsprecher und am Cinch-
Ausgang ein Subwoofer angeschlossen ist.
[REAR/SUB.W]
[SUB.W/SUB.W] Wählen Sie diese Option, wenn an den Ausgangsdrähten für die
H
ecklautsprecher ein passiver Subwoofer direkt angeschlossen
und am Cinch-Ausgang ein Subwoofer angeschlossen ist.
[REAR/REAR] Wählen Sie diese Option, wenn an den Ausgangsdrähten für die
H
ecklautsprecher Breitbandlautsprecher angeschlossen sind.
Wenn an den Ausgangsdrähten für die Hecklautsprecher ein
Breitbandlautsprecher angeschlossen ist und der Cinch-
Ausgang nicht verwendet wird, können Sie entweder [REAR/
SUB.W] oder [REAR/REAR] auswählen.
S/W UPDATE Wählen Sie diese Option, um die neuesten
S
ysteminformationen des Geräts zu bestätigen.
[SYSTEM INFO]
[SYSTEM UPDATE] Wählen Sie diese Option, um das Gerät auf die neueste Software
zu aktualisieren und die Einstellungen des Geräts zu
initialisieren. Einzelheiten zur neuesten Software und zur
Aktualisierung finden Sie auf unserer Website.
SYSTEM RESET Wählen Sie [YES], um die Geräteeinstellungen zu initialisieren.
D
as Gerät wird automatisch neu gestartet.
(Einige der Einstellungen können auch nach dem Zurücksetzen
d
es Geräts erhalten bleiben.)
[YES], [NO]
Radio
Empfangen von voreingestellten Sendern
Menüpunkt Beschreibung
TIPP
Die / -Tasten können auch verwendet werden, um einen voreingestellten Sender
auszuwählen, wenn [SEEK] in den FUNCTION-Einstellungen auf [PCH] eingestellt ist (Seite 11).
Die sechs stärksten Sender werden auf den Zifferntasten (1/ bis 6/ ) gespeichert.
1 Drücken Sie, nachdem Sie das Band ausgewählt haben, den M.C.-Regler, um das
Hauptmenü anzuzeigen.
2 Drehen Sie den M.C.-Regler, um [FUNCTION] auszuwählen, und drücken Sie ihn
dann, um den Vorgang zu bestätigen.
3 Drehen Sie den M.C.-Regler, um [BSM] auszuwählen, und drücken Sie ihn dann,
um den Vorgang zu bestätigen.
Sender manuell suchen
1 Drücken Sie, nachdem Sie das Band ausgewählt haben, / , um einen
Sender auszuwählen.
Halten Sie / gedrückt und lassen Sie dann die Taste los, um nach einem
verfügbaren Sender zu suchen. Der Suchlauf hält an, wenn das Gerät einen Sender
em
pfängt. Um den Suchlauf abzubrechen, drücken Sie / .
HINWEIS
[SEEK] muss in den FUNCTION-Einstellungen auf [MAN] eingestellt sein (Seite 11).
Sender manuell speichern
1 Halten Sie, während Sie den zu speichernden Sender empfangen, eine der
Zifferntasten (1/ bis 6/ ) gedrückt, bis sie zu blinken aufhört.
Das Gerät sucht anhand von PTY-Informationen (Programmtyp) nach einem Sender.
1 Drücken Sie während des FM-Empfangs .
2 Drehen Sie den M.C.-Regler, um einen Programmtyp auszuwählen: [NEWS/INFO],
[POPULAR], [CLASSICS] oder [OTHERS].
3 Drücken Sie den M.C.-Regler.
Speicher der besten Sender (BSM: Best Stations
Memory)
Verwenden von PTY-Funktionen

6De
Das Gerät beginnt, nach einem Sender zu suchen. Wenn ein Sender gefunden
wurde
, wird der Sendername angezeigt.
HINWEISE
• Um die Suche abzubrechen, drücken Sie den M.C.-Regler.
• Das Sendeprogramm einiger Sender kann von der übertragenen PTY-Klassifizierung abweichen.
• Wenn kein Sender den Programmtyp überträgt, nach dem Sie suchen, wird etwa zwei Sekunden lang
[NOT FOUND] angezeigt, und der Tuner kehrt dann zum ursprünglichen Sender zurück.
Ziehen Sie den Kopfhörer des externen Geräts ab, bevor Sie es an dieses Gerät
anschließen.
CD
1 Legen Sie eine CD mit der Etikettenseite nach oben in das CD-Fach ein.
Um eine Disc auszuwerfen, stoppen Sie als Erstes die Wiedergabe, und drücken Sie dann
.
USB-Geräte (einschließlich Android™)/iPod
1 Öffnen Sie die Abdeckung des USB-Anschlusses.
2 Schließen Sie mit einem geeigneten Kabel das USB-Gerät/den iPod an.
HINWEIS
Um automatisch zur [USB]-Quelle zu wechseln, wenn ein USB-Gerät/iPod an diesem Gerät
angeschlossen ist, stellen Sie [USB AUTO] in den SYSTEM-Einstellungen auf [ON] (Seite 12).
VORSICHT
Verwenden Sie ein optionales Pioneer-USB-Kabel (CD-U50E), um das USB-Gerät anzuschließen, da
jedes direkt am Gerät angeschlossene externe Gerät aus dem Gerät herausragen wird, was gefährlich
sein könnte.
Beenden Sie, bevor Sie das andere Gerät von diesem Gerät trennen, die Wiedergabe.
AOA-Verbindungen
Einzelheiten zur AOA-Verbindung finden Sie auf Seite 9.
MTP-Verbindung
Ein Gerät mit Android-Version 4.0 oder höher kann mit Hilfe des mit dem betreffenden Gerät
gelieferten Kabels über MTP an diesem Gerät angeschlossen werden. Je nach angeschlossenem Gerät
CD/USB/iPod/AUX
Wiedergabe
und der Anzahl der Dateien auf dem Gerät kann es sein, dass Audiodateien/Musiktitel nicht über MTP
wiedergegeben werden können. Beachten Sie, dass die MTP-Verbindung nicht mit WAV-
Datenformaten kompatibel ist und nicht mit der MIXTRAX-Funktion verwendet werden kann.
HINWEIS
Wenn Sie eine MTP-Verbindung verwenden, muss [ANDROID WIRED] in den SYSTEM-Einstellungen auf
[MEMORY] eingestellt sein (Seite 12).
AUX
1 Schließen Sie den Stereo-Mini-Stecker an der AUX-Eingangsbuchse an.
2 Drücken Sie SRC/OFF, um [AUX] als Quelle auszuwählen.
HINWEIS
Wenn in den SYSTEM-Einstellungen [AUX] auf [OFF] eingestellt ist, lässt sich [AUX] nicht als Quelle
auswählen (Seite 12).
In den FUNCTION-Einstellungen können Sie verschiedene Anpassungen vornehmen
(Seite 10).
Beachten Sie, dass die folgenden Bedienvorgänge nicht bei einem AUX-Gerät
funk
tionieren. Um ein AUX-Gerät zu bedienen, führen Sie die Vorgänge an dem Gerät
selbst aus.
Bedienvorgänge
Zweck Bedienung
Ordner/Album auswählen*1 Drücken Sie 1/ bzw. 2/ .
Track/Titel (Kapitel) auswählen Drücken Sie bzw. .
Vor- oder zurückspulen*3 Halten Sie bzw. gedrückt.
In einer Liste nach einer Datei suchen 1 Drücken Sie , um die Liste anzuzeigen.
2 Dreh
en Sie den M.C.-Regler, um den
Namen oder die Kategorie der/des
gewünschten Datei/Ordners
auszuwählen, und drücken Sie dann den
Regler, um den Vorgang zu bestätigen.
3 Dreh
en Sie den M.C.-Regler, um die
gewünschte Datei auszuwählen, und
drücken Sie ihn dann, um den Vorgang
zu bestätigen.
Die Wiedergabe startet.
Eine Liste der Dateien im ausgewählten
Or
dner/in der ausgewählten Kategorie
ansehen*1
Drücken Sie, wenn ein Ordner/eine
Kategorie ausgewählt ist, den M.C.-Regler.

7De
Deutsch
*1 Nur komprimierte Audiodateien
*2 Diese Funktion ist deaktiviert, wenn USB als Quelle ausgewählt und die MIXTRAX-Funktion
eingeschaltet ist.
*3 Wenn Sie während der Wiedergabe einer VBR-Datei die Vor- oder Rückspulfunktion verwenden,
kann es sein, dass die Wiedergabezeit nicht richtig angezeigt wird.
Einen Musiktitel aus dem/der ausgewählten
Ordner/Kategorie abspielen*1
Halten Sie, wenn ein Ordner/eine Kategorie
ausgewählt ist, den M.C.-Regler gedrückt.
Alphabetische Suche (nur iPod) 1 Dr
ücken Sie , um die Liste anzuzeigen.
2 D
rehen Sie den M.C.-Regler, um die
gewünschte Kategorieliste auszuwählen,
und drücken Sie dann , um den
alphabetischen Suchmodus aufzurufen.
(Zweimaliges Drehen des M.
C.-Reglers
ruft ebenfalls den alphabetischen
Suchmodus auf.)
3 D
rehen Sie den M.C.-Regler, um einen
Buchstaben auszuwählen, und drücken
Sie dann den Regler, um die
alphabetische Liste anzuzeigen.
Um die alphabetische Suche abzubrechen,
dr
ücken Sie BAND/ .
Wiedergabewiederholung Drücken Sie 6/ .
Zufalls-/Shuffle-Wiedergabe Drücken Sie 5/ .
Shuffle-Wiedergabe aller Titel (nur iPod) Halten Sie 5/ gedrückt.
Wiedergabe pausieren/fortsetzen Drücken Sie 4/PA
USE.
Sound Retriever*1*2 Drücken Sie 3/S.
Rtrv.
[1]: Effektiv bei niedrigen
K
ompressionsraten
[2]: Effektiv bei hohen Kompressionsraten
Rückkehr zum Stammordner (nur CD/
US
B)*1
Halten Sie gedrückt.
Wechsel zwischen komprimierten
A
udiodaten und CD-DA (nur CD)
Drücken Sie BAND/ .
Wechsel des Laufwerks im USB-Gerät
(Nur Geräte, die das USB-
Massenspeicherklasse-Protokoll
unterstützen)
Drücken Sie BA
ND/ .
Zweck Bedienung
Modus der verknüpften Wiedergabe
Sie können auf Musiktitel zugreifen, die einen Bezug zu dem momentan
wiedergegebenen Interpreten, Album oder Genre haben.
1 Halten Sie, während Sie einen Titel anhören, gedrückt, um in den Modus der
verknüpften Wiedergabe zu wechseln.
2 Drehen Sie den M.C.-Regler, um den Modus auszuwählen ([ARTIST], [ALBUM],
[GENRE]), und drücken Sie dann den Regler, um den Vorgang zu bestätigen.
Der ausgewählte Titel/das ausgewählte Album wird nach dem momentan
wie
dergegebenen Titel gespielt.
HINWEIS
Der ausgewählte Titel/das ausgewählte Album kann abgebrochen werden, wenn Sie Funktionen
verwenden, die nicht zum Modus der verknüpften Wiedergabe gehören (z. B. Vor- und Zurückspulen).
Steuerung über iPod
Sie können das Gerät über einen angeschlossenen iPod steuern.
Die folgenden iPod-Modelle sind nicht mit dieser Funktion kompatibel.
–iPod nano der 1. Generation, iPod mit Videofunktion
1 Drücken Sie während der Wiedergabe BAND/ , und wählen Sie dann den
Steuerungsmodus aus.
[CO
NTROL iPod]: Die iPod-Funktion des Geräts kann nur über den angeschlossenen
iPod bedient werden.
[CO
NTROL AUDIO]: Die iPod-Funktion des Geräts kann nur mit den Tasten des Geräts
bedient werden. In diesem Modus lässt sich der angeschlossene iPod nicht ein- oder
ausschalten.
HINWEISE
• Wenn Sie den Steuerungsmodus auf [CONTROL iPod] umschalten, pausiert die Musikwiedergabe.
Verwenden Sie den angeschlossenen iPod, um die Wiedergabe fortzusetzen.
• Die folgenden Bedienvorgänge sind weiterhin mit dem Gerät möglich, auch wenn der
Steuerungsmodus auf [CONTROL iPod] eingestellt ist.
– Pause, Vor-/Zurückspulen, Titel-/Kapitelauswahl
• Die Lautstärke kann nur am Gerät eingestellt werden.
Die MIXTRAX-Funktion erstellt einen von Beleuchtungseffekten begleiteten Nonstop-
Mix Ihrer Musikbibliothek. Einzelheiten zu den MIXTRAX-Einstellungen finden Sie auf
Seite 13.
Nützliche Funktionen für iPods
Über MIXTRAX (nur USB/iPod)

8De
HINWEISE
• Diese Funktion ist nicht mit einem über MTP angeschlossenen Android-Gerät kompatibel.
• Wenn USB als Quelle ausgewählt ist und die MIXTRAX-Funktion verwendet wird, ist die Sound-
Retriever-Funktion deaktiviert.
• Je nach Datei/Titel sind möglicherweise keine Klangeffekte verfügbar.
• Schalten Sie die MIXTRAX-Funktion aus, wenn die von ihr erzeugten Beleuchtungseffekte beim
Fahren stören.
1 Drücken Sie MIX, um MIXTRAX ein-/auszuschalten.
Sie können sich über dieses Gerät den Ton einer Anwendung auf einem iPhone anhören.
In
einigen Fällen können Sie eine Anwendung mit diesem Gerät steuern.
Einzelheiten zu kompatiblen Geräten finden Sie auf unserer Website.
Wichtig
Die Verwendung von Apps von Dritten kann eventuell die Angabe personenbezogener Daten nach
sich ziehen oder notwendig machen entweder durch das Eröffnen eines Benutzerkontos o. Ä. und für
bestimmte Anwendungen die Angabe von Geolokationsdaten.
ALLE APPS VON DRITTEN UNTERLIEGEN DER ALLEINIGEN VERANTWORTUNG DER ANBIETER
EINSCHLIESSLICH UND OHNE EINSCHRÄNKUNG DEM SAMMELN UND SICHERN DER ANWENDERDATEN
UND DATENSCHUTZMASSNAHMEN. DURCH ZUGRIFF AUF APPS VON DRITTEN ERKLÄREN SIE SICH MIT
DEN NUTZUNGSBEDINGUNGEN UND DATENSCHUTZRICHTLINIEN DER JEWEILIGEN ANBIETER
EINVERSTANDEN. WENN SIE DEN NUTZUNGSBEDINGUNGEN UND RICHTLINIEN EINES ANBIETERS ODER
DER VERWENDUNG VON GEOLOKATIONSDATEN, WO ZUTREFFEND, NICHT ZUSTIMMEN, DANN SEHEN
SIE VON DER VERWENDUNG VON APPS VON DRITTEN AB.
Für iPhone-Benutzer
Diese Funktion ist mit iPhone- und iPod touch-Geräten mit iOS 5.0 oder höher kompatibel.
HINWEIS
PIONEER IST NICHT FÜR DRITTANBIETER-APPS ODER -INHALTE VERANTWORTLICH, EINSCHLIESSLICH
OHNE BESCHRÄNKUNG DEREN RICHTIGKEIT ODER VOLLSTÄNDIGKEIT. DIE ALLEINIGE
VERANTWORTUNG FÜR INHALT UND FUNKTIONALITÄT SOLCHER APPS TRÄGT DER ANBIETER DER APP.
1 Verbinden Sie dieses Gerät mit dem mobilen Gerät.
• iP
hone über USB (Seite 6)
2 Drücken Sie SRC/OFF, um [APP] auszuwählen.
3 Bedienen Sie das mobile Gerät, um die Anwendung zu starten.
App-Modus
Wiedergabe einer Anwendung über das Gerät
Grundlegende Bedienvorgänge
In den FUNCTION-Einstellungen können Sie verschiedene Anpassungen vornehmen
(Seite 10).
(DEH-X2900UI ist nur kompatibel mit Spotify bei Installation auf iPhone.)
Spotify ist ein Musikstreaming-Dienst, der nicht mit Pioneer verbunden ist. Weitere
I
nformationen sind unter http://www.spotify.com verfügbar.
Die Spotify-Anwendung ist für kompatible Smartphones verfügbar, bitte besuchen Sie
htt
ps://support.spotify.com/, um die neuesten Kompatibilitätsinformationen zu
erhalten.
Um Spotify während der Fahrt zu nutzen, müssen Sie zunächst die Spotify-App auf Ihr
i
Phone herunterladen. Sie können sie über den iTunes App Store herunterladen. Wählen
Sie ein kostenloses Konto oder ein kostenpflichtiges Premium-Konto, entweder in der
App oder auf spotify.com. Mit einem Premium-Konto erhalten Sie mehr Funktionen wie
beispielsweise Musikhören offline.
Wichtig
• Dieses Produkt enthält Spotify-Software, die Drittlizenzen unterliegt, die Sie hier lesen können:
www.spotify.com/connect/third-party-licenses.
• Informationen über die Länder und Regionen, in denen Spotify verwendet werden kann, finden Sie
unter https://www.spotify.com/us/select-your-country/.
Aktualisieren Sie vor der Verwendung die Firmware der Spotify-Anwendung auf die
neueste Version.
1 Verbinden Sie dieses Gerät mit dem mobilen Gerät.
• iP
hone über USB (Seite 6)
2 Drücken Sie SRC/OFF, um [SPOTIFY] auszuwählen.
3 Starten Sie auf dem mobilen Gerät die Spotify-Anwendung und starten Sie die
Wiedergabe.
Zweck Bedienung
Track auswählen Drücken Sie bzw. .
Vor- oder zurückspulen Halten Sie bzw. gedrückt.
Wiedergabe pausieren/fortsetzen Drücken Sie BAND/ .
Spotify®
Spotify hören

9De
Deutsch
Grundlegende Bedienvorgänge
In den FUNCTION-Einstellungen können Sie verschiedene Anpassungen vornehmen
(Seite 10).
HINWEIS
Welche Vorgänge verfügbar sein, kann je nach der Art des abzuspielenden Inhalts (Titel/Album/
Interpret/Playlist/Radio) variieren.
HINWEIS
Einige Funktionen von Spotify lassen sich möglicherweise nicht mit dem Gerät bedienen.
Zweck Bedienung
Track überspringen Drücken Sie bzw. .
In einer Liste nach einem Titel suchen 1 Drücken Sie (Liste), um die Liste
anzuzeigen.
2 D
rehen Sie den M.C.-Regler, um die
gewünschte Kategorie auszuwählen, und
drücken Sie ihn dann, um den Vorgang
zu bestätigen.
3 D
rehen Sie den M.C.-Regler, um die
gewünschte Datei auszuwählen, und
drücken Sie ihn dann, um den Vorgang
zu bestätigen.
Die Wiedergabe startet.
Wiedergabe pausieren/fortsetzen Drücken Sie 4/
PAUSE.
Daumen hoch (Nur für Radio) Drücken Sie 1/ .
Daumen runter (Nur für Radio) Drücken Sie 2/ .
Zufallswiedergabe (Nur für Titel/Album/
In
terpret/Playlist)
Drücken Sie 5/ .
Wiedergabewiederholung (Nur für Titel/
Al
bum/Interpret/Playlist)
Drücken Sie 6/ .
Anhand des aktuell wiedergegebenen
S
ongs einen Radiosender starten.
1 Halten Sie (Liste) gedrückt, um einen
Radiosender zu starten.
2 D
rücken Sie den M.C.-Regler.
• Dies
e Funktion ist je nach ausgewähltem
Song möglicherweise nicht verfügbar.
Die Informationen über den aktuell
ge
spielten Song speichern.
Die gespeicherten Song-Informationen
lö
schen.
1 Ha
lten Sie 3/S.Rtrv gedrückt.
[SAVE]/[UNSAVE] wird angezeigt.
2 D
rücken Sie den M.C.-Regler.
Sie können das Gerät von der auf einem iPhone/Android-Gerät installierten Pioneer ARC
APP aus bedienen. In einigen Fällen können Sie mit dem Gerät Aspekte der Anwendung
steuern wie beispielsweise Quellenauswahl, Pause usw.
Einzelheiten zu den in der Anwendung zur Verfügung stehenden Bedienvorgängen
finden Sie im Hilfe-Abschnitt der Anwendung.
WARNUNG
Versuchen Sie nicht, die Anwendung zu bedienen, während Sie fahren. Achten Sie darauf, die Straße zu
verlassen und Ihr Fahrzeug an einem sicheren Ort abzustellen, bevor Sie versuchen, die
Bedienelemente der Anwendung zu benutzen.
Für iPhone-Benutzer
Diese Funktion ist mit iPhones (iPhone 5 oder höher) und iPod touch-Geräten mit iOS 8.0
o
der höher kompatibel.
Sie können Pioneer ARC APP von iTunes App Store herunterladen.
Für Benutzer von Android-Geräten
Diese Funktion ist mit Geräten mit Android OS 4.1 oder höher kompatibel, die AOA
(
Android Open Accessory) 2.0 unterstützen.
Sie können Pioneer ARC APP von Google Play™ herunterladen.
HINWEIS
Es kann sein, dass einige über AOA 2.0 angeschlossene Android-Geräte aufgrund ihres eigenen
Softwaredesigns unabhängig von der Version des Betriebssystems Geräusche erzeugen oder nicht
richtig funktionieren.
1 Verbinden Sie dieses Gerät mit dem mobilen Gerät.
• i
Phone/Android-Gerät über USB (Seite 6)
Fahren Sie mit Schritt 6 fort, wenn Sie die USB-Verbindung für iPhone auswählen.
2 Drehen Sie den M.C.-Regler, um das Hauptmenü anzuzeigen.
3 Drehen Sie den M.C.-Regler, um [SYSTEM] auszuwählen, und drücken Sie ihn
dann, um den Vorgang zu bestätigen.
4 Drehen Sie den M.C.-Regler, um [ANDROID WIRED] auszuwählen, und drücken
Sie ihn dann, um den Vorgang zu bestätigen.
5 Drehen Sie den M.C.-Regler, um für ein über USB angeschlossenes Android-Gerät
[APP CONTROL] auszuwählen.
Verwenden von Pioneer ARC APP
Herstellen einer Verbindung mit Pioneer ARC APP

10De
Wenn [ON] unter [P.APP AUTO ON] (Seite 12) ausgewählt wird, startet Pioneer ARC
APP am Android-Gerät automatisch und alle Schritte werden durchgeführt.
HINWEIS
Wenn Pioneer ARC APP noch nicht auf Ihrem Android-Gerät installiert wurde, erscheint eine
Meldung, die Sie auffordert, die Anwendung auf Ihrem Android-Gerät zu installieren. Wählen Sie
[OFF] unter [P.APP AUTO ON] zum Löschen der Meldung
(Seite 12).
6 Drücken Sie SRCOFF, um eine beliebige Quelle auszuwählen.
7 Starten Sie Pioneer ARC APP auf dem Mobilgerät.
HINWEIS
Sie können die Anwendung auch starten, indem Sie die M.C.-Taste für iPhone gedrückt halten.
1 Drücken Sie SRC/OFF, um [ANDROID] auszuwählen.
Grundlegende Bedienvorgänge
Sie können im Hauptmenü verschiedene Einstellungen vornehmen.
1 Drehen Sie den M.C.-Regler, um das Hauptmenü anzuzeigen.
2 Drehen Sie den M.C.-Regler, um eine der nachstehenden Kategorien
auszuwählen, und drücken Sie ihn dann, um den Vorgang zu bestätigen.
• FUNCTION-Einstellungen (Seite 10)
• AUDIO-Einstellungen (Seite 11)
• SYSTEM-Einstellungen (Seite 12)
• ILLUMINATION-Einstellungen (Seite 13)
Musik hören auf Android
Zweck Bedienung
Track auswählen Drücken Sie bzw. .
Vor- oder zurückspulen Halten Sie bzw. gedrückt.
Wiedergabe pausieren/fortsetzen Drücken Sie 4/PA
USE.
Sound Retriever Drücken Sie 3/S.
Rtrv.
[1]: Effektiv bei niedrigen
Ko
mpressionsraten
[2]: Effektiv bei hohen Kompressionsraten
Einstellungen
• MIXTRAX-Einstellungen (Seite 13)
3 Drehen Sie den M.C.-Regler, um die Optionen auszuwählen, und drücken Sie ihn
dann, um den Vorgang zu bestätigen.
Die Menüpunkte können sich je nach Quelle unterscheiden.
FUNCTION-Einstellungen
Menüpunkt Beschreibung
FM SETTING
[TALK], [STANDARD], [MUSIC] Die Klangqualität auf die
S
endesignalbedingungen des FM-Band-Signals
abstimmen. (Nur verfügbar, wenn das FM-Band
ausgewählt ist).
BSM
Die sechs stärksten Sender automatisch auf den
Zif
ferntasten (1/ bis 6/ ) speichern.
REGIONAL
[ON], [OFF] Den Empfang auf bestimmte
Regionalprogramme beschränken, wenn AF
(alternative Frequenzsuche) ausgewählt ist. (Nur
verfügbar, wenn das FM-Band ausgewählt ist).
LOCAL
FM: [O
FF], [LV1], [LV2], [LV3], [LV4]
MW/LW: [O
FF], [LV1], [LV2]
Die Suche auf Sender mit ausreichender
S
ignalstärke beschränken.
TA
[ON], [OFF] Aktuelle Verkehrsinformationen empfangen,
w
enn verfügbar. (Nur verfügbar, wenn das FM-
Band ausgewählt ist).
AF
[ON], [OFF] Dem Gerät erlauben, auf eine andere Frequenz
um
zuschalten, die den gleichen Sender
überträgt. (Nur verfügbar, wenn das FM-Band
ausgewählt ist).
NEWS
[ON], [OFF] Die momentan ausgewählte Quelle mit
N
achrichtenprogrammen unterbrechen. (Nur
verfügbar, wenn das FM-Band ausgewählt ist).

11De
Deutsch
SEEK
[MAN], [PCH] Zuweisung der - bzw. -Taste, um einen
Sender nach dem anderen zu suchen (manuelle
A
bstimmung), oder Auswahl eines Senders aus
den voreingestellten Kanälen.
SAVE
Die Informationen über den aktuell gespielten
S
ong auf Ihrer Musikliste auf Spotify speichern.
UNSAVE
Die in [SAVE] gespeicherten Song-Informationen
l
öschen.
S.RTRV
[1] (effektiv bei niedrigen
K
ompressionsraten),
[2] (effektiv bei hohen
K
ompressionsraten),
[OFF]
Die Qualität komprimierter Audiosignale
ver
bessern und einen satten Klang
wiederherstellen.
Nicht verfügbar, wenn:
• US
B als Quelle ausgewählt und die MIXTRAX-
Funktion eingeschaltet ist.
• C
D-DA/CD-TEXT wiedergegeben wird.
AUDIO BOOK
[FASTER], [NORMAL], [SLOWER] Wiedergabegeschwindigkeit ändern. (Nicht
ver
fügbar, wenn im Steuerungsmodus
[CONTROL iPod] ausgewählt ist.)
PAU SE
Wiedergabe pausieren oder fortsetzen.
AUDIO-Einstellungen
Menüpunkt Beschreibung
FADER*1
Balance der Front- und Hecklautsprecher
einstellen.
BALANCE
Balance der linken und rechten Lautsprecher
ein
stellen.
Menüpunkt Beschreibung
USB
iPod
iPod
*1 Nicht verfügbar, wenn [SUB.W/SUB.W] bei [SP-P/O MODE] in den INITIAL-Einstellungen ausgewählt
ist (Seite 5).
EQ SETTING
[SUPER BASS], [POWERFUL],
[NA
TURAL], [VOCAL], [CUSTOM1],
[CUSTOM2], [FLAT]
Wählen Sie ein Equalizer-Band
und einen Pegel aus, um weitere
Anpassungen vorzunehmen.
Equalizer-Band: [80H
Z], [250HZ],
[800HZ], [2.5KHZ], [8KHZ]
Equalizer-Pegel:
[+6] bis [–6]
Wählen Sie die Equalizer-Kurve oder passen Sie
sie an.
[CUSTOM1] kann für jede Quelle separat
ei
ngestellt werden. Jede der nachstehenden
Kombinationen wird jedoch automatisch auf
dieselbe Einstellung gesetzt.
• U
SB, iPod, ANDROID, SPOTIFY und APP
(iPhone)
[CUSTOM2] ist eine für alle Quellen gemeinsam
ver
wendete Einstellung.
LOUDNESS
[OFF], [LOW], [MID], [HI] Kompensieren, um bei niedriger Lautstärke
ei
nen klaren Klang zu erhalten.
SUB.W*2
[NOR], [REV], [OFF] Auswahl der Subwoofer-Phase.
SUB.W CTRL*2
*3
Grenzfrequenz: [
50HZ], [63HZ],
[80HZ], [100HZ], [125HZ],
[160HZ], [200HZ]
Ausgabepegel: [–
24] bis [+6]
Steilheit: [
–12], [–24]
Der Subwoofer gibt nur Signale unterhalb des
aus
gewählten Bereichs aus.
BASS BOOST
[0] bis [+6] Auswahl des Bassverstärkungspegels.
HPF SETTING
Grenzfrequenz: [
OFF], [50HZ],
[63HZ], [80HZ], [100HZ], [125HZ],
[160HZ], [200HZ]
Steilheit: [
–12], [–24]
Die Lautsprecher geben nur Signale oberhalb
d
er Grenzfrequenz des Hochpassfilters (HPF) aus.
SLA
[+4] bis [–4] Den Lautstärkepegel für alle Quellen außer FM
ei
nstellen.
Jede der nachstehenden Kombinationen wird
a
utomatisch auf dieselbe Einstellung gesetzt.
• USB, iPod, ANDROID, SPOTIFY und APP
(iPhone)
Menüpunkt Beschreibung

12De
*2 Nicht verfügbar, wenn [REAR/REAR] bei [SP-P/O MODE] in den INITIAL-Einstellungen ausgewählt ist
(Seite 5).
*3 Nicht verfügbar, wenn [OFF] bei [SUB.W] ausgewählt ist .
Sie können auch bei ausgeschaltetem Gerät auf diese Menüs zugreifen.
SYSTEM-Einstellungen
Menüpunkt Beschreibung
LANGUAGE
[ENG] (Englisch), [РУС] (Russisch),
[TUR] (Türkisch)
Auswahl der Sprache, in der die
Textinformationen komprimierter Audiodateien
angezeigt werden sollen.
CLOCK SET
Einstellung der Uhr (Seite 4).
12H/24H
[12H], [24H] Auswahl des Zeitdarstellungsformats.
AUTO PI
[ON], [OFF] Auch bei Verwendung eines voreingestellten
S
enders nach einem anderen Sender mit
demselben Programm suchen.
AUX
[ON], [OFF] Wählen Sie [ON], wenn Sie ein am Gerät
ang
eschlossenes Zusatzgerät verwenden.
SPOTIFY
[ON], [OFF] Wählen Sie [ON], wenn Sie die Spotify-Funktion
ve
rwenden.
PW SAVE*
[ON], [OFF] Batterieverbrauch verringern.
Das Einschalten der Quelle ist der einzige
V
organg, der erlaubt ist, wenn diese Funktion
eingeschaltet ist.
ANDROID WIRED
[MEMORY], [APP CONTROL] Wählen Sie die für ein Android-Gerät geeignete
V
erbindungsmethode.
* [PW SAVE] wird abgebrochen, wenn die Fahrzeugbatterie getrennt wird, und muss nach erneutem
Anschließen der Batterie wieder eingeschaltet werden. Wenn [PW SAVE] ausgeschaltet ist, kann es
abhängig von den Verbindungsmethoden sein, dass das Gerät weiterhin Strom von der Batterie
bezieht, wenn die Zündung Ihres Fahrzeugs keine ACC-Stellung (Stromversorgung über
Starterbatterie) hat.
P. A P P AU TO O N
[ON], [OFF]
Wählen Sie [ON], um automatisch Pioneer ARC
APP zu starten, wenn ein Android-Gerät über AOA
mit dem Gerät verbunden ist. (Nicht verfügbar,
wenn [MEMORY] unter [ANDROID WIRED]
ausgewählt ist.)
USB AUTO
[ON], [OFF] Wählen Sie [ON], um automatisch auf die [USB]-
Q
uelle umzuschalten, wenn ein USB-Gerät/iPod
an diesem Gerät angeschlossen ist.
Wählen Sie [OFF], wenn ein USB-Gerät/iPod nur
zum Aufladen an diesem Gerät angeschlossen
wird.
Menüpunkt Beschreibung

13De
Deutsch
ILLUMINATION-Einstellungen
Menüpunkt Beschreibung
COLOUR
[KEY COLOUR], [DISP COLOUR],
[BOTH COLOUR]
Auswahl der Farbe für die Tasten/das Display des
Geräts aus 12 voreingestellten Farben, [SCAN]
oder [CUSTOM]*.
• [
SCAN]: Automatischer Durchlauf durch eine
Reihe verschiedener Farben.
• [C
USTOM]*:
1 H
alten Sie den M.C.-Regler gedrückt, bis die
Anzeige zur Farbeinstellung erscheint.
2 S
tellen Sie die Hauptfarbe (R (rot)/G (grün)/B
(blau)) und die Helligkeitsstufe ([0] bis [60])
ein.
Es ist nicht möglich, für alle drei Farben R (rot),
G
(grün), B (blau) gleichzeitig einen Wert von
unter 10 einzustellen.
Sie können die voreingestellten Farben auch
anpa
ssen. Wählen Sie eine der voreingestellten
Farben aus, und halten Sie dann den M.C.-Regler
gedrückt, bis die Anzeige zur Farbeinstellung
erscheint.
* Die CUSTOM-Einstellung ist nur für [KEY COLOUR]
und [DISP COLOUR] verfügbar.
DIM SETTING
[SYNC ILLUMI], [SYNC CLOCK],
[MA
NUAL]
Displayhelligkeit ändern.
BRIGHTNESS
[KEY], [DISP] Auswahl der Helligkeit für die Tasten/das Display
d
er Einheit von [1] bis [10].
Welche Einstellbereiche verfügbar sind, richtet
si
ch nach [DIM SETTING].
ILLUMI FX
[ON], [OFF] Der Beleuchtungseffekt ist zu sehen, wenn eine
C
D eingelegt/ausgeworfen wird.
Ungeachtet dieser Einstellung wird der
B
eleuchtungseffekt beim Ein-/Ausschalten der
ACC-Stromversorgung aktiviert.
MIXTRAX-Einstellungen
Menüpunkt Beschreibung
SHORT PLAYBCK
[1.0 MIN], [1.5 MIN], [2.0 MIN],
[2.5 MIN], [3.0 MIN], [OFF]
Auswahl der Wiedergabedauer.
FLASH AREA
[KEY/DISPLAY], [KEY], [OFF] Auswahl des Bereichs für den
B
eleuchtungseffekt.
Wenn [OFF] ausgewählt ist, wird die in den
I
LLUMINATION-Einstellungen (Seite 13)
eingestellte Farbe als Displayfarbe verwendet.
FLASH PATTERN
[SOUND LEVEL 1] bis [SOUND
LEV
EL 6]
Anpassung des Beleuchtungseffekts an den
Ton- und Basspegel.
Das Blinkmuster ändert sich anhand des
T
onpegels.
[LOW PASS 1] bis [LOW PASS 6] Das Blinkmuster ändert sich anhand des
Ba
sspegels.
[RANDOM1] Das Blinkmuster ändert sich zufällig anhand
vo
n Tonpegel- und Tiefpassmodus.
[RANDOM2] Das Blinkmuster ändert sich anhand des
T
onpegelmodus.
[RANDOM3] Das Blinkmuster ändert sich anhand des
Tief
passmodus.
DISPLAY FX
[ON], [OFF] Ein-/Ausschalten der MIXTRAX-Spezialeffekte.
CUT IN FX
[ON], [OFF] Ein-/Ausschalten der MIXTRAX-Klangeffekte
b
eim manuellen Umschalten von Tracks.

14De
Wichtig
• Wenn dieses Gerät in ein Fahrzeug
eingebaut wird, das ein Zündschloss
ohne ACC-Stellung (Stromversorgung
über Starterbatterie) hat, und das rote
Kabel nicht mit dem Anschluss
verbunden wird, der die Betätigung des
Zündschlüssels erkennt, kann dies zur
Entladung der Batterie führen.
• Die Verwendung dieses Geräts in
anderen als den folgenden Bedingungen
könnte zu einem Brand oder
Funktionsstörungen führen.
–Fahrzeuge mit 12-Volt-Batterie und
neg
ativer Erdung.
–Wenn der Lautsprecherausgang von 4
K
anälen genutzt wird, verwenden Sie
Lautsprecher mit über 50 W (maximaler
Eingabewert) und 4 Ω bis 8 Ω
(Impedanzwert). Verwenden Sie für
dieses Gerät keine Lautsprecher mit
Impedanzen von 1 Ω bis 3 Ω.
–Wenn der Hecklautsprecherausgang
v
on einem 2-Ω-Subwoofer genutzt
wird, verwenden Sie Lautsprecher mit
über 70 W (maximaler Eingabewert).
* Zur Verbindungsmethode siehe den
Absch
nitt „Verbindungen“.
• U
m Kurzschlüsse, Überhitzung oder
Fehlfunktionen zu vermeiden, achten Sie
darauf, die nachstehenden Anweisungen
zu befolgen.
–Unterbrechen Sie vor dem Einbau den
Mi
nuspol der Autobatterie.
–Sichern Sie Kabel mit Kabelklemmen
oder Klebeband. Wickeln Sie Klebeband
um Kabel, die mit Metallteilen in
Kontakt kommen, um die Kabel zu
schützen.
–Verlegen Sie alle Kabel mit einem
Abst
and zu beweglichen Teilen wie
Schalthebel und Sitzschiene.
–Verlegen Sie alle Kabel mit einem
Abst
and zu warmen Umgebungen, z. B.
der Auslassöffnung der Heizung.
–Verbinden Sie das gelbe Kabel nicht mit
d
er Batterie, indem Sie es durch das
Loch zum Motorraum führen.
–Verkleiden Sie nicht angeschlossene
K
abelanschlüsse mit Isolierband.
–Kürzen Sie keine Kabel.
–Durchschneiden Sie niemals die
I
solierung des Stromkabels dieses
Geräts, um weitere Geräte mit Strom zu
versorgen. Die Strombelastbarkeit des
Kabels ist begrenzt.
–Verwenden Sie eine Sicherung mit dem
v
orgeschriebenen Sicherungswert.
–Schließen Sie das negative
L
autsprecherkabel niemals direkt an
Masse an.
–Binden Sie niemals die negativen Kabel
m
ehrerer Lautsprecher zusammen.
• W
enn dieses Gerät eingeschaltet ist,
werden Steuersignale durch das
blauweiße Kabel gesendet. Schließen Sie
dieses Kabel an der
Systemfernbedienung eines externen
Leistungsverstärkers oder an der
Steuerklemme des
Automatikantennenrelais des Fahrzeugs
an (max. 300 mA 12 V Gleichspannung).
Wenn das Fahrzeug eine
Scheibenantenne besitzt, schließen Sie
sie am Stromversorgungsanschluss für
den Antennenverstärker an.
Anschlüsse/Einbau
Anschlüsse
ACC-Stellung Keine ACC-Stellung
• Schließen Sie das blauweiße Kabel
niemals am Stromanschluss eines
externen Leistungsverstärkers an.
Schließen Sie es auch niemals am
Stromanschluss der Autoantenne an.
Dadurch kann es zu Batterieentladung
oder Funktionsstörungen kommen.
• Das schwarze Kabel ist das Massekabel.
Massekabel für dieses Gerät und andere
Geräte (insbesondere
Hochstromprodukte wie
Leistungsverstärker) müssen separat
verlegt und angeschlossen werden.
Andernfalls kann ein versehentliches
Abziehen zu einem Brand oder
Funktionsstörungen führen.
• D
as am Produkt angebrachte grafische
Symbol bedeutet Gleichstrom.
Dieses Gerät
Stromkabeleingang
Rückseitiger Anschluss AUX IN | [Tel In]
(3,5-mm-Stereobuchse)
Ein spezieller rückseitiger Eingang, der
nur m
it externen Bluetooth-
Freisprechanlagen-Kits kompatibel ist.
Das Audiosignal wird während des
Telefonanrufs stummgeschaltet, wenn
das gelb-schwarze Kabel
angeschlossen/aktiviert ist.
Hecklautsprecher- oder Subwoofer-
Ausgang
Frontlautsprecherausgang
Antenneneingang
Sicherung (10 A)
Eingang für Kabelfernbedienung
Hier kann ein festverdrahteter
F
ernbedienungsadapter angeschlossen
werden (separat erhältlich).
Stromkabel
Zum Stromkabeleingang
Je nach Fahrzeugart kann die Funktion
von und abweichen. Achten Sie
in diesem Fall darauf, an und
an anzuschließen.
Gelb
Konstantspannung (oder
Zü
ndschlossstrom)
Gelb
An der 12-V-Konstantspannungsbuchse
ans
chließen.
Rot
Zündschlossstrom (oder
Ko
nstantspannung)
Rot
An der vom Zündschlüssel gesteuerten
Bu
chse (12 V Gleichspannung)
anschließen.
Verbinden Sie die jeweils
gleichfarbigen Kontakte miteinander.
Schwarz (Gehäuseerdung)
Blauweiß
Die Polanordnung des ISO-Steckers
var
iiert je nach Fahrzeugtyp. Verbinden
Sie und , wenn Pol 5 zur

15De
Deutsch
Antennensteuerung vorgesehen ist. Bei
anderen Fahrzeugtypen dürfen
und
keinesfalls verbunden werden.
Blauweiß
An der Systemfernbedienungsbuchse
d
es Leistungsverstärkers anschließen
(max. 300 mA 12 V Gleichspannung).
Blauweiß
An der Steuerklemme des
Aut
omatikantennenrelais anschließen
(max. 300 mA 12 V Gleichspannung).
Lautsprecherkabel
Weiß: Vorn links
Schwarzweiß: Vorn links
Grau: Vorn rechts
Schwarzgrau: Vorn rechts
Grün: hinten links oder Subwoofer
Schwarzgrün: hinten links oder
Subwoofer
Violett: hinten rechts oder
Subwoofer
Schwarzviolett: hinten rechts oder
Subwoofer
Orangeweiß
Mit dem Beleuchtungssignal eines
Au
tos verbinden.
ISO-Stecker
Bei einigen Fahrzeugen kann der ISO-
S
tecker in zwei Einheiten aufgeteilt sein.
Achten Sie in diesem Fall darauf, die
Verbindung mit beiden Einheiten
herzustellen.
HINWEISE
• Ändern Sie das Grundeinstellungsmenü
dieses Geräts. Siehe [SP-P/O MODE]
(Seite 5). Der Subwoofer-Ausgang dieses
Geräts ist monaural.
• A
chten Sie bei Verwendung eines
Subwoofers mit 2 Ω darauf, den
Subwoofer am violetten und
schwarzvioletten Kabel dieses Geräts
anzuschließen. Schließen Sie nichts am
grünen und schwarzgrünen Kabel an.
Leistungsverstärker (separat
erhältlich)
Stellen Sie diese Verbindungen her, wenn
Sie den optionalen Verstärker verwenden.
Systemfernbedienung
Am blauweißen Kabel anschließen.
Leistungsverstärker (separat erhältlich)
Mit Cinch-Kabeln verbinden (separat
erhältlich)
Zum Ausgang für die Frontlautsprecher
Frontlautsprecher
Zum Ausgang für die Hecklautsprecher
oder den Subwoofer
Hecklautsprecher oder Subwoofer
Wichtig
• Prüfen Sie alle Anschlüsse und Systeme
vor dem endgültigen Einbau.
• Verwenden Sie keine nicht autorisierten
Teile, da dies Funktionsstörungen
verursachen kann.
• W
enden Sie sich an Ihren Händler, wenn
der Einbau das Bohren von Löchern oder
andere Modifikationen des Fahrzeugs
erfordert.
• B
auen Sie dieses Gerät nicht dort ein, wo:
– es den Betrieb des Fahrzeugs stören
k
ann.
– es infolge plötzlichen Anhaltens eine
V
erletzung von Insassen verursachen
kann.
• De
r Halbleiterlaser wird beschädigt,
wenn er sich überhitzt. Bauen Sie dieses
Einbau
Gerät mit einem Abstand zu warmen
Umgebungen, z. B. der Auslassöffnung
der Heizung, ein.
• Eine optimale Leistung
wird erzielt, wenn das Gerät
in einem Winkel von
weniger als 60 ° eingebaut
wird.
• A
chten Sie, um eine ordnungsgemäße
Wärmeableitung des Geräts
sicherzustellen, beim Einbau darauf,
reichlich Platz hinter der Rückwand des
Geräts zu lassen und lose Kabel so
aufzuwickeln, dass sie nicht die
Lüftungsschlitze blockieren.
Einbau in einer DIN-Halterung
1 Schieben Sie den mitgelieferten
Montagerahmen in das
Armaturenbrett.
2 Sichern Sie den Montagerahmen mit
Hilfe eines Schraubendrehers, indem
Sie die Metallzungen (90 °) an ihren
richtigen Platz biegen.
Armaturenbrett
Montagerahmen
• S
tellen Sie sicher, dass das Gerät sicher
an seinem Platz eingebaut ist. Ein
instabiler Einbau kann Aussetzer oder
andere Funktionsstörungen
verursachen.
Wenn Sie nicht den mitgelieferten
Montagerahmen verwenden
1 Ermitteln Sie die passende Position,
bei der die Löcher des
Befestigungswinkels und die Löcher
an der Geräteseite aufeinandertreffen.
2 Ziehen Sie auf jeder Seite zwei
Schrauben an.
Schneidschraube (5 mm × 9 mm,
nicht im Lieferumfang des Produkts)
Befestigungswinkel
Armaturenbrett oder Konsole
Entfernen des (mit dem
mitgelieferten Montagerahmen
eingebauten) Geräts
1 Entfernen Sie den Klemmflansch.
Klemmflansch
Kerbzunge
• Du
rch Entriegeln des Bedienfelds wird
der Klemmflansch leichter zugänglich.
• B
eim Wiederanbringen des
Klemmflanschs muss die gekerbte
Seite nach unten zeigen.
Reichlich Platz
lassen
5 cm
5 cm

16De
2 Schieben Sie die mitgelieferten
Entnahmeschlüssel in beide Seiten des
Geräts, bis sie mit einem Klicken
einrasten.
3 Ziehen Sie das Gerät aus dem
Armaturenbrett.
Das Display kehrt automatisch zur
normalen Anzeige zurück.
→ Es wurden etwa 30 Sekunden lang
keine Bedienvorgänge ausgeführt.
– Führen Sie einen Bedienvorgang aus.
Der Wiederholbereich ändert sich
unerwartet.
→ Je nach Wiederholbereich kann sich der
ausgewählte Bereich bei Auswahl eines
anderen Ordners oder Tracks oder
während des Vor-/Zurückspulens
ändern.
– Wählen Sie den Wiederholbereich
er
neut aus.
Ein Unterordner wird nicht
wiedergegeben.
→ Unterordner können nicht
wiedergegeben werden, wenn [FLD]
(Ordnerwiederholung) ausgewählt ist.
– Wählen Sie einen anderen
W
iederholbereich aus.
Der Ton wird unterbrochen.
→ Sie verwenden ein Gerät wie z. B. ein
Mobiltelefon, das hörbare Störungen
verursachen kann.
– Vergrößern Sie den Abstand
el
ektrischer Geräten, die
möglicherweise die Störung
verursachen, zum Gerät.
Allgemeines
AMP ERROR
→ Betriebsstörung des Geräts oder falsche
Lautsprecherverbindung.
→ D
ie Schutzschaltung ist aktiviert.
– Überprüfen Sie die
L
autsprecherverbindung.
– Schalten Sie die Zündung OFF und
d
ann wieder ON. Sollte die Meldung
weiter angezeigt werden, wenden Sie
sich zur Unterstützung an Ihren
Händler oder eine Pioneer-
Kundendienststelle.
NO XXXX (beispielsweise NO TITLE)
→ Es gibt keine eingebetteten
Textinformationen.
– Schalten Sie die Anzeige um oder
s
pielen Sie einen anderen Track/eine
andere Datei.
CD-Player
ERROR-07, 11, 12, 17, 30
→ Die Disc ist verschmutzt.
– Reinigen Sie die Disc.
→ Di
e Disc ist verkratzt.
– Wechseln Sie die Disc aus.
ERROR-07, 10, 11, 12, 15, 17, 30, A0
→ Es liegt ein elektrischer oder
mechanischer Fehler vor.
– Schalten Sie die Zündung AUS und
w
ieder EIN, oder schalten Sie auf eine
andere Quelle um und dann wieder
zum CD-Player zurück.
ERROR-15
→ Die eingelegte Disc ist leer.
– Wechseln Sie die Disc aus.
ERROR-23
→ Nicht unterstütztes CD-Format.
– Wechseln Sie die Disc aus.
Zusätzliche Informationen
Fehlerbehebung
Fehlermeldungen

17De
Deutsch
FORMAT READ
→ Nach dem Wiedergabestart ist der Ton
manchmal erst nach einer Verzögerung
zu hören.
– Warten Sie, bis die Meldung erlischt
u
nd Sie den Ton hören.
NO AUDIO
→ Die eingelegte Disc enthält keine
abspielbaren Dateien.
– Wechseln Sie die Disc aus.
SKIPPED
→ Die eingelegte Disc enthält DRM-
geschützte Dateien (digitale
Rechteverwaltung).
– Die geschützten Dateien werden
üb
ersprungen.
PROTECT
→ Sämtliche Dateien auf der eingelegten
Disc sind DRM-geschützt (digitale
Rechteverwaltung).
– Wechseln Sie die Disc aus.
USB-Gerät/iPod
FORMAT READ
→ Nach dem Wiedergabestart ist der Ton
manchmal erst nach einer Verzögerung
zu hören.
– Warten Sie, bis die Meldung erlischt
u
nd Sie den Ton hören.
NO AUDIO
→ Es sind keine Musiktitel vorhanden.
– Übertragen Sie die Audiodateien an
da
s USB-Gerät und schließen Sie es an.
→ Auf d
em angeschlossenen USB-Gerät ist
die Sicherheitsfunktion aktiviert.
– Folgen Sie den Anweisungen des USB-
Gerät
s, um die Sicherheitsfunktion zu
deaktivieren.
SKIPPED
→ Das angeschlossene USB-Gerät enthält
DRM-geschützte Dateien (digitale
Rechteverwaltung).
–Die geschützten Dateien werden
überspr
ungen.
PROTECT
→ Sämtliche Dateien auf dem
angeschlossenen USB-Gerät sind DRM-
geschützt (digitale Rechteverwaltung).
–Wechseln Sie das USB-Gerät aus.
N/A USB
→ Das angeschlossene USB-Gerät wird
von diesem Gerät nicht unterstützt.
–Trennen Sie Ihr Gerät ab und ersetzen
S
ie es durch ein kompatibles USB-
Gerät.
HUB ERROR
→ Das über einen USB-Hub
angeschlossene USB-Gerät wird von
diesem Gerät nicht unterstützt.
–Schließen Sie das USBGerät über ein
US
B-Kabel an diesem Gerät an.
CHECK USB
→ Der USB-Anschluss oder das USB-Kabel
wurde kurzgeschlossen.
–Vergewissern Sie sich, dass der USB-
Ansch
luss oder das USB-Kabel nicht
eingeklemmt oder beschädigt ist.
→ D
as angeschlossene USB-Gerät hat
einen höheren als den maximal
zulässigen Stromverbrauch.
–Trennen Sie das USB-Gerät ab und
v
erwenden Sie es nicht. Schalten Sie
die Zündung AUS und dann wieder
auf ACC oder EIN. Schließen Sie nur
kompatible USB-Geräte an.
→ D
er iPod funktioniert ordnungsgemäß,
wird aber nicht geladen.
–Vergewissern Sie sich, dass kein
Ku
rzschluss des iPod-Kabels vorliegt
(z. B. durch Einklemmen zwischen
Metallgegenständen). Schalten Sie
nach dem Überprüfen die Zündung
AUS und wieder EIN, oder trennen Sie
den iPod ab und schließen Sie ihn
wieder an.
ERROR-19
→ Kommunikation fehlgeschlagen.
– Führen Sie einen der folgenden
B
edienvorgänge aus, und kehren Sie
dann zur USB-Quelle zurück.
• S
chalten Sie die Zündung AUS und
wieder EIN.
• T
rennen Sie das USB-Gerät ab.
• S
chalten Sie auf eine andere Quelle
um.
→ iP
od-Störung.
– Trennen Sie das Kabel vom iPod.
S
chließen Sie, sobald auf dem iPod das
Hauptmenü angezeigt wird, den iPod
erneut an und setzen Sie ihn zurück.
ERROR-23
→ Das USB-Gerät wurde nicht
ordnungsgemäß formatiert.
– Formatieren Sie das USB-Gerät mit
FAT
12, FAT16 oder FAT32.
ERROR-16
→ Die iPod-Firmware ist veraltet.
– Aktualisieren Sie die iPod-Version.
→ iP
od-Störung.
– Trennen Sie das Kabel vom iPod.
S
chließen Sie, sobald auf dem iPod das
Hauptmenü angezeigt wird, den iPod
erneut an und setzen Sie ihn zurück.
STOP
→ Auf der aktuellen Liste befinden sich
keine Musiktitel.
– Wählen Sie eine Liste aus, die
Musik
titel enthält.
NOT FOUND
→ Keine entsprechenden Musiktitel
gefunden.
– Übertragen Sie Musiktitel an den iPod.
Apps
START UP APP
→ Die Anwendung wird noch nicht
ausgeführt.
–Bedienen Sie das mobile Gerät, um die
An
wendung zu starten.
Spotify
CHECK APP
→ Die Verbindung mit der Spotify-
Anwendung ist fehlgeschlagen.
–Folgen Sie den auf dem Bildschirm
gezeig
ten Anweisungen.
Discs und Player
• Verwenden Sie ausschließlich Discs, die
eines der beiden folgenden Logos tragen.
• Verwenden Sie 12-cm-Discs.
• V
erwenden Sie ausschließlich
herkömmliche, runde Discs.
• Die
folgenden Disc-Typen können nicht
mit diesem Gerät verwendet werden:
–DualDiscs
– 8-cm-Discs: Versuche, solche Discs mit
ei
nem Adapter zu verwenden, können
zu Funktionsstörungen des Geräts
führen.
– Ungewöhnlich geformte Discs
– Andere Discs als CDs
– Beschädigte Discs, darunter solche mit
R
issen, Abplatzern oder Verwellungen
–CD-R/RW-Discs mit nicht
a
bgeschlossener Aufzeichnung
• B
eschreiben Sie die Oberfläche der Discs
nicht und behandeln Sie sie nicht mit
Chemikalien.
Handhabungsrichtlinien

18De
• Wischen Sie CDs zum Reinigen mit einem
weichen Tuch von der Mitte nach außen
hin ab.
• K
ondensation kann die Leistung des
Players vorübergehend beeinträchtigen.
Warten Sie ungefähr eine Stunde, bis die
Anpassung an eine wärmere Temperatur
erfolgt ist. Wischen Sie außerdem feuchte
Discs mit einem weichen Tuch ab.
• B
ei Verwendung von bedruckbaren Discs
beachten Sie die Anleitung und die
Warnhinweise der Discs. Je nach Disc
kann es sein, dass sie sich nicht einlegen
und auswerfen lässt. Die Verwendung
solcher Discs kann zu einer Beschädigung
dieses Geräts führen.
• Br
ingen Sie auf den Discs keine
handelsüblichen Etiketten oder anderen
Materialien an.
–Die Discs können sich verformen und
d
adurch nicht mehr abspielbar sein.
–Die Etiketten können sich während der
W
iedergabe lösen und das Auswerfen
der Discs verhindern, was zu einer
Beschädigung des Geräts führen kann.
USB-Speichergerät
• Verbindungen über USB-Hubs werden
nicht unterstützt.
• S
orgen Sie vor der Fahrt für eine sichere
Befestigung des USB-Speichergeräts.
Lassen Sie das USB-Speichergerät nicht
auf den Boden fallen, wo es unter dem
Brems- oder Gaspedal eingeklemmt
werden könnte.
• J
e nach USB-Speichergerät können die
folgenden Probleme auftreten.
–Die Bedienung kann unterschiedlich
sein
.
–Möglicherweise wird das Speichergerät
nicht
erkannt.
–Möglicherweise werden Dateien nicht
ri
chtig wiedergegeben.
–Das Gerät kann Störgeräusche
v
erursachen, wenn Sie Radio hören.
iPod
• Bewahren Sie den iPod nicht an Orten mit
hohen Temperaturen auf.
• S
orgen Sie für eine sichere Befestigung
des iPods während er Fahrt. Lassen Sie
den iPod nicht auf den Boden fallen, wo
er unter dem Brems- oder Gaspedal
eingeklemmt werden könnte.
• Die E
instellungen des iPods, z. B.
Equalizer und Wiedergabewiederholung,
ändern sich beim Anschließen des iPods
an das Gerät automatisch. Wenn der iPod
vom Gerät getrennt wird, kehren diese
Einstellungen wieder in ihren
ursprünglichen Zustand zurück.
• A
uf dem iPod gespeicherter
inkompatibler Text wird vom Gerät nicht
angezeigt.
• N
ur die ersten 32 Zeichen können als
Dateiname (einschließlich
Dateierweiterung) oder Ordnername
angezeigt werden.
• J
e nach der zur Codierung von WMA-
Dateien verwendeten Anwendung kann
es sein, dass das Gerät nicht richtig
arbeitet.
• B
ei Audiodateien mit eingebetteten
Bilddaten oder bei auf einem USB-Gerät
mit komplexer Ordnerstruktur
gespeicherten Audiodateien kann sich
geringfügig der Beginn der Wiedergabe
verzögern.
• Z
ur Anzeige auf diesem Gerät sollte
russischer Text in einem der folgenden
Zeichensätze codiert sein:
–Unicode (UTF-8, UTF-16)
–Ein anderer Zeichensatz als Unicode,
d
er in einer Windows-Umgebung
verwendet wird und in den
Kompatibilität
komprimierter
Audioformate
Sprachoptionen auf Russisch eingestellt
ist
VORSICHT
• Pioneer kann nicht die Kompatibilität mit
allen USB-Massenspeichergeräten
gewährleisten und übernimmt keine
Verantwortung für eventuelle
Datenverluste auf Media-Playern,
Smartphones oder anderen Geräten, die
zusammen mit diesem Produkt
verwendet werden.
• Bewahren Sie Discs oder USB-
Speichergeräte nicht an Orten auf, an
denen hohe Temperaturen herrschen
können.
WMA-Dateien
MP3-Dateien
WAV-Dateien
• WAV-Datenformate können nicht über
MTP verbunden werden.
Disc
• Ungeachtet der Länge der Leerstellen,
die die Originalaufnahme zwischen den
einzelnen Musiktiteln aufweist, wird bei
der Wiedergabe von komprimierten
Audio-Discs stets eine kurze Pause
zwischen den Titeln eingefügt.
USB-Gerät
• Der Beginn der Wiedergabe von auf
einem USB-Gerät mit komplexer
Ordnerstruktur gespeicherten
Audiodateien kann sich geringfügig
verzögern.
Dateierweiterung .wma
Bitrate 48 Kbit/s bis 320 Kbit/s
(CBR), 48 Kbit/s bis
384 Kbit/s (VBR)
Abtastfrequenz 32 kHz, 44,1 kHz,
48 kHz
Windows Media™
Audio Professional,
Lossless, Voice/DRM
Stream/Stream mit
Video
Nicht kompatibel
Dateierweiterung .mp3
Bitrate 8 Kbit/s bis 320 Kbit/s
(CBR), VBR
Abtastfrequenz 8 kHz bis 48 kHz
(32 kHz, 44,1 kHz,
48 kHz zur Emphase)
Kompatible ID3-Tag-
Version
1.0, 1.1, 2.2, 2.3, 2.4
(ID3-Tag-Version 2.x
erhält Vorrang vor
Version 1.x.)
M3u-Wiedergabeliste Nicht kompatibel
MP3i (MP3 interaktiv),
mp3 PRO
Nicht kompatibel
Dateierweiterung .wav
Quantisierungsbits 8 und 16 (LPCM), 4
(MS ADPCM)
Abtastfrequenz 16 kHz bis 48 kHz
(LPCM), 22,05 kHz und
44,1 kHz (MS ADPCM)
Abspielbare
Ordnerstruktur
Bis zu acht Ebenen
(Praktikabel sind
weniger als zwei
Ebenen.)
Abspielbare Ordner Bis zu 99
Abspielbare Dateien Bis zu 999
Dateisystem ISO 9660 Stufe 1 und
2, Romeo, Joliet
Multi-Session-
Wiedergabe
Kompatibel
Datenübertragung im
Paketverfahren
Nicht kompatibel
Abspielbare
Ordnerstruktur
Bis zu acht Ebenen
(Praktikabel sind
weniger als zwei
Ebenen.)
Abspielbare Ordner Bis zu 500
Abspielbare Dateien Bis zu 15 000

19De
Deutsch
Dieses Gerät unterstützt nur die folgenden iPod-
Modelle. Die unterstützten iPod-
Softwareversionen sind nachstehend
aufgelistet. Ältere Versionen werden ggf. nicht
unterstützt.
Hergestellt für
–iPod touch (1. bis 6. Generation)
–iPod classic
–iPod mit Videofunktion
–iPod nano (1. bis 7. Generation)
–iPhone 6s
– iPhone 6s Plus
–iPhone 6
– iPhone 6 Plus
–iPhone 5s
–iPhone 5c
–iPhone 5
–iPhone 4s
–iPhone 4
–iPhone 3GS
–iPhone 3G
–iPhone
• Die B
edienung kann sich je nach
Generation und/oder Softwareversion
des iPods unterscheiden.
• Be
nutzer eines iPods mit Lightning-
Anschluss sollten das Lightning-auf-USB-
Kabel verwenden (im Lieferumfang des
iPods enthalten).
• Be
nutzer eines iPods mit Dock-Anschluss
sollten das CD-IU51 verwenden.
Einzelheiten erfahren Sie bei Ihrem
Fachhändler.
• In
formationen zur Datei-/
Formatkompatibilität finden Sie in den
iPod-Handbüchern.
• H
örbücher, Podcast: Kompatibel
VORSICHT
Pioneer übernimmt keine Haftung für den
Verlust von iPod-Daten, auch dann nicht,
wenn der Verlust der betreffenden Daten
während der Verwendung dieses Geräts
aufgetreten ist.
Der Benutzer kann mit diesem Gerät keine
Ordnernummern zuweisen und auch nicht
die Wiedergabereihenfolge festlegen. Die
Reihenfolge der Audiodateien richtet sich
nach dem angeschlossenen Gerät.
Beachten Sie, dass sich auf einem USB-
G
erät befindliche versteckte Dateien nicht
abspielen lassen.
Beispielstruktur
Wiedergabe von
urheberrechtlich
geschützten Dateien
Nicht kompatibel
Partitioniertes USB-
Gerät
Es kann nur die erste
Partition
wiedergegeben
werden.
iPod-Kompatibilität
Reihenfolge von
Audiodateien
Ordner
Komprimierte
Audiodatei
bis : Wiedergabereihenfolge
01 bis 05: Ordnernummer
iTunes
Apple und iTunes sind Marken von Apple
Inc., eingetragen in den USA und anderen
Ländern.
WMA
Windows Media ist eine eingetragene
M
arke oder eine Marke der Microsoft
Corporation in den USA und/oder anderen
Ländern.
Dieses Produkt enthält Technologie, die
Ei
gentum der Microsoft Corporation ist
und nicht ohne Lizenz von Microsoft
Licensing, Inc. vertrieben werden darf.
iPod & iPhone
iPhone, iPod, iPod classic, iPod nano und
i
Pod touch sind in den USA sowie in
anderen Ländern eingetragene Marken
von Apple Inc.
Lightning ist eine Marke der Apple Inc.
Die Kennzeichnungen „Made for iPod” und
„
Made for iPhone” bedeuten, dass ein
elektronisches Zubehörteil spezifisch zum
Anschluss an iPod oder iPhone konstruiert
wurde und entsprechend vom Entwickler
als die Leistungsstandards von Apple
erfüllend zertifiziert wurde. Apple
übernimmt keine Verantwortung für die
richtige Funktion dieses Geräts oder seine
Erfüllung von Sicherheitsoder anderen
Vorschriften. Bitte beachten Sie, dass der
Gebrauch dieses Zubehörteils in
Verbindung mit einem iPod oder iPhone
die drahtlose Leistung beeinträchtigen
kann.
Android & Google Play
Android, Google Play und der Google Play-
L
ogo sind Warenzeichen von Google Inc.
MIXTRAX
MIXTRAX ist eine Marke der PIONEER
CO
RPORATION.
Spotify®
SPOTIFY und das Spotify-Logo sind
e
ingetragene Warenzeichen von Spotify
AB. Soweit vorhanden, sind kompatible
digitale Mobilgeräte und ein Premium-
Abonnement erforderlich; Informationen
dazu finden Sie unter https://
www.spotify.com.
Allgemeines
Stromspannung: 14,4 V Gleichspannung
(Toleranz 10,8 V bis 15,1 V)
Erdungssystem: Negativ
Maximale Leistungsaufnahme: 10,0 A
Abmessungen (B × H × T):
Russische Zeichentabelle
Urheberrechte und
Marken
D: Anzeige C: Zeichen
Technische Daten

20De
DIN
Gehäuse: 178 mm × 50 mm × 165 mm
Frontfläche: 188 mm × 58 mm ×
17 mm
D
Gehäuse: 178 mm × 50 mm × 165 mm
Frontfläche: 170 mm × 46 mm ×
17 mm
Gewicht: 1 kg
Audio
Maximale Ausgangsleistung:
• 50 W × 4 ch/4 Ω (wenn ohne
Su
bwoofer)
• 50 W × 2 ch/4 Ω + 70 W × 1 ch/2 Ω
(für Subwoofer)
Dauer-Ausgangsleistung:
22 W × 4 (50 Hz bis 15 000 Hz, 5 %
TH
D, bei 4-Ω-Last, beide Kanäle
betrieben)
Lastimpedanz: 4 Ω (4 Ω bis 8 Ω zulässig)
Maximaler Preout-Ausgangspegel: 2,0 V
Loudness-Kontur: +10 dB (100 Hz), +6,5 dB
(10 k
Hz) (Lautstärke: –30 dB)
Equalizer (Grafischer 5-Band-Equalizer):
Frequenz: 80 Hz/250 Hz/800 Hz/
2,5 kHz/8 kHz
Entzerrungsbereich: ±12 dB
(I
nkrement 2 dB)
Subwoofer (Mono):
Frequenz: 50 Hz/63 Hz/80 Hz/100 Hz/
125 Hz/
160 Hz/200 Hz
Steilheit: –12 dB/Okt., –24 dB/Okt.
Verstärkung: +6 dB bis –24 dB
Phase: Normal/Gegen
CD-Player
System: Compact-Disc-Audiosystem
Verwendbare Discs: Compact Disc
Signal-Rauschabstand: 94 dB (1 kHz) (IEC-
A-
Netz)
Anzahl der Kanäle: 2 (Stereo)
MP3-Decodierformat: MPEG-1 & 2 Audio
La
yer 3
WMA-Decodierformat: Vers. 7, 7.1, 8, 9, 10,
11,
12 (2-Kanal-Audio) (Windows
Media Player)
WAV-Signalformat: Lineare PCM & MS
A
DPCM (nicht komprimiert)
USB
USB-Standard-Spezifikation: USB 2.0 Full
Speed
Maximale Leistungsaufnahme: 1,5 A
USB Protokoll:
MSC (Massenspeicher-Klasse)
MTP (Media Transfer Protocol)
AOA (Android Open Accessory) 2.0
Dateisystem: FAT12, FAT16, FAT32
MP3-Decodierformat: MPEG-1 & 2 Audio
La
yer 3
WMA-Decodierformat: Vers. 7, 7.1, 8, 9, 10,
11,
12 (2-Kanal-Audio) (Windows
Media Player)
WAV-Signalformat: Lineare PCM & MS
A
DPCM (nicht komprimiert)
FM-Tuner
Frequenzbereich: 87,5 MHz bis 108,0 MHz
Nutzempfindlichkeit: 11 dBf (1,0 μV/75 Ω,
M
ono, Signal-Rauschabstand: 30 dB)
Signal-Rauschabstand: 72 dB (IEC-A-Netz)
MW-Tuner
Frequenzbereich: 531 kHz bis 1 602 kHz
Nutzempfindlichkeit: 25 μV (Signal-
R
auschabstand: 20 dB)
Signal-Rauschabstand: 62 dB (IEC-A-Netz)
LW-Tuner
Frequenzbereich: 153 kHz bis 281 kHz
Nutzempfindlichkeit: 28 μV (Signal-
R
auschabstand: 20 dB)
Signal-Rauschabstand: 62 dB (IEC-A-Netz)
HINWEIS
Änderungen der technischen Daten und
des Designs vorbehalten.

21De
Deutsch

2Nl
Vóór u begint ........................................................................................... 2
Aan de slag............................................................................................... 3
Radio.......................................................................................................... 5
Cd/USB/iPod/AUX ................................................................................... 6
App-modus .............................................................................................. 8
Spotify®..................................................................................................... 8
Pioneer ARC APP gebruiken.................................................................. 9
Instellingen ............................................................................................ 10
FUNCTION-instellingen....................................................................... 10
AUDIO-instellingen.............................................................................. 11
SYSTEM-instellingen............................................................................ 11
ILLUMINATION-instellingen ............................................................... 12
MIXTRAX-instellingen.......................................................................... 13
Verbindingen/installatie...................................................................... 13
Aanvullende informatie....................................................................... 16
Over deze handleiding:
• In de volgende instructies worden een USB-geheugen of USB-audiospeler een “USB-
apparaat” genoemd.
• In deze handleiding wordt naar iPod en iPhone verwezen als “iPod”.
Inhoud
Hartelijk dank voor uw keuze voor dit PIONEER-product
Lees deze handleiding voordat u het product in gebruik neemt zodat u het goed leert gebruiken. Lees
vooral de gedeelten die met WAARSCHUWING en LET OP gemarkeerd zijn aandachtig. Bewaar deze
handleiding na het lezen op een veilige, voor de hand liggende plaats zodat u ze indien nodig altijd
kunt raadplegen.
In de lidstaten van de EU en in Zwitserland en Noorwegen kunnen particulieren afgedankte
elektronische producten gratis bij de daarvoor bestemde verzamelplaatsen inleveren. Als u een
soortgelijk nieuw product koopt, kunt u het afgedankte product ook bij uw verkooppunt inleveren.
Als u in een ander land woont, neem dan contact op met de plaatselijke overheid voor informatie over
het weggooien van afgedankte producten.
Op die manier zorgt u ervoor dat uw afgedankte product op de juiste wijze wordt verwerkt,
hergebruikt en gerecycled, zonder schadelijke gevolgen voor het milieu en de volksgezondheid.
WAARSCHUWING
•Probeer het product niet zelf te monteren en voer er geen onderhoud aan uit. Montage of
onderhoud van het product door personen zonder technische opleiding en ervaring met
elektronische apparatuur en auto-accessoires kan gevaarlijk zijn, en kan een elektrische schok,
verwonding of andere gevaren veroorzaken.
• Bedien het toestel niet tijdens het rijden. Als u knoppen op het toestel wilt bedienen, moet u het
voertuig eerst van de weg halen en op een veilige plaats parkeren.
LET OP
• Zorg ervoor dat dit toestel niet in contact komt met vocht en/of andere vloeistoffen. Dit kan een
elektrische schok veroorzaken. Ook schade aan het toestel, rook en oververhitting kunnen het gevolg
zijn van contact met vloeistoffen.
• Zet het volume nooit zo hoog dat u geluiden buiten het voertuig niet meer kunt horen.
• De Pioneer CarStereo-Pass wordt alleen in Duitsland gebruikt.
• Dit product is getest in gematigde en tropische klimaatomstandigheden volgens IEC 60065, Audio-,
video- en soortgelijke elektronische toestellen - Veiligheidseisen.
Vóór u begint
Deponeer dit product niet bij het gewone huishoudelijk afval wanneer u het wilt verwijderen. Er
bestaat een speciaal wettelijk voorgeschreven verzamelsysteem voor de juiste behandeling, het
opnieuw bruikbaar maken en de recycling van gebruikte elektronische producten.

3Nl
Nederlands
Bij problemen
Neem contact op met uw leverancier of het dichtstbijzijnde erkende Pioneer-servicecentrum als het
toestel niet naar behoren functioneert.
DEH-X2900UI
Optionele afstandsbediening
De afstandsbediening CD-R320 wordt afzonderlijk verkocht.
LET OP
Dit apparaat is geclassificeerd als een klasse 1 laserproduct onder de veiligheidsnormen voor
laserproducten, IEC 60825-1:2007.
Aan de slag
Basisbediening
Ontkoppelknop
Display
M.C.-knop (multicontrole)
BAND/
DISP (display)
SRC (bron)/OFF
USB-poort
(uitwerpen)
AUX-ingang (3,5mm-stereoaansluiting)
Laadsleuf voor disc
Vaak gebruikte functies
* Wanneer de blauw/witte draad van het toestel verbonden is met het relaiscontact voor de
automatische antenne van de auto, schuift de antenne uit wanneer de bron van het toestel wordt
ingeschakeld. Om de antenne weer in te trekken, schakelt u de bron uit.
Display-indicatie
Verwijder het voorpaneel om diefstal te voorkomen. Verwijder alle kabels en apparaten
die verbonden zijn met het voorpaneel en schakel het toestel uit voor u het voorpaneel
verwijdert.
Actie Bediening
Toestel inschakelen* Druk op SRC
/OFF om het toestel in te
schakelen.
Hou SRC
/OFF ingedrukt om het toestel uit
te schakelen.
Het volume regelen Draai de M.
C.-knop.
Een bron selecteren Druk herhaaldelijk op SRC
/OFF.
De display-informatie wijzigen Druk herhaaldelijk op DISP.
Terugkeren naar de vorige weergave/lijst Druk op BAND/ .
Terugkeren naar de normale weergave
vanuit
het menu
Houd BAND/ ingedrukt.
Indicatie Beschrijving
Verschijnt wanneer er een lager niveau van het menu of de map bestaat.
Verschijnt wanneer de knop wordt ingedrukt.
Verschijnt wanneer de functie afstemmen op lokale zenders is ingesteld
(pagina 10).
Verschijnt wanneer een verkeersprogramma wordt ontvangen.
Verschijnt wanneer de functie TA (verkeersberichten) is ingesteld
(pagina 10).
Verschijnt wanneer de functie sound retriever ingesteld is (pagina 11).
Verschijnt wanneer willekeurige weergave/shuffle is ingesteld.
Verschijnt wanneer weergave herhalen is ingesteld.
Verschijnt wanneer de iPod-bedieningsfunctie is ingesteld (pagina 7).
Het voorpaneel verwijderen

4Nl
Belangrijk
• Stel het voorpaneel niet bloot aan te grote schokken.
• Stel het voorpaneel niet bloot aan direct zonlicht en hoge temperaturen.
• Bewaar het verwijderde voorpaneel altijd in een beschermtas of zak.
Wanneer u de contactschakelaar inschakelt na de installatie, verschijnt [SET UP :YES] op
het display.
1 Druk op de M.C.-knop.
Het instellingenmenu verdwijnt als u het toestel niet binnen 30 seconden bedient.
Als u
de instelling later wilt maken, draait u de M.C.-knop om [NO] te selecteren,
druk daarna op de knop om te bevestigen.
2 Draai de M.C.-knop om de opties te selecteren, druk daarna op de knop om te
bevestigen.
Om naar de volgende menuoptie te gaan, dient u uw selectie te bevestigen.
3 [QUIT :YES] verschijnt als alle instellingen uitgevoerd zijn.
Om terug te keren naar het eerste item van het instellingenmenu, draait u de M.C
.-
knop om [QUIT :NO] te selecteren, druk daarna op de knop om te bevestigen.
4 Druk op de M.C.-knop om de instellingen te bevestigen.
Instellingenmenu
Menu-item Beschrijving
LANGUAGE Selecteer de taal om tekstinformatie van een gecomprimeerd
aud
iobestand weer te geven.
[ENG](Engels),
[Р
УС](Russisch),
[TUR](Turks)
CLOCK SET Stel de klok in.
FM STEP Selecteer de FM-afstemstap uit 100 kHz of 50 kHz.
[100], [50]
Ontkoppelen Bevestigen
OPMERKINGEN
• U kunt de menu-instelling annuleren door op SRC/OFF te drukken.
• U kunt deze instellingen gelijk wanneer uitvoeren bij de SYSTEM-instellingen (pagina 11) en INITIAL-
instellingen (pagina 4).
1 Druk op de M.C.-knop om het hoofdmenu weer te geven.
2 Draai aan de M.C.-knop om [SYSTEM] te selecteren, druk daarna op de knop om
te bevestigen.
3 Draai aan de M.C.-knop om [DEMO OFF] te selecteren, druk daarna op de knop
om te bevestigen.
4 Draai aan de M.C.-knop om [YES] te selecteren, druk daarna op de knop om te
bevestigen.
1 Hou SRC/OFF ingedrukt tot het toestel uitschakelt.
2 Hou SRC/OFF ingedrukt om het hoofdmenu weer te geven.
3 Draai aan de M.C.-knop om [INITIAL] te selecteren, druk daarna op de knop om te
bevestigen.
4 Draai de M.C.-knop om een optie te selecteren, druk daarna op de knop om te
bevestigen.
De demonstratieweergave annuleren (DEMO OFF)
INITIAL-instellingen
Menu-item Beschrijving
FM STEP Selecteer de FM-afstemstap uit 100 kHz of 50 kHz.
[100], [50]

5Nl
Nederlands
De tunerfrequenties van dit toestel zijn bedoeld voor gebruik in West-Europa, Azië, het
Midden-Oosten, Afrika en Oceanië. Bij gebruik in andere regio's kan de ontvangst zwak
zijn. De functie RDS (Radio Data System) werkt alleen in regio's die RDS-signalen voor
FM-zenders uitzenden.
1 Druk op SRC/OFF om [RADIO] te selecteren.
2 Druk op BAND/ om de band te selecteren uit [FM1], [FM2], [FM3], [MW] of
[LW].
3 Druk op een cijfertoets (1/ tot 6/ ).
SP-P/O MODE Selecteer deze optie als een fullrange-luidspreker aangesloten is
op de draden voor de achterluidspreker en een subwoofer
aangesloten is op de RCA-uitgang.
[REAR/SUB.W]
[SUB.W/SUB.W] Selecteer deze optie als een passieve subwoofer direct
aanges
loten is op de draden voor de achterluidspreker en een
subwoofer aangesloten is op de RCA-uitgang.
[REAR/REAR] Selecteer deze optie als fullrange-luidsprekers aangesloten zijn
o
p de draden voor de achterluidspreker en op de RCA-uitgang.
Als een fullrange-luidspreker aangesloten is op de draden voor
de achterluidspreker en de RCA-uitgang niet wordt gebruikt,
kunt u [REAR/SUB.W] of [REAR/REAR] selecteren.
S/W UPDATE Selecteer dit om de recentste systeeminformatie op het toestel
te
bevestigen.
[SYSTEM INFO]
[SYSTEM UPDATE] Selecteer dit om het toestel bij te werken naar de recentste
software en de instellingen van het toestel te initialiseren. Voor
meer informatie over de recentste software en het updaten van
deze software kunt u terecht op onze website.
SYSTEM RESET Selecteer [YES] om de instellingen van het toestel te initialiseren.
He
t toestel wordt automatisch opnieuw gestart.
(Sommige instellingen blijven behouden zelfs nadat een reset
v
an het toestel werd uitgevoerd.)
[YES], [NO]
Radio
Voorkeuzezenders ontvangen
Menu-item Beschrijving
TIP
De / -knoppen kunnen ook worden gebruikt om een voorkeuzezender te selecteren
wanneer [SEEK] is ingesteld op [PCH] in de FUNCTION-instellingen (pagina 10).
De zes sterkste zenders worden opgeslagen onder de cijfertoetsen (1/ tot 6/ ).
1 Druk, nadat u een band heeft geselecteerd, op de M.C.-knop om het hoofdmenu
weer te geven.
2 Draai aan de M.C.-knop om [FUNCTION] te selecteren, druk daarna op de knop
om te bevestigen.
3 Draai aan de M.C.-knop om [BSM] te selecteren, druk daarna op de knop om te
bevestigen.
Een zender handmatig zoeken
1 Als u de band heeft geselecteerd, drukt u op / om een zender te
selecteren.
Hou vervolgens / ingedrukt en laat los om een beschikbare zender te
zoeken. Het scannen stopt wanneer het toestel een zender ontvangt. Druk op /
om de zoekafstemming te annuleren.
OPMERKING
[SEEK] moet ingesteld zijn op [MAN] in de FUNCTION-instellingen (pagina 10).
Zenders handmatig opslaan
1 Terwijl u de zender ontvangt die u wilt opslaan, houdt u een van de cijfertoetsen
(1/ tot 6/ ) ingedrukt tot hij niet meer knippert.
Het toestel zoekt naar een zender op basis van de PTY (programmatype)-informatie.
1 Druk op tijdens FM-ontvangst.
2 Draai de M.C.-knop om een programmatype te selecteren uit [NEWS/INFO],
[POPULAR], [CLASSICS] of [OTHERS].
3 Druk op de M.C.-knop.
Het toestel begint naar een zender te zoeken. Als een zender gevonden is, wordt de
ser
vicenaam van het programma weergegeven.
Best stations memory (BSM)
PTY-functies gebruiken

6Nl
OPMERKINGEN
• Om het zoeken te annuleren, drukt u op de M.C.-knop.
• Het programma van bepaalde zenders kan afwijken van de doorgestuurde PTY.
• Als geen enkele zender het gewenste programmatype uitzendt, wordt gedurende ongeveer twee
seconden [NOT FOUND] weergegeven en keert de tuner terug naar de oorspronkelijke zender.
Koppel de hoofdtelefoon los van het apparaat voor u het aansluit op het toestel.
Cd
1 Plaats een disc met het etiket omhoog in de laadsleuf.
Om een disc uit te werpen, dient u eerst de weergave te stoppen en vervolgens op te
drukken.
USB-apparaten (inclusief Android™)/iPod
1 Open het deksel van de USB-poort.
2 Sluit het USB-apparaat/de iPod aan met behulp van een geschikte kabel.
OPMERKING
Om automatisch over te schakelen naar de bron [USB] wanneer er een USB-apparaat/iPod verbonden
wordt met het toestel, stelt u [USB AUTO] in op [ON] bij de SYSTEM-instellingen (pagina 12).
LET OP
Gebruik een optionele Pioneer USB-kabel (CD-U50E) om het USB-apparaat te verbinden, want elk
apparaat dat rechtstreeks op het toestel aangesloten is, steekt uit uit het toestel, wat gevaarlijk kan zijn.
Voor u het apparaat loskoppelt, dient u de weergave te stoppen.
AOA-verbindingen
Raapleeg pagina 9 voor meer informatie over AOA-verbindingen.
MTP-verbinding
Een apparaat waarop Android OS 4.0 of recenter geïnstalleerd is, kan via MTP worden verbonden met
het toestel met behulp van de bij het apparaat geleverde kabel. Afhankelijk van het aangesloten
apparaat en het aantal bestanden in het apparaat, kunnen audiobestanden/songs mogelijk niet via
MTP worden afgespeeld. Merk op dat de MTP-verbinding niet compatibel is met WAV-
bestandsindelingen en niet kan worden gebruikt met de MIXTRAX-functie.
Cd/USB/iPod/AUX
Weergave
OPMERKING
Als u een MTP-verbinding gebruikt, moet [ANDROID WIRED] ingesteld zijn op [MEMORY] in de SYSTEM-
instellingen (pagina 12).
AUX
1 Steek de stereo-miniplug in de AUX-ingangsaansluiting.
2 Druk op SRC/OFF om [AUX] als bron te selecteren.
OPMERKING
Als [AUX] is ingesteld op [OFF] in de SYSTEM-instellingen, kan [AUX] niet worden geselecteerd als bron
(pagina 12).
U kunt diverse instellingen uitvoeren in de FUNCTION-instellingen (pagina 10).
Merk op dat de volgende bedieningen niet werken voor een AUX-apparaat. Om een
A
UX-apparaat te bedienen, dient u het apparaat zelf te gebruiken.
Bedieningen
Actie Bediening
Een map/album selecteren*1 Druk op 1/ of 2/ .
Een fragment/song (hoofdstuk) selecteren Druk op of .
Snel vooruit- of achteruitspoelen*3 Houd of ingedrukt.
Een bestand in een lijst zoeken 1 Druk op om de lijst weer te geven.
2 Dra
ai de M.C.-knop om de naam van het
gewenste bestand (de gewenste map) of
categorie te selecteren, druk daarna op
de knop om te bevestigen.
3 Dra
ai de M.C.-knop om het gewenste
bestand te selecteren, druk daarna op de
knop om te bevestigen.
De weergave start.
Een lijst met bestanden in de geselecteerde
m
ap/categorie weergeven*1
Druk op de M.C.-knop wanneer een map/
categorie geselecteerd is.
Een song in de geselecteerde map/
c
ategorie weergeven*1
Hou de M.C.-knop ingedrukt wanneer een
map/categorie geselecteerd is.

7Nl
Nederlands
*1 Alleen gecomprimeerde audiobestanden
*2 Deze functie is uitgeschakeld wanneer USB als bron is geselecteerd en de MIXTRAX-functie
ingeschakeld is.
*3 Wanneer u de functie snel vooruit- of achteruitspoelen gebruikt terwijl een VBR-bestand wordt
afgespeeld, is de weergaveduur mogelijk niet correct.
Link-weergavemodus
U kunt songs oproepen op basis van de momenteel weergegeven artiest, album of
genre.
Alfabetisch zoeken (alleen voor een iPod) 1 Druk op om de lijst weer te geven.
2 D
raai aan de M.C.-knop om de gewenste
categorielijst te selecteren en druk
vervolgens op om de alfabetische
zoekmodus te activeren.
(U kunt de alfabetische zoekmodus ook
ac
tiveren door de M.C.-knop twee keer
te verdraaien.)
3 D
raai aan de M.C.-knop om een letter te
selecteren en druk vervolgens op de
knop om de alfabetische lijst weer te
geven.
Om alfabetisch zoeken te annuleren, drukt
u op BA
ND/ .
Weergave herhalen Druk op 6/ .
Willekeurige weergave/shuffle Druk op 5/ .
Alles in shuffle weergeven (alleen iPod) Hou 5/ ingedrukt.
Weergave pauzeren/hervatten Druk op 4/PA
USE.
Sound retriever*1*2 Druk op 3/S.
Rtrv.
[1]: Geschikt voor lage compressiewaarden
[2]: Geschikt voor hoge compressiewaarden
Terug naar de rootmap (alleen voor cd/
USB)*1
Houd ingedrukt.
Schakelen tussen gecomprimeerde audio
en C
D-DA (alleen voor cd)
Druk op BAND/ .
Stations wisselen op een USB-apparaat
(alleen apparaten die het protocol USB
mas
s storage device ondersteunen)
Druk op BA
ND/ .
Nuttige functies voor iPod
Actie Bediening
1 Terwijl u naar een song luistert, houdt u ingedrukt om naar de link-
weergavemodus te gaan.
2 Draai de M.C.-knop om de modus ([ARTIST], [ALBUM], [GENRE]) te selecteren, druk
daarna op de knop om te bevestigen.
De geselecteerde song/het geselecteerde album wordt weergegeven na de
m
omenteel weergegeven song.
OPMERKING
De geselecteerde song/het geselecteerde album kan worden geannuleerd als u andere functies
gebruikt dan functies uit de link-weergavemodus (bijv. snel vooruit en achteruit).
iPod-bediening
U kunt het toestel bedienen via een aangesloten iPod.
De volgende iPod-modellen zijn niet compatibel met deze functie.
–iPod nano 1e generatie, iPod met video
1 Druk op BAND/ tijdens het afspelen en selecteer vervolgens de
bedieningsmodus.
[CO
NTROL iPod]: De iPod-functie van het toestel kan bediend worden op de
aangesloten iPod.
[CO
NTROL AUDIO]: De iPod-functie van het toestel kan alleen bediend worden met
de knoppen op het toestel. In deze modus kan de aangesloten iPod niet worden in-
of uitgeschakeld.
OPMERKINGEN
• Als u overschakelt naar de bedieningsmodus [CONTROL iPod] wordt het afspelen van de song
gepauzeerd. Gebruik de aangesloten iPod om het afspelen te hervatten.
• De volgende bedieningen zijn nog steeds mogelijk op het toestel, zelfs als de bedieningsmodus
ingesteld is op [CONTROL iPod].
– Pauze, snel vooruit/achteruit, song/hoofdstuk selecteren
• Het volume kan alleen worden geregeld op het toestel.
De MIXTRAX-functie creëert een non-stop mix van uw muziekbibliotheek, aangevuld
met verlichtingseffecten. Voor meer details over MIXTRAX-instellingen, zie pagina 13.
OPMERKINGEN
• Deze functie is niet compatibel met een Android-apparaat dat via MTP is verbonden.
• Wanneer USB is geselecteerd als de bron en de MIXTRAX-functie in gebruik is, is de functie sound
retriever uitgeschakeld.
• Afhankelijk van het bestand/de song zijn geluidseffecten mogelijk niet beschikbaar.
• Schakelt de MIXTRAX-functie uit als de verlichtingseffecten hinderlijk zijn om uw wagen te besturen.
1 Druk op MIX om MIXTRAX aan/uit te schakelen.
Over MIXTRAX (alleen USB/iPod)

8Nl
U kunt via dit toestel luisteren naar een applicatie op een iPhone. In sommige gevallen
k
unt u een applicatie bedienen met het toestel.
Meer informatie over compatibele apparaten vindt u op onze website.
Belangrijk
Voor gebruik van applicaties van derden worden mogelijk persoonsgegevens gebruikt of moet u zulke
gegevens verstrekken, bijvoorbeeld door het opzetten van een gebruikersaccount of op andere wijze,
en voor sommige applicaties worden mogelijk geolocatiegegevens gebruikt.
ALLE APPLICATIES VAN DERDEN VALLEN UITSLUITEND ONDER VERANTWOORDELIJKHEID VAN HUN
UITGEVER, INCLUSIEF MAAR NIET BEPERKT TOT HET VERZAMELEN EN BEVEILIGEN VAN
GEBRUIKERSGEGEVENS EN HET PRIVACYBELEID. DOOR EEN APPLICATIE VAN DERDEN TE GEBRUIKEN,
GAAT U ERMEE AKKOORD OM U TE INFORMEREN OVER DE GEBRUIKSVOORWAARDEN EN HET
PRIVACYBELEID VAN DE UITGEVER ERVAN. ALS U NIET AKKOORD GAAT MET DE
GEBRUIKSVOORWAARDEN OF HET BELEID VAN EEN UITGEVER OF GEEN TOESTEMMING GEEFT VOOR
HET GEBRUIK VAN GEOLOCATIEGEGEVENS (INDIEN VAN TOEPASSING), MOET U DE APPLICATIE NIET
GEBRUIKEN.
Voor iPhone-gebruikers
Deze functie is compatibel met iPhones en iPod touches waarop iOS 5.0 of later geïnstalleerd is.
OPMERKING
PIONEER IS NIET AANSPRAKELIJK VOOR APPLICATIES VAN DERDEN OF HUN INHOUD, INCLUSIEF MAAR
NIET BEPERKT TOT HUN NAUWKEURIGHEID OF VOLLEDIGHEID. DE INHOUD EN DE FUNCTIONALITEIT
VAN DERGELIJKE APPLICATIES ZIJN UITSLUITEND DE VERANTWOORDELIJKHEID VAN DE LEVERANCIER
VAN DE APPLICATIE.
1 Verbind dit toestel met het mobiele apparaat.
• iP
hone via USB (pagina 6)
2 Druk op SRC/OFF om [APP] te selecteren.
3 Bedien het mobiele apparaat om de applicatie te starten.
Basisbedieningen
U kunt diverse instellingen uitvoeren in de FUNCTION-instellingen (pagina 10).
App-modus
Een applicatie weergeven via het toestel
Actie Bediening
Een track selecteren Druk op of .
Snel vooruit- of achteruitspoelen Houd of ingedrukt.
Het afspelen pauzeren/hervatten Druk op BA
ND/ .
(DEH-X2900UI is alleen compatibel met Spotify geïnstalleerd op iPhone.)
Spotify is een verspreidingsservice voor muziekstreaming die niet aangesloten is bij
Pioneer. Meer informatie vindt u op http://www.spotify.com.
De Spotify-toepassing is beschikbaar voor compatibele telefoons. Raadpleeg https://
s
upport.spotify.com/ voor de recentste informatie over compatibiliteit.
Om van Spotify te genieten terwijl u rijdt, downloadt u eerst de Spotify-app op uw
i
Phone. U kunt deze downloaden van de iTunes App Store. Kies een gratis account of
een betaalde Premium account, ofwel in de app of op spotify.com. Een Premium
account geeft u meer functies, zoals offline luisteren.
Belangrijk
• Dit product omvat Spotify-software, die onderworpen is aan licenties van derden, die u hier kunt
vinden: www.spotify.com/connect/third-party-licenses.
• Voor informatie over de landen en regio's waar Spotify kan worden gebruikt, gaat u naar https://
www.spotify.com/us/select-your-country/.
Update de firmware van Spotify naar de recentste versie voor u de applicatie gebruikt.
1 Verbind dit toestel met het mobiele apparaat.
• iP
hone via USB (pagina 6)
2 Druk op SRC/OFF om [SPOTIFY] te selecteren.
3 Open de applicatie Spotify op het mobiele apparaat en start de weergave.
Basisbedieningen
U kunt diverse instellingen uitvoeren in de FUNCTION-instellingen (pagina 10).
OPMERKING
De beschikbare functies zijn afhankelijk van het soort inhoud (track/album/artiest/afspeellijst/radio)
dat u wilt afspelen.
Spotify®
Luisteren naar Spotify
Actie Bediening
Een fragment overspringen Druk op of .

9Nl
Nederlands
OPMERKING
Sommige functies van Spotify kunnen niet op het toestel worden bediend.
U kunt het toestel bedienen via een Pioneer ARC APP die geïnstalleerd is op een iPhone/
Android-apparaat. In sommige gevallen kunt u via het toestel bepaalde functies van de
toepassing gebruiken, zoals bronselectie, pauzeren enz.
Raadpleeg de helpfunctie van de toepassing voor meer informatie over welke functies
er
beschikbaar zijn in de toepassing.
Een track in een lijst zoeken 1 Druk op (lijst) om de lijst weer te
geven.
2 D
raai de M.C.-knop om de gewenste
categorie te selecteren, druk daarna op
de knop om te bevestigen.
3 D
raai de M.C.-knop om het gewenste
bestand te selecteren, druk daarna op de
knop om te bevestigen.
De weergave start.
Het afspelen pauzeren/hervatten Druk op 4/
PAUSE.
Duim omhoog (alleen voor radio) Druk op 1/ .
Duim omlaag (alleen voor radio) Druk op 2/ .
Willekeurige weergave (alleen voor track/
album
/artiest/afspeellijst)
Druk op 5/ .
Weergave herhalen (alleen voor track/
album
/artiest/afspeellijst)
Druk op 6/ .
Start een radiokanaal op basis van de song
d
ie momenteel wordt afgespeeld.
1 Houd (lijst) ingedrukt om een
radiozender te starten.
2 Dr
uk op de M.C.-knop.
• D
eze functie is mogelijk niet beschikbaar,
afhankelijk van de geselecteerde song.
Sla de informatie op van de song die
m
omenteel wordt afgespeeld.
Verwijder de songinformatie die
opg
eslagen is.
1 Hou
d 3/S.Rtrv ingedrukt.
[SAVE]/[UNSAVE] verschijnt.
2 Dr
uk op de M.C.-knop.
Pioneer ARC APP gebruiken
Actie Bediening
WAARSCHUWING
Bedien de toepassing niet terwijl u rijdt. Parkeer uw wagen op een veilige plaats voor u de
bedieningselementen van de toepassing gebruikt.
Voor iPhone-gebruikers
Deze functie is compatibel met iPhones (iPhone 5 of later) en iPod touches waarop iOS
8.0
of later geïnstalleerd is.
U kunt Pioneer ARC APP downloaden op iTunes App Store.
Voor gebruikers van Android-apparaten
Deze functie is compatibel met apparaten waarop Android OS 4.1 of later geïnstalleerd
i
s en die ook AOA (Android Open Accessory) 2.0 ondersteunen.
U kunt de Pioneer ARC APP downloaden op Google Play™.
OPMERKING
Sommige Android-apparaten die via AOA 2.0 verbonden zijn, werken mogelijk niet goed of
produceren geluiden ten gevolge van hun eigen softwareontwerp, ongeacht de OS-versie.
1 Verbind dit toestel met het mobiele apparaat.
• i
Phone/Android-apparaat via USB (pagina 6)
Ga verder met stap 6 als u verbinding via USB kiest voor een iPhone.
2 Druk op de M.C.-knop om het hoofdmenu weer te geven.
3 Draai aan de M.C.-knop om [SYSTEM] te selecteren en druk vervolgens op de
knop om te bevestigen.
4 Draai aan de M.C.-knop om [ANDROID WIRED] te selecteren en druk vervolgens
op de knop om te bevestigen.
5 Draai aan de M.C.-knop om [APP CONTROL] te selecteren voor een Android-
apparaat dat verbonden is via USB.
Als [ON] is geselecteerd in [P.APP AUTO ON] (pagina 12), start Pioneer ARC APP op
het Android-toestel automatisch en worden alle stappen voltooid.
OPMERKING
Als Pioneer ARC APP niet op uw Android-toestel werd geïnstalleerd, verschijnt een bericht op uw
Android-toestel om u te vragen de applicatie te installeren. Selecteer [OFF] in [P.APP AUTO ON] om
het bericht te verwijderen (pagina 12).
6 Druk op SRC/OFF om een bron te selecteren.
7 Start Pioneer ARC APP op het mobiele apparaat.
Een verbinding tot stand brengen met Pioneer ARC
APP

10Nl
OPMERKING
Op een iPhone kunt u de toepassing ook starten door de M.C.-knop ingedrukt te houden.
1 Druk op SRC/OFF om [ANDROID] te selecteren.
Basisbedieningen
U kunt diverse instellingen aanpassen in het hoofdmenu.
1 Druk op de M.C.-knop om het hoofdmenu weer te geven.
2 Draai vervolgens aan de M.C.-knop om een van de volgende categorieën te
selecteren, druk daarna op de knop om te bevestigen.
• FUNCTION-instellingen (pagina 10)
• AUDIO-instellingen (pagina 11)
• SYSTEM-instellingen (pagina 11)
• ILLUMINATION-instellingen (pagina 12)
• MIXTRAX-instellingen (pagina 13)
3 Draai de M.C.-knop om de opties te selecteren, druk daarna op de knop om te
bevestigen.
De menu-items zijn afhankelijk van de bron.
Muziek beluisteren op een Android-apparaat
Actie Bediening
Een track selecteren Druk op of .
Snel vooruit- of achteruitspoelen Houd of ingedrukt.
Het afspelen pauzeren/hervatten Druk op 4/PA
USE.
Sound retriever Druk op 3/S.
Rtrv.
[1]: Geschikt voor lage compressiewaarden
[2]: Geschikt voor hoge compressiewaarden
Instellingen
FUNCTION-instellingen
Menu-item Beschrijving
FM SETTING
[TALK], [STANDARD], [MUSIC] Pas de geluidskwaliteit aan aan het zendsignaal
van d
e FM-band. (Alleen beschikbaar wanneer
FM-band is geselecteerd.)
BSM
Sla de zes sterkste zenders automatisch op onder
d
e cijfertoetsen (1/ tot 6/ ).
REGIONAL
[ON], [OFF] Beperk de ontvangst tot de specifieke regionale
pro
gramma's wanneer AF (alternatieve
frequenties zoeken) geselecteerd is. (Alleen
beschikbaar wanneer FM-band is geselecteerd.)
LOCAL
FM: [O
FF], [LV1], [LV2], [LV3], [LV4]
MW/LW: [O
FF], [LV1], [LV2]
Beperk de zenders automatisch volgens de
sig
naalsterkte.
TA
[ON], [OFF] Ontvang actuele verkeersinformatie indien
beschikbaar. (Alleen beschikbaar wanneer FM-
band is geselecteerd.)
AF
[ON], [OFF] Laat het toestel opnieuw afstemmen op een
and
ere frequentie van dezelfde zender. (Alleen
beschikbaar wanneer FM-band is geselecteerd.)
NEWS
[ON], [OFF] Onderbreek de momenteel geselecteerde bron
m
et nieuwsberichten. (Alleen beschikbaar
wanneer FM-band is geselecteerd.)
SEEK
[MAN], [PCH] Wijs de knoppen of toe om zenders
een voor een te zoeken (handmatige
af
stemming) of selecteer een zender uit de
voorgeprogrammeerde kanalen.
SAVE
Sla de informatie van de momenteel afgespeelde
s
ong op in uw muzieklijst op Spotify.

11Nl
Nederlands
UNSAVE
Verwijder de songinformatie die opgeslagen is in
[SAVE].
S.RTRV
[1]: (geschikt voor lage
compressiewaarden),
[2]: (geschikt voor hoge
co
mpressiewaarden),
[OFF]
Verbeter gecomprimeerde audio en zorg voor
ee
n rijk geluid.
Niet beschikbaar wanneer:
• US
B is geselecteerd als bron en de MIXTRAX-
functie is ingeschakeld.
• CD
-DA/CD-TEXT wordt weergegeven.
AUDIO BOOK
[FASTER], [NORMAL], [SLOWER] Wijzig de weergavesnelheid. (Niet beschikbaar
w
anneer [CONTROL iPod] geselecteerd is in de
bedieningsmodus.)
PAU SE
Pauzeer of hervat de weergave.
AUDIO-instellingen
Menu-item Beschrijving
FADER*1
Pas de balans aan tussen de voor- en
achterluidspreker.
BALANCE
Pas de balans aan tussen de linker en rechter
lu
idspreker.
EQ SETTING
[SUPER BASS], [POWERFUL],
[NA
TURAL], [VOCAL], [CUSTOM1],
[CUSTOM2], [FLAT]
Selecteer een equalizerband en -
ni
veau voor verdere aanpassing.
Equalizerband: [80H
Z], [250HZ],
[800HZ], [2.5KHZ], [8KHZ]
Equalizerniveau: [+
6] tot [–6]
Selecteer de equalizercurve of pas deze aan.
[CUSTOM1] kan voor elke bron afzonderlijk
w
orden ingesteld. Alle hierna vermelde
combinaties worden echter automatisch
ingesteld op dezelfde instelling.
• US
B, iPod, ANDROID, SPOTIFY en APP (iPhone)
[CUSTOM2] is een gedeelde instelling die voor
al
le bronnen wordt gebruikt.
Menu-item Beschrijving
USB
iPod
iPod
*1 Niet beschikbaar wanneer [SUB.W/SUB.W] is geselecteerd in [SP-P/O MODE] in de INITIAL-
instellingen (pagina 5).
*2 Niet beschikbaar wanneer [REAR/REAR] is geselecteerd in [SP-P/O MODE] in de INITIAL-instellingen
(pagina 5).
*3 Niet beschikbaar wanneer [OFF] is geselecteerd in [SUB.W].
U kunt deze menu's ook oproepen wanneer het toestel uitgeschakeld is.
LOUDNESS
[OFF], [LOW], [MID], [HI] Compenseer voor een helder geluid bij laag
volume
.
SUB.W*2
[NOR], [REV], [OFF] Selecteer de subwooferfase.
SUB.W CTRL*2
*3
Drempelfrequentie: [50H
Z],
[63HZ], [80HZ], [100HZ], [125HZ],
[160HZ], [200HZ]
Uitgangsniveau: [
–24] tot [+6]
Hellingsniveau: [–12],
[–24]
Alleen frequenties die lager zijn dan de
f
requenties in het geselecteerde bereik, worden
weergegeven door de subwoofer.
BASS BOOST
[0] tot [+6] Selecteer het bass boost-niveau.
HPF SETTING
Drempelfrequentie: [O
FF],
[50HZ], [63HZ], [80HZ], [100HZ],
[125HZ], [160HZ], [200HZ]
Hellingsniveau: [–12],
[–24]
Alleen frequenties boven de drempelfrequentie
van
het hoog-doorlaatfilter (HPF) worden
weergegeven.
SLA
[+4] tot [–4] Pas het volume aan voor elke bron behalve FM.
Alle hierna vermelde combinaties worden
a
utomatisch ingesteld op dezelfde instelling.
• U
SB, iPod, ANDROID, SPOTIFY en APP (iPhone)
SYSTEM-instellingen
Menu-item Beschrijving
LANGUAGE
[ENG](Engels), [РУС](Russisch),
[TUR](Turks)
Selecteer de taal om tekstinformatie van een
gecomprimeerd audiobestand weer te geven.
Menu-item Beschrijving

12Nl
* [PW SAVE] wordt geannuleerd als de accu losgekoppeld wordt, en moet weer worden ingeschakeld
als de accu weer wordt aangesloten. Wanneer [PW SAVE] uitgeschakeld is, kan het toestel, afhankelijk
CLOCK SET
Stel de klok in (pagina 4).
12H/24H
[12H], [24H] Selecteer de tijdnotatie.
AUTO PI
[ON], [OFF] Zoek naar een andere zender met dezelfde
p
rogrammering, zelfs als u een voorkeuzezender
gebruikt.
AUX
[ON], [OFF] Stel in op [ON] wanneer een hulpapparaat wordt
g
ebruikt dat verbonden is met het toestel.
SPOTIFY
[ON], [OFF] Stel in op [ON] wanneer u de Spotify-functie
ge
bruikt.
PW SAVE*
[ON], [OFF] Verminder het verbruik van batterijvermogen.
Het inschakelen van de bron is de enige
hand
eling die met deze functie mogelijk is.
ANDROID WIRED
[MEMORY], [APP CONTROL] Selecteer de geschikte verbindingsmethode
v
oor een Android-apparaat.
P. A P P AU TO O N
[ON], [OFF]
Selecteer [ON] om Pioneer ARC APP automatisch
te starten wanneer een Android-apparaat wordt
verbonden aan het toestel via AOA. (Niet
beschikbaar wanneer [MEMORY] is geselecteerd in
[ANDROID WIRED].)
USB AUTO
[ON], [OFF] Selecteer [ON] om automatisch over te
sch
akelen naar de bron [USB] wanneer er een
USB-apparaat/iPod verbonden wordt met het
toestel.
Selecteer [OFF] wanneer een USB-apparaat/iPod
alleen aangesloten wordt om opgeladen te
worden.
Menu-item Beschrijving
van de verbindingsmethode, stroom van de accu blijven trekken als de ontsteking van uw wagen
geen positie ACC (accessoire) heeft.
ILLUMINATION-instellingen
Menu-item Beschrijving
COLOUR
[KEY COLOUR], [DISP COLOUR],
[BOTH COLOUR]
Kies de kleur voor de knoppen/het display van
het toestel uit 12 voorgeprogrammeerde
kleuren, [SCAN] of [CUSTOM]*.
• [SCA
N]: doorloop diverse kleuren automatisch.
• [C
USTOM]*:
1 Hou
d de M.C.-knop ingedrukt tot het scherm
voor het instellen van de kleur verschijnt.
2 S
tel de primaire kleur (R (rood)/G (groen)/B
(blauw)) en de helderheid ([0] tot [60]) in.
Het is niet mogelijk om tegelijk voor R (rood),
G
(groen) en B (blauw) een niveau onder 10 te
selecteren.
U kunt ook de voorgeprogrammeerde kleuren
aanpas
sen. Selecteer een van de
voorgeprogrammeerde kleuren en houd
vervolgens de M.C.-knop ingedrukt tot het
scherm voor het instellen van de kleur verschijnt.
* De CUSTOM-instelling is alleen beschikbaar voor
[KEY COLOUR] en [DISP COLOUR].
DIM SETTING
[SYNC ILLUMI], [SYNC CLOCK],
[MA
NUAL]
De display-helderheid wijzigen.
BRIGHTNESS
[KEY], [DISP] Selecteer de helderheid voor de knoppen/het
d
isplay van het toestel uit [1] tot [10].
De beschikbare instelbereiken zijn verschillend
afh
ankelijk van [DIM SETTING].
ILLUMI FX
[ON], [OFF] Het verlichtingseffect is zichtbaar wanneer er
een cd
geplaatst/uitgeworpen wordt.
Het verlichtingseffect wordt geactiveerd
wann
eer de ACC-schakelaar wordt in-/
uitgeschakeld, ongeacht deze instelling.

13Nl
Nederlands
MIXTRAX-instellingen
Menu-item Beschrijving
SHORT PLAYBCK
[1.0 MIN], [1.5 MIN], [2.0 MIN],
[2.5 MIN], [3.0 MIN], [OFF]
Selecteer de weergaveduur.
FLASH AREA
[KEY/DISPLAY], [KEY], [OFF] Selecteer het gebied voor het
ver
lichtingseffect.
Wanneer [OFF] is geselecteerd, wordt de kleur
di
e ingesteld is bij de ILLUMINATION-
instellingen (pagina 12) gebruikt als
displaykleur.
FLASH PATTERN
[SOUND LEVEL 1] tot [SOUND
LEV
EL 6]
Wijzig het verlichtingseffect volgens het
geluids- en basniveau.
Het flitspatroon wijzigt volgens het
ge
luidsniveau.
[LOW PASS 1] tot [LOW PASS 6] Het flitspatroon wijzigt volgens het basniveau.
[RANDOM1] Het flitspatroon wijzigt willekeurig volgens de
g
eluidsniveaumodus en de laag-
doorlaatmodus.
[RANDOM2] Het flitspatroon wijzigt willekeurig volgens de
g
eluidsniveaumodus.
[RANDOM3] Het flitspatroon wijzigt willekeurig volgens de
l
aag-doorlaatmodus.
DISPLAY FX
[ON], [OFF] Zet de speciale MIXTRAX-effecten aan/uit.
CUT IN FX
[ON], [OFF] Schakel de speciale MIXTRAX-effecten aan/uit
t
erwijl de fragmenten handmatig worden
gewijzigd.
Belangrijk
• Wanneer dit toestel wordt geïnstalleerd
in een wagen zonder ACC (accessoire)-
positie van de contactschakelaar en als
de rode kabel niet wordt verbonden met
de aansluiting die de bediening van de
contactschakelaar detecteert, kan de
accu leeglopen.
• Als dit toestel wordt gebruikt in andere
omstandigheden dan hierna vermeld,
kan er brand of een storing optreden.
–Wagens met een 12 Volt accu en
neg
atieve aarding.
–Wanneer de luidsprekeruitgang door 4
k
analen wordt gebruikt, gebruikt u
luidsprekers van meer dan 50 W
(maximaal ingangsvermogen) en
tussen 4 Ω en 8 Ω (impedantiewaarde).
Gebruik geen luidsprekers van 1 Ω tot 3
Ω voor dit toestel.
–Wanneer de uitgang voor de
a
chterluidspreker wordt gebruikt door 2
Ω van de subwoofer, gebruikt u
luidsprekers van meer dan 70 W
(maximaal ingangsvermogen).
* Raadpleeg de verbindingen voor een
verbi
ndingsmethode.
• O
m kortsluiting, oververhitting of storing
te voorkomen, dient u de volgende
richtlijnen op te volgen.
–Koppel de negatieve pool van de accu
l
os voor u met de installatie begint.
–Zet de bedrading vast met
k
abelklemmen of kleefband. Wikkel
kleefband rond bedrading die in
contact komt met metalen delen om de
bedrading te beschermen.
– Plaats alle kabels op een veilige afstand
van beweg
ende delen, zoals de
schakelhendel en de stoelrails.
– Plaats alle kabels op een veilige afstand
van he
te plaatsen, dus niet nabij de
uitgang van de verwarming.
– Verbind de gele kabel niet met de accu
door
deze door het gat naar het
motorcompartiment te voeren.
– Dek alle losgekoppelde
k
abelconnectors af met isolatietape.
–Sluit kabels nooit kort.
– Verwijder de isolatie van de
vo
edingskabel van dit toestel niet om
de stroomtoevoer met andere
apparaten te delen. De
stroomcapaciteit van de kabel is
beperkt.
– Gebruik een zekering van de
voo
rgeschreven waarde.
– Verbind de negatieve luidsprekerkabel
n
ooit rechtstreeks met aarde.
– Voeg nooit negatieve kabels van
m
eerdere luidsprekers samen.
• Al
s het toestel ingeschakeld is, worden
stuursignalen via de blauw/witte kabel
verstuurd. Verbind deze kabel met de
systeemafstandsbediening van een
externe eindversterker of met het
relaiscontact voor de automatische
antenne (max. 300 mA 12 V gelijkstroom).
Als de wagen uitgerust is met een
ruitantenne, moet verbinding worden
gemaakt met de voedingsaansluiting van
de antennebooster.
• V
erbind de blauw/witte kabel nooit met
de voedingsaansluiting van een externe
eindversterker. Verbind deze kabel ook
nooit met de voedingsaansluiting van de
automatische antenne. Hierdoor zou de
Verbindingen/installatie
Verbindingen
ACC-positie Geen ACC-positie

14Nl
accu leeglopen of zou er een storing
optreden.
• D
e zwarte kabel is aarde. Aardingskabels
voor dit toestel en andere uitrusting (met
name producten die veel stroom trekken
zoals eindversterkers) moeten
afzonderlijk worden aangesloten. Anders
kan er, wanneer ze toevallig loskomen,
brand of een storing optreden.
• He
t grafische symbool op het
product duidt gelijkstroom aan.
Dit toestel
Stroomkabelingang
AUX IN | [Tel In] achteraan (3,5mm-
stereoaansluiting)
Een speciale ingang aan de achterkant
d
ie alleen compatibel is met externe
Bluetooth-handsfreetelefoonsets. Het
audiosignaal wordt gedempt tijdens
een telefoongesprek wanneer de geel/
zwarte draad verbonden/geactiveerd is.
Achteruitgang of subwooferuitgang
Vooruitgang
Antenne-ingang
Zekering (10 A)
Ingang draadafstandsbediening
Een vast bedrade
af
standsbedieningsadapter kan worden
aangesloten (afzonderlijk verkocht).
Stroomkabel
Naar stroomkabelingang
Afhankelijk van het soort wagen kan de
functie van en verschillend zijn.
In dit geval dient u te verbinden met
en met .
Geel
Reserve (of accessoire)
Geel
Verbinden met de constante 12 V
v
oedingsaansluiting.
Rood
Accessoire (of reserve)
Rood
Verbinden met de aansluiting die door
d
e contactschakelaar wordt gestuurd
(12 V gelijkstroom).
Verbind draden van dezelfde kleur met
elkaar.
Zwart (chassisaarde)
Blauw/wit
De penpositie van de ISO-connector is
afh
ankelijk van het wagentype. Verbind
en wanneer pen 5 een
antennestuurtype is. In een ander
wagentype mag u en nooit
verbinden.
Blauw/wit
Verbinden met de
sy
steembedieningsaansluiting van de
eindversterker (max. 300 mA 12 V
gelijkstroom).
Blauw/wit
Verbinden met het relaiscontact voor
de
automatische antenne (max. 300 mA
12 V gelijkstroom).
Luidsprekerdraden
Wit: links voor
Wit/zwart: links voor
Grijs: rechts voor
Grijs/zwart: rechts voor
Groen: links achter of subwoofer
Groen/zwart: links achter of
subwoofer
Violet: rechts achter of subwoofer
Violet/zwart: rechts achter of
subwoofer
Oranje/wit
Verbinden met het verlichtingsignaal
van een wa
gen
ISO-connector
In sommige wagens is de ISO-
c
onnector in twee gesplitst. In dit geval
dient u verbinding te maken met beide
connectoren.
OPMERKINGEN
• Wijzig het beginmenu van dit toestel. Zie
[SP-P/O MODE]
(pagina 5). De
subwooferuitgang van dit toestel is
mon
o.
• W
anneer u een subwoofer van 2 Ω
gebruikt, dient u de subwoofer te
verbinden met de violette en violet/
zwarte draden van dit toestel. Sluit niets
aan op de groene en groen/zwarte
draden.
Eindversterker (afzonderlijk
verkocht)
Voer deze verbindingen uit wanneer u de
optionele versterker gebruikt.
Systeemafstandsbediening
Verbinden met blauw/witte kabel.
Eindversterker (afzonderlijk verkocht)
Verbinden met RCA-kabels (afzonderlijk
verkocht)
Naar vooruitgang
Voorluidspreker
Naar achteruitgang of
subwooferuitgang
Achterluidspreker of subwoofer
Belangrijk
• Controleer alle verbindingen en
systemen voor de definitieve installatie.
• Gebruik geen ongeoorloofde
onderdelen, want dit kan tot storingen
leiden.
• Ra
adpleeg uw verdeler als u voor de
installatie gaten moet boren of andere
wijzigingen aan de wagen moet
aanbrengen.
• In
stalleer het toestel niet op de volgende
plaatsen:
–waar het de goede werking van de
wag
en kan storen.
–waar passagiers gekwetst kunnen
g
eraken bij bruusk afremmen.
• De ha
lfgeleiderlaser raakt beschadigd als
hij te warm wordt. Installeer dit toestel op
Installatie

15Nl
Nederlands
een veilige afstand van hete plaatsen,
zoals de uitgang van de verwarming.
• Optimale prestaties zijn
verzekerd wanneer het
toestel in een hoek van
minder dan 60° wordt
geïnstalleerd.
• T
ijdens de installatie dient u voor een
goede warmteafvoer bij het gebruik van
het toestel te zorgen. Voorzie daartoe
voldoende vrije ruimte achter het
achterpaneel en wikkel alle losse kabels
op, zodat ze de ventilatieopeningen niet
blokkeren.
DIN-installatie
1 Steek de bijgeleverde installatiekoker
in het dashboard.
2 Zet de installatiekoker vast door de
metalen lippen 90° te plooien met een
schroevendraaier.
Dashboard
Installatiekoker
• C
ontroleer of het toestel degelijk
geïnstalleerd is. Een onstabiele
installatie kan haperingen of andere
storingen veroorzaken.
Wanneer u de bijgeleverde
installatiekoker niet gebruikt
1 Bepaal de positie waar de gaten in de
beugel en de zijkant van het toestel
overeenkomen.
2 Draai aan elke kant twee schroeven
vast.
Tappende schroef (5 mm × 9 mm,
niet met het product meegeleverd)
Montagebeugel
Dashboard of console
Het toestel verwijderen
(geïnstalleerd met de bijgeleverde
installatiekoker)
1 Verwijder het sierkader.
Sierkader
Gekeepte lip
• Do
or het voorpaneel los te maken,
kunt u gemakkelijker bij het sierkader
komen.
• W
anneer het sierkader wordt
teruggezet, moet de kant met de
gekeepte lip omlaag wijzen.
2 Steek de meegeleverde uittrekspieën
in beide zijden van het toestel tot ze
op hun plaats klikken.
3 Trek het toestel uit het dashboard.
Voorzie
voldoende
ruimte
5 cm
5 cm

16Nl
Het display keert automatisch terug naar
het gewone display.
→ U hebt gedurende ongeveer 30
seconden geen handeling uitgevoerd.
– Voer een handeling uit.
Het bereik voor weergave herhalen wordt
onverwacht gewijzigd.
→ Afhankelijk van het bereik voor
weergave herhalen kan het
geselecteerde bereik gewijzigd worden
wanneer u een andere map of een
ander fragment selecteert of vooruit of
achteruit spoelt.
– Selecteer het gewenste bereik voor
weerg
ave herhalen opnieuw.
Een onderliggende map wordt niet
afgespeeld.
→ Onderliggende mappen worden niet
afgespeeld wanneer [FLD] (map
herhalen) is geselecteerd.
– Selecteer een ander bereik voor
weerg
ave herhalen.
Het geluid is onderbroken.
→ U gebruikt een apparaat, zoals een
mobiele telefoon, die hoorbare
storingen veroorzaakt.
– Plaats elektrische apparaten die de
s
toring kunnen veroorzaken, verder
weg van het toestel.
Algemeen
AMP ERROR
→ Dit toestel werkt niet of er is een
probleem met de
luidsprekeraansluiting.
→ H
et beveiligingscircuit is geactiveerd.
– Controleer de luidsprekeraansluiting.
– Draai de contactschakelaar naar OFF
e
n weer naar ON. Als het bericht nog
wordt weergegeven, neemt u contact
op met uw leverancier of een erkend
Pioneer Servicecentrum.
NO XXXX (bijvoorbeeld NO TITLE)
→ Er is geen ingebedde tekstinformatie.
– Schakel het display om of speel een
an
der fragment/bestand af.
Cd-speler
ERROR-07, 11, 12, 17, 30
→ De disc is vuil.
–Reinig de disc.
→ D
e disc is bekrast.
– Plaats een andere disc.
ERROR-07, 10, 11, 12, 15, 17, 30, A0
→ Elektrisch of mechanisch probleem.
– Zet de contactschakelaar UIT en weer
A
AN, of schakel naar een andere
signaalbron en dan terug naar de cd-
speler.
ERROR-15
→ De geplaatste disc bevat geen
gegevens.
– Plaats een andere disc.
ERROR-23
→ Het cd-formaat wordt niet ondersteund.
Aanvullende informatie
Problemen verhelpen Foutmeldingen
– Plaats een andere disc.
FORMAT READ
→ Soms is er een vertraging tussen het
begin van de weergave en wanneer u
het geluid begint te horen.
–Wacht tot het bericht verdwijnt en u
h
et geluid hoort.
NO AUDIO
→ De geplaatste disc bevat geen
afspeelbare bestanden.
– Plaats een andere disc.
SKIPPED
→ De geplaatste disc bevat door DRM
beveiligde bestanden.
– Beveiligde bestanden worden
o
vergeslagen.
PROTECT
→ Alle bestanden op de geplaatste disc
zijn beveiligd met DRM.
– Plaats een andere disc.
USB-apparaat/iPod
FORMAT READ
→ Soms is er een vertraging tussen het
begin van de weergave en wanneer u
het geluid begint te horen.
–Wacht tot het bericht verdwijnt en u
h
et geluid hoort.
NO AUDIO
→ Er zijn geen songs.
– Zet de audiobestanden over naar het
U
SB-apparaat en maak verbinding.
→ D
e inhoud van het USB-apparaat is
beveiligd.
– Raadpleeg de instructies bij het USB-
ap
paraat om de beveiliging uit te
schakelen.
SKIPPED
→ Het aangesloten USB-apparaat bevat
bestanden die met DRM zijn beveiligd.
– Beveiligde bestanden worden
ov
ergeslagen.
PROTECT
→ Alle bestanden op het aangesloten
USB-apparaat zijn beveiligd met DRM.
– Gebruik een ander USB-apparaat.
N/A USB
→ Het aangesloten USB-apparaat wordt
niet ondersteund door dit toestel.
– Gebruik een apparaat dat compatibel
is
met USB.
HUB ERROR
→ USB-apparaten die aangesloten zijn via
een USB-hub worden niet ondersteund
door dit toestel.
– Sluit het USB-apparaat rechtstreeks
a
an op dit toestel met behulp van een
USB-kabel.
CHECK USB
→ Er is kortsluiting opgetreden in de USB-
stekker of de USB-kabel.
– Controleer of de USB-stekker en de
U
SB-kabel niet ergens ingeklemd of
beschadigd zijn.
→ H
et aangesloten USB-apparaat
verbruikt meer stroom dan de maximaal
toelaatbare waarde.
– Ontkoppel het USB-apparaat en
g
ebruik het niet meer. Zet de
contactschakelaar op UIT en daarna
op ACC of AAN. Sluit alleen
compatibele USB-apparaten aan.
→ D
e iPod functioneert correct maar
wordt niet opgeladen.
– Controleer of de kabel van de iPod
n
iet is kortgesloten (bijvoorbeeld
contact maakt met metalen
voorwerpen). Zet daarna de
contactschakelaar UIT en weer AAN, of
ontkoppel de iPod en sluit hem weer
aan.
ERROR-19
→ Communicatiefout.

17Nl
Nederlands
– Probeer een van de volgende
mogelijkheden en keer dan terug naar
de USB-bron.
• Zet de contactschakelaar UIT en
weer AAN.
• Ont
koppel het USB-apparaat.
• S
chakel over naar een andere
signaalbron.
→ i
Pod-fout.
– Verwijder de kabel uit de iPod. Sluit de
k
abel weer aan als het hoofdmenu van
de iPod wordt weergegeven en stel de
iPod opnieuw in.
ERROR-23
→ Het USB-apparaat was niet goed
geformatteerd.
–Formatteer het USB-apparaat met
FAT
12, FAT16 of FAT32.
ERROR-16
→ De versie van de iPod-firmware is
verouderd.
– Werk de versie van de iPod bij.
→ i
Pod-fout.
– Verwijder de kabel uit de iPod. Sluit de
k
abel weer aan als het hoofdmenu van
de iPod wordt weergegeven en stel de
iPod opnieuw in.
STOP
→ De huidige lijst bevat geen songs.
– Selecteer een lijst die wel songs bevat.
NOT FOUND
→ Geen verwante songs.
– Zet songs over naar de iPod.
Apps
START UP APP
→ De applicatie is nog niet gestart.
– Bedien het mobiele apparaat om de
applic
atie te starten.
Spotify
CHECK APP
→ Verbinding met de applicatie Spotify
mislukt.
–Volg de instructies op het scherm.
Discs en de player
• Gebruik uitsluitend discs die voorzien zijn
van een van onderstaande twee logo's.
• Gebruik discs van 12 cm.
• G
ebruik uitsluitend normale, ronde discs.
• D
e volgende typen discs kunnen niet op
dit toestel worden afgespeeld:
–DualDiscs
– Discs van 8 cm. Als u deze discs met een
ad
apter probeert af te spelen, kan het
toestel defect raken.
– Discs in een ongewone vorm
– Andere discs dan cd's
– Beschadigde discs, inclusief schijven die
zij
n gebarsten, gebogen of waarvan
stukjes zijn afgebroken
– Cd-r/rw-discs die niet zijn gefinaliseerd
• S
chrijf niet op het oppervlak van de discs
en gebruik geen chemicaliën.
• O
m een cd te reinigen, veegt u de disc af
met een zachte doek, waarbij u van
buiten naar binnen gaat.
• C
ondens kan de goede werking van de
speler tijdelijk negatief beïnvloeden. Laat
de speler in een warmere omgeving
ongeveer een uur op temperatuur
komen. Veeg vochtige discs met een
zachte doek schoon.
• B
ij gebruik van discs met een bedrukbaar
labeloppervlak moet u de instructies en
Aanwijzingen voor het
gebruik
waarschuwingen van de discs
controleren. Afhankelijk van de disc kan
laden of uitwerpen niet mogelijk zijn. Het
gebruik van zulke discs kan dit toestel
beschadigen.
• Plak geen in de handel verkrijgbare labels
of andere materialen op de discs.
–De discs kunnen vervormen waardoor
ze onaf
speelbaar kunnen worden.
–De labels kunnen loslaten tijdens het
af
spelen en de disc blokkeren bij het
uitwerpen en het toestel beschadigen.
USB-opslagapparaat
• Het maken van verbindingen via een
USB-hub wordt niet ondersteund.
• Maak
het USB-apparaat stevig vast
voordat u gaat rijden. Zorg dat het USB-
apparaat niet op de vloer valt omdat het
dan onder het rem- of gaspedaal terecht
kan komen.
• Afhan
kelijk van het USB-apparaat kunnen
de volgende problemen voorkomen.
–De bediening kan verschillend zijn.
–Het opslagapparaat wordt niet herkend.
–Bestanden worden niet correct
af
gespeeld.
–Het apparaat kan hoorbare interferentie
vero
orzaken wanneer u naar de radio
luistert.
iPod
• Stel de iPod niet bloot aan hoge
temperaturen.
• Maak
de iPod stevig vast voordat u gaat
rijden. Zorg dat de iPod niet op de vloer
kan vallen omdat hij dan onder het rem-
of gaspedaal terecht kan komen.
• De
instellingen van de iPod, zoals de
equalizer en weergave herhalen, worden
automatisch gewijzigd wanneer de iPod
wordt aangesloten op het toestel. Als de
iPod wordt losgekoppeld, keren deze
instellingen terug naar de
oorspronkelijke instellingen.
• T
ekst op de iPod die niet compatibel is
met de specificaties van dit toestel, kan
niet worden weergegeven.
• All
een de eerste 32 tekens van de
bestandsnaam (inclusief de extensie) of
mapnaam worden weergegeven.
• E
en juiste werking van dit toestel is
afhankelijk van de toepassing waarmee
de WMA-bestanden zijn gecodeerd.
• E
r kan een beetje vertraging optreden bij
het beginnen met afspelen van
audiobestanden met beeldgegevens of
audiobestanden op een USB-apparaat
met een uitgebreide mappenstructuur.
• Russ
ische tekst kan alleen op dit toestel
worden weergegeven als die met een van
de volgende tekensets is gecodeerd:
–Unicode (UTF-8, UTF-16)
– Andere tekensets dan Unicode die in
e
en Windows-omgeving worden
gebruikt en op Russisch zijn ingesteld
bij de taalinstellingen
LET OP
• Pioneer garandeert geen compatibiliteit
met alle USB-opslagapparaten en kan
niet verantwoordelijk worden gesteld
voor eventueel gegevensverlies op
mediaspelers, smartphones of andere
apparaten tijdens het gebruik van dit
product.
• Laat discs en USB-opslagapparaten niet
achter op plaatsen waar de temperatuur
hoog kan oplopen.
WMA-bestanden
Compatibiliteit met
gecomprimeerde audio
Bestandsextensie .wma
Bitsnelheid 48 kbps tot 320 kbps
(CBR), 48 kbps tot 384
kbps (VBR)

18Nl
MP3-bestanden
WAV-bestanden
• WAV-bestandsindelingen kunnen niet
worden gebruikt via MTP.
Disc
• Ongeacht de tijdsduur tussen de songs
op de originele opname wordt bij het
afspelen van gecomprimeerde
audiodiscs een korte pauze tussen de
songs ingelast.
USB-apparaat
• Er kan een beetje vertraging optreden bij
het beginnen met afspelen van
audiobestanden op een USB-
opslagapparaat met een uitgebreide
mappenstructuur.
Alleen de volgende iPod-modellen kunnen met
dit toestel gebruikt worden. Ondersteunde
versies van de iPod-software worden hieronder
genoemd. Oudere versies worden wellicht niet
ondersteund.
Bemonsteringsfrequentie
32 kHz, 44,1 kHz, 48
kHz
Windows Media™
Audio Professional,
Lossless, Voice/DRM
Stream/Stream met
video
Niet compatibel
Bestandsextensie .mp3
Bitsnelheid 8 kbps tot 320 kbps
(CBR), VBR
Bemonsteringsfrequentie
8 kHz tot 48 kHz (32
kHz, 44,1 kHz, 48 kHz
voor de beste
kwaliteit)
Compatibele ID3-tag-
versie
1.0, 1.1, 2.2, 2.3, 2.4
(ID3-tag versie 2.x
krijgt prioriteit boven
versie 1.x.)
M3u-afspeellijst Niet compatibel
MP3i (MP3
interactive), mp3 PRO
Niet compatibel
Bestandsextensie .wav
Kwantisatiebits 8 en 16 (LPCM), 4 (MS
ADPCM)
Bemonsteringsfrequentie
16 kHz tot 48 kHz
(LPCM), 22,05 kHz en
44,1 kHz (MS ADPCM)
Hiërarchie afspeelbare
mappen
Tot acht niveaus (voor
praktisch gebruik kunt
u beter niet meer dan
twee niveaus
gebruiken)
Afspeelbare mappen Maximaal 99
Afspeelbare
bestanden
Maximaal 999
Bestandsysteem ISO 9660 Level 1 en 2,
Romeo, Joliet
Afspelen van
multisessie-discs
Compatibel
Gegevensoverdracht
pakket schrijven
Niet compatibel
Hiërarchie afspeelbare
mappen
Tot acht niveaus (voor
praktisch gebruik kunt
u beter niet meer dan
twee niveaus
gebruiken)
Afspeelbare mappen Maximaal 500
Afspeelbare
bestanden
Maximaal 15 000
Afspelen van
auteursrechtelijk
beschermde
bestanden
Niet compatibel
Gepartitioneerd USB-
apparaat
Alleen de eerste
partitie kan worden
afgespeeld.
Compatibiliteit met
iPod
Gemaakt voor
–iPod touch (1e tot 6e generatie)
–iPod classic
–iPod met video
–iPod nano (1e tot 7e generatie)
–iPhone 6s
– iPhone 6s Plus
–iPhone 6
–iPhone 6 Plus
–iPhone 5s
–iPhone 5c
–iPhone 5
–iPhone 4s
–iPhone 4
–iPhone 3GS
–iPhone 3G
–iPhone
• Af
hankelijk van de generatie en de versie
van de iPod zijn sommige functies
mogelijk niet beschikbaar.
• G
ebruikers van een iPod met Lightning-
aansluiting moeten de Lightning-naar-
USB-kabel gebruiken (bij de iPod
geleverd).
• G
ebruikers van een iPod met Dock
Connector moeten CD-IU51 gebruiken.
Raadpleeg uw leverancier voor meer
informatie.
• R
aadpleeg de handleiding van de iPod
voor meer informatie over ondersteunde
bestandsindelingen.
• A
udiobook, Podcast: Compatibel
LET OP
Pioneer is niet verantwoordelijk voor
verlies van gegevens op de iPod, ook niet
tijdens het gebruik van dit toestel.
De gebruiker kan met dit toestel geen
mapnummers toewijzen of de
afspeelvolgorde wijzigen. De volgorde van
de audiobestanden is afhankelijk van het
aangesloten apparaat.
Merk op dat verborgen bestanden op een
US
B-apparaat niet kunnen worden
weergegeven.
Voorbeeld van een boomstructuur
Volgorde van
audiobestanden
Map
Gecomprimeerd
audiobestand
tot : Afspeelvolgorde
01 tot 05: Mapnummer

19Nl
Nederlands
iTunes
Apple en iTunes zijn handelsmerken van
Apple Inc., geregistreerd in de V.S. en
andere landen.
WMA
Windows Media is een gedeponeerd
ha
ndelsmerk of een handelsmerk van
Microsoft Corporation in de Verenigde
Staten en/of in andere landen.
Dit product bevat technologie die het
e
igendom is van Microsoft Corporation en
die niet gebruikt of gedistribueerd mag
worden zonder toestemming van
Microsoft Licensing, Inc.
iPod & iPhone
iPhone, iPod, iPod classic, iPod nano en
iP
od touch zijn handelsmerken van Apple
Inc., gedeponeerd in de VS en andere
landen.
Lightning is een handelsmerk van Apple
In
c.
“Gemaakt voor iPod” en “Gemaakt voor
iPho
ne” wil zeggen dat een elektronische
accessoire speciaal ontwikkeld is voor
verbinding met respectievelijk een iPod of
iPhone en door de maker gewaarborgd is
als conform de Apple werkingsnormen.
Apple is niet verantwoordelijk voor de
werking van dit apparaat en voor het
voldoen aan de veiligheidsnormen en
wettelijke normen. Houd er rekening mee
dat het gebruik van dit accessoire met iPod
of iPhone invloed kan hebben op de
draadloze prestatie.
Android & Google Play
Android, Google Play en het Google Play-
l
ogo zijn handelsmerken van Google Inc.
MIXTRAX
MIXTRAX is een handelsmerk van de
PIO
NEER CORPORATION.
Spotify®
SPOTIFY en het Spotify-logo zijn
g
edeponeerde handelsmerken van Spotify
AB. Compatibel mobiel digitaal apparaat
en premium-abonnement vereist indien
beschikbaar; zie https://www.spotify.com.
Algemeen
Spanningsbron: 14,4 V gelijkstroom (10,8 V
tot 15,1 V toelaatbaar)
Aardingsysteem: negatief
Maximaal stroomverbruik: 10,0 A
Afmetingen (B × H × D):
DIN
Chassis: 178 mm × 50 mm × 165 mm
Voorkant: 188 mm × 58 mm × 17 mm
Lijst van Russische tekens
Copyright en
handelsmerken
D: Display C: Teken
Technische gegevens
D
Chassis: 178 mm × 50 mm × 165 mm
Voorkant: 170 mm × 46 mm × 17 mm
Gewicht: 1 kg
Audio
Maximaal uitgangsvermogen:
•50 W × 4 kan./4 Ω (zonder
s
ubwoofer)
• 50 W × 2 kan./4 Ω + 70 W × 1 kan./2
Ω (met subwoofer)
Doorlopend uitgangsvermogen:
22 W × 4 (50 Hz tot 15 000 Hz, 5%
TH
D, 4-Ω-belasting, beide kanalen)
Belastingsimpedantie: 4 Ω (4 Ω tot 8 Ω
t
oegestaan)
Preout maximaal uitgangsniveau: 2,0 V
Contouren loudness: +10 dB (100 Hz),
+6,5 dB (10 kHz) (volume: –30 dB)
Equalizer (grafische equalizer met 5
ban
den):
Frequentie: 80 Hz/250 Hz/800 Hz/
2,5 kHz/8 kHz
Bereik equalizer: ±12 dB (in stappen
van 2 d
B)
Subwoofer (mono):
Frequentie: 50 Hz/63 Hz/80 Hz/
100 Hz/125 Hz/160 Hz/200 Hz
Helling: –12 dB/oct, –24 dB/oct
Gain: +6 dB tot –24 dB
Fase: Normaal/tegengesteld
Cd-speler
Systeem: Compact Disc Audio
Bruikbare discs: Compact Discs
Signaal-ruisverhouding: 94 dB (1 kHz) (IEC-
A-
netwerk)
Aantal kanalen: 2 (stereo)
MP3-decoderingsformaat: MPEG-1 & 2
Au
dio Layer 3
WMA-decoderingsformaat: Versie 7, 7.1, 8,
9, 10
, 11, 12 (2-kanaalsaudio)
(Windows Media Player)
WAV-signaalformaat: Lineaire PCM & MS
AD
PCM (niet-gecomprimeerd)
USB
USB-standaardspecificatie: USB 2.0
volledige snelheid
Maximaal stroomverbruik: 1,5 A
USB-protocol:
MSC (Mass Storage Class)
MTP (Media Transfer Protocol)
AOA (Android Open Accessory) 2.0
Bestandsysteem: FAT12, FAT16, FAT32
MP3-decoderingsformaat: MPEG-1 & 2
Au
dio Layer 3
WMA-decoderingsformaat: Versie 7, 7.1, 8,
9, 10,
11, 12 (2-kanaalsaudio)
(Windows Media Player)
WAV-signaalformaat: Lineaire PCM & MS
A
DPCM (niet-gecomprimeerd)
FM-tuner
Frequentiebereik: 87,5 MHz tot 108,0 MHz
Bruikbare gevoeligheid: 11 dBf (1,0 μV/
75 Ω, mono, S/R: 30 dB)
Signaal-ruisverhouding: 72 dB (IEC-A-
ne
twerk)
MW-tuner
Frequentiebereik: 531 kHz tot 1 602 kHz
Bruikbare gevoeligheid: 25 μV (S/R: 20 dB)
Signaal-ruisverhouding: 62 dB (IEC-A-
ne
twerk)
LW-tuner
Frequentiebereik: 153 kHz tot 281 kHz
Bruikbare gevoeligheid: 28 μV (S/R: 20 dB)
Signaal-ruisverhouding: 62 dB (IEC-A-
ne
twerk)
OPMERKING
Technische gegevens en ontwerp kunnen
zonder voorafgaande kennisgeving
worden gewijzigd.

2Ru
Перед началом эксплуатации............................................................ 2
Начало работы....................................................................................... 3
Радио ........................................................................................................ 5
Компакт-диск/USB/iPod/AUX.............................................................. 6
Режим приложения .............................................................................. 8
Spotify®..................................................................................................... 8
Использование Pioneer ARC APP....................................................... 9
Настройки ............................................................................................. 10
Настройки FUNCTION ........................................................................ 10
Настройки AUDIO................................................................................ 11
Настройки SYSTEM ............................................................................. 12
Настройки ILLUMINATION................................................................. 13
Настройки MIXTRAX........................................................................... 13
Подключения/Установка .................................................................. 14
Дополнительная информация ........................................................ 16
О данном руководстве:
• В следующих инструкциях USB-накопитель и аудиопроигрыватель USB
называются “USB-устройство”.
• В данном руководстве устройства iPod и iPhone называются “iPod”.
Содержание
Благодарим Вас за покупку этого изделия компании PIONEER
Для обеспечения правильности эксплуатации внимательно прочитайте данное руководство
перед началом использования изделия. Особенно важно, чтобы Вы прочли и соблюдали
инструкции, помеченные в данном руководстве заголовками ПРЕДУПРЕЖДЕНИЕ и ВНИМАНИЕ.
Держите данное руководство под рукой для обращения к нему в будущем.
Частные лица в странах Евросоюза, Швейцарии и Норвегии могут бесплатно возвращать
использованные электронные изделия в специализированные пункты приема или в магазин (при
покупке аналогичного нового устройства).
Если Ваша страна не указана в приведенном выше перечне, обращайтесь в органы местного
управления за инструкциями по правильной утилизации продукта.
Тем самым Вы обеспечите утилизацию Вашего изделия с соблюдением обязательных процедур
по обработке, утилизации и вторичной переработке и, таким образом, предотвратите
потенциальное негативное воздействие на окружающую среду и здоровье людей.
Дату изготовления оборудования можно определить по серийному номеру, который содержит
информацию о месяце и годе производства.
ПРЕДУПРЕЖДЕНИЕ
• Не пытайтесь самостоятельно производить установку или ремонт изделия. Установка
или ремонт изделия лицами, не обладающими специальными навыками и опытом
работы с электронным оборудованием и автомобильными аксессуарами, могут создать
опасность поражения электрическим током или иных инцидентов.
• Ни в коем случае не пытайтесь управлять устройством во время движения. Прежде чем
использовать органы управления устройством, необходимо съехать с дороги и припарковать
автомобиль в безопасном месте.
Перед началом эксплуатации
Если вы желаете утилизировать данное изделие, не выбрасывайте его вместе с обычным
бытовым мусором. Существует отдельная система сбора использованных электронных
изделий в соответствии с законодательством, которая предполагает соответствующее
обращение, возврат и переработку.

3Ru
Русский
ВНИМАНИЕ
•Не допускайте попадания жидкости на устройство. Это может повлечь поражение
электрическим током. Кроме того, попадание жидкости в устройство может стать причиной его
выхода из строя, перегрева и появления дыма.
•Всегда сохраняйте уровень громкости достаточно низким, чтобы были слышны звуки извне.
•Pioneer CarStereo-Pass предназначен для использования только в Германии.
•Данное изделие оценено на соответствие требованиям стандарта IEC 60065, “Аудио-, видео- и
аналогичная электронная аппаратура. Требования безопасности” в условиях умеренного и
тропического климата.
При возникновении проблем
При неполадках в работе этого изделия свяжитесь с торговым представителем компании-
производителя или с ближайшим сервисным пунктом PIONEER.
DEH-X2900UI
ВНИМАНИЕ
Данное изделие является лазерным изделием класса 1 согласно классификации по
Безопасности лазерных изделий, IEC 60825-1:2007.
Начало работы
Основные операции
Кнопка отсоединения
Окно дисплея
Регулятор M.C. (многозадачное управление)
BAND/
DISP (дисплей)
SRC (источник)/OFF
USB-порт
(извлечение)
Вход AUX (стереоразъем 3,5 мм)
Щель для загрузки диска
Дополнительный пульт ДУ
Пульт ДУ CD-R320 приобретается отдельно.
Часто используемые операции
* Когда голубой/белый провод этого устройства подключен к терминалу релейного управления
автоматической антенны, антенна на автомобиле выдвигается при включении источника
сигнала этого устройства. Чтобы втянуть антенну, выключите источник сигнала.
Индикация на дисплее
Назначение Операция
Включение питания* Нажмите SRC
/OFF для включения
питания.
Нажмите и удерживайте SR
C/OFF для
выключения питания.
Настройка громкости Поверните регулятор M.
C..
Выбор источника Несколько раз нажмите SRC
/OFF.
Изменение информации на дисплее Несколько раз нажмите DISP.
Возврат к предыдущему экрану/списку Нажмите BAND/ .
Возврат к обычному дисплею из меню Нажмите и удерживайте BAND/ .
Индикация Описание
Отображается при наличии нижнего уровня меню или папки.
Отображается при нажатии кнопки .
Отображается при настройке функции поиска локальных
рад
иостанций (стр. 10).
Отображается при получении программы с трафиком.
Отображается при установке функции TA (уведомления о трафике)
(стр. 11).
Отображается, если установлена функция преобразования звука
(стр. 11).
Отображается при настройке произвольного/перемешанного
восп
роизведения.
Отображается при установке повтора воспроизведения.
Отображается, если установлена функция управления iPod (стр. 7).

4Ru
Снимите переднюю панель во избежание кражи. Перед снятием панели
от
соедините кабели и устройства, подключенные к передней панели, и отключите
устройство.
Важно
• Оберегайте переднюю панель от сильных ударов.
• Не подвергайте переднюю панель воздействию прямых солнечных лучей и высоких
температур.
• Всегда храните снятую панель в защитном чехле или сумке.
После установки устройства поверните ключ зажигания в положение ON; на
дисплее отобразится [SET UP :YES].
1 Нажмите регулятор M.C..
Если в течение 30 секунд устройство не используется, установочное меню не
б
удет выводиться. Если вы хотите выполнить настройку позже, поверните M.C.,
чтобы выбрать [NO], и нажмите для подтверждения.
2 Поверните M.C. для выбора параметров, затем нажмите для подтверждения.
Для перехода к следующему пункту меню необходимо подтвердить выбор.
Снятие передней панели
Установочное меню
Элемент меню Описание
LANGUAGE Выбор языка для отображения текстовой информации с
с
жатого аудиофайла.
[ENG](Английски
й),
[РУС](Русский),
[TUR](Турецкий)
CLOCK SET Настройка часов.
FM STEP Выбор шага настройки в FM-диапазоне (100 кГц или 50 кГц).
[100], [50]
Снятие Установка
3 [QUIT :YES] отображается после выполнения всех настроек.
Для возврата к первому элементу установочного меню поверните M.C
. для
выбора [QUIT :NO], затем нажмите для подтверждения.
4 Нажмите M.C. для подтверждения настроек.
ПРИМЕЧАНИЯ
• Вы можете отменить настройку параметра меню, нажав кнопку SRC/OFF.
• Настроить параметры меню можно в настройках SYSTEM (стр. 12) и настройках INITIAL (стр. 4).
1 Нажмите M.C. для отображения главного меню.
2 Поверните M.C. для выбора [SYSTEM], затем нажмите для подтверждения.
3 Поверните M.C. для выбора [DEMO OFF], затем нажмите для подтверждения.
4 Поверните M.C. для выбора [YES], затем нажмите для подтверждения.
1 Нажмите и удерживайте SRC/OFF, пока устройство не отключится.
2 Нажмите и удерживайте SRC/OFF для отображения главного меню.
3 Поверните M.C. для выбора [INITIAL], затем нажмите для подтверждения.
4 Поверните M.C. для выбора параметра, затем нажмите для подтверждения.
Отмена демонстрационного дисплея (DEMO
OFF)
Настройки INITIAL
Элемент меню Описание
FM STEP Выбор шага настройки в FM-диапазоне (100 кГц или 50 кГц).
[100], [50]

5Ru
Русский
Радиочастоты данного устройства предназначены для использования в Западной
Европе, Азии, Среднем Востоке, Африке и Океании. В других областях прием может
быть неудовлетворительным. Функция RDS (система радиоданных) работает
только в областях, где выполняется вещание сигналов RDS для FM-станций.
1 Нажмите SRC/OFF для выбора [RADIO].
2 Нажмите BAND/ для выбора полосы [FM1], [FM2], [FM3], [MW] или [LW].
3 Нажмите числовую кнопку (от 1/ до 6/ ).
SP-P/O MODE Используется, когда полночастотный динамик подключен к
проводам вывода заднего динамика, а сабвуфер подключен
к выводу RCA.
[REAR/SUB.W]
[SUB.W/SUB.W] Используется, когда пассивный сабвуфер подключен
н
епосредственно к проводам вывода заднего динамика, а
сабвуфер подключен к выводу RCA.
[REAR/REAR] Используется, когда полночастотный динамик подключен к
п
роводам вывода заднего динамика выводу RCA Если
полночастотный динамик подключен к проводам вывода
заднего динамика и вывод RCA не используется, выберите
[REAR/SUB.W] или [REAR/REAR].
S/W UPDATE Выберите для просмотра последней системной информации
д
ля устройства.
[SYSTEM INFO]
[SYSTEM UPDATE] Выберите для обновления программного обеспечения
устройства до последней версии и инициализации настроек
устройства. Для просмотра дополнительной информации о
последней версии программного обеспечения и
обновлении посетите наш веб-сайт.
SYSTEM RESET Выберите [YES] для инициализации настроек устройства.
Устройство б
удет перезагружено автоматически.
(Некоторые настройки будут сохранены даже после сброса
параметров у
стройства.)
[YES], [NO]
Радио
Прием предварительно установленных станций
Элемент меню Описание
СОВЕТ
Кнопки / можно также использовать для выбора предварительно установленной
станции, если для параметра [SEEK] установлено значение [PCH] в настройках FUNCTION (стр. 11).
За каждой числовой кнопкой сохранена одна из шести радиостанций с наилучшим
качеством приема (с 1/ по 6/ ).
1 После выбора полосы нажмите регулятор M.C. для отображения главного
меню.
2 Поверните M.C. для выбора [FUNCTION], затем нажмите для подтверждения.
3 Поверните M.C. для выбора [BSM], затем нажмите для подтверждения.
Поиск станции вручную
1 После выбора полосы нажмите / для выбора станции.
Нажмите и удерживайте / , затем отпустите для поиска доступной
станции. Поиск остановится, когда устройство выполнит прием станции. Для
отм
ены поиска нажмите / .
ПРИМЕЧАНИЕ
Для параметра [SEEK] необходимо установить значение [MAN] в настройках FUNCTION (стр. 11).
Сохранение станций вручную
1 Во время приема станции, которую требуется сохранить, нажмите и
удерживайте одну из числовых кнопок (с 1/ по 6/ ), пока мигание не
прекратится.
Устройство выполняет поиск станции по информации PTY (тип программы).
1 Нажмите во время FM-приема.
2 Поверните M.C. для выбора типа программы из [NEWS/INFO], [POPULAR],
[CLASSICS] или [OTHERS].
3 Нажмите регулятор M.C..
Устройство начнет поиск станции. После нахождения станции отобразится
н
азвание программной службы.
Запоминание лучших станций (BSM)
Использование функций PTY

6Ru
ПРИМЕЧАНИЯ
• Чтобы отменить поиск, нажмите M.C..
• Программы некоторых радиостанций могут отличаться от программ, указанных в
передаваемом коде PTY.
• Если ни одна из станций не передает программы нужного типа, то на дисплее в течение
примерно двух секунд будет показано [NOT FOUND], и затем тюнер перейдет в режим приема
станции, с которой был начат поиск.
Отключите от устройства наушники перед подключением к оборудованию.
Компакт-диск
1 Вставьте диск в щель загрузки диска маркированной стороной вверх.
Чтобы извлечь диск, остановите воспроизведение, затем нажмите .
Устройства USB (включая Android™)/iPod
1 Откройте крышку порта USB.
2 Подключите устройство USB/iPod с помощью соответствующего кабеля.
ПРИМЕЧАНИЕ
Для автоматического переключения на источник [USB], когда устройство USB/iPod подключено к
главному устройству, установите для [USB AUTO] значение [ON] в настройках SYSTEM (стр. 12).
ВНИМАНИЕ
Используйте дополнительный кабель Pioneer USB (CD-U50E) для подключения устройства USB,
поскольку любое устройство, подключенное непосредственно к главному устройству, будет
выступать, что может представлять опасность.
Перед извлечением устройства остановите воспроизведение.
Подключения AOA
Для получения дополнительных сведений о подключении AOA см. стр. 9.
Подключение по MTP
Устройство с операционной системой Android 4.0 или более поздней можно подключить по
протоколу MTP с помощью кабеля, прилагаемого к устройству. Однако в зависимости от
подключенного устройства и количества файлов аудиофайлы/композиции могут быть
недоступны для воспроизведения через MTP. Обратите внимание, что подключение по
Компакт-диск/USB/iPod/AUX
Воспроизведение
протоколу MTP несовместимо с файловыми форматами WAV и не может использоваться с
функцией MIXTRAX.
ПРИМЕЧАНИЕ
При использовании подключения MTP для параметра [ANDROID WIRED] необходимо установить
значение [MEMORY] в настройках SYSTEM (стр. 12).
AUX
1 Вставьте мини-стереоразъем в входной разъем AUX.
2 Нажмите SRC/OFF для выбора [AUX] в качестве источника.
ПРИМЕЧАНИЕ
Если для параметра [AUX] установлено значение [OFF] в настройках SYSTEM, будет невозможно
выбрать [AUX] в качестве источника (стр. 12).
Вы можете настроить различные параметры в настройках FUNCTION (стр. 10).
Обратите внимание, что следующие операции не работают на устройстве AUX. Для
раб
оты с устройством AUX используйте устройство непосредственно.
Операции
Назначение Операция
Выбор папки/альбома*1 Нажмите 1/ или 2/ .
Выбор дорожки/композиции (раздела) Нажмите или .
Быстрая перемотка вперед и назад*3 Нажмите и удерживайте или .
Поиск файла из списка 1 Нажмите для отображения списка.
2 Поверните M.
C. для выбора
необходимого имени файла (папки)
или категории, затем нажмите
регулятор для подтверждения.
3 Поверните M.
C. для выбора
необходимого файла, затем нажмите
для подтверждения.
Начнется воспроизведение.
Просмотр списка файлов в выбранной
пап
ке/категории*1
Нажмите M.C. после выбора папки/
категории.
Воспроизведение композиции в
выб
ранной папке/категории*1
Нажмите и удерживайте M.C. после
выбора папки/категории.

7Ru
Русский
*1 Только сжатые аудиофайлы
*2 Данная функция отключена, если в качестве источника выбрано USB и включена функция
MIXTRAX.
*3 При использовании быстрой перемотки или обратной перемотки во время воспроизведения
файла VBR время воспроизведения может быть неверным.
Поиск по алфавиту (только для iPod) 1 Нажмите для отображения списка.
2 Поверн
ите регулятор M.C. для выбора
необходимого списка категорий, затем
нажмите для входа в режим поиска
по алфавиту.
(Если повернуть M.
C. два раза, также
осуществляется переход в режим
поиска по алфавиту.)
3 Поверните M.
C. для выбора буквы,
затем нажмите, чтобы отобразить
алфавитный список.
Для отмены поиска по алфавиту нажмите
BAN
D/ .
Повтор воспроизведения Нажмите 6/ .
Произвольное воспроизведение Нажмите 5/ .
Произвольное воспроизведение всех
эл
ементов (только для iPod)
Нажмите и удерживайте 5/ .
Пауза/Возобновление воспроизведения Нажмите 4/PA
USE.
Функция преобразования звука*1*2 Нажмите 3/S.
Rtrv.
[1]: Предназначено для низких скоростей
сж
атия
[2]: Предназначено для высоких
с
коростей сжатия
Возврат к корневой папке (только для
комп
акт-дисков/USB)*1
Нажмите и удерживайте .
Переключение между сжатым аудио и
CD
-DA (только для компакт-дисков)
Нажмите BAND/ .
Смена дисков в устройстве USB
(Устройства, поддерживающие только
п
ротокол устройств хранения USB)
Нажмите BA
ND/ .
Назначение Операция
Режим ссылочного воспроизведения
Вы можете осуществить доступ к композициям на основе текущего исполнителя,
альбома или жанра.
1 Во время воспроизведения композиции нажмите и удерживайте для
перехода в режим ссылочного воспроизведения.
2 Поверните M.C. для выбора режима ([ARTIST], [ALBUM], [GENRE]), затем
нажмите для подтверждения.
Выбранная композиция/альбом будут воспроизведены после текущей
к
омпозиции.
ПРИМЕЧАНИЕ
Выбранную композицию/альбом можно отменить при использовании функций, отличных от
функций режима ссылочного воспроизведения (например, быстрая перемотка вперед и назад).
Управление iPod
Вы можете управлять устройством с помощью подключенного iPod.
Следующие модели iPod несовместимы с данной функцией.
–iPod nano 1-го поколения, iPod с видео
1 Во время воспроизведения нажмите BAND/ , затем выберите режим
управления.
[CO
NTROL iPod]: Функцией iPod устройства можно управлять с подключенного
iPod.
[CO
NTROL AUDIO]: Функцией iPod устройства можно управлять с помощью
кнопок на устройстве. В данном режиме подключенное устройство iPod нельзя
включить или выключить.
ПРИМЕЧАНИЯ
• При переключении режима управления на [CONTROL iPod] выполняется приостановка
воспроизведения композиции. Используйте подключенный iPod для возобновления
воспроизведения.
• Следующие операции будут доступны для выполнения с устройства, даже если установлен
режим управления [CONTROL iPod].
– Пауза, быстрая перемотка назад/вперед, выбор композиции/раздела
• Громкость можно настроить только на устройстве.
Полезные функции для iPod

8Ru
Функция MIXTRAX используется для вставки стереоэффектов между композициями,
п
озволяя слушать музыку нон-стоп в сочетании с визуальными эффектами.
Дополнительные сведения о настройках MIXTRAX см. стр. 13.
ПРИМЕЧАНИЯ
• Данная функция несовместима с устройством Android, подключенным с помощью MTP.
• Если в качестве источника выбрано USB и используется функция MIXTRAX, функция
преобразования звука будет отключена.
• В зависимости от файла/композиции звуковые эффекты могут быть недоступны.
• Выключите функцию MIXTRAX, если визуальные эффекты отвлекают вас от вождения.
1 Нажмите MIX для включения/отключения MIXTRAX.
Вы можете использовать данное приложение на устройстве iPhone с помощью
дан
ного устройства. В некоторых случаях вы можете управлять приложением с
помощью устройства.
Для просмотра сведений о совместимых устройствах посетите наш веб-сайт.
Важно
Использование приложений сторонних разработчиков может включать в себя или требовать
предоставления личных данных (создание профиля пользователя или другие способы), а для
некоторых приложений - предоставления данных о местонахождении.
ВСЕ ПРИЛОЖЕНИЯ СТОРОННИХ РАЗРАБОТЧИКОВ НАХОДЯТСЯ В СФЕРЕ ОТВЕТСТВЕННОСТИ ЭТИХ
РАЗРАБОТЧИКОВ, ЧТО БЕЗ ОГРАНИЧЕНИЙ ВКЛЮЧАЕТ В СЕБЯ СБОР И БЕЗОПАСНОСТЬ
ПОЛЬЗОВАТЕЛЬСКИХ ДАННЫХ И ОБРАЩЕНИЕ С ЧАСТНОЙ ИНФОРМАЦИЕЙ. ПРИ
ИСПОЛЬЗОВАНИИ ПРИЛОЖЕНИЙ СТОРОННИХ РАЗРАБОТЧИКОВ ВЫ СОГЛАШАЕТЕСЬ С
УСЛОВИЯМИ ПРЕДОСТАВЛЕНИЯ СЕРВИСА И ПОЛИТИКОЙ КОНФИДЕНЦИАЛЬНОСТИ
РАЗРАБОТЧИКОВ. ЕСЛИ ВЫ НЕ СОГЛАСНЫ С УСЛОВИЯМИ ИЛИ ПОЛИТИКОЙ РАЗРАБОТЧИКА ИЛИ
НЕ ЖЕЛАЕТЕ ПРЕДОСТАВЛЯТЬ ДАННЫЕ О СВОЕМ МЕСТОНАХОЖДЕНИИ, КОГДА ЭТО ТРЕБУЕТСЯ, НЕ
ИСПОЛЬЗУЙТЕ ТАКОЕ ПРИЛОЖЕНИЕ.
Для пользователей iPhone
Данная функция поддерживается iPhone и iPod touch с iOS 5.0 или более поздней версией.
ПРИМЕЧАНИЕ
КОМПАНИЯ PIONEER НЕ НЕСЕТ ОТВЕТСТВЕННОСТИ ЗА ПРИЛОЖЕНИЯ ИЛИ СОДЕРЖИМОЕ,
ПРЕДОСТАВЛЕННОЕ СТОРОННИМИ РАЗРАБОТЧИКАМИ, ВКЛЮЧАЯ ИХ ДОСТОВЕРНОСТЬ И
ПОЛНОТУ. ЗА СОДЕРЖИМОЕ И ФУНКЦИОНАЛЬНОСТЬ ТАКИХ ПРИЛОЖЕНИЙ НЕСУТ
ОТВЕТСТВЕННОСТЬ РАЗРАБОТЧИКИ ПРИЛОЖЕНИЙ.
Информация о MIXTRAX (только для USB/iPod)
Режим приложения
1 Подключите данное устройство к мобильному устройству.
• i
Phone через USB (стр. 6)
2 Нажмите SRC/OFF для выбора [APP].
3 Используйте мобильное устройство для запуска приложения.
Основные операции
Вы можете настроить различные параметры в настройках FUNCTION (стр. 10).
(DEH-X2900UI поддерживает только Spotify, установленный на iPhone.)
Spotify — это служба потоковой передачи музыки, не принадлежащая Pioneer.
Д
ополнительную информацию см. на веб-сайте http://www.spotify.com.
Приложение Spotify доступно для совместимых смартфонов; посетите https://
sup
port.spotify.com/ для получения последней информации о совместимости.
Для использования Spotify во время вождения сначала загрузите приложение
Spot
ify на iPhone. Приложение можно загрузить из iTunes App Store. Выберите
бесплатную учетную запись или платную учетную запись Premium в приложении
или на spotify.com. Учетная запись Premium предоставляет вам ряд
дополнительных возможностей, например прослушивание в автономном режиме.
Важно
• Данный продукт имеет программное обеспечение Spotify, регулирующееся лицензиями
сторонних поставщиков: www.spotify.com/connect/third-party-licenses.
• Для получения информации о странах и регионах, где поддерживается Spotify, см. https://
www.spotify.com/us/select-your-country/.
Перед использованием обновите микропрограммное обеспечение приложения
Spotify.
1 Подключите данное устройство к мобильному устройству.
Использование приложения на устройстве
Назначение Операция
Выбор дорожки Нажмите или .
Быстрая перемотка назад и вперед Нажмите и удерживайте или .
Пауза/Возобновление воспроизведения Нажмите BAND/ .
Spotify®
Прослушивание Spotify

9Ru
Русский
• iPhone через USB (стр. 6)
2 Нажмите SRC/OFF для выбора [SPOTIFY].
3 Запустите приложение Spotify на мобильном устройстве и начните
воспроизведение.
Основные операции
Вы можете настроить различные параметры в настройках FUNCTION (стр. 10).
ПРИМЕЧАНИЕ
Доступные операции могут отличаться в зависимости от типа содержимого (дорожка/альбом/
исполнитель/список воспроизведения/радио), которое вы хотите воспроизвести.
Назначение Операция
Пропуск дорожки Нажмите или .
Поиск дорожки из списка 1 Нажмите (список) для отображения
списка.
2 Поверн
ите регулятор M.C. для выбора
необходимой категории, затем
нажмите для подтверждения.
3 Поверн
ите регулятор M.C. для выбора
необходимого файла, затем нажмите
для подтверждения.
Начнется воспроизведение.
Пауза/Возобновление воспроизведения Нажмите 4/
PAUSE.
Переход вперед (только для радио) Нажмите 1/ .
Переход назад (только для радио) Нажмите 2/ .
Произвольное воспроизведение (только
д
ля дорожки/альбома/исполнителя/
списка воспроизведения)
Нажмите 5/ .
Повтор воспроизведения (только для
дорожки/альбома/исполнителя/списка
воспроизведения)
Нажмите 6/ .
Включение радиоканала на основе
восп
роизводимой композиции.
1 Нажмите и удерживайте (список)
для включения радио.
2 Н
ажмите регулятор M.C..
• Дан
ная функция может быть
недоступна в зависимости от
выбранной композиции.
ПРИМЕЧАНИЕ
Некоторыми функциями Spotify невозможно управлять с устройства.
Вы можете управлять устройством с помощью приложения Pioneer ARC APP,
установленного на устройстве iPhone/Android. В некоторых случаях вы можете
управлять такими аспектами приложения, как выбор источника, пауза и др. с
помощью данного устройства.
Для получения информации о доступных в приложении операциях см. раздел
сп
равки.
ПРЕДУПРЕЖДЕНИЕ
Не используйте данное приложение во время вождения автомобиля. Прежде чем использовать
элементы управления приложением сверните на обочину и припаркуйте транспортное средство.
Для пользователей iPhone
Данная функция поддерживается iPhone (iPhone 5 или более поздней версией) и
iP
od touch с iOS 8.0 или более поздней версией.
Вы можете загрузить Pioneer ARC APP в iTunes App Store.
Для пользователей Android
Данная функция совместима с устройствами, на которых установлена ОС Android
4.1 и
ли более поздней версии и которые поддерживают AOA (Android Open
Accessory) 2.0.
Вы можете загрузить Pioneer ARC APP в Google Play™.
ПРИМЕЧАНИЕ
Некоторые устройства Android, подключенные с помощью AOA 2.0, могут функционировать
неисправно или издавать посторонние звуки из-за особенностей их программного обеспечения,
вне зависимости от версии ОС.
1 Подключите данное устройство к мобильному устройству.
• У
стройство iPhone/Android через USB (стр. 6)
Перейдите к шагу 6 при выборе подключения USB для iPhone.
Сохранение информации о
воспроизводимой композиции.
Удаление информации о сохраненной
композиции
.
1 Н
ажмите и удерживайте 3/S.Rtrv.
Отобразится [SAVE]/[UNSAVE].
2 Н
ажмите регулятор M.C..
Использование Pioneer ARC APP
Подключение к Pioneer ARC APP
Назначение Операция

10Ru
2 Нажмите M.C. для отображения главного меню.
3 Поверните M.C. для выбора [SYSTEM], затем нажмите для подтверждения.
4 Поверните M.C. для выбора [ANDROID WIRED], затем нажмите для
подтверждения.
5 Поверните регулятор M.C., чтобы выбрать [APP CONTROL] для устройства
Android, подключенного по USB.
Если выбрано [ON] в пункте [P.APP AUTO ON] (стр. 12), приложение Pioneer ARC
APP на устройстве Android запустится
автоматически и все действия будут
завершены.
ПРИМЕЧАНИЕ
Если приложение Pioneer ARC APP не установлено на устройстве Android, на экране
устройства Android отобразится напоминание об установке приложения. Выберите [OFF] в
[P.APP AUTO ON], чтобы удалить сообщение (стр. 12).
6 Нажмите SRC/OFF для выбора любого источника.
7 Запустите Pioneer ARC APP на мобильном устройстве.
ПРИМЕЧАНИЕ
Вы также можете запустить данное приложение, нажав и удерживая регулятор M.C. для
iPhone.
1 Нажмите SRC/OFF для выбора [ANDROID].
Основные операции
Прослушивание музыки на Android
Назначение Операция
Выбор дорожки Нажмите или .
Быстрая перемотка назад и вперед Нажмите и удерживайте или .
Пауза/Возобновление воспроизведения Нажмите 4/PA
USE.
Технология преобразования звука Нажмите 3/S.
Rtrv.
[1]: Предназначено для низких скоростей
сж
атия
[2]: Предназначено для высоких
с
коростей сжатия
В главном меню можно настроить различные параметры.
1 Нажмите M.C. для отображения главного меню.
2 Поверните M.C. для выбора одной из следующих категорий, затем нажмите
для подтверждения.
• Настройки FUNCTION (стр. 10)
• Настройки AUDIO (стр. 11)
• Настройки SYSTEM (стр. 12)
• Настройки ILLUMINATION (стр. 13)
• Настройки MIXTRAX (стр. 13)
3 Поверните M.C. для выбора параметров, затем нажмите для подтверждения.
Элементы меню отличаются в зависимости от источника.
Настройки
Настройки FUNCTION
Элемент меню Описание
FM SETTING
[TALK], [STANDARD], [MUSIC] Настройка уровня качества сигнала в
соответс
твии с условиями сигнала вещания
полосы FM. (Доступно только при выборе
полосы FM.)
BSM
Автоматическое сохранение шести
рад
иостанций с наилучшим качеством приема
под числовыми кнопками (с 1/ по 6/ ).
REGIONAL
[ON], [OFF] Ограничение приема определенными
регионал
ьными программами, если выбрано
AF (поиск альтернативных частот). (Доступно
только при выборе полосы FM.)
LOCAL
FM: [O
FF], [LV1], [LV2], [LV3], [LV4]
MW/LW: [O
FF], [LV1], [LV2]
Ограничение настройки станции в
соответс
твии с мощностью сигнала.

11Ru
Русский
TA
[ON], [OFF] Получение информации о текущем трафике,
если доступно. (Доступно только при выборе
полосы FM.)
AF
[ON], [OFF] Перенастройка на другую частоту, на которой
ве
щается эта же станция. (Доступно только
при выборе полосы FM.)
NEWS
[ON], [OFF] Прерывание выбранного источника
пр
ограммами новостей. (Доступно только при
выборе полосы FM.)
SEEK
[MAN], [PCH] Назначение кнопок или для
поочередного поиска станций (настройка
вру
чную) или выбор станций из списка
предустановленных каналов.
SAVE
Сохранение информации о воспроизводимой
комп
озиции в музыкальном списке на Spotify.
UNSAVE
Удаление информации о композиции,
с
охраненной в [SAVE].
S.RTRV
[1]: (Предназначено для низких
с
коростей сжатия),
[2]: (Предназначено для
вы
соких скоростей сжатия),
[OFF]
Улучшение качества сжатого аудио и
восс
тановление насыщенности звука.
Недоступно в следующих случаях:
• есл
и в качестве источника выбрано USB и
включена функция MIXTRAX.
• вып
олняется воспроизведение CD-DA/CD-
TEXT.
AUDIO BOOK
[FASTER], [NORMAL], [SLOWER]
Изменение скорости воспроизведения.
(Недоступно, если выбран параметр
[CONTROL iPod] в режиме управления.)
Элемент меню Описание
USB
iPod
iPod
PAU SE
Пауза или возобновление воспроизведения.
Настройки AUDIO
Элемент меню Описание
FADER*1
Настройка баланса переднего и заднего
динамика.
BALANCE
Настройка баланса левого и правого
ди
намика.
EQ SETTING
[SUPER BASS], [POWERFUL],
[NA
TURAL], [VOCAL], [CUSTOM1],
[CUSTOM2], [FLAT]
Выбор полосы и уровня
э
квалайзера для дальнейшей
настройки.
Полоса эквалайзера: [80
HZ],
[250HZ], [800HZ], [2.5KHZ],
[8KHZ]
Уровень эквалайзера: от [+
6]
до [–6]
Выберите или настройте кривую эквалайзера.
[CUSTOM1] можно выбрать отдельно для
каж
дого источника. Однако для любых
комбинаций, указанных ниже, автоматически
устанавливаются одинаковые настройки.
• U
SB, iPod, ANDROID, SPOTIFY и APP (iPhone)
[CUSTOM2] является общей настройкой,
ис
пользуемой для всех источников.
LOUDNESS
[OFF], [LOW], [MID], [HI] Компенсация для четкого звучания при
низ
ком уровне громкости.
SUB.W*2
[NOR], [REV], [OFF] Выбор фазы сабвуфера.
SUB.W CTRL*2
*3
Частота среза: [
50HZ], [63HZ],
[80HZ], [100HZ], [125HZ],
[160HZ], [200HZ]
Уровень выходного сигнала:
от
[–24] до [+6]
Крутизна характеристики:
[–12], [–24]
На выходе сабвуфера будут воспроизводиться
тол
ько те частоты, которые ниже указанного
диапазона частот.
Элемент меню Описание

12Ru
*1 Недоступно, если выбран параметр [SUB.W/SUB.W] в [SP-P/O MODE] в настройках INITIAL
(стр. 5).
*2 Недоступно, если выбран параметр [REAR/REAR] в [SP-P/O MODE] в настройках INITIAL (стр. 5).
*3 Недоступно, если выбран параметр [OFF] в [SUB.W].
Вы можете получить доступ к этим меню даже если устройство выключено.
BASS BOOST
от [0] до [+6] Выбор усиления нижних звуковых частот.
HPF SETTING
Частота среза: [O
FF], [50HZ],
[63HZ], [80HZ], [100HZ], [125HZ],
[160HZ], [200HZ]
Крутизна характеристики:
[–12], [–24]
На динамики будут выводиться только
ча
стоты выше, чем установленные фильтром
высоких частот (HPF).
SLA
от [+4] до [–4] Настройка уровня громкости для каждого
источн
ика кроме FM.
Для любых комбинаций, указанных ниже,
автоматичес
ки устанавливаются одинаковые
настройки.
• U
SB, iPod, ANDROID, SPOTIFY и APP (iPhone)
Настройки SYSTEM
Элемент меню Описание
LANGUAGE
[ENG](Английский),
[РУС](Русский), [TUR](Турецкий)
Выбор языка для отображения текстовой
информации с сжатого аудиофайла.
CLOCK SET
Настройка часов (стр. 4).
12H/24H
[12H], [24H] Выбор формата времени.
AUTO PI
[ON], [OFF] Поиск другой станции с такой же программой
д
аже во время вызова предварительной
настройки.
Элемент меню Описание
* Режим [PW SAVE] отключается при отсоединении аккумуляторной батареи автомобиля; при
подсоединении батареи его потребуется включить снова. При выключенном режиме [PW SAVE]
возможно, что, в зависимости от метода подключения, устройство будет потреблять энергию
аккумулятора, если зажигание автомобиля не имеет положения ACC (аксессуар).
AUX
[ON], [OFF] Выберите [ON] при подключении к данному
у
стройству вспомогательного устройства.
SPOTIFY
[ON], [OFF] Установите значение [ON] при использовании
фу
нкции Spotify.
PW SAVE*
[ON], [OFF] Режим энергосбережения.
При включении функции будет доступно
тол
ько включение источника.
ANDROID WIRED
[MEMORY], [APP CONTROL] Выбор необходимого способа подключения
дл
я устройства Android.
P. A P P AU TO O N
[ON], [OFF]
Выберите [ON], чтобы автоматически запустить
приложение Pioneer ARC APP при подключении
устройства Android к устройству с помощью
AOA. (Недоступно, если выбран параметр
[MEMORY] в [ANDROID WIRED].)
USB AUTO
[ON], [OFF] Выберите [ON] для автоматического
пе
реключения на источник [USB], когда
устройство USB/iPod подключено к
устройству.
Выберите [OFF], когда устройство USB/iPod
подключается к устройству для зарядки.
Элемент меню Описание

13Ru
Русский
Настройки ILLUMINATION
Элемент меню Описание
COLOUR
[KEY COLOUR], [DISP COLOUR],
[BOTH COLOUR]
Выберите цвет для кнопок/дисплея
устройства из 12 предварительно
установленных цветов, [SCAN] или [CUSTOM]*.
• [S
CAN]: автоматическое циклическое
переключение цветов.
• [C
USTOM]*:
1 Н
ажмите и удерживайте регулятор M.C.,
пока не отобразится дисплей настройки
цветов.
2 Нас
тройте основной цвет (R (красный)/G
(зеленый)/B (синий)) и яркость (от [0] до
[60]).
Вы не можете выбрать уровень ниже 10 для
вс
ех трех цветов: R (красный), G (зеленый), B
(синий) одновременно.
Вы также можете настроить предварительно
ус
тановленные цвета. Выберите один из
предварительно установленных цветов, затем
нажмите и удерживайте регулятор M.C., пока
не отобразится окно настройки цвета.
* Параметр CUSTOM доступен только для [KEY
COLOUR] и [DISP COLOUR].
DIM SETTING
[SYNC ILLUMI], [SYNC CLOCK],
[MA
NUAL]
Изменение яркости дисплея.
BRIGHTNESS
[KEY], [DISP] Выберите значение яркости кнопок/дисплея
у
стройства от [1] до [10].
Набор настроек зависит от того, включена ли
фу
нкция [DIM SETTING].
ILLUMI FX
[ON], [OFF] Подсветка включается при установке/
из
влечении компакт-диска.
Подсветка активируется при включении и
от
ключении питания ACC независимо от
данной настройки.
Настройки MIXTRAX
Элемент меню Описание
SHORT PLAYBCK
[1.0 MIN], [1.5 MIN], [2.0 MIN],
[2.5 MIN], [3.0 MIN], [OFF]
Выбор продолжительности
воспроизведения.
FLASH AREA
[KEY/DISPLAY], [KEY], [OFF] Выбор области для применения световых
эффе
ктов.
При выборе параметра [OFF] цвет в
н
астройках ILLUMINATION (стр. 13) будет
использоваться в качестве цвета дисплея.
FLASH PATTERN
от [SOUND LEVEL 1] до [SOUND
LEV
EL 6]
Изменение светового эффекта в
соответствии с уровнем звука и низких
частот.
Цветовая заставка меняется в зависимости
от у
ровня громкости.
от [LOW PASS 1] до [LOW PASS 6] Цветовая заставка меняется в зависимости
от низ
ких частот.
[RANDOM1] Цветовая заставка меняется произвольно в
з
ависимости от уровня громкости и уровня
низких частот.
[RANDOM2] Цветовая заставка меняется произвольно в
зависимости от уровня громкости.
[RANDOM3] Цветовая заставка меняется произвольно в
з
ависимости от уровня низких частот.
DISPLAY FX
[ON], [OFF] Включение/отключение эффектов MIXTRAX.
CUT IN FX
[ON], [OFF] Включение/отключение звуковых эффектов
M
IXTRAX при изменении дорожек вручную.

14Ru
Важно
• При установке данного устройства в
автомобиле, когда ключ зажигания не
находится в положении ACC
(аксессуар), отсутствие подключения
красного кабеля к терминалу, который
фиксирует положение ключа
зажигания, может привести к разрядке
аккумулятора.
• Использование данного устройства в
условиях, отличных от указанных,
может привести к пожару или
неисправности.
–Автомобили с аккумуляторной
б
атареей 12 В и отрицательным
заземлением.
–Если выход динамика используется 4
кан
алами, используйте динамики
мощностью более 50 Вт
(максимальная входная мощность) и
сопротивлением от 4 Ω до 8 Ω
(значение сопротивления). Не
используйте для данного устройства
динамики с сопротивлением 1-3 Ω.
–Когда выход заднего динамика
исп
ользуется сабвуфером с
сопротивлением 2 Ω, используйте
динамики более 70 Вт (максимальная
входная мощность).
* См. подключения для выбора
с
оответствующего способа
подключения.
• Во
избежание короткого замыкания,
перегрева или неисправности
соблюдайте следующие указания.
–Перед установкой отключите
отрицател
ьную клемму батареи.
–Закрепите провода с помощью
заж
имов для кабелей или клейкой
ленты. Оберните клейкую ленту
вокруг проводов, которые касаются
металлических частей, для защиты
проводов.
–Уберите все кабели подальше от
д
вижущихся частей, таких как рычаг
переключения передач и
направляющие сидений.
–Уберите кабели подальше от мест с
п
овышенной температурой,
например печки.
–Не подключайте желтый кабель к
батаре
и путем просовывания его
через отверстие в двигательный
отсек.
– Заклейте неподключенные разъемы
каб
еля изолентой.
–Не укорачивайте кабели.
–Не нарушайте изоляцию кабеля
п
итания данного устройства для
питания других устройств. Емкость
кабеля является ограниченной.
–Используйте плавкий
пред
охранитель соответствующего
номинала.
–Не замыкайте отрицательный кабель
ди
намиков непосредственно на
землю.
–Не связывайте вместе отрицательные
кабел
и нескольких динамиков.
• К
огда устройство включено, сигналы
управления отправляются по синему/
белому кабелю. Подключите данный
кабель к удаленному управлению
системой внешнего усилителя или
терминалу релейного управления
Подключения/Установка
Подключения
В положении
ACC
Вне положения
ACC
автоматической антенны автомобиля
(макс. 300 мА, 12 В пост. тока). Если
автомобиль оснащен антенной,
встроенной в лобовое стекло,
подключите ее к терминалу питания
антенного усилителя.
• Никогда не подключайте синий/белый
провод к терминалу питания внешнего
усилителя. Также никогда не
подключайте его к терминалу питания
автоматической антенны. В противном
случае это может привести к
протеканию батареи или ее
неисправности.
• Ч
ерный кабель заземлен. Кабели
заземления для данного устройства и
другое оборудование (особенно
устройства высокого напряжения,
например усилители) необходимо
подключать отдельно. В противном
случае случайное отключение может
привести к пожару или неисправности.
• Гр
афический символ на изделии
означает постоянный ток.
Данное устройство
Вход шнура питания
Задний AUX IN | [Tel In] (стереоразъем
3,5 мм)
Выделенный задний вход совместим
тол
ько с внешними гарнитурами
громкой связи Bluetooth телефонов.
Аудиосигнал будет отключен во
время вызова, если подключен/
активирован желтый/черный провод.
Задний выход или выход сабвуфера
Передний выход
Вход для антенны
Предохранитель (10 A)
Вход для проводного пульта ДУ
Сюда можно подключить проводной
ад
аптер ДУ (приобретается
отдельно).
Шнур питания
Во вход шнура питания
В зависимости от типа автомобиля
функции и могут отличаться. В
этом случае подключите к и
к .
Желтый
Резервный (или опция)
Желтый
Выполняйте подключение к
терм
иналу с постоянным
напряжением 12 В.
Красный
Опция (или резервный)
Красный
Выполняйте подключение к
т
ерминалу, управляемому ключом
зажигания (12 В пост. тока).
Выполняйте подключение проводов
друг к другу одного цвета.
Черный (“масса”)
Синий/белый

15Ru
Русский
Положение контакта разъема ISO
будет отличаться в зависимости от
типа автомобиля. Подключите
и
, если 5 контакт отвечает за
управление антенной. Если
и
спользуется автомобиль другого
типа, никогда не подключайте и
.
Синий/белый
Выполняйте подключение к
термин
алу управления системой
усилителя (макс. 300 мА, 12 В пост.
тока).
Синий/белый
Выполняйте подключение к
термин
алу релейного управления
автоматической антенны (макс.
300 мА, 12 В пост. тока).
Провода динамика
Белый: Передний левый
Белый/черный: Передний левый
Серый: Передний правый
Серый/черный: Передний правый
Зеленый: Задний левый или
сабвуфер
Зеленый/черный: Задний левый
или сабвуфер
Фиолетовый: Задний правый или
сабвуфер
Фиолетовый/черный: Задний правый
или сабвуфер
Оранжевый/белый
Выполняйте подключение к сигналу
п
одсветки автомобиля.
Разъем ISO
В некоторый автомобилях разъем ISO
мож
ет быть разделен на два. В этом
случае выполняйте подключение к
обоим разъемам.
ПРИМЕЧАНИЯ
• Измените исходное меню данного
устройства. См. [SP-P/O MODE]
(стр. 5).
Выход сабвуфера данного устройства
яв
ляется монофоническим.
• При испол
ьзовании сабвуфера
сопротивлением 2 Ω подключайте
сабвуфер к фиолетовому и
фиолетовому/черному проводам
устройства. Не подключайте ничего к
зеленому или зеленому/черному
проводам.
Усилитель (приобретается
отдельно)
Выполните данные подключения при
использовании дополнительного
усилителя.
Пульт ДУ системой
Выполните подключение к синему/
бе
лому кабелю.
Усилитель (приобретается отдельно)
Выполните подключение с помощью
RCA (приобретается отдельно)
К переднему выходу
Передний динамик
К заднему выходу или выходу
сабвуфера
Задний динамик или сабвуфер
Важно
• Перед установкой проверьте все
подключения и системы.
• Не используйте неоригинальные
запчасти, так как это может привести к
неисправностям.
• О
братитесь к дилеру, если для
установки требуются дополнительные
Установка
отверстия или модификации в
автомобиле.
• Не устанавливайте данное устройство
в следующих случаях:
–если оно может нарушить работу
автомоб
иля.
–если оно может причинить травму
п
ассажиру в случае резкой
остановки.
• По
лупроводниковый лазер будет
поврежден в случае перегрева.
Выполняйте установку данного
устройства вдали от мест с
повышенной температурой, например
печки.
• Оп
тимальная
производительность
достигается при
установке устройства под
углом менее 60°.
• Ч
тобы обеспечить необходимое
распределение тепла при
использовании устройства, при
установке оставьте свободное место за
задней панелью и скрутите кабели,
чтобы они не блокировали
вентиляционные отверстия.
Установка крепления DIN
1 Установите на приборную панель
входящую в комплект установочную
шахту.
2 Закрепите установочную шахту,
отогнув с помощью отвертки
металлические лапки (90°).
Приборная панель
Установочная шахта
• Уб
едитесь, что устройство
установлено прочно. Непрочная
установка может привести к
возникновению пропусков при
воспроизведении и других
неисправностей.
Если входящая в комплект
установочная шахта не
используется
1 Определите положение, при
котором совпадают отверстия в
кронштейне с отверстиями сбоку
устройства.
2 Затяните по бокам два винта.
Саморез (5 мм × 9 мм, не
прилагается к устройству)
Крепежный кронштейн
Приборная панель или консоль
Извлечение устройства
(установленного с помощью
прилагаемой установочной
шахты)
1 Снимите окантовку.
Оставьте
достаточно
места
5 см
5 см

16Ru
Окантовка
Лапка с зазубринами
• При сн
ятии передней панели
облегчается доступ к окантовке.
• При п
овторной установке
окантовки поверните панель
стороной с зазубренной лапкой
вниз.
2 Вставьте прилагаемые ключи
извлечения по обеим сторонам
устройства до щелчка.
3 Потяните устройство из приборной
панели.
Дисплей автоматически возвращается
в исходный режим.
→ В течение 30 секунд не было
выполнено никаких операций.
–Выполните операцию.
Диапазон повторного
воспроизведения самопроизвольно
изменяется.
→ В зависимости от выбранного
диапазона повторного
воспроизведения он может
изменяться при выборе другой папки
или дорожки, а также при перемотке
вперед/назад.
– Выберите диапазон повторного
восп
роизведения еще раз.
Вложенная папка не воспроизводится.
→ Вложенные папки не
воспроизводятся, если выбран
диапазон [FLD] (повторное
воспроизведение папки).
– Выберите другой диапазон
п
овторного воспроизведения.
Имеются помехи звука.
→ Используется устройство, например,
сотовый телефон, которое может
вызывать шумовые помехи.
– Уберите приборы, вызывающие
п
омехи, от этого устройства.
Общие
AMP ERROR
→ Устройство не работает или
неправильно подсоединен динамик.
→ С
работала цепь защиты.
– Проверьте, подключен ли динамик.
– Поверните ключ зажигания в
п
оложение OFF и верните в
положение ON. Если сообщение не
исчезает, свяжитесь с дилерским
центром или авторизованным
сервисным пунктом Pioneer.
NO XXXX (NO TITLE, например)
→ Нет встроенной текстовой
информации.
– Переключите дисплей или
в
оспроизведите другую дорожку/
файл.
Проигрыватель компакт-
дисков
ERROR-07, 11, 12, 17, 30
→ Диск загрязнен.
– Очистите диск.
→ Ди
ск поцарапан.
– Замените диск.
ERROR-07, 10, 11, 12, 15, 17, 30, A0
→ Электрическая или механическая
неисправность.
–Установите ключ зажигания в
п
оложение OFF, а затем – в
положение ON или переключитесь
на другой источник сигнала, а затем
обратно на проигрыватель компакт-
дисков.
Дополнительная информация
Устранение
неисправностей
Сообщения об ошибках

17Ru
Русский
ERROR-15
→ Вставлен пустой диск.
– Замените диск.
ERROR-23
→ Формат диска не поддерживается.
– Замените диск.
FORMAT READ
→ Иногда происходит задержка между
началом воспроизведения и
появлением звука.
– Звук появится после того как с
д
исплея исчезнет сообщение.
NO AUDIO
→ На диске отсутствуют файлы, которые
можно воспроизвести.
– Замените диск.
SKIPPED
→ Диск содержит файлы, защищенные
технологией DRM.
– Защищенные файлы пропускаются.
PROTECT
→ Все файлы на диске защищены
технологией DRM.
– Замените диск.
USB-устройство/iPod
FORMAT READ
→ Иногда происходит задержка между
началом воспроизведения и
появлением звука.
– Звук появится после того как с
д
исплея исчезнет сообщение.
NO AUDIO
→ Композиции отсутствуют.
–Перенесите аудиофайлы на
запо
минающее устройство USB и
подключите его.
→ На п
одключенном устройстве USB
включена защита.
– Следуйте инструкциям устройства
U
SB для снятия защиты.
SKIPPED
→ Подключенное устройство USB
содержит файлы, защищенные
технологией DRM.
–Защищенные файлы пропускаются.
PROTECT
→ Все файлы на подключенном
устройстве USB защищены по
технологии DRM.
–Замените устройство USB.
N/A USB
→ Подключенное устройство USB не
поддерживается данным
устройством.
–Отключите устройство и замените
ег
о совместимым устройством USB.
HUB ERROR
→ Устройство USB, подключенное с
помощью концентратора USB, не
поддерживается данным
устройством.
–Подключите устройство USB
н
епосредственно к данному
устройств с помощью кабеля USB.
CHECK USB
→ Короткое замыкание на разъеме USB
или кабеле USB.
–Убедитесь, что разъем USB или
ка
бель USB не защемлен и не
поврежден.
→ Подкл
юченное запоминающее
устройство USB потребляет больше
максимально допустимой силы тока.
–Отсоедините запоминающее
у
стройство USB и не используйте
его. Установите ключ зажигания в
положение OFF, затем – в
положение ACC или ON.
Подключайте только совместимые
запоминающие устройства USB.
→ i
Pod работает, но не подзаряжается.
–Убедитесь в отсутствии короткого
з
амыкания в кабеле iPod (например,
что кабель не зажат между
металлическими предметами).
После проверки кабеля установите
ключ зажигания в положение OFF, а
затем – в положение ON, либо
отключите и заново подключите
iPod.
ERROR-19
→ Сбой связи.
– Выполните следующие операции,
затем сн
ова выберите USB в
качестве источника.
• Поверн
ите ключ зажигания в
положение OFF и верните в
положение ON.
• От
ключите устройство USB.
• Вы
полните переключение на
другой источник.
→ Сб
ой iPod.
– Отключите кабель от iPod. При
от
ображении главного меню iPod
переподключите iPod и выполните
сброс настроек.
ERROR-23
→ Устройство USB отформатировано
неверно.
– Отформатируйте устройство USB в
FAT
12, FAT16 или FAT32.
ERROR-16
→ Устаревшая версия прошивки iPod.
– Обновите версию iPod.
→ Сб
ой iPod.
– Отключите кабель от iPod. При
от
ображении главного меню iPod
переподключите iPod и выполните
сброс настроек.
STOP
→ В текущем списке отсутствуют
композиции.
– Выберите список, содержащий
м
узыкальные композиции.
NOT FOUND
→ Композиций не найдено.
–Загрузите композиции на iPod.
Приложения
START UP APP
→ Приложение еще не запущено.
–Используйте мобильное устройство
д
ля запуска приложения.
Spotify
CHECK APP
→ Сбой подключения к приложению
Spotify.
–Следуйте инструкциям на экране.
Диски и проигрыватель
• Используйте только диски, имеющие
один из следующих логотипов.
• Используйте 12-см диски.
• Испо
льзуйте только обычные круглые
диски.
• С
ледующие типы дисков нельзя
использовать на данном устройстве:
– Диски формата DualDisc
– 8-см диски: попытки использовать
такие
диски с помощью адаптера
могут привести к неисправности
устройства.
–Диски необычных форм
– Диски других форматов, кроме CD
–Поврежденные диски, в т.ч. с
трещ
инами, с отколотыми краями или
деформированные
– Диски CD-R/RW, запись на которых не
б
ыла завершена
Рекомендации по
обращению с изделием

18Ru
• Не пишите и не используйте
химические вещества на поверхности
дисков.
• Д
ля очистки компакт-диска протрите
диск мягкой тканью от центра к краю.
• К
онденсация может временно
ухудшить работу проигрывателя.
Оставьте его для адаптации к более
высокой температуре примерно на
час. Также удалите влагу с дисков с
помощью мягкой ткани.
• При и
спользовании дисков, на
поверхность которых могут
наноситься этикетки, изучите
инструкции и предупреждения для
этих дисков. Установка и извлечение
некоторых дисков могут быть
невозможны. Использование таких
дисков может привести к
повреждению оборудования.
• Н
е приклеивайте на диски этикетки и
другие материалы.
–Это может деформировать диски, в
резу
льтате чего их воспроизведение
будет невозможным.
–Этикетки могут отклеиться во время
восп
роизведения и затруднить
извлечение дисков, а также
повредить оборудование.
Запоминающее устройство
USB
• Подключение через USB-концентратор
не поддерживается.
• Не
подключайте другие устройства,
кроме запоминающих устройств USB.
Не допускайте падения устройства USB
на пол, где оно может застрять под
педалью газа или тормоза.
• В з
ависимости от типа запоминающего
устройства USB могут возникнуть
следующие проблемы.
–Управление функциями может
отл
ичаться.
–Запоминающее устройство может не
расп
ознаваться.
–Файлы могут не воспроизводиться
корректно
.
–Устройство может создавать
ш
умовые помехи во время
прослушивания радио.
iPod
• Не оставляйте iPod в местах с высокой
температурой воздуха.
• П
ри движении автомобиля надежно
закрепите iPod. Не допускайте падения
устройства iPod на пол, где оно может
застрять под педалью газа или
тормоза.
• Н
астройки iPod, такие как эквалайзер и
повторное воспроизведение,
изменяются автоматически при
подключении iPod к устройству. После
отключения iPod настройки будут
возвращены к исходным.
• Т
екст несовместимого формата,
сохраненный на iPod, не будет
отображаться устройством.
• В
качестве названия файла или папки
могут отображаться только первые 32
символа (включая расширение).
• Э
то устройство может работать
некорректно в зависимости от
приложений, использованных для
кодирования WMA.
• П
ри начале воспроизведения
аудиофайлов, содержащих
изображения, и файлов с
запоминающего устройства USB,
содержащего разветвленные иерархии
папок, может происходить небольшая
задержка.
• Р
усский текст для отображения на
данном устройстве должен быть
Поддержка сжатых
аудиофайлов
зашифрован в одном из следующих
форматов:
–Unicode (UTF-8, UTF-16)
–Другой формат, отличный от Unicode,
ко
торый используется в среде
Windows и настроен на русский язык.
ВНИМАНИЕ
• Pioneer не гарантирует совместимость
со всеми устройствами USB и не несет
ответственности за любую потерю
данных на медиапроигрывателях,
смартфонах и других устройствах при
использовании этого изделия.
• Не оставляйте диски или
запоминающее устройство USB в
местах с высокой температурой
воздуха.
Файлы WMA
Файлы MP3
Файлы WAV
• Файлы формата WAV невозможно
подключить через MTP.
Диск
• Независимо от продолжительности
паузы между композициями в
изначальной записи, при
воспроизведении дисков со сжатыми
аудиофайлами между композициями
будут короткие паузы.
USB-устройство
• При начале воспроизведения
аудиофайлов на запоминающем
устройстве USB, содержащем
Расширение .wma
Скорость передачи
данных
от 48 Кбит/с до
320 Кбит/с (CBR), от
48 Кбит/с до
384 Кбит/с (VBR)
Частота
дискретизации
32 кГц, 44,1 кГц,
48 кГц
Windows Media™
Audio Professional,
Lossless, Voice/DRM
Stream/Stream с
поддержкой видео
Не поддерживается
Расширение .mp3
Скорость передачи
данных
от 8 Кбит/с до
320 Кбит/с (CBR), VBR
Частота
дискретизации
от 8 кГц до 48 кГц
(32 кГц, 44,1 кГц,
48 кГц пиковая)
Совместимая версия
тегов ID3
1.0, 1.1, 2.2, 2.3, 2.4
(Версия тегов ID3 2.x
имеет приоритет
перед версией 1.x.)
Список
воспроизведения
M3u
Не поддерживается
MP3i (интерактивный
MP3), mp3 PRO
Не поддерживается
Расширение .wav
Разрядность
квантования
8 и 16 (LPCM), 4
(MSADPCM)
Частота
дискретизации
от 16 кГц до 48 кГц
(LPCM), 22,05 кГц и
44,1 кГц (MS ADPCM)
Допустимая
иерархия папок
До восьми уровней
(реальная иерархия
папок составляет
менее двух уровней)
Количество
воспроизводимых
папок
Не более 99
Количество
воспроизводимых
файлов
Не более 999
Файловая система ISO 9660 уровень 1 и
2, Romeo, Joliet
Воспроизведение
нескольких сессий
Поддерживается
Пакетный формат
записи
Не поддерживается

19Ru
Русский
разветвленные иерархии папок, может
возникать небольшая задержка.
Данное устройство поддерживает только
перечисленные ниже модели iPod.
Совместимые версии ПО для iPod также
указаны ниже. Более старые версии могут не
поддерживаться.
Сделано для
–iPod touch (с 1 по 6 поколение)
–iPod classic
–iPod с видео
–iPod nano (с 1 по 7 поколение)
–iPhone 6s
– iPhone 6s Plus
–iPhone 6
– iPhone 6 Plus
–iPhone 5s
–iPhone 5c
–iPhone 5
–iPhone 4s
–iPhone 4
–iPhone 3GS
–iPhone 3G
–iPhone
• Д
оступные функции могут отличаться в
зависимости от поколения и/или
версии программного обеспечения
iPod.
• П
ользователям iPod с разъемом
Lightning потребуется кабель Lightning
- USB (входит в комплект поставки
iPod).
• Пол
ьзователям iPod с интерфейсом
Dock Connector потребуется кабель
CD-IU51. Подробную информацию
можно получить по месту покупки.
• О
совместимости файлов/форматов см.
в руководствах к iPod.
• А
удиокниги, подкасты:
поддерживаются
ВНИМАНИЕ
Компания Pioneer не несет
ответственности за потерю данных на
iPod, даже если эти данные будут
потеряны во время использования
данного устройства.
Пользователь не может назначать
номера папок и устанавливать
последовательность воспроизведения с
помощью данного устройства.
Последовательность аудиофайлов
зависит от подключенного устройства.
Обратите внимание, что скрытые файлы
н
а устройстве USB воспроизвести
невозможно.
Допустимая
иерархия папок
До восьми уровней
(реальная иерархия
папок составляет
менее двух уровней)
Количество
воспроизводимых
папок
Не более 500
Количество
воспроизводимых
файлов
Не более 15 000
Воспроизведение
файлов, защищенных
авторским правом
Не поддерживается
Устройство USB с
несколькими
разделами
Для
воспроизведения
доступен только
первый раздел.
Поддержка iPod
Последовательность
воспроизведения
аудиофайлов
Пример иерархии
iTunes
Apple и iTunes являются торговыми
з
наками компании Apple Inc.,
зарегистрированными в США и других
странах.
WMA
Windows Media – это
з
арегистрированная торговая марка или
торговая марка Microsoft Corporation в
США и/или других странах.
В данном изделии используются
те
хнологии, принадлежащие
корпорации Microsoft, которые не
разрешается использовать или
распространять без лицензии от
Microsoft Licensing, Inc.
iPod & iPhone
iPhone, iPod, iPod classic, iPod nano и iPod
t
ouch являются товарными знаками
компании Apple Inc.,
зарегистрированными в США и других
странах.
Lightning является торговым знаком
комп
ании Apple Inc.
“Made for iPod” и “Made for iPhone”
оз
начает, что электронный прибор был
разработан с целью подключения
определенно к iPod или iPhone
соответственно, и имеется
сертифицикация разработчика о
соответствии с техническими
характеристиками Apple. Apple не несет
ответственности за работу данного
устройства или его соответствие со
стандартами по технике безопасности
или регулятивными нормами.
Пожалуйста, обратите внимание, что
использование данного прибора с iPod
или iPhone может отрицательно
сказываться на качестве беспроводной
связи.
Таблица символов для
русского языка
Папка
Сжатый
аудиофайл
до : Последовательность
воспроизведения
от 01 до 05: Номер папки
D: Дисплей C: Буква
Авторское право и
товарные знаки

20Ru
Android & Google Play
Android, Google Play и логотип Google
Play
являются товарными знаками
Google Inc.
MIXTRAX
MIXTRAX является торговой маркой
PI
ONEER CORPORATION.
Spotify®
SPOTIFY и логотип Spotify являются
зарег
истрированными торговыми
марками Spotify AB. Для получения
списка совместимых мобильных
устройств и сведений о премиум-
подписке, если применимо, см. https://
www.spotify.com.
Серийный номер
На этом рисунке показана информация о месяце и г
оде изготовления устройства.
P1 - Год изготовления
P2 - Месяц изготовления
Общие
Источник питания: 14,4 В пост. тока
(допустимый диапазон от 10,8 В до
15,1 В)
Система заземления: Заземление
о
трицательного полюса
Максимальный потребляемый ток:
10,0 A
Размеры (Ш × В × Г):
DIN
Шасси: 178 мм × 50 мм × 165 мм
Передняя панель: 188 мм × 58 мм ×
17 мм
D
Шасси: 178 мм × 50 мм × 165 мм
Передняя панель: 170 мм × 46 мм ×
17 мм
Масса: 1 кг
Аудио
Максимальная выходная мощность:
•50 Вт × 4 канала/4 Ω (без
саб
вуфера)
• 50 Вт × 2 канала/4 Ω + 70 Вт × 1
канал/2 Ω (для сабвуфера)
Номинальная выходная мощность:
22 Вт × 4 (от 50 Гц до 15 000 Гц,
су
ммарное значение коэффициента
нелинейных искажений 5%,
нагрузка 4 Ω для обоих каналов)
Сопротивление нагрузки: 4 Ω
(доп
устимо - от 4 Ω до 8 Ω)
Сопротивление нагрузки: 2,0 В
Контур громкости: +10 дБ (100 Гц),
+6,5 дБ (10 кГц) (громкость: –30 дБ)
Эквалайзер (5-полосный графический
эквал
айзер):
Год 2001 2002 2003 2004 2005 2006 2007 2008 2009 2010
Символ A B C D E F G H I J
Год 2011 2012 2013 2014 2015 2016 2017 2018 2019 2020
Символ K L M N O P Q R S T
Месяц 1 2 3 4 5 6 7 8 9 10 11 12
Символ A B C D E F G H I J K L
Технические
характеристики

21Ru
Русский
Частота: 80 Гц/250 Гц/800 Гц/2,5 кГц/
8 кГц
Диапазон амплитудно-частотных
характеристик: ±12 дБ (с шагом
2 дБ)
Сабвуфер (моно):
Частота: 50 Гц/63 Гц/80 Гц/100 Гц/
125 Г
ц/160 Гц/200 Гц
Крутизна характеристики: –12 дБ/
окт
, –24 дБ/окт
Усиление: +6 дБ до –24 дБ
Фаза: Нормальная/Обратная
Проигрыватель компакт-
дисков
Система: Аудиосистема с компакт-
диском
Используемые диски: Компакт-диск
Отношение сигнал/шум: 94 дБ (1 кГц)
(се
ть IEC-A)
Число каналов: 2 (стерео)
Формат декодирования файлов MP3:
MP
EG-1 и 2 Audio Layer 3
Формат декодирования файлов WMA:
ве
рсия 7, 7.1, 8, 9, 10, 11, 12 (2 кн
аудио) (Проигрыватель Windows
Media)
Формат сигнала WAV: Linear PCM и MS
A
DPCM (без компрессии)
USB
Стандартная спецификация USB: USB 2.0
полноскоростной
Максимальная сила тока: 1,5 A
Протокол USB:
MSC (Mass Storage Class)
MTP (Media Transfer Protocol)
AOA (Android Open Accessory) 2.0
Файловая система: FAT12, FAT16, FAT32
Формат декодирования файлов MP3:
MP
EG-1 и 2 Audio Layer 3
Формат декодирования файлов WMA:
ве
рсия 7, 7.1, 8, 9, 10, 11, 12 (2 кн
аудио) (Проигрыватель Windows
Media)
Формат сигнала WAV: Linear PCM и MS
A
DPCM (без компрессии)
Тюнер FM
Диапазон частот: от 87,5 МГц до
108,0 МГц
Полезная чувствительность: 11 дБф
(1,0 мкВ/75 Ω, моно, отношение
с
игнал/шум: 30 дБ)
Отношение сигнал/шум: 72 дБ (сеть
IEC-A)
Тюнер MW
Диапазон частот: от 531 кГц до 1 602 кГц
Полезная чувствительность: 25 мкВ
(от
ношение сигнал/шум: 20 дБ)
Отношение сигнал/шум: 62 дБ (сеть
IEC-A)
Тюнер LW
Диапазон частот: от 153 кГц до 281 кГц
Полезная чувствительность: 28 мкВ
(от
ношение сигнал/шум: 20 дБ)
Отношение сигнал/шум: 62 дБ (сеть
IEC-A)
ПРИМЕЧАНИЯ
• Характеристики и конструкция могут
быть изменены без предварительного
уведомления.
• Данное устройство произведено в
Таиланде.
Примечание:
В соответствии со статьей 5 закона
Российской Федерации «О защите прав
потребителей» и постановлением
правительства Российской Федерации №
720 от 16.06.97 компания Pioneer Europe NV
оговаривает следующий срок службы
изделий, официально поставляемых на
российский рынок.
Автомобильная электроника: 6 лет
Прочие изделия (наушники, микрофоны и
т.п.): 5 лет

22Ru

23Ru
Русский

© 2016 PIONEER CORPORATION. All rights reserved.
© 2016 PIONEER CORPORATION. Tous droits de reproduction et de traduction réservés.
© PIONEER CORPORATION, 2016. Все права защищены.
<QRD3374-B> EW
Documenttranscriptie
English CD RDS RECEIVER AUTORADIO CD RDS SINTOLETTORE CD RDS REPRODUCTOR DE CD CON RECEPTOR RDS CD RDS-EMPFÄNGER CD RDS-ONTVANGER CD RDS ПРИЕМНИК Français Italiano Español DEH-X2900UI Deutsch Nederlands Русский Owner’s Manual Mode d’emploi Manuale d’istruzioni Manual de instrucciones Bedienungsanleitung Handleiding Руководство пользователя Table of Contents Before You Start....................................................................................... 2 Getting Started........................................................................................ 3 Before You Start Thank you for purchasing this PIONEER product To ensure proper use, please read through this manual before using this product. It is especially important that you read and observe WARNINGs and CAUTIONs in this manual. Please keep the manual in a safe and accessible place for future reference. Radio.......................................................................................................... 4 CD/USB/iPod/AUX................................................................................... 5 App Mode ................................................................................................. 7 Spotify® ..................................................................................................... 7 Using Pioneer ARC APP.......................................................................... 8 Settings ..................................................................................................... 9 FUNCTION settings ................................................................................. 9 AUDIO settings...................................................................................... 10 SYSTEM settings ................................................................................... 10 ILLUMINATION settings....................................................................... 11 MIXTRAX settings ................................................................................. 12 Connections/Installation ..................................................................... 12 Additional Information ........................................................................ 14 About this manual: • In the following instructions, a USB memory or USB audio player are referred to as “USB device”. • In this manual, iPod and iPhone are referred to as “iPod”. If you want to dispose this product, do not mix it with general household waste. There is a separate collection system for used electronic products in accordance with legislation that requires proper treatment, recovery and recycling. Private households in the member states of the EU, in Switzerland and Norway may return their used electronic products free of charge to designated collection facilities or to a retailer (if you purchase a similar new one). For countries not mentioned above, please contact your local authorities for the correct method of disposal. By doing so you will ensure that your disposed product undergoes the necessary treatment, recovery and recycling and thus prevent potential negative effects on the environment and human health. WARNING • Do not attempt to install or service this product by yourself. Installation or servicing of this product by persons without training and experience in electronic equipment and automotive accessories may be dangerous and could expose you to the risk of electric shock, injury or other hazards. • Do not attempt to operate the unit while driving. Make sure to pull off the road and park your vehicle in a safe location before attempting to use the controls on the device. CAUTION • Do not allow this unit to come into contact with moisture and/or liquids. Electrical shock could result. Also, damage to this unit, smoke, and overheating could result from contact with liquids. • Always keep the volume low enough to hear outside sounds. • The Pioneer CarStereo-Pass is for use only in Germany. • This product is evaluated in moderate and tropical climate condition under the Audio, video and similar electronic apparatus - Safety requirements, IEC 60065. CAUTION This product is a class 1 laser product classified under the Safety of laser products, IEC 60825-1:2007. 2 En If you experience problems Purpose Operation Should this unit fail to work properly, please contact your dealer or nearest authorized PIONEER Service Station. Return to the previous display/list Press BAND/ . Return to the normal display from the menu Press and hold BAND/ . Getting Started English * When this unit’s blue/white lead is connected to the vehicle’s auto-antenna relay control terminal, the vehicle’s antenna extends when this unit’s source is turned on. To retract the antenna, turn the source off. Display indication Basic operation Indication Description Appears when a lower tier of the menu or folder exists. DEH-X2900UI M.C. (multi-control) dial Disc loading slot Display window SRC (source)/OFF Appears when the USB port (eject) button is pressed. Appears when the local seek tuning function is set (page 9). Appears when a traffic program is received. Appears when the TA (traffic announcements) function is set (page 9). Appears when the sound retriever function is set (page 10). Appears when random/shuffle play is set. Appears when repeat play is set. Appears when the iPod control function is set (page 6). BAND/ DISP (display) Detach button AUX input jack (3.5 mm stereo jack) Optional remote control Detaching the front panel Detach the front panel to prevent theft. Remove any cables and devices attached to the front panel and turn off the unit before detaching it. Detach Attach The remote control CD-R320 is sold separately. Frequently used operations Purpose Operation Turn on the power* Press SRC/OFF to turn on the power. Press and hold SRC/OFF to turn off the power. Adjust the volume Turn the M.C. dial. Select a source Press SRC/OFF repeatedly. Change the display information Press DISP repeatedly. Important • Avoid subjecting the front panel to excessive shock. • Keep the front panel out of direct sunlight and high temperatures. • Always store the detached front panel in a protective case or bag. En 3 Setup menu INITIAL settings When you turn the ignition switch to ON after installation, [SET UP :YES] appears in the display. 1 2 Press the M.C. dial. The setup menu disappears after 30 seconds of no operation. If you prefer not to set at this time, turn the M.C. dial to select [NO], then press to confirm. Turn the M.C. dial to select the options, then press to confirm. To proceed to the next menu option, you need to confirm your selection. Menu Item Description LANGUAGE Select the language to display the text information from a compressed audio file. [ENG](English), [РУС](Russian), [TUR](Turkish) CLOCK SET Set the clock. FM STEP Select the FM tuning step from 100 kHz or 50 kHz. [100], [50] 3 4 [QUIT :YES] appears when all the settings have been made. To return to the first item of the setup menu, turn the M.C. dial to select [QUIT :NO], then press to confirm. Press the M.C. dial to confirm the settings. NOTES • You can cancel the menu setting by pressing SRC/OFF. • These settings can be made at any time from the SYSTEM settings (page 10) and INITIAL settings (page 4). Canceling the demonstration display (DEMO OFF) 1 2 3 4 4 En 1 2 3 4 Press and hold SRC/OFF until the unit turns off. Press and hold SRC/OFF to display the main menu. Turn the M.C. dial to select [INITIAL], then press to confirm. Turn the M.C. dial to select an option, then press to confirm. Menu Item Description FM STEP Select the FM tuning step from 100 kHz or 50 kHz. [100], [50] SP-P/O MODE [REAR/SUB.W] Select when there is a full-range speaker connected to the rear speaker output leads and there is a subwoofer connected to the RCA output. [SUB.W/SUB.W] Select when there is a passive subwoofer connected directly to the rear speaker output leads and there is a subwoofer connected to the RCA output. [REAR/REAR] Select when there are full-range speakers connected to the rear speaker output leads and RCA output. If there is a full-range speaker connected to the rear speaker output leads, and the RCA output is not used, you may select either [REAR/SUB.W] or [REAR/REAR]. S/W UPDATE Select to confirm the latest system information on the unit. [SYSTEM INFO] [SYSTEM UPDATE] Select to update the unit to the latest software and initialize the unit settings. For details on the latest software and updating, visit our website. SYSTEM RESET [YES], [NO] Select [YES] to initialize the unit settings. The unit will be restarted automatically. (Some of the settings may be retained even after resetting the unit.) Press the M.C. dial to display the main menu. Turn the M.C. dial to select [SYSTEM], then press to confirm. Turn the M.C. dial to select [DEMO OFF], then press to confirm. Turn the M.C. dial to select [YES], then press to confirm. Radio The tuner frequencies on this unit are allocated for use in Western Europe, Asia, the Middle East, Africa and Oceania. Use in other areas may result in poor reception. The RDS (radio data system) function only works in areas that broadcast RDS signals for FM stations. The unit begins to search for a station. When it is found, its program service name is displayed. Receiving preset stations NOTES Press SRC/OFF to select [RADIO]. Press BAND/ to select the band from [FM1], [FM2], [FM3], [MW] or [LW]. Press a number button (1/ to 6/ ). • To cancel the search, press the M.C. dial. • The program of some stations may differ from that indicated by the transmitted PTY. • If no station is broadcasting the type of program you searched for, [NOT FOUND] is displayed for about two seconds and then the tuner returns to the original station. English 1 2 3 TIP The / buttons can be also used to select a preset station when [SEEK] is set to [PCH] in the FUNCTION settings (page 9). CD/USB/iPod/AUX Best stations memory (BSM) The six strongest stations are stored on the number buttons (1/ 1 2 3 to 6/ ). After selecting the band, press the M.C. dial to display the main menu. Turn the M.C. dial to select [FUNCTION], then press to confirm. Turn the M.C. dial to select [BSM], then press to confirm. To seek a station manually 1 After selecting the band, press / to select a station. Press and hold / then release to seek an available station. Scanning stops when the unit receives a station. To cancel seek tuning, press / . NOTE [SEEK] needs to be set to [MAN] in the FUNCTION settings (page 9). To store stations manually 1 While receiving the station you want to store, press and hold one of the number buttons (1/ to 6/ ) until it stops flashing. Using PTY functions The unit searches for a station by PTY (program type) information. 1 2 3 Press during FM reception. Turn the M.C. dial to select a program type from [NEWS/INFO], [POPULAR], [CLASSICS] or [OTHERS]. Press the M.C. dial. Playing back Disconnect headphones from the device before connecting it to the unit. CD 1 Insert a disc into the disc loading slot with the label side up. To eject a disc, stop playback first then press . USB devices (including Android™)/iPod 1 Open the USB port cover. 2 Plug in the USB device/iPod using an appropriate cable. NOTE To automatically switch to [USB] source when a USB device/iPod is connected to the unit, set [USB AUTO] to [ON] in the SYSTEM settings (page 11). CAUTION Use an optional Pioneer USB cable (CD-U50E) to connect the USB device as any device connected directly to the unit will protrude out from the unit, which could be dangerous. Before removing the device, stop playback. AOA connections For details on AOA connection, see page 8. MTP connection A device installed with Android OS 4.0 or later can be connected to the unit via MTP, using the cable supplied with the device. However, depending on the connected device and the numbers of the files in the device, audio files/songs may not be able to be played back via MTP. Note that MTP connection is not compatible with WAV file formats, and cannot be used with the MIXTRAX function. En 5 NOTE Purpose Operation If you use an MTP connection, [ANDROID WIRED] needs to be set to [MEMORY] in the SYSTEM settings (page 11). Repeat play Press 6/ . Random/shuffle play Press 5/ . Shuffle all play (iPod only) Press and hold 5/ Pause/resume playback Press 4/PAUSE. Sound retriever*1*2 Press 3/S.Rtrv. [1]: Effective for low compression rates [2]: Effective for high compression rates Return to root folder (CD/USB only)*1 Press and hold AUX 1 Insert the stereo mini plug into the AUX input jack. 2 Press SRC/OFF to select [AUX] as the source. NOTE If [AUX] is set to [OFF] in the SYSTEM settings, [AUX] cannot be selected as a source (page 11). Operations You can make various adjustments in the FUNCTION settings (page 9). Note that the following operations do not work for an AUX device. To operate an AUX device, use the device itself. Purpose Operation Select a folder/album*1 Press 1/ or 2/ or . . Switch between compressed audio and CD- Press BAND/ DA (CD only) . Change drives in USB device Press BAND/ (Devices that support the USB mass storage device class protocol only) . *1 Compressed audio files only *2 This function is disabled when USB is selected as a source and the MIXTRAX function is on. *3 When you use the fast forward or reverse function while playing a VBR file, the playback time may be not correct. . Select a track/song (chapter) Press Fast forward or reverse*3 Press and hold . Search for a file from a list 1 Press to display the list. 2 Turn the M.C. dial to select the desired file (folder) name or category, then press to confirm. 3 Turn the M.C. dial to select the desired file, then press to confirm. Playback starts. or . Useful functions for iPod Link play mode View a list of the files in the selected folder/ Press the M.C. dial when a folder/category category*1 is selected. You can access songs based on the artist, album, or genre currently playing. 1 While listening to a song, press and hold to enter the link play mode. 2 Turn the M.C. dial to select the mode ([ARTIST], [ALBUM], [GENRE]), then press to confirm. The selected song/album will be played after the currently playing song. Play a song in the selected folder/ category*1 Press and hold the M.C. dial when a folder/ category is selected. NOTE Alphabetical search (iPod only) 1 Press to display the list. 2 Turn the M.C. dial to select the desired category list, then press to enter the alphabetical search mode. (Turning the M.C. dial twice also enters the alphabetical search mode.) 3 Turn the M.C. dial to select a letter, then press to display the alphabetical list. To cancel alphabetical search, press BAND/ . 6 En The selected song/album may be canceled if you use functions other than those from the link play mode (e.g. fast forward and reverse). iPod control You can control the unit via a connected iPod. The following iPod models are not compatible with this function. – iPod nano 1st generation, iPod with video 1 Press BAND/ during playback, then select the control mode. [CONTROL iPod]: The unit’s iPod function can be operated from the connected iPod. [CONTROL AUDIO]: The unit’s iPod function can only be operated by the buttons on the unit. In this mode, the connected iPod cannot be turned on or off. NOTES About MIXTRAX (USB/iPod only) The MIXTRAX function creates a non-stop mix of your music library, accompanied by illumination effects. For details on MIXTRAX settings, see page 12. NOTES • This function is not compatible with an Android device connected via MTP. • When USB is selected as a source and the MIXTRAX function is in use, the sound retriever function is disabled. • Depending on the file/song, sound effects may not be available. • Turn the MIXTRAX function off if the illumination effects it produces interfere with driving. 1 Press MIX to turn MIXTRAX on/off. App Mode You can enjoy listening to an application on an iPhone via the unit. In some cases, you can control an application by using the unit. For details on compatible devices, visit our website. Important Use of third party apps may involve or require the provision of personally identifiable information, whether through the creation of a user account or otherwise, and for certain applications, the provision of geolocation data. ALL THIRD PARTY APPS ARE THE SOLE RESPONSIBILITY OF THE PROVIDERS, INCLUDING WITHOUT LIMITATION COLLECTION AND SECURITY OF USER DATA AND PRIVACY PRACTICES. BY ACCESSING THIRD PARTY APPS, YOU AGREE TO REVIEW THE TERMS OF SERVICE AND PRIVACY POLICIES OF THE PROVIDERS. IF YOU DO NOT AGREE WITH THE TERMS OR POLICIES OF ANY PROVIDER OR DO NOT CONSENT TO THE USE OF GEOLOCATION DATA WHERE APPLICABLE, DO NOT USE THAT THIRD PARTY APP. For iPhone users This function is compatible with iPhones and iPod touches installed with iOS 5.0 or later. PIONEER IS NOT LIABLE FOR ANY THIRD PARTY APPS OR CONTENT, INCLUDING WITHOUT LIMITATION THEIR ACCURACY OR COMPLETENESS. THE CONTENT AND FUNCTIONALITY OF SUCH APPS ARE THE SOLE RESPONSIBILITY OF THE APP PROVIDER. Playback of an application via the unit 1 2 3 English • Switching the control mode to [CONTROL iPod] pauses song playback. Use the connected iPod to resume playback. • The following operations are still accessible from the unit, even if the control mode is set to [CONTROL iPod]. – Pause, fast forward/reverse, song/chapter selection • The volume can only be adjusted from the unit. NOTE Connect this unit with the mobile device. • iPhone via USB (page 5) Press SRC/OFF to select [APP]. Operate the mobile device to start up the application. Basic operations You can make various adjustments in the FUNCTION settings (page 9). Purpose Operation Select a track Press Fast forward or reverse Press and hold or Pause/resume playback Press BAND/ . or . . Spotify® (DEH-X2900UI is only compatible with Spotify installed on iPhone.) Spotify is a music streaming distribution service not affiliated with Pioneer. More information is available at http://www.spotify.com. The Spotify application is available for compatible smartphones, please visit https:// support.spotify.com/ for the latest compatibility information. To enjoy Spotify as you drive, first download the Spotify app to your iPhone. You can download it on the iTunes App Store. Choose a free account or a paid Premium account, either in the app or at spotify.com. A Premium account gives you more features, like offline listening. Important • This product incorporates Spotify software which is subject to 3rd party licenses found here: www.spotify.com/connect/third-party-licenses. • For information on the countries and regions where Spotify can be used, take a look at https:// www.spotify.com/us/select-your-country/. En 7 Listening to Spotify Using Pioneer ARC APP Update the firmware of the Spotify application to the latest version before use. 1 2 3 You can operate the unit from Pioneer ARC APP installed on an iPhone/Android device. In some cases, you can control aspects of the application, such as source selection, pause, etc., by using the unit. For details on what operations are available on the application, see the application’s help section. Connect this unit with the mobile device. • iPhone via USB (page 5) Press SRC/OFF to select [SPOTIFY]. Launch the Spotify application on the mobile device and start playback. WARNING Do not attempt to operate the application while driving. Make sure to pull off the road and park your vehicle in a safe location before attempting to use the controls on the application. Basic operations You can make various adjustments in the FUNCTION settings (page 9). NOTE The available operations may vary according to the type of contents (track/album/artist/playlist/radio) you want to play. Purpose Operation Skip a track Press Search for a track from a list 1 Press (list) to display the list. 2 Turn the M.C. dial to select the desired category, then press to confirm. 3 Turn the M.C. dial to select the desired file, then press to confirm. Playback starts. or Pause/resume playback Press 4/PAUSE. Thumbs Up (Only for radio) Press 1/ . . . Press 2/ Press 5/ . Repeat play (Only for track/album/artist/ playlist) Press 6/ . Start a radio channel based on the song currently being played. 1 Press and hold (list) to start a radio. 2 Press the M.C. dial. • This function may not be available depending on the selected song. Store the information about the song currently being played. Remove the song information stored. 1 Press and hold 3/S.Rtrv. [SAVE]/[UNSAVE] appears. 2 Press the M.C. dial. Some functions of Spotify may not be operated from the unit. 8 En For Android device users This function is compatible with devices that have Android OS 4.1 or later installed and also support AOA (Android Open Accessory) 2.0. You can download Pioneer ARC APP on Google Play™. NOTE Some Android devices connected via AOA 2.0 may not work properly or emit sounds due to their own software design, regardless of the OS version. Making a connection with Pioneer ARC APP 1 Thumbs Down (Only for radio) Random play (Only for track/album/artist/ playlist) NOTE For iPhone users This function is compatible with iPhones (iPhone 5 or later) and iPod touches installed with iOS 8.0 or later. You can download Pioneer ARC APP on iTunes App Store. 2 3 4 5 Connect this unit with the mobile device. • iPhone/Android device via USB (page 5) Proceed to step 6 if you select the USB connection for iPhone. Press the M.C. dial to display the main menu. Turn the M.C. dial to select [SYSTEM], then press to confirm. Turn the M.C. dial to select [ANDROID WIRED], then press to confirm. Turn the M.C. dial to select [APP CONTROL] for an Android device connected via USB. If [ON] is selected in [P.APP AUTO ON] (page 11), Pioneer ARC APP on the Android device starts automatically, and all the steps are finished. NOTE FUNCTION settings The menu items vary according to the source. Press SRC/OFF to select any source. Menu Item Launch Pioneer ARC APP on the mobile device. FM SETTING [TALK], [STANDARD], [MUSIC] NOTE You can also launch the application by pressing and holding the M.C. dial for iPhone. Match the sound quality level with the broadcast signal conditions of the FM band signal. (Available only when FM band is selected.) BSM Listening to music on Android 1 Description English 6 7 If Pioneer ARC APP has not been installed on your Android device yet, a message that prompts you to install the application will appear on your Android device. Select [OFF] in [P.APP AUTO ON] to clear the message (page 11). Store the six strongest stations on the number to 6/ ) automatically. buttons (1/ Press SRC/OFF to select [ANDROID]. REGIONAL [ON], [OFF] Basic operations Purpose Operation Select a track Press Fast forward or reverse Press and hold or . Pause/resume playback Press 4/PAUSE. Sound retriever Press 3/S.Rtrv. [1]: Effective for low compression rates [2]: Effective for high compression rates or . Limit the reception to the specific regional programs when AF (alternative frequencies search) is selected. (Available only when FM band is selected.) LOCAL FM: [OFF], [LV1], [LV2], [LV3], [LV4] Restrict the tuning station according to the signal strength. MW/LW: [OFF], [LV1], [LV2] TA [ON], [OFF] Receive current traffic information if available. (Available only when FM band is selected.) [ON], [OFF] Allow the unit to retune to a different frequency providing the same station. (Available only when FM band is selected.) AF Settings You can adjust various settings in the main menu. 1 2 3 Press the M.C. dial to display the main menu. NEWS [ON], [OFF] Turn the M.C. dial to select one of the categories below, then press to confirm. • FUNCTION settings (page 9) • AUDIO settings (page 10) • SYSTEM settings (page 10) • ILLUMINATION settings (page 11) • MIXTRAX settings (page 12) Turn the M.C. dial to select the options, then press to confirm. Interrupt the currently selected source with news programs. (Available only when FM band is selected.) SEEK [MAN], [PCH] Assign or buttons to seek the stations one by one (manual tuning) or select a station from the preset channels. SAVE Store the information about the song currently being played to your music list on Spotify. En 9 Menu Item Description Menu Item [NOR], [REV], [OFF] Remove the song information stored in [SAVE]. S.RTRV USB Enhance compressed audio and restore rich sound. Not available when: • USB is selected as a source and the MIXTRAX function is set to on. • CD-DA/CD-TEXT is played back. Cut-off frequency: [50HZ], [63HZ], [80HZ], [100HZ], [125HZ], [160HZ], [200HZ] Output level: [–24] to [+6] Slope level: [–12], [–24] [0] to [+6] Change the playback speed. (Not available when [CONTROL iPod] is selected in the control mode.) Only frequencies lower than those in the selected range are output from the subwoofer. BASS BOOST iPod [FASTER], [NORMAL], [SLOWER] Select the subwoofer phase. SUB.W CTRL*2*3 iPod [1] (effective for low compression rates), [2] (effective for high compression rates), [OFF] AUDIO BOOK Description SUB.W*2 UNSAVE Select the bass boost level. HPF SETTING Cut-off frequency: [OFF], [50HZ], Only frequencies higher than the high-pass filter [63HZ], [80HZ], [100HZ], [125HZ], (HPF) cutoff are output from the speakers. [160HZ], [200HZ] Slope level: [–12], [–24] PAUSE Pause or resume playback. SLA AUDIO settings Menu Item [+4] to [–4] Description FADER*1 Adjust the front and rear speaker balance. BALANCE Adjust the left and right speaker balance. EQ SETTING [SUPER BASS], [POWERFUL], Select or customise the equalizer curve. [NATURAL], [VOCAL], [CUSTOM1], [CUSTOM1] can be set separately for each source. [CUSTOM2], [FLAT] However, each of the below combinations are set to the same setting automatically. • USB, iPod, ANDROID, SPOTIFY, and APP Select an equalizer band and (iPhone) level for further customising. Equalizer band: [80HZ], [250HZ], [CUSTOM2] is a shared setting used for all [800HZ], [2.5KHZ], [8KHZ] sources. Equalizer level: [+6] to [–6] *1 Not available when [SUB.W/SUB.W] is selected in [SP-P/O MODE] in the INITIAL settings (page 4). *2 Not available when [REAR/REAR] is selected in [SP-P/O MODE] in the INITIAL settings (page 4). *3 Not available when [OFF] is selected in [SUB.W]. SYSTEM settings You can also access to these menus when the unit is turned off. Menu Item Description LANGUAGE [ENG](English), [РУС](Russian), [TUR](Turkish) Select the language to display the text information from a compressed audio file. CLOCK SET LOUDNESS [OFF], [LOW], [MID], [HI] Adjust the volume level for each source except FM. Each of the below combinations are set to the same setting automatically. • USB, iPod, ANDROID, SPOTIFY, and APP (iPhone) Set the clock (page 4). Compensate for clear sound at low volume. 12H/24H [12H], [24H] 10 En Select the time notation. Menu Item Description AUTO PI [ON], [OFF] Search for a different station with the same programming, even if using a preset station. AUX Set to [ON] when using an auxiliary device connected to the unit. Menu Item [KEY COLOUR], [DISP COLOUR], [BOTH COLOUR] SPOTIFY [ON], [OFF] Set to [ON] when using the Spotify function. PW SAVE* [ON], [OFF] Reduce the battery power consumption. Turning on the source is the only operation allowed when this function is on. ANDROID WIRED [MEMORY], [APP CONTROL] Select the appropriate connection method for an Android device. P.APP AUTO ON [ON], [OFF] Select [ON] to automatically launch Pioneer ARC APP when an Android device is connected to the unit via AOA. (Not available when [MEMORY] is selected in [ANDROID WIRED].) USB AUTO [ON], [OFF] Select [ON] to automatically switch to [USB] source when a USB device/iPod is connected to the unit. Select [OFF] when a USB device/iPod is being connected to the unit just for charging. * [PW SAVE] is canceled if the vehicle battery is disconnected and will need to be turned back on once the battery is reconnected. When [PW SAVE] is off, depending on connection methods, the unit may continue to draw power from the battery if your vehicle’s ignition does not have an ACC (accessory) position. Description COLOUR Select colour for the keys/display of the unit from 12 preset colours, [SCAN] or [CUSTOM]*. • [SCAN]: Cycle through a variety of colours automatically. • [CUSTOM]*: 1 Press and hold the M.C. dial until the colour setting display appears. 2 Set the primary colour (R (red)/G (green)/B (blue)) and brightness level ([0] to [60]). You cannot select a level below 10 for all three of R (red), G (green), B (blue) at the same time. You can also customise the preset colours. Select one of the preset colours, then press and hold the M.C. dial until the colour setting display appears. English [ON], [OFF] ILLUMINATION settings * The CUSTOM setting is only available for [KEY COLOUR] and [DISP COLOUR]. DIM SETTING [SYNC ILLUMI], [SYNC CLOCK], [MANUAL] Change the display brightness. BRIGHTNESS [KEY], [DISP] Select the brightness for the keys/display of the unit from [1] to [10]. The available setting ranges differ depending on [DIM SETTING]. ILLUMI FX [ON], [OFF] The illumination effect can be seen when a CD is inserted/ejected. The illumination effect will activate when the ACC power is turned on/off regardless of this setting. En 11 MIXTRAX settings Menu Item Connections/Installation Description SHORT PLAYBCK [1.0 MIN], [1.5 MIN], [2.0 MIN], [2.5 MIN], [3.0 MIN], [OFF] Select the length of the playback time. FLASH AREA [KEY/DISPLAY], [KEY], [OFF] Select the area for the illumination effect. When [OFF] is selected, the colour set under the ILLUMINATION settings (page 11) is used as the display colour. Connections Important • When installing this unit in a vehicle without an ACC (accessory) position on the ignition switch, failure to connect the red cable to the terminal that detects operation of the ignition key may result in battery drain. FLASH PATTERN [SOUND LEVEL 1] to [SOUND LEVEL Change the illumination effect according to 6] the sound and bass level. The flash pattern changes according to the sound level. [LOW PASS 1] to [LOW PASS 6] The flash pattern changes according to the bass level. [RANDOM1] The flash pattern changes randomly according to the sound level mode and low pass mode. [RANDOM2] The flash pattern changes randomly according to the sound level mode. [RANDOM3] The flash pattern changes randomly according to the low pass mode. DISPLAY FX [ON], [OFF] Set the MIXTRAX special effects on/off. CUT IN FX [ON], [OFF] 12 En Turn the MIXTRAX sound effects on/off while manually changing the tracks. ACC position No ACC position • Use of this unit in conditions other than the following could result in fire or malfunction. – Vehicles with a 12-volt battery and negative grounding. – When speaker output is used by 4 channels, use speakers over 50 W (maximum input power) and between 4 Ω to 8 Ω (impedance value). Do not use 1 Ω to 3 Ω speakers for this unit. – When rear speaker output is used by 2 Ω of subwoofer, use speakers over 70 W (maximum input power). * Please refer to connections for a connection method. • To prevent a short-circuit, overheating or malfunction, be sure to follow the directions below. – Disconnect the negative terminal of the battery before installation. – Secure the wiring with cable clamps or adhesive tape. Wrap adhesive tape around wiring that comes into contact with metal parts to protect the wiring. – Place all cables away from moving parts, such as the shift lever and seat rails. • • • • – Place all cables away from hot places, such as near the heater outlet. – Do not connect the yellow cable to the battery by passing it through the hole to the engine compartment. – Cover any disconnected cable connectors with insulating tape. – Do not shorten any cables. – Never cut the insulation of the power cable of this unit in order to share the power with other devices. The current capacity of the cable is limited. – Use a fuse of the rating prescribed. – Never wire the negative speaker cable directly to ground. – Never band together negative cables of multiple speakers. When this unit is on, control signals are sent through the blue/white cable. Connect this cable to the system remote control of an external power amp or the vehicle’s auto-antenna relay control terminal (max. 300mA 12 V DC). If the vehicle is equipped with a glass antenna, connect it to the antenna booster power supply terminal. Never connect the blue/white cable to the power terminal of an external power amp. Also, never connect it to the power terminal of the auto antenna. Doing so may result in battery drain or a malfunction. The black cable is ground. Ground cables for this unit and other equipment (especially, high-current products such as power amps) must be wired separately. If they are not, an accidental detachment may result in a fire or malfunction. placed on The graphical symbol the product means direct current. This unit Power cord Violet: Rear right or subwoofer Violet/black: Rear right or subwoofer To power cord input Orange/white Connect to a car’s illumination signal. ISO connector In some vehicles, the ISO connector may be divided into two. In this case, be sure to connect to both connectors. NOTES • Change the initial menu of this unit. Refer to [SP-P/O MODE] (page 4). The subwoofer output of this unit is monaural. • When using a subwoofer of 2 Ω, be sure to connect the subwoofer to the violet and violet/black leads of this unit. Do not connect anything to the green and green/black leads. Power amp (sold separately) Perform these connections when using the optional amplifier. • Consult your dealer if installation requires drilling of holes or other modifications to the vehicle. • Do not install this unit where: – it may interfere with operation of the vehicle. – it may cause injury to a passenger as a result of a sudden stop. • The semiconductor laser will be damaged if it overheats. Install this unit away from hot places such as near the heater outlet. • Optimum performance is obtained when the unit is installed at an angle of less than 60°. • When installing, to ensure proper heat dispersal when using this unit, make sure you leave ample space behind the rear panel and wrap any loose cables so they are not blocking the vents. Leave ample space System remote control Connect to blue/white cable. Power amp (sold separately) Connect with RCA cables (sold separately) To front output Front speaker To rear output or subwoofer output Rear speaker or subwoofer English Power cord input Rear AUX IN | [Tel In] (3.5mm stereo jack) A dedicated rear input that is only compatible with external Bluetooth hands-free telephone kits. The audio signal is muted during a phone call when the yellow/black wire is connected/activated. Rear output or subwoofer output Front output Antenna input Fuse (10 A) Wired remote input Hard-wired remote control adapter can be connected (sold separately). Depending on the kind of vehicle, the function of and may be different. In this case, be sure to connect to and to . Yellow Back-up (or accessory) Yellow Connect to the constant 12 V supply terminal. Red Accessory (or back-up) Red Connect to terminal controlled by the ignition switch (12 V DC). Connect leads of the same colour to each other. Black (chassis ground) Blue/white The pin position of the ISO connector will differ depending on the type of vehicle. Connect and when Pin 5 is an antenna control type. In another and type of vehicle, never connect . Blue/white Connect to the system control terminal of the power amp (max. 300 mA 12 V DC). Blue/white Connect to the auto-antenna relay control terminal (max. 300 mA 12 V DC). Speaker leads White: Front left White/black: Front left Gray: Front right Gray/black: Front right Green: Rear left or subwoofer Green/black: Rear left or subwoofer 5 cm 5 cm DIN mount installation 1 Insert the supplied mounting sleeve 2 into the dashboard. Secure the mounting sleeve by using a screwdriver to bend the metal tabs (90°) into place. Installation Important • Check all connections and systems before final installation. • Do not use unauthorized parts as this may cause malfunctions. Dashboard Mounting sleeve En 13 • Make sure that the unit is installed securely in place. An unstable installation may cause skipping or other malfunctions. When not using the supplied mounting sleeve 1 2 Determine the appropriate position where the holes on the bracket and the side of the unit match. Tighten two screws on each side. Tapping screw (5 mm × 9 mm, not supplied with product) Mounting bracket Dashboard or console Removing the unit (installed with the supplied mounting sleeve) 1 Remove the trim ring. 3 Pull the unit out of the dashboard. Additional Information Troubleshooting The display automatically returns to the normal display. → No operations have been made for about 30 seconds. – Perform an operation. The repeat play range changes unexpectedly. → Depending on the repeat play range, the selected range may change when another folder or track is being selected or during fast forwarding/reversing. – Select the repeat play range again. A subfolder is not played back. → Subfolders cannot be played when [FLD] (folder repeat) is selected. – Select another repeat play range. The sound is intermittent. → You are using a device, such as a cellular phone, that may cause audible interference. – Move electrical devices that may be causing the interference away from the unit. Error messages Common 2 Trim ring Notched tab • Releasing the front panel allows easier access to the trim ring. • When reattaching the trim ring, point the side with the notched tab down. Insert the supplied extraction keys into both sides of the unit until they click into place. 14 En AMP ERROR → This unit fails to operate or the speaker connection is incorrect. → The protective circuit is activated. – Check the speaker connection. – Turn the ignition switch OFF and back to ON again. If the message remains, contact your dealer or an authorized Pioneer Service Station for assistance. NO XXXX (NO TITLE, for example) → There is no embedded text information. – Switch the display or play another track/file. CD player ERROR-07, 11, 12, 17, 30 → The disc is dirty. – Clean the disc. → The disc is scratched. – Replace the disc. ERROR-07, 10, 11, 12, 15, 17, 30, A0 → There is an electrical or mechanical error. – Turn the ignition switch OFF and back to ON, or switch to a different source, then back to the CD player. ERROR-15 → The inserted disc is blank. – Replace the disc. ERROR-23 → Unsupported CD format. – Replace the disc. FORMAT READ → Sometimes there is a delay between the start of playback and when you start to hear any sound. – Wait until the message disappears and you hear sound. NO AUDIO → The inserted disc does not contain any playable files. – Replace the disc. SKIPPED → The inserted disc contains DRM protected files. – The protected files are skipped. PROTECT → All the files on the inserted disc are embedded with DRM. – Replace the disc. USB device/iPod NO AUDIO → There are no songs. – Transfer the audio files to the USB device and connect. → The connected USB device has security enabled. – Follow the USB device instructions to disable the security. SKIPPED → The connected USB device contains DRM protected files. – The protected files are skipped. PROTECT → All the files on the connected USB device are embedded with DRM. – Replace the USB device. N/A USB → The connected USB device is not supported by this unit. – Disconnect your device and replace it with a compatible USB device. HUB ERROR → The USB device connected via a USB hub is not supported by this unit. – Connect the USB device directly to this unit using a USB cable. CHECK USB → The USB connector or USB cable has short-circuited. ERROR-19 → Communication failed. – Perform one of the following operations, then return to the USB source. • Turn the ignition switch OFF and back to ON. • Disconnect the USB device. • Change to a different source. → iPod failure. – Disconnect the cable from the iPod. Once the iPod’s main menu is displayed, reconnect the iPod and reset it. ERROR-23 → USB device was not formatted properly. – Format the USB device with FAT12, FAT16 or FAT32. ERROR-16 → The iPod firmware version is old. – Update the iPod version. → iPod failure. – Disconnect the cable from the iPod. Once the iPod’s main menu is displayed, reconnect the iPod and reset it. STOP → There are no songs in the current list. – Select a list that contains songs. NOT FOUND → No related songs. – Transfer songs to the iPod. Apps START UP APP → The application has not started running yet. – Operate the mobile device to start up the application. Spotify CHECK APP → Connection to the Spotify application failed. – Follow the instructions that appear on the screen. Handling guidelines Discs and player • Use only discs that feature either of the following two logos. • Use 12-cm discs. • Use only conventional, fully circular discs. • The following types of discs cannot be used with this unit: – DualDiscs – 8-cm discs: Attempts to use such discs with an adaptor may cause the unit to malfunction. – Oddly shaped discs – Discs other than CDs – Damaged discs, including discs that are cracked, chipped or warped – CD-R/RW discs that have not been finalized • Do not write on or apply chemicals to the surface of the discs. • To clean a CD, wipe the disc with a soft cloth outward from the center. • Condensation may temporarily impair the player’s performance. Let it rest for about one hour to adjust to a warmer temperature. Also, wipe any damp discs off with a soft cloth. • When using discs that can be printed on label surfaces, check the instructions and the warnings of the discs. Depending on the discs, inserting and ejecting may not be possible. Using such discs may result in damage to this equipment. • Do not attach commercially available labels or other materials to the discs. – The discs may warp making the disc unplayable. – The labels may come off during playback and prevent ejection of the discs, which may result in damage to the equipment. English FORMAT READ → Sometimes there is a delay between the start of playback and when you start to hear any sound. – Wait until the message disappears and you hear sound. – Check that the USB connector or USB cable is not caught in something or damaged. → The connected USB device consumes more than maximum allowable current. – Disconnect the USB device and do not use it. Turn the ignition switch OFF and back to ACC or ON. Connect only compliant USB devices. → The iPod operates correctly but does not charge. – Make sure the connection cable for the iPod has not shorted out (e.g., not caught in metal objects). After checking, turn the ignition switch OFF and back to ON, or disconnect the iPod and reconnect. USB storage device • Connections via USB hubs are not supported. • Firmly secure the USB storage device before driving. Do not let the USB storage device fall onto the floor, where it may become jammed under the brake or accelerator pedal. • Depending on the USB storage device, the following problems may occur. – Operations may vary. – The storage device may not be recognized. – Files may not be played back properly. – The device may cause audible interference when you are listening to the radio. En 15 iPod • Do not leave the iPod in places with high temperatures. • Firmly secure the iPod when driving. Do not let the iPod fall onto the floor, where it may become jammed under the brake or accelerator pedal. • The settings of the iPod such as the equalizer and repeat play are changed automatically when the iPod is connected to the unit. Once the iPod is disconnected, those settings will return to the original settings. • Incompatible text saved on the iPod will not be displayed by the unit. Compressed audio compatibility • Only the first 32 characters can be displayed as a file name (including the file extension) or a folder name. • The unit may not work properly depending on the application used to encode WMA files. • There may be a slight delay at the start of the playback of audio files embedded with image data, or audio files stored on a USB device with numerous folder hierarchies. • Russian text to be displayed on this unit should be encoded in one of the following character sets: – Unicode (UTF-8, UTF-16) – A character set other than Unicode that is used in a Windows environment and is set to Russian in the multi-language setting CAUTION • Pioneer cannot guarantee compatibility with all USB mass storage devices, and assumes no responsibility for any loss of 16 En data on media players, smartphones, or other devices while using this product. • Do not leave discs or a USB storage device in any place that is subject to high temperatures. WMA files File extension Bit rate Sampling frequency Windows Media™ Audio Professional, Lossless, Voice/DRM Stream/Stream with video .wma 48 kbps to 320 kbps (CBR), 48 kbps to 384 kbps (VBR) 32 kHz, 44.1 kHz, 48 kHz Not compatible MP3 files File extension Bit rate Sampling frequency Compatible ID3 tag version M3u playlist MP3i (MP3 interactive), mp3 PRO 1.0, 1.1, 2.2, 2.3, 2.4 (ID3 tag Version 2.x is given priority over Version 1.x.) Not compatible Not compatible Playable folder hierarchy Playable folders Playable files File system Multi-session playback Packet write data transfer Up to eight tiers (A practical hierarchy is less than two tiers.) Up to 99 Up to 999 ISO 9660 Level 1 and 2, Romeo, Joliet Compatible Not compatible • There may be a slight delay when starting playback of audio files on a USB storage device with numerous folder hierarchies. Playable folder hierarchy Up to eight tiers (A practical hierarchy is less than two tiers.) Playable folders Up to 500 Playable files Up to 15 000 Playback of copyright- Not compatible protected files Partitioned USB Only the first partition device can be played. iPod compatibility • WAV file formats cannot be connected via MTP. Sampling frequency • Regardless of the length of the blank section between the songs from the original recording, compressed audio discs play with a short pause between songs. USB device .mp3 8 kbps to 320 kbps (CBR), VBR 8 kHz to 48 kHz (32 kHz, 44.1 kHz, 48 kHz for emphasis) WAV files File extension Quantization bits Disc .wav 8 and 16 (LPCM), 4 (MSADPCM) 16 kHz to 48 kHz (LPCM), 22.05 kHz and 44.1 kHz (MS ADPCM) This unit supports only the following iPod models. Supported iPod software versions are shown below. Older versions may not be supported. Made for – iPod touch (1st through 6th generation) – iPod classic – iPod with video – iPod nano (1st through 7th generation) – iPhone 6s – iPhone 6s Plus – iPhone 6 – iPhone 6 Plus – iPhone 5s – iPhone 5c – iPhone 5 – iPhone 4s – iPhone 4 – iPhone 3GS – iPhone 3G – iPhone • Operations may vary depending on the generation and/or software version of the iPod. • Users of iPod with the Lightning Connector should use the Lightning to USB Cable (supplied with iPod). • Users of iPod with the Dock Connector should use the CD-IU51. For details, consult your dealer. • Refer to the iPod manuals for information about the file/format compatibility. • Audiobook, Podcast: Compatible CAUTION Pioneer accepts no responsibility for data lost on the iPod, even if that data is lost while this unit is used. Sequence of audio files The user cannot assign folder numbers and specify playback sequences with this unit. Sequence of audio file depends on the connected device. Note that the hidden files in a USB device cannot be played back. Example of a hierarchy Folder Compressed audio file Russian character chart iTunes Apple and iTunes are trademarks of Apple Inc., registered in the U.S. and other countries. WMA Windows Media is either a registered trademark or trademark of Microsoft Corporation in the United States and/or other countries. This product includes technology owned by Microsoft Corporation and cannot be used or distributed without a license from Microsoft Licensing, Inc. iPod & iPhone iPhone, iPod, iPod classic, iPod nano, and iPod touch are trademarks of Apple Inc., registered in the U.S. and other countries. Lightning is a trademark of Apple Inc. “Made for iPod” and “Made for iPhone” mean that an electronic accessory has been designed to connect specifically to iPod or iPhone, respectively, and has been certified by the developer to meet Apple performance standards. Apple is not responsible for the operation of this device or its compliance with safety and regulatory standards. Please note that the use of this accessory with iPod or iPhone may affect wireless performance. Android & Google Play Android, Google Play, and the Google Play logo are trademarks of Google Inc. MIXTRAX MIXTRAX is a trademark of the PIONEER CORPORATION. D: Display C: Character Spotify® SPOTIFY and the Spotify logo are among the registered trademarks of Spotify AB. Compatible mobile digital devices and premium subscription required, where available, see https://www.spotify.com. Specifications General Power source: 14.4 V DC (10.8 V to 15.1 V allowable) Grounding system: Negative type Maximum current consumption: 10.0 A Dimensions (W × H × D): DIN Chassis: 178 mm × 50 mm × 165 mm Nose: 188 mm × 58 mm × 17 mm D Chassis: 178 mm × 50 mm × 165 mm Nose: 170 mm × 46 mm × 17 mm Weight: 1 kg Audio Maximum power output: • 50 W × 4 ch/4 Ω (for no subwoofer) • 50 W × 2 ch/4 Ω + 70 W × 1 ch/2 Ω (for subwoofer) Continuous power output: 22 W × 4 (50 Hz to 15 000 Hz, 5 % THD, 4 Ω load, both channels driven) Load impedance: 4 Ω (4 Ω to 8 Ω allowable) Preout maximum output level: 2.0 V Loudness contour: +10 dB (100 Hz), +6.5 dB (10 kHz) (volume: –30 dB) Equalizer (5-Band Graphic Equalizer): Frequency: 80 Hz/250 Hz/800 Hz/2.5 kHz/8 kHz Equalization range: ±12 dB (2 dB step) Subwoofer (mono): Frequency: 50 Hz/63 Hz/80 Hz/100 Hz/125 Hz/160 Hz/200 Hz Slope: –12 dB/oct, –24 dB/oct Gain: +6 dB to –24 dB Phase: Normal/Reverse CD player System: Compact disc audio system Usable discs: Compact disc Signal-to-noise ratio: 94 dB (1 kHz) (IEC-A network) Number of channels: 2 (stereo) MP3 decoding format: MPEG-1 & 2 Audio Layer 3 WMA decoding format: Ver. 7, 7.1, 8, 9, 10, 11, 12 (2 ch audio) (Windows Media Player) WAV signal format: Linear PCM & MS ADPCM (Non-compressed) USB USB standard specification: USB 2.0 full speed Maximum current supply: 1.5 A USB Protocol: MSC (Mass Storage Class) MTP (Media Transfer Protocol) AOA (Android Open Accessory) 2.0 File system: FAT12, FAT16, FAT32 MP3 decoding format: MPEG-1 & 2 Audio Layer 3 WMA decoding format: Ver. 7, 7.1, 8, 9, 10, 11, 12 (2 ch audio) (Windows Media Player) WAV signal format: Linear PCM & MS ADPCM (Non-compressed) English 01 to 05: Folder number to : Playback sequence Copyright and trademark FM tuner Frequency range: 87.5 MHz to 108.0 MHz Usable sensitivity: 11 dBf (1.0 μV/75 Ω, mono, S/N: 30 dB) Signal-to-noise ratio: 72 dB (IEC-A network) MW tuner Frequency range: 531 kHz to 1 602 kHz Usable sensitivity: 25 μV (S/N: 20 dB) Signal-to-noise ratio: 62 dB (IEC-A network) LW tuner Frequency range: 153 kHz to 281 kHz Usable sensitivity: 28 μV (S/N: 20 dB) Signal-to-noise ratio: 62 dB (IEC-A network) NOTE Specifications and the design are subject to modifications without notice. En 17 Table des matières Avant de commencer Avant de commencer ............................................................................. 2 Mise en route ........................................................................................... 3 Radio.......................................................................................................... 5 Nous vous remercions d’avoir acheté cet appareil PIONEER Pour garantir une utilisation correcte, lisez bien ce mode d’emploi avant d’utiliser cet appareil. Il est particulièrement important que vous lisiez et respectiez les indications ATTENTION et PRÉCAUTION de ce mode d’emploi. Conservez-le dans un endroit sûr et facilement accessible pour toute consultation ultérieure. CD/USB/iPod/AUX................................................................................... 6 Mode d’application................................................................................. 8 Spotify® ..................................................................................................... 8 Utilisation de Pioneer ARC APP ............................................................ 9 Réglages ................................................................................................. 10 Réglages FUNCTION ............................................................................ Réglages AUDIO.................................................................................... Réglages SYSTEM ................................................................................. Réglages ILLUMINATION..................................................................... Réglages MIXTRAX ............................................................................... 10 11 12 13 13 Raccordements/Installation................................................................ 14 Informations complémentaires.......................................................... 16 À propos de ce mode d’emploi : • Parmi les instructions suivantes, les clés USB ou les lecteurs audio USB sont collectivement désignés sous le nom de « périphérique USB ». • Dans ce mode d’emploi, les iPod et les iPhone sont collectivement désignés sous le nom d’« iPod ». 2 Fr Si vous souhaitez vous débarrasser de cet appareil, ne le mettez pas à la poubelle avec vos ordures ménagères. Il existe un système de collecte séparé pour les appareils électroniques usagés, qui doivent être récupérés, traités et recyclés conformément à la législation. Dans les états membres de l’UE, en Suisse et en Norvège, les foyers domestiques peuvent rapporter leurs produits électroniques usagés gratuitement à des points de collecte spécifiés ou à un revendeur (sous réserve d’achat d’un produit similaire). Dans les pays qui ne sont pas mentionnés ci-dessus, veuillez contacter les autorités locales pour vous informer de la méthode correcte de mise au rebut. En agissant ainsi vous assurerez que le produit que vous mettez au rebut est soumis au processus de traitement, de récupération et de recyclage nécessaire et éviterez ainsi les effets négatifs potentiels sur l’environnement et la santé publique. ATTENTION • N’essayez pas d’installer cet appareil ou d’en faire l’entretien vous-même. L’installation ou l’entretien de cet appareil par des personnes sans formation et sans expérience en équipement électronique et en accessoires automobiles peut être dangereux et vous exposer à des risques d’électrocution ou à d’autres dangers. • N’essayez pas de démonter ou de modifier cet appareil. Veillez à quitter la route et garer votre véhicule en lieu sûr avant d’essayer d’utiliser les commandes de l’appareil. PRÉCAUTION • Ne laissez pas cet appareil entrer en contact avec de l’humidité et/ou des liquides. Cela pourrait provoquer une décharge électrique. Tout contact avec des liquides pourrait également provoquer des dommages, de la fumée et une surchauffe de l’appareil. • Maintenez le niveau d’écoute à une valeur telle que vous puissiez entendre les sons provenant de l’extérieur. • Le Pioneer CarStereo-Pass est utilisable seulement en Allemagne. • Ce produit est évalué sous des conditions climatiques modérées et tropicales conformément à la norme CEI 60065 sur les Appareils audio, vidéo et appareils électroniques analogues - Exigences de sécurité. PRÉCAUTION Cet appareil est un produit laser de Classe 1, classé selon l’article IEC 60825-1:2007 relatif à la Sécurité des produits laser. Si vous rencontrez des problèmes En cas d’anomalie, veuillez contacter votre revendeur ou le centre d’entretien agréé par PIONEER le plus proche. Fonctionnement de base DEH-X2900UI Objectif Opération Mettre l’appareil sous tension* Appuyez sur SRC/OFF pour mettre l’appareil sous tension. Appuyez longuement sur SRC/OFF pour mettre l’appareil hors tension. Régler le volume Tournez la molette M.C.. Sélectionner une source Appuyez plusieurs fois sur SRC/OFF. Modifier les informations d’affichage Appuyez plusieurs fois sur DISP. Revenir à l’affichage/la liste précédent(e) Appuyez sur BAND/ Revenir à l’affichage normal à partir du menu Appuyez longuement sur BAND/ . Français Mise en route Opérations fréquemment utilisées . * Si le fil bleu/blanc de l’appareil est relié à la borne de commande du relais d’antenne automatique du véhicule, l’antenne se déploie lorsque la source de cet appareil est mise en service. Pour rétracter l’antenne, mettez la source hors service. Indication de l’affichage Port USB Molette M.C. (multi-contrôle) Fente de chargement des disques (éjection) Fenêtre d’affichage SRC (source)/OFF Indication Description Apparaît lorsqu’il existe un niveau inférieur de menu ou de dossier. Apparaît lorsque vous appuyez sur la touche . Apparaît lorsque la fonction d’accord sur une station locale est en service (page 10). Apparaît lorsqu’un programme d’informations routières est capté. Apparaît lorsque la fonction TA (informations routières) est activée (page 10). BAND/ DISP (affichage) Touche de retrait Prise d’entrée AUX (prise stéréo 3,5 mm) Apparaît lorsque le sound retriever (correcteur de son compressé) est en service (page 11). Apparaît lorsque la lecture aléatoire est en service. Apparaît lorsque la lecture répétée est en service. Télécommande en option Apparaît lorsque la fonction de commande d’iPod est en service (page 7). La télécommande CD-R320 est vendue séparément. Retrait de la face avant Retirez la face avant pour empêcher tout vol. Débranchez tous les câbles et les périphériques branchés à la face avant et mettez l’appareil hors tension avant de le retirer. Fr 3 Retirer Fixer REMARQUES • Vous pouvez annuler le réglage du menu en appuyant sur SRC/OFF. • Ces paramètres peuvent être ajustés à tout moment à partir des réglages SYSTEM (page 12) et des réglages INITIAL (page 4). Annulation de l’affichage de démonstration (DEMO OFF) Important • Évitez de soumettre la face avant à des chocs excessifs. • Tenez la face avant à l’abri du soleil et des températures élevées. • Stockez toujours la face avant détachée, dans un étui de protection ou un sac. Menu de configuration Lorsque vous mettez le contact sur ON après avoir installé l’appareil, [SET UP :YES] s’affiche. 1 2 Appuyez sur la molette M.C.. Si vous n’utilisez pas l’appareil dans les 30 secondes qui suivent, le menu de configuration disparaît. Si vous préférez ne pas effectuer la configuration pour l’instant, tournez la molette M.C. pour sélectionner [NO], puis appuyez pour valider. Tournez la molette M.C. pour sélectionner les options, puis appuyez pour valider. Pour passer à l’option de menu suivante, vous devez valider votre sélection. 1 2 3 4 Appuyez sur la molette M.C. pour afficher le menu principal. Tournez la molette M.C. pour sélectionner [SYSTEM], puis appuyez pour valider. Tournez la molette M.C. pour sélectionner [DEMO OFF], puis appuyez pour valider. Tournez la molette M.C. pour sélectionner [YES], puis appuyez pour valider. Réglages INITIAL 1 2 3 4 Appuyez longuement sur SRC/OFF jusqu’à ce que l’appareil se mette hors tension. Appuyez longuement sur SRC/OFF pour afficher le menu principal. Tournez la molette M.C. pour sélectionner [INITIAL], puis appuyez pour valider. Tournez la molette M.C. pour sélectionner une option, puis appuyez pour valider. Élément de menu Description Élément de menu Description LANGUAGE Sélectionnez la langue d’affichage des informations textuelles à partir d’un fichier audio compressé. FM STEP Sélectionnez l’incrément d’accord FM à partir de 100 kHz ou de 50 kHz. [ENG] (anglais), [РУС] (russe), [TUR] (turc) [100], [50] SP-P/O MODE À sélectionner lorsqu’un haut-parleur à gamme étendue est relié aux fils de sortie du haut-parleur arrière et qu’un hautparleur d’extrêmes graves est branché à la sortie RCA. CLOCK SET Réglez l’horloge. [REAR/SUB.W] FM STEP Sélectionnez l’incrément d’accord FM à partir de 100 kHz ou de 50 kHz. [SUB.W/SUB.W] À sélectionner lorsqu’un haut-parleur d’extrêmes graves passif est directement relié aux fils de sortie du haut-parleur arrière et qu’un haut-parleur d’extrêmes graves est branché à la sortie RCA. [REAR/REAR] À sélectionner lorsque des haut-parleurs à gamme étendue sont reliés aux fils de sortie du haut-parleur arrière et à la sortie RCA. Si un haut-parleur à gamme étendue est relié aux fils de sortie du haut-parleur arrière et que la sortie RCA n’est pas utilisée, vous pouvez sélectionner [REAR/SUB.W] ou [REAR/REAR]. [100], [50] 3 4 4 Fr [QUIT :YES] apparaît lorsque tous les réglages sont terminés. Pour revenir au premier élément du menu de configuration, tournez la molette M.C. pour sélectionner [QUIT :NO], puis appuyez pour valider. Appuyez sur la molette M.C. pour valider les réglages. 2 Élément de menu Description S/W UPDATE À sélectionner pour valider les dernières informations relatives au système de l’appareil. [SYSTEM INFO] [SYSTEM UPDATE] À sélectionner pour effectuer la dernière mise à jour des logiciels de l’appareil et réinitialiser ses réglages. Pour obtenir de plus amples informations sur les derniers logiciels et mises à jour, veuillez vous rendre sur notre site Web. SYSTEM RESET [YES], [NO] 3 Tournez la molette M.C. pour sélectionner [FUNCTION], puis appuyez pour valider. Tournez la molette M.C. pour sélectionner [BSM], puis appuyez pour valider. Pour rechercher une station manuellement 1 Après avoir sélectionné la bande, appuyez sur / Français pour sélectionner une station. Appuyez longuement sur / , puis relâchez pour rechercher une station disponible. Le balayage s’arrête lorsque l’appareil capte une station. Pour annuler l’accord par recherche, appuyez sur / . Sélectionnez [YES] pour réinitialiser les réglages de l’appareil. L’appareil redémarre automatiquement. (Certains réglages sont conservés même après la réinitialisation de l’appareil.) REMARQUE [SEEK] doit être réglé sur [MAN] dans les réglages FUNCTION (page 11). Radio Les fréquences du syntoniseur de cet appareil sont destinées à une utilisation en Europe de l’Ouest, Asie, Moyen-Orient, Afrique et Océanie. Son utilisation dans d’autres régions peut se traduire par une réception de mauvaise qualité. La fonction RDS (Radio Data System) n’est opérationnelle que dans les régions où des signaux RDS sont diffusés pour les stations FM. 3 pour sélectionner la bande [FM1], [FM2], [FM3], [MW] ou Appuyez sur l’une des touches numériques (1/ à 6/ CONSEIL Les touches / peuvent également servir à sélectionner une station préréglée lorsque [SEEK] est réglé sur [PCH] dans les réglages FUNCTION (page 11). Mémoire des meilleures stations (BSM) 1 1 2 3 ). Les six stations les plus puissantes sont mémorisées sur les touches numériques (1/ 6/ ). à 6/ ) jusqu’à ce qu’elle L’appareil recherche une station diffusant des informations PTY (type de programme). Appuyez sur SRC/OFF pour sélectionner [RADIO]. Appuyez sur BAND/ [LW]. longuement sur l’une des touches numériques (1/ cesse de clignoter. Utilisation des fonctions PTY Réception des stations présélectionnées 1 2 Pour mémoriser des stations manuellement 1 Lorsque vous captez la station que vous souhaitez mémoriser, appuyez à Appuyez sur pendant la réception FM. Tournez la molette M.C. pour sélectionner le type de programme [NEWS/INFO], [POPULAR], [CLASSICS] ou [OTHERS]. Appuyez sur la molette M.C.. L’appareil continue à rechercher une station. Lorsqu’il en trouve une, son nom de service de programme s’affiche. REMARQUES • Pour annuler la recherche, appuyez sur la molette M.C.. • Le programme de certaines stations peut différer de celui qu’indique le PTY transmis. • Si aucune station ne diffuse le type de programme que vous recherchez, [NOT FOUND] s’affiche pendant environ deux secondes, puis le syntoniseur revient à la station de départ. Après avoir sélectionné la bande, appuyez sur la molette M.C. pour afficher le menu principal. Fr 5 2 CD/USB/iPod/AUX REMARQUE Si [AUX] est réglé sur [OFF] dans les réglages SYSTEM, il est impossible de sélectionner [AUX] en tant que source (page 12). Lecture Débranchez le casque ou les écouteurs du périphérique avant de raccorder ce dernier à l’appareil. CD 1 Insérez un disque dans la fente de chargement des disques en orientant l’étiquette vers le haut. Pour éjecter un disque, arrêtez d’abord la lecture avant d’appuyer sur Appuyez sur SRC/OFF pour sélectionner la source [AUX]. . Périphériques USB (y compris Android™)/iPod 1 Ouvrez le cache du port USB. 2 Raccordez le périphérique USB/l’iPod à l’aide d’un câble approprié. Opérations Vous pouvez procéder à différents ajustements dans les réglages FUNCTION (page 10). Notez que les opérations suivantes ne fonctionnent pas pour un périphérique AUX. Pour utiliser un périphérique AUX, utilisez le périphérique proprement dit. Objectif Appuyez sur 1/ ou 2/ Sélectionner une piste/un morceau (chapitre) Appuyez sur ou Avance ou retour rapide*3 Appuyez longuement sur 1 Appuyez sur pour afficher la liste. 2 Tournez la molette M.C. pour sélectionner la catégorie ou le nom de fichier (dossier) de votre choix, puis appuyez pour valider. 3 Tournez la molette M.C. pour sélectionner le fichier de votre choix, puis appuyez pour valider. La lecture démarre. Afficher une liste de fichiers dans la catégorie/le dossier sélectionné(e)*1 Appuyez sur la molette M.C. lorsqu’une catégorie/un dossier est sélectionné(e). Lire un morceau de la catégorie/du dossier sélectionné(e)*1 Appuyez longuement sur la molette M.C. lorsqu’une catégorie/un dossier est sélectionné(e). Pour basculer automatiquement sur une source [USB] lorsqu’un périphérique USB/iPod est connecté à l’appareil, réglez [USB AUTO] sur [ON] dans les paramètres SYSTEM (page 12). PRÉCAUTION Avant de retirer le périphérique, arrêtez la lecture. Connexions AOA Pour plus de détails sur la connexion AOA, voir page 9. Connexion MTP Il est possible de connecter un périphérique Android (utilisant le système d’exploitation Android 4.0 ou une version supérieure) via une connexion MTP à l’aide du câble fourni avec le périphérique. Toutefois, selon le périphérique connecté et les numéros des fichiers qu’il contient, il se peut que la lecture de fichiers audio/morceaux soit impossible via MTP. Notez que la connexion MTP n’est pas compatible avec les formats de fichier WAV et ne peut pas être utilisée avec la fonction MIXTRAX. REMARQUE Si vous utilisez une connexion MTP, vous devez régler [ANDROID WIRED] sur [MEMORY] dans les paramètres SYSTEM (page 12). AUX 1 Insérez la mini-fiche stéréo dans la prise d’entrée AUX. 6 Fr . . Rechercher un fichier dans une liste REMARQUE Utilisez un câble USB Pioneer en option (CD-U50E) pour raccorder le périphérique USB, car tout périphérique raccordé directement à l’appareil dépasse de ce dernier, ce qui peut être dangereux. Opération Sélectionner un dossier/album*1 ou . Objectif Opération Lecture répétée Appuyez sur 6/ . . Lecture aléatoire Appuyez sur 5/ Lecture aléatoire de toutes les pistes (iPod uniquement) Appuyez longuement sur 5/ Pause/Reprise de la lecture Appuyez sur 4/PAUSE. Sound retriever (correcteur de son compressé)*1*2 Appuyez sur 3/S.Rtrv. [1] : efficace pour les taux de compression faibles [2] : efficace pour les taux de compression élevés Retour au dossier racine (CD/USB uniquement)*1 Appuyez longuement sur Commutation entre les modes audio compressé et CD-DA (CD uniquement) Appuyez sur BAND/ . Changer de lecteur sur le périphérique USB Appuyez sur BAND/ (périphériques prenant en charge le protocole de classe de périphérique de stockage de masse USB uniquement) . . . Fonctions utiles pour iPod Mode de lecture en lien Vous pouvez accéder à des morceaux en vous basant sur l’artiste, l’album ou le genre en cours de lecture. 1 Pendant l’écoute d’un morceau, appuyez longuement sur pour entrer en mode de lecture en lien. 2 Tournez la molette M.C. pour sélectionner le mode ([ARTIST], [ALBUM], [GENRE]), puis appuyez pour valider. Le morceau/l’album sélectionné est lu après le morceau en cours de lecture. Français Recherche alphabétique (iPod uniquement) 1 Appuyez sur pour afficher la liste. 2 Tournez la molette M.C. pour sélectionner la liste de catégories de votre choix, puis appuyez sur pour accéder au mode de recherche alphabétique. (Pour accéder au mode de recherche alphabétique, vous pouvez également tourner deux fois la molette M.C..) 3 Tournez la molette M.C. pour sélectionner une lettre, puis appuyez pour afficher la liste alphabétique. Pour annuler la recherche alphabétique, . appuyez sur BAND/ REMARQUE Le morceau/l’album sélectionné peut être annulé si vous utilisez d’autres fonctions que le mode de lecture en lien (ex. : avance et retour rapides). Commande d’un iPod Vous pouvez commander l’appareil via un iPod raccordé. Les modèles d’iPod suivants ne sont pas compatibles avec cette fonction. – iPod nano 1e génération, iPod avec vidéo 1 Appuyez sur BAND/ en cours de lecture, puis sélectionnez le mode de commande. [CONTROL iPod] : la fonction iPod de l’appareil peut être activée à partir de l’iPod raccordé. [CONTROL AUDIO] : la fonction iPod de l’appareil ne peut être activée que par les touches situées sur l’appareil. Dans ce mode, il est impossible de mettre l’iPod raccordé sous ou hors tension. REMARQUES *1 Fichiers d’audio compressé uniquement *2 Cette fonction est désactivée lorsque USB est sélectionné en tant que source et que la fonction MIXTRAX est activée. *3 Si vous utilisez la fonction avance ou retour rapide au moment de la lecture d’un fichier VBR, la durée de lecture peut ne pas être correcte. • La commutation du mode de commande sur [CONTROL iPod] met en pause la lecture d’un morceau. Utilisez l’iPod raccordé pour reprendre la lecture. • Les opérations suivantes sont toujours accessibles à partir de l’appareil, même si le mode de commande est réglé sur [CONTROL iPod]. – Pause, avance/retour rapide, sélection d’un morceau/chapitre • Le volume ne peut être réglé qu’à partir de cet appareil. À propos de MIXTRAX (USB/iPod uniquement) La fonction MIXTRAX crée un mélange ininterrompu de pistes de votre bibliothèque musicale, agrémenté d’effets d’éclairage. Pour plus de détails sur les réglages de MIXTRAX, voir page 13. Fr 7 REMARQUES • Cette fonction n’est pas compatible avec un périphérique Android connecté via MTP. • Lorsque USB est sélectionné en tant que source et que la fonction MIXTRAX est en cours d’utilisation, la fonction de sound retriever (correcteur de son compressé) est désactivée. • Selon le fichier/morceau, il se peut que les effets sonores soient indisponibles. • Désactivez la fonction MIXTRAX si les effets d’éclairage qu’elle produit vous gênent dans votre conduite. 1 Appuyez sur MIX pour activer/désactiver MIXTRAX. Opérations de base Vous pouvez procéder à différents ajustements dans les réglages FUNCTION (page 10). Objectif Appuyez sur Avance ou retour rapide Appuyez longuement sur Pause/Reprise de la lecture Appuyez sur BAND/ Mode d’application Vous pouvez écouter une application sur un iPhone via cet appareil. Dans certains cas, vous pouvez commander une application en utilisant cet appareil. Pour plus de détails sur les périphériques compatibles, visitez notre site Web. Important L’utilisation d’applications tierces peut impliquer ou nécessiter la fourniture d’informations personnelles, que ce soit en créant un compte d’utilisateur ou une autre méthode ainsi que, pour certaines applications, la fourniture de données de géolocalisation. TOUTES LES APPLICATIONS TIERCES RELÈVENT DE L’ENTIÈRE RESPONSABILITÉ DES FOURNISSEURS, NOTAMMENT MAIS SANS S’Y LIMITER, LA COLLECTE ET LA PROTECTION DES DONNÉES UTILISATEUR ET LES BONNES PRATIQUES DE CONFIDENTIALITÉ. EN ACCÉDANT À UNE APPLICATION TIERCE, VOUS ACCEPTEZ DE PRENDRE CONNAISSANCE DES CONDITIONS DE SERVICE ET DES RÈGLES DE CONFIDENTIALITÉ DES FOURNISSEURS. SI VOUS N’ACCEPTEZ PAS LES CONDITIONS OU RÈGLES D’UN FOURNISSEUR OU SI VOUS N’ACCEPTEZ PAS L’UTILISATION DES DONNÉES DE GÉOLOCALISATION, LE CAS ÉCHÉANT, N’UTILISEZ PAS CETTE APPLICATION TIERCE. Pour les utilisateurs d’iPhone Cette fonction est compatible avec les iPhone et les iPod touch installés avec iOS 5.0 ou une version ultérieure. REMARQUE PIONEER DÉCLINE TOUTE RESPONSABILITÉ QUANT AUX APPLICATIONS OU AUX CONTENUS TIERS, Y COMPRIS, SANS S’Y LIMITER, QUANT À LEUR EXACTITUDE OU À LEUR EXHAUSTIVITÉ. LE CONTENU ET LA FONCTIONNALITÉ DE CES APPLICATIONS RELÈVENT DE LA SEULE RESPONSABILITÉ DU FOURNISSEUR DE L’APPLICATION. Lecture d’une application via cet appareil 1 2 3 8 Fr Connectez cet appareil au périphérique mobile. • iPhone via USB (page 6) Appuyez sur SRC/OFF pour sélectionner [APP]. Activez le périphérique mobile pour lancer l’application. Opération Sélectionner une piste ou . ou . . Spotify® (DEH-X2900UI est compatible uniquement avec les iPhone sur lesquels Spotify est installé.) Spotify est un service de diffusion de musique en continu non affilié à Pioneer. Des informations complémentaires sont disponibles sur http://www.spotify.com. L’application Spotify est disponible pour les smartphones compatibles ; veuillez consulter https://support.spotify.com/ afin d’obtenir les dernières informations sur la compatibilité. Pour profiter de Spotify pendant que vous conduisez, téléchargez d’abord l’application Spotify sur votre iPhone. Vous pouvez la télécharger sur iTunes App Store. Optez pour un compte gratuit ou payant Premium, sur l’application ou sur spotify.com. Un compte Premium vous permet d’accéder à davantage de fonctionnalités, comme l’écoute horsligne. Important • Ce produit contient le logiciel Spotify qui fait l’objet de licences tierces que vous trouverez ici : www.spotify.com/connect/third-party-licenses. • Pour obtenir de plus amples informations sur les pays et les régions où Spotify peut être utilisé, consultez https://www.spotify.com/us/select-your-country/. Écoute de Spotify Mettez à jour le microprogramme de l’application Spotify à sa dernière version avant de l’utiliser. 1 2 3 Connectez cet appareil au périphérique mobile. • iPhone via USB (page 6) Appuyez sur SRC/OFF pour sélectionner [SPOTIFY]. Lancez l’application Spotify sur le périphérique mobile, puis lancez la lecture. Opérations de base Utilisation de Pioneer ARC APP Vous pouvez procéder à différents ajustements dans les réglages FUNCTION (page 10). REMARQUE Les opérations disponibles peuvent varier selon le type de contenus (titres/albums/artistes/listes de lecture/radios) que vous souhaitez lire. Objectif Opération Appuyez sur Rechercher un titre dans une liste 1 Appuyez sur (liste) pour afficher la liste. 2 Tournez la molette M.C. pour sélectionner la catégorie de votre choix, puis appuyez pour valider. 3 Tournez la molette M.C. pour sélectionner le fichier de votre choix, puis appuyez pour valider. La lecture commence. ou Pause/Reprise de la lecture Appuyez sur 4/PAUSE. Pouces levés (uniquement pour la radio) Appuyez sur 1/ . . . Pouces baissés (uniquement pour la radio) Appuyez sur 2/ Lecture aléatoire (uniquement pour les titres/albums/artistes/listes de lecture) Appuyez sur 5/ . Lecture répétée (uniquement pour les titres/albums/artistes/listes de lecture) Appuyez sur 6/ . Lancez une station de radio en fonction de la chanson en cours de lecture. 1 Appuyez longuement sur (liste) pour lancer une radio. 2 Appuyez sur la molette M.C.. • Cette fonction peut ne pas être disponible selon la chanson sélectionnée. Enregistrez les informations concernant la chanson en cours de lecture. Supprimez les informations relatives à la chanson enregistrées. 1 Appuyez longuement sur 3/S.Rtrv. [SAVE]/[UNSAVE] apparaît. 2 Appuyez sur la molette M.C.. REMARQUE Certaines fonctions de Spotify ne peuvent pas être activées à partir de cet appareil. ATTENTION N’essayez pas d’utiliser l’application tout en conduisant. Veillez à quitter la route et à garer votre véhicule en lieu sûr avant d’essayer d’utiliser les commandes de l’application. Français Sauter une piste Vous pouvez faire fonctionner l’appareil à partir de Pioneer ARC APP installé sur un périphérique iPhone/Android. Dans certains cas, vous pouvez commander des aspects de l’application, par exemple, la sélection de la source, la mise en pause, etc. à l’aide de l’appareil. Pour plus de détails sur les opérations disponibles sur l’application, consultez la section d’aide de l’application. Pour les utilisateurs d’iPhone Cette fonction est compatible avec les iPhone (iPhone 5 ou ultérieur) et les iPod touch sur lesquels iOS 8.0 ou ultérieur est installé. Vous pouvez télécharger Pioneer ARC APP sur iTunes App Store. Pour les utilisateurs de périphérique Android Cette fonction est compatible avec les périphériques sur lesquels est installé Android OS 4.1 ou une version ultérieure et qui prennent également en charge les profils AOA (Android Open Accessory) 2.0. Vous pouvez télécharger Pioneer ARC APP sur Google Play™. REMARQUE Certains périphériques Android connectés via AOA 2.0 risquent de ne pas fonctionner correctement ou d’émettre des sons en raison de leur conception logicielle propre, indépendamment de la version du système d’exploitation. Connectez-vous à Pioneer ARC APP 1 2 3 4 5 Connectez cet appareil au périphérique mobile. • iPhone/périphérique Android via USB (page 6) Passez à l’étape 6 si vous sélectionnez la connexion USB pour iPhone. Appuyez sur la molette M.C. pour afficher le menu principal. Tournez la molette M.C. pour sélectionner [SYSTEM], puis appuyez pour valider. Tournez la molette M.C. pour sélectionner [ANDROID WIRED], puis appuyez pour valider. Tournez la molette M.C. pour sélectionner [APP CONTROL] pour un périphérique Android connecté via USB. Fr 9 Si [ON] est sélectionné dans [P.APP AUTO ON] (page 12), Pioneer ARC APP sur le périphérique Android démarrera automatiquement et toutes les étapes se termineront. REMARQUE 6 7 Si Pioneer ARC APP n’a pas encore été installé sur votre périphérique Android, un message vous invitant à installer l’application apparaîtra sur votre appareil Android. Sélectionnez [OFF] dans [P.APP AUTO ON] pour effacer le message (page 12). Appuyez sur SRC/OFF pour sélectionner une source. 3 • Réglages AUDIO (page 11) • Réglages SYSTEM (page 12) • Réglages ILLUMINATION (page 13) • Réglages MIXTRAX (page 13) Tournez la molette M.C. pour sélectionner les options, puis appuyez pour valider. Réglages FUNCTION Les éléments de menu varient selon la source. Lancer Pioneer ARC APP sur le périphérique mobile. REMARQUE Élément de menu Vous pouvez également lancer l’application en maintenant enfoncé la commande M.C. pour l’iPhone. FM SETTING [TALK], [STANDARD], [MUSIC] Écoute de musique sur Android 1 Appuyez sur SRC/OFF pour sélectionner [ANDROID]. Mémorisez automatiquement les six stations les plus puissantes sur les touches numériques (1/ à 6/ ). Objectif Opération Sélectionner une piste Appuyez sur Avance ou retour rapide Appuyez longuement sur Pause/Reprise de la lecture Appuyez sur 4/PAUSE. Sound retriever (correcteur de son compressé) Appuyez sur 3/S.Rtrv. [1] : efficace pour les taux de compression faibles [2] : efficace pour les taux de compression élevés ou REGIONAL . ou [ON], [OFF] . Réglages Vous pouvez régler divers paramètres dans le menu principal. 10 Fr Adaptez le niveau de qualité sonore aux conditions de signal de radiodiffusion du signal de la bande FM. (Disponible uniquement lorsque la bande FM est sélectionnée.) BSM Opérations de base 1 2 Description Appuyez sur la molette M.C. pour afficher le menu principal. Tournez la molette M.C. pour sélectionner l’une des catégories suivantes, puis appuyez pour valider. • Réglages FUNCTION (page 10) Limitez la réception des programmes régionaux spécifiques lorsque AF (recherche des autres fréquences) est sélectionné. (Disponible uniquement lorsque la bande FM est sélectionnée.) LOCAL FM : [OFF], [LV1], [LV2], [LV3], [LV4] MW/LW : [OFF], [LV1], [LV2] Restreignez la station d’accord suivant la puissance du signal. [ON], [OFF] Recevez des programmes d’informations routières, le cas échéant. (Disponible uniquement lorsque la bande FM est sélectionnée.) TA Élément de menu Description Réglages AUDIO Laissez l’appareil s’accorder sur une autre fréquence fournissant la même station. (Disponible uniquement lorsque la bande FM est sélectionnée.) FADER*1 AF [ON], [OFF] NEWS Description Réglez l’équilibre sonore entre les haut-parleurs avant et arrière. BALANCE [ON], [OFF] [MAN], [PCH] Attribuez aux touches ou la recherche de stations une par une (accord manuel) ou sélectionnez une station à partir des canaux préréglés. SAVE Enregistrez les informations concernant la chanson en cours de lecture sur votre liste de lecture sur Spotify. UNSAVE Réglez l’équilibre sonore entre les haut-parleurs gauche et droite. EQ SETTING Sélectionnez ou personnalisez la courbe de [SUPER BASS], [POWERFUL], [NATURAL], [VOCAL], [CUSTOM1], l’égaliseur. [CUSTOM2], [FLAT] [CUSTOM1] peut être défini séparément pour chaque source. Cependant, chacune des Sélectionnez la bande et le combinaisons ci-dessous est définie niveau de l’égaliseur pour une automatiquement sur le même réglage. personnalisation approfondie. • USB, iPod, ANDROID, SPOTIFY et APP (iPhone) [CUSTOM2] est un réglage partagé et commun à Bande de l’égaliseur : [80HZ], [250HZ], [800HZ], [2.5KHZ], toutes les sources. [8KHZ] Niveau de l’égaliseur : [+6] à [–6] Français Interrompez la source actuellement sélectionnée avec des bulletins d’informations. (Disponible uniquement lorsque la bande FM est sélectionnée.) SEEK LOUDNESS Supprimez les informations relatives à la chanson enregistrées dans [SAVE]. S.RTRV USB [NOR], [REV], [OFF] Améliorez l’audio compressé et restaurez un son riche. Indisponible lorsque : • USB est sélectionné en tant que source et que la fonction MIXTRAX est activée ; • CD-DA/CD-TEXT est en cours de lecture. SUB.W CTRL*2*3 Modifiez la vitesse de lecture. (Indisponible lorsque [CONTROL iPod] est sélectionné en mode de commande.) BASS BOOST iPod [FASTER], [NORMAL], [SLOWER] [OFF], [LOW], [MID], [HI] Compensez pour obtenir un son net à faible volume. SUB.W*2 iPod [1] (efficace pour les taux de compression faibles), [2] (efficace pour les taux de compression élevés), [OFF] AUDIO BOOK Élément de menu PAUSE Fréquence de coupure : [50HZ], [63HZ], [80HZ], [100HZ], [125HZ], [160HZ], [200HZ] Niveau de sortie : [–24] à [+6] Niveau de la pente : [–12], [–24] [0] à [+6] Sélectionnez la phase du haut-parleur d’extrêmes graves. Seules les fréquences inférieures à celles de la gamme sélectionnée sont émises par le hautparleur d’extrêmes graves. Sélectionnez le niveau d’accentuation des graves. Mettez sur pause ou reprenez la lecture. Fr 11 Élément de menu Description HPF SETTING Seules les fréquences supérieures à la coupure du filtre passe-haut (HPF) sont émises en sortie via les haut-parleurs. [+4] à [–4] Réglez le niveau de volume de chaque source, sauf celui de la FM. Chacune des combinaisons ci-dessous est définie automatiquement sur le même réglage. • USB, iPod, ANDROID, SPOTIFY et APP (iPhone) *1 Indisponible lorsque [SUB.W/SUB.W] est sélectionné sous [SP-P/O MODE] dans les réglages INITIAL (page 4). *2 Indisponible lorsque [REAR/REAR] est sélectionné sous [SP-P/O MODE] dans les réglages INITIAL (page 4). *3 Indisponible lorsque [OFF] est sélectionné sous [SUB.W]. Réglages SYSTEM Description LANGUAGE Sélectionnez la langue d’affichage des informations textuelles à partir d’un fichier audio compressé. CLOCK SET Réglez l’horloge (page 4). 12H/24H Sélectionnez la notation de l’heure. AUTO PI [ON], [OFF] Recherchez une autre station avec la même programmation, même si vous utilisez une station présélectionnée. [ON], [OFF] Sélectionnez [ON] lors de l’utilisation d’un périphérique auxiliaire connecté à l’appareil. AUX 12 Fr Sélectionnez [ON] lorsque vous utilisez la fonction Spotify. PW SAVE* Réduisez la consommation d’énergie de la batterie. L’activation de la source est la seule opération autorisée lorsque cette fonction est activée. ANDROID WIRED [MEMORY], [APP CONTROL] Sélectionnez la méthode de connexion adaptée à un périphérique Android. P.APP AUTO ON [ON], [OFF] Sélectionnez [ON] pour lancer automatiquement Pioneer ARC APP lorsqu’un périphérique Android est connecté à l’appareil via AOA. (Indisponible lorsque [MEMORY] est sélectionné sous [ANDROID WIRED].) USB AUTO Vous pouvez également accéder à ces menus lorsque l’appareil est hors tension. [12H], [24H] [ON], [OFF] [ON], [OFF] SLA [ENG] (anglais), [РУС] (russe), [TUR] (turc) Description SPOTIFY Fréquence de coupure : [OFF], [50HZ], [63HZ], [80HZ], [100HZ], [125HZ], [160HZ], [200HZ] Niveau de la pente : [–12], [–24] Élément de menu Élément de menu [ON], [OFF] Sélectionnez [ON] pour basculer automatiquement sur la source [USB] lorsqu’un périphérique USB/iPod est connecté à l’appareil. Sélectionnez [OFF] lorsqu’un périphérique USB/ iPod est connecté à l’appareil uniquement à des fins de charge. * [PW SAVE] s’annule si la batterie du véhicule est débranchée, et il doit être réactivé une fois la batterie rebranchée. Lorsque [PW SAVE] est désactivé, selon les méthodes de connexion, l’appareil peut continuer à consommer l’énergie de la batterie s’il n’y a pas de position ACC (accessoire) sur le contact de votre véhicule. Réglages ILLUMINATION Réglages MIXTRAX Élément de menu Élément de menu Description COLOUR [KEY COLOUR], [DISP COLOUR], [BOTH COLOUR] [1.0 MIN], [1.5 MIN], [2.0 MIN], [2.5 MIN], [3.0 MIN], [OFF] FLASH AREA [KEY/DISPLAY], [KEY], [OFF] FLASH PATTERN Modifiez l’effet d’éclairage suivant le niveau sonore et le niveau des graves. Le modèle de clignotement change suivant le niveau sonore. [LOW PASS 1] à [LOW PASS 6] Le modèle de clignotement change suivant le niveau des graves. [RANDOM1] Le modèle de clignotement change de manière aléatoire suivant le mode de niveau sonore et le mode passe-bas. * Le réglage CUSTOM est uniquement disponible pour [KEY COLOUR] et [DISP COLOUR]. [RANDOM2] Le modèle de clignotement change de manière aléatoire suivant le mode de niveau sonore. Changez la luminosité de l’affichage. [RANDOM3] Le modèle de clignotement change de manière aléatoire suivant le mode passe-bas. DISPLAY FX Sélectionnez la luminosité des touches ou de l’affichage de l’appareil de [1] à [10]. Les plages de réglage disponibles varient selon le paramètre [DIM SETTING]. [ON], [OFF] L’effet d’éclairage peut être visible lors de l’insertion/éjection d’un CD. L’effet d’éclairage s’active lorsque l’alimentation ACC est activée/désactivée, indépendamment de ce réglage. Activez/désactivez les effets spéciaux de MIXTRAX. CUT IN FX [ON], [OFF] ILLUMI FX [ON], [OFF] Sélectionnez la zone de l’effet d’éclairage. Lorsque [OFF] est sélectionné, la couleur définie dans les réglages ILLUMINATION (page 13) sert de couleur d’affichage. [SOUND LEVEL 1] à [SOUND LEVEL 6] BRIGHTNESS [KEY], [DISP] Sélectionnez la durée de lecture. Français Sélectionnez la couleur des touches ou de l’affichage de l’appareil parmi 12 couleurs présélectionnées, [SCAN] ou [CUSTOM]*. • [SCAN] : parcourez automatiquement une variété de couleurs. • [CUSTOM]* : 1 Appuyez longuement sur la molette M.C. jusqu’à ce que l’affichage de réglage des couleurs apparaisse. 2 Réglez la couleur primaire (R (rouge)/G (vert)/ B (bleu)) et le niveau de luminosité ([0] à [60]). Vous ne pouvez pas sélectionner un niveau inférieur à 10 pour les trois couleurs R (rouge), G (vert), B (bleu) à la fois. Vous pouvez également personnaliser les couleurs présélectionnées. Sélectionnez l’une des couleurs présélectionnées, puis appuyez longuement sur la molette M.C. jusqu’à ce que l’affichage de réglage des couleurs apparaisse. DIM SETTING [SYNC ILLUMI], [SYNC CLOCK], [MANUAL] Description SHORT PLAYBCK Activez/désactivez les effets sonores de MIXTRAX tout en changeant manuellement de piste. Fr 13 Raccordements/Installation Raccordements Important • Lorsque vous installez cet appareil dans un véhicule sans position ACC (accessoire) sur le contact, si vous omettez de brancher le câble rouge à la borne qui détecte le fonctionnement de la clé de contact, vous risquez d’entraîner une fuite de la batterie. Avec position ACC Sans position ACC • L’utilisation de cet appareil dans des conditions autres que ce qui suit peut provoquer un incendie ou un dysfonctionnement. – Véhicules équipés d’une batterie de 12 volts et d’une mise à la terre négative. – Lorsque la sortie de l’enceinte est utilisée par 4 stations, utilisez les hautparleurs de plus de 50 W (puissance d’entrée maximale) et entre 4 Ω et 8 Ω (valeur d’impédance). N’utilisez pas de haut-parleurs de 1 Ω à 3 Ω pour cet appareil. – Si la sortie du haut-parleur arrière est utilisée par un caisson de graves de 2 Ω, utilisez les haut-parleurs de plus de 70 W (puissance d’entrée maximale). * Veuillez voir les branchements pour la méthode de connexion. • Pour éviter un court-circuit, une surchauffe ou un dysfonctionnement, assurez-vous de suivre les instructions cidessous. – Débranchez la borne négative de la batterie avant l’installation. 14 Fr – Fixez les câbles au moyen de serrecâbles ou de ruban adhésif. Enroulez du ruban adhésif autour du câblage qui entre en contact avec des pièces métalliques afin de protéger le câblage. – Placez tous les câbles à l’écart des pièces mobiles, comme le levier de vitesse et les rails des sièges. – Placez tous les câbles à l’écart des endroits chauds (ex. : la sortie du chauffage). – Ne raccordez pas le câble jaune à la batterie en le faisant passer par le trou du compartiment moteur. – Recouvrez de ruban isolant tous les câbles non raccordés. – Ne raccourcissez pas les câbles. – Ne coupez jamais l’isolation du câble d’alimentation de cet appareil dans le but de partager l’alimentation avec d’autres périphériques. La capacité actuelle du câble est limitée. – Utilisez un fusible de la valeur indiquée. – Ne raccordez jamais le câble de hautparleur négatif directement à la masse. – N’attachez jamais ensemble les câbles négatifs de plusieurs haut-parleurs. • Lorsque cet appareil est sous tension, les signaux de commande sont transmis via le câble bleu/blanc. Branchez ce câble à la télécommande de système d’un amplificateur de puissance externe ou à la borne de commande du relais d’antenne automatique du véhicule (max. 300 mA 12 V CC). Si le véhicule est équipé d’une antenne de vitre, raccordez cette dernière à la borne d’alimentation de l’amplificateur d’antenne. • Ne raccordez jamais le câble bleu/blanc à la borne d’alimentation d’un amplificateur de puissance externe. De même, ne le raccordez jamais à la borne d’alimentation de l’antenne automatique. Cela pourrait entraîner la fuite de la batterie ou un dysfonctionnement de l’appareil. • Le câble noir est la masse. Les câbles de masse de cet appareil et d’autres équipements (notamment les produits à haute intensité tels que les amplificateurs de puissance) doivent être câblés séparément. Dans le cas contraire, un détachement accidentel peut provoquer un incendie ou un dysfonctionnement. situé sur le • Le symbole graphique produit représente le courant continu. Cordon d’alimentation Cet appareil Entrée du cordon d’alimentation AUX IN arrière | [Tel In] (prise stéréo 3,5 mm) Entrée arrière dédiée, uniquement compatible avec les kits téléphoniques mains libres Bluetooth externes. Le signal audio est coupé durant un appel téléphonique lorsque le fil jaune/noir est raccordé/activé. Sortie arrière ou sortie du haut-parleur d’extrêmes graves Sortie avant Entrée de l’antenne Fusible (10 A) Entrée de la télécommande filaire Il est possible de raccorder un adaptateur de télécommande câblé (vendu séparément). Vers l’entrée du cordon d’alimentation La fonction du et du peut varier selon le type de véhicule. Dans ce cas, au et le veillez à brancher le au . Jaune Secours (ou accessoire) Jaune À raccorder à la borne d’alimentation constante de 12 V. Rouge Accessoire (ou secours) Rouge À raccorder à la borne commandée par la clé de contact (12 V CC). Raccordez les fils de même couleur les uns aux autres. Noir (masse du châssis) Bleu/blanc La position des broches du connecteur ISO varie selon le type de véhicule. Raccordez le et le lorsque la broche 5 est un type de commande d’antenne. Dans un autre type de REMARQUES • Modifiez le menu initial de cet appareil. Reportez-vous à la section [SP-P/O MODE] (page 4). La sortie du haut-parleur d’extrêmes graves de cet appareil est monophonique. • Lorsque vous utilisez un caisson de graves de 2 Ω, assurez-vous de le raccorder aux fils violet et violet/noir de cet appareil. Ne raccordez rien aux fils vert et vert/noir. Amplificateur de puissance (vendu séparément) Effectuez ces raccordements si vous utilisez l’amplificateur optionnel. Télécommande de système À raccorder au câble bleu/blanc. Amplificateur de puissance (vendu séparément) À raccorder aux câbles RCA (vendus séparément) Vers la sortie avant Haut-parleur avant Vers la sortie arrière ou la sortie du hautparleur d’extrêmes graves Haut-parleur arrière ou haut-parleur d’extrêmes graves Installation Important • Vérifiez tous les raccordements et les systèmes avant l’installation finale. • N’utilisez pas de pièces non autorisées, car cela pourrait provoquer des dysfonctionnements. • Consultez votre revendeur si l’installation nécessite de percer des trous ou d’apporter d’autres modifications au véhicule. • N’installez pas cet appareil aux endroits où : – il peut interférer avec le fonctionnement du véhicule. – il peut causer des blessures à un passager à la suite d’un arrêt brusque. • S’il surchauffe, le laser à semiconducteur risque d’être endommagé. Installez cet appareil à l’écart des endroits chauds (ex. : la sortie du chauffage). • Une performance optimale est obtenue lorsque l’appareil est installé à un angle inférieur à 60°. • Pour l’installation, afin d’assurer une dispersion de chaleur adéquate lors de l’utilisation de cet appareil, veillez à laisser suffisamment d’espace derrière la face arrière et à enrouler tout câble gênant de façon à ne pas obstruer les ouvertures d’aération. Laissez suffisamment d’espace 1 Déterminez la position appropriée dans laquelle les orifices du support et le côté de l’appareil se font face. 2 Serrez deux vis de chaque côté. Vis taraudeuse (5 mm × 9 mm, non fournie avec le produit) Support de montage Tableau de bord ou console 5 cm 5 cm Installation pour montage DIN 1 Insérez le manchon de montage fourni 2 Si vous n’utilisez pas le manchon de montage fourni Français véhicule, ne branchez jamais le et le . Bleu/blanc À raccorder à la borne de commande de système de l’amplificateur de puissance (max. 300 mA 12 V CC). Bleu/blanc À raccorder à la borne de commande du relais d’antenne automatique (max. 300 mA 12 V CC). Fils de haut-parleur Blanc : avant gauche Blanc/noir : avant gauche Gris : avant droite Gris/noir : avant droite Vert : arrière gauche ou haut-parleur d’extrêmes graves Vert/noir : arrière gauche ou hautparleur d’extrêmes graves Violet : arrière droite ou haut-parleur d’extrêmes graves Violet/noir : arrière droite ou hautparleur d’extrêmes graves Orange/blanc À raccorder à un signal d’éclairage du véhicule. Connecteur ISO Dans certains véhicules, le connecteur ISO peut être divisé en deux. Dans ce cas, veillez à raccorder les deux connecteurs. Retrait de l’appareil (installé avec le manchon de montage fourni) 1 Retirez l’anneau de garniture. dans le tableau de bord. Fixez le manchon de montage à l’aide d’un tournevis pour plier les languettes métalliques (90°) et les mettre en place. Tableau de bord Manchon de montage • Vérifiez que l’appareil est bien en place. Une installation instable peut entraîner des tremblements et d’autres dysfonctionnements. 2 3 Anneau de garniture Languette crantée • Le détachement de la face avant permet d’accéder plus facilement à l’anneau de garniture. • Pour remettre l’anneau de garniture, orientez le côté de l’appareil avec la languette crantée vers le bas. Insérez les clés d’extraction fournies dans les deux côtés de l’appareil jusqu’à leur enclenchement. Retirez l’appareil du tableau de bord. Fr 15 Informations complémentaires Dépannage L’affichage redevient automatiquement ordinaire. → Vous n’avez exécuté aucune opération pendant environ 30 secondes. – Exécutez une opération. L’étendue de lecture répétée change de manière inattendue. → En fonction de l’étendue de lecture répétée, l’étendue sélectionnée peut changer lors de la sélection d’un autre dossier ou d’une autre piste ou pendant l’avance ou le retour rapide. – Sélectionnez à nouveau l’étendue de lecture répétée. Un sous-dossier n’est pas lu. → Il est impossible de lire les sous-dossiers lorsque [FLD] (répétition du dossier) est sélectionné. – Sélectionnez une autre étendue de lecture répétée. Le son est intermittent. → Vous utilisez un périphérique, un téléphone portable par exemple, qui peut générer des interférences sonores. – Éloignez de l’appareil tous les périphériques électriques susceptibles de provoquer des interférences. Messages d’erreur Commun AMP ERROR → Un dysfonctionnement de l’appareil s’est produit ou le raccordement des haut-parleurs est incorrect. → Le circuit de protection est activé. 16 Fr – Vérifiez le raccordement des hautparleurs. – Tournez la clé de contact sur OFF, puis de nouveau sur ON. Si le message ne disparaît pas, demandez de l’aide à votre revendeur ou à un centre d’entretien agréé par Pioneer. NO XXXX (ex. : NO TITLE) → Aucune information textuelle n’est intégrée. – Commutez l’affichage ou la lecture sur une autre piste ou un autre fichier. Lecteur de CD ERROR-07, 11, 12, 17, 30 → Le disque est sale. – Nettoyez le disque. → Le disque est rayé. – Utilisez un autre disque. ERROR-07, 10, 11, 12, 15, 17, 30, A0 → Une erreur mécanique ou électrique est survenue. – Tournez la clé de contact sur OFF, puis de nouveau sur ON ou choisissez une autre source, puis revenez au lecteur de CD. ERROR-15 → Le disque inséré est vierge. – Utilisez un autre disque. ERROR-23 → Format de CD non pris en charge. – Utilisez un autre disque. FORMAT READ → Le début de la lecture et le début de l’émission des sons sont parfois décalés. – Attendez que le message disparaisse pour entendre les sons. NO AUDIO → Le disque inséré ne contient pas de fichiers lisibles. – Utilisez un autre disque. SKIPPED → Le disque inséré contient des fichiers protégés par DRM. – Les fichiers protégés sont sautés. Périphérique USB/iPod FORMAT READ → Le début de la lecture et le début de l’émission des sons sont parfois décalés. – Attendez que le message disparaisse pour entendre les sons. NO AUDIO → Il n’y a aucun morceau. – Transférez les fichiers audio vers le périphérique USB et procédez à la connexion. → La sécurité est activée sur le périphérique USB connecté. – Suivez les instructions du périphérique USB pour désactiver la sécurité. SKIPPED → Le périphérique USB connecté contient des fichiers protégés par DRM. – Les fichiers protégés sont sautés. PROTECT → Tous les fichiers sur le périphérique USB connecté intègrent la protection par DRM. – Utilisez un autre périphérique USB. N/A USB → Le périphérique USB connecté n’est pas pris en charge par cet appareil. HUB ERROR → Le périphérique USB connecté via un concentrateur USB n’est pas pris en charge par cet appareil. – Connectez le périphérique USB directement à cet appareil à l’aide d’un câble USB. CHECK USB → Le connecteur USB ou le câble USB est en court-circuit. – Vérifiez que le connecteur USB ou le câble USB n’est pas coincé ou endommagé. → Le périphérique USB connecté consomme plus que le courant maximal autorisé. – Déconnectez le périphérique USB et ne l’utilisez pas. Mettez le contact sur OFF, puis de nouveau sur ACC ou ON. Ne connectez que des périphériques USB conformes. → L’iPod fonctionne correctement mais n’est pas chargé. – Assurez-vous que le câble de connexion de l’iPod n’est pas en courtcircuit (ex. : qu’il n’est pas coincé dans des objets métalliques). Après avoir procédé à cette vérification, mettez le contact sur OFF puis de nouveau sur ON, ou déconnectez l’iPod et reconnectez-le. ERROR-19 → Panne de communication. – Effectuez l’une des opérations suivantes, puis revenez à la source USB. • Tournez la clé de contact sur OFF, puis de nouveau sur ON. • Déconnectez le périphérique USB. • Changez de source. → Panne de l’iPod. – Débranchez le câble de l’iPod. Une fois le menu principal de l’iPod affiché, reconnectez et réinitialisez l’iPod. ERROR-23 → Le périphérique USB n’a pas été formaté correctement. – Formatez le périphérique USB avec FAT12, FAT16 ou FAT32. ERROR-16 → La version du microprogramme de l’iPod est désuète. – Mettez à jour la version de l’iPod. → Panne de l’iPod. – Débranchez le câble de l’iPod. Une fois le menu principal de l’iPod affiché, reconnectez et réinitialisez l’iPod. STOP → La liste en cours ne comporte aucun morceau. – Sélectionnez une liste contenant des morceaux. NOT FOUND → Aucun morceau connexe. – Transférez des morceaux sur l’iPod. Applications START UP APP → L’application n’a pas encore commencé à s’exécuter. – Activez le périphérique mobile pour lancer l’application. Spotify CHECK APP → Échec de la connexion à l’application Spotify. – Suivez les instructions qui s’affichent à l’écran. Conseils sur la manipulation Disques et lecteur • Utilisez uniquement des disques affichant l’un des deux logos suivants. • Utilisez des disques de 12 cm. • Utilisez seulement des disques conventionnels de forme circulaire. • Les types de disque suivants ne peuvent pas être utilisés avec cet appareil : – DualDisc – Disques de 8 cm : les tentatives d’utilisation de tels disques avec un adaptateur peuvent entraîner un dysfonctionnement de l’appareil. – Disques de forme bizarre – Disques autres que les CD – Disques endommagés, y compris les disques fendillés, ébréchés ou voilés – Disques CD-R/RW non finalisés • N’écrivez pas et n’appliquez aucun agent chimique sur la surface d’un disque. • Pour nettoyer un CD, essuyez le disque avec un chiffon doux en partant du centre vers l’extérieur. • La condensation peut perturber temporairement le fonctionnement du lecteur. Laissez celui-ci s’adapter à une température plus élevée pendant une heure environ. Essuyez également les disques humides avec un chiffon doux. • Lors de l’utilisation de disques dont la surface de l’étiquette est imprimable, vérifiez les instructions et les avertissements des disques. L’insertion et l’éjection peuvent ne pas être possibles selon les disques. L’utilisation de tels Fr Français PROTECT → Tous les fichiers sur le disque inséré intègrent la protection par DRM. – Utilisez un autre disque. – Déconnectez votre périphérique et remplacez-le par un périphérique USB compatible. 17 disques risque d’endommager cet appareil. • Ne posez aucune étiquette disponible dans le commerce ou tout autre matériau sur la surface des disques. – Les disques pourraient se déformer et devenir injouables. – Les étiquettes pourraient se décoller pendant la lecture et empêcher l’éjection des disques, ce qui pourrait endommager l’appareil. Périphérique de stockage USB • Les connexions via un concentrateur USB ne sont pas prises en charge. • Attachez fermement le périphérique de stockage USB avant de conduire. Ne laissez pas le périphérique de stockage USB tomber au sol, où il pourrait rester coincé sous la pédale de frein ou d’accélérateur. • Selon le périphérique de stockage USB, les problèmes suivants peuvent survenir. – Le fonctionnement peut varier. – Le périphérique de stockage peut ne pas être reconnu. – Les fichiers peuvent ne pas être lus correctement. – Le périphérique peut générer des interférences sonores lorsque vous écoutez la radio. iPod • Ne laissez pas l’iPod dans un endroit soumis à une température élevée. • Attachez fermement l’iPod pendant que vous conduisez. Ne laissez pas l’iPod tomber au sol, où il pourrait gêner le bon fonctionnement de la pédale de frein ou d’accélérateur. • Les réglages de l’iPod, comme l’égaliseur et la lecture répétée, changent automatiquement lorsque l’iPod est connecté à l’appareil. Une fois l’iPod déconnecté, les réglages d’origine sont rétablis. 18 Fr • Aucun texte incompatible enregistré sur l’iPod ne sera affiché par cet appareil. Compatibilité avec l’audio compressé • Seuls les 32 premiers caractères peuvent s’afficher en tant que nom de fichier (extension de fichier comprise) ou nom de dossier. • L’appareil risque de ne pas fonctionner correctement selon l’application utilisée pour encoder les fichiers WMA. • Il peut se produire un léger retard au début de la lecture de fichiers audio intégrés avec des données d’image, ou de fichiers audio stockés sur un périphérique USB avec de nombreuses hiérarchies de dossiers. • Les textes russes à afficher sur cet appareil doivent être codés avec l’un des jeux de caractères suivants : – Unicode (UTF-8, UTF-16) – Jeu de caractères autre que l’Unicode qui est utilisé dans un environnement Windows et est paramétré sur Russe dans le réglage multilingue Débit binaire Fréquence d’échantillonnage Windows Media™ Audio Professional, Lossless, Voice/DRM Stream/Stream avec vidéo 48 kbps à 320 kbps (CBR), 48 kbps à 384 kbps (VBR) 32 kHz, 44,1 kHz, 48 kHz Incompatible Fichiers MP3 Extension de fichier Débit binaire Fréquence d’échantillonnage Version étiquette ID3 compatible Liste de lecture M3u MP3i (MP3 interactif), mp3 PRO .mp3 8 kbps à 320 kbps (CBR), VBR 8 kHz à 48 kHz (32 kHz, 44,1 kHz, 48 kHz pour accentuation) 1.0, 1.1, 2.2, 2.3, 2.4 (la version 2.x de l’étiquette ID3 a priorité sur la version 1.x.) Incompatible Incompatible PRÉCAUTION • Pioneer ne garantit pas la compatibilité avec tous les périphériques de stockage de masse USB et décline toute responsabilité en cas de perte de données sur des lecteurs multimédia, smartphones ou autres périphériques lors de l’utilisation de ce produit. • Ne laissez pas de disques ou un périphérique de stockage USB dans un lieu où les températures sont élevées. Fichiers WAV Fichiers WMA • Quelle que soit la durée du silence entre les morceaux de l’enregistrement original, la lecture des disques d’audio compressé s’effectue avec une courte pause entre les morceaux. Extension de fichier .wma • Il est impossible de connecter les formats de fichier WAV via MTP. Extension de fichier Bits de quantification Fréquence d’échantillonnage .wav 8 et 16 (LPCM), 4 (MS ADPCM) 16 kHz à 48 kHz (LPCM), 22,05 kHz et 44,1 kHz (MS ADPCM) Disque Hiérarchie des dossiers lisibles Jusqu’à huit niveaux (dans la pratique, la hiérarchie compte moins de deux niveaux) Dossiers lisibles Jusqu’à 99 Fichiers lisibles Jusqu’à 999 Système de fichiers ISO 9660 Niveaux 1 et 2, Romeo, Joliet Lecture multi-session Compatible Transfert des données Incompatible en écriture par paquet Périphérique USB • Il peut se produire un léger retard au début de la lecture de fichiers audio stockés sur un périphérique de stockage USB avec de nombreuses hiérarchies de dossiers. Hiérarchie des dossiers lisibles Dossiers lisibles Fichiers lisibles Lecture des fichiers protégés par des droits d’auteur Périphérique USB partitionné Jusqu’à huit niveaux (dans la pratique, la hiérarchie compte moins de deux niveaux) Jusqu’à 500 Jusqu’à 15 000 Incompatible Seule la première partition est lisible. Compatibilité avec un iPod Cet appareil prend en charge uniquement les modèles d’iPod suivants. Les versions du logiciel iPod prises en charge sont indiquées ci-dessous. Les versions antérieures ne sont pas prises en charge. Made for (Conçu pour) – iPod touch (de la 1e à la 6e génération) – iPod classic – iPod avec vidéo – iPod nano (de la 1e à la 7e génération) – iPhone 6s – iPhone 6s Plus – iPhone 6 – iPhone 6 Plus – iPhone 5s – iPhone 5c – iPhone 5 – iPhone 4s – iPhone 4 – iPhone 3GS – iPhone 3G – iPhone Exemple de hiérarchie Dossier Fichier d’audio compressé 01 à 05 : numéro de dossier à : séquence de lecture Tableau des caractères cyrilliques PRÉCAUTION Pioneer n’accepte aucune responsabilité en cas de perte de données sur l’iPod, même si la perte de données se produit pendant l’utilisation de cet appareil. Séquence des fichiers audio Sur cet appareil, l’utilisateur ne peut pas affecter de numéros de dossier ni spécifier les séquences de lecture. La séquence de fichier audio dépend du périphérique raccordé. Droits d’auteur et marques commerciales iTunes Apple et iTunes sont des marques commerciales d’Apple Inc., enregistrées aux États-Unis et dans d’autres pays. WMA Windows Media est une marque déposée ou une marque commerciale de Microsoft Corporation aux États-Unis et/ou dans d’autres pays. Ce produit intègre une technologie détenue par Microsoft Corporation, qui ne peut être utilisée et distribuée que sous licence de Microsoft Licensing, Inc. iPod & iPhone iPhone, iPod, iPod classic, iPod nano et iPod touch sont des marques commerciales d’Apple Inc., déposées aux États-Unis et dans d’autres pays. Lightning est une marque commerciale d’Apple Inc. Les accessoires électroniques portant la mention « Made for iPod » et « Made for iPhone » ont été conçus pour fonctionner respectivement avec un iPod ou un iPhone et sont certifiés conformes aux exigences d’Apple par le fabricant. Apple n’est pas responsable du fonctionnement de cet appareil ou de sa compatibilité avec les normes réglementaires et de sécurité. Veuillez noter que l’emploi de cet accessoire avec un iPod ou un iPhone peut affecter les performances sans fil. Android & Google Play Android, Google Play et le logo Google Play sont des marques commerciales de Google Inc. MIXTRAX MIXTRAX est une marque commerciale de PIONEER CORPORATION. D : Affichage C : Caractère Spotify® SPOTIFY et le logo Spotify font partie des marques déposées de Spotify AB. Des appareils numériques mobiles compatibles et un abonnement premium sont nécessaires, le cas échéant, consultez le site https://www.spotify.com. Caractéristiques techniques Généralités Tension d’alimentation : 14,4 V CC (10,8 V à 15,1 V admissible) Mise à la masse : pôle négatif Consommation maximale : 10,0 A Dimensions (L × H × P) : DIN Châssis : 178 mm × 50 mm × 165 mm Panneau avant : 188 mm × 58 mm × 17 mm D Châssis : 178 mm × 50 mm × 165 mm Panneau avant : 170 mm × 46 mm × 17 mm Poids : 1 kg Français • Les opérations peuvent varier selon la génération et/ou la version de l’iPod. • Les utilisateurs d’un iPod avec connecteur Lightning doivent utiliser le câble Lightning vers USB (fourni avec l’iPod). • Les utilisateurs d’un iPod avec connecteur pour station d’accueil doivent utiliser le câble CD-IU51. Pour plus de détails, consultez votre revendeur. • Pour en savoir plus sur la compatibilité fichier/format, reportez-vous aux manuels de l’iPod. • Livre audio, podcast : compatible Notez que la lecture des fichiers masqués d’un périphérique USB est impossible. Audio Puissance de sortie maximale : • 50 W × 4 canaux/4 Ω (sans hautparleur d’extrêmes graves) • 50 W × 2 canaux/4 Ω + 70 W × 1 canal/2 Ω (pour haut-parleur d’extrêmes graves) Puissance de sortie continue : 22 W × 4 (50 Hz à 15 000 Hz, THD 5 %, impédance de charge 4 Ω, avec les deux canaux entraînés) Impédance de charge : 4 Ω (4 Ω à 8 Ω admissible) Niveau de sortie maximum de la sortie préamp. : 2,0 V Correction physiologique : +10 dB (100 Hz), +6,5 dB (10 kHz) (volume : –30 dB) Fr 19 Syntoniseur FM Égaliseur (égaliseur graphique à 5 bandes) : Fréquence : 80 Hz/250 Hz/800 Hz/ 2,5 kHz/8 kHz Plage d’égalisation : ±12 dB (par pas de 2 dB) Haut-parleur d’extrêmes graves (mono) : Fréquence : 50 Hz/63 Hz/80 Hz/ 100 Hz/125 Hz/160 Hz/200 Hz Pente : –12 dB/oct, –24 dB/oct Gain : +6 dB à –24 dB Phase : normale/inverse Gamme de fréquences : 531 kHz à 1 602 kHz Sensibilité utile : 25 μV (S/B : 20 dB) Rapport signal/bruit : 62 dB (réseau IEC-A) Lecteur de CD Syntoniseur LW Système : Compact Disc Audio Disques utilisables : disques compacts Rapport signal/bruit : 94 dB (1 kHz) (réseau IEC-A) Nombre de canaux : 2 (stéréo) Format de décodage MP3 : MPEG-1 et 2 Couche Audio 3 Format de décodage WMA : Ver. 7, 7.1, 8, 9, 10, 11, 12 (2 canaux audio) (Windows Media Player) Format de signal WAV : Linear PCM et MS ADPCM (non compressé) Gamme de fréquences : 153 kHz à 281 kHz Sensibilité utile : 28 μV (S/B : 20 dB) Rapport signal/bruit : 62 dB (réseau IEC-A) USB Spécification standard USB : USB 2.0 vitesse pleine Alimentation maximale : 1,5 A Protocole USB : MSC (Mass Storage Class) MTP (Media Transfer Protocol) AOA (Android Open Accessory) 2.0 Système de fichiers : FAT12, FAT16, FAT32 Format de décodage MP3 : MPEG-1 et 2 Couche Audio 3 Format de décodage WMA : Ver. 7, 7.1, 8, 9, 10, 11, 12 (2 canaux audio) (Windows Media Player) Format de signal WAV : Linear PCM et MS ADPCM (non compressé) 20 Fr Gamme de fréquences : 87,5 MHz à 108,0 MHz Sensibilité utile : 11 dBf (1,0 μV/75 Ω, mono, S/B : 30 dB) Rapport signal/bruit : 72 dB (réseau IEC-A) Syntoniseur MW REMARQUE Les caractéristiques et la présentation peuvent être modifiées sans avis préalable. Français 21 Fr Sommario Prima di iniziare Prima di iniziare....................................................................................... 2 Operazioni preliminari ........................................................................... 3 Grazie per avere acquistato questo prodotto PIONEER Per garantire un uso corretto, leggere attentamente questo manuale prima di utilizzare il prodotto. È fondamentale leggere e osservare le indicazioni di AVVERTENZA e ATTENZIONE del manuale. Tenere il manuale in un luogo sicuro e accessibile per future consultazioni. Radio.......................................................................................................... 5 CD/USB/iPod/AUX................................................................................... 6 Modalità app............................................................................................ 7 Spotify® ..................................................................................................... 8 Utilizzare Pioneer ARC APP ................................................................... 9 Impostazioni .......................................................................................... 10 Impostazioni FUNCTION ..................................................................... Impostazioni AUDIO ............................................................................ Impostazioni SYSTEM .......................................................................... Impostazioni ILLUMINATION.............................................................. Impostazioni MIXTRAX........................................................................ 10 11 11 12 13 Connessioni/Installazione ................................................................... 13 Informazioni aggiuntive ...................................................................... 16 Informazioni sul manuale: • Nelle seguenti istruzioni, una memoria USB o un lettore audio USB viene denominato “dispositivo USB”. • In questo manuale, iPod e iPhone vengono denominati “iPod”. 2 It Se si vuole eliminare questo prodotto, non gettarlo insieme ai rifiuti domestici. Esiste un sistema di raccolta differenziata in conformità alle leggi che richiedono appositi trattamenti, recupero e riciclo. Gli utenti privati dei Paesi membri dell’Unione Europea, della Svizzera e della Norvegia possono portare i propri prodotti elettronici gratuitamente presso i centri di raccolta specificati o presso il rivenditore al dettaglio (se l’acquisto è stato eseguito presso un rivenditore di questo tipo). Per i Paesi non specificati in precedenza, contattare le autorità locali per informazioni sul corretto metodo di smaltimento. In questo modo si garantirà che il prodotto smaltito subisca i processi di trattamento, recupero e riciclaggio necessari per prevenire i potenziali effetti negativi per l’ambiente e la salute umana. AVVERTENZA • Non cercare di installare o effettuare interventi di manutenzione sul prodotto. L’installazione o l’esecuzione di interventi di manutenzione sul prodotto da parte di persone sprovviste delle qualifiche o dell’esperienza richiesta per apparecchi elettronici e accessori automobilistici potrebbe risultare pericolosa ed esporre a rischi di scosse elettriche e di altre situazioni pericolose. • Non cercare di utilizzare i comandi dell’unità durante la guida. Prima di utilizzare i comandi dell’unità, parcheggiare il veicolo in un luogo sicuro. ATTENZIONE • Non lasciare che l’unità entri in contatto con umidità e/o liquidi. Possono verificarsi scosse elettriche. Inoltre, in seguito al contatto con i liquidi possono verificarsi danni all’unità, fumo e surriscaldamento. • Mantenere sempre il volume basso abbastanza da poter udire i suoni provenienti dall’esterno. • Il CarStereo-Pass Pioneer può essere usato solo in Germania. • Questo prodotto è stato sottoposto a valutazione in condizioni climatiche temperate e tropicali in conformità alla norma IEC 60065: Apparecchi audio, video ed apparecchi elettronici similari - Requisiti di sicurezza. ATTENZIONE Questo apparecchio è un prodotto al laser di Classe 1 secondo le norme di sicurezza dei prodotti al laser IEC 60825-1:2007. In caso di problemi Nel caso che questa unità non funzioni correttamente, contattare il rivenditore o il Centro di assistenza autorizzato PIONEER più vicino. Operazioni preliminari Funzionamento di base Operazioni frequenti Scopo Operazione Accendere l’alimentazione* Premere SRC/OFF per accendere l’alimentazione. Tenere premuto SRC/OFF per spegnere l’alimentazione. Regolare il volume Ruotare la ghiera M.C.. Selezionare una sorgente Premere ripetutamente SRC/OFF. Cambiare la visualizzazione delle informazioni Premere ripetutamente DISP. Tornare alla precedente visualizzazione/ elenco Premere BAND/ Tornare alla visualizzazione normale dal menu Tenere premuto BAND/ . . Porta USB Ghiera M.C. (multi-controllo) Fessura di caricamento del disco (espulsione) Finestra di visualizzazione SRC (sorgente)/OFF Italiano * Quando l’interlinea blu/bianca dell’unità è collegata al terminale di controllo relè dell’antenna automatica del veicolo, l’antenna del veicolo si estende quando la sorgente dell’unità è attivata. Per ritirare l’antenna, disattivare la sorgente. DEH-X2900UI Indicazione del display Indicazione Descrizione Viene visualizzata quando esiste un livello inferiore del menu o della cartella. Viene visualizzato quando si preme il pulsante . Viene visualizzata quando è impostata la funzione di sintonizzazione automatica locale (pagina 10). Viene visualizzata quando viene ricevuto un programma sul traffico. BAND/ DISP (display) Pulsante di sgancio Jack di ingresso AUX (jack stereo da 3,5 mm) Viene visualizzata quando è impostata la funzione TA (annunci sul traffico) (pagina 10). Viene visualizzata quando è impostata la funzione sound retriever (pagina 11). Telecomando opzionale Viene visualizzata quando è impostata la riproduzione casuale/shuffle. Il telecomando CD-R320 viene venduto separatamente. Viene visualizzata quando è impostata la ripetizione della riproduzione. Viene visualizzata quando è impostata la funzione di controllo dell’iPod (pagina 7). It 3 Per tornare alla prima voce del menu di configurazione, ruotare la ghiera M.C. per selezionare [QUIT :NO], quindi premere per confermare. Rimozione del frontalino Staccare il frontalino per evitarne il furto. Rimuovere tutti i cavi e i dispositivi collegati al frontalino e spegnere l’unità prima di staccarla. Stacca Attacca 4 Premere la ghiera M.C. per confermare le impostazioni. NOTE • È possibile annullare l’impostazione del menu premendo SRC/OFF. • Tali impostazioni possono essere effettuate in qualsiasi momento dalle impostazioni SYSTEM (pagina 11) e dalle impostazioni INITIAL (pagina 4). Annullamento della visualizzazione di dimostrazione (DEMO OFF) Importante • Evitare di sottoporre il frontalino a forti urti. • Mantenere il frontalino lontano da luce diretta del sole e alte temperature. • Conservare sempre il frontalino staccato in una custodia protettiva o in borsa. Menu di configurazione Quando, dopo l’installazione, si imposta l’interruttore di accensione su ON, sul display viene visualizzato [SET UP :YES]. 1 2 Premere la ghiera M.C.. Il menu di configurazione scompare dopo 30 secondi di attività. Se si desidera effettuare l’impostazione in seguito, ruotare la ghiera M.C. per selezionare [NO], quindi premere per confermare. Ruotare la ghiera M.C. per selezionare le opzioni, quindi premere per confermare. Per passare all’opzione di menu successiva, confermare la selezione. 1 2 3 4 Premere la ghiera M.C. per visualizzare il menu principale. Ruotare la ghiera M.C. per selezionare [SYSTEM], quindi premere per confermare. Ruotare la ghiera M.C. per selezionare [DEMO OFF], quindi premere per confermare. Ruotare la ghiera M.C. per selezionare [YES], quindi premere per confermare. Impostazioni INITIAL 1 2 3 4 Tenere premuto SRC/OFF finché l’unità si spegne. Tenere premuto SRC/OFF per visualizzare il menu principale. Ruotare la ghiera M.C. per selezionare [INITIAL], quindi premere per confermare. Ruotare la ghiera M.C. per selezionare un’opzione, quindi premere per confermare. Voce del menu Descrizione Voce del menu Descrizione LANGUAGE Selezionare la lingua per visualizzare le informazioni di testo di un file audio compresso. FM STEP Selezionare il passo di frequenza FM tra 100 kHz o 50 kHz. [ENG](Inglese), [РУС](Russo), [TUR](Turco) CLOCK SET Impostare l’orologio. FM STEP Selezionare il passo di frequenza FM tra 100 kHz o 50 kHz. [100], [50] 3 4 It [QUIT :YES] viene visualizzato quando sono state effettuate tutte le impostazioni. [100], [50] Voce del menu Descrizione SP-P/O MODE Selezionare in presenza di un altoparlante full-range collegato alle interlinee di uscita dell’altoparlante posteriore e di un subwoofer collegato a un’uscita RCA. [REAR/SUB.W] Best stations memory (BSM) [SUB.W/SUB.W] Selezionare in presenza di un subwoofer passivo collegato direttamente alle interlinee di uscita dell’altoparlante posteriore e di un subwoofer collegato all’uscita RCA. [REAR/REAR] Selezionare in presenza di altoparlanti full-range collegati alle interlinee di uscita dell’altoparlante posteriore e all’uscita RCA. In presenza di un altoparlante full-range collegato alle interlinee di uscita dell’altoparlante posteriore e l’uscita RCA non viene utilizzata, è possibile selezionare [REAR/SUB.W] o [REAR/REAR]. S/W UPDATE [SYSTEM INFO] Selezionare per confermare le più recenti informazioni di sistema sull’unità. SYSTEM RESET [YES], [NO] Selezionare [YES] per avviare le impostazioni dell’unità. L'unità verrà riavviata automaticamente. (Alcune impostazioni possono essere mantenute anche dopo la reimpostazione dell’unità.) 1 2 3 1 2 3 Ruotare la ghiera M.C. per selezionare [BSM], quindi premere per confermare. per selezionare una stazione. Tenere premuto / , quindi rilasciarlo per cercare una stazione disponibile. La scansione termina quando l’unità riceve una stazione. Per annullare la sintonizzazione, premere / . NOTA [SEEK] deve essere impostato su [MAN] nelle impostazioni FUNCTION (pagina 10). Per memorizzare manualmente le stazioni 1 Durante la ricezione della stazione che si desidera memorizzare, tenere premuto per selezionare la banda [FM1], [FM2], [FM3], [MW] o [LW]. Premere un pulsante numerico (da 1/ a 6/ ). TIP I pulsanti / possono anche essere utilizzati per selezionare una stazione preimpostata quando [SEEK] è impostato su [PCH] nelle impostazioni FUNCTION (pagina 10). a 6/ ) fino a quando non smette di Utilizzo delle funzioni PTY L’unità cerca una stazione per informazione PTY (tipo di programma). 1 2 3 Premere SRC/OFF per selezionare [RADIO]. Premere BAND/ Ruotare la ghiera M.C. per selezionare [FUNCTION], quindi premere per confermare. uno dei pulsanti numerici (da 1/ lampeggiare. Ricezione delle stazioni preimpostate ). Per cercare manualmente una stazione 1 Una volta selezionata la banda, premere / Radio Le frequenze del tuner sull’unità sono distribuite per l’utilizzo in Europa occidentale, Asia, Medio oriente, Africa e Oceania. L’utilizzo in altre aree può provocare una scarsa ricezione. La funzione RDS (radio data system) funziona solo nelle aree di trasmissione dei segnali RDS per le stazioni FM. a 6/ Una volta selezionata la banda, premere la ghiera M.C. per visualizzare il menu principale. Italiano [SYSTEM UPDATE] Selezionare per aggiornare l’unità al software più recente e avviare le impostazioni dell’unità. Per dettagli sul software più recente e sull’aggiornamento, visitare il nostro sito Web. Le sei stazioni più forti vengono memorizzate sui pulsanti numerici (da 1/ Premere durante la ricezione FM. Ruotare la ghiera M.C. per selezionare un tipo di programma da [NEWS/INFO], [POPULAR], [CLASSICS] o [OTHERS]. Premere la ghiera M.C.. L’unità inizia a cercare una stazione. Una volta trovata, viene visualizzato il relativo nome di servizio del programma. NOTE • Per annullare la ricerca, premere la ghiera M.C.. • Il programma di alcune stazioni può differire da quanto indicato dal PTY trasmesso. • Se non viene trasmessa alcuna stazione per il tipo di programma che si sta cercando, viene visualizzato [NOT FOUND] per circa due secondi, quindi il tuner torna alla stazione originale. It 5 NOTA CD/USB/iPod/AUX Se [AUX] è impostato su [OFF] nelle impostazioni SYSTEM, non è possibile selezionare [AUX] come sorgente (pagina 12). Riproduzione Operazioni Scollegare le cuffie dal dispositivo prima di collegarlo all’unità. È possibile effettuare diverse regolazioni nelle impostazioni FUNCTION (pagina 10). Si prega di notare che le seguenti operazioni non funzionano su un dispositivo AUX. Per utilizzare un dispositivo AUX, utilizzare il dispositivo stesso. CD 1 Inserire un disco nella fessura di caricamento con l’etichetta rivolta verso l’alto. Per espellere un disco, per prima cosa interrompere la riproduzione, quindi premere . Dispositivi USB (incluso Android™)/iPod 1 Aprire il coperchio della porta USB. 2 Collegare il dispositivo USB/iPod utilizzando un cavo idoneo. Scopo Operazione Selezionare una cartella/album*1 Premere 1/ o 2/ Selezionare una traccia/brano (capitolo) Premere o Avanzamento o avvolgimento rapido*3 Tenere premuto Cercare un file da un elenco 1 Premere per visualizzare l’elenco. 2 Ruotare la ghiera M.C. per selezionare il nome file desiderato (cartella) o la categoria, quindi premere per confermare. 3 Ruotare la ghiera M.C. per selezionare il file desiderato, quindi premere per confermare. Viene avviata la riproduzione. Visualizzare un elenco di file nella cartella/ categoria selezionata*1 Premere la ghiera M.C. quando viene selezionata una cartella/categoria. NOTA Per passare automaticamente alla sorgente [USB] quando un dispositivo USB/iPod è collegato all’unità, impostare [USB AUTO] su [ON] nelle impostazioni SYSTEM (pagina 12). ATTENZIONE Utilizzare un cavo Pioneer USB opzionale (CD-U50E) per collegare il dispositivo USB in quanto ogni dispositivo collegato direttamente all’unità sporge e può risultare pericoloso. Prima di rimuovere il dispositivo, interrompere la riproduzione. Connessioni AOA Per dettagli sulla connessione AOA, consultare pagina 9. . Ricerca alfabetica (solo iPod) per visualizzare l’elenco. 1 Premere 2 Ruotare la ghiera M.C. per selezionare l’elenco di categoria desiderato, quindi premere per inserire la modalità di ricerca alfabetica. (È possibile inserire la modalità di ricerca alfabetica M.C. anche ruotando la ghiera due volte). 3 Ruotare la ghiera M.C. per selezionare una lettera, quindi premere per visualizzare l’elenco alfabetico. Per annullare la ricerca alfabetica, premere . BAND/ Ripetere la riproduzione Premere 6/ . Riproduzione casuale/shuffle Premere 5/ . Un dispositivo installato con Android OS 4.0 o versioni successive, può essere collegato all’unità via MTP, utilizzando il cavo in dotazione con il dispositivo. Tuttavia, in base al dispositivo connesso e al numero di file nel dispositivo, i brani/file audio potrebbero non essere riprodotti via MTP. Si prega di notare che la connessione MTP non è compatibile con i formati file WAV e non può essere utilizzata con la funzione MIXTRAX. NOTA Se si utilizza una connessione MTP, impostare [ANDROID WIRED] su [MEMORY] nelle impostazioni SYSTEM (pagina 12). 6 It o Riprodurre un brano nella cartella/categoria Tenere premuto la ghiera M.C. quando viene selezionata una cartella/categoria. selezionata*1 Connessione MTP AUX 1 Inserire la spina mini stereo nel jack di ingresso AUX. 2 Premere SRC/OFF per selezionare [AUX] come sorgente. . . Scopo Operazione Riproduzione shuffle di tutti i brani (solo iPod) Tenere premuto 5/ Controllo iPod . Premere 4/PAUSE. Premere 3/S.Rtrv. [1]: efficace per velocità di compressione basse [2]: efficace per velocità di compressione alte Tornare alla cartella principale (solo CD/ USB)*1 Tenere premuto Passare da audio compresso a CD-DA (solo CD) Premere BAND/ . Cambiare le unità nel dispositivo USB (dispositivi che supportano solo il protocollo di classe dispositivo di archiviazione di massa USB) Premere BAND/ . . *1 Solo file audio compressi *2 Questa funzione è disabilitata quando USB è selezionato come sorgente e la funzione MIXTRAX è attiva. *3 Quando si utilizza la funzione di avanzamento o avvolgimento rapido durante la riproduzione di un file VBR, la durata della riproduzione indicata potrebbe non essere corretta. Funzioni utili per iPod Modalità di riproduzione collegamento È possibile accedere ai brani in base ad artista, album o genere attualmente in riproduzione. 1 Mentre si ascolta un brano, tenere premuto per inserire la modalità di riproduzione collegamento. 2 Ruotare la ghiera M.C. per selezionare la modalità ([ARTIST], [ALBUM], [GENRE]), quindi premere per confermare. Il brano/album selezionato verrà riprodotto dopo il brano attualmente in riproduzione. NOTA È possibile annullare il brano/album selezionato se si utilizzano funzioni diverse dalla modalità di ricerca collegamento (ad esempio avanzamento e riavvolgimento rapidi). NOTE • Il passaggio dalla modalità di controllo a [CONTROL iPod] sospende la riproduzione del brano. Utilizzare l’iPod collegato per riprendere la riproduzione. • Le seguenti operazioni continuano a essere accessibili dall’unità anche se la modalità di controllo è impostata su [CONTROL iPod]. – Pausa, avanzamento/riavvolgimento rapido, selezione brano/capitolo • Il volume può essere regolato solo dall’unità. Italiano Sospendere/riprendere la riproduzione Sound retriever*1*2 È possibile controllare l’unità mediante un iPod connesso. I seguenti modelli di iPod non sono compatibili con questa funzione. – iPod nano 1° generazione, iPod con video 1 Premere BAND/ durante la riproduzione, quindi selezionare la modalità di controllo. [CONTROL iPod]: la funzione iPod dell’unità può essere utilizzata dall’iPod collegato. [CONTROL AUDIO]: la funzione iPod dell’unità può essere utilizzata solo mediante i pulsanti dell’unità. In questa modalità, l’iPod collegato non può essere acceso o spento. Informazioni su MIXTRAX (solo USB/iPod) La funzione MIXTRAX crea un mix ininterrotto della vostra libreria musicale, accompagnato da effetti luminosi. Per dettagli sulle impostazioni di MIXTRAX, consultare pagina 13. NOTE • Questa funzione non è compatibile con un dispositivo Android collegato via MTP. • Quando si seleziona USB come sorgente e la funzione MIXTRAX è in uso, la funzione sound retriever è disattivata. • In base al file/brano, gli effetti sonori potrebbero non essere disponibili. • Disattivare la funzione MIXTRAX nel caso in cui gli effetti luminosi interferiscano con la guida. 1 Premere MIX per attivare/disattivare MIXTRAX. Modalità app È possibile ascoltare un’applicazione su un iPhone attraverso l’unità. In alcuni casi, è possibile controllare un’applicazione utilizzando l’unità. Per dettagli sui dispositivi compatibili, visitare il nostro sito Web. It 7 Importante L’utilizzo di applicazioni di terze parti potrebbe comportare o richiedere di fornire informazioni personali di identificazione attraverso la creazione di un account utente o in altro modo e, per alcune applicazioni, attraverso l’invio di dati di geolocalizzazione. TUTTE LE APPLICAZIONI DI TERZE PARTI SONO DI RESPONSABILITÀ ESCLUSIVA DEI RISPETTIVI FORNITORI, INCLUSI MA NON LIMITATAMENTE ALLA GESTIONE E SICUREZZA DEI DATI UTENTE E ALLE PROCEDURE DI TUTELA DELLA PRIVACY. ACCEDENDO AD APPLICAZIONI DI TERZE PARTI, SI ACCETTA DI ESAMINARE I TERMINI DEL SERVIZIO E I CRITERI SULLA PRIVACY DEI FORNITORI. SE NON SI ACCETTANO I TERMINI O I CRITERI DI QUALSIASI FORNITORE O NON SI ACCONSENTE, DOVE SIA APPLICABILE, ALL’USO DEI DATI DI GEOLOCALIZZAZIONE, NON UTILIZZARE TALI APPLICAZIONI DI TERZE PARTI. Per gli utenti iPhone Questa funzione è compatibile con iPhone e iPod touch installati con iOS 5.0 o versioni successive. NOTA PIONEER NON È RESPONSABILE DELLE APP DI TERZE PARTI O DEI RELATIVI CONTENUTI, SENZA ALCUNA LIMITAZIONE ALL’ACCURATEZZA O ALLA COMPLETEZZA. IL CONTENUTO E LA FUNZIONALITÀ DI TALI APPLICAZIONI SONO DI SOLA RESPONSABILITÀ DEL FORNITORE DELLA APP. Riproduzione di un’applicazione attraverso l’unità 1 2 3 Per utilizzare Spotify durante la guida, per prima cosa scaricare la app Spotify sull’iPhone. È possibile effettuare il download da iTunes App Store. Scegliere un account gratuito o Premium a pagamento, all’interno della app o su spotify.com. Un account Premium offre molte più funzioni, come ad esempio l’ascolto offline. Importante • Questo prodotto include il software Spotify soggetto a licenze di terze parti consultabili qui: www.spotify.com/connect/third-party-licenses. • Per informazioni sui Paesi e sulle regioni in cui è possibile utilizzare Spotify, dare un’occhiata a https:// www.spotify.com/us/select-your-country/. Ascoltare Spotify Prima dell’uso, aggiornare il firmware dell’applicazione Spotify alla versione più recente. 1 2 3 Connettere l’unità con un dispositivo mobile. • iPhone via USB (pagina 6) Premere SRC/OFF per selezionare [SPOTIFY]. Avviare l’applicazione Spotify sul dispositivo mobile e avviare la riproduzione. Connettere l’unità con un dispositivo mobile. • iPhone via USB (pagina 6) Operazioni di base Premere SRC/OFF per selezionare [APP]. È possibile effettuare diverse regolazioni nelle impostazioni FUNCTION (pagina 10). Utilizzare il dispositivo mobile per avviare l’applicazione. NOTA Le operazioni disponibili variano in base al tipo di contenuti (brano/album/artista/playlist/radio) che si desidera riprodurre. Operazioni di base È possibile effettuare diverse regolazioni nelle impostazioni FUNCTION (pagina 10). Scopo Operazione Selezionare una traccia Premere Avanzamento o avvolgimento rapido Tenere premuto Sospendere/riprendere la riproduzione Premere BAND/ o Scopo Operazione Saltare una traccia Premere Cercare un brano da un elenco 1 Premere (elenco) per visualizzare l’elenco. 2 Ruotare la ghiera M.C. per selezionare la categoria desiderata, quindi premere per confermare. 3 Ruotare la ghiera M.C. per selezionare il file desiderato, quindi premere per confermare. La riproduzione si avvia. Sospendere/riprendere la riproduzione Premere 4/PAUSE. . o . . Spotify® (DEH-X2900UI è compatibile solo con Spotify installato su iPhone.) Spotify è un servizio di distribuzione musicale in streaming non affiliato con Pioneer. Maggiori informazioni sono disponibili alla pagina http://www.spotify.com. L’applicazione Spotify è disponibile per gli smartphone compatibili. Per informazioni aggiornate sulla compatibilità, visitare la pagina https://support.spotify.com/. 8 It o Pollice in su (solo per la radio) Premere 1/ . Pollice in giù (solo per la radio) Premere 2/ . Riproduzione casuale (solo per brano/ album/artista/playlist) Premere 5/ . . Scopo Operazione Riproduzione ripetuta (solo per brano/ album/artista/playlist) Premere 6/ Avviare un canale radio in base al brano attualmente riprodotto. 1 Tenere premuto (elenco) per avviare una radio. 2 Premere la ghiera M.C.. • Questa funzione potrebbe non essere disponibile in base al brano selezionato. Memorizzare le informazioni sul brano attualmente riprodotto. Rimuovere le informazioni memorizzate. Effettuare una connessione con Pioneer ARC APP . 1 Tenere premuto 3/S.Rtrv. Viene visualizzato [SAVE]/[UNSAVE]. 2 Premere la ghiera M.C.. NOTA Alcune funzioni di Spotify potrebbero non funzionare dall’unità. 1 2 3 4 5 Utilizzare Pioneer ARC APP Premere la ghiera M.C. per visualizzare il menu principale. Ruotare la ghiera M.C. per selezionare [SYSTEM], quindi premere per confermare. Ruotare la ghiera M.C. per selezionare [ANDROID WIRED], quindi premere per confermare. Ruotare la ghiera M.C. per selezionare [APP CONTROL] per un dispositivo Android connesso via USB. Se si seleziona [ON] in [P.APP AUTO ON] (pagina 12), Pioneer ARC APP sul dispositivo Android si avvia automaticamente e tutti i passaggi sono stati completati. NOTA 6 7 Italiano È possibile utilizzare l’unità dall’applicazione Pioneer ARC APP installata su un dispositivo iPhone/Android. In alcuni casi, è possibile controllare aspetti dell’applicazione utilizzando l’unità, quali selezione della sorgente, pausa e così via. Per dettagli sulle operazioni disponibili nell’applicazione, consultare la sezione di supporto dell’applicazione. Connettere l’unità con un dispositivo mobile. • Dispositivo iPhone/Android via USB (pagina 6) Se si seleziona la connessione USB per iPhone, passare al punto 6. Se Pioneer ARC APP non è ancora stato installato sul dispositivo Android, viene visualizzato un messaggio che richiede di installare l’applicazione sul dispositivo Android. Selezionare [OFF] in [P.APP AUTO ON] per annullare il messaggio (pagina 12). Premere SRC/OFF per selezionare qualsiasi sorgente. Avviare Pioneer ARC APP sul dispositivo mobile. NOTA AVVERTENZA Non tentare di utilizzare l’applicazione durante la guida. Assicurarsi di uscire dalla strada e parcheggiare il veicolo in un luogo sicuro prima di tentare di utilizzare i comandi sull’applicazione. Per gli utenti iPhone Questa funzione è compatibile con iPhone (iPhone 5 o successivo) e iPod touch installati con iOS 8.0 o versioni successive. È possibile scaricare Pioneer ARC APP da iTunes App Store. Per gli utenti di dispositivi Android Questa funzione è compatibile con i dispositivi con Android OS 4.1 o versioni successive installate e inoltre supportano AOA (Android Open Accessory) 2.0. È possibile scaricare Pioneer ARC APP su Google Play™. NOTA Alcuni dispositivi Android collegati via AOA 2.0 potrebbero non funzionare correttamente o emettere suoni a causa del proprio software, indipendentemente dalla versione del sistema operativo. Per l’iPhone, è anche possibile avviare l’applicazione tenendo premuta la ghiera M.C.. Ascoltare musica su Android 1 Premere SRC/OFF per selezionare [ANDROID]. Operazioni di base Scopo Operazione Selezionare una traccia Premere Avanzamento o avvolgimento rapido Tenere premuto Sospendere/riprendere la riproduzione Premere 4/PAUSE. o . o . It 9 Scopo Operazione Voce del menu Sound retriever Premere 3/S.Rtrv. [1]: efficace per velocità di compressione basse [2]: efficace per velocità di compressione alte REGIONAL [ON], [OFF] Descrizione Limitare la ricezione ai programmi regionali specifici quando è selezionato AF (ricerca frequenze alternative). (Disponibile solo con banda FM selezionata.) LOCAL FM: [OFF], [LV1], [LV2], [LV3], [LV4] Limitare la stazione di sintonizzazione in base alla potenza del segnale. MW/LW: [OFF], [LV1], [LV2] Impostazioni È possibile regolare diverse impostazioni nel menu principale. 1 2 3 [ON], [OFF] Ricevere le informazioni correnti sul traffico, se disponibili. (Disponibile solo con banda FM selezionata.) [ON], [OFF] Consentire all’unità di risintonizzarsi su una frequenza differente fornendo la medesima stazione. (Disponibile solo con banda FM selezionata.) Premere la ghiera M.C. per visualizzare il menu principale. Ruotare la ghiera M.C. per selezionare una delle seguenti categorie, quindi premere per confermare. • Impostazioni FUNCTION (pagina 10) • Impostazioni AUDIO (pagina 11) • Impostazioni SYSTEM (pagina 11) • Impostazioni ILLUMINATION (pagina 12) • Impostazioni MIXTRAX (pagina 13) Ruotare la ghiera M.C. per selezionare le opzioni, quindi premere per confermare. Impostazioni FUNCTION Le voci del menu variano a seconda della sorgente. Voce del menu [TALK], [STANDARD], [MUSIC] AF NEWS [ON], [OFF] Corrispondenza del livello della qualità audio con le condizioni del segnale di trasmissione del segnale di banda FM. (Disponibile solo con banda FM selezionata.) Interrompere la sorgente attualmente selezionata con nuovi programmi. (Disponibile solo con banda FM selezionata.) SEEK [MAN], [PCH] Descrizione FM SETTING Assegnare i pulsanti o per cercare le stazioni una a una (sintonizzazione manuale) o selezionare una stazione dai canali preimpostati. SAVE Memorizzare le informazioni sul brano attualmente riprodotto nell’elenco musicale in Spotify. UNSAVE BSM Memorizzare automaticamente le sei stazioni più a 6/ ). forti sui pulsanti numerici (da 1/ 10 It TA Rimuovere le informazioni memorizzate in [SAVE]. Voce del menu Descrizione S.RTRV USB [1] (efficace per velocità di compressione basse), [2] (efficace per velocità di compressione alte), [OFF] AUDIO BOOK Voce del menu Potenziare l’audio compresso e ripristinare il suono completo. Non disponibile quando: • USB è selezionato come sorgente e la funzione MIXTRAX è impostata su On. • Viene riprodotto CD-DA/CD-TEXT. [OFF], [LOW], [MID], [HI] Compensare il suono chiaro a basso volume. SUB.W*2 [NOR], [REV], [OFF] Selezionare la fase del subwoofer. SUB.W CTRL*2*3 Frequenza di cutoff: [50HZ], [63HZ], [80HZ], [100HZ], [125HZ], [160HZ], [200HZ] Livello di output: da [–24] a [+6] Livello di pendenza: [–12], [–24] iPod [FASTER], [NORMAL], [SLOWER] Descrizione LOUDNESS iPod Modificare la velocità di riproduzione. (Non disponibile quando [CONTROL iPod] è selezionato nella modalità di controllo.) Il subwoofer emette solo le frequenze inferiori a quelle presenti nell’intervallo selezionato. BASS BOOST PAUSE Da [0] a [+6] Sospendere o riprendere la riproduzione. Selezionare il livello di incremento dei bassi. HPF SETTING Voce del menu Descrizione FADER*1 Frequenza di cutoff: [OFF], [50HZ], [63HZ], [80HZ], [100HZ], [125HZ], [160HZ], [200HZ] Livello di pendenza: [–12], [–24] Dagli altoparlanti vengono emesse solo le frequenze superiori al cutoff del filtro passa alto (HPF). Da [+4] a [–4] Regolare il volume del livello per ogni sorgente, fatta eccezione per FM. Ognuna delle seguenti combinazioni viene impostata automaticamente sulla stessa impostazione. • USB, iPod, ANDROID, SPOTIFY e APP (iPhone) Italiano Impostazioni AUDIO SLA Regolare il bilanciamento dell’altoparlante anteriore e posteriore. BALANCE Regolare il bilanciamento dell’altoparlante destro e sinistro. EQ SETTING Selezionare o personalizzare la curva di [SUPER BASS], [POWERFUL], [NATURAL], [VOCAL], [CUSTOM1], equalizzazione. [CUSTOM2], [FLAT] [CUSTOM1] può essere importato separatamente per ogni sorgente. Tuttavia, ognuna delle seguenti combinazioni viene Selezionare una banda impostata automaticamente sulla stessa equalizzatore e il livello per un’ulteriore personalizzazione. impostazione. Banda equalizzatore: [80HZ], • USB, iPod, ANDROID, SPOTIFY e APP (iPhone) [250HZ], [800HZ], [2.5KHZ], [CUSTOM2] è un’impostazione condivisa [8KHZ] utilizzata per tutte le origini. Livello equalizzatore: da [+6] a [–6] *1 Non disponibile quando [SUB.W/SUB.W] è selezionato in [SP-P/O MODE] nelle impostazioni INITIAL (pagina 5). *2 Non disponibile quando [REAR/REAR] è selezionato in [SP-P/O MODE] nelle impostazioni INITIAL (pagina 5). *3 Non disponibile quando [OFF] è selezionato in [SUB.W]. Impostazioni SYSTEM È anche possibile accedere a questi menu quando l’unità è spenta. Voce del menu Descrizione LANGUAGE [ENG](Inglese), [РУС](Russo), [TUR](Turco) Selezionare la lingua per visualizzare le informazioni di testo di un file audio compresso. It 11 Voce del menu Descrizione Impostazioni ILLUMINATION Impostare l’orologio (pagina 4). Voce del menu CLOCK SET [12H], [24H] Selezionare la notazione temporale. AUTO PI [ON], [OFF] Cercare una stazione differente con la medesima programmazione, anche se si utilizza una stazione preimpostata. [ON], [OFF] Impostare su [ON] quando si utilizza un dispositivo ausiliario connesso all’unità. [KEY COLOUR], [DISP COLOUR], [BOTH COLOUR] AUX SPOTIFY [ON], [OFF] Impostare su [ON] quando si utilizza la funzione Spotify. PW SAVE* [ON], [OFF] Ridurre il consumo della batteria. L’attivazione della sorgente è consentita solo se questa funzione è attiva. Selezionare il metodo di connessione idoneo in base al dispositivo Android. P.APP AUTO ON [ON], [OFF] Selezionare [ON] per avviare automaticamente Pioneer ARC APP quando all’unità è collegato un dispositivo Android mediante AOA. (Non disponibile quando [MEMORY] è selezionato in [ANDROID WIRED].) DIM SETTING [SYNC ILLUMI], [SYNC CLOCK], [MANUAL] Selezionare [ON] per passare automaticamente alla sorgente [USB] quando un dispositivo USB/ iPod è collegato all’unità. Selezionare [OFF] quando un dispositivo USB/ iPod è stato collegato all’unità solo per essere caricato. * [PW SAVE] è annullato se la batteria del veicolo è scollegata e dovrà essere riattivato una volta ricollegata la batteria. Quando [PW SAVE] è disattivato, in base ai metodi di connessione, l’unità può continuare a ricavare energia dalla batteria se l’interruttore di accensione del veicolo non dispone di una posizione ACC (accessorio). 12 It Cambiare la luminosità del display. BRIGHTNESS [KEY], [DISP] USB AUTO [ON], [OFF] Selezionare il colore per i tasti/display dell’unità tra i 12 colori preimpostati, [SCAN] o [CUSTOM]*. • [SCAN]: consente di percorrere automaticamente una vasta gamma di colori. • [CUSTOM]*: 1 Tenere premuta la ghiera M.C. finché non viene visualizzata l’impostazione del colore. 2 Impostare il colore primario (R (rosso)/G (verde)/B (blu)) e il livello di luminosità (da [0] a [60]). Non è possibile selezionare un livello inferiore a 10 per tutti e tre R (rosso), G (verde), B (blu) contemporaneamente. È inoltre possibile personalizzare i colori preimpostati. Selezionare uno dei colori preimpostati, quindi tenere premuta la ghiera M.C. finché non viene visualizzato il display di impostazione del colore. * L’impostazione CUSTOM è disponibile solo per [KEY COLOUR] e [DISP COLOUR]. ANDROID WIRED [MEMORY], [APP CONTROL] Descrizione COLOUR 12H/24H Selezionare la luminosità per i tasti/display dell’unità da [1] a [10]. La gamma di impostazioni disponibili varia in base a [DIM SETTING]. ILLUMI FX [ON], [OFF] È possibile visualizzare l’effetto di illuminazione quando viene inserito/espulso un CD. L’effetto di illuminazione si attiva quando l’alimentazione ACC viene accesa/spenta, indipendentemente dall’impostazione. Impostazioni MIXTRAX Voce del menu Descrizione SHORT PLAYBCK [1.0 MIN], [1.5 MIN], [2.0 MIN], [2.5 MIN], [3.0 MIN], [OFF] Selezionare la lunghezza del tempo di riproduzione. FLASH AREA [KEY/DISPLAY], [KEY], [OFF] Selezionare l’area per l’effetto luminoso. Quando è selezionato [OFF], il colore impostato nelle impostazioni ILLUMINATION (pagina 12) viene utilizzato come colore del display. Connessioni/Installazione Connessioni Importante • Durante l’installazione dell’unità su un veicolo privo di posizione ACC (accessorio) sull’interruttore di accensione, il mancato collegamento del cavo rosso al terminale che rileva il funzionamento del tasto di accensione può provocare il consumo della batteria. FLASH PATTERN Da [SOUND LEVEL 1] a [SOUND LEVEL 6] Da [LOW PASS 1] a [LOW PASS 6] L’effetto lampeggiante cambia in base al livello dei bassi. [RANDOM1] L’effetto lampeggiante cambia casualmente in base alla modalità di livello audio e alla modalità di passa basso. [RANDOM2] L’effetto lampeggiante cambia casualmente in base alla modalità del livello audio. [RANDOM3] L’effetto lampeggiante cambia casualmente in base alla modalità di passa basso. DISPLAY FX [ON], [OFF] Impostare gli effetti speciali MIXTRAX su on/ off. CUT IN FX [ON], [OFF] Attivare/disattivare gli effetti audio MIXTRAX mentre si cambiano manualmente le tracce. Posizione ACC Senza posizione ACC • Se questa unità venisse, utilizzata in condizioni diverse dalle seguenti, potrebbero verificarsi incendi o malfunzionamenti. – Veicoli con batteria da 12 volt e messa a terra negativa. – Quando l’uscita dell’altoparlante viene utilizzata da 4 canali, usare altoparlanti oltre 50 W (potenza in entrata massima) e tra 4 Ω e 8 Ω (valore di impedenza). Per questa unità, non utilizzare altoparlanti con valore di impedenza compreso tra 1 Ω e 3 Ω. – Quando l’uscita dell’altoparlante posteriore viene utilizzata da un subwoofer da 2 Ω, usare altoparlanti oltre 70 W (potenza in entrata massima). * Fare riferimento alle connessioni per un metodo di connessione. • Per evitare cortocircuiti, surriscaldamento e malfunzionamenti, assicurarsi di attenersi alla seguente procedura. – Scollegare il terminale negativo della batteria prima dell’installazione. – Fissare il cablaggio con fascette o nastro adesivo. Avvolgere nastro adesivo It Italiano Cambiare l’effetto luminoso in base al livello audio e dei bassi. L’effetto lampeggiante cambia in base al livello audio. intorno cablaggio che entra in contatto con le parti metalliche per proteggere i cavi. – Posizionare tutti i cavi lontano dalle parti in movimento, come ad esempio la leva del cambio e le guide dei sedili. – Posizionare tutti i cavi lontano da luoghi caldi, come ad esempio vicino alle bocchette del riscaldamento. – Non collegare il cavo giallo alla batteria facendolo passare attraverso il foro del vano motore. – Coprire tutti i connettori per cavi scollegati con nastro isolante. – Non accorciare i cavi. – Non tagliare mai l’isolamento del cavo di alimentazione dell’unità al fine di condividere la potenza con altri dispositivi. La capacità corrente del cavo è limitata. – Utilizzare un fusibile dal valore prescritto. – Non collegare il cavo negativo dell’altoparlante direttamente alla messa a terra. – Non unire mai i cavi negativi di diversi altoparlanti. • Quando l’unità è accesa, i segnali di controllo vengono inviati attraverso il cavo blu/bianco. Collegare il cavo al telecomando di sistema di un amplificatore di potenza esterno o al terminale di controllo relè dell’antenna automatica del veicolo (max. 300 mA 12 V CC). Se il veicolo è dotato di un’antenna da vetro, collegarla al terminale di alimentazione del booster. • Non collegare il cavo blu/bianco al terminale di alimentazione di un amplificatore di potenza esterno. Inoltre, non collegarlo al terminale di alimentazione dell’antenna automatica. Questa operazione può provocare 13 l’esaurimento della batteria o un malfunzionamento. • Il cavo nero è la messa a terra. I cavi di messa a terra per l’unità e per altre apparecchiature (in particolare prodotti ad alta corrente, come ad esempio amplificatori di potenza) devono essere collegati separatamente. In caso contrario, un distacco accidentale può provocare incendi o malfunzionamenti. situato sul • Il simbolo grafico prodotto significa corrente continua. Cavo di alimentazione L’unità Ingresso cavo di alimentazione AUX IN posteriore | [Tel In] (jack stereo da 3,5 mm) Ingresso posteriore dedicato compatibile solo con i kit telefonici Bluetooth hands-free esterni. Il segnale audio viene disattivato durante una telefonata quando il filo giallo/nero è collegato/attivato. Uscita posteriore o uscita subwoofer Uscita anteriore Ingresso antenna Fusibile (10 A) Ingresso remoto cablato È possibile collegare un adattatore per il telecomando cablato (venduto separatamente). 14 It All’ingresso del cavo di alimentazione In base al veicolo, la funzione di e può variare. In questo caso, assicurarsi a e a . di collegare Giallo Backup (o accessorio) Giallo Effettuare la connessione a un terminale di alimentazione costante pari a 12 V. Rosso Accessorio (o backup) Rosso Effettuare la connessione a un terminale controllato dall’interruttore di accensione (12 V CC). Collegare tra loro le interlinee del medesimo colore. Nero (messa a terra telaio) Blu/bianco La posizione del pin del connettore ISO varia in base al tipo di veicolo. Collegare e quando il Pin 5 è di tipo controllo antenna. In un altro tipo di e . veicolo, non collegare mai Blu/bianco Effettuare il collegamento al terminale di controllo del sistema dell’amplificatore di potenza (max. 300 mA 12 V CC). Blu/bianco Effettuare il collegamento al terminale di controllo relè dell’antenna automatica (max. 300 mA 12 V CC). Interlinee altoparlante Bianco: anteriore sinistra Bianco/nero: anteriore sinistra Grigio: anteriore destra Grigio/nero: anteriore destra Verde: posteriore sinistra o subwoofer Verde/nero: posteriore sinistra o subwoofer Viola: posteriore destra o subwoofer Viola/nero: posteriore destra o subwoofer Arancione/bianco Effettuare il collegamento al segnale di illuminazione del veicolo. Connettore ISO In alcuni veicoli, il connettore ISO può essere diviso in due. In questo caso, assicurarsi di collegare entrambi i connettori. NOTE • Cambiare il menu iniziale dell’unità. Fare riferimento a [SP-P/O MODE] (pagina 5). L’uscita subwoofer dell’unità è monofonica. • Quando si utilizza un subwoofer da 2 Ω, assicurarsi di collegare il subwoofer alle interlinee viola e viola/nero dell’unità. Non collegare nulla alle interlinee verde e verde/nero. Amplificatore di potenza (venduto separatamente) Eseguire questi collegamenti quando si utilizza un amplificatore opzionale. Telecomando di sistema Effettuare la connessione al cavo blu/ bianco. Amplificatore di potenza (venduto separatamente) Effettuare la connessione con cavi RCA (venduti separatamente) All’uscita anteriore Altoparlante anteriore All’uscita posteriore o all’uscita subwoofer Altoparlante posteriore o subwoofer Installazione Importante • Verificare tutti i collegamenti e i sistemi prima dell’installazione finale. • Non utilizzare parti non autorizzate, in quanto possono provocare malfunzionamenti. • Se l’installazione richiede la foratura o altre modifiche del veicolo, consultare il rivenditore. • Non installare l’unità se: – può interferire con il funzionamento dei veicolo. – può causare lesioni ai passeggeri in caso di arresto improvviso. • In caso di surriscaldamento, il laser semiconduttore può subire danni. Installare l’unità lontano da luoghi caldi, come ad esempio vicino alle bocchette del riscaldamento. • È possibile ottenere prestazioni ottimali quando l’unità viene installata con un’angolazione inferiore ai 60°. • Durante l’installazione, per garantire la corretta dispersione del calore quando si utilizza l’unità, accertarsi di lasciare ampio spazio dietro il pannello posteriore e avvolgere i cavi allentati in modo che non blocchino le aperture. Lasciare ampio spazio Quando non si utilizza il riduttore di montaggio in dotazione 1 Determinare la posizione corretta in cui i fori della forcella e il lato dell’unità corrispondono. 2 Serrare le due viti su ogni lato. 5 cm Installazione a montaggio DIN 1 Inserire il riduttore di montaggio in 2 dotazione nel cruscotto. Fissare il riduttore di montaggio utilizzando un cacciavite per piegare le linguette metalliche (90°) in posizione. Italiano Vite filettata (5 mm × 9 mm, non in dotazione con il prodotto) Forcella montante Cruscotto o console 5 cm Rimozione dell’unità (installata con il riduttore di montaggio in dotazione) 1 Cruscotto Riduttore di montaggio • Assicurarsi che l’unità sia installata saldamente in posizione. Un’installazione instabile può provocare salti o malfunzionamenti. 2 3 Rimuovere l’anello di rivestimento. Anello di rivestimento Linguetta a tacche • Il rilascio del pannello anteriore consente un più facile accesso all’anello di rivestimento. • Quando l’anello di rivestimento viene nuovamente collegato, puntare il lato con la linguetta a tacche rivolta verso il basso. Inserire le chiavi di estrazione in dotazione in entrambi i lati dell’unità finché non scattano in posizione. Estrarre l’unità dal cruscotto. It 15 Informazioni aggiuntive Risoluzione dei problemi Il display torna automaticamente alla visualizzazione normale. → Non è stata effettuata alcuna operazione per circa 30 secondi. – Eseguire un’operazione. Il range della riproduzione ripetuta cambia in maniera inattesa. → In base al range di riproduzione ripetuta, il range selezionato può cambiare quando viene selezionata un’altra cartella o traccia o durante l’avanzamento/riavvolgimento rapido. – Selezionare nuovamente il range di riproduzione ripetuta. Una cartella secondaria non viene riprodotta. → Non è possibile riprodurre le cartelle secondarie quando è selezionato [FLD] (ripetizione cartella). – Selezionare un altro range di riproduzione ripetuta. Il suono è intermittente. → Si sta utilizzando un dispositivo, come ad esempio un cellulare, che può provocare interferenze audio. – Allontanare dall’unità i dispositivi elettronici che possono causare interferenze. Messaggi di errore Comuni AMP ERROR → Unità non funzionante o collegamento altoparlante errato. → Il circuito protettivo è attivato. 16 It – Verificare il collegamento degli altoparlanti. – Posizionare l’interruttore di accensione su OFF e nuovamente su ON. Se il messaggio rimane, contattare il rivenditore o una Stazione di servizio Pioneer per ottenere assistenza. NO XXXX (NO TITLE, a esempio) → Non sono presenti informazioni di testo incorporate. – Accendere il display o riprodurre un altro file o traccia. Lettore CD ERROR-07, 11, 12, 17, 30 → Il disco è sporco. – Pulire il disco. → Il disco è graffiato. – Sostituire il disco. ERROR-07, 10, 11, 12, 15, 17, 30, A0 → Si è verificato un errore elettrico e meccanico. – Posizionare l’interruttore di accensione su OFF e nuovamente su ON, oppure passare a una sorgente differente, quindi tornare la lettore CD. ERROR-15 → Il disco inserito è vuoto. – Sostituire il disco. ERROR-23 → Formato CD non supportato. – Sostituire il disco. FORMAT READ → Può verificarsi un ritardo tra l’inizio della riproduzione e il momento in cui si inizia a udire il suono. – Attendere che il messaggio scompaia e ascoltare l’audio. NO AUDIO → Il disco inserito non contiene file riproducibili. – Sostituire il disco. SKIPPED → Il dico inserito contiene file protetti da DRM. – I file protetti vengono ignorati. PROTECT → Tutti i file del disco inserito hanno il DRM incorporato. – Sostituire il disco. Dispositivo USB/iPod FORMAT READ → Può verificarsi un ritardo tra l’inizio della riproduzione e il momento in cui si inizia a udire il suono. – Attendere che il messaggio scompaia e ascoltare l’audio. NO AUDIO → Non sono presenti brani. – Trasferire i file audio al dispositivo USB ed effettuare la connessione. → Il dispositivo USB connesso ha la sicurezza abilitata. – Attenersi alle istruzioni del dispositivo USB per disattivare la sicurezza. SKIPPED → Il dispositivo USB connesso contiene file protetti da DRM. – I file protetti vengono ignorati. PROTECT → Tutti i file sul dispositivo USB connesso hanno il DRM incorporato. – Sostituire il dispositivo USB. N/A USB → Il dispositivo USB connesso non è supportato dall’unità. – Scollegare il dispositivo e sostituirlo con un dispositivo USB compatibile. HUB ERROR → Il dispositivo USB connesso mediante un hub USB non è supportato dall’unità. – Collegare il dispositivo USB direttamente all’unità utilizzando un cavo USB. CHECK USB → Il connettore USB o il cavo USB ha subito un corto circuito. – Verificare che il connettore USB o il cavo USB non siano impigliati in qualcosa o danneggiati. → Il dispositivo USB collegato consuma più della quantità di energia massima consentita. – Scollegare il dispositivo USB e non utilizzarlo. Posizionare l’interruttore di accensione su OFF e nuovamente su ACC o ON. Collegare solo dispositivi USB conformi. → L’iPod funziona correttamente ma non è in carica. – Assicurarsi che il cavo di collegamento dell’iPod non sia accorciato (ad esempio, non sia impigliato in oggetti metallici). Una volta verificato, posizionare l’interruttore di accensione su OFF e nuovamente su ON, oppure scollegare e ricollegare l’iPod. ERROR-19 → Comunicazione non riuscita. – Effettuare una delle seguenti operazioni, quindi tornare alla sorgente USB. • Posizionare l’interruttore di accensione su OFF e nuovamente su ON. • Scollegare il dispositivo USB. • Passare a una sorgente diversa. → Errore iPod. – Scollegare il cavo dall’iPod. Una volta visualizzato il menu principale dell’iPod, ricollegare e reimpostare l’iPod. ERROR-23 → Il dispositivo USB non è formattato correttamente. – Formattare il dispositivo USB con FAT12, FAT16 o FAT32. ERROR-16 → La versione firmware dell’iPod è obsoleta. – Aggiornare la versione iPod. → Errore iPod. – Scollegare il cavo dall’iPod. Una volta visualizzato il menu principale dell’iPod, ricollegare e reimpostare l’iPod. NOT FOUND → Nessun brano correlato. – Trasferire i brani all’iPod. App START UP APP → L’applicazione non è ancora in esecuzione. – Utilizzare il dispositivo mobile per avviare l’applicazione. Spotify CHECK APP → Connessione all’applicazione Spotify non riuscita. – Attenersi alle istruzioni visualizzate sullo schermo. Dischi e lettori • Utilizzare solo dischi che riportano uno dei due loghi riportati di seguito. – I dischi possono deformarsi rendendo il disco non riproducibile. – Le etichette possono staccarsi durante la riproduzione e impedire l’espulsione dei dischi, provocando danni all’apparecchiatura. Dispositivo di archiviazione USB • Utilizzare dischi da 12 cm. • Utilizzare solo dischi circolari convenzionali. • Con questa unità non è possibile utilizzare i seguenti tipi di disco: – DualDiscs – Dischi da 8 cm: il tentativo di utilizzare tali dischi con un adattatore può provocare il malfunzionamento dell’unità. – Dischi dalla forma non convenzionale – Dischi diversi da CD – Dischi danneggiati, inclusi dischi rotti, scheggiati o deformati – Dischi CD-R/RW non finalizzati • Non scrivere o non applicare prodotti chimici sulla superficie dei dischi. • Per pulire un CD, utilizzare un panno morbido dal centro verso l’esterno. • La condensa può compromettere temporaneamente le prestazioni del lettore. Lasciare riposare per circa un’ora a una temperatura più calda. Inoltre, pulire tutti i dischi umidi con un panno morbido. • Quando si utilizzano dischi che possono essere stampati su superfici adesive, controllare le istruzioni e le avvertenze dei dischi. In base al disco, l’inserimento e l’espulsione potrebbe non essere possibile. L’utilizzo di simili dischi può danneggiare l’apparecchiatura. • Non attaccare sul disco etichette disponibili in commercio o altri materiali. • Le connessioni via hub USB non sono supportate. • Fissare saldamente il dispositivo di archiviazione USB prima di guidare. Non lasciar cadere il dispositivo di archiviazione USB sul pavimento, in quanto potrebbe incastrarsi sotto il pedale del freno o dell’acceleratore. • In base al dispositivo di archiviazione USB, potrebbero verificarsi i seguenti problemi. – Le operazioni possono variare. – Il dispositivo di archiviazione potrebbe non essere riconosciuto. – I file potrebbero non essere riprodotti correttamente. – Il dispositivo può causare interferenze audio durante l’ascolto della radio. iPod • Non lasciare l’iPod in luoghi con temperature elevate. • Fissare saldamente l’iPod durante la guida. Non lasciar cadere l’iPod sul pavimento, in quanto potrebbe incastrarsi sotto il pedale del freno o dell’acceleratore. • Le impostazioni dell’iPod, come ad esempio equalizzatore e ripetizione della riproduzione, cambiano automaticamente quando l’iPod è collegato all’unità. Una volta scollegato l’iPod, tali impostazioni tornano alle impostazioni originali. • Il testo incompatibile salvato sull’iPod non verrà visualizzato dall’unità. Compatibilità audio compresso • Per il nome cartella o per il nome file, è possibile visualizzare solo i primi 32 caratteri (inclusa l’estensione del file). • L’unità potrebbe non funzionare correttamente in base all’applicazione utilizzata per decodificare i file WMA. • Potrebbe verificarsi un leggero ritardo all’avvio della riproduzione dei file audio incorporati con i dati immagine o dei file audio memorizzati su un dispositivo USB con numerose gerarchie di cartelle. • Il testo con caratteri russi da visualizzare sull’unità deve essere codificato con uno dei seguenti gruppi di caratteri: – Unicode (UTF-8, UTF-16) – Un gruppo di caratteri diverso da Unicode utilizzato in un ambiente Windows e impostato su Russo nell’impostazione multilingue Italiano STOP → Nell’elenco corrente non sono presenti brani. – Selezionare un elenco che contenga dei brani. Linee guida di gestione ATTENZIONE • Pioneer non può garantire la compatibilità con tutti i dispositivi di archiviazione di massa USB e non si assume alcuna responsabilità per eventuali perdite di dati su lettori multimediali, smartphone o altri dispositivi durante l’utilizzo del prodotto. • Non lasciare i dischi o un dispositivo di archiviazione USB in luoghi soggetti a temperature elevate. File WMA Estensione file Velocità di trasmissione Frequenza di campionamento .wma Da 48 kbps a 320 kbps (CBR), da 48 kbps a 384 kbps (VBR) 32 kHz, 44,1 kHz, 48 kHz It 17 Windows Media™ Audio Professional, Compressione dati senza perdita, Voce/ Streaming DRM/ Streaming con video Non compatibile File MP3 Estensione file Velocità di trasmissione Frequenza di campionamento Versione tag ID3 compatibile Playlist M3u MP3i (MP3 interattivo), mp3 PRO 18 It Non compatibile • Potrebbe verificarsi un leggero ritardo all’avvio della riproduzione dei file audio su un dispositivo di archiviazione USB con numerose gerarchie di cartelle. Non compatibile .wav 8 e 16 (LPCM), 4 (MSADPCM) Da 16 kHz a 48 kHz (LPCM), 22,05 kHz e 44,1 kHz (MS ADPCM) • Indipendentemente dalla lunghezza della sezione vuota tra i brani della registrazione originale, i dischi con audio compresso vengono riprodotti con una breve pausa tra i brani. Cartelle riproducibili Compatibile Dispositivo USB Disco Gerarchia cartella riproducibile Riproduzione a sessione multipla Trasferimento dati scrittura a pacchetti Da 8 kbps a 320 kbps (CBR), VBR Da 8 kHz a 48 kHz (32 kHz, 44,1 kHz, 48 kHz per enfasi) 1.0, 1.1, 2.2, 2.3, 2.4 (la versione tag ID3 2.x ha la priorità sulla versione 1.x.) Non compatibile • I formati file WAV non possono essere collegati via MTP. Frequenza di campionamento Fino a 999 ISO 9660 livello 1 e 2, Romeo, Joliet .mp3 File WAV Estensione file Bit di quantizzazione File riproducibili File system Fino a otto livelli (una gerarchia pratica presenta meno di due livelli). Fino a 99 Gerarchia cartella riproducibile Cartelle riproducibili File riproducibili Riproduzione di file protetti da copyright Dispositivo USB partizionato Fino a otto livelli (una gerarchia pratica presenta meno di due livelli). Fino a 500 Fino a 15 000 Non compatibile È possibile riprodurre solo la prima partizione. Compatibilità iPod L’unità supporta solo i seguenti modelli di iPod. Di seguito vengono indicate le versioni supportate del software iPod. Le versioni precedenti potrebbero non essere supportate. Realizzato per – iPod touch (dalla 1° alla 6° generazione) – iPod classic – iPod con video – iPod nano (dalla 1° alla 7° generazione) – iPhone 6s – iPhone 6s Plus – iPhone 6 – iPhone 6 Plus – iPhone 5s – iPhone 5c – iPhone 5 – iPhone 4s – iPhone 4 – iPhone 3GS – iPhone 3G – iPhone • Le operazioni possono variare in base alla generazione e/o alla versione del software dell’iPod. • Gli utenti dell’iPod con Lightning Connector devono utilizzare il cavo da Lightning a USB (in dotazione con iPod). • Gli utenti dell’iPod con Dock Connector devono utilizzare CD-IU51. Per dettagli, consultare il rivenditore. • Fare riferimento ai manuali dell’iPod per ottenere informazioni sulla compatibilità di file/formato. • Audiolibri, Podcast: compatibile ATTENZIONE Pioneer declina ogni responsabilità per la perdita di dati sull’iPod, anche se i dati vengono persi durante l’utilizzo dell’unità. Esempio di gerarchia Cartella File audio compresso Da 01 a 05: numero cartella a : sequenza di riproduzione Grafico caratteri russi Sequenza di file audio Con questa unità, l’utente non può assegnare numeri di cartella e specificare le sequenze di riproduzione. La sequenza di file audio dipende dal dispositivo collegato. Notare che i file nascosti in un dispositivo USB non possono essere riprodotti. D: visualizzazione C: carattere Copyright e marchio iTunes Apple ed iTunes sono marchi di fabbrica di Apple Inc., registrati negli Stati Uniti ed in altri Paesi. WMA Windows Media è un marchio di fabbrica o marchio di fabbrica depositato della Microsoft Corporation negli Stati Uniti ed in altri paesi. Questo prodotto include tecnologie di proprietà della Microsoft Corporation e non è utilizzabile senza licenza della Microsoft Licensing, Inc. Android & Google Play Android, Google Play e il logo Google Play sono marchi di Google Inc. MIXTRAX MIXTRAX è un marchio registrato di PIONEER CORPORATION. Spotify® SPOTIFY e il logo Spotify sono marchi registrati di Spotify AB. Sono necessari dispositivi digitali mobili compatibili e Specifiche Generali Alimentazione: 14,4 V CC (da 10,8 V a 15,1 V consentiti) Sistema di messa a terra: tipo negativo Consumo di corrente massimo: 10,0 A Dimensioni (L × A × P): DIN Telaio: 178 mm × 50 mm × 165 mm Testata: 188 mm × 58 mm × 17 mm D Telaio: 178 mm × 50 mm × 165 mm Testata: 170 mm × 46 mm × 17 mm Peso: 1 kg Audio Potenza massima: • 50 W × 4 canali/4 Ω (senza subwoofer) • 50 W × 2 canali/4 Ω + 70 W × 1 canale/2 Ω (per il subwoofer) Potenza continua: 22 W × 4 (da 50 Hz a 15 000 Hz, 5 % THD, 4 Ω di carico, entrambi i canali pilotati) Impedenza di carico: 4 Ω (da 4 Ω a 8 Ω consentiti) Livello di output massimo tensione preout: 2,0 V Profilo loudness: +10 dB (100 Hz), +6,5 dB (10 kHz) (volume: –30 dB) Equalizzatore (equalizzatore grafico a 5 bande): Frequenza: 80 Hz/250 Hz/800 Hz/ 2,5 kHz/8 kHz Campo di equalizzazione: ±12 dB (passo 2 dB) Subwoofer (mono): Frequenza: 50 Hz/63 Hz/80 Hz/ 100 Hz/125 Hz/160 Hz/200 Hz Pendenza: –12 dB/oct, –24 dB/oct Guadagno: da +6 dB a –24 dB Fase: normale/inversa Rapporto segnale-rumore: 62 dB (rete IEC-A) Lettore CD Tuner LW Sistema: sistema audio compact disc Dischi utilizzabili: compact disc Rapporto segnale-rumore: 94 dB (1 kHz) (rete IEC-A) Numero di canali: 2 (stereo) Formato di decodifica MP3: MPEG-1 e 2 Audio Layer 3 Formato di decodifica WMA: ver. 7, 7.1, 8, 9, 10, 11, 12 (audio a 2 canali) (Windows Media Player) Formato segnale WAV: Linear PCM & MS ADPCM (non compresso) Intervallo di frequenza: da 153 kHz a 281 kHz Sensibilità utilizzabile: 28 μV (S/N: 20 dB) Rapporto segnale-rumore: 62 dB (rete IEC-A) NOTA Caratteristiche tecniche e design sono soggetti a eventuali modifiche senza preavviso. USB Specifica standard USB: USB 2.0 full speed Alimentazione massima: 1,5 A USB Protocollo: MSC (Mass Storage Class) MTP (Media Transfer Protocol) AOA (Android Open Accessory) 2.0 File system: FAT12, FAT16, FAT32 Formato di decodifica MP3: MPEG-1 e 2 Audio Layer 3 Formato di decodifica WMA: ver. 7, 7.1, 8, 9, 10, 11, 12 (audio a 2 canali) (Windows Media Player) Formato segnale WAV: Linear PCM & MS ADPCM (non compresso) Italiano iPod & iPhone iPhone, iPod, iPod classic, iPod nano, e iPod touch sono marchi di Apple Inc., registrati negli Stati Uniti e in altri Paesi. Lightning è un marchio di fabbrica di Apple Inc. “Fatto per l'iPod” e “Fatto per l'iPhone” significano che un accessorio elettronico è stato progettato specificamente rispettivamente per il collegamento con l'iPod o l'iPhone ed è stato certificato dal suo sviluppatore corrispondere agli standard operativi stabiliti da Apple. Apple non può essere considerata responsabile di questo dispositivo o della sua osservanza delle norme di sicurezza e dei vari regolamenti. Tenere presente che l'uso di questo accessorio con l'iPod o l'iPhone può peggiorare le prestazioni wireless. abbonamento premium, ove disponibili, vedere https://www.spotify.com. Tuner FM Intervallo di frequenza: da 87,5 MHz a 108,0 MHz Sensibilità utilizzabile: 11 dBf (1,0 μV/75 Ω, mono, S/N: 30 dB) Rapporto segnale-rumore: 72 dB (rete IEC-A) Tuner MW Intervallo di frequenza: da 531 kHz a 1 602 kHz Sensibilità utilizzabile: 25 μV (S/N: 20 dB) It 19 Índice Antes de empezar Antes de empezar ................................................................................... 2 Procedimientos iniciales........................................................................ 3 Muchas gracias por adquirir este producto PIONEER Lea este manual con atención antes de usar este producto para garantizar un uso correcto. Es muy importante que lea y respete los mensajes de ADVERTENCIA y PRECAUCIÓN de este manual. Guarde el manual en un lugar seguro y de fácil acceso para poder consultarlo en el futuro. Radio.......................................................................................................... 5 CD/USB/iPod/AUX................................................................................... 6 Modo app ................................................................................................. 8 Spotify® ..................................................................................................... 8 Uso de Pioneer ARC APP........................................................................ 9 Ajustes..................................................................................................... 10 Ajustes de FUNCTION .......................................................................... Ajustes de AUDIO ................................................................................. Ajustes de SYSTEM ............................................................................... Ajustes de ILLUMINATION................................................................... Ajustes de MIXTRAX............................................................................. 10 11 12 12 13 Conexiones/instalación ....................................................................... 14 Información complementaria............................................................. 16 Acerca de este manual: • En las siguientes instrucciones, la designación “dispositivo USB” hace referencia tanto a dispositivos de memoria USB como a reproductores de audio USB. • En este manual, la designación “iPod” hace referencia tanto a un iPod como a un iPhone. 2 Es Si desea deshacerse de este producto, no lo mezcle con los residuos generales de su hogar. De conformidad con la legislación vigente, existe un sistema de recogida distinto para los productos electrónicos que requieren un procedimiento adecuado de tratamiento, recuperación y reciclado. Las viviendas privadas en los estados miembros de la UE, en Suiza y Noruega pueden devolver gratuitamente sus productos electrónicos usados en los centros de recolección previstos o bien en una tienda minorista (si adquieren un producto similar nuevo). En el caso de los países que no se han mencionado en el párrafo anterior, póngase en contacto con las autoridades locales a fin de conocer el método de eliminación correcto. Al actuar siguiendo estas instrucciones, se asegurará de que el producto eliminado se someta a los procesos de tratamiento, recuperación y reciclaje necesarios, evitando de este modo efectos potencialmente negativos en el entorno y la salud humana. ADVERTENCIA • No trate de instalar o reparar este producto usted mismo. La instalación o la reparación de este producto por parte de personas sin cualificación ni experiencia en equipos electrónicos y accesorios para automóviles puede ser peligrosa y puede exponerle al riesgo de sufrir una descarga eléctrica u otros peligros. • No intente utilizar la unidad mientras esté conduciendo. Asegúrese de salir de la carretera y aparcar su vehículo en un lugar seguro antes de intentar utilizar los controles del dispositivo. PRECAUCIÓN • No permita que la unidad entre en contacto con líquidos y/o humedad. De lo contrario, podría producirse una descarga eléctrica. Asimismo, el contacto de esta unidad con líquidos podría provocar averías, humo y sobrecalentamientos. • Mantenga siempre el volumen lo suficientemente bajo como para poder escuchar los sonidos que provienen del exterior. • El CarStereo-Pass de Pioneer solo debe usarse en Alemania. • Este producto se ha evaluado bajo condiciones moderadas y tropicales de acuerdo con los Requisitos de seguridad , IEC 60065, para dispositivos de audio, vídeo y dispositivos electrónicos similares. PRECAUCIÓN Este aparato es un producto de láser de clase 1 clasificado como tal en Seguridad de productos de láser, IEC 60825-1:2007. PRODUCTO LASER CLASE 1 Operaciones más frecuentes Función Operación Encendido* Pulse SRC/OFF para encender la unidad. Mantenga pulsado SRC/OFF para apagar la unidad. En caso de problemas con el dispositivo Ajustar el volumen Gire el selector M.C.. Si esta unidad no funcionase correctamente, póngase en contacto con su concesionario o con el centro de servicio PIONEER autorizado más cercano. Seleccionar una fuente Pulse SRC/OFF varias veces. Procedimientos iniciales Cambiar la información mostrada Pulse DISP varias veces. Volver a la visualización/lista anterior Pulse BAND/ Volver a la visualización normal desde el menú principal Mantenga pulsado BAND/ . . * Si el cable azul/blanco de esta unidad está conectado al terminal de control de relé de antena de automóvil, la antena del vehículo se extiende cuando se activa la fuente de esta unidad. Para replegar la antena, apague la fuente. Funcionamiento básico Indicaciones en pantalla DEH-X2900UI Puerto USB (expulsar) Indicación Descripción Aparece si existe un nivel inferior para un menú o una carpeta. Aparece al pulsar el botón . Español Selector M.C. (control múltiple) Ranura de carga de discos Visor SRC (fuente)/OFF Aparece si se ha ajustado la función de exploración local (página 10). Aparece si se está recibiendo un programa de tráfico. Aparece si se ha ajustado la función TA (anuncios de tráfico) (página 10). Aparece si se ha ajustado la función de recuperación del sonido (página 11). BAND/ DISP (visualización) Botón de extracción Toma de entrada AUX (toma estéreo de 3,5 mm) Mando a distancia opcional El mando a distancia CD-R320 se vende por separado. Aparece si se ha seleccionado la reproducción aleatoria. Aparece si se ha seleccionado la reproducción repetida. Aparece si se ha ajustado la función de control de iPod (página 7). Extracción del frontal Extraiga el frontal para evitar robos. Desconecte todos los cables y dispositivos conectados al frontal y apague la unidad antes de extraerlo. Es 3 Extracción Colocación NOTAS • Puede cancelar la configuración de los menús pulsando SRC/OFF. • La configuración puede realizarse en cualquier momento desde los ajustes de SYSTEM (página 12) y los ajustes de INITIAL (página 4). Cancelación de la pantalla de demostración (DEMO OFF) Importante • Evite la exposición del frontal a impactos violentos. • Guarde el frontal protegido de la luz solar directa y de las temperaturas elevadas. • Guarde siempre el frontal desmontado en un estuche de protección o una bolsa. Menú de configuración Al situar el contacto en ON después de la instalación, aparece [SET UP :YES] en el visor. 1 2 Presione el selector M.C.. El menú de configuración desaparece después de 30 segundos sin realizar operaciones. Si prefiere realizar la configuración en otro momento, gire el selector M.C. para seleccionar [NO] y presione para confirmar. Gire el selector M.C. para seleccionar las opciones y, a continuación, presione para confirmar. Para pasar a la siguiente opción del menú, tiene que confirmar la selección. Opción del menú Descripción LANGUAGE Seleccione el idioma en el que debe aparecer la información de texto de un archivo de audio comprimido. [ENG](inglés), [РУС](ruso), [TUR](turco) CLOCK SET Ajuste el reloj. FM STEP Seleccione los pasos de la sintonización FM entre 100 kHz y 50 kHz. [100], [50] 3 4 4 Es [QUIT :YES] aparece una vez realizados todos los ajustes. Para volver a la primera opción del menú de configuración, gire el selector M.C. para seleccionar [QUIT :NO] y, a continuación, presione para confirmar. Presione el selector M.C. para confirmar los ajustes. 1 2 3 4 Presione el selector M.C. para que aparezca el menú principal. Gire el selector M.C. para seleccionar [SYSTEM] y, a continuación, presione para confirmar. Gire el selector M.C. para seleccionar [DEMO OFF] y, a continuación, presione para confirmar. Gire el selector M.C. para seleccionar [YES] y, a continuación, presione para confirmar. Ajustes de INITIAL 1 2 3 4 Mantenga pulsado SRC/OFF hasta que se apague la unidad. Mantenga pulsado SRC/OFF para mostrar el menú principal. Gire el selector M.C. para seleccionar [INITIAL] y, a continuación, presione para confirmar. Gire el selector M.C. para seleccionar una opción y, a continuación, presione para confirmar. Opción del menú Descripción FM STEP Seleccione los pasos de la sintonización FM entre 100 kHz y 50 kHz. [100], [50] SUGERENCIA Opción del menú Descripción SP-P/O MODE Seleccione esta opción si hay un altavoz de gama completa conectado a los cables de salida de los altavoces traseros y un subwoofer conectado a la salida RCA. [REAR/SUB.W] [SUB.W/SUB.W] [REAR/REAR] S/W UPDATE [SYSTEM INFO] Seleccione esta opción si hay un subwoofer pasivo conectado directamente a los cables de salida de los altavoces traseros y un subwoofer conectado a la salida RCA. [YES], [NO] Memoria de mejores emisoras (BSM) Las seis emisoras con mejor señal se guardan en los botones numéricos (de 1/ ). Seleccione esta opción si hay altavoces de gama completa conectados a los cables de salida de los altavoces traseros y a la salida RCA. Si hay un altavoz de gama completa conectado a los cables de salida de los altavoces traseros y no se utiliza la salida RCA, puede seleccionar [REAR/SUB.W] o [REAR/REAR]. 1 Seleccione para confirmar la información más reciente del sistema en la unidad. 3 [SYSTEM UPDATE] Seleccione esta opción para actualizar la unidad con el software más reciente e inicializar los ajustes de la unidad. Para obtener más información sobre el software y las actualizaciones más recientes, visite nuestro sitio web. SYSTEM RESET Los botones / también pueden utilizarse para seleccionar una emisora memorizada cuando [SEEK] está ajustado en [PCH] en los ajustes de FUNCTION (página 10). Después de seleccionar la banda, presione el selector M.C. para que aparezca el menú principal. Gire el selector M.C. para seleccionar [FUNCTION] y, a continuación, presione para confirmar. Gire el selector M.C. para seleccionar [BSM] y, a continuación, presione para confirmar. Para buscar una emisora manualmente 1 Después de seleccionar la banda, pulse / para seleccionar una emisora. Mantenga pulsado / y suéltelo para buscar una emisora disponible. La exploración se detiene cuando la unidad recibe una emisora. Para cancelar la búsqueda local, pulse / . Español Seleccione [YES] para inicializar los ajustes de la unidad. La unidad se reiniciará automáticamente. (Algunos de los ajustes se mantendrán incluso después de reiniciar la unidad.) 2 a 6/ NOTA [SEEK] debe estar ajustado en [MAN] en los ajustes de FUNCTION (página 10). Radio Las frecuencias del sintonizador de esta unidad están pensadas para su utilización en Europa Occidental, Asia, Oriente Medio, África y Oceanía. Si se utiliza en otras áreas es posible que la recepción no sea correcta. La función RDS (Radio Data System) solo funciona en áreas en las que se emiten señales RDS correspondientes a emisoras FM. Recepción de emisoras memorizadas 1 2 3 Pulse SRC/OFF para seleccionar [RADIO]. Pulse BAND/ [MW] o [LW]. para seleccionar la banda entre las opciones [FM1], [FM2], [FM3], Pulse un botón numérico (de 1/ a 6/ ). Para almacenar las emisoras manualmente 1 Mientras recibe la emisora que desea guardar, mantenga pulsado uno de los botones numéricos (de 1/ a 6/ ) hasta que deje de parpadear. Utilización de las funciones de PTY La unidad busca una emisora según la información de PTY (tipo de programa). 1 2 3 Pulse durante la recepción FM. Gire el selector M.C. para seleccionar un tipo de programa entre las opciones [NEWS/INFO], [POPULAR], [CLASSICS] y [OTHERS]. Presione el selector M.C.. La unidad empieza a buscar una emisora. Cuando la encuentra, muestra el nombre de su servicio de programas. Es 5 NOTAS NOTA • Para cancelar la búsqueda, presione el selector M.C.. • El programa de algunas emisoras puede no coincidir con la indicación del PTY transmitido. • Si ninguna emisora emite el tipo de programa que ha buscado, aparecerá [NOT FOUND] durante aproximadamente dos segundos y el sintonizador volverá a la emisora original. Si utiliza una conexión MTP, [ANDROID WIRED] debe estar ajustado en [MEMORY] en los ajustes de SYSTEM (página 12). CD/USB/iPod/AUX AUX 1 Inserte el miniconector estéreo en la toma de entrada AUX. 2 Pulse SRC/OFF para seleccionar [AUX] como fuente. NOTA Si [AUX] está ajustado en [OFF] en los ajustes de SYSTEM, [AUX] no puede seleccionarse como fuente (página 12). Reproducción Desconecte los auriculares del dispositivo antes de conectarlo a la unidad. Operaciones CD 1 Inserte un disco en la ranura de carga de discos con la cara de la etiqueta hacia arriba. Puede realizar varios ajustes en los ajustes de FUNCTION (página 10). Tenga en cuenta que las siguientes operaciones no pueden realizarse en un dispositivo AUX. Para controlar un dispositivo AUX, utilice el propio dispositivo. Función Operación Seleccionar una carpeta/álbum*1 Pulse 1/ o 2/ Seleccionar una pista/canción (capítulo) Pulse o Avanzar o retroceder rápidamente*3 Mantenga pulsado Buscar un archivo en una lista 1 Pulse para mostrar la lista. 2 Gire el selector M.C. para seleccionar el nombre del archivo (o carpeta) o la categoría que busca y, a continuación, presione para confirmar. 3 Gire el selector M.C. para seleccionar el archivo que desee y, a continuación, presione para confirmar. Empieza la reproducción. Antes de extraer el dispositivo, detenga la reproducción. Ver una lista de los archivos de la carpeta/ categoría seleccionada*1 Presione el selector M.C. después de seleccionar una carpeta/categoría. Conexiones AOA Para obtener más información sobre la conexión AOA, consulte la página 9. Reproducir una canción de la carpeta/ categoría seleccionada*1 Mantenga presionado el selector M.C. después de seleccionar una carpeta/ categoría. Para expulsar un disco, interrumpa la reproducción y pulse a continuación . USB dispositivos (incluyendo Android™)/iPod 1 Abra la tapa del puerto USB. 2 Conecte el dispositivo USB/iPod utilizando un cable adecuado. NOTA Para cambiar automáticamente a la fuente [USB] cuando el dispositivo USB/iPod está conectado a la unidad, ajuste [USB AUTO] en [ON] en los ajustes SYSTEM (página 12). PRECAUCIÓN Utilice un cable Pioneer USB opcional (CD-U50E) para conectar el dispositivo USB, ya que cualquier dispositivo conectado directamente a la unidad sobresaldrá y podría resultar peligroso. Conexión MTP Puede conectar a la unidad un dispositivo con Android OS 4.0 o una versión posterior a través de MTP, utilizando el cable suministrado con el dispositivo. Sin embargo, en función del dispositivo conectado y del número de archivos en el dispositivo, es posible que no puedan reproducirse archivos de audio/ canciones a través de MTP. Tenga en cuenta que la conexión MTP no es compatible con los formatos de archivo WAV y no puede utilizarse con la función MIXTRAX. 6 Es . . o . Función Operación Búsqueda alfabética (solo iPod) 1 Pulse para mostrar la lista. 2 Gire el selector M.C. para seleccionar la lista de categorías deseadas y, a continuación, pulse para pasar al modo de búsqueda alfabética. (Girar el selector M.C. dos veces también permite acceder al modo de búsqueda alfabética.) 3 Gire el selector M.C. para elegir una letra y, a continuación, presione para ver la lista alfabética. Para cancelar la búsqueda alfabética, pulse . BAND/ Funciones útiles para iPod Modo de reproducción por asociación Puede acceder a canciones a partir del artista, el álbum o el género que se está reproduciendo en cada momento. 1 Mientras escucha una canción, mantenga pulsado para pasar al modo de reproducción por asociación. 2 Gire el selector M.C. para seleccionar el modo ([ARTIST], [ALBUM], [GENRE]) y, a continuación, presione para confirmar. La canción o álbum seleccionado se reproducirá después de la canción que está sonando. Reproducción repetida Pulse 6/ . NOTA Reproducción aleatoria Pulse 5/ . Puede cancelar la reproducción de la canción o el álbum seleccionado si utiliza funciones no relacionadas con el modo de reproducción por asociación (como el avance o retroceso rápido). Reproducción aleatoria de todo (solo iPod) Mantenga pulsado 5/ Poner en pausa/reanudar la reproducción Pulse 4/PAUSE. Control de iPod Recuperación de sonido*1*2 Pulse 3/S.Rtrv. [1]: funciona con índices de compresión bajos [2]: funciona con índices de compresión altos Puede controlar la unidad a través de un iPod conectado. Los siguientes modelos de iPod no son compatibles con esta función. – iPod nano 1.ª generación, iPod con vídeo 1 Pulse BAND/ durante la reproducción y, a continuación, seleccione el modo de control. [CONTROL iPod]: la función de iPod de la unidad puede controlarse desde el iPod conectado. [CONTROL AUDIO]: la función de iPod de la unidad solo puede controlarse desde los botones de la unidad. En este modo, no es posible encender ni apagar el iPod conectado. Mantenga pulsado Pulse BAND/ . Cambiar de unidades en el dispositivo USB (Solo dispositivos compatibles con el protocolo de la clase de dispositivo de almacenamiento masivo USB) Pulse BAND/ . . *1 Solo archivos de audio comprimido *2 Esta función está desactivada cuando se ha seleccionado USB como fuente y la función MIXTRAX está activada. *3 Cuando utilice la función de avance/retroceso rápido durante la reproducción de un archivo VBR, es posible que el tiempo de reproducción no sea correcto. Español Volver a la carpeta raíz (solo CD/USB)*1 Cambiar entre audio comprimido y CD-DA (solo CD) . NOTAS • Si selecciona [CONTROL iPod] como modo de control la reproducción de las canciones se pone en pausa. Utilice el iPod conectado para reanudar la reproducción. • Es posible acceder a las siguientes operaciones desde la unidad, aunque el modo de control esté ajustado en [CONTROL iPod]. – Pausa, avance/retroceso rápido, selección de canción/capítulo • El volumen solo puede ajustarse desde la unidad. Acerca de MIXTRAX (solo USB/iPod) La función MIXTRAX genera una mezcla ininterrumpida a partir de su biblioteca musical, acompañada de efectos de iluminación. Para obtener más información sobre los ajustes de MIXTRAX, consulte la página 13. Es 7 NOTAS • Esta función no es compatible con un dispositivo Android conectado a través de MTP. • Mientras USB está seleccionado como fuente y se esté utilizando la función MIXTRAX, la función de recuperación de sonido está desactivada. • En función del archivo o la canción, es posible que los efectos de sonido no estén disponibles. • Desactive la función MIXTRAX si los efectos de iluminación generados interfieren con la conducción. 1 Pulse MIX para activar o desactivar MIXTRAX. Modo app Puede escuchar el audio de una aplicación de un iPhone a través de la unidad. En algunos casos, puede incluso controlar la aplicación utilizando la unidad. Para obtener más información sobre los dispositivos compatibles, visite nuestro sitio web. Importante El uso de aplicaciones de terceros puede implicar o necesitar la puesta a disposición de información de identificación personal, bien mediante la creación de una cuenta de usuario o de algún otro modo, y, para ciertas aplicaciones, la puesta a disposición de datos de geoubicación. TODAS LAS APLICACIONES DE TERCEROS SON RESPONSABILIDAD EXCLUSIVA DE LOS PROVEEDORES, INCLUIDAS SIN LIMITACIÓN LA RECOPILACIÓN Y LA SEGURIDAD DE LOS DATOS DE USUARIO Y LAS PRÁCTICAS DE PRIVACIDAD. AL ACCEDER A APLICACIONES DE TERCEROS, USTED SE MANIFIESTA DE ACUERDO EN REVISAR LOS TÉRMINOS DE SERVICIO Y LAS POLÍTICAS DE PRIVACIDAD DE LOS PROVEEDORES. SI NO ESTÁ DE ACUERDO CON LOS TÉRMINOS O LAS POLÍTICAS DE ALGÚN PROVEEDOR O NO CONSIENTE EL USO DE DATOS DE GEOUBICACIÓN DONDE SEA APLICABLE, NO UTILICE ESTAS APLICACIONES DE TERCEROS. Para usuarios de iPhone Esta función es compatible con dispositivos iPhone y iPod touch con iOS 5.0 o una versión posterior. NOTA PIONEER NO SE HACE RESPONSABLE DE APPS O CONTENIDOS DE OTROS PROVEEDORES, EN RELACIÓN CON ASPECTOS COMO SU PRECISIÓN, SU EXACTITUD Y OTROS ASPECTOS. EL CONTENIDO Y LAS FUNCIONALIDADES DE DICHAS APPS SON RESPONSABILIDAD EXCLUSIVA DEL PROVEEDOR DE CADA APP. Reproducción de una aplicación a través de la unidad 1 2 Conecte el dispositivo móvil a esta unidad. • iPhone a través de USB (página 6) Pulse SRC/OFF para seleccionar [APP]. 3 Utilice el dispositivo móvil para iniciar la aplicación. Funcionamiento básico Puede realizar varios ajustes en los ajustes de FUNCTION (página 10). Función Operación Seleccionar una pista Pulse Avanzar o retroceder rápidamente Mantenga pulsado o . Poner en pausa/reanudar la reproducción Pulse BAND/ . Spotify® (DEH-X2900UI solo es compatible con Spotify instalado en iPhone.) Spotify es un servicio de distribución de música en streaming que no está afiliado a Pioneer. Más información disponible en http://www.spotify.com. La aplicación de Spotify está disponible para teléfonos compatibles. Visite https:// support.spotify.com/ para consultar la información sobre compatibilidad más reciente. Para disfrutar de Spotify durante la conducción, primero descargue la aplicación Spotify en su iPhone. Puede descargarla en iTunes App Store. Seleccione una cuenta gratis o una cuenta Premium de pago, tanto en la aplicación como en spotify.com. Una cuenta Premium le ofrece más funciones, como escuchar música offline. Importante • Este producto incorpora el software Spotify, que está sujeto a licencias de terceros que puede consultar aquí: www.spotify.com/connect/third-party-licenses. • Para obtener información acerca de los países y regiones donde se puede utilizar Spotify, consulte https://www.spotify.com/us/select-your-country/. Escuchar Spotify Actualice el firmware de la aplicación Spotify a la última versión antes de utilizarla. 1 2 3 Conecte el dispositivo móvil a esta unidad. • iPhone a través de USB (página 6) Pulse SRC/OFF para seleccionar [SPOTIFY]. Abra la aplicación Spotify en el dispositivo móvil e inicie la reproducción. Funcionamiento básico Puede realizar varios ajustes en los ajustes de FUNCTION (página 10). 8 Es o . NOTA Las operaciones disponibles pueden variar en función del tipo de contenidos (pista/álbum/artista/lista de reproducción/radio) que desee reproducir. Función Para obtener más información sobre las operaciones que están disponibles en la aplicación, consulte la sección de ayuda de la aplicación. ADVERTENCIA Operación Saltar una pista Pulse Buscar una pista en una lista 1 Pulse (lista) para mostrar la lista. 2 Gire el selector M.C. para seleccionar la categoría que desee y, a continuación, presione para confirmar. 3 Gire el selector M.C. para seleccionar el archivo que desee y, a continuación, presione para confirmar. Empieza la reproducción. o . No trate de controlar la aplicación mientras conduce. Detenga y aparque el vehículo en un lugar seguro antes de intentar usar los controles de la aplicación. Para usuarios de iPhone Esta función es compatible con dispositivos iPhone (iPhone 5 o una versión posterior) y iPod touch con iOS 8.0 o una versión posterior. Puede descargar Pioneer ARC APP en iTunes App Store. Pulse 4/PAUSE. Para usuarios de dispositivos Android Esta función es compatible con dispositivos con Android OS 4.1 o posterior instalado y que sean compatibles con los perfiles de AOA (Android Open Accessory) 2.0. Puede descargar Pioneer ARC APP en Google Play™. Pulgar arriba (solo para radio) Pulse 1/ . NOTA Pulgar abajo (solo para radio) Pulse 2/ . Reproducción aleatoria (solo para pista/ álbum/artista/lista de reproducción) Pulse 5/ . Es posible que algunos dispositivos Android conectados vía AOA 2.0 no funcionen correctamente o emitan sonidos debido a su propio diseño de software, independientemente de la versión del SO. Reproducción repetida (solo para pista/ álbum/artista/lista de reproducción) Pulse 6/ . Poner en pausa/reanudar la reproducción Almacenar la información sobre la canción que se está reproduciendo en ese momento. Borrar la información de la canción almacenada. 1 Mantenga pulsado 3/S.Rtrv. Aparece [SAVE]/[UNSAVE]. 2 Presione el selector M.C.. NOTA 1 2 3 4 5 Algunas funciones de Spotify no pueden controlarse desde esta unidad. Presione el selector M.C. para que aparezca el menú principal. Gire el selector M.C. para seleccionar [SYSTEM] y, a continuación, presione para confirmar. Gire el selector M.C. para seleccionar [ANDROID WIRED] y, a continuación, presione para confirmar. Gire el selector M.C. para seleccionar [APP CONTROL] para un dispositivo Android conectado a través de USB. Si se ha seleccionado [ON] en [P.APP AUTO ON] (página 12), Pioneer ARC APP en el dispositivo Android se inicia automáticamente y el proceso habrá finalizado. NOTA Uso de Pioneer ARC APP Puede utilizar la unidad desde la Pioneer ARC APP instalada en un dispositivo iPhone/ Android. En algunos casos, puede controlar aspectos de la aplicación, como por ejemplo selección de fuente, pausa, etc., al utilizar la unidad. Conecte el dispositivo móvil a esta unidad. • Dispositivos iPhone/Android a través de USB (página 6) Continúe con el paso 6 si selecciona la conexión USB para iPhone. Español Iniciar un canal de radio en función de la 1 Mantenga pulsado (lista) para iniciar canción que se reproduce en ese momento. la radio. 2 Presione el selector M.C.. • Es posible que esta función no esté disponible en función de la canción seleccionada. Cómo realizar una conexión con Pioneer ARC APP 6 7 Si Pioneer ARC APP no está aún instalada en su dispositivo Android, aparece un mensaje que le pide que instale la aplicación en su dispositivo Android. Seleccione [OFF] en [P.APP AUTO ON] para borrar el mensaje (página 12). Pulse SRC/OFF para seleccionar una fuente. Inicie la Pioneer ARC APP en el dispositivo móvil. Es 9 NOTA Opción del menú Descripción También puede iniciar la aplicación manteniendo pulsada la tecla M.C. en el iPhone. FM SETTING [TALK], [STANDARD], [MUSIC] Cómo escuchar música en Android 1 Pulse SRC/OFF para seleccionar [ANDROID]. BSM Funcionamiento básico Función Ajusta el nivel de calidad del sonido a las condiciones de señal de la emisión de la banda FM. (Disponible solo si se selecciona la banda FM.) Las seis emisoras con mejor señal se guardan en a 6/ ) los botones numéricos (de 1/ automáticamente. Operación Seleccionar una pista Pulse Avanzar o retroceder rápidamente Mantenga pulsado o . Poner en pausa/reanudar la reproducción Pulse 4/PAUSE. Recuperación de sonido Pulse 3/S.Rtrv. [1]: funciona con índices de compresión bajos [2]: funciona con índices de compresión altos o . REGIONAL [ON], [OFF] Limita la recepción a los programas regionales específicos cuando se selecciona AF (búsqueda de frecuencias alternativas). (Disponible solo si se selecciona la banda FM.) LOCAL FM: [OFF], [LV1], [LV2], [LV3], [LV4] Limita las emisoras sintonizadas en función de la intensidad de la señal. MW/LW: [OFF], [LV1], [LV2] TA Ajustes Puede ajustar diferentes valores en el menú principal. 1 2 3 Presione el selector M.C. para que aparezca el menú principal. Recibe la información de tráfico actual, si está disponible. (Disponible solo si se selecciona la banda FM.) [ON], [OFF] Permite a la unidad volver a sintonizar una frecuencia diferente que ofrezca la misma emisora. (Disponible solo si se selecciona la banda FM.) AF Gire el selector M.C. para seleccionar una de las categorías siguientes y, a continuación, presione para confirmar. • Ajustes de FUNCTION (página 10) • Ajustes de AUDIO (página 11) • Ajustes de SYSTEM (página 12) • Ajustes de ILLUMINATION (página 12) • Ajustes de MIXTRAX (página 13) NEWS Gire el selector M.C. para seleccionar las opciones y, a continuación, presione para confirmar. SEEK Ajustes de FUNCTION Los elementos de los menús varían en función de la fuente. 10 Es [ON], [OFF] [ON], [OFF] [MAN], [PCH] Interrumpe la fuente activa con programas de noticias. (Disponible solo si se selecciona la banda FM.) Permite utilizar los botones o para buscar emisoras una a una (sintonización manual) o seleccionar una emisora a partir de los canales memorizados. Opción del menú Descripción Opción del menú [SUPER BASS], [POWERFUL], Seleccione o personalice la curva del ecualizador. [NATURAL], [VOCAL], [CUSTOM1], [CUSTOM1] puede ajustarse por separado para [CUSTOM2], [FLAT] cada fuente. Sin embargo, cada una de las siguientes combinaciones presenta Seleccione la banda y el nivel del automáticamente el mismo ajuste. ecualizador para personalizar • USB, iPod, ANDROID, SPOTIFY y APP (iPhone) [CUSTOM2] es un ajuste compartido utilizado todavía más la configuración. Banda del ecualizador: [80HZ], para todas las fuentes. [250HZ], [800HZ], [2.5KHZ], [8KHZ] Nivel del ecualizador: de [+6] a [–6] Almacena la información sobre la canción que se está reproduciendo en su lista de música en Spotify. UNSAVE Borra la información de la canción almacenada en [SAVE]. S.RTRV USB iPod [1] (funciona con índices de compresión bajos), [2] (funciona con índices de compresión altos), [OFF] AUDIO BOOK Descripción EQ SETTING SAVE Mejora el audio comprimido y recupera un sonido de calidad. No disponible si: • USB está seleccionado como fuente y la función MIXTRAX está activada. • Se reproduce un CD-DA/CD-TEXT. LOUDNESS [OFF], [LOW], [MID], [HI] iPod [FASTER], [NORMAL], [SLOWER] Cambia la velocidad de reproducción. (No está disponible si [CONTROL iPod] está seleccionado en el modo de control.) Permite aplicar compensación para disfrutar de un sonido nítido con el volumen más bajo. SUB.W*2 [NOR], [REV], [OFF] Seleccione la fase del subwoofer. SUB.W CTRL*2*3 PAUSE Ajustes de AUDIO El subwoofer solo emite las frecuencias por debajo del intervalo seleccionado. Español Frecuencia de corte: [50HZ], [63HZ], [80HZ], [100HZ], [125HZ], [160HZ], [200HZ] Nivel de salida: de [–24] a [+6] Nivel de curva: [–12], [–24] Pone en pausa o reanuda la reproducción. BASS BOOST Opción del menú Descripción FADER*1 De [0] a [+6] Seleccione el nivel de intensificación de graves. HPF SETTING Ajuste el balance de los altavoces delanteros y traseros. BALANCE Ajuste el balance de los altavoces derechos e izquierdos. Frecuencia de corte: [OFF], [50HZ], [63HZ], [80HZ], [100HZ], [125HZ], [160HZ], [200HZ] Nivel de curva: [–12], [–24] Los altavoces solo emiten frecuencias por encima del punto de corte del filtro de paso alto (HPF). De [+4] a [–4] Ajusta el nivel de volumen de cada fuente excepto FM. Cada una de las siguientes combinaciones presenta automáticamente el mismo ajuste. • USB, iPod, ANDROID, SPOTIFY y APP (iPhone) SLA *1 No está disponible si [SUB.W/SUB.W] está seleccionado en [SP-P/O MODE], en los ajustes de INITIAL (página 5). Es 11 *2 No está disponible si [REAR/REAR] está seleccionado en [SP-P/O MODE], en los ajustes de INITIAL (página 5). *3 No está disponible si [OFF] está seleccionado en [SUB.W]. Opción del menú [ON], [OFF] Ajustes de SYSTEM También puede acceder a estos menús cuando la unidad está apagada. Opción del menú Descripción LANGUAGE [ENG](inglés), [РУС](ruso), [TUR](turco) Seleccione el idioma en el que debe aparecer la información de texto de un archivo de audio comprimido. Descripción USB AUTO Seleccione [ON] para cambiar automáticamente a la fuente [USB] cuando un dispositivo USB/iPod está conectado a la unidad. Seleccione [OFF] cuando se está conectando un dispositivoUSB/iPod a la unidad solo para carga. * [PW SAVE] se cancela y se desconecta la batería del vehículo, por lo que tendrá que volver a encenderse una vez conectada de nuevo la batería. Si [PW SAVE] está desactivado, en función de los métodos de conexión, es posible que la unidad continúe consumiendo energía de la batería si el contacto del vehículo no incorpora una posición ACC (accesorio). Ajustes de ILLUMINATION CLOCK SET Ajuste el reloj (página 4). Opción del menú 12H/24H [12H], [24H] Seleccione el formato de la hora. [KEY COLOUR], [DISP COLOUR], [BOTH COLOUR] AUTO PI [ON], [OFF] Busca una emisora diferente con la misma programación, aunque se haya seleccionado una emisora memorizada. [ON], [OFF] Ajuste esta opción en [ON] si utiliza un dispositivo auxiliar conectado a la unidad. AUX SPOTIFY [ON], [OFF] Seleccione [ON] cuando utilice la función Spotify. PW SAVE* [ON], [OFF] Reduce el consumo de la batería. La activación de la fuente es la única operación permitida cuando esta función está activada. ANDROID WIRED [MEMORY], [APP CONTROL] Seleccione el método de conexión adecuado en función de su dispositivo Android. P.APP AUTO ON [ON], [OFF] 12 Es Descripción COLOUR Selecciona el color de las teclas/visor de la unidad a partir de 12 colores predefinidos, [SCAN] o [CUSTOM]*. • [SCAN]: acceda a una secuencia automática de diferentes colores. • [CUSTOM]*: 1 Mantenga presionado el selector M.C. hasta que aparezca la pantalla de ajuste del color. 2 Ajuste el color principal (R (rojo)/G (verde)/B (azul)) y el nivel de brillo ([0] a [60]). No puede seleccionar un nivel inferior a 10 para los tres colores R (rojo), G (verde), B (azul) al mismo tiempo. También puede personalizar los colores predefinidos. Seleccione uno de los colores predefinidos y mantenga presionado el selector M.C. hasta que aparezca la pantalla de ajuste de colores. * El ajuste CUSTOM solo está disponible para [KEY COLOUR] y [DISP COLOUR]. DIM SETTING Seleccione [ON] para iniciar Pioneer ARC APP automáticamente si se conecta un dispositivo Android a la unidad a través de AOA. (No está disponible si [MEMORY] está seleccionado en [ANDROID WIRED].) [SYNC ILLUMI], [SYNC CLOCK], [MANUAL] Modifica el brillo del visor. Opción del menú Descripción BRIGHTNESS [KEY], [DISP] Descripción DISPLAY FX Seleccione el brillo de las teclas/visor de la unidad, de [1] a [10]. Los intervalos de ajuste disponibles varían en función de [DIM SETTING]. ILLUMI FX [ON], [OFF] Opción del menú [ON], [OFF] Activa o desactiva los efectos especiales MIXTRAX. CUT IN FX [ON], [OFF] Activa o desactiva los efectos de sonido MIXTRAX durante el cambio manual de pistas. El efecto de iluminación puede observarse cuando se inserta o se expulsa un CD. El efecto de iluminación se activa cuando se activa/desactiva ACC, independientemente de este ajuste. Ajustes de MIXTRAX Opción del menú Descripción SHORT PLAYBCK [1.0 MIN], [1.5 MIN], [2.0 MIN], [2.5 MIN], [3.0 MIN], [OFF] Seleccione la duración del tiempo de reproducción. FLASH AREA Seleccione la zona del efecto de iluminación. Si se ha seleccionado [OFF], el color definido en los ajustes de ILLUMINATION (página 12) se utiliza como color del visor. Español [KEY/DISPLAY], [KEY], [OFF] FLASH PATTERN De [SOUND LEVEL 1] a [SOUND LEVEL 6] Modifique el efecto de iluminación con arreglo al nivel de sonido y de graves. El patrón de parpadeo cambia en función del nivel de sonido. De [LOW PASS 1] a [LOW PASS 6] El patrón de parpadeo cambia en función del nivel de graves. [RANDOM1] El patrón de parpadeo cambia de forma aleatoria en función del modo de nivel de sonido y el modo de paso bajo. [RANDOM2] El patrón de parpadeo cambia aleatoriamente en función del modo de nivel de sonido. [RANDOM3] El patrón de parpadeo cambia aleatoriamente en función del modo de paso bajo. Es 13 Conexiones/instalación Conexiones Importante • Si instala esta unidad en un vehículo sin posición ACC (accesorio) en el contacto, si no conecta el cable rojo al terminal que detecta el funcionamiento de la llave de contacto la batería podría agotarse. Posición ACC Sin posición ACC • Si utiliza esta unidad en condiciones diferentes de las descritas, podría producirse un incendio o una avería. – Vehículos con una batería de 12 V y una conexión a tierra negativa. – Cuando los 4 canales utilizan la salida del altavoz, use altavoces de más de 50 W (alimentación de entrada máxima) y de entre 4 Ω y 8 Ω (valor de impedancia). No utilice altavoces de entre 1 Ω y 3 Ω con esta unidad. – Cuando la salida del altavoz trasero la utilice un subwoofer de 2 Ω, use altavoces de más de 70 W (alimentación de entrada máxima). * Consulte las conexiones para obtener información sobre el método de conexión. • Para impedir un cortocircuito, un sobrecalentamiento o una avería, siga las indicaciones descritas a continuación. – Desconecte el terminal negativo de la batería antes de la instalación. – Fije el cable con abrazaderas de cable o cinta adhesiva. Envuelva con cinta adhesiva los cables que estén en contacto con piezas metálicas, para protegerlos. 14 Es – Aleje los cables de piezas en movimiento, como la palanca de cambios o las guías de los asientos. – Aleje los cables de lugares calientes, como por ejemplo las salidas de la calefacción. – No conecte el cable amarillo a la batería pasándolo a través del orificio del compartimento del motor. – Cubra los conectores de cables desconectados con cinta aislante. – No acorte ningún cable. – Nunca corte el aislamiento del cable de alimentación de esta unidad para compartir la potencia con otros dispositivos. La capacidad de corriente del cable es limitada. – Utilice un fusible del nivel especificado. – Nunca conecte el cable negativo del altavoz directamente a tierra. – Nunca agrupe diferentes cables negativos de varios altavoces. • Cuando esta unidad está encendida, las señales de control se envían a través del cable azul/blanco. Conecte este cable al terminal de control remoto del sistema de un amplificador externo o al terminal de control de relé de antena de automóvil (máx. 300 mA 12 V CC). Si el vehículo incorpora una antena en el cristal, conéctela al terminal de alimentación de intensificación de la antena. • Nunca conecte el cable azul/blanco al terminal de alimentación de un amplificador externo ni al terminal de alimentación de la antena para automóvil. De lo contrario, la batería podría agotarse o podría producirse una avería. • El cable negro es el cable de tierra. Los cables de tierra de esta unidad y de otros equipos (especialmente productos de alto voltaje como amplificadores) deben conectarse por separado. De lo contrario, podrían desprenderse por accidente y provocar un incendio o una avería. • El símbolo gráfico colocado en el producto significa corriente continua. Cable de alimentación Esta unidad Entrada de cable de alimentación AUX IN trasera | [Tel In] (toma estéreo de 3,5 mm) Una entrada trasera dedicada compatible únicamente con kits telefónicos de manos libres Bluetooth. La señal de audio se silencia durante una llamada telefónica si el cable amarillo/negro está conectado/ activado. Salida trasera o salida de subwoofer Salida frontal Entrada de antena Fusible (10 A) Entrada de mando a distancia con cable Puede conectarse un adaptador de mando a distancia con cable (vendido por separado). A entrada de cable de alimentación En función del tipo de vehículo, la función de y puede ser diferente. En este caso, asegúrese de conectar a y a . Amarillo Reserva (o adicional) Amarillo Conectar al terminal de alimentación constante de 12 V. Rojo Adicional (o reserva) Rojo Conectar al terminal controlado por el interruptor de encendido (12 V CC). Conecte cada cable con el cable del mismo color. Negro (tierra del chasis) Azul/blanco La posición de las clavijas del conector ISO será diferente en función del tipo de vehículo. Conecte y cuando la clavija 5 sea de control de antena. En otro tipo de vehículo, nunca conecte y . Azul/blanco Conectar al terminal de control del sistema del amplificador (máx. 300 mA 12 V CC). Azul/blanco Conectar al terminal de control de relé de antena de automóvil (máx. 300 mA 12 V CC). Cables de los altavoces Blanco: frontal izquierdo Blanco/negro: frontal izquierdo Gris: frontal derecho Gris/negro: frontal derecho Verde: izquierdo trasero o subwoofer Verde/negro: izquierdo trasero o subwoofer Violeta: derecho trasero o subwoofer NOTAS • Cambie el menú inicial de esta unidad. Consulte [SP-P/O MODE] (página 5). La salida de subwoofer de esta unidad es monoaural. • Si utiliza un subwoofer de 2 Ω, asegúrese de conectar el subwoofer a los cables violeta y violeta/negro de esta unidad. No conecte nada a los cables verde y verde/ negro. Amplificador (vendido por separado) Realice estas conexiones cuando utilice el amplificador opcional. Control remoto del sistema Conectar al cable azul/blanco. Amplificador (vendido por separado) Conectar con cables RCA (vendidos por separado) A la salida frontal Altavoz frontal A salida trasera o salida de subwoofer Altavoz trasero o subwoofer Instalación Importante • Compruebe todas las conexiones y sistemas antes de la instalación definitiva. • No utilice piezas no homologadas, ya que podrían producirse averías. • Consulte con su distribuidor si la instalación requiere el taladrado de orificios u otras modificaciones en el vehículo. • No instale esta unidad en los siguientes lugares: – donde pueda interferir con el control del vehículo. – donde pueda lesionar a un pasajero en caso de parada brusca. • El láser semiconductor puede resultar dañado en caso de recalentamiento. Instale esta unidad lejos de lugares calientes, como por ejemplo las salidas de la calefacción. • La unidad funciona en su nivel óptimo cuando se instala en ángulos inferiores a 60°. Deje espacio suficiente 2 5 cm Tornillo de rosca cortante (5 mm × 9 mm, no suministrado con el producto) Soporte de montaje Salpicadero o consola 5 cm Instalación en soporte DIN 1 Introduzca la carcasa de montaje en el 2 Apriete dos tornillos en cada lado. salpicadero. Fije la carcasa de montaje utilizando un destornillador para doblar las lengüetas metálicas (90°) y encajarlas en sus posiciones. Salpicadero Carcasa de montaje • Asegúrese de que la unidad está instalada de forma segura. Una instalación inestable podría provocar saltos u otros errores. Extraiga la unidad (instalada con la carcasa de montaje suministrada) 1 2 3 Extraiga el marco decorativo. Marco decorativo Lengüeta con muesca • El desmontaje del frontal facilita el acceso al marco decorativo. • Al volver a colocar el marco decorativo, hágalo con la parte de la lengüeta con muesca hacia abajo. Introduzca las llaves de extracción suministradas en ambos lados de la unidad hasta que escuche un clic. Tire de la unidad. Español Violeta/negro: derecho trasero o subwoofer Naranja/blanco Conectar a la señal de iluminación de un coche. Conector ISO En algunos vehículos, es posible que el conector ISO esté dividido en dos. En este caso, asegúrese de realizar la conexión a los dos conectores. • Al realizar la instalación, asegúrese de que la dispersión del calor es correcta durante la utilización de la unidad, deje espacio suficiente detrás del panel posterior y recoja los cables sueltos para que no obstruyan las salidas de ventilación. Cuando no utilice la carcasa de montaje suministrada 1 Determine la posición exacta para encajar los orificios del soporte con los orificios del lateral de la unidad. Es 15 Información complementaria Solución de problemas El visor vuelve automáticamente a la visualización normal. → No se han realizado operaciones en aproximadamente 30 segundos. – Realice una operación. El intervalo de la reproducción repetida cambia de forma imprevista. → En función del intervalo de la reproducción repetida, es posible que el intervalo seleccionado se modifique cuando se selecciona otra carpeta o pista o durante el avance o retroceso rápido. – Seleccione de nuevo el intervalo de la reproducción repetida. No se reproduce una subcarpeta. → Las subcarpetas no pueden reproducirse si se ha seleccionado la opción [FLD] (repetición de carpeta). – Seleccione otro intervalo de la reproducción repetida. El sonido es intermitente. → Utiliza un dispositivo, como un teléfono móvil, que puede provocar interferencias audibles. – Aleje de la unidad los dispositivos que puedan provocar las interferencias. Mensajes de error Generales AMP ERROR → La unidad no funciona o la conexión del altavoz es incorrecta. → El circuito de protección está activado. – Compruebe la conexión del altavoz. 16 Es – Sitúe la llave de contacto en la posición OFF y de nuevo en la posición ON. Si el mensaje continúa apareciendo, póngase en contacto con su distribuidor o con un centro de asistencia Pioneer autorizado para obtener ayuda. NO XXXX (NO TITLE, por ejemplo) → No hay información de texto asociada. – Cambie de pantalla o reproduzca otra pista o archivo. Reproductor de CD ERROR-07, 11, 12, 17, 30 → El disco está sucio. – Limpie el disco. → El disco está arañado. – Cambie el disco. ERROR-07, 10, 11, 12, 15, 17, 30, A0 → Se ha producido un error eléctrico o mecánico. – Sitúe la llave de contacto en la posición OFF y de nuevo en la posición ON o seleccione una fuente diferente y luego vuelva a seleccionar el reproductor de CD. ERROR-15 → El disco introducido está en blanco. – Cambie el disco. ERROR-23 → Formato de CD no compatible. – Cambie el disco. FORMAT READ → A veces transcurre un tiempo entre el inicio de la reproducción y el instante en que empieza a escuchar sonido. – Espere hasta que el mensaje desaparezca y empiece a escuchar sonido. NO AUDIO → El disco introducido no contiene archivos reproducibles. – Cambie el disco. SKIPPED → El disco introducido contiene archivos con protección DRM. – Se saltarán los archivos protegidos. PROTECT → Todos los archivos del disco introducido incorporan información DRM. – Cambie el disco. Dispositivo USB/iPod FORMAT READ → A veces transcurre un tiempo entre el inicio de la reproducción y el instante en que empieza a escuchar sonido. – Espere hasta que el mensaje desaparezca y empiece a escuchar sonido. NO AUDIO → No hay canciones. – Transfiera archivos de audio al dispositivo USB y conéctelo. → El dispositivo USB conectado tiene la protección activada. – Siga las instrucciones de seguridad del dispositivo USB para desactivar la protección. SKIPPED → El dispositivo USB conectado contiene archivos con protección DRM. – Se saltarán los archivos protegidos. PROTECT → Todos los archivos del dispositivo USB conectado tienen incorporada información DRM. – Cambie el dispositivo USB. N/A USB → El dispositivo USB conectado no es compatible con esta unidad. – Desconecte el dispositivo y cámbielo por un dispositivo USB compatible. HUB ERROR → Esta unidad no permite utilizar el dispositivo USB conectado a través de un concentrador USB. – Conecte el dispositivo USB directamente a esta unidad utilizando un cable USB. CHECK USB → El conector USB o el cable USB presenta un cortocircuito. – Compruebe si el conector USB o el cable USB está atrapado o dañado. → El dispositivo USB conectado consume una cantidad de corriente superior al máximo permitido. – Desconecte el dispositivo USB y no vuelva a utilizarlo. Sitúe la llave de contacto en la posición OFF y de nuevo en la posición ACC u ON. Conecte solo dispositivos USB compatibles. → El iPod funciona correctamente pero no se carga. – Asegúrese de que el cable de conexión del iPod no haya quedado cortocircuitado (por ejemplo, por quedar atrapado en objetos metálicos). Después de la comprobación, sitúe la llave de contacto en OFF y de nuevo en ON o desconecte el iPod y vuelva a conectarlo. ERROR-19 → Error en la comunicación. – Realice una de las operaciones siguientes y, a continuación, vuelva a la fuente USB. • Sitúe la llave de contacto en la posición OFF y seguidamente en la posición ON. • Desconecte el dispositivo USB. • Seleccione una fuente diferente. → Error del iPod. – Desconecte el cable del iPod. Cuando aparezca el menú principal del iPod, vuelva a conectar el iPod y reinícielo. ERROR-23 → El dispositivo USB no se ha formateado correctamente. – Formatee el dispositivo USB con los formatos FAT12, FAT16 o FAT32. ERROR-16 → La versión del firmware del iPod es antigua. – Actualice la versión del iPod. → Error del iPod. – Desconecte el cable del iPod. Cuando aparezca el menú principal del iPod, vuelva a conectar el iPod y reinícielo. NOT FOUND → No hay canciones asociadas. – Transfiera canciones al iPod. Apps START UP APP → La aplicación todavía no se ha iniciado. – Utilice el dispositivo móvil para iniciar la aplicación. Spotify CHECK APP → Error en la conexión con la aplicación Spotify. – Siga las instrucciones que aparecen en pantalla. Discos y reproductor • Utilice únicamente discos que incorporen alguno de los dos logotipos siguientes. • Utilice discos de 12 cm. • Utilice únicamente discos convencionales y totalmente circulares. • Los tipos de discos siguientes no pueden utilizarse con esta unidad: – Discos DualDisc – Discos de 8 cm: si intenta utilizar estos discos sin ningún adaptador la unidad podría dejar de funcionar correctamente. – Discos de formas no convencionales – Discos que no sean CD – Discos estropeados, como por ejemplo discos con grietas, deformados o desconchados – Discos CD-R/RW sin finalizar • No escriba en la superficie de los discos ni aplique productos químicos encima. • Para limpiar un CD, utilice un paño suave realizando movimientos desde el centro hacia fuera. • La condensación puede impedir temporalmente el funcionamiento correcto del reproductor. Espere aproximadamente una hora, hasta que el reproductor se adapte a la temperatura más cálida. Asimismo, seque los discos húmedos con un paño suave. • Si utiliza discos en los que es posible imprimir en las superficies de las etiquetas, revise las instrucciones y los avisos de los discos. En función de los discos, es posible que las operaciones de inserción y expulsión no puedan realizarse. Si utiliza este tipo de discos pueden producirse daños en el equipo. • No pegue en los discos etiquetas ni otros materiales disponibles en el mercado. – Los discos podrían deformarse y podrían no reproducirse. – Las etiquetas pueden desprenderse durante la reproducción e impedir la extracción de los discos, lo que puede provocar daños en el equipo. Dispositivo de almacenamiento USB • No están permitidas las conexiones a través de concentradores USB. • Asegure correctamente el dispositivo de almacenamiento USB antes de arrancar. No permita que el dispositivo de almacenamiento USB se caiga al suelo, ya que podría interferir con el funcionamiento del pedal de freno o de aceleración. • En función del dispositivo de almacenamiento USB, pueden producirse los siguientes problemas. – Las operaciones pueden variar. – Es posible que no se reconozca el dispositivo de almacenamiento. – Es posible que los archivos no se reproduzcan correctamente. – El dispositivo puede provocar interferencias audibles mientras escucha la radio. iPod • No deje el iPod en lugares expuestos a temperaturas elevadas. • Asegure correctamente el iPod mientras conduce. No permita que el iPod se caiga al suelo, ya que podría interferir con el funcionamiento del pedal de freno o de aceleración. • Determinados ajustes del iPod, como el ecualizador y la reproducción repetida, cambian automáticamente cuando se conecta el iPod a la unidad. Una vez desconectado el iPod, estos ajustes recuperan los parámetros normales. • El texto no compatible guardado en el iPod no se visualizará tampoco en la unidad. Compatibilidad con formatos de audio comprimido • Solo se mostrarán los primeros 32 caracteres de un nombre de archivo (incluyendo la extensión del archivo) o un nombre de carpeta. • Es posible que la unidad no funcione correctamente, en función de la aplicación utilizada para codificar los archivos WMA. • La reproducción de archivos de audio con datos de imagen asociados o archivos de audio almacenados en un dispositivo USB con una jerarquía de carpetas compleja podría tardar un poco en empezar. • Para poder visualizar texto en ruso en esta unidad, debe estar codificado en alguno de los conjuntos de caracteres siguientes: – Unicode (UTF-8, UTF-16) – Un conjunto de caracteres diferente de Unicode utilizado en un entorno Windows y definido como ruso en la configuración de múltiples idiomas Español STOP → No hay canciones en la lista actual. – Seleccione una lista que contenga canciones. Instrucciones de manipulación PRECAUCIÓN • Pioneer no garantiza la compatibilidad con todos los dispositivos de almacenamiento masivo USB y no asume responsabilidad alguna en caso de pérdida de datos en reproductores multimedia, smartphones u otros dispositivos al utilizar este producto. • No deje discos ni dispositivos de almacenamiento USB en lugares expuestos a temperaturas elevadas. Es 17 Archivos WMA Extensión del archivo Tasa de bits Frecuencia de muestreo Windows Media™ Audio Professional, Lossless, Voice/DRM Stream/Stream con vídeo .wma De 48 kbps a 320 kbps (CBR), de 48 kbps a 384 kbps (VBR) 32 kHz, 44,1 kHz, 48 kHz No compatible Archivos MP3 Extensión del archivo .mp3 Tasa de bits De 8 kbps a 320 kbps (CBR), VBR Frecuencia de muestreo De 8 kHz a 48 kHz (32 kHz, 44,1 kHz, 48 kHz para énfasis) 1.0, 1.1, 2.2, 2.3, 2.4 (la versión de etiqueta ID3 2.x tiene prioridad sobre la versión 1.x.) No compatible Versión de etiqueta ID3 compatible Lista de reproducción M3u MP3i (MP3 No compatible interactivo), mp3 PRO Archivos WAV • Los formatos de archivo WAV no pueden conectarse a través de MTP. Extensión del archivo Bits de cuantificación Frecuencia de muestreo .wav 8 y 16 (LPCM), 4 (MS ADPCM) De 16 kHz a 48 kHz (LPCM), 22,05 kHz y 44,1 kHz (MS ADPCM) Disco • Independientemente de la longitud de la secciones en blanco que haya entre las canciones de la grabación original, los 18 Es discos de audio comprimidos se reproducirán con una breve pausa entre cada canción. Jerarquía de carpetas reproducibles Carpetas reproducibles Archivos reproducibles Sistema de archivos Hasta ocho niveles (una jerarquía práctica debe tener menos de dos niveles) Hasta 99 Hasta 999 ISO 9660 Nivel 1 y 2, Romeo, Joliet Compatible Reproducción multisesión Transferencia de datos No compatible en formato Packet Write software de iPod compatibles se indican a continuación. Es posible que la unidad no sea compatible con versiones anteriores. Diseñado para – iPod touch (generaciones de 1.ª a 6.ª) – iPod classic – iPod con vídeo – iPod nano (generaciones de 1.ª a 7.ª) – iPhone 6s – iPhone 6s Plus – iPhone 6 – iPhone 6 Plus – iPhone 5s – iPhone 5c – iPhone 5 – iPhone 4s – iPhone 4 – iPhone 3GS – iPhone 3G – iPhone Secuencia de archivos de audio El usuario no puede asignar números de carpeta ni especificar secuencias de reproducción con esta unidad. La secuencia de los archivos de audio depende del dispositivo conectado. Tenga en cuenta que los archivos ocultos de un dispositivo USB no podrán reproducirse. Ejemplo de una jerarquía Carpeta Archivo de audio comprimido Dispositivo USB • La reproducción de archivos de audio almacenados en un dispositivo USB con una jerarquía de carpetas compleja podría tardar un poco en empezar. Jerarquía de carpetas reproducibles Carpetas reproducibles Archivos reproducibles Reproducción de archivos protegidos por derechos de autor Dispositivo USB con particiones Hasta ocho niveles (una jerarquía práctica debe tener menos de dos niveles) Hasta 500 Hasta 15 000 No compatible Solo es posible reproducir la primera partición. Compatibilidad de modelos de iPod Esta unidad es compatible únicamente con los siguientes modelos de iPod. Las versiones de • Las operaciones pueden variar en función de la generación y/o la versión del software del iPod. • Los usuarios de un iPod con conector Lightning deben utilizar el cable de Lightning a USB (suministrado con el iPod). • Los usuarios de un iPod con conector Dock deben utilizar el CD-IU51. Para obtener más información, consulte a su distribuidor. • Consulte los manuales del iPod para obtener información sobre la compatibilidad de archivos y formatos. • Audiolibro, podcast: compatible PRECAUCIÓN Pioneer declina toda responsabilidad por la pérdida de datos del iPod, aunque la pérdida se produzca durante la utilización de esta unidad. De 01 a 05: número de carpeta a : secuencia de reproducción Tabla de caracteres de ruso iPod & iPhone iPhone, iPod, iPod classic, iPod nano y iPod touch son marcas comerciales de Apple Inc., registradas en los EE. UU. y en otros países. Lightning es una marca comercial de Apple Inc. “Made for iPod” y “Made for iPhone” significan que un accesorio electrónico ha sido diseñado para ser conectado específicamente a un iPod o a un iPhone, respectivamente, y ha sido homologado por quien lo desarrolló para cumplir con las normas de funcionamiento de Apple. Apple no es responsable del funcionamiento de este aparato ni de que cumpla con las normas de seguridad y reguladoras. Tenga presente que el empleo de este accesorio con un iPod o iPhone puede afectar el funcionamiento inalámbrico. D: visor C: carácter Copyright y marcas registradas iTunes Apple e iTunes son marcas comerciales de Apple Inc., registradas en los EE.UU. y en otros países. WMA Windows Media es una marca registrada o una marca de fábrica de Microsoft Corporation en los Estados Unidos y/u otros países. Este producto incluye tecnología propiedad de Microsoft Corporation, y no se puede usar ni distribuir sin una licencia de Microsoft Licensing, Inc. MIXTRAX MIXTRAX es una marca comercial de PIONEER CORPORATION. Spotify® SPOTIFY y el logotipo de Spotify se encuentran entre las marcas registradas de Spotify AB. Se requieren dispositivos digitales móviles y una suscripción Premium, si está disponible; consulte https://www.spotify.com. Especificaciones General Fuente de alimentación: 14,4 V CC (de 10,8 V a 15,1 V permisible) Sistema de conexión a tierra: tipo negativo Consumo máximo de corriente: 10,0 A Dimensiones (An × Al × Pr): Audio Salida de potencia máxima: • 50 W × 4 canales/4 Ω (sin subwoofer) • 50 W × 2 canales/4 Ω + 70 W × 1 canal/2 Ω (con subwoofer) Salida de potencia continua: 22 W × 4 (de 50 Hz a 15 000 Hz, 5% THD, 4 Ω carga, ambos canales activados) Impedancia de carga: 4 Ω (de 4 Ω a 8 Ω permisible) Nivel de salida máxima del preamplificador: 2,0 V Contorno de sonoridad: +10 dB (100 Hz), +6,5 dB (10 kHz) (volumen: –30 dB) Ecualizador (ecualizador gráfico de 5 bandas): Frecuencia: 80 Hz/250 Hz/800 Hz/2,5 kHz/8 kHz Intervalo de ecualización: ±12 dB (pasos de 2 dB) Subwoofer (mono): Frecuencia: 50 Hz/63 Hz/80 Hz/ 100 Hz/125 Hz/160 Hz/200 Hz Curva: –12 dB/oct, –24 dB/oct Ganancia: +6 dB a –24 dB Fase: normal/inversa Reproductor de CD Sistema: sistema de audio de discos compactos Discos utilizables: discos compactos Relación señal/ruido: 94 dB (1 kHz) (red IEC-A) Número de canales: 2 (estéreo) Formato de decodificación MP3: MPEG-1 & 2 Audio Layer 3 Formato de decodificación WMA: ver. 7, 7.1, 8, 9, 10, 11, 12 (audio 2 canales) (Windows Media Player) Formato de señal WAV: PCM lineal y MS ADPCM (sin comprimir) USB Especificación estándar USB: USB 2.0 de alta velocidad Corriente máxima: 1,5 A USB Protocolo: MSC (Clase de almacenamiento masivo) MTP (Protocolo de transferencia multimedia) AOA (Open Accessory de Android) 2.0 Sistema de archivos: FAT12, FAT16, FAT32 Formato de decodificación MP3: MPEG-1 & 2 Audio Layer 3 Formato de decodificación WMA: ver. 7, 7.1, 8, 9, 10, 11, 12 (audio 2 canales) (Windows Media Player) Formato de señal WAV: PCM lineal y MS ADPCM (sin comprimir) Sintonizador FM Español Android & Google Play Android, Google Play y el logotipo de Google Play son marcas comerciales de Google Inc. DIN Bastidor: 178 mm × 50 mm × 165 mm Cara anterior: 188 mm × 58 mm × 17 mm D Bastidor: 178 mm × 50 mm × 165 mm Cara anterior: 170 mm × 46 mm × 17 mm Peso: 1 kg Intervalo de frecuencias: de 87,5 MHz a 108,0 MHz Sensibilidad utilizable: 11 dBf (1,0 μV/75 Ω, mono, señal/ruido: 30 dB) Relación señal/ruido: 72 dB (red IEC-A) Sintonizador MW Intervalo de frecuencias: de 531 kHz a 1 602 kHz Sensibilidad utilizable: 25 μV (señal/ruido: 20 dB) Relación señal/ruido: 62 dB (red IEC-A) Sintonizador LW Intervalo de frecuencias: de 153 kHz a 281 kHz Sensibilidad utilizable: 28 μV (señal/ruido: 20 dB) Es 19 Relación señal/ruido: 62 dB (red IEC-A) NOTA Las especificaciones y el diseño están sujetos a modificaciones sin previo aviso. 20 Es Español 21 Es Inhaltsverzeichnis Bevor Sie beginnen Bevor Sie beginnen................................................................................. 2 Erste Schritte............................................................................................ 3 Radio.......................................................................................................... 5 Vielen Dank für den Kauf dieses PIONEER-Produkts Um eine ordnungsgemäße Verwendung sicherzustellen, lesen Sie sich bitte dieses Handbuch durch, bevor Sie dieses Produkt verwenden. Besonders wichtig ist, dass Sie die Hinweise WARNUNG und VORSICHT in diesem Handbuch lesen. Bitte bewahren Sie das Handbuch an einem sicheren und gut zugänglichen Ort auf, um später darin nachschlagen zu können. CD/USB/iPod/AUX................................................................................... 6 App-Modus............................................................................................... 8 Spotify® ..................................................................................................... 8 Verwenden von Pioneer ARC APP........................................................ 9 Einstellungen ......................................................................................... 10 FUNCTION-Einstellungen ................................................................... AUDIO-Einstellungen........................................................................... SYSTEM-Einstellungen ........................................................................ ILLUMINATION-Einstellungen ............................................................ MIXTRAX-Einstellungen ...................................................................... 10 11 12 13 13 Anschlüsse/Einbau................................................................................ 14 Zusätzliche Informationen .................................................................. 16 Über dieses Handbuch: • In den folgenden Anweisungen werden ein USB-Stick oder USB-Audioplayer als „USBGerät” bezeichnet. • iPod und iPhone werden in diesem Handbuch als „iPod” bezeichnet. Mischen Sie dieses Produkt, wenn Sie es entsorgen wollen, nicht mit gewöhnlichen Haushaltsabfällen. Es gibt ein getrenntes Sammelsystem für gebrauchte elektronische Produkte, über das die richtige Behandlung, Rückgewinnung und Wiederverwertung gemäß der bestehenden Gesetzgebung gewährleistet wird. Privathaushalte in den Mitgliedstaaten der EU, in der Schweiz und in Norwegen können ihre gebrauchten elektronischen Produkte kostenfrei bei speziell dafür eingerichteten Sammelstellen abgeben oder zu einem Fachhändler zurückbringen (sofern sie ein vergleichbares neues Produkt kaufen). In den Ländern, die hier nicht aufgeführt sind, wenden Sie sich hinsichtlich der zu beachtenden Entsorgungsweise bitte an die zuständige Gemeindeverwaltung. Auf diese Weise stellen Sie sicher, dass das zu entsorgende Produkt der erforderlichen Verarbeitung, Rückgewinnung und Wiederverwertung zugeführt wird, und verhindern damit potenziell negative Auswirkungen auf die Umwelt sowie Gesundheitsschäden. Wichtig Bitte tragen Sie die folgenden Informationen in das dafür vorgesehene Formular in der „Schnellstartanleitung“ ein. — 14-stellige Seriennummer (an der Unterseite des Geräts angegeben) — Kaufdatum (Datum der Quittung) — Stempel des Händlers Diese Informationen dienen als Eigentumsnachweis. Im Fall eines Diebstahls teilen Sie der Polizei die 14-stellige Seriennummer und das Kaufdatum des Geräts mit. Bewahren Sie die „Schnellstartanleitung“ an einem sicheren Ort auf. WARNUNG • Versuchen Sie nicht, dieses Produkt selbst zu montieren oder zu warten. Werden Montageoder Wartungsarbeiten des Produkts von Personen ohne Ausbildung und Erfahrung hinsichtlich elektronischer Geräte und Fahrzeugzubehör vorgenommen, kann dies gefährlich sein und möglicherweise zu elektrischen Schlägen, Verletzungen oder anderen Gefahren führen. • Bedienen Sie das Gerät niemals während der Fahrt. Fahren Sie an den Straßenrand und parken Sie Ihr Fahrzeug zuerst an einem sicheren Ort, bevor Sie die Bedienelemente des Geräts bedienen. 2 De VORSICHT Optionale Fernbedienung • Lassen Sie dieses Gerät nicht in Kontakt mit Feuchtigkeit und/oder Flüssigkeiten kommen. Dies könnte zu einem elektrischen Schlag führen. Außerdem könnte es bei Kontakt mit Flüssigkeiten zu Beschädigungen des Geräts, Rauchentwicklung und Überhitzung kommen. • Wählen Sie stets eine Lautstärke, bei der Sie Umgebungsgeräusche noch deutlich wahrnehmen können. • Dieses Produkt wurde unter moderaten und tropischen Klimabedingungen entsprechend der Sicherheitsbestimmungen, IEC 60065, für Audio-, Video- und ähnliche Elektrogeräte getestet. Die Fernbedienung CD-R320 ist separat erhältlich. Häufig verwendete Bedienvorgänge Zweck Bedienung Gerät einschalten* Drücken Sie SRC/OFF, um das Gerät einzuschalten. Halten Sie SRC/OFF gedrückt, um das Gerät auszuschalten. VORSICHT Bei diesem Gerät handelt es sich um ein Laserprodukt der Klasse 1, das entsprechend dem Standard Sicherheit für Laserprodukte IEC 60825-1:2007 klassifiziert ist. Im Problemfall Sollte dieses Gerät nicht ordnungsgemäß funktionieren, dann wenden Sie sich an Ihren Händler oder an die nächstgelegene PIONEER-Kundendienststelle. Lautstärke einstellen Drehen Sie den M.C.-Regler. Quelle auswählen Drücken Sie mehrmals SRC/OFF. Anzeigeinformationen umschalten Drücken Sie mehrmals DISP. Zur vorhergehenden Anzeige/Liste zurückkehren Drücken Sie BAND/ Vom Menü zur normalen Anzeige zurückkehren Halten Sie BAND/ . gedrückt. * Wenn das blauweiße Kabel dieses Geräts an der Steuerklemme des Automatikantennenrelais des Fahrzeugs angeschlossen ist, fährt die Fahrzeugantenne aus, wenn die Quelle dieses Geräts eingeschaltet wird. Um die Antenne einzuziehen, schalten Sie die Quelle aus. Erste Schritte Grundlagen der Bedienung Anzeige im Display Anzeige DEH-X2900UI Beschreibung Erscheint, wenn eine untere Ebene des Menüs oder Ordners existiert. CD-Fach SRC (Quelle)/OFF USB-Anschluss (auswerfen) Anzeigefenster Erscheint, wenn die -Taste gedrückt wird. Deutsch M.C.-(Mehrfunktions-)Regler Erscheint, wenn der Lokalsender-Suchlauf eingeschaltet ist (Seite 10). Erscheint, wenn ein Verkehrsfunkprogramm empfangen wird. Erscheint, wenn die TA-Funktion (Verkehrsdurchsagen) eingeschaltet ist (Seite 10). Erscheint, wenn die Sound Retriever-Funktion eingeschaltet ist (Seite 11). Erscheint, wenn die Zufalls-/Shuffle-Wiedergabe eingeschaltet ist. Erscheint, wenn die Wiedergabewiederholung eingeschaltet ist. Erscheint, wenn die iPod-Steuerung eingeschaltet ist (Seite 7). BAND/ DISP (Display) Entriegelungstaste AUX-Eingangsbuchse (3,5-mm-Stereobuchse) De 3 Abnehmen des Bedienfelds Nehmen Sie das Bedienfeld ab, um einen Diebstahl zu verhindern. Ziehen Sie am Bedienfeld befestigte Kabel und Geräte ab und schalten Sie das Gerät aus, bevor Sie das Bedienfeld abnehmen. Abnehmen Anbringen Menüpunkt Beschreibung FM STEP Auswahl der FM-Schrittweite: 100 kHz oder 50 kHz. [100], [50] 3 4 [QUIT :YES] erscheint, wenn sämtliche Einstellungen vorgenommen wurden. Um zum ersten Eintrag des Einrichtungsmenüs zurückzukehren, drehen Sie den M.C.-Regler, um [QUIT :NO] auszuwählen, und drücken Sie ihn dann, um den Vorgang zu bestätigen. Drehen Sie den M.C.-Regler, um die Einstellungen zu bestätigen. HINWEISE • Sie können die Menüeinstellung durch Drücken von SRC/OFF abbrechen. • Diese Einstellungen können jederzeit über die SYSTEM- (Seite 12) und INITIAL-Einstellungen (Seite 4) vorgenommen werden. Wichtig • Setzen Sie das Bedienfeld keinen starken Erschütterungen aus. • Halten Sie das Bedienfeld von direktem Sonnenlicht und hohen Temperaturen fern. • Bewahren Sie das abgenommene Bedienfeld immer in einer Schutzhülle oder Tasche auf. Einrichtungsmenü Wenn Sie nach dem Einbau die Zündung einschalten, erscheint [SET UP :YES] im Display. 1 2 Drücken Sie den M.C.-Regler. Das Einrichtungsmenü verschwindet, wenn 30 Sekunden lang kein Bedienvorgang ausgeführt wird. Wenn Sie die Einrichtung im Moment nicht durchführen möchten, drehen Sie den M.C.-Regler, um [NO] auszuwählen, und drücken Sie ihn dann, um den Vorgang zu bestätigen. Drehen Sie den M.C.-Regler, um die Optionen auszuwählen, und drücken Sie ihn dann, um den Vorgang zu bestätigen. Um mit der nächsten Menüoption fortzufahren, müssen Sie Ihre Auswahl bestätigen. Menüpunkt Beschreibung LANGUAGE Auswahl der Sprache, in der die Textinformationen komprimierter Audiodateien angezeigt werden sollen. [ENG] (Englisch), [РУС] (Russisch), [TUR] (Türkisch) CLOCK SET Einstellung der Uhr. Abbrechen der Demoanzeige (DEMO OFF) 1 2 3 4 Drehen Sie den M.C.-Regler, um das Hauptmenü anzuzeigen. Drehen Sie den M.C.-Regler, um [SYSTEM] auszuwählen, und drücken Sie ihn dann, um den Vorgang zu bestätigen. Drehen Sie den M.C.-Regler, um [DEMO OFF] auszuwählen, und drücken Sie ihn dann, um den Vorgang zu bestätigen. Drehen Sie den M.C.-Regler, um [YES] auszuwählen, und drücken Sie ihn dann, um den Vorgang zu bestätigen. INITIAL-Einstellungen 1 2 3 4 Halten Sie SRC/OFF gedrückt, bis sich das Gerät ausschaltet. Halten Sie SRC/OFF gedrückt, um das Hauptmenü anzuzeigen. Drehen Sie den M.C.-Regler, um [INITIAL] auszuwählen, und drücken Sie ihn dann, um den Vorgang zu bestätigen. Drehen Sie den M.C.-Regler, um eine Option auszuwählen, und drücken Sie ihn dann, um den Vorgang zu bestätigen. Menüpunkt Beschreibung FM STEP Auswahl der FM-Schrittweite: 100 kHz oder 50 kHz. [100], [50] 4 De TIPP Menüpunkt Beschreibung SP-P/O MODE Wählen Sie diese Option, wenn an den Ausgangsdrähten für die Hecklautsprecher ein Breitbandlautsprecher und am CinchAusgang ein Subwoofer angeschlossen ist. [REAR/SUB.W] Die / -Tasten können auch verwendet werden, um einen voreingestellten Sender auszuwählen, wenn [SEEK] in den FUNCTION-Einstellungen auf [PCH] eingestellt ist (Seite 11). Speicher der besten Sender (BSM: Best Stations Memory) [SUB.W/SUB.W] Wählen Sie diese Option, wenn an den Ausgangsdrähten für die Hecklautsprecher ein passiver Subwoofer direkt angeschlossen und am Cinch-Ausgang ein Subwoofer angeschlossen ist. [REAR/REAR] Wählen Sie diese Option, wenn an den Ausgangsdrähten für die Hecklautsprecher Breitbandlautsprecher angeschlossen sind. Wenn an den Ausgangsdrähten für die Hecklautsprecher ein Breitbandlautsprecher angeschlossen ist und der CinchAusgang nicht verwendet wird, können Sie entweder [REAR/ SUB.W] oder [REAR/REAR] auswählen. Die sechs stärksten Sender werden auf den Zifferntasten (1/ Wählen Sie diese Option, um die neuesten Systeminformationen des Geräts zu bestätigen. 3 S/W UPDATE [SYSTEM INFO] [SYSTEM UPDATE] Wählen Sie diese Option, um das Gerät auf die neueste Software zu aktualisieren und die Einstellungen des Geräts zu initialisieren. Einzelheiten zur neuesten Software und zur Aktualisierung finden Sie auf unserer Website. SYSTEM RESET [YES], [NO] 1 2 bis 6/ ) gespeichert. Drücken Sie, nachdem Sie das Band ausgewählt haben, den M.C.-Regler, um das Hauptmenü anzuzeigen. Drehen Sie den M.C.-Regler, um [FUNCTION] auszuwählen, und drücken Sie ihn dann, um den Vorgang zu bestätigen. Drehen Sie den M.C.-Regler, um [BSM] auszuwählen, und drücken Sie ihn dann, um den Vorgang zu bestätigen. Sender manuell suchen 1 Drücken Sie, nachdem Sie das Band ausgewählt haben, / , um einen Sender auszuwählen. Halten Sie / gedrückt und lassen Sie dann die Taste los, um nach einem verfügbaren Sender zu suchen. Der Suchlauf hält an, wenn das Gerät einen Sender empfängt. Um den Suchlauf abzubrechen, drücken Sie / . Wählen Sie [YES], um die Geräteeinstellungen zu initialisieren. Das Gerät wird automatisch neu gestartet. (Einige der Einstellungen können auch nach dem Zurücksetzen des Geräts erhalten bleiben.) HINWEIS [SEEK] muss in den FUNCTION-Einstellungen auf [MAN] eingestellt sein (Seite 11). Radio Empfangen von voreingestellten Sendern 1 2 3 Drücken Sie SRC/OFF, um [RADIO] auszuwählen. Drücken Sie BAND/ oder [LW]. , um das Band auszuwählen: [FM1], [FM2], [FM3], [MW] Drücke Sie eine Zifferntaste (1/ bis 6/ ). Deutsch Die Empfangsfrequenzen dieses Geräts sind für die Nutzung in Westeuropa, Asien, dem Nahen Osten, Afrika und Ozeanien vorgesehen. Eine Nutzung in anderen Regionen kann zu schlechtem Empfang führen. Die RDS-Funktion (Radio Data System: Datenfunksystem) funktioniert nur in Regionen, die RDS-Signale für FM-Sender übertragen. Sender manuell speichern 1 Halten Sie, während Sie den zu speichernden Sender empfangen, eine der Zifferntasten (1/ bis 6/ ) gedrückt, bis sie zu blinken aufhört. Verwenden von PTY-Funktionen Das Gerät sucht anhand von PTY-Informationen (Programmtyp) nach einem Sender. 1 2 3 Drücken Sie während des FM-Empfangs . Drehen Sie den M.C.-Regler, um einen Programmtyp auszuwählen: [NEWS/INFO], [POPULAR], [CLASSICS] oder [OTHERS]. Drücken Sie den M.C.-Regler. De 5 Das Gerät beginnt, nach einem Sender zu suchen. Wenn ein Sender gefunden wurde, wird der Sendername angezeigt. HINWEISE • Um die Suche abzubrechen, drücken Sie den M.C.-Regler. • Das Sendeprogramm einiger Sender kann von der übertragenen PTY-Klassifizierung abweichen. • Wenn kein Sender den Programmtyp überträgt, nach dem Sie suchen, wird etwa zwei Sekunden lang [NOT FOUND] angezeigt, und der Tuner kehrt dann zum ursprünglichen Sender zurück. CD/USB/iPod/AUX und der Anzahl der Dateien auf dem Gerät kann es sein, dass Audiodateien/Musiktitel nicht über MTP wiedergegeben werden können. Beachten Sie, dass die MTP-Verbindung nicht mit WAVDatenformaten kompatibel ist und nicht mit der MIXTRAX-Funktion verwendet werden kann. HINWEIS Wenn Sie eine MTP-Verbindung verwenden, muss [ANDROID WIRED] in den SYSTEM-Einstellungen auf [MEMORY] eingestellt sein (Seite 12). AUX 1 Schließen Sie den Stereo-Mini-Stecker an der AUX-Eingangsbuchse an. 2 Drücken Sie SRC/OFF, um [AUX] als Quelle auszuwählen. HINWEIS Wiedergabe Ziehen Sie den Kopfhörer des externen Geräts ab, bevor Sie es an dieses Gerät anschließen. CD 1 Legen Sie eine CD mit der Etikettenseite nach oben in das CD-Fach ein. Um eine Disc auszuwerfen, stoppen Sie als Erstes die Wiedergabe, und drücken Sie dann . USB-Geräte (einschließlich Android™)/iPod 1 Öffnen Sie die Abdeckung des USB-Anschlusses. 2 Schließen Sie mit einem geeigneten Kabel das USB-Gerät/den iPod an. Wenn in den SYSTEM-Einstellungen [AUX] auf [OFF] eingestellt ist, lässt sich [AUX] nicht als Quelle auswählen (Seite 12). Bedienvorgänge In den FUNCTION-Einstellungen können Sie verschiedene Anpassungen vornehmen (Seite 10). Beachten Sie, dass die folgenden Bedienvorgänge nicht bei einem AUX-Gerät funktionieren. Um ein AUX-Gerät zu bedienen, führen Sie die Vorgänge an dem Gerät selbst aus. Zweck Drücken Sie 1/ bzw. 2/ Track/Titel (Kapitel) auswählen Drücken Sie bzw. Vor- oder zurückspulen*3 Halten Sie 1 Drücken Sie , um die Liste anzuzeigen. 2 Drehen Sie den M.C.-Regler, um den Namen oder die Kategorie der/des gewünschten Datei/Ordners auszuwählen, und drücken Sie dann den Regler, um den Vorgang zu bestätigen. 3 Drehen Sie den M.C.-Regler, um die gewünschte Datei auszuwählen, und drücken Sie ihn dann, um den Vorgang zu bestätigen. Die Wiedergabe startet. Eine Liste der Dateien im ausgewählten Ordner/in der ausgewählten Kategorie ansehen*1 Drücken Sie, wenn ein Ordner/eine Kategorie ausgewählt ist, den M.C.-Regler. Um automatisch zur [USB]-Quelle zu wechseln, wenn ein USB-Gerät/iPod an diesem Gerät angeschlossen ist, stellen Sie [USB AUTO] in den SYSTEM-Einstellungen auf [ON] (Seite 12). VORSICHT Verwenden Sie ein optionales Pioneer-USB-Kabel (CD-U50E), um das USB-Gerät anzuschließen, da jedes direkt am Gerät angeschlossene externe Gerät aus dem Gerät herausragen wird, was gefährlich sein könnte. Beenden Sie, bevor Sie das andere Gerät von diesem Gerät trennen, die Wiedergabe. MTP-Verbindung Ein Gerät mit Android-Version 4.0 oder höher kann mit Hilfe des mit dem betreffenden Gerät gelieferten Kabels über MTP an diesem Gerät angeschlossen werden. Je nach angeschlossenem Gerät 6 De bzw. . . In einer Liste nach einer Datei suchen HINWEIS AOA-Verbindungen Einzelheiten zur AOA-Verbindung finden Sie auf Seite 9. Bedienung Ordner/Album auswählen*1 gedrückt. Zweck Bedienung Nützliche Funktionen für iPods Einen Musiktitel aus dem/der ausgewählten Halten Sie, wenn ein Ordner/eine Kategorie Ordner/Kategorie abspielen*1 ausgewählt ist, den M.C.-Regler gedrückt. Alphabetische Suche (nur iPod) 1 Drücken Sie , um die Liste anzuzeigen. 2 Drehen Sie den M.C.-Regler, um die gewünschte Kategorieliste auszuwählen, und drücken Sie dann , um den alphabetischen Suchmodus aufzurufen. (Zweimaliges Drehen des M.C.-Reglers ruft ebenfalls den alphabetischen Suchmodus auf.) 3 Drehen Sie den M.C.-Regler, um einen Buchstaben auszuwählen, und drücken Sie dann den Regler, um die alphabetische Liste anzuzeigen. Um die alphabetische Suche abzubrechen, . drücken Sie BAND/ Wiedergabewiederholung Drücken Sie 6/ Zufalls-/Shuffle-Wiedergabe Drücken Sie 5/ . Shuffle-Wiedergabe aller Titel (nur iPod) Halten Sie 5/ Wiedergabe pausieren/fortsetzen Drücken Sie 4/PAUSE. Sound Retriever*1*2 Drücken Sie 3/S.Rtrv. [1]: Effektiv bei niedrigen Kompressionsraten [2]: Effektiv bei hohen Kompressionsraten Rückkehr zum Stammordner (nur CD/ USB)*1 Halten Sie Wechsel zwischen komprimierten Audiodaten und CD-DA (nur CD) Drücken Sie BAND/ . Wechsel des Laufwerks im USB-Gerät (Nur Geräte, die das USBMassenspeicherklasse-Protokoll unterstützen) Drücken Sie BAND/ . Modus der verknüpften Wiedergabe Sie können auf Musiktitel zugreifen, die einen Bezug zu dem momentan wiedergegebenen Interpreten, Album oder Genre haben. 1 Halten Sie, während Sie einen Titel anhören, gedrückt, um in den Modus der verknüpften Wiedergabe zu wechseln. 2 Drehen Sie den M.C.-Regler, um den Modus auszuwählen ([ARTIST], [ALBUM], [GENRE]), und drücken Sie dann den Regler, um den Vorgang zu bestätigen. Der ausgewählte Titel/das ausgewählte Album wird nach dem momentan wiedergegebenen Titel gespielt. HINWEIS Der ausgewählte Titel/das ausgewählte Album kann abgebrochen werden, wenn Sie Funktionen verwenden, die nicht zum Modus der verknüpften Wiedergabe gehören (z. B. Vor- und Zurückspulen). Steuerung über iPod . gedrückt. gedrückt. Deutsch *1 Nur komprimierte Audiodateien *2 Diese Funktion ist deaktiviert, wenn USB als Quelle ausgewählt und die MIXTRAX-Funktion eingeschaltet ist. *3 Wenn Sie während der Wiedergabe einer VBR-Datei die Vor- oder Rückspulfunktion verwenden, kann es sein, dass die Wiedergabezeit nicht richtig angezeigt wird. Sie können das Gerät über einen angeschlossenen iPod steuern. Die folgenden iPod-Modelle sind nicht mit dieser Funktion kompatibel. – iPod nano der 1. Generation, iPod mit Videofunktion 1 Drücken Sie während der Wiedergabe BAND/ , und wählen Sie dann den Steuerungsmodus aus. [CONTROL iPod]: Die iPod-Funktion des Geräts kann nur über den angeschlossenen iPod bedient werden. [CONTROL AUDIO]: Die iPod-Funktion des Geräts kann nur mit den Tasten des Geräts bedient werden. In diesem Modus lässt sich der angeschlossene iPod nicht ein- oder ausschalten. HINWEISE • Wenn Sie den Steuerungsmodus auf [CONTROL iPod] umschalten, pausiert die Musikwiedergabe. Verwenden Sie den angeschlossenen iPod, um die Wiedergabe fortzusetzen. • Die folgenden Bedienvorgänge sind weiterhin mit dem Gerät möglich, auch wenn der Steuerungsmodus auf [CONTROL iPod] eingestellt ist. – Pause, Vor-/Zurückspulen, Titel-/Kapitelauswahl • Die Lautstärke kann nur am Gerät eingestellt werden. Über MIXTRAX (nur USB/iPod) Die MIXTRAX-Funktion erstellt einen von Beleuchtungseffekten begleiteten NonstopMix Ihrer Musikbibliothek. Einzelheiten zu den MIXTRAX-Einstellungen finden Sie auf Seite 13. De 7 HINWEISE • Diese Funktion ist nicht mit einem über MTP angeschlossenen Android-Gerät kompatibel. • Wenn USB als Quelle ausgewählt ist und die MIXTRAX-Funktion verwendet wird, ist die SoundRetriever-Funktion deaktiviert. • Je nach Datei/Titel sind möglicherweise keine Klangeffekte verfügbar. • Schalten Sie die MIXTRAX-Funktion aus, wenn die von ihr erzeugten Beleuchtungseffekte beim Fahren stören. 1 Drücken Sie MIX, um MIXTRAX ein-/auszuschalten. Grundlegende Bedienvorgänge In den FUNCTION-Einstellungen können Sie verschiedene Anpassungen vornehmen (Seite 10). Zweck Bedienung Track auswählen Drücken Sie Vor- oder zurückspulen Halten Sie Wiedergabe pausieren/fortsetzen Drücken Sie BAND/ App-Modus Sie können sich über dieses Gerät den Ton einer Anwendung auf einem iPhone anhören. In einigen Fällen können Sie eine Anwendung mit diesem Gerät steuern. Einzelheiten zu kompatiblen Geräten finden Sie auf unserer Website. Wichtig Die Verwendung von Apps von Dritten kann eventuell die Angabe personenbezogener Daten nach sich ziehen oder notwendig machen entweder durch das Eröffnen eines Benutzerkontos o. Ä. und für bestimmte Anwendungen die Angabe von Geolokationsdaten. ALLE APPS VON DRITTEN UNTERLIEGEN DER ALLEINIGEN VERANTWORTUNG DER ANBIETER EINSCHLIESSLICH UND OHNE EINSCHRÄNKUNG DEM SAMMELN UND SICHERN DER ANWENDERDATEN UND DATENSCHUTZMASSNAHMEN. DURCH ZUGRIFF AUF APPS VON DRITTEN ERKLÄREN SIE SICH MIT DEN NUTZUNGSBEDINGUNGEN UND DATENSCHUTZRICHTLINIEN DER JEWEILIGEN ANBIETER EINVERSTANDEN. WENN SIE DEN NUTZUNGSBEDINGUNGEN UND RICHTLINIEN EINES ANBIETERS ODER DER VERWENDUNG VON GEOLOKATIONSDATEN, WO ZUTREFFEND, NICHT ZUSTIMMEN, DANN SEHEN SIE VON DER VERWENDUNG VON APPS VON DRITTEN AB. Für iPhone-Benutzer Diese Funktion ist mit iPhone- und iPod touch-Geräten mit iOS 5.0 oder höher kompatibel. HINWEIS PIONEER IST NICHT FÜR DRITTANBIETER-APPS ODER -INHALTE VERANTWORTLICH, EINSCHLIESSLICH OHNE BESCHRÄNKUNG DEREN RICHTIGKEIT ODER VOLLSTÄNDIGKEIT. DIE ALLEINIGE VERANTWORTUNG FÜR INHALT UND FUNKTIONALITÄT SOLCHER APPS TRÄGT DER ANBIETER DER APP. Wiedergabe einer Anwendung über das Gerät 1 2 3 8 De Verbinden Sie dieses Gerät mit dem mobilen Gerät. • iPhone über USB (Seite 6) Drücken Sie SRC/OFF, um [APP] auszuwählen. Bedienen Sie das mobile Gerät, um die Anwendung zu starten. bzw. . bzw. gedrückt. . Spotify® (DEH-X2900UI ist nur kompatibel mit Spotify bei Installation auf iPhone.) Spotify ist ein Musikstreaming-Dienst, der nicht mit Pioneer verbunden ist. Weitere Informationen sind unter http://www.spotify.com verfügbar. Die Spotify-Anwendung ist für kompatible Smartphones verfügbar, bitte besuchen Sie https://support.spotify.com/, um die neuesten Kompatibilitätsinformationen zu erhalten. Um Spotify während der Fahrt zu nutzen, müssen Sie zunächst die Spotify-App auf Ihr iPhone herunterladen. Sie können sie über den iTunes App Store herunterladen. Wählen Sie ein kostenloses Konto oder ein kostenpflichtiges Premium-Konto, entweder in der App oder auf spotify.com. Mit einem Premium-Konto erhalten Sie mehr Funktionen wie beispielsweise Musikhören offline. Wichtig • Dieses Produkt enthält Spotify-Software, die Drittlizenzen unterliegt, die Sie hier lesen können: www.spotify.com/connect/third-party-licenses. • Informationen über die Länder und Regionen, in denen Spotify verwendet werden kann, finden Sie unter https://www.spotify.com/us/select-your-country/. Spotify hören Aktualisieren Sie vor der Verwendung die Firmware der Spotify-Anwendung auf die neueste Version. 1 2 3 Verbinden Sie dieses Gerät mit dem mobilen Gerät. • iPhone über USB (Seite 6) Drücken Sie SRC/OFF, um [SPOTIFY] auszuwählen. Starten Sie auf dem mobilen Gerät die Spotify-Anwendung und starten Sie die Wiedergabe. Grundlegende Bedienvorgänge In den FUNCTION-Einstellungen können Sie verschiedene Anpassungen vornehmen (Seite 10). HINWEIS Welche Vorgänge verfügbar sein, kann je nach der Art des abzuspielenden Inhalts (Titel/Album/ Interpret/Playlist/Radio) variieren. Zweck Bedienung Track überspringen Drücken Sie In einer Liste nach einem Titel suchen 1 Drücken Sie (Liste), um die Liste anzuzeigen. 2 Drehen Sie den M.C.-Regler, um die gewünschte Kategorie auszuwählen, und drücken Sie ihn dann, um den Vorgang zu bestätigen. 3 Drehen Sie den M.C.-Regler, um die gewünschte Datei auszuwählen, und drücken Sie ihn dann, um den Vorgang zu bestätigen. Die Wiedergabe startet. bzw. Verwenden von Pioneer ARC APP Sie können das Gerät von der auf einem iPhone/Android-Gerät installierten Pioneer ARC APP aus bedienen. In einigen Fällen können Sie mit dem Gerät Aspekte der Anwendung steuern wie beispielsweise Quellenauswahl, Pause usw. Einzelheiten zu den in der Anwendung zur Verfügung stehenden Bedienvorgängen finden Sie im Hilfe-Abschnitt der Anwendung. . WARNUNG Versuchen Sie nicht, die Anwendung zu bedienen, während Sie fahren. Achten Sie darauf, die Straße zu verlassen und Ihr Fahrzeug an einem sicheren Ort abzustellen, bevor Sie versuchen, die Bedienelemente der Anwendung zu benutzen. Für iPhone-Benutzer Diese Funktion ist mit iPhones (iPhone 5 oder höher) und iPod touch-Geräten mit iOS 8.0 oder höher kompatibel. Sie können Pioneer ARC APP von iTunes App Store herunterladen. Drücken Sie 4/PAUSE. Für Benutzer von Android-Geräten Diese Funktion ist mit Geräten mit Android OS 4.1 oder höher kompatibel, die AOA (Android Open Accessory) 2.0 unterstützen. Sie können Pioneer ARC APP von Google Play™ herunterladen. Daumen hoch (Nur für Radio) Drücken Sie 1/ . HINWEIS Daumen runter (Nur für Radio) Drücken Sie 2/ . Zufallswiedergabe (Nur für Titel/Album/ Interpret/Playlist) Drücken Sie 5/ . Wiedergabewiederholung (Nur für Titel/ Album/Interpret/Playlist) Drücken Sie 6/ . Anhand des aktuell wiedergegebenen Songs einen Radiosender starten. 1 Halten Sie (Liste) gedrückt, um einen Radiosender zu starten. 2 Drücken Sie den M.C.-Regler. • Diese Funktion ist je nach ausgewähltem Song möglicherweise nicht verfügbar. Die Informationen über den aktuell gespielten Song speichern. Die gespeicherten Song-Informationen löschen. 1 Halten Sie 3/S.Rtrv gedrückt. [SAVE]/[UNSAVE] wird angezeigt. 2 Drücken Sie den M.C.-Regler. Wiedergabe pausieren/fortsetzen Einige Funktionen von Spotify lassen sich möglicherweise nicht mit dem Gerät bedienen. Herstellen einer Verbindung mit Pioneer ARC APP 1 2 3 4 5 Deutsch HINWEIS Es kann sein, dass einige über AOA 2.0 angeschlossene Android-Geräte aufgrund ihres eigenen Softwaredesigns unabhängig von der Version des Betriebssystems Geräusche erzeugen oder nicht richtig funktionieren. Verbinden Sie dieses Gerät mit dem mobilen Gerät. • iPhone/Android-Gerät über USB (Seite 6) Fahren Sie mit Schritt 6 fort, wenn Sie die USB-Verbindung für iPhone auswählen. Drehen Sie den M.C.-Regler, um das Hauptmenü anzuzeigen. Drehen Sie den M.C.-Regler, um [SYSTEM] auszuwählen, und drücken Sie ihn dann, um den Vorgang zu bestätigen. Drehen Sie den M.C.-Regler, um [ANDROID WIRED] auszuwählen, und drücken Sie ihn dann, um den Vorgang zu bestätigen. Drehen Sie den M.C.-Regler, um für ein über USB angeschlossenes Android-Gerät [APP CONTROL] auszuwählen. De 9 Wenn [ON] unter [P.APP AUTO ON] (Seite 12) ausgewählt wird, startet Pioneer ARC APP am Android-Gerät automatisch und alle Schritte werden durchgeführt. HINWEIS 6 7 Wenn Pioneer ARC APP noch nicht auf Ihrem Android-Gerät installiert wurde, erscheint eine Meldung, die Sie auffordert, die Anwendung auf Ihrem Android-Gerät zu installieren. Wählen Sie [OFF] unter [P.APP AUTO ON] zum Löschen der Meldung (Seite 12). Drücken Sie SRCOFF, um eine beliebige Quelle auszuwählen. 3 • MIXTRAX-Einstellungen (Seite 13) Drehen Sie den M.C.-Regler, um die Optionen auszuwählen, und drücken Sie ihn dann, um den Vorgang zu bestätigen. FUNCTION-Einstellungen Die Menüpunkte können sich je nach Quelle unterscheiden. Starten Sie Pioneer ARC APP auf dem Mobilgerät. Menüpunkt HINWEIS FM SETTING Sie können die Anwendung auch starten, indem Sie die M.C.-Taste für iPhone gedrückt halten. [TALK], [STANDARD], [MUSIC] Musik hören auf Android 1 Drücken Sie SRC/OFF, um [ANDROID] auszuwählen. Beschreibung Die Klangqualität auf die Sendesignalbedingungen des FM-Band-Signals abstimmen. (Nur verfügbar, wenn das FM-Band ausgewählt ist). BSM Die sechs stärksten Sender automatisch auf den bis 6/ ) speichern. Zifferntasten (1/ Grundlegende Bedienvorgänge REGIONAL Zweck Bedienung Track auswählen Drücken Sie Vor- oder zurückspulen Halten Sie Wiedergabe pausieren/fortsetzen Drücken Sie 4/PAUSE. Sound Retriever Drücken Sie 3/S.Rtrv. [1]: Effektiv bei niedrigen Kompressionsraten [2]: Effektiv bei hohen Kompressionsraten bzw. bzw. [ON], [OFF] . gedrückt. Den Empfang auf bestimmte Regionalprogramme beschränken, wenn AF (alternative Frequenzsuche) ausgewählt ist. (Nur verfügbar, wenn das FM-Band ausgewählt ist). LOCAL FM: [OFF], [LV1], [LV2], [LV3], [LV4] Die Suche auf Sender mit ausreichender Signalstärke beschränken. MW/LW: [OFF], [LV1], [LV2] TA [ON], [OFF] Aktuelle Verkehrsinformationen empfangen, wenn verfügbar. (Nur verfügbar, wenn das FMBand ausgewählt ist). [ON], [OFF] Dem Gerät erlauben, auf eine andere Frequenz umzuschalten, die den gleichen Sender überträgt. (Nur verfügbar, wenn das FM-Band ausgewählt ist). Einstellungen Sie können im Hauptmenü verschiedene Einstellungen vornehmen. 1 2 10 De Drehen Sie den M.C.-Regler, um das Hauptmenü anzuzeigen. Drehen Sie den M.C.-Regler, um eine der nachstehenden Kategorien auszuwählen, und drücken Sie ihn dann, um den Vorgang zu bestätigen. • FUNCTION-Einstellungen (Seite 10) • AUDIO-Einstellungen (Seite 11) • SYSTEM-Einstellungen (Seite 12) • ILLUMINATION-Einstellungen (Seite 13) AF NEWS [ON], [OFF] Die momentan ausgewählte Quelle mit Nachrichtenprogrammen unterbrechen. (Nur verfügbar, wenn das FM-Band ausgewählt ist). Menüpunkt Beschreibung Menüpunkt [MAN], [PCH] Wählen Sie die Equalizer-Kurve oder passen Sie [SUPER BASS], [POWERFUL], [NATURAL], [VOCAL], [CUSTOM1], sie an. [CUSTOM2], [FLAT] [CUSTOM1] kann für jede Quelle separat eingestellt werden. Jede der nachstehenden Wählen Sie ein Equalizer-Band Kombinationen wird jedoch automatisch auf und einen Pegel aus, um weitere dieselbe Einstellung gesetzt. Anpassungen vorzunehmen. • USB, iPod, ANDROID, SPOTIFY und APP (iPhone) Equalizer-Band: [80HZ], [250HZ], [800HZ], [2.5KHZ], [8KHZ] [CUSTOM2] ist eine für alle Quellen gemeinsam Equalizer-Pegel: [+6] bis [–6] verwendete Einstellung. Zuweisung der - bzw. -Taste, um einen Sender nach dem anderen zu suchen (manuelle Abstimmung), oder Auswahl eines Senders aus den voreingestellten Kanälen. SAVE Die Informationen über den aktuell gespielten Song auf Ihrer Musikliste auf Spotify speichern. UNSAVE Die in [SAVE] gespeicherten Song-Informationen löschen. S.RTRV USB LOUDNESS [OFF], [LOW], [MID], [HI] iPod [1] (effektiv bei niedrigen Kompressionsraten), [2] (effektiv bei hohen Kompressionsraten), [OFF] AUDIO BOOK Die Qualität komprimierter Audiosignale verbessern und einen satten Klang wiederherstellen. Nicht verfügbar, wenn: • USB als Quelle ausgewählt und die MIXTRAXFunktion eingeschaltet ist. • CD-DA/CD-TEXT wiedergegeben wird. Wiedergabegeschwindigkeit ändern. (Nicht verfügbar, wenn im Steuerungsmodus [CONTROL iPod] ausgewählt ist.) PAUSE Kompensieren, um bei niedriger Lautstärke einen klaren Klang zu erhalten. SUB.W*2 [NOR], [REV], [OFF] Auswahl der Subwoofer-Phase. SUB.W CTRL*2*3 Grenzfrequenz: [50HZ], [63HZ], [80HZ], [100HZ], [125HZ], [160HZ], [200HZ] Ausgabepegel: [–24] bis [+6] Steilheit: [–12], [–24] iPod [FASTER], [NORMAL], [SLOWER] Der Subwoofer gibt nur Signale unterhalb des ausgewählten Bereichs aus. BASS BOOST [0] bis [+6] Auswahl des Bassverstärkungspegels. AUDIO-Einstellungen Beschreibung FADER*1 Balance der Front- und Hecklautsprecher einstellen. BALANCE Balance der linken und rechten Lautsprecher einstellen. Grenzfrequenz: [OFF], [50HZ], [63HZ], [80HZ], [100HZ], [125HZ], [160HZ], [200HZ] Steilheit: [–12], [–24] Die Lautsprecher geben nur Signale oberhalb der Grenzfrequenz des Hochpassfilters (HPF) aus. [+4] bis [–4] Den Lautstärkepegel für alle Quellen außer FM einstellen. Jede der nachstehenden Kombinationen wird automatisch auf dieselbe Einstellung gesetzt. • USB, iPod, ANDROID, SPOTIFY und APP (iPhone) Deutsch HPF SETTING Wiedergabe pausieren oder fortsetzen. Menüpunkt Beschreibung EQ SETTING SEEK SLA *1 Nicht verfügbar, wenn [SUB.W/SUB.W] bei [SP-P/O MODE] in den INITIAL-Einstellungen ausgewählt ist (Seite 5). De 11 *2 Nicht verfügbar, wenn [REAR/REAR] bei [SP-P/O MODE] in den INITIAL-Einstellungen ausgewählt ist (Seite 5). *3 Nicht verfügbar, wenn [OFF] bei [SUB.W] ausgewählt ist . Menüpunkt [ON], [OFF] SYSTEM-Einstellungen Sie können auch bei ausgeschaltetem Gerät auf diese Menüs zugreifen. Menüpunkt Beschreibung LANGUAGE CLOCK SET Einstellung der Uhr (Seite 4). 12H/24H [12H], [24H] Auswahl des Zeitdarstellungsformats. AUTO PI [ON], [OFF] Auch bei Verwendung eines voreingestellten Senders nach einem anderen Sender mit demselben Programm suchen. [ON], [OFF] Wählen Sie [ON], wenn Sie ein am Gerät angeschlossenes Zusatzgerät verwenden. AUX SPOTIFY [ON], [OFF] Wählen Sie [ON], wenn Sie die Spotify-Funktion verwenden. PW SAVE* [ON], [OFF] Batterieverbrauch verringern. Das Einschalten der Quelle ist der einzige Vorgang, der erlaubt ist, wenn diese Funktion eingeschaltet ist. ANDROID WIRED [MEMORY], [APP CONTROL] 12 De Wählen Sie die für ein Android-Gerät geeignete Verbindungsmethode. Wählen Sie [ON], um automatisch Pioneer ARC APP zu starten, wenn ein Android-Gerät über AOA mit dem Gerät verbunden ist. (Nicht verfügbar, wenn [MEMORY] unter [ANDROID WIRED] ausgewählt ist.) USB AUTO [ON], [OFF] [ENG] (Englisch), [РУС] (Russisch), Auswahl der Sprache, in der die [TUR] (Türkisch) Textinformationen komprimierter Audiodateien angezeigt werden sollen. Beschreibung P.APP AUTO ON Wählen Sie [ON], um automatisch auf die [USB]Quelle umzuschalten, wenn ein USB-Gerät/iPod an diesem Gerät angeschlossen ist. Wählen Sie [OFF], wenn ein USB-Gerät/iPod nur zum Aufladen an diesem Gerät angeschlossen wird. * [PW SAVE] wird abgebrochen, wenn die Fahrzeugbatterie getrennt wird, und muss nach erneutem Anschließen der Batterie wieder eingeschaltet werden. Wenn [PW SAVE] ausgeschaltet ist, kann es abhängig von den Verbindungsmethoden sein, dass das Gerät weiterhin Strom von der Batterie bezieht, wenn die Zündung Ihres Fahrzeugs keine ACC-Stellung (Stromversorgung über Starterbatterie) hat. ILLUMINATION-Einstellungen MIXTRAX-Einstellungen Menüpunkt Menüpunkt Beschreibung COLOUR [KEY COLOUR], [DISP COLOUR], [BOTH COLOUR] Auswahl der Farbe für die Tasten/das Display des Geräts aus 12 voreingestellten Farben, [SCAN] oder [CUSTOM]*. • [SCAN]: Automatischer Durchlauf durch eine Reihe verschiedener Farben. • [CUSTOM]*: 1 Halten Sie den M.C.-Regler gedrückt, bis die Anzeige zur Farbeinstellung erscheint. 2 Stellen Sie die Hauptfarbe (R (rot)/G (grün)/B (blau)) und die Helligkeitsstufe ([0] bis [60]) ein. Es ist nicht möglich, für alle drei Farben R (rot), G (grün), B (blau) gleichzeitig einen Wert von unter 10 einzustellen. Sie können die voreingestellten Farben auch anpassen. Wählen Sie eine der voreingestellten Farben aus, und halten Sie dann den M.C.-Regler gedrückt, bis die Anzeige zur Farbeinstellung erscheint. * Die CUSTOM-Einstellung ist nur für [KEY COLOUR] und [DISP COLOUR] verfügbar. DIM SETTING [SYNC ILLUMI], [SYNC CLOCK], [MANUAL] [1.0 MIN], [1.5 MIN], [2.0 MIN], [2.5 MIN], [3.0 MIN], [OFF] Auswahl der Wiedergabedauer. FLASH AREA [KEY/DISPLAY], [KEY], [OFF] Auswahl des Bereichs für den Beleuchtungseffekt. Wenn [OFF] ausgewählt ist, wird die in den ILLUMINATION-Einstellungen (Seite 13) eingestellte Farbe als Displayfarbe verwendet. FLASH PATTERN [SOUND LEVEL 1] bis [SOUND LEVEL 6] Anpassung des Beleuchtungseffekts an den Ton- und Basspegel. Das Blinkmuster ändert sich anhand des Tonpegels. [LOW PASS 1] bis [LOW PASS 6] Das Blinkmuster ändert sich anhand des Basspegels. [RANDOM1] Das Blinkmuster ändert sich zufällig anhand von Tonpegel- und Tiefpassmodus. [RANDOM2] Das Blinkmuster ändert sich anhand des Tonpegelmodus. [RANDOM3] Das Blinkmuster ändert sich anhand des Tiefpassmodus. Displayhelligkeit ändern. [ON], [OFF] Auswahl der Helligkeit für die Tasten/das Display der Einheit von [1] bis [10]. Welche Einstellbereiche verfügbar sind, richtet sich nach [DIM SETTING]. Ein-/Ausschalten der MIXTRAX-Spezialeffekte. CUT IN FX [ON], [OFF] Deutsch DISPLAY FX BRIGHTNESS [KEY], [DISP] Beschreibung SHORT PLAYBCK Ein-/Ausschalten der MIXTRAX-Klangeffekte beim manuellen Umschalten von Tracks. ILLUMI FX [ON], [OFF] Der Beleuchtungseffekt ist zu sehen, wenn eine CD eingelegt/ausgeworfen wird. Ungeachtet dieser Einstellung wird der Beleuchtungseffekt beim Ein-/Ausschalten der ACC-Stromversorgung aktiviert. De 13 Anschlüsse/Einbau Anschlüsse Wichtig • Wenn dieses Gerät in ein Fahrzeug eingebaut wird, das ein Zündschloss ohne ACC-Stellung (Stromversorgung über Starterbatterie) hat, und das rote Kabel nicht mit dem Anschluss verbunden wird, der die Betätigung des Zündschlüssels erkennt, kann dies zur Entladung der Batterie führen. ACC-Stellung Keine ACC-Stellung • Die Verwendung dieses Geräts in anderen als den folgenden Bedingungen könnte zu einem Brand oder Funktionsstörungen führen. – Fahrzeuge mit 12-Volt-Batterie und negativer Erdung. – Wenn der Lautsprecherausgang von 4 Kanälen genutzt wird, verwenden Sie Lautsprecher mit über 50 W (maximaler Eingabewert) und 4 Ω bis 8 Ω (Impedanzwert). Verwenden Sie für dieses Gerät keine Lautsprecher mit Impedanzen von 1 Ω bis 3 Ω. – Wenn der Hecklautsprecherausgang von einem 2-Ω-Subwoofer genutzt wird, verwenden Sie Lautsprecher mit über 70 W (maximaler Eingabewert). * Zur Verbindungsmethode siehe den Abschnitt „Verbindungen“. • Um Kurzschlüsse, Überhitzung oder Fehlfunktionen zu vermeiden, achten Sie darauf, die nachstehenden Anweisungen zu befolgen. – Unterbrechen Sie vor dem Einbau den Minuspol der Autobatterie. 14 De – Sichern Sie Kabel mit Kabelklemmen oder Klebeband. Wickeln Sie Klebeband um Kabel, die mit Metallteilen in Kontakt kommen, um die Kabel zu schützen. – Verlegen Sie alle Kabel mit einem Abstand zu beweglichen Teilen wie Schalthebel und Sitzschiene. – Verlegen Sie alle Kabel mit einem Abstand zu warmen Umgebungen, z. B. der Auslassöffnung der Heizung. – Verbinden Sie das gelbe Kabel nicht mit der Batterie, indem Sie es durch das Loch zum Motorraum führen. – Verkleiden Sie nicht angeschlossene Kabelanschlüsse mit Isolierband. – Kürzen Sie keine Kabel. – Durchschneiden Sie niemals die Isolierung des Stromkabels dieses Geräts, um weitere Geräte mit Strom zu versorgen. Die Strombelastbarkeit des Kabels ist begrenzt. – Verwenden Sie eine Sicherung mit dem vorgeschriebenen Sicherungswert. – Schließen Sie das negative Lautsprecherkabel niemals direkt an Masse an. – Binden Sie niemals die negativen Kabel mehrerer Lautsprecher zusammen. • Wenn dieses Gerät eingeschaltet ist, werden Steuersignale durch das blauweiße Kabel gesendet. Schließen Sie dieses Kabel an der Systemfernbedienung eines externen Leistungsverstärkers oder an der Steuerklemme des Automatikantennenrelais des Fahrzeugs an (max. 300 mA 12 V Gleichspannung). Wenn das Fahrzeug eine Scheibenantenne besitzt, schließen Sie sie am Stromversorgungsanschluss für den Antennenverstärker an. • Schließen Sie das blauweiße Kabel niemals am Stromanschluss eines externen Leistungsverstärkers an. Schließen Sie es auch niemals am Stromanschluss der Autoantenne an. Dadurch kann es zu Batterieentladung oder Funktionsstörungen kommen. • Das schwarze Kabel ist das Massekabel. Massekabel für dieses Gerät und andere Geräte (insbesondere Hochstromprodukte wie Leistungsverstärker) müssen separat verlegt und angeschlossen werden. Andernfalls kann ein versehentliches Abziehen zu einem Brand oder Funktionsstörungen führen. • Das am Produkt angebrachte grafische Symbol bedeutet Gleichstrom. Stromkabel Dieses Gerät Stromkabeleingang Rückseitiger Anschluss AUX IN | [Tel In] (3,5-mm-Stereobuchse) Ein spezieller rückseitiger Eingang, der nur mit externen BluetoothFreisprechanlagen-Kits kompatibel ist. Das Audiosignal wird während des Telefonanrufs stummgeschaltet, wenn das gelb-schwarze Kabel angeschlossen/aktiviert ist. Hecklautsprecher- oder SubwooferAusgang Frontlautsprecherausgang Antenneneingang Sicherung (10 A) Eingang für Kabelfernbedienung Hier kann ein festverdrahteter Fernbedienungsadapter angeschlossen werden (separat erhältlich). Zum Stromkabeleingang Je nach Fahrzeugart kann die Funktion von und abweichen. Achten Sie in diesem Fall darauf, an und an anzuschließen. Gelb Konstantspannung (oder Zündschlossstrom) Gelb An der 12-V-Konstantspannungsbuchse anschließen. Rot Zündschlossstrom (oder Konstantspannung) Rot An der vom Zündschlüssel gesteuerten Buchse (12 V Gleichspannung) anschließen. Verbinden Sie die jeweils gleichfarbigen Kontakte miteinander. Schwarz (Gehäuseerdung) Blauweiß Die Polanordnung des ISO-Steckers variiert je nach Fahrzeugtyp. Verbinden Sie und , wenn Pol 5 zur HINWEISE • Ändern Sie das Grundeinstellungsmenü dieses Geräts. Siehe [SP-P/O MODE] (Seite 5). Der Subwoofer-Ausgang dieses Geräts ist monaural. • Achten Sie bei Verwendung eines Subwoofers mit 2 Ω darauf, den Subwoofer am violetten und schwarzvioletten Kabel dieses Geräts anzuschließen. Schließen Sie nichts am grünen und schwarzgrünen Kabel an. Leistungsverstärker (separat erhältlich) Stellen Sie diese Verbindungen her, wenn Sie den optionalen Verstärker verwenden. Systemfernbedienung Am blauweißen Kabel anschließen. Leistungsverstärker (separat erhältlich) Mit Cinch-Kabeln verbinden (separat erhältlich) Zum Ausgang für die Frontlautsprecher Frontlautsprecher Zum Ausgang für die Hecklautsprecher oder den Subwoofer Hecklautsprecher oder Subwoofer Einbau Wichtig • Prüfen Sie alle Anschlüsse und Systeme vor dem endgültigen Einbau. • Verwenden Sie keine nicht autorisierten Teile, da dies Funktionsstörungen verursachen kann. • Wenden Sie sich an Ihren Händler, wenn der Einbau das Bohren von Löchern oder andere Modifikationen des Fahrzeugs erfordert. • Bauen Sie dieses Gerät nicht dort ein, wo: – es den Betrieb des Fahrzeugs stören kann. – es infolge plötzlichen Anhaltens eine Verletzung von Insassen verursachen kann. • Der Halbleiterlaser wird beschädigt, wenn er sich überhitzt. Bauen Sie dieses Gerät mit einem Abstand zu warmen Umgebungen, z. B. der Auslassöffnung der Heizung, ein. • Eine optimale Leistung wird erzielt, wenn das Gerät in einem Winkel von weniger als 60 ° eingebaut wird. • Achten Sie, um eine ordnungsgemäße Wärmeableitung des Geräts sicherzustellen, beim Einbau darauf, reichlich Platz hinter der Rückwand des Geräts zu lassen und lose Kabel so aufzuwickeln, dass sie nicht die Lüftungsschlitze blockieren. andere Funktionsstörungen verursachen. Wenn Sie nicht den mitgelieferten Montagerahmen verwenden 1 Ermitteln Sie die passende Position, bei der die Löcher des Befestigungswinkels und die Löcher an der Geräteseite aufeinandertreffen. 2 Ziehen Sie auf jeder Seite zwei Schrauben an. Reichlich Platz 5 cm lassen Schneidschraube (5 mm × 9 mm, nicht im Lieferumfang des Produkts) Befestigungswinkel Armaturenbrett oder Konsole 5 cm Einbau in einer DIN-Halterung 1 Schieben Sie den mitgelieferten 2 Montagerahmen in das Armaturenbrett. Sichern Sie den Montagerahmen mit Hilfe eines Schraubendrehers, indem Sie die Metallzungen (90 °) an ihren richtigen Platz biegen. Armaturenbrett Montagerahmen • Stellen Sie sicher, dass das Gerät sicher an seinem Platz eingebaut ist. Ein instabiler Einbau kann Aussetzer oder Entfernen des (mit dem mitgelieferten Montagerahmen eingebauten) Geräts 1 Entfernen Sie den Klemmflansch. Deutsch Antennensteuerung vorgesehen ist. Bei und anderen Fahrzeugtypen dürfen keinesfalls verbunden werden. Blauweiß An der Systemfernbedienungsbuchse des Leistungsverstärkers anschließen (max. 300 mA 12 V Gleichspannung). Blauweiß An der Steuerklemme des Automatikantennenrelais anschließen (max. 300 mA 12 V Gleichspannung). Lautsprecherkabel Weiß: Vorn links Schwarzweiß: Vorn links Grau: Vorn rechts Schwarzgrau: Vorn rechts Grün: hinten links oder Subwoofer Schwarzgrün: hinten links oder Subwoofer Violett: hinten rechts oder Subwoofer Schwarzviolett: hinten rechts oder Subwoofer Orangeweiß Mit dem Beleuchtungssignal eines Autos verbinden. ISO-Stecker Bei einigen Fahrzeugen kann der ISOStecker in zwei Einheiten aufgeteilt sein. Achten Sie in diesem Fall darauf, die Verbindung mit beiden Einheiten herzustellen. Klemmflansch Kerbzunge • Durch Entriegeln des Bedienfelds wird der Klemmflansch leichter zugänglich. • Beim Wiederanbringen des Klemmflanschs muss die gekerbte Seite nach unten zeigen. De 15 2 3 Schieben Sie die mitgelieferten Entnahmeschlüssel in beide Seiten des Geräts, bis sie mit einem Klicken einrasten. Ziehen Sie das Gerät aus dem Armaturenbrett. Zusätzliche Informationen Fehlerbehebung Das Display kehrt automatisch zur normalen Anzeige zurück. → Es wurden etwa 30 Sekunden lang keine Bedienvorgänge ausgeführt. – Führen Sie einen Bedienvorgang aus. Der Wiederholbereich ändert sich unerwartet. → Je nach Wiederholbereich kann sich der ausgewählte Bereich bei Auswahl eines anderen Ordners oder Tracks oder während des Vor-/Zurückspulens ändern. – Wählen Sie den Wiederholbereich erneut aus. Ein Unterordner wird nicht wiedergegeben. → Unterordner können nicht wiedergegeben werden, wenn [FLD] (Ordnerwiederholung) ausgewählt ist. – Wählen Sie einen anderen Wiederholbereich aus. Der Ton wird unterbrochen. → Sie verwenden ein Gerät wie z. B. ein Mobiltelefon, das hörbare Störungen verursachen kann. – Vergrößern Sie den Abstand elektrischer Geräten, die möglicherweise die Störung verursachen, zum Gerät. Fehlermeldungen Allgemeines AMP ERROR → Betriebsstörung des Geräts oder falsche Lautsprecherverbindung. 16 De → Die Schutzschaltung ist aktiviert. – Überprüfen Sie die Lautsprecherverbindung. – Schalten Sie die Zündung OFF und dann wieder ON. Sollte die Meldung weiter angezeigt werden, wenden Sie sich zur Unterstützung an Ihren Händler oder eine PioneerKundendienststelle. NO XXXX (beispielsweise NO TITLE) → Es gibt keine eingebetteten Textinformationen. – Schalten Sie die Anzeige um oder spielen Sie einen anderen Track/eine andere Datei. CD-Player ERROR-07, 11, 12, 17, 30 → Die Disc ist verschmutzt. – Reinigen Sie die Disc. → Die Disc ist verkratzt. – Wechseln Sie die Disc aus. ERROR-07, 10, 11, 12, 15, 17, 30, A0 → Es liegt ein elektrischer oder mechanischer Fehler vor. – Schalten Sie die Zündung AUS und wieder EIN, oder schalten Sie auf eine andere Quelle um und dann wieder zum CD-Player zurück. ERROR-15 → Die eingelegte Disc ist leer. – Wechseln Sie die Disc aus. ERROR-23 → Nicht unterstütztes CD-Format. – Wechseln Sie die Disc aus. FORMAT READ → Nach dem Wiedergabestart ist der Ton manchmal erst nach einer Verzögerung zu hören. – Warten Sie, bis die Meldung erlischt und Sie den Ton hören. SKIPPED → Das angeschlossene USB-Gerät enthält DRM-geschützte Dateien (digitale Rechteverwaltung). – Die geschützten Dateien werden übersprungen. NO AUDIO → Die eingelegte Disc enthält keine abspielbaren Dateien. – Wechseln Sie die Disc aus. PROTECT → Sämtliche Dateien auf dem angeschlossenen USB-Gerät sind DRMgeschützt (digitale Rechteverwaltung). – Wechseln Sie das USB-Gerät aus. SKIPPED → Die eingelegte Disc enthält DRMgeschützte Dateien (digitale Rechteverwaltung). – Die geschützten Dateien werden übersprungen. PROTECT → Sämtliche Dateien auf der eingelegten Disc sind DRM-geschützt (digitale Rechteverwaltung). – Wechseln Sie die Disc aus. USB-Gerät/iPod NO AUDIO → Es sind keine Musiktitel vorhanden. – Übertragen Sie die Audiodateien an das USB-Gerät und schließen Sie es an. → Auf dem angeschlossenen USB-Gerät ist die Sicherheitsfunktion aktiviert. – Folgen Sie den Anweisungen des USBGeräts, um die Sicherheitsfunktion zu deaktivieren. HUB ERROR → Das über einen USB-Hub angeschlossene USB-Gerät wird von diesem Gerät nicht unterstützt. – Schließen Sie das USBGerät über ein USB-Kabel an diesem Gerät an. CHECK USB → Der USB-Anschluss oder das USB-Kabel wurde kurzgeschlossen. – Vergewissern Sie sich, dass der USBAnschluss oder das USB-Kabel nicht eingeklemmt oder beschädigt ist. → Das angeschlossene USB-Gerät hat einen höheren als den maximal zulässigen Stromverbrauch. – Trennen Sie das USB-Gerät ab und verwenden Sie es nicht. Schalten Sie die Zündung AUS und dann wieder auf ACC oder EIN. Schließen Sie nur kompatible USB-Geräte an. → Der iPod funktioniert ordnungsgemäß, wird aber nicht geladen. – Vergewissern Sie sich, dass kein Kurzschluss des iPod-Kabels vorliegt (z. B. durch Einklemmen zwischen Metallgegenständen). Schalten Sie ERROR-19 → Kommunikation fehlgeschlagen. – Führen Sie einen der folgenden Bedienvorgänge aus, und kehren Sie dann zur USB-Quelle zurück. • Schalten Sie die Zündung AUS und wieder EIN. • Trennen Sie das USB-Gerät ab. • Schalten Sie auf eine andere Quelle um. → iPod-Störung. – Trennen Sie das Kabel vom iPod. Schließen Sie, sobald auf dem iPod das Hauptmenü angezeigt wird, den iPod erneut an und setzen Sie ihn zurück. ERROR-23 → Das USB-Gerät wurde nicht ordnungsgemäß formatiert. – Formatieren Sie das USB-Gerät mit FAT12, FAT16 oder FAT32. ERROR-16 → Die iPod-Firmware ist veraltet. – Aktualisieren Sie die iPod-Version. → iPod-Störung. – Trennen Sie das Kabel vom iPod. Schließen Sie, sobald auf dem iPod das Hauptmenü angezeigt wird, den iPod erneut an und setzen Sie ihn zurück. STOP → Auf der aktuellen Liste befinden sich keine Musiktitel. – Wählen Sie eine Liste aus, die Musiktitel enthält. NOT FOUND → Keine entsprechenden Musiktitel gefunden. – Übertragen Sie Musiktitel an den iPod. Apps START UP APP → Die Anwendung wird noch nicht ausgeführt. – Bedienen Sie das mobile Gerät, um die Anwendung zu starten. Spotify CHECK APP → Die Verbindung mit der SpotifyAnwendung ist fehlgeschlagen. – Folgen Sie den auf dem Bildschirm gezeigten Anweisungen. Handhabungsrichtlinien Discs und Player • Verwenden Sie ausschließlich Discs, die eines der beiden folgenden Logos tragen. • Verwenden Sie 12-cm-Discs. • Verwenden Sie ausschließlich herkömmliche, runde Discs. • Die folgenden Disc-Typen können nicht mit diesem Gerät verwendet werden: – DualDiscs – 8-cm-Discs: Versuche, solche Discs mit einem Adapter zu verwenden, können zu Funktionsstörungen des Geräts führen. – Ungewöhnlich geformte Discs – Andere Discs als CDs – Beschädigte Discs, darunter solche mit Rissen, Abplatzern oder Verwellungen – CD-R/RW-Discs mit nicht abgeschlossener Aufzeichnung • Beschreiben Sie die Oberfläche der Discs nicht und behandeln Sie sie nicht mit Chemikalien. De Deutsch FORMAT READ → Nach dem Wiedergabestart ist der Ton manchmal erst nach einer Verzögerung zu hören. – Warten Sie, bis die Meldung erlischt und Sie den Ton hören. N/A USB → Das angeschlossene USB-Gerät wird von diesem Gerät nicht unterstützt. – Trennen Sie Ihr Gerät ab und ersetzen Sie es durch ein kompatibles USBGerät. nach dem Überprüfen die Zündung AUS und wieder EIN, oder trennen Sie den iPod ab und schließen Sie ihn wieder an. 17 • Wischen Sie CDs zum Reinigen mit einem weichen Tuch von der Mitte nach außen hin ab. • Kondensation kann die Leistung des Players vorübergehend beeinträchtigen. Warten Sie ungefähr eine Stunde, bis die Anpassung an eine wärmere Temperatur erfolgt ist. Wischen Sie außerdem feuchte Discs mit einem weichen Tuch ab. • Bei Verwendung von bedruckbaren Discs beachten Sie die Anleitung und die Warnhinweise der Discs. Je nach Disc kann es sein, dass sie sich nicht einlegen und auswerfen lässt. Die Verwendung solcher Discs kann zu einer Beschädigung dieses Geräts führen. • Bringen Sie auf den Discs keine handelsüblichen Etiketten oder anderen Materialien an. – Die Discs können sich verformen und dadurch nicht mehr abspielbar sein. – Die Etiketten können sich während der Wiedergabe lösen und das Auswerfen der Discs verhindern, was zu einer Beschädigung des Geräts führen kann. USB-Speichergerät • Verbindungen über USB-Hubs werden nicht unterstützt. • Sorgen Sie vor der Fahrt für eine sichere Befestigung des USB-Speichergeräts. Lassen Sie das USB-Speichergerät nicht auf den Boden fallen, wo es unter dem Brems- oder Gaspedal eingeklemmt werden könnte. • Je nach USB-Speichergerät können die folgenden Probleme auftreten. – Die Bedienung kann unterschiedlich sein. – Möglicherweise wird das Speichergerät nicht erkannt. – Möglicherweise werden Dateien nicht richtig wiedergegeben. – Das Gerät kann Störgeräusche verursachen, wenn Sie Radio hören. 18 De iPod • Bewahren Sie den iPod nicht an Orten mit hohen Temperaturen auf. • Sorgen Sie für eine sichere Befestigung des iPods während er Fahrt. Lassen Sie den iPod nicht auf den Boden fallen, wo er unter dem Brems- oder Gaspedal eingeklemmt werden könnte. • Die Einstellungen des iPods, z. B. Equalizer und Wiedergabewiederholung, ändern sich beim Anschließen des iPods an das Gerät automatisch. Wenn der iPod vom Gerät getrennt wird, kehren diese Einstellungen wieder in ihren ursprünglichen Zustand zurück. • Auf dem iPod gespeicherter inkompatibler Text wird vom Gerät nicht angezeigt. Kompatibilität komprimierter Audioformate • Nur die ersten 32 Zeichen können als Dateiname (einschließlich Dateierweiterung) oder Ordnername angezeigt werden. • Je nach der zur Codierung von WMADateien verwendeten Anwendung kann es sein, dass das Gerät nicht richtig arbeitet. • Bei Audiodateien mit eingebetteten Bilddaten oder bei auf einem USB-Gerät mit komplexer Ordnerstruktur gespeicherten Audiodateien kann sich geringfügig der Beginn der Wiedergabe verzögern. • Zur Anzeige auf diesem Gerät sollte russischer Text in einem der folgenden Zeichensätze codiert sein: – Unicode (UTF-8, UTF-16) – Ein anderer Zeichensatz als Unicode, der in einer Windows-Umgebung verwendet wird und in den Sprachoptionen auf Russisch eingestellt ist VORSICHT • Pioneer kann nicht die Kompatibilität mit allen USB-Massenspeichergeräten gewährleisten und übernimmt keine Verantwortung für eventuelle Datenverluste auf Media-Playern, Smartphones oder anderen Geräten, die zusammen mit diesem Produkt verwendet werden. • Bewahren Sie Discs oder USBSpeichergeräte nicht an Orten auf, an denen hohe Temperaturen herrschen können. WMA-Dateien Dateierweiterung Bitrate Abtastfrequenz Windows Media™ Audio Professional, Lossless, Voice/DRM Stream/Stream mit Video .wma 48 Kbit/s bis 320 Kbit/s (CBR), 48 Kbit/s bis 384 Kbit/s (VBR) 32 kHz, 44,1 kHz, 48 kHz Nicht kompatibel MP3-Dateien Dateierweiterung Bitrate .mp3 8 Kbit/s bis 320 Kbit/s (CBR), VBR Abtastfrequenz 8 kHz bis 48 kHz (32 kHz, 44,1 kHz, 48 kHz zur Emphase) Kompatible ID3-Tag1.0, 1.1, 2.2, 2.3, 2.4 Version (ID3-Tag-Version 2.x erhält Vorrang vor Version 1.x.) M3u-Wiedergabeliste Nicht kompatibel MP3i (MP3 interaktiv), Nicht kompatibel mp3 PRO WAV-Dateien • WAV-Datenformate können nicht über MTP verbunden werden. Dateierweiterung Quantisierungsbits Abtastfrequenz .wav 8 und 16 (LPCM), 4 (MS ADPCM) 16 kHz bis 48 kHz (LPCM), 22,05 kHz und 44,1 kHz (MS ADPCM) Disc • Ungeachtet der Länge der Leerstellen, die die Originalaufnahme zwischen den einzelnen Musiktiteln aufweist, wird bei der Wiedergabe von komprimierten Audio-Discs stets eine kurze Pause zwischen den Titeln eingefügt. Abspielbare Ordnerstruktur Abspielbare Ordner Abspielbare Dateien Dateisystem Bis zu acht Ebenen (Praktikabel sind weniger als zwei Ebenen.) Bis zu 99 Bis zu 999 ISO 9660 Stufe 1 und 2, Romeo, Joliet Kompatibel Multi-SessionWiedergabe Datenübertragung im Nicht kompatibel Paketverfahren USB-Gerät • Der Beginn der Wiedergabe von auf einem USB-Gerät mit komplexer Ordnerstruktur gespeicherten Audiodateien kann sich geringfügig verzögern. Abspielbare Ordnerstruktur Abspielbare Ordner Abspielbare Dateien Bis zu acht Ebenen (Praktikabel sind weniger als zwei Ebenen.) Bis zu 500 Bis zu 15 000 Wiedergabe von urheberrechtlich geschützten Dateien Partitioniertes USBGerät Nicht kompatibel Es kann nur die erste Partition wiedergegeben werden. iPod-Kompatibilität Dieses Gerät unterstützt nur die folgenden iPodModelle. Die unterstützten iPodSoftwareversionen sind nachstehend aufgelistet. Ältere Versionen werden ggf. nicht unterstützt. Hergestellt für • Die Bedienung kann sich je nach Generation und/oder Softwareversion des iPods unterscheiden. • Benutzer eines iPods mit LightningAnschluss sollten das Lightning-auf-USBKabel verwenden (im Lieferumfang des iPods enthalten). • Benutzer eines iPods mit Dock-Anschluss sollten das CD-IU51 verwenden. Einzelheiten erfahren Sie bei Ihrem Fachhändler. Russische Zeichentabelle VORSICHT Pioneer übernimmt keine Haftung für den Verlust von iPod-Daten, auch dann nicht, wenn der Verlust der betreffenden Daten während der Verwendung dieses Geräts aufgetreten ist. Reihenfolge von Audiodateien Der Benutzer kann mit diesem Gerät keine Ordnernummern zuweisen und auch nicht die Wiedergabereihenfolge festlegen. Die Reihenfolge der Audiodateien richtet sich nach dem angeschlossenen Gerät. Beachten Sie, dass sich auf einem USBGerät befindliche versteckte Dateien nicht abspielen lassen. Android & Google Play Android, Google Play und der Google PlayLogo sind Warenzeichen von Google Inc. D: Anzeige C: Zeichen Beispielstruktur Ordner Komprimierte Audiodatei Urheberrechte und Marken iTunes Apple und iTunes sind Marken von Apple Inc., eingetragen in den USA und anderen Ländern. 01 bis 05: Ordnernummer bis : Wiedergabereihenfolge iPod & iPhone iPhone, iPod, iPod classic, iPod nano und iPod touch sind in den USA sowie in anderen Ländern eingetragene Marken von Apple Inc. Lightning ist eine Marke der Apple Inc. Die Kennzeichnungen „Made for iPod” und „Made for iPhone” bedeuten, dass ein elektronisches Zubehörteil spezifisch zum Anschluss an iPod oder iPhone konstruiert wurde und entsprechend vom Entwickler als die Leistungsstandards von Apple erfüllend zertifiziert wurde. Apple übernimmt keine Verantwortung für die richtige Funktion dieses Geräts oder seine Erfüllung von Sicherheitsoder anderen Vorschriften. Bitte beachten Sie, dass der Gebrauch dieses Zubehörteils in Verbindung mit einem iPod oder iPhone die drahtlose Leistung beeinträchtigen kann. WMA Windows Media ist eine eingetragene Marke oder eine Marke der Microsoft Corporation in den USA und/oder anderen Ländern. Dieses Produkt enthält Technologie, die Eigentum der Microsoft Corporation ist und nicht ohne Lizenz von Microsoft Licensing, Inc. vertrieben werden darf. MIXTRAX MIXTRAX ist eine Marke der PIONEER CORPORATION. Spotify® SPOTIFY und das Spotify-Logo sind eingetragene Warenzeichen von Spotify AB. Soweit vorhanden, sind kompatible digitale Mobilgeräte und ein PremiumAbonnement erforderlich; Informationen dazu finden Sie unter https:// www.spotify.com. Deutsch – iPod touch (1. bis 6. Generation) – iPod classic – iPod mit Videofunktion – iPod nano (1. bis 7. Generation) – iPhone 6s – iPhone 6s Plus – iPhone 6 – iPhone 6 Plus – iPhone 5s – iPhone 5c – iPhone 5 – iPhone 4s – iPhone 4 – iPhone 3GS – iPhone 3G – iPhone • Informationen zur Datei-/ Formatkompatibilität finden Sie in den iPod-Handbüchern. • Hörbücher, Podcast: Kompatibel Technische Daten Allgemeines Stromspannung: 14,4 V Gleichspannung (Toleranz 10,8 V bis 15,1 V) Erdungssystem: Negativ Maximale Leistungsaufnahme: 10,0 A Abmessungen (B × H × T): De 19 DIN Gehäuse: 178 mm × 50 mm × 165 mm Frontfläche: 188 mm × 58 mm × 17 mm D Gehäuse: 178 mm × 50 mm × 165 mm Frontfläche: 170 mm × 46 mm × 17 mm Gewicht: 1 kg Audio Maximale Ausgangsleistung: • 50 W × 4 ch/4 Ω (wenn ohne Subwoofer) • 50 W × 2 ch/4 Ω + 70 W × 1 ch/2 Ω (für Subwoofer) Dauer-Ausgangsleistung: 22 W × 4 (50 Hz bis 15 000 Hz, 5 % THD, bei 4-Ω-Last, beide Kanäle betrieben) Lastimpedanz: 4 Ω (4 Ω bis 8 Ω zulässig) Maximaler Preout-Ausgangspegel: 2,0 V Loudness-Kontur: +10 dB (100 Hz), +6,5 dB (10 kHz) (Lautstärke: –30 dB) Equalizer (Grafischer 5-Band-Equalizer): Frequenz: 80 Hz/250 Hz/800 Hz/ 2,5 kHz/8 kHz Entzerrungsbereich: ±12 dB (Inkrement 2 dB) Subwoofer (Mono): Frequenz: 50 Hz/63 Hz/80 Hz/100 Hz/ 125 Hz/160 Hz/200 Hz Steilheit: –12 dB/Okt., –24 dB/Okt. Verstärkung: +6 dB bis –24 dB Phase: Normal/Gegen CD-Player System: Compact-Disc-Audiosystem Verwendbare Discs: Compact Disc Signal-Rauschabstand: 94 dB (1 kHz) (IECA-Netz) Anzahl der Kanäle: 2 (Stereo) MP3-Decodierformat: MPEG-1 & 2 Audio Layer 3 20 De WMA-Decodierformat: Vers. 7, 7.1, 8, 9, 10, 11, 12 (2-Kanal-Audio) (Windows Media Player) WAV-Signalformat: Lineare PCM & MS ADPCM (nicht komprimiert) USB USB-Standard-Spezifikation: USB 2.0 Full Speed Maximale Leistungsaufnahme: 1,5 A USB Protokoll: MSC (Massenspeicher-Klasse) MTP (Media Transfer Protocol) AOA (Android Open Accessory) 2.0 Dateisystem: FAT12, FAT16, FAT32 MP3-Decodierformat: MPEG-1 & 2 Audio Layer 3 WMA-Decodierformat: Vers. 7, 7.1, 8, 9, 10, 11, 12 (2-Kanal-Audio) (Windows Media Player) WAV-Signalformat: Lineare PCM & MS ADPCM (nicht komprimiert) FM-Tuner Frequenzbereich: 87,5 MHz bis 108,0 MHz Nutzempfindlichkeit: 11 dBf (1,0 μV/75 Ω, Mono, Signal-Rauschabstand: 30 dB) Signal-Rauschabstand: 72 dB (IEC-A-Netz) MW-Tuner Frequenzbereich: 531 kHz bis 1 602 kHz Nutzempfindlichkeit: 25 μV (SignalRauschabstand: 20 dB) Signal-Rauschabstand: 62 dB (IEC-A-Netz) LW-Tuner Frequenzbereich: 153 kHz bis 281 kHz Nutzempfindlichkeit: 28 μV (SignalRauschabstand: 20 dB) Signal-Rauschabstand: 62 dB (IEC-A-Netz) HINWEIS Änderungen der technischen Daten und des Designs vorbehalten. Deutsch 21 De Inhoud Vóór u begint Vóór u begint ........................................................................................... 2 Aan de slag ............................................................................................... 3 Radio.......................................................................................................... 5 Hartelijk dank voor uw keuze voor dit PIONEER-product Lees deze handleiding voordat u het product in gebruik neemt zodat u het goed leert gebruiken. Lees vooral de gedeelten die met WAARSCHUWING en LET OP gemarkeerd zijn aandachtig. Bewaar deze handleiding na het lezen op een veilige, voor de hand liggende plaats zodat u ze indien nodig altijd kunt raadplegen. Cd/USB/iPod/AUX ................................................................................... 6 App-modus .............................................................................................. 8 Spotify® ..................................................................................................... 8 Pioneer ARC APP gebruiken.................................................................. 9 Instellingen ............................................................................................ 10 FUNCTION-instellingen....................................................................... AUDIO-instellingen .............................................................................. SYSTEM-instellingen............................................................................ ILLUMINATION-instellingen ............................................................... MIXTRAX-instellingen.......................................................................... 10 11 11 12 13 Verbindingen/installatie...................................................................... 13 Aanvullende informatie....................................................................... 16 Over deze handleiding: • In de volgende instructies worden een USB-geheugen of USB-audiospeler een “USBapparaat” genoemd. • In deze handleiding wordt naar iPod en iPhone verwezen als “iPod”. 2 Nl Deponeer dit product niet bij het gewone huishoudelijk afval wanneer u het wilt verwijderen. Er bestaat een speciaal wettelijk voorgeschreven verzamelsysteem voor de juiste behandeling, het opnieuw bruikbaar maken en de recycling van gebruikte elektronische producten. In de lidstaten van de EU en in Zwitserland en Noorwegen kunnen particulieren afgedankte elektronische producten gratis bij de daarvoor bestemde verzamelplaatsen inleveren. Als u een soortgelijk nieuw product koopt, kunt u het afgedankte product ook bij uw verkooppunt inleveren. Als u in een ander land woont, neem dan contact op met de plaatselijke overheid voor informatie over het weggooien van afgedankte producten. Op die manier zorgt u ervoor dat uw afgedankte product op de juiste wijze wordt verwerkt, hergebruikt en gerecycled, zonder schadelijke gevolgen voor het milieu en de volksgezondheid. WAARSCHUWING • Probeer het product niet zelf te monteren en voer er geen onderhoud aan uit. Montage of onderhoud van het product door personen zonder technische opleiding en ervaring met elektronische apparatuur en auto-accessoires kan gevaarlijk zijn, en kan een elektrische schok, verwonding of andere gevaren veroorzaken. • Bedien het toestel niet tijdens het rijden. Als u knoppen op het toestel wilt bedienen, moet u het voertuig eerst van de weg halen en op een veilige plaats parkeren. LET OP • Zorg ervoor dat dit toestel niet in contact komt met vocht en/of andere vloeistoffen. Dit kan een elektrische schok veroorzaken. Ook schade aan het toestel, rook en oververhitting kunnen het gevolg zijn van contact met vloeistoffen. • Zet het volume nooit zo hoog dat u geluiden buiten het voertuig niet meer kunt horen. • De Pioneer CarStereo-Pass wordt alleen in Duitsland gebruikt. • Dit product is getest in gematigde en tropische klimaatomstandigheden volgens IEC 60065, Audio-, video- en soortgelijke elektronische toestellen - Veiligheidseisen. LET OP Dit apparaat is geclassificeerd als een klasse 1 laserproduct onder de veiligheidsnormen voor laserproducten, IEC 60825-1:2007. Bij problemen Neem contact op met uw leverancier of het dichtstbijzijnde erkende Pioneer-servicecentrum als het toestel niet naar behoren functioneert. Aan de slag Vaak gebruikte functies Actie Bediening Toestel inschakelen* Druk op SRC/OFF om het toestel in te schakelen. Hou SRC/OFF ingedrukt om het toestel uit te schakelen. Het volume regelen Draai de M.C.-knop. Een bron selecteren Druk herhaaldelijk op SRC/OFF. De display-informatie wijzigen Druk herhaaldelijk op DISP. Terugkeren naar de vorige weergave/lijst Druk op BAND/ Terugkeren naar de normale weergave vanuit het menu Houd BAND/ . ingedrukt. * Wanneer de blauw/witte draad van het toestel verbonden is met het relaiscontact voor de automatische antenne van de auto, schuift de antenne uit wanneer de bron van het toestel wordt ingeschakeld. Om de antenne weer in te trekken, schakelt u de bron uit. Basisbediening DEH-X2900UI Display-indicatie M.C.-knop (multicontrole) Laadsleuf voor disc Display SRC (bron)/OFF USB-poort (uitwerpen) Indicatie Beschrijving Verschijnt wanneer er een lager niveau van het menu of de map bestaat. Verschijnt wanneer de knop wordt ingedrukt. Verschijnt wanneer de functie afstemmen op lokale zenders is ingesteld (pagina 10). Verschijnt wanneer een verkeersprogramma wordt ontvangen. Verschijnt wanneer de functie TA (verkeersberichten) is ingesteld (pagina 10). BAND/ DISP (display) Ontkoppelknop AUX-ingang (3,5mm-stereoaansluiting) Verschijnt wanneer de functie sound retriever ingesteld is (pagina 11). Verschijnt wanneer willekeurige weergave/shuffle is ingesteld. Nederlands Verschijnt wanneer weergave herhalen is ingesteld. Verschijnt wanneer de iPod-bedieningsfunctie is ingesteld (pagina 7). Optionele afstandsbediening De afstandsbediening CD-R320 wordt afzonderlijk verkocht. Het voorpaneel verwijderen Verwijder het voorpaneel om diefstal te voorkomen. Verwijder alle kabels en apparaten die verbonden zijn met het voorpaneel en schakel het toestel uit voor u het voorpaneel verwijdert. Nl 3 Ontkoppelen Bevestigen OPMERKINGEN • U kunt de menu-instelling annuleren door op SRC/OFF te drukken. • U kunt deze instellingen gelijk wanneer uitvoeren bij de SYSTEM-instellingen (pagina 11) en INITIALinstellingen (pagina 4). De demonstratieweergave annuleren (DEMO OFF) 1 2 Belangrijk • Stel het voorpaneel niet bloot aan te grote schokken. • Stel het voorpaneel niet bloot aan direct zonlicht en hoge temperaturen. • Bewaar het verwijderde voorpaneel altijd in een beschermtas of zak. Instellingenmenu Wanneer u de contactschakelaar inschakelt na de installatie, verschijnt [SET UP :YES] op het display. 1 2 Druk op de M.C.-knop. Het instellingenmenu verdwijnt als u het toestel niet binnen 30 seconden bedient. Als u de instelling later wilt maken, draait u de M.C.-knop om [NO] te selecteren, druk daarna op de knop om te bevestigen. Draai de M.C.-knop om de opties te selecteren, druk daarna op de knop om te bevestigen. Om naar de volgende menuoptie te gaan, dient u uw selectie te bevestigen. Menu-item Beschrijving LANGUAGE Selecteer de taal om tekstinformatie van een gecomprimeerd audiobestand weer te geven. [ENG](Engels), [РУС](Russisch), [TUR](Turks) CLOCK SET Stel de klok in. Selecteer de FM-afstemstap uit 100 kHz of 50 kHz. [100], [50] 4 4 Nl 4 Draai aan de M.C.-knop om [SYSTEM] te selecteren, druk daarna op de knop om te bevestigen. Draai aan de M.C.-knop om [DEMO OFF] te selecteren, druk daarna op de knop om te bevestigen. Draai aan de M.C.-knop om [YES] te selecteren, druk daarna op de knop om te bevestigen. INITIAL-instellingen 1 2 3 4 Hou SRC/OFF ingedrukt tot het toestel uitschakelt. Hou SRC/OFF ingedrukt om het hoofdmenu weer te geven. Draai aan de M.C.-knop om [INITIAL] te selecteren, druk daarna op de knop om te bevestigen. Draai de M.C.-knop om een optie te selecteren, druk daarna op de knop om te bevestigen. Menu-item Beschrijving FM STEP Selecteer de FM-afstemstap uit 100 kHz of 50 kHz. [100], [50] FM STEP 3 3 Druk op de M.C.-knop om het hoofdmenu weer te geven. [QUIT :YES] verschijnt als alle instellingen uitgevoerd zijn. Om terug te keren naar het eerste item van het instellingenmenu, draait u de M.C.knop om [QUIT :NO] te selecteren, druk daarna op de knop om te bevestigen. Druk op de M.C.-knop om de instellingen te bevestigen. TIP Menu-item Beschrijving SP-P/O MODE Selecteer deze optie als een fullrange-luidspreker aangesloten is op de draden voor de achterluidspreker en een subwoofer aangesloten is op de RCA-uitgang. [REAR/SUB.W] [SUB.W/SUB.W] [REAR/REAR] S/W UPDATE [SYSTEM INFO] Selecteer deze optie als een passieve subwoofer direct aangesloten is op de draden voor de achterluidspreker en een subwoofer aangesloten is op de RCA-uitgang. Selecteer deze optie als fullrange-luidsprekers aangesloten zijn op de draden voor de achterluidspreker en op de RCA-uitgang. Als een fullrange-luidspreker aangesloten is op de draden voor de achterluidspreker en de RCA-uitgang niet wordt gebruikt, kunt u [REAR/SUB.W] of [REAR/REAR] selecteren. Selecteer dit om de recentste systeeminformatie op het toestel te bevestigen. [SYSTEM UPDATE] Selecteer dit om het toestel bij te werken naar de recentste software en de instellingen van het toestel te initialiseren. Voor meer informatie over de recentste software en het updaten van deze software kunt u terecht op onze website. SYSTEM RESET [YES], [NO] De / -knoppen kunnen ook worden gebruikt om een voorkeuzezender te selecteren wanneer [SEEK] is ingesteld op [PCH] in de FUNCTION-instellingen (pagina 10). Best stations memory (BSM) De zes sterkste zenders worden opgeslagen onder de cijfertoetsen (1/ 1 2 3 tot 6/ ). Druk, nadat u een band heeft geselecteerd, op de M.C.-knop om het hoofdmenu weer te geven. Draai aan de M.C.-knop om [FUNCTION] te selecteren, druk daarna op de knop om te bevestigen. Draai aan de M.C.-knop om [BSM] te selecteren, druk daarna op de knop om te bevestigen. Een zender handmatig zoeken 1 Als u de band heeft geselecteerd, drukt u op / om een zender te selecteren. Hou vervolgens / ingedrukt en laat los om een beschikbare zender te zoeken. Het scannen stopt wanneer het toestel een zender ontvangt. Druk op om de zoekafstemming te annuleren. Selecteer [YES] om de instellingen van het toestel te initialiseren. Het toestel wordt automatisch opnieuw gestart. (Sommige instellingen blijven behouden zelfs nadat een reset van het toestel werd uitgevoerd.) / OPMERKING [SEEK] moet ingesteld zijn op [MAN] in de FUNCTION-instellingen (pagina 10). Radio De tunerfrequenties van dit toestel zijn bedoeld voor gebruik in West-Europa, Azië, het Midden-Oosten, Afrika en Oceanië. Bij gebruik in andere regio's kan de ontvangst zwak zijn. De functie RDS (Radio Data System) werkt alleen in regio's die RDS-signalen voor FM-zenders uitzenden. 1 2 3 Druk op SRC/OFF om [RADIO] te selecteren. Druk op BAND/ [LW]. om de band te selecteren uit [FM1], [FM2], [FM3], [MW] of Druk op een cijfertoets (1/ tot 6/ ). (1/ tot 6/ ) ingedrukt tot hij niet meer knippert. PTY-functies gebruiken Nederlands Voorkeuzezenders ontvangen Zenders handmatig opslaan 1 Terwijl u de zender ontvangt die u wilt opslaan, houdt u een van de cijfertoetsen Het toestel zoekt naar een zender op basis van de PTY (programmatype)-informatie. 1 2 3 Druk op tijdens FM-ontvangst. Draai de M.C.-knop om een programmatype te selecteren uit [NEWS/INFO], [POPULAR], [CLASSICS] of [OTHERS]. Druk op de M.C.-knop. Het toestel begint naar een zender te zoeken. Als een zender gevonden is, wordt de servicenaam van het programma weergegeven. Nl 5 OPMERKINGEN OPMERKING • Om het zoeken te annuleren, drukt u op de M.C.-knop. • Het programma van bepaalde zenders kan afwijken van de doorgestuurde PTY. • Als geen enkele zender het gewenste programmatype uitzendt, wordt gedurende ongeveer twee seconden [NOT FOUND] weergegeven en keert de tuner terug naar de oorspronkelijke zender. Als u een MTP-verbinding gebruikt, moet [ANDROID WIRED] ingesteld zijn op [MEMORY] in de SYSTEMinstellingen (pagina 12). AUX 1 Steek de stereo-miniplug in de AUX-ingangsaansluiting. 2 Druk op SRC/OFF om [AUX] als bron te selecteren. Cd/USB/iPod/AUX OPMERKING Als [AUX] is ingesteld op [OFF] in de SYSTEM-instellingen, kan [AUX] niet worden geselecteerd als bron (pagina 12). Weergave Koppel de hoofdtelefoon los van het apparaat voor u het aansluit op het toestel. Bedieningen U kunt diverse instellingen uitvoeren in de FUNCTION-instellingen (pagina 10). Merk op dat de volgende bedieningen niet werken voor een AUX-apparaat. Om een AUX-apparaat te bedienen, dient u het apparaat zelf te gebruiken. Cd 1 Plaats een disc met het etiket omhoog in de laadsleuf. Om een disc uit te werpen, dient u eerst de weergave te stoppen en vervolgens op drukken. te USB-apparaten (inclusief Android™)/iPod 1 Open het deksel van de USB-poort. 2 Sluit het USB-apparaat/de iPod aan met behulp van een geschikte kabel. Actie Bediening Een map/album selecteren*1 Druk op 1/ of 2/ Een fragment/song (hoofdstuk) selecteren Druk op of Snel vooruit- of achteruitspoelen*3 Houd Een bestand in een lijst zoeken 1 Druk op om de lijst weer te geven. 2 Draai de M.C.-knop om de naam van het gewenste bestand (de gewenste map) of categorie te selecteren, druk daarna op de knop om te bevestigen. 3 Draai de M.C.-knop om het gewenste bestand te selecteren, druk daarna op de knop om te bevestigen. De weergave start. OPMERKING Om automatisch over te schakelen naar de bron [USB] wanneer er een USB-apparaat/iPod verbonden wordt met het toestel, stelt u [USB AUTO] in op [ON] bij de SYSTEM-instellingen (pagina 12). LET OP Gebruik een optionele Pioneer USB-kabel (CD-U50E) om het USB-apparaat te verbinden, want elk apparaat dat rechtstreeks op het toestel aangesloten is, steekt uit uit het toestel, wat gevaarlijk kan zijn. of . . ingedrukt. Voor u het apparaat loskoppelt, dient u de weergave te stoppen. Een lijst met bestanden in de geselecteerde Druk op de M.C.-knop wanneer een map/ categorie geselecteerd is. map/categorie weergeven*1 AOA-verbindingen Raapleeg pagina 9 voor meer informatie over AOA-verbindingen. Een song in de geselecteerde map/ categorie weergeven*1 MTP-verbinding Een apparaat waarop Android OS 4.0 of recenter geïnstalleerd is, kan via MTP worden verbonden met het toestel met behulp van de bij het apparaat geleverde kabel. Afhankelijk van het aangesloten apparaat en het aantal bestanden in het apparaat, kunnen audiobestanden/songs mogelijk niet via MTP worden afgespeeld. Merk op dat de MTP-verbinding niet compatibel is met WAVbestandsindelingen en niet kan worden gebruikt met de MIXTRAX-functie. 6 Nl Hou de M.C.-knop ingedrukt wanneer een map/categorie geselecteerd is. 1 Actie Bediening Alfabetisch zoeken (alleen voor een iPod) 1 Druk op om de lijst weer te geven. 2 Draai aan de M.C.-knop om de gewenste categorielijst te selecteren en druk vervolgens op om de alfabetische zoekmodus te activeren. (U kunt de alfabetische zoekmodus ook activeren door de M.C.-knop twee keer te verdraaien.) 3 Draai aan de M.C.-knop om een letter te selecteren en druk vervolgens op de knop om de alfabetische lijst weer te geven. Om alfabetisch zoeken te annuleren, drukt . u op BAND/ Weergave herhalen Druk op 6/ Willekeurige weergave/shuffle Druk op 5/ . Alles in shuffle weergeven (alleen iPod) Hou 5/ Weergave pauzeren/hervatten Druk op 4/PAUSE. Sound retriever*1*2 Druk op 3/S.Rtrv. [1]: Geschikt voor lage compressiewaarden [2]: Geschikt voor hoge compressiewaarden Terug naar de rootmap (alleen voor cd/ USB)*1 Houd Schakelen tussen gecomprimeerde audio en CD-DA (alleen voor cd) Druk op BAND/ . Stations wisselen op een USB-apparaat (alleen apparaten die het protocol USB mass storage device ondersteunen) Druk op BAND/ . . ingedrukt. ingedrukt. 2 Terwijl u naar een song luistert, houdt u ingedrukt om naar de linkweergavemodus te gaan. Draai de M.C.-knop om de modus ([ARTIST], [ALBUM], [GENRE]) te selecteren, druk daarna op de knop om te bevestigen. De geselecteerde song/het geselecteerde album wordt weergegeven na de momenteel weergegeven song. OPMERKING De geselecteerde song/het geselecteerde album kan worden geannuleerd als u andere functies gebruikt dan functies uit de link-weergavemodus (bijv. snel vooruit en achteruit). iPod-bediening U kunt het toestel bedienen via een aangesloten iPod. De volgende iPod-modellen zijn niet compatibel met deze functie. – iPod nano 1e generatie, iPod met video 1 Druk op BAND/ tijdens het afspelen en selecteer vervolgens de bedieningsmodus. [CONTROL iPod]: De iPod-functie van het toestel kan bediend worden op de aangesloten iPod. [CONTROL AUDIO]: De iPod-functie van het toestel kan alleen bediend worden met de knoppen op het toestel. In deze modus kan de aangesloten iPod niet worden inof uitgeschakeld. OPMERKINGEN Over MIXTRAX (alleen USB/iPod) De MIXTRAX-functie creëert een non-stop mix van uw muziekbibliotheek, aangevuld met verlichtingseffecten. Voor meer details over MIXTRAX-instellingen, zie pagina 13. Nederlands *1 Alleen gecomprimeerde audiobestanden *2 Deze functie is uitgeschakeld wanneer USB als bron is geselecteerd en de MIXTRAX-functie ingeschakeld is. *3 Wanneer u de functie snel vooruit- of achteruitspoelen gebruikt terwijl een VBR-bestand wordt afgespeeld, is de weergaveduur mogelijk niet correct. • Als u overschakelt naar de bedieningsmodus [CONTROL iPod] wordt het afspelen van de song gepauzeerd. Gebruik de aangesloten iPod om het afspelen te hervatten. • De volgende bedieningen zijn nog steeds mogelijk op het toestel, zelfs als de bedieningsmodus ingesteld is op [CONTROL iPod]. – Pauze, snel vooruit/achteruit, song/hoofdstuk selecteren • Het volume kan alleen worden geregeld op het toestel. OPMERKINGEN Nuttige functies voor iPod Link-weergavemodus U kunt songs oproepen op basis van de momenteel weergegeven artiest, album of genre. • Deze functie is niet compatibel met een Android-apparaat dat via MTP is verbonden. • Wanneer USB is geselecteerd als de bron en de MIXTRAX-functie in gebruik is, is de functie sound retriever uitgeschakeld. • Afhankelijk van het bestand/de song zijn geluidseffecten mogelijk niet beschikbaar. • Schakelt de MIXTRAX-functie uit als de verlichtingseffecten hinderlijk zijn om uw wagen te besturen. 1 Druk op MIX om MIXTRAX aan/uit te schakelen. Nl 7 App-modus Spotify® U kunt via dit toestel luisteren naar een applicatie op een iPhone. In sommige gevallen kunt u een applicatie bedienen met het toestel. Meer informatie over compatibele apparaten vindt u op onze website. Belangrijk Voor gebruik van applicaties van derden worden mogelijk persoonsgegevens gebruikt of moet u zulke gegevens verstrekken, bijvoorbeeld door het opzetten van een gebruikersaccount of op andere wijze, en voor sommige applicaties worden mogelijk geolocatiegegevens gebruikt. ALLE APPLICATIES VAN DERDEN VALLEN UITSLUITEND ONDER VERANTWOORDELIJKHEID VAN HUN UITGEVER, INCLUSIEF MAAR NIET BEPERKT TOT HET VERZAMELEN EN BEVEILIGEN VAN GEBRUIKERSGEGEVENS EN HET PRIVACYBELEID. DOOR EEN APPLICATIE VAN DERDEN TE GEBRUIKEN, GAAT U ERMEE AKKOORD OM U TE INFORMEREN OVER DE GEBRUIKSVOORWAARDEN EN HET PRIVACYBELEID VAN DE UITGEVER ERVAN. ALS U NIET AKKOORD GAAT MET DE GEBRUIKSVOORWAARDEN OF HET BELEID VAN EEN UITGEVER OF GEEN TOESTEMMING GEEFT VOOR HET GEBRUIK VAN GEOLOCATIEGEGEVENS (INDIEN VAN TOEPASSING), MOET U DE APPLICATIE NIET GEBRUIKEN. Voor iPhone-gebruikers Deze functie is compatibel met iPhones en iPod touches waarop iOS 5.0 of later geïnstalleerd is. OPMERKING PIONEER IS NIET AANSPRAKELIJK VOOR APPLICATIES VAN DERDEN OF HUN INHOUD, INCLUSIEF MAAR NIET BEPERKT TOT HUN NAUWKEURIGHEID OF VOLLEDIGHEID. DE INHOUD EN DE FUNCTIONALITEIT VAN DERGELIJKE APPLICATIES ZIJN UITSLUITEND DE VERANTWOORDELIJKHEID VAN DE LEVERANCIER VAN DE APPLICATIE. Een applicatie weergeven via het toestel 1 2 3 Verbind dit toestel met het mobiele apparaat. • iPhone via USB (pagina 6) (DEH-X2900UI is alleen compatibel met Spotify geïnstalleerd op iPhone.) Spotify is een verspreidingsservice voor muziekstreaming die niet aangesloten is bij Pioneer. Meer informatie vindt u op http://www.spotify.com. De Spotify-toepassing is beschikbaar voor compatibele telefoons. Raadpleeg https:// support.spotify.com/ voor de recentste informatie over compatibiliteit. Om van Spotify te genieten terwijl u rijdt, downloadt u eerst de Spotify-app op uw iPhone. U kunt deze downloaden van de iTunes App Store. Kies een gratis account of een betaalde Premium account, ofwel in de app of op spotify.com. Een Premium account geeft u meer functies, zoals offline luisteren. Belangrijk • Dit product omvat Spotify-software, die onderworpen is aan licenties van derden, die u hier kunt vinden: www.spotify.com/connect/third-party-licenses. • Voor informatie over de landen en regio's waar Spotify kan worden gebruikt, gaat u naar https:// www.spotify.com/us/select-your-country/. Luisteren naar Spotify Update de firmware van Spotify naar de recentste versie voor u de applicatie gebruikt. 1 2 3 Verbind dit toestel met het mobiele apparaat. • iPhone via USB (pagina 6) Druk op SRC/OFF om [SPOTIFY] te selecteren. Open de applicatie Spotify op het mobiele apparaat en start de weergave. Basisbedieningen U kunt diverse instellingen uitvoeren in de FUNCTION-instellingen (pagina 10). Druk op SRC/OFF om [APP] te selecteren. OPMERKING Bedien het mobiele apparaat om de applicatie te starten. De beschikbare functies zijn afhankelijk van het soort inhoud (track/album/artiest/afspeellijst/radio) dat u wilt afspelen. Basisbedieningen Actie Bediening U kunt diverse instellingen uitvoeren in de FUNCTION-instellingen (pagina 10). Een fragment overspringen Druk op Actie Bediening Een track selecteren Druk op Snel vooruit- of achteruitspoelen Houd Het afspelen pauzeren/hervatten Druk op BAND/ 8 Nl of of . ingedrukt. . of . Actie Bediening Een track in een lijst zoeken 1 Druk op (lijst) om de lijst weer te geven. 2 Draai de M.C.-knop om de gewenste categorie te selecteren, druk daarna op de knop om te bevestigen. 3 Draai de M.C.-knop om het gewenste bestand te selecteren, druk daarna op de knop om te bevestigen. De weergave start. Het afspelen pauzeren/hervatten WAARSCHUWING Druk op 4/PAUSE. Duim omhoog (alleen voor radio) Druk op 1/ . Duim omlaag (alleen voor radio) Druk op 2/ . Willekeurige weergave (alleen voor track/ album/artiest/afspeellijst) Druk op 5/ . Weergave herhalen (alleen voor track/ album/artiest/afspeellijst) Druk op 6/ . Start een radiokanaal op basis van de song die momenteel wordt afgespeeld. 1 Houd (lijst) ingedrukt om een radiozender te starten. 2 Druk op de M.C.-knop. • Deze functie is mogelijk niet beschikbaar, afhankelijk van de geselecteerde song. Sla de informatie op van de song die momenteel wordt afgespeeld. Verwijder de songinformatie die opgeslagen is. Bedien de toepassing niet terwijl u rijdt. Parkeer uw wagen op een veilige plaats voor u de bedieningselementen van de toepassing gebruikt. Voor iPhone-gebruikers Deze functie is compatibel met iPhones (iPhone 5 of later) en iPod touches waarop iOS 8.0 of later geïnstalleerd is. U kunt Pioneer ARC APP downloaden op iTunes App Store. Voor gebruikers van Android-apparaten Deze functie is compatibel met apparaten waarop Android OS 4.1 of later geïnstalleerd is en die ook AOA (Android Open Accessory) 2.0 ondersteunen. U kunt de Pioneer ARC APP downloaden op Google Play™. OPMERKING 1 Houd 3/S.Rtrv ingedrukt. [SAVE]/[UNSAVE] verschijnt. 2 Druk op de M.C.-knop. OPMERKING Sommige functies van Spotify kunnen niet op het toestel worden bediend. U kunt het toestel bedienen via een Pioneer ARC APP die geïnstalleerd is op een iPhone/ Android-apparaat. In sommige gevallen kunt u via het toestel bepaalde functies van de toepassing gebruiken, zoals bronselectie, pauzeren enz. Raadpleeg de helpfunctie van de toepassing voor meer informatie over welke functies er beschikbaar zijn in de toepassing. Een verbinding tot stand brengen met Pioneer ARC APP 1 2 3 4 5 Verbind dit toestel met het mobiele apparaat. • iPhone/Android-apparaat via USB (pagina 6) Ga verder met stap 6 als u verbinding via USB kiest voor een iPhone. Druk op de M.C.-knop om het hoofdmenu weer te geven. Draai aan de M.C.-knop om [SYSTEM] te selecteren en druk vervolgens op de knop om te bevestigen. Draai aan de M.C.-knop om [ANDROID WIRED] te selecteren en druk vervolgens op de knop om te bevestigen. Draai aan de M.C.-knop om [APP CONTROL] te selecteren voor een Androidapparaat dat verbonden is via USB. Als [ON] is geselecteerd in [P.APP AUTO ON] (pagina 12), start Pioneer ARC APP op het Android-toestel automatisch en worden alle stappen voltooid. Nederlands Pioneer ARC APP gebruiken Sommige Android-apparaten die via AOA 2.0 verbonden zijn, werken mogelijk niet goed of produceren geluiden ten gevolge van hun eigen softwareontwerp, ongeacht de OS-versie. OPMERKING 6 7 Als Pioneer ARC APP niet op uw Android-toestel werd geïnstalleerd, verschijnt een bericht op uw Android-toestel om u te vragen de applicatie te installeren. Selecteer [OFF] in [P.APP AUTO ON] om het bericht te verwijderen (pagina 12). Druk op SRC/OFF om een bron te selecteren. Start Pioneer ARC APP op het mobiele apparaat. Nl 9 OPMERKING Menu-item Beschrijving Op een iPhone kunt u de toepassing ook starten door de M.C.-knop ingedrukt te houden. FM SETTING [TALK], [STANDARD], [MUSIC] Muziek beluisteren op een Android-apparaat 1 Druk op SRC/OFF om [ANDROID] te selecteren. Pas de geluidskwaliteit aan aan het zendsignaal van de FM-band. (Alleen beschikbaar wanneer FM-band is geselecteerd.) BSM Sla de zes sterkste zenders automatisch op onder tot 6/ ). de cijfertoetsen (1/ Basisbedieningen Actie Bediening Een track selecteren Druk op Snel vooruit- of achteruitspoelen Houd Het afspelen pauzeren/hervatten Druk op 4/PAUSE. Sound retriever Druk op 3/S.Rtrv. [1]: Geschikt voor lage compressiewaarden [2]: Geschikt voor hoge compressiewaarden REGIONAL of of . [ON], [OFF] ingedrukt. Beperk de ontvangst tot de specifieke regionale programma's wanneer AF (alternatieve frequenties zoeken) geselecteerd is. (Alleen beschikbaar wanneer FM-band is geselecteerd.) LOCAL FM: [OFF], [LV1], [LV2], [LV3], [LV4] Beperk de zenders automatisch volgens de signaalsterkte. MW/LW: [OFF], [LV1], [LV2] TA Instellingen U kunt diverse instellingen aanpassen in het hoofdmenu. 1 2 3 Druk op de M.C.-knop om het hoofdmenu weer te geven. Draai vervolgens aan de M.C.-knop om een van de volgende categorieën te selecteren, druk daarna op de knop om te bevestigen. • FUNCTION-instellingen (pagina 10) • AUDIO-instellingen (pagina 11) • SYSTEM-instellingen (pagina 11) • ILLUMINATION-instellingen (pagina 12) • MIXTRAX-instellingen (pagina 13) Draai de M.C.-knop om de opties te selecteren, druk daarna op de knop om te bevestigen. [ON], [OFF] Ontvang actuele verkeersinformatie indien beschikbaar. (Alleen beschikbaar wanneer FMband is geselecteerd.) [ON], [OFF] Laat het toestel opnieuw afstemmen op een andere frequentie van dezelfde zender. (Alleen beschikbaar wanneer FM-band is geselecteerd.) AF NEWS [ON], [OFF] Onderbreek de momenteel geselecteerde bron met nieuwsberichten. (Alleen beschikbaar wanneer FM-band is geselecteerd.) SEEK [MAN], [PCH] FUNCTION-instellingen Wijs de knoppen of toe om zenders een voor een te zoeken (handmatige afstemming) of selecteer een zender uit de voorgeprogrammeerde kanalen. SAVE De menu-items zijn afhankelijk van de bron. 10 Nl Sla de informatie van de momenteel afgespeelde song op in uw muzieklijst op Spotify. Menu-item Beschrijving UNSAVE Menu-item [OFF], [LOW], [MID], [HI] Verwijder de songinformatie die opgeslagen is in [SAVE]. S.RTRV USB Verbeter gecomprimeerde audio en zorg voor een rijk geluid. Niet beschikbaar wanneer: • USB is geselecteerd als bron en de MIXTRAXfunctie is ingeschakeld. • CD-DA/CD-TEXT wordt weergegeven. [NOR], [REV], [OFF] Wijzig de weergavesnelheid. (Niet beschikbaar wanneer [CONTROL iPod] geselecteerd is in de bedieningsmodus.) Drempelfrequentie: [50HZ], [63HZ], [80HZ], [100HZ], [125HZ], [160HZ], [200HZ] Uitgangsniveau: [–24] tot [+6] Hellingsniveau: [–12], [–24] Alleen frequenties die lager zijn dan de frequenties in het geselecteerde bereik, worden weergegeven door de subwoofer. BASS BOOST [0] tot [+6] Selecteer het bass boost-niveau. HPF SETTING PAUSE Pauzeer of hervat de weergave. AUDIO-instellingen Menu-item Selecteer de subwooferfase. SUB.W CTRL*2*3 iPod [FASTER], [NORMAL], [SLOWER] Compenseer voor een helder geluid bij laag volume. SUB.W*2 iPod [1]: (geschikt voor lage compressiewaarden), [2]: (geschikt voor hoge compressiewaarden), [OFF] AUDIO BOOK Beschrijving LOUDNESS Drempelfrequentie: [OFF], [50HZ], [63HZ], [80HZ], [100HZ], [125HZ], [160HZ], [200HZ] Hellingsniveau: [–12], [–24] Alleen frequenties boven de drempelfrequentie van het hoog-doorlaatfilter (HPF) worden weergegeven. [+4] tot [–4] Pas het volume aan voor elke bron behalve FM. Alle hierna vermelde combinaties worden automatisch ingesteld op dezelfde instelling. • USB, iPod, ANDROID, SPOTIFY en APP (iPhone) SLA Beschrijving FADER*1 Pas de balans aan tussen de voor- en achterluidspreker. BALANCE Pas de balans aan tussen de linker en rechter luidspreker. EQ SETTING SYSTEM-instellingen Nederlands [SUPER BASS], [POWERFUL], Selecteer de equalizercurve of pas deze aan. [NATURAL], [VOCAL], [CUSTOM1], [CUSTOM1] kan voor elke bron afzonderlijk [CUSTOM2], [FLAT] worden ingesteld. Alle hierna vermelde combinaties worden echter automatisch Selecteer een equalizerband en - ingesteld op dezelfde instelling. niveau voor verdere aanpassing. • USB, iPod, ANDROID, SPOTIFY en APP (iPhone) Equalizerband: [80HZ], [250HZ], [CUSTOM2] is een gedeelde instelling die voor [800HZ], [2.5KHZ], [8KHZ] alle bronnen wordt gebruikt. Equalizerniveau: [+6] tot [–6] *1 Niet beschikbaar wanneer [SUB.W/SUB.W] is geselecteerd in [SP-P/O MODE] in de INITIALinstellingen (pagina 5). *2 Niet beschikbaar wanneer [REAR/REAR] is geselecteerd in [SP-P/O MODE] in de INITIAL-instellingen (pagina 5). *3 Niet beschikbaar wanneer [OFF] is geselecteerd in [SUB.W]. U kunt deze menu's ook oproepen wanneer het toestel uitgeschakeld is. Menu-item Beschrijving LANGUAGE [ENG](Engels), [РУС](Russisch), [TUR](Turks) Selecteer de taal om tekstinformatie van een gecomprimeerd audiobestand weer te geven. Nl 11 Menu-item Beschrijving van de verbindingsmethode, stroom van de accu blijven trekken als de ontsteking van uw wagen geen positie ACC (accessoire) heeft. CLOCK SET Stel de klok in (pagina 4). ILLUMINATION-instellingen Selecteer de tijdnotatie. Menu-item 12H/24H [12H], [24H] AUTO PI [ON], [OFF] Zoek naar een andere zender met dezelfde programmering, zelfs als u een voorkeuzezender gebruikt. [ON], [OFF] Stel in op [ON] wanneer een hulpapparaat wordt gebruikt dat verbonden is met het toestel. [KEY COLOUR], [DISP COLOUR], [BOTH COLOUR] AUX SPOTIFY [ON], [OFF] Stel in op [ON] wanneer u de Spotify-functie gebruikt. PW SAVE* [ON], [OFF] Verminder het verbruik van batterijvermogen. Het inschakelen van de bron is de enige handeling die met deze functie mogelijk is. ANDROID WIRED [MEMORY], [APP CONTROL] Selecteer de geschikte verbindingsmethode voor een Android-apparaat. P.APP AUTO ON [ON], [OFF] DIM SETTING Selecteer [ON] om Pioneer ARC APP automatisch te starten wanneer een Android-apparaat wordt verbonden aan het toestel via AOA. (Niet beschikbaar wanneer [MEMORY] is geselecteerd in [ANDROID WIRED].) Selecteer [ON] om automatisch over te schakelen naar de bron [USB] wanneer er een USB-apparaat/iPod verbonden wordt met het toestel. Selecteer [OFF] wanneer een USB-apparaat/iPod alleen aangesloten wordt om opgeladen te worden. * [PW SAVE] wordt geannuleerd als de accu losgekoppeld wordt, en moet weer worden ingeschakeld als de accu weer wordt aangesloten. Wanneer [PW SAVE] uitgeschakeld is, kan het toestel, afhankelijk 12 Nl Kies de kleur voor de knoppen/het display van het toestel uit 12 voorgeprogrammeerde kleuren, [SCAN] of [CUSTOM]*. • [SCAN]: doorloop diverse kleuren automatisch. • [CUSTOM]*: 1 Houd de M.C.-knop ingedrukt tot het scherm voor het instellen van de kleur verschijnt. 2 Stel de primaire kleur (R (rood)/G (groen)/B (blauw)) en de helderheid ([0] tot [60]) in. Het is niet mogelijk om tegelijk voor R (rood), G (groen) en B (blauw) een niveau onder 10 te selecteren. U kunt ook de voorgeprogrammeerde kleuren aanpassen. Selecteer een van de voorgeprogrammeerde kleuren en houd vervolgens de M.C.-knop ingedrukt tot het scherm voor het instellen van de kleur verschijnt. * De CUSTOM-instelling is alleen beschikbaar voor [KEY COLOUR] en [DISP COLOUR]. [SYNC ILLUMI], [SYNC CLOCK], [MANUAL] De display-helderheid wijzigen. BRIGHTNESS [KEY], [DISP] USB AUTO [ON], [OFF] Beschrijving COLOUR Selecteer de helderheid voor de knoppen/het display van het toestel uit [1] tot [10]. De beschikbare instelbereiken zijn verschillend afhankelijk van [DIM SETTING]. ILLUMI FX [ON], [OFF] Het verlichtingseffect is zichtbaar wanneer er een cd geplaatst/uitgeworpen wordt. Het verlichtingseffect wordt geactiveerd wanneer de ACC-schakelaar wordt in-/ uitgeschakeld, ongeacht deze instelling. MIXTRAX-instellingen Menu-item Verbindingen/installatie Beschrijving SHORT PLAYBCK [1.0 MIN], [1.5 MIN], [2.0 MIN], [2.5 MIN], [3.0 MIN], [OFF] Selecteer de weergaveduur. FLASH AREA [KEY/DISPLAY], [KEY], [OFF] Selecteer het gebied voor het verlichtingseffect. Wanneer [OFF] is geselecteerd, wordt de kleur die ingesteld is bij de ILLUMINATIONinstellingen (pagina 12) gebruikt als displaykleur. Verbindingen Belangrijk • Wanneer dit toestel wordt geïnstalleerd in een wagen zonder ACC (accessoire)positie van de contactschakelaar en als de rode kabel niet wordt verbonden met de aansluiting die de bediening van de contactschakelaar detecteert, kan de accu leeglopen. FLASH PATTERN [SOUND LEVEL 1] tot [SOUND LEVEL 6] Wijzig het verlichtingseffect volgens het geluids- en basniveau. Het flitspatroon wijzigt volgens het geluidsniveau. [LOW PASS 1] tot [LOW PASS 6] Het flitspatroon wijzigt volgens het basniveau. [RANDOM1] Het flitspatroon wijzigt willekeurig volgens de geluidsniveaumodus en de laagdoorlaatmodus. [RANDOM2] Het flitspatroon wijzigt willekeurig volgens de geluidsniveaumodus. [RANDOM3] Het flitspatroon wijzigt willekeurig volgens de laag-doorlaatmodus. DISPLAY FX [ON], [OFF] Zet de speciale MIXTRAX-effecten aan/uit. CUT IN FX [ON], [OFF] Geen ACC-positie Nl Nederlands Schakel de speciale MIXTRAX-effecten aan/uit terwijl de fragmenten handmatig worden gewijzigd. ACC-positie • Als dit toestel wordt gebruikt in andere omstandigheden dan hierna vermeld, kan er brand of een storing optreden. – Wagens met een 12 Volt accu en negatieve aarding. – Wanneer de luidsprekeruitgang door 4 kanalen wordt gebruikt, gebruikt u luidsprekers van meer dan 50 W (maximaal ingangsvermogen) en tussen 4 Ω en 8 Ω (impedantiewaarde). Gebruik geen luidsprekers van 1 Ω tot 3 Ω voor dit toestel. – Wanneer de uitgang voor de achterluidspreker wordt gebruikt door 2 Ω van de subwoofer, gebruikt u luidsprekers van meer dan 70 W (maximaal ingangsvermogen). * Raadpleeg de verbindingen voor een verbindingsmethode. • Om kortsluiting, oververhitting of storing te voorkomen, dient u de volgende richtlijnen op te volgen. – Koppel de negatieve pool van de accu los voor u met de installatie begint. – Zet de bedrading vast met kabelklemmen of kleefband. Wikkel kleefband rond bedrading die in contact komt met metalen delen om de bedrading te beschermen. – Plaats alle kabels op een veilige afstand van bewegende delen, zoals de schakelhendel en de stoelrails. – Plaats alle kabels op een veilige afstand van hete plaatsen, dus niet nabij de uitgang van de verwarming. – Verbind de gele kabel niet met de accu door deze door het gat naar het motorcompartiment te voeren. – Dek alle losgekoppelde kabelconnectors af met isolatietape. – Sluit kabels nooit kort. – Verwijder de isolatie van de voedingskabel van dit toestel niet om de stroomtoevoer met andere apparaten te delen. De stroomcapaciteit van de kabel is beperkt. – Gebruik een zekering van de voorgeschreven waarde. – Verbind de negatieve luidsprekerkabel nooit rechtstreeks met aarde. – Voeg nooit negatieve kabels van meerdere luidsprekers samen. • Als het toestel ingeschakeld is, worden stuursignalen via de blauw/witte kabel verstuurd. Verbind deze kabel met de systeemafstandsbediening van een externe eindversterker of met het relaiscontact voor de automatische antenne (max. 300 mA 12 V gelijkstroom). Als de wagen uitgerust is met een ruitantenne, moet verbinding worden gemaakt met de voedingsaansluiting van de antennebooster. • Verbind de blauw/witte kabel nooit met de voedingsaansluiting van een externe eindversterker. Verbind deze kabel ook nooit met de voedingsaansluiting van de automatische antenne. Hierdoor zou de 13 accu leeglopen of zou er een storing optreden. • De zwarte kabel is aarde. Aardingskabels voor dit toestel en andere uitrusting (met name producten die veel stroom trekken zoals eindversterkers) moeten afzonderlijk worden aangesloten. Anders kan er, wanneer ze toevallig loskomen, brand of een storing optreden. op het • Het grafische symbool product duidt gelijkstroom aan. Stroomkabel Dit toestel Stroomkabelingang AUX IN | [Tel In] achteraan (3,5mmstereoaansluiting) Een speciale ingang aan de achterkant die alleen compatibel is met externe Bluetooth-handsfreetelefoonsets. Het audiosignaal wordt gedempt tijdens een telefoongesprek wanneer de geel/ zwarte draad verbonden/geactiveerd is. Achteruitgang of subwooferuitgang Vooruitgang Antenne-ingang Zekering (10 A) Ingang draadafstandsbediening Een vast bedrade afstandsbedieningsadapter kan worden aangesloten (afzonderlijk verkocht). 14 Nl Naar stroomkabelingang Afhankelijk van het soort wagen kan de functie van en verschillend zijn. In dit geval dient u te verbinden met en met . Geel Reserve (of accessoire) Geel Verbinden met de constante 12 V voedingsaansluiting. Rood Accessoire (of reserve) Rood Verbinden met de aansluiting die door de contactschakelaar wordt gestuurd (12 V gelijkstroom). Verbind draden van dezelfde kleur met elkaar. Zwart (chassisaarde) Blauw/wit De penpositie van de ISO-connector is afhankelijk van het wagentype. Verbind en wanneer pen 5 een antennestuurtype is. In een ander wagentype mag u en nooit verbinden. Blauw/wit Verbinden met de systeembedieningsaansluiting van de eindversterker (max. 300 mA 12 V gelijkstroom). Blauw/wit Verbinden met het relaiscontact voor de automatische antenne (max. 300 mA 12 V gelijkstroom). Luidsprekerdraden Wit: links voor Wit/zwart: links voor Grijs: rechts voor Grijs/zwart: rechts voor Groen: links achter of subwoofer Groen/zwart: links achter of subwoofer Violet: rechts achter of subwoofer Violet/zwart: rechts achter of subwoofer Oranje/wit Verbinden met het verlichtingsignaal van een wagen ISO-connector In sommige wagens is de ISOconnector in twee gesplitst. In dit geval dient u verbinding te maken met beide connectoren. OPMERKINGEN • Wijzig het beginmenu van dit toestel. Zie [SP-P/O MODE] (pagina 5). De subwooferuitgang van dit toestel is mono. • Wanneer u een subwoofer van 2 Ω gebruikt, dient u de subwoofer te verbinden met de violette en violet/ zwarte draden van dit toestel. Sluit niets aan op de groene en groen/zwarte draden. Eindversterker (afzonderlijk verkocht) Voer deze verbindingen uit wanneer u de optionele versterker gebruikt. Systeemafstandsbediening Verbinden met blauw/witte kabel. Eindversterker (afzonderlijk verkocht) Verbinden met RCA-kabels (afzonderlijk verkocht) Naar vooruitgang Voorluidspreker Naar achteruitgang of subwooferuitgang Achterluidspreker of subwoofer Installatie Belangrijk • Controleer alle verbindingen en systemen voor de definitieve installatie. • Gebruik geen ongeoorloofde onderdelen, want dit kan tot storingen leiden. • Raadpleeg uw verdeler als u voor de installatie gaten moet boren of andere wijzigingen aan de wagen moet aanbrengen. • Installeer het toestel niet op de volgende plaatsen: – waar het de goede werking van de wagen kan storen. – waar passagiers gekwetst kunnen geraken bij bruusk afremmen. • De halfgeleiderlaser raakt beschadigd als hij te warm wordt. Installeer dit toestel op een veilige afstand van hete plaatsen, zoals de uitgang van de verwarming. • Optimale prestaties zijn verzekerd wanneer het toestel in een hoek van minder dan 60° wordt geïnstalleerd. • Tijdens de installatie dient u voor een goede warmteafvoer bij het gebruik van het toestel te zorgen. Voorzie daartoe voldoende vrije ruimte achter het achterpaneel en wikkel alle losse kabels op, zodat ze de ventilatieopeningen niet blokkeren. Voorzie voldoende ruimte Wanneer u de bijgeleverde installatiekoker niet gebruikt 1 Bepaal de positie waar de gaten in de beugel en de zijkant van het toestel overeenkomen. 2 Draai aan elke kant twee schroeven vast. 5 cm Tappende schroef (5 mm × 9 mm, niet met het product meegeleverd) Montagebeugel Dashboard of console 5 cm DIN-installatie 1 Steek de bijgeleverde installatiekoker 2 in het dashboard. Zet de installatiekoker vast door de metalen lippen 90° te plooien met een schroevendraaier. 1 2 3 Verwijder het sierkader. Sierkader Gekeepte lip • Door het voorpaneel los te maken, kunt u gemakkelijker bij het sierkader komen. • Wanneer het sierkader wordt teruggezet, moet de kant met de gekeepte lip omlaag wijzen. Steek de meegeleverde uittrekspieën in beide zijden van het toestel tot ze op hun plaats klikken. Trek het toestel uit het dashboard. Nederlands Dashboard Installatiekoker • Controleer of het toestel degelijk geïnstalleerd is. Een onstabiele installatie kan haperingen of andere storingen veroorzaken. Het toestel verwijderen (geïnstalleerd met de bijgeleverde installatiekoker) Nl 15 Aanvullende informatie Problemen verhelpen Het display keert automatisch terug naar het gewone display. → U hebt gedurende ongeveer 30 seconden geen handeling uitgevoerd. – Voer een handeling uit. Het bereik voor weergave herhalen wordt onverwacht gewijzigd. → Afhankelijk van het bereik voor weergave herhalen kan het geselecteerde bereik gewijzigd worden wanneer u een andere map of een ander fragment selecteert of vooruit of achteruit spoelt. – Selecteer het gewenste bereik voor weergave herhalen opnieuw. Een onderliggende map wordt niet afgespeeld. → Onderliggende mappen worden niet afgespeeld wanneer [FLD] (map herhalen) is geselecteerd. – Selecteer een ander bereik voor weergave herhalen. Het geluid is onderbroken. → U gebruikt een apparaat, zoals een mobiele telefoon, die hoorbare storingen veroorzaakt. – Plaats elektrische apparaten die de storing kunnen veroorzaken, verder weg van het toestel. Foutmeldingen Algemeen AMP ERROR → Dit toestel werkt niet of er is een probleem met de luidsprekeraansluiting. → Het beveiligingscircuit is geactiveerd. – Controleer de luidsprekeraansluiting. – Draai de contactschakelaar naar OFF en weer naar ON. Als het bericht nog wordt weergegeven, neemt u contact op met uw leverancier of een erkend Pioneer Servicecentrum. NO XXXX (bijvoorbeeld NO TITLE) → Er is geen ingebedde tekstinformatie. – Schakel het display om of speel een ander fragment/bestand af. Cd-speler ERROR-07, 11, 12, 17, 30 → De disc is vuil. – Reinig de disc. → De disc is bekrast. – Plaats een andere disc. ERROR-07, 10, 11, 12, 15, 17, 30, A0 → Elektrisch of mechanisch probleem. – Zet de contactschakelaar UIT en weer AAN, of schakel naar een andere signaalbron en dan terug naar de cdspeler. ERROR-15 → De geplaatste disc bevat geen gegevens. – Plaats een andere disc. ERROR-23 → Het cd-formaat wordt niet ondersteund. 16 Nl – Plaats een andere disc. FORMAT READ → Soms is er een vertraging tussen het begin van de weergave en wanneer u het geluid begint te horen. – Wacht tot het bericht verdwijnt en u het geluid hoort. NO AUDIO → De geplaatste disc bevat geen afspeelbare bestanden. – Plaats een andere disc. SKIPPED → De geplaatste disc bevat door DRM beveiligde bestanden. – Beveiligde bestanden worden overgeslagen. PROTECT → Alle bestanden op de geplaatste disc zijn beveiligd met DRM. – Plaats een andere disc. USB-apparaat/iPod FORMAT READ → Soms is er een vertraging tussen het begin van de weergave en wanneer u het geluid begint te horen. – Wacht tot het bericht verdwijnt en u het geluid hoort. NO AUDIO → Er zijn geen songs. – Zet de audiobestanden over naar het USB-apparaat en maak verbinding. → De inhoud van het USB-apparaat is beveiligd. – Raadpleeg de instructies bij het USBapparaat om de beveiliging uit te schakelen. SKIPPED → Het aangesloten USB-apparaat bevat bestanden die met DRM zijn beveiligd. – Beveiligde bestanden worden overgeslagen. PROTECT → Alle bestanden op het aangesloten USB-apparaat zijn beveiligd met DRM. – Gebruik een ander USB-apparaat. N/A USB → Het aangesloten USB-apparaat wordt niet ondersteund door dit toestel. – Gebruik een apparaat dat compatibel is met USB. HUB ERROR → USB-apparaten die aangesloten zijn via een USB-hub worden niet ondersteund door dit toestel. – Sluit het USB-apparaat rechtstreeks aan op dit toestel met behulp van een USB-kabel. CHECK USB → Er is kortsluiting opgetreden in de USBstekker of de USB-kabel. – Controleer of de USB-stekker en de USB-kabel niet ergens ingeklemd of beschadigd zijn. → Het aangesloten USB-apparaat verbruikt meer stroom dan de maximaal toelaatbare waarde. – Ontkoppel het USB-apparaat en gebruik het niet meer. Zet de contactschakelaar op UIT en daarna op ACC of AAN. Sluit alleen compatibele USB-apparaten aan. → De iPod functioneert correct maar wordt niet opgeladen. – Controleer of de kabel van de iPod niet is kortgesloten (bijvoorbeeld contact maakt met metalen voorwerpen). Zet daarna de contactschakelaar UIT en weer AAN, of ontkoppel de iPod en sluit hem weer aan. ERROR-19 → Communicatiefout. – Probeer een van de volgende mogelijkheden en keer dan terug naar de USB-bron. • Zet de contactschakelaar UIT en weer AAN. • Ontkoppel het USB-apparaat. • Schakel over naar een andere signaalbron. → iPod-fout. – Verwijder de kabel uit de iPod. Sluit de kabel weer aan als het hoofdmenu van de iPod wordt weergegeven en stel de iPod opnieuw in. ERROR-23 → Het USB-apparaat was niet goed geformatteerd. – Formatteer het USB-apparaat met FAT12, FAT16 of FAT32. ERROR-16 → De versie van de iPod-firmware is verouderd. – Werk de versie van de iPod bij. → iPod-fout. – Verwijder de kabel uit de iPod. Sluit de kabel weer aan als het hoofdmenu van de iPod wordt weergegeven en stel de iPod opnieuw in. STOP → De huidige lijst bevat geen songs. – Selecteer een lijst die wel songs bevat. NOT FOUND → Geen verwante songs. – Zet songs over naar de iPod. START UP APP → De applicatie is nog niet gestart. – Bedien het mobiele apparaat om de applicatie te starten. CHECK APP → Verbinding met de applicatie Spotify mislukt. – Volg de instructies op het scherm. Aanwijzingen voor het gebruik Discs en de player • Gebruik uitsluitend discs die voorzien zijn van een van onderstaande twee logo's. • Gebruik discs van 12 cm. • Gebruik uitsluitend normale, ronde discs. • De volgende typen discs kunnen niet op dit toestel worden afgespeeld: – DualDiscs – Discs van 8 cm. Als u deze discs met een adapter probeert af te spelen, kan het toestel defect raken. – Discs in een ongewone vorm – Andere discs dan cd's – Beschadigde discs, inclusief schijven die zijn gebarsten, gebogen of waarvan stukjes zijn afgebroken – Cd-r/rw-discs die niet zijn gefinaliseerd • Schrijf niet op het oppervlak van de discs en gebruik geen chemicaliën. • Om een cd te reinigen, veegt u de disc af met een zachte doek, waarbij u van buiten naar binnen gaat. • Condens kan de goede werking van de speler tijdelijk negatief beïnvloeden. Laat de speler in een warmere omgeving ongeveer een uur op temperatuur komen. Veeg vochtige discs met een zachte doek schoon. • Bij gebruik van discs met een bedrukbaar labeloppervlak moet u de instructies en waarschuwingen van de discs controleren. Afhankelijk van de disc kan laden of uitwerpen niet mogelijk zijn. Het gebruik van zulke discs kan dit toestel beschadigen. • Plak geen in de handel verkrijgbare labels of andere materialen op de discs. – De discs kunnen vervormen waardoor ze onafspeelbaar kunnen worden. – De labels kunnen loslaten tijdens het afspelen en de disc blokkeren bij het uitwerpen en het toestel beschadigen. USB-opslagapparaat • Het maken van verbindingen via een USB-hub wordt niet ondersteund. • Maak het USB-apparaat stevig vast voordat u gaat rijden. Zorg dat het USBapparaat niet op de vloer valt omdat het dan onder het rem- of gaspedaal terecht kan komen. • Afhankelijk van het USB-apparaat kunnen de volgende problemen voorkomen. – De bediening kan verschillend zijn. – Het opslagapparaat wordt niet herkend. – Bestanden worden niet correct afgespeeld. – Het apparaat kan hoorbare interferentie veroorzaken wanneer u naar de radio luistert. iPod • Stel de iPod niet bloot aan hoge temperaturen. • Maak de iPod stevig vast voordat u gaat rijden. Zorg dat de iPod niet op de vloer kan vallen omdat hij dan onder het remof gaspedaal terecht kan komen. • De instellingen van de iPod, zoals de equalizer en weergave herhalen, worden automatisch gewijzigd wanneer de iPod wordt aangesloten op het toestel. Als de iPod wordt losgekoppeld, keren deze instellingen terug naar de oorspronkelijke instellingen. • Tekst op de iPod die niet compatibel is met de specificaties van dit toestel, kan niet worden weergegeven. Compatibiliteit met gecomprimeerde audio • Alleen de eerste 32 tekens van de bestandsnaam (inclusief de extensie) of mapnaam worden weergegeven. • Een juiste werking van dit toestel is afhankelijk van de toepassing waarmee de WMA-bestanden zijn gecodeerd. • Er kan een beetje vertraging optreden bij het beginnen met afspelen van audiobestanden met beeldgegevens of audiobestanden op een USB-apparaat met een uitgebreide mappenstructuur. • Russische tekst kan alleen op dit toestel worden weergegeven als die met een van de volgende tekensets is gecodeerd: – Unicode (UTF-8, UTF-16) – Andere tekensets dan Unicode die in een Windows-omgeving worden gebruikt en op Russisch zijn ingesteld bij de taalinstellingen LET OP • Pioneer garandeert geen compatibiliteit met alle USB-opslagapparaten en kan niet verantwoordelijk worden gesteld voor eventueel gegevensverlies op mediaspelers, smartphones of andere apparaten tijdens het gebruik van dit product. • Laat discs en USB-opslagapparaten niet achter op plaatsen waar de temperatuur hoog kan oplopen. WMA-bestanden Bestandsextensie Bitsnelheid Nederlands Apps Spotify .wma 48 kbps tot 320 kbps (CBR), 48 kbps tot 384 kbps (VBR) Nl 17 Bemonsteringsfrequentie 32 kHz, 44,1 kHz, 48 kHz Windows Media™ Niet compatibel Audio Professional, Lossless, Voice/DRM Stream/Stream met video MP3-bestanden Bestandsextensie Bitsnelheid .mp3 8 kbps tot 320 kbps (CBR), VBR Bemonsteringsfrequentie 8 kHz tot 48 kHz (32 kHz, 44,1 kHz, 48 kHz voor de beste kwaliteit) Compatibele ID3-tag- 1.0, 1.1, 2.2, 2.3, 2.4 versie (ID3-tag versie 2.x krijgt prioriteit boven versie 1.x.) M3u-afspeellijst Niet compatibel MP3i (MP3 Niet compatibel interactive), mp3 PRO WAV-bestanden • WAV-bestandsindelingen kunnen niet worden gebruikt via MTP. Bestandsextensie Kwantisatiebits .wav 8 en 16 (LPCM), 4 (MS ADPCM) Bemonsteringsfrequentie 16 kHz tot 48 kHz (LPCM), 22,05 kHz en 44,1 kHz (MS ADPCM) Disc • Ongeacht de tijdsduur tussen de songs op de originele opname wordt bij het afspelen van gecomprimeerde audiodiscs een korte pauze tussen de songs ingelast. Hiërarchie afspeelbare Tot acht niveaus (voor mappen praktisch gebruik kunt u beter niet meer dan twee niveaus gebruiken) Afspeelbare mappen Maximaal 99 Afspeelbare Maximaal 999 bestanden Bestandsysteem ISO 9660 Level 1 en 2, Romeo, Joliet Afspelen van Compatibel multisessie-discs Gegevensoverdracht Niet compatibel pakket schrijven USB-apparaat • Er kan een beetje vertraging optreden bij het beginnen met afspelen van audiobestanden op een USBopslagapparaat met een uitgebreide mappenstructuur. Hiërarchie afspeelbare Tot acht niveaus (voor mappen praktisch gebruik kunt u beter niet meer dan twee niveaus gebruiken) Afspeelbare mappen Maximaal 500 Maximaal 15 000 Afspeelbare bestanden Afspelen van Niet compatibel auteursrechtelijk beschermde bestanden Gepartitioneerd USB- Alleen de eerste apparaat partitie kan worden afgespeeld. Compatibiliteit met iPod Alleen de volgende iPod-modellen kunnen met dit toestel gebruikt worden. Ondersteunde versies van de iPod-software worden hieronder genoemd. Oudere versies worden wellicht niet ondersteund. 18 Nl Gemaakt voor – iPod touch (1e tot 6e generatie) – iPod classic – iPod met video – iPod nano (1e tot 7e generatie) – iPhone 6s – iPhone 6s Plus – iPhone 6 – iPhone 6 Plus – iPhone 5s – iPhone 5c – iPhone 5 – iPhone 4s – iPhone 4 – iPhone 3GS – iPhone 3G – iPhone • Afhankelijk van de generatie en de versie van de iPod zijn sommige functies mogelijk niet beschikbaar. • Gebruikers van een iPod met Lightningaansluiting moeten de Lightning-naarUSB-kabel gebruiken (bij de iPod geleverd). • Gebruikers van een iPod met Dock Connector moeten CD-IU51 gebruiken. Raadpleeg uw leverancier voor meer informatie. • Raadpleeg de handleiding van de iPod voor meer informatie over ondersteunde bestandsindelingen. • Audiobook, Podcast: Compatibel LET OP Pioneer is niet verantwoordelijk voor verlies van gegevens op de iPod, ook niet tijdens het gebruik van dit toestel. Volgorde van audiobestanden De gebruiker kan met dit toestel geen mapnummers toewijzen of de afspeelvolgorde wijzigen. De volgorde van de audiobestanden is afhankelijk van het aangesloten apparaat. Merk op dat verborgen bestanden op een USB-apparaat niet kunnen worden weergegeven. Voorbeeld van een boomstructuur Map Gecomprimeerd audiobestand 01 tot 05: Mapnummer tot : Afspeelvolgorde Lijst van Russische tekens iPod & iPhone iPhone, iPod, iPod classic, iPod nano en iPod touch zijn handelsmerken van Apple Inc., gedeponeerd in de VS en andere landen. Lightning is een handelsmerk van Apple Inc. “Gemaakt voor iPod” en “Gemaakt voor iPhone” wil zeggen dat een elektronische accessoire speciaal ontwikkeld is voor verbinding met respectievelijk een iPod of iPhone en door de maker gewaarborgd is als conform de Apple werkingsnormen. Apple is niet verantwoordelijk voor de werking van dit apparaat en voor het voldoen aan de veiligheidsnormen en wettelijke normen. Houd er rekening mee dat het gebruik van dit accessoire met iPod of iPhone invloed kan hebben op de draadloze prestatie. Android & Google Play Android, Google Play en het Google Playlogo zijn handelsmerken van Google Inc. D: Display C: Teken Copyright en handelsmerken iTunes Apple en iTunes zijn handelsmerken van Apple Inc., geregistreerd in de V.S. en andere landen. Spotify® SPOTIFY en het Spotify-logo zijn gedeponeerde handelsmerken van Spotify AB. Compatibel mobiel digitaal apparaat en premium-abonnement vereist indien beschikbaar; zie https://www.spotify.com. Technische gegevens Algemeen Spanningsbron: 14,4 V gelijkstroom (10,8 V tot 15,1 V toelaatbaar) Aardingsysteem: negatief Maximaal stroomverbruik: 10,0 A Afmetingen (B × H × D): DIN Chassis: 178 mm × 50 mm × 165 mm Voorkant: 188 mm × 58 mm × 17 mm Audio Maximaal uitgangsvermogen: • 50 W × 4 kan./4 Ω (zonder subwoofer) • 50 W × 2 kan./4 Ω + 70 W × 1 kan./2 Ω (met subwoofer) Doorlopend uitgangsvermogen: 22 W × 4 (50 Hz tot 15 000 Hz, 5% THD, 4-Ω-belasting, beide kanalen) Belastingsimpedantie: 4 Ω (4 Ω tot 8 Ω toegestaan) Preout maximaal uitgangsniveau: 2,0 V Contouren loudness: +10 dB (100 Hz), +6,5 dB (10 kHz) (volume: –30 dB) Equalizer (grafische equalizer met 5 banden): Frequentie: 80 Hz/250 Hz/800 Hz/ 2,5 kHz/8 kHz Bereik equalizer: ±12 dB (in stappen van 2 dB) Subwoofer (mono): Frequentie: 50 Hz/63 Hz/80 Hz/ 100 Hz/125 Hz/160 Hz/200 Hz Helling: –12 dB/oct, –24 dB/oct Gain: +6 dB tot –24 dB Fase: Normaal/tegengesteld Cd-speler Systeem: Compact Disc Audio Bruikbare discs: Compact Discs Signaal-ruisverhouding: 94 dB (1 kHz) (IECA-netwerk) Aantal kanalen: 2 (stereo) MP3-decoderingsformaat: MPEG-1 & 2 Audio Layer 3 WMA-decoderingsformaat: Versie 7, 7.1, 8, 9, 10, 11, 12 (2-kanaalsaudio) (Windows Media Player) WAV-signaalformaat: Lineaire PCM & MS ADPCM (niet-gecomprimeerd) USB USB-standaardspecificatie: USB 2.0 volledige snelheid Maximaal stroomverbruik: 1,5 A USB-protocol: MSC (Mass Storage Class) MTP (Media Transfer Protocol) AOA (Android Open Accessory) 2.0 Bestandsysteem: FAT12, FAT16, FAT32 MP3-decoderingsformaat: MPEG-1 & 2 Audio Layer 3 WMA-decoderingsformaat: Versie 7, 7.1, 8, 9, 10, 11, 12 (2-kanaalsaudio) (Windows Media Player) WAV-signaalformaat: Lineaire PCM & MS ADPCM (niet-gecomprimeerd) FM-tuner Frequentiebereik: 87,5 MHz tot 108,0 MHz Bruikbare gevoeligheid: 11 dBf (1,0 μV/ 75 Ω, mono, S/R: 30 dB) Signaal-ruisverhouding: 72 dB (IEC-Anetwerk) MW-tuner Frequentiebereik: 531 kHz tot 1 602 kHz Bruikbare gevoeligheid: 25 μV (S/R: 20 dB) Signaal-ruisverhouding: 62 dB (IEC-Anetwerk) LW-tuner Frequentiebereik: 153 kHz tot 281 kHz Bruikbare gevoeligheid: 28 μV (S/R: 20 dB) Signaal-ruisverhouding: 62 dB (IEC-Anetwerk) OPMERKING Technische gegevens en ontwerp kunnen zonder voorafgaande kennisgeving worden gewijzigd. Nl Nederlands WMA Windows Media is een gedeponeerd handelsmerk of een handelsmerk van Microsoft Corporation in de Verenigde Staten en/of in andere landen. Dit product bevat technologie die het eigendom is van Microsoft Corporation en die niet gebruikt of gedistribueerd mag worden zonder toestemming van Microsoft Licensing, Inc. MIXTRAX MIXTRAX is een handelsmerk van de PIONEER CORPORATION. D Chassis: 178 mm × 50 mm × 165 mm Voorkant: 170 mm × 46 mm × 17 mm Gewicht: 1 kg 19 Содержание Перед началом эксплуатации Перед началом эксплуатации............................................................ 2 Начало работы....................................................................................... 3 Радио ........................................................................................................ 5 Благодарим Вас за покупку этого изделия компании PIONEER Для обеспечения правильности эксплуатации внимательно прочитайте данное руководство перед началом использования изделия. Особенно важно, чтобы Вы прочли и соблюдали инструкции, помеченные в данном руководстве заголовками ПРЕДУПРЕЖДЕНИЕ и ВНИМАНИЕ. Держите данное руководство под рукой для обращения к нему в будущем. Компакт-диск/USB/iPod/AUX.............................................................. 6 Режим приложения .............................................................................. 8 Spotify® ..................................................................................................... 8 Использование Pioneer ARC APP....................................................... 9 Настройки ............................................................................................. 10 Настройки FUNCTION ........................................................................ Настройки AUDIO................................................................................ Настройки SYSTEM ............................................................................. Настройки ILLUMINATION................................................................. Настройки MIXTRAX ........................................................................... 10 11 12 13 13 Подключения/Установка .................................................................. 14 Если вы желаете утилизировать данное изделие, не выбрасывайте его вместе с обычным бытовым мусором. Существует отдельная система сбора использованных электронных изделий в соответствии с законодательством, которая предполагает соответствующее обращение, возврат и переработку. Частные лица в странах Евросоюза, Швейцарии и Норвегии могут бесплатно возвращать использованные электронные изделия в специализированные пункты приема или в магазин (при покупке аналогичного нового устройства). Если Ваша страна не указана в приведенном выше перечне, обращайтесь в органы местного управления за инструкциями по правильной утилизации продукта. Тем самым Вы обеспечите утилизацию Вашего изделия с соблюдением обязательных процедур по обработке, утилизации и вторичной переработке и, таким образом, предотвратите потенциальное негативное воздействие на окружающую среду и здоровье людей. Дополнительная информация ........................................................ 16 О данном руководстве: • В следующих инструкциях USB-накопитель и аудиопроигрыватель USB называются “USB-устройство”. • В данном руководстве устройства iPod и iPhone называются “iPod”. Дату изготовления оборудования можно определить по серийному номеру, который содержит информацию о месяце и годе производства. ПРЕДУПРЕЖДЕНИЕ • Не пытайтесь самостоятельно производить установку или ремонт изделия. Установка или ремонт изделия лицами, не обладающими специальными навыками и опытом работы с электронным оборудованием и автомобильными аксессуарами, могут создать опасность поражения электрическим током или иных инцидентов. • Ни в коем случае не пытайтесь управлять устройством во время движения. Прежде чем использовать органы управления устройством, необходимо съехать с дороги и припарковать автомобиль в безопасном месте. 2 Ru ВНИМАНИЕ Дополнительный пульт ДУ • Не допускайте попадания жидкости на устройство. Это может повлечь поражение электрическим током. Кроме того, попадание жидкости в устройство может стать причиной его выхода из строя, перегрева и появления дыма. • Всегда сохраняйте уровень громкости достаточно низким, чтобы были слышны звуки извне. • Pioneer CarStereo-Pass предназначен для использования только в Германии. • Данное изделие оценено на соответствие требованиям стандарта IEC 60065, “Аудио-, видео- и аналогичная электронная аппаратура. Требования безопасности” в условиях умеренного и тропического климата. ВНИМАНИЕ Данное изделие является лазерным изделием класса 1 согласно классификации по Безопасности лазерных изделий, IEC 60825-1:2007. При возникновении проблем При неполадках в работе этого изделия свяжитесь с торговым представителем компаниипроизводителя или с ближайшим сервисным пунктом PIONEER. Начало работы Основные операции Пульт ДУ CD-R320 приобретается отдельно. Часто используемые операции Назначение Операция Включение питания* Нажмите SRC/OFF для включения питания. Нажмите и удерживайте SRC/OFF для выключения питания. Настройка громкости Поверните регулятор M.C.. Выбор источника Несколько раз нажмите SRC/OFF. Изменение информации на дисплее Несколько раз нажмите DISP. Возврат к предыдущему экрану/списку Нажмите BAND/ Возврат к обычному дисплею из меню Нажмите и удерживайте BAND/ USB-порт Регулятор M.C. (многозадачное управление) Щель для загрузки диска (извлечение) Окно дисплея SRC (источник)/OFF . * Когда голубой/белый провод этого устройства подключен к терминалу релейного управления автоматической антенны, антенна на автомобиле выдвигается при включении источника сигнала этого устройства. Чтобы втянуть антенну, выключите источник сигнала. Индикация на дисплее Индикация Описание Отображается при наличии нижнего уровня меню или папки. Отображается при нажатии кнопки DEH-X2900UI . . Отображается при настройке функции поиска локальных радиостанций (стр. 10). Отображается при получении программы с трафиком. Отображается при установке функции TA (уведомления о трафике) (стр. 11). Отображается, если установлена функция преобразования звука (стр. 11). Отображается при настройке произвольного/перемешанного воспроизведения. Отображается при установке повтора воспроизведения. Русский Отображается, если установлена функция управления iPod (стр. 7). BAND/ DISP (дисплей) Кнопка отсоединения Вход AUX (стереоразъем 3,5 мм) Ru 3 3 Снятие передней панели [QUIT :YES] отображается после выполнения всех настроек. Для возврата к первому элементу установочного меню поверните M.C. для выбора [QUIT :NO], затем нажмите для подтверждения. Снимите переднюю панель во избежание кражи. Перед снятием панели отсоедините кабели и устройства, подключенные к передней панели, и отключите устройство. 4 Снятие ПРИМЕЧАНИЯ Установка Нажмите M.C. для подтверждения настроек. • Вы можете отменить настройку параметра меню, нажав кнопку SRC/OFF. • Настроить параметры меню можно в настройках SYSTEM (стр. 12) и настройках INITIAL (стр. 4). Отмена демонстрационного дисплея (DEMO OFF) Важно • Оберегайте переднюю панель от сильных ударов. • Не подвергайте переднюю панель воздействию прямых солнечных лучей и высоких температур. • Всегда храните снятую панель в защитном чехле или сумке. Установочное меню После установки устройства поверните ключ зажигания в положение ON; на дисплее отобразится [SET UP :YES]. 1 2 Нажмите регулятор M.C.. Если в течение 30 секунд устройство не используется, установочное меню не будет выводиться. Если вы хотите выполнить настройку позже, поверните M.C., чтобы выбрать [NO], и нажмите для подтверждения. Поверните M.C. для выбора параметров, затем нажмите для подтверждения. Для перехода к следующему пункту меню необходимо подтвердить выбор. 1 2 3 4 Нажмите M.C. для отображения главного меню. Поверните M.C. для выбора [SYSTEM], затем нажмите для подтверждения. Поверните M.C. для выбора [DEMO OFF], затем нажмите для подтверждения. Поверните M.C. для выбора [YES], затем нажмите для подтверждения. Настройки INITIAL 1 2 3 4 Нажмите и удерживайте SRC/OFF, пока устройство не отключится. Нажмите и удерживайте SRC/OFF для отображения главного меню. Поверните M.C. для выбора [INITIAL], затем нажмите для подтверждения. Поверните M.C. для выбора параметра, затем нажмите для подтверждения. Элемент меню Описание FM STEP Выбор шага настройки в FM-диапазоне (100 кГц или 50 кГц). [100], [50] Элемент меню Описание LANGUAGE Выбор языка для отображения текстовой информации с сжатого аудиофайла. [ENG](Английски й), [РУС](Русский), [TUR](Турецкий) CLOCK SET Настройка часов. FM STEP Выбор шага настройки в FM-диапазоне (100 кГц или 50 кГц). [100], [50] 4 Ru СОВЕТ Элемент меню Описание SP-P/O MODE Используется, когда полночастотный динамик подключен к проводам вывода заднего динамика, а сабвуфер подключен к выводу RCA. [REAR/SUB.W] [SUB.W/SUB.W] [REAR/REAR] S/W UPDATE [SYSTEM INFO] Используется, когда пассивный сабвуфер подключен непосредственно к проводам вывода заднего динамика, а сабвуфер подключен к выводу RCA. Используется, когда полночастотный динамик подключен к проводам вывода заднего динамика выводу RCA Если полночастотный динамик подключен к проводам вывода заднего динамика и вывод RCA не используется, выберите [REAR/SUB.W] или [REAR/REAR]. Выберите для просмотра последней системной информации для устройства. [SYSTEM UPDATE] Выберите для обновления программного обеспечения устройства до последней версии и инициализации настроек устройства. Для просмотра дополнительной информации о последней версии программного обеспечения и обновлении посетите наш веб-сайт. SYSTEM RESET [YES], [NO] Выберите [YES] для инициализации настроек устройства. Устройство будет перезагружено автоматически. (Некоторые настройки будут сохранены даже после сброса параметров устройства.) 1 2 3 После выбора полосы нажмите регулятор M.C. для отображения главного меню. Поверните M.C. для выбора [FUNCTION], затем нажмите для подтверждения. Поверните M.C. для выбора [BSM], затем нажмите для подтверждения. Поиск станции вручную 1 После выбора полосы нажмите / для выбора станции. Нажмите и удерживайте / , затем отпустите для поиска доступной станции. Поиск остановится, когда устройство выполнит прием станции. Для отмены поиска нажмите / . ПРИМЕЧАНИЕ Для параметра [SEEK] необходимо установить значение [MAN] в настройках FUNCTION (стр. 11). удерживайте одну из числовых кнопок (с 1/ прекратится. Радиочастоты данного устройства предназначены для использования в Западной Европе, Азии, Среднем Востоке, Африке и Океании. В других областях прием может быть неудовлетворительным. Функция RDS (система радиоданных) работает только в областях, где выполняется вещание сигналов RDS для FM-станций. Прием предварительно установленных станций Нажмите SRC/OFF для выбора [RADIO]. Нажмите BAND/ Запоминание лучших станций (BSM) За каждой числовой кнопкой сохранена одна из шести радиостанций с наилучшим качеством приема (с 1/ по 6/ ). Сохранение станций вручную 1 Во время приема станции, которую требуется сохранить, нажмите и Радио для выбора полосы [FM1], [FM2], [FM3], [MW] или [LW]. Нажмите числовую кнопку (от 1/ до 6/ ). по 6/ ), пока мигание не Использование функций PTY Устройство выполняет поиск станции по информации PTY (тип программы). 1 2 3 Нажмите во время FM-приема. Поверните M.C. для выбора типа программы из [NEWS/INFO], [POPULAR], [CLASSICS] или [OTHERS]. Нажмите регулятор M.C.. Устройство начнет поиск станции. После нахождения станции отобразится название программной службы. Русский 1 2 3 Кнопки / можно также использовать для выбора предварительно установленной станции, если для параметра [SEEK] установлено значение [PCH] в настройках FUNCTION (стр. 11). Ru 5 ПРИМЕЧАНИЯ • Чтобы отменить поиск, нажмите M.C.. • Программы некоторых радиостанций могут отличаться от программ, указанных в передаваемом коде PTY. • Если ни одна из станций не передает программы нужного типа, то на дисплее в течение примерно двух секунд будет показано [NOT FOUND], и затем тюнер перейдет в режим приема станции, с которой был начат поиск. Компакт-диск/USB/iPod/AUX протоколу MTP несовместимо с файловыми форматами WAV и не может использоваться с функцией MIXTRAX. ПРИМЕЧАНИЕ При использовании подключения MTP для параметра [ANDROID WIRED] необходимо установить значение [MEMORY] в настройках SYSTEM (стр. 12). AUX 1 Вставьте мини-стереоразъем в входной разъем AUX. 2 Нажмите SRC/OFF для выбора [AUX] в качестве источника. ПРИМЕЧАНИЕ Если для параметра [AUX] установлено значение [OFF] в настройках SYSTEM, будет невозможно выбрать [AUX] в качестве источника (стр. 12). Воспроизведение Отключите от устройства наушники перед подключением к оборудованию. Компакт-диск 1 Вставьте диск в щель загрузки диска маркированной стороной вверх. Чтобы извлечь диск, остановите воспроизведение, затем нажмите . Устройства USB (включая Android™)/iPod 1 Откройте крышку порта USB. 2 Подключите устройство USB/iPod с помощью соответствующего кабеля. Операции Вы можете настроить различные параметры в настройках FUNCTION (стр. 10). Обратите внимание, что следующие операции не работают на устройстве AUX. Для работы с устройством AUX используйте устройство непосредственно. Назначение Операция Выбор папки/альбома*1 Нажмите 1/ или 2/ Выбор дорожки/композиции (раздела) Нажмите или Быстрая перемотка вперед и назад*3 Нажмите и удерживайте Поиск файла из списка 1 Нажмите для отображения списка. 2 Поверните M.C. для выбора необходимого имени файла (папки) или категории, затем нажмите регулятор для подтверждения. 3 Поверните M.C. для выбора необходимого файла, затем нажмите для подтверждения. Начнется воспроизведение. Просмотр списка файлов в выбранной папке/категории*1 Нажмите M.C. после выбора папки/ категории. Воспроизведение композиции в выбранной папке/категории*1 Нажмите и удерживайте M.C. после выбора папки/категории. ПРИМЕЧАНИЕ Для автоматического переключения на источник [USB], когда устройство USB/iPod подключено к главному устройству, установите для [USB AUTO] значение [ON] в настройках SYSTEM (стр. 12). ВНИМАНИЕ Используйте дополнительный кабель Pioneer USB (CD-U50E) для подключения устройства USB, поскольку любое устройство, подключенное непосредственно к главному устройству, будет выступать, что может представлять опасность. Перед извлечением устройства остановите воспроизведение. Подключения AOA Для получения дополнительных сведений о подключении AOA см. стр. 9. Подключение по MTP Устройство с операционной системой Android 4.0 или более поздней можно подключить по протоколу MTP с помощью кабеля, прилагаемого к устройству. Однако в зависимости от подключенного устройства и количества файлов аудиофайлы/композиции могут быть недоступны для воспроизведения через MTP. Обратите внимание, что подключение по 6 Ru . . или . Назначение Операция Поиск по алфавиту (только для iPod) 1 Нажмите для отображения списка. 2 Поверните регулятор M.C. для выбора необходимого списка категорий, затем нажмите для входа в режим поиска по алфавиту. (Если повернуть M.C. два раза, также осуществляется переход в режим поиска по алфавиту.) 3 Поверните M.C. для выбора буквы, затем нажмите, чтобы отобразить алфавитный список. Для отмены поиска по алфавиту нажмите . BAND/ Полезные функции для iPod Режим ссылочного воспроизведения Вы можете осуществить доступ к композициям на основе текущего исполнителя, альбома или жанра. 1 Во время воспроизведения композиции нажмите и удерживайте для перехода в режим ссылочного воспроизведения. 2 Поверните M.C. для выбора режима ([ARTIST], [ALBUM], [GENRE]), затем нажмите для подтверждения. Выбранная композиция/альбом будут воспроизведены после текущей композиции. Повтор воспроизведения Нажмите 6/ . ПРИМЕЧАНИЕ Произвольное воспроизведение Нажмите 5/ . Выбранную композицию/альбом можно отменить при использовании функций, отличных от функций режима ссылочного воспроизведения (например, быстрая перемотка вперед и назад). Произвольное воспроизведение всех элементов (только для iPod) Нажмите и удерживайте 5/ Пауза/Возобновление воспроизведения Нажмите 4/PAUSE. Функция преобразования звука*1*2 Нажмите 3/S.Rtrv. [1]: Предназначено для низких скоростей сжатия [2]: Предназначено для высоких скоростей сжатия Возврат к корневой папке (только для компакт-дисков/USB)*1 Нажмите и удерживайте Переключение между сжатым аудио и CD-DA (только для компакт-дисков) Нажмите BAND/ . Смена дисков в устройстве USB (Устройства, поддерживающие только протокол устройств хранения USB) Нажмите BAND/ . . Управление iPod . *1 Только сжатые аудиофайлы *2 Данная функция отключена, если в качестве источника выбрано USB и включена функция MIXTRAX. *3 При использовании быстрой перемотки или обратной перемотки во время воспроизведения файла VBR время воспроизведения может быть неверным. Вы можете управлять устройством с помощью подключенного iPod. Следующие модели iPod несовместимы с данной функцией. – iPod nano 1-го поколения, iPod с видео 1 Во время воспроизведения нажмите BAND/ , затем выберите режим управления. [CONTROL iPod]: Функцией iPod устройства можно управлять с подключенного iPod. [CONTROL AUDIO]: Функцией iPod устройства можно управлять с помощью кнопок на устройстве. В данном режиме подключенное устройство iPod нельзя включить или выключить. ПРИМЕЧАНИЯ • При переключении режима управления на [CONTROL iPod] выполняется приостановка воспроизведения композиции. Используйте подключенный iPod для возобновления воспроизведения. • Следующие операции будут доступны для выполнения с устройства, даже если установлен режим управления [CONTROL iPod]. – Пауза, быстрая перемотка назад/вперед, выбор композиции/раздела • Громкость можно настроить только на устройстве. Русский Ru 7 Информация о MIXTRAX (только для USB/iPod) Функция MIXTRAX используется для вставки стереоэффектов между композициями, позволяя слушать музыку нон-стоп в сочетании с визуальными эффектами. Дополнительные сведения о настройках MIXTRAX см. стр. 13. ПРИМЕЧАНИЯ • Данная функция несовместима с устройством Android, подключенным с помощью MTP. • Если в качестве источника выбрано USB и используется функция MIXTRAX, функция преобразования звука будет отключена. • В зависимости от файла/композиции звуковые эффекты могут быть недоступны. • Выключите функцию MIXTRAX, если визуальные эффекты отвлекают вас от вождения. 1 Нажмите MIX для включения/отключения MIXTRAX. Режим приложения Использование приложения на устройстве 1 2 3 Важно Для пользователей iPhone Данная функция поддерживается iPhone и iPod touch с iOS 5.0 или более поздней версией. ПРИМЕЧАНИЕ КОМПАНИЯ PIONEER НЕ НЕСЕТ ОТВЕТСТВЕННОСТИ ЗА ПРИЛОЖЕНИЯ ИЛИ СОДЕРЖИМОЕ, ПРЕДОСТАВЛЕННОЕ СТОРОННИМИ РАЗРАБОТЧИКАМИ, ВКЛЮЧАЯ ИХ ДОСТОВЕРНОСТЬ И ПОЛНОТУ. ЗА СОДЕРЖИМОЕ И ФУНКЦИОНАЛЬНОСТЬ ТАКИХ ПРИЛОЖЕНИЙ НЕСУТ ОТВЕТСТВЕННОСТЬ РАЗРАБОТЧИКИ ПРИЛОЖЕНИЙ. Нажмите SRC/OFF для выбора [APP]. Используйте мобильное устройство для запуска приложения. Основные операции Вы можете настроить различные параметры в настройках FUNCTION (стр. 10). Назначение Операция Выбор дорожки Нажмите Быстрая перемотка назад и вперед Нажмите и удерживайте Пауза/Возобновление воспроизведения Нажмите BAND/ Вы можете использовать данное приложение на устройстве iPhone с помощью данного устройства. В некоторых случаях вы можете управлять приложением с помощью устройства. Для просмотра сведений о совместимых устройствах посетите наш веб-сайт. Использование приложений сторонних разработчиков может включать в себя или требовать предоставления личных данных (создание профиля пользователя или другие способы), а для некоторых приложений - предоставления данных о местонахождении. ВСЕ ПРИЛОЖЕНИЯ СТОРОННИХ РАЗРАБОТЧИКОВ НАХОДЯТСЯ В СФЕРЕ ОТВЕТСТВЕННОСТИ ЭТИХ РАЗРАБОТЧИКОВ, ЧТО БЕЗ ОГРАНИЧЕНИЙ ВКЛЮЧАЕТ В СЕБЯ СБОР И БЕЗОПАСНОСТЬ ПОЛЬЗОВАТЕЛЬСКИХ ДАННЫХ И ОБРАЩЕНИЕ С ЧАСТНОЙ ИНФОРМАЦИЕЙ. ПРИ ИСПОЛЬЗОВАНИИ ПРИЛОЖЕНИЙ СТОРОННИХ РАЗРАБОТЧИКОВ ВЫ СОГЛАШАЕТЕСЬ С УСЛОВИЯМИ ПРЕДОСТАВЛЕНИЯ СЕРВИСА И ПОЛИТИКОЙ КОНФИДЕНЦИАЛЬНОСТИ РАЗРАБОТЧИКОВ. ЕСЛИ ВЫ НЕ СОГЛАСНЫ С УСЛОВИЯМИ ИЛИ ПОЛИТИКОЙ РАЗРАБОТЧИКА ИЛИ НЕ ЖЕЛАЕТЕ ПРЕДОСТАВЛЯТЬ ДАННЫЕ О СВОЕМ МЕСТОНАХОЖДЕНИИ, КОГДА ЭТО ТРЕБУЕТСЯ, НЕ ИСПОЛЬЗУЙТЕ ТАКОЕ ПРИЛОЖЕНИЕ. Подключите данное устройство к мобильному устройству. • iPhone через USB (стр. 6) или . или Spotify® (DEH-X2900UI поддерживает только Spotify, установленный на iPhone.) Spotify — это служба потоковой передачи музыки, не принадлежащая Pioneer. Дополнительную информацию см. на веб-сайте http://www.spotify.com. Приложение Spotify доступно для совместимых смартфонов; посетите https:// support.spotify.com/ для получения последней информации о совместимости. Для использования Spotify во время вождения сначала загрузите приложение Spotify на iPhone. Приложение можно загрузить из iTunes App Store. Выберите бесплатную учетную запись или платную учетную запись Premium в приложении или на spotify.com. Учетная запись Premium предоставляет вам ряд дополнительных возможностей, например прослушивание в автономном режиме. Важно • Данный продукт имеет программное обеспечение Spotify, регулирующееся лицензиями сторонних поставщиков: www.spotify.com/connect/third-party-licenses. • Для получения информации о странах и регионах, где поддерживается Spotify, см. https:// www.spotify.com/us/select-your-country/. Прослушивание Spotify Перед использованием обновите микропрограммное обеспечение приложения Spotify. 1 8 Ru . . Подключите данное устройство к мобильному устройству. 2 3 • iPhone через USB (стр. 6) Назначение Операция Нажмите SRC/OFF для выбора [SPOTIFY]. Сохранение информации о воспроизводимой композиции. Удаление информации о сохраненной композиции. 1 Нажмите и удерживайте 3/S.Rtrv. Отобразится [SAVE]/[UNSAVE]. 2 Нажмите регулятор M.C.. Запустите приложение Spotify на мобильном устройстве и начните воспроизведение. ПРИМЕЧАНИЕ Основные операции Некоторыми функциями Spotify невозможно управлять с устройства. Вы можете настроить различные параметры в настройках FUNCTION (стр. 10). ПРИМЕЧАНИЕ Использование Pioneer ARC APP Доступные операции могут отличаться в зависимости от типа содержимого (дорожка/альбом/ исполнитель/список воспроизведения/радио), которое вы хотите воспроизвести. Назначение Операция Пропуск дорожки Нажмите Поиск дорожки из списка 1 Нажмите (список) для отображения списка. 2 Поверните регулятор M.C. для выбора необходимой категории, затем нажмите для подтверждения. 3 Поверните регулятор M.C. для выбора необходимого файла, затем нажмите для подтверждения. Начнется воспроизведение. Пауза/Возобновление воспроизведения или . Нажмите 4/PAUSE. Переход вперед (только для радио) Нажмите 1/ . Переход назад (только для радио) Нажмите 2/ . Произвольное воспроизведение (только для дорожки/альбома/исполнителя/ списка воспроизведения) Нажмите 5/ . Повтор воспроизведения (только для дорожки/альбома/исполнителя/списка воспроизведения) Нажмите 6/ . Включение радиоканала на основе воспроизводимой композиции. 1 Нажмите и удерживайте (список) для включения радио. 2 Нажмите регулятор M.C.. • Данная функция может быть недоступна в зависимости от выбранной композиции. Вы можете управлять устройством с помощью приложения Pioneer ARC APP, установленного на устройстве iPhone/Android. В некоторых случаях вы можете управлять такими аспектами приложения, как выбор источника, пауза и др. с помощью данного устройства. Для получения информации о доступных в приложении операциях см. раздел справки. ПРЕДУПРЕЖДЕНИЕ Не используйте данное приложение во время вождения автомобиля. Прежде чем использовать элементы управления приложением сверните на обочину и припаркуйте транспортное средство. Для пользователей iPhone Данная функция поддерживается iPhone (iPhone 5 или более поздней версией) и iPod touch с iOS 8.0 или более поздней версией. Вы можете загрузить Pioneer ARC APP в iTunes App Store. Для пользователей Android Данная функция совместима с устройствами, на которых установлена ОС Android 4.1 или более поздней версии и которые поддерживают AOA (Android Open Accessory) 2.0. Вы можете загрузить Pioneer ARC APP в Google Play™. ПРИМЕЧАНИЕ Некоторые устройства Android, подключенные с помощью AOA 2.0, могут функционировать неисправно или издавать посторонние звуки из-за особенностей их программного обеспечения, вне зависимости от версии ОС. Подключение к Pioneer ARC APP Русский 1 Подключите данное устройство к мобильному устройству. • Устройство iPhone/Android через USB (стр. 6) Перейдите к шагу 6 при выборе подключения USB для iPhone. Ru 9 2 3 4 5 Нажмите M.C. для отображения главного меню. Настройки Поверните M.C. для выбора [SYSTEM], затем нажмите для подтверждения. В главном меню можно настроить различные параметры. Поверните M.C. для выбора [ANDROID WIRED], затем нажмите для подтверждения. Поверните регулятор M.C., чтобы выбрать [APP CONTROL] для устройства Android, подключенного по USB. Если выбрано [ON] в пункте [P.APP AUTO ON] (стр. 12), приложение Pioneer ARC APP на устройстве Android запустится автоматически и все действия будут завершены. 1 2 ПРИМЕЧАНИЕ 6 7 Если приложение Pioneer ARC APP не установлено на устройстве Android, на экране устройства Android отобразится напоминание об установке приложения. Выберите [OFF] в [P.APP AUTO ON], чтобы удалить сообщение (стр. 12). Нажмите SRC/OFF для выбора любого источника. 3 Нажмите M.C. для отображения главного меню. Поверните M.C. для выбора одной из следующих категорий, затем нажмите для подтверждения. • Настройки FUNCTION (стр. 10) • Настройки AUDIO (стр. 11) • Настройки SYSTEM (стр. 12) • Настройки ILLUMINATION (стр. 13) • Настройки MIXTRAX (стр. 13) Поверните M.C. для выбора параметров, затем нажмите для подтверждения. Настройки FUNCTION Запустите Pioneer ARC APP на мобильном устройстве. Элементы меню отличаются в зависимости от источника. ПРИМЕЧАНИЕ Элемент меню Вы также можете запустить данное приложение, нажав и удерживая регулятор M.C. для iPhone. [TALK], [STANDARD], [MUSIC] Прослушивание музыки на Android 1 Описание FM SETTING Нажмите SRC/OFF для выбора [ANDROID]. Настройка уровня качества сигнала в соответствии с условиями сигнала вещания полосы FM. (Доступно только при выборе полосы FM.) BSM Основные операции Назначение Автоматическое сохранение шести радиостанций с наилучшим качеством приема под числовыми кнопками (с 1/ по 6/ ). Операция Выбор дорожки Нажмите Быстрая перемотка назад и вперед Нажмите и удерживайте Пауза/Возобновление воспроизведения Нажмите 4/PAUSE. Технология преобразования звука Нажмите 3/S.Rtrv. [1]: Предназначено для низких скоростей сжатия [2]: Предназначено для высоких скоростей сжатия 10 Ru или . REGIONAL или . [ON], [OFF] Ограничение приема определенными региональными программами, если выбрано AF (поиск альтернативных частот). (Доступно только при выборе полосы FM.) LOCAL FM: [OFF], [LV1], [LV2], [LV3], [LV4] Ограничение настройки станции в соответствии с мощностью сигнала. MW/LW: [OFF], [LV1], [LV2] Элемент меню Описание TA Элемент меню Описание PAUSE [ON], [OFF] Получение информации о текущем трафике, если доступно. (Доступно только при выборе полосы FM.) [ON], [OFF] Перенастройка на другую частоту, на которой вещается эта же станция. (Доступно только при выборе полосы FM.) AF Пауза или возобновление воспроизведения. Настройки AUDIO Элемент меню Настройка баланса переднего и заднего динамика. NEWS [ON], [OFF] Прерывание выбранного источника программами новостей. (Доступно только при выборе полосы FM.) SEEK [MAN], [PCH] Назначение кнопок или для поочередного поиска станций (настройка вручную) или выбор станций из списка предустановленных каналов. SAVE Сохранение информации о воспроизводимой композиции в музыкальном списке на Spotify. UNSAVE Удаление информации о композиции, сохраненной в [SAVE]. S.RTRV USB BALANCE Настройка баланса левого и правого динамика. EQ SETTING [SUPER BASS], [POWERFUL], Выберите или настройте кривую эквалайзера. [NATURAL], [VOCAL], [CUSTOM1], [CUSTOM1] можно выбрать отдельно для [CUSTOM2], [FLAT] каждого источника. Однако для любых комбинаций, указанных ниже, автоматически устанавливаются одинаковые настройки. Выбор полосы и уровня • USB, iPod, ANDROID, SPOTIFY и APP (iPhone) эквалайзера для дальнейшей [CUSTOM2] является общей настройкой, настройки. используемой для всех источников. Полоса эквалайзера: [80HZ], [250HZ], [800HZ], [2.5KHZ], [8KHZ] Уровень эквалайзера: от [+6] до [–6] iPod [1]: (Предназначено для низких скоростей сжатия), [2]: (Предназначено для высоких скоростей сжатия), [OFF] AUDIO BOOK Описание FADER*1 Улучшение качества сжатого аудио и восстановление насыщенности звука. Недоступно в следующих случаях: • если в качестве источника выбрано USB и включена функция MIXTRAX. • выполняется воспроизведение CD-DA/CDTEXT. iPod [FASTER], [NORMAL], [SLOWER] [OFF], [LOW], [MID], [HI] Компенсация для четкого звучания при низком уровне громкости. SUB.W*2 [NOR], [REV], [OFF] Выбор фазы сабвуфера. SUB.W CTRL*2*3 Частота среза: [50HZ], [63HZ], [80HZ], [100HZ], [125HZ], [160HZ], [200HZ] Уровень выходного сигнала: от [–24] до [+6] Крутизна характеристики: [–12], [–24] На выходе сабвуфера будут воспроизводиться только те частоты, которые ниже указанного диапазона частот. Русский Изменение скорости воспроизведения. (Недоступно, если выбран параметр [CONTROL iPod] в режиме управления.) LOUDNESS Ru 11 Элемент меню Описание BASS BOOST от [0] до [+6] Элемент меню Выбор усиления нижних звуковых частот. [ON], [OFF] HPF SETTING Частота среза: [OFF], [50HZ], [63HZ], [80HZ], [100HZ], [125HZ], [160HZ], [200HZ] Крутизна характеристики: [–12], [–24] На динамики будут выводиться только частоты выше, чем установленные фильтром высоких частот (HPF). от [+4] до [–4] Настройка уровня громкости для каждого источника кроме FM. Для любых комбинаций, указанных ниже, автоматически устанавливаются одинаковые настройки. • USB, iPod, ANDROID, SPOTIFY и APP (iPhone) [ON], [OFF] [ON], [OFF] Описание LANGUAGE Выбор языка для отображения текстовой информации с сжатого аудиофайла. CLOCK SET Настройка часов (стр. 4). 12H/24H Выбор формата времени. AUTO PI 12 Ru ANDROID WIRED [MEMORY], [APP CONTROL] Выбор необходимого способа подключения для устройства Android. P.APP AUTO ON [ON], [OFF] [ON], [OFF] Вы можете получить доступ к этим меню даже если устройство выключено. [ON], [OFF] Режим энергосбережения. При включении функции будет доступно только включение источника. Выберите [ON], чтобы автоматически запустить приложение Pioneer ARC APP при подключении устройства Android к устройству с помощью AOA. (Недоступно, если выбран параметр [MEMORY] в [ANDROID WIRED].) USB AUTO Настройки SYSTEM [12H], [24H] Установите значение [ON] при использовании функции Spotify. PW SAVE* *1 Недоступно, если выбран параметр [SUB.W/SUB.W] в [SP-P/O MODE] в настройках INITIAL (стр. 5). *2 Недоступно, если выбран параметр [REAR/REAR] в [SP-P/O MODE] в настройках INITIAL (стр. 5). *3 Недоступно, если выбран параметр [OFF] в [SUB.W]. [ENG](Английский), [РУС](Русский), [TUR](Турецкий) Выберите [ON] при подключении к данному устройству вспомогательного устройства. SPOTIFY SLA Элемент меню Описание AUX Поиск другой станции с такой же программой даже во время вызова предварительной настройки. Выберите [ON] для автоматического переключения на источник [USB], когда устройство USB/iPod подключено к устройству. Выберите [OFF], когда устройство USB/iPod подключается к устройству для зарядки. * Режим [PW SAVE] отключается при отсоединении аккумуляторной батареи автомобиля; при подсоединении батареи его потребуется включить снова. При выключенном режиме [PW SAVE] возможно, что, в зависимости от метода подключения, устройство будет потреблять энергию аккумулятора, если зажигание автомобиля не имеет положения ACC (аксессуар). Настройки ILLUMINATION Настройки MIXTRAX Элемент меню Элемент меню Описание COLOUR [KEY COLOUR], [DISP COLOUR], [BOTH COLOUR] Выберите цвет для кнопок/дисплея устройства из 12 предварительно установленных цветов, [SCAN] или [CUSTOM]*. • [SCAN]: автоматическое циклическое переключение цветов. • [CUSTOM]*: 1 Нажмите и удерживайте регулятор M.C., пока не отобразится дисплей настройки цветов. 2 Настройте основной цвет (R (красный)/G (зеленый)/B (синий)) и яркость (от [0] до [60]). Вы не можете выбрать уровень ниже 10 для всех трех цветов: R (красный), G (зеленый), B (синий) одновременно. Вы также можете настроить предварительно установленные цвета. Выберите один из предварительно установленных цветов, затем нажмите и удерживайте регулятор M.C., пока не отобразится окно настройки цвета. * Параметр CUSTOM доступен только для [KEY COLOUR] и [DISP COLOUR]. [1.0 MIN], [1.5 MIN], [2.0 MIN], [2.5 MIN], [3.0 MIN], [OFF] Изменение яркости дисплея. BRIGHTNESS [KEY], [DISP] [KEY/DISPLAY], [KEY], [OFF] Выбор области для применения световых эффектов. При выборе параметра [OFF] цвет в настройках ILLUMINATION (стр. 13) будет использоваться в качестве цвета дисплея. FLASH PATTERN от [SOUND LEVEL 1] до [SOUND LEVEL 6] Изменение светового эффекта в соответствии с уровнем звука и низких частот. Цветовая заставка меняется в зависимости от уровня громкости. от [LOW PASS 1] до [LOW PASS 6] Цветовая заставка меняется в зависимости от низких частот. [RANDOM1] Цветовая заставка меняется произвольно в зависимости от уровня громкости и уровня низких частот. [RANDOM2] Цветовая заставка меняется произвольно в зависимости от уровня громкости. [RANDOM3] Цветовая заставка меняется произвольно в зависимости от уровня низких частот. DISPLAY FX Выберите значение яркости кнопок/дисплея устройства от [1] до [10]. Набор настроек зависит от того, включена ли функция [DIM SETTING]. ILLUMI FX [ON], [OFF] Выбор продолжительности воспроизведения. FLASH AREA DIM SETTING [SYNC ILLUMI], [SYNC CLOCK], [MANUAL] Описание SHORT PLAYBCK [ON], [OFF] Включение/отключение эффектов MIXTRAX. CUT IN FX [ON], [OFF] Включение/отключение звуковых эффектов MIXTRAX при изменении дорожек вручную. Русский Подсветка включается при установке/ извлечении компакт-диска. Подсветка активируется при включении и отключении питания ACC независимо от данной настройки. Ru 13 Подключения/Установка Подключения Важно • При установке данного устройства в автомобиле, когда ключ зажигания не находится в положении ACC (аксессуар), отсутствие подключения красного кабеля к терминалу, который фиксирует положение ключа зажигания, может привести к разрядке аккумулятора. В положении ACC Вне положения ACC • Использование данного устройства в условиях, отличных от указанных, может привести к пожару или неисправности. – Автомобили с аккумуляторной батареей 12 В и отрицательным заземлением. – Если выход динамика используется 4 каналами, используйте динамики мощностью более 50 Вт (максимальная входная мощность) и сопротивлением от 4 Ω до 8 Ω (значение сопротивления). Не используйте для данного устройства динамики с сопротивлением 1-3 Ω. – Когда выход заднего динамика используется сабвуфером с сопротивлением 2 Ω, используйте динамики более 70 Вт (максимальная входная мощность). * См. подключения для выбора соответствующего способа подключения. 14 Ru • Во избежание короткого замыкания, перегрева или неисправности соблюдайте следующие указания. – Перед установкой отключите отрицательную клемму батареи. – Закрепите провода с помощью зажимов для кабелей или клейкой ленты. Оберните клейкую ленту вокруг проводов, которые касаются металлических частей, для защиты проводов. – Уберите все кабели подальше от движущихся частей, таких как рычаг переключения передач и направляющие сидений. – Уберите кабели подальше от мест с повышенной температурой, например печки. – Не подключайте желтый кабель к батареи путем просовывания его через отверстие в двигательный отсек. – Заклейте неподключенные разъемы кабеля изолентой. – Не укорачивайте кабели. – Не нарушайте изоляцию кабеля питания данного устройства для питания других устройств. Емкость кабеля является ограниченной. – Используйте плавкий предохранитель соответствующего номинала. – Не замыкайте отрицательный кабель динамиков непосредственно на землю. – Не связывайте вместе отрицательные кабели нескольких динамиков. • Когда устройство включено, сигналы управления отправляются по синему/ белому кабелю. Подключите данный кабель к удаленному управлению системой внешнего усилителя или терминалу релейного управления автоматической антенны автомобиля (макс. 300 мА, 12 В пост. тока). Если автомобиль оснащен антенной, встроенной в лобовое стекло, подключите ее к терминалу питания антенного усилителя. • Никогда не подключайте синий/белый провод к терминалу питания внешнего усилителя. Также никогда не подключайте его к терминалу питания автоматической антенны. В противном случае это может привести к протеканию батареи или ее неисправности. • Черный кабель заземлен. Кабели заземления для данного устройства и другое оборудование (особенно устройства высокого напряжения, например усилители) необходимо подключать отдельно. В противном случае случайное отключение может привести к пожару или неисправности. на изделии • Графический символ означает постоянный ток. Данное устройство Вход шнура питания Задний AUX IN | [Tel In] (стереоразъем 3,5 мм) Выделенный задний вход совместим только с внешними гарнитурами громкой связи Bluetooth телефонов. Аудиосигнал будет отключен во время вызова, если подключен/ активирован желтый/черный провод. Задний выход или выход сабвуфера Передний выход Вход для антенны Предохранитель (10 A) Вход для проводного пульта ДУ Сюда можно подключить проводной адаптер ДУ (приобретается отдельно). Шнур питания Во вход шнура питания В зависимости от типа автомобиля функции и могут отличаться. В этом случае подключите к и к . Желтый Резервный (или опция) Желтый Выполняйте подключение к терминалу с постоянным напряжением 12 В. Красный Опция (или резервный) Красный Выполняйте подключение к терминалу, управляемому ключом зажигания (12 В пост. тока). Выполняйте подключение проводов друг к другу одного цвета. Черный (“масса”) Синий/белый Положение контакта разъема ISO будет отличаться в зависимости от и типа автомобиля. Подключите , если 5 контакт отвечает за управление антенной. Если используется автомобиль другого типа, никогда не подключайте и . Синий/белый Выполняйте подключение к терминалу управления системой усилителя (макс. 300 мА, 12 В пост. тока). Синий/белый Выполняйте подключение к терминалу релейного управления автоматической антенны (макс. 300 мА, 12 В пост. тока). Провода динамика Белый: Передний левый Белый/черный: Передний левый Серый: Передний правый Серый/черный: Передний правый Зеленый: Задний левый или сабвуфер Зеленый/черный: Задний левый или сабвуфер Фиолетовый: Задний правый или сабвуфер Фиолетовый/черный: Задний правый или сабвуфер Оранжевый/белый Выполняйте подключение к сигналу подсветки автомобиля. Разъем ISO В некоторый автомобилях разъем ISO может быть разделен на два. В этом случае выполняйте подключение к обоим разъемам. Усилитель (приобретается отдельно) Выполните данные подключения при использовании дополнительного усилителя. Пульт ДУ системой Выполните подключение к синему/ белому кабелю. Усилитель (приобретается отдельно) Выполните подключение с помощью RCA (приобретается отдельно) К переднему выходу Передний динамик К заднему выходу или выходу сабвуфера Задний динамик или сабвуфер отверстия или модификации в автомобиле. • Не устанавливайте данное устройство в следующих случаях: – если оно может нарушить работу автомобиля. – если оно может причинить травму пассажиру в случае резкой остановки. • Полупроводниковый лазер будет поврежден в случае перегрева. Выполняйте установку данного устройства вдали от мест с повышенной температурой, например печки. • Оптимальная производительность достигается при установке устройства под углом менее 60°. • Чтобы обеспечить необходимое распределение тепла при использовании устройства, при установке оставьте свободное место за задней панелью и скрутите кабели, чтобы они не блокировали вентиляционные отверстия. Оставьте достаточно места Приборная панель Установочная шахта • Убедитесь, что устройство установлено прочно. Непрочная установка может привести к возникновению пропусков при воспроизведении и других неисправностей. Если входящая в комплект установочная шахта не используется 1 Определите положение, при котором совпадают отверстия в кронштейне с отверстиями сбоку устройства. 2 Затяните по бокам два винта. 5 см 5 см Установка Важно • Перед установкой проверьте все подключения и системы. • Не используйте неоригинальные запчасти, так как это может привести к неисправностям. • Обратитесь к дилеру, если для установки требуются дополнительные Саморез (5 мм × 9 мм, не прилагается к устройству) Крепежный кронштейн Приборная панель или консоль Установка крепления DIN 1 Установите на приборную панель 2 входящую в комплект установочную шахту. Закрепите установочную шахту, отогнув с помощью отвертки металлические лапки (90°). Извлечение устройства (установленного с помощью прилагаемой установочной шахты) 1 Русский ПРИМЕЧАНИЯ • Измените исходное меню данного устройства. См. [SP-P/O MODE] (стр. 5). Выход сабвуфера данного устройства является монофоническим. • При использовании сабвуфера сопротивлением 2 Ω подключайте сабвуфер к фиолетовому и фиолетовому/черному проводам устройства. Не подключайте ничего к зеленому или зеленому/черному проводам. Снимите окантовку. Ru 15 Дополнительная информация 2 3 Окантовка Лапка с зазубринами • При снятии передней панели облегчается доступ к окантовке. • При повторной установке окантовки поверните панель стороной с зазубренной лапкой вниз. Вставьте прилагаемые ключи извлечения по обеим сторонам устройства до щелчка. Потяните устройство из приборной панели. Устранение неисправностей Дисплей автоматически возвращается в исходный режим. → В течение 30 секунд не было выполнено никаких операций. – Выполните операцию. Диапазон повторного воспроизведения самопроизвольно изменяется. → В зависимости от выбранного диапазона повторного воспроизведения он может изменяться при выборе другой папки или дорожки, а также при перемотке вперед/назад. – Выберите диапазон повторного воспроизведения еще раз. Вложенная папка не воспроизводится. → Вложенные папки не воспроизводятся, если выбран диапазон [FLD] (повторное воспроизведение папки). – Выберите другой диапазон повторного воспроизведения. Имеются помехи звука. → Используется устройство, например, сотовый телефон, которое может вызывать шумовые помехи. – Уберите приборы, вызывающие помехи, от этого устройства. 16 Ru Сообщения об ошибках Общие AMP ERROR → Устройство не работает или неправильно подсоединен динамик. → Сработала цепь защиты. – Проверьте, подключен ли динамик. – Поверните ключ зажигания в положение OFF и верните в положение ON. Если сообщение не исчезает, свяжитесь с дилерским центром или авторизованным сервисным пунктом Pioneer. NO XXXX (NO TITLE, например) → Нет встроенной текстовой информации. – Переключите дисплей или воспроизведите другую дорожку/ файл. Проигрыватель компактдисков ERROR-07, 11, 12, 17, 30 → Диск загрязнен. – Очистите диск. → Диск поцарапан. – Замените диск. ERROR-07, 10, 11, 12, 15, 17, 30, A0 → Электрическая или механическая неисправность. – Установите ключ зажигания в положение OFF, а затем – в положение ON или переключитесь на другой источник сигнала, а затем обратно на проигрыватель компактдисков. ERROR-15 → Вставлен пустой диск. – Замените диск. ERROR-23 → Формат диска не поддерживается. – Замените диск. FORMAT READ → Иногда происходит задержка между началом воспроизведения и появлением звука. – Звук появится после того как с дисплея исчезнет сообщение. NO AUDIO → На диске отсутствуют файлы, которые можно воспроизвести. – Замените диск. SKIPPED → Диск содержит файлы, защищенные технологией DRM. – Защищенные файлы пропускаются. PROTECT → Все файлы на диске защищены технологией DRM. – Замените диск. USB-устройство/iPod FORMAT READ → Иногда происходит задержка между началом воспроизведения и появлением звука. – Звук появится после того как с дисплея исчезнет сообщение. PROTECT → Все файлы на подключенном устройстве USB защищены по технологии DRM. – Замените устройство USB. N/A USB → Подключенное устройство USB не поддерживается данным устройством. – Отключите устройство и замените его совместимым устройством USB. HUB ERROR → Устройство USB, подключенное с помощью концентратора USB, не поддерживается данным устройством. – Подключите устройство USB непосредственно к данному устройств с помощью кабеля USB. CHECK USB → Короткое замыкание на разъеме USB или кабеле USB. – Убедитесь, что разъем USB или кабель USB не защемлен и не поврежден. → Подключенное запоминающее устройство USB потребляет больше максимально допустимой силы тока. – Отсоедините запоминающее устройство USB и не используйте его. Установите ключ зажигания в положение OFF, затем – в положение ACC или ON. Подключайте только совместимые запоминающие устройства USB. → iPod работает, но не подзаряжается. – Убедитесь в отсутствии короткого замыкания в кабеле iPod (например, что кабель не зажат между металлическими предметами). После проверки кабеля установите ключ зажигания в положение OFF, а затем – в положение ON, либо отключите и заново подключите iPod. ERROR-19 → Сбой связи. – Выполните следующие операции, затем снова выберите USB в качестве источника. • Поверните ключ зажигания в положение OFF и верните в положение ON. • Отключите устройство USB. • Выполните переключение на другой источник. → Сбой iPod. – Отключите кабель от iPod. При отображении главного меню iPod переподключите iPod и выполните сброс настроек. ERROR-23 → Устройство USB отформатировано неверно. – Отформатируйте устройство USB в FAT12, FAT16 или FAT32. ERROR-16 → Устаревшая версия прошивки iPod. – Обновите версию iPod. → Сбой iPod. – Отключите кабель от iPod. При отображении главного меню iPod переподключите iPod и выполните сброс настроек. STOP → В текущем списке отсутствуют композиции. – Выберите список, содержащий музыкальные композиции. – Загрузите композиции на iPod. Приложения START UP APP → Приложение еще не запущено. – Используйте мобильное устройство для запуска приложения. Spotify CHECK APP → Сбой подключения к приложению Spotify. – Следуйте инструкциям на экране. Рекомендации по обращению с изделием Диски и проигрыватель • Используйте только диски, имеющие один из следующих логотипов. • Используйте 12-см диски. • Используйте только обычные круглые диски. • Следующие типы дисков нельзя использовать на данном устройстве: – Диски формата DualDisc – 8-см диски: попытки использовать такие диски с помощью адаптера могут привести к неисправности устройства. – Диски необычных форм – Диски других форматов, кроме CD – Поврежденные диски, в т.ч. с трещинами, с отколотыми краями или деформированные – Диски CD-R/RW, запись на которых не была завершена NOT FOUND → Композиций не найдено. Ru Русский NO AUDIO → Композиции отсутствуют. – Перенесите аудиофайлы на запоминающее устройство USB и подключите его. → На подключенном устройстве USB включена защита. – Следуйте инструкциям устройства USB для снятия защиты. SKIPPED → Подключенное устройство USB содержит файлы, защищенные технологией DRM. – Защищенные файлы пропускаются. 17 • Не пишите и не используйте химические вещества на поверхности дисков. • Для очистки компакт-диска протрите диск мягкой тканью от центра к краю. • Конденсация может временно ухудшить работу проигрывателя. Оставьте его для адаптации к более высокой температуре примерно на час. Также удалите влагу с дисков с помощью мягкой ткани. • При использовании дисков, на поверхность которых могут наноситься этикетки, изучите инструкции и предупреждения для этих дисков. Установка и извлечение некоторых дисков могут быть невозможны. Использование таких дисков может привести к повреждению оборудования. • Не приклеивайте на диски этикетки и другие материалы. – Это может деформировать диски, в результате чего их воспроизведение будет невозможным. – Этикетки могут отклеиться во время воспроизведения и затруднить извлечение дисков, а также повредить оборудование. Запоминающее устройство USB • Подключение через USB-концентратор не поддерживается. • Не подключайте другие устройства, кроме запоминающих устройств USB. Не допускайте падения устройства USB на пол, где оно может застрять под педалью газа или тормоза. • В зависимости от типа запоминающего устройства USB могут возникнуть следующие проблемы. – Управление функциями может отличаться. 18 Ru – Запоминающее устройство может не распознаваться. – Файлы могут не воспроизводиться корректно. – Устройство может создавать шумовые помехи во время прослушивания радио. iPod • Не оставляйте iPod в местах с высокой температурой воздуха. • При движении автомобиля надежно закрепите iPod. Не допускайте падения устройства iPod на пол, где оно может застрять под педалью газа или тормоза. • Настройки iPod, такие как эквалайзер и повторное воспроизведение, изменяются автоматически при подключении iPod к устройству. После отключения iPod настройки будут возвращены к исходным. • Текст несовместимого формата, сохраненный на iPod, не будет отображаться устройством. Поддержка сжатых аудиофайлов • В качестве названия файла или папки могут отображаться только первые 32 символа (включая расширение). • Это устройство может работать некорректно в зависимости от приложений, использованных для кодирования WMA. • При начале воспроизведения аудиофайлов, содержащих изображения, и файлов с запоминающего устройства USB, содержащего разветвленные иерархии папок, может происходить небольшая задержка. • Русский текст для отображения на данном устройстве должен быть зашифрован в одном из следующих форматов: – Unicode (UTF-8, UTF-16) – Другой формат, отличный от Unicode, который используется в среде Windows и настроен на русский язык. ВНИМАНИЕ • Pioneer не гарантирует совместимость со всеми устройствами USB и не несет ответственности за любую потерю данных на медиапроигрывателях, смартфонах и других устройствах при использовании этого изделия. • Не оставляйте диски или запоминающее устройство USB в местах с высокой температурой воздуха. Файлы WMA Расширение Скорость передачи данных .wma от 48 Кбит/с до 320 Кбит/с (CBR), от 48 Кбит/с до 384 Кбит/с (VBR) Частота дискретизации 32 кГц, 44,1 кГц, 48 кГц Не поддерживается Windows Media™ Audio Professional, Lossless, Voice/DRM Stream/Stream с поддержкой видео Файлы MP3 Расширение Скорость передачи данных Частота дискретизации .mp3 от 8 Кбит/с до 320 Кбит/с (CBR), VBR от 8 кГц до 48 кГц (32 кГц, 44,1 кГц, 48 кГц пиковая) Совместимая версия 1.0, 1.1, 2.2, 2.3, 2.4 тегов ID3 (Версия тегов ID3 2.x имеет приоритет перед версией 1.x.) Список Не поддерживается воспроизведения M3u MP3i (интерактивный Не поддерживается MP3), mp3 PRO Файлы WAV • Файлы формата WAV невозможно подключить через MTP. Расширение Разрядность квантования Частота дискретизации .wav 8 и 16 (LPCM), 4 (MSADPCM) от 16 кГц до 48 кГц (LPCM), 22,05 кГц и 44,1 кГц (MS ADPCM) Диск • Независимо от продолжительности паузы между композициями в изначальной записи, при воспроизведении дисков со сжатыми аудиофайлами между композициями будут короткие паузы. Допустимая иерархия папок Количество воспроизводимых папок Количество воспроизводимых файлов Файловая система Воспроизведение нескольких сессий Пакетный формат записи До восьми уровней (реальная иерархия папок составляет менее двух уровней) Не более 99 Не более 999 ISO 9660 уровень 1 и 2, Romeo, Joliet Поддерживается Не поддерживается USB-устройство • При начале воспроизведения аудиофайлов на запоминающем устройстве USB, содержащем разветвленные иерархии папок, может возникать небольшая задержка. Допустимая иерархия папок Количество воспроизводимых папок Количество воспроизводимых файлов Воспроизведение файлов, защищенных авторским правом Устройство USB с несколькими разделами До восьми уровней (реальная иерархия папок составляет менее двух уровней) Не более 500 Не более 15 000 Не поддерживается Для воспроизведения доступен только первый раздел. Поддержка iPod Данное устройство поддерживает только перечисленные ниже модели iPod. Совместимые версии ПО для iPod также указаны ниже. Более старые версии могут не поддерживаться. Сделано для ВНИМАНИЕ Компания Pioneer не несет ответственности за потерю данных на iPod, даже если эти данные будут потеряны во время использования данного устройства. Пример иерархии Папка Сжатый аудиофайл от 01 до 05: Номер папки до : Последовательность воспроизведения Таблица символов для русского языка Последовательность воспроизведения аудиофайлов Пользователь не может назначать номера папок и устанавливать последовательность воспроизведения с помощью данного устройства. Последовательность аудиофайлов зависит от подключенного устройства. Обратите внимание, что скрытые файлы на устройстве USB воспроизвести невозможно. D: Дисплей C: Буква Авторское право и товарные знаки iTunes Apple и iTunes являются торговыми знаками компании Apple Inc., зарегистрированными в США и других странах. WMA Windows Media – это зарегистрированная торговая марка или торговая марка Microsoft Corporation в США и/или других странах. В данном изделии используются технологии, принадлежащие корпорации Microsoft, которые не разрешается использовать или распространять без лицензии от Microsoft Licensing, Inc. iPod & iPhone iPhone, iPod, iPod classic, iPod nano и iPod touch являются товарными знаками компании Apple Inc., зарегистрированными в США и других странах. Lightning является торговым знаком компании Apple Inc. “Made for iPod” и “Made for iPhone” означает, что электронный прибор был разработан с целью подключения определенно к iPod или iPhone соответственно, и имеется сертифицикация разработчика о соответствии с техническими характеристиками Apple. Apple не несет ответственности за работу данного устройства или его соответствие со стандартами по технике безопасности или регулятивными нормами. Пожалуйста, обратите внимание, что использование данного прибора с iPod или iPhone может отрицательно сказываться на качестве беспроводной связи. Ru Русский – iPod touch (с 1 по 6 поколение) – iPod classic – iPod с видео – iPod nano (с 1 по 7 поколение) – iPhone 6s – iPhone 6s Plus – iPhone 6 – iPhone 6 Plus – iPhone 5s – iPhone 5c – iPhone 5 – iPhone 4s – iPhone 4 – iPhone 3GS – iPhone 3G – iPhone • Доступные функции могут отличаться в зависимости от поколения и/или версии программного обеспечения iPod. • Пользователям iPod с разъемом Lightning потребуется кабель Lightning - USB (входит в комплект поставки iPod). • Пользователям iPod с интерфейсом Dock Connector потребуется кабель CD-IU51. Подробную информацию можно получить по месту покупки. • О совместимости файлов/форматов см. в руководствах к iPod. • Аудиокниги, подкасты: поддерживаются 19 Android & Google Play Android, Google Play и логотип Google Play являются товарными знаками Google Inc. Серийный номер На этом рисунке показана информация о месяце и годе изготовления устройства. MIXTRAX MIXTRAX является торговой маркой PIONEER CORPORATION. Spotify® SPOTIFY и логотип Spotify являются зарегистрированными торговыми марками Spotify AB. Для получения списка совместимых мобильных устройств и сведений о премиумподписке, если применимо, см. https:// www.spotify.com. P1 - Год изготовления Год Символ 2001 A 2002 B 2003 C 2004 D 2005 E 2006 F 2007 G 2008 H 2009 I 2010 J Год Символ 2011 K 2012 L 2013 M 2014 N 2015 O 2016 P 2017 Q 2018 R 2019 S 2020 T 6 F 7 G P2 - Месяц изготовления Месяц Символ 1 A 2 B 3 C 4 D 5 E Технические характеристики Общие Источник питания: 14,4 В пост. тока (допустимый диапазон от 10,8 В до 15,1 В) Система заземления: Заземление отрицательного полюса Максимальный потребляемый ток: 10,0 A Размеры (Ш × В × Г): DIN Шасси: 178 мм × 50 мм × 165 мм Передняя панель: 188 мм × 58 мм × 17 мм D Шасси: 178 мм × 50 мм × 165 мм Передняя панель: 170 мм × 46 мм × 17 мм 20 Ru 8 H 9 I 10 J 11 K 12 L Масса: 1 кг Аудио Максимальная выходная мощность: • 50 Вт × 4 канала/4 Ω (без сабвуфера) • 50 Вт × 2 канала/4 Ω + 70 Вт × 1 канал/2 Ω (для сабвуфера) Номинальная выходная мощность: 22 Вт × 4 (от 50 Гц до 15 000 Гц, суммарное значение коэффициента нелинейных искажений 5%, нагрузка 4 Ω для обоих каналов) Сопротивление нагрузки: 4 Ω (допустимо - от 4 Ω до 8 Ω) Сопротивление нагрузки: 2,0 В Контур громкости: +10 дБ (100 Гц), +6,5 дБ (10 кГц) (громкость: –30 дБ) Эквалайзер (5-полосный графический эквалайзер): Частота: 80 Гц/250 Гц/800 Гц/2,5 кГц/ 8 кГц Диапазон амплитудно-частотных характеристик: ±12 дБ (с шагом 2 дБ) Сабвуфер (моно): Частота: 50 Гц/63 Гц/80 Гц/100 Гц/ 125 Гц/160 Гц/200 Гц Крутизна характеристики: –12 дБ/ окт, –24 дБ/окт Усиление: +6 дБ до –24 дБ Фаза: Нормальная/Обратная Проигрыватель компактдисков Система: Аудиосистема с компактдиском Используемые диски: Компакт-диск Отношение сигнал/шум: 94 дБ (1 кГц) (сеть IEC-A) Число каналов: 2 (стерео) Формат декодирования файлов MP3: MPEG-1 и 2 Audio Layer 3 Формат декодирования файлов WMA: версия 7, 7.1, 8, 9, 10, 11, 12 (2 кн аудио) (Проигрыватель Windows Media) Формат сигнала WAV: Linear PCM и MS ADPCM (без компрессии) USB Тюнер FM Диапазон частот: от 87,5 МГц до 108,0 МГц Полезная чувствительность: 11 дБф (1,0 мкВ/75 Ω, моно, отношение сигнал/шум: 30 дБ) Отношение сигнал/шум: 72 дБ (сеть IEC-A) Тюнер MW Диапазон частот: от 531 кГц до 1 602 кГц Полезная чувствительность: 25 мкВ (отношение сигнал/шум: 20 дБ) Отношение сигнал/шум: 62 дБ (сеть IEC-A) Тюнер LW Диапазон частот: от 153 кГц до 281 кГц Полезная чувствительность: 28 мкВ (отношение сигнал/шум: 20 дБ) Отношение сигнал/шум: 62 дБ (сеть IEC-A) Примечание: В соответствии со статьей 5 закона Российской Федерации «О защите прав потребителей» и постановлением правительства Российской Федерации № 720 от 16.06.97 компания Pioneer Europe NV оговаривает следующий срок службы изделий, официально поставляемых на российский рынок. Автомобильная электроника: 6 лет Прочие изделия (наушники, микрофоны и т.п.): 5 лет ПРИМЕЧАНИЯ • Характеристики и конструкция могут быть изменены без предварительного уведомления. • Данное устройство произведено в Таиланде. Русский Стандартная спецификация USB: USB 2.0 полноскоростной Максимальная сила тока: 1,5 A Протокол USB: MSC (Mass Storage Class) MTP (Media Transfer Protocol) AOA (Android Open Accessory) 2.0 Файловая система: FAT12, FAT16, FAT32 Формат декодирования файлов MP3: MPEG-1 и 2 Audio Layer 3 Формат декодирования файлов WMA: версия 7, 7.1, 8, 9, 10, 11, 12 (2 кн аудио) (Проигрыватель Windows Media) Формат сигнала WAV: Linear PCM и MS ADPCM (без компрессии) Ru 21 22 Ru Русский 23 Ru © 2016 PIONEER CORPORATION. All rights reserved. © 2016 PIONEER CORPORATION. Tous droits de reproduction et de traduction réservés. © PIONEER CORPORATION, 2016. Все права защищены. <QRD3374-B> EW-
 1
1
-
 2
2
-
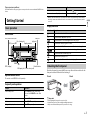 3
3
-
 4
4
-
 5
5
-
 6
6
-
 7
7
-
 8
8
-
 9
9
-
 10
10
-
 11
11
-
 12
12
-
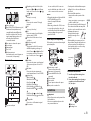 13
13
-
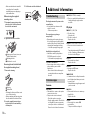 14
14
-
 15
15
-
 16
16
-
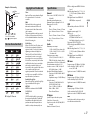 17
17
-
 18
18
-
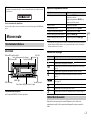 19
19
-
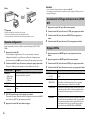 20
20
-
 21
21
-
 22
22
-
 23
23
-
 24
24
-
 25
25
-
 26
26
-
 27
27
-
 28
28
-
 29
29
-
 30
30
-
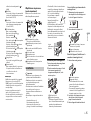 31
31
-
 32
32
-
 33
33
-
 34
34
-
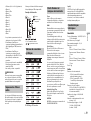 35
35
-
 36
36
-
 37
37
-
 38
38
-
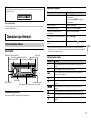 39
39
-
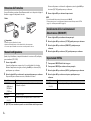 40
40
-
 41
41
-
 42
42
-
 43
43
-
 44
44
-
 45
45
-
 46
46
-
 47
47
-
 48
48
-
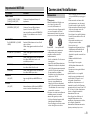 49
49
-
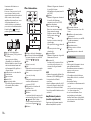 50
50
-
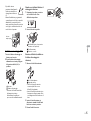 51
51
-
 52
52
-
 53
53
-
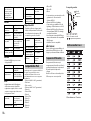 54
54
-
 55
55
-
 56
56
-
 57
57
-
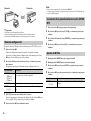 58
58
-
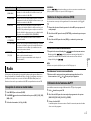 59
59
-
 60
60
-
 61
61
-
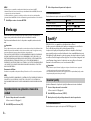 62
62
-
 63
63
-
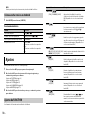 64
64
-
 65
65
-
 66
66
-
 67
67
-
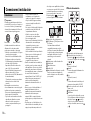 68
68
-
 69
69
-
 70
70
-
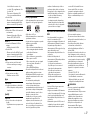 71
71
-
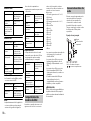 72
72
-
 73
73
-
 74
74
-
 75
75
-
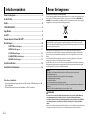 76
76
-
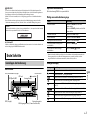 77
77
-
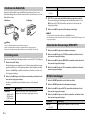 78
78
-
 79
79
-
 80
80
-
 81
81
-
 82
82
-
 83
83
-
 84
84
-
 85
85
-
 86
86
-
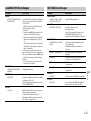 87
87
-
 88
88
-
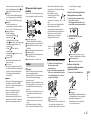 89
89
-
 90
90
-
 91
91
-
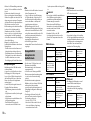 92
92
-
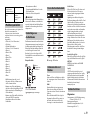 93
93
-
 94
94
-
 95
95
-
 96
96
-
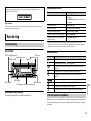 97
97
-
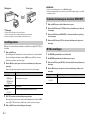 98
98
-
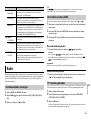 99
99
-
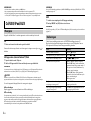 100
100
-
 101
101
-
 102
102
-
 103
103
-
 104
104
-
 105
105
-
 106
106
-
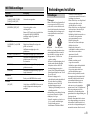 107
107
-
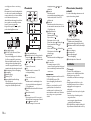 108
108
-
 109
109
-
 110
110
-
 111
111
-
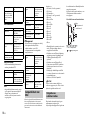 112
112
-
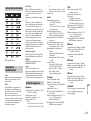 113
113
-
 114
114
-
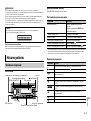 115
115
-
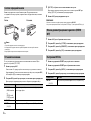 116
116
-
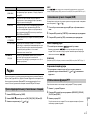 117
117
-
 118
118
-
 119
119
-
 120
120
-
 121
121
-
 122
122
-
 123
123
-
 124
124
-
 125
125
-
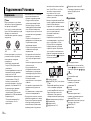 126
126
-
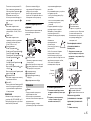 127
127
-
 128
128
-
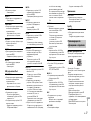 129
129
-
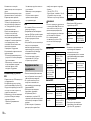 130
130
-
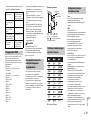 131
131
-
 132
132
-
 133
133
-
 134
134
-
 135
135
-
 136
136


Pioneer DEH-X2900UI Handleiding
- Categorie
- Auto media-ontvangers
- Type
- Handleiding
in andere talen
- English: Pioneer DEH-X2900UI User manual
- italiano: Pioneer DEH-X2900UI Manuale utente
- русский: Pioneer DEH-X2900UI Руководство пользователя
- français: Pioneer DEH-X2900UI Manuel utilisateur
- español: Pioneer DEH-X2900UI Manual de usuario
- Deutsch: Pioneer DEH-X2900UI Benutzerhandbuch
Gerelateerde papieren
-
Pioneer DEH-X3800UI Handleiding
-
Pioneer DEH-2800UI Handleiding
-
Pioneer DEH-Х3700UI Handleiding
-
Pioneer FH-X840DAB Handleiding
-
Pioneer DEH-X7800DAB de handleiding
-
-
-
Pioneer DEH-X5900BT Handleiding
-
-