

INHOUDSOPGAVE
1. VEILIGHEIDSINFORMATIE.......................................................................................3
2. VEILIGHEIDSVOORSCHRIFTEN.............................................................................. 4
3. BEDIENING............................................................................................................... 6
4. DAGELIJKS GEBRUIK............................................................................................... 8
5. ONDERHOUD EN REINIGING................................................................................ 8
6. PROBLEEMOPLOSSING.......................................................................................... 9
7. MONTAGE ..............................................................................................................11
8. TECHNISCHE GEGEVENS..................................................................................... 12
VOOR PERFECTE RESULTATEN
Bedankt dat u voor dit AEG-product heeft gekozen. Dit apparaat is ontworpen
om vele jaren uitstekend te presteren, met innovatieve technologieën die het
leven gemakkelijker helpen maken met functies die gewone apparaten wellicht
niet hebben. Neem een paar minuten de tijd om het door te lezen zodat u er
optimaal van kunt profiteren.
Ga naar onze website voor:
Advies over gebruik, brochures, het oplossen van problemen en
onderhoudsinformatie:
www.aeg.com/webselfservice
Registreer uw product voor een betere service:
www.registeraeg.com
Koop accessoires, verbruiksartikelen en originele reserveonderdelen voor uw
apparaat:
www.aeg.com/shop
KLANTENSERVICE
Gebruik altijd originele onderdelen.
Als u contact opneemt met de klantenservice zorg dat u de volgende gegevens
bij de hand hebt: model, productnummer, serienummer.
Deze informatie wordt vermeld op het typeplaatje.
Waarschuwing / Belangrijke veiligheidsinformatie
Algemene informatie en tips
Milieu-informatie
Wijzigingen voorbehouden.
www.aeg.com
2

1. VEILIGHEIDSINFORMATIE
Lees zorgvuldig de meegeleverde instructies voor
installatie en gebruik van het apparaat. De fabrikant is
niet verantwoordelijk voor letsel of schade veroorzaakt
door een verkeerde installatie of verkeerd gebruik.
Bewaar de instructies altijd op een veilige en
toegankelijke plaats voor toekomstig gebruik.
1.1 Veiligheid van kinderen en kwetsbare mensen
• Dit apparaat kan worden gebruikt door kinderen vanaf
8 jaar en ouder en door personen met beperkingen,
mits ze zijn voorgelicht over het veilige gebruik van
het apparaat en de potentiële gevaren en/of ze onder
toezicht staan.
• Laat kinderen niet met het apparaat spelen.
• Kinderen mogen zonder toezicht geen reinigings- en
onderhoudswerkzaamheden aan het apparaat
uitvoeren.
• Houd alle verpakking uit de buurt van kinderen en
gooi het op passende wijze weg.
1.2
Algemene veiligheid
•
Dit apparaat is bedoeld voor huishoudelijk gebruik of
gelijksoortige toepassingen zoals:
– Boerderijen, personeelskeukens in winkels,
kantoren of andere werkomgevingen
– Door gasten in hotels, motels, bed&breakfasts en
andere woonomgevingen
• Houd de ventilatieopeningen altijd vrij van
obstructies; dit geldt zowel voor losstaande als
ingebouwde modellen.
• Gebruik geen mechanische of andere middelen om
het ontdooiproces te versnellen, behalve die
middelen die door de fabrikant zijn aanbevolen.
• Let op dat u het koelcircuit niet beschadigt.
• Gebruik geen elektrische apparaten in de koelkast,
tenzij deze door de fabrikant worden aanbevolen.
NEDERLANDS
3

• Gebruik geen waterstralen of stoom om het apparaat
te reinigen.
• Maak het apparaat schoon met een vochtige, zachte
doek. Gebruik alleen neutrale schoonmaakmiddelen.
Gebruik geen schuurmiddelen, schuursponsjes,
oplosmiddelen of metalen voorwerpen.
• Bewaar geen explosieve substanties zoals spuitbussen
met drijfgas in dit apparaat.
• Als de voedingskabel beschadigd is, moet de
fabrikant, een erkende serviceverlener of een
gekwalificeerd persoon deze vervangen teneinde
gevaarlijke situaties te voorkomen.
2. VEILIGHEIDSVOORSCHRIFTEN
2.1 Montage
WAARSCHUWING!
Alleen een erkende
installatietechnicus mag het
apparaat installeren.
• Verwijder de verpakking en de
transportbouten.
• Installeer en gebruik geen
beschadigd apparaat.
• Volg de installatie-instructies op die
zijn meegeleverd met het apparaat.
• Pas altijd op bij verplaatsing van het
apparaat, want het is zwaar. Gebruik
altijd veiligheidshandschoenen en
gesloten schoeisel.
• Zorg ervoor dat rond het apparaat
lucht kan circuleren.
• Wacht ten minste 4 uur alvorens het
apparaat aan de netstroom aan te
sluiten. Hierdoor kan de olie terug in
de compressor stromen.
• Installeer het apparaat niet in de
nabijheid van radiators, fornuizen,
ovens of kookplaten.
• De achterzijde van het apparaat moet
tegen de muur worden geplaatst.
• Installeer het apparaat niet op een
plaats met direct zonlicht.
• Gebruik dit apparaat niet in gebieden
die te vochtig of te koud zijn, zoals
bijgebouwen, garages of kelders.
• Til de voorkant van het apparaat op
als u hem wilt verplaatsen, om krassen
op de vloer te voorkomen.
2.2 Aansluiting op het
elektriciteitsnet
WAARSCHUWING!
Gevaar voor brand en
elektrische schokken.
• Dit apparaat moet worden
aangesloten op een geaard
stopcontact.
• Controleer of de elektrische
informatie op het typeplaatje
overeenkomt met de
stroomvoorziening. Zo niet, neem dan
contact op met een elektromonteur.
• Gebruik altijd een correct
geïnstalleerd, schokbestendig
stopcontact.
• Gebruik geen meerwegstekkers en
verlengsnoeren.
• Zorg dat u de elektrische onderdelen
(hoofdstekker, kabel, compressor) niet
beschadigt. Neem contact met de
erkende servicedienst of een
elektricien om de elektrische
onderdelen te wijzigen.
• De stroomkabel moet lager blijven
dan het niveau van de stopcontact.
• Steek de stekker pas in het
stopcontact als de installatie is
www.aeg.com
4

voltooid. Zorg ervoor dat het
netsnoer na installatie bereikbaar is.
• Trek niet aan het netsnoer om het
apparaat los te koppelen. Trek altijd
aan de stekker.
2.3 Gebruik
WAARSCHUWING!
Gevaar op letsel,
brandwonden of elektrische
schokken.
• De specificatie van het apparaat mag
niet worden veranderd.
• Plaats geen elektrische apparaten
(bijv. ijsmachines) in het apparaat
tenzij uitdrukkelijk geschikt verklaard
door de fabrikant.
• Zorg ervoor dat u het koelcircuit niet
beschadigt. Het bevat isobutaan
(R600a), aardgas met een hoge
ecologische compatibiliteit. Dit gas is
ontvlambaar.
• Als er schade aan het koelcircuit
optreedt, zorg er dan voor dat er zich
geen vlammen en andere
ontstekingsbronnen in de kamer
bevinden. Ventileer de kamer goed.
• Zet geen hete items op de
kunststofonderdelen van het
apparaat.
• Bewaar geen ontvlambare gassen en
vloeistoffen in het apparaat.
• Plaats geen ontvlambare producten
of items die vochtig zijn door
ontvlambare producten in, bij of op
het apparaat.
• Raak de compressor of condensator
niet aan. Ze zijn heet.
2.4 Onderhoud en reiniging
WAARSCHUWING!
Gevaar voor letsel of schade
aan het apparaat.
• Schakel het apparaat uit en trek de
stekker uit het stopcontact voordat u
onderhoudshandelingen verricht.
• Het koelcircuit van dit apparaat bevat
koolwaterstoffen. Enkel bevoegde
personen mogen de eenheid
onderhouden en herladen.
• Controleer regelmatig de afvoer van
het apparaat en reinig het indien
nodig. Indien de afvoer verstopt is, zal
er water op de bodem van het
apparaat liggen.
2.5 Verwijdering
WAARSCHUWING!
Gevaar voor letsel of
verstikking.
• Haal de stekker uit het stopcontact.
• Snij het netsnoer van het apparaat af
en gooi dit weg.
• Verwijder de deur om te voorkomen
dat kinderen en huisdieren
opgesloten raken in het apparaat.
• Het koelcircuit en de
isolatiematerialen van dit apparaat
zijn ozonvriendelijk.
• Het isolatieschuim bevat ontvlambare
gassen. Neem contact met uw
plaatselijke overheid voor informatie
m.b.t. correcte afvalverwerking van
het apparaat.
• Veroorzaak geen schade aan het deel
van de koeleenheid dat zich naast de
warmtewisselaar bevindt.
NEDERLANDS
5

3. BEDIENING
3.1 Bedieningspaneel
56 4 3 2
1
1
Weergave
2
Toets om de temperatuur hoger te
zetten
3
Toets om de temperatuur lager te
zetten
4
OK
5
Mode
6
ON/OFF
Het is mogelijk om het vooraf ingestelde
geluid van toetsen te wijzigen door de
Mode-toets en de toets om de
temperatuur kouder te zetten,
tegelijkertijd gedurende enkele
seconden in te drukken. U kunt deze
wijziging ook weer ongedaan maken.
Weergave
C DBA
EFGH
A. Timer-functie
B. COOLMATIC-functie
C. Holiday-functie
D. Temperatuurweergave
E. Alarmlampje
F. ChildLock-functie
G. MinuteMinder-functie
H. DYNAMICAIR-functie
3.2 Inschakelen
1. Steek de stekker in het stopcontact.
2. Druk op de ON/OFF-toets van het
apparaat als het display uit is.
Het temperatuurlampje toont de
ingestelde standaardtemperatuur.
Zie 'Temperatuurregeling' om een
andere temperatuur in te stellen.
Raadpleeg als "dEMo" op het display
verschijnt het hoofdstuk "Problemen
oplossen".
3.3 Uitschakelen
1. Houd ON/OFF een paar seconden
ingedrukt.
Het display wordt uitgeschakeld.
2. Trek de stekker uit het stopcontact.
3.4 Temperatuurregeling
De ingestelde temperatuur van de
koelkast kan worden aangepast door op
de thermostaatknoppen te drukken.
Standaardtemperatuur:
www.aeg.com6

• +5°C voor de koelkast
Het temperatuurlampje toont de
ingestelde temperatuur.
De ingestelde temperatuur
zal binnen 24 uur worden
bereikt. Na een
stroomonderbreking blijft de
ingestelde temperatuur
opgeslagen.
3.5 COOLMATIC-functie
Als u een grote hoeveelheid warm
voedsel, bijvoorbeeld na het doen van
de boodschappen, in de koelkast wilt
plaatsen, adviseren wij u de
COOLMATIC-functie in te schakelen om
deze producten sneller te koelen en om
te voorkomen dat voedsel dat al in de
koelkast ligt warm wordt.
1. Druk op Mode tot het bijbehorende
pictogram verschijnt.
Het COOLMATIC-lampje knippert.
2. Druk op OK om te bevestigen.
Het COOLMATIC-lampje wordt
getoond.
De COOLMATIC-functie
wordt automatisch na
ongeveer 52 uur
uitgeschakeld.
Om de functie uit te
schakelen voor de
automatische uitschakeleing,
herhaalt u de procedure
totdat het bijbehorende
pictogram COOLMATIC is
uitgeschakeld.
3.6 Holiday modus
Met deze functie kunt u de koelkast
gesloten en leeg houden tijdens een
lange vakantieperiode zonder dat u vieze
luchtjes krijgt.
Als de Holiday-functie actief
is, moet het koelvak leeg
zijn.
1. Druk op Mode tot het Holiday-
indicatielampje verschijnt.
Het Holiday-pictogram knippert.
Het temperatuurlampje van de koelkast
toont de ingestelde temperatuur.
2. Druk op OK om te bevestigen.
Het Holiday-pictogram verschijnt.
Als u de Holiday-modus wilt
uitschakelen, herhaalt u deze procedure
totdat het Holiday-pictogram is
uitgeschakeld.
3.7 Alarm bij open deur
Als de deur enkele minuten heeft
opengestaan, klinkt er een geluidsalarm.
Het alarm voor een geopende deur
bestaat uit:
• een knipperend alarmindicatielampje:
• een zoemer.
Als de normale omstandigheden zijn
hersteld (deur gesloten), wordt het
geluidsalarm uitgeschakeld. De zoemer
kan worden uitgeschakeld door op een
knop te drukken.
3.8 MinuteMinder -functie
De MinuteMinder-functie moet worden
gebruikt om een geluidsalarm op de
gewenste tijd in te stellen. Dit is
bijvoorbeeld handig als in een recept
staat dat producten een bepaalde tijd
moet afkoelen.
1. Druk op Mode tot het bijbehorende
pictogram verschijnt.
Het MinuteMinder-lampje knippert.
De timer toont gedurende enkele
seconden de ingestelde waarde (30
minuten).
2. Druk op de knop Temperatuur lager
of de knop Temperatuur hoger om
de waarde van de timer te wijzigen
van 1 tot 90 minuten.
3. Druk op OK om te bevestigen.
Het MinuteMinder-lampje wordt
getoond.
De timer begint te knipperen (min).
Het is mogelijk om te allen tijde tijdens
het aftellen en voor het einde van de
ingestelde tijd, de tijd te veranderen
door op de toets voor het lager zetten
van de temperatuur en op de toets voor
het hoger zetten van de temperatuur te
drukken.
Op het einde van de aftelling knippert
het MinuteMinder-lampje en klinkt een
alarm. Druk op de OK-toets om het
geluid uit te schakelen en de functie te
beëindigen.
NEDERLANDS
7

Om de functie tijdens het aftellen op elk
gewenst moment uit te schakelen,
herhaalt u de functiestappen tot het
indicatielampje uit gaat.
3.9 ChildLock-functie
Activeer de functie ChildLock om de
bediening van de knoppen te
vergrendelen tegen onbedoelde
bediening.
1. Druk op Mode tot het bijbehorende
pictogram verschijnt.
Het ChildLock-lampje knippert.
2. Druk op OK om te bevestigen.
Het ChildLock-lampje wordt getoond.
Om de functie ChildLock uit te
schakelen, herhaalt u de procedure
totdat het bijbehorende pictogram
ChildLock uit gaat.
3.10 DYNAMICAIR-functie
1. Druk op Mode tot het bijbehorende
pictogram verschijnt.
Het DYNAMICAIR-lampje knippert.
2. Druk op OK om te bevestigen.
Het DYNAMICAIR-lampje wordt
getoond.
Het activeren van de functie
DYNAMICAIR verhoogt het
energieverbruik.
Als de functie automatisch
wordt geactiveerd, wordt
het indicatielampje
DYNAMICAIR niet
weergegeven (zie "Dagelijks
gebruik").
Om de functie uit te schakelen, herhaalt
u de procedure totdat het bijbehorende
pictogram DYNAMICAIR is
uitgeschakeld.
4. DAGELIJKS GEBRUIK
WAARSCHUWING!
Raadpleeg de hoofdstukken
Veiligheid.
4.1 DYNAMICAIR
Het koelvak is voorzien van een apparaat
dat snelle koeling van voedsel mogelijk
maakt en zorgt voor een gelijkmatigere
temperatuur in het vak.
Het apparaat activeert automatisch
indien nodig, bijvoorbeeld voor een snel
temperatuurherstel nadat de deur is
geopend of als de
omgevingstemperatuur hoog is.
Het is mogelijk om het apparaat
handmatig in te schakelen indien nodig
(zie 'DYNAMICAIR -functie').
5. ONDERHOUD EN REINIGING
WAARSCHUWING!
Raadpleeg de hoofdstukken
Veiligheid.
5.1 De binnenkant
schoonmaken
Voordat u het apparaat voor de eerste
keer gebruikt, wast u de binnenkant en
de interne accessoires met lauwwarm
water en een beetje neutrale zeep om de
typische geur van een nieuw product
weg te nemen. Droog daarna grondig af.
LET OP!
Gebruik geen
oplosmiddelen of
schuurmiddelen. Deze
beschadigen de lak.
www.aeg.com8

5.2 Periodieke reiniging
LET OP!
Trek niet aan leidingen en/of
kabels aan de binnenkant
van de kast en verplaats of
beschadig ze niet.
LET OP!
Zorg ervoor dat u het
koelsysteem niet
beschadigt.
LET OP!
Til de voorkant van de
koelkast op als u hem wilt
verplaatsen, om krassen op
de vloer te voorkomen.
Het apparaat moet regelmatig worden
schoongemaakt:
1. Maak de binnenkant en de
accessoires schoon met lauw water
en wat neutrale zeep.
2. Controleer de afdichtingen
regelmatig en wrijf ze schoon om u
ervan te verzekeren dat ze schoon en
vrij van restjes zijn.
3. Spoel ze af en maak ze grondig
droog.
4. Maak indien toegankelijk de
condensor en de compressor aan de
achterkant van het apparaat schoon
met een borstel.
Deze handeling zal de prestatie van
het apparaat verbeteren en het
elektriciteitsverbruik besparen.
5.3 Het ontdooien van de
koelkast
Rijp wordt elke keer als de
compressormotor tijdens normale
werking stopt, automatisch van de
verdamper van het koelvak verwijderd.
Het dooiwater loopt via een gootje in
een speciale opvangbak aan de
achterkant van het apparaat, boven de
compressormotor, waar het verdampt.
Het is belangrijk om het afvoergaatje van
het dooiwater in het midden van het
koelvak regelmatig schoon te maken om
te voorkomen dat het water overloopt en
op het voedsel in de koelkast gaat
druppelen.
5.4 Periodes dat het apparaat
niet gebruikt wordt
Neem de volgende
voorzorgsmaatregelen als het apparaat
gedurende lange tijd niet gebruikt
wordt:
1. Trek de stekker uit het stopcontact.
2. Verwijder al het voedsel.
3. Maak het apparaat en alle
toebehoren schoon.
4. Laat de deur/deuren open staan om
onaangename luchtjes te
voorkomen.
6.
PROBLEEMOPLOSSING
WAARSCHUWING!
Raadpleeg de hoofdstukken
Veiligheid.
NEDERLANDS 9

6.1 Wat moet u doen als…
Probleem Mogelijke oorzaak Oplossing
Het apparaat maakt lawaai. Het apparaat is niet stevig
en stabiel geplaatst.
Controleer of het apparaat
stabiel staat.
Er is een hoorbaar of zicht-
baar alarm.
De kist is kortgeleden aan-
gezet of de temperatuur is
nog steeds te hoog.
Zie 'Deur open alarm' of
'Alarm hoge temperatuur'.
De temperatuur in het ap-
paraat is te hoog.
Zie 'Deur open alarm' of
'Alarm hoge temperatuur'.
Het lampje werkt niet. Het lampje staat in de
stand-by stand.
Sluit en open de deur.
Het lampje werkt niet. Het lampje is stuk. Neem contact op met de
dichtstbijzijnde klantenservice.
De compressor werkt con-
tinu.
De temperatuur is goed in-
gesteld.
Raadpleeg het hoofdstuk 'Be-
diening'.
Er worden veel producten
tegelijk geplaatst.
Wacht een paar uur en con-
troleer dan nogmaals de tem-
peratuur.
De omgevingstemperatuur
is te hoog.
Zie het typeplaatje voor de kli-
maatklasse.
Het voedsel dat in het ap-
paraat werd geplaatst, was
te warm.
Laat voedsel afkoelen tot ka-
mertemperatuur voordat u het
bewaart.
De functie COOLMATIC is
ingeschakeld.
Raadpleeg 'COOLMATIC
functie'.
De compressor start niet
onmiddellijk na het drukken
op COOLMATIC of na het
veranderen van de temper-
atuur.
Dit is normaal, er is geen
storing.
De compressor start na enige
tijd.
Er loopt water in de koel-
kast.
De waterafvoer is verstopt. Reinig de waterafvoer.
Producten verhinderen dat
het water in de waterop-
vangbak loopt.
Zorg ervoor dat de producten
de achterwand niet raken.
Er ligt water op de vloer. De dooiwaterafvoer is niet
aangesloten op de verdam-
perbak boven de compres-
sor.
Maak de dooiwaterafvoer vast
op de verdamperbak.
www.aeg.com10

Probleem Mogelijke oorzaak Oplossing
De temperatuur kan niet
worden ingesteld.
De functie FROSTMATIC of
COOLMATIC is ingescha-
keld.
Schakel FROSTMATIC of
COOLMATIC handmatig uit,
of wacht tot de functie autom-
atisch reset om de tempera-
tuur in te stellen. Zie 'FROST-
MATIC of COOLMATIC func-
tie'.
DEMO verschijnt op het
display.
Het apparaat staat in de
demonstratiemodus.
Houd NO REFERENCE TO
BUTTON MODE ongeveer 10
seconden ingedrukt tot een
lang geluid klinkt en het dis-
play even uitschakelt.
De temperatuur in het ap-
paraat is te laag/hoog.
De temperatuurknop is niet
goed ingesteld.
Stel een hogere/lagere tem-
peratuur in.
De temperatuur van het
voedsel is te hoog.
Laat het voedsel afkoelen tot
kamertemperatuur voordat u
het conserveert.
Er worden veel producten
tegelijk bewaard.
Conserveer minder producten
tegelijk.
De functie COOLMATIC is
ingeschakeld.
Raadpleeg 'COOLMATIC
functie'.
Bel, wanneer het advies niet
tot resultaten leidt, de
dichtstbijzijnde
klantenservice voor dit merk.
6.2 Het lampje vervangen
Het apparaat is uitgerust met een LED-
binnenlampje dat een lange levensduur
heeft.
Alleen een onderhoudsmonteur mag de
verlichting vervangen. Neem contact op
met de klantenservice.
7. MONTAGE
WAARSCHUWING!
Raadpleeg de hoofdstukken
Veiligheid.
7.1 Opstelling
Het apparaat moet geïnstalleerd worden
op een droge, goed geventileerde plaats
binnen waar de omgevingstemperatuur
overeenkomt met de klimaatklasse die
vermeld is op het typeplaatje van het
apparaat:
Klimaat-
klasse
Omgevingstemperatuur
SN +10°C tot + 32°C
N +16°C tot + 32°C
ST +16°C tot + 38°C
T +16°C tot + 43°C
NEDERLANDS 11

7.2 Aansluiting op het
elektriciteitsnet
• Zorg er vóór het aansluiten voor dat
het voltage en de frequentie op het
typeplaatje overeenkomen met de
stroomtoevoer in uw huis.
• Dit apparaat moet worden
aangesloten op een geaard
stopcontact. De netsnoerstekker is
voorzien van een contact voor dit
doel Als het stopcontact niet geaard
is, sluit het apparaat dan aan op een
afzonderlijk aardepunt, in
overeenstemming met de geldende
regels, raadpleeg hiervoor een
gekwalificeerd elektricien
• De fabrikant kan niet aansprakelijk
gesteld worden als bovenstaande
veiligheidsvoorschriften niet
opgevolgd worden.
• Dit apparaat voldoet aan de EEG-
richtlijnen.
7.3 Installatie van het apparaat
en het omdraaien van de deur
Raadpleeg afzonderlijke
instructies voor installatie
(ventilatievereisten, waterpas
zetten) en omdraaien van de
deur.
8. TECHNISCHE GEGEVENS
Hoogte 1850 mm
Breedte 595 mm
Diepte 668 mm
Spanning 230 – 240 V
Tijd 50 Hz
De technische gegevens staan op het
typeplaatje aan de binnen- of buitenkant
van het apparaat en op het energielabel.
9. MILIEUBESCHERMING
Recycle de materialen met het symbool
. Gooi de verpakking in een geschikte
verzamelcontainer om het te recyclen.
Help om het milieu en de
volksgezondheid te beschermen en
recycle het afval van elektrische en
elektronische apparaten. Gooi apparaten
gemarkeerd met het symbool niet weg
met het huishoudelijk afval. Breng het
product naar het milieustation bij u in de
buurt of neem contact op met de
gemeente.
www.aeg.com12

CONTENTS
1. SAFETY INFORMATION.........................................................................................14
2. SAFETY INSTRUCTIONS........................................................................................ 15
3. OPERATION............................................................................................................ 16
4. DAILY USE................................................................................................................18
5. CARE AND CLEANING.......................................................................................... 19
6. TROUBLESHOOTING.............................................................................................20
7. INSTALLATION....................................................................................................... 21
8. TECHNICAL DATA..................................................................................................22
FOR PERFECT RESULTS
Thank you for choosing this AEG product. We have created it to give you
impeccable performance for many years, with innovative technologies that help
make life simpler features you might not find on ordinary appliances. Please
spend a few minutes reading to get the very best from it.
Visit our website for:
Get usage advice, brochures, trouble shooter, service information:
www.aeg.com/webselfservice
Register your product for better service:
www.registeraeg.com
Buy Accessories, Consumables and Original spare parts for your appliance:
www.aeg.com/shop
CUSTOMER CARE AND SERVICE
Always use original spare parts.
When contacting our Authorised Service Centre, ensure that you have the
following data available: Model, PNC, Serial Number.
The information can be found on the rating plate.
Warning / Caution-Safety information
General information and tips
Environmental information
Subject to change without notice.
ENGLISH
13

1. SAFETY INFORMATION
Before the installation and use of the appliance,
carefully read the supplied instructions. The
manufacturer is not responsible for any injuries or
damages that are the result of incorrect installation or
usage. Always keep the instructions in a safe and
accessible location for future reference.
1.1 Children and vulnerable people safety
• This appliance can be used by children aged 8 years
and above and by persons with reduced capabilities
provided that they have been given instruction and/or
supervision regarding the safe use of the appliance
and understand the potential hazards involved.
• Do not let children play with the appliance.
• Children shall not carry out cleaning and user
maintenance of the appliance without supervision.
•
Keep all packaging away from children and dispose of
it appropriately.
1.2
General Safety
•
This appliance is intended to be used in household
and similar applications such as:
– Farm houses; staff kitchen areas in shops, offices
and other working environments
– By clients in hotels, motels, bed and breakfast and
other residential type environments
• Keep ventilation openings, in the appliance enclosure
or in the built-in structure, clear of obstruction.
• Do not use mechanical devices or other means to
accelerate the defrosting process, other than those
recommended by the manufacturer.
• Do not damage the refrigerant circuit.
• Do not use electrical appliances inside the food
storage compartments of the appliance, unless they
are of the type recommended by the manufacturer.
www.aeg.com
14

• Do not use water spray and steam to clean the
appliance.
• Clean the appliance with a moist soft cloth. Only use
neutral detergents. Do not use abrasive products,
abrasive cleaning pads, solvents or metal objects.
• Do not store explosive substances such as aerosol
cans with a flammable propellant in this appliance.
• If the supply cord is damaged, it must be replaced by
the manufacturer, its Authorised Service Centre or
similarly qualified persons in order to avoid a hazard.
2. SAFETY INSTRUCTIONS
2.1 Installation
WARNING!
Only a qualified person must
install this appliance.
• Remove all the packaging and the
transit bolts.
• Do not install or use a damaged
appliance.
• Follow the installation instruction
supplied with the appliance.
• Always take care when moving the
appliance as it is heavy. Always use
safety gloves and enclosed footwear.
• Make sure the air can circulate around
the appliance.
• Wait at least 4 hours before
connecting the appliance to the
power supply. This is to allow the oil
to flow back in the compressor.
• Do not install the appliance close to
radiators or cookers, oven or hobs.
• The rear of the appliance must stand
against the wall.
• Do not install the appliance where
there is direct sunlight.
• Do not install this appliance in areas
that are too humid or too colds, such
as the construction appendices,
garages or wine cellars.
• When you move the appliance, lift it
by the front edge to avoid scratching
the floor.
2.2 Electrical connection
WARNING!
Risk of fire and electrical
shock.
• The appliance must be earthed.
• Make sure that the electrical
information on the rating plate agrees
with the power supply. If not, contact
an electrician.
• Always use a correctly installed
shockproof socket.
• Do not use multi-plug adapters and
extension cables.
• Make sure not to cause damage to
the electrical components (e.g. mains
plug, mains cable, compressor).
Contact the Authorised Service
Centre or an electrician to change the
electrical components.
• The mains cable must stay below the
level of the mains plug.
• Connect the mains plug to the mains
socket only at the end of the
installation. Make sure that there is
access to the mains plug after the
installation.
• Do not pull the mains cable to
disconnect the appliance. Always pull
the mains plug.
2.3 Use
WARNING!
Risk of injury, burns,
electrical shock or fire.
ENGLISH 15

• Do not change the specification of
this appliance.
• Do not put electrical appliances (e.g.
ice cream makers) in the appliance
unless they are stated applicable by
the manufacturer.
• Be careful not to cause damage to
the refrigerant circuit. It contains
isobutane (R600a), a natural gas with a
high level of environmental
compatibility. This gas is flammable.
• If damage occurs to the refrigerant
circuit, make sure that there are no
flames and sources of ignition in the
room. Ventilate the room.
• Do not let hot items to touch the
plastic parts of the appliance.
• Do not store flammable gas and
liquid in the appliance.
• Do not put flammable products or
items that are wet with flammable
products in, near or on the appliance.
• Do not touch the compressor or the
condenser. They are hot.
2.4 Care and cleaning
WARNING!
Risk of injury or damage to
the appliance.
• Before maintenance, deactivate the
appliance and disconnect the mains
plug from the mains socket.
• This appliance contains hydrocarbons
in the cooling unit. Only a qualified
person must do the maintenance and
the recharging of the unit.
• Regularly examine the drain of the
appliance and if necessary, clean it. If
the drain is blocked, defrosted water
collects in the bottom of the
appliance.
2.5 Disposal
WARNING!
Risk of injury or suffocation.
• Disconnect the appliance from the
mains supply.
• Cut off the mains cable and discard it.
• Remove the door to prevent children
and pets to be closed inside of the
appliance.
• The refrigerant circuit and the
insulation materials of this appliance
are ozone-friendly.
• The insulation foam contains
flammable gas. Contact your
municipal authority for information on
how to discard the appliance
correctly.
• Do not cause damage to the part of
the cooling unit that is near the heat
exchanger.
3.
OPERATION
3.1 Control panel
56 4 3 2
1
1
Display
2
Temperature warmer button
3
Temperature colder button
4
OK
5
Mode
6
ON/OFF
www.aeg.com16

It is possible to change predefined
sound of buttons by pressing together
Mode and Temperature colder button
for some seconds. Change is reversible.
Display
C DBA
EFGH
A. Timer function
B. COOLMATIC function
C. Holiday function
D. Temperature indicator
E. Alarm indicator
F. ChildLock function
G. MinuteMinder function
H. DYNAMICAIR function
3.2 Switching on
1. Connect the mains plug to the power
socket.
2. Press the appliance ON/OFF if the
display is off.
The temperature indicators show the set
default temperature.
To select a different set temperature
refer to "Temperature regulation".
If "dEMo" appears on the display, refer
to "Troubleshooting" chapter.
3.3 Switching off
1. Press ON/OFF for a few seconds.
The display switches off.
2. Disconnect the mains plug from the
power socket.
3.4 Temperature regulation
The set temperature of the fridge may be
adjusted by pressing the temperature
button.
Default temperature:
• +5°C for the fridge
The temperature indicator shows the set
temperature.
The set temperature will be
reached within 24 hours.
After a power failure the set
temperature remains stored.
3.5 COOLMATIC function
If you need to insert a large amount of
warm food, for example after doing
grocery shopping, we suggest activating
the COOLMATIC function to chill the
products more rapidly and to avoid
warming the other food which is already
in the refrigerator.
1. Press Mode until the corresponding
icon appears.
The COOLMATIC indicator flashes.
2. Press OK to confirm.
The COOLMATIC indicator is shown.
The COOLMATIC function
shuts off automatically after
52 hours.
To switch off the function
before its automatic end,
repeat the steps until the
COOLMATIC indicator goes
off.
3.6 Holiday mode
This function allows you to keep the
refrigerator closed and empty during a
long holiday period without the
formation of a bad smell.
Empty the fridge
compartment before turning
the Holiday mode on.
1. Press the Mode until the Holiday
indicator icon appears.
ENGLISH
17

The Holiday icon flashes.
The fridge temperature indicator shows
the set temperature.
2. Press the OK to confirm.
The Holiday icon appears.
To turn off the Holiday mode, repeat the
procedure until the Holiday indicator
icon goes off.
3.7 Door open alarm
An acoustic alarm will sound if the door
is left open for a few minutes. The door
open alarm conditions are indicated by:
• a flashing Alarm indicator;
• an acoustic buzzer.
When normal conditions are restored
(door closed), the alarm will stop. The
buzzer can also be switched off by
pressing any button.
3.8 MinuteMinder function
The MinuteMinder function is to be used
to set an acoustic alarm at the preferred
time, useful for example when a recipe
requires to cool down food products for
a certain length of time.
1. Press Mode until the corresponding
icon appears.
The MinuteMinder indicator flashes.
The Timer shows the set value (30
minutes) for a few seconds.
2. Press the Temperature colder or
Temperature warmer button to
change the Timer set value from 1 to
90 minutes.
3. Press OK to confirm.
The MinuteMinder indicator is shown.
The Timer starts to flash (min).
It is possible to change the time at any
time during the countdown and at the
end by pressing the Temperature colder
button and the Temperature warmer
button.
At the end of the countdown, the
MinuteMinder indicator flashes and an
audible alarm sounds. Press OK to switch
off the sound and terminate the function.
It is possible to deactivate the function at
any time during the countdown by
repeating the function steps, until the
indicator turns off.
3.9 ChildLock function
Activate the ChildLock function to lock
the buttons from unintentional
operation.
1. Press Mode until the corresponding
icon appears.
The ChildLock indicator flashes.
2. Press OK to confirm.
The ChildLock indicator is shown.
To deactivate the ChildLock function,
repeat the procedure until the ChildLock
indicator goes off.
3.10 DYNAMICAIR function
1. Press Mode until the corresponding
icon appears.
The DYNAMICAIR indicator flashes.
2. Press OK to confirm.
The DYNAMICAIR indicator is shown.
The activation of the
DYNAMICAIR function
increases energy
consumption.
If the function is activated
automatically, the
DYNAMICAIR indicator is
not shown (refer to "Daily
use").
To switch off the function, repeat the
steps until the DYNAMICAIR indicator
goes off.
4.
DAILY USE
WARNING!
Refer to Safety chapters.
4.1 DYNAMICAIR
The refrigerator compartment is
equipped with a device that allows rapid
cooling of food and keeps a more
uniform temperature in the
compartment.
www.aeg.com18

This device activates automatically when
needed, for example for a quick
temperature recovery after door opening
or when the ambient temperature is
high.
It is possible to switch on the device
manually when needed (refer to
"DYNAMICAIR function").
5. CARE AND CLEANING
WARNING!
Refer to Safety chapters.
5.1 Cleaning the interior
Before using the appliance for the first
time, the interior and all internal
accessories should be washed with
lukewarm water and some neutral soap
to remove the typical smell of a brand-
new product, then dried thoroughly.
CAUTION!
Do not use detergents or
abrasive powders, as these
will damage the finish.
5.2 Periodic cleaning
CAUTION!
Do not pull, move or
damage any pipes and/or
cables inside the cabinet.
CAUTION!
Take care of not to damage
the cooling system.
CAUTION!
When moving the cabinet,
lift it by the front edge to
avoid scratching the floor.
The equipment has to be cleaned
regularly:
1. Clean the inside and accessories with
lukewarm water and some neutral
soap.
2. Regularly check the door seals and
wipe clean to ensure they are clean
and free from debris.
3. Rinse and dry thoroughly.
4. If accessible, clean the condenser
and the compressor at the back of
the appliance with a brush.
This operation will improve the
performance of the appliance and
save electricity consumption.
5.3 Defrosting of the
refrigerator
Frost is automatically eliminated from the
evaporator of the refrigerator
compartment every time the motor
compressor stops, during normal use.
The defrost water drains out through a
trough into a special container at the
back of the appliance, over the motor
compressor, where it evaporates.
It is important to periodically clean the
defrost water drain hole in the middle of
the refrigerator compartment channel to
prevent the water overflowing and
dripping onto the food inside.
5.4 Periods of non-operation
When the appliance is not in use for long
periods, take the following precautions:
1. Disconnect the appliance from
electricity supply.
2. Remove all food.
3. Clean the appliance and all
accessories.
4. Leave the door/doors open to
prevent unpleasant smells.
ENGLISH
19

6. TROUBLESHOOTING
WARNING!
Refer to Safety chapters.
6.1 What to do if...
Problem Possible cause Solution
The appliance is noisy. The appliance is not sup-
ported properly.
Check if the appliance stands
stable.
Audible or visual alarm is
on.
The cabinet has been re-
cently switched on or the
temperature is still too
high.
Refer to "Door Open
Alarm"or "High Temperature
Alarm".
The temperature in the ap-
pliance is too high.
Refer to "Door Open
Alarm"or "High Temperature
Alarm".
The lamp does not work. The lamp is in stand-by. Close and open the door.
The lamp does not work. The lamp is defective. Contact the nearest Author-
ised Service Centre.
The compressor operates
continually.
Temperature is set incor-
rectly.
Refer to "Operation" chapter.
Many food products were
put in at the same time.
Wait some hours and then
check the temperature again.
The room temperature is
too high.
Refer to climate class chart on
the rating plate.
Food products placed in
the appliance were too
warm.
Allow food products to cool to
room temperature before stor-
ing.
The COOLMATIC function
is switched on.
Refer to "COOLMATIC func-
tion".
The compressor does not
start immediately after
pressing the COOLMATIC,
or after changing the tem-
perature.
This is normal, no error has
occurred.
The compressor starts after a
period of time.
Water flows inside the re-
frigerator.
The water outlet is clog-
ged.
Clean the water outlet.
Food products prevent that
water flows into the water
collector.
Make sure that food products
do not touch the rear plate.
www.aeg.com20

Problem Possible cause Solution
Water flows on the floor. The melting water outlet is
not connected to the evap-
orative tray above the com-
pressor.
Attach the melting water out-
let to the evaporative tray.
Temperature cannot be set. The FROSTMATIC or
COOLMATIC function is
switched on.
Switch off FROSTMATIC or
COOLMATIC manually, or wait
until the function resets auto-
matically to set the tempera-
ture. Refer to "FROSTMATIC
or COOLMATIC function".
DEMO appears on the dis-
play.
The appliance is in demon-
stration mode.
Keep the NO REFERENCE TO
BUTTON MODE pressed for
approximately 10 seconds un-
til a long sound is heard and
display shuts off for a short
time.
The temperature in the ap-
pliance is too low/too high.
The temperature regulator
is not set correctly.
Set a higher/lower tempera-
ture.
The food products' temper-
ature is too high.
Let the food products temper-
ature decrease to room tem-
perature before storage.
Many food products are
stored at the same time.
Store less food products at the
same time.
The COOLMATIC function
is switched on.
Refer to "COOLMATIC func-
tion".
If the advice does not lead
to the desired result, contact
the nearest Authorised
Service Centre.
6.2 Replacing the lamp
The appliance is equipped with a longlife
LED interior light.
Only service is allowed to replace the
lighting device. Contact your Authorised
Service Centre.
7. INSTALLATION
WARNING!
Refer to Safety chapters.
7.1 Positioning
This appliance can be installed in a dry,
well ventilated indoor where the ambient
temperature corresponds to the climate
class indicated on the rating plate of the
appliance:
Climate
class
Ambient temperature
SN +10°C to + 32°C
ENGLISH 21

Climate
class
Ambient temperature
N +16°C to + 32°C
ST +16°C to + 38°C
T +16°C to + 43°C
7.2 Electrical connection
• Before plugging in, ensure that the
voltage and frequency shown on the
rating plate correspond to your
domestic power supply.
• The appliance must be earthed. The
power supply cable plug is provided
with a contact for this purpose. If the
domestic power supply socket is not
earthed, connect the appliance to a
separate earth in compliance with
current regulations, consulting a
qualified electrician.
• The manufacturer declines all
responsibility if the above safety
precautions are not observed.
• This appliance complies with the
E.E.C. Directives.
7.3 Installation of the
appliance and door reversal
Please refer to separate
instructions on installation
(ventilation requirements,
levelling) and door reversal.
8. TECHNICAL DATA
Height 1850 mm
Width 595 mm
Depth 668 mm
Voltage 230 - 240 V
Frequency 50 Hz
The technical information is situated in
the rating plate, on the external or
internal side of the appliance and in the
energy label.
9. ENVIRONMENTAL CONCERNS
Recycle the materials with the symbol .
Put the packaging in applicable
containers to recycle it. Help protect the
environment and human health and to
recycle waste of electrical and electronic
appliances. Do not dispose appliances
marked with the symbol with the
household waste. Return the product to
your local recycling facility or contact
your municipal office.
www.aeg.com22

TABLE DES MATIÈRES
1. CONSIGNES DE SÉCURITÉ................................................................................... 24
2. INSTRUCTIONS DE SÉCURITÉ.............................................................................. 25
3. FONCTIONNEMENT..............................................................................................27
4. UTILISATION QUOTIDIENNE................................................................................29
5. ENTRETIEN ET NETTOYAGE................................................................................ 29
6. EN CAS D'ANOMALIE DE FONCTIONNEMENT................................................30
7. INSTALLATION....................................................................................................... 33
8. CARACTÉRISTIQUES TECHNIQUES.....................................................................33
POUR DES RÉSULTATS PARFAITS
Merci d'avoir choisi ce produit AEG. Nous l'avons conçu pour qu'il vous offre des
performances irréprochables pour longtemps, en intégrant des technologies
innovantes qui vous simplifient la vie grâce à des caractéristiques que vous ne
trouverez pas forcément sur des appareils ordinaires. Veuillez prendre quelques
instants pour lire cette notice afin d'utiliser au mieux votre appareil.
Visitez notre site Internet pour :
Obtenir des conseils d'utilisation, des brochures, de l'aide, des informations :
www.aeg.com/webselfservice
Enregistrer votre produit pour obtenir un meilleur service :
www.registeraeg.com
Acheter des accessoires, consommables et pièces de rechange d'origine pour
votre appareil :
www.aeg.com/shop
SERVICE APRÈS-VENTE
N'utilisez que des pièces de rechange d'origine.
Avant de contacter le service, assurez-vous de disposer des informations
suivantes : Modèle, PNC, numéro de série.
Vous trouverez ces informations sur la plaque signalétique.
Avertissement/Attention : consignes de sécurité.
Informations générales et conseils.
Informations en matière de protection de l'environnement.
Sous réserve de modifications.
FRANÇAIS
23

1. CONSIGNES DE SÉCURITÉ
Avant d'installer et d'utiliser cet appareil, lisez
soigneusement les instructions fournies. Le fabricant ne
pourra être tenu pour responsable des blessures et
dégâts résultant d'une mauvaise installation ou
utilisation. Conservez toujours les instructions dans un
lieu sûr et accessible pour vous y référer ultérieurement.
1.1 Sécurité des enfants et des personnes
vulnérables
• Cet appareil peut être utilisé par des enfants de plus
de 8 ans et par des personnes dont les capacités sont
réduites, à condition qu'ils soient surveillés ou qu'ils
aient reçu des instructions concernant l'utilisation
sécurisée de l'appareil et qu'ils comprennent les
risques encourus.
• Ne laissez pas les enfants jouer avec l'appareil.
•
Les enfants ne doivent pas nettoyer ni entreprendre
une opération de maintenance sur l'appareil sans
surveillance.
• Ne laissez pas les emballages à la portée des enfants
et jetez-les convenablement.
1.2
Consignes générales de sécurité
•
Cet appareil est conçu uniquement pour un usage
domestique et des utilisations telles que :
– dans les bâtiments de ferme, dans des cuisines
réservées aux employés dans des magasins,
bureaux et autres lieux de travail ;
– pour une utilisation privée, par les clients, dans des
hôtels et autres lieux de séjour.
• Veillez à ce que les orifices de ventilation, situés dans
l'enceinte de l'appareil ou dans la structure intégrée,
ne soient pas obstrués.
• N'utilisez aucun dispositif mécanique ou autre
appareil pour accélérer le processus de dégivrage
que ceux recommandés par le fabricant.
www.aeg.com
24

• N'endommagez pas le circuit frigorifique.
• N'utilisez pas d'appareils électriques à l'intérieur des
compartiments de conservation des aliments de
l'appareil, sauf s'ils sont du type recommandé par le
fabricant.
• Ne pulvérisez pas d'eau ni de vapeur pour nettoyer
l'appareil.
• Nettoyez l'appareil avec un chiffon doux humide.
Utilisez uniquement des produits de nettoyage
neutres. N'utilisez pas de produits abrasifs, de
tampons à récurer, de solvants ni d'objets métalliques.
• Ne conservez aucune substance explosive dans cet
appareil, comme des aérosols contenant un produit
inflammable.
• Si le câble d'alimentation est endommagé, il doit être
remplacé par le fabricant, son service après-vente ou
des personnes de qualification similaire afin d'éviter
un danger.
2. INSTRUCTIONS DE SÉCURITÉ
2.1 Installation
AVERTISSEMENT!
L'appareil doit être installé
uniquement par un
professionnel qualifié.
• Retirez l'intégralité de l'emballage et
les boulons de transport.
• N'installez pas et ne branchez pas un
appareil endommagé.
• Suivez scrupuleusement les
instructions d'installation fournies
avec l'appareil.
• Soyez toujours vigilants lorsque vous
déplacez l'appareil car il est lourd.
Utilisez toujours des gants de sécurité
et des chaussures fermées.
• Assurez-vous que l'air circule autour
de l'appareil.
• Attendez au moins 4 heures avant de
brancher l'appareil sur le secteur.
Cela permet à l'huile de refouler dans
le compresseur.
• N'installez pas l'appareil à proximité
d'un radiateur, d'une cuisinière, d'un
four ou d'une table de cuisson.
• La surface arrière de l'appareil doit
être positionnée contre un mur.
• N'installez pas l'appareil dans un
endroit exposé à la lumière directe du
soleil.
• N'installez pas l'appareil dans un
endroit trop humide ou trop froid,
comme une dépendance extérieure,
un garage ou une cave.
• Lorsque vous déplacez l'appareil,
veillez à le soulever par l'avant pour
éviter de rayer le sol.
2.2 Connexion électrique
AVERTISSEMENT!
Risque d'incendie ou
d'électrocution.
• L'appareil doit être relié à la terre.
• Vérifiez que les données électriques
figurant sur la plaque signalétique
correspondent à celles de votre
FRANÇAIS
25

réseau. Si ce n'est pas le cas,
contactez un électricien.
• Utilisez toujours une prise de courant
de sécurité correctement installée.
• N'utilisez pas d'adaptateurs
multiprises ni de rallonges.
• Veillez à ne pas endommager les
composants électriques tels que la
fiche secteur, le câble d'alimentation
ou le compresseur. Contactez le
service après-vente agréé ou un
électricien pour changer les
composants électriques.
• Le câble d'alimentation doit rester en
dessous du niveau de la fiche secteur.
• Ne branchez la fiche d'alimentation à
la prise de courant qu'à la fin de
l'installation. Assurez-vous que la
prise de courant est accessible une
fois l'appareil installé.
• Ne tirez jamais sur le câble
d'alimentation pour débrancher
l'appareil. Tirez toujours sur la fiche.
2.3 Usage
AVERTISSEMENT!
Risque de blessures, de
brûlures, d'électrocution ou
d'incendie.
• Ne modifiez pas les caractéristiques
de cet appareil.
• Ne placez aucun appareil électrique
(sorbetière, etc.) dans l'appareil, en
l'absence d'indications du fabricant.
• Veillez à ne pas endommager le
circuit frigorifique. Il contient de
l'isobutane (R600a), un gaz naturel
ayant un niveau élevé de
compatibilité environnementale. Ce
gaz est inflammable.
• Si le circuit frigorifique est
endommagé, assurez-vous de
l'absence de flammes et de sources
d'ignition dans la pièce. Aérez la
pièce.
• Évitez tout contact d'éléments chauds
avec les parties en plastique de
l'appareil.
• Ne stockez jamais de gaz ou de
liquide inflammable dans l'appareil.
• Ne placez pas de produits
inflammables ou d'éléments imbibés
de produits inflammables à l'intérieur
ou à proximité de l'appareil, ni sur
celui-ci.
• Ne touchez pas le compresseur ni le
condenseur. Ils sont chauds.
2.4 Entretien et nettoyage
AVERTISSEMENT!
Risque de blessure
corporelle ou de dommages
matériels.
• Avant toute opération d'entretien,
éteignez l'appareil et débranchez la
fiche de la prise secteur.
• Cet appareil contient des
hydrocarbures dans son circuit de
réfrigération. L'entretien et la
recharge du circuit de réfrigération
doivent être effectués par un
professionnel qualifié.
• Examinez régulièrement l'écoulement
de l'appareil et si nécessaire,
nettoyez-le. Si l'orifice est bouché,
l'eau provenant du dégivrage
s'écoulera en bas de l'appareil.
2.5 Mise au rebut
AVERTISSEMENT!
Risque de blessure ou
d'asphyxie.
• Débranchez l'appareil de
l'alimentation électrique.
• Coupez le câble d'alimentation et
mettez-le au rebut.
• Retirez la porte pour empêcher les
enfants et les animaux de s'enfermer
dans l'appareil.
• Le circuit frigorifique et les matériaux
d'isolation de cet appareil préservent
la couche d'ozone.
• La mousse isolante contient un gaz
inflammable. Contactez votre service
municipal pour obtenir des
informations sur la marche à suivre
pour mettre l'appareil au rebut.
• N'endommagez pas la partie du
circuit de réfrigération située à
proximité du condenseur thermique.
www.aeg.com
26

3. FONCTIONNEMENT
3.1 Panneau de commande
56 4 3 2
1
1
Affichage
2
Touche d'augmentation de la
température
3
Touche de diminution de la
température
4
OK
5
Mode
6
ON/OFF
Pour augmenter le volume de la tonalité
des touches, appuyez simultanément sur
la touche Mode et la touche de
diminution de la température pendant
plusieurs secondes. Ce changement est
réversible.
Affichage
C DBA
EFGH
A. Fonction Minuteur
B. Fonction COOLMATIC
C. Fonction Holiday
D. Indicateur de température
E. Voyant d'alarme
F. Fonction ChildLock
G. Fonction MinuteMinder
H. Fonction DYNAMICAIR
3.2 Mise en marche
1. Branchez la fiche électrique de
l'appareil à la prise de courant.
2. Appuyez sur la touche ON/OFF de
l'appareil si l'affichage est éteint.
Les indicateurs de température indiquent
la température programmée par défaut.
Pour sélectionner une température
différente, reportez-vous au paragraphe
« Réglage de la température ».
Si "dEMo" s'affiche, reportez-vous au
chapitre « En cas d'anomalie de
fonctionnement ».
3.3 Mise hors tension
1. Appuyez sur la touche ON/OFF
pendant quelques secondes.
L'affichage s'éteint.
2. Débranchez la fiche électrique de
l'appareil de la prise de courant.
FRANÇAIS 27

3.4 Réglage de la température
La température du réfrigérateur est
réglée en appuyant sur la touche de
température.
Température par défaut :
• +5 °C dans le réfrigérateur
L'indicateur de température indique la
température programmée.
La température
programmée sera atteinte
sous 24 heures. Après une
coupure de courant, la
température programmée
reste enregistrée.
3.5 Fonction COOLMATIC
Si vous avez besoin de ranger une
grande quantité d'aliments chauds dans
votre réfrigérateur, par exemple après
avoir fait vos courses, nous vous
suggérons d'activer la fonction
COOLMATIC pour refroidir rapidement
les aliments tout en évitant le
réchauffement des denrées déjà
stockées dans le réfrigérateur.
1. Appuyez sur la touche Mode jusqu'à
ce que le symbole correspondant
s'affiche.
L'indicateur COOLMATIC clignote.
2. Appuyez sur OK pour confirmer.
L'indicateur COOLMATIC s'affiche.
La fonction COOLMATIC se
désactive automatiquement
au bout de 52 heures.
Pour désactiver la fonction
avant qu'elle ne s'arrête
automatiquement, répétez
la procédure jusqu'à ce que
le voyant COOLMATIC
s'éteigne.
3.6 Mode Holiday
Cette fonction vous permet de laisser le
compartiment réfrigérateur vide et fermé
pendant une longue période sans
formation de mauvaises odeurs.
Videz le compartiment de
réfrigération avant d'activer
le mode Holiday.
1. Appuyez sur la touche Mode jusqu'à
ce que le voyant du mode Holiday
s'allume.
L'icône Holiday clignote.
L'indicateur de température du
réfrigérateur indique la température
programmée.
2. Appuyez sur la touche OK pour
confirmer.
L'icône Holiday apparaît.
Pour désactiver le mode Holiday, répétez
les mêmes opérations jusqu'à ce que
l'icône Holiday disparaisse.
3.7 Alarme de porte ouverte
Une alarme sonore se déclenche si la
porte reste ouverte pendant quelques
minutes. Les conditions d'alarme de
porte ouverte sont indiquées par :
• un voyant d'alarme clignotant ;
• une alarme sonore.
Au rétablissement des conditions
normales (porte fermée), l'alarme
s'arrête. Vous pouvez également
éteindre le signal sonore en appuyant
sur n'importe quelle touche.
3.8 Fonction MinuteMinder
La fonction MinuteMinder doit être
utilisée pour le réglage d'une alarme
sonore à une heure souhaitée, ce qui est
utile, par exemple, lorsque l'on souhaite
refroidir des aliments pendant un certain
temps dans le cadre d'une recette de
cuisine.
1. Appuyez sur la touche Mode jusqu'à
ce que le symbole correspondant
s'affiche.
L'indicateur MinuteMinder clignote.
Le minuteur indique pendant quelques
secondes la valeur programmée
(30 minutes).
2. Appuyez sur la touche de diminution
ou d'augmentation de la
température pour changer la valeur
programmée de la minuterie de 1 à
90 minutes.
3. Appuyez sur la touche OK pour
confirmer.
L'indicateur MinuteMinder s'affiche.
Le minuteur se met à clignoter (min).
www.aeg.com
28

Il est possible de modifier la durée à tout
moment et avant la fin du décompte en
appuyant sur la touche de diminution de
la température et sur la touche
d'augmentation de la température.
Une fois le décompte terminé, le voyant
MinuteMinder clignote et un signal
sonore retentit. Appuyez sur la touche
OK pour arrêter le signal sonore et
désactiver la fonction.
Il est possible de désactiver une fonction
à tout moment pendant le décompte en
répétant les étapes de sélection de la
fonction, jusqu'à ce que le voyant
s'éteigne.
3.9 Fonction ChildLock
Activez la fonction ChildLock pour
verrouiller les touches et éviter toute
opération accidentelle.
1. Appuyez sur la touche Mode jusqu'à
ce que le symbole correspondant
s'affiche.
L'indicateur ChildLock clignote.
2. Appuyez sur OK pour confirmer.
L'indicateur ChildLock s'affiche.
Pour désactiver la fonction ChildLock,
répétez la procédure jusqu'à ce que le
voyant ChildLock s'éteigne.
3.10 Fonction DYNAMICAIR
1. Appuyez sur la touche Mode jusqu'à
ce que le symbole correspondant
s'affiche.
L'indicateur DYNAMICAIR clignote.
2. Appuyez sur la touche OK pour
confirmer.
L'indicateur DYNAMICAIR s'affiche.
L'activation de la fonction
DYNAMICAIR augmente la
consommation d'électricité.
Si la fonction est activée
automatiquement, le voyant
DYNAMICAIR reste éteint
(reportez-vous à la section
« Utilisation quotidienne »).
Pour désactiver la fonction, répétez les
étapes jusqu'à ce que l'indicateur
DYNAMICAIR s'éteigne.
4. UTILISATION QUOTIDIENNE
AVERTISSEMENT!
Reportez-vous aux chapitres
concernant la sécurité.
4.1 DYNAMICAIR
Le compartiment réfrigérateur est
équipé d'un dispositif qui permet le
refroidissement rapide des aliments et
qui maintient une température plus
homogène dans le compartiment.
Ce dispositif s'active automatiquement
en cas de besoin, par exemple, pour un
refroidissement rapide de la température
lorsque la porte du réfrigérateur est
restée ouverte, ou si la température
ambiante est élevée.
Il est possible de mettre manuellement
le dispositif en fonctionnement lorsque
nécessaire (reportez-vous au chapitre
« DYNAMICAIR Fonction »).
5. ENTRETIEN ET NETTOYAGE
AVERTISSEMENT!
Reportez-vous aux chapitres
concernant la sécurité.
5.1 Nettoyage de l'intérieur
Avant d'utiliser l'appareil pour la
première fois, nettoyez l'intérieur et tous
les accessoires avec de l'eau tiède
savonneuse (pour supprimer toute odeur
de neuf), puis séchez-les soigneusement.
ATTENTION!
N'utilisez jamais de produits
abrasifs ou caustiques car ils
pourraient endommager le
revêtement.
FRANÇAIS 29

5.2 Nettoyage périodique
ATTENTION!
Ne tirez pas, ne déplacez
pas, n'endommagez pas les
tuyaux et/ou câbles qui se
trouvent à l'intérieur de
l'appareil.
ATTENTION!
Attention à ne pas
endommager le système de
réfrigération.
ATTENTION!
Lorsque vous déplacez
l'appareil, veillez à le
soulever par l'avant pour
éviter de rayer le sol.
L'appareil doit être nettoyé
régulièrement :
1. Nettoyez l'intérieur et les accessoires
avec de l'eau tiède et un détergent
doux.
2. Vérifiez régulièrement les joints de
porte et essuyez-les pour vous
assurer qu'ils sont propres et ne
contiennent pas de résidus.
3. Rincez et séchez soigneusement.
4. S'ils sont accessibles, nettoyez le
condenseur et le compresseur situés
à l'arrière de l'appareil avec une
brosse.
Cette opération améliore les
performances de l'appareil et permet
des économies d'électricité.
5.3 Dégivrage du réfrigérateur
En fonctionnement normal, le givre est
automatiquement éliminé de
l'évaporateur du compartiment
réfrigérateur à chaque fois que le
compresseur s'arrête. L'eau de
dégivrage est collectée dans un récipient
spécial situé à l'arrière de l'appareil, au-
dessus du compresseur, d'où elle
s'évapore.
Il est important de nettoyer
régulièrement l'orifice d'écoulement de
la goulotte d'évacuation de l'eau de
dégivrage située au milieu du
compartiment réfrigérateur pour
empêcher l'eau de déborder et de
couler à l'intérieur de l'appareil.
5.4 En cas de non-utilisation
prolongée
Si l'appareil n'est pas utilisé pendant de
longues périodes, prenez les précautions
suivantes :
1. Débranchez l'appareil de
l'alimentation électrique.
2. Retirez tous les aliments.
3. Nettoyez l'appareil et tous les
accessoires.
4. Laissez la porte/les portes ouverte(s)
pour éviter la formation d'odeurs
désagréables.
6.
EN CAS D'ANOMALIE DE FONCTIONNEMENT
AVERTISSEMENT!
Reportez-vous aux chapitres
concernant la sécurité.
www.aeg.com30

6.1 En cas d'anomalie de fonctionnement
Problème Cause probable Solution
L'appareil est bruyant. L'appareil n'est pas stable. Assurez-vous de la stabilité de
l'appareil.
Les signaux sonores et vi-
suels sont activés.
L'appareil a récemment été
mis en marche ou la tem-
pérature est toujours trop
élevée.
Consultez le paragraphe
« Alarme porte ouverte » ou
« Alarme haute température ».
La température à l'intérieur
de l'appareil est trop éle-
vée.
Consultez le paragraphe
« Alarme porte ouverte » ou
« Alarme haute température ».
L'éclairage ne fonctionne
pas.
L'éclairage est en mode
veille.
Fermez puis ouvrez la porte.
L'éclairage ne fonctionne
pas.
L'éclairage est défectueux. Contactez le service après-
vente agréé le plus proche.
Le compresseur fonctionne
en permanence.
Il y a une erreur dans le rég-
lage de la température.
Reportez-vous au chapitre
« Fonctionnement ».
Trop de produits ont été in-
troduits simultanément.
Attendez quelques heures et
vérifiez de nouveau la tempér-
ature.
La température ambiante
est trop élevée.
Reportez-vous au tableau des
classes climatiques de la pla-
que signalétique.
Les aliments introduits dans
l'appareil étaient trop
chauds.
Laissez refroidir les aliments à
température ambiante avant
de les mettre dans l'appareil.
La fonction COOLMATIC
est activée.
Consultez le paragraphe
« Fonction COOLMATIC ».
Le compresseur ne démarre
pas immédiatement après
avoir appuyé sur la touche
COOLMATIC, ou après
avoir changé la tempéra-
ture.
Ce phénomène est normal,
il ne s'agit pas d'une anom-
alie.
Le compresseur démarre au
bout d'un certain temps.
De l'eau s'écoule à l'intér-
ieur du réfrigérateur.
L'orifice d'écoulement de
l'eau de dégivrage est ob-
strué.
Nettoyez l'orifice d'écoule-
ment de l'eau de dégivrage.
Des aliments empêchent
l'eau de s'écouler dans le
réservoir d'eau.
Assurez-vous que les produits
ne touchent pas la plaque ar-
rière.
FRANÇAIS 31

Problème Cause probable Solution
De l'eau coule sur le sol. Le tuyau d'évacuation de
l'eau de dégivrage n'est
pas raccordé au bac d'éva-
poration situé au-dessus du
compresseur.
Fixez le tuyau d'évacuation de
l'eau au bac d'évaporation de
l'eau de dégivrage.
Il est impossible de régler la
température.
La fonction FROSTMATIC
ou COOLMATIC est ac-
tivée.
Désactivez manuellement la
fonction FROSTMATIC ou
COOLMATIC, ou attendez
que la fonction se réinitialise
automatiquement avant de ré-
gler la température. Reportez-
vous au chapitre « Fonction
FROSTMATIC ou COOLMAT-
IC ».
DEMO s'affiche sur le pan-
neau.
L'appareil est en mode
démonstration.
Maintenez la touche NO REF-
ERENCE TO BUTTON MODE
enfoncée pendant environ
10 secondes, jusqu'à ce qu'un
long signal sonore retentisse
et que l'affichage s'éteigne
pendant un court instant.
La température à l'intérieur
de l'appareil est trop basse/
élevée.
Le thermostat n'est pas ré-
glé correctement.
Augmentez/réduisez la tem-
pérature.
La température des pro-
duits est trop élevée.
Laissez les aliments refroidir à
température ambiante avant
de les placer dans l'appareil.
Trop de produits ont été in-
troduits simultanément.
Introduisez moins de produits
en même temps.
La fonction COOLMATIC
est activée.
Consultez le paragraphe
« Fonction COOLMATIC ».
Si ces conseils n'apportent
pas de solution à votre
problème, veuillez consulter
le service après-vente agréé
le plus proche.
6.2 Remplacement de
l'éclairage
L'appareil est équipé d'un éclairage à
LED longue durée.
Le remplacement du dispositif
d'éclairage doit uniquement être
effectué par un technicien du service
après-vente. Contactez votre service
après-vente agréé.
www.aeg.com32

7. INSTALLATION
AVERTISSEMENT!
Reportez-vous aux chapitres
concernant la sécurité.
7.1 Installation
Cet appareil peut être installé dans un
pièce intérieure sèche et bien ventilée où
la température ambiante correspond à la
classe climatique indiquée sur la plaque
signalétique de l'appareil :
Classe
clima-
tique
Température ambiante
SN +10 °C à + 32 °C
N +16 °C à + 32 °C
ST +16 °C à + 38 °C
T +16 °C à + 43 °C
7.2 Branchement électrique
• Avant de brancher l'appareil, assurez-
vous que la tension et la fréquence
indiquées sur la plaque signalétique
correspondent à celles de votre
réseau électrique domestique.
• L'appareil doit être relié à la terre. La
fiche du cordon d'alimentation est
fournie avec un contact à cette fin. Si
la prise de courant n'est pas mise à la
terre, branchez l'appareil à une mise à
la terre séparée conformément aux
réglementations en vigueur, en
consultant un électricien spécialisé.
• Le fabricant décline toute
responsabilité en cas de non-respect
de ces consignes de sécurité.
• Cet appareil est conforme aux
directives CEE.
7.3 Installation de l'appareil et
réversibilité de la porte
Veuillez vous reportez aux
instructions séparées
relatives à l'installation
(ventilation, conditions, mise
de niveau) et à la
réversibilité de la porte.
8. CARACTÉRISTIQUES TECHNIQUES
Hauteur 1850 mm
Largeur 595 mm
Profondeur 668 mm
Tension 230 - 240 V
Fréquence 50 Hz
Les caractéristiques techniques figurent
sur la plaque signalétique située sur le
côté intérieur ou extérieur de l'appareil
et sur l'étiquette énergétique.
9. EN MATIÈRE DE PROTECTION DE
L'ENVIRONNEMENT
Recyclez les matériaux portant le
symbole . Déposez les emballages
dans les conteneurs prévus à cet effet.
Contribuez à la protection de
l'environnement et à votre sécurité,
recyclez vos produits électriques et
électroniques. Ne jetez pas les appareils
portant le symbole avec les ordures
ménagères. Emmenez un tel produit
dans votre centre local de recyclage ou
contactez vos services municipaux.
FRANÇAIS 33

INHALTSVERZEICHNIS
1. SICHERHEITSHINWEISE.........................................................................................35
2. SICHERHEITSANWEISUNGEN.............................................................................. 36
3. BETRIEB................................................................................................................... 38
4. TÄGLICHER GEBRAUCH........................................................................................40
5. REINIGUNG UND PFLEGE.....................................................................................40
6. FEHLERSUCHE........................................................................................................41
7. MONTAGE...............................................................................................................44
8. TECHNISCHE DATEN............................................................................................ 44
FÜR PERFEKTE ERGEBNISSE
Danke, dass Sie sich für dieses AEG-Produkt entschieden haben. Wir haben es
geschaffen, damit Sie viele Jahre von seiner ausgezeichneten Leistung und den
innovativen Technologien, die Ihnen das Leben erleichtern, profitieren können.
Es ist mit Funktionen ausgestattet, die in gewöhnlichen Geräten nicht vorhanden
sind. Nehmen Sie sich ein paar Minuten Zeit zum Lesen, um seine Vorzüge
kennen zu lernen.
Besuchen Sie uns auf unserer Website, um:
Anwendungshinweise, Prospekte, Fehlerbehebungs- und Service-
Informationen zu erhalten:
www.aeg.com/webselfservice
Ihr erworbenes Produkt zu registrieren, um den besten Service dafür zu
gewährleisten:
www.registeraeg.com
Zubehör, Verbrauchsmaterial und Original-Ersatzteile für Ihr Gerät zu
erwerben:
www.aeg.com/shop
REPARATUR- UND KUNDENDIENST
Bitte verwenden Sie ausschließlich Original-Ersatzteile für Ihre Produkte.
Halten Sie folgende Angaben bereit, wenn Sie sich an den Kundendienst wenden
Modell, Produktnummer (PNC), Seriennummer.
Diese Informationen finden Sie auf dem Typenschild.
Warnungs-/ Sicherheitshinweise
Allgemeine Informationen und Empfehlungen
Informationen zum Umweltschutz
Änderungen vorbehalten.
www.aeg.com
34

1. SICHERHEITSHINWEISE
Lesen Sie die mitgelieferte Gebrauchsanleitung
sorgfältig vor Montage und Inbetriebnahme des Geräts.
Bei Verletzungen oder Schäden infolge nicht
ordnungsgemäßer Montage oder Verwendung des
Geräts übernimmt der Hersteller keine Haftung.
Bewahren Sie die Anleitung immer an einem sicheren
und zugänglichen Ort zum späteren Nachschlagen auf.
1.1 Sicherheit von Kindern und schutzbedürftigen
Personen
• Dieses Gerät kann dann von Kindern ab 8 Jahren und
von Personen mit eingeschränkten Fähigkeiten
bedient werden, wenn sie dabei beaufsichtigt werden
und/oder ihnen die sichere Benutzung des Geräts
erklärt wurde, und wenn sie die potenziellen Gefahren
der Benutzung kennen.
•
Kinder dürfen nicht mit dem Gerät spielen.
• Kinder dürfen keine Reinigung und Wartung ohne
Beaufsichtigung durchführen.
• Halten Sie sämtliches Verpackungsmaterial von
Kindern fern und entsorgen Sie es auf angemessene
Weise.
1.2
Allgemeine Sicherheit
•
Dieses Gerät ist für die Verwendung im Haushalt und
ähnliche Zwecke vorgesehen, wie z. B.:
– Bauernhöfe, Personalküchenbereiche in
Geschäften, Büros und anderen Arbeitsumfeldern
– Für Gäste in Hotels, Motels, Pensionen und
anderen wohnungsähnlichen Räumlichkeiten
• Achten Sie darauf, dass die Belüftungsöffnungen im
Gehäuse, um das Gerät und in der Einbaunische nicht
blockiert sind.
• Versuchen Sie nicht, den Abtauvorgang durch andere
als vom Hersteller empfohlene mechanische oder
sonstige Hilfsmittel zu beschleunigen.
DEUTSCH
35

• Beschädigen Sie nicht den Kältekreislauf.
• Betreiben Sie in den Lebensmittelfächern des Geräts
keine anderen als die vom Hersteller empfohlenen
Elektrogeräte.
• Reinigen Sie das Gerät nicht mit einem Wasser- oder
Dampfstrahl.
• Reinigen Sie das Gerät mit einem weichen, feuchten
Tuch. Verwenden Sie ausschließlich Neutralreiniger.
Benutzen Sie keine Scheuermittel, scheuernde
Reinigungsschwämmchen, Lösungsmittel oder
Metallgegenstände.
• Bewahren Sie in dem Gerät keine explosiven
Substanzen, wie Spraydosen mit entzündlichen
Treibgasen auf.
• Wenn das Netzkabel beschädigt ist, muss es vom
Hersteller, seinem autorisierten Kundenservice oder
einer gleichermaßen qualifizierten Person
ausgetauscht werden, um Gefahrenquellen zu
vermeiden.
2. SICHERHEITSANWEISUNGEN
2.1 Montage
WARNUNG!
Nur eine qualifizierte
Fachkraft darf den
elektrischen Anschluss des
Geräts vornehmen.
• Entfernen Sie die
Verpackungsmaterialien und die
Transportschrauben.
• Montieren Sie ein beschädigtes Gerät
nicht und benutzen Sie es nicht.
• Halten Sie sich an die mitgelieferte
Montageanleitung.
• Gehen Sie beim Umsetzen des Geräts
vorsichtig vor, da es schwer ist.
Tragen Sie stets Schutzhandschuhe
und feste Schuhe.
• Stellen Sie sicher, dass die Luft um
das Gerät zirkulieren kann.
• Warten Sie mindestens 4 Stunden,
bevor Sie das Gerät an das Stromnetz
anschließen. Dies ist erforderlich,
damit das Öl in den Kompressor
zurückfließen kann.
• Stellen Sie das Gerät nicht in der
Nähe von Heizkörpern, Herden,
Backöfen oder Kochfeldern auf.
• Die Geräterückseite muss gegen die
Wand gestellt werden.
• Stellen Sie das Gerät nicht dort auf,
wo es direktem Sonnenlicht
ausgesetzt sein könnte.
• Stellen Sie das Gerät nicht an zu
feuchten oder kalten Orten auf, wie z.
B. in Nebengebäuden, Garagen oder
Weinkellern.
• Wenn Sie das Gerät verschieben
möchten, heben Sie es bitte an der
Vorderkante an, um den Fußboden
nicht zu verkratzen.
2.2 Elektrischer Anschluss
WARNUNG!
Brand- und
Stromschlaggefahr.
www.aeg.com36

• Das Gerät muss geerdet sein.
• Stellen Sie sicher, dass die
elektrischen Daten auf dem
Typenschild den Daten Ihrer
Stromversorgung entsprechen.
Wenden Sie sich anderenfalls an eine
Elektrofachkraft.
• Schließen Sie das Gerät unbedingt an
eine sachgemäß installierte
Schutzkontaktsteckdose an.
• Verwenden Sie keine
Mehrfachsteckdosen oder
Verlängerungskabel.
• Achten Sie darauf, elektrische
Bauteile (wie Netzstecker, Netzkabel
und Kompressor) nicht zu
beschädigen. Wenden Sie sich an den
autorisierten Kundendienst oder
einen Elektriker, um die elektrischen
Bauteile auszutauschen.
• Das Netzkabel muss unterhalb des
Netzsteckers verlegt werden.
• Stecken Sie den Netzstecker erst nach
Abschluss der Montage in die
Steckdose. Stellen Sie sicher, dass der
Netzstecker nach der Montage noch
zugänglich ist.
• Ziehen Sie nicht am Netzkabel, wenn
Sie das Gerät vom Netzstrom trennen
möchten. Ziehen Sie stets am
Netzstecker.
2.3 Verwendung
WARNUNG!
Es besteht Verletzungs-,
Verbrennungs-,
Stromschlag- und
Brandgefahr.
• Nehmen Sie keine technischen
Änderungen am Gerät vor.
• Stellen Sie keine elektrischen Geräte
(z. B. Eisbereiter) in das Gerät, wenn
solche Geräte nicht ausdrücklich vom
Hersteller für diesen Zweck
zugelassen sind.
• Achten Sie darauf, den Kältekreislauf
nicht zu beschädigen. Er enthält
Isobutan (R600a), ein Erdgas mit
einem hohen Grad an
Umweltverträglichkeit. Dieses Gas ist
brennbar.
• Wird der Kältekreislauf beschädigt,
stellen Sie bitte sicher, dass es keine
Flammen und Zündquellen im Raum
gibt. Belüften Sie den Raum.
• Stellen Sie keine heißen Gegenstände
auf die Kunststoffteile des Geräts.
• Bewahren Sie keine entzündbaren
Gase und Flüssigkeiten im Gerät auf.
• Platzieren Sie keine entflammbaren
Produkte oder Gegenstände, die mit
entflammbaren Produkten benetzt
sind, im Gerät, auf dem Gerät oder in
der Nähe des Geräts.
• Berühren Sie nicht den Kompressor
oder den Kondensator. Sie sind heiß.
2.4 Reinigung und Pflege
WARNUNG!
Verletzungsgefahr sowie
Risiko von Schäden am
Gerät.
• Schalten Sie das Gerät immer aus und
ziehen Sie den Netzstecker aus der
Steckdose, bevor Reinigungsarbeiten
durchgeführt werden.
• Der Kältekreis des Gerätes enthält
Kohlenwasserstoffe. Das Gerät muss
von einer qualifizierten Fachkraft
gewartet und nachgefüllt werden.
• Prüfen Sie regelmäßig den
Wasserabfluss des Geräts und
reinigen Sie ihn gegebenenfalls. Bei
verstopftem Wasserabfluss sammelt
sich das Abtauwasser am Boden des
Geräts an.
2.5 Entsorgung
WARNUNG!
Verletzungs- und
Erstickungsgefahr.
• Trennen Sie das Gerät von der
Stromversorgung.
• Schneiden Sie das Netzkabel ab, und
entsorgen Sie es.
• Entfernen Sie die Tür, um zu
verhindern, dass sich Kinder oder
Haustiere in dem Gerät einschließen.
• Der Kältekreislauf und die
Isolierungsmaterialien dieses Gerätes
sind ozonfreundlich.
• Die Isolierung enthält entzündliches
Gas. Für Informationen zur korrekten
Entsorgung des Gerätes wenden Sie
sich an Ihre kommunale Behörde.
DEUTSCH
37

• Achten Sie darauf, dass die
Kühleinheit in der Nähe des
Wärmetauschers nicht beschädigt
wird.
3. BETRIEB
3.1 Bedienfeld
56 4 3 2
1
1
Display
2
Taste zum Erhöhen der Temperatur
3
Taste zum Senken der Temperatur
4
OK
5
Mode
6
ON/OFF
Der voreingestellte Tastenton lässt sich
ändern. Halten Sie dazu Mode und die
Taste zum Senken der Temperatur einige
Sekunden gedrückt. Die Änderung lässt
sich rückgängig machen.
Display
C DBA
EFGH
A. Uhrfunktion
B. Funktion COOLMATIC
C. Funktion Holiday
D. Temperaturanzeige
E. Alarmanzeige
F. Funktion ChildLock
G. Funktion MinuteMinder
H. Funktion DYNAMICAIR
3.2 Einschalten des Geräts
1. Stecken Sie den Netzstecker in die
Netzsteckdose.
2. Drücken Sie ON/OFF, wenn das
Display ausgeschaltet ist.
Die Temperaturanzeigen zeigen die
jeweils eingestellte Standardtemperatur
an.
Informationen zur Auswahl einer anderen
Temperatur finden Sie unter
„Temperaturregelung“.
Wenn das Display "dEMo" anzeigt, siehe
Kapitel „Fehlersuche“.
3.3 Ausschalten des Geräts
1. Drücken Sie ON/OFF einige
Sekunden.
Das Display wird ausgeschaltet.
www.aeg.com38

2. Ziehen Sie den Netzstecker aus der
Netzsteckdose.
3.4 Temperaturregelung
Die Temperatur des Kühlschranks lässt
sich durch Drücken der Temperaturtaste
einstellen.
Standardtemperatur:
• +5 °C für den Kühlschrank
Die Temperaturanzeige zeigt die
eingestellte Temperatur an.
Die eingestellte Temperatur
wird innerhalb von 24
Stunden erreicht. Nach
einem Stromausfall bleibt
die eingestellte Temperatur
gespeichert.
3.5 Funktion COOLMATIC
Wenn Sie zum Beispiel nach einem
Einkauf größere Mengen warmer
Lebensmittel einlegen möchten,
empfehlen wir die Funktion
COOLMATIC einzuschalten, um die
Produkte schneller zu kühlen und um zu
vermeiden, dass die bereits im
Kühlschrank befindlichen Lebensmittel
erwärmt werden.
1. Drücken Sie die Taste Mode, bis das
entsprechende Symbol angezeigt
wird.
Die Anzeige COOLMATIC blinkt.
2. Mit OK bestätigen.
Die Anzeige COOLMATIC leuchtet.
Die Funktion COOLMATIC
wird nach etwa 52 Stunden
automatisch abgeschaltet.
Zum Ausschalten der
Funktion vor ihrer
automatischen Abschaltung,
wiederholen Sie die obigen
Schritte, bis die Anzeige
COOLMATIC erlischt.
3.6 Holiday-Modus
Mit dieser Funktion können Sie den
Kühlschrank über längere Zeit mit
geschlossener Tür leer stehen lassen,
ohne dass sich ein unangenehmer
Geruch entwickelt.
Leeren Sie den Kühlraum,
bevor Sie den Holiday-
Modus einschalten.
1. Drücken Sie Mode, bis die Holiday-
Anzeige erscheint.
Das Holiday-Symbol blinkt.
Die Kühlraum-Temperaturanzeige zeigt
die eingestellte Temperatur an.
2. Mit OK bestätigen.
Das Holiday-Symbol erscheint.
Wiederholen Sie zum Ausschalten des
Holiday-Modus die obigen Schritte, bis
die Holiday-Anzeige erlischt.
3.7 Alarm „Tür offen“
Es ertönt ein Alarmsignal, wenn die Tür
einige Minuten lang offen steht. Der
Alarm „Tür offen“ wird wie folgt
angezeigt:
• Blinkende Alarmanzeige
• Akustisches Signal.
Sobald der Normalzustand
wiederhergestellt ist (Tür geschlossen),
wird der Alarm ausgeschaltet. Der
Summer kann auch durch Drücken einer
beliebigen Taste ausgeschaltet werden.
3.8 Funktion MinuteMinder
Mit der Funktion MinuteMinder wird ein
akustischer Alarm auf eine gewünschte
Zeit eingestellt. Dies ist zum Beispiel
nützlich, wenn ein Rezept erfordert, dass
eine Speise für eine bestimmte Zeit
abkühlen muss.
1. Drücken Sie Mode, bis das
entsprechende Symbol angezeigt
wird.
Die Anzeige MinuteMinder blinkt.
Der Timer zeigt den eingestellten Wert
(30 Minuten) einige Sekunden lang an.
2. Drücken Sie die Taste zur Erhöhung
oder Verringerung der Temperatur,
um die Uhreinstellung von 1 bis 90
Minuten zu ändern.
3. Mit OK bestätigen.
Die MinuteMinder-Anzeige erscheint.
Im Timer blinkt (min)..
Die Zeit kann während des Countdowns
und am Ende geändert werden, indem
Sie die Tasten zur Erhöhung und
Verringerung der Temperatur drücken.
DEUTSCH
39

Nach Ablauf des Countdowns blinkt die
Anzeige MinuteMinder und es ertönt ein
Alarmsignal. Schalten Sie den Alarmton
und die Funktion mit OK aus.
Diese Funktion kann während des
Countdowns jederzeit ausgeschaltet
werden. Wiederholen Sie hierzu die
obigen Schritte, bis die Anzeige erlischt.
3.9 Funktion ChildLock
Schalten Sie die Funktion ChildLock ein,
um die Tasten gegen eine
unbeabsichtigte Betätigung zu
verriegeln.
1. Drücken Sie die Taste Mode, bis das
entsprechende Symbol angezeigt
wird.
Die ChildLock Anzeige blinkt.
2. Mit OK bestätigen.
Die Anzeige ChildLock leuchtet.
Um die Funktion ChildLock
auszuschalten, wiederholen Sie den
Vorgang, bis die Anzeige ChildLock
erlöscht.
3.10 Funktion DYNAMICAIR
1. Drücken Sie Mode, bis das
entsprechende Symbol angezeigt
wird.
Die DYNAMICAIR-Anzeige blinkt.
2. Mit OK bestätigen.
Die DYNAMICAIR-Anzeige erscheint.
Durch das Einschalten der
Funktion DYNAMICAIR
erhöht sich der
Energieverbrauch.
Wird die Funktion
automatisch eingeschaltet,
leuchtet die Anzeige
DYNAMICAIR nicht (siehe
„Täglicher Gebrauch“).
Wiederholen Sie zum Ausschalten der
Funktion die obigen Schritte, bis die
DYNAMICAIR-Anzeige erlischt.
4. TÄGLICHER GEBRAUCH
WARNUNG!
Siehe Kapitel
"Sicherheitshinweise".
4.1 DYNAMICAIR
Der Kühlschrank ist mit einer Vorrichtung
ausgestattet, die für eine rasche Kühlung
der Lebensmittel und eine
gleichmäßigere Temperatur im
Innenraum sorgt.
Bei Bedarf schaltet sich diese
Vorrichtung automatisch ein, z. B. zur
raschen Wiederherstellung der
Temperatur, nachdem die Tür geöffnet
wurde, oder wenn die
Umgebungstemperatur hoch ist.
Sie können die Vorrichtung bei Bedarf
manuell einschalten (siehe „Funktion
DYNAMICAIR “).
5. REINIGUNG UND PFLEGE
WARNUNG!
Siehe Kapitel
"Sicherheitshinweise".
5.1 Reinigen des Innenraums
Bevor Sie das Gerät in Betrieb nehmen,
beseitigen Sie den typischen
"Neugeruch" am besten durch
Auswaschen der Innenteile mit
lauwarmem Wasser und einer neutralen
Seife. Sorgfältig nachtrocknen.
ACHTUNG!
Verwenden Sie keine
Reinigungsmittel oder
Scheuerpulver, da diese die
Oberfläche beschädigen.
www.aeg.com40

5.2 Regelmäßige Reinigung
ACHTUNG!
Ziehen Sie nicht an
Leitungen und/oder Kabeln
im Innern des Geräts und
achten Sie darauf, diese
nicht zu verschieben oder zu
beschädigen.
ACHTUNG!
Bitte achten Sie darauf, das
Kühlsystem nicht zu
beschädigen.
ACHTUNG!
Wenn Sie das Gerät
verschieben möchten,
heben Sie es bitte an der
Vorderkante an, um den
Fußboden nicht zu
verkratzen.
Das gesamte Gerät muss regelmäßig
gereinigt werden:
1. Reinigen Sie die Innenseiten und die
Zubehörteile mit lauwarmem Wasser
und etwas Neutralseife.
2. Prüfen und säubern Sie die
Türdichtungen in regelmäßigen
Abständen, um zu gewährleisten,
dass diese sauber und frei von
Fremdkörpern sind.
3. Spülen und trocknen Sie diese
sorgfältig ab.
4. Reinigen Sie den Kondensator und
den Kompressor auf der
Geräterückseite, falls diese
zugänglich sind, mit einer Bürste.
Dadurch verbessert sich die Leistung
des Geräts und es verbraucht
weniger Strom.
5.3 Abtauen des Kühlschranks
Bei normalem Betrieb wird Reif bei
jedem Anhalten des Kompressors
automatisch vom Verdampfer des
Kühlschranks entfernt. Das Tauwasser
sammelt sich in einer Auffangrinne und
läuft durch eine Abflussöffnung in einen
speziellen Behälter an der Rückseite des
Geräts über dem Kompressor, wo es
verdampft.
Reinigen Sie deshalb regelmäßig die
Abflussöffnung in der Mitte der
Auffangrinne an der Rückwand des
Kühlraums, damit das Tauwasser nicht
überläuft und auf die eingelagerten
Lebensmittel tropft.
5.4 Stillstandszeiten
Bei längerem Stillstand des Geräts
müssen Sie folgende Vorkehrungen
treffen:
1. Trennen Sie das Gerät von der
Netzstromversorgung.
2. Entnehmen Sie alle Lebensmittel.
3. Reinigen Sie das Gerät und alle
Zubehörteile.
4. Lassen Sie die Tür(en) offen, um das
Entstehen unangenehmer Gerüche
zu vermeiden.
6.
FEHLERSUCHE
WARNUNG!
Siehe Kapitel
"Sicherheitshinweise".
DEUTSCH 41

6.1 Was tun, wenn ...
Problem Mögliche Ursache Abhilfe
Das Gerät erzeugt Geräu-
sche.
Das Gerät ist nicht ord-
nungsgemäß aufgestellt.
Kontrollieren Sie, ob das Gerät
stabil steht.
Es wird ein akustisches oder
optisches Alarmsignal aus-
gelöst.
Das Gerät wurde erst kür-
zlich eingeschaltet oder die
Temperatur ist noch zu
hoch.
Siehe „Alarm Tür offen“ oder
„Temperaturwarnung“.
Die Temperatur im Gerät
ist zu hoch.
Siehe „Alarm Tür offen“ oder
„Temperaturwarnung“.
Die Lampe funktioniert
nicht.
Die Lampe befindet sich im
Standby-Modus.
Schließen und öffnen Sie die
Tür.
Die Lampe funktioniert
nicht.
Die Lampe ist defekt. Wenden Sie sich an die
nächste autorisierte Kunden-
dienststelle.
Der Kompressor arbeitet
ständig.
Die Temperatur ist nicht
richtig eingestellt.
Siehe Kapitel „Betrieb“.
Es wurden zu viele Leben-
smittel gleichzeitig einge-
legt.
Warten Sie einige Stunden
und prüfen Sie dann die Tem-
peratur erneut.
Die Raumtemperatur ist zu
hoch.
Siehe Klimaklasse auf dem
Typenschild.
In das Gerät eingelegte
Lebensmittel waren noch zu
warm.
Lassen Sie die Lebensmittel
vor dem Einlagern auf Raum-
temperatur abkühlen.
Die Funktion COOLMATIC
ist eingeschaltet.
Siehe „Funktion COOLMAT-
IC“.
Der Kompressor schaltet
sich nicht sofort ein, nach-
dem Sie COOLMATIC ge-
drückt oder die Solltemper-
atur auf einen anderen Wert
eingestellt haben.
Dies ist normal, keine Stör-
ung.
Der Kompressor schaltet sich
erst nach einer Weile ein.
Wasser fließt in den Kühls-
chrank.
Der Wasserablauf ist ver-
stopft.
Reinigen Sie den Wassera-
blauf.
Die eingelagerten Leben-
smittel verhindern, dass das
Wasser zum Wassersamm-
ler fließt.
Stellen Sie sicher, dass die
Lebensmittel nicht die Rück-
wand berühren.
www.aeg.com42

Problem Mögliche Ursache Abhilfe
Wasser läuft auf den Boden. Der Tauwasserablauf ist
nicht mit der Verdampfer-
schale über dem Kompres-
sor verbunden.
Verbinden Sie den Tauwasser-
ablauf mit der Verdampfer-
schale.
Eine Temperatureinstellung
ist nicht möglich.
Die Funktion FROSTMATIC
oder COOLMATIC ist ein-
geschaltet.
Schalten Sie die Funktion
FROSTMATIC oder COOL-
MATIC manuell aus, oder
warten Sie mit dem Einstellen
der Temperatur, bis die Funk-
tion automatisch abgeschaltet
wurde. Siehe Funktion
„FROSTMATIC oder COOL-
MATIC“.
Das Display zeigt DEMO an. Das Gerät befindet sich im
Demo-Betrieb.
Halten Sie NO REFERENCE
TO BUTTON MODE etwa 10
Sekunden gedrückt, bis ein
langer Signalton ertönt und
das Display für kurze Zeit aus-
geschaltet wird.
Die Temperatur im Gerät ist
zu hoch/niedrig.
Der Temperaturregler ist
nicht richtig eingestellt.
Stellen Sie eine höhere/niedri-
gere Temperatur ein.
Die Temperatur der zu küh-
lenden Lebensmittel ist zu
hoch.
Lassen Sie die Lebensmittel
auf Raumtemperatur abküh-
len, bevor Sie sie in das Gerät
stellen.
Es wurden zu viele Leben-
smittel gleichzeitig einge-
legt.
Legen Sie weniger Lebensmit-
tel gleichzeitig ein.
Die Funktion COOLMATIC
ist eingeschaltet.
Siehe „Funktion COOLMAT-
IC“.
Bitte wenden Sie sich an den
nächsten autorisierten
Kundendienst, wenn alle
genannten
Abhilfemaßnahmen nicht
zum gewünschten Erfolg
führen.
6.2 Austauschen der Lampe
Das Gerät ist mit einer langlebigen LED-
Innenbeleuchtung ausgestattet.
Die Beleuchtung darf nur von einer
Fachkraft ausgetauscht werden. Wenden
Sie sich an Ihren autorisierten
Kundendienst.
DEUTSCH 43

7. MONTAGE
WARNUNG!
Siehe Kapitel
"Sicherheitshinweise".
7.1 Aufstellung
Installieren Sie dieses Gerät in einem
trockenen, gut belüfteten Raum, in dem
die Umgebungstemperatur mit der
Klimaklasse übereinstimmt, die auf dem
Typenschild des Geräts angegeben ist:
Klima-
klasse
Umgebungstemperatur
SN +10 °C bis +32 °C
N +16 °C bis +32 °C
ST +16 °C bis +38 °C
T +16 °C bis +43 °C
7.2 Elektrischer Anschluss
• Kontrollieren Sie vor der ersten
Benutzung des Geräts, ob die
Netzspannung und -frequenz Ihres
Hausanschlusses mit den auf dem
Typenschild angegebenen
Anschlusswerten übereinstimmen.
• Das Gerät muss geerdet sein. Zu
diesem Zweck ist der Netzstecker mit
einem Schutzkontakt ausgestattet.
Falls die Steckdose Ihres
Hausanschlusses nicht geerdet sein
sollte, lassen Sie das Gerät gemäß
den geltenden Vorschriften von
einem qualifizierten Elektriker erden.
• Der Hersteller übernimmt keinerlei
Haftung bei Missachtung der
vorstehenden Sicherheitshinweise.
• Das Gerät entspricht den EWG-
Richtlinien.
7.3 Montage des Geräts und
Wechseln des Türanschlags
Informationen zu Montage
(Belüftungsanforderungen,
waagrechte Ausrichtung)
und zum Wechsel des
Türanschlags finden Sie in
einer separaten
Montageanleitung.
8. TECHNISCHE DATEN
Höhe 1850 mm
Breite 595 mm
Tiefe 668 mm
Spannung 230 - 240 V
Frequenz 50 Hz
Die technischen Daten befinden sich auf
dem Typenschild auf der Außen- oder
Innenseite des Geräts sowie auf der
Energieplakette.
9. UMWELTTIPPS
Recyceln Sie Materialien mit dem Symbol
. Entsorgen Sie die Verpackung in den
entsprechenden Recyclingbehältern.
Recyceln Sie zum Umwelt- und
Gesundheitsschutz elektrische und
elektronische Geräte. Entsorgen Sie
Geräte mit diesem Symbol nicht mit
dem Hausmüll. Bringen Sie das Gerät zu
Ihrer örtlichen Sammelstelle oder
wenden Sie sich an Ihr Gemeindeamt.
*
www.aeg.com
44

DEUTSCH 45

www.aeg.com46

DEUTSCH 47

www.aeg.com/shop
280155711-A-022016
-
 1
1
-
 2
2
-
 3
3
-
 4
4
-
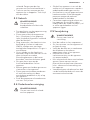 5
5
-
 6
6
-
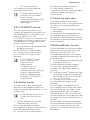 7
7
-
 8
8
-
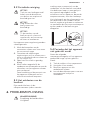 9
9
-
 10
10
-
 11
11
-
 12
12
-
 13
13
-
 14
14
-
 15
15
-
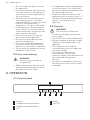 16
16
-
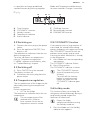 17
17
-
 18
18
-
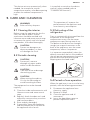 19
19
-
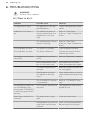 20
20
-
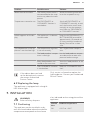 21
21
-
 22
22
-
 23
23
-
 24
24
-
 25
25
-
 26
26
-
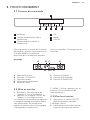 27
27
-
 28
28
-
 29
29
-
 30
30
-
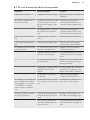 31
31
-
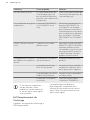 32
32
-
 33
33
-
 34
34
-
 35
35
-
 36
36
-
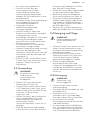 37
37
-
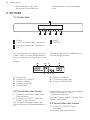 38
38
-
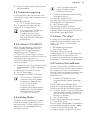 39
39
-
 40
40
-
 41
41
-
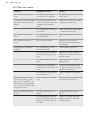 42
42
-
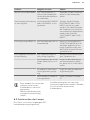 43
43
-
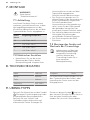 44
44
-
 45
45
-
 46
46
-
 47
47
-
 48
48


in andere talen
- English: AEG S74010KDWF User manual
- français: AEG S74010KDWF Manuel utilisateur
- Deutsch: AEG S74010KDWF Benutzerhandbuch