
USER’S MANUAL
GB
NL
FR D
HD 720P
DASHCAM
Guarantee, questions and service:
support@quintezz.com
INTRODUCTION
Congratulations on your purchase. Please read all instructions carefully before you
use your device. You can use the QUINTEZZ HD 720P DASHCAM inside your car for
recording your rides and dangerous situations or accidents on the road during driving.
PACKAGE CONTENTS
See illustration I
1. Camera DVR unit
a. : Turn device on/off (Press & hold for turning on/off when not connected to
power source)
b. : Enter/exit the menu
c. : Conrm the selected option
d. : Go up or 1/2/3/4 x digital zoom in
e. : Go down or 1/2/3/4 x digital zoom out
f. MODE: Mode switching between VIDEO recording / PHOTO / AUDIO
recording/PLAYBACK / Conrm the selected option
g. : Audio ON/OFF
2. Suction cup
3. 3,5m XL USB connection cable for data and charging
4. 12/24V DC 5V Duo USB Car Charger - max. 2100mA (2xUSB)
CHARGING
• The device has a built-in Li-ion rechargeable battery that has to be fully charged
and decharged 3 times to activate the maximum capacity of the battery. Charging
time is about 1 hour maximum.
• When the battery is completely charged, the display will show a “full battery”
symbol. Operation time without connection to a power source is max. 15 minutes
for emergency use.
Charging options:
Connect the device to a computer/laptop using the USB connection cable (3). See “PC
mode” before connection.
OR
Plug the device with the USB connection cable (3) into Port A of the Duo USB car charger
(4) for car/truck use.
Only when used with car charger:
As soon as the car engine is started, the recording will start automatically.
The
QUINTEZZ HD 720P DASHCAM
will now be charged during recording. When the car
charger is disconnected from the unit, the
QUINTEZZ HD 720P DASHCAM
will shut down
automatically after a few seconds and save the les.
Caution: With low battery, the QUINTEZZ HD 720P DASHCAM will enter into
protection state. Please charge the battery to make sure you can turn on the device.
USING SD CARD (not supplied, optionally available)
See illustration II
• Insert your SD card into the SD slot until it clicks into place.
• To remove the SD Card, press the card lightly. It is partially ejected allowing you to
pull the card out.
• With no card in the SD slot, the displays shows “No card”.
Note:
1. We recommend using a 16 GB SDHC card (or higher) with class 10 (or
higher). (not supplied, optionally available)
2. Without SD card, the unit will NOT function!
3. If the SD card is inserted in a wrong way (difcult to insert), it may damage the
device and the memory card. This is the user’s responsibility!
4. The device will set the SD card after it has been inserted.
5. Format the SD card in the menu of the QUINTEZZ HD 720P DASHCAM. See
System Settings.
* Depends on SD card brand, model and class type. Data are approximate.
MOUNTING
See illustration III
• Mount the QUINTEZZ HD 720P DASHCAM (1) to the suction cup (2).
• Moisten the suction cup, place it on the inside of your windshield and close the cup
using the lever. We recommend placing the QUINTEZZ HD 720P DASHCAM on
the right side of the rear view mirror.
• Adjust the bracket by using the adjustment knobs.
• Make sure the camera is mounted horizontal for the best view.
• Connect the Duo USB car charger (4) to the car lighter for power.
PC MODE
• You can connect the QUINTEZZ HD 720P DASHCAM to your PC by using the
supplied USB cable (3
). You can use it to backup or playback les on your PC.
• Press the / buttons (d-e) to choose the mode:
» MSDC: It is a computer interface between a computer and a digital
camera which shows the digital camera as a removable disk drive
attached to the computer.
» CAM/Recording mode: Press the button to start video recording.
You don’t need to install drivers to use the QUINTEZZ HD 720P DASHCAM with your
PC because these are already installed by Windows in the Windows pack*.
You should connect the camera as following:
1. Make sure the battery is charged.
2. Only use the SUPPLIED USB cable, that was in the packaging.
3. Turn the camera ON.
4. Connect the USB cable with the camera (at the top side) and only then with the
PC.
5. Select “MSDC” on the Camera and press the button (c).
6. The driver will now install itself and in the folder “My computer” on your desktop
you will see a new (hard)disk (it is possible that a window will appear in which you
can indicate how you would like to view the les).
7.
You can now see all les in the folder and double-click them to watch the videos using
the standard Windows Media Player or Apple Quicktime (you can select yourself).
Note:
• You can also remove the SD card from the DASHCAM and place it in a (built-in) SD
card reader from your PC or a separate SD card reader if you have one. This is a
quick and more easy-to-use solution.
* In case of a conict, when the camera is not recognized or not installed correctly, you
can download the USB drivers from the website www.quintezz.com.
MENU SETTINGS
Attention! This menu will not function
when MSDC mode is active.
1. Power on the unit using the charged
battery or the Duo USB car charger.
2. Press MODE (f) until you have selected
the desired mode.
3. Press (b) to enter the menu.
4. Press / buttons (d-e) to scroll
through the submenus.
5. After selection, click (c) or MODE
(f) to conrm and save the setting.
6. Press (b) to exit.
For example: to set date and time, please
follow these steps:
1. Make sure the battery is charged.
2. Turn the Camera ON.
3. Press (b).
4. Press MODE (f).
5. Use the (e) button to go to DATE &
TIME.
6. Press the button (c).
7. You can now use the & buttons
(d-e) to change the date and time and
conrm each setting by pressing the
MODE button (f).
8.
As soon as you are ready, you should
press (b) or (c) to conrm the
settings.
VIDEO MENU
Movie Size (HD) 1280x720
Video resolution
(D1) 848x480
(640) 640x480
Date stamp Off
Date indication
during recording
Date
Date & Time
Motion Detect Off *
Automatic recording
when movement is
detected when used
on battery.
On
Loop Rec. Off
Cycle recording
On *
Loop Time 2 min *
Saving time of each
section on SD card
5 min
10 min
Video sound On
Sound recording
Off
PHOTO MENU
Resolution (5MP) 2592x1944
(3MP) 2048x1536
(2MP) 1600x1200
(1MP) 1280x1024
Quality Super Fine
Fine
Normal
Exposure
-2.0/ -1.7/ -1.3/
-1.0/ -0.7/ -0.3/
+0.0/ +0.3/ +0.7/
+1.0/ +1.3/ +1.7/
+2.0
Luminance
adjustment
Capture Mode Off
Photo timer
Self-timer 2S
Self-timer 10S
Burst
Date stamp Off
Date indication
on photo
Date&Time
PLAYBACK MENU
Lock Lock/Unlock one
File locking
Lock All
Unlock All
Delete One
File removal
All
Slide show Start
Interval
Repeat
Voice memo Add
Delete
SYSTEM SETTINGS
Attention! This menu will not function when MSDC mode is
active.
1. Power on the unit.
2. Press (b) to enter the menu
when the device is in recording
mode.
3. Press MODE (f) until you can select the Setup menu. Press
(c) to select.
4. Use the / buttons (d-e) to scroll through the submenus.
5. After selection, click MODE (f) or (c) to conrm and save the
setting.
6. Press (b) to exit.
7. Settings will be changed after restart of the unit.
Sounds Shutter On
Shutter sound
Off
Start-up None
Select start-up
sound
1
2
3
Beep On
Key tone
Off
Volume 0/ 1/ 2/ 3
Power frequency 50 Hz*
60 Hz
Power save 1 Min
Automatic power off
when use on battery
3 Min
5 Min
Off*
Panel protect 30sec.
Screensaver when
used on battery.
1min.
2min.
OFF*
Date & Time Year
Month
Day
Hour
Minute
Time Style MM/DD/YYYY
DD/MM/YYYY
YYYY/MM/DD
Language
English, Dutch, French, Spanish
Italian, Portuguese, Czech, Hungarian,
Swedish, Russian
Polish, German, Turkish, Greek
Format Yes
Formatting the
SD card
No
If you would have problems with
your SD card (like “memory full”) we
advise you to format the card using
this menu, and make a “reset all*” to
factory settings
LED light Off*
On
*Reset all Yes
Reset to factory
settings
No
Version
Software version information
CUSTOMER SUPPORT
For more information, technical questions and return
requests concerning this product, you should contact
.
GUARANTEE
Copyright © Quintezz. Quintezz is a registered
trade
mark of TE-
Group NV. The
Quintezz
brand stands for superior product
quality and outstanding customer service. That is why
Quintezz
warrants this product against all defects in material
and workmanship for a period of two (2) years from the date
of original purchase of the product. The conditions of this
guarantee and the extent of responsibility of
Quintezz
under
this guarantee can be downloaded from our website:
www.quintezz.com.
VIDEO* IMAGE*
SD CARD 1280X720 848X480 640X480 1280X1024 1600X1200 2048X1536 2592X1944
32GB 480 min 480 min 520 min 24320 23040 21920 18880
16 GB 240 min 240 min 260 min 12160 11520 10960 9440
INLEIDING
Gefeliciteerd met uw aankoop. Gelieve alle instructies aandachtig te lezen voordat u het
apparaat gebruikt. U kunt de QUINTEZZ HD 720P DASHCAM in uw auto gebruiken om
uw ritten en gevaarlijke situaties en ongevallen op de weg tijdens het rijden op te nemen.
INHOUD VAN HET PAKKET
Zie afbeelding I
1. Camera DVR-systeem
a. : apparaat in- en uitschakelen (indrukken en ingedrukt houden om in en uit te
schakelen wanneer het apparaat niet op een stroombron aangesloten is)
b. : in/uit het menu gaan
c. : de geselecteerde optie bevestigen
d. : omhoog of 1/2/3/4 x digitaal inzoomen
e. : omlaag of 1/2/3/4 x digitaal uitzoomen
f.
MODE: omschakelen tussen VIDEO-opnamen/FOTO/AUDIO-opnamen/
AFSPELEN/
geselecteerde optie bevestigen
g. : Audio Aan/Uit
2. Houder met zuignap
3. 3,5m XL USB-aansluitkabel voor data en opladen
4. 12/24V DC 5V Duo USB Autolader - max. 2100mA (2xUSB)
OPLADEN
• In het apparaat is een oplaadbare Li-ion batterij ingebouwd die 3 keer volledig
opgeladen en ontladen moet worden om de maximale capaciteit van de batterij te
activeren. De oplaadtijd bedraagt ongeveer 1 uur (maximum).
•
Wanneer de batterij volledig opgeladen is, verschijnt op het display het symbool “volle
batterij’. De camera werkt max. 15 min. in noodgevallen wanneer hij niet op een stroombron
aangesloten is.
Opties voor het opladen:
Sluit het apparaat met behulp van de USB-aansluitkabel (3) op een computer/laptop aan. Bekijk
“PC modus” voor de verbinding.
OF
Plug het apparaat met de USB-aanlsuitkabel (3) aan op Poort A van de Duo USB autolader (4)
voor gebruik in de wagen.
Enkel bij gebruik met een autolader:
Zodra de motor van de auto wordt opgestart, begint de camera automatisch beelden op
te nemen. De QUINTEZZ HD 720P DASHCAM wordt nu tijdens het opnemen opgeladen.
Wanneer de autolader van het toestel wordt losgekoppeld, valt de QUINTEZZ HD 720P
DASHCAM automatisch uit na enkele seconden en slaat hij alle bestanden op.
Opgelet:
Wanneer de batterijcapaciteit laag is, gaat de QUINTEZZ HD 720P DASHCAM in de
beschermingsstand staan. Laad de batterij op, zodat u het apparaat zeker kunt inschakelen.
GEBRUIK VAN EEN SD-KAART (niet meegeleverd, optioneel te verkrijgen)
Zie afbeelding II
• Schuif uw SD-kaart in de SD-sleuf tot ze op haar plaats klikt.
• Druk licht op de SD-kaart als u ze uit de sleuf wilt halen. De kaart wordt dan
gedeeltelijk uitgeworpen, waarna u ze gemakkelijk kunt uitnemen.
•
Op het display staat het bericht ‘Geen kaart’ wanneer er geen kaart in de SD-sleuf zit.
Opmerking:
1. Wij adviseren het gebruik van een 16GB SDHC-kaart (of hoger) met klasse 10 (of
hoger).
(niet meegeleverd, optioneel te verkrijgen)
2. Zonder SD-kaart, werkt het toestel NIET!
3. Als de SD-kaart verkeerd wordt ingevoerd (moeilijk om in te voeren), bestaat
het risico dat het apparaat en de geheugenkaart beschadigd raken. Dit is de
verantwoordleijkheid van de gebruiker.
4. Het apparaat stelt de SD-kaart in nadat ze werd ingevoerd.
5. Formateer vervolgens de kaart in het menu van de QUINTEZZ HD 720P DASHCAM.
Bekijk “Systeeminstellingen”.
* Afhankelijk van het merk, model en “klasse”-type van de SD kaart en bij benadering.
MONTAGE
Zie afbeelding III
• Monteer de QUINTEZZ HD 720P DASHCAM (1) op de houder met zuignap (2).
• Maak de zuignap vochtig, plaats ze op de binnenkant van de voorruit en sluit de
zuignap met behulp van de hendel. We adviseren u om de QUINTEZZ HD 720P
DASHCAM rechts van de achteruitkijkspiegel op te stellen.
• Stel de houder in met behulp van de stelknoppen.
• Monteer de camera horizontaal, zodat u het beste zicht krijgt.
•
Sluit de Duo USB autolader (4) aan op de sigarettenaansteker in de auto voor de nodige
stroom.
VIDEO* IMAGE*
SD CARD 1280X720 848X480 640X480 1280X1024 1600X1200 2048X1536 2592X1944
32GB 480 min 480 min 520 min 24320 23040 21920 18880
16 GB 240 min 240 min 260 min 12160 11520 10960 9440
GEBRUIK VAN DE QUINTEZZ HD 720P
#
DASHCAM
MODI
Let op! Dit menu werkt niet indien de MSDC modus geactiveerd is.
VIDEO-OPNAMEMODUS
In de linkerbovenhoek van het display wordt een rood camera-pictogram weergegeven.
•
Wanneer de
QUINTEZZ HD 720P DASHCAM
op de voeding van uw auto is
aangesloten, begint hij videobeelden op te nemen zodra de motor van de auto wordt
opgestart. Hij stopt met opnemen zodra de auto tot stilstand is gekomen.
• Wanneer de QUINTEZZ HD 720P DASHCAM niet op de voeding van uw
auto is aangesloten, moet u op de knop (a) en daarna op de knop (c)
drukken om beelden te beginnen op te nemen. Het toestel staat automatisch
in de video-opnamemode. Druk nog eens op (c) als u de opname wilt
stoppen en de bestanden automatisch wilt opslaan.
• Opnemen in een lus: tijdens het opnemen slaat het apparaat ieder
videobestand elke 2, 5 of 10 minuten automatisch op. Wanneer de SD-kaart
vol is, wist het toestel het oudste videobestand automatisch.
FOTOMODUS
In de linkerbovenhoek van het display wordt een fotopictogram weergegeven.
• Druk 1 keer op de MODE-knop (f) als u foto's in plaats van videobeelden wilt
nemen.
• Druk op de knop (c) telkens wanneer u een foto wilt nemen.
AUDIO-OPNAMEMODUS
In de linkerbovenhoek van het display wordt een audiopictogram weergegeven.
• Druk 2 keer op de MODE-knop (f) als u alleen audio-opnamen wilt maken en
druk op (c) om met de opname te beginnen.
• Druk nog eens op (c) als u de opname wilt stoppen en de bestanden
automatisch wilt opslaan.
• Druk op de -knop (d) als u de opname tijdelijk wilt onderbreken of als u
opnieuw wilt beginnen op te nemen.
AFSPEELMODUS
In de linkerbovenhoek van het display wordt een afspeelpictogram weergegeven.
• Druk 3 keer op de MODE-knop (f) als u de afspeelmode kiest.
• M.b.v de & knoppen (d-e) kunt u doorheen de opnamen scrollen.
• Druk op (c) om met het afspelen te beginnen.
• Druk op de -knop (d) als u de opname tijdelijk wilt onderbreken of als u
opnieuw wilt beginnen af te spelen.
PC MODUS
• U kunt de QUINTEZZ HD 720P DASHCAM met behulp van de meegeleverde
USB-kabel (3) op uw PC aansluiten. Hiermee kunt u een back-up maken of
kunt u bestanden op uw PC afspelen.
• Druk op de & knoppen (d-e) om de mode te kiezen:
» MSDC: dit is een computerinterface tussen een computer en een digitale
camera, die de digitale camera weergeeft als een losse diskdrive die met
de computer verbonden is.
» CAM/Opnamemode: druk op de knop om videobeelden op te nemen.
Om de DASHBOARD CAMERA op uw PC te gebruiken zijn er geen drivers nodig
aangezien deze door Windows zelf geïnstalleerd en voorzien zijn in het Windows
pakket*. U moet de DASHBOARD CAMERA als volgt aansluiten:
1. Zorg dat de batterij geladen is.
2. Maak enkel gebruik van de MEEGELEVERDE USB kabel, die in de verpakking zit.
3. Zet de camera AAN.
4. Verbind vervolgens de USB kabel met de camera (aan de bovenkant) en dan pas
met de PC.
5. Kies op de camera “MSDC” en druk op de knop (c) op de camera.
6. De driver zal zichzelf nu installeren en onder “Deze computer” op uw bureaublad
zal dan een nieuwe (harde)-schijf aangemaakt zijn en te zien zijn (het kan ook zijn
dat er automatisch een venster geopend wordt waarin u kan aangeven hoe u de
bestanden wilt bekijken).
7. U kunt dan de bestanden zien in een map en deze dubbelklikken om de video te
laten afspelen door de standaard Windows Media Player of Apple Quicktime (kunt u
eventueel zelf selecteren).
Opmerking:
• U kunt ook de SD-kaart uit de DASHCAM halen en deze in een (ingebouwde) SD-
kaart lezer plaatsen van uw PC of een losse SD-kaartlezer gebruiken indien u deze
zou hebben. Dit gaat sneller en is gemakkelijker in gebruik.
* Indien er wel een conict zou zijn, de camera niet herkend of correct geïnstalleerd
wordt, kunt u de USB drivers downloaden via www.quintezz.com.
INSTELLINGEN MENU
Let op! Dit menu werkt niet indien de MSDC
modus geactiveerd is.
1. Schakel het toestel in via de reeds
opgeladen batterij of via de Duo USB
autolader.
2. Druk op MODE (f) tot u de gewenste
mode hebt geselecteerd.
3.
Druk op (b) om in het menu te gaan.
4. Druk op de & knoppen (d-e)
om doorheen de submenu’s te scrollen.
5.
Klik na de selectie op (c) of MODE (f)
om uw keuze te bevestigen en de instelling
op te slaan.
6.
Druk op (b) om het menu te verlaten
.
Bijvoorbeeld: Voor het instellen van datum en
tijd, volgt u de volgende stappen:
1. Zorg dat de batterij geladen is.
2. Zet de camera AAN.
3. Druk op (b).
4. Druk dan op MODE (f).
5. Ga dan met de (e) knop naar DATUM
& TIJD (Date & Time).
6. Druk op de knop (c)
.
7. U kunt nu met de & knoppen (d-e)
de data wijzigen alsmede de tijd en deze
elke keer bevestigen met de MODE knop
(f).
8. Zodra u klaar bent drukt u op (b) of
(c) ter bevestiging.
VIDEOMENU
Formaat (HD) 1280x720
Videoresolutie
(D1) 848x480
(640) 640x480
Datumstempel Uit
Weergave datum
tijdens het opnemen
Datum
Datum & tijd
Bewegingsdetectie Uit *
Automatisch
opnemen wanneer
er beweging wordt
gedetecteerd indien
gebruikt in accu-
stand.
Aan
Loop Opname Uit
Cyclusopname
Aan *
Loop duur 2 min *
Tijd van ieder deel op
de SD-kaart opslaan
5 min
10 min
Video Geluid Aan
Opname geluid
Uit
FOTOMENU
Resolutie (5MP) 2592x1944
(3MP) 2048x1536
(2MP) 1600x1200
(1MP) 1280x1024
Kwaliteit Zeer jn
Fijn
Normaal
Belichting
-2.0/ -1.7/ -1.3/
-1.0/ -0.7/ -0.3/
+0.0/ +0.3/ +0.7/
+1.0/ +1.3/ +1.7/
+2.0
Instelling
helderheid
Opname Modus Uit
Foto timer
Zelfontspan. 2s
Zelfontspan. 10s
Serie
Datumstempel Uit
Weergave
datum op de
foto
Datum & tijd
AFSPEELMENU
Vergrendelen 1 vergr./ontgr.
Vergrendeling
bestand
Alles vergrend.
Alles ontgrend.
Wissen Eén
Verwijdering
bestand
Alles
Diashow Start
Interval
Herhalen
Stem Opname Toevoegen
Wissen
KLANTENONDERSTEUNING
Voor meer informatie, technische vragen of retour-
aanvragen met betrekking tot dit product dient u rechtsreeks
contact op te nemen met [email protected]
GARANTIE
Copyright © Quintezz. Quintezz
is een gedeponeerd
handelsmerk van TE-Group NV. Het
Quintezz
merk
staat voor superieure productkwaliteit en uitstekende
dienstverlening aan de klanten. Dat is de reden waarom
Quintezz
voor dit product een garantie van twee (2) jaar,
vanaf de originele aankoop van het product, biedt tegen
alle materiaal- en verwerkingsfouten. De voorwaarden van
deze garantie en de reikwijdte van de aansprakelijkheid van
Quintezz
in het kader va
n deze garantie kunnen van onze website
www.quintezz.com word
en gedownload.
SYSTEEMINSTELLINGEN
Let op! Dit menu werkt niet indien de MSDC modus geactiveerd is.
1. Schakel het toestel in.
2. Druk op (b) om in het menu te gaan wanneer het apparaat in de
opnamemode staat.
3. Druk op MODE (f) tot u het instelmenu kunt selecteren. Druk op
(c) om een keuze te maken.
4. Druk op de & knoppen (d-e) om doorheen de submenu’s te
scrollen.
5. Klik na de selectie op MODE (f) of (c) om uw keuze te
bevestigen en de instelling op te slaan.
6. Druk op (b) om het menu te verlaten.
7. De instellingen worden veranderd nadat het toestel opnieuw wordt
opgestart.
Geluiden Ontspanknop
Aan
Geluid sluiter
Uit
Opstarten
Uit
Selecteer
startgeluid
1
2
3
Pieptoon
Aan
Toetstoon
Uit
Volume
0/ 1/ 2/ 3
Net frequentie 50 Hz*
60 Hz
Energie sparen 1 Min
Automatisch
uitschakelen bij
gebruik op batterij
3 Min
5 Min
Uit*
Schermbeveiliging 30 sec.
Screensaver indien
gebruikt in accu-
stand.
1 min.
2 min.
Uit*
Datum & tijd Jaar
Maand
Dag
Uren
Minuten
Tijdnotatie
MM/DD/YYYY
DD/MM/YYYY
YYYY/MM/DD
Taal Engels
Engels, Nederlands, Frans, Spaans
Italiaans, Portugees, Tsjechisch
Hongaars, Zweeds, Russisch, Pools
Duits, Turks, Grieks
Formatteren Ja
SD-kaart
formatteren
Nee
Indien u problemen zou hebben met uw
SD-kaart (zoals “memory full”) raden we u
aan om uw kaart via dit menu te formatteren
en te kiezen voor “beginwaarden*” om de
fabrieksinstellingen te herstellen.
LED licht Uit*
Aan
*Beginwaarden Ja
Terug naar
fabrieksinstellingen
Nee
Versie
Informatie over softwareversie
GB
NL
ILLUSTRATIONS
* Recommended setting.
MODES
Attention! This menu will not function when MSDC mode is active.
VIDEO RECORDING MODE
A red camera icon will be shown in the upper left corner of the display.
• When the QUINTEZZ HD 720P DASHCAM is connected to your car’s power
supply, it will start Video recording as soon as the car engine is started. It will
stop recording after the car is stopped.
• When the QUINTEZZ HD 720P DASHCAM is not connected to the car’s
power supply, press the button (a), and press the button (c) to start
recording. The unit will automatically be in Video recording mode. Press
(c) again to stop recording and save the les automatically.
• Loop recording: During recording, the device will save each video le every 2,
5 or 10 minutes automatically. When the SD card is full, the device will delete
the oldest video le automatically.
PHOTO MODE
A photo icon will be shown in the upper left corner of the display.
• Press the MODE button (f) 1x if you want to make pictures instead of recordings.
• Press the button (c) every time you want to take a picture.
AUDIO RECORDING MODE
An audio icon would be shown in the upper left corner of the display.
• Press the MODE button (f) 2x if you want to make Audio recordings only, and
press (c) to start recording.
• Press (c) again to stop recording and save the les automatically.
• Press the button (d) to pause or begin recording again.
PLAYBACK MODE
A playback icon will be shown in the upper left corner of the display.
• For Playback mode, press the MODE button (f) 3x.
• Using the and buttons (d-e) you can scroll through the recordings.
• Press (c) to start playback.
• Press the button (d) to pause or begin playback again.
USE OF THE QUINTEZZ HD 720P
#
DASHCAM
* Aanbevolen instelling.
Illustration II Illustration III
DECLARATION OF CONFORMITY
Hereby,
Par la présente,
Company:
Entreprise:
Address:
Adresse:
declare that the following equipment:
déclare que le disposif suivant :
Product name:
Nom du produit:
Product type:
Type de produit:
Joseph van Oosterum, CEO TE-Group NV
DECLARATION OF CONFORMITY
TE-Group NV
Kapelsestraat 61, 2950 Kapellen, Belgium
Quintezz HD 720P# Dashcam
Dashboard Flat Camera - Caméra embarquée plate
conforms with the following safety requirements of the direcves 2011/65/EU &
2014/30/EU. Conformity is guaranteed by the CE-symbol.
est conforme aux exigences de sécurité suivantes des direcves 2011/65/EU &
2014/30/EU. La conformité est garane par le symbole CE.
This product has been tested against following standards and specificaons, applying
versions valid in January 2016.
Ce produit a été testé par rapport aux normes et spécificaons suivantes, appliquant les
versions valides en Janvier 2016.
EN 55022
EN 55024
---------- Manual/QUINTEZZ HD 720P
#
DASHCAM HD carbon/05-16/V02 ------------
Copyright © Quintezz
Illustration I
* Recommended setting. * Aanbevolen instelling.
#
INTERPOLATED
#

FR
INTRODUCTION
Nous vous félicitons pour votre achat. Veuillez lire attentivement toutes les instructions
avant d’utiliser votre appareil. Vous pouvez utiliser le QUINTEZZ HD 720P DASHCAM
à l’intérieur de votre voiture an d’enregistrer vos promenades et les accidents et
situations dangereuses dont vous êtes témoin sur la route.
CONTENU DE LA BOÎTE
Référez-vous à l’illustration I
1. Caméra DVR
a. : allumer/éteindre l’appareil (Pour allumer/éteindre l’appareil lorsqu’il n’est pas
branché à une source d’alimentation, le bouton POWER doit être maintenu enfoncé.)
b. : accéder/sortir du menu
c. : conrmer la sélection
d. : se déplacer vers le haut ou effectuer un zoom numérique avant 1/2/3/4X
e. : se déplacer vers le bas ou effectuer un zoom numérique arrière 1/2/3/4X
f. MODE : passer d’un mode à l’autre (enregistrement VIDÉO/PHOTO/
enregistrement AUDIO/LECTURE) / conrmer la sélection
g. : Audio allumé/éteint
2. Support à ventouse
3. 3,5m XL Câble USB pour le transfert de données et la charge
4. Chargeur de voiture Duo USB 12/24V DC 5V - max. 2100mA (2xUSB)
CHARGEMENT
• L’appareil intègre une batterie Li-ion rechargeable. Pour bénécier de la capacité
maximale de cette batterie, elle doit être chargée et déchargée complètement trois
fois. La durée de chargement est d'approximativement 1 heure maximum.
• Lorsque la batterie est complètement chargée, l’écran afche une icône
représentant une batterie chargée. La durée de fonctionnement autonome (sans
branchement à une source d’alimentation) est de 15 minutes maximum en cas
d’urgence.
Options de chargement :
Brancher l’appareil à un ordinateur à l’aide du câble USB (3). Voir “Mode PC” avant
la connexion.
OU
Brancher l’appareil au Port A du chargeur de voiture Duo USB (4) à l’aide du câble USB
pour une utilisation dans la voiture/camion.
Seulement lors l’utilisation d’un chargeur de voiture:
Au démarrage du moteur du véhicule, l’enregistrement débute automatiquement.
Le chargement du QUINTEZZ HD 720P DASHCAM se poursuit pendant l’enregis-
trement. Lorsque le chargeur de voiture n’est pas branché à la caméra, celle-ci s’éteint
automatiquement après quelques secondes après avoir enregistré les chiers.
Avertissement :
Lorsque le niveau de batterie est faible, le QUINTEZZ HD 720P DASHCAM entre en
mode protection. Veuillez charger la batterie an de pouvoir allumer l’appareil.
UTILISATION D’UNE CARTE SD (pas fournie, disponible en option)
Référez-vous à l’ illustration II
• Insérez votre carte SD dans la fente SD jusqu’à entendre un clic.
• Pour retirer la carte SD, appuyez légèrement sur cette dernière. La carte est alors
partiellement éjectée an que vous puissiez la retirer.
•
Lorsqu’il n’y a pas de carte dans la fente SD, l'écran afche « No card » (Aucune carte).
Remarques :
1. Nous vous recommandons l’utilisation d’une carte SDHC 16 Go (ou
supérieure) de classe 10 (ou supérieure). (pas fournie, disponible en option)
2. Sans carte SD, l’appareil ne fonctionnera pas!
3. Une insertion incorrecte (difculté lors de l’insertion) de la carte SD est susceptible
d’endommager l’appareil et la carte mémoire. Un tel dommage sera à la charge de
l’utilisateur.
4. L’appareil xe la carte SD après son insertion.
5. Formatez la carte dans le menu du QUINTEZZ HD 720P DASHCAM. Voir
“Réglage du Système”.
* Dépend de la marque, du type et de la classe de la carte SD. Les données sont
approximatives.
FIXATION
Référez-vous à l’illustration III.
• Fixez le QUINTEZZ HD 720P DASHCAM (1) au support à ventouse (2).
• Humidiez la ventouse, placez-la sur la face intérieure de votre pare-brise,
puis xez la ventouse à l’aide du levier. Nous vous recommandons de placer le
QUINTEZZ HD 720P DASHCAM à droite du rétroviseur.
• Réglez le support de xation à l’aide des boutons de réglage.
• Assurez-vous que la caméra est xée à l’horizontale pour une vue optimale.
• Branchez le chargeur de voiture Duo USB (4) à l’allume-cigare pour proter d’une
source d’alimentation.
MENU VIDÉO
Format vidéo (HD) 1280x720
Résolution vidéo
(D1) 848x480
(640) 640x480
Imprim. date Désactivée
Indication de
la date lors de
l’enregistrement
Date
Date/Heure
Dét. Mouvement Desactivé *
Enregistrement auto-
matique dès la détec-
tion
d’u
n mouvement
lors d’une utilisation
sur batterie.
Activé
Cycle vidéo Desactivé
Enregistrement en
boucle
Activé *
Temps de cycle 2 min *
Délai d’enregistre-ment
de chaque section sur
la carte SD
5 min
10 min
Son Vidéo Activé
Enregistrement
audio
Desactivé
MENU PHOTO
Résolution (5MP) 2592x1944
(3MP) 2048x1536
(2MP) 1600x1200
(1MP) 1280x1024
Qualité Très haute
Haute
Normale
Exposition
-2.0/ -1.7/ -1.3/
-1.0/ -0.7/ -0.3/
+0.0/ +0.3/ +0.7/
+1.0/ +1.3/ +1.7/
+2.0
Réglage de la
luminosité
Mode Enregistr. Désactivé
Minuterie photo
Retardat. 2s
Retardat. 10s
Séquence
Imprim. date Désactivée
Indication de
la date sur les
photos
Date/Heure
MENU LECTURE
Bloquer
Bloq./Débloq. 1
Verrouiller des
chiers
Bloquer tout
Débloquer tout
Supprimer Une
Supprimer des
chiers
Tout
Diaporama Démarrer
Intervalle
Répéter
Mémo vocale Ajouter
Supprimer
Sons Obturateur Allumé
Son
d’obturateur
Eteint
Démarrage Eteint
Sélectionner
le son de
démarrage
1
2
3
Signal Sonore Activé
Son des
touches
Désactivé
Volume 0/ 1/ 2/ 3
Fréquence 50 Hz*
60 Hz
Éco. Energie 1 Min
Mise hors tension
automatique en
cas d’utilisation sur
batterie
3 Min
5 Min
Désactivé*
Econom. écran 30sec.
Écran de veille lors
d’une utilisation sur
batterie.
1min.
2min.
Désactivé*
Date/Heure... Année
Mois
Jour
Heure
Minutes
Format de date MM/DD/YYYY
DD/MM/YYYY
YYYY/MM/DD
Langue
Anglais, Néerlandais, Français
Espagnol, Italien, Portuguais
Tchèque, Hongrois, Suédois, Russe,
Polonais, Allemand, Turc, Grecque
Formater
Oui
Formater la carte
SD
Non
Si vous avez des problèmes avec
votre carte SD (comme «mémoire
pleine») nous vous conseillons de
formater la carte à l’aide de ce menu
et de selectionner “Réinitialiser*” pour
restaurer les réglages d’usine.
Lumière LED
Désactivée*
Activée
*Réinitialiser
Oui
Restaurer les
paramètres d’usine
Non
Version
Informations sur la version logicielle
UTILISATION DU QUINTEZZ HD 720P
#
DASHCAM
MODES
Attention! Ce menu ne fonctionne pas lorsque le mode MSDC est active.
MODE ENREGISTREMENT VIDÉO
Une icône représentant une caméra rouge doit s’afcher dans le coin supérieur gauche
de l’écran.
• Lorsque le QUINTEZZ HD 720P DASHCAM est branché à la source
d’alimentation de votre voiture, l'enregistrement vidéo débute au démarrage du
moteur et s’arrête à l’arrêt de la voiture.
• Lorsque le QUINTEZZ HD 720P DASHCAM n’est pas branché à la source
d’alimentation de la voiture, appuyez sur le bouton (a), puis sur le bouton
(c) pour lancer l’enregistrement. La caméra démarrera automatiquement
en mode Enregistrement vidéo. Appuyez sur (c) à nouveau pour arrêter
l’enregistrement et enregistrer automatiquement les chiers.
• Enregistrement en boucle : pendant l’enregistrement, la caméra enregistre
automatiquement les chiers vidéo toutes les 2, 5 à 10 minutes. Lorsque
la capacité maximale de la carte SD est atteinte, la caméra supprime
automatiquement le chier vidéo le plus ancien.
MODE PHOTO
Une icône représentant une photo doit s’afcher dans le coin supérieur gauche de
l’écran.
• Appuyez une fois sur le bouton MODE (f) lorsque vous souhaitez faire une
photo plutôt qu’un enregistrement.
• Appuyez sur le bouton (c) chaque fois que vous voulez prendre une photo.
MODE ENREGISTREMENT AUDIO
Une icône audio doit s’afcher dans le coin supérieur gauche de l’écran.
• Appuyez deux fois sur le bouton MODE (f) lorsque vous souhaitez faire un
enregistrement audio uniquement, puis appuyez sur (c) pour lancer
l’enregistrement.
• Appuyez sur (c) à nouveau pour arrêter l’enregistrement et enregistrer
automatiquement les chiers.
•
Appuyez sur le bouton (d) pour suspendre ou relancer
l’enregistrement.
MODE LECTURE
Une icône lecture doit s’afcher dans le coin supérieur gauche de l’écran.
• Pour accéder au mode Lecture, appuyez trois fois sur le bouton MODE (f).
• Pour parcourir les enregistrements, utilisez les boutons et (d-e).
• Appuyez sur (c) pour lancer la lecture.
• Appuyez sur le bouton (d) pour suspendre ou relancer la lecture.
MODE PC
• Le QUINTEZZ HD 720P DASHCAM peut être branché à votre ordinateur à
l’aide du câble USB fourni (3). Ce mode peut être utilisé pour réaliser une
sauvegarde des chiers ou les lire sur un ordinateur.
• Appuyez sur les boutons / (d-e) pour sélectionner le mode :
» MSDC : il s’agit d’une interface entre un ordinateur et une caméra
numérique qui afche la caméra numérique en tant que disque amovible
connecté à l'ordinateur.
» CAM/Mode Enregistrement : appuyez sur le bouton pour lancer
l’enregistrement
vidéo.
Il ne faut pas installer des pilotes pour utiliser le
QUINTEZZ HD 720P DASHCAM
avec
votre PC, car ceux-ci sont déjà installés par Windows dans le pack Windows.*
Connectez la caméra comme décrit dans les étapes suivants:
1. Assurez-vous que la batterie est chargée.
2. Utilisez uniquement le câble USB FOURNI dans l’emballage.
3. Allumez la caméra.
4. Branchez le câble USB avec la caméra et ensuite avec le PC.
5. Sélectionnez «MSDC» sur la caméra et appuyez sur le bouton (c).
6. Le pilote va maintenant s’installer. Dans le dossier “Poste de travail” sur votre bureau,
vous verrez un nouveau disque (dur) (il est possible qu’une fenêtre s’afche dans
laquelle vous pouvez indiquer comment vous souhaitez afcher les chiers).
7. Vous pouvez maintenant voir tous les chiers dans le dossier. Double-cliquez les
chiers pour regarder les vidéos en utilisant Windows Media Player ou Apple Quicktime
(vous pouvez choisir vous-même).
Remarque:
• Vous pouvez également retirer la carte SD de la caméra et le placer dans un lecteur
de carte SD (interne) à partir de votre PC ou un lecteur de carte SD séparée si vous en
avez un. Il s’agit d’une solution rapide et plus facile à utiliser.
* En cas de conit, lorsque la caméra n’est pas reconnue ou n’est pas installée correc-
tement, vous pouvez télécharger les pilotes USB sur le site www.quintezz.com
RÉGLAGE DU MENU
Attention! Ce menu ne fonctionne pas
lorsque le mode MSDC est active.
1. Allumez la caméra en utilisant la batterie
chargée ou le chargeur de voiture Duo USB.
2. Appuyez sur MODE (f) jusqu’à ce que vous
ayez sélectionné le mode souhaité.
3. Appuyez sur (b) pour accéder au menu.
4. Appuyez sur les boutons / (d-e) pour
vous déplacer dans les sous-menus.
5.
Après avoir fait votre choix, cliquez sur
(c) ou MODE (f) pour conrmer et enregistrer
le réglage.
6. Appuyez sur (b) pour sortir.
Par exemple: pour régler la date et l’heure,
veuillez suivre ces étapes:
1. Assurez-vous que la batterie est chargée.
2. Allumer la caméra.
3. Appuyez sur (b).
4. Appuyez sur MODE (f).
5. Utilisez le bouton (e) pour aller à DATE &
HEURE.
6.
Appuyez sur le bouton (c).
7. Vous pouvez maintenant utiliser les boutons
/ (d-e) pour modier la date et l’heure.
Conrmez chaque réglage en appuyant sur
le bouton MODE (f).
8. Dès que vous êtes prêt, veuillez appuyer
sur (b) ou (c) pour conrmer les
réglages.
RÉGLAGE DU SYSTÈME
Attention! Ce menu ne fonctionne pas lorsque le mode MSDC
est active.
1. Allumez la caméra.
2. Appuyez sur (b) pour accéder au menu lorsque la caméra se
trouve en mode Enregistrement.
3. Appuyez sur MODE (f) jusqu’à pouvoir sélectionner le menu
Setup (Conguration). Appuyez sur (c) pour conrmer la
sélection.
4. Utilisez les boutons / (d-e) pour vous déplacer dans les
sous-menus.
5. Après avoir fait votre choix, cliquez sur MODE (f) ou (c)
pour conrmer et enregistrer le réglage.
6. Appuyez sur (b) pour sortir.
7. Les réglages prendront effet après le redémarrage de la
caméra.
SUPPORT CLIENT
Pour plus d’informations, des questions techniques ou des
demandes de retour concernant ce produit, il faut contacter
GARANTIE
Copyright © Quintezz. Quintezz
est une marque déposée de
TE-Group NV. La marque
Quintezz
est synonyme de qualité
supérieure des produits et de service clientèle d’excellence.
C’est la raison pour laquelle
Quintezz
garantit ce produit
contre tout défaut matériel et de main-d’œuvre pendant une
période de deux (2) ans à compter de la date d’achat initiale
du produit. Les conditions de cette garantie et l’étendue de
la responsabilité de
Quintezz
dans le cadre de cette garantie
peuvent être téléchargées sur notre site : www.quintezz.com
D
EINLEITUNG
Wir danken Ihnen für den Kauf dieses Produktes. Bitte lesen Sie diese Anleitung
sorgfältig durch, bevor Sie das Gerät verwenden. Sie können die QUINTEZZ HD 720P
DASHCAM in Ihrem Auto verwenden, um Ihre Fahrten aufzuzeichnen und gefährliche
Situationen und Unfälle auf der Straße während des Fahrens festzuhalten.
LIEFERUMFANG
Siehe Abbildung I
1. DVR-Kamera
a. : Gerät ein-/ausschalten (zum Ein- und Ausschalten gedrückt halten, wenn
keine externe Stromquelle angeschlossen ist)
b. : Menü öffnen/schließen
c. : Gewählte Option bestätigen
d. : Nach oben oder 1-/2-/3-/4-facher Digitalzoom (vergrößern)
e. : Nach unten oder 1-/2-/3-/4-facher Digitalzoom (verkleinern)
f. MODE: Modus umschaltbar zwischen VIDEO-Aufnahme/FOTO/AUDIO-
Aufnahme/WIEDERGABE / Gewählte Option bestätigen
g. : Audio ein/aus
2. Saugnapfhalter
3. 3,5m XL USB-Verbindungskabel für die Datenübertragung und Ladung
4. Duo-USB-Autoladegerät 12/24V DC 5V - max. 2100mA (2xUSB)
AKKU LADEN
• Das Gerät besitzt einen eingebauten Li-Ion-Akku, der dreimal vollständig geladen
und entladen werden muss, um seine maximale Leistungsfähigkeit zu aktivieren.
Die Ladezeit beträgt max. 1 Stunde.
• Wenn der Akku vollständig geladen ist, wird im Display das Symbol für einen vollen
Akku angezeigt. Die Betriebszeit ohne Anschluss an eine externe Stromquelle
beträgt max. 15 Minuten für Notbetrieb.
Ladeoptionen:
Schließen Sie das Gerät mithilfe des USB-Verbindungskabels (3) an einen Computer
oder ein Notebook an. Siehe “PC-Modus” vor der Verbindung.
ODER
Schließen Sie das Gerät
mithilfe des USB-Verbindungskabels (3)
an den Port A des Duo-
USB-Autoladegeräts
(
4
) für PKW/LKW an.
Nur bei Anschluss an Autoladevorrichtung:
Der Ladevorgang beginnt automatisch, sobald die Zündung eingeschaltet ist. Die
QUINTEZZ HD 720P DASHCAM wird jetzt während des Aufzeichnens geladen. Wenn
die Autoladevorrichtung vom Gerät getrennt wird, speichert die QUINTEZZ HD 720P
DASHCAM die Dateien und schaltet sich aus nach einigen Sekunden.
Achtung:
Wenn der Akku fast leer ist, schaltet die QUINTEZZ HD 720P DASHCAM in den
Schutzmodus. Bitte laden Sie den Akku, damit Sie das Gerät einschalten können.
V
ERWENDUNG EINER SD-KARTE (nicht im Lieferumfang enthalten, optional erhältlich)
Siehe Abbildung II
• Schieben Sie die SD-Karte in den SD-Kartenschlitz, bis Sie ein Klickgeräusch hören.
• Zum Entfernen muss die SD-Karte vorsichtig hineingedrückt werden. Dadurch
wird die Karte freigegeben und kann herausgezogen werden.
• Wenn sich keine SD-Karte im Gerät bendet, zeigt das Display die Meldung ‚No
card‘ an.
Hinweis:
1. Wir empfehlen die Verwendung einer SDHC-Karte mit mind. 16 GB und mind.
Class 10. (nicht im Lieferumfang enthalten, optional erhältlich)
2. Ohne SD-Karte, wird das Gerät nicht funktionieren!
3. Die SD-Karte darf niemals gewaltsam in das Gerät gesteckt werden, da
andernfalls Gerät und Karte zerstört werden können. Schäden liegen in der
Verantwortung des Benutzers.
4. Das Gerät macht die SD-Karte nach dem Einsetzen betriebsbereit.
5. Formatieren Sie der Karte in das Menü der Kamera. Siehe “Systemeinstellungen”.
* Abhängig von Marke, Modell und Klasse der Karte. Daten sind ungefähre Angaben.
MONTAGE
Siehe Abbildung III
• Befestigen Sie die QUINTEZZ HD 720P DASHCAM (1) an der Saugnapfhalter (2).
• Befeuchten Sie die Saugäche, drücken Sie sie auf die Innenseite Ihrer
Windschutzscheibe und arretieren Sie die Halterung mithilfe des Hebels. Wir
empfehlen, die QUINTEZZ HD 720P DASHCAM an der rechten Seite des
Rückspiegels zu befestigen.
• Stellen Sie die Halterung mithilfe der Arretierschrauben ein.
•
Zum Erzielen bestmöglicher Ergebnisse muss die Kamera waagerecht montiert sein.
• Schließen Sie das Duo-USB-Autoladegerät (4) an die Autosteckdose an.
VERWENDUNG DER QUINTEZZ HD 720P
#
DASHCAM
BETRIEBSARTEN
Achtung! Dieses Menü funktioniert nicht, wenn MSDC-Modus aktiv ist.
VIDEO-AUFZEICHNUNGSMODUS
In diesem Modus wird in der linken oberen Ecke des Displays ein rotes Kamerasymbol
angezeigt.
• Wenn die QUINTEZZ HD 720P DASHCAM an die Autoladevorrichtung
angeschlossen ist, beginnt sie mit der Video-Aufzeichnung, sobald die
Zündung eingeschaltet ist. Die Aufzeichnung wird automatisch unterbrochen,
wenn die Zündung ausgeschaltet wird.
• Wenn die QUINTEZZ HD 720P DASHCAM nicht an die Autoladevorrichtung
angeschlossen ist, müssen Sie den -Knopf (a) drücken und dann auf (c)
drücken, um mit dem Aufzeichnen zu beginnen. Das Gerät wird automatisch in
den Video-Aufzeichnungsmodus gesetzt. Drücken Sie erneut auf (c), um
die Aufzeichnung zu beenden. Die Dateien werden automatisch gespeichert.
• Loop-Aufzeichnung: Im Video-Aufzeichnungsmodus werden alle Videodateien
automatisch nach 2, 5 oder 10 Minuten gespeichert. Wenn die SD-Karte voll ist,
löscht das Gerät die älteste Videodatei automatisch.
FOTOMODUS
In diesem Modus wird in der linken oberen Ecke des Displays ein Fotosymbol angezeigt.
• Drücken Sie 1 x auf MODE (f), wenn Sie Bilder statt Videos machen möchten.
• Bei jedem Drücken auf (c) wird ein Foto gemacht.
AUDIO-AUFZEICHNUNGSMODUS
In diesem Modus wird in der linken oberen Ecke des Displays ein Audiosymbol angezeigt
.
• Drücken Sie 2 x auf MODE (f), wenn Sie nur Audio-Aufnahmen machen
möchten. Mit Druck auf (c) wird die Aufnahme gestartet.
• Drücken Sie erneut auf (c), um die Aufzeichnung zu beenden. Die Dateien
werden automatisch gespeichert.
• Drücken Sie auf (d), um die Aufnahme zu pausieren oder erneut zu starten.
WIEDERGABEMODUS
In diesem Modus wird in der linken oberen Ecke des Displays ein Wiedergabesymbol
angezeigt.
• Durch dreimaliges Drücken auf MODE (f) gelangen Sie in den Wiedergabemodus.
• Durch Drücken auf und (d-e) können Sie durch die Aufzeichnungen
navigieren.
• Drücken Sie auf (c), um mit der Wiedergabe zu beginnen.
•
Drücken Sie
auf (d)
, um die Wiedergabe zu pausieren oder erneut zu starten.
VIDEOMENÜ
Filmgröße
(HP) 1280x720
Video-Auösung
(D1) 848x480
(640) 640x480
Datum drucken
Aus
Datumsanzeige
während der
Aufzeichnung
Datum
Datum/Uhrzeit
Bewegungserk.
Aus *
Automatischer Beginn
der Aufzeichnung,
wenn eine Bewegung
erkannt wird. bei
Batteriebetrieb.
Ein
Loop-Aufnahme
Aus
Loop-Aufzeichnung
Ein *
Loopzeit
2 Min *
Intervall der Speicher-
ung auf der SD-Karte
5 Min
10 Min
Videoton
Ein
Audio-Aufzeichnung
Aus
FOTOMENÜ
Bildauösung (5 MP) 2592x1944
(3MP) 2048x1536
(2MP) 1600x1200
(1MP) 1280x1024
Qualität Sehr fein
Fein
Normal
Belichtung
-2.0/ -1.7/ -1.3/
-1.0/ -0.7/ -0.3/
+0.0/ +0.3/ +0.7/
+1.0/ +1.3/ +1.7/
+2.0
Luminanz-
Einstellung
Betriebsart Aus
Foto Timer
Selbstausl. 2s
Selbstausl. 10s
Bildse
Datumsstempel
Aus
Datumsanzeige
auf Fotos
Datum & Uhrzeit
WIEDERGABEMENÜ
Sperren 1 sperren/Ents.
Dateisicherung
Alle sperren
Alle entsperren
Löschen Eins
Datei löschen
Alle
Dia-Show Start
Intervall
Wiederholen
Sprach Aufnahme
Hinzufügen
Löschen
MENÜ-EINSTELLUNGEN
Achtung! Dieses Menü funktioniert nicht,
wenn MSDC-Modus aktiv ist.
1. Schalten Sie das Gerät ein. Verwenden Sie
den geladenen Akku oder das Duo-USB-
Autoladegerät (4).
2.
Drücken Sie so oft auf MODE (f), bis der
gewünschte Modus eingestellt ist.
3. Drücken Sie auf (b), um in das Menü zu
gelangen.
4. Drücken Sie auf oder (d-e), um durch
die Untermenüs zu navigieren.
5. Klicken Sie nach der Auswahl zum
Bestätigen auf (c) oder MODE (f), um
die Einstellung zu speichern.
6.
Drücken Sie zum Schluss die Taste (b).
Zum Beispiel: Um Datum und Uhrzeit
einzustellen, gehen Sie folgendermaßen vor:
1. Stellen Sie sicher, dass die Batterie
aufgeladen ist.
2.
Schalten Sie den Kamera EIN.
3. Drücken Sie auf (b).
4. Drücken Sie auf MODE (f).
5. Verwenden Sie die -Taste (e), um zu
DATUM & ZEIT zu gehen.
6. Drücken Sie die -Taste (c).
7. Sie können nun die und -Tasten (d-e)
brauchen um das Datum und die Uhrzeit
zu ändern. Bestätigen Sie jede Einstellung
durch Drücken der MODE-Taste (f).
8. Sobald Sie fertig sind, sollten Sie die
Taste (b) oder (c) drücken, um die
Einstellungen zu bestätigen.
SYSTEMEINSTELLUNGEN
Achtung! Dieses Menü funktioniert nicht, wenn MSDC-
Modus aktiv ist.
1. Schalten Sie das Gerät ein.
2.
Drücken Sie
auf (b)
, um in das Menü
zu gelangen, wenn
sich das Gerät im Aufzeichnungs-modus bendet.
3. Drücken Sie auf MODE (f), bis Sie das Setup-Menü
auswählen können. Drücken Sie auf (c) , um Ihre
Auswahl zu bestätigen.
4. Drücken Sie auf oder (d-e), um durch die
Untermenüs zu navigieren.
5. Klicken Sie nach der Auswahl zum Bestätigen auf MODE
(f) oder (c), um die Einstellungen zu speichern.
6. Drücken Sie zum Schluss die Taste (b).
7. Die Einstellungen werden nach dem Neustart des Geräts
geändert.
KUNDENDIENST
Für weitere Informationen, technische Fragen oder
Rücksendungen zu diesem Produkt wenden Sie sich bitte an
GARANTIE
Copyright © Quintezz. Quintezz
ist ein eingetragenes
Warenzeichen der TE-Group NV. Das Markenzeichen
Quintezz
steht für hervorragende Produktqualität und einen
überdurchschnittlichen Kundendienst. Deshalb gewährt
Quintezz
eine Produktgarantie auf alle Material- und
Produktionsfehler für einen Zeitraum von zwei (2) Jahren ab
Datum des Kaufbelegs. Die Garantiebedingungen und der
Haftungsumfang von
Quintezz
im Rahmen dieser Garantie
können von unserer Internetseite heruntergeladen werden:
www.quintezz.com
Töne Auslöser Ein
Verschluss-
geräusch
Aus
Start Aus
Klang bei der
Inbetriebnahme
1
2
3
Signalton Ein
Tastenton
Aus
Lautstärke 0/ 1/ 2/ 3
Netzfrequenz 50 Hz*
60 Hz
Strom sparen 1 Min
Automatische
Ausschaltung bei
Akku-Betrieb
3 Min
5 Min
Aus*
Bildsch. schoner 30sec.
Bildschirmschoner
bei Batteriebetrieb.
1 Min.
2 Min.
Aus*
Datum / Uhrzeit... Jahr
Monat
Tag
Stunden
Minuten
Format Uhrzeit MM/DD/YYYY
DD/MM/YYYY
YYYY/MM/DD
Sprache
Englisch, Holländisch, Französisch
Spanisch, Italienisch, Portugiesisch
Tschechisch, Ungarisch, Schwedisch
Russisch, Polnisch, Deutsch
Türkisch, Griechisch
Formatieren Ja
SD-Karte
formatieren
Ein
Wenn Sie Probleme mit der SD-
Karte haben (wie “Speicher voll”)
empfehlen wir Sie, um die Karte
über dieses Menü formatieren und
wählen Sie “Anfangswerte*”, um die
Werkseinstellungen wiederherzustellen.
LED-Licht Ein*
Aus
*Anfangswerte Ja
Werkseinstellung
Nein
Version
Software-Version
VIDEO* IMAGE*
SD CARD 1280X720 848X480 640X480 1280X1024 1600X1200 2048X1536 2592X1944
32GB 480 min 480 min 520 min 24320 23040 21920 18880
16 GB 240 min 240 min 260 min 12160 11520 10960 9440
VIDEO* IMAGE*
SD CARD 1280X720 848X480 640X480 1280X1024 1600X1200 2048X1536 2592X1944
32GB 480 min 480 min 520 min 24320 23040 21920 18880
16 GB 240 min 240 min 260 min 12160 11520 10960 9440
* Réglage recommandé.
PC-MODUS
• Sie können die QUINTEZZ HD 720P DASHCAM über das mitgelieferte USB-
Kabel (3) an Ihren PC anschließen, um Dateien auf Ihrem PC zu speichern
oder abzuspielen.
• Drücken Sie auf und (d-e), um den Modus auszuwählen:
» MSDC: Schnittstelle zwischen einem Computer und einer Digitalkamera,
die die Digitalkamera als ‚Gerät mit Wechselmedium’ anzeigt, das an
den Computer angeschlossen ist.
» CAM/Recording mode: Drücken Sie auf (c), um mit der
Aufzeichnung zu beginnen.
Sie brauchen keine Treiber zu installieren, um die QUINTEZZ HD 720P DASHCAM
mit Ihrem PC zu verwenden, da diese bereits von Windows in der Windows-Pack
installiert sind*.
Sie sollten die Kamera wie folgt anschließen:
1. Stellen Sie sicher, dass die Batterie aufgeladen ist.
2. Verwenden Sie nur das im Lieferumfang enthaltene USB-Kabel.
3. Schalten Sie die Kamera EIN.
4. Verbinden Sie das USB-Kabel mit dem Kamera und dann mit dem PC.
5. Wählen Sie “MSDC” auf der Kamera und drücken Sie auf (c).
6. Der Treiber wird jetzt installiert und in den Ordner “Arbeitsplatz” auf Ihrem Desktop
nden Sie eine neue (Hard) Disk (es ist möglich, dass ein Fenster angezeigt, in dem
Sie angeben können, wie Sie die Dateien anzuzeigen möchten).
7. Sie sehen nun alle Dateien in dem Ordner. Doppelklicken Sie auf sie, um die
Videos mit der normalen Windows Media Player oder Apple Quicktime (Sie
können wählen) zu beobachten.
Hinweis:
• Sie können auch die SD-Karte aus dem Kamera nehmen und in einem
(eingebautene) SD-Kartenleser von Ihrem PC oder einer separaten SD-
Kartenleser legen, wenn Sie eine haben. Dies ist eine schnelle und einfache
Lösung.
* Bei einem Konikt, wenn die Kamera nicht erkannt oder nicht richtig installiert wird,
können Sie die USB-Treiber von der Website www.quintezz.com herunterzuladen.
* Empfohlene Einstellung.
* Réglage recommandé.
* Empfohlene Einstellung.

INTRODUZIONE
Congratulazioni per l’acquisto. Si prega di leggere attentamente tutte le istruzioni prima
di utilizzare il dispositivo. È possibile utilizzare il DASHCAM Quintezz HD 720P dentro
la vostra auto per registrare le vostre passeggiate e le situazioni pericolose o incidenti
sulla strada durante la guida.
CONTENUTO DEL PACCO
Vedere l’illustrazione I
1. Camera DVR
a. : Dispositivo Accendere / spegnere (premere e tenere premuto per accendere
/ spegnere quando non è collegato alla presa di corrente)
b. : Entrare / uscire dal menu
c. : Confermare l’opzione selezionata
d. : Salire o 1/2/3/4 zoom digitale x
e. : Scendete o 1/2/3/4 x zoom digitale fuori
f. MODALITA ‘: la commutazione della modalità di registrazione video tra / FOTO
/ AUDIO registrazione / riproduzione / confermare l’opzione selezionata
g. : Audio ON / OFF
2. Tazza aspirazione
3. cavo di collegamento USB XL 3. 3,5m per i dati e la ricarica
4. 12 / 24V DC 5V Duo USB Car Charger - max. 2100mA (2xUSB)
CARICA
• Il dispositivo ha una batteria ricaricabile agli ioni di litio incorporata che deve essere
completamente carica e decharged 3 volte per attivare la capacità massima della
batteria. Il tempo di ricarica è di circa 1 ora al massimo.
• Quando la batteria è completamente carica, sul display apparirà il simbolo
“batteria completa”. Tempo di funzionamento senza collegamento ad una fonte di
alimentazione è max. 15 minuti per casi di emergenza.
Opzioni di ricarica:
Collegare il dispositivo a un computer / laptop utilizzando il cavo di collegamento USB
(3). Vedere “Modalità PC” prima del collegamento.
O
Collegare il dispositivo con il cavo di collegamento USB (3) nella porta A del caricabatteria
per auto USB Duo (4) per l’uso auto / camion
Solo quando viene utilizzato con il caricatore dell’automobile:
Non appena viene avviato il motore dell’auto, la registrazione si avvierà automaticamente.
Il Quintezz HD 720P DASHCAM sarà ora l’addebito durante la registrazione. Quando il
caricabatteria per auto è scollegato dall’unità, il Quintezz HD 720P DASHCAM si spegne
Attenzione:
: con batteria scarica, la Quintezz HD 720P DASHCAM entrerà in stato di protezione.
Si prega di caricare la batteria per assicurarsi la possibilità di accendere il dispositivo.
UTILIZZANDO LA SD (non in dotazione, disponibile come optional)
Vedere l’illustrazione II
•
• Per rimuovere la scheda SD, premere la scheda leggermente. Si è parzialmente
espulsa che consente di estrarre la scheda.
• In assenza di scheda nello slot SD, il display mostra “No Card”.
Nota:
1. Si consiglia di utilizzare una scheda SDHC da 16 GB (o superiore) con classe 10 (o
superiore). (Non fornito, disponibile come optional)
2. Senza scheda SD, l’unità non funzionerà!
3.
dispositivo e la scheda di memoria. Questa è responsabilità dell’utente!
4. Il dispositivo imposterà la scheda SD dopo che è stata inserita.
5. Formattare la scheda SD nel menu del DASHCAM Quintezz HD 720P.
Vedere Impostazioni di sistema.
*
Dipende dalla marca della scheda SD, il modello e il tipo di classe. I dati sono approssimativi.
MONTAGGIO
Vedere l’illustrazione III
• Montare il Quintezz HD 720P DASHCAM (1) per la ventosa (2).
• Inumidire la ventosa, posizionarlo sulla parte interna del parabrezza e chiudere la coppa
con la leva. Si consiglia di posizionare il Quintezz HD 720P DASHCAM sul lato destro
dello specchio retrovisore.
• Regolare la staffa utilizzando le manopole di regolazione.
• Assicurarsi che la fotocamera è montata orizzontale per la vista migliore.
• Collegare il caricabatteria per auto USB Duo (4)
per l’accendisigari per il potere.
VIDEO* IMMAGINE*
SCHEDA SD 1280X720 848X480 640X480 1280X1024 1600X1200 2048X1536 2592X1944
32GB 480 min 480 min 520 min 24320 23040 21920 18880
16 GB 240 min 240 min 260 min 12160 11520 10960 9440
USO DEL QUINTEZZ HD 720P # DASHCAM
MODALITÀ
Attenzione! Questo menu non funziona quando la modalità MSDC è attiva.
VIDEO REGISTRAZIONE
L’icona della fotocamera rosso sarà visualizzata nell’angolo in alto a sinistra del display.
• Quando il DASHCAM Quintezz HD 720P è collegato alla rete elettrica della
vostra auto, si avvierà la registrazione del video non appena si avvia il motore
della vettura. Si fermerà la registrazione dopo che la macchina si è fermata.
• Quando il Quintezz HD 720P DASHCAM non è collegato alla alimentazione
della macchina, premere il pulsante
(a), e premere il pulsante (C)
per avviare la registrazione. L’unità sarà automaticamente in modalità di
registrazione video. Premere
(C) per arrestare la registrazione e salvare i
•
video ogni 2, 5 o 10 minuti automaticamente. Quando la scheda SD è piena, il
MODALITÀ FOTO
Una icona della foto verrà mostrata nell’angolo in alto a sinistra del display.
• Premere il tasto MODE (f) 1x se si vuole rendere le immagini al posto delle
registrazioni.
• Premere il pulsante
(c) ogni volta che si vuole scattare una foto.
AUDIO MODE DI REGISTRAZIONE
Un’icona audio sarebbe stato mostrato in alto a sinistra del display.
• Premere il tasto MODE (f) 2x se si vuole fare solo le registrazioni audio, e
premere il tasto
(C) per avviare la registrazione.
• Premere
• Premere il pulsante (d) per mettere in pausa o iniziare la registrazione.
MODALITA ‘DI RIPRODUZIONE
Una icona di riproduzione verrà visualizzato nell’angolo in alto a sinistra del display.
• Per la modalità di riproduzione, premere il pulsante MODE (f) 3x.
• Con i tasti e
& (d-e) è possibile scorrere le registrazioni.
• Premere
(C) per avviare la riproduzione.
• Premere il pulsante
(d) per mettere in pausa o ricominciare la
riproduzione.
MODALITÀ PC
• È possibile collegare la DASHCAM Quintezz HD 720P al PC utilizzando il cavo
vostro PC.
• Premere i pulsanti
& (D-e) per scegliere la modalità:
» MSDC: Si tratta di un computer interfaccia tra un computer e una
disco rimovibile collegato al computer.
» Modalità CAM / Registrazione: Premere il pulsante
per avviare la
registrazione video.
Non è necessario installare i driver per utilizzare la DASHCAM Quintezz HD 720P con il
PC, perché questi sono già installati da Windows nel pacchetto di Windows *.
Si dovrebbe collegare la fotocamera come segue:
1. Assicurarsi che la batteria è carica.
2. Utilizzare solo il cavo USB in dotazione, che era nella confezione.
3. Accendere la fotocamera.
4. Collegare il cavo USB con la fotocamera (sul lato superiore) e solo allora con il PC.
5. Selezionare “MSDC” sulla fotocamera e premere il pulsante (C).
6. Il driver verrà ora installarsi e nella cartella “Risorse del computer” sul desktop si
7.
guardare i video utilizzando Windows Media Player standard o Apple Quicktime (è
possibile selezionare da soli).
Nota:
• È inoltre possibile rimuovere la scheda SD dal DASHCAM e posizionarlo in un (built-
in) lettore di schede SD dal PC o un lettore di schede SD separata se ne hai uno.
Questa è una soluzione rapida e più facile da usare.
correttamente, è possibile scaricare i driver USB dal sito www.quintezz.com.
IMPOSTAZIONI MENU
Attenzione! Questo menu non funziona
quando la modalità MSDC è attiva.
1. Accendere l’apparecchio utilizza la
batteria carica o il caricabatteria per auto
USB Duo.
2.
modalità desiderata.
3. Premere
(B) per accedere al menu.
4. Premere pulsanti
& (D-e) per
scorrere i sottomenu.
5. Dopo la selezione, fare clic su
(c)
o
MODE
(f) per confermare e salvare le
impostazioni.
6. Premere
(B) per uscire.
Per esempio: per impostare la data e l’ora, si
prega di attenersi alla seguente procedura:
1. Assicurarsi che la batteria è carica.
2. Accendere la fotocamera.
3. Premere
(b).
4. Premere MODE (f).
5. Utilizzare il pulsante
(e) per andare a
DATA E ORA.
6. Premere il pulsante
(C).
7. È ora possibile utilizzare i tasti e
&
(d-e) per cambiare la data e l’ora e
confermare ogni impostazione premendo
il tasto MODE (f).
8. Non appena si è pronti, è necessario
premere
(b) o (c) per confermare
le impostazioni.
MENU VIDEO
Movie Size
(HD) 1280x720
Risoluzione video
(D1) 848x480
(640) 640x480
Date stamp Off
indicazione della
data durante la
registrazione
Date
Date & Time
Motion Detect Off *
Registrazione auto-
matica quando viene
rilevato un movimento
quando viene utilizzato
con la batteria
On
Loop Rec.
Off
Registrazione del
ciclo
On *
Loop Time
2 min *
Risparmio di tempo
di ogni sezione su
scheda SD
5 min
10 min
Video sound On
registrazione del
suono
Off
MENU FOTO
Resolution
(5MP) 2592x1944
(3MP) 2048x1536
(2MP) 1600x1200
(1MP) 1280x1024
Quality Super Fine
Fine
Normal
Exposure
-2.0/ -1.7/ -1.3/
-1.0/ -0.7/ -0.3/
+0.0/ +0.3/ +0.7/
+1.0/ +1.3/ +1.7/
+2.0
regolazione
luminosità
Capture Mode Off
timer Foto
Self-timer 2S
Self-timer 10S
Burst
Date stamp Off
indicazione della
data sulla foto
Date&Time
MENU RIPRODUZIONE
Lock Lock/Unlock one
Lock All
Unlock All
Delete One
All
Slide show Start
Interval
Repeat
Voice memo Add
Delete
SERVIZIO CLIENTI
Per ulteriori informazioni, domande tecniche e le richieste
di ritorno per quanto riguarda questo prodotto, è necessario
contattare [email protected].
GARANZIA
Copyright © Quintezz. Quintezz è un marchio registrato di
TE-Group NV. Il marchio Quintezz è sinonimo di qualità del
prodotto e il servizio clienti eccellente. Questo è il motivo
Quintezz garantisce questo prodotto contro tutti i difetti nei
materiali e nella lavorazione per un periodo di due (2) anni
dalla data di acquisto originale del prodotto. Le condizioni
di questa garanzia e il grado di responsabilità di Quintezz
questa garanzia possono essere scaricati dal nostro sito
web:
www.quintezz.com.
IMPOSTAZIONI DI SISTEMA
Attenzione! Questo menu non funziona quando la modalità MSDC
è attiva.
1. Accendere l’unità.
2. Premere (B) per accedere al menu quando il dispositivo è in
modalità di registrazione.
3.
(C) per selezionare.
4. Utilizzare i pulsanti & (D-E) per scorrere i sottomenu.
5. Dopo la selezione, fare clic su MODE (f) o (c) per confermare
e salvare le impostazioni.
6. Premere (B) per uscire.
7. Impostazioni sarà cambiato dopo il riavvio della macchina.
Sounds Shutter On
suono otturatore
Off
Start-up None
Selezionare il
suono di avvio
1
2
3
Beep On
Tono dei tasti
Off
Volume
0/ 1/ 2/ 3
Power frequency 50 Hz*
60 Hz
Power save 1 Min
Spegnimento
automatico quando
l’uso della batteria
3 Min
5 Min
OFF*
Panel protect 30 sec.
Screensaver
quando viene
utilizzato con la
batteria.
1 min.
2 min.
OFF*
Date & Time Year
Month
Day
Hour
Minute
Time Style
MM/DD/YYYY
DD/MM/YYYY
YYYY/MM/DD
Language
English, Dutch, French, Spanish
Italian, Portuguese, Czech, Hungarian,
Swedish, Russian, Polish, German,
Turkish, Greek
Format Yes
La formattazione
della scheda SD
No
Se si hanno problemi con la scheda SD
(come “memoria piena”), vi consigliamo
di formattare la scheda di questo menu,
e fare un “reset tutti *” alle impostazioni di
fabbrica
LED light Off*
On
*Reset all Yes
Ripristinare le
impostazioni di
fabbrica
No
Version
Informazioni sulla versione del software
IT
ILLUSTRAZIONI
* Impostazione consigliata.
Illustrazione II
Illustrazione III
Illustrazione I
* Impostazione consigliata.
Guarantee, questions and service:
support@quintezz.com

USER’S MANUAL
GB
NL
FR D
HD 720P
DASHCAM
Guarantee, questions and service:
support@quintezz.com
INTRODUCTION
Congratulations on your purchase. Please read all instructions carefully before you
use your device. You can use the QUINTEZZ HD 720P DASHCAM inside your car for
recording your rides and dangerous situations or accidents on the road during driving.
PACKAGE CONTENTS
See illustration I
1. Camera DVR unit
a. : Turn device on/off (Press & hold for turning on/off when not connected to
power source)
b. : Enter/exit the menu
c. : Conrm the selected option
d. : Go up or 1/2/3/4 x digital zoom in
e. : Go down or 1/2/3/4 x digital zoom out
f. MODE: Mode switching between VIDEO recording / PHOTO / AUDIO
recording/PLAYBACK / Conrm the selected option
g. : Audio ON/OFF
2. Suction cup
3. 3,5m XL USB connection cable for data and charging
4. 12/24V DC 5V Duo USB Car Charger - max. 2100mA (2xUSB)
CHARGING
• The device has a built-in Li-ion rechargeable battery that has to be fully charged
and decharged 3 times to activate the maximum capacity of the battery. Charging
time is about 1 hour maximum.
• When the battery is completely charged, the display will show a “full battery”
symbol. Operation time without connection to a power source is max. 15 minutes
for emergency use.
Charging options:
Connect the device to a computer/laptop using the USB connection cable (3). See “PC
mode” before connection.
OR
Plug the device with the USB connection cable (3) into Port A of the Duo USB car charger
(4) for car/truck use.
Only when used with car charger:
As soon as the car engine is started, the recording will start automatically.
The
QUINTEZZ HD 720P DASHCAM
will now be charged during recording. When the car
charger is disconnected from the unit, the
QUINTEZZ HD 720P DASHCAM
will shut down
automatically after a few seconds and save the les.
Caution: With low battery, the QUINTEZZ HD 720P DASHCAM will enter into
protection state. Please charge the battery to make sure you can turn on the device.
USING SD CARD (not supplied, optionally available)
See illustration II
• Insert your SD card into the SD slot until it clicks into place.
• To remove the SD Card, press the card lightly. It is partially ejected allowing you to
pull the card out.
• With no card in the SD slot, the displays shows “No card”.
Note:
1. We recommend using a 16 GB SDHC card (or higher) with class 10 (or
higher). (not supplied, optionally available)
2. Without SD card, the unit will NOT function!
3. If the SD card is inserted in a wrong way (difcult to insert), it may damage the
device and the memory card. This is the user’s responsibility!
4. The device will set the SD card after it has been inserted.
5. Format the SD card in the menu of the QUINTEZZ HD 720P DASHCAM. See
System Settings.
* Depends on SD card brand, model and class type. Data are approximate.
MOUNTING
See illustration III
• Mount the QUINTEZZ HD 720P DASHCAM (1) to the suction cup (2).
• Moisten the suction cup, place it on the inside of your windshield and close the cup
using the lever. We recommend placing the QUINTEZZ HD 720P DASHCAM on
the right side of the rear view mirror.
• Adjust the bracket by using the adjustment knobs.
• Make sure the camera is mounted horizontal for the best view.
• Connect the Duo USB car charger (4) to the car lighter for power.
PC MODE
• You can connect the QUINTEZZ HD 720P DASHCAM to your PC by using the
supplied USB cable (3
). You can use it to backup or playback les on your PC.
• Press the / buttons (d-e) to choose the mode:
» MSDC: It is a computer interface between a computer and a digital
camera which shows the digital camera as a removable disk drive
attached to the computer.
» CAM/Recording mode: Press the button to start video recording.
You don’t need to install drivers to use the QUINTEZZ HD 720P DASHCAM with your
PC because these are already installed by Windows in the Windows pack*.
You should connect the camera as following:
1. Make sure the battery is charged.
2. Only use the SUPPLIED USB cable, that was in the packaging.
3. Turn the camera ON.
4. Connect the USB cable with the camera (at the top side) and only then with the
PC.
5. Select “MSDC” on the Camera and press the button (c).
6. The driver will now install itself and in the folder “My computer” on your desktop
you will see a new (hard)disk (it is possible that a window will appear in which you
can indicate how you would like to view the les).
7.
You can now see all les in the folder and double-click them to watch the videos using
the standard Windows Media Player or Apple Quicktime (you can select yourself).
Note:
• You can also remove the SD card from the DASHCAM and place it in a (built-in) SD
card reader from your PC or a separate SD card reader if you have one. This is a
quick and more easy-to-use solution.
* In case of a conict, when the camera is not recognized or not installed correctly, you
can download the USB drivers from the website www.quintezz.com.
MENU SETTINGS
Attention! This menu will not function
when MSDC mode is active.
1. Power on the unit using the charged
battery or the Duo USB car charger.
2. Press MODE (f) until you have selected
the desired mode.
3. Press (b) to enter the menu.
4. Press / buttons (d-e) to scroll
through the submenus.
5. After selection, click (c) or MODE
(f) to conrm and save the setting.
6. Press (b) to exit.
For example: to set date and time, please
follow these steps:
1. Make sure the battery is charged.
2. Turn the Camera ON.
3. Press (b).
4. Press MODE (f).
5. Use the (e) button to go to DATE &
TIME.
6. Press the button (c).
7. You can now use the & buttons
(d-e) to change the date and time and
conrm each setting by pressing the
MODE button (f).
8.
As soon as you are ready, you should
press (b) or (c) to conrm the
settings.
VIDEO MENU
Movie Size (HD) 1280x720
Video resolution
(D1) 848x480
(640) 640x480
Date stamp Off
Date indication
during recording
Date
Date & Time
Motion Detect Off *
Automatic recording
when movement is
detected when used
on battery.
On
Loop Rec. Off
Cycle recording
On *
Loop Time 2 min *
Saving time of each
section on SD card
5 min
10 min
Video sound On
Sound recording
Off
PHOTO MENU
Resolution (5MP) 2592x1944
(3MP) 2048x1536
(2MP) 1600x1200
(1MP) 1280x1024
Quality Super Fine
Fine
Normal
Exposure
-2.0/ -1.7/ -1.3/
-1.0/ -0.7/ -0.3/
+0.0/ +0.3/ +0.7/
+1.0/ +1.3/ +1.7/
+2.0
Luminance
adjustment
Capture Mode Off
Photo timer
Self-timer 2S
Self-timer 10S
Burst
Date stamp Off
Date indication
on photo
Date&Time
PLAYBACK MENU
Lock Lock/Unlock one
File locking
Lock All
Unlock All
Delete One
File removal
All
Slide show Start
Interval
Repeat
Voice memo Add
Delete
SYSTEM SETTINGS
Attention! This menu will not function when MSDC mode is
active.
1. Power on the unit.
2. Press (b) to enter the menu
when the device is in recording
mode.
3. Press MODE (f) until you can select the Setup menu. Press
(c) to select.
4. Use the / buttons (d-e) to scroll through the submenus.
5. After selection, click MODE (f) or (c) to conrm and save the
setting.
6. Press (b) to exit.
7. Settings will be changed after restart of the unit.
Sounds Shutter On
Shutter sound
Off
Start-up None
Select start-up
sound
1
2
3
Beep On
Key tone
Off
Volume 0/ 1/ 2/ 3
Power frequency 50 Hz*
60 Hz
Power save 1 Min
Automatic power off
when use on battery
3 Min
5 Min
Off*
Panel protect 30sec.
Screensaver when
used on battery.
1min.
2min.
OFF*
Date & Time Year
Month
Day
Hour
Minute
Time Style MM/DD/YYYY
DD/MM/YYYY
YYYY/MM/DD
Language
English, Dutch, French, Spanish
Italian, Portuguese, Czech, Hungarian,
Swedish, Russian
Polish, German, Turkish, Greek
Format Yes
Formatting the
SD card
No
If you would have problems with
your SD card (like “memory full”) we
advise you to format the card using
this menu, and make a “reset all*” to
factory settings
LED light Off*
On
*Reset all Yes
Reset to factory
settings
No
Version
Software version information
CUSTOMER SUPPORT
For more information, technical questions and return
requests concerning this product, you should contact
.
GUARANTEE
Copyright © Quintezz. Quintezz is a registered
trade
mark of TE-
Group NV. The
Quintezz
brand stands for superior product
quality and outstanding customer service. That is why
Quintezz
warrants this product against all defects in material
and workmanship for a period of two (2) years from the date
of original purchase of the product. The conditions of this
guarantee and the extent of responsibility of
Quintezz
under
this guarantee can be downloaded from our website:
www.quintezz.com.
VIDEO* IMAGE*
SD CARD 1280X720 848X480 640X480 1280X1024 1600X1200 2048X1536 2592X1944
32GB 480 min 480 min 520 min 24320 23040 21920 18880
16 GB 240 min 240 min 260 min 12160 11520 10960 9440
INTRODUCCIÓN
Felicitaciones por su compra. Lea atentamente todas las instrucciones antes de utilizar
su dispositivo. Usted puede utilizar el QUINTEZZ HD 720P DASHCAM dentro de su
coche para registrar sus paseos y situaciones peligrosas o accidentes en la carretera
durante la conducción.
CONTENIDOS DEL PAQUETE
Vea la ilustración I
1. Cámara
a. : Activar / desactivar el dispositivo (Mantenga pulsado para encender / apagar
cuando no esté conectado a la fuente de alimentación)
b. : Entrar / salir del menú
c. : Conrmar la opción seleccionada
d. : Subir o 1/2/3/4 x zoom digital +
e. : Bajar o 1/2/3/4 x zoom digital -
f. MODE: Cambio de modo entre grabación VIDEO / grabación FOTO / AUDIO /
REPRODUCCIÓN / Conrmación de la opción seleccionada
g. : Audio ON / OFF
2. Ventosa
3. 3.5m XL Cable de conexión USB para datos y para cargar
4. 12 / 24V DC 5V Cargador de coche doble USB - máx. 2100mA (2xUSB)
CARGAR
• El dispositivo tiene una batería recargable de iones de litio incorporada que debe
cargarse y descargarse 3 veces para activar la capacidad máxima de la batería. El
tiempo de carga es de aproximadamente 1 hora máximo.
• Cuando la batería esté completamente cargada, la pantalla mostrará un símbolo
de “batería completa”. El tiempo de funcionamiento sin conexión a una fuente de
alimentación es de máx. 15 minutos para el uso de emergencia.
Opciones de carga:
Conecte el dispositivo a un ordenador / laptop utilizando el cable de conexión USB (3).
Consulte “Modo PC” antes de la conexión.
O
Enchufe el dispositivo con el cable de conexión USB (3) en el puerto A del cargador de
coche doble USB (4) para el uso en coche / camión.
Sólo cuando se utiliza con cargador de coche:
Tan pronto como arranque el motor del coche, la grabación comenzará automáticamente.
El QUINTEZZ HD 720P DASHCAM se cargará durante la grabación. Cuando el cargador
para automóvil está desconectado de la unidad, el QUINTEZZ HD 720P DASHCAM se
apagará automáticamente después de unos segundos y guardará los archivos.
Precaución: Con batería baja, el QUINTEZZ HD 720P DASHCAM entrará en estado de
protección. Cargue la batería para asegurarse de que puede encender el dispositivo.
USO DE TARJETA SD (NO SUMINISTRADO, OPCIONALMENTE DISPONIBLE)
Véase la ilustración II
• Inserte la tarjeta SD en la ranura SD hasta que encaje en su lugar.
• Para extraer la tarjeta SD, presione ligeramente la tarjeta. Se expulsa parcialmente
permitiendo sacar la tarjeta.
• Sin tarjeta en la ranura SD, la pantalla muestra “Sin tarjeta”.
Nota:
1. Recomendamos utilizar una tarjeta SDHC de 16 GB (o superior) con la clase 10 (o
superior). (No suministrado, opcionalmente disponible)
2. Sin la tarjeta del SD, la unidad NO funcionará!
3. Si la tarjeta SD está insertada de forma incorrecta (difícil de insertar), puede dañar el
dispositivo y la tarjeta de memoria. ¡Esta es la responsabilidad del usuario!
4. El dispositivo congurará la tarjeta SD después de haber sido insertada.
5. Formatee la tarjeta SD en el menú del QUINTEZZ HD 720P DASHCAM. Consulte
“Conguración del Sistema”.
* Depende de la marca de tarjeta SD, modelo y tipo de clase. Los datos son aproximados.
MONTAJE
Ver ilustración III
• Montar el QUINTEZZ HD 720P DASHCAM (1) en la ventosa (2).
• Humedezca la ventosa, colóquela en el interior del parabrisas y cierre la taza con
la palanca. Recomendamos colocar el QUINTEZZ HD 720P DASHCAM en el lado
derecho del espejo retrovisor.
• Ajuste el soporte utilizando las perillas de ajuste.
• Asegúrese de que la cámara esté montada horizontalmente para obtener la mejor
vista.
• Conecte el cargador de coche doble USB (4) al encendedor del automóvil para
obtener alimentación.
VIDEO* IMAGEN*
RANURA SD 1280X720 848X480 640X480 1280X1024 1600X1200 2048X1536 2592X1944
32GB 480 min 480 min 520 min 24320 23040 21920 18880
16 GB 240 min 240 min 260 min 12160 11520 10960 9440
USO DEL QUINTEZZ HD 720P # DASHCAM
MODOS
¡Atención! Este menú no funcionará cuando el modo MSDC esté activo.
MODO DE GRABACIÓN DE VIDEO
Se mostrará un icono rojo de cámara en la esquina superior izquierda de la pantalla.
• Cuando el QUINTEZZ HD 720P DASHCAM esté conectado a la fuente de
alimentación del coche, comenzará la grabación de vídeo tan pronto como
arranque el motor del coche. Se detendrá la grabación después de que el coche
se detiene.
• Cuando el QUINTEZZ HD 720P DASHCAM no esté conectado a la fuente de
alimentación del coche, pulse el botón (a) y pulse el botón (c) para
iniciar la grabación. La unidad estará automáticamente en modo de grabación de
vídeo. Pulse (c) de nuevo para detener la grabación y guardar los archivos
automáticamente.
• Grabación en bucle: Durante la grabación, el dispositivo guardará cada archivo de
vídeo cada 2, 5 o 10 minutos automáticamente. Cuando la tarjeta SD está llena, el
dispositivo borrará automáticamente el archivo de vídeo más antiguo.
MODO FOTO
Se mostrará un icono de foto en la esquina superior izquierda de la pantalla
• Pulse el botón MODE (f) 1x si desea realizar imágenes en lugar de grabaciones.
• Presione el botón (c) cada vez que quiera tomar una fotografía.
MODO DE GRABACIÓN DE AUDIO
Aparecerá un icono de audio en la esquina superior izquierda de la pantalla.
• Pulse el botón MODE (f) 2x si sólo desea grabar audio y pulse (c) para
iniciar la grabación.
• Pulse (c) de nuevo para detener la grabación y guardar los archivos
automáticamente.
• Pulse el botón (d) para pausar o comenzar a grabar de nuevo.
MODO DE REPRODUCCIÓN
Aparecerá un ícono de reproducción en la esquina superior izquierda de la pantalla.
• Para el modo de reproducción, pulse el botón MODE (f) 3x.
• Con los botones y (d-e) puede desplazarse por las grabaciones.
• Presione (c) para iniciar la reproducción.
• Presione el botón (d) para pausar o comenzar la reproducción nuevamente.
MODO PC
• Puede conectar el QUINTEZZ HD 720P DASHCAM a su PC mediante el cable
USB suministrado (3). Puede utilizarlo para copiar o reproducir archivos en su PC.
• Pulse los botones y (d-e) para elegir el modo:
»MSDC: Es una interfaz de computadora entre una computadora y una cámara
digital que muestra la cámara digital como una unidad de disco extraíble
conectada a la computadora.
»CAM / modo de grabación: Pulse el botón para iniciar la grabación de vídeo.
No es necesario instalar los controladores para utilizar el QUINTEZZ HD 720P
DASHCAM con su PC porque éstos ya están instalados por Windows en el paquete
de Windows *.
Debe conectar la cámara de la siguiente manera:
1. Asegúrese de que la batería esté cargada.
2. Utilice únicamente el cable USB SUMINISTRADO que se encontraba en el embalaje.
3. Encienda la cámara.
4. Conecte el cable USB con la cámara (en la parte superior) y sólo con el PC.
5. Seleccione “MSDC” en la cámara y pulse el botón (c).
6. El controlador se instalará ahora y en la carpeta “Mi PC” en su escritorio verá un nuevo
disco (duro) (es posible que aparezca una ventana en la que puede indicar cómo desea
ver los archivos).
7. Ahora puede ver todos los archivos de la carpeta y hacer doble clic en ellos para ver los
videos usando el reproductor estándar de Windows Media o Quicktime de Apple (puede
seleccionar usted mismo).
Nota:
• También puede extraer la tarjeta SD del DASHCAM y colocarla en un lector de
tarjetas SD (incorporado) desde su PC o un lector de tarjetas SD separado si tiene
uno. Esta es una solución rápida y fácil de usar.
* En caso de conicto, cuando la cámara no se reconoce o no se instala correctamente,
puede descargar los controladores USB desde el sitio web www.quintezz.com..
CONFIGURACIÓN DEL MENÚ
¡Atención! Este menú no funcionará
cuando el modo MSDC esté activo.
1. Encienda la unidad con la batería cargada o
con el cargador de coche doble USB.
2. Presione MODE (f) hasta que haya
seleccionado el modo deseado.
3. Presione (b) para entrar en el menú.
4. Pulse los botones & (d-e) para
desplazarse por los submenús.
5. Después de la selección, haga clic en
(c) o MODE (f) para conrmar y guardar la
conguración.
6. Presione (b) para salir.
Por ejemplo: para establecer la fecha y la
hora, siga estos pasos:
1. Asegúrese de que la batería esté cargada.
2. Encienda la cámara.
3. Presione (b).
4. Presione MODE (f).
5. Utilice el botón (e) para ir a DATE & TIME.
6. Presione el botón (c).
7. Ahora puede utilizar los botones & (d-
e) para cambiar la fecha y la hora y conrmar
cada ajuste pulsando el botón MODE (f).
8. Tan pronto como esté listo, debe presionar
(b) o (c) para conrmar los ajustes.
MENU VIDEO
Movie Size
(HD) 1280x720
Resolución video
(D1) 848x480
(640) 640x480
Date stamp
Off
Indicación de la
fecha de la grabación
Date
Date & Time
Motion Detect Off *
Grabación automática
cuando se detecta
movimiento cuando se
utiliza con la batería
On
Loop Rec.
Off
grabación del ciclo
On *
Loop Time
2 min *
Ahorrar tiempo de
cada sección de la
tarjeta SD
5 min
10 min
Video sound On
grabación sonora
Off
MENU FOTO
Resolution
(5MP) 2592x1944
(3MP) 2048x1536
(2MP) 1600x1200
(1MP) 1280x1024
Quality Super Fine
Fine
Normal
Exposure
-2.0/ -1.7/ -1.3/
-1.0/ -0.7/ -0.3/
+0.0/ +0.3/ +0.7/
+1.0/ +1.3/ +1.7/
+2.0
control de brillo
Capture Mode Off
Foto
temporizador
Self-timer 2S
Self-timer 10S
Burst
Date stamp Off
indicación de
la fecha en la
fotografía
Date&Time
MENU REPRODUCCIÓN
Lock Lock/Unlock one
bloqueo de
archivos
Lock All
Unlock All
Delete One
Eliminación de
archivos
All
Slide show Start
Interval
Repeat
Voice memo
Add
Delete
ATENCIÓN AL CLIENTE
Para obtener más información, preguntas técnicas y
solicitudes de devolución relacionadas con este producto,
debe ponerse en contacto con [email protected].
GARANTÍA
Copyright © Quintezz. Quintezz es una marca registrada de
TE-Group NV. La marca Quintezz representa una calidad
de producto superior y un excelente servicio al cliente.
Por eso Quintezz garantiza este producto contra todos
los defectos de material y mano de obra por un período
de dos (2) años a partir de la fecha de compra original del
producto. Las condiciones de esta garantía y el alcance de
la responsabilidad de Quintezz bajo esta garantía se pueden
descargar desde nuestro sitio web www.quintezz.com.
AJUSTES DEL SISTEMA
¡Atención! Este menú no funcionará cuando el modo MSDC esté
activo.
1. Encienda la unidad.
2. Pulse (b) para entrar en el menú cuando el dispositivo esté en
modo de grabación.
3. Presione MODE (f) hasta que pueda seleccionar el menú de
conguración. Pulse (c) para seleccionar.
4. Utilice los botones & (d-e) para desplazarse por los submenús.
5. Después de la selección, haga clic en MODE (f) o (c) para
conrmar y guardar la conguración.
6. Presione (b) para salir.
7. La conguración cambiará después de reiniciar la unidad.
Sounds Shutter On
suono otturatore
Off
Start-up None
Selezionare il
suono di avvio
1
2
3
Beep On
Tono dei tasti
Off
Volume
0/ 1/ 2/ 3
Power frequency 50 Hz*
60 Hz
Power save 1 Min
apagado
automático cuando
el uso de la batería
3 Min
5 Min
OFF*
Panel protect 30 sec.
Panel de proteger
Protector de
pantalla cuando
se utiliza con la
batería.
1 min.
2 min.
OFF*
Date & Time Year
Month
Day
Hour
Minute
Time Style
MM/DD/YYYY
DD/MM/YYYY
YYYY/MM/DD
Language
English, Dutch, French, Spanish
Italian, Portuguese, Czech, Hungarian,
Swedish, Russian, Polish, German,
Turkish, Greek
Format Yes
Formateo de una
tarjeta de memoria
No
i tiene problemas con su tarjeta SD (como
"memoria llena"), se debe formatear la
tarjeta en este menú, y hacer un "reset
todos *" a los ajustes de fábrica
LED licht Off*
On
*Reset all Yes
La restauración
de los ajustes de
fábrica
No
Version
versiones de software
GB
ES
ILLUSTRACIONES
* Recommended setting.
MODES
Attention! This menu will not function when MSDC mode is active.
VIDEO RECORDING MODE
A red camera icon will be shown in the upper left corner of the display.
• When the QUINTEZZ HD 720P DASHCAM is connected to your car’s power
supply, it will start Video recording as soon as the car engine is started. It will
stop recording after the car is stopped.
• When the QUINTEZZ HD 720P DASHCAM is not connected to the car’s
power supply, press the button (a), and press the button (c) to start
recording. The unit will automatically be in Video recording mode. Press
(c) again to stop recording and save the les automatically.
• Loop recording: During recording, the device will save each video le every 2,
5 or 10 minutes automatically. When the SD card is full, the device will delete
the oldest video le automatically.
PHOTO MODE
A photo icon will be shown in the upper left corner of the display.
• Press the MODE button (f) 1x if you want to make pictures instead of recordings.
• Press the button (c) every time you want to take a picture.
AUDIO RECORDING MODE
An audio icon would be shown in the upper left corner of the display.
• Press the MODE button (f) 2x if you want to make Audio recordings only, and
press (c) to start recording.
• Press (c) again to stop recording and save the les automatically.
• Press the button (d) to pause or begin recording again.
PLAYBACK MODE
A playback icon will be shown in the upper left corner of the display.
• For Playback mode, press the MODE button (f) 3x.
• Using the and buttons (d-e) you can scroll through the recordings.
• Press (c) to start playback.
• Press the button (d) to pause or begin playback again.
USE OF THE QUINTEZZ HD 720P
#
DASHCAM
* Conguración recomendada.
Ilustración II
Ilustración III
DECLARATION OF CONFORMITY
Hereby,
Par la présente,
Company:
Entreprise:
Address:
Adresse:
declare that the following equipment:
déclare que le disposif suivant :
Product name:
Nom du produit:
Product type:
Type de produit:
Joseph van Oosterum, CEO TE-Group NV
DECLARATION OF CONFORMITY
TE-Group NV
Kapelsestraat 61, 2950 Kapellen, Belgium
Quintezz HD 720P# Dashcam
Dashboard Flat Camera - Caméra embarquée plate
conforms with the following safety requirements of the direcves 2011/65/EU &
2014/30/EU. Conformity is guaranteed by the CE-symbol.
est conforme aux exigences de sécurité suivantes des direcves 2011/65/EU &
2014/30/EU. La conformité est garane par le symbole CE.
This product has been tested against following standards and specificaons, applying
versions valid in January 2016.
Ce produit a été testé par rapport aux normes et spécificaons suivantes, appliquant les
versions valides en Janvier 2016.
EN 55022
EN 55024
---------- Manual/QUINTEZZ HD 720P
#
DASHCAM HD carbon/05-16/V02 ------------
Copyright © Quintezz
Ilustración I
* Recommended setting.
* Conguración recomendada.
#
INTERPOLATED
#
-
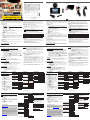 1
1
-
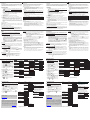 2
2
-
 3
3
-
 4
4


in andere talen
- English: Quintezz HD 720P User manual
- italiano: Quintezz HD 720P Manuale utente
- français: Quintezz HD 720P Manuel utilisateur
- español: Quintezz HD 720P Manual de usuario
- Deutsch: Quintezz HD 720P Benutzerhandbuch
Andere documenten
-
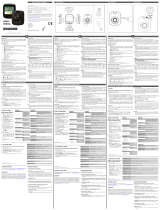 Mr Handsfree Dashcam 1080P HD DC-100 de handleiding
-
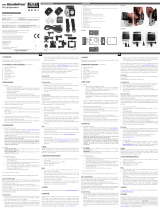 Mr Handsfree Sportscam 100 - FULL HD Sportcamera de handleiding
-
Ring RDC1000 Gebruikershandleiding
-
Hama 00136697 de handleiding
-
Bresser Junior 9680850 de handleiding
-
National Geographic NATIONAL GEOGRAPHIC 9180850 de handleiding
-
-
Caliber DVR225DUAL de handleiding
-
-
Gembird DCAM-GPS-01 Handleiding

