
GUIDE D’UTILISATION/ USER GUIDE
GEBRUIKSGIDS /
ﻝﺎﻤﻌﺘﺳﻹﺍ ﻞﻴﻟﺩ
BBP200 FR

BBP200 FR
BeeWi SmartPad application:

User’s guide
4
9
14
20
FRANCAIS
ENGLISH
NEDERLANDS
ﺔﻴﺑﺮﻌﻟﺍ

4
FRANÇAIS
INTRODUCTION
La prise connectée BBP200, une des plus avancées de sa génération, peut être
complètement gérée à distance avec une application dédiée sur Smartphone. Elle est
entièrement programmable pour régler l’alimentation d’un dispositif électrique et permet
aussi de contrôler les mouvements et la température dans son environnement proche. Elle
parfaitement adaptée pour différent types d’automatismes :
- Allumer ou éteindre manuellement un dispositif électrique au moyen du bouton physique
ou à partir de l’application
- Allumer ou éteindre un dispositif électrique automatiquement en fonction de l’heure, de
la température ou de la détection de présence
- Gérer les historiques de présence ou de température
Basée sur la dernière technologie Bluetooth Low Energy, elle est compatible avec
l’ensemble des appareils Bluetooth Smart Ready comme les Smartphones et tablettes de
récente génération au moyen d’applications dédiées.
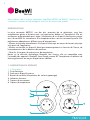
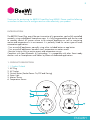
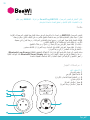
1. DESCRIPTION DU PRODUIT
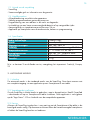
1.1. Description
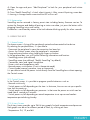
1. Prise électrique
2. Socle pour dispositif externe
3. Bouton de contrôle (Alimentation du socle et appairage)
4. Indicateur lumineux
5. Capteur de mouvement
6. Capteur de température
Merci d’avoir choisi la prise connectée SmartPlug BBP200 de BEEWI. Veuillez lire les
instructions suivantes afin de configurer et utiliser au mieux votre produit.
1
5
2
6
4
3

5
FRANÇAIS
1.2. Contenu du pack
• Prise SmartPlug
• Guide simplifié et information de garantie
1.3. Caractéristiques principales
• Contrôle à distance des dispositifs électriques
• Automatismes entièrement programmables
• Programmation d’un radiateur en modes économique et confort
• Allumage d’une lampe sur détection de présence ou à heures spécifiques
• Historiques de présence et de température sur 24 heures
• Application sur Smartphone pour contrôle à distance, gestion et programmation
1.4. Spécifications
2. MODE AUTONOME
2.1. Introduction
Le mode autonome est le mode par défaut de la prise SmartPlug. Cela correspond à un
accès local via une application sur Smartphone ou tablette.
2.2. Réglages préalables
Pour utiliser la prise en mode local, télécharger et installer l’application « BeeWi
SmartPad » sur Smartphone ou tablette. Cette application est disponible sur les « App
Stores » iOS & Android pour les appareils compatibles.
2.3. Appairage
Avant d’utiliser la prise, il est nécessaire de l’apparier en mode sécurisé avec le
Smartphone ou la tablette. De cette manière, seuls les Smartphones ou tablettes autorisés
pourront adresser et commander la prise.
1) Télécharger et installer l’application BeeWi SmartPad
2) Brancher la prise dans le socle mural. L’indicateur clignote une fois par seconde.
Technologie radio Bluetooth Smart
Portée Classe 2, jusqu’à 30 mètres
Puissance de sortie Max 16A, 3600 W
Alimentation 100-250V Alternatif, 50-60 Hz
Capteur de température +/- 1°C de -25° à +85°C
Capteur de mouvement Angle de 100°, distance 5 mètres
Dimensions L124 x l76 x H36.5 mm
Poids 170 g

6
FRANÇAIS
3) Appuyer sur le bouton de la prise pendant 2 secondes jusqu’à ce que l’indicateur
clignote deux fois par seconde..
4) Lancer l’application SmartPad et activer le bouton “Ajouter périphérique » pour
rechercher le périphérique.
5) Dès que la prise « BeeWi SmartPlug » est listée, la sélectionner pour l’apparier. Après
un appairage réussi, un nouveau cartouche est affiché sur l’écran principal et l’indicateur
s’éteint.
2.4. Restauration
La prise SmartPlug peut être restaurée à l’état initial incluant le firmware usine. Pour
restaurer le firmware usine et supprimer les données d’appairage ou d’utilisation,
appuyer sur le bouton tout en branchant la prise sur un socle mural. La restauration est
confirmée par l’indicateur clignotant rapidement pendant quelques seconds.
3. UTILISATION DE L’APPLICATION
Attention: certaines opérations peuvent différer en fonction de l’OS de l’appareil.
3.1. Ecran principal
L’écran principal liste les différents périphériques appariés sous forme de cartouches.
En sélectionnant un cartouche de périphérique, il est possible de :
- Reconnecter le périphérique dans le cas où la connexion a été perdue
- Accéder à l’écran de contrôle lorsque le périphérique est connecté
Dans le cartouche, vous trouverez les informations et les fonctions suivantes:
- Icône de la prise SmartPlug (éditable)
- Nom de la prise SmartPlug (éditable, par défaut “BeeWi SmartPlug”)
- Etat de la connexion et barre de signal
- Etat On/Off et valeur de température
- Bouton interrupteur On/Off (si le mode thermostat n’est pas actif)
- Mode présent (manuel, présence, minuteur ou thermostat)
Il est possible de contrôler le bouton On/Off directement sur le cartouche sans ouvrir
l’écran de contrôle.
3.2. Ecran de contrôle
Dans l’écran de contrôle il est possible de faire les réglages suivants :
- Commutation manuelle uniquement
- Commutation en fonction du temps : dans ce cas, l’utilisateur peut programmer des
plages de temps spécifiques pour l’allumage de la prise.
- Commutation en fonction de la présence : dans ce cas, la prise peut s’allumer pendant
5 secondes jusqu’à 5 minutes.
- Commutation en fonction de la température pour régler un radiateur en modes
économique (température réduite) et confort (température max) durant la journée.
3.3. Ecran d’historiques
L’écran d’historiques affiche les graphes de température et de présence jusqu’à 24

7
FRANÇAIS
heures. Les graphes peuvent être ajustés sur différente périodes en cliquant dessus :
- Température : 24, 12 ou 6 H
- Présence : 24, 12, 6, 3 ou 1H
Noter que la température est affichée avec une précision de 1°C et la présence par
plage de 10 minutes.
3.4. Ecran d’édition
L’écran d’édition permet l’édition de certains détails de la prise SmartPlug tels que
le nom ou l’icône. Cet écran inclus aussi d’autres réglages tells que les fonctions
d’enregistrement de la présence.
L’écran d’édition inclus aussi l’information de version du firmware et un bouton de mise
à jour qui apparait dans le cas où un nouveau firmware est disponible. Pour mettre à
jour le firmware, presser simplement le bouton “Mise à jour” puis confirmer l’action et
attendre environ 6 minutes la fin de la mise à jour.
4. MODE DISTANT
4.1. Introduction
La prise SmartPlug peut aussi être contrôlée à distance en utilisant une passerelle internet
dédiée. Pour plus de renseignements consultez notre site web : www.bee-wi.com.
Dans ce cas, il est nécessaire d’utiliser une application web différente comme décrit dans
le manuel de la passerelle BeeWi.
4.2. Appairage
Pour enregistrer la prise sur le réseau HomeBee, il est nécessaire de l’appairer de manière
sécurisée à la passerelle. Pour ce faire, suivre les étapes suivantes:
1) Brancher la prise dans le socle mural. L’indicateur clignote une fois par seconde.
2) Appuyer sur le bouton de la prise pendant 2 secondes jusqu’à ce que l’indicateur
clignote deux fois par seconde.
3) Appuyer sur le bouton de la passerelle pendant 1 seconde jusqu’à ce que l’indicateur
clignote deux fois par seconde pour initier l’appairage.
4) Dès que la prise est appariée avec succès à la passerelle, l’indicateur clignote une fois
par secondes et le nouveau périphérique s’affiche sur l’écran de l’application web.
4.3. Serveur Web
Aller sur le portail HomeBee en utilisant un navigateur internet ou l’application Web sur
Smartphone et tablette pour accéder au périphérique.
En utilisant le portail avec votre compte utilisateur, il est possible d’accéder à la plupart
des fonctions disponibles sur l’application SmartPad :
- Etats de la prise SmartPlug : On/Off, valeur de température et mode programmé.
- Réglages des actions: activation de la prise manuellement ou selon les heures
programmées.
- Réglages des alertes : envoi d’une alerte par email en cas de présence détectée ou de
niveau spécifique de température.
- Visualisation des graphes d’historique de présence ou de température.

8
FRANÇAIS
5. PRECAUTIONS ET EXCLUSIONS DE GARANTIE
5.1. Entretien du produit
• Utiliser le produit en intérieur uniquement.
• Eviter d’exposer le produit à des températures extrêmes, au-delà de 45°C ou en-deçà
de -10°C pour conserver un fonctionnement et des performances optimales.
• Ne pas exposer le produit à l’humidité ou la moisissure.
• En cas de non utilisation prolongée, entreposer le produit dans un endroit sûr.
5.2. Dommages non couverts par la garantie standard
• Dommages causés par une utilisation inadéquate du produit, notamment choc, chute,
exposition à des températures extrêmes, à la poussière ou l’humidité ou autres causes.
• Dommages résultant du non-respect des instructions du constructeur.
• Dommages cosmétiques tels que, éraflures, traces de colles ou autres changement fait
au produit.
• Dommages consécutifs au démontage du produit ou à une tentative de réparation par
du personnel non autorisé.
Copyright et autres informations
BEEWI est une marque déposée. Les autres marques mentionnées ci-après appartiennent
à leurs propriétaires. Les autres noms de produit ou de service utilisés sont la propriété de
leurs détenteurs respectifs.
L’utilisation d’appareils sans fil et de ses accessoires peuvent être interdite dans certains
endroits. Toujours respecter les réglementations et lois en vigueur.
Ce produit est couvert par une garantie de deux ans s’appliquant à compter de la date
d’achat du matériel. Les utilisateurs n’ont pas l’autorisation de faire quelque changement
ou modification que ce soit. Tout changement ou modification non expressément approuvé
annule la garantie.
Veuillez visiter notre site web www.bee-wi.com pour plus d’information.
Support technique: suppor[email protected].
© OTIO, 2016.
OTIO - SAS, 719 rue Albert Camus - 31190 Auteriv France

9
ENGLISH
INTRODUCTION
The BBP200 Smart Plug, one of the most innovative of its generation, can be fully controlled
remotely using a dedicated Smartphone app. It is fully programmable and can be used
to remotely control AC power source to an external appliance as well as monitoring
motion and temperature in its environment. It is perfectly suited for various types of home
automation applications:
- Turn on and off appliances manually using either included button or app button
- Turn on and off appliances based on time, temperature or motion events
- Monitor histories such as motion events and temperature curves
Compliant with latest Bluetooth 4.0 technology, it is compatible with other Smart ready
devices such as Smartphones and Tablets by means of dedicated applications.
1. PRODUCT DESCRIPTION
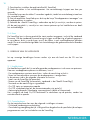
1.1. Product Outlook
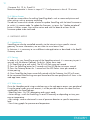
1. AC Plug
2. AC Socket
3. Control Button (Socket Power On/Off and Pairing)
4. Status Light
5. Motion Sensor
6. Temperature Sensor
Thank you for purchasing the BBP200 SmartPlug from BEEWI. Please read the following
instructions to learn how to configure and use more effectively your product
1
5
2
6
4
3

10
ENGLISH
1.2. Package Content
• SmartPlug
• Quick Start Guide and other info
1.3. Main features
• Remote control your electric appliances
• Fully programmable
• Program your heater to get comfort temperature when you are present
• Switch on a light when you come through or at specific hours
• Get the history of presence and temperature
• Smartphone App support for remote control, monitoring and programming features
1.4. Specifications
2. STANDALONE MODE
2.1. Introduction
The standalone mode is the default mode for SmartPlug. This corresponds to the local
access via a Smartphone or Tablet app.
2.2. Initial Settings
To use SmartPlug in standalone mode, first download and install the “BeeWi SmartPad”
application on Smartphone or Tablet devices. This app is available on the app stores for
compatible iOS and Android devices.
2.3. Pairing
Before using SmartPlug, it is necessary to securely pair the Smartphone and SmartPlug.
This way, only authorized Smartphone or Table will be able to access the Plug.
1) Download the BeeWi SmartPad app.
2) Plug SmartPlug into a wall socket. The LED will flash once by second.
3) Press SmartPlug button for 2 seconds until the LED flashes twice per second.
Radio technology Bluetooth Smart
Range Class 2, up to 30 meter typical
Output Power Ratings 16A max, up to 3600 W
Power Ratings Input : AC 100-250V, 50-60 Hz
Temperature sensor +/- 1° C from -25° to +85°C
Motion sensor 100° radius, up to 5 meters
Dimensions L124 x W76 x H36.5 mm
Weight 170 g

11
ENGLISH
4) Open the app and press “Add Peripheral” to look for your peripheral and initiate
pairing.
5) Once “BeeWi SmartPlug” is listed, select it to pair it. After successful pairing, a new box
is showing in the app home screen and the LED will turn off.
2.3. Restauration
SmartPlug can be restored in factory preset state including factory firmware version. To
restore the firmware and delete all pairing or status user data, just press the button whilst
plugging SmartPlug into a wall socket.
Restoration is confirmed by means of the Led indicator blinking quickly for a few seconds.
3. USING THE APP
3.1. Home Screen
The home screen is listing all the peripherals paired and connected to the device.
By selecting the peripheral box, it is possible to:
- Reconnect the peripheral in case the connection has been lost
- Access the Control screen when the peripheral is connected
- Drag and move the box when holding the finger on the box
In the peripheral box, you will find the following information and function:
- SmartPlug picture (user defined)
- SmartPlug name (user defined, “BeeWi SmartPlug” by default)
- Connection status and signal strength bar
- Power switch and temperature status
- Manual power switch button (if not in thermostat mode)
- Current mode (manual, presence, timer or thermostat)
It is possible to control the power switch directly from the SmartPlug box without opening
the Control screen.
3.2. Control Screen
In the Control screen, it is possible to program specific behaviors such as:
- Manual switch only.
- Switch power on/off depending on the time: in that case, the user can set up a specific
time slots for power on.
- Switch power on/off depending on presence: in that case the power on switch can be
timed from 5 seconds to 5 minutes.
- Switch power on/off depending on actual temperature to set up eco and comfort
temperature period during the day.
3.3. History Screen
The history screen provides up to 24H history graphs for both temperature and presence.
Both graphs can be set for different period of times, by clicking on them.
- Temperature: 24, 12, and 6H

12
ENGLISH
- Presence: 24, 12, 6, 3 and 1H
Note the temperature is shown in steps of 1° C and presence in slots of 10 minutes
3.4. Edition Screen
The edition screen allows for editing SmartPlug details such as name and picture and
other settings such as presence recording.
The edition screen also includes a button to update SmartPlug with the latest firmware or
to switch it in remote mode. To update the firmware, just press the “Update peripheral”
button in Edition screen, then confirm action and wait for about 6 minutes for the
firmware update to be confirmed.
4. GATEWAY MODE
4.1. Introduction
SmartPlug can also be controlled remotely via the internet using a specific internet
gateway. For more information, see our web site www.bee-wi.com.
In that case, it is necessary to use a different web application as described in the BeeWi
Gateway manual.
4.2. Pairing
In order to list your SmartPlug as part of the HomeBee network, it is necessary to pair it
securely with the Master Gateway. To do this, follow these steps:
1) Fit SmartPlug into a wall socket. The LED will flash once per second
2) Press the SmartPlug button for 2 seconds until the LED flashes twice per second.
3) Press the Gateway button for 1 second until the LED flashes twice per second to
initiate pairing.
4) Once SmartPlug has been successfully paired with the Gateway, the LED will revert
to the connected state flashing once par second and the new peripheral will show in the
web app home screen.
4.3. Web server
Go to the HomeBee portal using a web browser or the web app to access your peripheral.
Using the portal under your own account, it will be possible to access the same functions
supported by the SmartPad app:
- SmartPlug status: On/Off, temperature and current mode.
- Action settings: switch the SmartPlug On and Off manually or depending on time, pres-
ence or temperature.
- Alert settings: send an alert email in case of presence detection or specific temperature
level.
- View history graphs for presence and temperature.

13
ENGLISH
5. CAUTION & WARRANTY EXCEPTIONS
5.1. Taking care of your product
• Use the product indoor only.
• Avoid storage at extreme temperatures, above 45°C (including direct sunlight) or
below -10°C.
• Do not expose the product to rain or moisture.
• When not in use, always store the product in a safe place.
5.2. Damages not covered by standard Warranty
• Damages caused by an improper use of the product such as shocks, drops, exposition
to extreme temperatures, dust, or humidity, or any other cause.
• Damages resulting from any non-respect of manufacturer instructions.
• Cosmetic damages such as scratches, paint, glue or any other alteration made to the
product.
• Damages to the product after an repair or disassembly from non authorized personal.
Copyright and other legal information
BEEWI is a registered trademark. Other trademarks mentioned herewith are owned by
their proprietors. All other product or service names are the property of their respective
owners.
The use of wireless devices and their accessories may be prohibited or restricted in certain
areas. Always obey the laws and regulations on the use of these products.
This product is covered by a 2-year product warranty which is valid from the date of
purchase. Users are not permitted to make changes or modify the device in any way.
Changes or modifications not expressly approved by the party responsible for compliance
will void the user’s warranty.
Please visit our website www.bee-wi.com for more information.
Technical support: [email protected].
© OTIO, 2016.
OTIO - SAS, 719 rue Albert Camus - 31190 Auteriv France

14
NEDERLANDS
INLEIDING
Die Steckdose BBP200, eine der fortschrittlichsten ihrer Generation, kann mit einer
speziellen Smartphone-App voll und ganz ferngesteuert werden. Sie ist umfassend
programmierbar, um die Versorgung eines Elektrogeräts zu steuern und kann Bewegungen
und die Temperatur in ihrer näheren Umgebung überwachen. Sie ist für verschiedene
automatische Steuerungsarten perfekt geeignet:
- manuelles Ein- oder Ausschalten eines elektrischen Geräts mit Hilfe des Schalters oder
über die App,
- automatisches Ein- oder Ausschalten eines elektrischen Geräts in Abhängigkeit von der
Zeit, der Temperatur oder nach Anwesenheitsdetektion,
- Verwaltung von Anwesenheits- bzw. Temperaturberichten.
Da sie auf der neuesten Bluetooth Low Energy-Technologie basiert, ist sie anhand spezieller
Applikationen mit allen Bluetooth Smart Ready-Geräten
1. BESCHRIJVING VAN HET PRODUCT
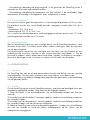
1.1. Beschrijving
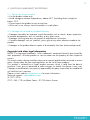
1. Stekker
2. Voet voor externe apparatuur
3. Controleknop (Voeding van de voet en pairing)
4. Controlelampje
5. Bewegingssensor
6. Temperatuursensor
Wij danken u voor uw keuze van de SmartPlug BBP200 van BEEWI. Gelieve de volgende
instructies door te lezen, om uw product zo goed mogelijk te kunnen configureren en
gebruiken.
1
5
2
6
4
3

15
NEDERLANDS
1.2. Inhoud van de verpakking
- SmartPlug
- Vereenvoudigde gids en informatie over de garantie
1.3. Hoofdkenmerken
- Afstandsbediening van elektrische apparatuur
- Volledig programmeerbare gestuurde processen
- Programmering van een radiator in de nacht- en dagmodus
- Inschakeling van een lamp na aanwezigheidsdetectie of op vastgestelde tijden
- Aanwezigheids- en temperatuuroverzichten over 24 uur
- Applicatie op Smartphone voor afstandscontrole, beheer en programmering
1.4. Specificaties
N.b.: er bestaan 3 verschillende versies, naargelang het stopcontact: Frankrijk, Europa,
VS
2. AUTONOME MODUS
2.1. Inleiding
De autonome modus is de standaard modus van de SmartPlug. Deze komt overeen met
een complete toegang via een applicatie op een Smartphone of een tablet.
2.2. Voorafgaande instellingen
Om de SmartPlug in lokale modus te gebruiken, moet u de applicatie « BeeWi SmartPad
» downloaden en op uw Smartphone of tablet installeren. Deze applicatie is verkrijgbaar
op de “App Stores” iOS en Android voor de compatibele apparaten.
2.3. Pairing
Alvorens de SmartPlug te gebruiken is een pairing met de Smartphone of de tablet in de
beveiligde modus nodig. Op deze manier kunnen alleen de hiertoe bevoegde Smartphones
of tablets de SmartPlug bereiken en bedienen.
Radio technologie Bluetooth Smart
Bereik Klasse 2, tot 30 meter
Uitgangsvermogen Max 16A, 3600 W
Voeding 100-250V Wisselspanning, 50-60 Hz
Temperatuursensor +/- 1°C tussen -25° en +85°C
Bewegingssensor Hoek van 100°, afstand 5 meter
Afmetingen L124 x Br76 x H36.5 mm
Gewicht 170 g

16
NEDERLANDS
1) Download en installeer de applicatie BeeWi SmartPad
2) Steek de stekker in het wandstopcontact. Het controlelampje knippert een keer per
seconde.
3) Houd de knop van de stekker 2 seconden ingedrukt, totdat het controlelampje twee keer
per seconde knippert.
4) Start de applicatie SmartPad op en druk op de knop “Randapparatuur toevoegen” om
de randapparatuur te zoeken.
5) Selecteer de « BeeWi SmartPlug » zodra deze op de lijst verschijnt, om deze te pairen.
Als de pairing gelukt is, verschijnt er een nieuwe patroon op het hoofdscherm en dooft
het controlelampje.
2.4. Reset
De SmartPlug kan in de oorspronkelijke staat worden teruggezet, inclusief de standaard
firmware. Om de standaard firmware terug te krijgen en de pairing- of gebruiksgegevens
te verwijderen, drukt u op de knop, terwijl de stekker in een wandstopcontact gestoken
wordt. De reset wordt bevestigd door het controlelampje dat gedurende enkele seconden
snel knippert.
3. GEBRUIK VAN DE APPLICATIE
Let op: sommige handelingen kunnen anders zijn aan de hand van de OS van het
apparaat.
3.1. Hoofdscherm
Het hoofdscherm geeft de lijst met alle gepairde randapparatuur in de vorm van patronen.
Door een randapparatuurpatroon te selecteren, kunt u:
- De randapparatuur opnieuw aansluiten, indien de aansluiting mislukt is
- Naar het controlescherm wanneer de randapparatuur is aangesloten
In de patroon vindt u de volgende informatie en functies:
- Icoon van de SmartPlug (te bewerken)
- Naam van de SmartPlug (te bewerken, standaard is dat “BeeWi SmartPlug”)
- Toestand van de aansluiting en signaalbalk
- On/Off status en temperatuurwaarde
- On/Off schakelaarknop (als de thermostaatmodus niet actief is)
- Aanwezigheidsmodus (handmatig, aanwezigheid, tijdklok of thermostaat)
Het is mogelijk de knop On/Off rechtstreeks te controleren op de patroon, zonder het
controlescherm te openen.
3.2. Controlescherm
Op het controlescherm kan men de volgende instellingen uitvoeren:
- Uitsluitend handmatige omschakeling
- Omschakeling naargelang de tijd: in dit geval kan de gebruiker de specifieke tijdsverlopen
programmeren voor het inschakelen van de SmartPlug.

17
NEDERLANDS
- Omschakeling naargelang de aanwezigheid: in dit geval kan de SmartPlug tussen 5
seconden en 5 minuten ingeschakeld worden.
- Omschakeling naargelang de temperatuur om een radiator in de nachtmodus (lage
temperatuur) of overdag in de dagmodus (max. temperatuur) te zetten.
3.3. Overzichtsscherm
Het overzichtsscherm geeft de temperatuur- en aanwezigheidsgrafieken tot 24 uur weer.
De grafieken kunnen over verschillende periodes aangepast worden door hier op te
klikken:
- Temperatuur: 24, 12 of 6 uur
- Aanwezigheid: 24, 12, 6, 3 of 1 uur
Wij wijzen er op dat de temperatuur wordt weergegeven met een precisie van 1°C en de
aanwezigheid per periode van 10 minuten.
3.4. Bewerkingsscherm
Met het bewerkingsscherm kan men sommige details van de SmartPlug bewerken, zoals
de naam of de icoon. Dit scherm omvat tevens andere instellingen, zoals de registratie
van de aanwezigheid.
Het bewerkscherm omvat ook de informatie over de versie van de firmware en een
updateknop die verschijnt wanneer er een nieuwe firmware beschikbaar is. Om de
firmware te updaten, hoeft u alleen maar op de knop “Update” te drukken en vervolgens
de actie te bevestigen en ca. 6 minuten te wachten tot het einde van de update.
4. AFSTANDSMODUS
4.1. Inleiding
De SmartPlug kan ook op afstand gecontroleerd worden met behulp van een speciale
internetgateway. Ga voor meer informatie naar onze website: www.bee-wi.com
In dat geval moet u een andere webapplicatie gebruiken dan beschreven in de handleiding
van de gateway BeeWi.
4.2. Pairing
Om de SmartPlug op het netwerk HomeBee te pairen, moet deze op beveiligde wijze aan
de gateway gekoppeld worden. Volg daarvoor de volgende stappen:
1) Steek de stekker in het wandstopcontact. Het controlelampje knippert een keer per
seconde.
2) Houd de knop van de stekker 2 seconden ingedrukt, totdat het controlelampje twee keer
per seconde knippert.
3) Houd de knop van de gateway 1 second ingedrukt, totdat het controlelampje twee keer
per seconde knippert, om met het pairen te beginnen.
4) Zodra de SmartPlug met succes met de gateway gepaird is, knippert het controlelampje
een keer per seconde en wordt de nieuwe randapparatuur op het scherm van de
webapplicatie weergegeven.

18
NEDERLANDS
4.4. Webserver
Ga naar het portaal HomeBee met behulp van een internetbrowser of de webapplicatie
op de Smartphone of tablet voor toegang tot de randapparatuur.
Door het portaal met uw gebruikersaccount te gebruiken, heeft u toegang tot de meeste
functies van de applicatie SmartPad:
- Staat van de SmartPlug: On/Off, temperatuurwaarde en geprogrammeerde modus.
- Instellingen van de handelingen: inschakeling van de SmartPlug met de hand of volgens
de geprogrammeerde tijden.
- Instellingen van de alarmen: verzending van een alarm per e-mail in geval van een
gedetecteerde aanwezigheid of een specifiek temperatuurniveau.
- Visualisering van de overzichtsgrafieken van aanwezigheid of temperatuur.
5. VOORZORGSMAATREGELEN EN GARANTIE-UITSLUITINGEN
5.1. Onderhoud van het product
• Gebruik het product uitsluitend binnenshuis.
• Vermijd blootstelling van het product aan extreem hoge en lage temperaturen, boven
45°C en onder -10°C om de werking en de prestaties optimaal te houden.
• Het product niet blootstellen aan vocht of schimmel.
• Berg het product op een beschutte plaats op wanneer u het lange tijd niet zult gebruiken.
5.2. Schade die niet gedekt wordt door de standaardgarantie
• Schade veroorzaakt door een onjuist gebruik van het product, met name schokken,
vallen, blootstelling aan extreem hoge of lage temperaturen, aan stof of vocht of andere
oorzaken.
• Schade voortvloeiend uit het niet in acht nemen van de instructies van de fabrikant.
• Cosmetische schade, zoals krassen, lijmsporen of aan het product aangebrachte
wijzigingen.
• Schade als gevolg van het demonteren van het product of van een poging tot reparatie
door onbevoegd personeel.

19
NEDERLANDS
Copyright en andere informatie
BEEWI is een gedeponeerd merk. De andere, hierna vermelde merken zijn eigendom van
hun eigenaren. De andere gebruikte product- of dienstennamen zijn het eigendom van hun
respectievelijke houders.
Op sommige plaatsen kan het gebruik van draadloze apparaten en hun accessoires
verboden zijn. Neem altijd de geldende regelgevingen en wetten in acht.
Dit product heeft een garantie van twee jaar vanaf de datum van aankoop van het
materiaal. De gebruikers hebben geen toestemming om veranderingen of wijzigingen
aan te brengen. Een verandering of wijziging waarvoor niet uitdrukkelijk toestemming
werd gegeven, annuleert de garantie.
Bezoek onze website www.bee-wi.com voor meer informatie.
Technische hulpdienst: suppor[email protected].
© OTIO, 2016
OTIO - SAS, 719 rue Albert Camus - 31190 Auteriv Frankrijk

20
ﺔﻴﺑﺮﻌﻟﺍ
ﺔﻣﺪﻘﻣ
ﺎﻫﺮﺜﻛﺃﻭ ﺔﻟﻮﺻﻮﻤﻟﺍ ﺲﺑﺎﻘﻤﻟﺍ ﺎﻴﺟﻮﻟﻮﻨﻜﺗ ﻝﺎﺠﻣ ﻲﻓ ﻪﻴﻟﺇ ﻞﺻﻮﺘﻟﺍ ﻢﺗ ﺎﻣ ﺙﺪﺣﺃ ﻦﻣ BBP200 ﻝﻮﺻﻮﻤﻟﺍ ﺲﺒﻘﻤﻟﺍ
ﻪﺘﺠﻣﺮﺑ ﻦﻜﻤﻳ .ﻲﻛﺬﻟﺍ ﻒﺗﺎﻬﻟﺍ ﻰﻠﻋ ﻪﺑ ﺹﺎﺧ ﻖﻴﺒﻄﺗ ﻝﺎﻤﻌﺘﺳﺎﺑ ﺪﻌﺑ ﻦﻋ ﺎﻴﻠﻛ ﻪﻴﻓ ﻢﻜﺤﺘﻟﺍ ﻦﻜﻤﻳ ﺚﻴﺣ ،ﺍﺭﻮﻄﺗ
ﻪﻄﻴﺤﻣ ﻲﻓ ﺓﺭﺍﺮﺤﻟﺍ ﺔﺟﺭﺩ ﻭ ﺕﺎﻛﺮﺤﻟﺍ ﻲﻓ ﻢﻜﺤﺘﻟﺎﺑ ﺎﻀﻳﺃ ﺢﻤﺴﻳ ﻭ ،ﻲﺋﺎﺑﺮﻬﻛ ﺯﺎﻬﺟ ﺔﻳﺬﻐﺗ ﻞﻳﺪﻌﺘﻟ ﻞﻣﺎﻜﻟﺎﺑ
:ﻲﺋﺎﻘﻠﺘﻟﺍ ﻞﻴﻐﺸﺘﻟﺍ ﻉﺍﻮﻧﺃ ﻒﻠﺘﺨﻣ ﻊﻣ ﺎﻣﺎﻤﺗ ﻢﻠﻗﺄﺘﻳ ﻪﻧﺇ .ﺏﺮﻗﻷﺍ
ﻖﻴﺒﻄﺘﻟﺍ ﻝﻼﺧ ﻦﻣ ﻭﺃ ﻱﺩﺎﻣ ﺭﺯ ﺔﻄﺳﺍﻮﺑ ﺎﻳﻭﺪﻳ ﻲﺋﺎﺑﺮﻬﻛ ﺯﺎﻬﺟ ءﺎﻔﻃﺇ ﻭﺃ ﺓءﺎﺿﺇ -
.ﺭﻮﻀﺣ ﻑﺎﺸﺘﻛﺍ ﻭﺃ ﺓﺭﺍﺮﺤﻟﺍ ﺔﺟﺭﺩ ،ﺔﻋﺎﺴﻟﺍ ﻖﻓﻭ ﺎﻴﺋﺎﻘﻠﺗ ﻲﺋﺎﺑﺮﻬﻛ ﺯﺎﻬﺟ ءﺎﻔﻃﺇ ﻭﺃ ﺓءﺎﺿﺇ -
.ﺓﺭﺍﺮﺤﻟﺍ ﺔﺟﺭﺩ ﻲﻓ ﻭﺃ ﺭﻮﻀﺤﻟﺍ ﺕﺎﻧﺎﻴﺑ ﻲﻓ ﻢﻜﺤﺘﻟﺍ -
(Bluetooth Low Energy) ﺔﻗﺎﻄﻠﻟ ﺾﻔﺨﻨﻤﻟﺍ ﻙﻼﻬﺘﺳﻻﺍ ﺕﺍﺫ ﺙﻮﺗﻮﻠﺒﻟﺍ ﺎﻴﺟﻮﻟﻮﻨﻜﺗ ﺙﺪﺣﺃ ﻰﻟﺇ ﺲﺒﻘﻤﻟﺍ ﺪﻨﺘﺴﻳ
ﺔﻴﻛﺬﻟﺍ ﻒﺗﺍﻮﻬﻟﺍ ﻞﺜﻣ Bluetooth Smart Ready ﺔﻴﻨﻘﺘﺑ ﺓﺩﻭﺰﻤﻟﺍ ﺓﺰﻬﺟﻷﺍ ﻞﻤﺠﻣ ﻊﻣ ﻖﻓﺍﻮﺘﻳ ﻪﻠﻌﺠﻳ ﺎﻣ ﺍﺬﻫ ﻭ ،
.ﺔﺻﺎﺧ ﺕﺎﻘﻴﺒﻄﺗ ﻝﺎﻤﻌﺘﺳﺎﺑ ﻚﻟﺫ ﻭ ﺚﻳﺪﺤﻟﺍ ﻞﻴﺠﻟﺍ ﻦﻣ ﺔﻴﺣﻮﻠﻟﺍ ﺮﺗﻮﻴﺒﻤﻜﻟﺍ ﺓﺰﻬﺟﺃ ﻭ
ﺯﺎﻬﺠﻟﺍ ﺕﺎﻔﺻﺍﻮﻣ .1
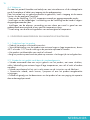
ﻡﺎﻌﻟﺍ ﺮﻬﻈﻤﻟﺍ 1.1
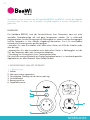
ﻲﺋﺎﺑﺮﻬﻛ ﺲﺒﻘﻣ .1
ﻲﺟﺭﺎﺧ ﺯﺎﻬﺠﻟ ﺓﺪﻋﺎﻗ .2
(ﻥﺍﺮﻗﻹﺍ ﻭ ﺓﺪﻋﺎﻘﻟﺍ ﺔﻳﺬﻐﺗ) ﻢﻜﺤﺘﻟﺍ ﺭﺯ .3
ﻲﺋﻮﺿ ﺮﺷﺆﻣ .4
ﺔﻛﺮﺤﻟﺍ ﺭﺎﻌﺸﺘﺳﺍ ﺯﺎﻬﺟ .5
ﺓﺭﺍﺮﺤﻟﺍ ﺔﺟﺭﺩ ﺭﺎﻌﺸﺘﺳﺍ ﺯﺎﻬﺟ .6
ﻢﻜﻨﻣ ﻮﺟﺮﻧ BEEWI . ﺔﻛﺮﺷ ﻦﻣ SmartPlug BBP200 ﻝﻮﺻﻮﻤﻟﺍ ﺲﺒﻘﻤﻟﺍ ﻢﻛﺭﺎﻴﺘﺧﻻ ﺍﺮﻜﺷ
. ﻢﻜﺟﻮﺘﻤﻟ ﻝﺎﻤﻌﺘﺳﺍ ﻞﻀﻓﺃ ﻖﻴﻘﺤﺗ ﻭ ﻞﻴﻐﺸﺘﻟ ﺔﻴﻟﺎﺘﻟﺍ ﺕﺎﻤﻴﻠﻌﺘﻟﺍ ﺓءﺍﺮﻗ
1
5
2
6
4
3

21
ﺔﻴﺑﺮﻌﻟﺍ
ﺔﺒﻠﻌﻟﺍ ﻯﻮﺘﺤﻣ .2.1
SmartPlug ﺲﺒﻘﻣ -
ﻥﺎﻤﻀﻟﺍ ﺕﺎﻣﻮﻠﻌﻣ ﻭ ﻂﺴﺒﻣ ﻞﻴﻟﺩ -
ﺔﻴﺳﺎﺳﻷﺍ ﺯﺎﻬﺠﻟﺍ ﺕﺍﺰﻴﻣ.3.1
ﺔﻴﺋﺎﺑﺮﻬﻜﻟﺍ ﺓﺰﻬﺟﻷﺍ ﻲﻓ ﺪﻌﺑ ﻦﻋ ﻢﻜﺤﺘﻟﺍ -
ﻞﻣﺎﻜﻟﺎﺑ ﺔﺠﻣﺮﺒﻠﻟ ﺔﻠﺑﺎﻗ ﺔﺘﻤﺗﺃ -
ﺔﺤﻳﺮﻣ ﻭ ﺓﺪﺼﺘﻘﻣ ﺔﻴﻌﺿﻭ ﻲﻓ ﻉﺎﻌﺸﻣ ﺔﺠﻣﺮﺑ -
.ﺓﺩﺪﺤﻣ ﺕﺎﻋﺎﺳ ﻲﻓ ﻭﺃ ﺭﻮﻀﺣ ﻑﺎﺸﺘﻛﺍ ﺪﻨﻋ ﺡﺎﺒﺼﻣ ﺓءﺎﺿﺇ -
ﺔﻋﺎﺳ ٤٢ﻝﺍ ﻯﺪﻣ ﻰﻠﻋ ﺓﺭﺍﺮﺤﻟﺍ ﺔﺟﺭﺩ ﻭ ﺭﻮﻀﺤﻟﺍ ﺕﺎﻧﺎﻴﺑ -
.ﺔﺠﻣﺮﺒﻟﺍ ﻭ ﻑﺮﺼﺘﻟﺍ ،ﺪﻌﺑ ﻦﻋ ﻢﻜﺤﺘﻠﻟ ﻲﻛﺬﻟﺍ ﻒﺗﺎﻬﻟﺍ ﻰﻠﻋ ﻖﻴﺒﻄﺗ -
:ﺔﻴﻨﻘﺘﻟﺍ ﺕﺎﻔﺻﺍﻮﻤﻟﺍ.4.1
ﺔﻴﻜﻳﺮﻣﻷﺍ ﺓﺪﺤﺘﻤﻟﺍ ﺕﺎﻳﻻﻮﻟﺍ ،ﺎﺑﻭﺭﻭﺃ ،ﺎﺴﻧﺮﻓ .ﺲﺒﻘﻤﻟﺍ ﻉﻮﻧ ﺐﺴﺣ ﺔﻔﻠﺘﺨﻣ ﺦﺴﻧ 3 ﻙﺎﻨﻫ :ﺔﻈﺣﻼﻣ
ﻞﻘﺘﺴﻣ ﻂﻤﻧ .2
ﺔﻣﺪﻘﻣ .1.2
ﻒﺗﺎﻬﻟﺍ ﻰﻠﻋ ﻖﻴﺒﻄﺗ ﺮﺒﻋ ﻲﻠﺤﻣ ﻝﻮﺧﺩ ﻊﻣ ﻖﺑﺎﻄﺘﻳ ﺍﺬﻫ SmartPlug. ﺲﺒﻘﻤﻠﻟ ﻲﺿﺍﺮﺘﻓﻻﺍ ﻂﻤﻨﻟﺍ ﻮﻫ ﻞﻘﺘﺴﻤﻟﺍ ﻂﻤﻨﻟﺍ
.ﻲﺣﻮﻠﻟﺍ ﺮﺗﻮﻴﺒﻤﻜﻟﺍ ﻭﺃ ﻲﻛﺬﻟﺍ
ﺔﻴﻟﻭﺃ ﺕﻼﻳﺪﻌﺗ .2.2
ﻊﻴﻄﺘﺴﺗ ﻲﻜﻟ ﻲﺣﻮﻠﻟﺍ ﺮﺗﻮﻴﺒﻤﻜﻟﺍ ﻭﺃ ﻲﻛﺬﻟﺍ ﻒﺗﺎﻬﻟﺍ ﻰﻠﻋ «BeeWi SmartPad» ﻖﻴﺒﻄﺗ ﺖﻴﺒﺜﺗ ﻭ ﻞﻴﻤﺤﺗ ﺐﺠﻳ
ﻭ Android ،iOS ﻞﻴﻐﺸﺘﻟﺍ ﻢﻈﻨﻟ «App Stores» ﻰﻠﻋ ﺮﻓﻮﺘﻣ ﻖﻴﺒﻄﺘﻟﺍ .ﻲﻠﺤﻤﻟﺍ ﻂﻤﻨﻟﺍ ﻲﻓ ﺲﺒﻘﻤﻟﺍ ﻝﺎﻤﻌﺘﺳﺍ
.ﺔﻘﺑﺎﻄﺘﻤﻟﺍ ﺓﺰﻬﺟﻷﺍ ﺺﺨﻳ
ﻥﺍﺮﻗﻹﺍ .3.2
،ﺔﻘﻳﺮﻄﻟﺍ ﻪﺗﺎﻬﺑ .ﻲﺣﻮﻠﻟﺍ ﺮﺗﻮﻴﺒﻤﻜﻟﺍ ﻭﺃ ﻲﻛﺬﻟﺍ ﻒﺗﺎﻬﻟﺍ ﻊﻣ ﺔﻨﻣﺁ ﺔﻘﻳﺮﻄﺑ ﻪﻧﺍﺮﻗﺇ ﻱﺭﻭﺮﻀﻟﺍ ﻦﻣ ،ﺲﺒﻘﻤﻟﺍ ﻝﺎﻤﻌﺘﺳﺍ ﻞﺒﻗ
.ﺲﺒﻘﻤﻟﺍ ﺓﺩﺎﻴﻗ ﻭ ﻪﻴﺟﻮﺘﺑ ﺔﺼﺧﺮﻤﻟﺍ ﻲﺣﻮﻠﻟﺍ ﺮﺗﻮﻴﺒﻤﻜﻟﺍ ﺓﺰﻬﺟﺃ ﻭ ﺔﻴﻛﺬﻟﺍ ﻒﺗﺍﻮﻬﻠﻟ ﻻﺇ ﺢﻤﺴﻳ ﻻ
BeeWi SmartPad ﻖﻴﺒﻄﺗ ﺖﻴﺒﺜﺗ ﻭ ﻞﻴﻤﺤﺘﺑ ﻢﻗ(1
.ﺔﻴﻧﺎﺜﻟﺍ ﻲﻓ ﺓﺪﺣﺍﻭ ﺓﺮﻣ ﺾﻣﻮﻳ ﺮﺷﺆﻤﻟﺍ .ﻱﺭﺍﺪﺠﻟﺍ ﺲﺒﻘﻤﻟﺎﺑ ﺲﺒﻘﻤﻟﺍ ﻞﺻﻭﺃ (2
Bluetooth Smart ﻉﺎﻳﺬﻤﻟﺍ ﺎﻴﺟﻮﻟﻮﻨﻜﺗ
ﺮﺘﻣ 30 ﺩﻭﺪﺣ ﻰﻟﺇ ،2 ﺔﺌﻓ ﻕﺎﻄﻨﻟﺍ
ﻁﺍﻭ 3600 ،ﺮﻴﺒﻣﺃ16 ﻰﺼﻗﻷﺍ ﻰﻠﻋ ﺝﻭﺮﺨﻟﺍ ﺓﻮﻗ
ﺰﺗﺮﻫ 60-50 ،ﺏﻭﺎﻨﺘﻣ ﺖﻟﻮﻓ250-100 ﺔﻳﺬﻐﺘﻟﺍ
ﺔﻳﻮﺌﻣ +85° ﻰﻟﺇ -25° ﻦﻣ ﺔﻳﻮﺌﻣ -/+1° ﺓﺭﺍﺮﺤﻟﺍ ﺔﺟﺭﺩ ﺭﺎﻌﺸﺘﺳﺍ ﺯﺎﻬﺟ
ﺭﺎﺘﻣﺃ 5 ﺔﻓﺎﺴﻤ،100° ﺏ ﺔﻳﻭﺍﺯ ﺔﻛﺮﺤﻟﺍ ﺭﺎﻌﺸﺘﺳﺍ ﺯﺎﻬﺟ
ﻢﻣ 36.5 ﻉﺎﻔﺗﺭﺍ x76ﺽﺮﻋx124ﻝﻮﻃ ﻢﺠﺤﻟﺍ

22
ﺔﻴﺑﺮﻌﻟﺍ
.ﺔﻴﻧﺎﺜﻟﺍ ﻲﻓ ﻦﻴﺗﺮﻣ ﺮﺷﺆﻤﻟﺍ ﺾﻣﻮﻳ ﻰﺘﺣ ﻦﻴﺘﻴﻧﺎﺛ ﺓﺪﻤﻟ ﺲﺒﻘﻤﻟﺍ ﺭﺯ ﻰﻠﻋ ﻂﻐﺿﺍ (3
.ﻖﺤﻠﻤﻟﺍ ﺯﺎﻬﺠﻟﺍ ﻦﻋ ﺚﺤﺒﻟﺍ ﺓﺩﺎﻋﻹ «ﺯﺎﻬﺟ ﻒﺿﺃ» ﺭﺰﻟﺍ ﻞﻌﻓ ﻭ SmartPad ﻖﻴﺒﻄﺗ ﻖﻠﻃﺃ (4
ﻥﺍﺮﻗﻹﺍ ﻢﺘﻳ ﻥﺃ ﺪﻌﺑ .ﻥﺍﺮﻗﻺﻟ ﻩﺭﺎﻴﺘﺧﺎﺑ ﻢﻗ ،ﺔﻤﺋﺎﻘﻟﺍ ﻦﻤﺿ «BeeWi SmartPlug» ﺲﺒﻘﻤﻟﺍ ﺝﺭﺪﻳ ﺎﻤﻟﺎﺣ(5
.ﺮﺷﺆﻤﻟﺍ ﺊﻔﻄﻨﻳ ﻭ ﺔﻴﺴﻴﺋﺮﻟﺍ ﺔﺷﺎﺸﻟﺍ ﻰﻠﻋ ﺓﺪﻳﺪﺟ ﺔﺴﻳﻭﺮﺗ ﺮﻬﻈﺘﺳ ،ﺡﺎﺠﻨﺑ
ﺔﻘﺑﺎﺴﻟﺍ ﺔﻟﺎﺤﻟﺍ ﻰﻟﺇ ﺓﺩﻮﻌﻟﺍ .4.2
ﺞﻣﺎﻧﺮﺒﻟﺍ ﻊﻨﺼﻣ ﺓﺩﺎﻋﻹ .ﺖﺑﺎﺜﻟﺍ ﺞﻣﺎﻧﺮﺒﻟﺍ ﻊﻨﺼﻣ ﻝﺎﺧﺩﺈﺑ ﺔﻴﻠﺻﻷﺍ ﻪﺘﻟﺎﺣ ﻰﻟﺇ SmartPlug ﺲﺒﻘﻤﻟﺍ ﺓﺩﺎﻋﺇ ﻦﻜﻤﻳ
ﺲﺒﻘﻤﻟﺎﺑ ﺲﺒﻘﻤﻟﺍ ﻞﺻﻭ ﻊﻣ ﺭﺰﻟﺍ ﻰﻠﻋ ﻂﻐﺿﺍ ،ﻝﺎﻤﻌﺘﺳﻻﺍ ﻭﺃ ﻥﺍﺮﻗﻹﺍ ﺕﺎﻴﻄﻌﻣ ﻑﺬﺣ ﻭ ﺔﻘﺑﺎﺴﻟﺍ ﻪﺘﻟﺎﺣ ﻰﻟﺇ ﺖﺑﺎﺜﻟﺍ
.ﻲﻧﺍﻮﺜﻟﺍ ﺾﻌﺑ ﺓﺪﻤﻟ ﺔﻌﻳﺮﺳ ﺔﻘﻳﺮﻄﺑ ﺮﺷﺆﻤﻟﺍ ﺾﻴﻣﻭ ﻝﻼﺧ ﻦﻣ ﺔﻘﺑﺎﺴﻟﺍ ﺔﻟﺎﺤﻟﺍ ﻰﻟﺇ ﺓﺩﻮﻌﻟﺍ ﺪﻛﺄﺘﺗ .ﻱﺭﺍﺪﺠﻟﺍ
ﻖﻴﺒﻄﺘﻟﺍ ﻝﺎﻤﻌﺘﺳﺍ .3
.ﺯﺎﻬﺠﻠﻟ ﻞﻴﻐﺸﺘﻟﺍ ﻡﺎﻈﻧ ﺐﺴﺣ ﺕﺎﻴﻠﻤﻌﻟﺍ ﺾﻌﺑ ﻒﻠﺘﺨﺗ ﻥﺃ ﻦﻜﻤﻳ :ﻪﻴﺒﻨﺗ
ﺔﻴﺴﻴﺋﺮﻟﺍ ﺔﺷﺎﺸﻟﺍ .1.3
.ﺔﻠﺼﺘﻤﻟﺍ ﺓﺰﻬﺟﻷﺍ ﻒﻠﺘﺨﻤﻟ ﺕﺎﺴﻳﻭﺮﺗ ﻞﻜﺷ ﻰﻠﻋ ﺔﻤﺋﺎﻗ ﺔﻴﺴﻴﺋﺮﻟﺍ ﺔﺷﺎﺸﻟﺍ ﻢﻀﺗ
:ﻢﻜﻨﻜﻤﻳ ،ﺯﺎﻬﺟ ﺔﺴﻳﻭﺮﺗ ﺭﺎﻴﺘﺧﺎﺑ
ﻝﺎﺼﺗﻻﺍ ﻉﺎﻄﻘﻧﺍ ﺔﻟﺎﺣ ﻲﻓ ﺯﺎﻬﺠﻟﺍ ﻞﻴﺻﻮﺗ ﺓﺩﺎﻋﺇ -
ﻞﺼﺘﻣ ﺯﺎﻬﺠﻟﺍ ﻥﺎﻛ ﺔﻟﺎﺣ ﻲﻓ ﻢﻜﺤﺘﻟﺍ ﺔﺷﺎﺷ ﻰﻟﺇ ﻝﻮﺧﺪﻟﺍ -
:ﺔﻴﻟﺎﺘﻟﺍ ﻒﺋﺎﻇﻮﻟﺍ ﻭ ﺕﺎﻣﻮﻠﻌﻤﻟﺍ ﺔﺴﻳﻭﺮﺘﻟﺍ ﻞﺧﺍﺩ ﺪﺠﺘﺳ
(ﻞﻳﺪﻌﺘﻠﻟ ﺔﻠﺑﺎﻗ) SmartPlug ﺲﺒﻘﻤﻟﺍ ﺔﻧﻮﻘﻳﺃ -
(«BeeWi SmartPlug» ﺎﻴﺿﺍﺮﺘﻓﺍ ،ﻞﻳﺪﻌﺘﻠﻟ ﻞﺑﺎﻗ) SmartPlug ﺲﺒﻘﻤﻟﺍ ﻢﺳﺍ -
ﺓﺭﺎﺷﻹﺍ ﻂﻳﺮﺷ ﻭ ﻝﺎﺼﺗﻻﺍ ﺔﻟﺎﺣ -
ﺓﺭﺍﺮﺤﻟﺍ ﺔﺟﺭﺩ ﺱﺎﻴﻘﻣ ﻭ On/Off ﺔﻟﺎﺣ -
(ﻂﻴﺸﻧ ﺮﻴﻏ ﻱﺭﺍﺮﺤﻟﺍ ﻢﻈﻨﻤﻟﺍ ﻊﺿﻭ ﻥﺎﻛ ﺍﺫﺇ) On/Off ﺲﺒﻜﻤﻟﺍ ﺭﺯ -
(ﻱﺭﺍﺮﺣ ﻢﻈﻨﻣ ﻭﺃ ﺩﺍﺪﻋ ،ﺭﻮﻀﺣ ،ﻱﻭﺪﻳ) ﻲﻟﺎﺤﻟﺍ ﻂﻤﻨﻟﺍ -
.ﻢﻜﺤﺘﻟﺍ ﺔﺷﺎﺷ ﺢﺘﻓ ﻥﻭﺪﺑ ﺔﺴﻳﻭﺮﺘﻟﺍ ﻰﻠﻋ ﺓﺮﺷﺎﺒﻣ On/Off ﺭﺯ ﻲﻓ ﻢﻜﺤﺘﻟﺍ ﻦﻜﻤﻤﻟﺍ ﻦﻣ
ﻢﻜﺤﺘﻟﺍ ﺔﺷﺎﺷ .2.3
:ﺔﻴﻟﺎﺘﻟﺍ ﺕﻼﻳﺪﻌﺘﻟﺎﺑ ﻡﺎﻴﻘﻟﺍ ﻦﻜﻤﻳ ،ﻢﻜﺤﺘﻟﺍ ﺔﺷﺎﺷ ﻲﻓ
ﻂﻘﻓ ﻱﻭﺪﻳ ﻞﻳﺪﺒﺗ -
.ﺲﺒﻘﻤﻟﺍ ﺓءﺎﺿﻹ ﺓﺩﺪﺤﻣ ﺔﻴﻨﻣﺯ ﺕﺍﺮﺘﻓ ﺞﻣﺮﺒﻳ ﻥﺃ ﻞﻤﻌﺘﺴﻤﻠﻟ ﻦﻜﻤﻳ ،ﺔﻟﺎﺤﻟﺍ ﻪﺗﺎﻫ ﻲﻓ :ﺖﻗﻮﻟﺍ ﺐﺴﺣ ﻞﻳﺪﺒﺗ -
.ﻖﺋﺎﻗﺩ 5 ﻰﻟﺇ ﻲﻧﺍﻮﺛ 5 ﻦﻣ ﺪﺘﻤﺗ ﺓﺪﻤﻟ ءﺎﻀﻳ ﻥﺃ ﺲﺒﻘﻤﻠﻟ ﻦﻜﻤﻳ ،ﺔﻟﺎﺤﻟﺍ ﻪﺗﺎﻫ ﻲﻓ :ﺭﻮﻀﺤﻟﺍ ﺐﺴﺣ ﻞﻳﺪﺒﺗ -
ﺔﺟﺭﺩ) ﺢﻳﺮﻣ ﻊﺿﻭ ﻭ (ﺔﻀﻔﺨﻨﻣ ﺓﺭﺍﺮﺣ ﺔﺟﺭﺩ) ﺪﺼﺘﻘﻣ ﻊﺿﻭ ﻲﻓ ﻉﺎﻌﺸﻤﻟﺍ ﻞﻳﺪﻌﺘﻟ ﺓﺭﺍﺮﺤﻟﺍ ﺔﺟﺭﺩ ﺐﺴﺣ ﻞﻳﺪﺒﺗ -
.ﻡﻮﻴﻟﺍ ﺔﻠﻴﻃ (ﻯﻮﺼﻗ ﺓﺭﺍﺮﺣ
ﺕﺎﻧﺎﻴﺒﻟﺍ ﺔﺷﺎﺷ .3.3
ﻥﺃ ﻦﻜﻤﻳ ﺔﻴﻧﺎﻴﺒﻟﺍ ﻡﻮﺳﺮﻟﺍ .ﺔﻋﺎﺳ 24 ﺓﺪﻤﻟ ﺭﻮﻀﺤﻟﺍ ﻭ ﺓﺭﺍﺮﺤﻟﺍ ﺔﺟﺭﺪﻟ ﺔﻴﻧﺎﻴﺒﻟﺍ ﻡﻮﺳﺮﻟﺍ ﺽﺮﻌﺗ ﺕﺎﻧﺎﻴﺒﻟﺍ ﺔﺷﺎﺷ
:ﺎﻬﻴﻠﻋ ﺮﻘﻨﻟﺎﺑ ﺔﻔﻠﺘﺨﻣ ﻞﺣﺍﺮﻣ ﻰﻠﻋ ﻝﺪﻌﺗ
ﺕﺎﻋﺎﺳ 6 ﻭﺃ 12 ،24 :ﺓﺭﺍﺮﺤﻟﺍ ﺔﺟﺭﺩ -

23
ﺔﻴﺑﺮﻌﻟﺍ
ﺓﺪﺣﺍﻭ ﺔﻋﺎﺳ ﻭﺃ 3 ،6 ،12 ،24 :ﺭﻮﻀﺤﻟﺍ -
.ﻖﺋﺎﻗﺩ 10 ﺏ ﺓﺩﺪﺤﻣ ﺓﺪﻤﻟ ﺭﻮﻀﺤﻟﺍ ﻭ ﺔﻳﻮﺌﻣ 1° ﺏ ﺔﻗﺪﺑ ﺔﺿﻭﺮﻌﻣ ﺓﺭﺍﺮﺤﻟﺍ ﺔﺟﺭﺩ ﻥﺃ ﻭ ﻆﺣﻻ
ﻞﻳﺪﻌﺘﻟﺍ ﺔﺷﺎﺷ .4.3
ﺔﺷﺎﺸﻟﺍ ﻩﺬﻫ .ﺔﻧﻮﻘﻳﻷﺍ ﻭﺃ ﻢﺳﻻﺍ ﻞﺜﻣ SmartPlug ﺲﺒﻘﻤﺑ ﺔﺻﺎﺨﻟﺍ ﻞﻴﺻﺎﻔﺘﻟﺍ ﺾﻌﺑ ﻞﻳﺪﻌﺘﺑ ﻞﻳﺪﻌﺘﻟﺍ ﺔﺷﺎﺷ ﺢﻤﺴﺗ
.ﺭﻮﻀﺤﻟﺍ ﻞﻴﺠﺴﺗ ﻒﺋﺎﻇﻭ ﻞﺜﻣ ﻯﺮﺧﺃ ﺕﻼﻳﺪﻌﺗ ﺎﻀﻳﺃ ﻞﻤﺸﺗ
ﺖﺑﺎﺛ ﺞﻣﺎﻧﺮﺑ ﺮﻓﻮﺗ ﺔﻟﺎﺣ ﻲﻓ ﺮﻬﻈﻳ ﺚﻳﺪﺤﺗ ﺭﺯ ﻭ ﺖﺑﺎﺜﻟﺍ ﺞﻣﺎﻧﺮﺒﻟﺍ ﺔﺨﺴﻧ ﻦﻋ ﺕﺎﻣﻮﻠﻌﻣ ﺎﻀﻳﺃ ﻞﻤﺸﺗ ﻞﻳﺪﻌﺘﻟﺍ ﺔﺷﺎﺷ
ﺔﻳﺎﻬﻨﻟ ﻖﺋﺎﻗﺩ 6 ﻲﻟﺍﻮﺣ ﺐﻗﺮﺗ ﻭ ﺔﻴﻠﻤﻌﻟﺍ ﺪﻛﺃ ﻢﺛ «ﺚﻳﺪﺤﺗ» ﺭﺰﻟﺍ ﻰﻠﻋ ﻂﻘﻓ ﻂﻐﺿﺍ ،ﺖﺑﺎﺜﻟﺍ ﺞﻣﺎﻧﺮﺒﻟﺍ ﺚﻳﺪﺤﺘﻟ .ﺪﻳﺪﺟ
.ﺚﻳﺪﺤﺘﻟﺍ ﺔﻴﻠﻤﻋ
ﺪﻌﺑ ﻦﻋ ﻢﻜﺤﺘﻟﺍ ﻂﻤﻧ .4
ﺔﻣﺪﻘﻣ .1.4
ﻦﻣ ﺪﻳﺰﻤﻠﻟ .ﺯﺎﻬﺠﻠﻟ ﺔﺼﺼﺨﻣ ﺖﻧﺮﺘﻧﺍ ﺔﺑﺍﻮﺑ ﻝﺎﻤﻌﺘﺳﺎﺑ ﺪﻌﺑ ﻦﻋ SmartPlug ﺲﺒﻘﻣ ﻲﻓ ﻢﻜﺤﺘﻟﺍ ﺎﻀﻳﺃ ﻦﻜﻤﻳ
.www.bee-wi.com :ﺎﻨﻌﻗﻮﻣ ﻰﻠﻋ ﻉﻼﻃﻻﺍ ﻰﺟﺮﻳ ،ﺕﺎﻣﻮﻠﻌﻤﻟﺍ
.BeeWi ﺔﺑﺍﻮﺑ ﻝﺎﻤﻌﺘﺳﺍ ﻞﻴﻟﺩ ﻲﻓ ﻦﻴﺒﻣ ﻮﻫ ﺎﻤﻛ ﻒﻠﺘﺨﻣ ﺏﺍﻭ ﻖﻴﺒﻄﺗ ﻝﺎﻤﻌﺘﺳﺍ ﻱﺭﻭﺮﻀﻟﺍ ﻦﻣ ،ﺔﻟﺎﺤﻟﺍ ﻪﺗﺎﻫ ﻲﻓ
ﻲﻠﺤﻤﻟﺍ ﻊﺿﻮﻟﺍ ﻲﻓ ﻪﻌﺿﻭ ﻦﻜﻤﻳ ﻭ ﺖﺑﺎﺜﻟﺍ ﺞﻣﺎﻧﺮﺒﻟﺍ ﺚﻳﺪﺤﺗ ﻝﻼﺧ ﻦﻣ ﺪﻌﺑ ﻦﻋ ﻢﻜﺤﺘﻟﺍ ﻂﻤﻧ ﺐﺴﺣ ﺞﻣﺮﺒﻣ ﺲﺒﻘﻤﻟﺍ
.ﺔﻘﺑﺎﺴﻟﺍ ﺔﻟﺎﺤﻟﺍ ﻰﻟﺇ ﻪﺗﺩﺎﻋﺇ ﺔﻴﻠﻤﻌﺑ ﻡﺎﻴﻘﻟﺎﺑ
ﻥﺍﺮﻗﺇ .2.4
ﻉﺎﺒﺗﺍ ﻰﺟﺮﻳ ،ﻚﻟﺬﺑ ﻡﺎﻴﻘﻠﻟ .ﺔﺑﺍﻮﺒﻟﺍ ﻊﻣ ﺔﻨﻣﺁ ﺔﻘﻳﺮﻄﺑ ﻪﻧﺍﺮﻗﺇ ﻱﺭﻭﺮﻀﻟﺍ ﻦﻣ ،HomeBee ﺔﻜﺒﺷ ﻰﻠﻋ ﺲﺒﻘﻤﻟﺍ ﻞﻴﺠﺴﺘﻟ
:ﺔﻴﻟﺎﺘﻟﺍ ﺕﺍﻮﻄﺨﻟﺍ
.ﺔﻴﻧﺎﺜﻟﺍ ﻲﻓ ﺓﺮﻣ ﺮﺷﺆﻤﻟﺍ ﺾﻣﻮﻳ .ﻱﺭﺍﺪﺠﻟﺍ ﺲﺒﻘﻤﻟﺎﺑ ﺲﺒﻘﻤﻟﺍ ﻞﺻﻭﺃ(1
.ﺔﻴﻧﺎﺜﻟﺍ ﻲﻓ ﻦﻴﺗﺮﻣ ﺮﺷﺆﻤﻟﺍ ﺾﻣﻮﻳ ﻰﺘﺣ ﻦﻴﺘﻴﻧﺎﺛ ﺓﺪﻤﻟ ﺲﺒﻘﻤﻟﺍ ﺭﺯ ﻰﻠﻋ ﻂﻐﺿﺍ(2
.ﻥﺍﺮﻗﻹﺍ ﺔﻴﻠﻤﻋ ﺃﺪﺒﺘﻟ ﺔﻴﻧﺎﺜﻟﺍ ﻲﻓ ﻦﻴﺗﺮﻣ ﺮﺷﺆﻤﻟﺍ ﺾﻣﻮﻳ ﻰﺘﺣ ﻲﻧﺍﻮﺛ ٤ ﺓﺪﻤﻟ ﺔﺑﺍﻮﺒﻟﺍ ﺭﺯ ﻰﻠﻋ ﻂﻐﺿﺍ(3
ﺔﺷﺎﺸﻟﺍ ﻰﻠﻋ ﺪﻳﺪﺠﻟﺍ ﺯﺎﻬﺠﻟﺍ ﺮﻬﻈﻳ ﻭ ﺔﻴﻧﺎﺜﻟﺍ ﻲﻓ ﺓﺮﻣ ﺮﺷﺆﻤﻟﺍ ﺾﻣﻮﻳ ،ﺔﺑﺍﻮﺒﻟﺎﺑ ﺡﺎﺠﻨﺑ ﺲﺒﻘﻤﻟﺍ ﻥﺮﺘﻘﻳ ﺎﻤﻟﺎﺣ(4
.ﺏﺍﻭ ﻖﻴﺒﻄﺘﻟ
ﺏﺍﻮﻟﺍ ﻡﺩﺎﺧ .3.4
ﻲﺣﻮﻟ ﺮﺗﻮﻴﺒﻤﻛ ﻭﺃ ﻲﻛﺬﻟﺍ ﻒﺗﺎﻬﻟﺍ ﻰﻠﻋ ﺏﺍﻭ ﻖﻴﺒﻄﺘﻟﺍ ﻭﺃ ﺖﻧﺮﺘﻧﺍ ﺢﻔﺼﺘﻣ ﻝﺎﻤﻌﺘﺳﺎﺑ HomeBee ﺔﺑﺍﻮﺑ ﻰﻟﺍ ﺐﻫﺫﺍ
ﻰﻠﻋ ﺔﺣﺎﺘﻤﻟﺍ ﻒﺋﺎﻇﻮﻟﺍ ﻢﻈﻌﻣ ﻰﻟﺇ ﻝﻮﺧﺪﻟﺍ ﻢﻜﻨﻜﻤﻳ ،ﻡﺪﺨﺘﺴﻤﻛ ﻢﻜﺑﺎﺴﺣ ﺔﻄﺳﺍﻮﺑ ﺔﺑﺍﻮﺒﻠﻟ ﻢﻜﻟﺎﻤﻌﺘﺳﺎﺑ .ﺯﺎﻬﺠﻟﺍ ﻰﻟﺇ ﺫﺎﻔﻨﻠﻟ
: SmartPad ﻖﻴﺒﻄﺗ
.ﺞﻣﺮﺒﻣ ﻊﺿﻭ ﻭ ﺓﺭﺍﺮﺤﻟﺍ ﺔﺟﺭﺩ ﻯﻮﺘﺴﻣ ،On/Off : SmartPlug ﺲﺒﻘﻤﻟﺍ ﻉﺎﺿﻭﺃ -
.ﺔﺠﻣﺮﺒﻤﻟﺍ ﺕﺎﻋﺎﺴﻟﺍ ﺐﺴﺣ ﻭﺃ ﺎﻳﻭﺪﻳ ﺲﺒﻘﻤﻟﺍ ﻞﻴﻌﻔﺗ :ﺕﺎﻴﻠﻤﻌﻟﺍ ﺕﻼﻳﺪﻌﺗ -
ﺔﺟﺭﺪﻟ ﺩﺪﺤﻣ ﻯﻮﺘﺴﻤﻟ ﻭﺃ ﺔﻔﺸﺘﻜﻣ ﺭﻮﻀﺣ ﺔﻟﺎﺣ ﻲﻓ ﻲﻧﻭﺮﺘﻜﻟﻻﺍ ﺪﻳﺮﺒﻟﺍ ﻖﻳﺮﻃ ﻦﻋ ﻪﻴﺒﻨﺗ ﻝﺎﺳﺭﺇ :ﺕﺎﻬﻴﺒﻨﺘﻟﺍ ﺕﻼﻳﺪﻌﺗ -
.ﺓﺭﺍﺮﺤﻟﺍ
ﺓﺭﺍﺮﺤﻟﺍ ﺔﺟﺭﺩ ﻭﺃ ﺭﻮﻀﺤﻟﺍ ﺕﺎﻧﺎﻴﺑ ﻡﻮﺳﺭ ﺯﺍﺮﺑﺇ -

24
:ﻥﺎﻤﻀﻟﺍ ﻲﻓ ﺕﺍءﺎﻨﺜﺘﺳﺍ ﻭ ﻪﻴﺒﻨﺗ.5
ﺝﻮﺘﻨﻤﻟﺍ ﺔﻧﺎﻴﺻ .1.5
ﻂﻘﻓ ﻲﻠﺧﺍﺪﻟﺍ ﻝﺎﻤﻌﺘﺳﻼﻟ ﺯﺎﻬﺠﻟﺍ ﺺﻴﺼﺨﺗ -
ﻦﻣ ﻞﻗﺃ ﻭﺃ ﺔﻳﻮﺌﻣ 45° ﻕﻮﻔﺗ ﻯﻮﺼﻗ ﺓﺭﺍﺮﺣ ﺕﺎﺟﺭﺪﻟ ﺝﻮﺘﻨﻤﻟﺍ ﺽﺮﻌﻳ ﻻ ،ءﺍﺩﺃ ﻞﻀﻓﺃ ﻭ ﻝﺎﻐﺘﺷﺍ ﻦﺴﺣﺃ ﻥﺎﻤﻀﻟ -
. ﺔﻳﻮﺌﻣ 10°
ﻱﺮﻄﻔﻟﺍ ﻦﻔﻌﻟﺍ ﻭﺃ ﺔﺑﻮﻃﺮﻠﻟ ﺝﻮﺘﻨﻤﻟﺍ ﺽﺮﻌﻳ ﻻ -
.ﻦﻣﺍ ﻥﺎﻜﻣ ﻲﻓ ﻪﻌﺿﻭ ﻰﺟﺮﻳ ،ﺔﻠﻳﻮﻃ ﺓﺪﻤﻟ ﺯﺎﻬﺠﻟﺍ ﻡﺍﺪﺨﺘﺳﺍ ﻡﺪﻋ ﺔﻟﺎﺣ ﻲﻓ -
:ﻱﺩﺎﻌﻟﺍ ﻥﺎﻤﻀﻟﺍ ﺎﻬﻠﻤﺸﻳ ﻻ ﻲﺘﻟﺍ ﺭﺍﺮﺿﻷﺍ .2.5
ﻭﺃ ﻯﻮﺼﻗ ﺓﺭﺍﺮﺣ ﺕﺎﺟﺭﺪﻟ ﻪﺿﺮﻌﺗ ﻭﺃ ﻁﻮﻘﺳ ،ﺔﻣﺪﺼﻟ ﺔﺠﻴﺘﻧ ،ﺝﻮﺘﻨﻤﻠﻟ ﻢﺋﻼﻣ ﺮﻴﻏ ﻝﺎﻤﻌﺘﺳﺍ ﻦﻋ ﺔﻤﺟﺎﻨﻟﺍ ﺭﺍﺮﺿﻷﺍ -
.ﻯﺮﺧﺃ ﺏﺎﺒﺳﻷ ﻭﺃ ﺔﺑﻮﻃﺮﻟﺍ ﻭﺃ ﺭﺎﺒﻐﻟﺍ
.ﻊﻨﺼﻤﻟﺍ ﺕﺎﻤﻴﻠﻌﺗ ﻡﺍﺮﺘﺣﺍ ﻡﺪﻋ ﻦﻋ ﺔﺠﺗﺎﻧ ﺭﺍﺮﺿﺃ -
.ﺯﺎﻬﺠﻟﺎﺑ ﺲﻤﻳ ﺮﻴﻴﻐﺗ ﻱﺃ ﻭﺃ ﺔﻘﺻﻼﻟﺍ ﺩﺍﻮﻤﻟﺍ ﺭﺎﺛﺁ ﻭﺃ ﺵﺪﺨﻟﺎﻛ ﺔﻴﺤﻄﺳ ﺭﺍﺮﺿﺃ -
.ﻝﻮﺨﻣ ﺮﻴﻏ ﺺﺨﺷ ﻑﺮﻃ ﻦﻣ ﺢﻴﻠﺼﺗ ﺔﻟﻭﺎﺤﻣ ﻭﺃ ﺯﺎﻬﺠﻟﺍ ﻚﻴﻜﻔﺘﻟ ﺔﻌﺑﺎﺗ ﺭﺍﺮﺿﺃ -
ﺔﻴﻓﺎﺿﺇ ﺕﺎﻣﻮﻠﻌﻣﻭ ﺮﺸﻨﻟﺍﻭ ﻊﺒﻄﻟﺍ ﻕﻮﻘﺣ
ﺓﺰﻬﺟﻷﺍ ءﺎﻤﺳﺃ .ﺎﻬﺑﺎﺤﺻﻷ ﻚﻠﻣ ﺎﻫﺮﻛﺫ ﻲﺗﻵﺍ ﺔﻳﺭﺎﺠﺘﻟﺍ ﺕﺎﻣﻼﻌﻟﺍ .ﺔﻠﺠﺴﻣ ﺔﻳﺭﺎﺠﺗ ﺔﻣﻼﻋ BEEWI ﻱﻭ ﻲﺑ
ﺾﻌﺑ ﻲﻓ ﻉﻮﻨﻤﻣ ﺎﻬﻣﺯﺍﻮﻟﻭ ﺔﻴﻜﻠﺳﻼﻟﺍ ﺓﺰﻬﺟﻷﺍ ﻝﺎﻤﻌﺘﺳﺍ .ﺎﻬﺑﺎﺤﺻﻷ ﻚﻠﻣ ﻲﻫ ﺔﻠﻤﻌﺘﺴﻤﻟﺍ ﻯﺮﺧﻷﺍ ﺕﺎﻣﺪﺨﻟﺍﻭ
.ﻝﻮﻌﻔﻤﻟﺍ ﺔﻳﺭﺎﺳ ﻦﻴﻧﺍﻮﻘﻟﺍﻭ ﺕﺎﻤﻴﻠﻌﺘﻟﺍ ﻡﺍﺮﺘﺣﺍ ﺐﺠﻳ .ﻦﻛﺎﻣﻷﺍ
ﻰﻠﻋ ﻞﻳﺪﻌﺗ ﻭﺃ ﺮﻴﻴﻐﺗ ﻱﺄﺑ ﻡﺎﻴﻘﻟﺍ ﻞﻤﻌﺘﺴﻤﻠﻟ ﺢﻤﺴﻳ ﻻ .ﻪﺋﺍﺮﺷ ﺦﻳﺭﺎﺗ ﻦﻣ ﺔﻳﺍﺪﺑ ﻦﻴﻣﺎﻋ ﺓﺪﻤﻟ ﻥﺎﻤﺿ ﺝﻮﺘﻨﻤﻟﺍ ﻲﻄﻐﻳ
.ﻥﺎﻤﻀﻟﺍ ﻞﻄﺒﻳ ﺔﺣﺍﺮﺻ ﻪﻴﻠﻋ ﻖﻓﺍﻮﻳ ﻢﻟ ﻞﻳﺪﻌﺗ ﻭﺃ ﺮﻴﻴﻐﺗ ﻱﺃ .ﺝﻮﺘﻨﻤﻟﺍ
www.bee-wi.com ﻲﻧﻭﺮﺘﻜﻟﻹﺍ ﺎﻨﻌﻗﻮﻣ ﺓﺭﺎﻳﺯ ءﺎﺟﺮﻟﺍ ﺕﺎﻣﻮﻠﻌﻤﻟﺍ ﻦﻣ ﺪﻳﺰﻤﻠﻟ
[email protected] :ﻲﻨﻘﺘﻟﺍ ﻢﻋﺪﻟﺍ
© OTIO, 2016
OTIO - SAS, 719 rue Albert Camus - 31190 Auteriv France
ﺔﻴﺑﺮﻌﻟﺍ

25
© OTIO 2016
Documenttranscriptie
BBP200 FR GUIDE D’UTILISATION/ USER GUIDE GEBRUIKSGIDS / ﺩﻟﻴﻞ ﺍﻹﺳﺘﻌﻤﺎﻝ BBP200 FR BeeWi SmartPad application: User’s guide FRANCAIS ENGLISH NEDERLANDS ﺍﻟﻌﺮﺑﻴﺔ 4 9 14 20 4 Merci d’avoir choisi la prise connectée SmartPlug BBP200 de BEEWI. Veuillez lire les instructions suivantes afin de configurer et utiliser au mieux votre produit. INTRODUCTION La prise connectée BBP200, une des plus avancées de sa génération, peut être complètement gérée à distance avec une application dédiée sur Smartphone. Elle est entièrement programmable pour régler l’alimentation d’un dispositif électrique et permet aussi de contrôler les mouvements et la température dans son environnement proche. Elle parfaitement adaptée pour différent types d’automatismes : - Allumer ou éteindre manuellement un dispositif électrique au moyen du bouton physique ou à partir de l’application - Allumer ou éteindre un dispositif électrique automatiquement en fonction de l’heure, de la température ou de la détection de présence - Gérer les historiques de présence ou de température Basée sur la dernière technologie Bluetooth Low Energy, elle est compatible avec l’ensemble des appareils Bluetooth Smart Ready comme les Smartphones et tablettes de récente génération au moyen d’applications dédiées. 1. DESCRIPTION DU PRODUIT 1.1. Description 1. Prise électrique 2. Socle pour dispositif externe 3. Bouton de contrôle (Alimentation du socle et appairage) 4. Indicateur lumineux 5. Capteur de mouvement 6. Capteur de température 5 3 4 2 1 6 FRANÇAIS 5 1.2. Contenu du pack • Prise SmartPlug • Guide simplifié et information de garantie 1.3. Caractéristiques principales • Contrôle à distance des dispositifs électriques • Automatismes entièrement programmables • Programmation d’un radiateur en modes économique et confort • Allumage d’une lampe sur détection de présence ou à heures spécifiques • Historiques de présence et de température sur 24 heures • Application sur Smartphone pour contrôle à distance, gestion et programmation 1.4. Spécifications Technologie radio Portée Puissance de sortie Alimentation Capteur de température Capteur de mouvement Dimensions Poids Bluetooth Smart Classe 2, jusqu’à 30 mètres Max 16A, 3600 W 100-250V Alternatif, 50-60 Hz +/- 1°C de -25° à +85°C Angle de 100°, distance 5 mètres L124 x l76 x H36.5 mm 170 g 2. MODE AUTONOME 2.1. Introduction Le mode autonome est le mode par défaut de la prise SmartPlug. Cela correspond à un accès local via une application sur Smartphone ou tablette. 2.2. Réglages préalables Pour utiliser la prise en mode local, télécharger et installer l’application « BeeWi SmartPad » sur Smartphone ou tablette. Cette application est disponible sur les « App Stores » iOS & Android pour les appareils compatibles. 2.3. Appairage Avant d’utiliser la prise, il est nécessaire de l’apparier en mode sécurisé avec le Smartphone ou la tablette. De cette manière, seuls les Smartphones ou tablettes autorisés pourront adresser et commander la prise. 1) Télécharger et installer l’application BeeWi SmartPad 2) Brancher la prise dans le socle mural. L’indicateur clignote une fois par seconde. FRANÇAIS 6 3) Appuyer sur le bouton de la prise pendant 2 secondes jusqu’à ce que l’indicateur clignote deux fois par seconde.. 4) Lancer l’application SmartPad et activer le bouton “Ajouter périphérique » pour rechercher le périphérique. 5) Dès que la prise « BeeWi SmartPlug » est listée, la sélectionner pour l’apparier. Après un appairage réussi, un nouveau cartouche est affiché sur l’écran principal et l’indicateur s’éteint. 2.4. Restauration La prise SmartPlug peut être restaurée à l’état initial incluant le firmware usine. Pour restaurer le firmware usine et supprimer les données d’appairage ou d’utilisation, appuyer sur le bouton tout en branchant la prise sur un socle mural. La restauration est confirmée par l’indicateur clignotant rapidement pendant quelques seconds. 3. UTILISATION DE L’APPLICATION Attention: certaines opérations peuvent différer en fonction de l’OS de l’appareil. 3.1. Ecran principal L’écran principal liste les différents périphériques appariés sous forme de cartouches. En sélectionnant un cartouche de périphérique, il est possible de : - Reconnecter le périphérique dans le cas où la connexion a été perdue - Accéder à l’écran de contrôle lorsque le périphérique est connecté Dans le cartouche, vous trouverez les informations et les fonctions suivantes: - Icône de la prise SmartPlug (éditable) - Nom de la prise SmartPlug (éditable, par défaut “BeeWi SmartPlug”) - Etat de la connexion et barre de signal - Etat On/Off et valeur de température - Bouton interrupteur On/Off (si le mode thermostat n’est pas actif) - Mode présent (manuel, présence, minuteur ou thermostat) Il est possible de contrôler le bouton On/Off directement sur le cartouche sans ouvrir l’écran de contrôle. 3.2. Ecran de contrôle Dans l’écran de contrôle il est possible de faire les réglages suivants : - Commutation manuelle uniquement - Commutation en fonction du temps : dans ce cas, l’utilisateur peut programmer des plages de temps spécifiques pour l’allumage de la prise. - Commutation en fonction de la présence : dans ce cas, la prise peut s’allumer pendant 5 secondes jusqu’à 5 minutes. - Commutation en fonction de la température pour régler un radiateur en modes économique (température réduite) et confort (température max) durant la journée. 3.3. Ecran d’historiques L’écran d’historiques affiche les graphes de température et de présence jusqu’à 24 FRANÇAIS 7 heures. Les graphes peuvent être ajustés sur différente périodes en cliquant dessus : - Température : 24, 12 ou 6 H - Présence : 24, 12, 6, 3 ou 1H Noter que la température est affichée avec une précision de 1°C et la présence par plage de 10 minutes. 3.4. Ecran d’édition L’écran d’édition permet l’édition de certains détails de la prise SmartPlug tels que le nom ou l’icône. Cet écran inclus aussi d’autres réglages tells que les fonctions d’enregistrement de la présence. L’écran d’édition inclus aussi l’information de version du firmware et un bouton de mise à jour qui apparait dans le cas où un nouveau firmware est disponible. Pour mettre à jour le firmware, presser simplement le bouton “Mise à jour” puis confirmer l’action et attendre environ 6 minutes la fin de la mise à jour. 4. MODE DISTANT 4.1. Introduction La prise SmartPlug peut aussi être contrôlée à distance en utilisant une passerelle internet dédiée. Pour plus de renseignements consultez notre site web : www.bee-wi.com. Dans ce cas, il est nécessaire d’utiliser une application web différente comme décrit dans le manuel de la passerelle BeeWi. 4.2. Appairage Pour enregistrer la prise sur le réseau HomeBee, il est nécessaire de l’appairer de manière sécurisée à la passerelle. Pour ce faire, suivre les étapes suivantes: 1) Brancher la prise dans le socle mural. L’indicateur clignote une fois par seconde. 2) Appuyer sur le bouton de la prise pendant 2 secondes jusqu’à ce que l’indicateur clignote deux fois par seconde. 3) Appuyer sur le bouton de la passerelle pendant 1 seconde jusqu’à ce que l’indicateur clignote deux fois par seconde pour initier l’appairage. 4) Dès que la prise est appariée avec succès à la passerelle, l’indicateur clignote une fois par secondes et le nouveau périphérique s’affiche sur l’écran de l’application web. 4.3. Serveur Web Aller sur le portail HomeBee en utilisant un navigateur internet ou l’application Web sur Smartphone et tablette pour accéder au périphérique. En utilisant le portail avec votre compte utilisateur, il est possible d’accéder à la plupart des fonctions disponibles sur l’application SmartPad : - Etats de la prise SmartPlug : On/Off, valeur de température et mode programmé. - Réglages des actions: activation de la prise manuellement ou selon les heures programmées. - Réglages des alertes : envoi d’une alerte par email en cas de présence détectée ou de niveau spécifique de température. - Visualisation des graphes d’historique de présence ou de température. FRANÇAIS 8 5. PRECAUTIONS ET EXCLUSIONS DE GARANTIE 5.1. Entretien du produit • Utiliser le produit en intérieur uniquement. • Eviter d’exposer le produit à des températures extrêmes, au-delà de 45°C ou en-deçà de -10°C pour conserver un fonctionnement et des performances optimales. • Ne pas exposer le produit à l’humidité ou la moisissure. • En cas de non utilisation prolongée, entreposer le produit dans un endroit sûr. 5.2. Dommages non couverts par la garantie standard • Dommages causés par une utilisation inadéquate du produit, notamment choc, chute, exposition à des températures extrêmes, à la poussière ou l’humidité ou autres causes. • Dommages résultant du non-respect des instructions du constructeur. • Dommages cosmétiques tels que, éraflures, traces de colles ou autres changement fait au produit. • Dommages consécutifs au démontage du produit ou à une tentative de réparation par du personnel non autorisé. Copyright et autres informations BEEWI est une marque déposée. Les autres marques mentionnées ci-après appartiennent à leurs propriétaires. Les autres noms de produit ou de service utilisés sont la propriété de leurs détenteurs respectifs. L’utilisation d’appareils sans fil et de ses accessoires peuvent être interdite dans certains endroits. Toujours respecter les réglementations et lois en vigueur. Ce produit est couvert par une garantie de deux ans s’appliquant à compter de la date d’achat du matériel. Les utilisateurs n’ont pas l’autorisation de faire quelque changement ou modification que ce soit. Tout changement ou modification non expressément approuvé annule la garantie. Veuillez visiter notre site web www.bee-wi.com pour plus d’information. Support technique: [email protected]. © OTIO, 2016. OTIO - SAS, 719 rue Albert Camus - 31190 Auteriv France FRANÇAIS 9 Thank you for purchasing the BBP200 SmartPlug from BEEWI. Please read the following instructions to learn how to configure and use more effectively your product INTRODUCTION The BBP200 Smart Plug, one of the most innovative of its generation, can be fully controlled remotely using a dedicated Smartphone app. It is fully programmable and can be used to remotely control AC power source to an external appliance as well as monitoring motion and temperature in its environment. It is perfectly suited for various types of home automation applications: - Turn on and off appliances manually using either included button or app button - Turn on and off appliances based on time, temperature or motion events - Monitor histories such as motion events and temperature curves Compliant with latest Bluetooth 4.0 technology, it is compatible with other Smart ready devices such as Smartphones and Tablets by means of dedicated applications. 1. PRODUCT DESCRIPTION 1.1. Product Outlook 1. AC Plug 2. AC Socket 3. Control Button (Socket Power On/Off and Pairing) 4. Status Light 5. Motion Sensor 6. Temperature Sensor 5 3 4 2 1 6 ENGLISH 10 1.2. Package Content • SmartPlug • Quick Start Guide and other info 1.3. Main features • Remote control your electric appliances • Fully programmable • Program your heater to get comfort temperature when you are present • Switch on a light when you come through or at specific hours • Get the history of presence and temperature • Smartphone App support for remote control, monitoring and programming features 1.4. Specifications Radio technology Range Output Power Ratings Power Ratings Temperature sensor Motion sensor Dimensions Weight Bluetooth Smart Class 2, up to 30 meter typical 16A max, up to 3600 W Input : AC 100-250V, 50-60 Hz +/- 1° C from -25° to +85°C 100° radius, up to 5 meters L124 x W76 x H36.5 mm 170 g 2. STANDALONE MODE 2.1. Introduction The standalone mode is the default mode for SmartPlug. This corresponds to the local access via a Smartphone or Tablet app. 2.2. Initial Settings To use SmartPlug in standalone mode, first download and install the “BeeWi SmartPad” application on Smartphone or Tablet devices. This app is available on the app stores for compatible iOS and Android devices. 2.3. Pairing Before using SmartPlug, it is necessary to securely pair the Smartphone and SmartPlug. This way, only authorized Smartphone or Table will be able to access the Plug. 1) Download the BeeWi SmartPad app. 2) Plug SmartPlug into a wall socket. The LED will flash once by second. 3) Press SmartPlug button for 2 seconds until the LED flashes twice per second. ENGLISH 11 4) Open the app and press “Add Peripheral” to look for your peripheral and initiate pairing. 5) Once “BeeWi SmartPlug” is listed, select it to pair it. After successful pairing, a new box is showing in the app home screen and the LED will turn off. 2.3. Restauration SmartPlug can be restored in factory preset state including factory firmware version. To restore the firmware and delete all pairing or status user data, just press the button whilst plugging SmartPlug into a wall socket. Restoration is confirmed by means of the Led indicator blinking quickly for a few seconds. 3. USING THE APP 3.1. Home Screen The home screen is listing all the peripherals paired and connected to the device. By selecting the peripheral box, it is possible to: - Reconnect the peripheral in case the connection has been lost - Access the Control screen when the peripheral is connected - Drag and move the box when holding the finger on the box In the peripheral box, you will find the following information and function: - SmartPlug picture (user defined) - SmartPlug name (user defined, “BeeWi SmartPlug” by default) - Connection status and signal strength bar - Power switch and temperature status - Manual power switch button (if not in thermostat mode) - Current mode (manual, presence, timer or thermostat) It is possible to control the power switch directly from the SmartPlug box without opening the Control screen. 3.2. Control Screen In the Control screen, it is possible to program specific behaviors such as: - Manual switch only. - Switch power on/off depending on the time: in that case, the user can set up a specific time slots for power on. - Switch power on/off depending on presence: in that case the power on switch can be timed from 5 seconds to 5 minutes. - Switch power on/off depending on actual temperature to set up eco and comfort temperature period during the day. 3.3. History Screen The history screen provides up to 24H history graphs for both temperature and presence. Both graphs can be set for different period of times, by clicking on them. - Temperature: 24, 12, and 6H ENGLISH 12 - Presence: 24, 12, 6, 3 and 1H Note the temperature is shown in steps of 1° C and presence in slots of 10 minutes 3.4. Edition Screen The edition screen allows for editing SmartPlug details such as name and picture and other settings such as presence recording. The edition screen also includes a button to update SmartPlug with the latest firmware or to switch it in remote mode. To update the firmware, just press the “Update peripheral” button in Edition screen, then confirm action and wait for about 6 minutes for the firmware update to be confirmed. 4. GATEWAY MODE 4.1. Introduction SmartPlug can also be controlled remotely via the internet using a specific internet gateway. For more information, see our web site www.bee-wi.com. In that case, it is necessary to use a different web application as described in the BeeWi Gateway manual. 4.2. Pairing In order to list your SmartPlug as part of the HomeBee network, it is necessary to pair it securely with the Master Gateway. To do this, follow these steps: 1) Fit SmartPlug into a wall socket. The LED will flash once per second 2) Press the SmartPlug button for 2 seconds until the LED flashes twice per second. 3) Press the Gateway button for 1 second until the LED flashes twice per second to initiate pairing. 4) Once SmartPlug has been successfully paired with the Gateway, the LED will revert to the connected state flashing once par second and the new peripheral will show in the web app home screen. 4.3. Web server Go to the HomeBee portal using a web browser or the web app to access your peripheral. Using the portal under your own account, it will be possible to access the same functions supported by the SmartPad app: - SmartPlug status: On/Off, temperature and current mode. - Action settings: switch the SmartPlug On and Off manually or depending on time, presence or temperature. - Alert settings: send an alert email in case of presence detection or specific temperature level. - View history graphs for presence and temperature. ENGLISH 13 5. CAUTION & WARRANTY EXCEPTIONS 5.1. Taking care of your product • Use the product indoor only. • Avoid storage at extreme temperatures, above 45°C (including direct sunlight) or below -10°C. • Do not expose the product to rain or moisture. • When not in use, always store the product in a safe place. 5.2. Damages not covered by standard Warranty • Damages caused by an improper use of the product such as shocks, drops, exposition to extreme temperatures, dust, or humidity, or any other cause. • Damages resulting from any non-respect of manufacturer instructions. • Cosmetic damages such as scratches, paint, glue or any other alteration made to the product. • Damages to the product after an repair or disassembly from non authorized personal. Copyright and other legal information BEEWI is a registered trademark. Other trademarks mentioned herewith are owned by their proprietors. All other product or service names are the property of their respective owners. The use of wireless devices and their accessories may be prohibited or restricted in certain areas. Always obey the laws and regulations on the use of these products. This product is covered by a 2-year product warranty which is valid from the date of purchase. Users are not permitted to make changes or modify the device in any way. Changes or modifications not expressly approved by the party responsible for compliance will void the user’s warranty. Please visit our website www.bee-wi.com for more information. Technical support: [email protected]. © OTIO, 2016. OTIO - SAS, 719 rue Albert Camus - 31190 Auteriv France ENGLISH 14 Wij danken u voor uw keuze van de SmartPlug BBP200 van BEEWI. Gelieve de volgende instructies door te lezen, om uw product zo goed mogelijk te kunnen configureren en gebruiken. INLEIDING Die Steckdose BBP200, eine der fortschrittlichsten ihrer Generation, kann mit einer speziellen Smartphone-App voll und ganz ferngesteuert werden. Sie ist umfassend programmierbar, um die Versorgung eines Elektrogeräts zu steuern und kann Bewegungen und die Temperatur in ihrer näheren Umgebung überwachen. Sie ist für verschiedene automatische Steuerungsarten perfekt geeignet: - manuelles Ein- oder Ausschalten eines elektrischen Geräts mit Hilfe des Schalters oder über die App, - automatisches Ein- oder Ausschalten eines elektrischen Geräts in Abhängigkeit von der Zeit, der Temperatur oder nach Anwesenheitsdetektion, - Verwaltung von Anwesenheits- bzw. Temperaturberichten. Da sie auf der neuesten Bluetooth Low Energy-Technologie basiert, ist sie anhand spezieller Applikationen mit allen Bluetooth Smart Ready-Geräten 1. BESCHRIJVING VAN HET PRODUCT 1.1. Beschrijving 1. Stekker 2. Voet voor externe apparatuur 3. Controleknop (Voeding van de voet en pairing) 4. Controlelampje 5. Bewegingssensor 6. Temperatuursensor 5 3 4 2 1 6 NEDERLANDS 15 1.2. Inhoud van de verpakking - SmartPlug - Vereenvoudigde gids en informatie over de garantie 1.3. Hoofdkenmerken - Afstandsbediening van elektrische apparatuur - Volledig programmeerbare gestuurde processen - Programmering van een radiator in de nacht- en dagmodus - Inschakeling van een lamp na aanwezigheidsdetectie of op vastgestelde tijden - Aanwezigheids- en temperatuuroverzichten over 24 uur - Applicatie op Smartphone voor afstandscontrole, beheer en programmering 1.4. Specificaties Radio technologie Bereik Uitgangsvermogen Voeding Temperatuursensor Bewegingssensor Afmetingen Gewicht Bluetooth Smart Klasse 2, tot 30 meter Max 16A, 3600 W 100-250V Wisselspanning, 50-60 Hz +/- 1°C tussen -25° en +85°C Hoek van 100°, afstand 5 meter L124 x Br76 x H36.5 mm 170 g N.b.: er bestaan 3 verschillende versies, naargelang het stopcontact: Frankrijk, Europa, VS 2. AUTONOME MODUS 2.1. Inleiding De autonome modus is de standaard modus van de SmartPlug. Deze komt overeen met een complete toegang via een applicatie op een Smartphone of een tablet. 2.2. Voorafgaande instellingen Om de SmartPlug in lokale modus te gebruiken, moet u de applicatie « BeeWi SmartPad » downloaden en op uw Smartphone of tablet installeren. Deze applicatie is verkrijgbaar op de “App Stores” iOS en Android voor de compatibele apparaten. 2.3. Pairing Alvorens de SmartPlug te gebruiken is een pairing met de Smartphone of de tablet in de beveiligde modus nodig. Op deze manier kunnen alleen de hiertoe bevoegde Smartphones of tablets de SmartPlug bereiken en bedienen. NEDERLANDS 16 1) Download en installeer de applicatie BeeWi SmartPad 2) Steek de stekker in het wandstopcontact. Het controlelampje knippert een keer per seconde. 3) Houd de knop van de stekker 2 seconden ingedrukt, totdat het controlelampje twee keer per seconde knippert. 4) Start de applicatie SmartPad op en druk op de knop “Randapparatuur toevoegen” om de randapparatuur te zoeken. 5) Selecteer de « BeeWi SmartPlug » zodra deze op de lijst verschijnt, om deze te pairen. Als de pairing gelukt is, verschijnt er een nieuwe patroon op het hoofdscherm en dooft het controlelampje. 2.4. Reset De SmartPlug kan in de oorspronkelijke staat worden teruggezet, inclusief de standaard firmware. Om de standaard firmware terug te krijgen en de pairing- of gebruiksgegevens te verwijderen, drukt u op de knop, terwijl de stekker in een wandstopcontact gestoken wordt. De reset wordt bevestigd door het controlelampje dat gedurende enkele seconden snel knippert. 3. GEBRUIK VAN DE APPLICATIE Let op: sommige handelingen kunnen anders zijn aan de hand van de OS van het apparaat. 3.1. Hoofdscherm Het hoofdscherm geeft de lijst met alle gepairde randapparatuur in de vorm van patronen. Door een randapparatuurpatroon te selecteren, kunt u: - De randapparatuur opnieuw aansluiten, indien de aansluiting mislukt is - Naar het controlescherm wanneer de randapparatuur is aangesloten In de patroon vindt u de volgende informatie en functies: - Icoon van de SmartPlug (te bewerken) - Naam van de SmartPlug (te bewerken, standaard is dat “BeeWi SmartPlug”) - Toestand van de aansluiting en signaalbalk - On/Off status en temperatuurwaarde - On/Off schakelaarknop (als de thermostaatmodus niet actief is) - Aanwezigheidsmodus (handmatig, aanwezigheid, tijdklok of thermostaat) Het is mogelijk de knop On/Off rechtstreeks te controleren op de patroon, zonder het controlescherm te openen. 3.2. Controlescherm Op het controlescherm kan men de volgende instellingen uitvoeren: - Uitsluitend handmatige omschakeling - Omschakeling naargelang de tijd: in dit geval kan de gebruiker de specifieke tijdsverlopen programmeren voor het inschakelen van de SmartPlug. NEDERLANDS 17 - Omschakeling naargelang de aanwezigheid: in dit geval kan de SmartPlug tussen 5 seconden en 5 minuten ingeschakeld worden. - Omschakeling naargelang de temperatuur om een radiator in de nachtmodus (lage temperatuur) of overdag in de dagmodus (max. temperatuur) te zetten. 3.3. Overzichtsscherm Het overzichtsscherm geeft de temperatuur- en aanwezigheidsgrafieken tot 24 uur weer. De grafieken kunnen over verschillende periodes aangepast worden door hier op te klikken: - Temperatuur: 24, 12 of 6 uur - Aanwezigheid: 24, 12, 6, 3 of 1 uur Wij wijzen er op dat de temperatuur wordt weergegeven met een precisie van 1°C en de aanwezigheid per periode van 10 minuten. 3.4. Bewerkingsscherm Met het bewerkingsscherm kan men sommige details van de SmartPlug bewerken, zoals de naam of de icoon. Dit scherm omvat tevens andere instellingen, zoals de registratie van de aanwezigheid. Het bewerkscherm omvat ook de informatie over de versie van de firmware en een updateknop die verschijnt wanneer er een nieuwe firmware beschikbaar is. Om de firmware te updaten, hoeft u alleen maar op de knop “Update” te drukken en vervolgens de actie te bevestigen en ca. 6 minuten te wachten tot het einde van de update. 4. AFSTANDSMODUS 4.1. Inleiding De SmartPlug kan ook op afstand gecontroleerd worden met behulp van een speciale internetgateway. Ga voor meer informatie naar onze website: www.bee-wi.com In dat geval moet u een andere webapplicatie gebruiken dan beschreven in de handleiding van de gateway BeeWi. 4.2. Pairing Om de SmartPlug op het netwerk HomeBee te pairen, moet deze op beveiligde wijze aan de gateway gekoppeld worden. Volg daarvoor de volgende stappen: 1) Steek de stekker in het wandstopcontact. Het controlelampje knippert een keer per seconde. 2) Houd de knop van de stekker 2 seconden ingedrukt, totdat het controlelampje twee keer per seconde knippert. 3) Houd de knop van de gateway 1 second ingedrukt, totdat het controlelampje twee keer per seconde knippert, om met het pairen te beginnen. 4) Zodra de SmartPlug met succes met de gateway gepaird is, knippert het controlelampje een keer per seconde en wordt de nieuwe randapparatuur op het scherm van de webapplicatie weergegeven. NEDERLANDS 18 4.4. Webserver Ga naar het portaal HomeBee met behulp van een internetbrowser of de webapplicatie op de Smartphone of tablet voor toegang tot de randapparatuur. Door het portaal met uw gebruikersaccount te gebruiken, heeft u toegang tot de meeste functies van de applicatie SmartPad: - Staat van de SmartPlug: On/Off, temperatuurwaarde en geprogrammeerde modus. - Instellingen van de handelingen: inschakeling van de SmartPlug met de hand of volgens de geprogrammeerde tijden. - Instellingen van de alarmen: verzending van een alarm per e-mail in geval van een gedetecteerde aanwezigheid of een specifiek temperatuurniveau. - Visualisering van de overzichtsgrafieken van aanwezigheid of temperatuur. 5. VOORZORGSMAATREGELEN EN GARANTIE-UITSLUITINGEN 5.1. Onderhoud van het product • Gebruik het product uitsluitend binnenshuis. • Vermijd blootstelling van het product aan extreem hoge en lage temperaturen, boven 45°C en onder -10°C om de werking en de prestaties optimaal te houden. • Het product niet blootstellen aan vocht of schimmel. • Berg het product op een beschutte plaats op wanneer u het lange tijd niet zult gebruiken. 5.2. Schade die niet gedekt wordt door de standaardgarantie • Schade veroorzaakt door een onjuist gebruik van het product, met name schokken, vallen, blootstelling aan extreem hoge of lage temperaturen, aan stof of vocht of andere oorzaken. • Schade voortvloeiend uit het niet in acht nemen van de instructies van de fabrikant. • Cosmetische schade, zoals krassen, lijmsporen of aan het product aangebrachte wijzigingen. • Schade als gevolg van het demonteren van het product of van een poging tot reparatie door onbevoegd personeel. NEDERLANDS 19 Copyright en andere informatie BEEWI is een gedeponeerd merk. De andere, hierna vermelde merken zijn eigendom van hun eigenaren. De andere gebruikte product- of dienstennamen zijn het eigendom van hun respectievelijke houders. Op sommige plaatsen kan het gebruik van draadloze apparaten en hun accessoires verboden zijn. Neem altijd de geldende regelgevingen en wetten in acht. Dit product heeft een garantie van twee jaar vanaf de datum van aankoop van het materiaal. De gebruikers hebben geen toestemming om veranderingen of wijzigingen aan te brengen. Een verandering of wijziging waarvoor niet uitdrukkelijk toestemming werd gegeven, annuleert de garantie. Bezoek onze website www.bee-wi.com voor meer informatie. Technische hulpdienst: [email protected]. © OTIO, 2016 OTIO - SAS, 719 rue Albert Camus - 31190 Auteriv Frankrijk NEDERLANDS 20 ﺷﻜﺮﺍ ﻻﺧﺘﻴﺎﺭﻛﻢ ﺍﻟﻤﻘﺒﺲ ﺍﻟﻤﻮﺻﻮﻝ SmartPlug BBP200ﻣﻦ ﺷﺮﻛﺔ BEEWI .ﻧﺮﺟﻮ ﻣﻨﻜﻢ ﻗﺮﺍءﺓ ﺍﻟﺘﻌﻠﻴﻤﺎﺕ ﺍﻟﺘﺎﻟﻴﺔ ﻟﺘﺸﻐﻴﻞ ﻭ ﺗﺤﻘﻴﻖ ﺃﻓﻀﻞ ﺍﺳﺘﻌﻤﺎﻝ ﻟﻤﺘﻮﺟﻜﻢ . ﻣﻘﺪﻣﺔ ﺍﻟﻤﻘﺒﺲ ﺍﻟﻤﻮﺻﻮﻝ BBP200ﻣﻦ ﺃﺣﺪﺙ ﻣﺎ ﺗﻢ ﺍﻟﺘﻮﺻﻞ ﺇﻟﻴﻪ ﻓﻲ ﻣﺠﺎﻝ ﺗﻜﻨﻮﻟﻮﺟﻴﺎ ﺍﻟﻤﻘﺎﺑﺲ ﺍﻟﻤﻮﺻﻮﻟﺔ ﻭﺃﻛﺜﺮﻫﺎ ﺗﻄﻮﺭﺍ ،ﺣﻴﺚ ﻳﻤﻜﻦ ﺍﻟﺘﺤﻜﻢ ﻓﻴﻪ ﻛﻠﻴﺎ ﻋﻦ ﺑﻌﺪ ﺑﺎﺳﺘﻌﻤﺎﻝ ﺗﻄﺒﻴﻖ ﺧﺎﺹ ﺑﻪ ﻋﻠﻰ ﺍﻟﻬﺎﺗﻒ ﺍﻟﺬﻛﻲ .ﻳﻤﻜﻦ ﺑﺮﻣﺠﺘﻪ ﺑﺎﻟﻜﺎﻣﻞ ﻟﺘﻌﺪﻳﻞ ﺗﻐﺬﻳﺔ ﺟﻬﺎﺯ ﻛﻬﺮﺑﺎﺋﻲ ،ﻭ ﻳﺴﻤﺢ ﺃﻳﻀﺎ ﺑﺎﻟﺘﺤﻜﻢ ﻓﻲ ﺍﻟﺤﺮﻛﺎﺕ ﻭ ﺩﺭﺟﺔ ﺍﻟﺤﺮﺍﺭﺓ ﻓﻲ ﻣﺤﻴﻄﻪ ﺍﻷﻗﺮﺏ .ﺇﻧﻪ ﻳﺘﺄﻗﻠﻢ ﺗﻤﺎﻣﺎ ﻣﻊ ﻣﺨﺘﻠﻒ ﺃﻧﻮﺍﻉ ﺍﻟﺘﺸﻐﻴﻞ ﺍﻟﺘﻠﻘﺎﺋﻲ: ﺇﺿﺎءﺓ ﺃﻭ ﺇﻃﻔﺎء ﺟﻬﺎﺯ ﻛﻬﺮﺑﺎﺋﻲ ﻳﺪﻭﻳﺎ ﺑﻮﺍﺳﻄﺔ ﺯﺭ ﻣﺎﺩﻱ ﺃﻭ ﻣﻦ ﺧﻼﻝ ﺍﻟﺘﻄﺒﻴﻖ ﺇﺿﺎءﺓ ﺃﻭ ﺇﻃﻔﺎء ﺟﻬﺎﺯ ﻛﻬﺮﺑﺎﺋﻲ ﺗﻠﻘﺎﺋﻴﺎ ﻭﻓﻖ ﺍﻟﺴﺎﻋﺔ ،ﺩﺭﺟﺔ ﺍﻟﺤﺮﺍﺭﺓ ﺃﻭ ﺍﻛﺘﺸﺎﻑ ﺣﻀﻮﺭ. ﺍﻟﺘﺤﻜﻢ ﻓﻲ ﺑﻴﺎﻧﺎﺕ ﺍﻟﺤﻀﻮﺭ ﺃﻭ ﻓﻲ ﺩﺭﺟﺔ ﺍﻟﺤﺮﺍﺭﺓ.ﻳﺴﺘﻨﺪ ﺍﻟﻤﻘﺒﺲ ﺇﻟﻰ ﺃﺣﺪﺙ ﺗﻜﻨﻮﻟﻮﺟﻴﺎ ﺍﻟﺒﻠﻮﺗﻮﺙ ﺫﺍﺕ ﺍﻻﺳﺘﻬﻼﻙ ﺍﻟﻤﻨﺨﻔﺾ ﻟﻠﻄﺎﻗﺔ )(Bluetooth Low Energy ،ﻭ ﻫﺬﺍ ﻣﺎ ﻳﺠﻌﻠﻪ ﻳﺘﻮﺍﻓﻖ ﻣﻊ ﻣﺠﻤﻞ ﺍﻷﺟﻬﺰﺓ ﺍﻟﻤﺰﻭﺩﺓ ﺑﺘﻘﻨﻴﺔ Bluetooth Smart Readyﻣﺜﻞ ﺍﻟﻬﻮﺍﺗﻒ ﺍﻟﺬﻛﻴﺔ ﻭ ﺃﺟﻬﺰﺓ ﺍﻟﻜﻤﺒﻴﻮﺗﺮ ﺍﻟﻠﻮﺣﻴﺔ ﻣﻦ ﺍﻟﺠﻴﻞ ﺍﻟﺤﺪﻳﺚ ﻭ ﺫﻟﻚ ﺑﺎﺳﺘﻌﻤﺎﻝ ﺗﻄﺒﻴﻘﺎﺕ ﺧﺎﺻﺔ. .1ﻣﻮﺍﺻﻔﺎﺕ ﺍﻟﺠﻬﺎﺯ 1.1ﺍﻟﻤﻈﻬﺮ ﺍﻟﻌﺎﻡ .1ﻣﻘﺒﺲ ﻛﻬﺮﺑﺎﺋﻲ .2ﻗﺎﻋﺪﺓ ﻟﺠﻬﺎﺯ ﺧﺎﺭﺟﻲ .3ﺯﺭ ﺍﻟﺘﺤﻜﻢ )ﺗﻐﺬﻳﺔ ﺍﻟﻘﺎﻋﺪﺓ ﻭ ﺍﻹﻗﺮﺍﻥ( .4ﻣﺆﺷﺮ ﺿﻮﺋﻲ .5ﺟﻬﺎﺯ ﺍﺳﺘﺸﻌﺎﺭ ﺍﻟﺤﺮﻛﺔ .6ﺟﻬﺎﺯ ﺍﺳﺘﺸﻌﺎﺭ ﺩﺭﺟﺔ ﺍﻟﺤﺮﺍﺭﺓ 5 3 4 1 2 6 ﺍﻟﻌﺮﺑﻴﺔ 21 .2.1ﻣﺤﺘﻮﻯ ﺍﻟﻌﻠﺒﺔ ﻣﻘﺒﺲ SmartPlug ﺩﻟﻴﻞ ﻣﺒﺴﻂ ﻭ ﻣﻌﻠﻮﻣﺎﺕ ﺍﻟﻀﻤﺎﻥ.3.1ﻣﻴﺰﺍﺕ ﺍﻟﺠﻬﺎﺯ ﺍﻷﺳﺎﺳﻴﺔ ﺍﻟﺘﺤﻜﻢ ﻋﻦ ﺑﻌﺪ ﻓﻲ ﺍﻷﺟﻬﺰﺓ ﺍﻟﻜﻬﺮﺑﺎﺋﻴﺔ ﺃﺗﻤﺘﺔ ﻗﺎﺑﻠﺔ ﻟﻠﺒﺮﻣﺠﺔ ﺑﺎﻟﻜﺎﻣﻞ ﺑﺮﻣﺠﺔ ﻣﺸﻌﺎﻉ ﻓﻲ ﻭﺿﻌﻴﺔ ﻣﻘﺘﺼﺪﺓ ﻭ ﻣﺮﻳﺤﺔ ﺇﺿﺎءﺓ ﻣﺼﺒﺎﺡ ﻋﻨﺪ ﺍﻛﺘﺸﺎﻑ ﺣﻀﻮﺭ ﺃﻭ ﻓﻲ ﺳﺎﻋﺎﺕ ﻣﺤﺪﺩﺓ. ﺑﻴﺎﻧﺎﺕ ﺍﻟﺤﻀﻮﺭ ﻭ ﺩﺭﺟﺔ ﺍﻟﺤﺮﺍﺭﺓ ﻋﻠﻰ ﻣﺪﻯ ﺍﻝ ٤٢ﺳﺎﻋﺔ ﺗﻄﺒﻴﻖ ﻋﻠﻰ ﺍﻟﻬﺎﺗﻒ ﺍﻟﺬﻛﻲ ﻟﻠﺘﺤﻜﻢ ﻋﻦ ﺑﻌﺪ ،ﺍﻟﺘﺼﺮﻑ ﻭ ﺍﻟﺒﺮﻣﺠﺔ..4.1ﺍﻟﻤﻮﺍﺻﻔﺎﺕ ﺍﻟﺘﻘﻨﻴﺔ: ﺗﻜﻨﻮﻟﻮﺟﻴﺎ ﺍﻟﻤﺬﻳﺎﻉ ﺍﻟﻨﻄﺎﻕ ﻗﻮﺓ ﺍﻟﺨﺮﻭﺝ ﺍﻟﺘﻐﺬﻳﺔ ﺟﻬﺎﺯ ﺍﺳﺘﺸﻌﺎﺭ ﺩﺭﺟﺔ ﺍﻟﺤﺮﺍﺭﺓ ﺟﻬﺎﺯ ﺍﺳﺘﺸﻌﺎﺭ ﺍﻟﺤﺮﻛﺔ ﺍﻟﺤﺠﻢ Bluetooth Smart ﻓﺌﺔ ،2ﺇﻟﻰ ﺣﺪﻭﺩ 30ﻣﺘﺮ ﻋﻠﻰ ﺍﻷﻗﺼﻰ 16ﺃﻣﺒﻴﺮ 3600 ،ﻭﺍﻁ 250-100ﻓﻮﻟﺖ ﻣﺘﻨﺎﻭﺏ 60-50 ،ﻫﺮﺗﺰ -/+1°ﻣﺌﻮﻳﺔ ﻣﻦ -25°ﺇﻟﻰ +85°ﻣﺌﻮﻳﺔ ﺯﺍﻭﻳﺔ ﺏ ،100°ﻤﺴﺎﻓﺔ 5ﺃﻣﺘﺎﺭ ﻃﻮﻝx124ﻋﺮﺽ x76ﺍﺭﺗﻔﺎﻉ 36.5ﻣﻢ ﻣﻼﺣﻈﺔ :ﻫﻨﺎﻙ 3ﻧﺴﺦ ﻣﺨﺘﻠﻔﺔ ﺣﺴﺐ ﻧﻮﻉ ﺍﻟﻤﻘﺒﺲ .ﻓﺮﻧﺴﺎ ،ﺃﻭﺭﻭﺑﺎ ،ﺍﻟﻮﻻﻳﺎﺕ ﺍﻟﻤﺘﺤﺪﺓ ﺍﻷﻣﺮﻳﻜﻴﺔ .2ﻧﻤﻂ ﻣﺴﺘﻘﻞ .1.2ﻣﻘﺪﻣﺔ ﺍﻟﻨﻤﻂ ﺍﻟﻤﺴﺘﻘﻞ ﻫﻮ ﺍﻟﻨﻤﻂ ﺍﻻﻓﺘﺮﺍﺿﻲ ﻟﻠﻤﻘﺒﺲ SmartPlug.ﻫﺬﺍ ﻳﺘﻄﺎﺑﻖ ﻣﻊ ﺩﺧﻮﻝ ﻣﺤﻠﻲ ﻋﺒﺮ ﺗﻄﺒﻴﻖ ﻋﻠﻰ ﺍﻟﻬﺎﺗﻒ ﺍﻟﺬﻛﻲ ﺃﻭ ﺍﻟﻜﻤﺒﻴﻮﺗﺮ ﺍﻟﻠﻮﺣﻲ. .2.2ﺗﻌﺪﻳﻼﺕ ﺃﻭﻟﻴﺔ ﻳﺠﺐ ﺗﺤﻤﻴﻞ ﻭ ﺗﺜﺒﻴﺖ ﺗﻄﺒﻴﻖ » «BeeWi SmartPadﻋﻠﻰ ﺍﻟﻬﺎﺗﻒ ﺍﻟﺬﻛﻲ ﺃﻭ ﺍﻟﻜﻤﺒﻴﻮﺗﺮ ﺍﻟﻠﻮﺣﻲ ﻟﻜﻲ ﺗﺴﺘﻄﻴﻊ ﺍﺳﺘﻌﻤﺎﻝ ﺍﻟﻤﻘﺒﺲ ﻓﻲ ﺍﻟﻨﻤﻂ ﺍﻟﻤﺤﻠﻲ .ﺍﻟﺘﻄﺒﻴﻖ ﻣﺘﻮﻓﺮ ﻋﻠﻰ » «App Storesﻟﻨﻈﻢ ﺍﻟﺘﺸﻐﻴﻞ Android ،iOSﻭ ﻳﺨﺺ ﺍﻷﺟﻬﺰﺓ ﺍﻟﻤﺘﻄﺎﺑﻘﺔ. .3.2ﺍﻹﻗﺮﺍﻥ ﻗﺒﻞ ﺍﺳﺘﻌﻤﺎﻝ ﺍﻟﻤﻘﺒﺲ ،ﻣﻦ ﺍﻟﻀﺮﻭﺭﻱ ﺇﻗﺮﺍﻧﻪ ﺑﻄﺮﻳﻘﺔ ﺁﻣﻨﺔ ﻣﻊ ﺍﻟﻬﺎﺗﻒ ﺍﻟﺬﻛﻲ ﺃﻭ ﺍﻟﻜﻤﺒﻴﻮﺗﺮ ﺍﻟﻠﻮﺣﻲ .ﺑﻬﺎﺗﻪ ﺍﻟﻄﺮﻳﻘﺔ، ﻻ ﻳﺴﻤﺢ ﺇﻻ ﻟﻠﻬﻮﺍﺗﻒ ﺍﻟﺬﻛﻴﺔ ﻭ ﺃﺟﻬﺰﺓ ﺍﻟﻜﻤﺒﻴﻮﺗﺮ ﺍﻟﻠﻮﺣﻲ ﺍﻟﻤﺮﺧﺼﺔ ﺑﺘﻮﺟﻴﻪ ﻭ ﻗﻴﺎﺩﺓ ﺍﻟﻤﻘﺒﺲ. (1ﻗﻢ ﺑﺘﺤﻤﻴﻞ ﻭ ﺗﺜﺒﻴﺖ ﺗﻄﺒﻴﻖ BeeWi SmartPad (2ﺃﻭﺻﻞ ﺍﻟﻤﻘﺒﺲ ﺑﺎﻟﻤﻘﺒﺲ ﺍﻟﺠﺪﺍﺭﻱ .ﺍﻟﻤﺆﺷﺮ ﻳﻮﻣﺾ ﻣﺮﺓ ﻭﺍﺣﺪﺓ ﻓﻲ ﺍﻟﺜﺎﻧﻴﺔ. ﺍﻟﻌﺮﺑﻴﺔ 22 (3ﺍﺿﻐﻂ ﻋﻠﻰ ﺯﺭ ﺍﻟﻤﻘﺒﺲ ﻟﻤﺪﺓ ﺛﺎﻧﻴﺘﻴﻦ ﺣﺘﻰ ﻳﻮﻣﺾ ﺍﻟﻤﺆﺷﺮ ﻣﺮﺗﻴﻦ ﻓﻲ ﺍﻟﺜﺎﻧﻴﺔ. (4ﺃﻃﻠﻖ ﺗﻄﺒﻴﻖ SmartPadﻭ ﻓﻌﻞ ﺍﻟﺰﺭ »ﺃﺿﻒ ﺟﻬﺎﺯ« ﻹﻋﺎﺩﺓ ﺍﻟﺒﺤﺚ ﻋﻦ ﺍﻟﺠﻬﺎﺯ ﺍﻟﻤﻠﺤﻖ. (5ﺣﺎﻟﻤﺎ ﻳﺪﺭﺝ ﺍﻟﻤﻘﺒﺲ » «BeeWi SmartPlugﺿﻤﻦ ﺍﻟﻘﺎﺋﻤﺔ ،ﻗﻢ ﺑﺎﺧﺘﻴﺎﺭﻩ ﻟﻺﻗﺮﺍﻥ .ﺑﻌﺪ ﺃﻥ ﻳﺘﻢ ﺍﻹﻗﺮﺍﻥ ﺑﻨﺠﺎﺡ ،ﺳﺘﻈﻬﺮ ﺗﺮﻭﻳﺴﺔ ﺟﺪﻳﺪﺓ ﻋﻠﻰ ﺍﻟﺸﺎﺷﺔ ﺍﻟﺮﺋﻴﺴﻴﺔ ﻭ ﻳﻨﻄﻔﺊ ﺍﻟﻤﺆﺷﺮ. .4.2ﺍﻟﻌﻮﺩﺓ ﺇﻟﻰ ﺍﻟﺤﺎﻟﺔ ﺍﻟﺴﺎﺑﻘﺔ ﻳﻤﻜﻦ ﺇﻋﺎﺩﺓ ﺍﻟﻤﻘﺒﺲ SmartPlugﺇﻟﻰ ﺣﺎﻟﺘﻪ ﺍﻷﺻﻠﻴﺔ ﺑﺈﺩﺧﺎﻝ ﻣﺼﻨﻊ ﺍﻟﺒﺮﻧﺎﻣﺞ ﺍﻟﺜﺎﺑﺖ .ﻹﻋﺎﺩﺓ ﻣﺼﻨﻊ ﺍﻟﺒﺮﻧﺎﻣﺞ ﺍﻟﺜﺎﺑﺖ ﺇﻟﻰ ﺣﺎﻟﺘﻪ ﺍﻟﺴﺎﺑﻘﺔ ﻭ ﺣﺬﻑ ﻣﻌﻄﻴﺎﺕ ﺍﻹﻗﺮﺍﻥ ﺃﻭ ﺍﻻﺳﺘﻌﻤﺎﻝ ،ﺍﺿﻐﻂ ﻋﻠﻰ ﺍﻟﺰﺭ ﻣﻊ ﻭﺻﻞ ﺍﻟﻤﻘﺒﺲ ﺑﺎﻟﻤﻘﺒﺲ ﺍﻟﺠﺪﺍﺭﻱ .ﺗﺘﺄﻛﺪ ﺍﻟﻌﻮﺩﺓ ﺇﻟﻰ ﺍﻟﺤﺎﻟﺔ ﺍﻟﺴﺎﺑﻘﺔ ﻣﻦ ﺧﻼﻝ ﻭﻣﻴﺾ ﺍﻟﻤﺆﺷﺮ ﺑﻄﺮﻳﻘﺔ ﺳﺮﻳﻌﺔ ﻟﻤﺪﺓ ﺑﻌﺾ ﺍﻟﺜﻮﺍﻧﻲ. .3ﺍﺳﺘﻌﻤﺎﻝ ﺍﻟﺘﻄﺒﻴﻖ ﺗﻨﺒﻴﻪ :ﻳﻤﻜﻦ ﺃﻥ ﺗﺨﺘﻠﻒ ﺑﻌﺾ ﺍﻟﻌﻤﻠﻴﺎﺕ ﺣﺴﺐ ﻧﻈﺎﻡ ﺍﻟﺘﺸﻐﻴﻞ ﻟﻠﺠﻬﺎﺯ. .1.3ﺍﻟﺸﺎﺷﺔ ﺍﻟﺮﺋﻴﺴﻴﺔ ﺗﻀﻢ ﺍﻟﺸﺎﺷﺔ ﺍﻟﺮﺋﻴﺴﻴﺔ ﻗﺎﺋﻤﺔ ﻋﻠﻰ ﺷﻜﻞ ﺗﺮﻭﻳﺴﺎﺕ ﻟﻤﺨﺘﻠﻒ ﺍﻷﺟﻬﺰﺓ ﺍﻟﻤﺘﺼﻠﺔ. ﺑﺎﺧﺘﻴﺎﺭ ﺗﺮﻭﻳﺴﺔ ﺟﻬﺎﺯ ،ﻳﻤﻜﻨﻜﻢ: ﺇﻋﺎﺩﺓ ﺗﻮﺻﻴﻞ ﺍﻟﺠﻬﺎﺯ ﻓﻲ ﺣﺎﻟﺔ ﺍﻧﻘﻄﺎﻉ ﺍﻻﺗﺼﺎﻝ ﺍﻟﺪﺧﻮﻝ ﺇﻟﻰ ﺷﺎﺷﺔ ﺍﻟﺘﺤﻜﻢ ﻓﻲ ﺣﺎﻟﺔ ﻛﺎﻥ ﺍﻟﺠﻬﺎﺯ ﻣﺘﺼﻞﺳﺘﺠﺪ ﺩﺍﺧﻞ ﺍﻟﺘﺮﻭﻳﺴﺔ ﺍﻟﻤﻌﻠﻮﻣﺎﺕ ﻭ ﺍﻟﻮﻇﺎﺋﻒ ﺍﻟﺘﺎﻟﻴﺔ: ﺃﻳﻘﻮﻧﺔ ﺍﻟﻤﻘﺒﺲ ) SmartPlugﻗﺎﺑﻠﺔ ﻟﻠﺘﻌﺪﻳﻞ( ﺍﺳﻢ ﺍﻟﻤﻘﺒﺲ ) SmartPlugﻗﺎﺑﻞ ﻟﻠﺘﻌﺪﻳﻞ ،ﺍﻓﺘﺮﺍﺿﻴﺎ »(«BeeWi SmartPlug ﺣﺎﻟﺔ ﺍﻻﺗﺼﺎﻝ ﻭ ﺷﺮﻳﻂ ﺍﻹﺷﺎﺭﺓ ﺣﺎﻟﺔ On/Offﻭ ﻣﻘﻴﺎﺱ ﺩﺭﺟﺔ ﺍﻟﺤﺮﺍﺭﺓ ﺯﺭ ﺍﻟﻤﻜﺒﺲ ) On/Offﺇﺫﺍ ﻛﺎﻥ ﻭﺿﻊ ﺍﻟﻤﻨﻈﻢ ﺍﻟﺤﺮﺍﺭﻱ ﻏﻴﺮ ﻧﺸﻴﻂ( ﺍﻟﻨﻤﻂ ﺍﻟﺤﺎﻟﻲ )ﻳﺪﻭﻱ ،ﺣﻀﻮﺭ ،ﻋﺪﺍﺩ ﺃﻭ ﻣﻨﻈﻢ ﺣﺮﺍﺭﻱ(ﻣﻦ ﺍﻟﻤﻤﻜﻦ ﺍﻟﺘﺤﻜﻢ ﻓﻲ ﺯﺭ On/Offﻣﺒﺎﺷﺮﺓ ﻋﻠﻰ ﺍﻟﺘﺮﻭﻳﺴﺔ ﺑﺪﻭﻥ ﻓﺘﺢ ﺷﺎﺷﺔ ﺍﻟﺘﺤﻜﻢ. .2.3ﺷﺎﺷﺔ ﺍﻟﺘﺤﻜﻢ ﻓﻲ ﺷﺎﺷﺔ ﺍﻟﺘﺤﻜﻢ ،ﻳﻤﻜﻦ ﺍﻟﻘﻴﺎﻡ ﺑﺎﻟﺘﻌﺪﻳﻼﺕ ﺍﻟﺘﺎﻟﻴﺔ: ﺗﺒﺪﻳﻞ ﻳﺪﻭﻱ ﻓﻘﻂ ﺗﺒﺪﻳﻞ ﺣﺴﺐ ﺍﻟﻮﻗﺖ :ﻓﻲ ﻫﺎﺗﻪ ﺍﻟﺤﺎﻟﺔ ،ﻳﻤﻜﻦ ﻟﻠﻤﺴﺘﻌﻤﻞ ﺃﻥ ﻳﺒﺮﻣﺞ ﻓﺘﺮﺍﺕ ﺯﻣﻨﻴﺔ ﻣﺤﺪﺩﺓ ﻹﺿﺎءﺓ ﺍﻟﻤﻘﺒﺲ. ﺗﺒﺪﻳﻞ ﺣﺴﺐ ﺍﻟﺤﻀﻮﺭ :ﻓﻲ ﻫﺎﺗﻪ ﺍﻟﺤﺎﻟﺔ ،ﻳﻤﻜﻦ ﻟﻠﻤﻘﺒﺲ ﺃﻥ ﻳﻀﺎء ﻟﻤﺪﺓ ﺗﻤﺘﺪ ﻣﻦ 5ﺛﻮﺍﻧﻲ ﺇﻟﻰ 5ﺩﻗﺎﺋﻖ. ﺗﺒﺪﻳﻞ ﺣﺴﺐ ﺩﺭﺟﺔ ﺍﻟﺤﺮﺍﺭﺓ ﻟﺘﻌﺪﻳﻞ ﺍﻟﻤﺸﻌﺎﻉ ﻓﻲ ﻭﺿﻊ ﻣﻘﺘﺼﺪ )ﺩﺭﺟﺔ ﺣﺮﺍﺭﺓ ﻣﻨﺨﻔﻀﺔ( ﻭ ﻭﺿﻊ ﻣﺮﻳﺢ )ﺩﺭﺟﺔﺣﺮﺍﺭﺓ ﻗﺼﻮﻯ( ﻃﻴﻠﺔ ﺍﻟﻴﻮﻡ. .3.3ﺷﺎﺷﺔ ﺍﻟﺒﻴﺎﻧﺎﺕ ﺷﺎﺷﺔ ﺍﻟﺒﻴﺎﻧﺎﺕ ﺗﻌﺮﺽ ﺍﻟﺮﺳﻮﻡ ﺍﻟﺒﻴﺎﻧﻴﺔ ﻟﺪﺭﺟﺔ ﺍﻟﺤﺮﺍﺭﺓ ﻭ ﺍﻟﺤﻀﻮﺭ ﻟﻤﺪﺓ 24ﺳﺎﻋﺔ .ﺍﻟﺮﺳﻮﻡ ﺍﻟﺒﻴﺎﻧﻴﺔ ﻳﻤﻜﻦ ﺃﻥ ﺗﻌﺪﻝ ﻋﻠﻰ ﻣﺮﺍﺣﻞ ﻣﺨﺘﻠﻔﺔ ﺑﺎﻟﻨﻘﺮ ﻋﻠﻴﻬﺎ: -ﺩﺭﺟﺔ ﺍﻟﺤﺮﺍﺭﺓ 12 ،24 :ﺃﻭ 6ﺳﺎﻋﺎﺕ ﺍﻟﻌﺮﺑﻴﺔ 23 ﺍﻟﺤﻀﻮﺭ 3 ،6 ،12 ،24 :ﺃﻭ ﺳﺎﻋﺔ ﻭﺍﺣﺪﺓﻻﺣﻆ ﻭ ﺃﻥ ﺩﺭﺟﺔ ﺍﻟﺤﺮﺍﺭﺓ ﻣﻌﺮﻭﺿﺔ ﺑﺪﻗﺔ ﺏ 1°ﻣﺌﻮﻳﺔ ﻭ ﺍﻟﺤﻀﻮﺭ ﻟﻤﺪﺓ ﻣﺤﺪﺩﺓ ﺏ 10ﺩﻗﺎﺋﻖ. .4.3ﺷﺎﺷﺔ ﺍﻟﺘﻌﺪﻳﻞ ﺗﺴﻤﺢ ﺷﺎﺷﺔ ﺍﻟﺘﻌﺪﻳﻞ ﺑﺘﻌﺪﻳﻞ ﺑﻌﺾ ﺍﻟﺘﻔﺎﺻﻴﻞ ﺍﻟﺨﺎﺻﺔ ﺑﻤﻘﺒﺲ SmartPlugﻣﺜﻞ ﺍﻻﺳﻢ ﺃﻭ ﺍﻷﻳﻘﻮﻧﺔ .ﻫﺬﻩ ﺍﻟﺸﺎﺷﺔ ﺗﺸﻤﻞ ﺃﻳﻀﺎ ﺗﻌﺪﻳﻼﺕ ﺃﺧﺮﻯ ﻣﺜﻞ ﻭﻇﺎﺋﻒ ﺗﺴﺠﻴﻞ ﺍﻟﺤﻀﻮﺭ. ﺷﺎﺷﺔ ﺍﻟﺘﻌﺪﻳﻞ ﺗﺸﻤﻞ ﺃﻳﻀﺎ ﻣﻌﻠﻮﻣﺎﺕ ﻋﻦ ﻧﺴﺨﺔ ﺍﻟﺒﺮﻧﺎﻣﺞ ﺍﻟﺜﺎﺑﺖ ﻭ ﺯﺭ ﺗﺤﺪﻳﺚ ﻳﻈﻬﺮ ﻓﻲ ﺣﺎﻟﺔ ﺗﻮﻓﺮ ﺑﺮﻧﺎﻣﺞ ﺛﺎﺑﺖ ﺟﺪﻳﺪ .ﻟﺘﺤﺪﻳﺚ ﺍﻟﺒﺮﻧﺎﻣﺞ ﺍﻟﺜﺎﺑﺖ ،ﺍﺿﻐﻂ ﻓﻘﻂ ﻋﻠﻰ ﺍﻟﺰﺭ »ﺗﺤﺪﻳﺚ« ﺛﻢ ﺃﻛﺪ ﺍﻟﻌﻤﻠﻴﺔ ﻭ ﺗﺮﻗﺐ ﺣﻮﺍﻟﻲ 6ﺩﻗﺎﺋﻖ ﻟﻨﻬﺎﻳﺔ ﻋﻤﻠﻴﺔ ﺍﻟﺘﺤﺪﻳﺚ. .4ﻧﻤﻂ ﺍﻟﺘﺤﻜﻢ ﻋﻦ ﺑﻌﺪ .1.4ﻣﻘﺪﻣﺔ ﻳﻤﻜﻦ ﺃﻳﻀﺎ ﺍﻟﺘﺤﻜﻢ ﻓﻲ ﻣﻘﺒﺲ SmartPlugﻋﻦ ﺑﻌﺪ ﺑﺎﺳﺘﻌﻤﺎﻝ ﺑﻮﺍﺑﺔ ﺍﻧﺘﺮﻧﺖ ﻣﺨﺼﺼﺔ ﻟﻠﺠﻬﺎﺯ .ﻟﻠﻤﺰﻳﺪ ﻣﻦ ﺍﻟﻤﻌﻠﻮﻣﺎﺕ ،ﻳﺮﺟﻰ ﺍﻻﻃﻼﻉ ﻋﻠﻰ ﻣﻮﻗﻌﻨﺎ.www.bee-wi.com : ﻓﻲ ﻫﺎﺗﻪ ﺍﻟﺤﺎﻟﺔ ،ﻣﻦ ﺍﻟﻀﺮﻭﺭﻱ ﺍﺳﺘﻌﻤﺎﻝ ﺗﻄﺒﻴﻖ ﻭﺍﺏ ﻣﺨﺘﻠﻒ ﻛﻤﺎ ﻫﻮ ﻣﺒﻴﻦ ﻓﻲ ﺩﻟﻴﻞ ﺍﺳﺘﻌﻤﺎﻝ ﺑﻮﺍﺑﺔ .BeeWi ﺍﻟﻤﻘﺒﺲ ﻣﺒﺮﻣﺞ ﺣﺴﺐ ﻧﻤﻂ ﺍﻟﺘﺤﻜﻢ ﻋﻦ ﺑﻌﺪ ﻣﻦ ﺧﻼﻝ ﺗﺤﺪﻳﺚ ﺍﻟﺒﺮﻧﺎﻣﺞ ﺍﻟﺜﺎﺑﺖ ﻭ ﻳﻤﻜﻦ ﻭﺿﻌﻪ ﻓﻲ ﺍﻟﻮﺿﻊ ﺍﻟﻤﺤﻠﻲ ﺑﺎﻟﻘﻴﺎﻡ ﺑﻌﻤﻠﻴﺔ ﺇﻋﺎﺩﺗﻪ ﺇﻟﻰ ﺍﻟﺤﺎﻟﺔ ﺍﻟﺴﺎﺑﻘﺔ. .2.4ﺇﻗﺮﺍﻥ ﻟﺘﺴﺠﻴﻞ ﺍﻟﻤﻘﺒﺲ ﻋﻠﻰ ﺷﺒﻜﺔ ،HomeBeeﻣﻦ ﺍﻟﻀﺮﻭﺭﻱ ﺇﻗﺮﺍﻧﻪ ﺑﻄﺮﻳﻘﺔ ﺁﻣﻨﺔ ﻣﻊ ﺍﻟﺒﻮﺍﺑﺔ .ﻟﻠﻘﻴﺎﻡ ﺑﺬﻟﻚ ،ﻳﺮﺟﻰ ﺍﺗﺒﺎﻉ ﺍﻟﺨﻄﻮﺍﺕ ﺍﻟﺘﺎﻟﻴﺔ: (1ﺃﻭﺻﻞ ﺍﻟﻤﻘﺒﺲ ﺑﺎﻟﻤﻘﺒﺲ ﺍﻟﺠﺪﺍﺭﻱ .ﻳﻮﻣﺾ ﺍﻟﻤﺆﺷﺮ ﻣﺮﺓ ﻓﻲ ﺍﻟﺜﺎﻧﻴﺔ. (2ﺍﺿﻐﻂ ﻋﻠﻰ ﺯﺭ ﺍﻟﻤﻘﺒﺲ ﻟﻤﺪﺓ ﺛﺎﻧﻴﺘﻴﻦ ﺣﺘﻰ ﻳﻮﻣﺾ ﺍﻟﻤﺆﺷﺮ ﻣﺮﺗﻴﻦ ﻓﻲ ﺍﻟﺜﺎﻧﻴﺔ. (3ﺍﺿﻐﻂ ﻋﻠﻰ ﺯﺭ ﺍﻟﺒﻮﺍﺑﺔ ﻟﻤﺪﺓ ٤ﺛﻮﺍﻧﻲ ﺣﺘﻰ ﻳﻮﻣﺾ ﺍﻟﻤﺆﺷﺮ ﻣﺮﺗﻴﻦ ﻓﻲ ﺍﻟﺜﺎﻧﻴﺔ ﻟﺘﺒﺪﺃ ﻋﻤﻠﻴﺔ ﺍﻹﻗﺮﺍﻥ. (4ﺣﺎﻟﻤﺎ ﻳﻘﺘﺮﻥ ﺍﻟﻤﻘﺒﺲ ﺑﻨﺠﺎﺡ ﺑﺎﻟﺒﻮﺍﺑﺔ ،ﻳﻮﻣﺾ ﺍﻟﻤﺆﺷﺮ ﻣﺮﺓ ﻓﻲ ﺍﻟﺜﺎﻧﻴﺔ ﻭ ﻳﻈﻬﺮ ﺍﻟﺠﻬﺎﺯ ﺍﻟﺠﺪﻳﺪ ﻋﻠﻰ ﺍﻟﺸﺎﺷﺔ ﻟﺘﻄﺒﻴﻖ ﻭﺍﺏ. .3.4ﺧﺎﺩﻡ ﺍﻟﻮﺍﺏ ﺍﺫﻫﺐ ﺍﻟﻰ ﺑﻮﺍﺑﺔ HomeBeeﺑﺎﺳﺘﻌﻤﺎﻝ ﻣﺘﺼﻔﺢ ﺍﻧﺘﺮﻧﺖ ﺃﻭ ﺍﻟﺘﻄﺒﻴﻖ ﻭﺍﺏ ﻋﻠﻰ ﺍﻟﻬﺎﺗﻒ ﺍﻟﺬﻛﻲ ﺃﻭ ﻛﻤﺒﻴﻮﺗﺮ ﻟﻮﺣﻲ ﻟﻠﻨﻔﺎﺫ ﺇﻟﻰ ﺍﻟﺠﻬﺎﺯ .ﺑﺎﺳﺘﻌﻤﺎﻟﻜﻢ ﻟﻠﺒﻮﺍﺑﺔ ﺑﻮﺍﺳﻄﺔ ﺣﺴﺎﺑﻜﻢ ﻛﻤﺴﺘﺨﺪﻡ ،ﻳﻤﻜﻨﻜﻢ ﺍﻟﺪﺧﻮﻝ ﺇﻟﻰ ﻣﻌﻈﻢ ﺍﻟﻮﻇﺎﺋﻒ ﺍﻟﻤﺘﺎﺣﺔ ﻋﻠﻰ ﺗﻄﺒﻴﻖ : SmartPad ﺃﻭﺿﺎﻉ ﺍﻟﻤﻘﺒﺲ ،On/Off : SmartPlugﻣﺴﺘﻮﻯ ﺩﺭﺟﺔ ﺍﻟﺤﺮﺍﺭﺓ ﻭ ﻭﺿﻊ ﻣﺒﺮﻣﺞ. ﺗﻌﺪﻳﻼﺕ ﺍﻟﻌﻤﻠﻴﺎﺕ :ﺗﻔﻌﻴﻞ ﺍﻟﻤﻘﺒﺲ ﻳﺪﻭﻳﺎ ﺃﻭ ﺣﺴﺐ ﺍﻟﺴﺎﻋﺎﺕ ﺍﻟﻤﺒﺮﻣﺠﺔ. ﺗﻌﺪﻳﻼﺕ ﺍﻟﺘﻨﺒﻴﻬﺎﺕ :ﺇﺭﺳﺎﻝ ﺗﻨﺒﻴﻪ ﻋﻦ ﻃﺮﻳﻖ ﺍﻟﺒﺮﻳﺪ ﺍﻻﻟﻜﺘﺮﻭﻧﻲ ﻓﻲ ﺣﺎﻟﺔ ﺣﻀﻮﺭ ﻣﻜﺘﺸﻔﺔ ﺃﻭ ﻟﻤﺴﺘﻮﻯ ﻣﺤﺪﺩ ﻟﺪﺭﺟﺔﺍﻟﺤﺮﺍﺭﺓ. -ﺇﺑﺮﺍﺯ ﺭﺳﻮﻡ ﺑﻴﺎﻧﺎﺕ ﺍﻟﺤﻀﻮﺭ ﺃﻭ ﺩﺭﺟﺔ ﺍﻟﺤﺮﺍﺭﺓ ﺍﻟﻌﺮﺑﻴﺔ 24 .5ﺗﻨﺒﻴﻪ ﻭ ﺍﺳﺘﺜﻨﺎءﺍﺕ ﻓﻲ ﺍﻟﻀﻤﺎﻥ: .1.5ﺻﻴﺎﻧﺔ ﺍﻟﻤﻨﺘﻮﺝ ﺗﺨﺼﻴﺺ ﺍﻟﺠﻬﺎﺯ ﻟﻼﺳﺘﻌﻤﺎﻝ ﺍﻟﺪﺍﺧﻠﻲ ﻓﻘﻂ ﻟﻀﻤﺎﻥ ﺃﺣﺴﻦ ﺍﺷﺘﻐﺎﻝ ﻭ ﺃﻓﻀﻞ ﺃﺩﺍء ،ﻻ ﻳﻌﺮﺽ ﺍﻟﻤﻨﺘﻮﺝ ﻟﺪﺭﺟﺎﺕ ﺣﺮﺍﺭﺓ ﻗﺼﻮﻯ ﺗﻔﻮﻕ 45°ﻣﺌﻮﻳﺔ ﺃﻭ ﺃﻗﻞ ﻣﻦ 10°ﻣﺌﻮﻳﺔ . ﻻ ﻳﻌﺮﺽ ﺍﻟﻤﻨﺘﻮﺝ ﻟﻠﺮﻃﻮﺑﺔ ﺃﻭ ﺍﻟﻌﻔﻦ ﺍﻟﻔﻄﺮﻱ ﻓﻲ ﺣﺎﻟﺔ ﻋﺪﻡ ﺍﺳﺘﺨﺪﺍﻡ ﺍﻟﺠﻬﺎﺯ ﻟﻤﺪﺓ ﻃﻮﻳﻠﺔ ،ﻳﺮﺟﻰ ﻭﺿﻌﻪ ﻓﻲ ﻣﻜﺎﻥ ﺍﻣﻦ. .2.5ﺍﻷﺿﺮﺍﺭ ﺍﻟﺘﻲ ﻻ ﻳﺸﻤﻠﻬﺎ ﺍﻟﻀﻤﺎﻥ ﺍﻟﻌﺎﺩﻱ: ﺍﻷﺿﺮﺍﺭ ﺍﻟﻨﺎﺟﻤﺔ ﻋﻦ ﺍﺳﺘﻌﻤﺎﻝ ﻏﻴﺮ ﻣﻼﺋﻢ ﻟﻠﻤﻨﺘﻮﺝ ،ﻧﺘﻴﺠﺔ ﻟﺼﺪﻣﺔ ،ﺳﻘﻮﻁ ﺃﻭ ﺗﻌﺮﺿﻪ ﻟﺪﺭﺟﺎﺕ ﺣﺮﺍﺭﺓ ﻗﺼﻮﻯ ﺃﻭﺍﻟﻐﺒﺎﺭ ﺃﻭ ﺍﻟﺮﻃﻮﺑﺔ ﺃﻭ ﻷﺳﺒﺎﺏ ﺃﺧﺮﻯ. ﺃﺿﺮﺍﺭ ﻧﺎﺗﺠﺔ ﻋﻦ ﻋﺪﻡ ﺍﺣﺘﺮﺍﻡ ﺗﻌﻠﻴﻤﺎﺕ ﺍﻟﻤﺼﻨﻊ. ﺃﺿﺮﺍﺭ ﺳﻄﺤﻴﺔ ﻛﺎﻟﺨﺪﺵ ﺃﻭ ﺁﺛﺎﺭ ﺍﻟﻤﻮﺍﺩ ﺍﻟﻼﺻﻘﺔ ﺃﻭ ﺃﻱ ﺗﻐﻴﻴﺮ ﻳﻤﺲ ﺑﺎﻟﺠﻬﺎﺯ. ﺃﺿﺮﺍﺭ ﺗﺎﺑﻌﺔ ﻟﺘﻔﻜﻴﻚ ﺍﻟﺠﻬﺎﺯ ﺃﻭ ﻣﺤﺎﻭﻟﺔ ﺗﺼﻠﻴﺢ ﻣﻦ ﻃﺮﻑ ﺷﺨﺺ ﻏﻴﺮ ﻣﺨﻮﻝ.ﺣﻘﻮﻕ ﺍﻟﻄﺒﻊ ﻭﺍﻟﻨﺸﺮ ﻭﻣﻌﻠﻮﻣﺎﺕ ﺇﺿﺎﻓﻴﺔ ﺑﻲ ﻭﻱ BEEWIﻋﻼﻣﺔ ﺗﺠﺎﺭﻳﺔ ﻣﺴﺠﻠﺔ .ﺍﻟﻌﻼﻣﺎﺕ ﺍﻟﺘﺠﺎﺭﻳﺔ ﺍﻵﺗﻲ ﺫﻛﺮﻫﺎ ﻣﻠﻚ ﻷﺻﺤﺎﺑﻬﺎ .ﺃﺳﻤﺎء ﺍﻷﺟﻬﺰﺓ ﻭﺍﻟﺨﺪﻣﺎﺕ ﺍﻷﺧﺮﻯ ﺍﻟﻤﺴﺘﻌﻤﻠﺔ ﻫﻲ ﻣﻠﻚ ﻷﺻﺤﺎﺑﻬﺎ .ﺍﺳﺘﻌﻤﺎﻝ ﺍﻷﺟﻬﺰﺓ ﺍﻟﻼﺳﻠﻜﻴﺔ ﻭﻟﻮﺍﺯﻣﻬﺎ ﻣﻤﻨﻮﻉ ﻓﻲ ﺑﻌﺾ ﺍﻷﻣﺎﻛﻦ .ﻳﺠﺐ ﺍﺣﺘﺮﺍﻡ ﺍﻟﺘﻌﻠﻴﻤﺎﺕ ﻭﺍﻟﻘﻮﺍﻧﻴﻦ ﺳﺎﺭﻳﺔ ﺍﻟﻤﻔﻌﻮﻝ. ﻳﻐﻄﻲ ﺍﻟﻤﻨﺘﻮﺝ ﺿﻤﺎﻥ ﻟﻤﺪﺓ ﻋﺎﻣﻴﻦ ﺑﺪﺍﻳﺔ ﻣﻦ ﺗﺎﺭﻳﺦ ﺷﺮﺍﺋﻪ .ﻻ ﻳﺴﻤﺢ ﻟﻠﻤﺴﺘﻌﻤﻞ ﺍﻟﻘﻴﺎﻡ ﺑﺄﻱ ﺗﻐﻴﻴﺮ ﺃﻭ ﺗﻌﺪﻳﻞ ﻋﻠﻰ ﺍﻟﻤﻨﺘﻮﺝ .ﺃﻱ ﺗﻐﻴﻴﺮ ﺃﻭ ﺗﻌﺪﻳﻞ ﻟﻢ ﻳﻮﺍﻓﻖ ﻋﻠﻴﻪ ﺻﺮﺍﺣﺔ ﻳﺒﻄﻞ ﺍﻟﻀﻤﺎﻥ. ﻟﻠﻤﺰﻳﺪ ﻣﻦ ﺍﻟﻤﻌﻠﻮﻣﺎﺕ ﺍﻟﺮﺟﺎء ﺯﻳﺎﺭﺓ ﻣﻮﻗﻌﻨﺎ ﺍﻹﻟﻜﺘﺮﻭﻧﻲ www.bee-wi.com ﺍﻟﺪﻋﻢ ﺍﻟﺘﻘﻨﻲ[email protected] : © OTIO, 2016 OTIO - SAS, 719 rue Albert Camus - 31190 Auteriv France ﺍﻟﻌﺮﺑﻴﺔ 25 © OTIO 2016-
 1
1
-
 2
2
-
 3
3
-
 4
4
-
 5
5
-
 6
6
-
 7
7
-
 8
8
-
 9
9
-
 10
10
-
 11
11
-
 12
12
-
 13
13
-
 14
14
-
 15
15
-
 16
16
-
 17
17
-
 18
18
-
 19
19
-
 20
20
-
 21
21
-
 22
22
-
 23
23
-
 24
24
-
 25
25


in andere talen
- English: BeeWi BBP200-A1 User manual
- français: BeeWi BBP200-A1 Manuel utilisateur

