Siemens GI81NHCE0/01 Handleiding
- Categorie
- Combi-koelkasten
- Type
- Handleiding
Deze handleiding is ook geschikt voor


1
2
3
4
1
1 2 3 4 5
2

3 4
5

en
4
Table of contents
1 Safety ............................................6
1.1 General information....................6
1.2 Intended use...............................6
1.3 Restriction on user group...........6
1.4 Safe transport.............................6
1.5 Safe installation ..........................7
1.6 Safe use .....................................8
1.7 Damaged appliance...................9
2 Preventing material damage .....11
3 Environmental protection and
saving energy.............................11
3.1 Disposing of packaging ...........11
3.2 Saving energy...........................11
4 Installation and connection.......11
4.1 Scope of delivery......................11
4.2 Criteria for the installation
location .....................................12
4.3 Installing the appliance ............12
4.4 Preparing the appliance for
the first time..............................13
4.5 Connecting the appliance to
the electricity supply.................13
5 Familiarising yourself with
your appliance............................13
5.1 Appliance .................................13
5.2 Control panel............................13
6 Features......................................13
6.1 Freezer compartment flap ........13
6.2 Accessories..............................13
7 Basic operation ..........................14
7.1 Switching on the appliance ......14
7.2 Operating tips...........................14
7.3 Switching off the appliance ......14
7.4 Setting the temperature............14
8 Additional functions ..................14
8.1 Automatic Super freezing.........14
8.2 Manual Super freezing .............15
9 Alarm...........................................15
9.1 Door alarm ...............................15
9.2 Temperature alarm ...................15
10 HomeConnect .........................16
10.1 Connecting the appliance
to a WLAN home network
(Wi-Fi) with WPS function .......16
10.2 Connecting the appliance
to a WLAN home network
(Wi-Fi) without WPS func-
tion..........................................17
10.3 Connecting the appliance
to the HomeConnect app .....17
10.4 Installing updates for the
Home Connect software ........18
10.5 Resetting HomeConnect
settings ...................................18
10.6 Data protection.......................18
11 Freezer compartment...............19
11.1 Freezing capacity ...................19
11.2 Fully utilising the freezer
compartment volume .............19
11.3 Tips for storing food in the
freezer compartment ..............19
11.4 Freezing smaller amounts
of food quickly........................19
11.5 Tips for freezing fresh food ....19
11.6 Shelf life of frozen food at
−18°C....................................20
11.7 Defrosting methods for
frozen food .............................20
12 Defrosting.................................20
12.1 Defrosting in the freezer
compartment ..........................20
13 Cleaning and servicing............20
13.1 Preparing the appliance for
cleaning ..................................20
13.2 Cleaning the appliance ..........21
13.3 Removing the fittings..............21

en
5
14 Troubleshooting.......................22
15 Storage and disposal...............24
15.1 Switching off the appliance ....24
15.2 Disposing of old appliance ....24
16 Customer Service.....................25
16.1 Product number (E-Nr.) and
production number (FD).........25
17 Technical data ..........................25
18 Declaration of Conformity .......26

en Safety
6
1 Safety
Observe the following safety instructions.
1.1 General information
¡ Read this instruction manual carefully.
¡ Keep the instruction manual and the product information safe
for future reference or for the next owner.
¡ Do not connect the appliance if it has been damaged in transit.
1.2 Intended use
This appliance is only intended to be fully fitted in a kitchen.
Only use this appliance:
¡ for freezing food and making ice cubes.
¡ In private households and in enclosed spaces in a domestic en-
vironment.
¡ Up to an altitude of max. 2000m above sea level.
1.3 Restriction on user group
This appliance may be used by children aged 8 or over and by
people who have reduced physical, sensory or mental abilities or
inadequate experience and/or knowledge, provided that they are
supervised or have been instructed on how to use the appliance
safely and have understood the resulting dangers.
Children must not play with the appliance.
Cleaning and user maintenance must not be performed by chil-
dren unless they are being supervised.
Children above the age of three years old and younger than eight
years old may load and unload the the fridge-freezer.
1.4 Safe transport
WARNING‒Risk of injury!
The high weight of the appliance may result in injury when lifted.
▶
Do not lift the appliance on your own.

Safety en
7
1.5 Safe installation
WARNING‒Risk of electric shock!
Improper installation is dangerous.
▶
Connect and operate the appliance only in accordance with the
specifications on the rating plate.
▶
Connect the appliance to a power supply with alternating cur-
rent only via a properly installed socket with earthing.
▶
The protective conductor system of the domestic electrical in-
stallation must be properly installed.
▶
Never equip the appliance with an external switching device,
e.g. a timer or remote control.
▶
When the appliance is installed, the mains plug of the power
cord must be freely accessible. If free access is not possible, an
all-pole isolating switch must be installed in the permanent elec-
trical installation according to the installation regulations.
▶
When installing the appliance, check that the power cable is not
trapped or damaged.
If the insulation of the power cord is damaged, this is dangerous.
▶
Never let the power cord come into contact with heat sources.
WARNING‒Risk of explosion!
If the appliance's ventilation openings are sealed, a leak in the re-
frigeration circuit may result in a flammable mixture of gas and air.
▶
Keep ventilation openings, in the appliance enclosure or in the
built-in structure, clear of obstruction.
WARNING‒Risk of fire!
It is dangerous to use an extended power cord and non-approved
adapters.
▶
Do not use extension cables or multiple socket strips.
▶
If the power cord is too short, contact Customer Service.
▶
Only use adapters approved by the manufacturer.
Portable multiple socket strips or portable power supply units may
overheat and cause a fire.
▶
Do not place portable multiple socket strips or power supply
units on the back of the appliance.

en Safety
8
1.6 Safe use
WARNING‒Risk of electric shock!
An ingress of moisture can cause an electric shock.
▶
Only use the appliance in enclosed spaces.
▶
Never expose the appliance to intense heat or humidity.
▶
Do not use steam- or high-pressure cleaners to clean the appli-
ance.
WARNING‒Risk of suffocation!
Children may put packaging material over their heads or wrap
themselves up in it and suffocate.
▶
Keep packaging material away from children.
▶
Do not let children play with packaging material.
Children may breathe in or swallow small parts, causing them to
suffocate.
▶
Keep small parts away from children.
▶
Do not let children play with small parts.
WARNING‒Risk of explosion!
Mechanical devices or other devices may damage the refrigera-
tion circuit; flammable refrigerant may escape and explode.
▶
To accelerate the defrosting process, do not use any other
mechanical devices or devices other than those recommended
by the manufacturer.
Products which contain flammable propellants and explosive sub-
stances may explode, e.g. spray cans.
▶
Do not store products which contain flammable propellants (e.g.
spray cans) or explosive substances in the appliance.
WARNING‒Risk of fire!
Electrical devices within the appliance may cause a fire, e.g. heat-
ers or electric ice makers.
▶
Do not operate electrical devices within the appliance.

Safety en
9
WARNING‒Risk of injury!
Containers that contain carbonated drinks may burst.
▶
Do not store containers that contain carbonated drinks in the
freezer compartment.
Injury to the eyes caused by escaping flammable refrigerant and
hazardous gases.
▶
Do not damage the tubes of the refrigerant circuit or the insula-
tion.
WARNING‒Risk of cold burns!
Contact with frozen food and cold surfaces may cause burns by
refrigeration.
▶
Never put frozen food straight from the freezer compartment
into your mouth.
▶
Avoid prolonged contact of the skin with frozen food, ice and
surfaces in the freezer compartment.
CAUTION‒Risk of harm to health!
To prevent food from being contaminated, you must observe the
following instructions.
▶
If the door is open for an extended period of time, this may lead
to a considerable temperature increase in the compartments of
the appliance.
▶
Regularly clean the surfaces that may come into contact with
food and accessible drain systems.
▶
If the fridge/freezer is empty for an extended period of time,
switch off the appliance, defrost it, clean it and leave the door
open to prevent the formation of mould.
1.7 Damaged appliance
WARNING‒Risk of electric shock!
If the appliance or the power cord is damaged, this is dangerous.
▶
Never operate a damaged appliance.
▶
Never pull on the power cord to unplug the appliance. Always
unplug the appliance at the mains.
▶
If the appliance or the power cord is damaged, immediately un-
plug the power cord or switch off the fuse in the fuse box.

en Safety
10
▶
Call customer services. →Page25
Incorrect repairs are dangerous.
▶
Repairs to the appliance should only be carried out by trained
specialist staff.
▶
Only use genuine spare parts when repairing the appliance.
▶
If the power cord of this appliance is damaged, it must be re-
placed by the manufacturer, the manufacturer's Customer Ser-
vice or a similarly qualified person in order to prevent any risk.
WARNING‒Risk of fire!
If the tubes are damaged, flammable refrigerant and harmful
gases may escape and ignite.
▶
Keep naked flames and ignition sources away from the appli-
ance.
▶
Ventilate the room.
▶
Switch off the appliance. →Page14
▶
Unplug the appliance from the mains or switch off the circuit
breaker in the fuse box.
▶
Call after-sales service. →Page25

Preventing material damage en
11
Preventing material damage
2 Preventing material
damage
Preventing material damage
ATTENTION!
Using the base, runners or appliance
doors as a seat surface or climbing
surface may damage the appliance.
▶
Do not stand or support yourself
on the base, runners or doors.
Contamination with oil or fat may
cause plastic parts and door seals to
become porous.
▶
Keep plastic parts and door seals
free of oil and grease.
Environmental protection and saving energy
3 Environmental protec-
tion and saving energy
Environmental protection and saving energy
3.1 Disposing of packaging
The packaging materials are environ-
mentally compatible and can be re-
cycled.
▶
Sort the individual components by
type and dispose of them separ-
ately.
3.2 Saving energy
If you follow these instructions, your
appliance will use less power.
Selecting the installation location
¡ Keep the appliance out of direct
sunlight.
¡ Install the appliance as far away as
possible from heating elements,
cookers and other heat sources:
– Maintain a 30mm clearance to
electric or gas cookers.
– Maintain a 300cm clearance to
oil or solid-fuel cookers.
¡ Use a niche depth of 560mm.
¡ Never cover or block the exterior
ventilation grilles.
Saving energy during use
Note:The arrangement of the fittings
does not affect the energy consump-
tion of the appliance.
¡ Open the appliance only briefly.
¡ Never cover or block the interior
ventilation openings or the exterior
ventilation grilles.
¡ Transport purchased food in a
cool bag and place in the appli-
ance quickly.
¡ Allow warm food and drinks to
cool down before storing them.
¡ Always leave some space between
the food and to the back panel.
¡ Pack the food airtight.
¡ Open the freezer compartment
door only briefly and then close it
properly.
Installation and connection
4 Installation and con-
nection
Installation and connection
You can find out where and how best
to install your appliance here. You
will also learn how to connect your
appliance to the power supply.
4.1 Scope of delivery
After unpacking all parts, check for
any transport damage and for com-
pleteness of delivery.
If you have any complaints, contact
your dealer or our after-sales service
→Page25.
The delivery consists of the following:
¡ Built-in appliance
¡ Equipment and accessories
1
¡ Installation material
1
Depending on the appliance specifications

en Installation and connection
12
¡ Installation instructions
¡ User manual
¡ Customer service directory
¡ Warranty enclosure
1
¡ Energy label
¡ Information on energy consump-
tion and noises
¡ Information about HomeConnect
4.2 Criteria for the installation
location
WARNING
Risk of explosion!
If the appliance is in a space that is
too small, a leak in the refrigeration
circuit may result in a flammable mix-
ture of gas and air.
▶
Only install the appliance in a
space with a volume of at least
1m
3
per 8g refrigerant. The
volume of refrigerant is indicated
on the rating plate. →Fig.
1
/
4
The weight of the appliance ex works
may be up to 70kg depending on
the model.
The subfloor must be sufficiently
stable to bear the weight of the appli-
ance.
Permitted room temperature
The permitted room temperature de-
pends on the appliance's climate
class.
The climate class can be found on
the rating plate. →Fig.
1
/
4
Climate
class
Permitted room tem-
perature
SN 10°C to 32°C
N 16°C to 32°C
ST 16°C to 38°C
T 16°C to 43°C
The appliance is fully functional within
the permitted room temperature.
If an appliance with climate class SN
is operated at colder room temperat-
ures, the appliance will not be dam-
aged up to a room temperature of
5°C.
Niche dimensions
Observe the niche dimensions if you
install your appliance in the niche. If
this is not the case, problems may
occur when installing the appliance.
Niche depth
Install the appliance in the recom-
mended niche depth of 560mm.
If the niche depth is smaller, the en-
ergy consumption increases slightly.
The niche depth must be a minimum
550mm.
Niche width
An inside niche width of at least
560mm is required for the appli-
ance.
Side-by-side installation
If, in addition to this appliance, you
want to operate another appliance
featuring a freezer compartment, you
must maintain a distance of at least
150mm between the appliances.
If you do not observe the minimum
distance, you can only set up this ap-
pliance next to 556mm wide appli-
ances without a freezer compartment.
4.3 Installing the appliance
▶
Install the appliance in accordance
with the enclosed installation in-
structions.
1
Not in all countries

Familiarising yourself with your appliance en
13
4.4 Preparing the appliance
for the first time
1. Remove the informative material.
2. Remove the protective foil and
transit bolts, e.g. remove the ad-
hesive strips and carton.
3. Clean the appliance for the first
time. →Page21
4.5 Connecting the appliance
to the electricity supply
1. Insert the mains plug of the appli-
ance's power cable in a socket
nearby.
The connection data of the appli-
ance can be found on the rating
plate. →Fig.
1
/
4
2. Check the mains plug is inserted
properly.
a The appliance is now ready for
use.
Familiarising yourself with your appliance
5 Familiarising yourself
with your appliance
Familiarising yourself with your appliance
5.1 Appliance
You can find an overview of the parts
of your appliance here.
→Fig.
1
1
Control panel
2
Freezer compartment shelf
3
Freezer compartment flap
4
Rating plate
Note:Deviations between your appli-
ance and the diagrams may differ
with regard to their features and size.
5.2 Control panel
You can use the control panel to con-
figure all functions of your appliance
and to obtain information about the
operating status.
→Fig.
2
1
switches the warning sig-
nal off.
2
/ sets the temperature of
the freezer compartment.
3
Displays the set temperature
for the freezer compartment
in °C.
4
switches Super freezing
on or off.
5
switches the appliance on
or off.
Features
6 Features
Features
The features of your appliance de-
pend on the model.
6.1 Freezer compartment flap
Store food that is used frequently or
that only needs to be stored for a
short time on the shelf behind the
freezer-compartment flap.
6.2 Accessories
Use original accessories. These have
been made especially for your appli-
ance.
The accessories for your appliance
depend on the model.
Ice pack
Use the ice pack for temporarily
keeping food cool, e.g. in a cool bag.
Tip:If a power failure or malfunction
occurs, the ice pack can be used to
slow down the thawing process for
the stored frozen food.

en Basic operation
14
Ice cube tray
Use the ice cube tray to make ice
cubes.
Making ice cubes
1. Fill the ice cube tray with water up
to ¾ and place in the freezer com-
partment.
If the ice cube tray is stuck to the
freezer compartment, loosen it with
a blunt implement only (e.g. spoon
handle).
2. To loosen the ice cubes, twist the
ice cube tray slightly or hold it
briefly under flowing water.
Basic operation
7 Basic operation
Basic operation
7.1 Switching on the appli-
ance
1. Press .
a The appliance begins to cool.
a A warning signal sounds and
lights up because the freezer com-
partment is still too warm.
2. Switch off the warning signal with
.
a goes out as soon as the set
temperature has been reached.
3. Set the required temperature.
→Page14
7.2 Operating tips
¡ Once you have switched on the
appliance, the set temperature is
only reached after several hours.
Do not put any food in the appli-
ance until the temperature has
been reached.
¡ The front panels of the housing are
temporarily heated slightly. This
prevents condensation in the area
of the door seal.
¡ When you close the door, a va-
cuum may be created. The door is
then difficult to open again. Wait a
moment until the vacuum is offset.
7.3 Switching off the appli-
ance
▶
Press .
7.4 Setting the temperature
Setting the freezer compartment
temperature
▶
Press / repeatedly until the
temperature display shows the re-
quired temperature.
The recommended temperature in
the freezer compartment is
−18°C.
Additional functions
8 Additional functions
Additional functions
8.1 Automatic Super freezing
The automatic Super freezing auto-
matically switches on when warm
food is placed in the compartment.
With automatic Super freezing, the
freezer compartment cools down to a
much lower temperature than for nor-
mal mode.
If the automatic Super freezing is
switched on, lights up and in-
creased noises may occur.
After operation, the appliance
switches from automatic Super freez-
ing to normal operation.
Cancelling automatic Super freezing
▶
Press .
a The previously set temperature is
displayed.

Alarm en
15
8.2 Manual Super freezing
With Super freezing, the freezer com-
partment cools so that it as cold as
possible.
Switch on Super freezing four to
sixhours before placing food weigh-
ing 2kg or more into the freezer
compartment.
In order to utilise the freezer capacity,
use Super freezing.
→"Prerequisites for freezing capa-
city", Page19
Note:When Super freezing is
switched on, increased noise may
occur.
Switching on manual Super freezing
▶
Press .
a lights up.
Note:After approx. 60hours, the ap-
pliance switches to normal operation.
Switching off manual Super freezing
▶
Press .
a The previously set temperature is
displayed.
Alarm
9 Alarm
Alarm
9.1 Door alarm
If the appliance door is open for a
longer period, the door alarm
switches on.
Switching off the door alarm
▶
Close the appliance door or press
.
a The warning tone is switched off.
9.2 Temperature alarm
If the freezer compartment becomes
too warm, the temperature alarm is
switched on.
CAUTION
Risk of harm to health!
During the thawing process, bacteria
may multiply and spoil the frozen
food.
▶
Do not refreeze food after it has
been defrosted or started to de-
frost.
▶
Refreeze food only after cooking.
▶
These items should no longer be
stored for the maximum storage
period.
The temperature alarm can be
switched on in the following cases:
¡ The appliance is switched on.
Do not store any food until the ap-
pliance has reached the set tem-
perature.
¡ The freezer compartment door is
open for too long.
Check whether the frozen food has
defrosted or thawed.
Switching off the temperature alarm
▶
Press .
a The warning tone is switched off.
a From this time on, the warmest
temperature is measured again
and saved.
a lights up until the set temper-
ature is reached again.

en HomeConnect
16
HomeConnect
10 HomeConnect
HomeConnect
This appliance is network-capable.
Connect your appliance to a mobile
device to control its functions via the
HomeConnect app.
The HomeConnect services are not
available in every country. The avail-
ability of the HomeConnect function
depends on the availability of
HomeConnect services in your coun-
try. You can find information about
this at: www.home-connect.com.
To be able to use HomeConnect,
you must first set up the connection
to the WLAN home network (Wi-Fi
1
)
and to the HomeConnect app.
After switching on the appliance, wait
at least 2minutes until internal
device initialisation is complete. Only
then should you set up HomeCon-
nect.
¡ Connecting appliance to WLAN
home network (Wi-Fi) with WPS
function →Page16
¡ Connecting appliance to WLAN
home network (Wi-Fi) without WPS
function →Page17
The HomeConnect app guides you
through the entire login process. Fol-
low the instructions in the HomeCon-
nect app to configure the settings.
Tips
¡ Please consult the documents sup-
plied by HomeConnect.
¡ Please also follow the instructions
in the HomeConnect app.
Notes
¡ Please note the safety precautions
in this instruction manual and
make sure that they are also ob-
served when operating the appli-
ance via the HomeConnect app.
→"Safety", Page6
¡ Operating the appliance on the ap-
pliance itself always takes priority.
During this time it is not possible
to operate the appliance using the
HomeConnect app.
10.1 Connecting the appli-
ance to a WLAN home
network (Wi-Fi) with
WPS function
If your router has a WPS function,
you can connect the appliance to
your WLAN home network (Wi-Fi)
automatically.
1. Press .
a The temperature display shows .
2. Press repeatedly until the tem-
perature display shows .
3. Press .
a The temperature display shows an
animation for twominutes. The ap-
pliance is ready for automatic con-
nection to the WLAN home net-
work (WiFi).
4. Activate the WPS function on the
router during this period.
To do this, take note of the inform-
ation in the documents for your
router.
a Once successfully connected,
flashes in the temperature display.
5. If the temperature display shows
, the appliance was unable to es-
tablish a connection to the WLAN
home network (WiFi).
‒ Check whether the appliance is
located within the range of the
WLAN home network (Wi-Fi).
‒ Repeat the process or establish
the connection manually
→Page17.
1
Wi-Fi is a registered trademark of the Wi-Fi Alliance.

HomeConnect en
17
6. Connect the appliance to the
Home Connect app. →Page17
10.2 Connecting the appli-
ance to a WLAN home
network (Wi-Fi) without
WPS function
If your router does not have a WPS
function, you can connect the appli-
ance to your WLAN home network
(Wi-Fi) manually. The appliance
briefly sets up its own WLAN net-
work. You can connect a mobile
device to the WLAN network and
transfer the network information for
the WLAN home network (Wi-Fi) to
your appliance.
Requirement:The HomeCon-
nectapp has been installed on your
mobile device.
1. Press .
a The temperature display shows .
2. Press repeatedly until the tem-
perature display shows .
3. Press .
a The appliance now sets up its own
WLAN network with the network
name "HomeConnect".
a The temperature display shows an
animation. The appliance is ready
for manual connection to the
WLAN home network (WiFi).
4. Follow the instructions in the
HomeConnect app on the mobile
device.
a The network information for the
WLAN home network (Wi-Fi) is
transferred to the appliance.
a Once successfully connected,
flashes in the temperature display.
5. If the temperature display shows
, the appliance was unable to es-
tablish a connection to the WLAN
home network (WiFi).
‒ Check whether the appliance is
located within the range of the
WLAN home network (Wi-Fi).
‒ Repeat the process.
10.3 Connecting the appli-
ance to the HomeCon-
nect app
If you have automatically connected
your appliance to your WLAN home
network (Wi-Fi), you can connect
your appliance to the HomeConnect
app.
Requirements
¡ The appliance is connected to the
WLAN home network (Wi-Fi).
→Page16
¡ The HomeConnectapp has been
installed on your mobile device.
1. Press .
a The temperature display shows .
2. Press repeatedly until the tem-
perature display shows .
3. Press .
a The temperature display shows an
animation.
4. Follow the instructions in the
HomeConnectapp until the pro-
cess is complete.
a Once successfully connected, the
temperature display shows .
5. If the temperature display shows
, the appliance was able to es-
tablish a connection to the
HomeConnect app.
‒ In the HomeConnect app,
check whether the mobile
device is connected to the
WLAN home network (Wi-Fi).
‒ Repeat the process.
6. If the temperature display shows
, reset the HomeConnect set-
tings. →Page18

en HomeConnect
18
10.4 Installing updates for the
Home Connect software
The appliance searches for updates
to the HomeConnect software at reg-
ular intervals.
Note:If updates are available, the
temperature display shows .
To reset the update and the temper-
ature display to the set temperature,
press any touch field.
1. Press .
a The temperature display shows .
2. Press repeatedly until the tem-
perature display shows .
3. Press .
a The temperature display shows an
animation.
a The update is installed.
a The control panel is locked during
the installation.
a If the installation is successful, the
temperature display shows .
4. If the temperature display shows
, the appliance was unable to in-
stall the update.
‒ Repeat the process at a later
point.
5. If the update cannot be completed
after several attempts, contact cus-
tomer service →Page25 .
10.5 Resetting HomeConnect
settings
If your appliance experiences con-
nection problems with the WLAN
home network (Wi-Fi) or your appli-
ance wants to log into a different
WLAN home network (Wi-Fi), you can
reset the HomeConnectsettings.
1. Press .
a The temperature display shows .
2. Press repeatedly until the tem-
perature display shows .
3. Press .
a The temperature display shows an
animation for 15seconds.
a The temperature display then
shows .
a The HomeConnect settings have
been reset.
10.6 Data protection
Please see the information on data
protection.
The first time your appliance is
registered on a home network
connected to the Internet, your
appliance will transmit the following
types of data to the HomeConnect
server (initial registration):
¡ Unique appliance identification
(consisting of appliance codes as
well as the MAC address of the
Wi-Fi communication module in-
stalled).
¡ Security certificate of the Wi-Fi
communication module (to ensure
a secure data connection).
¡ The current software and hardware
version of your appliance.
¡ Status of any previous reset to
factory settings.
This initial registration prepares the
HomeConnect functions for use and
is only required when you want to
use the HomeConnect functions for
the first time.
Note:Please note that the
HomeConnect functions can only be
utilised with the HomeConnect app.
Information on data protection can be
retrieved in the HomeConnect app.

Freezer compartment en
19
Freezer compartment
11 Freezer compartment
Freezer compartment
You can store frozen food, freeze
food and make ice cubes in the
freezer compartment.
The temperature can be set from
−16°C to −24°C.
Long-term storage of food should be
at –18°C or lower.
The freezer compartment can be
used to store perishable food long-
term. The low temperatures slow
down or stop the spoilage.
11.1 Freezing capacity
The maximum freezing capacity indic-
ates the quantity of food that can be
frozen right through to the centre
within a specific period of time.
Information on the maximum freezing
capacity can be found on the rating
plate. →Fig.
1
/
4
Prerequisites for freezing capacity
1. Approx. 24 hours before placing
fresh food in the appliance, switch
on Super freezing.
→"Switching on manual Super
freezing", Page15
2. Fill the upper compartment with
food first. This is where the food
freezes most quickly.
3. If the top compartment does not
have enough space, store the re-
maining quantity in the compart-
ment underneath.
11.2 Fully utilising the freezer
compartment volume
Learn how to store the maximum
amount of frozen food in the freezer
compartment.
1.
Remove all fittings. →Page21
2. Store food directly on the shelves
and on the floor of the freezer
compartment.
11.3 Tips for storing food in
the freezer compartment
¡ To quickly and gently freeze larger
quantities of fresh food, place this
in the top frozen food container.
¡ Place the food over the whole area
of the compartments or the frozen
food containers.
¡ Do not bring food which is to be
frozen into contact with frozen
food.
¡ To ensure that the air can circulate
freely in the appliance, push the
frozen food containers in as far as
they will go.
11.4 Freezing smaller
amounts of food quickly
1. Add the food to the second frozen
food container from the bottom,
starting from the right.
2. Spread the food over a wide area
in the freezer compartment.
11.5 Tips for freezing fresh
food
¡ Freeze fresh and undamaged food
only.
¡ Freeze food in portions.
¡ Cooked food is more suitable than
food that can be eaten raw.
¡ Vegetables: Wash, chop up and
blanch before freezing.
¡ Fruit: Wash, pit and perhaps peel,
possibly add sugar or ascorbic
acid solution.
¡ Food that is suitable for freezing in-
cludes baked items, fish and sea-
food, meat, game, poultry, eggs
without shells, cheese, butter and
quark, ready meals and leftovers.

en Defrosting
20
¡ Food that is unsuitable for freezing
includes lettuce, radishes, eggs in
shells, grapes, raw apples and
pears, yoghurt, sour cream, crème
fraîche and mayonnaise.
Packing frozen food
If you select suitable packaging ma-
terial and the correct type of pack-
aging, you can determine the product
quality and prevent freezer burn.
1. Place the food in the packaging.
2. Squeeze out the air.
3. Pack food airtight to prevent it
from losing flavour and drying out.
4. Label the packaging with the con-
tents and the date of freezing.
11.6 Shelf life of frozen food
at −18°C
Food Storage time
Fish, sausages, pre-
pared meals and
baked goods
up to
6months
Poultry, meat up to
8months
Vegetables, fruit up to
12months
The imprinted freezer calendar indic-
ates the maximum storage duration
in months at a constant temperature
of –18°C.
11.7 Defrosting methods for
frozen food
CAUTION
Risk of harm to health!
During the thawing process, bacteria
may multiply and spoil the frozen
food.
▶
Do not refreeze food after it has
been defrosted or started to de-
frost.
▶
Refreeze food only after cooking.
▶
These items should no longer be
stored for the maximum storage
period.
¡ Defrost animal-based food, such
as fish, meat, cheese, quark, in the
refrigerator compartment.
¡ Defrost bread at room temperat-
ure.
¡ Prepare food for immediate con-
sumption in the microwave, in the
oven or on the hob.
Defrosting
12 Defrosting
Defrosting
12.1 Defrosting in the freezer
compartment
The fully automatic NoFrost system
ensures that the freezer compartment
remains frost-free. Defrosting is not
required.
Cleaning and servicing
13 Cleaning and servi-
cing
Cleaning and servicing
To keep your appliance working effi-
ciently for a long time, it is important
to clean and maintain it carefully.
Customer Service must clean inac-
cessible points. Cleaning by cus-
tomer service can give rise to costs.
13.1 Preparing the appliance
for cleaning
1. Switch off the appliance.
→Page14
2. Disconnect the appliance from the
power supply.
Unplug the appliance from the
mains or switch off the circuit
breaker in the fuse box.

Cleaning and servicing en
21
3. Take out all of the food and store it
in a cool place.
Place ice packs (if available) onto
the food.
4. Remove all fittings from the appli-
ance. →Page21
13.2 Cleaning the appliance
WARNING
Risk of electric shock!
An ingress of moisture can cause an
electric shock.
▶
Do not use steam- or high-pres-
sure cleaners to clean the appli-
ance.
Liquid in the lighting or in the con-
trols can be dangerous.
▶
The rinsing water must not drip
into the lighting or controls.
ATTENTION!
Unsuitable cleaning products may
damage the surfaces of the appli-
ance.
▶
Do not use hard scouring pads or
cleaning sponges.
▶
Do not use harsh or abrasive de-
tergents.
▶
Do not use cleaning products with
a high alcohol content.
If you clean fittings and accessories
in the dishwasher, this may cause
them to become deformed or discol-
our.
▶
Never clean fittings and accessory
in the dishwasher.
1. Prepare the appliance for cleaning.
→Page20
2. Clean the appliance, the fittings
and the door seals with a dish
cloth, lukewarm water and a little
pH-neutral washing-up liquid.
3. Dry thoroughly with a soft, dry
cloth.
4. Insert the fittings.
5. Electrically connect the appliance.
6. Switch on the appliance.
→Page14
7. Putting the food into the appliance.
13.3 Removing the fittings
If you want to clean the fittings thor-
oughly, remove these from your ap-
pliance.
Removing the freezer flap
▶
Open the freezer compartment flap
and release from the holder.
→Fig.
3
Removing the freezer compartment
shelf
▶
Pull out the freezer compartment
shelf and remove it.
→Fig.
4
Removing the frozen food container
1. Take out the frozen food container
as far as it will go.
2. Lift the frozen food container at the
front and remove it .
→Fig.
5

en Troubleshooting
22
Troubleshooting
14 Troubleshooting
Troubleshooting
You can rectify minor faults on your appliance yourself. Read the troubleshoot-
ing information before contacting after-sales service. This will avoid unneces-
sary costs.
WARNING
Risk of electric shock!
Incorrect repairs are dangerous.
▶
Repairs to the appliance should only be carried out by trained specialist
staff.
▶
Only use genuine spare parts when repairing the appliance.
▶
If the power cord of this appliance is damaged, it must be replaced by the
manufacturer, the manufacturer's Customer Service or a similarly qualified
person in order to prevent any risk.
Fault Cause and troubleshooting
The appliance is not
cooling, the displays
and lighting light up.
Showroom mode is switched on.
▶
Carry out the appliance self-test. →Page24
a Once the appliance self-test has ended, the appli-
ance switches to normal operation.
HomeConnect is not
working correctly.
Different causes are possible.
▶
Go to www.home-connect.com.
or appears in the
temperature display.
The electronics have detected a fault.
1.
Switch off the appliance. →Page14
2. Disconnect the appliance from the mains.
Unplug the appliance from the mains or switch off
the circuit breaker in the fuse box.
3. Reconnect the appliance after five minutes.
4. If the message still appears on the display, call cus-
tomer service.
The customer service number can be found in the
enclosed customer service directory.
Temperature display
flashes.
Different causes are possible.
▶
Press .
a The alarm is switched off.
The appliance door is open.
▶
Close the appliance door.
The exterior ventilation grilles are blocked.
▶
Remove any obstructions from in front of the exter-
ior ventilation grilles.
Larger quantities of fresh food have been put in.

Troubleshooting en
23
Fault Cause and troubleshooting
Temperature display
flashes.
▶
Do not exceed the max. freezing capacity.
→"Freezing capacity", Page19
The temperature dis-
play flashes, a warn-
ing signal sounds and
lights up.
Different causes are possible.
▶
Press .
a The alarm is switched off.
The appliance door is open.
▶
Close the appliance door.
The exterior ventilation grilles are blocked.
▶
Remove any obstructions from in front of the exter-
ior ventilation grilles.
Larger quantities of fresh food have been put in.
▶
Do not exceed the max. freezing capacity.
→"Freezing capacity", Page19
The temperature dif-
fers greatly from the
setting.
Different causes are possible.
1.
Switch off the appliance. →Page14
2. Switch the appliance back on after fiveminutes.
→Page14
‒ If the temperature is too warm, check the temper-
ature again after a couple of hours.
‒ If the temperature is too cold, check the temper-
ature again on the following day.
The appliance hums,
bubbles, buzzes,
gargles, clicks or
crackles.
Not a fault. A motor is running, e.g. refrigerating unit,
fan. Refrigerant flows through the pipes. The motor,
switches or solenoid valves are switching on or off.
Automatic defrosting is running.
No action required.
The appliance makes
noises.
Fittings wobble or stick.
▶
Check the removable fittings and, if required, re-
place these.
Containers are touching.
▶
Move the containers apart.
Super freezing is switched on.
No action required.

en Storage and disposal
24
14.1 Power failure
During a power failure, the temperat-
ure in the appliance rises; this re-
duces the storage time and the qual-
ity of the frozen food.
The stored frozen food is cooled to
the temperature increase time spe-
cified on the rating plate. →Fig.
1
/
4
Notes
¡ Open the appliance as little as
possible during a power failure
and do not place any other food in
the appliance.
¡ Check the quality of the food
immediately after a power failure.
– Dispose of any frozen food that
has defrosted and is hotter than
5°C.
– Cook or fry slightly thawed
frozen food, and then either con-
sume it or freeze it again.
14.2 Conducting an appliance
self-test
1. Switch off the appliance.
→Page14
2. Switch the appliance back on after
approx. fiveminutes. →Page14
3. Within the first 10seconds after
switching on, press and hold
for 3 to 5seconds until an audible
signal sounds.
a The appliance self-test starts.
a While the appliance self-test is run-
ning, a long audible signal sounds.
a If, at the end of the appliance self-
test, two audible signals sound
and the temperature display indic-
ates the set temperature, your ap-
pliance is OK. The appliance
switches to normal operation.
a If, at the end of the appliance self-
test, five audible signals sound
and flashes for 10seconds,
inform the after-sales service.
Storage and disposal
15 Storage and disposal
Storage and disposal
You can find out here how to prepare
your appliance for storage. You will
also find out how to dispose of old
appliances.
15.1 Switching off the appli-
ance
1. Switch off the appliance.
→Page14
2. Disconnect the appliance from the
power supply.
Unplug the appliance from the
mains or switch off the circuit
breaker in the fuse box.
3. Remove all of the food.
4.
Clean the appliance. →Page21
5. To ensure the ventilation inside the
appliance, leave the appliance
open.
15.2 Disposing of old appli-
ance
Valuable raw materials can be re-
used by recycling.
WARNING
Risk of harm to health!
Children can lock themselves in the
appliance, thereby putting their lives
at risk.
▶
Leave shelves and containers in-
side the appliance to prevent chil-
dren from climbing in.
▶
Keep children away from the re-
dundant appliance.
WARNING
Risk of fire!
If the tubes are damaged, flammable
refrigerant and harmful gases may
escape and ignite.
▶
Do not damage the tubes of the re-
frigerant circuit or the insulation.

Customer Service en
25
1. Unplug the appliance from the
mains.
2. Cut through the power cord.
3. Dispose of the appliance in an en-
vironmentally friendly manner.
Information about current disposal
methods are available from your
specialist dealer or local authority.
This appliance is la-
belled in accordance
with European Directive
2012/19/EU concerning
used electrical and elec-
tronic appliances (waste
electrical and electronic
equipment - WEEE).
The guideline determ-
ines the framework for
the return and recycling
of used appliances as
applicable throughout
the EU.
Customer Service
16 Customer Service
Customer Service
If you have any queries, are unable to
rectify faults on the appliance your-
self or if your appliance needs to be
repaired, contact Customer Service.
Function-relevant genuine spare parts
according to the corresponding Eco-
design Order can be obtained from
Customer Service for a period of at
least 10 years from the date on
which your appliance was placed on
the market within the European Eco-
nomic Area.
Note:Under the terms of the manu-
facturer's warranty applicable to the
location, the use of Customer Service
is free of charge. The minimum dura-
tion of the warranty (manufacturer's
warranty for private consumers) in
the European Economic Area is 2
years according to the terms of war-
ranty applicable to the location. The
terms of warranty do not affect other
rights or claims held by yourself un-
der local legislation.
Detailed information on the warranty
period and terms of warranty in your
country is available from our after-
sales service, your retailer or on our
website.
If you contact Customer Service, you
will require the product number (E-
Nr.) and the production number (FD)
of your appliance.
The contact details for Customer Ser-
vice can be found in the enclosed
Customer Service directory or on our
website.
16.1 Product number (E-Nr.)
and production number
(FD)
You can find the product number (E-
Nr.) and the production number (FD)
on the appliance's rating plate.
→Fig.
1
/
4
Make a note of your appliance's de-
tails and the Customer Service tele-
phone number to find them again
quickly.
Technical data
17 Technical data
Technical data
Refrigerant, cubic capacity and fur-
ther technical specifications can be
found on the rating plate.
→Fig.
1
/
4
More information about your model
can be found online at https://en-
ergylabel.bsh-group.com
1
. This web
address is linked to the official EU
EPREL product database. At the time
1
Only applies to countries in the European Economic Area

en Declaration of Conformity
26
of printing its web address had not
yet been published. Please then fol-
low the instructions on searching for
models. The model identifier is made
up of the characters before the slash
in the product number (E-Nr.) on the
rating plate. Alternatively you can
also find the model identifier in the
first line of the EU energy label.
Declaration of Conformity
18 Declaration of Con-
formity
Declaration of Conformity
BSH Hausgeräte GmbH hereby de-
clares that the appliance with Home
Connect functionality meets the es-
sential requirements and other relev-
ant provisions of the Directive
2014/53/EU.
A detailed RED Declaration of Con-
formity can be found online at
www.siemens-home.bsh-group.com
among the additional documents on
the product page for your appliance.
2.4GHz band: 100mW max.
5GHz band: 100mW max.
BE BG CZ DK DE EE IE EL
ES FR HR IT CY LV LT LU
HU MT NL AT PL PT RO SI
SK FI SE UK NO CH TR
5GHz WLAN (Wi-Fi): For indoor use only.

nl
27
Inhoudsopgave
1 Veiligheid....................................29
1.1 Algemene aanwijzingen ...........29
1.2 Bestemming van het appa-
raat ...........................................29
1.3 Inperking van de gebruikers ....29
1.4 Veiliger transport ......................29
1.5 Veilige installatie.......................30
1.6 Veilig gebruik............................31
1.7 Beschadigd apparaat...............33
2 Het voorkomen van materiële
schade ........................................34
3 Milieubescherming en bespa-
ring..............................................34
3.1 Afvoeren van de verpakking ....34
3.2 Energie besparen.....................34
4 Opstellen en aansluiten .............34
4.1 Leveringsomvang .....................34
4.2 Criteria voor de opstellocatie ...35
4.3 Apparaat monteren ..................36
4.4 Het apparaat voor het eerste
gebruik voorbereiden ...............36
4.5 Apparaat elektrisch aanslui-
ten.............................................36
5 Uw apparaat leren kennen.........36
5.1 Apparaat...................................36
5.2 Bedieningspaneel.....................36
6 Uitrusting....................................36
6.1 Klep van het vriesvak ...............36
6.2 Accessoires..............................36
7 De Bediening in essentie...........37
7.1 Apparaat inschakelen...............37
7.2 Opmerkingen bij het gebruik ...37
7.3 Machine uitschakelen...............37
7.4 Temperatuur instellen...............37
8 Extra functies .............................37
8.1 Automatisch Supervriezen........37
8.2 Handmatig Supervriezen ..........38
9 Alarm...........................................38
9.1 Deuralarm.................................38
9.2 Temperatuuralarm ....................38
10 HomeConnect .........................39
10.1 Apparaat met WLAN-thuis-
netwerk (Wi-Fi) met WPS-
functie verbinden....................39
10.2 Apparaat met WLAN-thuis-
netwerk (Wi-Fi) zonder
WPS-functie verbinden ...........40
10.3 Apparaat met HomeCon-
nect app verbinden ................40
10.4 Update van de Home Con-
nect software installeren ........41
10.5 HomeConnect instellingen
resetten...................................41
10.6 Bescherming persoonsge-
gevens ....................................41
11 Vriesvak ....................................42
11.1 Invriescapaciteit......................42
11.2 Vriesvakvolume volledig
gebruiken ...............................42
11.3 Tips voor het bewaren van
levensmiddelen in het vries-
vak ..........................................42
11.4 Kleinere hoeveelheid le-
vensmiddelen snel bevrie-
zen ..........................................43
11.5 Tips voor het bevriezen van
verse levensmiddelen ............43
11.6 Houdbaarheid van de diep-
vrieswaren bij −18°C ............43
11.7 Ontdooimethodes voor
diepvrieswaren .......................43
12 Ontdooien.................................44
12.1 Ontdooien in het vriesvak ......44
13 Reiniging en onderhoud ..........44
13.1 Apparaat voorbereiden
voor reiniging .........................44

nl
28
13.2 Apparaat schoonmaken.........44
13.3 Onderdelen eruit halen...........45
14 Storingen verhelpen ................46
15 Opslaan en afvoeren................48
15.1 Apparaat buiten gebruik
stellen .....................................48
15.2 Afvoeren van uw oude ap-
paraat .....................................49
16 Servicedienst............................49
16.1 Productnummer (E-nr.) en
productienummer (FD) ...........50
17 Technische gegevens..............50
18 Conformiteitsverklaring...........50

Veiligheid nl
29
1 Veiligheid
Neem de volgende veiligheidsvoorschriften in acht.
1.1 Algemene aanwijzingen
¡ Lees deze gebruiksaanwijzing zorgvuldig door.
¡ Bewaar de gebruiksaanwijzing en de productinformatie voor la-
ter gebruik of voor volgende eigenaren.
¡ Sluit het apparaat in geval van transportschade niet aan.
1.2 Bestemming van het apparaat
Dit apparaat is uitsluitend voor de inbouw bedoeld.
Gebruik het apparaat uitsluitend:
¡ om levensmiddelen te bevriezen en voor de bereiding van ijs-
blokjes.
¡ voor huishoudelijk gebruik en in gesloten ruimtes binnen de hui-
selijke omgeving.
¡ tot een hoogte van 2000m boven zeeniveau.
1.3 Inperking van de gebruikers
Dit apparaat kan worden bediend door kinderen vanaf 8 jaar en
door personen met fysieke, sensorische of geestelijke beperkin-
gen of met gebrekkige ervaring en/of kennis, indien zij onder toe-
zicht staan of zijn geïnstrueerd in het veilige gebruik van het appa-
raat en de daaruit resulterende gevaren hebben begrepen.
Kinderen mogen niet met het apparaat spelen.
Reiniging en gebruikersonderhoud mogen niet worden uitgevoerd
door kinderen indien deze niet onder toezicht staan.
Kinderen vanaf 3 jaar en jonger dan 8 jaar mogen de koelkast/
diepvriezer vullen en legen.
1.4 Veiliger transport
WAARSCHUWING‒Kans op letsel!
Het hoge gewicht van het apparaat kan bij het optillen letsels ver-
oorzaken.
▶
Het apparaat niet alleen optillen.

nl Veiligheid
30
1.5 Veilige installatie
WAARSCHUWING‒Kans op elektrische schok!
Ondeskundige installaties zijn gevaarlijk.
▶
Het apparaat uitsluitend aansluiten en gebruiken volgens de ge-
gevens op het typeplaatje.
▶
Het apparaat uitsluitend via een volgens de voorschriften geïn-
stalleerd stopcontact met randaarde op een stroomnet met wis-
selstroom aansluiten.
▶
Het randaardesysteem van de elektrische huisinstallatie moet
conform de elektrotechnische voorschriften zijn geïnstalleerd.
▶
Nooit het apparaat via een externe schakelinrichting voeden, bij-
voorbeeld een tijdschakelaar of besturing op afstand.
▶
Wanneer het apparaat is ingebouwd, moet de netstekker van de
netaansluitkabel vrij toegankelijk zijn, of wanneer vrije toegang
niet mogelijk is, moet in de vast geplaatste elektrische installatie
een alpolige scheidingsinrichting volgens de installatievoor-
schriften worden ingebouwd.
▶
Bij het opstellen van het apparaat erop letten dat het netsnoer
niet wordt afgeklemd of beschadigd.
Een beschadigde isolatie van het netsnoer is gevaarlijk.
▶
Nooit het aansluitsnoer met warmtebronnen in contact brengen.
WAARSCHUWING‒Kans op explosie!
Wanneer de ventilatie-openingen van het apparaat zijn gesloten,
dan kan bij een lek van het koude circuit een brandbaar gas-lucht-
mengsel ontstaan.
▶
Sluit ventilatie-openingen in de behuizing van het apparaat of in
de inbouwbehuizing niet af.
WAARSCHUWING‒Kans op brand!
Het gebruik van een verlengd netsnoer en niet-toegestane adap-
ters is gevaarlijk.
▶
Geen verlengsnoeren of meervoudige stopcontacten gebruiken.
▶
Als het netsnoer te kort is, contact opnemen met de service-
dienst.
▶
Alleen door de fabrikant goedgekeurde adapters gebruiken.

Veiligheid nl
31
Draagbare mobiele meervoudige stopcontacten of draagbare net-
voedingen kunnen oververhit raken en tot brand leiden.
▶
Draagbare mobiele meervoudige stopcontacten of draagbare
netvoedingen niet aan de achterkant van de apparaten plaat-
sen.
1.6 Veilig gebruik
WAARSCHUWING‒Kans op elektrische schok!
Binnendringend vocht kan een elektrische schok veroorzaken.
▶
Gebruik het apparaat alleen in gesloten ruimtes.
▶
Stel het apparaat nooit bloot aan grote hitte en vochtigheid.
▶
Geen stoomreiniger of hogedrukreiniger gebruiken om het ap-
paraat te reinigen.
WAARSCHUWING‒Kans op verstikking!
Kinderen kunnen verpakkingsmateriaal over het hoofd trekken en
hierin verstrikt raken en stikken.
▶
Verpakkingsmateriaal uit de buurt van kinderen houden.
▶
Laat kinderen niet met verpakkingsmateriaal spelen.
Kinderen kunnen kleine onderdelen inademen of inslikken en hier-
door stikken.
▶
Kleine onderdelen uit de buurt van kinderen houden.
▶
Kinderen niet met kleine onderdelen laten spelen.
WAARSCHUWING‒Kans op explosie!
Mechanische inrichtingen of andere middelen kunnen de koude-
kringloop beschadigen, brandbaar koudemiddel kan lekken en ex-
ploderen.
▶
Gebruik voor het versnellen van het ontdooien geen andere me-
chanische inrichtingen of andere middelen dan diegene die
door de fabrikant zijn aanbevolen.
Producten met brandbare drijfgassen en explosieve stoffen kun-
nen exploderen, bijv. spuitbussen.
▶
Bewaar geen producten met brandbare drijfgassen en explosie-
ve stoffen in het apparaat.

nl Veiligheid
32
WAARSCHUWING‒Kans op brand!
Elektrische apparaten binnenin het apparaat kunnen tot een brand
leiden, bijv. verwarmingsapparaten of elektrische ijsbereiders.
▶
Gebruik geen elektrische apparaten binnenin het apparaat.
WAARSCHUWING‒Kans op letsel!
Flessen of blikjes met koolzuurhoudende drank kunnen barsten.
▶
Geen flessen of blikjes met koolzuurhoudende drank in het
vriesvak bewaren.
Letsel aan de ogen door lekkend brandbaar koudemiddel en
schadelijke gassen.
▶
De buizen van de koudemiddelkringloop en de isolatie niet be-
schadigen.
WAARSCHUWING‒Kans op koude-brandwonden!
Contact met diepvrieswaren en koude oppervlakken kan tot
brandwonden door koude leiden.
▶
Nooit diepvrieswaren in de mond nemen nadat deze uit het
vriesvak werden genomen.
▶
Vermijd langer contact van de huid met diepvrieswaren, ijs en
oppervlakken van het vriesvak.
VOORZICHTIG‒Kans op gevaar voor de gezondheid!
Houd de volgende aanwijzingen aan om verontreiniging van le-
vensmiddelen te voorkomen.
▶
Wanneer de deur langere tijd wordt geopend, kan dit leiden tot
een aanzienlijke temperatuurstijging in de vakken van het appa-
raat.
▶
Maak de oppervlakken, die met levensmiddelen en toegankelij-
ke afvoersystemen in contact komen, regelmatig schoon.
▶
Wanneer het koel-/vriesapparaat langere tijd leeg staat, het ap-
paraat uitschakelen, ontdooien, reinigen en de deur open laten,
om schimmelvorming te voorkomen.

Veiligheid nl
33
1.7 Beschadigd apparaat
WAARSCHUWING‒Kans op elektrische schok!
Een beschadigd apparaat of een beschadigd netsnoer is gevaar-
lijk.
▶
Nooit een beschadigd apparaat gebruiken.
▶
Nooit aan het netsnoer trekken, om het apparaat van het elektri-
citeitsnet te scheiden. Altijd aan de stekker van het netsnoer
trekken.
▶
Wanneer het apparaat of het netsnoer is beschadigd, dan direct
de stekker van het netsnoer uit het stopcontact halen of de ze-
kering in de meterkast uitschakelen.
▶
Contact opnemen met de servicedienst. →Pagina49
Ondeskundige reparaties zijn gevaarlijk.
▶
Alleen daarvoor geschoold vakpersoneel mag reparaties aan
het apparaat uitvoeren.
▶
Er mogen uitsluitend originele reserveonderdelen worden ge-
bruikt voor reparatie van het apparaat.
▶
Als het netsnoer van dit apparaat beschadigd raakt, moet het
ter vermijding van risico's worden vervangen door de fabrikant,
de servicedienst of een andere gekwalificeerde persoon.
WAARSCHUWING‒Kans op brand!
Bij beschadiging van de leidingen kunnen brandbaar koudemid-
del en schadelijke gassen ontsnappen en ontsteken.
▶
Houd vuur en ontstekingsbronnen uit de buurt van het apparaat.
▶
Ventileer de ruimte.
▶
Het apparaat uitschakelen. →Pagina37
▶
De stekker van het netsnoer uit het stopcontact trekken of de
zekering in de meterkast uitschakelen.
▶
Neem contact op met de service-afdeling. →Pagina49

nl Het voorkomen van materiële schade
34
Het voorkomen van materiële schade
2 Het voorkomen van
materiële schade
Het voorkomen van materiële schade
LET OP!
Door het gebruik van de plint, laden
of apparaatdeuren als zitvlak of op-
stapje kan het apparaat beschadigd
raken.
▶
Niet op de plint, laden of deuren
staat of leunen.
Door verontreinigingen met olie of vet
kunnen kunststofdelen en deurafdich-
tingen poreus worden.
▶
Houd kunststofdelen en deuraf-
dichtingen olie- en vetvrij.
Milieubescherming en besparing
3 Milieubescherming en
besparing
Milieubescherming en besparing
3.1 Afvoeren van de verpak-
king
De verpakkingsmaterialen zijn milieu-
vriendelijk en kunnen worden herge-
bruikt.
▶
De afzonderlijke componenten op
soort gescheiden afvoeren.
3.2 Energie besparen
Als u deze aanwijzingen opvolgt, ver-
bruikt uw apparaat minder stroom.
Keuze van de opstellingslocatie
¡ Stel het apparaat niet bloot aan di-
rect zonlicht.
¡ Plaats het apparaat zo ver moge-
lijk van radiatoren, fornuis en ande-
re warmtebronnen:
– Houd 30mm afstand aan tot
elektrische- of gasfornuizen.
– Houd 300mm afstand aan tot
olie- en kolenfornuizen.
¡ Een nisdiepte van 560 mm gebrui-
ken.
¡ Nooit de externe ventilatie-opening
afdekken of dicht maken.
Energie besparen bij het gebruik.
Opmerking:De plaatsing van de uit-
rustingsonderdelen heeft geen in-
vloed op het energieverbruik van het
apparaat.
¡ Open het apparaat slechts kort.
¡ Nooit de ventilatie-openingen bin-
nenin, of de ventilatieroosters aan
de buitenzijde afdekken of dicht
maken.
¡ Transporteer gekoelde levensmid-
delen in een koeltas en leg ze snel
in het apparaat.
¡ Warm voedsel en dranken eerst la-
ten afkoelen, daarna in het appa-
raat plaatsen.
¡ Laat altijd wat ruimte tussen de le-
vensmiddelen en de achterwand.
¡ Verpak de levensmiddelen lucht-
dicht.
¡ Open het vriesvak slechts kort en
sluit het zorgvuldig.
Opstellen en aansluiten
4 Opstellen en aansluiten
Opstellen en aansluiten
Waar en hoe u het apparaat het bes-
te opstelt, komt u hier te weten. Bo-
vendien komt u te weten hoe u het
apparaat op het elektriciteitsnet aan-
sluit.
4.1 Leveringsomvang
Controleer na het uitpakken alle on-
derdelen op transportschade en de
volledigheid van de levering.
Neem bij klachten met uw dealer of
onze servicedienst →Pagina49
contact op.
De levering bestaat uit:
¡ Inbouw

Opstellen en aansluiten nl
35
¡ Uitrusting en accessoires
1
¡ Montagemateriaal
¡ Montagehandleiding
¡ Gebruiksaanwijzing
¡ Klantenservice overzicht
¡ Garantiebijlage
2
¡ Energielabel
¡ Informatie over energieverbruik en
geluiden
¡ Informatie over HomeConnect
4.2 Criteria voor de opstello-
catie
WAARSCHUWING
Kans op explosie!
Wanneer het apparaat in een te klei-
ne ruimte staat, kan er bij een lek van
het koudecircuit een brandbaar gas-
luchtmengsel ontstaan.
▶
Stel het apparaat uitsluitend op in
een ruimte, welke tenminste een
volume heeft van 1m
3
per 8g
koudemiddel. De hoeveelheid van
het koudemiddel staat op het type-
plaatje. →Fig.
1
/
4
Het gewicht van het apparaat kan af-
hankelijk van het model tot 70 bedra-
gen.
De ondergrond moet stabiel genoeg
zijn om het gewicht van het apparaat
te dragen.
Toegestane ruimtetemperatuur
De toegestane kamertemperatuur is
afhankelijk van de klimaatklasse van
het apparaat.
De klimaatklasse vindt u op het type-
plaatje. →Fig.
1
/
4
Klimaat-
klasse
Toegestane ruimte-
temperatuur
SN 10°C…32°C
Klimaat-
klasse
Toegestane ruimte-
temperatuur
N 16°C…32°C
ST 16°C…38°C
T 16°C…43°C
Het apparaat is volledig functioneel
binnen de toegestane binnentempe-
ratuur.
Wanneer u een apparaat van de kli-
maatklasse SN gebruikt bij lagere ka-
mertemperaturen, dan kunnen be-
schadigingen aan het apparaat tot
een kamertemperatuur van 5°C wor-
den uitgesloten.
Nismaten
Neem de nisafmetingen in acht als u
uw apparaat in de nis inbouwt. Bij af-
wijkingen kunnen problemen optre-
den tijdens de installatie van het ap-
paraat.
Nisdiepte
Bouw het apparaat in de aanbevolen
nisdiepte van 560 mm in.
Bij een kleinere nisdiepte wordt het
energieverbruik iets hoger. De nis-
diepte moet minimaal 550 mm be-
dragen.
Nisbreedte
Voor het apparaat is een meubelnis
met een binnenbreedte van minimaal
560 mm nodig.
Side-by-side-opstelling
Als u naast dit apparaat een ander
apparaat met vriesvak wilt gebruiken,
moet u tussen de apparaten mini-
maal een tussenafstand van 150 mm
aanhouden.
1
Afhankelijk van de apparaatuitvoering
2
Niet in alle landen

nl Uw apparaat leren kennen
36
Als u de minimale tussenafstand niet
in acht neemt, kunt u dit apparaat al-
leen naast 556 mm brede apparaten
zonder vriesvak opstellen.
4.3 Apparaat monteren
▶
Het apparaat conform meegelever-
de montagehandleiding monteren.
4.4 Het apparaat voor het eer-
ste gebruik voorbereiden
1. Haal het informatiemateriaal er uit.
2. Verwijder de beschermfolie en
transportborgingen, bijv. plakstrips
en karton.
3. Het apparaat voor de eerste keer
reinigen. →Pagina44
4.5 Apparaat elektrisch aan-
sluiten
1. De netstekker van het aansluit-
snoer van het apparaat in een
stopcontact in de omgeving van
het apparaat steken.
De aansluitgegevens van het ap-
paraat staan op het typeplaatje.
→Fig.
1
/
4
2. De netstekker op vastheid contro-
leren.
a Het apparaat is nu gereed voor ge-
bruik.
Uw apparaat leren kennen
5 Uw apparaat leren ken-
nen
Uw apparaat leren kennen
5.1 Apparaat
Hier vindt u een overzicht van de on-
derdelen van uw apparaat.
→Fig.
1
1
Bedieningspaneel
2
Vriesvaklegplateau
3
Klep van het vriesvak
4
Typeplaatje
Opmerking:Verschillen tussen uw
apparaat en de afbeeldingen zijn mo-
gelijk op basis van uitrusting en
grootte.
5.2 Bedieningspaneel
Via het bedieningsveld kunt u alle
functies van uw apparaat instellen en
informatie krijgen over de gebruiks-
toestand.
→Fig.
2
1
schakelt het alarmsignaal
uit.
2
/ stelt de temperatuur van
het vriesvak in.
3
Toont de ingestelde tempera-
tuur van het vriesvak in°C.
4
schakelt Supervriezen in
of uit.
5
schakelt het apparaat in of
uit.
Uitrusting
6 Uitrusting
Uitrusting
De uitrusting van uw apparaat is mo-
delafhankelijk.
6.1 Klep van het vriesvak
Bewaar op het legplateau achter de
klep van het vriesvak vaak gebruikte
of kortstondig te bewaren levensmid-
delen.
6.2 Accessoires
Gebruik alleen originele accessoires.
Deze zijn op het apparaat afgestemd.
De accessoires van het apparaat zijn
afhankelijk van het model.

De Bediening in essentie nl
37
Koude-accu
Gebruik de koude-accu voor het tij-
delijk koel houden van levensmidde-
len, bijv. in een koeltas.
Tip:Dekoude-accu vertraagt bij
hetuitvallen van destroom of bij een
storing hetverwarmen van deopge-
slagen diepvrieswaren.
IJsblokjesschaal
Gebruik de ijsblokjesschaal om ijs-
blokjes te maken.
IJsblokjes maken
1. De ijsblokjesschaal voor ¾ met
water vullen en in het vriesvak
plaatsen.
Vastgevroren ijsblokjesschaal al-
leen met een bot voorwerp, bijv.
steel van een lepel, losmaken.
2. Om deijsblokjesschaal los tema-
ken de ijsblokjesschaal iets torde-
ren of kort onder stromend water
houden.
De Bediening in essentie
7 De Bediening in essen-
tie
De Bediening in essentie
7.1 Apparaat inschakelen
1. indrukken.
a Het apparaat begint te koelen.
a Er weerklinkt een waarschuwings-
signaal en brandt omdat het
vriesvak nog te warm is.
2. Het waarschuwingssignaal met
uitschakelen.
a gaat uit zodra de ingestelde
temperatuur is bereikt.
3. De gewenste temperatuur instellen.
→Pagina37
7.2 Opmerkingen bij het ge-
bruik
¡ Wanneer u het apparaat heeft in-
geschakeld, duurt het tot enkele
uren voordat de ingestelde tempe-
ratuur wordt bereikt.
Geen levensmiddelen in het appa-
raat doen voordat de temperatuur
is bereikt.
¡ De kopzijden van de behuizing
worden tijdelijk licht verwarmd. Dit
voorkomt vorming van condenswa-
ter in de zone van de deurafdich-
ting.
¡ Wanneer u de deur sluit, kan een
onderdruk ontstaan. De deur gaat
dan alleen moeilijker open. Wacht
een ogenblik tot de onderdruk
wordt gecompenseerd.
7.3 Machine uitschakelen
▶
indrukken.
7.4 Temperatuur instellen
Vriesvaktemperatuur instellen
▶
Zo vaak op / drukken tot de
temperatuurindicatie de gewenste
temperatuur toont.
De aanbevolen temperatuur in het
vriesvak bedraagt −18°C.
Extra functies
8 Extra functies
Extra functies
8.1 Automatisch Supervrie-
zen
Het automatisch Supervriezen scha-
kelt bij het inruimen van warme le-
vensmiddelen automatisch in.
Bij het automatisch Supervriezen
koelt het vriesvak duidelijk op een la-
gere temperatuur dan bij de normale
werking.

nl Alarm
38
Als het automatische Supervriezen is
ingeschakeld, brandt en er kun-
nen meer geluiden ontstaan.
Het apparaat schakelt na het verstrij-
ken van het automatisch Supervrie-
zen op normale werking.
Automatisch Supervriezen
annuleren
▶
indrukken.
a De voordien ingestelde tempera-
tuur wordt op indicatie aangege-
ven.
8.2 Handmatig Supervriezen
Bij het Supervriezen koelt het vries-
vak zo koud mogelijk.
Schakel Supervriezen 4 tot 6 uur
voor het inladen van een hoeveelheid
levensmiddelen vanaf 2 kg in het
vriesvak in.
Om het invriesvermogen te benutten,
gebruikt u Supervriezen.
→"Voorwaarden voor invriesvermo-
gen", Pagina42
Opmerking:Als Supervriezen is inge-
schakeld, kan er meer geluid ont-
staan.
Handmatig Supervriezen
inschakelen
▶
indrukken.
a brandt.
Opmerking:Na ca. 60 uur schakelt
het apparaat over op de normale
werking.
Handmatig Supervriezen
uitschakelen
▶
indrukken.
a De voordien ingestelde tempera-
tuur wordt op indicatie aangege-
ven.
Alarm
9 Alarm
Alarm
9.1 Deuralarm
Als de deur van het apparaat langere
tijd open staat wordt het deuralarm
ingeschakeld.
Deuralarm uitschakelen
▶
De apparaatdeur sluiten of op
drukken.
a Het waarschuwingssignaal is uitge-
schakeld.
9.2 Temperatuuralarm
Wanneer het te warm is in het vries-
vak, wordt het temperatuuralarm ge-
activeerd.
VOORZICHTIG
Kans op gevaar voor de gezond-
heid!
Bij het ontdooien kunnen bacteriën
zich vermeerderen en kunnen de
diepvrieswaren bederven.
▶
Half of geheel ontdooide diepvries-
waren niet opnieuw invriezen.
▶
Het voedsel pas na koken of bra-
den opnieuw invriezen.
▶
De maximale bewaartijd niet meer
ten volle benutten.
Het temperatuuralarm kan in de
volgende gevallen inschakelen:
¡ Het apparaat wordt in gebruik ge-
nomen.
Levensmiddelen pas in het appa-
raat inruimen wanneer de ingestel-
de temperatuur is bereikt.
¡ De deur van het vriesvak is te lang
geopend.
Controleer of het diepvriesproduct
deels of geheel is ontdooid.
Temperatuuralarm uitschakelen
▶
indrukken.

HomeConnect nl
39
a Het waarschuwingssignaal is uitge-
schakeld.
a Vanaf dit moment wordt dewarm-
ste temperatuur opnieuw bepaald
en inhetgeheugen opgeslagen.
a brandt als de ingestelde tem-
peratuur opnieuw is bereikt.
HomeConnect
10 HomeConnect
HomeConnect
Dit apparaat is geschikt voor netwer-
ken. Verbind uw apparaat met een
mobiel eindapparaat om functies te
kunnen bedienen via de HomeCon-
nect app te bedienen.
De HomeConnect diensten zijn niet
in elk land beschikbaar. De beschik-
baarheid van de functie HomeCon-
nect is afhankelijk van de beschik-
baarheid van de HomeConnect dien-
sten in uw land. Informatie hierover
vindt u op: www.home-connect.com.
Om HomeConnect te kunnen gebrui-
ken, dient u eerst de verbinding met
het WLAN-thuisnetwerk (Wi-Fi
1
) en
met de HomeConnect app te confi-
gureren.
Na het inschakelen van het apparaat
ten minste 2 minuten wachten tot de
interne initialisatie van het apparaat is
voltooid. Configureer pas dan Ho-
meConnect.
¡ Apparaat met WLAN-thuisnetwerk
(Wi-Fi) middels WPS-functie verbin-
den →Pagina39
¡ Apparaat met WLAN-thuisnetwerk
(Wi-Fi) zonder WPS-functie verbin-
den →Pagina40
De HomeConnect app leidt u door
het gehele aanmeldingsproces. Volg
de aanwijzingen in de HomeConnect
app om de instellingen aan te bren-
gen.
Tips
¡ Neem de meegeleverde documen-
ten vanHomeConnect in acht.
¡ Neem ook de aanwijzingen in
deHomeConnectapp in acht.
Opmerkingen
¡ Houd u aan de veiligheidsinstruc-
ties in deze gebruiksaanwijzing en
zorg ervoor dat deze ook worden
nageleefd wanneer u het apparaat
via de HomeConnect app bedient.
→"Veiligheid", Pagina29
¡ De bediening aan het apparaat
heeft altijd voorrang. Gedurende
deze tijd is de bediening via de
HomeConnectapp niet mogelijk.
10.1 Apparaat met WLAN-
thuisnetwerk (Wi-Fi) met
WPS-functie verbinden
Heeft uw router een WPS-functie, dan
kunt u het apparaat automatisch met
uw WLAN (Wi-Fi) thuisnetwerk verbin-
den.
1. indrukken.
a De temperatuurindicatie geeft
weer.
2. Zo vaak op drukken tot de
temperatuurindicatie toont.
3. indrukken.
a De temperatuurindicatie toont ge-
durende 2 minuten een animatie.
Het apparaat is gereed voor de au-
tomatische verbinding met het
WLAN-thuisnetwerk (Wi-Fi).
4. In deze tijd de WPS-functie op de
router inschakelen.
Houd hiervoor de informatie aan in
de documentatie van uw router.
a Bij een succesvolle verbinding
knippert in de temperatuurindi-
catie.
1
Wi-Fi is een geregistreerd handelsmerk van de Wi-Fi Alliance.

nl HomeConnect
40
5. Als de temperatuurindicatie
toont, kon het apparaat geen ver-
binding met het WLAN-thuisnet-
werk (Wi-Fi) maken.
‒ Controleer of het apparaat zich
binnen het bereik van het
WLAN-thuisnetwerk (Wi-Fi) be-
vindt.
‒ Het proces herhalen of handma-
tig verbinding maken
→Pagina40.
6. Het apparaat met de Home Con-
nect app verbinden. →Pagina40
10.2 Apparaat met WLAN-
thuisnetwerk (Wi-Fi) zon-
der WPS-functie verbin-
den
Heeft uw router geen WPS-functie,
dan kunt u het apparaat handmatig
met uw WLAN-thuisnetwerk (Wi-Fi)
verbinden. Het apparaat bouwt in
korte tijd een eigen WLAN-netwerk
op. U kunt met een mobiel eindappa-
raat verbinding maken met het Wi-Fi-
netwerk en de netwerkinformatie van
het WLAN-thuisnetwerk (Wi-Fi) aan
uw apparaat overdragen.
Vereiste:De HomeConnectapp is
op het mobiele eindapparaat geïn-
stalleerd.
1. indrukken.
a De temperatuurindicatie geeft
weer.
2. Zo vaak op drukken tot de
temperatuurindicatie toont.
3. indrukken.
a Het apparaat bouwt een eigen Wi-
Fi-netwerk met de netwerknaam
"HomeConnect" op.
a De temperatuurindicatie toont een
animatie. Het apparaat is gereed
voor de handmatige verbinding
met het WLAN-thuisnetwerk (Wi-Fi).
4. De instructies in de HomeConnect
app op het mobiele eindapparaat
volgen.
a De netwerkinformatie van het
WLAN-thuisnetwerk (Wi-Fi) wordt
op het apparaat overgedragen.
a Bij een succesvolle verbinding
knippert in de temperatuurindi-
catie.
5. Als de temperatuurindicatie
toont, kon het apparaat geen ver-
binding met het WLAN-thuisnet-
werk (Wi-Fi) maken.
‒ Controleer of het apparaat zich
binnen het bereik van het
WLAN-thuisnetwerk (Wi-Fi) be-
vindt.
‒ De procedure herhalen.
10.3 Apparaat met Ho-
meConnect app verbin-
den
Als u uw apparaat automatisch met
uw WLAN-thuisnetwerk (Wi-Fi) hebt
verbonden, kunt u uw apparaat met
de HomeConnect app verbinden.
Vereisten
¡ Het apparaat is verbonden met het
Wi-Fi thuisnetwerk. →Pagina39
¡ De HomeConnectapp is op het
mobiele eindapparaat geïnstal-
leerd.
1. indrukken.
a De temperatuurindicatie geeft
weer.
2. Zo vaak op drukken tot de
temperatuurindicatie toont.
3. indrukken.
a De temperatuurindicatie toont een
animatie.

HomeConnect nl
41
4. De instructies in de HomeConnect
app opvolgen tot het proces is vol-
tooid.
a Bij een geslaagde verbinding toont
de temperatuurindicatie .
5. Als de temperatuurindicatie
toont, kon het apparaat geen ver-
binding met de HomeConnect
app maken.
‒ In de HomeConnect app con-
troleren of het mobiele eindap-
paraat met het WLAN-thuisnet-
werk (Wi-Fi) is verbonden.
‒ De procedure herhalen.
6. Als de temperatuurindicatie
toont, de HomeConnect instellin-
gen terugzetten. →Pagina41
10.4 Update van de Home
Connect software instal-
leren
Het apparaat zoekt regelmatig naar
updates voor de HomeConnect soft-
ware.
Opmerking:Als er updates beschik-
baar zijn, toont de temperatuurindica-
tie .
Om de update af te breken en de
temperatuurindicatie op de ingestel-
de temperatuur terug te zetten, op
een willekeurig touchveld drukken.
1. indrukken.
a De temperatuurindicatie geeft
weer.
2. Zo vaak op drukken tot de
temperatuurindicatie toont.
3. indrukken.
a De temperatuurindicatie toont een
animatie.
a De update wordt geïnstalleerd.
a Tijdens de installatie is het bedie-
ningspaneel geblokkeerd.
a Bij een succesvolle installatie toont
de temperatuurindicatie .
4. Als de temperatuurindicatie
toont, kon het apparaat de update
niet installeren.
‒ De procedure op een later tijd-
stip herhalen.
5. Neem wanneer de update na
meerdere pogingen niet kan wor-
den afgesloten, contact op met de
Servicedienst →Pagina49 .
10.5 HomeConnect instellin-
gen resetten
Als het tot verbindingsproblemen van
uw apparaat met uw thuisnetwerk
(WiFi) komt of als u uw apparaat in
een ander thuisnetwerk (WiFi) wilt
aanmelden, kunt u de HomeCon-
nectinstellingen terugzetten.
1. indrukken.
a De temperatuurindicatie geeft
weer.
2. Zo vaak op drukken tot de
temperatuurindicatie toont.
3. indrukken.
a De temperatuurindicatie toont ge-
durende ca. 15 seconden een ani-
matie.
a Vervolgens toont de temperatuurin-
dicatie .
a De HomeConnectinstellingen zijn
gereset.
10.6 Bescherming persoons-
gegevens
Neem de aanwijzingen m.b.t. de be-
scherming van de persoonsgegevens
in acht.
Wanneer uw apparaat voor de eerste
keer wordt verbonden met een
thuisnetwerk dat op het internet is
aangesloten, geeft het de volgende

nl Vriesvak
42
gegevenscategorieën door aan de
HomeConnect server(eerste
registratie):
¡ Eenduidige identificatie van het ap-
paraat (bestaande uit apparaat-
sleutels en het MAC-adres van de
ingebouwde
Wi-Ficommunicatiemodule).
¡ Veiligheidscertificaat van de Wi-Fi
communicatiemodule (voor de in-
formatietechnische beveiliging van
de verbinding).
¡ De actuele software- en hardware-
versie van uw huishoudapparaat.
¡ Status van een eventuele eerdere
reset naar de fabrieksinstellingen.
Bij de eerste registratie wordt het ge-
bruik van de HomeConnect functio-
naliteiten voorbereid. Deze registratie
dient pas te worden uitgevoerd op
het moment dat u voor het eerst van
de HomeConnect functionaliteiten
gebruik wilt maken.
Opmerking:Let erop dat de Ho-
meConnect functionaliteiten alleen
kunnen worden gebruikt in combina-
tie met de HomeConnect app. Infor-
matie over gegevensbescherming
kan worden opgeroepen in de Ho-
meConnect app.
Vriesvak
11 Vriesvak
Vriesvak
In het vriesvak kunt u diepvrieswaren
bewaren, levensmiddelen bevriezen
en ijsblokjes maken.
De temperatuur is van −16°C tot
−24°C instelbaar.
Langdurig bewaren van levensmidde-
len moet opeen temperatuur van –
18°C of lager gebeuren.
Door het invriezen kunt u bederfelijke
levensmiddelen gedurende lange tijd
bewaren. De lage temperaturen ver-
tragen of stoppen het bederven.
11.1 Invriescapaciteit
Het invriesvermogen geeft aan welke
hoeveelheid levensmiddelen in hoe-
veel uur tot in de kern kan worden in-
gevroren.
Informatie over het invriesvermogen
vindt u op het typeplaatje. →Fig.
1
/
4
Voorwaarden voor invriesvermogen
1. Ca. 24 uur vóór het inladen van
verse levensmiddelen, Supervrie-
zen inschakelen.
→"Handmatig Supervriezen in-
schakelen", Pagina38
2. Eerst het bovenste vak vullen met
levensmiddelen. Daar bevriezen de
levensmiddelen het snelst.
3. Wanneer het bovenste vak niet
groot genoeg is, de resterende
hoeveelheid in het vak eronder in-
ruimen.
11.2 Vriesvakvolume volledig
gebruiken
Kom te weten hoe u de maximale
hoeveelheid diepvriesproducten in
het vriesvak onderbrengt.
1. Alle uitrustingsdelen verwijderen.
→Pagina45
2. Levensmiddelen rechtstreeks op
de legplateaus en de bodem van
het vriesvak bewaren.
11.3 Tips voor het bewaren
van levensmiddelen in
het vriesvak
¡ Om grotere hoeveelheden verse
levensmiddelen snel en voorzichtig
in te vriezen, deze in de bovenste
diepvrieslade leggen.
¡ De levensmiddelen naast elkaar in
de vakken of diepvriesladen leg-
gen.

Vriesvak nl
43
¡ In te vriezen levensmiddelen niet in
aanraking brengen met ingevroren
levensmiddelen.
¡ Voor een goede luchtcirculatie in
het apparaat de diepvrieslade tot
aan de aanslag inschuiven.
11.4 Kleinere hoeveelheid le-
vensmiddelen snel be-
vriezen
1. De levensmiddelen van rechts be-
ginnend in de tweede diepvriesla-
de van onderen leggen.
2. De levensmiddelen over een groot
oppervlak verdelen.
11.5 Tips voor het bevriezen
van verse levensmidde-
len
¡ Alleen verse en onberispelijke le-
vensmiddelen bevriezen.
¡ Levensmiddelen per portie invrie-
zen.
¡ Bereide levensmiddelen zijn beter
geschikt dan rauw eetbare levens-
middelen.
¡ Groente vóór het invriezen wassen,
kleiner maken en blancheren.
¡ Fruit vóór het invriezen wassen,
ontpitten en eventueel schillen,
eventueel suiker of ascorbinezuur-
oplossing toevoegen.
¡ Voor het invriezen geschikte le-
vensmiddelen zijn bijv. bakwaren,
vis en zeevruchten, vlees, wild en
gevogelte, eieren zonder schaal,
kaas, boter, kwark, kant-en-klaar-
gerechten en etensresten.
¡ Voor het invriezen ongeschikte le-
vensmiddelen zijn bijv. kropsla, ra-
dijsjes, eieren met schaal, druiven,
rode appels en peren, yoghurt, zu-
re room, crème fraîche en mayo-
naise.
Diepvrieswaren verpakken
Geschikt verpakkingsmateriaal en de
juiste soort verpakking behouden in
hoge mate de productkwaliteit en
vermijden vriesbrand.
1. De levensmiddelen in de verpak-
king leggen.
2. De lucht eruit drukken.
3. De verpakking luchtdicht afsluiten
om te voorkomen dat de levens-
middelen hun smaak verliezen of
uitdrogen.
4. De verpakking met de inhoud van
de invriesdatum voorzien.
11.6 Houdbaarheid van de
diepvrieswaren bij
−18°C
Product Bewaartijd
Vis, worst, klaarge-
maakte gerechten,
brood en banket
Tot 6 maan-
den
Gevogelte, vlees Tot 8 maan-
den
Groente, fruit Tot 12 maan-
den
De erop gedrukte vrieskalender geeft
de maximale bewaartijd in maanden
aan bij een constante temperatuur
van –18°C.
11.7 Ontdooimethodes voor
diepvrieswaren
VOORZICHTIG
Kans op gevaar voor de gezond-
heid!
Bij het ontdooien kunnen bacteriën
zich vermeerderen en kunnen de
diepvrieswaren bederven.
▶
Half of geheel ontdooide diepvries-
waren niet opnieuw invriezen.
▶
Het voedsel pas na koken of bra-
den opnieuw invriezen.

nl Ontdooien
44
▶
De maximale bewaartijd niet meer
ten volle benutten.
¡ In het koelvak dierlijke levensmid-
delen ontdooien, bijv. vis, vlees,
kaas en kwark.
¡ Bij kamertemperatuur brood ont-
dooien.
¡ In de magnetron, in de oven of op
het fornuis levensmiddelen voor di-
recte consumptie bereiden.
Ontdooien
12 Ontdooien
Ontdooien
12.1 Ontdooien in het vries-
vak
Door hetvolledig automatische “NoF-
rost”-systeem blijft hetvriesvak vorst-
vrij. Ontdooien isniet nodig.
Reiniging en onderhoud
13 Reiniging en onder-
houd
Reiniging en onderhoud
Reinig en onderhoud uw apparaat
zorgvuldig om er voor te zorgen dat
het lang goed blijft werken.
De reiniging van ontoegankelijke
plaatsen moet door de servicedienst
worden uitgevoerd. Aan de reiniging
door de servicedienst kunnen kosten
verbonden zijn.
13.1 Apparaat voorbereiden
voor reiniging
1. Het apparaat uitschakelen.
→Pagina37
2. Haal de stekker van het apparaat
uit het stopcontact.
De stekker van het netsnoer uit het
stopcontact trekken of de zekering
in de meterkast uitschakelen.
3. Alle levensmiddelen eruit halen en
op een koele plaats bewaren.
Indien beschikbaar koelelementen
op de levensmiddelen leggen.
4. Neem alle uitrustingsdelen uit het
apparaat. →Pagina45
13.2 Apparaat schoonmaken
WAARSCHUWING
Kans op elektrische schok!
Binnendringend vocht kan een schok
veroorzaken.
▶
Geen stoomreiniger of hogedruk-
reiniger gebruiken om het appa-
raat te reinigen.
Vloeistof in de verlichting of in de be-
dieningselementen kan gevaarlijk
zijn.
▶
Het spoelwater mag niet in de ver-
lichting of in de bedieningselemen-
ten terechtkomen.
LET OP!
Ongeschikte reinigingsmiddelen kun-
nen de oppervlakken van het appa-
raat beschadigen.
▶
Geen harde schuur- of afwas-
sponsjes gebruiken.
▶
Geen scherpe of schurende reini-
gingsmiddelen gebruiken.
▶
Geen sterk alcoholhoudende reini-
gingsmiddelen gebruiken.
Wanneer u uitrustingsdelen en acces-
soires in de vaatwasser reinigt, kun-
nen deze vervormen of verkleuren.
▶
Nooit uitrustingsdelen en accessoi-
res in de vaatwasser reinigen.
1. Apparaat voorbereiden voor reini-
ging. →Pagina44
2. Het apparaat, de uitrustingsdelen
en de deurafdichting met een vaat-
doek, lauwwarm water en een
beetje pH-neutraal afwasmiddel rei-
nigen.
3. Met een zachte, droge doek gron-
dig nadrogen.

Reiniging en onderhoud nl
45
4. Plaats de uitrustingsdelen in het
apparaat.
5. Het apparaat elektrisch aansluiten.
6. Het apparaat inschakelen.
→Pagina37
7. Doe de levensmiddelen in het ap-
paraat.
13.3 Onderdelen eruit halen
Neem wanneer u de uitrustingsdelen
grondig wilt reinigen deze uit het ap-
paraat.
Klep van het vriesvak verwijderen
▶
De klep van het vriesvak openen
en van de houder losmaken.
→Fig.
3
Vriesvaklegplateau verwijderen
▶
Het vriesvaklegplateau uittrekken
en verwijderen.
→Fig.
4
Diepvrieslade verwijderen
1. De diepvrieslade tot aan de aan-
slag uittrekken.
2. De diepvrieslade vooraan optillen
en eruit halen .
→Fig.
5

nl Storingen verhelpen
46
Storingen verhelpen
14 Storingen verhelpen
Storingen verhelpen
Kleinere storingen aan het apparaat kunt u zelf verhelpen. Raadpleeg voordat u
contact opneemt met de klantenservice de informatie over het verhelpen van
storingen. Zo voorkomt u onnodige kosten.
WAARSCHUWING
Kans op elektrische schok!
Ondeskundige reparaties zijn gevaarlijk.
▶
Alleen daarvoor geschoold vakpersoneel mag reparaties aan het apparaat
uitvoeren.
▶
Er mogen uitsluitend originele reserveonderdelen worden gebruikt voor repa-
ratie van het apparaat.
▶
Als het netsnoer van dit apparaat beschadigd raakt, moet het ter vermijding
van risico's worden vervangen door de fabrikant, de servicedienst of een an-
dere gekwalificeerde persoon.
Storing Oorzaak en probleemoplossing
Apparaat koelt niet, in-
dicaties en verlichting
branden.
Het presentatielicht is ingeschakeld.
▶
Voer de apparaatzelftest uit. →Pagina48
a Na het verstrijken van de apparaatzelftest gaat het
apparaat weer over op normale werking.
Home Connect functi-
oneert niet correct.
Verschillende oorzaken zijn mogelijk.
▶
Ga naar www.home-connect.com.
of verschijnt op het
temperatuurdisplay.
De elektronica heeft een fout geconstateerd.
1.
Schakel het apparaat uit. →Pagina37
2. Koppel het apparaat los van de voedingspanning.
Haal stekker van het netsnoer uit het stopcontact
trekken of schakel de zekering in de meterkast uit.
3. Sluit het apparaat na 5minuten weer aan.
4. Verschijnt de melding nog steeds, neem dan con-
tact op met de servicedienst.
Het nummer van de servicedienst vindt u in het bij-
gevoegde overzicht van servicediensten.
De temperatuurindica-
tie knippert.
Verschillende oorzaken zijn mogelijk.
▶
Druk op .
a Schakel het alarm uit.
Deur van het apparaat is open.
▶
Sluit de deur van het apparaat.
Ventilatieroosters aan de buitenkant zijn afgedekt.
▶
Verwijder blokkades voor de externe ventilatieroos-
ters.

Storingen verhelpen nl
47
Storing Oorzaak en probleemoplossing
De temperatuurindica-
tie knippert.
Er zijn grotere hoeveelheden verse levensmiddelen in-
geruimd.
▶
Overschrijd het vriesvermogen niet.
→"Invriescapaciteit", Pagina42
Temperatuurindicatie
knippert, waarschu-
wingssignaal weer-
klinkt en brandt.
Verschillende oorzaken zijn mogelijk.
▶
Druk op .
a Schakel het alarm uit.
Deur van het apparaat is open.
▶
Sluit de deur van het apparaat.
Ventilatieroosters aan de buitenkant zijn afgedekt.
▶
Verwijder blokkades voor de externe ventilatieroos-
ters.
Er zijn grotere hoeveelheden verse levensmiddelen in-
geruimd.
▶
Overschrijd het vriesvermogen niet.
→"Invriescapaciteit", Pagina42
Temperatuur wijkt erg
af van deinstelling.
Verschillende oorzaken zijn mogelijk.
1.
Schakel het apparaat uit. →Pagina37
2. Schakel het apparaat na ca. 5 minuten opnieuw in.
→Pagina37
‒ Als de temperatuur te hoog is, controleer dan de
temperatuur na een paar uur opnieuw.
‒ Als de temperatuur te laag is, controleer de tem-
peratuur dan de volgende dag opnieuw.
Het apparaat bromt,
borrelt, zoemt, gorgelt,
klikt, of maakt knakge-
luiden.
Geen storing. Een motor draait, bijv. koelaggregaat,
ventilator. Er stroomt koudemiddel door de buizen.
Motor, schakelaars of magneetventielen schakelen in-
of uit. Het automatische ontdooisysteem treedt in wer-
king.
Geen handeling vereist.Geen handeling vereist.
Apparaat produceert
geluiden.
Uitrustingsdelen wiebelen of klemmen.
▶
Controleer de uitneembare uitrustingsdelen en zet
ze eventueel opnieuw in het apparaat.
Serviesgoed raakt elkaar.
▶
Zet het serviesgoed verder uit elkaar.
Supervriezen is ingeschakeld.
Geen handeling vereist.Geen handeling vereist.

nl Opslaan en afvoeren
48
14.1 Stroomuitval
Tijdens een stroomuitval stijgt de
temperatuur in het apparaat, hierdoor
verkort de bewaartijd en de kwaliteit
van de diepvriesproducten vermin-
dert.
De opgeslagen diepvriesproducten
worden gedurende de stijgingstijd
van de temperatuur op het typeplaat-
je gekoeld. →Fig.
1
/
4
Opmerkingen
¡ Het apparaat tijdens een stroomuit-
val zo weinig mogelijk openen en
geen andere levensmiddelen inrui-
men.
¡ De kwaliteit van de levensmiddelen
onmiddellijk na de stroomuitval
controleren.
– Diepvriesproducten die ontdooid
en warmer dan 5 °C zijn, weg-
gooien.
– Licht ontdooide diepvriesproduc-
ten koken of bakken en ofwel
verbruiken of opnieuw invriezen.
14.2 Apparaatzelftest uitvoe-
ren
1. Het apparaat uitschakelen.
→Pagina37
2. Het apparaat na 5minuten op-
nieuw inschakelen. →Pagina37
3. Binnen 10 seconden na het in-
schakelen gedurende 3 tot 5
seconden ingedrukt houden tot er
een akoestisch signaal weerklinkt.
a De apparaatzelftest start.
a Tijdens de apparaatzelftest weer-
klinkt tussendoor een lang akoes-
tisch signaal.
a Als na het einde van de apparaat-
zelftest 2 akoestische signalen
weerklinken en de temperatuurindi-
catie de ingestelde temperatuur
toont, is uw apparaat in orde. Het
apparaat gaat over op de normale
werking.
a Als na het einde van de apparaat-
zelftest 5 akoestische signalen
weerklinken en gedurende 10
seconden knippert, contact opne-
men met de service.
Opslaan en afvoeren
15 Opslaan en afvoeren
Opslaan en afvoeren
Hier krijgt u uitleg over de manier
waarop u het apparaat voorbereidt
voor de opslag. Daarnaast leggen we
u uit hoe u oude apparaten dient af
te voeren.
15.1 Apparaat buiten gebruik
stellen
1. Het apparaat uitschakelen.
→Pagina37
2. Haal de stekker van het apparaat
uit het stopcontact.
De stekker van het netsnoer uit het
stopcontact trekken of de zekering
in de meterkast uitschakelen.
3. Alle levensmiddelen verwijderen.
4. Het apparaat reinigen.
→Pagina44
5. Om de ventilatie van het interieur
te waarborgen het apparaat geo-
pend laten.

Servicedienst nl
49
15.2 Afvoeren van uw oude
apparaat
Door een milieuvriendelijke afvoer
kunnen waardevolle grondstoffen op-
nieuw worden gebruikt.
WAARSCHUWING
Kans op gevaar voor de gezond-
heid!
Kinderen kunnen zich in het apparaat
opsluiten en in levensgevaar gera-
ken.
▶
Om te voorkomen dat kinderen in
het apparaat kruipen legplateaus
en lades niet uit het apparaat ne-
men.
▶
Kinderen uit de buurt van een af-
gedankt apparaat houden.
WAARSCHUWING
Kans op brand!
Bij beschadiging van de leidingen
kunnen brandbaar koudemiddel en
schadelijke gassen ontsnappen en
ontsteken.
▶
De buizen van de koudemiddel-
kringloop en de isolatie niet be-
schadigen.
1. De stekker van het netsnoer uit het
stopcontact trekken.
2. Het netsnoer doorknippen.
3. Het apparaat milieuvriendelijk af-
voeren.
Bij uw dealer en uw gemeente- of
deelraadskantoor kunt u informatie
verkrijgen over de actuele afvoer-
methoden.
Dit apparaat is geken-
merkt in overeenstem-
ming met de Europese
richtlijn 2012/19/EU be-
treffende afgedankte
elektrische en elektroni-
sche apparatuur (waste
electrical and electronic
equipment - WEEE).
De richtlijn geeft het ka-
der aan voor de in de
EU geldige terugneming
en verwerking van oude
apparaten.
Servicedienst
16 Servicedienst
Servicedienst
Als u vragen hebt, een storing aan
het apparaat niet zelf kunt verhelpen
of als het apparaat moet worden ge-
repareerd, neem dan contact op met
onze servicedienst.
Originele vervangende onderdelen
die relevant zijn voor de werking in
overeenstemming met de desbetref-
fende Ecodesign-verordening kunt u
voor de duur van ten minste 10 jaar
vanaf het moment van in de handel
brengen van het apparaat binnen de
Europese Economische Ruimte bij
onze servicedienst verkrijgen.
Opmerking:Het inschakelen van de
servicedienst is in het kader van de
plaatselijk geldende fabrieksgarantie-
voorwaarden gratis. De minimumduur
van de garantie (fabrieksgarantie
voor particuliere gebruikers) in de Eu-
ropese Economische Ruimte be-
draagt 2 jaar in overeenstemming
met de geldende plaatselijke garan-
tievoorwaarden. De garantievoor-
waarden doen geen afbreuk aan
eventuele andere rechten of claims
die u op grond van het plaatselijke
recht heeft.
Gedetailleerde informatie over de ga-
rantieperiode en garantievoorwaar-
den in uw land kunt u opvragen bij
onze servicedienst, uw dealer of op
onze website.

nl Technische gegevens
50
Als u contact opneemt met de servi-
cedienst, hebt u het productnummer
(E-Nr.) en het productienummer (FD)
van het apparaat nodig.
De contactgegevens van de service-
dienst vindt u in de meegeleverde
servicedienstlijst of op onze website.
16.1 Productnummer (E-nr.)
en productienummer
(FD)
Het productnummer (E-Nr.) en het
productienummer (FD) vindt u op het
typeplaatje van het apparaat.
→Fig.
1
/
4
Om uw apparaatgegevens en de ser-
vicedienst-telefoonnummers snel te-
rug te kunnen vinden, kunt u de ge-
gevens noteren.
Technische gegevens
17 Technische gegevens
Technische gegevens
Koudemiddel, netto inhoud en overi-
ge technische gegevens bevinden
zich op het typeplaatje.
→Fig.
1
/
4
Overige informatie over uw model
vindt u op het internet onder https://
energylabel.bsh-group.com
1
. Dit we-
badres bevat een link naar de officië-
le EU-productdatabase EPREL, waar-
van de URL ten tijde van het drukken
nog niet was gepubliceerd. Volg dan
de aanwijzingen bij het zoeken naar
het model op. De modelidentificatie
bestaat uit het teken voor de slash
van het E-nummer (E-Nr.) op het ty-
peplaatje. Alternatief vindt u de mo-
delidentificatie ook in de eerste regel
van het EU-energielabel.
Conformiteitsverklaring
18 Conformiteitsverkla-
ring
Conformiteitsverklaring
Hierbij verklaart BSH Hausgeräte
GmbH dat het apparaat met Home
Connect functionaliteit voldoet aan de
fundamentele vereisten en de overige
toepasselijke bepalingen van de
richtlijn 2014/53/EU.
Een uitvoerige RED conformiteitsver-
klaring vindt u op het internet onder
www.siemens-home.bsh-group.com
op de productpagina van uw appa-
raat bij de aanvullende documenten.
2,4 GHz band: 100 mW max.
5 GHz band: 100 mW max.
BE BG CZ DK DE EE IE el
ES FR HR IT CY LV LT LU
HU MT NL AT PL PT RO SI
SK FI SE UK NO CH TR
5GHz WLAN (WiFi): alleen voor het gebruik binnenshuis.
1
Geldt alleen voor landen in de Europese Economische Ruimte


*9001547037*
9001547037 (001005)
en, nl
BSH Hausgeräte GmbH
Carl-Wery-Straße 34
81739 München
GERMANY
www.siemens-home.bsh-group.com
Manufactured by BSH Hausgeräte GmbH under the trademark licence of Siemens AG
Geproduceerd door BSH Hausgeräte GmbH onder de handelsmerklicentie van Siemens AG
-
 1
1
-
 2
2
-
 3
3
-
 4
4
-
 5
5
-
 6
6
-
 7
7
-
 8
8
-
 9
9
-
 10
10
-
 11
11
-
 12
12
-
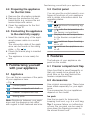 13
13
-
 14
14
-
 15
15
-
 16
16
-
 17
17
-
 18
18
-
 19
19
-
 20
20
-
 21
21
-
 22
22
-
 23
23
-
 24
24
-
 25
25
-
 26
26
-
 27
27
-
 28
28
-
 29
29
-
 30
30
-
 31
31
-
 32
32
-
 33
33
-
 34
34
-
 35
35
-
 36
36
-
 37
37
-
 38
38
-
 39
39
-
 40
40
-
 41
41
-
 42
42
-
 43
43
-
 44
44
-
 45
45
-
 46
46
-
 47
47
-
 48
48
-
 49
49
-
 50
50
-
 51
51
-
 52
52


Siemens GI81NHCE0/01 Handleiding
- Categorie
- Combi-koelkasten
- Type
- Handleiding
- Deze handleiding is ook geschikt voor
in andere talen
- English: Siemens GI81NHCE0/01 User manual