
YAMAHA Wave Editor TWE
Version 2.2.0
for Macintosh
Owner's manual (1/3)
The TWE wave editor (hereafter referred to as TWE) is software for digitally
recording sounds (instrumental sounds, sound effects, voice, etc.) to the
hard disk of a personal computer, and for editing recorded sound data. If an
external Yamaha sampler (*) is connected via a SCSI connection, the sound
data recorded in the sampler can be loaded into TWE and edited, and then re-
transmitted back to the sampler.
*This software supports the Yamaha A3000/4000/5000 professional samplers and
the EX5/5R/7 synthesizers.
TWE was created by the Yamaha Corporation, and is distributed at no cost.
Yamaha Corporation makes no guarantees, implicit or explicit, regarding the
quality or performance of this software. Yamaha Corporation will accept no
responsibility for any damages, direct or consequential (including extended
damages), which may result from use of this software. You must make backups
of data files you create.
In order to use this software, you will need to be familiar with the
Macintosh and the connected devices. Before using this software, please
carefully read this manual and the manuals for your connected device and
Macintosh.
*By using this software, it is possible to create sound data which could not
be produced by normal recording. However, be aware that playing back high
volume full-scale data, or data of extremely low frequencies below 20 Hertz,
or data with a large direct current component may damage your ears and/or
any speakers or headphones that are connected. Please use caution.
•The software and this owner's manual are the exclusive copyrights of Yamaha
Corporation.
•Copying of the software or reproduction of this manual in whole or in part
by any means is expressly forbidden without the written consent of the
manufacturer.
•Yamaha makes no representations or warranties with regard to the use of the
software and documentation and cannot be held responsible for the results of
the use of this manual and the software.
•Since this software is being distributed in free of charge, no user support
will be provided.
•Copying of the commercially available music sequence data and/or digital
audio files is strictly prohibited except for your personal use.
- 1 -

•The company names and product names in this owner's manual are the
trademarks or registered trademarks of their respective companies.
•The screen displays as illustrated in this owner's manual are for
instructional purposes, and may appear somewhat different from the screens
which appear on your computer.
[Contents]
1. Basics
1.1. Operating environment
1.2. Applicable data
1.3. Recording/playback
2. Installing and starting TWE
3. Tag Window and Transport Window
3.1. Tag Window
3.2. Transport Window
4. Waveform Window
4.1. File information display
4.2. Device information display
4.3. Playback start location display
4.4. Selected region display
4.5. Loop region display
4.6. Display resolution
4.7. Waveform display
4.8. Overall waveform display
4.9 Status bar
5. File menu
5.1. New...
5.2. Open...
5.3. Close
5.4. Save
5.5. Save As...
5.6. Revert
5.7. Resample...
5.8. Convert Bit Size...
5.9. Add Channel...
5.10. Delete Channel...
5.11. Swap Channels...
5.12. Import From Sampler...
5.13. Export To Sampler...
- 2 -

5.14. Load Preferences...
5.15. Save Preferences As...
5.16. Page Setup...
5.17. Print...
5.18. Quit
6. Edit menu
6.1. Undo (or Redo)
6.2. Cut
6.3. Copy
6.4. Paste
6.5. Insert
6.6. Clear
6.7. Select All
6.8. Trim
6.9. Mix
6.10. Reverse
6.11. Invert
6.12. Fade In
6.13. Fade Out
6.14. Loop Crossfade...
6.15. EQ…
6.16. Time Comp / Exp …
6.17. Pitch Shift …
6.18 Gain
6.19. Normalize...
6.20. Silence
6.21. DC Offset...
7. View menu
7.1. Go to
7.2. Zoom
7.3. Selection
7.4. Auto Snap
7.5. Hide (or Show) File/Device Info
7.6. Hide (or Show) Waveform
7.7. Hide (or Show) Overview
7.8. Time Ruler
7.9. Level Ruler
7.10. Scroll During Playback
7.11. Connect Dots
7.12. Waveform Scanning
8. Options menu
8.1. Rescan SCSI
8.2. Select Working Dir...
- 3 -

8.3. Preferences …
9. Window menu
9.1. Hide (or Show) Tag Window
9.2. Hide (or Show) Transport
9.3. Cascade
9.4. Tile Horizontally
9.5. Tile Vertically
9.6. Next Window
9.7. Close All
9.8. (Select Window)
10. List of shortcut key default settings
11. Main new functions in version 2.2.0
[1. Basics]
1.1. Operating environment
<Computer>
•Macintosh
<CPU>
•PowerPC
<OS>
•System 7.6.1 or newer
<Display>
•256 colors or more, resolution 640 x 400 or higher
<Free memory>
•6MB or more (8MB or more is recommended)
<Hard disk>
•Average access time 30ms or less
*If you are using the OS earlier than System 7.5, there are some limitations
on the use of the Transport Window. For details refer to "3.2. Transport
Window."
1.2. Applicable data
- 4 -

<File formats>
•Apple AIFF (displayed by TWE as "AIFF")
•Digidesign Sound Designer II (displayed by TWE as "Sd2f")
•Microsoft Wave PCM (displayed by TWE as "WAVE")
<Sample size>
•1 bit to 32 bit
<Sampling frequency>
•11,025Hz to 96,000Hz
<Number of channels>
•1 to 16 channels
1.3. Recording/playback
•Recording/playback via the Macintosh Sound Manager is supported. (Sound
Manager 3.0 or higher is recommended.)
•Only the first one or two channels are used for recording/playback. (This
depends on the Macintosh that you are using.)
•If there is sufficient space on your hard disk, a maximum of two hours of
continuous recording is possible.
•SCSI sample dump data can be transferred between TWE and the A3000/4000/
5000 or EX5/5R/7.
•Loop playback of the desired number of samples can be performed.
[2. Installing and starting TWE]
The TWE application can be used by itself, without any particular
installation procedure.
Double-click the TWE icon. A "Select Working Dir…" dialog box will appear.
Here you can specify the directory in which TWE will create its temporary
working files. (The working directory that you specify here can be changed
using the [Options] menu command [Select Working Dir...]. Refer to "8.2.
Select Working Dir...".)
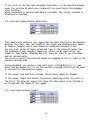
After you specify the working directory, the TWE title will appear, and Tag
window (the window containing the [Open] button and [New] button) and
Transport window (which contains buttons for playback and recording) will
open.
Then, use the [File] menu commands [Open] or [New...] etc. to open a sound
data file (sound file), and the Waveform Window (TWE's main window which
- 5 -

displays various settings of the sound file) will appear. The following
chapters explain the various parts of TWE's windows.
[3. Tag Window and Transport Window]
3.1. Tag Window
The Tag Window is a small window with two buttons: [Open] and [New].
Clicking [Open] will open an existing sound data file (sound file). (This is
the same function as the [File] menu command [Open...].) Clicking [New] will
create new sound data. (This is the same function as the [File] menu
command [New...].)
If you are using other applications while TWE is running, you may find it
convenient to place the Tag Window at the edge of the screen, so that it can
simply be clicked when you once again want to use TWE.
3.2. Transport Window
The Transport Window contains the buttons which allow sound data to be
played back and recorded, etc.
<Rewind>
- 6 -

Moves the playback start location (Play Location) to the beginning of the
sound data.
<Stop>
Stops playback/recording.
<Play>
Begins playback from the playback start location.
<Record>
Begins recording from the playback start location. During recording, the
loop region setting is ignored. If sufficient space is available on your
hard disk, a maximum of two hours of recording is possible.
<Play Selection>
If a region is selected in the waveform display area, only that region will
play back. While the region is playing back, the loop region setting is
ignored.
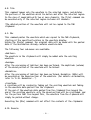
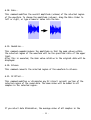
*The TWE window contains two waveform displays. In this manual, the larger
display located below is referred to as the "waveform display (Waveform)."
The smaller display located above is referred to as the "overall waveform
display (Overview)." The waveform display can be made to show a magnified
portion of the overall waveform display. For details on the waveform
display, refer to "4.7. Waveform display," and on the overall waveform
- 7 -

display refer to "4.8. Overall waveform display."
*If the OS you are using is earlier than System 7.5, there will be cases in
which it will not be possible to switch applications while the Transport
Window is being used. In such cases, temporarily close the Transport Window
before switching applications.
[4. Waveform Window]
The Waveform Window is TWE's main window, in which various settings of the
sound file are shown.
A Waveform Window will open when you execute one of the [File] menu commands
[New...], [Open...], or [Import From Sampler...]. Up to twenty of these
windows can be open at once.
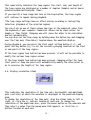
4.1. File information display (File)
This display section is located at the left of the waveform display.
The following information is displayed for the sound file currently opened
by TWE. If the device information display (Device) is open, click the File
tab.
<Creator>
The creator (the ID code of the application which created the sound file) is
displayed. Sound files created by TWE are displayed as "YHWO." For sound
files created by other applications, this display will depend on the
application.
<File type>
Displays the file type (AIFF, Sd2f, or WAVE).
<Size>
Displays the sample size of the sound file in bits.
<Rate>
Displays the sampling frequency of the sound file in Hertz (Hz).
<Channels>
Displays the number of channels within the sound file.
<Length>
Displays the total playback time of the file
(hours:minutes:seconds.milliseconds).
- 8 -

<Samples>
Displays the total number of samples in the sound file.
<Data size>
Displays the size (number of bytes) of the sound file.
<Modified>
Displays the last time the file was modified (year.month.day and time).
4.2. Device information display (Device)
This display section is located at the left of the waveform display.
The following information on the audio input/output devices etc. is
displayed. If the file information is displayed (File), click the Device
tab.
<Output Volume>
Specify the volume for playback. In the case of multi-channel sound data, it
is not possible to set the volume of the channels independently.
<Audio Device>
Indicates the version of the Sound Manager being used.
<Working Volume/Working Directory>
Indicates the currently selected working directory and its volume (disk
name).
4.3. Playback start location display (Play Location)
This numerically indicates the location at which playback will begin. The
upper line shows the time location (hours/minutes/seconds/milliseconds), and
the lower line shows the number of samples up to that point.
You can click on one of these values and type in the numerical value from
the keyboard of your computer. Numerical values can be input either for the
upper (time) or lower (sample) fields. Changing one will cause the other to
be calculated and set automatically.
- 9 -

If you click on the time axis markings (Time Ruler) of the waveform display
area, the location at which you clicked will be specified as the playback
start location.
While sound data is being played back or recorded, the current location is
displayed in realtime.
4.4. Selected region display (Selection)
This numerically indicates the region that has been selected in the waveform
display. The start, end, and length of the region are displayed as a number
of samples (Sample) and as hours/minutes/seconds/milliseconds (Time).
You can click on one of these values and type in the numerical value from
the keyboard of your computer. Numerical values can be input either for
Sample or Time fields. Changing one will cause the other to be calculated
and set automatically.
You can also specify the selected region by dragging to left or right in the
waveform display area.
During playback, you can press the start point setting button [|<] / end
point setting button [>|] to set the currently-playing location as the start
or end point of the selected region.
If the region lock button is pressed, these values cannot be changed.
If the region length lock button is pressed, modifying either the start or
the end of the selected region will cause the other point to be shifted so
as to maintain the length of the region.
4.5. Loop region display (Loop)
- 10 -

This numerically indicates the loop region. The start, end, and length of
the loop region are displayed as a number of samples (Sample) and as hours/
minutes/seconds/milliseconds (Time).
If you specify a loop range and turn on the Loop button, the loop region
will continue to repeat during playback.
*The loop range settings have no effect during recording or during Play
Selection (playback of the selected region).
You can click on one of these values and type in the numerical value from
the keyboard of your computer. Numerical values can be input either for
Sample or Time fields. Changing one will cause the other to be calculated
and set automatically.
You can also set the loop range by holding down the Option key and dragging
over the time axis (Time Ruler) located above the waveform display.
During playback, you can press the start point setting button [|<] / end
point setting button [>|] to set the currently-playing location as the start
or end point of the loop region.
If the loop region lock button has been pressed, it will not be possible to
modify the various loop region values.
If the loop length lock button has been pressed, changing either the loop
start point or loop end point will automatically modify the other point so
as to preserve the length of the loop region.
4.6. Display resolution (Zoom)
This indicates the resolution of the time axis (horizontal) and amplitude
axis (vertical) at which the waveform is displayed in the waveform display
area.
To change the resolution of the time axis, drag the slider knob to left or
right, or click the +/- buttons located at each end. To change the
resolution of the amplitude axis, press the mouse button on the numerals and
then select a value from the popup menu that appears, or click the +/-
buttons located at each end.
- 11 -

4.7. Waveform display (Waveform)
This area shows a magnified portion of the currently opened sound file.
You can use the horizontal and vertical scroll bars to move the displayed
portion. You can also click on the overall waveform display (Overview) to
move the displayed area.
*For details on the overall waveform display, refer to "4.8. Overall
waveform display."
When a sound file is first opened or created, TWE creates waveform display
data that is separate from the actual sound data, in order to speed up the
waveform display. This waveform display data will be saved in the same file
as the sound data when the [File] menu command [Save As...] is executed, so
that even long sound files can be displayed immediately next time.
This waveform display data can be created in the background gradually (refer
to "8.3.3. Others" paragraph "Full scan on open," and "7.12. Waveform
Scanning"). At this time, the entire waveform is displayed in general
outline, and the display will gradually become more accurate. However,
display data for the portion that is actually shown in the waveform display
area will be given priority.
The portion in which the display data is still begin generated will be shown
in a different color than the portion which has already been completed
(refer to "8.3.1. Colors").
By dragging to left or right over a desired region of the waveform display,
you can select that region. If the selected region is not locked, clicking
in the waveform display area will defeat the previously selected region.
For sound data which contains two or more channels (stereo, etc.), you can
drag the mouse across the dividing lines between channels to simultaneously
select adjacent channels. Some operations which modify the length of the
waveform, such as the [Edit] menu command [Cut], cannot be executed unless
all channels are selected simultaneously.
If you press the Option key while the mouse cursor is located in the
waveform display, a cross-shaped cursor will appear. This is convenient when
you wish to use the time axis (Time Ruler) and amplitude axis (Level Ruler)
to learn the precise position of the mouse.
By holding down the Option key and dragging across the time axis (Time
Ruler) located above the waveform display, you can set the loop region.
Also, when you move the mouse pointer near the left (or right) edge of the
- 12 -

loop region shown in the time axis ruler, the mouse pointer will change
shape, and you can drag to left or right to modify the start/end points of
the loop region. By dragging the mouse within the loop region (brown, with
the default settings) in the time axis ruler, you can change the location of
the loop region without affecting the length of the loop. In addition, if
you hold down both the Option key and the Shift key and then click outside
the loop region shown in the time axis ruler, the loop region will be
extended to that point.
By clicking any other point in the time axis ruler, you can set the playback
start time to that location.
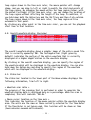
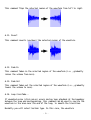
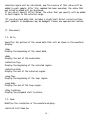
4.8. Overall waveform display (Overview)
The overall waveform display shows a graphic image of the entire sound file
that is currently opened by TWE. The rectangular bar (light green by
default) indicates the portion of the entire waveform that is currently
displayed at a higher magnification in the waveform display.
By clicking in the overall waveform display, you can specify the region of
the waveform which will be displayed in the waveform display. You can also
hold down the Option key and drag to specify the region of the waveform
which will be displayed in the waveform display.
4.9. Status bar
The status bar located in the lower part of the Wave window displapys the
following information, from left to right.
< Waveform scan ratio >
The progress of the scanning that is performed in order to generate the
waveform display data is displayed here as a percentage. When the scan is
completed, this will indicate "100.0%."
< Mouse cursor location on the time axis >
This indicates the location of the mouse pointer within the waveform display
area. The units are the same as those currently selected for the Time Ruler.
If the Time Ruler is not being used, this location will be shown as time
(hours:minutes:seconds.milliseconds).
- 13 -

- continues to 2/3 -
- 14 -

YAMAHA Wave Editor TWE
Version 2.2.0
for Macintosh
Owner's manual (2/3)
[5. File menu]
5.1. New...
This command creates new sound data. When you select [New...], a dialog box
will appear, allowing you to set the following parameters.
<File Type>
Specify the file type of the new sound data: AIFF, Sd2f, or WAVE. (For
details on each file type, refer to "1.2. Applicable data.")
<Sample Size>
Select the sample size (bit) of the new sound data.
By selecting Others, you can specify a sample size in the range of 1-32
bits.
<Channels>
Specify whether the new sound data will be stereo or monaural. By selecting
Others, you can specify up to 16 channels.
<Sample Rate>
Select the sampling frequency (Hz) of the new sound data.
<Length>
You can specify the length (playback time) of the new sound data either in
minutes/seconds/milliseconds (In Time) or as a number of samples (In
Sample). When you input one of these, the other will be calculated and
displayed automatically. The data size (Data size) and remaining space on
the disk (Working volume remain) will also be displayed as bytes.
<Initial Data>
Specify what type of sound data will be created. Select from the following
choices.
•Silence...
(Blank data will be created. This is completely silent data.)
•Disk Garbage...
- 1 -

(The data which was originally on the disk (meaningless garbage) will be
used without change.)
•Square...
(Square wave data will be created.)
•Sawtooth...
(Sawtooth wave data will be created.)
•Triangle...
(Triangle wave data will be created.)
•Sine...
(Sine wave data will be created.)
If you select a choice other than Disk Garbage, the actual sound data will
simply be created as an image in memory, meaning that the data will not be
saved as a sound file until you execute the [File] menu command [Save
As...].
If you have selected Square, Sawtooth, Triangle, or Sine, you can specify
the Amplitude and Frequency.
*Please be aware that playing back high volume full-scale data or data of
extremely low frequencies below 20 Hertz may damage your ears and/or any
speakers or headphones that are connected. Please use with caution.
*If your Macintosh has a 68K CPU, sawtooth wave, triangle wave, and sine
wave display will become extremely slow. In such cases, execute the [New]
command, and then save the newly created sound data to hard disk before
using it.
5.2. Open...
Opens a sound file that is compatible with TWE, and displays it in a
Waveform Window. TWE can open AIFF, Sound Designer II(Sd2f), and normal (PCM
type) WAVE format files.
5.3. Close
Closes the Waveform Window.
If the edited content has not been saved, you will be asked whether or not
you wish to save. Select one of the following choices.
- 2 -

[Save]
Save the edited content and close the Waveform Window.
[Don't Save]
Close the Waveform Window without saving the edited content. Your edits will
be lost.
[Cancel]
The Waveform Window will not be closed, nor will the edited content be
saved.
5.4. Save
Saves the edited sound data by overwriting it onto the original sound file.
5.5. Save As...
Saves the edited sound data as a new file of a different name. In this
dialog box you can also specify a different format (AIFF, Sd2f, or WAVE) for
saving.
5.6. Revert
Returns the edited content to the state which was last saved. Your edits up
to that point will be lost.
*It is not possible to Undo (cancel) this operation.
5.7. Resample...
This command converts the sampling frequency of the sound data.
A FIR filter is used for the conversion. The characteristics of this FIR
filter can be set by three parameters: FIR Order, Rejection, and Sampling
Rate.
<FIR Order>
Specify the coefficient of the FIR filter which will be used for the
conversion. The higher this value, the better the quality will be, but a
longer time will be required for processing.
<Rejection(dB)>
Specify the ratio at which aliasing noise will be canceled. As this value is
- 3 -

raised, the noise produced during conversion will decrease, but the high
frequency range will be cut.
<Sampling Rate>
Specify the sampling frequency after conversion. The available range is
11,000Hz-64,000Hz.
5.8. Convert Bit Size ...
This command converts the sample size (number of bits) of the sound data.
5.9. Add Channel...
This command adds a silent channel to the currently open sound data. If you
execute the [Add Channel...] command on monaural data, it will become stereo
data with one side of silence.
5.10. Delete Channel...
This command deletes the specified channel from multi-channel sound data. If
you execute the [Delete Channel...] command on stereo data, it will become
monaural data.
5.11. Swap Channels...
This command exchanges the waveforms of two specified channels within multi-
channel sound data.
5.12. Import From Sampler...
When an external Yamaha sampler (A3000/4000/5000, EX5/5R/7) is connected via
SCSI, this command loads sound data from the sampler into TWE.
*If you are using an A3000/4000/5000, you must first select MIDI function in
Utility mode, and turn off the Bulk Dump Protect setting.
* If you are using an EX5/5R/7, only those samples which are stored in DRAM
can be transmitted to TWE. Samples stored in FLASH cannot be transmitted. If
you wish to transmit samples stored in FLASH to TWE, you must execute the
Copy Sample function on the EX to copy the desired sample from FLASH to
DRAM, and then execute TWE's [Import From Sampler...] command.
- 4 -

5.13. Export To Sampler...
When an external Yamaha sampler (A3000/4000/5000, EX5/5R7) is connected via
SCSI, this command transmits sound data to the sampler.
*If you are using an A3000/4000/5000, you must first select MIDI function in
Utility mode, and turn off the Bulk Dump Protect setting.
*Many of the sound parameters associated with the waveform data of a sampler
will be lost when the sample is imported into TWE. This means that after a
sound data file which was imported from a sampler to TWE is once again
exported back to the sampler, the sound parameters and various other
settings may have changed. Also, parameters such as the sample size may also
be converted as appropriate for that sampler when they are exported.
5.14. Load Preferences...
This command lets you select any previously saved Preference file, and load
its settings into TWE.
Preference data includes settings such as the color scheme of TWE's windows
and the shortcut key settings, which you are free to set as desired using
the [Options] menu command [Preferences...]. (Refer to "8.3.
Preferences...")
These Preference settings can then be saved using the [File] menu command
[Save Preferences As...] (see below), as a Preference file that is separate
from the sound files.
*Unless you execute the [Load Preferences...] command, the previously used
Preference data will be loaded when TWE is started up. When you exit TWE,
the Preference data at that point will be preserved.
*You can also load the settings of a Preference file into TWE by double-
clicking the desired Preference file.
5.15. Save Preferences As...
This command saves TWE's current Preference data as a Preference file. The
Preference file that you save can be loaded into TWE by the above-described
[Load Preferences...] command.
- 5 -

5.16. Page Setup...
This command opens the standard Macintosh page setup dialog box, allowing
you to specify the page setup settings that will be used when you use the
[Print...] command (see below).
5.17. Print...
This command lets you make a hard copy (printout) of the currently active
Waveform Window.
5.18. Quit
This command closes all currently open Waveform Windows, and exits TWE.
[6. Edit menu]
This version of TWE performs all editing operations non-destructively. This
means that until you execute the [File] menu command [Save] to overwrite the
previous data, the previously saved sound file will not be rewritten.
This lets you edit data safely, but has the drawback that a large capacity
disk is required. Make sure that you specify a disk with sufficient capacity
as the Working Directory. (For details on the Working Directory, refer to
"8.2. Select Working Dir...")
6.1. Undo (or Redo)
The [Undo] command restores the data to the state in which it was before the
previous editing operation. After Undo has been executed, the [Undo] command
in the [Edit] menu will change to [Redo]. The [Redo] command will bring back
the edited data which had been canceled by Undo.
6.2. Cut
This command cuts the region that is currently selected in the waveform
display, and copies it to the TWE clipboard. The data following the region
which was cut will slide forward.
In the case of sound data with two or more channels, the [Cut] command can
be executed only if the selected region includes all channels.
- 6 -

6.3. Copy
This command copies the region currently selected in the waveform display to
the TWE clipboard.
6.4. Paste
This command pastes the waveform which was copied to the TWE clipboard,
starting at the specified point in the waveform display.
If waveform data already exists at the paste destination, the original data
will be overwritten and replaced by the newly pasted data. If the
overwritten area extends beyond the end of the sound data, the sound data
will be extended by that amount.
Executing the [Paste] command will not affect the contents of the clipboard.
6.5. Insert
This command inserts the waveform which was copied to the TWE clipboard,
replacing the waveform of the region that was selected in the waveform
display. The portion of the waveform following the selected region will
slide backward to make room for the inserted data.
In the case of sound data with two or more channels, the [Insert] command
can be executed only if the selected region includes all channels.
Executing the [Insert] command will not affect the contents of the
clipboard.
6.6. Clear
This command deletes the waveform in the region selected in the waveform
display. The portion following the deleted area will slide forward.
Unlike the [Cut] command, the deleted waveform will not be copied to the TWE
clipboard.
In the case of sound data of two or more channels, the [Clear] command can
be executed only if the selected region includes all channels.
6.7. Select All
This command selects the entire length (from the beginning to the end) of
the channel(s) in which a region is currently selected in the waveform
display.
- 7 -

6.8. Trim
This command leaves only the waveform in the selected region, and deletes
the portions of the waveform which lie before and after the selected region.
In the case of sound data with two or more channels, the [Trim] command can
be executed only if the selected region includes all channels.
*The deleted portion of the waveform will not be copied to the TWE
clipboard.
6.9. Mix
This command pastes the waveform which was copied to the TWE clipboard,
starting at the specified location in the waveform display.
Unlike the [Paste] command, the original data will be mixed with the pasted
data if the destination already contains waveform data.
The following four sub-menus are available.
<Add Over>
The waveform in the clipboard will simply be added onto the existing
waveform.
<Average>
After the processing of Add Over has been performed, the amplitude (volume)
of the mixed portion of the waveform will be halved.
<Normalize>
After the processing of Add Over has been performed, Normalize (100%) will
be executed on the mixed portion of the waveform. (For details on Normalize,
refer to "6.19. Normalize...")
<Crossfade>
A crossfade will be created by fading out the existing waveform and fading
in the waveform data pasted from the clipboard.
If the end of the waveform data pasted from the clipboard lies beyond the
end of the existing waveform, only the mixed portion will be crossfaded, and
for the portion that lies beyond this, the waveform from the clipboard will
simply be pasted without change.
Executing the [Mix] command will not affect the contents of the clipboard.
6.10. Reverse
- 8 -

This command flips the selected region of the waveform from left to right.
6.11. Invert
This command inverts (up/down) the selected region of the waveform.
6.12. Fade In
This command fades-in the selected region of the waveform (i.e., gradually
raises the volume from zero).
6.13. Fade Out
This command fades-out the selected region of the waveform (i.e., gradually
lowers the volume to zero).
6.14. Loop Crossfade...
If unwanted noise (click noise) occurs during loop playback at the boundary
between the loop end and beginning, this command can be used to rewrite the
waveform in the area near the end of the loop, to smooth the transition.
Normally you will select Sustain type. In this case, the waveform
- 9 -

immediately before the end of the loop region will be crossfaded and
rewritten. If you select Sustain + Release type, the waveform immediately
before and after the end of the loop region will be crossfaded and
rewritten.
*If you have imported sound data which had an A3000 Loop Mode setting of
"Forward loop, Exit at Note-Off", select the Sustain + Release type.
Higher values for Sustain and Release will lengthen the area which will be
crossfaded and rewritten, causing the loop playback to be smoother.
6.15. EQ…
This command applies equalization to the selected region of the waveform.
This is a parametric equalizer in which you can set each of five frequency
bands to a specified type of filter, gain (Gain), frequency (Freq), and Q.
Each band can be turned off without erasing its parameters.
By default, all five bands are set as a presence filter, but by selecting
from the popup menu, you can also specify a shelving filter.
* A presence filter (displayed as Presence in the menu) is a type of filter
that boosts or cuts the level of a band centered at a specific frequency,
thus creating a peak-shaped or valley-shaped curve in the frequency
response.
* A shelving filter (displayed as LSF or HSF in the menu) is a type of
filter that boosts or cuts the entire frequency region above (HSF) or below
(LSF) a specific frequency, thus creating a shelf-shaped curve in the
frequency response.
The parameters (Gain, Freq, Q) provided for each of the five bands have the
following functions.
<Gain>
This sets the amount in decibels (dB) by which the frequency region
specified by Freq will be boosted or cut.
<Freq>
In the case of a presence filter, this specifies the center frequency of the
region whose signal level will be boosted or cut. In the case of a shelving
filter, this specifies the boundary between the frequency region that will
be boosted or cut and the unaffected frequency region.
<Q>
- 10 -

In the case of a presence filter, this specifies the steepness of the peak
or valley that is produced by boosting or cutting the signal level of the
specified region. Higher values of Q will produce a sharper curve. In the
case of a shelving filter, this parameter is not available.
You can click on each value to select it, and type in a numeric value from
the keyboard of your computer. Alternatively, you can click on the buttons
for Band1 through Band5, and drag the curve of the displayed graph to modify
the Gain and Freq of each band.
If the [OFF] button is checked for a band, equalization will not be applied
to that band.
If you are using a Power Macintosh, you can click the speaker button so that
the sound will be played back with equalization applied. If [Loop] is
checked, the data in the selected region of the waveform display will be
played back repeatedly with equalization applied. At this time if [Bypass
EQ] is checked, the un-equalized, original data will be played back. To stop
playback, click the speaker button once again.
* If your Macintosh has a 68K CPU, these buttons will not be displayed.
Clicking [Revert] will return all values to the settings that were in effect
when the dialog box was opened.
Clicking [Reset] will return all values to the default settings.
When you click [OK], equalization processing will be performed on the data
in the selected region of the waveform display. To cancel equalization
processing, click [Cancel].
6.16. Time Comp / Exp …
This command modifies only the length of the selected region of the
waveform, without affecting its pitch.
To change the length, you can drag the slider to left or right, or input a
value in the percentage box, or type a number of samples or a time into the
Modified box.
If the sound data contains two or more channels, this [Time Comp/Exp…]
command can be executed only if the selected region includes all channels.
6.17. Pitch Shift…
This command modifies only the pitch of the selected region of the waveform,
without modifying its length.
To change the pitch, you can drag the slider to left or right, or type a
value into the Rate (%) or Cent boxes.
- 11 -

6.18. Gain...
This command modifies the overall amplitude (volume) of the selected region
of the waveform. To change the amplitude (volume), drag the Rate slider to
left or right, or type a numeric value into the box.
6.19. Normalize...
This command expands/reduces the amplitude so that the peak values within
the selected region of the waveform will be the specified ratio of the upper
limit.
After this is executed, the Gain value relative to the original data will be
displayed.
6.20. Silence
This command converts the selected region of the waveform to silence.
6.21. DC Offset...
This command modifies or eliminates any DC (direct current) portion of the
selected region of the sound data. The same value will be added to all
samples in the selected region.
If you select Auto Elimination, the average value of all samples in the
- 12 -

selected region will be calculated, and the inverse of this value will be
added to each sample. After this command has been executed, the value that
was actually added will be displayed.
If you select Specify Offset Value, the value that you specify will be added
to each sample in the selected range.
*If you play back data that includes a significant direct current portion,
your speakers or headphones may be damaged. Please use appropriate caution.
[7. View menu]
7.1. Go to
Specifies the portion of the sound data that will be shown in the waveform
display.
<Top>
Display the beginning of the sound data.
<End>
Display the end of the sound data.
<Selection Top>
Display the beginning of the selected region.
<Selection End>
Display the end of the selected region.
<Loop Top>
Display the beginning of the loop region.
<Loop End>
Display the end of the loop region.
<Play Location>
Display the playback start location.
7.2. Zoom
Modifies the resolution of the waveform display.
<Vertical Full Zoom In>
- 13 -

Maximize the vertical display resolution.
<Vertical Full Zoom Out>
Minimize the vertical display resolution.
<Horizontal Full Zoom In>
Maximize the horizontal display resolution.
<Horizontal Full Zoom Out>
Minimize the horizontal display resolution.
<Fit To Selection>
Change the resolution so that the selected region fits within the waveform
display.
<Fit To Loop>
Change the resolution so that the loop region fits within the waveform
display.
<Previous Zoom>
Return to the previous resolution setting.
7.3. Selection
<Select Loop>
Select the currently specified loop region as the selected region.
<Selection to Loop>
Specify the currently selected region as the loop region.
7.4. Auto Snap
When the start/end points of the selected region or loop region are newly
set or changed in the waveform display, Auto Snap will automatically move
these start/end points to the nearest sample location of the specified
level. Three types of Auto Snap setting can be selected.
<None>
Auto Snap will not occur.
<Zero Cross>
The start/end point will be moved to a zero-cross point (a point where the
level intersects the center line of the waveform display).
- 14 -

<Level>
If either the start point or the end point are changed to a location that is
near the level of the other point (the existing end point or start point),
the newly set point will be moved to a location of a matching level. If both
points are newly set, the end point will be moved to the level of the start
point.
* The start point and end point will always move toward the inside of the
region.
* If two or more channels are selected, the points will be moved according
to the data of the upper channel.
* The range of the adjustment performed by Auto Snap will not exceed five
seconds for either the start point or end point.
* With the default settings, Auto Snap will match the upward/downward level
slope of the start point and end point, but you can make settings in the
"Preferences…" dialog box so that this will be ignored. For details refer to
"8.3.3. Others."
7.5. Hide (or Show) File/Device Info
Toggle the file information display and device information display between
hidden and visible.
7.6. Hide (or Show) Waveform
Toggle the waveform in the waveform display between hidden and visible.
7.7. Hide (or Show) Overview
Toggle the overall waveform display between hidden and visible.
7.8. Time Ruler
Select whether the time axis (horizontal) of the waveform display will be
displayed in the specified units or will be hidden.
<Hide>
Hide the time axis.
- 15 -

<Time>
The time axis will be in units of time.
<Samples>
The time axis will be in units of samples.
7.9. Level Ruler
Select whether the amplitude axis located at the left of the waveform
display will be displayed in the specified units or will be hidden.
<Hide>
Hide the amplitude axis.
<Percent>
The amplitude axis will be in percentage units.
<dB>
The amplitude axis will be in decibel units.
<Value>
The amplitude axis will be in units of actual data values (hexadecimal).
7.10. Scroll During Playback
This specifies whether or not the waveform display will scroll during
playback of sound data. If you want the waveform display to scroll, select
and check [Scroll During Playback].
7.11. Connect Dots
When the waveform display is magnified, specify whether or not the "dots"
which indicate individual samples in the waveform will be connected by a
line.
7.12. Waveform Scanning
Specify how the waveform will be scanned in order to create waveform display
data.
<Full Speed Scanning>
Portions which have not been scanned will be scanned at maximum speed.
- 16 -

<Stop (or Start) Background Scanning>
Specify whether to stop/start scanning of data that is being performed in
the background.
<Refresh All>
All data will be rescanned, including the portion for which scanning has
already been completed.
[8. Options menu]
8.1. Rescan SCSI
This command causes TWE to re-detect the devices connected to the SCSI bus.
8.2. Select Working Dir...
TWE temporarily creates working files in a directory, and you can use this
command to change the directory.
*If for some reason TWE terminates with an error, the working files will
remain. You may delete these or reuse them as necessary. (It may be possible
to open the files using TWE.)
*When changing the directory in which working files will be created, please
select a hard disk which contains sufficient free area and has a fast access
time. (For example, in order to create an Undo sound file when the entire
waveform has been edited, the Undo sound file will occupy the same amount of
space as the original sound file, meaning that you would need at least twice
the size of the original sound file.)
8.3. Preferences…
The Preferences dialog box will open, allowing you to specify the desired
Colors (of screen components), Shortcuts (shortcut key settings), and Others
(other settings).
Click the Colors, Shortcuts, or Others tabs located at the top of the dialog
box to select the desired panel.
Changes you make in the dialog box will take effect only when you click the
[OK] button. If you click the [Cancel], all changes you made in the dialog
box (including changes made in other panels) will be canceled.
If you click the [Initial Settings] button, the contents of the currently
- 17 -

displayed tab panel will return to their default settings. If you click the
[Revert Panel] button, the contents of the currently displayed tab panel
will return to the settings that were in effect when the dialog box was
opened.
8.3.1. Colors
Specify the colors of TWE window components shown below.
<Waveform Colors>
•Usual...
Normal color scheme for the waveform display area (Fore is the color of the
waveform / Back is the background color)
•Selected...
Color scheme for the selected range in the waveform display (Fore is the
waveform color / Back is the background color)
•Scanning...
The color for the portion of the waveform display for which scanning has not
yet been completed.
•Hidden...
The waveform display color used when the [View] menu command [Hide Waveform]
is executed.
•Outside...
The color of the outline of the waveform display.
•Center line...
The color of the center line of the waveform.
•Ch. Border...
The color of the channel boundary line.
•Ruler...
The color scheme of the time axis (Time Ruler) and amplitude axis (Level
Ruler). (Fore is the color of the markings / Back is the background color)
•Cursor...
In the waveform display area, the color of the cursor line which indicates
the Play Location.
•Loop mark...
The color of the loop region in the waveform display.
- 18 -

<Window Colors>
•Tag...
The background color of the Tag Window
•Transport...
The background color of the Transport Window
•Waveform...
The background color of the Waveform Window.
•Dialog box...
The background color of the various dialog boxes.
<Overview Colors>
•Fore/Back...
The color scheme of the overall waveform display (Fore is the waveform color
/ Back is the background color).
•Finder...
The color of the Finder (The rectangle that indicates the portion currently
shown in the waveform display).
*The Cursor, Loop mark, and Finder colors will be the colors that are
respectively specified for the waveform background. The color of the portion
which overlaps with the waveform cannot be specified directly, so try
various different settings.
8.3.2. Shortcuts
Here you can make shortcut key settings.
Click the [Key] field to select the action for which you wish to specify a
shortcut key, and then type the desired key on the keyboard of your
computer. At this time, if the Command key, Option key, Control key or Shift
key are pressed, the corresponding checkbox will be checked.
To cancel a setting, click the [Key] field for the action that you wish to
cancel, and then click the [Clear] button.
By clicking the panel buttons [Action], [Cmd], [Opt], [Ctrl], [Shft], or
[Key], you can rearrange all of the action items in the order in which the
buttons were pressed. If at this time you hold down the Option key as you
click, the items will be ordered in reverse.
If the same key is assigned to a different action, that line will be
displayed in red, and until you change this to a different key, it will not
be possible to press the [OK] button or to move to a different panel.
*It is not possible to change the settings of the common Macintosh
shortcuts, such as the [File] menu commands [Open] or [Close].
- 19 -

*Pressing the return key or the enter key in the Colors or Others panels
will execute [Cancel], but when the Shortcuts panel is open, pressing the
return key or the enter key will specify these keys as the shortcut key for
the currently selected action. Please use caution.
8.3.3. Others
Here you can make various other settings.
<Startup command>
Specify the command that will be executed when TWE is first started up. If
you select None, no command will be executed.
<Waveform window>
•Draw mode...
Select the drawing mode for the waveform. In order of Speedy - Smooth - Very
smooth, there will be less flicker when the waveform is drawn, but the
drawing speed will be slower.
•Waveform margin...
Specify the width of the margin on all sides of the waveform in the waveform
display, as the number of pixels.
Horizontal specifies the margin at the beginning and end of the waveform,
and Vertical specifies the upper and lower margins.
If you set these margins appropriately, it will be easier to select from the
beginning of the waveform using the mouse, and easier to check whether the
waveform extends to the maximum amplitude.
•Initial status
Specify the default state when a Waveform window is opened.
•Close on suspend...
If this is checked, all Waveform windows will disappear when you switch from
TWE to another application. When you switch back to TWE, the Waveform
windows will reappear.
•Active scrolling...
If this is checked, the display will be updated in realtime when you drag
the scroll bar indicator. On slower computers, the scroll bar will respond
better if you uncheck this item.
•Coarse waveform during playback...
If this is checked, the waveform display during playback when the [View]
menu item [Scroll during playback] is on will become approximate (i.e.,
rougher), and the recording and playback performance will become
- 20 -

correspondingly better. On fast computers you will want to uncheck this
item, and check it on slower computers.
•Up/Down sensitive Auto Snap
If this is checked, Auto Snap will be performed so that the upward/downward
level slope of the start and end points will match (unless the View menu
item Auto Snap is set to "None"). If this is not checked, the start or end
point will be adjusted to a location where the level matches, regardless of
the upward/downward level slope at that point.
•Full scan on open...
If this is checked, opening a sound file will first cause all data to be
scanned in order to create waveform display data. Editing operations will
not be possible until data scan is completed or the [Abort] button is used
to abort the operation.
*Even if you click the [Abort] during data scan, the remainder of the
operation will be continued in the background.
*If this is not checked, data scan will be carried on in the background.
•Full scan after editing...
If this is checked, all data will be scanned after each editing operation to
create waveform display data. Editing operations will not be possible until
data scan is completed or the [Abort] button is used to abort the operation.
*Even if you click the [Abort] during data scan, the remainder of the
operation will be continued in the background.
*If this is not checked, data scan will be carried on in the background.
[9. Window menu]
9.1. Hide (or Show) Tag Window
This toggles the Tag window between visible and hidden.
9.2. Hide (or Show) Transport
This toggles the Transport window between visible and hidden.
- 21 -

9.3. Cascade
All Waveform windows will be displayed in overlapping "stair-step" fashion.
9.4. Tile Horizontally
All Waveform windows will be shown side by side.
9.5. Tile Vertically
All Waveform windows will be shown stacked vertically
9.6. Next Window
This cycles through the currently open Waveform windows, making each one
active in turn.
9.7. Close All
This closes all Waveform windows.
9.8. (Select Window)
The names of the currently open windows are shown at the bottom of the
[Window] menu, and you can select any of these to make it the active window.
- continues to 3/3 -
- 22 -

YAMAHA Wave Editor TWE
Version 2.2.0
for Macintosh
Owner's manual (3/3)
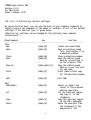
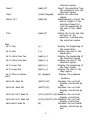
[10. List of shortcut key default settings]
By using shortcut keys, you can use the keys of your computer keyboard to
rapidly execute the commands of the menus or toolbars. A list of the default
settings of the shortcut keys is given below.
(Shortcut key settings can be changed by the [Options] menu command
[Preferences].)
Menu/Command Key Function
---------------------------------------------------------------------------
File
New [cmd]+[N] Create new sound data.
Open [cmd]+[O] Open an existing sound
file, and display it in
a Waveform window.
Close [cmd]+[W] Close a Waveform window.
Save [cmd]+[S] Save the edited sound
data by overwriting it
on the original file.
Save As [cmd]+[opt]+[S] Save the edited sound
data as a new file with
its own name.
Print [cmd]+[P] Print (make a hard copy
of) the Waveform window
Quit [cmd]+[Q] Exit TWE.
Edit
Undo(Redo) [cmd]+[Z] Cancel (or Redo) the
result of the previous
editing operation.
Cut [cmd]+[X] Cut the selected region,
and copy it to the
clipboard.
Copy [cmd]+[C] Copy the selected region
to the TWE clipboard.
Paste [cmd]+[V] Paste the waveform from
the clipboard to the
beginning of the
- 1 -

selected region.
Insert [cmd]+[I] Insert the waveform from
the clipboard into the
selected region.
Clear [clear](keypad) Delete the selected
region.
Select All [cmd]+[A] Simultaneously select the
entire length of the
selected channel(s),
from the beginning to
the end of the sound
file.
Trim [cmd]+[T] Delete the first and last
portions of the
waveform, leaving only
the selected region.
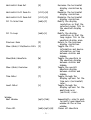
View
Go To Top [<-] Display the beginning of
the sound data.
Go To End [->] Display the end of the
sound data.
Go To Selection Top [cmd]+[<-] Display the beginning of
the selected region.
Go To Selection End [cmd]+[->] Display the end of the
selected region.
Go To Loop Top [opt]+[<-] Display the beginning of
the loop region.
Go To Loop End [opt]+[->] Display the end of the
loop region.
Go To Play Location [5] (keypad) Display the playback
start
location.
Vertical Zoom In [shift]+[H] Increase the vertical
display resolution by
one.
Vertical Zoom Out [shift]+[G] Decrease the vertical
display resolution by
one.
Vertical Full Zoom In [ctrl]+[shift]+[H] Maximize the vertical
display resolution.
Vertical Full Zoom Out [ctrl]+[shift]+[G] Minimize the vertical
display resolution.
Horizontal Zoom In [H] Increase the horizontal
display resolution by
one.
- 2 -

Horizontal Zoom Out [G] Decrease the horizontal
display resolution by
one.
Horizontal Full Zoom In [ctrl]+[H] Maximize the horizontal
display resolution.
Horizontal Full Zoom Out [ctrl]+[G] Minimize the horizontal
display resolution.
Fit To Selection [cmd]+[F] Modify the display
resolution so that the
selected region fits in
the waveform display
area.
Fit To Loop [cmd]+[L] Modify the display
resolution so that the
loop region fits in the
waveform display area.
Previous Zoom [Z] Return to the previous
display resolution.
Show (Hide) File/Device Info [I] Toggle the file
information and device
information section
between visible and
hidden.
Show(Hide) Waveform [W] Toggle the waveform in
the waveform display
between visible and
hidden.
Show (Hide) Overview [O] Toggle the overall
waveform display
between visible and
hidden.
Time Ruler [T] Toggle through the
display options for the
time axis (horizontal)
ruler.
Level Ruler [L] Toggle through the
display options for the
amplitude axis
(vertical) ruler.
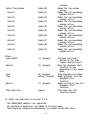
Window
Next Window [opt]+[tab] Sequentially selects each
currently open Waveform
window as the active
window.
Close All [cmd]+[opt]+[W] Closes all Waveform
- 3 -

windows.
Select Tag Window [cmd]+[0] Makes the Tag window
active.
(Select) [cmd]+[1] Makes the corresponding
window active.
(Select) [cmd]+[2] Makes the corresponding
window active.
(Select) [cmd]+[3] Makes the corresponding
window active.
(Select) [cmd]+[4] Makes the corresponding
window active.
(Select) [cmd]+[5] Makes the corresponding
window active.
(Select) [cmd]+[6] Makes the corresponding
window active.
(Select) [cmd]+[7] Makes the corresponding
window active.
(Select) [cmd]+[8] Makes the corresponding
window active.
(Select) [cmd]+[9] Makes the corresponding
window active.
Others
Loop ON/OFF [/] (keypad) Switches the [Loop]
button of the loop
region display on/off.
Rewind [1] (keypad) Move the playback start
location to the
beginning of the sound
data.
Stop [0] (keypad) Stop playback/recording.
Play [enter] (keypad) Begin playback from the
playback start
location.
Record [*] (keypad) Begin recording from the
playback start
location.
Play Selection [space] Play back only the
selected region.
11. Major new functions in version 2.2.0
- The A4000/5000 samplers are supported.
- EQ (parametric equalizer) was added to the Edit menu.
- Time Comp/Exp (Compression/Expansion) was added to the Edit menu.
- 4 -

- Pitch Shift was added to the Edit menu.
- Auto Snap was added to the View menu.
- Cascade, Tile Horizontally, and Tile Vertically were added to the Window
menu.
- Initial Status and other items were added to Others in the Preferences
menu.
- Buttons were added to allow the play location to be set as the start point
/ end point of the selection or loop..
- The Option key can now be used to display a cross-shaped cursor in the
waveform display area.
- A status bar display has been added.
- Waveform display and waveform selection have been speeded up.
- Background scanning of the waveform has been speeded up.
- End -
- 5 -
-
 1
1
-
 2
2
-
 3
3
-
 4
4
-
 5
5
-
 6
6
-
 7
7
-
 8
8
-
 9
9
-
 10
10
-
 11
11
-
 12
12
-
 13
13
-
 14
14
-
 15
15
-
 16
16
-
 17
17
-
 18
18
-
 19
19
-
 20
20
-
 21
21
-
 22
22
-
 23
23
-
 24
24
-
 25
25
-
 26
26
-
 27
27
-
 28
28
-
 29
29
-
 30
30
-
 31
31
-
 32
32
-
 33
33
-
 34
34
-
 35
35
-
 36
36
-
 37
37
-
 38
38
-
 39
39
-
 40
40
-
 41
41


Yamaha A3000 de handleiding
- Categorie
- Software
- Type
- de handleiding