
Copyright © 2022 Vetus b.v. Schiedam Holland
Energieverbruiksmeter
Battery monitor
Energieverbrauchsmesser
Indicateur de consommation d’énergie
Medidor de consumo de energía
Indicatore di consumo d’energia
BATMONB
Installatie- en gebruikershandleiding
Installation and user manual
Installations- und Benutzerhandbuch
Manuel d’Installation et d’utilisation
Manual de instalación y usuario
Manuale d'installazione e d'uso

2 090433.01 Battery Monitor
Inhoud Content Inhalt
1 Inleiding ..................................... 4
1.1 Toelichting gebruikte
tekst opmaak ........................... 4
2 Installatie .................................. 4
2.1 Meetinstrument ................... 4
2.2 Shunt, converter en
hoofdstroomkabels ........... 4
2.3 Aansluiten ................................. 5
3 Instellen ..................................... 6
3.1 Controle aansluitingen
shunt op converter ............ 6
3.2 Accucapaciteit ....................... 6
3.3 Shunt ............................................. 7
3.4 Kalibreren .................................. 8
3.5 Ladingstoestand .................. 8
3.6 Instellen alarmen................. 8
4 Bediening ................................. 9
4.1 Instellen
schaalverlichting ................. 9
4.2 Alarmen ...................................... 9
5 Storingen ............................... 10
6 Technische gegevens .. 11
1 Introduction ........................ 12
1.1 Explanation used text
formatting .............................. 12
2 Installation ........................... 12
2.1 Meter .......................................... 12
2.2 Shunt, converter and
main battery cables ....... 12
2.3 Connections ......................... 13
3 Set-up ........................................ 14
3.1 Checking connections
shunt to converter .......... 14
3.2 Battery capacity................. 14
3.3 Shunt .......................................... 15
3.4 Calibration ............................. 16
3.5 Charge condition ............. 16
3.6 Setting alarms ..................... 16
4 Operating .............................. 17
4.1 Setting dial
illumination........................... 17
4.2 Alarms ....................................... 17
5 Trouble shooting ............ 18
6 Technical data .................... 19
1 Einleitung .............................. 20
1.1 Erklärung der
Textformate........................... 20
2 Montage ................................. 20
2.1 Meter .......................................... 20
2.2 Shunt, Konverter und
Haupt Batterie Kabel ..... 20
2.3 Verbindungen ..................... 21
3 Konguration ..................... 22
3.1 Prüfung der
Verbindungen zwischen
Shunt und Konverter .... 22
3.2 Batteriekapazität .............. 22
3.3 Shunt .......................................... 23
3.4 Eichung .................................... 24
3.5 Ladezustand ......................... 24
3.6 Alarme einstellen ............. 24
4 Betrieb ...................................... 25
4.1 Einstellung der
Beleuchtung ......................... 25
4.2 Alarme ....................................... 25
5 Fehlerbehebung.............. 26
6 Technische Daten ........... 27
7 Hoofdafmetingen ............52 7 Overall dimensions .........52
7 Hauptmaße ............................ 52

090433.01 3
Battery Monitor
Sommaire Índice Indice
1 Introduction ........................ 28
1.1 Explication du formatage
du texte. ................................... 28
2 Installation ........................... 28
2.1 Appareil de mesure ........ 28
2.2 Shunt, convertisseur et
câbles principaux de
batterie. .................................... 28
2.3 Connections ......................... 29
3 Installation ........................... 30
3.1 Vérication des
connections du shunt au
convertisseur. ...................... 30
3.2 Capacité de batterie ...... 30
3.3 Shunt .......................................... 31
3.4 Calibrage ................................. 32
3.5 Conditions de charge ... 32
3.6 Mettre les Alarmes .......... 32
4 Utilisations............................ 33
4.1 Illumination de cadran 33
4.2 Alarmes .................................... 33
5 Dépannage........................... 34
6 Info Technique................... 35
1 Introducción........................ 36
1.1 Explicación utilizando
formato de texto ............. 36
2 Instalación ............................ 36
2.1 Contador ................................. 36
2.2 Derivación, convertidor
y principales cables de la
batería ....................................... 36
2.3 Conexiones............................ 37
3 Set-up ........................................ 38
3.1 Compruebe las
conexiones de derivación
al convertidor ...................... 38
3.2 Capacidad de la
batería ....................................... 38
3.3 Derivación .............................. 39
3.4 Calibración ............................. 40
3.5 Condiciones de carga ... 40
3.6 Ajuste de las alarmas .... 40
4 Operación .............................. 41
4.1 Dial de ajuste de la
iluminación ........................... 41
4.2 Alarmas..................................... 41
5 Solución de problemas 42
6 Datos técnicos ................... 43
1 Introduzione ....................... 44
1.1 Spiegazione
formattazione di testo
utilizzata .................................. 44
2 Installazione ........................ 44
2.1 Misuratore .............................. 44
2.2 Cavi shunt, convertitore e
alimentazione batteria 44
2.3 Collegamenti ....................... 45
3 Congurazione
................ 46
3.1 Vericare i collegamenti
shunt a convertitore ...... 46
3.2 Capacità della batteria . 46
3.3 Shunt .......................................... 47
3.4 Calibrazione .......................... 48
3.5 Condizione di carica ...... 48
3.6 Impostare gli allarmi ..... 48
4 Operatività ........................... 49
4.1 Impostare illuminazione
quadrante ............................... 49
4.2 Allarmi ....................................... 49
5 Risoluzione dei
problemi ................................. 50
6 Dati tecnici ............................ 51
7 Dimensions pricipales..52
7 Dimensiones
generales .................................52
7 Misure principali ...............52

4 090433.01 Battery Monitor
1 Inleiding
Met de VETUS energieverbruikmeter
kan onder andere de ladingstoestand
van de accu bepaald worden en kan,
tijdens het ontladen, de tijd gemeten
worden die nog resteert voor de accu
volledig ontladen zal zijn.
De volgende functies kunnen worden
afgelezen:
- de ladingstoestand van de accu
- de laad- of ontlaadstroom
- de spanning
- de tijdsduur tot de accu volledig ont-
laden zal zijn
Tevens kunnen een aantal alarmen wor-
den ingesteld.
De energieverbruikmeter kan zowel op
een 12 Volt systeem als op een 24 Volt
systeem worden aangesloten, met min
aan massa of massavrij (2-polig).
1.1 Toelichting gebruikte tekst-
opmaak
'Tekst' : Verwijzing naar informatie op
aparte blad.
Tekst : Tekst zoals afgebeeld op het
uitleesscherm.
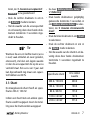
2 Installatie
2.1 Meetinstrument
• Klik de afwerkring op het meetinstru-
ment. Maak een gat in het paneel en
monteer het instrument.
2.2 Shunt, converter en hoofd-
stroomkabels
• Monteer de shunt in de nabijheid van
de accu of de accu’s.
• Plaats de converter zo dicht mogelijk
bij de shunt en houdt de aansluitdra-
den van shunt naar converter zo kort
mogelijk.
• Neem in de "+" kabel een zekering en
een hoofdschakelaar op.

090433.01 5
Battery Monitor
• Gebruik kabelschoenen om de ka-
bels aan de shunt, de zekering en de
schakelaar aan te sluiten. Breng deze
kabelschoenen bij voorkeur aan door
middel van persen (krimpen).
• Zet de bouten en moeren goed vast
om een goede verbinding te verkrij-
gen.
- Toe te passen kabeldoorsnede
Maximale laad-
of ontlaadstroom
Minimale door-
snede hoofd-
stroomkabel
70 A 10 mm2
100 A 16 mm2
140 A 25 mm2
185 A 35 mm2
230 A 50 mm2
WaarschuWing!
Grote stromen door te dunne draden
of overgangsweerstanden veroorzaakt
door slechte verbindingen kunnen er
toe leiden dat draden of verbindingen
zeer heet worden en brand kunnen
veroorzaken.
Let Op
De meegeleverde shuntweerstand is
geschikt voor een maximale stroom van
200 A.
Een stroom groter dan 200 A zal niet
correct worden gemeten.
2.3 Aansluiten
Raadpleeg de aansluitschema’s, op het
aparte blad, hoe de energieverbruikme-
ter kan worden aangesloten.
Voor 3 verschillende installaties zijn aan-
sluitschema’s gegeven:
1 Installatie met verbrandingsmotor
met 1 accu
2 Installatie met verbrandingsmotor
met 2 accu’s en een scheidingsdiode
3 Elektrische voortstuwingsinstallatie
Raadpleeg schema 4 indien een alarm-
zoemer moet worden aangesloten.
NEDERLANDS

6 090433.01 Battery Monitor
3 Instellen
Voordat het instrument gebruikt kan
worden, dient deze eerst ingesteld te
worden.
Wanneer het instrument eenmaal is
ingesteld, dient het instellen alleen op-
nieuw plaats te vinden wanneer de accu
of de shunt wordt vervangen.
Let Op
Op het aparte blad ‘Bediening en Instel-
ling’ staan alle uit te voeren handelin-
gen afgebeeld.
• Schakel de spanning in, hoofdschake-
laar en contactslot.
Na het inschakelen van de spanning
geeft de wijzer op het instrument de
ladingstoestand aan en in het uitlees-
scherm wordt de laad- of ontlaadstroom
aangegeven.
3.1 Controle aansluitingen
shunt op converter
Een laadstroom wordt positief weer-
gegeven (geen teken voor de stroom-
waarde).
Een ontlaadstroom wordt negatief
weergegeven (een "–" teken voor de
stroomwaarde)
Wanneer de polariteit van de stroom
niet correct wordt aangegeven, verwis-
sel dan de draden op de converter (3 en
4) die op de shunt zijn aangesloten.
• Gebruik de druktoetsen om andere
informatie in het uitleesscherm te to-
nen en om de instellingen uit te voe-
ren. Zie ‘Bediening en Instelling’ op
het aparte blad.
3.2 Accucapaciteit
• Ga naar Baery Monitor Setup zie
‘2 Bediening’.
• Druk beide druktoetsen gelijktijdig
gedurende tenminste 3 seconden in
om Baery Monitor Setup te selec-

090433.01 7
Battery Monitor
teren, zie ‘3 Invoeren accucapaciteit’.
Baery is nu geselecteerd
• Druk de rechter druktoets in om in
de Baery mode te komen.
• Stel de waarde van de accucapaciteit
in en bevestig deze door beide druk-
toetsen tenminste 3 seconden inge-
drukt te houden.
tip
Wanneer de accu in slechte staat is (accu
is oud, vaak ontladen en weer geladen,
enzovoort), stel dan een lagere waarde
in dan de accucapaciteit die op de accu
vermeld staat. Een accu van 3 jaar oud
kan bijvoorbeeld nog maar een capaci-
teit hebben van 80 %.
3.3 Shunt
De meegeleverde shunt heeft als speci-
catie: 200 A / 100 mV.
Indien een shunt met een andere speci-
catie wordt toegepast moet de instel-
ling voor de shunt worden aangepast
• Ga naar Baery Monitor Setup zie
‘2 Bediening’.
• Druk beide druktoetsen gelijktijdig
gedurende tenminste 3 seconden in
om Baery Monitor Setup te selec-
teren, zie ‘4 Invoeren stroomwaarde
shunt’.
• Druk de linker druktoets in om Shunt
te selecteren.
• Druk de rechter druktoets in om in
de Shunt mode te komen.
• Stel de waarde van de shunt in en be-
vestig deze door beide druktoetsen
tenminste 3 seconden ingedrukt te
houden.
Specicatie shunt In te stellen
waarde
200 A / 100 mV 200 A
100 A / 100 mV 100 A
80 A / 60 mV 133 A
100 A / 60 mV 167 A
200 A / 60 mV 333 A
NEDERLANDS

8 090433.01 Battery Monitor
3.4 Kalibreren
• Ga naar Current , zie ‘2 Bediening’.
• Sluit de aansluitingen 3 en 4 op de
converter kort.
• Kalibreer het instrument indien
stroom wordt aangegeven van meer
dan + of - 0,2 A.
• Druk beide druktoetsen gelijktijdig
gedurende tenminste 3 seconden in
om het instrument te kalibreren, zie
‘5 Kalibreren stroommeting’.
• Verwijder de kortsluiting en sluit de
converter weer op de shunt aan.
3.5 Ladingstoestand
Zorg ervoor dat de accu volledig gela-
den is.
• Ga naar Charge , zie ‘2 Bediening’.
• Druk beide druktoetsen gelijktijdig
gedurende tenminste 3 seconden in
om de ladingstoestand op 100 % in te
stellen, zie ‘6 Instellen 100% ladings-
toestand’.
3.6 Instellen alarmen
In het instrument kunnen 3 verschillen-
de alarmen ingesteld worden:
- te lage ladingstoestand van de accu:
standaard ingesteld op 20.0%
- te lage accuspanning:
standaard ingesteld op 10,0 V
- te hoge accuspanning:
standaard ingesteld op 30,0 V
• Volg de aanwijzingen bij ‘1 Samen-
vatting Bediening en Instelling’ om de
alarmen in te stellen.

090433.01 9
Battery Monitor
4 Bediening
Na het inschakelen van de spanning
geeft de wijzer op het instrument de
ladingstoestand aan en in het uitlees-
scherm wordt de laad- of ontlaadstroom
aangegeven.
• Druk de rechter druktoets herhaalde-
lijk in om de andere informatie in het
uitleesscherm weer te geven, zie het
aparte blad ‘Bediening en Instelling’.
De wijzer blijft altijd de laadtoestand
van de accu aangeven.
4.1 Instellen schaalverlichting
• Ga naar Dimmer Control zie ‘2 Be-
diening’.
• Verlaag de lichtsterkte door de linker
druktoets tenminste 3 seconden in-
gedrukt te houden.
• Verhoog de lichtsterkte door de rech-
ter druktoets tenminste 3 seconden
ingedrukt te houden.
Zie ‘7 Instellen schaalverlichting’.
4.2 Alarmen
Indien een alarmtoestand optreedt
wordt elke 30 seconden het alarmsym-
bool in de uitlezing weergegeven.
Er klinkt een hoorbaar alarm indien
een alarmzoemer is aangesloten. Druk
een van de toetsen in om het hoorbare
alarm uit te schakelen.
Zie 3.6 Instellen alarmen, voor instellen
van de alarmen.
NEDERLANDS

10 090433.01 Battery Monitor
5 Storingen
Probleem Mogelijke oorzaak Oplossing
Het minteken wordt bij de
laadstroom weergegeven
in plaats van bij de ont-
laadstroom.
Shuntweerstand en con-
verter zijn niet correct
aangesloten.
Verwissel de aansluitingen
van de shuntweerstand op
de converter (3 en 4), zie
3.1.
De waarde van de stroom
wordt niet goed weerge-
geven.
Kalibreren van het instru-
ment is noodzakelijk.
Kalibreer het instrument,
zie 3.4.
De ingevoerde waarde
voor de shunt is onjuist.
Voer de juiste waarde in,
zie 3.3.
De ladingstoestand van
de accu wordt niet correct
weergegeven.
De ingevoerde waarde
voor de accucapaciteit is
onjuist.
Voer de juiste waarde in,
zie 3.2.
De 100% ladingstoestand
is niet ingevoerd met een
100% geladen accu.
Voer de 100% ladingstoe-
stand correct in , zie 3.5.
Een alarm voor te lage
ladingstoestand van de
accu.
De ladingstoestand van
de accu is te laag.
Laad de accu op.
De ingevoerde waarde
voor het alarm is te hoog .
Stel een lagere waarde in,
zie 3.6.
Een alarm voor te lage ac-
cuspanning.
De spanning is te laag. Laad de accu op.
De ingevoerde waarde
voor het alarm is te hoog .
Stel een lagere waarde in,
zie 3.6.

090433.01 11
Battery Monitor
Probleem Mogelijke oorzaak Oplossing
Een alarm voor te hoge ac-
cuspanning.
De spanning is te hoog. Controleer de spannings-
regelaar van de dynamo
en/of de acculader.
De ingevoerde waarde
voor het alarm is te laag .
Stel een hogere waarde in,
zie 3.6.
6 Technische gegevens
Voedingsspanning : 12 .. 24 V gelijkspanning
Stroomverbruik,
exclusief schaalverlichting : 45 mA bij 12 V, 30 mA bij 24 V
schaalverlichting : 55 mA bij 12 V, 35 mA bij 24 V
Meegeleverde shunt : 200 A / 100 mV
Bescherming : IP66 (alleen de voorzijde van het instrument, na
het inbouwen)
Omgevingstemperatuur : 0 .. 50°C
Weergave Bereik Resolutie
Spanning : 9 .. 32,6 V 0,1 V
Stroom : -200 .. +200 A 0,5 A,
bij een 200 A / 100 V shunt
Accucapaciteit : 0 .. 100% 0,1% (digitaal)
Ontlaadtijd : 0 .. 999 uur 0,1 uur
NEDERLANDS

12 090433.01 Battery Monitor
1 Introduction
The Vetus battery monitor can be used
to measure the charge condition of the
battery and also, while discharging, the
time remaining before the battery will
be completely discharged.
The following functions can be read:
- the charge condition of the battery
- the charge or discharge current
- the voltage
- the time limit before the battery is
completely discharged.
A number of alarms can also be set.
The battery monitor can be connected
to both a 12 Volt and a 24 Volt system,
with negative earthed or earth free (2
pole).
1.1 Explanation used text for-
matting
‘Text’ : Reference to information on
separate sheet.
Text : Text in the display.
2 Installation
2.1 Meter
• Click the ring onto the meter. Make a
hole in the panel and t the meter.
2.2 Shunt, converter and main
battery cables
• Install the shunt near the battery or
batteries
• Place the converter as close as pos-
sible to the shunt and keep the con-
necting wires between shunt and
converter as short as possible.
• Fit a fuse and a main switch in the
positive "+" cable.
• Use cable terminals to connect the
cables to the shunt, the fuse and the
switch. Preferably t cable terminals
by crimping.
• Tighten bolts and nuts securely to en-
sure a good connection.

090433.01 13
Battery Monitor
ENGLISH
- Cable cross-section to be used
Maximum charge
or discharge
current
Minimum cross-
section battery
main cable
70 A 10 mm2 (AWG 8)
100 A 16 mm2 (AWG 6)
140 A
(135 A)
25 mm2
(AWG 4)
185 A
(180 A)
35 mm2
(AWG 2)
230 A
(210 A)
50 mm2
(AWG 1)
Warning!
Large currents through too thin wires
or contact resistances caused by poor
connections can lead to wires or plug
connections becoming very hot and
could cause a re.
nOte!
The shunt resistance supplied is suitable
for a maximum current of 200 A.
A current larger than 200 A will not be
measured correctly.
2.3 Connections
Consult the wiring diagrams, on the sep-
arate sheet, how to connect the battery
monitor.
For 3 dierent installations a wiring dia-
gram is supplied:
1 Installation with internal combustion
engine with 1 battery
2 Installation with internal combustion
engine with 2 batteries and a battery
splitter.
3 Installation with electrical propulsion
Consult diagram 4 how to connect a
warning buzzer.

14 090433.01 Battery Monitor
3 Set-up
The instrument must rst be set-up be-
fore it can be used.
Once it has been set correctly this only
has to be done again when the battery
or the shunt is replaced.
nOte!
On the separate sheet ‘Operation and
Setup’ all the actions to be performed
are shown.
• Switch on the power, battery main
switch and key switch.
When the power is switched on the
pointer on the instrument will indicate
the charge condition and on the display
the charge or discharge current will be
displayed.
3.1 Checking connections shunt
to converter
A charging current is shown as positive
(no sign before the value of the current).
A discharging current is shown as neg-
ative (a "–" sign before the value of the
current).
If the polarity of the current is not dis-
played correctly, then exchange the
wires at the converter (3 and 4) which
are connected to the shunt.
Use the push button switches to display
other information and to carry out the
set-up. See ‘Operation and Setup’ on
the separate sheet.
3.2 Battery capacity
• Go to Baery Monitor Setup see
‘2 Operation’.
• Press both push buttons simultane-
ously for at least 3 seconds to se-
lect Baery Monitor Setup , see
'3 Entering battery capacity’.
Baery is now selected.

090433.01 15
Battery Monitor
ENGLISH
• Press the right push button to en-
ter Baery mode.
• Adjust the value of the battery ca-
pacity and press both push buttons
simultaneously for at least 3 seconds
to conrm.
tip
If the battery is in poor condition (old,
often been discharged and re-charged,
etc.) then enter a lower value then the
battery capacity as stated on the bat-
tery. A battery of 3 years old can have a
capacity of only 80 %.
3.3 Shunt
De supplied shunt is specied for 200 A
/ 100 mV.
If a shunt with a dierent specication is
installed the value for the shunt must be
adapted.
• Go to Baery Monitor Setup see
‘2 Operation’.
• Press both push buttons simultane-
ously for at least 3 seconds to se-
lect Baery Monitor Setup , see
'4 Entering current capacity shunt’.
• Press the left push button once to se-
lect Shunt .
• Press the right push button to en-
ter Shunt mode.
• Adjust the value of the shunt and
press both push buttons simultane-
ously for at least 3 seconds to conrm.
Specication
shunt Value to be set
200 A / 100 mV 200 A
100 A / 100 mV 100 A
80 A / 60 mV 133 A
100 A / 60 mV 167 A
200 A / 60 mV 333 A

16 090433.01 Battery Monitor
3.4 Calibration
• Go to Current , see ‘2 Operation’.
• Short-circuit connections 3 and 4 on
the converter.
• Calibrate the instrument if a current
is indicated of more than + or - 0.2 A.
• Press both push buttons simultane-
ously for at least 3 seconds to cali-
brate the instrument, see ‘5 Calibra-
tion current measurement’.
• Remove the short-circuit and re-con-
nect the converter to the shunt.
3.5 Charge condition
Make sure that the battery is fully
charged
• Go to Charge , see ‘2 Operation’.
• Press both push buttons simultane-
ously for at least 3 seconds to set 100
% charge condition, see ‘6 Setting
100 % charge condition’.
3.6 Setting alarms
3 dierent alarms can be set using the
instrument:
- battery charge condition too low:
standard setting 20.0%
- battery voltage too low:
standard setting 10.0 V
- battery voltage too high:
standard setting 30.0 V
• Follow the directions given in ‘1 Sum-
mary Operation and Setup’ to set the
alarms.

090433.01 17
Battery Monitor
ENGLISH
4 Operating
When the power is switched on the
pointer on the instrument will indicate
the charge condition and on the display
the charge or discharge current will be
displayed.
• Press the right push button repeat-
edly to show the other information
in the display, see the separate sheet
‘Operation and Setup’. The pointer
will continue to indicate the battery
capacity.
4.1 Setting dial illumination
• Go to Dimmer Control , see ‘2 Op-
eration’.
• Dim the brightness by pressing the
left push button for at least 3 seconds.
• Increase the brightness by pressing
the right push button for at least 3
seconds.
See ‘7 Setting dial illumination’.
4.2 Alarms
In case an alarm condition occurs the
warning symbol will be displayed every
30 seconds.
An audible alarm sounds if a buzzer is
connected. Press one of the push but-
tons to switch o the audible alarm.
See 3.6 Setting alarms, for setting the
alarms.

18 090433.01 Battery Monitor
5 Trouble shooting
Problem Possible cause Solution
The minus sign is dis-
played together with the
charging current instead
of the discharge current
Shunt and converter are
incorrect connected.
Reverse the connections
from the shunt to the con-
verter (3 and 4), see 3.1.
Current value is incorrectly
displayed.
Calibration of the instru-
ment is required.
Calibrate the instrument,
see 3.4.
The value entered for the
shunt is incorrect.
Enter the correct value, see
3.3.
Charge condition is incor-
rectly displayed.
The battery capacity en-
tered is incorrect
Enter the correct value, see
3.2.
The 100 % charge condi-
tion has not been entered
with a fully charged bat-
tery.
Enter the 100 % charge
condition correctly, see 3.5
An alarm for a too low
charge condition.
The charge condition is
too low.
Charge the battery.
The value entered for the
alarm is too high.
Enter a lower value, see
3.6.
An alarm for a too low volt-
age.
Voltage is too low. Charge the battery.
The value entered for the
alarm is too high.
Enter a lower value, see
3.6.

090433.01 19
Battery Monitor
ENGLISH
Problem Possible cause Solution
An alarm for a too high
voltage.
Voltage is too high. Check the alternator volt-
age regulator and/or the
battery charger.
The value entered for the
alarm is too low.
Enter a higher value, see
3.6.
6 Technical data
Power supply : 12 .. 24 V direct current
Power consumption ,
without dial illumination : 45 mA at 12 V, 30 mA at 24 V
dial illumination : 55 mA at 12 V, 35 mA at 24 V
Shunt supplied : 200 A / 100 mV
Protection : IP66 (only the front of the instrument, after instal-
lation)
Ambient temperature : 0 .. 50°C
Display Range Resolution
Voltage : 9 .. 32.6 V 0.1 V
Current : -200 .. +200 A 0.5 A,
for a 200 A / 100 V shunt
Battery capacity : 0 .. 100% 0.1% (digital)
Discharge time : 0 .. 999 hour 0.1 hour

20 090433.01 Battery Monitor
1 Einleitung
Die Vetus Akkuüberwachung lässt sich
zum Messen des Ladezustandes und
zum Zeitmessung bis zur vollständigen
Entladung der Batterie einsetzen.
Folgende Ablesungen sind möglich:
- der LadeZustand der Batterie
- der Lade- oder Entladung Zustand
- die Spannung
- die Zeit bis zur vollständigen Entla-
dung der Batterie.
Eine Anzahl von Alarmen kann einge-
stellt werden.
Die Akkuüberwachung kann entwe-
der an einem 12 Volt oder an einem 24
Volt System, geerdet oder nicht-geerdet
(2-polig) eingesetzt werden.
1.1 Erklärung der Textformate
'Text' : Eine Reference zu Informatio-
nen auf einem anderen Blatt.
Text : Der Text in der Anzeige.
2 Montage
2.1 Meter
• Rasten Sie den Ring an den Meter.
Versehen Sie das Panel mit einem pas-
senden Loch für den Meter.
2.2 Shunt, Konverter und Haupt
Batterie Kabel
• Montieren Sie den Shunt bei der Bat-
terie oder den Batterien
• Platzieren Sie den Konverter so nah
beim Shunt wie nur möglich und hal-
ten Sie Kabel Verbindungen zwischen
Shunt und Konverter so kurz wie
möglich.
• Montieren Sie Sicherung und Haupt-
schalter am positiven „+“ Kabel.
• Nutzen Sie die Kabelschuhe um die
Kabel an Shunt, Sicherung und Schal-
ter zu befestigen. Befestigen Sie die
Kabelschuhe vorzugsweise durch
Krimpen.
• Ziehen Sie Bolzen und Schrauben gut
an um eine sichere Verbindung zu ge-

090433.01 21
Battery Monitor
DEUTSCH
währleisten.
- Folgende Kabel Querschnitte werden
angeraten
Maximale Lade-
oder Entladung
Spannung
Minimal Quer-
schnitt der Kabel
70 A 10 mm2
100 A 16 mm2
140 A 25 mm2
185 A 35 mm2
230 A 50 mm2
Warnung!
Hohe Spannungen, zu dünne Drähte
oder schlechte Verbindungen verur-
sachen Übergangswiderstände und
können zur Überhitzung von Drähten
oder Steckverbindungen führen und
Brände verursachen.
hinWeis!
Der Wiederstand des mitgelieferten
Shunts ist für maximal 200 A ausgelegt.
Ein Stromuss von mehr als 200 A wird
nicht korrekt gemessen.
2.3 Verbindungen
Nutzen Sie die Schaltpläne (separate
Beilage) als Vorlage für die Verbindung
der Akkuüberwachung.
Das Kabeldiagramm ist für die 3 ver-
schiedenen Arten der Installationen
geeignet:
1 Montage mit Verbrennungsmotor
und mit 1 Batterie
2 Montage mit Verbrennungsmotor
und mit 2 Batterien
3 Installation mit einem Elektro- An-
trieb
Das Diagramm 4 zeigt die Position zur
Installation des Warn-Summer.

22 090433.01 Battery Monitor
3 Konguration
Das Instrument muss vor dem Einsatz
konguriert werden.
Einmal korrekt konguriert, muss dieser
Vorgang nur wiederholt werden, wenn
der Shunt oder Batterie gewechselt wer-
den.
hinWeis!
Im separaten Anhang ‚'Betrieb und
Einrichtung‘ sind alle zu vollziehenden
Schritte dargestellt.
• Schalten Sie die Stromzufuhr, den Bat-
terie Hauptschalter und den Schlüs-
selschalter ein.
Wenn die Stromversorgung gewährleis-
tet ist, zeigt der Zeiger des Instruments
den Ladezustand und die Ladung oder
die Entlade Spannung an.
3.1 Prüfung der Verbindungen
zwischen Shunt und Kon-
verter
Der Ladestrom wird als positive (ohne
Vorzeichen) vor dem Stromwert ange-
zeigt.
Die Entladestrom wird als ein negatives
(„–“ Zeichen) vor dem Stromwert ange-
zeigt.
Wenn die Polarität der Stroms nicht rich-
tig angezeigt wird tauschen Sie bitte die
Kable (3 und 4) am Konverter die mit
dem Shunt verbunden sind.
• Nutzen Sie die Drucktasten zur Anzei-
ge anderer Informationen und für die
Einstellungen. Siehe separaten An-
hang ‘Betrieb und Einrichtung'.
3.2 Batteriekapazität
• Gehen Sie zu Baery Monitor Setup
siehe‚ '2 Betrieb'.
• Drücken Sie beide Drucktasten
gleichzeitig für mindestens 3 Sekun-
den um das Baery Monitor Setup ,

090433.01 23
Battery Monitor
siehe‚ '3 Eingabe der Batteriekapazi-
tät' aufzurufen.
Baery ist gewählt.
• Drücken Sie die rechte Taste für
den Baery Modus.
• Stellen Sie den Wert der Batteriekapa-
zität ein und drücken Sie beide Tasten
gleichzeitig für mindestens 3 Sekun-
den zur Bestätigung.
hinWeis!
Wenn sich die Batterie in einem schlech-
ten Zustand bendet (alt, oftmals entla-
den und neu geladen usw.) dann geben
Sie einen geringeren, als auf der Batterie
angegebenen Wert ein. Eine 3 Jahre alte
Batterie kann eine Kapazität von nur
80% aufweisen.
3.3 Shunt
Die Spezikationen für den Shunt sind
200 A / 100 mV.
Wenn ein Shunt zusammen mit ande-
ren technischen benutzt wird, müssen
die Werte für den Shunt neu eingestellt
werden.
• Gehen Sie zu Baery Monitor Setup
siehe‚ '2 Betrieb'.
• Drücken Sie beide Drucktasten
gleichzeitig für mindestens 3 Sekun-
den um das Baery Monitor Setup ,
siehe ‚'4 Eingabe der Strom Kapazität
für den Shunt' aufzurufen.
• Drücken Sie die linke Taste und wäh-
len Sie Shunt .
• Drücken Sie die rechte Taste für
den Shunt Modus.
• Stellen Sie den Wert für den Shunt ein
und drücken Sie beide Tasten gleich-
zeitig für mindestens 3 Sekunden als
Bestätigung.
Technische Daten
des Shunt
Einzustellender
Wert
200 A / 100 mV 200 A
100 A / 100 mV 100 A
80 A / 60 mV 133 A
100 A / 60 mV 167 A
200 A / 60 mV 333 A
DEUTSCH

24 090433.01 Battery Monitor
3.4 Eichung
• Gehen Sie zu Current , siehe ‚ '2 Be-
trieb'.
• Kurzschluss Verbindungen 3 und 4
am Konverter.
• Eichen Sie das Instrument, wenn der
Strom mit mehr als +/--0.2 A ange-
zeigt wird.
• Drücken Sie beide Tasten gleichzei-
tig für mindestens 3 Sekunden zur
Eichung des Instruments, siehe dazu,
'5 Eichung der Strommessung'.
• Entfernen Sie den Kurzschluss und
verbinden den Shunt erneut mit dem
Konverter.
3.5 Ladezustand
Stellen Sie sicher, dass die Batterie voll
geladen ist.
• Gehen Sie zu Charge , siehe ‚'2 Be-
trieb'.
• Drücken Sie beide Tasten gleichzeitig
für mindestens 3 Sekunden um eine
100 %-ige Ladung einzustellen, siehe
‚ '6 Einstellung 100 % Ladezustand'.
3.6 Alarme einstellen
3 verschieden Alarme können mit dem
Instrument eingestellt werden.
- Batterie Ladezustand Wert zu nied-
rig:
Standard Einstellung 20,0 %
- Batterie Spannung zu niedrig:
Standard Einstellung 10,0 V
- Batterie Spannung zu hoch:
Standard Einstellung 30,0 V
• Folgen Sie den Anleitungen in ‚'1 Zu-
sammenfassung für Betrieb und Ein-
richtung'.

090433.01 25
Battery Monitor
4 Betrieb
Wenn die Stromversorgung gewährleis-
tet ist, zeigt der Zeiger des Instruments
den Ladezustand und die Ladung oder
die Entlade Spannung an.
• Drücken Sie die rechte Drucktaste
wiederholt für andere Informationen
in der Anzeige, sehen Sie dazu ‚'Be-
trieb und Einrichtung' als separate
Anlage. Der Zeiger wird weiterhin die
Batteriekapazität anzeigen
4.1 Einstellung der Beleuchtung
• Gehen Sie zu Dimmer Control , im
Punkt ‚'2 Betrieb'.
• Sie können die Helligkeit durch das
Drücken der linken Taste für mindes-
tens 3 Sekunden dimmen.
• Sie können die Helligkeit durch das
Drücken der linken Taste für mindes-
tens 3 Sekunden erhöhen.
Siehe ‚ '7 Einstellung der Beleuchtung'.
4.2 Alarme
Wenn ein Alarmzustand eintritt, dann
erscheint das Warnsymbol alle 30 Se-
kunden in der Anzeige.
Mit einem angeschlossen Summer ist
dieser auch akustisch. Drücken Sie eine
der zwei Drucktasten, um den Alarm
auszuschalten.
Siehe 3.6 Einstellung der Alarme für de-
ren Konguration.
DEUTSCH

26 090433.01 Battery Monitor
5 Fehlerbehebung
Problem Mögliche Ursache Lösung
Das Minus-Zeichen
wird zusammen mit
dem Ladestrom an-
stelle des Entlade-
stroms angezeigt.
Shunt und Konverter sind
nicht korrekt verbunden.
Tauschen Sie die Verbin-
dungen von Shunt zum
Konverter (3 und 4), siehe
3.1.
Stromanzeige ist un-
genau.
Eichung des Instruments ist
notwendig.
Eichung des Instruments,
siehe 3.4.
Der eingegebene Wert für
den Shunt ist nicht korrekt.
Eingabe des korrekten Wer-
tes Siehe 3.3.
Der Ladezustand ist
ungenau angezeigt.
Die eingegebene Batterieka-
pazität ist inkorrekt
Eingab des korrekten Wer-
tes, siehe 3.2.
Ein 100 %-iger Ladezustand
wurde noch nicht mit einer
voll geladenen Batterie einge-
geben.
Geben Sie den 100 %-igen
Ladezustand korrekt ein,
siehe 3.5
Ein Alarm für zu ge-
ringen Ladezustand.
Der Ladezustand ist zu gering. Laden Sie die Batterie.
Der eingegebene Wert für
den Alarm ist zu hoch.
Geben Sie einen kleineren
Wert ein, siehe 3.6.
Ein Niederspannung-
salarm.
Die Spannung ist zu gering Laden Sie die Batterie.
Der eingegebene Wert für
den Alarm ist zu hoch.
Geben Sie einen kleineren
Wert ein, siehe 3.6.

090433.01 27
Battery Monitor
Problem Mögliche Ursache Lösung
Ein Hochspannungs-
alarm.
Die Spannung ist zu hoch. Prüfen Sie mit einem ande-
ren Spannungsregler und/
oder Batterieladegerät.
Der eingegebene Wert für
den Alarm ist zu niedrig.
Geben Sie einen größeren
Wert ein, siehe 3.6.
6 Technische Daten
Stromversorgung : 12 .. 24 V Gleichspannung
Leistungsaufnahme ,
ohne Beleuchtungswahl : 45 mA bei 12 V, 30 mA bei 24 V
Beleuchtungswahl : 55 mA bei 12 V, 35 mA bei24 V
Shunt : 200 A / 100 mV
Schutzgrad : IP66 (nur die Frontseite des Instruments, nach
Installation)
Umgebungstemperatur : 0 .. 50°C
Anzeige Bereich Auösung
Spannung : 9 .. 32.6 V 0,1 V
Strom : -200 .. +200 A 0,5 A,
für einen 200 A / 100V Shunt
Batteriekapazität : 0 .. 100 % 0,1 % (digital)
Entladungszeit : 0 .. 999 Stunden 0,1 Stunde
DEUTSCH

28 090433.01 Battery Monitor
1 Introduction
Le moniteur de batterie de Vetus peut
être employé pour mesurer l'état de
charge de la batterie et aussi, en déchar-
geant, le temps restant avant que la bat-
terie soit complètement déchargée.
Les fonctions suivantes peuvent être lues :
- L’état de charge de la batterie
- La charge ou le courant de dérive
- La tension
- Le délai avant que la batterie soit
complètement déchargée.
Certaines alarmes peuvent également
être mises.
Le moniteur de batterie peut être
connecté à 12 volts et à des systèmes
24 volts, avec une terre négative ou sans
terre (2 électrodes).
1.1 Explication du formatage du
texte.
‘Texte’ : Référence aux infos sur un
texte un texte séparé.
Texte : Texte dans écran.
2 Installation
2.1 Appareil de mesure
• Cliquez l'anneau sur le mètre. Faites
un trou dans le panneau et adaptez
l’appareil de mesure.
2.2 Shunt, convertisseur et
câbles principaux de batte-
rie.
• Installez le shunt près de la batterie
ou des batteries.
• Placez le convertisseur aussi près que
possible au shunt et gardez les ls de
connexion entre le shunt et le conver-
tisseur le plus court que possible.
• Placez un fusible et un commutateur
principal au câble positif « + ».
• Utilisez les bornes de câble pour relier
les câbles au shunt, au fusible et au
commutateur. Adaptez de préférence
les bornes de câble par rabattement.
• Serrez les boulons et les écrous soli-
dement pour assurer une bonne
connexion.

090433.01 29
Battery Monitor
FRANÇAIS
- Utilisez la section transversale du
câble
Charge maxi-
mum ou
décharge du
courent
Sectiontransver-
sale minimum
câble principale
de la batterie
70 A 10 mm2
100 A 16 mm2
140 A 25 mm2
185 A 35 mm2
230 A 50 mm2
avertissement!
Des grands courants par les ls trop
minces ou les résistances de contact
provoquées par les raccordements
pauvres peuvent causer aux ls ou aux
raccordements de prise de devenir très
chauds et pourraient causer un feu.
remarquez!
La résistance de shunt inclus convient à
un courant de maximum de 200 A. Un
courant plus grand que 200 A ne sera
pas mesuré correctement.
2.3 Connections
Consultez les schémas de câblage, sur la
feuille séparée, comment connecter le
moniteur de la batterie.
Pour 3 installations diérentes un sché-
ma de câblage est fourni :
1 Installation avec le moteur à com-
bustion interne avec 1 batterie
2 Installation avec le moteur à com-
bustion interne avec 2 batteries et un
diviseur de batterie.
3 Installation avec la propulsion élec-
trique
Consultez le schéma 4 pour voir com-
ment connecter un vibreur d'avertisse-
ment.

30 090433.01 Battery Monitor
3 Installation
L'instrument doit d'abord être installé
avant qu'il puisse être employé. Une fois
qu'il a été installé correctement ceci doit
seulement être fait encore quand la bat-
terie ou le shunt doit être remplacée.
remarquez!
Sur la feuille séparée ‘Opération et
Installation’ toutes les actions à exécu-
ter sont montrées.
• Branchez l'électricité, le commutateur
principal de batterie et le commuta-
teur principal.
Quand l'électricité est branchée l'indica-
teur sur l'instrument indiquera l'état de
charge et sur l'achage la charge ou la
décharge sera montée.
3.1 Vérication des connections
du shunt au convertisseur.
Un courant de charge est montré
comme positif (aucun signe avant la
valeur du courant).
Un courant de décharge est montré en
tant que négatif (« - » signe devant la
valeur du courant).
Si la polarité du courant n'est pas mon-
trée correctement, alors échangez les
ls au convertisseur (3 et 4) qui sont
connectés au shunt.
• Utilisez les commutateurs de bouton
poussoir pour montrer l'autre infor-
mation et pour eectuer l'installation.
Voyez ’ l'opération et Installation' sur
la feuille séparée.
3.2 Capacité de batterie
• Allez au Baery Monitor Setup
voyez ‘2 Opération’.
• Pressez les deux boutons poussoirs
simultanément pendant au moins 3
secondes pour choisir Baery Moni-

090433.01 31
Battery Monitor
FRANÇAIS
tor Setup , voyez ‘3 Register la capa-
cité de la batterie’.
Baery est sélectée maintenant.
• Pressez le bouton à droite pour saisir
mode de Baery .
• Ajustée la valeur de capacité de la
batterie et pressez les deux boutons
poussoirs simultanément pendant au
moins 3 secondes pour conrmer.
tip
Si la batterie est dans un mauvais état
(vieux, charge et déchargée plusieurs
fois) alors dans ces cas entrez une valeur
plus petite que indiquée sur la batterie.
Une batterie de trois ans peut seulement
avaloir une capacité de 80 %.
3.3 Shunt
Le shunt inclus est spécique pour
200A / 100 mV.
Si un shunt est installé avec une spé-
cication diérente la valeur doit être
adaptée.
Allez au Baery Monitor Setup voyez
‘2 Opération’.
• Pressez les deux boutons poussoirs
simultanément pendant au moins 3
secondes pour choisir Baery Moni-
tor Setup , voyez ‘4 Register capacité
de courant du shunt’.
• Pressez le bouton à gauche une fois
pour sélecter Shunt .
• Pressez le boute droite une fois pour
saisir mode Shunt .
• Adaptez la valeur pressez les deux
boutons poussoirs simultanément
pendant au moins 3 secondes pour
conrmer.
Spécications
shunt Valeur à mettre
200 A / 100 mV 200 A
100 A / 100 mV 100 A
80 A / 60 mV 133 A
100 A / 60 mV 167 A
200 A / 60 mV 333 A

32 090433.01 Battery Monitor
3.4 Calibrage
• Allez au Current , voyez ‘2 Opéra-
tion’.
• Connections de courts-circuits 3 et 4
sur le convertisseur.
• Calibrez l'instrument si un courant est
indiqué de plus que + ou - 0,2 A.
• Pressez les deux boutons poussoirs
simultanément pendant au moins 3
secondes pour calibrer l'instrument,
voyez `5 Calibrage de mesurer du
courant’
• Enlevez le court-circuit et rebranchez
le convertisseur au shunt.
3.5 Conditions de charge
Rassurez vous que la batterie soit com-
plètement chargée
• Allez au Charge , voyez ‘2 Opéra-
tion’.
• Pressez les deux boutons poussoirs
simultanément pendant au moins
3 secondes pour atteindre 100 % de
charge, voyez ‘6 Position de condi-
tion de charge de 100 %’.
3.6 Mettre les Alarmes
3 alarmes diérentes peuvent être utili-
sés en utilisant l'instrument :
- État de charge de batterie trop bas :
20.0% référence standard
- Voltage de batterie trop basse :
10.0 V référence standard
- Voltage de batterie trop haut :
30.0 V référence standard
• Suivez les instructions données en
‘1 Sommaire: Opération et Installa-
tion’ pour mettre les Alarmes.

090433.01 33
Battery Monitor
FRANÇAIS
4 Utilisations
Quand le courant est alimenté l'indica-
teur de l'instrument indiquera l'état de
charge et sur l'achage la charge ou la
décharge sera montrée.
• Pressez le bouton poussoir droit plu-
sieurs fois pour montrer l'autre infor-
mation dans l'achage, voyez ‘Opé-
ration et Installation’ sur la feuille
séparée.
L'indicateur continuera à indiquer la
capacité de la batterie.
4.1 Illumination de cadran
• Allez au Dimmer Control , voyez
‘2 Opération’.
• Obscurcissez l'éclat en pressant le
bouton poussoir gauche pendant au
moins 3 secondes.
• Augmentez l'éclat en pressant le bou-
ton poussoir droit pendant au moins
3 secondes.
Voyez : ‘7 Arranger Illumination Ca-
dran’.
4.2 Alarmes
Au cas où des conditions d'alarme se
produiraient le symbole d'avertissement
sera montré toutes les 30 secondes. Une
alarme sonore sonne si un vibreur est
connecté. Pressez un des boutons pous-
soirs pour couper l'alarme sonore.
Voyez 3.6: Mettre des alarmes, pour
mettre des Alarmes.

34 090433.01 Battery Monitor
5 Dépannage
Problème Cause Possible Solution
Le signe minus est montré
ensemble avec le courant
de charge au lieu du cou-
rant de décharge.
Le shunt et le convertis-
seur ne sont pas connec-
tés correctement.
Renversez les raccor-
dements du shunt au
convertisseur (3 et 4),
voyez 3.1.
La valeur du courant est
inexactement montrée.
Calibrage de l’instrument
est exigé.
Calibrage de l’instrument,
voyez 3.4.
La valeur donnée pour le
shunt n’est pas correcte.
Entrez la valeur correcte,
voyez 3.3.
Condition de charge est
montrée incorrectement.
La capacité de la batterie
n’est pas correcte
Entrez la valeur correcte,
voyez 3.2.
La condition de charge
de 100 % n’est pas venue
même avec la batterie
chargée complètement.
Entrez la condition de
charge de 100 % correcte-
ment, voyez 3.5
Une alarme pour la condi-
tion de charge trop basse.
La condition de charge
est trop basse.
Chargez la batterie
La valeur entrée pour
l’l’alarme est trop haute.
Entrez une valeur plus
basse, voyez 3.6.
Une alarme pour un vol-
tage trop bas.
Le Voltage est trop bas. Chargez la batterie.
La valeur entrée pour
l’alarme est trop haut.
Entrez une valeur plus
basse, voyez 3.6.

090433.01 35
Battery Monitor
FRANÇAIS
Problème Cause Possible Solution
Une alarme pour un vol-
tage trop haut.
Le Voltage est trop haut. Révisez le régulateur du
alternateur de voltage
et / ou le chargeur de
batterie.
La valeur entrée pour
l’alarme est trop bas.
Entrez une valeur plus
haute, voyez 3.6.
6 Info Technique
Alimentation : 12 .. 24 V courants directs
Consommation de courant,
Sans illumination cadran : 45 mA a 12 V, 30 mA a 24 V
Illumination du cadran : 55 mA a 12 V, 35 mA a 24 V
Shunt inclus : 200 A / 100 mV
Protection : IP66 (seulement la face de l’instrument, âpres ins-
tallation)
Température ambiante : 0.. 50°C
Écran Range Résolution
Voltage : 9 .. 32,6 V 0,1 V
Courant : -200 .. +200 A 0,5 A,
pour un 200 A / 100 V shunt
Capacité Batterie : 0 .. 100% 0,1% (digitale)
Temps de décharge : 0 .. 999 heures 0,1 heur

36 090433.01 Battery Monitor
1 Introducción
El monitor de batería Vetus se puede uti-
lizar para medir el estado de carga de la
batería y también, mientras se descarga,
el tiempo restante antes de que la bate-
ría se quede descarga totalmente.
Las siguientes funciones se pueden leer:
- el estado de carga de la batería
- la carga o descarga de corriente
- el voltaje
- el tiempo límite antes de que la bate-
ría está completamente descargada.
Una serie de alarmas también se pueden
congurar.
El monitor de la batería puede ser co-
nectado a una de 12 voltios y un sistema
de 24 voltios, con negativo a tierra o tie-
rra libre (2 polos).
1.1 Explicación utilizando for-
mato de texto
‘Text’ : Referencia a la información en
una hoja aparte.
Text : Texto en la pantalla.
2 Instalación
2.1 Contador
Haga clic en el anillo en el contador. Ha-
cer un agujero en el panel y el ajuste el
contador.
2.2 Derivación, convertidor
y principales cables de la
batería
• Instale la derivación, cerca de la bate-
ría o baterías
• Coloque el convertidor lo más cerca
posible de la derivación y mantener
los cables de conexión entre la deri-
vación y el convertidor lo más corto
posible.
• Coloque un fusible y un interruptor
principal en el cable "+" .
• Utilice terminales de los cables para
conectar los cables de la derivación,
el fusible y el interruptor. Preferente-
mente je los terminales de los cables
prensando.
• Apretar tuercas y tornillos de forma

090433.01 37
Battery Monitor
ESPAÑOL
segura para garantizar una buena co-
nexión.
- Sección transversal del cable se debe
utilizar
Máximo de carga
o corriente de
descarga
Sección trans-
versal mínima
de cable de la
batería principal
70 A 10 mm2
100 A 16 mm2
140 A 25 mm2
185 A 35 mm2
230 A 50 mm2
advertencia!
Las grandes corrientes a través de ca-
bles demasiado delgados o resisten-
cias de contacto causadas por malas
conexiones pueden llevar a cables o
conexiones de enchufe a calentarse y
causar un incendio.
nOta!
La resistencia de derivación suminis-
trada es apropiada para una corriente
máxima de 200 A.
Una corriente de más de 200 A no se
mide correctamente.
2.3 Conexiones
Consulte los diagramas de cableado, en
la hoja aparte, como conectar el monitor
de la batería.
Por 3 instalaciones diferentes se sumi-
nistra un diagrama de cableado:
1 Instalación con motor de combus-
tión interna con una batería
2 Instalación con motor de combus-
tión interna con dos baterías y un
separador de la batería.
3 Instalación con propulsión eléctrica
Consulte el diagrama 4 cómo conectar
un zumbador de aviso.

38 090433.01 Battery Monitor
3 Set-up
El instrumento primero debe ser puesto
en marcha antes de que pueda ser uti-
lizado.
Una vez que se haya ajustado correcta-
mente esto sólo se tiene que hacer de
nuevo cuando la batería o la derivación
se sustituye.
nOta!
En la hoja por separado ‘Operación y
conguración’ se muestran todas las ac-
ciones a realizar.
• Conecte la alimentación, el interrup-
tor principal de la batería y llave de
contacto.
Cuando la alimentación se enciende el
indicador en el instrumento indicará el
estado de carga y en la pantalla de la
carga o descarga de corriente se mos-
trará.
3.1 Compruebe las conexiones
de derivación al convertidor
Una corriente de carga se se muestra
como positiva (no hay señal antes el va-
lor de la corriente).
Una corriente de descarga se muestra
como negativo (un signo "-" antes el va-
lor de la corriente).
Si la polaridad de la corriente no se
muestra correctamente, entonces inter-
cambie los cables en el convertidor (3 y
4) que están conectadas a la derivación.
• Utilice los interruptores de botón
para mostrar otro tipo de información
y llevar a cabo la puesta a punto. Vea
‘Operación y conguración’ en la
hoja por separado.
3.2 Capacidad de la batería
• Vaya al Baery Monitor Setup vea
‘2 Operación’.
• Pulse los dos botones simultánea-
mente durante al menos 3 segundos
para seleccionar Baery Monitor Se-

090433.01 39
Battery Monitor
ESPAÑOL
tup , vea ‘3 Introduciendo capacidad
de la batería
Baery no esta seleccionado.
• Pulse el botón derecho para entrar en
modo Baery .
• Ajuste el valor de la capacidad de la
batería y presione los dos botones si-
multáneamente durante al menos 3
segundos para conrmar.
cOnsejO
Si la batería está en malas condiciones
(vieja, ha sido descargada y re-cargadas
a menudo, etc), entonces introduzca un
valor menor que la capacidad de la ba-
tería como se indica en la batería. Una
batería de 3 años de edad puede tener
una capacidad de sólo el 80%.
3.3 Derivación
La derivación suministrada se especica
para 200 A / 100 mV.
Si una derivación con una especicación
diferente se instala el valor de la deriva-
ción debe ser adaptado.
• Vaya a Baery Monitor Setup vea
‘2 Operación’.
• Pulse los dos botones simultánea-
mente durante al menos 3 segundos
para seleccionar Baery Monitor
Setup , vea ‘4 Introduciendo la deri-
vación de la capacidad de corriente'.
• Pulse el botón izquierdo una vez para
seleccionar Shunt .
• Pulse el botón derecho para acceder
al modo Shunt .
• Ajuste el valor de la derivación y pre-
sione los dos botones simultánea-
mente durante al menos 3 segundos
para conrmar.
Especicación de
derivación
Valor a estable-
cerse
200 A / 100 mV 200 A
100 A / 100 mV 100 A
80 A / 60 mV 133 A
100 A / 60 mV 167 A
200 A / 60 mV 333 A

40 090433.01 Battery Monitor
3.4 Calibración
• Vaya a Current , vea ‘2 Operación’.
• Las conexiones de cortocircuito 3 y 4
al convertidor.
• Calibrar el instrumento, si una corrien-
te se indica por más de + o - 0,2 A.
• Pulse los dos botones simultánea-
mente durante al menos 3 segundos
para calibrar el instrumento, consulte
‘5 Calibración de medición de co-
rriente’.
• Eliminar el cortocircuito y vuelva a co-
nectar el convertidor a la derivación.
3.5 Condiciones de carga
Asegúrese de que la batería esté com-
pletamente cargada
• Vaya a Charge , vea ‘2 Operación’.
• Pulse los dos botones simultánea-
mente durante al menos 3 segundos
para jar lo al 100% nivel de carga,
consulte ‘6 Fijando condiciones de
carga del 100%’.
3.6 Ajuste de las alarmas
3 alarmas diferentes se pueden estable-
cer mediante el instrumento:
- Estado de carga de la batería dema-
siado bajo:
Normas estándar 20.0%
- Voltaje de la batería es demasiado
bajo:
Normas estándar 10.0 V
- Voltaje de batería muy alta:
Normas estándar 30.0 V
• Siga las instrucciones que se dan en
el ‘1 Resumen de funcionamiento y
conguración’ para jar las alarmas.

090433.01 41
Battery Monitor
ESPAÑOL
4 Operación
Cuando la alimentación se enciende el
indicador en el instrumento indicará el
estado de carga y en la pantalla la co-
rriente de carga o descarga se mostrará.
• Pulse el botón derecho varias veces
para mostrar la información en la pan-
talla, consulte la hoja por separado
‘Operación y conguración'.
El puntero seguirá indicando la capaci-
dad de la batería
4.1 Dial de ajuste de la ilumina-
ción
• Vaya al Dimmer Control , vea
‘2 Operación’.
• Atenuar el brillo pulsando el botón
izquierdo por lo menos durante 3 se-
gundos.
• Aumentar el brillo pulsando el botón
derecho por lo menos durante 3 se-
gundos.
Vea ‘7 Ajuste de la iluminación del cua-
drante’.
4.2 Alarmas
En el caso de que se produzca una alar-
ma el símbolo de advertencia se mostra-
rá cada 30 segundos.
Una alarma audible suena si un zumba-
dor está conectado. Pulse uno de los bo-
tones para desactivar la alarma sonora.
Consulte la sección 3.6 ajuste de las
alarmas, para el establecimiento de las
alarmas.

42 090433.01 Battery Monitor
5 Solución de problemas
Problema Posible causa Solución
El signo menos se mues-
tra junto con la corriente
de carga en lugar de la
corriente de descarga
La derivación y el convertidor
están conectados incorrecta-
mente.
Invierta las conexiones
de la derivación al con-
vertidor (3 y 4), vea 3.1.
El valor de la corriente se
muestra de forma inco-
rrecta.
Se requiere la calibración del
instrumento.
Calibre el instrumento,
vea 3.4.
El valor introducido por la de-
rivación es incorrecto.
Introduzca el valor co-
rrecto, vea 3.3.
El estado de carga se
muestra incorrectamen-
te.
La capacidad de la batería in-
troducida no es correcta
Introduzca el valor co-
rrecto, vea 3.2.
El estado de carga del 100%
no se ha introducido con una
batería completamente car-
gada.
Introduzca el estado de
carga del 100% correcto,
vea 3.5
Una alarma para una
condición de carga muy
baja.
El estado de carga es dema-
siado bajo.
Cargue la batería.
El valor introducido para la
alarma es demasiado alto.
Introduzca un valor infe-
rior, vea 3.6.
Una alarma para un vol-
taje demasiado bajo.
El Voltaje es muy bajo. Cargue la batería.
El valor introducido para la
alarma es demasiado alto.
Introduzca un valor infe-
rior, vea 3.6.

090433.01 43
Battery Monitor
ESPAÑOL
Problema Posible causa Solución
Una alarma para un vol-
taje demasiado alto.
El voltaje es demasiado alto. Compruebe que el regu-
lador del alternador de
voltaje y / o el cargador
de batería.
El valor introducido para la
alarma es demasiado bajo.
Introduzca un valor su-
perior, consulte 3.6.
6 Datos técnicos
Alimentación : 12 .. 24 V corriente continua
Consumo de energía ,
Sin iluminación del cuadrante : 45 mA at 12 V, 30 mA at 24 V
Iluminación del cuadrante : 55 mA at 12 V, 35 mA at 24 V
Derivación suministrado : 200 A / 100 mV
Protección : IP66 (sólo la parte frontal del instrumento, des-
pués de la instalación)
Temperatura ambiente : 0 .. 50°C
Display Rango Resolución
Voltaje : 9 .. 32,6 V 0,1 V
Corriente : -200 .. +200 A 0,5 A,
Para 200 A / 100 V desviación
Capacidad de la batería : 0 .. 100% 0,1% (digital)
Tiempo de descarga : 0 .. 999 hora 0,1 hora

44 090433.01 Battery Monitor
1 Introduzione
Indicatore di consumo d’energia può es-
sere usato per misurare la condizione di
carica della batteria ed anche, in fase di
scaricamento, il tempo rimanente prima
che la batteria sia completamente scari-
ca.
E’ possibile leggere le seguenti funzioni:
- La condizione di carica della batteria
- La corrente di carico o scarico
- La tensione
- Il tempo limite prima che la batteria
sia completamente scarica.
È anche possibile impostare un certo nu-
mero di allarmi.
L’indicatore di consumo di energia può
essere collegato ad un sistema a 12 Volt
o 24 Volt , con riferimento a massa nega-
tivo o massa libera (2 poli).
1.1 Spiegazione formattazione
di testo utilizzata
‘Testo’ : Riferimento ad informazioni
su scheda separata.
Testo : Testo a display.
2 Installazione
2.1 Misuratore
• Incastrare la ghiera sul misuratore. Re-
alizzare un foro nel pannello ed adat-
tare il misuratore.
2.2 Cavi shunt, convertitore e
alimentazione batteria
• Installare lo shunt vicino alla batteria
o batterie.
• Posizionare il convertitore il più vicino
possibile allo shunt e mantenere i cavi
di collegamento tra lo shunt ed il con-
vertitore quanto più corti possibile.
• Inserire un fusibile ed un interruttore
generale nel cavo positivo“+” .
• Usare i morsetti per collegare i cavi
allo shunt, al fusibile ad all’interrutto-
re. Preferibilmente, adattare i morsetti
dei cavi tramite crimpatura.
• Serrare saldamente dadi e bulloni per
garantire un buon collegamento.

090433.01 45
Battery Monitor
ITALIANO
- Sezione trasversale del cavo da utiliz-
zare
Corrente
massima di
caricamento o
scaricamento
Sezione trasver-
sale minima
cavo principale
batteria
70 A 10 mm2
100 A 16 mm2
140 A 25 mm2
185 A 35 mm2
230 A 50 mm2
avvertenza!
Grandi correnti attraverso cavi troppo
piccoli o resistenze di contatto causate
da scarsi collegamenti possono porta-
re al surriscaldamento di cavi o prese e
possono causare un incendio.
nOta!
La resistenza shunt fornita è adatta ad
una corrente massima di 200 A.
Una corrente maggiore di 200 A non
sarà misurata correttamente.
2.3 Collegamenti
Consultare gli schemi di cablaggio, su
scheda a parte, come collegare l’indica-
tore di consumo di energia.
È fornito uno schema di collegamento
per 3 diverse installazioni:
1 Installazione con motore a combu-
stione interna con 1 batteria
2 Installazione con motore a combu-
stione interna con 2 batterie ed uno
splitter di batteria.
3 Installazione con propulsione elettri-
ca
Consultare il diagramma 4 come colle-
gare un avvisatore acustico.

46 090433.01 Battery Monitor
3 Congurazione
Lo strumento deve essere congurato
prima di poterlo usare.
Una volta congurato correttamente,
ciò dovrà essere ripetuto quando si so-
stituisce la batteria dello shunt.
nOta!
Su scheda separata ‘Funzionamento e
congurazione’ sono illustrate tutte le
azioni da eettuare.
• Attivare l’alimentazione, l’interruttore
principale della batteria e l’interrutto-
re a chiave.
Quando l’alimentazione è attivata il
puntatore sullo strumento indicherà la
condizione di carica e sul display sarà
visualizzata la corrente di caricamento o
scaricamento.
3.1 Vericare i collegamenti
shunt a convertitore
Una corrente di caricamento è mostrata
come positiva (nessun segno prima del
valore della corrente).
Una corrente di scaricamento è mostra-
ta come negativa (segno “–” prima del
valore della corrente).
Se la polarità della corrente non è visua-
lizzata correttamente, scambiare i cavi
al convertitore (3 e 4) che sono collegati
allo shunt.
Usare i pulsanti a pressione per visualiz-
zare alter informazioni e per eettuare la
congurazione. SI veda ‘Funzionamen-
to e Congurazione’ su scheda separa-
ta.
3.2 Capacità della batteria
• Andare a Baery Monitor Setup si
veda ‘2 Funzionamento’.
• Premere contemporaneamente en-
trambi i pulsanti a pressione per alme-
no 3 secondi per selezionare Baery

090433.01 47
Battery Monitor
ITALIANO
Monitor Setup , si veda ‘3 Inserire la
capacità della batteria'.
Baery è ora selezionato.
• Premere il pulsante a pressione destro
per accedere alla modalità Baery .
• Regolare il valore della capacità della
batteria e premere entrambi i pulsan-
ti a pressione contemporaneamente
per almeno 3 secondi per confermare.
suggerimentO
Se la batteria è in scarse condizioni (vec-
chia, scaricata e ricaricata spesso, ecc.)
inserire un valore inferiore rispetto alla
capacità della batteria indicato sulla bat-
teria. Una batteria di 3 anni può avere
una capacità pari al solo 80 %.
3.3 Shunt
Lo shunt in dotazione è specico per
200 A / 100 mV.
Se si installa uno shunt con una specica
dierent, il valore dello shunt deve esse-
re regolato.
• Andare a Baery Monitor Setup si
veda ‘2 Funzionamento’.
• Premere entrambi I pulsanti a pressio-
ne contemporaneamente per almeno
3 secondi per selezionare Baery
Monitor Setup , si veda ‘4 Inserire a
capacità di corrente shunt’.
• Premere il pulsante a pressione
sinistro una volta per seleziona-
re Shunt .
• Premere il pulsante a pressione destro
per accedere alla modalità Shunt .
• Regolare il valore dello shunt e pre-
mere entrambi i pulsanti a pressione
contemporaneamente per almeno 3
secondi per confermare.
Speciche shunt Valore da impo-
stare
200 A / 100 mV 200 A
100 A / 100 mV 100 A
80 A / 60 mV 133 A
100 A / 60 mV 167 A
200 A / 60 mV 333 A

48 090433.01 Battery Monitor
3.4 Calibrazione
• Andare a Current , si veda ‘2 Funzio-
namento’.
• Cortocircuitare i collegamenti 3 e 4 sul
convertitore.
• Calibrare lo strumento se si indica una
corrente superiore a + o - 0,2 A.
• Premere entrambi i pulsanti a pressio-
ne contemporaneamente per almeno
3 secondi per calibrare lo strumento,
si veda ‘5 Misurazione corrente cali-
brazione'.
• Togliere il corto-circuito e ricollegare
il convertitore allo shunt.
3.5 Condizione di carica
Assicurarsi che la batteria sia completa-
mente carica
• Andare a Charge , si veda ‘2 Funzio-
namento’.
• Premere entrambi i pulsanti a pressio-
ne contemporaneamente per almeno
3 secondi per impostare condizione
di carica100 %, si veda ‘6 Impostare
condizione di carica 100%’.
3.6 Impostare gli allarmi
È possibile impostare 3 diversi allarmi
utilizzando lo strumento:
- Condizione di carica della batteria
troppo bassa:
Impostazione standard 20.0%
- Tensione batteria troppo bassa:
Impostazione standard 10.0 V
- Tensione batteria troppo alta:
Impostazione standard 30.0 V
• Seguire le indicazioni forite in ‘1 Som-
mario funzionamento e congurazio-
ne’ per impostare gli allarmi.

090433.01 49
Battery Monitor
ITALIANO
4 Operatività
Quando si attiva l’alimentazione il pun-
tatore dello strumento indicherà la
condizione di carica e sul display sarà
visualizzata la corrente di caricamento o
scaricamento.
• Premere più volte il pulsante a pres-
sione destro per visualizzare le altre
informazioni a display, si veda la sche-
da ‘Funzionamento e congurazio-
ne'. IL puntatore continuerà ad indi-
care la capacità della batteria.
4.1 Impostare illuminazione
quadrante
• Andare a Dimmer Control , si veda
‘2 Funzionamento’.
• Regolare la luminosità premendo il
pulsante a pressione sinistro per al-
meno 3 secondi.
• Aumentare la luminosità premendo il
pulsante a pressione destro per alme-
no 3 secondi.
• Si veda ‘7 Impostare illuminazione
quadrante’.
4.2 Allarmi
Nel caso in cui si verichi una condizione
di allarme il simbolo di avvertenza sarà
visualizzato ogni 30 secondi.
Un allarme sonoro suona se si collega
un avvisatore acustico. Premere uno dei
due pulsanti a pressione per spegnere
l’allarme sonoro.
Si veda 3.6 Impostare gli allarmi, per im-
postare gli allarmi.

50 090433.01 Battery Monitor
5 Risoluzione dei problemi
Problema Possibile Causa Soluzione
Il segno meno è vi-
sualizzato insieme alla
corrente di caricamento
invece della corrente di
scaricamento
Lo Shunt ed il convertitore
non sono collegati corretta-
mente.
Invertire i collegamenti
dallo shunt al converti-
tore (3 e 4), si veda 3.1.
Il valore di corrente non
è visualizzato corretta-
mente.
È necessario calibrare lo
strumento.
Calibrare lo strumento,
si veda 3.4.
Il valore inserito per lo shunt
non è corretto.
Inserire il valore corret-
to, si veda 3.3.
La condizione di carica
non è visualizzata cor-
rettamente.
La capacità della batteria
inserità non è corretta
Inserire il valore corret-
to, si veda 3.2.
La condizione di carica 100%
non è stata inserita con batte-
ria completamente carica.
Inserire correttamente
la condizione di carica
100 % , si veda 3.5
Allarme per condizione
di carica troppo bassa.
La condizione di carica è
troppo bassa.
Caricare la batteria.
Il valore inserito per l’allarme
è troppo alto.
Inserire un valore infe-
riore, si veda 3.6.
Allarme per tensione
troppo bassa.
La tensione è troppo bassa Caricare la batteria.
Il valore inserito per l’allarme
è troppo alto.
Inserire un valore infe-
riore, si veda 3.6.

090433.01 51
Battery Monitor
ITALIANO
Problema Possibile Causa Soluzione
Allarme per tensione
troppo alta.
La tensione è troppo alta. Vericare il regolatore di
tensione dell’alternatore
e/o il caricabatterie.
Il valore inserito per l’allarme
è troppo basso.
Inserire un valore più
alto, si veda 3.6.
6 Dati tecnici
Alimentazione : 12 .. 24 V DC
Consumo,
senza illuminazione quadrante : 45 mA @ 12 V, 30 mA @ 24 V
illuminazione quadrante : 55 mA @ 12 V, 35 mA @ 24 V
Shunt in dotazione : 200 A / 100 mV
Protezione : IP66 (solo parte frontale dello strumento,
dopo installazione)
Temperatura Ambientale : 0 .. 50°C
Display Intervallo Risoluzione
Tensione : 9 .. 32.6 V 0,1 V
Corrente : -200 .. +200 A 0,5 A,
per shunt 200 A / 100 V
Capacità batteria : 0 .. 100% 0,1% (digitale)
Tempo di scaricamento : 0 .. 999 ora 0,1 ora

52 090433.01 Battery Monitor
7 Hoofdafmetingen
Overall dimensions
Hauptmaße
Dimensions pricipales
Dimensiones generales
Misure principali
ø 85 (3 11/32”)
15(9/16”) 57 (2 1/4”)
97 (3 13/16”) 35 (1 3/8”)
0 100
20 80
6040
% CAPACITY

090433.01 53
Battery Monitor
1
2
3
4
5
6
44 (1 3/4”)
33 (1 5/16”)
16 (5/8”)
ø 4 (
5
/
32
”)
123 (4 13/16”)
103 (4 1/16”)
8
(5/16”)
20
(15/32”)
ø 8.5 (5/16”) M5

54 090433.01 Battery Monitor
1
2
(2 x)
5
3
4
200 A / 100 mV
BATMON Service onderdelen Service parts
pos. qty part benaming description
1 1 BATM001B Instrument, zwart Meter, black
1 BATM001W Instrument, wit Meter, white
2 1 BATM002 Montageset Mounting set
3 1 BATM003 Shunt Shunt
4 1 BATM004 Converter Converter
5 2 BATM005 Kabel Cable


Printed in the Netherlands
090433.01 2022-01
vetus b. v.
Fokkerstraat 571 - 3125 BD SCHIEDAM - HOLLAND
Tel.: +31 (0)88 4884700 - [email protected] - www.vetus.com
-
 1
1
-
 2
2
-
 3
3
-
 4
4
-
 5
5
-
 6
6
-
 7
7
-
 8
8
-
 9
9
-
 10
10
-
 11
11
-
 12
12
-
 13
13
-
 14
14
-
 15
15
-
 16
16
-
 17
17
-
 18
18
-
 19
19
-
 20
20
-
 21
21
-
 22
22
-
 23
23
-
 24
24
-
 25
25
-
 26
26
-
 27
27
-
 28
28
-
 29
29
-
 30
30
-
 31
31
-
 32
32
-
 33
33
-
 34
34
-
 35
35
-
 36
36
-
 37
37
-
 38
38
-
 39
39
-
 40
40
-
 41
41
-
 42
42
-
 43
43
-
 44
44
-
 45
45
-
 46
46
-
 47
47
-
 48
48
-
 49
49
-
 50
50
-
 51
51
-
 52
52
-
 53
53
-
 54
54
-
 55
55
-
 56
56


