
S63600CMM1 NL Gebruiksaanwijzing 2
EN User manual 27

INHOUD
1. VEILIGHEIDSVOORSCHRIFTEN . . . . . . . . . . . . . . . . . . . . . . . . . . . . . . . . . . . . . . . . . . . . . . . . 3
2. BESCHRIJVING VAN HET PRODUCT . . . . . . . . . . . . . . . . . . . . . . . . . . . . . . . . . . . . . . . . . . . 6
3. BEDIENINGSPANEEL . . . . . . . . . . . . . . . . . . . . . . . . . . . . . . . . . . . . . . . . . . . . . . . . . . . . . . . . 6
4. DAGELIJKS GEBRUIK . . . . . . . . . . . . . . . . . . . . . . . . . . . . . . . . . . . . . . . . . . . . . . . . . . . . . . . 10
5. NUTTIGE AANWIJZINGEN EN TIPS . . . . . . . . . . . . . . . . . . . . . . . . . . . . . . . . . . . . . . . . . . . 15
6. ONDERHOUD EN REINIGING . . . . . . . . . . . . . . . . . . . . . . . . . . . . . . . . . . . . . . . . . . . . . . . . 16
7. PROBLEMEN OPLOSSEN . . . . . . . . . . . . . . . . . . . . . . . . . . . . . . . . . . . . . . . . . . . . . . . . . . . . 18
8. MONTAGE . . . . . . . . . . . . . . . . . . . . . . . . . . . . . . . . . . . . . . . . . . . . . . . . . . . . . . . . . . . . . . . . 20
9. GELUIDEN . . . . . . . . . . . . . . . . . . . . . . . . . . . . . . . . . . . . . . . . . . . . . . . . . . . . . . . . . . . . . . . . 24
10. TECHNISCHE GEGEVENS . . . . . . . . . . . . . . . . . . . . . . . . . . . . . . . . . . . . . . . . . . . . . . . . . . . 26
VOOR PERFECTE RESULTATEN
Bedankt dat u voor dit AEG product heeft gekozen. Dit apparaat is ontworpen om vele jaren
uitstekend te presteren, met innovatieve technologieën die het leven gemakkelijker helpen
maken – functies die gewone apparaten wellicht niet hebben. Neem een paar minuten de tijd
om het door te lezen zodat u er optimaal van kunt profiteren.
Ga naar onze website voor:
Advies over gebruik, brochures, het oplossen van problemen en
onderhoudsinformatie:
www.aeg.com
Registreer uw product voor een betere service:
www.aeg.com/productregistration
Koop accessoires, verbruiksartikelen en originele reserveonderdelen voor uw
apparaat:
www.aeg.com/shop
KLANTENSERVICE
Wij raden altijd het gebruik van originele onderdelen aan.
Zorg er als u contact opneemt met de klantenservice voor dat u de volgende gegevens bij de
hand hebt.
De informatie staat op het typeplaatje. model, productnummer, serienummer.
Waarschuwing - Belangrijke veiligheidsinformatie.
Algemene informatie en tips
Milieu-informatie
Wijzigingen voorbehouden.
2
www.aeg.com

1.
VEILIGHEIDSVOORSCHRIFTEN
In het belang van uw veiligheid en om
een correct gebruik te kunnen waarbor-
gen is het van belang dat u, alvorens het
apparaat te installeren en in gebruik te
nemen, deze gebruiksaanwijzing, inclu-
sief de tips en waarschuwingen, grondig
doorleest. Om onnodige vergissingen
en ongevallen te voorkomen is het be-
langrijk ervoor te zorgen dat alle mensen
die het apparaat gebruiken, volledig be-
kend zijn met de werking ervan en de
veiligheidsvoorzieningen. Bewaar deze
instructies en zorg ervoor dat zij bij het
apparaat blijven als het wordt verplaatst
of verkocht, zodat iedereen die het ap-
paraat gedurende zijn hele levensduur
gebruikt, naar behoren is geïnformeerd
over het gebruik en de veiligheid van het
apparaat.
Voor de veiligheid van mensen en eigen-
dommen dient u zich aan de voorzorgs-
maatregelen uit dit instructieboekje te
houden, de fabrikant is niet verantwoor-
delijk voor schade die door het niet op-
volgen van de aanwijzingen veroorzaakt
is.
1.1 Veiligheid van kinderen en
kwetsbare mensen
• Dit apparaat is niet bedoeld voor ge-
bruik door personen (waaronder be-
grepen kinderen) met verminderde fy-
sieke, zintuiglijke vermogens of een
gebrek aan ervaring en kennis, tenzij
dit onder toezicht gebeurt van een
voor hun veiligheid verantwoordelijke
persoon of tenzij zij van een dergelijke
persoon instructie hebben ontvangen
over het gebruik van het apparaat.
Houd kinderen uit de buurt om te
voorkomen dat ze met het apparaat
gaan spelen.
• Houd alle verpakkingsmateriaal buiten
het bereik van kinderen. Gevaar voor
verstikking.
• Als u het apparaat afdankt trek dan de
stekker uit het stopcontact, snij de
voedingskabel door (zo dicht mogelijk
bij het apparaat) en verwijder de deur
om te voorkomen dat kinderen een
elektrische schok krijgen of zichzelf in
het apparaat opsluiten.
• Als dit apparaat, dat voorzien is van
een magnetische deursluiting, een ou-
der apparaat vervangt, dat voorzien is
van een veerslot (slot) op de deur of
het deksel, zorg er dan voor dat u het
slot onbruikbaar maakt voordat u het
oude apparaat weggooit. Dit voor-
komt dat kinderen er in opgesloten
kunnen raken.
1.2 Algemene veiligheid
WAARSCHUWING!
Houd de ventilatieopeningen altijd vrij
van obstructies; dit geldt zowel voor los-
staande als ingebouwde modellen.
• Dit apparaat is bedoeld voor het be-
waren van levensmiddelen en/of dran-
ken in een gewoon huishouden en ge-
lijkaardig gebruik zoals:
– personeelskeukens in winkels, kan-
toren of andere werkomgevingen;
– door gasten in hotels, motels en an-
dere residentiële omgevingen;
– bed-and-breakfast-accommodatie;
– catering en gelijkaardige niet-com-
mercieel gebruik.
• Gebruik geen mechanische hulpmid-
delen of kunstgrepen om het ontdooi-
proces te versnellen.
• Gebruik geen andere elektrische ap-
paraten (bijvoorbeeld ijsmachines) in
koelkasten, tenzij ze voor dit doel
goedgekeurd zijn door de fabrikant.
• Let op dat u het koelcircuit niet be-
schadigt.
• Het koelmiddel isobutaan (R600a) be-
vindt zich in het koelcircuit van het ap-
paraat, dit is een natuurlijk gas dat
weliswaar milieuvriendelijk is, maar
ook uiterst ontvlambaar.
Controleer of de onderdelen van het
koelcircuit tijdens transport en installa-
tie van het apparaat niet beschadigd
zijn geraakt.
Indien het koelcircuit beschadigd is:
– open vuur en ontstekingsbronnen
vermijden
NEDERLANDS 3

– de ruimte waar het apparaat zich
bevindt grondig ventileren
• Het is gevaarlijk om wijzigingen aan te
brengen in de specificaties of dit pro-
duct op enigerlei wijze te modificeren.
Een beschadigd netsnoer kan kortslui-
ting, brand en/of een elektrische
schok veroorzaken.
WAARSCHUWING!
Alle elektrische onderdelen (net-
snoer, stekker, compressor) mo-
gen om gevaar te voorkomen
uitsluitend worden vervangen
door een erkende onderhouds-
dienst of gekwalificeerd onder-
houdspersoneel.
1.
Het netsnoer mag niet verlengd
worden.
2.
Verzeker u ervan dat de stekker
niet platgedrukt of beschadigd
wordt door de achterkant van het
apparaat. Een platgedrukte of be-
schadigde stekker kan oververhit
raken en brand veroorzaken.
3.
Verzeker u ervan dat u de stekker
van het apparaat kunt bereiken.
4.
Trek niet aan het snoer.
5.
Als de stekker los zit, steek hem
dan niet in het stopcontact. Dan
bestaat er een risico op een elek-
trische schok of brand.
6.
U mag het apparaat niet gebrui-
ken zonder het afdekkapje (indien
van toepassing) van het lampje.
• Dit apparaat is zwaar. Wees voorzich-
tig als u het apparaat verplaatst.
• Haal geen artikelen uit het vriesvak en
raak ze niet aan als uw handen voch-
tig/nat zijn, dit kan uw huid beschadi-
gen of vrieswonden veroorzaken.
• Stel het apparaat niet langdurig bloot
aan direct zonlicht.
• De eventuele gloeilampen in dit appa-
raat zijn speciaal geselecteerd en uit-
sluitend bedoeld voor gebruik in huis-
houdelijke apparaten. De lampjes zijn
niet geschikt voor de verlichting van
ruimtes.
1.3 Dagelijks gebruik
• Zet geen hete potten op de kunststof
onderdelen in het apparaat.
• Bewaar geen brandbare gassen of
vloeistoffen in het apparaat, deze kun-
nen ontploffen.
• Zet geen levensmiddelen direct tegen
de luchtopening in de achterwand.
(Als het apparaat rijpvrij is)
• Diepgevroren voedsel mag niet op-
nieuw worden ingevroren als het een-
maal ontdooid is.
• Bewaar voorverpakte diepvriesproduc-
ten volgens de aanwijzingen van de
fabrikant.
• U dient zich strikt te houden aan de
aanbevelingen van de fabrikant van
het apparaat met betrekking tot het
bewaren van voedsel. Raadpleeg de
betreffende aanwijzingen.
• Leg geen koolzuurhoudende of mous-
serende dranken in de vriezer, deze
veroorzaken druk op de fles die daar-
door kan ontploffen, dit kan schade
toebrengen aan het apparaat.
• IJslollies kunnen vrieswonden veroor-
zaken als ze rechtstreeks vanuit het
apparaat geconsumeerd worden.
1.4 Onderhoud en reiniging
• Schakel het apparaat uit en trek de
stekker uit het stopcontact voordat u
onderhoudshandelingen verricht.
• Maak het apparaat niet schoon met
metalen voorwerpen.
• Gebruik geen scherpe voorwerpen om
ijs van het apparaat te krabben. Ge-
bruik een kunststof schraper.
• Controleer de afvoer in de koelkast re-
gelmatig op dooiwater. Maak de af-
voer, indien nodig, schoon. Als de af-
voer verstopt is, zal er water op de bo-
dem van het apparaat liggen.
1.5 Installatie
Voor de aansluiting van elektrici-
teit dienen de instructies in de
desbetreffende paragrafen
nauwgezet te worden opge-
volgd.
• Pak het apparaat uit en controleer of
er beschadigingen zijn. Sluit het appa-
raat niet aan als het beschadigd is.
Meld mogelijke beschadigingen on-
middellijk bij de winkel waar u het ap-
4
www.aeg.com

paraat gekocht heeft. Gooi in dat ge-
val de verpakking niet weg.
• Wij adviseren u om 4 uur te wachten
voordat u het apparaat aansluit, dan
kan de olie terugvloeien in de com-
pressor.
• Rond het apparaat dient adequate
luchtcirculatie te zijn, anders kan dit
tot oververhitting leiden. Om voldoen-
de ventilatie te verkrijgen de instruc-
ties met betrekking tot de installatie
opvolgen.
• De achterkant dient zo mogelijk tegen
een muur geplaatst te worden, tenein-
de te voorkomen dat hete onderdelen
(compressor, condensator) aangeraakt
kunnen worden en brandwonden ver-
oorzaken.
• Het apparaat mag niet vlakbij radiato-
ren of kooktoestellen geplaatst wor-
den.
• Verzeker u ervan dat de stekker be-
reikbaar is nadat het apparaat geïn-
stalleerd is.
• Aansluiten op de drinkwatervoorzie-
ning (indien voorzien van een water-
aansluiting).
1.6 Service
• Alle elektrotechnische werkzaamhe-
den die noodzakelijk zijn voor het uit-
voeren van onderhoud aan het appa-
raat, dienen uitgevoerd te worden
door een gekwalificeerd elektricien of
competent persoon.
• Verwijder het afdekplaatje van de
LED-verlichting niet. Neem contact op
met de dichtstbijzijnde After Sales
Service om het LED-lichtbord indien
nodig te vervangen.
• Dit product mag alleen worden onder-
houden door een erkend onderhouds-
centrum en er dient alleen gebruik te
worden gemaakt van originele reser-
veonderdelen.
1.7 Bescherming van het
milieu
Dit apparaat bevat geen gassen
die de ozonlaag kunnen bescha-
digen, niet in het koelcircuit en
evenmin in de isolatiematerialen.
Het apparaat mag niet worden
weggegooid bij het normale
huishoudelijke afval. Het isolatie-
schuim bevat ontvlambare gas-
sen: het apparaat moet wegge-
gooid worden conform de van
toepassing zijnde regels die u bij
de lokale overheidsinstanties
kunt verkrijgen. Voorkom be-
schadiging aan de koeleenheid,
vooral aan de achterkant bij de
warmtewisselaar. De materialen
die gebruikt zijn voor dit appa-
raat en die voorzien zijn van het
symbool
zijn recyclebaar.
NEDERLANDS 5

2. BESCHRIJVING VAN HET PRODUCT
2 3 8 9 1071
11121314
4 65
1
Maxibox-lade
2
Freshbox-lade
3
Temperatuurweergave
4
Glazen planken
5
DynamicAir koeling
6
Flessenrek
7
Bedieningspaneel
8
Boterschap
9
Deurplateaus
10
Flessenrek
11
Vriesmand
12
Maxibox-lade
13
Frostmatic-mandje
14
Typeplaatje
3. BEDIENINGSPANEEL
1 2 3 4 5 6 7 8
6
www.aeg.com

1
Apparaat ON/OFF -toets
2
Toets om de temperatuur van de
koelkast lager te zetten
3
Toets om de temperatuur van de
koelkast hoger te zetten
4
Mode-toets
5
OK -toets
6
Toets om de temperatuur van de
vriezer lager te zetten
7
Toets om de temperatuur van de
vriezer hoger te zetten
8
Display
Het is mogelijk om het vooraf ingestelde
geluid van toetsen te wijzigen in een
hard geluid door de Mode -toets en de
toets om de temperatuur kouder te zet-
ten, tegelijkertijd gedurende enkele se-
conden in te drukken. U kunt deze wijzi-
ging ongedaan maken.
3.1 Display
Off
COOL FROST
MATICMATIC
min
KL J HI
F GDCBA E
• A. Indicatielampje koelvak
• B. Temperatuur- en timerlampje van
de koelkast
• C. Lampje koelkast uit
• D. COOLMATIC-functie
• E. Vakantiefunctie
• F. FROSTMATIC-functie
• G. Vriezertemperatuur-indicator
• H. Indicatie vriescompartiment
• I. Alarmindicator
• J. Kinderslotfunctie
• K. Minute Minder-functie
• L. Vochtigheidsfunctie
3.2 Inschakelen
Ga als volgt te werk om het apparaat in
te schakelen:
1.
Steek de stekker in het stopcontact.
2.
Druk op de ON/OFF -toets van het
apparaat als het display uit is.
3.
Het alarm kan na een paar seconden
afgaan.
Zie 'Alarm hoge temperatuur' voor
informatie over het resetten van het
alarm.
4.
Als "dEMo" verschijnt op het dis-
play, staat het apparaat in de de-
monstratiestand. Raadpleeg 'Pro-
bleemoplossing'.
5.
Het temperatuurlampje toont de in-
gestelde standaardtemperatuur.
Zie 'Temperatuurregeling' om een ande-
re temperatuur in te stellen.
3.3 Uitschakelen
Ga als volgt te werk om het apparaat uit
te schakelen:
1.
Druk de ON/OFF-toets van het ap-
paraat gedurende 5 seconden in.
2.
Het display wordt uitgeschakeld.
3.
Trek de stekker uit het stopcontact
om de stroomtoevoer naar het ap-
paraat af te sluiten.
3.4 De koelkast uitschakelen
Voor uitschakeling van de koelkast:
1.
Druk op de Mode-toets tot het bij-
behorende pictogram verschijnt.
De indicator als de koelkast uit is en
de indicator van het koelkastvak
knipperen.
Het temperatuurlampje van de koel-
kast toont streepjes.
2.
Druk op de OK-toets om te bevesti-
gen.
3.
Het indicatielampje Koelkast uit
wordt getoond.
3.5 De koelkast inschakelen
Voor inschakeling van de koelkast:
1.
Druk op de temperatuurknop van de
koelkast.
Of:
1.
Druk op de Mode-knop tot het bij-
behorende pictogram verschijnt.
Het indicatielampje Koelkast uit
knippert.
2.
Druk op de OK-knop om te bevesti-
gen.
NEDERLANDS 7

3.
Het indicatielampje Koelkast uit gaat
uit.
Zie 'Temperatuuregeling' om een ande-
re temperatuur in te stellen.
3.6 Temperatuurregeling
De ingestelde temperatuur van de koel-
kast en de vriezer kan worden ingesteld
met de temperatuurknoppen.
Standaard ingestelde temperatuur:
• +5°C voor de koelkast
• -18 °C voor de vriezer
De temperatuurweergave toont de inge-
stelde temperatuur.
De ingestelde temperatuur zal binnen 24
uur worden bereikt.
Schommelingen van een paar graden
rond de ingestelde temperatuur zijn nor-
maal en zijn geen storing van het appa-
raat.
Na een stroomonderbreking
blijft de ingestelde temperatuur
opgeslagen.
3.7 Minute Minder-functie
DeMinute Minder -functie wordt ge-
bruikt om een akoestisch alarm in te stel-
len op een gekozen tijd. Dit is bijvoor-
beeld nuttig wanneer een recept gedu-
rende een bepaalde tijd moet afkoelen
of wanneer u niet wilt vergeten dat u
flessen in de vriezer hebt geplaatst om
ze snel te laten afkoelen.
Om de functie aan te zetten:
1.
Druk op de Mode-knop tot het bij-
behorende pictogram verschijnt.
Het Minute Minder indicatielampje
knippert.
De Timer toont gedurende enkele
seconden de ingestelde waarde (30
minuten).
2.
Druk op de knop Koeltemperatuur
om de waarde van de timer te wijzi-
gen van 1 tot 90 minuten.
3.
Druk op de OK-toets om te bevesti-
gen.
Het Minute Minder -indicatielampje
wordt weergegeven.
De timer begint te knipperen (min).
Op het einde van de aftelling knippert
het Minute Minder -lampje en klinkt een
alarm:
1.
Verwijder alle drankjes uit het vries-
vak.
2.
Druk op de OK -knop om de klank
uit te schakelen en de functie te be-
eindigen.
De functie kan op elk moment worden
uitgeschakeld tijdens het aftellen:
1.
Druk op de Mode-knop tot het Mi-
nute Minder -lampje knippert.
2.
Druk op de OK-toets om te bevesti-
gen.
3.
Het Minute Minder -lampje gaat uit.
U kunt de tijd tijdens het aftellen en na
afloop altijd wijzigen door op de knop
Koeltemperatuur kouder en de knop
Koeltemperatuur warmer te drukken.
3.8 Kinderslot-functie
Selecteer de kinderslotfunctie om de be-
diening van de knoppen te vergrendelen
tegen onbedoelde bediening.
Voor inschakeling van de functie:
1.
Druk op de Mode-knop tot het bij-
behorende pictogram verschijnt.
2.
Het indicatielampje Kinderslot knip-
pert.
3.
Druk op de OK-knop om te bevesti-
gen.
Het indicatielampje Kinderslot wordt
getoond.
Voor uitschakeling van de functie:
1.
Druk op de Mode-knop tot het indi-
catielampje Kinderslot knippert.
2.
Druk op de OK-knop om te bevesti-
gen.
3.
Het indicatielampje Kinderslot gaat
uit.
3.9 Alarm hoge temperatuur
Een toename van de temperatuur in de
vriesruimte (bijvoorbeeld door een eer-
dere stroomuitval) wordt aangegeven
door:
• knipperende indicatielampjes van het
alarm en de vriezertemperatuur
• het geluid van de zoemer.
Om het alarm te resetten:
1.
Druk op een willekeurige toets.
2.
De zoemer gaat uit.
3.
De temperatuurweergave van de
vriezer toont de hoogste tempera-
8
www.aeg.com

tuur gedurende een aantal secon-
den. En toont dan weer de ingestel-
de temperatuur.
4.
Het indicatielampje alarm blijft knip-
peren totdat de normale omstandig-
heden zijn hersteld.
Als het alarm is teruggekeerd, gaat het
indicatielampje alarm uit.
3.10 COOLMATIC-functie
Als u een grote hoeveelheid warm voed-
sel, bijvoorbeeld na het doen van de
boodschappen, in de koelkast wilt plaat-
sen, adviseren wij u de COOLMATIC-
functie in te schakelen om deze produc-
ten sneller te koelen en om te voorko-
men dat voedsel dat al in de koelkast
ligt warm wordt.
Om de functie aan te zetten:
1.
Druk op de Mode-knop tot het bij-
behorende pictogram verschijnt.
Het COOLMATIC indicatielampje
knippert.
2.
Druk op de OK-toets om te bevesti-
gen.
Het COOLMATIC -indicatielampje
wordt weergegeven.
De COOLMATIC-functie wordt automa-
tisch na ongeveer 6 uur uitgeschakeld.
Om de functie uit te schakelen voor de-
ze automatisch afloopt:
1.
Druk op de Mode-knop tot het
COOLMATIC-lampje knippert.
2.
Druk op de OK-toets om te bevesti-
gen.
3.
Het COOLMATIC-lampje gaat uit.
De functie gaat uit door een an-
dere ingestelde koelkasttempe-
ratuur te selecteren.
3.11 Vakantiefunctie
Met deze functie kunt u de koelkast ge-
sloten en leeg houden tijdens een lange
vakantieperiode zonder dat u vieze
luchtjes krijgt.
Als de vakantiefunctie actief is,
moet het koelvak leeg zijn.
Voor inschakeling van de functie:
1.
Druk op de Mode-knop tot het bij-
behorende pictogram verschijnt.
Het indicatielampje Vakantie knip-
pert.
De temperatuurweergave van de
koelkast toont de ingestelde tempe-
ratuur.
2.
Druk op de OK-knop om te bevesti-
gen.
Het indicatielampje Vakantie wordt
getoond.
Voor uitschakeling van de functie:
1.
Druk op de Mode-knop tot het indi-
catielampje Vakantie knippert.
2.
Druk op de OK-knop om te bevesti-
gen.
3.
Het indicatielampje Vakantie gaat
uit.
De functie gaat uit door een an-
dere ingestelde koelkasttempe-
ratuur te selecteren.
3.12 Functie extra vochtigheid
Indien u de vochtigheid van de koelkast
wilt verhogen, raden we u aan de functie
Extra Vochtigheid te activeren:
Om de functie aan te zetten:
1.
Druk op de Mode-knop tot het bij-
behorende pictogram verschijnt.
Het indicatielampje Extra Vochtig-
heid knippert.
2.
Druk op de toets OK om te bevesti-
gen.
Het indicatielampje Extra Vochtig-
heid wordt weergegeven.
Om de functie uit te zetten:
1.
Druk op de Mode-knop tot het indi-
catielampje Extra Vochtigheid knip-
pert.
2.
Druk op de toets OK om te bevesti-
gen.
3.
Het indicatielampje Extra Vochtig-
heid gaat uit.
3.13 FROSTMATIC-functie
Om de functie aan te zetten:
1.
Druk op de Mode-knop tot het bij-
behorende pictogram verschijnt.
Het FROSTMATIC indicatielampje
knippert.
2.
Druk op de OK-toets om te bevesti-
gen.
NEDERLANDS 9

Het FROSTMATIC -indicatielampje
wordt weergegeven.
Deze functie stopt automatisch na 52
uur.
Om de functie uit te schakelen voor de-
ze automatisch afloopt:
1.
Druk op de Mode-knop tot het
FROSTMATIC-lampje knippert.
2.
Druk op de OK-toets om te bevesti-
gen.
3.
Het FROSTMATIC-lampje gaat uit.
Plaats het verse voedsel dat
moet worden ingevroren in de
FROSTMATIC-lade.
De functie gaat uit door een an-
dere ingestelde vriezertempera-
tuur te selecteren.
3.14 Alarm bij open deur
Als de koelkastdeur enkele minuten
heeft opengestaan klinkt er een akoes-
tisch alarm. De alarmtoestand bij geo-
pende deur wordt aangegeven door:
• een knipperende alarmindicatie
• een zoemer
Als de normale omstandigheden zijn
hersteld (deur gesloten), wordt het
akoestische alarm uitgeschakeld.
4. DAGELIJKS GEBRUIK
4.1 Vers voedsel invriezen
Het vriesvak is geschikt voor het invrie-
zen van vers voedsel en voor het voor
een lange periode bewaren van ingevro-
ren en diepgevroren voedsel.
Om vers voedsel in te vriezen, acvtiveer
de FROSTMATIC functie ten minste 24
uur voordat u het in te vriezen voedsel in
het vriesvak legt.
Plaats het verse voedsel dat moet wor-
den ingevroren in het FROSTMATIC-
compartiment.
De maximale hoeveelheid voedsel die in
24 uur ingevroren kan worden is vermeld
op het typeplaatje, een etiket dat aan
de binnenkant van het apparaat zit.
Het invriesproces duurt 24 uur. Vries tij-
dens deze periode geen ander voedsel
in.
4.2 Het bewaren van
ingevroren voedsel
Als u het apparaat voor het eerst of na
een periode dat het niet gebruikt is in-
schakelt, het apparaat minstens 2 uur la-
ten werken voordat u er producten in
plaatst.
De vriesladen zorgen ervoor dat u het
voedselpakket dat u wenst, snel en mak-
kelijk kan vinden. Indien grote hoeveel-
heden voedsel moeten worden be-
waard, verwijder dan alle lades behalve
de onderste lade die nodig is voor een
goede luchtcirculatie. Het voedsel kan
op alle schappen tot 15 mm ver naar de
deur uitsteken.
In het geval van onbedoelde ont-
dooiing, bijvoorbeeld als de
stroom langer is uitgevallen dan
de duur die op de kaart met
technische kenmerken onder
'tijdsduur' is vermeld, moet het
ontdooide voedsel snel geconsu-
meerd worden of onmiddellijk
bereid worden en dan weer wor-
den ingevroren (nadat het afge-
koeld is).
4.3 Ontdooien
Diepgevroren of ingevroren voedsel
kunt, voordat het gebruikt wordt, in het
koelvak of op kamertemperatuur laten
ontdooien, afhankelijk van de hoeveel-
heid tijd die hiervoor nodig is.
Kleine stukken kunnen zelfs rechtstreeks
vanuit de vriezer gekookt worden als ze
nog bevroren zijn: in dat geval zal de be-
reiding iets langer duren.
10
www.aeg.com

4.4 Temperatuurweergave
Thermostaat moet bijgesteld worden
Juiste temperatuur
OK
Om u te helpen uw apparaat correct te
bedienen, hebben we uw koelkast uitge-
rust met een temperatuurlampje.
Het symbool aan de zijkant duidt het
koudste deel van de koelkast aan.
Het koudste deel is het deel van de gla-
zen legplank van de fruit- en groentenla-
de tot aan het symbool of tot de leg-
plank ter hoogte van het symbool.
Om ervoor te zorgen dat het voedsel op
de juiste manier bewaard wordt, zorg er-
voor dat het temperatuurlampje het be-
richt "OK" weergeeft.
Indien "OK" niet wordt weergegeven,
stel dan de temperatuur in op een lage-
re temperatuur en wacht 12 uur alvorens
de temperatuur nogmaals te controle-
ren.
Het is normaal dat het bericht "OK" ver-
dwijnt nadat u voedsel in het apparaat
geplaatst hebt of na herhaaldelijk ope-
nen van de deur.
4.5 Luchtkoeling
Met de ClimaTech-technologie wordt
voedsel snel gekoeld en wordt de tem-
peratuur in het koelvak gelijkmatiger.
Deze voorziening maakt snelle koeling
van levensmiddelen mogelijk en zorgt
voor een gelijkmatiger temperatuur in
het vak.
NEDERLANDS 11

4.6 Koolstofluchtfilter
CLEANAIR CONTROL
Uw apparaat is voorzien van een kool-
stoffilter CLEANAIR CONTROL die zich
achter een klepje op de achterkant van
het koelvak bevindt.
Het filter zuivert de lucht van ongewen-
ste geuren in de koelkast en het LONG-
FRESH -vak, waardoor de bewaarkwali-
teit verder wordt verbeterd.
Houd tijdens de werking de ventilatiek-
lep altijd gesloten.
4.7 Verplaatsbare schappen
De wanden van de koelkast zijn voorzien
van een aantal geleiders zodat de schap-
pen op de gewenste plaats gezet kun-
nen worden.
4.8 Flessenrek
Plaats de flessen (met de openingen
naar voren gericht) in het voorgeplaatste
schap.
Als het schap horizontaal geplaatst is,
mogen alleen afgesloten flessen worden
neergezet.
Dit schap voor een flessenhouder kan
worden gekanteld om vooraf geopende
flessen te bewaren. Trek hiervoor de
houder omhoog zodat deze omhoog
draait en op het niveau erboven kan
worden geplaatst.
12
www.aeg.com

4.9 Het plaatsen van de deurplateaus
2
1
3
Om het bewaren van voedselpakketten
van verschillende afmetingen mogelijk te
maken, kunnen de schappen op verschil-
lende hoogtes worden geplaatst.
Om deze aanpassingen uit te voeren,
gaat u als volgt te werk:
trek het schap geleidelijk in de richting
van de pijlen totdat het los komt en
plaats het schap op een andere gewen-
ste hoogte terug.
4.10 FreshBox lade
Deze functie maakt snelle koeling van le-
vensmiddelen mogelijk en zorgt voor
een gelijkmatige temperatuur in de lade.
Om de functie aan te zetten:
1.
Schakel de functie COOLMATIC in.
2.
Het COOLMATIC-lampje gaat bran-
den.
3.
Schuif de klep naar boven zoals
weergegeven op de afbeelding.
Om de functie uit te zetten:
1.
Schuif de klep naar beneden.
2.
Schakel de COOLMATIC-functie uit.
3.
Het COOLMATIC-lampje gaat uit.
De functie wordt na enkele uren
automatisch uitgeschakeld.
4.11 ProFresh Stand
Als het compartiment niet als FreshBox
nodig is, dan kunnen de instellingen
worden gewijzigd om een koude lade te
verkrijgen.
NEDERLANDS 13

Om de functie aan te zetten:
1.
Schuif de klep naar boven zoals
weergegeven op de afbeelding.
Om de functie uit te zetten:
1.
Schuif de klep naar beneden.
4.12 QuickChill van dranken
Deze functie stelt u in staat om dranken
snel te koelen.
Om de functie aan te zetten:
1.
Verwijder de FreshBox-lade, of
plaats deze omhoog, en plaats het
flessenrek voor de QuickChill ope-
ningen, zoals weergegeven op de
afbeelding.
2.
Schakel de functie COOLMATIC in.
3.
Het COOLMATIC-lampje gaat bran-
den.
4.
Schuif de klep naar boven zoals
weergegeven op de afbeelding.
Om de functie uit te zetten:
1.
Schuif de klep naar beneden.
2.
Schakel de COOLMATIC-functie uit.
3.
Het COOLMATIC-lampje gaat uit.
De functie wordt na enkele uren
automatisch uitgeschakeld.
4.13 MAXIBOX lade
De lade is geschikt voor het opbergen
van fruit en groente.
Er zit een schotje in de lade dat in ver-
schillende standen gezet kan worden om
aan persoonlijke behoeftes te voldoen.
Er zit een rooster (indien aanwezig) op
de bodem van de lade om fruit en
groente op afstand te houden van even-
tuele vochtigheid op het oppervlak van
de bodem.
Verwijder alle delen in de lade voor
schoonmaakwerkzaamheden.
14
www.aeg.com

4.14 Vriesmandjes uit de vriezer verwijderen
2
1
De vriesmandjes hebben een limietstop
om te voorkomen dat ze per ongeluk
verschuiven of vallen. Trek de korf naar u
toe om het uit de vriezer te halen, tot
het niet verder kan, verwijder de korf
door de voorkant naar boven te kante-
len.
Bij het terugzetten tilt u de voorkant van
de korf een beetje op en schuift u hem
gekanteld in de vriezer. Zodra het mand-
je over de eindpunten heen is, kunt u
hem terug op zijn plaats schuiven.
5. NUTTIGE AANWIJZINGEN EN TIPS
5.1 Normale bedrijfsgeluiden
• U kunt een zwak gorgelend en borre-
lend geluid horen wanneer het koel-
middel door leidingen wordt ge-
pompt. Dit is normaal.
• Als de compressor aan staat, wordt
het koelmiddel rondgepompt en dan
zult u een zoemend en kloppend ge-
luid van de compressor horen. Dit is
normaal.
• De thermische uitzetting kan een plot-
seling krakend geluid veroorzaken. Dit
is een natuurlijk, niet gevaarlijk fysisch
verschijnsel. Dit is normaal.
5.2 Tips voor
energiebesparing
• De deur niet vaker openen of open la-
ten staan dan strikt noodzakelijk.
• Als de omgevingstemperatuur hoog
is, de thermostaatknop op een lage
temperatuur staat en het apparaat vol-
ledig gevuld is, kan de compressor
continu aan staan waardoor er ijs op
de verdamper ontstaat. Als dit ge-
beurt, zet u de thermostaatknop naar
een warmere instelling om de koelkast
automatisch te laten ontdooien en zo
elektriciteitsverbruik te besparen.
5.3 Tips voor het koelen van
vers voedsel
Om de beste prestatie te verkrijgen:
• Zet geen warm voedsel of verdampen-
de vloeistoffen in de koelkast
• dek het voedsel af of verpak het, in
het bijzonder als het een sterke geur
heeft
• plaats het voedsel zodanig dat de
lucht er vrijelijk omheen kan circuleren
5.4 Nuttige tips voor het
koelen
Nuttige tips:
Vlees (alle soorten) in plastic zakken ver-
pakken en op het glazen schap leggen,
boven de groentelade.
Bewaar het, voor de veiligheid, slechts
een of maximaal twee dagen op deze
manier.
Gekookt voedsel, koude schotels, enz.:
deze moeten afgedekt worden en mo-
gen op willekeurig welk schap gezet
worden.
Fruit en groente: deze moeten zorgvul-
dig schoongemaakt worden en in de
speciaal daarvoor bedoelde lade(n) ge-
plaatst worden.
Boter en kaas: dit moet in speciale lucht-
dichte bakjes gelegd of in aluminiumfo-
lie of plastic zakjes gewikkeld worden
NEDERLANDS 15

om zoveel mogelijk lucht buiten te slui-
ten.
Melkflessen: deze moeten een afdekdop
hebben en opgeslagen worden in het
flessenrek in de deur.
Bananen, aardappelen, uien en knof-
look, indien niet verpakt, mogen niet in
de koelkast bewaard worden.
5.5 Tips voor het invriezen
Om u te helpen om het beste van het in-
vriesproces te maken, volgen hier een
paar belangrijke tips:
• de maximale hoeveelheid voedsel die
in 24 uur ingevroren kan worden. is
vermeld op het typeplaatje;
• het invriesproces duurt 24 uur. Voeg
gedurende deze periode niet meer in
te vriezen voedsel toe;
• vries alleen vers en grondig schoonge-
maakte levensmiddelen van uitsteken-
de kwaliteit in;
• bereid het voedsel in kleine porties
voor, zo kan het snel en volledig wor-
den ingevroren en zo kunt u later al-
leen die hoeveelheid laten ontdooien
die u nodig heeft;
• wikkel het voedsel in aluminiumfolie of
plastic en zorg ervoor dat de pakjes
luchtdicht zijn;
• leg vers, nog niet ingevroren voedsel
niet tegen het al ingevroren voedsel,
om te voorkomen dat dit laatste warm
wordt;
• smalle pakjes zijn makkelijker op te
bergen dan dikke; zout maakt voedsel
minder lang houdbaar;
• water bevriest, als dit rechtstreeks uit
het vriesvak geconsumeerd wordt, kan
het aan de huid vastvriezen;
• het is aan te bevelen de invriesdatum
op elk pakje te vermelden, dan kunt u
zien hoe lang het al bewaard is;
5.6 Tips voor het bewaren van
ingevroren voedsel
De vriesmanden zorgen ervoor dat u het
voedselpakket dat u wenst, snel en mak-
kelijk kan vinden. Indien grote hoeveel-
heden voedsel moeten worden be-
waard, verwijder dan alle lades behalve
de onderste mand die nodig is voor een
goede luchtcirculatie.
Om de beste resultaten van dit apparaat
te verkrijgen, dient u:
• verzeker u ervan dat de commercieel
ingevroren levensmiddelen op ge-
schikte wijze door de detailhandelaar
werden opgeslagen;
• zorg ervoor dat de ingevroren levens-
middelen zo snel mogelijk van de win-
kel naar uw vriezer gebracht worden;
• de deur niet vaker te openen of open
te laten staan dan strikt noodzakelijk;
• als voedsel eenmaal ontdooid is, be-
derft het snel en kan het niet opnieuw
worden ingevroren;
• bewaar het voedsel niet langer dan de
door de fabrikant aangegeven be-
waarperiode.
6. ONDERHOUD EN REINIGING
6.1 De binnenkant
schoonmaken
Voordat u het apparaat voor de eerste
keer gebruikt, wast u de binnenkant en
de interne accessoires met lauwwarm
water en een beetje neutrale zeep om
de typische geur van een nieuw product
weg te nemen. Droog daarna grondig
af.
Gebruik geen oplosmiddelen of
schuurmiddelen. Deze beschadi-
gen de lak.
LET OP!
Voordat u welke onderhoudshan-
deling dan ook verricht, de stek-
ker uit het stopcontact trekken.
Het koelcircuit van dit apparaat
bevat koolwaterstoffen; onder-
houd en herladen mag alleen uit-
16
www.aeg.com

gevoerd worden door bevoegde
technici.
6.2 Periodieke reiniging
Het apparaat moet regelmatig worden
schoongemaakt:
• maak de binnenkant en de accessoires
schoon met lauw water en wat neutra-
le zeep.
• controleer de afdichtingen regelmatig
en wrijf ze schoon om u ervan te ver-
zekeren dat ze schoon zijn en vrij van
restjes zijn.
• spoel ze af en maak ze grondig droog.
Trek niet aan leidingen en/of ka-
bels aan de binnenkant van de
kast en verplaats of beschadig ze
niet.
Gebruik nooit schoonmaakmid-
delen, schuurpoeders, erg ge-
parfumeerde reinigingsproduc-
ten en waspolijstmiddelen om de
binnenkant schoon te maken,
aangezien deze het oppervlak
beschadigen en een sterke geur
achterlaten.
Maak de condensor (zwart rooster) en de
compressor op de achterkant van het
apparaat schoon met een borstel of stof-
zuiger. Deze handeling zal de prestatie
van het apparaat verbeteren en het elek-
triciteitsverbruik besparen.
Zorg ervoor dat u het koelsys-
teem niet beschadigt.
Veel normaal verkrijgbare keukenreini-
gers bevatten chemicaliën die de kunst-
stoffen die in dit apparaat gebruikt zijn
kunnen aantasten/beschadigen. Daarom
wordt het aanbevolen de buitenkant van
dit apparaat alleen schoon te maken
met warm water met een beetje afwas-
middel.
Steek, na het schoonmaken van het ap-
paraat, de stekker weer in het stopcon-
tact.
6.3 Het ontdooien van de
koelkast
Rijp wordt elke keer als de compressor-
motor tijdens normale werking stopt, au-
tomatisch van de verdamper van het
koelvak verwijderd. Het dooiwater loopt
via een gootje in een speciale opvang-
bak aan de achterkant van het apparaat,
boven de compressormotor, waar het
verdampt.
Het is belangrijk om het afvoergaatje
van het dooiwater in het midden van het
koelvak regelmatig schoon te maken om
te voorkomen dat het water overloopt
en op het voedsel in de koelkast gaat
druppelen. Gebruik daarvoor de specia-
le reiniger, die al in het afvoergaatje zit.
6.4 Ontdooien
Uw apparaat is rijpvrij. Dit betekent dat
er geen rijp gevormd wordt als het vries-
vak werkt, noch op de binnenwanden,
noch op het voedsel.
Dit komt door de continue circulatie van
koude lucht binnen het vak door een au-
tomatisch aangedreven ventilator.
NEDERLANDS 17

7. PROBLEMEN OPLOSSEN
LET OP!
Voordat u problemen oplost,
trekt u eerst de stekker uit het
stopcontact.
Alleen een gekwalificeerd elek-
trotechnicus of een bevoegd
persoon mag problemen oplos-
sen die niet in deze handleiding
beschreven zijn.
Tijdens een normale gebruik
hoort u geluiden (compressor,
koelmiddelcirculatie).
Probleem Mogelijke oorzaak Oplossing
Het apparaat maakt
lawaai.
Het apparaat is niet ste-
vig en stabiel geplaatst.
Controleer of het apparaat
stabiel staat (alle vier de
voetjes moeten op de
vloer staan).
De compressor
werkt continu.
De thermostaatknop staat
misschien niet goed.
Stel een hogere tempera-
tuur in.
De deur is niet goed ge-
sloten.
Zie 'De deur sluiten'.
De deur is te vaak geo-
pend.
Laat de deur niet langer
dan nodig openstaan.
De temperatuur van het
product is te hoog.
Laat het product afkoelen
tot kamertemperatuur
voordat u het opbergt.
De omgevingstempera-
tuur is te hoog.
Verlaag de omgevingstem-
peratuur.
De functie FROSTMATIC
is ingeschakeld
Raadpleeg " FROSTMA-
TIC functie"
De functie COOLMATIC
is ingeschakeld
Raadpleeg " COOLMATIC
functie"
Er loopt water over
de achterkant van de
koelkast.
Tijdens het automatische
ontdooiproces ontdooit
de rijp tegen de achter-
wand.
Dit is normaal.
Er loopt water in de
koelkast.
De waterafvoer is ver-
stopt.
Reinig de waterafvoer.
Producten verhinderen
dat water in de waterop-
vangbak kan stromen.
Zorg ervoor dat de pro-
ducten de achterwand niet
raken.
Er loopt water over
de vloer.
De dooiwaterafvoer loopt
niet in de verdamperbak
boven de compressor.
Maak de dooiwaterafvoer
vast op de verdamperbak.
Er is te veel rijp en
ijs.
De producten zijn niet op
de juiste wijze verpakt.
Pak de producten beter in.
De deur is niet goed ge-
sloten.
Zie 'De deur sluiten'.
18
www.aeg.com

Probleem Mogelijke oorzaak Oplossing
De temperatuur in de
koelkast is te laag.
Stel een hogere tempera-
tuur in.
De temperatuur in
het apparaat is te
hoog.
De deur is niet goed ge-
sloten.
Zie 'De deur sluiten'.
De temperatuur van het
product is te hoog.
Laat het product afkoelen
tot kamertemperatuur
voordat u het opbergt.
Er zijn veel producten te-
gelijk opgeborgen.
Berg minder producten te-
gelijk op.
De temperatuur in
de koelkast is te
hoog.
Er is geen koude luchtcir-
culatie in het apparaat
aanwezig.
Zorg ervoor dat er koude
luchtcirculatie in het appa-
raat aanwezig is.
De temperatuur in
de vriezer is te
hoog.
Producten zijn te dicht op
elkaar geplaatst.
Berg de producten zo op
dat er een koude luchtcir-
culatie is.
Het apparaat werkt
niet.
Het apparaat is uitge-
schakeld.
Schakel het apparaat in.
De stekker zit niet goed
in het stopcontact.
Steek de stekker goed in
het stopcontact.
Het apparaat krijgt geen
stroom. Er staat geen
spanning op het stopcon-
tact.
Sluit een ander elektrisch
apparaat op het stopcon-
tact aan. Neem contact op
met een gekwalificeerd
elektricien.
Het lampje werkt
niet.
Het lampje staat in stand-
by.
Sluit en open de deur.
"dEMo" verschijnt
op het display.
Het apparaat staat in de
demonstratiestand.
Houd de knop OK onge-
veer 10 seconden inge-
drukt tot er een lang
zoemgeluid klinkt en het
display even uit gaat: het
apparaat gaat weer wer-
ken.
Bel, wanneer het advies niet tot resultaten leidt, de dichtstbijzijnde klantenservice
voor dit merk.
7.1 De deur sluiten
1.
Maak de afdichtingen van de deur
schoon.
2.
Stel de deur, indien nodig, af. Raad-
pleeg "Montage".
3.
Vervang, indien nodig, de defecte
deurafdichtingen. Neem contact op
met de klantenservice.
1.1 Het lampje vervangen
Het apparaat is uitgerust met een LED-
binnenlampje dat een lange levensduur
heeft.
Alleen een onderhoudsmonteur mag de
verlichting vervangen. Neem contact op
met uw servicecentrum.
NEDERLANDS 19

8. MONTAGE
WAARSCHUWING!
Lees voor uw eigen veiligheid en
correcte werking van het appa-
raat eerst de "veiligheidsinforma-
tie" aandachtig door, alvorens
het apparaat te installeren.
8.1 Opstelling
Installeer dit apparaat op een plaats
waar de omgevingstemperatuur over-
eenkomt met de klimaatklasse die ver-
meld is op het typeplaatje van het appa-
raat:
Kli-
maat-
klasse
Omgevingstemperatuur
SN +10°C tot + 32°C
N +16°C tot + 32°C
ST +16°C tot + 38°C
T +16°C tot + 43°C
8.2 Locatie
A
B
100 mm
min
20 mm
Het apparaat moet ver van hittebronnen,
zoals radiatoren, boilers, direct zonlicht
enz., vandaan worden geïnstalleerd.
Zorg er voor dat de lucht vrij kan circule-
ren aan de achterkant van de kast. Als
het apparaat onder een wandkast wordt
geplaatst, moet de minimale afstand tus-
sen de bovenkant van de kast en de
wandkast ten minste 100 mm bedragen
om optimale prestaties te garanderen.
Voor de beste prestatie kunt u het appa-
raat echter beter niet onder een wand-
kast zetten. De afstelbare voetjes aan de
onderkant van het apparaat garanderen
een nauwkeurig horizontale uitlijning.
WAARSCHUWING!
De stroomtoevoer aan het appa-
raat moet verbroken kunnen wor-
den; de stekker moet daarom na
de installatie gemakkelijk toe-
gankelijk zijn.
20
www.aeg.com

8.3 Installatie van het CleanAir Control filter
Het CleanAir Control-filter is een filter
met actieve koolstof dat vervelende
geurtjes absorbeert. Hierdoor blijven de
optimale smaak en het aroma van het
voedsel bewaard zonder dat luchtjes van
het ene levensmiddel op het andere
worden overgebracht.
Bij aflevering zit de koolstoffilter in een
plastic zak om de levensduur en eigen-
schappen ervan te garanderen. De filter
moet achter de klep geplaatst worden
voordat het apparaat wordt ingescha-
keld.
1.
Sluit het klepje.
2.
Haal het filter uit de plastic zak.
3.
Plaats het filter in de gleuf in de ach-
terkant van het klepdeksel.
4.
Sluit het klepdeksel.
Het filter moet voorzichtig wor-
den gehanteerd om te voorko-
men dat deeltjes van het opper-
vlak loskomen. Het filter moet
elke 6 maanden worden vervan-
gen.
8.4 Afstandhouders achterkant
2
4
3
1
U vindt de twee afstandhouders in de
zak van de gebruikershandleiding.
Volg deze stappen om de afstandhou-
ders te installeren:
1.
Draai de schroef los.
2.
Plaats de afstandhouder onder de
schroef.
3.
Draai de afstandshouder in de juiste
positie.
4.
Draai de schroeven opnieuw aan.
8.5 Elektrische aansluiting
Zorg er vóór het aansluiten voor dat het
voltage en de frequentie op het typepla-
tje overeenkomen met de stroomtoe-
voer in uw huis.
Het apparaat moet geaard zijn. De net-
snoerstekker is voorzien van een contact
voor dit doel. Als het stopcontact niet
geaard is, sluit het apparaat dan aan op
een afzonderlijk aardepunt, in overeen-
stemming met de geldende regels,
raadpleeg hiervoor een gekwalificeerd
elektricien.
De fabrikant neemt geen verantwoorde-
lijkheid op zich als de bovenstaande vei-
ligheidsmaatregelen niet worden nage-
leefd.
Dit apparaat voldoet aan de EU. richtlij-
nen.
NEDERLANDS 21

8.6 Nivellering
Zorg ervoor dat het apparaat waterpas
staat wanneer u het plaatst. Deze stand
kan bereikt worden met de twee afstel-
bare voetjes die aan de voorkant en on-
derkant van het apparaat bevestigd zijn
8.7 Omkeerbaarheid van de deur
E
F
A
B
DC
WAARSCHUWING!
Voordat werkzaamheden worden
uitgevoerd, moet u zich ervan
verzekeren dat de stekker uit het
stopcontact is getrokken.
Om de volgende handelingen uit
te voeren, raden we aan dit te
doen met de hulp van iemand
anders die de deuren van het ap-
paraat tijdens de werkzaamhe-
den stevig vasthoudt.
• Open de deur. Schroef het middelste
scharnier (B) los. Verwijder het kunst-
stof afstandsstuk (A).
• Verwijder de afstandsstukken (F) en
verplaats ze naar de andere kant van
het scharnier (E).
• Verwijder de deuren.
• Verwijder de linkerpen van het deksel
van het middelste scharnier (C, D) en
verplaats deze naar de andere kant.
• Monteer de pen van het middelste
scharnier (E) in het linkergat van de
onderste deur.
A
C
B
• Verwijder, met behulp van een ge-
reedschap, het deksel (A). Schroef het
onderste scharnier (B) en het afstands-
stuk (C) los en monteer ze aan de an-
dere kant.
• Plaats de afdekking (A) aan de andere
kant.
22
www.aeg.com

1
2
3
6
5
4
• De handgreep verwijderen. Schroef
de bovenste beugel van de hand-
greep los van de staaf van de hand-
greep (1). Schroef de onderste beugel
van de handgreep los van de deur (2)
• Schroef de bovenste beugel van de
handgreep los van de deur (3).
• Schroef de beugel van de handgreep
weer aan de deur (4). Verdraai de beu-
gel van de handgreep met de hand-
greep en schroef deze aan de deur (5)
en de gemonteerde beugel van de
handgreep (6).
1
2
1
2
12
34
• Verwijder het deksel met behulp van
gereedschap. (1).
• Schroef het onderste scharnier (2) los
en monteer het aan de andere kant.
• Schroef het bovenste scharnier terug
vast.
• Bevestig de bovenste deur op het bo-
venste scharnier.
• Plaats de bovenste deur weer op het
middelste scharnier (3) en kantel beide
deuren enigszins.
• Schroef het middelste scharnier terug
vast. Vergeet het kunststof afstands-
stuk niet.
Voer een eindcontrole uit en verzeker
u ervan dat:
• alle schroeven zijn aangedraaid.
• De magnetische afdichtstrip vast zit
aan de kast.
• De deur goed open en dicht gaat.
Als de omgevingstemperatuur laag is
(bijv. in de winter), kan het zijn dat het
deurrubber niet precies op de kast past.
Wacht in dat geval tot de deurrubber
zich op een natuurlijke wijze zet.
Als u bovenstaande handelingen liever
niet zelf uitvoert, neem dan contact op
met de dichtstbijzijnde klantenservice.
Een vakman van de klantenservice zal de
draairichting van de deuren op uw kos-
ten veranderen.
NEDERLANDS 23

9. GELUIDEN
Tijdens normaal gebruik hoort u gelui-
den (compressor, koelmiddelcirculatie).
BRRR!
HISSS!
CLICK!
BLUBB!
CRACK!
SSSRRR!
OK
CLICK!
CLICK!
BRRR!
BRRR!
BLUBB!
BLUBB!
24
www.aeg.com

HISSS!
HISSS!
SSSRRR!
SSSRRR!
CRACK!
CRACK!
NEDERLANDS 25

10. TECHNISCHE GEGEVENS
Afmeting
Hoogte 2025 mm
Breedte 595 mm
Diepte 660 mm
maximale bewaartijd bij
stroomuitval
18 h
Voltage 230 - 240 V
Frequentie 50 Hz
De technische gegevens staan op het ty-
peplaatje aan de linker binnenkant van
het apparaat en op het energielabel.
11. MILIEUBESCHERMING
Recycle de materialen met het
symbool
. Gooi de verpakking in
een geschikte verzamelcontainer om
het te recyclen.
Help om het milieu en de
volksgezondheid te beschermen en
recycle het afval van elektrische en
elektronische apparaten. Gooi
apparaten gemarkeerd met het
symbool
niet weg met het
huishoudelijk afval. Breng het
product naar het milieustation bij u
in de buurt of neem contact op met
de gemeente.
26
www.aeg.com

CONTENTS
1. SAFETY INSTRUCTIONS . . . . . . . . . . . . . . . . . . . . . . . . . . . . . . . . . . . . . . . . . . . . . . . . . . . . . 28
2. PRODUCT DESCRIPTION . . . . . . . . . . . . . . . . . . . . . . . . . . . . . . . . . . . . . . . . . . . . . . . . . . . . 31
3. CONTROL PANEL . . . . . . . . . . . . . . . . . . . . . . . . . . . . . . . . . . . . . . . . . . . . . . . . . . . . . . . . . . 31
4. DAILY USE . . . . . . . . . . . . . . . . . . . . . . . . . . . . . . . . . . . . . . . . . . . . . . . . . . . . . . . . . . . . . . . . 35
5. HELPFUL HINTS AND TIPS . . . . . . . . . . . . . . . . . . . . . . . . . . . . . . . . . . . . . . . . . . . . . . . . . . . 40
6. CARE AND CLEANING . . . . . . . . . . . . . . . . . . . . . . . . . . . . . . . . . . . . . . . . . . . . . . . . . . . . . . 41
7. WHAT TO DO IF… . . . . . . . . . . . . . . . . . . . . . . . . . . . . . . . . . . . . . . . . . . . . . . . . . . . . . . . . . 42
8. INSTALLATION . . . . . . . . . . . . . . . . . . . . . . . . . . . . . . . . . . . . . . . . . . . . . . . . . . . . . . . . . . . . 44
9. NOISES . . . . . . . . . . . . . . . . . . . . . . . . . . . . . . . . . . . . . . . . . . . . . . . . . . . . . . . . . . . . . . . . . . . 48
10. TECHNICAL DATA . . . . . . . . . . . . . . . . . . . . . . . . . . . . . . . . . . . . . . . . . . . . . . . . . . . . . . . . . . 50
FOR PERFECT RESULTS
Thank you for choosing this AEG product. We have created it to give you impeccable
performance for many years, with innovative technologies that help make life simpler –
features you might not find on ordinary appliances. Please spend a few minutes reading to get
the very best from it.
Visit our website for:
Get usage advice, brochures, trouble shooter, service information:
www.aeg.com
Register your product for better service:
www.aeg.com/productregistration
Buy Accessories, Consumables and Original spare parts for your appliance:
www.aeg.com/shop
CUSTOMER CARE AND SERVICE
We recommend the use of original spare parts.
When contacting Service, ensure that you have the following data available.
The information can be found on the rating plate. Model, PNC, Serial Number.
Warning / Caution-Safety information
General information and tips
Environmental information
Subject to change without notice.
ENGLISH 27

1.
SAFETY INSTRUCTIONS
In the interest of your safety and to en-
sure the correct use, before installing
and first using the appliance, read this
user manual carefully, including its hints
and warnings. To avoid unnecessary mis-
takes and accidents, it is important to
ensure that all people using the appli-
ance are thoroughly familiar with its op-
eration and safety features. Save these
instructions and make sure that they re-
main with the appliance if it is moved or
sold, so that everyone using it through
its life will be properly informed on ap-
pliance use and safety.
For the safety of life and property keep
the precautions of these user's instruc-
tions as the manufacturer is not respon-
sible for damages caused by omission.
1.1 Children and vulnerable
people safety
• This appliance is not intended for use
by persons (including children) with re-
duced physical, sensory or mental ca-
pabilities, or lack of experience and
knowledge, unless they have been giv-
en supervision or instruction concern-
ing use of the appliance by a person
responsible for their safety.
Children should be supervised to en-
sure that they do not play with the ap-
pliance.
• Keep all packaging well away from
children. There is risk of suffocation.
• If you are discarding the appliance
pull the plug out of the socket, cut the
connection cable (as close to the ap-
pliance as you can) and remove the
door to prevent playing children to
suffer electric shock or to close them-
selves into it.
• If this appliance featuring magnetic
door seals is to replace an older appli-
ance having a spring lock (latch) on
the door or lid, be sure to make that
spring lock unusable before you dis-
card the old appliance. This will pre-
vent it from becoming a death trap for
a child.
1.2 General safety
WARNING!
Keep ventilation openings, in the appli-
ance enclosure or in the built-in struc-
ture, clear of obstruction.
• The appliance is intended for keeping
foodstuff and/or beverages in a nor-
mal household and similar applica-
tions such as:
– staff kitchen areas in shops, offices
and other working environments;
– farm houses and by clients in hotels,
motels and other residential type
environments;
– bed and breakfast type environ-
ments;
– catering and similar non-retail appli-
cations.
• Do not use a mechanical device or any
artificial means to speed up the thaw-
ing process.
• Do not use other electrical appliances
(such as ice cream makers) inside of
refrigerating appliances, unless they
are approved for this purpose by the
manufacturer.
• Do not damage the refrigerant circuit.
• The refrigerant isobutane (R600a) is
contained within the refrigerant circuit
of the appliance, a natural gas with a
high level of environmental compati-
bility, which is nevertheless flammable.
During transportation and installation
of the appliance, be certain that none
of the components of the refrigerant
circuit become damaged.
If the refrigerant circuit should be-
come damaged:
– avoid open flames and sources of
ignition
– thoroughly ventilate the room in
which the appliance is situated
• It is dangerous to alter the specifica-
tions or modify this product in any
way. Any damage to the cord may
cause a short-circuit, fire and/or elec-
tric shock.
28
www.aeg.com

WARNING!
Any electrical component (power
cord, plug, compressor) must be
replaced by a certified service
agent or qualified service per-
sonnel to avoid hazard.
1.
Power cord must not be length-
ened.
2.
Make sure that the power plug is
not squashed or damaged by the
back of the appliance. A squashed
or damaged power plug may
overheat and cause a fire.
3.
Make sure that you can come to
the mains plug of the appliance.
4.
Do not pull the mains cable.
5.
If the power plug socket is loose,
do not insert the power plug.
There is a risk of electric shock or
fire.
6.
You must not operate the appli-
ance without the lamp cover (if
foreseen) of interior lighting.
• This appliance is heavy. Care should
be taken when moving it.
• Do not remove nor touch items from
the freezer compartment if your hands
are damp/wet, as this could cause skin
abrasions or frost/freezer burns.
• Avoid prolonged exposure of the ap-
pliance to direct sunlight.
• Bulb lamps (if foreseen) used in this
appliance are special purpose lamps
selected for household appliances use
only. They are not suitable for house-
hold room illumination.
1.3 Daily Use
• Do not put hot pot on the plastic parts
in the appliance.
• Do not store flammable gas and liquid
in the appliance, because they may
explode.
• Do not place food products directly
against the air outlet on the rear wall.
(If the appliance is Frost Free)
• Frozen food must not be re-frozen
once it has been thawed out.
• Store pre-packed frozen food in ac-
cordance with the frozen food manu-
facturer's instructions.
• Appliance's manufacturers storage
recommendations should be strictly
adhered to. Refer to relevant instruc-
tions.
• Do not place carbonated or fizzy
drinks in the freezer compartment as it
creates pressure on the container,
which may cause it to explode, result-
ing in damage to the appliance.
• Ice lollies can cause frost burns if con-
sumed straight from the appliance.
1.4 Care and cleaning
• Before maintenance, switch off the ap-
pliance and disconnect the mains plug
from the mains socket.
• Do not clean the appliance with metal
objects.
• Do not use sharp objects to remove
frost from the appliance. Use a plastic
scraper.
• Regularly examine the drain in the re-
frigerator for defrosted water. If neces-
sary, clean the drain. If the drain is
blocked, water will collect in the bot-
tom of the appliance.
1.5 Installation
For electrical connection careful-
ly follow the instructions given in
specific paragraphs.
• Unpack the appliance and check if
there are damages on it. Do not con-
nect the appliance if it is damaged.
Report possible damages immediately
to the place you bought it. In that case
retain packing.
• It is advisable to wait at least four
hours before connecting the appli-
ance to allow the oil to flow back in
the compressor.
• Adequate air circulation should be
around the appliance, lacking this
leads to overheating. To achieve suffi-
cient ventilation follow the instructions
relevant to installation.
• Wherever possible the back of the
product should be against a wall to
avoid touching or catching warm parts
(compressor, condenser) to prevent
possible burn.
ENGLISH 29

• The appliance must not be located
close to radiators or cookers.
• Make sure that the mains plug is ac-
cessible after the installation of the ap-
pliance.
• Connect to potable water supply only
(If a water connection is foreseen).
1.6 Service
• Any electrical work required to do the
servicing of the appliance should be
carried out by a qualified electrician or
competent person.
• Do not remove the LED light cover.
Contact the nearest After Sales Serv-
ice Force to replace the LED light
board, if it is necessary.
• This product must be serviced by an
authorized Service Centre, and only
genuine spare parts must be used.
1.7 Environment Protection
This appliance does not contain
gasses which could damage the
ozone layer, in either its refriger-
ant circuit or insulation materials.
The appliance shall not be dis-
carded together with the urban
refuse and rubbish. The insula-
tion foam contains flammable
gases: the appliance shall be dis-
posed according to the applica-
ble regulations to obtain from
your local authorities. Avoid
damaging the cooling unit, espe-
cially at the rear near the heat ex-
changer. The materials used on
this appliance marked by the
symbol
are recyclable.
30
www.aeg.com

2. PRODUCT DESCRIPTION
2 3 8 9 1071
11121314
4 65
1
Maxibox drawer
2
Freshbox drawer
3
Temperature indicator
4
Glass shelves
5
DynamicAir cooling
6
Bottle rack
7
Control panel
8
Butter shelf
9
Door shelves
10
Bottle shelf
11
Freezer basket
12
Maxibox drawer
13
Frostmatic basket
14
Rating plate
3. CONTROL PANEL
1 2 3 4 5 6 7 8
ENGLISH 31

1
Appliance ON/OFF button
2
Fridge Temperature colder button
3
Fridge Temperature warmer button
4
Mode button
5
OK button
6
Freezer Temperature colder button
7
Freezer Temperature warmer button
8
Display
It is possible to change predefined
sound of buttons to a louder one by
pressing together the Mode button and
Temperature colder button for some
seconds. Change is reversible.
3.1 Display
Off
COOL FROST
MATICMATIC
min
KL J HI
F GDCBA E
• A. Fridge compartment indicator
• B. Fridge temperature indicator and
timer indicator
• C. Fridge off indicator
• D. COOLMATIC function
• E. Holiday function
• F. FROSTMATIC function
• G. Freezer temperature indicator
• H. Freezer compartment indicator
• I. Alarm indicator
• J. Child Lock function
• K. Minute Minder function
• L. Humidity function
3.2 Switching on
To switch on the appliance do these
steps:
1.
Connect the mains plug to the pow-
er socket.
2.
Press the appliance ON/OFF button
if the display is off.
3.
The alarm buzzer may sound after a
few seconds.
To reset the alarm refer to "High
temperature alarm".
4.
If "dEMo" appears on the display,
the appliance is in demonstration
mode. Refer to "Troubleshooting...".
5.
The temperature indicators show the
set default temperature.
To select a different set temperature re-
fer to "Temperature regulation".
3.3 Switching off
To switch off the appliance do these
steps:
1.
Press the appliance ON/OFF button
for 5 seconds.
2.
The display switches off.
3.
To disconnect the appliance from
the power disconnect the mains
plug from the power socket.
3.4 Switching off the fridge
To switch off the fridge:
1.
Press the Mode button until the cor-
responding icon appears.
The fridge Off indicator and the
fridge compartment indicator flash.
The fridge temperature indicator
shows dashes.
2.
Press the OK button to confirm.
3.
The fridge Off indicator is shown.
3.5 Switching on the fridge
To switch on the fridge:
1.
Press the fridge temperature regula-
tor.
Or:
1.
Press the Mode button until the cor-
responding icon appears.
The Fridge Off indicator flashes.
2.
Press the OK button to confirm.
3.
The fridge Off indicator goes off.
To select a different set temperature re-
fer to "Temperature regulation".
3.6 Temperature regulation
The set temperature of the fridge and of
the freezer may be adjusted by pressing
the temperature regulators.
Set default temperature:
• +5°C for the fridge
• -18°C for the freezer
32
www.aeg.com

The temperature indicators show the set
temperature.
The set temperature will be reached
within 24 hours.
Fluctuations of some degrees around set
temperature are normal and does not
mean any fault in the appliance.
After a power failure the set tem-
perature remains stored.
3.7 Minute Minder function
The Minute Minder function is to be
used to set an acoustic alarm at the pre-
ferred time, useful for example when a
recipe requires to cool down a mixture
for a certain lenght of time, or when a re-
minder is needed in order not to forget
the bottles placed in the freezer for fast
cooling.
To switch on the function:
1.
Press the Mode button until the cor-
responding icon appears.
The Minute Minder indicator flashes.
The Timer shows the set value (30
minutes) for a few seconds.
2.
Press the Fridge Temperature but-
ton to change the Timer set value
from 1 to 90 minutes.
3.
Press the OK button to confirm.
The Minute Minder indicator is
shown.
The Timer start to flash (min).
At the end of the countdown the Minute
Minder indicator flashes and an audible
alarm sounds:
1.
Remove any drinks contained in the
freezer compartment.
2.
Press OK button to switch off the
sound and terminate the function.
It is possible to deactivate the function
at any time during the countdown:
1.
Press the Mode button until the Mi-
nute Minder indicator flashes.
2.
Press the OK button to confirm.
3.
The Minute Minder indicator goes
off.
It is possible to change the time during
the countdown and at the end by press-
ing the Fridge Temperature colder but-
ton or the Fridge Temperature warmer
button.
3.8 Child Lock function
To lock the buttons from unintentional
operation select the Child Lock function.
To switch on the function:
1.
Press the Mode button until the cor-
responding icon appears.
2.
The Child Lock indicator flashes.
3.
Press the OK button to confirm.
The Child Lock indicator is shown.
To switch off the function:
1.
Press the Mode button until the
Child Lock indicator flashes.
2.
Press the OK button to confirm.
3.
The Child Lock indicator goes off.
3.9 High temperature alarm
An increase in the temperature in the
freezer compartment (for example due
to an earlier power failure) is indicated
by:
• flashing the alarm and freezer temper-
ature indicators
• sounding of buzzer.
To reset the alarm:
1.
Press any button.
2.
The buzzer switches off.
3.
The freezer temperature indicator
shows the highest temperature
reached for a few seconds. Then
show again the set temperature.
4.
The alarm indicator continue to flash
until the normal conditions are re-
stored.
When the alarm has returned the alarm
indicator goes off.
3.10 COOLMATIC function
If you need to insert a large amount of
warm food, for example after doing the
grocery shopping, we suggest activating
the COOLMATIC function to chill the
products more rapidly and to avoid
warming the other food which is already
in the refrigerator.
To switch on the function:
1.
Press the Mode button until the cor-
responding icon appears.
The COOLMATIC indicator flashes.
2.
Press the OK button to confirm.
ENGLISH 33

The COOLMATIC indicator is
shown.
The COOLMATIC function shuts off au-
tomatically after approximately 6 hours.
To switch off the function before its au-
tomatic end:
1.
Press the Mode button until the
COOLMATIC indicator flashes.
2.
Press the OK button to confirm.
3.
The COOLMATIC indicator goes off.
The function switches off by se-
lecting a different fridge set tem-
perature.
3.11 Holiday function
This function allows you to keep the re-
frigerator closed and empty during a
long holiday period without the forma-
tion of a bad smell.
The fridge compartment must be
empty with holiday function on.
To switch on the function:
1.
Press the Mode button until the cor-
responding icon appears.
The Holiday indicator flashes.
The fridge temperature indicator
shows the set temperature.
2.
Press the OK button to confirm.
The Holiday indicator is shown.
To switch off the function:
1.
Press the Mode button until the Hol-
iday indicator flashes.
2.
Press the OK button to confirm.
3.
The Holiday indicator goes off.
The function switches off by se-
lecting a different fridge set tem-
perature.
3.12 Extra Humidity function
If you need to increase the humidity in
the refrigerator, we suggest activating
the Extra Humidity function:
To switch on the function:
1.
Press the Mode button until the cor-
responding icon appears.
The Extra Humidity indicator flashes.
2.
Press the OK button to confirm.
The Extra Humidity indicator is
shown.
To switch off the function:
1.
Press the Mode button until the Ex-
tra Humidity indicator flashes.
2.
Press the OK button to confirm.
3.
The Extra Humidity indicator goes
off.
3.13 FROSTMATIC function
To switch on the function:
1.
Press the Mode button until the cor-
responding icon appears.
The FROSTMATIC indicator flashes.
2.
Press the OK button to confirm.
The FROSTMATIC indicator is
shown.
This function stops automatically after 52
hours.
To switch off the function before its au-
tomatic end:
1.
Press the Mode button until the
FROSTMATIC indicator flashes.
2.
Press the OK button to confirm.
3.
The FROSTMATIC indicator goes
off.
Place the fresh food to be frozen
in the FROSTMATIC basket.
The function switches off by se-
lecting a different freezer set
temperature.
3.14 Door open alarm
An acoustic alarm will sound if the fridge
door is left open for a few minutes. The
door open alarm conditions are indica-
ted by:
• flashing Alarm indicator
• acoustic buzzer
When normal conditions are restored
(door closed), the alarm will stop.
34
www.aeg.com

4. DAILY USE
4.1 Freezing fresh food
The freezer compartment is suitable for
freezing fresh food and storing frozen
and deep-frozen food for a long time.
To freeze fresh food activate the FROST-
MATIC function at least 24 hours before
placing the food to be frozen in the
freezer compartment.
Place the fresh food to be frozen in the
FROSTMATIC compartment.
The maximum amount of food that can
be frozen in 24 hours is specified on the
rating plate, a label located on the in-
side of the appliance.
The freezing process lasts 24 hours: dur-
ing this period do not add other food to
be frozen.
4.2 Storage of frozen food
When first starting-up or after a period
out of use, before putting the products
in the compartment let the appliance run
at least 2 hours.
The freezer drawers ensure that it is
quick and easy to find the food package
you want. If large quantities of food are
to be stored, remove all drawers except
for the bottom drawer which needs to
be in place to provide good air circula-
tion. On all shelves it is possible to place
food that protrude until 15 mm from the
door.
In the event of accidental de-
frosting, for example due to a
power failure, if the power has
been off for longer that the value
shown in the technical character-
istics chart under "rising time",
the defrosted food must be con-
sumed quickly or cooked imme-
diately and then re-frozen (after
cooling).
4.3 Thawing
Deep-frozen or frozen food, prior to be-
ing used, can be thawed in the refrigera-
tor compartment or at room tempera-
ture, depending on the time available
for this operation.
Small pieces may even be cooked still
frozen, directly from the freezer: in this
case, cooking will take longer.
4.4 Temperature indicator
Thermostat requires adjustment
Correct temperature
OK
To assist you in controlling your appli-
ance correctly we have fitted a tempera-
ture indicator to your refrigerator.
The symbol at the side indicates the
coldest area in the refrigerator.
The coldest area goes from the glass
shelf of the fruit and vegetable drawer to
the symbol or to the shelf positioned at
the same height of the symbol.
For proper storage of the food, ensure
that the temperature indicator is display-
ing the “OK” message.
If “OK” is not displayed adjust the tem-
perature controller to a colder setting
and wait 12 hours before checking the
temperature indicator again.
After putting fresh food into the appli-
ance or after opening the door repeat-
edly for a long period, it is normal for the
“OK” message to disappear.
ENGLISH 35

4.5 Air cooling
The ClimaTech technology let food cool
quickly and a more uniform temperature
in the compartment
This device allows for rapid cooling of
foods and a more uniform temperature
in the compartment.
4.6 Carbon Air Filter
CLEANAIR CONTROL
Your appliance is equipped with a car-
bon filter CLEANAIR CONTROL behind
a flap in the rear wall of the fridge com-
partment.
The filter purifies the air from unwanted
odours in the fridge and LONGFRESH
compartment meaning that the storage
quality will be further improved.
During the operation, always keep the
air ventilation flap closed.
4.7 Movable shelves
The walls of the refrigerator are equip-
ped with a series of runners so that the
shelves can be positioned as desired.
36
www.aeg.com

4.8 Bottle rack
Place the bottles (with the opening fac-
ing front) in the pre-positioned shelf.
If the shelf is positioned horizontally,
place only closed bottles.
This bottle holder shelf can be tilted in
order to store previously opened bot-
tles. To obtain this result, pull the shelf
up so it can rotate upwards and be
placed on the next higher level.
4.9 Positioning the door shelves
2
1
3
To permit storage of food packages of
various sizes, the door shelves can be
placed at different heights.
To make these adjustments proceed as
follows:
gradually pull the shelf in the direction of
the arrows until it comes free, then repo-
sition as required.
4.10 FreshBox drawer
This device allows rapid cooling of foods
and more uniform temperature in the
drawer
ENGLISH 37

To switch on the function:
1.
Switch on the COOLMATIC function.
2.
The COOLMATIC indicator comes
on.
3.
Slide upward the flap as shown in
the figure.
To switch off the function:
1.
Slide down the flap.
2.
Switch off the COOLMATIC func-
tion.
3.
The COOLMATIC indicator goes off.
The function switches off auto-
matically after few hours.
4.11 ProFresh Mode
If the compartment is not needed as
FreshBox, the settings can be changed
in order to have it just as a low tempera-
ture drawer.
To switch on the function:
1.
Slide upward the flap as shown in
the figure.
To switch off the function:
1.
Slide down the flap.
38
www.aeg.com

4.12 QuickChill of Drinks
This function allows rapid cooling of
drinks.
To switch on the function:
1.
Remove or place upward the Fresh-
Box drawer and put the bottle rack
in front of the QuickChill slots as
shown in the figure.
2.
Switch on the COOLMATIC function.
3.
The COOLMATIC indicator comes
on.
4.
Slide upward the flap as shown in
the figure.
To switch off the function:
1.
Slide down the flap.
2.
Switch off the COOLMATIC func-
tion.
3.
The COOLMATIC indicator goes off.
The function switches off auto-
matically after few hours.
4.13 MAXIBOX drawer
The drawer is suitable for storing fruit
and vegetables.
There is a separator inside the drawer
that can be placed in different positions
to allow for the subdivision best suited
to personal needs.
There is a grille (if foreseen) on the bot-
tom of the drawer to separate the fruit
and vegetables from any humidity that
may form on the bottom surface.
Remove all parts inside the drawer for
cleaning purposes.
4.14 Removal of freezing baskets from the freezer
2
1
The freezing baskets have a limit stop to
prevent their accidental removal or fall-
ing out. At the time of its removal from
the freezer, pull the basket towards your-
self and, upon reaching the end point,
remove the basket by tilting its front up-
wards.
At the time of putting it back, slightly lift
the front of the basket to insert it into
the freezer. Once you are over the end
points, push the baskets back in their
position.
ENGLISH 39

5. HELPFUL HINTS AND TIPS
5.1 Normal Operating Sounds
• You may hear a faint gurgling and a
bubbling sound when the refrigerant
is pumped through the coils or tubing.
This is correct.
• When the compressor is on, the refrig-
erant is being pumped around and
you will hear a whirring sound and a
pulsating noise from the compressor.
This is correct.
• The thermic dilatation might cause a
sudden cracking noise. It is natural,
not dangerous physical phenomenon.
This is correct.
5.2 Hints for energy saving
• Do not open the door frequently or
leave it open longer than absolutely
necessary.
• If the ambient temperature is high and
the Temperature Regulator is set to
low temperature and the appliance is
fully loaded, the compressor may run
continuously, causing frost or ice on
the evaporator. If this happens, set the
Temperature Regulator toward warm-
er settings to allow automatic defrost-
ing and so a saving in electricity con-
sumption.
5.3 Hints for fresh food
refrigeration
To obtain the best performance:
• do not store warm food or evaporat-
ing liquids in the refrigerator
• do cover or wrap the food, particularly
if it has a strong flavour
• position food so that air can circulate
freely around it
5.4 Hints for refrigeration
Useful hints:
Meat (all types) : wrap in polythene bags
and place on the glass shelf above the
vegetable drawer.
For safety, store in this way only one or
two days at the most.
Cooked foods, cold dishes, etc..: these
should be covered and may be placed
on any shelf.
Fruit and vegetables: these should be
thoroughly cleaned and placed in the
special drawer(s) provided.
Butter and cheese: these should be
placed in special airtight containers or
wrapped in aluminium foil or polythene
bags to exclude as much air as possible.
Milk bottles: these should have a cap
and should be stored in the bottle rack
on the door.
Bananas, potatoes, onions and garlic, if
not packed, must not be kept in the re-
frigerator.
5.5 Hints for freezing
To help you make the most of the freez-
ing process, here are some important
hints:
• the maximum quantity of food which
can be frozen in 24 hrs. is shown on
the rating plate;
• the freezing process takes 24 hours.
No further food to be frozen should
be added during this period;
• only freeze top quality, fresh and thor-
oughly cleaned, foodstuffs;
• prepare food in small portions to ena-
ble it to be rapidly and completely fro-
zen and to make it possible subse-
quently to thaw only the quantity re-
quired;
• wrap up the food in aluminium foil or
polythene and make sure that the
packages are airtight;
• do not allow fresh, unfrozen food to
touch food which is already frozen,
thus avoiding a rise in temperature of
the latter;
• lean foods store better and longer
than fatty ones; salt reduces the stor-
age life of food;
• water ices, if consumed immediately
after removal from the freezer com-
partment, can possibly cause the skin
to be freeze burnt;
• it is advisable to show the freezing in
date on each individual pack to enable
you to keep tab of the storage time.
40
www.aeg.com

5.6 Hints for storage of frozen
food
The freezer baskets ensure that it is
quick and easy to find the food package
you want. If large quantities of food are
to be stored, remove all drawers except
for the bottom basket which needs to be
in place to provide good air circulation.
To obtain the best performance from
this appliance, you should:
• make sure that the commercially fro-
zen foodstuffs were adequately stored
by the retailer;
• be sure that frozen foodstuffs are
transferred from the foodstore to the
freezer in the shortest possible time;
• not open the door frequently or leave
it open longer than absolutely neces-
sary;
• once defrosted, food deteriorates rap-
idly and cannot be refrozen;
• do not exceed the storage period in-
dicated by the food manufacturer.
6. CARE AND CLEANING
6.1 Cleaning the interior
Before using the appliance for the first
time, wash the interior and all internal
accessories with lukewarm water and
some neutral soap so as to remove the
typical smell of a brand-new product,
then dry thoroughly.
Do not use detergents or abra-
sive powders, as these will dam-
age the finish.
CAUTION!
Unplug the appliance before car-
rying out any maintenance oper-
ation.
This appliance contains hydrocar-
bons in its cooling unit; mainte-
nance and recharging must
therefore only be carried out by
authorized technicians.
6.2 Periodic cleaning
The equipment has to be cleaned regu-
larly:
• clean the inside and accessories with
lukewarm water and some neutral
soap.
• regularly check the door seals and
wipe clean to ensure they are clean
and free from debris.
• rinse and dry thoroughly.
Do not pull, move or damage
any pipes and/or cables inside
the cabinet.
Never use detergents, abrasive
powders, highly perfumed clean-
ing products or wax polishes to
clean the interior as this will dam-
age the surface and leave a
strong odour.
Clean the condenser (black grill) and the
compressor at the back of the appliance
with a brush. This operation will improve
the performance of the appliance and
save electricity consumption.
Take care of not to damage the
cooling system.
Many proprietary kitchen surface clean-
ers contain chemicals that can attack/
damage the plastics used in this appli-
ance. For this reason it is recommended
that the outer casing of this appliance is
only cleaned with warm water with a little
washing-up liquid added.
After cleaning, reconnect the equipment
to the mains supply.
ENGLISH 41

6.3 Defrosting of the
refrigerator
Frost is automatically eliminated from
the evaporator of the refrigerator com-
partment every time the motor compres-
sor stops, during normal use. The de-
frost water drains out through a trough
into a special container at the back of
the appliance, over the motor compres-
sor, where it evaporates.
It is important to periodically clean the
defrost water drain hole in the middle of
the refrigerator compartment channel to
prevent the water overflowing and drip-
ping onto the food inside. Use the spe-
cial cleaner provided, which you will find
already inserted into the drain hole.
6.4 Defrosting
Your appliance is frost free. This means
that there is no buildup of frost when it is
in operation, neither on the internal walls
nor on the foods.
The absence of frost is due to the con-
tinuous circulation of cold air inside the
compartment, driven by an automatically
controlled fan.
7. WHAT TO DO IF…
CAUTION!
Before troubleshooting, discon-
nect the power supply.
Only a qualified electrician or
competent person must do the
troubleshooting that is not in this
manual.
There are some sounds during
normal use (compressor, refriger-
ant circulation).
Problem Possible cause Solution
The appliance is
noisy.
The appliance is not sup-
ported properly.
Check if the appliance
stands stable (all the four
feet should be on the
floor).
The compressor op-
erates continually.
The Temperature regula-
tor may be set incorrectly.
Set a warmer temperature.
The door is not closed
correctly.
Refer to "Closing the
door".
The door has been
opened too frequently.
Do not keep the door
open longer than necessa-
ry.
The product temperature
is too high.
Let the product tempera-
ture decrease to room
temperature before stor-
age.
The room temperature is
too high.
Decrease the room tem-
perature.
42
www.aeg.com

Problem Possible cause Solution
The FROSTMATIC func-
tion is switched on.
Refer to "FROSTMATIC
function".
The COOLMATIC func-
tion is switched on.
Refer to "COOLMATIC
function".
Water flows on the
rear plate of the re-
frigerator.
During the automatic de-
frosting process, frost de-
frosts on the rear plate.
This is correct.
Water flows into the
refrigerator.
The water outlet is clog-
ged.
Clean the water outlet.
Products prevent that wa-
ter flows into the water
collector.
Make sure that products
do not touch the rear
plate.
Water flows on the
ground.
The melting water outlet
does not flow in the evap-
orative tray above the
compressor.
Attach the melting water
outlet to the evaporative
tray.
There is too much
frost and ice.
Products are not wrapped
properly.
Wrap the products better.
The door is not closed
correctly.
Refer to "Closing the
door".
The temperature in the
refrigerator is too low.
Set a higher temperature.
The temperature in
the appliance is too
high.
The door is not closed
correctly.
Refer to "Closing the
door".
The product temperature
is too high.
Let the product tempera-
ture decrease to room
temperature before stor-
age.
Many products are stored
at the same time.
Store less products at the
same time.
The temperature in
the refrigeration is
too high.
There is no cold air circu-
lation in the appliance.
Make sure that there is
cold air circulation in the
appliance.
The temperature in
the freezer is too
high.
Products are too near to
each other.
Store products so that
there is cold air circulation.
The appliance does
not operate.
The appliance is switched
off.
Switch on the appliance.
The mains plug is not
connected to the mains
socket correctly.
Connect the mains plug to
the mains socket correctly.
ENGLISH 43

Problem Possible cause Solution
The appliance has no
power. There is no volt-
age in the mains socket.
Connect a different electri-
cal appliance to the mains
socket. Contact a qualified
electrician.
The lamp does not
work.
The lamp is in stand-by. Close and open the door.
"dEMo" appears on
the display.
The appliance is in dem-
onstration mode.
Keep pressed approxi-
mately 10 sec the OK but-
ton since a long sound of
buzzer is heard and the
display shut off for a short
while: appliance start
works regularly.
As much as the advice does not lead to result, call the nearest brand-mark service.
7.1 Closing the door
1.
Clean the door gaskets.
2.
If necessary, adjust the door. Refer
to "Installation".
3.
If necessary, replace the defective
door gaskets. Contact the Service
Center.
1.1 Replacing the lamp
The appliance is equipped with a long-
life LED interior light.
Only service is allowed to replace the
lighting device. Contact your Service
Center .
8. INSTALLATION
WARNING!
Read the "Safety Information"
carefully for your safety and cor-
rect operation of the appliance
before installing the appliance.
8.1 Positioning
Install this appliance at a location where
the ambient temperature corresponds to
the climate class indicated on the rating
plate of the appliance:
Cli-
mate
class
Ambient temperature
SN +10°C to + 32°C
N +16°C to + 32°C
ST +16°C to + 38°C
T +16°C to + 43°C
44
www.aeg.com

8.2 Location
A
B
100 mm
min
20 mm
The appliance should be installed well
away from sources of heat such as radia-
tors, boilers, direct sunlight etc. Ensure
that air can circulate freely around the
back of the cabinet. To ensure best per-
formance, if the appliance is positioned
below an overhanging wall unit, the min-
imum distance between the top of the
cabinet and the wall unit must be at least
100 mm . Ideally, however, the appliance
should not be positioned below over-
hanging wall units. Accurate levelling is
ensured by one or more adjustable feet
at the base of the cabinet.
WARNING!
It must be possible to disconnect
the appliance from the mains
power supply; the plug must
therefore be easily accessible af-
ter installation.
8.3 Installation of the CleanAir Control filter
The CleanAir Control filter is an active
carbon filter which absorbs bad odours
and permits to maintain the best flavour
and aroma for all foodstuffs without risk
of odour cross contamination
On delivery the carbon filter is in a plas-
tic bag to maintain it’s duration and
characteristics. The filter should be
placed behind the flap before the appli-
ance is turned on.
1.
Open the flap cover.
2.
Remove the filter from the plastic
bag.
3.
Insert the filter in the slot found in
the back of the flap cover.
4.
Close the flap cover.
The filter should be handled
carefully so fragments do not
loosen from the surface. The fil-
ter should change once every six
months.
ENGLISH 45

8.4 Rear spacers
2
4
3
1
You can find the two spacers in the bag
with documentation.
Do these steps to install the spacers:
1.
Release the screw.
2.
Engage the spacer below the screw.
3.
Turn the spacer to the right position.
4.
Tighten again the screws.
8.5 Electrical connection
Before plugging in, ensure that the volt-
age and frequency shown on the rating
plate correspond to your domestic pow-
er supply.
The appliance must be earthed. The
power supply cable plug is provided
with a contact for this purpose. If the do-
mestic power supply socket is not earth-
ed, connect the appliance to a separate
earth in compliance with current regula-
tions, consulting a qualified electrician.
The manufacturer declines all responsi-
bility if the above safety precautions are
not observed.
This appliance complies with the E.E.C.
Directives.
8.6 Levelling
When placing the appliance ensure that
it stands level. This can be achieved by
two adjustable feet at the bottom in
front.
46
www.aeg.com

8.7 Door reversibility
E
F
A
B
DC
WARNING!
Before carrying out any opera-
tions, remove the plug from the
power socket.
To carry out the following opera-
tions, we suggest that this be
made with another person that
will keep a firm hold on the doors
of the appliance during the oper-
ations.
• Open the doors. Unscrew the middle
hinge (B). Remove the plastic spacer
(A)
• Remove the spacer (F) and move to
the other side of the hinge pivot (E).
• Remove the doors.
• Remove the left-hand cover pin of the
middle hinge (C, D) and move to the
other side.
• Fit the pin of the middle hinge (E) into
the left-hand hole of the lower door.
A
C
B
• Remove using a tool the cover (A). Un-
screw the lower hinge pivot (B) and
the spacer (C) and place them on the
opposite side.
• Re-insert the cover (A) on the opposite
side.
1
2
3
6
5
4
• Remove the handle. Unscrew the top
handle bracket from the handle rod
(1). Unscrew the bottom handle brack-
et from the door (2)
• Unscrew the top handle bracket from
the door (3).
• Re-screw the handle bracket on the
door (4). Turn the handle bracket with
the handle and screw them to the
door (5) and the fitted handle bracket
(6).
ENGLISH 47

1
2
1
2
12
34
• Remove using a tool the cover. (1).
• Unscrew the upper hinge pivot (2) and
place it on the opposite side.
• Re-screw the upper hinge.
• Fit the upper door on the upper door
pivot.
• Re-insert the upper door on the mid-
dle hinge pivot (3 )slightly tilting both
doors.
• Re-screw the middle hinge. Do not
forget the plastic spacer.
Do a final check to make sure that:
• All screws are tightened.
• The magnetic seal adheres to the cab-
inet.
• The door opens and closes correctly.
If the ambient temperature is cold (i.e. in
Winter), the gasket may not fit perfectly
to the cabinet. In that case, wait for the
natural fitting of the gasket.
In case you do not want to carry out the
above mentioned operations, contact
the nearest After Sales Service Force.
The After Sales Service specialist will car-
ry out the reversibility of the doors at
your cost.
9. NOISES
There are some sounds during normal
running (compressor, refrigerant circula-
tion).
BRRR!
HISSS!
CLICK!
BLUBB!
CRACK!
SSSRRR!
OK
48
www.aeg.com

CLICK!
CLICK!
BRRR!
BRRR!
BLUBB!
BLUBB!
HISSS!
HISSS!
ENGLISH 49

SSSRRR!
SSSRRR!
CRACK!
CRACK!
10. TECHNICAL DATA
Dimension
Height 2025 mm
Width 595 mm
Depth 660 mm
Rising Time 18 h
Voltage 230 - 240 V
Frequency 50 Hz
The technical information are situated in
the rating plate on the internal left side
of the appliance and in the energy label.
11. ENVIRONMENT CONCERNS
Recycle the materials with the
symbol
. Put the packaging in
applicable containers to recycle it.
Help protect the environment and
human health and to recycle waste
of electrical and electronic
appliances. Do not dispose
50
www.aeg.com

appliances marked with the symbol
with the household waste. Return the
product to your local recycling
facility or contact your municipal
office.
ENGLISH 51

www.aeg.com/shop
280150884-A-362012
-
 1
1
-
 2
2
-
 3
3
-
 4
4
-
 5
5
-
 6
6
-
 7
7
-
 8
8
-
 9
9
-
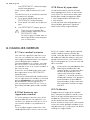 10
10
-
 11
11
-
 12
12
-
 13
13
-
 14
14
-
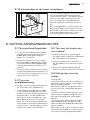 15
15
-
 16
16
-
 17
17
-
 18
18
-
 19
19
-
 20
20
-
 21
21
-
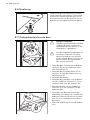 22
22
-
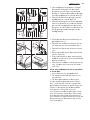 23
23
-
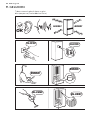 24
24
-
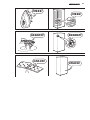 25
25
-
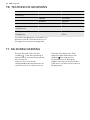 26
26
-
 27
27
-
 28
28
-
 29
29
-
 30
30
-
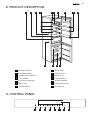 31
31
-
 32
32
-
 33
33
-
 34
34
-
 35
35
-
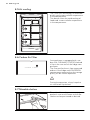 36
36
-
 37
37
-
 38
38
-
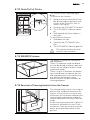 39
39
-
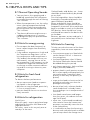 40
40
-
 41
41
-
 42
42
-
 43
43
-
 44
44
-
 45
45
-
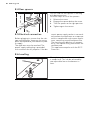 46
46
-
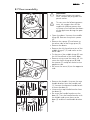 47
47
-
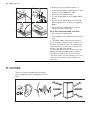 48
48
-
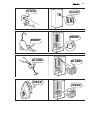 49
49
-
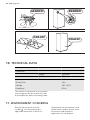 50
50
-
 51
51
-
 52
52


in andere talen
- English: AEG S63600CMM1 User manual
Andere documenten
-
Aeg-Electrolux AGS88800F0 Handleiding
-
-
-
-
-
-
-
-