Lenco DF-1520 de handleiding
- Categorie
- Digitale fotolijsten
- Type
- de handleiding

DF-1520 Digital photoframe
OWNERS MANUAL
BEDIENUNGSANLEITUNG
MODE D’EMPLOI
GEBRUIKSAANWIJZING
MANUAL DEL USUARIO
For information and support, www.lenco.eu

Manual Languages
English
Dutch
French
German
Spanish
http://www.lenco.eu


Introduction ................................................................................................. - 1 -
Main Features ............................................................................................. - 1 -
Getting Started ............................................................................................ - 2 -
Package Contents ................................................................................... - 2 -
Installing your unit.................................................................................... - 3 -
Connecting to a PC ................................................................................. - 3 -
Operation................................................................................................. - 4 -
Controls....................................................................................................... - 5 -
Using your Remote Control......................................................................... - 6 -
Inserting Memory Cards.............................................................................. - 7 -
Main menu .................................................................................................. - 8 -
Viewing Pictures ...................................................................................... - 9 -
Previous............................................................................................. - 10 -
Play or Pause..................................................................................... - 10 -
Next ................................................................................................... - 10 -
Rotate ................................................................................................ - 10 -
Stop ................................................................................................... - 10 -
Zoom.................................................................................................. - 10 -
Watching video ...................................................................................... - 11 -
Previous............................................................................................. - 12 -
Fast Forward...................................................................................... - 12 -
Play or Pause..................................................................................... - 12 -
Fast Backward ................................................................................... - 12 -
Next ................................................................................................... - 12 -
Stop ................................................................................................... - 12 -
Zoom.................................................................................................. - 12 -
Listening to MP3 music ......................................................................... - 13 -
File Option ............................................................................................. - 14 -
Playing a slideshow with music ............................................................. - 14 -
Previous............................................................................................. - 15 -
Play or Pause..................................................................................... - 15 -
Next ................................................................................................... - 15 -
Rotate ................................................................................................ - 15 -
Stop ................................................................................................... - 15 -
Zoom.................................................................................................. - 15 -
VOL.................................................................................................... - 15 -
Copying and Deleting Files.................................................................... - 16 -
Using the SETUP option ........................................................................... - 18 -
Technical Support ..................................................................................... - 19 -
Frequently asked questions................................................................... - 19 -
Specifications ...................................................................................... - 21 -
Table Of Contents

For information and support; www.lenco.eu
- 1 -
Introduction
Congratulations on your purchase of 15 inch Digital Picture Frame, model DP-1520
Before operating the unit, please read this manual thoroughly, and retain it for future reference.
This manual will help you use many of the exciting and useful features that will make your
Digital Picture Frame viewing more enjoyable.
This Digital Picture Frame lets you view digital pictures directly from your camera's memory
cards. You will be able to create a slideshow using multiple transition effects or display one
picture at a time. No computer, digital camera or Internet connection is required.
This Digital Picture Frame is compatible with the following popular memory card formats:
CompactFlash®, SD™, XD, MultiMediaCard™, and Memory Stick®.
It can also read files stored on a USB Flash drive using the USB host port.
Main Features
• Displays digital pictures (JPEG) without a computer
• Simply insert a compatible memory card into the Digital Picture Frame to show
photos, play MP3 music or supported video files (memory card not included).
• Compatible memory cards include Secure Digital Card (SD), MultiMedia Card
(MMC), Memory Stick (MS), XD Cards & Compact Flash
• Able to read files located on a USB Flash drive
• Instantly plays MP3 music with the integrated speakers.
• Instantly plays MPEG124 files stored on supported memory cards*.
• Supports up to 12 Mega Pixels image files (JPEG format).
• Compatible with most digital cameras’ stored JPEG images and motion JPEG files.
• Includes a credit card style remote control
• Bright 15” TFT active matrix LCD screen.
• Automatic slide show with multiple transition effects.
• Plays slide show with MP3 music on the background.
• User-friendly on-screen display lets you access all controls easily.
*Video files may not play properly if stored on a low speed card.

For information and support; www.lenco.eu
- 2 -
Getting Started
Package Contents
Digital Picture Frame and stand
User Guide
AC/DC Adapter
Remote
USB cable

For information and support; www.lenco.eu
- 3 -
Installing your unit
• Open the package and remove the protective foam. Remove the protective sleeve from
the unit.
• Install the Digital Picture Frame stand as the back of the unit.
• Plug in the AC adapter into power outlet. Plug the other end into the unit.
• After the content is stored on the target flash media; insert the media into the correct
slot.
• Turn power to ON position via the ON/OFF switch.
Connecting to a PC
The Digital Picture Frame has a USB port for connection to a PC (USB Slave) and a second USB
port for connection to other devices such as a Flash Drive, USB card reader, or a camera (USB
Host). When connected to the PC you can drag-and-drop content from the PC to the internal
memory or memory card. You can also delete content from the internal memory.
NOTE: USB Slave and USB Host can not be used at the same time.

For information and support; www.lenco.eu
- 4 -
Operation
This Digital Frame is extremely easy to operate:
1. Remove memory card from camera:
2. Insert memory card into the frame with face away from the unit:
3. when power on the frame,the picture would displayed automatically.

For information and support; www.lenco.eu
- 5 -
Controls

For information and support; www.lenco.eu
- 6 -
Using your Remote Control
The following table briefly describes the remote control functions
Button Description
On/Off Switch on/off the frame
Mode Photo/Audio/Video Mode
Switch
Vol - Decrease volume
Vol + Increase Volume
Slideshow Start the slideshow
OSD Display the picture menu
Menu Display the main menu
Rotate Rotate the current picture
Enter Confirm
Zoom Zoom the current picture
Play/Pause
Stop
Arrows Navigate on screen

For information and support; www.lenco.eu
- 7 -
Inserting Memory Cards
The Digital Picture Frame is compatible with the following memory cards:
• Secure Digital
TM
Card (SD)
• MultiMedia
TM
Card (MMC)
• Memory Stick
TM
• CompactFlash
TM
(CF) Card
• XD Picture Cards
Insert the memory card with the front label facing AWAY from you. Do not force the memory
card into the memory slot. If you are not able to easily insert the memory card completely, you
may have inserted it the wrong way.
Note:
The Digital Picture Frame will ONLY recognize digital pictures stored in JPEG format. Digital
pictures stored in other formats will be ignored by the device.
Make sure you have at least one picture stored on the memory card. The frame will not function
properly without a stored picture.
You also can use a USB flash drive in the exact same way as you would use a memory card.
Simply copy files on the flash drive and insert it at the right side of the unit in the USB Host plug.

For information and support; www.lenco.eu
- 8 -
Main menu
Upon turning on the Digital Picture Frame, you will go straight to the MENU screen. To set the
Auto Start feature Choose the SETUP screen. Use the left/right arrow to go to the “Set up”. Press
the Enter button to enter the options screen. Use the Up / down arrows to choose your auto start
option. Press the “MENU” button to show the following menu:
Use the left and right arrows to move inside the menu and then press “Enter” to continue
Note: In all menus, pressing the “Menu” button will bring you back to the main menu
Function Description
Nand Play files in internal memory
Setup Set system menu
Calendar Display calendar, clock, alarm
SD/MMC/MS/xD Play files on SD/MMC/MS/xD memory card
CF Play files on CF memory card
USB Play files on USB flash drive
NOTE: Icons of above functions shall appear automatically on MENU screen when certain
memory card is inserted. Icons shall disappear when correspondent card is removed from card
slot.

For information and support; www.lenco.eu
- 9 -
Viewing Pictures
Make sure you have at least one picture on your memory card or your USB flash drive. When this
is done:
• Select the desired flash media on main menu. (SD/xD/CF/MS/USB/NAND-Internal
Memory)
• Select the “PHOTO” option from the menu and press “ENTER”
• A Photo thumbnail will appear. User UP/DOWN/LEFT/RIGHT arrows can move the
highlight. If the highlighted is a folder, press Enter to enter the folder.

For information and support; www.lenco.eu
- 10 -
• Otherwise press Enter to enter the full screen photo (pause mode) and press Play to enter
into slideshow mode.
• Once a slideshow is playing or a picture is being shown, press the OSD button. The
following menu will appear:
Previous
Play previous picture in the picture list
Play or Pause
Play or pause the current slideshow.
Next
Play next picture in the picture list
Rotate
Use the rotate function to change the picture orientation to either portrait or landscape.
Stop
Stop slideshow and return to photo thumbnail.
Zoom
Choose the Zoom function to magnify the iamge,Repeat this operation several times to further
zoom in.

For information and support; www.lenco.eu
- 11 -
Watching video
The Digital Picture Frame supports the following video formats:
• Motion JPEG (*avi): video format used by most digital cameras
MPEG-I &MPEG-2 –w/layer I,II,III(*MPG,*MPEG,*DAT)
• MPEG 4-W/MP3 audio (*avi)
Make sure you have at least one video on your memory card or your USB flash drive. When this
is done:
• Select the desired flash media on main menu. (SD/xD/CF/MS/USB/NAND-Internal
Memory)
• Select the “MOVIE” option from the menu and press “ENTER”
• A list of all movie files will be listed on the left side of the screen. The right side consists
of the movie preview window and information display of the current movie. Use
Up/Down arrows to select the movie and press Enter to play.
Once a movie is playing, press the OSD button on the remote control. The following menu will
appear:

For information and support; www.lenco.eu
- 12 -
Previous
Play previous movie in the play list
Fast Forward
Play forward the movie by 2/3/4 times speed.
Play or Pause
Play or Pause the movie.
Fast Backward
Play backward the movie by 2/3/4 times speed.
Next
Play next movie in the play list
Stop
Stop the movie and return to the play list
Zoom
Increase the size of the picture by 2/3/4/1 times.

For information and support; www.lenco.eu
- 13 -
Listening to MP3 music
Make sure you have at least one MP3 file on your memory card or your USB flash drive. When
this is done:
• Select the desired flash media on main menu. (SD/xD/CF/MS/USB/NAND-Internal
Memory)
• Select the “MUSIC” option from the menu and press “ENTER”
•
• A list of music files will be listed on the left side of the screen. The right side consists of
the frequency chart and information status bar. The song information area is below the
status bar. Use the Up/Down arrows to select the music file and press Enter to play.

For information and support; www.lenco.eu
- 14 -
• Press VOL+ to increase the volume or VOL- to decrease the volume.
• Press the Play/Pause button on remote control to play or pause the music file.
• Press the Stop button on the remote control to return to the list of music files.
File Option
Playing a slideshow with music
Ensure you have at least one picture on your memory card or your USB flash drive. Additionally,
you must have one MP3 file saved on the selected memory card/USB/Internal Memory. When
this is done:
• Select the desired flash media on main menu. (SD/xD/CF/MS/USB/NAND-Internal
Memory)
• Select the “FILE” option from the menu and press “ENTER”
• A list of all files on the selected memory card or internal memory will be listed on the left
side of the screen. The right side consists of the file information. Use Up/Down arrows to
select a picture file and press Enter to enter a full screen photo (pause mode). Press Play
button on the remote control, an audio slideshow will begin automatically.
Once an audio-slideshow is playing, press the OSD button. The following menu will appear:

For information and support; www.lenco.eu
- 15 -
Previous
Play previous picture in the picture list
Play or Pause
Play or pause the current slideshow.
Next
Play next picture in the picture list
Rotate
Use the rotate function to change the picture orientation to either portrait or landscape.
Stop
Stop slideshow and return to photo thumbnail.
Zoom
Increase the size of the picture by 2/4/8/16/1 times.
VOL
Press VOL+ or VOL- on remote control to increase or decrease the volume

For information and support; www.lenco.eu
- 16 -
Copying and Deleting Files
To copy and delete files on your memory card, USB drive or internal memory.
Copy
• Select the desired flash media on main menu. (SD/xD/CF/MS/USB/NAND-Internal
Memory)
• Select the “FILE” option from the menu and press “ENTER”
• A list of available files will be displayed. Use the up and down arrows to highlight your
required file and press the right arrow to highlight the desired file. Repeat for all files that
you want to copy
• Press the “OSD” button to display the Copy and Delete menu. Select Copy function and
Enter.
• Use the Up/Down arrows to select the file destination folder. Press Right button to
confirm.

For information and support; www.lenco.eu
- 17 -
• Press Enter to start copying the file.
Delete
• Select the desired flash media on main menu. (SD/xD/CF/MS/USB/NAND-Internal
Memory)
• Select the “FILE” option from the menu and press “ENTER”
• A list of available files will be displayed. Use the up and down arrows to highlight your
required file and press the right arrow to highlight the desired file. Repeat for all files that
you want to copy
• Press the “OSD” button to display the Copy and Delete menu. Select Delete function and
press Enter. File will be deleted.

For information and support; www.lenco.eu
- 18 -
Using the SETUP option
The following options can be changed by using the “SETUP” option from the main menu:
Function Description
Language Includes English, French,
SpanishDeutsch,Swedish,Greek,Italian,Turkce.
Slideshow time Slideshow duration: 3s/5s/15s/1mins/15mins/1hour
Slideshow mode Off, Random, Fading, Bottom_to_top, Top_to_bottom, Left_to
right, Right_to_left, Door_close, Door_open, Hori_cross,
Verti_cross
Music Repeat
Mode
Repeat one, Repeat all, Repeat off
Movie Repeat
Mode
Repeat one, Repeat all, Repeat off
Display mode Crop, Stretch, Cinema
Time Year/Month/Date/Time setup
Alarm Alarm Time/Alarm Music/Alarm On/off setup
Default Recover the factory default setup
Calendar/Clock Display
Upon turning on the Digital Picture Frame, you will go straight to the MENU screen. If you
select the Calendar/Clock and press Enter, you will go to Calendar/Clock screen. If the Alarm is
turned on, it will also show the alarm time. A picture slideshow will begin at the picture preview
window at the right part of the screen.

For information and support; www.lenco.eu
- 19 -
Technical Support
Frequently asked questions
1) Q: Can I use touch-enabled technology for my Digital Picture Frame?
A: The LCD screen does not support touch-enabled technology. Please use the buttons or remote
control to control the Digital Picture Frame.
2) Q: If I keep showing the same photo for a long time, will it damage the LCD screen?
A: No. The Digital Picture Frame can display the same photo continuously for a long time. But it
is recommended not to show the same picture continuously for more than 1 month.
3) Q: How do I store music files?
A: First, use a personal computer and popular audio editing software to convert your music to
MP3 format. The Digital Picture Frame will only play MP3 files so all Windows Media Player™
and/or iTunes™ files will have to be converted first. You can use a card reader or your digital
camera to transfer those files to your memory card.
4) Q: Does the Digital Picture Frame have built-in memory?
A: Yes. The Digital Picture Frame has 128 MB built-in memory to store your files.
5) Q: What is the maximum picture size?
A: The Digital Picture Frame is able to display pictures up to 12 Mega Pixels.
7) Q: How come the Digital Picture Frame does not show some of my photos?
A: The Digital Picture Frame is designed to show photos following the same camera industry
standards format as digital cameras. This format is a JPEG format. Images, such as web images,
scanned images, or photos in RAW format, are not stored according to camera industry standards
and therefore cannot be displayed correctly on the Digital Picture Frame. Please use your PC
applications to convert such images into standard JPEG format before viewing them on the
Digital Picture Frame.

For information and support; www.lenco.eu
- 20 -
Troubleshooting
Symptom Cause Corrective Actions
Digital Picture
Frame doesn’t power
on
The POWER connector to the unit
is not securely inserted.
Make sure you connect the AC
adapter to the frame properly.
When you connect the AC
adapter to the frame and power
up the unit, even without a
memory card, you should see a
blank
screen. If you don’t see the lit
screen, check if the power is
connected to the Digital
Picture Frame and make sure it
is securely attached.
No Start-up screen Memory card is not inserted
correctly.
Insert a supported memory card
The File doesn’t
play
Incompatible File Format Make sure there is at least one
supported photo file on the
memory card.
• Compatible
Photo format:
Compatible
Photo format:
JPEG
• Compatible
Music format:
MP3
• Compatible Video
format: Motion JPEG
(avi), MPEG1, MPEG2,
MPEG4.
Video doesn’t play
properly
Slow Memory Card Make sure you use a high-
speed memory card to play
video files.
Small video size on
the screen
Low Video Resolution The best supported resolution
of a photo or video is 1024x768
Use the Zoom button on the
remote control to enlarge it.

For information and support; www.lenco.eu
- 21 -
Specifications
Type 15 inch Digital Picture Frame
Internal Memory 128 MB
Resolution 1024x786
Alimentation 12 V
Consumption 24 Watts
Luminosity 450cd/m
2
max.
Contrast 450:1
Viewing Angle 60/60/45/45 (CR=10)
Response Time 10ms
Display Mode 4:3
File Format JPEG, MPEG1, MPEG2, MP3, MPEG4
Photo Size 12 Mega Pixels
Current AC110—240V (50HZ—60HZ)
Cards SD/MMC/MS/CF/XD/USB
USB ports USB Host, USB Slave
Package Contents Digital Picture Frame
AC/DC Adapter
User Guide
Remote control
USB Cable
Stand
If at any time in the future you should need to dispose of this product please
note that: Waste electrical products should not be disposed of with household waste. Please
recycle where facilities exist. Check with your Local Authority or retailer for recycling
advice. (Waste Electrical andElectronic Equipment Directive)

For information and support; www.lenco.eu
- 22 -
Inhouds opgave
Inleiding………………………………………………………………………………………………..……………23
Voornaamste functies………………………………………………………………………………...…………..23
Start………………………………………………………………………………………………………..…………24
Inhoud van de verpakking……………………………………………………………….....….......……………24
Het toestel installeren…………………………………………………………………….................……..……24
Aansluiten op de PC……………………………………………………………………………….……………..25
Werking…………………………………………………………………………......…............…………………..25
Bediening……………………………………………………………………………......….....….………………..26
Gebruik van de afstandbediening……………………………………….............….......……………………….27
Geheugenkaart inbrengen………………………………………..…..…..........…..…....……………………….28
Hoofdmenu……………………………………………………………...........…........……………………………28
Foto’s bekijken…………………………………………………….............….........……………………………29
Vorige……………………………………………………………….......................………………………………30
Afspelen pauzeren……………………………………………..….......................………………………………30
Volgende…………………………………………………...................…......……………………………………30
Draaien……………………………………………………........................………………………………………31
Stop………………………………………………………..........................………………………………………31
Zoom………………………………………………………........................………………………………………31
Video’s bekijken……………………………………….......................…………………………………………31
Vorige……………………………………………….................…….....…………………………………………32
Snel vooruit……………………………………..........….......……………………………………………………32
Afspelen of pauzeren…………………………………..…………………………………………………………32
Snel achteruit…………………………………………………...…………………………………………………32
Volgende……………………………………………………………………………………………………………32
Stop…………………………………………………………………………………………………………………32
Zoom………………………………………………………………………………………….….…………………32
MP3 muziek beluisteren……………………………………………………………………………..…………33
Bestandskeuze……………………………………………………………………………………………………34
Een diavoorstelling afspelen met muziek……………………………………………………..……………34
Vorige………………………………………………………………………………………………………………35
Afspelen of pauzeren……………………………………………………………………….........………………35
Volgende……………………………………………………………………………………….............…………35
Draaien…………………………………………………………………………………………........……………35
Stop…………………………………………………………………………………………….............…………35
Zoom……………………………………………………………………………………………….………………35
VOL…………………………………………………………………………………………………….......………35
Bestanden kopieren en verwijderen…………………………………………………………………………36
Instellingen………………………………………… …………………………………………………...………37
Technische indersteuning………………………………………………………………………..……………39
Veel gestelde vragen…………………………………………………..…………………………….…………40
Specificaties…………………………………………………………..………………………………….………41

For information and support; www.lenco.eu
- 23 -
Inleiding
Gefeliciteerd met de aankoop van uw 15 inch Digitaal Fotokader
model DF-1520.
Lees zorgvuldig de gebruiksaanwijzing alvorens het toestel in gebruik te nemen en bewaar de
gebruiksaanwijzing voor later gebruik. Deze handleiding helpt u gebruik te maken van de vele
boeiende mogelijkheden van uw Digitaal Fotokader.
Dit Digitaal Fotokader laat u toe uw foto’s rechtstreeks van de geheugenkaart van uw fototoestel
te bekijken. U kunt een diavoorstelling maken met verschillende overgangseffecten of gewoon
een foto tonen. U heeft hiervoor geen computer, fototoestel of internetverbinding nodig.
Dit Digitaal Fotokader is geschikt voor de volgende veel voorkomende geheugenkaarten:
CompactFlash®, SD™, XD, MultiMediaCard™ en Memory Stick®.
Het toestel kan ook bestanden lezen die opgeslagen zijn op een USB-stick via de USB-poort.
Voornaamste functies
Toont digitale foto’s zonder computer.
Plaats gewoon een geheugenkaart in het Digitaal Fotokader om de foto’s te bekijken of om MP3
bestanden en video’s af te spelen (geheugenkaart niet inbegrepen).
Geschikte geheugenkaarten zijn Secure Digital Card (SD), MultiMedia Card (MMC), Memory
Stick (MS), XD Cards & Compact Flash.
Leest bestanden van een USB Flash geheugen.
Speelt rechtstreeks MP3 muziek via de geïntegreerde luidsprekers.
Speelt rechtstreeks MPEG12en 4 bestanden vanop de geschikte geheugenkaarten*.
Ondersteunt foto’s tot 12 Mega Pixels (JPEG formaat).
Compatibel met de meeste fotocamera’s voor JPEG bestanden en video.
Bevat een afstandsbediening ter grootte van een kredietkaart.
Helder 15” TFT active matrix LCD scherm.
Automatische diavoorstelling met verschillende overgangseffecten.
Speelt diavoorstellingen met MP3 muziek op de achtergrond.
Gebruiksvriendelijk scherm met eenvoudige toegang tot alle mogelijkheden.
*Het is mogelijk dat video bestanden niet goed afspeeld worden als ze opgeslagen zijn op kaarten
met lage snelheid.

For information and support; www.lenco.eu
- 24 -
Starten
Inhoud van de verpakking
Digitaal Fotokader en standaard
Handleiding
AC/DC Adapter
Afstandsbediening
USB kabel
Het toestel installeren
Open de verpakking en verwijder het beschermende piepschuim. Verwijder ook de
beschermhoes rond het toestel.
Bevestig de standaard achteraan het toestel.
Steek de adapter in een wisselstroom stopcontact. Steek het
andere einde in het toestel.
Plaats de geheugenkaart met de bestanden in de juiste gleuf.
Zet het toestel aan met de Aan/Uit schakelaar.

For information and support; www.lenco.eu
- 25 -
Aansluiten op een PC
Het Digitaal Fotokader heeft een USB poort om op een PC (USB Slave) aan te sluiten en een
tweede om andere apparaten aan te sluiten zoals een Flash geheugen, een USB kaartlezer of een
camera (USB Host). Wanneer het toestel aangesloten is op een PC kan u bestanden van de PC
verplaaatsen naar het intern geheugen of de geheugenkaart. U kan ook bestanden uit het intern
geheugen verwijderen.
Opmerking: USB Slave en USB Host kunnen niet gelijktijdig gebruikt worden.
Werking
Het Digitaal Fotokader is zeer eenvoudig te gebruiken:
1. Verwijder de geheugenkaart uit de camera.
2. Plaats de geheugenkaart in het toestel met de bedrukte kant naar beneden.
3. Zet het toestel aan, de foto wordt nu automatisch getoond.

For information and support; www.lenco.eu
- 26 -
Bediening

For information and support; www.lenco.eu
- 27 -
Gebruik van de afstandsbediening
De volgende tabel bevat een beknopte beschrijving van de afstandsbediening.
Geheugenkaarten inbrengen
Toets Beschrijving
On/Off Toestel aan/uit zetten
Mode Modus schakelaar
Foto/Audio/Video
Vol - Volume verhogen
Vol + Volume verlagen
Slideshow Start de diavoorstelling
OSD Toont het foto menu
Menu Toont het hoofdmenu
Rotate Draait de getoonde foto
Enter Bevestigen
Zoom Inzoomen op de getoonde
foto
Afspelen/pauzeren
Stop
Pijlen Selecteren op het scherm

For information and support; www.lenco.eu
- 28 -
Het Digitaal Fotokader ondersteunt de volgende geheugenkaarten:
Secure DigitalTM Card (SD)
MultiMediaTM Card (MMC)
Memory StickTM
CompactFlashTM (CF) Card
XD Picture Cards
Plaats de geheugenkaart in het toestel met de bovenzijde naar beneden gericht. Oefen geen druk
uit, als u de geheugenkaart niet vloeiend in het slot kunt plaatsen heeft u de kaart waarschijnlijk
verkeerd ingebracht.
Opmerking:
Het Digitaal Fotokader herkent alleen foto’s die opgeslagen zijn in JPEG formaat. Foto’s in
andere formaten worden niet herkend en dus niet getoond.
Zorg ervoor dat er minstens één foto op de geheugenkaart staat, zoniet werkt het toestel niet naar
behoren.
U kunt op dezelfde manier een USB flash geheugen gebruiken. Kopieer eenvoudig de bestanden
naar de flash drive en plaats deze in de USB poort (USB Host).
Hoofdmenu
Als u het Digitaal Fotokader aan zet ziet u meteen het hoofdmenu op het scherm. Ga naar het
Instelscherm om de functie Automatische Start in te stellen. U doet dit via de Links/Rechts pijlen.
Druk op de Enter toets om het Keuzescherm te openen. Kies met de Omhoog/Omlaag pijlen de
Automatische Start optie. Druk op de Menu toets voor het volgende menu:
Gebruik de Links/Rechts pijlen om een keuze te maken in het menu en druk op de Enter toets om
verder te gaan.

For information and support; www.lenco.eu
- 29 -
Opmerking: Als u op de Menu toets drukt, gaat u steeds terug naar het hoofmenu, ongeacht in
welk menu u zich bevindt.
Functie Omschrijving
Nand Speel bestanden af in het intern geheugen
Setup Instellingen menu
Calendar Toont kalender, klok en alarm
SD/MMC/MS/xD Toont bestanden op SD/MMC/MS/xD geheugenkaarten
CF Toont bestanden op CF geheugenkaarten
USB Toont bestanden op USB flash geheugen
Opmerking: De icoontjes van bovenstaande functies verschijnen automatisch op het scherm
afhankelijk van de ingebrachte geheugenkaart en verdwijnen als de geheugenkaart terug
verwijderd wordt.
Foto’s bekijken
Zorg ervoor dat er minstens één foto op de geheugenkaart of USB flash drive staat.
Kies de gewenste media in het hoofdmenu (SD/xD/CF/MS/USB/NAND-Intern Geheugen)
Kies in het menu de Foto optie en druk op de Enter toets.
U ziet nu een miniatuurweergave van de foto. Met de Links/Rechts/Omhoog/Omlaag toetsen
(pijlen) kunt u een foto kiezen. Als u een map gekozen heeft, druk dan op de Enter toets om die
map te openen.

For information and support; www.lenco.eu
- 30 -
Heeft u een foto gekozen, druk dan op de Enter toets om de volledige foto te tonen (in pauze
modus) of druk op de Play toets voor de Diavoorstelling modus.
Als u op de OSD knop op de afstandsbediening drukt terwijl er een diavoorstelling bezig is of er
een foto getoond wordt, ziet u volgend menu:
Vorige
Toont de vorige foto in de lijst.
Afspelen of Pauze
Afspelen of pauzeren van de lopende diavoorstelling.
Volgende
Toont de volgende foto in de lijst.

For information and support; www.lenco.eu
- 31 -
Draaien
De oriëntatie van de foto wijzigen naar portret (rechtop) of landschap (liggend).
Stop
De diavoorstelling beëindigen en terug gaan naar de miniatuurvoorstelling.
Zoom
De foto vergroten: druk verschillende keren om steeds verder te vergroten.
Video’s bekijken
Het Digitaal Fotokader ondersteunt volgende video formaten:
Motion JPEG (*avi): gebruikt door de meeste video camera’s.
MPEG-I &MPEG-2 –w/layer I,II,III(*MPG,*MPEG,*DAT)
MPEG 4-W/MP3 audio (*avi)
Zorg ervoor dat er minstens één video op de geheugenkaart of de USB flash drive staat.
Kies de gewenste media in het hoofdmenu (SD/xD/CF/MS/USB/NAND-Intern Geheugen)
Kies de Movie optie in het hoofdmenu en druk op de Enter toets.
Op de linkerhelft van het scherm verschijnt de lijst met alle films. Op de rechterhelft ziet u het
voorproef venster en informatie over de gekozen film. Kies met de Omhoog/Omlaag toetsen de
gewenste film en druk op de Enter toets om deze af te spelen.

For information and support; www.lenco.eu
- 32 -
Als u op de OSD knop drukt op de afstandsbediening terwijl er een filmvertoning bezig is, ziet u
volgend menu:
Vorige
Speelt de vorige film in de lijst af.
Snel vooruit
Speelt de film af met een 2/3/4 keer hogere snelheid.
Afspelen of Pauzeren
De film afspelen of onderbreken.
Snel achteruit
Speelt de film achterwaarts af met een 2/3/4 keer hogere snelheid.
Volgende
Speelt de volgende film in de lijst af.
Stop
Stopt het afspelen en keert terug naar de afspeellijst.
Zoom
Vergroot het beeld 2/3/4/1 keer.

For information and support; www.lenco.eu
- 33 -
MP3 muziek beluisteren
Zorg ervoor dat er minstens één MP3 bestand op de geheugenkaart of het USB flash geheugen
staat.
Kies de gewenste media in het hoofdmenu (SD/xD/CF/MS/USB/NAND-Intern Geheugen)
Kies de Muziek optie in het menu en druk op de Enter toets.
Op de linkerhelft van het scherm verschijnt de lijst met alle muziekbestanden.
Op de rechterhelft ziet u het de frequentiebalken en de informatie over het gekozen bestand. Kies
met de Omhoog/Omlaag toetsen het gewenste muziekbestand en druk op de Enter toets om het af
te spelen.

For information and support; www.lenco.eu
- 34 -
Druk op de VOL+ toets om het geluidsvolume te verhogen en op de VOL- toets om het te
verlagen.
Druk op de Play/Pause toets op de afstandsbediening om de muziek af te spelen of te
onderbreken.
Druk op de Stop toets op de afstandsbediening om terug te gaan naar de lijst met
muziekbestanden.
Bestandskeuze
Een diavoorstelling afspelen met muziek.
Zorg ervoor dat er minstens één fotobestand op de geheugenkaart of USB flash geheugen staat.
Daarnaast moet er een MP3 bestand staan op de gekozen geheugenkaart/USB/Intern geheugen.
Kies de gewenste media in het hoofdmenu (SD/xD/CF/MS/USB/NAND-Intern Geheugen)
Kies de File optie in het menu en druk op de Enter toets.
Op de linkerhelft van het scherm verschijnt de lijst met alle bestanden op de geheugenkaart of het
intern geheugen.Op de rechterhelft ziet u de informatie over het gekozen bestand.
Kies met de Omhoog/Omlaag toetsen een fotobestand en druk op de Enter toets om de foto op het
gehele scherm te tonen (pauze modus). Druk op de Play toets op de afstandsbediening en een
diavoorstelling met muziek start automatisch.
Als u op de OSD knop drukt op de afstandsbediening terwijl er een diavoorsteling met geluid
bezig is, ziet u volgend menu:

For information and support; www.lenco.eu
- 35 -
Vorige
Toont de vorige foto in de lijst.
Afspelen of Pauzeren
De diavoorstelling afspelen of onderbreken..
Volgende
Toont de volgende foto in de lijst.
Draaien
Wijzigt de oriëntatie van de foto naar portret (rechtop) of landschap (liggend).
Stop
De diavoorstelling beëindigen en terug gaan naar de miniatuurvoorstelling.
Zoom
De foto 2/4/8/16/1 keer vergroten..
VOL
Druk op VOL+ of VOL- toetsen op de afstandsbediening om het geluidsvolume te verhogen of te
verlagen.

For information and support; www.lenco.eu
- 36 -
Bestanden kopiëren en verwijderen
Bestanden op uw geheugenkaart, USB flash geheugen of intern geheugen kopiëren of
verwijderen.
Kopiëren
Kies het gewenste geheugen in het hoofdmenu (SD/xD/CF/MS/USB/NAND-Intern Geheugen)
Kies de File optie in het menu en druk op de Enter toets.
U ziet nu de lijst van de beschikbare bestanden. Kies met de Omhoog/Omlaag toetsen het
gewenste bestand en druk dan op de Rechts toets. Herhaal dit voor alle bestanden die u wil
kopiëren.
Druk op ds OSD toets om het Kopieer en Verwijder menu te tonen. Kies de Kopie functie en
druk op de Enter toets.
Kies met de Omhoog/Omlaag toetsen de gewenste bestemmingsmap. Druk op de Rechts toets om
dit te bevestigen.

For information and support; www.lenco.eu
- 37 -
Druk op de Enter toets om het kopiëren te starten.
Verwijderen
Kies het gewenste geheugen in het hoofdmenu (SD/xD/CF/MS/USB/NAND-Intern Geheugen)
Kies de File optie in het menu en druk op de Enter toets.
U ziet nu de lijst van de beschikbare bestanden. Kies met de Omhoog/Omlaag toetsen het
gewenste bestand en druk dan op de Rechts toets. Herhaal dit voor alle bestanden die u wil
verwijderen.
Druk op ds OSD toets om het Kopieer en Verwijder menu te tonen. Kies de Verwijderen functie
en druk op de Enter toets. De bestanden worden verwijderd.
Instellingen
Met de Setup optie in het hoofdmenu kunt u volgende mogelijkheden instellen.
Functie Omschrijving
Taal Taalselectie: Engels, Frans, Spaans, Duits, Zweeds, Grieks,
Italiaans of Turks
Duur diavoorstelling Duur van de diavoorstelling: 3s/5s/15s/1min/15min/1uur
Modus
diavoorstelling
Uit, willekeurig, langzaam verdwijnen, van beneden naar
boven, van boven naar beneden, links naar rechts, rechts naar
links, gesloten deur, open deur, horizontaal dwars, vertikaal
dwars
Muziek herhaling Uit, herhaal één, herhaal alles
Film herhaling Uit, herhaal één, herhaal alles
Scherm modus Verkort, gerekt, cinema
Tijd Jaar/maand/dag
Alarm Tijd alarm, muziek alarm, aan/uit
Default De fabrieksinstellingen terugzetten

For information and support; www.lenco.eu
- 38 -
Kalender/klok
Als u het toestel aan zet gaat u meteen naar het Menu scherm. Als u Kalender/Klok kiest en op de
Enter toets drukt, krijgt u het Kalender/Klok scherm. Als het alarm aangezet is ziet u meteen ook
de alarmtijd. Een diavoorstelling start op de rechterhelft in het voorproef venster.

For information and support; www.lenco.eu
- 39 -
Technische ondersteuning
Veel gestelde vragen
1) V: Beschikt mijn Digitaal Fotokader over een aanraakscherm?
A: Het LCD scherm is niet voorzien van aanraak technologie. Gebruik de toetsen op de
afstandsbediening om het toestel te bedienen.
2) V: Wordt het LCD scherm beschadigd als ik lange tijd dezelfde foto toon?
A: Neen. Het Digitaal Fotokader kan dezelfde foto lange tijd ononderbroken tonen. Het is
nochtans aangeraden eenzelfde foto niet langer dan een maand ononderbroken te tonen.
3) V: Hoe sla ik muziekbestanden op?
A: Gebruik uw computer en eenvoudige geluidssoftware om uw muziekbestanden om te zetten
naar MP3 formaat. Het Digitaal Fotokader kan enkel MP3 bestanden afspelen, dus moeten al uw
Windows Media Player™ en/of iTunes™ bestanden eerst omgezet worden. U kan een kaartlezer
of uw digitale camera gebruiken om deze bestanden op uw geheugenkaart te zetten.
4) V: Heeft het Digitaal Fotokader een intern geheugen?
A: Ja. Het Digitaal Fotokader heeft een intern geheugen van 128 MB om uw bestanden op te
slaan.
5) V: Hoe groot is het maximale foto formaat?
A: Het Digitaal Fotokader kan foto’s tot 12 Mega Pixels tonen.
7) V: Waarom kan mijn Digitaal Fotokader sommige foto’s niet tonen?
A: Het Digitaal Fotokader is ontworpen om foto’s te tonen met dezelfde standaard als die voor
digitale camera’s gebruikt wordt, nl. het JPEG formaat. Beelden, zoals web foto’s, ingescande
beelden of beelden in RAW formaat zijn niet opgeslagen volgens deze standaard en kunnen dus
niet getoond worden op het Digitaal Fotokader. Zet dus altijd uw bestanden, met behulp van uw
computer, om naar het standaard JPEG formaat alvorens ze te gebruiken met uw Digitaal
Fotokader.

For information and support; www.lenco.eu
- 40 -
Problemen oplossen
Probleem Oorzaak Remedie
U kan het Digitaal
Fotokader niet inschakelen
De stroomvoorziening van het
toestel is niet goed aangesloten.
Zorg ervoor dat de adapter
goed op het toestel is
aangesloten. Bij het
opstarten, ook zonder
geheugenkaart, moet het
scherm oplichten. Als dit
niet zo is, controleer dan of
de stekker in het stopcontact
zit en de adapter goed op het
toestel aangesloten is.
Geen opstartscherm Geheugenkaart niet goed geplaatst. Plaats een geschikte
geheugenkaart in het toestel.
Een bestand wordt niet
afgespeeld
Geen geschikt bestandsformaat Zorg ervoor dat er minstens
één geschikt bestand op de
geheugenkaart staat:
foto: JPEG
muziek: MP3
video: Motion JPEG (avi),
MPEG1, MPEG2, MPEG4.
Video’s worden niet goed
afgespeeld
Trage geheugenkaart Zorg ervoor dat u een
geheugenkaart met hoge
snelheid gebruikt om video
bestanden af te spelen.
Klein video beeld op het
scherm
Lage video resolutie De beste resolutie voor foto
of video is 1024x768
Gebruik de Zoom toets om
het beeld te vergroten.

For information and support; www.lenco.eu
- 41 -
Specificaties
Type 15 inch Digitaal Fotokader
Intern geheugen 128 MB
Resolutie 1024x768
Voeding 12 V
Verbruik 24 Watts
Helderheid 450cd/m2 max.
Contrast 450:1
Kijkhoek 60/60/45/45 (CR=10)
Reactie tijd 10ms
Schermformaat 4:3
Bestandsformaat JPEG, MPEG1, MPEG2, MP3, MPEG4
Foto afmetingen 12 Mega Pixels
Stroom AC110—240V (50HZ—60HZ)
Kaarten SD/MMC/MS/CF/XD/USB
USB poorten USB Host, USB Slave
Inhoud van de verpakking Digitaal Fotokader
AC/DC Adapter
Handleiding
Afstandsbediening
USB kabel
Standaard
Wanneer u in de toekomst dit toestel moet weggooien, doe dit dan niet bij het
restafval. Elektrische toestellen kunnen gerecycleerd worden. Informeer u over de
mogelijkheden bij uw plaatselijke overheid of uw verdeler

For information and support; www.lenco.eu
- 42 -
Sommaire
Introduction ............................................................................................... - 43 -
Fonctionnalités principales ........................................................................ - 43 -
Démarrage ................................................................................................ - 44 -
Contenu de l’emballage......................................................................... - 44 -
Installation de votre unité....................................................................... - 45 -
Raccordement à un PC ......................................................................... - 45 -
Mode opératoire .................................................................................... - 46 -
Commandes.............................................................................................. - 47 -
Fonctionnement de la télécommande ....................................................... - 48 -
Insertion de cartes mémoire...................................................................... - 49 -
Menu principal........................................................................................... - 50 -
Visionner des images ............................................................................ - 51 -
Précédent........................................................................................... - 52 -
Lecture ou Pause............................................................................... - 52 -
Suivant............................................................................................... - 52 -
Rotation.............................................................................................. - 52 -
Arrêt ................................................................................................... - 52 -
Zoom.................................................................................................. - 52 -
Visionner des vidéos ............................................................................. - 53 -
Précédent........................................................................................... - 54 -
Avance rapide .................................................................................... - 54 -
Lecture ou Pause............................................................................... - 54 -
Rembobinage..................................................................................... - 54 -
Suivant............................................................................................... - 54 -
Arrêt ................................................................................................... - 54 -
Zoom.................................................................................................. - 54 -
Ecouter une musique MP3 .................................................................... - 55 -
Option des fichiers................................................................................. - 56 -
Lire un diaporama avec de la musique.................................................. - 56 -
Précédent........................................................................................... - 57 -
Lecture ou Pause............................................................................... - 57 -
Suivant............................................................................................... - 57 -
Rotation.............................................................................................. - 57 -
Arrêt ................................................................................................... - 57 -
Zoom.................................................................................................. - 57 -
VOL.................................................................................................... - 57 -
Copie et suppression de fichiers............................................................ - 58 -
Mode opératoire de la fonction CONFIGURATION................................... - 59 -
Support technique ..................................................................................... - 61 -
Questions fréquemment posées.......... Fout! Bladwijzer niet gedefinieerd.
Spécifications techniques ...................................................................... - 63 -

For information and support; www.lenco.eu
- 43 -
Introduction
Nous vous félicitons d’avoir fait l’acquisition du cadre photo numérique avec écran 15 pouces,
modèle DF-1520
Avant d’utiliser l’unité, lisez attentivement ce manuel et conservez-le pour pouvoir vous y référer
ultérieurement. Ce manuel vous aidera à vous familiariser avec les nombreuses fonctions
excitantes et pratiques qui rendront votre visionnage de photos encore plus appréciable.
Ce cadre photo numérique vous permet de visionner des photos numériques directement depuis la
carte mémoire de votre appareil photo numérique. Il vous est possible alors de créer un
diaporama avec de multiples effets de transition ou afficher les images une par une. Aucun
ordinateur, appareil photo numérique ou Internet n’est requis.
Ce cadre photo numérique est compatible avec les populaires formats de cartes mémoire suivants
: CompactFlash®, SD™, XD, MultiMedia™ et Memory Stick®.
Le cadre photo peut également lire les fichiers contenus dans un disque amovible USB en
utilisant le connecteur USB.
Fonctionnalités principales
Permet d’afficher les images numériques (JPEG) sans ordinateur :
Insérez simplement une carte mémoire compatible dans le cadre photo numérique pour afficher
vos photos, lire des musiques MP3 ou fichiers vidéo supportés (carte mémoire non fournie).
Les cartes mémoire compatibles incluent les cartes Secure Digital (SD), MultiMedia (MMC),
Memory Stick (MS), XD & Compact Flash
Lecture des fichiers contenus dans un lecteur Flash USB
Lecture instantanée des musiques MP3 avec les haut-parleurs intégrés.
Lecture instantanée des fichiers MPEG124 fichiers stockés sur une carte mémoire supportée*.
Prise en charge des fichiers image ayant une résolution inférieure à 12 méga pixels (format JPEG
).
Compatible avec la plupart des photos numériques JPEG enregistrées sur des cartes mémoire
d’appareils photo et images animées JPEG.
Télécommande en forme de carte de crédit incluse
Ecran 15 pouces TFT LCD à matrice active.
Diaporama automatique avec de multiples effets de transition.
Lecture des diaporamas avec musique MP3 en fond.
Menus intuitifs vous permettant d’accéder aisément aux commandes de l’appareil.
*Les fichiers vidéo pourraient ne pas être lus correctement si ceux-ci sont stockés sur une carte
mémoire faible vitesse.

For information and support; www.lenco.eu
- 44 -
Démarrage
Contenu de l’emballage
Cadre photo numérique et son support
Manuel d’utilisation
Adaptateur de courant CA/CC
Remote Télécommande
Cordon USB

For information and support; www.lenco.eu
- 45 -
Installation de votre unité
Ouvrez l’emballage et retirez la mousse de protection. Retirez la pochette en plastique recouvrant
l’unité.
Installez le support du cadre photo numérique à l’arrière de l’unité.
Raccordez une extrémité du cordon d’alimentation CA à une prise de courant. Raccordez l’autre
extrémité du cordon à l’unité.
Une fois le contenu stocké sur le lecteur média Flash cible; connectez le média sur son
emplacement respectif.
Positionnez le commutateur d’alimentation ON/OFF sur ON.
Raccordement à un PC
Le cadre photo numérique possède un port USB permettant de raccorder l’unité à un port PC
(USB esclave) et un second port USB permettant de raccorder l’unité à un autre périphérique
Flash, lecteur de cartes USB ou un appareil photo (hôte USB). Lorsque vous raccordez l’unité à
un ordinateur, vous pouvez déplacer le contenu de l'ordinateur dans la mémoire interne ou carte
mémoire. Vous pouvez également supprimer le contenu de la mémoire interne.
REMARQUE: les ports esclave USB et hôte USB ne peuvent être utilisés simultanément.

For information and support; www.lenco.eu
- 46 -
Mode opératoire
Ce cadre photo numérique est très simple d’emploi :
1. Retirez la carte mémoire de votre appareil photo :
2. Insérez la carte mémoire dans le cadre photo en dirigeant la carte dans la direction opposée :
3. Lorsque vous mettez en marche le cadre photo numérique, les images s’affichent
automatiquement.

For information and support; www.lenco.eu
- 47 -
Commandes

For information and support; www.lenco.eu
- 48 -
Fonctionnement de la télécommande
Le tableau suivant offre une brève présentation des fonctions de la télécommande
Touche Description
On/Off Mettre en marche/arrêter le
cadre photo
Mode Sélection du mode
Photo/Audio/Vidéo
Vol - Diminuer le volume
Vol + Augmenter le Volume
Slideshow Démarrer le diaporama
OSD Afficher le menu Image
Menu Afficher le menu principal
Rotate Effectuer une rotation sur
image
Enter Confirmer
Zoom Effectuer un zoom sur
l’image sélectionnée
Lecture/Pause
Arrêt
Flèches Pour naviguer sur
l’interface

For information and support; www.lenco.eu
- 49 -
Insertion de cartes mémoire
Le cadre photo numérique est compatible avec les cartes mémoire suivantes:
Cartes Secure Digital
TM
(SD)
Cartes MultiMedia
TM
(MMC)
Cartes Memory Stick
TM
Cartes CompactFlash
TM
(CF)
Cartes XD Image
Insérez la carte mémoire en dirigeant l’étiquette avant dans l’autre direction. Ne forcez pas
l’insertion de la carte mémoire dans l’emplacement carte mémoire. S’il vous est impossible
d’insérer la carte mémoire complètement, cela signifie que vous avez mal orienté la carte.
Remarque:
Le cadre photo numérique reconnait SEULEMENT les fichiers images stockés au format JPEG.
Les fichiers d’autres formats seront ignorés.
Assurez-vous qu’au moins une image soit stockée sur la carte mémoire. Le cadre photo ne
fonctionnera pas normalement si aucune image n’est stockée.
Vous pouvez également utiliser un lecteur USB de la même manière qu’une carte mémoire.
Copiez simplement les fichiers sur le lecteur flash et raccordez-le au connecteur USB du cadre de
manière adaptée.

For information and support; www.lenco.eu
- 50 -
Menu principal
Après avoir mis en marche le cadre photo numérique, le MENU s’affiche. Pour définir la
fonction Démarrage automatique, sélectionnez l’interface CONFIGURATION. Utilisez les
touches directionnelles Gauche/Droite pour accéder à l’interface “Configuration”. Appuyez sur la
touche Enter pour accéder aux options de l’interface. Utilisez les touches directionnelles
Haut/Bas pour choisir l’option Démarrage automatique. Appuyez sur la touche “MENU” pour
afficher le menu suivant:
Utilisez les touches directionnelles Gauche et Droite pour vous déplacer dans le menu puis
appuyez sur la touche “Enter” pour continuer
Remarque: dans tous les menus, appuyer sur la touche “Menu” vous permet de revenir au menu
principal
Fonction Description
Nand Permet de lire les fichiers de la mémoire interne
Configuration Permet de définir les options du menu Système
Calendrier Permet d’afficher le calendrier, l’horloge, l’alarme
SD/MMC/MS/xD Permet de lire les fichiers sur la carte mémoire SD/MMC/MS/xD
CF Permet de lire les fichiers sur carte mémoire CF
USB Permet de lire les fichiers sur le lecteur USB
REMARQUE: les icônes des fonctions précédentes apparaitront automatiquement sur l’interface
MENU lorsqu’une carte mémoire est insérée. Les icônes disparaitront lorsque vous retirerez la
carte.

For information and support; www.lenco.eu
- 51 -
Visionner des images
Assurez-vous qu’au moins une image soit présente sur votre carte mémoire ou votre lecteur USB.
Une fois ceci effectué:
Sélectionnez le média flash désiré du menu principal. (SD/xD/CF/MS/USB/NAND-Mémoire
interne)
Sélectionnez l’option “PHOTO” du menu et appuyez sur la touche “ENTER”
Une miniature apparait. Utilisez les touches directionnelles HAUT/BAS/GAUCHE/DROITE
pour sélectionner un fichier. Si un dossier est mis en surbrillance, appuyez sur la touche Enter
pour accéder au répertoire.
Autrement, appuyez sur la touche Enter pour accéder à l’affichage de la photo en mode plein
écran (mode pause) et appuyez sur la touche Play pour accéder au mode Diaporama.

For information and support; www.lenco.eu
- 52 -
Lorsqu’un diaporama est en cours de lecture ou lorsqu’une image est affichée, appuyez sur la
touche OSD. Le menu suivant s’affiche:
Précédent
Permet de lire l’image précédente de la liste des photos
Lecture ou Pause
Permet de lire ou mettre en pause le diaporama en cours.
Suivant
Permet de lire l’image suivante de la liste des photos
Rotation
Utilisez la fonction rotation pour changer l’orientation de l’image : portrait ou paysage.
Arrêt
Permet d'arrêter le diaporama et de revenir aux miniatures.
Zoom
Sélectionnez la fonction Zoom pour effectuer un zoom avant sur image, répétez cette opération
pour agrandir l’image à nouveau.

For information and support; www.lenco.eu
- 53 -
Visionner des vidéos
Le cadre photo numérique prend en charge les formats vidéo suivants :
JPEG animé (*avi): format vidéo utilisé par la plupart des appareils photo numériques
MPEG-I &MPEG-2 –w/layer I,II,III(*MPG,*MPEG,*DAT)
MPEG 4-W/MP3 audio (*avi)
Assurez-vous qu’au moins une vidéo soit présente sur votre carte mémoire ou votre lecteur USB.
Une fois ceci effectué:
Sélectionnez le média flash désiré du menu principal. (SD/xD/CF/MS/USB/NAND-Mémoire
interne)
Sélectionnez l’option “VIDEO” du menu et appuyez sur la touche “ENTER”
Une liste de tous les fichiers vidéo s’affiche sur la partie gauche de l’écran. Une fenêtre de
prévisualisation se trouve sur la partie droite de l’écran et affiche les informations de la vidéo
sélectionnée. Utilisez les touches directionnelles haut/bas pour sélectionner une vidéo et appuyez
sur la touche Enter pour la lire.
Une fois la vidéo en cours de lecture, appuyez sur la touche OSD de la télécommande. Le menu
suivant s’affiche:

For information and support; www.lenco.eu
- 54 -
Précédent
Permet de lire la vidéo précédente de la liste de lecture
Avance rapide
Permet de lire la vidéo à une vitesse de 2/3/4 fois la vitesse normale.
Lecture ou Pause
Permet de lire ou mettre en pause la vidéo.
Rembobinage
Permet de lire la vidéo vers l’arrière à une vitesse de 2/3/4 fois la vitesse normale.
Suivant
Permet de lire la vidéo suivante de la liste de lecture
Arrêt
Permet d’arrêter la vidéo et de revenir à la liste de lecture
Zoom
Permet d’agrandir la taille de l’image de 2/3/4/1 fois.

For information and support; www.lenco.eu
- 55 -
Ecouter une musique MP3
Assurez-vous qu’au moins un fichier MP3 soit stocké sur votre carte mémoire ou votre lecteur
USB. Une fois ceci effectué:
Sélectionnez le média flash désiré du menu principal. (SD/xD/CF/MS/USB/NAND-Mémoire
interne)
Sélectionnez l’option “MUSIQUE” du menu et appuyez sur la touche “ENTER”
Une liste des fichiers musique s’affiche sur la partie gauche de l’écran. Une liste des fréquences
et les informations de la barre d’état s’affichent sur la partie droite de l’écran. Les informations
de la zone musique se trouve sous la barre d’état. Utilisez les touches directionnelles Haut/Bas
pour sélectionner le fichier musique et appuyez sur la touche Enter pour le lire.

For information and support; www.lenco.eu
- 56 -
Appuyez sur la touche VOL+ pour augmenter le volume ou VOL- pour diminuer le volume.
Appuyez sur la touche Play/Pause de la télécommande pour lire ou mettre en pause le fichier
musique.
Appuyez sur la touche Stop de la télécommande pour revenir à la liste des fichiers musique.
Option des fichiers
Lire un diaporama avec de la musique
Assurez-vous qu’il y ait au moins une image sur votre carte mémoire ou votre lecteur USB. De
plus, vous devez avoir un fichier MP3 stocké sur la carte mémoire/USB/mémoire interne. Une
fois ceci effectué:
Sélectionnez le média flash désiré du menu principal. (SD/xD/CF/MS/USB/NAND-Mémoire
interne)
Sélectionnez l’option “FICHIER” du menu et appuyez sur la touche “ENTER”
Les fichiers de la carte mémoire sélectionnée ou de la mémoire interne seront listés sur la partie
gauche de l’écran. La partie droite de l’écran contient les informations du fichier. Utilisez les
touches directionnelles Haut/Bas pour sélectionner un fichier image et appuyez sur la touche
Enter pour accéder au mode plein écran (mode pause). Appuyez sur la touche Play de la
télécommande, le diaporama audio démarre instantanément.
Une fois le diaporama avec son en cours de lecture, appuyez sur la touche OSD. Le menu suivant
s’affiche:

For information and support; www.lenco.eu
- 57 -
Précédent
Pour lire l’image précédente de la liste des photos
Lecture ou Pause
Pour lire ou mettre en pause le diaporama en cours.
Suivant
Pour lire la photo suivante de la liste des photos
Rotation
Utilisez la fonction rotation pour afficher l’image en mode portrait ou paysage.
Arrêt
Permet d’arrêter le diaporama et de revenir aux miniatures.
Zoom
Permet d’augmenter la taille de l’image de 2/4/8/16/1 fois.
VOL
Appuyez sur la touche VOL+ ou VOL- de la télécommande pour augmenter ou diminuer le
volume

For information and support; www.lenco.eu
- 58 -
Copie et suppression de fichiers
Pour copier et supprimer des fichiers sur votre carte mémoire, le disque USB ou la mémoire
interne.
Copie
Sélectionnez le média flash désiré du menu principal. (SD/xD/CF/MS/USB/NAND-Mémoire
interne)
Sélectionnez l’option “FICHIER” du menu et appuyez sur la touche “ENTER”
Une liste des fichiers disponibles s’affiche. Utilisez les touches directionnelles haut et bas pour
mettre en surbrillance le fichier désiré et appuyez sur la touche directionnelle droite pour mettre
en surbrillance le fichier désiré. Répétez ces étapes pour tous les fichiers que vous souhaitez
copier
Appuyez sur la touche “OSD” pour afficher le menu Copie et Suppression. Sélectionnez la
fonction Copie et appuyez sur Enter.
Utilisez les touches directionnelles Haut/Bas pour sélectionner le répertoire de destination des
fichiers. Appuyez sur la touche Droite pour confirmer.
Appuyez sur la touche Enter pour démarrer la copie des fichiers.

For information and support; www.lenco.eu
- 59 -
Suppression
Sélectionnez le média flash désiré du menu principal. (SD/xD/CF/MS/USB/NAND-Mémoire
interne)
Sélectionnez l’option “FICHIER” du menu et appuyez sur la touche “ENTER”
Une liste des fichiers disponibles s’affiche. Utilisez les touches directionnelles haut et bas pour
mettre en surbrillance le fichier désiré et appuyez sur la touche directionnelle droite pour mettre
en surbrillance le fichier désiré. Répétez ces étapes pour tous les fichiers que vous souhaitez
copier.
Appuyez sur la touche “OSD” pour afficher le menu Copie et Suppression. Sélectionnez la
fonction Suppression et appuyez sur la touche Enter. Le fichier sera supprimé.
Mode opératoire de la fonction CONFIGURATION
Les options suivantes peuvent être configurées en utilisant l’option “SETUP” option du menu
principal:
Fonction Description
Langue Inclus : Anglais, Français, EspagnolAllemand, Suédois, Grec,
Italien, Turc.
Durée du
diaporama
Durée du diaporama: 3s/5s/15s/1 mins/15 mins/1 heure
Mode de
diaporama
Désactivé, Aléatoire, Fondu, Bas vers le haut, Haut vers le bas,
Gauche à droite, de droite à gauche, Fermeture de porte,
Ouverture de porte, Passage horizontal, Passage vertical
Mode Répétition
de musiques
Répéter 1, Répéter tout, Répétition désactivée
Mode Répétition
de vidéos
Répéter 1, Répéter tout, Répétition désactivée
Mode d’affichage Centré, Etiré, Cinéma
Heure Année/Mois/Date/Heure
Alarme Heure de l’alarme/Musique de l’alarme/Alarme
activée/désactivée
Défaut Rétablir la configuration d’usine

For information and support; www.lenco.eu
- 60 -
Affichage du Calendrier/horloge
Après avoir mis en marche le cadre photo numérique, le MENU s’affiche. Si vous sélectionnez
Calendrier/Horloge et appuyez sur la touche Enter, vous accéderez à l’interface
Calendrier/Horloge. Si l’alarme est activée, l’heure de l’alarme sera également affichée. Un
diaporama d’images démarre dans la fenêtre de prévisualisation d’images située sur la partie
droite de l’écran.

For information and support; www.lenco.eu
- 61 -
Questions fréquemment posées
Support technique
1) Q: Puis-je utiliser l’écran du cadre photo numérique comme un écran tactile ?
A: L’écran LCD ne prend pas en charge la technologie tactile. Veuillez utiliser les touches de la
télécommande pour contrôler le cadre photo numérique.
2) Q: Si je laisse la même photo affichée pendant une longue période, est-ce que ceci endommage
l’écran LCD ?
A: Non. Le cadre photo numérique peut afficher la même photo de manière continue, et ce,
pendant une longue période. Il est cependant recommandé de ne pas afficher la même image
pendant plus d’un mois.
3) Q: Comment puis-je stocker mes fichiers musique?
A: Tout d’abord, utilisez un ordinateur et un lecteur audio pour convertir votre musique au
format MP3. Le cadre photo numérique lit seulement les fichiers MP3, les fichiers du lecteur
Windows Media ™ et/ou iTunes™ doivent donc d’abord être convertis. Vous pouvez utiliser un
lecteur de cartes ou votre appareil photo numérique pour transférer ces fichiers sur la carte
mémoire.
4) Q: Est ce que le cadre photo numérique possède une mémoire interne?
A: Oui. Le cadre photo numérique possède une mémoire intégrée de 128 Mo permettant de
stocker vos fichiers.
5) Q: Quelle est la taille maximale prise en charge pour une image?
A: Le cadre photo numérique peut afficher les images d’une résolution atteignant 12 méga pixels.
7) Q: Pourquoi le cadre photo numérique n’affiche pas certaines de mes photos?
A: Le cadre photo numérique est conçu pour afficher les photos en se basant sur les mêmes
normes que celles de l’industrie des appareils photo numériques et de la même manière qu’un
appareil photo numérique. Ce format est le format JPEG. Les images, comme les images sur
internet, images scannées ou photos au format RAW, ne sont pas stockées selon la norme de
l’industrie des appareils photo numériques et ne peuvent pas être correctement affichés sur le
cadre photo numérique. Utilisez vos applications PC pour convertir ces images en format
standard JPEG avant de les visualiser sur le cadre photo.

For information and support; www.lenco.eu
- 62 -
Dépannage
Problème Cause Solution
Impossible de mettre
en marche le cadre
photo numérique
Le connecteur POWER de l’unité
est mal raccordé.
Assurez-vous d’avoir
correctement raccordé le
cordon d’alimentation CA à
l’unité. Lorsque vous raccordez
le cordon d’alimentation CA à
l’unité et que vous mettez en
marche le cadre photo même
sans la carte mémoire, vous
devriez apercevoir un écran
blanc. Si vous ne voyez pas cet
écran, vérifiez le raccordement
du cordon d’alimentation.
Aucun écran de
démarrage
La carte mémoire est mal insérée. Insérez une carte mémoire
compatible
Impossible de lire le
fichier
Format de fichier incompatible Assurez-vous qu’il y ait au
moins une photo sur la carte
mémoire.
Formats image compatibles :
JPEG
Formats musique compatibles:
MP3
Formats vidéo compatibles :
JPEG animé (avi), MPEG1,
MPEG2, MPEG4.
La vidéo s’affiche
mal
Carte mémoire de faible vitesse Assurez-vous d’utiliser une
carte mémoire haute vitesse
pour lire les fichiers vidéo.
La taille de la vidéo
est trop petite
Vidéo de faible résolution La meilleure résolution photo
est 1024x768
Utilisez la touche Zoom de la
télécommande pour agrandir
l’image.

For information and support; www.lenco.eu
- 63 -
Spécifications techniques
Type Cadre photo numérique avec écran 15 pouces
Mémoire interne 128 Mo
Résolution 1024x768
Alimentation 12 V
Consommation d’énergie 24 Watts
Luminosité 450cd/m
2
max.
Contraste 450:1
Angle de vue 60/60/45/45 (CR=10)
Temps de réponse 10ms
Format d’affichage 4:3
Formats de fichiers
supportés
JPEG, MPEG1, MPEG2, MP3, MPEG4
Résolution maximale des
photos
12 méga pixels
Alimentation CA 110—240V (50HZ—60HZ)
Cartes mémoire
compatibles
SD/MMC/MS/CF/XD/USB
Ports USB Hôte USB, USB esclave
Contenu de l’emballage Cadre photo numérique
Adaptateur de courant CA/CC
Manuel d’utilisation
Télécommande
Cordon USB
Support
A noter lorsque vous disposerez de ce produit ; les déchets de produits électriques
ne doivent pas être jetés avec les déchets ménagers. Veuillez déposer l’appareil
dans un centre de recyclage. Consultez votre municipalité ou votre revendeur pour
plus de précisions. (Directive portant sur les déchets de produits électriques et
électroniques)

For information and support; www.lenco.eu
- 64 -
Inhalt
Einleitung .................................................................................................. - 65 -
Hauptmerkmale......................................................................................... - 65 -
Loslegen ................................................................................................... - 66 -
Packungsinhalt ...................................................................................... - 66 -
Installation des Geräts........................................................................... - 67 -
Anschluss an einen PC ......................................................................... - 67 -
Bedienung ............................................................................................. - 68 -
Tastenfeld ................................................................................................. - 69 -
Handhabung der Fernbedienung .............................................................. - 70 -
Speicherkarten einstecken ........................................................................ - 71 -
Hauptmenü ............................................................................................... - 71 -
Bilder betrachten ................................................................................... - 72 -
Zurück................................................................................................ - 73 -
Wiedergabe/Pause ............................................................................ - 74 -
Weiter ................................................................................................ - 74 -
Drehen ............................................................................................... - 74 -
Stop ................................................................................................... - 74 -
Zoom.................................................................................................. - 74 -
Videos anschauen ................................................................................. - 74 -
Zurück................................................................................................ - 76 -
Schnellvorlauf .................................................................................... - 76 -
Wiedergabe/Pause ............................................................................ - 76 -
Schnellrücklauf................................................................................... - 76 -
Weiter ................................................................................................ - 76 -
Stop ................................................................................................... - 76 -
Zoom.................................................................................................. - 76 -
MP3-Musikdateien abspielen................................................................. - 77 -
File-Menü .............................................................................................. - 78 -
Eine Diahows mit Hintergrundmusik abspielen...................................... - 78 -
Zurück................................................................................................ - 79 -
Wiedergabe/Pause ............................................................................ - 79 -
Weiter ................................................................................................ - 79 -
Drehen ............................................................................................... - 79 -
Stop ................................................................................................... - 79 -
Zoom.................................................................................................. - 79 -
VOL.................................................................................................... - 79 -
Kopieren und Löschen von Dateien....................................................... - 80 -
Das SETUP-Menü..................................................................................... - 81 -
Technische Hilfe........................................................................................ - 83 -
Häufig gestellte Fragen ......................................................................... - 83 -
Technische Daten................................................................................ - 85 -

For information and support; www.lenco.eu
- 65 -
Einleitung
Herzlichen Glückwunsch zum Kauf dieses digitalen Bilderrahmens mit 15 Zoll
Bildschirmdiagonale und der Modellbezeichnung DP-1520
Bevor Sie das Gerät in Betrieb nehmen, lesen Sie diese Bedienungsanleitung bitte gründlich
durch. Bewahren Sie sie zum späteren Gebrauch auf. Diese Anleitung wird Ihnen dabei helfen,
die vielen aufregenden und nützlichen Funktionen zu nutzen, dank denen Sie mehr Freude an
Ihrem digitalen Bilderrahmen haben werden.
Dieser digitale Bilderrahmen ermöglicht es Ihnen, digitale Bilder unmittelbar von den
Speicherkarten Ihrer Kamera anzusehen. Sie können eine Diashow mit verschiedenen
Übergangseffekten erstellen oder ein Bild nach dem anderen anschauen. Sie benötigen dazu
weder Computer, digitale Kamera noch Internetanschluss.
Dieser digitale Bilderrahmen ist zu den folgenden gängigen Speicherkarten kompatibel:
CompactFlash®, SD™, XD, MultiMediaCard™ und Memory Stick®.
Über die USB-Schnittstelle können ebenfalls Dateien gelesen werden, die sich auf einem USB-
Flash-Laufwerk befinden.
Hauptmerkmale
• Zeigt digitale Bilder (JPEG) ohne Computer an
• Einfach eine kompatible Speicherkarte in den digitalen Bilderrahmen einstecken, um
Bilder anzuzeigen, MP3-Musik oder unterstützte Videodateien abzuspielen
(Speicherkarte nicht enthalten).
• Kompatible Speicherkarten sind unter anderem Secure Digital Card (SD), MultiMedia
Card (MMC), Memory Stick (MS), XD Cards & Compact Flash.
• Kann Dateien auf USB-Flash-Laufwerken lesen.
• Sofortwiedergabe von MP3-Dateien über integrierte Lautsprecher.
• Sofortwiedergabe von MPEG1-2-4-Dateien auf unterstützten Speicherkarten*.
• Unterstützt Bilderdateien mit bis zu 12 Megapixel (JPEG-Format).
• Kompatibel zu den meisten von digitalen Kameras gespeicherten JPEG-Bildern und
Motion-JPEG-Videos.
• Fernbedienung in Kreditkartenbauweise eingeschlossen
• Leuchtstarker 15”-TFT-Aktivmatrix-LCD-Bildschirm.
• Automatische Diashow mit verschiedenen Übergangseffekten.
• Diashow kann mit MP3-Hintergrundmusik abgespielt werden.
• Anwenderfreundliches Bildschirmmenü für leichten Zugang zu allen Funktionen.
*Videodateien können unter Umständen nicht flüssig wiedergegeben werden, wenn sie auf
einer langsamen Karte gespeichert sind.

For information and support; www.lenco.eu
- 66 -
Loslegen
Packungsinhalt
Digitaler Bilderrahme und Standfuß
Bedienungsanleitung
Wechselstromadapter
Fernbedienung
USB-Kabel

For information and support; www.lenco.eu
- 67 -
Installation des Geräts
• Öffnen Sie die Verpackung und entnehmen den Schaumstoff. Entfernen Sie die
Schutzhülle vom Gerät.
• Bringen Sie den Standfuß auf der Rückseite des digitalen Bilderrahmens an.
• Stecken Sie den Wechselstromadapter in eine Steckdose. Verbinden Sie das andere
Ende mit dem Gerät.
• Nachdem der Inhalt auf dem Flash-Medium gespeichert wurde, stecken Sie es in den
richtigen Einschubschlitz.
• Stellen Sie die Ein/Aus-Taste auf ON.
Anschluss an einen PC
Der digitale Bilderrahmen verfügt über eine USB-Schnittstelle („slave“) zum Anschluss an einen
PC und eine zweite USB-Schnittstelle („host“) zum Anschluss an andere Geräte wie z.B. ein
Flash-Laufwerk, einen USB-Kartenleser oder eine Kamera. Wenn das Gerät mit einem PC
verbunden ist, können Sie Inhalte vom PC einfach in den internen Speicher oder auf die
Speicherkarte ziehen („drag-and-drop“). Sie können ebenfalls Inhalte aus dem internen Speicher
löschen.
HINWEIS: USB-Slave- und USB-Host-Schnittstelle können nicht gleichzeitig benutzt werden.

For information and support; www.lenco.eu
- 68 -
Bedienung
Der digitale Bilderrahmen ist ganz einfach zu bedienen:
1. Die Speicherkarte aus der Kamera nehmen:
2. Die Speicherkarte in den Bilderrahmen stecken, so dass die beschriftete Seite vom Gerät
weggerichtet ist:
3. Nach dem Einschalten des Bilderrahmens wird das Bild automatisch angezeigt.

For information and support; www.lenco.eu
- 69 -
Tastenfeld

For information and support; www.lenco.eu
- 70 -
Handhabung der Fernbedienung
Die folgende Tabelle beschreibt kurz die Funktionen der Fernbedienung
Taste Beschreibung
On/Off Ein/Aus: Den
Bilderrahmen ein-
/ausschalten
Mode Zwischen Foto-/Audio-
/Videomodus umschalten
Vol - Lautstärke reduzieren
Vol + Lautstärke erhöhen
Slideshow Start der Diashow
OSD Ruft das Bildschirmmenü
auf.
Menu Menütaste: Ruft das
Hauptmenü auf.
Rotate Das aktuell angezeigte Bild
drehen
Enter Eingabetaste/Bestätigung
Zoom Das aktuell angezeigte Bild
vergrößern
Wiedergabe/Pause
Stop
Richtungstasten Auf dem Bildschirm
bewegen

For information and support; www.lenco.eu
- 71 -
Speicherkarten einstecken
Der digitale Bilderrahmen ist zu den folgenden Speicherkarten kompatibel:
• Secure Digital
TM
Card (SD)
• MultiMedia
TM
Card (MMC)
• Memory Stick
TM
• CompactFlash
TM
(CF) Card
• XD Picture Cards
Stecken Sie die Speicherkarte so ein, dass die beschriftete Seite von Ihnen WEGgerichtet ist.
Schieben Sie die Speicherkarte nicht mit Gewalt in den Einschubschlitz. Falls es Ihnen nicht
gelingt, die Speicherkarte ohne Druck ganz einzustecken, haben Sie sie möglicherweise falsch
herum eingesteckt.
Hinweis:
Der digitale Bilderrahmen erkennt AUSSCHLIEßLICH Bilder im JPEG-Format. Digitale Bilder
anderer Formate werden von dem Gerät ignoriert.
Vergewissern Sie sich, dass mindestens ein Bild auf der Speicherkarte gespeichert ist. Der
Bilderrahmen kann nicht ordnungsgemäß arbeiten, wenn kein Bild vorliegt.
Sie können ebenfalls ein USB-Flash-Laufwerk auf die gleiche Weise wie eine Speicherkarte
benutzen. Überspielen Sie einfach Dateien auf das Flash-Laufwerk und stecken es dann in die
USB-Host-Schnittstelle rechts am Gerät.
Hauptmenü
Nachdem Sie den digitalen Bilderrahmen eingeschaltet haben, gelangen Sie direkt zum
Menübildschirm. Um die Autostartfunktion einzustellen, gehen Sie ins SETUP-Menü. Benutzen
Sie die Richtungstasten (links/rechts) und wählen das „Set up”-Symbol. Drücken Sie die
Eingabetaste, um die verfügbaren Optionen anzuzeigen. Mit den Richtungstaste (hoch/runter)
„auto start“ wählen. Drücken Sie die MENU-Taste, um das folgende Menü aufzurufen:

For information and support; www.lenco.eu
- 72 -
Benutzen Sie die Richtungstasten (rechts/links) zur Steuerung des Menüs und die Eingabetaste
zur Bestätigung.
Hinweis: Sie können aus allen Menüs in das Hauptmenü zurückkehren, indem Sie die Menütaste
drücken
Funktion Beschreibung
Nand Dateien im internen Speicher wiedergeben
Setup Einstellungsmenü
Calendar Anzeige von Kalender, Uhr- und Weckzeit
SD/MMC/MS/xD Dateien auf einer SD/MMC/MS/xD-Speicherkarte wiedergeben
CF Dateien auf einer CF-Speicherkarte wiedergeben
USB Dateien auf einem USB-Flash-Laufwerk wiedergeben
HINWEIS: Die Symbole der obigen Funktionen erscheinen automatisch auf dem
Menübildschirm, wenn die entsprechenden Speicherkarten eingesteckt werden. Die
Symbole verschwinden wieder, wenn die entsprechende Karte aus dem Einschubschlitz
genommen wird.
Bilder betrachten
Achten Sie darauf, dass sich mindestens ein Bild auf Ihrer Speicherkarte oder Ihrem USB-Flash-
Laufwerk befindet. Danach:
• Im Hauptmenü den zutreffenden Flash-Datenträger wählen. (SD/xD/CF/MS/USB/NAND-
Interner Speicher)
• Im Menü PHOTO wählen und die Eingabetaste drücken
• Das Vorschaubild eines Fotos erscheint. Sie können die Markierung mit den
Richtungstasten (hoch/runter/links/rechts) bewegen. Falls ein Verzeichnis markiert ist,
können Sie das Verzeichnis mit der Eingabetaste öffnen.

For information and support; www.lenco.eu
- 73 -
• Andernfalls bewirkt Drücken der Eingabetaste, dass das Bild auf dem ganzen Bildschirm
angezeigt wird (Pausenmodus). Drücken Sie die Wiedergabetaste, um die Diashow zu
starten.
• Wenn eine Diashow läuft oder ein Bild angezeigt wird, können Sie die OSD-Taste
drücken. Das folgende Menü erscheint:
Zurück
Das vorherige Bild der Bilderliste anzeigen

For information and support; www.lenco.eu
- 74 -
Wiedergabe/Pause
Die aktuelle Diashow wiedergeben oder pausieren.
Weiter
Das nächste Bild der Bilderliste anzeigen
Drehen
Benutzen Sie die Drehfunktion, um die Ausrichtung des Bilds auf Hoch- oder Querformat zu
ändern.
Stop
Die Diashow anhalten und zur Bildvorschau zurückkehren.
Zoom
Zum Vergrößern des Bilds. Wiederholtes Drücken vergrößert das Bild noch weiter.
Videos anschauen
Der digitale Bilderrahmen unterstützt die folgenden Videoformate:
• Motion JPEG (*avi): Das Videoformat, das von den meisten digitalen Kameras
verwendet wird
MPEG-1 &MPEG-2 –w/layer I,II,III (*MPG,*MPEG,*DAT)
• MPEG 4-W/MP3-audio (*avi)
Achten Sie darauf, dass sich mindestens ein Video auf Ihrer Speicherkarte oder Ihrem USB-
Flash-Laufwerk befindet. Danach:
• Im Hauptmenü den zutreffenden Flash-Datenträger wählen. (SD/xD/CF/MS/USB/NAND-
Interner Speicher)
• Im Menü MOVIE wählen und die Eingabetaste drücken

For information and support; www.lenco.eu
- 75 -
• Eine Liste aller Videodateien wird auf der linken Seite des Bildschirms angezeigt. Die
rechte Seite besteht aus dem Videovorschaufenster und der Informationsanzeige zum
aktuellen Video. Mit den Richtungstasten (Hoch/Runter) ein Video wählen und mit der
Eingabetaste abspielen.
Während ein Video abgespielt wird, können Sie die OSD-Taste auf der Fernbedienung drücken.
Das folgende Menü erscheint:

For information and support; www.lenco.eu
- 76 -
Zurück
Das vorherige Video der Wiedergabeliste abspielen
Schnellvorlauf
Das Video mit 2-, 3-, 4-facher Geschwindigkeit abspielen.
Wiedergabe/Pause
Das Video abspielen oder pausieren.
Schnellrücklauf
Das Video mit 2-, 3-, 4-facher Geschwindigkeit rückwärts abspielen.
Weiter
Das nächste Video der Wiedergabeliste abspielen
Stop
Das Video anhalten und zur Wiedergabeliste zurückkehren
Zoom
Die Bild um den Faktor 2/3/4/1 vergrößern.

For information and support; www.lenco.eu
- 77 -
MP3-Musikdateien abspielen
Achten Sie darauf, dass sich mindestens eine MP3-Datei auf Ihrer Speicherkarte oder Ihrem
USB-Flash-Laufwerk befindet. Danach:
• Im Hauptmenü den zutreffenden Flash-Datenträger wählen. (SD/xD/CF/MS/USB/NAND-
Interner Speicher)
• Im Menü MUSIC wählen und die Eingabetaste drücken
•
• Eine Liste aller Musikdateien wird auf der linken Seite des Bildschirms angezeigt. Die
rechte Seite besteht aus der Frequenzpegelanzeige und der Statuszeile. Unterhalb der
Statuszeile befindet sich ein Feld zur Anzeige von Informationen zum Lied. Mit den
Richtungstasten (Hoch/Runter) eine Musikdatei wählen und mit der Eingabetaste
abspielen.
• Mit VOL+ die Lautstärke erhöhen und mit VOL- verringern.
• Mit der Wiedergabe/Pause-Taste der Fernbedienung eine Musikdatei abspielen oder
pausieren.
• Mit der Stop-Taste der Fernbedienung zur Liste der Musikdateien zurückkehren.

For information and support; www.lenco.eu
- 78 -
File-Menü
Eine Diahows mit Hintergrundmusik abspielen
Achten Sie darauf, dass sich mindestens ein Bild auf Ihrer Speicherkarte oder Ihrem USB-Flash-
Laufwerk befindet. Zusätzlich muss sich eine MP3-Datei auf der gewählten Speicherkarte/dem
USB-Laufwerk/im internen Speicher befinden. Danach:
• Im Hauptmenü den zutreffenden Flash-Datenträger wählen. (SD/xD/CF/MS/USB/NAND-
Interner Speicher)
• Im Menü FILE wählen und die Eingabetaste drücken
• Eine Liste aller Dateien auf der gewählten Speicherkarte bzw. im internen Speicher wird
auf der linken Seite des Bildschirms angezeigt. Auf der rechten Seite werden
Dateiinformationen angezeigt. Mit den Richtungstasten (hoch/runter) eine Bilddatei
wählen und die Eingabetaste drücken, um das Foto auf dem ganzen Bildschirm
anzuzeigen (Pausenmodus). Die Wiedergabetaste der Fernbedienung drücken. Die
Diashow wird gestartet.
• Während eine Audio-Diashow abgespielt wird, können Sie die OSD-Taste drücken. Das
folgende Menü erscheint:

For information and support; www.lenco.eu
- 79 -
Zurück
Das vorherige Bild der Bilderliste anzeigen
Wiedergabe/Pause
Die aktuelle Diashow wiedergeben oder pausieren.
Weiter
Das nächste Bild der Bilderliste anzeigen
Drehen
Benutzen Sie die Drehfunktion, um die Ausrichtung des Bilds auf Hoch- oder Querformat zu
ändern.
Stop
Die Diashow anhalten und zur Bildvorschau zurückkehren.
Zoom
Die Bild um den Faktor 2/4/8/16/1 vergrößern.
VOL
VOL+ oder VOL- der Fernbedienung drücken, um die Lautstärke zu erhöhen oder zu verringern

For information and support; www.lenco.eu
- 80 -
Kopieren und Löschen von Dateien
Zum Kopieren oder Löschen von Dateien auf der Speicherkarte, dem USB-Laufwerk oder im
internen Speicher.
Kopieren
• Im Hauptmenü den zutreffenden Flash-Datenträger wählen. (SD/xD/CF/MS/USB/NAND-
Interner Speicher)
• Im Menü FILE wählen und die Eingabetaste drücken
• Eine Liste der verfügbaren Dateien wird angezeigt. Mit den Richtungstasten (hoch/runter)
die gewünschte Datei markieren und mit der rechten Richtungstaste bestätigen. Diesen
Vorgang für alle Dateien wiederholen, die Sie kopieren möchten
• Durch Drücken der OSD-Taste das Copy-/Delete-Menü aufrufen. „Copy“ wählen und die
Eingabetaste drücken.
• Mit den Richtungstasten (hoch/runter) das Zielverzeichnis für die Datei wählen. Mit der
rechten Richtungstaste bestätigen.
• Mit der Eingabetaste den Kopiervorgang starten.

For information and support; www.lenco.eu
- 81 -
Löschen
• Im Hauptmenü den zutreffenden Flash-Datenträger wählen. (SD/xD/CF/MS/USB/NAND-
Interner Speicher)
• Im Menü FILE wählen und die Eingabetaste drücken
• Eine Liste der verfügbaren Dateien wird angezeigt. Mit den Richtungstasten (hoch/runter)
die gewünschte Datei markieren und mit der Eingabetaste bestätigen. Diesen Vorgang für
alle Dateien wiederholen, die Sie kopieren möchten
• Durch Drücken der OSD-Taste das Copy-/Delete-Menü aufrufen. „Delete“ wählen und
die Eingabetaste drücken. Die Datei wird gelöscht.
Das SETUP-Menü
Die folgenden Optionen können über das SETUP-Menü, das im Hauptmenü zugänglich ist,
geändert werden:
Funktion Beschreibung
Language
(Sprache)
Englisch, Französisch, Spanisch, Deutsch, Schwedisch,
Griechisch, Italienisch, Türkisch.
Slideshow time Anzeigedauer der Diashow: 3s/5s/15s/1min/15min/1h
Slideshow mode Modus der Diashow: Off, Random, Fading, Bottom_to_top,
Top_to_bottom, Left_to right, Right_to_left, Door_close,
Door_open, Hori_cross, Verti_cross
Music Repeat
Mode
Einstellung der Wiederholung für die Musikwiedergabe: Repeat
one (eines wiederholen), Repeat all (alle wiederholen), Repeat
off (keine Wiederholung)
Movie Repeat
Mode
Einstellung der Wiederholung für die Videowiedergabe: Repeat
one (eines wiederholen), Repeat all (alle wiederholen), Repeat
off (keine Wiederholung)
Display mode Bildschirmmodus: Crop (schneiden), Stretch (anpassen),
Cinema (mit schwarzen Balken anzeigen)
Time Einstellung von Jahr/Monat/Datum/Uhrzeit
Alarm Alarm Time (Weckzeit)/Alarm Music (Weckmusik)/Alarm
On/Off setup (Wecker aktivieren/deaktivieren)
Default Auf die Werkseinstellungen zurücksetzen

For information and support; www.lenco.eu
- 82 -
Kalender/Uhrzeit anzeigen
Nachdem Sie den digitalen Bilderrahmen eingeschaltet haben, gelangen Sie direkt zum
Menübildschirm. Zur Anzeige des Kalenders und der Uhrzeit wählen Sie CALENDER/CLOCK
und drücken die Eingabetaste. Falls der Wecker aktiviert ist, wird ebenfalls die Weckzeit
angezeigt. Eine Diashow wird im Bildvorschaufenster auf der rechten Seite des Bildschirms
gestartet.

For information and support; www.lenco.eu
- 83 -
Technische Hilfe
Häufig gestellte Fragen
1) F: Kann ich den digitalen Bilderrahmen durch Berühung des Bildschirms bedienen?
A: Es handelt sich bei dem LCD-Bildschirm nicht um einen Sensorbildschirm. Bitte verwenden
Sie das Tastenfeld oder die Fernbedienung, um den digitalen Bilderrahmen zu bedienen.
2) F: Kann der LCD-Bildschirm Schaden nehmen, wenn ich ein bestimmtes Bild sehr lange
anzeigen lasse?
A: Nein. Der digitale Bilderrahmen kann ein Bild lange Zeit ohne Unterbrechnung anzeigen. Wir
empfehlen jedoch, ein und dasselbe Bild nicht länger als einen Monat anzuzeigen.
3) F: Wie kann ich Musikdateien speichern?
A: Benutzen Sie zuerst einen PC und ein gängiges Tonbearbeitungsprogramm, um Ihre Musik ins
MP3-Format umzuwandeln. Der digitale Bilderrahmen kann nur MP3-Musikdateien abspielen.
Das heißt, dass alle Windows Media Player™- und/oder iTunes™-Dateien zunächst konvertiert
werden müssen. Sie können ein Kartenlesegerät oder Ihre digitale Kamera verwenden, um diese
Dateien auf Ihre Speicherkarte zu überspielen.
4) F: Verfügt der digitale Bilderrahmen über einen internen Speicher?
A: Ja. Der digitale Bilderrahmen verfügt über 128 MB internen Speicher zur Speicherung Ihrer
Dateien.
5) F: Was ist die maximale Bildgröße?
A: Der digitale Bilderrahme kann Bilder bis zu einer Größe von 12 Megapixel anzeigen.
7) F: Warum zeigt der digitale Bilderrahmen manche meiner Bilder nicht an?
A: Der digitale Bilderrahmen zeigt Fotos an, welche demselben Standard wie Bilder von digitalen
Kameras entsprechen. Dieses Format ist ein JPEG-Format. Manche Bilder, z.B. Bilder aus dem
Internet, gescannte Bilder oder Bilder im RAW-Format, sind nicht dem Kameraindustriestandard
entsprechend gespeichert worden. Daher können Sie nicht korrekt vom digitalen Bilderrahmen
angezeigt werden. Bitte verwenden Sie PC-Software, um solche Bilder ins Standard-JPEG-
Format umzuwandeln, bevor Sie sie auf dem digitalen Bilderrahmen betrachten.

For information and support; www.lenco.eu
- 84 -
Fehlerbehebung
Symptom Ursache Abhilfe
Der digitale
Bilderrahmen lässt
sich nicht
einschalten
Der Stromstecker des Geräts ist
nicht richtig eingesteckt.
Achten Sie darauf, dass der
Wechselstromadapter richtig
mit dem Bilderrahmen
verbunden ist. Auch ohne
Speicherkarte sollten Sie einen
weißen Bildschirm sehen, wenn
Sie den Wechselstromadapter
an den Bilderrahmen
anschließen und das Gerät
einschalten.
Falls sich der Bildschirm nicht
aktiviert, prüfen Sie, ob das
Stromkabel an den digitalen
Bilderrahmen angeschlossen
ist. Achten Sie darauf, dass es
sicher verbunden ist.
Kein Startbildschirm Die Speicherkarte ist nicht richtig
eingesteckt.
Stecken Sie eine unterstützte
Speicherkarte ein
Die Datei lässt sich
nicht wiedergeben
Inkompatibles Dateiformat Achten Sie darauf, dass sich
wenigstens eine unterstützte
Fotodatei auf der Speicherkarte
befindet.
• Kompatibles
Fotoformat:
Kompatibles
Fotoformat:
JPEG
• Kompatibles
Musikformat:
MP3
• Kompatibles
Videoformat: Motion
JPEG (avi), MPEG1,
MPEG2, MPEG4.
Video lässt sich
nicht gut abspielen
Langsame Speicherkarte Achten Sie darauf, zur
Wiedergabe von Videodateien
eine
Hochgeschwindigkeitsspeicher
karte zu verwenden.
Das Video erscheint
sehr klein auf dem
Bildschirm
Geringe Videoauflösung Die ideale unterstützte
Auflösung für Fotos und
Videos ist 1024x768
. Benutzen Sie zur
Vergrößerung die Zoom-Taste
der Ferndienung.

For information and support; www.lenco.eu
- 85 -
Technische Daten
Typ 15 Zoll digitaler Bilderrahmen
Interner Speicher 128MB
Auflösung 1024x768
Stromversorgung 12 V
Stromverbrauch 24 Watt
Leuchtstärke 450cd/m
2
max.
Kontrast 450:1
Blickwinkel 60/60/45/45 (Kontrastverhältnis=10)
Reaktionszeit 10ms
Bildschirmmodus 4:3
Dateiformat JPEG, MPEG1, MPEG2, MP3, MPEG4
Fotogröße 12 Megapixel
Netzspannung 110–240V~ (50HZ–60Hz)
Karten SD/MMC/MS/CF/XD/USB
USB-Schnittstellen USB-Host, USB-Slave
Packungsinhalt Digitaler Bilderrahmen
Netzadapter
Bedienungsanleitung
Fernbedienung
USB-Kabel
Standfuß
Falls Sie dieses Produkt zu einem späteren Zeitpunkt entsorgen müssen, beachten Sie
bitte: Elektro- und Elektronik-Altgeräte dürfen nicht mit dem Hausmüll entsorgt werden.
Bitte wiederverwerten, falls entsprechende Einrichtungen vorhanden sind. Für Hinweise
zur Wiederverwertung wenden Sie sich an die zuständigen örtlichen Stellen oder Ihren
Händler. (Richtlinie über die Entsorgung von Elektro- und Elektronik-Altgeräten)

For information and support; www.lenco.eu
- 86 -
Tabla de contenidos
Introducción .............................................................................................. - 87 -
Características principales ........................................................................ - 87 -
Iniciación ................................................................................................... - 88 -
Contenido del paquete .......................................................................... - 88 -
Instalación de su unidad........................................................................ - 89 -
Conexión a un PC ................................................................................. - 89 -
Funcionamiento ..................................................................................... - 90 -
Controles................................................................................................... - 91 -
Uso del mando a distancia ........................................................................ - 92 -
Introducción de tarjetas de memoria ......................................................... - 93 -
Menú principal........................................................................................... - 94 -
Visionado de imágenes ......................................................................... - 95 -
Anterior .............................................................................................. - 96 -
Reproducción o pausa ....................................................................... - 96 -
Siguiente............................................................................................ - 96 -
Rotación............................................................................................. - 96 -
Stop ................................................................................................... - 96 -
Zoom.................................................................................................. - 96 -
Visionado de vídeo ................................................................................ - 97 -
Anterior .............................................................................................. - 98 -
Avance rápido .................................................................................... - 98 -
Reproducción o pausa ....................................................................... - 98 -
Retroceso rápido................................................................................ - 98 -
Siguiente............................................................................................ - 98 -
Stop ................................................................................................... - 98 -
Zoom.................................................................................................. - 98 -
Para escuchar música MP3................................................................... - 99 -
Opciones de archivo............................................................................ - 100 -
Reproducción de una presentación de fotos con música .................... - 100 -
Anterior ............................................................................................ - 101 -
Reproducción o pausa ..................................................................... - 101 -
Siguiente.......................................................................................... - 101 -
Rotación........................................................................................... - 101 -
Stop ................................................................................................. - 101 -
Zoom................................................................................................ - 101 -
VOL.................................................................................................. - 101 -
Copia y eliminación de archivos .......................................................... - 101 -
Uso de la opción SETUP ........................................................................ - 103 -
Soporte técnico ....................................................................................... - 105 -
Preguntas frecuentes .......................................................................... - 105 -
Especificaciones ............................................................................... - 107 -

For information and support; www.lenco.eu
- 87 -
Introducción
Enhorabuena por la adquisición del Marco para Fotos Digitales de 15 pulgadas, modelo
DF-1520
Antes de operar con la unidad, por favor, lea este manual de principio a fin, y consérvelo para
futuras referencias. Este manual le ayudará a usar muchas de las excitantes y útiles funciones que
harán del uso de su Marco para Fotos Digitales un puro disfrute.
Este Marco para Fotos Digitales le permitirá ver imágenes digitales directamente desde las
tarjetas de memoria de su cámara digital. Podrá crear una presentación de fotografías con
múltiples efectos de transición, o mostrar únicamente una imagen. Para ello, no será precisa la
conexión a un ordenador, cámara digital o internet.
Este Marco para Fotos Digitales es compatible con los siguientes formatos de tarjeta de memoria,
de sobras conocidos: CompactFlash®, SD™, XD, MultiMediaCard™ y Memory Stick®.
También puede leer archivos almacenados en un dispositivo USB de memoria flash, a través del
puerto USB instalado.
Características principales
• Visualización de imágenes digitales (JPEG) sin la necesidad de un ordenador
• Basta con introducir una tarjeta de memoria compatible en el Marco para Fotos
Digitales para mostrar fotos, reproducir música en formato MP3 o archivos de vídeo
compatibles (tarjeta de memoria no incluida).
• Las tarjetas de memoria compatibles incluyen Secure Digital (SD), MultiMedia Card
(MMC), Memory Stick (MS), tarjetas XD y Compact Flash
• Permite la lectura de archivos ubicados en dispositivos USB de memoria flash
• Reproducción instantánea de música en formato MP3 con los altavoces integrados.
• Reproducción instantánea de archivos MPEG124 almacenados en tarjetas de
memoria aceptadas*.
• Soporte de archivos de imágenes de hasta 12 megapíxeles (formato JPEG).
• Compatible con las imágenes JPEG y archivos motion JPEG almacenados de la
mayoría de cámaras digitales.
• Se incluye un mando a distancia parecido, en tamaño y forma, a una tarjeta de crédito
• Pantalla LCD TFT de matriz activa y 15” .
• Presentación de fotografías automática con múltiples efectos de transición.
• Reproducción de una presentación de fotografías con música MP3 de fondo.
• Visualización en pantalla accesible para el usuario, que le permite un manejo sencillo
de todos los controles.
*Los archivos de vídeo podrían reproducirse de un modo anormal si estuvieran
almacenados en una tarjeta de baja velocidad.

For information and support; www.lenco.eu
- 88 -
Iniciación
Contenido del paquete
Marco para Fotos Digitales y pie de soporte
Guía del usuario
Adaptador AC/DC
Mando a distancia
Cable USB

For information and support; www.lenco.eu
- 89 -
Instalación de su unidad
• Abra el paquete y retire la espuma protectora. Retire también la funda protectora de la
unidad.
• Coloque el pie del Marco para Fotos Digitales en la parte posterior de la unidad.
• Enchufe el adaptador AC a una toma de corriente. Conecte el otro extremo a la
unidad.
• Cuando el contenido se encuentre almacenado en el dispositivo de memoria, inserte
este en la ranura de entrada correcta.
• Encienda el aparato (posición ON) con el interruptor ON/OFF.
Conexión a un PC
El Marco para Fotos Digitales cuenta con un Puerto USB para la conexión a un PC (USB
secundario), y un segundo puerto USB para la conexión a otros dispositivos, como memorias
flash, lectores de tarjetas USB o una cámara (USB principal). Cuando esté conectado al PC podrá
arrastrar y soltar contenidos del PC a la memoria interna o la tarjeta de memoria. Podrá también
eliminar contenidos de la memoria interna.
NOTA: El USB secundario y el USB principal no podrán usarse al mismo tiempo.

For information and support; www.lenco.eu
- 90 -
Funcionamiento
El funcionamiento con el Marco Digital es extremadamente sencillo:
1. Extraiga la tarjeta de memoria de la cámara:
2. Introduzca la tarjeta de memoria en el marco con la cara mirando hacia el interior:
3. Al encender el marco, la imagen se mostrará automáticamente.

For information and support; www.lenco.eu
- 91 -
Controles

For information and support; www.lenco.eu
- 92 -
Uso del mando a distancia
La tabla siguiente describe brevemente las funciones del mando a distancia:
Botón Descripción
On/Off
Encendido/apagado del marco
Mode
Selector de modo
Foto/Audio/Vídeo
Vol -
Disminución del volumen
Vol +
Aumento del volumen
Slideshow
Inicio de la presentación de fotos
OSD
Visualización del menú de imágenes
Menu
Visualización del menú principal
Rotate
Rotación de la imagen en
reproducción
Enter Confirmación
Zoom
Aumento de la imagen en
reproducci
ón
Reproducción/Pausa
Stop
Flechas
Desplazamiento por la pantalla

For information and support; www.lenco.eu
- 93 -
Introducción de tarjetas de memoria
El Marco para Fotos Digitales es Compatible con las siguientes tarjetas de memoria:
• Secure Digital
TM
(SD)
• MultiMedia
TM
Card (MMC)
• Memory Stick
TM
• CompactFlash
TM
(CF)
• XD Picture
Introduzca la tarjeta de memoria con la etiqueta mirando hacia el interior. No fuerce la tarjeta al
meterla en la ranura. Si no pudiera introducir completamente y con facilidad la tarjeta de
memoria, es muy probable que la haya insertado de forma incorrecta.
Nota:
El Marco para Fotos Digitales SÓLO reconocerá imágenes digitales almacenadas en el formato
JPEG. Las imágenes digitales almacenadas en otros formatos serán ignoradas por el dispositivo.
Asegúrese de que hay al menos una imagen almacenada en la tarjeta de memoria. El marco no
funcionará de modo apropiado sin imágenes almacenadas.
También podrá utilizar un dispositivo USB de memoria flash del mismo modo que usaría una
tarjeta de memoria. No tiene más que copiar archivos en la memoria flash e introducirla en el
puerto USB principal de la parte derecha de la unidad.

For information and support; www.lenco.eu
- 94 -
Menú principal
Habiendo encendido el Marco para Fotos Digitales, irá directamente a la pantalla del MENU.
Para establecer la función de inicio automático (Auto Start), seleccione la pantalla SETUP
(Configuración). Utilice la flecha izquierda/derecha para desplazarse hasta “Set up”. Pulse el
botón Enter para entrar en la pantalla de opciones. Use las flechas arriba / abajo para seleccionar
la opción de inicio automático. Pulse el botón “MENU” para mostrar el siguiente menú:
Emplee las flechas izquierda y derecha para desplazarse por el menú, pulse después “Enter” para
continuar.
Nota: en todos los menús, al pulsar el botón “Menu”, volverá al menú principal
Función Descripción
Nand Reproducción de archivos en la memoria interna
Setup Configuración del menú del sistema
Calendar Visualización del calendario, hora, alarma
SD/MMC/MS/xD Reproducción de archivos en tarjetas de memoria
SD/MMC/MS/xD
CF Reproducción de archivos en tarjetas de memoria CF
USB Reproducción de archivos en memorias flash USB
NOTA: Los iconos de las funciones anteriores aparecerán automáticamente en la pantalla
MENU al introducir ciertos tipos de tarjeta de memoria. Los iconos desaparecerán cuando
se extraiga la tarjeta correspondiente de la entrada para tarjetas.

For information and support; www.lenco.eu
- 95 -
Visionado de imágenes
Asegúrese de que haya al menos una imagen almacenada en la tarjeta de memoria o su
dispositivo USB de memoria flash. Una vez hecho esto:
• Seleccione el sistema de reproducción flash del menú principal
(SD/xD/CF/MS/USB/NAND-Memoria interna).
Seleccione la opción “PHOTO” del menú y pulse “ENTER”
• Aparecerá entonces una serie de fotos en miniatura. Emplee las flechas
ARRIBA/ABAJO/IZQUIERDA/DERECHA para mover el contorno destacado. Si el
contorno destacado fuera una carpeta, pulse Enter para entrar en ella.
• Si no, pulse Enter para entrar en la foto a tamaño completo (modo pausa) y pulse
reproducción (Play) para entrar en el modo de presentación de fotografías (slideshow).

For information and support; www.lenco.eu
- 96 -
• Una vez la presentación de fotografías esté en reproducción, o se esté mostrando una
imagen, pulse el botón OSD. Aparecerá entonces el siguiente menú:
Anterior
Reproduce la imagen anterior de la lista de imágenes.
Reproducción o pausa
Para reproducir o dejar en pausa la presentación de fotografías en curso.
Siguiente
Reproduce la imagen siguiente de la lista de imágenes
Rotación
Use la opción de rotación de imagen para cambiar la orientación de la imagen a retrato o paisaje.
Stop
Detiene la presentación de fotografías y vuelve al modo de fotos en miniatura.
Zoom
Seleccione la función de zoom para aumentar la imagen. Repita esta operación diversas veces
para aumentar varias veces la imagen.

For information and support; www.lenco.eu
- 97 -
Visionado de vídeo
El Marco para Fotos Digitales acepta los siguientes formatos de vídeo:
• Motion JPEG (*avi): formato de vídeo usado en la mayoría de cámaras digitales
MPEG-I y MPEG-2 –w/capa I,II,III(*MPG,*MPEG,*DAT)
• MPEG 4-W/MP3 audio (*avi)
Asegúrese de que su tarjeta de memoria o dispositivo USB de memoria flash contienen al menos
un archivo de vídeo. Una vez hecho esto:
• Seleccione el sistema de reproducción flash del menú principal.
(SD/xD/CF/MS/USB/NAND-Memoria interna)
• Seleccione la opción “MOVIE” del menú y pulse “ENTER”
• Se mostrará una lista de todos los archivos de películas en la parte izquierda de la
pantalla. La parte derecha consistirá en una ventana con una vista previa de la película
actual e información acerca de ella. Utilice las flechas Arriba/Abajo para seleccionar la
película y pulse Enter para reproducirla.

For information and support; www.lenco.eu
- 98 -
Una vez la película esté en reproducción, pulse el botón OSD del mando a distancia. Entonces,
aparecerá el siguiente menú:
Anterior
Reproduce la película anterior de la lista de reproducción.
Avance rápido
Reproduce la película hacia delante a las velocidades x2/x3/x4.
Reproducción o pausa
Reproduce o deja en pausa la película.
Retroceso rápido
Reproduce la película hacia atrás a las velocidades x2/x3/x4.
Siguiente
Reproduce la película siguiente de la lista de reproducción.
Stop
Detiene la película y vuelve a la lista de reproducción.
Zoom
Aumenta el tamaño de la imagen hasta x2/x3/x4/x1veces.

For information and support; www.lenco.eu
- 99 -
Para escuchar música MP3
Asegúrese de que haya al menos un archivo MP3 en su tarjeta de memoria o dispositivo USB de
memoria flash. Una vez hecho esto:
• Seleccione el sistema de reproducción flash del menú principal.
(SD/xD/CF/MS/USB/NAND-Memoria interna)
• Seleccione la opción “MUSIC” del menú y pulse “ENTER”
• Se mostrará una lista de archivos de música en la parte izquierda de la pantalla. La parte
derecha consiste en un cuadro de frecuencia y una barra de estado con información. La
parte con información sobre la canción se encuentra debajo de la barra de estado. Utilice
las flechas Arriba/Abajo para seleccionar el archivo de música y pulse Enter para
reproducir.
• Pulse VOL+ para subir el volumen o VOL- para bajarlo.
• Pulse el botón de Reproducción/Pausa en el mando a distancia para reproducir o dejar en
pausa el archivo de música.
• Pulse el botón Stop en el mando a distancia para volver a la lista de archivos de música.

For information and support; www.lenco.eu
- 100 -
Opciones de archivo
Reproducción de una presentación de fotos con música
Asegúrese de que haya al menos una imagen almacenada en la tarjeta de memoria o su
dispositivo USB de memoria flash. Además, deberá haber guardado un archivo MP3 en la tarjeta
de memoria seleccionada /USB/memoria interna. Una vez hecho esto:
• Seleccione el sistema de reproducción flash del menú principal.
(SD/xD/CF/MS/USB/NAND-Memoria iterna)
• Seleccione la opción “FILE” del menú y pulse “ENTER”
• Se mostrará una lista de todos los archivos de la tarjeta de memoria seleccionada o de la
memoria interna en la parte izquierda de la pantalla. La parte derecha consistirá en
información sobre el archivo. Emplee las flechas Arriba/Abajo para seleccionar un
archivo de imagen y pulse Enter para entrar en la foto a tamaño completo (modo pausa).
Pulse el botón de reproducción en el mando a distancia, y una presentación de fotografías
con audio dará comienzo automáticamente.
• Una vez una presentación de fotografías con audio se encuentre en reproducción, pulse el
botón OSD. Aparecerá entonces el siguiente menú:

For information and support; www.lenco.eu
- 101 -
Anterior
Reproduce la imagen anterior de la lista de imágenes.
Reproducción o pausa
Para reproducir o dejar en pausa la presentación de fotografías en curso.
Siguiente
Reproduce la imagen siguiente de la lista de imágenes
Rotación
Use la opción de rotación de imagen para cambiar la orientación de la imagen a retrato o paisaje.
Stop
Detiene la presentación de fotografías y vuelve al modo de fotos en miniatura.
Zoom
Aumenta el tamaño de la imagen hasta x2/x4/x8/x16/x1 veces.
VOL
Pulse VOL+ or VOL- en el mando a distancia para subir o bajar el volumen
Copia y eliminación de archivos
Para copiar y eliminar archivos de su tarjeta de memoria, dispositivo USB o memoria interna.

For information and support; www.lenco.eu
- 102 -
Copiar
• Seleccione el sistema de reproducción flash del menú principal.
(SD/xD/CF/MS/USB/NAND- Memoria interna)
• Seleccione la opción “FILE” del menú y pulse “ENTER”
• Se mostrará una lista de archivos disponibles. Use las flechas arriba y abajo para destacar
el archivo que le interese y pulse la flecha derecha para destacar el archivo que desee.
Repita este proceso para todos los archivos que quiera copiar.
• Pulse el botón “OSD” para mostrar el menú Copy (Copiar) y Delete (Eliminar).
Seleccione la función Copy y después Enter.
•
• Utilice las flechas Arriba/Abajo para seleccionar la carpeta de destino de archivo. Pulse el
botón Derecha para confirmar.
• Pulse Enter para empezar a copiar el archivo.

For information and support; www.lenco.eu
- 103 -
Eliminar
• Seleccione el sistema de reproducción flash del menú principal.
(SD/xD/CF/MS/USB/NAND-Memoria interna)
• Seleccione la opción “FILE” del menú y pulse “ENTER”
• Se mostrará una lista de archivos disponibles. Use las flechas arriba y abajo para destacar
el archivo que le interese y pulse la flecha derecha para destacar el archivo que desee.
Repita este proceso para todos los archivos que quiera eliminar.
• Pulse el botón “OSD” para mostrar el menú Copy (Copiar) y Delete (Eliminar).
Seleccione la función Delete y pulse Enter. El archivo será entonces eliminado.
Uso de la opción SETUP
Las siguientes opciones podrán cambiarse usando la opción “SETUP” del menú principal:
Función Descripción
Idioma (Language) Incluye el inglés, francés, español, alemán, sueco, griego,
italiano, turco.
Tiempo de
presentación
(Slideshow time)
Duración de la presentación de fotografías:
3s/5s/15s/1min/15min/1hora
Modo de
presentación
(Slideshow mode)
Desactivado (Off), Aleatorio (Random), Atenuante (Fading), De
abajo a arriba(Bottom_to_top), De arriba a abajo
(Top_to_bottom), De izquierda a derecha (Left_to right), De
derecha a izquierda (Right_to_left), Puerta que se cierra
(Door_close), Puerta que se abre (Door_open), Cruce horizontal
(Hori_cross), Cruce vertical (Verti_cross)
Modo de
repetición de
música (Music
Repeat Mode)
Repetir una (Repeat one), Repetir todas (Repeat all), Repetición
desactivada (Repeat off)
Modo de
repetición de
película (Movie
Repeat Mode)
Repetir una (Repeat one), Repetir todas (Repeat all), Repetición
desactivada (Repeat off)
Modo de
visualización
(Display mode)
Crop, Stretch, Cinema
Time Año (Year)/Mes (Month)/Día (Date)/Ajuste de la hora (Time
setup)
Alarma (Alarma) Hora de la alarma (Alarm Time)/Música de la alarma (Alarm
Music)/Alarma activada/desactivada (Alarm On/off setup)
Predeterminado
(Default)
Vuelta a la configuración predeterminada del aparato

For information and support; www.lenco.eu
- 104 -
Visualización del calendario/hora
Habiendo encendido el Marco para Fotos Digitales, irá directamente a la pantalla MENU. Si
selecciona el calendario/hora (Calendar/Clock) y pulsa Enter, pasará a la pantalla del
calendario/hora. Si la alarma estuviera activada, también mostrará la hora de la alarma. Una
presentación de fotografías dará comienzo en la ventana de vista previa de imágenes de la parte
derecha de la pantalla.

For information and support; www.lenco.eu
- 105 -
Soporte técnico
Preguntas frecuentes
1) Puedo usar tecnología de pantalla táctil para mi Marco de Fotos Digitales?
R: La pantalla LCD no incluye soporte para tecnología de pantalla táctil. Por favor, limítese al
uso de los botones y el mando a distancia para manejar su Marco para Fotos Digitales.
2) Si muestro la misma imagen durante un largo periodo de tiempo, podré así dañar la pantalla
LCD?
R: No. El Marco para Fotos Digitales puede mostrar la misma foto de forma continua durante un
tiempo prolongado, aunque le recomendamos no hacerlo por un periodo superior a un mes.
3) Cómo puedo almacenar archivos de música?
R: En primer lugar, utilice un PC y un software de edición de audio reconocido para convertir sus
archivos de música al formato MP3. El marco para Fotos Digitales sólo reproducirá archivos
MP3, así que todos los archivos del Windows Media Player™ y/o iTunes™deberán ser antes
convertidos. Podrá usar un lector de tarjetas o su cámara digital para transferir esos archivos a su
tarjeta de memoria.
4) Tiene el Marco para Fotos Digitales una memoria interna?
R: Sí. El Marco para Fotos Digitales tiene una memoria interna de 128 MB para almacenar sus
archivos.
5) Cuál es el tamaño máximo visualizable de una imagen?
R: El Marco para Fotos Digitales permite mostrar imágenes de hasta 12 megapíxeles.
6) Cómo es que el Marco para Fotos Digitales no muestra algunas de mis fotos?
R: El Marco para Fotos Digitales está diseñado para mostrar fotos que sigan formatos con los
mismos estándares que los de las cámaras digitales. Este formato es el JPEG. Las imágenes,
como las de páginas web, imágenes escaneadas o fotos en el formato RAW, no se almacenan de
acuerdo con los estándares de la industria de las cámaras y, por lo tanto, no podrán mostrarse
correctamente en el Marco para Fotos Digitales. Por favor, utilice las aplicaciones de su PC para
convertir dichas imágenes al formato estándar JPEG antes de visionarlas en el Marco para Fotos
Digitales.

For information and support; www.lenco.eu
- 106 -
Localización y resolución de problemas
Síntoma Causa Medidas correctivas
El Marco para Fotos
Digitales no se
enciende
La conexión a la unidad no se ha
realizado correctamente
Asegúrese de que conecta el
adaptador AC al marco de
forma correcta. Cuando conecte
el adaptador AC al marco y lo
enciende, incluso sin tarjeta de
memoria, debería poder ver la
pantalla en blanco. Si no viera
la pantalla iluminada,
compruebe si la unidad está
efectivamente alimentada y
asegúrese de que se conecta
adecuadamente.
No hay pantalla de
inicio
La tarjeta de memoria no se ha
introducido correctamente.
Introduzca una tarjeta de
memoria aceptada por el
marco.
El archivo no se
reproduce
Formato de archivo incompatible Asegúrese de que hay al menos
un archivo de foto aceptado en
la tarjeta de memoria.
• Archivo de fotos
compatible:
JPEG
• Formato de
música
compatible:
MP3
• Formatos de vídeo
compatible: Motion
JPEG (avi), MPEG1,
MPEG2, MPEG4.
El vídeo no se
reproduce
adecuadamente
Tarjeta de memoria lenta Asegúrese de que utiliza una
tarjeta de memoria de alta
velocidad para reproducir
archivos de vídeo.
Tamaño de vídeo
pequeño en la
pantalla
Resolución de vídeo baja La mejor resolución aceptada
de una foto o vídeo es
1024x768
Use el botón Zoom en el mando
a distancia para aumentarla.

For information and support; www.lenco.eu
- 107 -
Especificaciones
Tipo Marco para Fotos Digitales de 15 pulgadas
Memoria interna 128 MB
Resolución 1024x768
Alimentación 12 V
Consumo 24 Vatios
Luminosidad 450cd/m
2
máx.
Contraste 450:1
Ángulo de visión 60/60/45/45 (CR=10)
Tiempo e respuesta 10ms
Modo de visualización 4:3
Formato de archivo JPEG, MPEG1, MPEG2, MP3, MPEG4
Tamaño de la foto 12 Megapíxeles
Corriente AC110—240V (50HZ—60HZ)
Tarjetas SD/MMC/MS/CF/XD/USB
Puertos USB USB principal, USB secundario
Contenido del paquete Marco para Fotos Digitales
Adaptador AC/DC
Guía del usuario
Mando a distancia
Cable USB
Pie de soporte
Si en lo sucesivo tuviera que deshacerse de este producto, por favor, fíjese en que: La
eliminación de productos eléctricos no debe hacerse junto con los desechos del hogar. Por
favor, recicle haya donde se disponga de instalaciones a tal efecto. Consulte a las
autoridades locales o a su distribuidor sobre los consejos de reciclaje (Directiva sobre la
Eliminación de Equipos Eléctricos y Electrónicos).
Documenttranscriptie
DF-1520 Digital photoframe OWNERS MANUAL BEDIENUNGSANLEITUNG MODE D’EMPLOI GEBRUIKSAANWIJZING MANUAL DEL USUARIO For information and support, www.lenco.eu Manual Languages English Dutch French German Spanish http://www.lenco.eu Table Of Contents Introduction ................................................................................................. - 1 Main Features ............................................................................................. - 1 Getting Started ............................................................................................ - 2 Package Contents ................................................................................... - 2 Installing your unit.................................................................................... - 3 Connecting to a PC ................................................................................. - 3 Operation................................................................................................. - 4 Controls....................................................................................................... - 5 Using your Remote Control......................................................................... - 6 Inserting Memory Cards.............................................................................. - 7 Main menu .................................................................................................. - 8 Viewing Pictures ...................................................................................... - 9 Previous ............................................................................................. - 10 Play or Pause..................................................................................... - 10 Next ................................................................................................... - 10 Rotate ................................................................................................ - 10 Stop ................................................................................................... - 10 Zoom.................................................................................................. - 10 Watching video ...................................................................................... - 11 Previous ............................................................................................. - 12 Fast Forward...................................................................................... - 12 Play or Pause..................................................................................... - 12 Fast Backward ................................................................................... - 12 Next ................................................................................................... - 12 Stop ................................................................................................... - 12 Zoom.................................................................................................. - 12 Listening to MP3 music ......................................................................... - 13 File Option ............................................................................................. - 14 Playing a slideshow with music ............................................................. - 14 Previous ............................................................................................. - 15 Play or Pause..................................................................................... - 15 Next ................................................................................................... - 15 Rotate ................................................................................................ - 15 Stop ................................................................................................... - 15 Zoom.................................................................................................. - 15 VOL.................................................................................................... - 15 Copying and Deleting Files.................................................................... - 16 Using the SETUP option ........................................................................... - 18 Technical Support ..................................................................................... - 19 Frequently asked questions................................................................... - 19 Specifications ...................................................................................... - 21 - Introduction Congratulations on your purchase of 15 inch Digital Picture Frame, model DP-1520 Before operating the unit, please read this manual thoroughly, and retain it for future reference. This manual will help you use many of the exciting and useful features that will make your Digital Picture Frame viewing more enjoyable. This Digital Picture Frame lets you view digital pictures directly from your camera's memory cards. You will be able to create a slideshow using multiple transition effects or display one picture at a time. No computer, digital camera or Internet connection is required. This Digital Picture Frame is compatible with the following popular memory card formats: CompactFlash®, SD™, XD, MultiMediaCard™, and Memory Stick®. It can also read files stored on a USB Flash drive using the USB host port. Main Features • • • • • • • • • • • • • Displays digital pictures (JPEG) without a computer Simply insert a compatible memory card into the Digital Picture Frame to show photos, play MP3 music or supported video files (memory card not included). Compatible memory cards include Secure Digital Card (SD), MultiMedia Card (MMC), Memory Stick (MS), XD Cards & Compact Flash Able to read files located on a USB Flash drive Instantly plays MP3 music with the integrated speakers. Instantly plays MPEG1 2 4 files stored on supported memory cards*. Supports up to 12 Mega Pixels image files (JPEG format). Compatible with most digital cameras’ stored JPEG images and motion JPEG files. Includes a credit card style remote control Bright 15” TFT active matrix LCD screen. Automatic slide show with multiple transition effects. Plays slide show with MP3 music on the background. User-friendly on-screen display lets you access all controls easily. *Video files may not play properly if stored on a low speed card. For information and support; www.lenco.eu -1- Getting Started Package Contents Digital Picture Frame and stand User Guide AC/DC Adapter Remote USB cable For information and support; www.lenco.eu -2- Installing your unit • • • • • Open the package and remove the protective foam. Remove the protective sleeve from the unit. Install the Digital Picture Frame stand as the back of the unit. Plug in the AC adapter into power outlet. Plug the other end into the unit. After the content is stored on the target flash media; insert the media into the correct slot. Turn power to ON position via the ON/OFF switch. Connecting to a PC The Digital Picture Frame has a USB port for connection to a PC (USB Slave) and a second USB port for connection to other devices such as a Flash Drive, USB card reader, or a camera (USB Host). When connected to the PC you can drag-and-drop content from the PC to the internal memory or memory card. You can also delete content from the internal memory. NOTE: USB Slave and USB Host can not be used at the same time. For information and support; www.lenco.eu -3- Operation This Digital Frame is extremely easy to operate: 1. Remove memory card from camera: 2. Insert memory card into the frame with face away from the unit: 3. when power on the frame,the picture would displayed automatically. For information and support; www.lenco.eu -4- Controls For information and support; www.lenco.eu -5- Using your Remote Control The following table briefly describes the remote control functions Button Description On/Off Switch on/off the frame Mode Vol - Photo/Audio/Video Mode Switch Decrease volume Vol + Increase Volume Slideshow Start the slideshow OSD Display the picture menu Menu Display the main menu Rotate Rotate the current picture Enter Confirm Zoom Zoom the current picture Play/Pause Stop Arrows Navigate on screen For information and support; www.lenco.eu -6- Inserting Memory Cards The Digital Picture Frame is compatible with the following memory cards: • • • • • Secure Digital Card (SD) MultiMedia Card (MMC) Memory Stick CompactFlash (CF) Card XD Picture Cards TM TM TM TM Insert the memory card with the front label facing AWAY from you. Do not force the memory card into the memory slot. If you are not able to easily insert the memory card completely, you may have inserted it the wrong way. Note: The Digital Picture Frame will ONLY recognize digital pictures stored in JPEG format. Digital pictures stored in other formats will be ignored by the device. Make sure you have at least one picture stored on the memory card. The frame will not function properly without a stored picture. You also can use a USB flash drive in the exact same way as you would use a memory card. Simply copy files on the flash drive and insert it at the right side of the unit in the USB Host plug. For information and support; www.lenco.eu -7- Main menu Upon turning on the Digital Picture Frame, you will go straight to the MENU screen. To set the Auto Start feature Choose the SETUP screen. Use the left/right arrow to go to the “Set up”. Press the Enter button to enter the options screen. Use the Up / down arrows to choose your auto start option. Press the “MENU” button to show the following menu: Use the left and right arrows to move inside the menu and then press “Enter” to continue Note: In all menus, pressing the “Menu” button will bring you back to the main menu Function Nand Setup Calendar SD/MMC/MS/xD CF USB Description Play files in internal memory Set system menu Display calendar, clock, alarm Play files on SD/MMC/MS/xD memory card Play files on CF memory card Play files on USB flash drive NOTE: Icons of above functions shall appear automatically on MENU screen when certain memory card is inserted. Icons shall disappear when correspondent card is removed from card slot. For information and support; www.lenco.eu -8- Viewing Pictures Make sure you have at least one picture on your memory card or your USB flash drive. When this is done: • • • Select the desired flash media on main menu. (SD/xD/CF/MS/USB/NAND-Internal Memory) Select the “PHOTO” option from the menu and press “ENTER” A Photo thumbnail will appear. User UP/DOWN/LEFT/RIGHT arrows can move the highlight. If the highlighted is a folder, press Enter to enter the folder. For information and support; www.lenco.eu -9- • Otherwise press Enter to enter the full screen photo (pause mode) and press Play to enter into slideshow mode. • Once a slideshow is playing or a picture is being shown, press the OSD button. The following menu will appear: Previous Play previous picture in the picture list Play or Pause Play or pause the current slideshow. Next Play next picture in the picture list Rotate Use the rotate function to change the picture orientation to either portrait or landscape. Stop Stop slideshow and return to photo thumbnail. Zoom Choose the Zoom function to magnify the iamge,Repeat this operation several times to further zoom in. For information and support; www.lenco.eu - 10 - Watching video The Digital Picture Frame supports the following video formats: • • Motion JPEG (*avi): video format used by most digital cameras MPEG-I &MPEG-2 –w/layer I,II,III(*MPG,*MPEG,*DAT) MPEG 4-W/MP3 audio (*avi) Make sure you have at least one video on your memory card or your USB flash drive. When this is done: • • • Select the desired flash media on main menu. (SD/xD/CF/MS/USB/NAND-Internal Memory) Select the “MOVIE” option from the menu and press “ENTER” A list of all movie files will be listed on the left side of the screen. The right side consists of the movie preview window and information display of the current movie. Use Up/Down arrows to select the movie and press Enter to play. Once a movie is playing, press the OSD button on the remote control. The following menu will appear: For information and support; www.lenco.eu - 11 - Previous Play previous movie in the play list Fast Forward Play forward the movie by 2/3/4 times speed. Play or Pause Play or Pause the movie. Fast Backward Play backward the movie by 2/3/4 times speed. Next Play next movie in the play list Stop Stop the movie and return to the play list Zoom Increase the size of the picture by 2/3/4/1 times. For information and support; www.lenco.eu - 12 - Listening to MP3 music Make sure you have at least one MP3 file on your memory card or your USB flash drive. When this is done: • • • • Select the desired flash media on main menu. (SD/xD/CF/MS/USB/NAND-Internal Memory) Select the “MUSIC” option from the menu and press “ENTER” A list of music files will be listed on the left side of the screen. The right side consists of the frequency chart and information status bar. The song information area is below the status bar. Use the Up/Down arrows to select the music file and press Enter to play. For information and support; www.lenco.eu - 13 - • Press VOL+ to increase the volume or VOL- to decrease the volume. • Press the Play/Pause button on remote control to play or pause the music file. • Press the Stop button on the remote control to return to the list of music files. File Option Playing a slideshow with music Ensure you have at least one picture on your memory card or your USB flash drive. Additionally, you must have one MP3 file saved on the selected memory card/USB/Internal Memory. When this is done: • • • Select the desired flash media on main menu. (SD/xD/CF/MS/USB/NAND-Internal Memory) Select the “FILE” option from the menu and press “ENTER” A list of all files on the selected memory card or internal memory will be listed on the left side of the screen. The right side consists of the file information. Use Up/Down arrows to select a picture file and press Enter to enter a full screen photo (pause mode). Press Play button on the remote control, an audio slideshow will begin automatically. Once an audio-slideshow is playing, press the OSD button. The following menu will appear: For information and support; www.lenco.eu - 14 - Previous Play previous picture in the picture list Play or Pause Play or pause the current slideshow. Next Play next picture in the picture list Rotate Use the rotate function to change the picture orientation to either portrait or landscape. Stop Stop slideshow and return to photo thumbnail. Zoom Increase the size of the picture by 2/4/8/16/1 times. VOL Press VOL+ or VOL- on remote control to increase or decrease the volume For information and support; www.lenco.eu - 15 - Copying and Deleting Files To copy and delete files on your memory card, USB drive or internal memory. Copy • • • • • Select the desired flash media on main menu. (SD/xD/CF/MS/USB/NAND-Internal Memory) Select the “FILE” option from the menu and press “ENTER” A list of available files will be displayed. Use the up and down arrows to highlight your required file and press the right arrow to highlight the desired file. Repeat for all files that you want to copy Press the “OSD” button to display the Copy and Delete menu. Select Copy function and Enter. Use the Up/Down arrows to select the file destination folder. Press Right button to confirm. For information and support; www.lenco.eu - 16 - • Press Enter to start copying the file. Delete • • • • Select the desired flash media on main menu. (SD/xD/CF/MS/USB/NAND-Internal Memory) Select the “FILE” option from the menu and press “ENTER” A list of available files will be displayed. Use the up and down arrows to highlight your required file and press the right arrow to highlight the desired file. Repeat for all files that you want to copy Press the “OSD” button to display the Copy and Delete menu. Select Delete function and press Enter. File will be deleted. For information and support; www.lenco.eu - 17 - Using the SETUP option The following options can be changed by using the “SETUP” option from the main menu: Function Language Slideshow time Slideshow mode Music Repeat Mode Movie Repeat Mode Display mode Time Alarm Default Description Includes English, French, Spanish Deutsch,Swedish,Greek,Italian,Turkce. Slideshow duration: 3s/5s/15s/1mins/15mins/1hour Off, Random, Fading, Bottom_to_top, Top_to_bottom, Left_to right, Right_to_left, Door_close, Door_open, Hori_cross, Verti_cross Repeat one, Repeat all, Repeat off Repeat one, Repeat all, Repeat off Crop, Stretch, Cinema Year/Month/Date/Time setup Alarm Time/Alarm Music/Alarm On/off setup Recover the factory default setup Calendar/Clock Display Upon turning on the Digital Picture Frame, you will go straight to the MENU screen. If you select the Calendar/Clock and press Enter, you will go to Calendar/Clock screen. If the Alarm is turned on, it will also show the alarm time. A picture slideshow will begin at the picture preview window at the right part of the screen. For information and support; www.lenco.eu - 18 - Technical Support Frequently asked questions 1) Q: Can I use touch-enabled technology for my Digital Picture Frame? A: The LCD screen does not support touch-enabled technology. Please use the buttons or remote control to control the Digital Picture Frame. 2) Q: If I keep showing the same photo for a long time, will it damage the LCD screen? A: No. The Digital Picture Frame can display the same photo continuously for a long time. But it is recommended not to show the same picture continuously for more than 1 month. 3) Q: How do I store music files? A: First, use a personal computer and popular audio editing software to convert your music to MP3 format. The Digital Picture Frame will only play MP3 files so all Windows Media Player™ and/or iTunes™ files will have to be converted first. You can use a card reader or your digital camera to transfer those files to your memory card. 4) Q: Does the Digital Picture Frame have built-in memory? A: Yes. The Digital Picture Frame has 128 MB built-in memory to store your files. 5) Q: What is the maximum picture size? A: The Digital Picture Frame is able to display pictures up to 12 Mega Pixels. 7) Q: How come the Digital Picture Frame does not show some of my photos? A: The Digital Picture Frame is designed to show photos following the same camera industry standards format as digital cameras. This format is a JPEG format. Images, such as web images, scanned images, or photos in RAW format, are not stored according to camera industry standards and therefore cannot be displayed correctly on the Digital Picture Frame. Please use your PC applications to convert such images into standard JPEG format before viewing them on the Digital Picture Frame. For information and support; www.lenco.eu - 19 - Troubleshooting Symptom Cause Digital Picture The POWER connector to the unit Frame doesn’t power is not securely inserted. on Corrective Actions Make sure you connect the AC adapter to the frame properly. When you connect the AC adapter to the frame and power up the unit, even without a memory card, you should see a blank screen. If you don’t see the lit screen, check if the power is connected to the Digital Picture Frame and make sure it is securely attached. No Start-up screen Insert a supported memory card The File doesn’t play Memory card is not inserted correctly. Incompatible File Format Video doesn’t play properly Slow Memory Card Small video size on the screen Low Video Resolution Make sure there is at least one supported photo file on the memory card. • Compatible Photo format: Compatible Photo format: JPEG • Compatible Music format: MP3 • Compatible Video format: Motion JPEG (avi), MPEG1, MPEG2, MPEG4. Make sure you use a highspeed memory card to play video files. The best supported resolution of a photo or video is 1024x768 Use the Zoom button on the remote control to enlarge it. For information and support; www.lenco.eu - 20 - Specifications Type Internal Memory Resolution Alimentation Consumption Luminosity Contrast Viewing Angle Response Time Display Mode File Format Photo Size Current Cards USB ports Package Contents 15 inch Digital Picture Frame 128 MB 1024x786 12 V 24 Watts 450cd/m2 max. 450:1 60/60/45/45 (CR=10) 10ms 4:3 JPEG, MPEG1, MPEG2, MP3, MPEG4 12 Mega Pixels AC110—240V (50HZ—60HZ) SD/MMC/MS/CF/XD/USB USB Host, USB Slave Digital Picture Frame AC/DC Adapter User Guide Remote control USB Cable Stand If at any time in the future you should need to dispose of this product please note that: Waste electrical products should not be disposed of with household waste. Please recycle where facilities exist. Check with your Local Authority or retailer for recycling advice. (Waste Electrical andElectronic Equipment Directive) For information and support; www.lenco.eu - 21 - Inhouds opgave Inleiding………………………………………………………………………………………………..……………23 Voornaamste functies………………………………………………………………………………...…………..23 Start………………………………………………………………………………………………………..…………24 Inhoud van de verpakking……………………………………………………………….....….......……………24 Het toestel installeren…………………………………………………………………….................……..……24 Aansluiten op de PC……………………………………………………………………………….……………..25 Werking…………………………………………………………………………......…............…………………..25 Bediening……………………………………………………………………………......….....….………………..26 Gebruik van de afstandbediening……………………………………….............….......……………………….27 Geheugenkaart inbrengen………………………………………..…..…..........…..…....……………………….28 Hoofdmenu……………………………………………………………...........…........……………………………28 Foto’s bekijken…………………………………………………….............….........……………………………29 Vorige……………………………………………………………….......................………………………………30 Afspelen pauzeren……………………………………………..….......................………………………………30 Volgende…………………………………………………...................…......……………………………………30 Draaien……………………………………………………........................………………………………………31 Stop………………………………………………………..........................………………………………………31 Zoom………………………………………………………........................………………………………………31 Video’s bekijken……………………………………….......................…………………………………………31 Vorige……………………………………………….................…….....…………………………………………32 Snel vooruit……………………………………..........….......……………………………………………………32 Afspelen of pauzeren…………………………………..…………………………………………………………32 Snel achteruit…………………………………………………...…………………………………………………32 Volgende……………………………………………………………………………………………………………32 Stop…………………………………………………………………………………………………………………32 Zoom………………………………………………………………………………………….….…………………32 MP3 muziek beluisteren……………………………………………………………………………..…………33 Bestandskeuze……………………………………………………………………………………………………34 Een diavoorstelling afspelen met muziek……………………………………………………..……………34 Vorige………………………………………………………………………………………………………………35 Afspelen of pauzeren……………………………………………………………………….........………………35 Volgende……………………………………………………………………………………….............…………35 Draaien…………………………………………………………………………………………........……………35 Stop…………………………………………………………………………………………….............…………35 Zoom……………………………………………………………………………………………….………………35 VOL…………………………………………………………………………………………………….......………35 Bestanden kopieren en verwijderen…………………………………………………………………………36 Instellingen………………………………………… …………………………………………………...………37 Technische indersteuning………………………………………………………………………..……………39 Veel gestelde vragen…………………………………………………..…………………………….…………40 Specificaties…………………………………………………………..………………………………….………41 For information and support; www.lenco.eu - 22 - Inleiding Gefeliciteerd met de aankoop van uw 15 inch Digitaal Fotokader model DF-1520. Lees zorgvuldig de gebruiksaanwijzing alvorens het toestel in gebruik te nemen en bewaar de gebruiksaanwijzing voor later gebruik. Deze handleiding helpt u gebruik te maken van de vele boeiende mogelijkheden van uw Digitaal Fotokader. Dit Digitaal Fotokader laat u toe uw foto’s rechtstreeks van de geheugenkaart van uw fototoestel te bekijken. U kunt een diavoorstelling maken met verschillende overgangseffecten of gewoon een foto tonen. U heeft hiervoor geen computer, fototoestel of internetverbinding nodig. Dit Digitaal Fotokader is geschikt voor de volgende veel voorkomende geheugenkaarten: CompactFlash®, SD™, XD, MultiMediaCard™ en Memory Stick®. Het toestel kan ook bestanden lezen die opgeslagen zijn op een USB-stick via de USB-poort. Voornaamste functies Toont digitale foto’s zonder computer. Plaats gewoon een geheugenkaart in het Digitaal Fotokader om de foto’s te bekijken of om MP3 bestanden en video’s af te spelen (geheugenkaart niet inbegrepen). Geschikte geheugenkaarten zijn Secure Digital Card (SD), MultiMedia Card (MMC), Memory Stick (MS), XD Cards & Compact Flash. Leest bestanden van een USB Flash geheugen. Speelt rechtstreeks MP3 muziek via de geïntegreerde luidsprekers. Speelt rechtstreeks MPEG1 2 en 4 bestanden vanop de geschikte geheugenkaarten*. Ondersteunt foto’s tot 12 Mega Pixels (JPEG formaat). Compatibel met de meeste fotocamera’s voor JPEG bestanden en video. Bevat een afstandsbediening ter grootte van een kredietkaart. Helder 15” TFT active matrix LCD scherm. Automatische diavoorstelling met verschillende overgangseffecten. Speelt diavoorstellingen met MP3 muziek op de achtergrond. Gebruiksvriendelijk scherm met eenvoudige toegang tot alle mogelijkheden. *Het is mogelijk dat video bestanden niet goed afspeeld worden als ze opgeslagen zijn op kaarten met lage snelheid. For information and support; www.lenco.eu - 23 - Starten Inhoud van de verpakking Digitaal Fotokader en standaard Handleiding AC/DC Adapter Afstandsbediening USB kabel Het toestel installeren Open de verpakking en verwijder het beschermende piepschuim. Verwijder ook de beschermhoes rond het toestel. Bevestig de standaard achteraan het toestel. Steek de adapter in een wisselstroom stopcontact. Steek het andere einde in het toestel. Plaats de geheugenkaart met de bestanden in de juiste gleuf. Zet het toestel aan met de Aan/Uit schakelaar. For information and support; www.lenco.eu - 24 - Aansluiten op een PC Het Digitaal Fotokader heeft een USB poort om op een PC (USB Slave) aan te sluiten en een tweede om andere apparaten aan te sluiten zoals een Flash geheugen, een USB kaartlezer of een camera (USB Host). Wanneer het toestel aangesloten is op een PC kan u bestanden van de PC verplaaatsen naar het intern geheugen of de geheugenkaart. U kan ook bestanden uit het intern geheugen verwijderen. Opmerking: USB Slave en USB Host kunnen niet gelijktijdig gebruikt worden. Werking Het Digitaal Fotokader is zeer eenvoudig te gebruiken: 1. Verwijder de geheugenkaart uit de camera. 2. Plaats de geheugenkaart in het toestel met de bedrukte kant naar beneden. 3. Zet het toestel aan, de foto wordt nu automatisch getoond. For information and support; www.lenco.eu - 25 - Bediening For information and support; www.lenco.eu - 26 - Gebruik van de afstandsbediening De volgende tabel bevat een beknopte beschrijving van de afstandsbediening. Toets Beschrijving On/Off Toestel aan/uit zetten Mode Vol - Modus schakelaar Foto/Audio/Video Volume verhogen Vol + Volume verlagen Slideshow Start de diavoorstelling OSD Toont het foto menu Menu Toont het hoofdmenu Rotate Draait de getoonde foto Enter Bevestigen Zoom Inzoomen op de getoonde foto Afspelen/pauzeren Stop Pijlen Selecteren op het scherm Geheugenkaarten inbrengen For information and support; www.lenco.eu - 27 - Het Digitaal Fotokader ondersteunt de volgende geheugenkaarten: Secure DigitalTM Card (SD) MultiMediaTM Card (MMC) Memory StickTM CompactFlashTM (CF) Card XD Picture Cards Plaats de geheugenkaart in het toestel met de bovenzijde naar beneden gericht. Oefen geen druk uit, als u de geheugenkaart niet vloeiend in het slot kunt plaatsen heeft u de kaart waarschijnlijk verkeerd ingebracht. Opmerking: Het Digitaal Fotokader herkent alleen foto’s die opgeslagen zijn in JPEG formaat. Foto’s in andere formaten worden niet herkend en dus niet getoond. Zorg ervoor dat er minstens één foto op de geheugenkaart staat, zoniet werkt het toestel niet naar behoren. U kunt op dezelfde manier een USB flash geheugen gebruiken. Kopieer eenvoudig de bestanden naar de flash drive en plaats deze in de USB poort (USB Host). Hoofdmenu Als u het Digitaal Fotokader aan zet ziet u meteen het hoofdmenu op het scherm. Ga naar het Instelscherm om de functie Automatische Start in te stellen. U doet dit via de Links/Rechts pijlen. Druk op de Enter toets om het Keuzescherm te openen. Kies met de Omhoog/Omlaag pijlen de Automatische Start optie. Druk op de Menu toets voor het volgende menu: Gebruik de Links/Rechts pijlen om een keuze te maken in het menu en druk op de Enter toets om verder te gaan. For information and support; www.lenco.eu - 28 - Opmerking: Als u op de Menu toets drukt, gaat u steeds terug naar het hoofmenu, ongeacht in welk menu u zich bevindt. Functie Nand Setup Calendar SD/MMC/MS/xD CF USB Omschrijving Speel bestanden af in het intern geheugen Instellingen menu Toont kalender, klok en alarm Toont bestanden op SD/MMC/MS/xD geheugenkaarten Toont bestanden op CF geheugenkaarten Toont bestanden op USB flash geheugen Opmerking: De icoontjes van bovenstaande functies verschijnen automatisch op het scherm afhankelijk van de ingebrachte geheugenkaart en verdwijnen als de geheugenkaart terug verwijderd wordt. Foto’s bekijken Zorg ervoor dat er minstens één foto op de geheugenkaart of USB flash drive staat. Kies de gewenste media in het hoofdmenu (SD/xD/CF/MS/USB/NAND-Intern Geheugen) Kies in het menu de Foto optie en druk op de Enter toets. U ziet nu een miniatuurweergave van de foto. Met de Links/Rechts/Omhoog/Omlaag toetsen (pijlen) kunt u een foto kiezen. Als u een map gekozen heeft, druk dan op de Enter toets om die map te openen. For information and support; www.lenco.eu - 29 - Heeft u een foto gekozen, druk dan op de Enter toets om de volledige foto te tonen (in pauze modus) of druk op de Play toets voor de Diavoorstelling modus. Als u op de OSD knop op de afstandsbediening drukt terwijl er een diavoorstelling bezig is of er een foto getoond wordt, ziet u volgend menu: Vorige Toont de vorige foto in de lijst. Afspelen of Pauze Afspelen of pauzeren van de lopende diavoorstelling. Volgende Toont de volgende foto in de lijst. For information and support; www.lenco.eu - 30 - Draaien De oriëntatie van de foto wijzigen naar portret (rechtop) of landschap (liggend). Stop De diavoorstelling beëindigen en terug gaan naar de miniatuurvoorstelling. Zoom De foto vergroten: druk verschillende keren om steeds verder te vergroten. Video’s bekijken Het Digitaal Fotokader ondersteunt volgende video formaten: Motion JPEG (*avi): gebruikt door de meeste video camera’s. MPEG-I &MPEG-2 –w/layer I,II,III(*MPG,*MPEG,*DAT) MPEG 4-W/MP3 audio (*avi) Zorg ervoor dat er minstens één video op de geheugenkaart of de USB flash drive staat. Kies de gewenste media in het hoofdmenu (SD/xD/CF/MS/USB/NAND-Intern Geheugen) Kies de Movie optie in het hoofdmenu en druk op de Enter toets. Op de linkerhelft van het scherm verschijnt de lijst met alle films. Op de rechterhelft ziet u het voorproef venster en informatie over de gekozen film. Kies met de Omhoog/Omlaag toetsen de gewenste film en druk op de Enter toets om deze af te spelen. For information and support; www.lenco.eu - 31 - Als u op de OSD knop drukt op de afstandsbediening terwijl er een filmvertoning bezig is, ziet u volgend menu: Vorige Speelt de vorige film in de lijst af. Snel vooruit Speelt de film af met een 2/3/4 keer hogere snelheid. Afspelen of Pauzeren De film afspelen of onderbreken. Snel achteruit Speelt de film achterwaarts af met een 2/3/4 keer hogere snelheid. Volgende Speelt de volgende film in de lijst af. Stop Stopt het afspelen en keert terug naar de afspeellijst. Zoom Vergroot het beeld 2/3/4/1 keer. For information and support; www.lenco.eu - 32 - MP3 muziek beluisteren Zorg ervoor dat er minstens één MP3 bestand op de geheugenkaart of het USB flash geheugen staat. Kies de gewenste media in het hoofdmenu (SD/xD/CF/MS/USB/NAND-Intern Geheugen) Kies de Muziek optie in het menu en druk op de Enter toets. Op de linkerhelft van het scherm verschijnt de lijst met alle muziekbestanden. Op de rechterhelft ziet u het de frequentiebalken en de informatie over het gekozen bestand. Kies met de Omhoog/Omlaag toetsen het gewenste muziekbestand en druk op de Enter toets om het af te spelen. For information and support; www.lenco.eu - 33 - Druk op de VOL+ toets om het geluidsvolume te verhogen en op de VOL- toets om het te verlagen. Druk op de Play/Pause toets op de afstandsbediening om de muziek af te spelen of te onderbreken. Druk op de Stop toets op de afstandsbediening om terug te gaan naar de lijst met muziekbestanden. Bestandskeuze Een diavoorstelling afspelen met muziek. Zorg ervoor dat er minstens één fotobestand op de geheugenkaart of USB flash geheugen staat. Daarnaast moet er een MP3 bestand staan op de gekozen geheugenkaart/USB/Intern geheugen. Kies de gewenste media in het hoofdmenu (SD/xD/CF/MS/USB/NAND-Intern Geheugen) Kies de File optie in het menu en druk op de Enter toets. Op de linkerhelft van het scherm verschijnt de lijst met alle bestanden op de geheugenkaart of het intern geheugen.Op de rechterhelft ziet u de informatie over het gekozen bestand. Kies met de Omhoog/Omlaag toetsen een fotobestand en druk op de Enter toets om de foto op het gehele scherm te tonen (pauze modus). Druk op de Play toets op de afstandsbediening en een diavoorstelling met muziek start automatisch. Als u op de OSD knop drukt op de afstandsbediening terwijl er een diavoorsteling met geluid bezig is, ziet u volgend menu: For information and support; www.lenco.eu - 34 - Vorige Toont de vorige foto in de lijst. Afspelen of Pauzeren De diavoorstelling afspelen of onderbreken.. Volgende Toont de volgende foto in de lijst. Draaien Wijzigt de oriëntatie van de foto naar portret (rechtop) of landschap (liggend). Stop De diavoorstelling beëindigen en terug gaan naar de miniatuurvoorstelling. Zoom De foto 2/4/8/16/1 keer vergroten.. VOL Druk op VOL+ of VOL- toetsen op de afstandsbediening om het geluidsvolume te verhogen of te verlagen. For information and support; www.lenco.eu - 35 - Bestanden kopiëren en verwijderen Bestanden op uw geheugenkaart, USB flash geheugen of intern geheugen kopiëren of verwijderen. Kopiëren Kies het gewenste geheugen in het hoofdmenu (SD/xD/CF/MS/USB/NAND-Intern Geheugen) Kies de File optie in het menu en druk op de Enter toets. U ziet nu de lijst van de beschikbare bestanden. Kies met de Omhoog/Omlaag toetsen het gewenste bestand en druk dan op de Rechts toets. Herhaal dit voor alle bestanden die u wil kopiëren. Druk op ds OSD toets om het Kopieer en Verwijder menu te tonen. Kies de Kopie functie en druk op de Enter toets. Kies met de Omhoog/Omlaag toetsen de gewenste bestemmingsmap. Druk op de Rechts toets om dit te bevestigen. For information and support; www.lenco.eu - 36 - Druk op de Enter toets om het kopiëren te starten. Verwijderen Kies het gewenste geheugen in het hoofdmenu (SD/xD/CF/MS/USB/NAND-Intern Geheugen) Kies de File optie in het menu en druk op de Enter toets. U ziet nu de lijst van de beschikbare bestanden. Kies met de Omhoog/Omlaag toetsen het gewenste bestand en druk dan op de Rechts toets. Herhaal dit voor alle bestanden die u wil verwijderen. Druk op ds OSD toets om het Kopieer en Verwijder menu te tonen. Kies de Verwijderen functie en druk op de Enter toets. De bestanden worden verwijderd. Instellingen Met de Setup optie in het hoofdmenu kunt u volgende mogelijkheden instellen. Functie Taal Duur diavoorstelling Modus diavoorstelling Muziek herhaling Film herhaling Scherm modus Tijd Alarm Default Omschrijving Taalselectie: Engels, Frans, Spaans, Duits, Zweeds, Grieks, Italiaans of Turks Duur van de diavoorstelling: 3s/5s/15s/1min/15min/1uur Uit, willekeurig, langzaam verdwijnen, van beneden naar boven, van boven naar beneden, links naar rechts, rechts naar links, gesloten deur, open deur, horizontaal dwars, vertikaal dwars Uit, herhaal één, herhaal alles Uit, herhaal één, herhaal alles Verkort, gerekt, cinema Jaar/maand/dag Tijd alarm, muziek alarm, aan/uit De fabrieksinstellingen terugzetten For information and support; www.lenco.eu - 37 - Kalender/klok Als u het toestel aan zet gaat u meteen naar het Menu scherm. Als u Kalender/Klok kiest en op de Enter toets drukt, krijgt u het Kalender/Klok scherm. Als het alarm aangezet is ziet u meteen ook de alarmtijd. Een diavoorstelling start op de rechterhelft in het voorproef venster. For information and support; www.lenco.eu - 38 - Technische ondersteuning Veel gestelde vragen 1) V: Beschikt mijn Digitaal Fotokader over een aanraakscherm? A: Het LCD scherm is niet voorzien van aanraak technologie. Gebruik de toetsen op de afstandsbediening om het toestel te bedienen. 2) V: Wordt het LCD scherm beschadigd als ik lange tijd dezelfde foto toon? A: Neen. Het Digitaal Fotokader kan dezelfde foto lange tijd ononderbroken tonen. Het is nochtans aangeraden eenzelfde foto niet langer dan een maand ononderbroken te tonen. 3) V: Hoe sla ik muziekbestanden op? A: Gebruik uw computer en eenvoudige geluidssoftware om uw muziekbestanden om te zetten naar MP3 formaat. Het Digitaal Fotokader kan enkel MP3 bestanden afspelen, dus moeten al uw Windows Media Player™ en/of iTunes™ bestanden eerst omgezet worden. U kan een kaartlezer of uw digitale camera gebruiken om deze bestanden op uw geheugenkaart te zetten. 4) V: Heeft het Digitaal Fotokader een intern geheugen? A: Ja. Het Digitaal Fotokader heeft een intern geheugen van 128 MB om uw bestanden op te slaan. 5) V: Hoe groot is het maximale foto formaat? A: Het Digitaal Fotokader kan foto’s tot 12 Mega Pixels tonen. 7) V: Waarom kan mijn Digitaal Fotokader sommige foto’s niet tonen? A: Het Digitaal Fotokader is ontworpen om foto’s te tonen met dezelfde standaard als die voor digitale camera’s gebruikt wordt, nl. het JPEG formaat. Beelden, zoals web foto’s, ingescande beelden of beelden in RAW formaat zijn niet opgeslagen volgens deze standaard en kunnen dus niet getoond worden op het Digitaal Fotokader. Zet dus altijd uw bestanden, met behulp van uw computer, om naar het standaard JPEG formaat alvorens ze te gebruiken met uw Digitaal Fotokader. For information and support; www.lenco.eu - 39 - Problemen oplossen Probleem Oorzaak U kan het Digitaal De stroomvoorziening van het Fotokader niet inschakelen toestel is niet goed aangesloten. Remedie Zorg ervoor dat de adapter goed op het toestel is aangesloten. Bij het opstarten, ook zonder geheugenkaart, moet het scherm oplichten. Als dit niet zo is, controleer dan of de stekker in het stopcontact zit en de adapter goed op het toestel aangesloten is. Geen opstartscherm Geheugenkaart niet goed geplaatst. Een bestand wordt niet afgespeeld Geen geschikt bestandsformaat Video’s worden niet goed afgespeeld Trage geheugenkaart Plaats een geschikte geheugenkaart in het toestel. Zorg ervoor dat er minstens één geschikt bestand op de geheugenkaart staat: foto: JPEG muziek: MP3 video: Motion JPEG (avi), MPEG1, MPEG2, MPEG4. Zorg ervoor dat u een geheugenkaart met hoge snelheid gebruikt om video bestanden af te spelen. Klein video beeld op het scherm Lage video resolutie De beste resolutie voor foto of video is 1024x768 Gebruik de Zoom toets om het beeld te vergroten. For information and support; www.lenco.eu - 40 - Specificaties Type Intern geheugen Resolutie Voeding Verbruik Helderheid Contrast Kijkhoek Reactie tijd Schermformaat Bestandsformaat Foto afmetingen Stroom Kaarten USB poorten Inhoud van de verpakking 15 inch Digitaal Fotokader 128 MB 1024x768 12 V 24 Watts 450cd/m2 max. 450:1 60/60/45/45 (CR=10) 10ms 4:3 JPEG, MPEG1, MPEG2, MP3, MPEG4 12 Mega Pixels AC110—240V (50HZ—60HZ) SD/MMC/MS/CF/XD/USB USB Host, USB Slave Digitaal Fotokader AC/DC Adapter Handleiding Afstandsbediening USB kabel Standaard Wanneer u in de toekomst dit toestel moet weggooien, doe dit dan niet bij het restafval. Elektrische toestellen kunnen gerecycleerd worden. Informeer u over de mogelijkheden bij uw plaatselijke overheid of uw verdeler For information and support; www.lenco.eu - 41 - Sommaire Introduction ............................................................................................... - 43 Fonctionnalités principales ........................................................................ - 43 Démarrage ................................................................................................ - 44 Contenu de l’emballage......................................................................... - 44 Installation de votre unité....................................................................... - 45 Raccordement à un PC ......................................................................... - 45 Mode opératoire .................................................................................... - 46 Commandes.............................................................................................. - 47 Fonctionnement de la télécommande ....................................................... - 48 Insertion de cartes mémoire...................................................................... - 49 Menu principal........................................................................................... - 50 Visionner des images ............................................................................ - 51 Précédent........................................................................................... - 52 Lecture ou Pause............................................................................... - 52 Suivant ............................................................................................... - 52 Rotation.............................................................................................. - 52 Arrêt ................................................................................................... - 52 Zoom.................................................................................................. - 52 Visionner des vidéos ............................................................................. - 53 Précédent........................................................................................... - 54 Avance rapide .................................................................................... - 54 Lecture ou Pause............................................................................... - 54 Rembobinage..................................................................................... - 54 Suivant ............................................................................................... - 54 Arrêt ................................................................................................... - 54 Zoom.................................................................................................. - 54 Ecouter une musique MP3 .................................................................... - 55 Option des fichiers................................................................................. - 56 Lire un diaporama avec de la musique.................................................. - 56 Précédent........................................................................................... - 57 Lecture ou Pause............................................................................... - 57 Suivant ............................................................................................... - 57 Rotation.............................................................................................. - 57 Arrêt ................................................................................................... - 57 Zoom.................................................................................................. - 57 VOL.................................................................................................... - 57 Copie et suppression de fichiers............................................................ - 58 Mode opératoire de la fonction CONFIGURATION................................... - 59 Support technique ..................................................................................... - 61 Questions fréquemment posées.......... Fout! Bladwijzer niet gedefinieerd. Spécifications techniques ...................................................................... - 63 - For information and support; www.lenco.eu - 42 - Introduction Nous vous félicitons d’avoir fait l’acquisition du cadre photo numérique avec écran 15 pouces, modèle DF-1520 Avant d’utiliser l’unité, lisez attentivement ce manuel et conservez-le pour pouvoir vous y référer ultérieurement. Ce manuel vous aidera à vous familiariser avec les nombreuses fonctions excitantes et pratiques qui rendront votre visionnage de photos encore plus appréciable. Ce cadre photo numérique vous permet de visionner des photos numériques directement depuis la carte mémoire de votre appareil photo numérique. Il vous est possible alors de créer un diaporama avec de multiples effets de transition ou afficher les images une par une. Aucun ordinateur, appareil photo numérique ou Internet n’est requis. Ce cadre photo numérique est compatible avec les populaires formats de cartes mémoire suivants : CompactFlash®, SD™, XD, MultiMedia™ et Memory Stick®. Le cadre photo peut également lire les fichiers contenus dans un disque amovible USB en utilisant le connecteur USB. Fonctionnalités principales Permet d’afficher les images numériques (JPEG) sans ordinateur : Insérez simplement une carte mémoire compatible dans le cadre photo numérique pour afficher vos photos, lire des musiques MP3 ou fichiers vidéo supportés (carte mémoire non fournie). Les cartes mémoire compatibles incluent les cartes Secure Digital (SD), MultiMedia (MMC), Memory Stick (MS), XD & Compact Flash Lecture des fichiers contenus dans un lecteur Flash USB Lecture instantanée des musiques MP3 avec les haut-parleurs intégrés. Lecture instantanée des fichiers MPEG1 2 4 fichiers stockés sur une carte mémoire supportée*. Prise en charge des fichiers image ayant une résolution inférieure à 12 méga pixels (format JPEG ). Compatible avec la plupart des photos numériques JPEG enregistrées sur des cartes mémoire d’appareils photo et images animées JPEG. Télécommande en forme de carte de crédit incluse Ecran 15 pouces TFT LCD à matrice active. Diaporama automatique avec de multiples effets de transition. Lecture des diaporamas avec musique MP3 en fond. Menus intuitifs vous permettant d’accéder aisément aux commandes de l’appareil. *Les fichiers vidéo pourraient ne pas être lus correctement si ceux-ci sont stockés sur une carte mémoire faible vitesse. For information and support; www.lenco.eu - 43 - Démarrage Contenu de l’emballage Cadre photo numérique et son support Manuel d’utilisation Adaptateur de courant CA/CC Remote Télécommande Cordon USB For information and support; www.lenco.eu - 44 - Installation de votre unité Ouvrez l’emballage et retirez la mousse de protection. Retirez la pochette en plastique recouvrant l’unité. Installez le support du cadre photo numérique à l’arrière de l’unité. Raccordez une extrémité du cordon d’alimentation CA à une prise de courant. Raccordez l’autre extrémité du cordon à l’unité. Une fois le contenu stocké sur le lecteur média Flash cible; connectez le média sur son emplacement respectif. Positionnez le commutateur d’alimentation ON/OFF sur ON. Raccordement à un PC Le cadre photo numérique possède un port USB permettant de raccorder l’unité à un port PC (USB esclave) et un second port USB permettant de raccorder l’unité à un autre périphérique Flash, lecteur de cartes USB ou un appareil photo (hôte USB). Lorsque vous raccordez l’unité à un ordinateur, vous pouvez déplacer le contenu de l'ordinateur dans la mémoire interne ou carte mémoire. Vous pouvez également supprimer le contenu de la mémoire interne. REMARQUE: les ports esclave USB et hôte USB ne peuvent être utilisés simultanément. For information and support; www.lenco.eu - 45 - Mode opératoire Ce cadre photo numérique est très simple d’emploi : 1. Retirez la carte mémoire de votre appareil photo : 2. Insérez la carte mémoire dans le cadre photo en dirigeant la carte dans la direction opposée : 3. Lorsque vous mettez en marche le cadre photo numérique, les images s’affichent automatiquement. For information and support; www.lenco.eu - 46 - Commandes For information and support; www.lenco.eu - 47 - Fonctionnement de la télécommande Le tableau suivant offre une brève présentation des fonctions de la télécommande Touche Description On/Off Mettre en marche/arrêter le cadre photo Mode Vol - Sélection du mode Photo/Audio/Vidéo Diminuer le volume Vol + Augmenter le Volume Slideshow Démarrer le diaporama OSD Afficher le menu Image Menu Afficher le menu principal Rotate Effectuer une rotation sur image Enter Confirmer Zoom Effectuer un zoom sur l’image sélectionnée Lecture/Pause Arrêt Flèches Pour naviguer sur l’interface For information and support; www.lenco.eu - 48 - Insertion de cartes mémoire Le cadre photo numérique est compatible avec les cartes mémoire suivantes: Cartes Secure Digital (SD) Cartes MultiMedia (MMC) Cartes Memory Stick Cartes CompactFlash (CF) Cartes XD Image TM TM TM TM Insérez la carte mémoire en dirigeant l’étiquette avant dans l’autre direction. Ne forcez pas l’insertion de la carte mémoire dans l’emplacement carte mémoire. S’il vous est impossible d’insérer la carte mémoire complètement, cela signifie que vous avez mal orienté la carte. Remarque: Le cadre photo numérique reconnait SEULEMENT les fichiers images stockés au format JPEG. Les fichiers d’autres formats seront ignorés. Assurez-vous qu’au moins une image soit stockée sur la carte mémoire. Le cadre photo ne fonctionnera pas normalement si aucune image n’est stockée. Vous pouvez également utiliser un lecteur USB de la même manière qu’une carte mémoire. Copiez simplement les fichiers sur le lecteur flash et raccordez-le au connecteur USB du cadre de manière adaptée. For information and support; www.lenco.eu - 49 - Menu principal Après avoir mis en marche le cadre photo numérique, le MENU s’affiche. Pour définir la fonction Démarrage automatique, sélectionnez l’interface CONFIGURATION. Utilisez les touches directionnelles Gauche/Droite pour accéder à l’interface “Configuration”. Appuyez sur la touche Enter pour accéder aux options de l’interface. Utilisez les touches directionnelles Haut/Bas pour choisir l’option Démarrage automatique. Appuyez sur la touche “MENU” pour afficher le menu suivant: Utilisez les touches directionnelles Gauche et Droite pour vous déplacer dans le menu puis appuyez sur la touche “Enter” pour continuer Remarque: dans tous les menus, appuyer sur la touche “Menu” vous permet de revenir au menu principal Fonction Nand Configuration Calendrier SD/MMC/MS/xD CF USB Description Permet de lire les fichiers de la mémoire interne Permet de définir les options du menu Système Permet d’afficher le calendrier, l’horloge, l’alarme Permet de lire les fichiers sur la carte mémoire SD/MMC/MS/xD Permet de lire les fichiers sur carte mémoire CF Permet de lire les fichiers sur le lecteur USB REMARQUE: les icônes des fonctions précédentes apparaitront automatiquement sur l’interface MENU lorsqu’une carte mémoire est insérée. Les icônes disparaitront lorsque vous retirerez la carte. For information and support; www.lenco.eu - 50 - Visionner des images Assurez-vous qu’au moins une image soit présente sur votre carte mémoire ou votre lecteur USB. Une fois ceci effectué: Sélectionnez le média flash désiré du menu principal. (SD/xD/CF/MS/USB/NAND-Mémoire interne) Sélectionnez l’option “PHOTO” du menu et appuyez sur la touche “ENTER” Une miniature apparait. Utilisez les touches directionnelles HAUT/BAS/GAUCHE/DROITE pour sélectionner un fichier. Si un dossier est mis en surbrillance, appuyez sur la touche Enter pour accéder au répertoire. Autrement, appuyez sur la touche Enter pour accéder à l’affichage de la photo en mode plein écran (mode pause) et appuyez sur la touche Play pour accéder au mode Diaporama. For information and support; www.lenco.eu - 51 - Lorsqu’un diaporama est en cours de lecture ou lorsqu’une image est affichée, appuyez sur la touche OSD. Le menu suivant s’affiche: Précédent Permet de lire l’image précédente de la liste des photos Lecture ou Pause Permet de lire ou mettre en pause le diaporama en cours. Suivant Permet de lire l’image suivante de la liste des photos Rotation Utilisez la fonction rotation pour changer l’orientation de l’image : portrait ou paysage. Arrêt Permet d'arrêter le diaporama et de revenir aux miniatures. Zoom Sélectionnez la fonction Zoom pour effectuer un zoom avant sur image, répétez cette opération pour agrandir l’image à nouveau. For information and support; www.lenco.eu - 52 - Visionner des vidéos Le cadre photo numérique prend en charge les formats vidéo suivants : JPEG animé (*avi): format vidéo utilisé par la plupart des appareils photo numériques MPEG-I &MPEG-2 –w/layer I,II,III(*MPG,*MPEG,*DAT) MPEG 4-W/MP3 audio (*avi) Assurez-vous qu’au moins une vidéo soit présente sur votre carte mémoire ou votre lecteur USB. Une fois ceci effectué: Sélectionnez le média flash désiré du menu principal. (SD/xD/CF/MS/USB/NAND-Mémoire interne) Sélectionnez l’option “VIDEO” du menu et appuyez sur la touche “ENTER” Une liste de tous les fichiers vidéo s’affiche sur la partie gauche de l’écran. Une fenêtre de prévisualisation se trouve sur la partie droite de l’écran et affiche les informations de la vidéo sélectionnée. Utilisez les touches directionnelles haut/bas pour sélectionner une vidéo et appuyez sur la touche Enter pour la lire. Une fois la vidéo en cours de lecture, appuyez sur la touche OSD de la télécommande. Le menu suivant s’affiche: For information and support; www.lenco.eu - 53 - Précédent Permet de lire la vidéo précédente de la liste de lecture Avance rapide Permet de lire la vidéo à une vitesse de 2/3/4 fois la vitesse normale. Lecture ou Pause Permet de lire ou mettre en pause la vidéo. Rembobinage Permet de lire la vidéo vers l’arrière à une vitesse de 2/3/4 fois la vitesse normale. Suivant Permet de lire la vidéo suivante de la liste de lecture Arrêt Permet d’arrêter la vidéo et de revenir à la liste de lecture Zoom Permet d’agrandir la taille de l’image de 2/3/4/1 fois. For information and support; www.lenco.eu - 54 - Ecouter une musique MP3 Assurez-vous qu’au moins un fichier MP3 soit stocké sur votre carte mémoire ou votre lecteur USB. Une fois ceci effectué: Sélectionnez le média flash désiré du menu principal. (SD/xD/CF/MS/USB/NAND-Mémoire interne) Sélectionnez l’option “MUSIQUE” du menu et appuyez sur la touche “ENTER” Une liste des fichiers musique s’affiche sur la partie gauche de l’écran. Une liste des fréquences et les informations de la barre d’état s’affichent sur la partie droite de l’écran. Les informations de la zone musique se trouve sous la barre d’état. Utilisez les touches directionnelles Haut/Bas pour sélectionner le fichier musique et appuyez sur la touche Enter pour le lire. For information and support; www.lenco.eu - 55 - Appuyez sur la touche VOL+ pour augmenter le volume ou VOL- pour diminuer le volume. Appuyez sur la touche Play/Pause de la télécommande pour lire ou mettre en pause le fichier musique. Appuyez sur la touche Stop de la télécommande pour revenir à la liste des fichiers musique. Option des fichiers Lire un diaporama avec de la musique Assurez-vous qu’il y ait au moins une image sur votre carte mémoire ou votre lecteur USB. De plus, vous devez avoir un fichier MP3 stocké sur la carte mémoire/USB/mémoire interne. Une fois ceci effectué: Sélectionnez le média flash désiré du menu principal. (SD/xD/CF/MS/USB/NAND-Mémoire interne) Sélectionnez l’option “FICHIER” du menu et appuyez sur la touche “ENTER” Les fichiers de la carte mémoire sélectionnée ou de la mémoire interne seront listés sur la partie gauche de l’écran. La partie droite de l’écran contient les informations du fichier. Utilisez les touches directionnelles Haut/Bas pour sélectionner un fichier image et appuyez sur la touche Enter pour accéder au mode plein écran (mode pause). Appuyez sur la touche Play de la télécommande, le diaporama audio démarre instantanément. Une fois le diaporama avec son en cours de lecture, appuyez sur la touche OSD. Le menu suivant s’affiche: For information and support; www.lenco.eu - 56 - Précédent Pour lire l’image précédente de la liste des photos Lecture ou Pause Pour lire ou mettre en pause le diaporama en cours. Suivant Pour lire la photo suivante de la liste des photos Rotation Utilisez la fonction rotation pour afficher l’image en mode portrait ou paysage. Arrêt Permet d’arrêter le diaporama et de revenir aux miniatures. Zoom Permet d’augmenter la taille de l’image de 2/4/8/16/1 fois. VOL Appuyez sur la touche VOL+ ou VOL- de la télécommande pour augmenter ou diminuer le volume For information and support; www.lenco.eu - 57 - Copie et suppression de fichiers Pour copier et supprimer des fichiers sur votre carte mémoire, le disque USB ou la mémoire interne. Copie Sélectionnez le média flash désiré du menu principal. (SD/xD/CF/MS/USB/NAND-Mémoire interne) Sélectionnez l’option “FICHIER” du menu et appuyez sur la touche “ENTER” Une liste des fichiers disponibles s’affiche. Utilisez les touches directionnelles haut et bas pour mettre en surbrillance le fichier désiré et appuyez sur la touche directionnelle droite pour mettre en surbrillance le fichier désiré. Répétez ces étapes pour tous les fichiers que vous souhaitez copier Appuyez sur la touche “OSD” pour afficher le menu Copie et Suppression. Sélectionnez la fonction Copie et appuyez sur Enter. Utilisez les touches directionnelles Haut/Bas pour sélectionner le répertoire de destination des fichiers. Appuyez sur la touche Droite pour confirmer. Appuyez sur la touche Enter pour démarrer la copie des fichiers. For information and support; www.lenco.eu - 58 - Suppression Sélectionnez le média flash désiré du menu principal. (SD/xD/CF/MS/USB/NAND-Mémoire interne) Sélectionnez l’option “FICHIER” du menu et appuyez sur la touche “ENTER” Une liste des fichiers disponibles s’affiche. Utilisez les touches directionnelles haut et bas pour mettre en surbrillance le fichier désiré et appuyez sur la touche directionnelle droite pour mettre en surbrillance le fichier désiré. Répétez ces étapes pour tous les fichiers que vous souhaitez copier. Appuyez sur la touche “OSD” pour afficher le menu Copie et Suppression. Sélectionnez la fonction Suppression et appuyez sur la touche Enter. Le fichier sera supprimé. Mode opératoire de la fonction CONFIGURATION Les options suivantes peuvent être configurées en utilisant l’option “SETUP” option du menu principal: Fonction Langue Durée du diaporama Mode de diaporama Mode Répétition de musiques Mode Répétition de vidéos Mode d’affichage Heure Alarme Défaut Description Inclus : Anglais, Français, Espagnol Allemand, Suédois, Grec, Italien, Turc. Durée du diaporama: 3s/5s/15s/1 mins/15 mins/1 heure Désactivé, Aléatoire, Fondu, Bas vers le haut, Haut vers le bas, Gauche à droite, de droite à gauche, Fermeture de porte, Ouverture de porte, Passage horizontal, Passage vertical Répéter 1, Répéter tout, Répétition désactivée Répéter 1, Répéter tout, Répétition désactivée Centré, Etiré, Cinéma Année/Mois/Date/Heure Heure de l’alarme/Musique de l’alarme/Alarme activée/désactivée Rétablir la configuration d’usine For information and support; www.lenco.eu - 59 - Affichage du Calendrier/horloge Après avoir mis en marche le cadre photo numérique, le MENU s’affiche. Si vous sélectionnez Calendrier/Horloge et appuyez sur la touche Enter, vous accéderez à l’interface Calendrier/Horloge. Si l’alarme est activée, l’heure de l’alarme sera également affichée. Un diaporama d’images démarre dans la fenêtre de prévisualisation d’images située sur la partie droite de l’écran. For information and support; www.lenco.eu - 60 - Questions fréquemment posées Support technique 1) Q: Puis-je utiliser l’écran du cadre photo numérique comme un écran tactile ? A: L’écran LCD ne prend pas en charge la technologie tactile. Veuillez utiliser les touches de la télécommande pour contrôler le cadre photo numérique. 2) Q: Si je laisse la même photo affichée pendant une longue période, est-ce que ceci endommage l’écran LCD ? A: Non. Le cadre photo numérique peut afficher la même photo de manière continue, et ce, pendant une longue période. Il est cependant recommandé de ne pas afficher la même image pendant plus d’un mois. 3) Q: Comment puis-je stocker mes fichiers musique? A: Tout d’abord, utilisez un ordinateur et un lecteur audio pour convertir votre musique au format MP3. Le cadre photo numérique lit seulement les fichiers MP3, les fichiers du lecteur Windows Media ™ et/ou iTunes™ doivent donc d’abord être convertis. Vous pouvez utiliser un lecteur de cartes ou votre appareil photo numérique pour transférer ces fichiers sur la carte mémoire. 4) Q: Est ce que le cadre photo numérique possède une mémoire interne? A: Oui. Le cadre photo numérique possède une mémoire intégrée de 128 Mo permettant de stocker vos fichiers. 5) Q: Quelle est la taille maximale prise en charge pour une image? A: Le cadre photo numérique peut afficher les images d’une résolution atteignant 12 méga pixels. 7) Q: Pourquoi le cadre photo numérique n’affiche pas certaines de mes photos? A: Le cadre photo numérique est conçu pour afficher les photos en se basant sur les mêmes normes que celles de l’industrie des appareils photo numériques et de la même manière qu’un appareil photo numérique. Ce format est le format JPEG. Les images, comme les images sur internet, images scannées ou photos au format RAW, ne sont pas stockées selon la norme de l’industrie des appareils photo numériques et ne peuvent pas être correctement affichés sur le cadre photo numérique. Utilisez vos applications PC pour convertir ces images en format standard JPEG avant de les visualiser sur le cadre photo. For information and support; www.lenco.eu - 61 - Dépannage Problème Impossible de mettre en marche le cadre photo numérique Cause Le connecteur POWER de l’unité est mal raccordé. Solution Assurez-vous d’avoir correctement raccordé le cordon d’alimentation CA à l’unité. Lorsque vous raccordez le cordon d’alimentation CA à l’unité et que vous mettez en marche le cadre photo même sans la carte mémoire, vous devriez apercevoir un écran blanc. Si vous ne voyez pas cet écran, vérifiez le raccordement du cordon d’alimentation. Aucun écran de démarrage Impossible de lire le fichier La carte mémoire est mal insérée. La vidéo s’affiche mal Carte mémoire de faible vitesse Insérez une carte mémoire compatible Assurez-vous qu’il y ait au moins une photo sur la carte mémoire. Formats image compatibles : JPEG Formats musique compatibles: MP3 Formats vidéo compatibles : JPEG animé (avi), MPEG1, MPEG2, MPEG4. Assurez-vous d’utiliser une carte mémoire haute vitesse pour lire les fichiers vidéo. La taille de la vidéo est trop petite Vidéo de faible résolution Format de fichier incompatible La meilleure résolution photo est 1024x768 Utilisez la touche Zoom de la télécommande pour agrandir l’image. For information and support; www.lenco.eu - 62 - Spécifications techniques Type Mémoire interne Résolution Alimentation Consommation d’énergie Luminosité Contraste Angle de vue Temps de réponse Format d’affichage Formats de fichiers supportés Résolution maximale des photos Alimentation Cartes mémoire compatibles Ports USB Contenu de l’emballage Cadre photo numérique avec écran 15 pouces 128 Mo 1024x768 12 V 24 Watts 450cd/m2 max. 450:1 60/60/45/45 (CR=10) 10ms 4:3 JPEG, MPEG1, MPEG2, MP3, MPEG4 12 méga pixels CA 110—240V (50HZ—60HZ) SD/MMC/MS/CF/XD/USB Hôte USB, USB esclave Cadre photo numérique Adaptateur de courant CA/CC Manuel d’utilisation Télécommande Cordon USB Support A noter lorsque vous disposerez de ce produit ; les déchets de produits électriques ne doivent pas être jetés avec les déchets ménagers. Veuillez déposer l’appareil dans un centre de recyclage. Consultez votre municipalité ou votre revendeur pour plus de précisions. (Directive portant sur les déchets de produits électriques et électroniques) For information and support; www.lenco.eu - 63 - Inhalt Einleitung .................................................................................................. - 65 Hauptmerkmale......................................................................................... - 65 Loslegen ................................................................................................... - 66 Packungsinhalt ...................................................................................... - 66 Installation des Geräts ........................................................................... - 67 Anschluss an einen PC ......................................................................... - 67 Bedienung ............................................................................................. - 68 Tastenfeld ................................................................................................. - 69 Handhabung der Fernbedienung .............................................................. - 70 Speicherkarten einstecken ........................................................................ - 71 Hauptmenü ............................................................................................... - 71 Bilder betrachten ................................................................................... - 72 Zurück ................................................................................................ - 73 Wiedergabe/Pause ............................................................................ - 74 Weiter ................................................................................................ - 74 Drehen ............................................................................................... - 74 Stop ................................................................................................... - 74 Zoom.................................................................................................. - 74 Videos anschauen ................................................................................. - 74 Zurück ................................................................................................ - 76 Schnellvorlauf .................................................................................... - 76 Wiedergabe/Pause ............................................................................ - 76 Schnellrücklauf................................................................................... - 76 Weiter ................................................................................................ - 76 Stop ................................................................................................... - 76 Zoom.................................................................................................. - 76 MP3-Musikdateien abspielen................................................................. - 77 File-Menü .............................................................................................. - 78 Eine Diahows mit Hintergrundmusik abspielen...................................... - 78 Zurück ................................................................................................ - 79 Wiedergabe/Pause ............................................................................ - 79 Weiter ................................................................................................ - 79 Drehen ............................................................................................... - 79 Stop ................................................................................................... - 79 Zoom.................................................................................................. - 79 VOL.................................................................................................... - 79 Kopieren und Löschen von Dateien....................................................... - 80 Das SETUP-Menü..................................................................................... - 81 Technische Hilfe........................................................................................ - 83 Häufig gestellte Fragen ......................................................................... - 83 Technische Daten................................................................................ - 85 - For information and support; www.lenco.eu - 64 - Einleitung Herzlichen Glückwunsch zum Kauf dieses digitalen Bilderrahmens mit 15 Zoll Bildschirmdiagonale und der Modellbezeichnung DP-1520 Bevor Sie das Gerät in Betrieb nehmen, lesen Sie diese Bedienungsanleitung bitte gründlich durch. Bewahren Sie sie zum späteren Gebrauch auf. Diese Anleitung wird Ihnen dabei helfen, die vielen aufregenden und nützlichen Funktionen zu nutzen, dank denen Sie mehr Freude an Ihrem digitalen Bilderrahmen haben werden. Dieser digitale Bilderrahmen ermöglicht es Ihnen, digitale Bilder unmittelbar von den Speicherkarten Ihrer Kamera anzusehen. Sie können eine Diashow mit verschiedenen Übergangseffekten erstellen oder ein Bild nach dem anderen anschauen. Sie benötigen dazu weder Computer, digitale Kamera noch Internetanschluss. Dieser digitale Bilderrahmen ist zu den folgenden gängigen Speicherkarten kompatibel: CompactFlash®, SD™, XD, MultiMediaCard™ und Memory Stick®. Über die USB-Schnittstelle können ebenfalls Dateien gelesen werden, die sich auf einem USBFlash-Laufwerk befinden. Hauptmerkmale • • • • • • • • • • • • • Zeigt digitale Bilder (JPEG) ohne Computer an Einfach eine kompatible Speicherkarte in den digitalen Bilderrahmen einstecken, um Bilder anzuzeigen, MP3-Musik oder unterstützte Videodateien abzuspielen (Speicherkarte nicht enthalten). Kompatible Speicherkarten sind unter anderem Secure Digital Card (SD), MultiMedia Card (MMC), Memory Stick (MS), XD Cards & Compact Flash. Kann Dateien auf USB-Flash-Laufwerken lesen. Sofortwiedergabe von MP3-Dateien über integrierte Lautsprecher. Sofortwiedergabe von MPEG1- 2- 4-Dateien auf unterstützten Speicherkarten*. Unterstützt Bilderdateien mit bis zu 12 Megapixel (JPEG-Format). Kompatibel zu den meisten von digitalen Kameras gespeicherten JPEG-Bildern und Motion-JPEG-Videos. Fernbedienung in Kreditkartenbauweise eingeschlossen Leuchtstarker 15”-TFT-Aktivmatrix-LCD-Bildschirm. Automatische Diashow mit verschiedenen Übergangseffekten. Diashow kann mit MP3-Hintergrundmusik abgespielt werden. Anwenderfreundliches Bildschirmmenü für leichten Zugang zu allen Funktionen. *Videodateien können unter Umständen nicht flüssig wiedergegeben werden, wenn sie auf einer langsamen Karte gespeichert sind. For information and support; www.lenco.eu - 65 - Loslegen Packungsinhalt Digitaler Bilderrahme und Standfuß Bedienungsanleitung Wechselstromadapter Fernbedienung USB-Kabel For information and support; www.lenco.eu - 66 - Installation des Geräts • • • • • Öffnen Sie die Verpackung und entnehmen den Schaumstoff. Entfernen Sie die Schutzhülle vom Gerät. Bringen Sie den Standfuß auf der Rückseite des digitalen Bilderrahmens an. Stecken Sie den Wechselstromadapter in eine Steckdose. Verbinden Sie das andere Ende mit dem Gerät. Nachdem der Inhalt auf dem Flash-Medium gespeichert wurde, stecken Sie es in den richtigen Einschubschlitz. Stellen Sie die Ein/Aus-Taste auf ON. Anschluss an einen PC Der digitale Bilderrahmen verfügt über eine USB-Schnittstelle („slave“) zum Anschluss an einen PC und eine zweite USB-Schnittstelle („host“) zum Anschluss an andere Geräte wie z.B. ein Flash-Laufwerk, einen USB-Kartenleser oder eine Kamera. Wenn das Gerät mit einem PC verbunden ist, können Sie Inhalte vom PC einfach in den internen Speicher oder auf die Speicherkarte ziehen („drag-and-drop“). Sie können ebenfalls Inhalte aus dem internen Speicher löschen. HINWEIS: USB-Slave- und USB-Host-Schnittstelle können nicht gleichzeitig benutzt werden. For information and support; www.lenco.eu - 67 - Bedienung Der digitale Bilderrahmen ist ganz einfach zu bedienen: 1. Die Speicherkarte aus der Kamera nehmen: 2. Die Speicherkarte in den Bilderrahmen stecken, so dass die beschriftete Seite vom Gerät weggerichtet ist: 3. Nach dem Einschalten des Bilderrahmens wird das Bild automatisch angezeigt. For information and support; www.lenco.eu - 68 - Tastenfeld For information and support; www.lenco.eu - 69 - Handhabung der Fernbedienung Die folgende Tabelle beschreibt kurz die Funktionen der Fernbedienung Taste Beschreibung On/Off Ein/Aus: Den Bilderrahmen ein/ausschalten Mode Vol - Zwischen Foto-/Audio/Videomodus umschalten Lautstärke reduzieren Vol + Lautstärke erhöhen Slideshow Start der Diashow OSD Ruft das Bildschirmmenü auf. Menu Menütaste: Ruft das Hauptmenü auf. Rotate Das aktuell angezeigte Bild drehen Enter Eingabetaste/Bestätigung Zoom Das aktuell angezeigte Bild vergrößern Wiedergabe/Pause Stop Richtungstasten Auf dem Bildschirm bewegen For information and support; www.lenco.eu - 70 - Speicherkarten einstecken Der digitale Bilderrahmen ist zu den folgenden Speicherkarten kompatibel: • • • • • Secure Digital Card (SD) MultiMedia Card (MMC) Memory Stick CompactFlash (CF) Card XD Picture Cards TM TM TM TM Stecken Sie die Speicherkarte so ein, dass die beschriftete Seite von Ihnen WEGgerichtet ist. Schieben Sie die Speicherkarte nicht mit Gewalt in den Einschubschlitz. Falls es Ihnen nicht gelingt, die Speicherkarte ohne Druck ganz einzustecken, haben Sie sie möglicherweise falsch herum eingesteckt. Hinweis: Der digitale Bilderrahmen erkennt AUSSCHLIEßLICH Bilder im JPEG-Format. Digitale Bilder anderer Formate werden von dem Gerät ignoriert. Vergewissern Sie sich, dass mindestens ein Bild auf der Speicherkarte gespeichert ist. Der Bilderrahmen kann nicht ordnungsgemäß arbeiten, wenn kein Bild vorliegt. Sie können ebenfalls ein USB-Flash-Laufwerk auf die gleiche Weise wie eine Speicherkarte benutzen. Überspielen Sie einfach Dateien auf das Flash-Laufwerk und stecken es dann in die USB-Host-Schnittstelle rechts am Gerät. Hauptmenü Nachdem Sie den digitalen Bilderrahmen eingeschaltet haben, gelangen Sie direkt zum Menübildschirm. Um die Autostartfunktion einzustellen, gehen Sie ins SETUP-Menü. Benutzen Sie die Richtungstasten (links/rechts) und wählen das „Set up”-Symbol. Drücken Sie die Eingabetaste, um die verfügbaren Optionen anzuzeigen. Mit den Richtungstaste (hoch/runter) „auto start“ wählen. Drücken Sie die MENU-Taste, um das folgende Menü aufzurufen: For information and support; www.lenco.eu - 71 - Benutzen Sie die Richtungstasten (rechts/links) zur Steuerung des Menüs und die Eingabetaste zur Bestätigung. Hinweis: Sie können aus allen Menüs in das Hauptmenü zurückkehren, indem Sie die Menütaste drücken Funktion Nand Setup Calendar SD/MMC/MS/xD CF USB Beschreibung Dateien im internen Speicher wiedergeben Einstellungsmenü Anzeige von Kalender, Uhr- und Weckzeit Dateien auf einer SD/MMC/MS/xD-Speicherkarte wiedergeben Dateien auf einer CF-Speicherkarte wiedergeben Dateien auf einem USB-Flash-Laufwerk wiedergeben HINWEIS: Die Symbole der obigen Funktionen erscheinen automatisch auf dem Menübildschirm, wenn die entsprechenden Speicherkarten eingesteckt werden. Die Symbole verschwinden wieder, wenn die entsprechende Karte aus dem Einschubschlitz genommen wird. Bilder betrachten Achten Sie darauf, dass sich mindestens ein Bild auf Ihrer Speicherkarte oder Ihrem USB-FlashLaufwerk befindet. Danach: • • • Im Hauptmenü den zutreffenden Flash-Datenträger wählen. (SD/xD/CF/MS/USB/NANDInterner Speicher) Im Menü PHOTO wählen und die Eingabetaste drücken Das Vorschaubild eines Fotos erscheint. Sie können die Markierung mit den Richtungstasten (hoch/runter/links/rechts) bewegen. Falls ein Verzeichnis markiert ist, können Sie das Verzeichnis mit der Eingabetaste öffnen. For information and support; www.lenco.eu - 72 - • Andernfalls bewirkt Drücken der Eingabetaste, dass das Bild auf dem ganzen Bildschirm angezeigt wird (Pausenmodus). Drücken Sie die Wiedergabetaste, um die Diashow zu starten. • Wenn eine Diashow läuft oder ein Bild angezeigt wird, können Sie die OSD-Taste drücken. Das folgende Menü erscheint: Zurück Das vorherige Bild der Bilderliste anzeigen For information and support; www.lenco.eu - 73 - Wiedergabe/Pause Die aktuelle Diashow wiedergeben oder pausieren. Weiter Das nächste Bild der Bilderliste anzeigen Drehen Benutzen Sie die Drehfunktion, um die Ausrichtung des Bilds auf Hoch- oder Querformat zu ändern. Stop Die Diashow anhalten und zur Bildvorschau zurückkehren. Zoom Zum Vergrößern des Bilds. Wiederholtes Drücken vergrößert das Bild noch weiter. Videos anschauen Der digitale Bilderrahmen unterstützt die folgenden Videoformate: • • Motion JPEG (*avi): Das Videoformat, das von den meisten digitalen Kameras verwendet wird MPEG-1 &MPEG-2 –w/layer I,II,III (*MPG,*MPEG,*DAT) MPEG 4-W/MP3-audio (*avi) Achten Sie darauf, dass sich mindestens ein Video auf Ihrer Speicherkarte oder Ihrem USBFlash-Laufwerk befindet. Danach: • • Im Hauptmenü den zutreffenden Flash-Datenträger wählen. (SD/xD/CF/MS/USB/NANDInterner Speicher) Im Menü MOVIE wählen und die Eingabetaste drücken For information and support; www.lenco.eu - 74 - • Eine Liste aller Videodateien wird auf der linken Seite des Bildschirms angezeigt. Die rechte Seite besteht aus dem Videovorschaufenster und der Informationsanzeige zum aktuellen Video. Mit den Richtungstasten (Hoch/Runter) ein Video wählen und mit der Eingabetaste abspielen. Während ein Video abgespielt wird, können Sie die OSD-Taste auf der Fernbedienung drücken. Das folgende Menü erscheint: For information and support; www.lenco.eu - 75 - Zurück Das vorherige Video der Wiedergabeliste abspielen Schnellvorlauf Das Video mit 2-, 3-, 4-facher Geschwindigkeit abspielen. Wiedergabe/Pause Das Video abspielen oder pausieren. Schnellrücklauf Das Video mit 2-, 3-, 4-facher Geschwindigkeit rückwärts abspielen. Weiter Das nächste Video der Wiedergabeliste abspielen Stop Das Video anhalten und zur Wiedergabeliste zurückkehren Zoom Die Bild um den Faktor 2/3/4/1 vergrößern. For information and support; www.lenco.eu - 76 - MP3-Musikdateien abspielen Achten Sie darauf, dass sich mindestens eine MP3-Datei auf Ihrer Speicherkarte oder Ihrem USB-Flash-Laufwerk befindet. Danach: • • • Im Hauptmenü den zutreffenden Flash-Datenträger wählen. (SD/xD/CF/MS/USB/NANDInterner Speicher) Im Menü MUSIC wählen und die Eingabetaste drücken • Eine Liste aller Musikdateien wird auf der linken Seite des Bildschirms angezeigt. Die rechte Seite besteht aus der Frequenzpegelanzeige und der Statuszeile. Unterhalb der Statuszeile befindet sich ein Feld zur Anzeige von Informationen zum Lied. Mit den Richtungstasten (Hoch/Runter) eine Musikdatei wählen und mit der Eingabetaste abspielen. • Mit VOL+ die Lautstärke erhöhen und mit VOL- verringern. • Mit der Wiedergabe/Pause-Taste der Fernbedienung eine Musikdatei abspielen oder pausieren. • Mit der Stop-Taste der Fernbedienung zur Liste der Musikdateien zurückkehren. For information and support; www.lenco.eu - 77 - File-Menü Eine Diahows mit Hintergrundmusik abspielen Achten Sie darauf, dass sich mindestens ein Bild auf Ihrer Speicherkarte oder Ihrem USB-FlashLaufwerk befindet. Zusätzlich muss sich eine MP3-Datei auf der gewählten Speicherkarte/dem USB-Laufwerk/im internen Speicher befinden. Danach: • • Im Hauptmenü den zutreffenden Flash-Datenträger wählen. (SD/xD/CF/MS/USB/NANDInterner Speicher) Im Menü FILE wählen und die Eingabetaste drücken • Eine Liste aller Dateien auf der gewählten Speicherkarte bzw. im internen Speicher wird auf der linken Seite des Bildschirms angezeigt. Auf der rechten Seite werden Dateiinformationen angezeigt. Mit den Richtungstasten (hoch/runter) eine Bilddatei wählen und die Eingabetaste drücken, um das Foto auf dem ganzen Bildschirm anzuzeigen (Pausenmodus). Die Wiedergabetaste der Fernbedienung drücken. Die Diashow wird gestartet. • Während eine Audio-Diashow abgespielt wird, können Sie die OSD-Taste drücken. Das folgende Menü erscheint: For information and support; www.lenco.eu - 78 - Zurück Das vorherige Bild der Bilderliste anzeigen Wiedergabe/Pause Die aktuelle Diashow wiedergeben oder pausieren. Weiter Das nächste Bild der Bilderliste anzeigen Drehen Benutzen Sie die Drehfunktion, um die Ausrichtung des Bilds auf Hoch- oder Querformat zu ändern. Stop Die Diashow anhalten und zur Bildvorschau zurückkehren. Zoom Die Bild um den Faktor 2/4/8/16/1 vergrößern. VOL VOL+ oder VOL- der Fernbedienung drücken, um die Lautstärke zu erhöhen oder zu verringern For information and support; www.lenco.eu - 79 - Kopieren und Löschen von Dateien Zum Kopieren oder Löschen von Dateien auf der Speicherkarte, dem USB-Laufwerk oder im internen Speicher. Kopieren • Im Hauptmenü den zutreffenden Flash-Datenträger wählen. (SD/xD/CF/MS/USB/NANDInterner Speicher) • Im Menü FILE wählen und die Eingabetaste drücken • Eine Liste der verfügbaren Dateien wird angezeigt. Mit den Richtungstasten (hoch/runter) die gewünschte Datei markieren und mit der rechten Richtungstaste bestätigen. Diesen Vorgang für alle Dateien wiederholen, die Sie kopieren möchten • Durch Drücken der OSD-Taste das Copy-/Delete-Menü aufrufen. „Copy“ wählen und die Eingabetaste drücken. • Mit den Richtungstasten (hoch/runter) das Zielverzeichnis für die Datei wählen. Mit der rechten Richtungstaste bestätigen. • Mit der Eingabetaste den Kopiervorgang starten. For information and support; www.lenco.eu - 80 - Löschen • • • • Im Hauptmenü den zutreffenden Flash-Datenträger wählen. (SD/xD/CF/MS/USB/NANDInterner Speicher) Im Menü FILE wählen und die Eingabetaste drücken Eine Liste der verfügbaren Dateien wird angezeigt. Mit den Richtungstasten (hoch/runter) die gewünschte Datei markieren und mit der Eingabetaste bestätigen. Diesen Vorgang für alle Dateien wiederholen, die Sie kopieren möchten Durch Drücken der OSD-Taste das Copy-/Delete-Menü aufrufen. „Delete“ wählen und die Eingabetaste drücken. Die Datei wird gelöscht. Das SETUP-Menü Die folgenden Optionen können über das SETUP-Menü, das im Hauptmenü zugänglich ist, geändert werden: Funktion Language (Sprache) Slideshow time Slideshow mode Music Repeat Mode Movie Repeat Mode Display mode Time Alarm Default Beschreibung Englisch, Französisch, Spanisch, Deutsch, Schwedisch, Griechisch, Italienisch, Türkisch. Anzeigedauer der Diashow: 3s/5s/15s/1min/15min/1h Modus der Diashow: Off, Random, Fading, Bottom_to_top, Top_to_bottom, Left_to right, Right_to_left, Door_close, Door_open, Hori_cross, Verti_cross Einstellung der Wiederholung für die Musikwiedergabe: Repeat one (eines wiederholen), Repeat all (alle wiederholen), Repeat off (keine Wiederholung) Einstellung der Wiederholung für die Videowiedergabe: Repeat one (eines wiederholen), Repeat all (alle wiederholen), Repeat off (keine Wiederholung) Bildschirmmodus: Crop (schneiden), Stretch (anpassen), Cinema (mit schwarzen Balken anzeigen) Einstellung von Jahr/Monat/Datum/Uhrzeit Alarm Time (Weckzeit)/Alarm Music (Weckmusik)/Alarm On/Off setup (Wecker aktivieren/deaktivieren) Auf die Werkseinstellungen zurücksetzen For information and support; www.lenco.eu - 81 - Kalender/Uhrzeit anzeigen Nachdem Sie den digitalen Bilderrahmen eingeschaltet haben, gelangen Sie direkt zum Menübildschirm. Zur Anzeige des Kalenders und der Uhrzeit wählen Sie CALENDER/CLOCK und drücken die Eingabetaste. Falls der Wecker aktiviert ist, wird ebenfalls die Weckzeit angezeigt. Eine Diashow wird im Bildvorschaufenster auf der rechten Seite des Bildschirms gestartet. For information and support; www.lenco.eu - 82 - Technische Hilfe Häufig gestellte Fragen 1) F: Kann ich den digitalen Bilderrahmen durch Berühung des Bildschirms bedienen? A: Es handelt sich bei dem LCD-Bildschirm nicht um einen Sensorbildschirm. Bitte verwenden Sie das Tastenfeld oder die Fernbedienung, um den digitalen Bilderrahmen zu bedienen. 2) F: Kann der LCD-Bildschirm Schaden nehmen, wenn ich ein bestimmtes Bild sehr lange anzeigen lasse? A: Nein. Der digitale Bilderrahmen kann ein Bild lange Zeit ohne Unterbrechnung anzeigen. Wir empfehlen jedoch, ein und dasselbe Bild nicht länger als einen Monat anzuzeigen. 3) F: Wie kann ich Musikdateien speichern? A: Benutzen Sie zuerst einen PC und ein gängiges Tonbearbeitungsprogramm, um Ihre Musik ins MP3-Format umzuwandeln. Der digitale Bilderrahmen kann nur MP3-Musikdateien abspielen. Das heißt, dass alle Windows Media Player™- und/oder iTunes™-Dateien zunächst konvertiert werden müssen. Sie können ein Kartenlesegerät oder Ihre digitale Kamera verwenden, um diese Dateien auf Ihre Speicherkarte zu überspielen. 4) F: Verfügt der digitale Bilderrahmen über einen internen Speicher? A: Ja. Der digitale Bilderrahmen verfügt über 128 MB internen Speicher zur Speicherung Ihrer Dateien. 5) F: Was ist die maximale Bildgröße? A: Der digitale Bilderrahme kann Bilder bis zu einer Größe von 12 Megapixel anzeigen. 7) F: Warum zeigt der digitale Bilderrahmen manche meiner Bilder nicht an? A: Der digitale Bilderrahmen zeigt Fotos an, welche demselben Standard wie Bilder von digitalen Kameras entsprechen. Dieses Format ist ein JPEG-Format. Manche Bilder, z.B. Bilder aus dem Internet, gescannte Bilder oder Bilder im RAW-Format, sind nicht dem Kameraindustriestandard entsprechend gespeichert worden. Daher können Sie nicht korrekt vom digitalen Bilderrahmen angezeigt werden. Bitte verwenden Sie PC-Software, um solche Bilder ins Standard-JPEGFormat umzuwandeln, bevor Sie sie auf dem digitalen Bilderrahmen betrachten. For information and support; www.lenco.eu - 83 - Fehlerbehebung Symptom Der digitale Bilderrahmen lässt sich nicht einschalten Ursache Der Stromstecker des Geräts ist nicht richtig eingesteckt. Abhilfe Achten Sie darauf, dass der Wechselstromadapter richtig mit dem Bilderrahmen verbunden ist. Auch ohne Speicherkarte sollten Sie einen weißen Bildschirm sehen, wenn Sie den Wechselstromadapter an den Bilderrahmen anschließen und das Gerät einschalten. Falls sich der Bildschirm nicht aktiviert, prüfen Sie, ob das Stromkabel an den digitalen Bilderrahmen angeschlossen ist. Achten Sie darauf, dass es sicher verbunden ist. Kein Startbildschirm Die Speicherkarte ist nicht richtig eingesteckt. Inkompatibles Dateiformat Stecken Sie eine unterstützte Speicherkarte ein Achten Sie darauf, dass sich wenigstens eine unterstützte Fotodatei auf der Speicherkarte befindet. • Kompatibles Fotoformat: Kompatibles Fotoformat: JPEG • Kompatibles Musikformat: MP3 • Kompatibles Videoformat: Motion JPEG (avi), MPEG1, MPEG2, MPEG4. Achten Sie darauf, zur Wiedergabe von Videodateien eine Hochgeschwindigkeitsspeicher karte zu verwenden. Die Datei lässt sich nicht wiedergeben Video lässt sich nicht gut abspielen Langsame Speicherkarte Das Video erscheint sehr klein auf dem Bildschirm Geringe Videoauflösung Die ideale unterstützte Auflösung für Fotos und Videos ist 1024x768 . Benutzen Sie zur Vergrößerung die Zoom-Taste der Ferndienung. For information and support; www.lenco.eu - 84 - Technische Daten Typ Interner Speicher Auflösung Stromversorgung Stromverbrauch Leuchtstärke Kontrast Blickwinkel Reaktionszeit Bildschirmmodus Dateiformat Fotogröße Netzspannung Karten USB-Schnittstellen Packungsinhalt 15 Zoll digitaler Bilderrahmen 128MB 1024x768 12 V 24 Watt 450cd/m2 max. 450:1 60/60/45/45 (Kontrastverhältnis=10) 10ms 4:3 JPEG, MPEG1, MPEG2, MP3, MPEG4 12 Megapixel 110–240V~ (50HZ–60Hz) SD/MMC/MS/CF/XD/USB USB-Host, USB-Slave Digitaler Bilderrahmen Netzadapter Bedienungsanleitung Fernbedienung USB-Kabel Standfuß Falls Sie dieses Produkt zu einem späteren Zeitpunkt entsorgen müssen, beachten Sie bitte: Elektro- und Elektronik-Altgeräte dürfen nicht mit dem Hausmüll entsorgt werden. Bitte wiederverwerten, falls entsprechende Einrichtungen vorhanden sind. Für Hinweise zur Wiederverwertung wenden Sie sich an die zuständigen örtlichen Stellen oder Ihren Händler. (Richtlinie über die Entsorgung von Elektro- und Elektronik-Altgeräten) For information and support; www.lenco.eu - 85 - Tabla de contenidos Introducción .............................................................................................. - 87 Características principales ........................................................................ - 87 Iniciación ................................................................................................... - 88 Contenido del paquete .......................................................................... - 88 Instalación de su unidad ........................................................................ - 89 Conexión a un PC ................................................................................. - 89 Funcionamiento ..................................................................................... - 90 Controles................................................................................................... - 91 Uso del mando a distancia ........................................................................ - 92 Introducción de tarjetas de memoria ......................................................... - 93 Menú principal........................................................................................... - 94 Visionado de imágenes ......................................................................... - 95 Anterior .............................................................................................. - 96 Reproducción o pausa ....................................................................... - 96 Siguiente ............................................................................................ - 96 Rotación............................................................................................. - 96 Stop ................................................................................................... - 96 Zoom.................................................................................................. - 96 Visionado de vídeo ................................................................................ - 97 Anterior .............................................................................................. - 98 Avance rápido .................................................................................... - 98 Reproducción o pausa ....................................................................... - 98 Retroceso rápido................................................................................ - 98 Siguiente ............................................................................................ - 98 Stop ................................................................................................... - 98 Zoom.................................................................................................. - 98 Para escuchar música MP3................................................................... - 99 Opciones de archivo............................................................................ - 100 Reproducción de una presentación de fotos con música .................... - 100 Anterior ............................................................................................ - 101 Reproducción o pausa ..................................................................... - 101 Siguiente .......................................................................................... - 101 Rotación........................................................................................... - 101 Stop ................................................................................................. - 101 Zoom................................................................................................ - 101 VOL.................................................................................................. - 101 Copia y eliminación de archivos .......................................................... - 101 Uso de la opción SETUP ........................................................................ - 103 Soporte técnico ....................................................................................... - 105 Preguntas frecuentes .......................................................................... - 105 Especificaciones ............................................................................... - 107 - For information and support; www.lenco.eu - 86 - Introducción Enhorabuena por la adquisición del Marco para Fotos Digitales de 15 pulgadas, modelo DF-1520 Antes de operar con la unidad, por favor, lea este manual de principio a fin, y consérvelo para futuras referencias. Este manual le ayudará a usar muchas de las excitantes y útiles funciones que harán del uso de su Marco para Fotos Digitales un puro disfrute. Este Marco para Fotos Digitales le permitirá ver imágenes digitales directamente desde las tarjetas de memoria de su cámara digital. Podrá crear una presentación de fotografías con múltiples efectos de transición, o mostrar únicamente una imagen. Para ello, no será precisa la conexión a un ordenador, cámara digital o internet. Este Marco para Fotos Digitales es compatible con los siguientes formatos de tarjeta de memoria, de sobras conocidos: CompactFlash®, SD™, XD, MultiMediaCard™ y Memory Stick®. También puede leer archivos almacenados en un dispositivo USB de memoria flash, a través del puerto USB instalado. Características principales • • • • • • • • • • • • • Visualización de imágenes digitales (JPEG) sin la necesidad de un ordenador Basta con introducir una tarjeta de memoria compatible en el Marco para Fotos Digitales para mostrar fotos, reproducir música en formato MP3 o archivos de vídeo compatibles (tarjeta de memoria no incluida). Las tarjetas de memoria compatibles incluyen Secure Digital (SD), MultiMedia Card (MMC), Memory Stick (MS), tarjetas XD y Compact Flash Permite la lectura de archivos ubicados en dispositivos USB de memoria flash Reproducción instantánea de música en formato MP3 con los altavoces integrados. Reproducción instantánea de archivos MPEG1 2 4 almacenados en tarjetas de memoria aceptadas*. Soporte de archivos de imágenes de hasta 12 megapíxeles (formato JPEG). Compatible con las imágenes JPEG y archivos motion JPEG almacenados de la mayoría de cámaras digitales. Se incluye un mando a distancia parecido, en tamaño y forma, a una tarjeta de crédito Pantalla LCD TFT de matriz activa y 15” . Presentación de fotografías automática con múltiples efectos de transición. Reproducción de una presentación de fotografías con música MP3 de fondo. Visualización en pantalla accesible para el usuario, que le permite un manejo sencillo de todos los controles. *Los archivos de vídeo podrían reproducirse de un modo anormal si estuvieran almacenados en una tarjeta de baja velocidad. For information and support; www.lenco.eu - 87 - Iniciación Contenido del paquete Marco para Fotos Digitales y pie de soporte Guía del usuario Adaptador AC/DC Mando a distancia Cable USB For information and support; www.lenco.eu - 88 - Instalación de su unidad • • • • • Abra el paquete y retire la espuma protectora. Retire también la funda protectora de la unidad. Coloque el pie del Marco para Fotos Digitales en la parte posterior de la unidad. Enchufe el adaptador AC a una toma de corriente. Conecte el otro extremo a la unidad. Cuando el contenido se encuentre almacenado en el dispositivo de memoria, inserte este en la ranura de entrada correcta. Encienda el aparato (posición ON) con el interruptor ON/OFF. Conexión a un PC El Marco para Fotos Digitales cuenta con un Puerto USB para la conexión a un PC (USB secundario), y un segundo puerto USB para la conexión a otros dispositivos, como memorias flash, lectores de tarjetas USB o una cámara (USB principal). Cuando esté conectado al PC podrá arrastrar y soltar contenidos del PC a la memoria interna o la tarjeta de memoria. Podrá también eliminar contenidos de la memoria interna. NOTA: El USB secundario y el USB principal no podrán usarse al mismo tiempo. For information and support; www.lenco.eu - 89 - Funcionamiento El funcionamiento con el Marco Digital es extremadamente sencillo: 1. Extraiga la tarjeta de memoria de la cámara: 2. Introduzca la tarjeta de memoria en el marco con la cara mirando hacia el interior: 3. Al encender el marco, la imagen se mostrará automáticamente. For information and support; www.lenco.eu - 90 - Controles For information and support; www.lenco.eu - 91 - Uso del mando a distancia La tabla siguiente describe brevemente las funciones del mando a distancia: Botón Descripción On/Off Encendido/apagado del marco Mode Selector de modo Foto/Audio/Vídeo Vol - Disminución del volumen Vol + Aumento del volumen Slideshow Inicio de la presentación de fotos OSD Visualización del menú de imágenes Menu Visualización del menú principal Rotate Rotación de la imagen en reproducción Enter Confirmación Zoom Aumento de la imagen en reproducción Reproducción/Pausa Stop Flechas Desplazamiento por la pantalla For information and support; www.lenco.eu - 92 - Introducción de tarjetas de memoria El Marco para Fotos Digitales es Compatible con las siguientes tarjetas de memoria: • • • • • Secure Digital (SD) MultiMedia Card (MMC) Memory Stick CompactFlash (CF) XD Picture TM TM TM TM Introduzca la tarjeta de memoria con la etiqueta mirando hacia el interior. No fuerce la tarjeta al meterla en la ranura. Si no pudiera introducir completamente y con facilidad la tarjeta de memoria, es muy probable que la haya insertado de forma incorrecta. Nota: El Marco para Fotos Digitales SÓLO reconocerá imágenes digitales almacenadas en el formato JPEG. Las imágenes digitales almacenadas en otros formatos serán ignoradas por el dispositivo. Asegúrese de que hay al menos una imagen almacenada en la tarjeta de memoria. El marco no funcionará de modo apropiado sin imágenes almacenadas. También podrá utilizar un dispositivo USB de memoria flash del mismo modo que usaría una tarjeta de memoria. No tiene más que copiar archivos en la memoria flash e introducirla en el puerto USB principal de la parte derecha de la unidad. For information and support; www.lenco.eu - 93 - Menú principal Habiendo encendido el Marco para Fotos Digitales, irá directamente a la pantalla del MENU. Para establecer la función de inicio automático (Auto Start), seleccione la pantalla SETUP (Configuración). Utilice la flecha izquierda/derecha para desplazarse hasta “Set up”. Pulse el botón Enter para entrar en la pantalla de opciones. Use las flechas arriba / abajo para seleccionar la opción de inicio automático. Pulse el botón “MENU” para mostrar el siguiente menú: Emplee las flechas izquierda y derecha para desplazarse por el menú, pulse después “Enter” para continuar. Nota: en todos los menús, al pulsar el botón “Menu”, volverá al menú principal Función Nand Setup Calendar SD/MMC/MS/xD CF USB Descripción Reproducción de archivos en la memoria interna Configuración del menú del sistema Visualización del calendario, hora, alarma Reproducción de archivos en tarjetas de memoria SD/MMC/MS/xD Reproducción de archivos en tarjetas de memoria CF Reproducción de archivos en memorias flash USB NOTA: Los iconos de las funciones anteriores aparecerán automáticamente en la pantalla MENU al introducir ciertos tipos de tarjeta de memoria. Los iconos desaparecerán cuando se extraiga la tarjeta correspondiente de la entrada para tarjetas. For information and support; www.lenco.eu - 94 - Visionado de imágenes Asegúrese de que haya al menos una imagen almacenada en la tarjeta de memoria o su dispositivo USB de memoria flash. Una vez hecho esto: Seleccione el sistema de reproducción flash del menú principal (SD/xD/CF/MS/USB/NAND-Memoria interna). Seleccione la opción “PHOTO” del menú y pulse “ENTER” • • Aparecerá entonces una serie de fotos en miniatura. Emplee las flechas ARRIBA/ABAJO/IZQUIERDA/DERECHA para mover el contorno destacado. Si el contorno destacado fuera una carpeta, pulse Enter para entrar en ella. • Si no, pulse Enter para entrar en la foto a tamaño completo (modo pausa) y pulse reproducción (Play) para entrar en el modo de presentación de fotografías (slideshow). For information and support; www.lenco.eu - 95 - • Una vez la presentación de fotografías esté en reproducción, o se esté mostrando una imagen, pulse el botón OSD. Aparecerá entonces el siguiente menú: Anterior Reproduce la imagen anterior de la lista de imágenes. Reproducción o pausa Para reproducir o dejar en pausa la presentación de fotografías en curso. Siguiente Reproduce la imagen siguiente de la lista de imágenes Rotación Use la opción de rotación de imagen para cambiar la orientación de la imagen a retrato o paisaje. Stop Detiene la presentación de fotografías y vuelve al modo de fotos en miniatura. Zoom Seleccione la función de zoom para aumentar la imagen. Repita esta operación diversas veces para aumentar varias veces la imagen. For information and support; www.lenco.eu - 96 - Visionado de vídeo El Marco para Fotos Digitales acepta los siguientes formatos de vídeo: • • Motion JPEG (*avi): formato de vídeo usado en la mayoría de cámaras digitales MPEG-I y MPEG-2 –w/capa I,II,III(*MPG,*MPEG,*DAT) MPEG 4-W/MP3 audio (*avi) Asegúrese de que su tarjeta de memoria o dispositivo USB de memoria flash contienen al menos un archivo de vídeo. Una vez hecho esto: • • • Seleccione el sistema de reproducción flash del menú principal. (SD/xD/CF/MS/USB/NAND-Memoria interna) Seleccione la opción “MOVIE” del menú y pulse “ENTER” Se mostrará una lista de todos los archivos de películas en la parte izquierda de la pantalla. La parte derecha consistirá en una ventana con una vista previa de la película actual e información acerca de ella. Utilice las flechas Arriba/Abajo para seleccionar la película y pulse Enter para reproducirla. For information and support; www.lenco.eu - 97 - Una vez la película esté en reproducción, pulse el botón OSD del mando a distancia. Entonces, aparecerá el siguiente menú: Anterior Reproduce la película anterior de la lista de reproducción. Avance rápido Reproduce la película hacia delante a las velocidades x2/x3/x4. Reproducción o pausa Reproduce o deja en pausa la película. Retroceso rápido Reproduce la película hacia atrás a las velocidades x2/x3/x4. Siguiente Reproduce la película siguiente de la lista de reproducción. Stop Detiene la película y vuelve a la lista de reproducción. Zoom Aumenta el tamaño de la imagen hasta x2/x3/x4/x1veces. For information and support; www.lenco.eu - 98 - Para escuchar música MP3 Asegúrese de que haya al menos un archivo MP3 en su tarjeta de memoria o dispositivo USB de memoria flash. Una vez hecho esto: • • Seleccione el sistema de reproducción flash del menú principal. (SD/xD/CF/MS/USB/NAND-Memoria interna) Seleccione la opción “MUSIC” del menú y pulse “ENTER” • Se mostrará una lista de archivos de música en la parte izquierda de la pantalla. La parte derecha consiste en un cuadro de frecuencia y una barra de estado con información. La parte con información sobre la canción se encuentra debajo de la barra de estado. Utilice las flechas Arriba/Abajo para seleccionar el archivo de música y pulse Enter para reproducir. • Pulse VOL+ para subir el volumen o VOL- para bajarlo. • Pulse el botón de Reproducción/Pausa en el mando a distancia para reproducir o dejar en pausa el archivo de música. • Pulse el botón Stop en el mando a distancia para volver a la lista de archivos de música. For information and support; www.lenco.eu - 99 - Opciones de archivo Reproducción de una presentación de fotos con música Asegúrese de que haya al menos una imagen almacenada en la tarjeta de memoria o su dispositivo USB de memoria flash. Además, deberá haber guardado un archivo MP3 en la tarjeta de memoria seleccionada /USB/memoria interna. Una vez hecho esto: • • Seleccione el sistema de reproducción flash del menú principal. (SD/xD/CF/MS/USB/NAND-Memoria iterna) Seleccione la opción “FILE” del menú y pulse “ENTER” • Se mostrará una lista de todos los archivos de la tarjeta de memoria seleccionada o de la memoria interna en la parte izquierda de la pantalla. La parte derecha consistirá en información sobre el archivo. Emplee las flechas Arriba/Abajo para seleccionar un archivo de imagen y pulse Enter para entrar en la foto a tamaño completo (modo pausa). Pulse el botón de reproducción en el mando a distancia, y una presentación de fotografías con audio dará comienzo automáticamente. • Una vez una presentación de fotografías con audio se encuentre en reproducción, pulse el botón OSD. Aparecerá entonces el siguiente menú: For information and support; www.lenco.eu - 100 - Anterior Reproduce la imagen anterior de la lista de imágenes. Reproducción o pausa Para reproducir o dejar en pausa la presentación de fotografías en curso. Siguiente Reproduce la imagen siguiente de la lista de imágenes Rotación Use la opción de rotación de imagen para cambiar la orientación de la imagen a retrato o paisaje. Stop Detiene la presentación de fotografías y vuelve al modo de fotos en miniatura. Zoom Aumenta el tamaño de la imagen hasta x2/x4/x8/x16/x1 veces. VOL Pulse VOL+ or VOL- en el mando a distancia para subir o bajar el volumen Copia y eliminación de archivos Para copiar y eliminar archivos de su tarjeta de memoria, dispositivo USB o memoria interna. For information and support; www.lenco.eu - 101 - Copiar • • • • • • • Seleccione el sistema de reproducción flash del menú principal. (SD/xD/CF/MS/USB/NAND- Memoria interna) Seleccione la opción “FILE” del menú y pulse “ENTER” Se mostrará una lista de archivos disponibles. Use las flechas arriba y abajo para destacar el archivo que le interese y pulse la flecha derecha para destacar el archivo que desee. Repita este proceso para todos los archivos que quiera copiar. Pulse el botón “OSD” para mostrar el menú Copy (Copiar) y Delete (Eliminar). Seleccione la función Copy y después Enter. Utilice las flechas Arriba/Abajo para seleccionar la carpeta de destino de archivo. Pulse el botón Derecha para confirmar. Pulse Enter para empezar a copiar el archivo. For information and support; www.lenco.eu - 102 - Eliminar • • • • Seleccione el sistema de reproducción flash del menú principal. (SD/xD/CF/MS/USB/NAND-Memoria interna) Seleccione la opción “FILE” del menú y pulse “ENTER” Se mostrará una lista de archivos disponibles. Use las flechas arriba y abajo para destacar el archivo que le interese y pulse la flecha derecha para destacar el archivo que desee. Repita este proceso para todos los archivos que quiera eliminar. Pulse el botón “OSD” para mostrar el menú Copy (Copiar) y Delete (Eliminar). Seleccione la función Delete y pulse Enter. El archivo será entonces eliminado. Uso de la opción SETUP Las siguientes opciones podrán cambiarse usando la opción “SETUP” del menú principal: Función Idioma (Language) Tiempo de presentación (Slideshow time) Modo de presentación (Slideshow mode) Modo de repetición de música (Music Repeat Mode) Modo de repetición de película (Movie Repeat Mode) Modo de visualización (Display mode) Time Alarma (Alarma) Predeterminado (Default) Descripción Incluye el inglés, francés, español, alemán, sueco, griego, italiano, turco. Duración de la presentación de fotografías: 3s/5s/15s/1min/15min/1hora Desactivado (Off), Aleatorio (Random), Atenuante (Fading), De abajo a arriba(Bottom_to_top), De arriba a abajo (Top_to_bottom), De izquierda a derecha (Left_to right), De derecha a izquierda (Right_to_left), Puerta que se cierra (Door_close), Puerta que se abre (Door_open), Cruce horizontal (Hori_cross), Cruce vertical (Verti_cross) Repetir una (Repeat one), Repetir todas (Repeat all), Repetición desactivada (Repeat off) Repetir una (Repeat one), Repetir todas (Repeat all), Repetición desactivada (Repeat off) Crop, Stretch, Cinema Año (Year)/Mes (Month)/Día (Date)/Ajuste de la hora (Time setup) Hora de la alarma (Alarm Time)/Música de la alarma (Alarm Music)/Alarma activada/desactivada (Alarm On/off setup) Vuelta a la configuración predeterminada del aparato For information and support; www.lenco.eu - 103 - Visualización del calendario/hora Habiendo encendido el Marco para Fotos Digitales, irá directamente a la pantalla MENU. Si selecciona el calendario/hora (Calendar/Clock) y pulsa Enter, pasará a la pantalla del calendario/hora. Si la alarma estuviera activada, también mostrará la hora de la alarma. Una presentación de fotografías dará comienzo en la ventana de vista previa de imágenes de la parte derecha de la pantalla. For information and support; www.lenco.eu - 104 - Soporte técnico Preguntas frecuentes 1) Puedo usar tecnología de pantalla táctil para mi Marco de Fotos Digitales? R: La pantalla LCD no incluye soporte para tecnología de pantalla táctil. Por favor, limítese al uso de los botones y el mando a distancia para manejar su Marco para Fotos Digitales. 2) Si muestro la misma imagen durante un largo periodo de tiempo, podré así dañar la pantalla LCD? R: No. El Marco para Fotos Digitales puede mostrar la misma foto de forma continua durante un tiempo prolongado, aunque le recomendamos no hacerlo por un periodo superior a un mes. 3) Cómo puedo almacenar archivos de música? R: En primer lugar, utilice un PC y un software de edición de audio reconocido para convertir sus archivos de música al formato MP3. El marco para Fotos Digitales sólo reproducirá archivos MP3, así que todos los archivos del Windows Media Player™ y/o iTunes™deberán ser antes convertidos. Podrá usar un lector de tarjetas o su cámara digital para transferir esos archivos a su tarjeta de memoria. 4) Tiene el Marco para Fotos Digitales una memoria interna? R: Sí. El Marco para Fotos Digitales tiene una memoria interna de 128 MB para almacenar sus archivos. 5) Cuál es el tamaño máximo visualizable de una imagen? R: El Marco para Fotos Digitales permite mostrar imágenes de hasta 12 megapíxeles. 6) Cómo es que el Marco para Fotos Digitales no muestra algunas de mis fotos? R: El Marco para Fotos Digitales está diseñado para mostrar fotos que sigan formatos con los mismos estándares que los de las cámaras digitales. Este formato es el JPEG. Las imágenes, como las de páginas web, imágenes escaneadas o fotos en el formato RAW, no se almacenan de acuerdo con los estándares de la industria de las cámaras y, por lo tanto, no podrán mostrarse correctamente en el Marco para Fotos Digitales. Por favor, utilice las aplicaciones de su PC para convertir dichas imágenes al formato estándar JPEG antes de visionarlas en el Marco para Fotos Digitales. For information and support; www.lenco.eu - 105 - Localización y resolución de problemas Síntoma El Marco para Fotos Digitales no se enciende Causa La conexión a la unidad no se ha realizado correctamente Medidas correctivas Asegúrese de que conecta el adaptador AC al marco de forma correcta. Cuando conecte el adaptador AC al marco y lo enciende, incluso sin tarjeta de memoria, debería poder ver la pantalla en blanco. Si no viera la pantalla iluminada, compruebe si la unidad está efectivamente alimentada y asegúrese de que se conecta adecuadamente. No hay pantalla de inicio La tarjeta de memoria no se ha introducido correctamente. El archivo no se reproduce Formato de archivo incompatible El vídeo no se reproduce adecuadamente Tarjeta de memoria lenta Introduzca una tarjeta de memoria aceptada por el marco. Asegúrese de que hay al menos un archivo de foto aceptado en la tarjeta de memoria. • Archivo de fotos compatible: JPEG • Formato de música compatible: MP3 • Formatos de vídeo compatible: Motion JPEG (avi), MPEG1, MPEG2, MPEG4. Asegúrese de que utiliza una tarjeta de memoria de alta velocidad para reproducir archivos de vídeo. Tamaño de vídeo pequeño en la pantalla Resolución de vídeo baja La mejor resolución aceptada de una foto o vídeo es 1024x768 Use el botón Zoom en el mando a distancia para aumentarla. For information and support; www.lenco.eu - 106 - Especificaciones Tipo Memoria interna Resolución Alimentación Consumo Luminosidad Contraste Ángulo de visión Tiempo e respuesta Modo de visualización Formato de archivo Tamaño de la foto Corriente Tarjetas Puertos USB Contenido del paquete Marco para Fotos Digitales de 15 pulgadas 128 MB 1024x768 12 V 24 Vatios 450cd/m2 máx. 450:1 60/60/45/45 (CR=10) 10ms 4:3 JPEG, MPEG1, MPEG2, MP3, MPEG4 12 Megapíxeles AC110—240V (50HZ—60HZ) SD/MMC/MS/CF/XD/USB USB principal, USB secundario Marco para Fotos Digitales Adaptador AC/DC Guía del usuario Mando a distancia Cable USB Pie de soporte Si en lo sucesivo tuviera que deshacerse de este producto, por favor, fíjese en que: La eliminación de productos eléctricos no debe hacerse junto con los desechos del hogar. Por favor, recicle haya donde se disponga de instalaciones a tal efecto. Consulte a las autoridades locales o a su distribuidor sobre los consejos de reciclaje (Directiva sobre la Eliminación de Equipos Eléctricos y Electrónicos). For information and support; www.lenco.eu - 107 --
 1
1
-
 2
2
-
 3
3
-
 4
4
-
 5
5
-
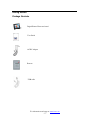 6
6
-
 7
7
-
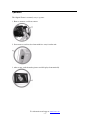 8
8
-
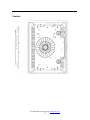 9
9
-
 10
10
-
 11
11
-
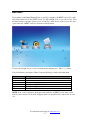 12
12
-
 13
13
-
 14
14
-
 15
15
-
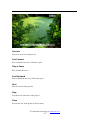 16
16
-
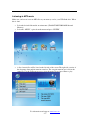 17
17
-
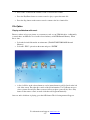 18
18
-
 19
19
-
 20
20
-
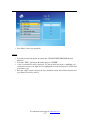 21
21
-
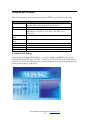 22
22
-
 23
23
-
 24
24
-
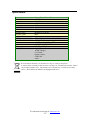 25
25
-
 26
26
-
 27
27
-
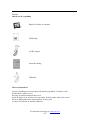 28
28
-
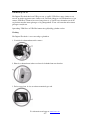 29
29
-
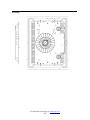 30
30
-
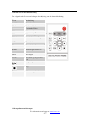 31
31
-
 32
32
-
 33
33
-
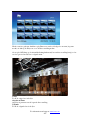 34
34
-
 35
35
-
 36
36
-
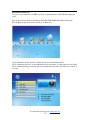 37
37
-
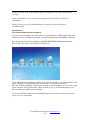 38
38
-
 39
39
-
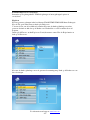 40
40
-
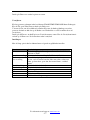 41
41
-
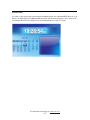 42
42
-
 43
43
-
 44
44
-
 45
45
-
 46
46
-
 47
47
-
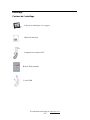 48
48
-
 49
49
-
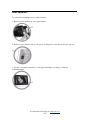 50
50
-
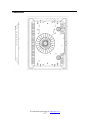 51
51
-
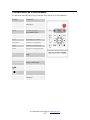 52
52
-
 53
53
-
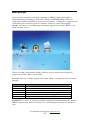 54
54
-
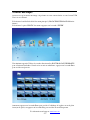 55
55
-
 56
56
-
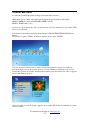 57
57
-
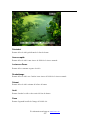 58
58
-
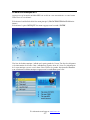 59
59
-
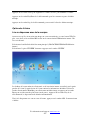 60
60
-
 61
61
-
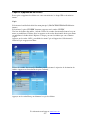 62
62
-
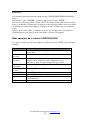 63
63
-
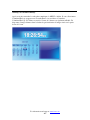 64
64
-
 65
65
-
 66
66
-
 67
67
-
 68
68
-
 69
69
-
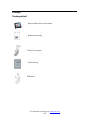 70
70
-
 71
71
-
 72
72
-
 73
73
-
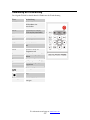 74
74
-
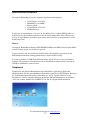 75
75
-
 76
76
-
 77
77
-
 78
78
-
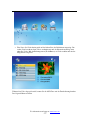 79
79
-
 80
80
-
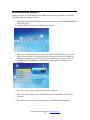 81
81
-
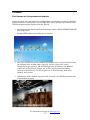 82
82
-
 83
83
-
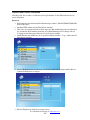 84
84
-
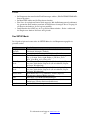 85
85
-
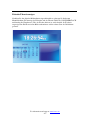 86
86
-
 87
87
-
 88
88
-
 89
89
-
 90
90
-
 91
91
-
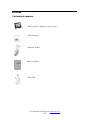 92
92
-
 93
93
-
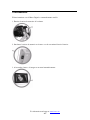 94
94
-
 95
95
-
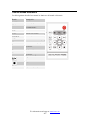 96
96
-
 97
97
-
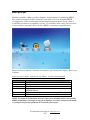 98
98
-
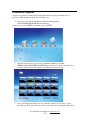 99
99
-
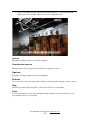 100
100
-
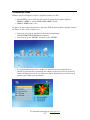 101
101
-
 102
102
-
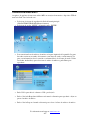 103
103
-
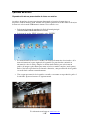 104
104
-
 105
105
-
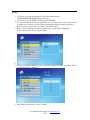 106
106
-
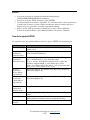 107
107
-
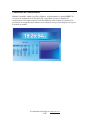 108
108
-
 109
109
-
 110
110
-
 111
111


Lenco DF-1520 de handleiding
- Categorie
- Digitale fotolijsten
- Type
- de handleiding
in andere talen
- English: Lenco DF-1520 Owner's manual
- français: Lenco DF-1520 Le manuel du propriétaire
- español: Lenco DF-1520 El manual del propietario
- Deutsch: Lenco DF-1520 Bedienungsanleitung
Gerelateerde artikelen
Andere documenten
-
König KN-WS700 Handleiding
-
LG PF391 de handleiding
-
HP DF770 Handleiding
-
Hama 00055748 de handleiding
-
Telefunken DPF 15002 de handleiding
-
Salora dpf7013 de handleiding
-
Braun Photo Technik DigiFrame 1560 Handleiding
-
AgfaPhoto AF-5086MS Handleiding
-
Braun phototechnik DigiFrame 1960 de handleiding
-
AIPTEK Monet Handleiding